Ariel goes Edwardian

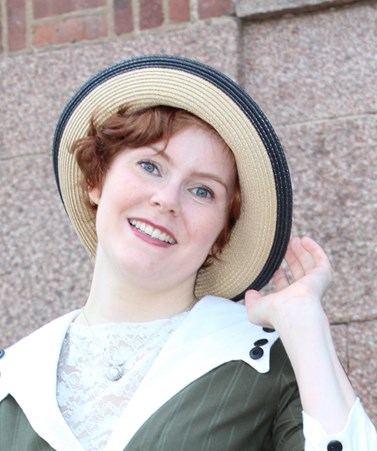
For the HSF challenge 6 – Farytale, I’ve been working on an Edwardian dress for “The litle mermaid” Ariel. (If you wonder how the heck that works, take a look at my previous post.)

b494ff618d0617fcfd3b9dc06ed0a0f5
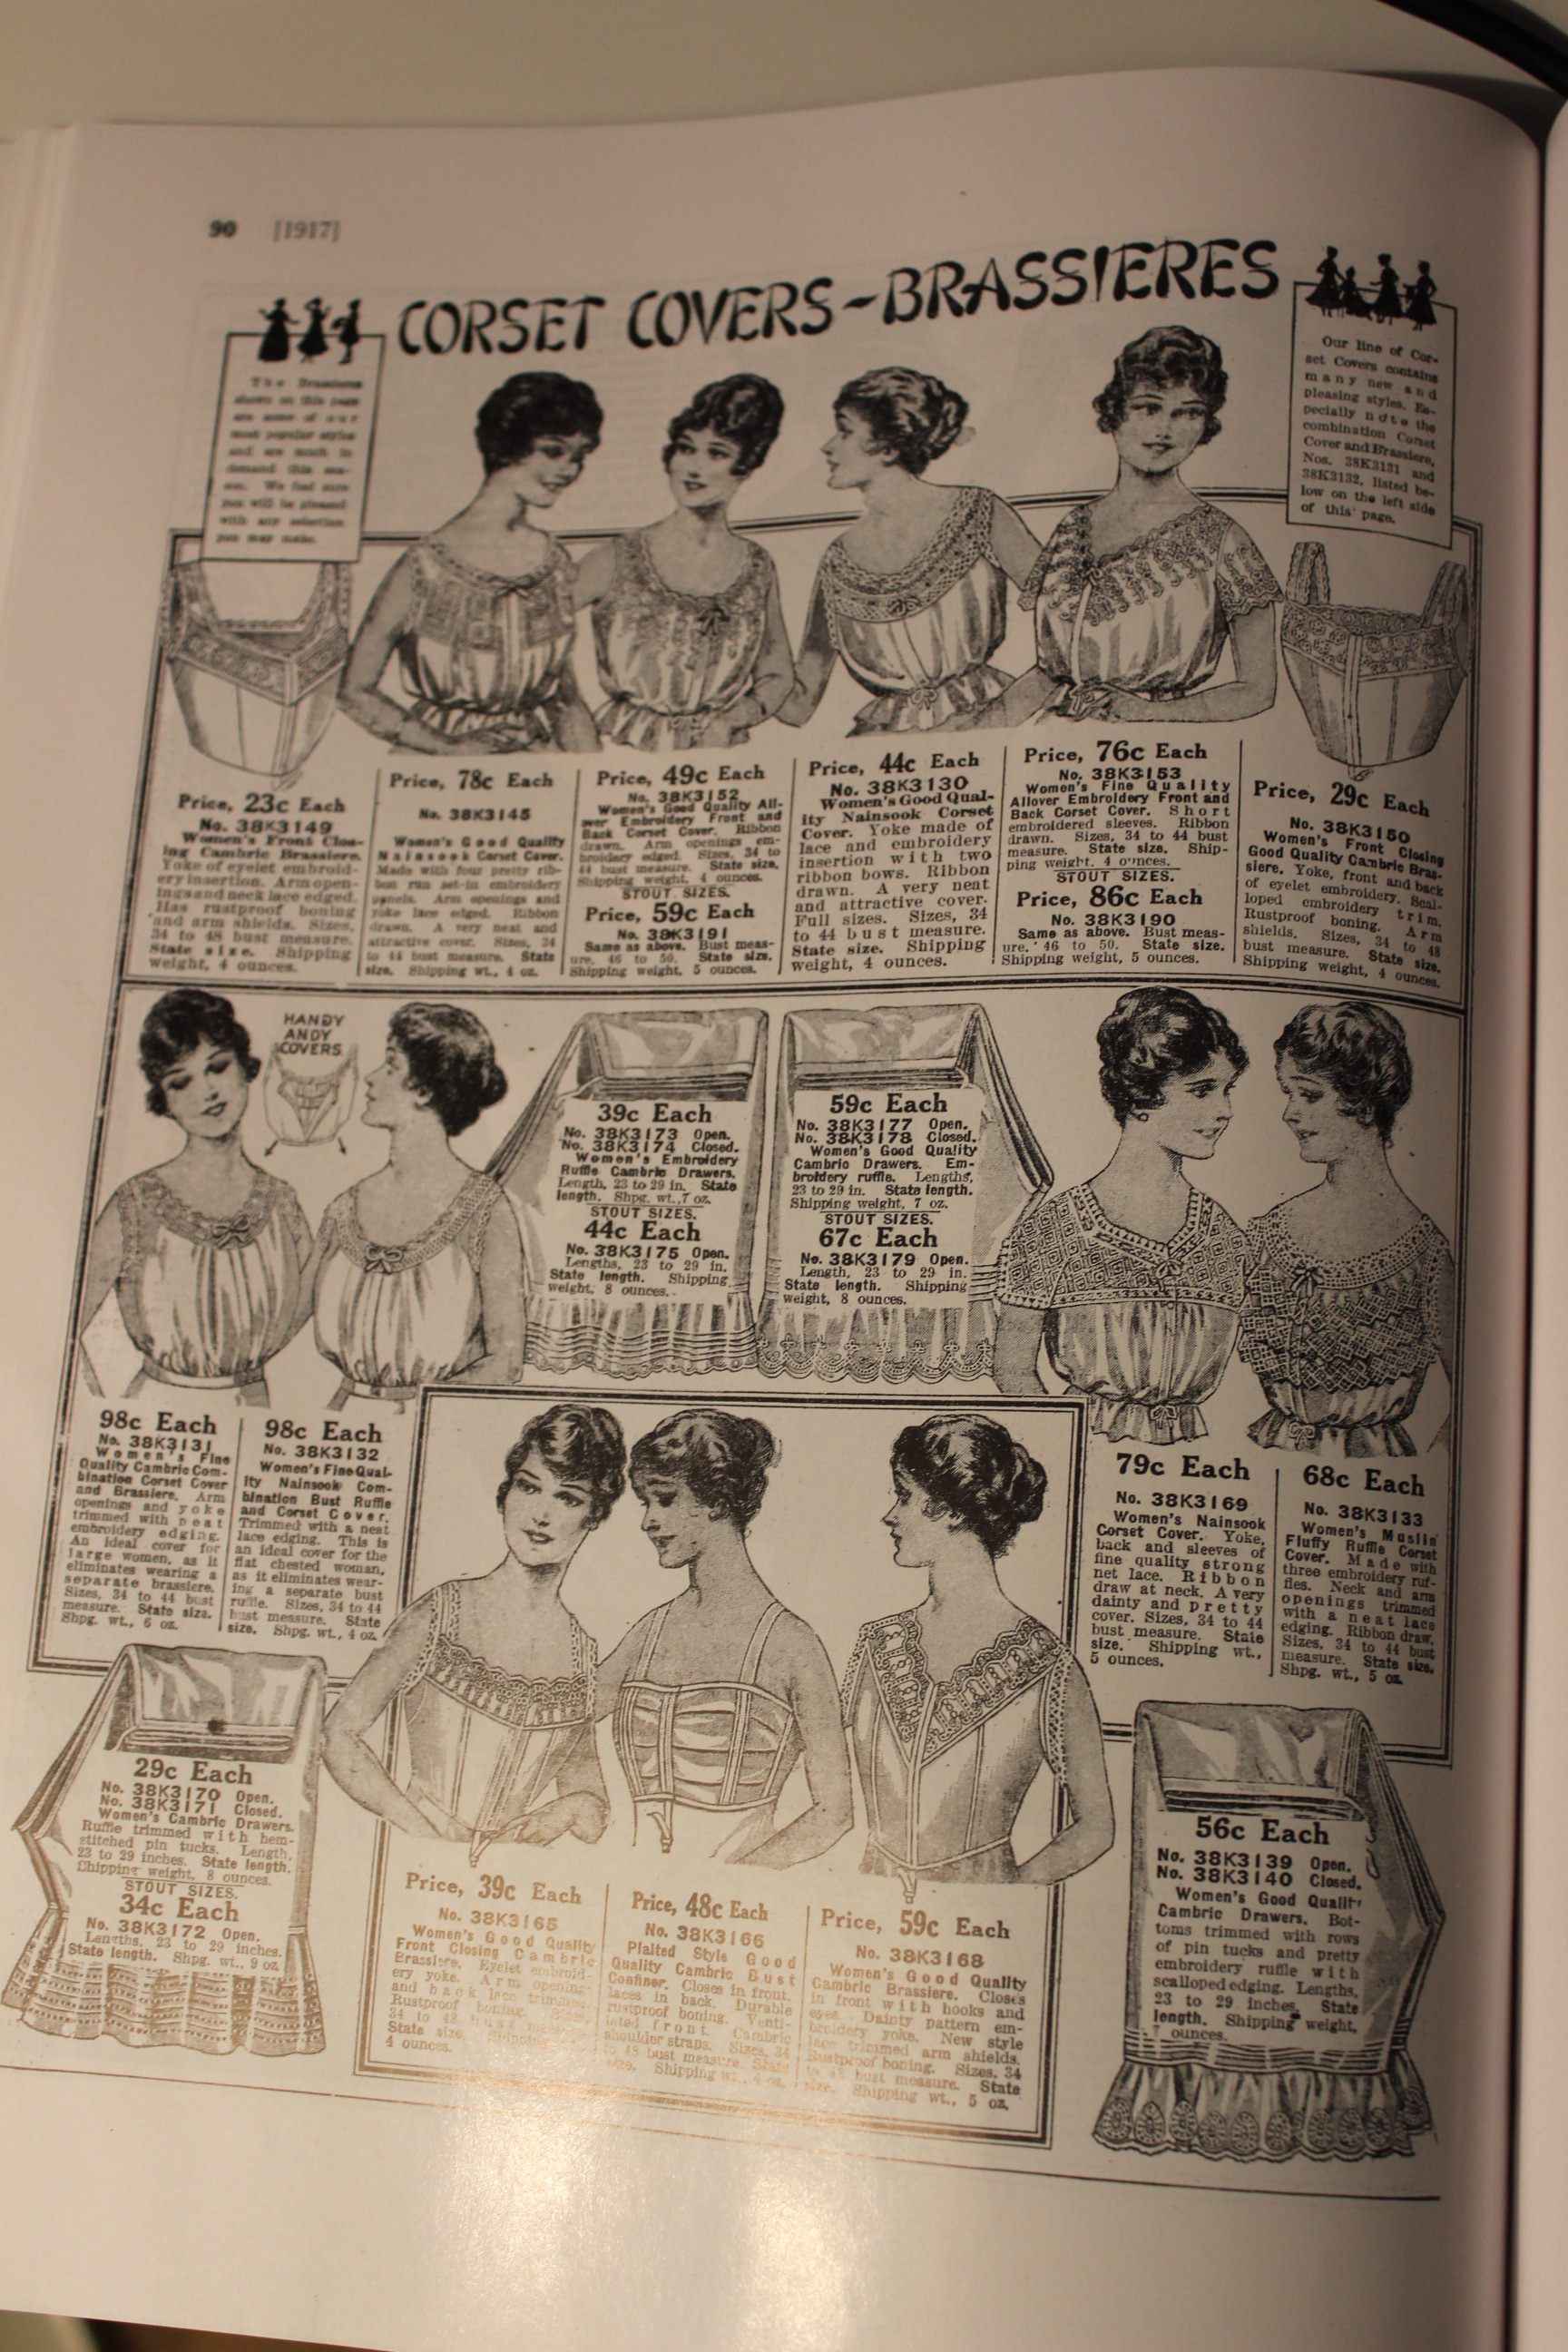
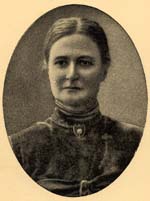
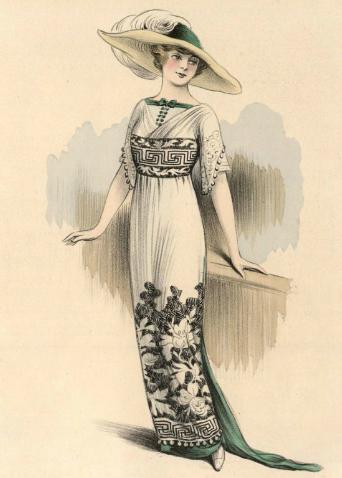
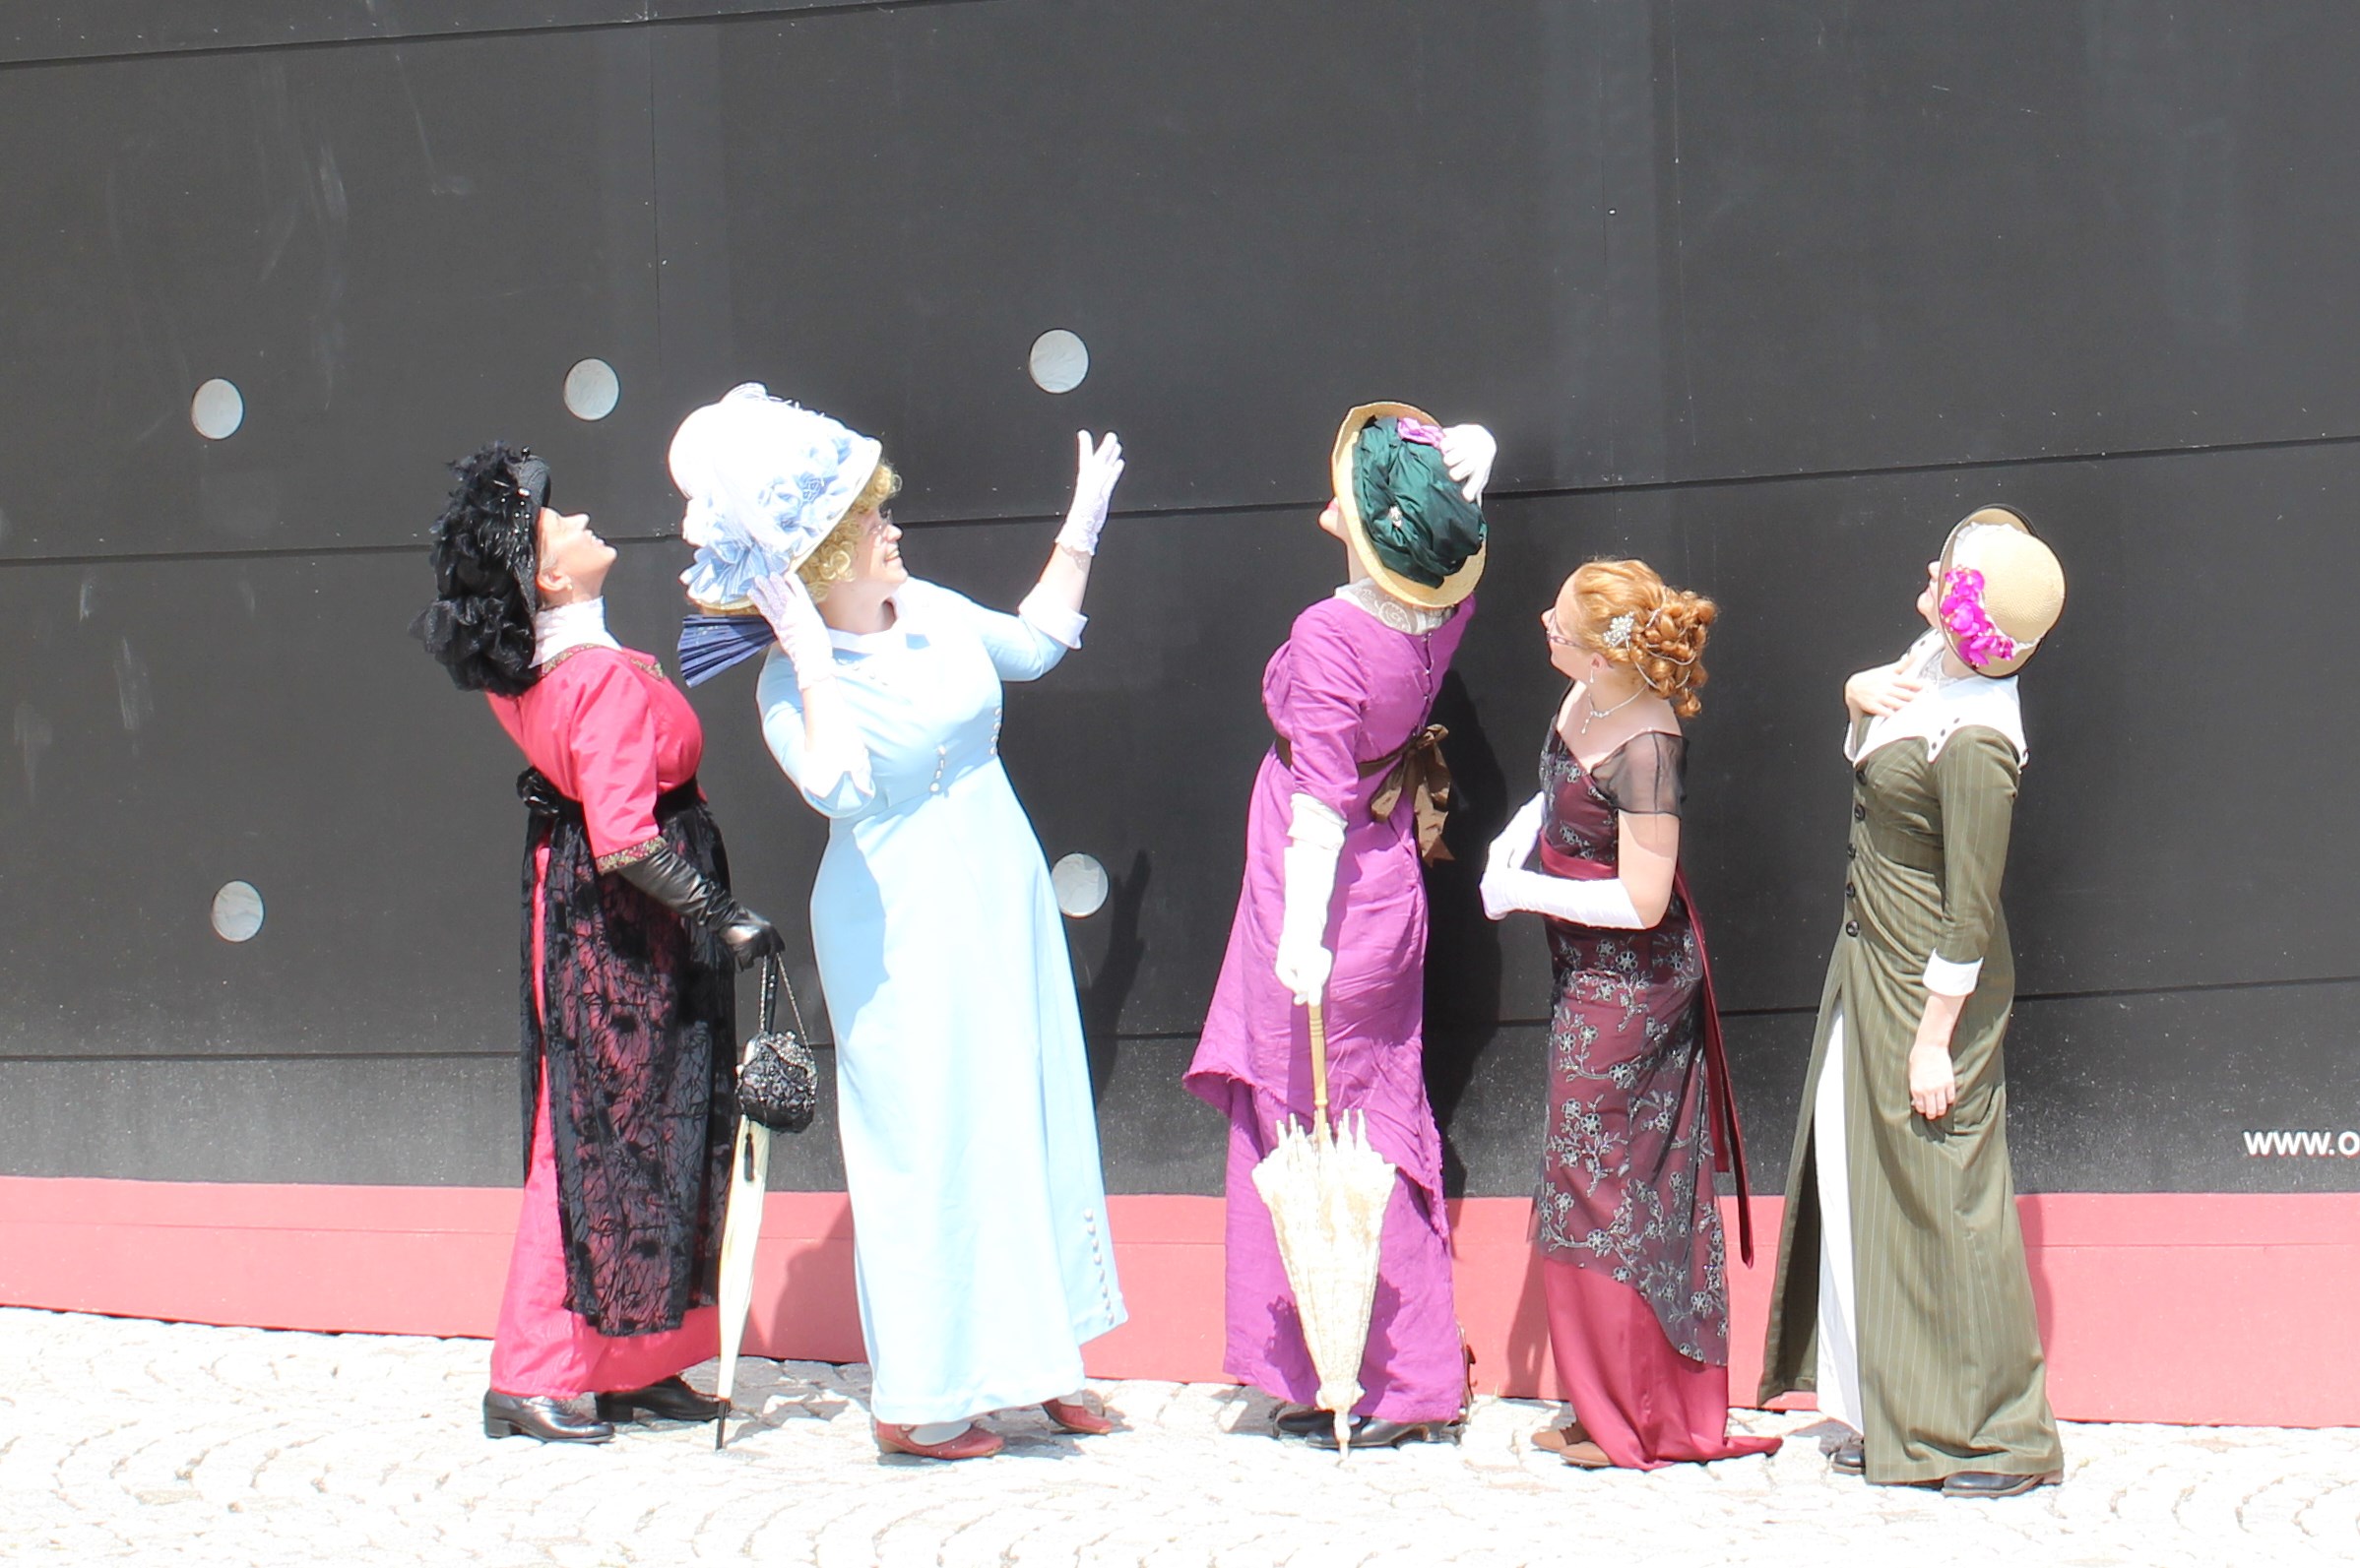
The girl on the left is my main inspiration.

IMG_6653A quick design sketch.

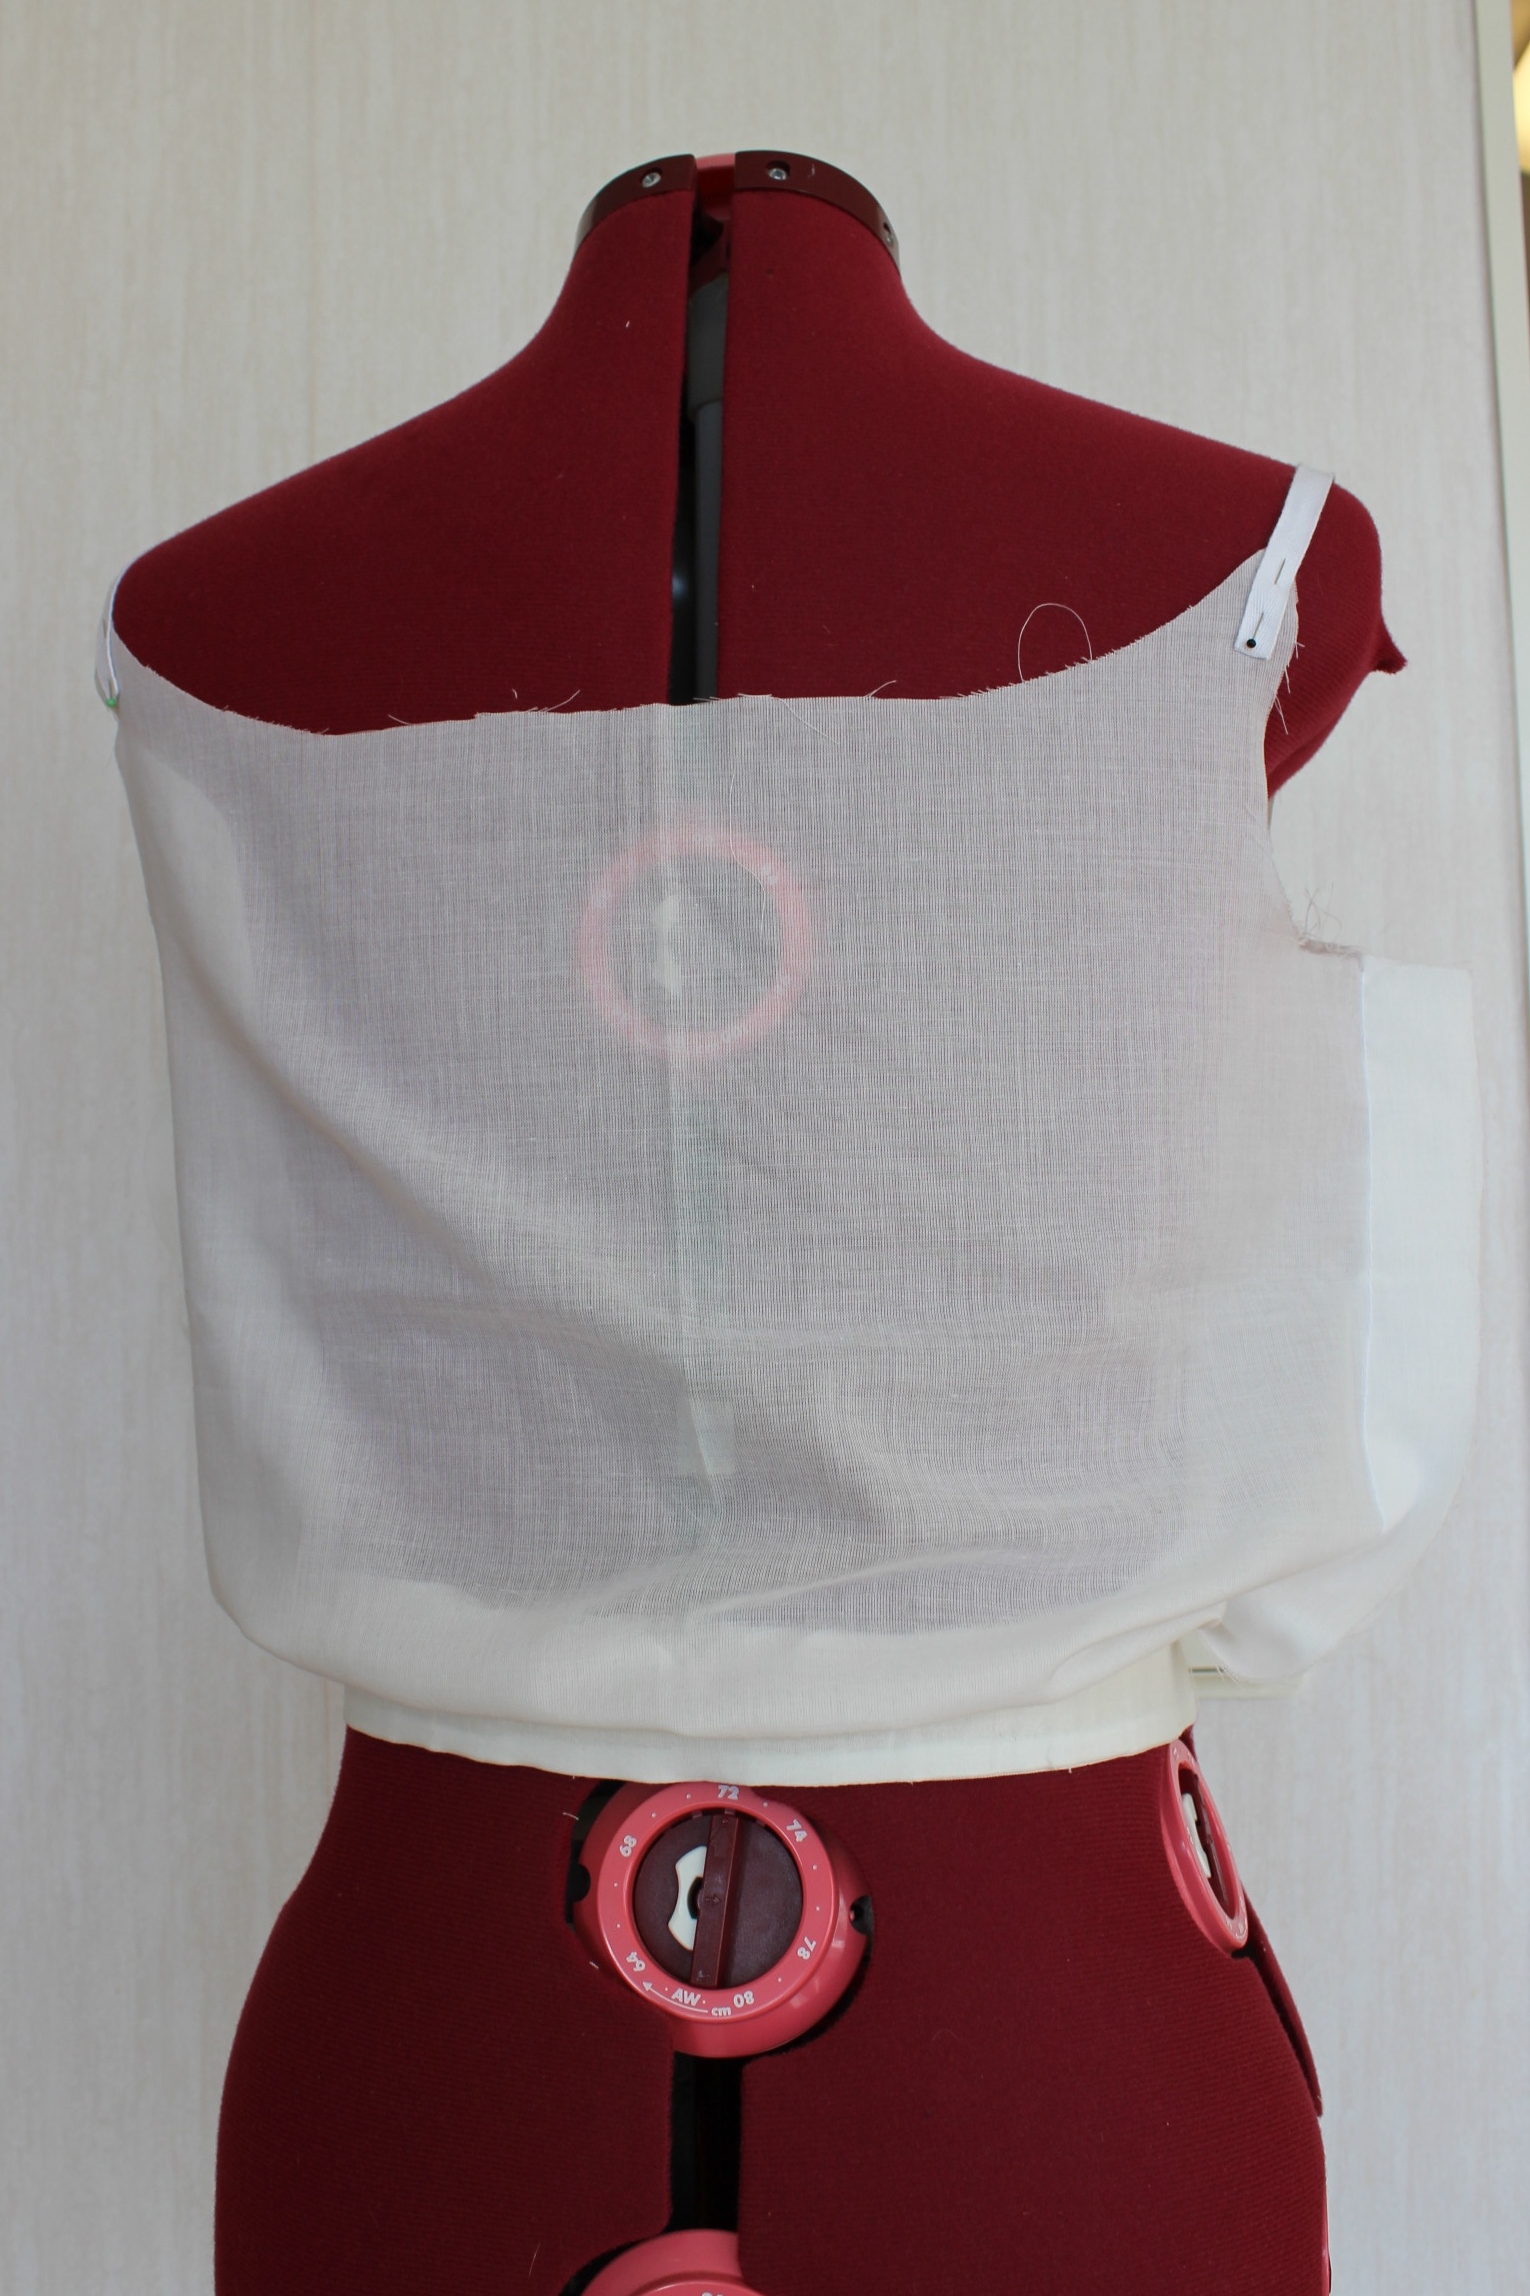
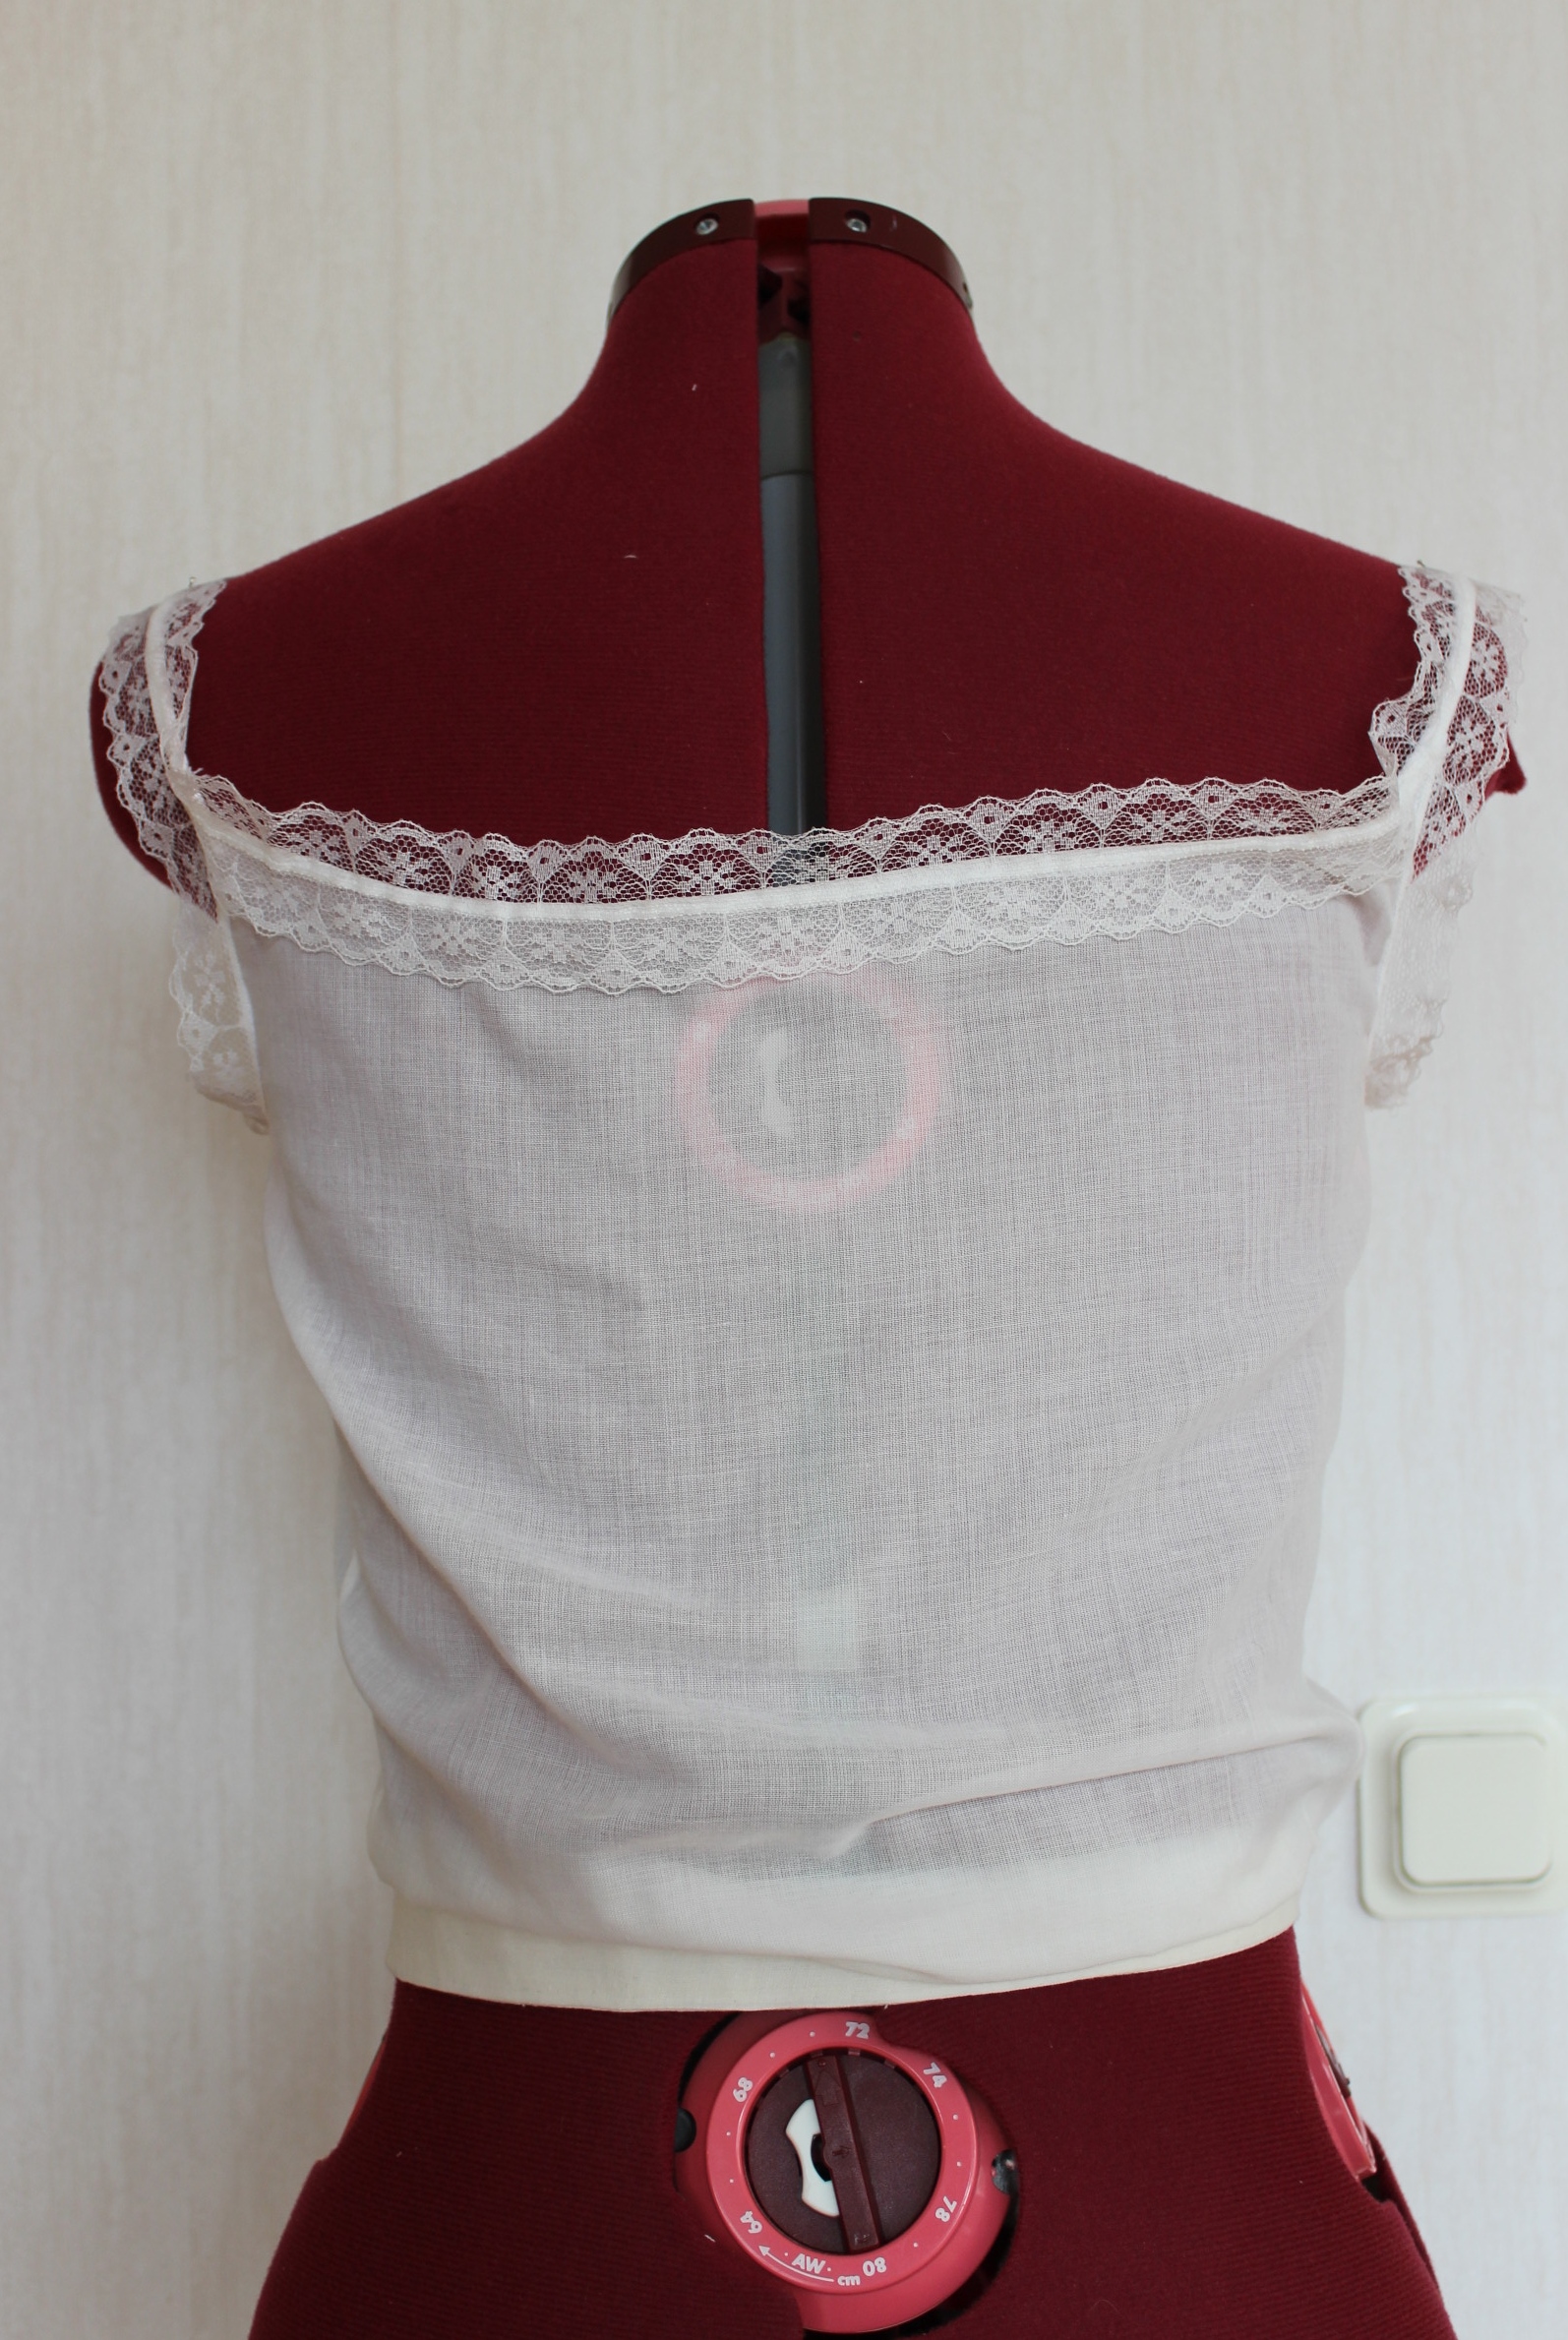
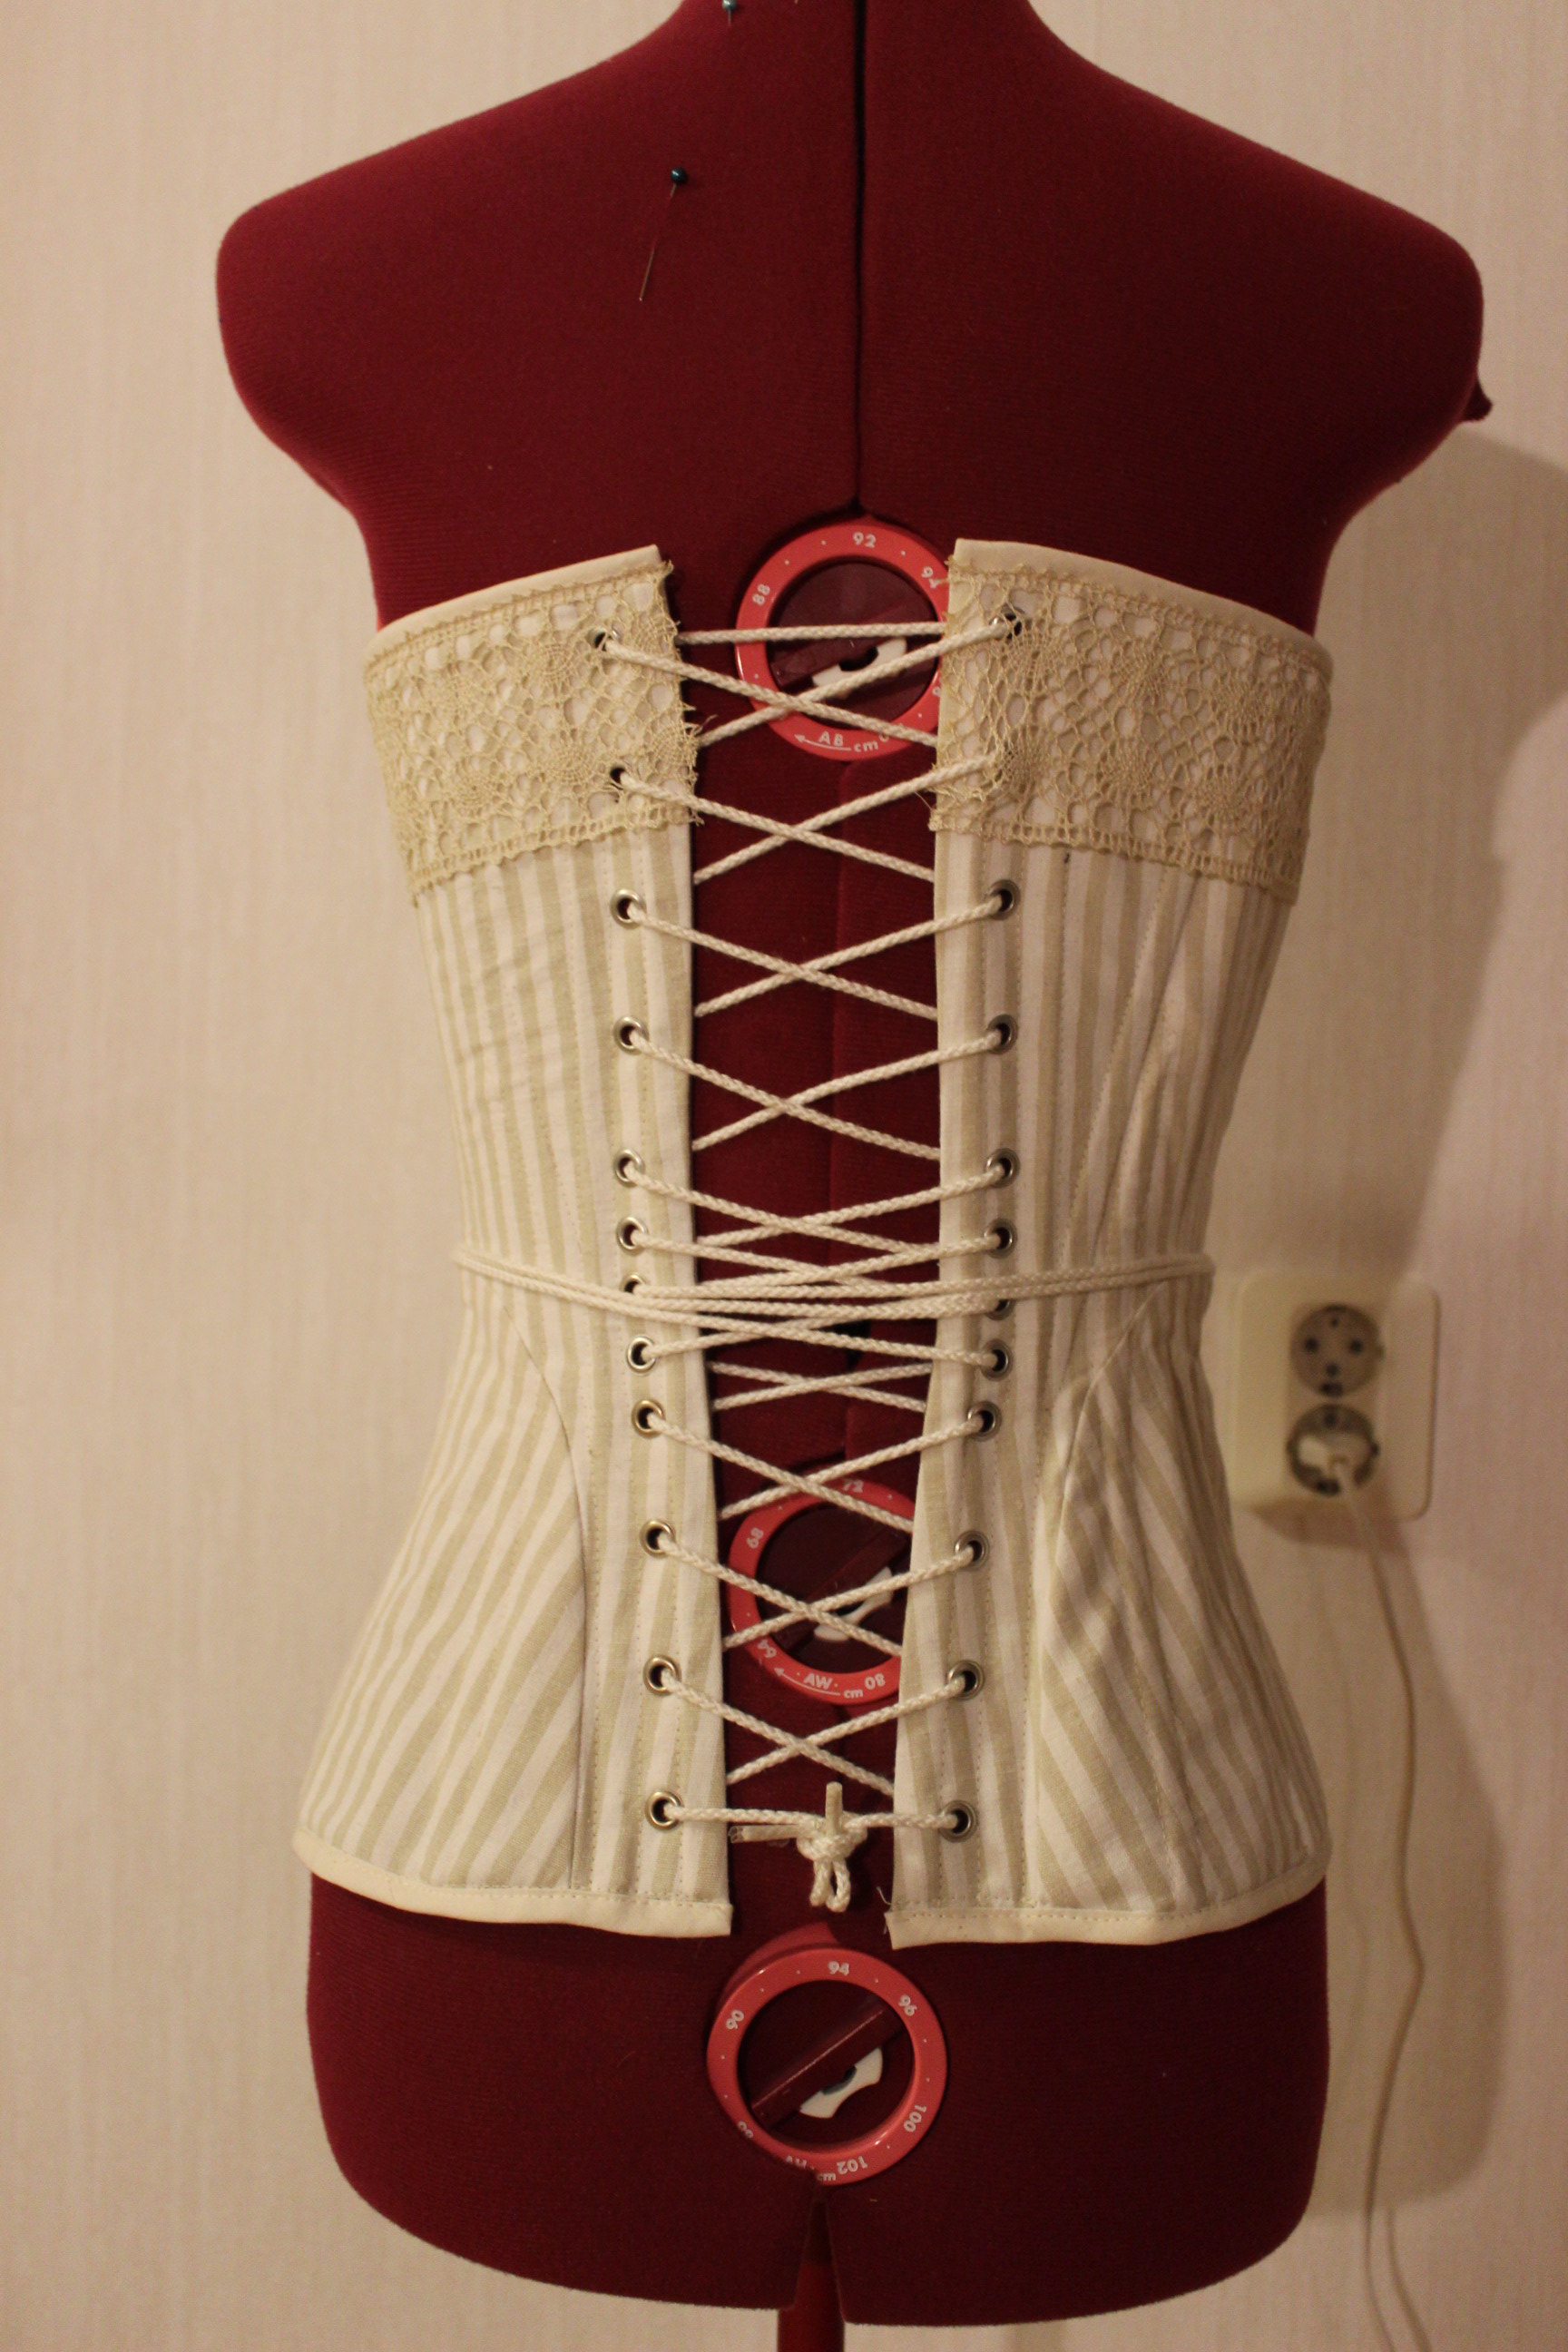
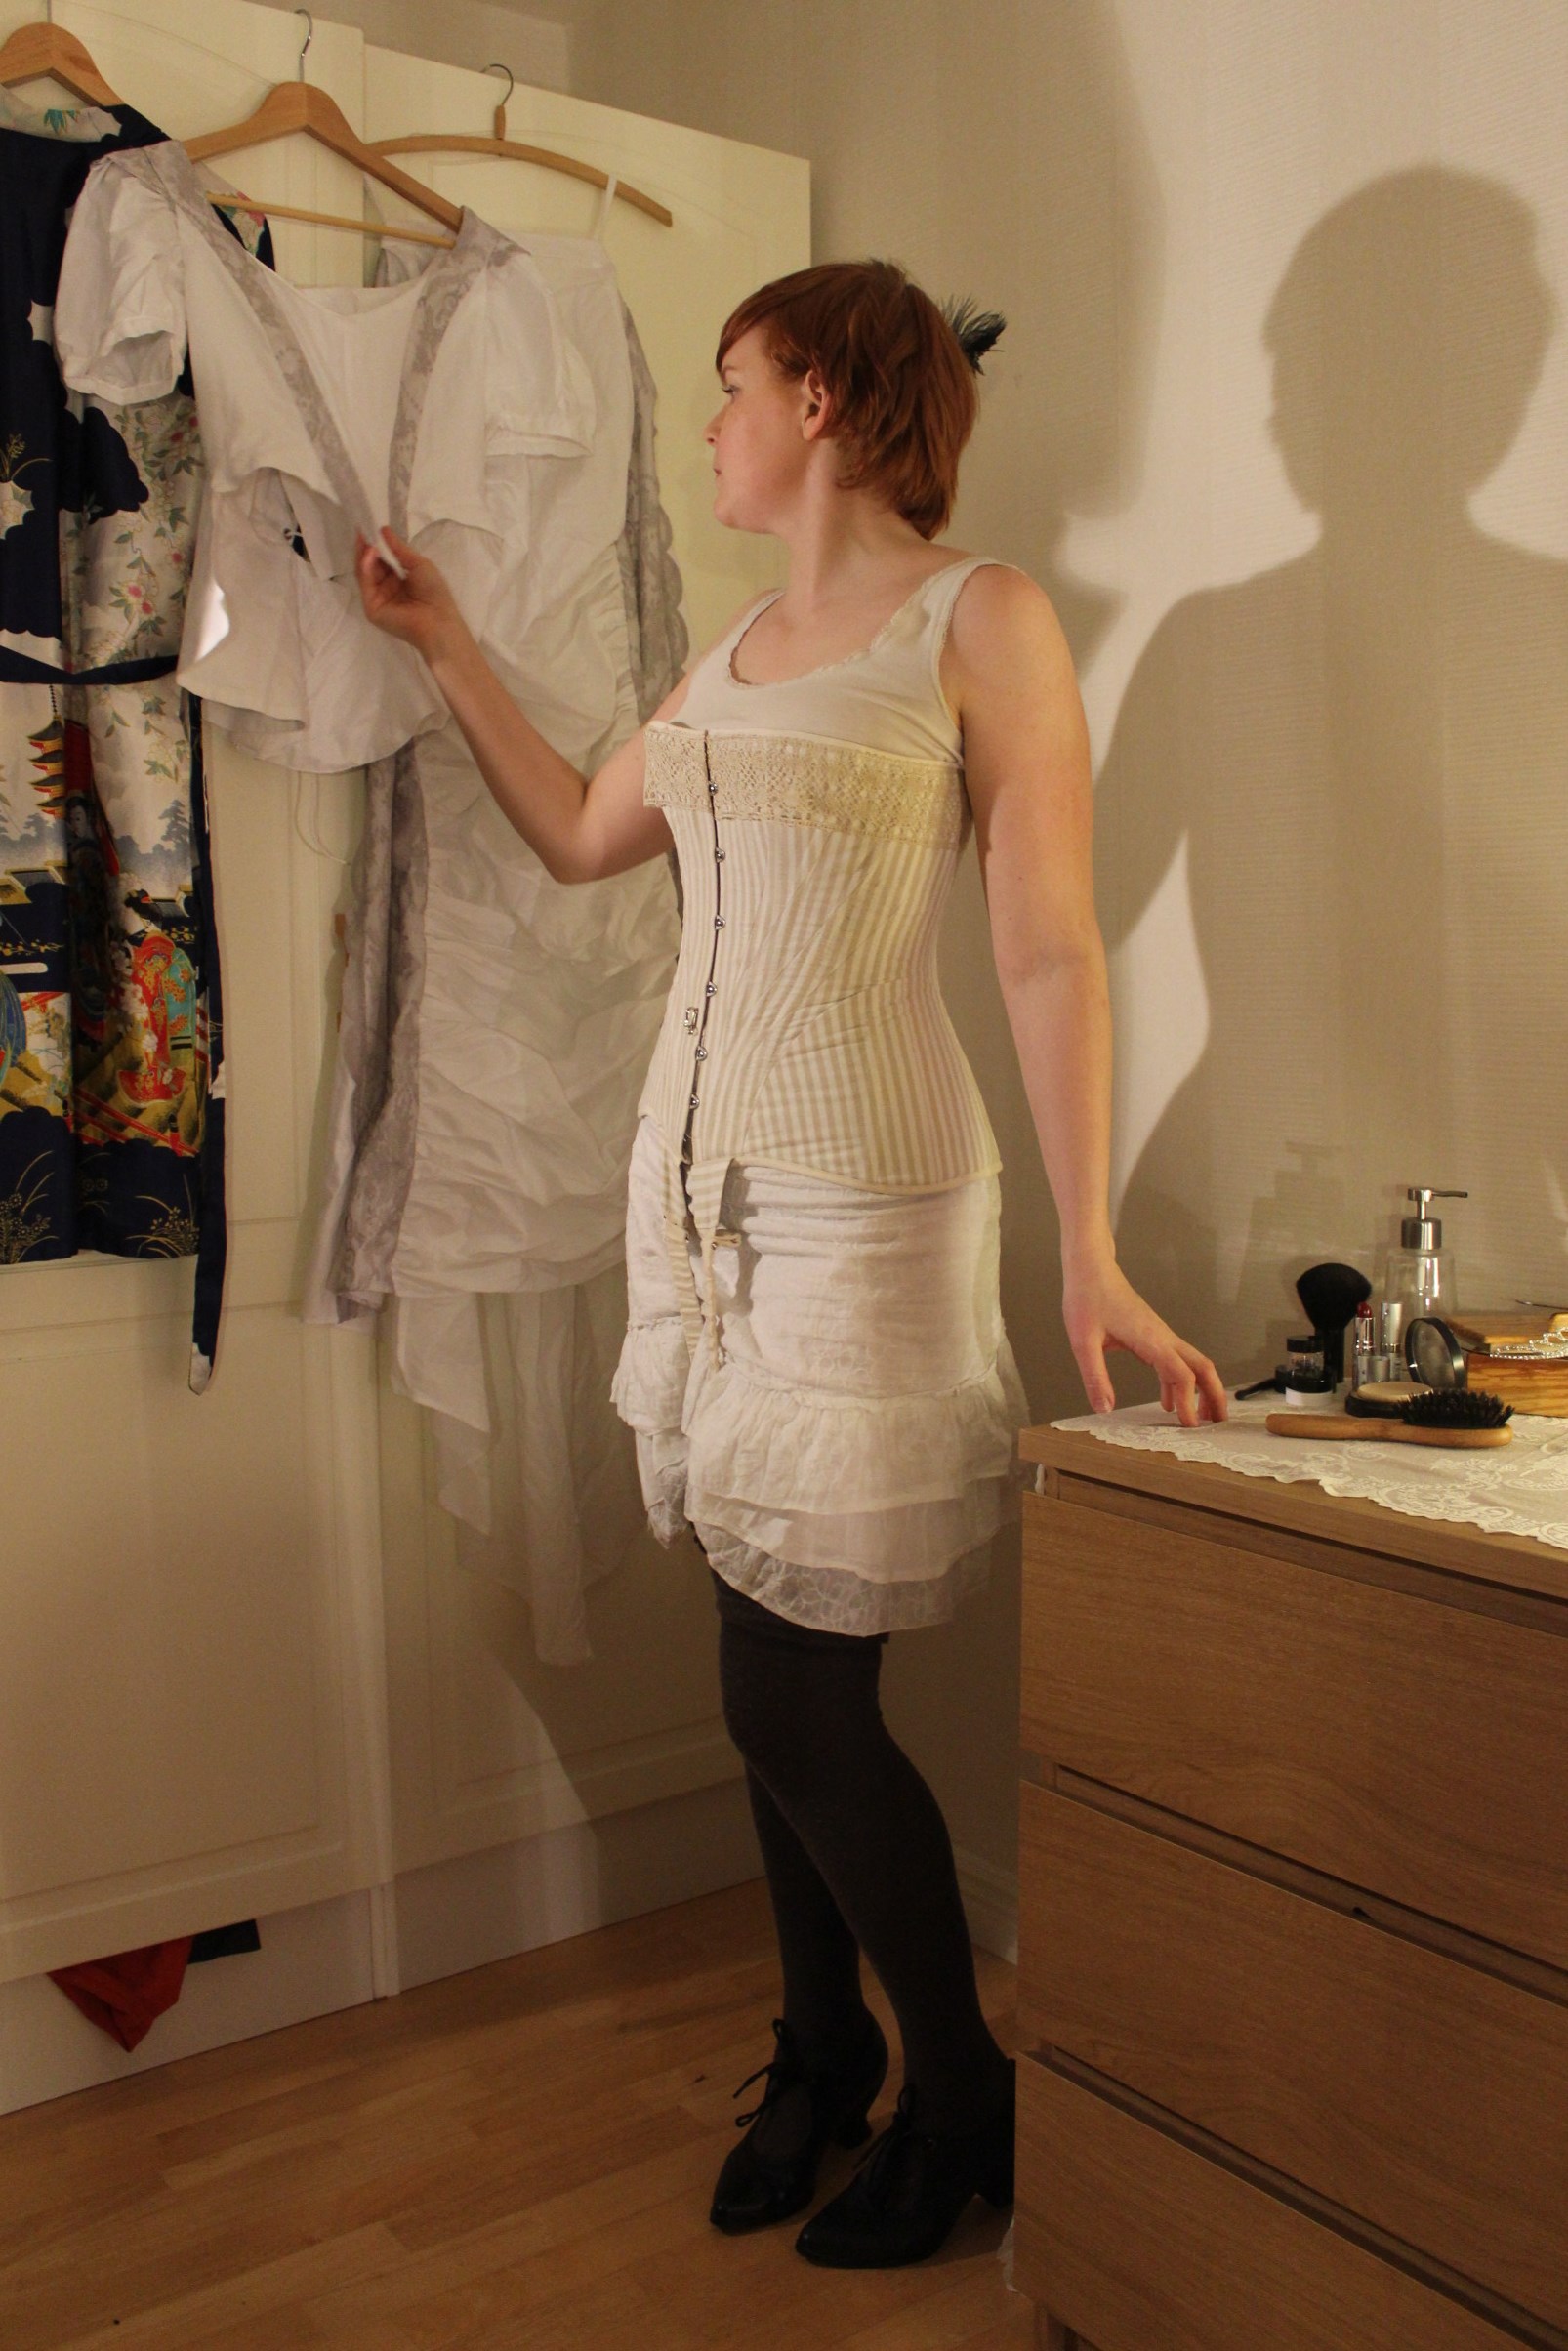
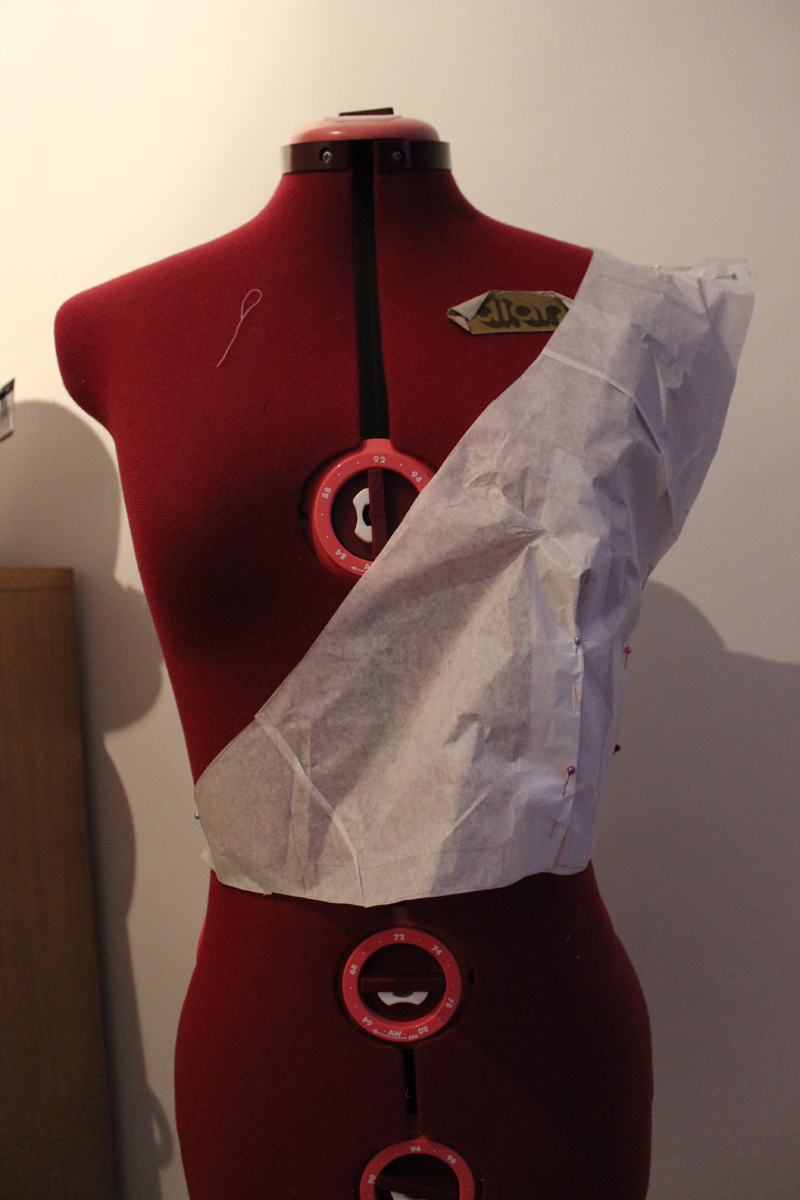
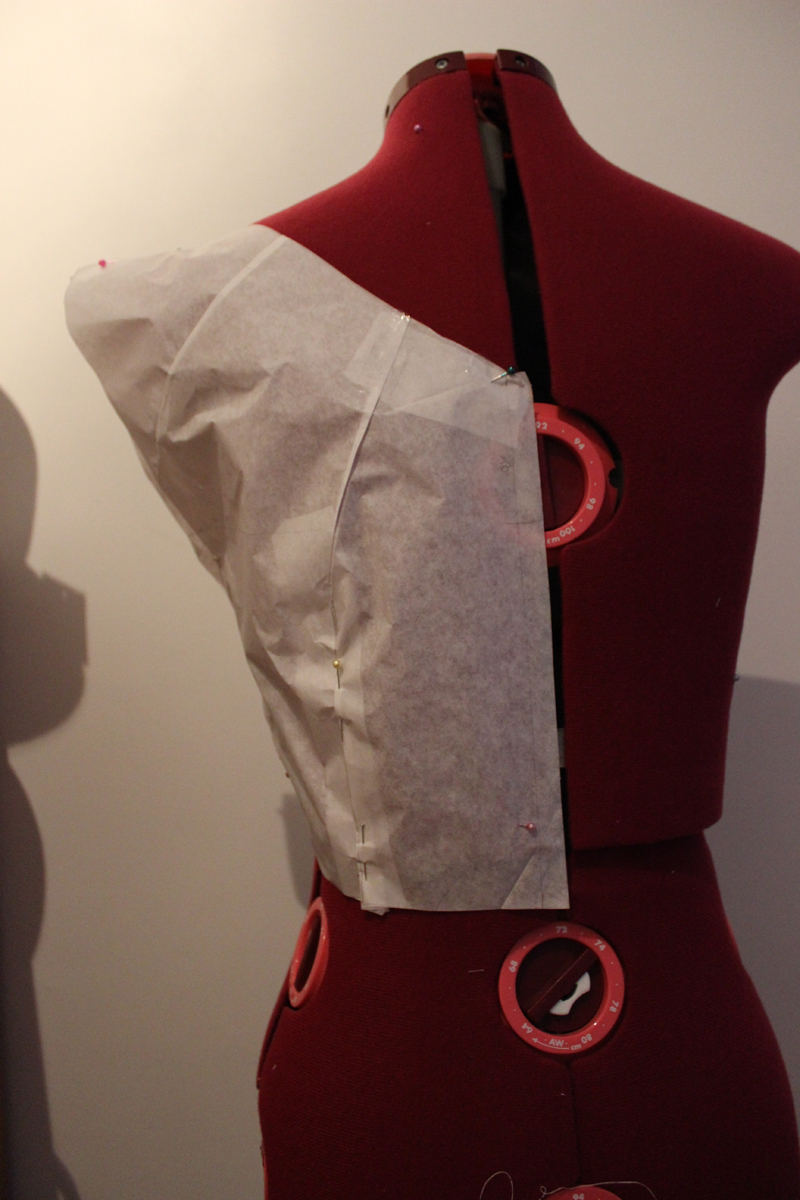
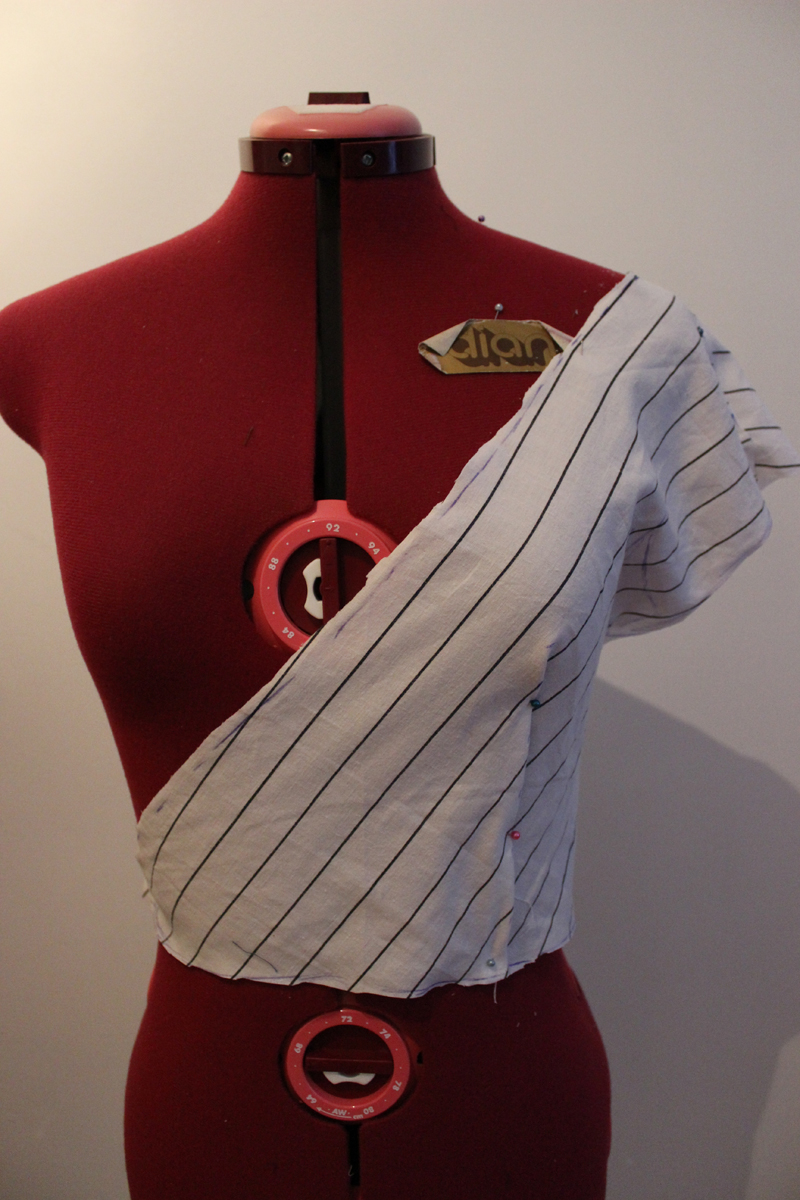
As usual, I started with the draping of the pattern. I pinned the fabric to my dressform (on top of the corset and brassiere) and draped a tight fitting lining.

IMG_6595 IMG_6594

IMG_6587
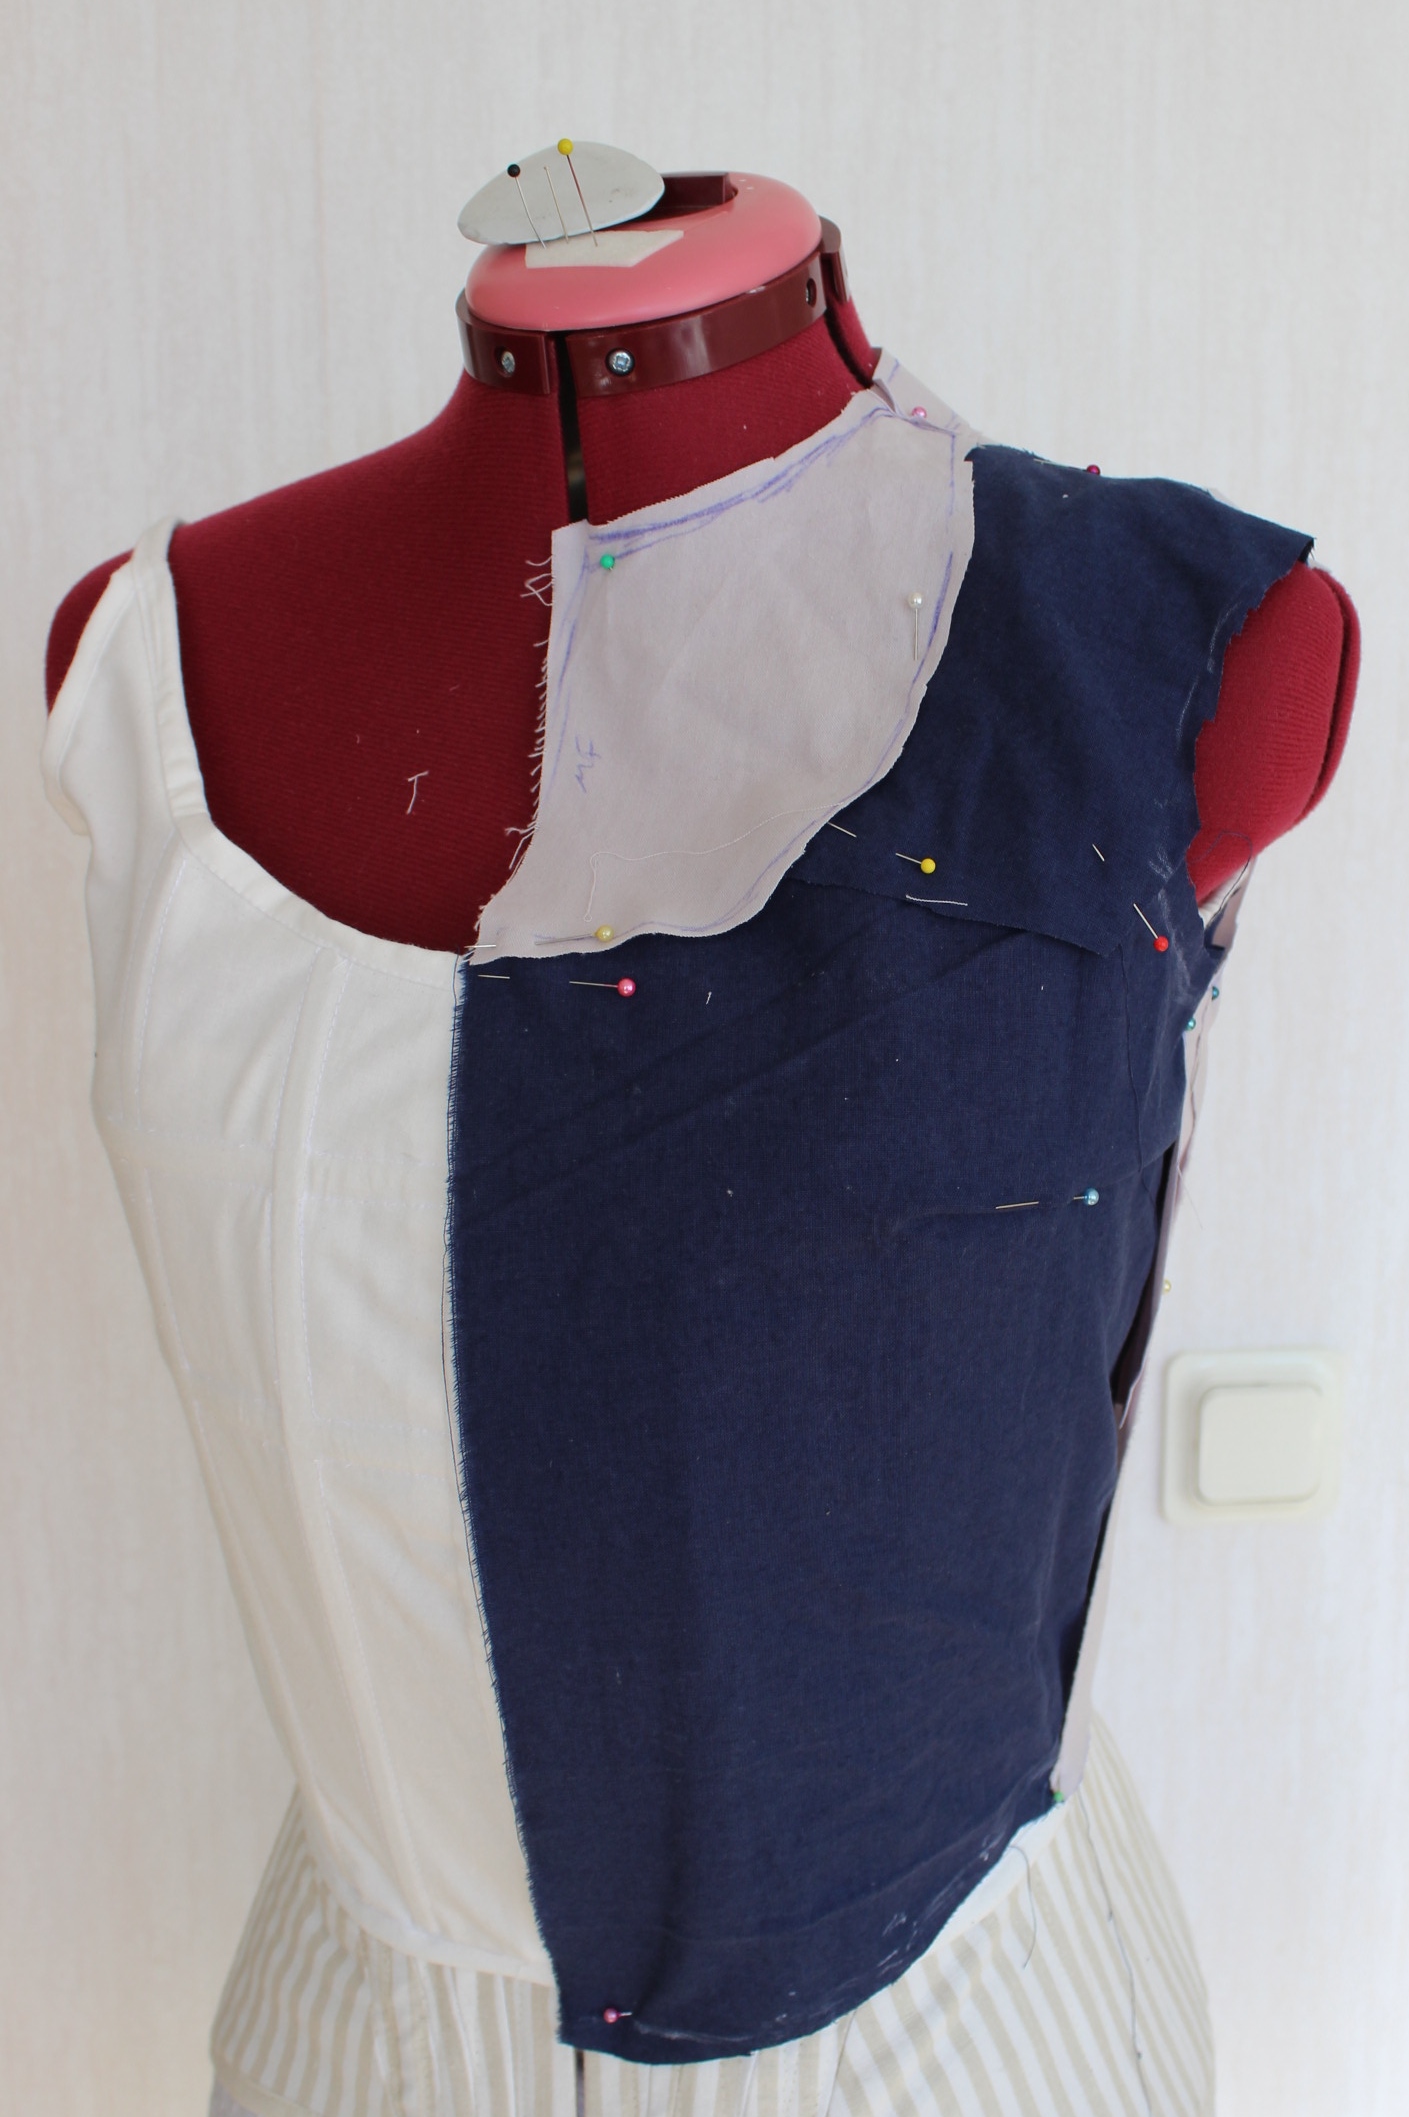
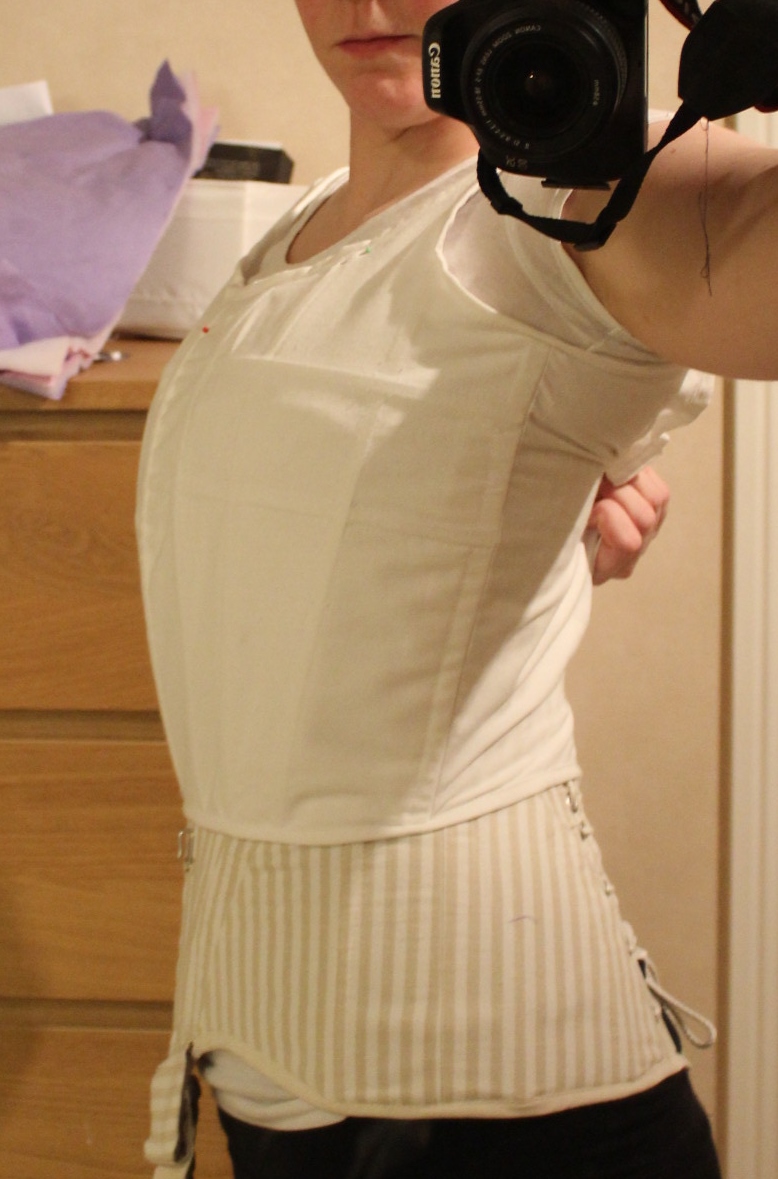
And a larger outer layer.

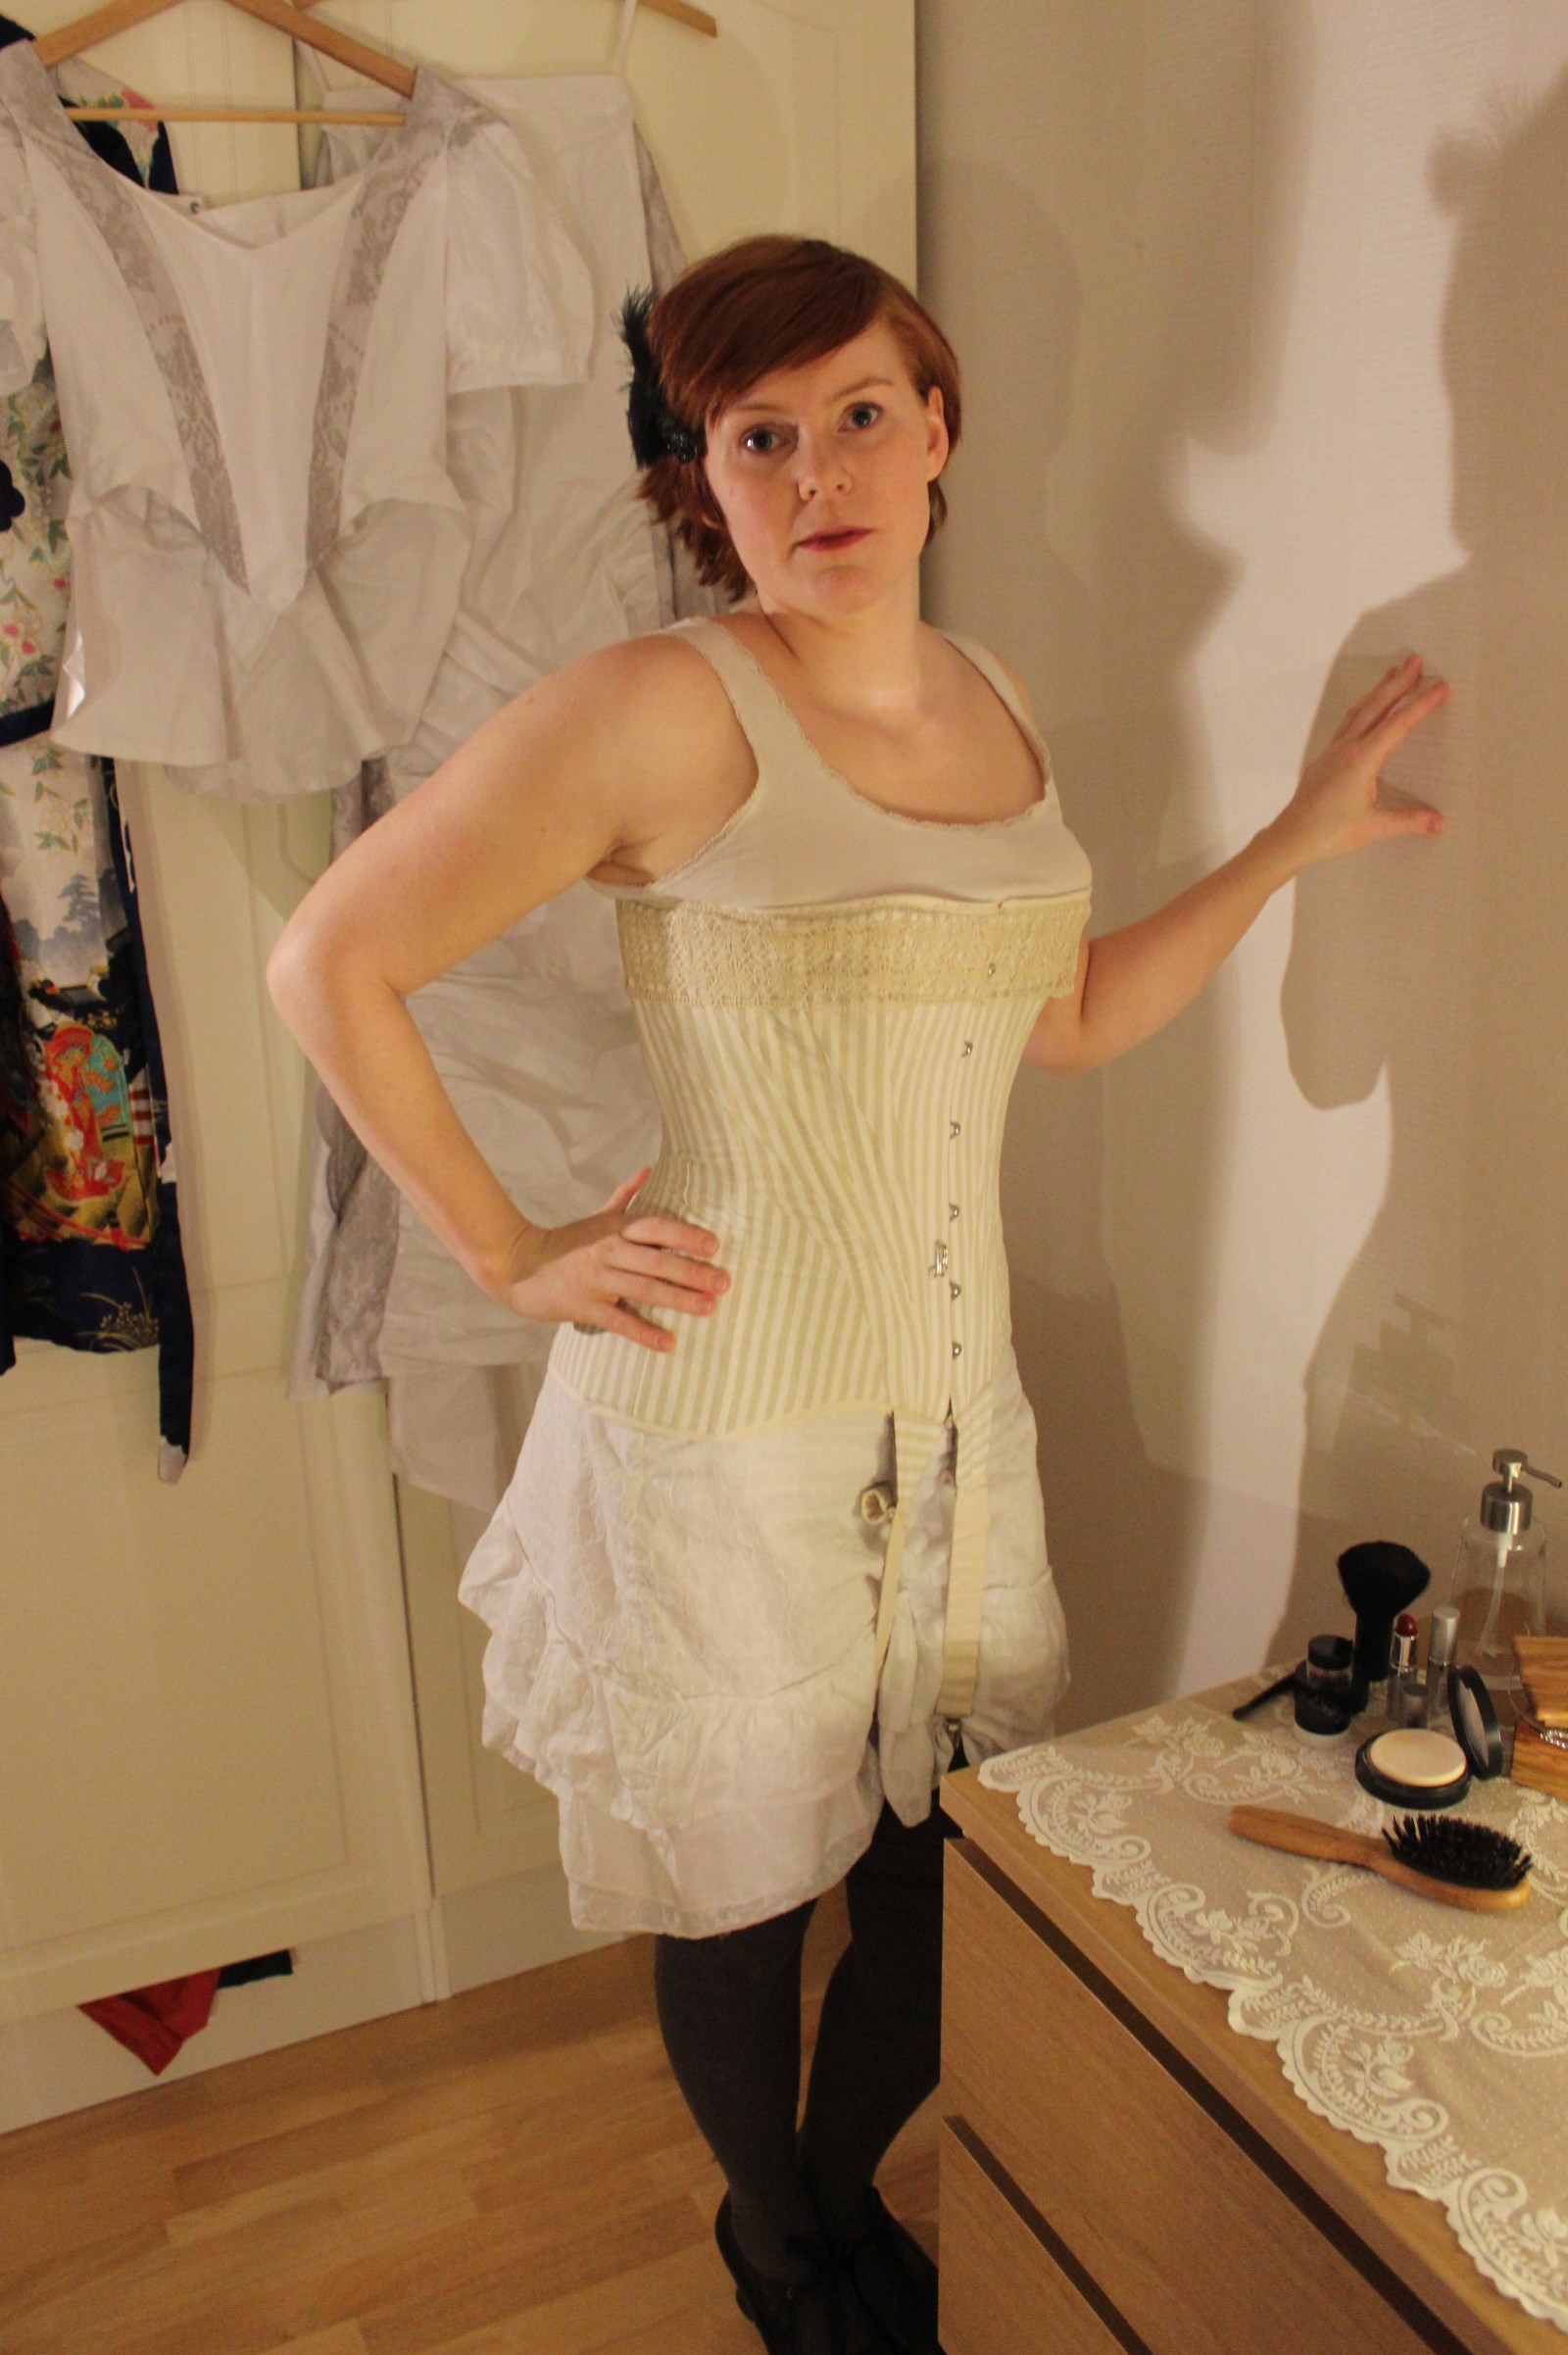
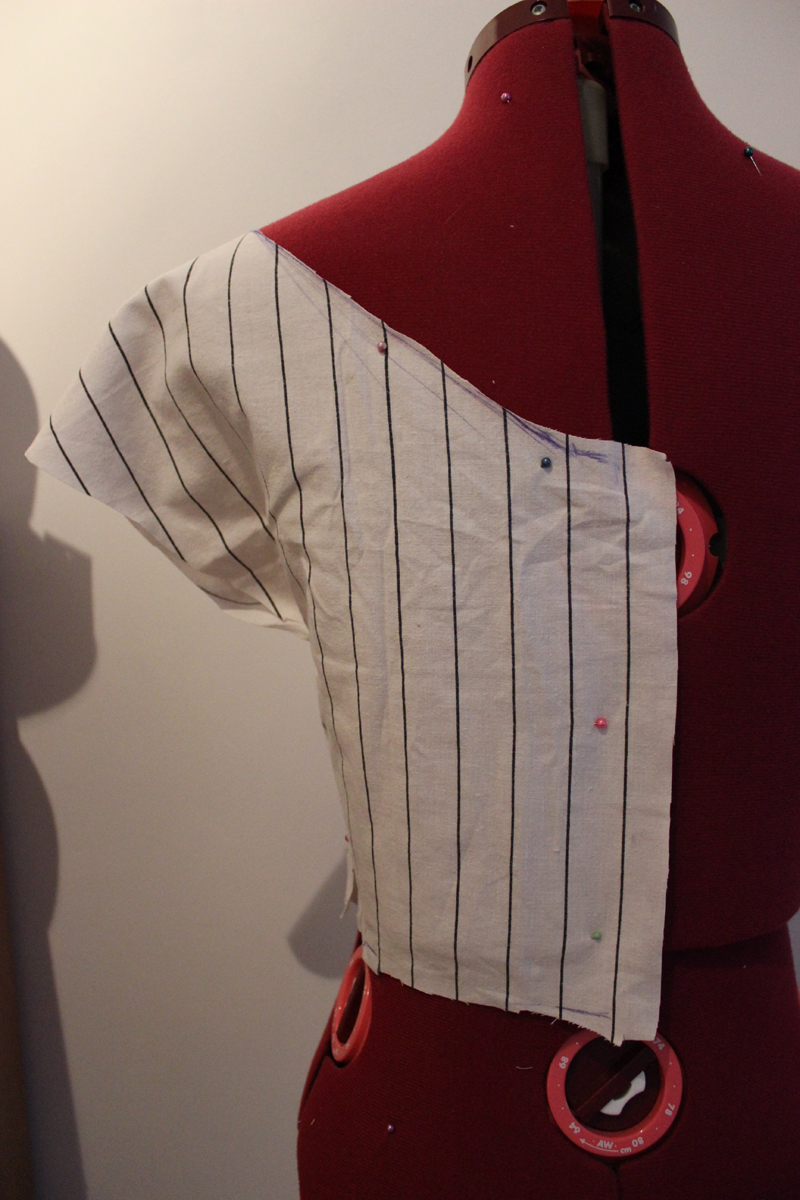
Then cut and made a quick mock-up. First I tried on the lining.

IMG_6606IMG_6604

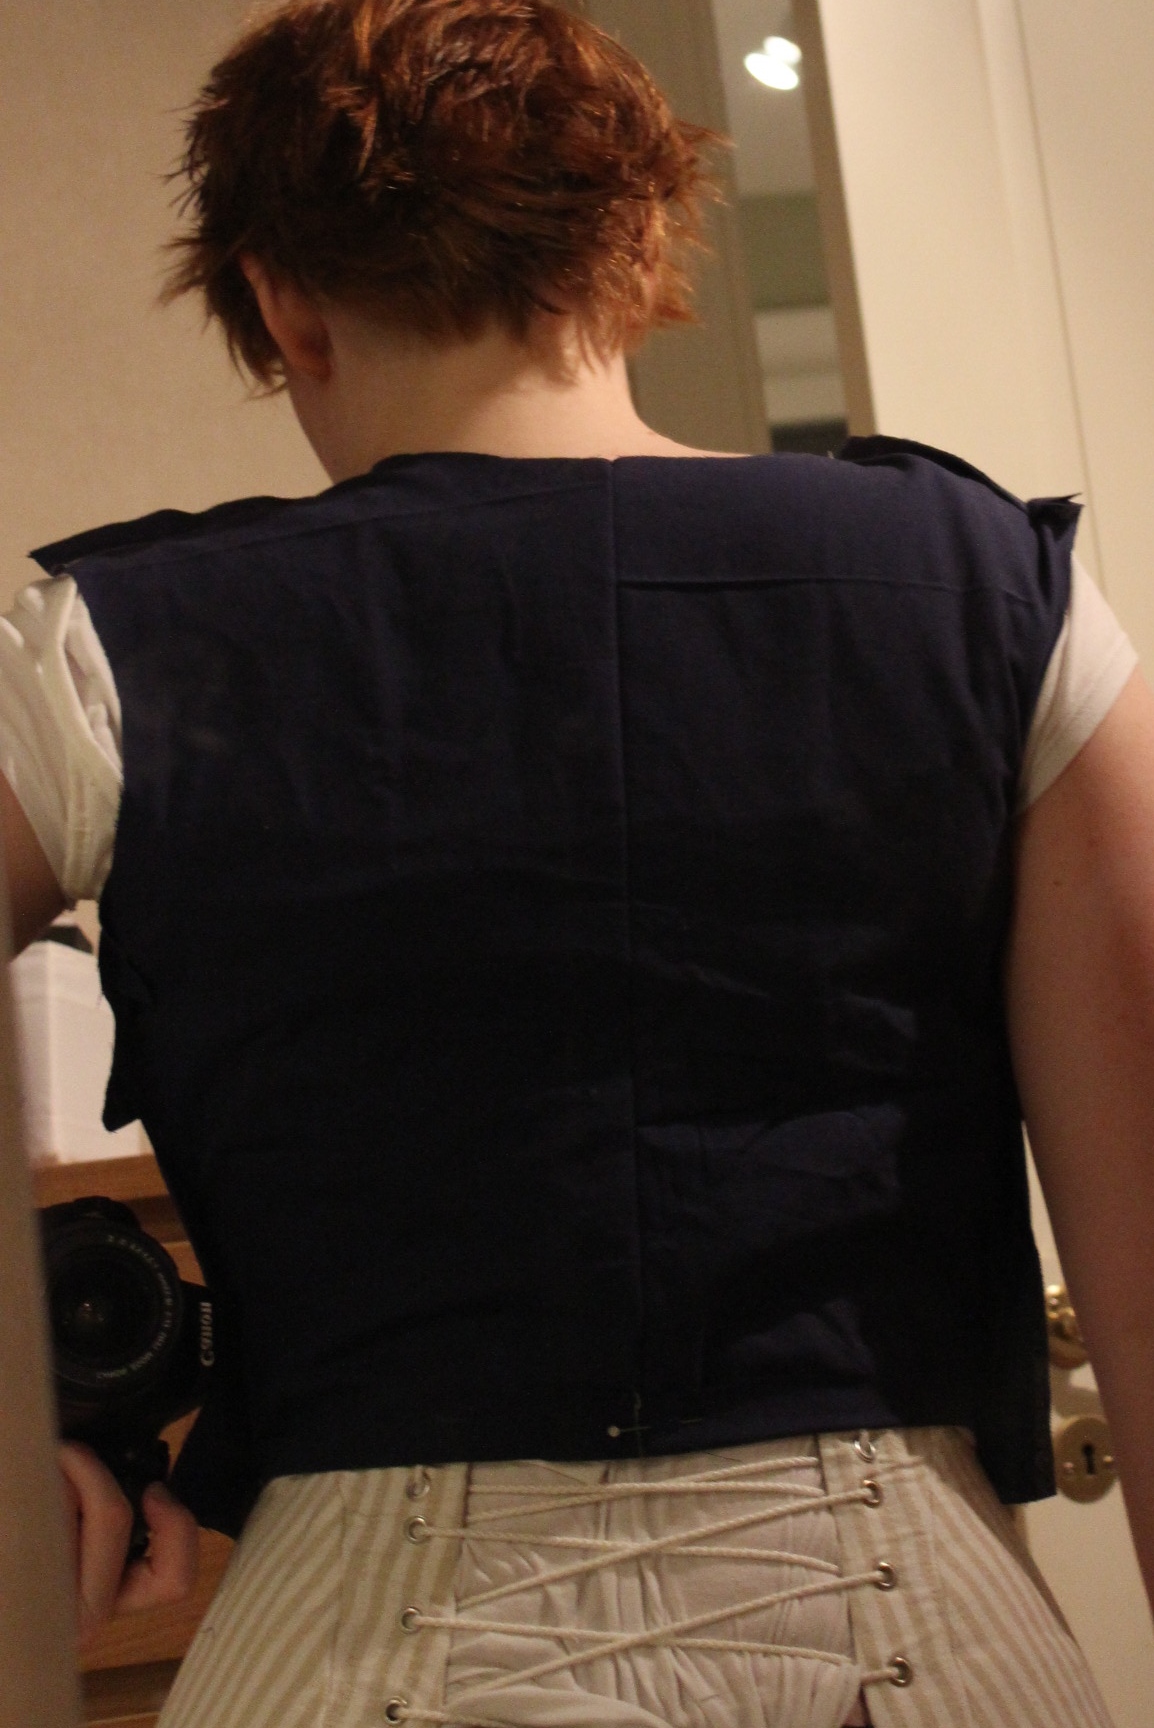
And then I pinned on the draping outer layer.

IMG_6614 IMG_6611

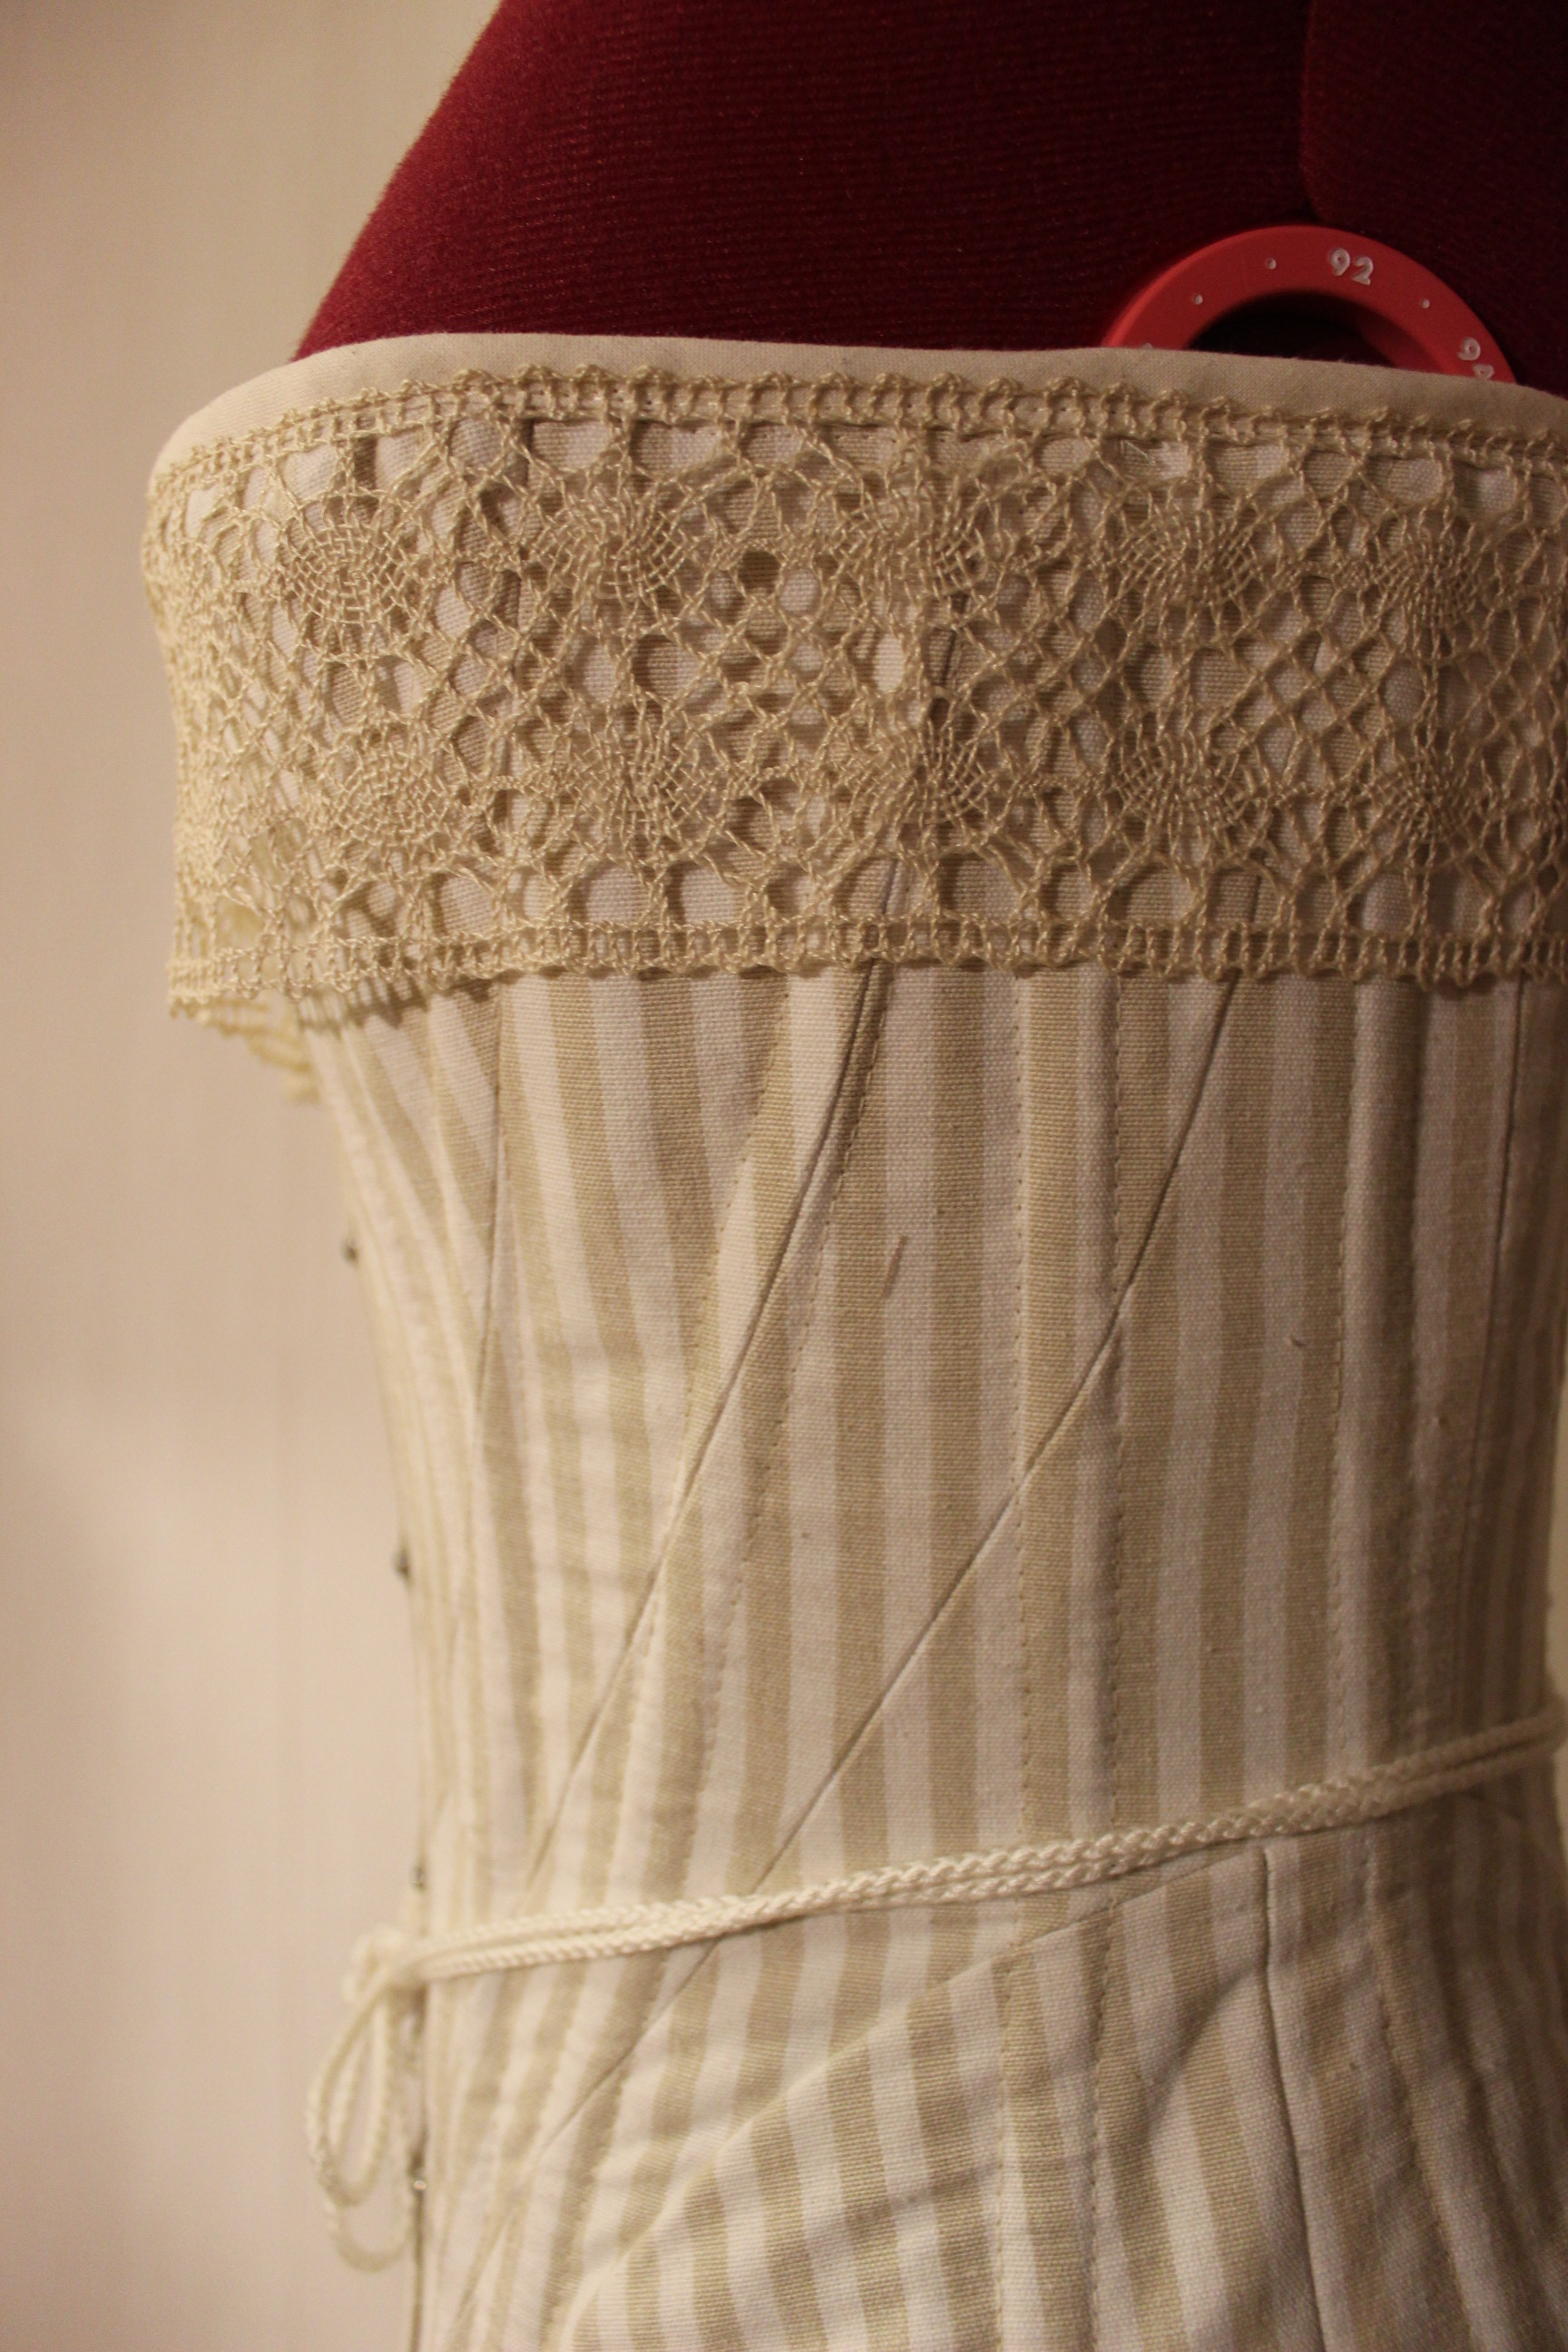
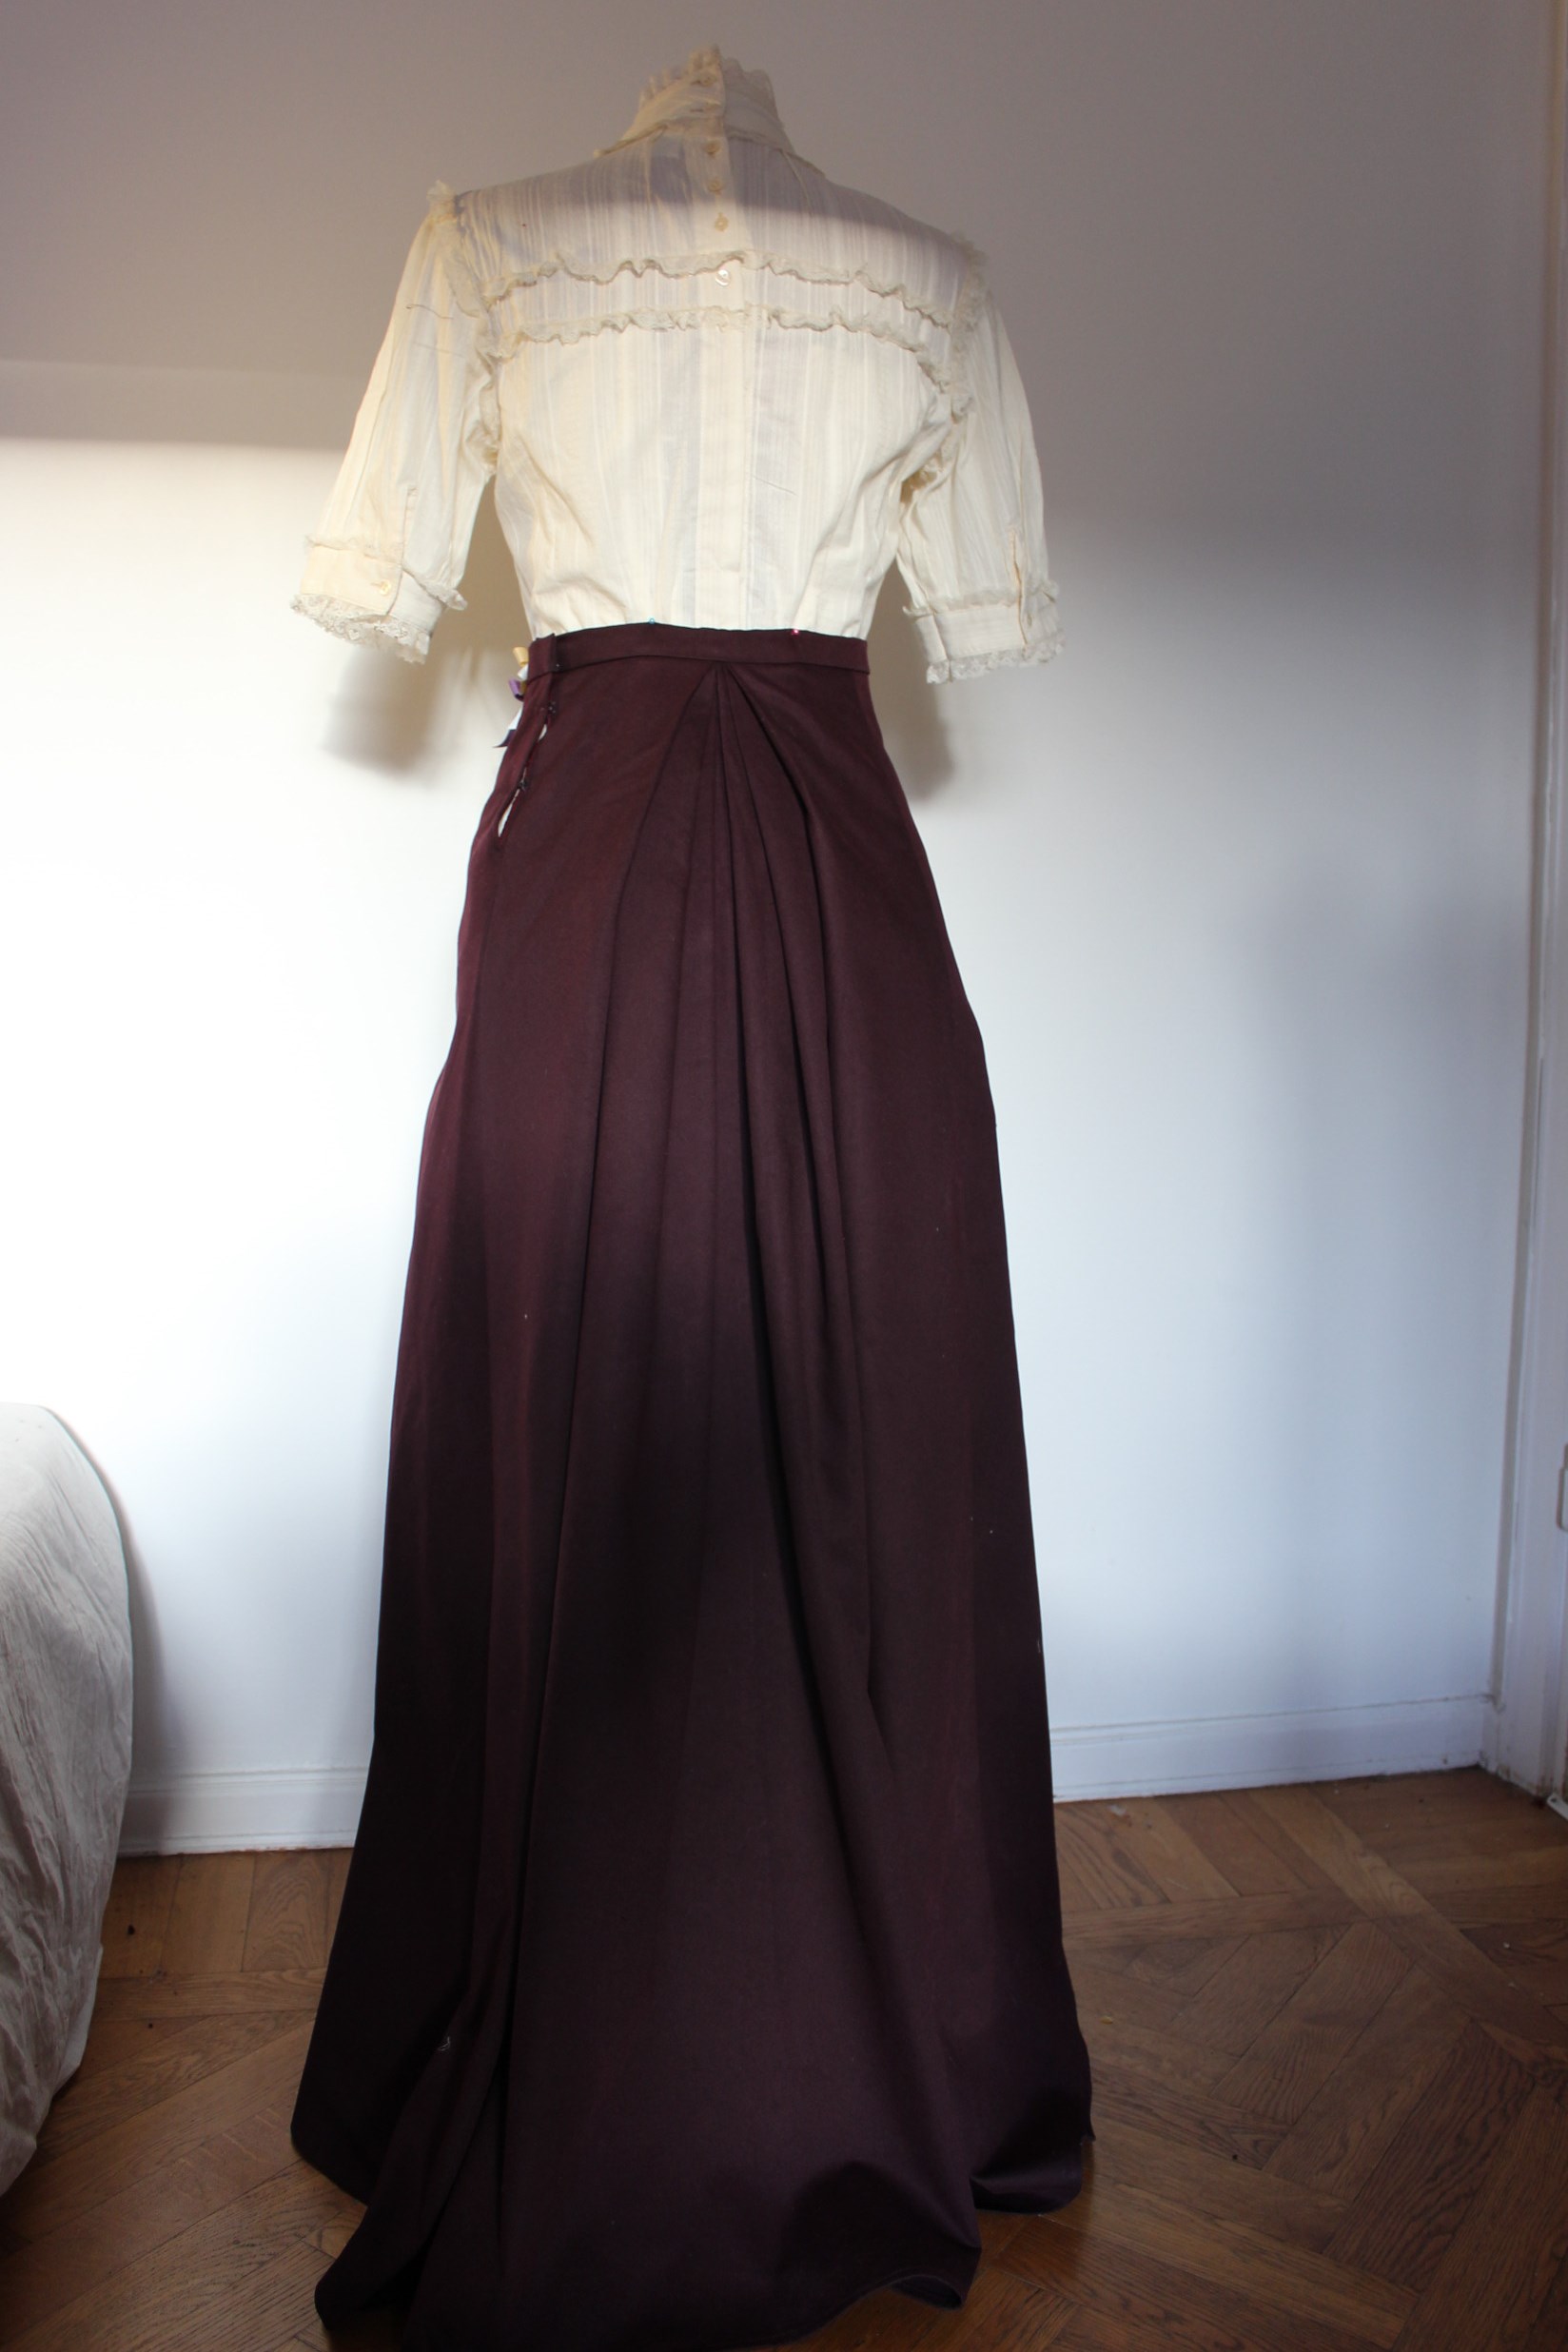
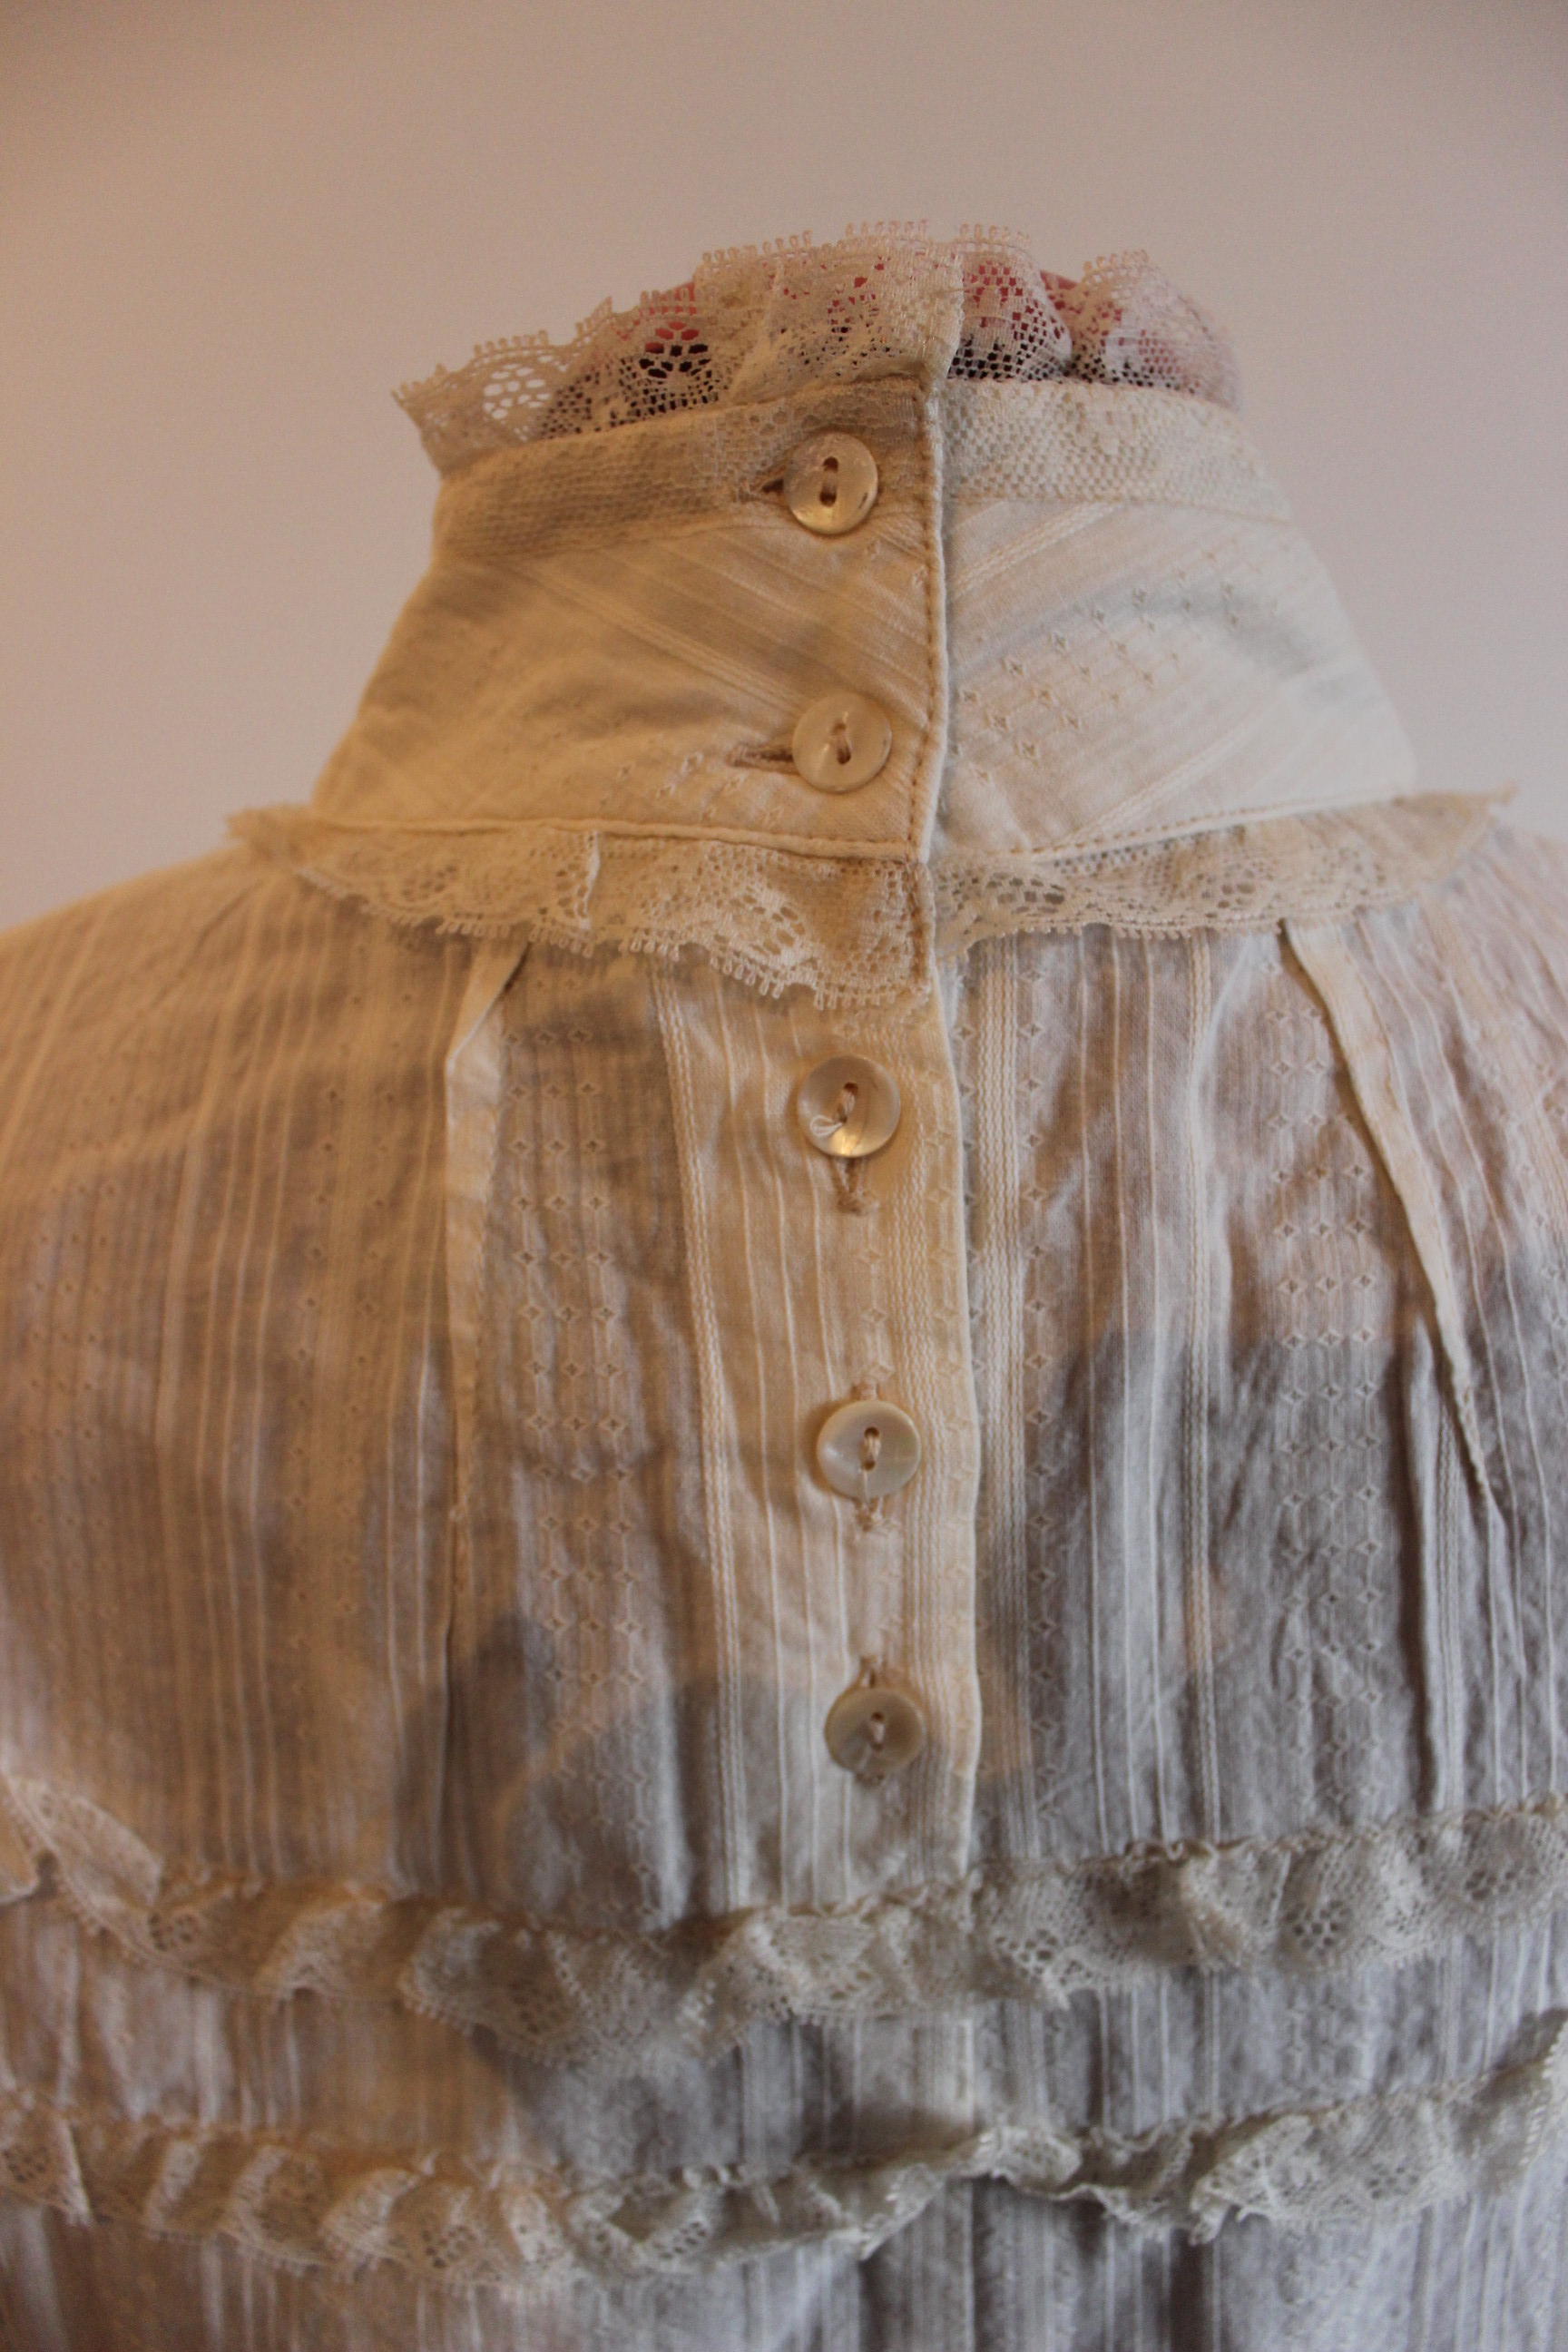
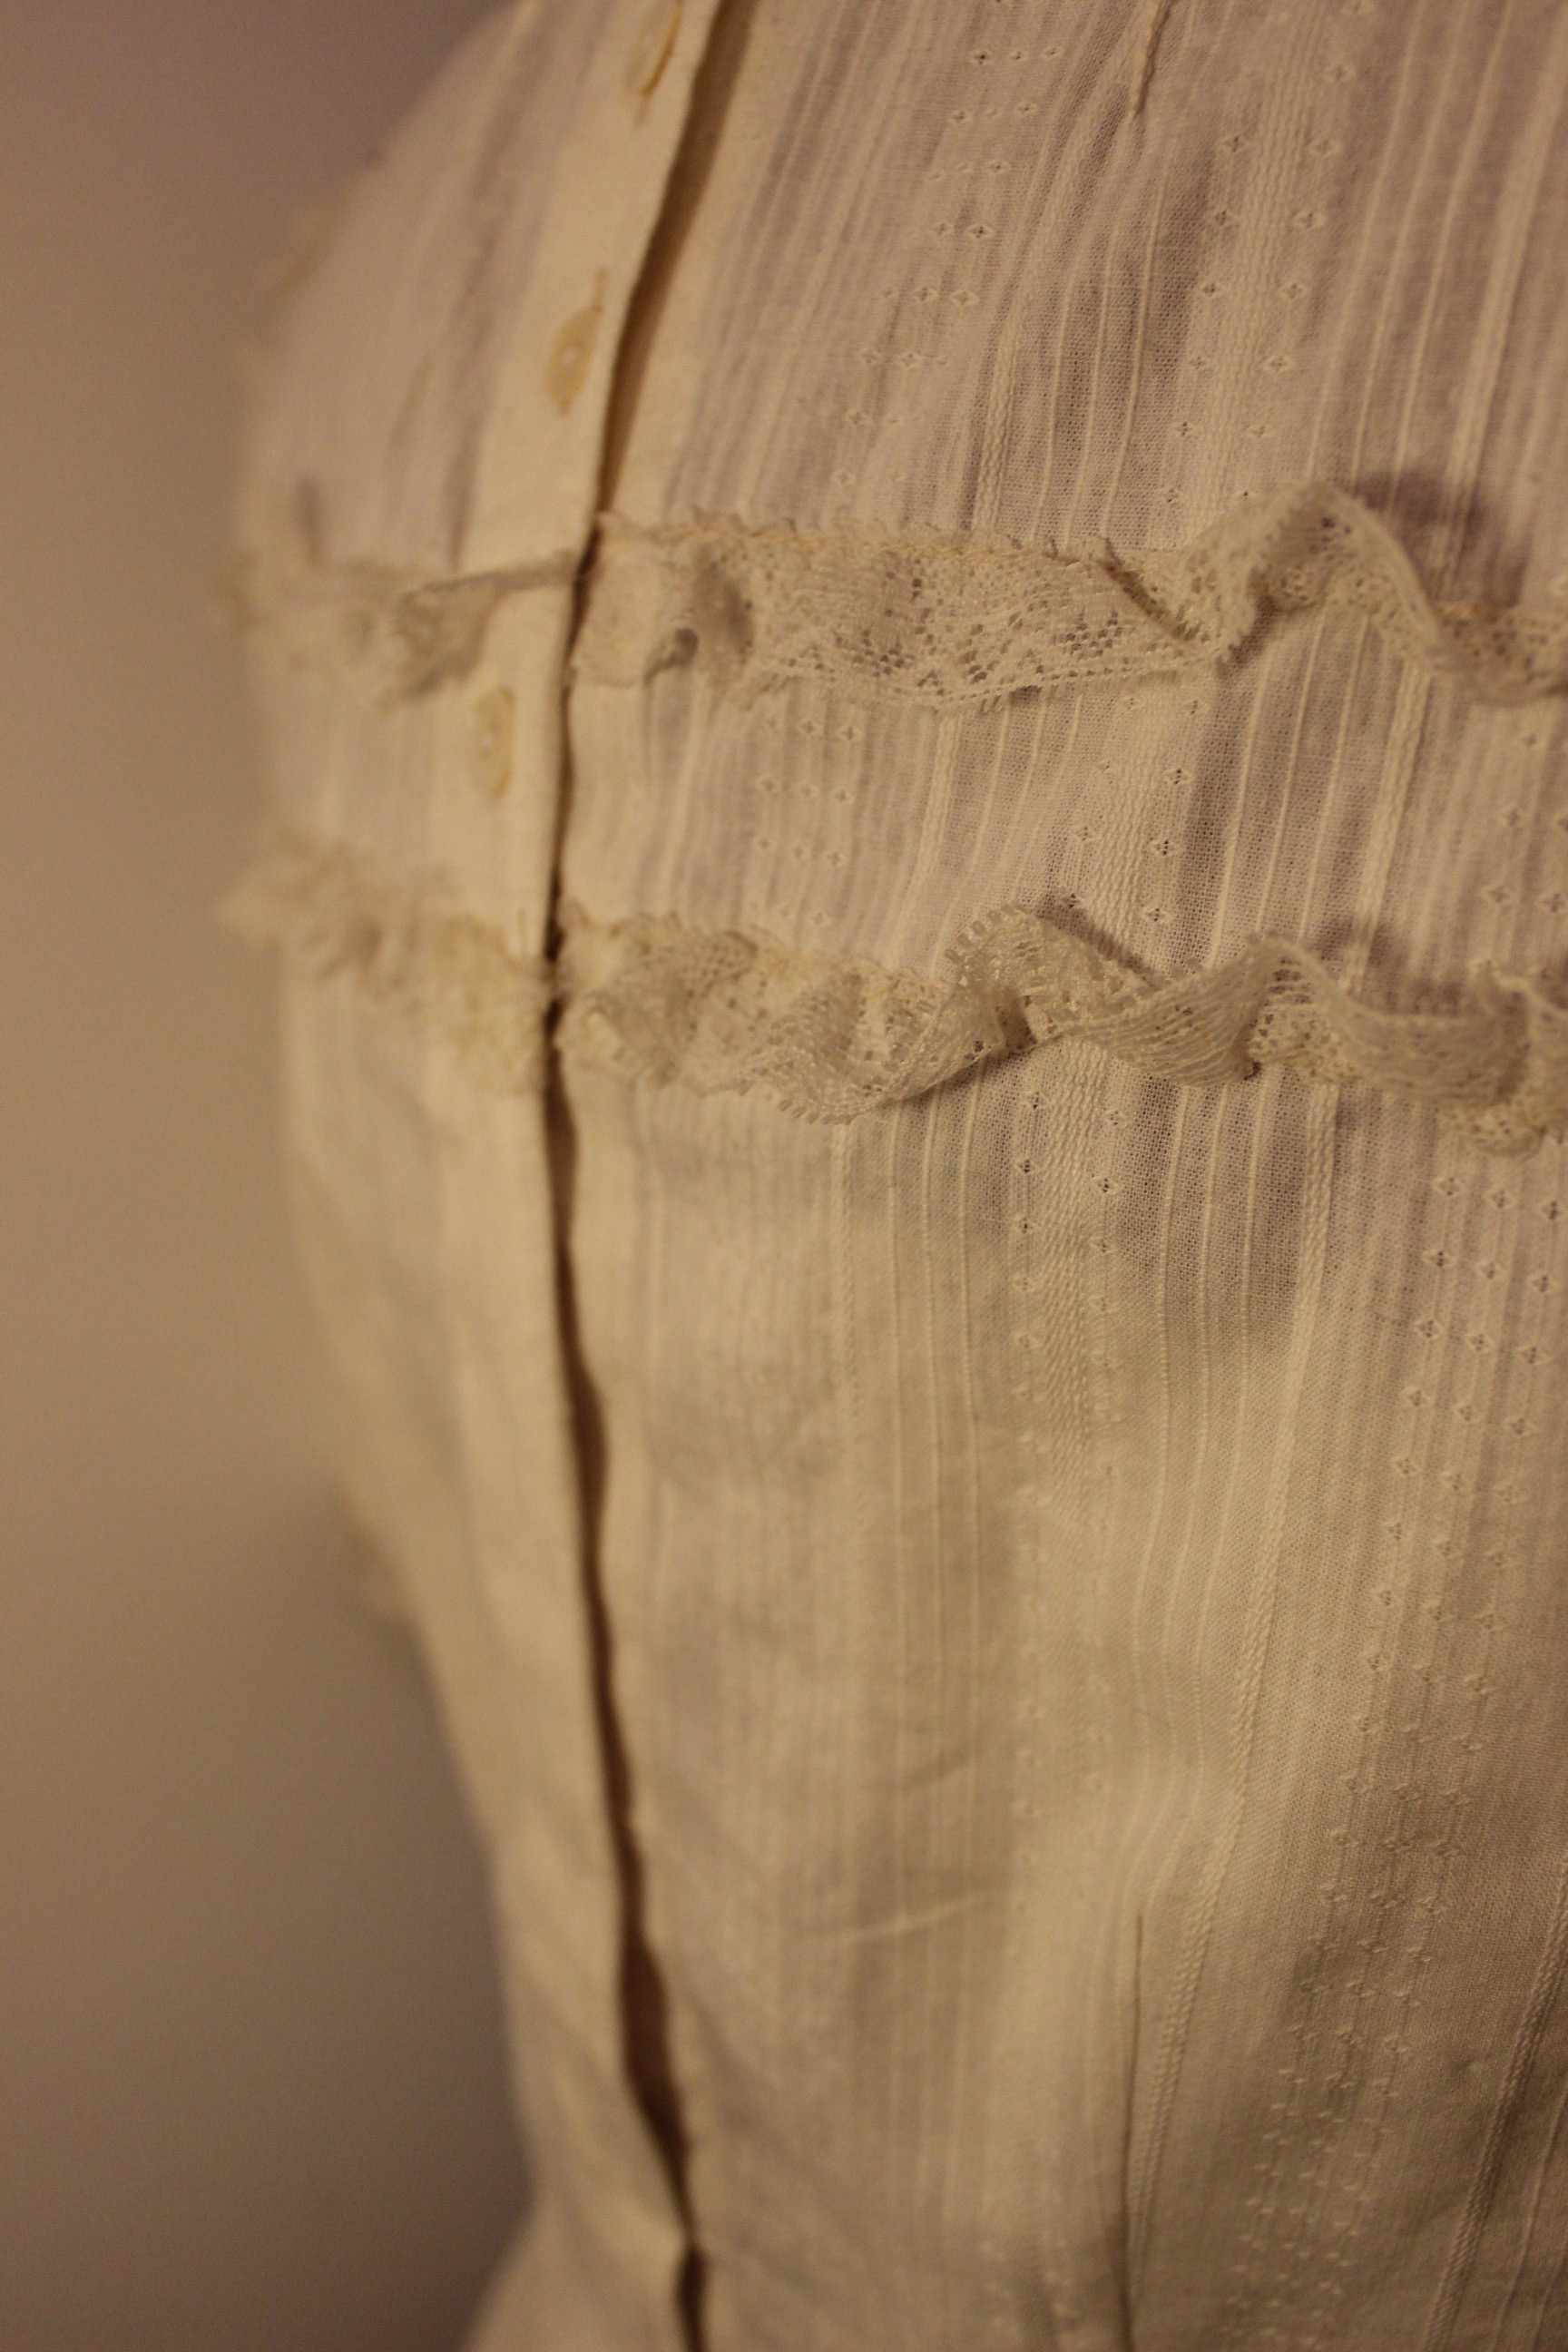
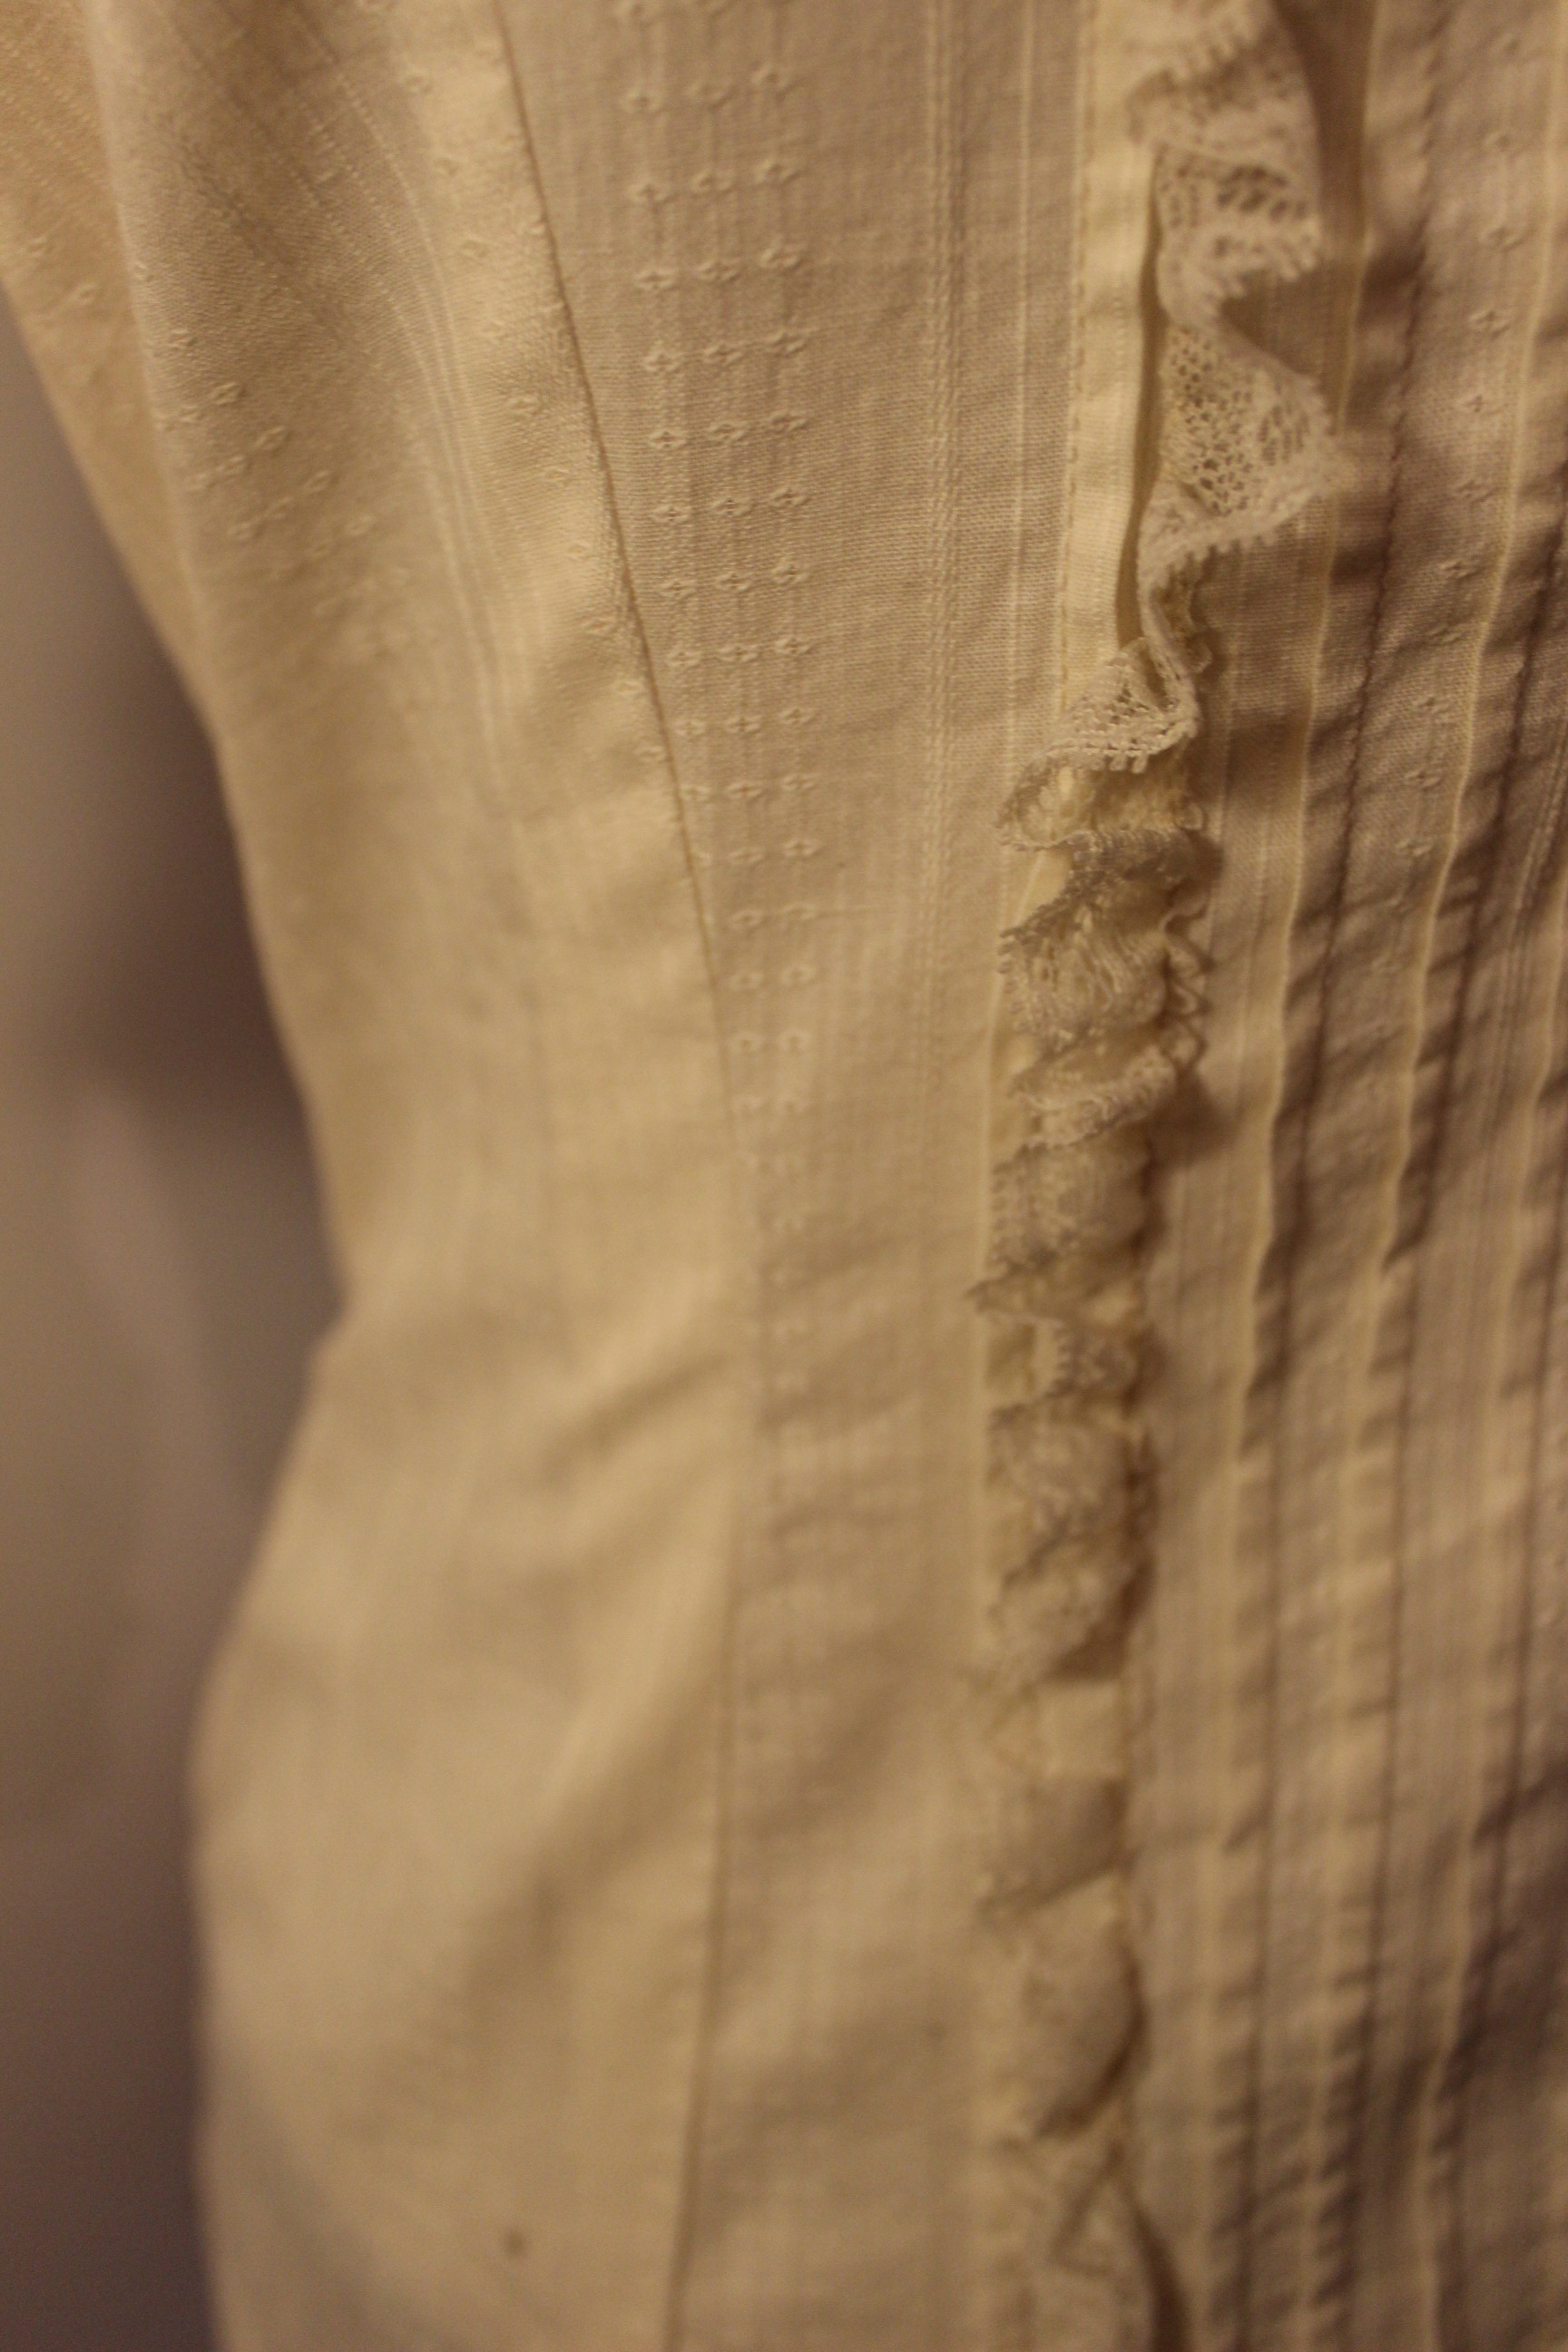
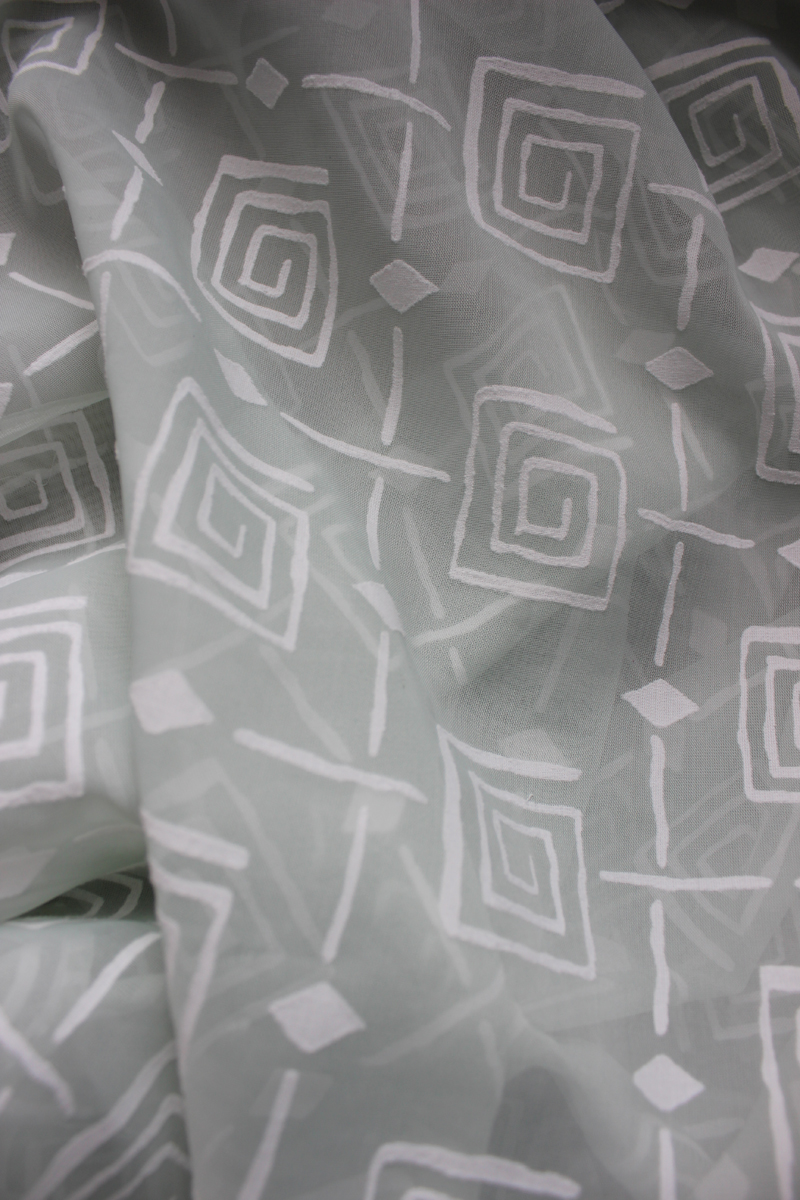
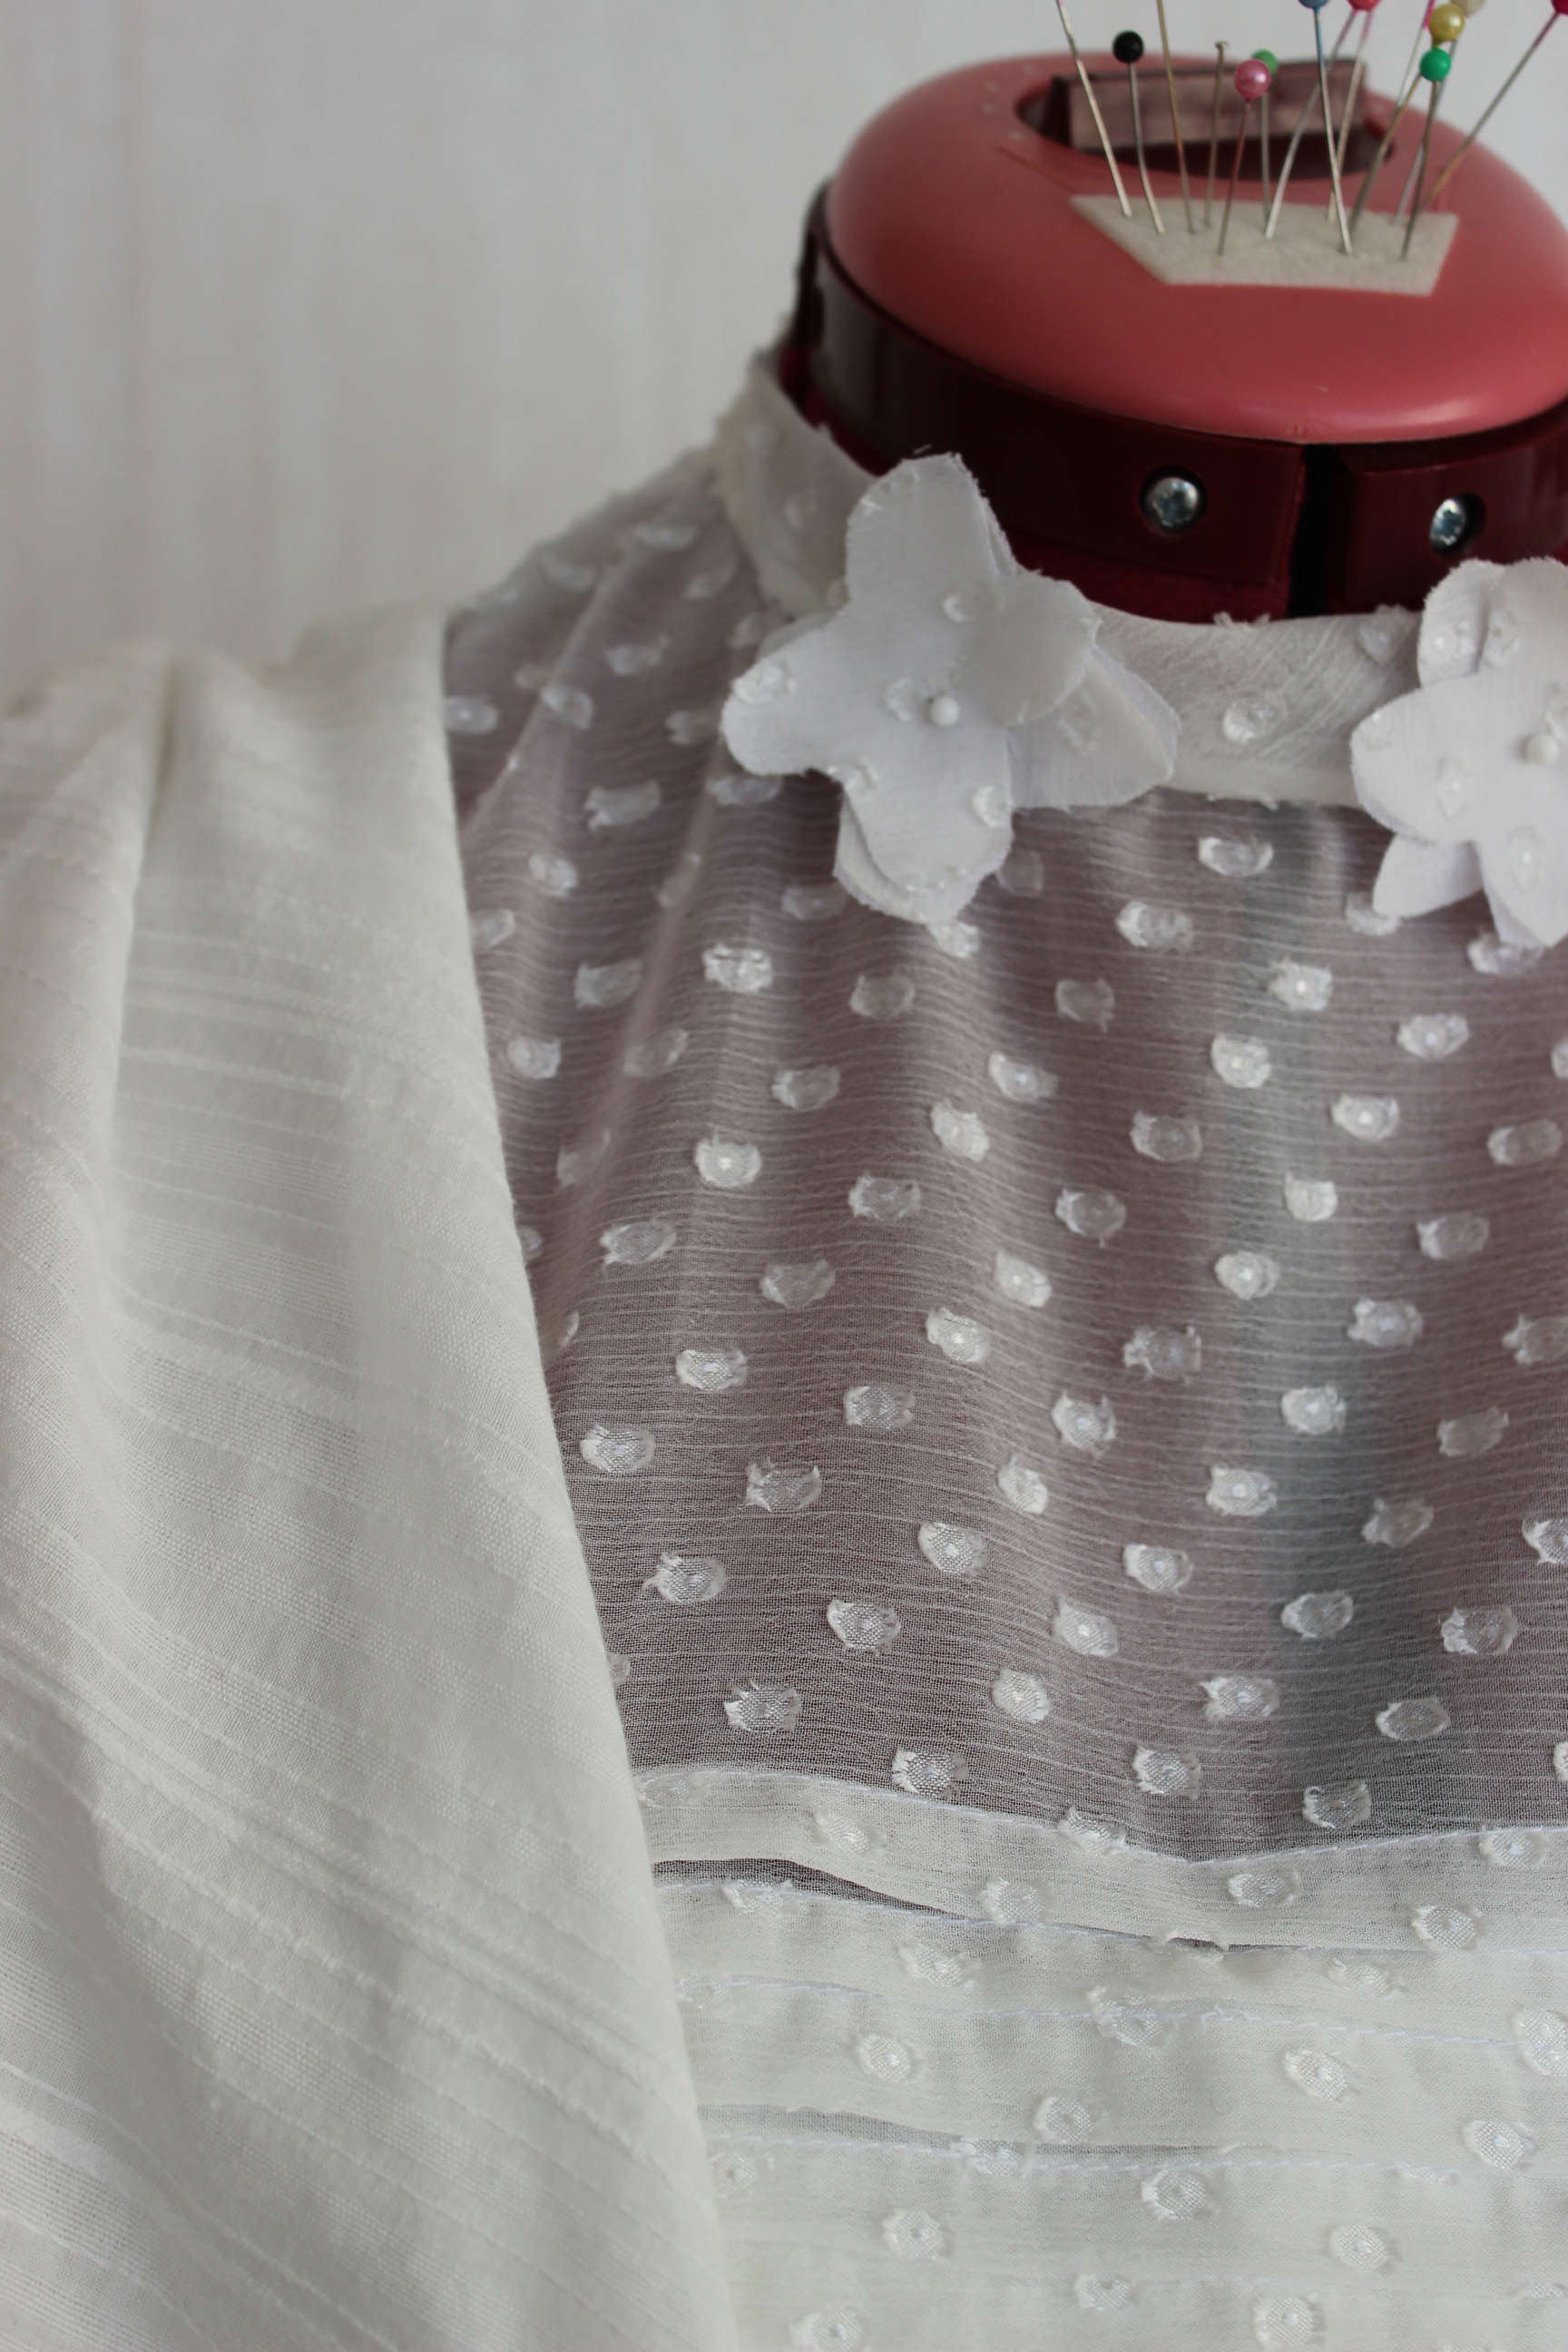
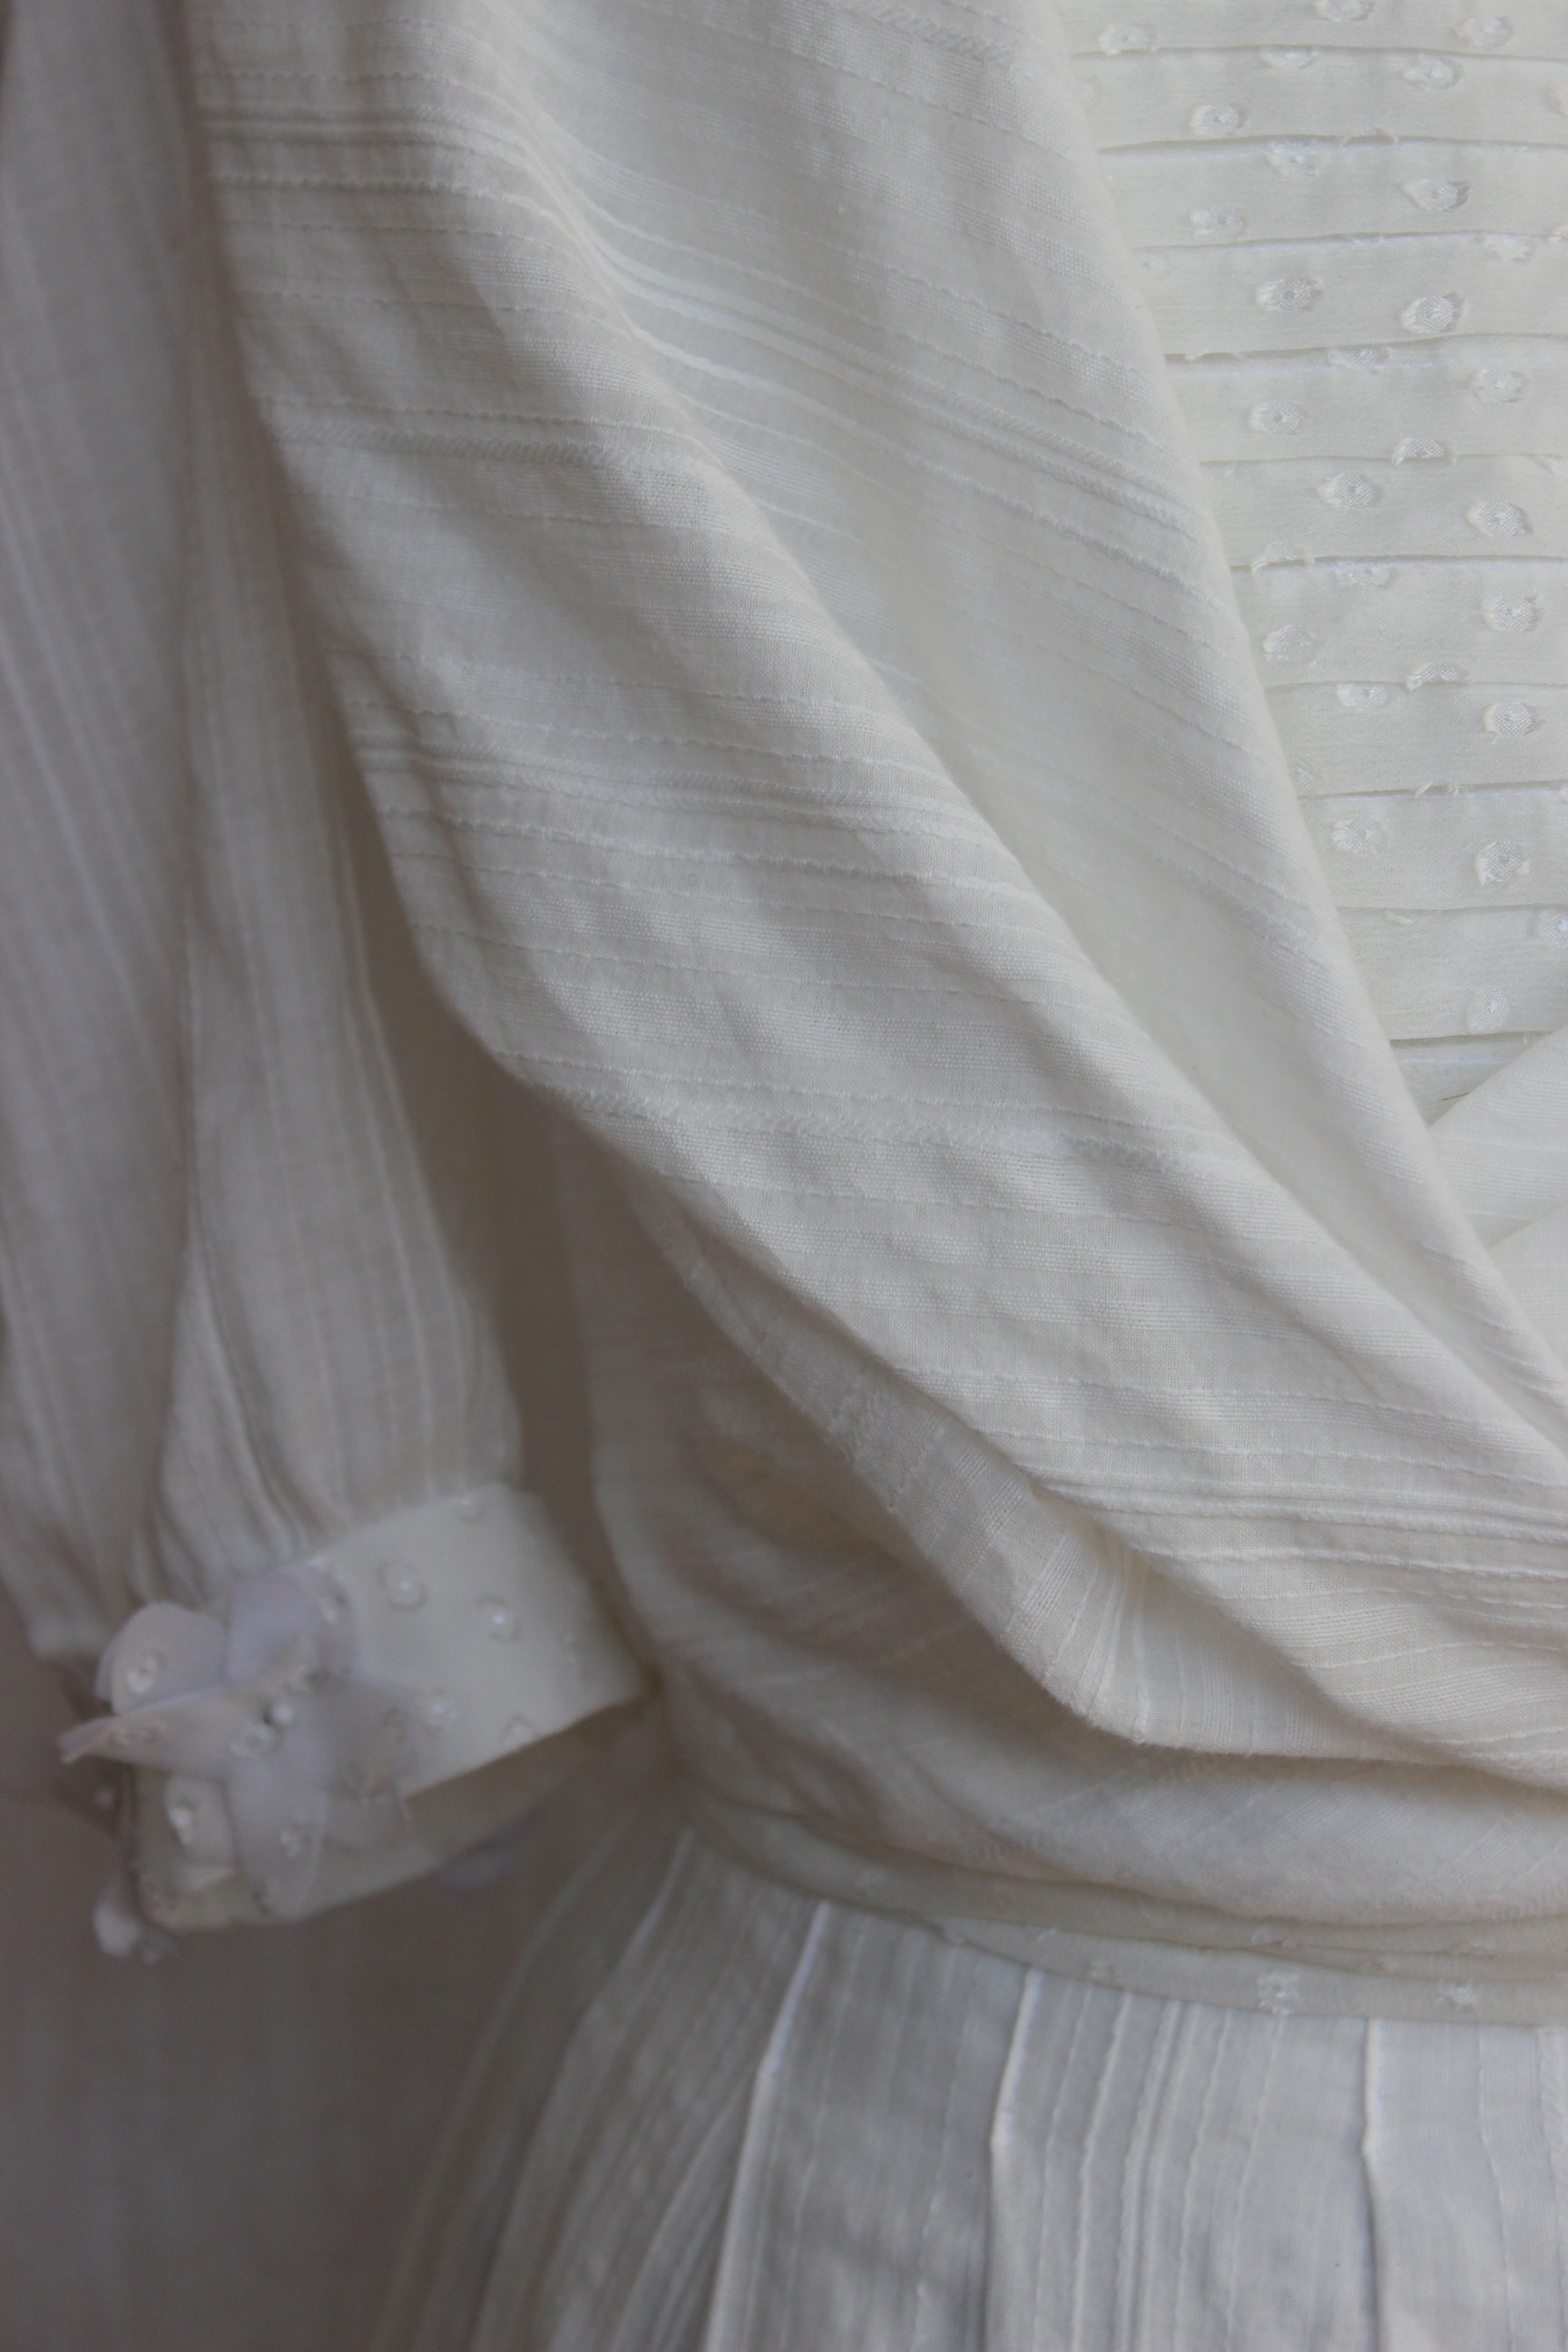
After some minor changes to the pattern, I cut all the pieces. Using a striped cotton voile (same as for my “Chemise a la Reine“) for the bodice, sleeves and skirt. And a dotted polyester organdy for the neck insertion, and decoration.

IMG_6692
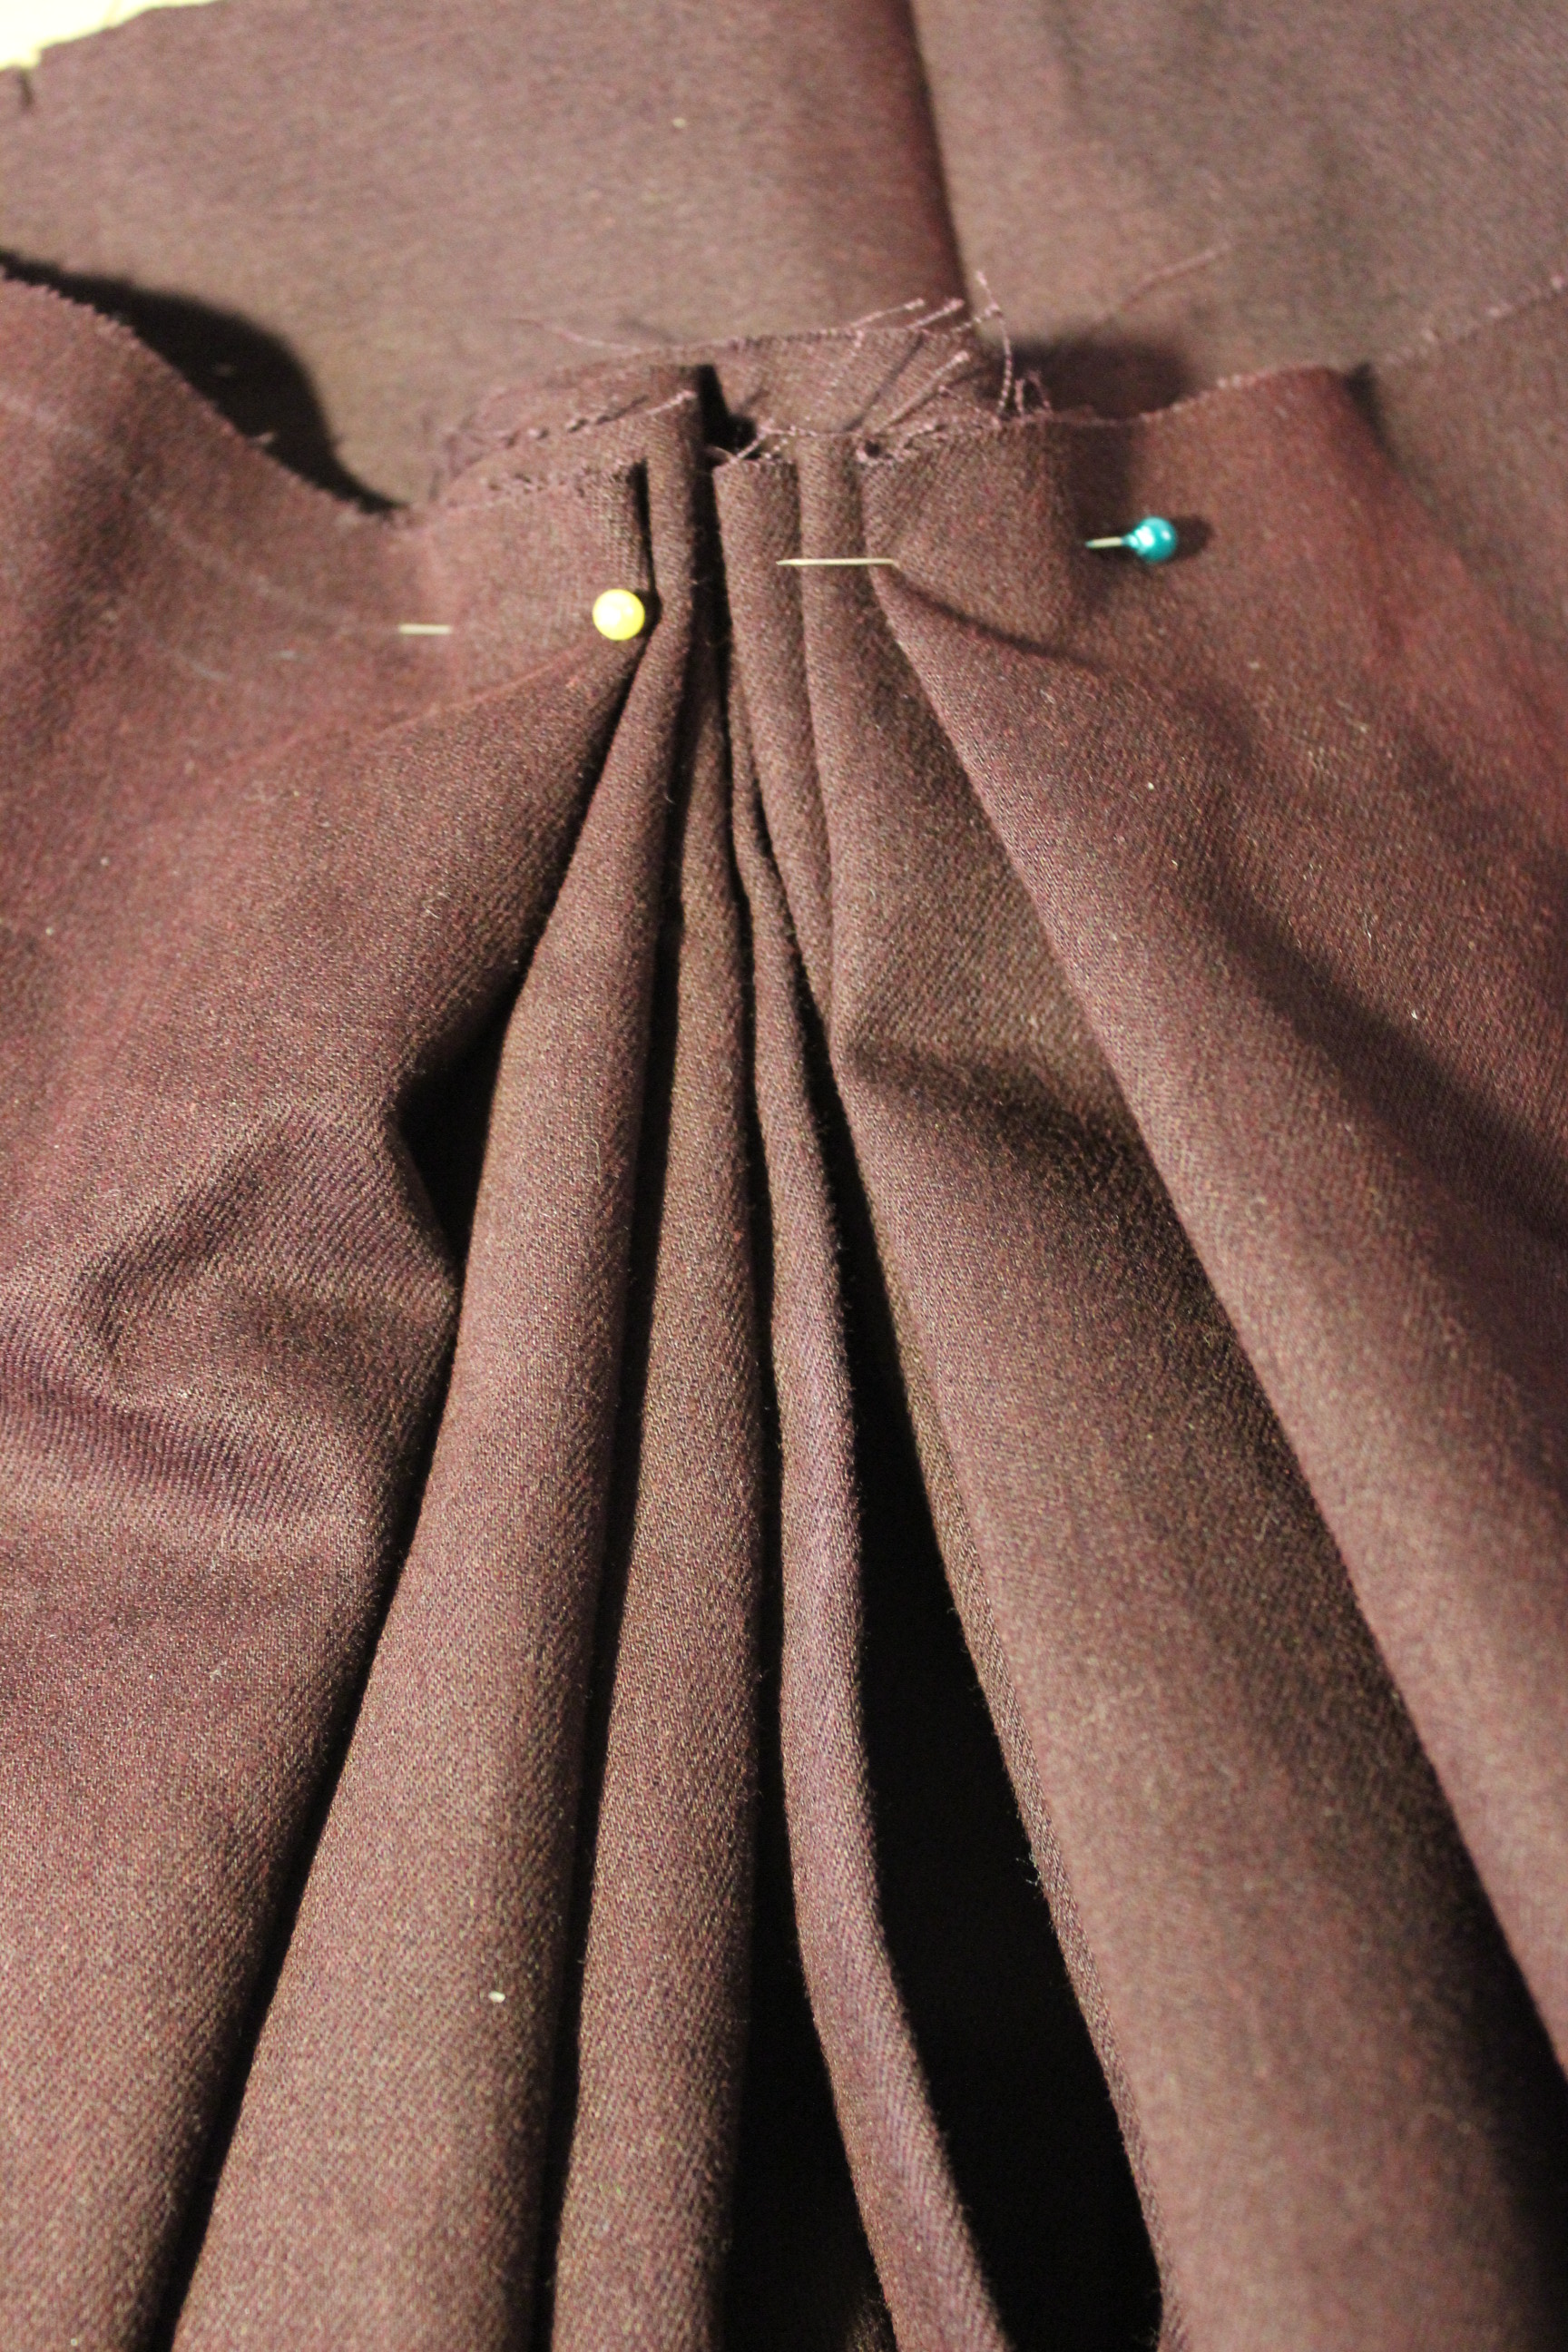
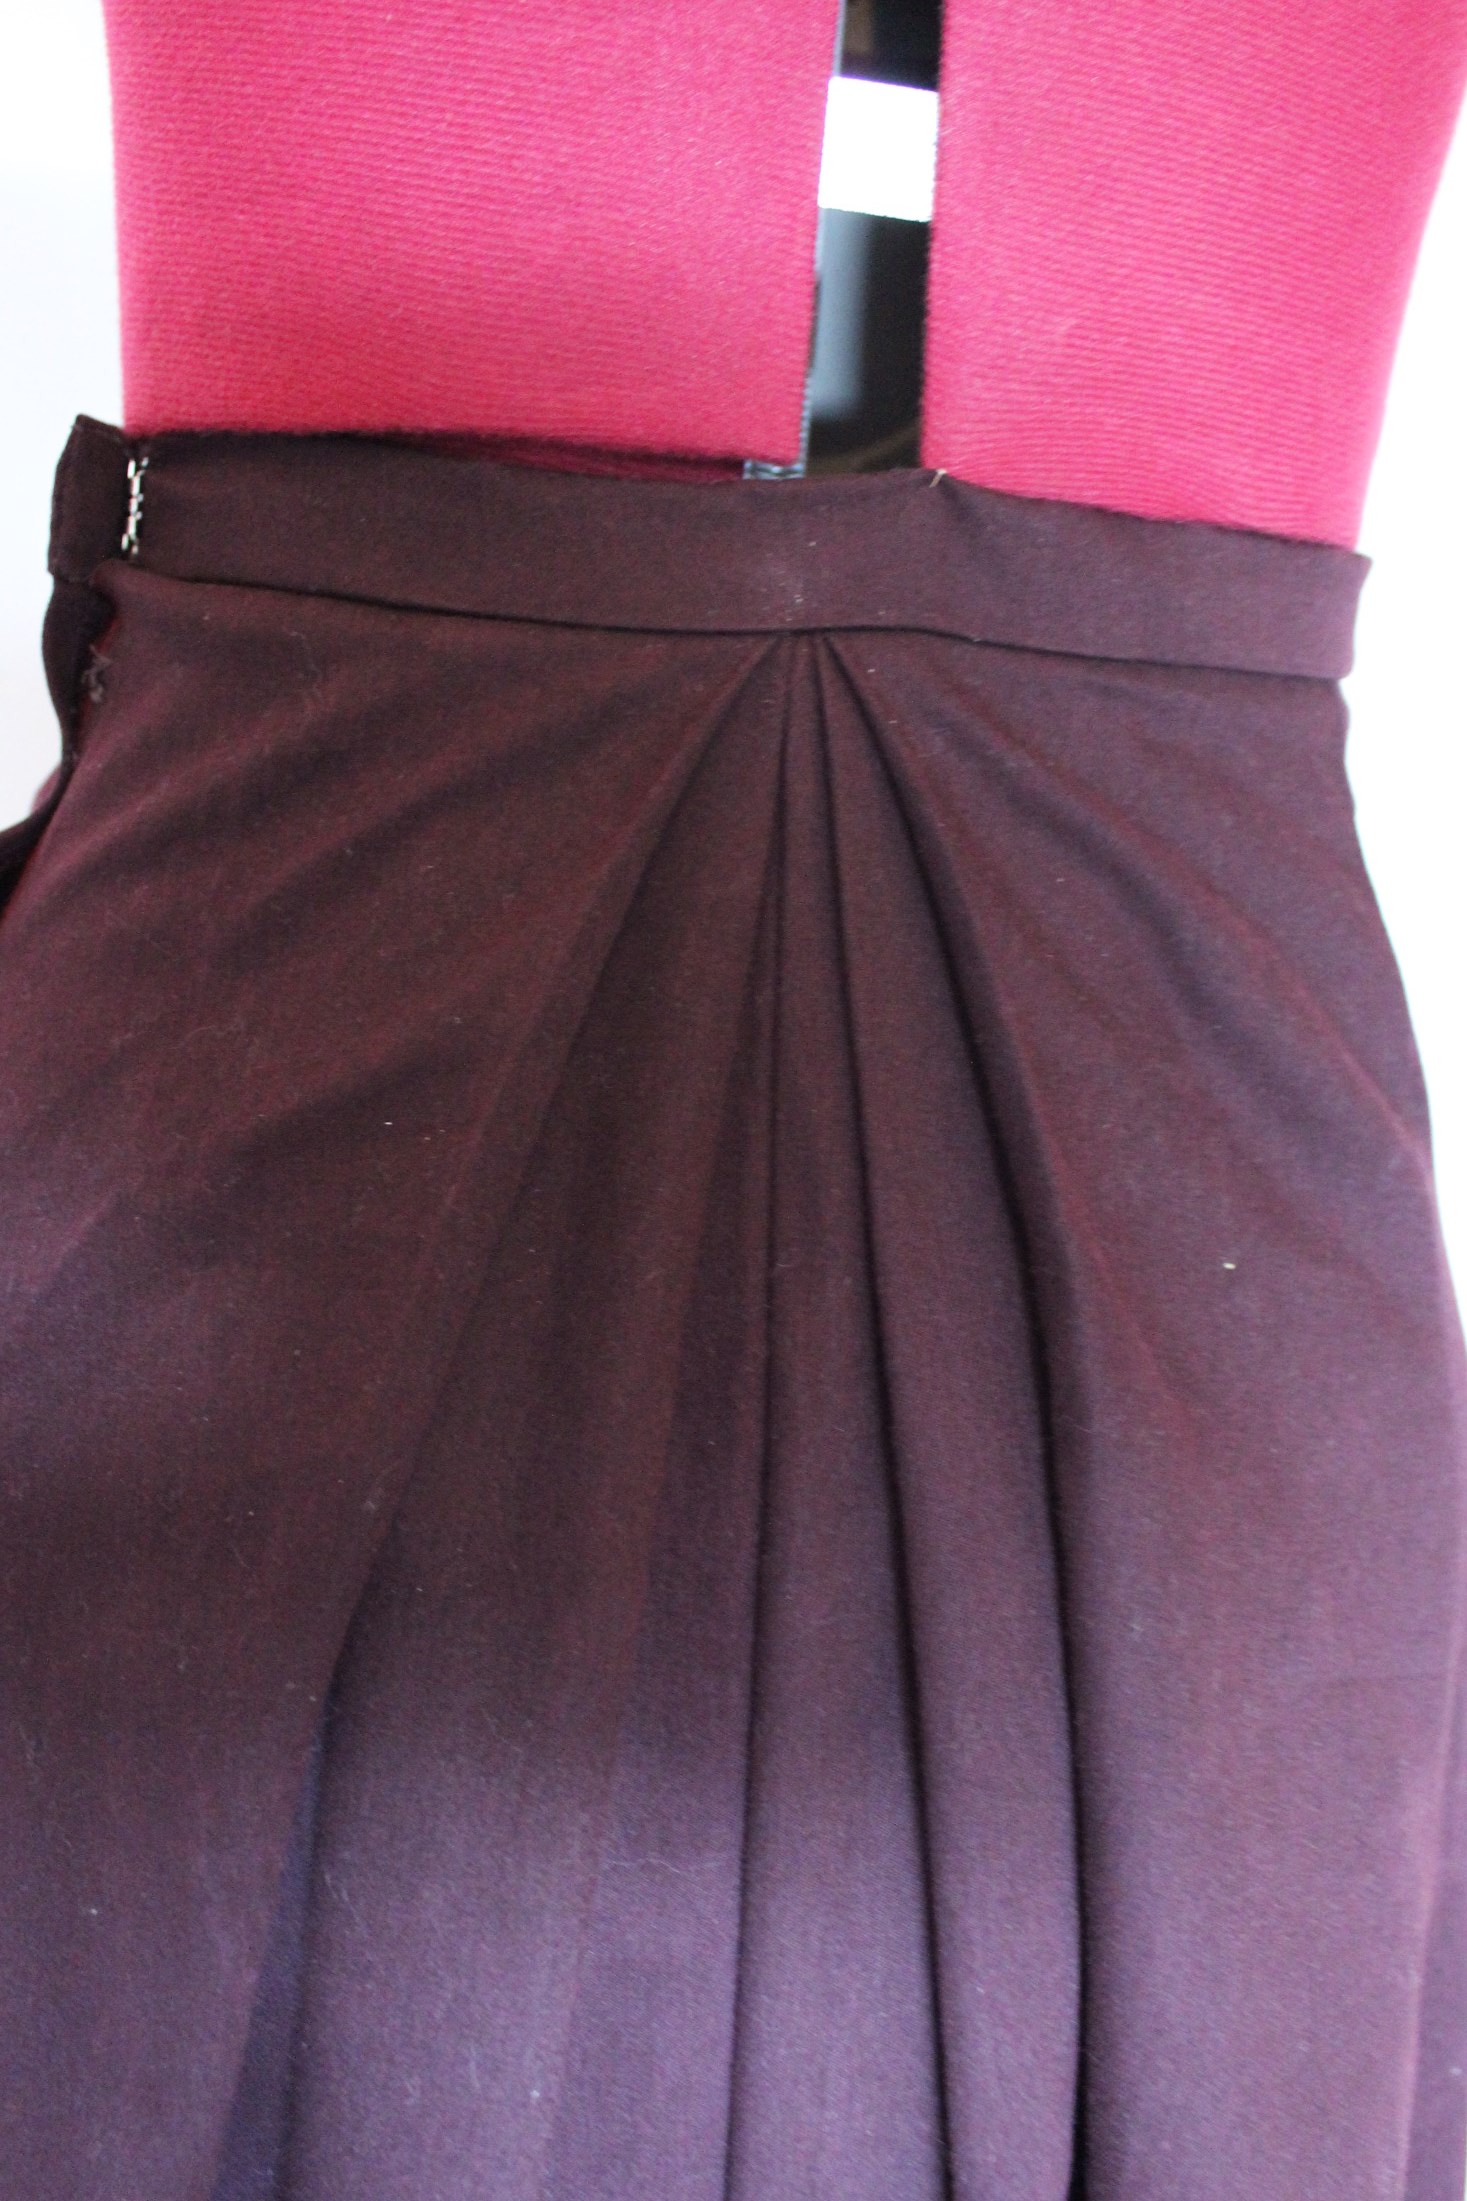
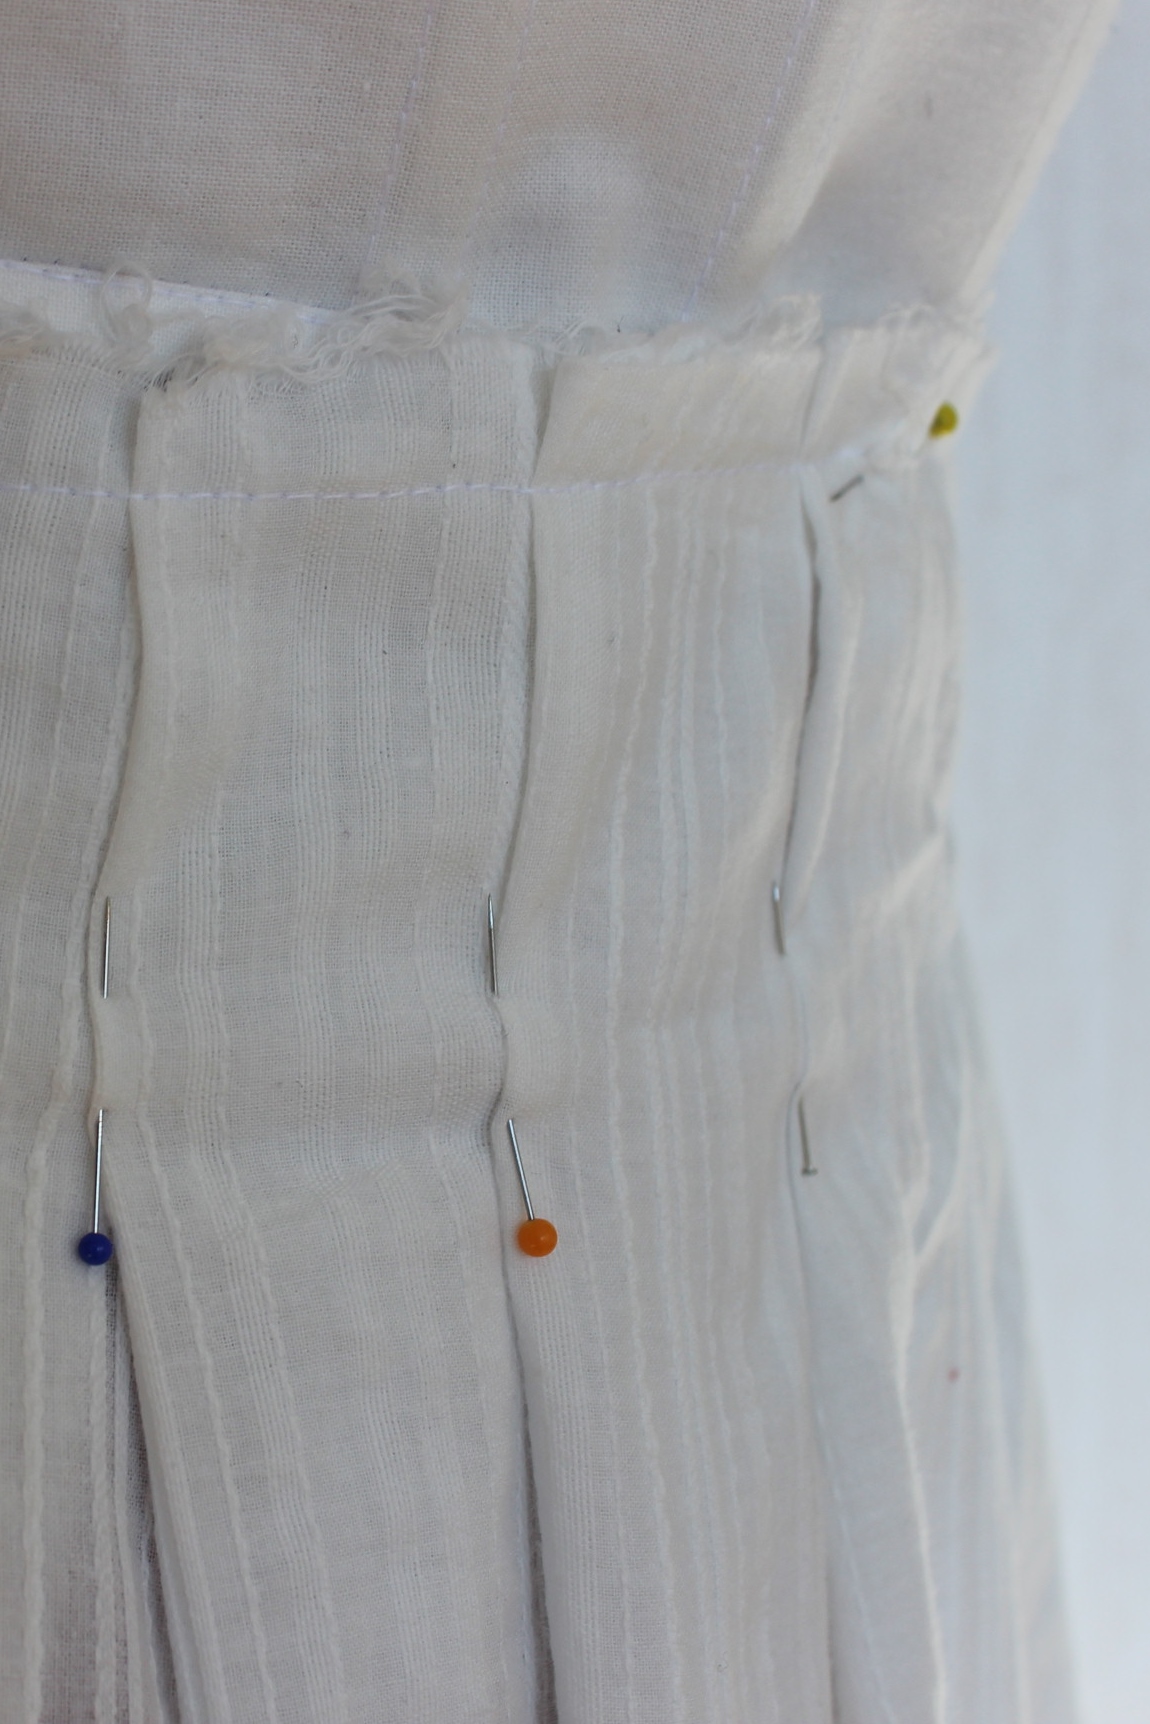
I cut the skirt as two lenghts of fabric, sewed them together and pleated the wasit to the right measurments.

IMG_6695I made the pin-tucks from a long piece of the organdy, only cuting the front insertion when the piece was finished.

IMG_6755 
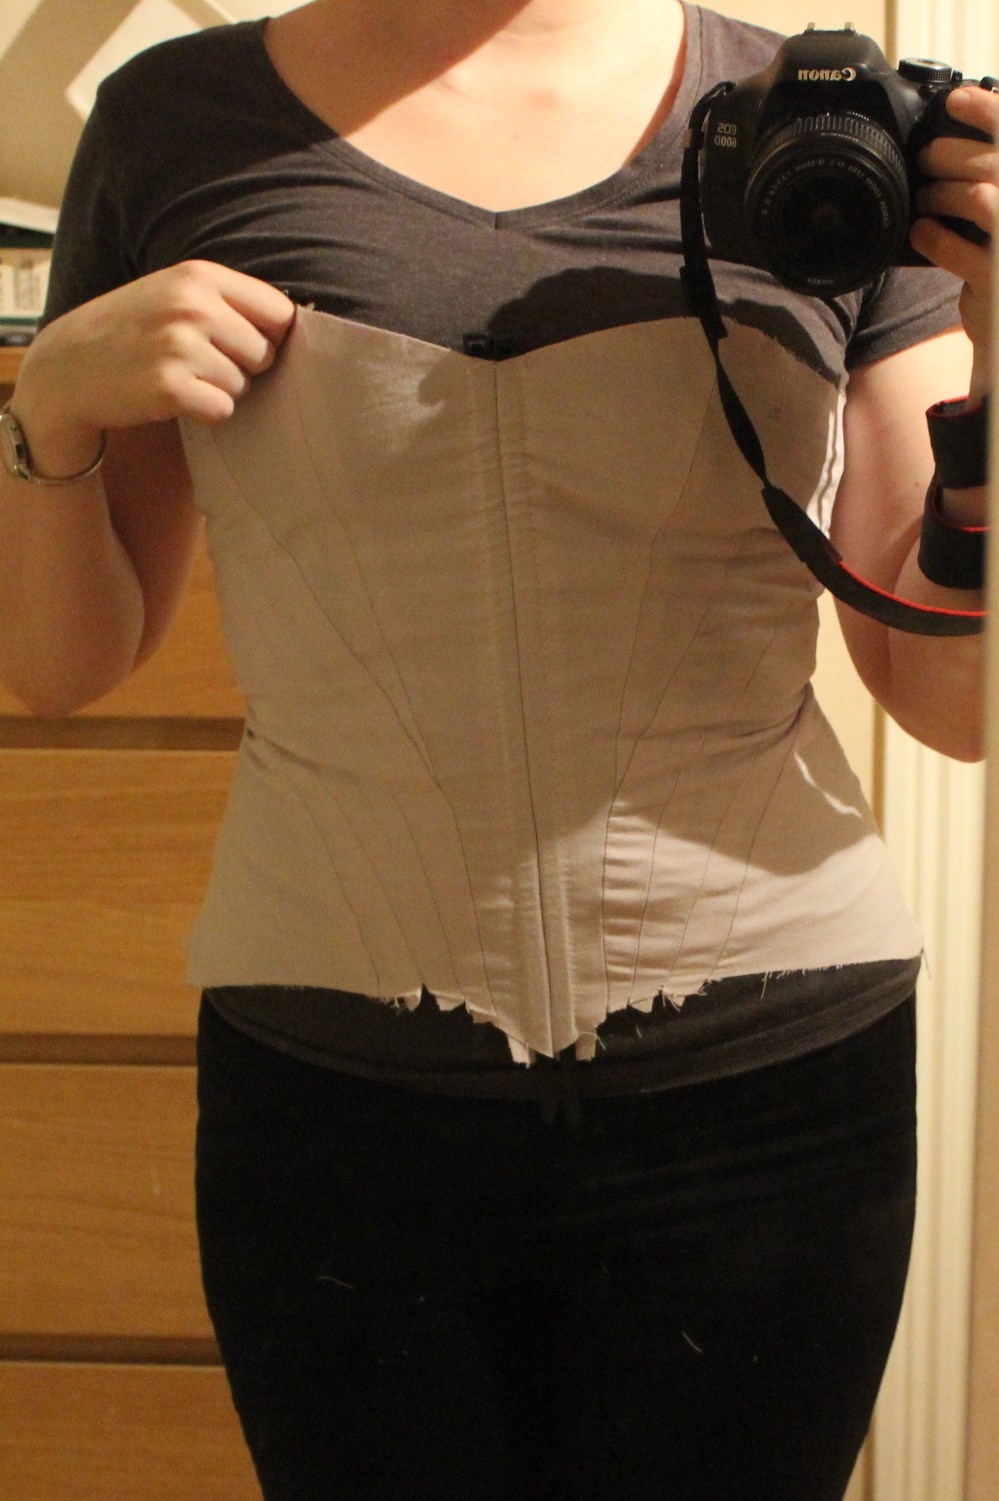
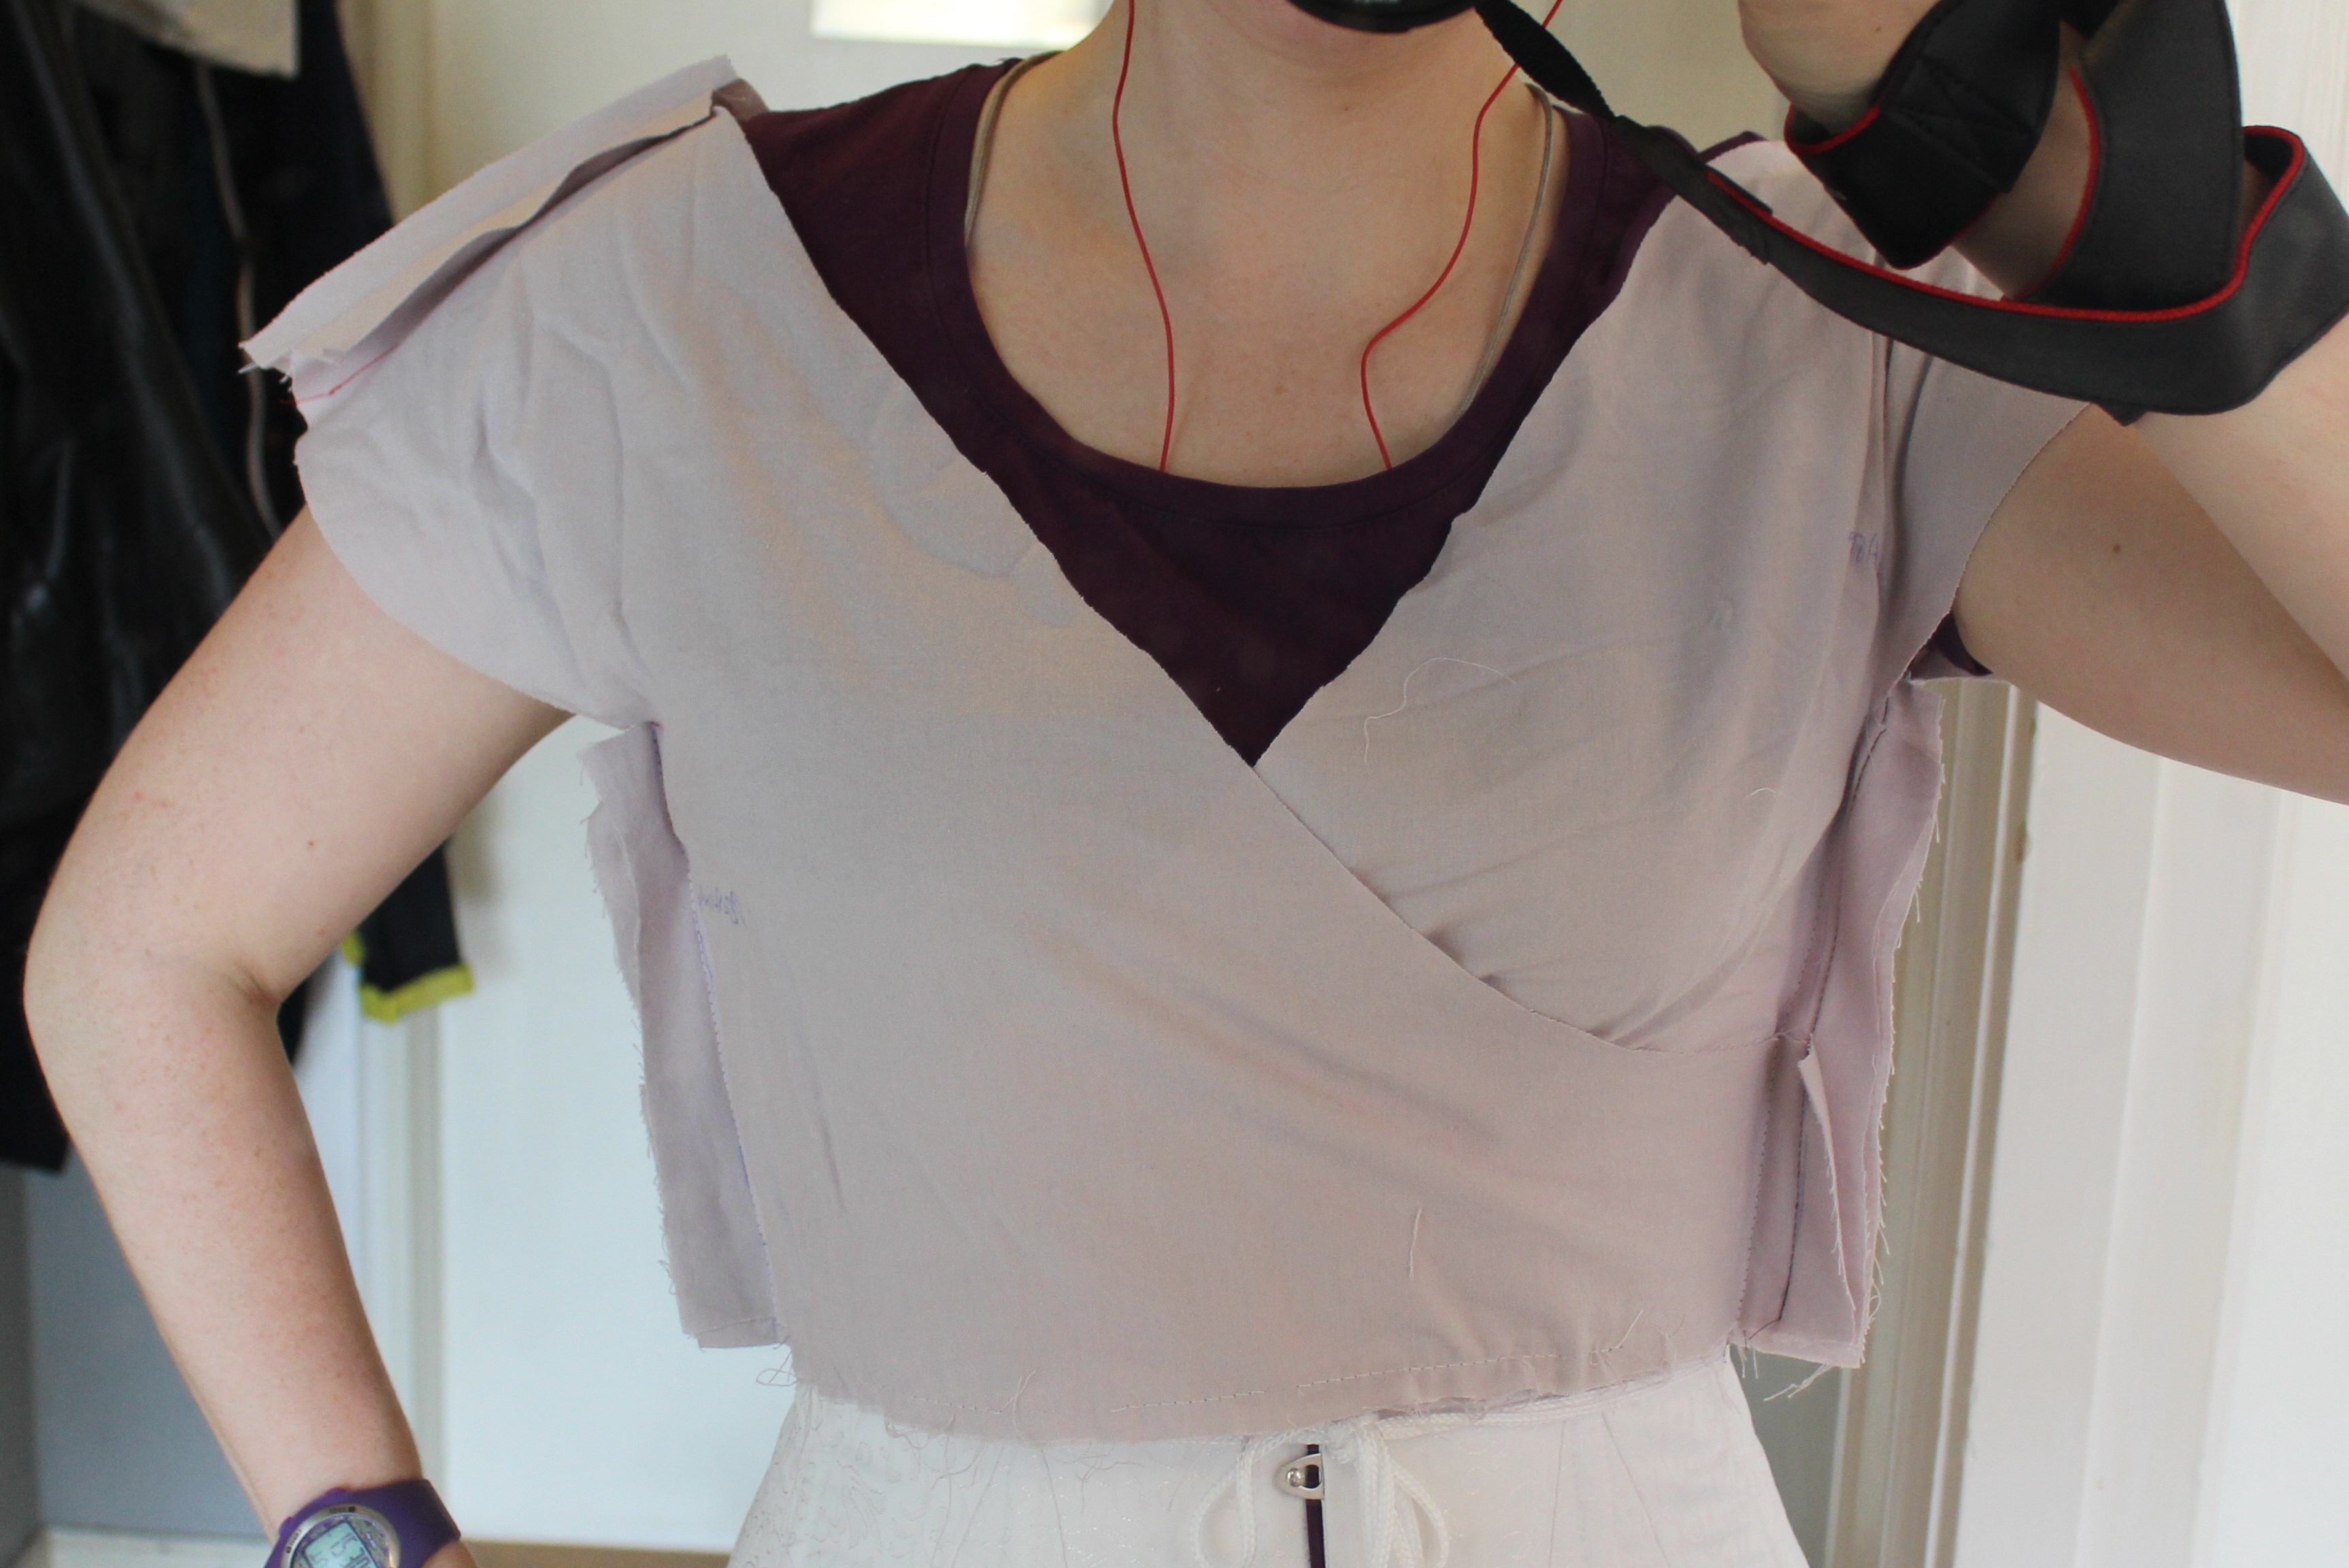
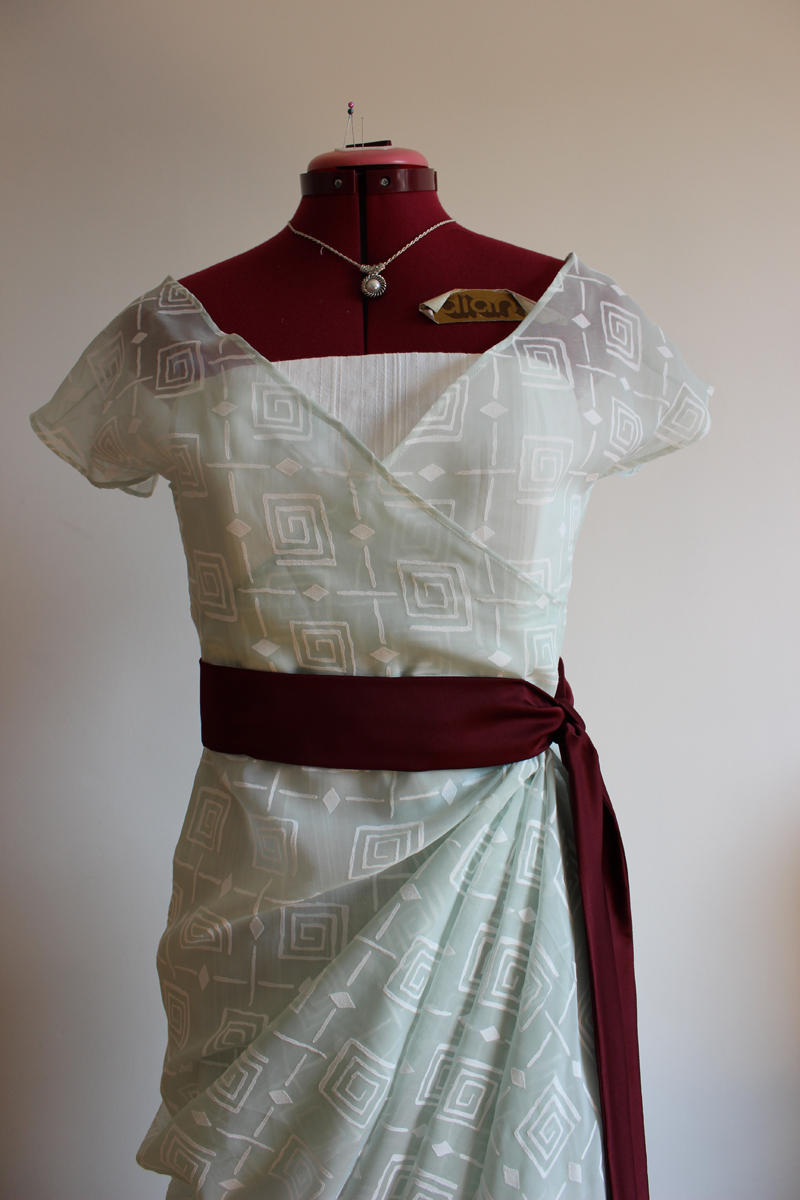
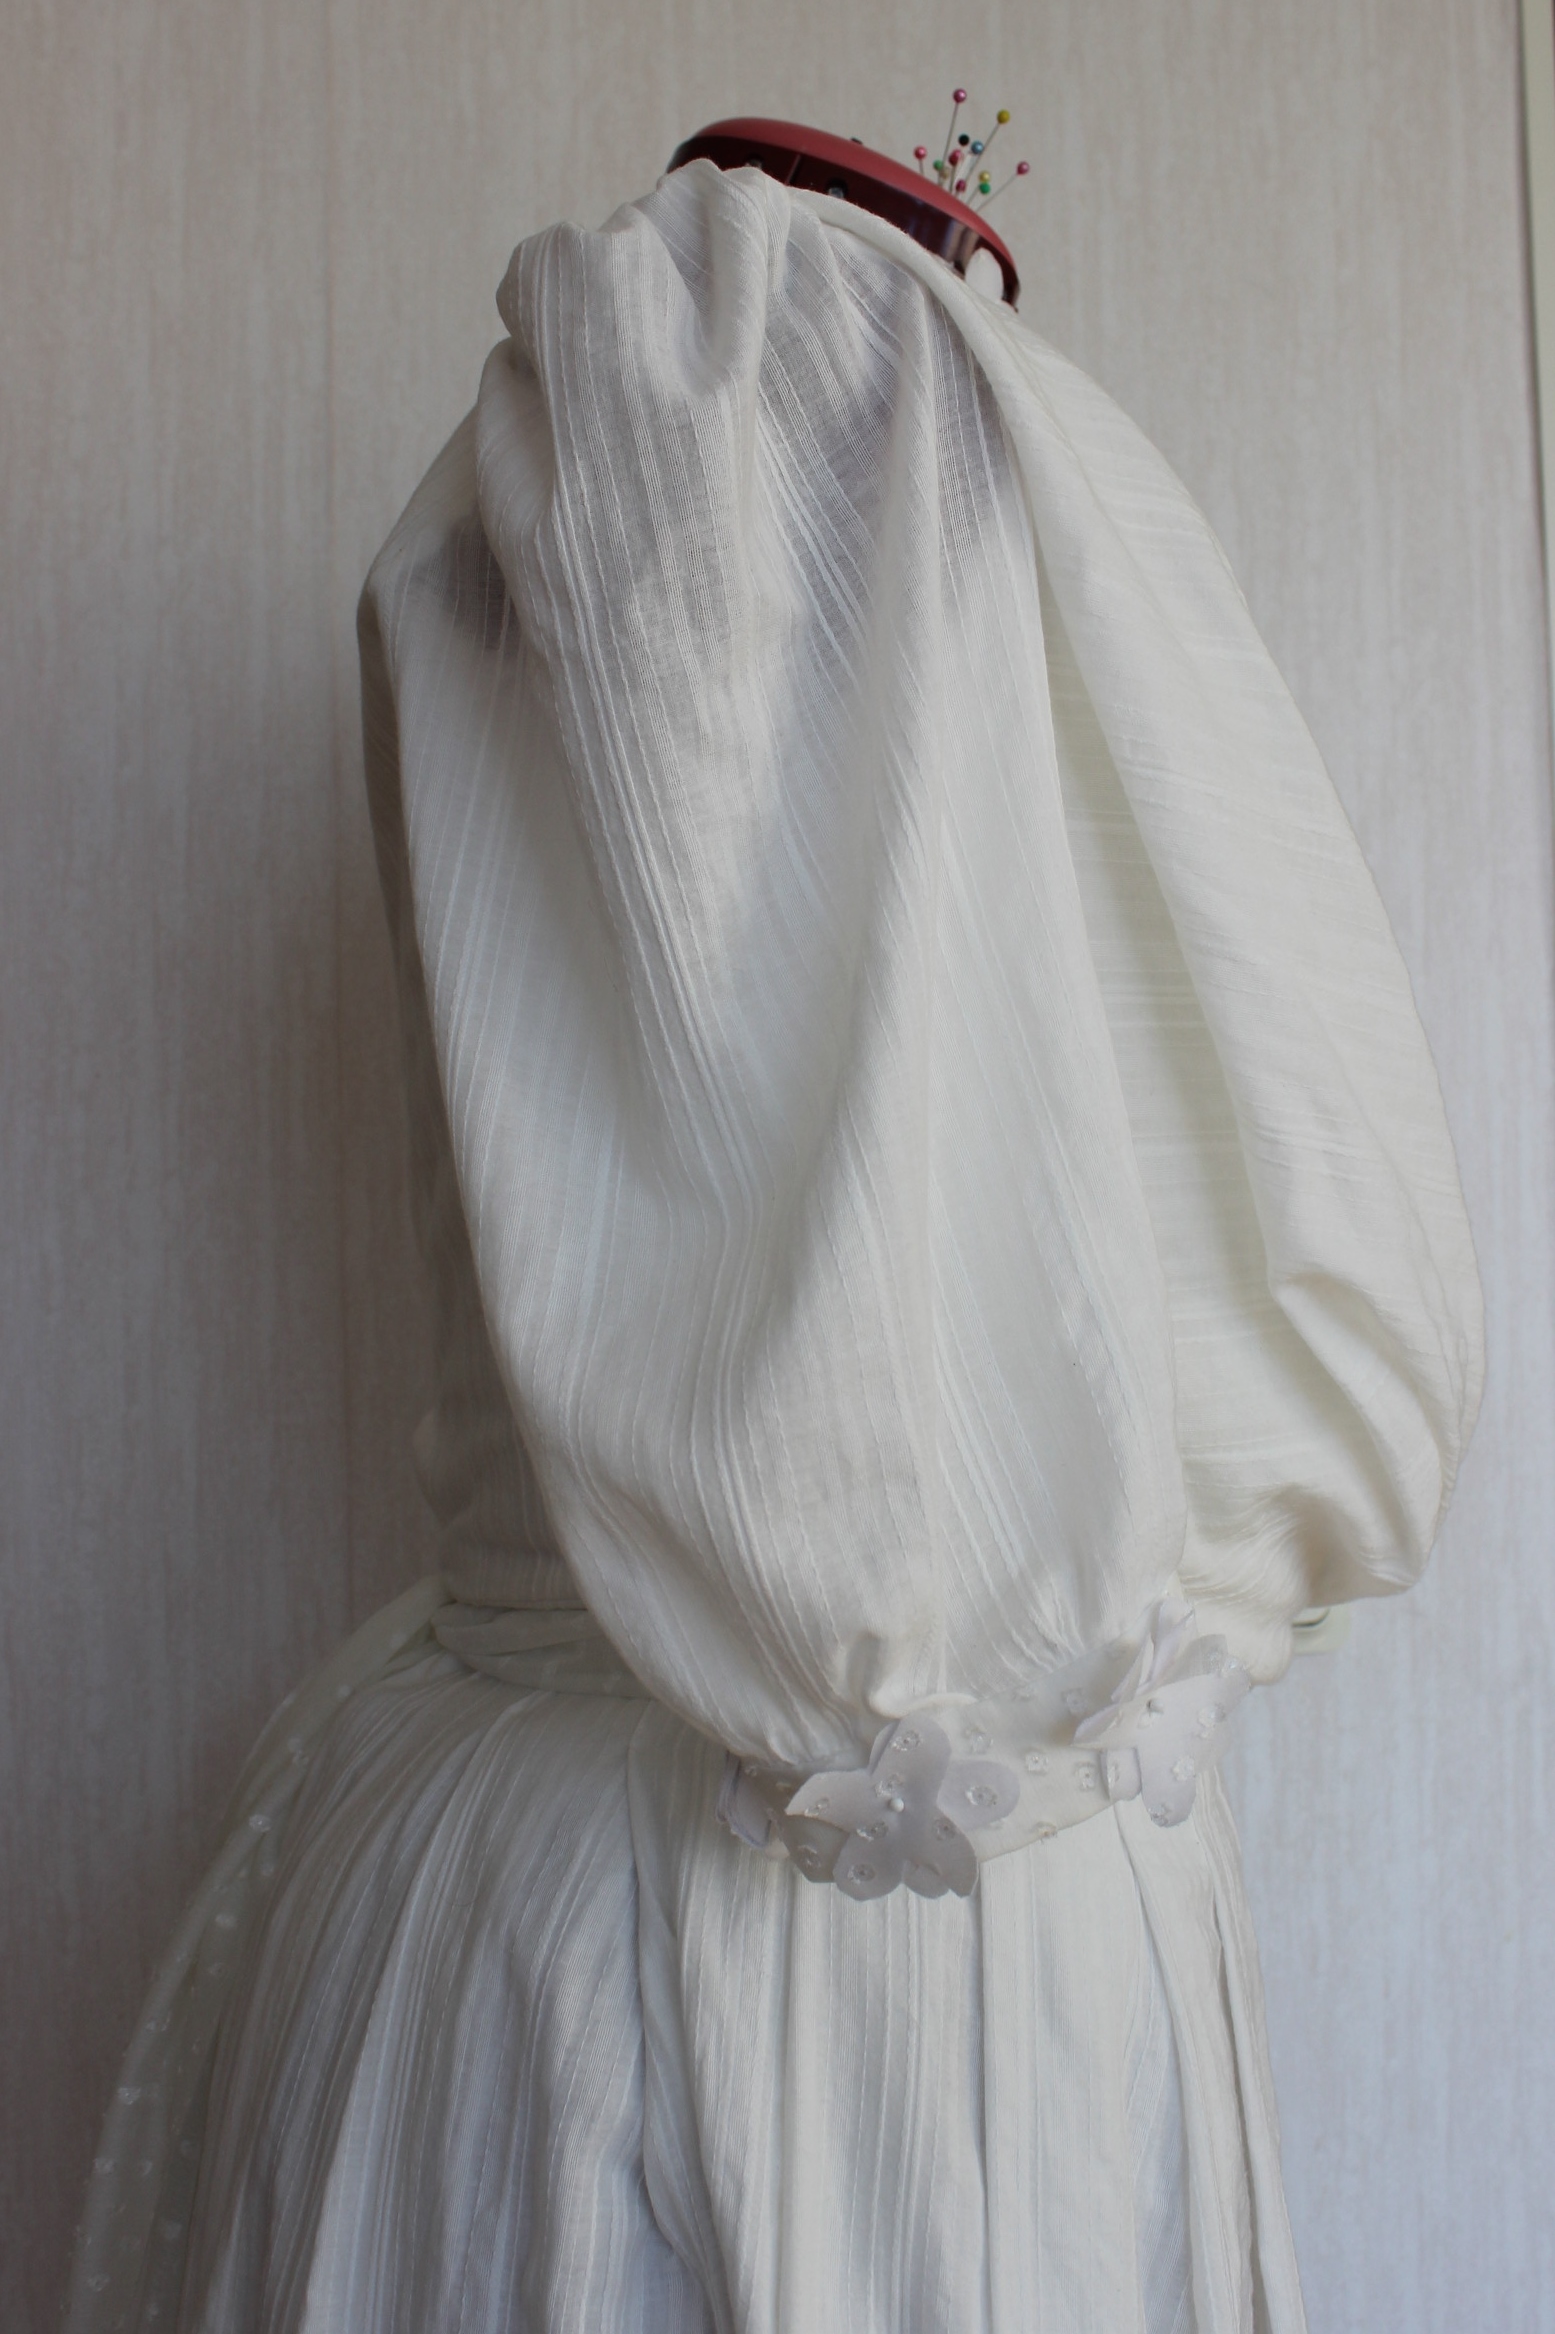
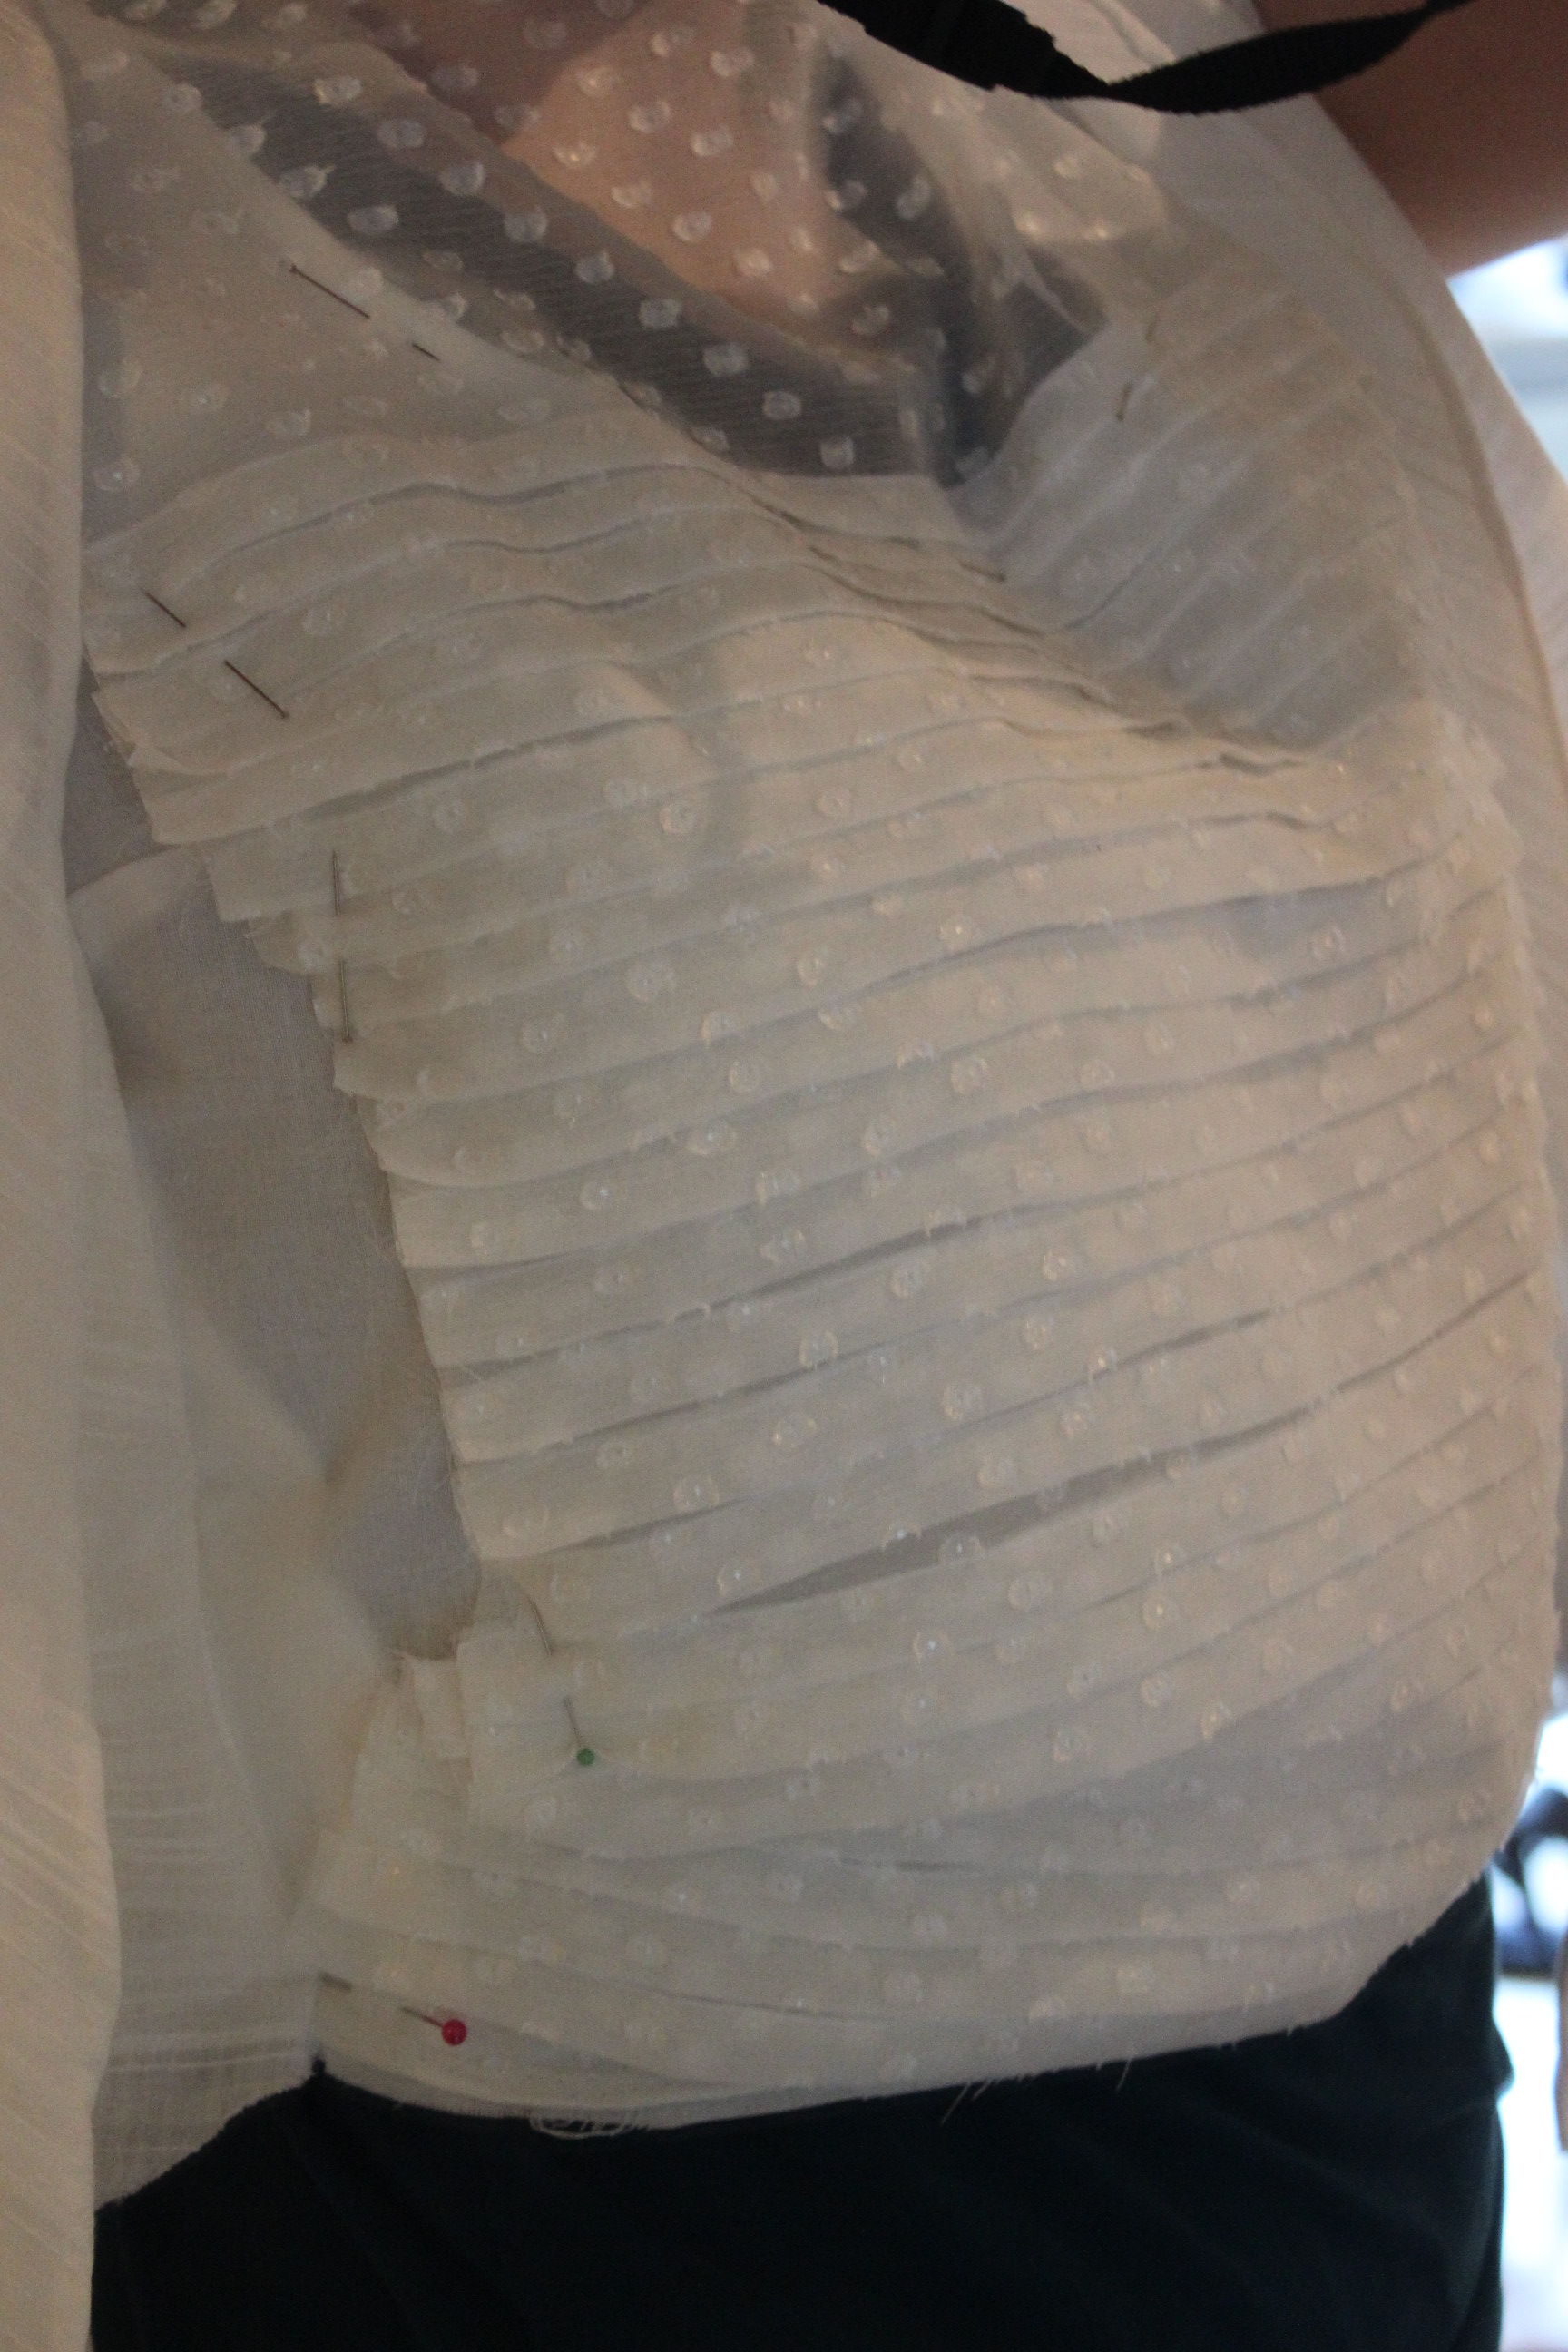
I interlined the bodice and stitched it togehter, then I put it on to determen the placing of the pin-tucked front piece.

IMG_6758And pinned the front draping fabric to the waist.

IMG_6728

IMG_6725
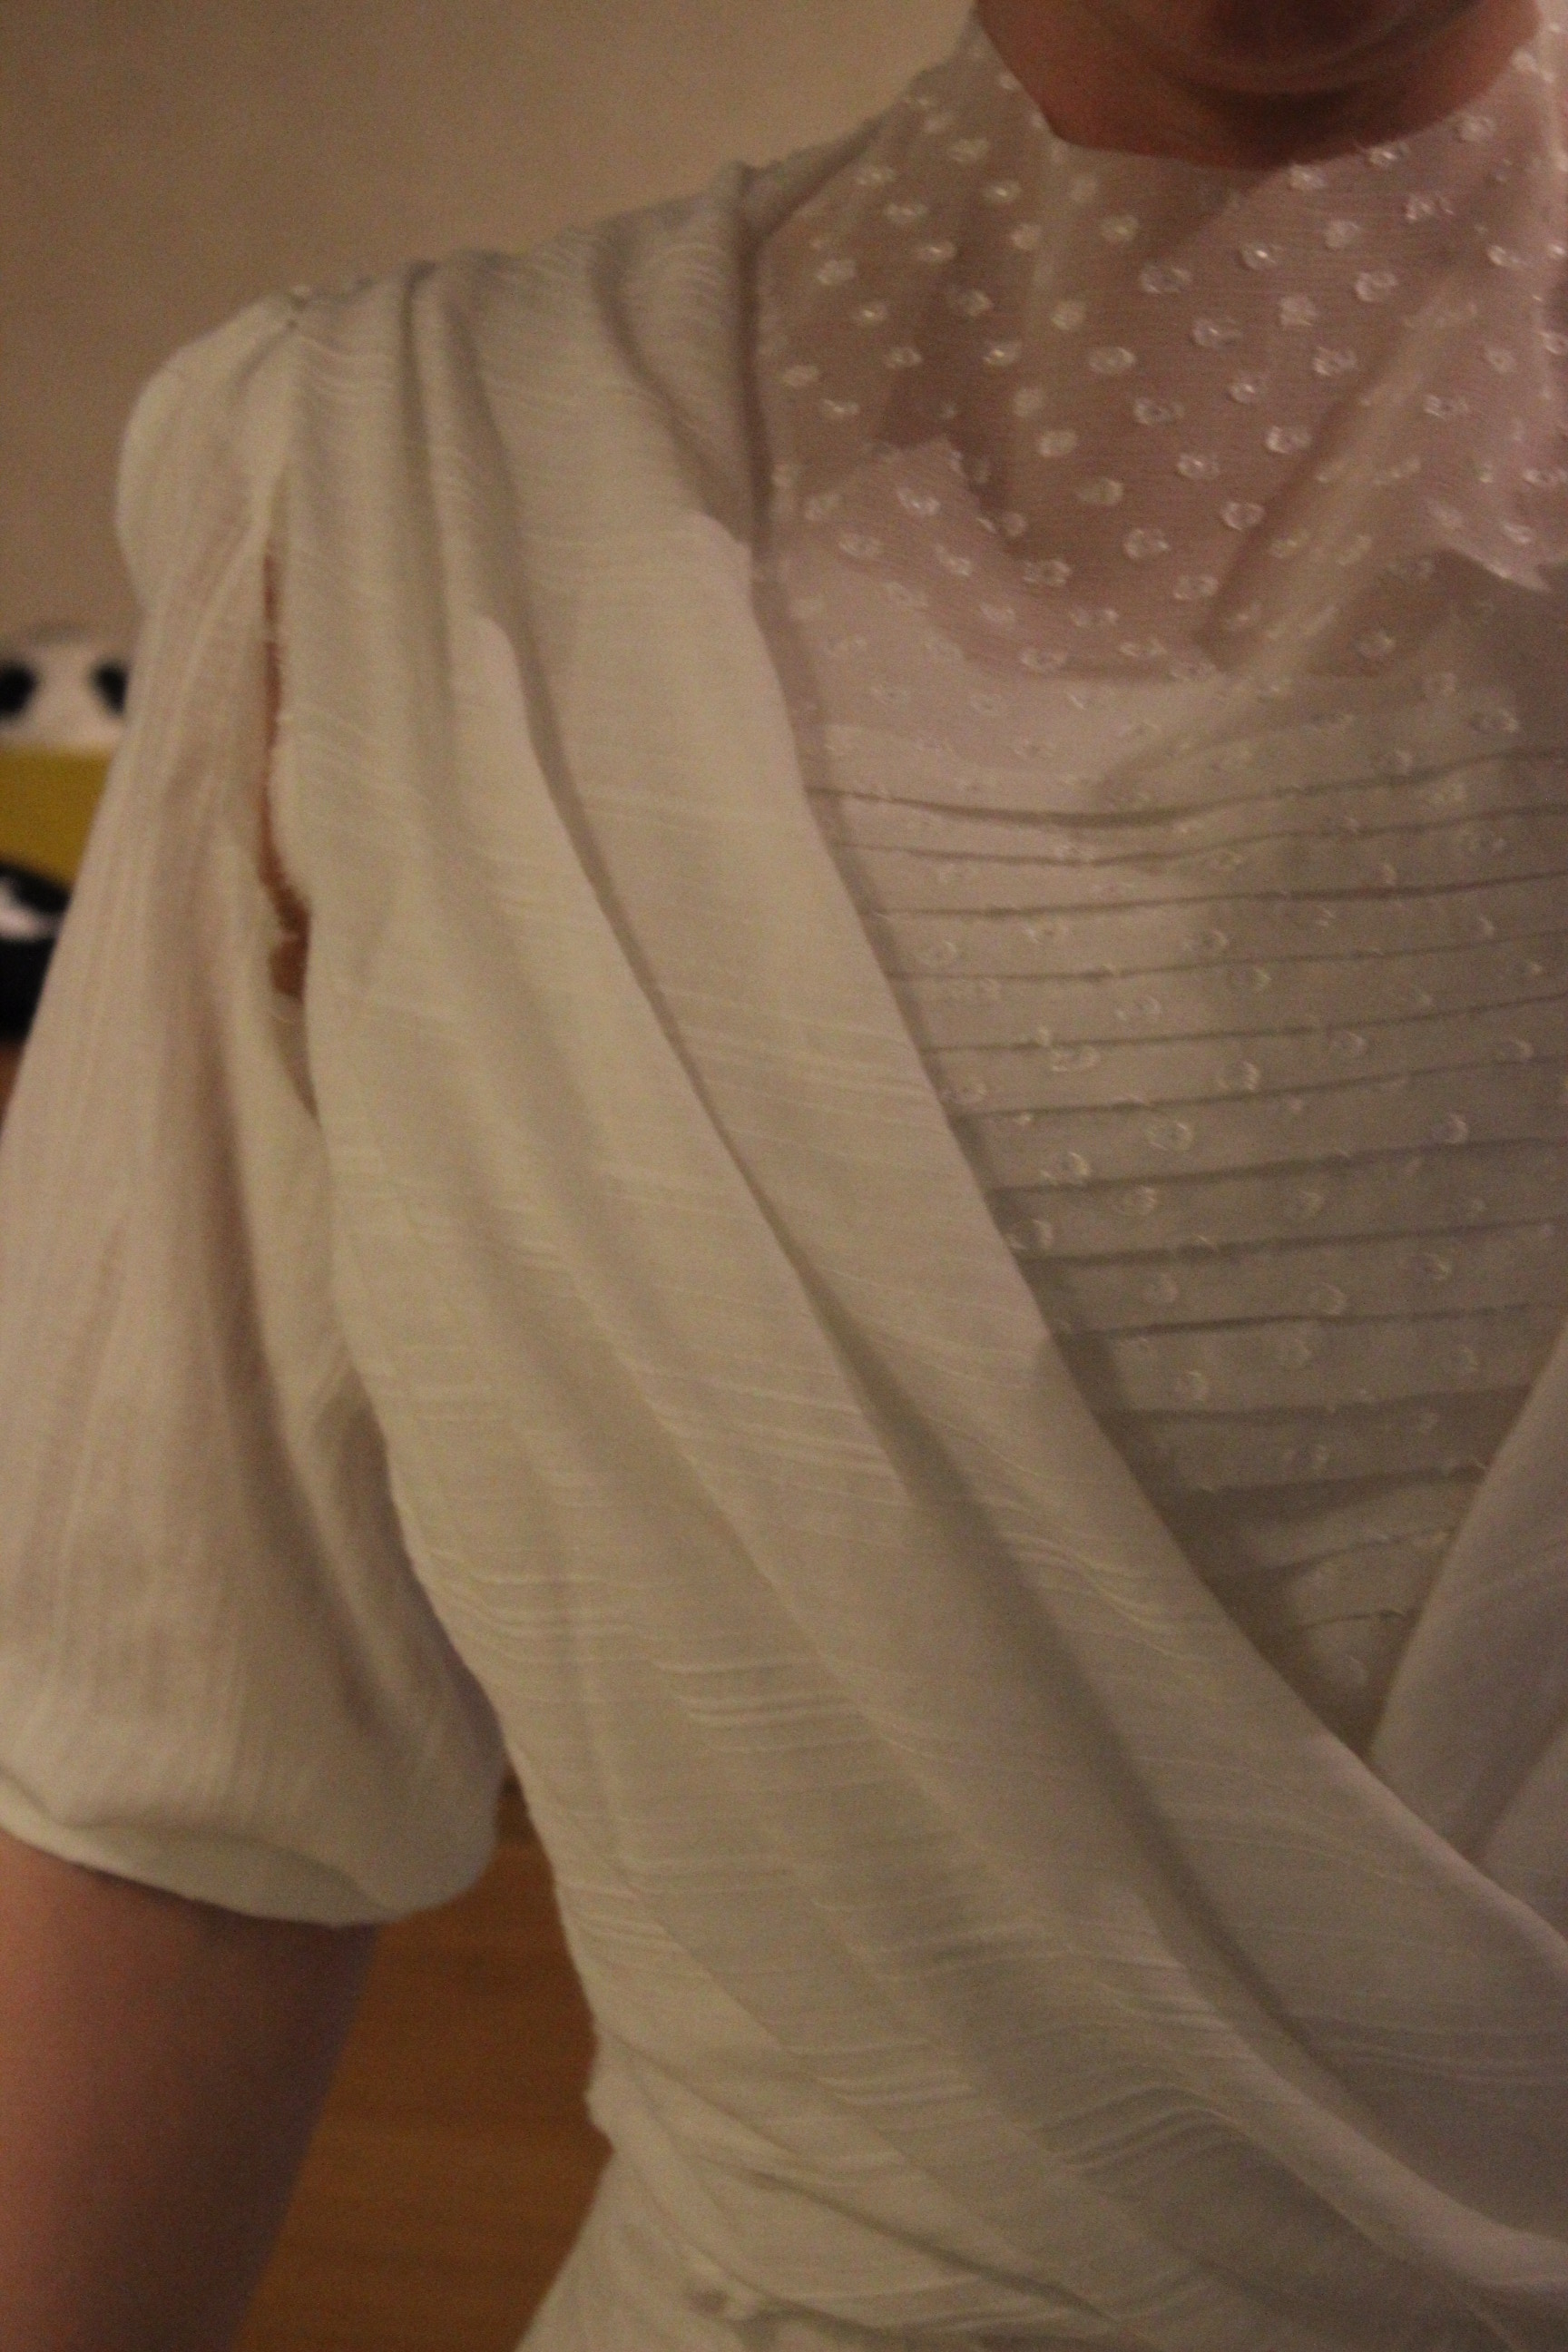
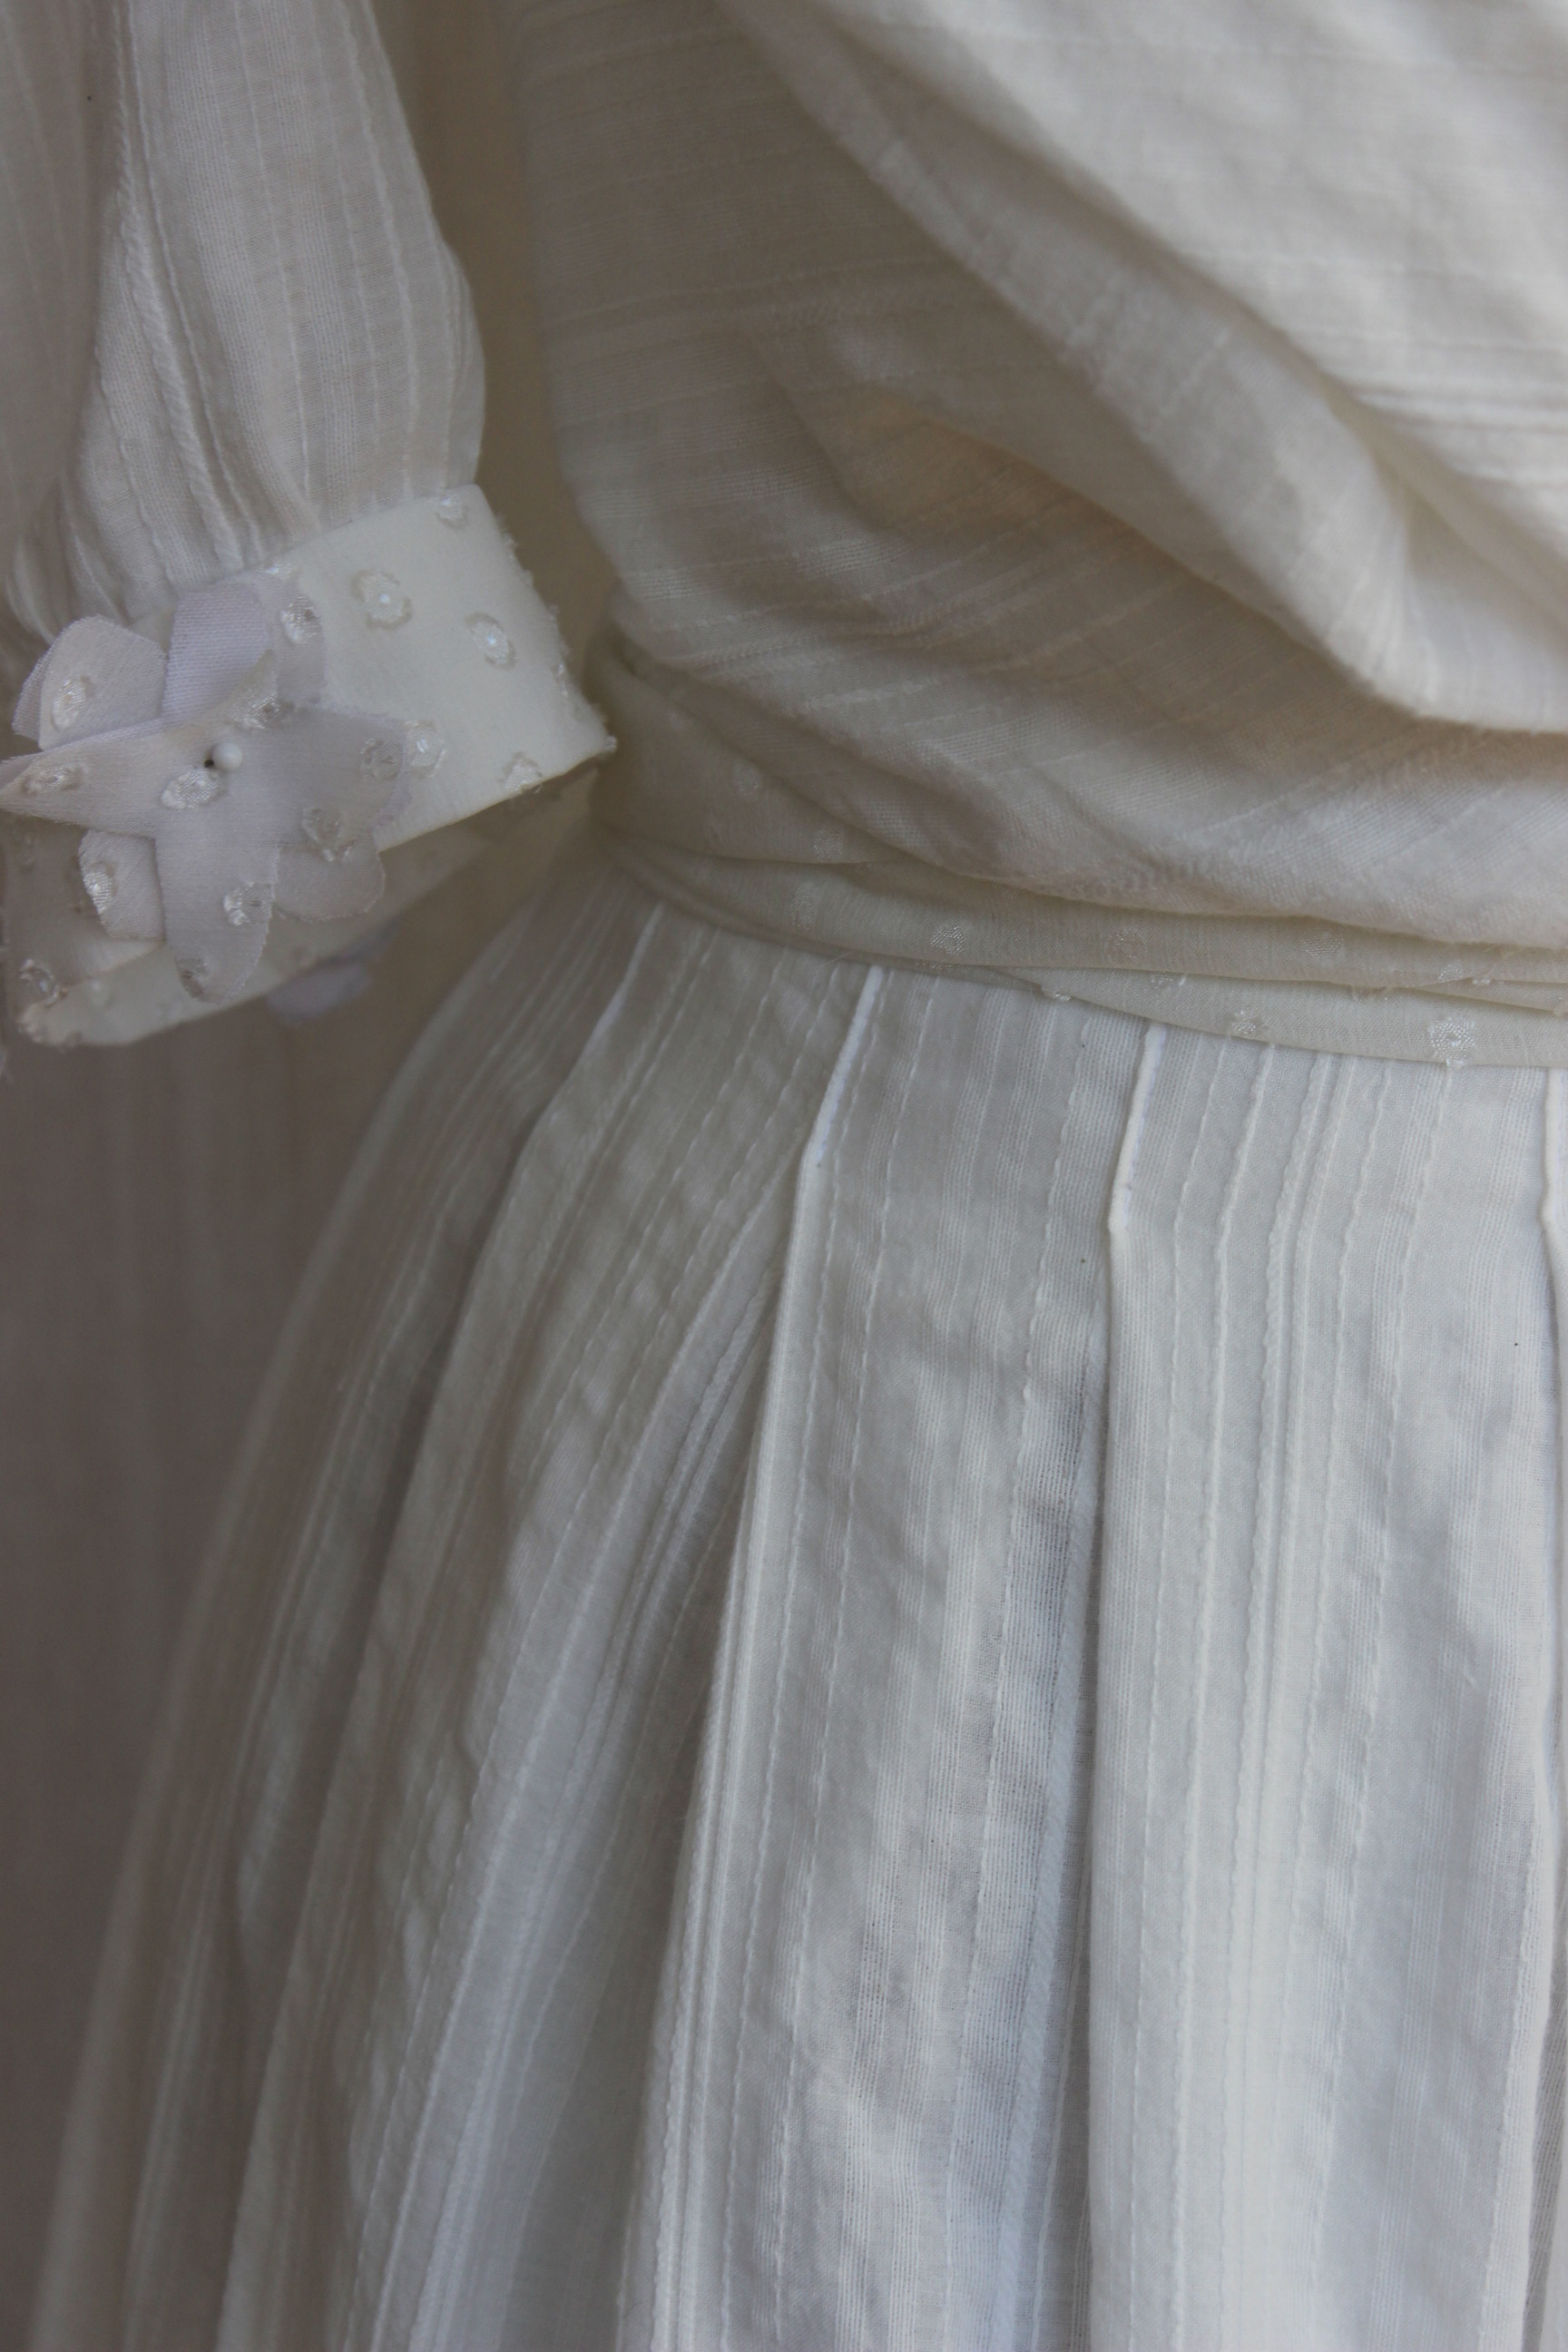
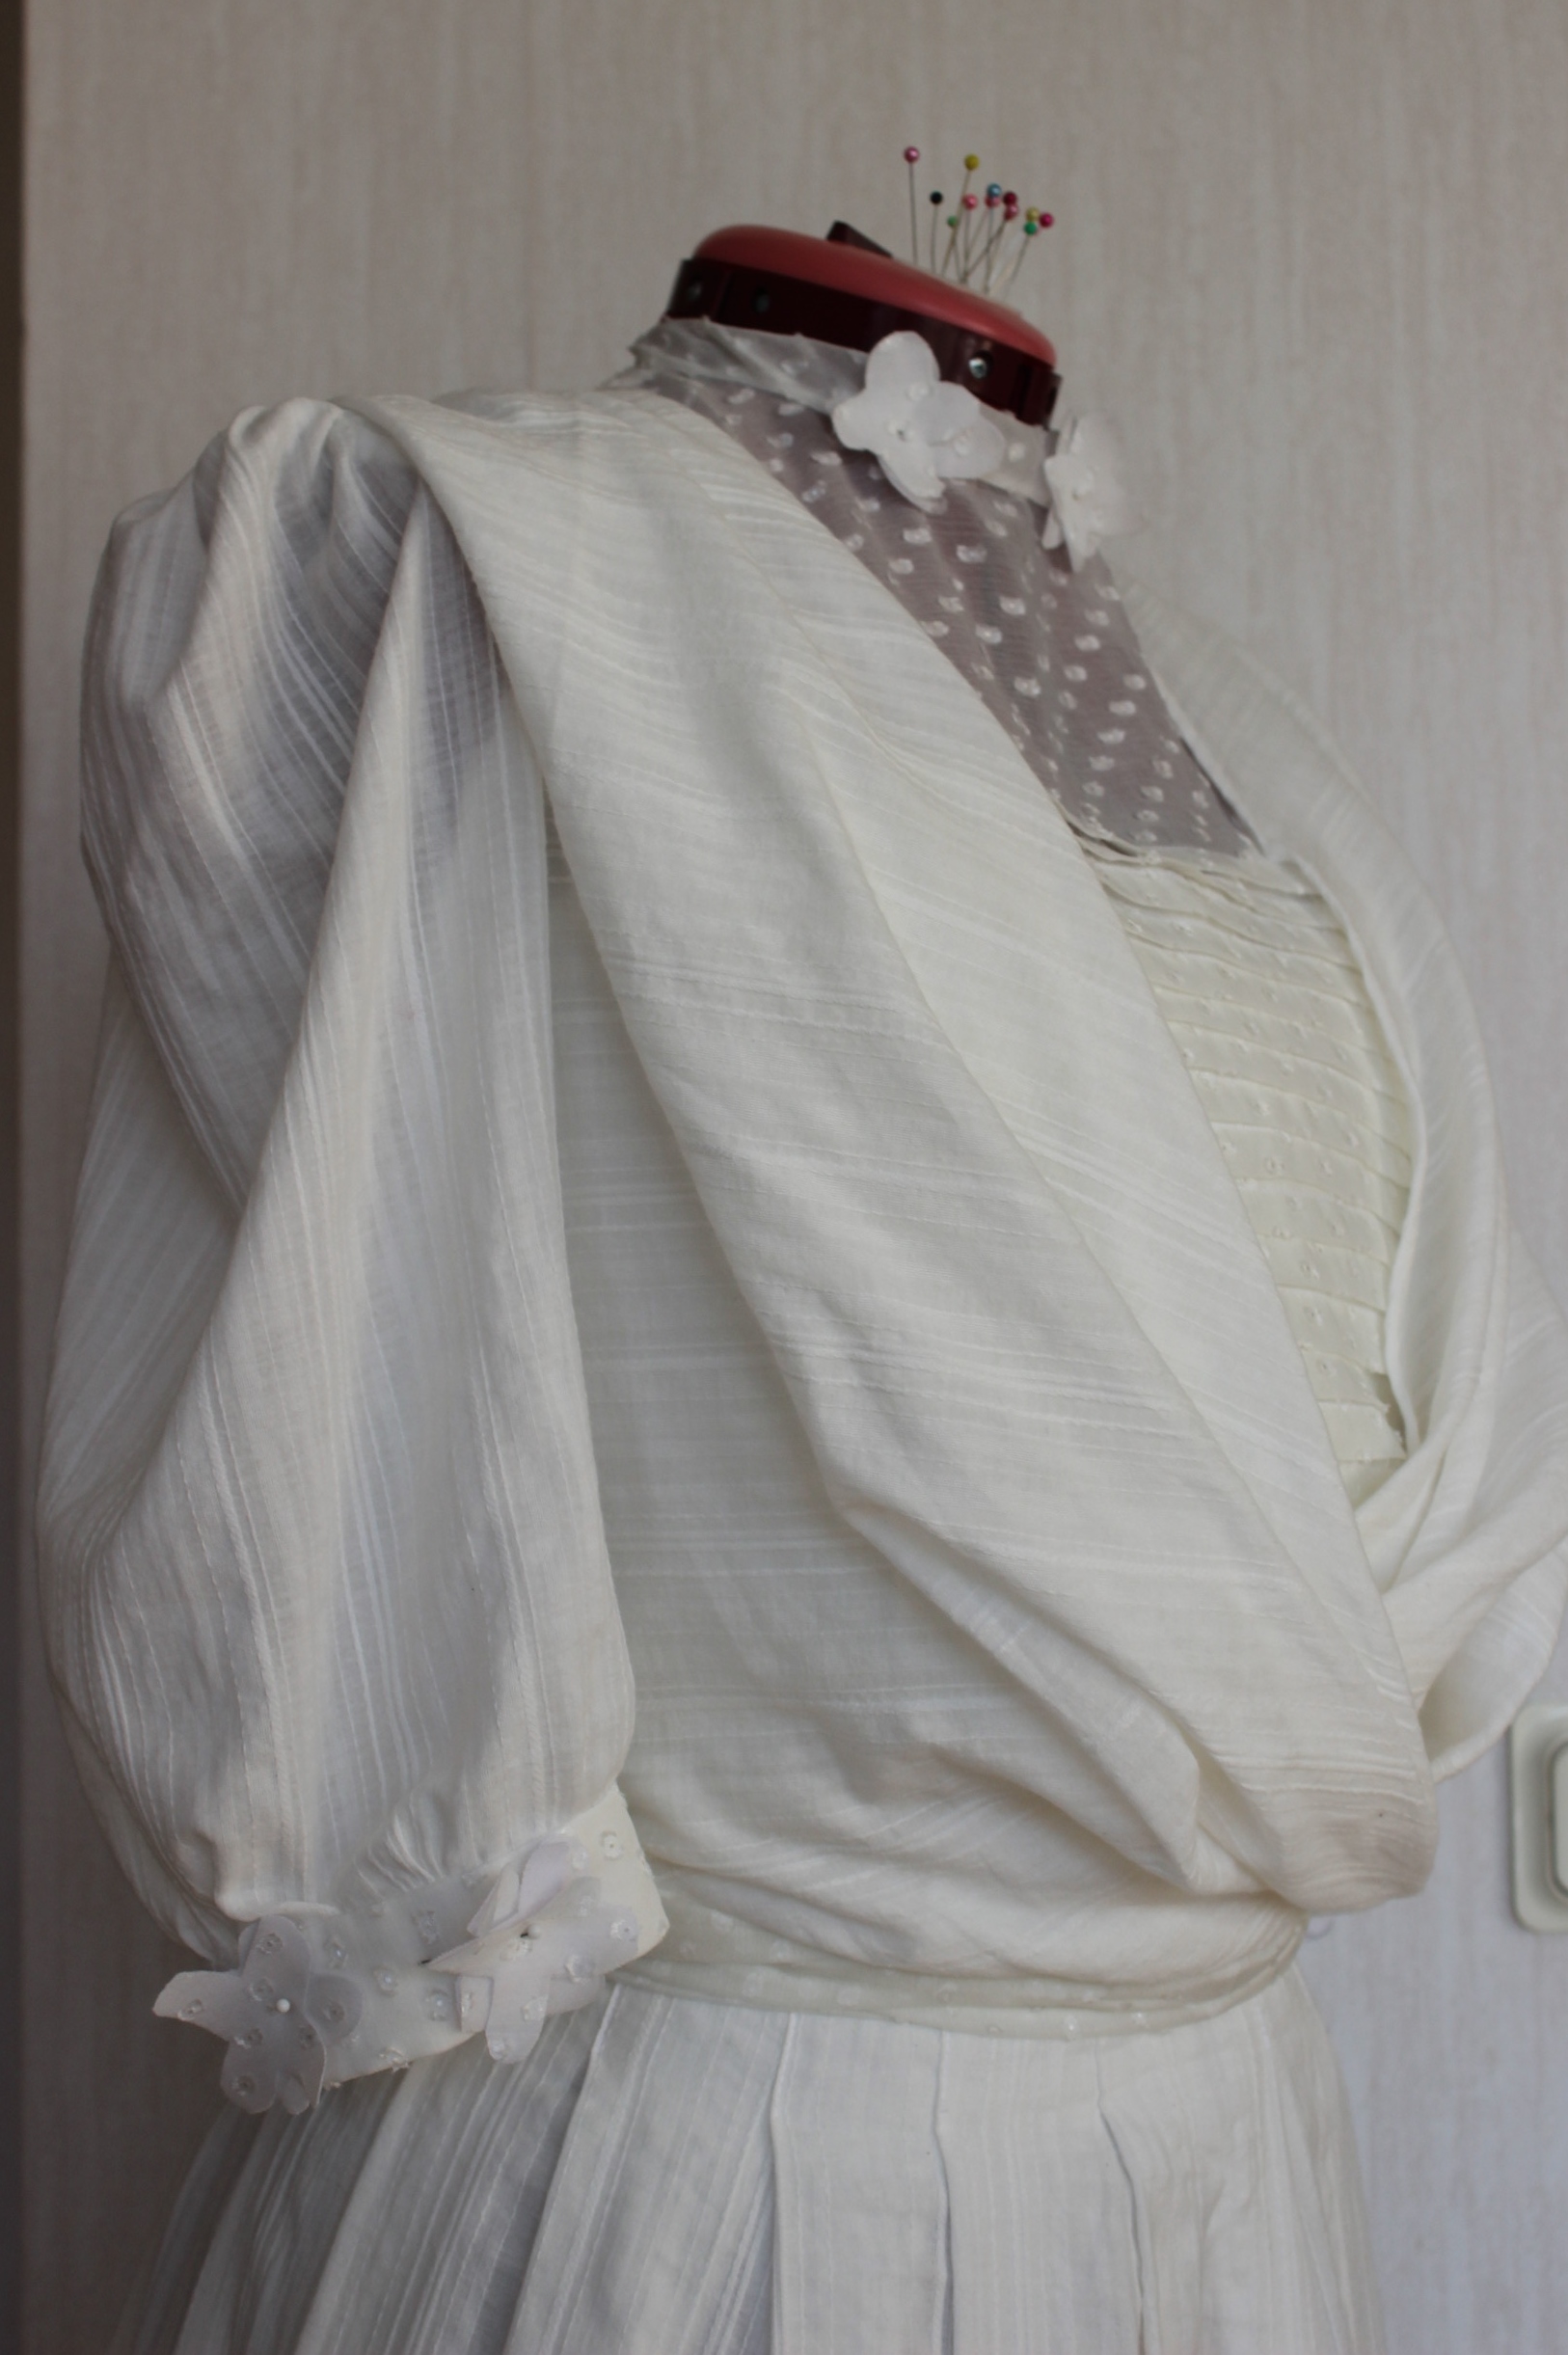
It does look pretty good ( the skirt and leeve ae just pined on at this stage).

IMG_6713 IMG_6705

But I do have some minor problems at the back and side, which fortanly can both be fixed by shortening the waist a few cm.

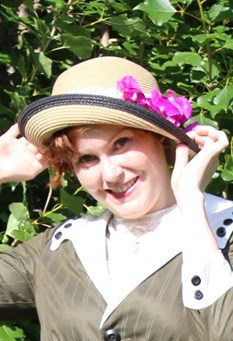
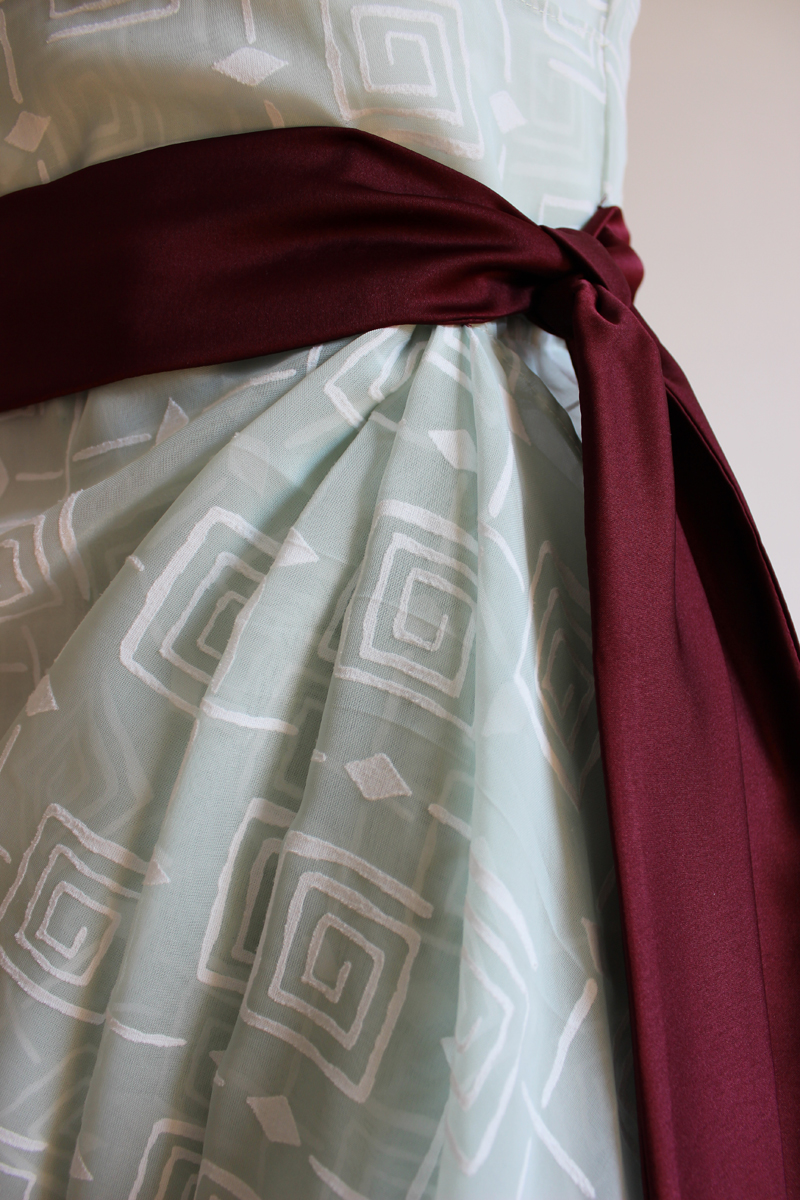
Then it was time to stich on the front piece, collar, sleeves and skirt. Putt in the hooks and eyes, and finishing the whole thing of with some flowers.
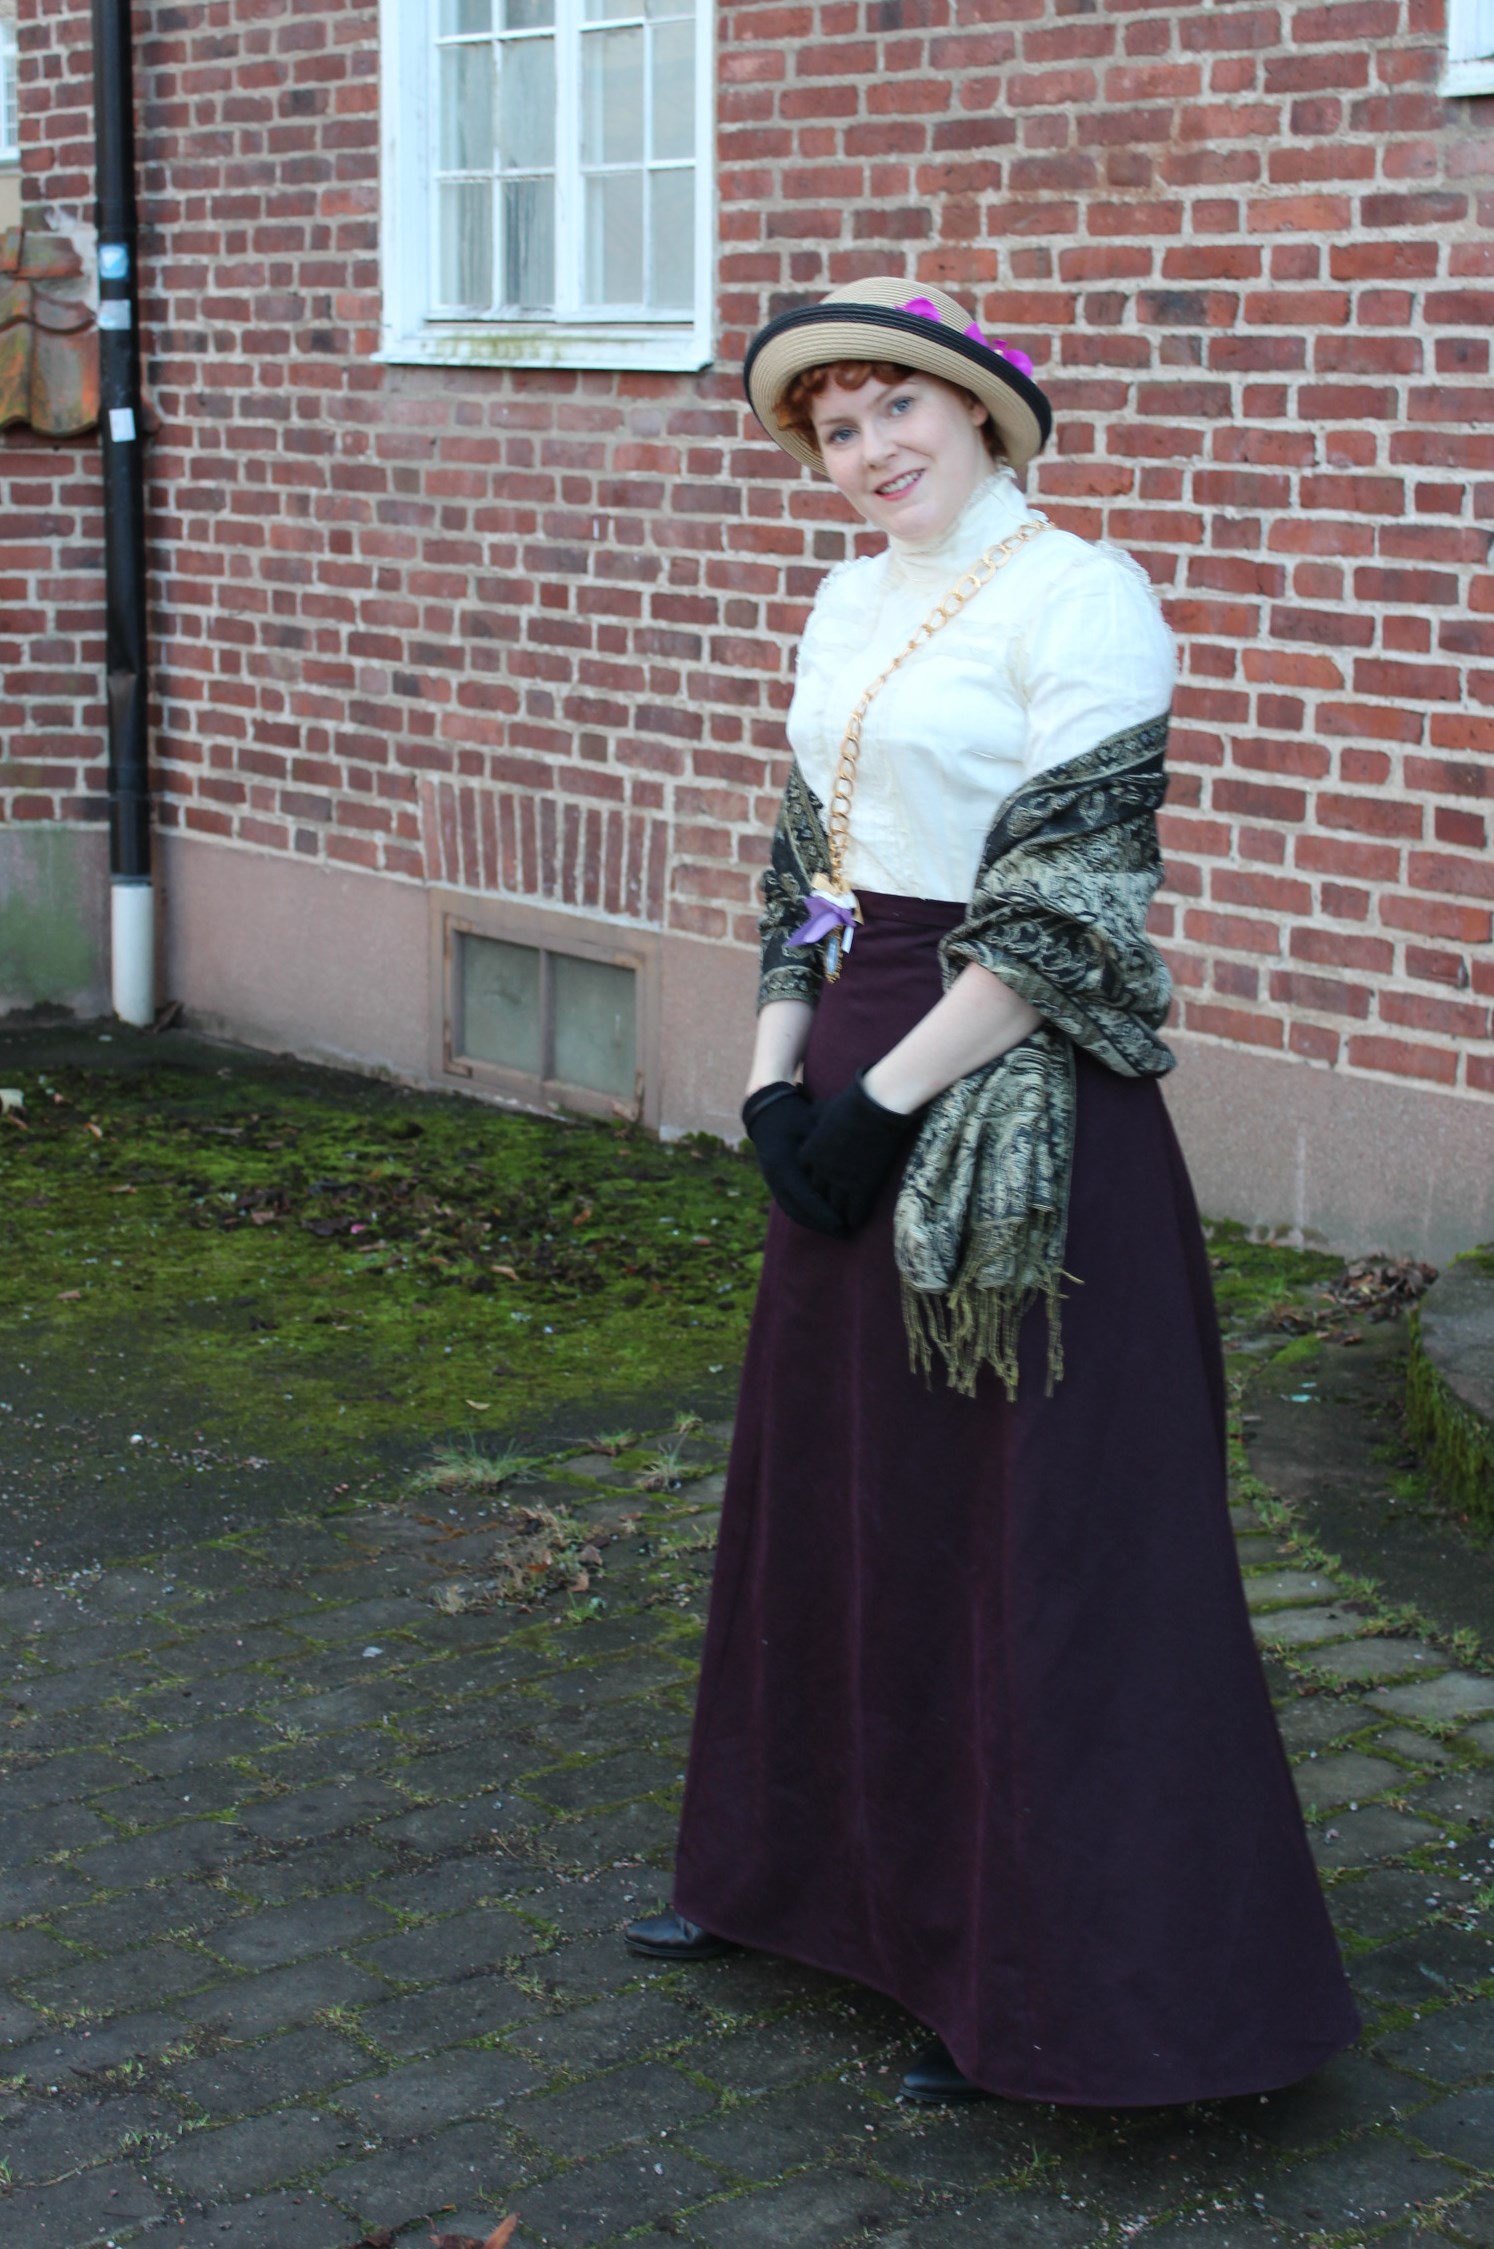
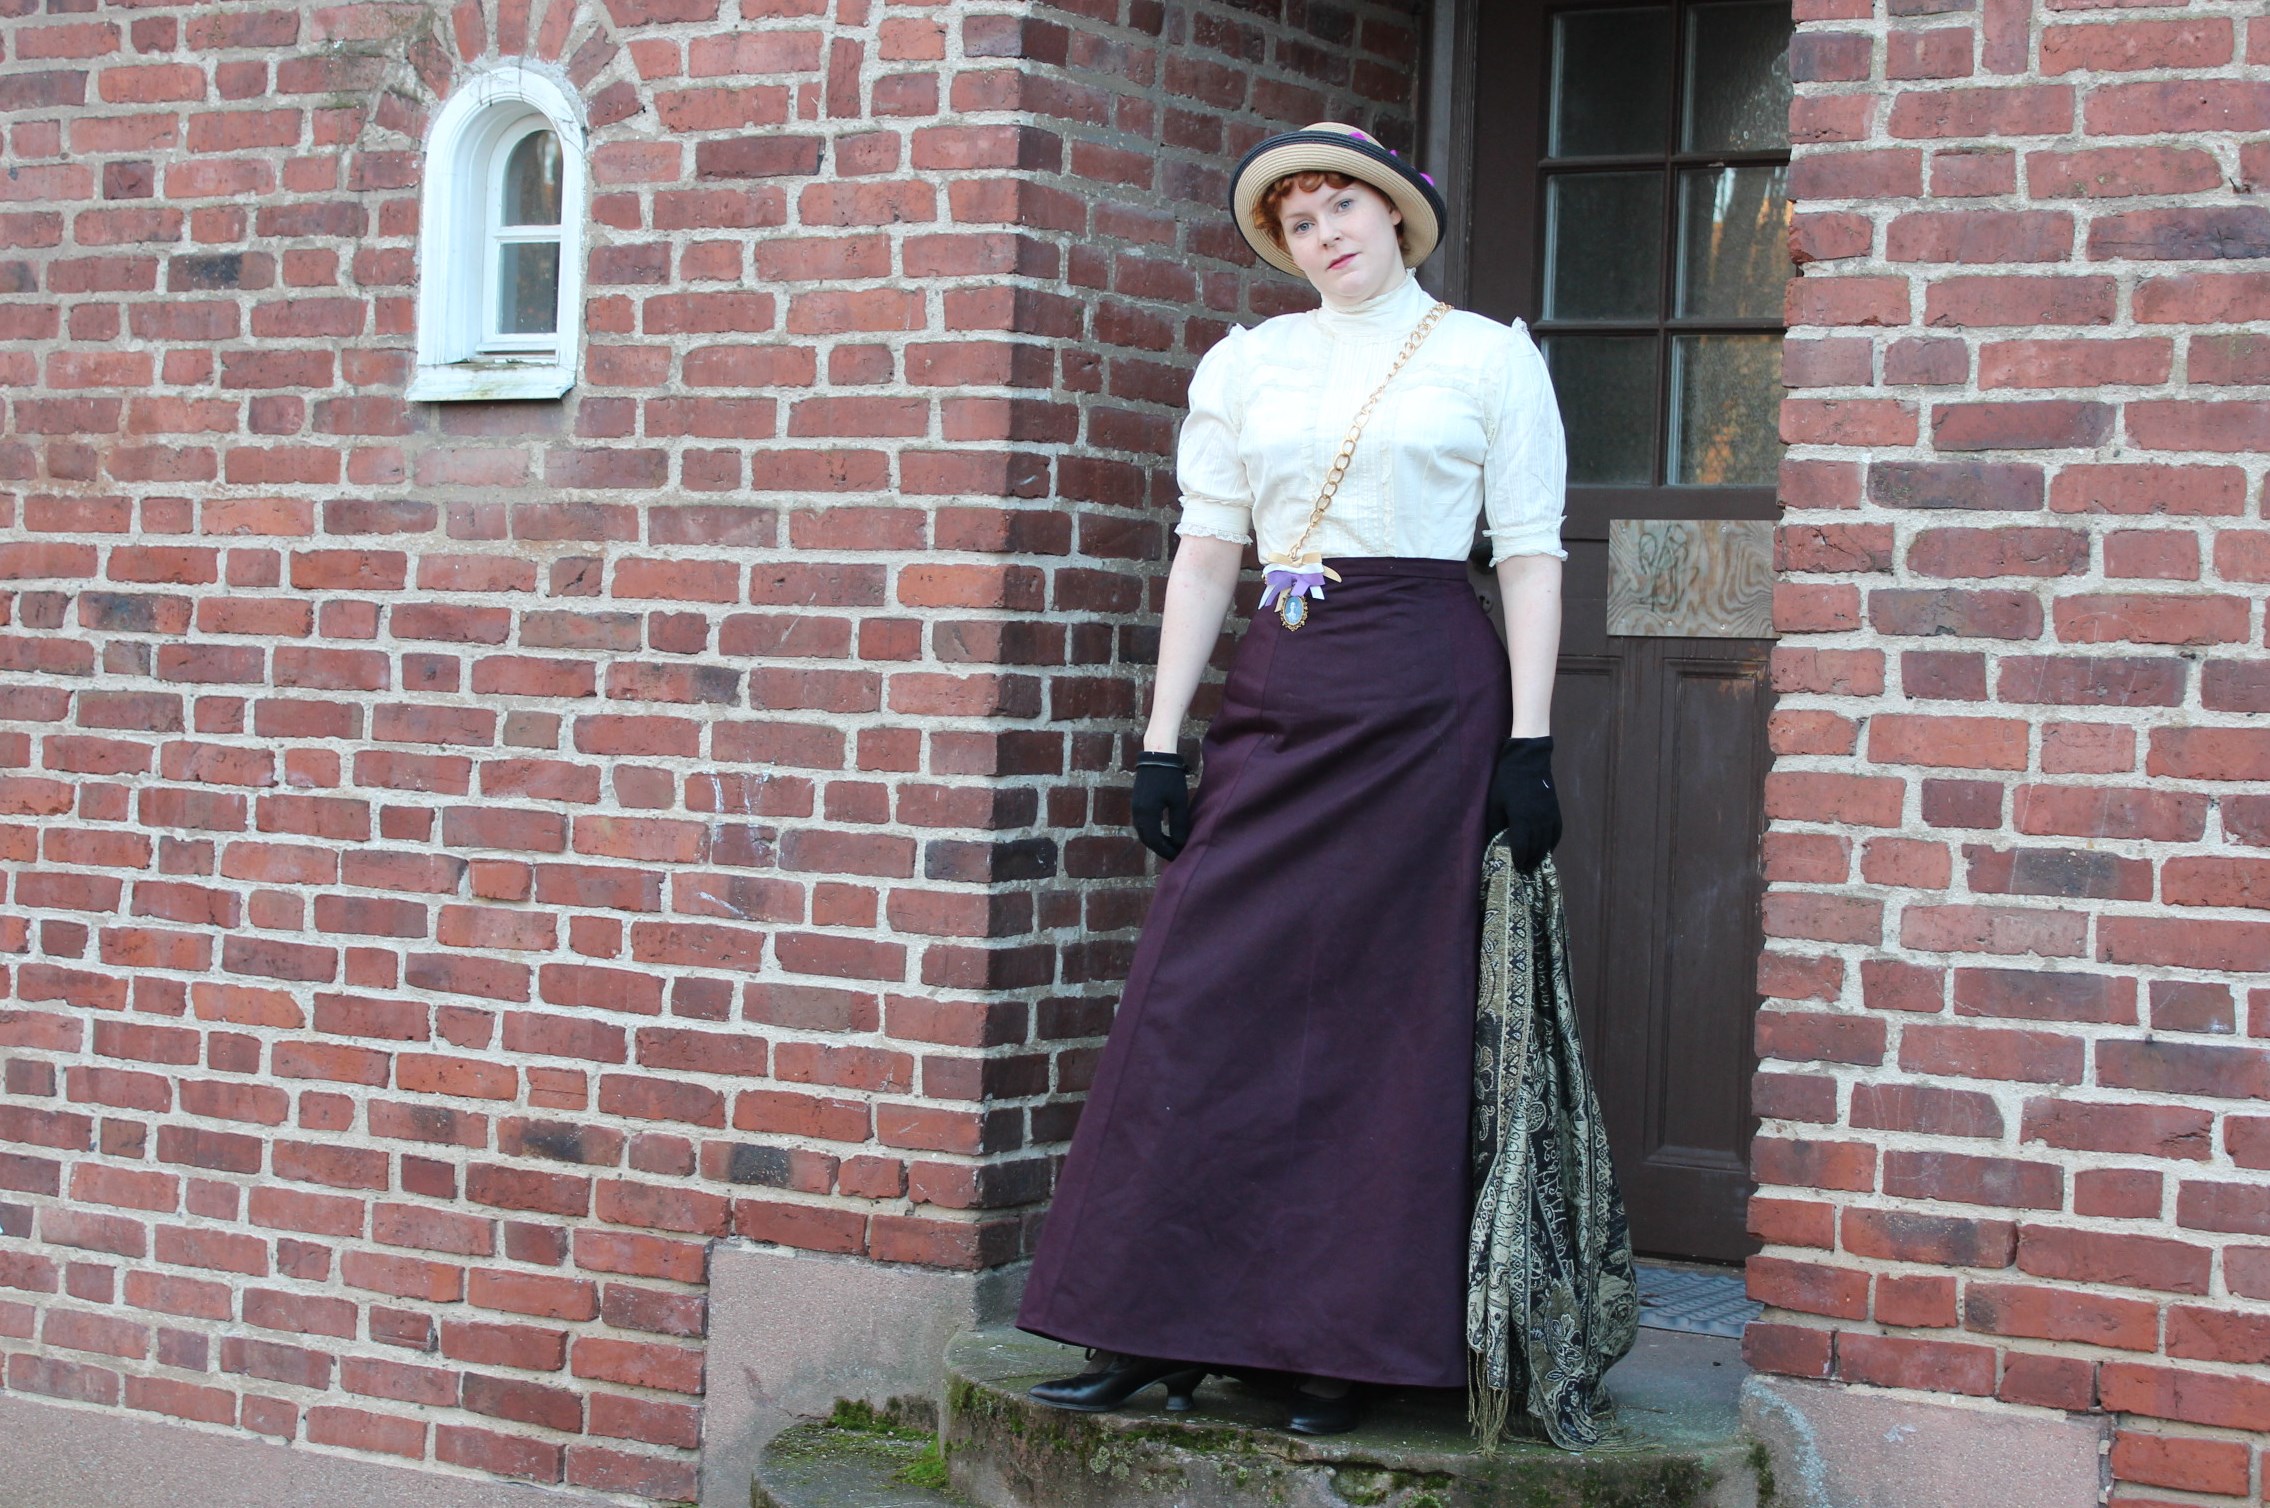
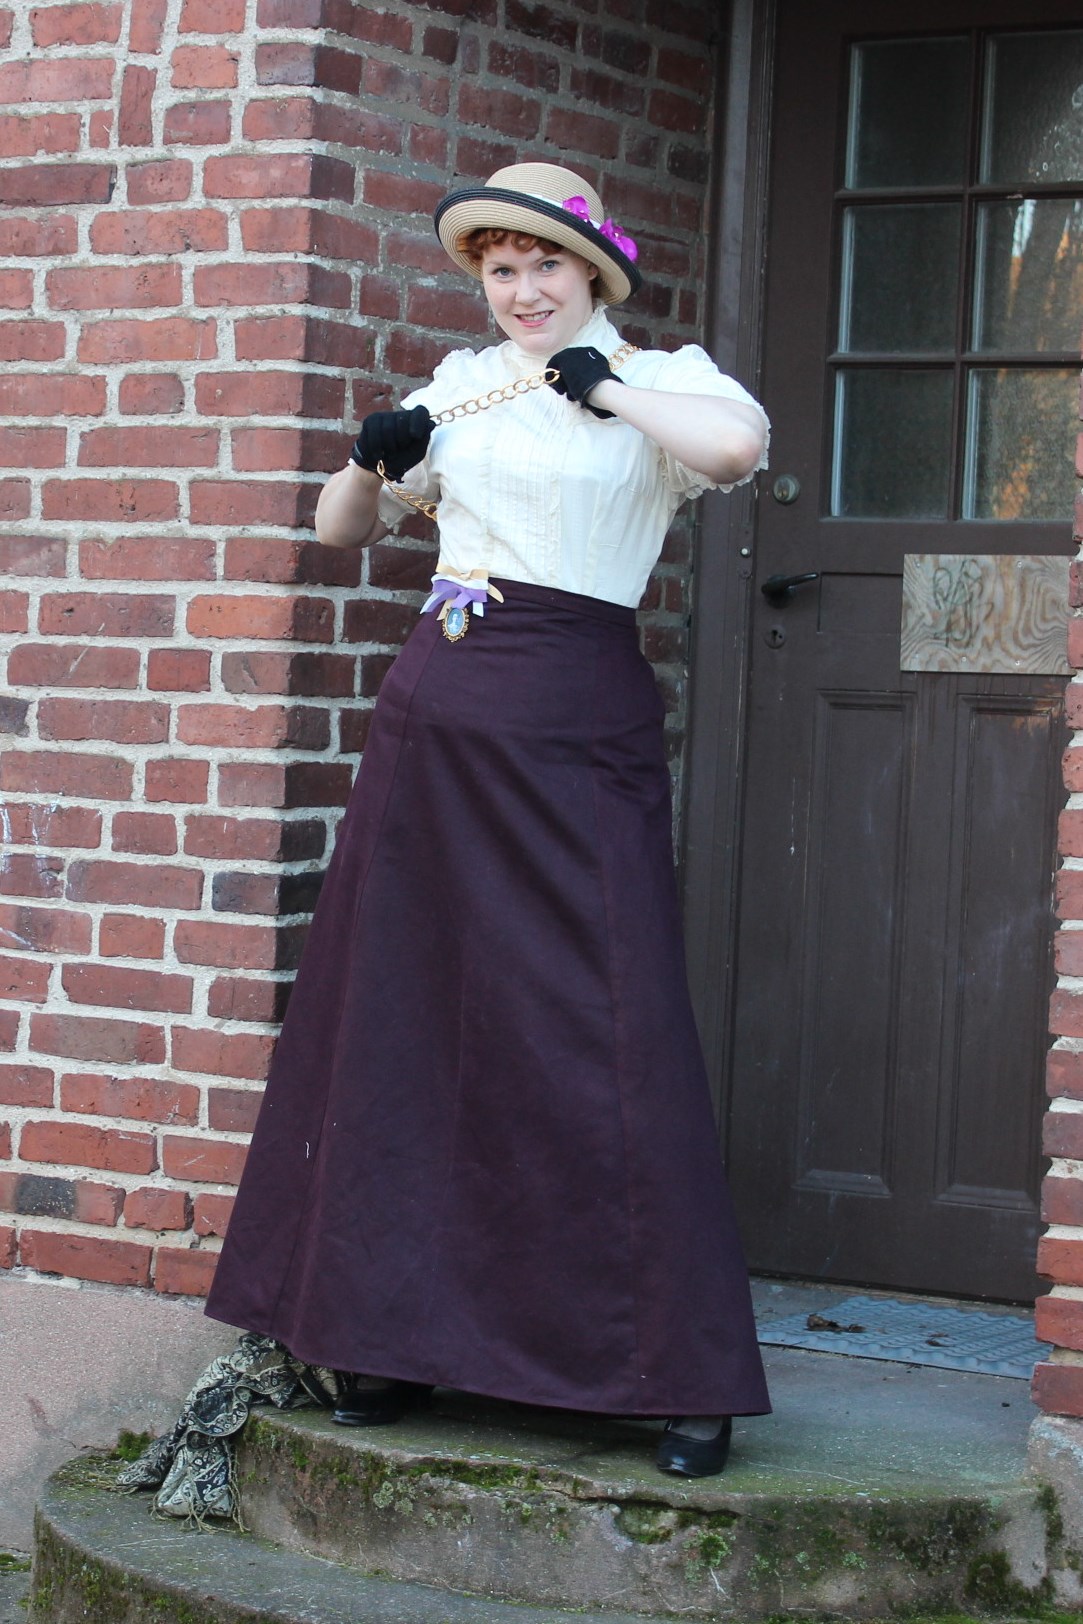
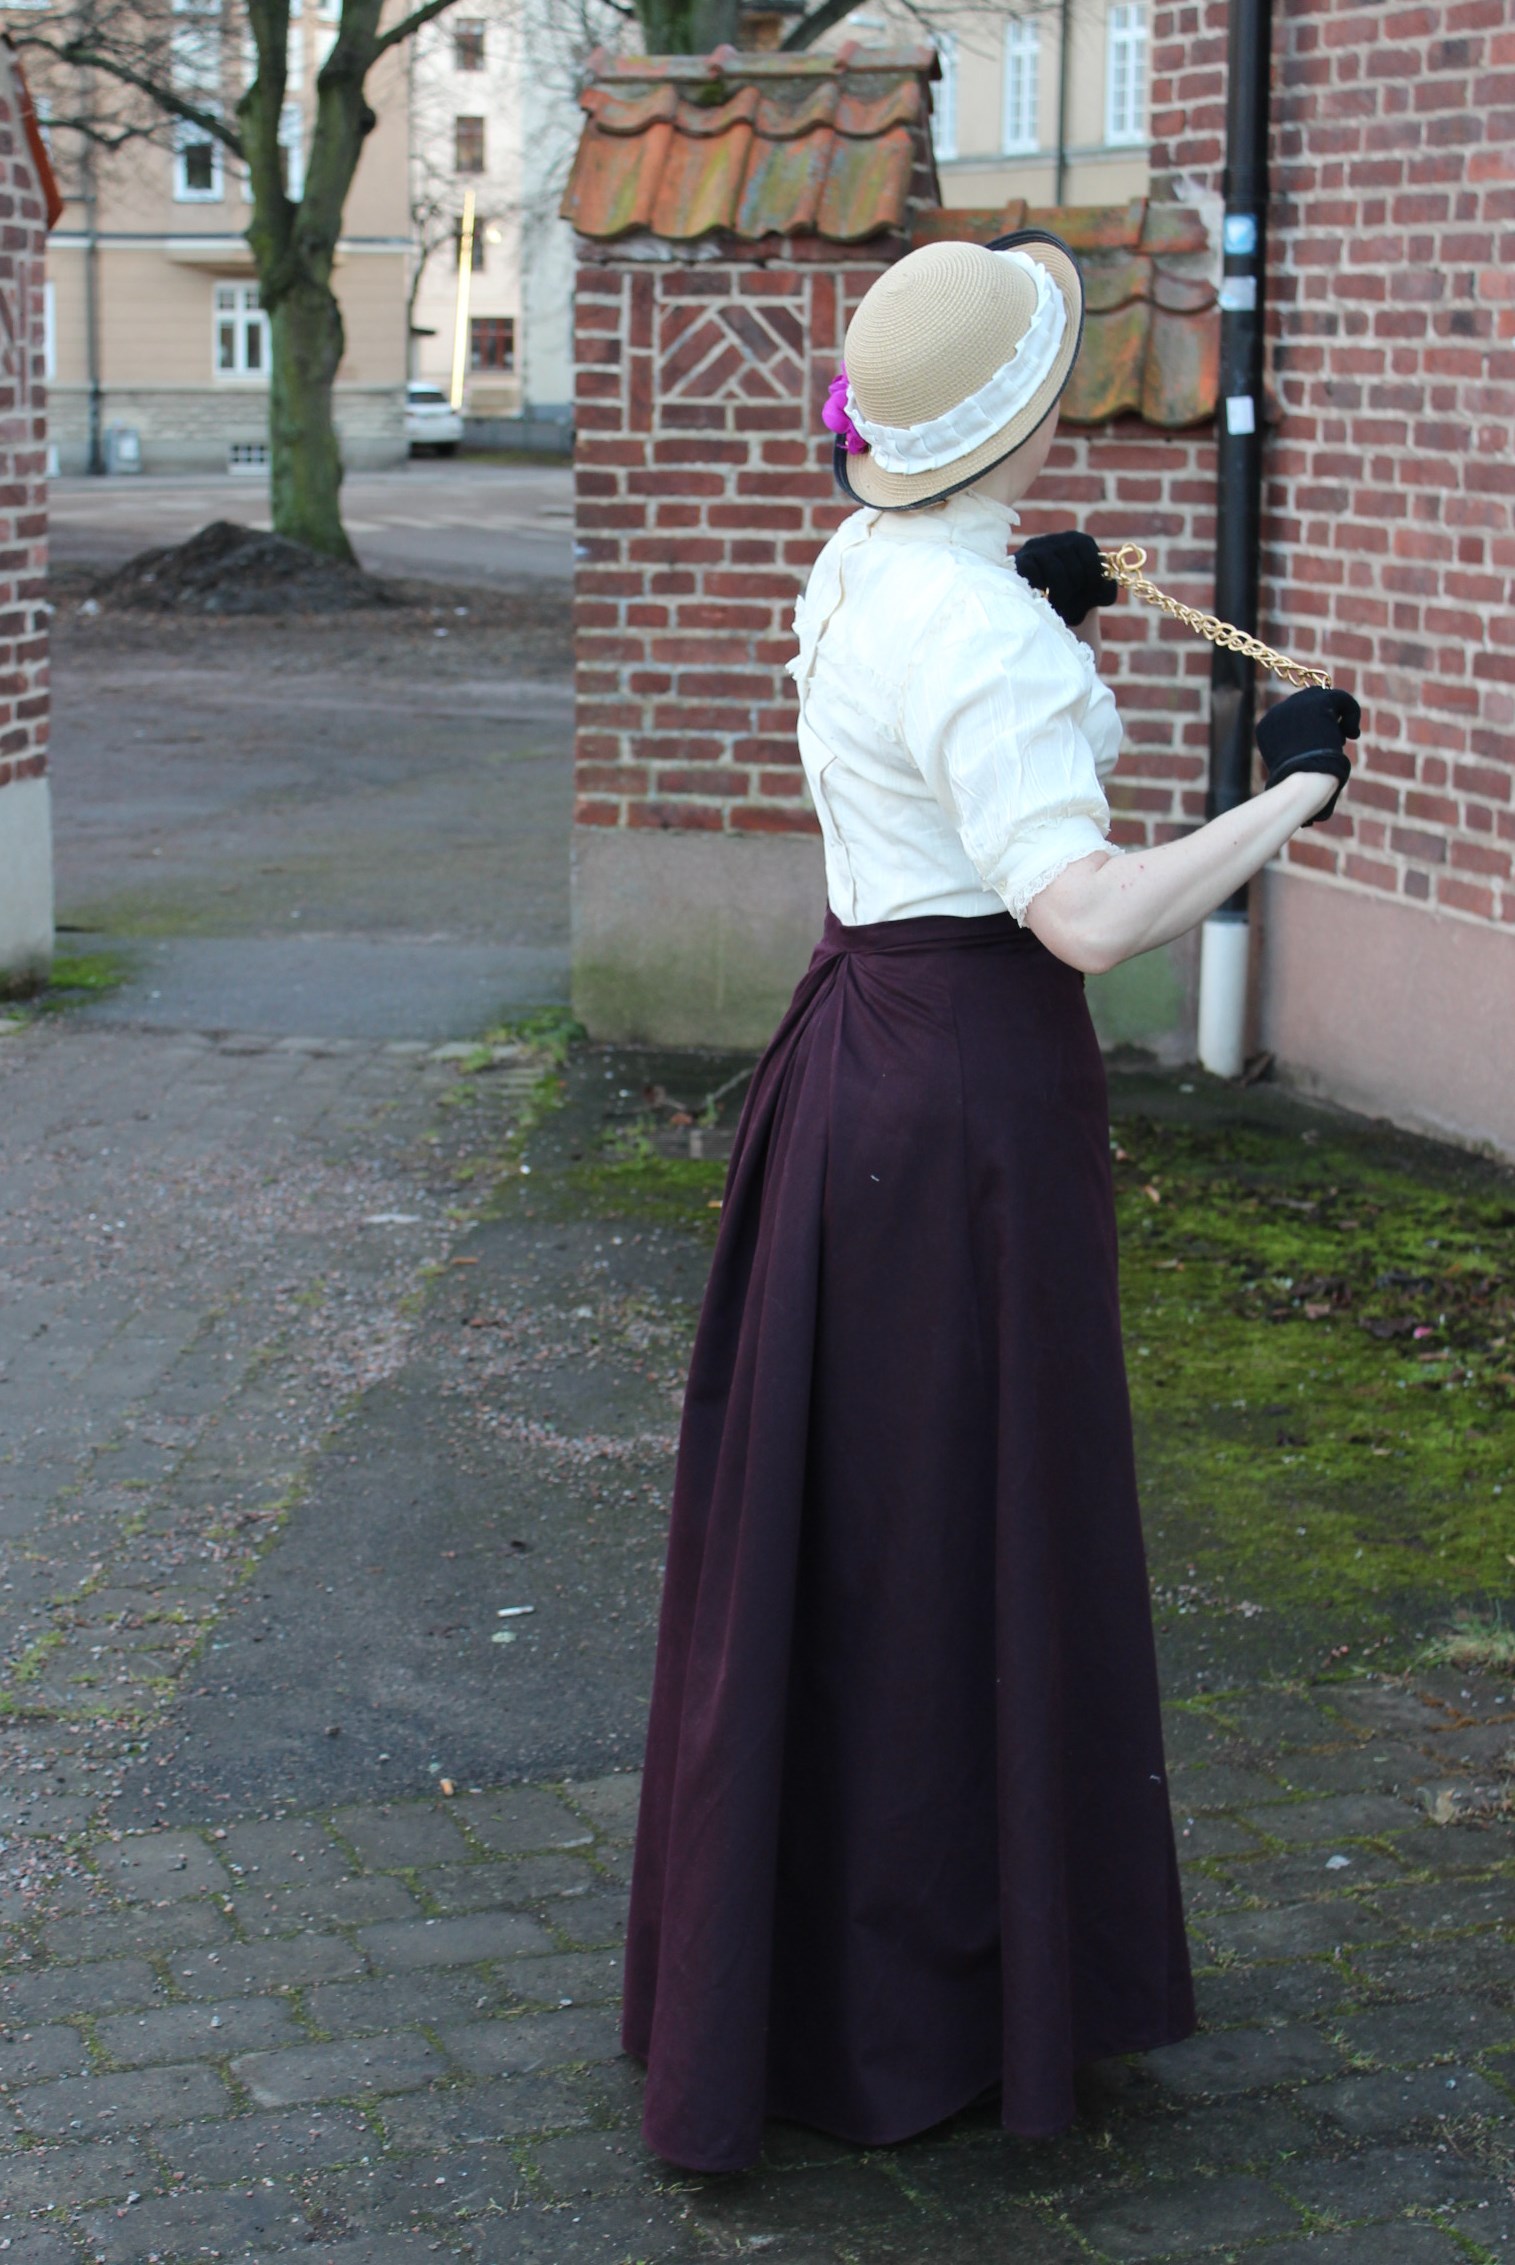
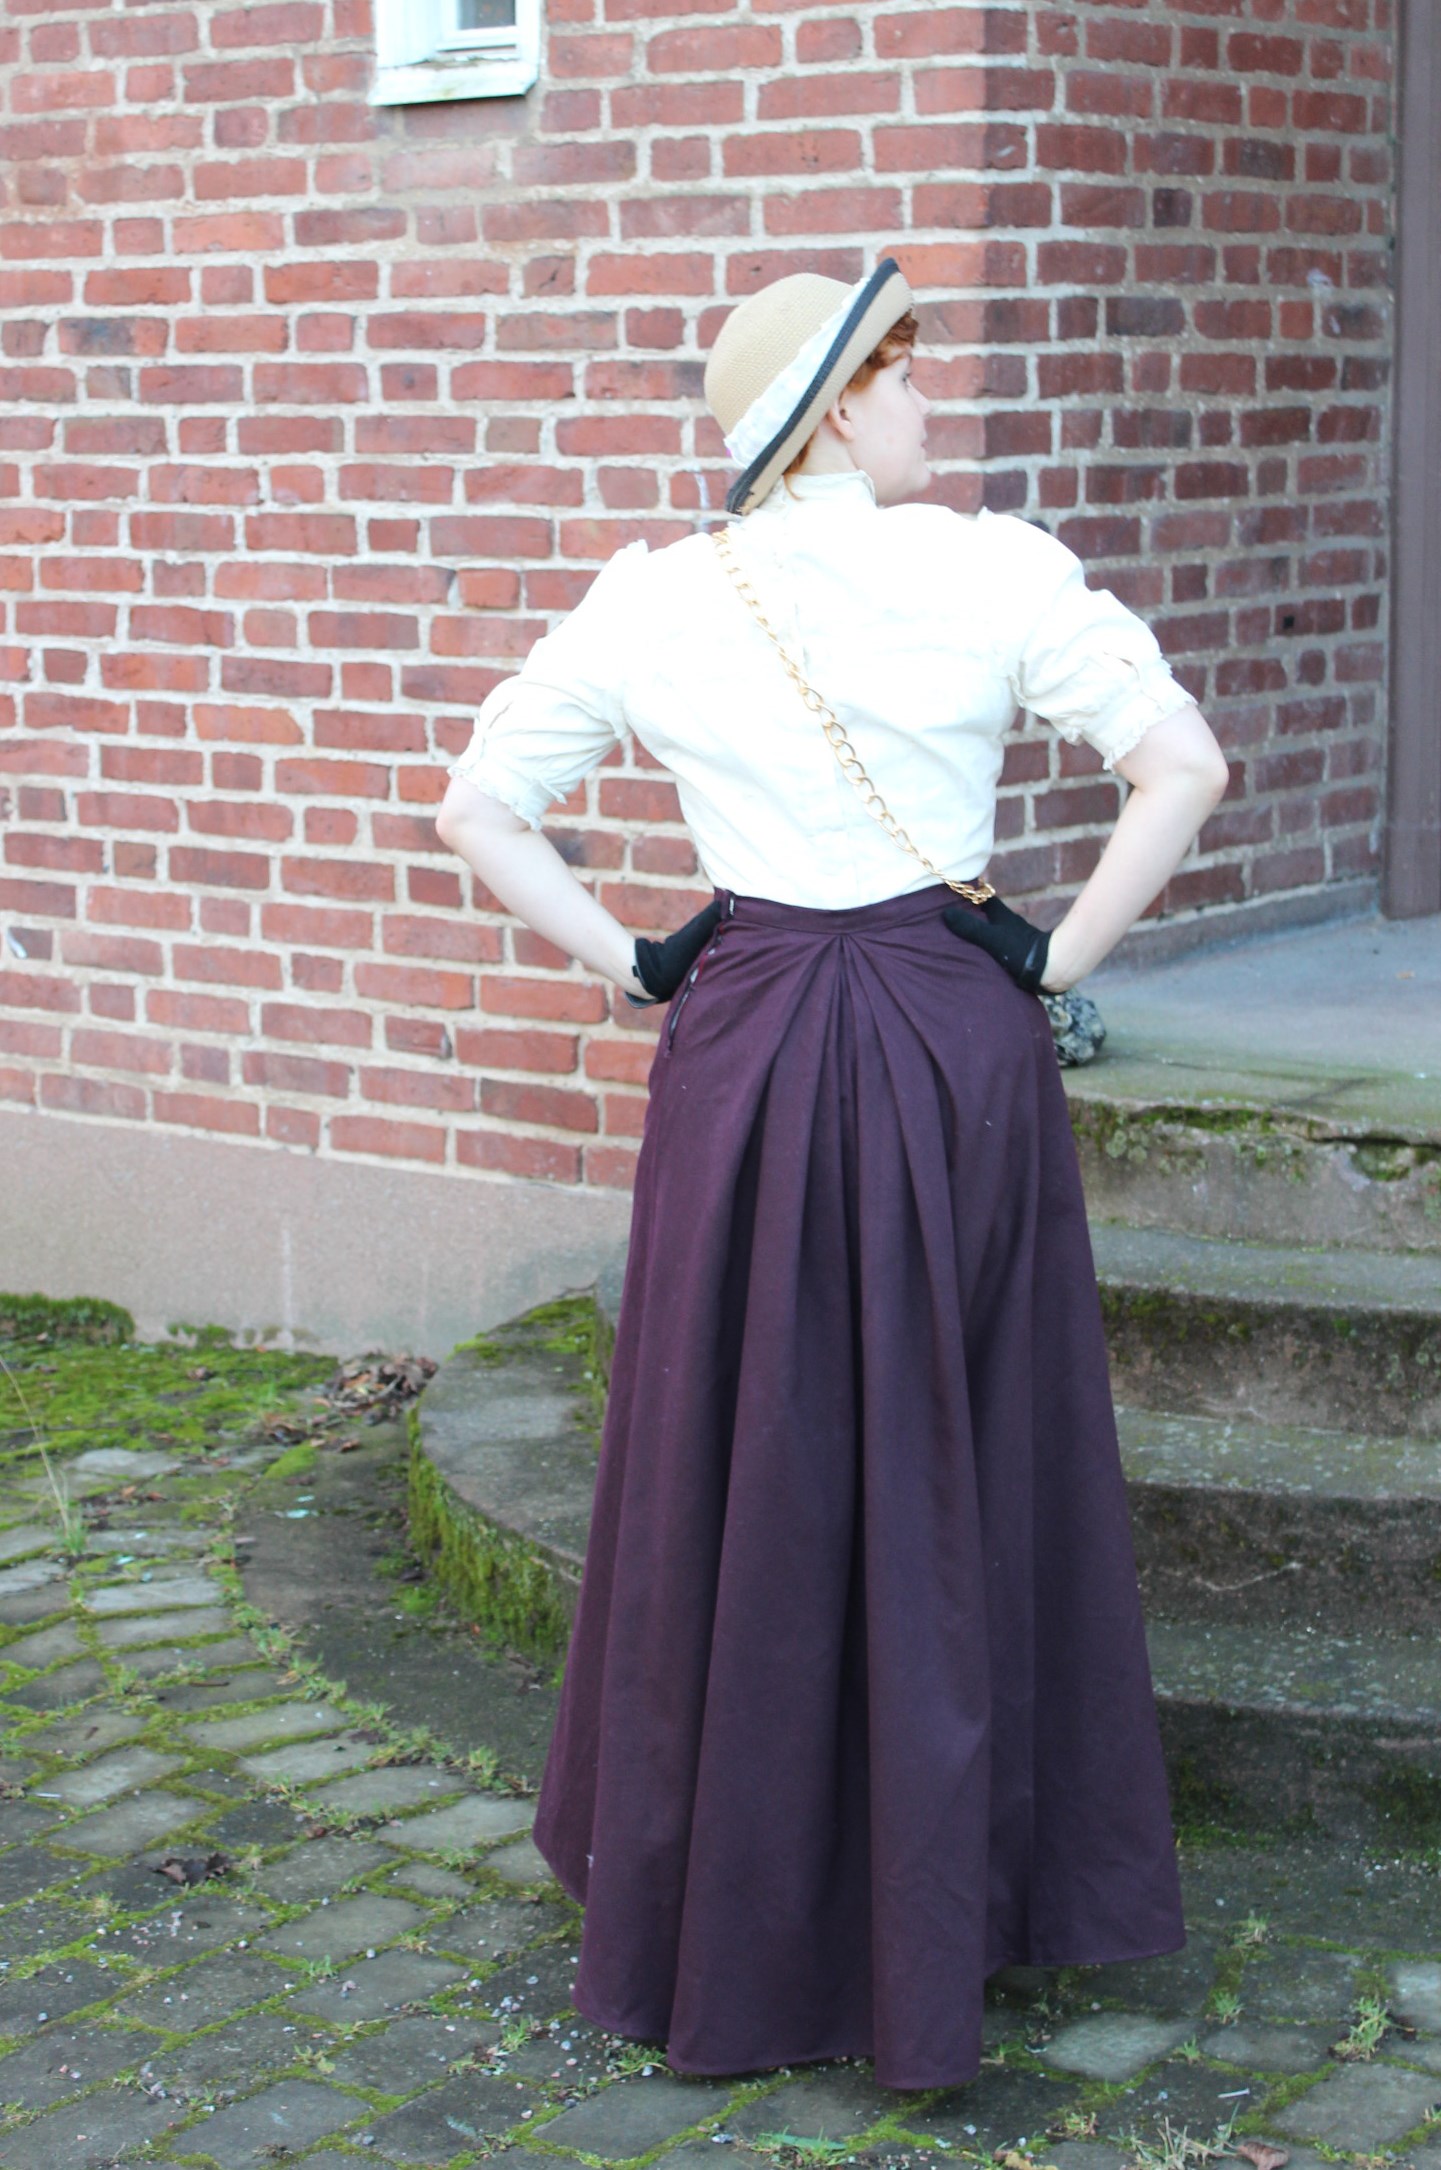
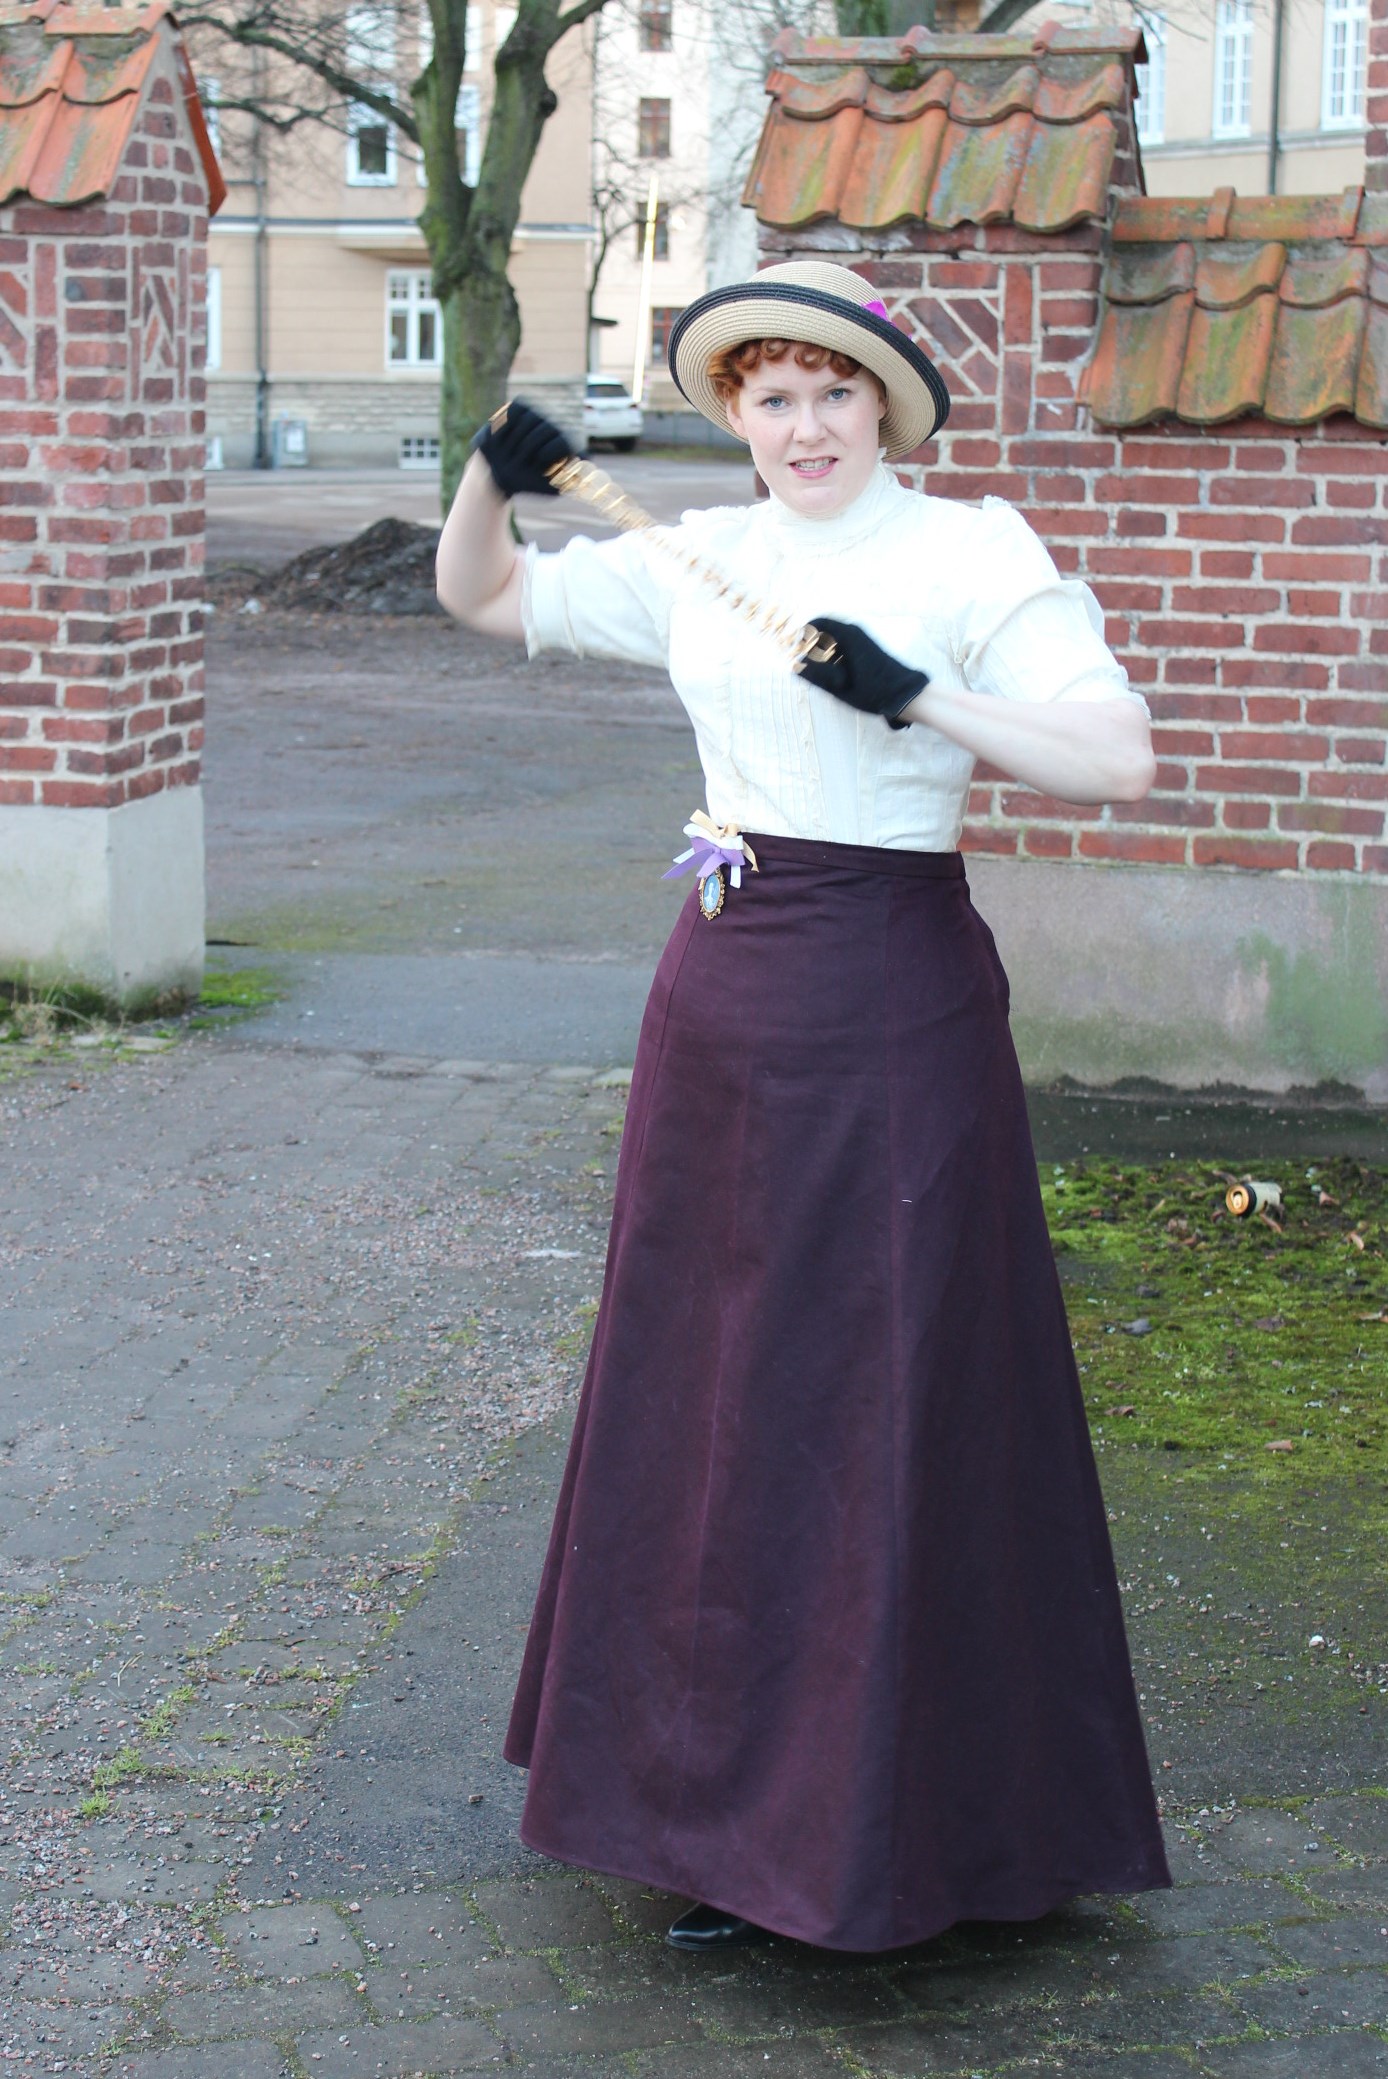
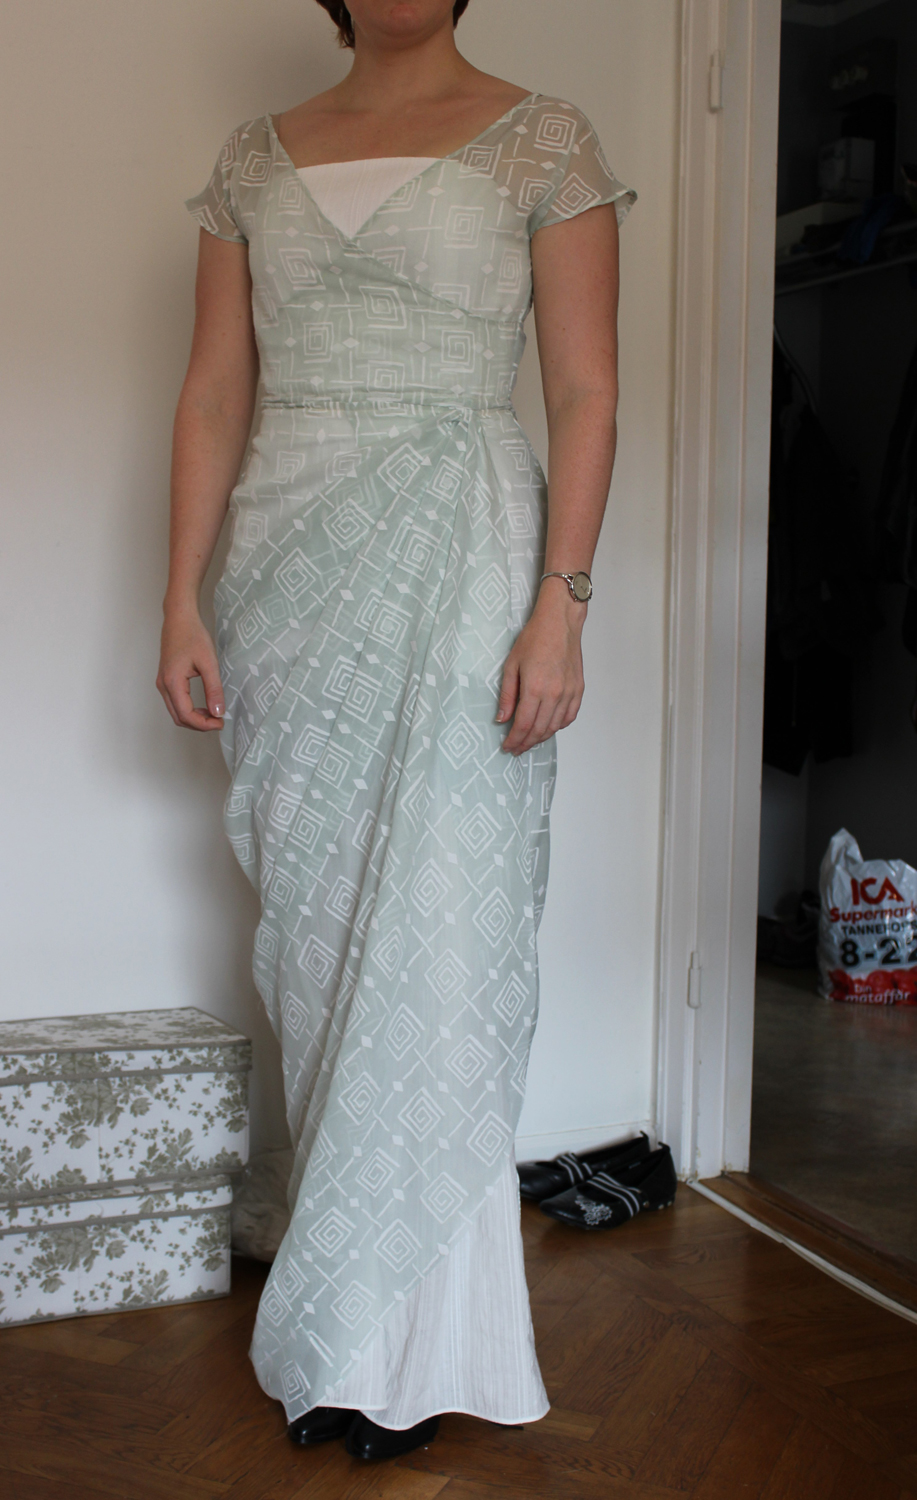
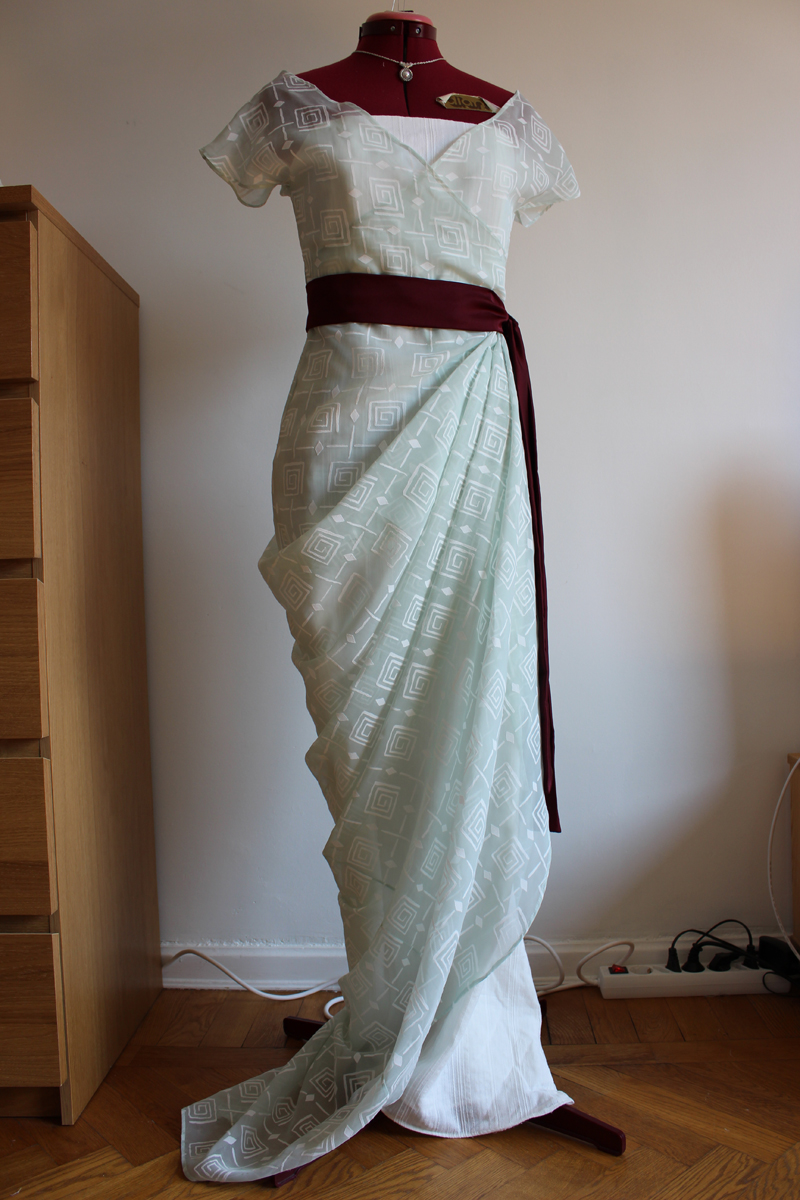
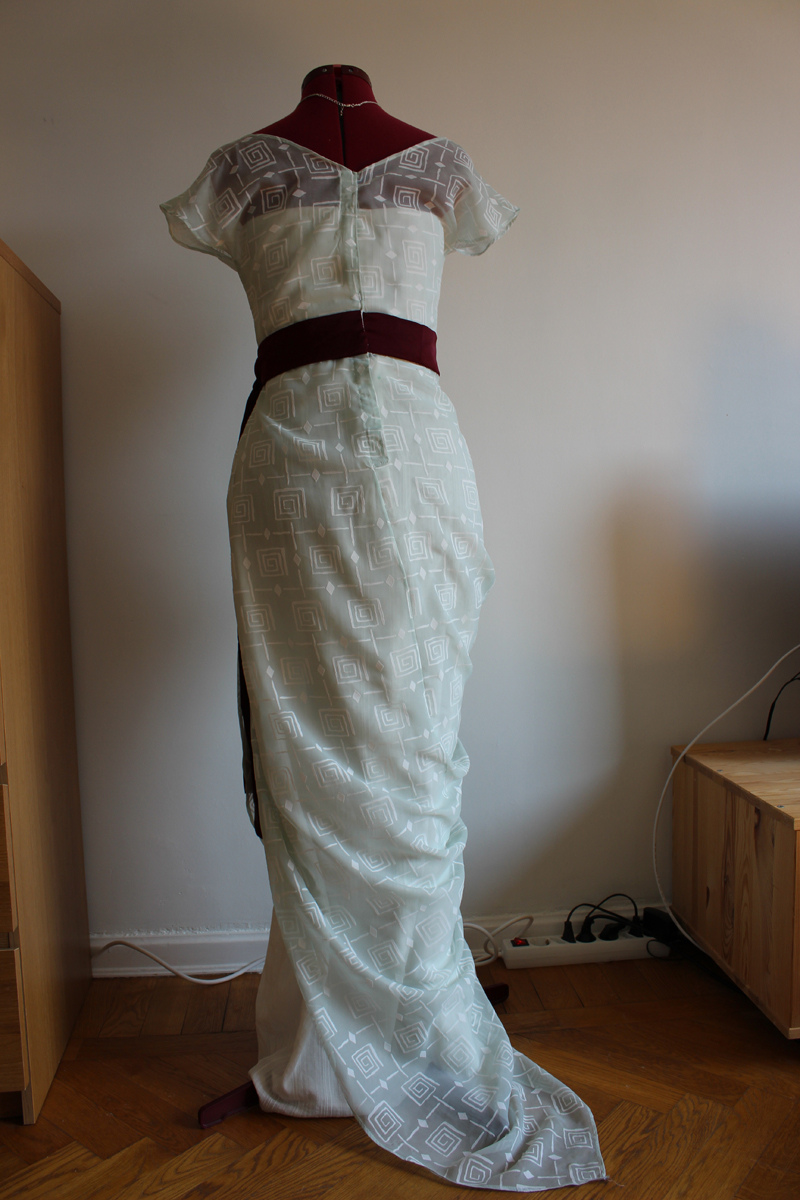
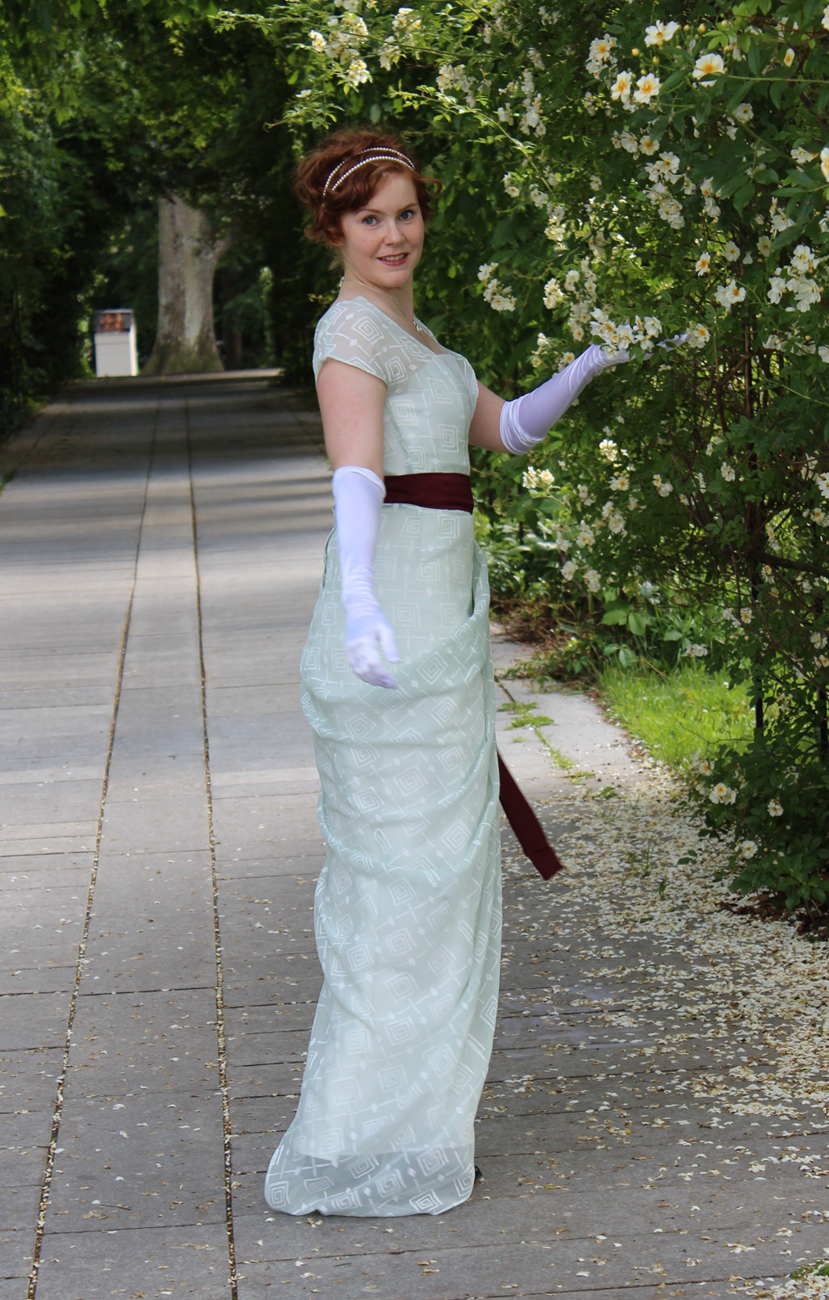
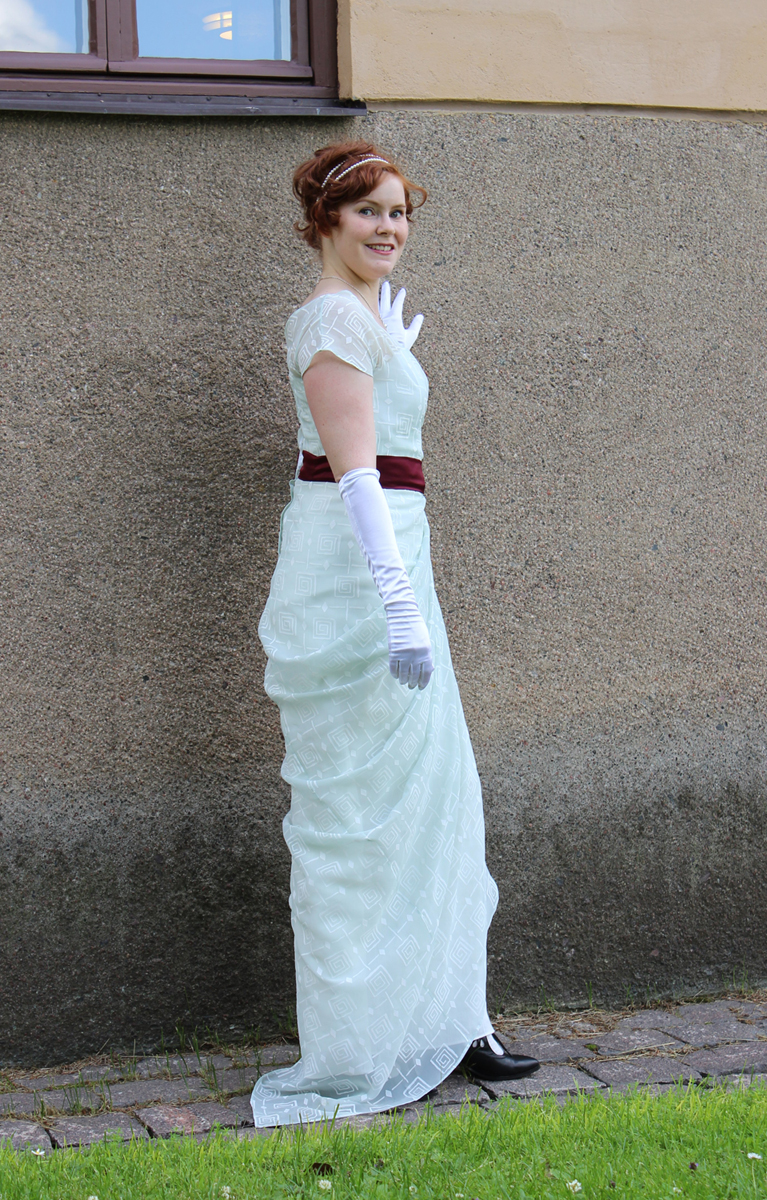
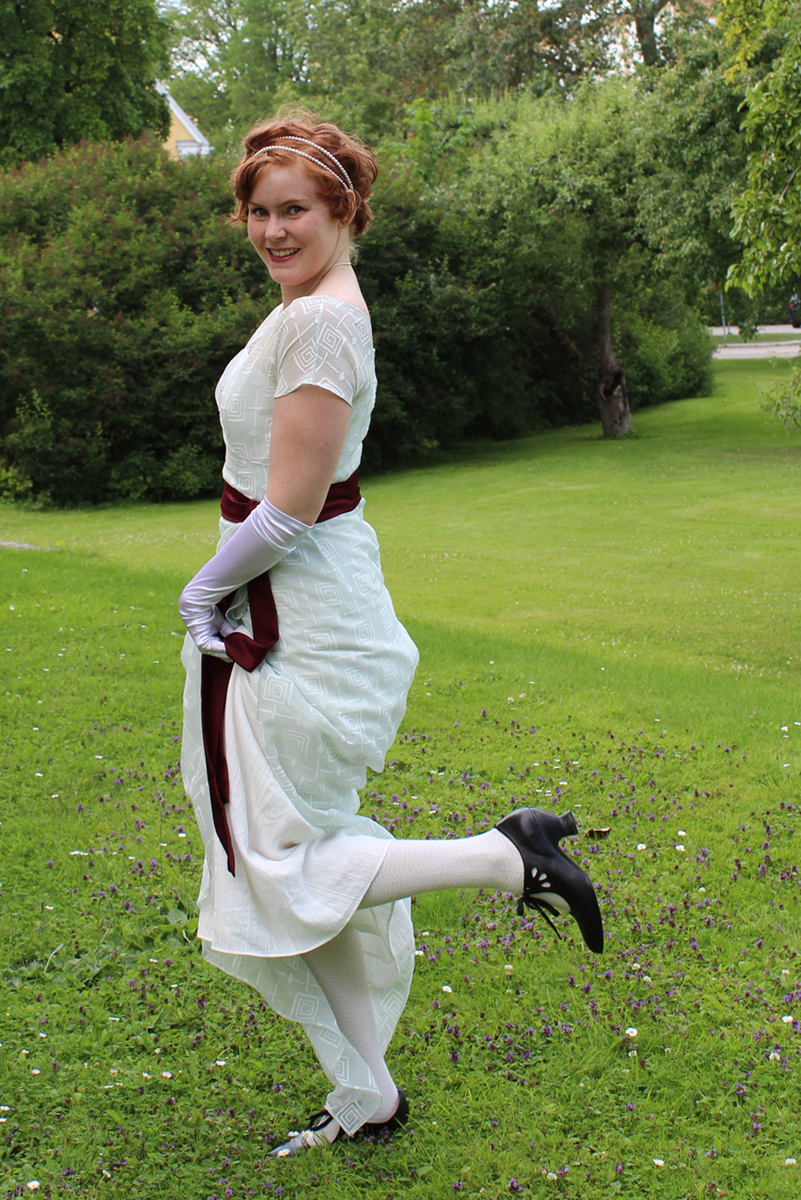
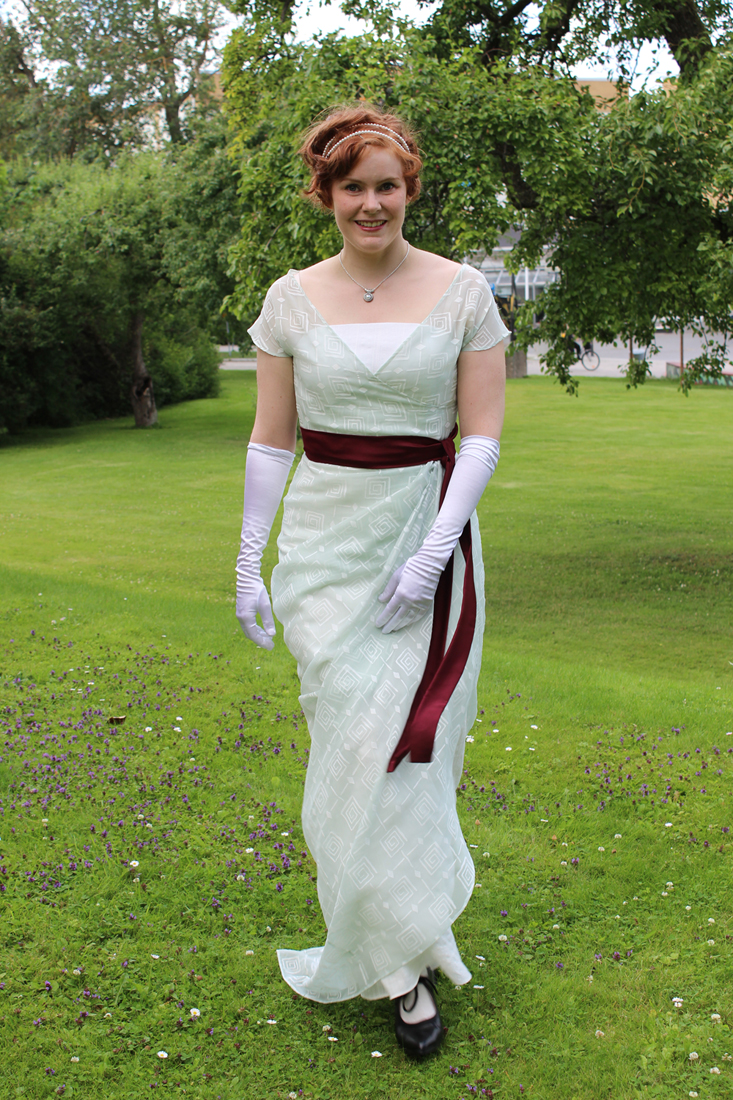
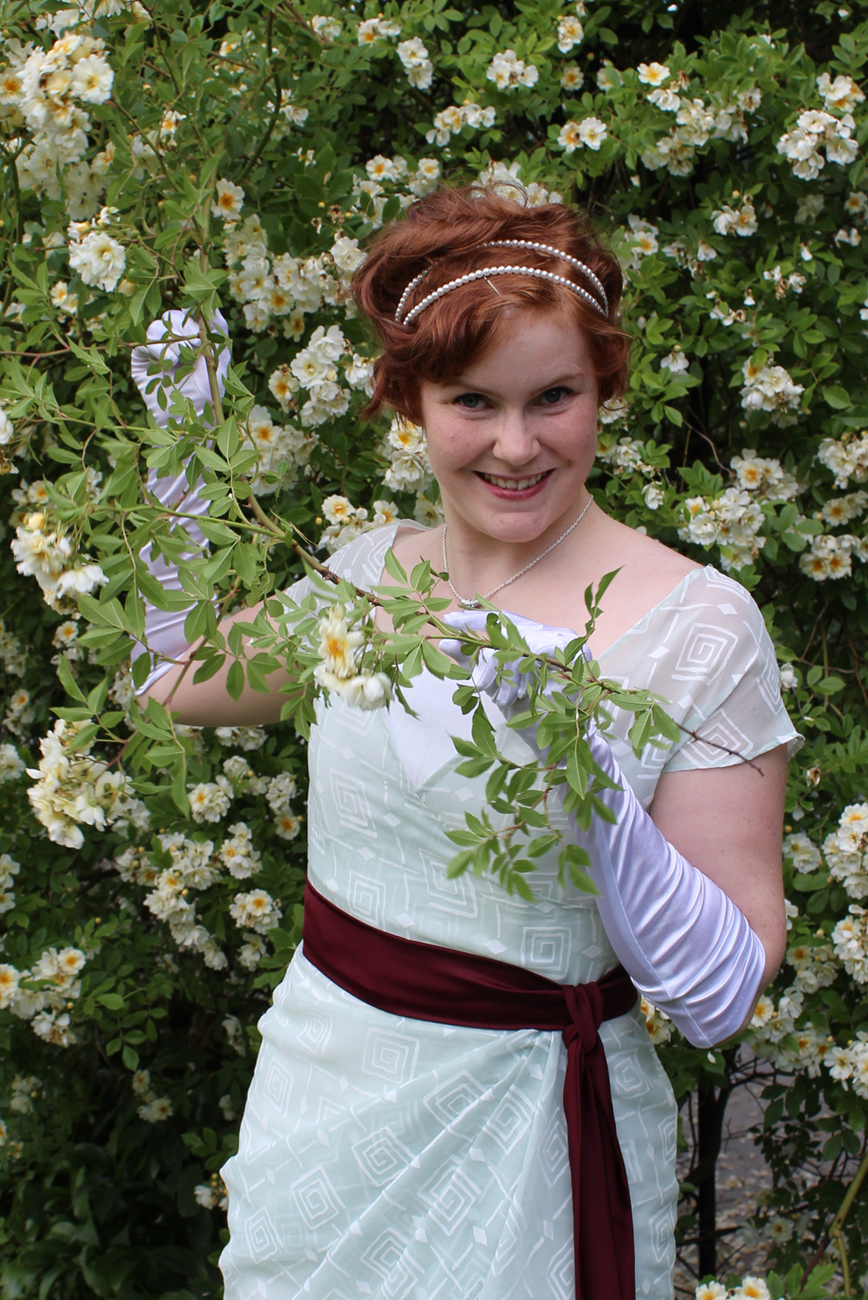
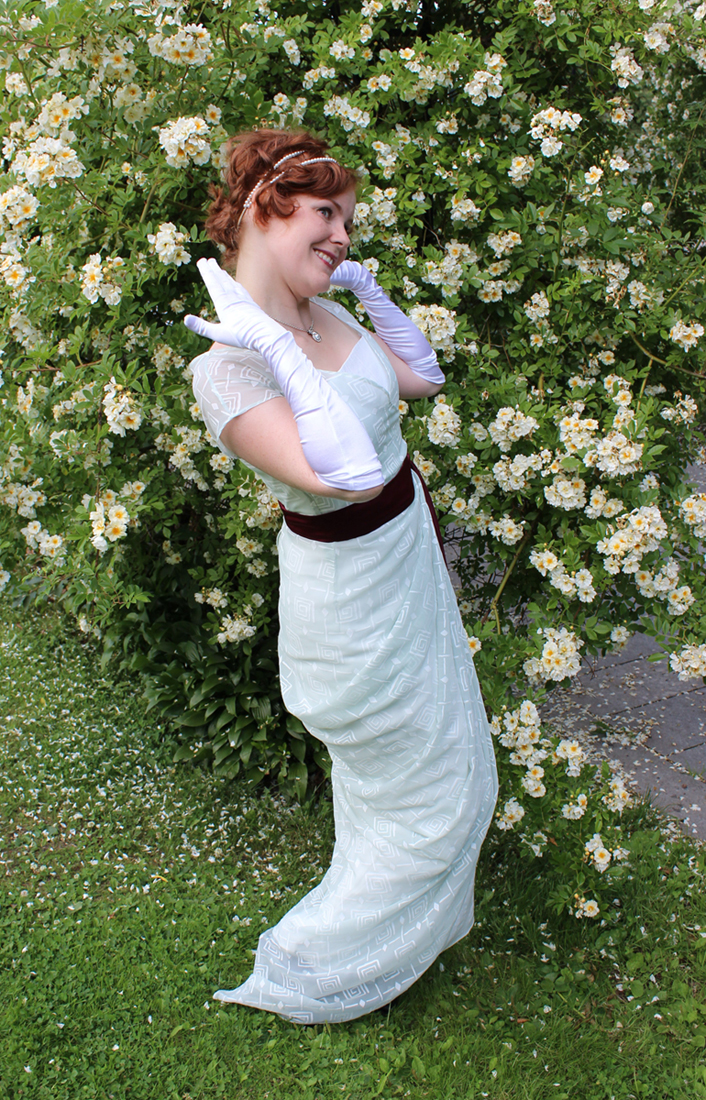
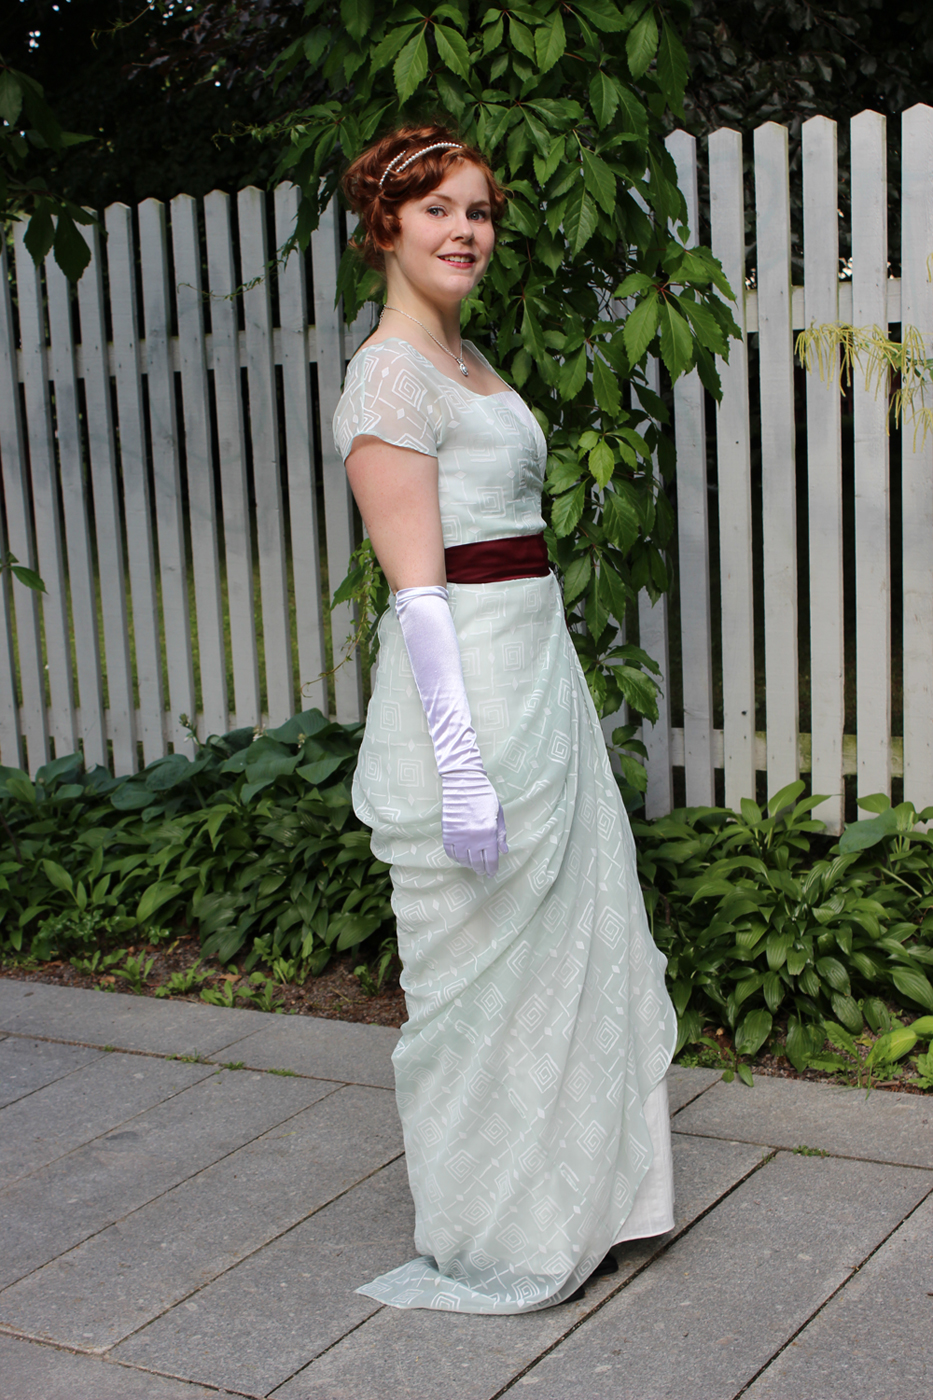
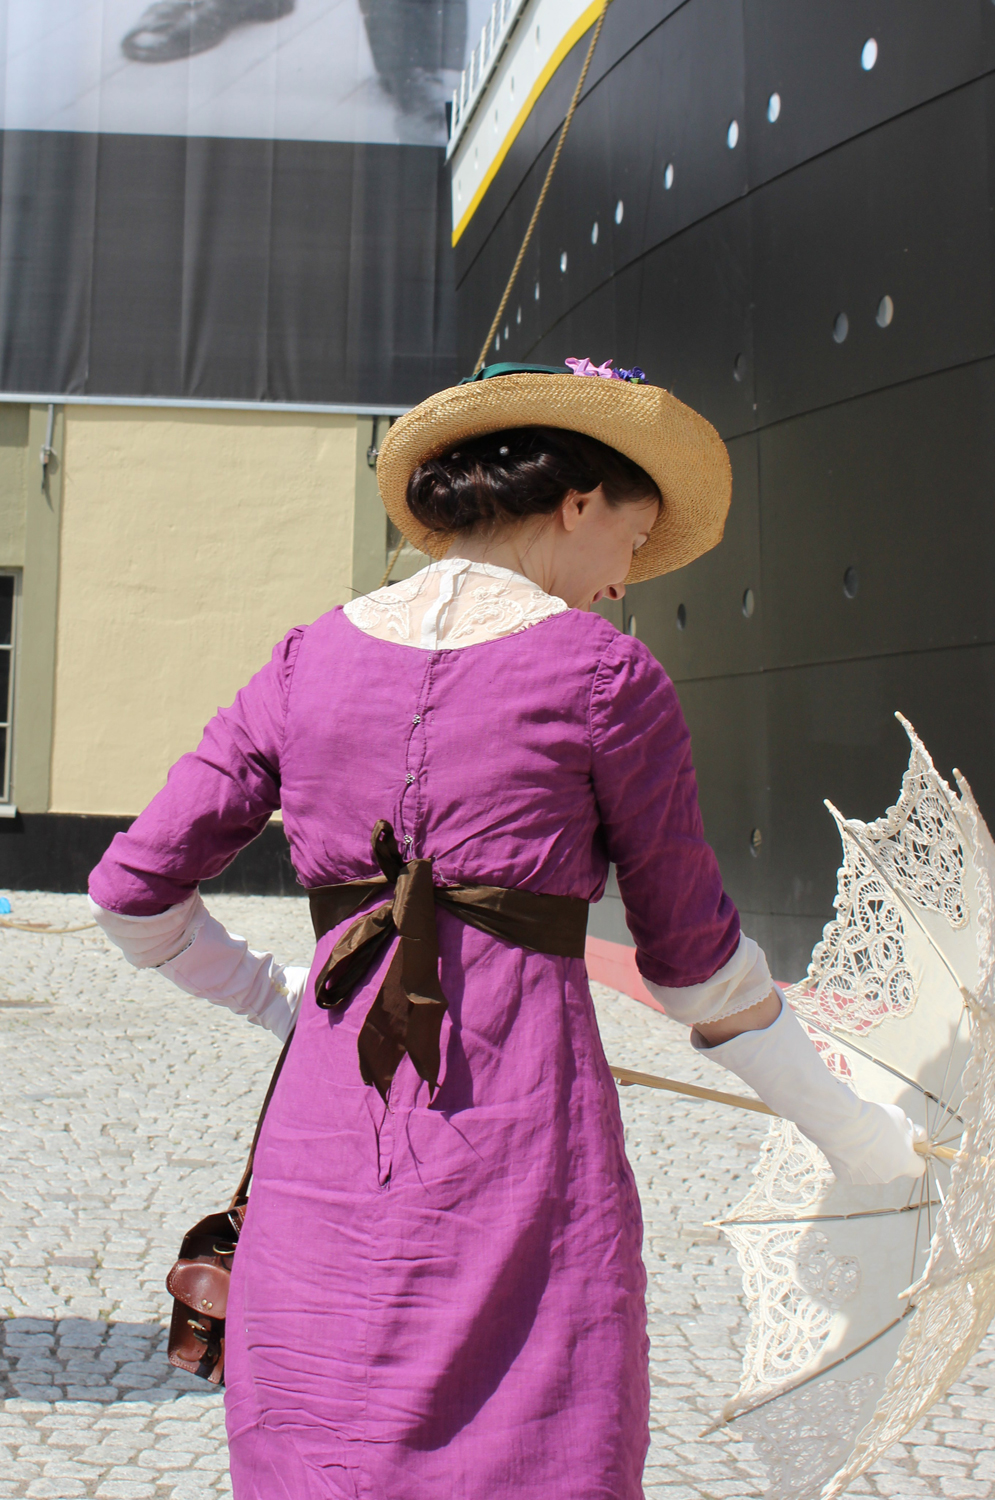
The Finished Gown:IMG_7045

IMG_7038

IMG_7044

IMG_7041

IMG_7035

IMG_7055

IMG_7052

IMG_7047

IMG_7048

IMG_7043

IMG_7037

Just the Facts:

Challenge: 6 – Farytale

What: An Edwardian (1901s) gown for “The little Mermaid”.

Pattern: Drafted my own, using a picture for reference.

Fabric: 3m of striped white cotton voile, 0,5 m of white dotted polyester organza and 0,5 m regular white cotton sheets for interlining.

Notions: Thread, hooks and eyes and about 80 cm syntetic whalebone.

How historical accurate: Not much, the cotton content is ok, and the colour would suffice for a “nice dress”. But I don’t think I quite got the shape/look right.

Time: About 10 hours – on and of for two weeks.

Cost: About 100Sek (16Usd), everything from stash (bought on sale about a year ago).

First worn: 30th of mars, for the “farytale” photoshoot.

Final thoughts: Sadly I did’t enjoy making this dress.

I was way to tired after work, and to occupied on weekends, to take the time to do the dress right.

Instead I forced myself to make some “baby-step” progress on it for about two weeks, and then pulling myself up and stressing like crazy to get it finished before the photoshoot on sunday 30s.

All that stress would have been worth it, if I at least would have liked the dress.

But No, when I putt it on for the first time (at the photoshoot) I really hated it.

I feelt fat, ugly and ridicoulus in it, and was more then a bit ashamed to go outside for the photo session.

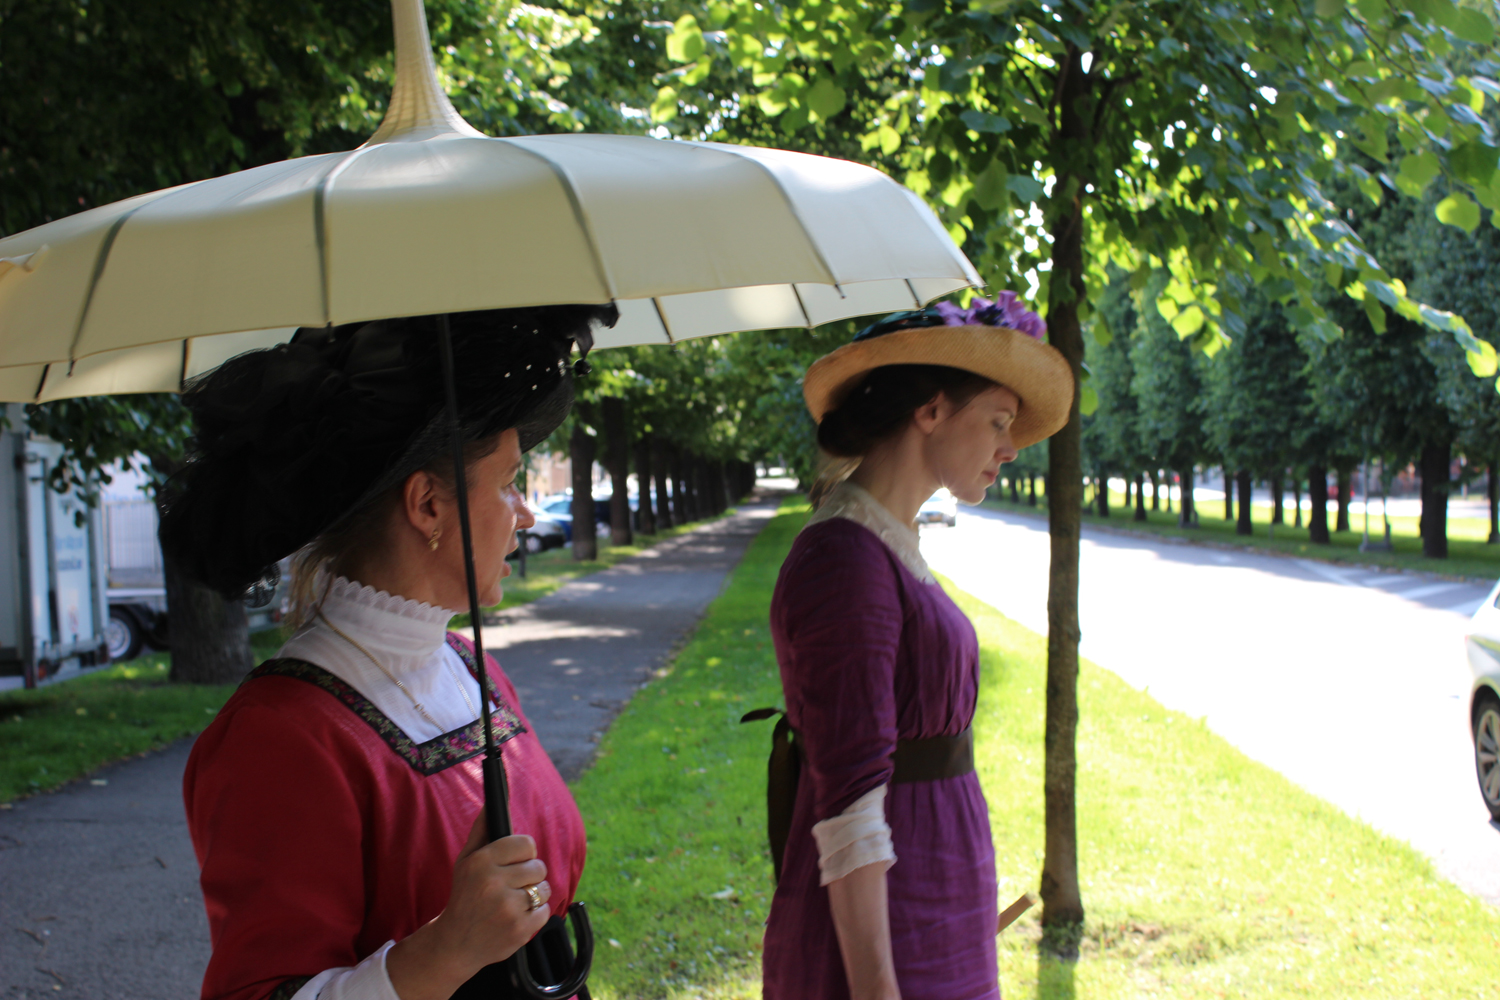
But now, when I’ve been going through the pictures we took, I think I do like it a bit more.

Because I can tell you – we got some awsome looking photos, which I’m dying to show you. (As soon as I can get this damn blog to stop deciding over my picture sizes).


Re-working the Edwardian Brassiere

Lateley I’ve been bothered by the ill-fitting brassiere I made last week for the HSF 5 challenge (bodice).

And since I’m curently working on a dress to be worn over the brassiere, I figured I needed to take the time to re-work it.

IMG_6578Before

IMG_6639 IMG_6644

The brassiere needed to be let out a couple of cm in the sides, shortened at the waist and lowered both at the armcykles and neckline.

So this weekend I grabbed the seam ripper and got to work.

I started by removing most of the bias tape, and the boning.IMG_6654

IMG_6652

Then I cut the new neckline, armholes and waistline. IMG_6647

The side seams was being let out a bit, and I needed to make some additional bias tape to cover for the new and longer edges. IMG_6656

Then I shortened the boning and finishing of by sewing the bias-tape back on.

IMG_6657But it does look very nice. There are to much fabric at the top neckline.

So I tried it on.IMG_6671And pined away the exess fabric.

IMG_6677
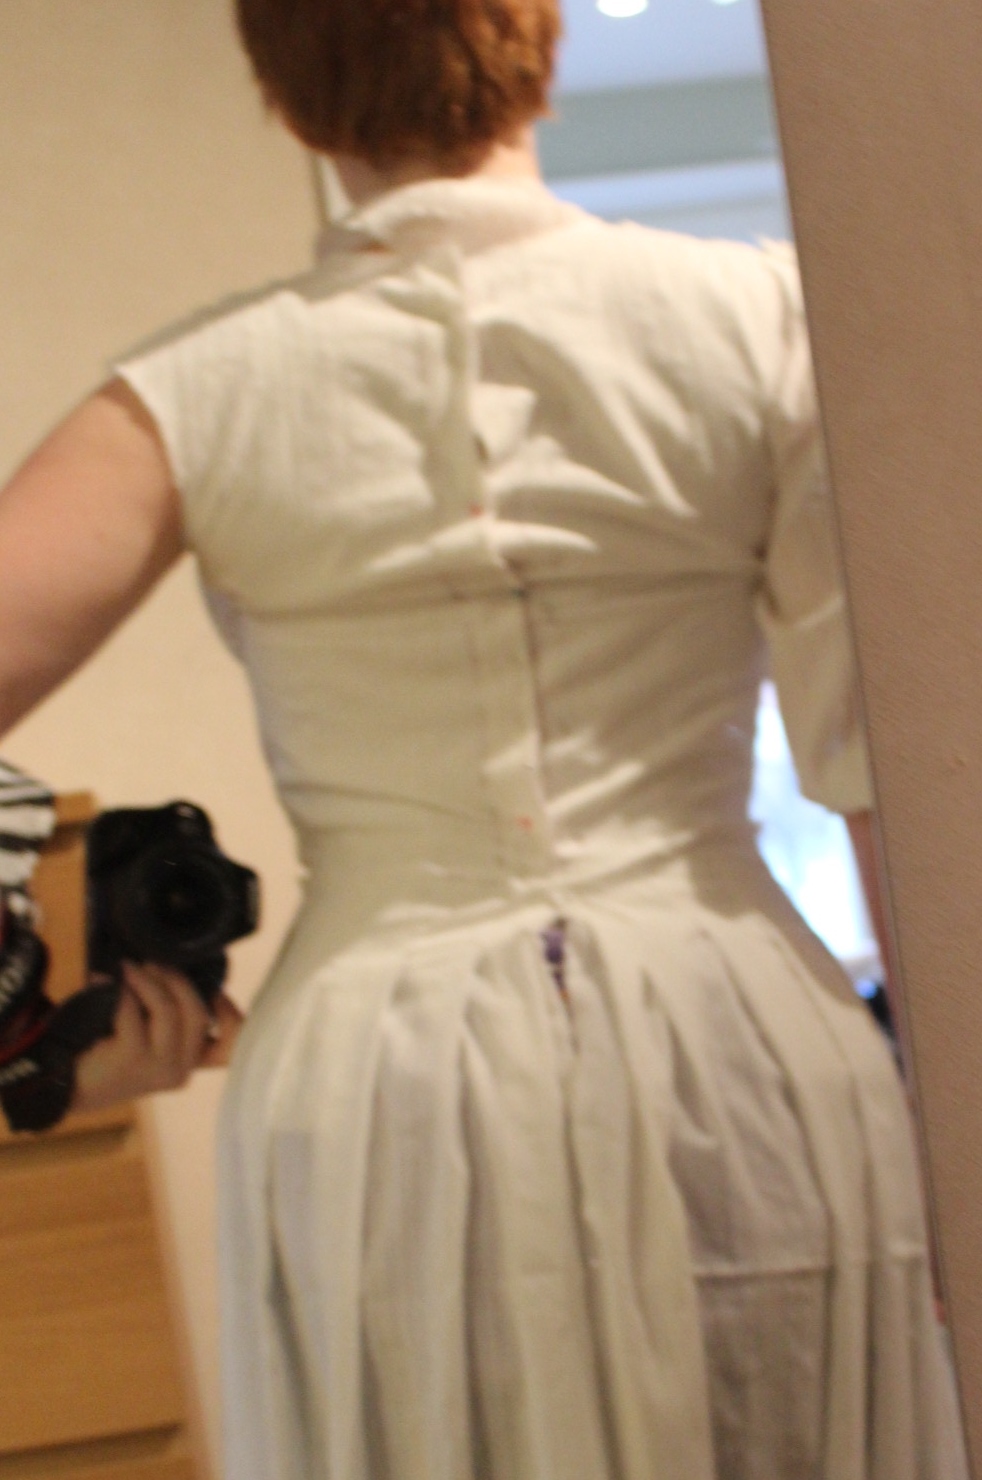
The shoulder straps need to be adjusted – re-shaped and shortened.

There was noting to do but to start ripping out the bias tape once more.

Finished:IMG_6679

IMG_6680

IMG_6683

IMG_6684

IMG_6682

It is defenetly not my best work, but at least it does what it is supposed to.

The whole procedure took about two-three hours, but together with lots of over time at work, it unfortanly left me with only one week to start and finish my entry for the next challenge…


Edwardian Corset Cover

When the HSF challenge 5 – Bodice was announced I had no idea on what to make.

But reading about some of the other particapants ideas, gave me one of my own.

I have needed a corset cover for quite some time now – somehow a modern tank top don’t feel quite the same, even though I must say it does do a good job.

So I went searcing for inspiration, finding this in one of my costuming books.IMG_6433Corset Cover ca 1917.

I decided to try to make the one to the left.

And drew a quick pattern sketch.IMG_6441

And scaled it up.IMG_6442

Then I cut the pattern in paper and tried it on my dressform.

IMG_6446IMG_6447

Using a nice cotton voile I cut the pieces.IMG_6450And stiched them togheter.

Putting it once more on the dressform, I tought it looked rather big.

IMG_6459IMG_6460

So I decided to take out about 8 cm in each side, thous making it more figure hugging.

IMG_6462IMG_6464

The next thing needed to be decided was what kind of trim I wanted.

IMG_6425IMG_6423

Deciding on a couple of rows of the narrow trim, I pinned and stiched it on.IMG_6498Backside view.

Then I sewed the buttonholes and stiched on the buttons.IMG_6500

IMG_6497On the floor.

Finished:IMG_6476

IMG_6478

IMG_6482

IMG_6483

IMG_6480

IMG_6489

IMG_6485

IMG_6486

IMG_6487

IMG_6477

Just the facts:

Challenge: 5 – Bodice

What: A 1910s Corset Cover.

Pattern: Drafted my own.

Fabric: 0,5 m of cotton voile.

Notions: Thread, 8 buttons and 4 m of narrow lace,

Historical accurate: So so. The lace is polyester and the buttons are plastic, but the fabric is accurate. And I think it is to slim to really look accuarate. 5/10

Cost: Les then 100Sek (16 Usd)

Time: Way to long. About 8 hours.

First worn: I only tried it on so far, but hopefully I get a chanse to wear it at a Suffraget lunch in may.

Final thoughts: I regret taking in so much of the widht in the sides. The cover is very tight on me as it is, and I would have liked it to have a bit more space and drape at the front. I’t does look pretty though.

1900s S-shaped Underwear

The item for challenge 4 of the HSF14 was quite simle to decide – Looking at my intended “sewing list” where a 1900s evening gown is the next big thing, I of course needed the proper undergarmnents.

Since this is a new era for me (I’ve done 1980s and 1910s, but they are not at all the same) I needed to start from the bottom. So a corset it is.

Looking through the internet for inspiration I really liked this one. 72867cfdcae740e03be80aca71d75b95

And amongst my patterns I found the 1901s corset from Nora Waughs “Corset and Crinolines”. 1901 waugh

My original thought was to make the corset in ivory cotton sateen, but when searching my stash I discovered it was all gone (I’ve already used it all on a couple of other corsets). And the only other strong ivory colored fabric I had was a rough unbleached cottonblend. So on to the fabric store I went, finding this nice striped cotton upholstery fabric instead. IMG_6291

I had wished to make this a quick and dirty stash busting prject, but found I already had had to many of those lately – thous leaving my stash of notions almost empty (sigh). So I also needed to buy gromets, lacing cord, suspender grips and plastic boning (the planchett and decorational lace thankfully already in stash). IMG_6324

I originaly started this project 9 months ago till the HSF13 “White” challenge – before I realised I had other more pressing costuming needs.

So the pattern and the toile was already prepeared. And since I had absolutly no idea of the measurments I used making the mock-up, I just tried it on.  

IMG_6231 IMG_6233

IMG_6242 IMG_6244

And as could be expected, it didn’t fit at all.

So I took out a total of about 10cm on the size, and added some lenght to make the front bottom smother. The rest of the fitting isues will be corrected once made up in a sturdier fabric and properly boned (I hope).

After the adjusments had been done, I cut the fabric, linning and interlining. Using as litle fabric as I posibly could. IMG_6289

IMG_6281

Then I started to sew it togehter, begining with the narrow side pieces. IMG_6297

And continuing on to the busk…IMG_6304

…and the gromets… IMG_6306

Realising to late I’ve put the gromets to far appart.IMG_6310I tried to fix it by putting some extra gromets at the waist (as in 1880s corsets).

Then I sewed the pieces together and made the boning chanels, using self made bias tape, and sewed them on. IMG_6327

When all the boning was inserted I sewed and trimmed down the top and bottom of the corset, prepeared it for the biastape.IMG_6332

Then I stiched on the pretty lace (which I picked from my “Lace box“).IMG_6317

Finished:IMG_6405

IMG_6407

IMG_6418

IMG_6417

IMG_6409

IMG_6412

IMG_6415

And being worn:IMG_6359

IMG_6384

IMG_6382

IMG_6377

IMG_6372

IMG_6400

Just the facts:

Challenge: 4 – Under it all.

What: a 1900s S-shaped corset.

Pattern: Nora Whaugh’s 1901s corset from “Corset and Crinolines”.

Fabric: 0,5 of striped cotton upholstery fabric (50Sek), 0,4 m of nougat cotton lawn for lining and 0,5 m ivory cotton satten (used on bed-bolsers) both from stash.

Notions: Thread (stash), 32cm Busk (80Sek), 20 gromets (35Sek), 4m of lacing cord (50 Sek), 2 m of ivory biastape (stash), 5m selfmade biastape for boning chanels (stash), 5m plastic cable ties for boning (30sek), 2m steel boning (stash), 1 m lace (stash), 0,5 m elastics (stash) and 2 suspender-grips (50Sek).

How historical accurate: The fabric and pattern are all good. But the plastic boning and the construction tecninques are modern. so maybe 6/10.

Time: About 12 hours.

Cost: Money spent: 275 Sek (42Usd). Actual cost (including stash worth): about 400 Sek (61Usd).

First worn: For photograps 1 mars. But hopefully on some suffraget events and some summer picknics.

Final Thoughs: I’m pretty happy with it, but I think I will need to add some stuffing at the bum to get a more pronounced S-shape.

Celebrational 1900s Skirt

As the time ran away into the days between christmas and the new year, I needed to whip something up for the final HSF challenge this year, nr 26: Celebrate.

Between the christmas and a up-coming move there was really not much time, so I looked at a few of the others HSF participants prevous projects and decided to make a skirt maching the newly modeled 1900s shirtwaist.

It would be a fairly simple project and it would be celebrating my surviving of the entire HSF13.

I searched my stash for apropate fabric and found a burgundy cotton twill that I bought on sale a couple of years ago.

IMG_4545

It is not the ideal fabric for this type of garmnent, but both time and money was lacking at the moment so it would have to do.

I drafted a pattern using some diagrams from Waughs “Cut of Womens Clothes”.

IMG_4550

I cut and basted the skirt togheter. Then I tried it on and discoverewd the skirt was a bit on the short side, but since it meant to be a walking skirt it will do.

IMG_4546 IMG_4548

The sewed it togehter and made the tucks in the back and side fastening.

The finished skirt.

IMG_4687 IMG_4690

IMG_4693

IMG_4695

While dressing the form and thinking about the perfect way to style the skirt I realised the real celebration it symbilsed: The Suffragets struggel for womens rights.

The skirt togheter with the 1900s Shirtwaist and Suffragete brosh.

IMG_4556 IMG_4559

IMG_4558

And then I dressed up and took a couple of shots in the mirror.IMG_4634

Adding the golden chain to symbolise both the acctual chain the suffragets used during their struggle, and the figuraly chains who even today keeps women from real ecuallity to men.IMG_4641

I’m in love with the symbolism and style of this picture.IMG_4654

Then I manadged to talk my boyfriend into taking some better photos of me in the outfit.IMG_4567

IMG_4581

IMG_4586

IMG_4589

IMG_4600

IMG_4593

IMG_4632

IMG_4611

IMG_4618Lets break those chains!

Just the Facts:

Challenge: nr 26 – Celebrate.

What: A 1900s walking skirt.

Celebrate What: The womens rights movement.

Pattern: None, but I studied some pattern diagram from Whaugs “Cut of Womens Clothes”.

Fabric: 2,5 m of burgundy cotton twill

Notions: Thread, hook and eyes.

How Historical Accurate: So so, the shape and fabric of the skirt are acceptable, but the contruction are modern. So about 5/10

Time: 3 hours.

Cost: 100 Sek (11Usd) fabric from stash, but I did buy it one time.

First Worn: On photoshoot on new year.

Final Thougts: I loved wearing this outfit, and already plan on using it for a up-coming suffraget luncheon.

Re-make a 1900s shirtwaist

A very late entry to the HSF challenge 18: Re-make.

I’ve been so busy with work, moving and life it-self that I totaly forgot I didn’t do the 18th challenge back in aug/sep. But now finaly I’ve manadged to make it.

I found this blouse on a sale two days ago and emedetly feelt it would be perfect as a late 19th century/early 20th century shirtwaist. The model is completly straight (no darts or shaping what so ever), but do have some lovely detalied tucks and lace work.

IMG_4512 IMG_4511

IMG_4516

IMG_4513

IMG_4514

To make it look a bit more historical I needed to make a few changes.

Firstly I needed to give it some shape in the waist era. Sewing the sides and creating a few darts to give it that desired hourglas shape.

Then I needed to lenghten the button clouser n the back – now when the blouse is much tighter you can’t put it on over your head as you could before. Ripping the back seam open and creating a longer buttonhole stand, then sewing the buttonholes and attaching the buttons.

IMG_4531

And as this was a stash project I could only use buttons I already owned, resulting in lots of different buttons.IMG_4529

And lastly I needed to strenghten the neck collor a bit, to keep it standing straght.

As it was a bit to big I started by taking it in. Then I was thinking about putting smal plastic bonning into the created chanels, but with the extra bulk, the collar now manadged to hold itself up. So no bones where needed.

IMG_4530

And that was that, quick and simple. And now it fitt perfectly over a corset.

IMG_4536


IMG_4538


IMG_4540


IMG_4543


IMG_4542


IMG_4534

Just the Facts:

Challenge: nr 18 – Re-Fashion.

What: a 1900s Shirtwaist out of a modern blouse.

Pattern: None

Fabric; A smal stripe of ream coloured cotton for the buttonhole stand.

Notions: Thread and 8 asorted buttons.

How Historical Accurate: Not at all. The look is accepteble and so is the fabric, but the blouse is factory made and reshaped using modern tecniqukes. So about 2/10.

Time: 2 hours.

Cost: 150 Sek (16 Usd) for the blouse, none for notions who have been in my stash for ages.

First worn: Not yet, but hopefully will be when its gets a litle bit warmer.

Final Thoughts: The re-fashioning was quite easy to make, and I guess you can do this to a lots of garmnents.

The blouse does look a bit odd on the dressform though, but it fits me perfectly, and worn with a high waisted skirt I’m sure it will look faboulus.

A 1913s hat

When posting about my To late for Titanic 1913s dress I got quite a few remarks on my hat, and the ladys who went with me to the Titanic exhibithion also admired it and asked where I bought it.

Well, It is a totaly modern and ordinary sun hat from any clothing store.

IMG_0297All that’s needed was a bit of re-styling.

IMG_0296

So I bought some fejk flowers for decoration. And pleated a white ribbon, and sewed it to the hat in order to hide the black stripe on the crown.

And turned the brim up on one side to get those 1910s look.

IMG_0300I only used the orchids, so the rest of the flowers will be left for some other time.

And the hat being worn.

IMG_0640

IMG_0558

IMG_0589

IMG_0582

IMG_0562

IMG_0638

It was only a happy coincident that the violet flowers together with my green and white “Titanic dress” symbolizes the collors of the suffragetts.

Suffragett Metal Brosches

For the HSFs 19 challenge: Metal, wood and bone I decided to make yet another simple piece.

I’ve been in need of some Suffragett symbols and ribbons, to wear to an upcoming event.

So I searched the internet and fell in love with these beautiful suffragett brosches. images

Portrait_Badge_of_Emmeline_Pankhurst_-_c1909_-_Museum_of_London

So I bought three frames from the local craft store. 2013-09-23 22.05.35

I also got some ribbon (violet, green, yellow, white and lace) and started to tie rosettes.

Once by my computer I searched and found some fascinating Swedish women who fought for the rights of women in the beginning of the century.

442px-Signe_Bergman

carlberg2

Rösträttsvykort. Anna Wicksell

I printed and glued the pictures into the frames, and then sewed the ribbons to the frames. So simple.2013-09-23 22.47.33

2013-09-23 22.46.28

2013-09-23 22.46.01

I think they look lovely, although I do not know if this was something who actually was being worn by the women’s rights movements at the time, or a more recent invention.

Just the facts:

Challenge: 19 Wood, metal and bone

Year: 1900-1920s

What: Womens rights brosches

Fabric: None

Notions: metal frames, ribbons, glue, hot glue, paper, thread.

Historical accuracy: I have no idea, but ribbons in violet, white and green/yellow was the symbol of the movement.

Time: 1 hour

Cost: 100Sek (11 USD)

First worn: Not yet, but will be on the 5 okt for a Suffragett brunch.

Eastern Influences in 1914

I had some difficulties figuring out what to make for the HSF Challenge 14 – Eastern Influences. I didn’t want to start a too big project, being so busy with the Titanic dresses at this time.

After much hesitation and changing my mind I finally decided to use the 1,5 m of light pistage-colored organdy already waiting in the stash. It is covered in a geometrical pattern in the shape of 4cm big grecian keys. So perfect for the challenge. But I’m not much of a print person, and feared that the geometrical pattern would be too obvious, too silly or just simply destroy whatever I made from it.

IMG_0302

Ok, fears aside – what exactly was I going to make with it (that wouldn’t look costumy or silly)?

I had not enough fabric for a regency-dress, and the fabric was not suitable for anything heavy like a round skirt or a stiff bodice. What to do?

The answer fell on me when searching the internet for inspiration for another project.

1912

A Titanic era evening-gown. It seemed perfect, and already being totally emgrossed by the early 20th century I didn’t hesitate.

I quickly made some sketches and played around a bit with the fabric on my dressform to get the basic shapes and cuts figured out.

Then I started drafting the pattern. I wanted a cross-over bodice with a short kimono-sleeve attached to a draped skirt. The bodice was a bit tricky and I decided to try the paper pattern on my dressform before cutting a toile. That impuls saved me making a useless mock-up.

IMG_0266IMG_0267

I tried but could not get the pattern and the dressform to co-operate, so I scratched the paper pattern and instead draped a bodice on the form. So much better.

IMG_0261IMG_0260

I then did the mock-up, tried it on and pinned all the necessary alterations. (It is not easy trying and fitting a back-closed mock-up by your self).

IMG_0284Ignore the huge seam allowance.

Since the organdy is so sheer I needed to make some foundation underneat – both for modesty and to get the right support and shape. I used the the same white skirt as for my late Titanic dress, and drafted a strapless dress-bodice to attach the organdy-bodice on.

Then it was time to cut the fabric. I sewed the foundation bodice and tried it on, then I stitched the organdy and draped the skirt on the dressform.

Everything went together fine and I just needed to make some minor alterations on the waist and shoulders. I tried the dress on and really liked it, but felt like something was missing.

IMG_0311IMG_0314

IMG_0316

I rummaged around a bit for a suitable waist-sash, but neither white nor pistage seemed right. Then I found the vine colored sash for my sisters Titanic-rose dress, and it was perfect. So I used whatever leftovers I had and made another dark red sash.

The finished dress.

IMG_0695IMG_0687

IMG_0684

IMG_0690Detail of sash and drape.

And the dress being worn.

IMG_0413

IMG_0416

IMG_0447

IMG_0450

IMG_0453

IMG_0469

IMG_0479

IMG_0485

IMG_0489

IMG_0498

IMG_0501

IMG_0522Photo: Maria Petersson

Just the facts:

Challenge 14: Eastern Influences.

What: A 1912 evening dress.

Pattern: None, I draped my own.

Fabric: 1,5 m polyester organdy, 0,3 m white cotton voile and 0,5 m white cotton sheets for lining and interlining the bodice. And 0,2 m vine colored viscose for the sash.

Notions: Thread, plastic boning, hooks and eyes and snaps.

Historical accuracy: There are way too much polyester in it to be any good. But I think the look and the overall feel of the dress is right. And according to Arnold they did use foundation-bodices beneath sheer and slippery fabrics. Maybe 6/10.

Time: 15 hours (made it in a two days speedrush).

Cost: 100 SEK (11 Euro).

First worn: On the photoshoot July 5.

Titanic – A Jurney to the past.

This weekend it was finally time for my 19th century group to visit the big “Titanic Exhibition“. I’ve been pending between super stressed and super excited these past weeks, working non stop with finishing and perfecting the dresses for me and my sister to wear.

And I made it. Everything was ready in time. Although blisters on my feet did stop me from wearing my new Gibson shoes (stupid, stupid, stupid me, wearing bright new high heels the day before a big event). I will never do that mistake again.

I really enjoyed meeting some of the members from our costume group, and looking at (and envying) everyones beautiful dresses. The weather was sunny – in fact it was too sunny. We were all toasting in our corsets and petticoats.

The Exhibition was wonderful and we had such a lovely time walkig around, looking at and listening to the fascinating stories of the real people who lived and died when the Titanic sunk.

We were not allowed to take any photos inside the exhibition, so instead I will show you some which I found online.

barcelona-titanic-the-exhibition

imagesCAN4VKIJTicket please. welcome aboard.

g_vigoenfotos_3047kUnfortunately we did not get the chance to walk down the big stairway, but had to settle for just looking at a painting of it. Even though the picture was beautifully made.

first-class-hallway-the-henry-ford-titanic-the-artifact-exhibitionWe did however walk down the first class corridor to the cabins. That was amazing, you could almost feel the “boat” rock beneath your feet and I did even get the impulse to grab the rail.

Titanic_radiohytten_530090v530x800The settings of the different rooms were really detailed and nicely done. It was in a room such as this the telegraphs sent the distress code CQD and SOS out into he night, continuing all the way until their little booth was flooded.

image_galleryWhat I found most interesting was the cross-section model of Titanic, which let you see all the little rooms and corridors. I could have stayed there for hours looking at the little people walking the deck or having breakfast in their suites.

bg-slider_2Some wood working tools used to make the ship.

2811456_520_292Pictures of families and spauses travelling to the new world.

imagesCABZABXRTrinkets and letters found on the numerous dead bodies.

artifacts-titanic

ImageHandlerThe (tiny) necklace that is said to have inspired James Camerons Movie “Titanic” (1997).

Photograph_of_a_lifeboat_carrying_TITANIC_survivors__The_following_partial_caption_appears_on_the_back_of_the____-_NARA_-_278338Photo of survivors taken from the rescuing ship “Carpathia”.

7165050206_9c2afcb36a_oBut the most moving piece in the exhibition was when you turned a corner and suddenly stood before the names of all those who lost their lifes during the sinking. Men, women and children – all died in the freezing water.

This was a beautiful and well executed exhibition and I think everyone who is the least interested should go visit it. It was much bigger than I would have thought, yet intimate and really let you get close to the objects. The voice in the headphones was interesting and informative yet left room for your own thoughts aswell. It made you really think.

Besides walking the corridors of Titanic in our time typical clothes we also had a meeting and interview with the local paper. We talked about our clothes, the costuming community and everything concerning 19th century from Napoleon to the suffragets.

The news crew was allowed to take some photos of us inside the exhibition.

ImageHandler (4)

ImageHandler (3)By the main stairway.

ImageHandler (5)Walking down the first class corridor.

ImageHandler (2)Looking at a first class apartment.

News article (in swedish)

And then some of my own pictures from that day.

framsidabaksida

13 bildBoarding the Titanic

2Such lovely colors.

4It’s a bird, it’s a plane…

3…It’s Titanic!

7Look at those accessories. Fans, gloves and gorgeus hats.

6I’m  in love with her umbrella. Damn those hobble skirts, or else I would have made a run for it….

9We did get quite the attention, and by-passers stopped to look.

10One more lovely umbrella.

IMG_0667My sisters 15 minute hairstyle (ok, the curling took a bit longer).

IMG_0672Two happy but tired travellers on the train home.

1