
And here comes the photos of me wearing the 1920s dress.


 Photos by: Elin Evaldotter
Category: 20th century
1920s Sparkling Evening Gown (HSM 6/2017)
Since my first planes for the HSM nr 6/2017 fell through, I needed to think of something else to make.
Stuck in the 1920s as I where, I quickly decided to use on of my old fabrics (you know the ones you bough really Loooong ago, when you were “young” and foolishly though everything poly and shiny was pretty). I still think this fabrics pretty, sort of, but now I’m all to aware that sequined polyester lace was not a 1920s thing.
Anyhow I figure if I ever’s gona use it now might be the time.
Unfortunately I only had about 1 m.
Not enough for a dress – how small the 20s fashion ever might be compared to my usual stuff.
Hm, how to get that little amount of fabric to cover the body?
By making really low necklines and short hemes of course.

like the V-necks in this fashion plate or the pattern from “Waughs Cut of Womens clothes”
So I though of the brilliant idea to cut the lace in half almost at the bias to create the triangular pieces that would make up the bodice. only trouble was I forgot to mirror the pieces for the second cut – which of course left me with 4 identical trapezes pieces of fabric (and not 2 left and 2 right which I needed).
Crap!
I had absolutely no fabric left, not even scraps, so I experimented with using the wrong side of the fabric for two of the pieces.
No, that would not work, neither esthetically or functionally, since the sequins would snatch hold on the lining or underdress.
So I decided to try to fix my mistake by also cutting the pieces the correct way. Which ment they would need to be mended back together form the first cut. This resulted in slightly smaller pattern pieces and a mend that would hopefully not be this obvious with selveges cut down and worn over a underdress.
I experimented on my dressform to get the sizing right and cut and stitched as I went along, deciding on a knot for the front to make it easy to adjust and to create some interest in the otherwise simple design. 
 I also found the perfect little dress (on sale) to use as a slip.
 The dress worn open.
The Finished dress:


Just the facts:
Challenge: 2017 nr 6 – Metallics – make something in silver, gold, bronze, and copper, whether it be an actual metal, cloth of gold or silver, or lamé.
What: a 1920s silvery palette party gown
Pattern: None – I just cut and stitched
Fabric & Notions: 1,5m of white/silver palette lace in polyester and sewing thread.
How historical accurate: Not at all. Maybe the silhouette would be passable but it lacks lots of the refinement the dresses of the time possessed. i’ll give it a 3/10.
Time: About 6 hours (most of which I spent scratching my head and cursing, wanting to trash the damn thing).
Cost: About 50 Sek (5 Usd), found the fabric in the clearance bin several years ago.
First worn: Beginning of July for photos.
Final thoughts: I can’t say I’m particular happy about this dress. The dress itself are fine, but the road to make it was only trouble and the fit is strange on me (it requires a smaller figure). But I am glad I pushed through and finished it despite everything, then again I’ll be reminded of it every time i find some more lost sequins in my home (which will probably be for several more years)
A Turqouise 1920s daydress – Photoshoot
And here are some photos of the new dress.


 And here’s where my baby boy comes to see what mommy is doing…


 Photos by: Elin Evaldsdotter
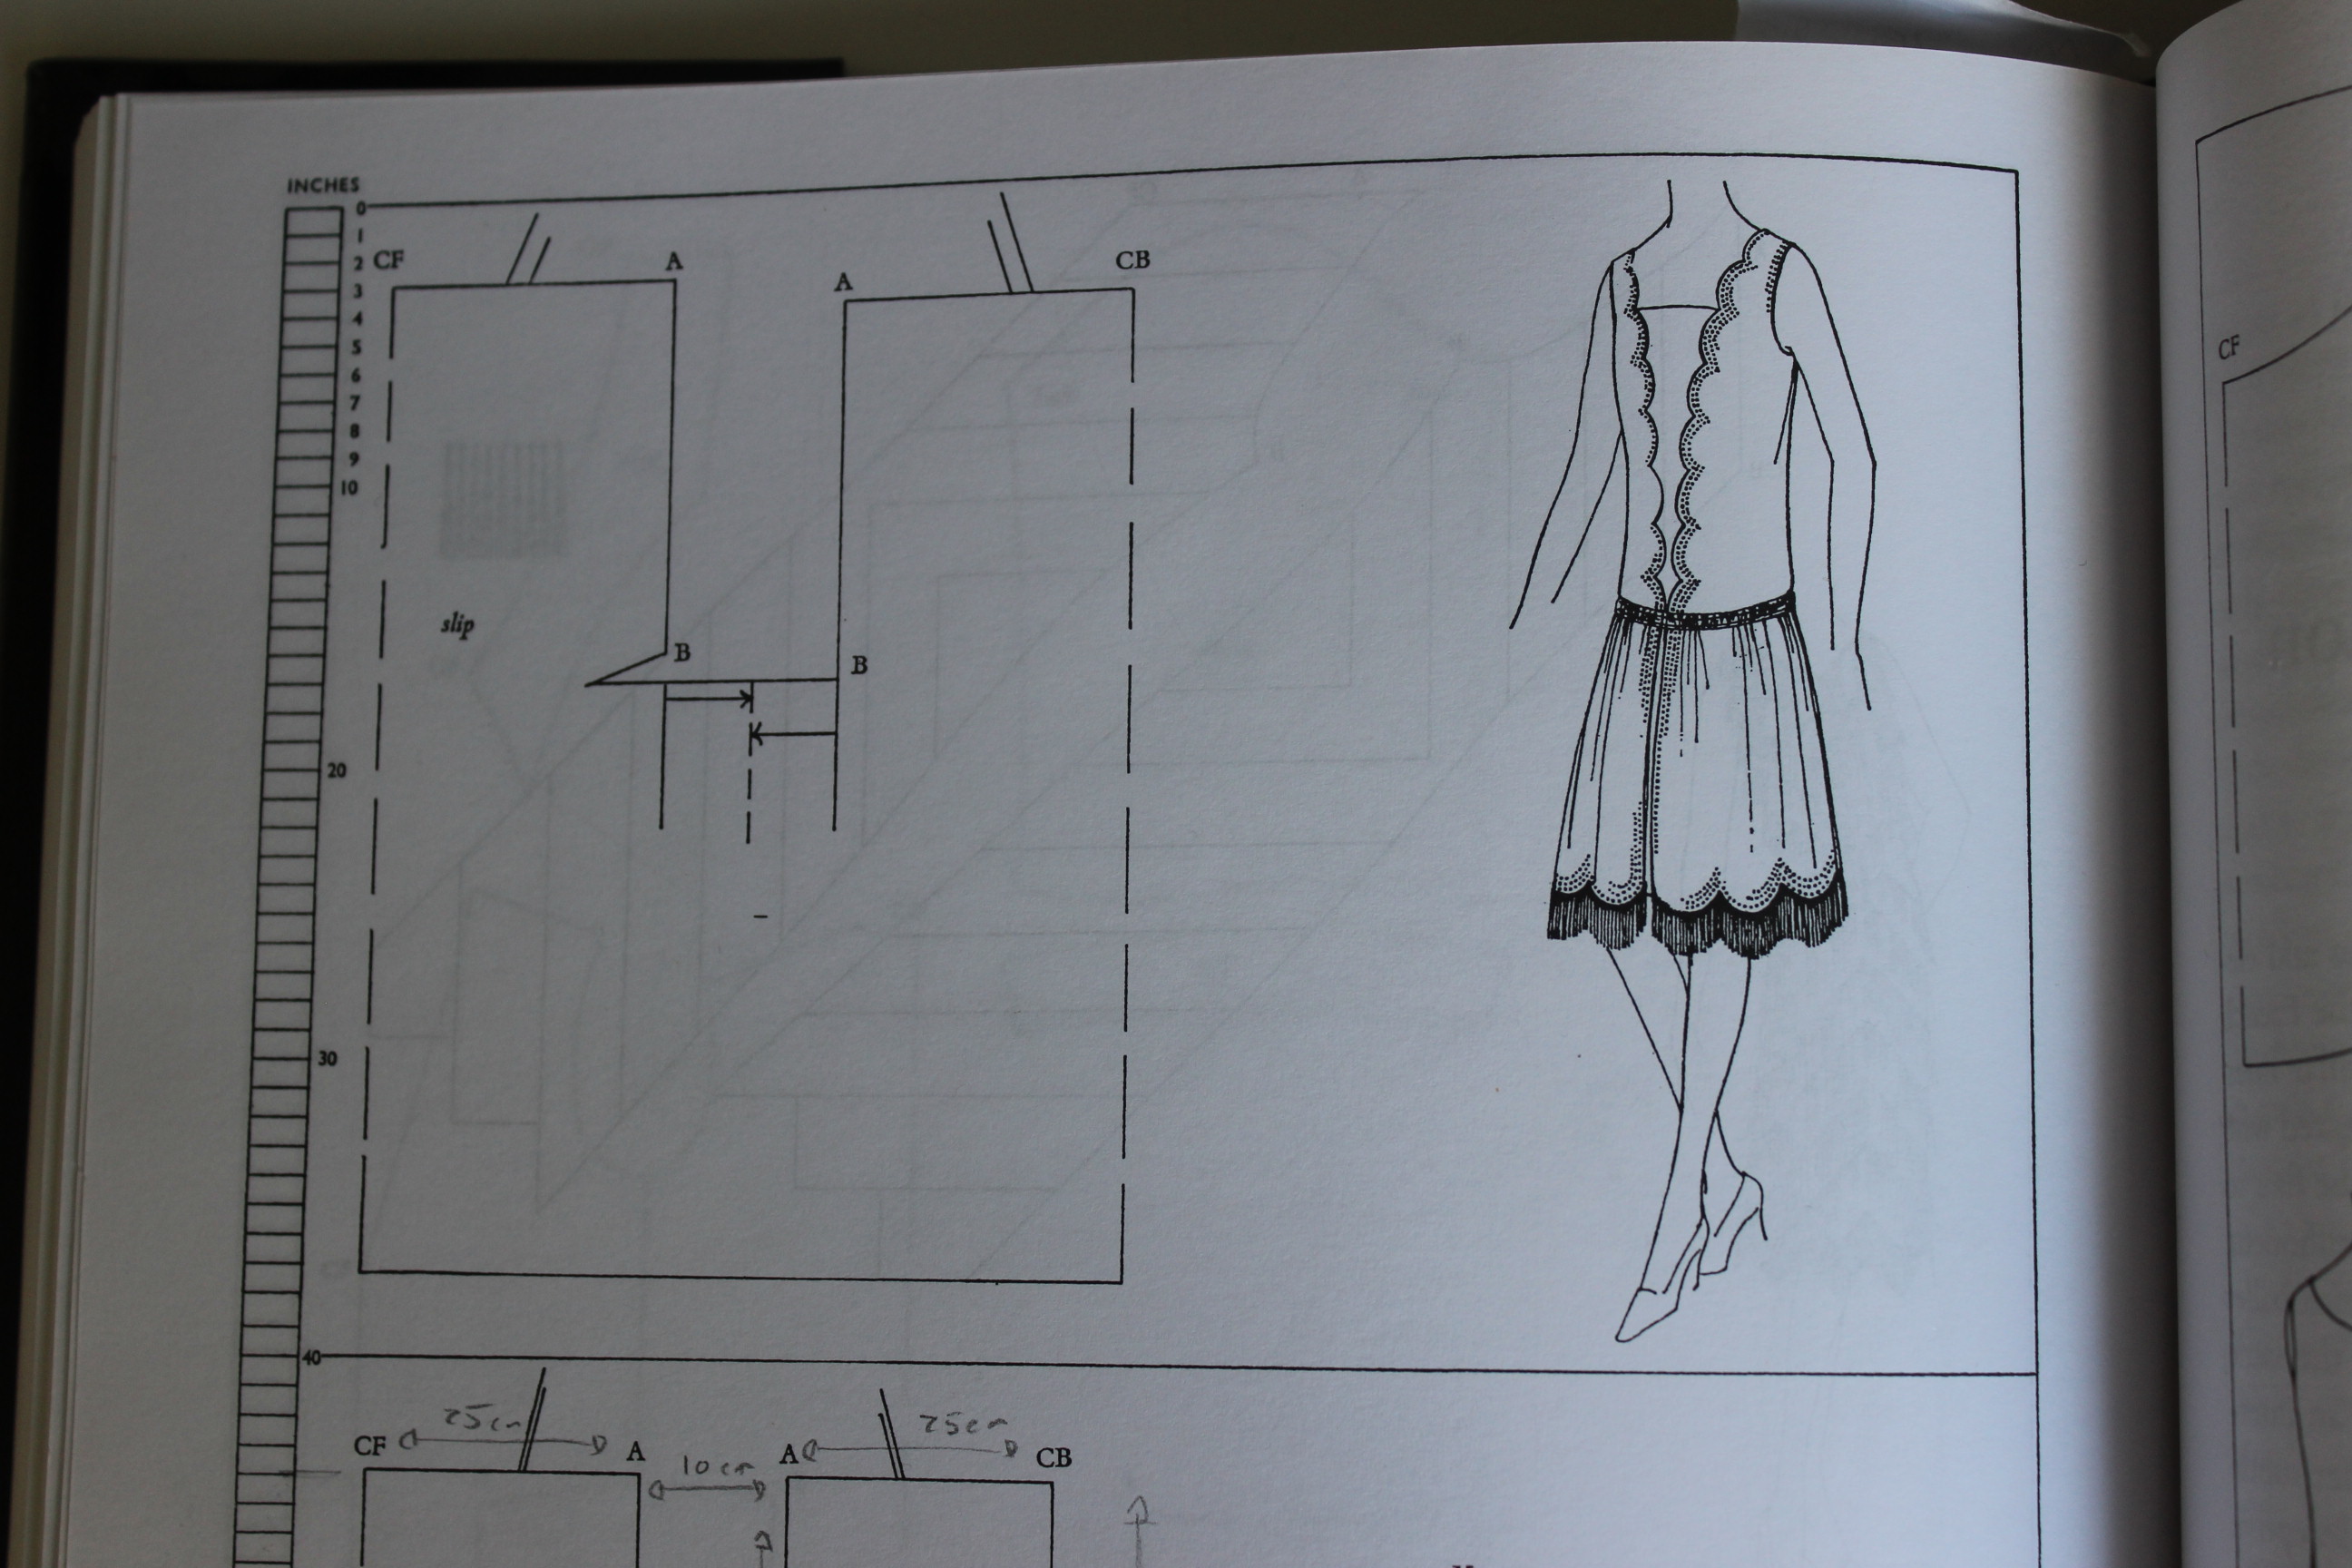
1920s Turquoise 1-hour daydress
For the HSM June challenge – Metallics, I wanted to make something easy and fast, an using fabric from my stash, so I decided to make a 1920s “1-hour dress” from the remnant of the slinky (devilish) Rayon charmouse I used for my Greek dress a few months back. 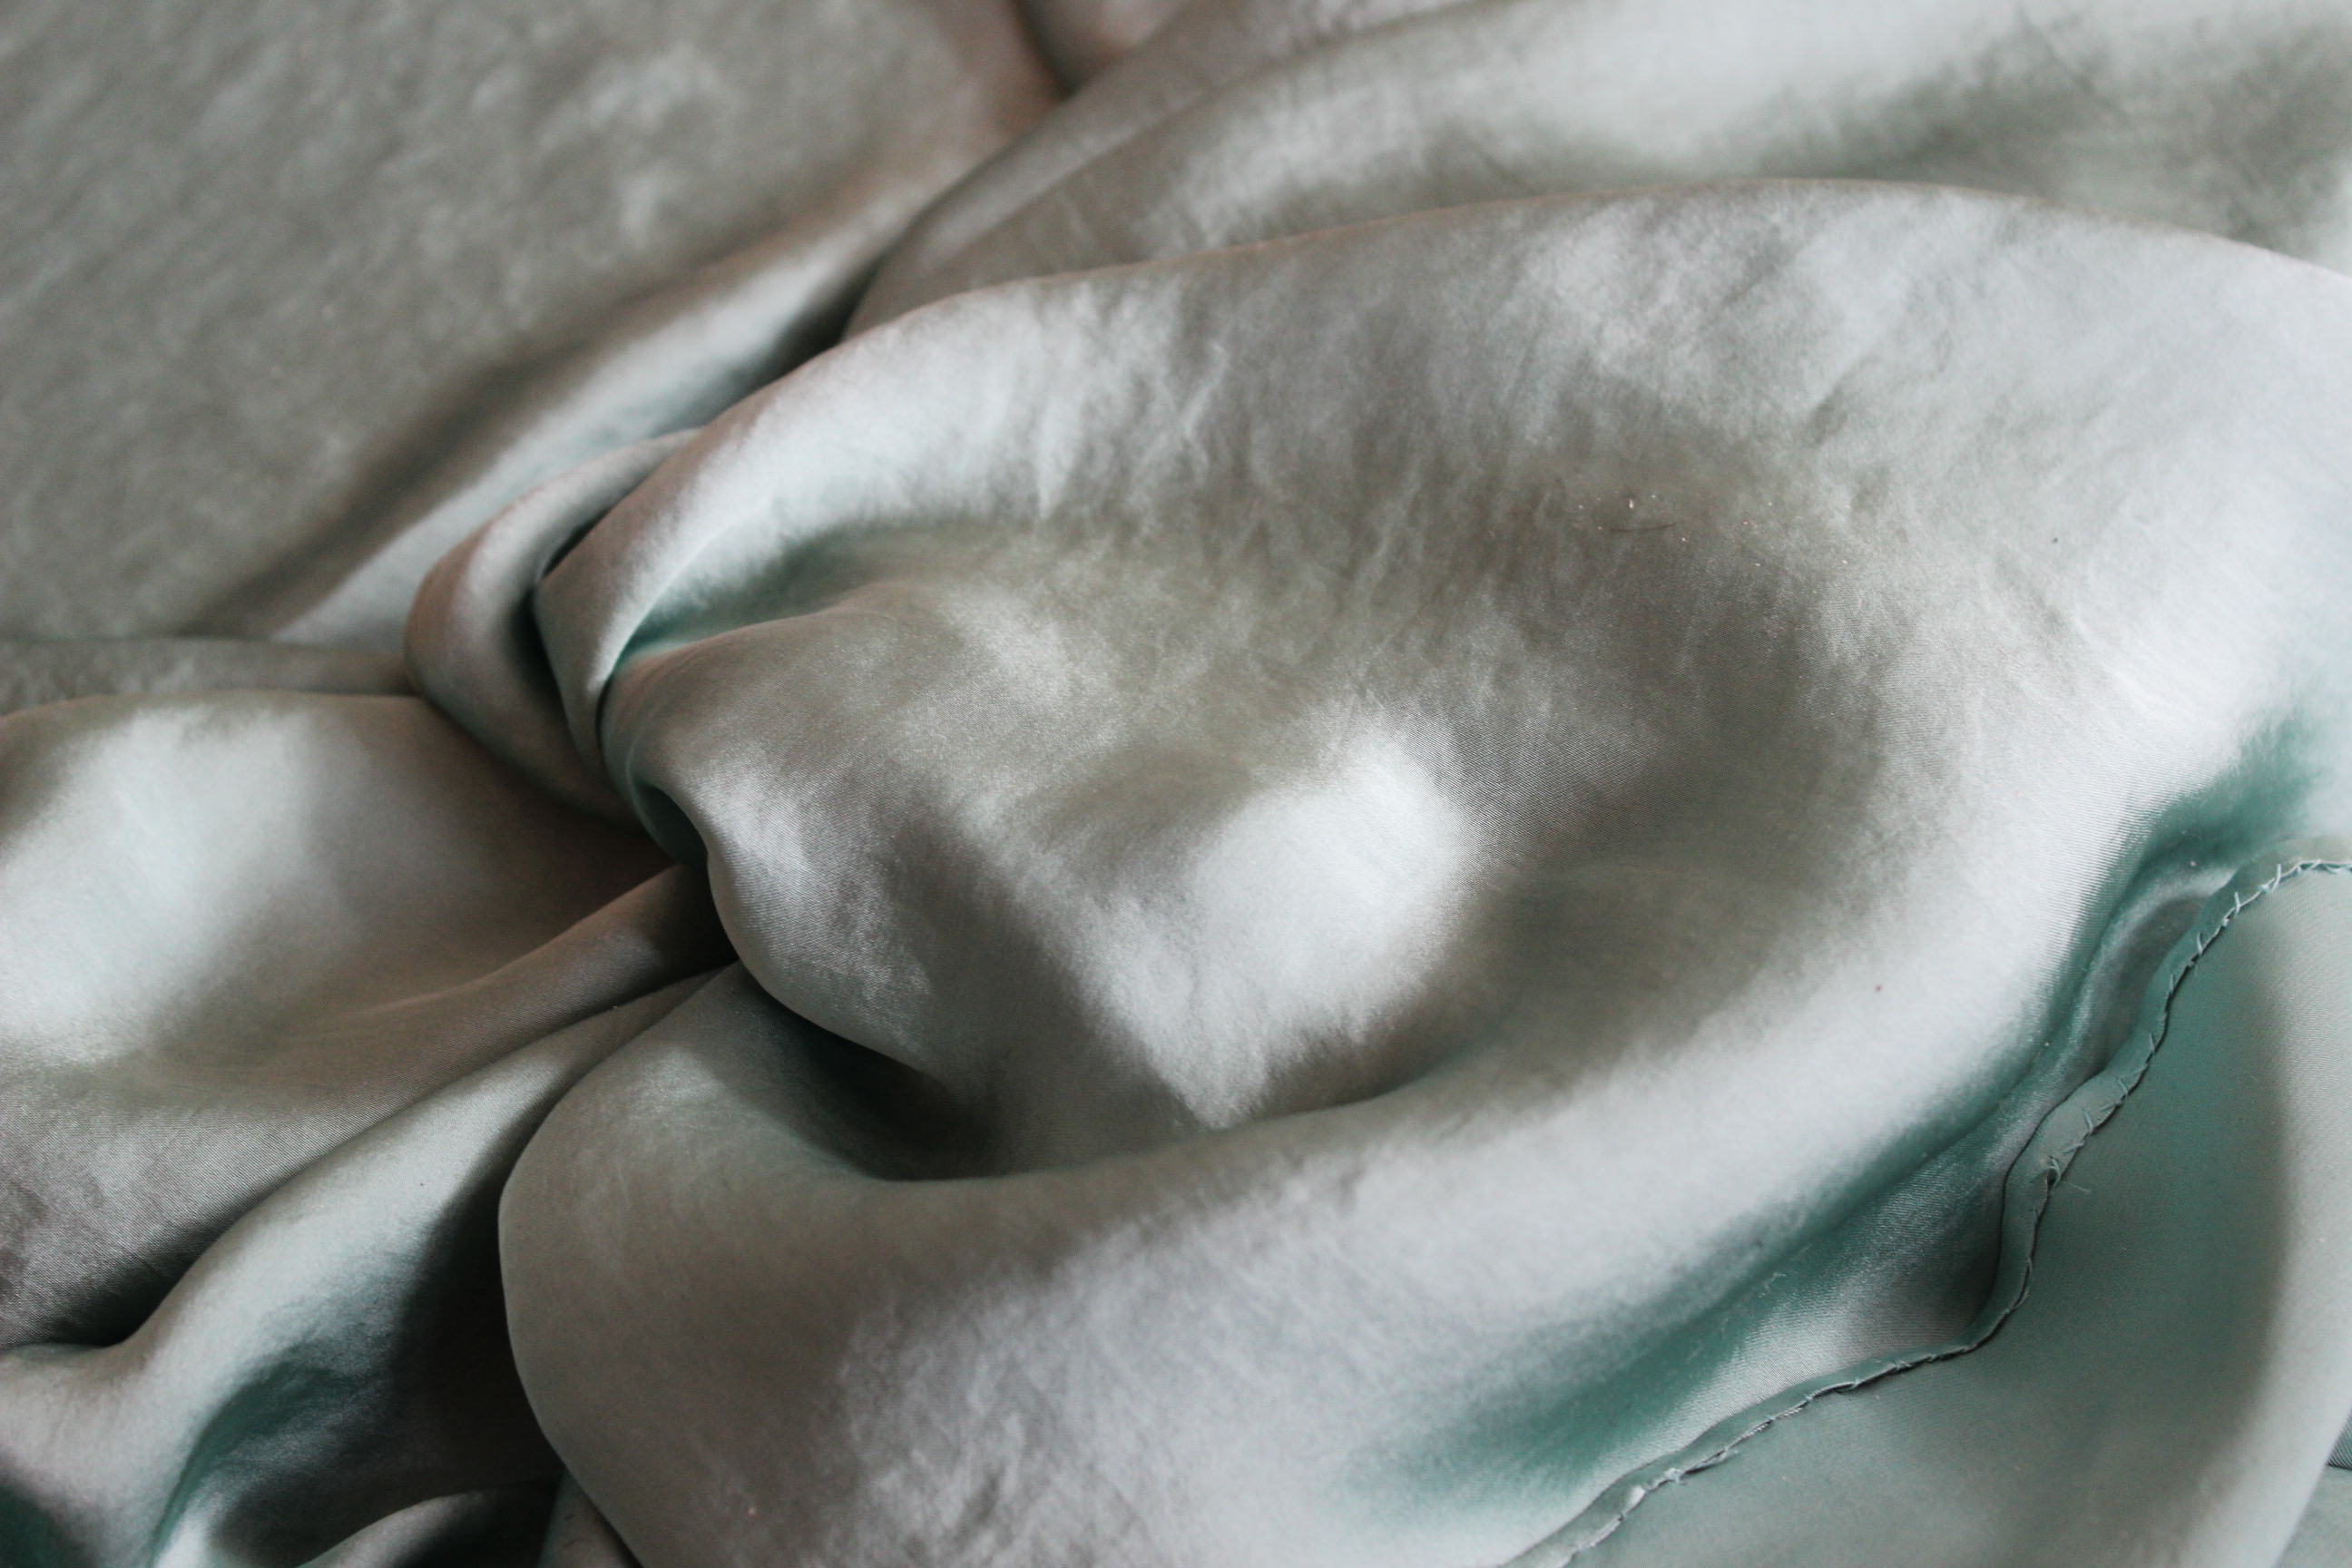
I used the pattern layout guide from “The Closet Historian“, and got cracking.
 The cut fabric
 And the stitched dress (and Yup, I used the serger…)
After stitching the sides together, I put it on the dressform to see the over all look. Looks ok 🙂
Then I hemmed the neckline, sleeves and bottom and made a belt of the remaining fabric scraps.
While debating what to make for the challenge I realized that the word “Metallic’s” didn’t, as I first though, equals “Jewel-tone”, so my Turquoise dress did in fact not qualify for this one.
So I made planes to bling it out with some pretty beads or trimmings, and got as far as buying a nice silvery trim, before I realized I couldn’t find any nice way to attach it.
I tried a lot of different variations and didn’t feel happy with anyone.
 It does look pretty in this picture, but I’m telling you, it didn’t in real life.
So I decided to scrap the whole “bling it out” idea, and just call it a day.
So without further ado here is the (Not HSM worthy entry) finished dress.
The finished dress:


The facts:
What: A 1920s daydress
Pattern: Made my own based on 1-hour dress layouts from the internet.
Fabric & Notions: 1,5 m of turquoise rayon charmouse and thread
Time & Cost: About 6 hours (1 hour my ass…), and 100 Sek (10Usd) for the fabric.
Final thoughts: It is a tad small over my hips but otherwise it turned out better then imagined. The making of took a lot linger then expected though and the fabric was the devil to work with:-(
1950s Turquoise Slim Dress
This dress was originally planed to be one of two options for my friends wedding mid July, but as you might expect – it wasn’t finished by then (so I wore a different dress instead).
(who knew you would get so little time for sewing whit a newborn in your lap…)
 The pattern is an original I won at an online auction about a year ago.
The fabric is 1,5 m of soft Viscose in a lovely turquoise, I had in my stash, from which I barely managed to irk all the pattern pieces from.
Unfortunately I didn’t take any in progress photos, but the construction was really simple – basically a darted slim skirt sewn to a slightly larger/ lose T-shirt bodice. No zipper or clouser, just interfacing to the neckline and bust darts. A quick hemming and it was done (probably took me less then 4 hours, all and all).
Simple as it was, I did however made two pretty classic mistakes.
1. When enlarging the pattern for the bodice I added a bit to much center front/back which made the neckline to wide. It doesn’t show but it feels when worn.
2. I didn’t took the time to go into town to get more interfacing, but used what I had, which of course was way to stiff for the soft fabric, thous making the neckline facings to hard and adding to the weird look/feel of the neckline.
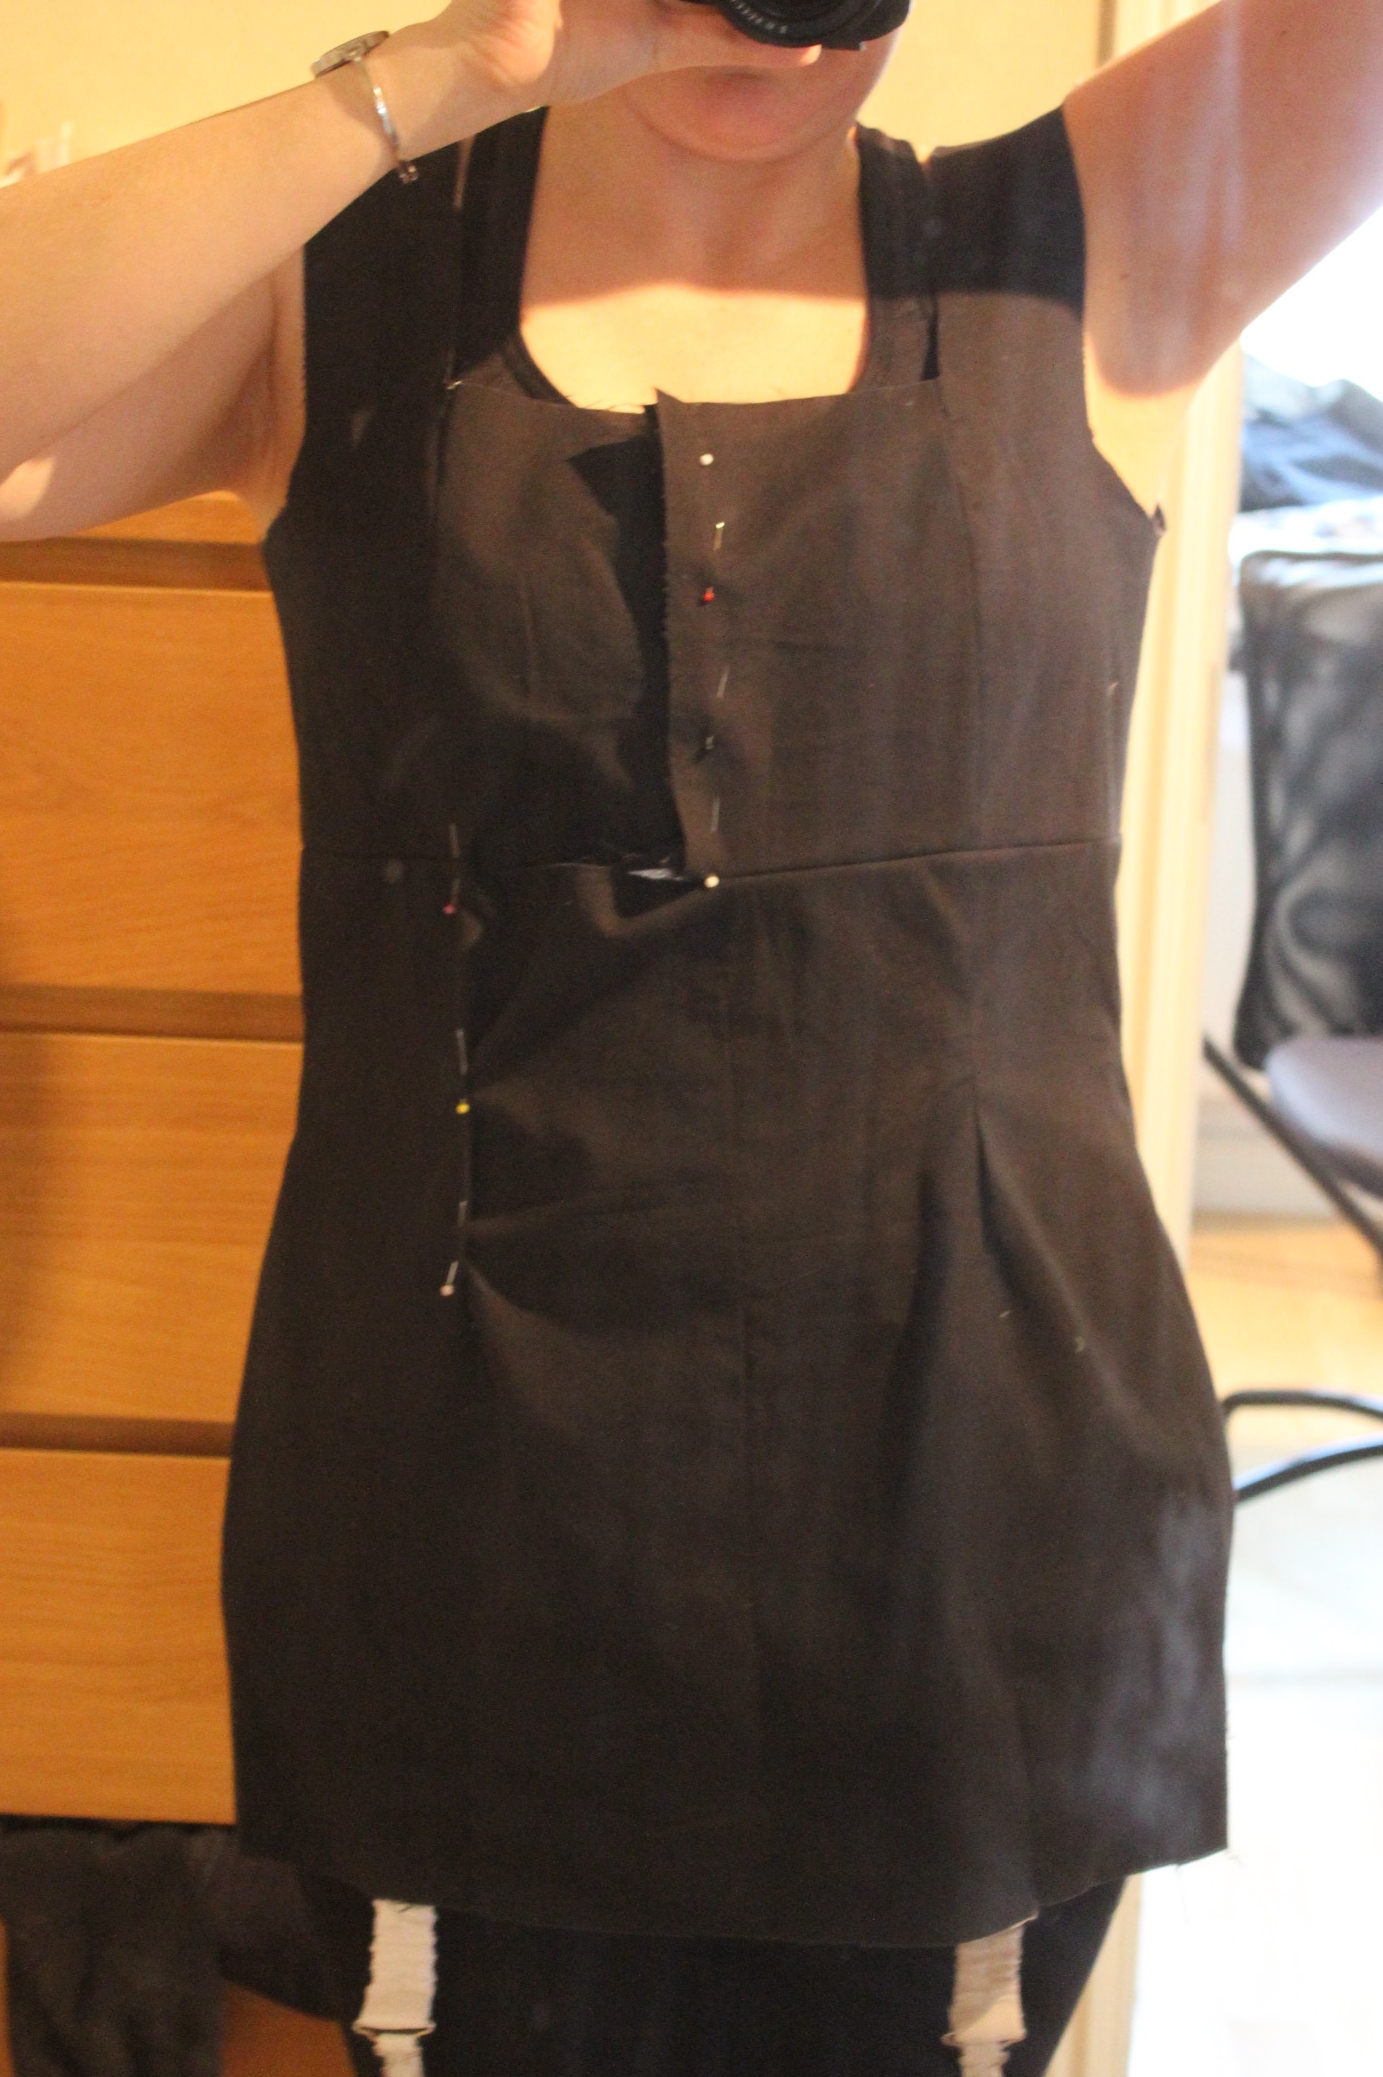
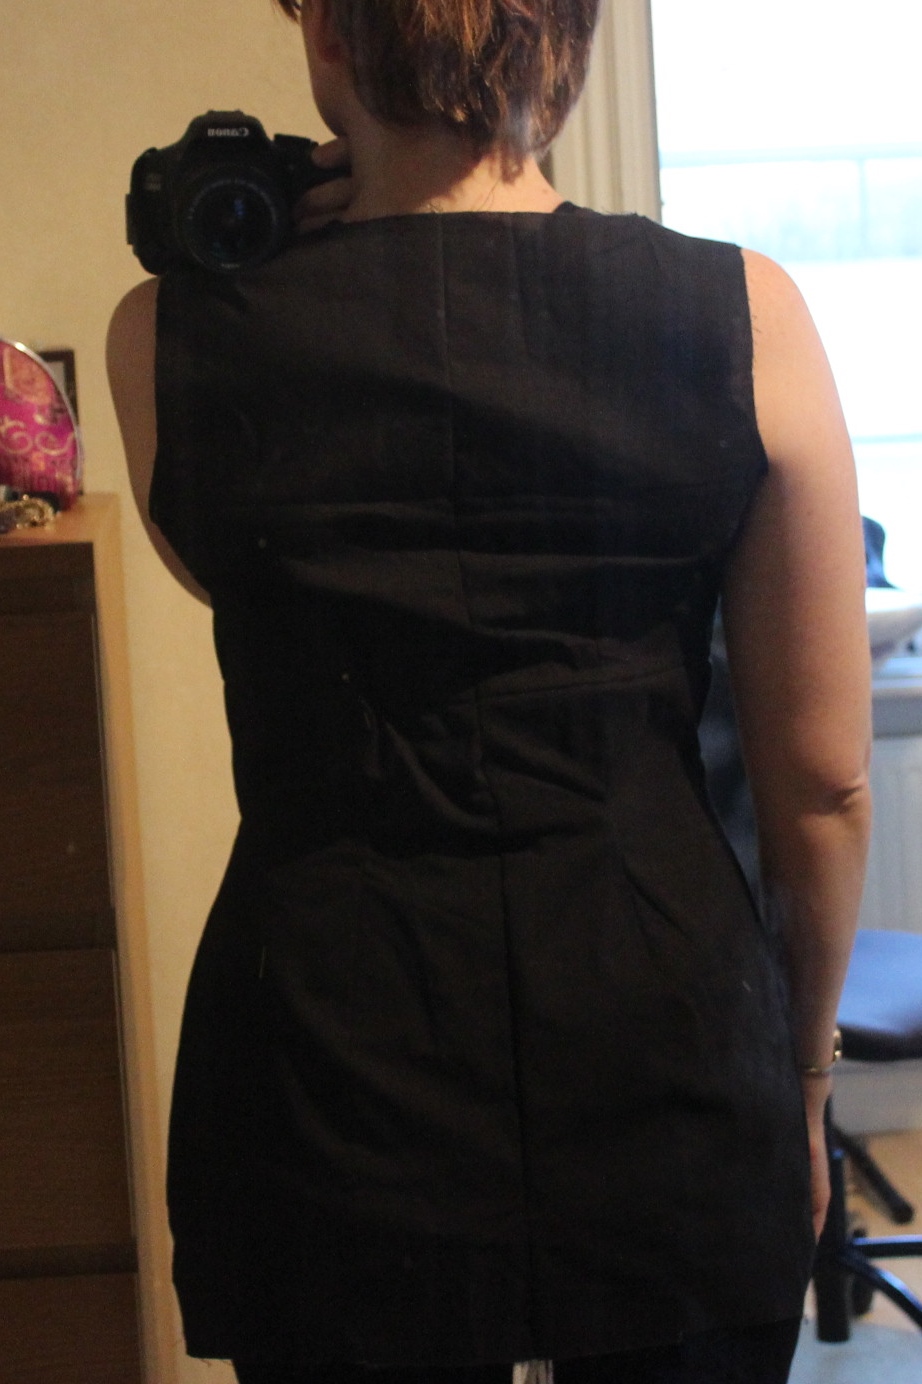
 It does not look like much on the hanger…
The finished dress


The Photoshoot


 Photo by: Maria Petersson
The facts:
What: A 1950s summer dress
Pattern: Simplicity 2963
Fabric & Notions: 1,5 m turquoise viscose, Thread and pieces of interfacing for the neck-facings.
Time & cost: about 100 Sek (16 Usd) and less then 4 hours (although I worked on it in 10 minute portions for 3 weeks, so it’s hard to tell exactly).
Final Thoughts: I do love the idea of this dress, but sadly I’m not a fan o it in real life. The lose bodice make my upper body look huge and the slim skirt only enhances that feeling. On a slimmer person, or at least someone with hm.. les bobbage (Did I mention I’m currently breastfeeding…) it would probably look great. But I don’t think I will ever wear it again.
A Treasured Heirlome
Last months theme on “Historical Sew Monthly” was “Heirloom” (yes, I’m a month behind, but plan to soon be back on track).
Since all my older relatives have past away I struggled a bit with this one, but finally came up with something that would work.
But while I finish things up an get proper photographs of my entry, I thought I’d share one of my favorite Heirlooms from my grandmother.
Her binder from the pattern drafting mail class she took in 1964. 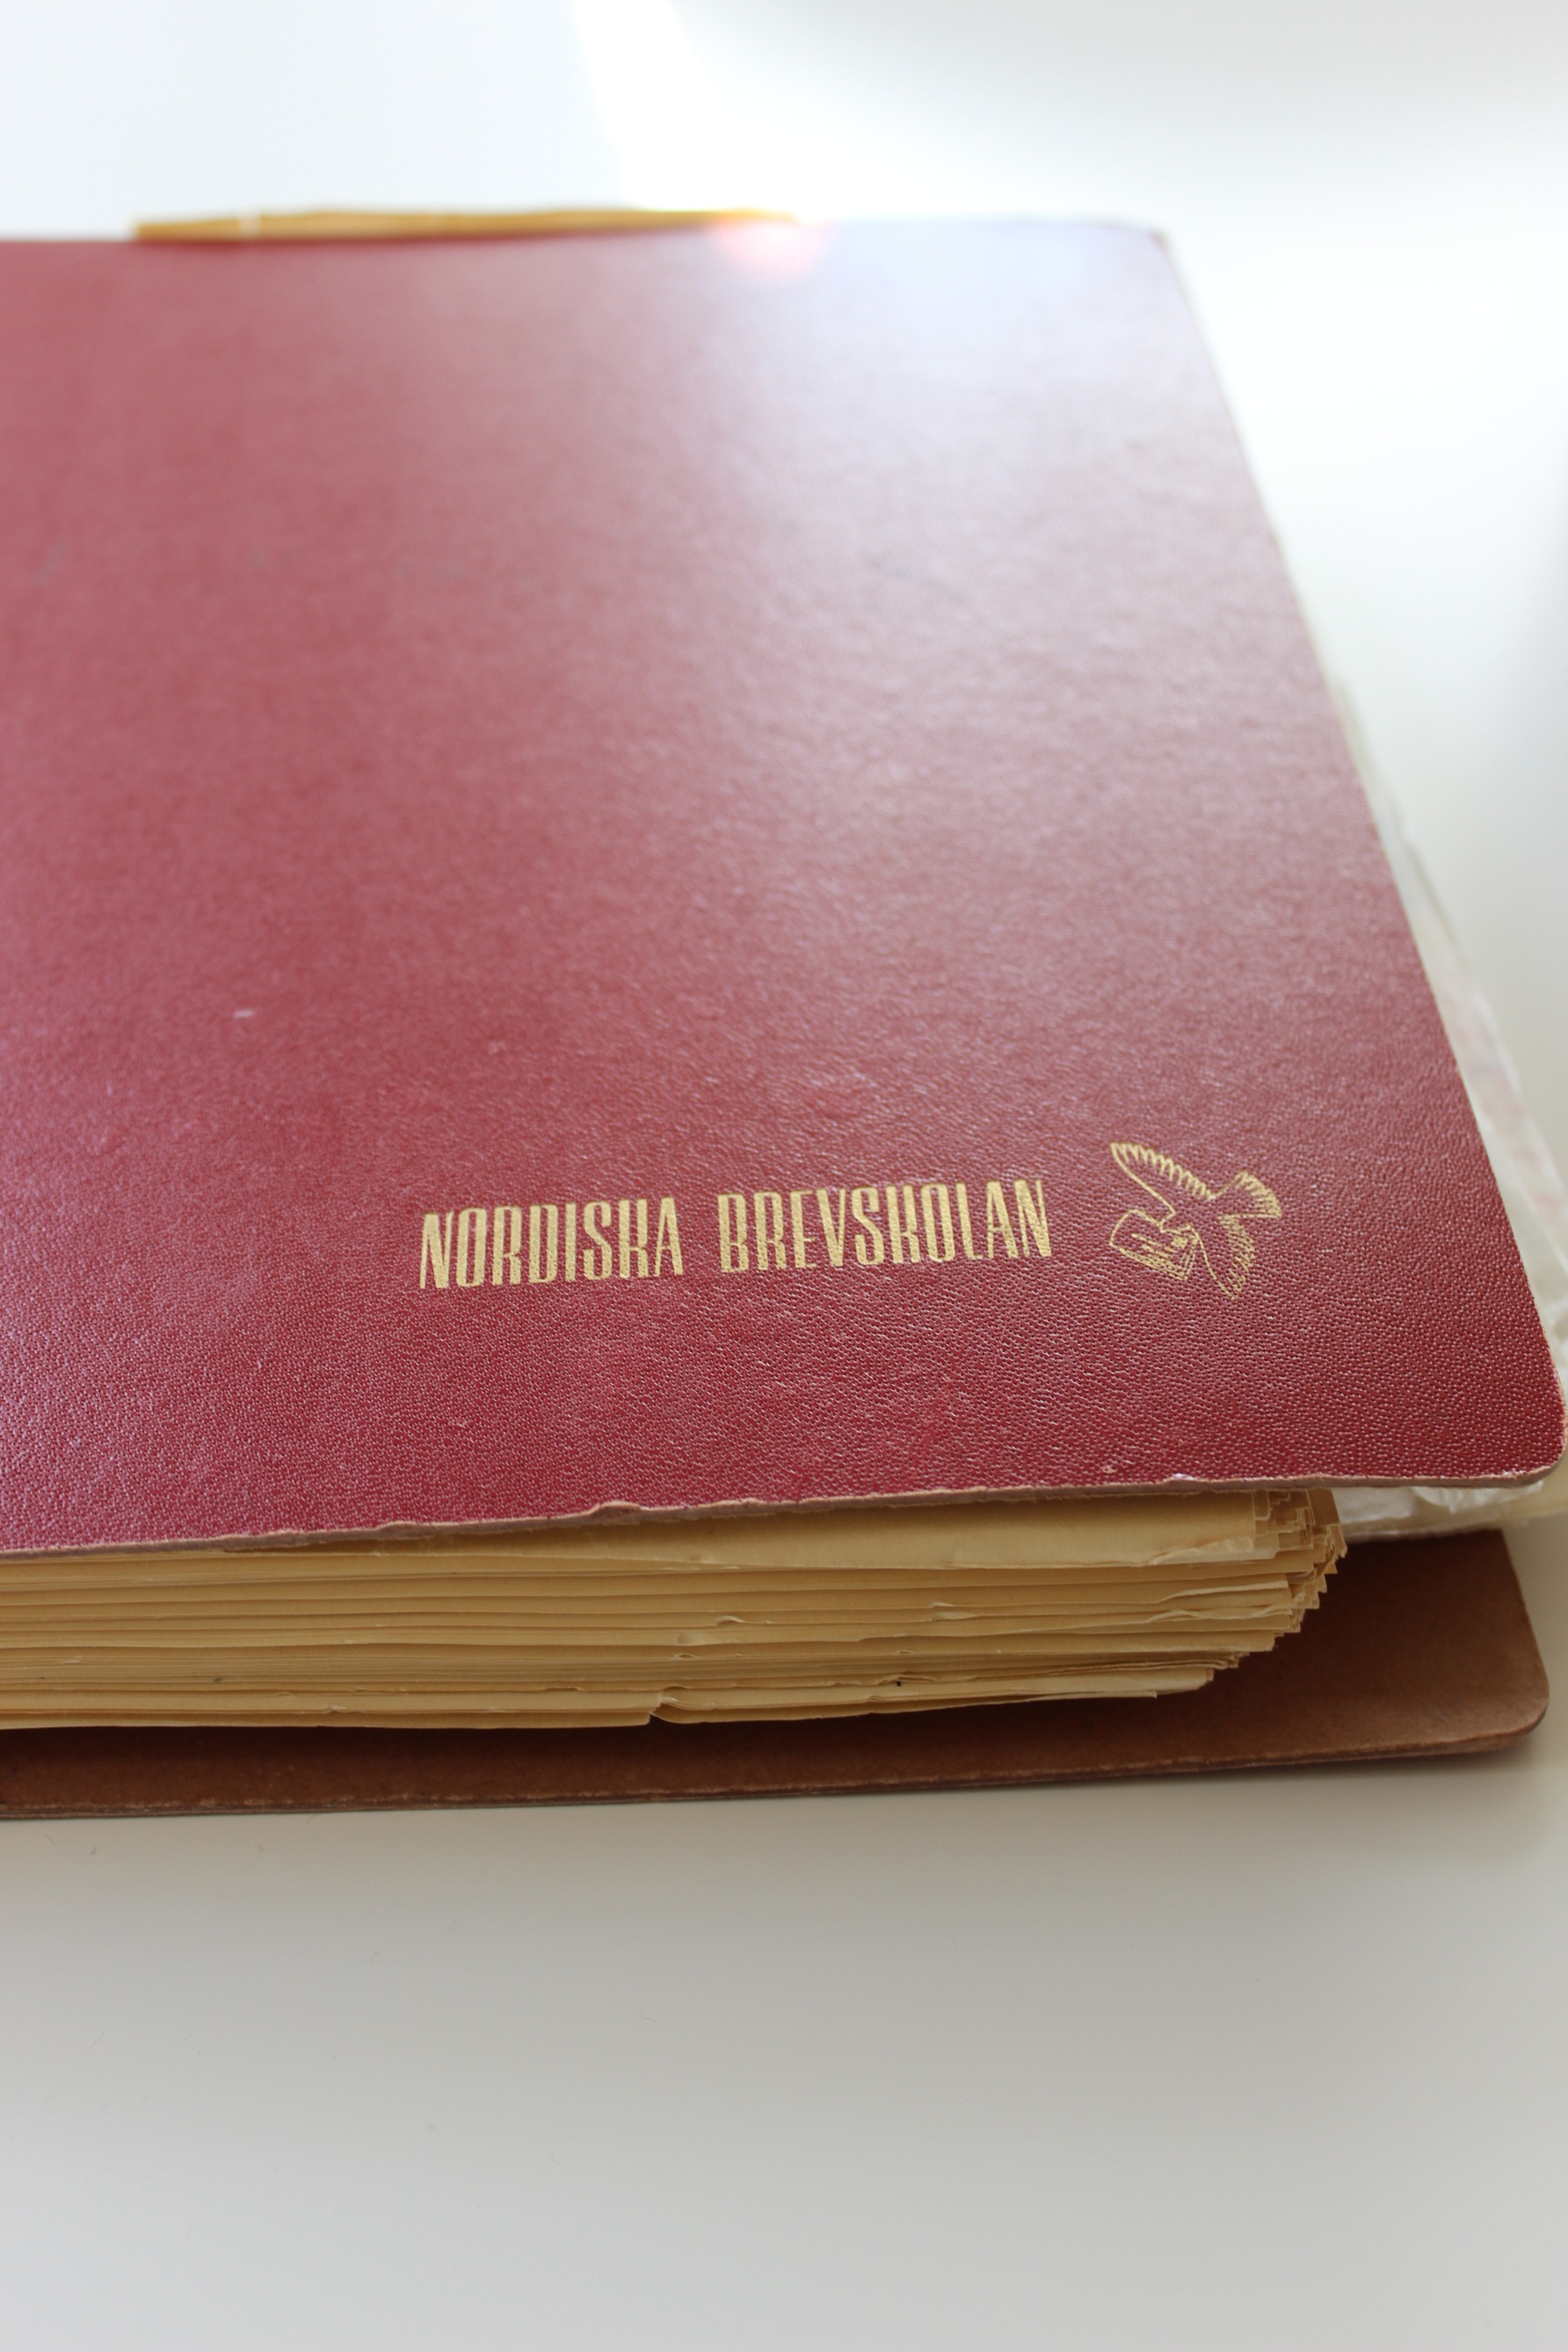 “Nordisk brevskola” (Nordic mail courses”
When I was a kid me and my siblings used to visit my grandparents every weekend.
My grandmother was such a fun person who loved children and was never to occupied to play with us or show us how to pluck starwberries from their gardens.
She suffered from a stroke when I was about 13 years old, and even though she survived she could no longer play with us, or even make us understand her strange sounds, no longer able to produce any words.
I remember how chocked I was about her sudden change, and my uncomfortable feeling of insecurity and when she tried to talk to me.
I’m ashamed to admit I couldn’t handle it and thous almost stopped coming along to wist her.
A few years later she had yet another stroke, lethal this time, and I remember the emptiness and sorrow I felt, regretting not being there more at the end.
After her death I was given her old sewing patterns, some threads and this particular binder – which I hold dear to my heart.
The thought of her taking the pattern drafting course slowly learning by finishing one homework/test at the time, is just wonderful.
Since I also know she loved to sew little dresses for me and my sisters – which unfortunately all have now gone to charity.
Anyhow, to late in date for the HSM but a nice piece of Swedish dressmaking history all the same.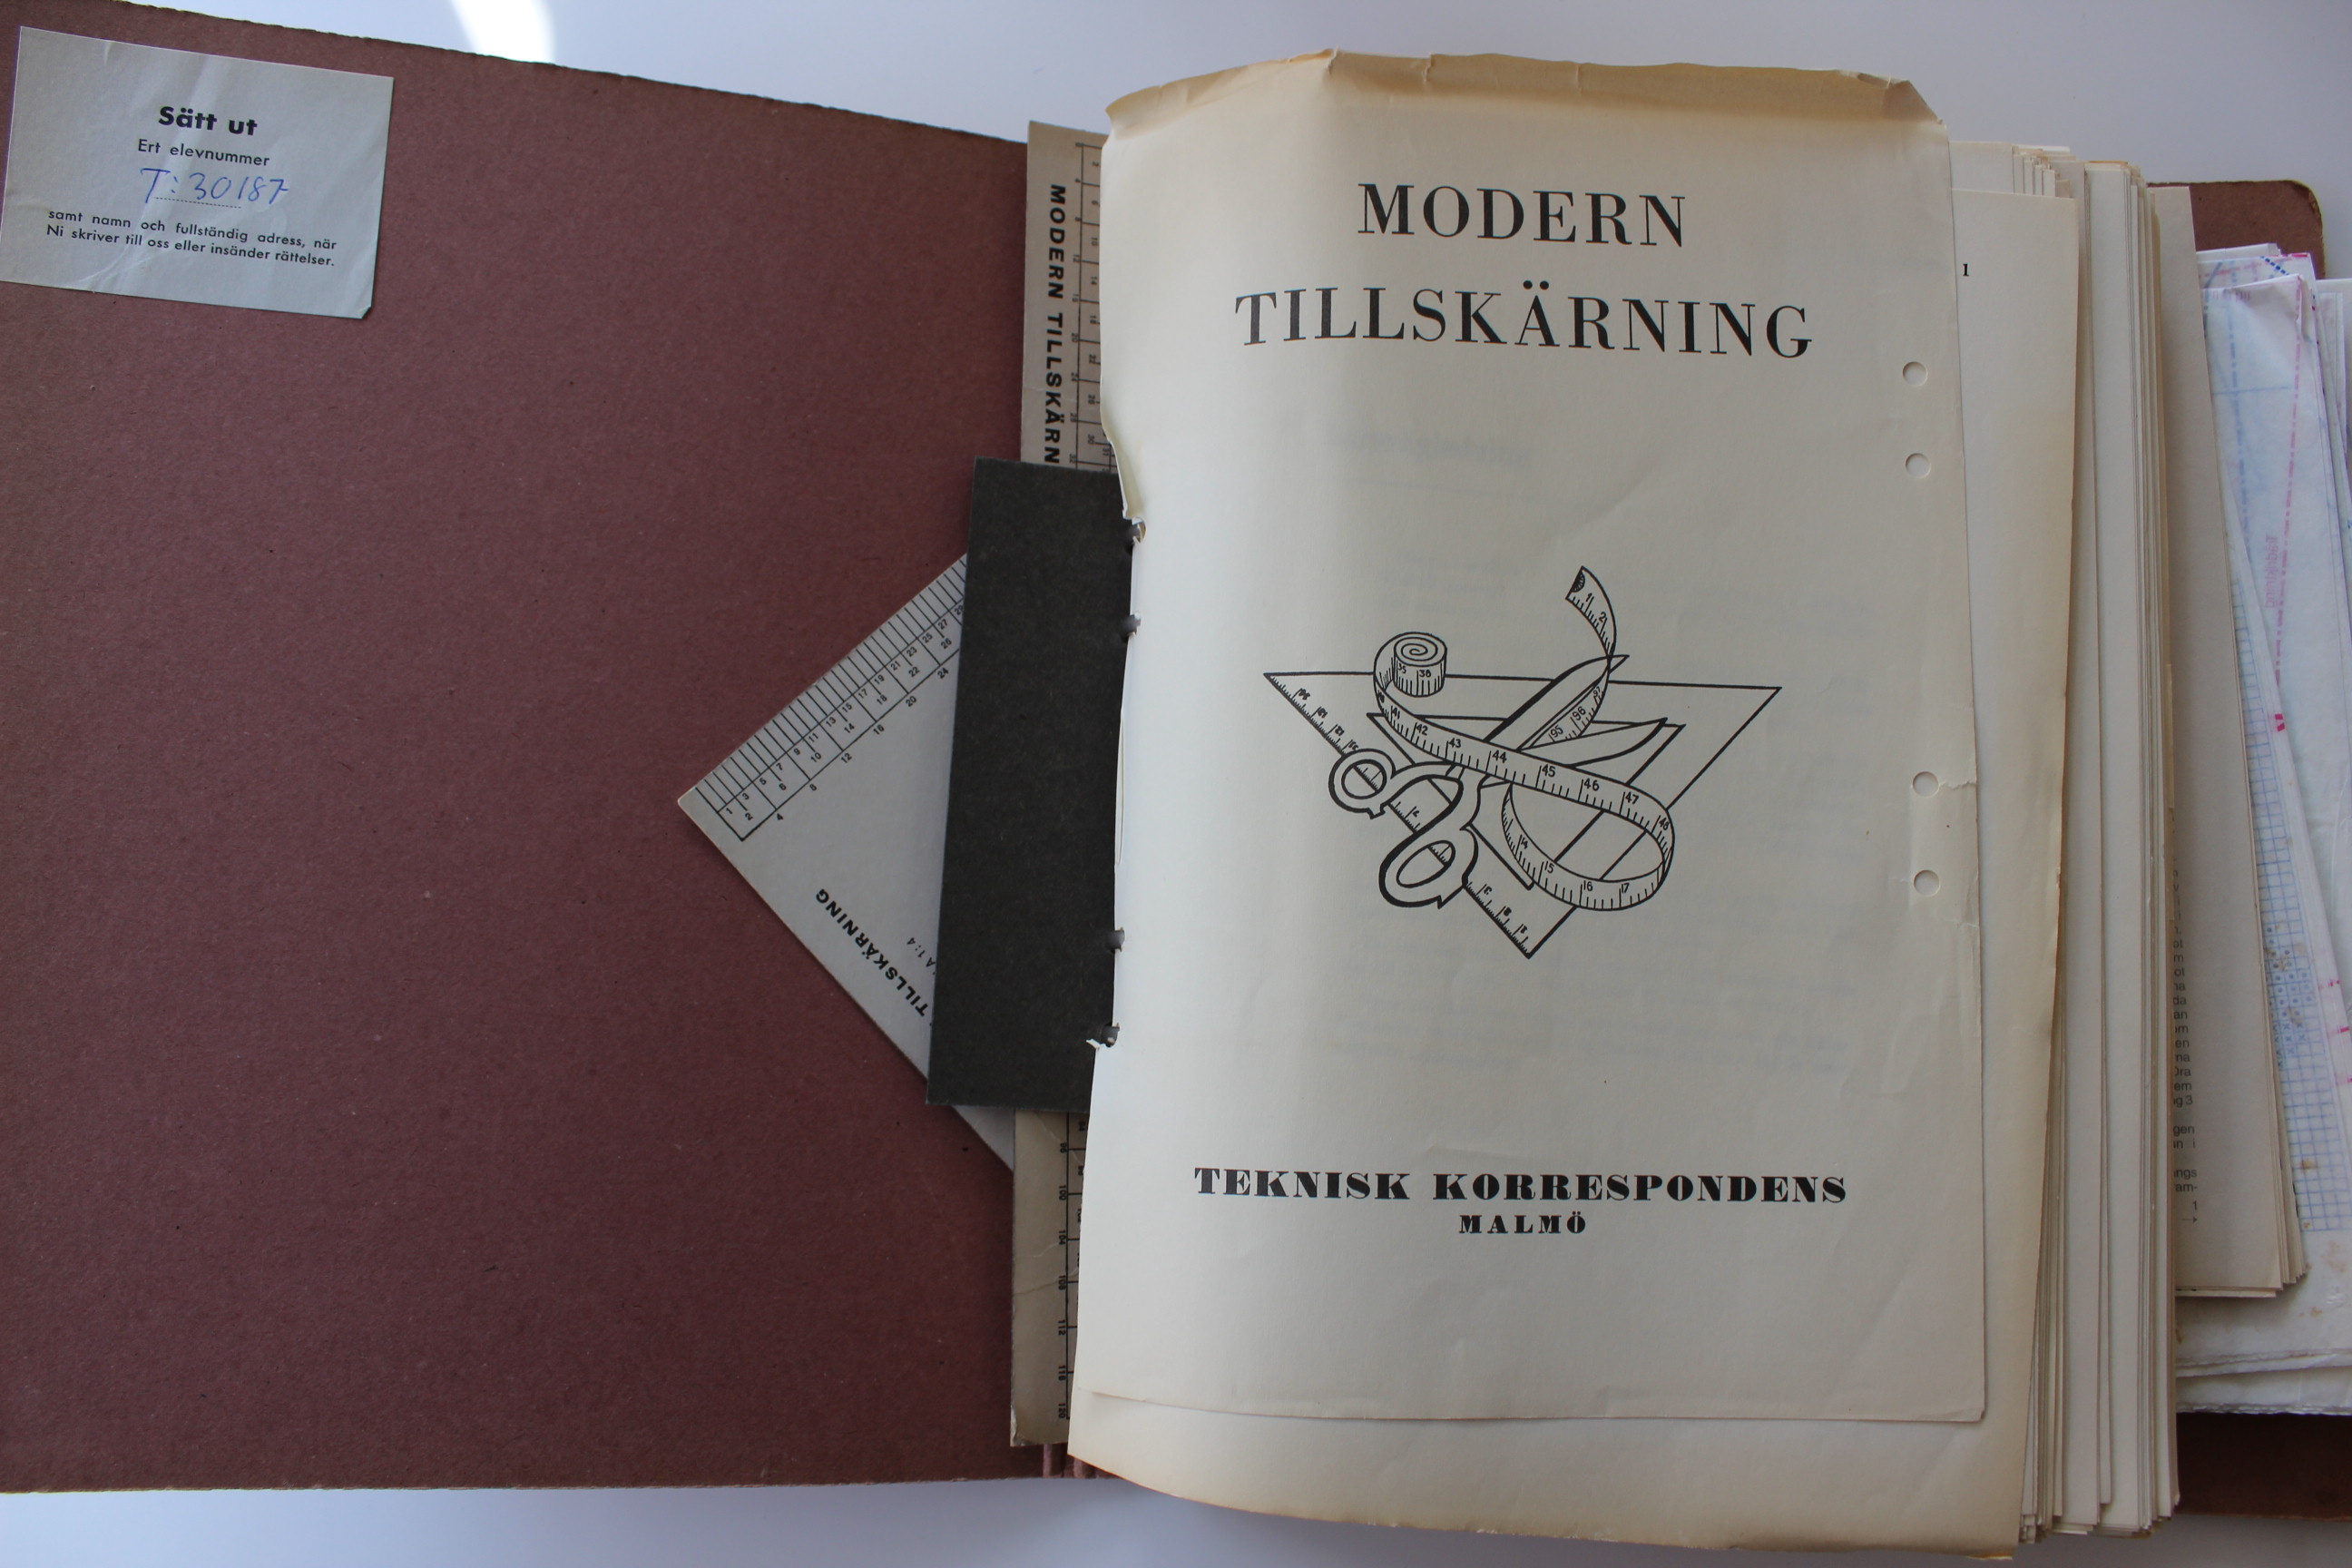 “Modern pattern drafting”
You’l learn how to properly measure someone.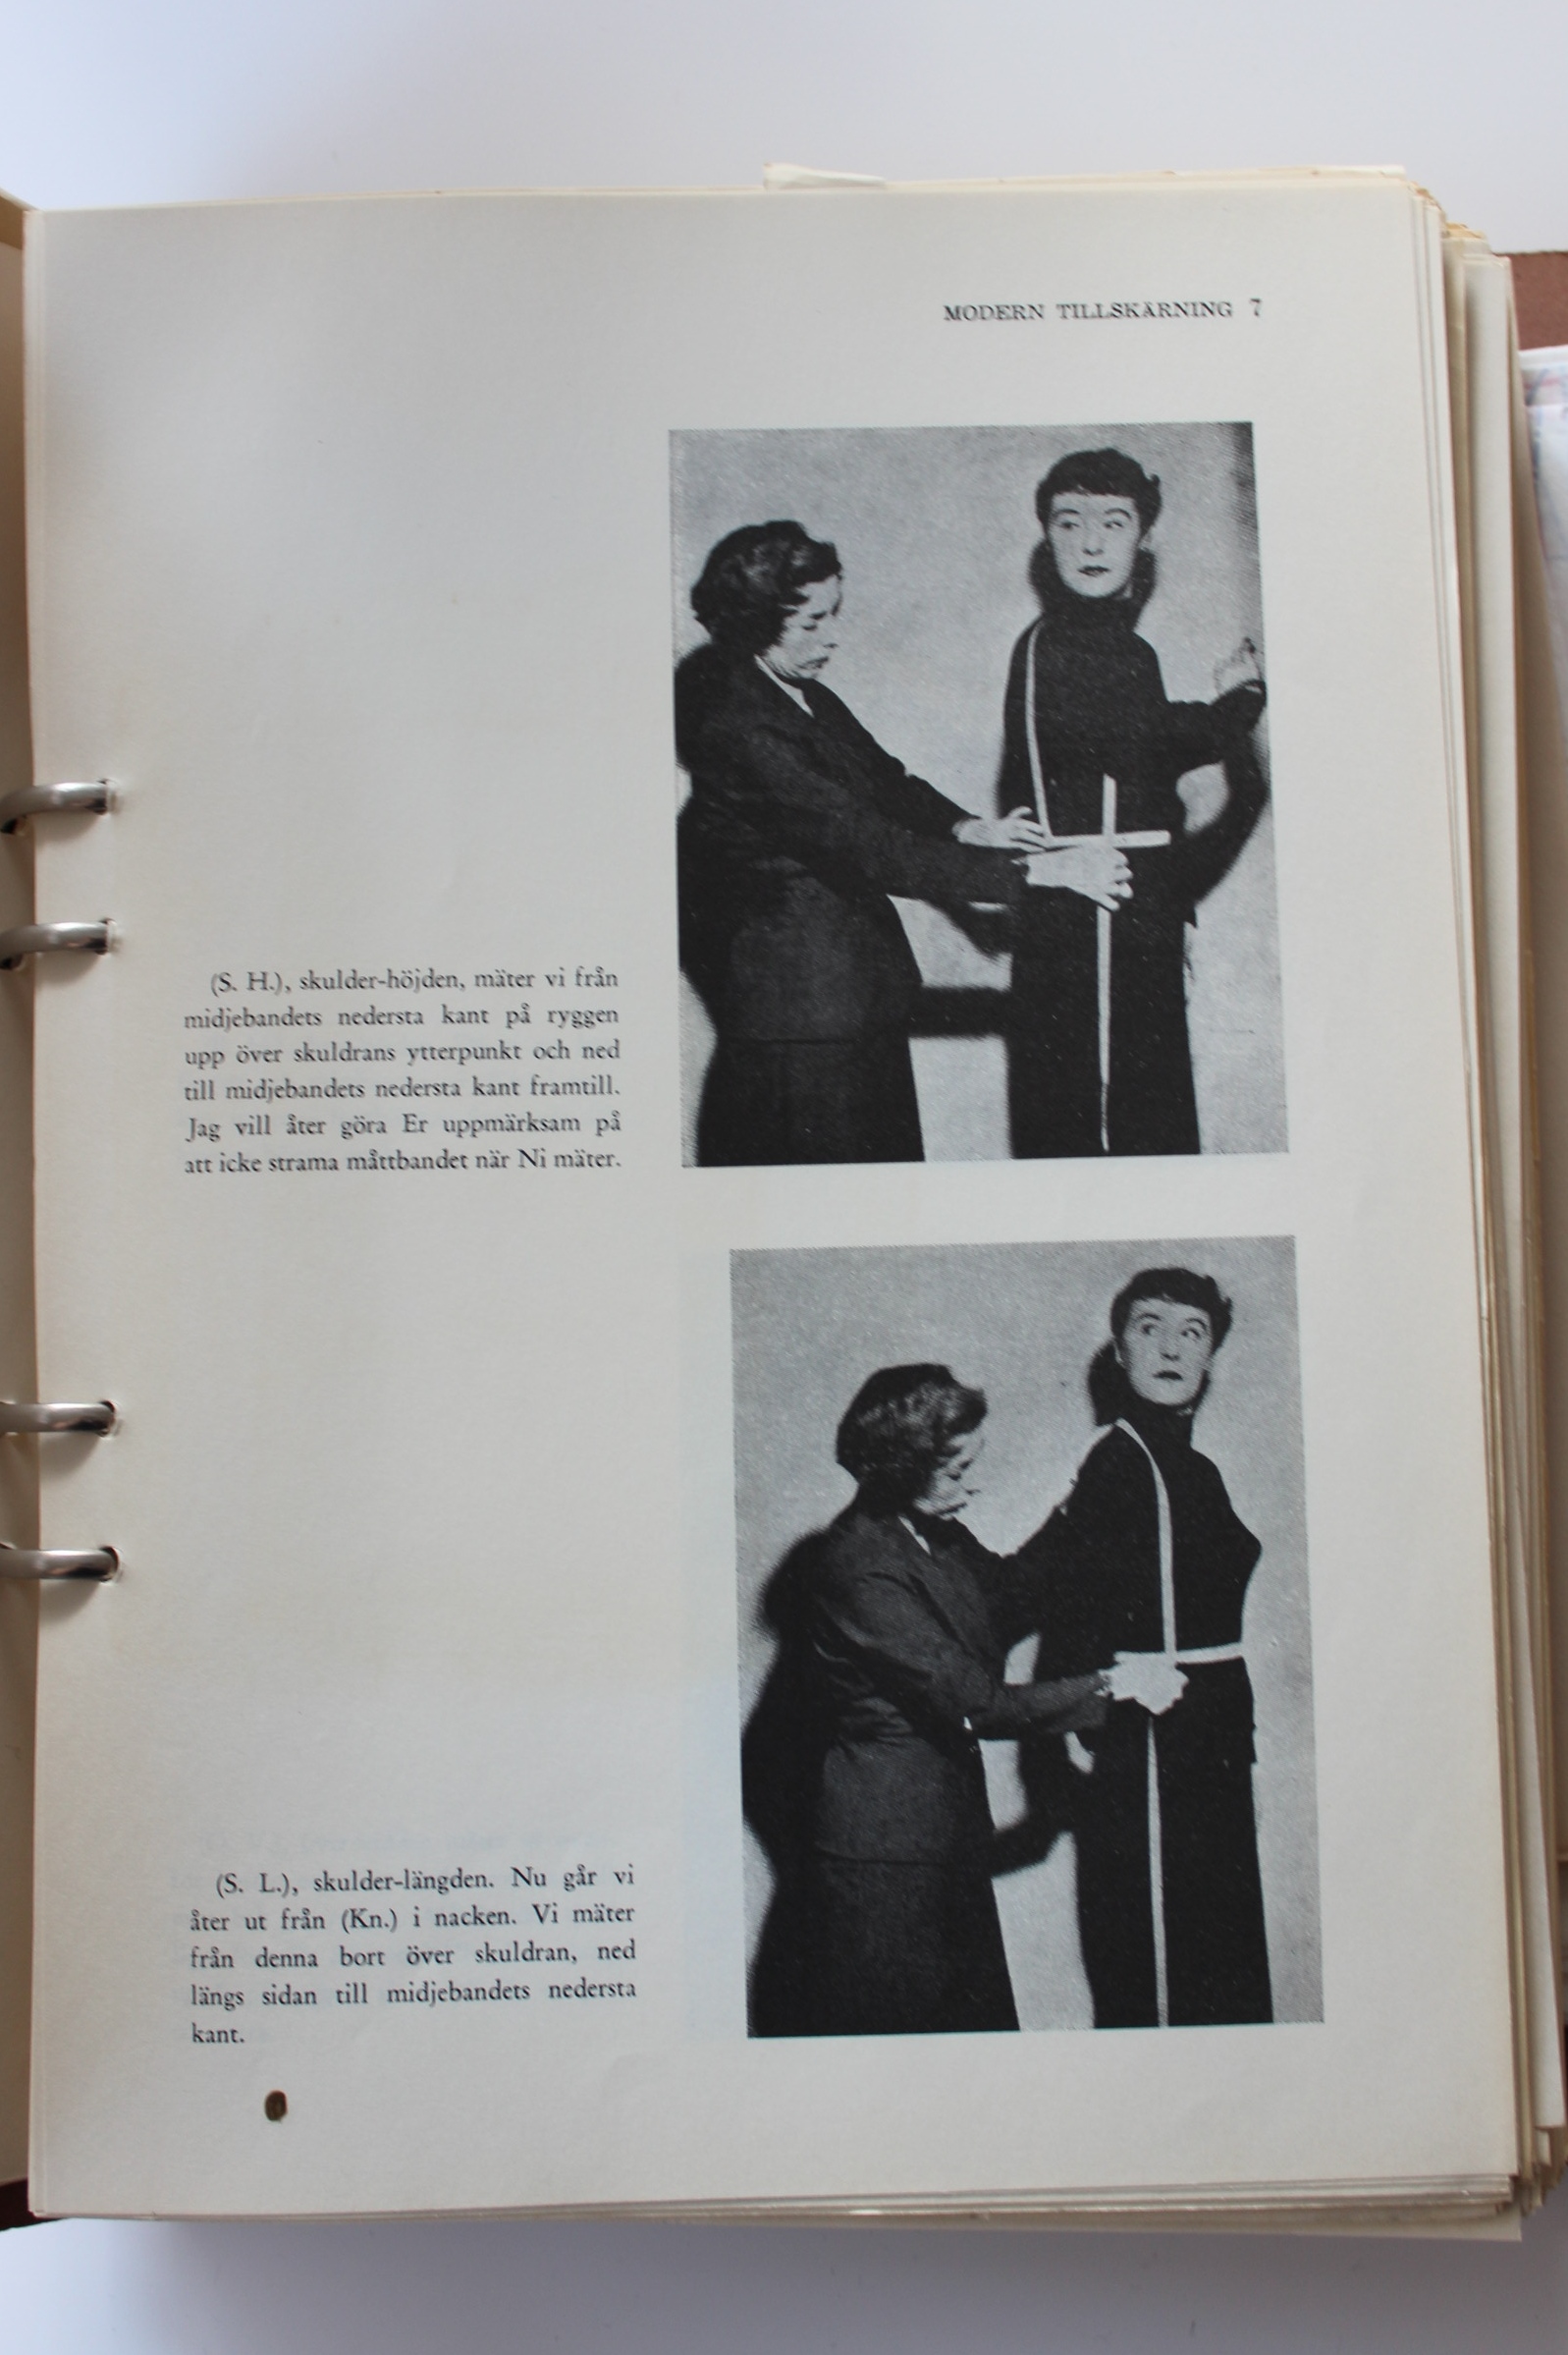
Drafting the basic pattern templates – Her the dress/bodice/skirt pattern.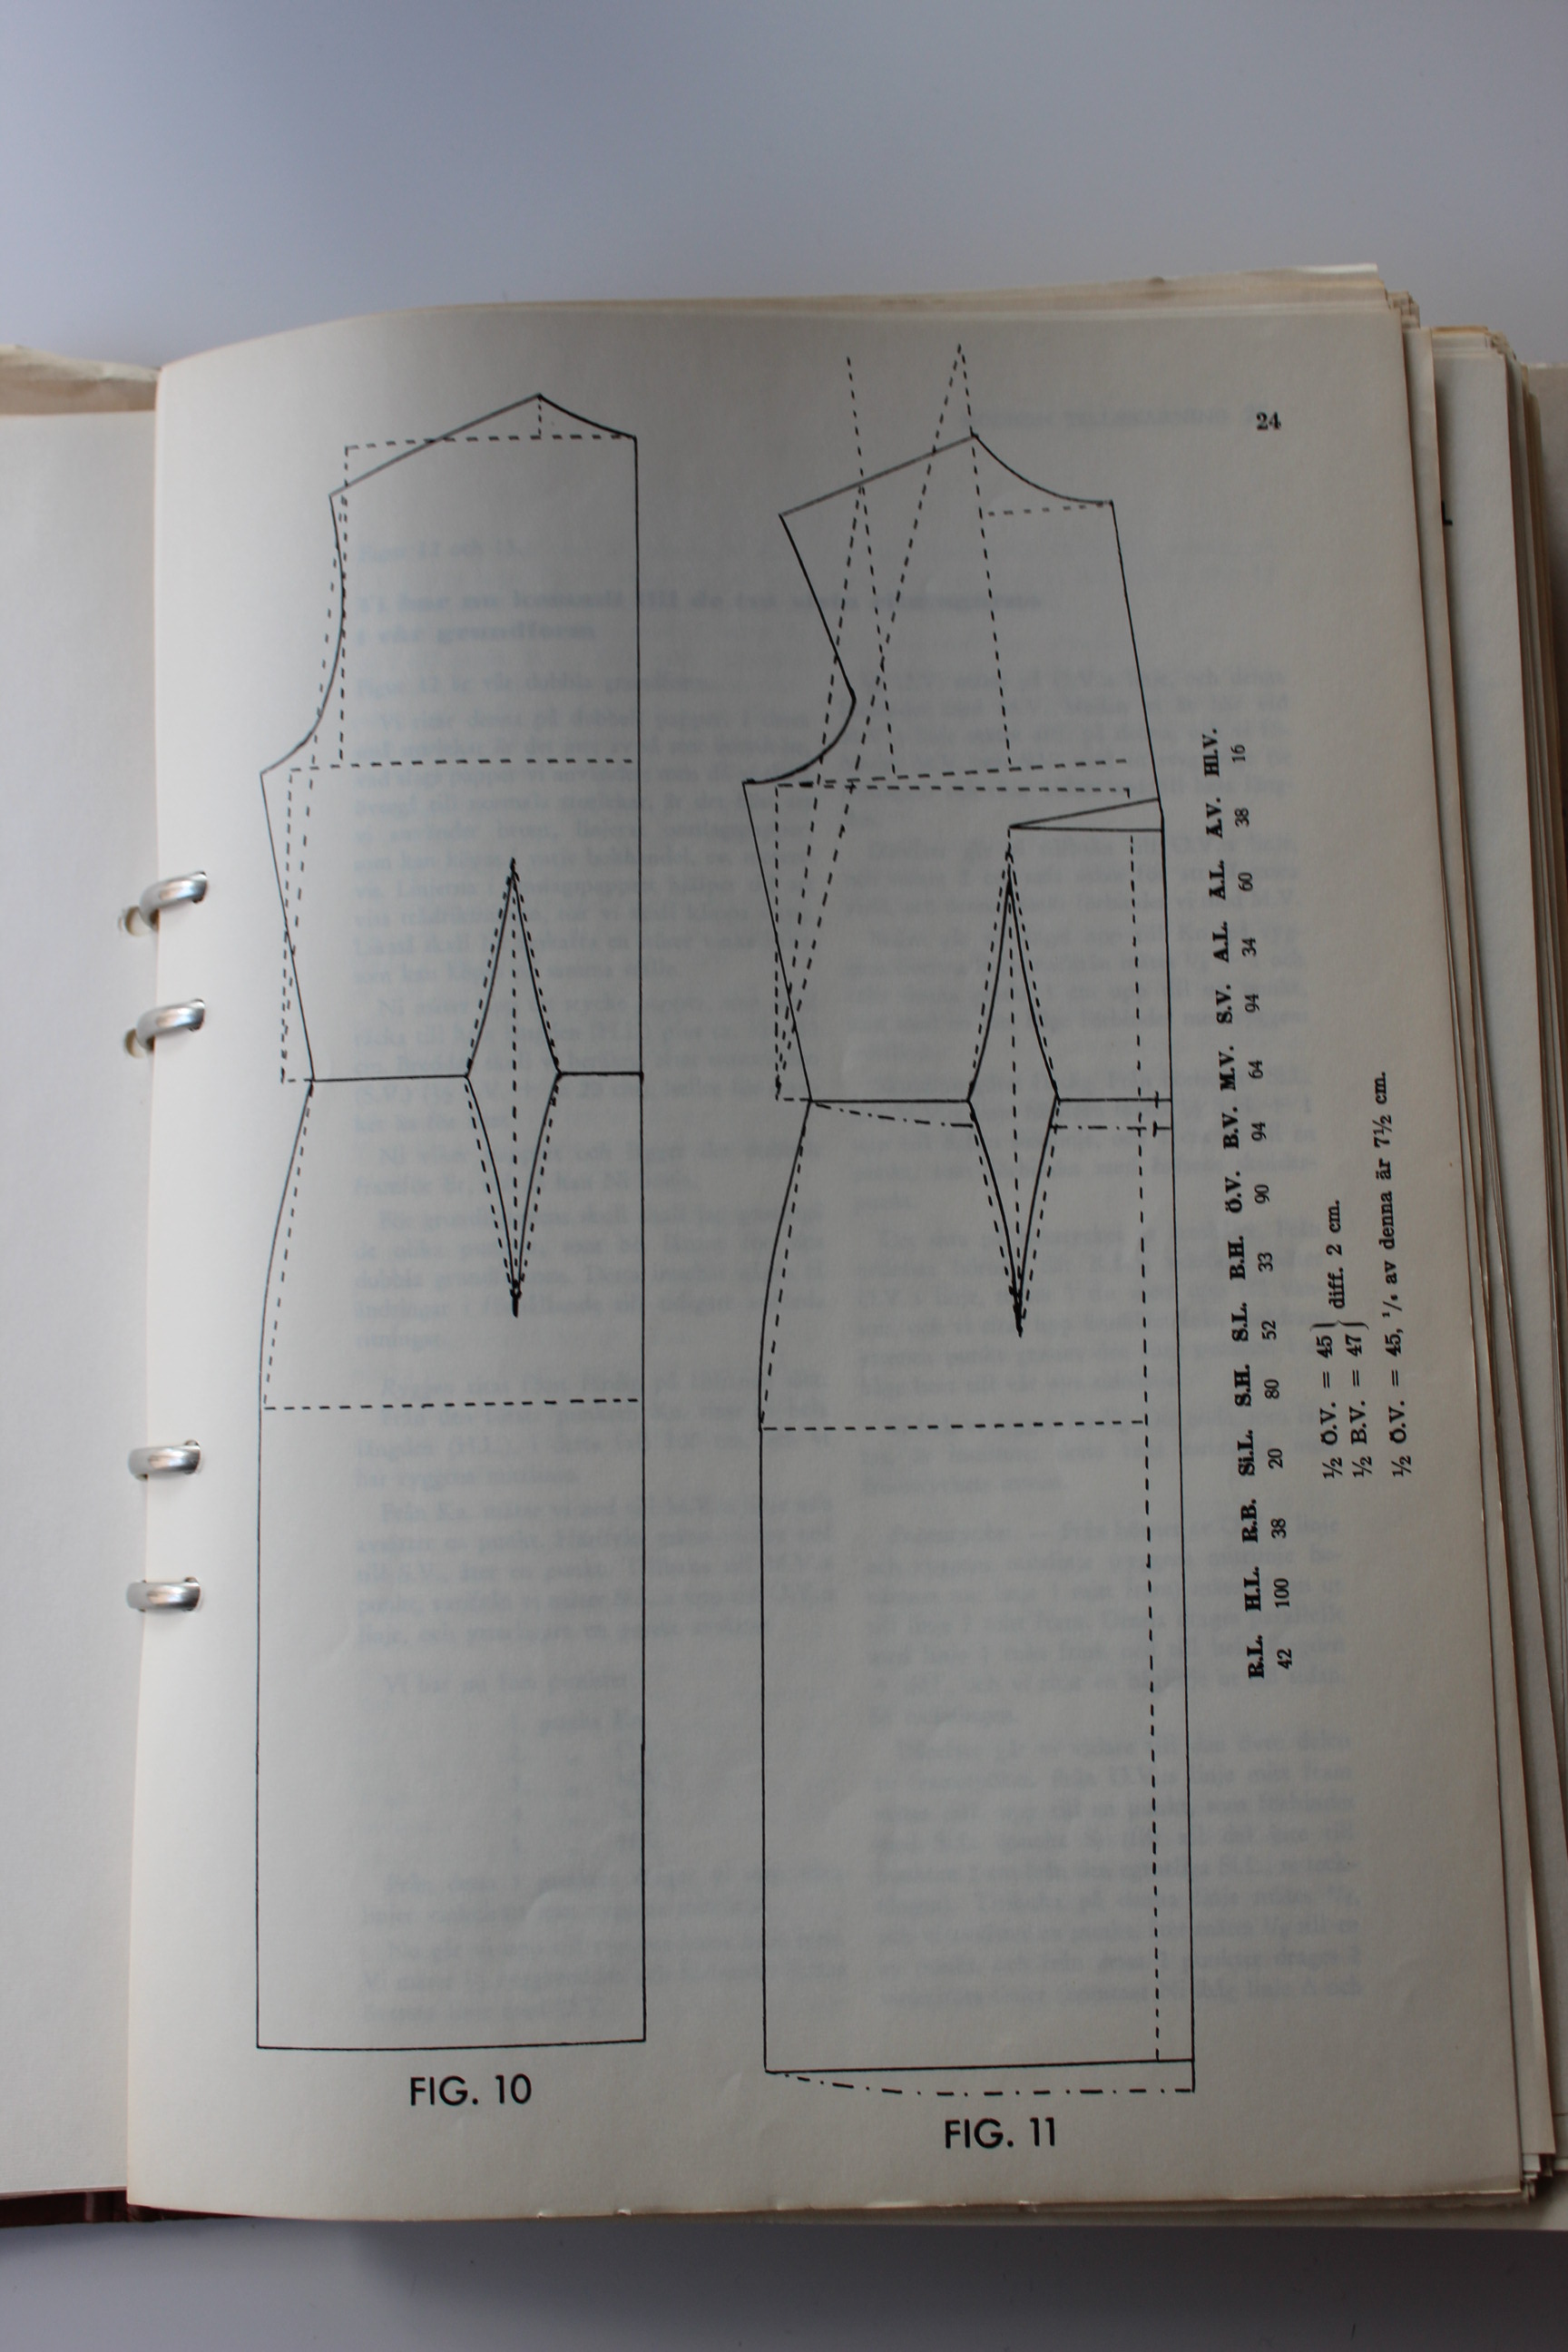
Fabric layout’s equally important – in Sweden we call this a “Läggbild”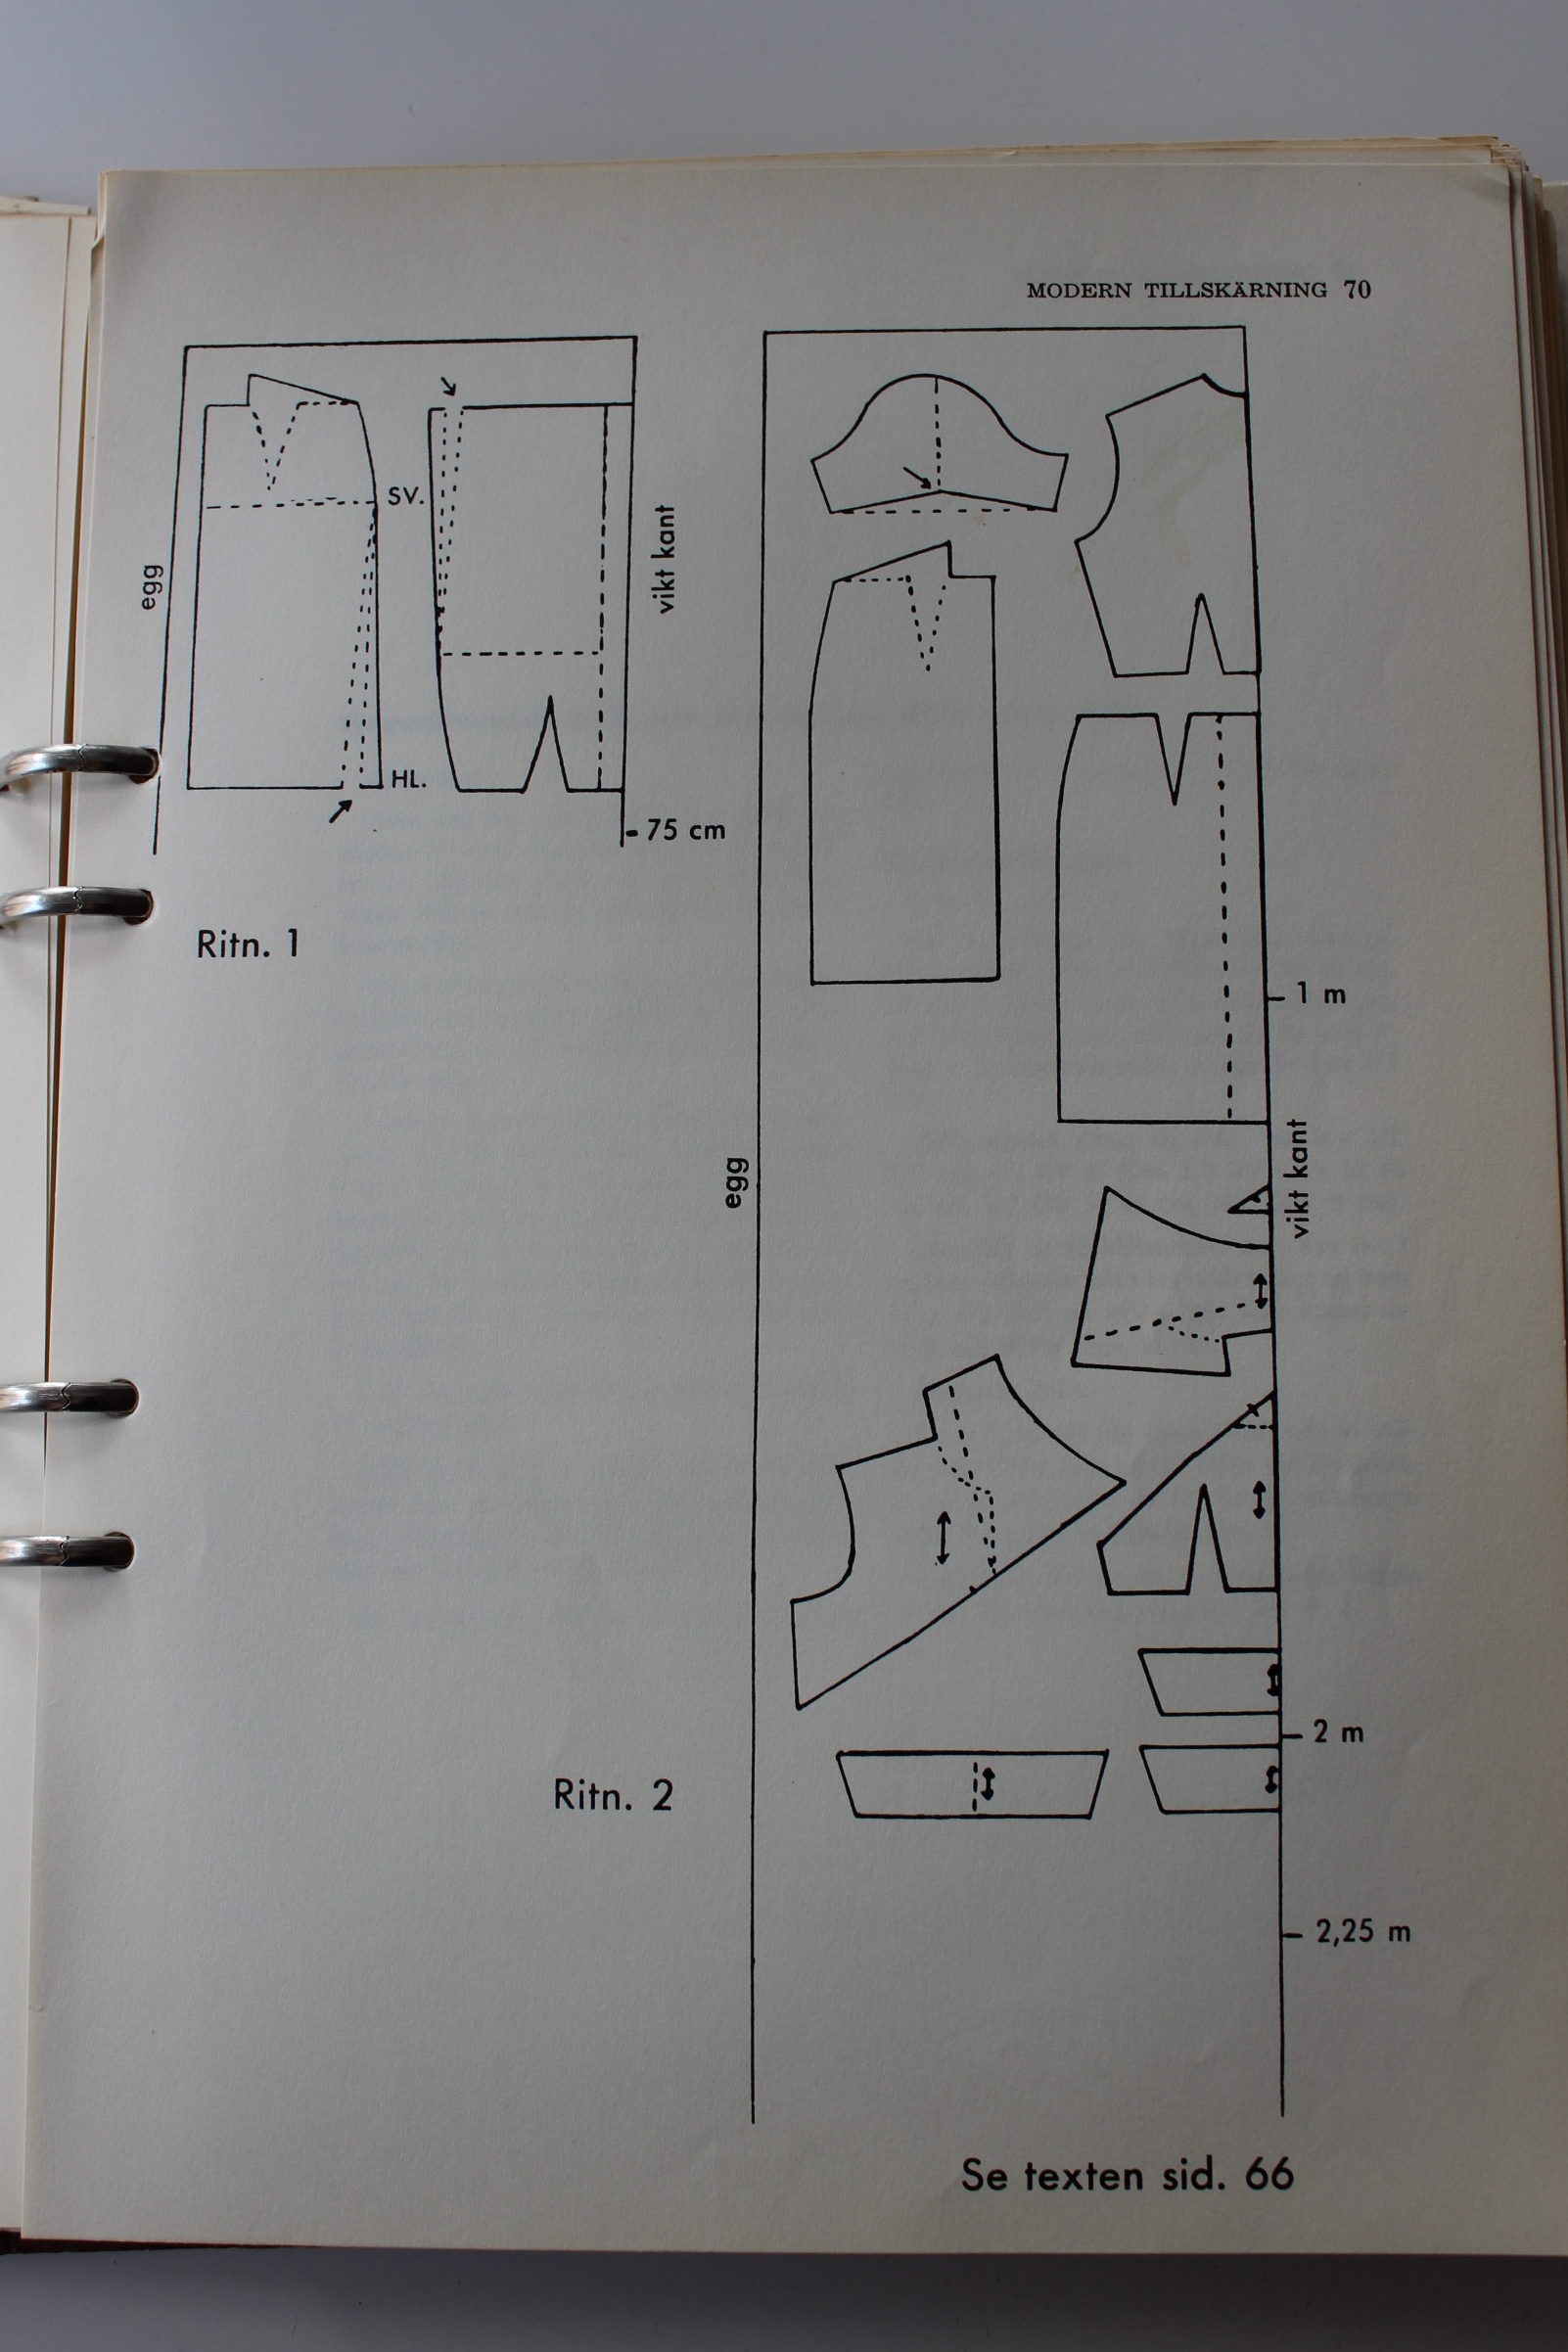
You also need to know how to alter the pattern pieces, and how to move the darts to your desired location.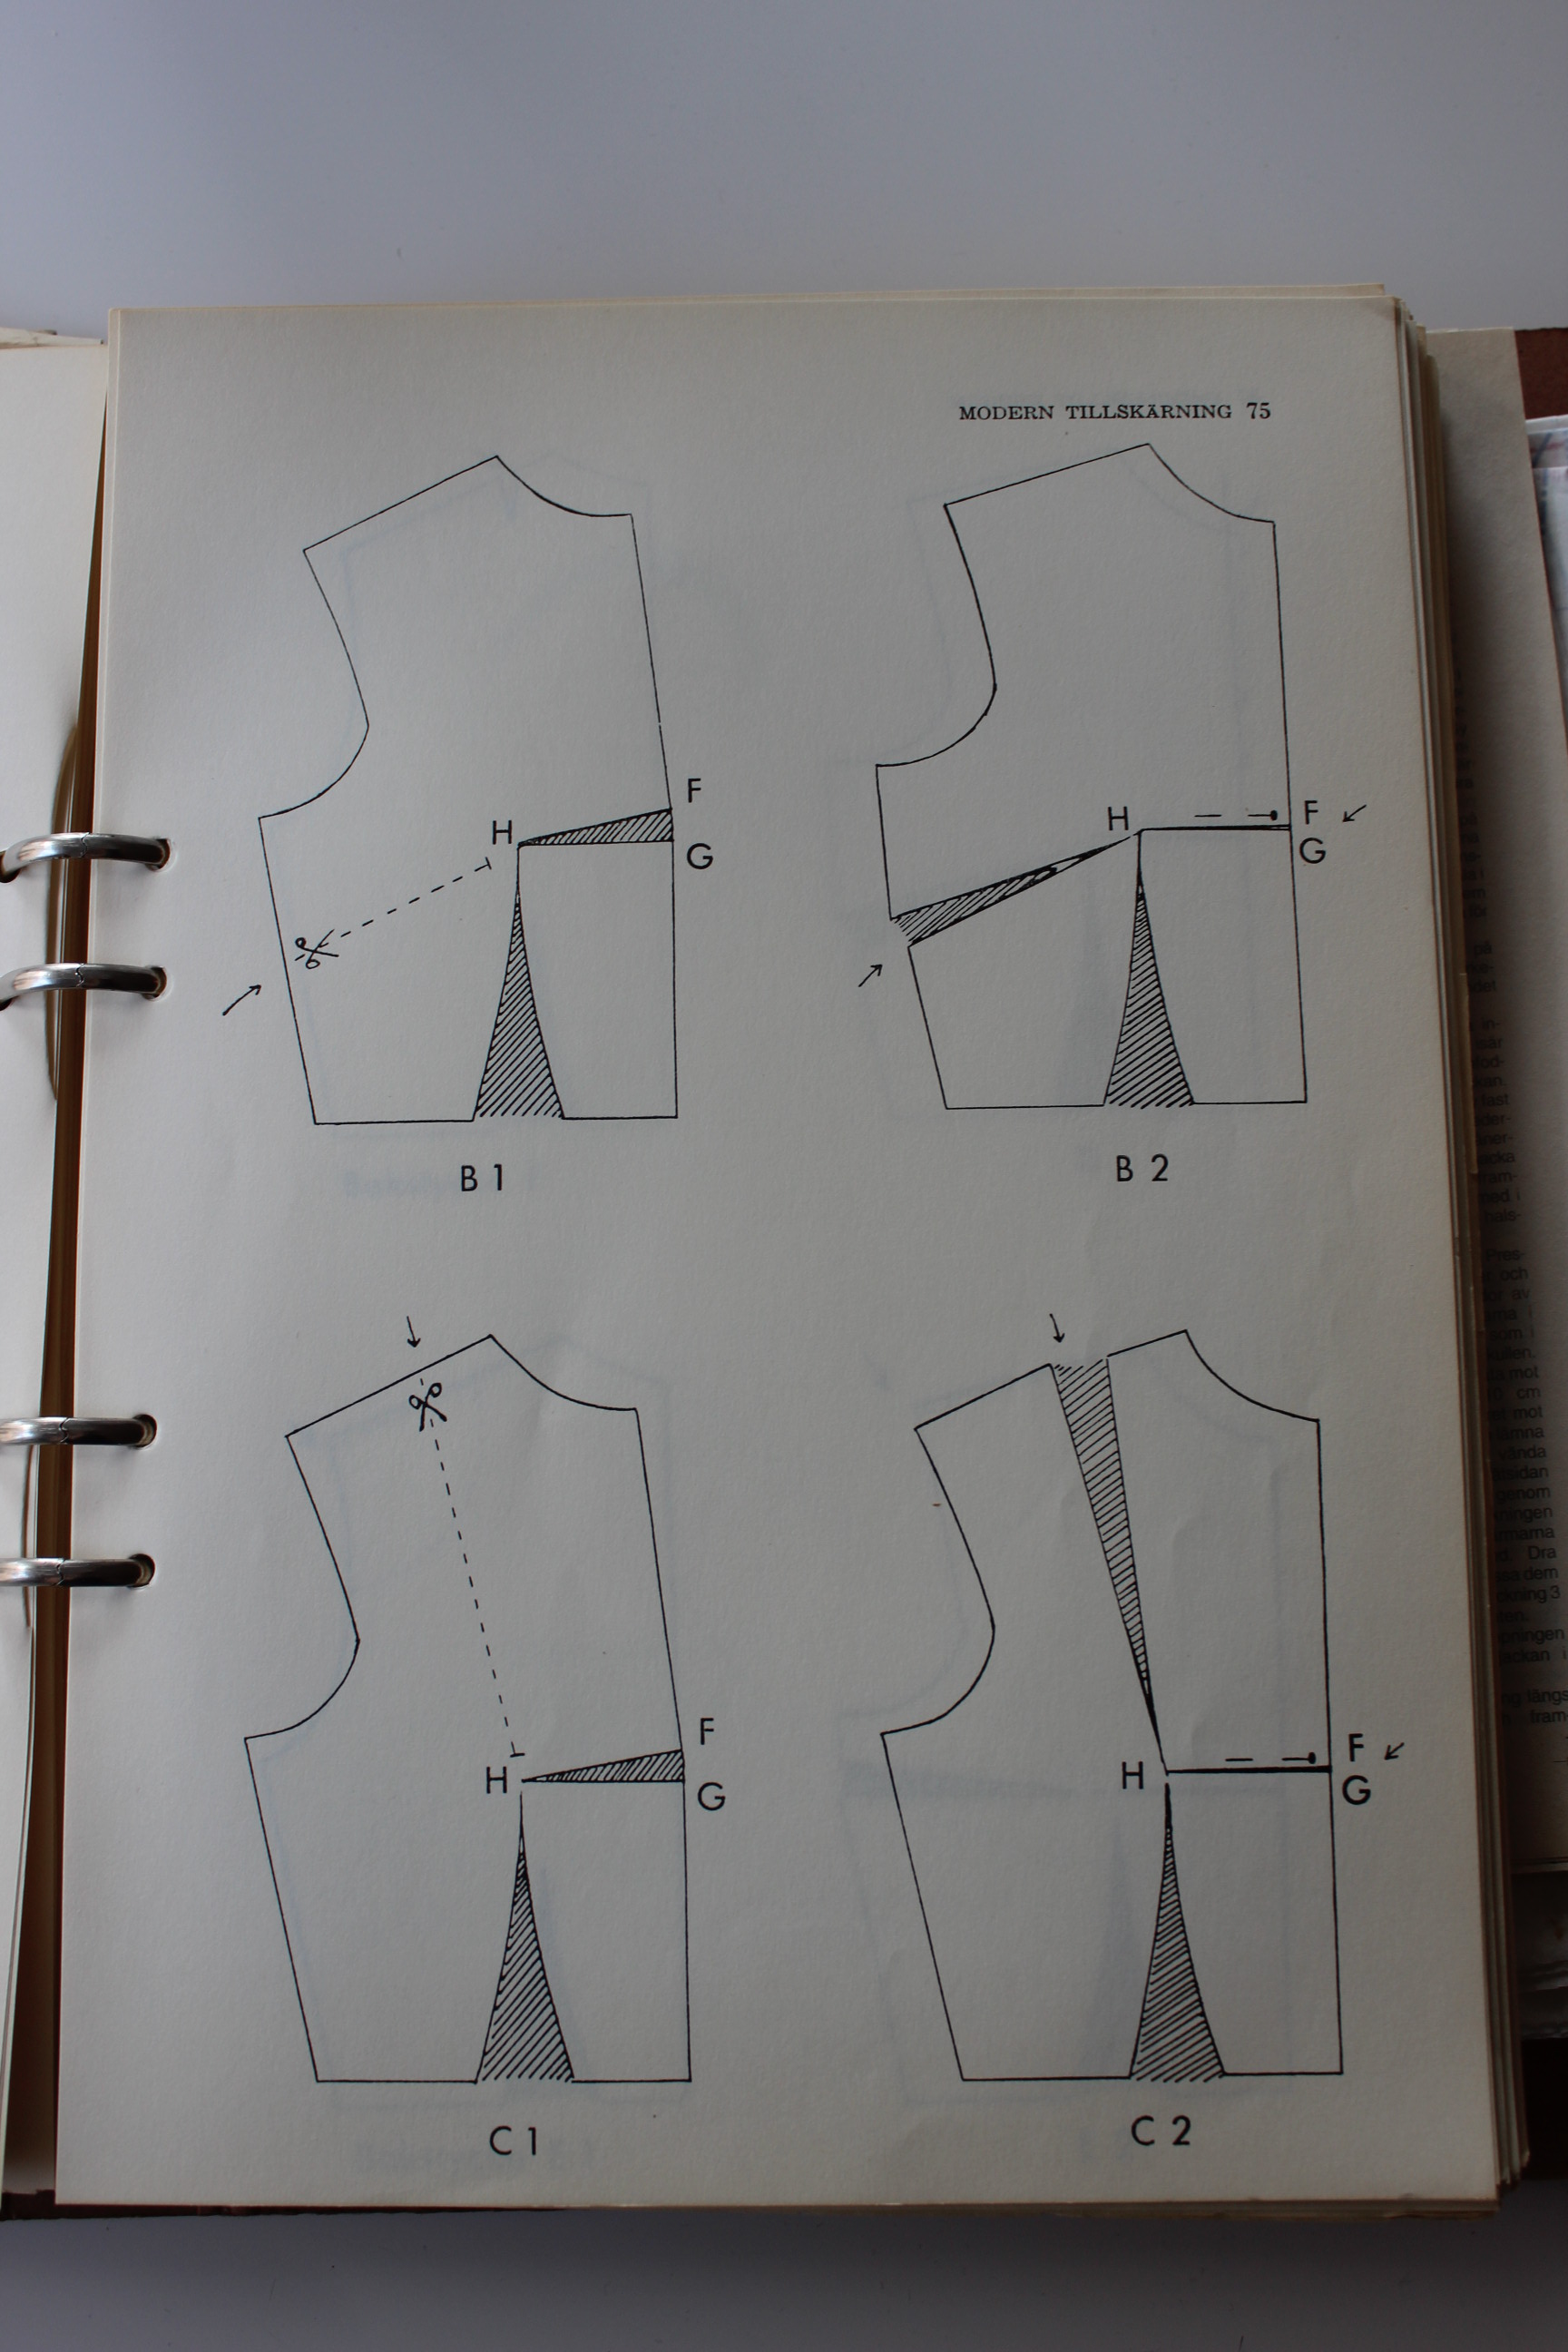 Interesting to see the way they used to put the darts between the breasts – something almost never used anymore.
Drafting a circular skirt (half circle) for that characteristic 50s look.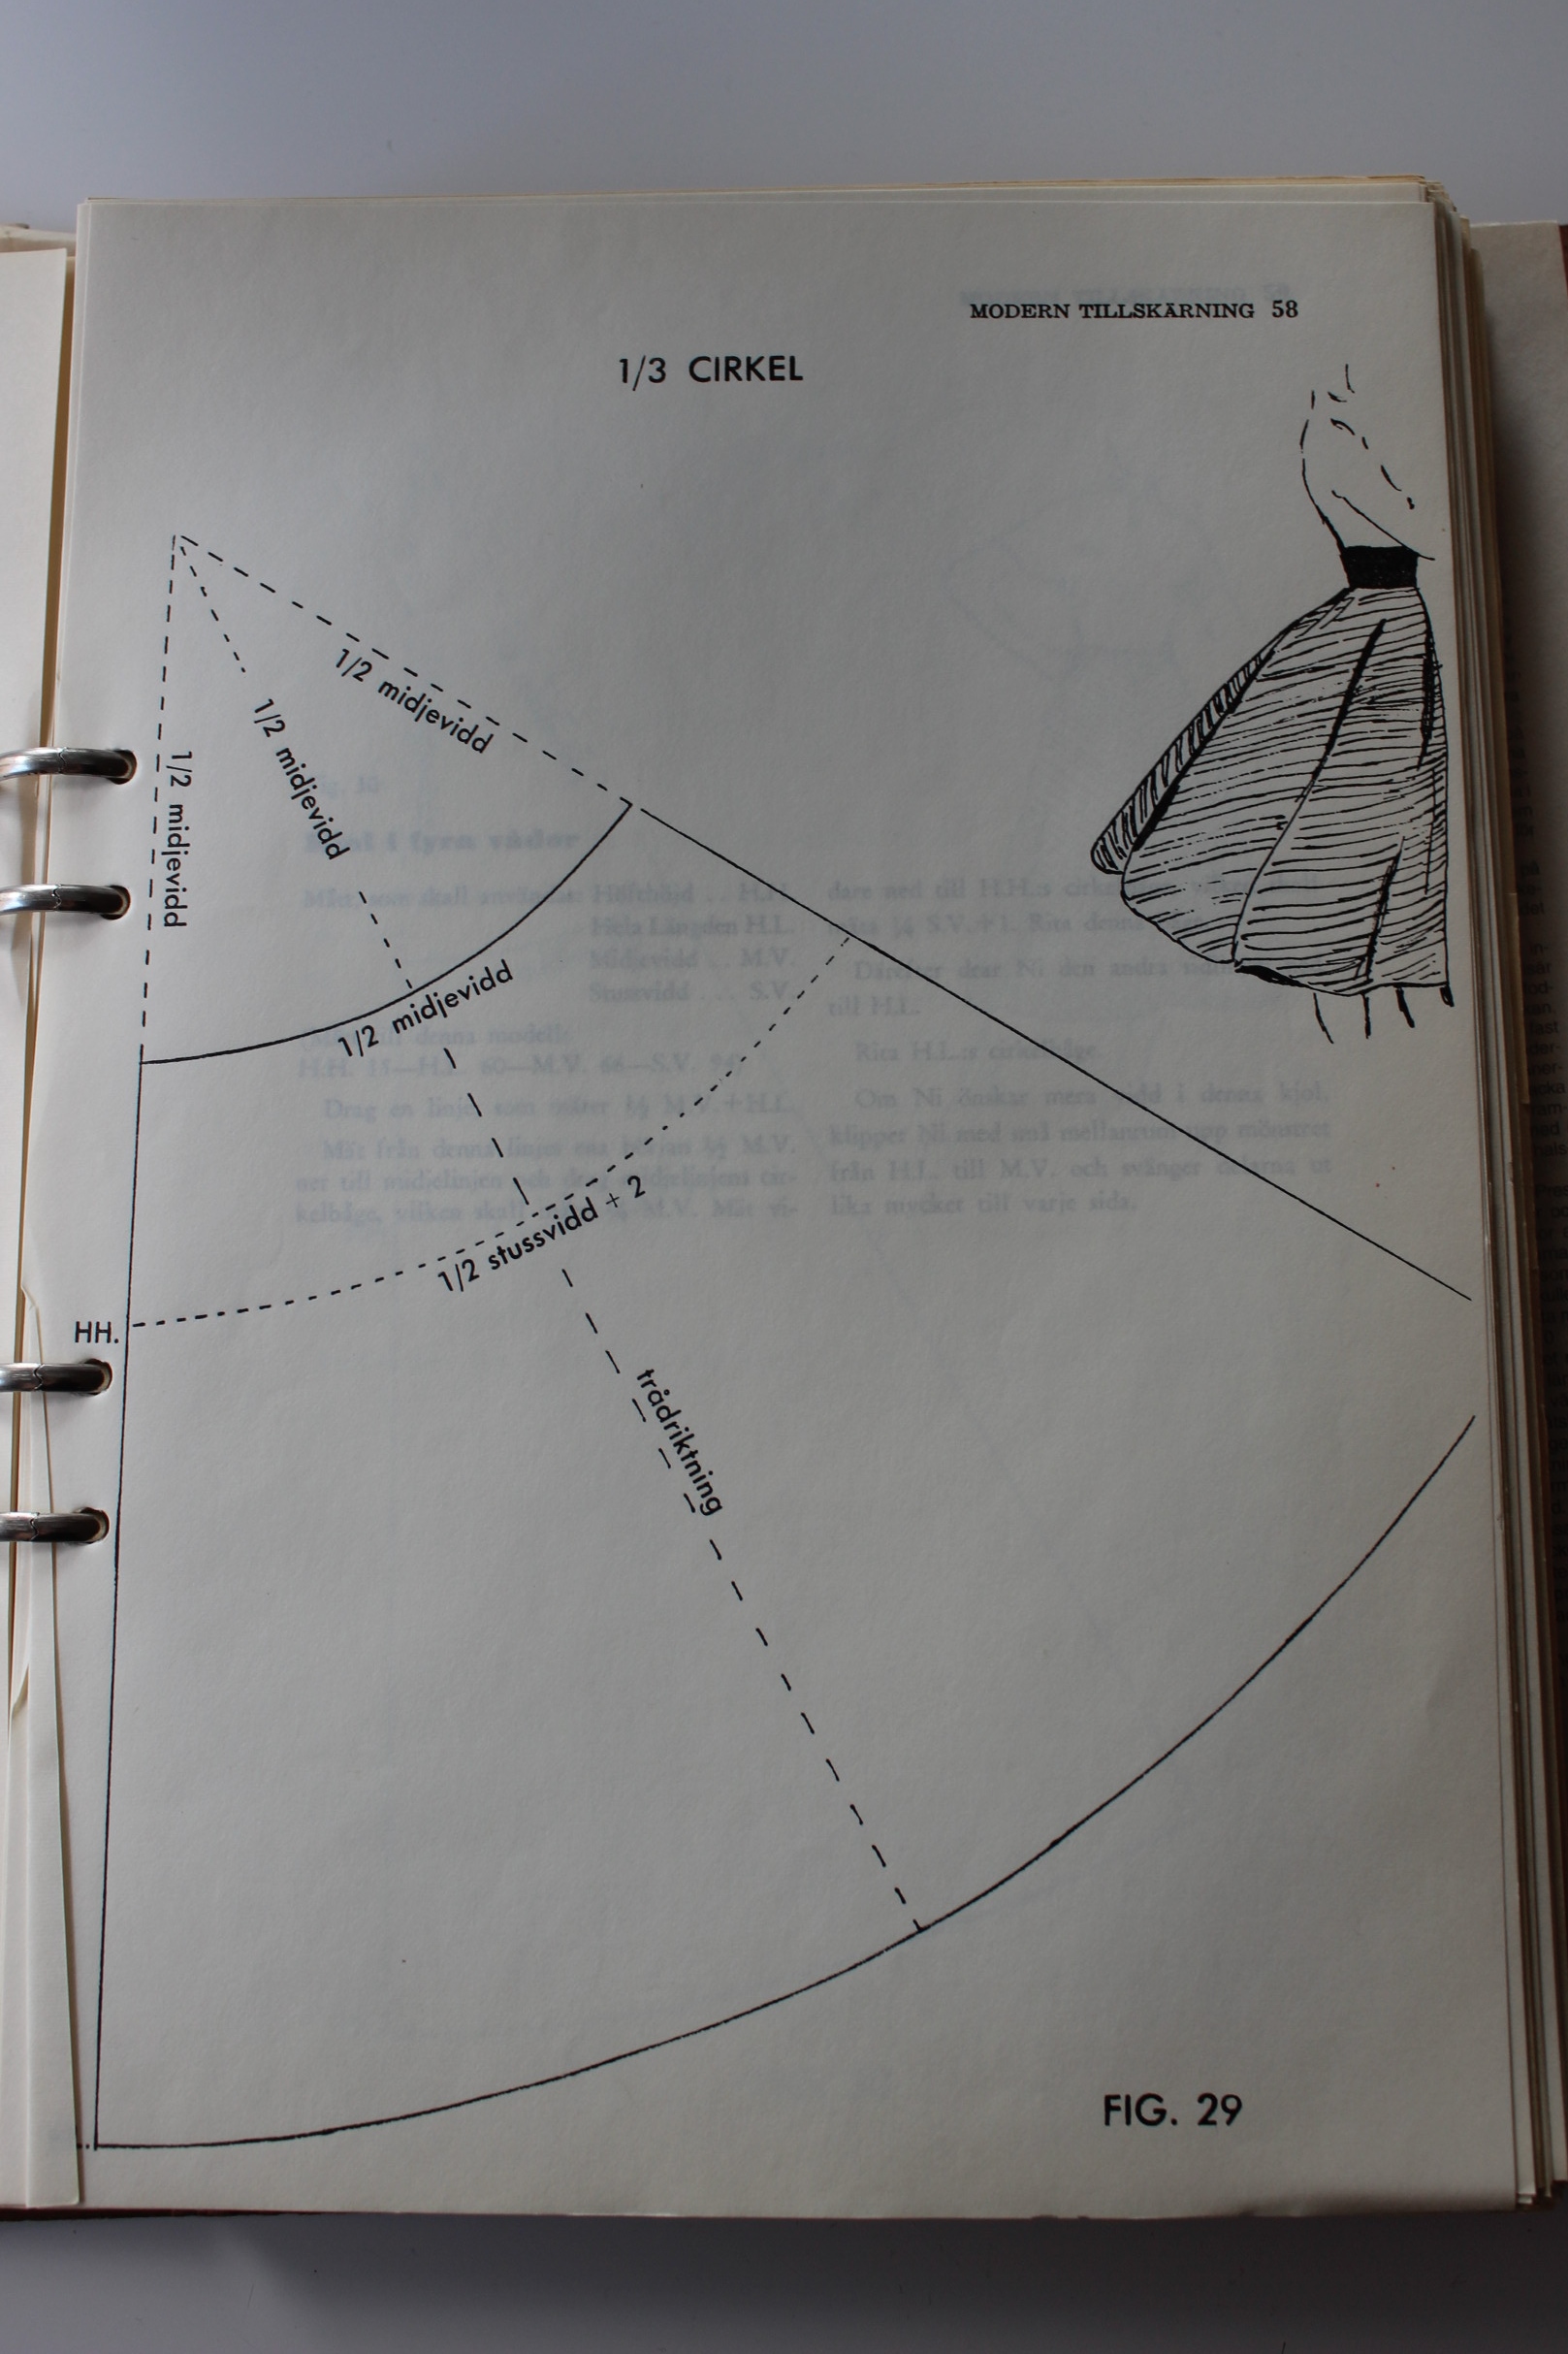
And some more challenging stuff like this fabulous jacket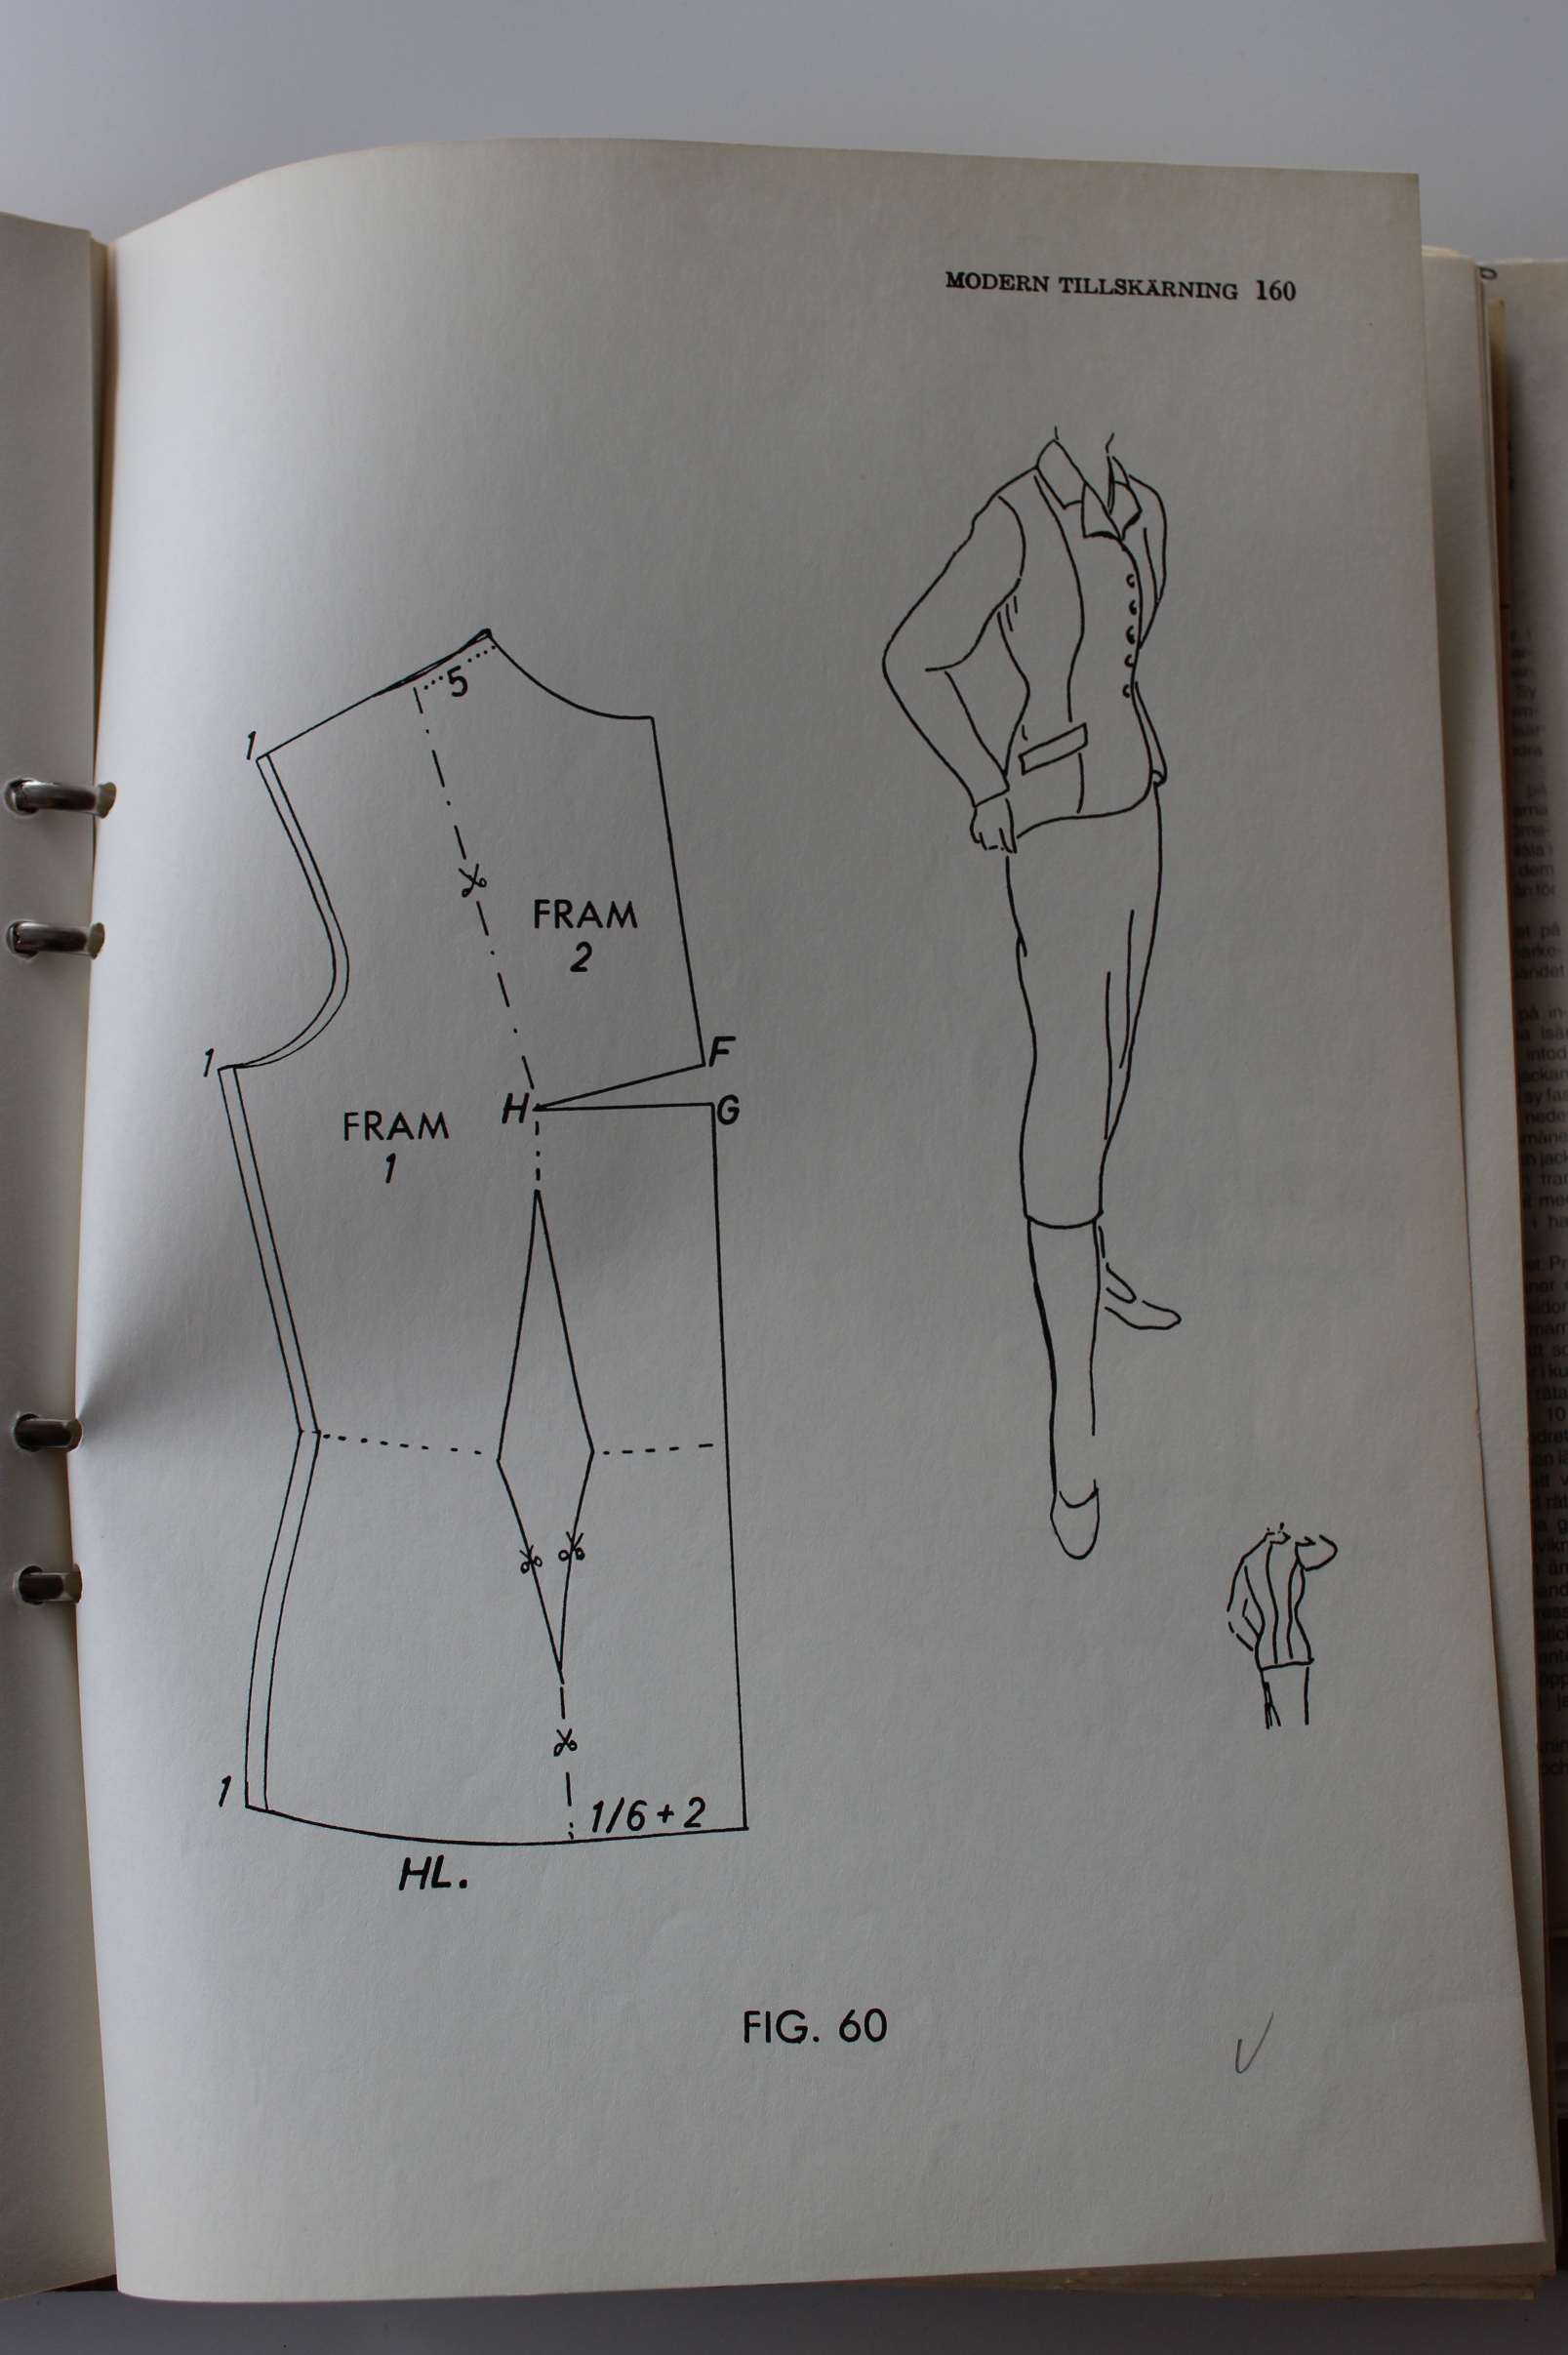
I also love this kimono sleeve drafting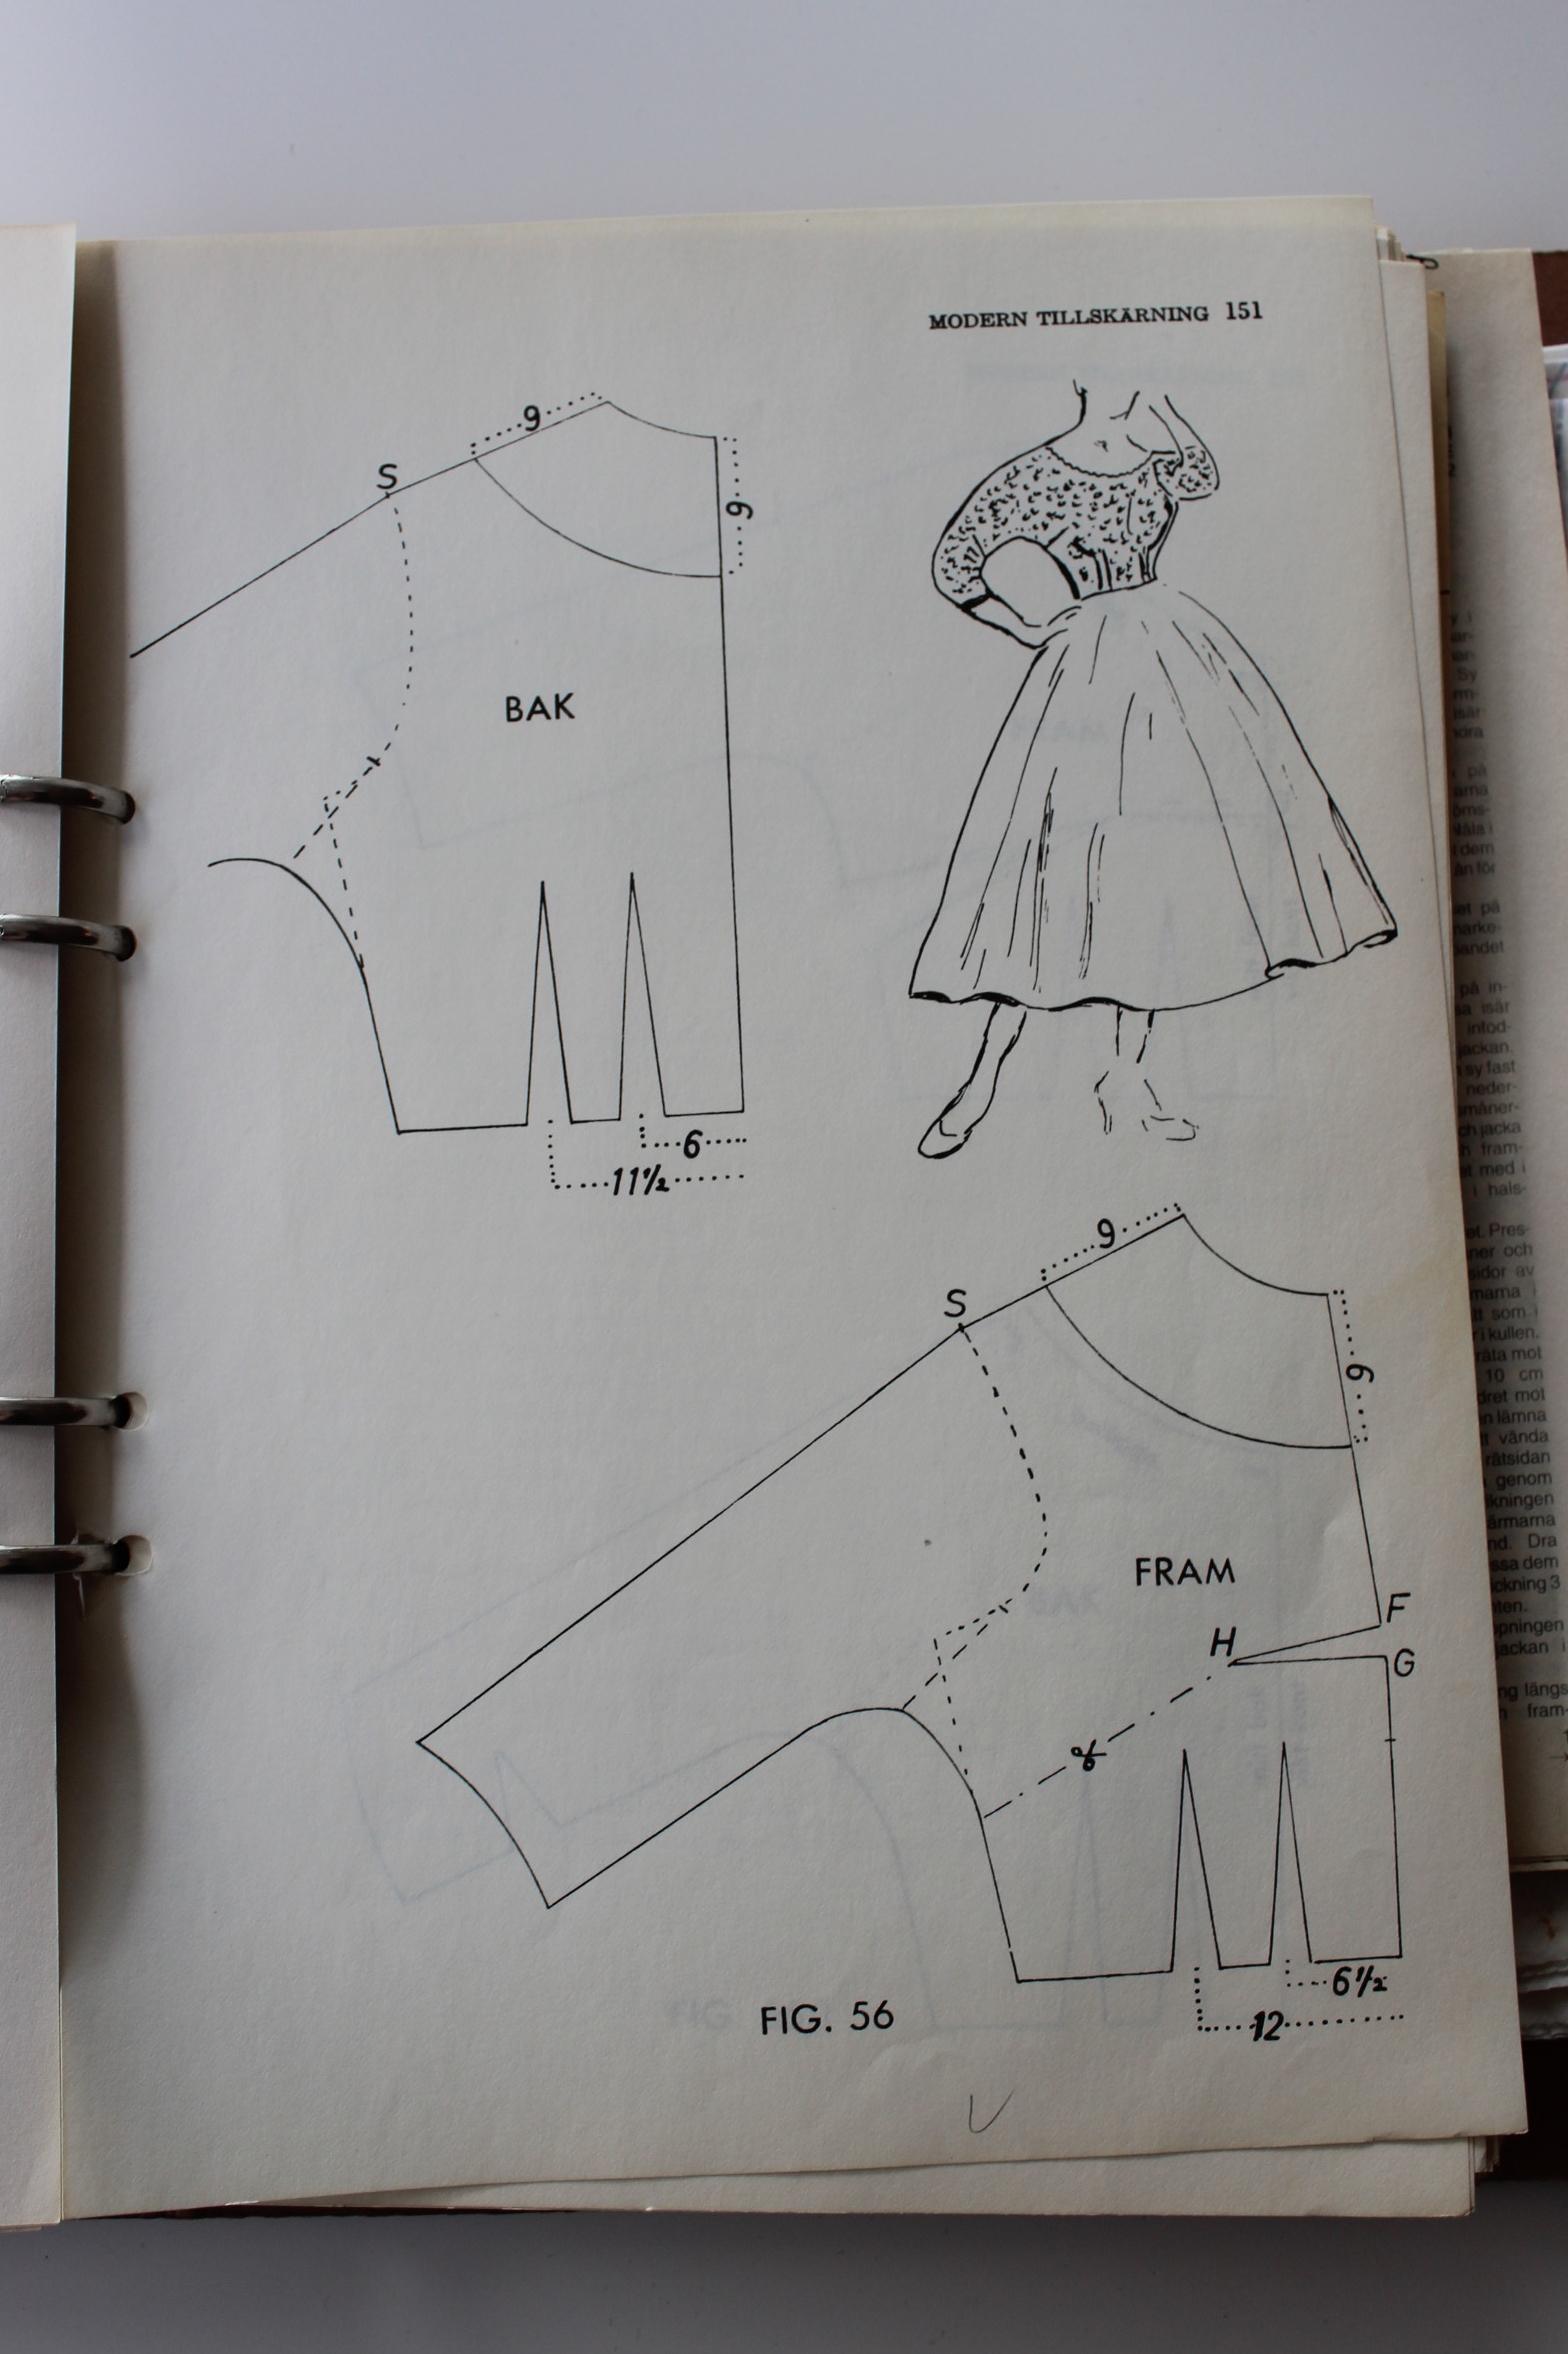
And who can resist the glamorous 1960s full skirted evening gowns 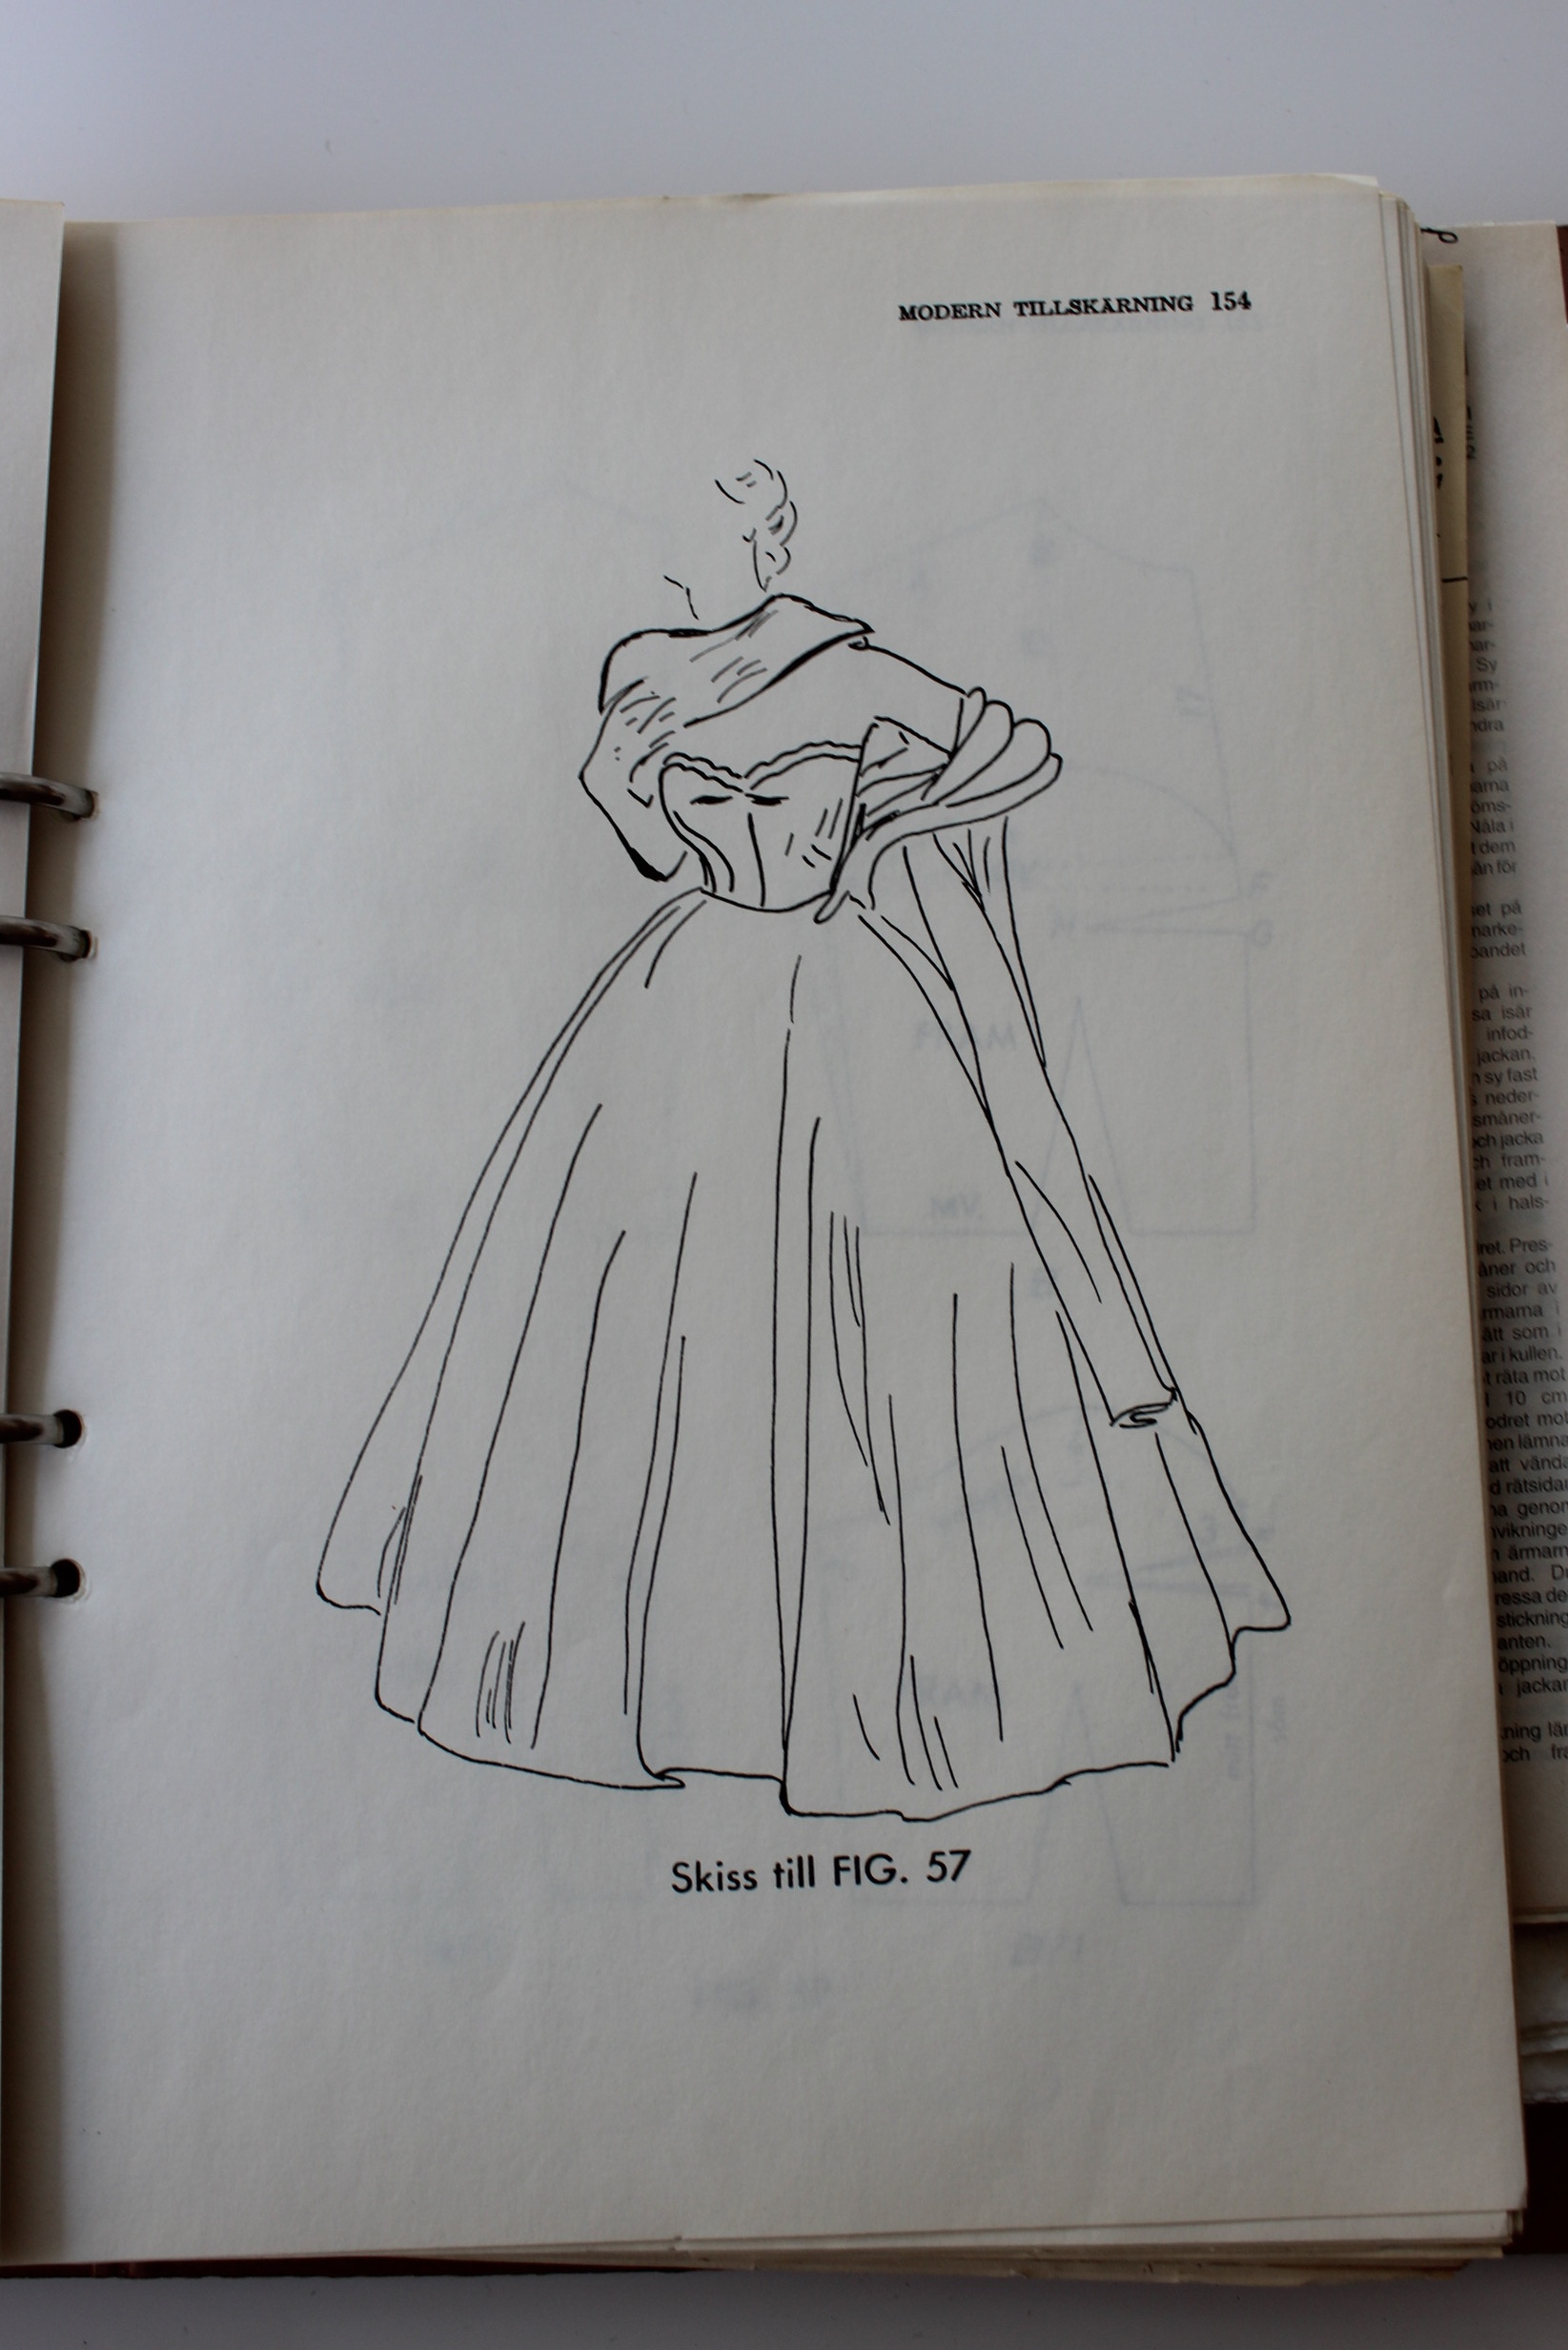 Oh la la
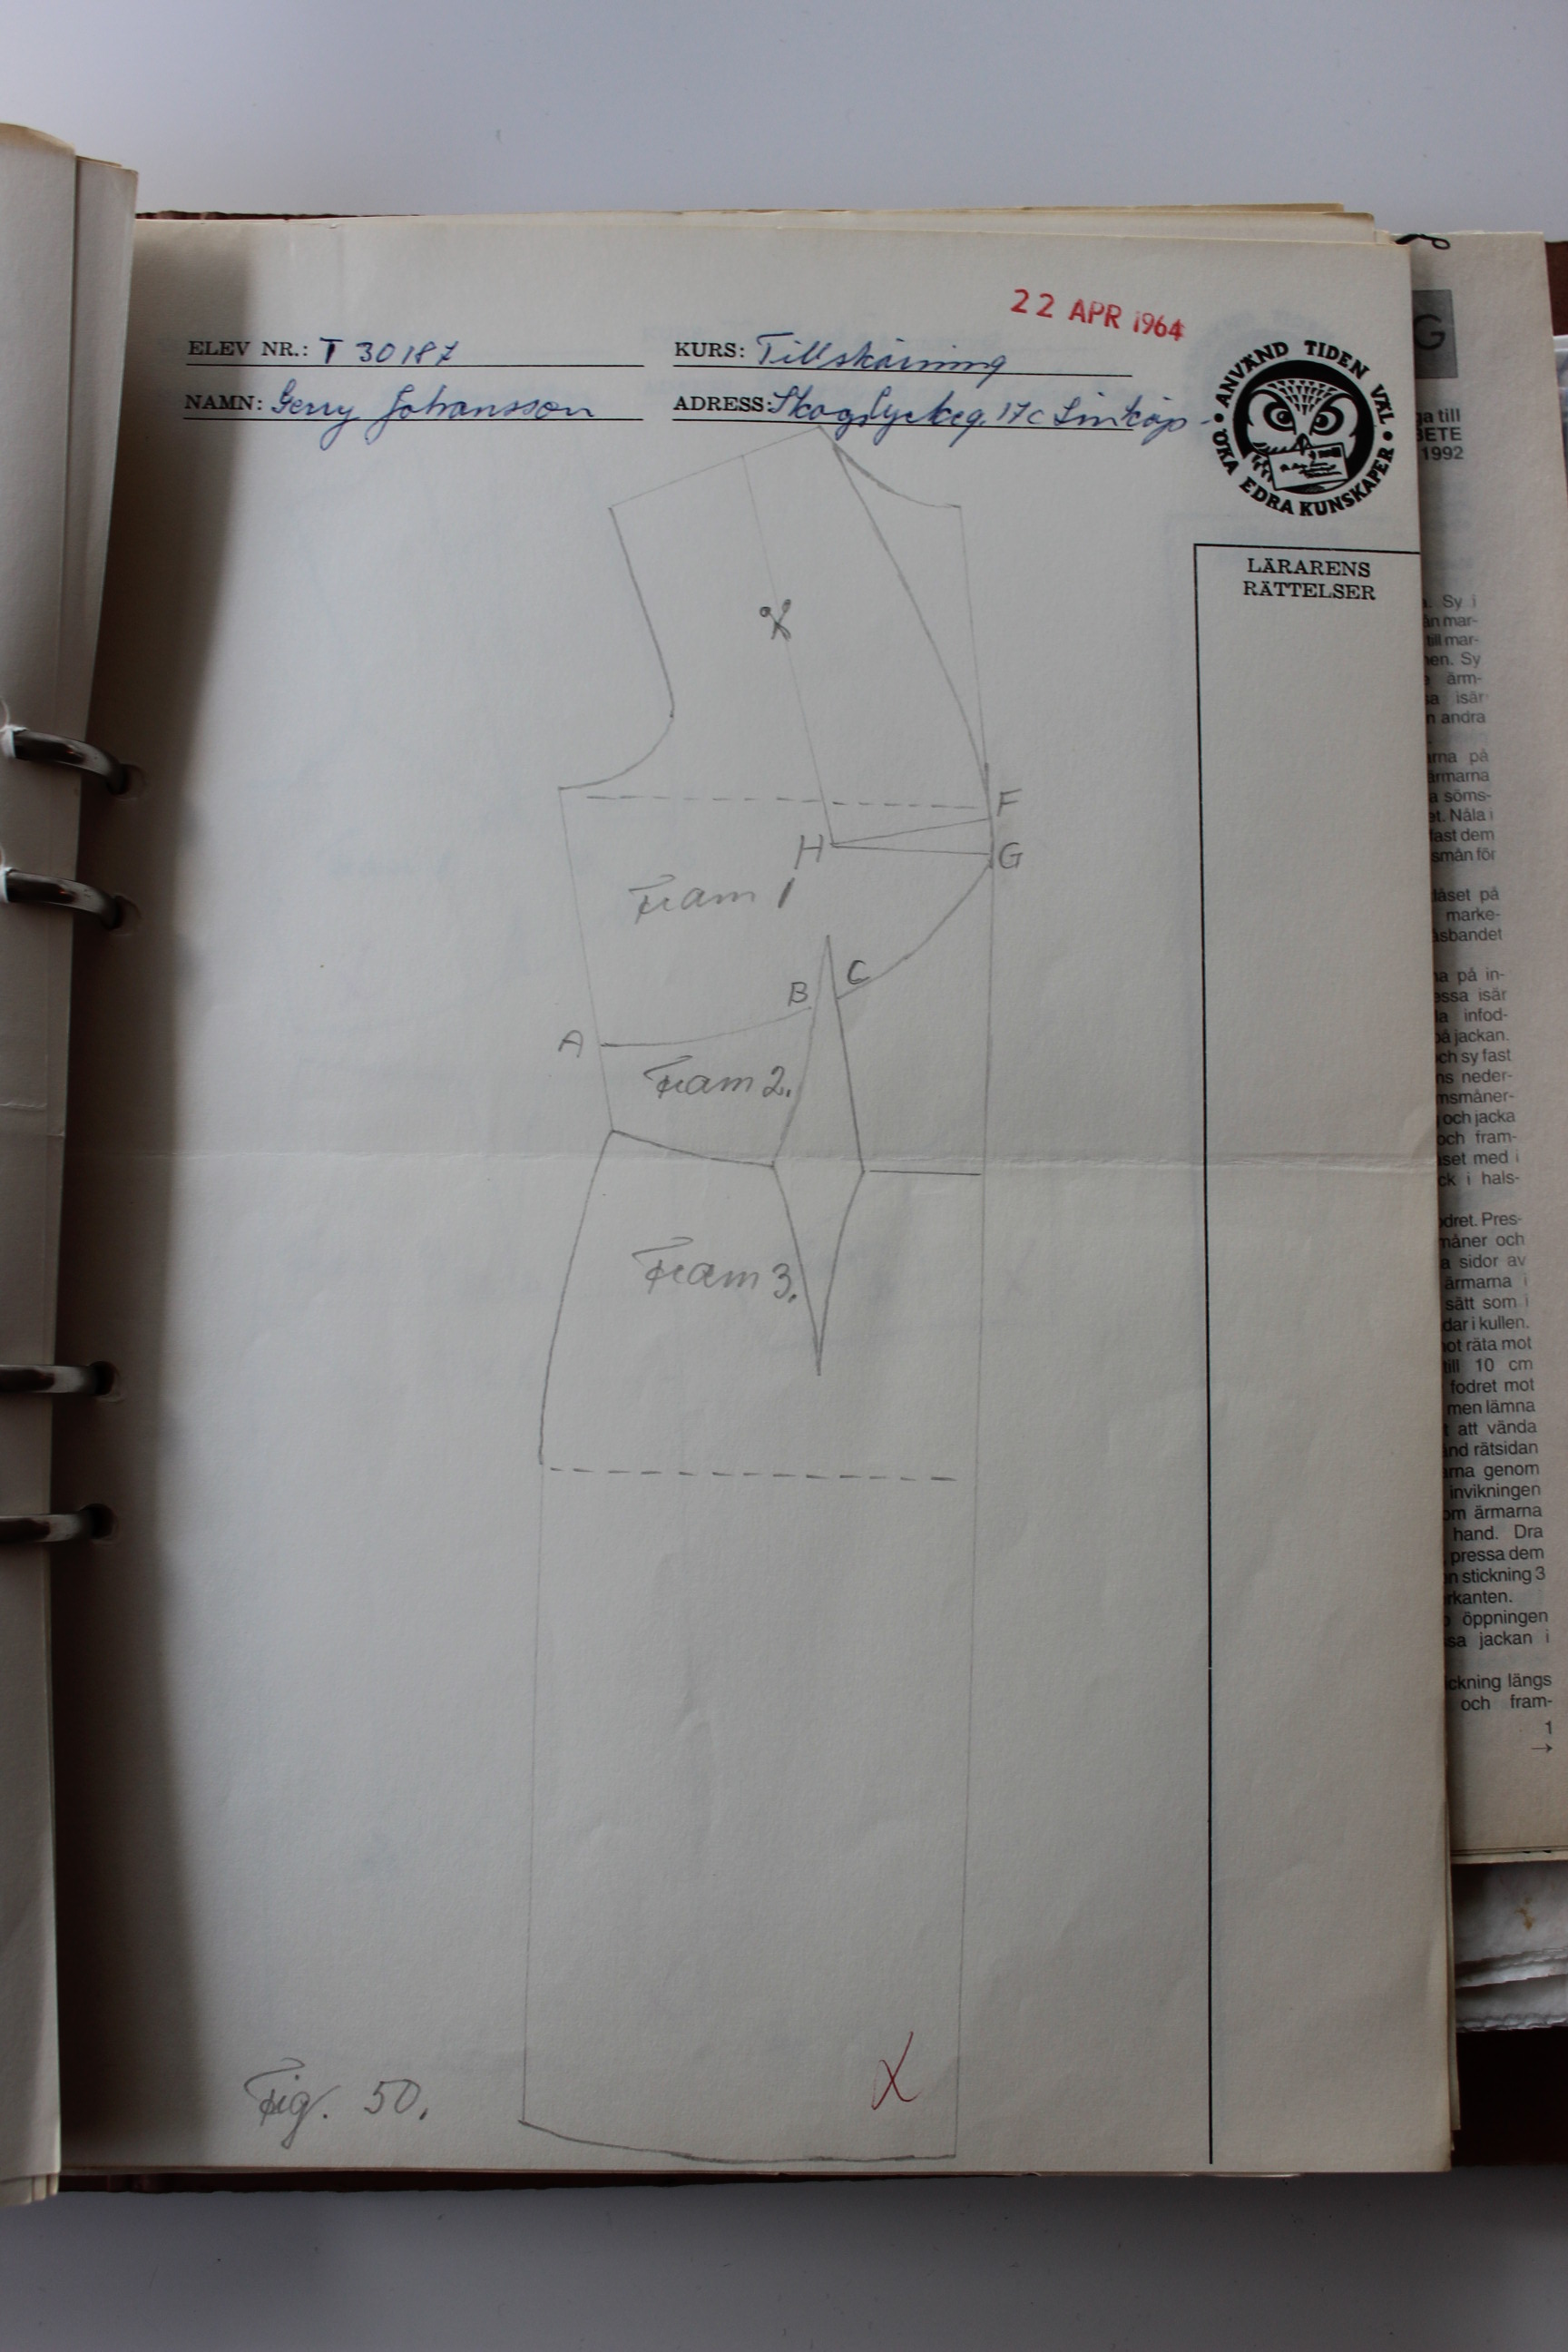 My grandmothers “homework” drafting’s.
And at the end of the binder/course she received a diploma – notice the date…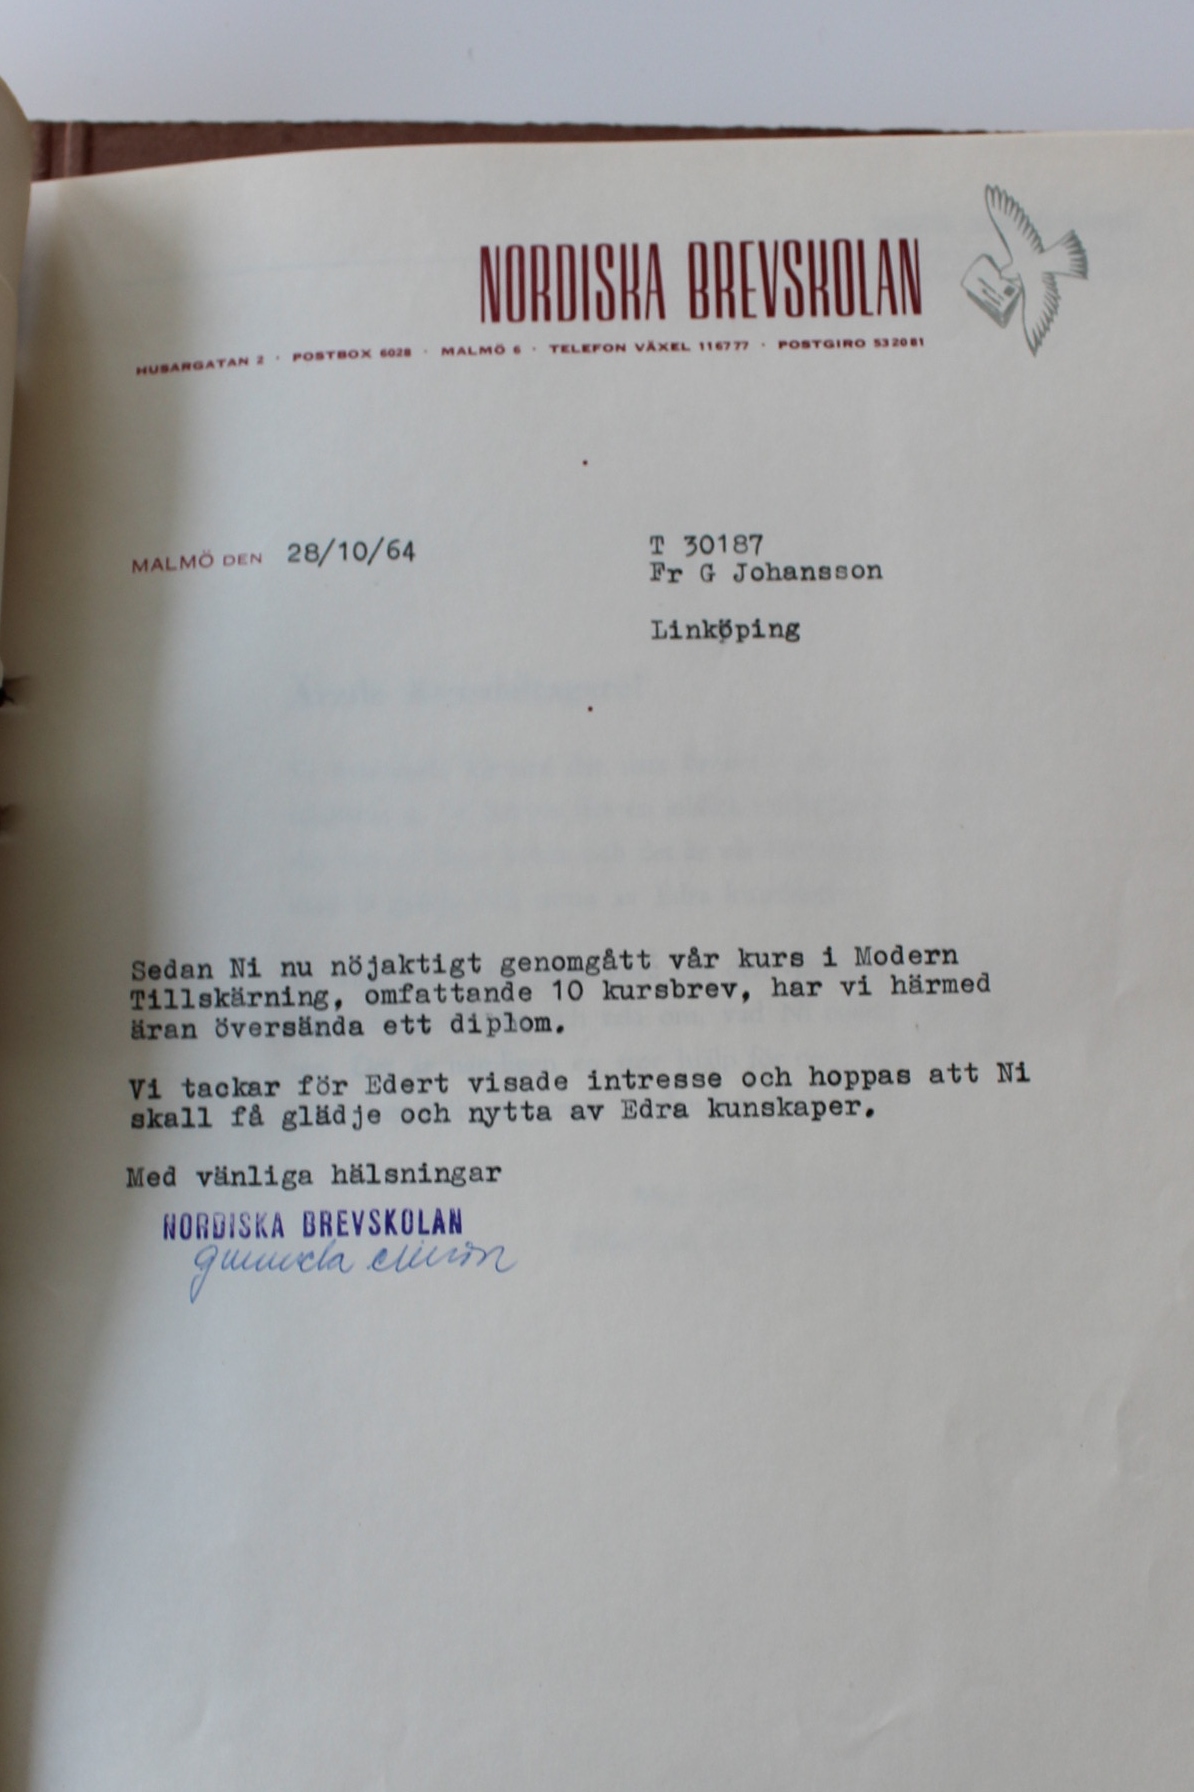
I’m yet to make up one of these patterns, but I definitely will someday – if only to remember my granny.
The Start of a war – Downton Marys style – Photoshoot
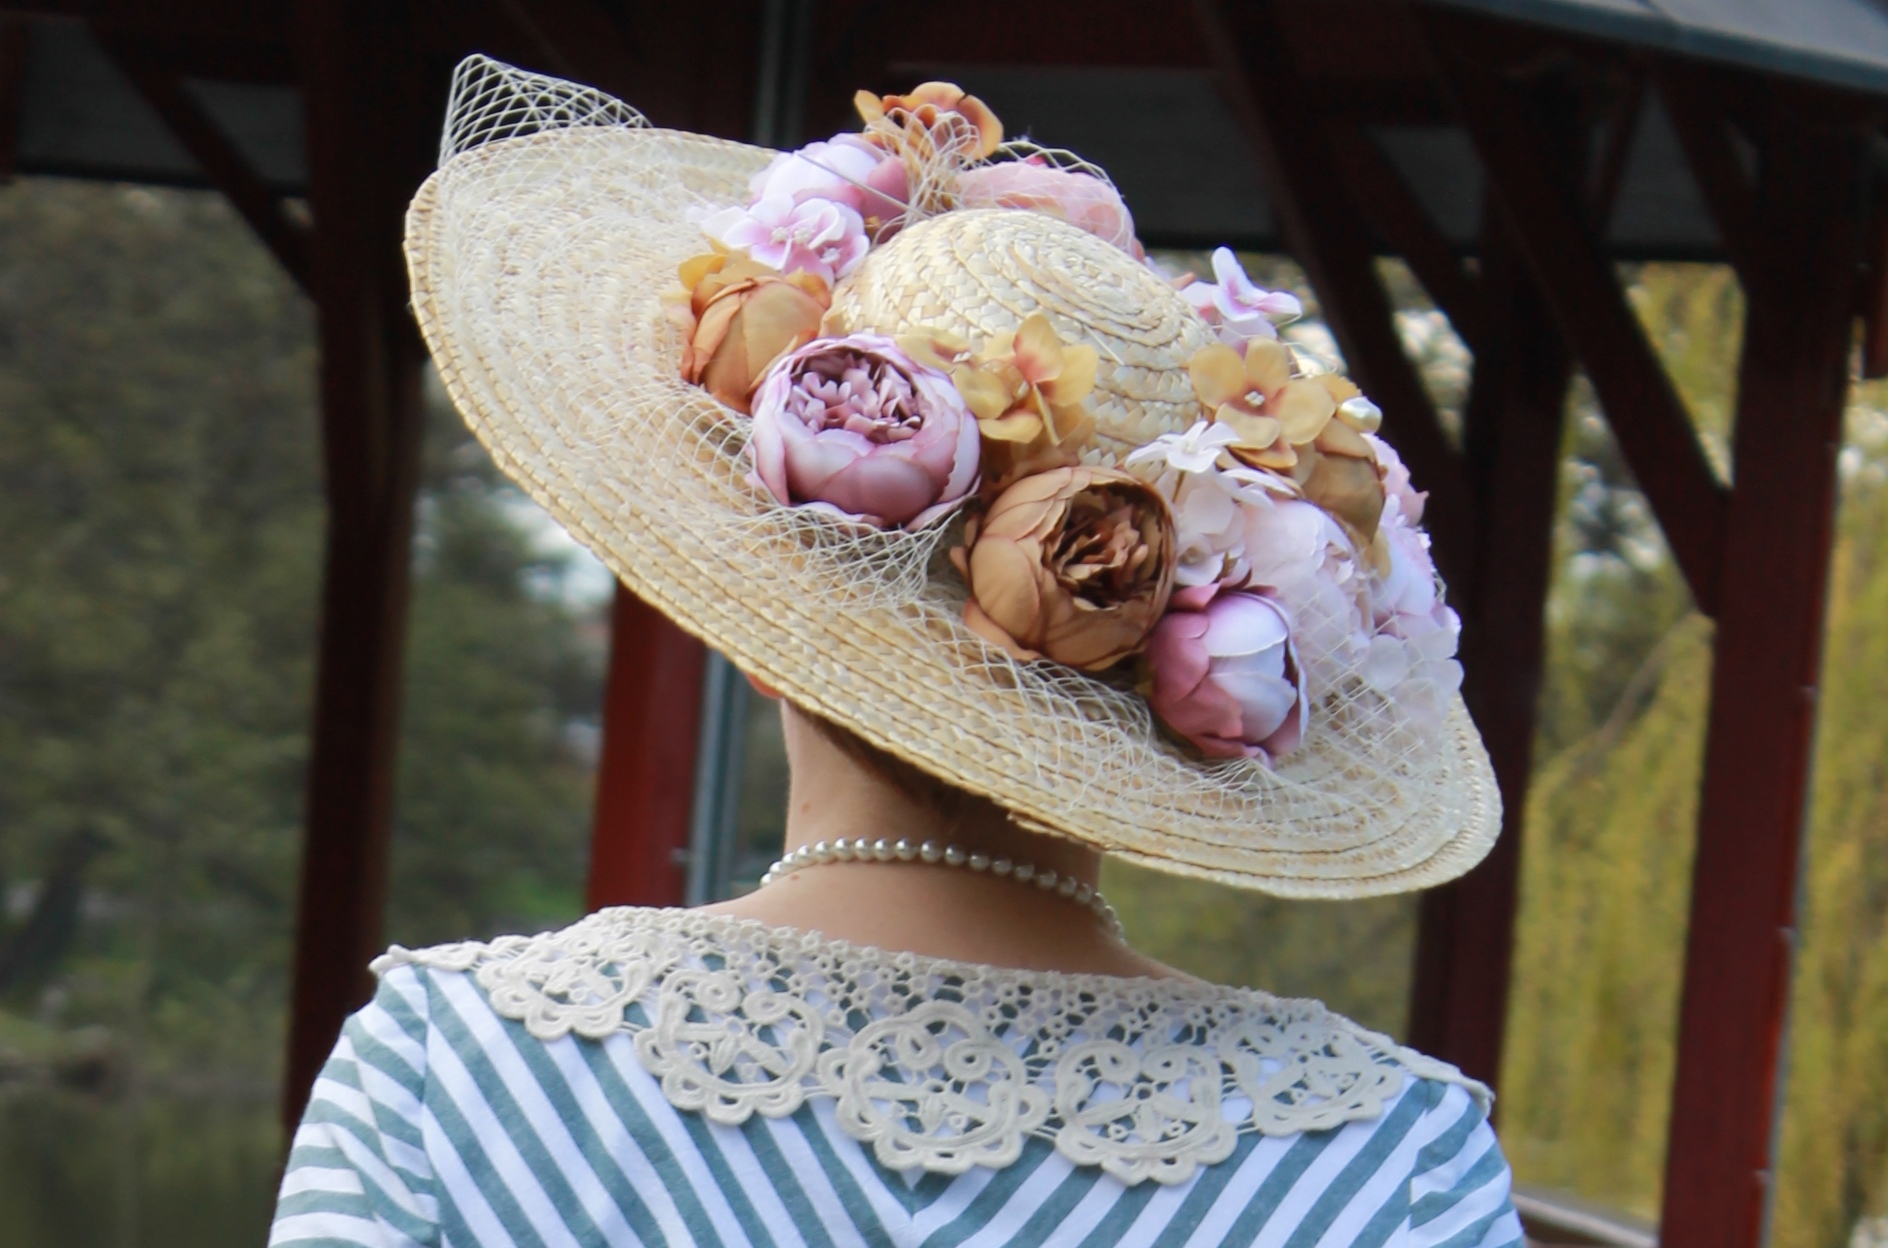
Last Sunday I took the chance to both see my sister, and to do a little photoshoot of my new striped Lady Mary/”Downton Abby” Dress (read about it here (Part 1) and here (Part 2)) The weather was warm but a bit cloudy, so unfortunately we didn’t get any sunny pictures. I wore my dress with my long line 1910s corset, Autumn garden hat, American Duchess Gibson shoes, stockings, a thin petticoat, and a few bits and pieces like crocheted gloves, antique velvet bag and long pearl necklace. 


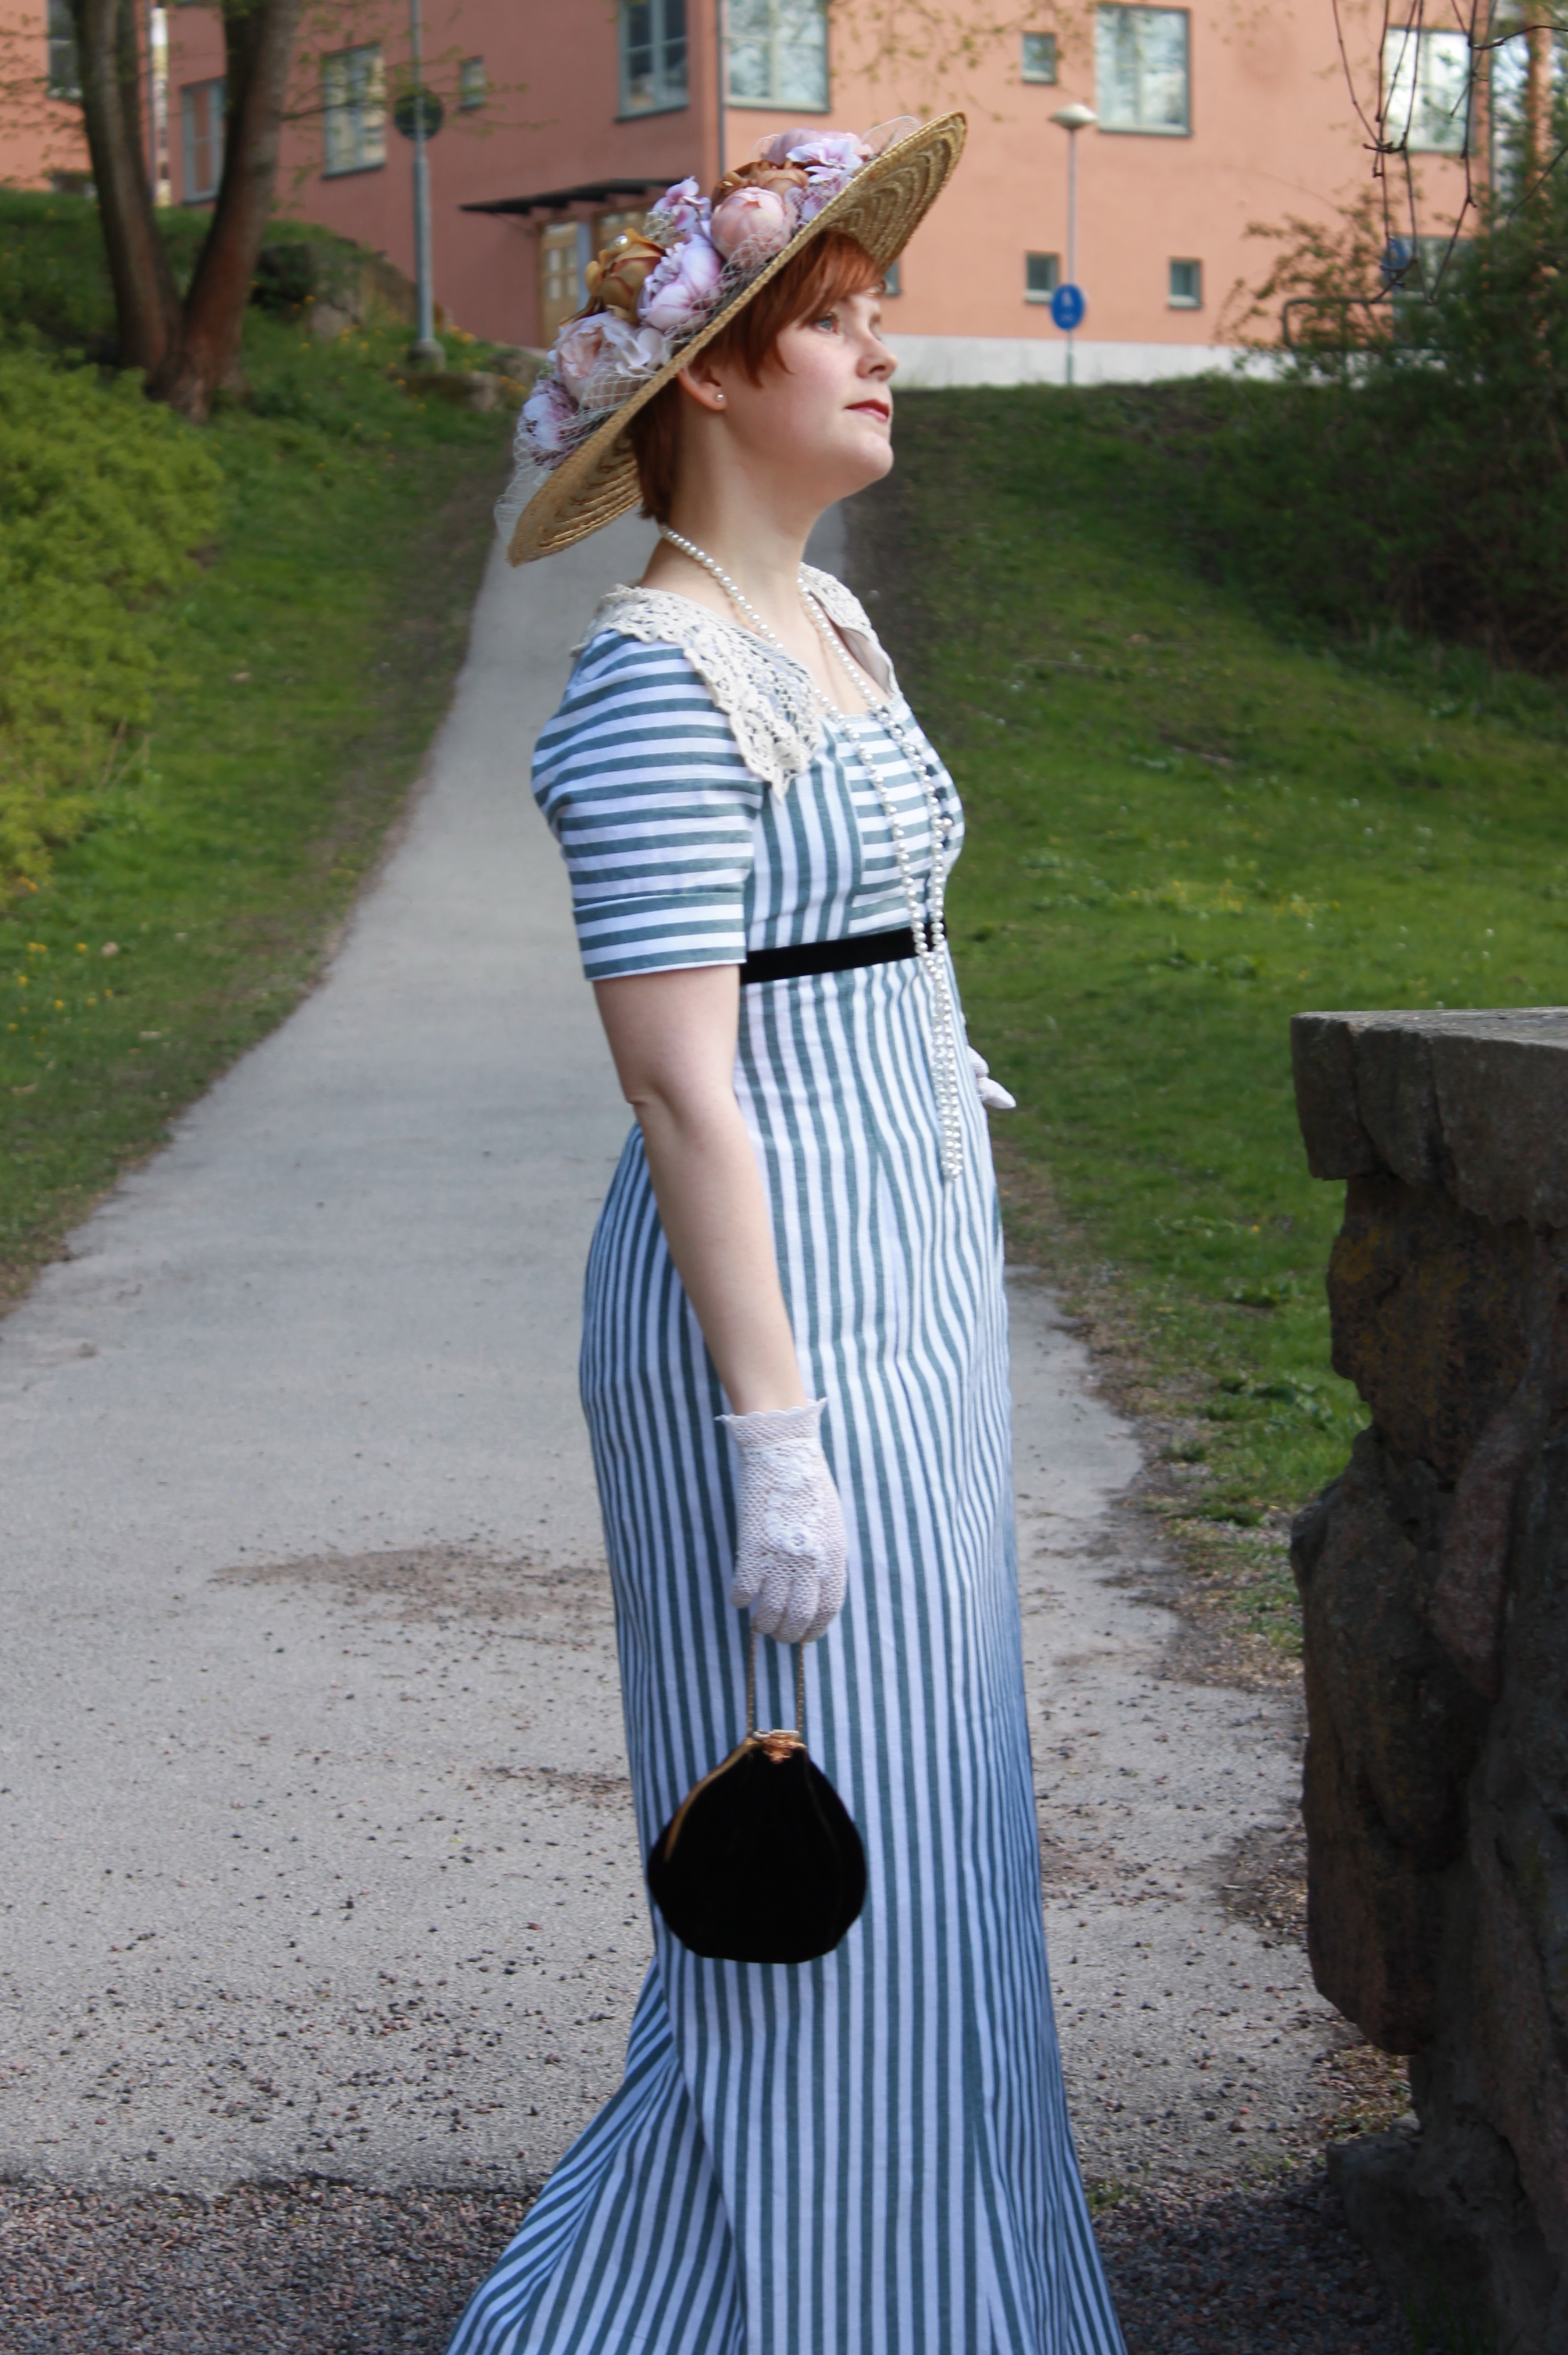
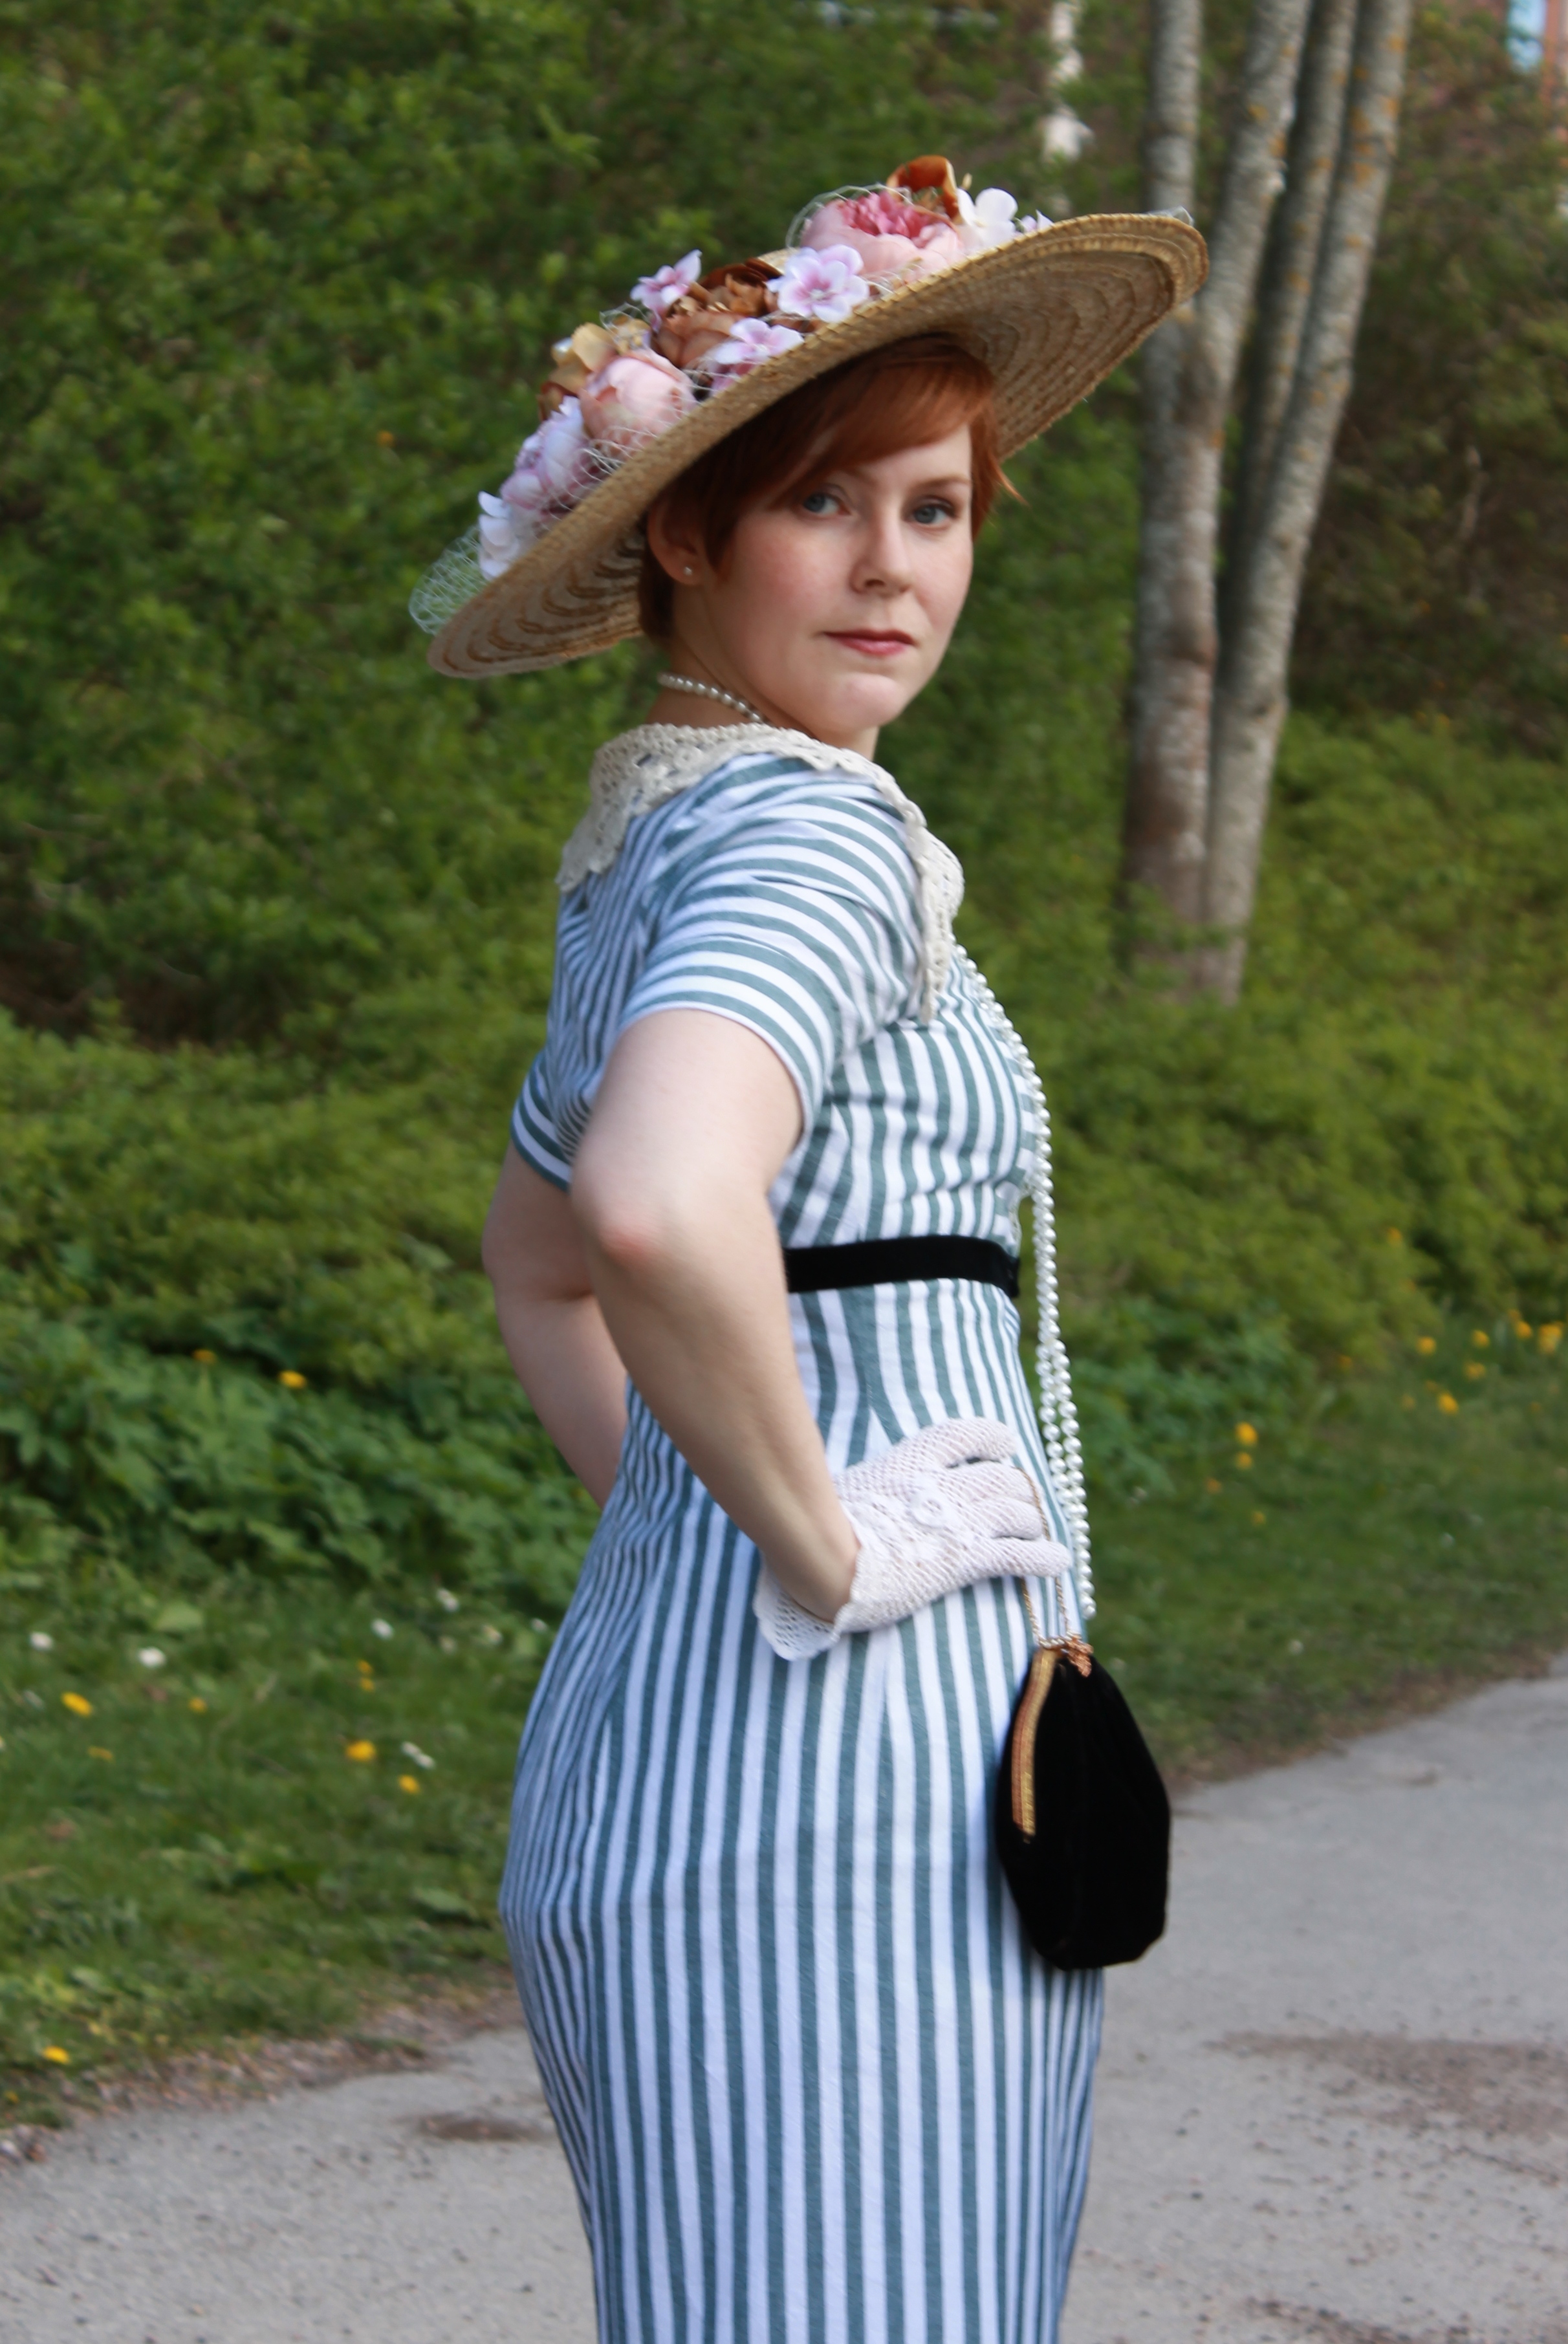
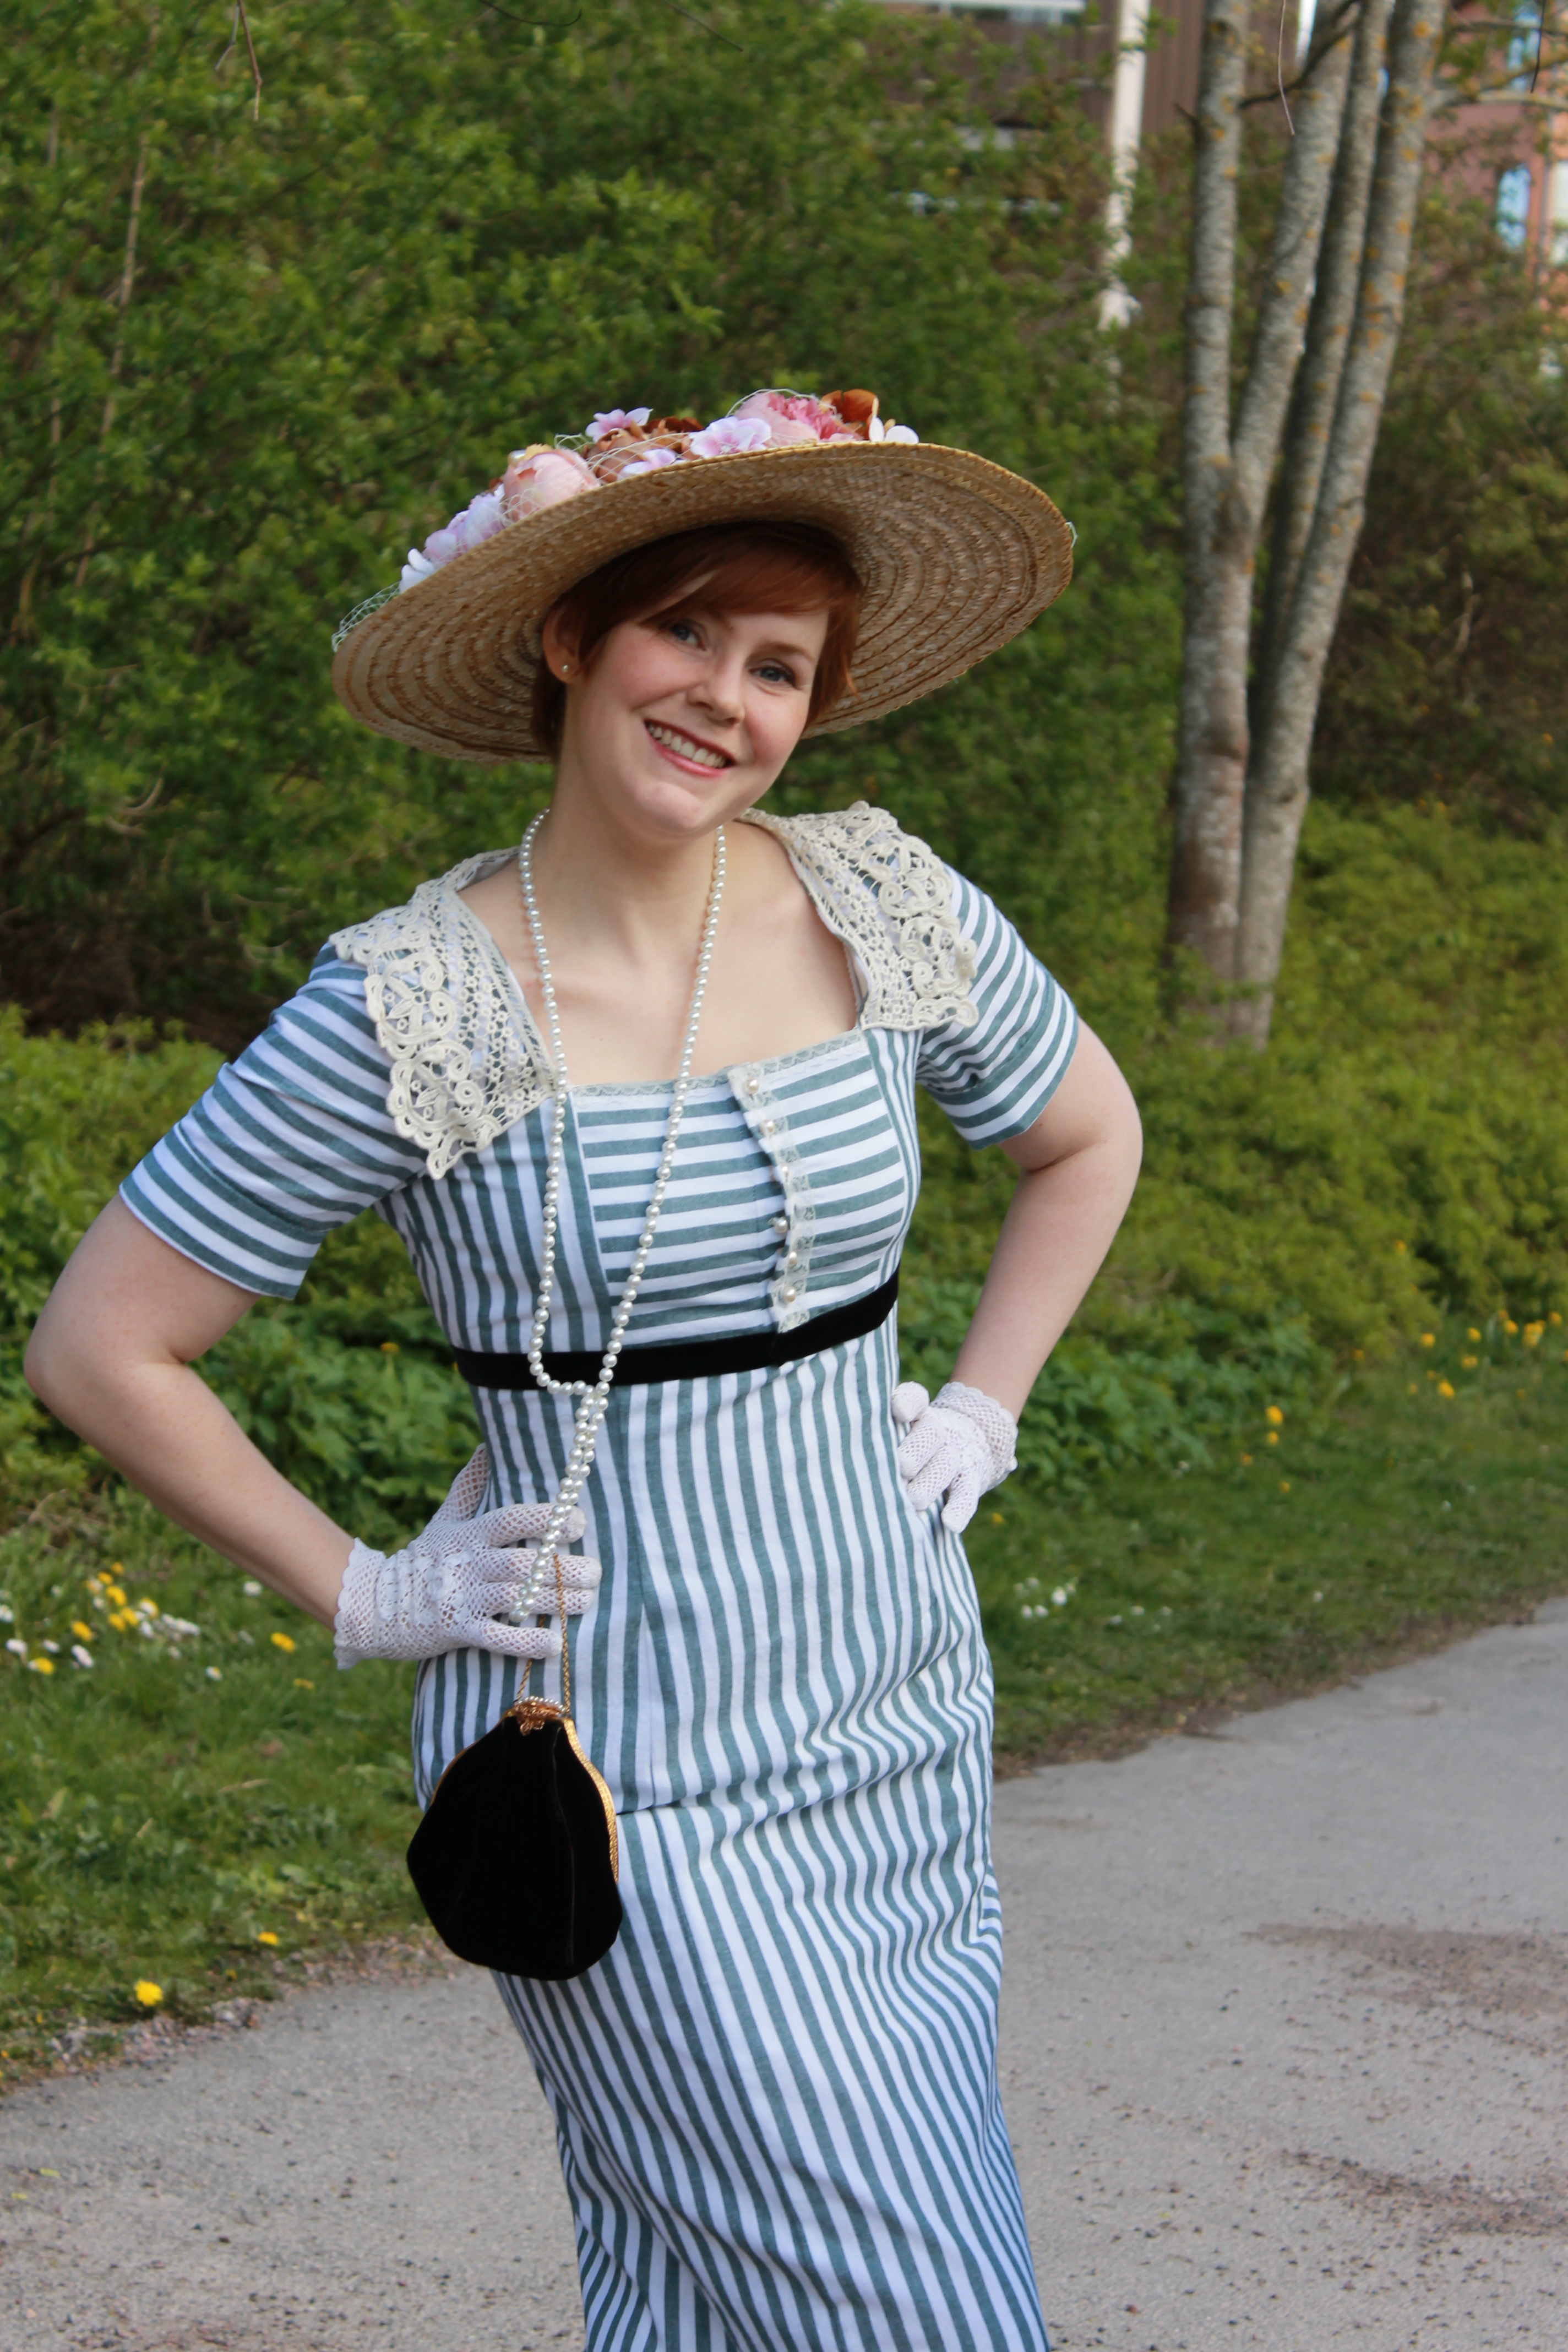
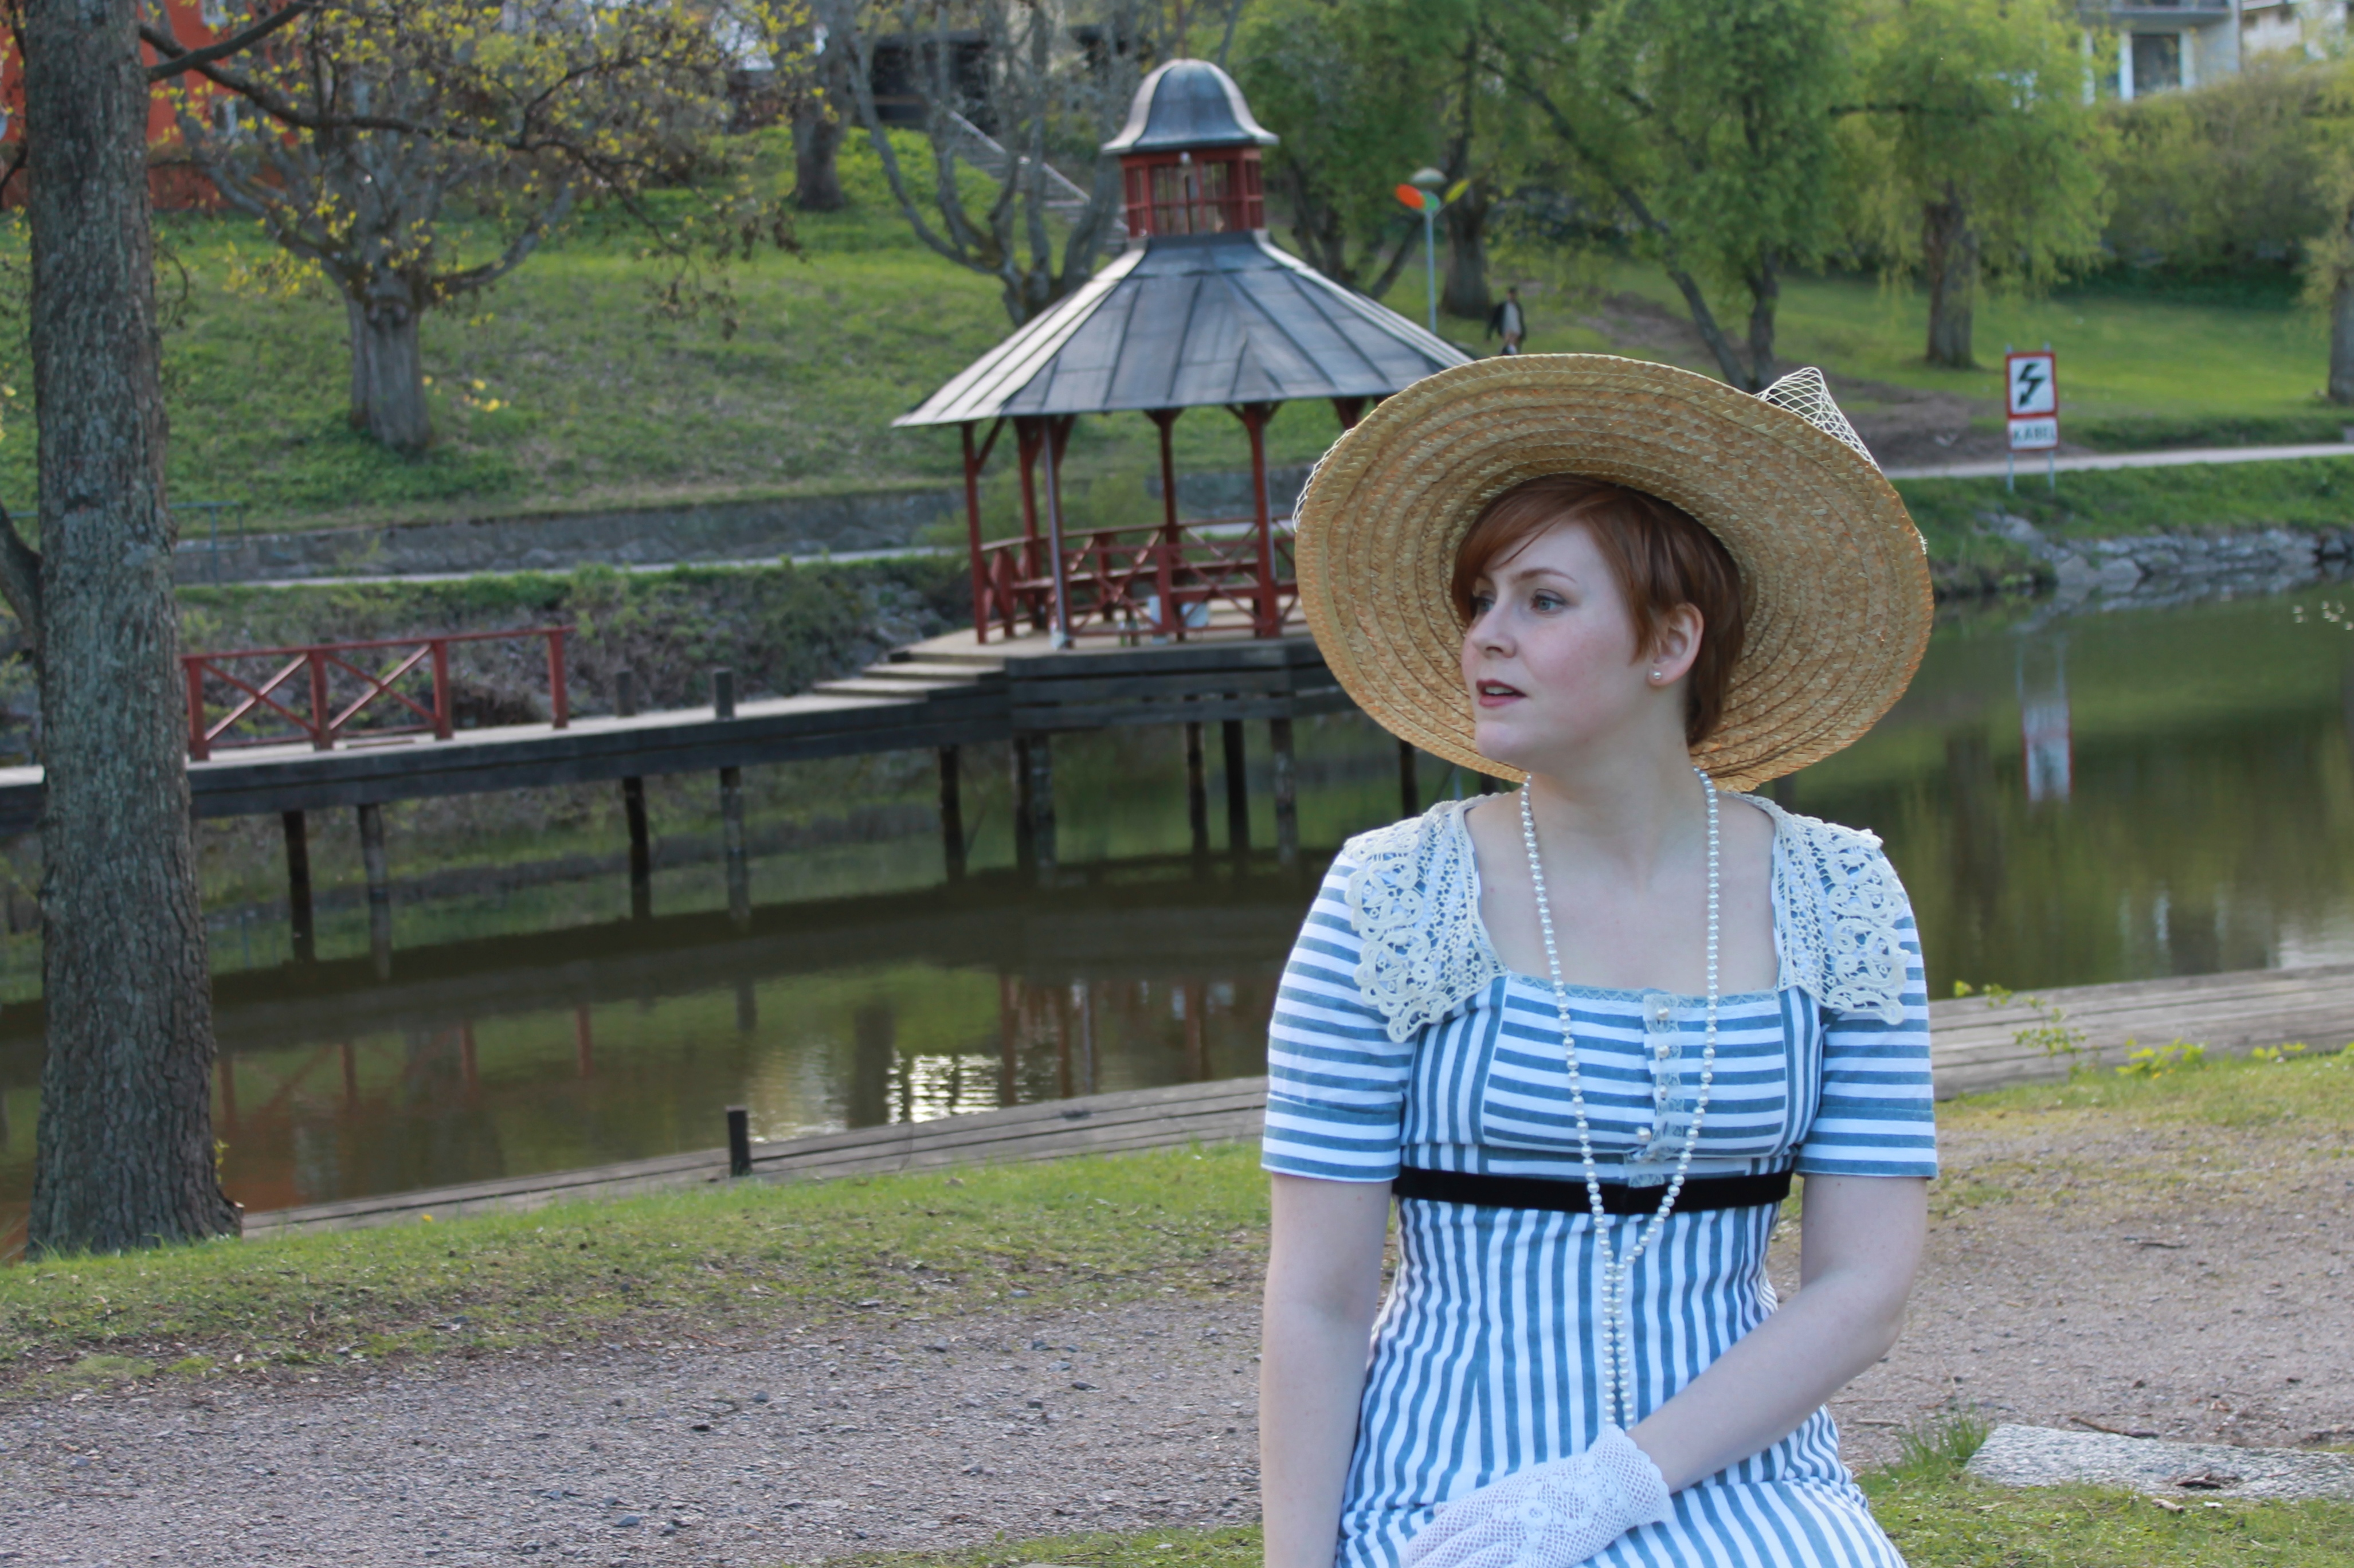


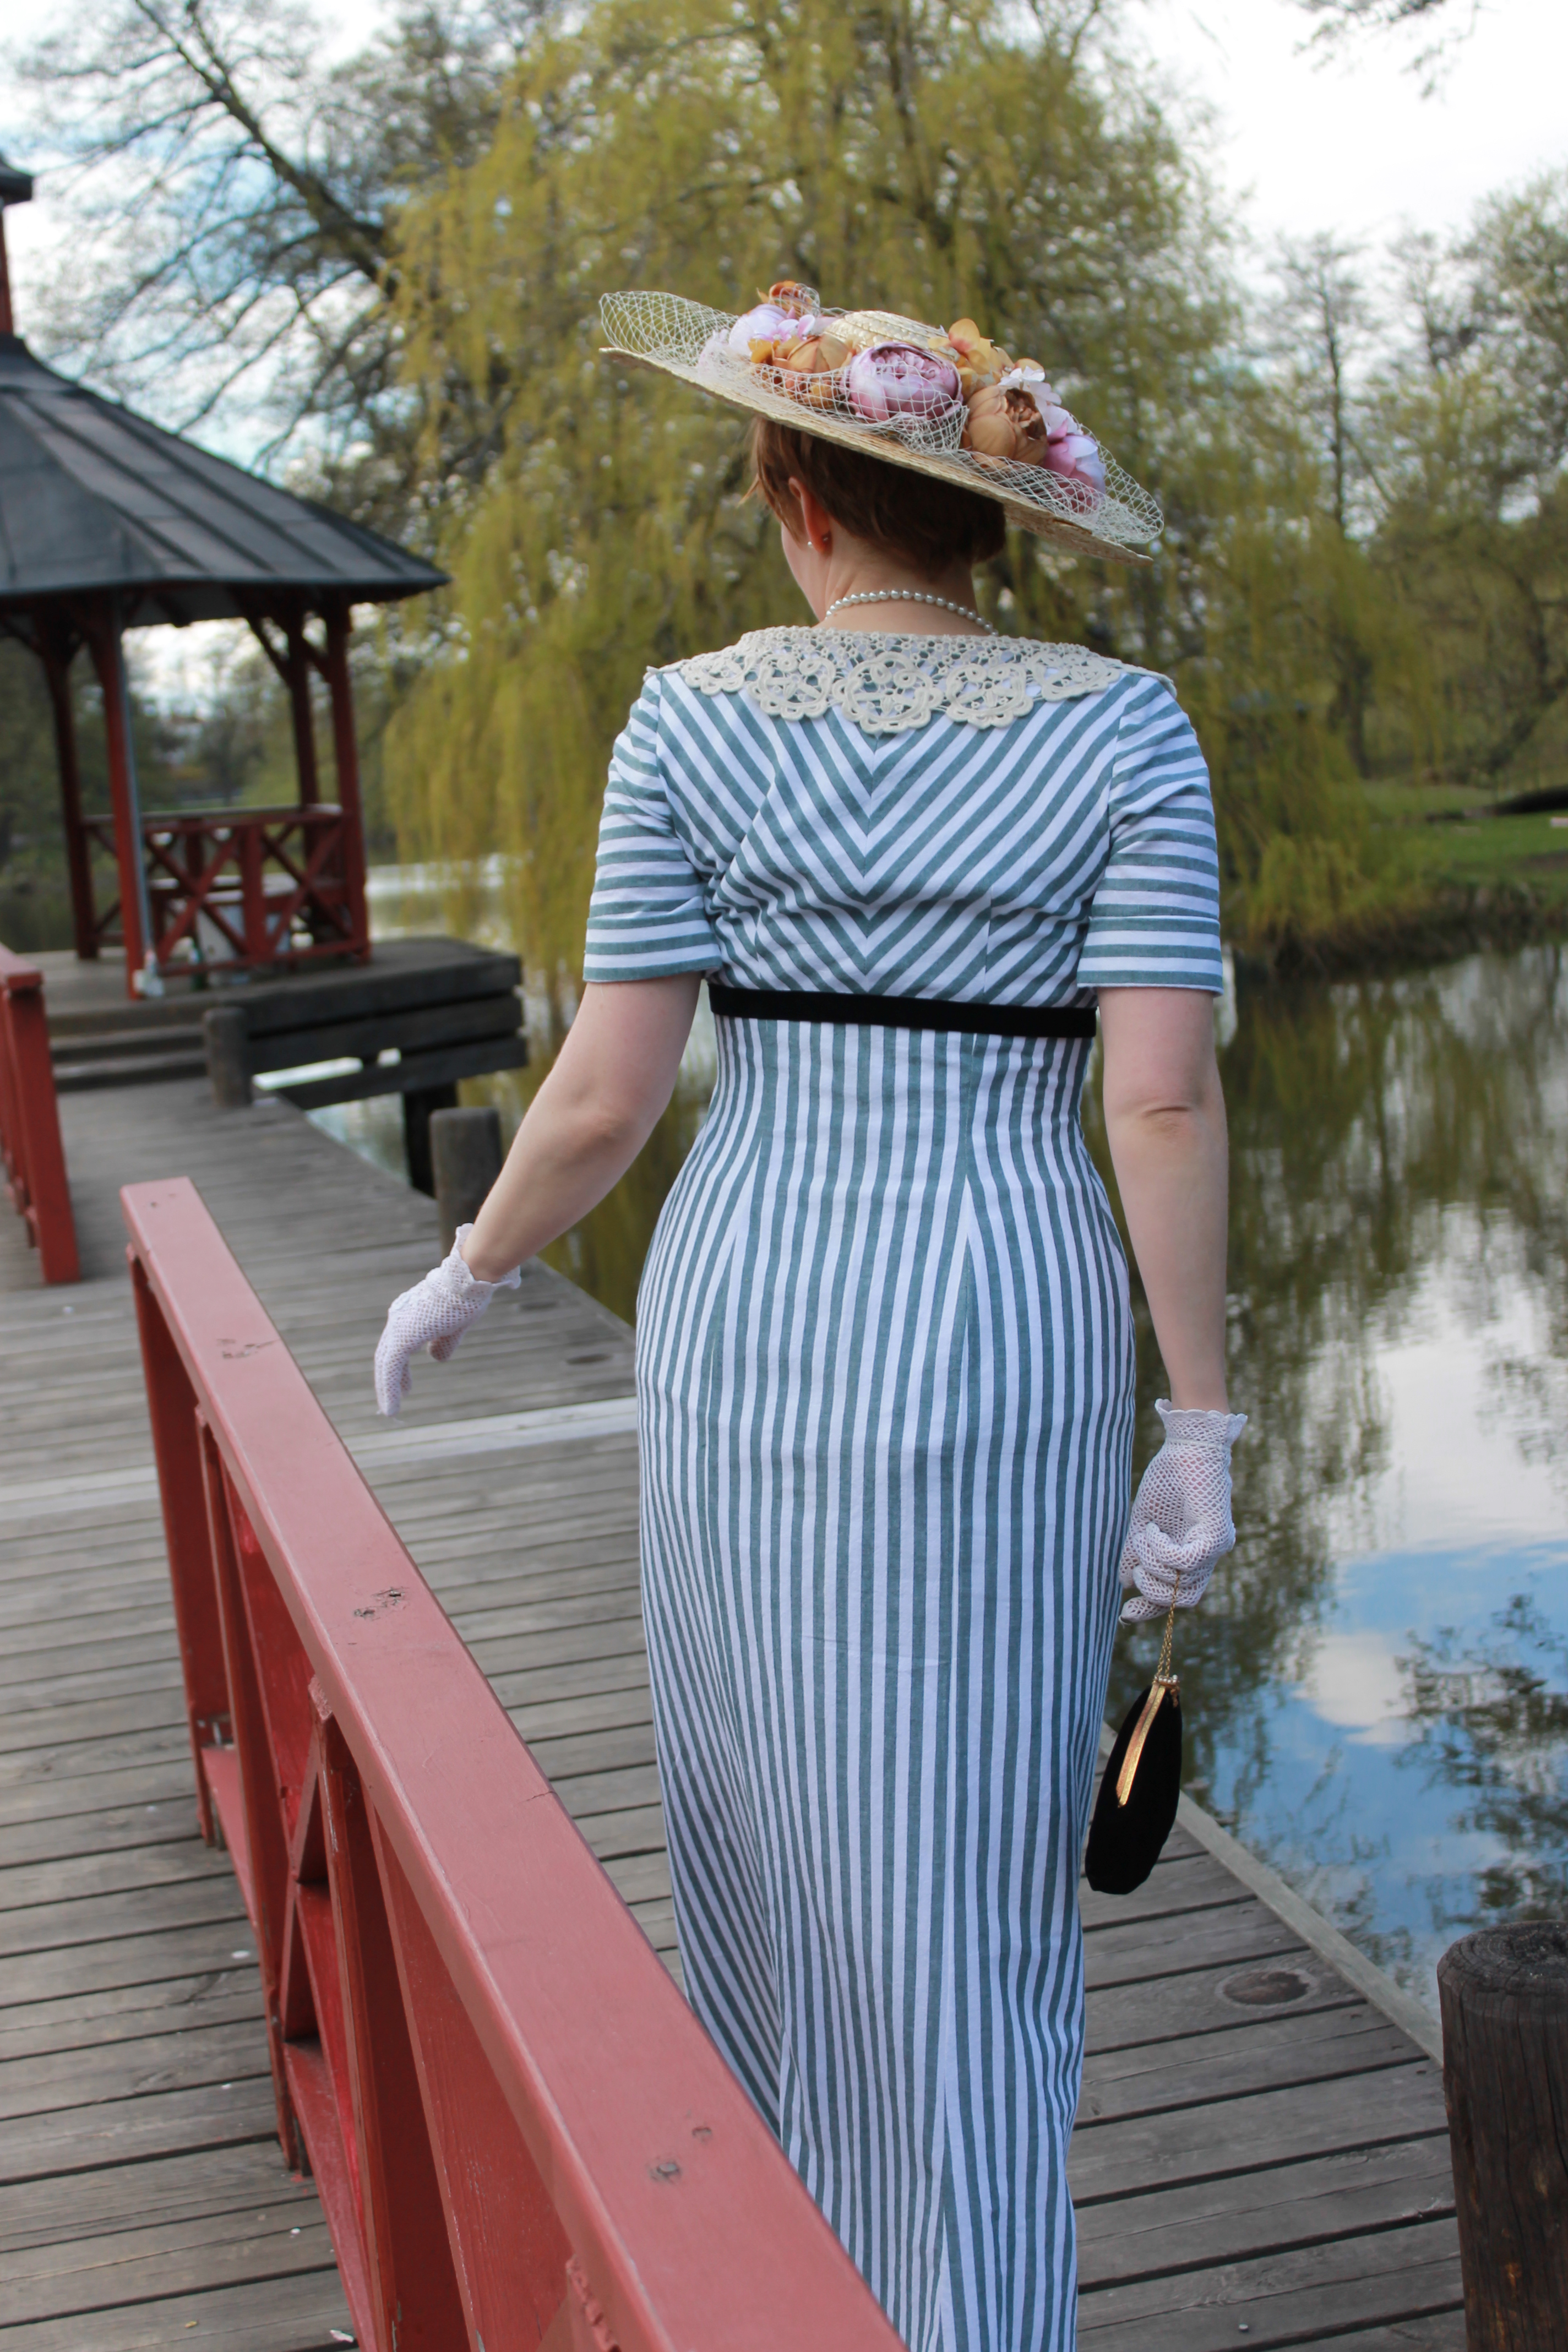
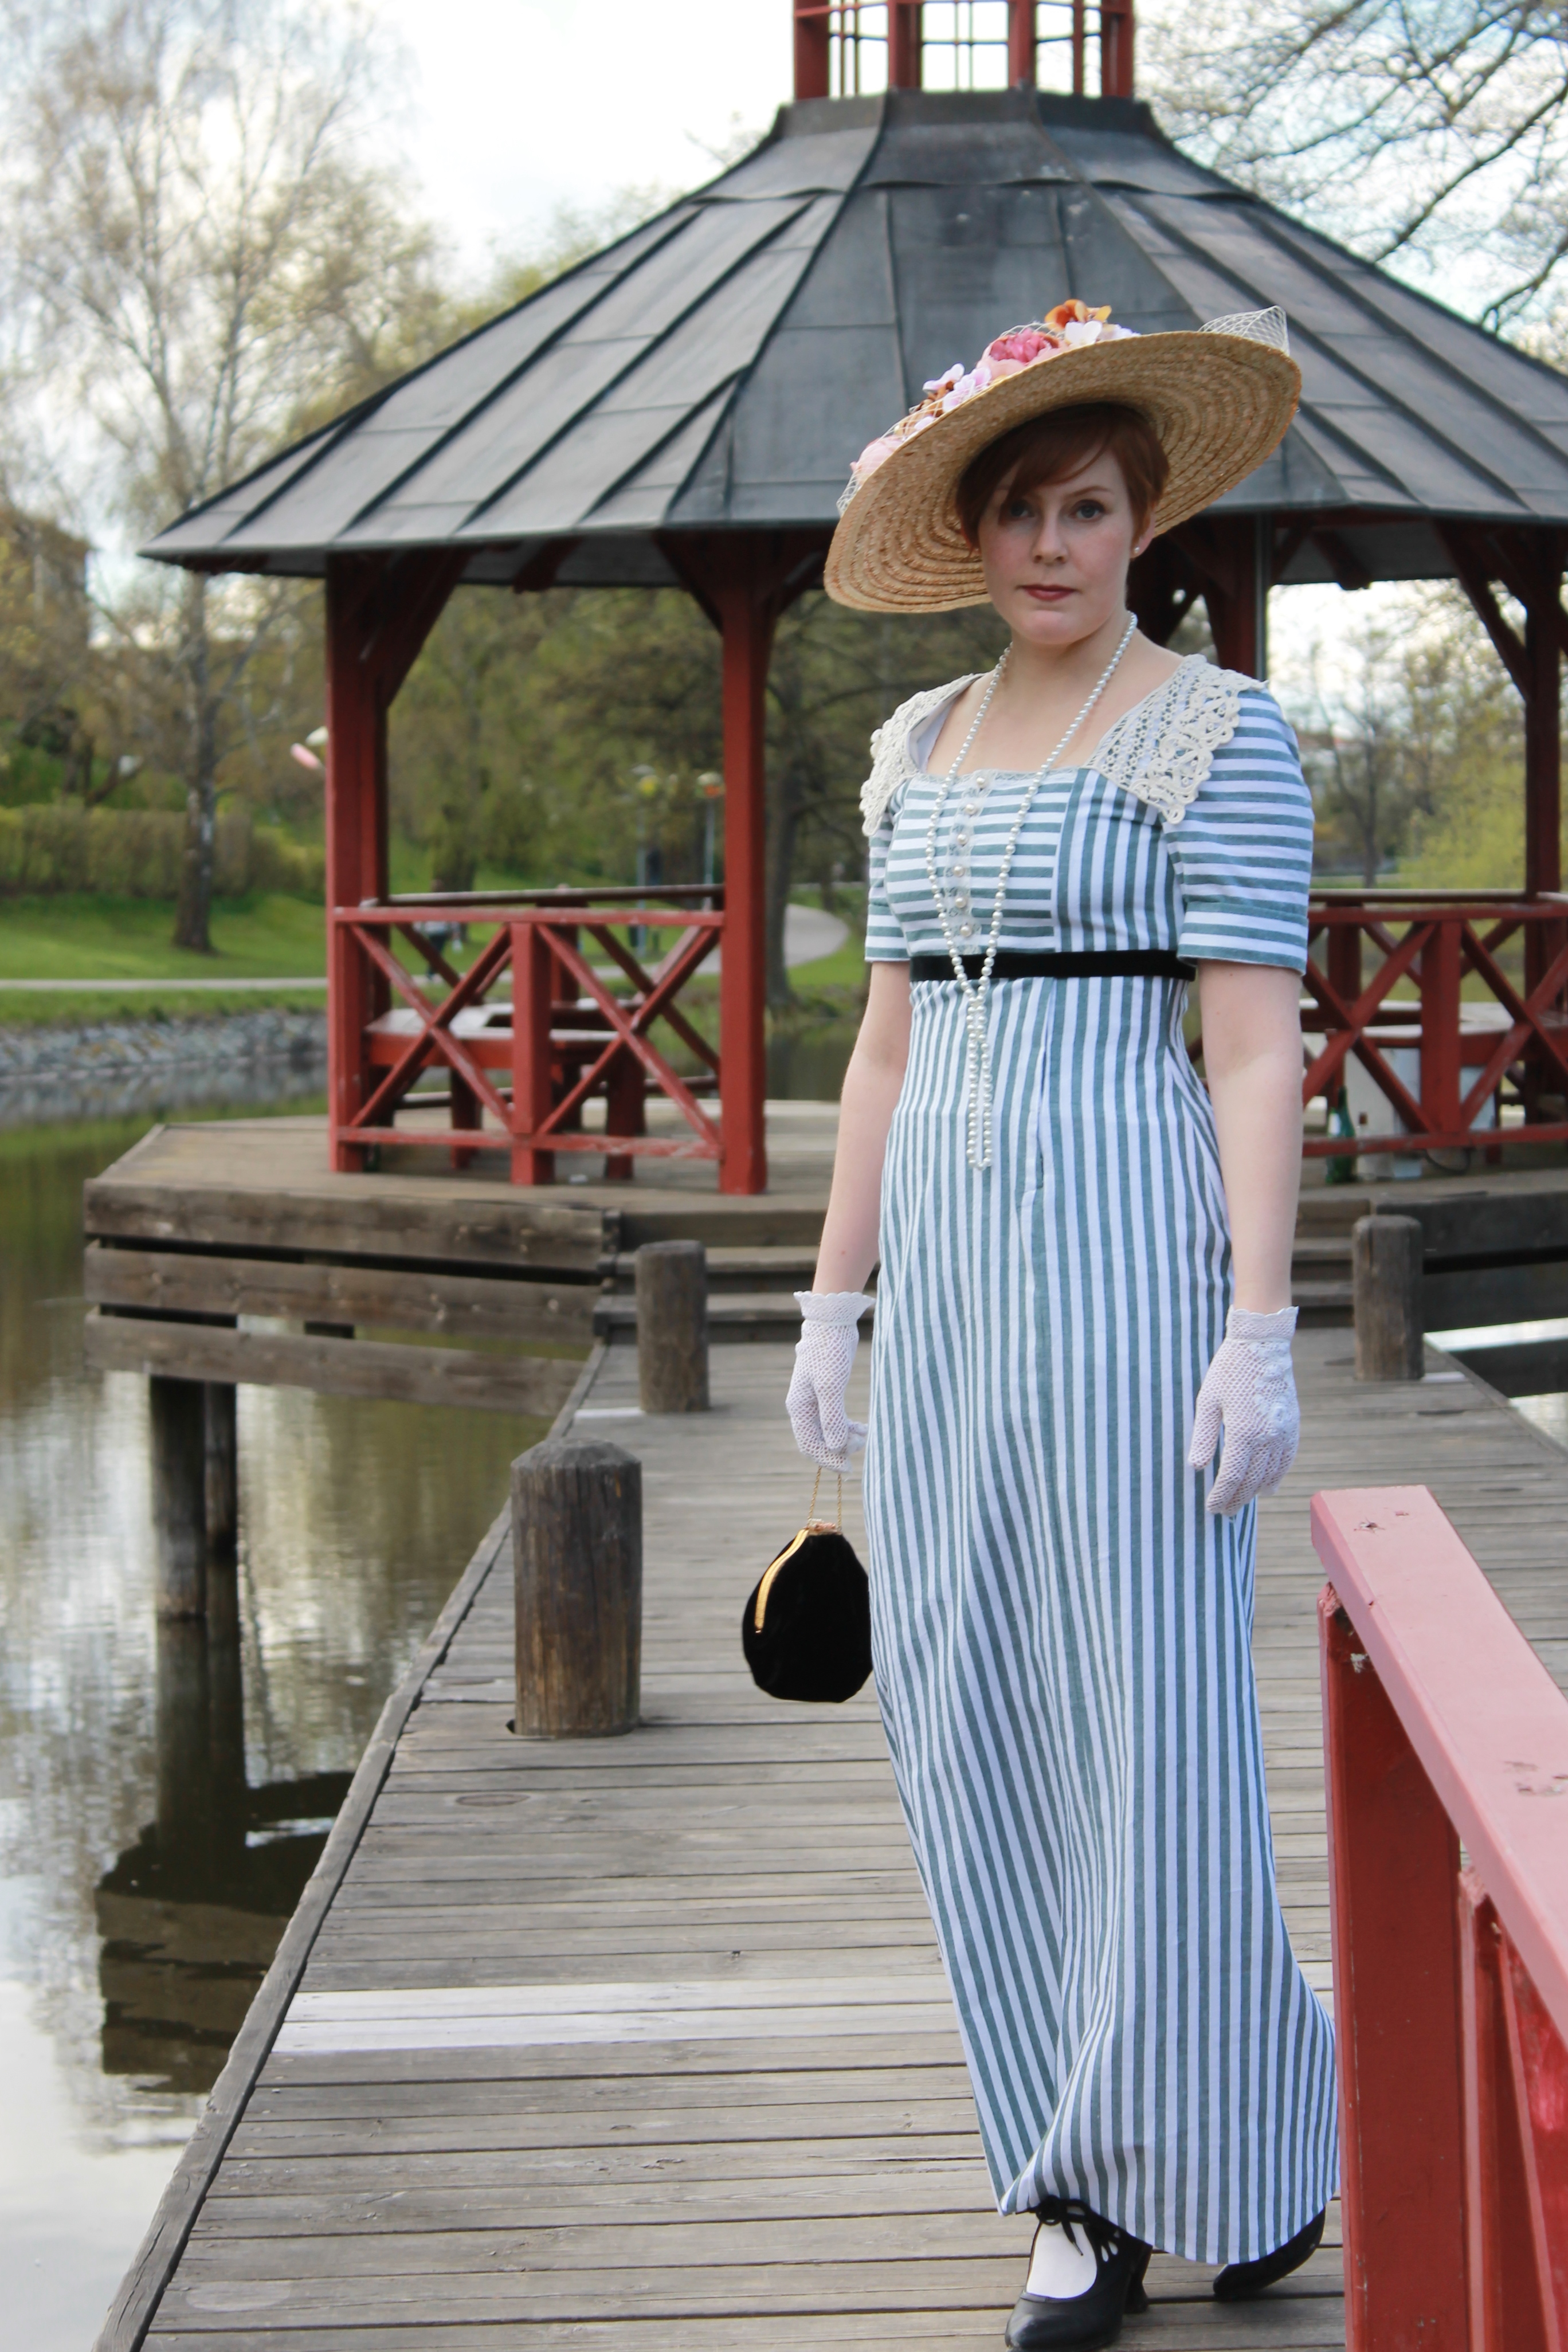
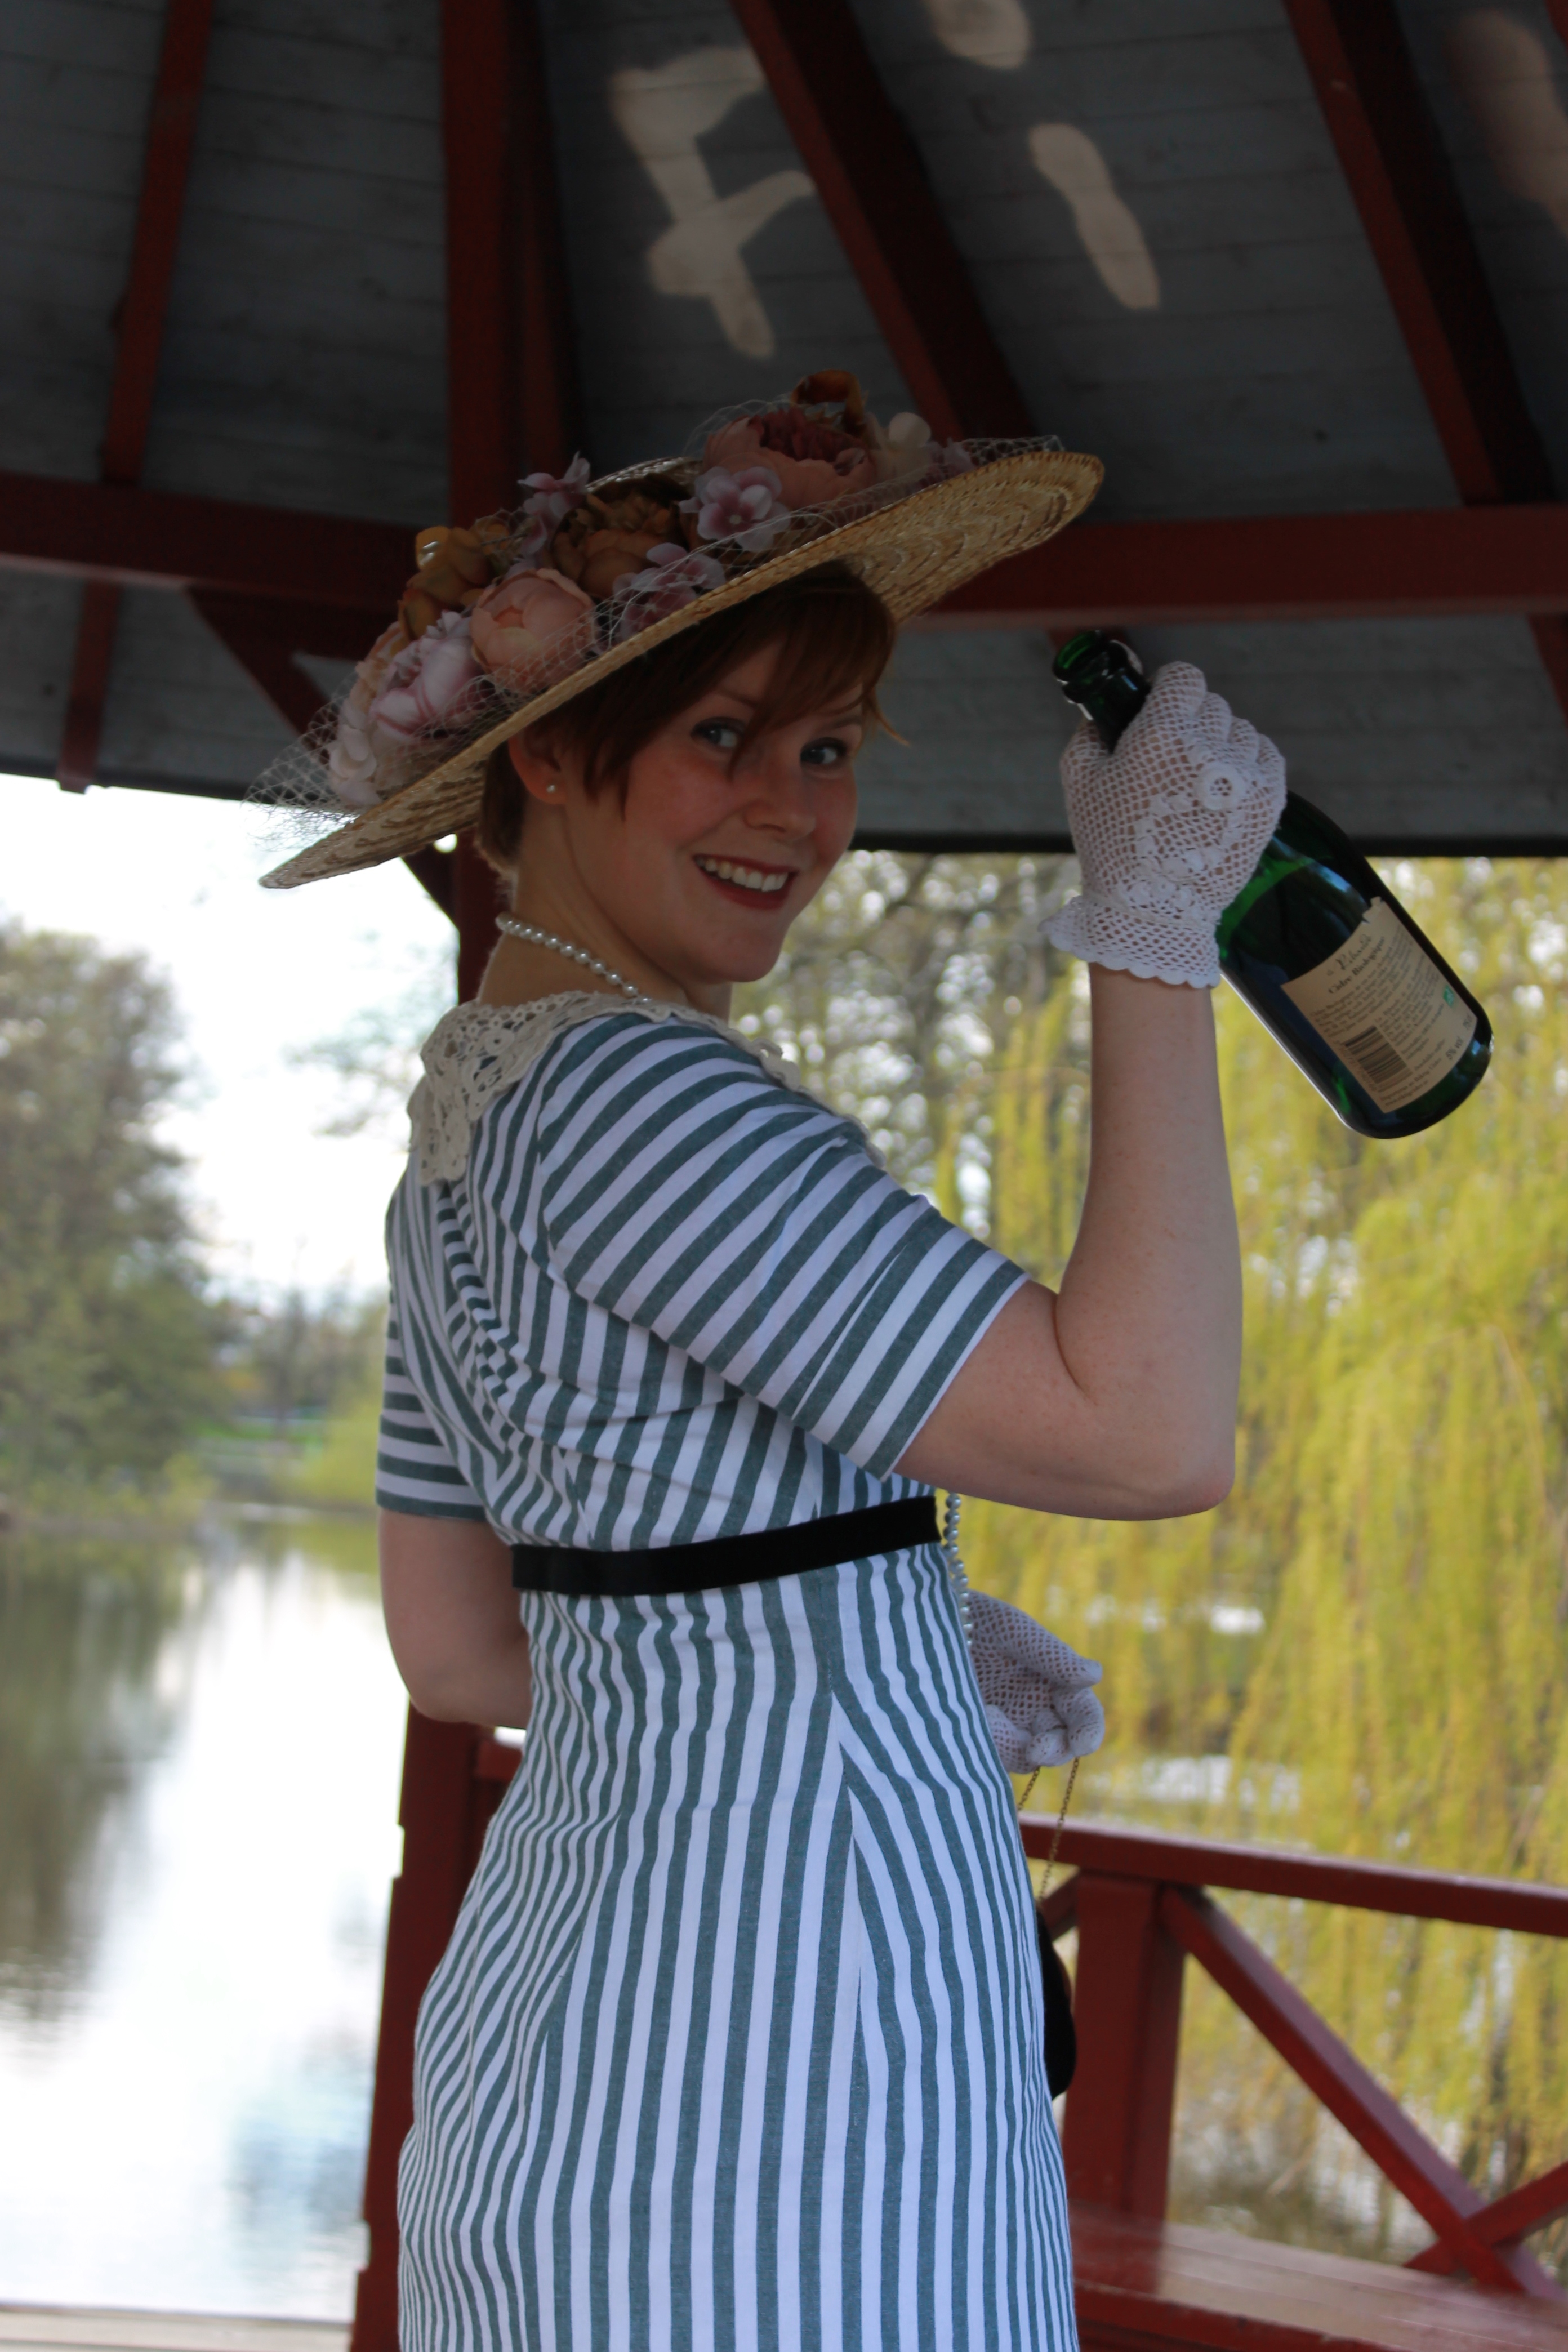 Photo: Elin Evaldsdottra
The Start of a war – Downton Mary’s Autumn Flowery Hat
Before I could call it a day and be finished with the Striped Lady Mary dress (part 1 & part 2) I needed to make the most vital (and biggest) of her accessorizes – The hat.
 The Hat Lady Mary wears in the series are huge and awesome – of course I needed one just like it.
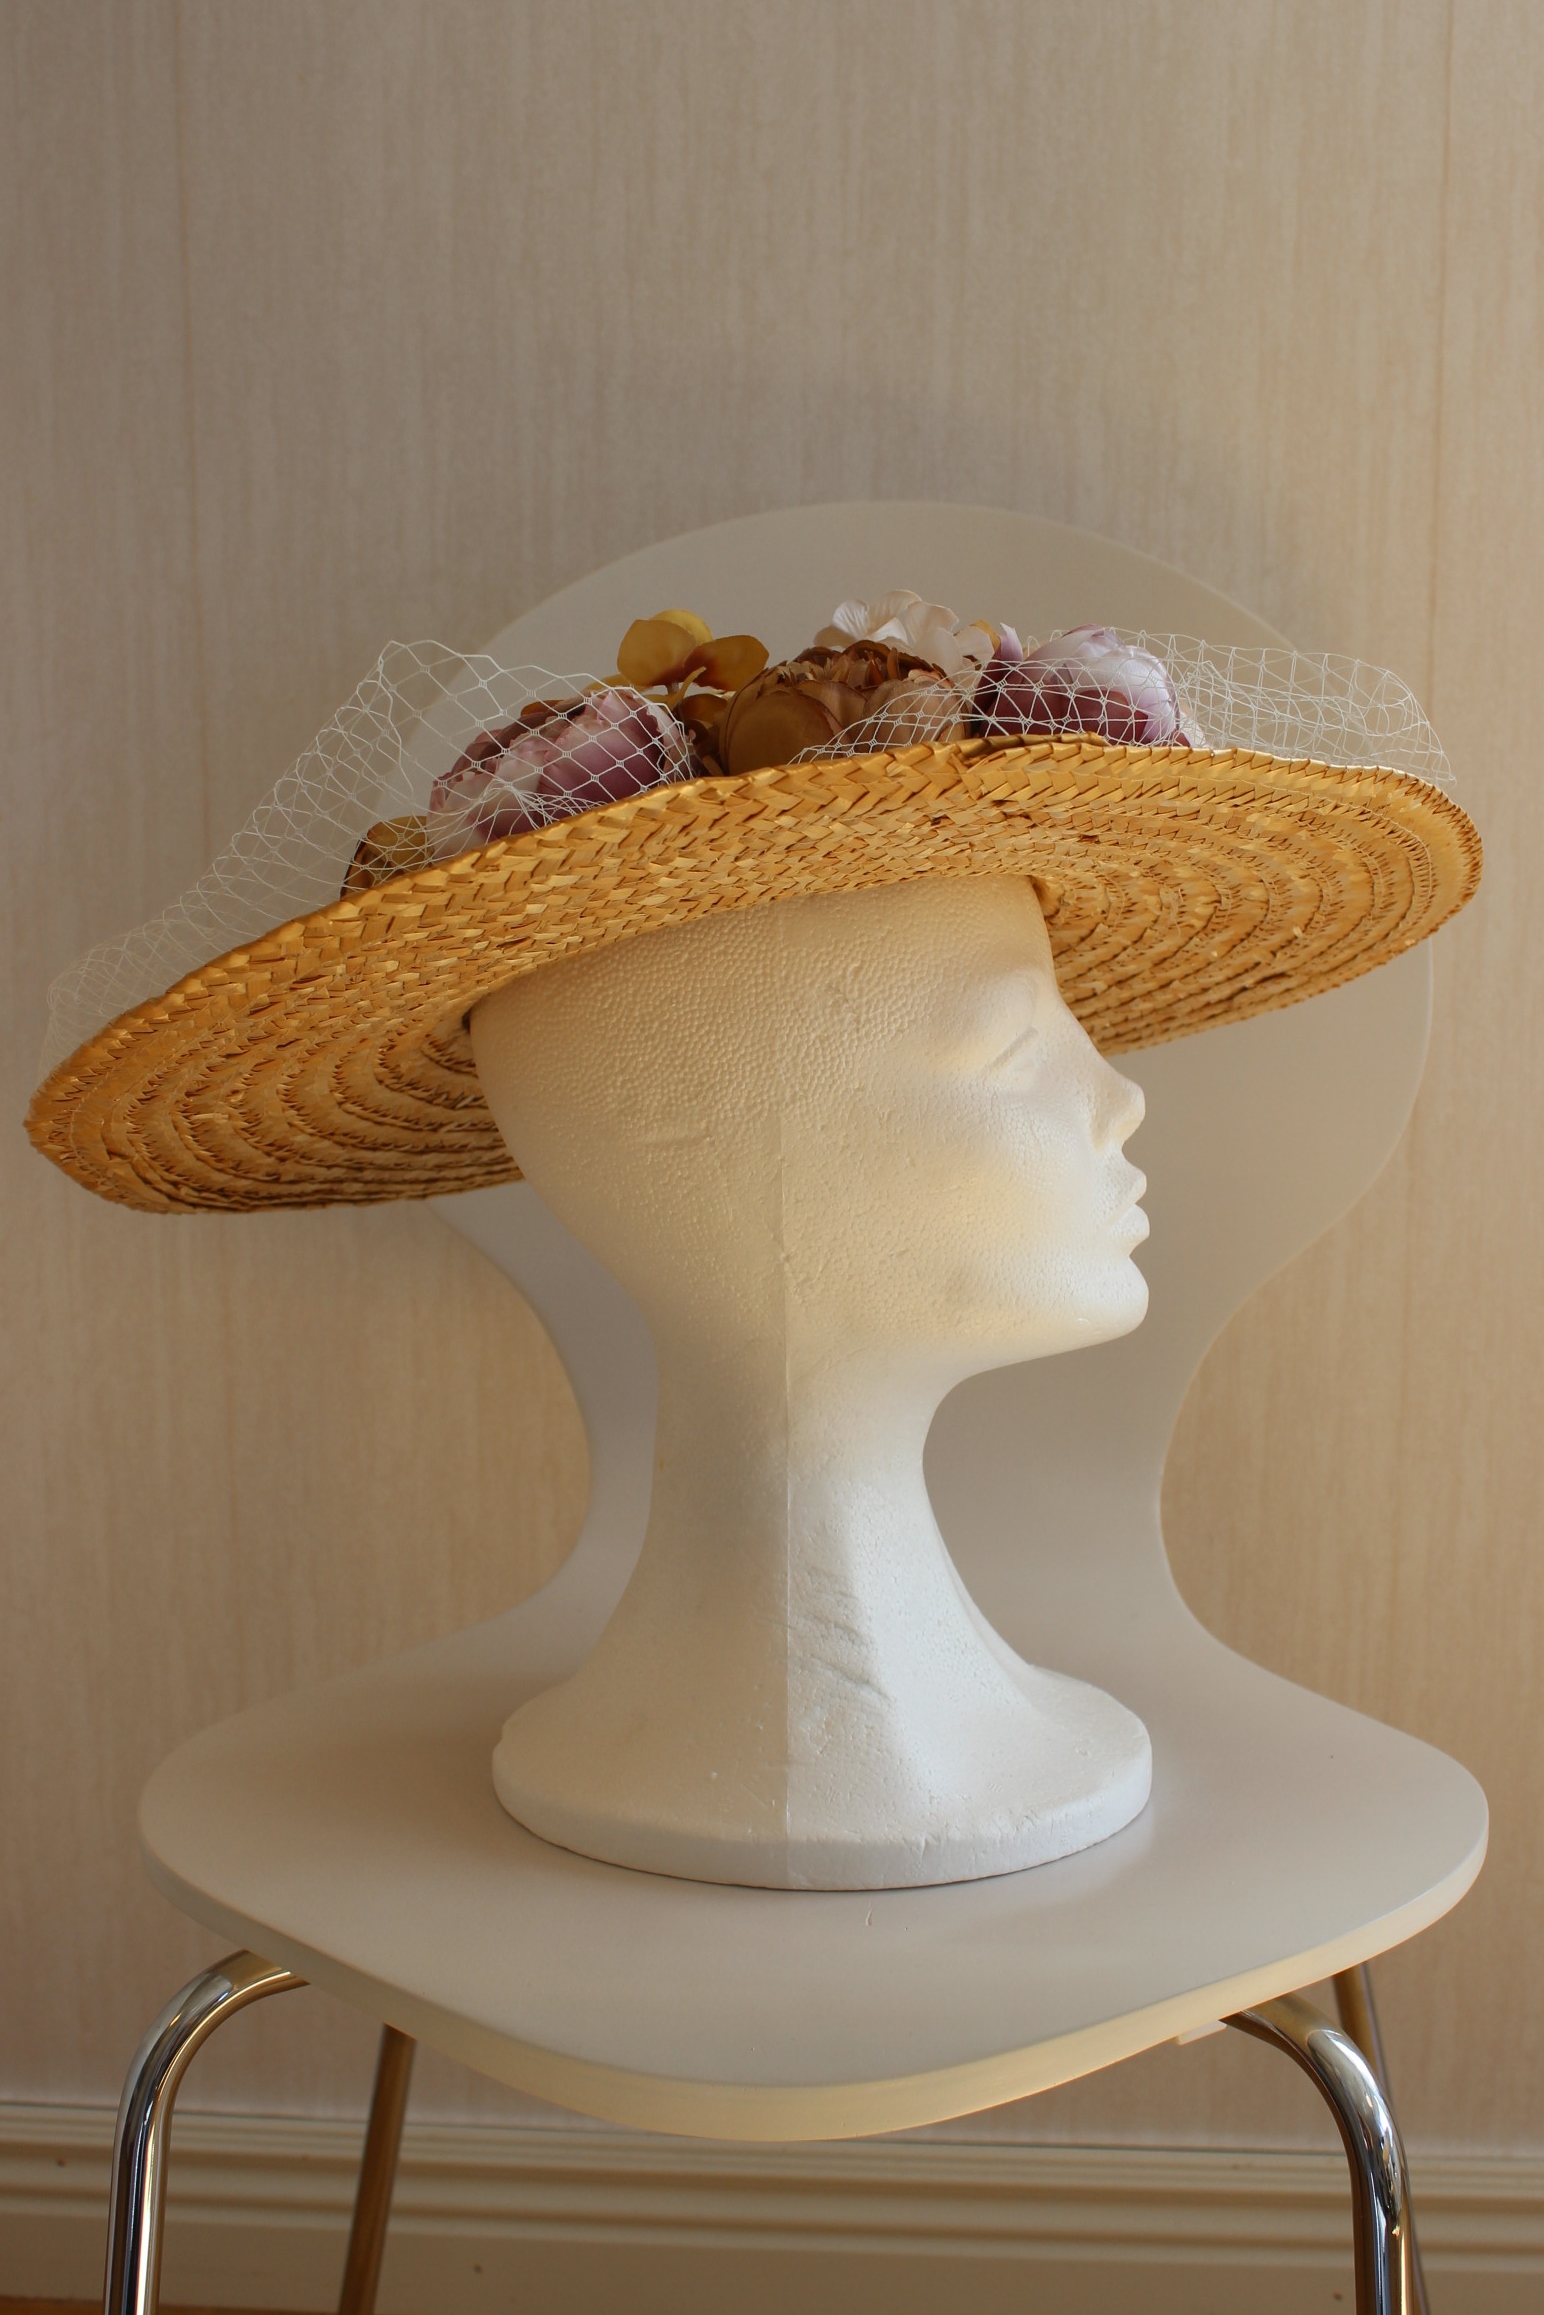
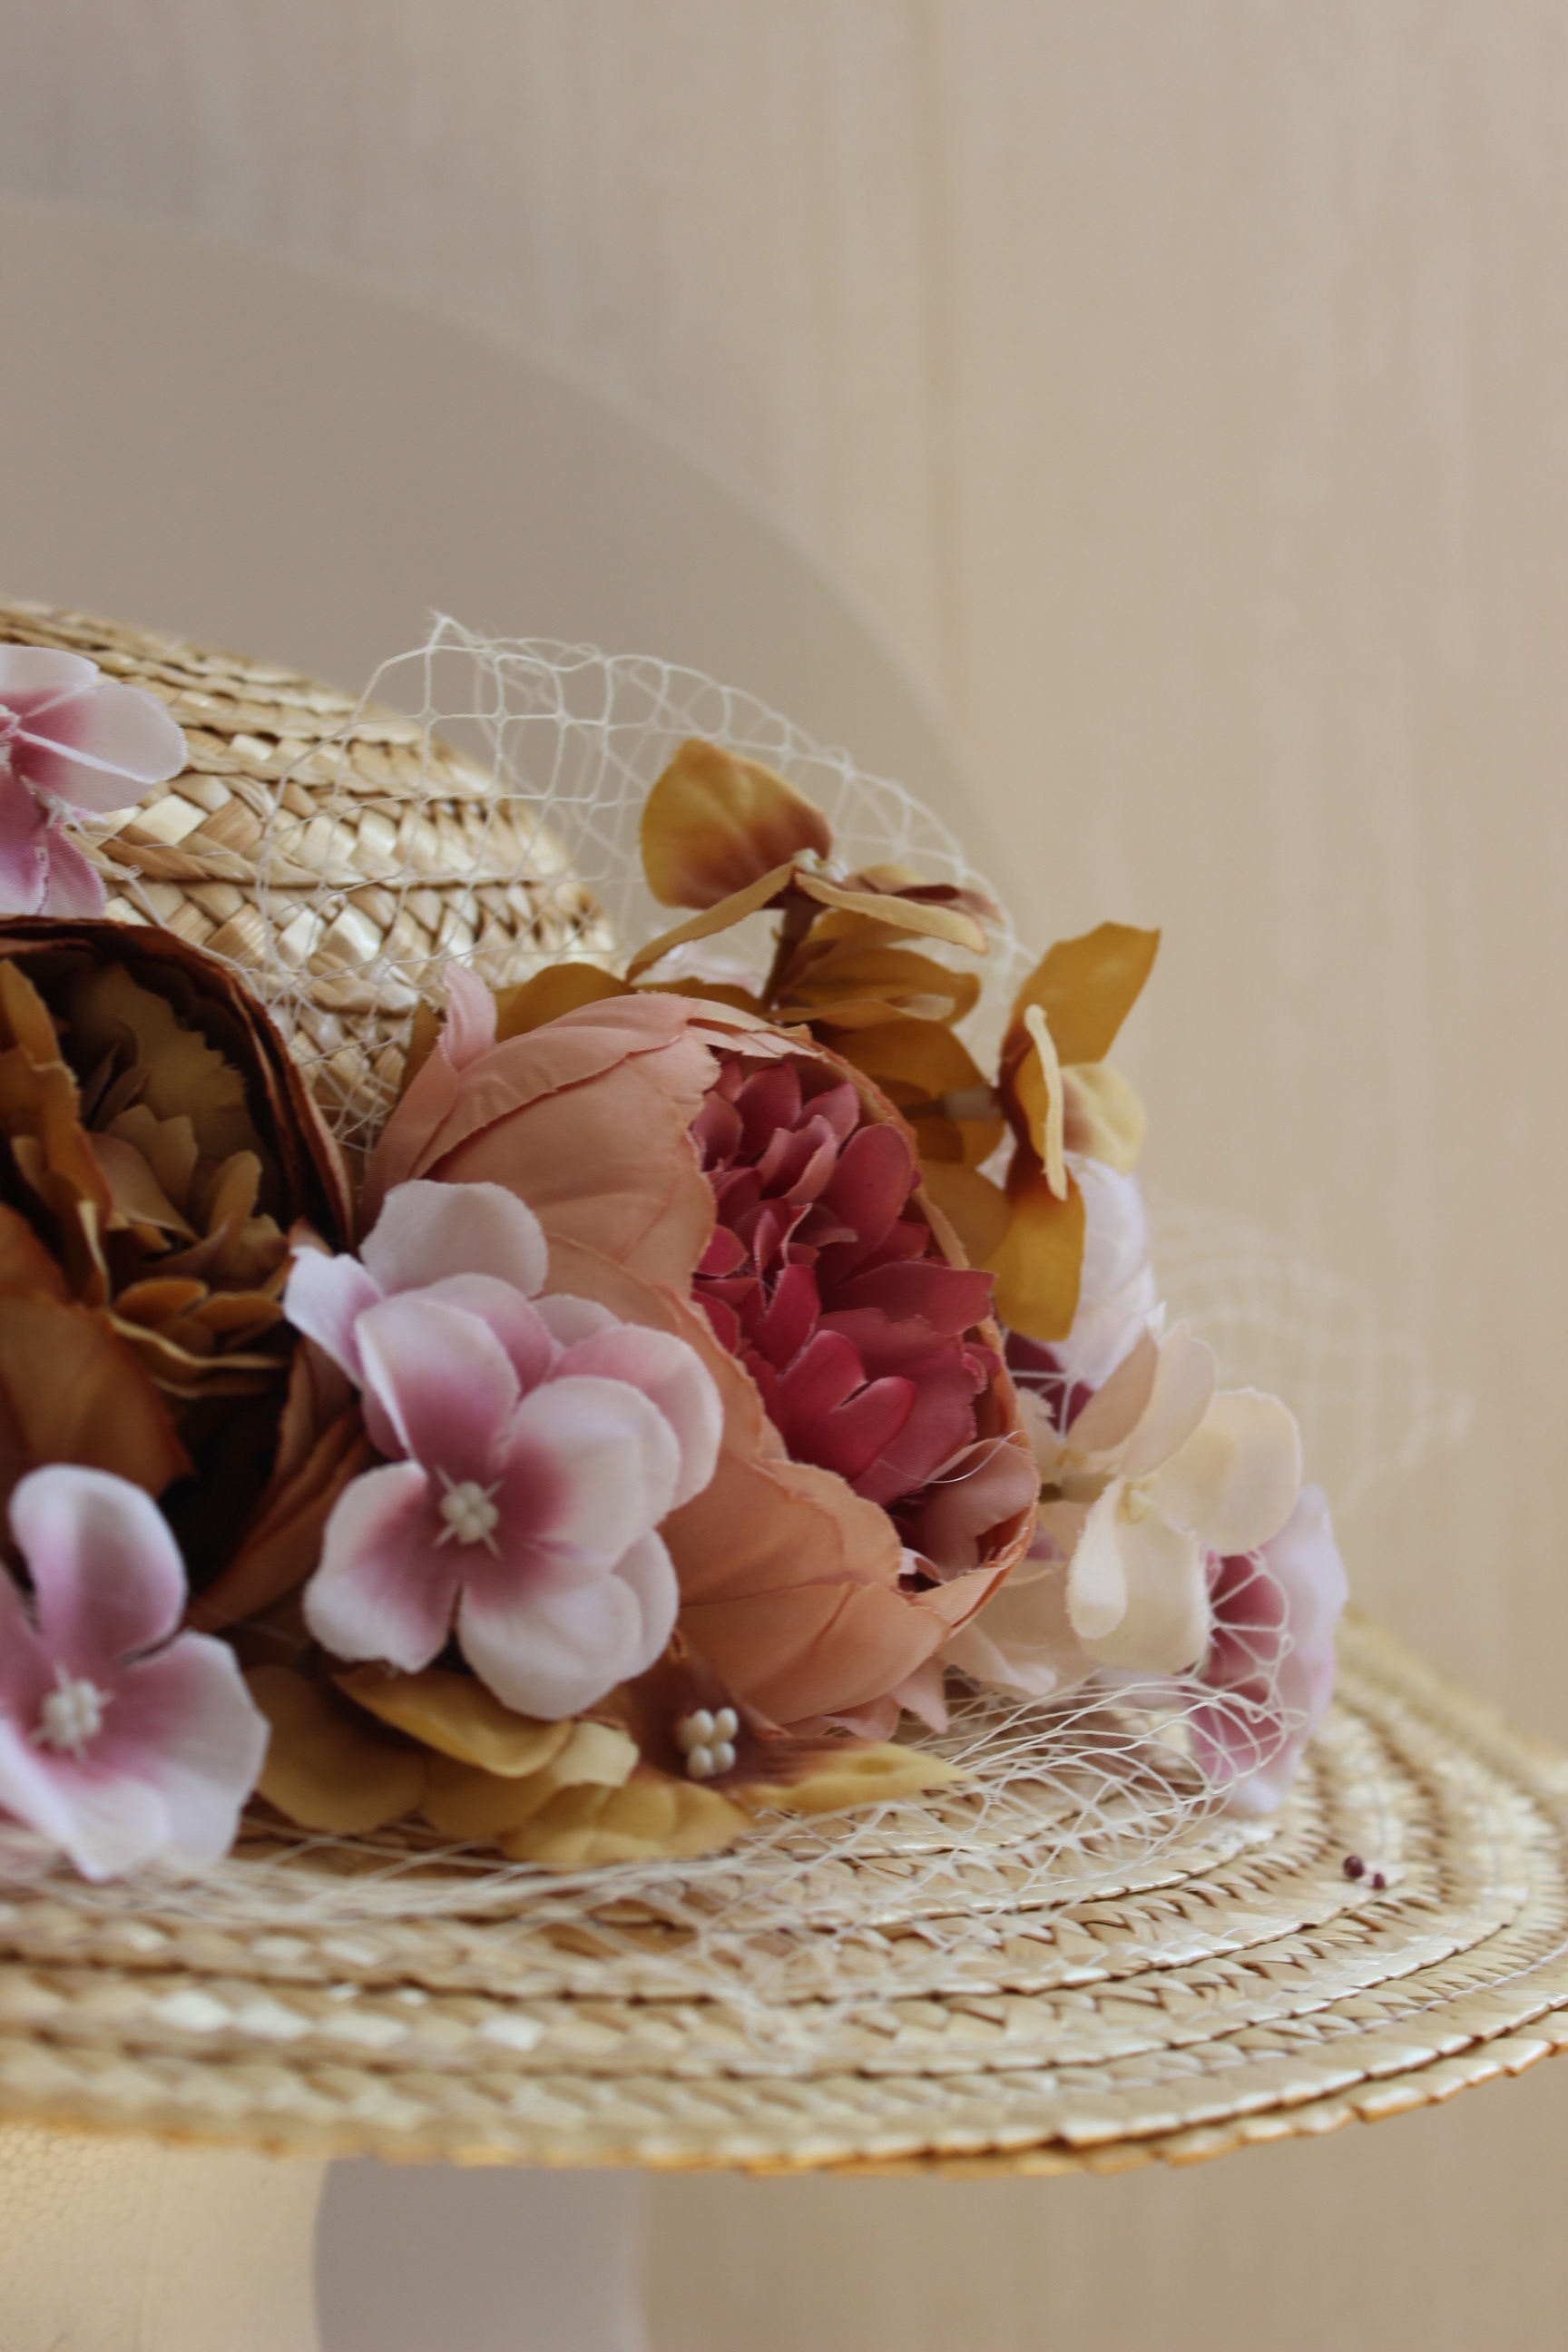
I started with a cheap straw hat as a base.
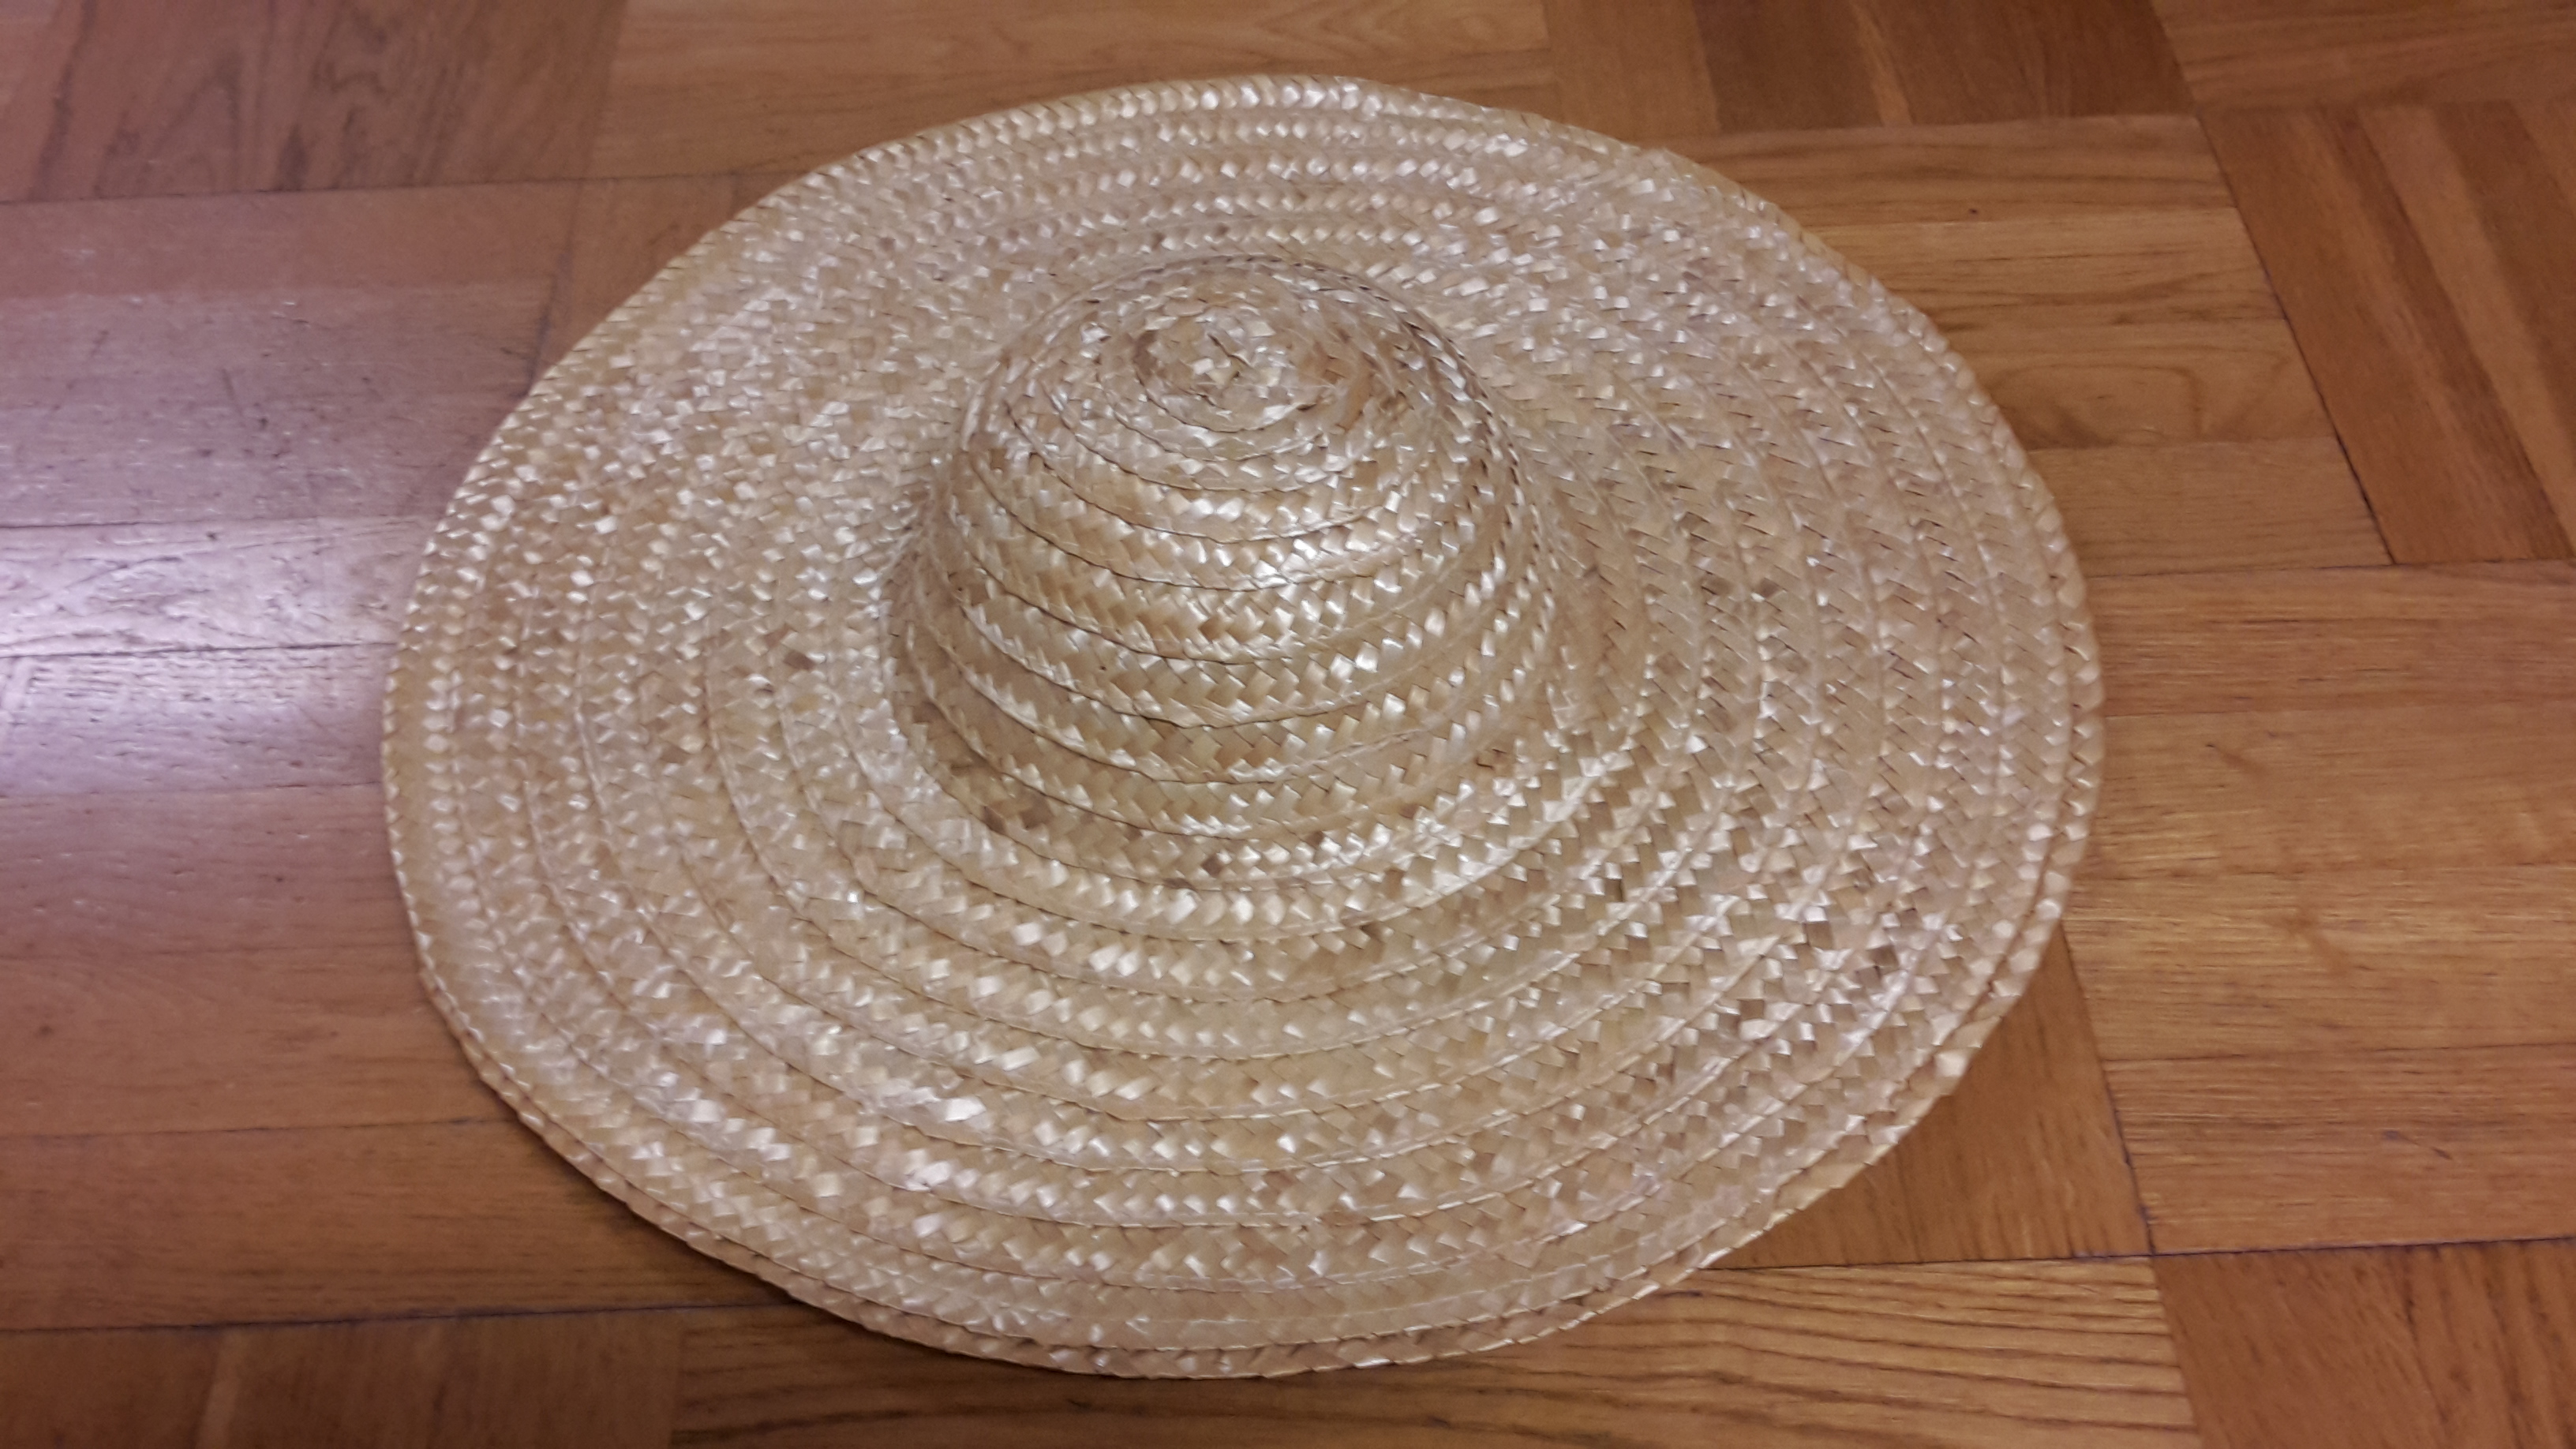
The most important things I needed from the hat was a straw base, lightly colored and strong enough to carry all the decoration.
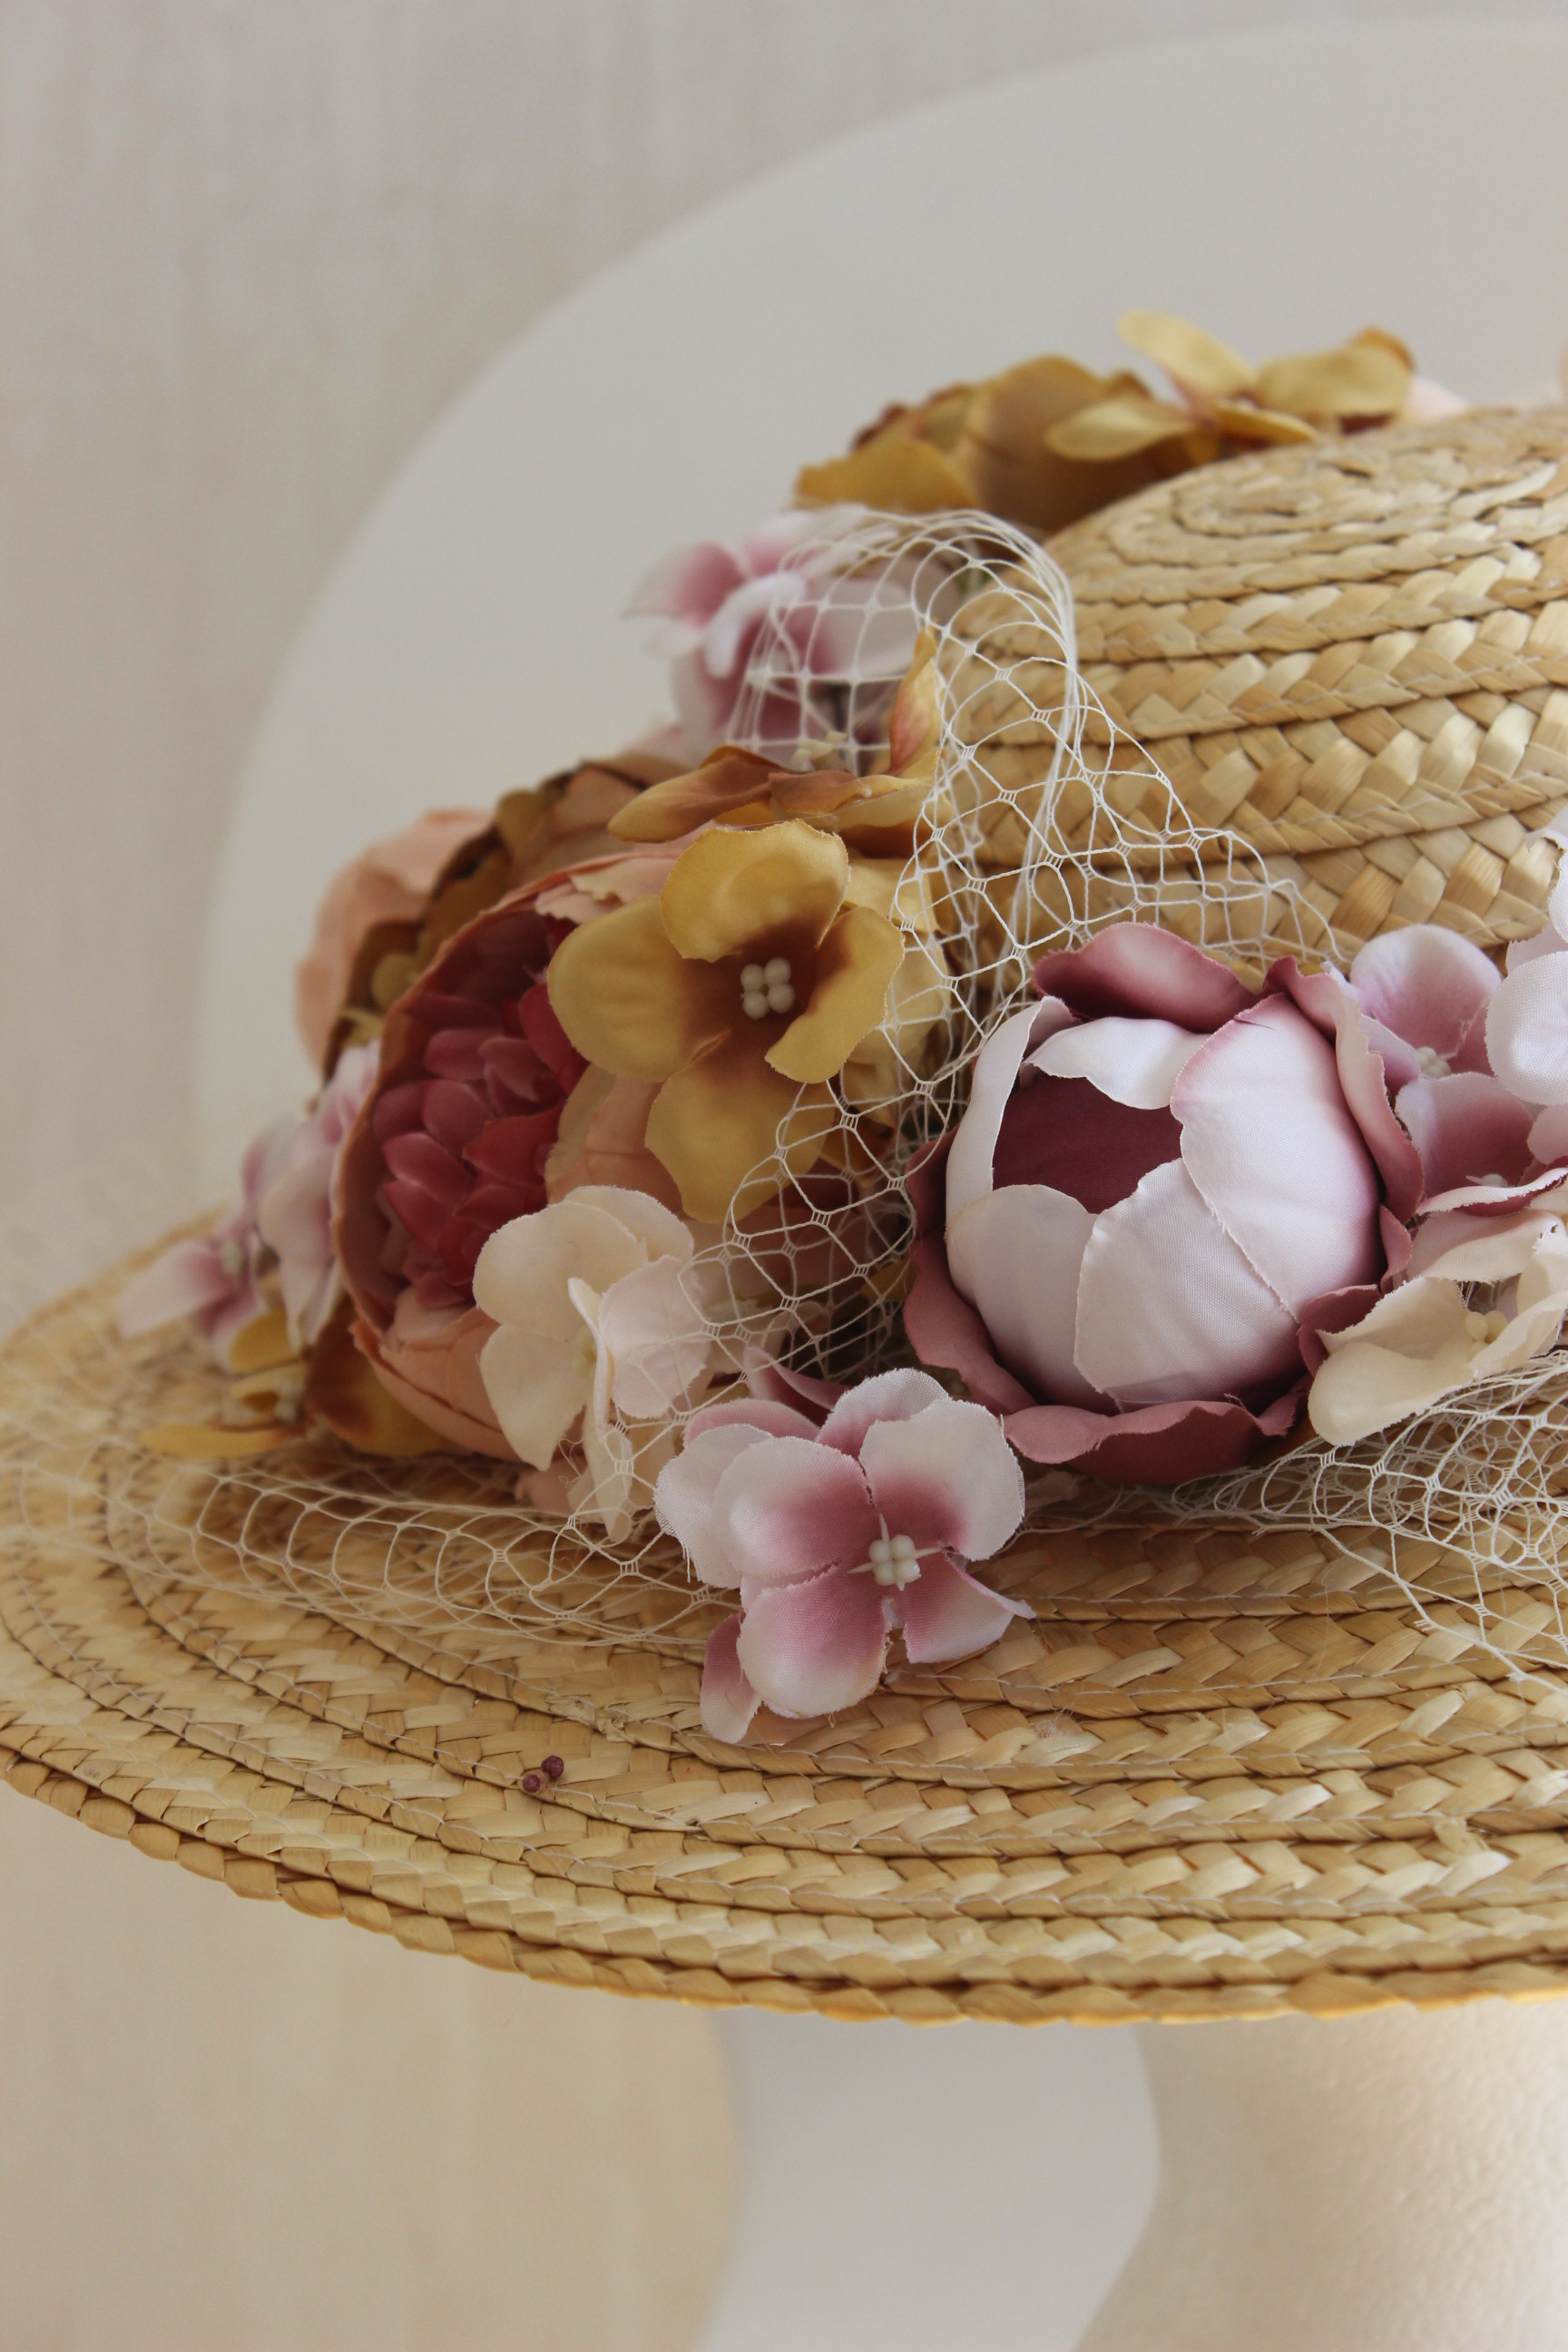
I stitched the netting irregularly and random to the brim of the hat. 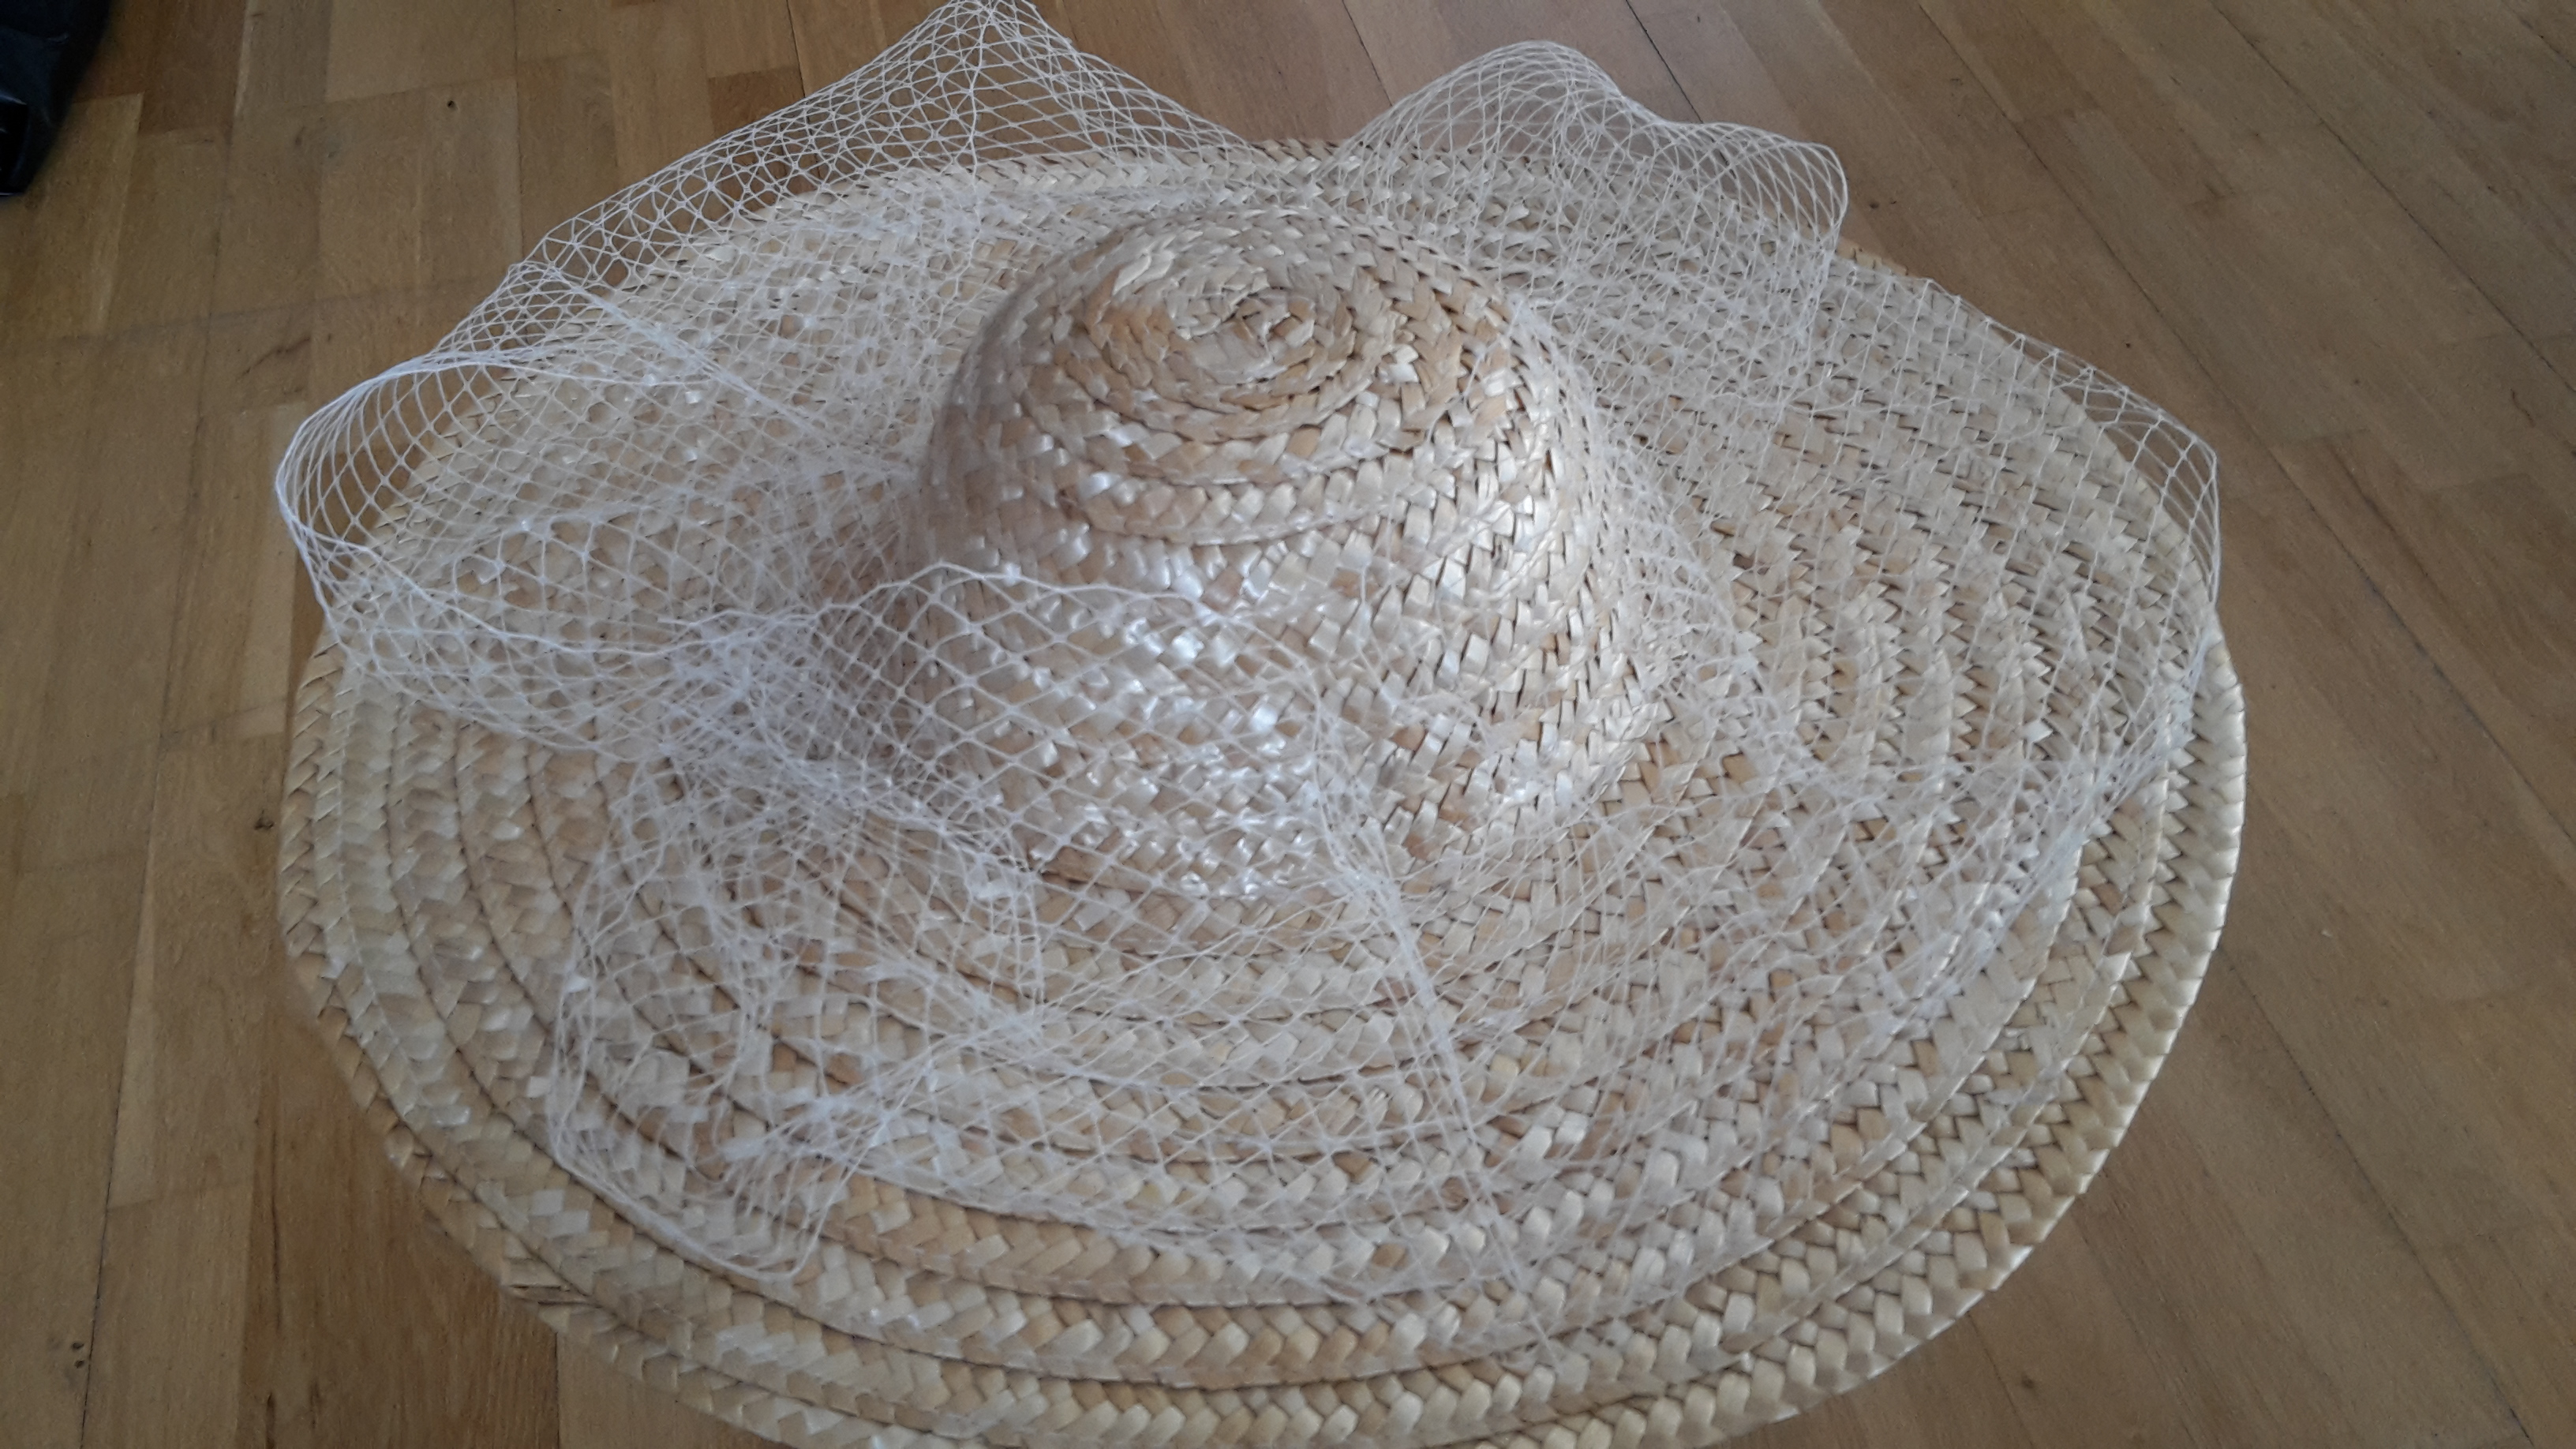
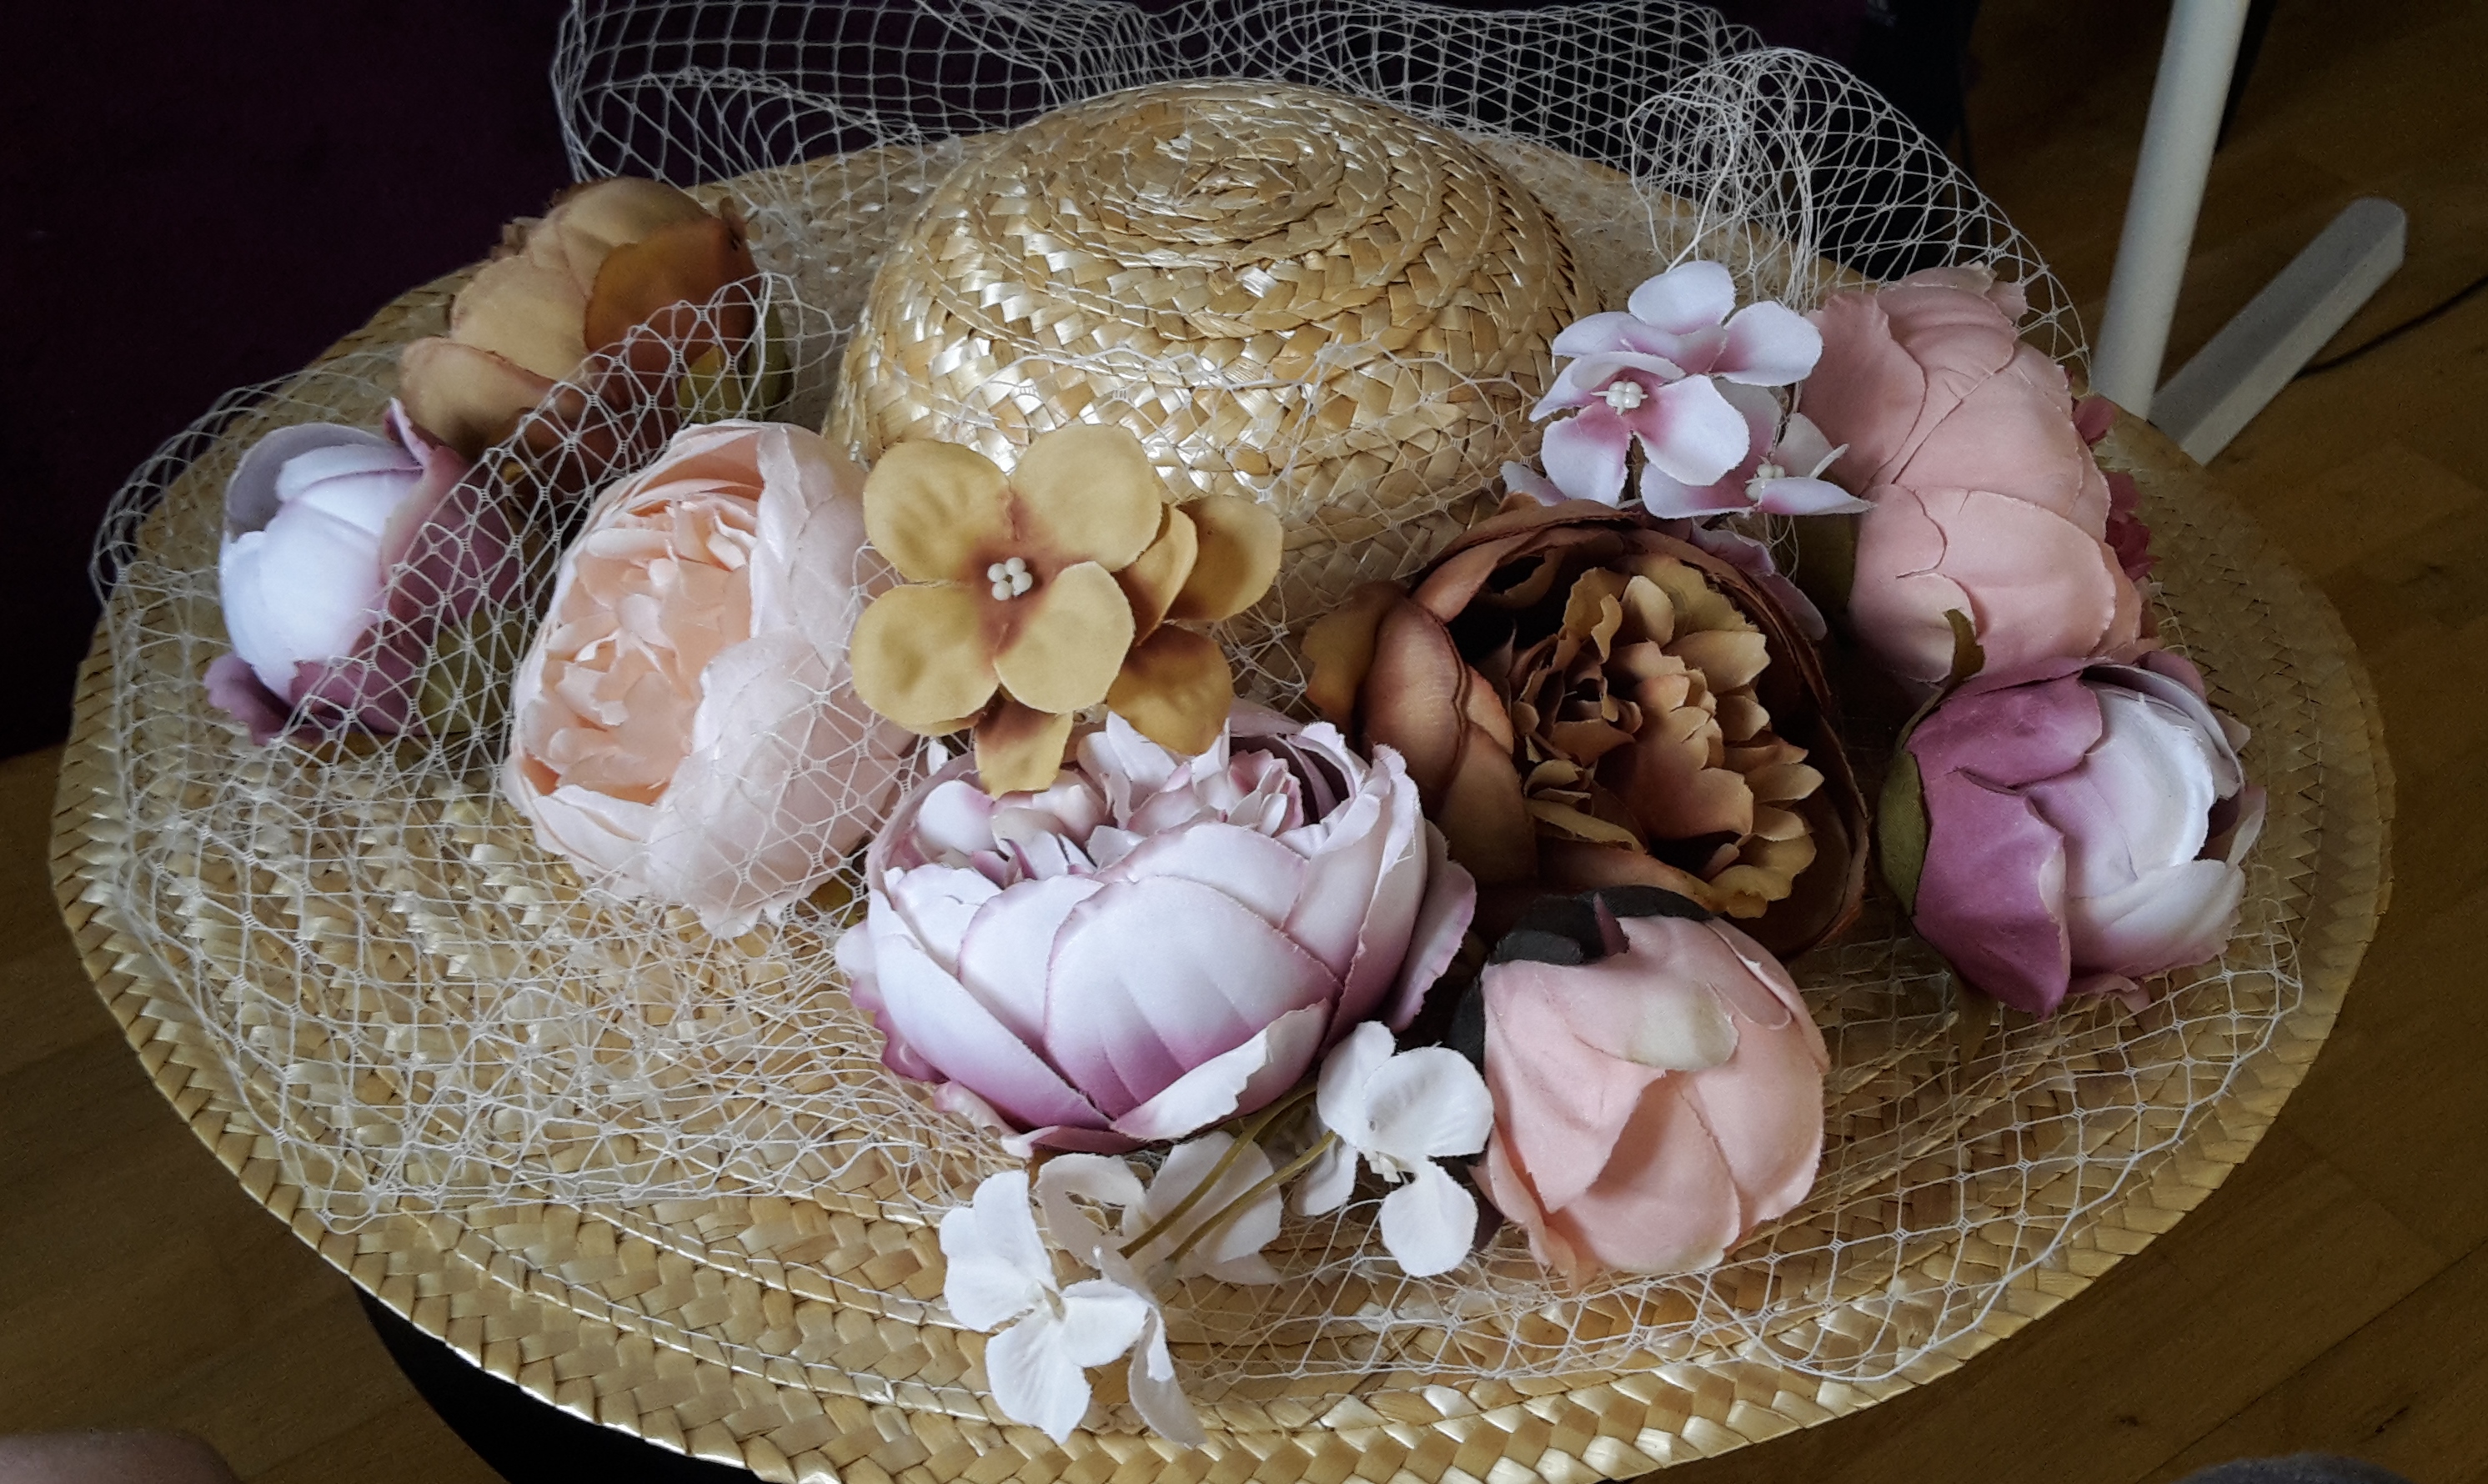
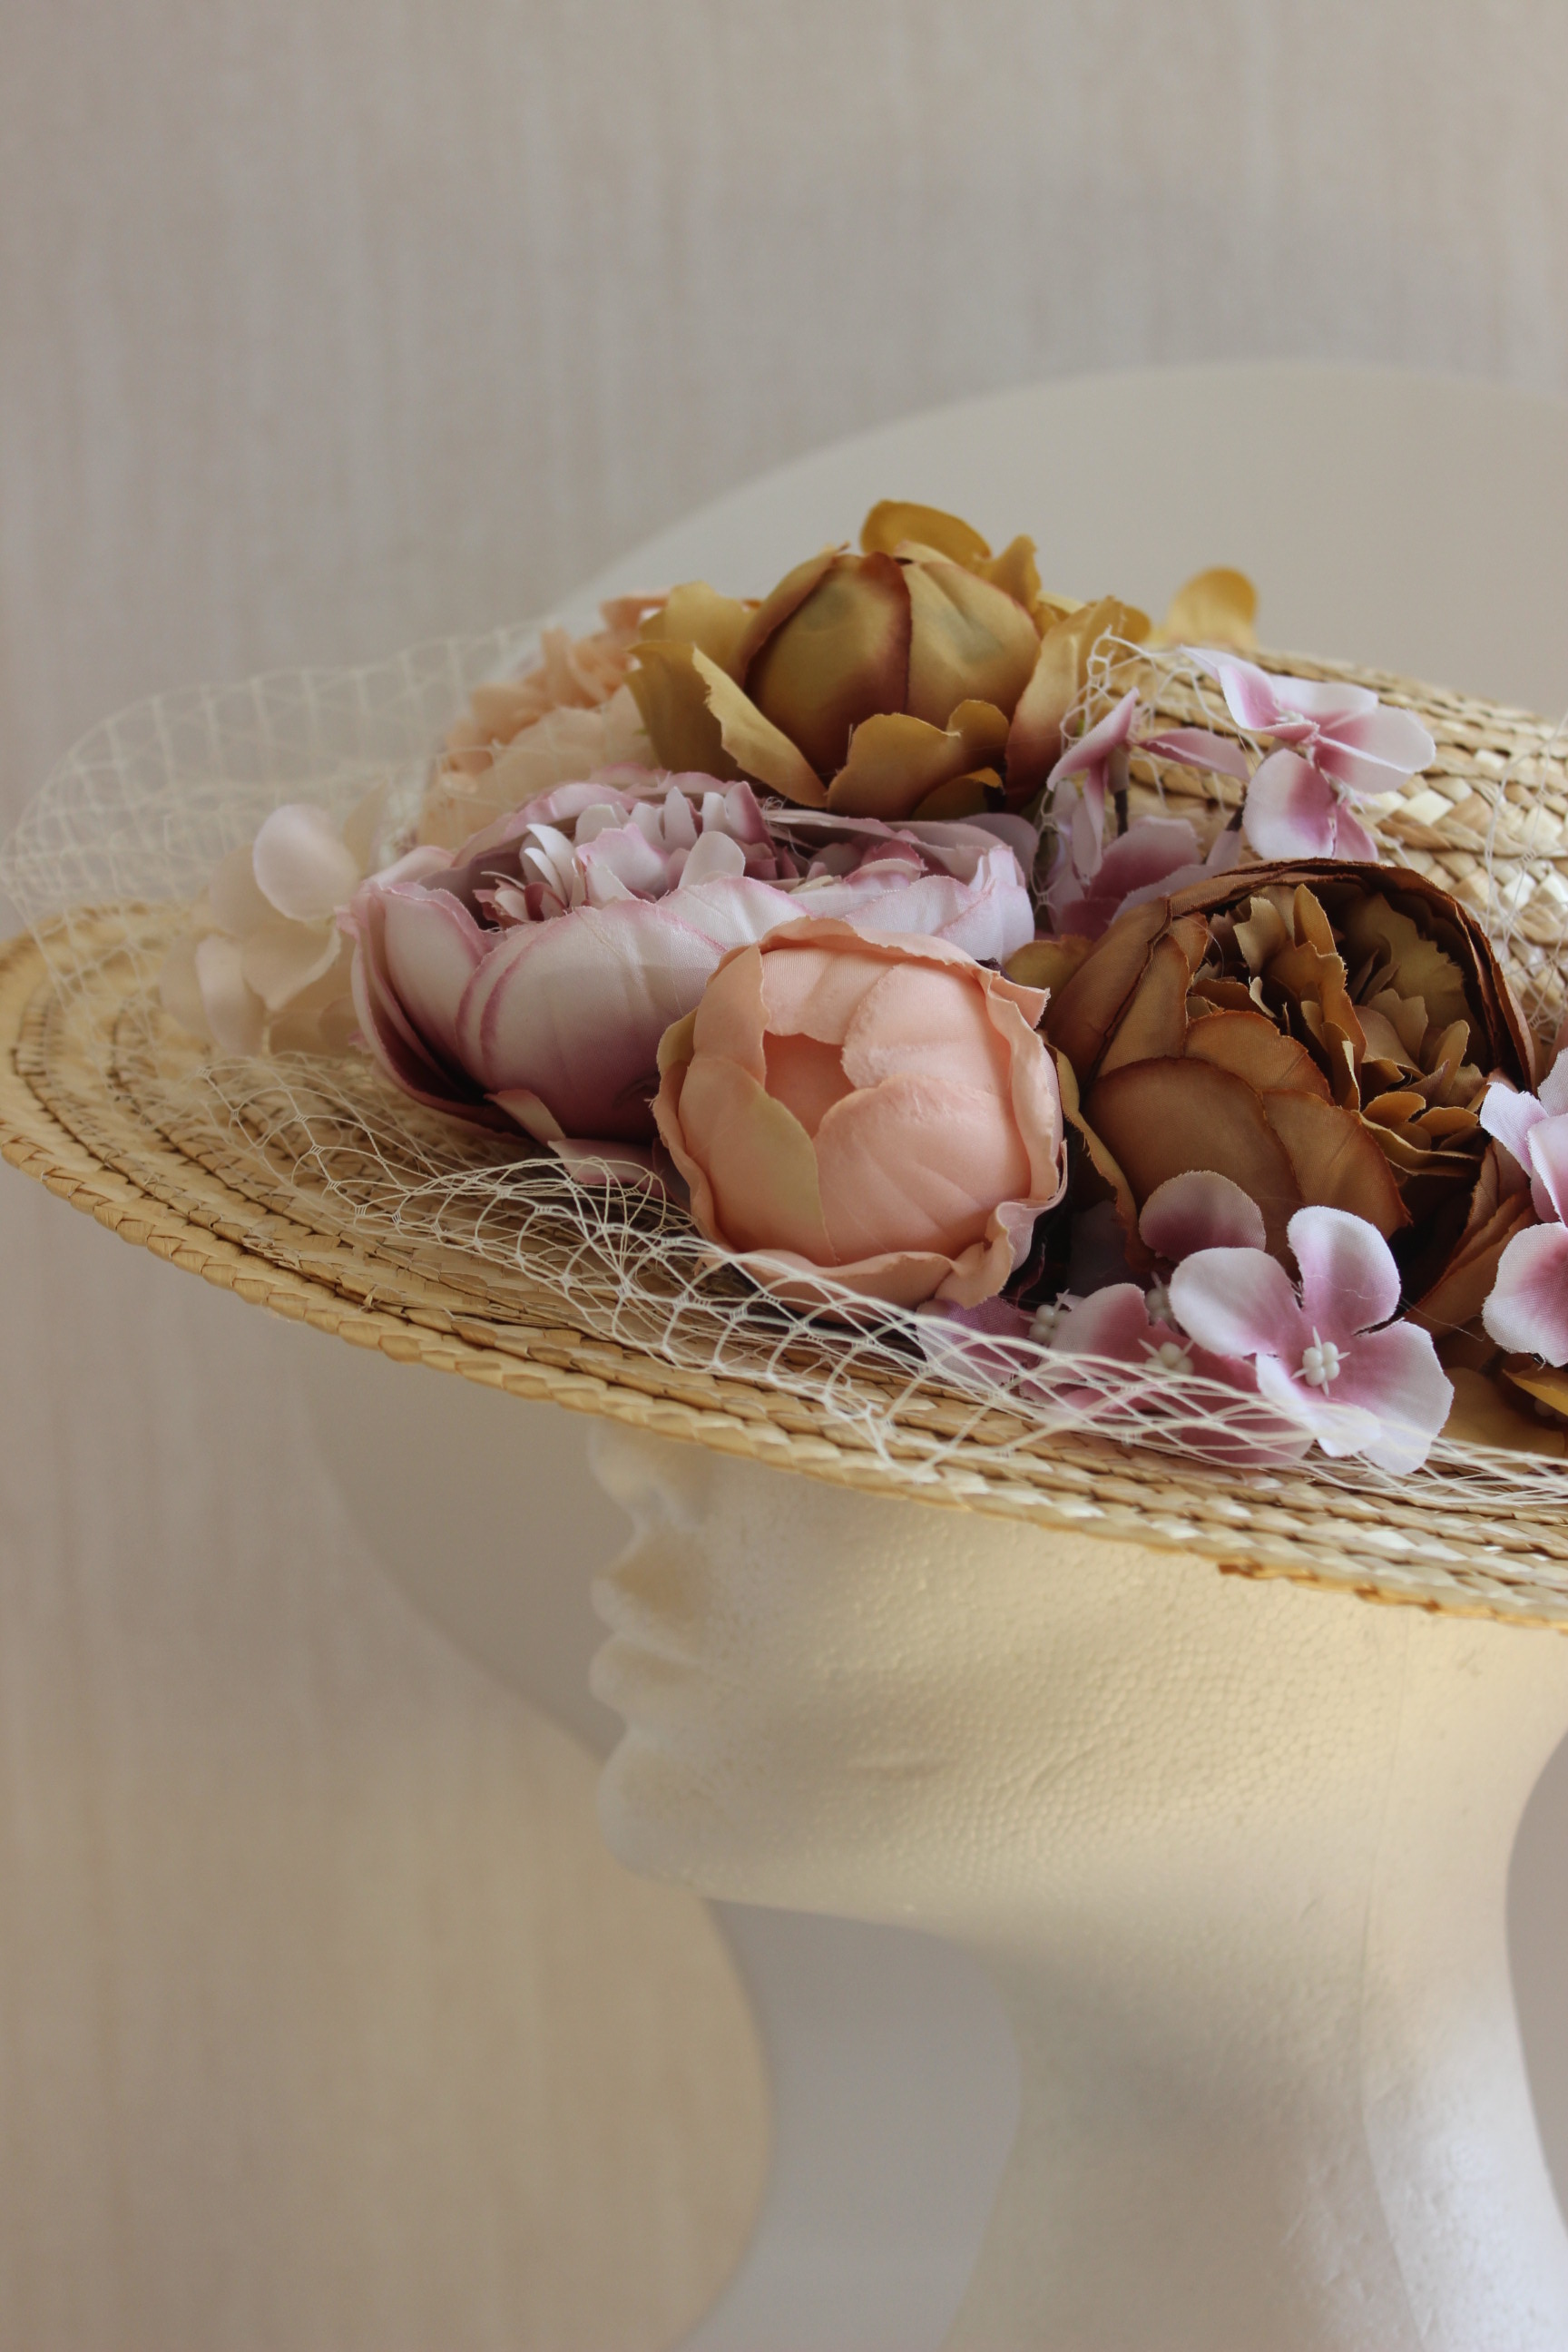
For the flowers I visited E-bay before Easter and ordered tree silk flower bouquets in muted brown, beige and violet colors, and the arrived in perfect time a week ago.
I needed to cut the flowers from the stems on each of the bouquets, but that went really easy and fast using a nippers, and then they were ready to be attached.
I placed a few flowers on the hat just to get a feeling for how many I would need, and how to best arrange them to get the flowing organic look of the original.
 Looks pretty good I think.
I tried to stitch the flowers down but It didn’t work, so after some hesitation I decided to use the most loved (and hated) tool of them all – hot glue.
Then I got to work arranging and attaching the flowers as I went.
It was so easy, and went so fast, it almost felt like cheating.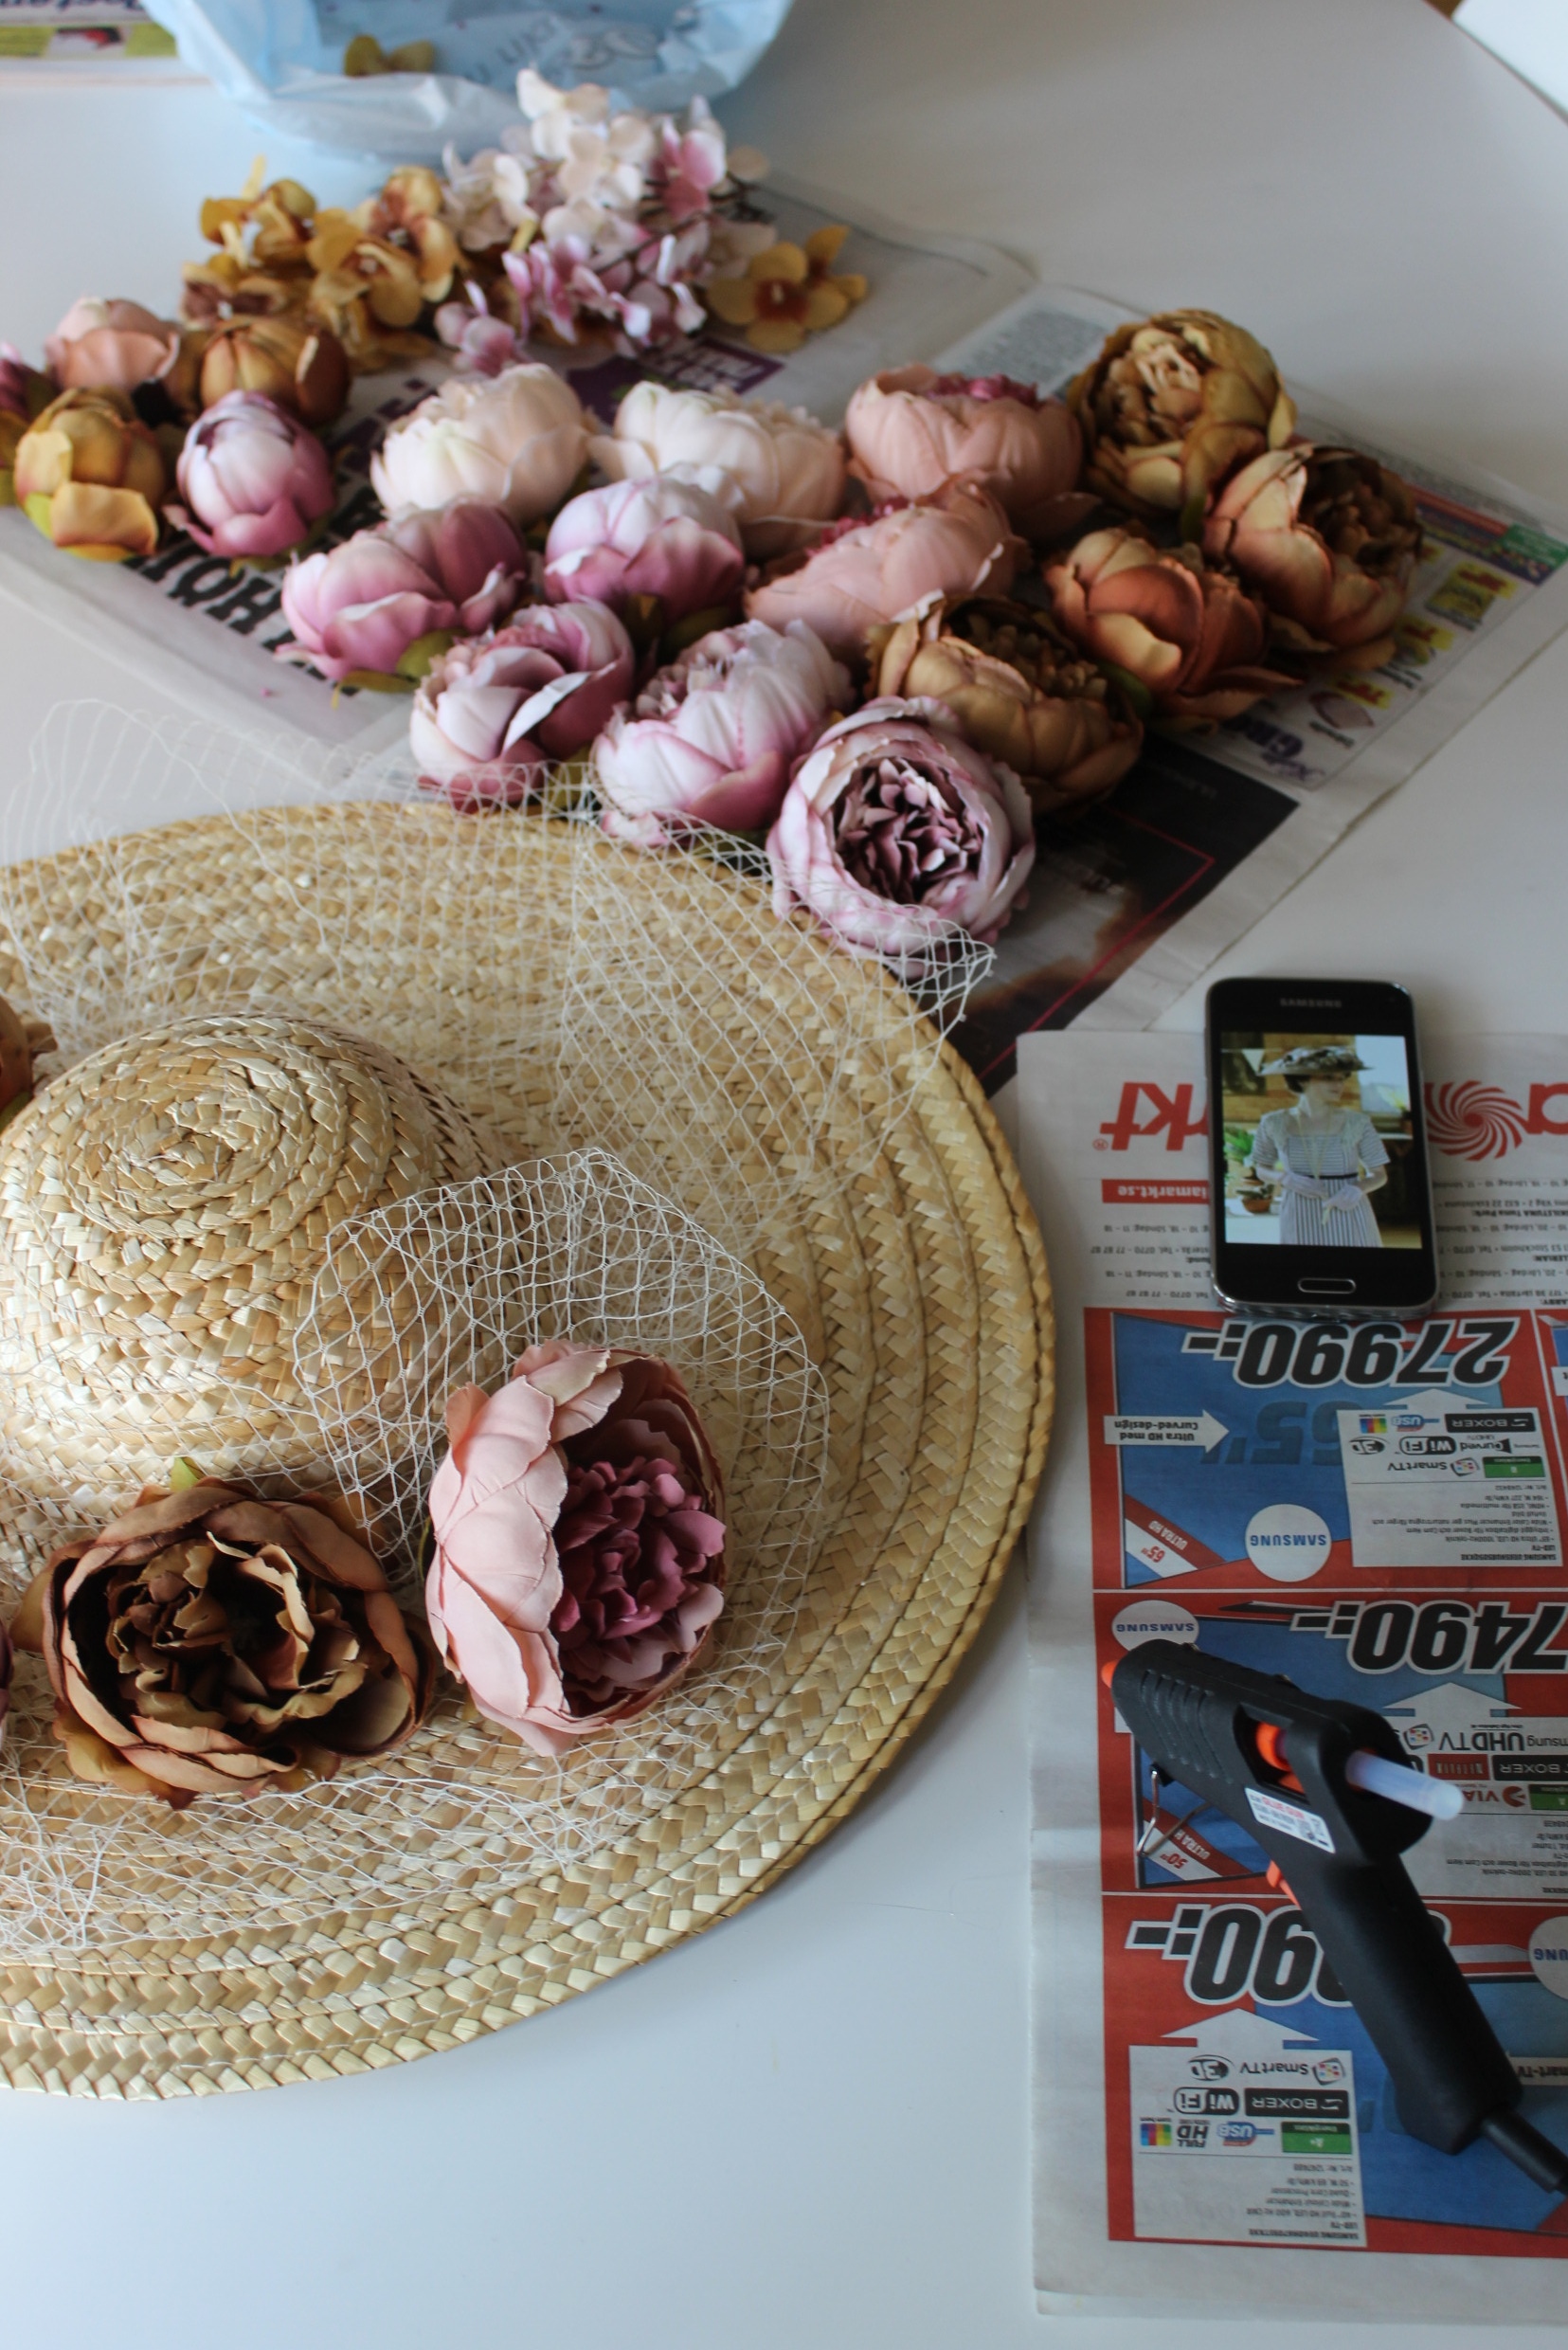 All you need for your hat project: Hat, Netting, Flowers, Inspiration pic and hot glue…
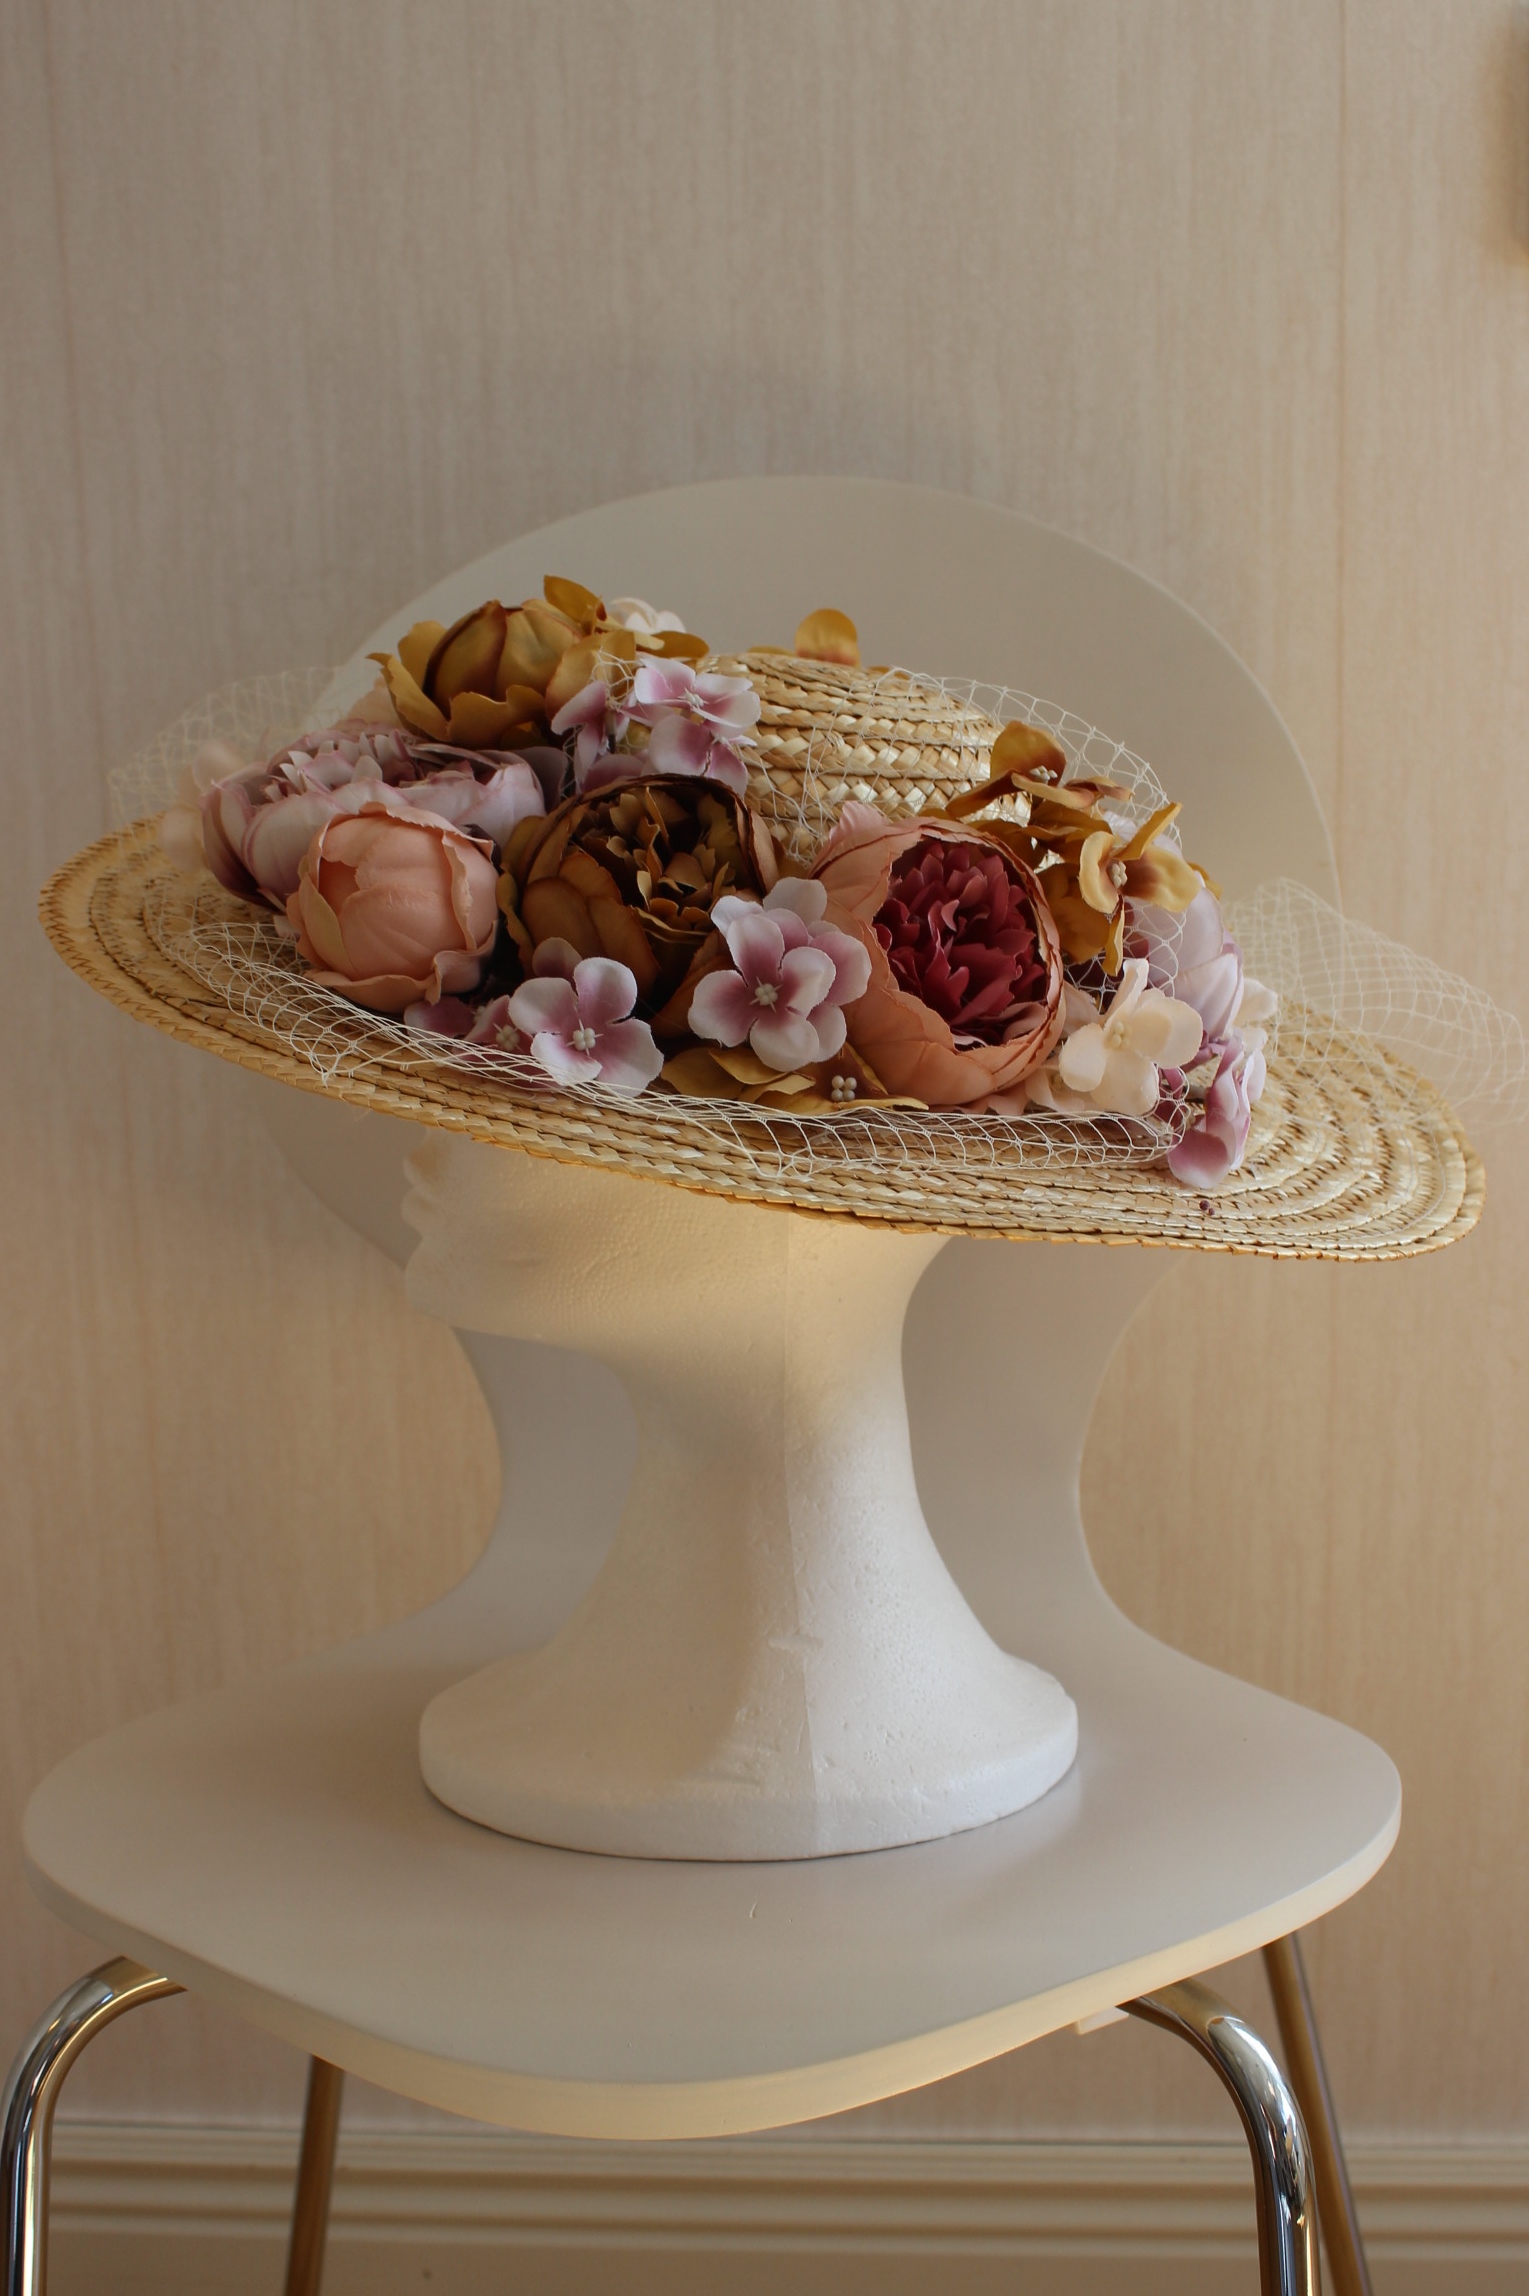
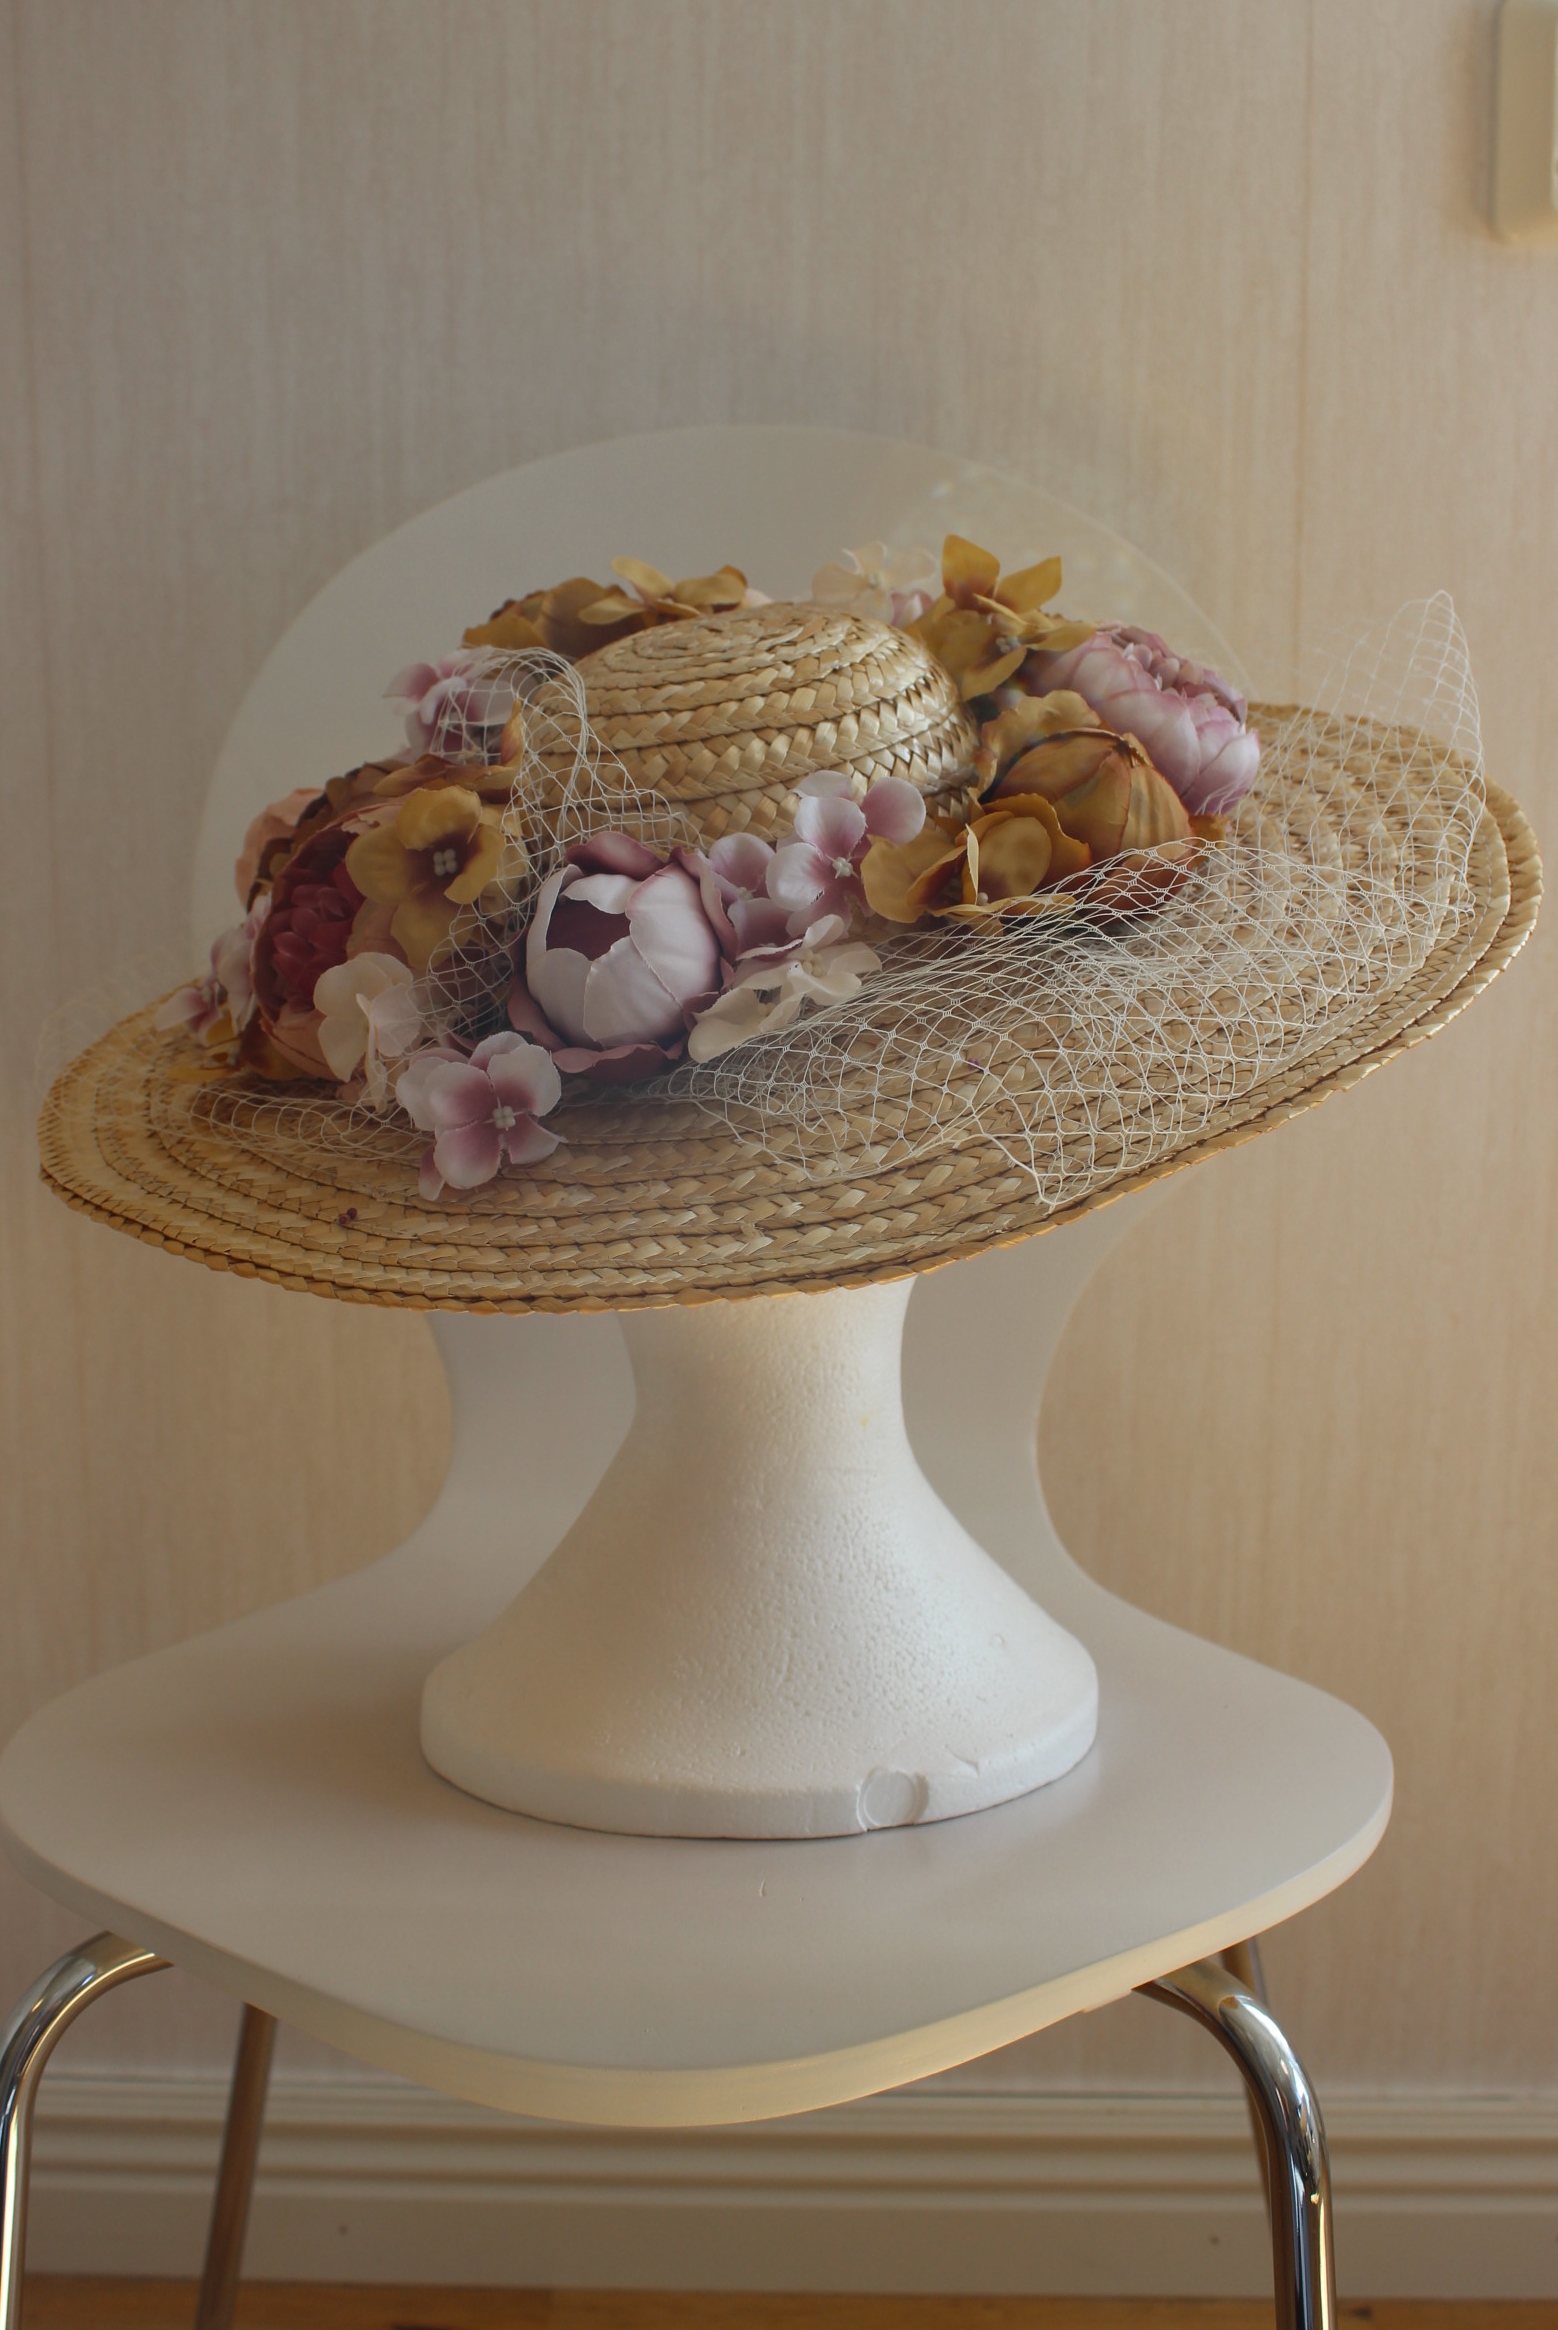
Finished Hat: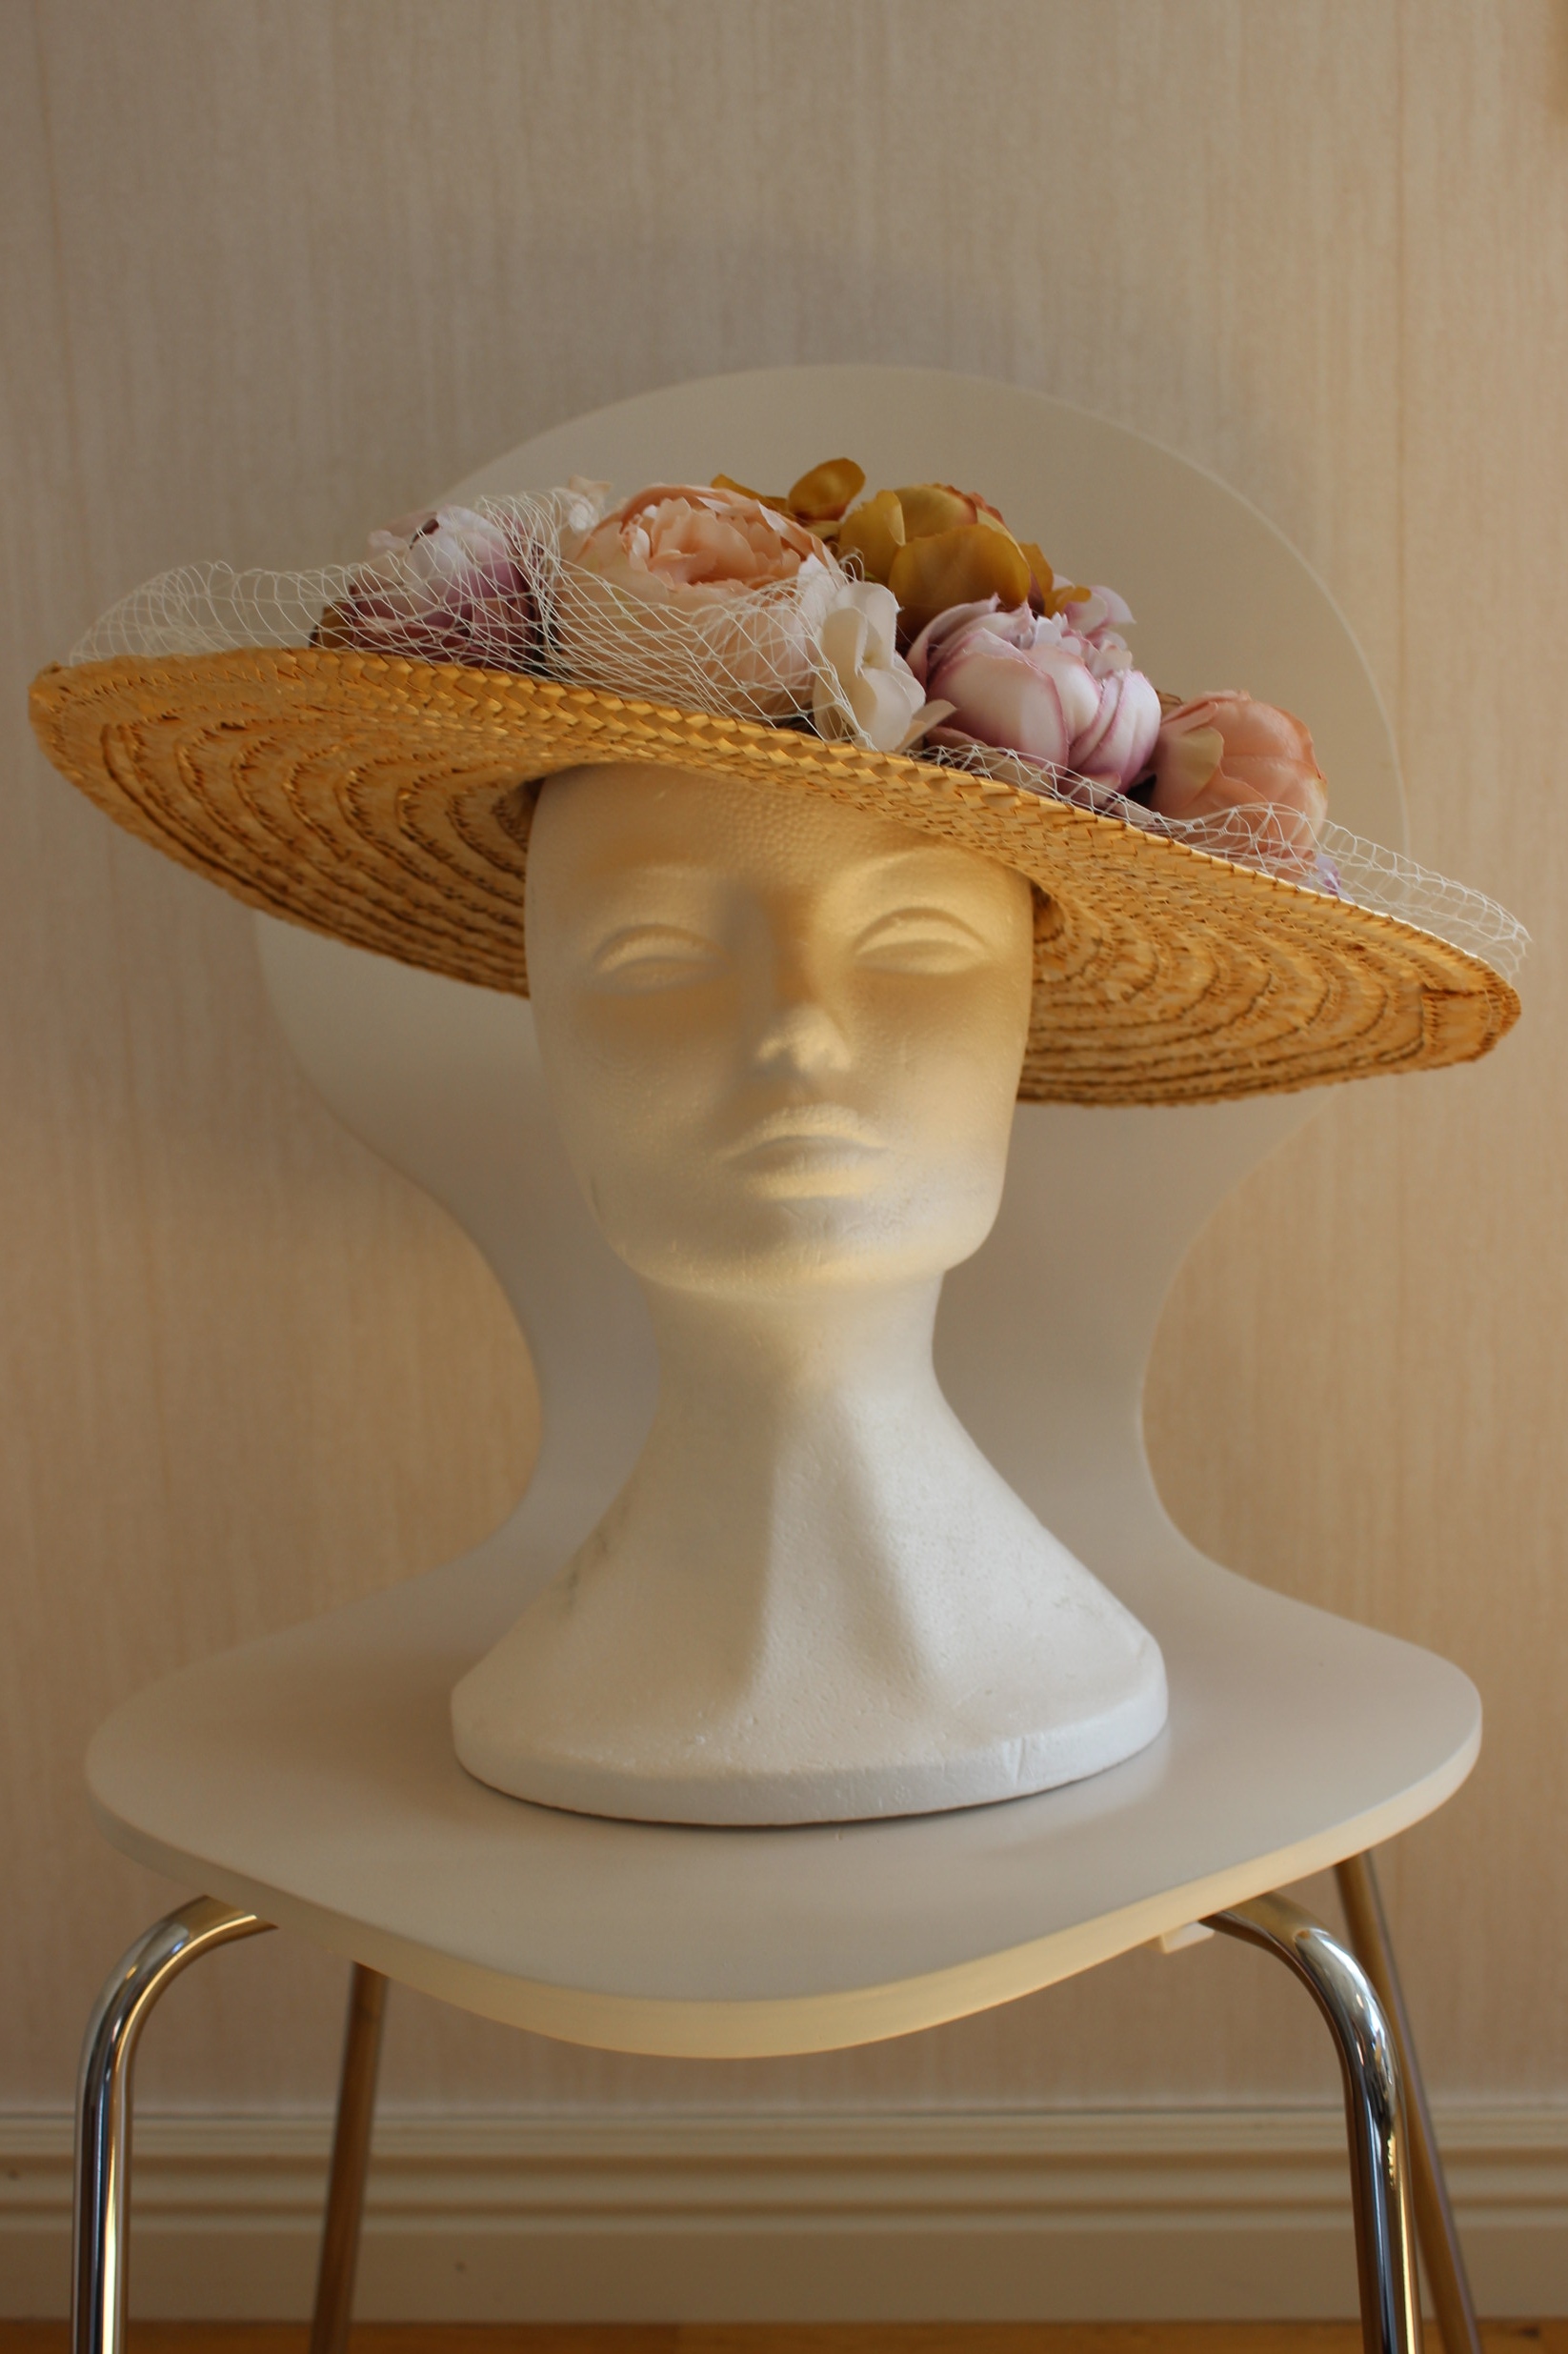

And a few pics from the photoshoot:

The facts:
What: a 1914s summer hat (with autumn colored flowers)
Notions/Materials: A big brimmed straw hat, synthetic flowers in different muted colors, white hat netting, thread and hot glue (ops…)
Time: 1 hour
Cost: 250Sek (40Usd)
Final Thought: The hat is a bit to wide in the brim and a bit to small in the head to be perfect. Put considering the shape (and look) of most modern straw hats I won’t complain.
I think it turned out beautifully, and think it fits my “Lady Mary” dress just perfect.
The Start of a war – Downton Mary’s Striped Dress (part 2)
I’ve been working on my entry for the HSM15 nr 4 – War & peace for the past week (Part 1), and here are the rest of my viral dress diary:
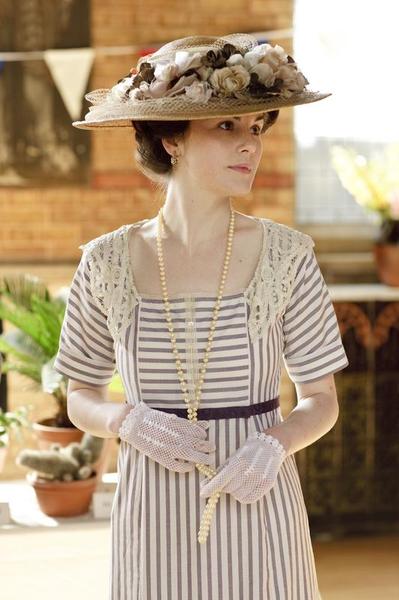
Lady Mary in one of her signature dresses from the Tv-series “Downton Abby”.
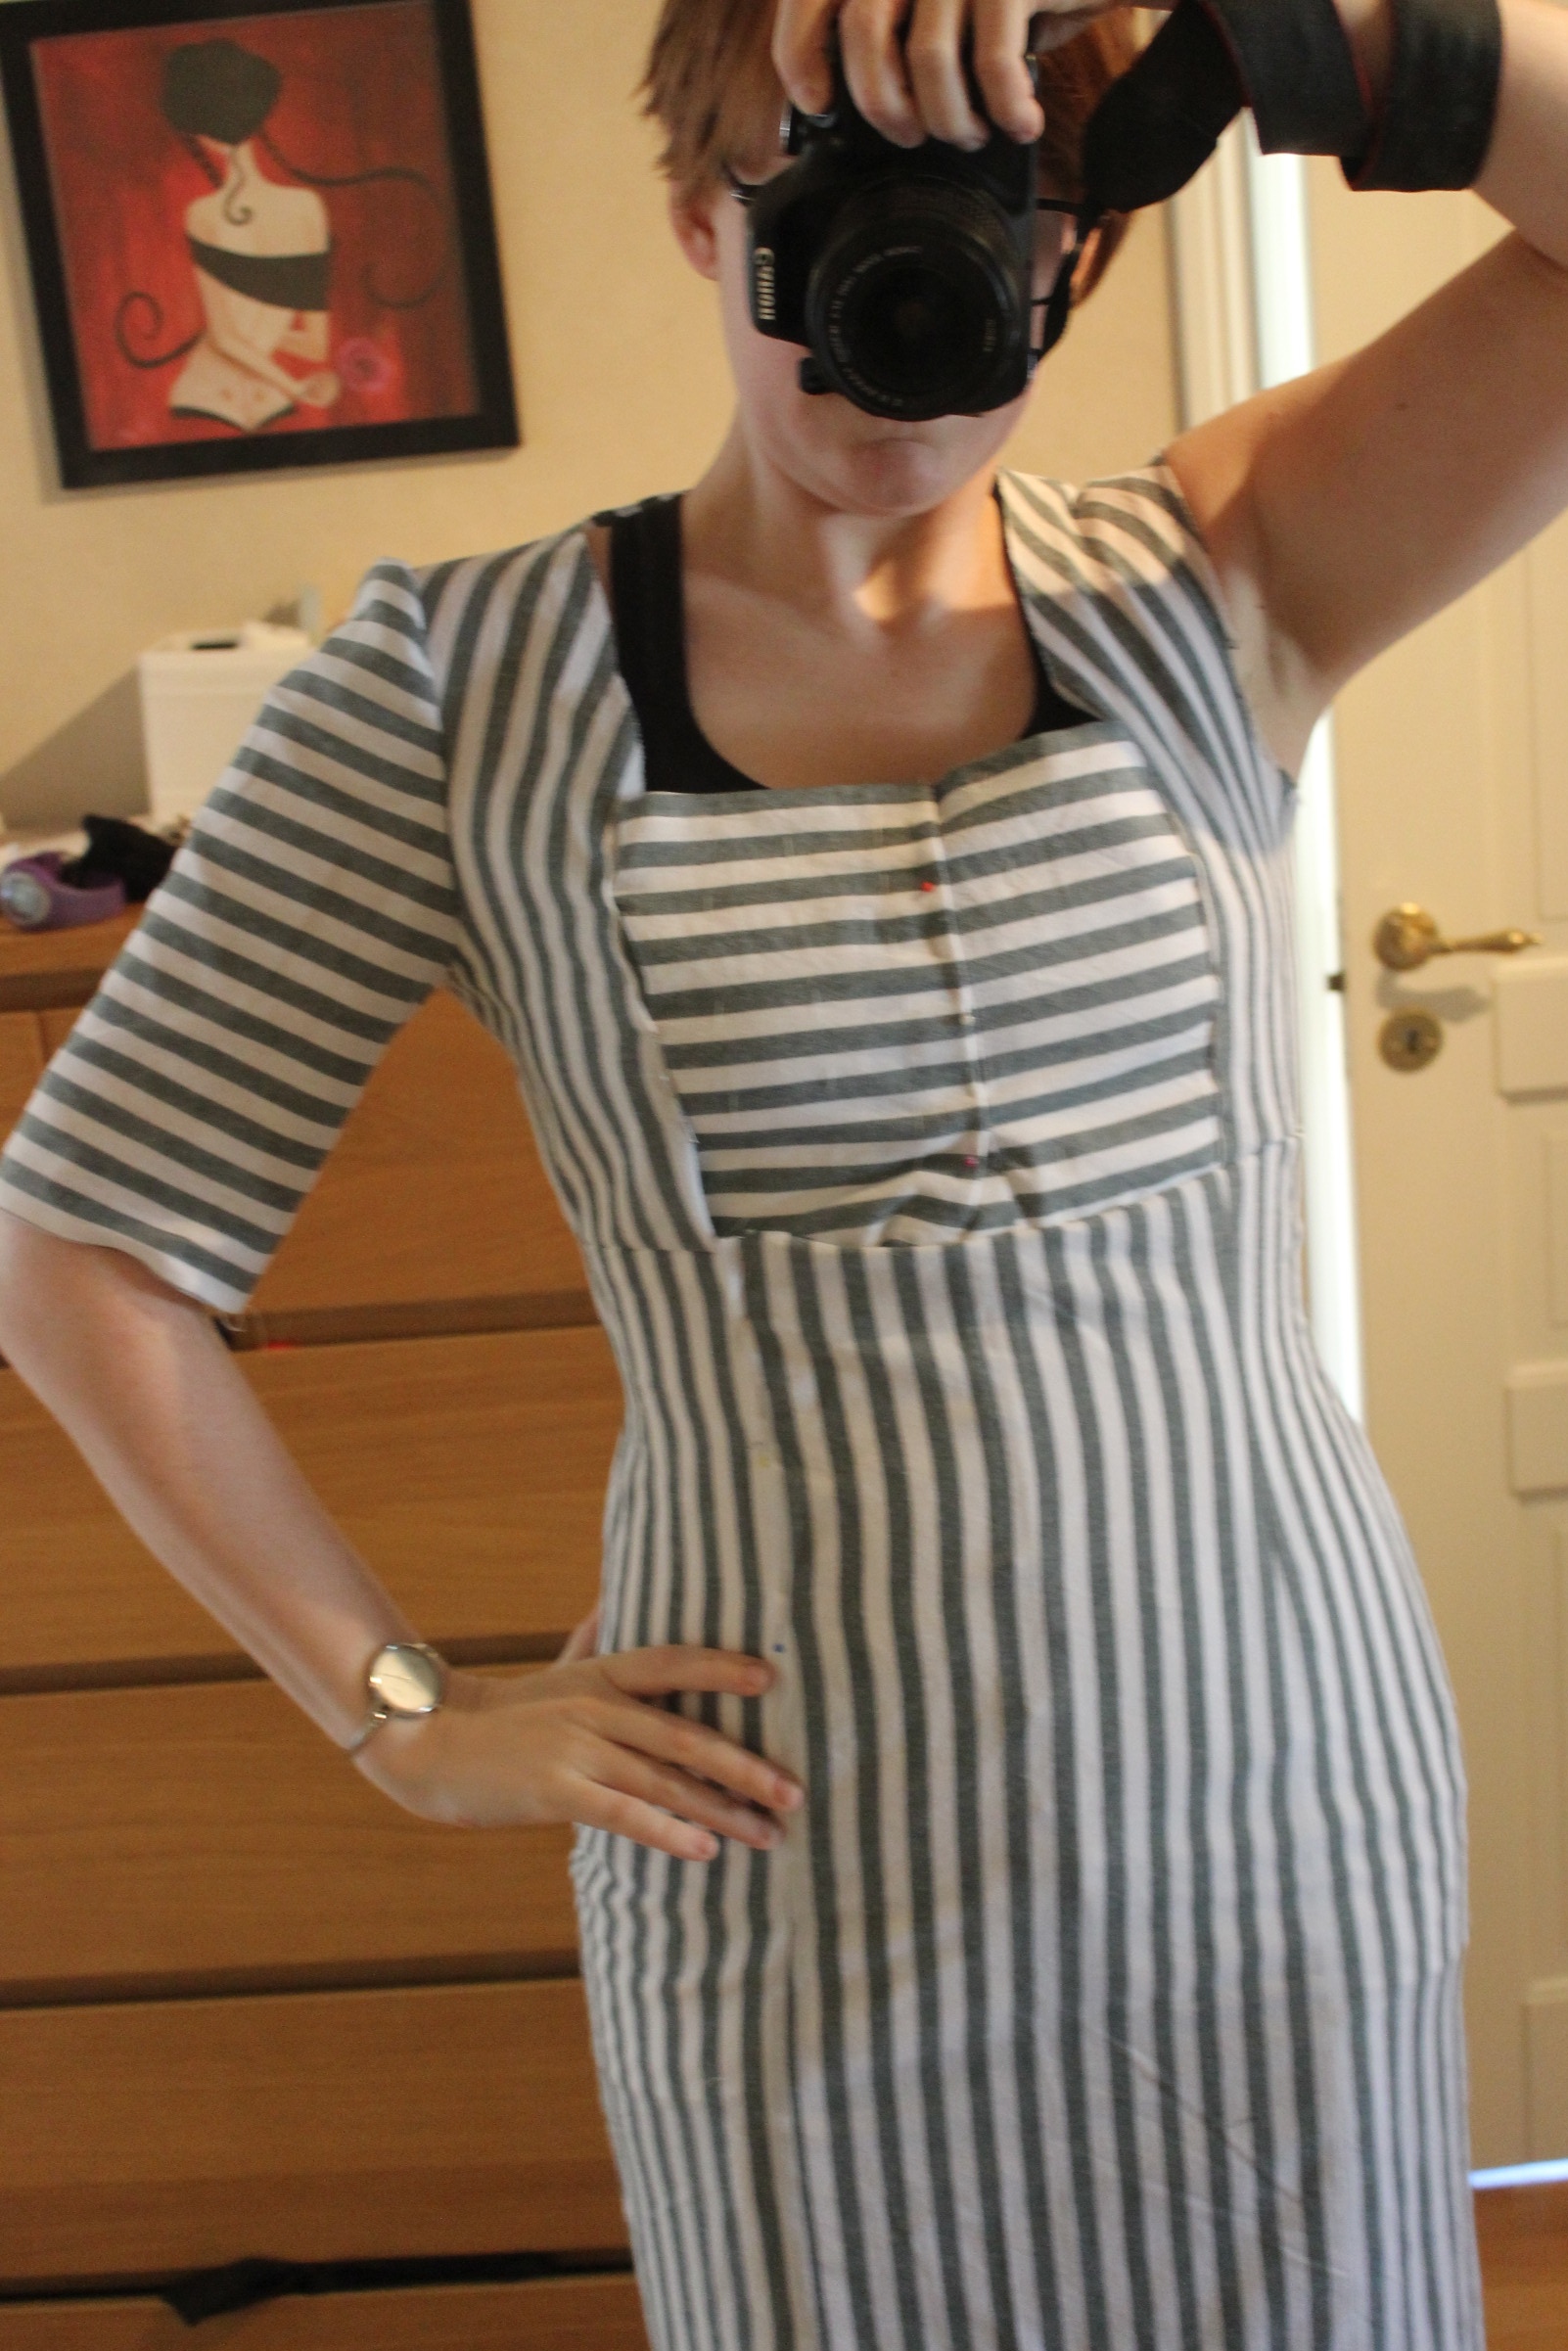
Once the bodice was finished and lined I attached it to the skirt, set the sleeves I once more tried it on to determent the exact placement of the hook and bars for the skirt closure.
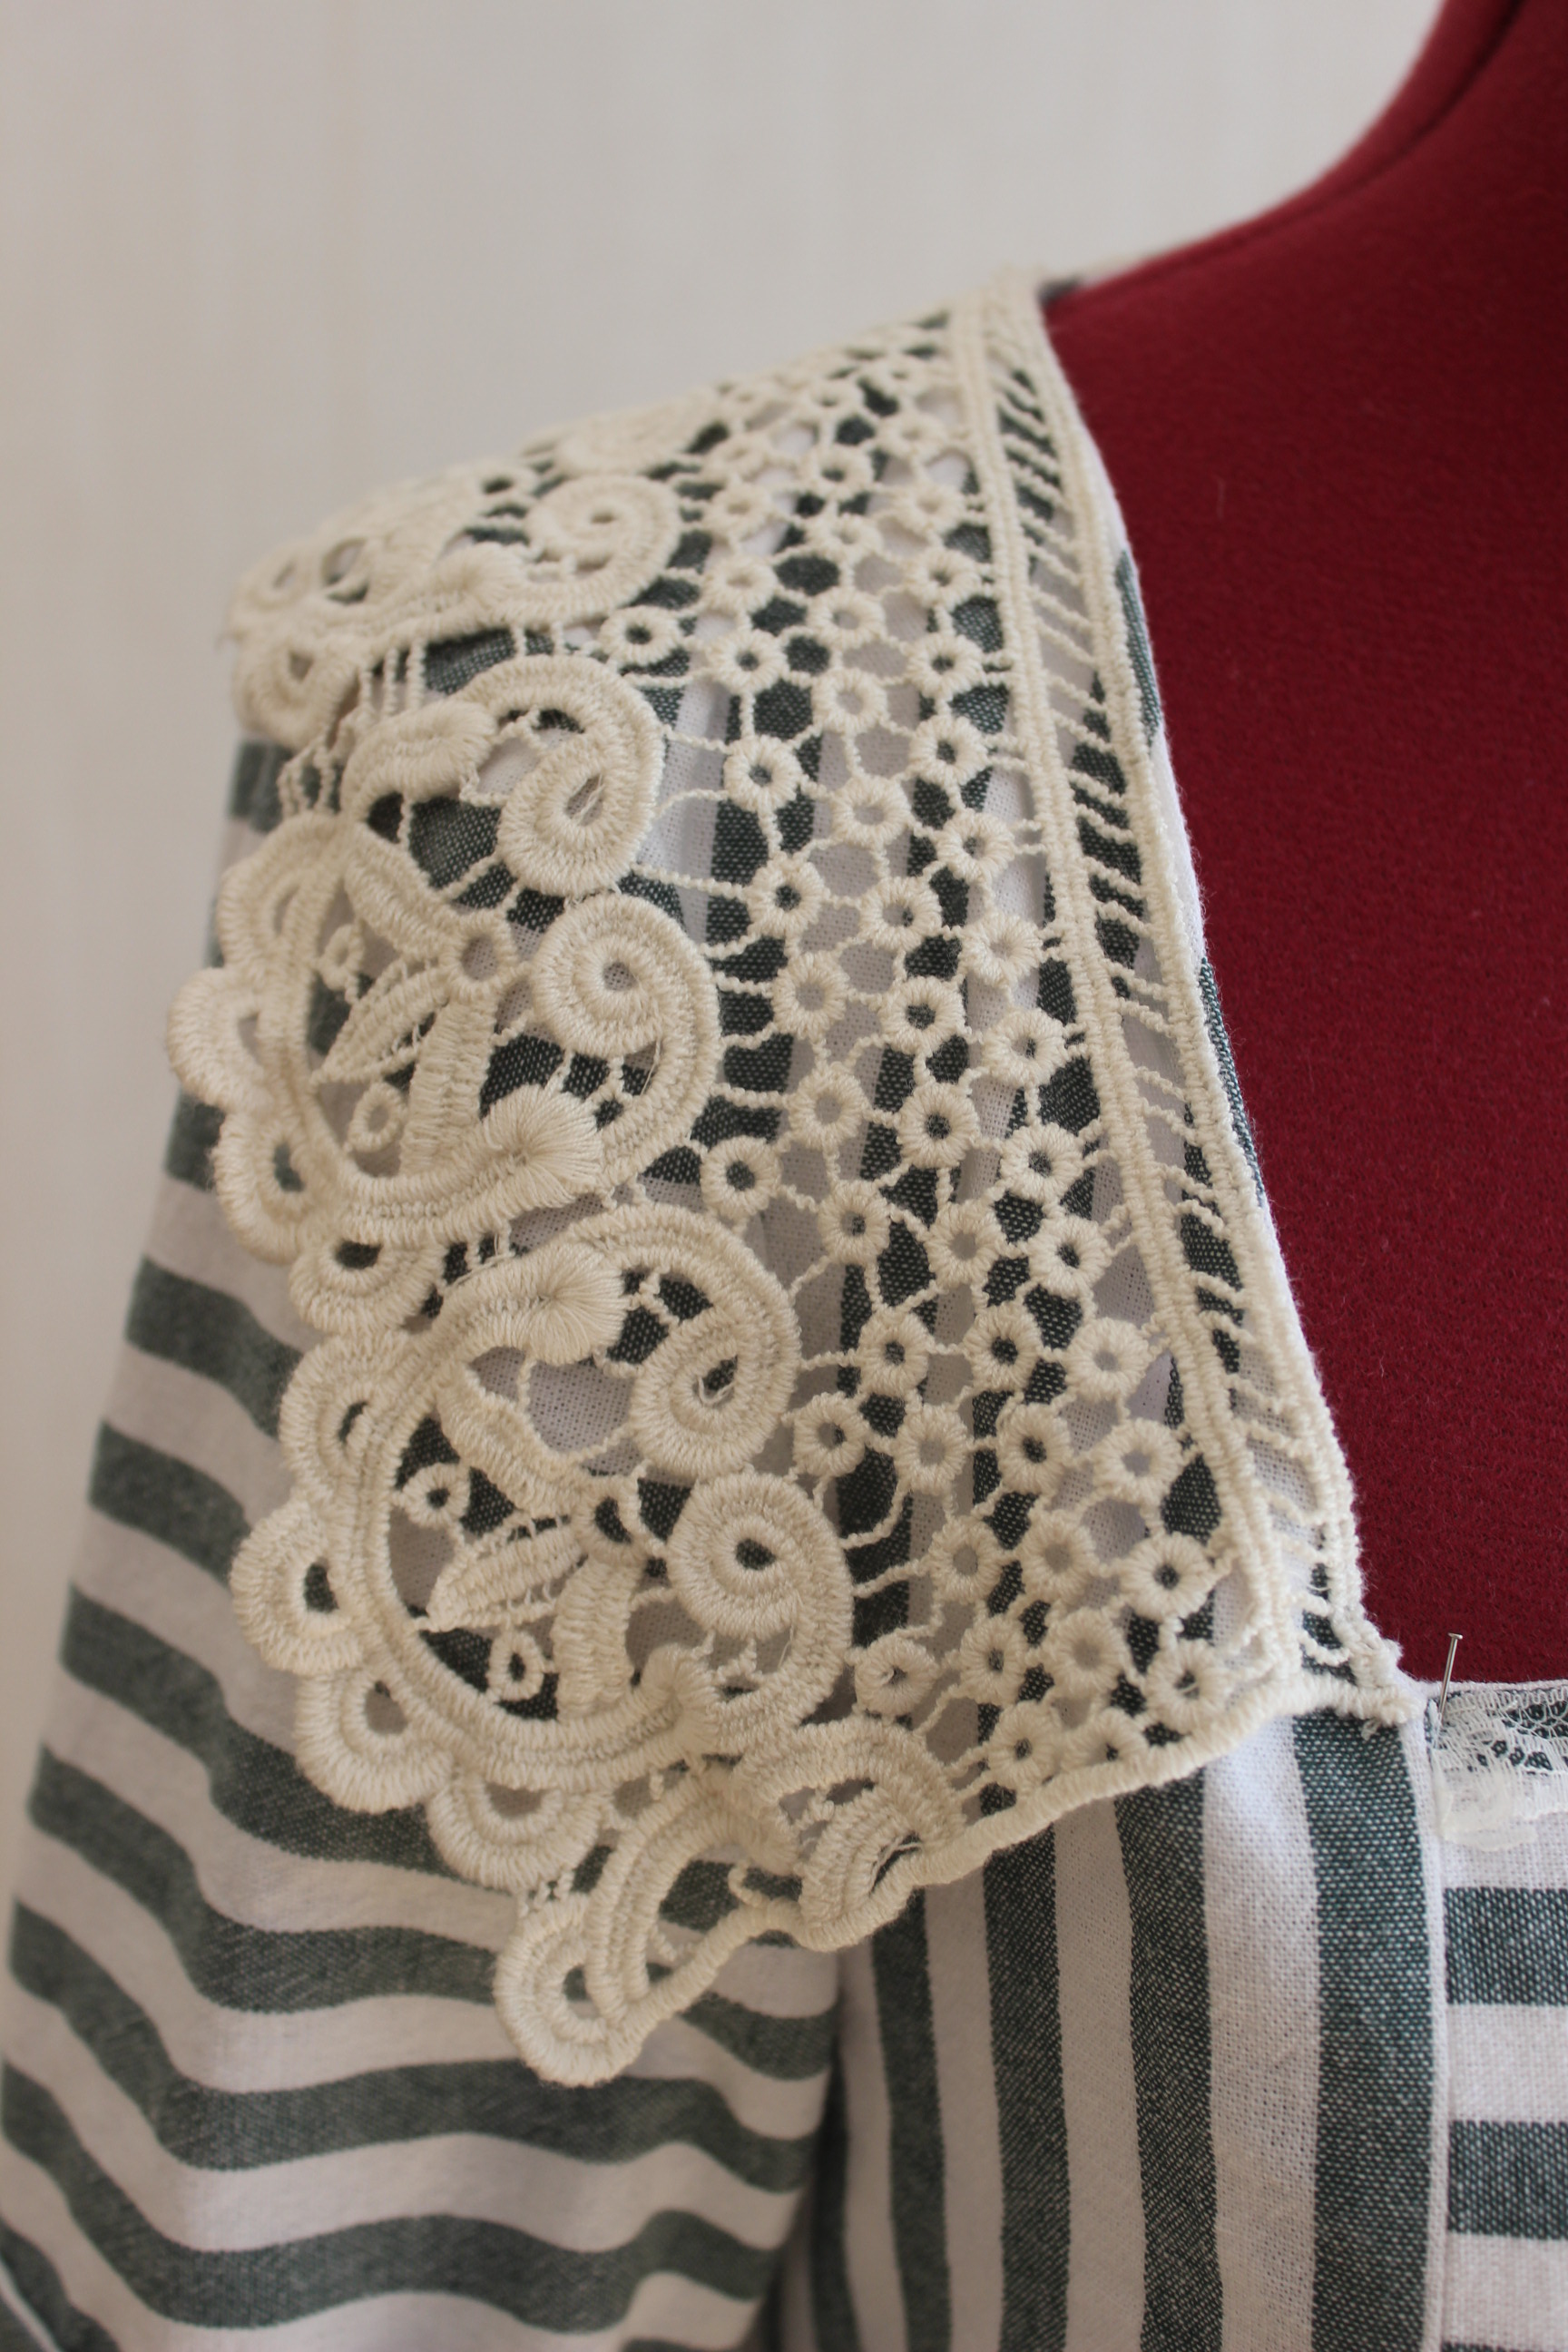
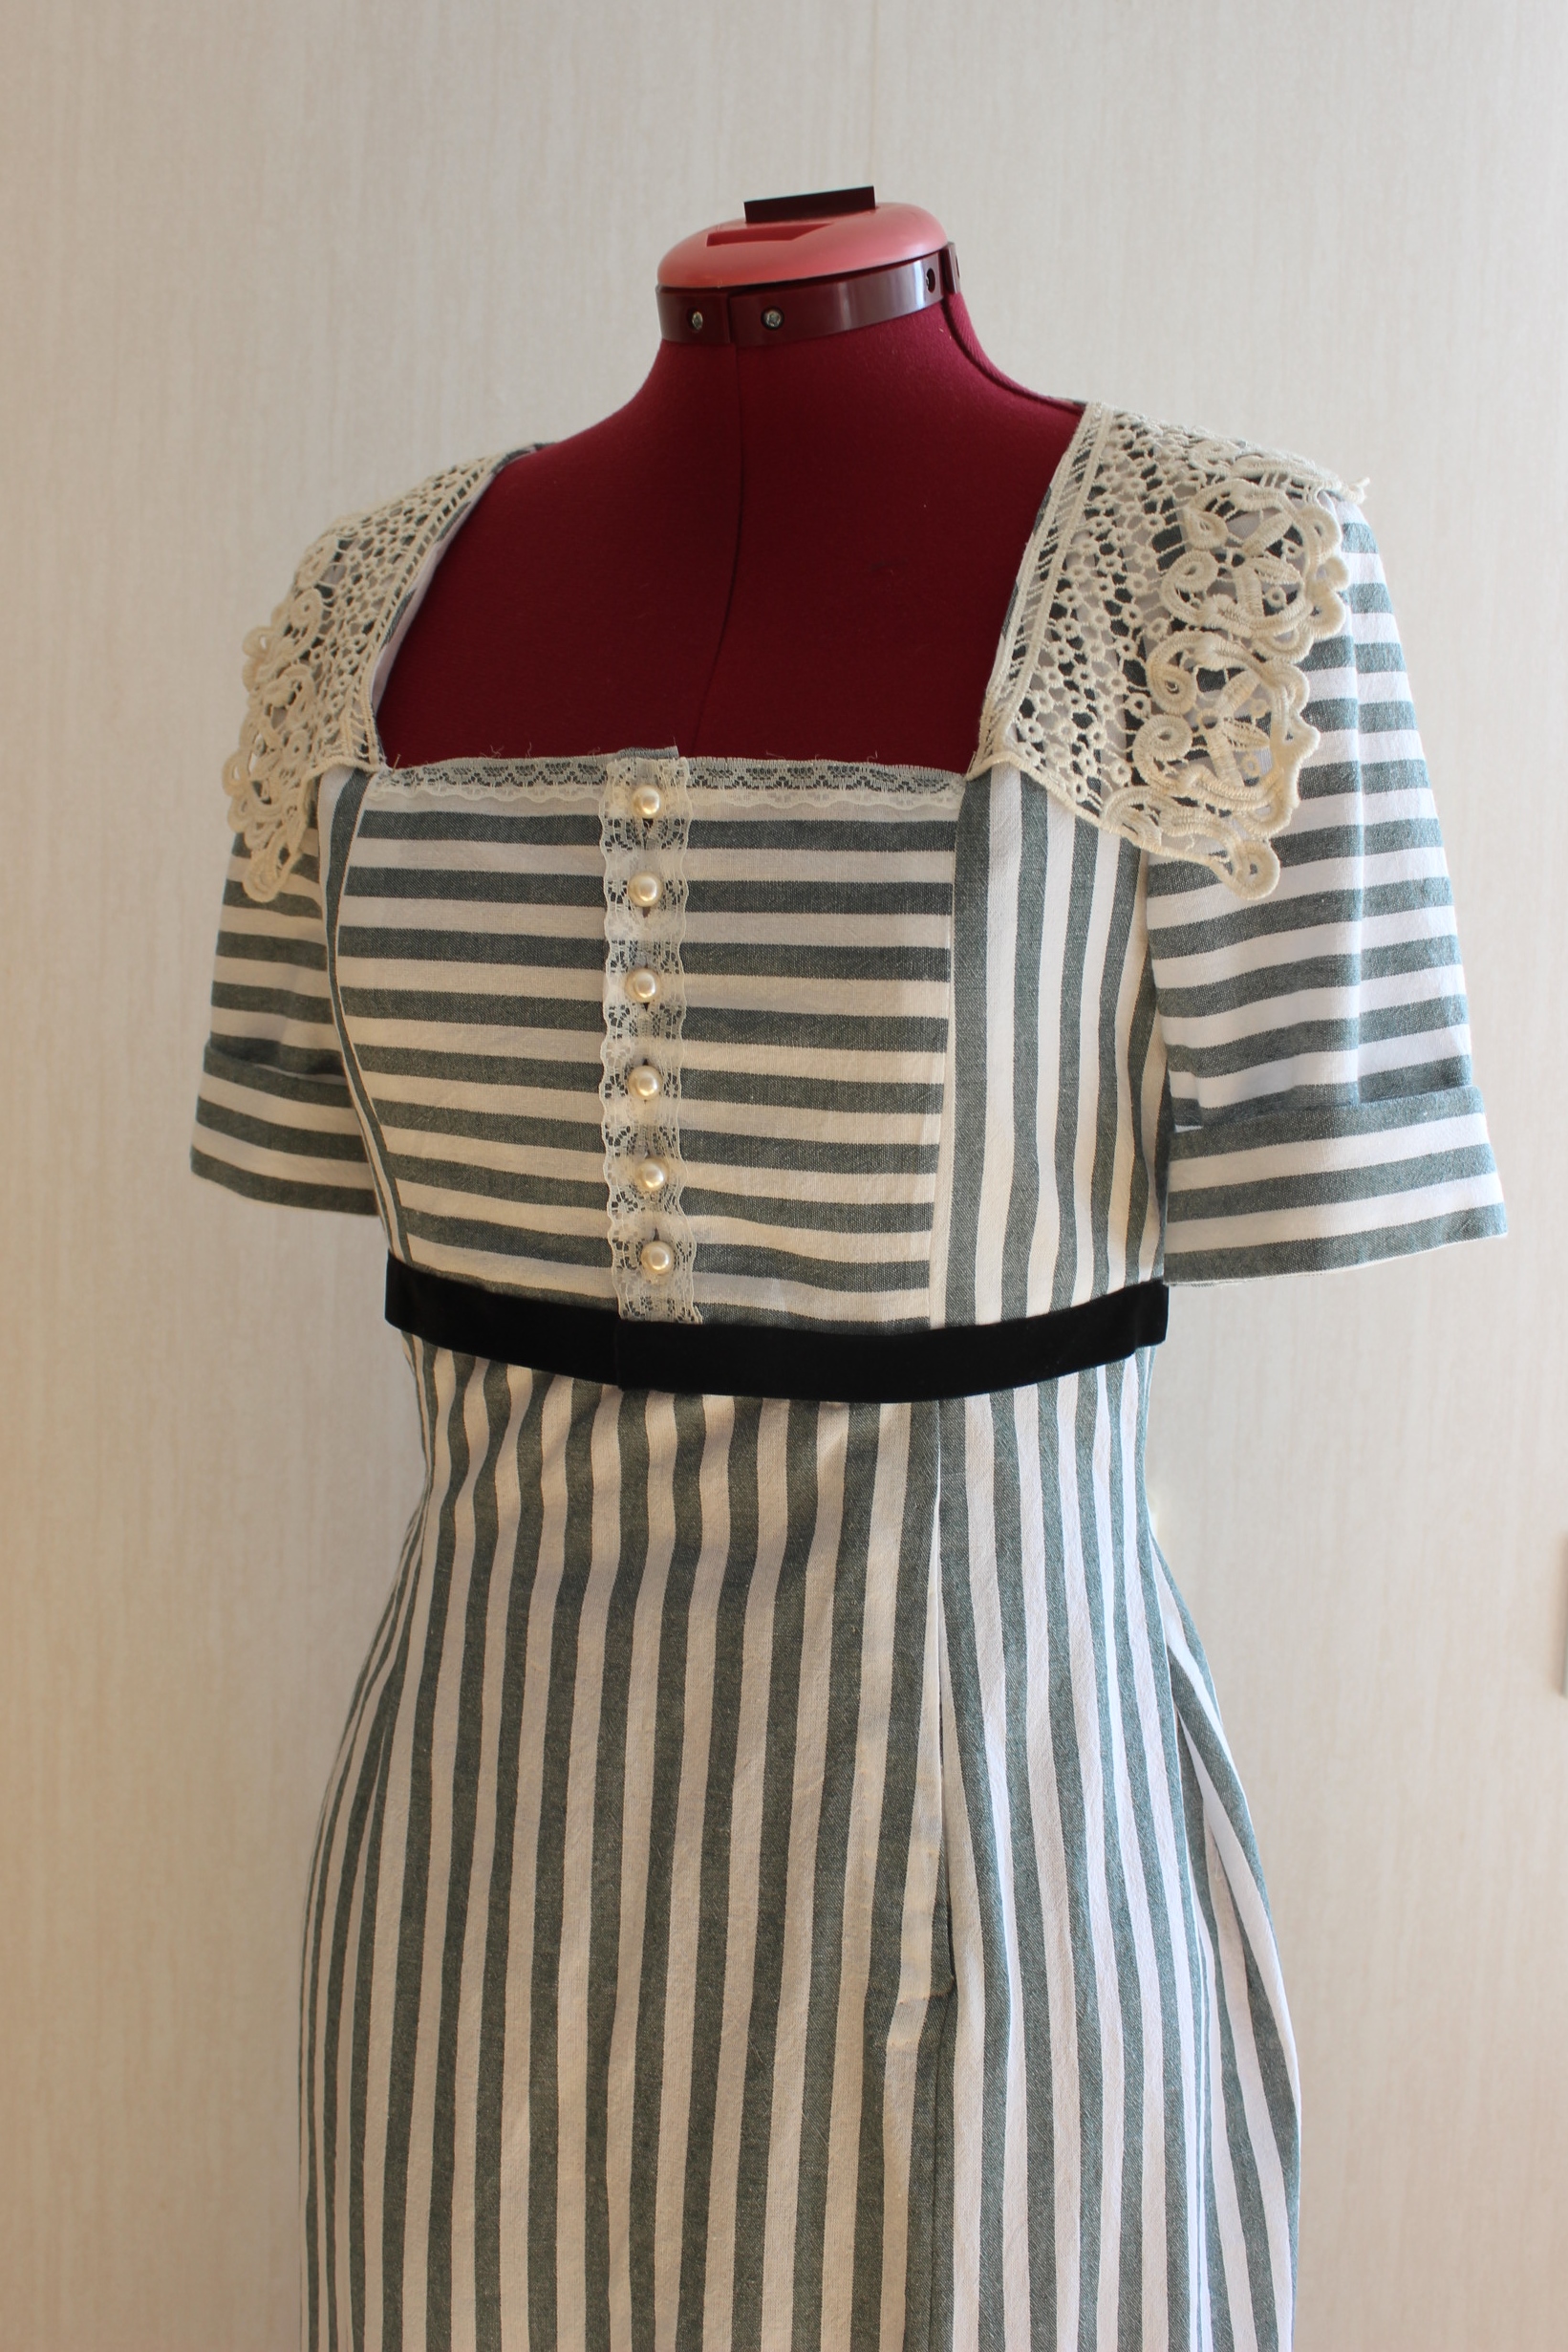
I also pinned on the collar to get a better visual of the completed look.

The fit looks good even though it’s more figure hugging and shaped then the one on Lady Mary.
(I’m pretty sure the actress have a completely different body then mine…)
Then I needed to pause the sewing for a few days over the May 1st celebration, so I put it on the dress form to keep me inspired (and to show of to our long distance friends coming over – don’t tell me you never done that…).


Once back at sewing, I pinned some narrow lace ribbons to the buttonhole stand and top front piece. Then I spent a few hours (at my in-laws) hand stitching the narrow lace, the collar, the lining, the black velvet ribbon and the hooks and bars to the bodice.
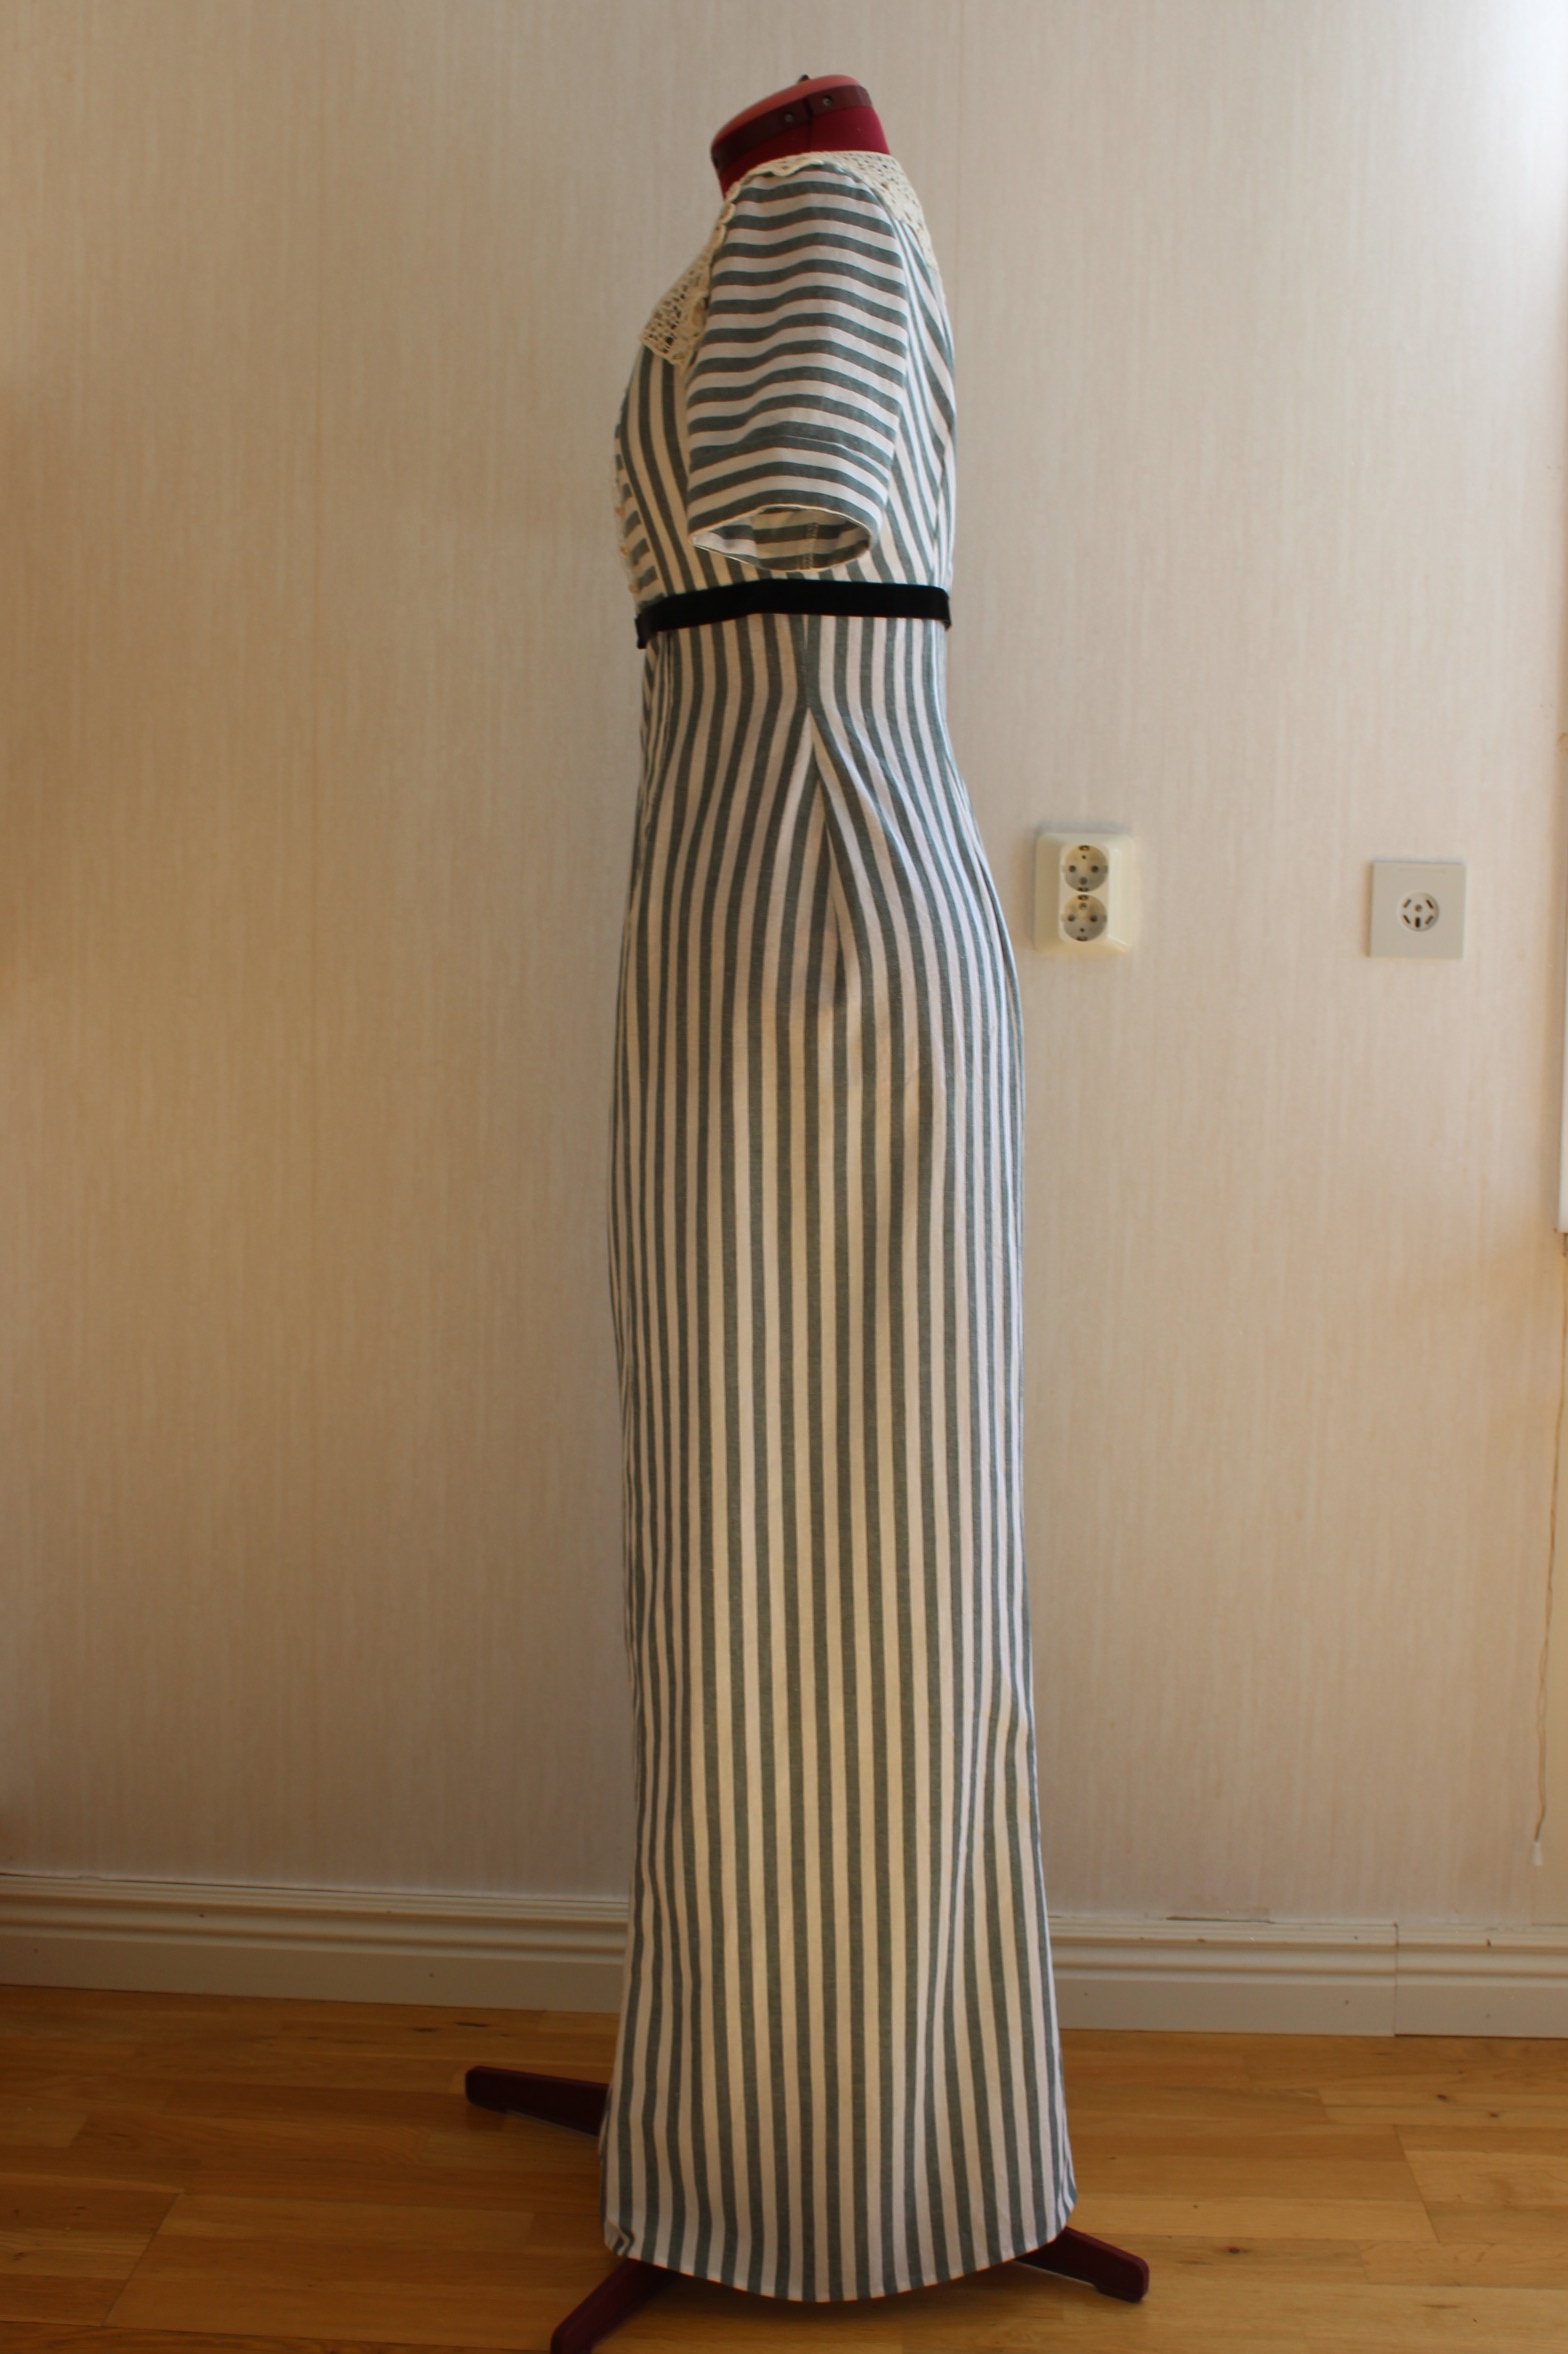
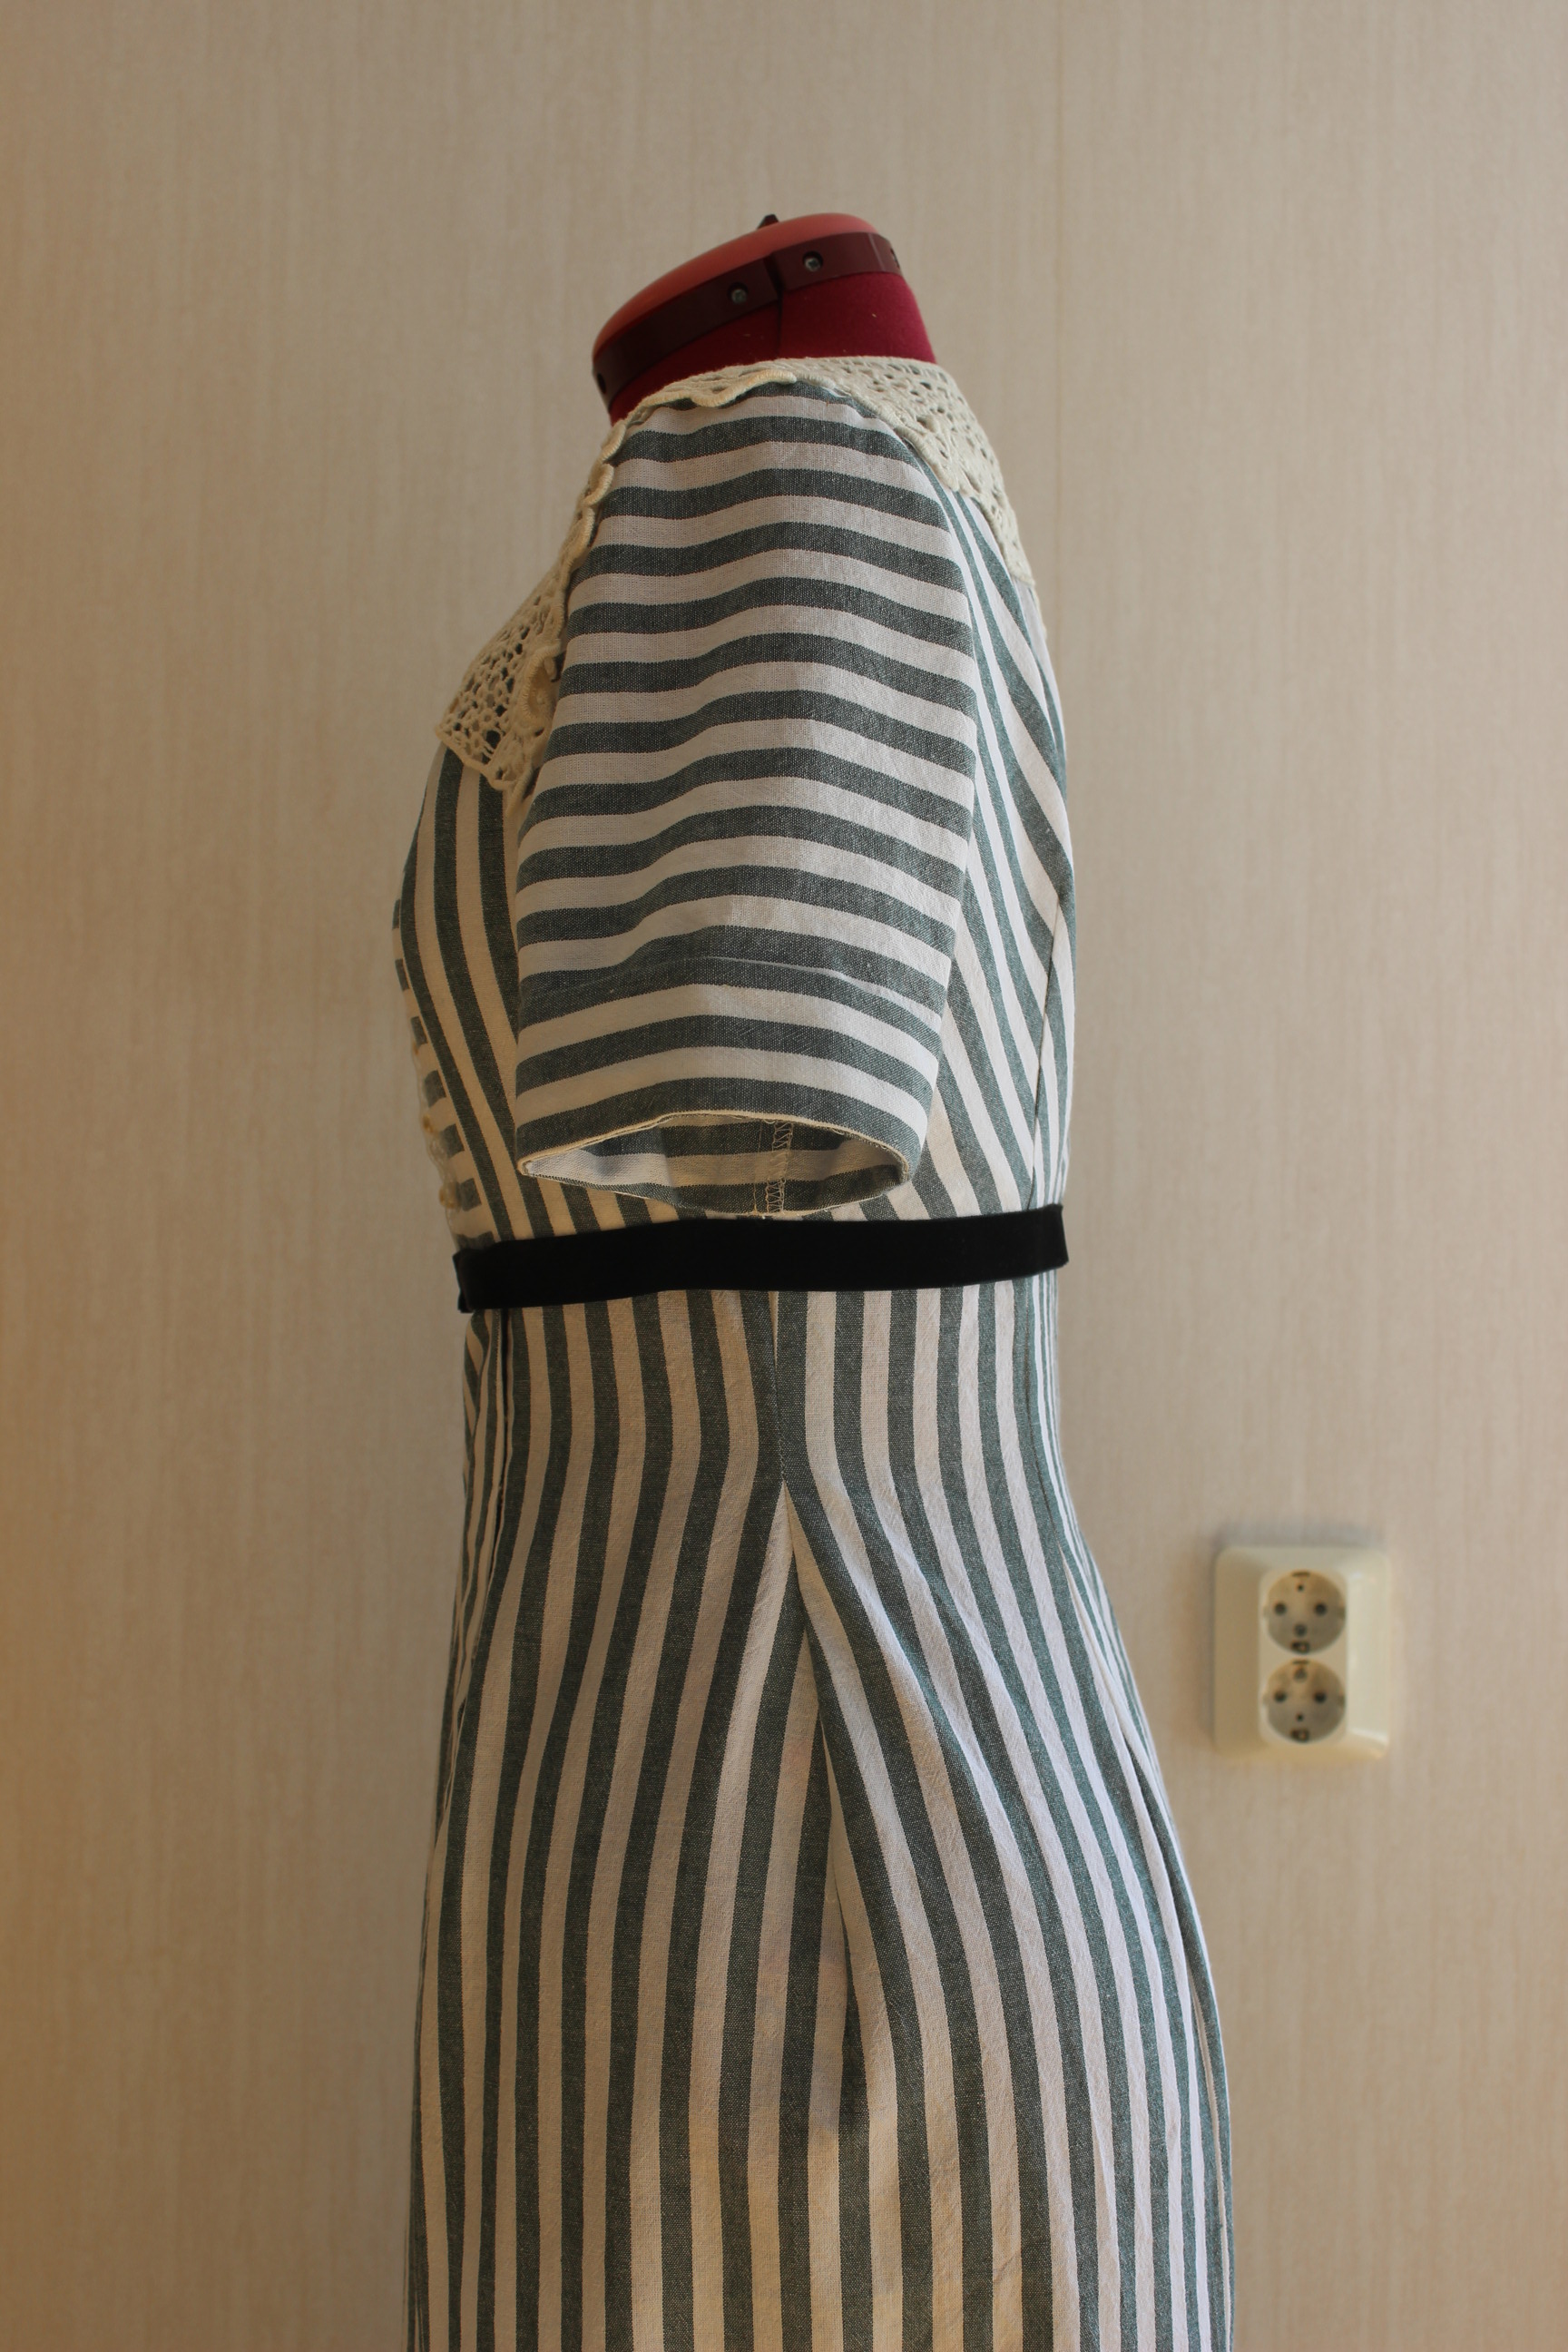
The Finished Dress:


Just the Facts:
Challenge: HSM15 nr 4 – War and Peace
What: A 1914s striped summer dress
How it fit the challenge: WWI started in summer 2014.
My dress is also a re-creation of the dress Lady Mary Crawley wears in the TV-series “Downton Abby”, in the episodes (and at the garden party) it’s announced that England will join the war.
Pattern: None, I drafted my own with influences from a small sketch in Janet Arnolds “Pattern of Fashion 2”
Fabric: 2,5 m of striped cotton, and 0,5 m white cotton for lining – both leftovers from previous projects.
Notions: Thread, buttonhole tread, 6 buttons, 2 pairs of hooks and eyes, 6 snaps, 0,5 m of narrow lace, 1 m black velvet ribbon, one extra long lace/crocheted collar.
How historical accurate: Not sure. I used modern techniques with lots of hand finishing. The fabric wold have existed in the period, but I think the slim silhouette are a bit to modern. Perhaps 5/10.
Time: About 15-20 hours. Lots of fiddling with both the fit and matching the stripes made this project a bit more time consuming then I expected.
Cost: About 250 Sek (40Usd) all fabric from stash – Bought on sale a few years ago.
First Worn: May 3 for photos.
Final Thoughts: I really like this dress. It came out exactly like I envisioned and I felt really pretty (and posh) in it.
I’m really happy with the decision to make the dress slim and figure hugging (contrary to the original which have a more straight shape) even though it diverts a bit from the fashion of the day.
But there are as always a few thing I would like to fix before wearing it again: The back bodice are still to long (what’s that about?) and the button holes need to be stitched shut about 2 mm each (those buttons needs to remain closed next time around).
***
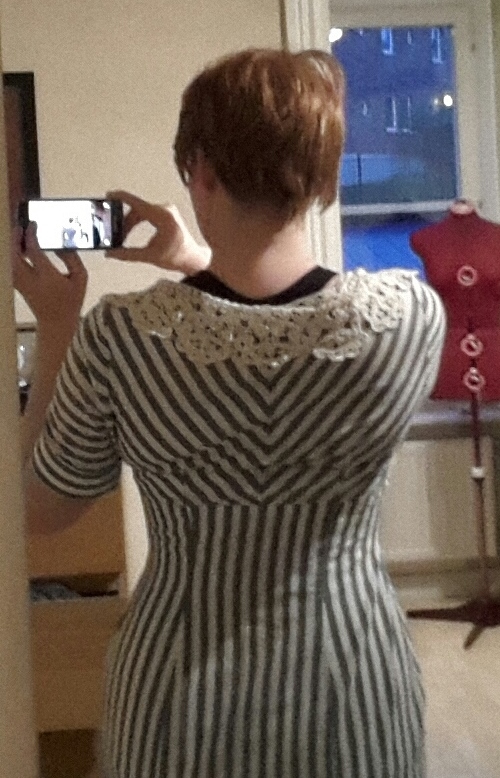
 Accessorized and ready for a photoshoot.
The Start of a war – Downton Mary’s Striped Dress (Part 1)
When going over the many ways on which I could go for the HSM15 nr 4 – War & Peace, I remembered a project I’ve been dying to make for quite some time.
The striped dress The character Lady Mary wears in “Downton Abby”. The time period (1914s) was perfect for this challenge, and when I remember the striped cotton in my stash the decision was made.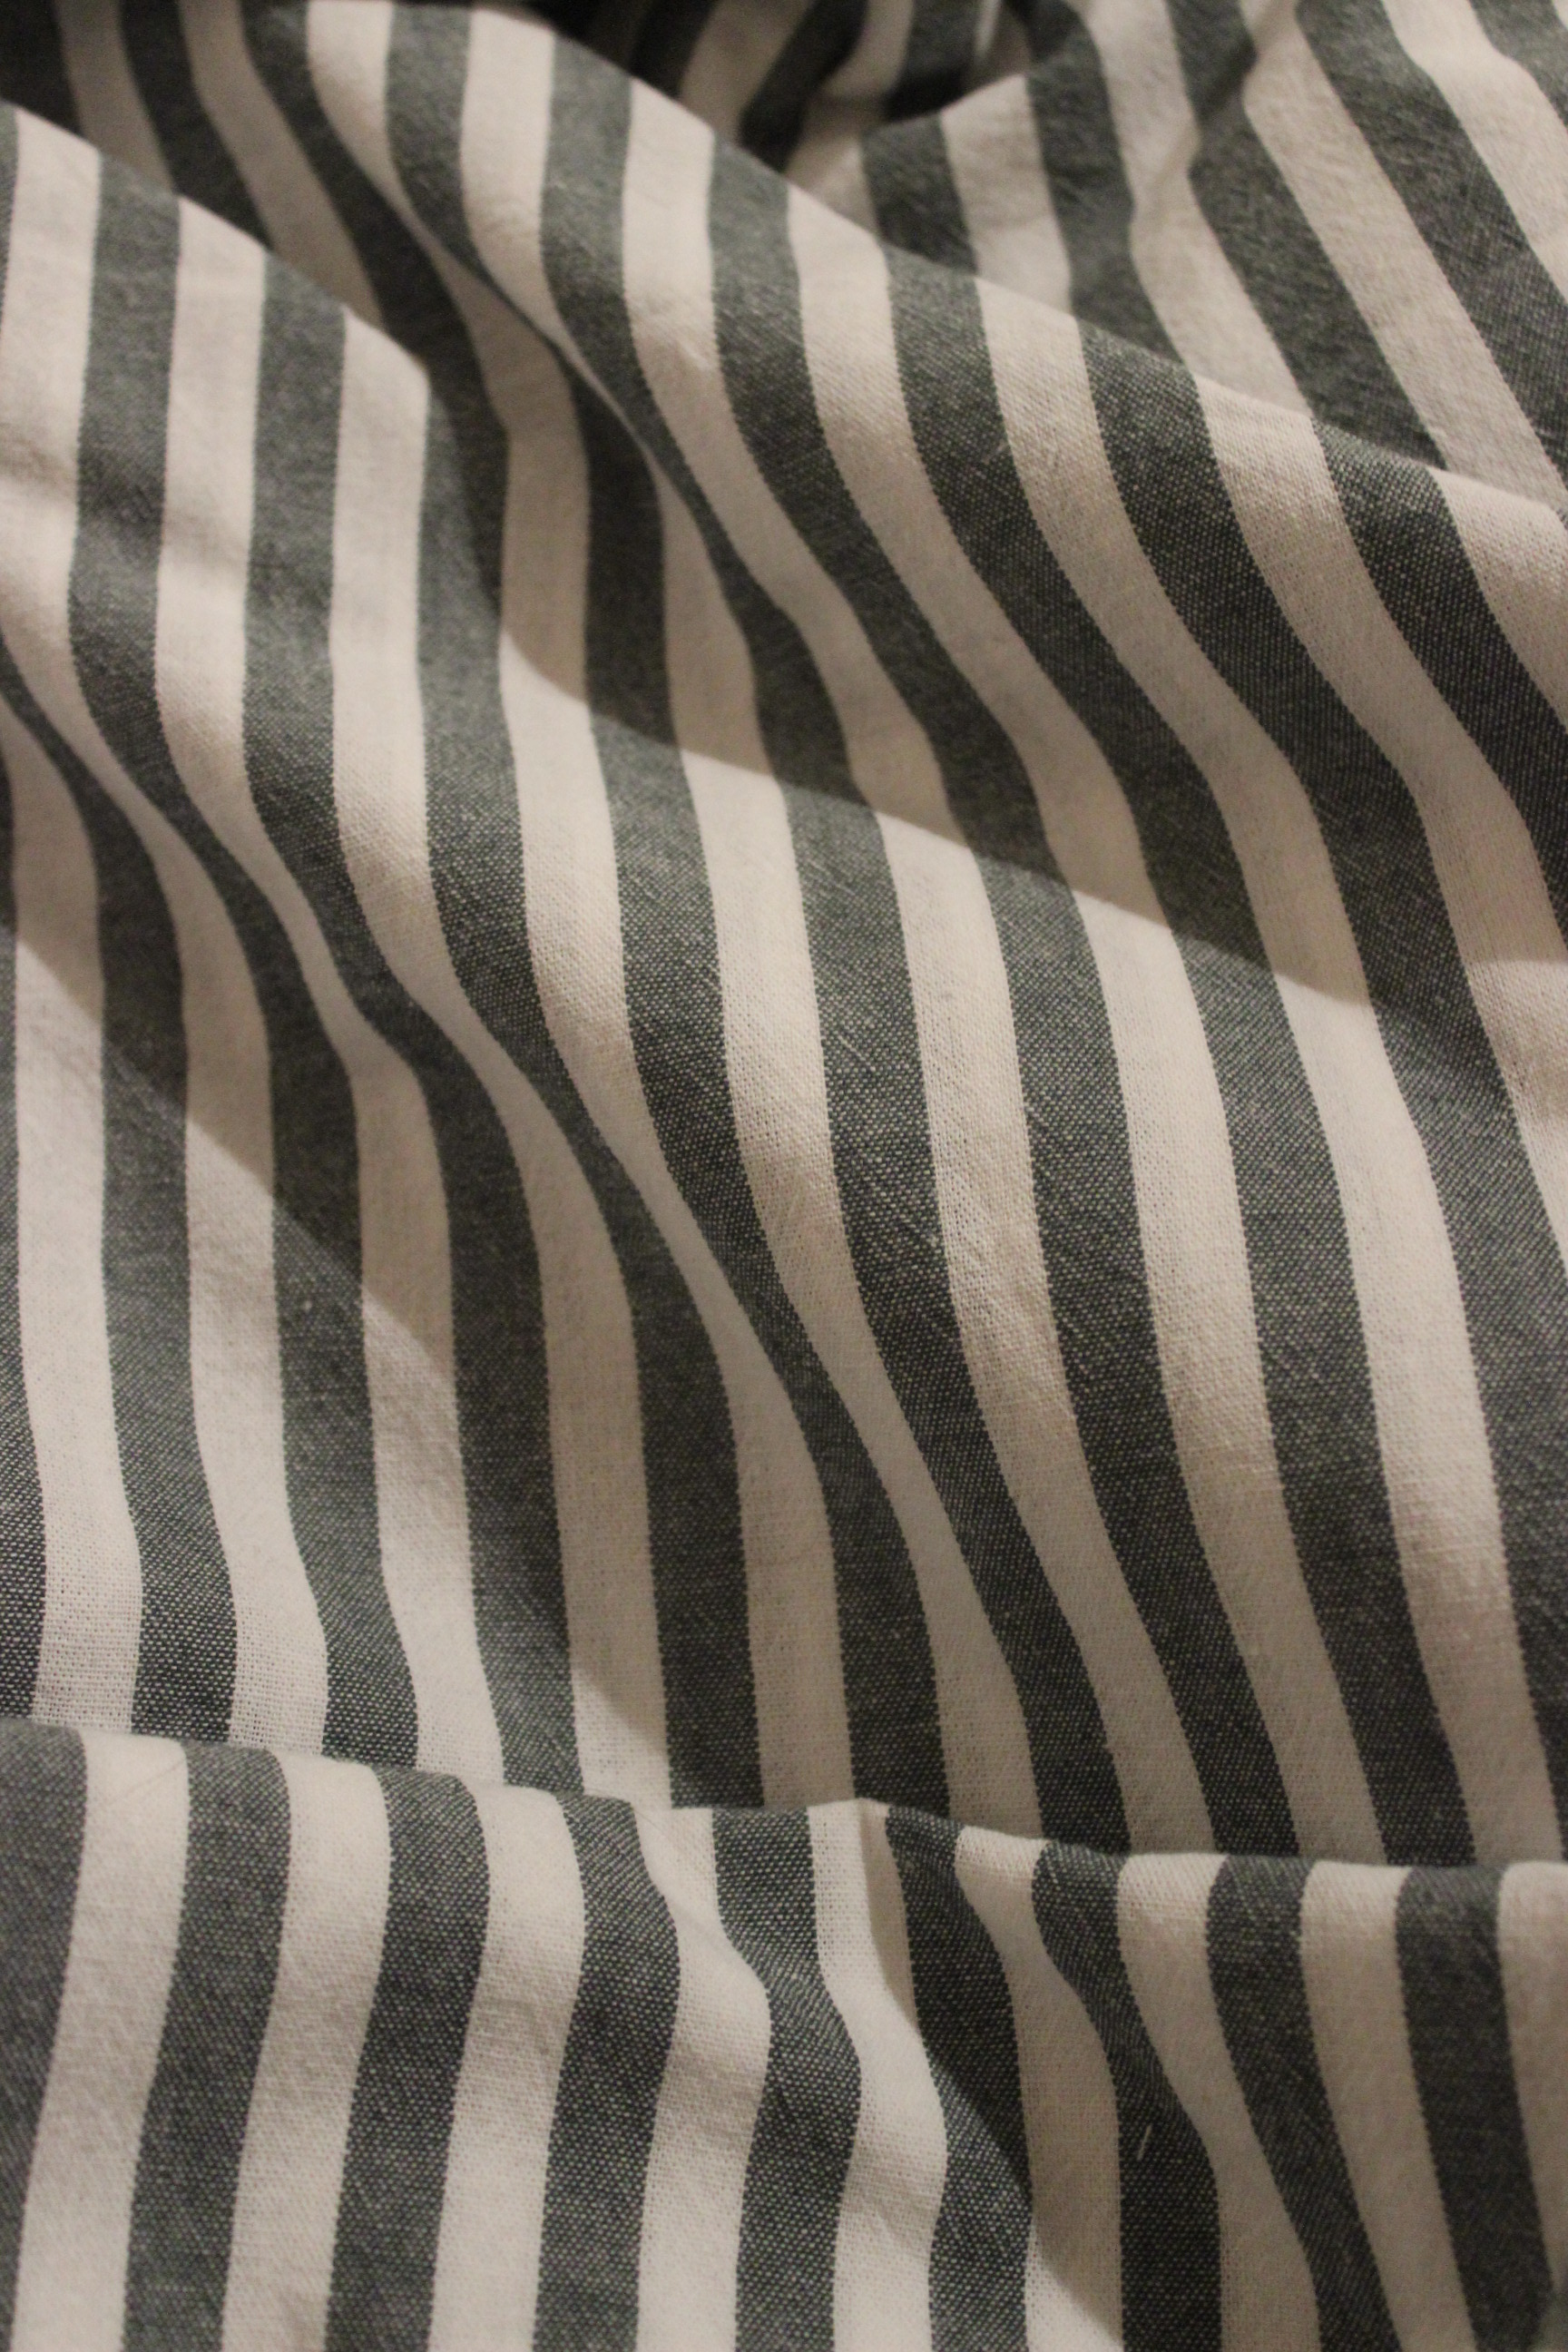 Thin, structured, white and green cotton fabric – leftovers from my 18th century “Artsy Robe a la Anglaise/Turque“.
I started by doing a dress studie – sketching down the basic look, special details for the pattern and all the materials. 
looking through my costuming book for a way to tackle the pattern drafting I found a sketch of a 1910s, high waisted slim skirt that would be perfect for this dress.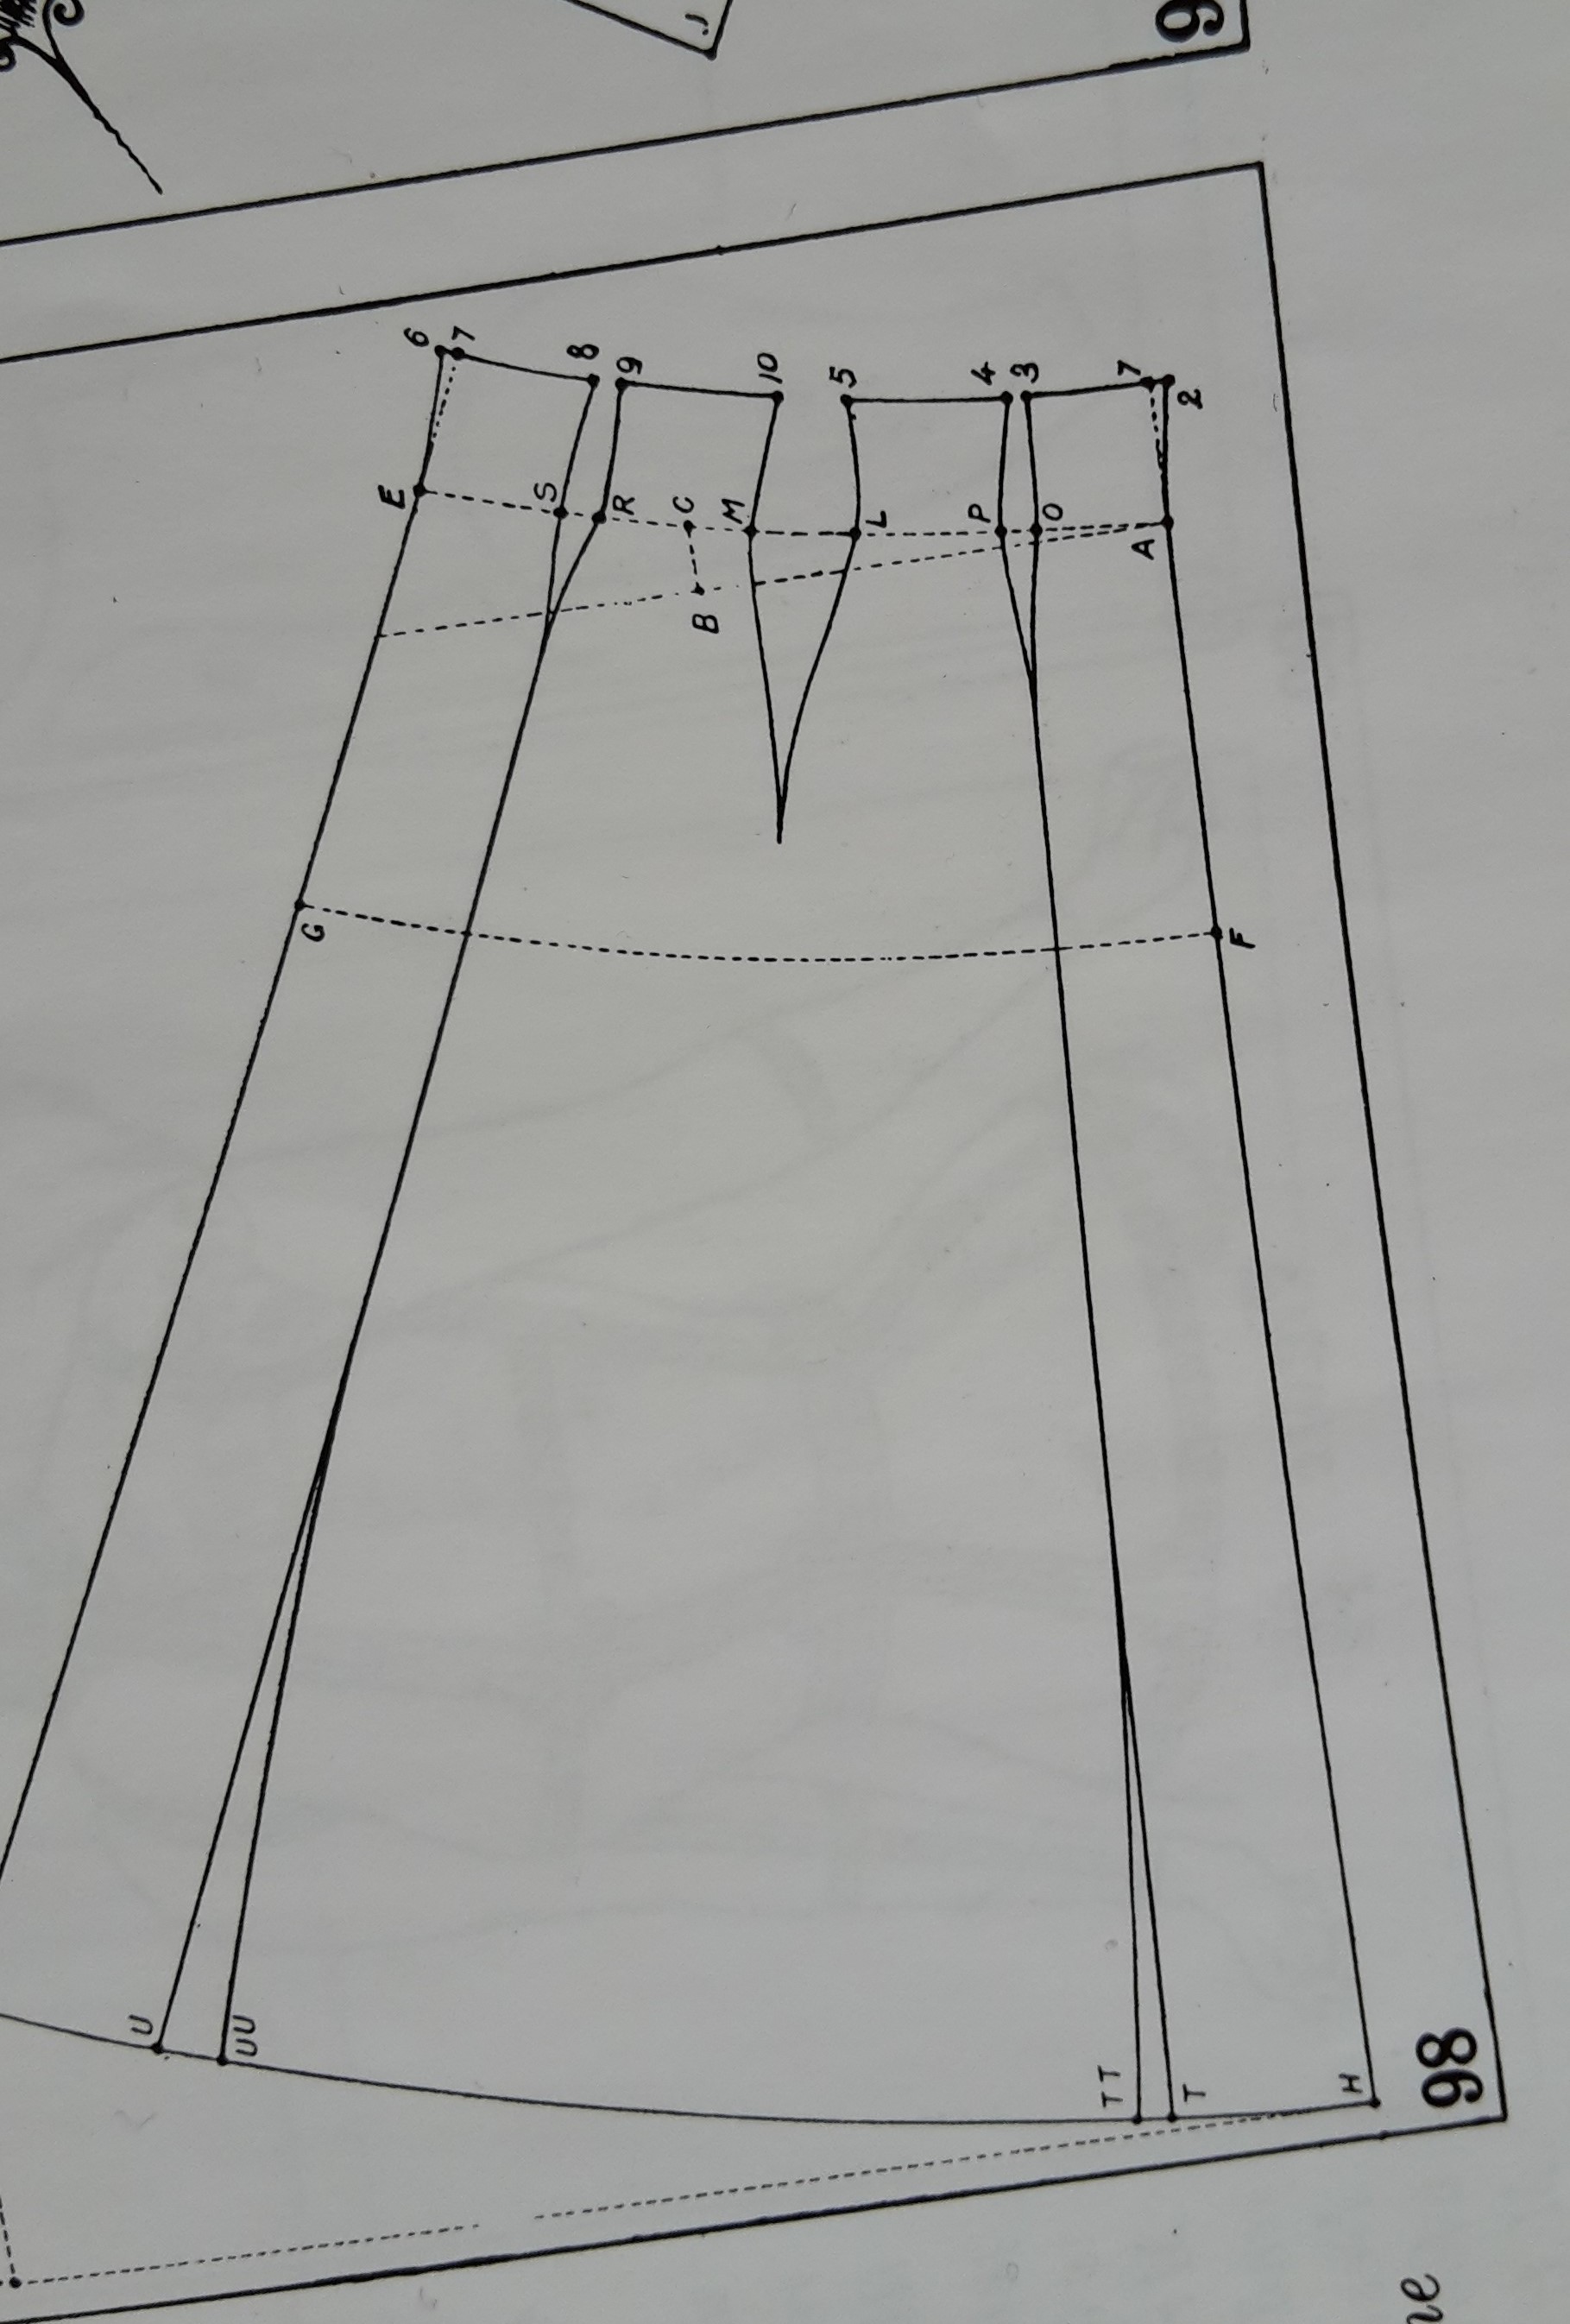 Sketch from Janet Arnolds “Pattern of Fashion nr 2”.
I used the basic principle from Arnolds book and drafted the pattern to fit my measurements.
Then I made a mock-up and tried it on over my long line corset.

And it was huge.
I’m still amazed of how much ease it must be in my modern pattern temples since I almost always end up with mock-ups about 10 cm to big.
I took it in everywhere about that much.

Much better.
But still in need for some extra alterations, like smoothing out the darts and taking out a few cm from the length at the bodice back. Here you can see the way I took out the width at the seams and darts.
Once the pattern was adjusted it was time to cut the fabric.


The back bodice being cut on bias and with the stripes carefully matched to he shoulders, sleeves and center back.
Before I started sewing I needed to be sure the collar was long enough to fit the neckline. Perfect match.
I sewed most of the dress on my sewing machine. 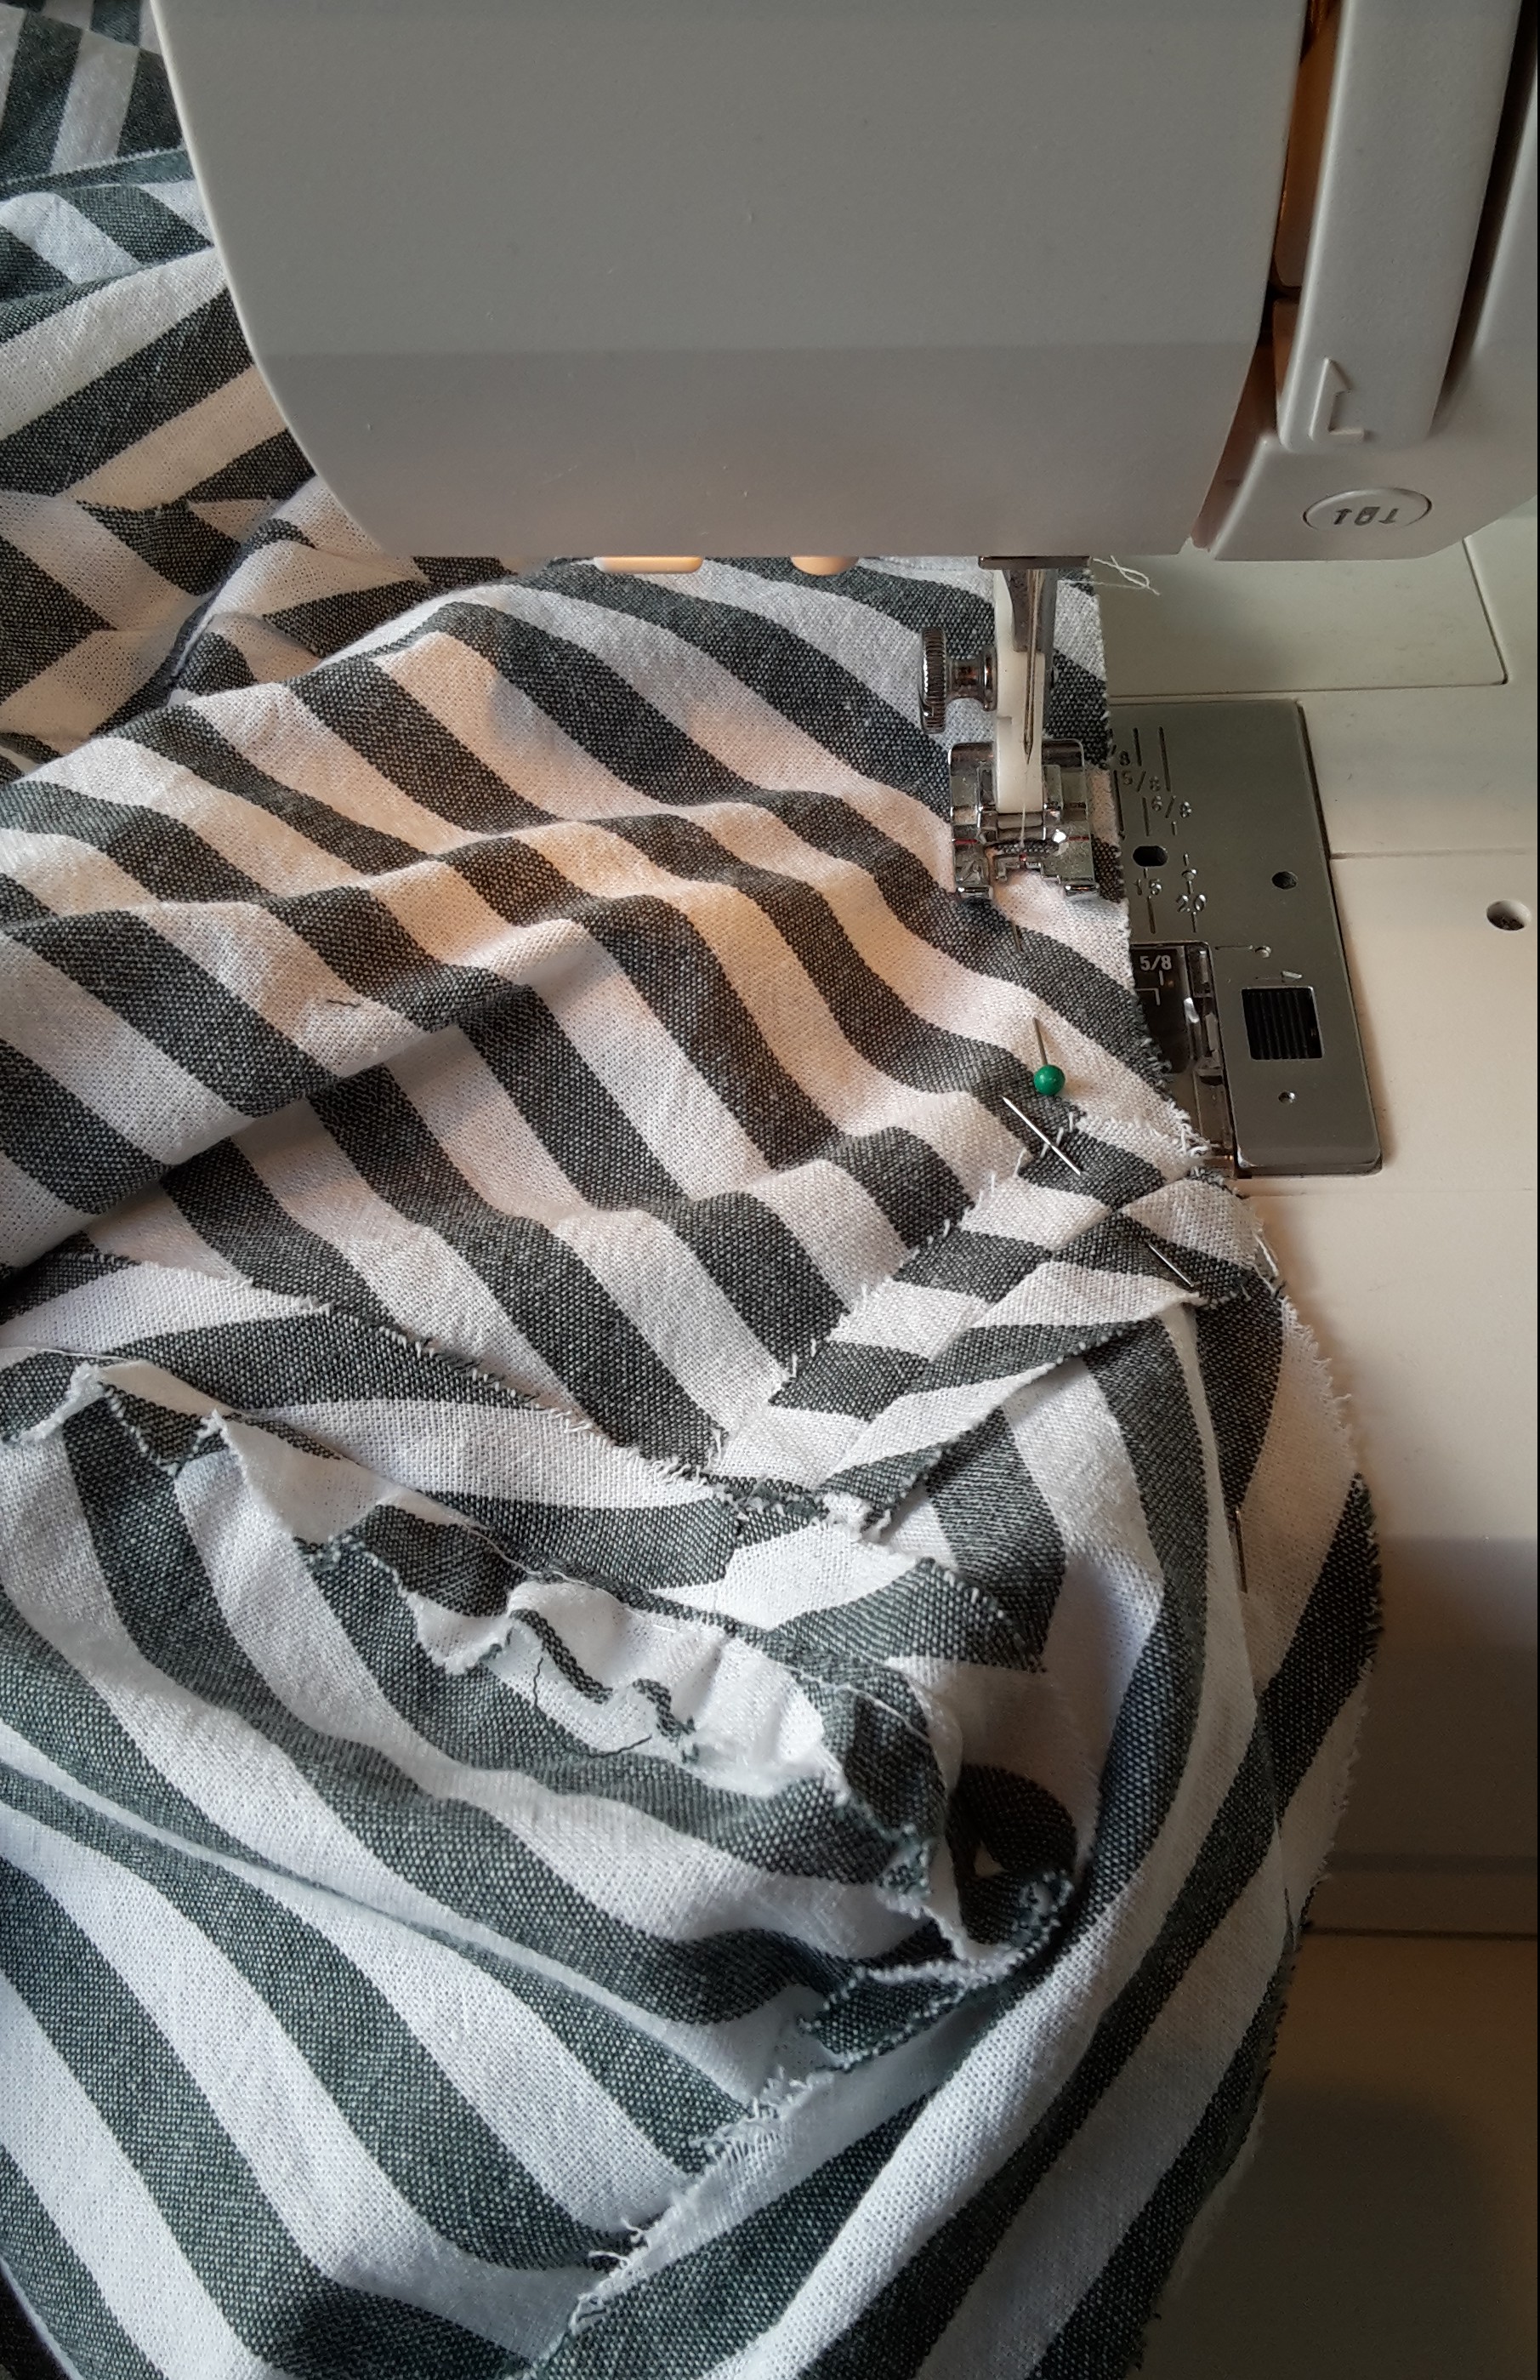 Sewing the bodice, skirt, sleeves and lining together but away from each other at this pont.
 Making the placket for the skirts closure.
Once all the separate pieces was ready, I basted the front bodice to the sides, the bodice to the skirt and one sleeve to the sleeve-cap. And then I tried it on.

Pretty good fit. The back is still to long (just to take some more out), and the bodice front was a bit to big.
I decided to take the width out at the bust seam.
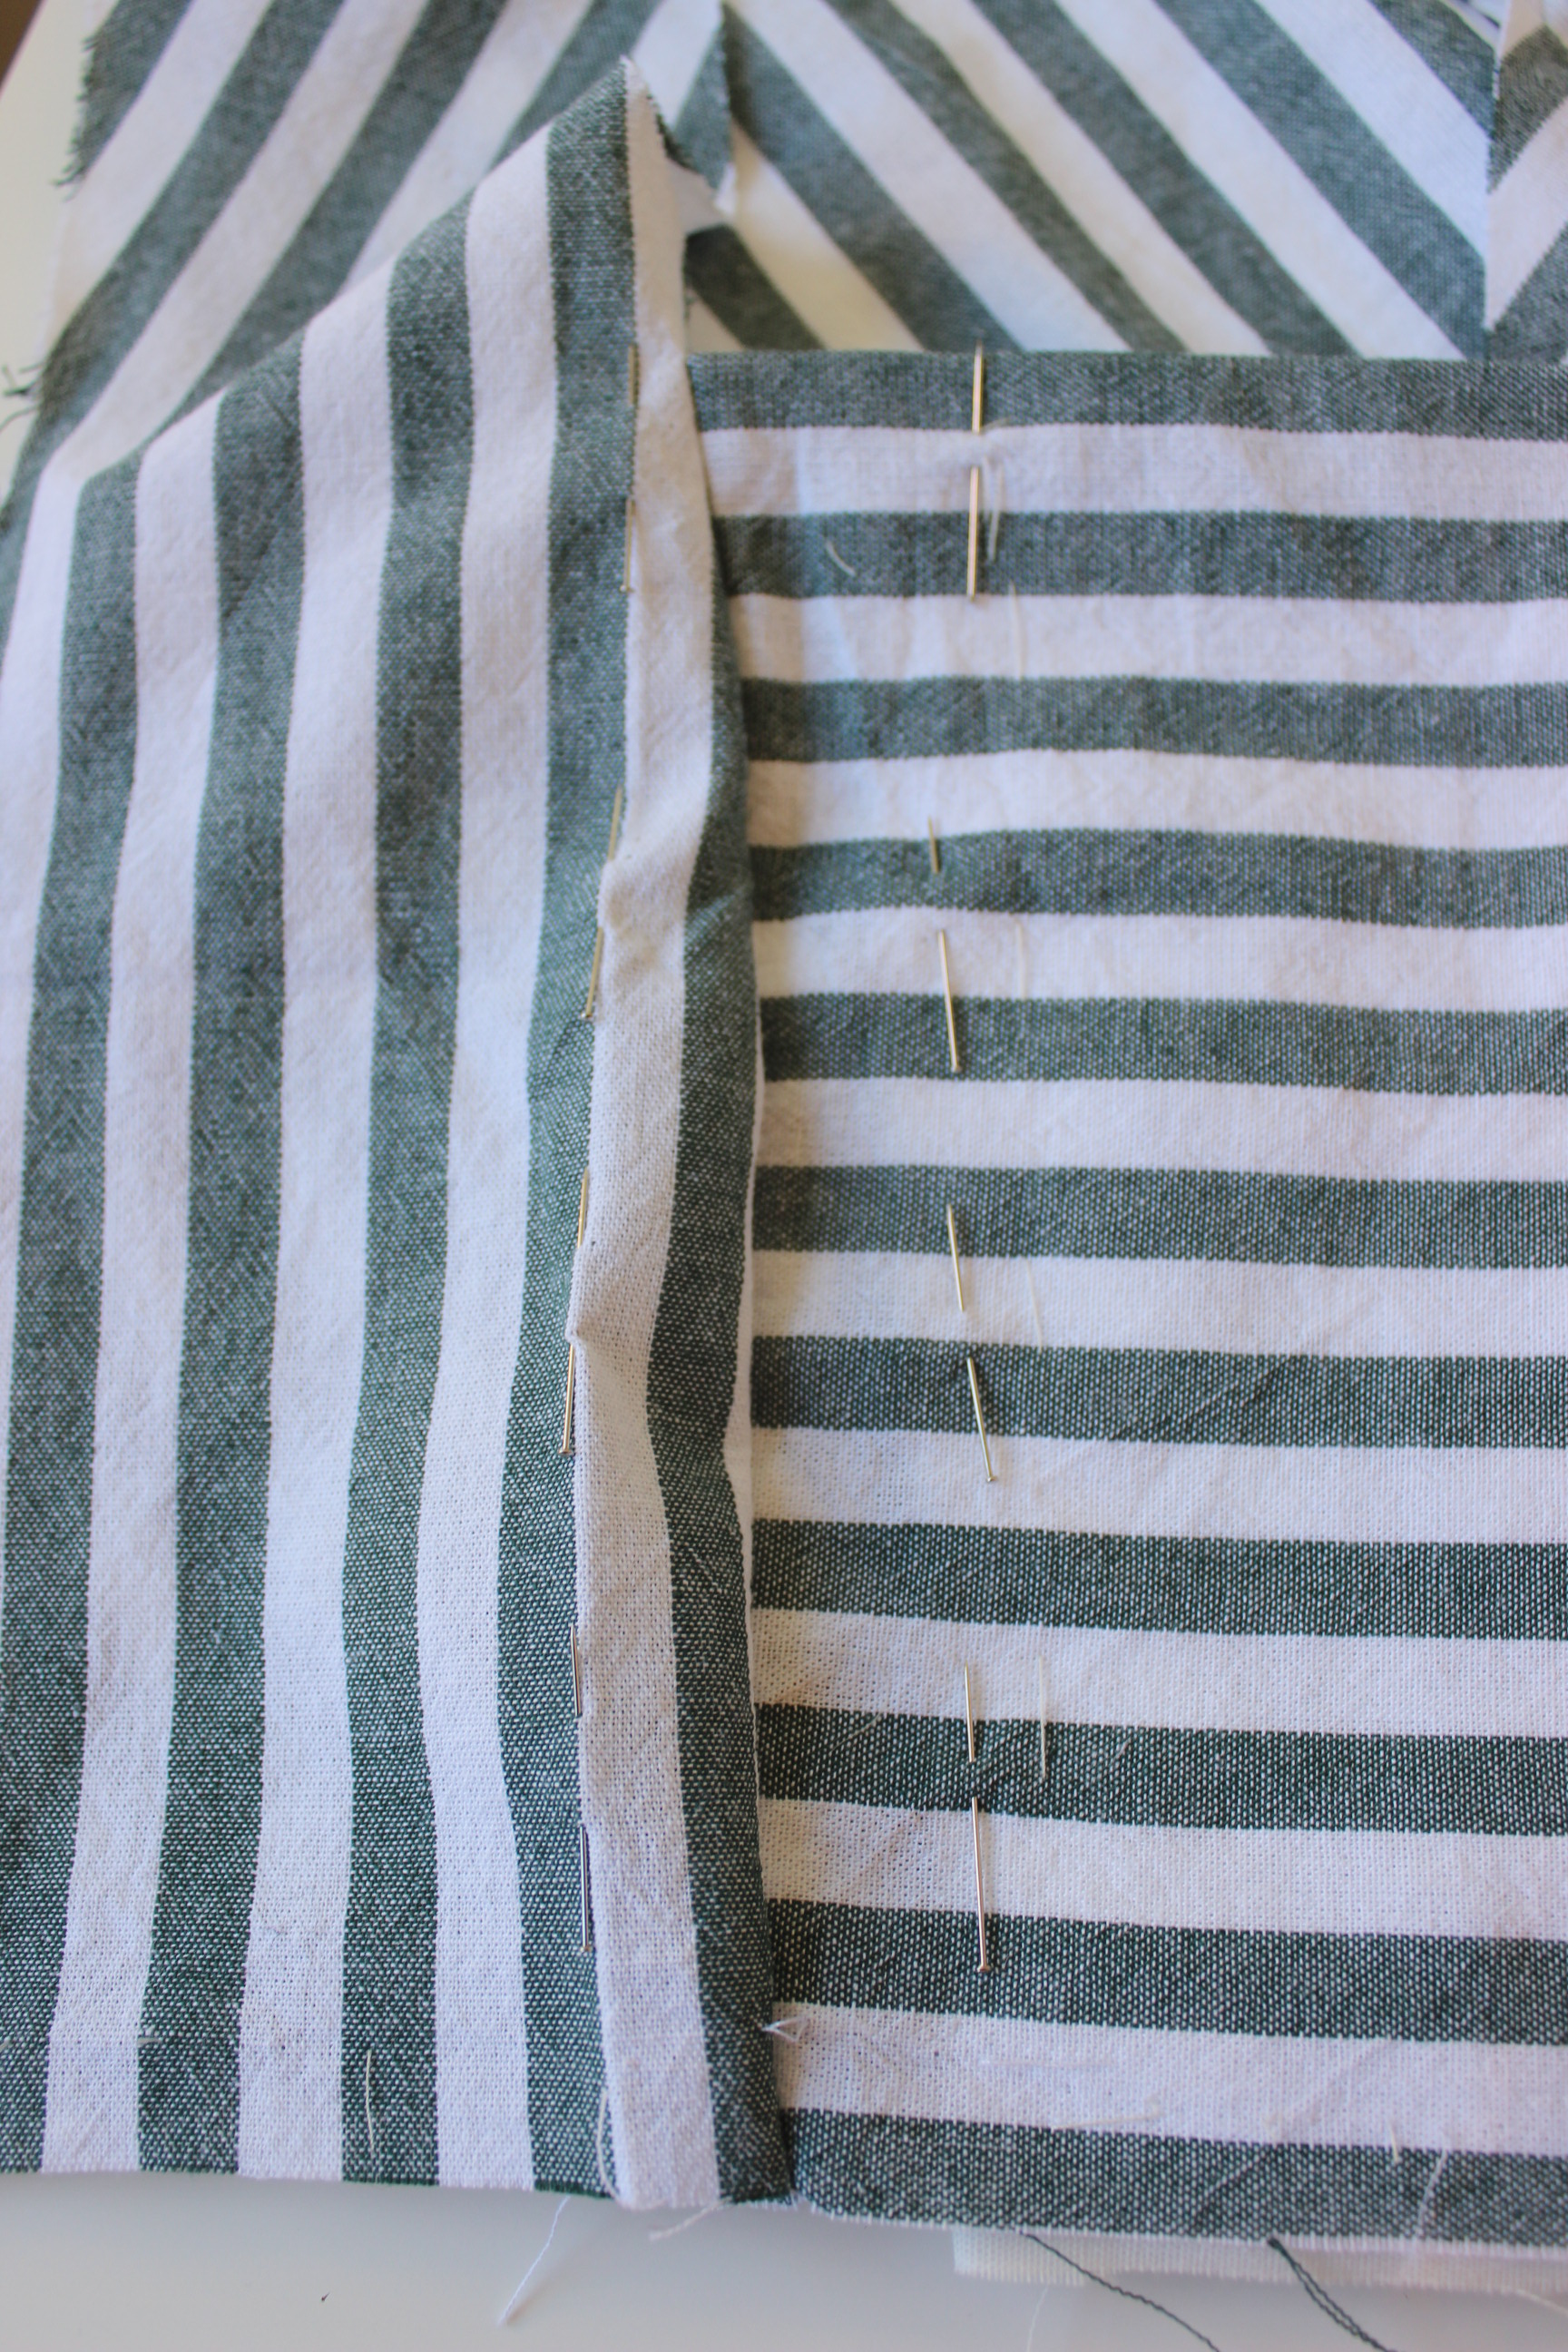
Pins to show where to make the new seam line.
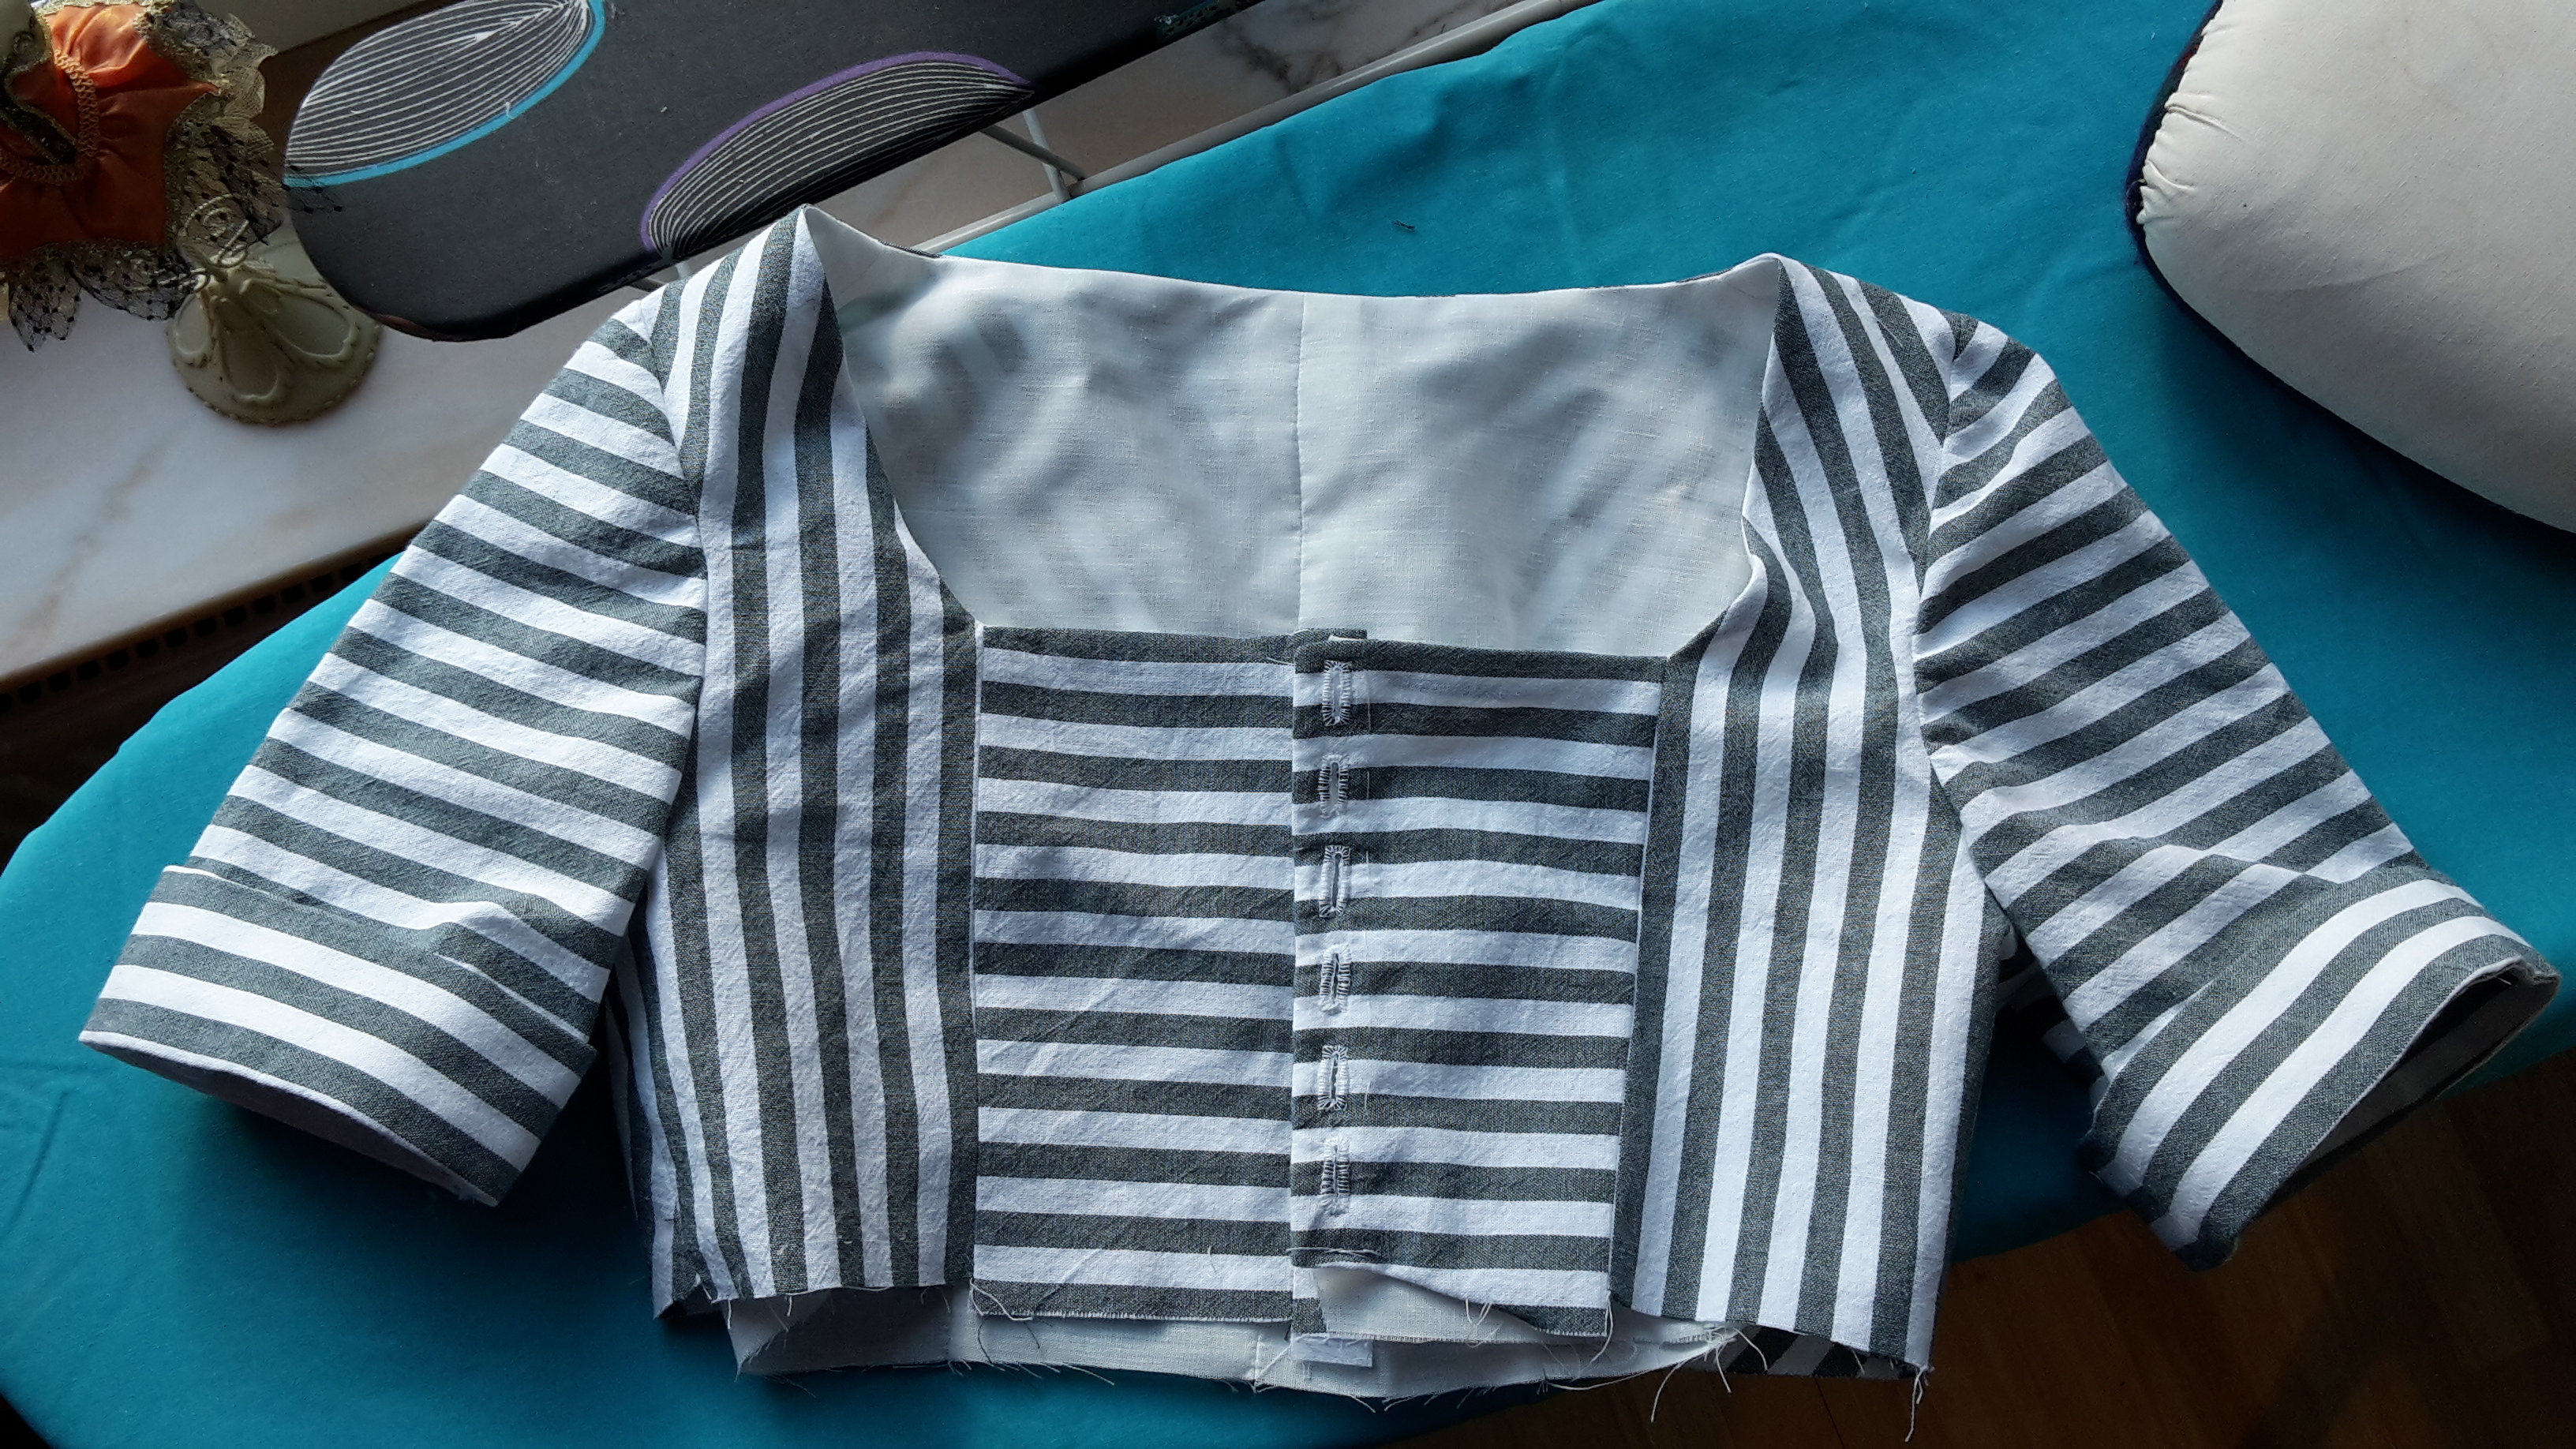
When the fit was once more good, I un-picked the basting and marked the button holes. 
Then I hand stitched the buttonholes, and sewed the front pieces to the rest of the bodice (using the new seam-lines).
Once I had the bodice ready, I attached the lining to the neckline, cut he seam allowance, flipped it over and carefully pressed the edge.
Then I made the cuffs for the sleeves, and attached them to the bodice.
 Now it is starting to look like something
To be continued…
(Because otherwise this would be an extremely long post)
