
Even though the weather was gloomy on the day of the 1850s event, me and my sister took the opportunity to take some photos of her outfit.  Inspirational Fashion plate


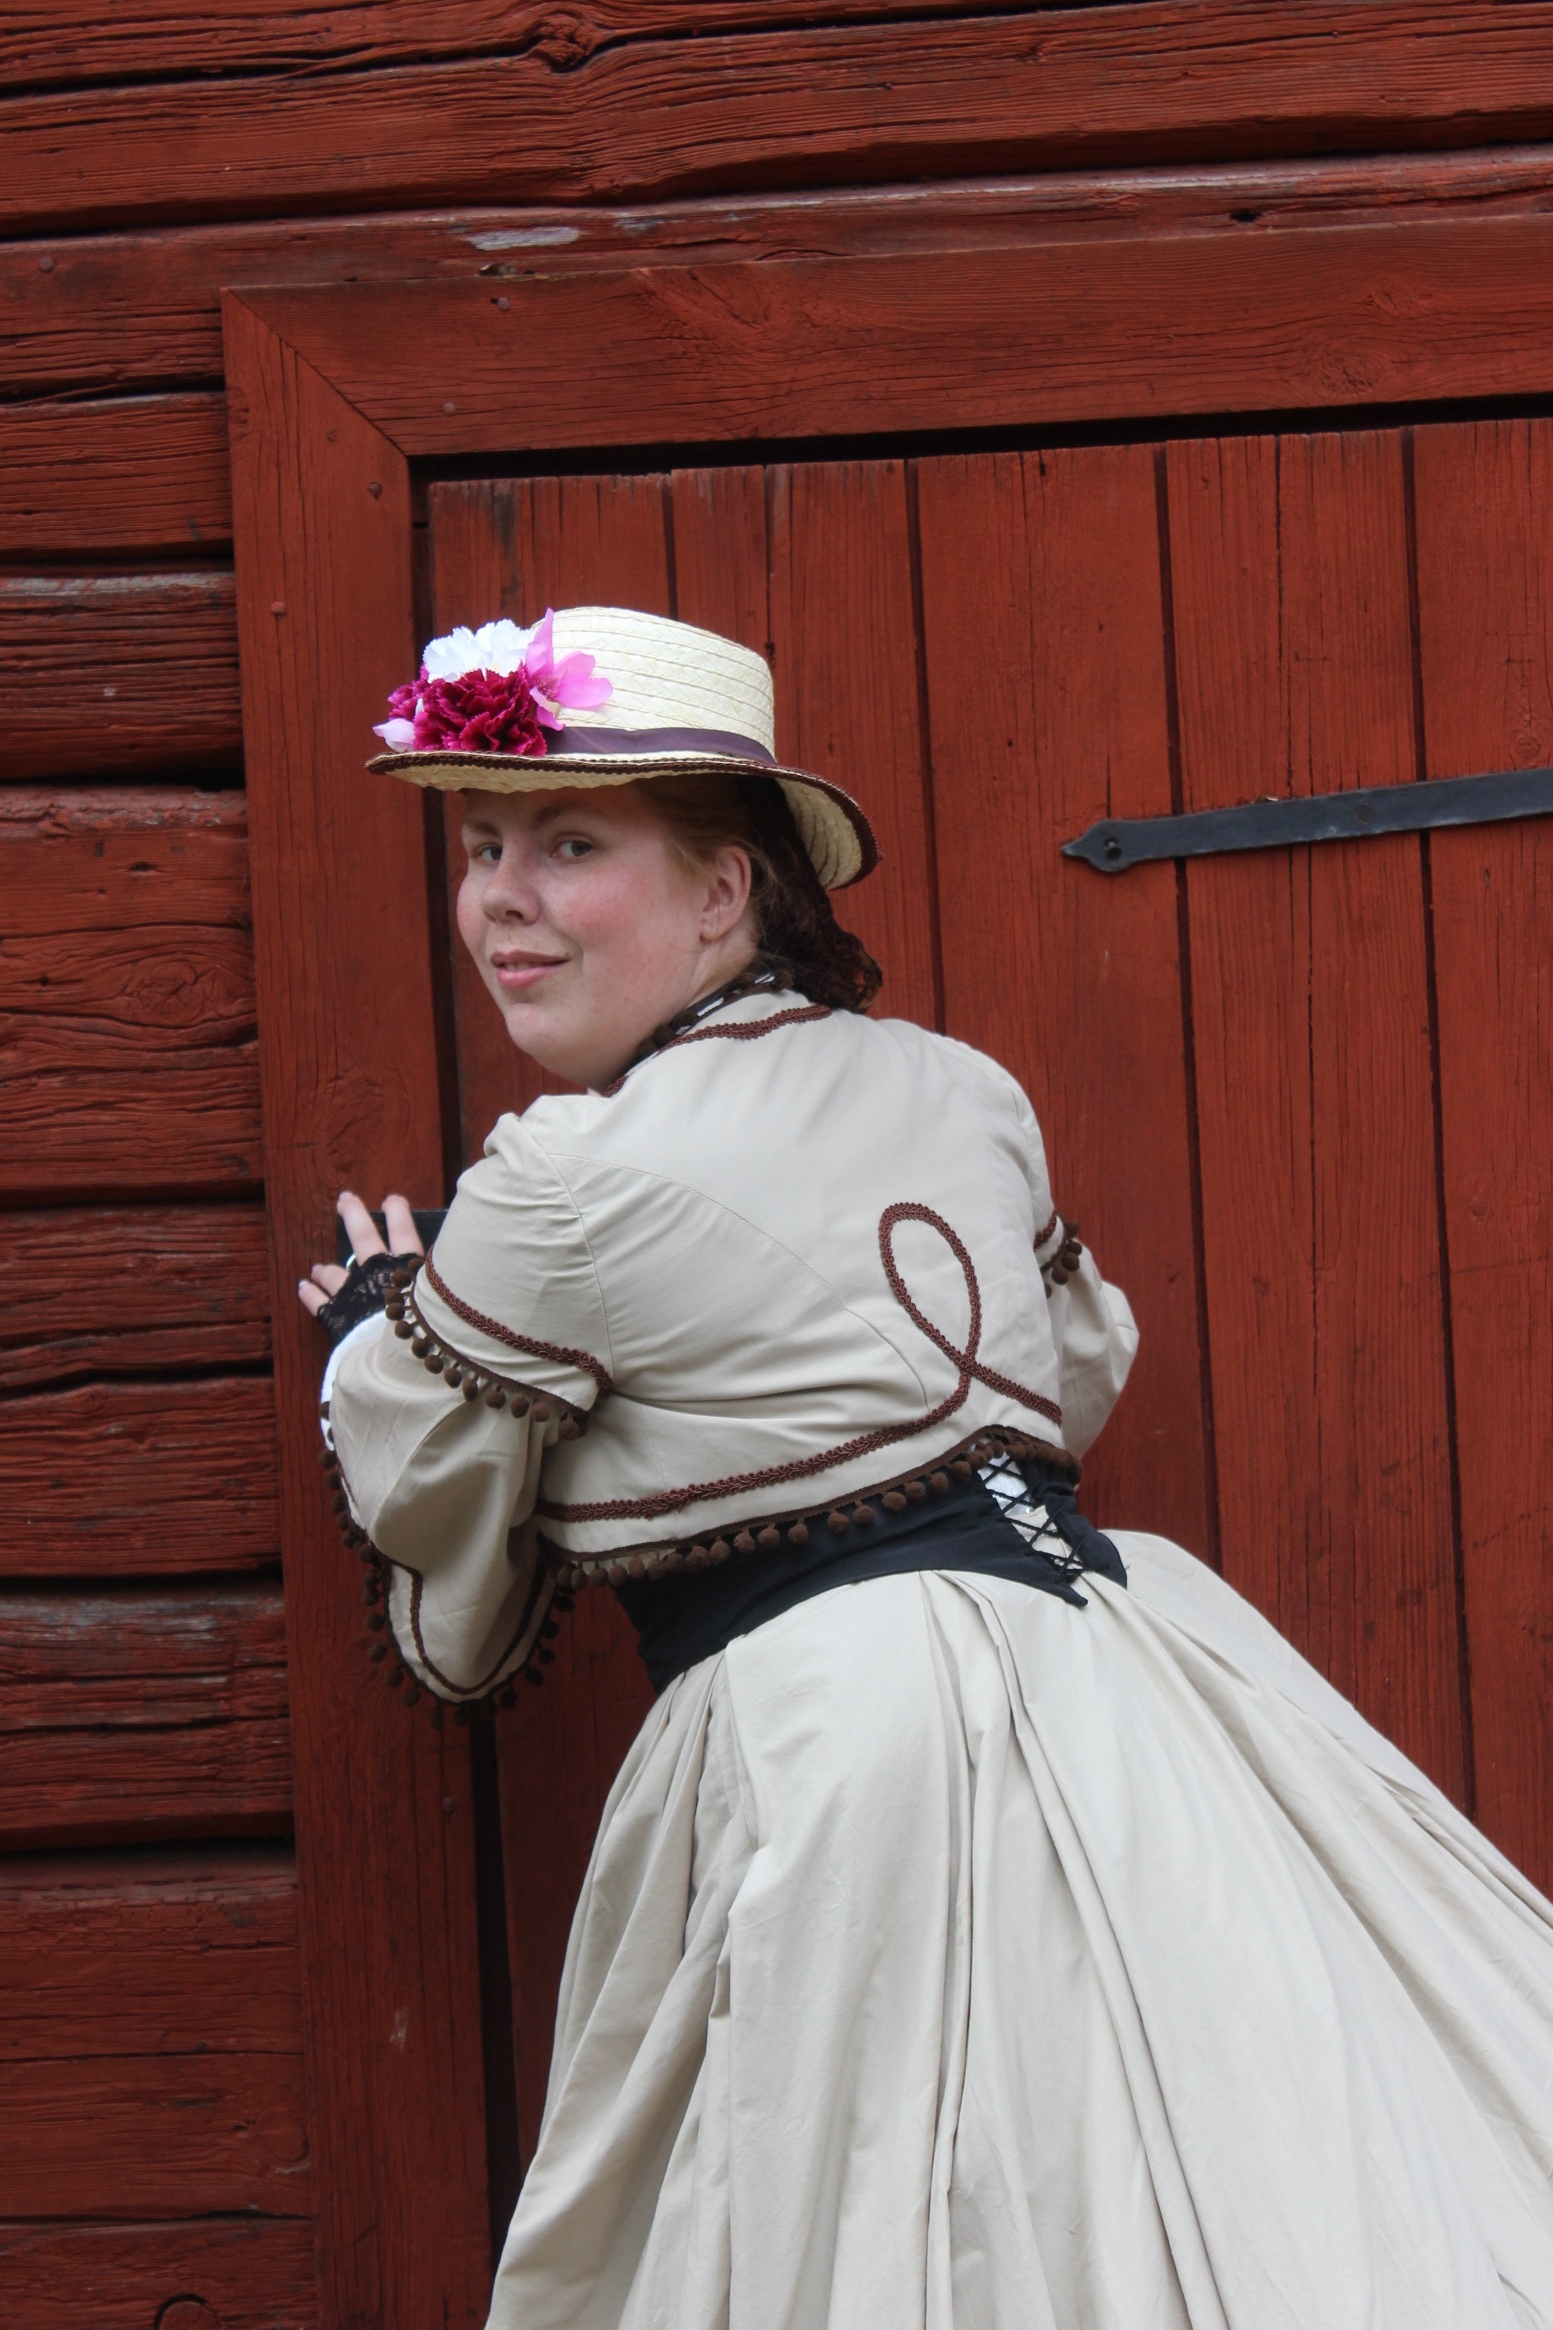


Even though the weather was gloomy on the day of the 1850s event, me and my sister took the opportunity to take some photos of her outfit. Inspirational Fashion plate
A dress does not make an outfit, and besides the skirt and jacket, my sister also needed some additional items
(part 1).
 inspiration
I’ve made her basic undergarments earlier this spring:
 Huge elliptical hoop crinoline
 mid 19th century corset
But one thing I hadn’t had the time for was a proper petticoat
(one that actually was wide enough to fit over the huge hoops).
So that’s where I begun.
Using 2,5 white cotton sheets from IKEA I cut and pleated a whole afternoon and evening, before I could call it a day and consider myself done. 

When the under-layers was done (I know, I know – She could easily have used her another petticoat, but this will have to do for now) it was time for the rest of the outfit.
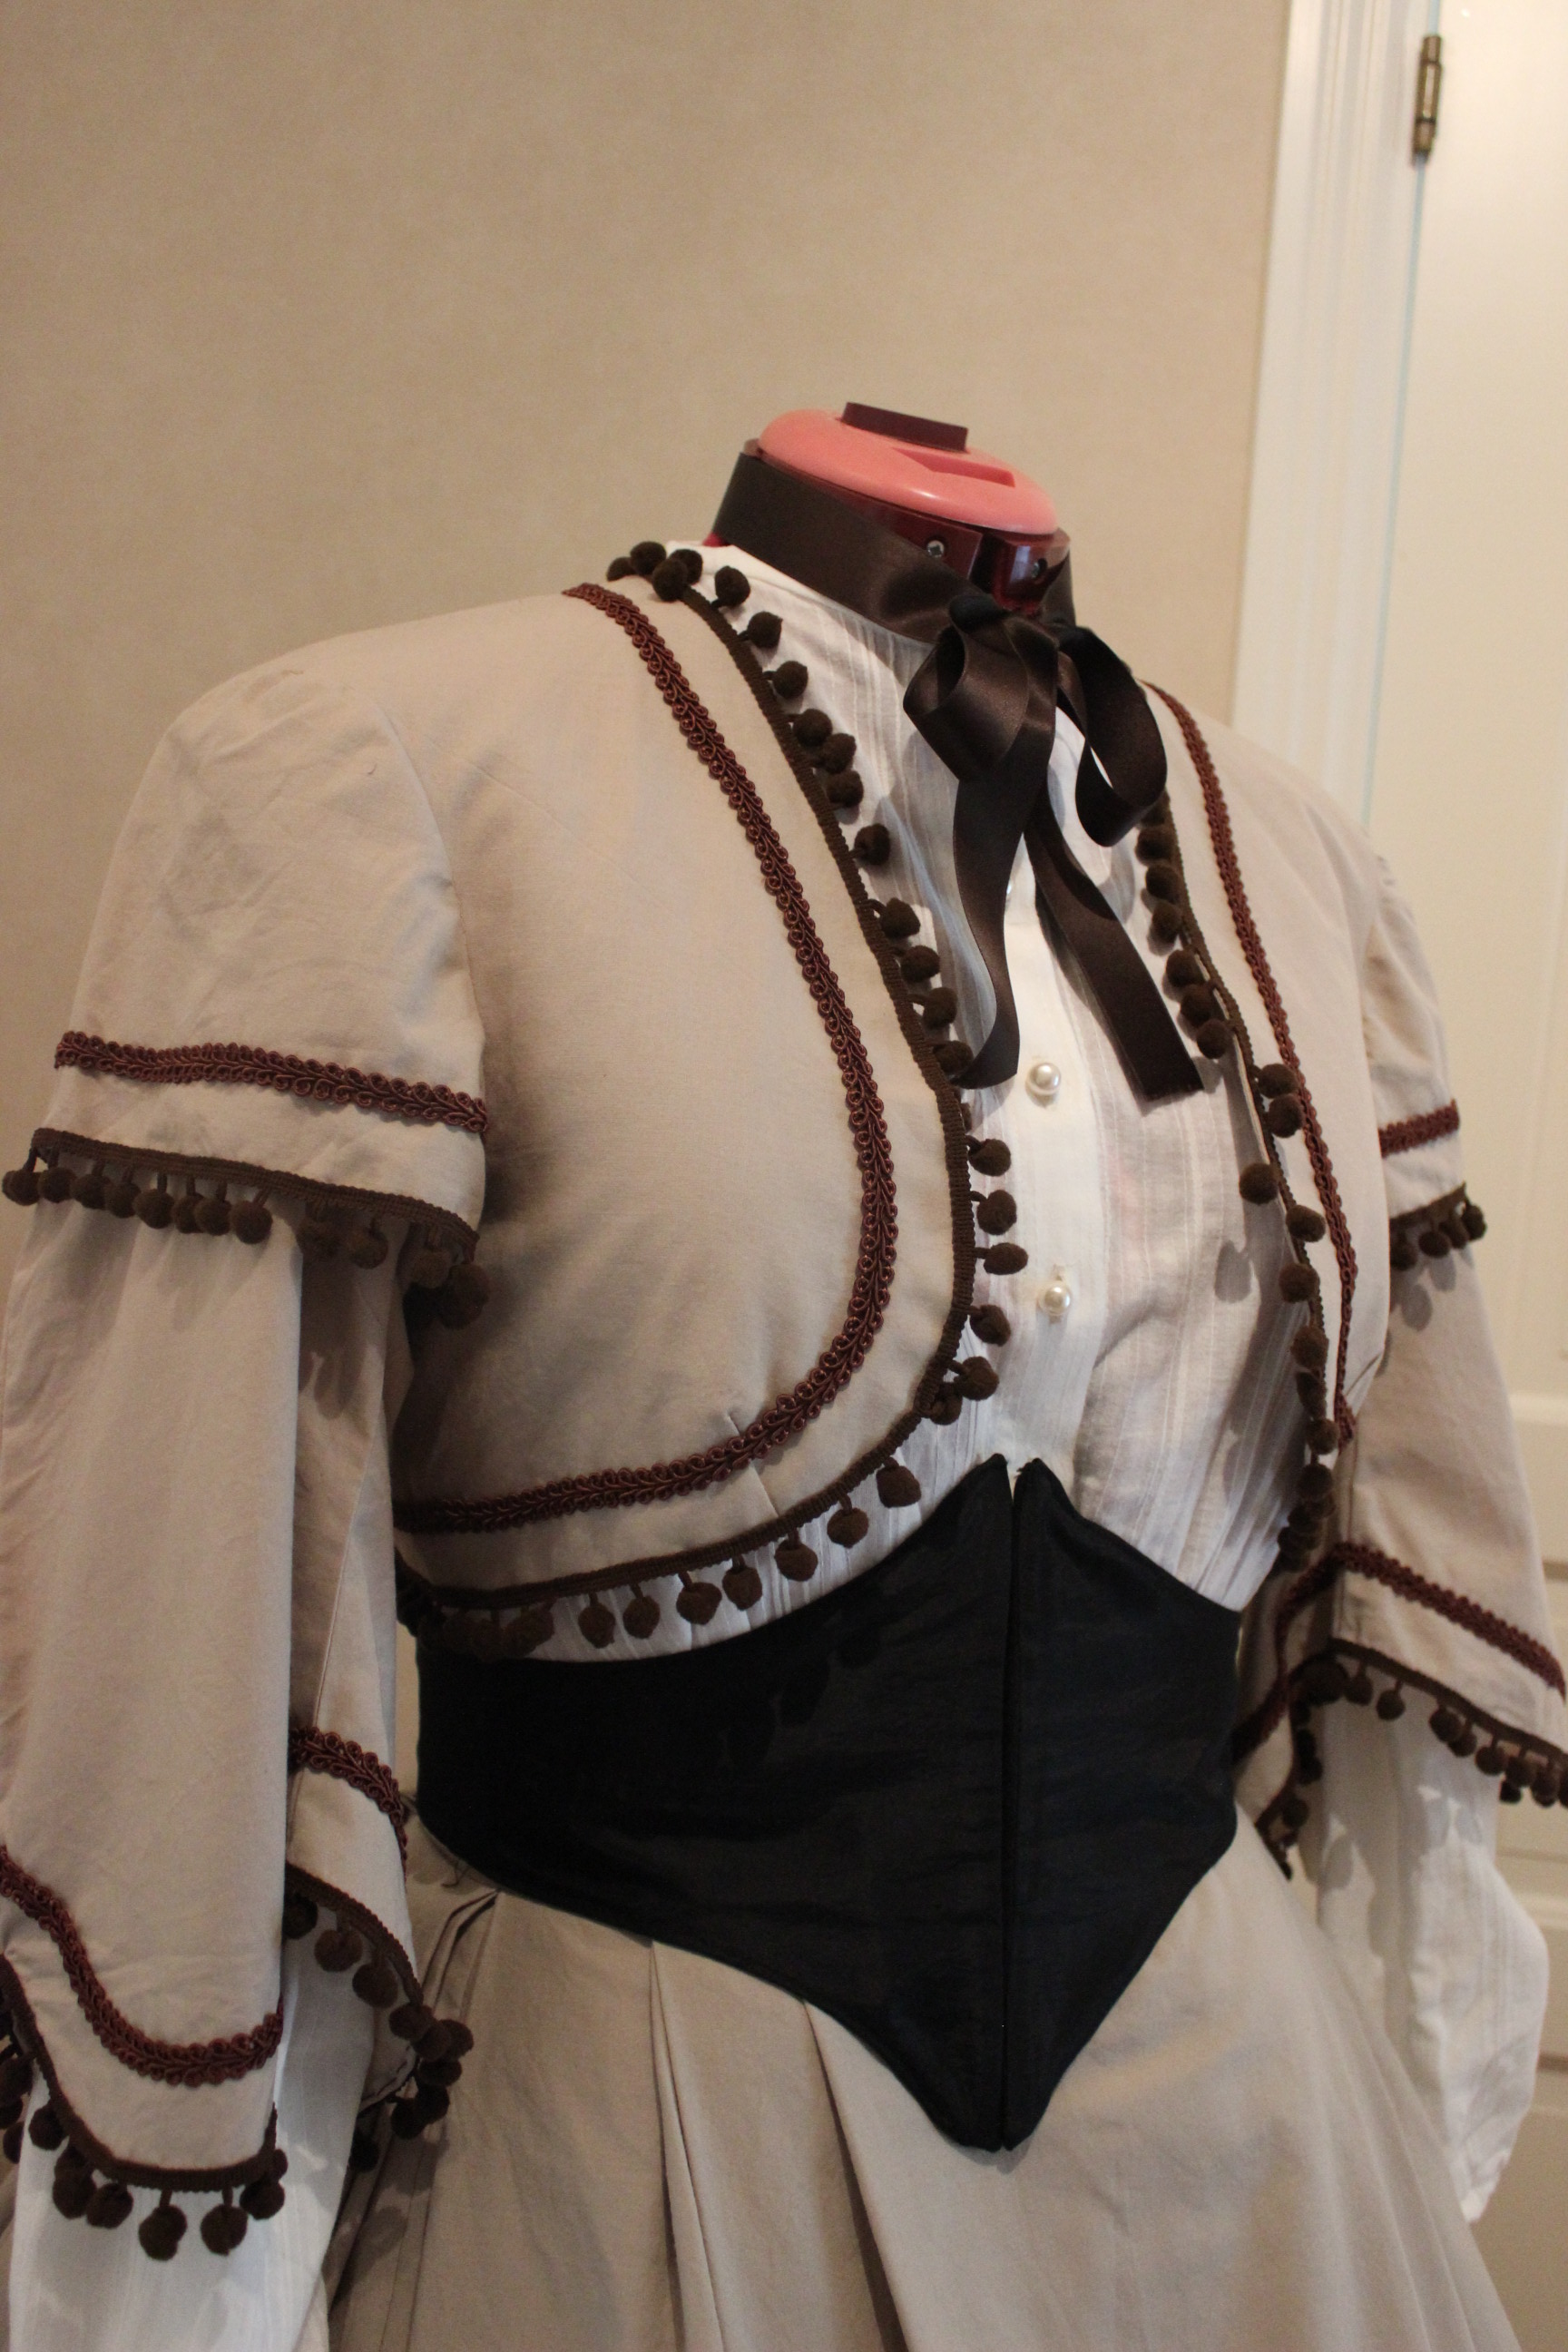
On the same event 2 years ago, I made my sister a more basic version of this years outfit, so some of the pieces she needed was already waiting in the closet.  We re-used the shirt and swiss-waist she’d worn last time.
Added a longer silk-ribbon to the neck and that was that 🙂

Well, actually she still needed something on her head…
I’d warned her beforehand, that I might not have the time to come up with something new, but when I came upon this perfectly cheap straw-hat (IKEA, once again) a few days before the event, I knew I needed to give it a try.
I Started by picking almost the whole hat apart.

I only left a few cm on the crown, before I (with the fashion plate as a guide)started to pin the braid back in a different shape.  It took me several hours and multitude of re-pinning and starting all over again before I finally had a shape that was good.
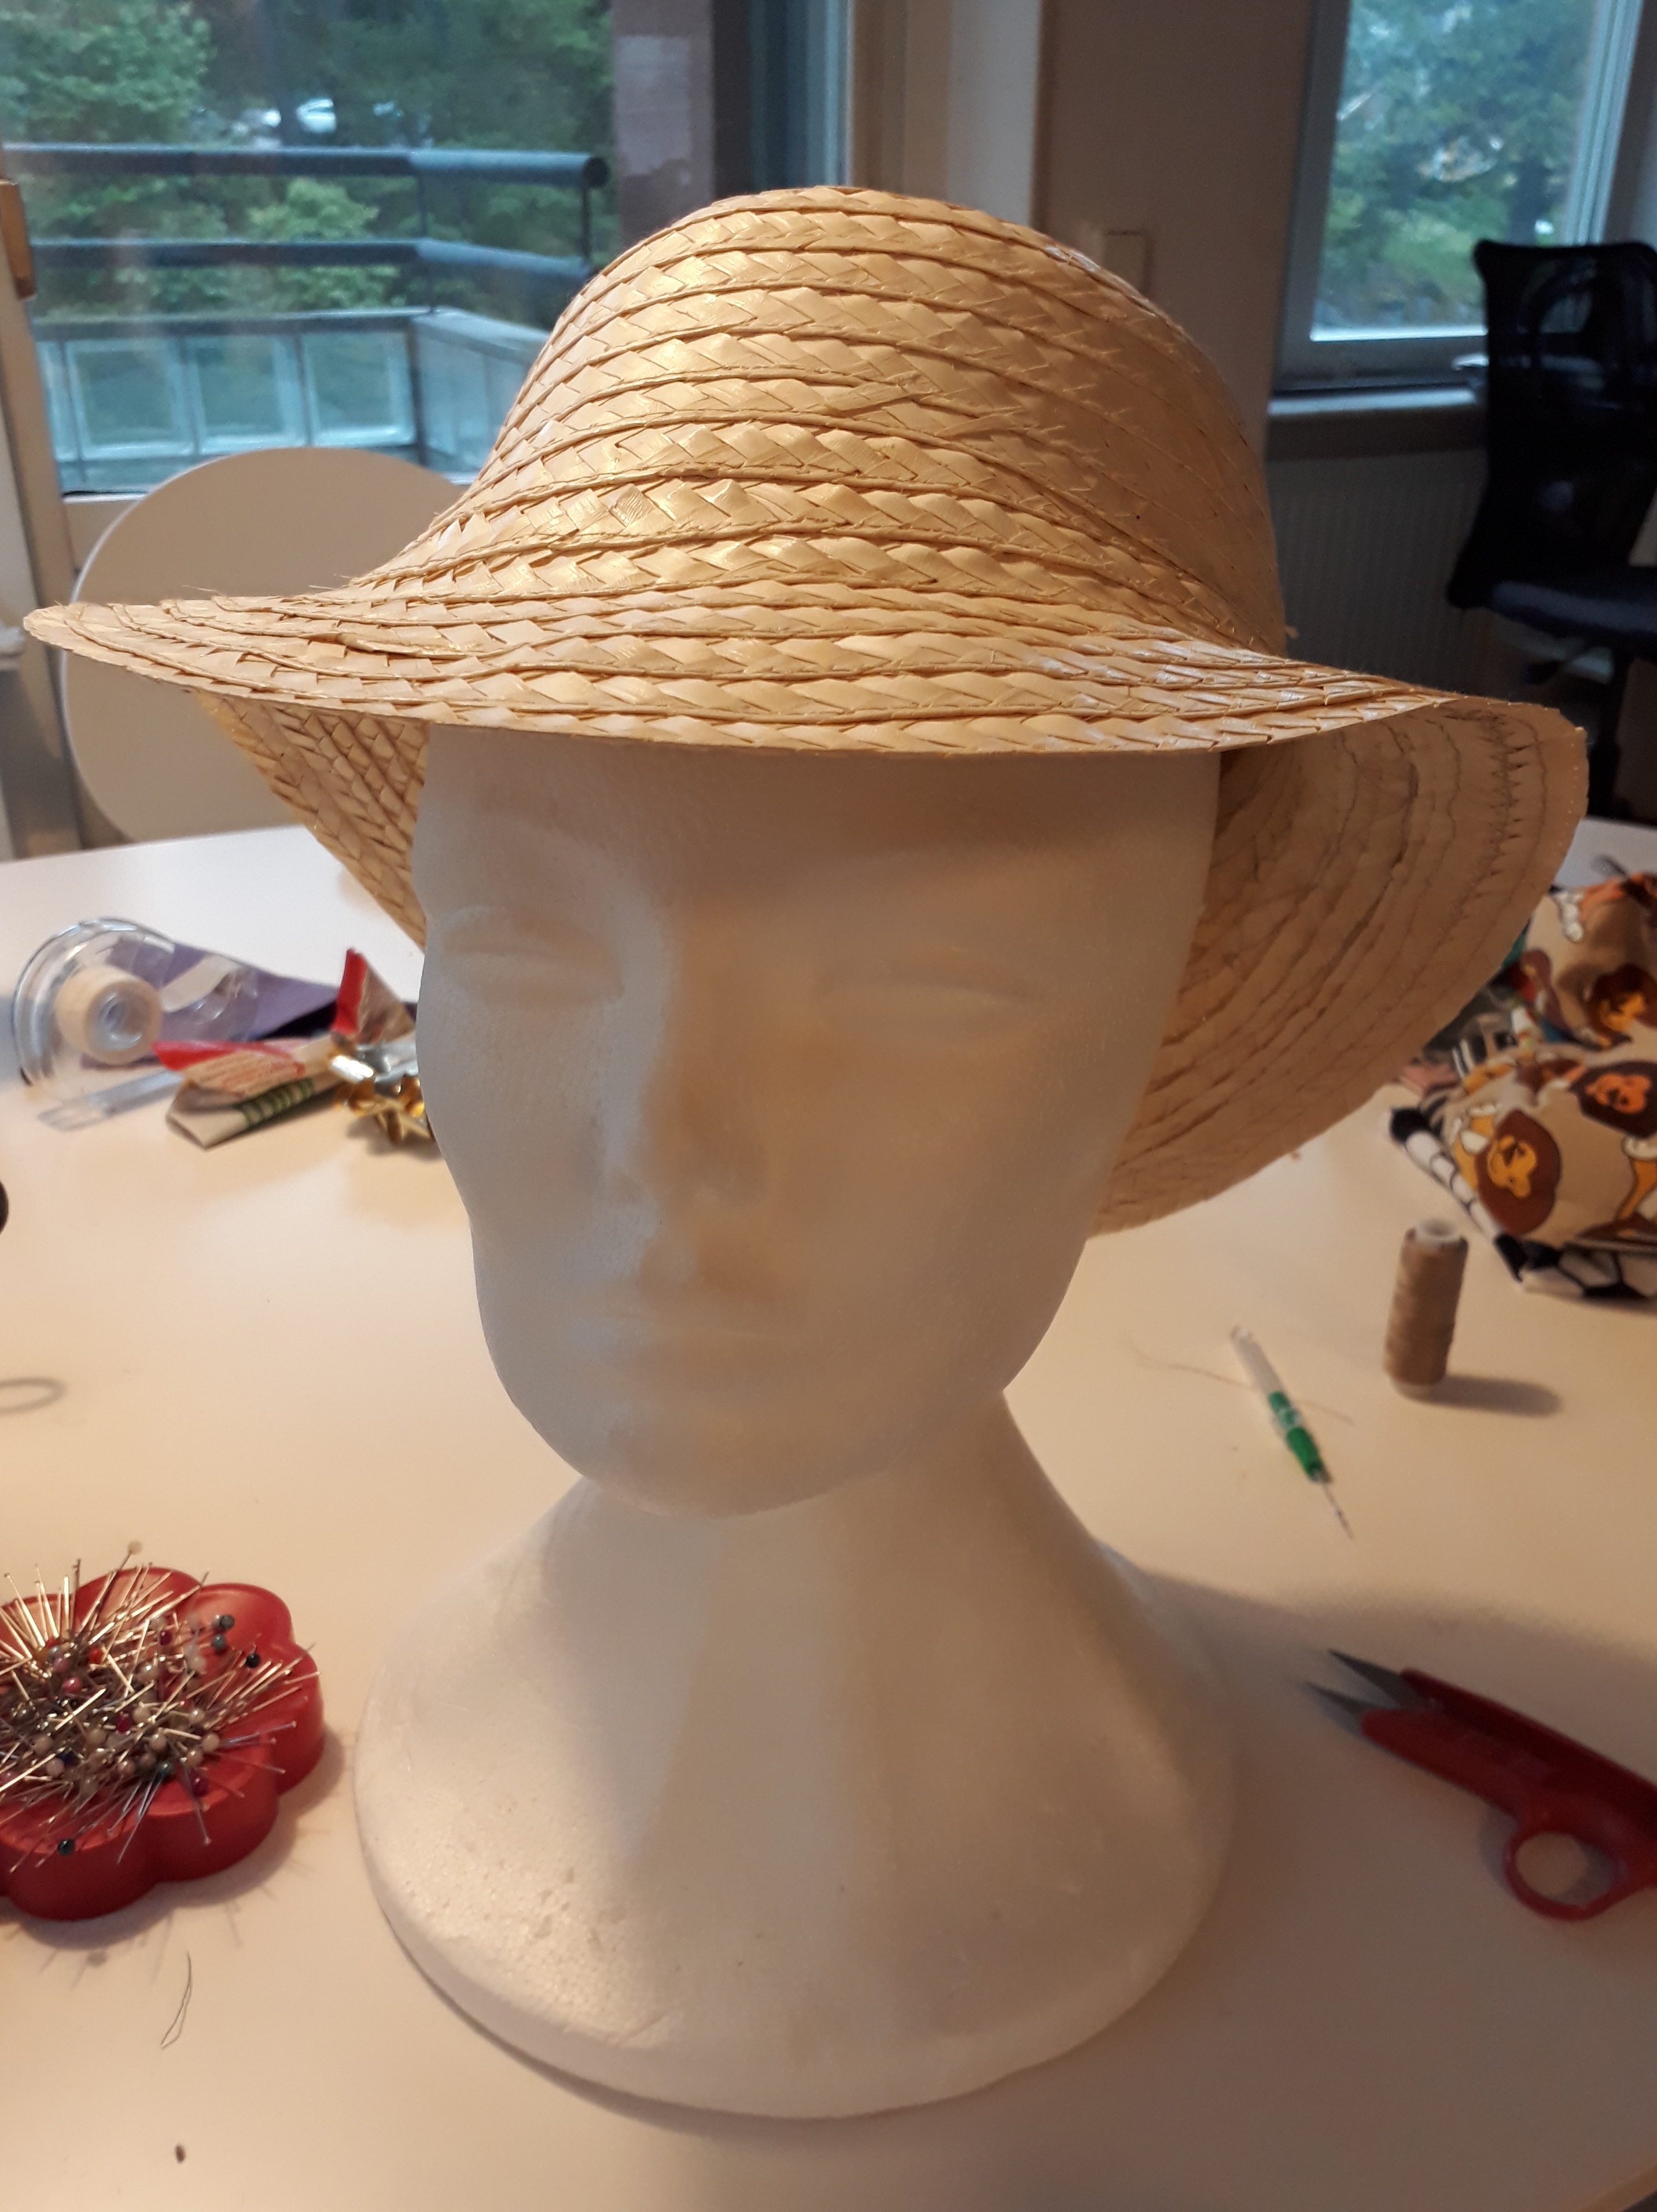
after a first try at hand-stitching, I decided that if it couldn’t be done by machine it was not meant to happen this time (since this was the night before the event).
Turns out, it worked like a charm.  It was a bit fiddly to turn the brim around inside my machine but with the right angle (and the use of free space ove r the table edge) the hat was stitched in no time.
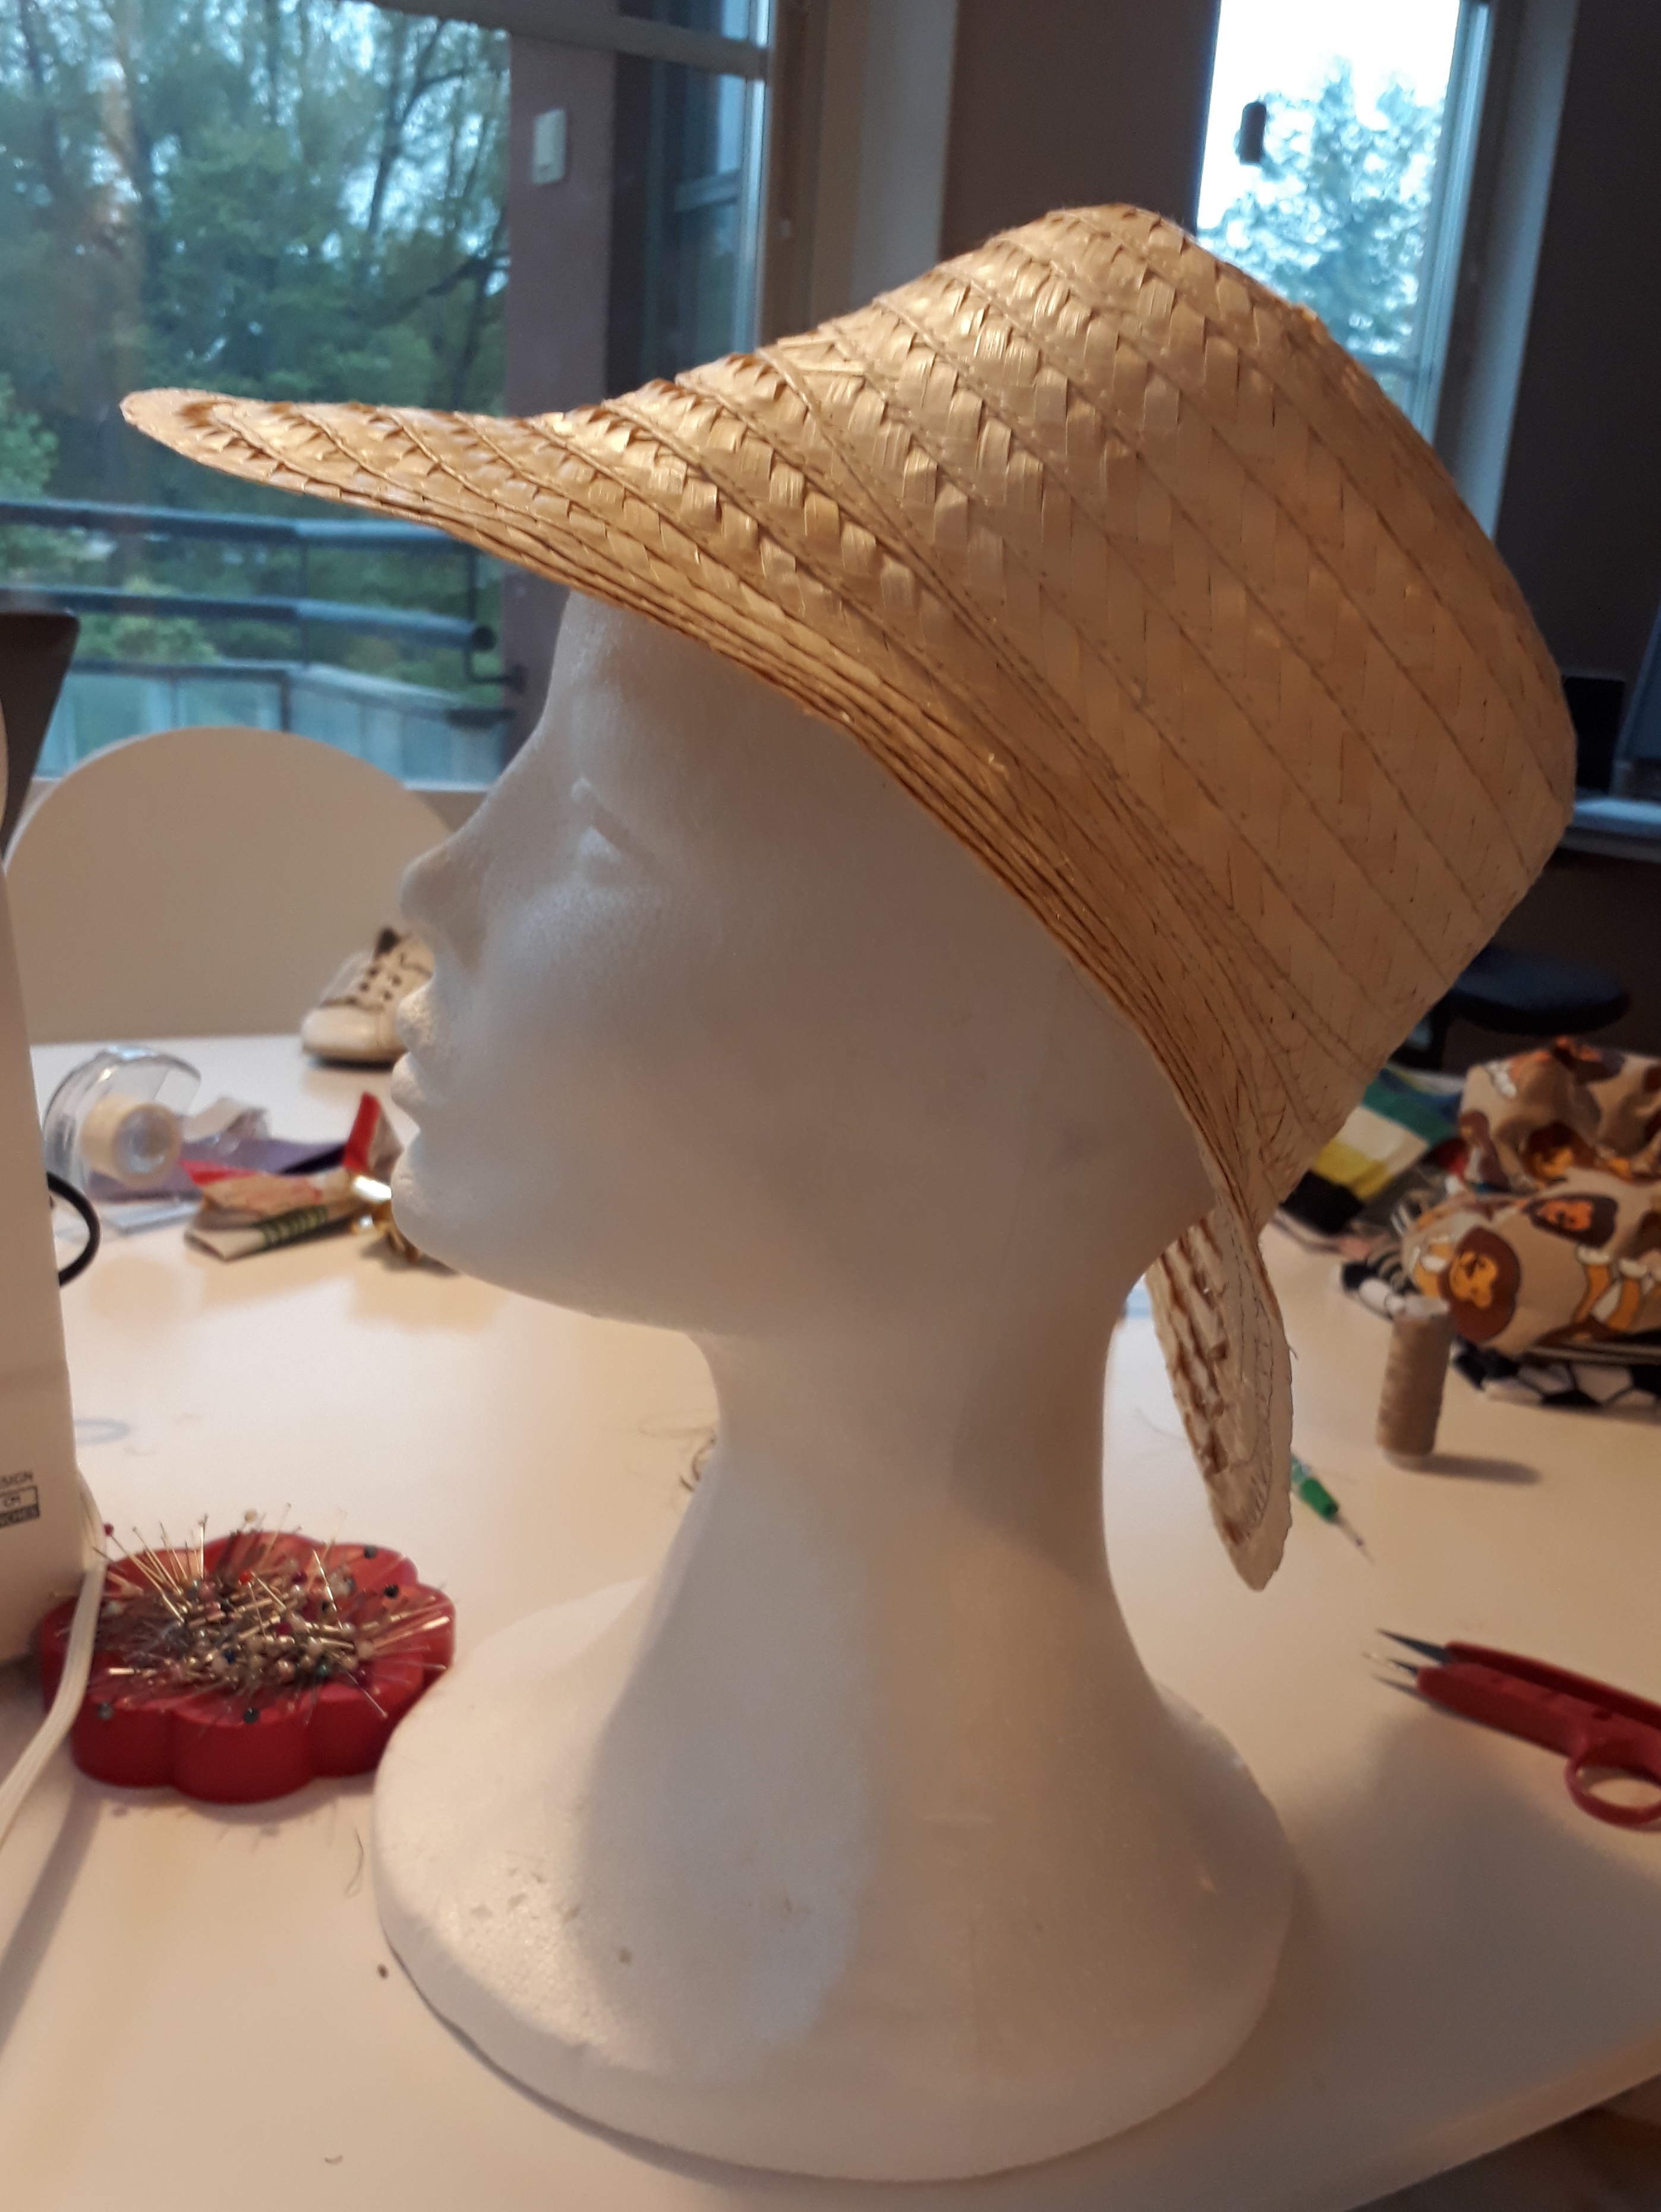
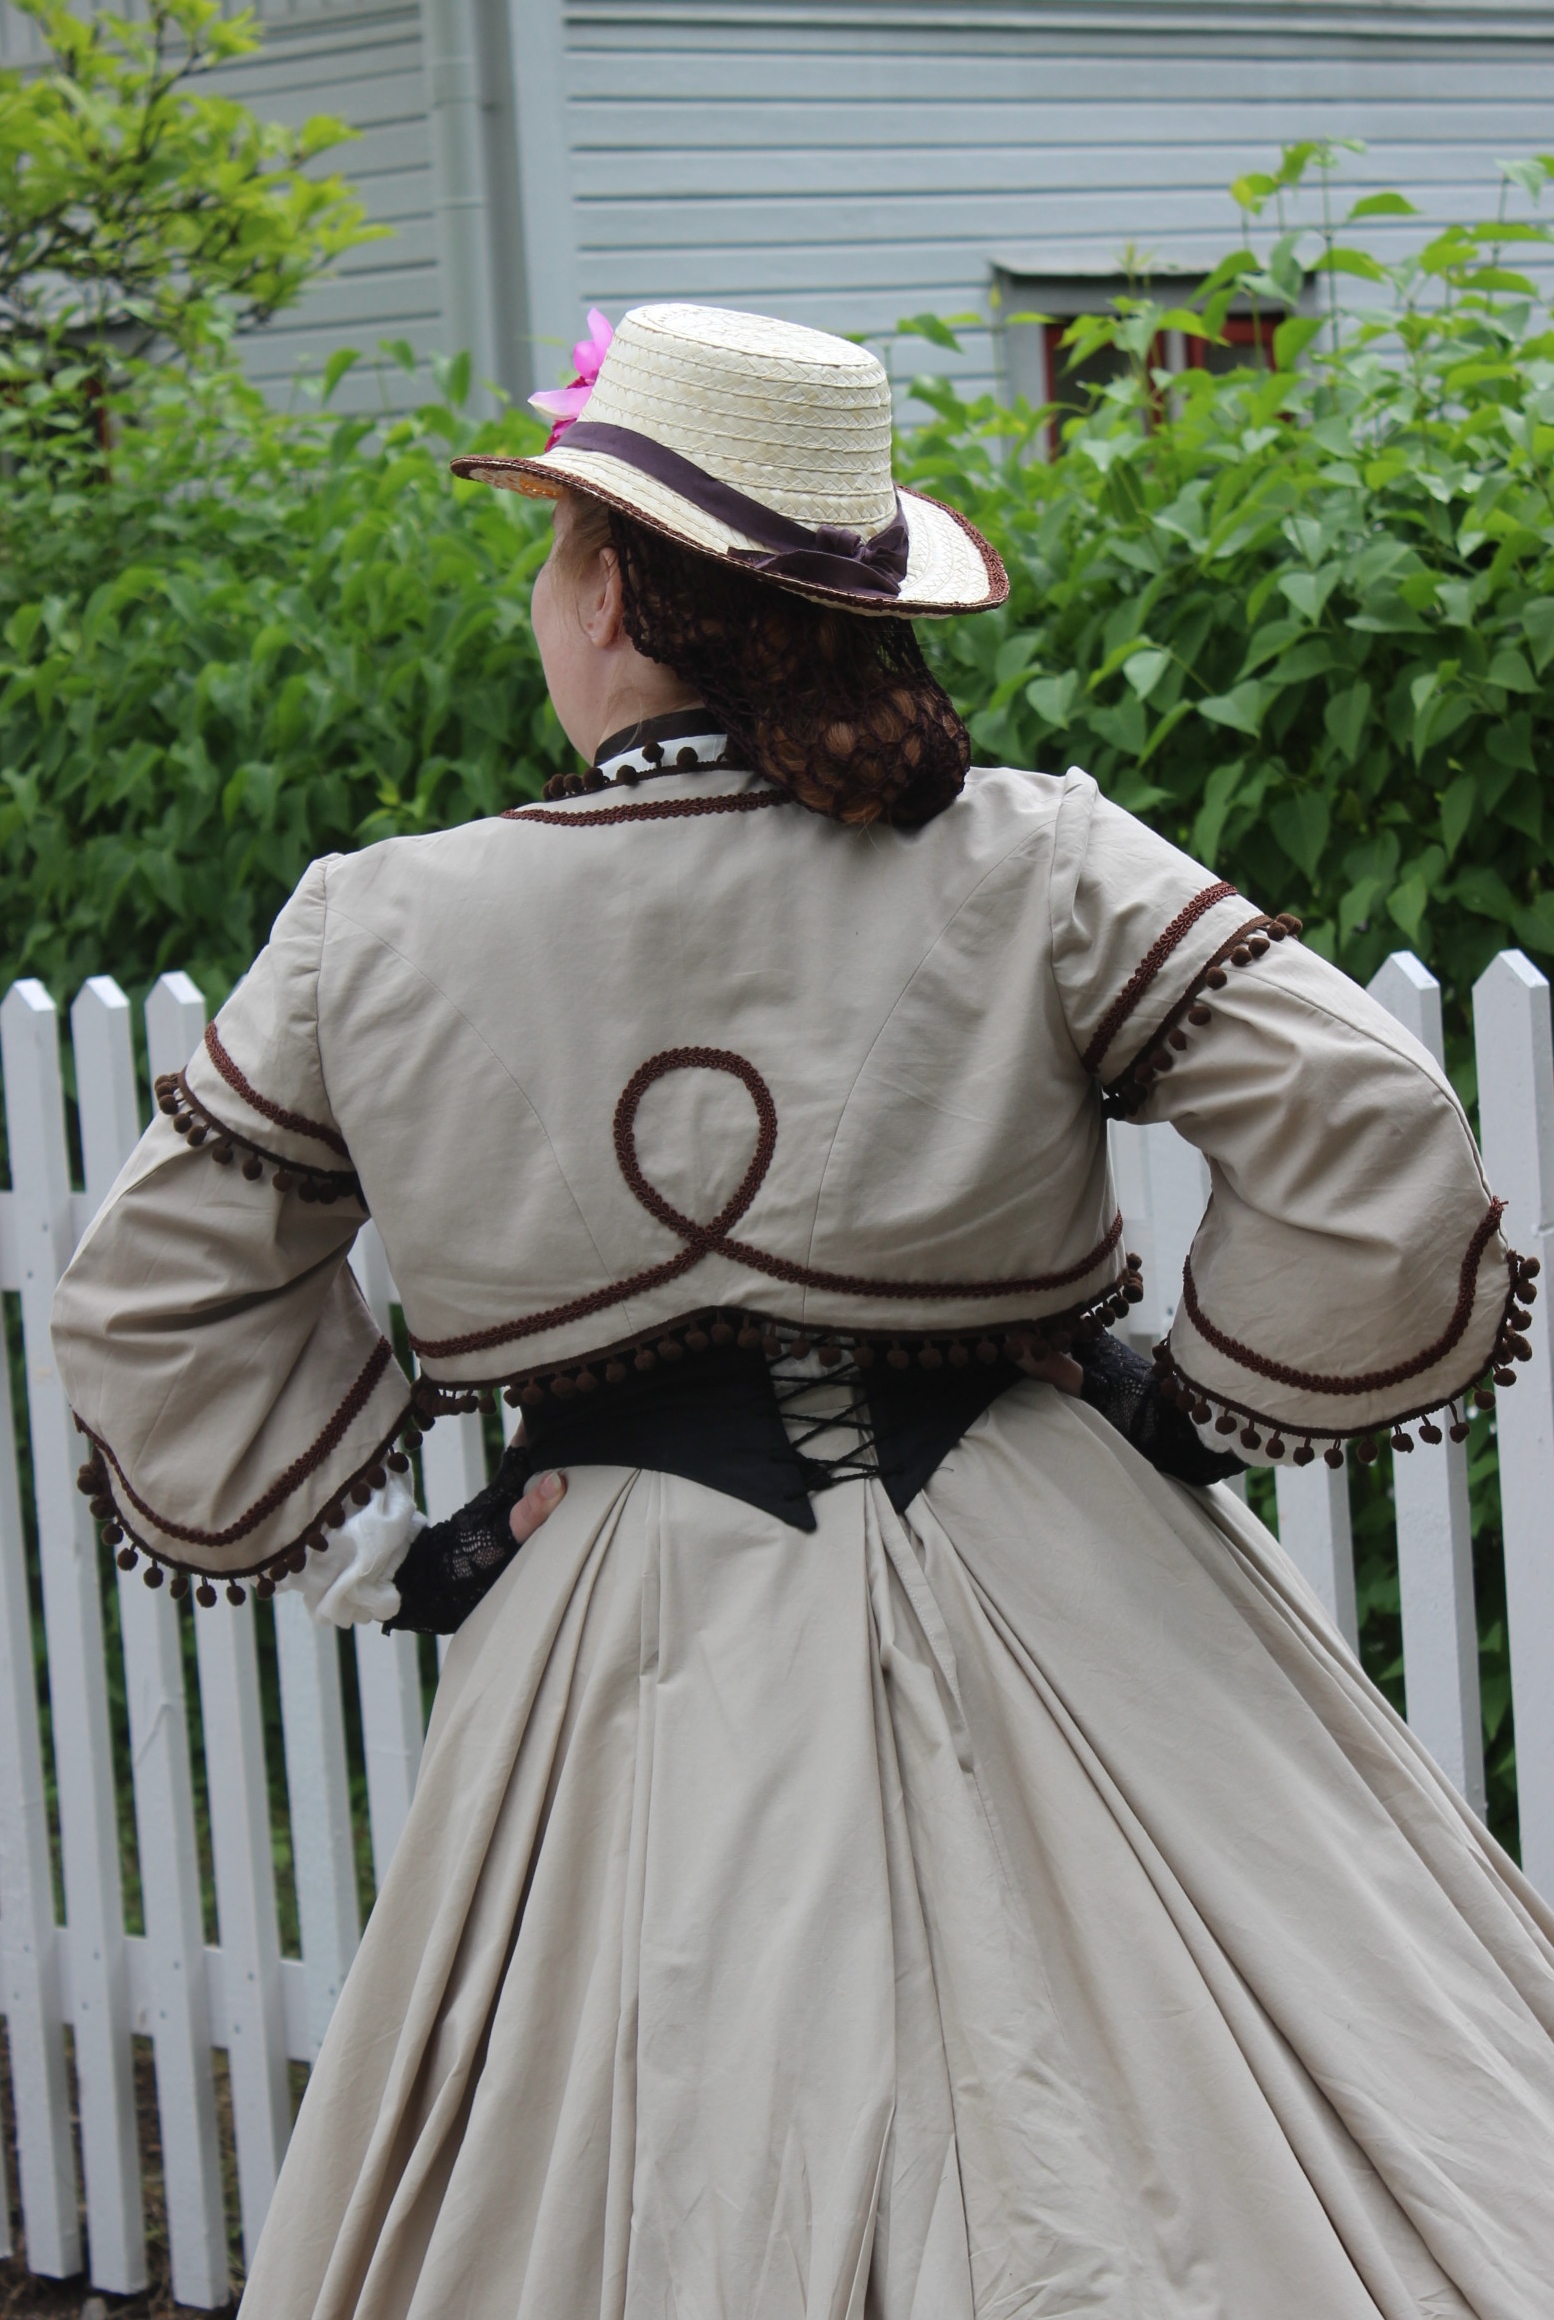
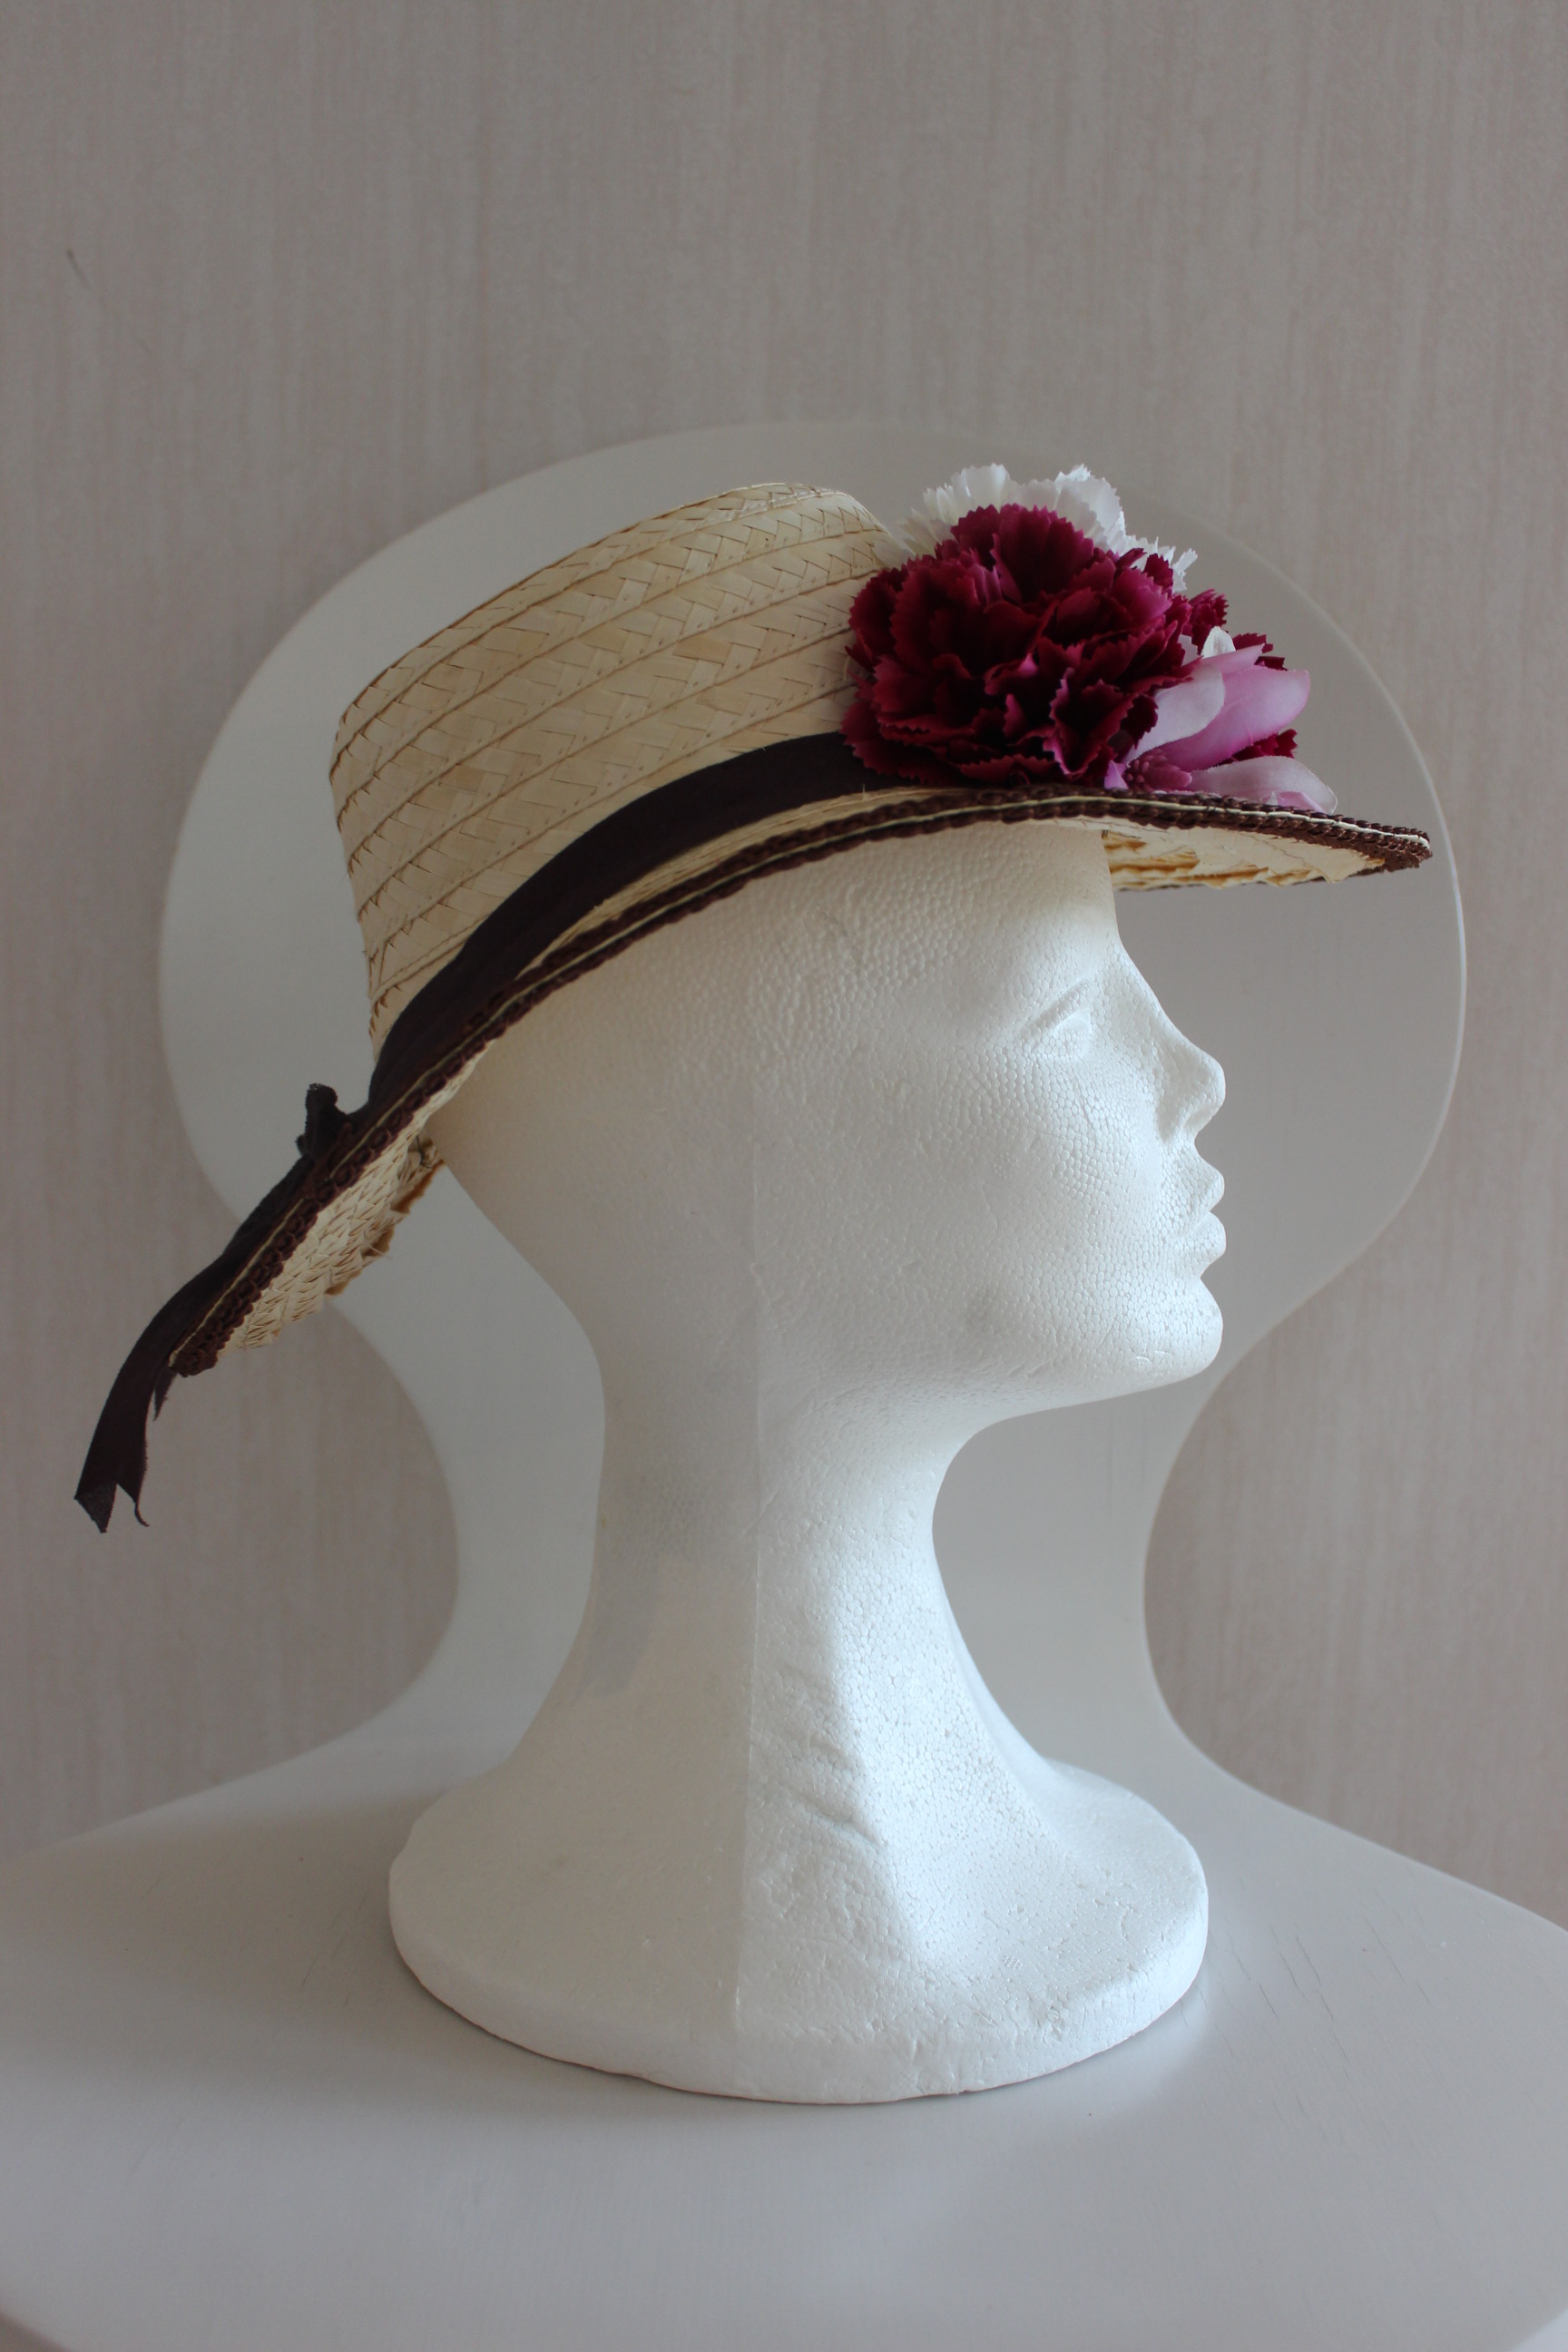
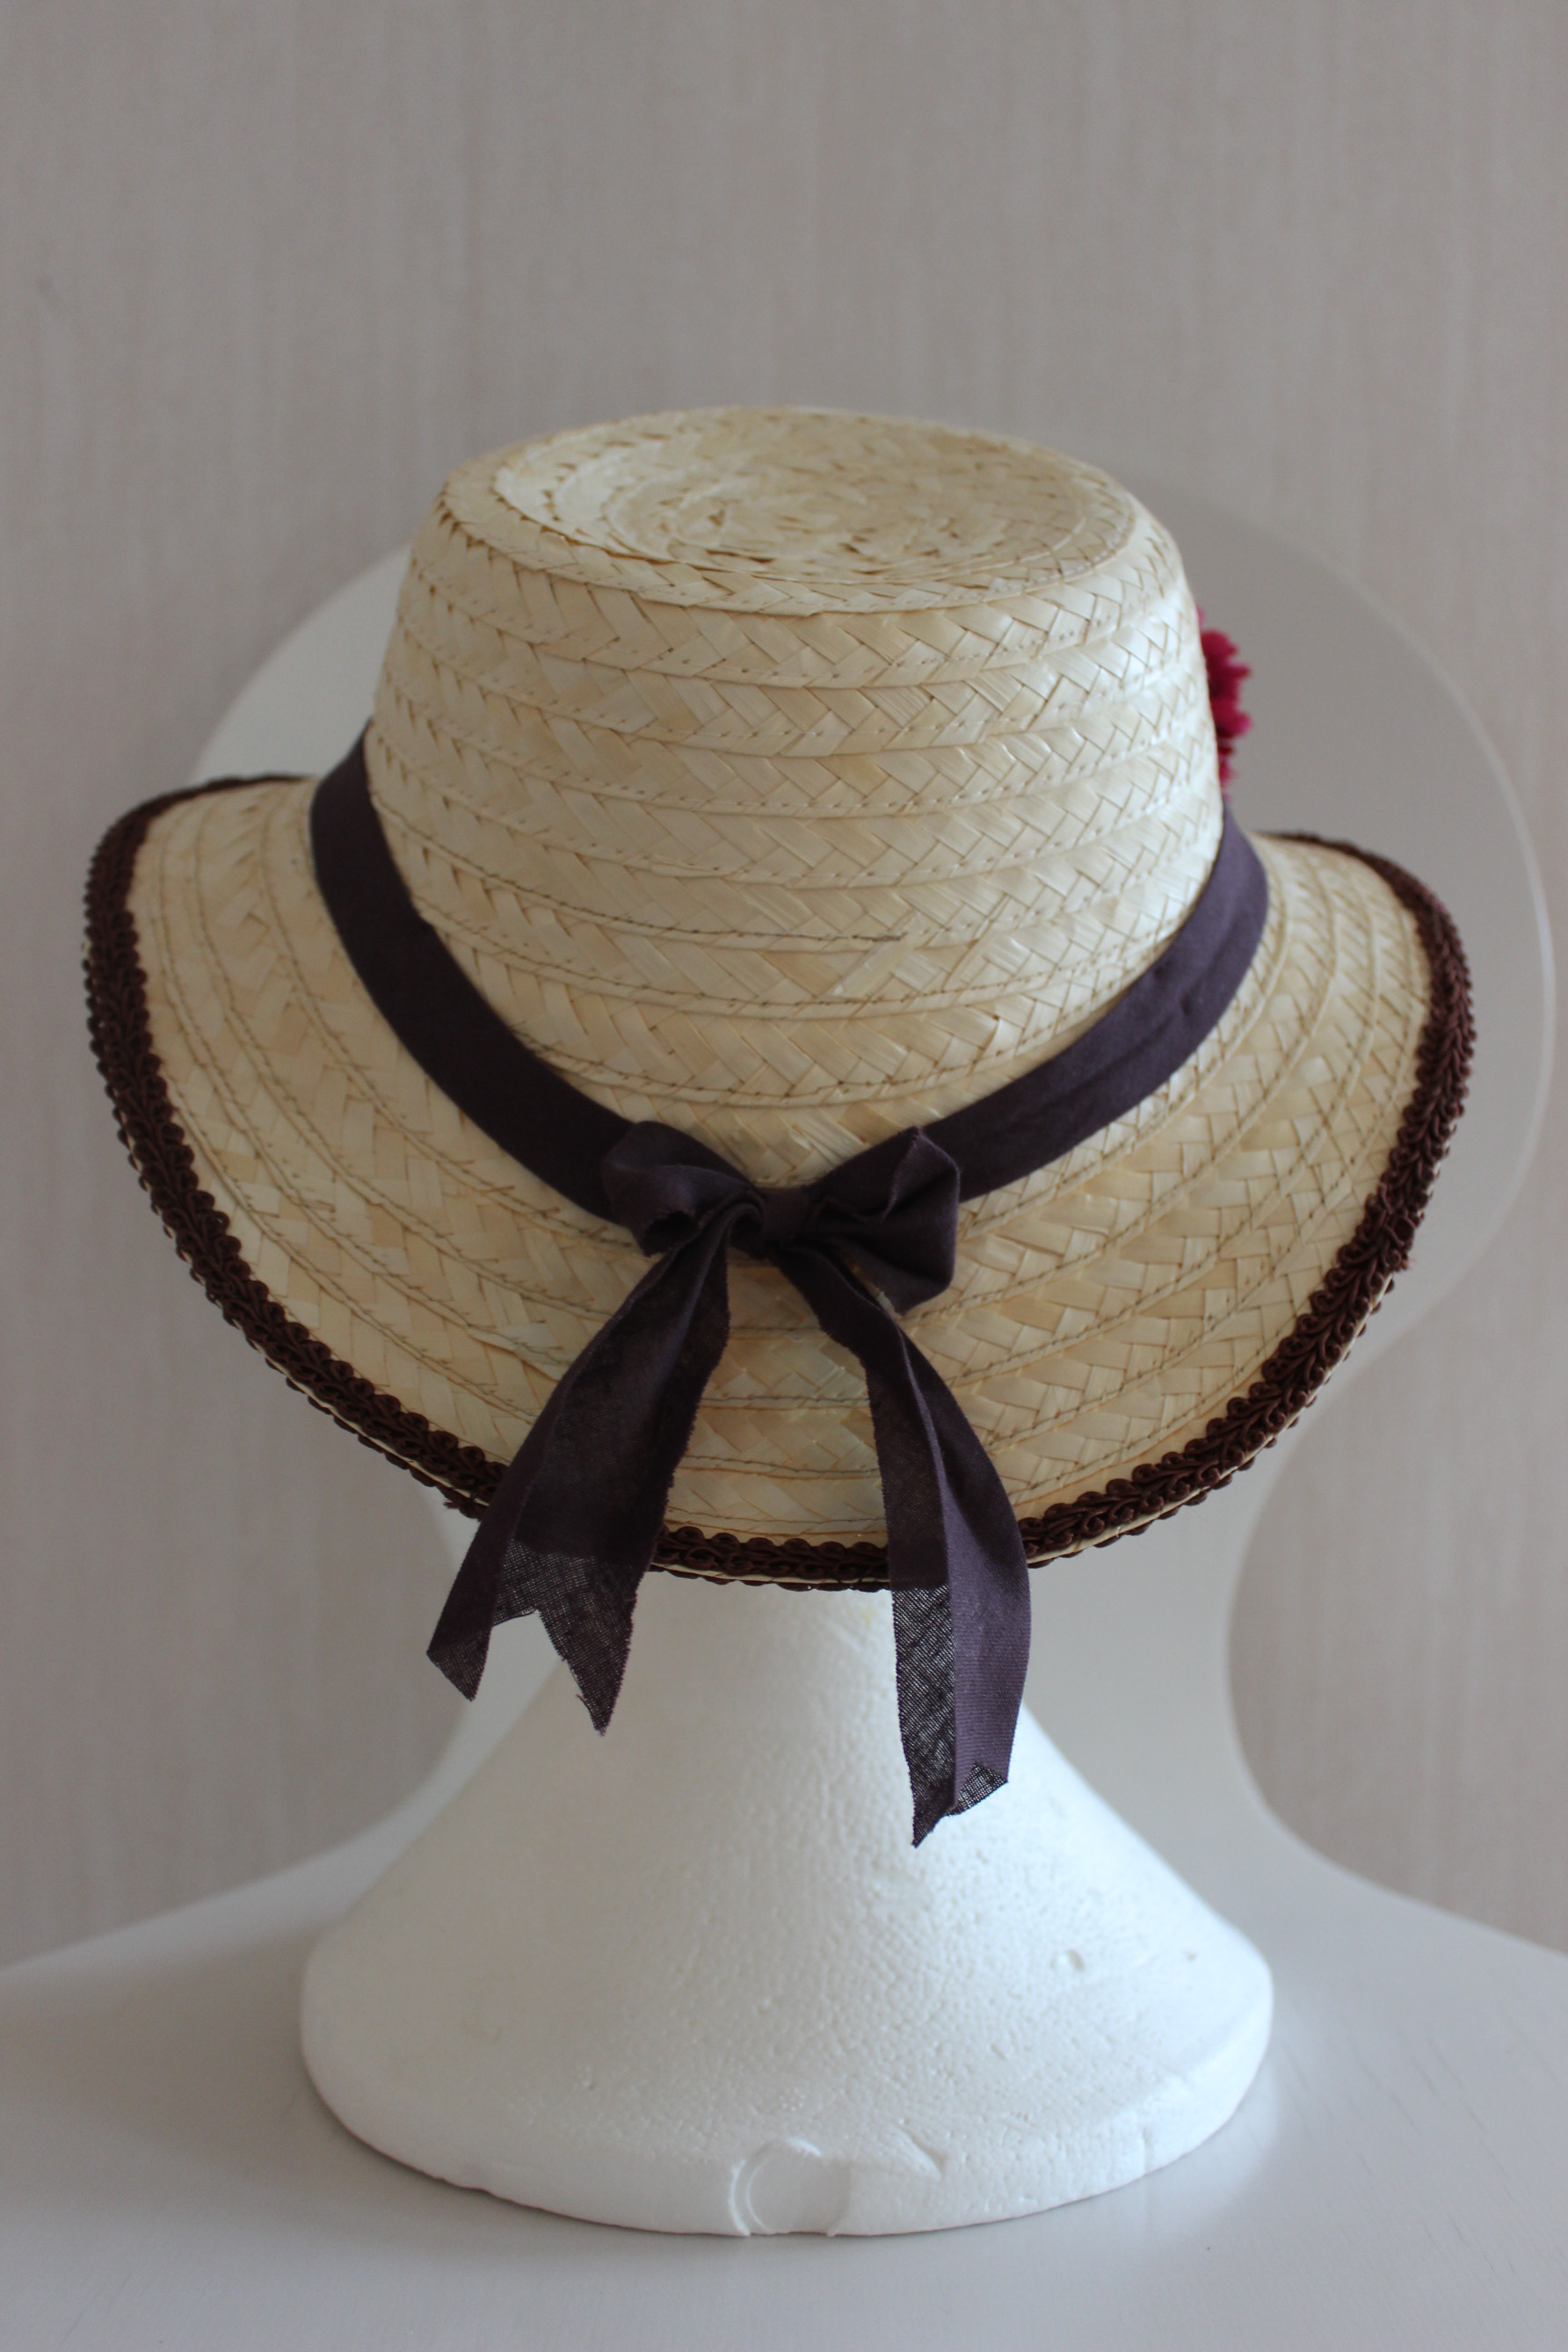
Once the base was done I started adding decoration, using the same braid as on the jacket & skirt.  Note the braid stitched both to the upper and under sides of the brim.
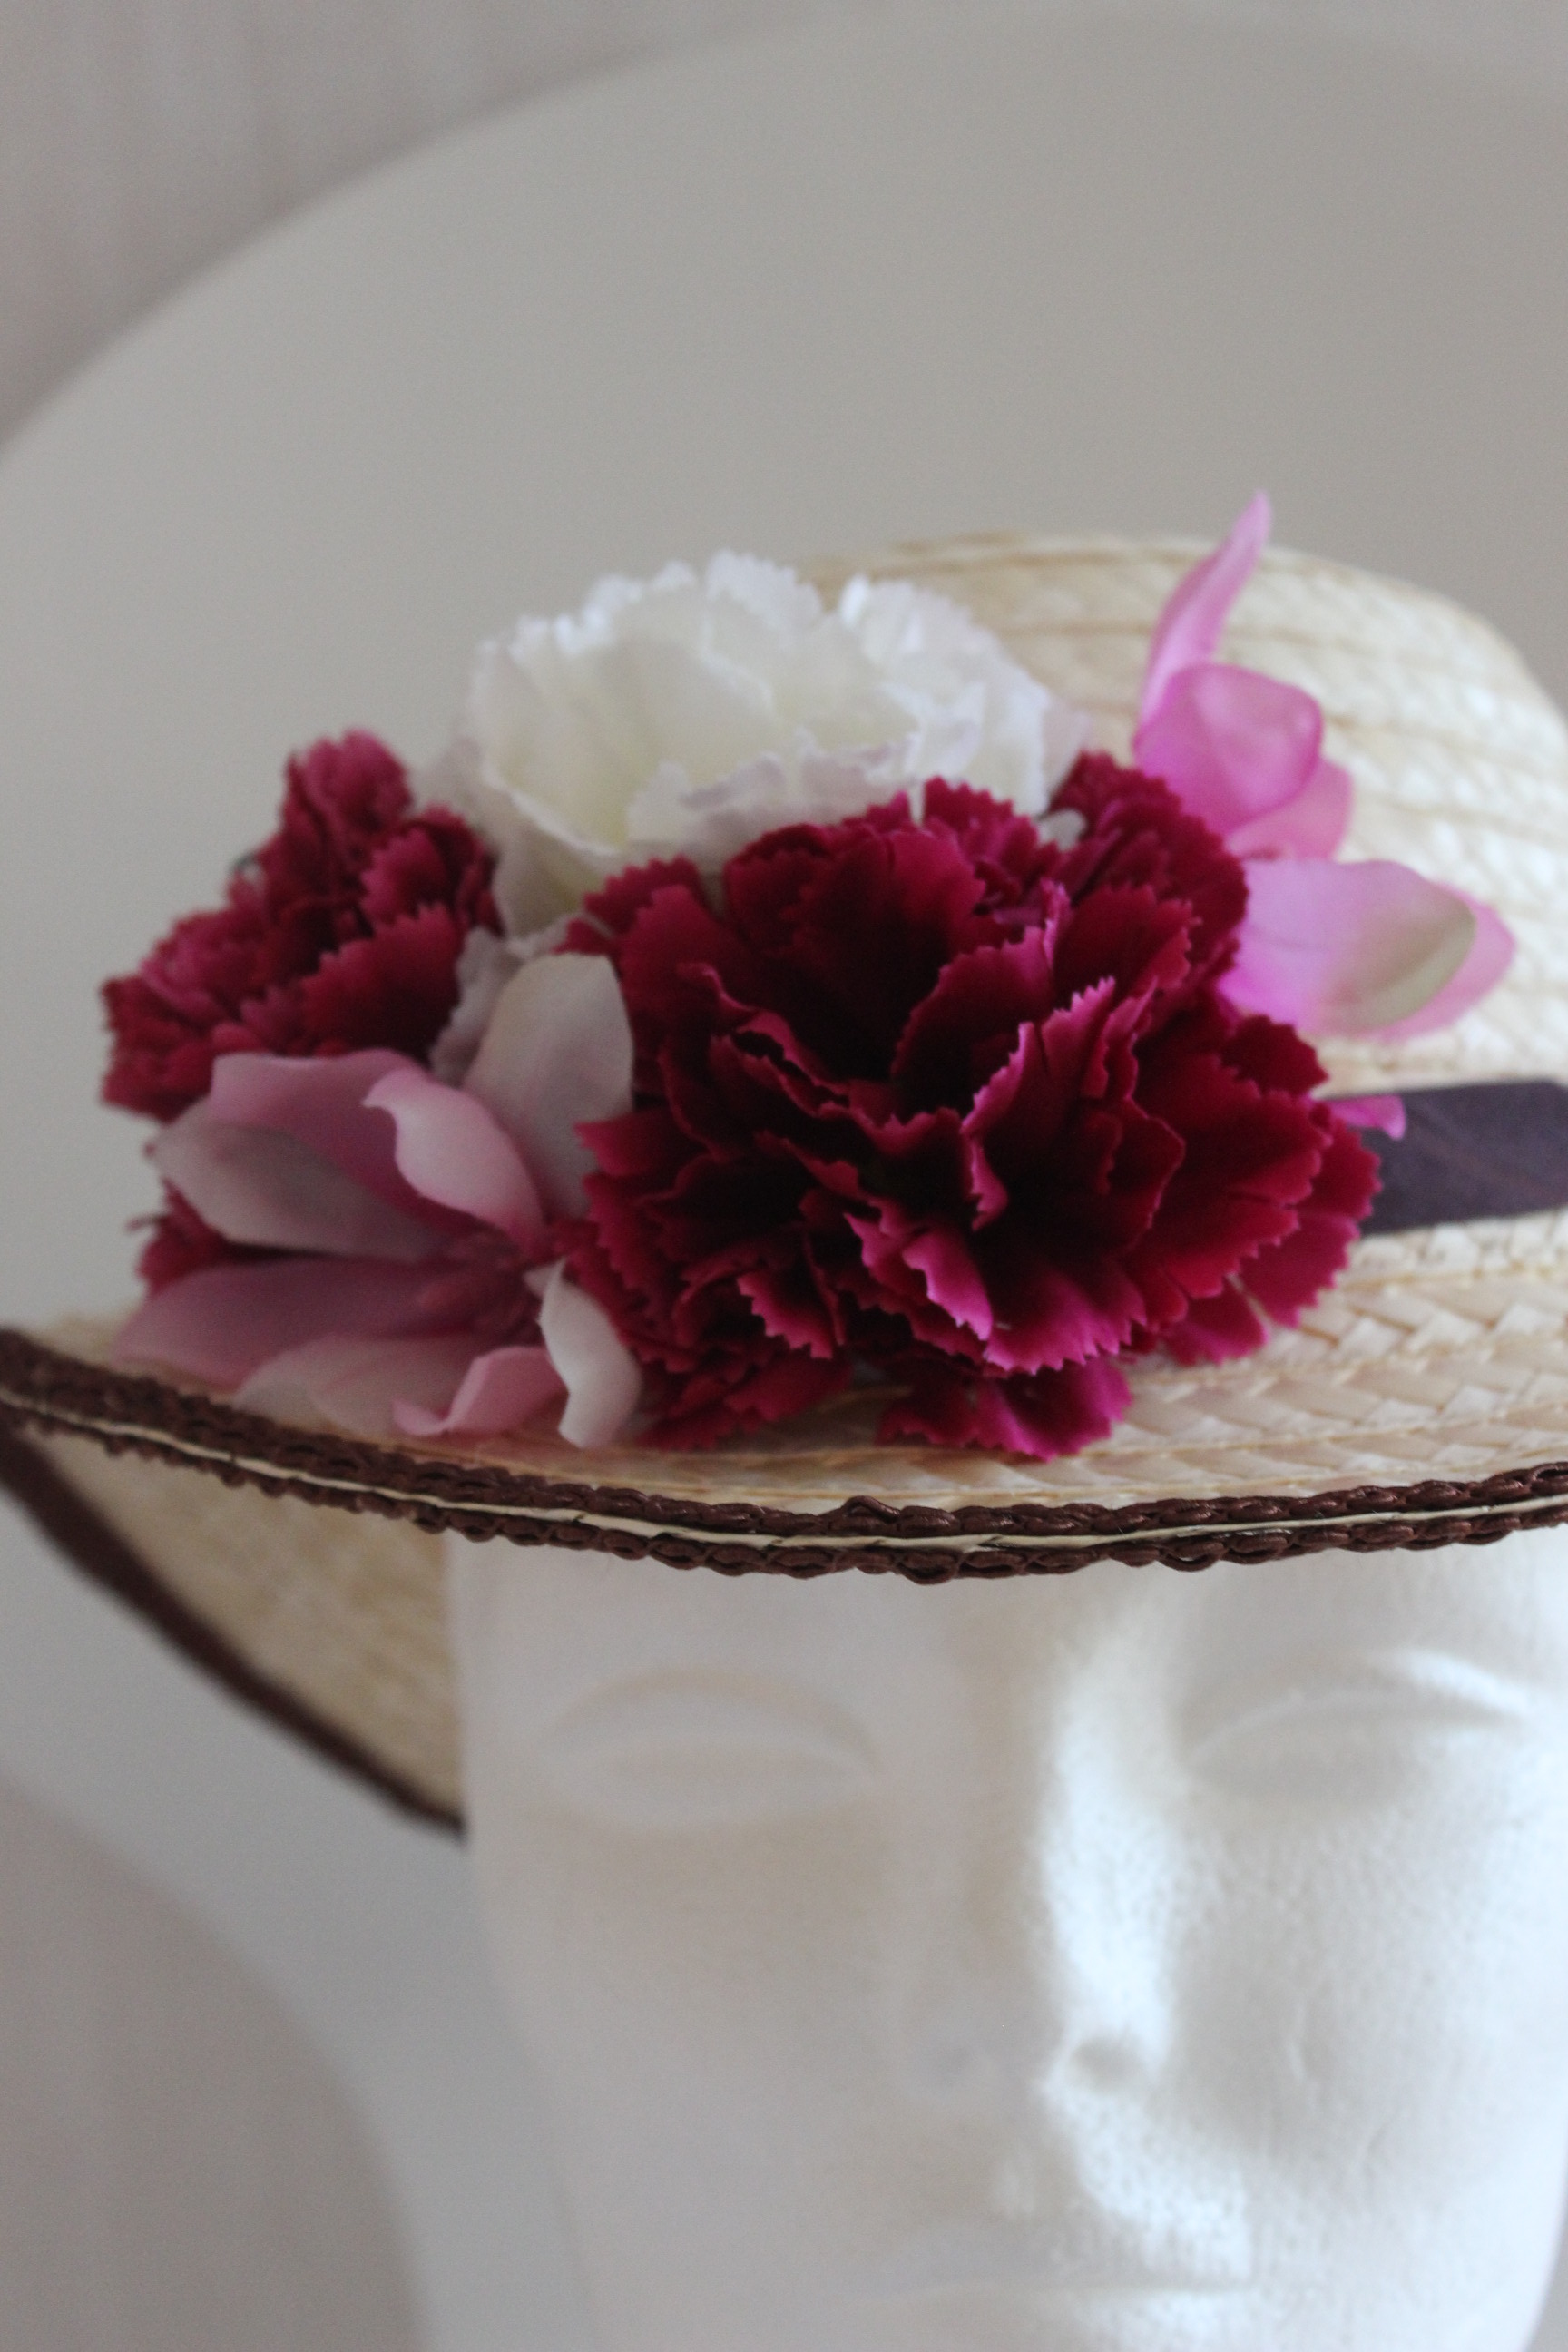
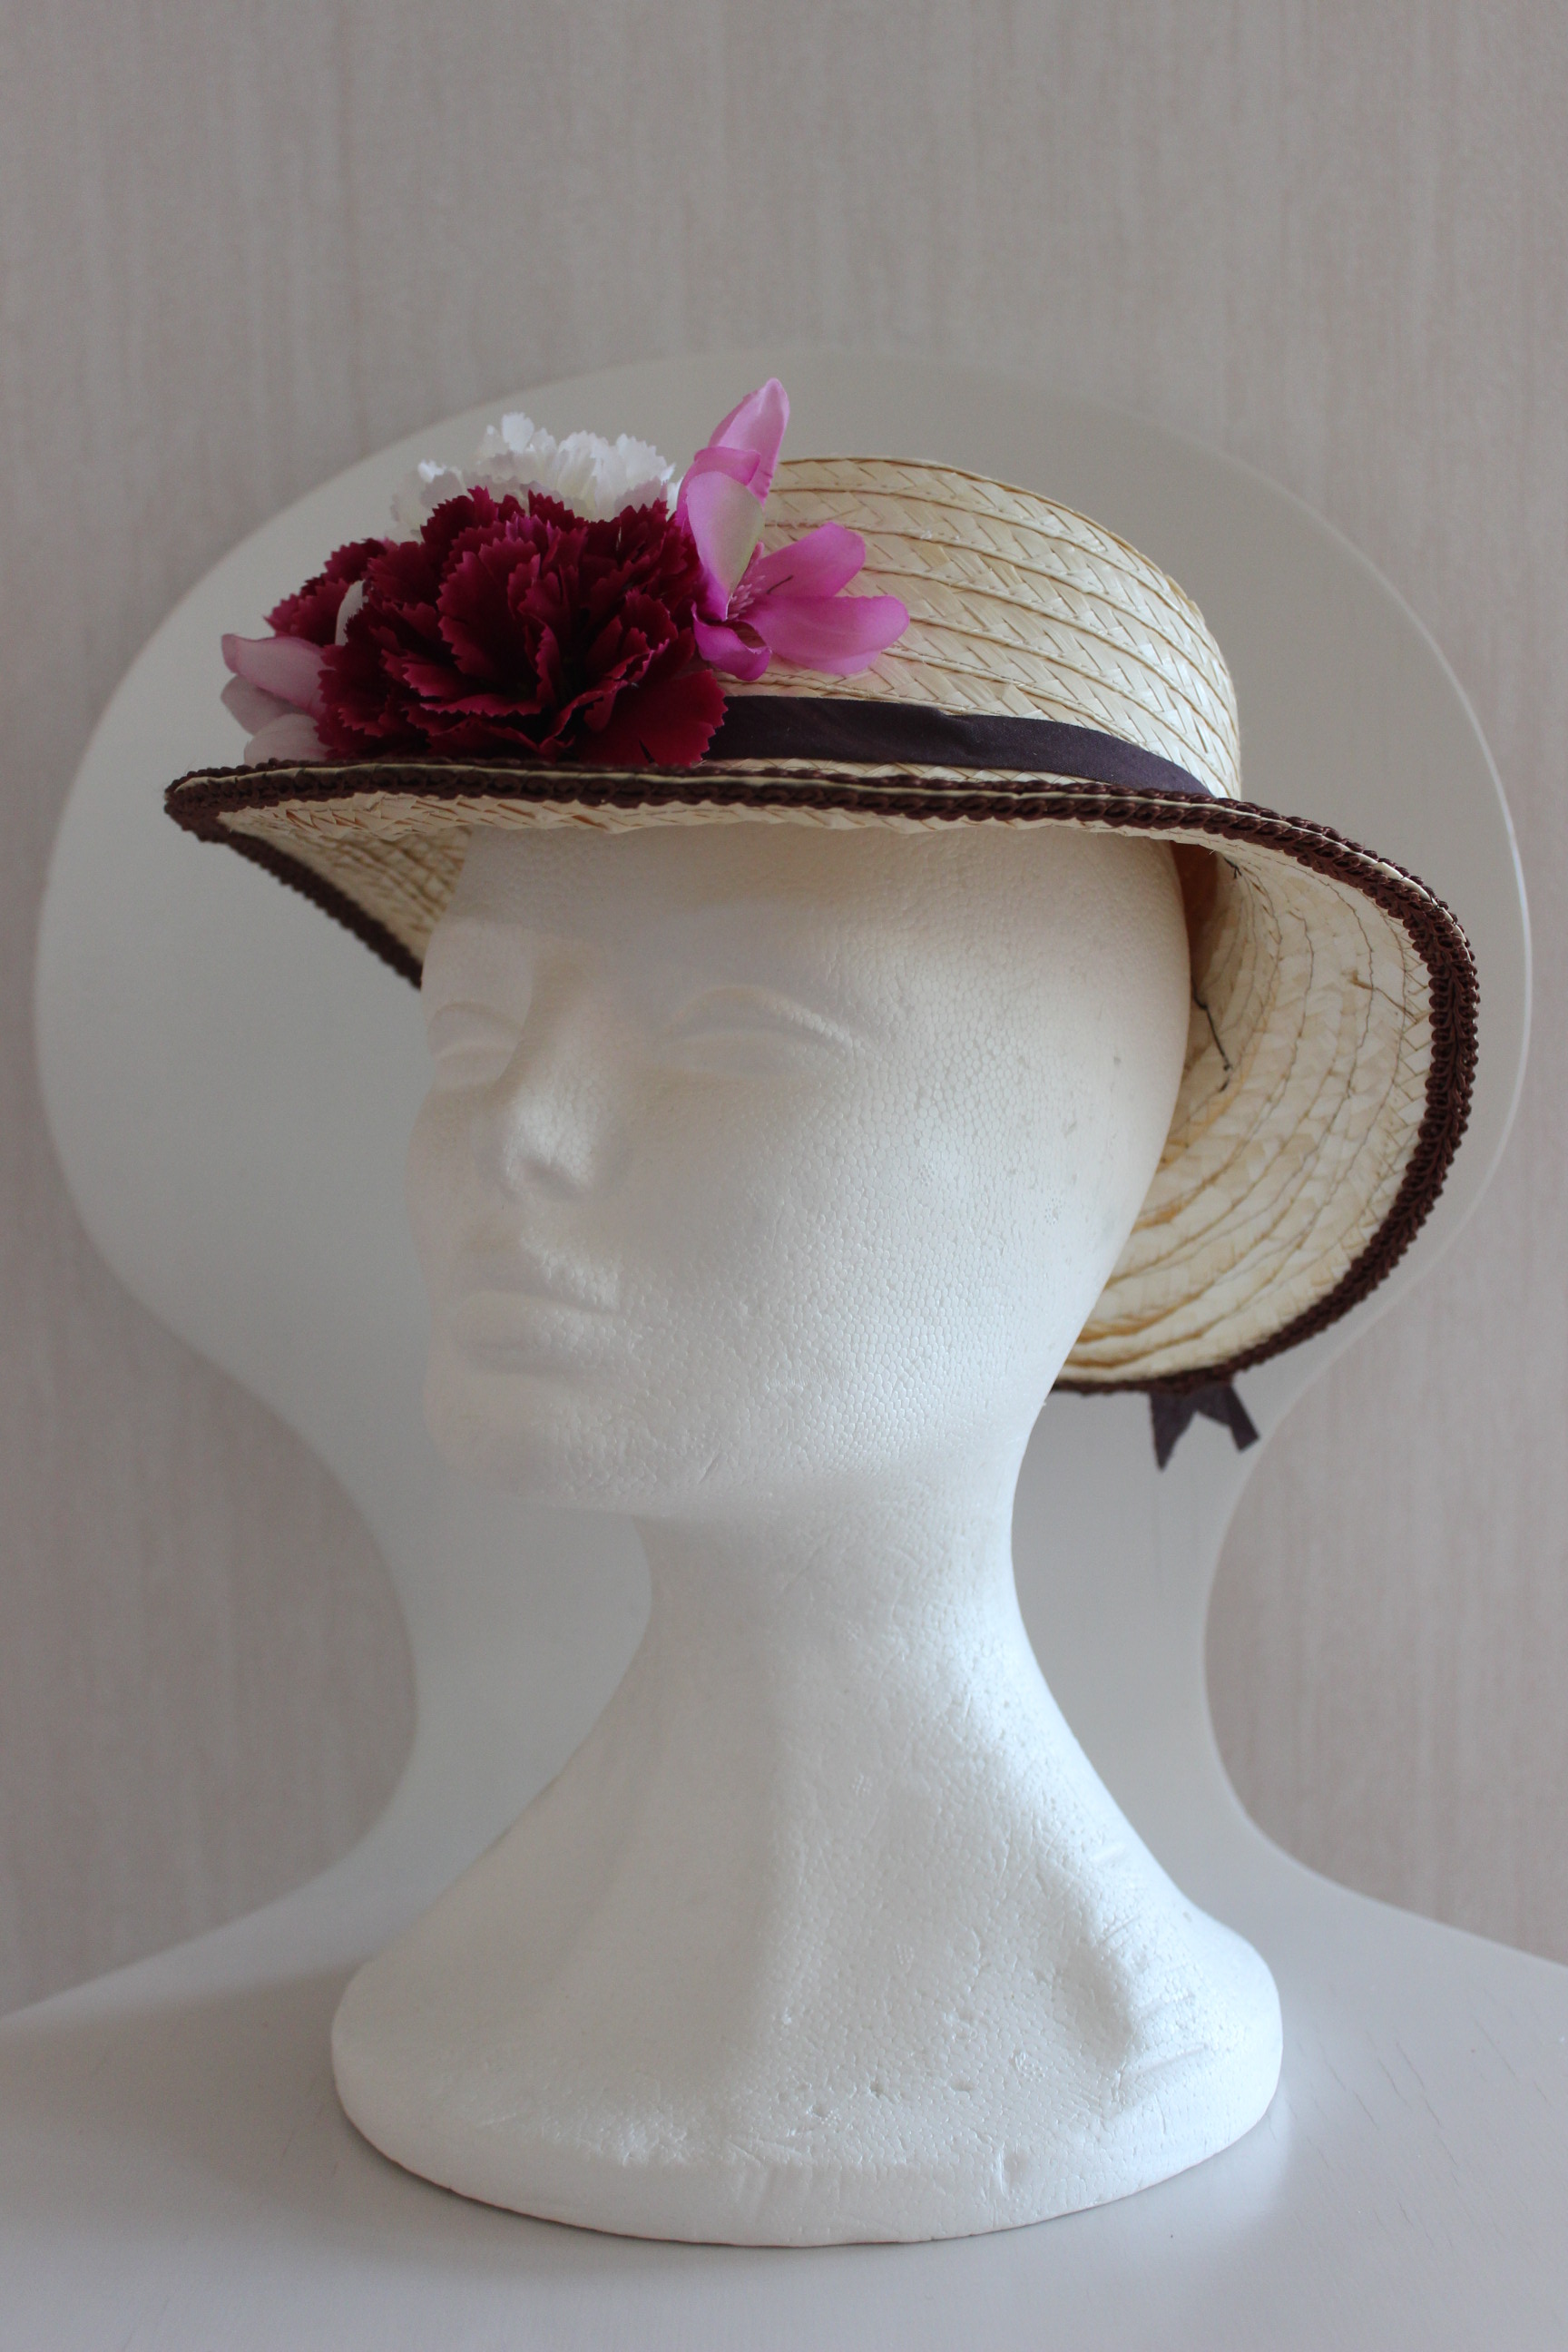
The final touch was to add some flowers and I opted for a nice pop of color with a few of these plastic flowers.

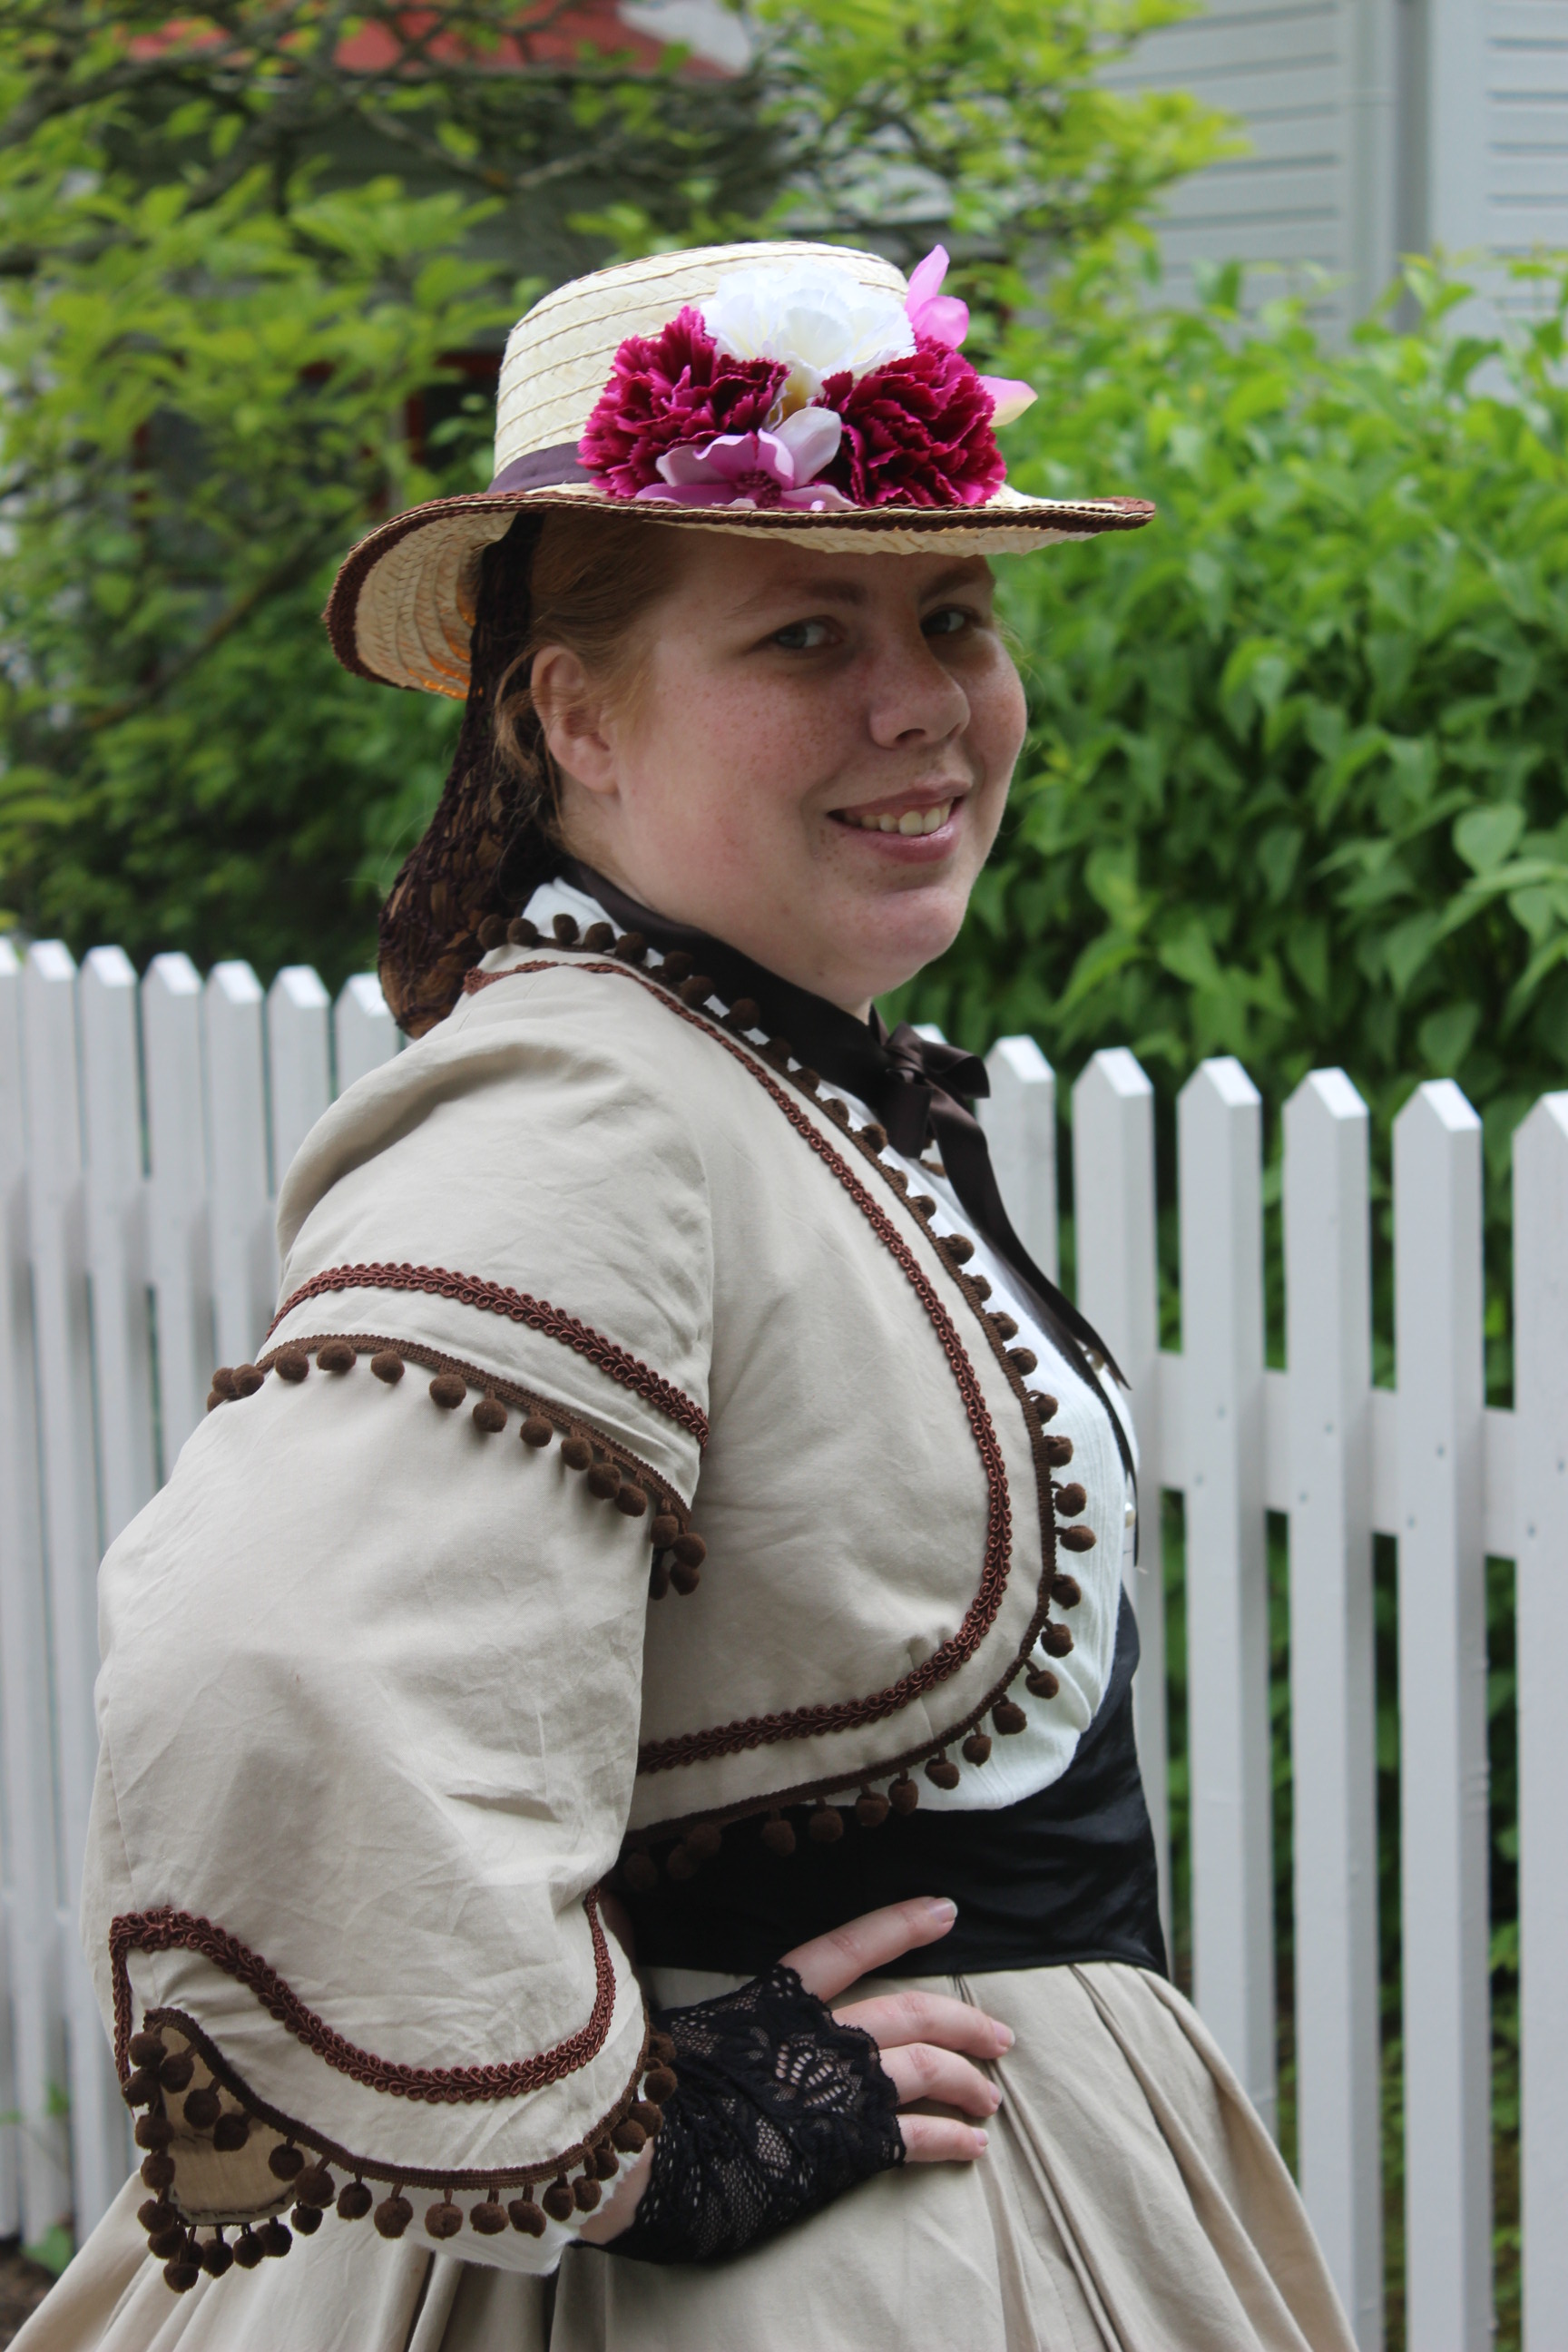
The finished hat: 

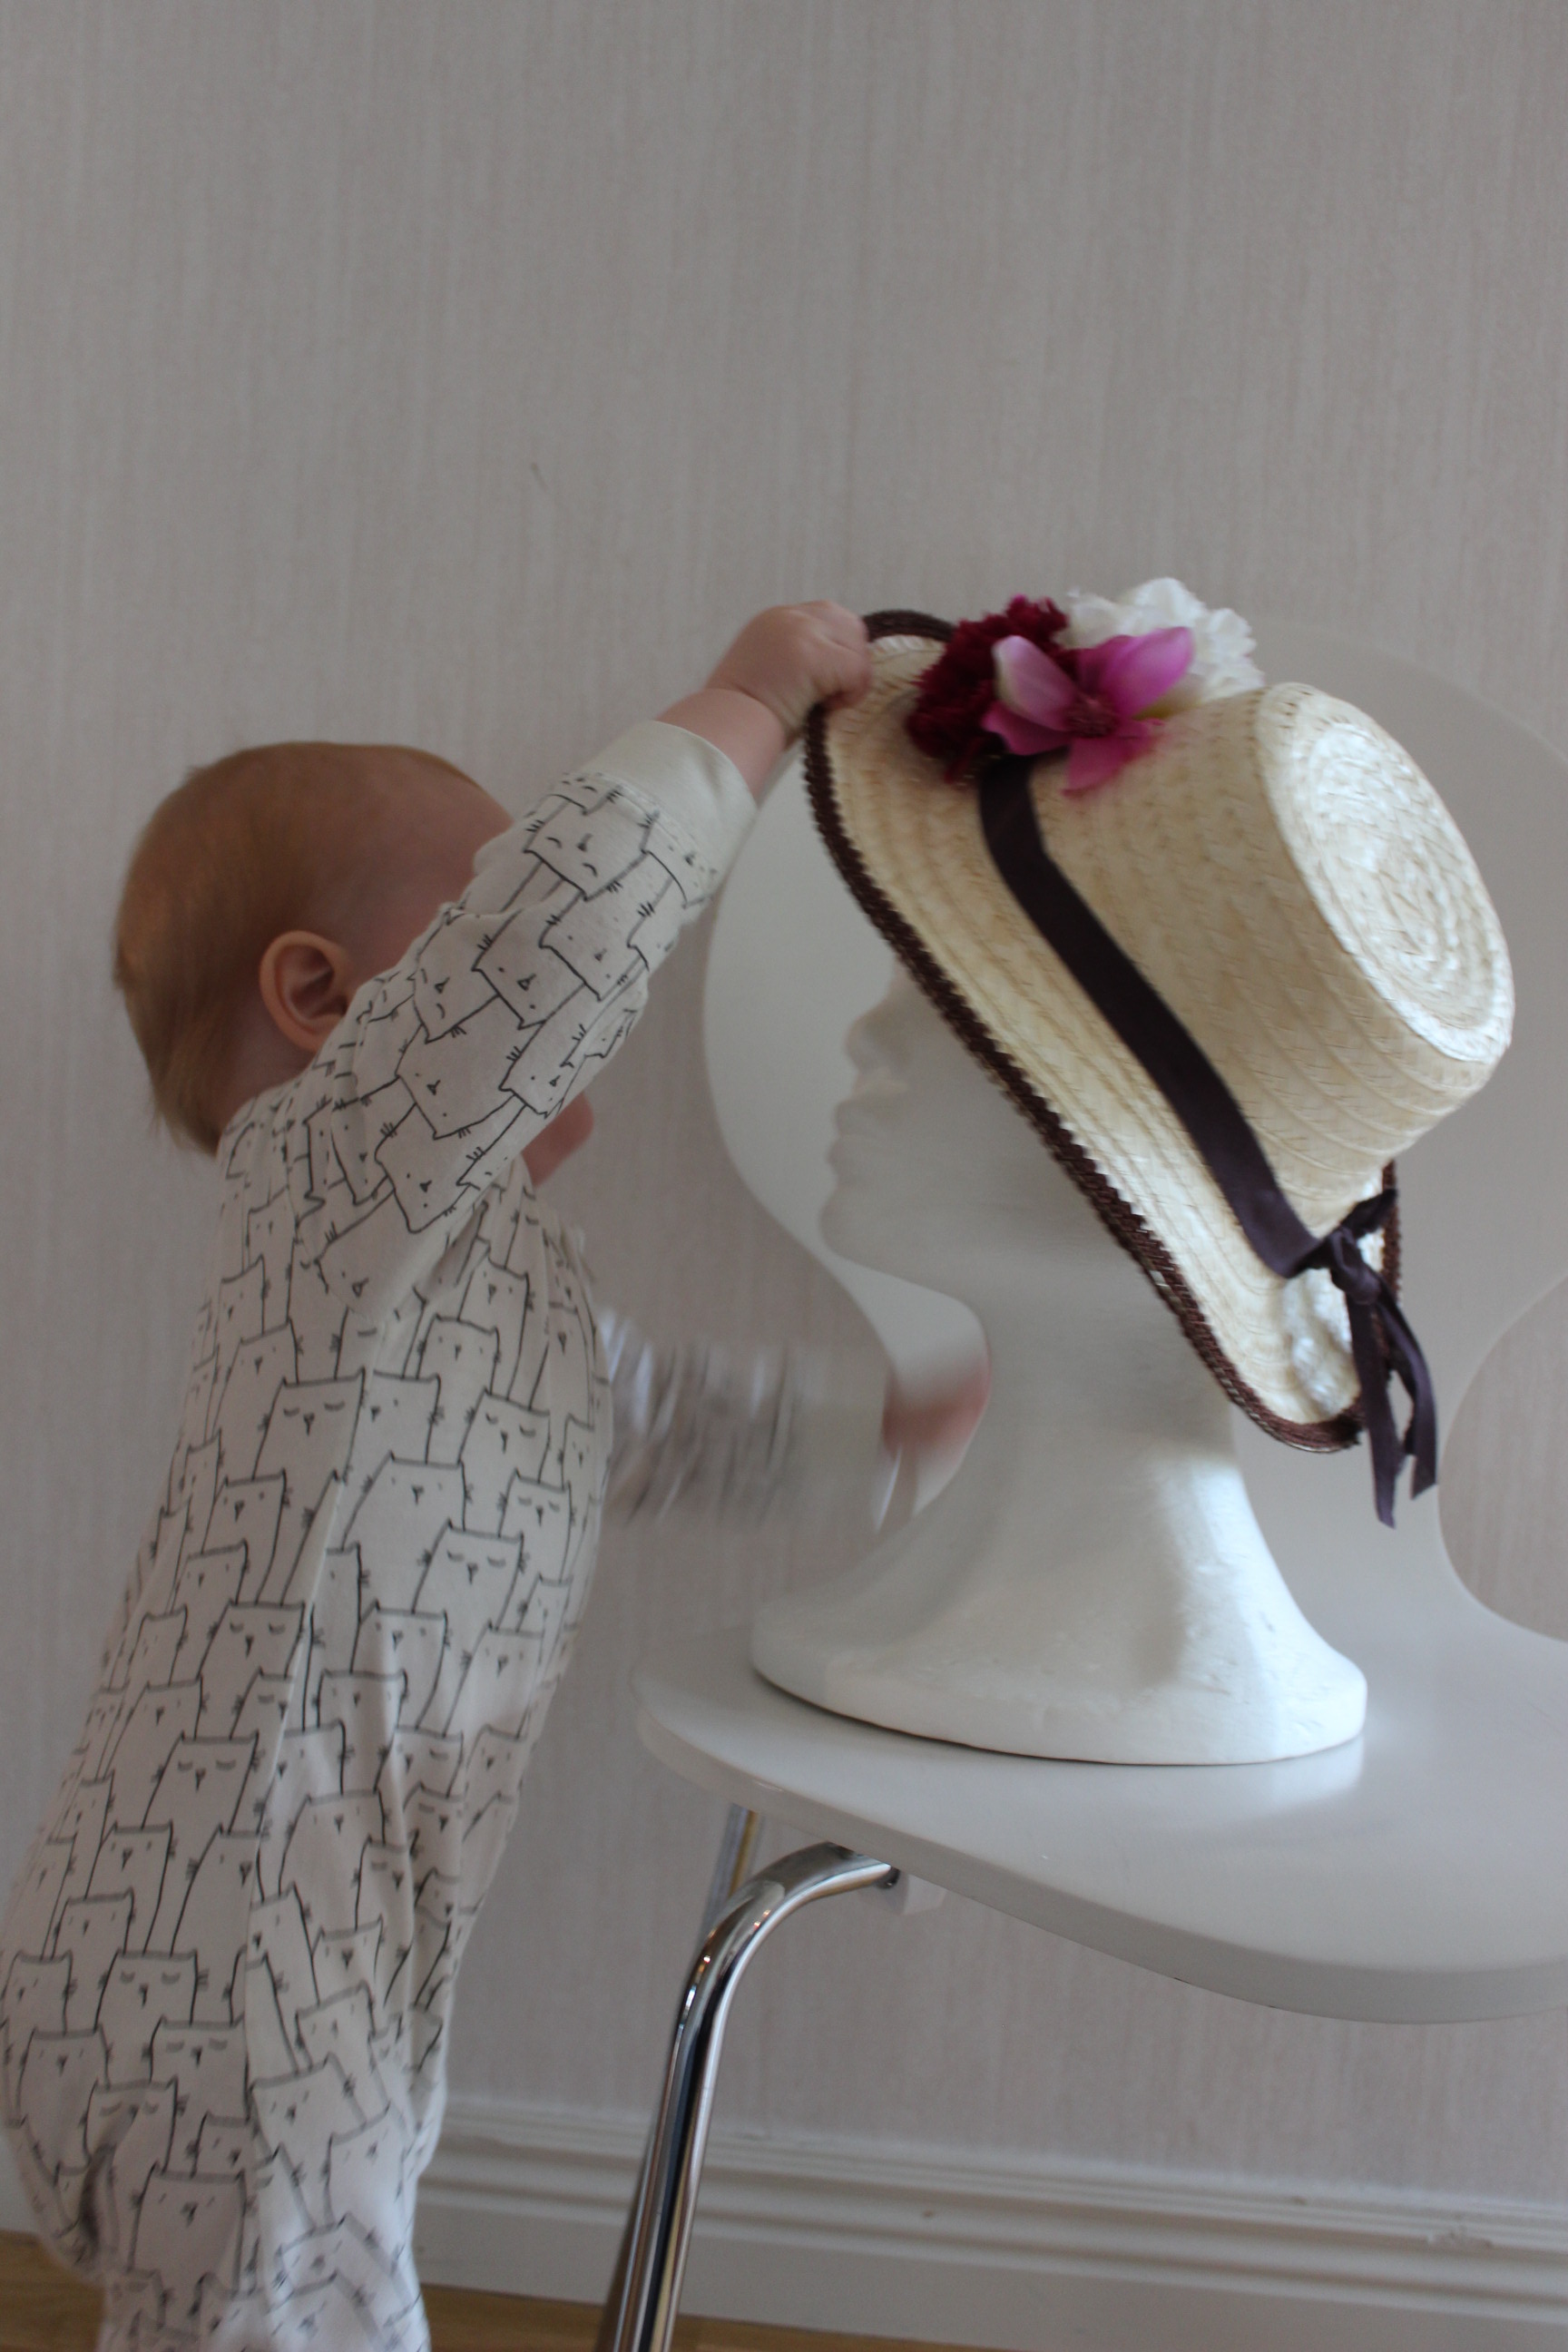
Bonus pictures of my little helper, getting the hat to sitt exactly “right” on my mannequin head.
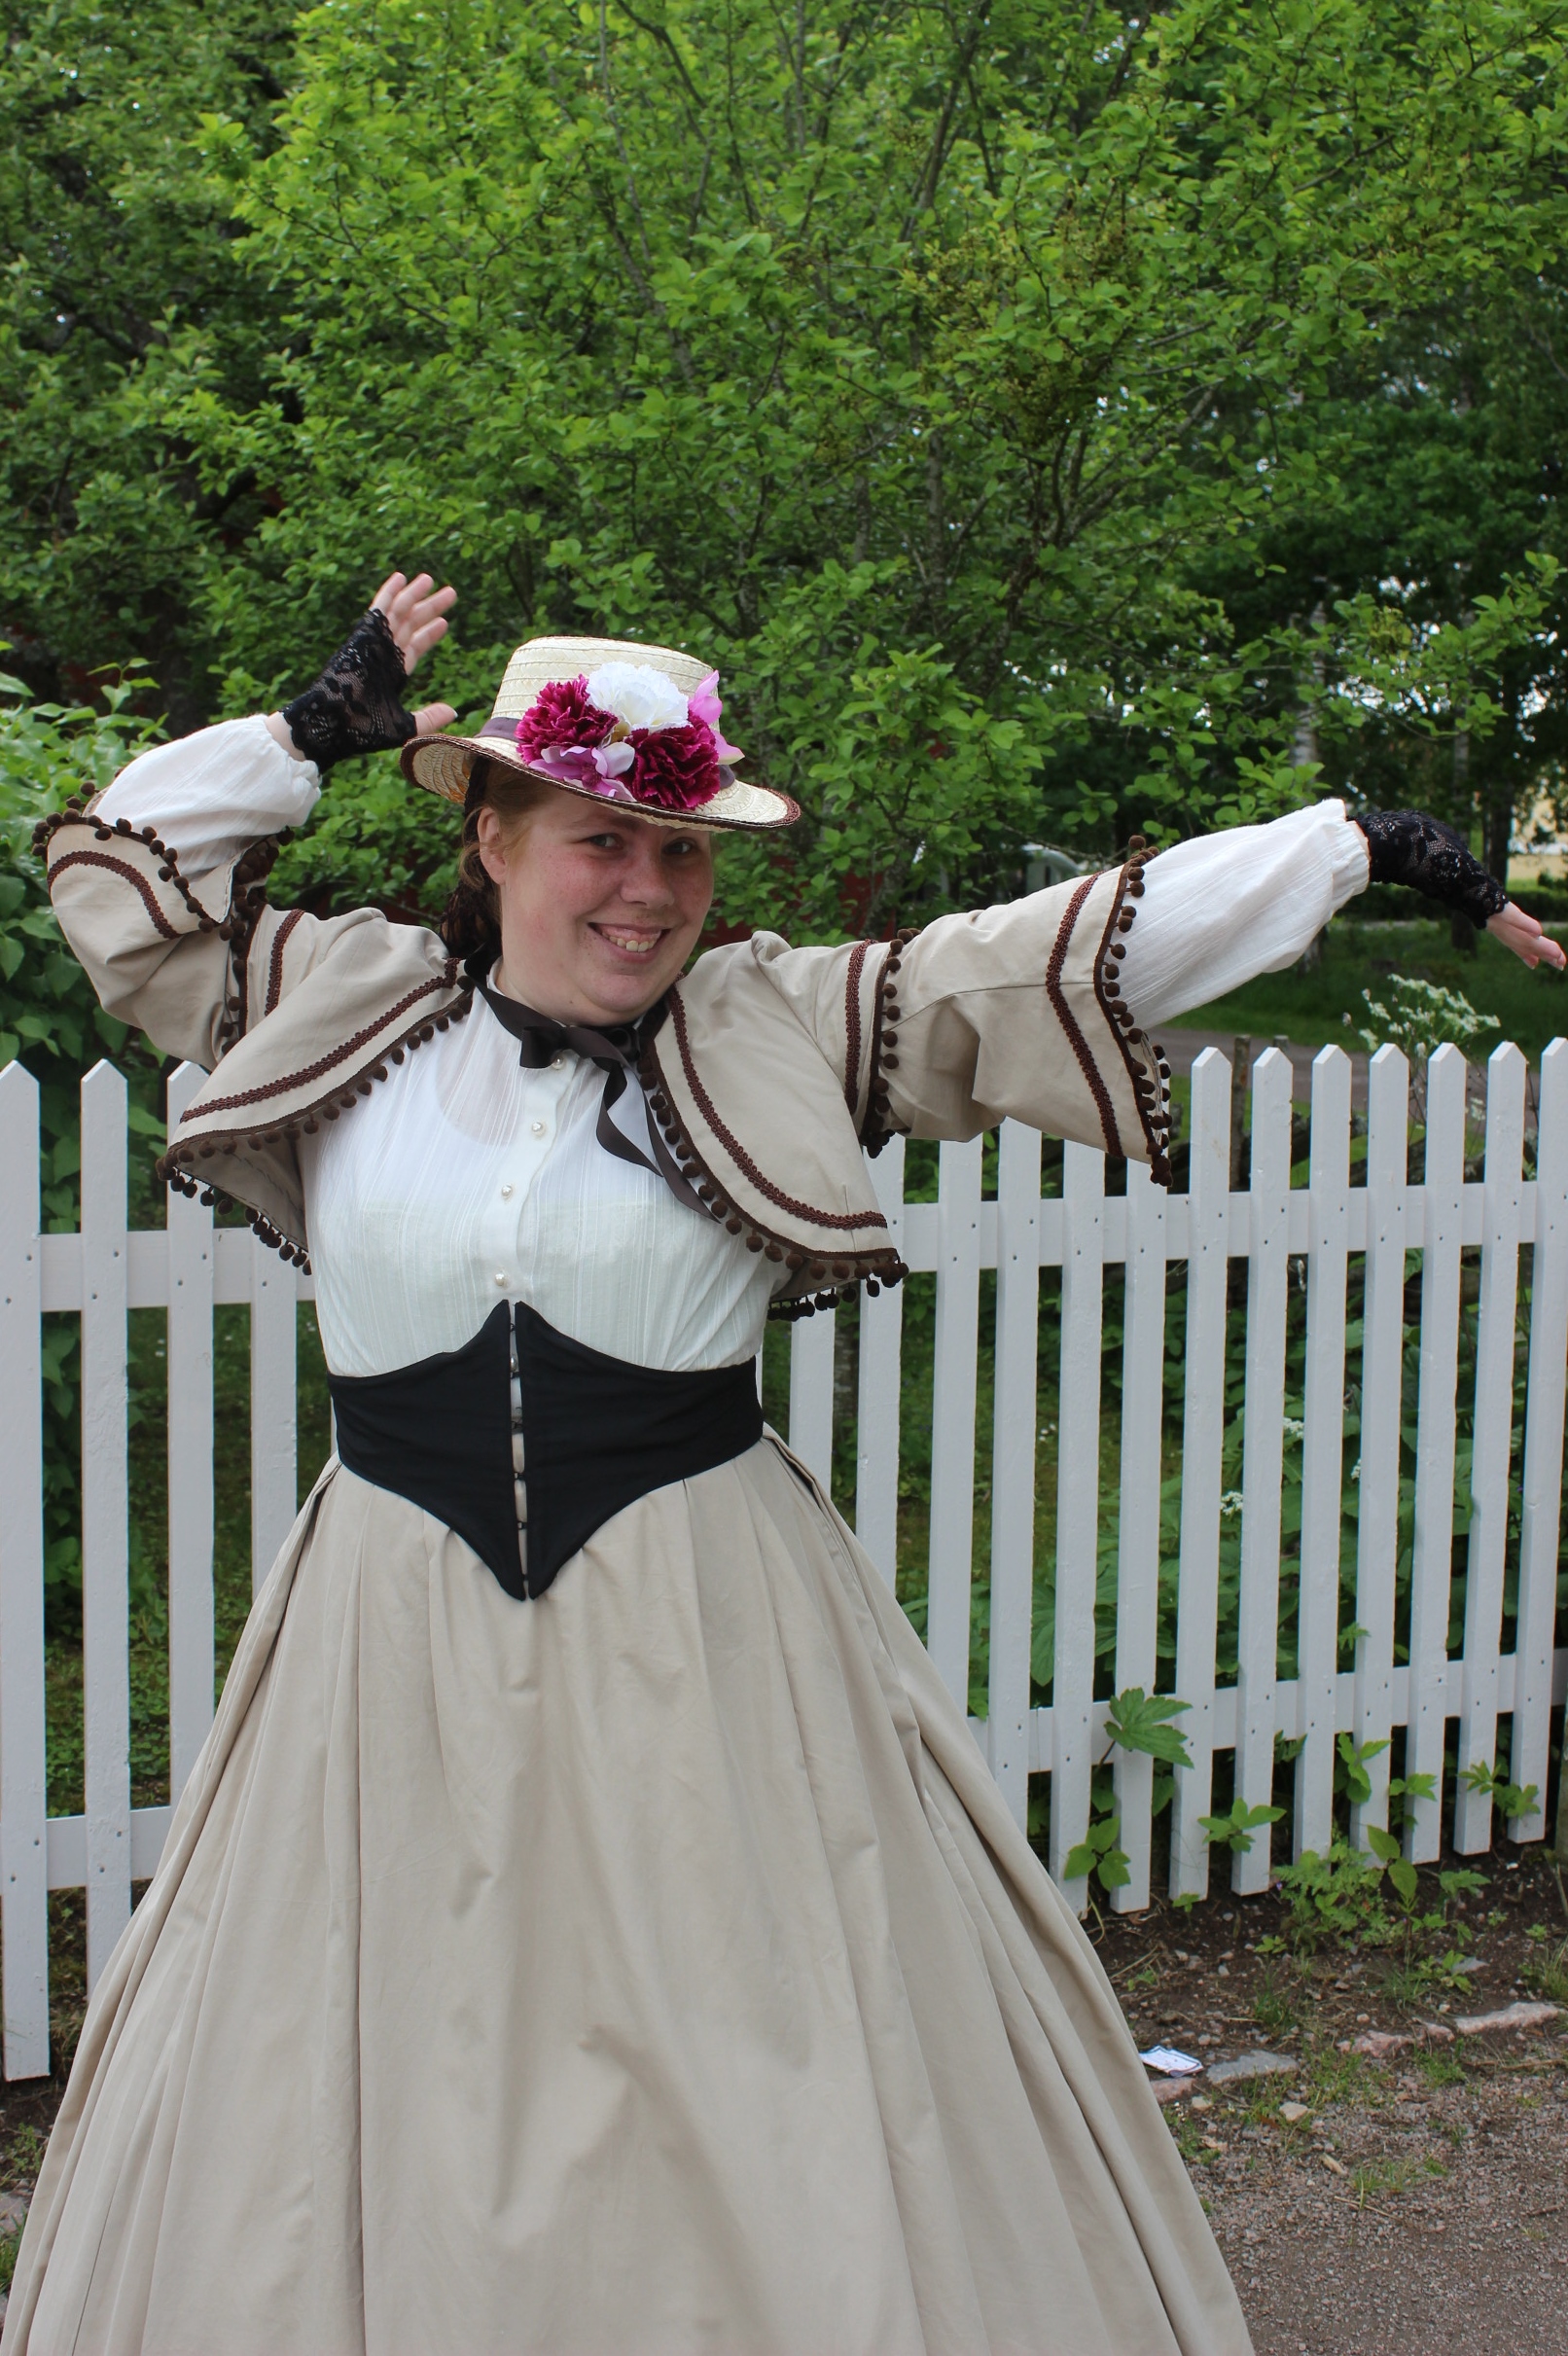
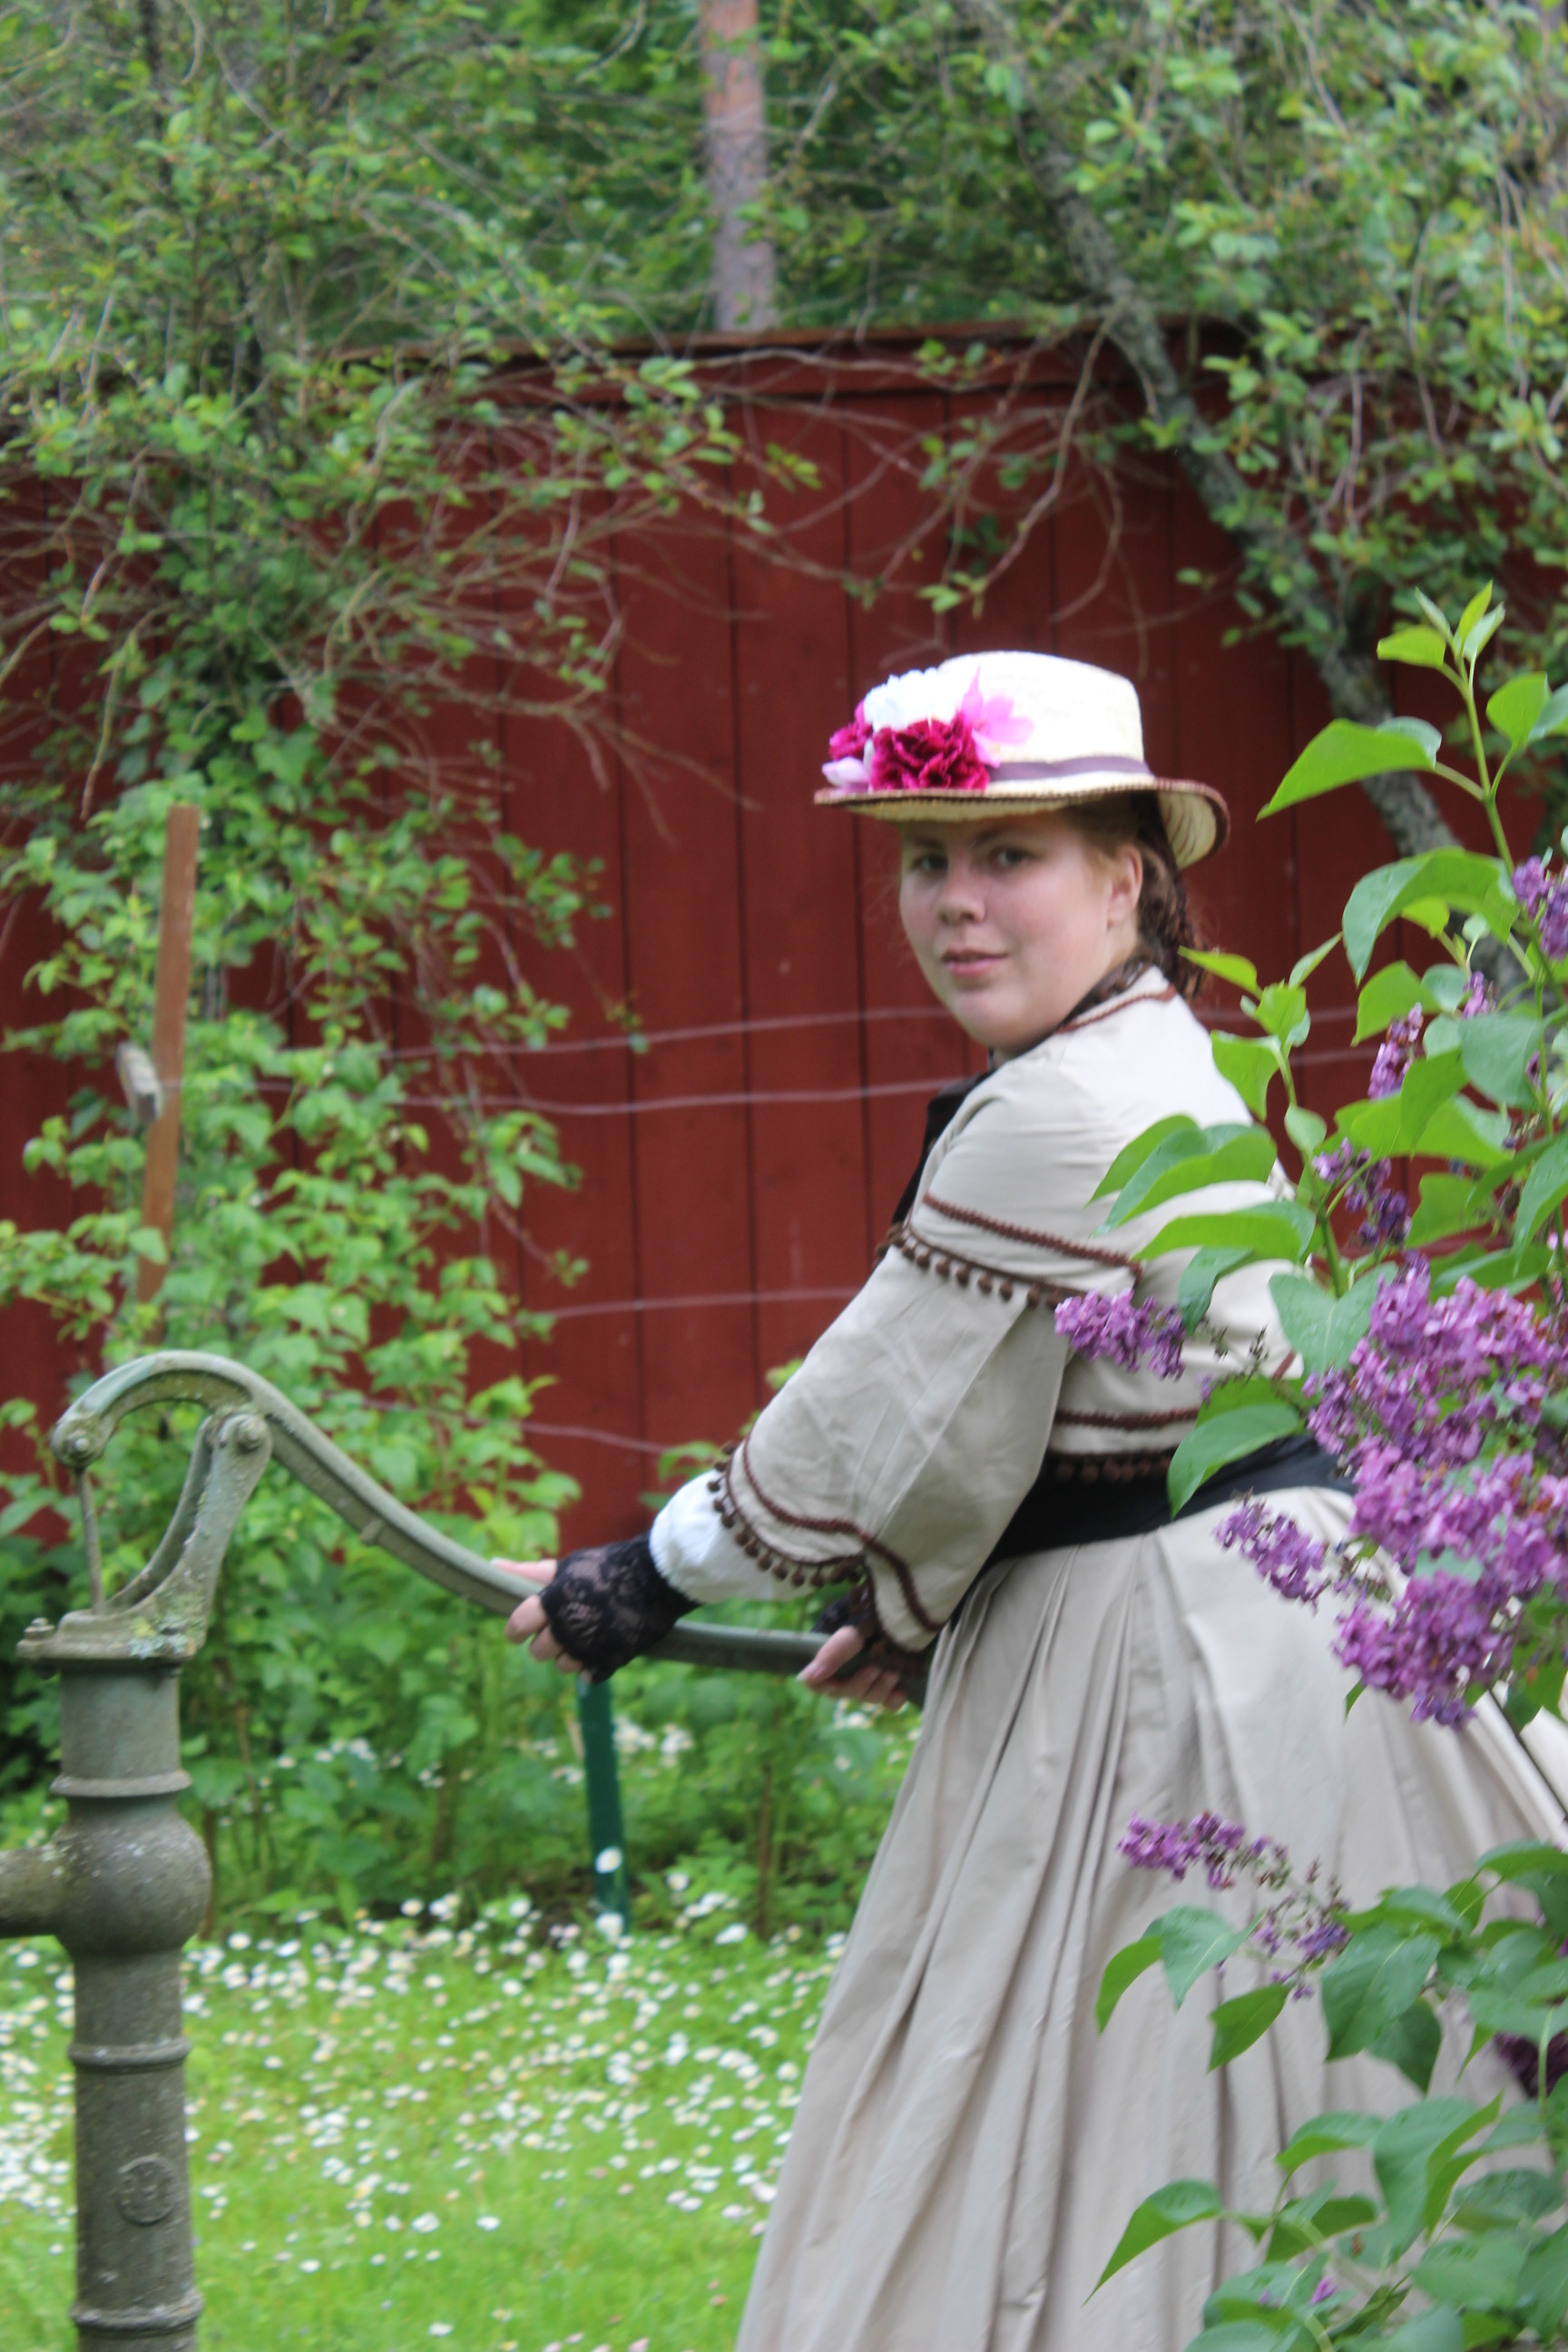
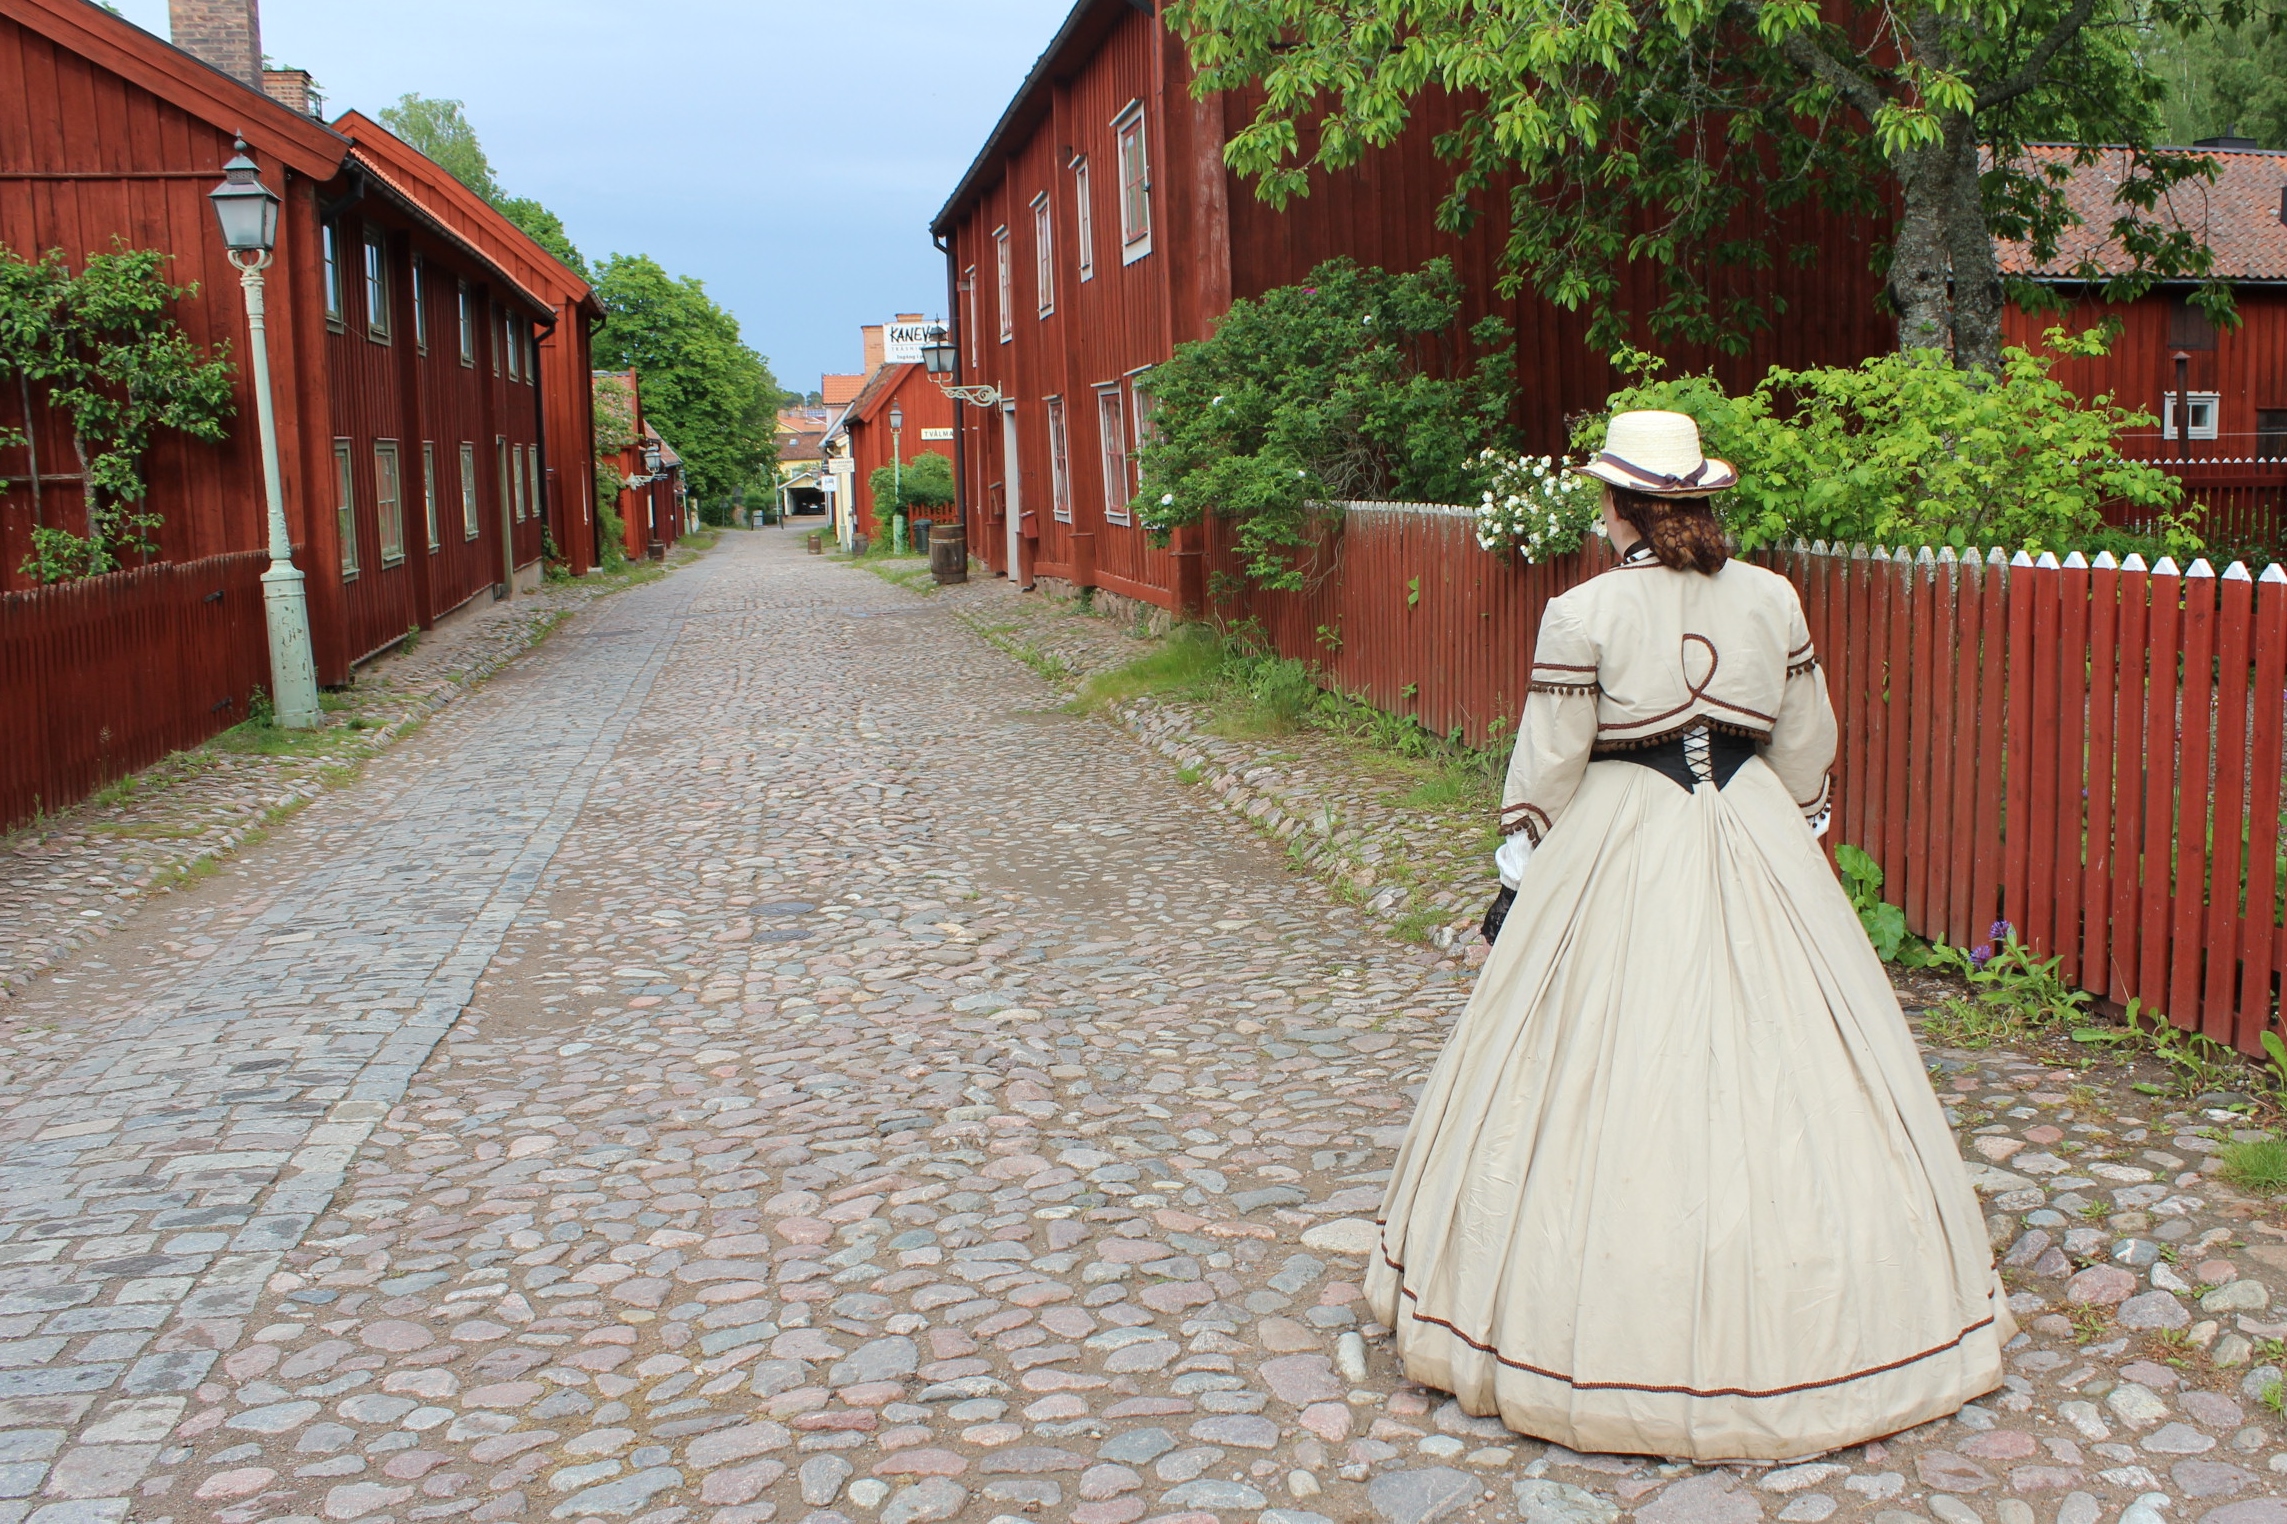
And the whole outfit completed
HSM 7/2017 – Fashion Plate
I knew from the start this challenge would be an easy one (or hard, depending on how you see it), cause I often use pictures and extant garment as my inspiration. The only trouble was to pick which one to make.
But since my sister needed a new 1860s outfit for an upcoming event and I already had this pic saved on my ” wish to make someday” list, The choice turned out easier then expected.
Fashion plate from 1862
 Close-up on the outfit I planed to make.
I also looked at some extant garments for additional inspiration and style choices. Then I got to work.
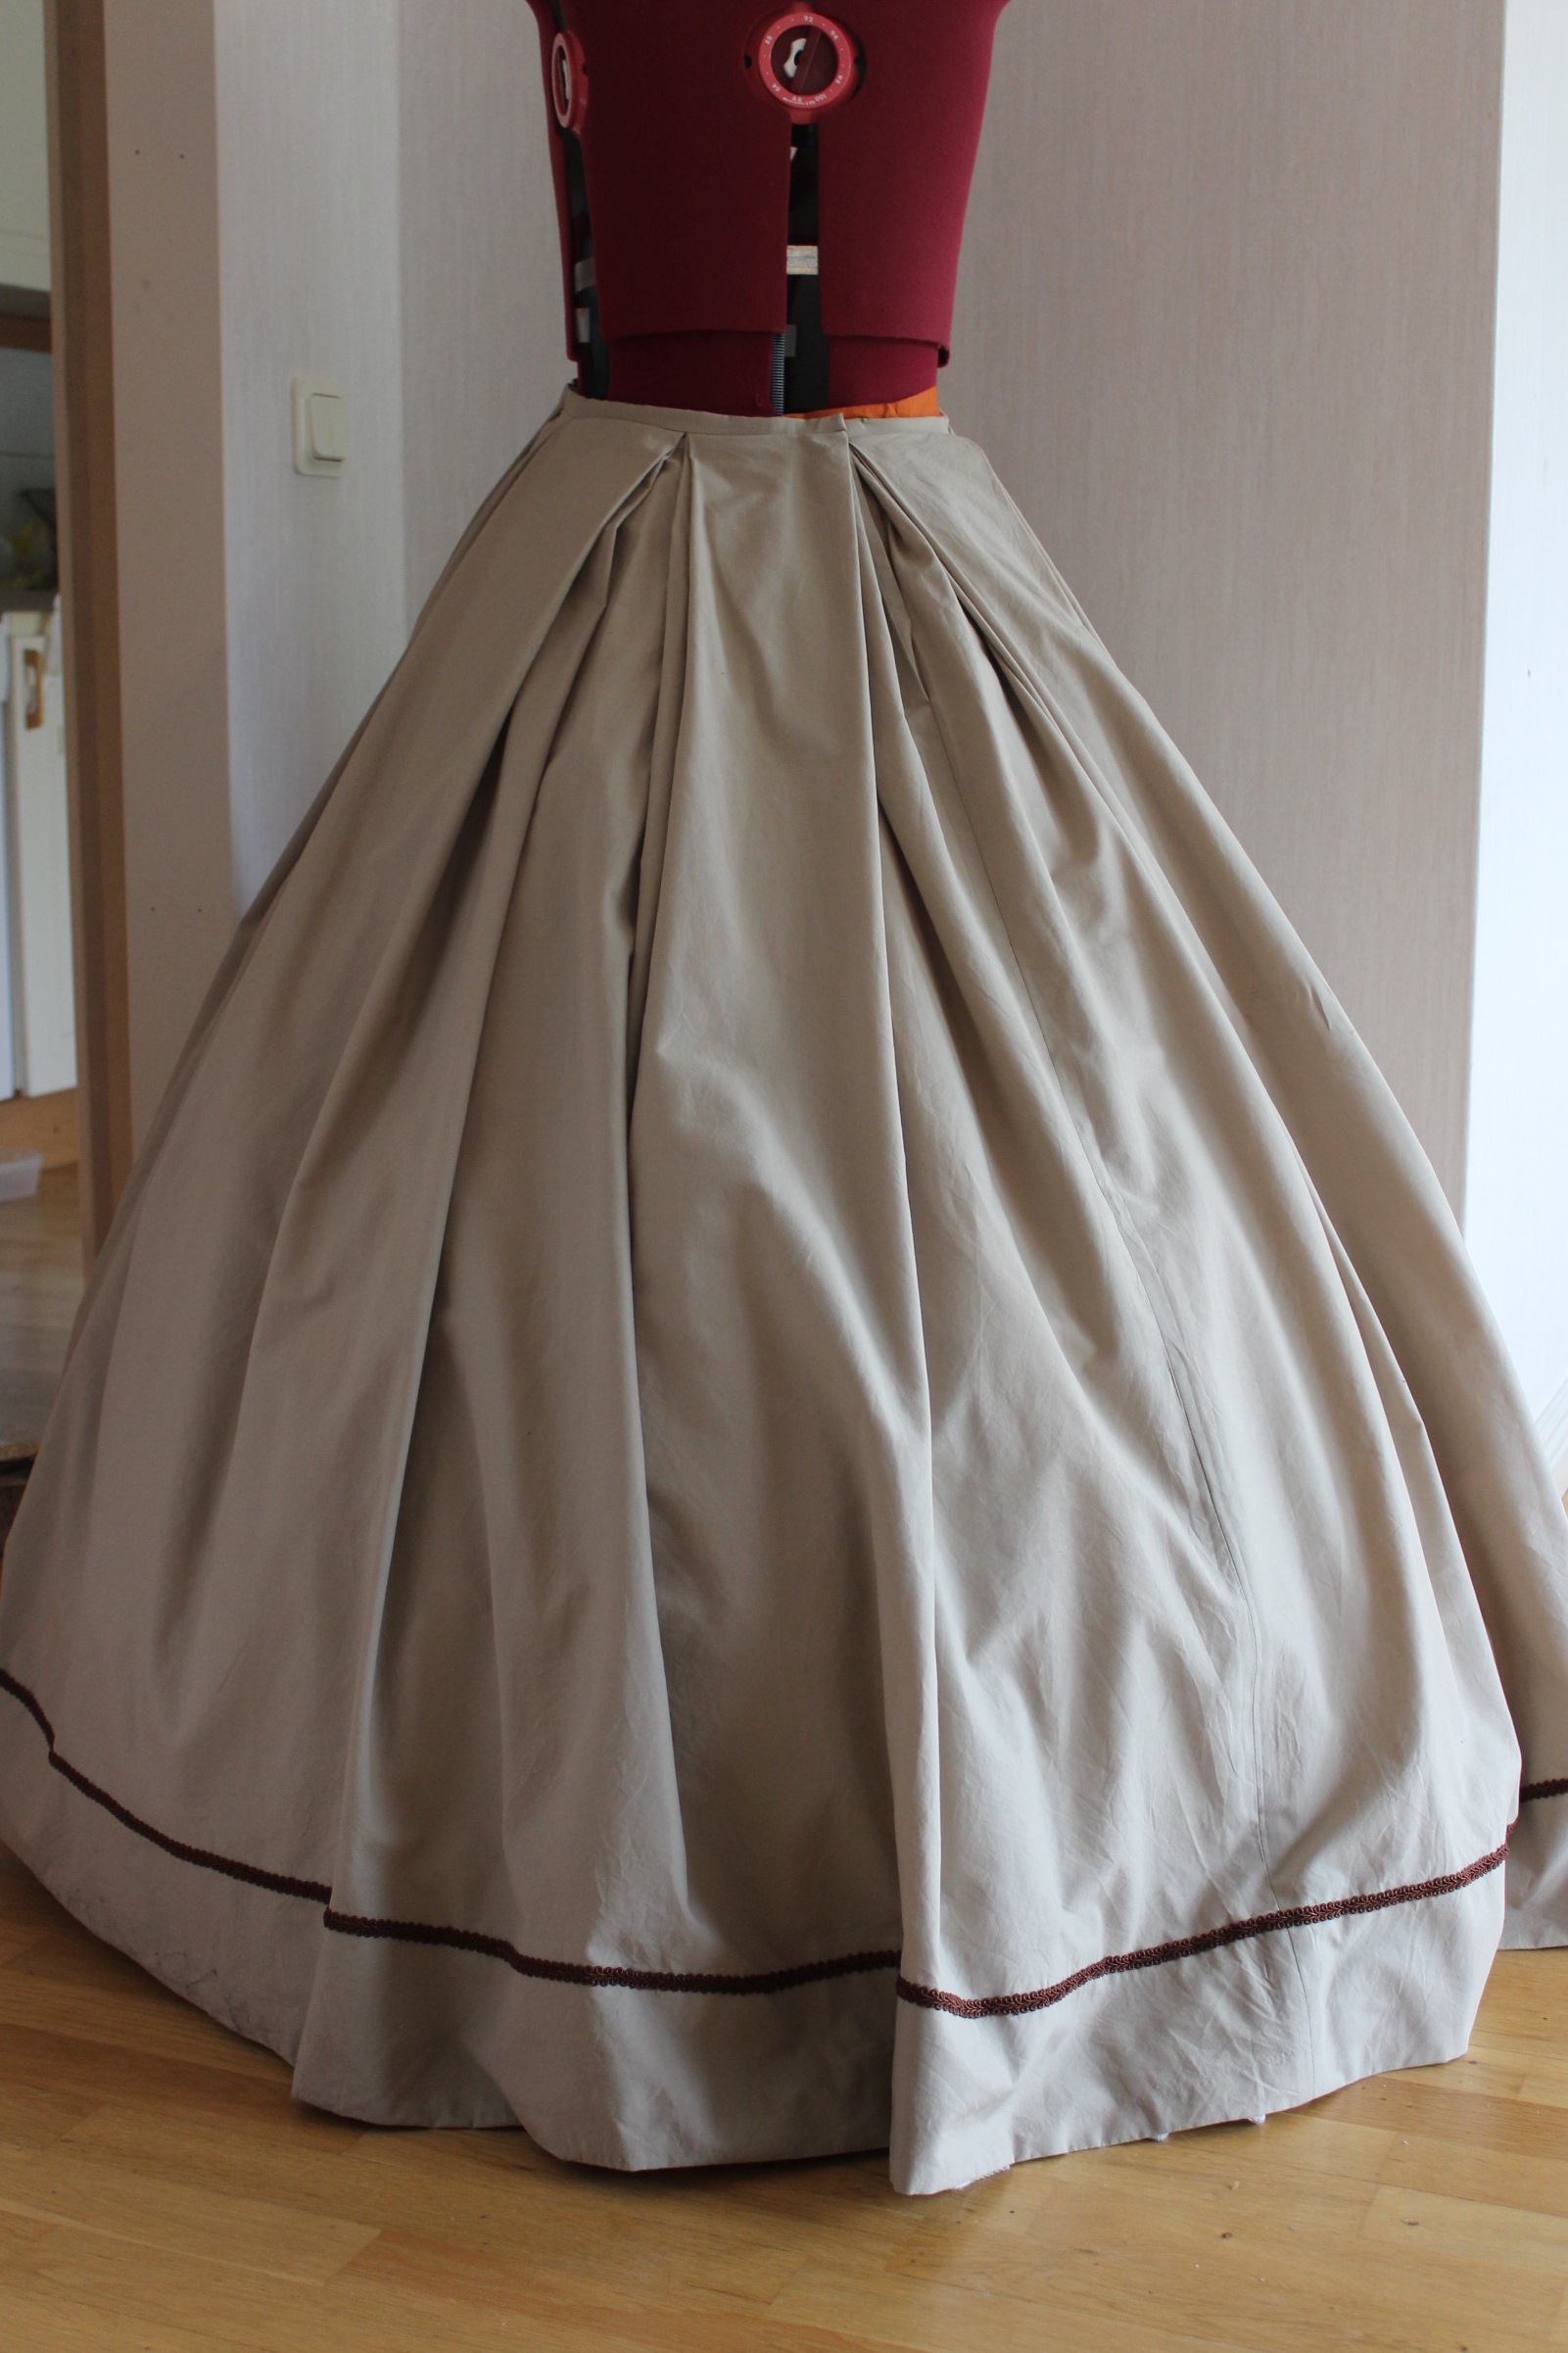
Using two beige cotton sheets from IKEA.
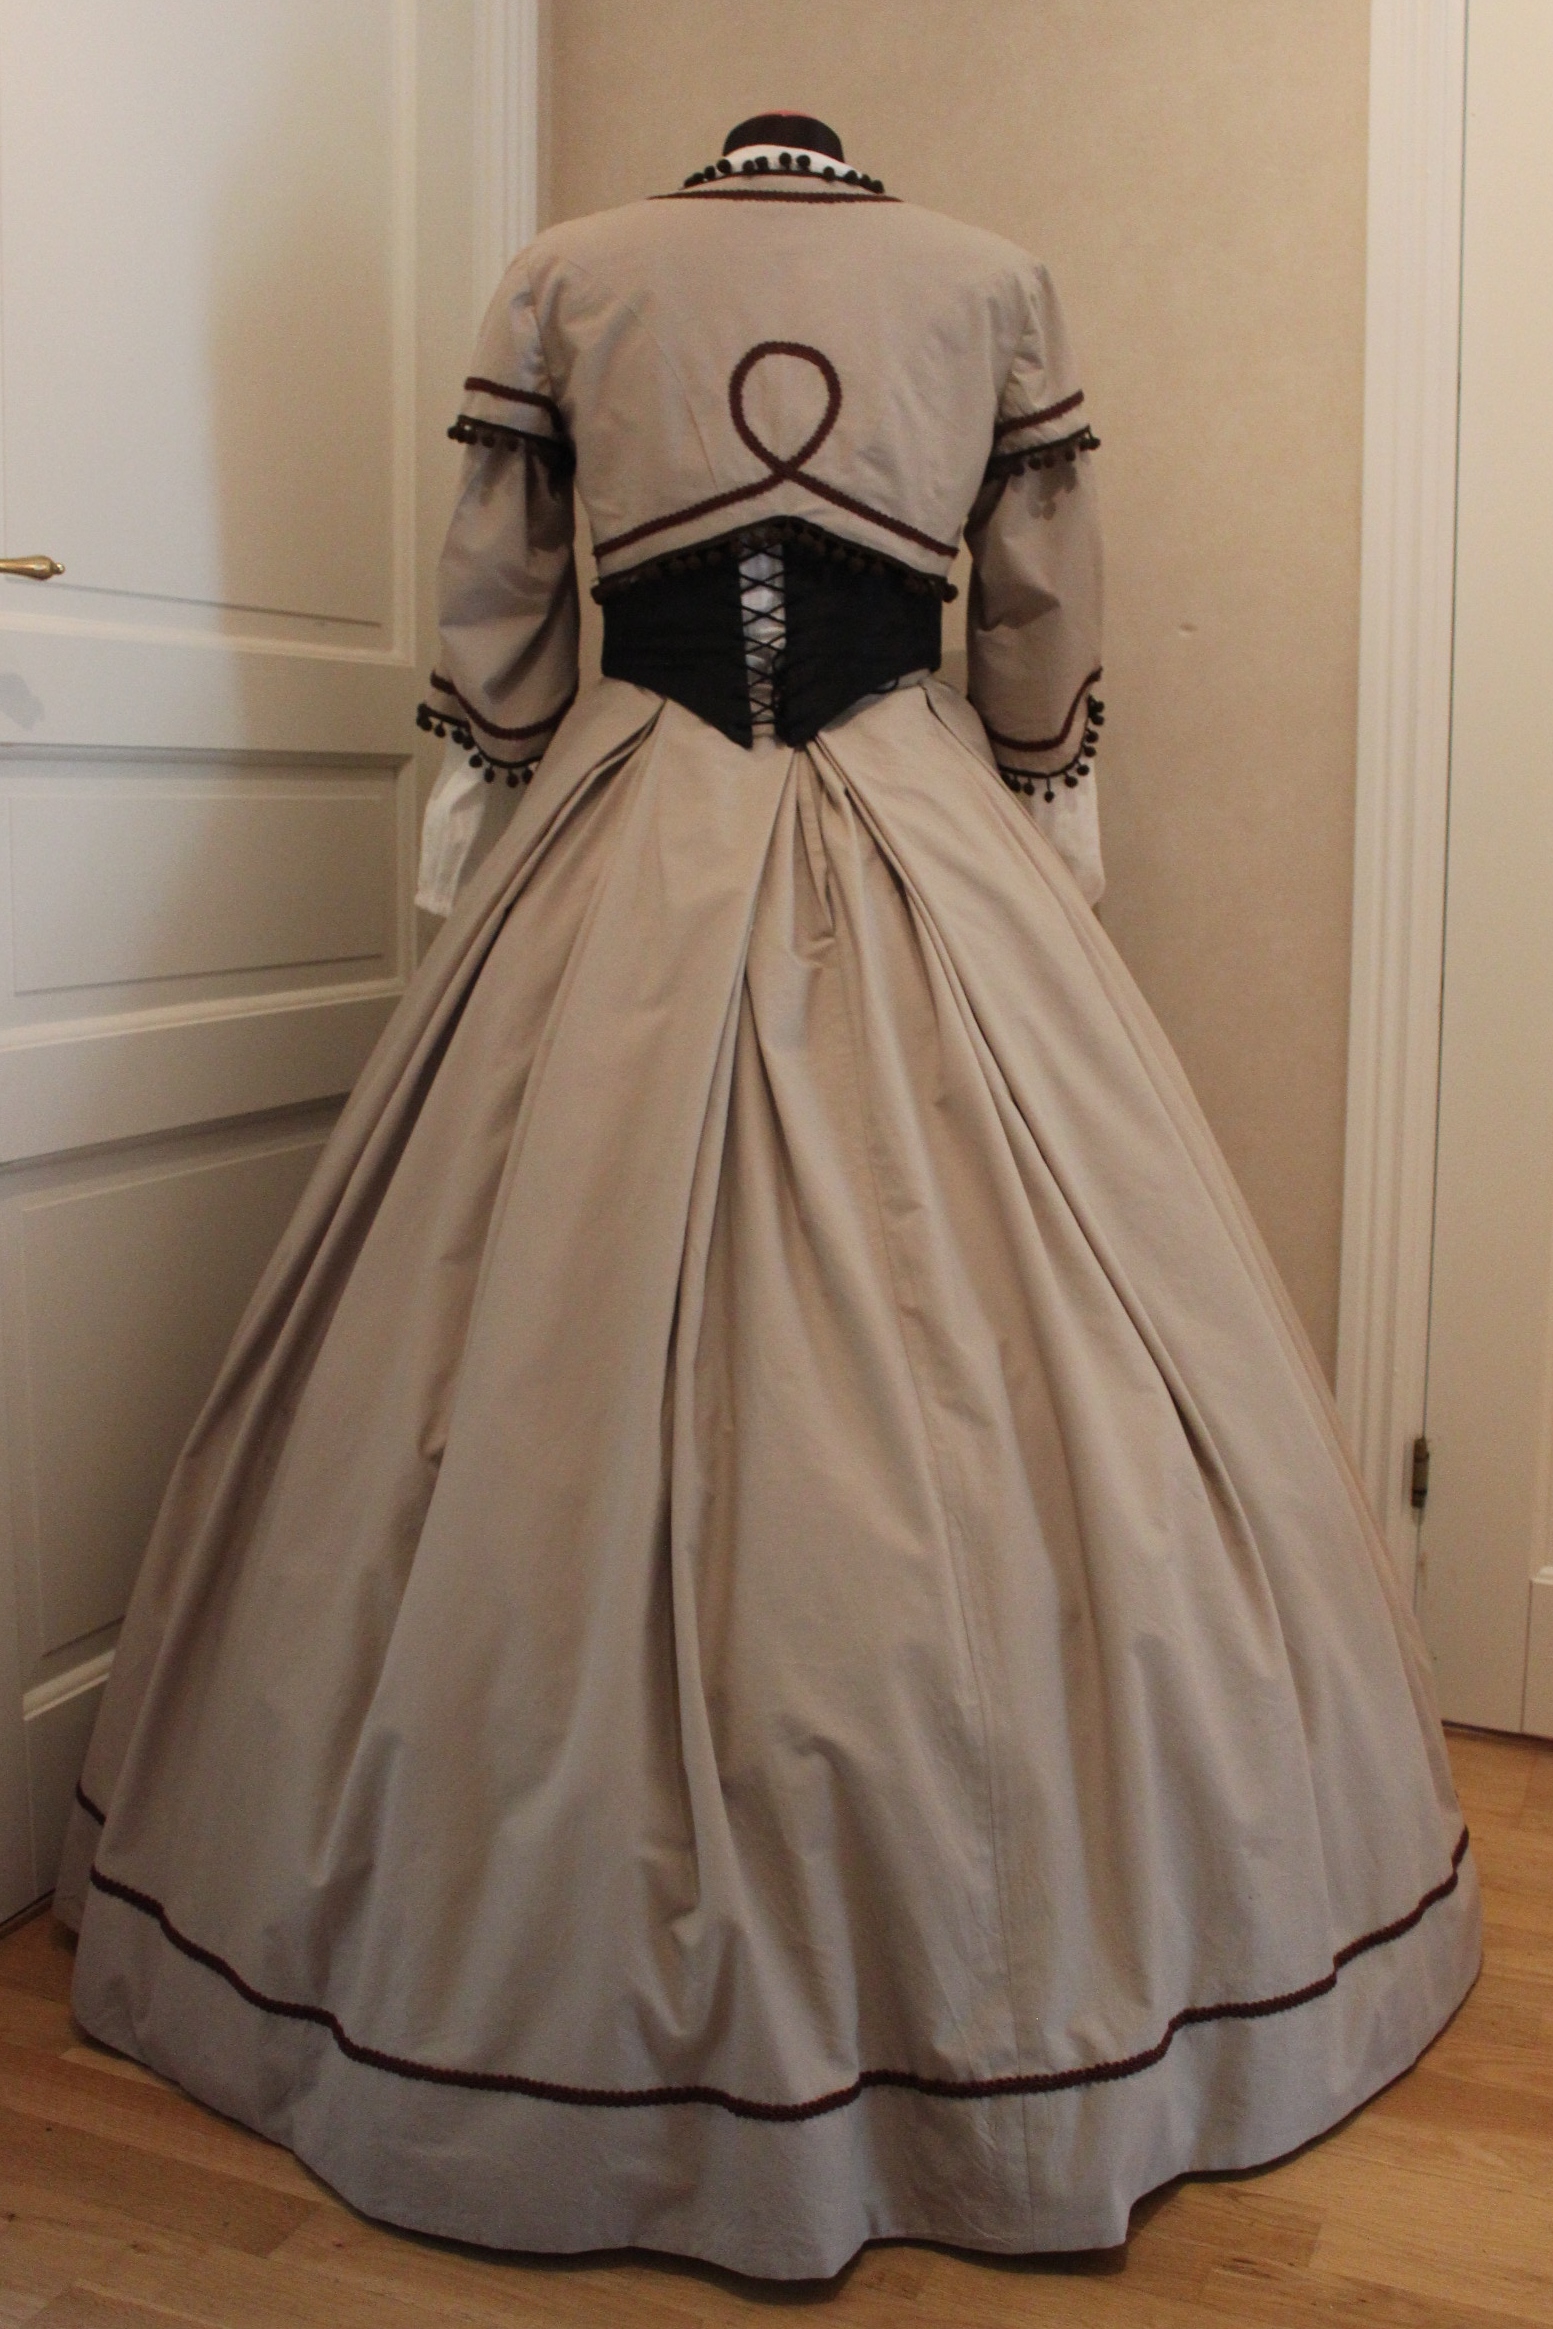
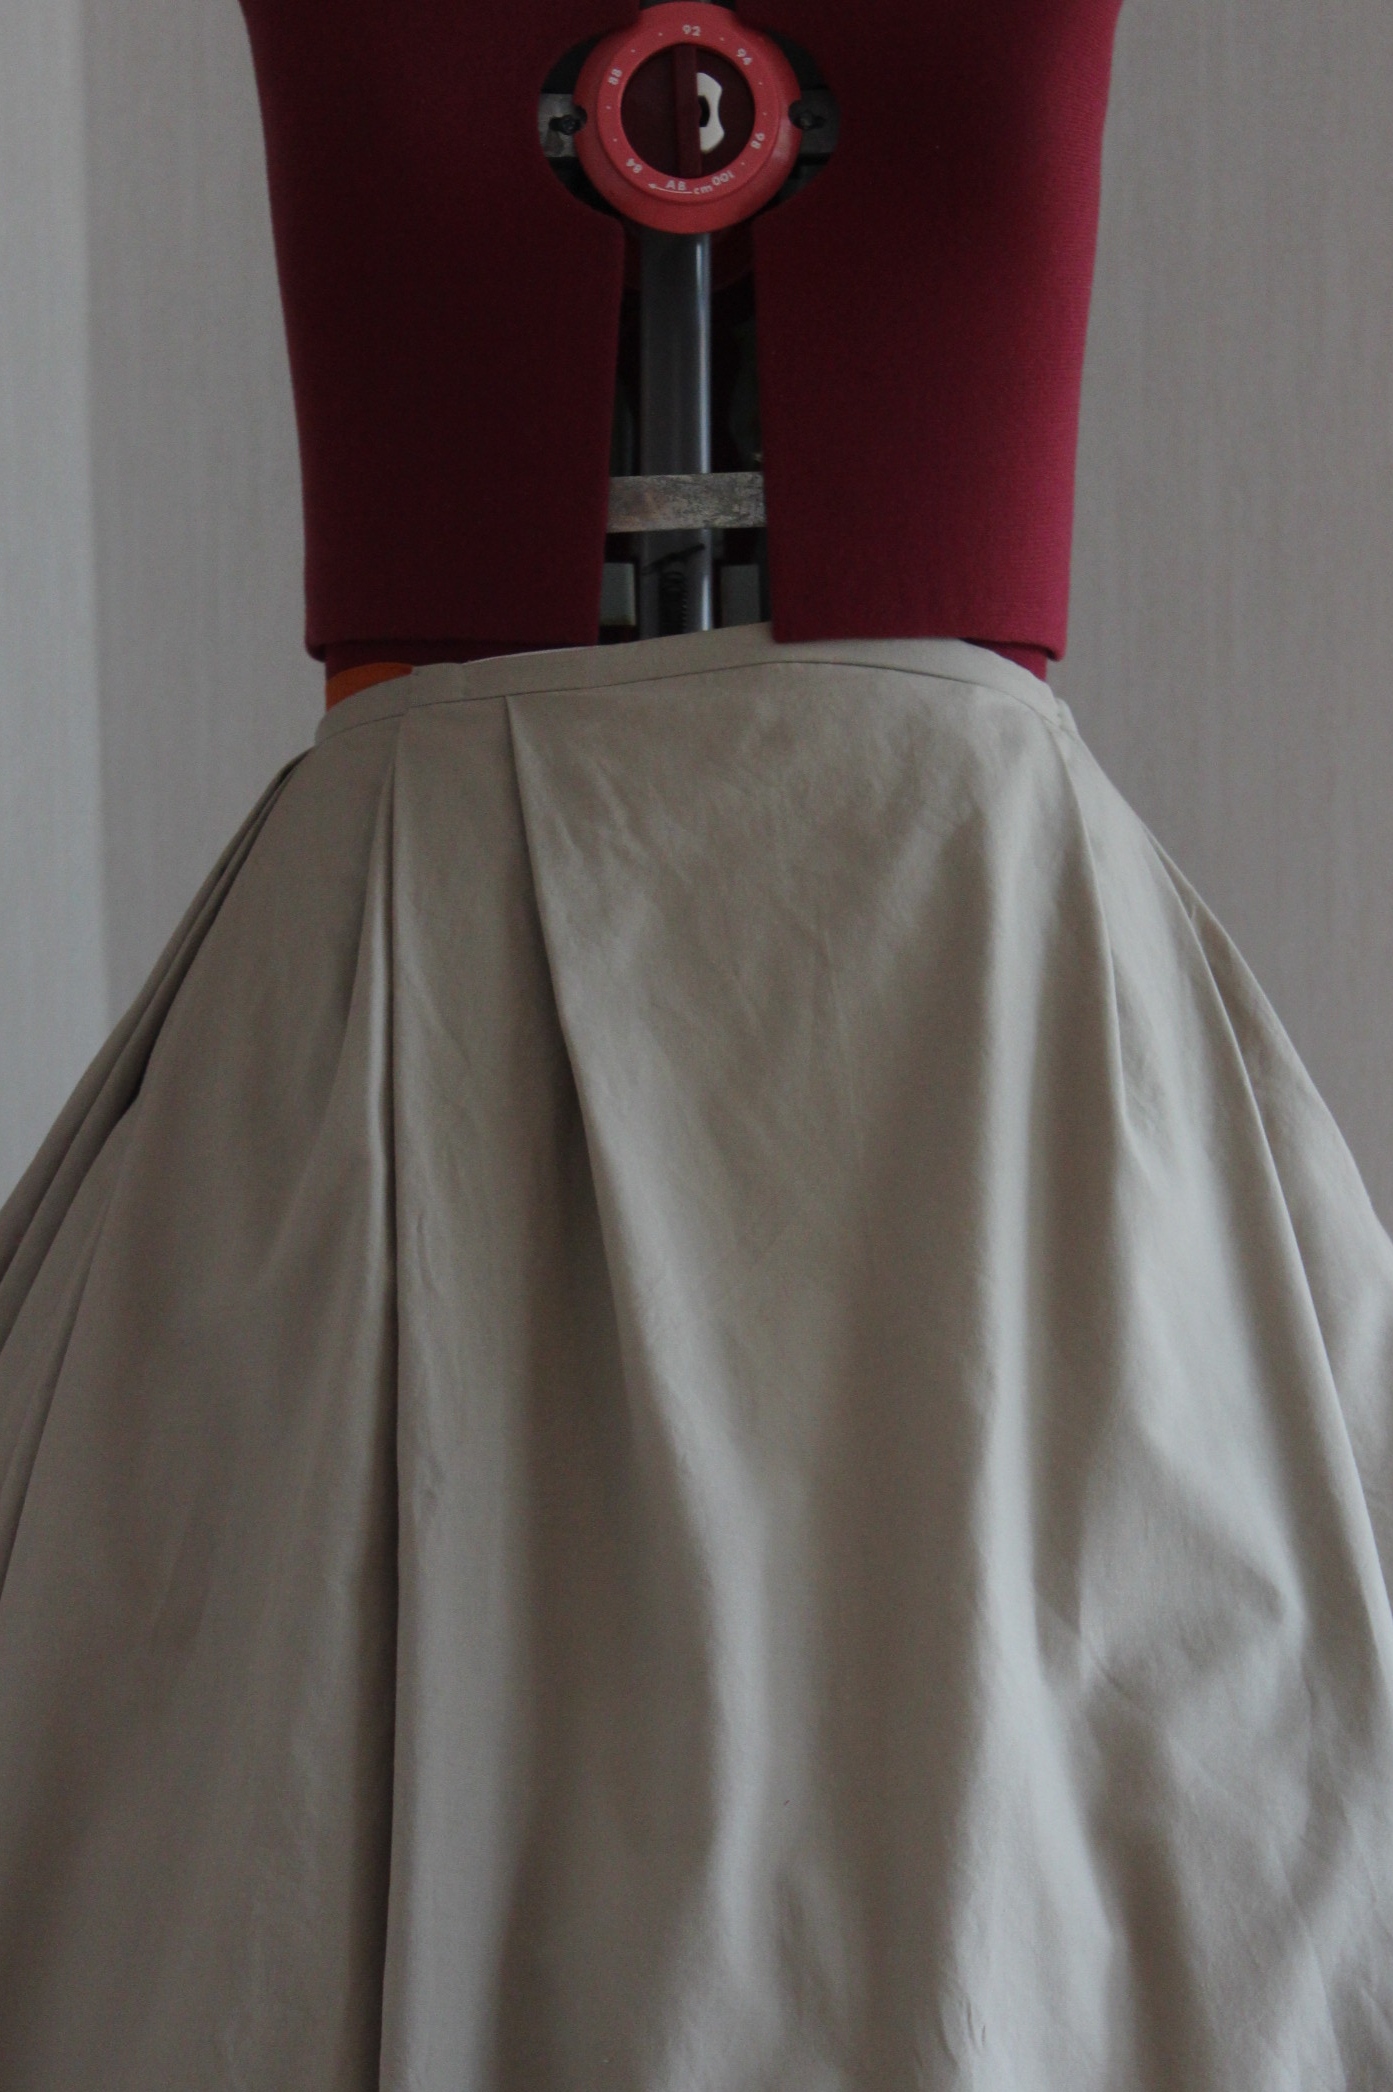
I started by cutting the skirt and used the same method and calculations as my latest 1860s dress, stitching the skirt together. This time it went a lot faster, since I already had the measurements and the technique down.
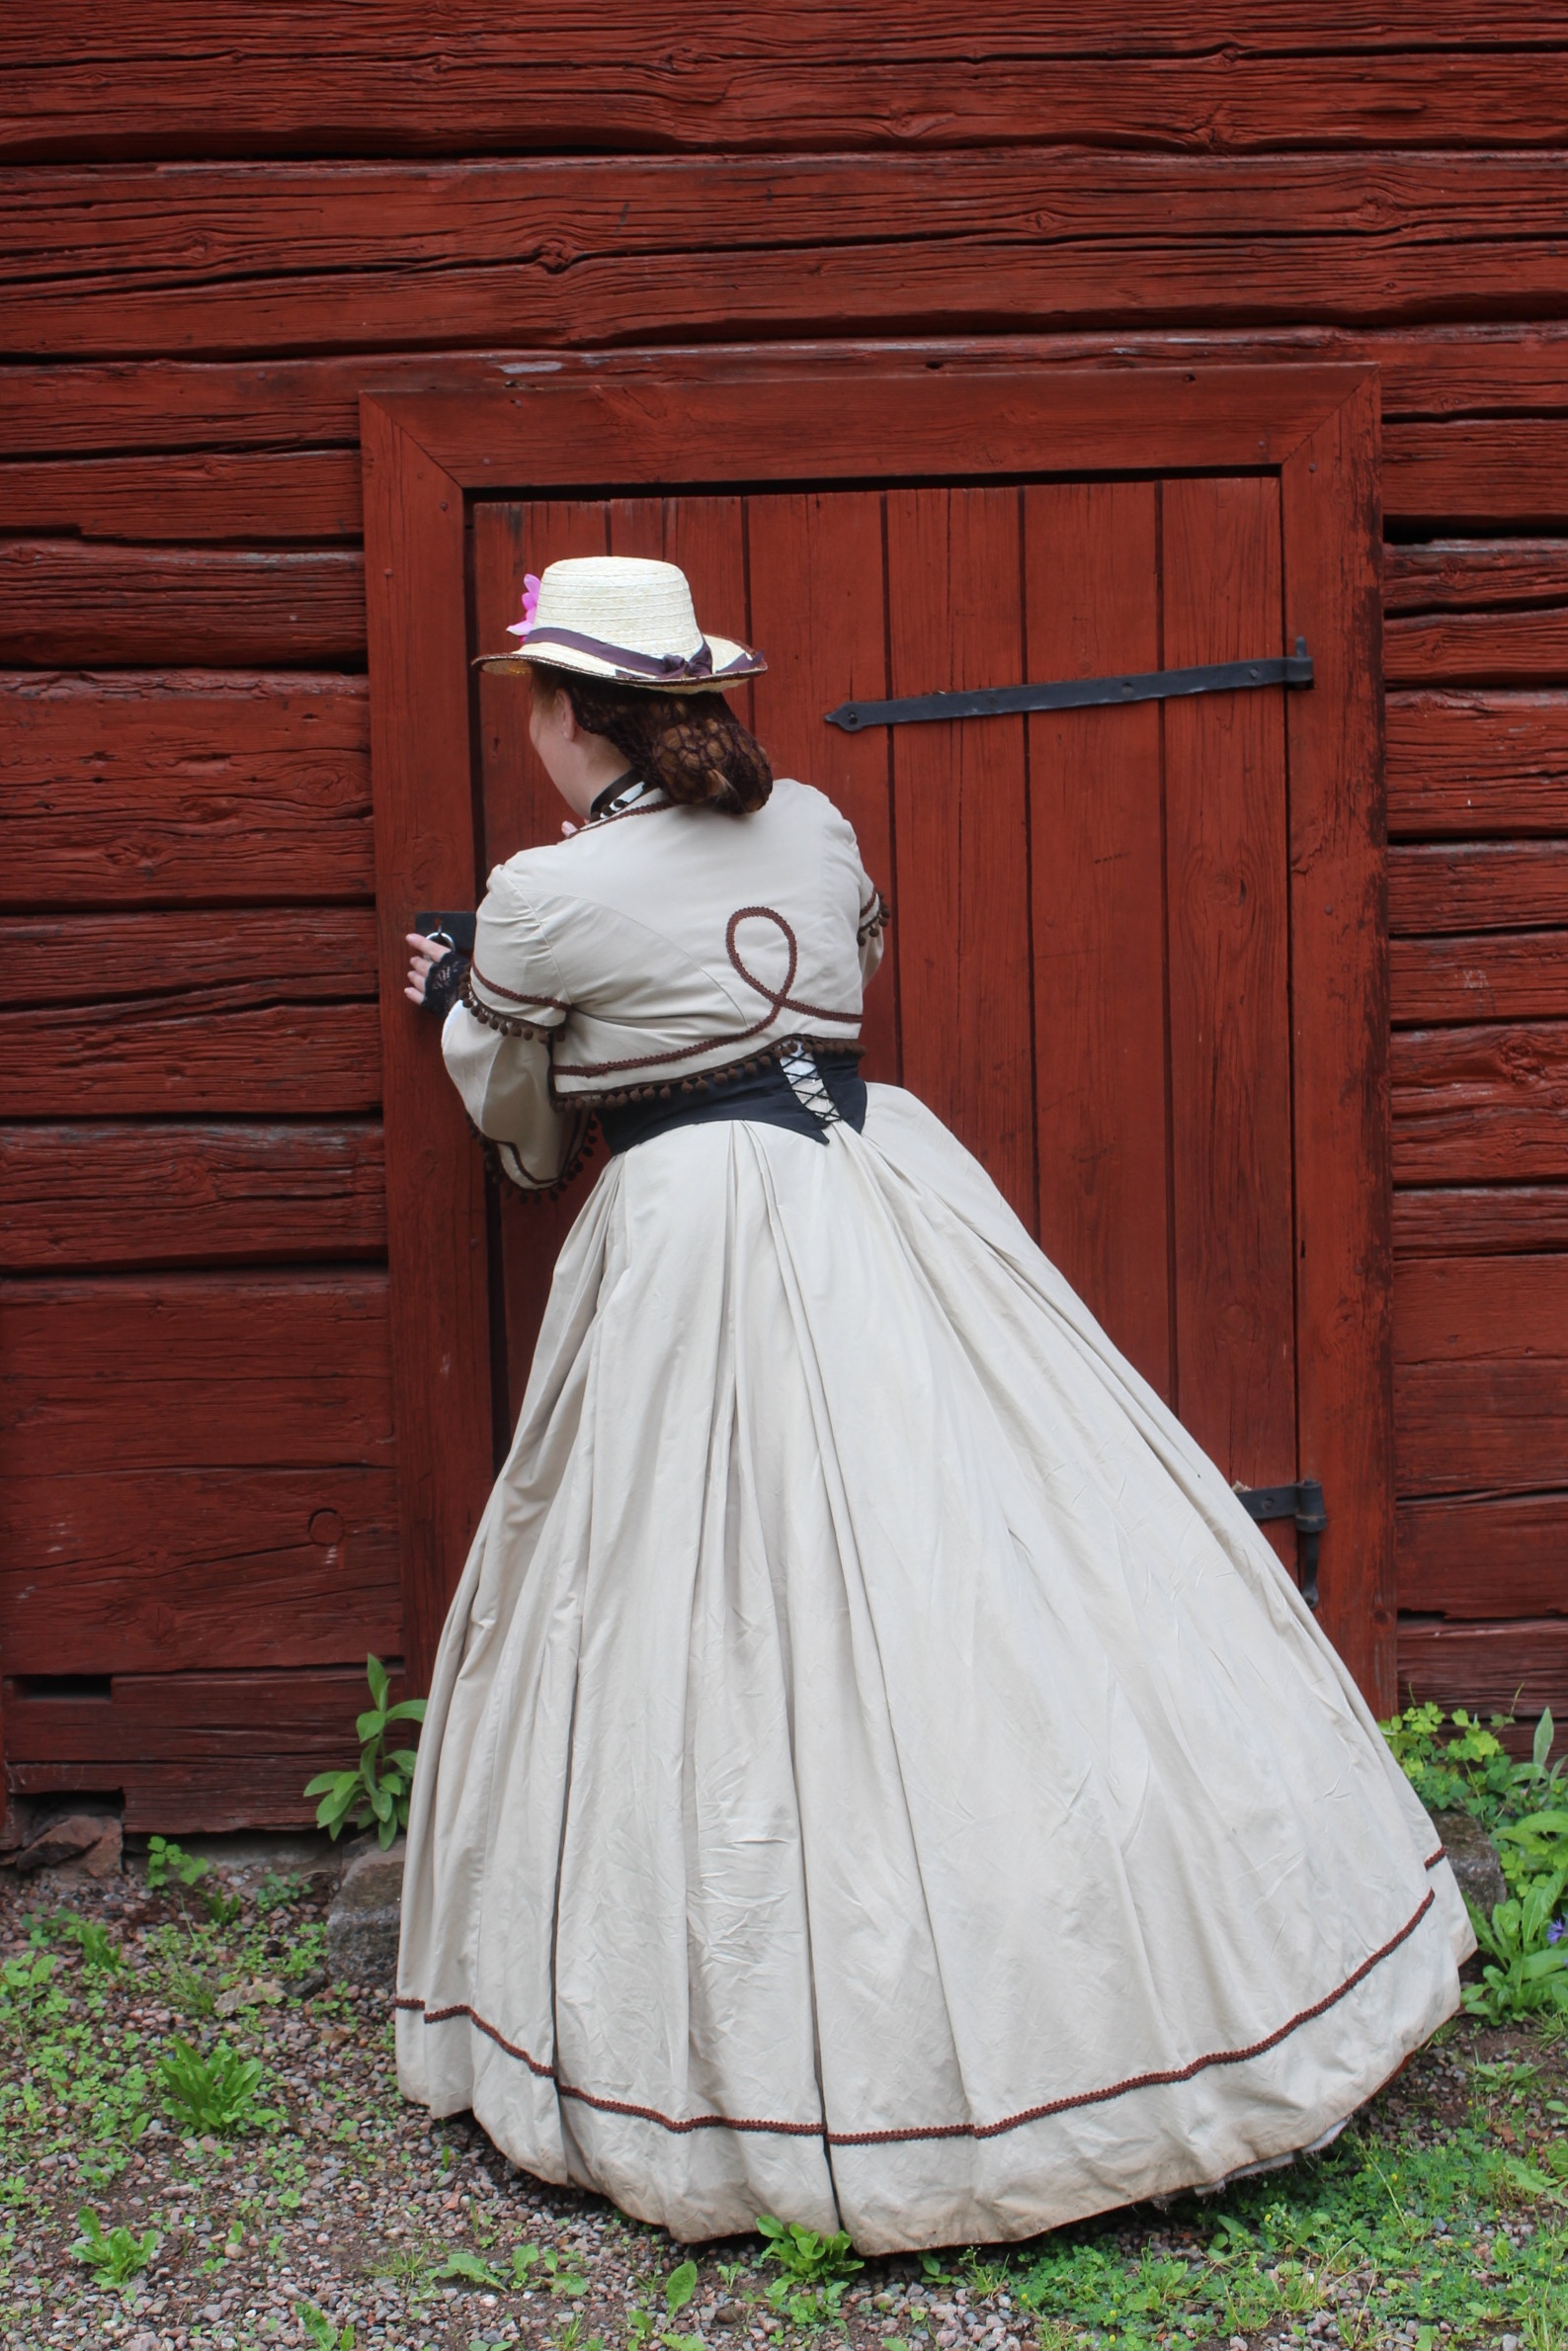
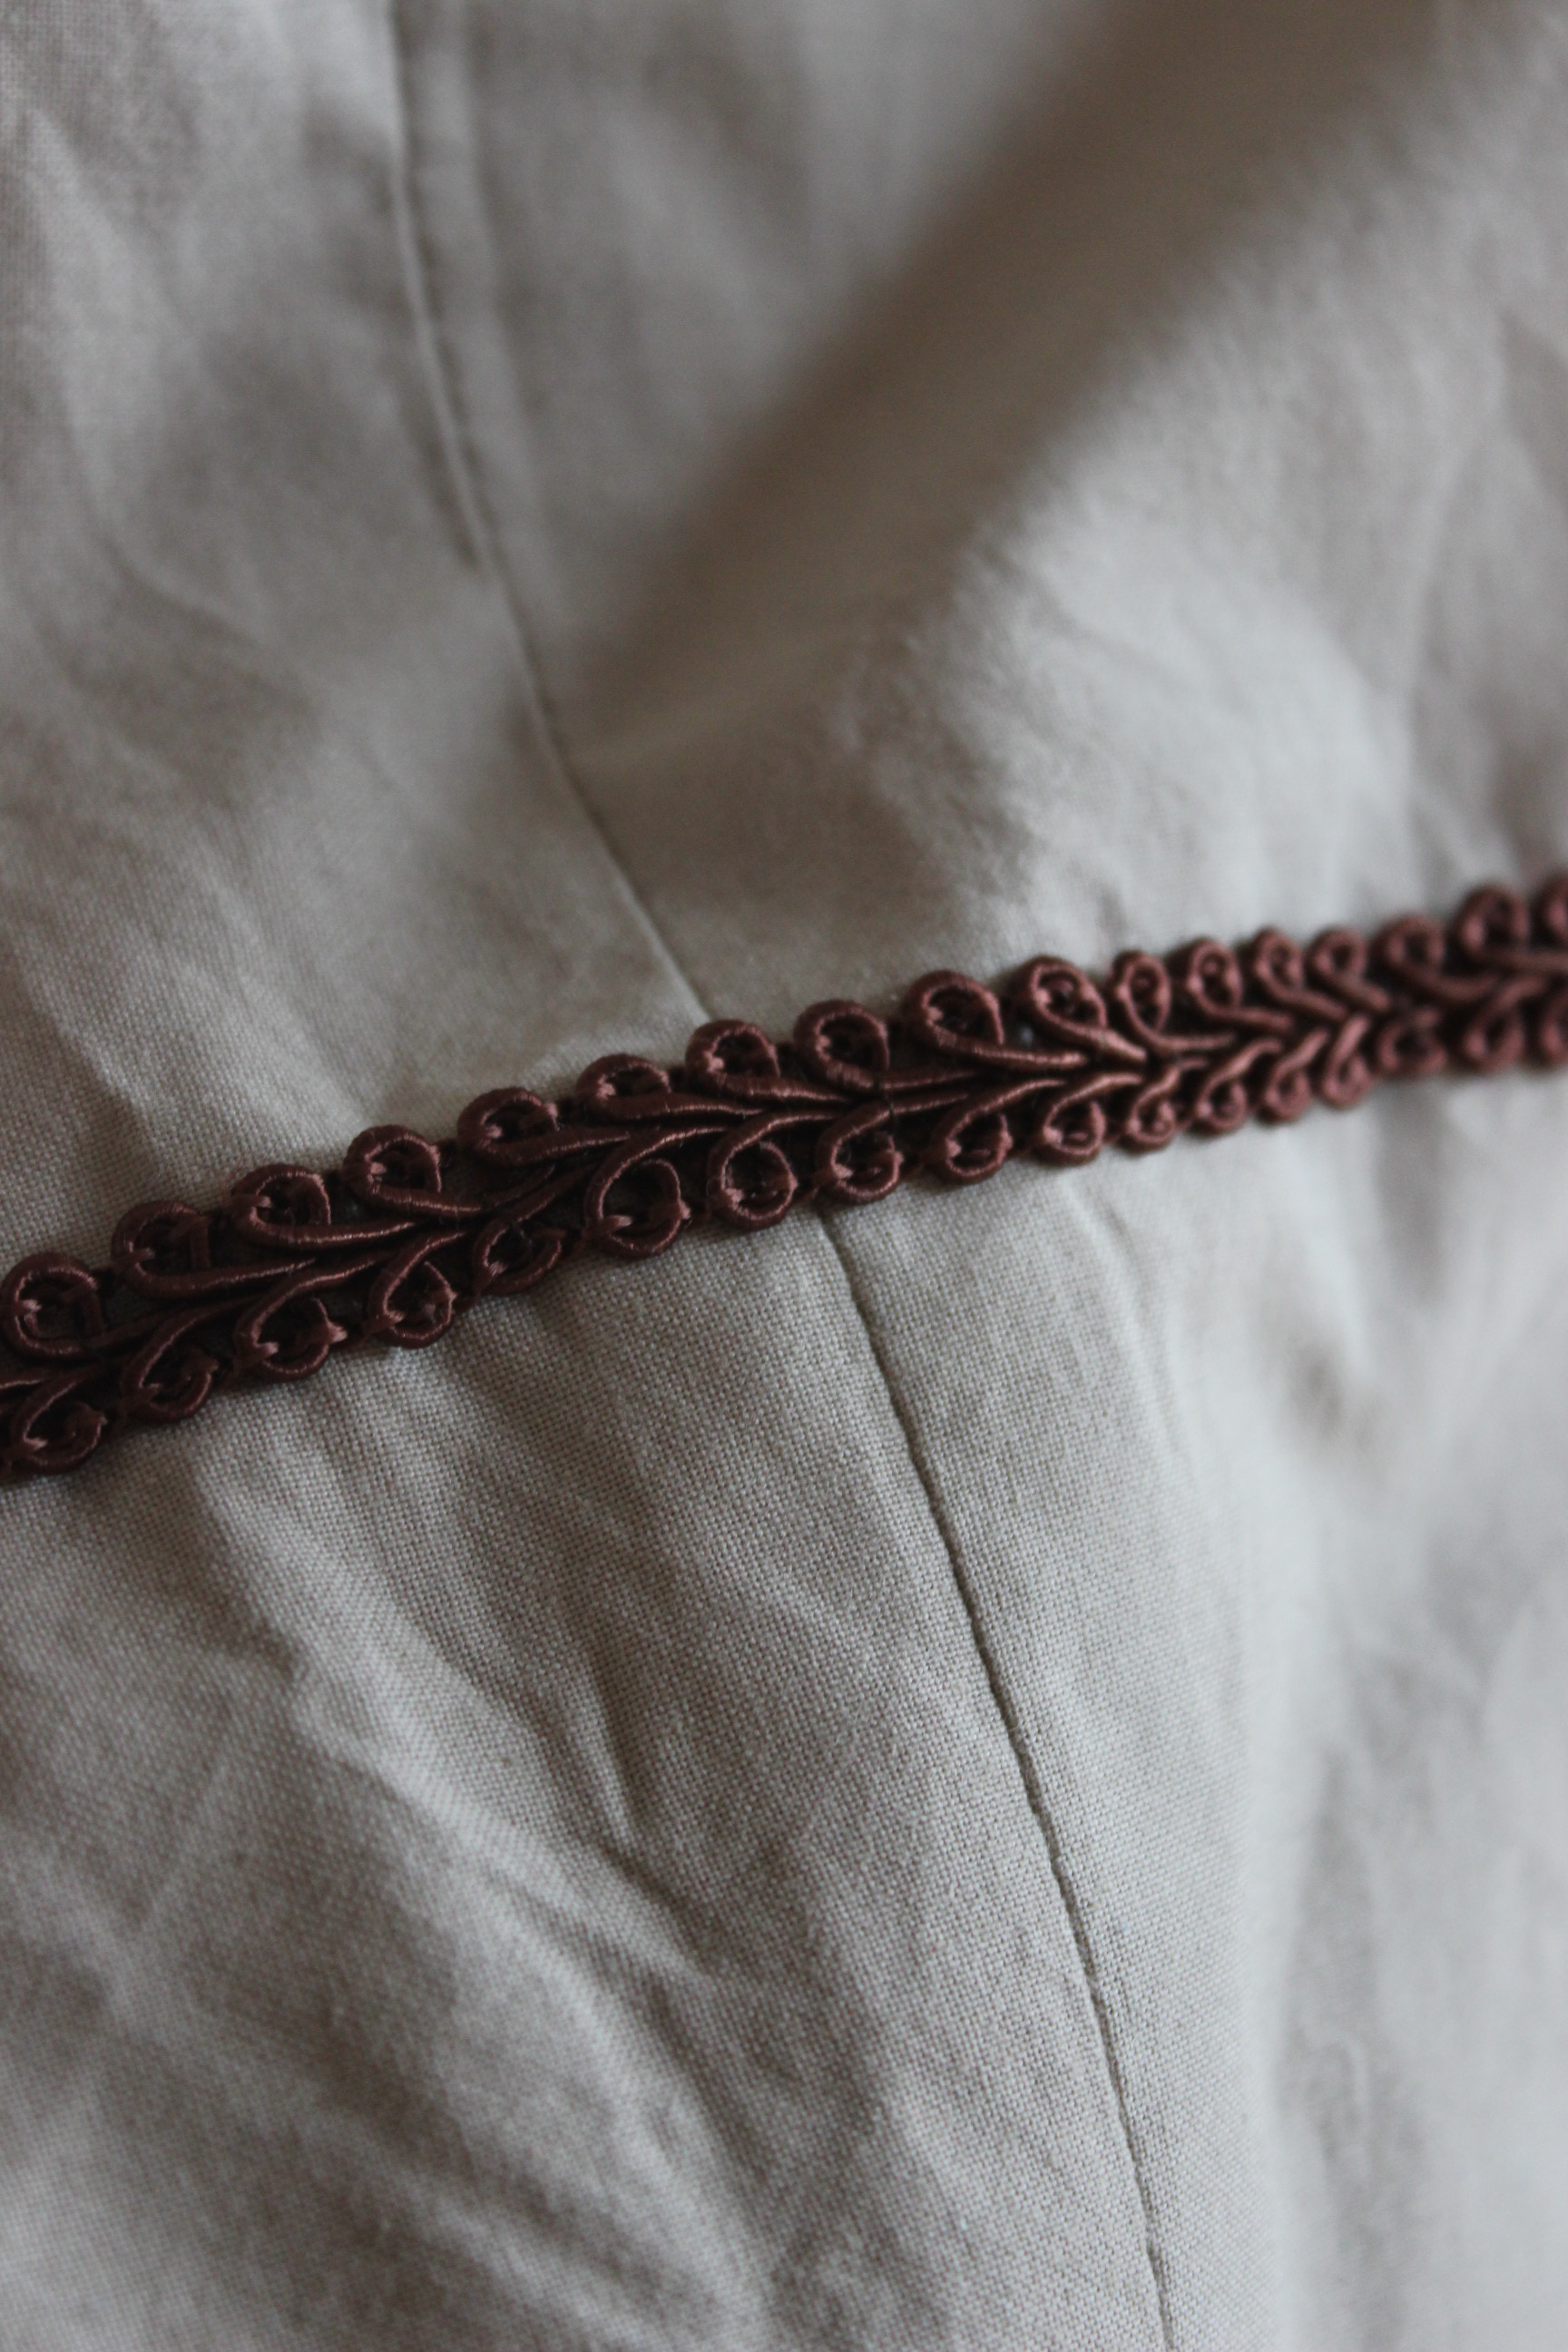
Once it was stitched and hemmed (after quick fitting) I added a singel row of braid around the bottom. Even though my insoiration din’t have one, I really liked the way t looked, and how it connected with the decoration to be made on the jacket. 
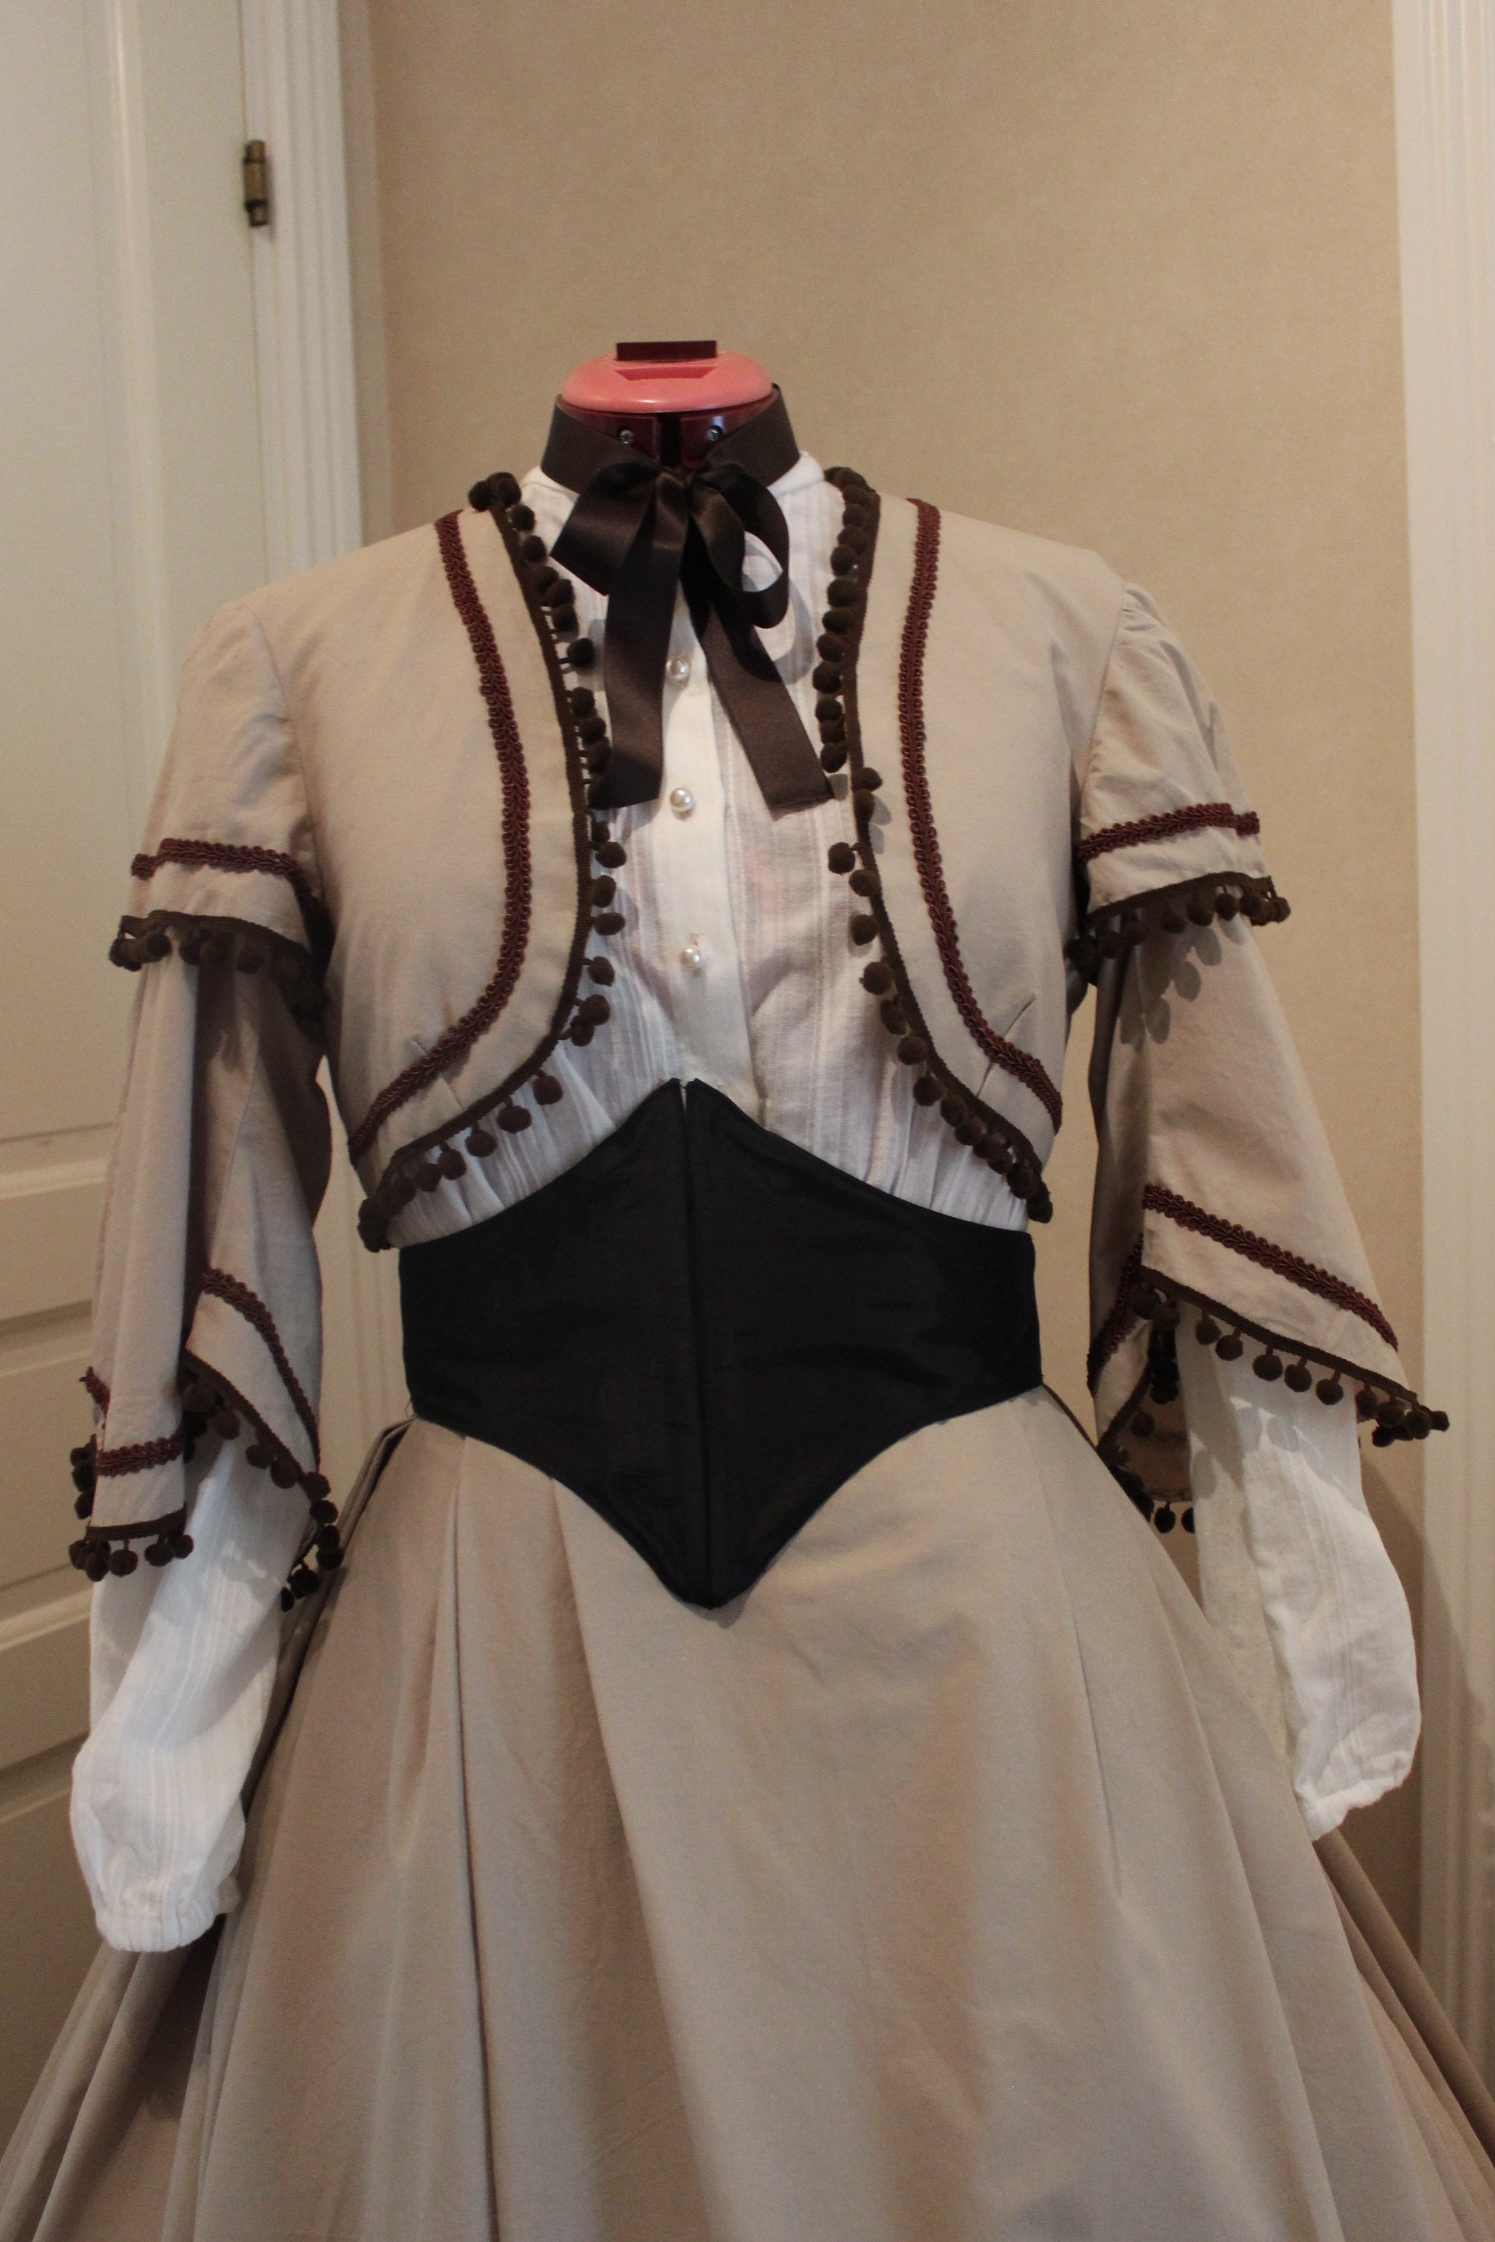
Then it was time for the jacket.
After some quick research and studying of pattern-diagrams and extant jackets on the internet I drafted my own pattern from my usual modern templates.
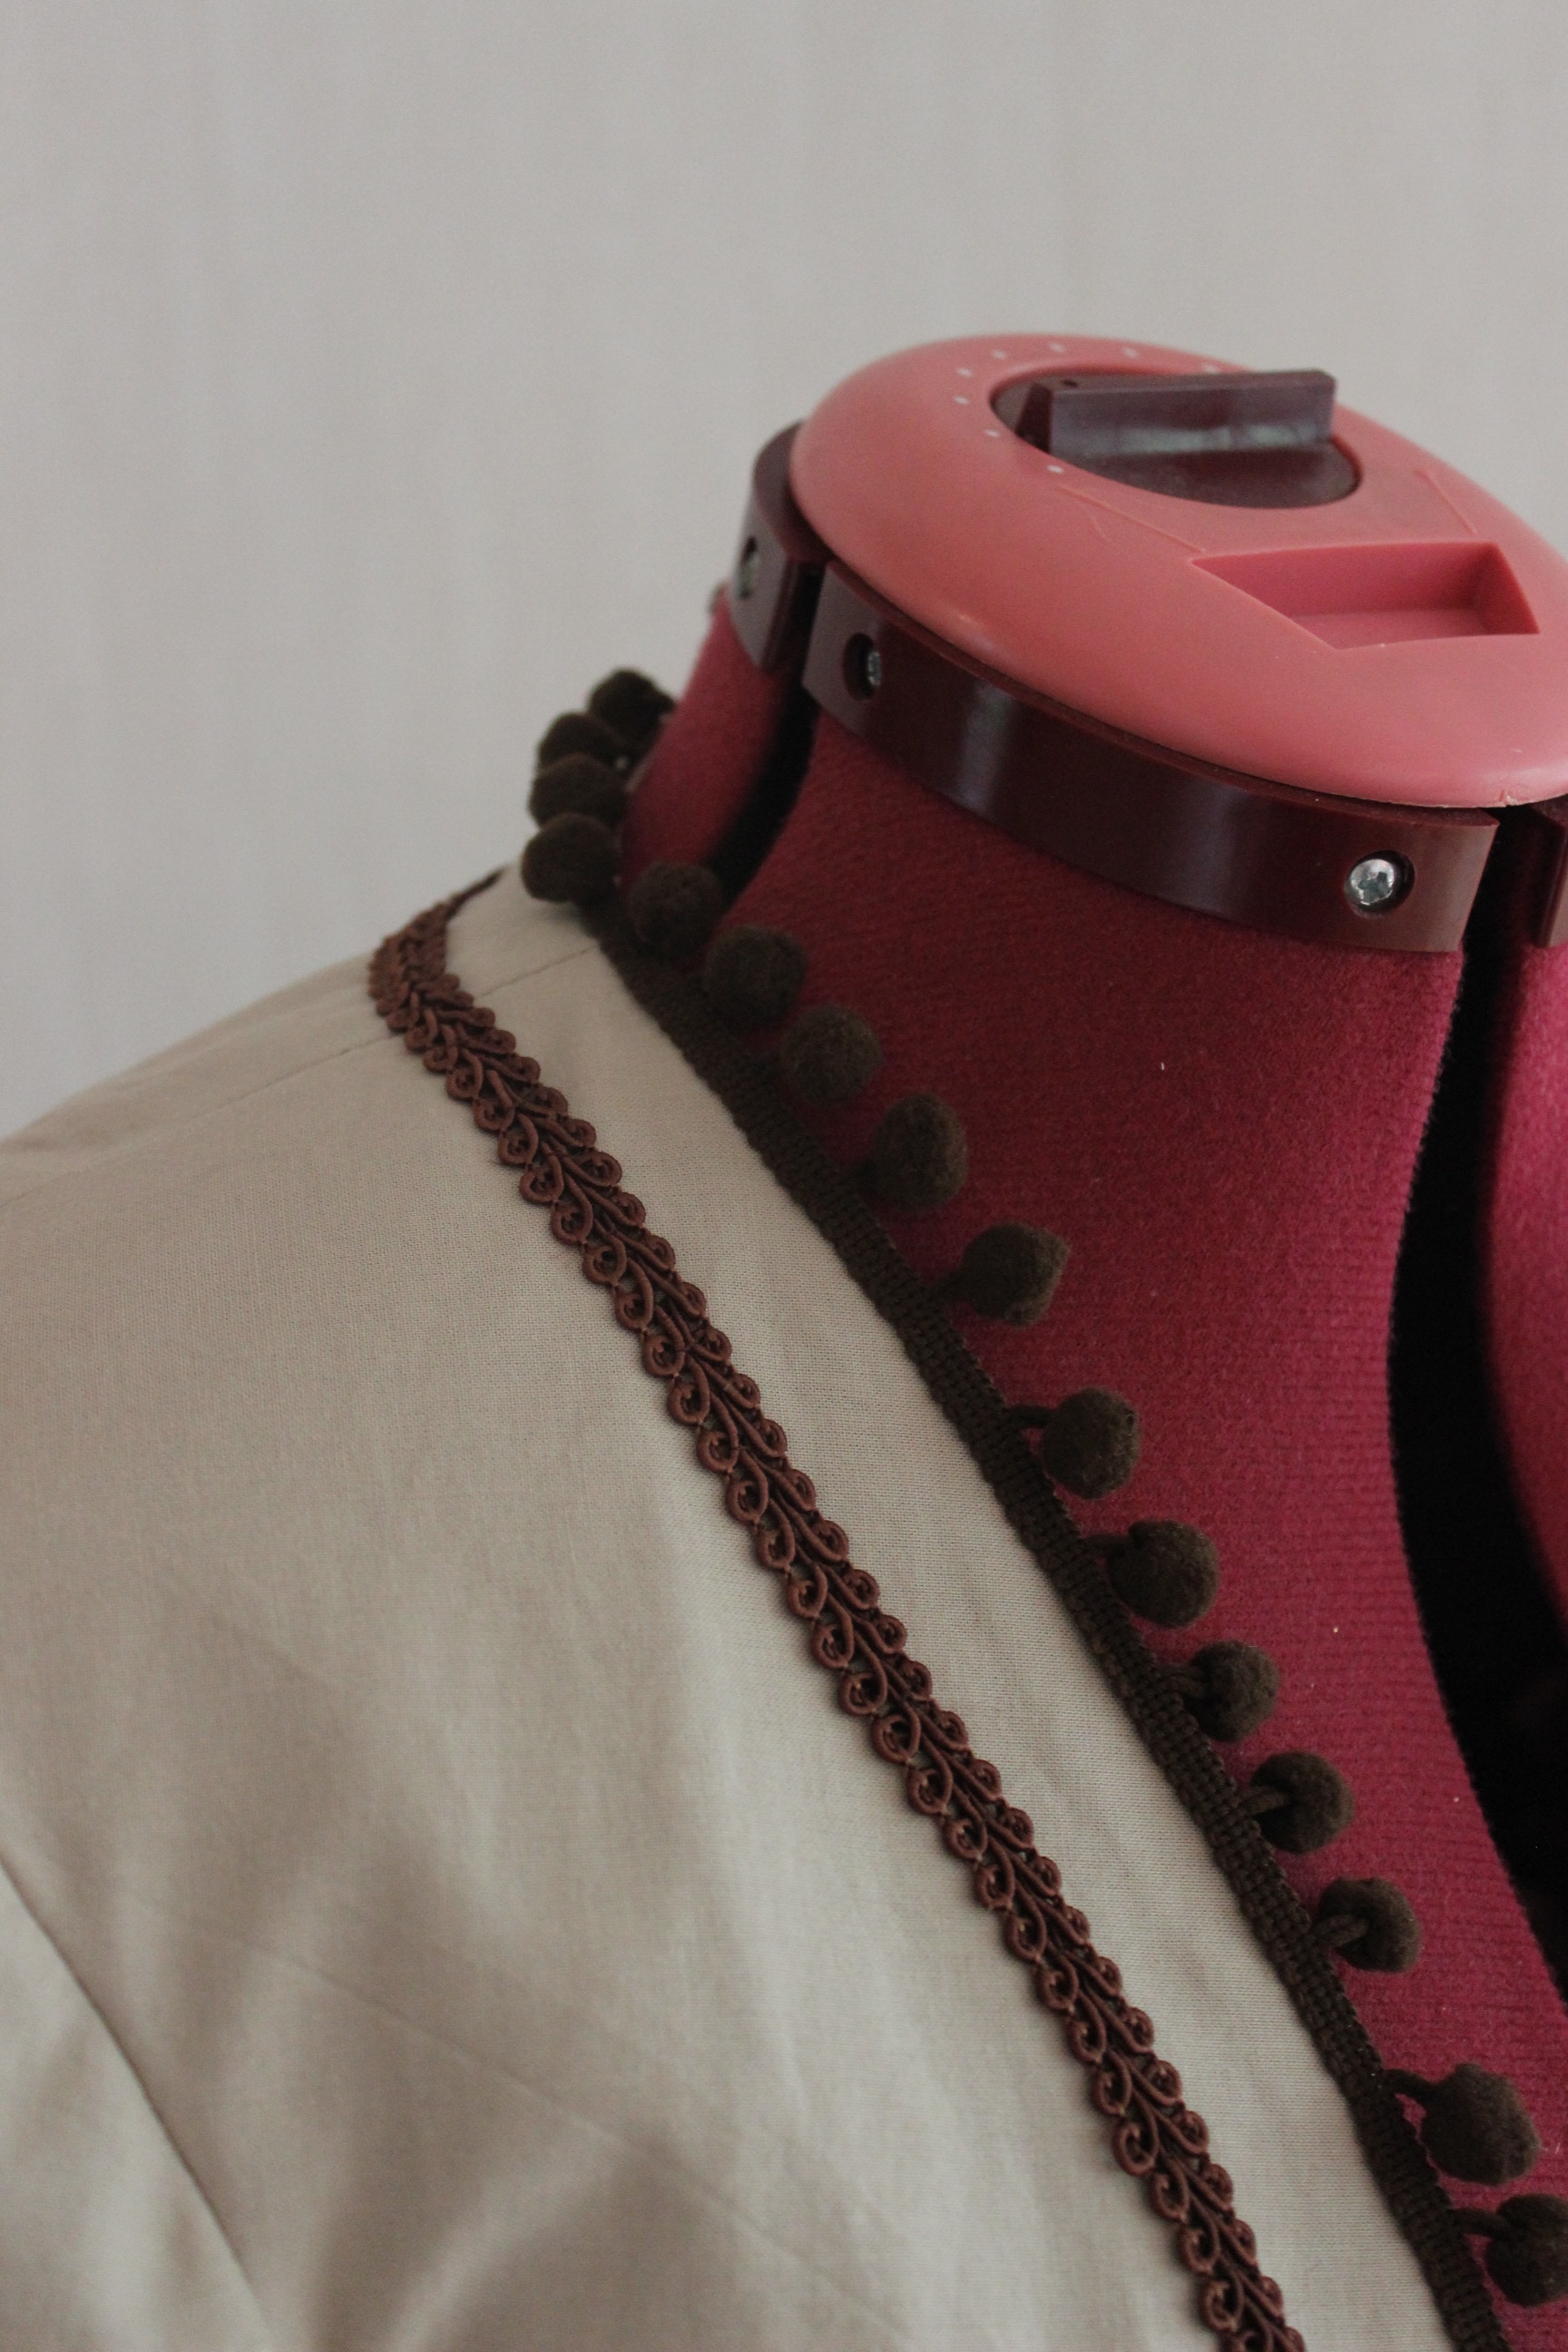
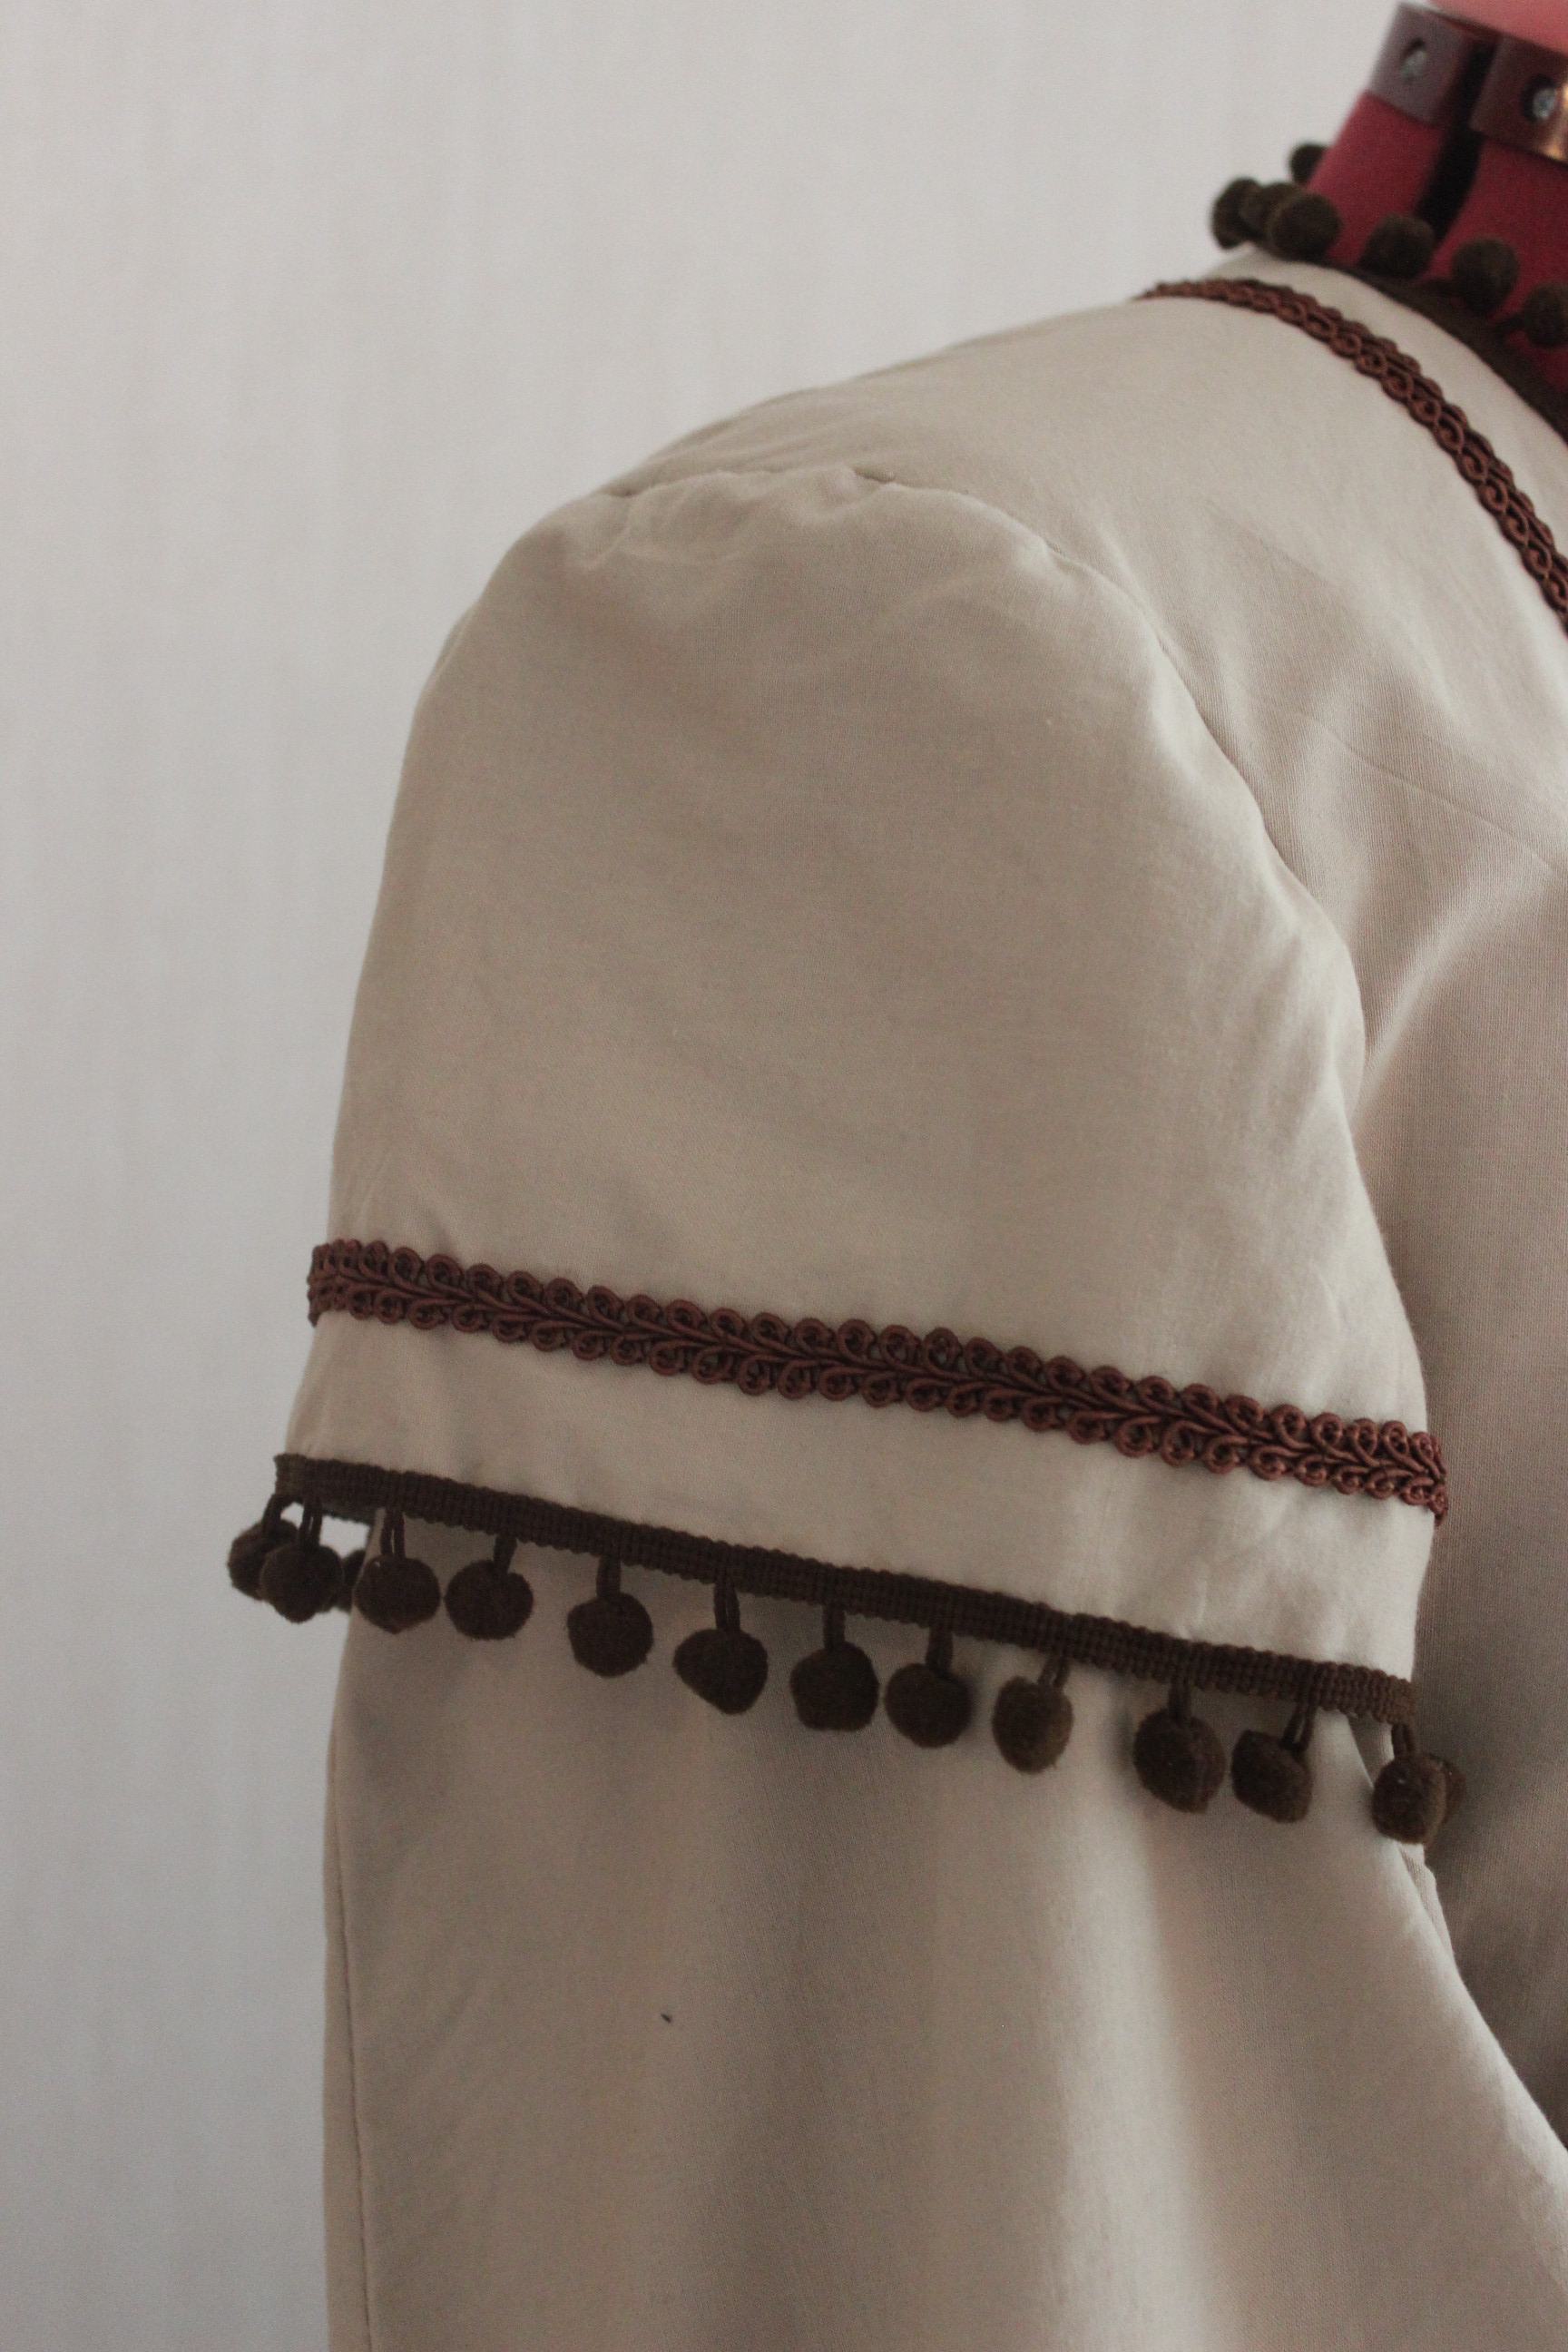
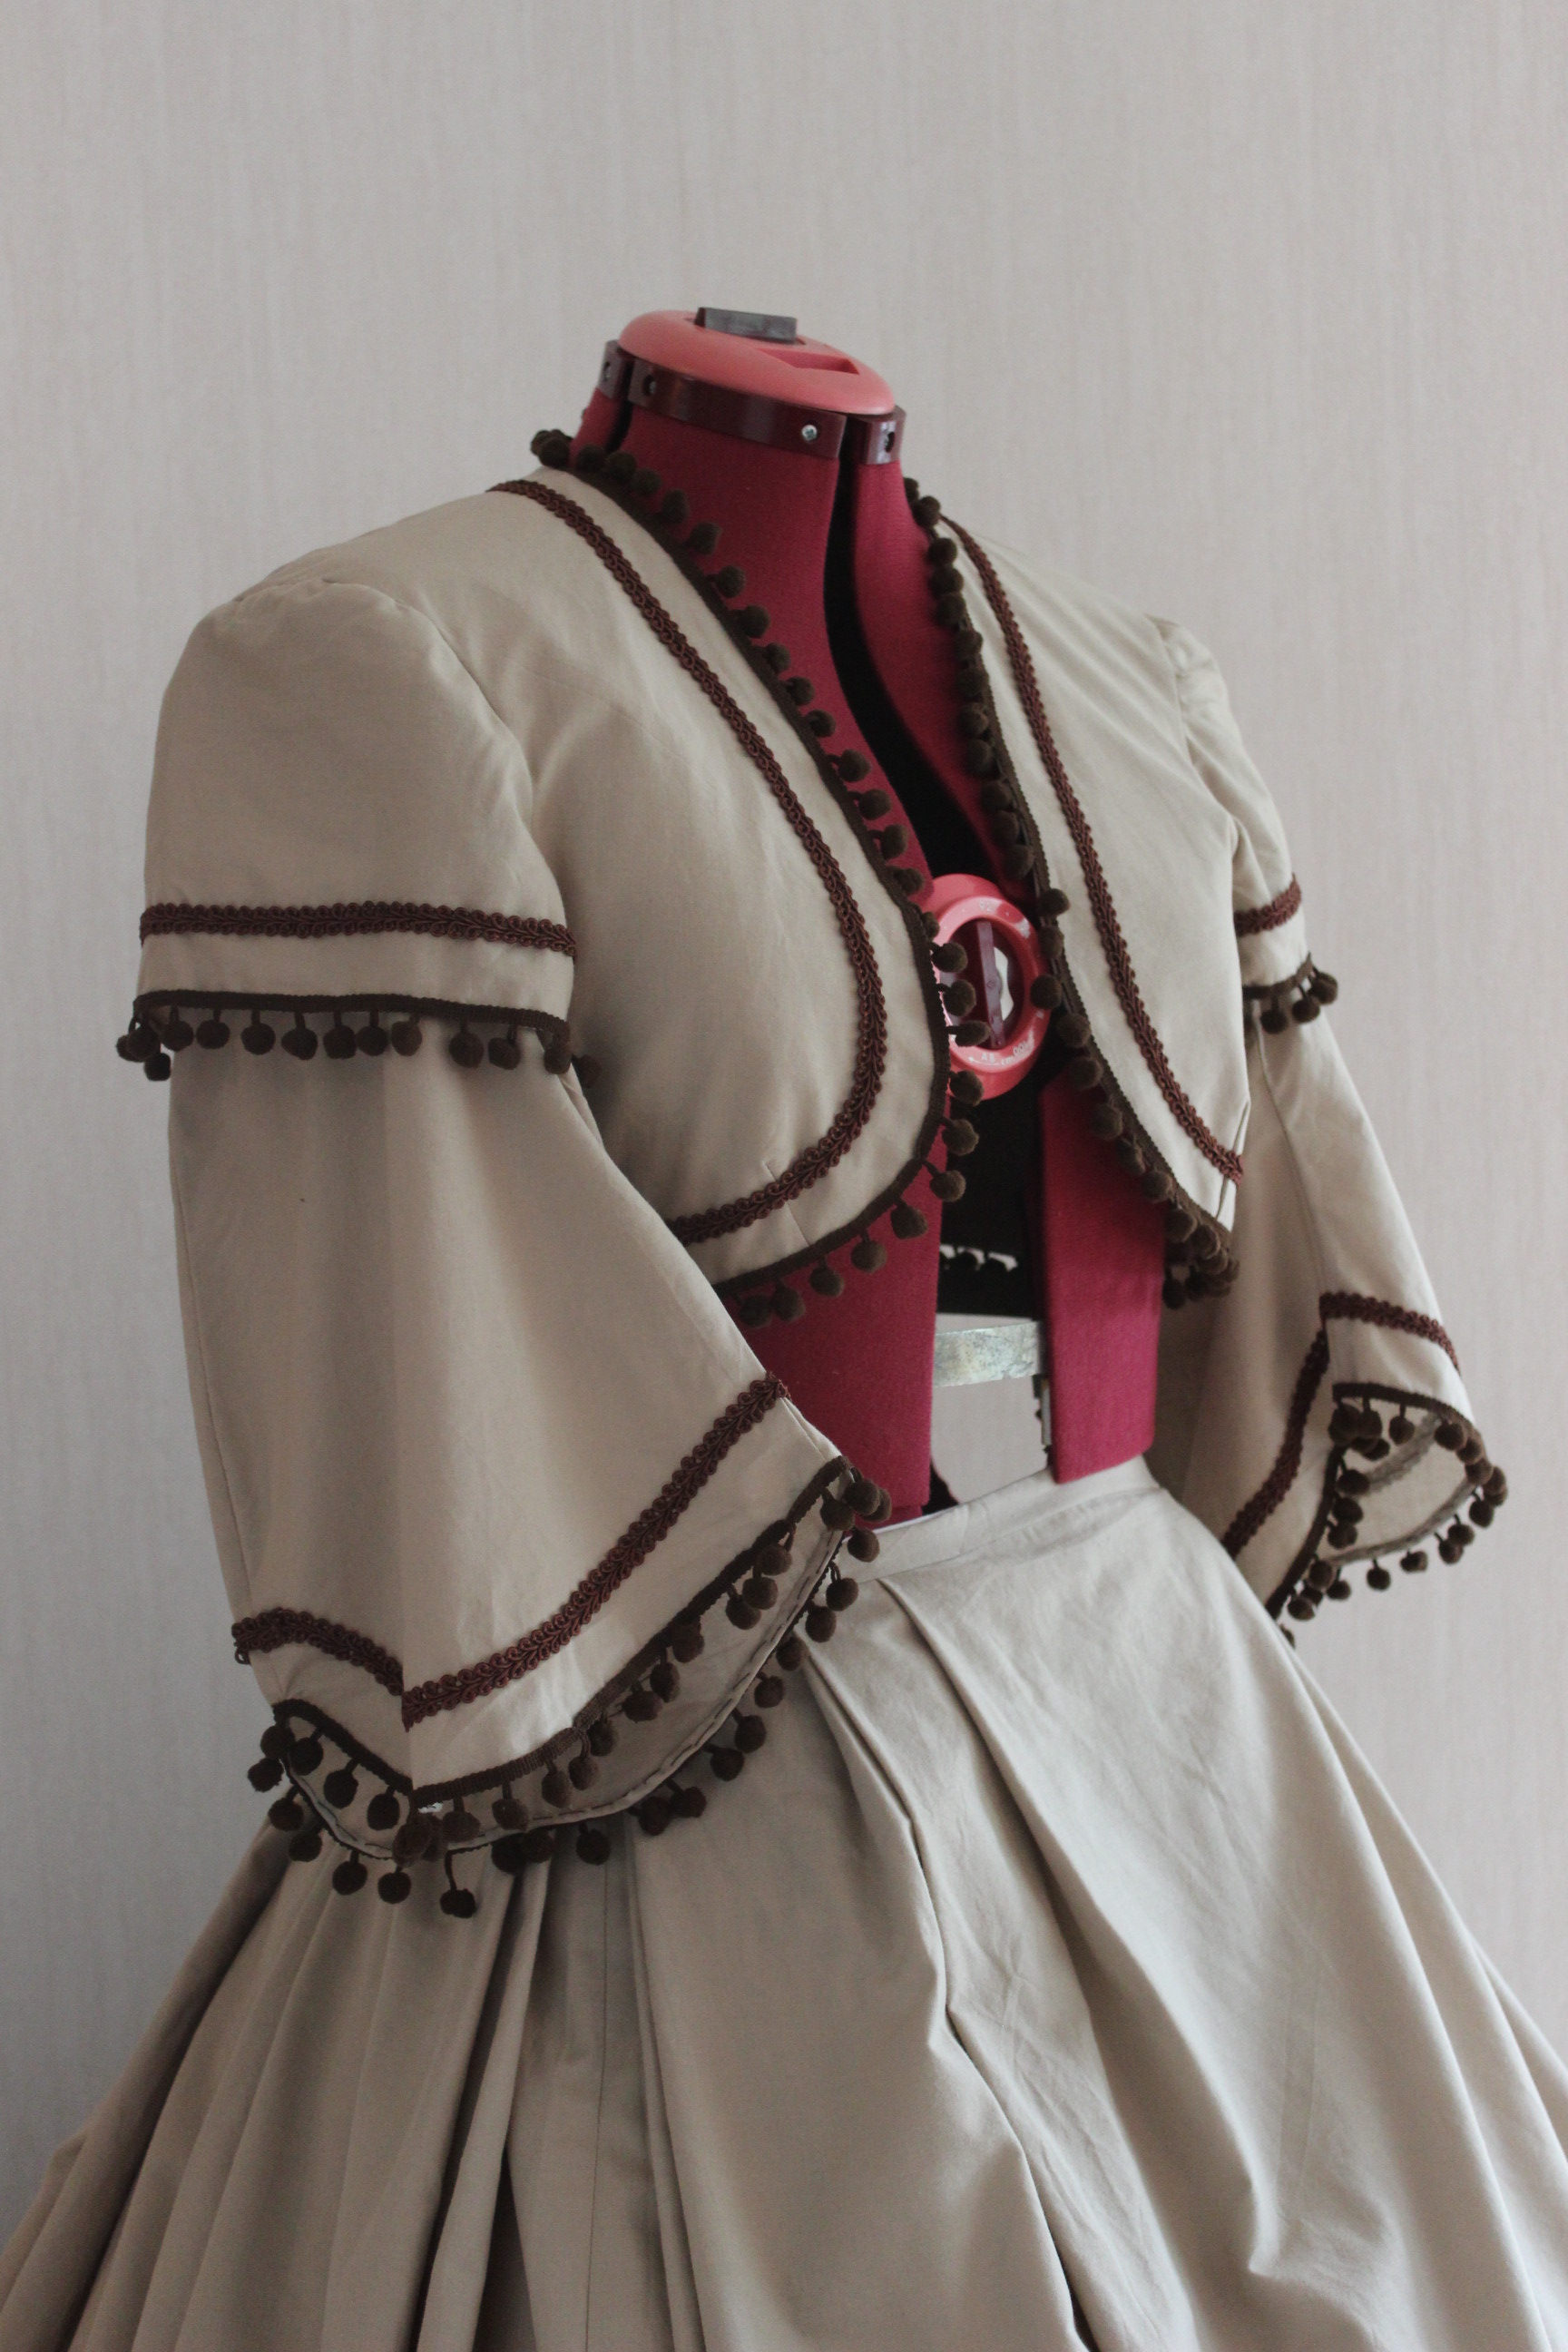
Then I stitched it together, inserted the double sleeves, added lining and begun working on the trimming.
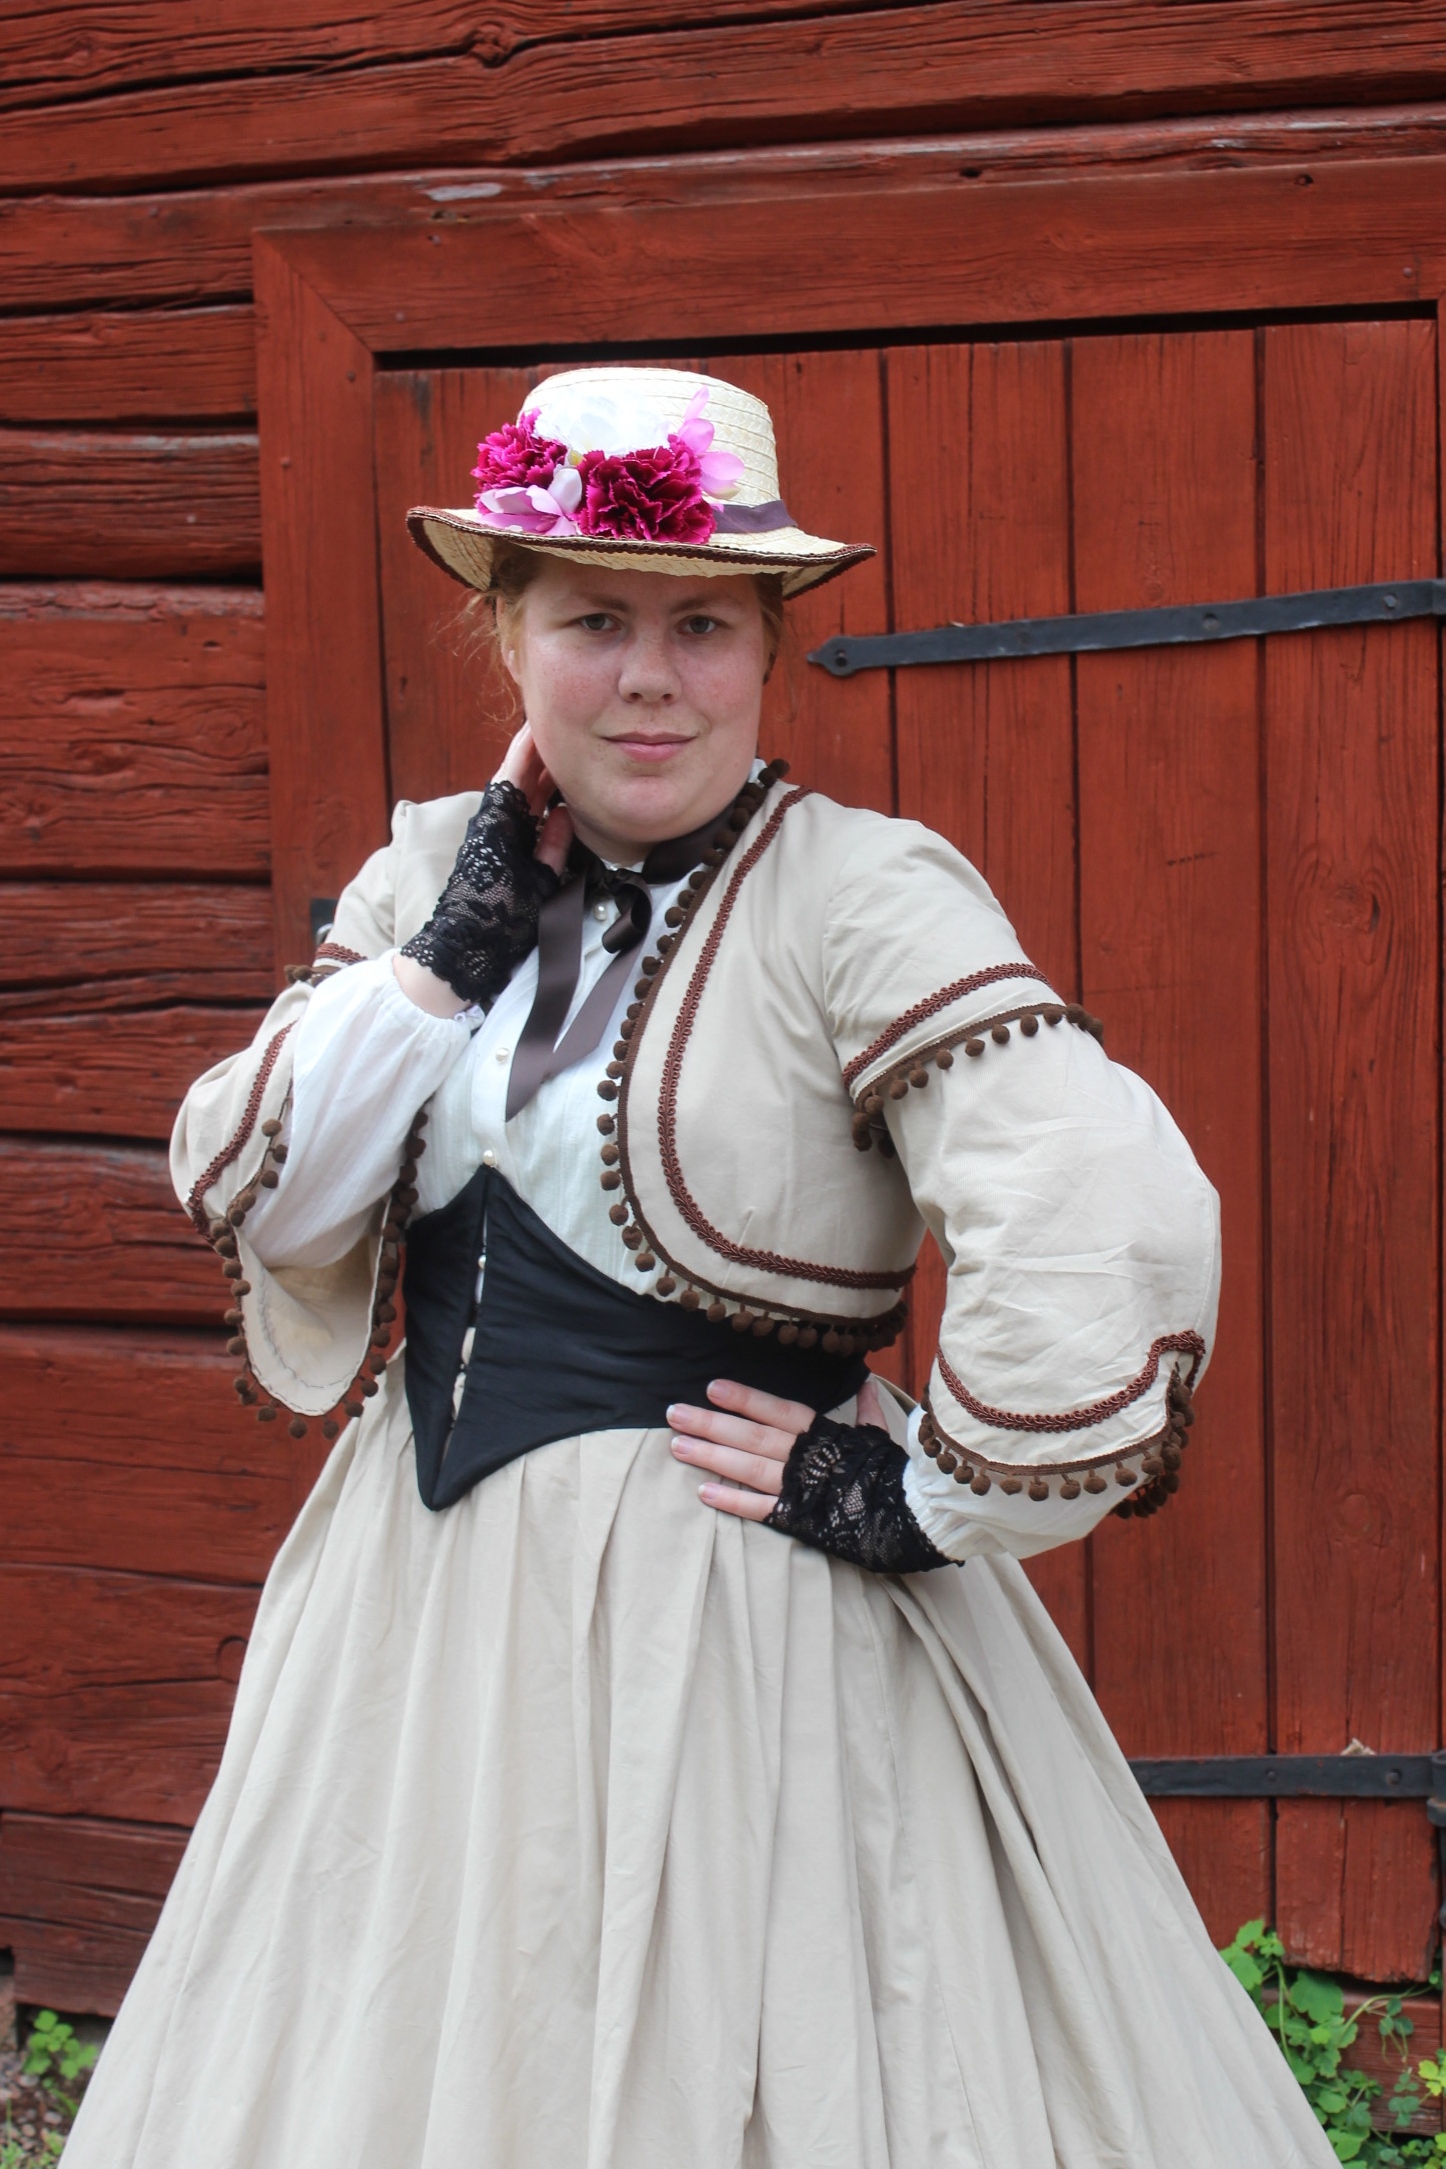
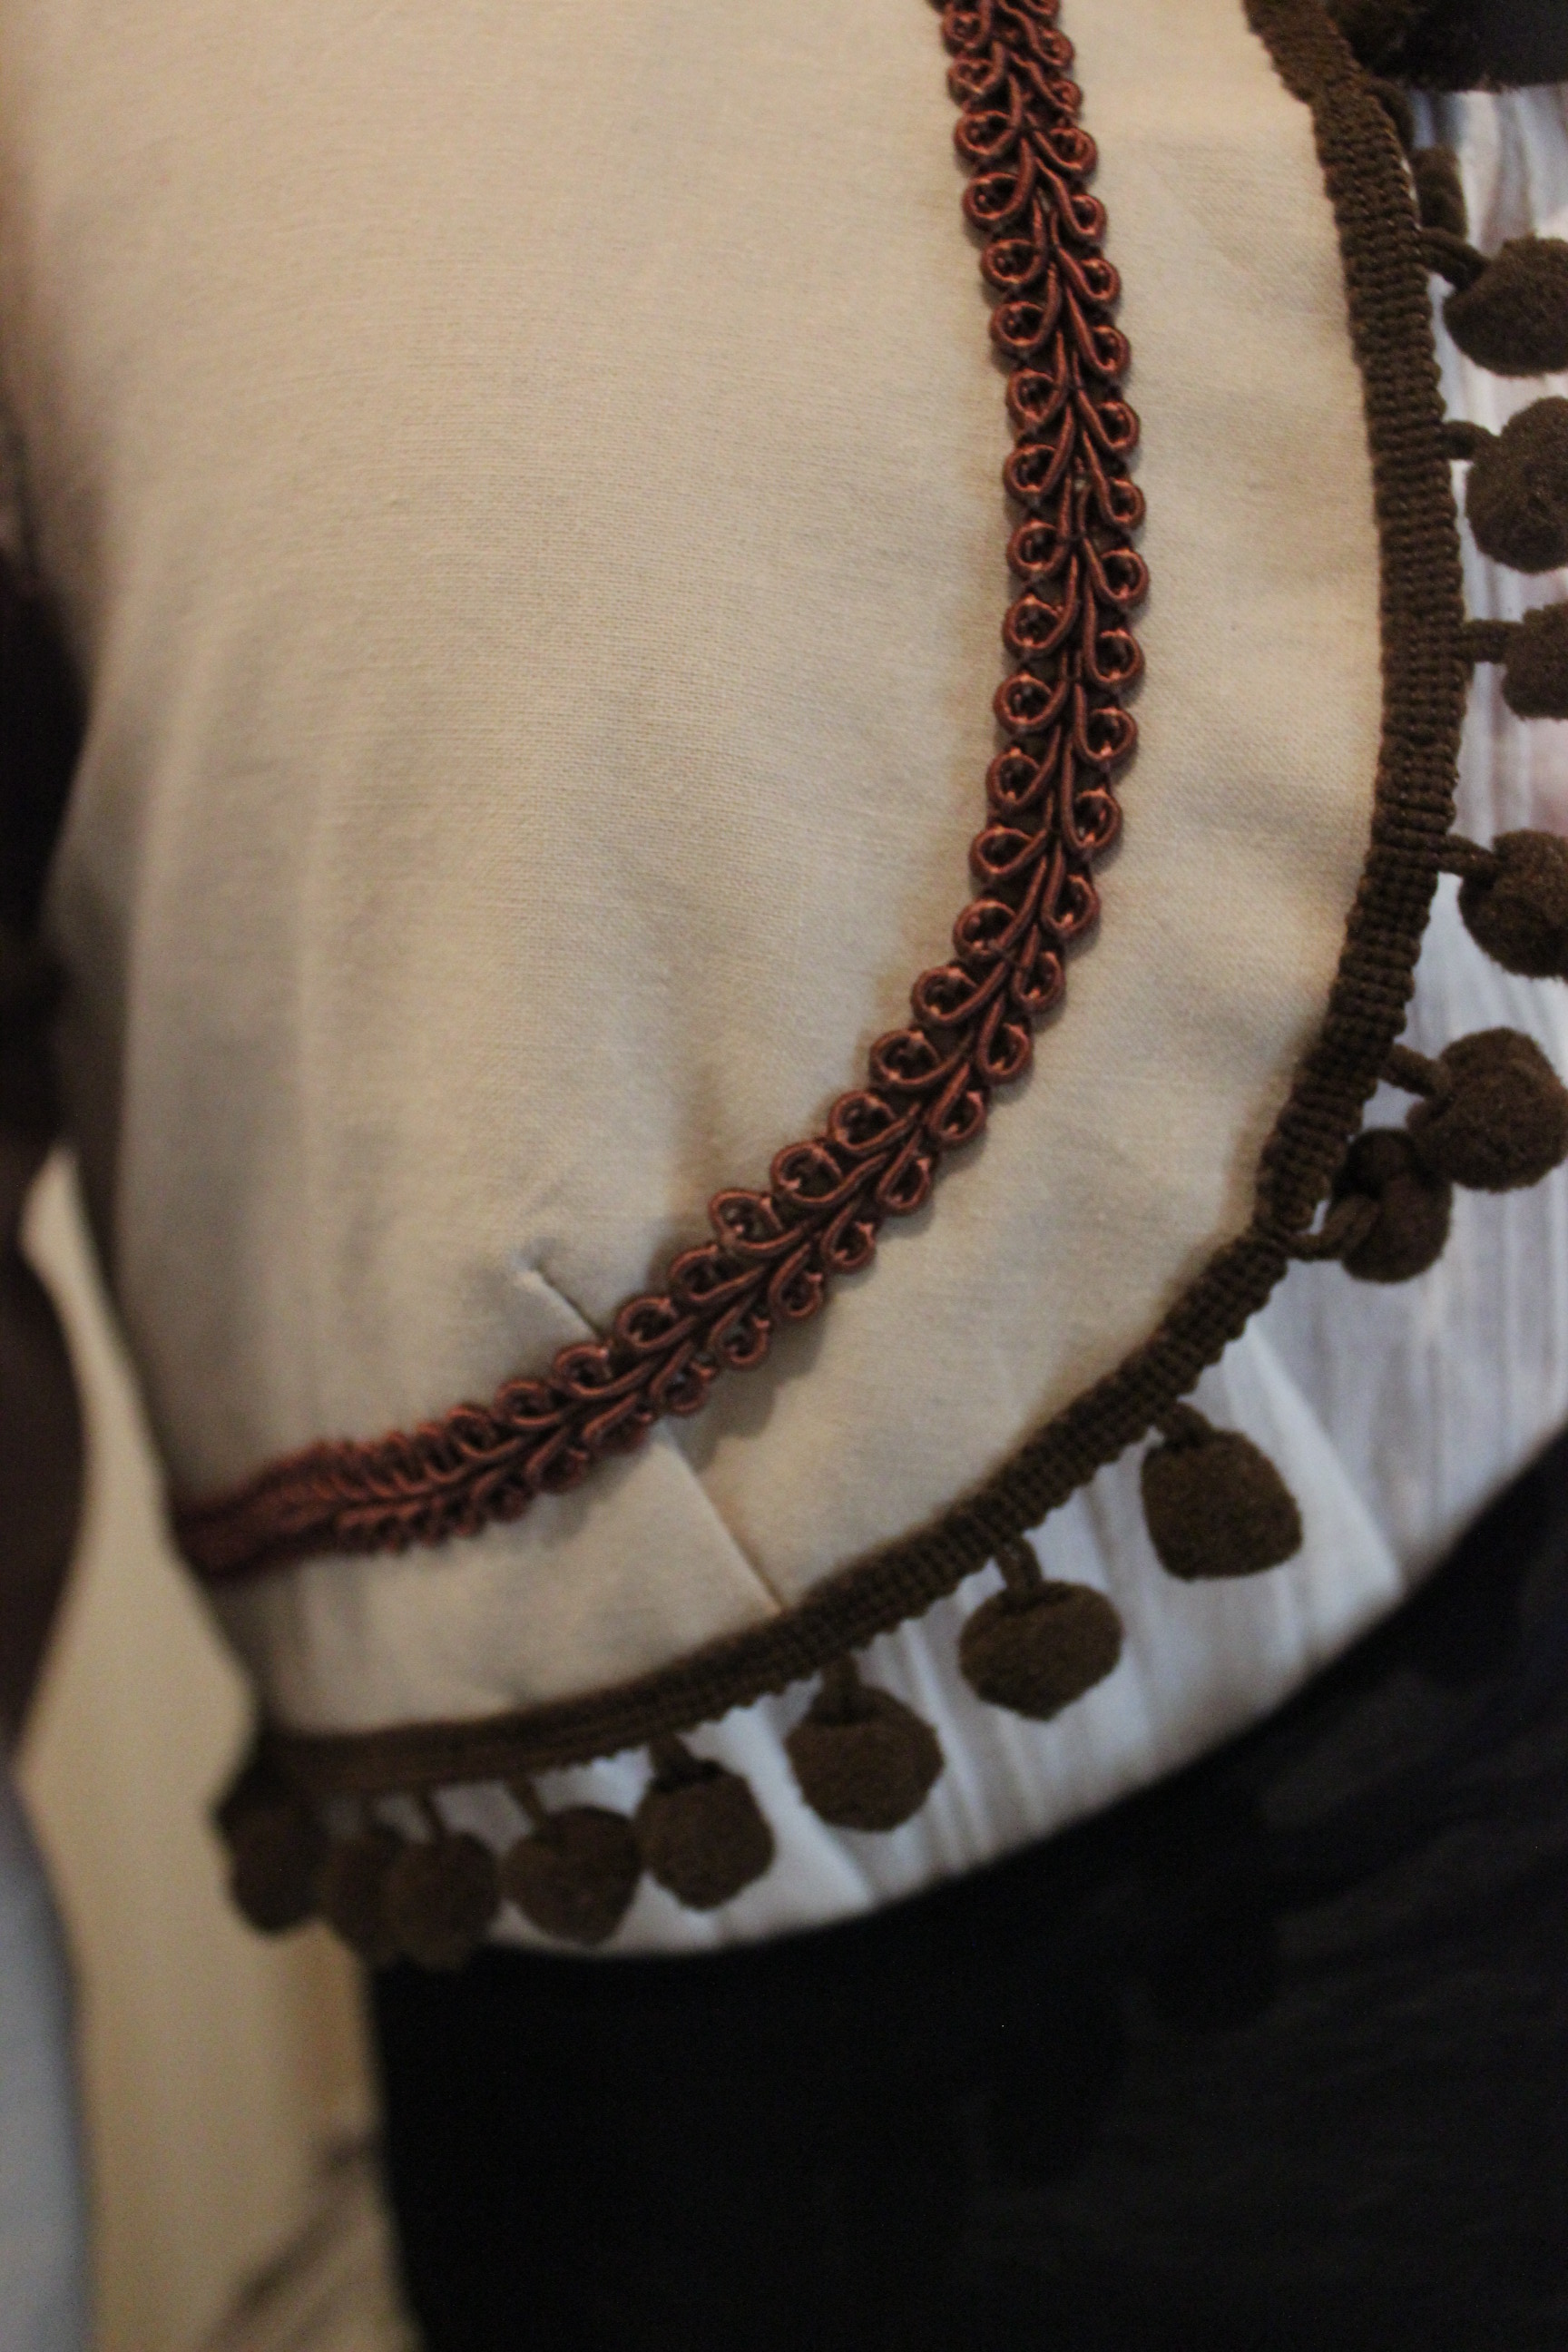
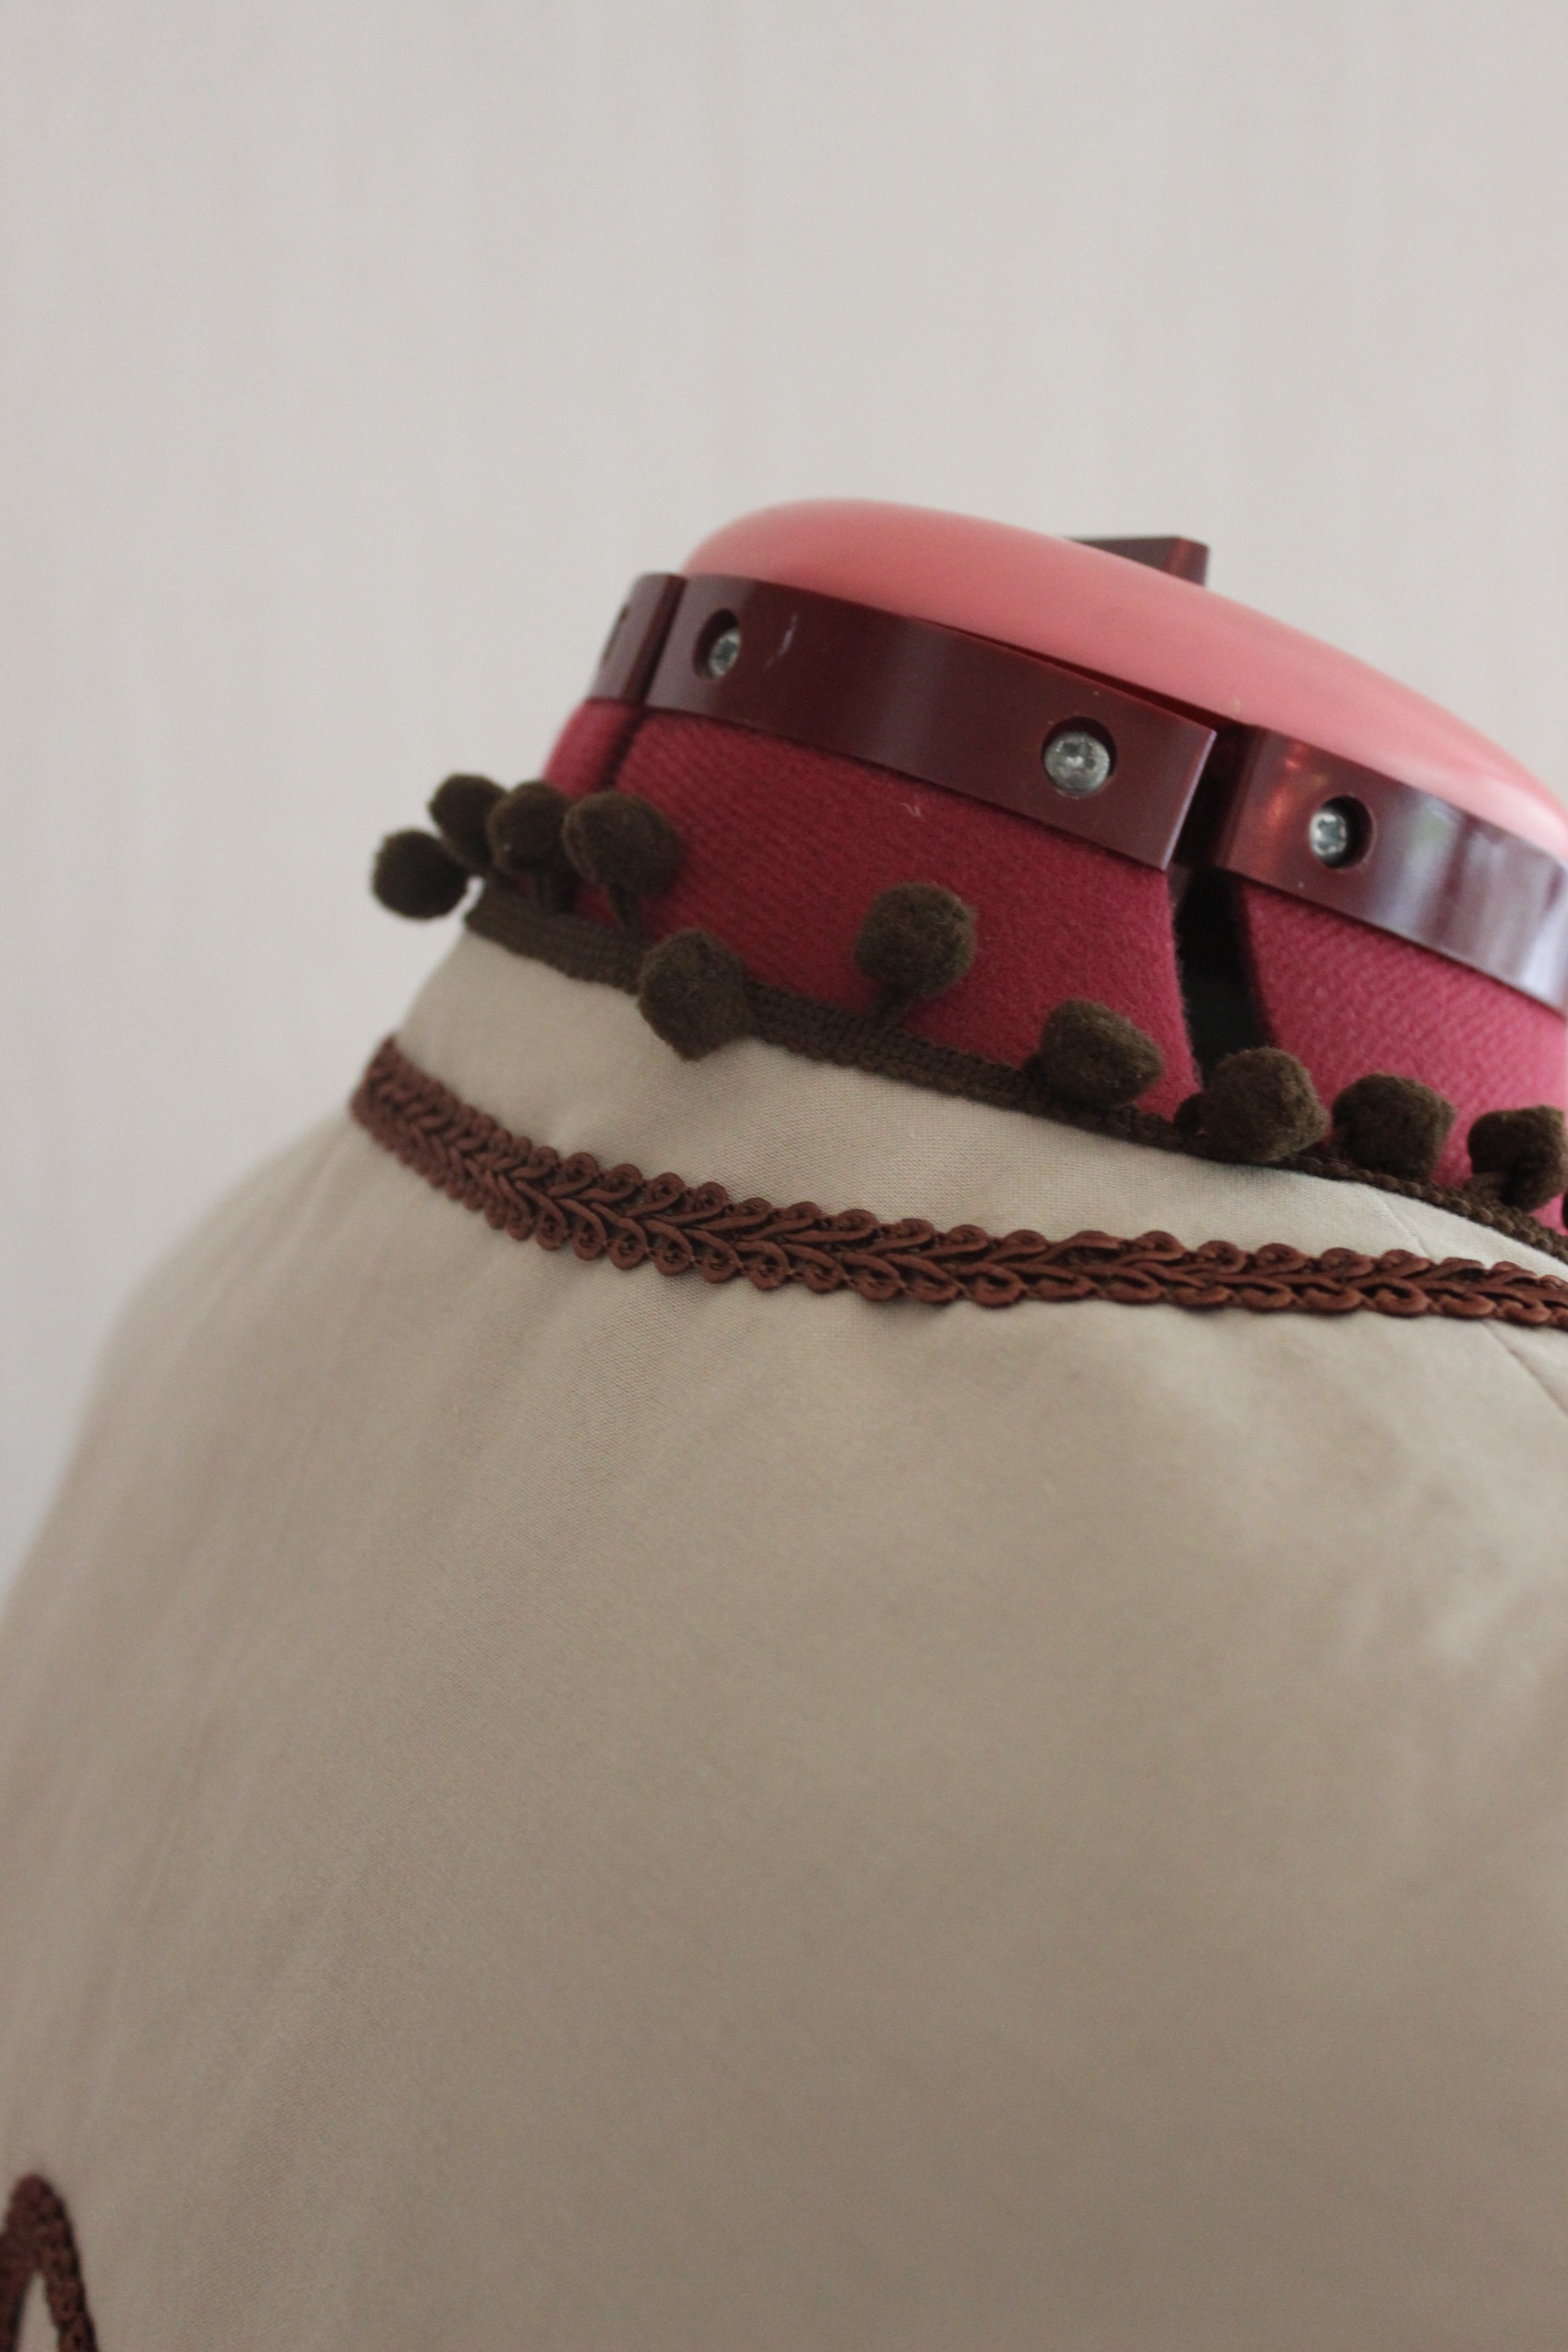
 I used the same furniture braid as on the skirt combined with a brown pom-pom trim also from my stash.
Even though they weren’t a perfect match color-wise the effect was really nice.
A quick pic of the just “finished” outfit on the floor. Now all that was needed was some pressing and the right accessories. 
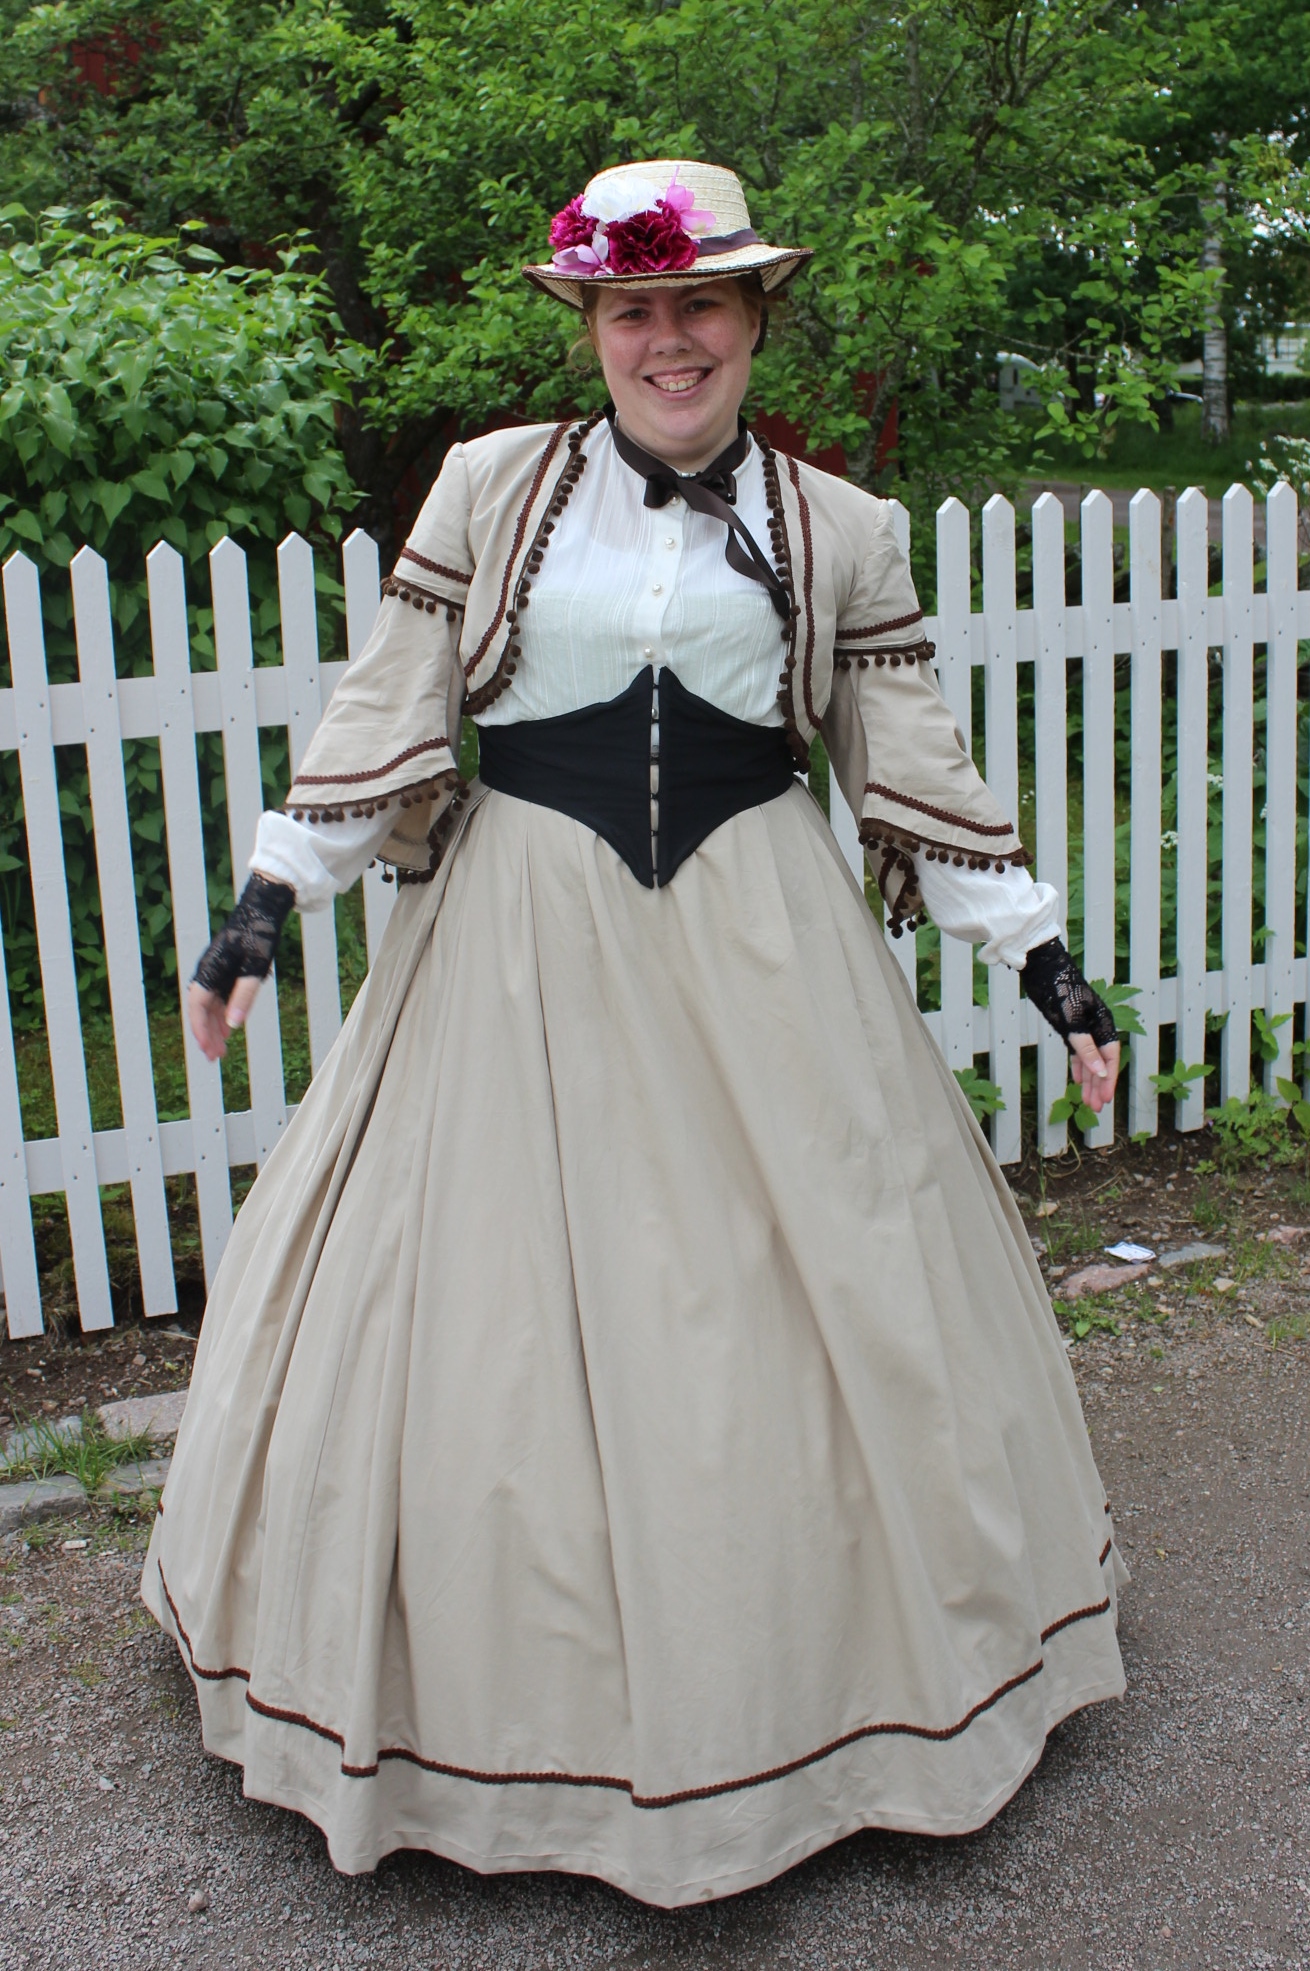
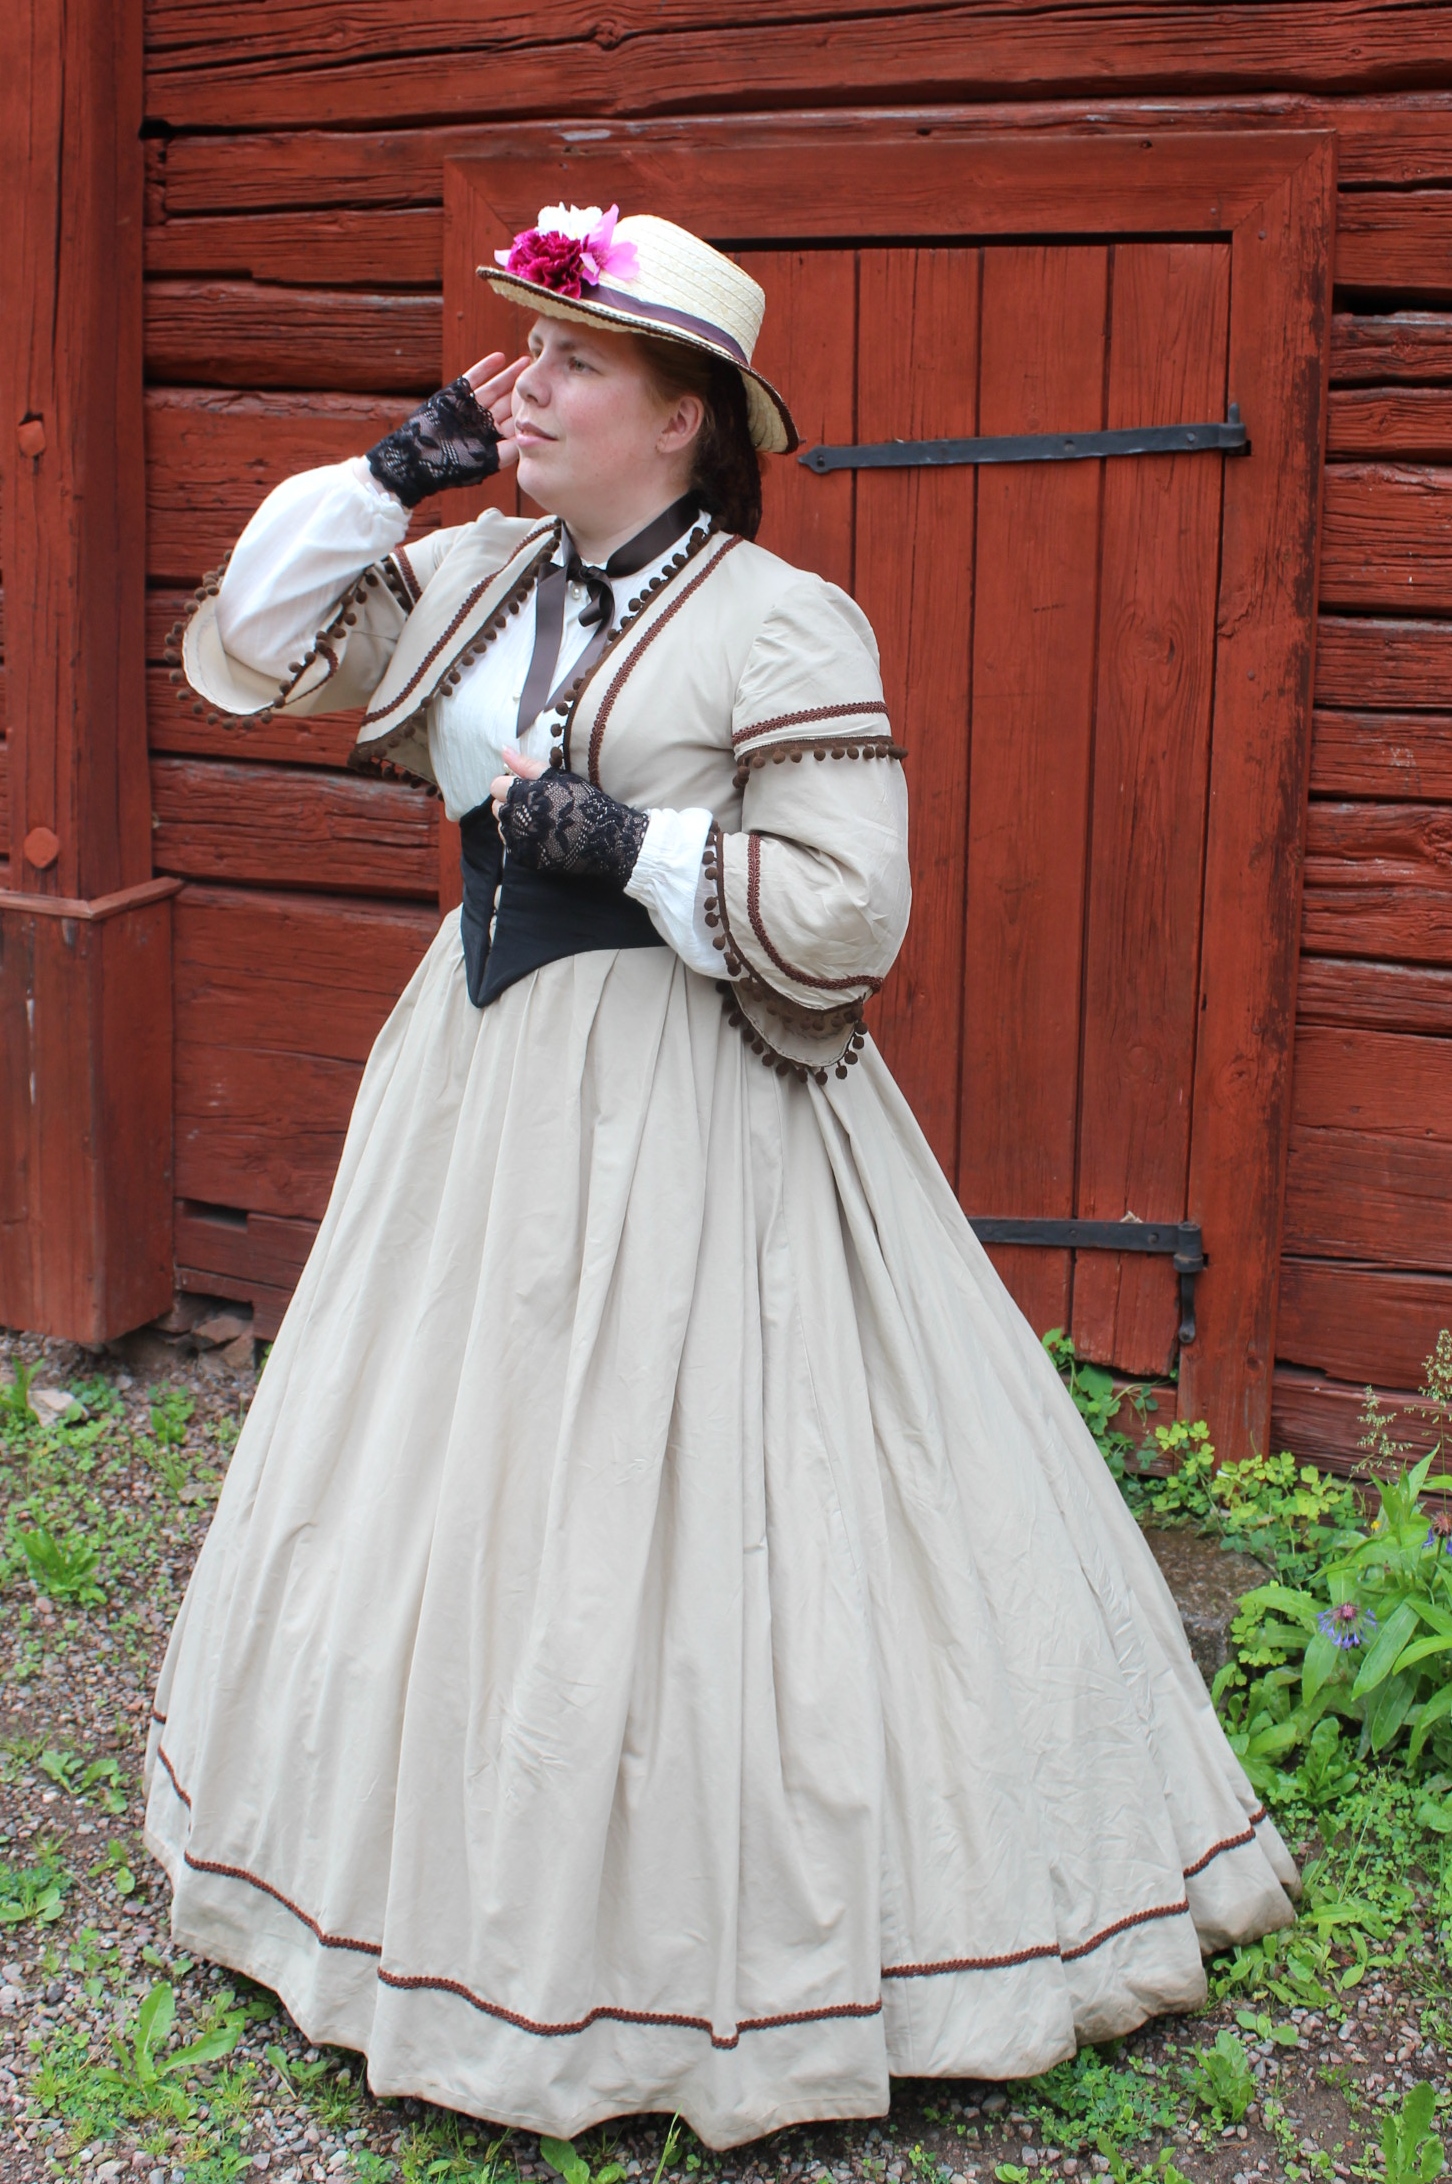
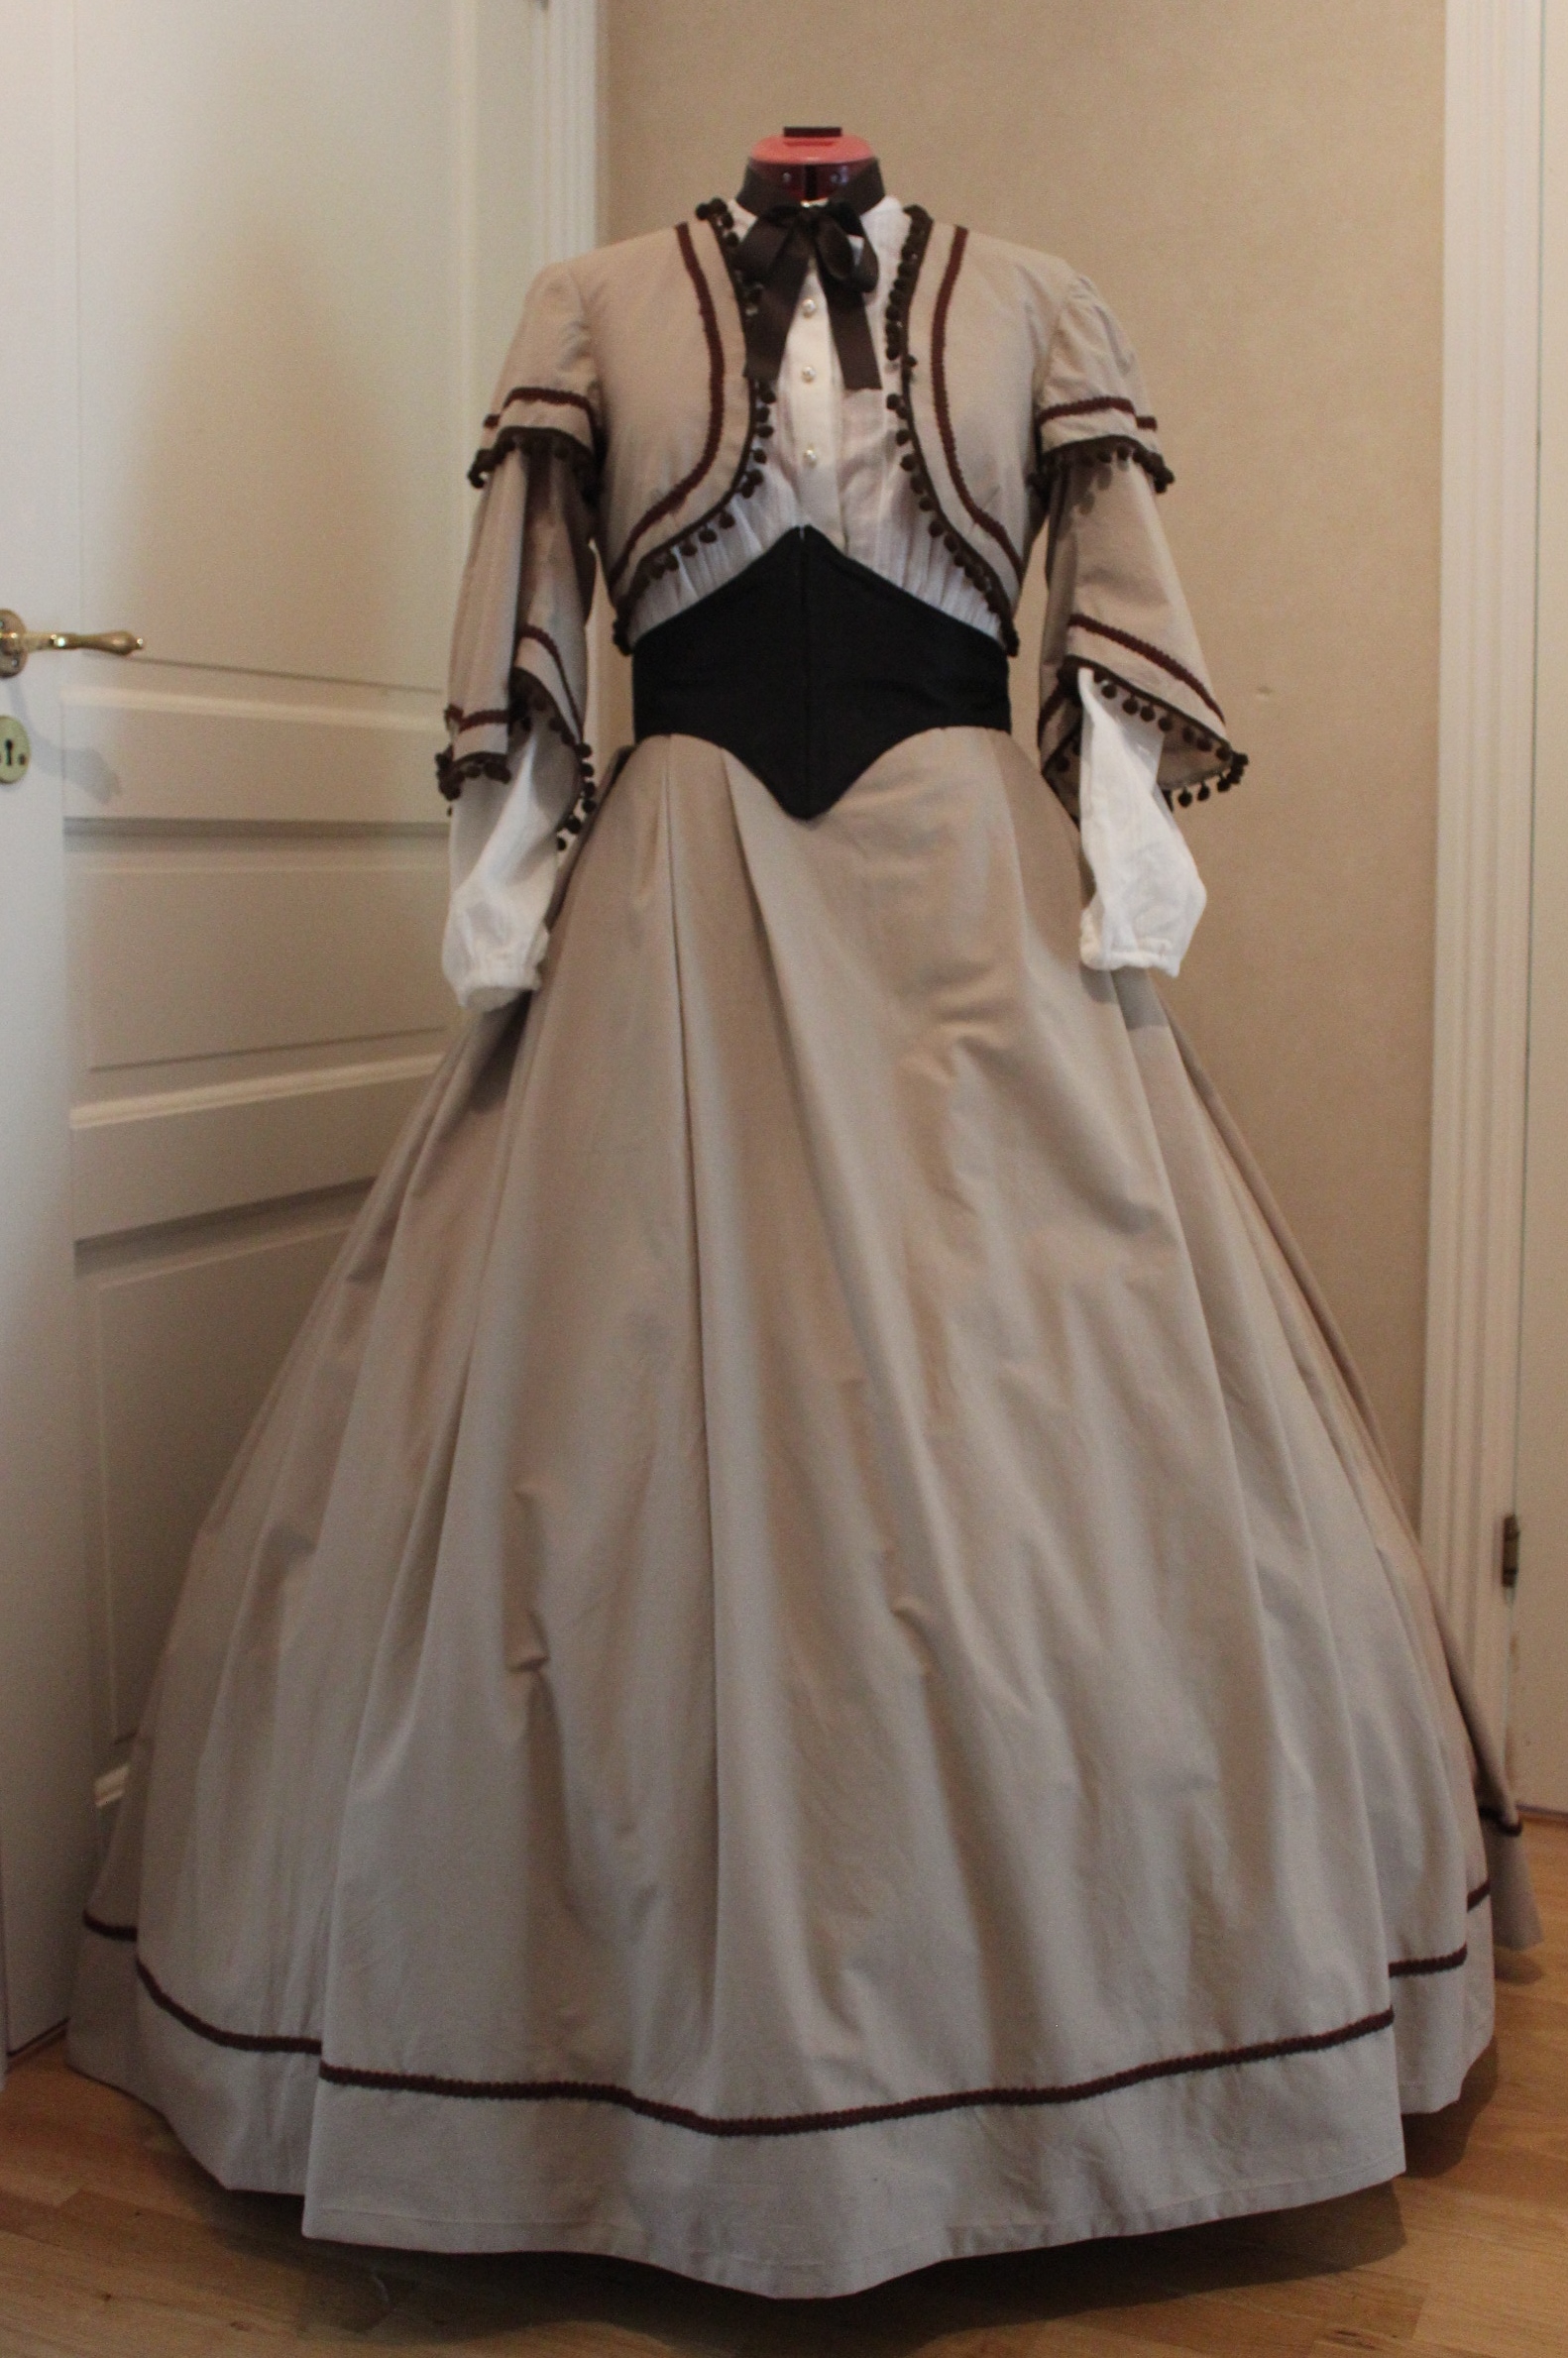
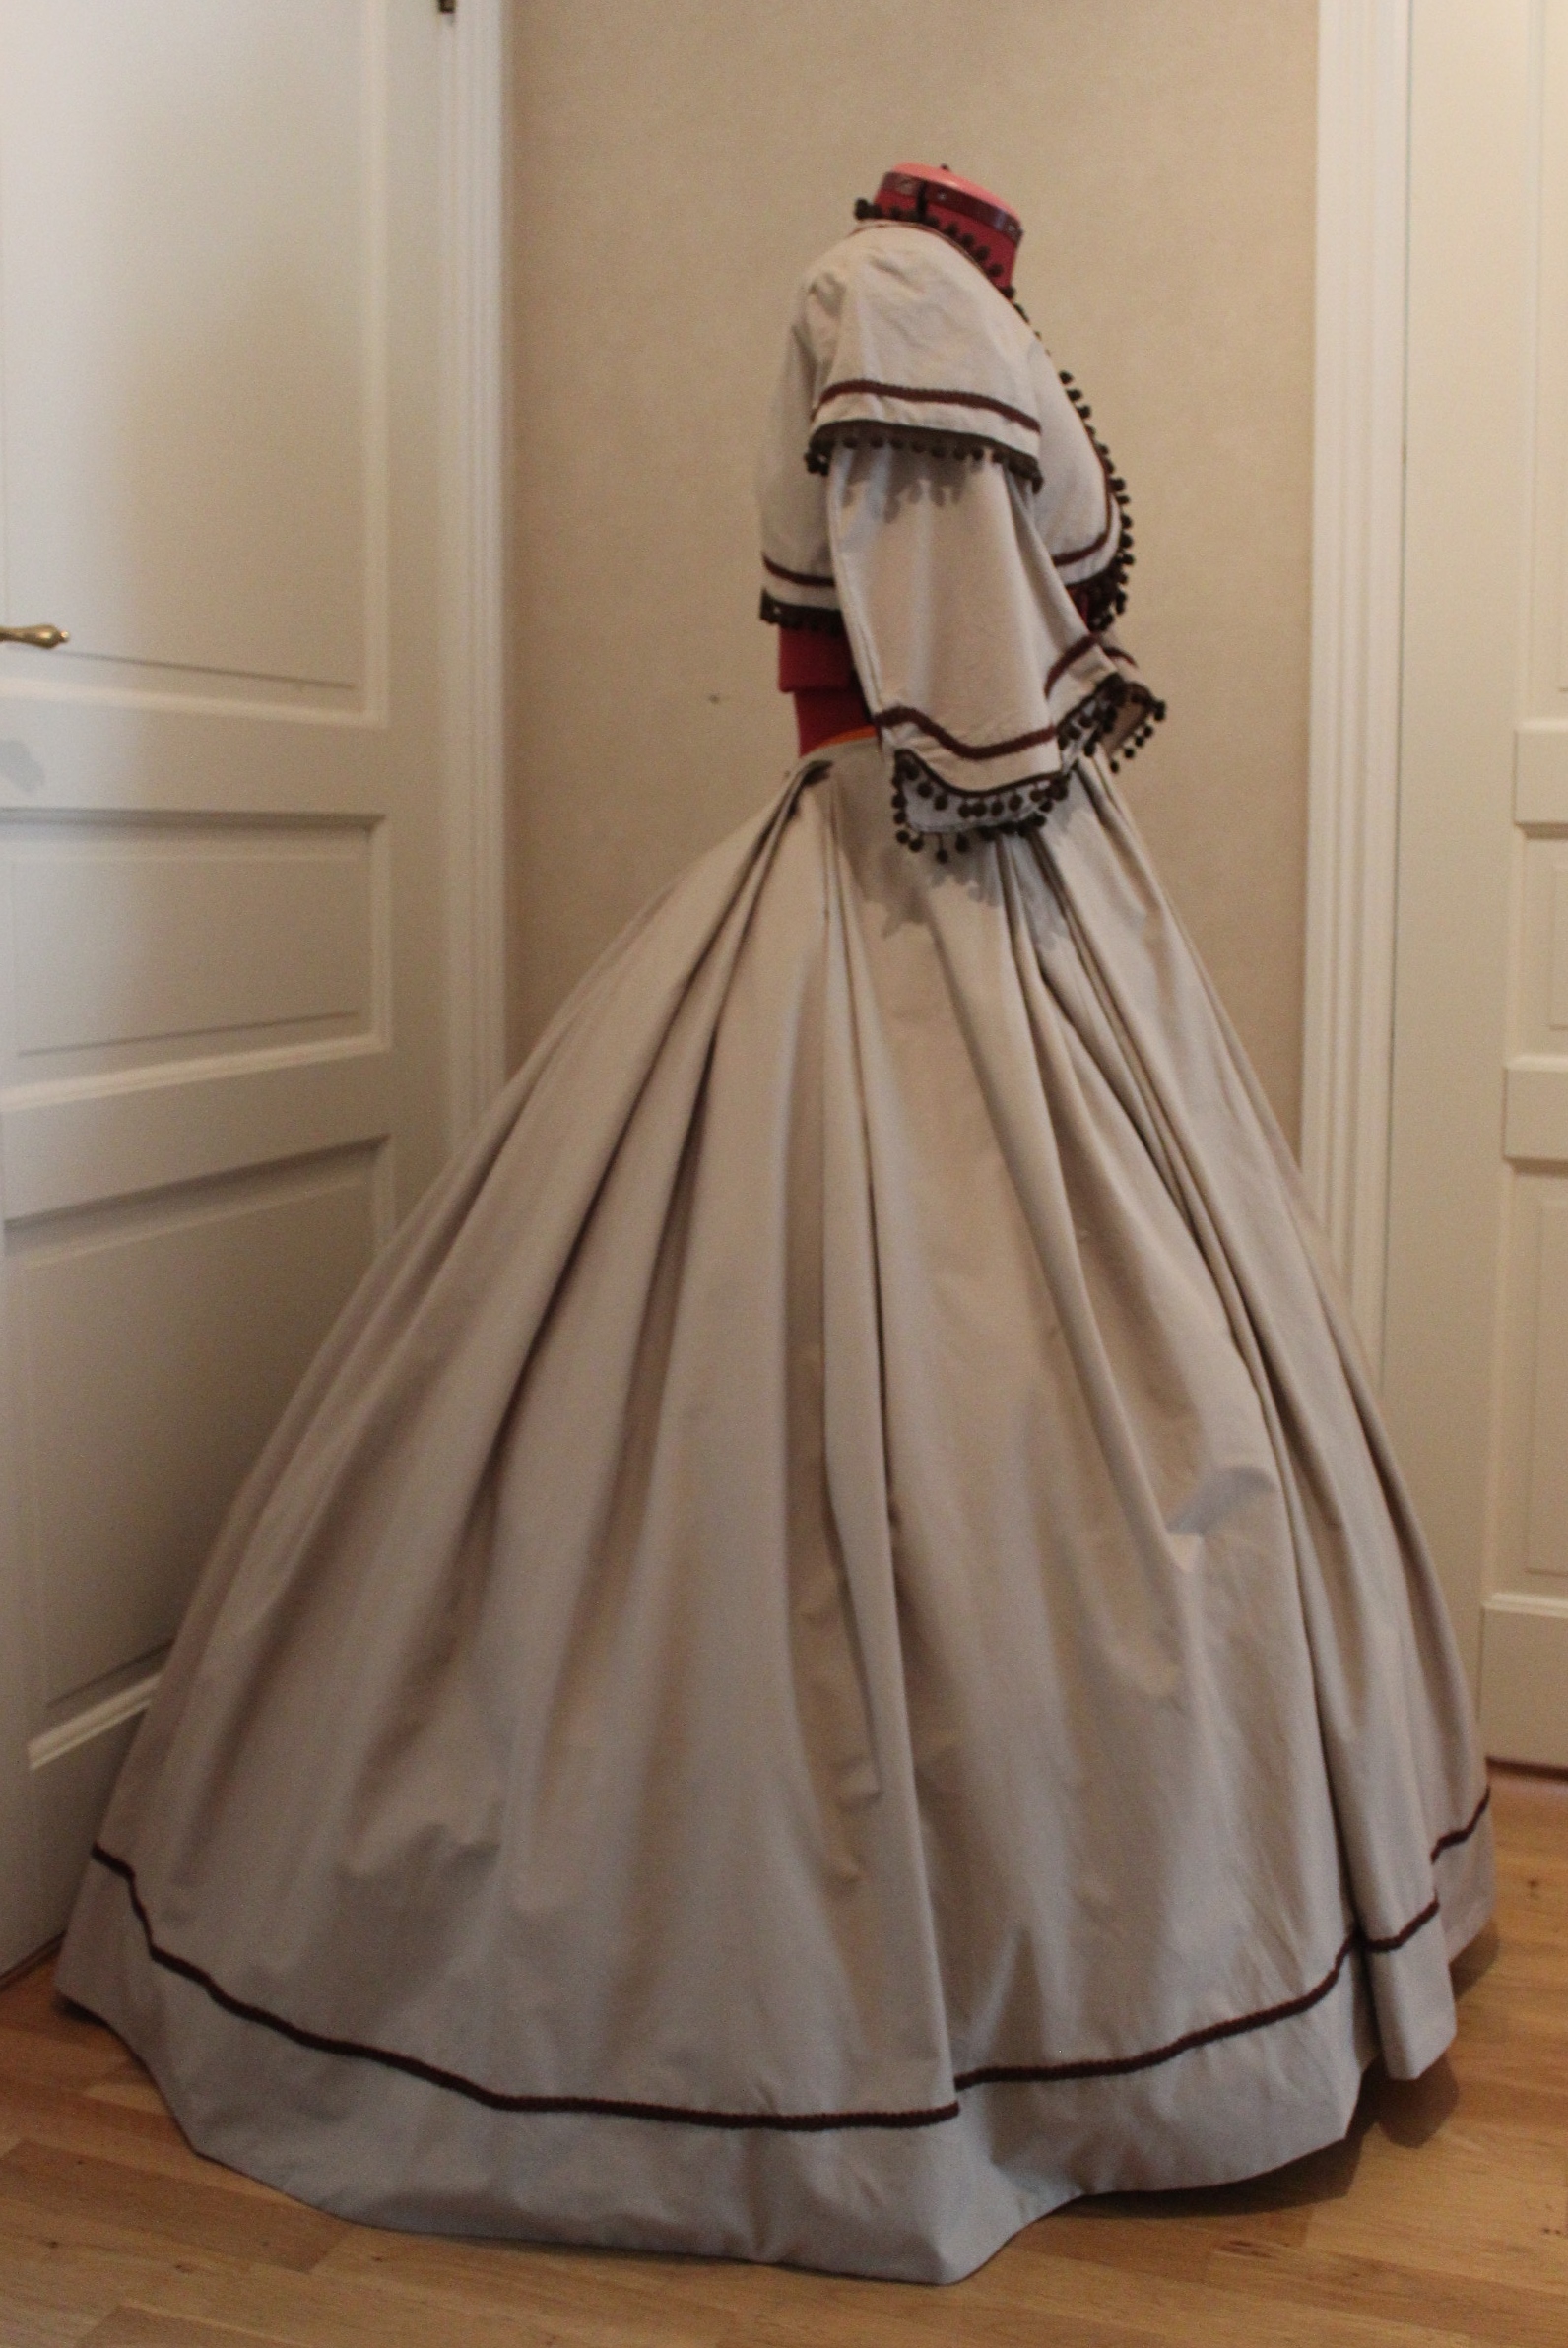
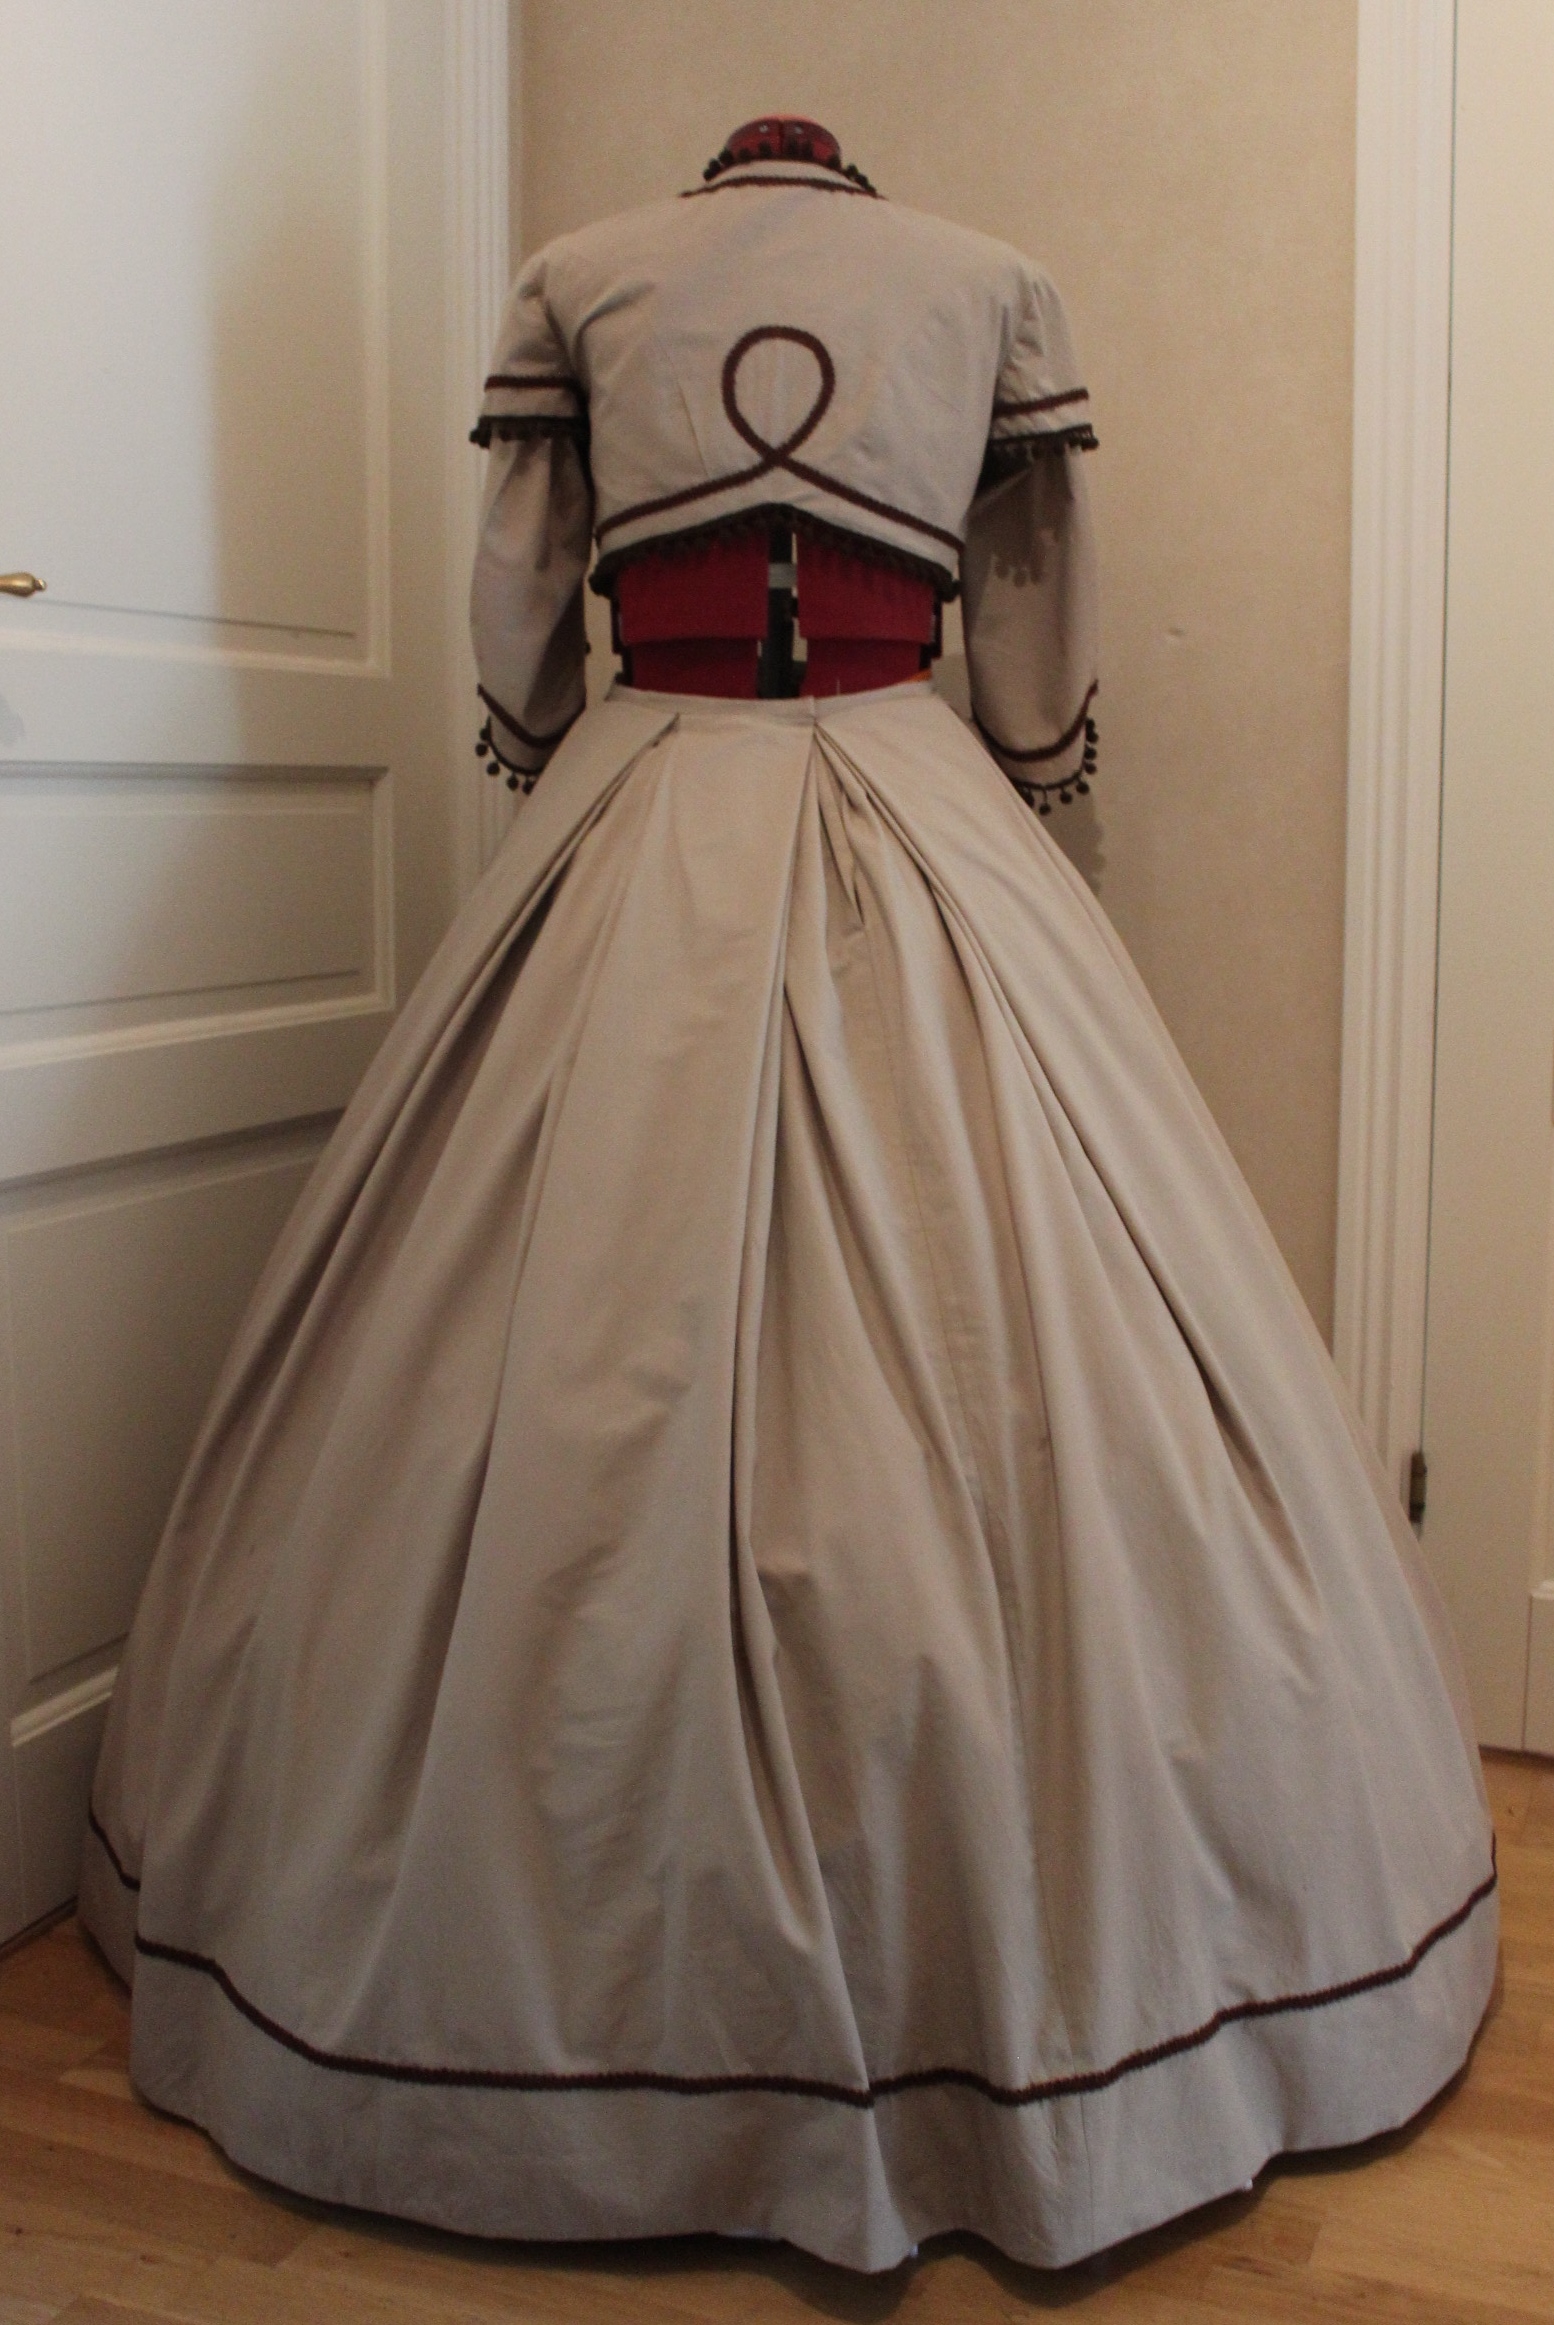
The finished dress: 


Just the facts:
Challenge: Nr 7 2017 – Fashion plate
“Make an outfit inspired by a fashion plate […]”
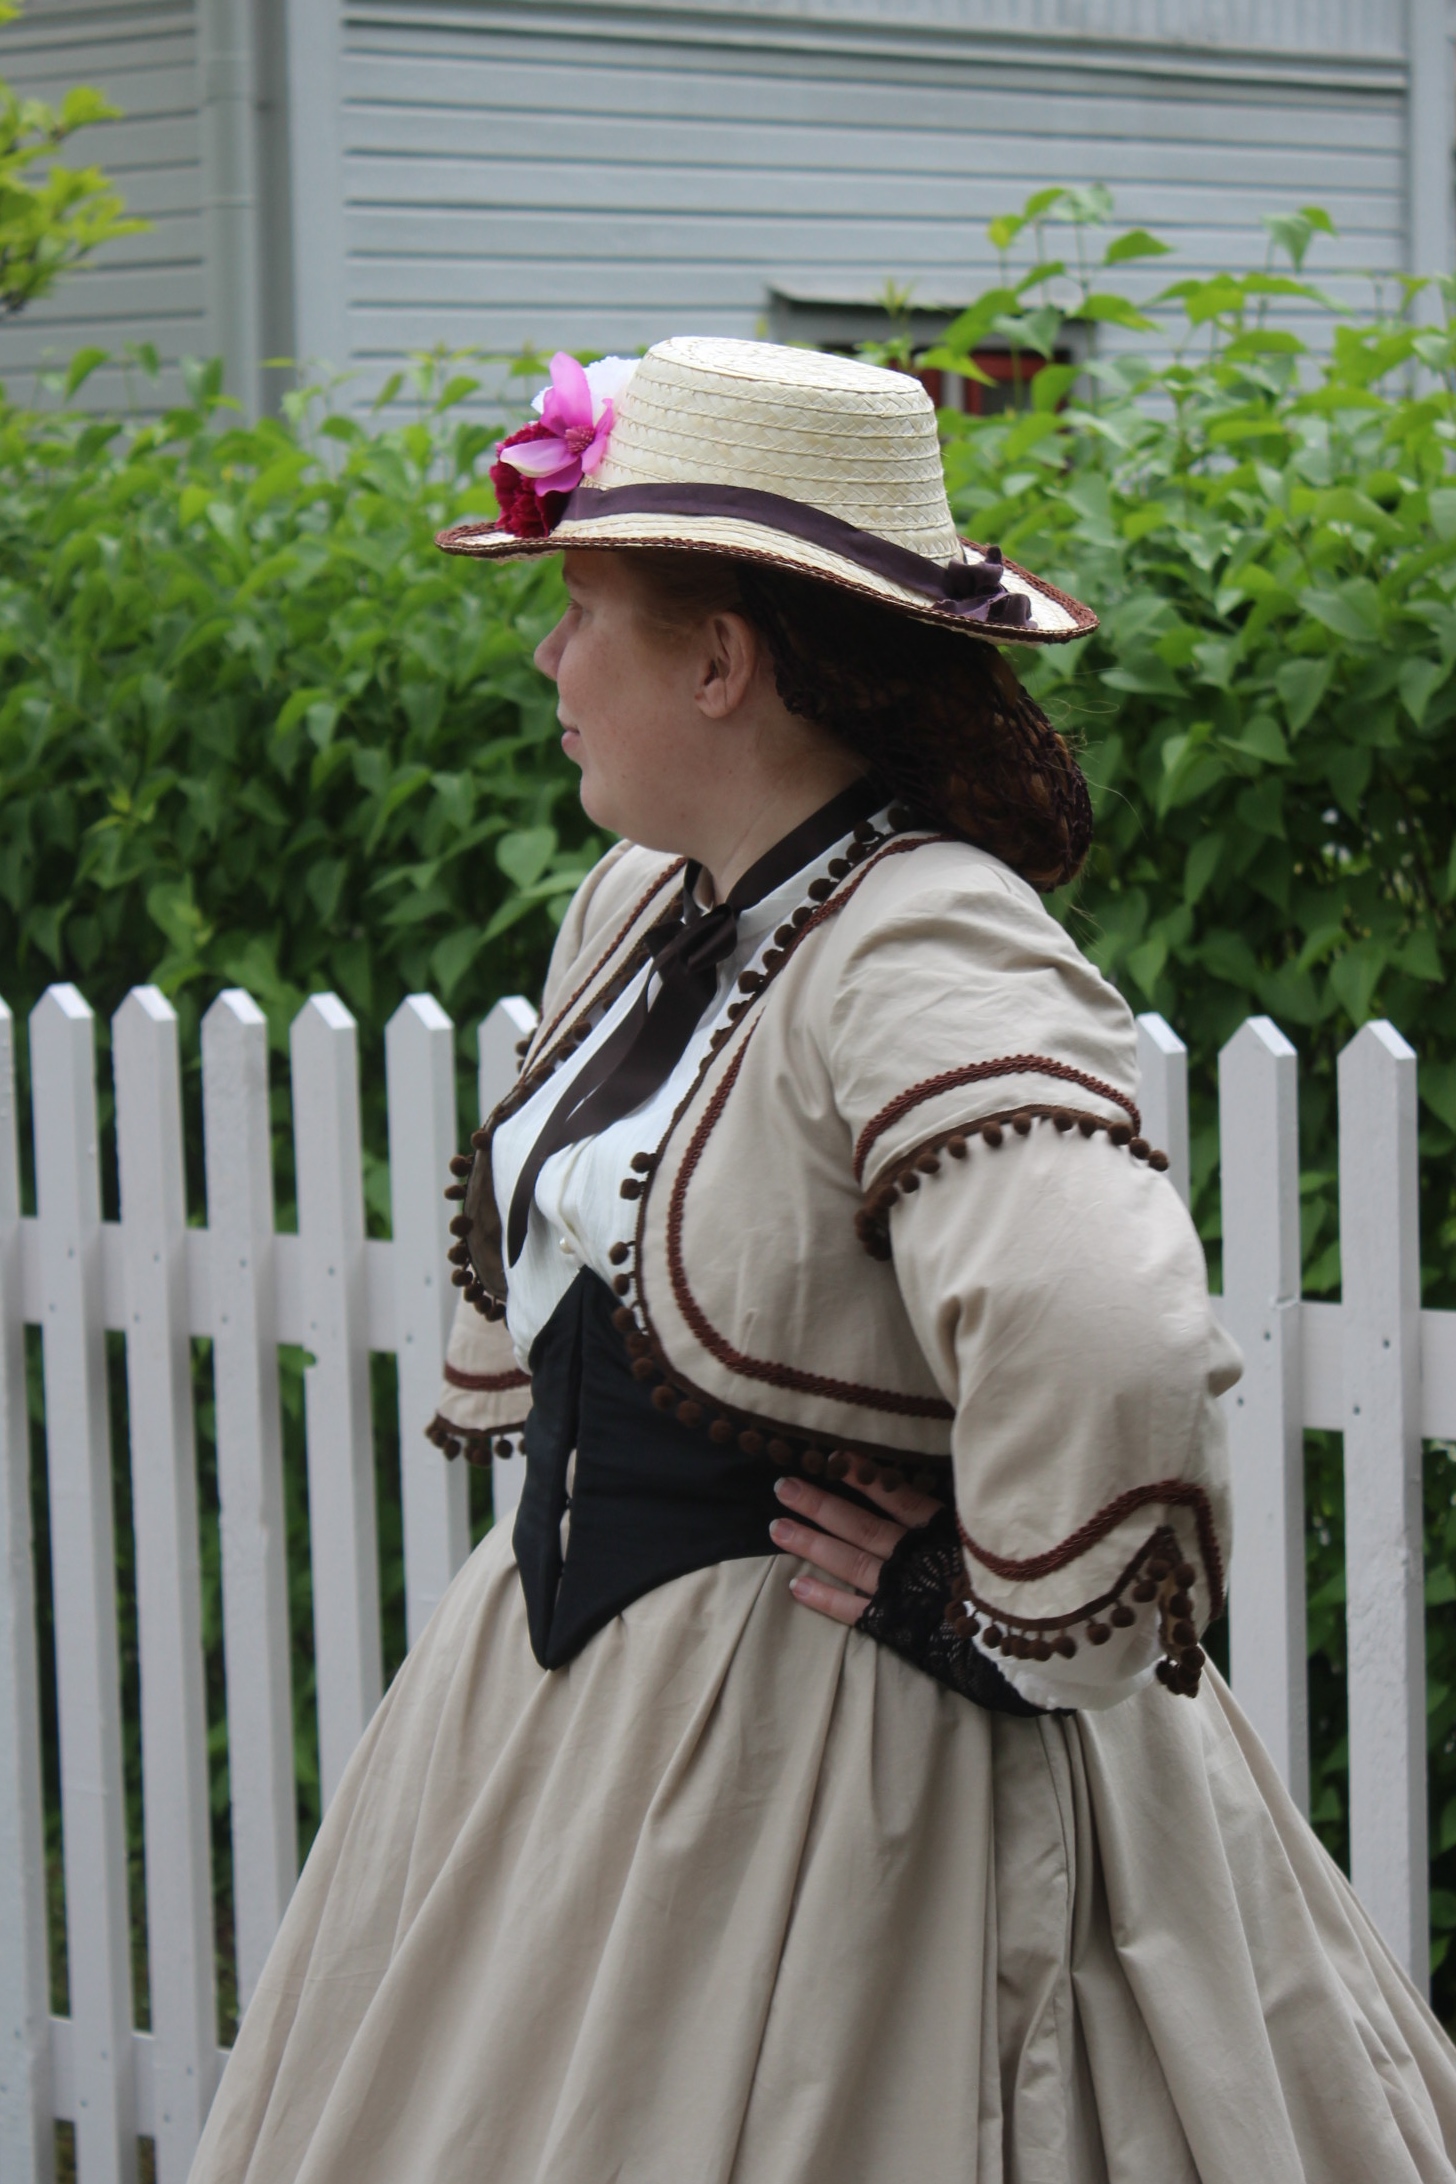
What: A 1860s Walking ensamble – Skirt and Zouvare Jacket)
Pattern: None – I drafted my own based on pictures and pattern drafts from the time.
Fabric & Notions: 2 beige cotton sheets (150 x 200cm/each), thread, hook and eye for skirt closure, 6 m of tapestry braid and 2 m of pom-pom trim.
How historical accurate: So so – The look and the pattern are good, but the fabric is way to thin and should have been either a thin wool or a heavier cotton. Also it’s stretching it a bit time wise by saying they used sewing-machines at this time, so thats another “wrong”. Maybe 7/10
Time: About 10 hours. more then half of which went into hemming and trimming by hand.
Cost: About 150-200 Sek (all trim was in my stash from a notions clear-out a few years ago)
First worn: On June 10 for “The day of the Big Crinolines”.
Final thoughts: I think it turned out pretty good. My sister looked like she had fun wearing it and the whole outfit came together really well.
Wow, It’s already been more then a month since the spring ball (and summer arrived) but I just now finished my blogpost about it.
As you might recall, I had quite a bit sewing done before the ball, both for me (1825s bonanza)
and my sister (a whole 1860s costume with underpinnings and everything).
Thanks to good planing (he he, right;-)) I managed to finish everything in time,
and didn’t even have the panicked last minute finishes that always seams to be my lot.
The day of the ball was a bit hectic though.
As I needed to turn the mandatory dance rehearsal down, in order to get to a friends babys christening instead.
But since I still had my sisters dress at home, I had to make a pit-stop at the dance-hall to leave it to her, before I stuffed my (relatively) clean baby in the car and drove 1 hour to get to the church. After a quick stop, leaving our present, and eating some cake I rushed home to get dressed in record speed for the ball.  My outfit ready and awaiting.
Thank good my boyfriend (who happened to have a book-release that same day) had already come home, and could take the baby and help me close the dress.
Even more thank good, I’ve already done the dress-rehearsal (or more exactly the hair-rehearsal) so I managed to get the hair done and the dress on in not more then 30 minutes.
Beat that!
 Does this lok like a fast and easy hairdo?
Arriving (in time) to the ball, I had some time to calm down and to find my sister. Hiding out by the fire-extinguisher
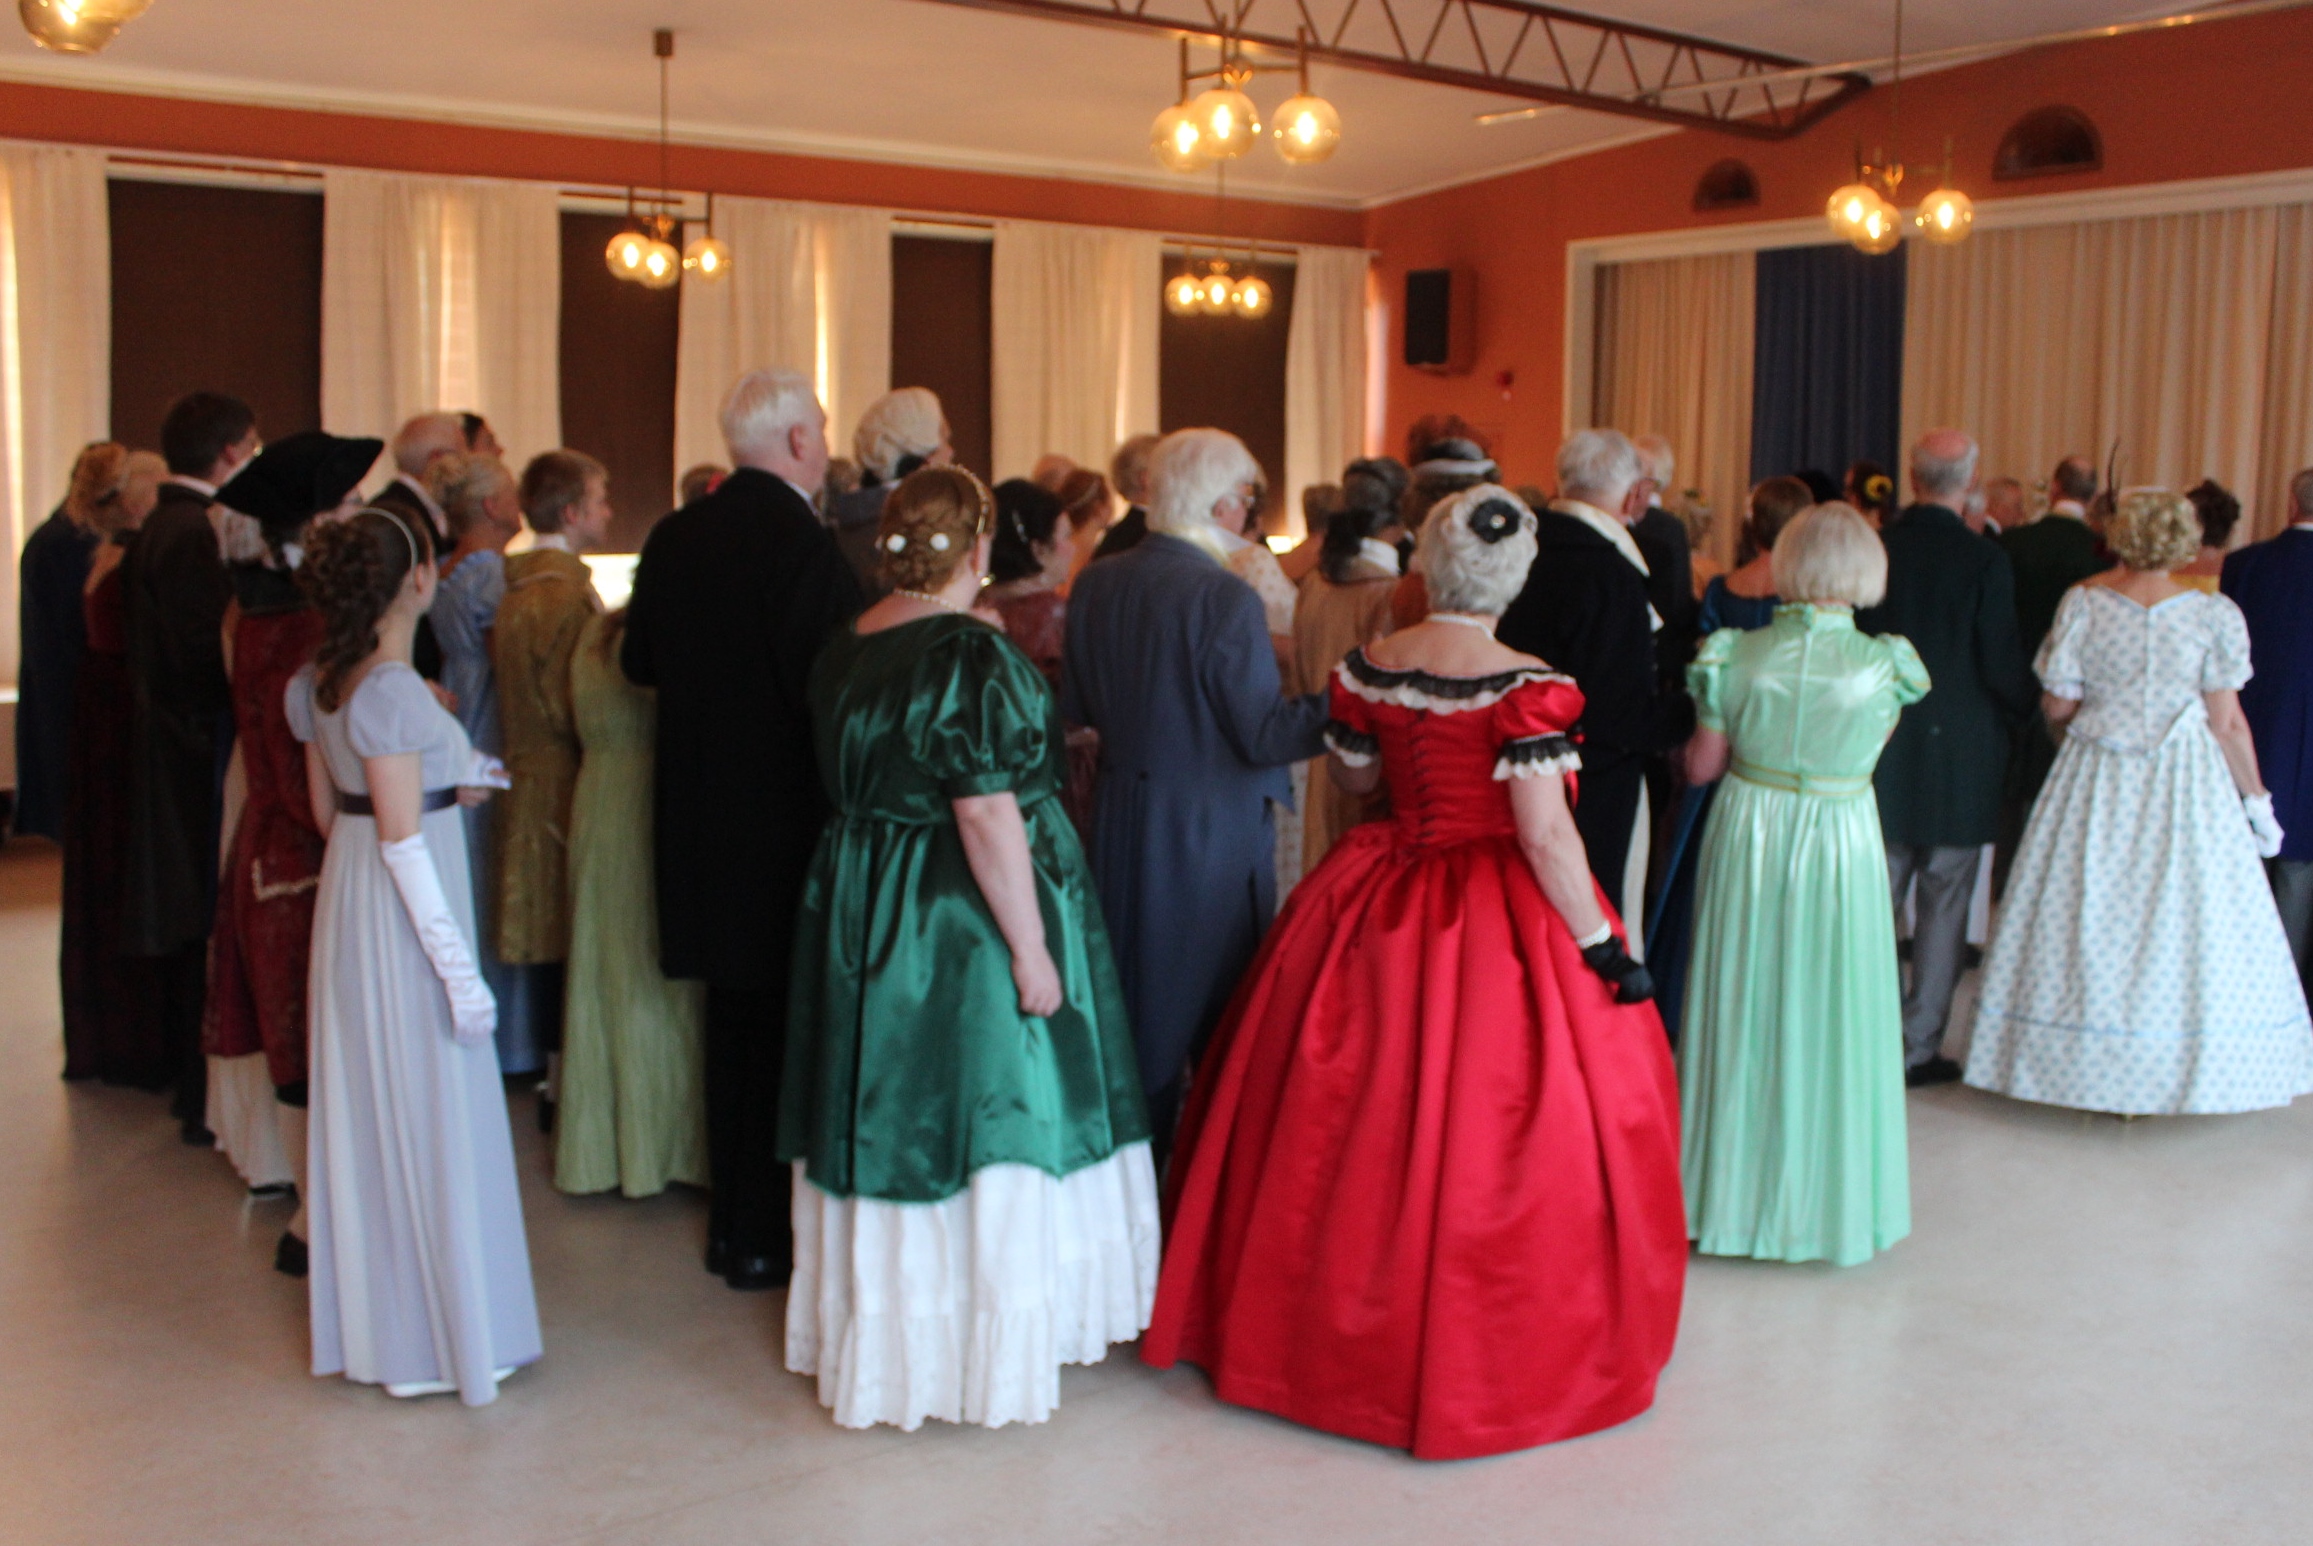
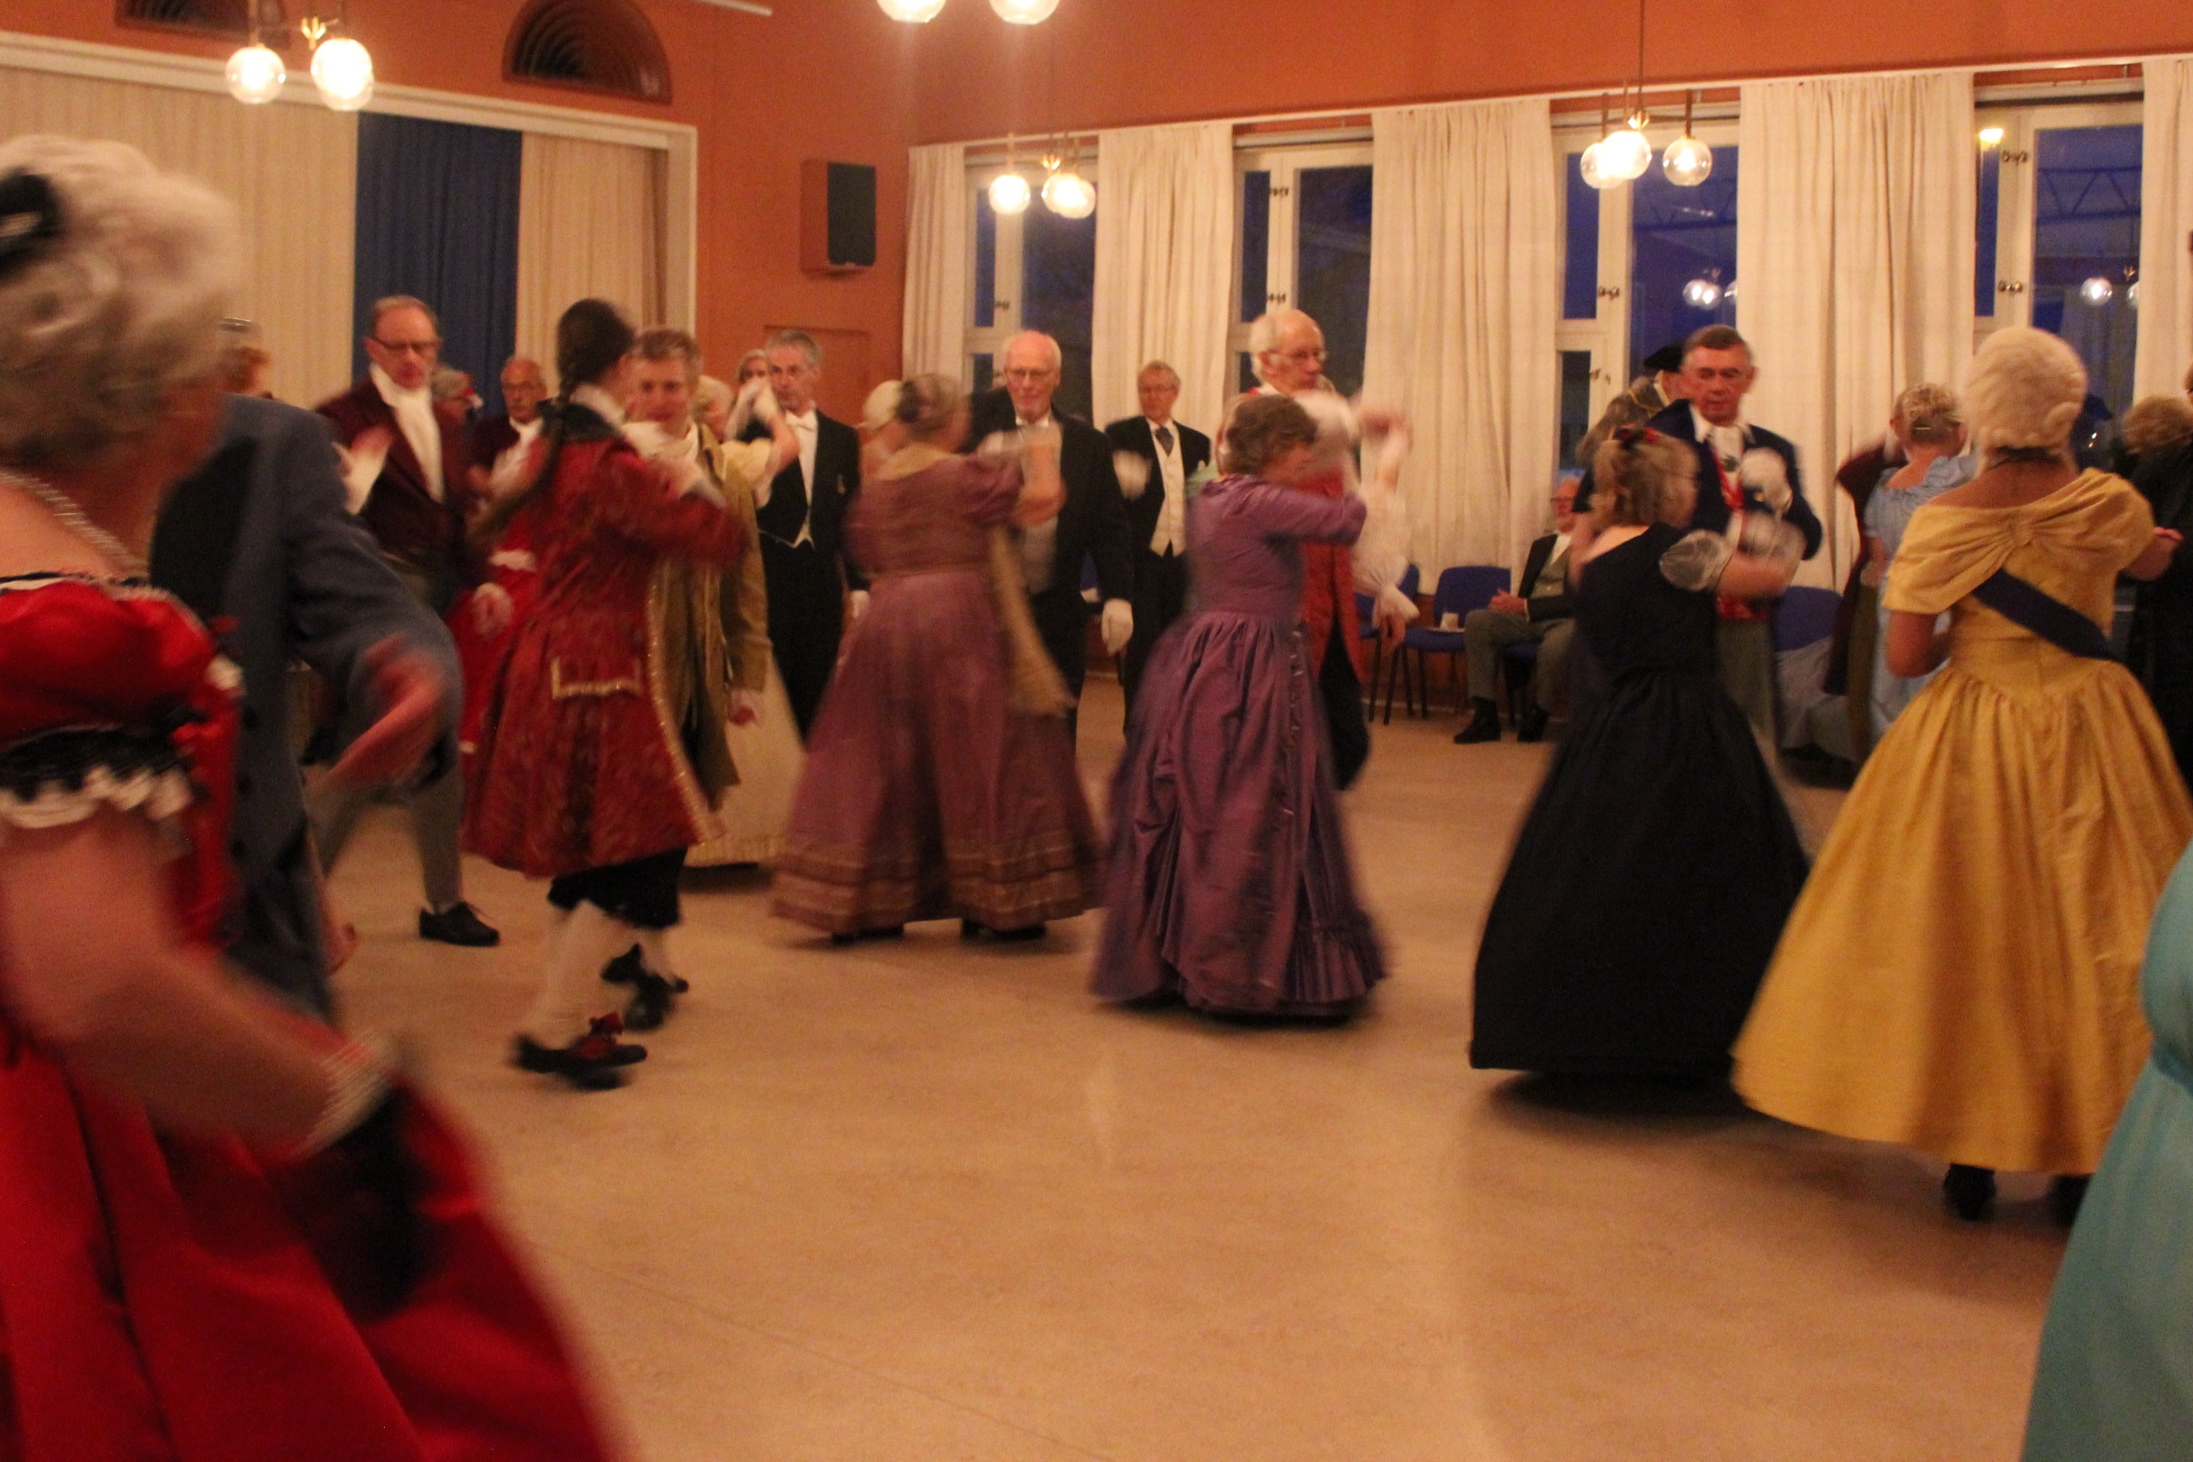
The evening started with a mingel and everyone admiring everyone else dresses/costumes. 
 Selfie with a big digital camera is not as easy as it looks…

 Beautiful girl – terrible lighting…
I’m not kidding, this is how bad the lighting is in the dance hall.
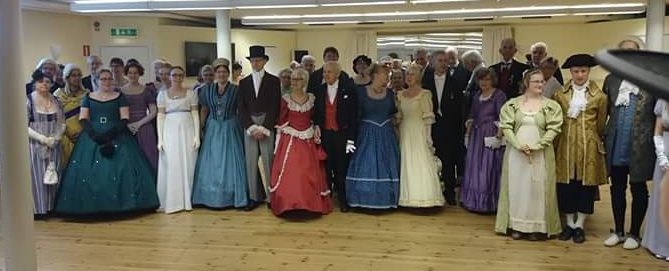 Group picture, with awful resolution
 Pretty bows on the shoes 🙂
Then it was time to head upstairs to get some dinner.  unfortunately me and my sister dragged a bit behind to take some silly pictures, and once we got upstairs there was no seats left.
They managed to get out a few extra chairs for us, but since all tables was full, we was seated on the table flanks far away from each-other.
 pretty far away…
The dinner started with a soup made from peas, which was really good. 
The main course was basically beef, chicken and bacon combined.
As a vegetarian there wasn’t to much to eat, unfortunately.  “Can we pleas call for a pizza, cause I’ve only had some cake since breakfast…”
During dinner one gentleman got up and started singing an “humorous” old song, which was kind of musing, at first, but 78 verses in I was not the only one rolling my eyes at the (inappropriate old sexist jokes in the song and) man taking up to much space.
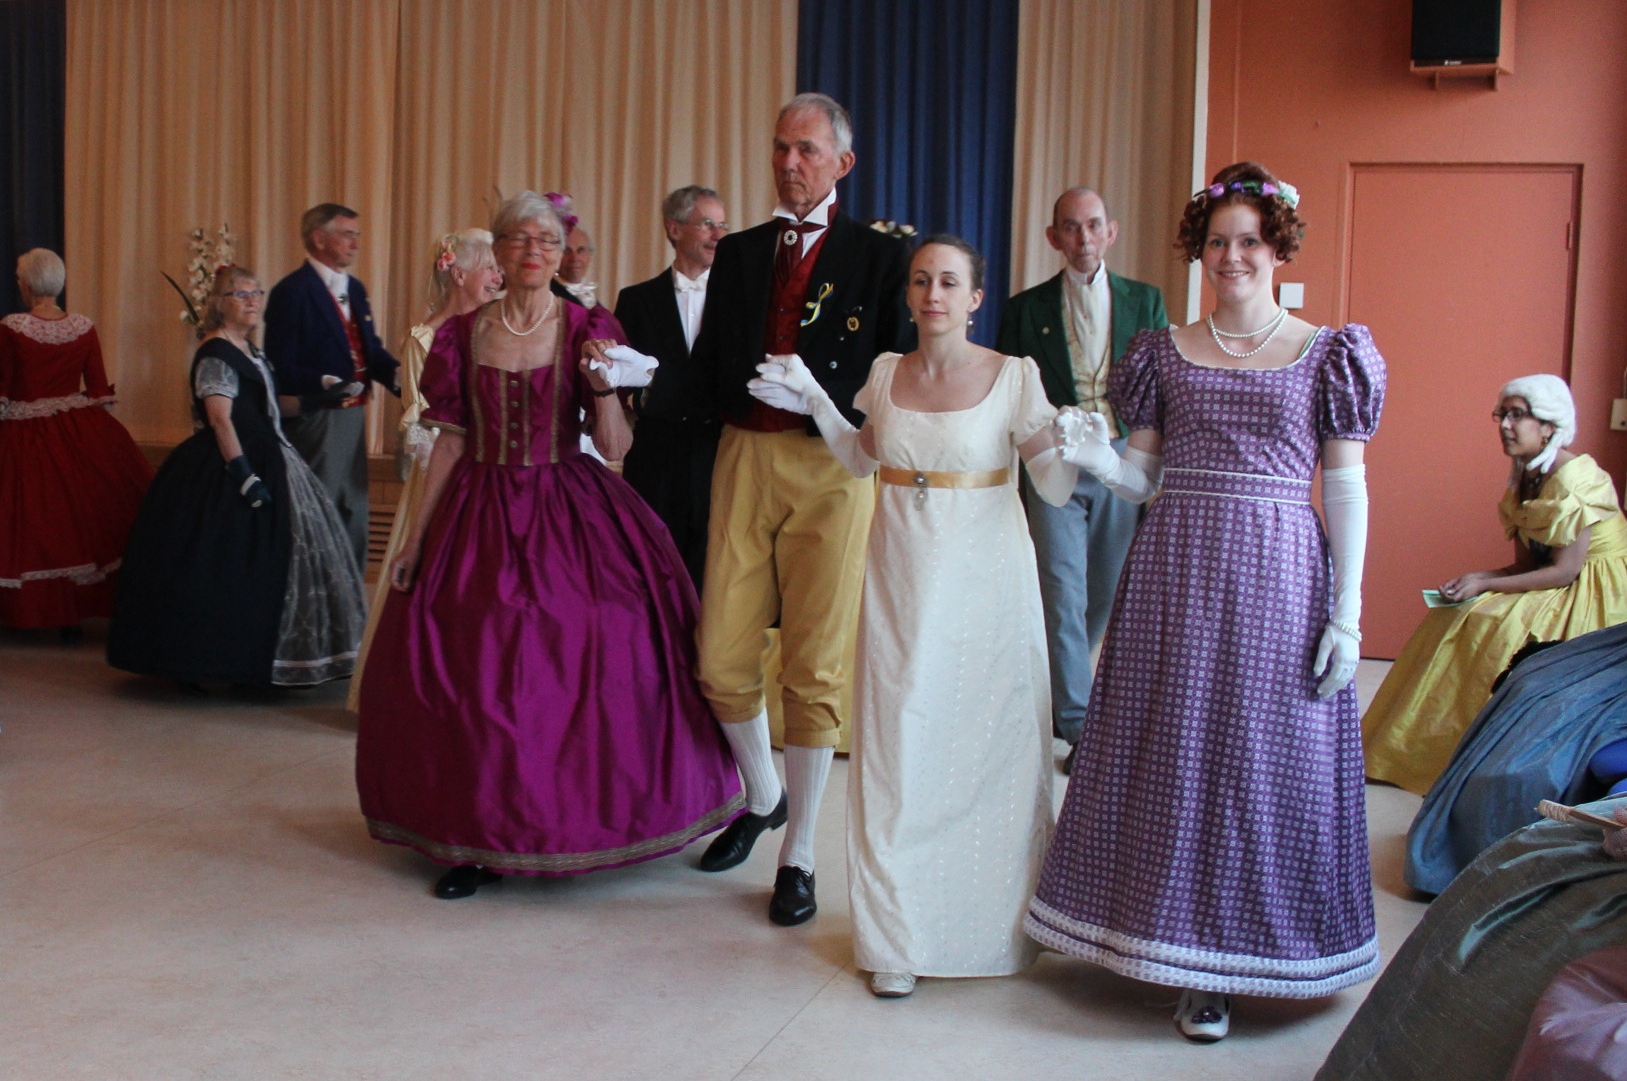
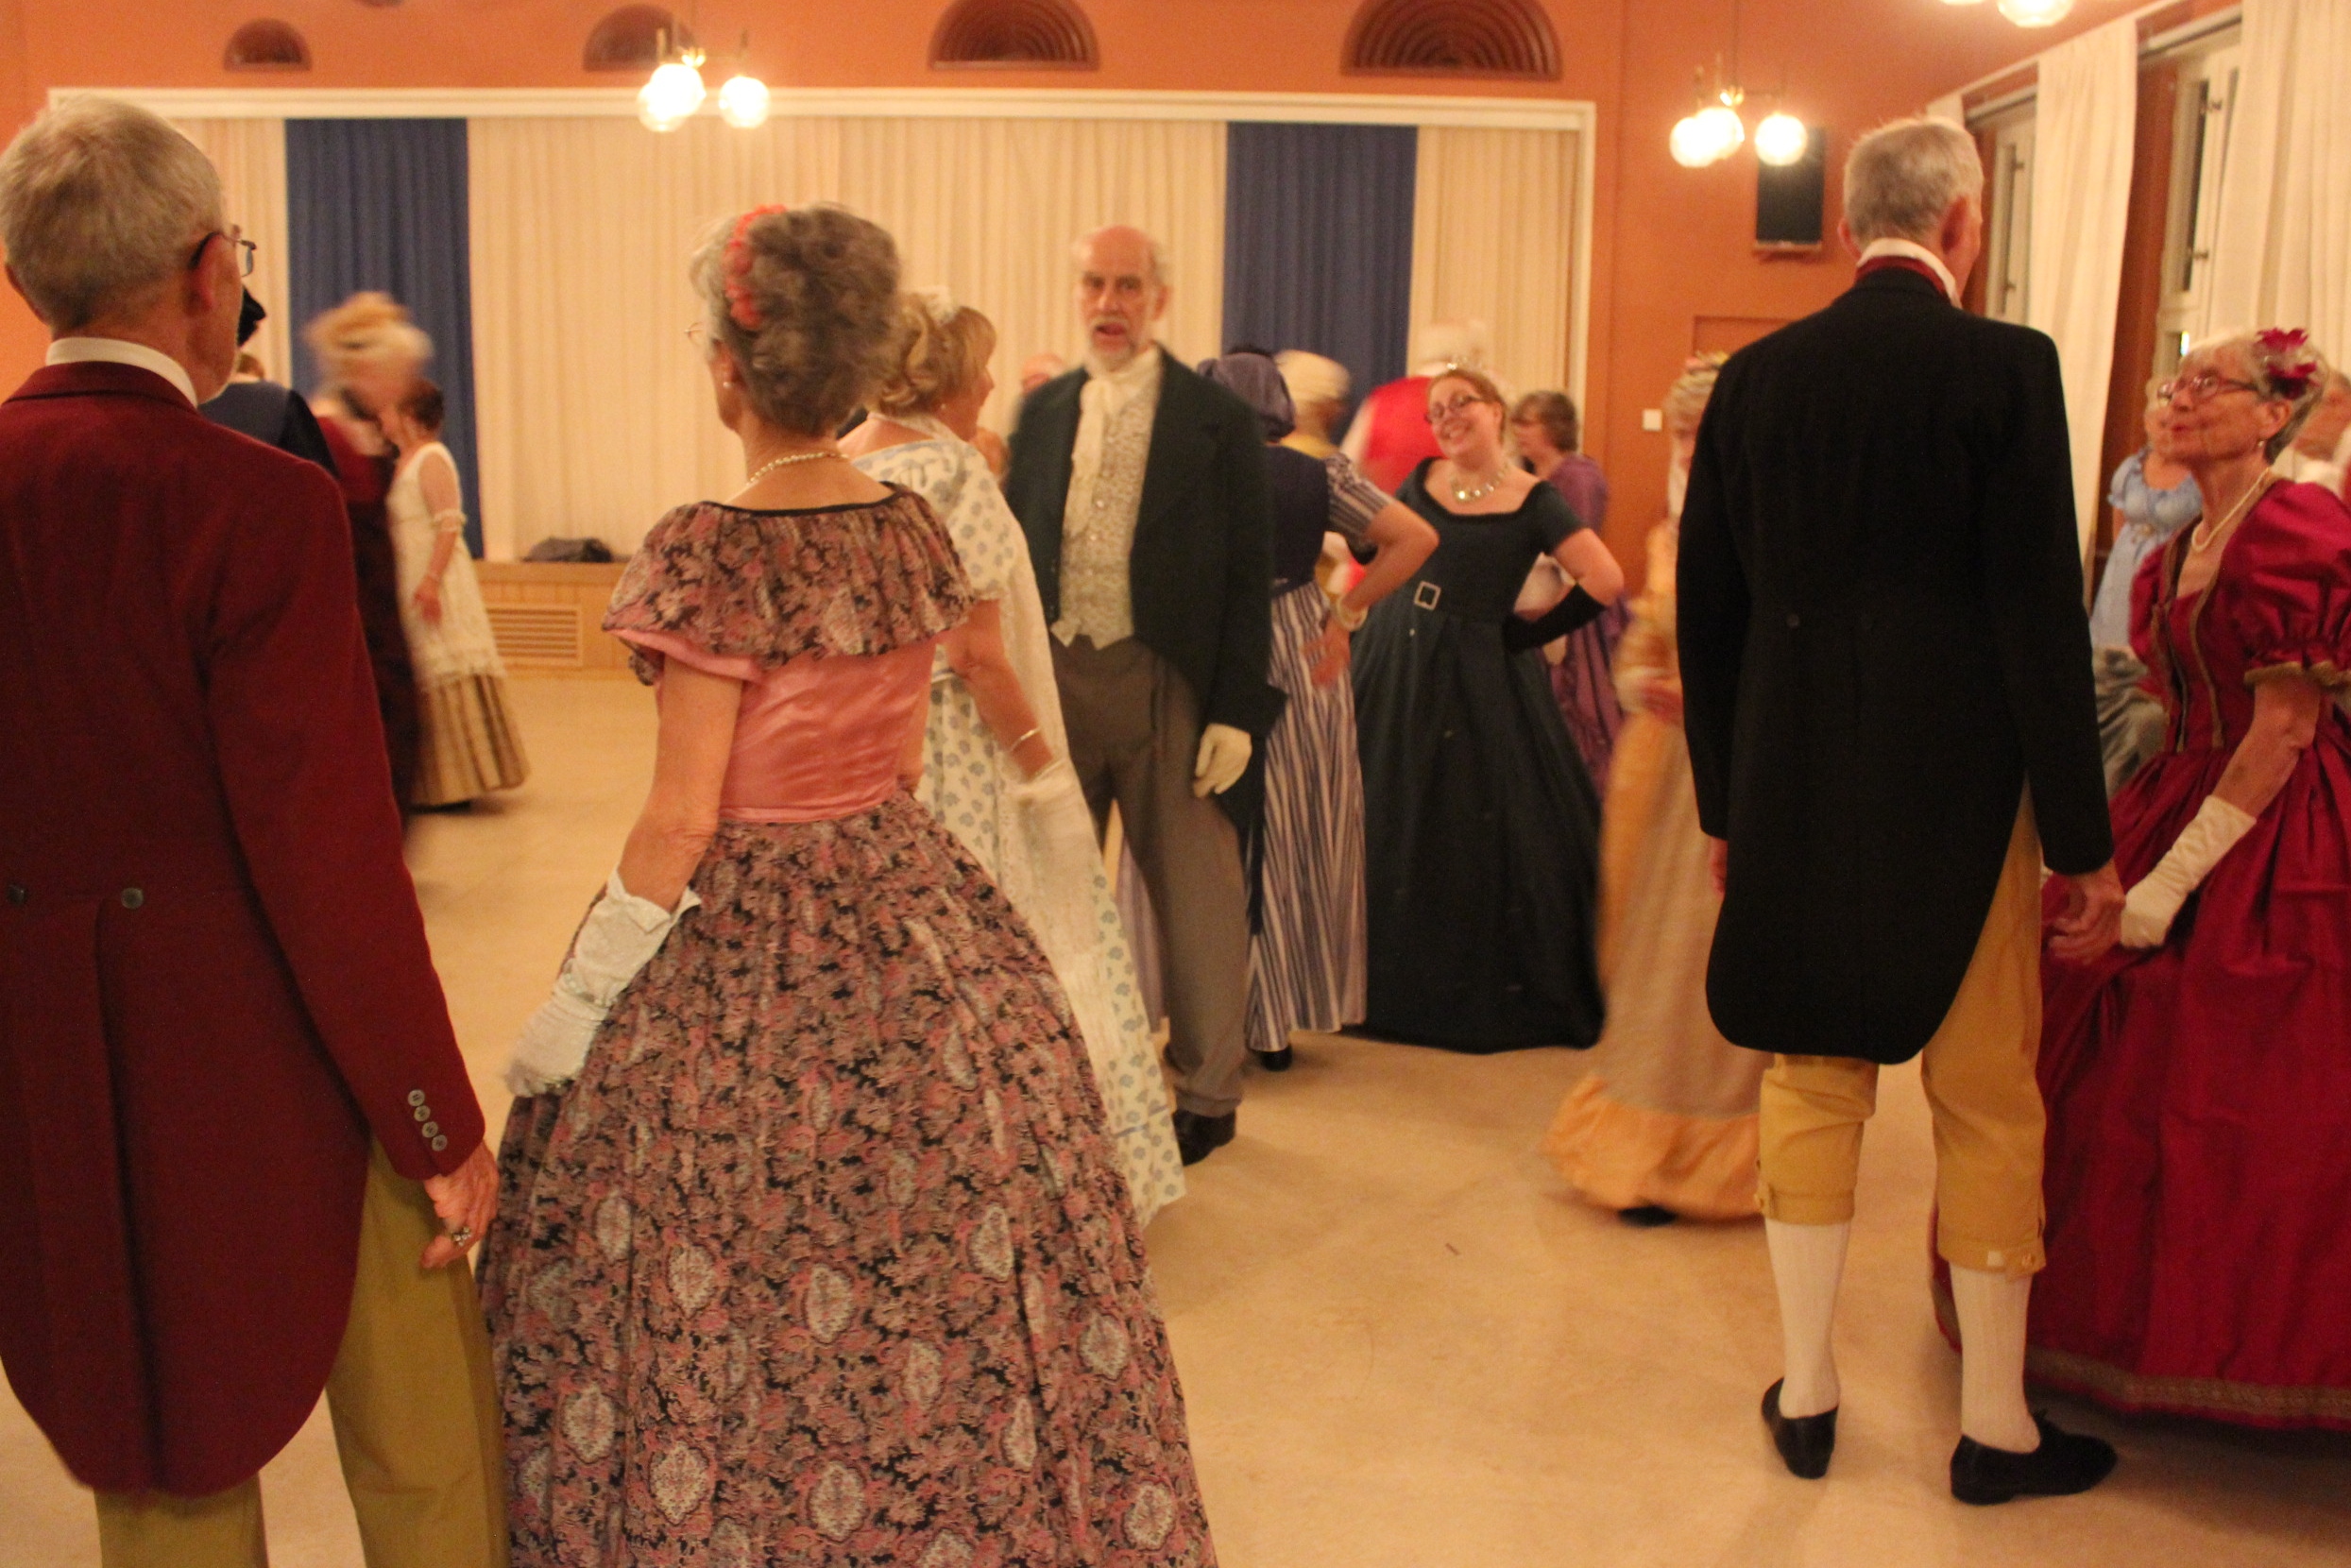
Once we finished the dinner I took the opportunity to take some picture of pretty dresses while the tables cleared to make room for the dance. 
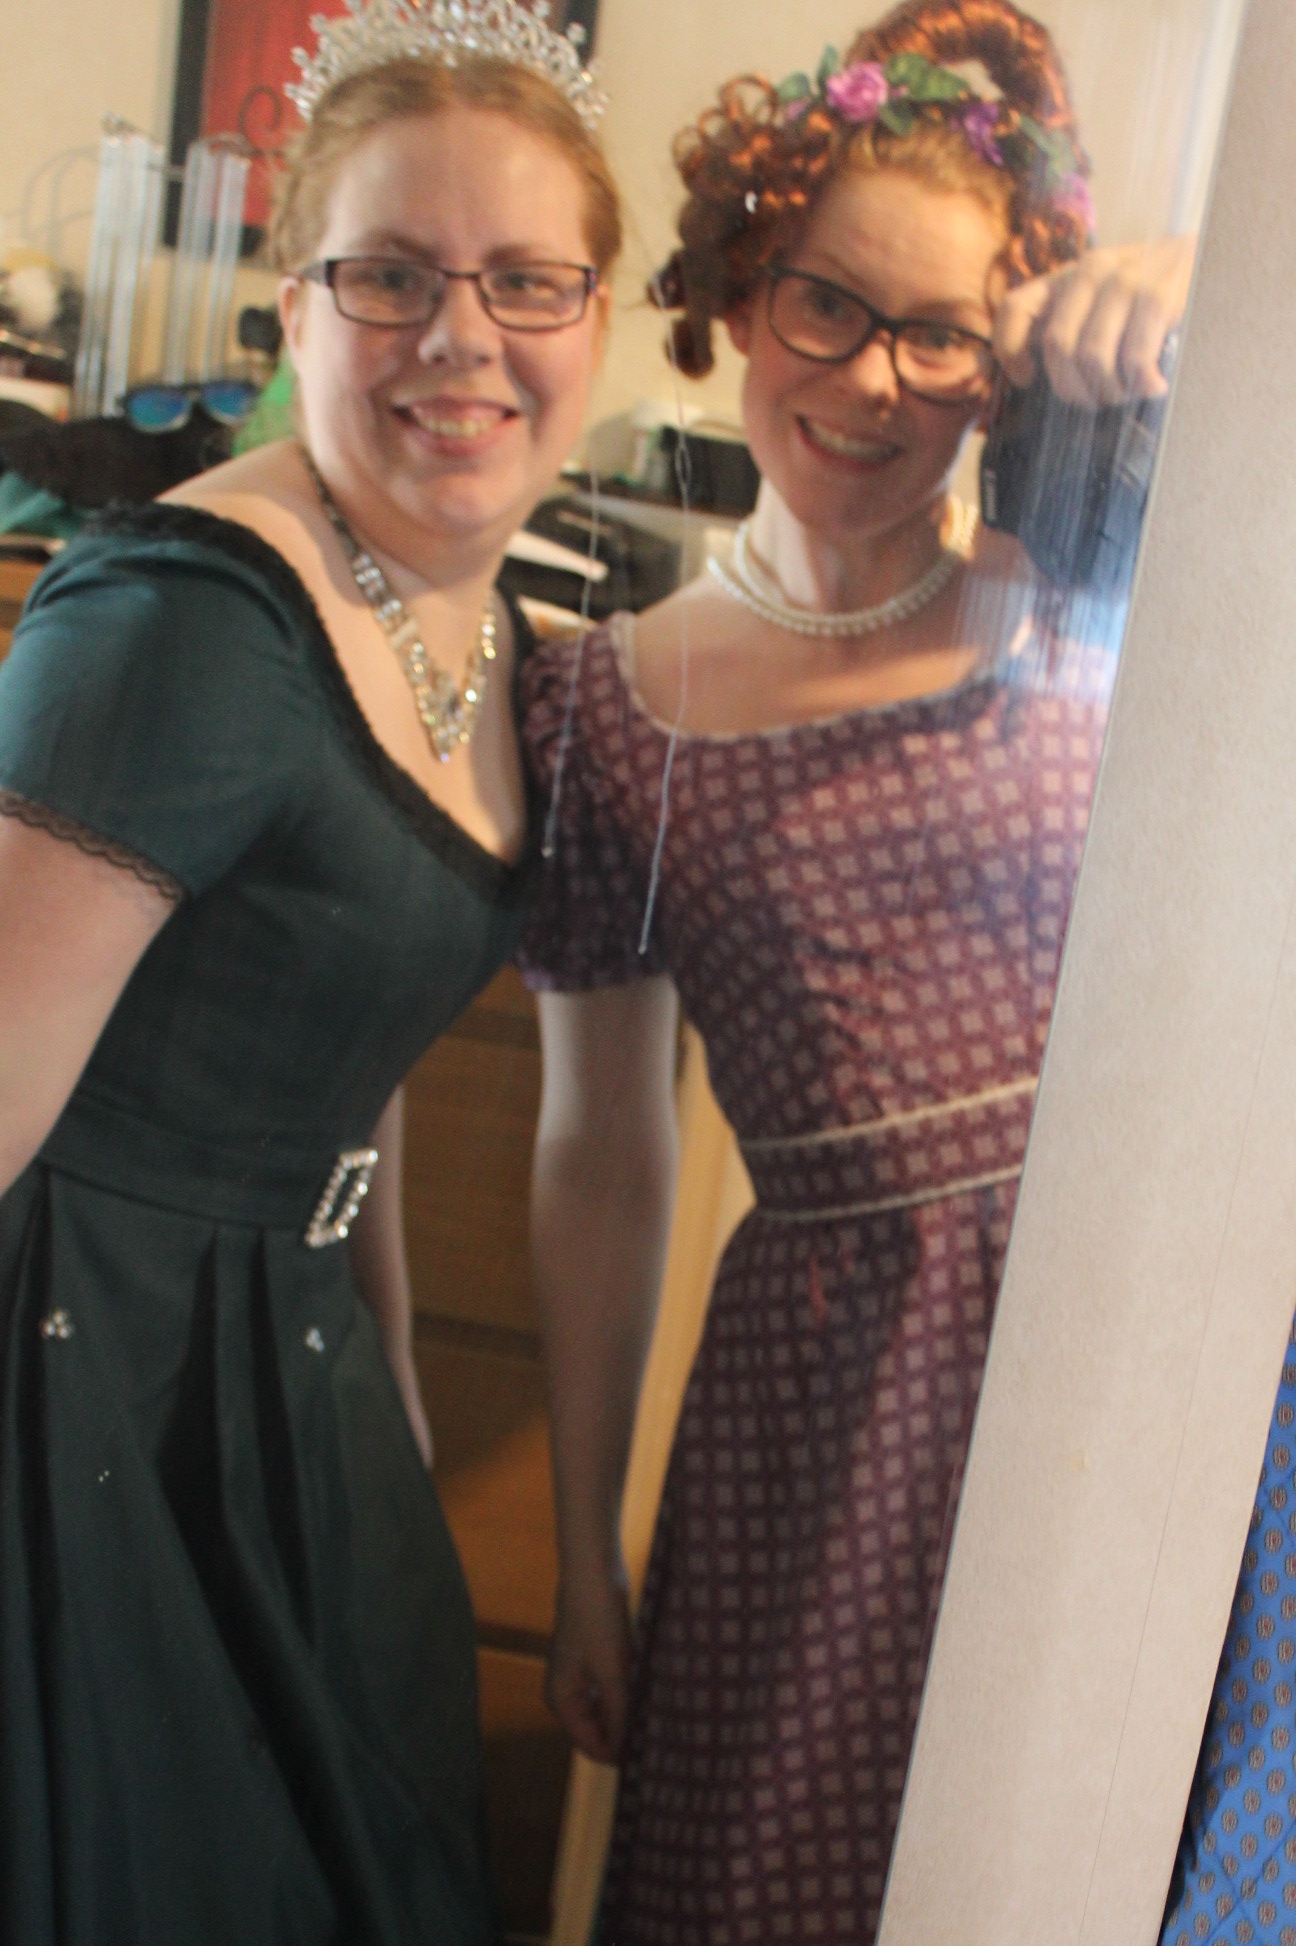
 Beautiful regency sisters
 Mirror selfie
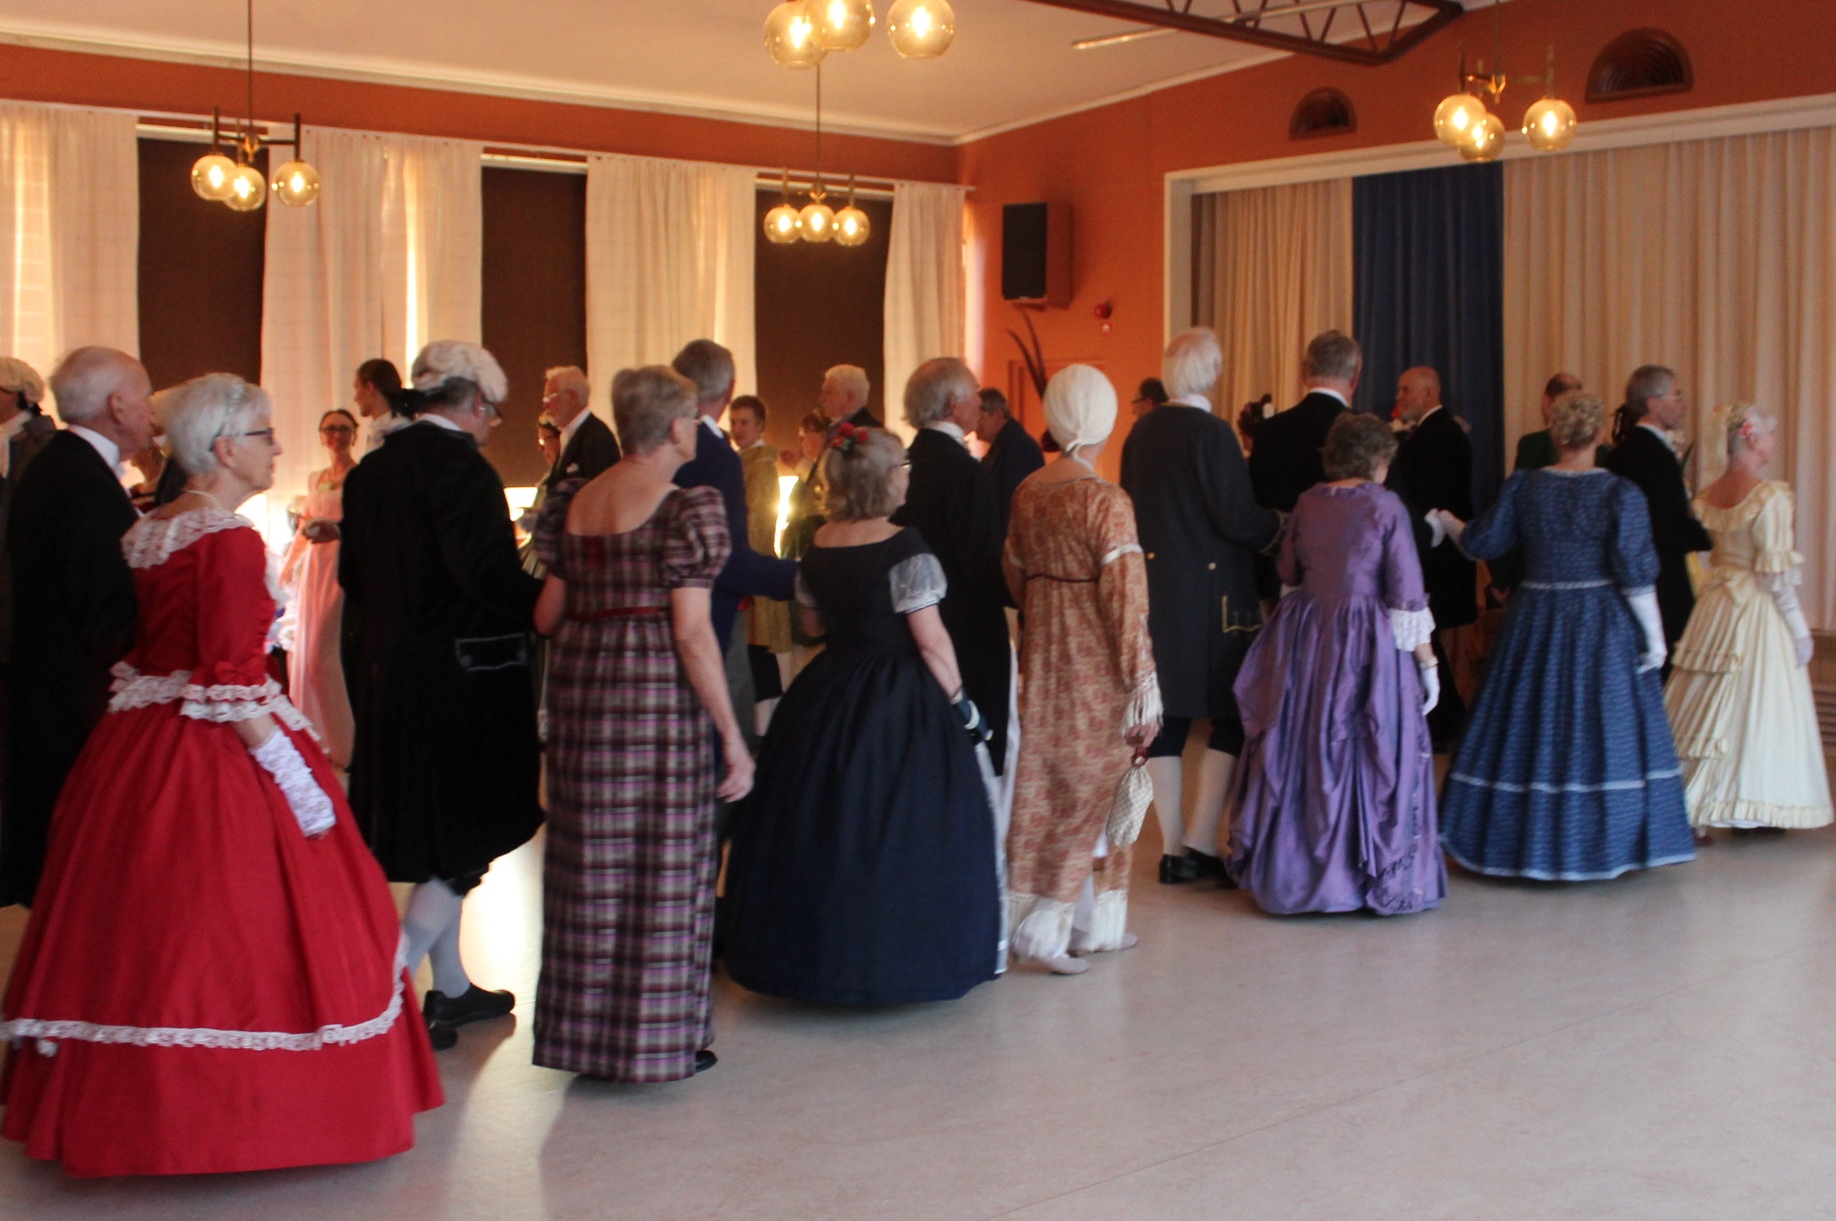
Then it was time to dance

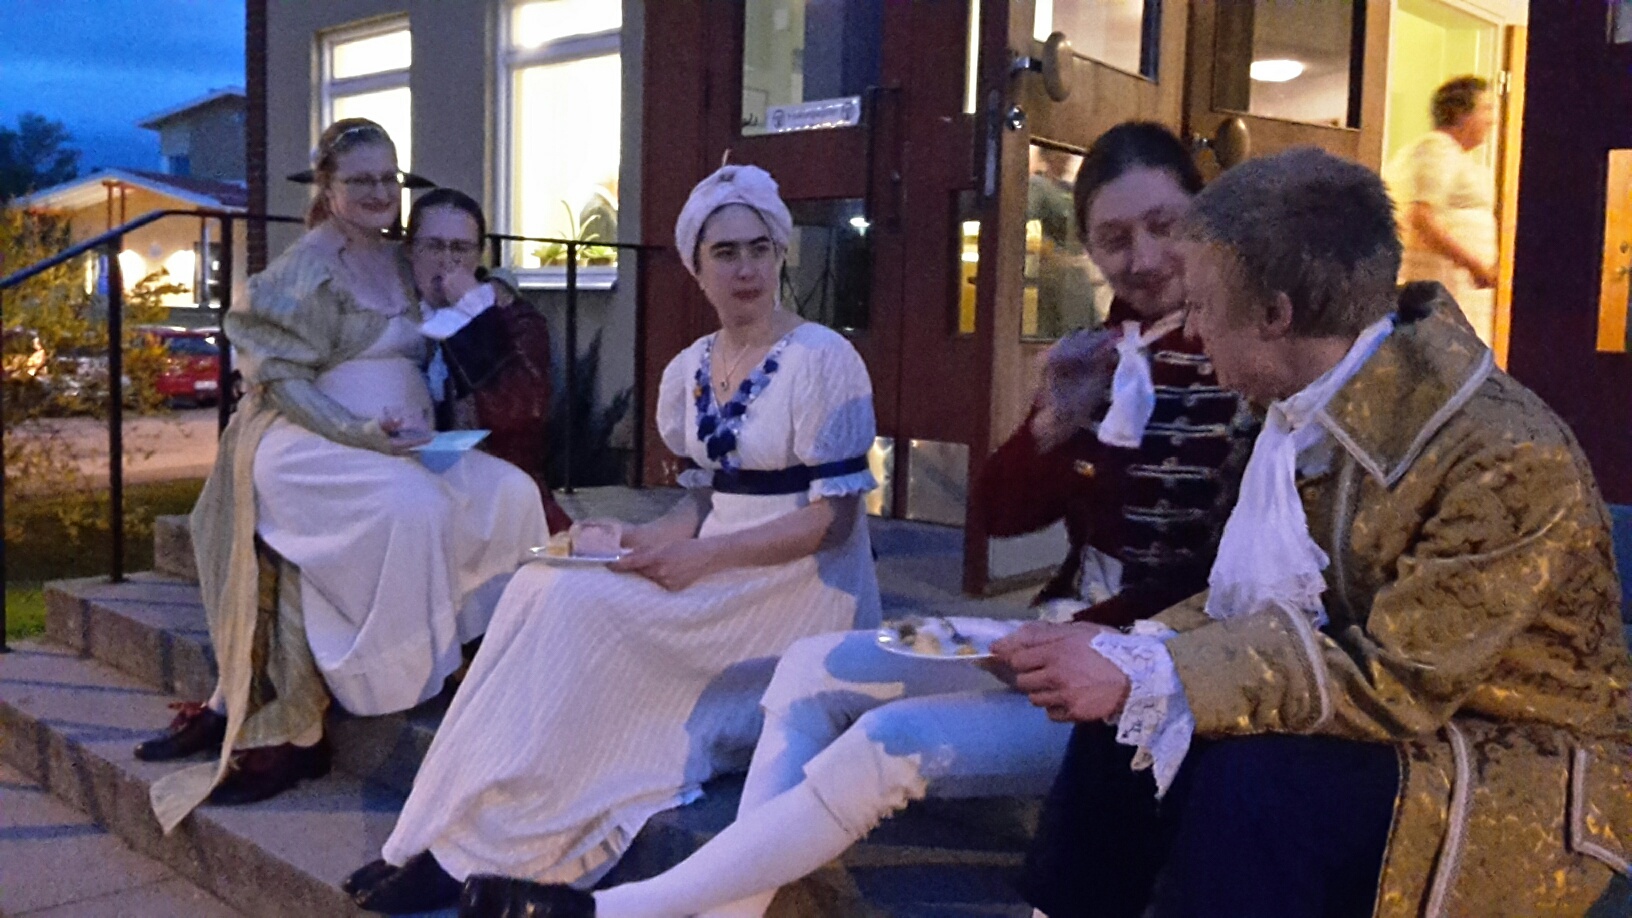
We had one break for dessert later in the evening I’m still starving, thank you very much 😦
Then the dancing continued
 Somebody knows how to pose…
Then it was time to say goodbye and go home.
 I had lots of fun dancing and fooling around with my friends, making some new friends as well, but to be both hungry and really tired made me a bit cranky at the end.
At least I got lots of compliments for both my hair and my dress(es) 🙂
While we where both styled to our teeth, we also took a few shots together, me and my sister.
 Getting ourself ready


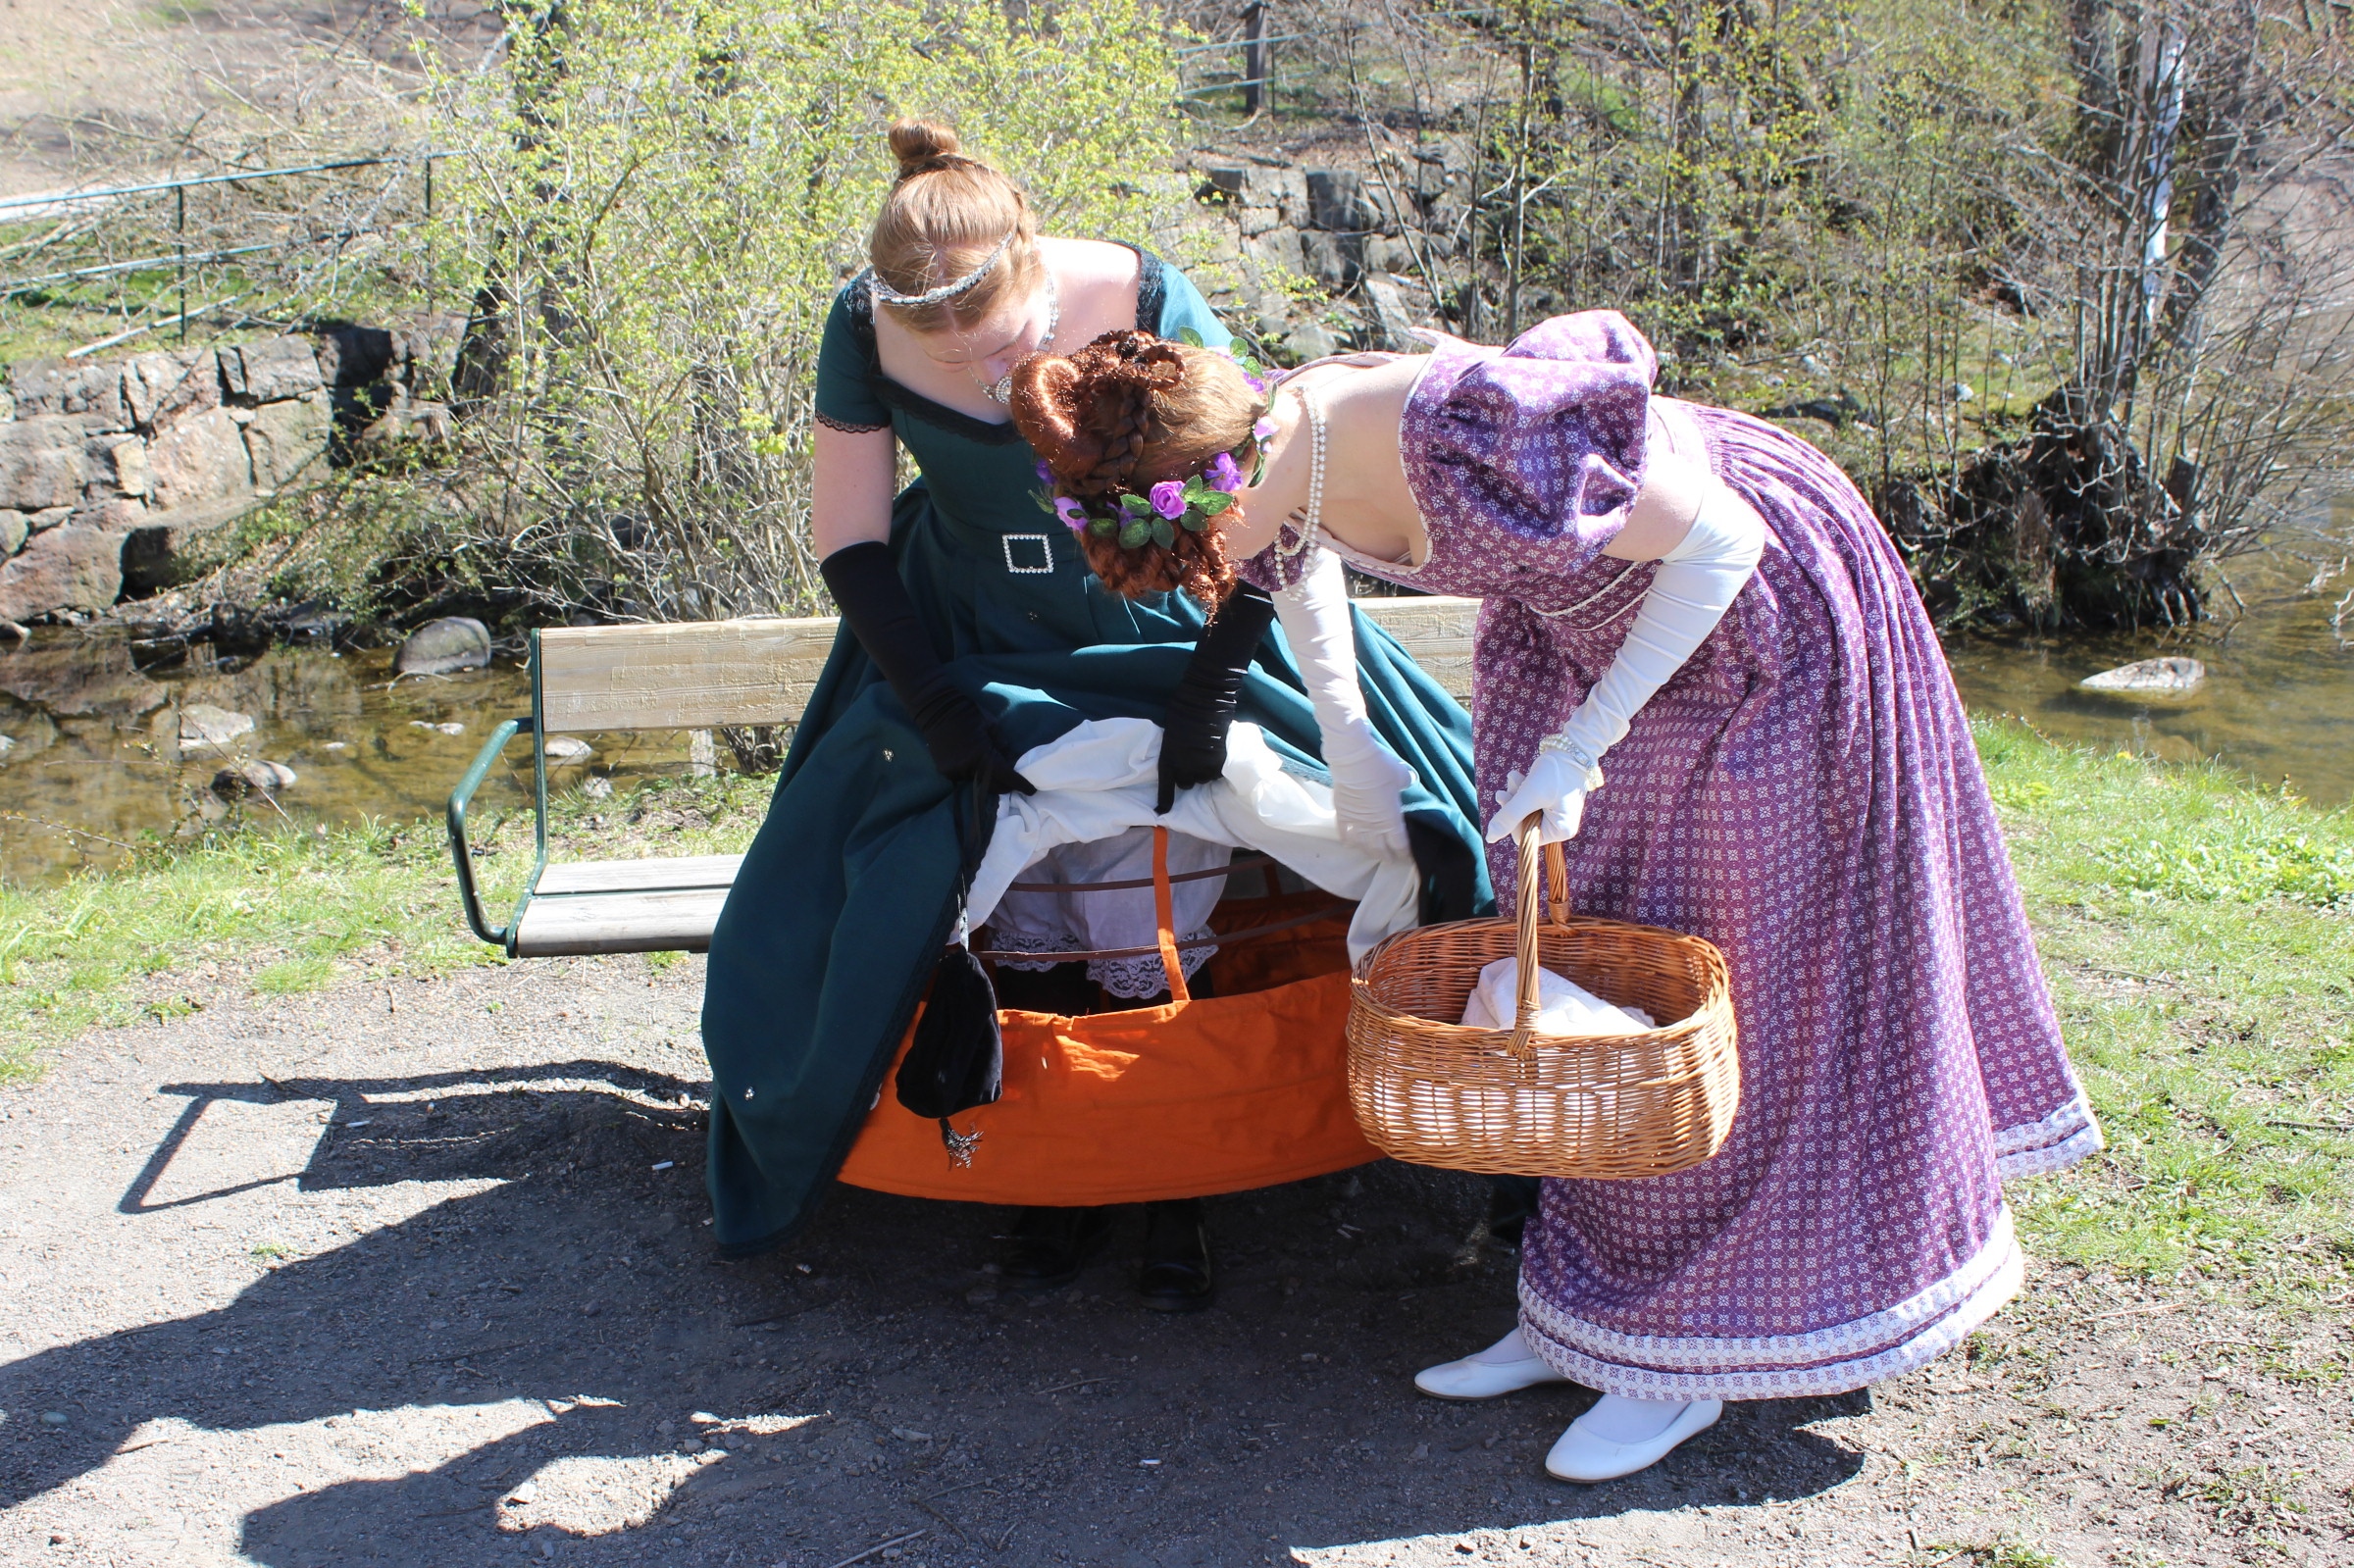 “Whats that?”
 “I’v could have sworn it run in under here…”
 Lets take a spin around the block…

Photos/filming: Elin Evaldsdotter
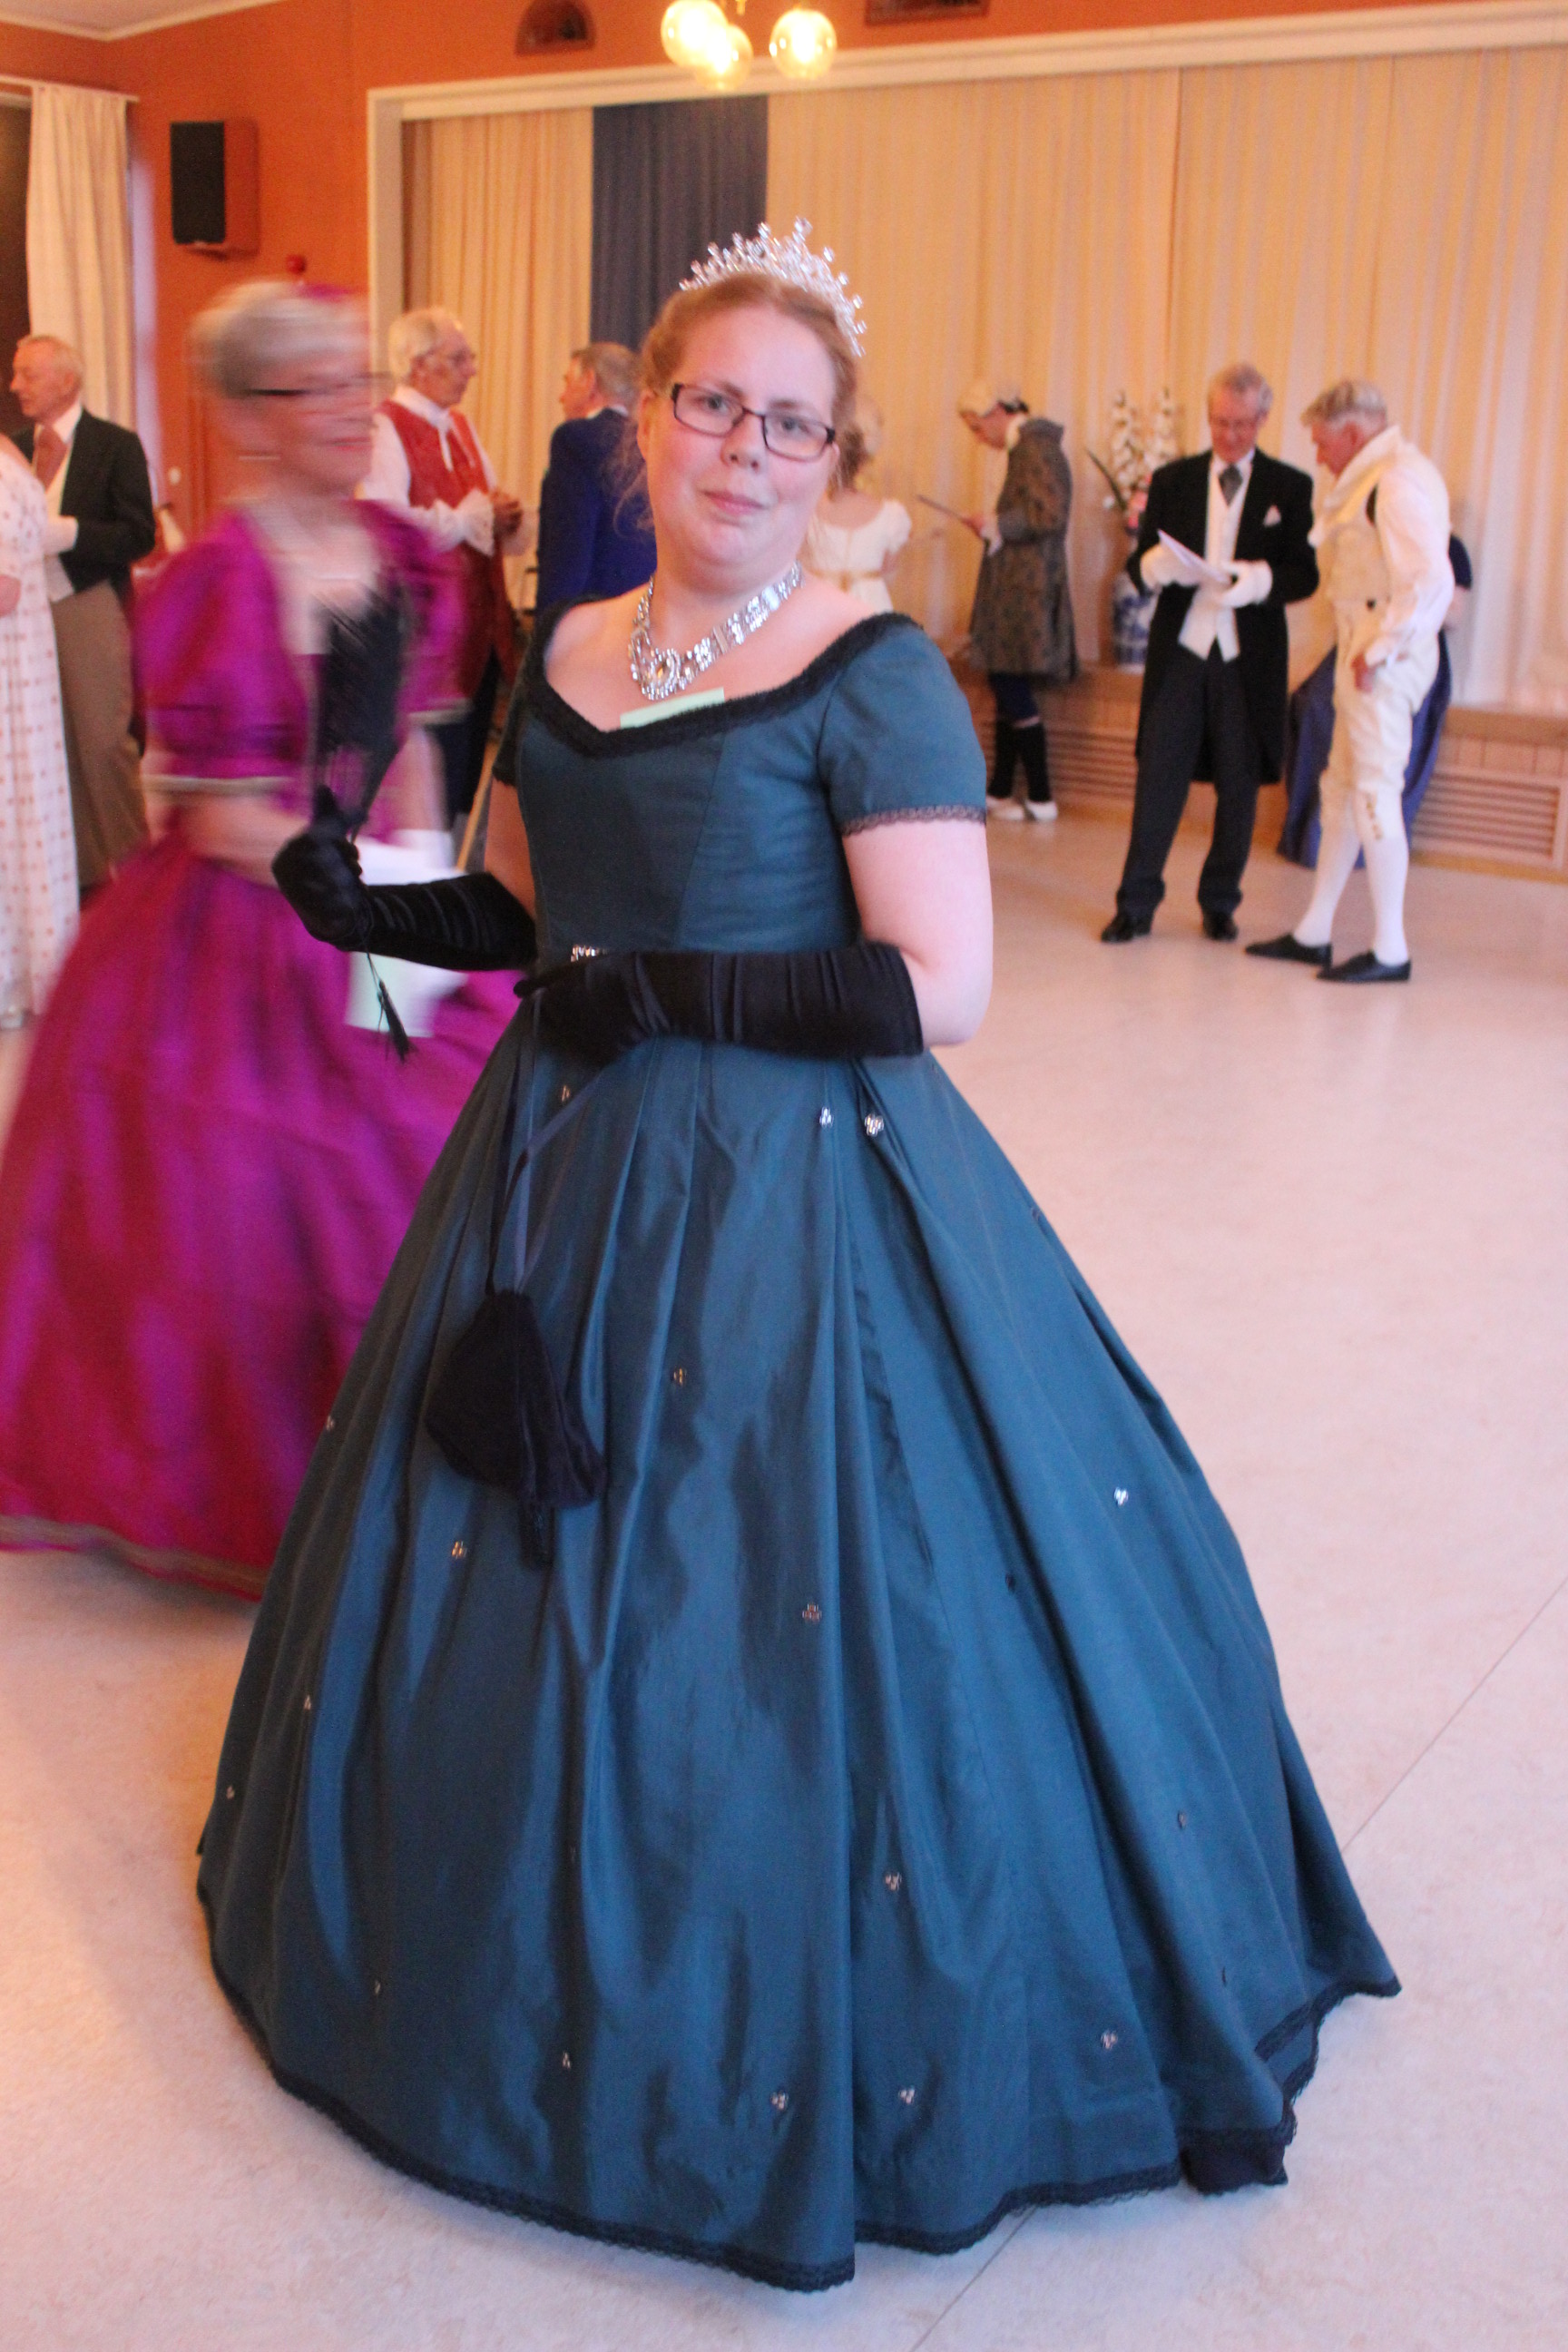
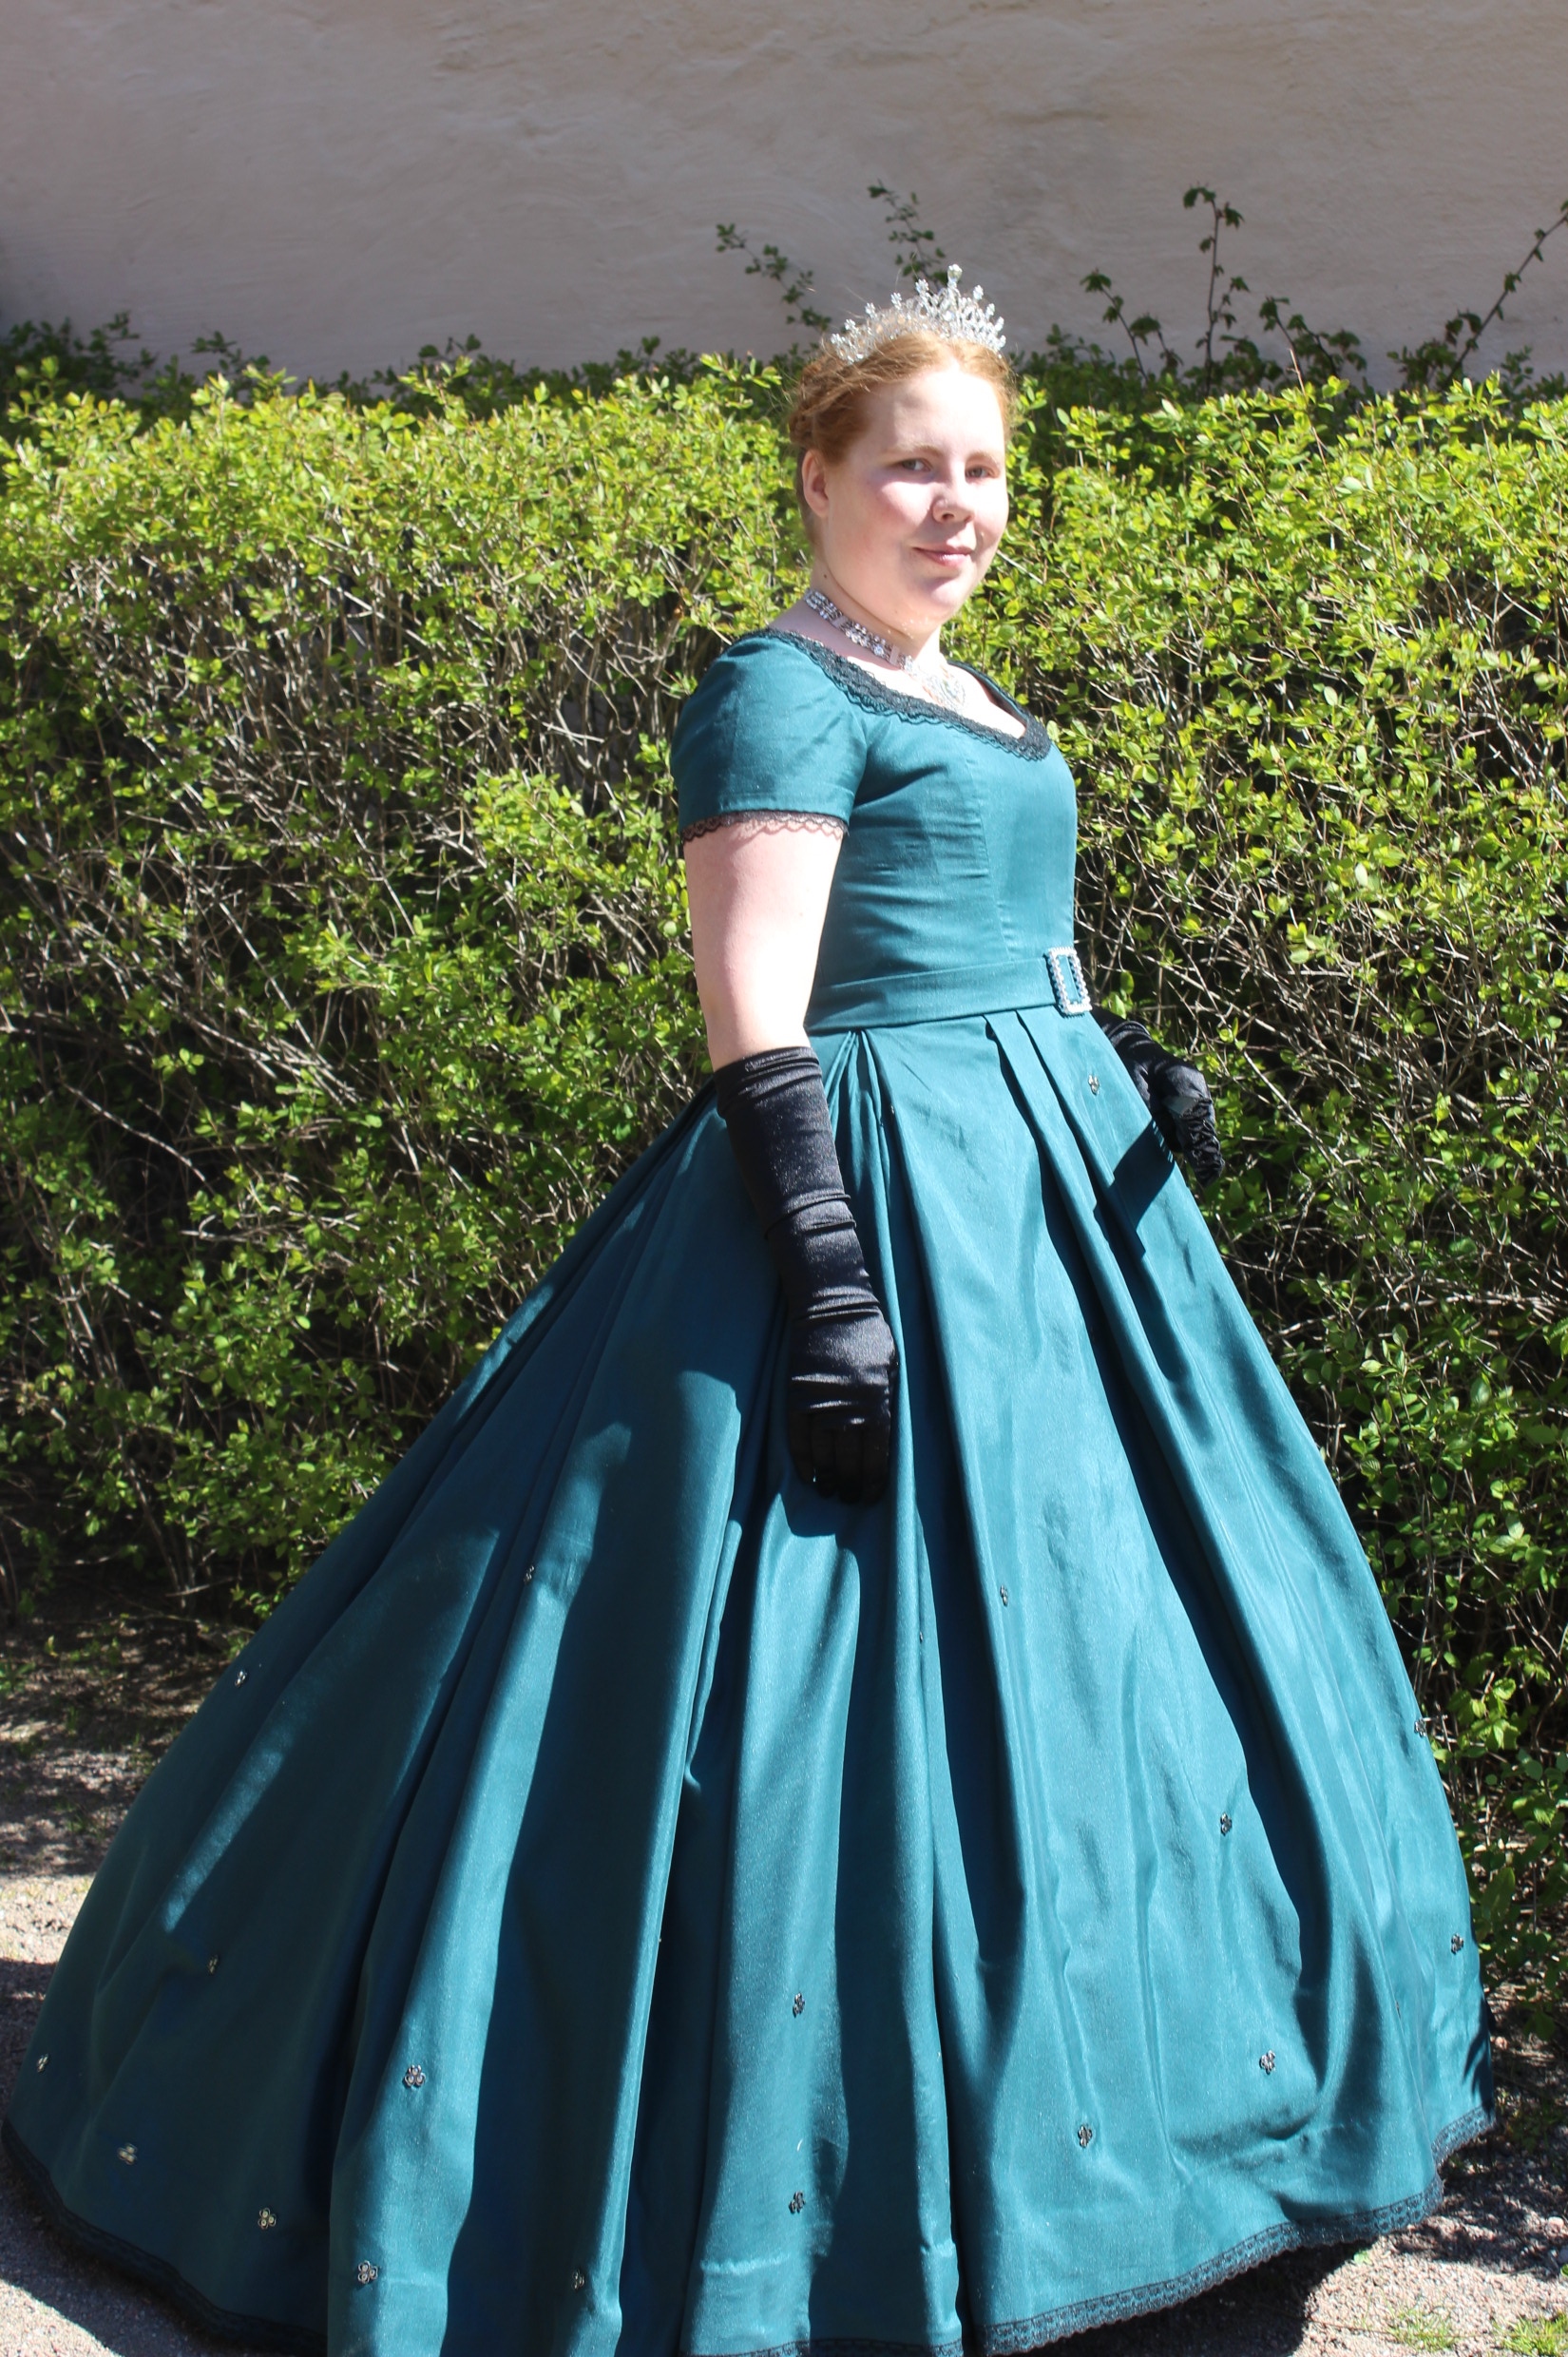
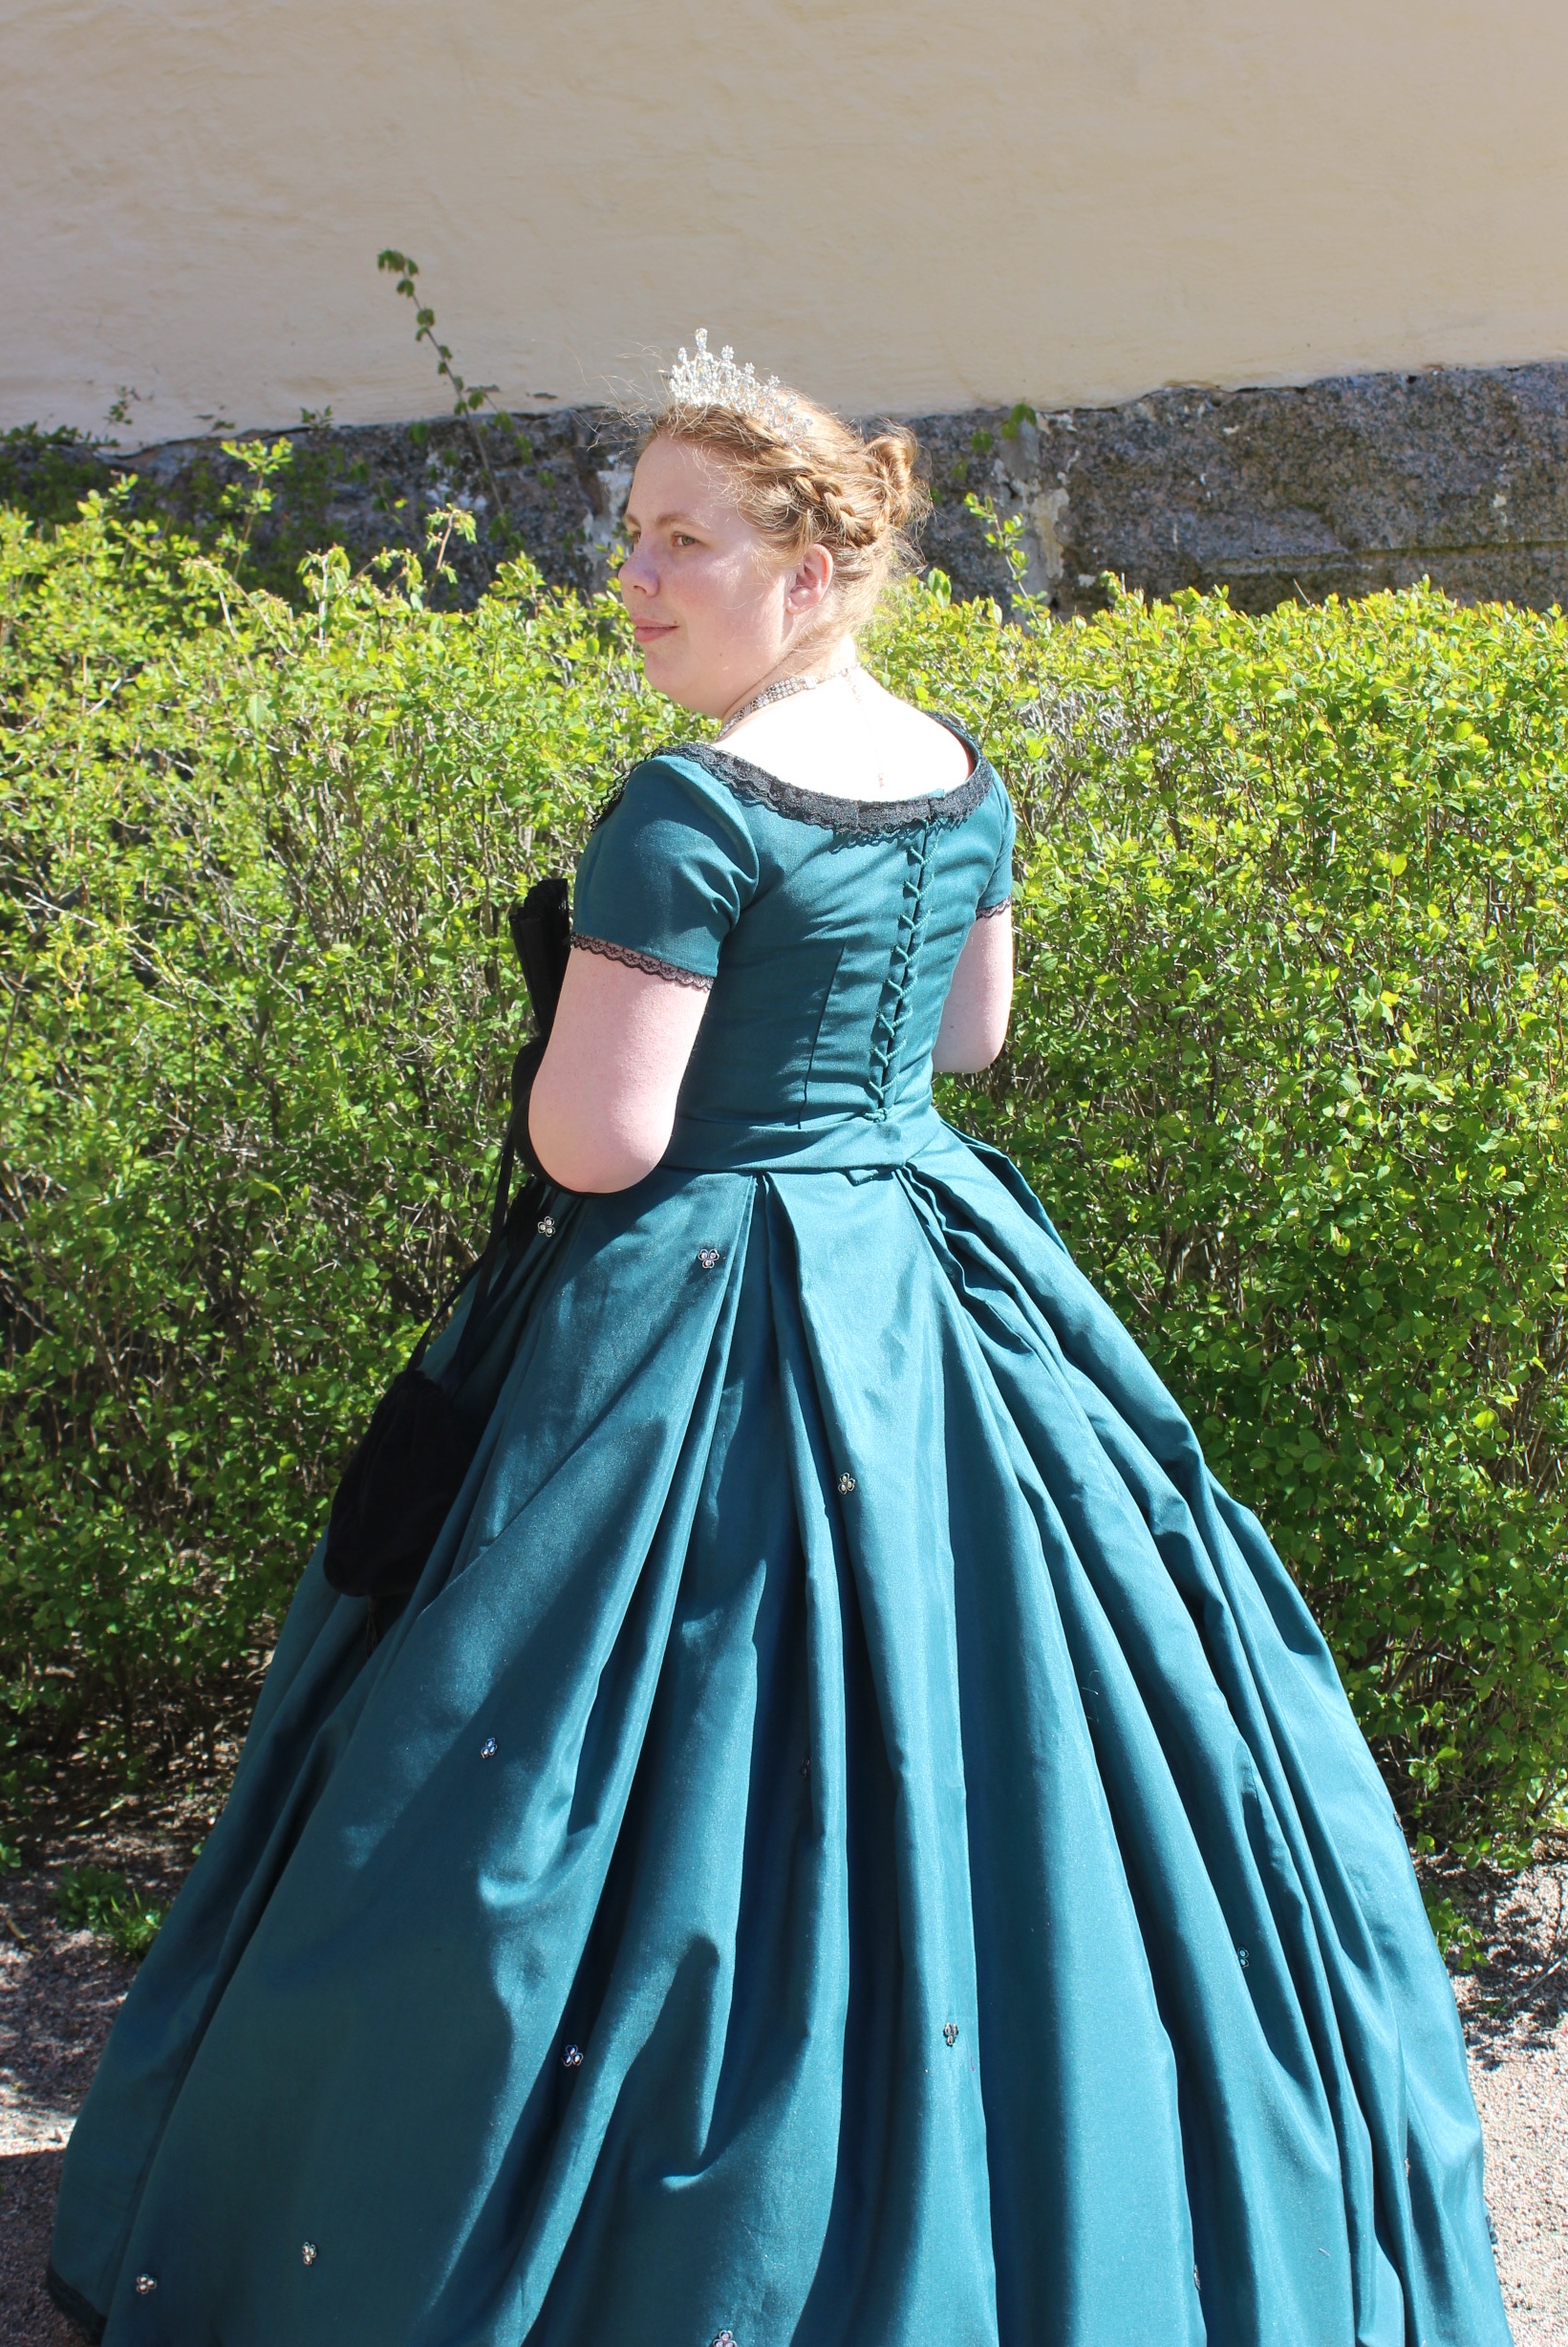
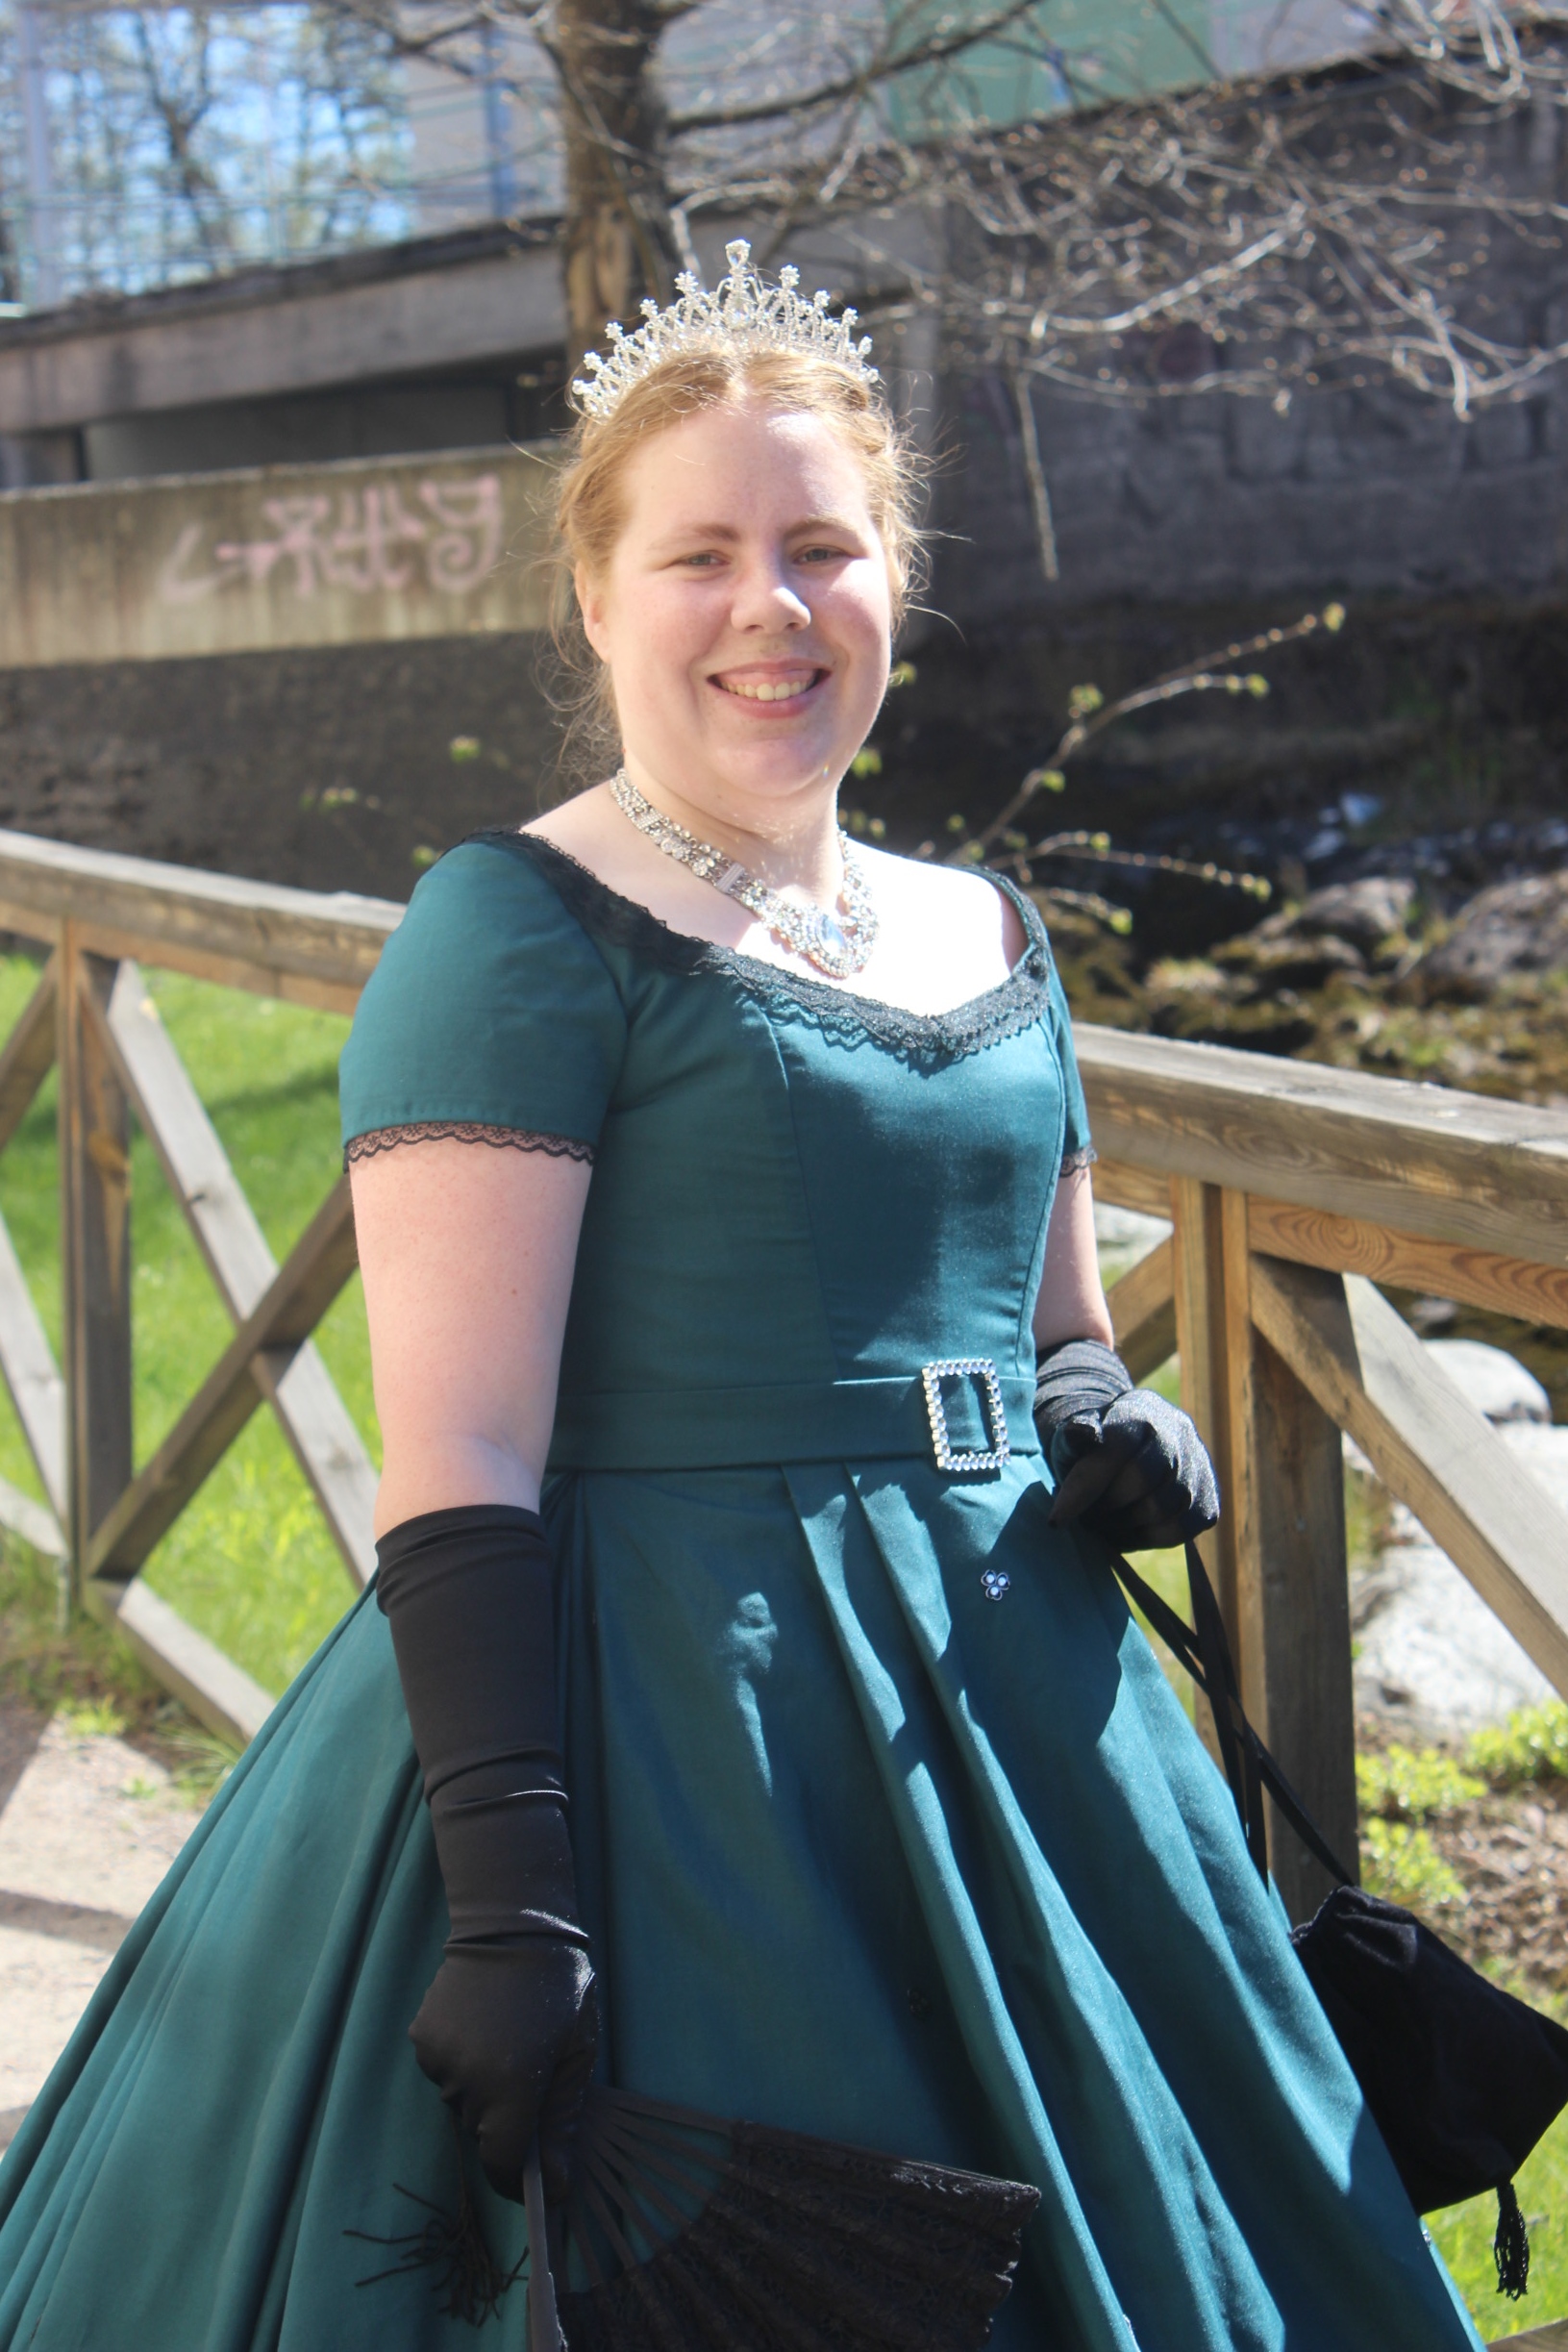
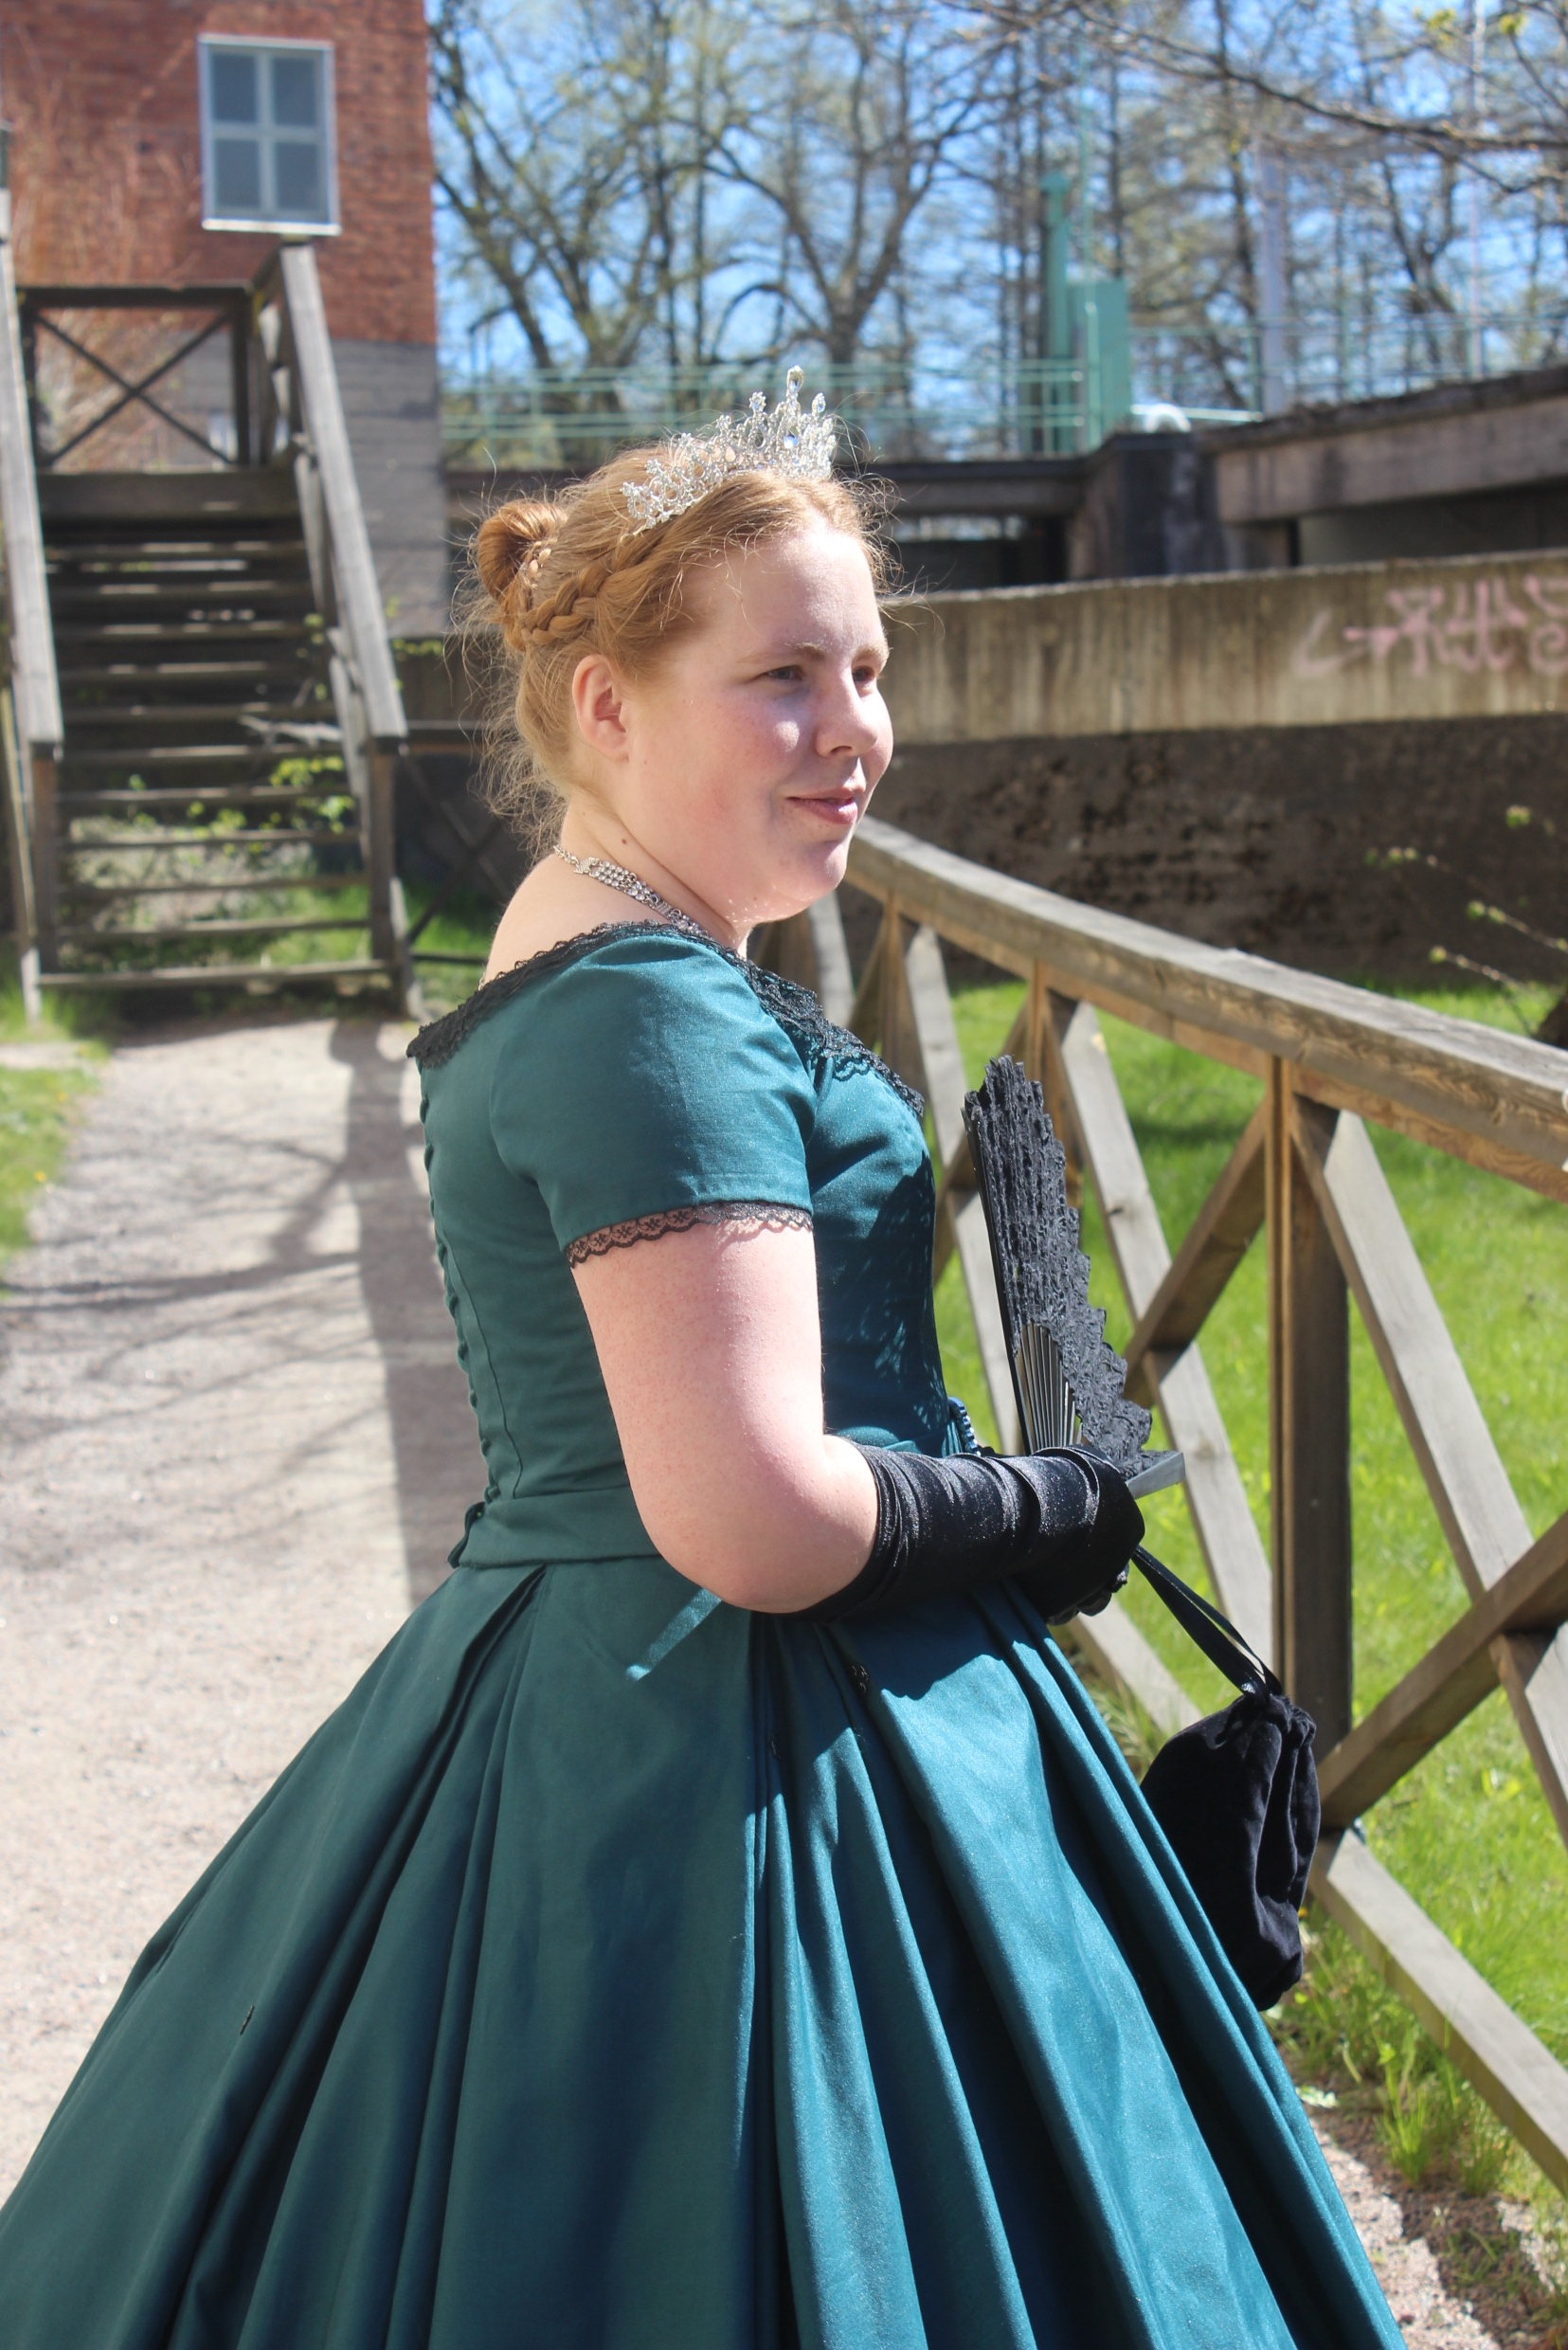
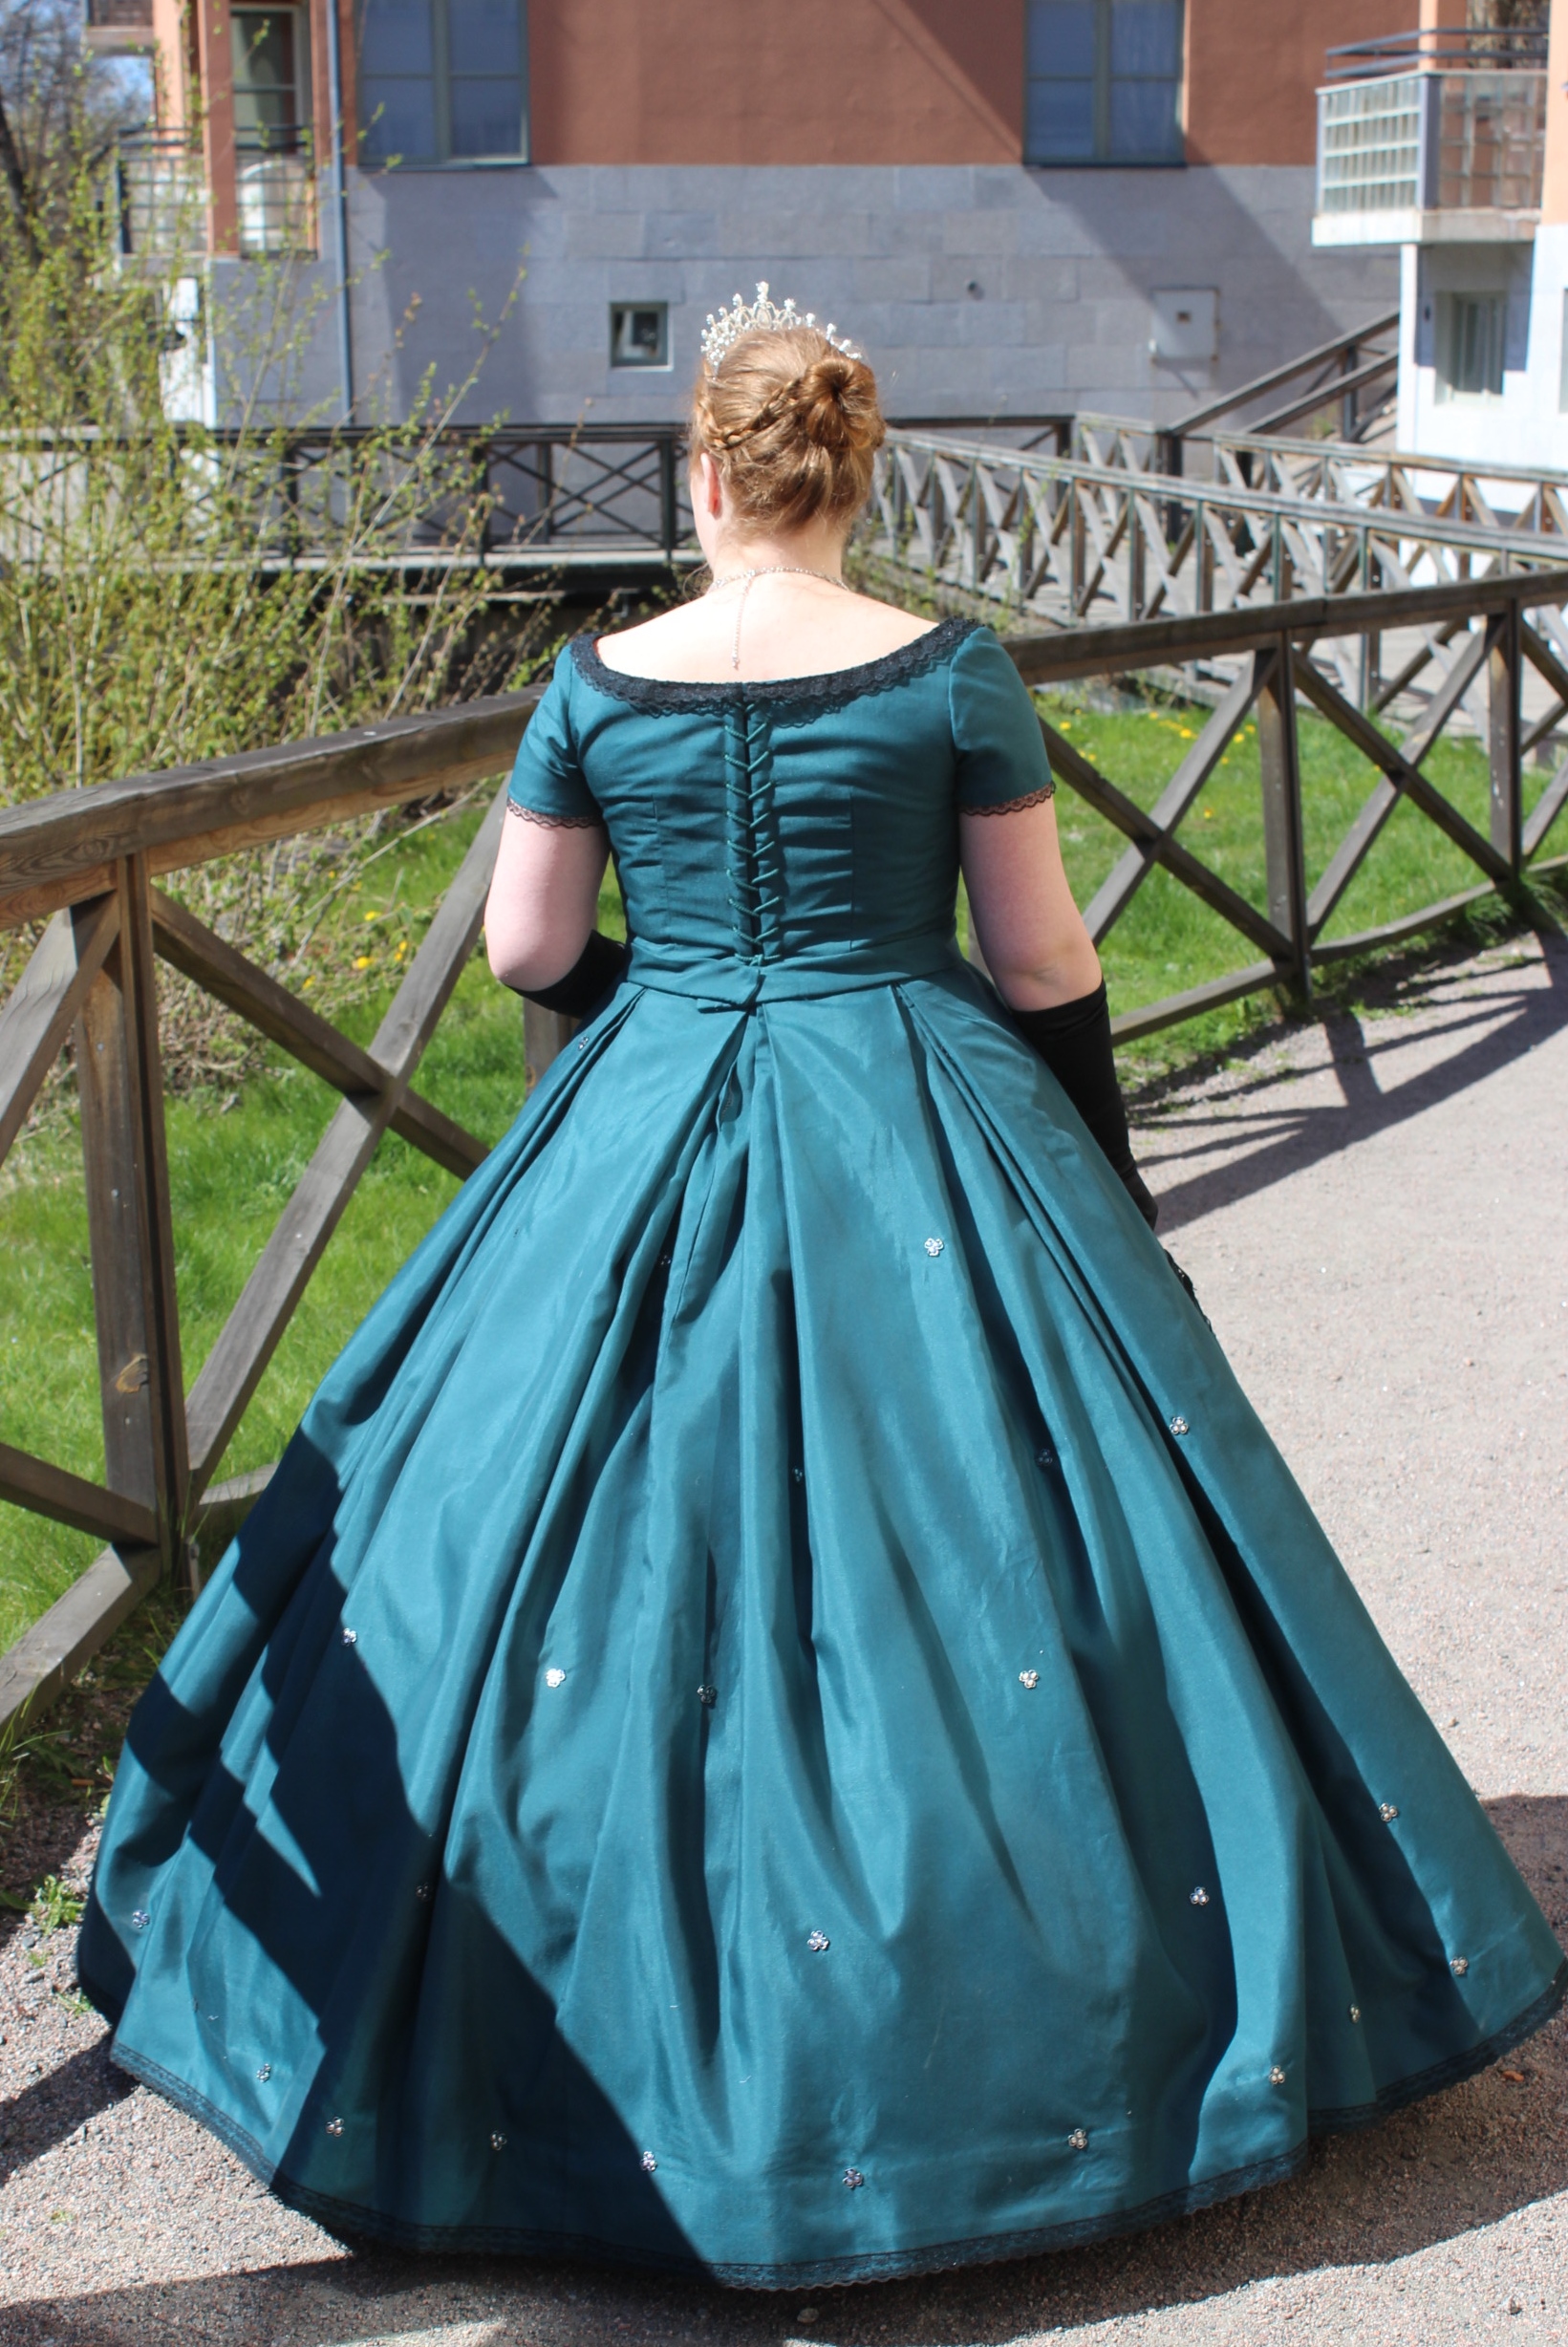
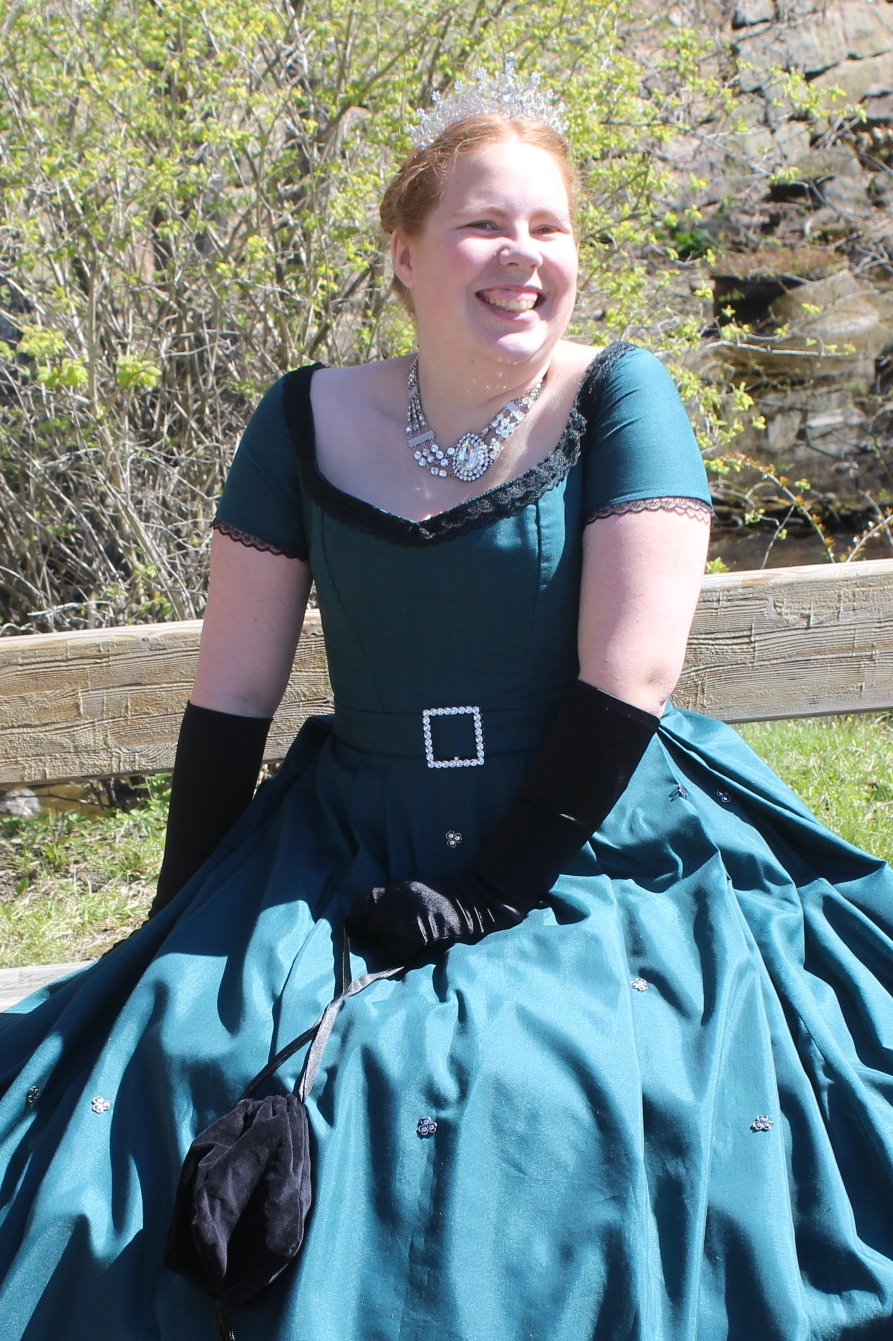
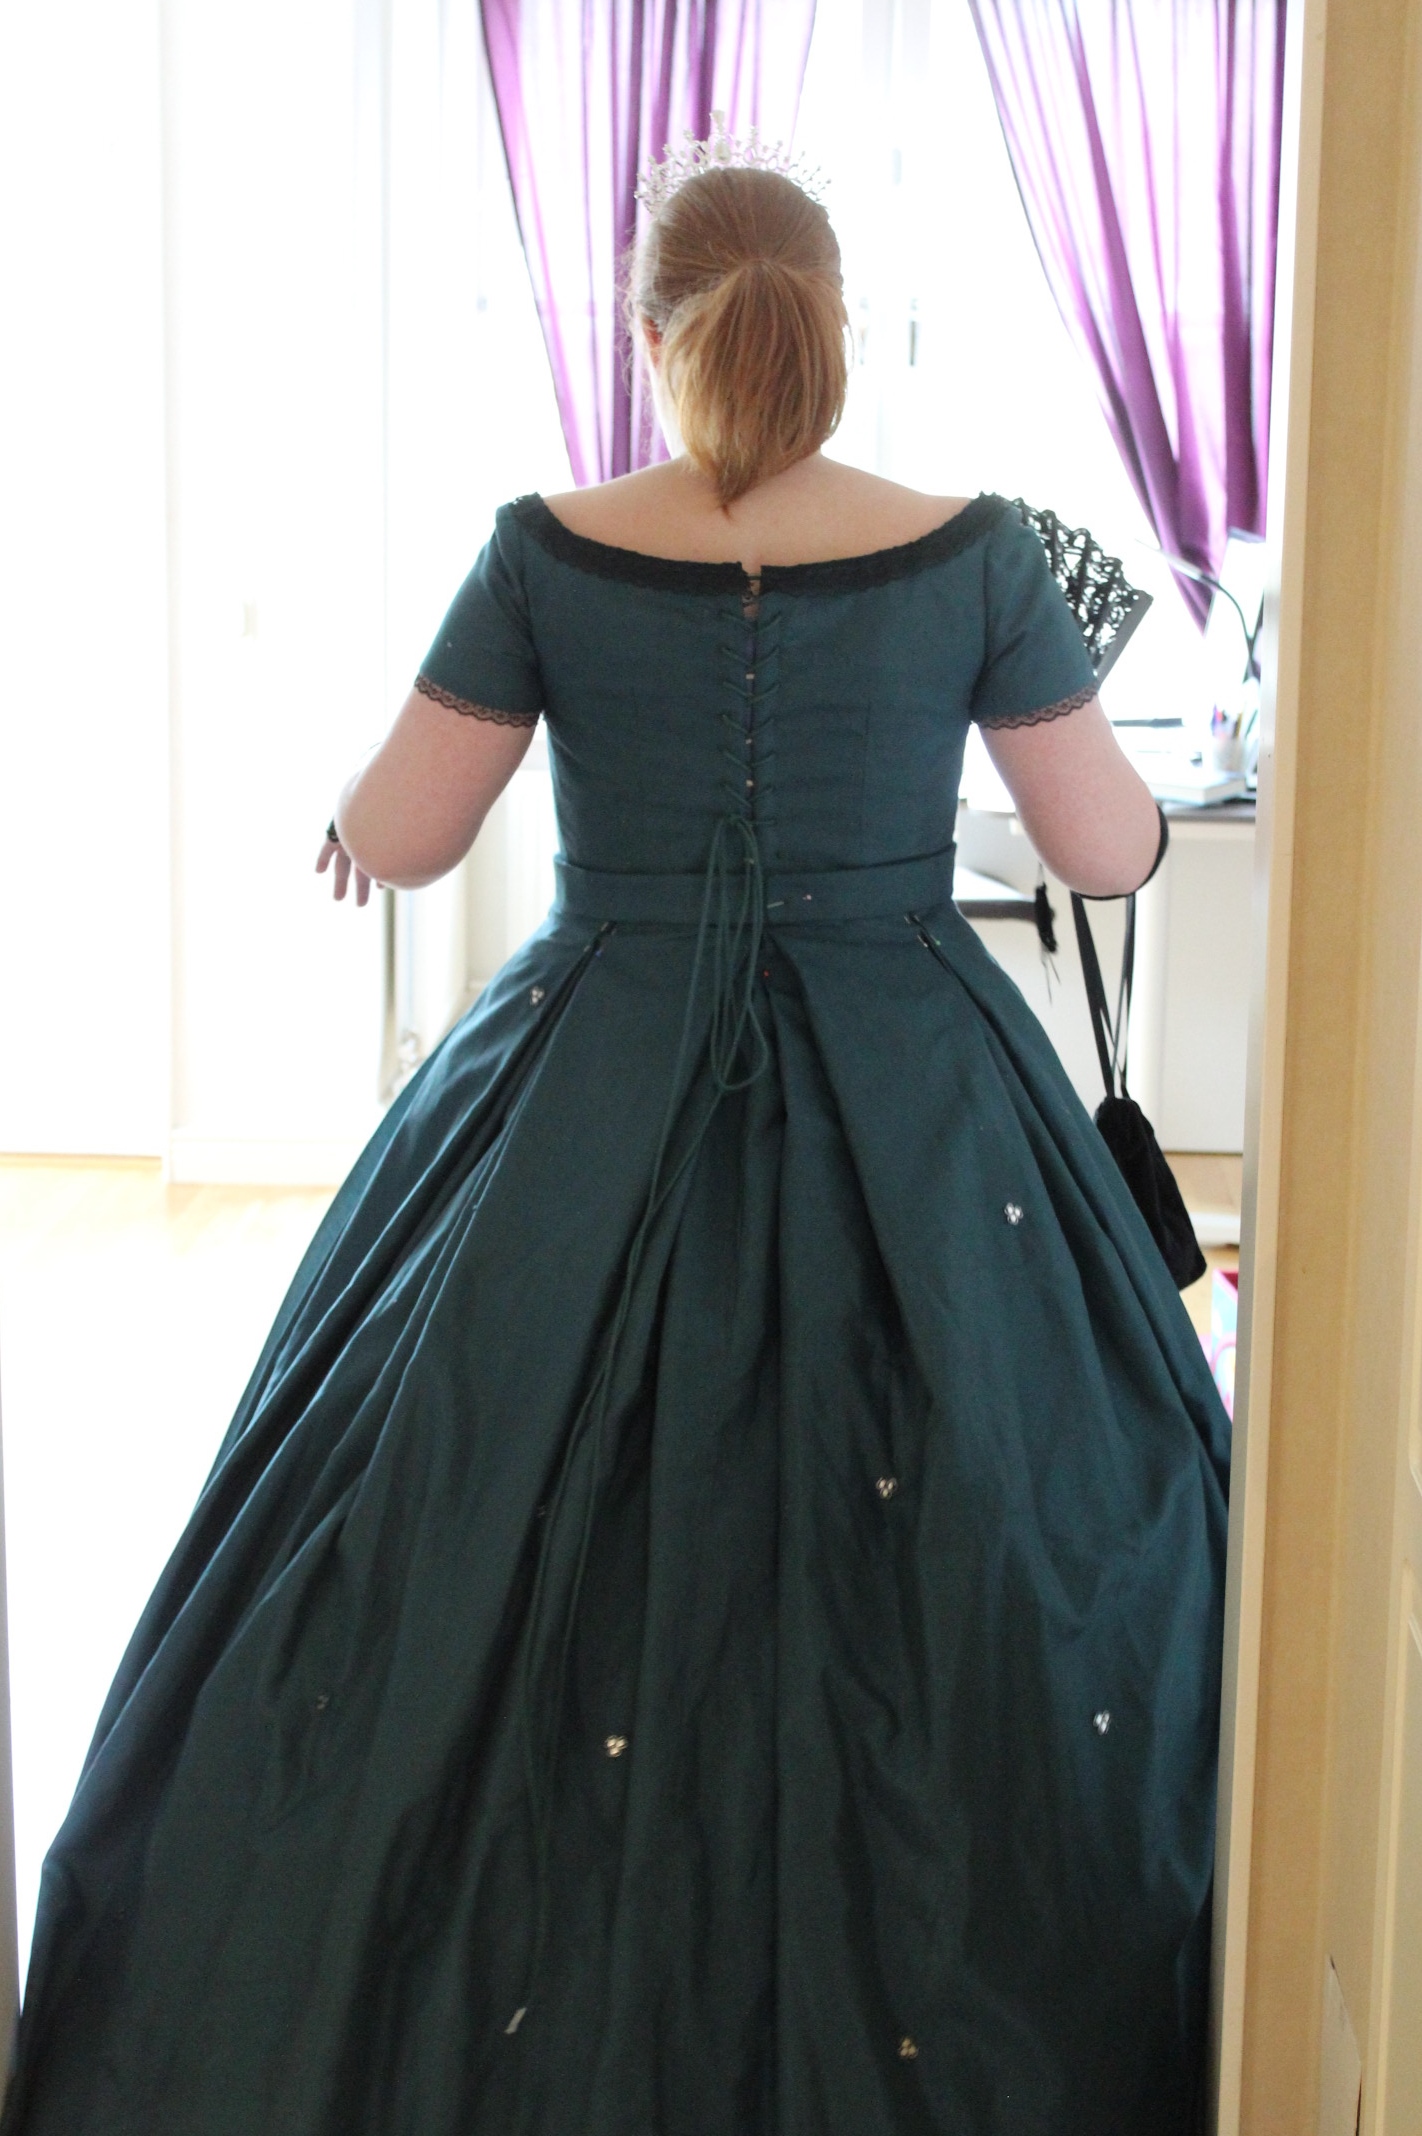
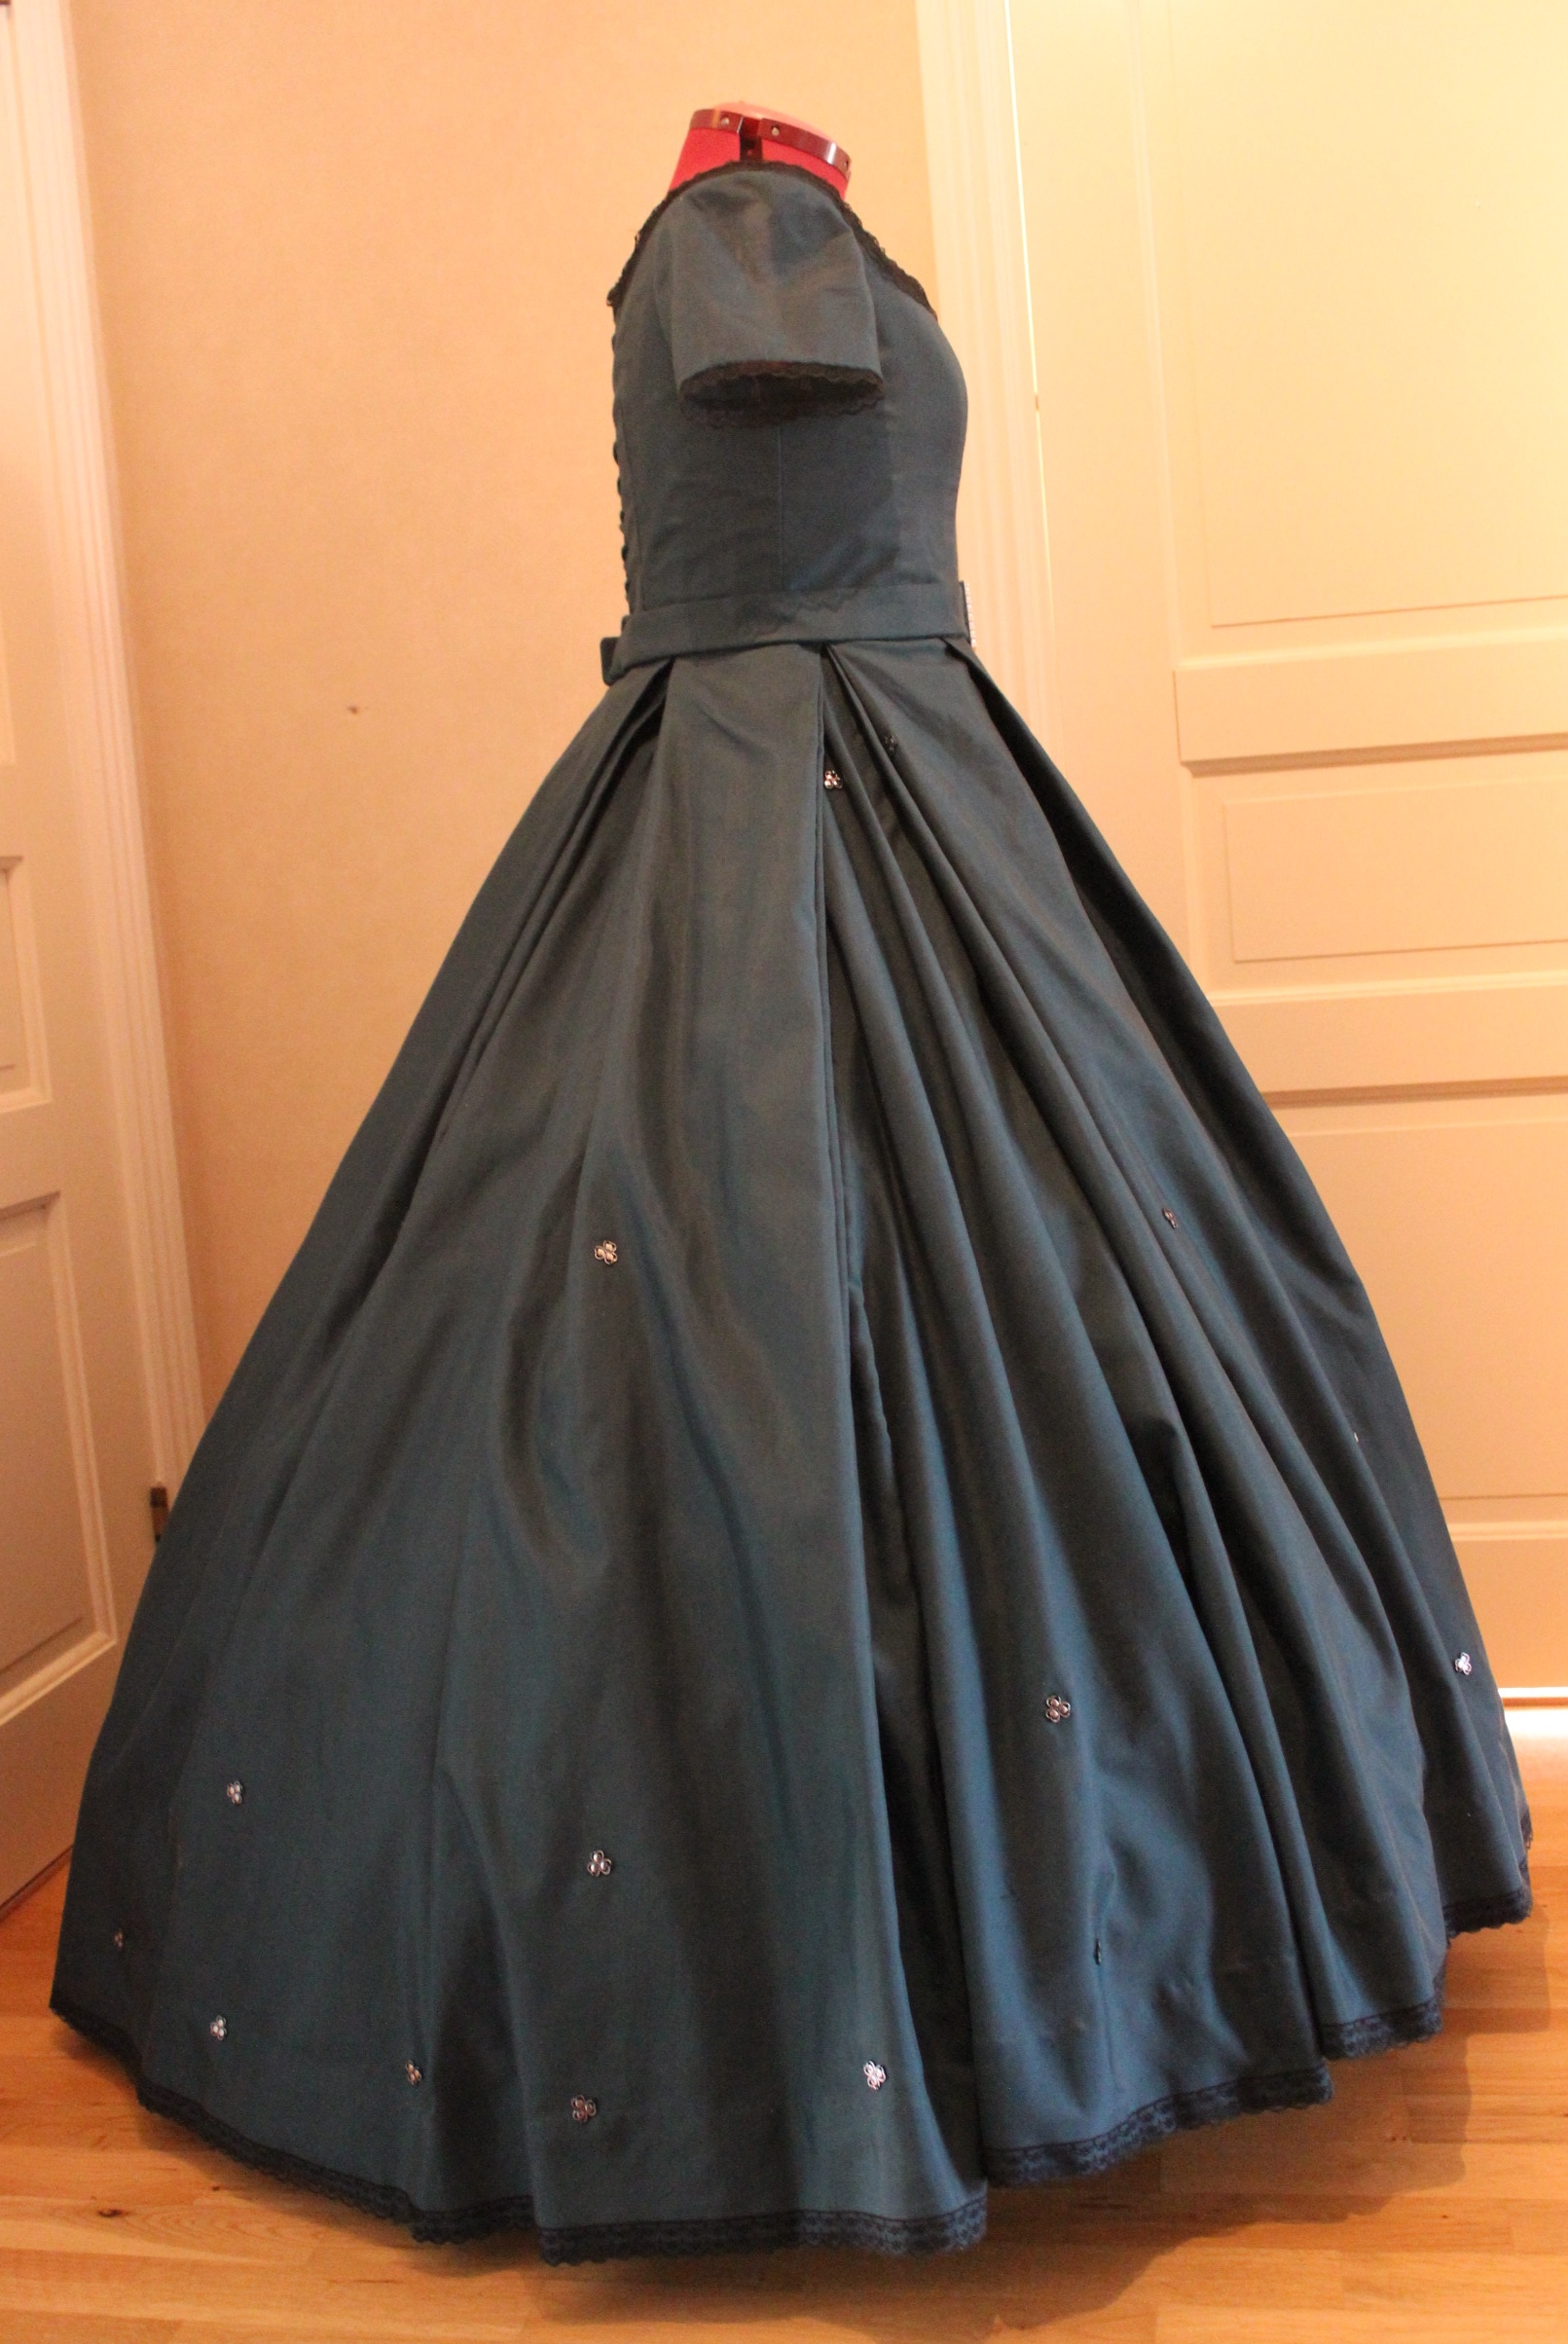
The week before the ball my sister came over to do the final fitting and to take some photos.
She is wearing her new green corset, orange cage crinoline, petticoat and 2 pieced gown. Accessorized with black gloves, black lace-fan, a black velvet bag, silver tiara and necklace. She is also wearing a chemise, stockings, bloomers and dancing shoes.


 Photos: Elin Evaldsdotter
Bonus:
Video of the gown in motion (shaky mobile video – sorry)
When all the underwear (almost all, I still had the chemise and a second petticoat left to finish), it was time to get started on the dress itself.
Since the dress was for my sister, it was she who ultimately took all the decisions on the final style, and I came with lots of suggestions, inspirations and different looks. inspiration sketch
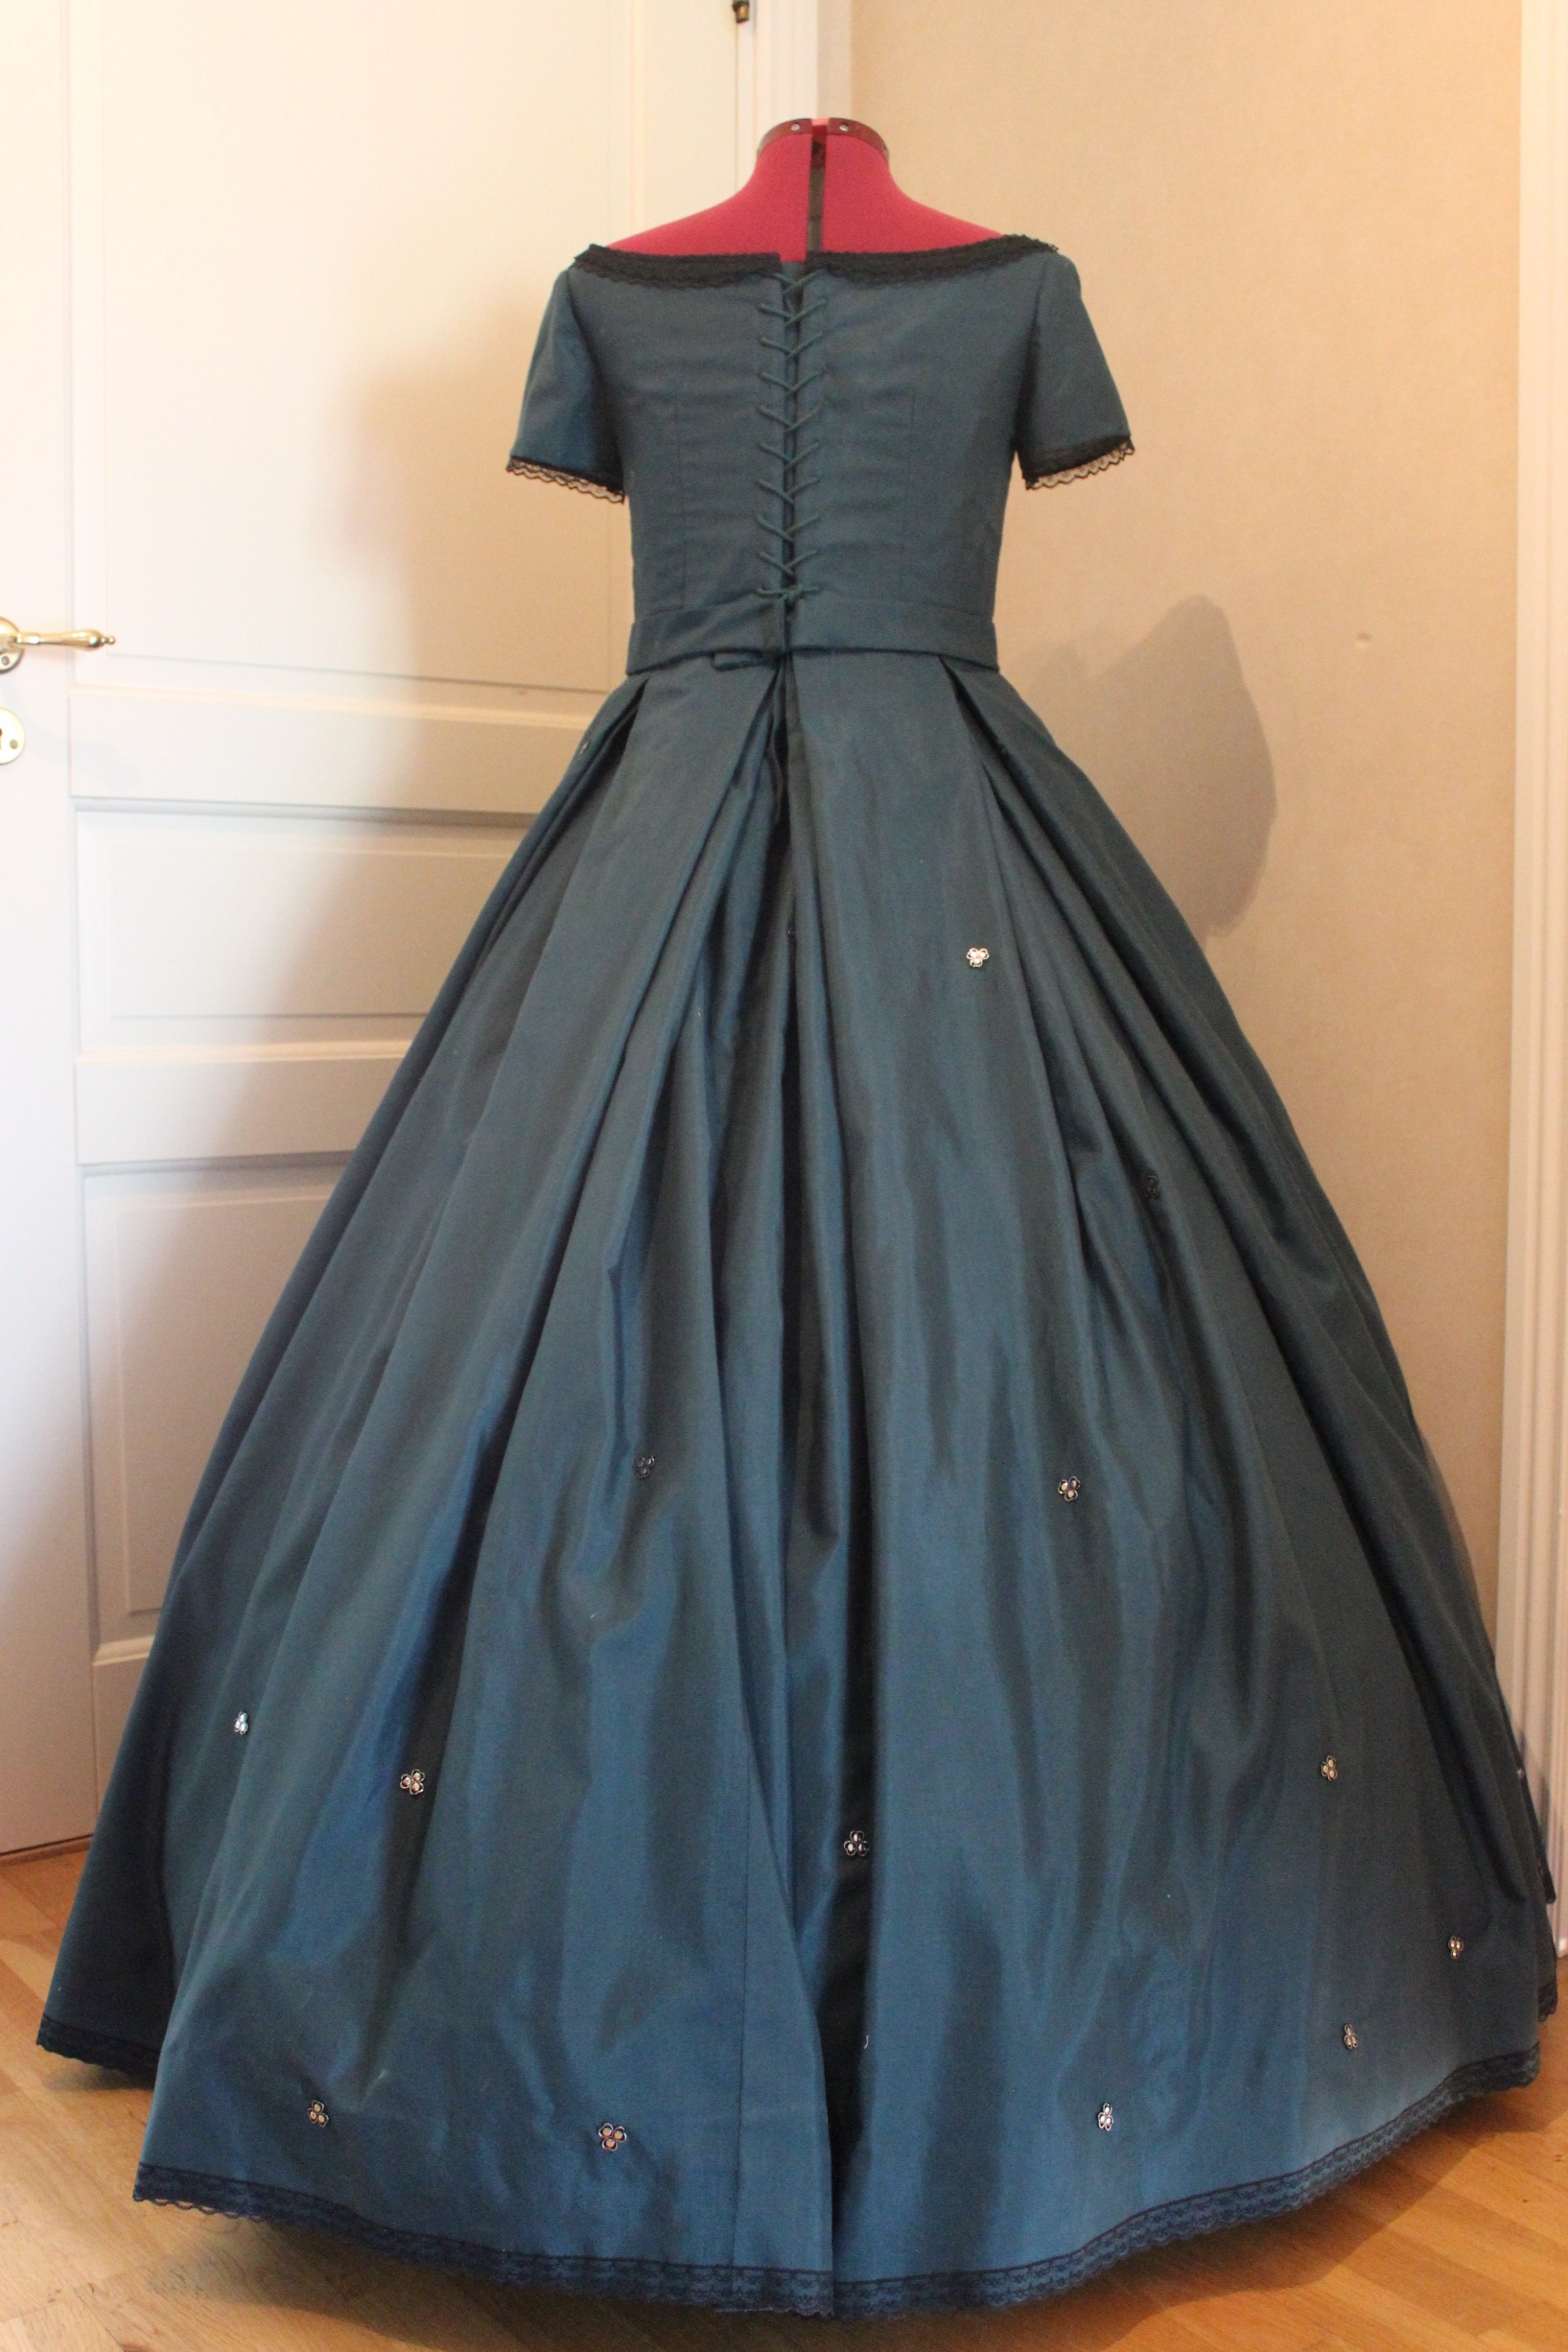
We finally decided on one main inspiration 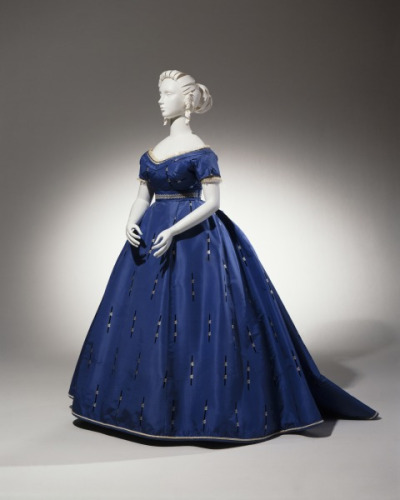 Evening dress ca. 1865, From the Cincinnati Art Museum
Since the budget was particularly scarce on this project, we decided to cheat and use a set of IKEA curtains I already had in my stash for the dress fabric. It’s a thin polyester in a lovely dark blue/teal color that would be really pretty in a style like this.
1 pair of 2,5m x 1.45m curtains would require some really thoughtful cutting and pattern layout, but with some math and quick calculations I was fairly shore I could get the dress cut from the fabric (as long as I didn’t do any errors…)
I also recently ordered 5 m of silver sparkles and a few m of black lace which both would be perfect for this project. (So, not stash, but almost:-))
I started by drafting the bodice pattern using modern templates and my sisters measurements.
Then I did a quick mock-up that we tried on over her recently finished corset.


Lots of adjustments needed
Just to be sure I got everything right (and since I didn’t had fabric for any errors) I did another mock-up of the bodice.

After the last alterations was made, it was time to cut the fabric.
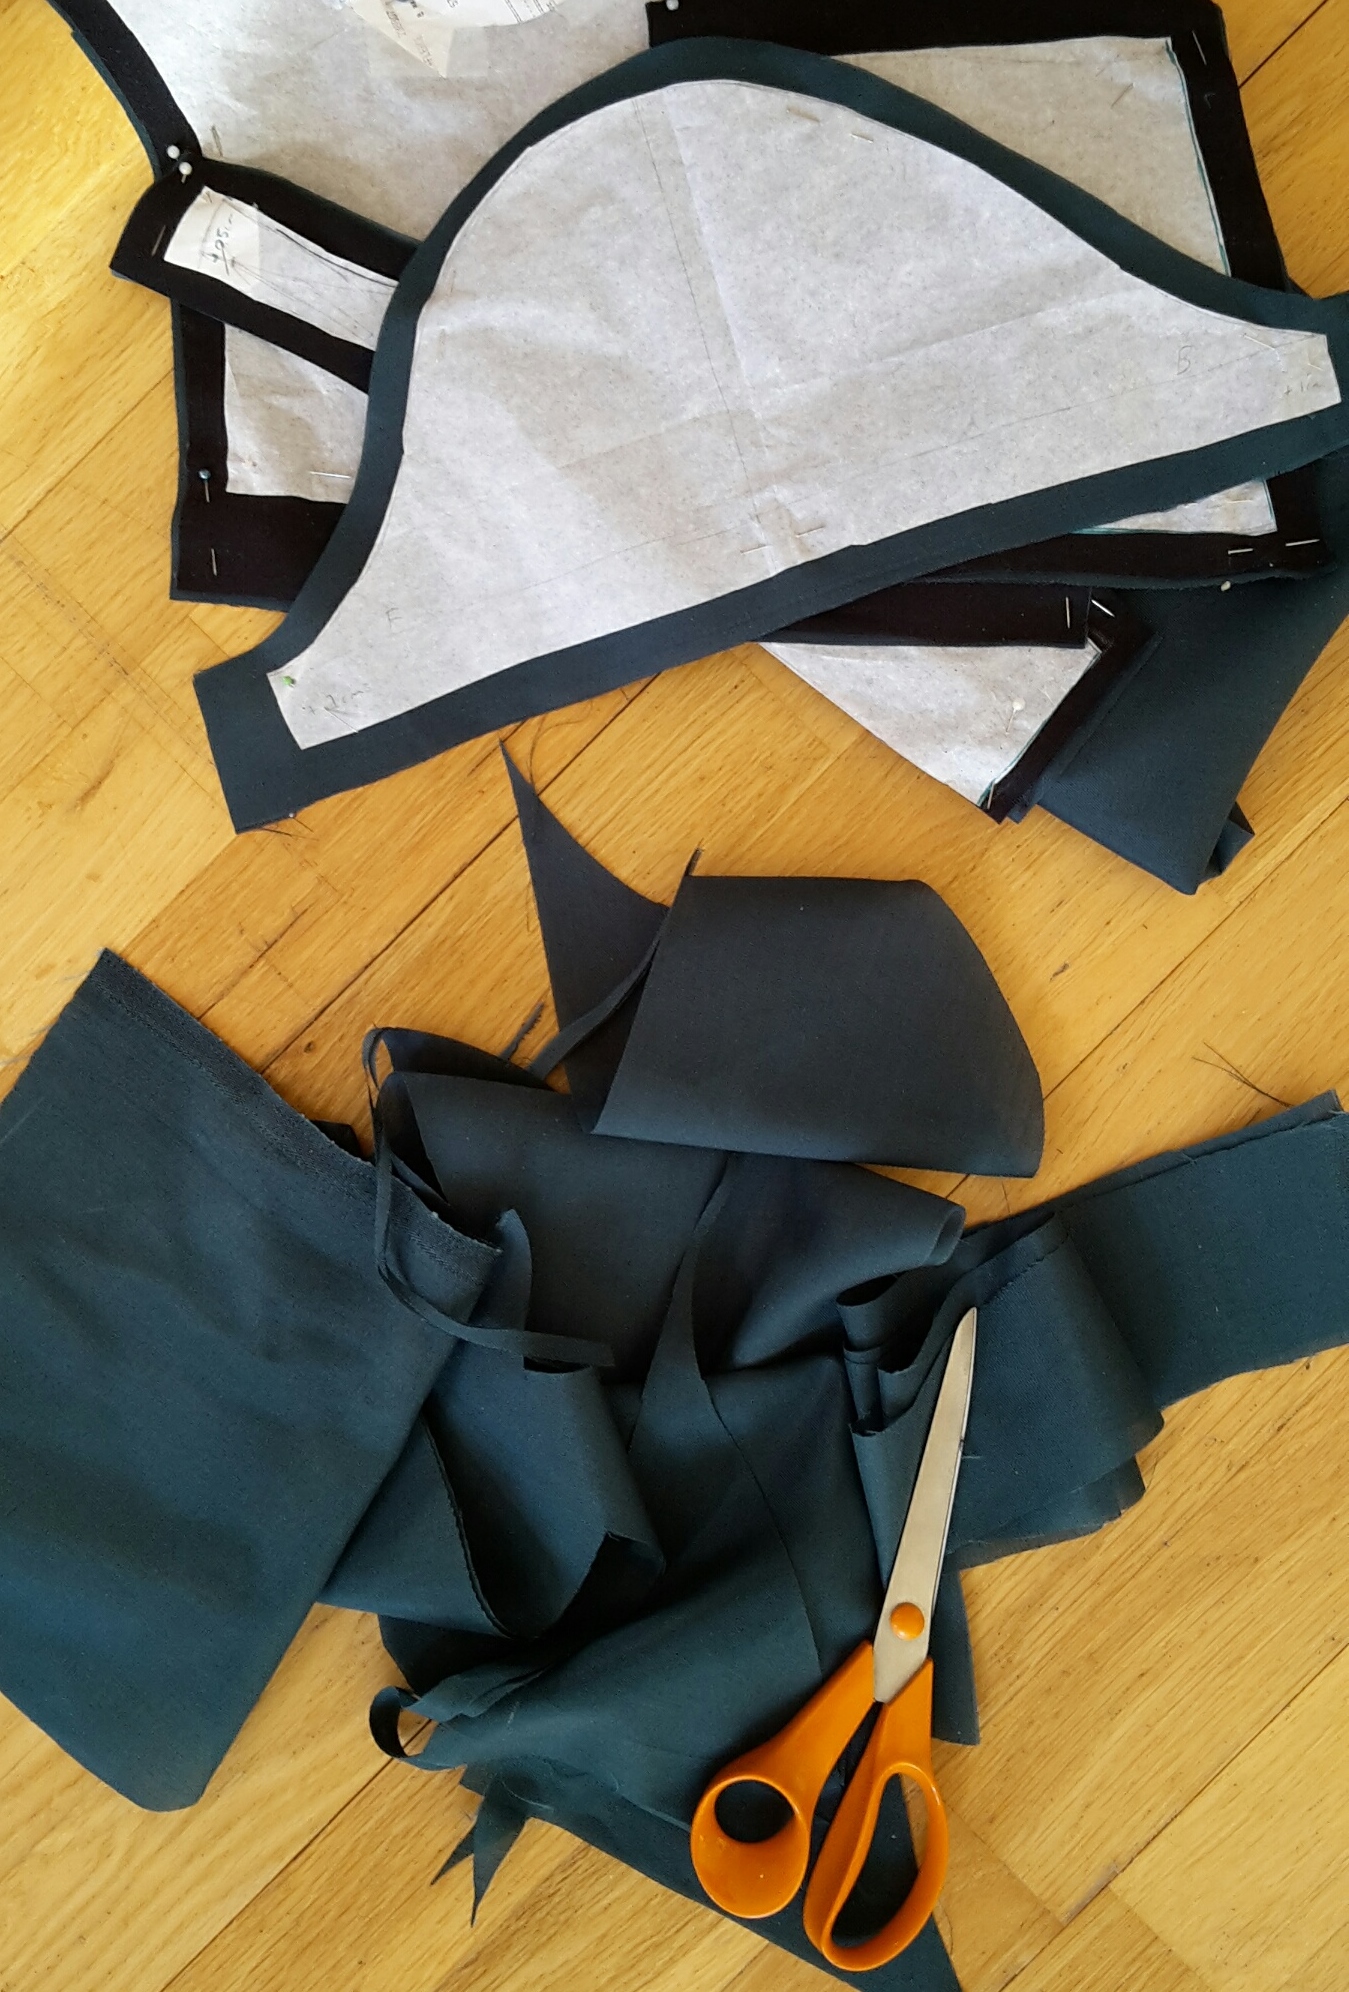 Only scraps left.
Then I got to work making the skirt.
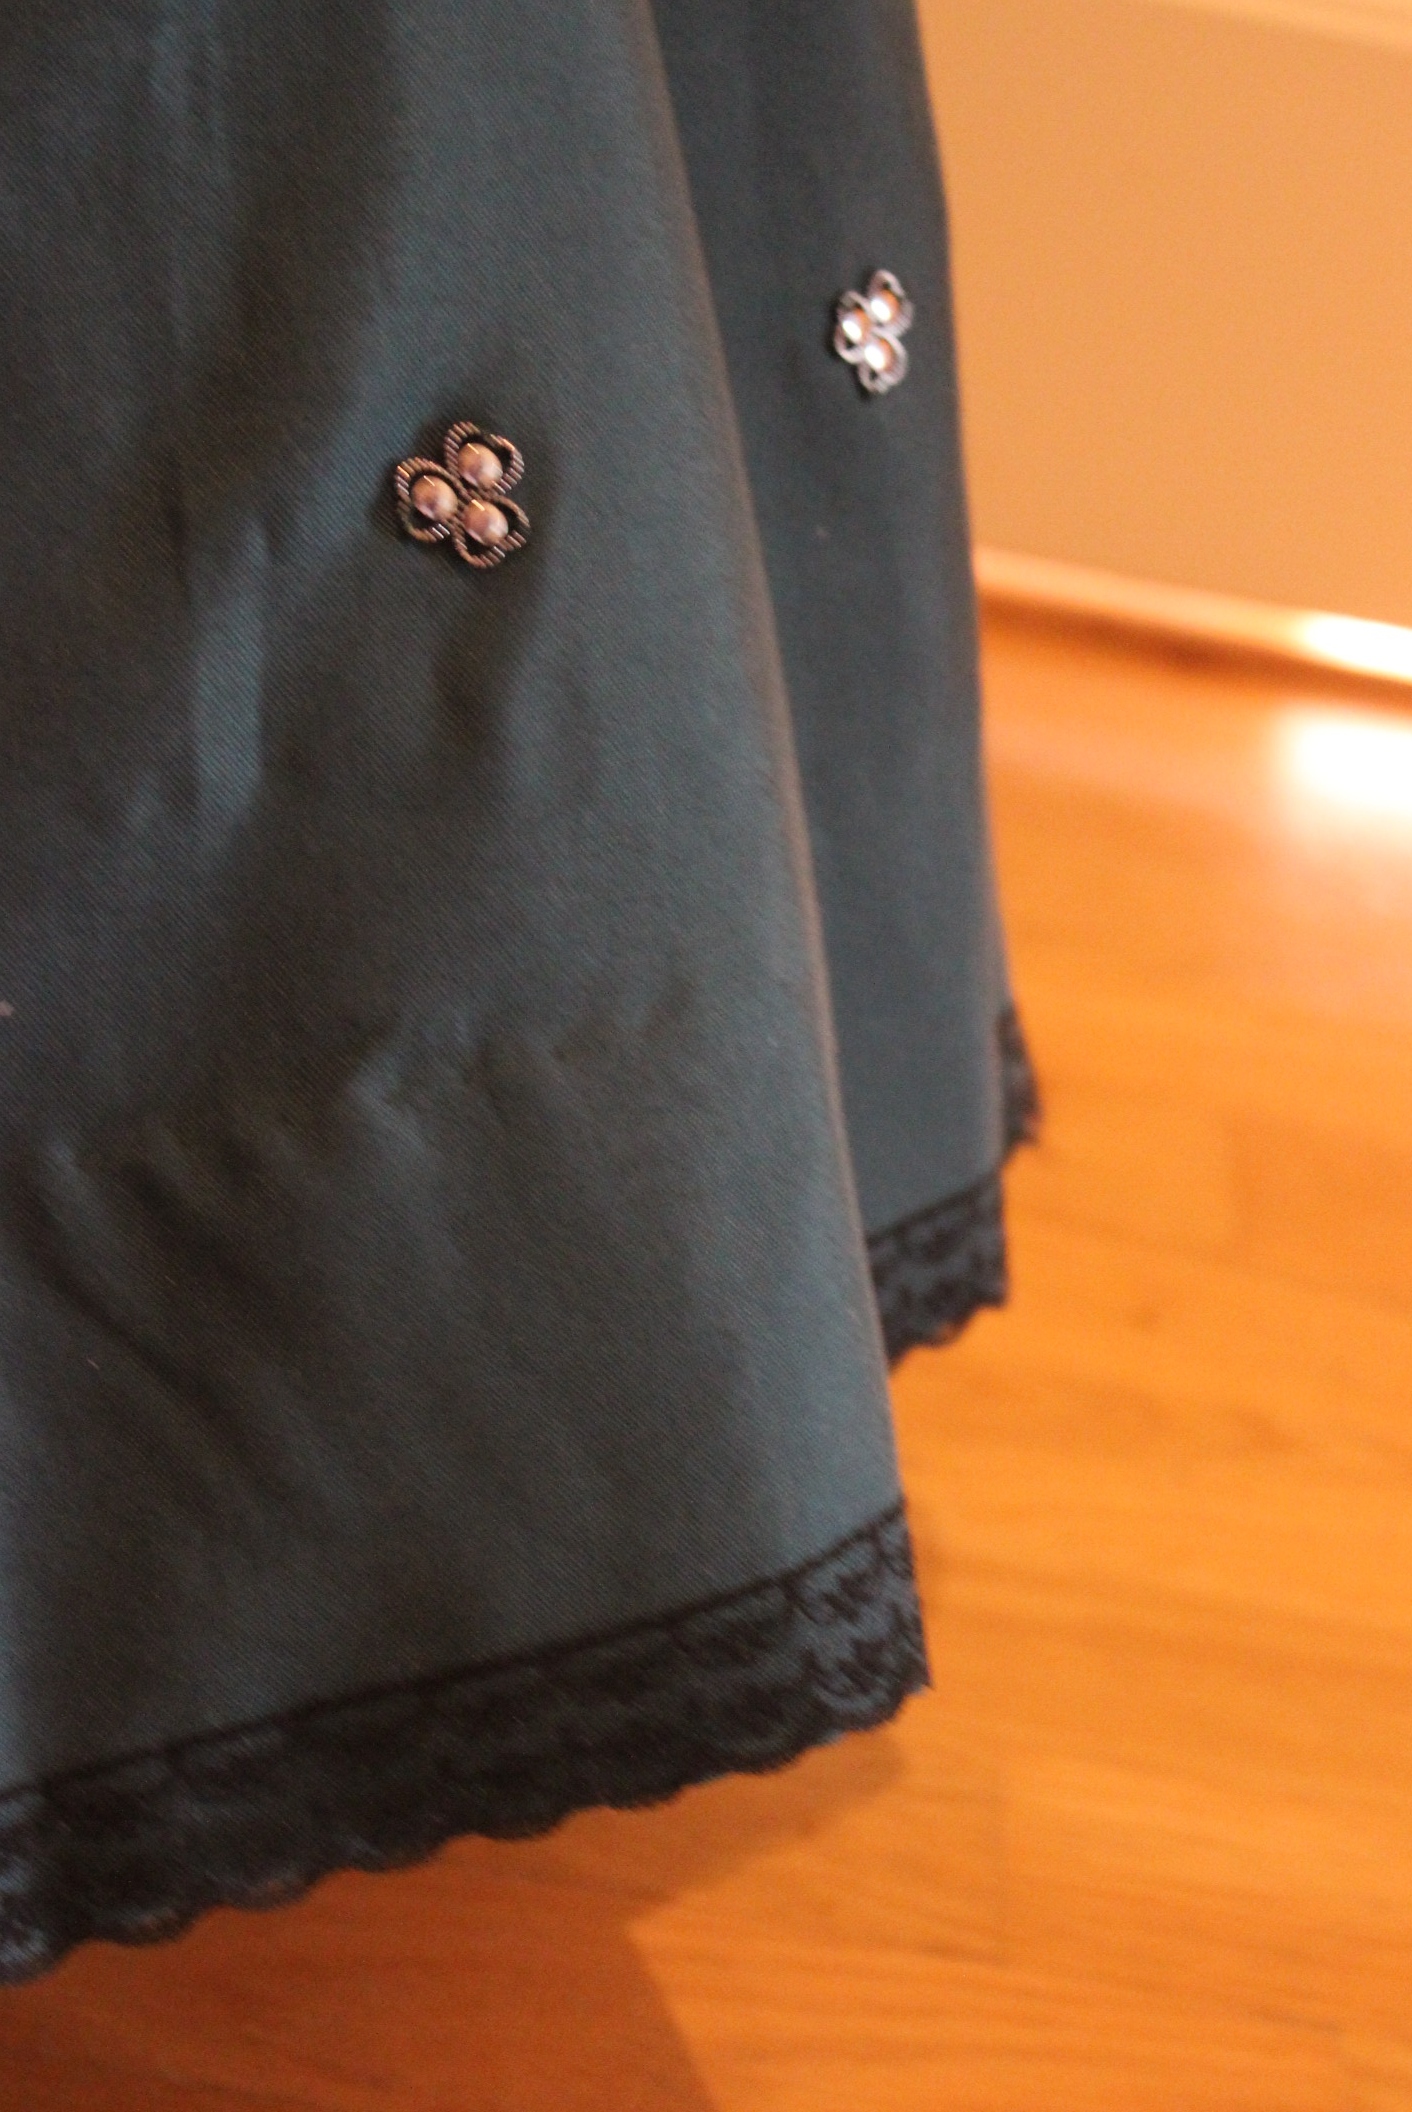
Starting by marking and stitching the silvery sparkles (which I’ve already cut apart) on the skirt panels.
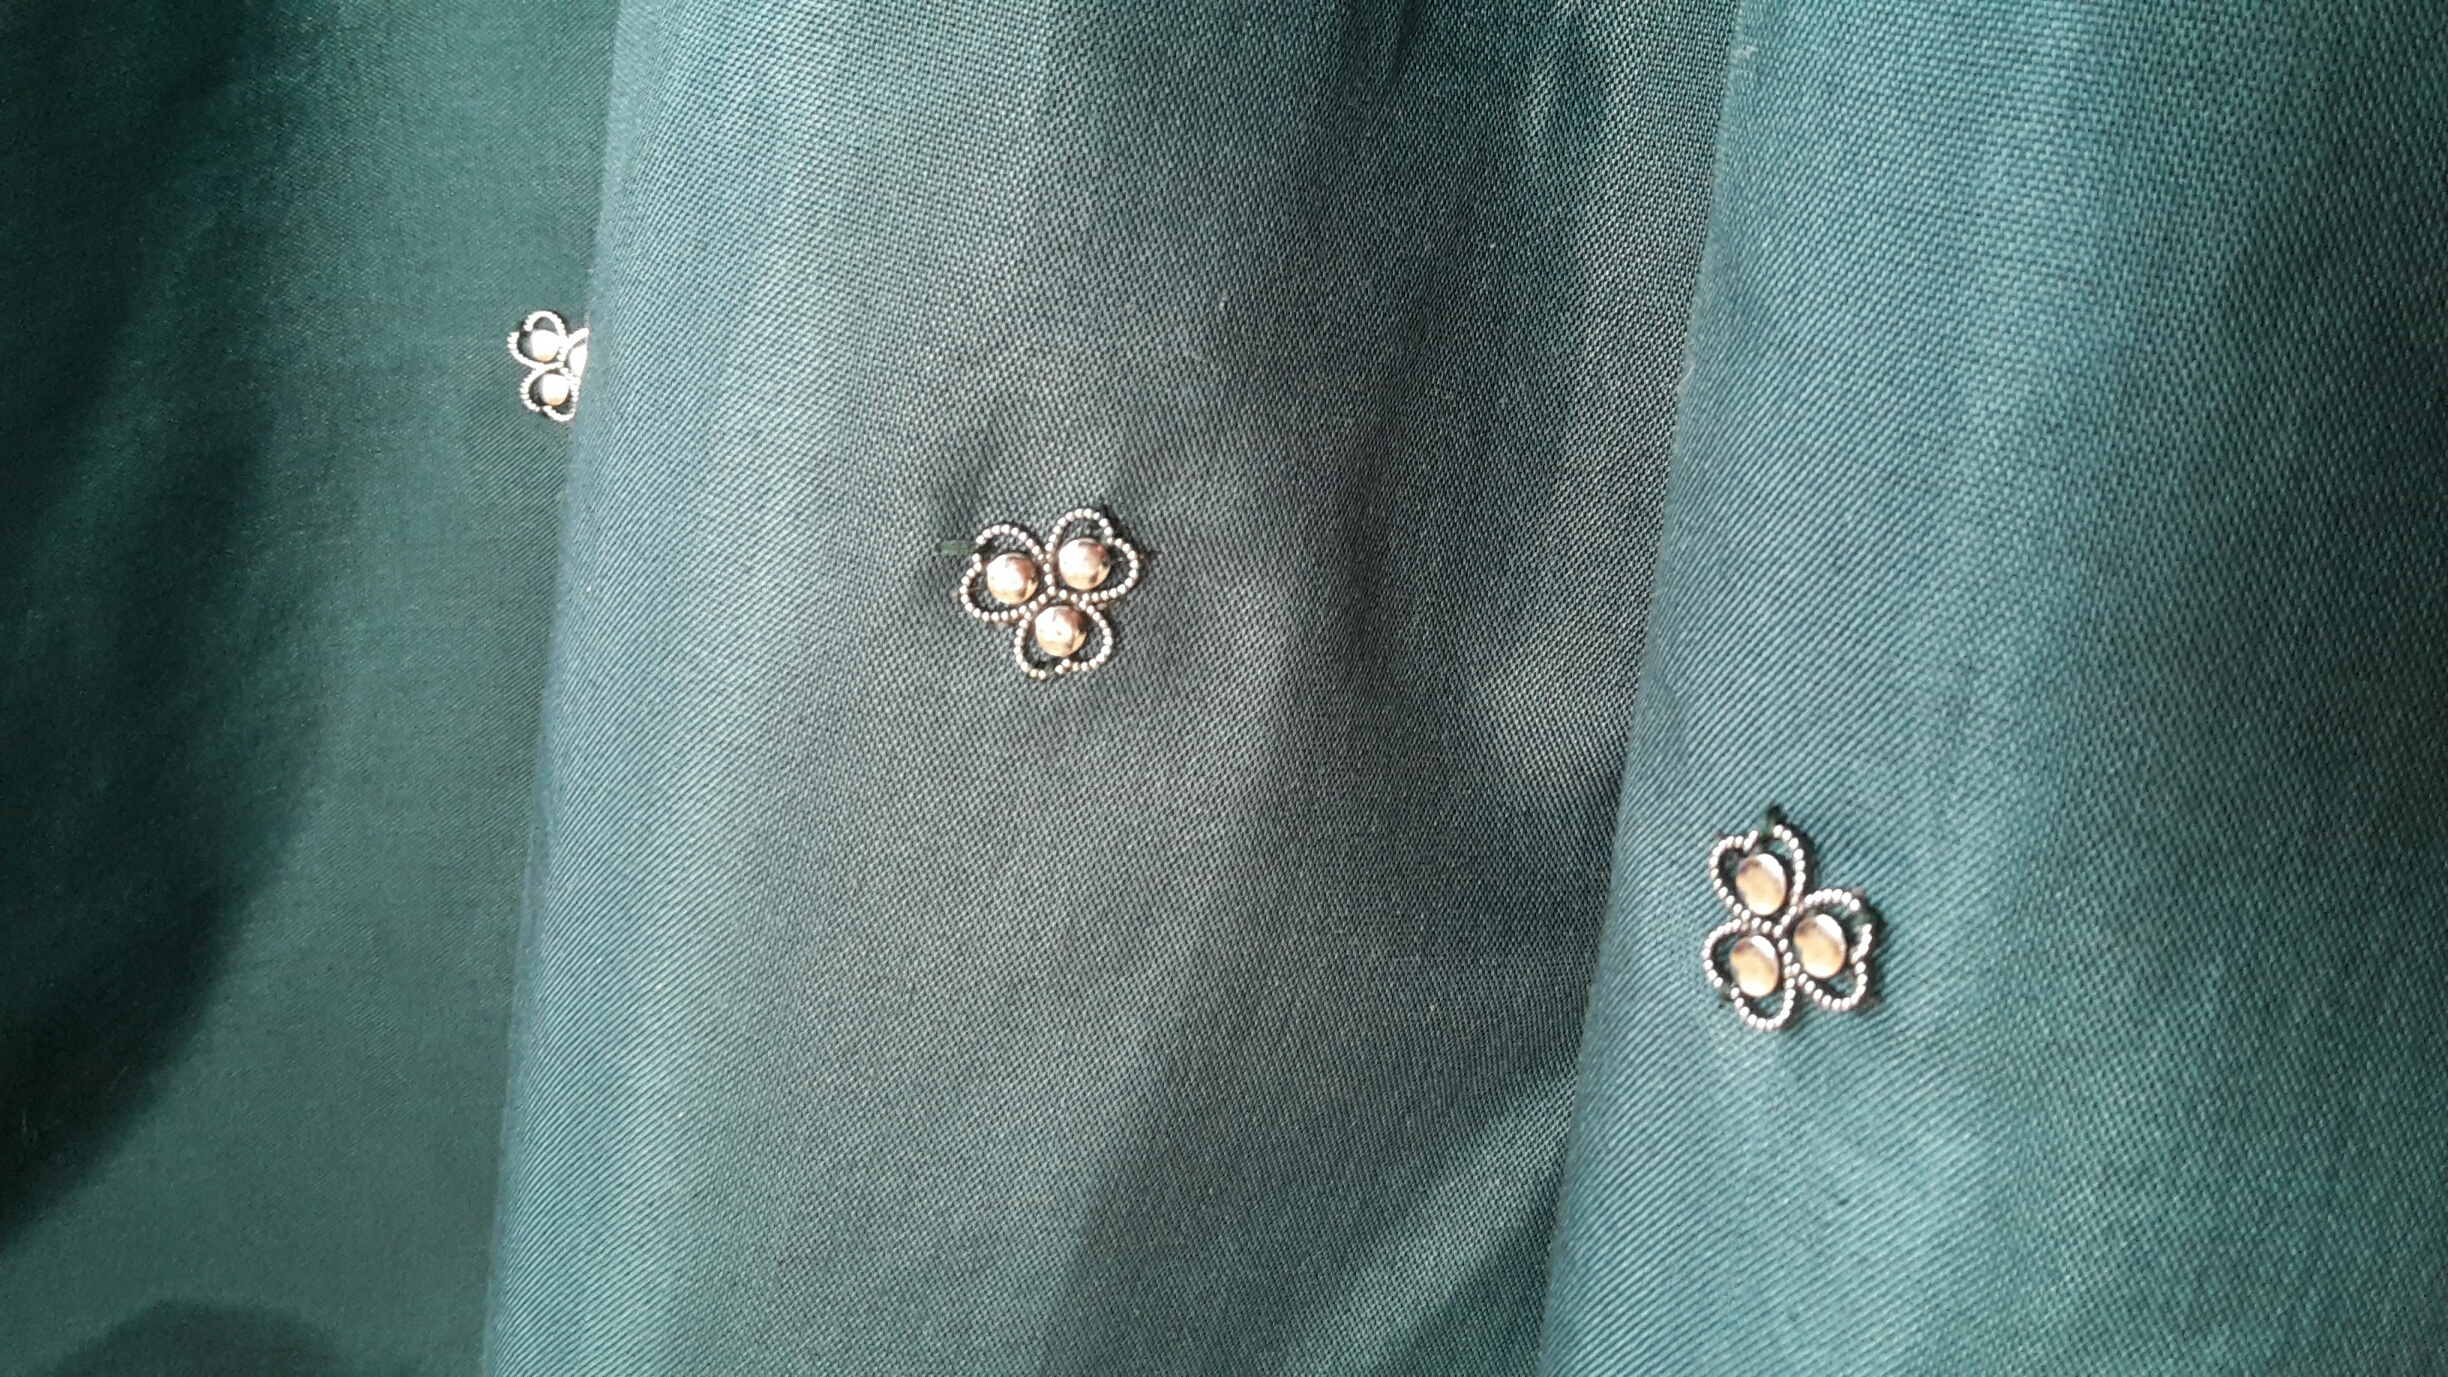
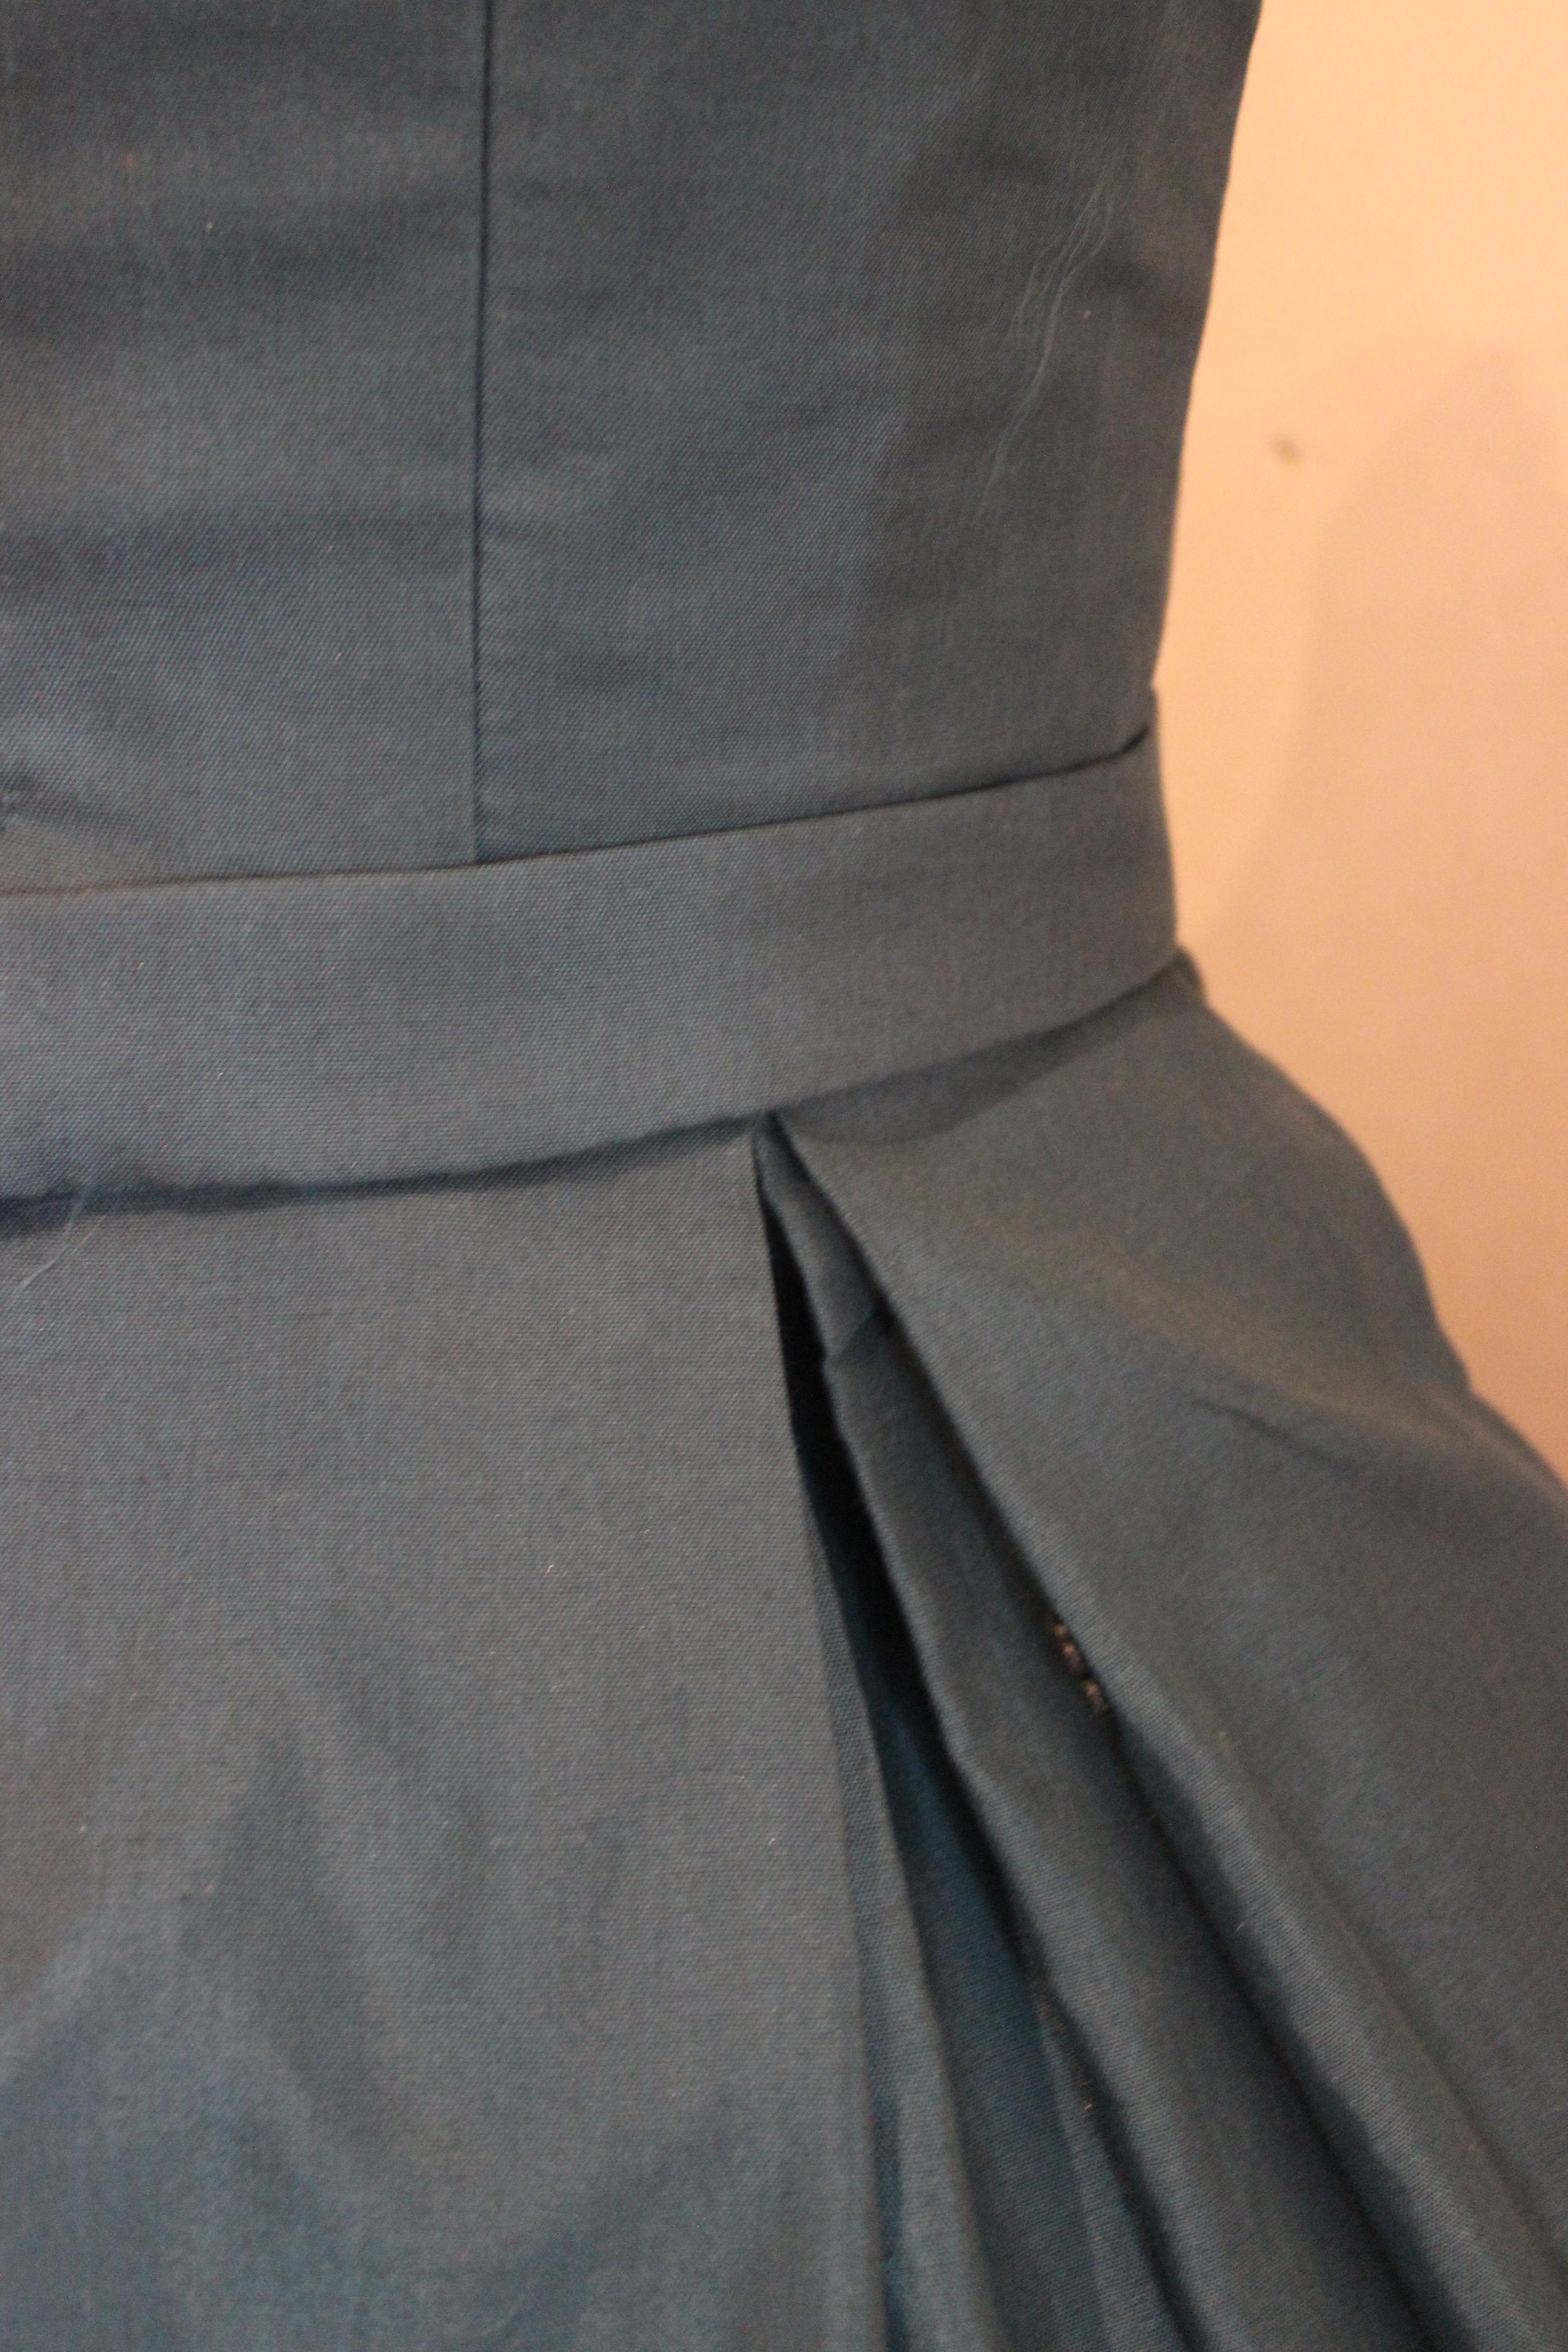
Then I sewed the skirt panels together, interlined it with a black cotton fabric that also would serve as lining and pleated the top to my sisters waist measurement.
not completely happy about the look of the pleats, I put it on my dress-form (over the new crinoline) to get a beter look. Something seamed wrong.
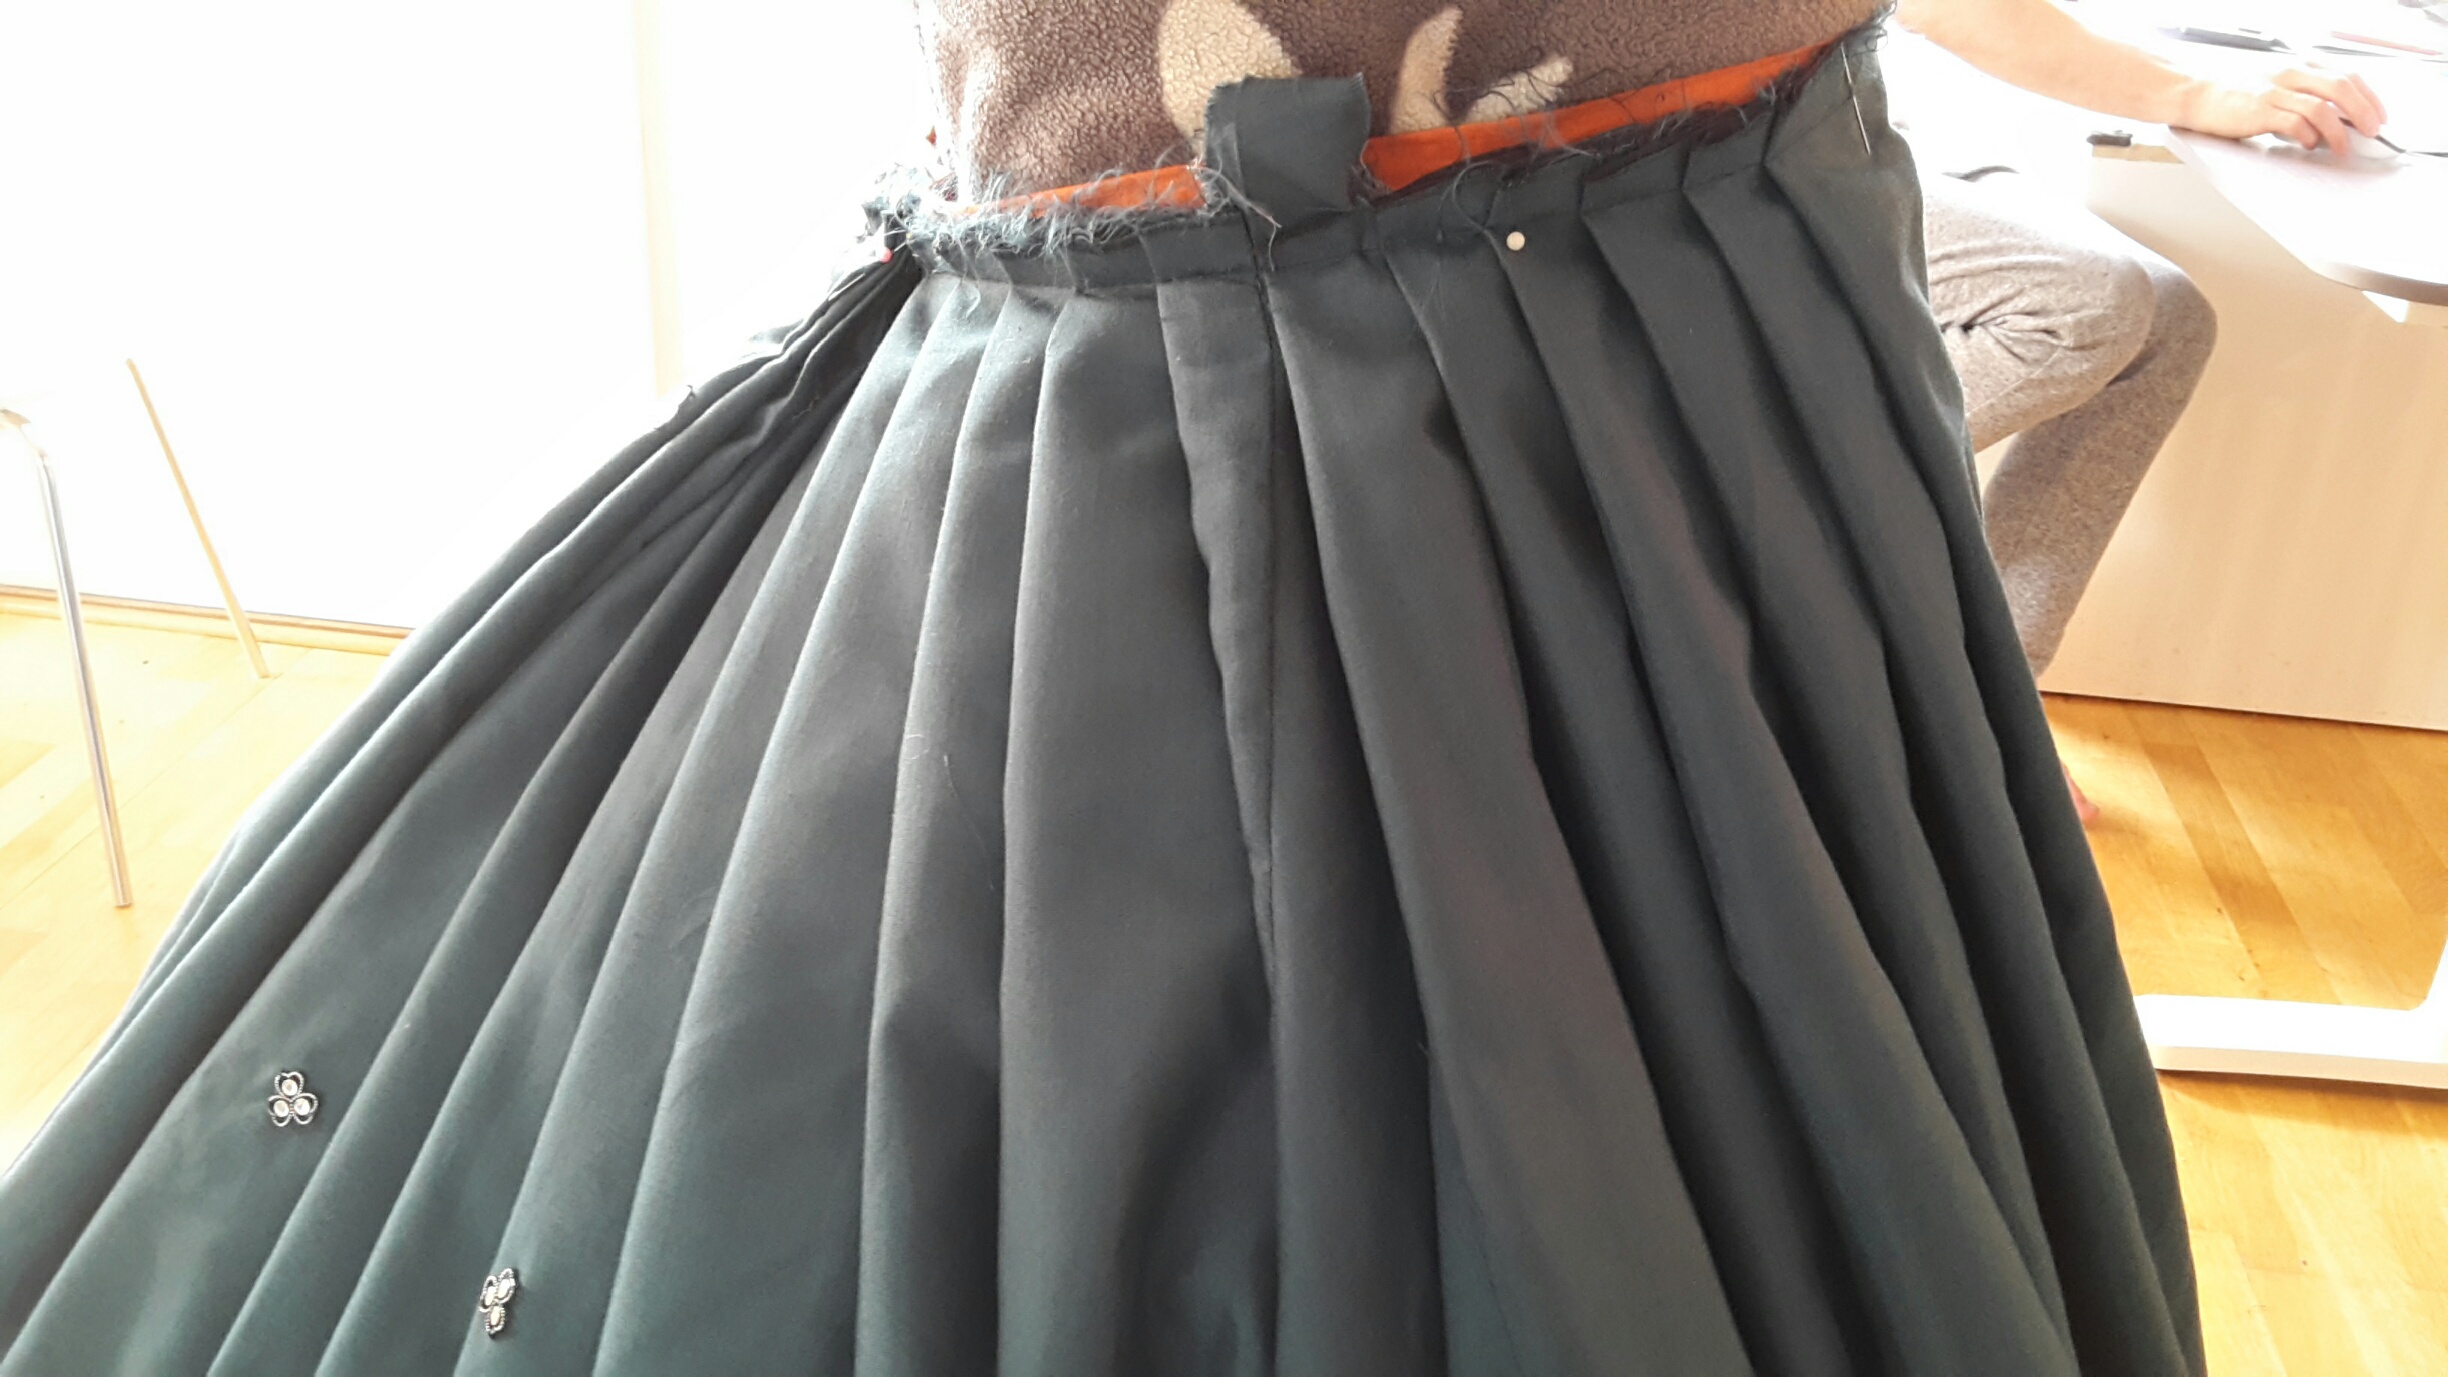 So I grabbed my books and read up on the period way to pleat the skirts to he waistband, and there I found the answer – by the 1860s they left the knifepleats of the earlier period for a few double box-pleats evenly spaced around the skirt. So that what I did.
 Much better
Then I attached the skirt to the waistband and after a final fitting cut and hemmed the length. I also moved some and added some extra sparkles and stitched on a narrow black lace ribbon to the bottom edge.
Then it was time to get started on the bodice.
I started by interlining all the pieces in a strong black cotton twill, after which I stitched the darts and the pieces together. I added some bias tape and bones to the seams to make the bodice old its shape.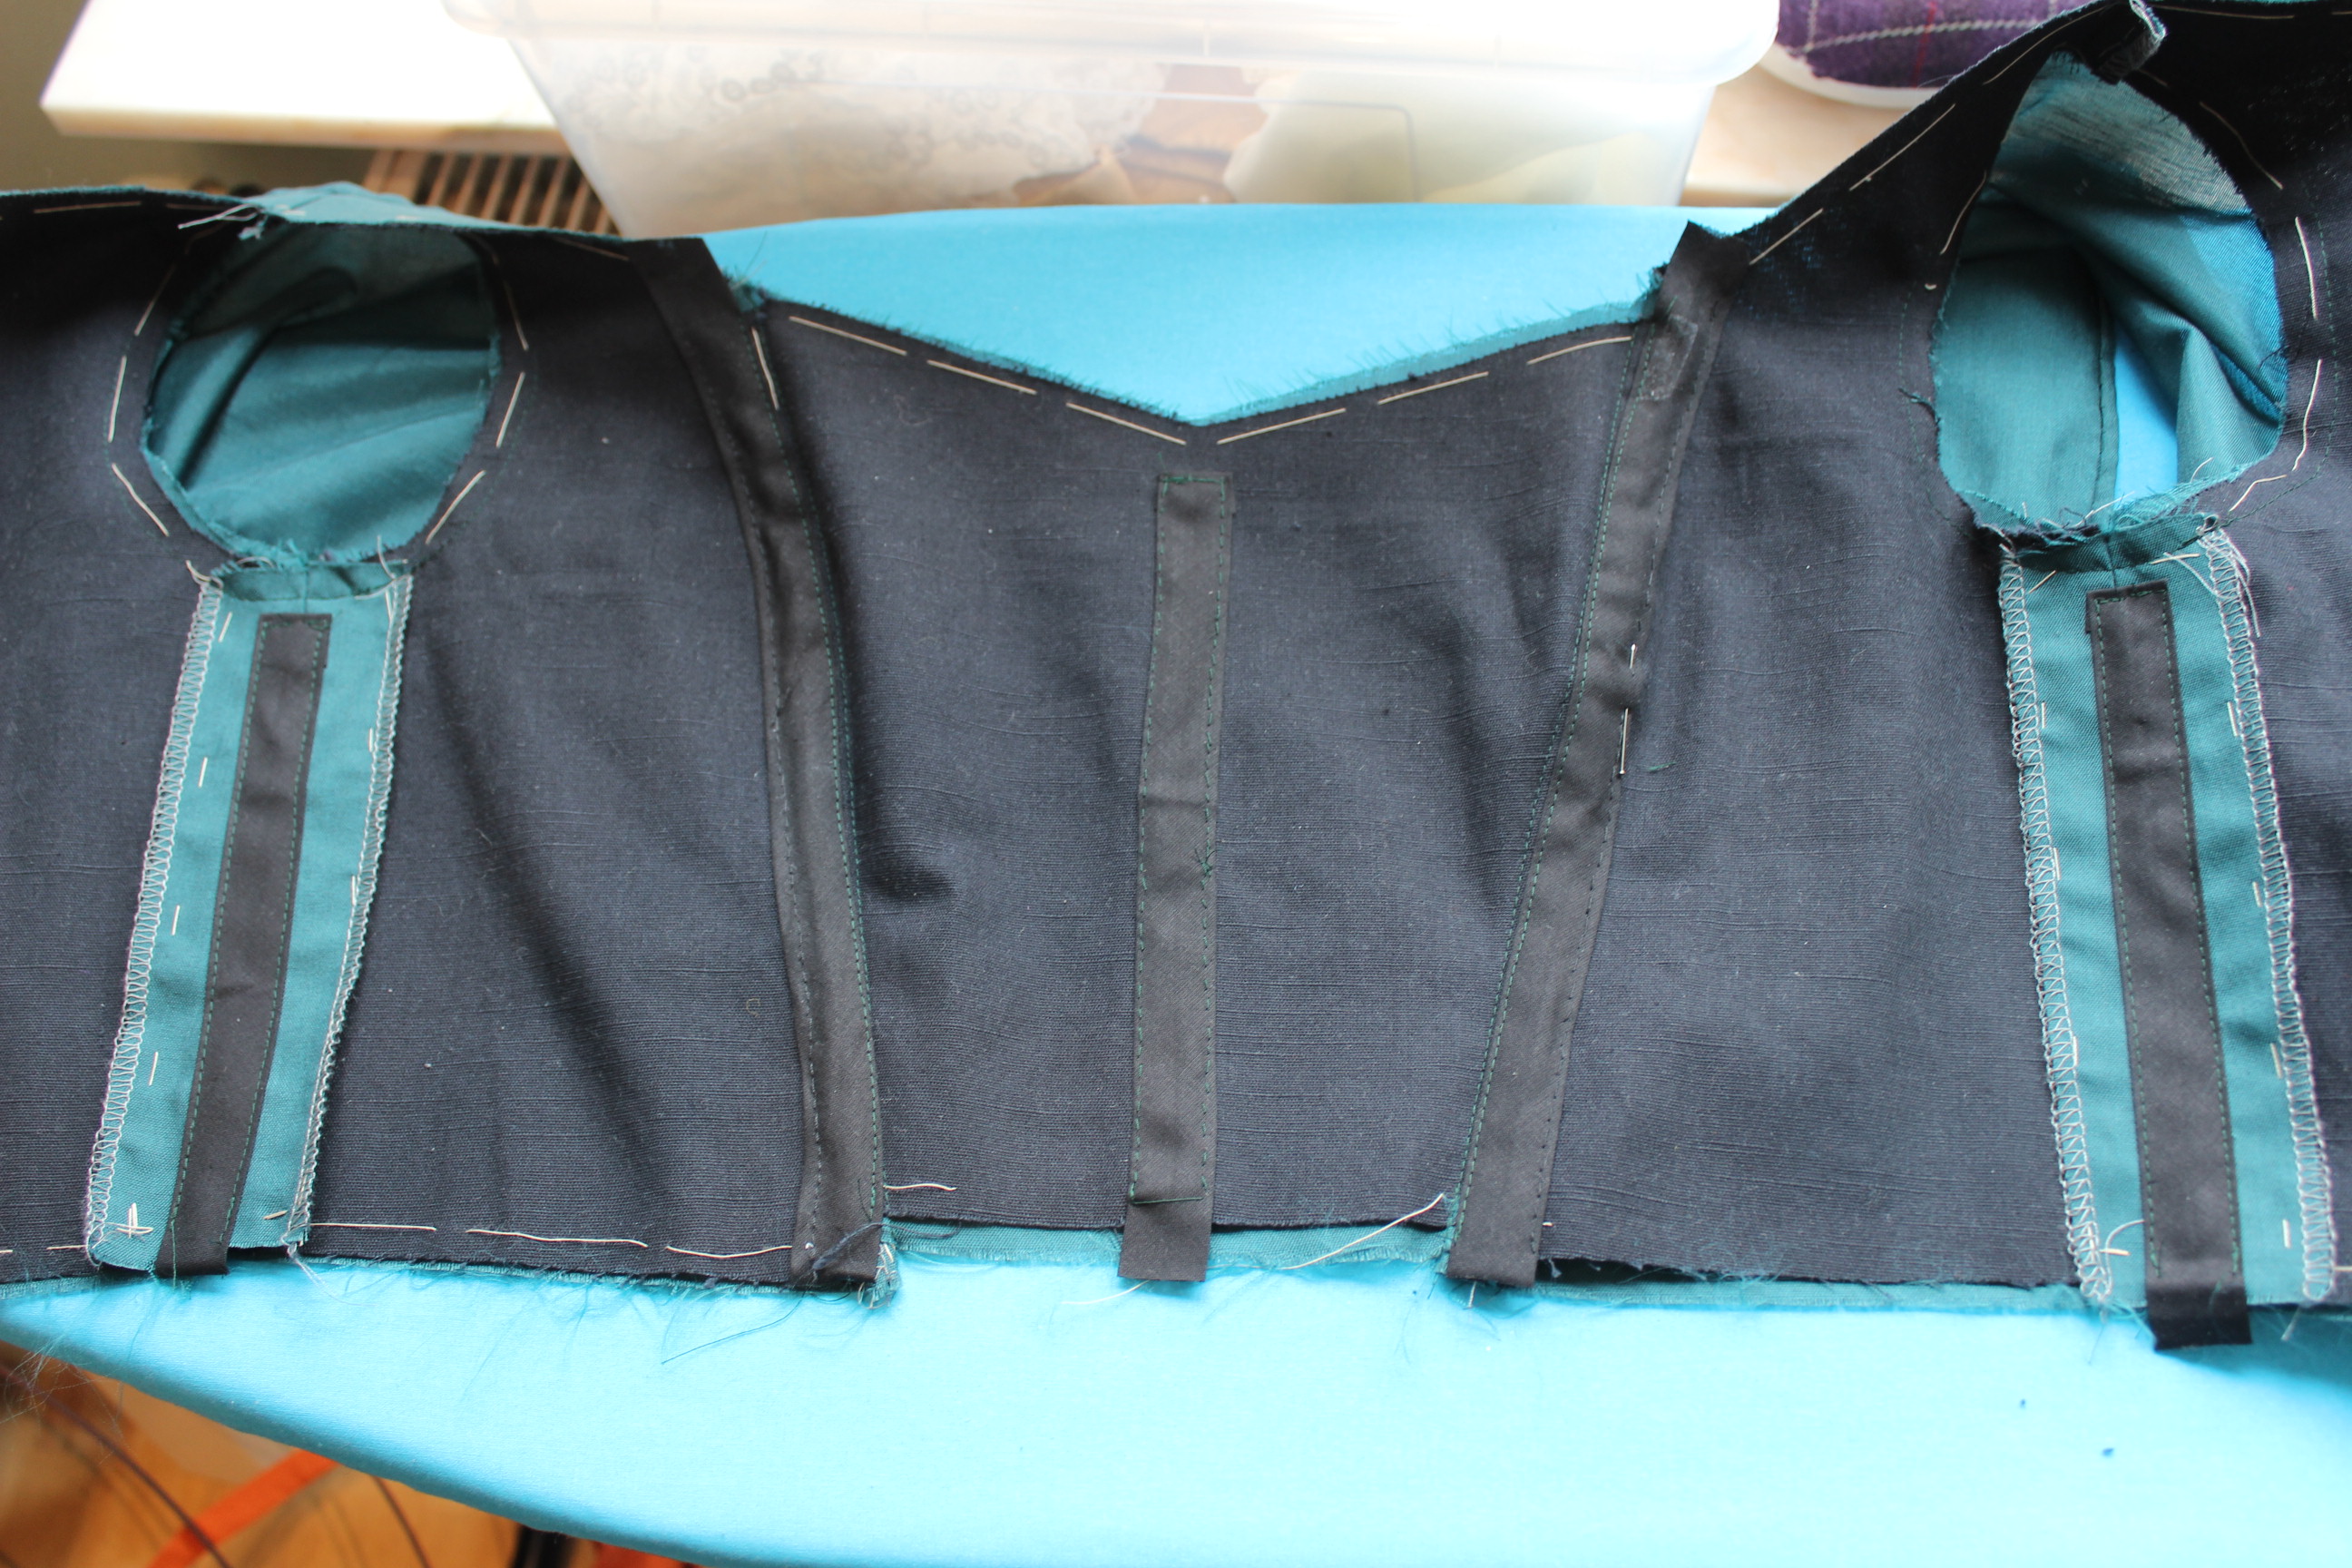 The interior of the bodice
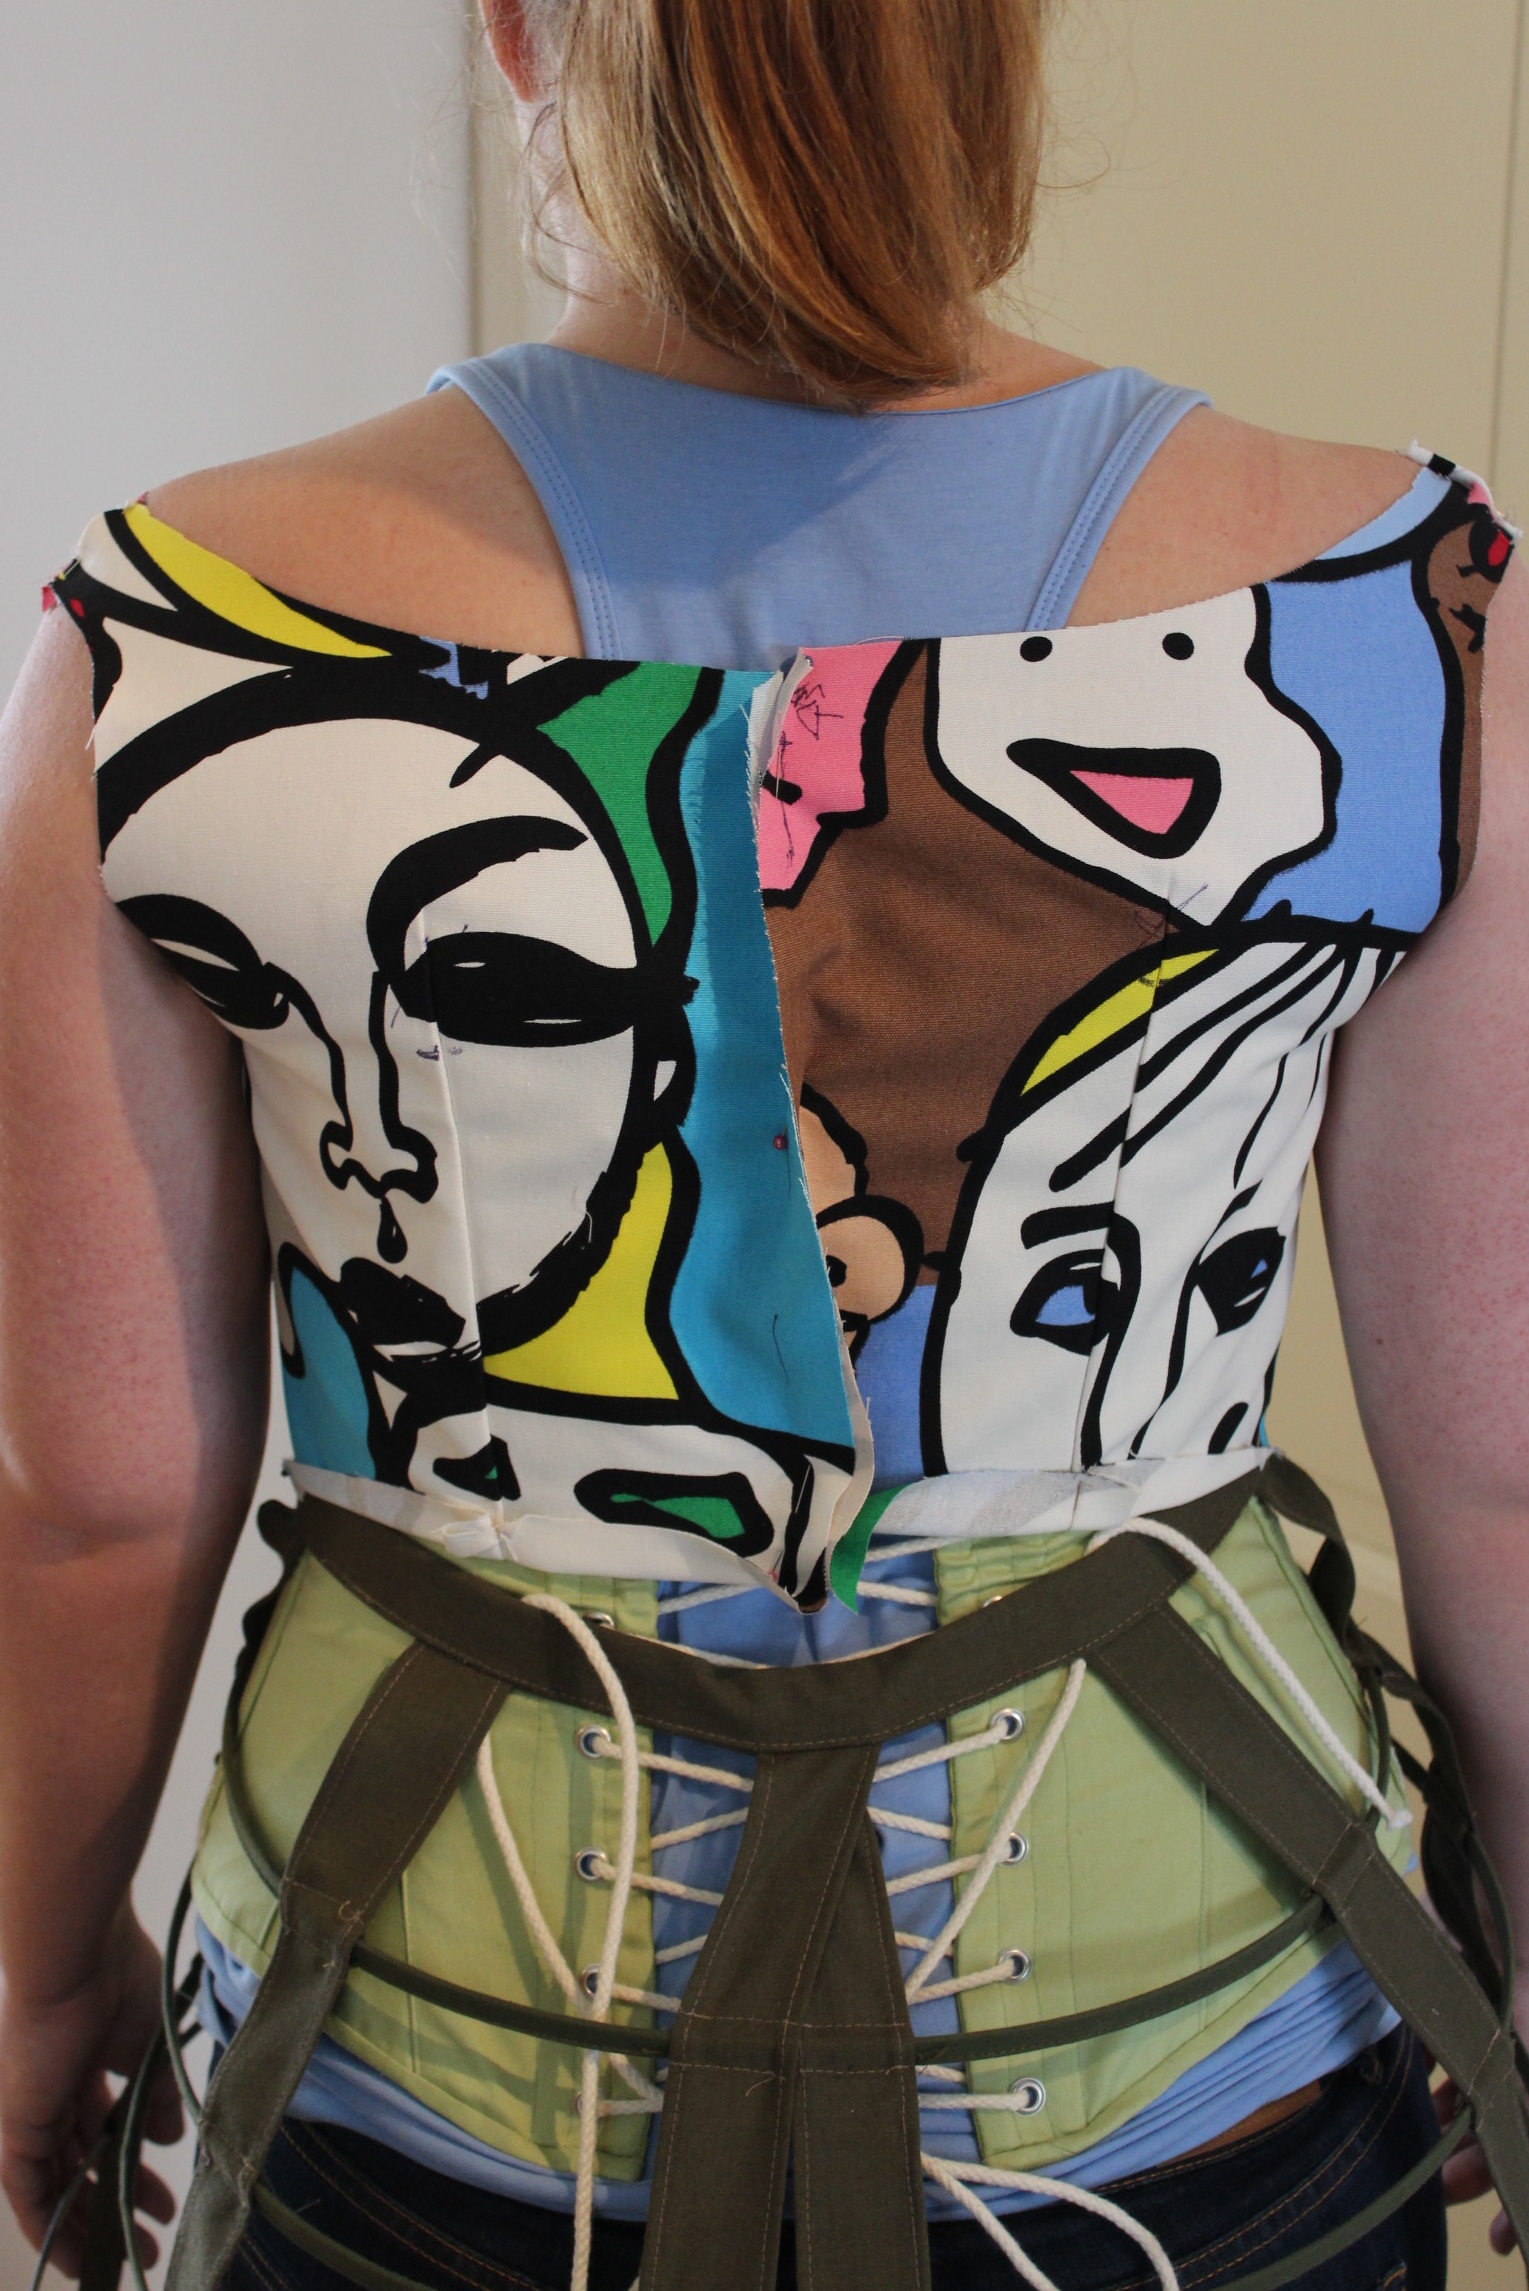
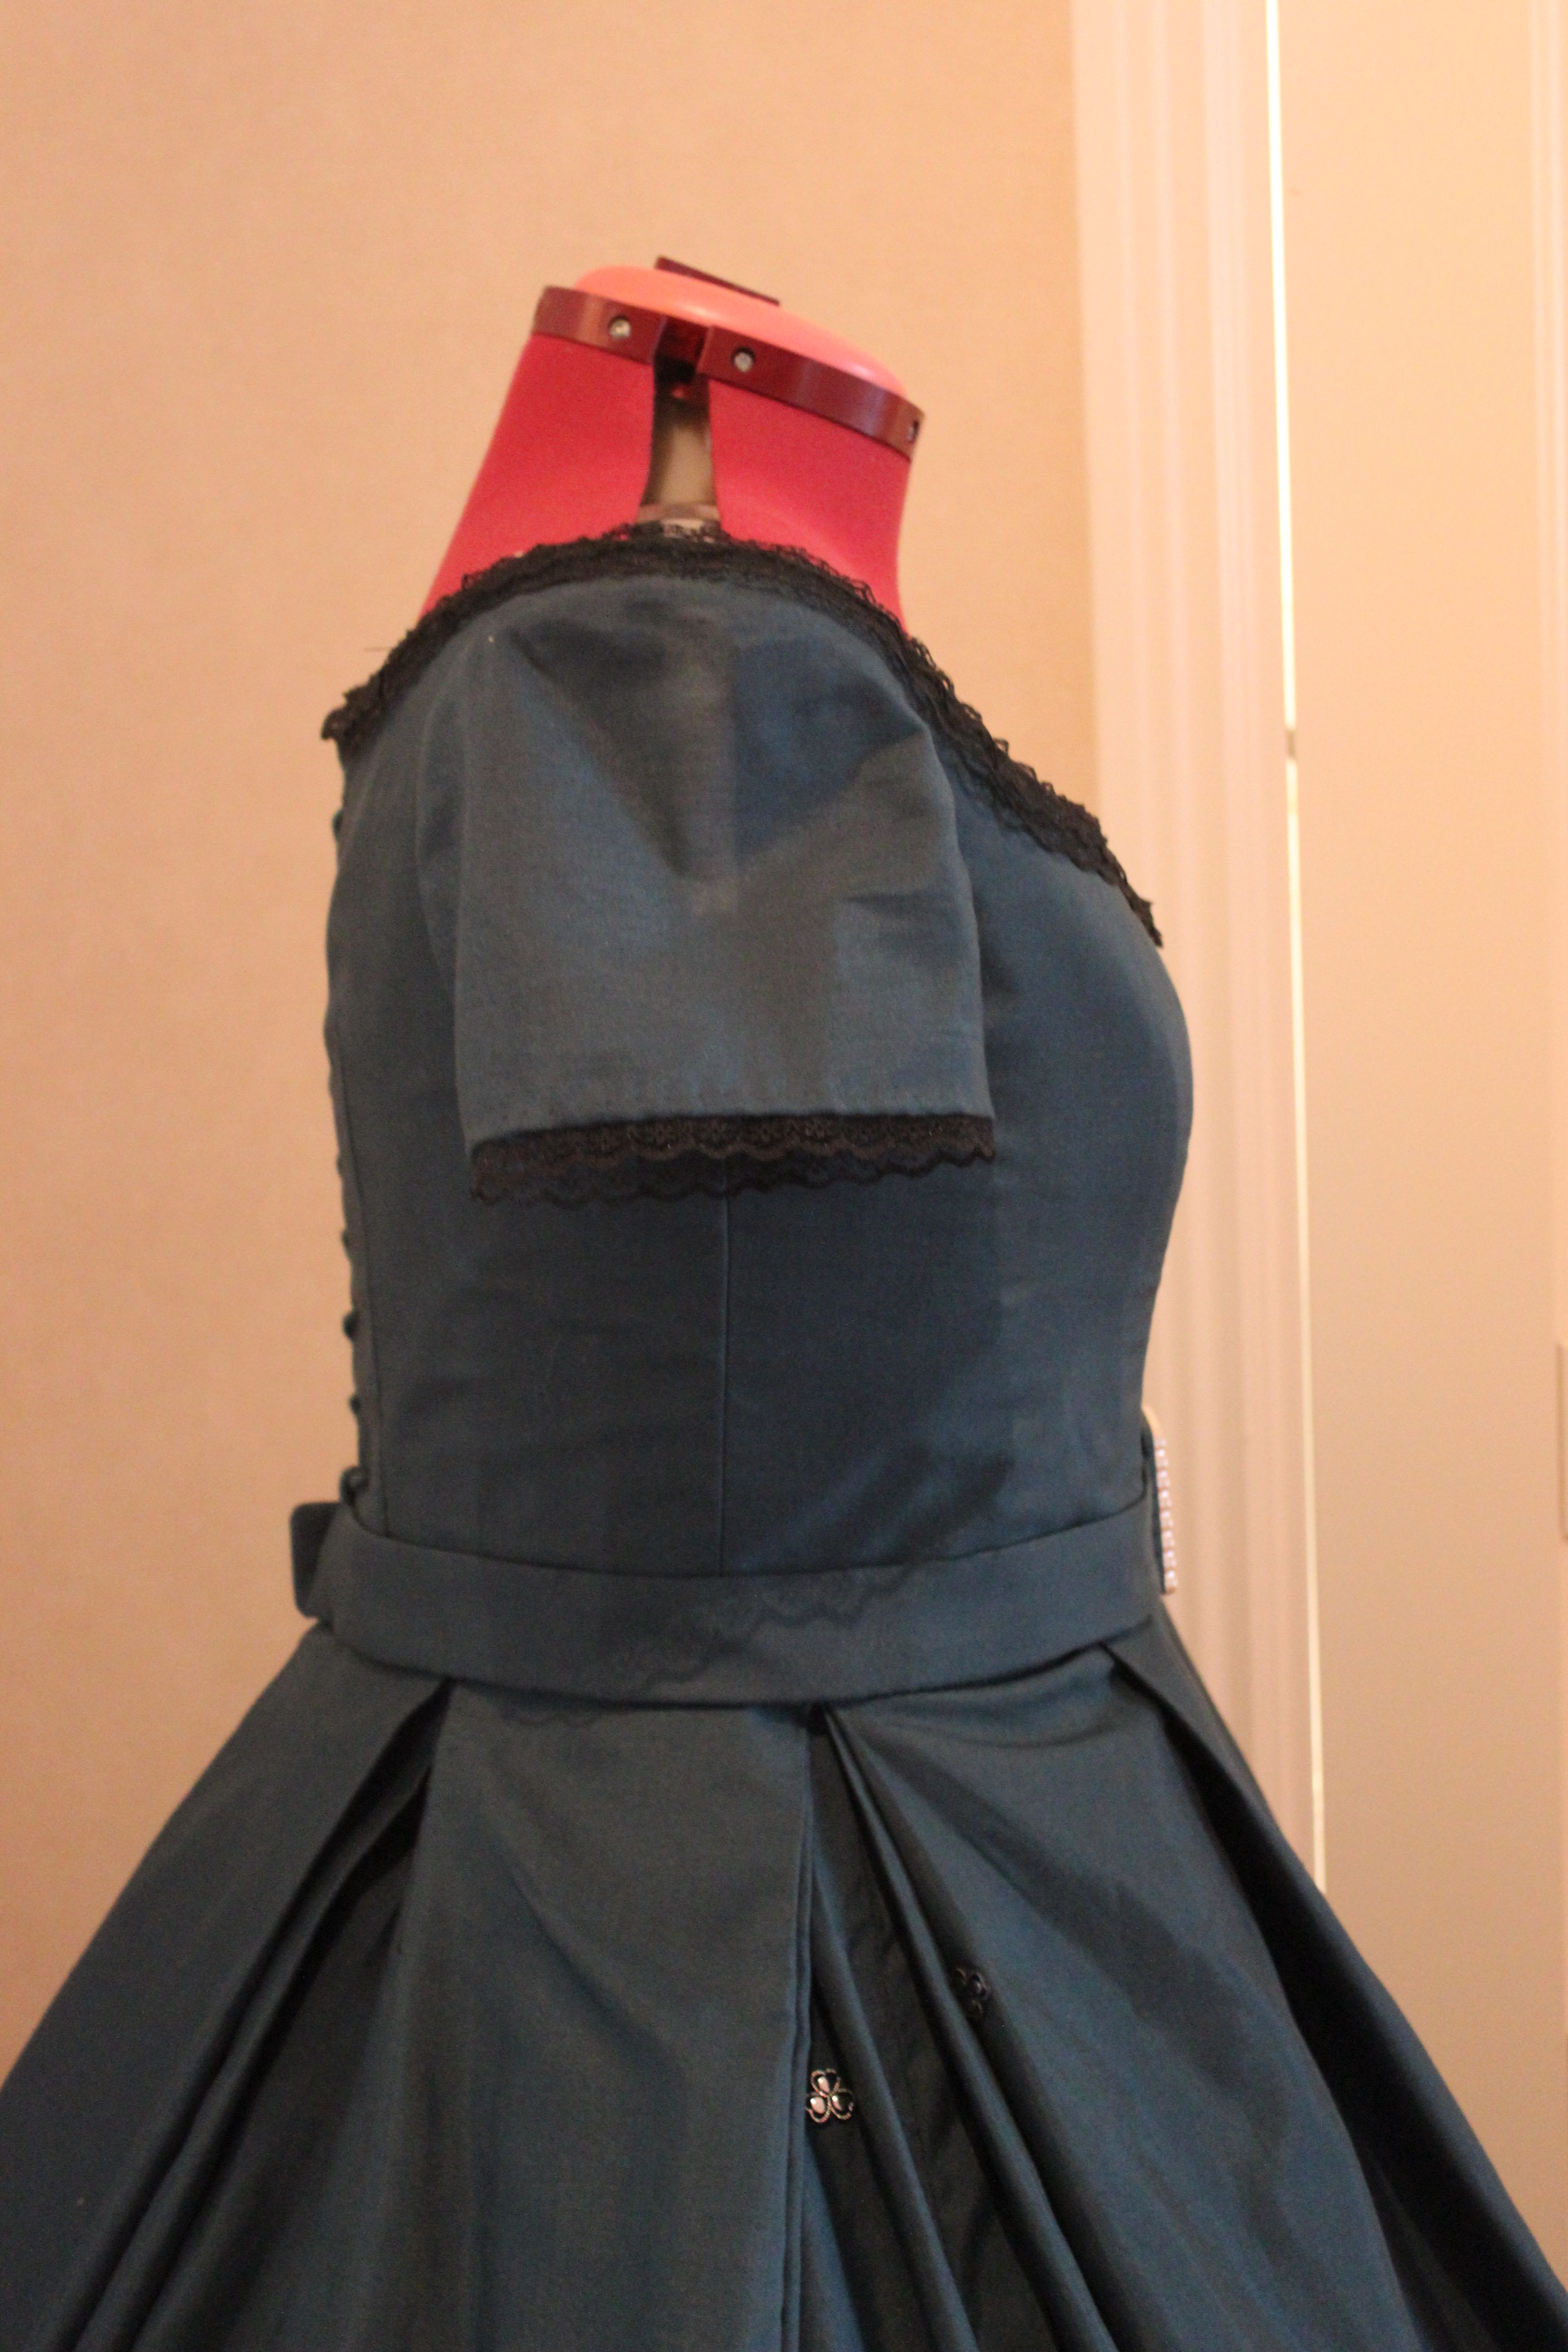
Then it was time to try the gown on my sister.
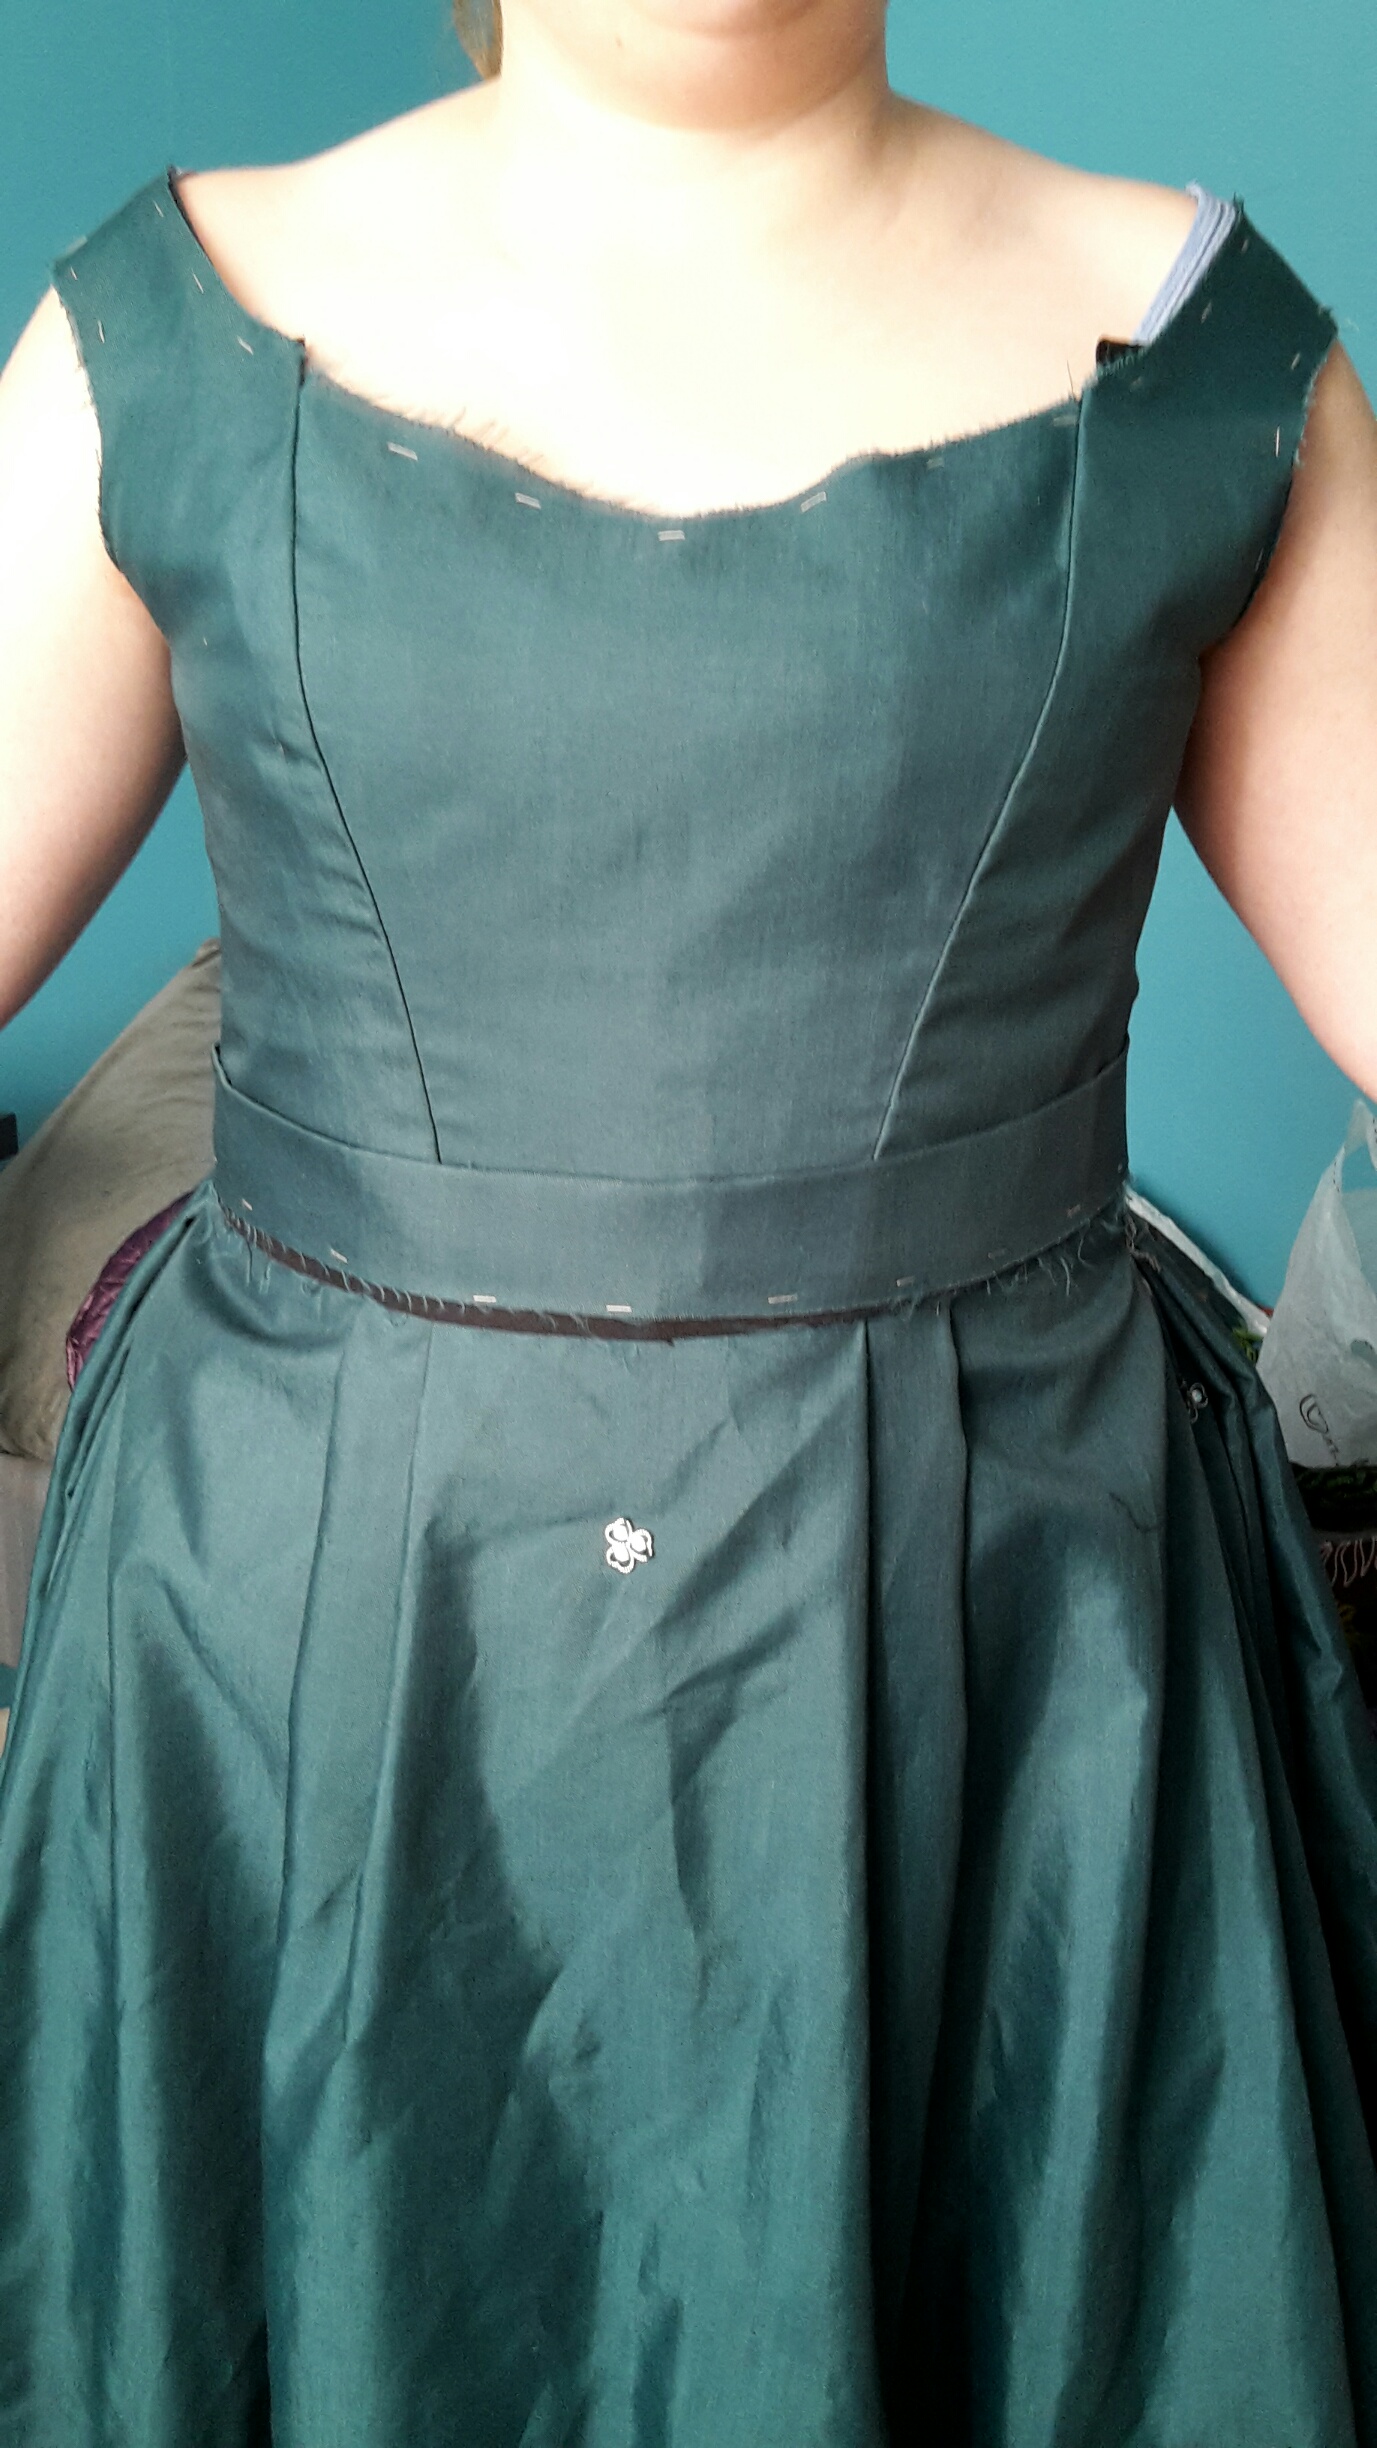

Don’t you just love how she matches the wall…
Thank good for multiple mock-ups. The bodice (and skirt) fit almost perfectly (the wrinkles you see at the back will disappear once I got the center back bones in).
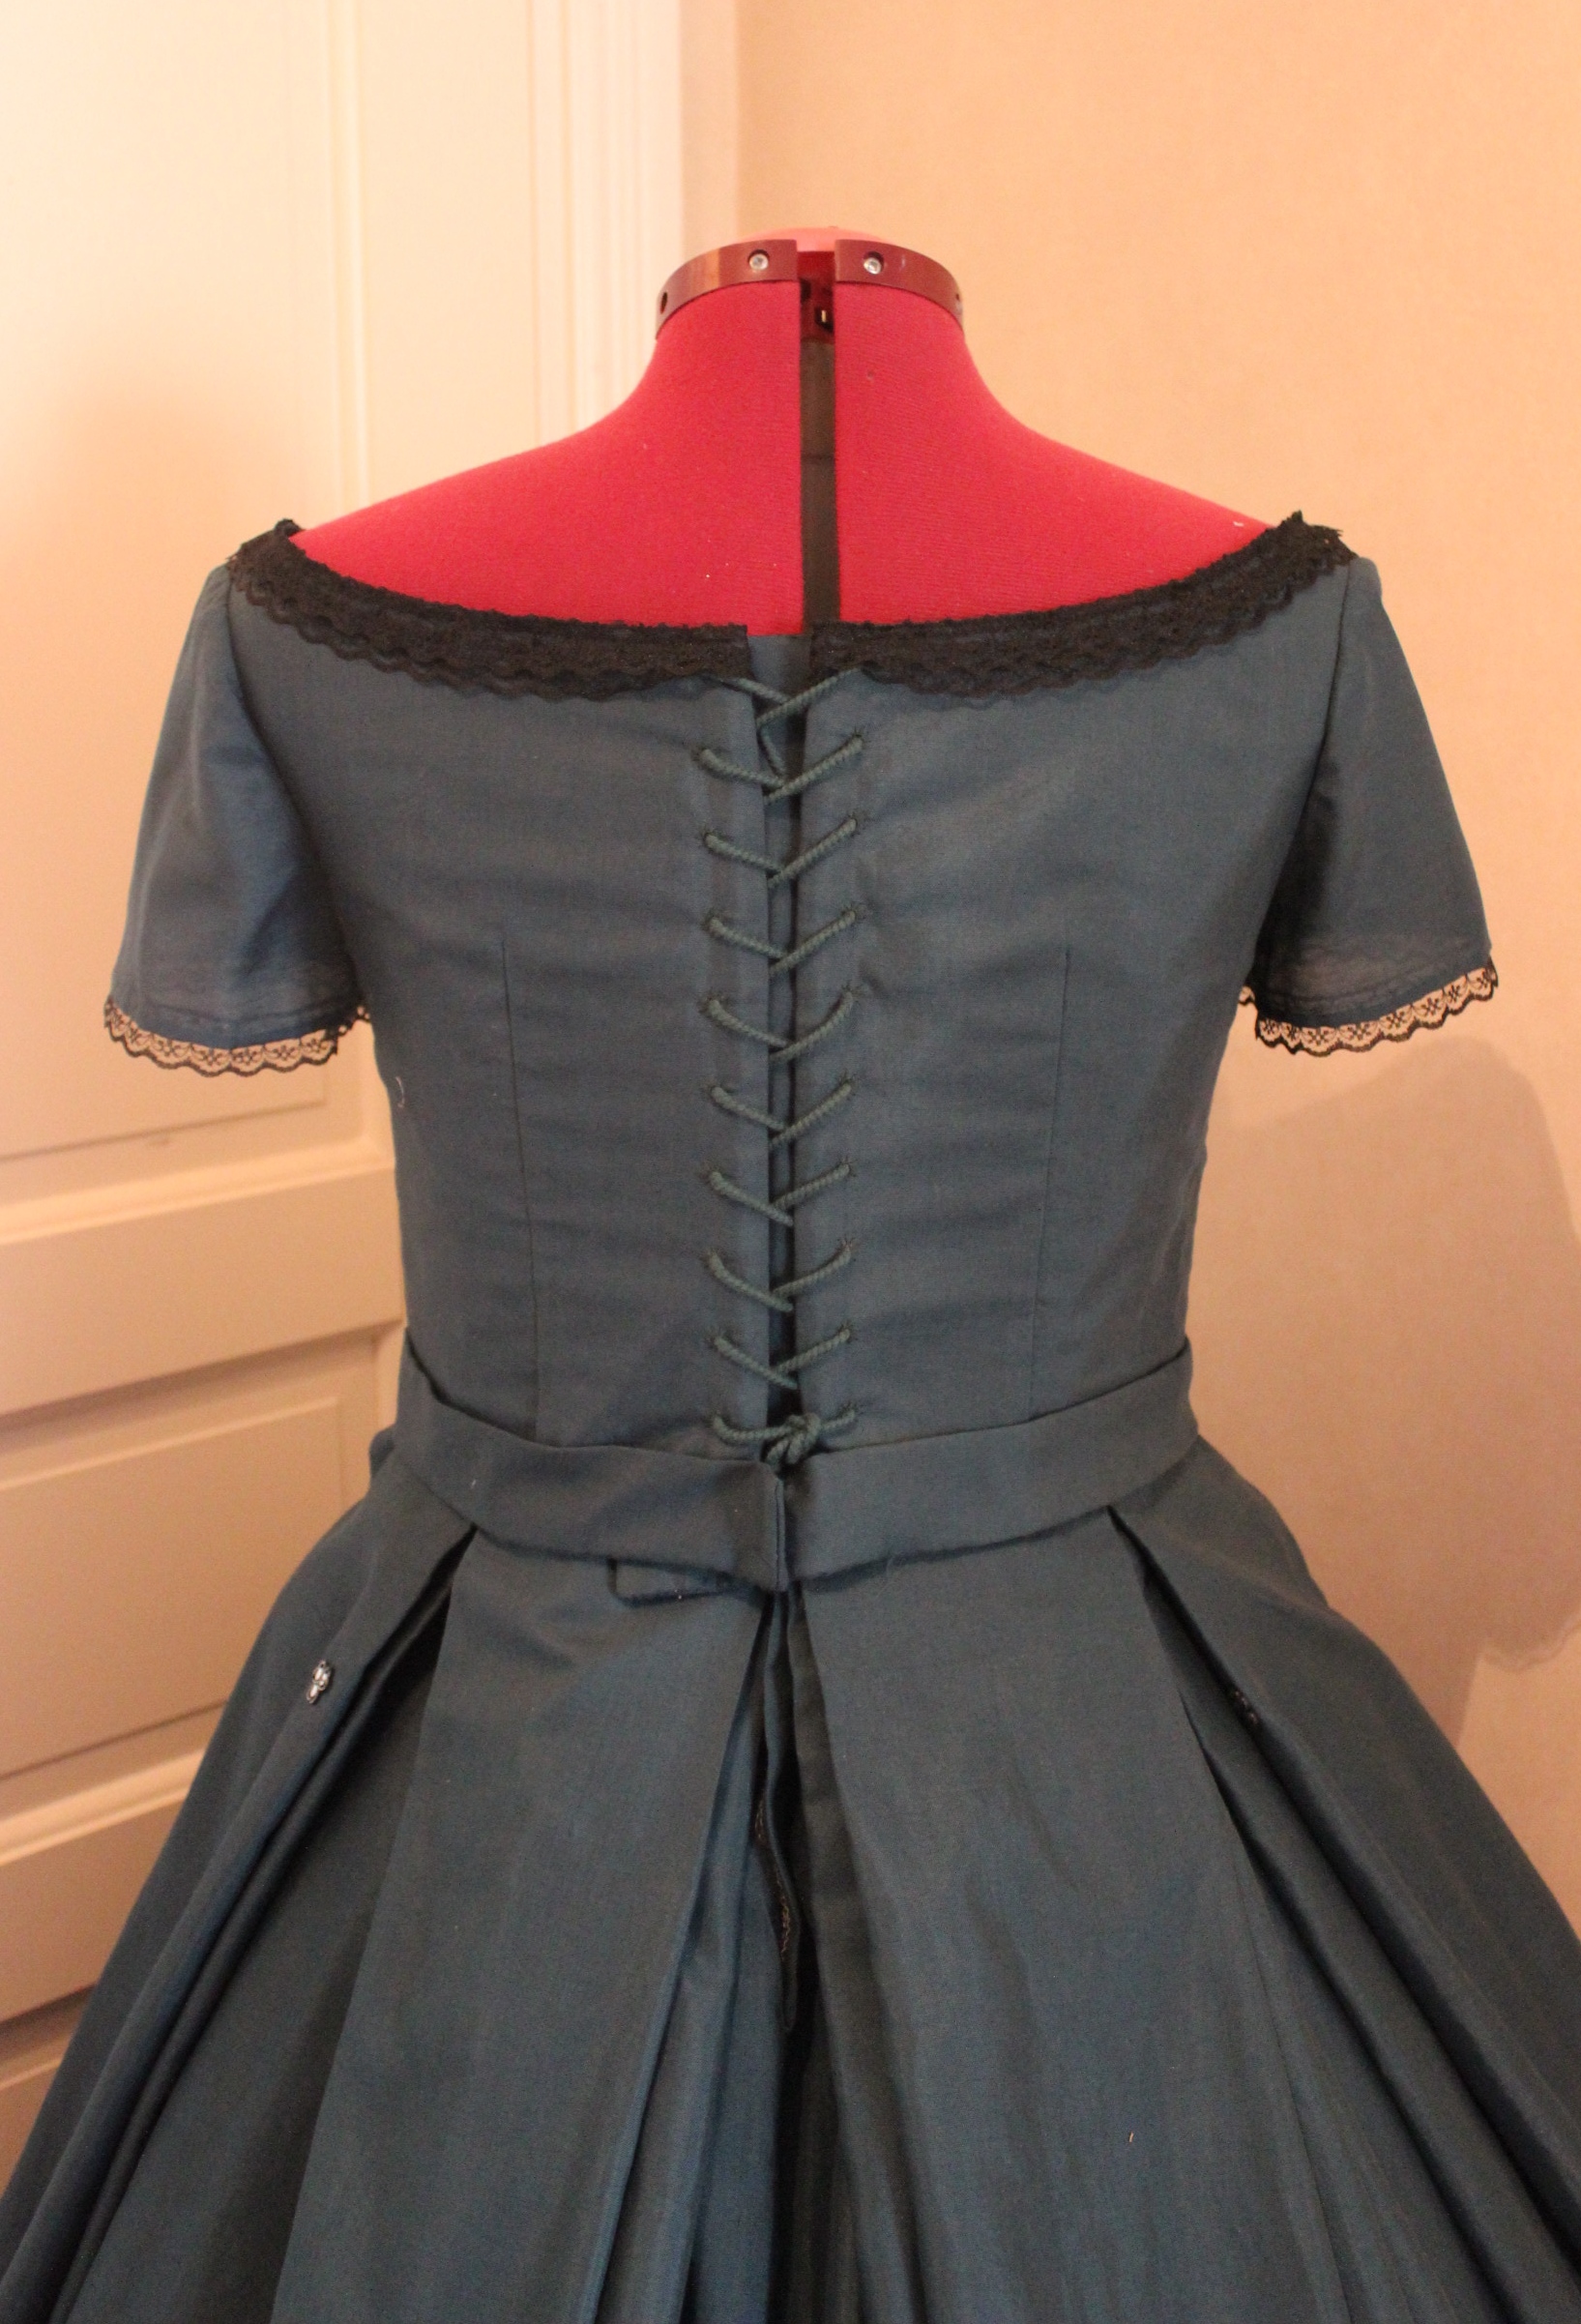
After some minor adjustments, I set the sleeves and the lining and got started on the eyelet for the back lacing. Here I ran into trouble. after almost 3 months of planing and making undergarments for this dress, I still hadn’t found any suitable lacing cord in a color that would work for the dress. I’d been to every sore in town, searched the internet, contemplated using black or even discard of lacing for closure all together, when I realized I might in fact have something in my own stash that would work.
Hurray! The odd colored cotton cord I’d got on super sale a few years back turned out to be the exact shade of Teal I needed – what are the odds? 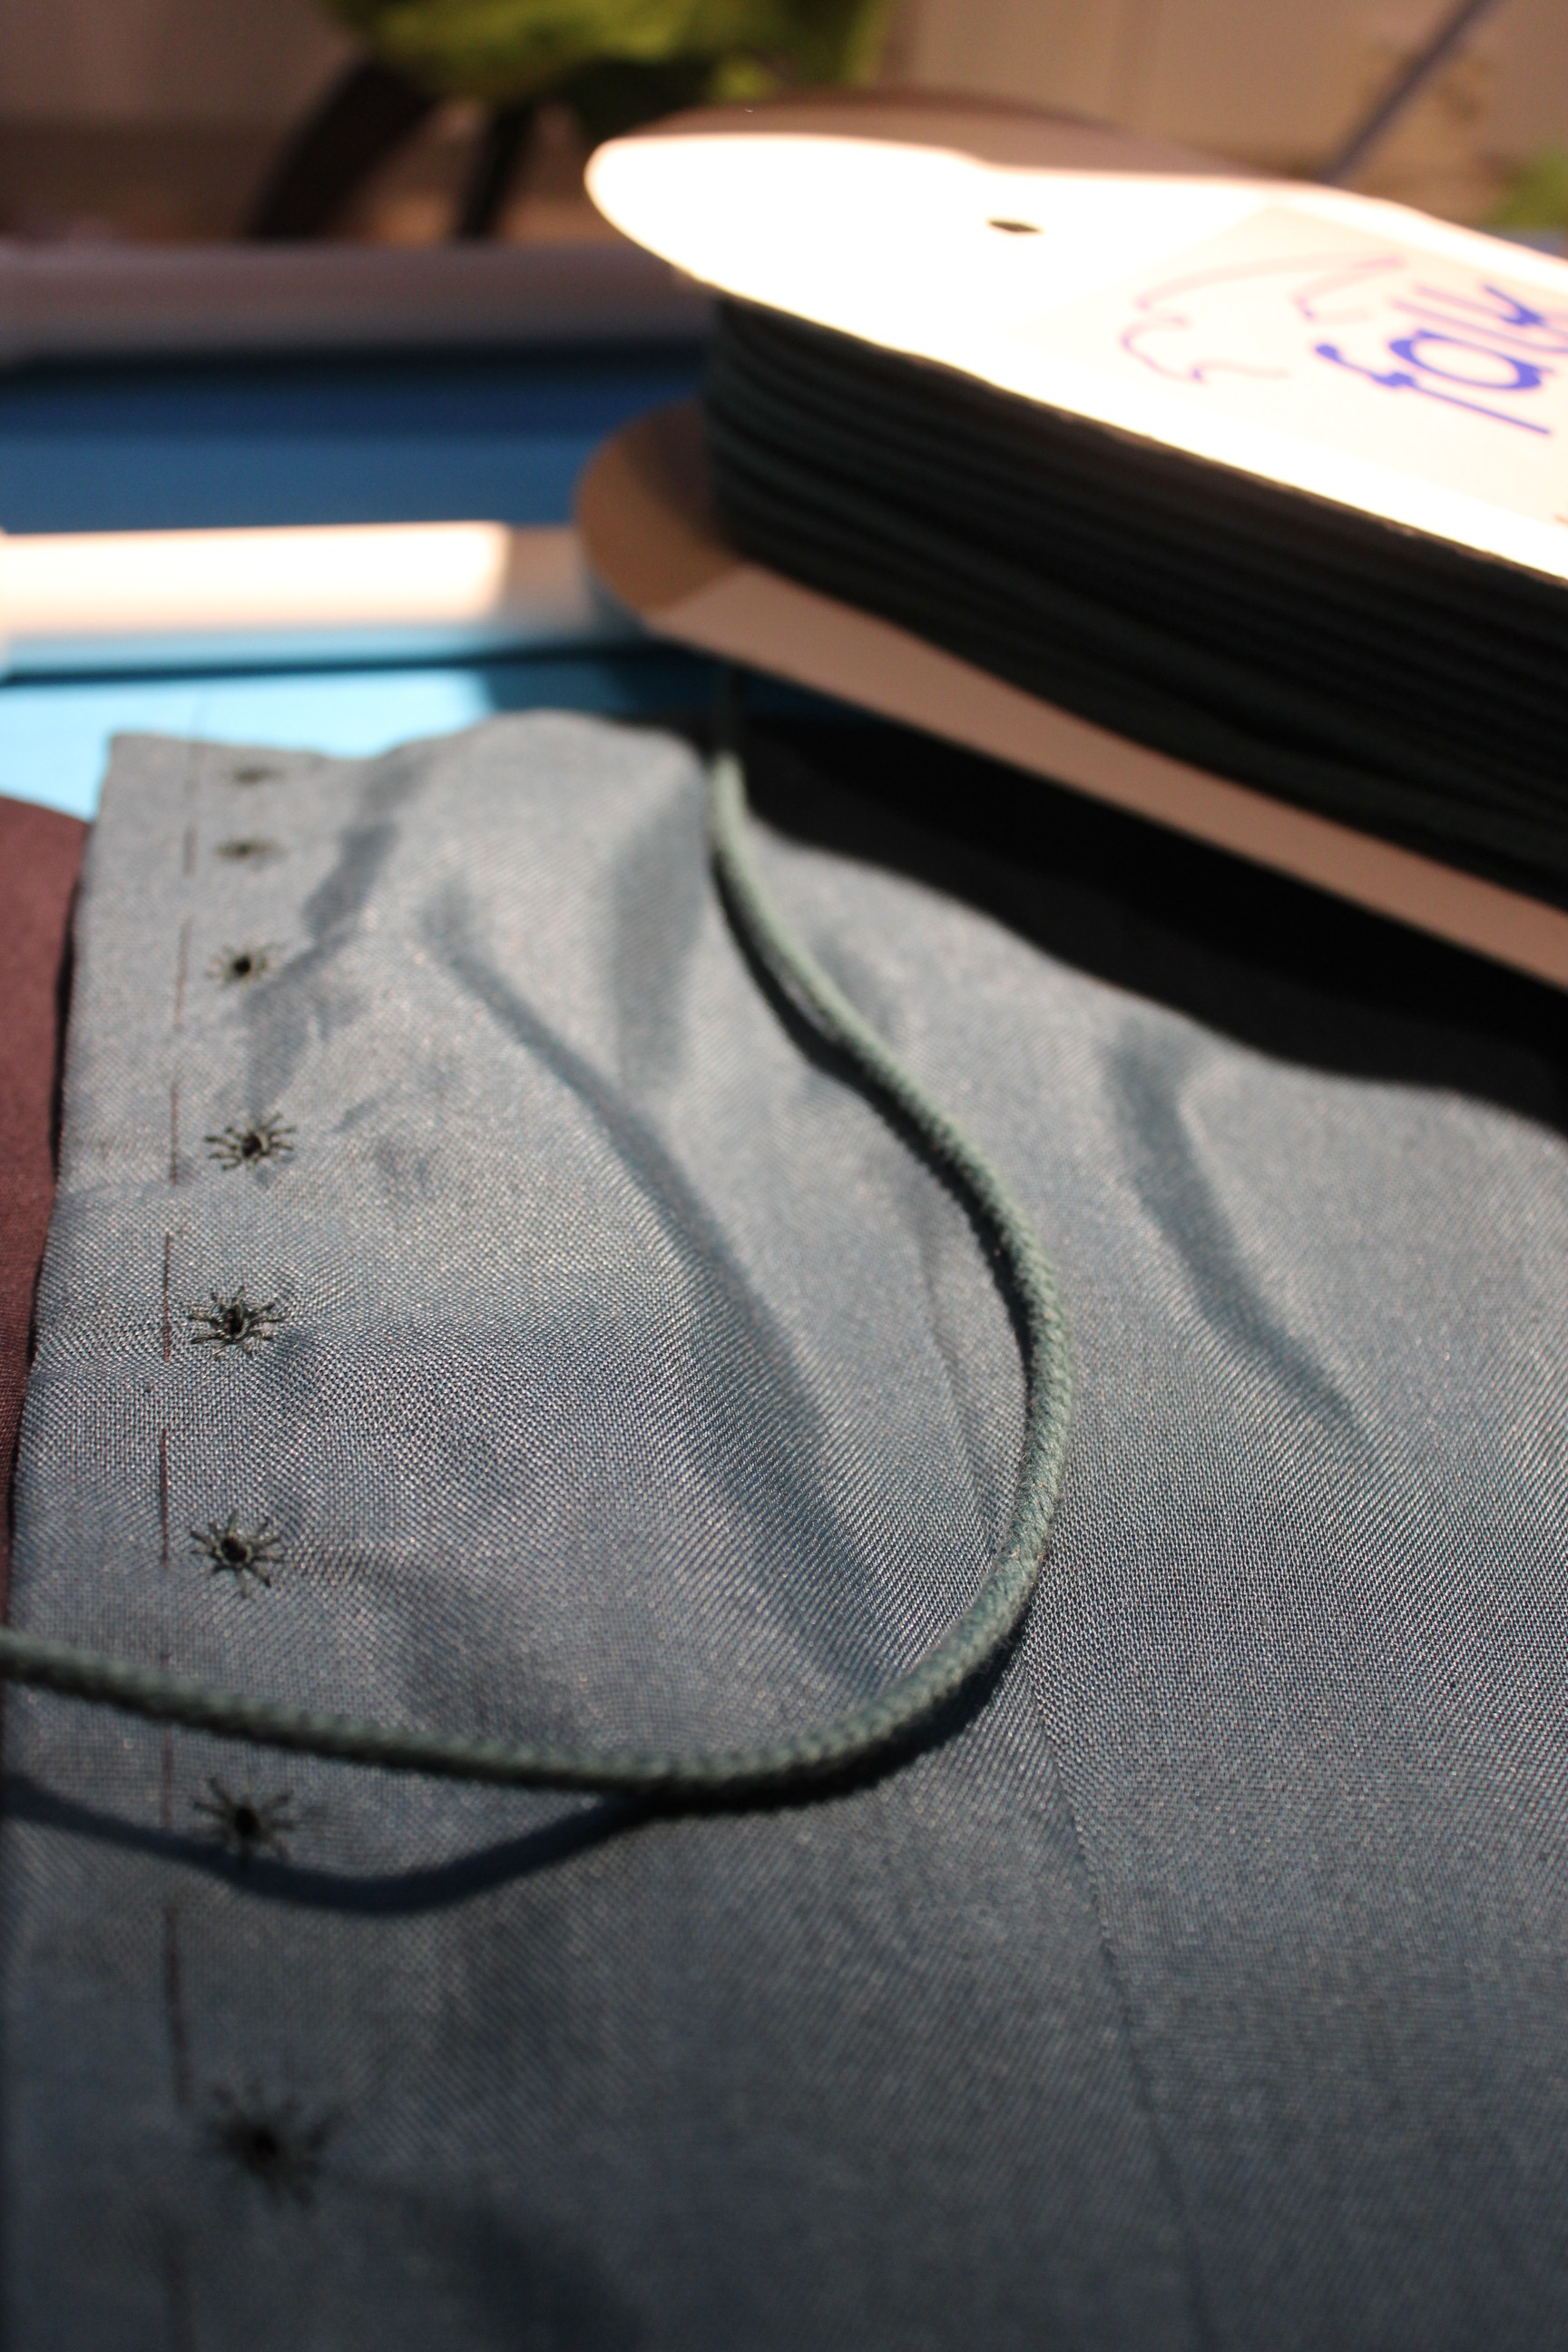 Perfect match! – Is this a sign my stash are to big?
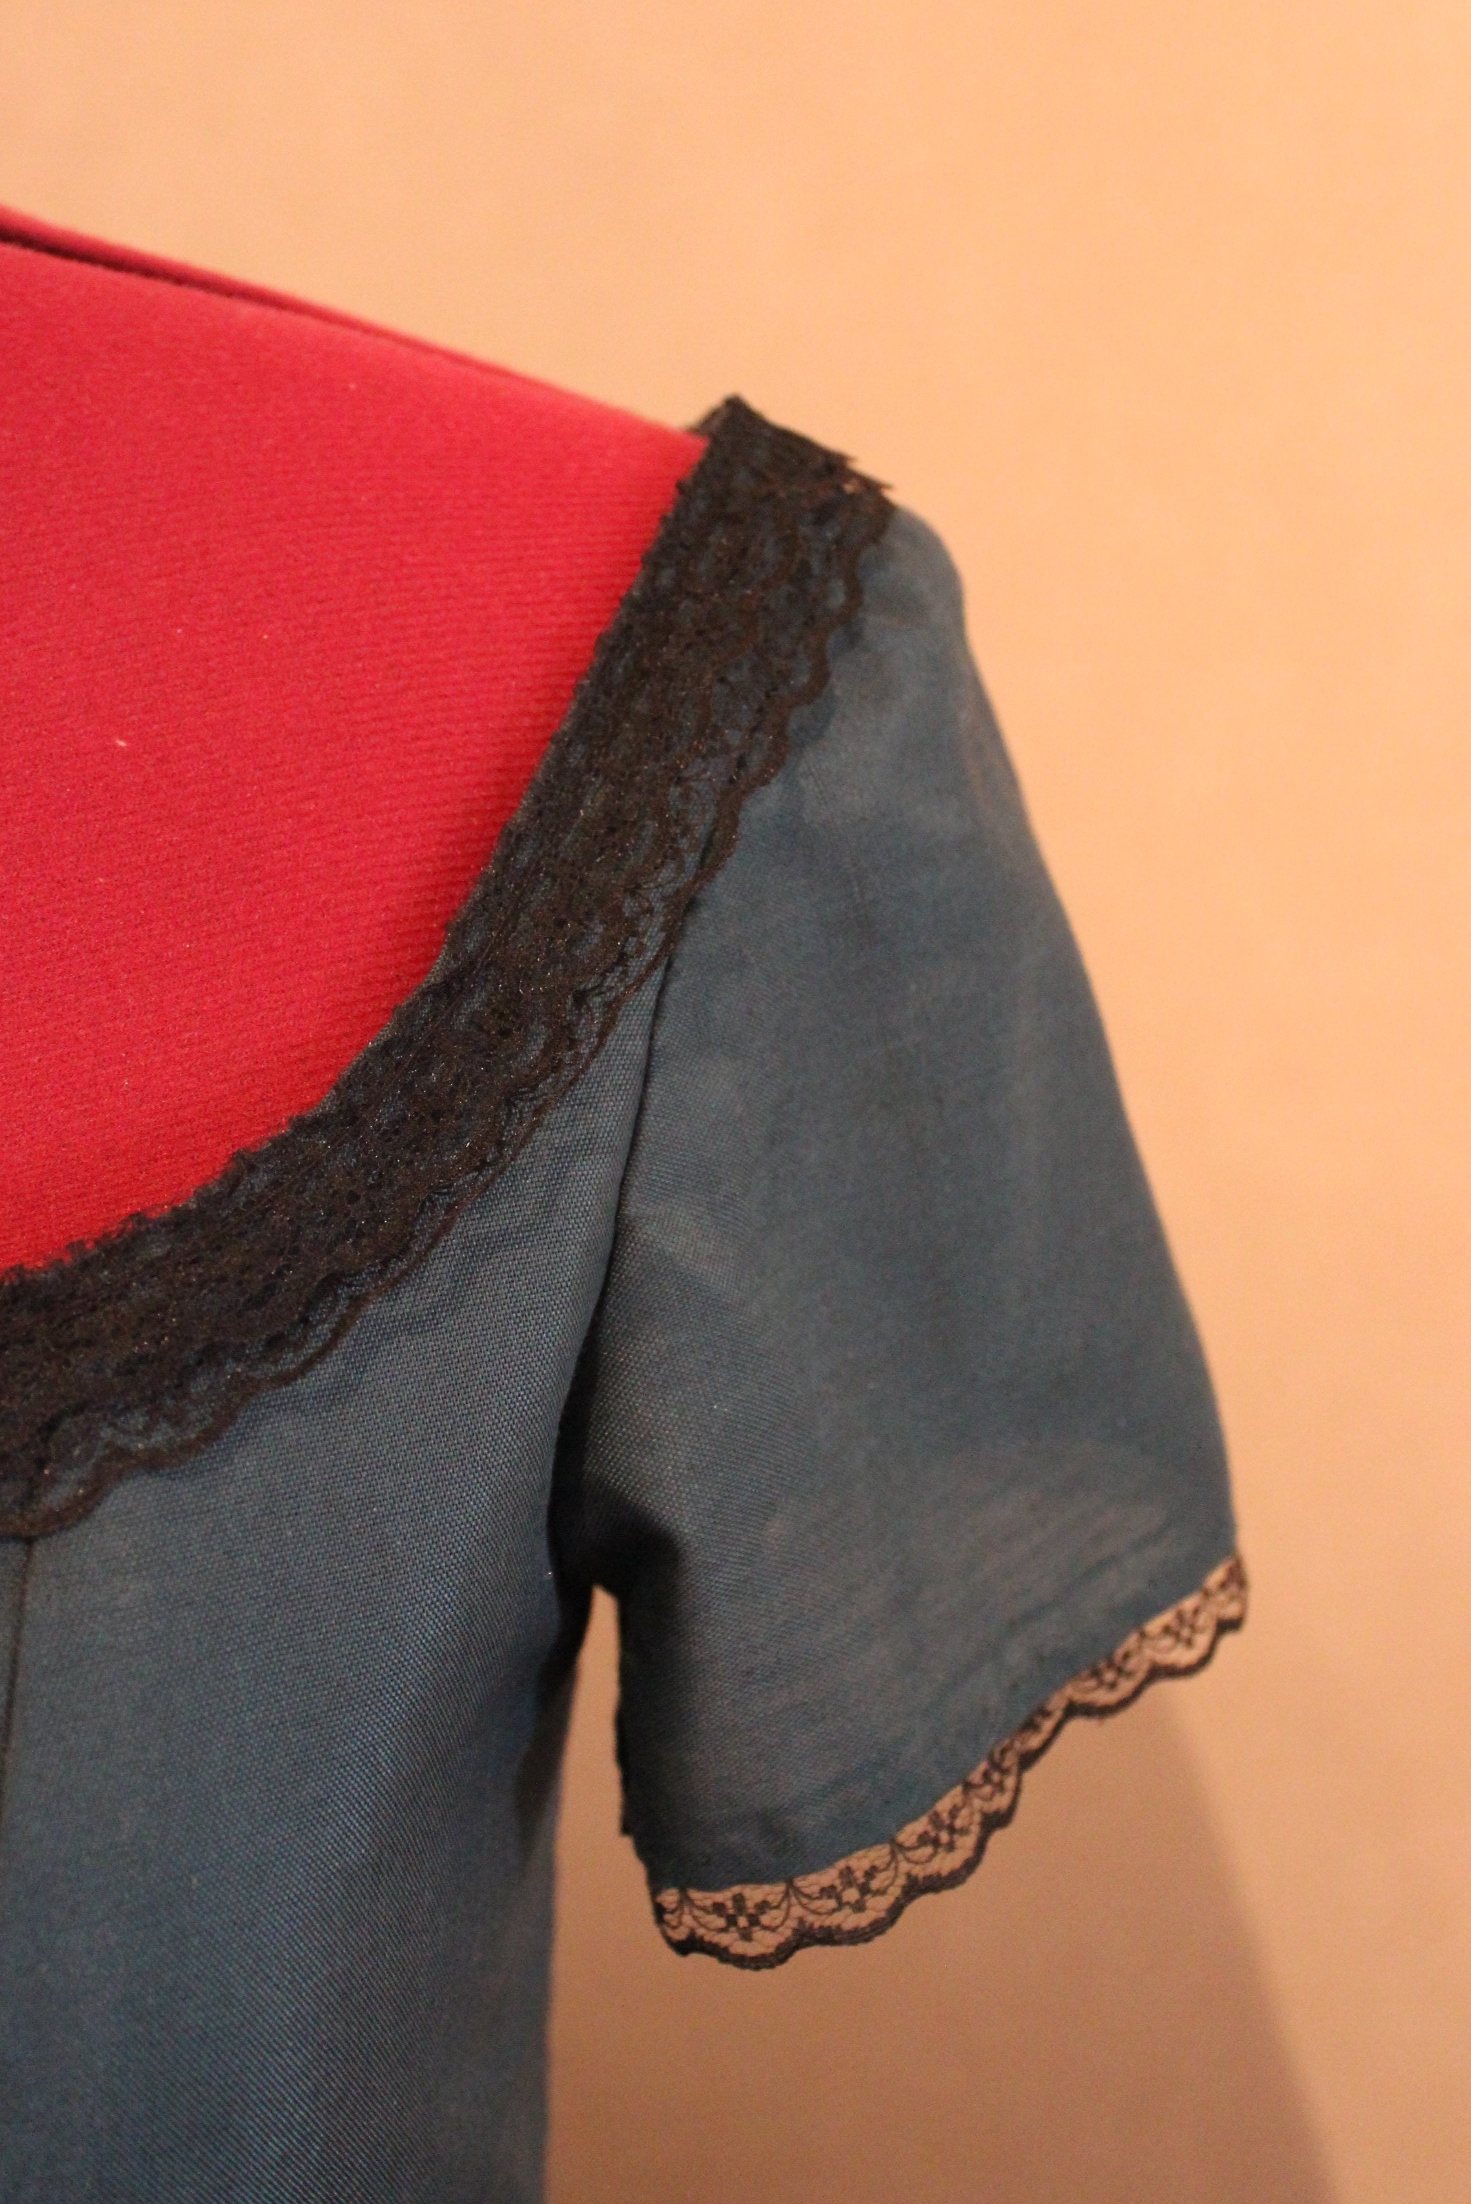
Once the eyelets where finished I stitched down the lining, hemed the sleeves made a belt and added some black lace to the neckline. 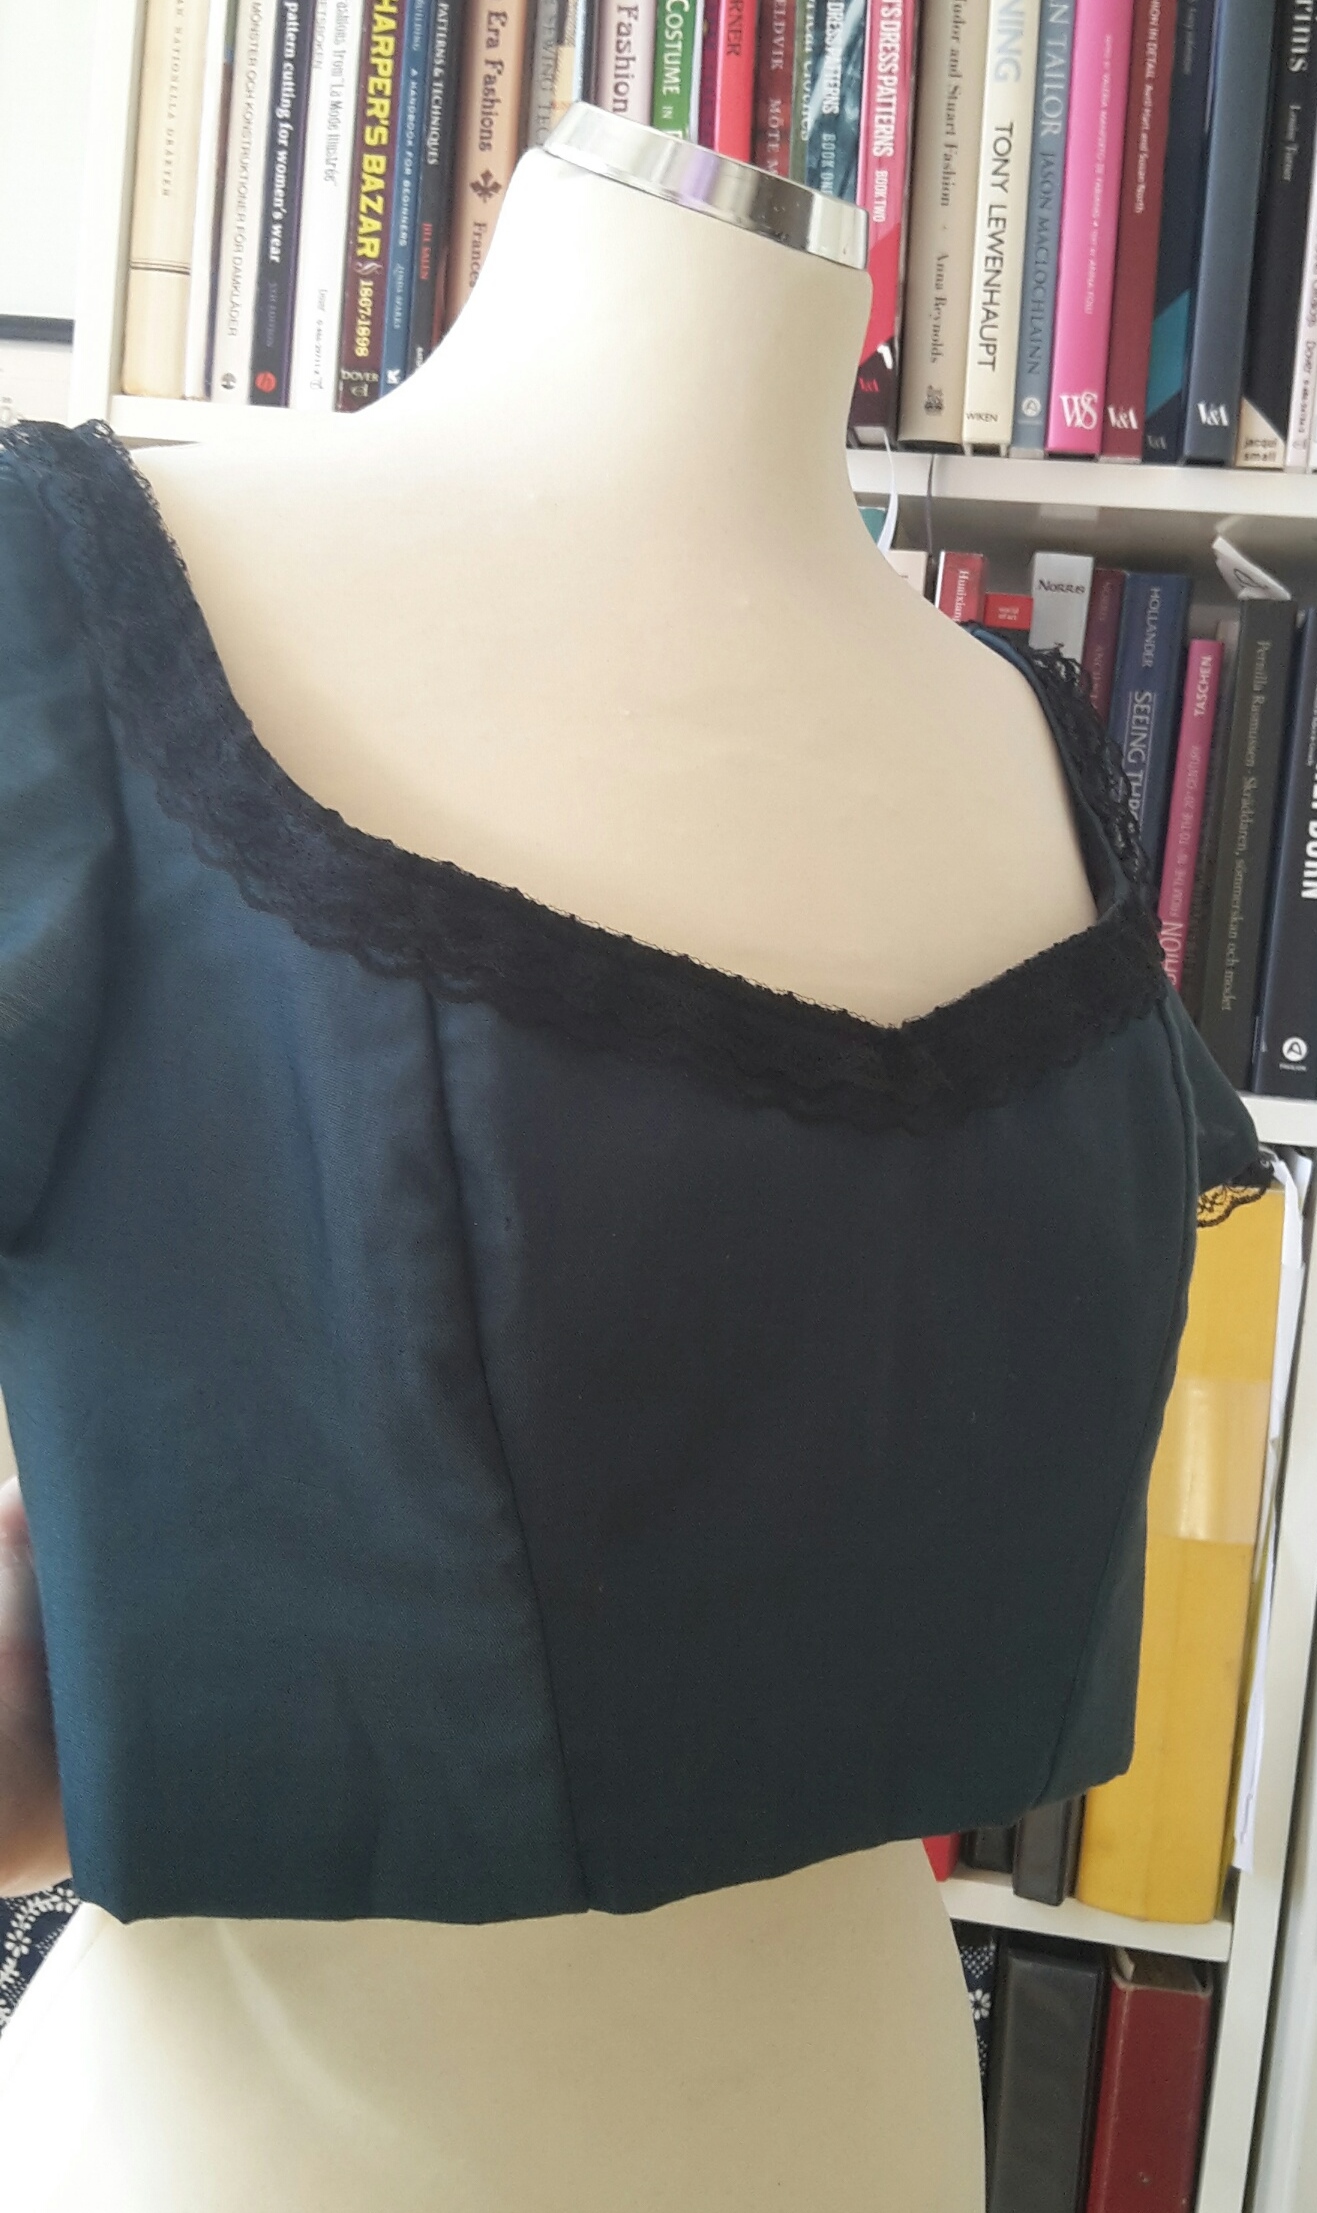
Then I got my sister to come and try it on for a (almost) final fitting, where we marked the skirt length, stitched the belt on the bodice and added hooks and eyes to the waistbands of both pieces to keep the bodice from riding up.

 We also decided on how to accessorize, and to ad a piece of the same black lace around the sleeves and hem.
And since I want to submit this dress for the Historical Sew Monthly nr 5/2017 – Literature, I did some thinking on what book I would choose to make it fit. Then came the obvious answer – Victoria and her Court by Virginia Schomp (find preview from Google Books here).
Because who if not Queen Victoria would house a gown like this.
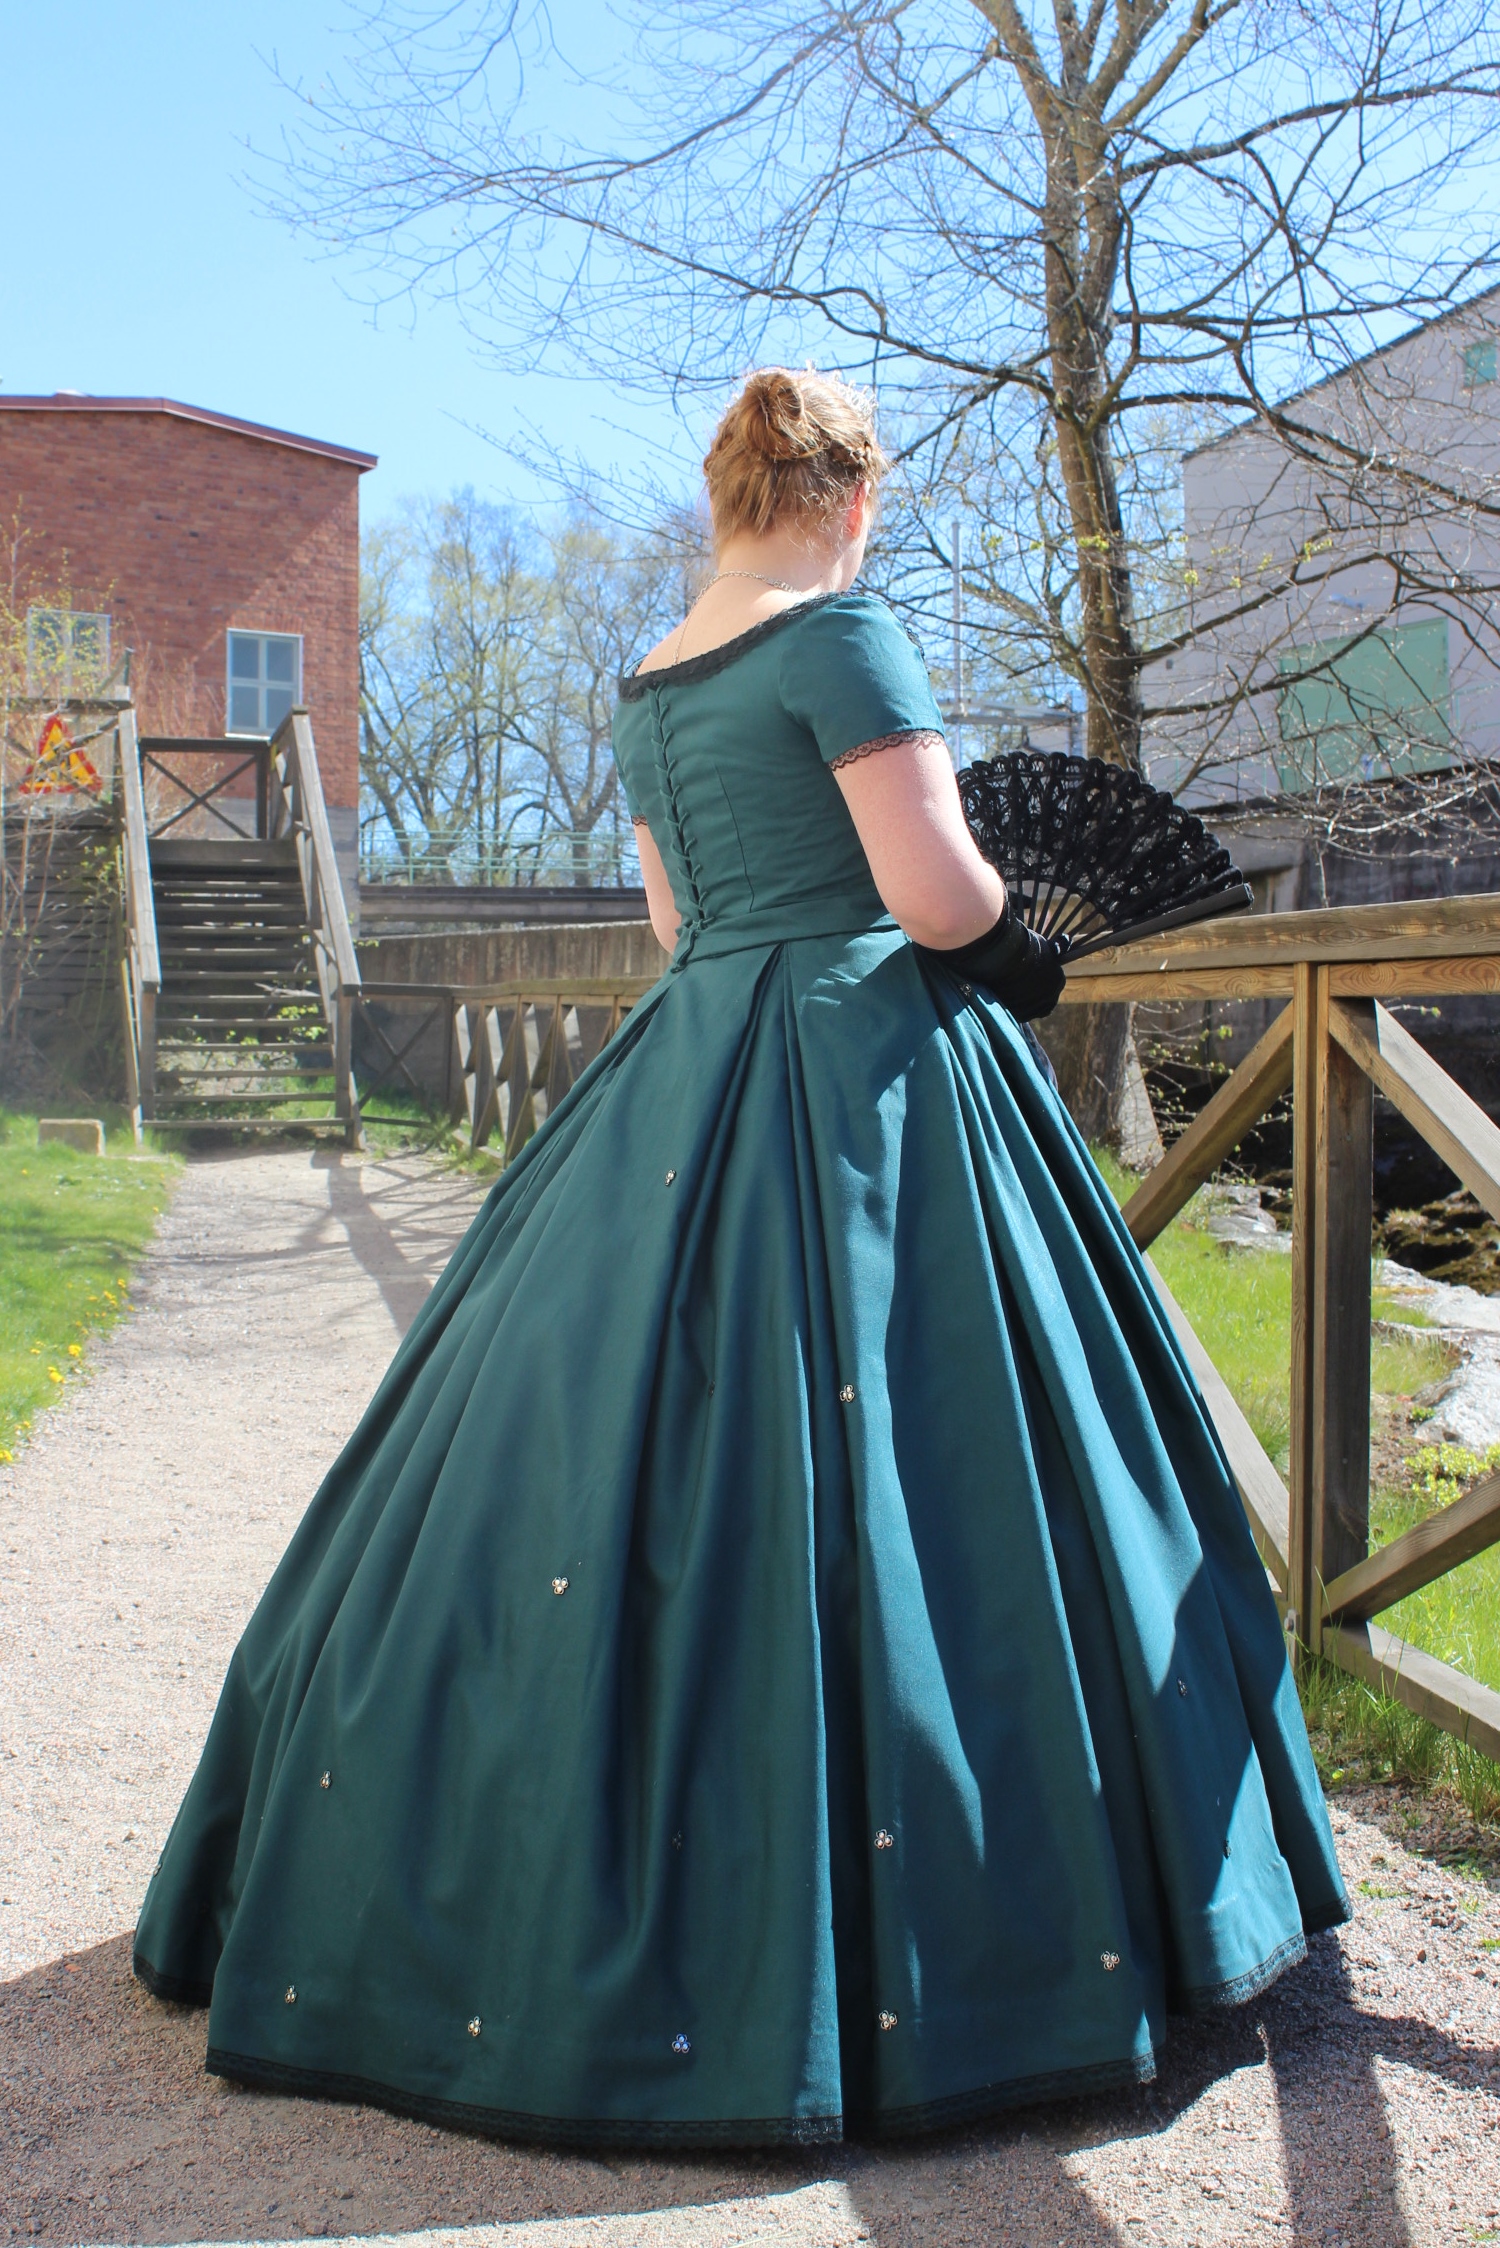
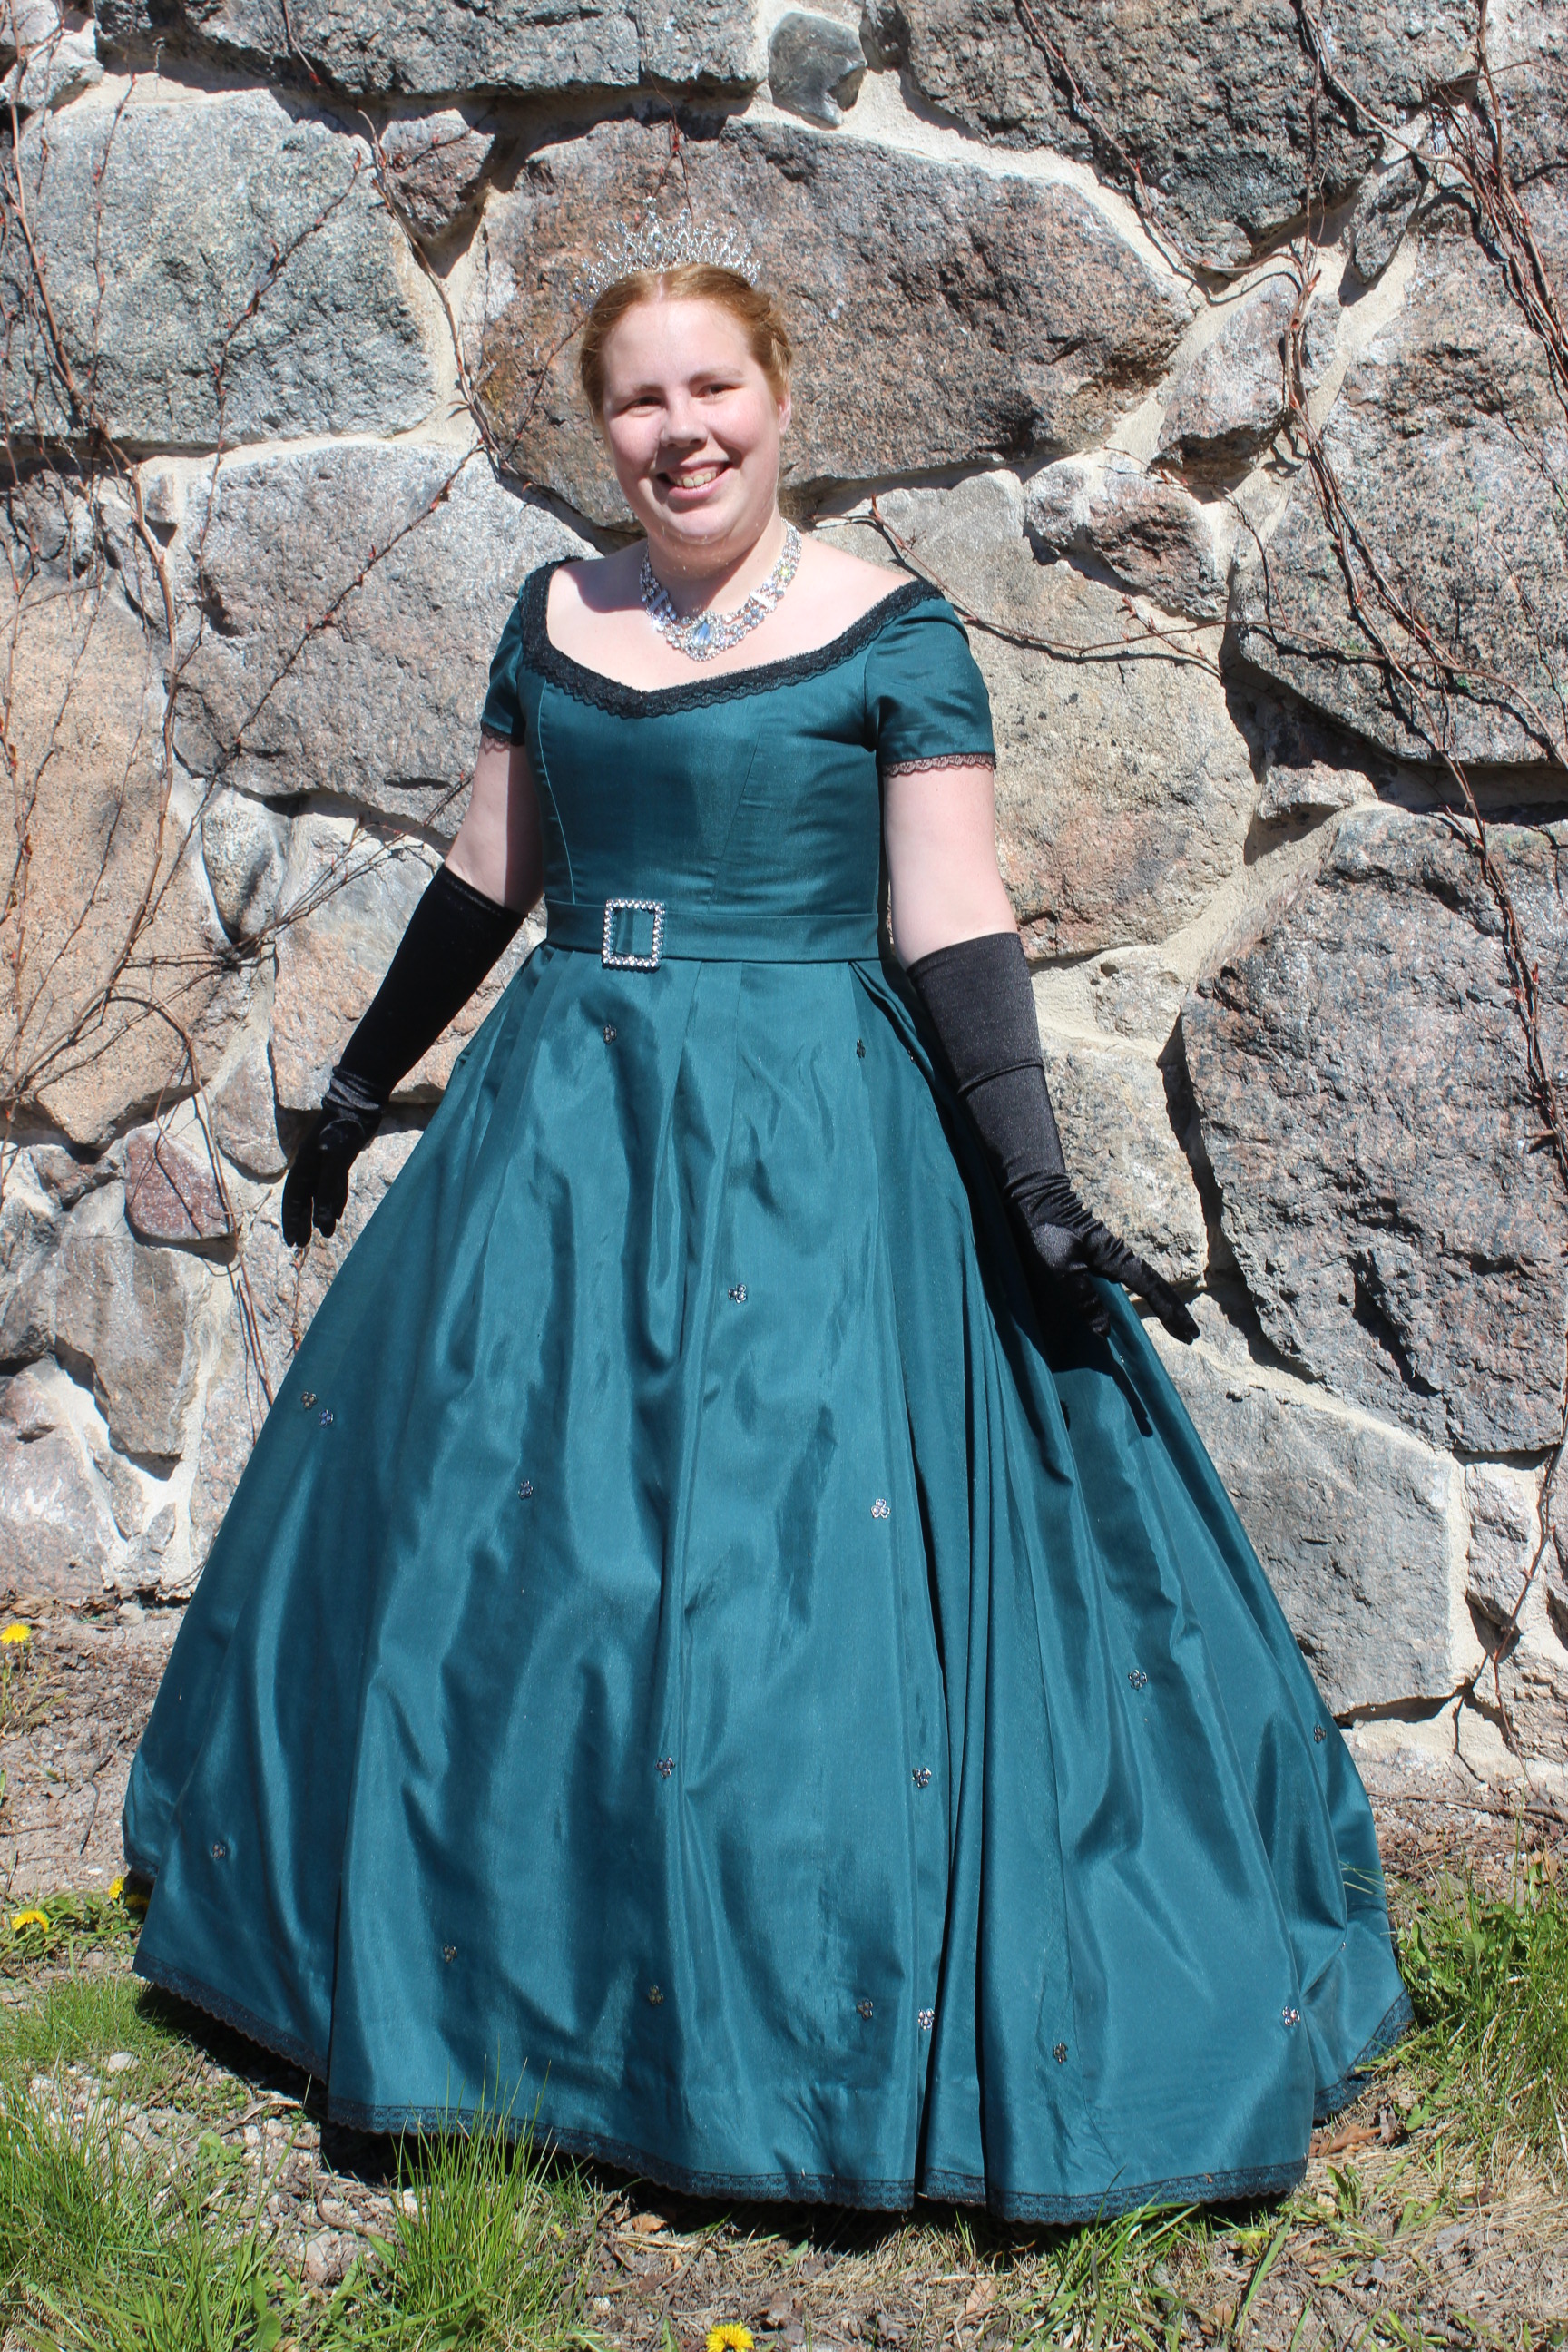
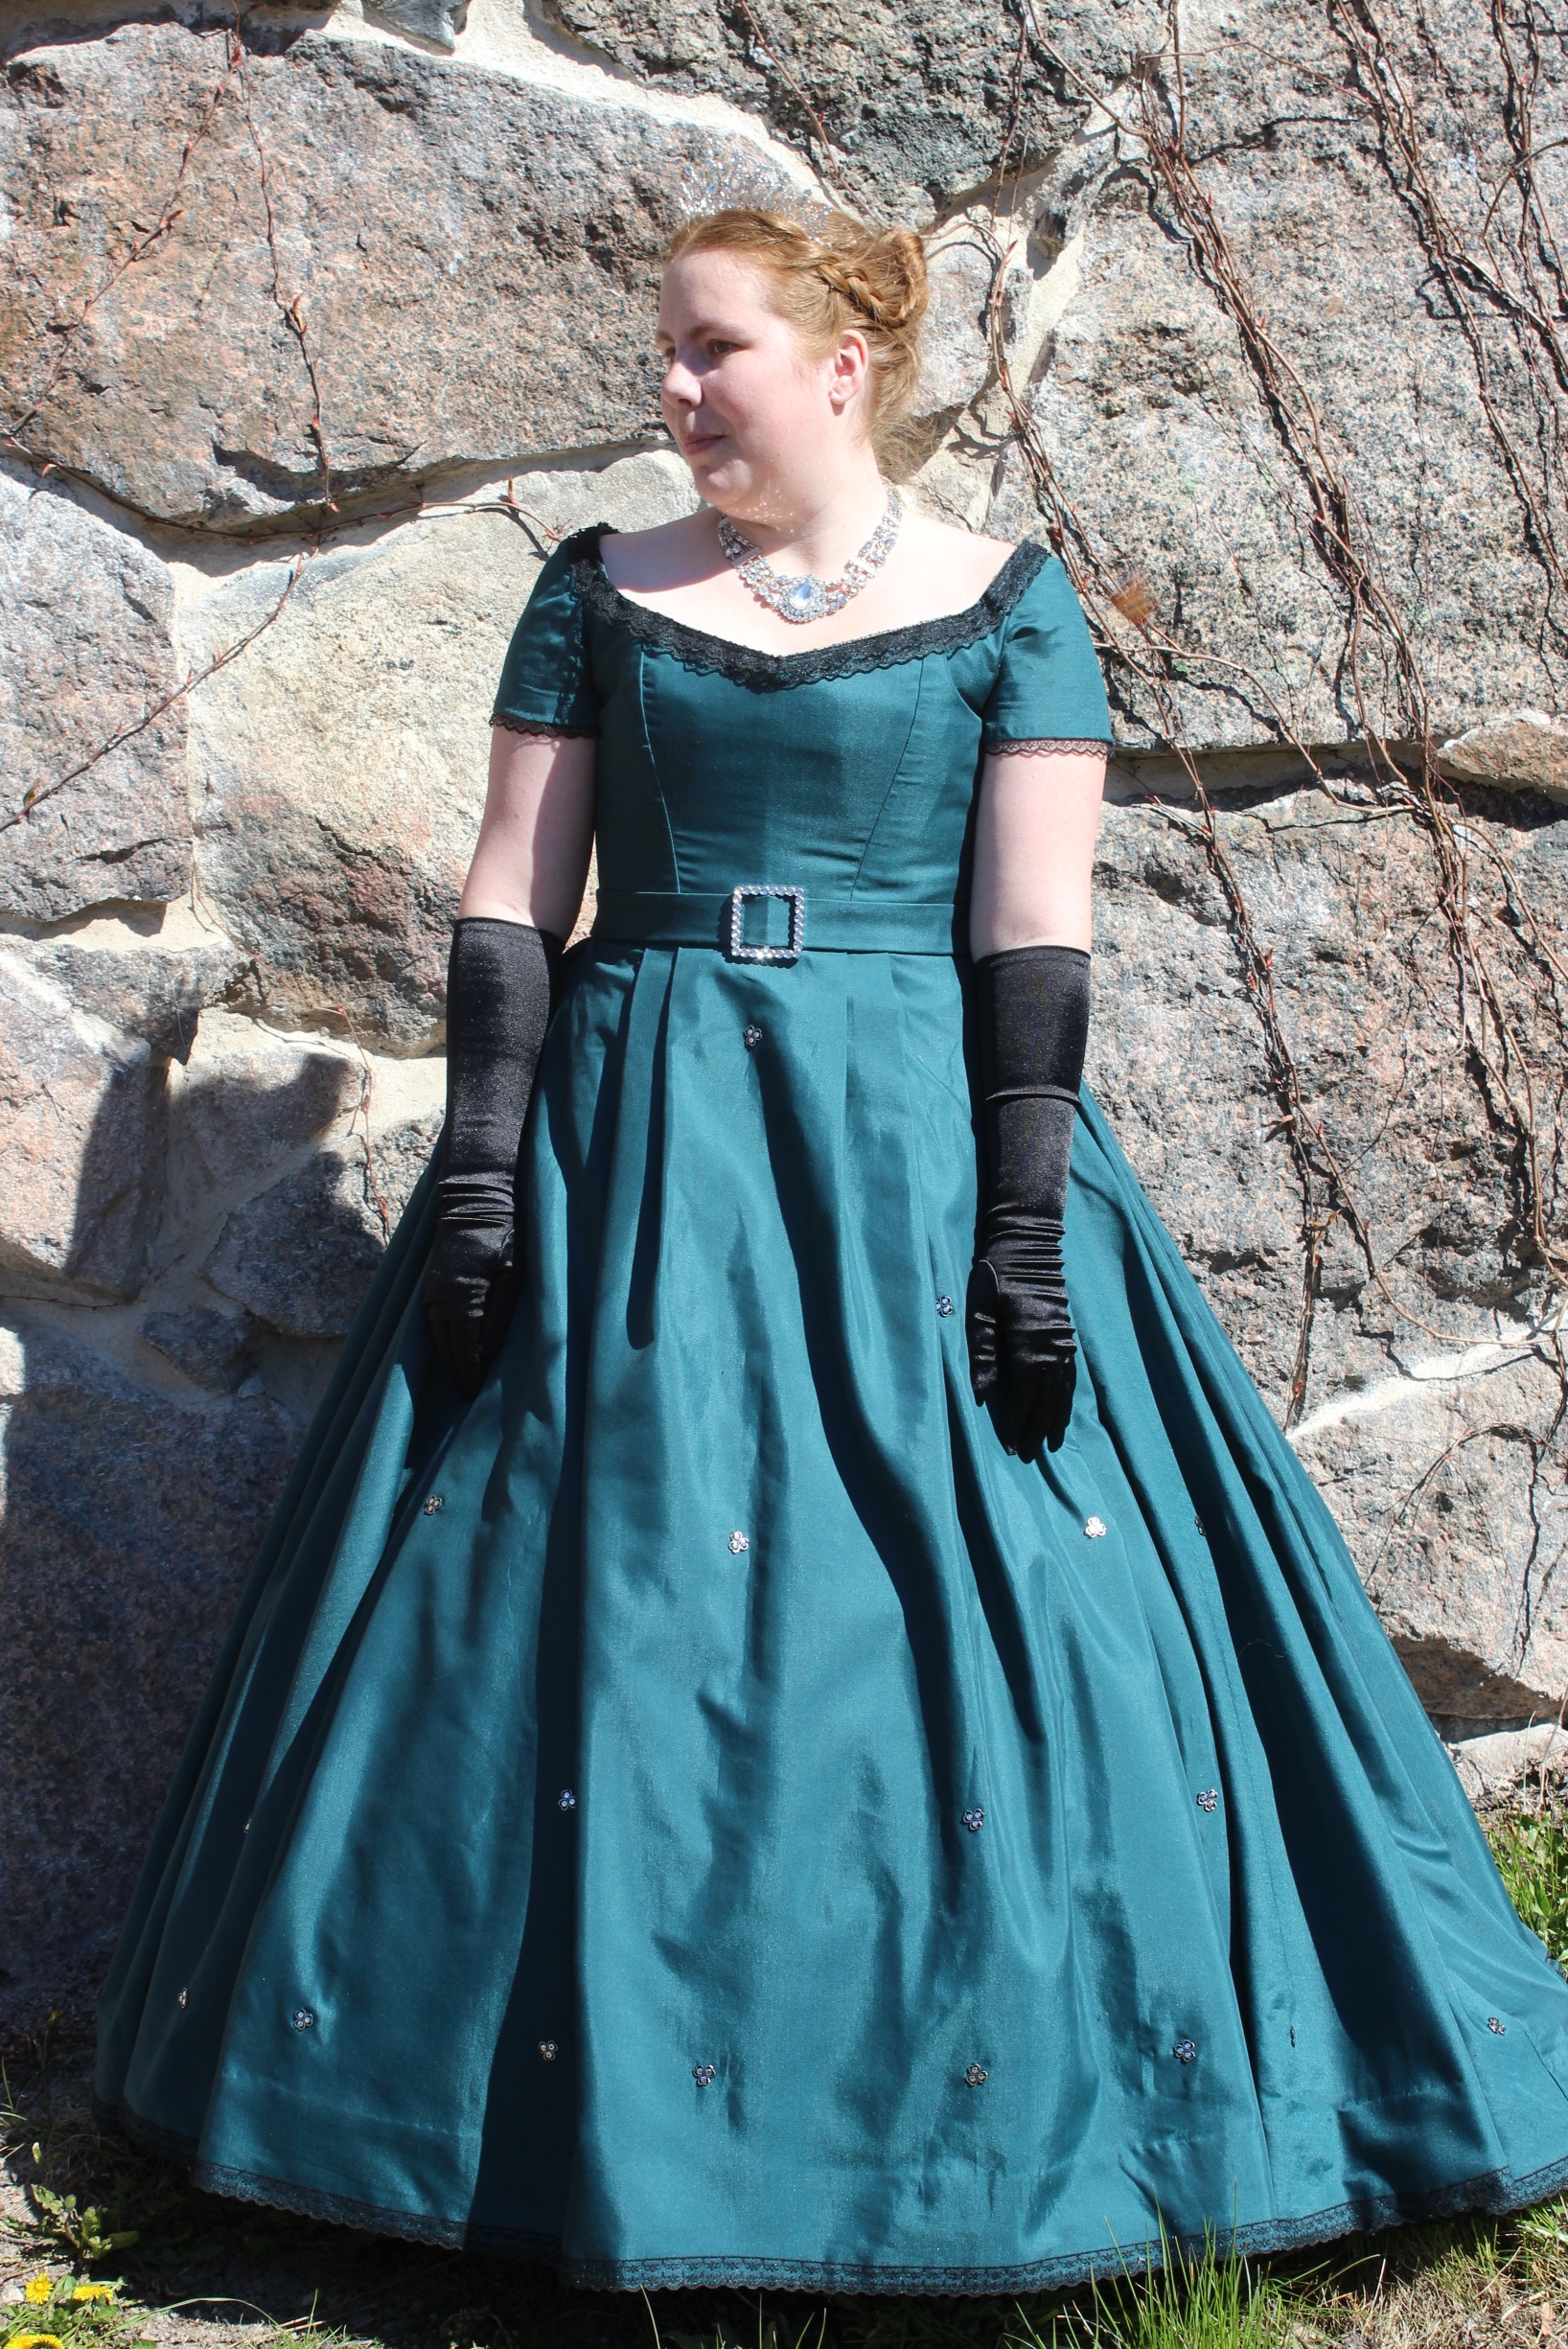
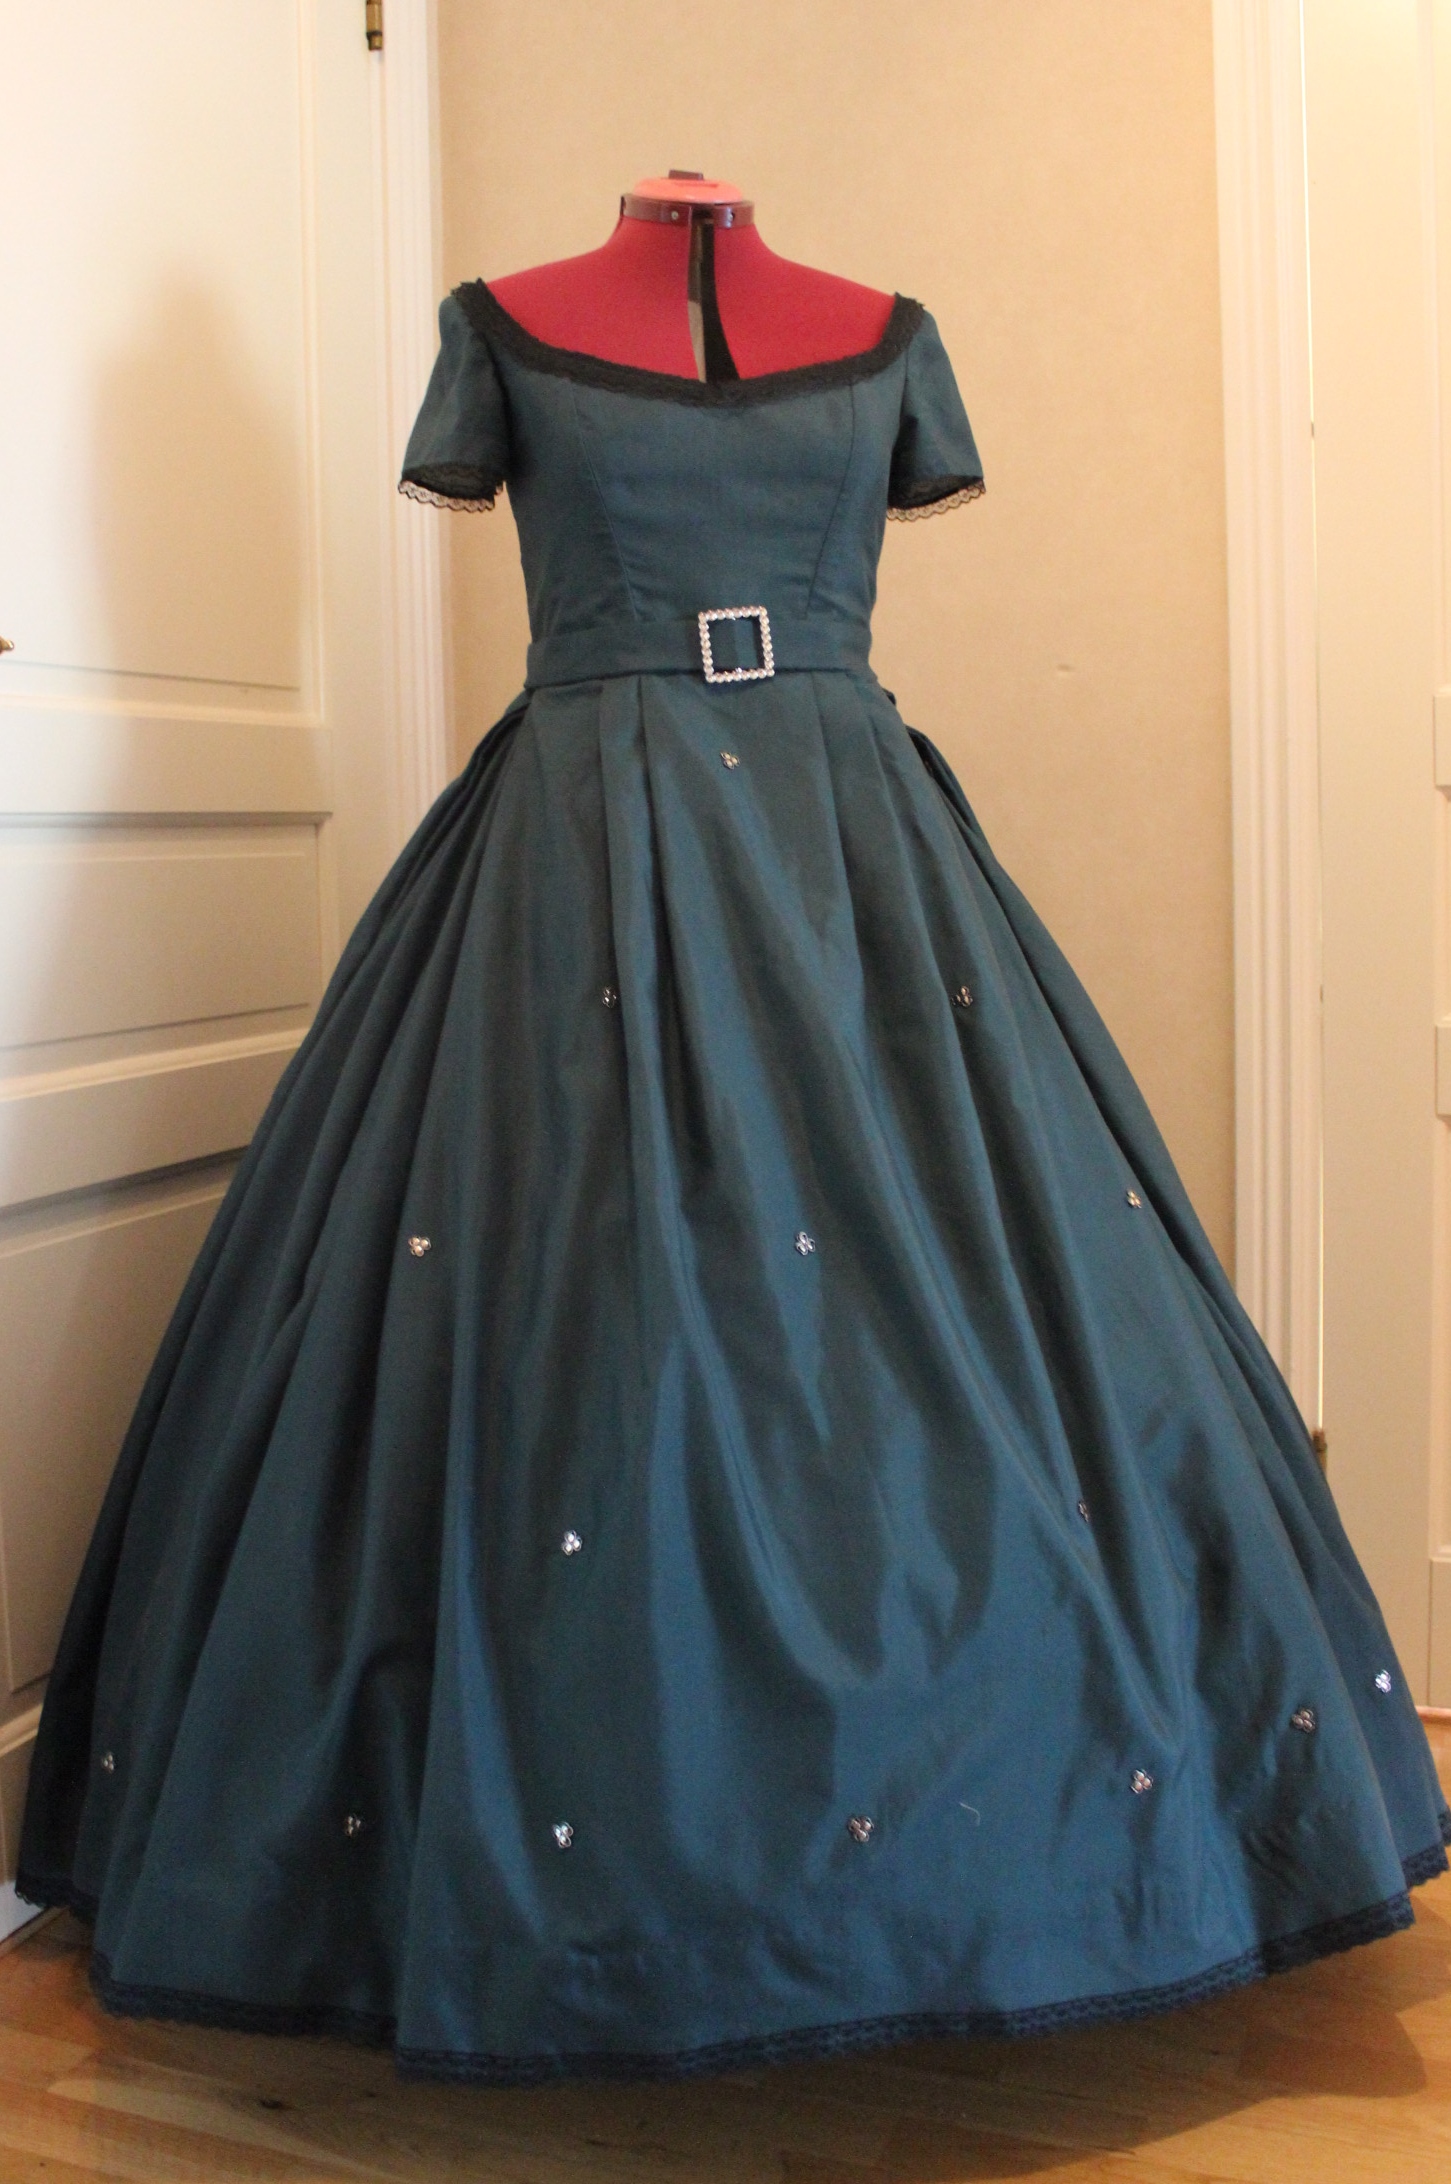
The Finished dress:


Just the facts:
Challenge: Nr 5/2017 – Literature
What: A 1865s evening dress
How it fit the challenge: It’s a plausible outfit for one of Victorias many ladies in waiting, or even the Queen itself, as described in Virginia Schomps book Victoria and Her Court.
Pattern: I drafted my own after studying the 1865s dresses from Waughs Cut of women’s clothes and Arnolds Pattern of Fashion.
Fabric: 5 m of teal colored polyester curtains (2 pieces 250 x 145 cm each), 4 m of black sheets for lining and 0,5 m of black cotton twill for interlining.
Notions: Thread, Buttonhole-thread, 7 short bones, 1m black bias tape to use as bone casings, 1 m heavy interfacing for the belt, 1 belt buckle, cotton cord for lacing, lots of silver spangles and 7 m of black lace for decoration.
How historical accurate: The shape/look is right, but the construction, pattern and material are all modern. So maybe 4/10
Time: In total about 20 hours (on the dress).
Cost: Almost everything came from stash and/or was really, really cheap. I think I payed about 300 Sek (30 Usd) total for everything. But on a dress like this there really is no limit at what it could cost.
First worn: For photos on May 1 by my sister, and later for a ball on May 6 2017.
Final Thoughts: Both me and my sister are totally in love with this dress. I love how it’s so stylized yet over the top at the same time. The small bodice comparied to the lovely exaggerated shape of the skirt, and the subtle sparkle of glitter when it moves makes me very happy. I also had a lot of fun making it. Only problem is, now I want my own…
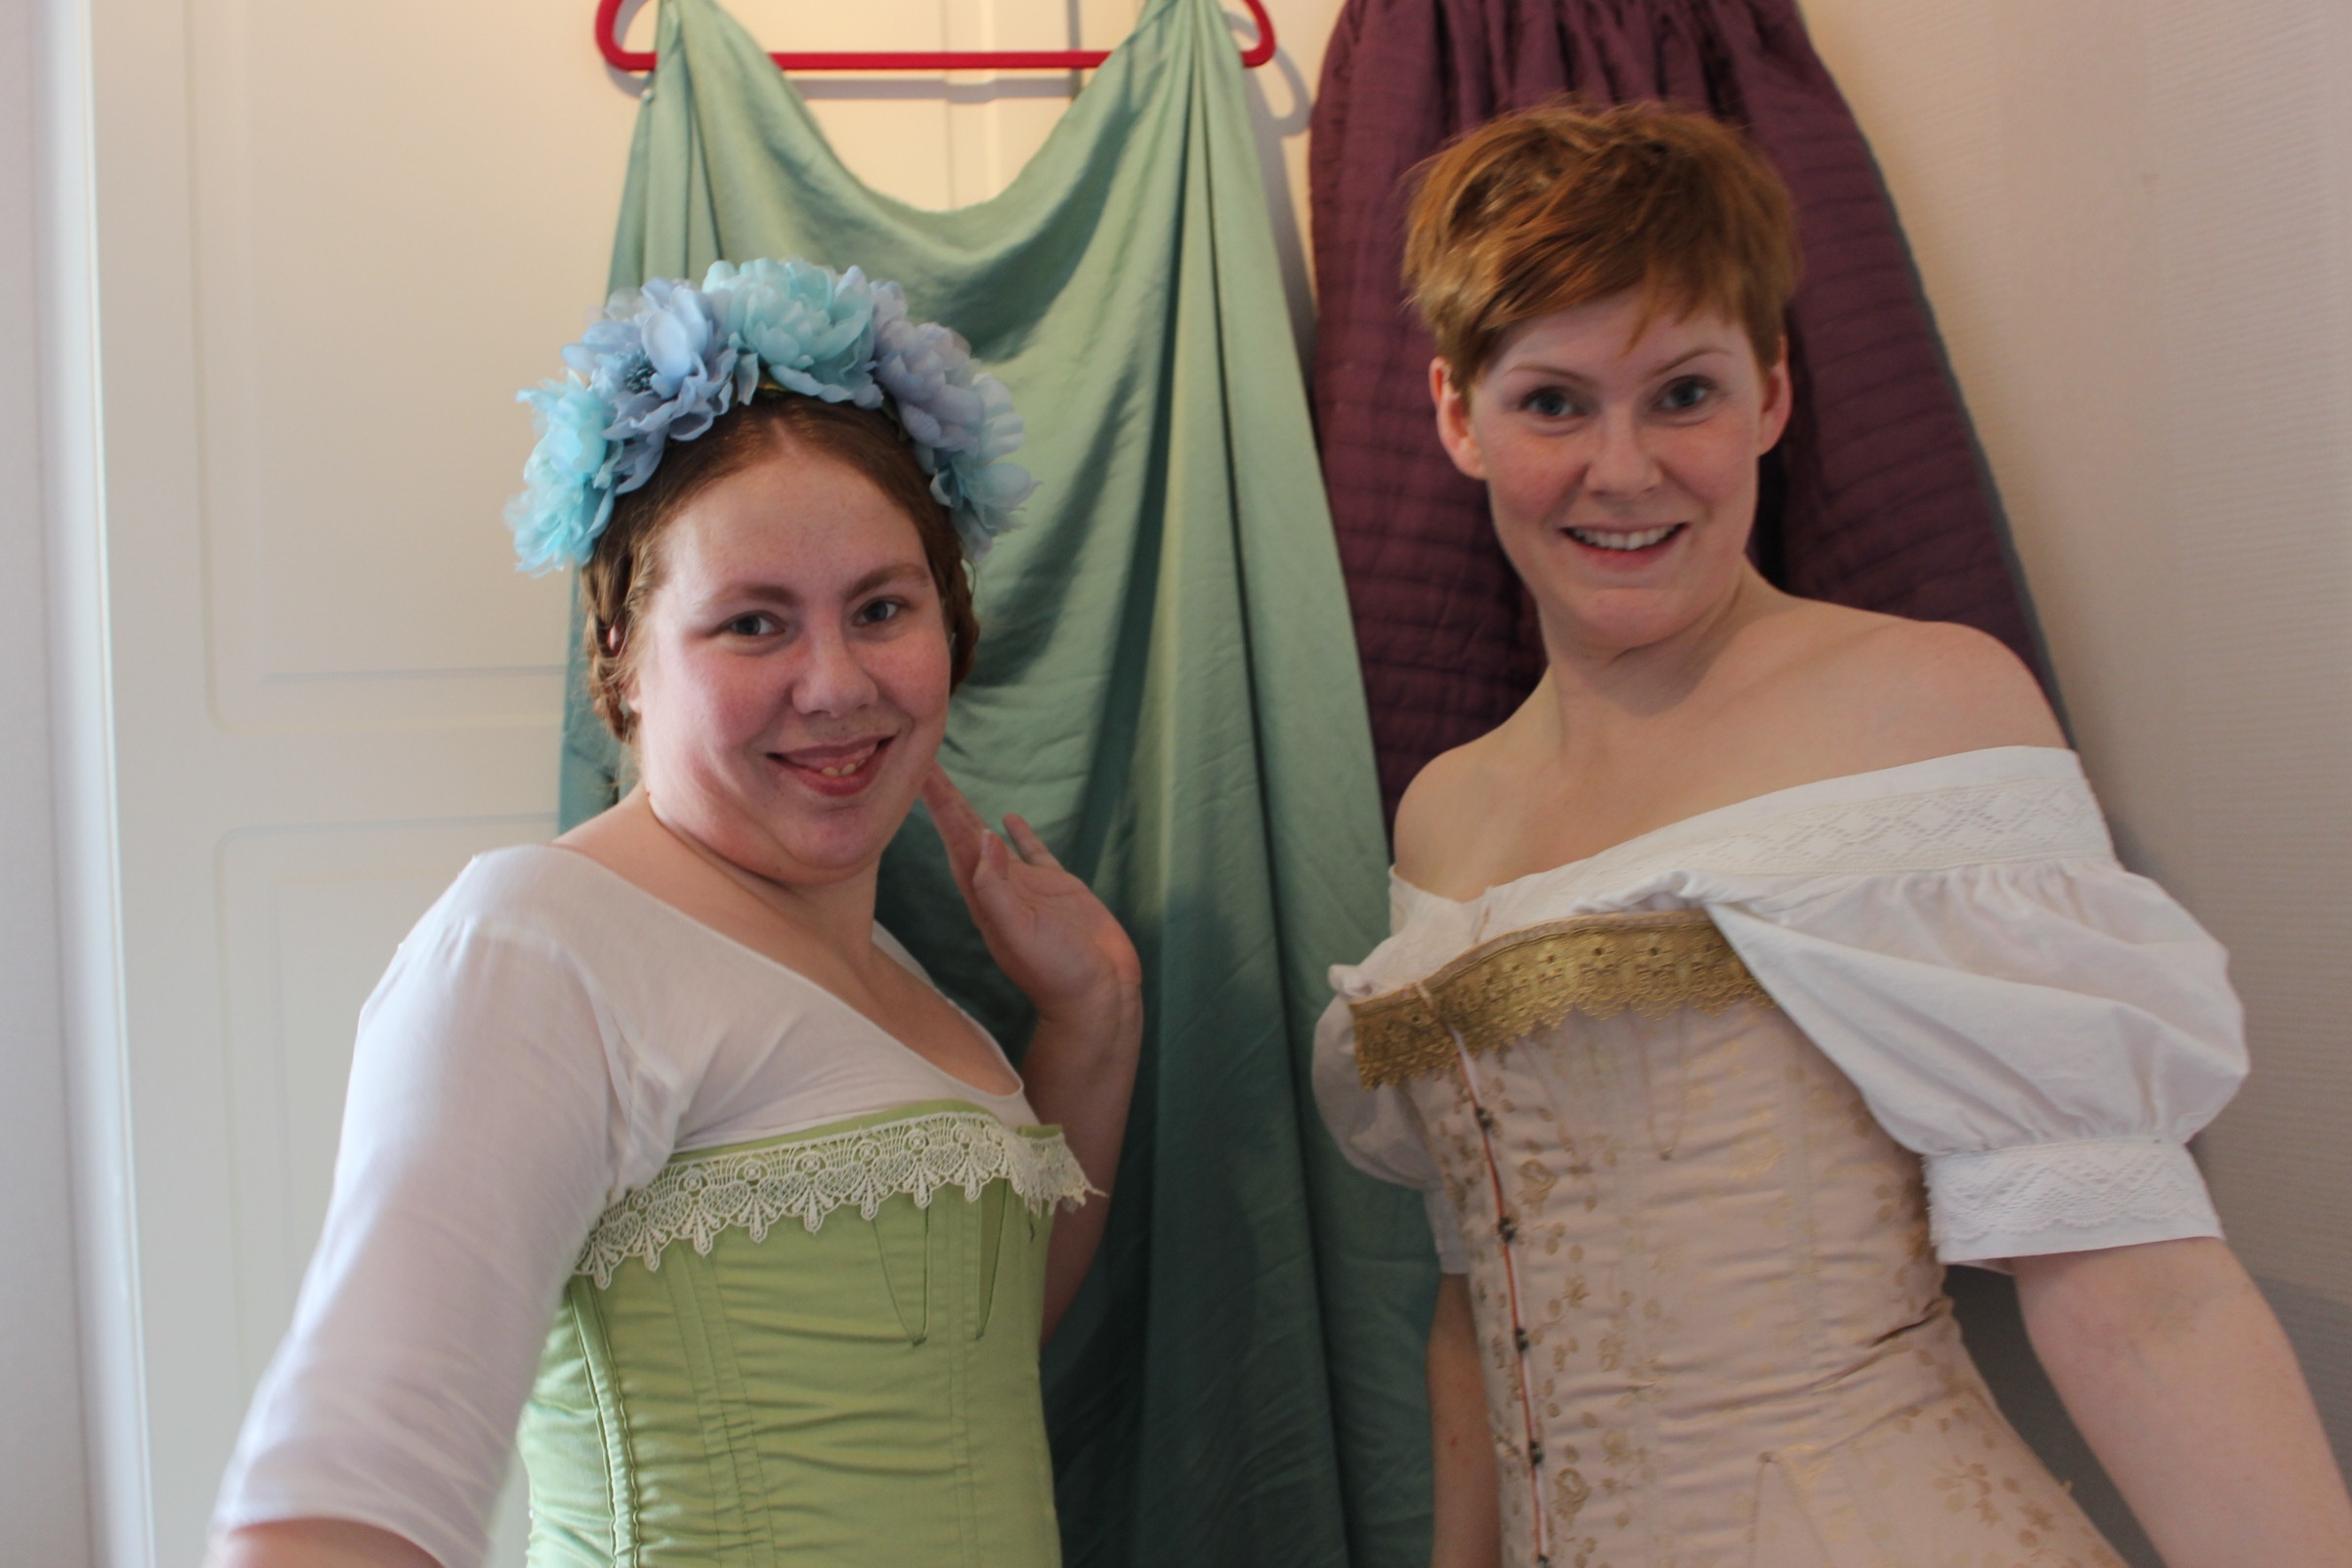
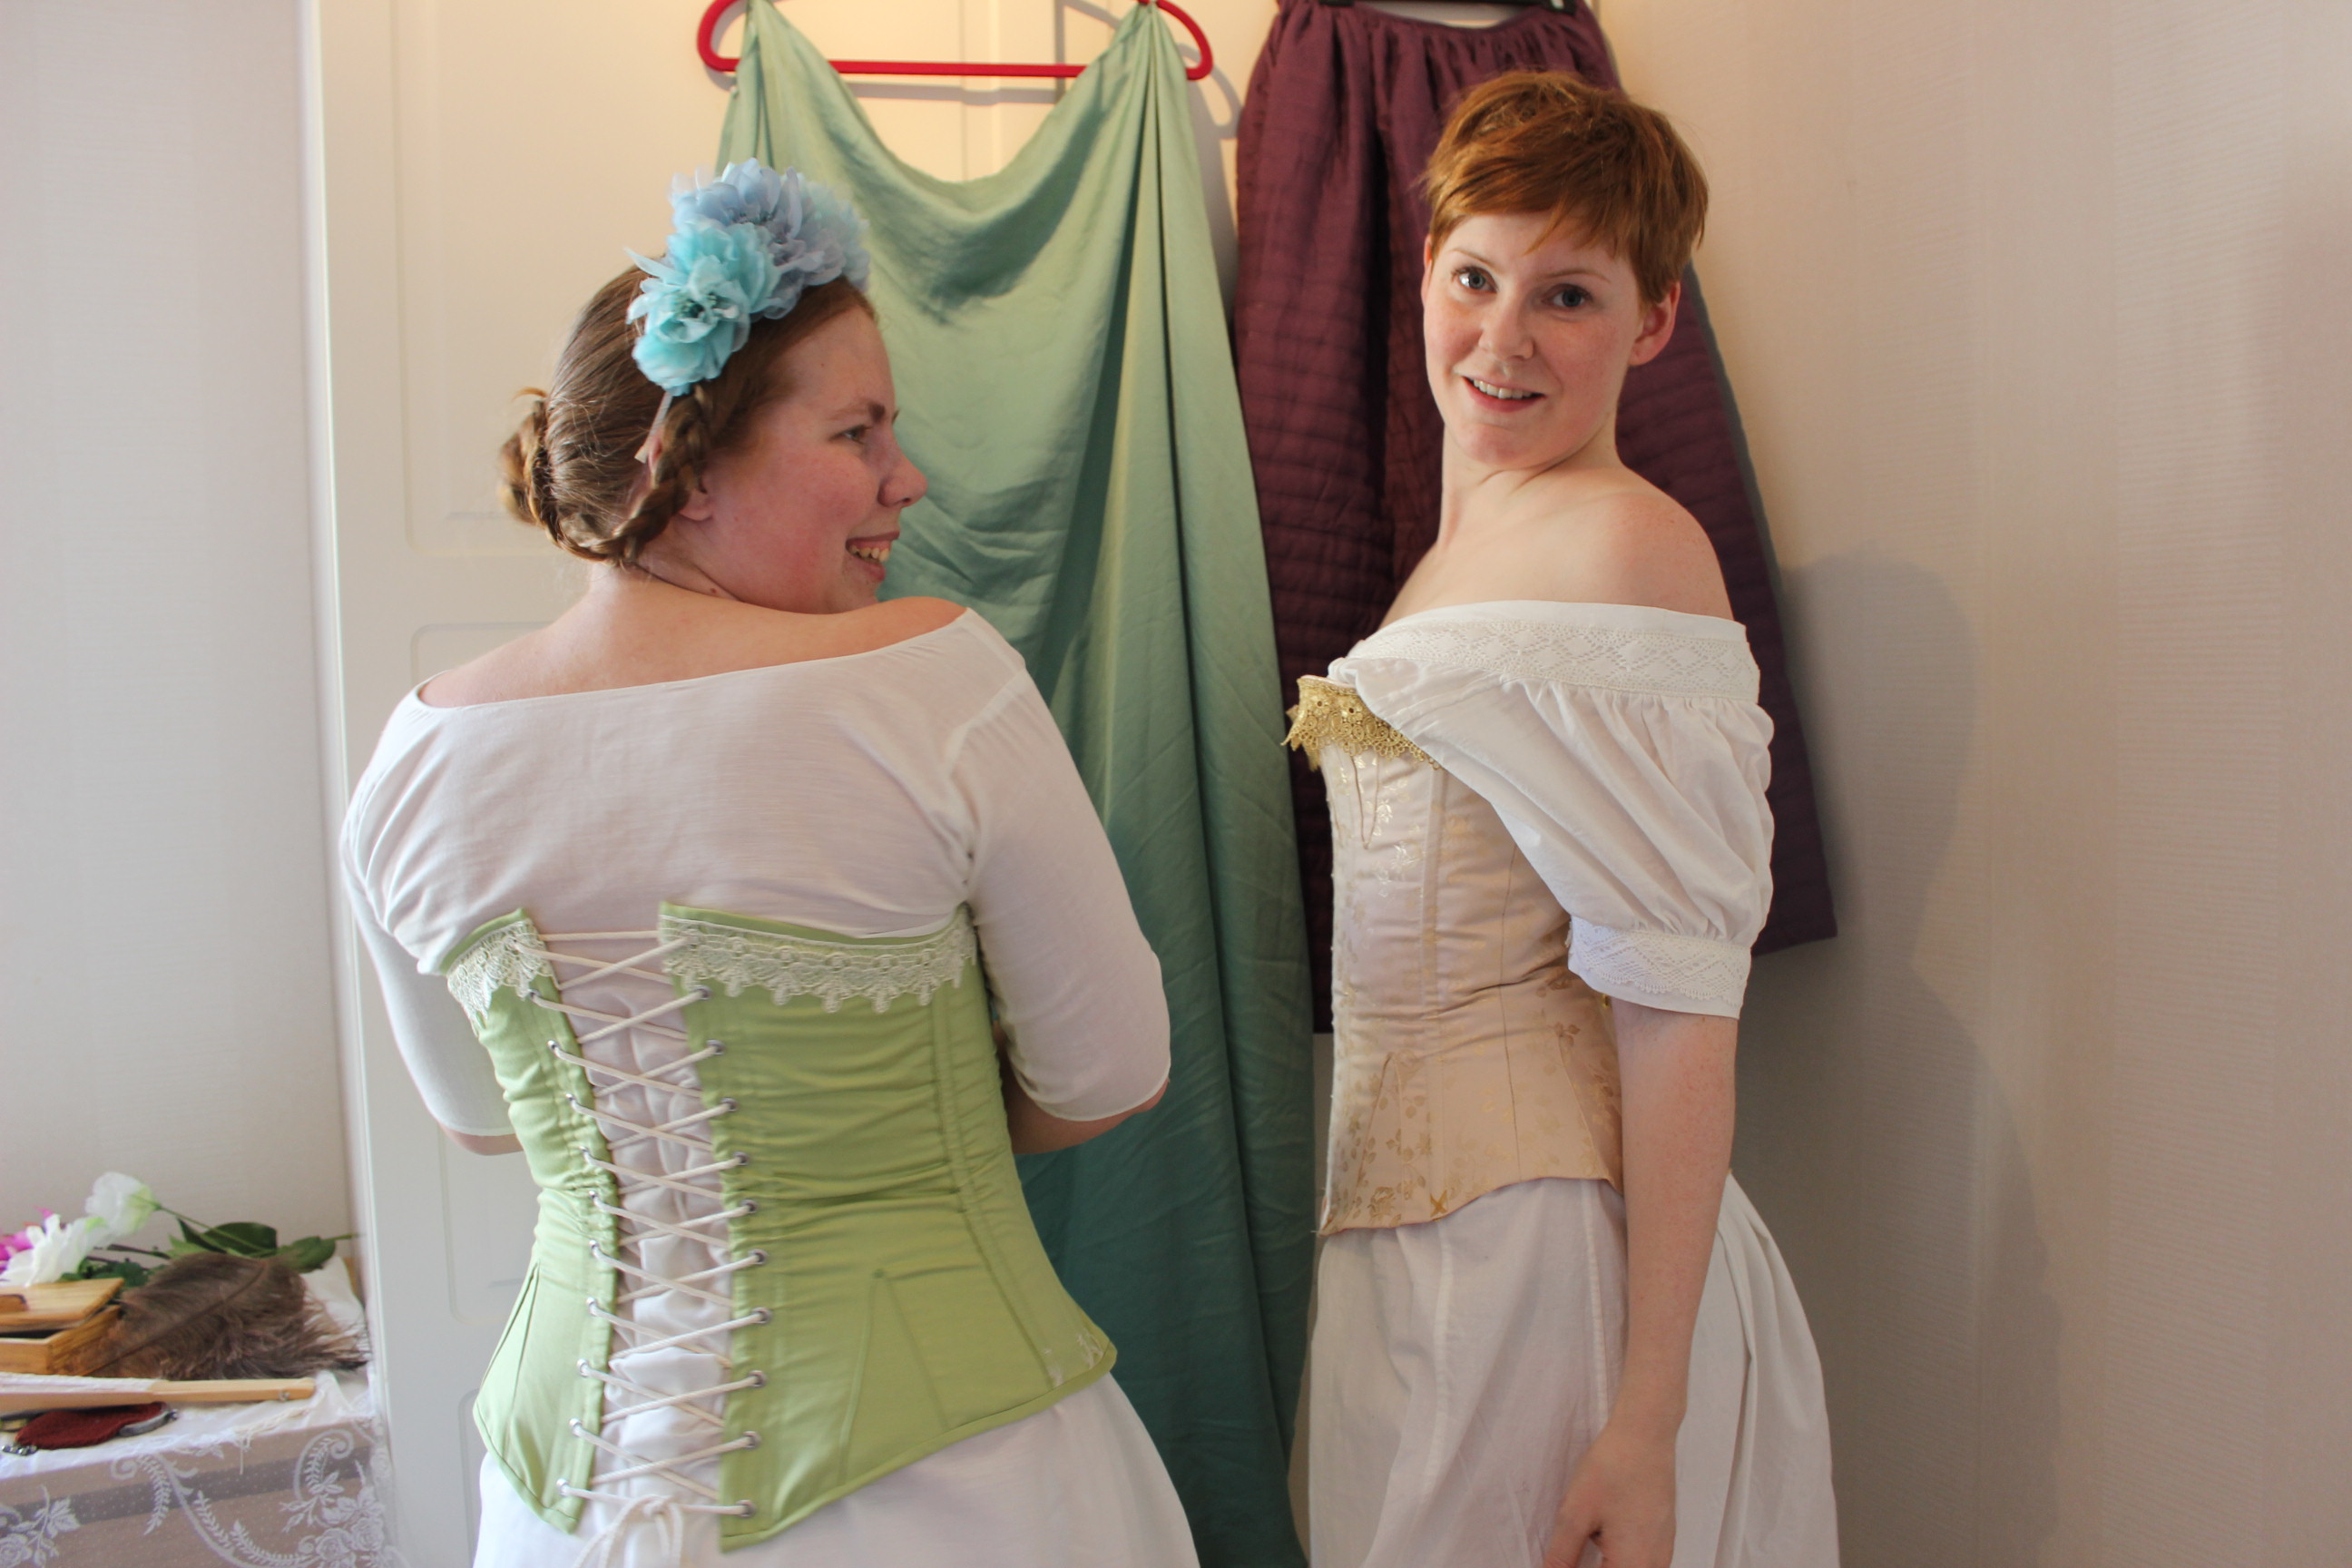
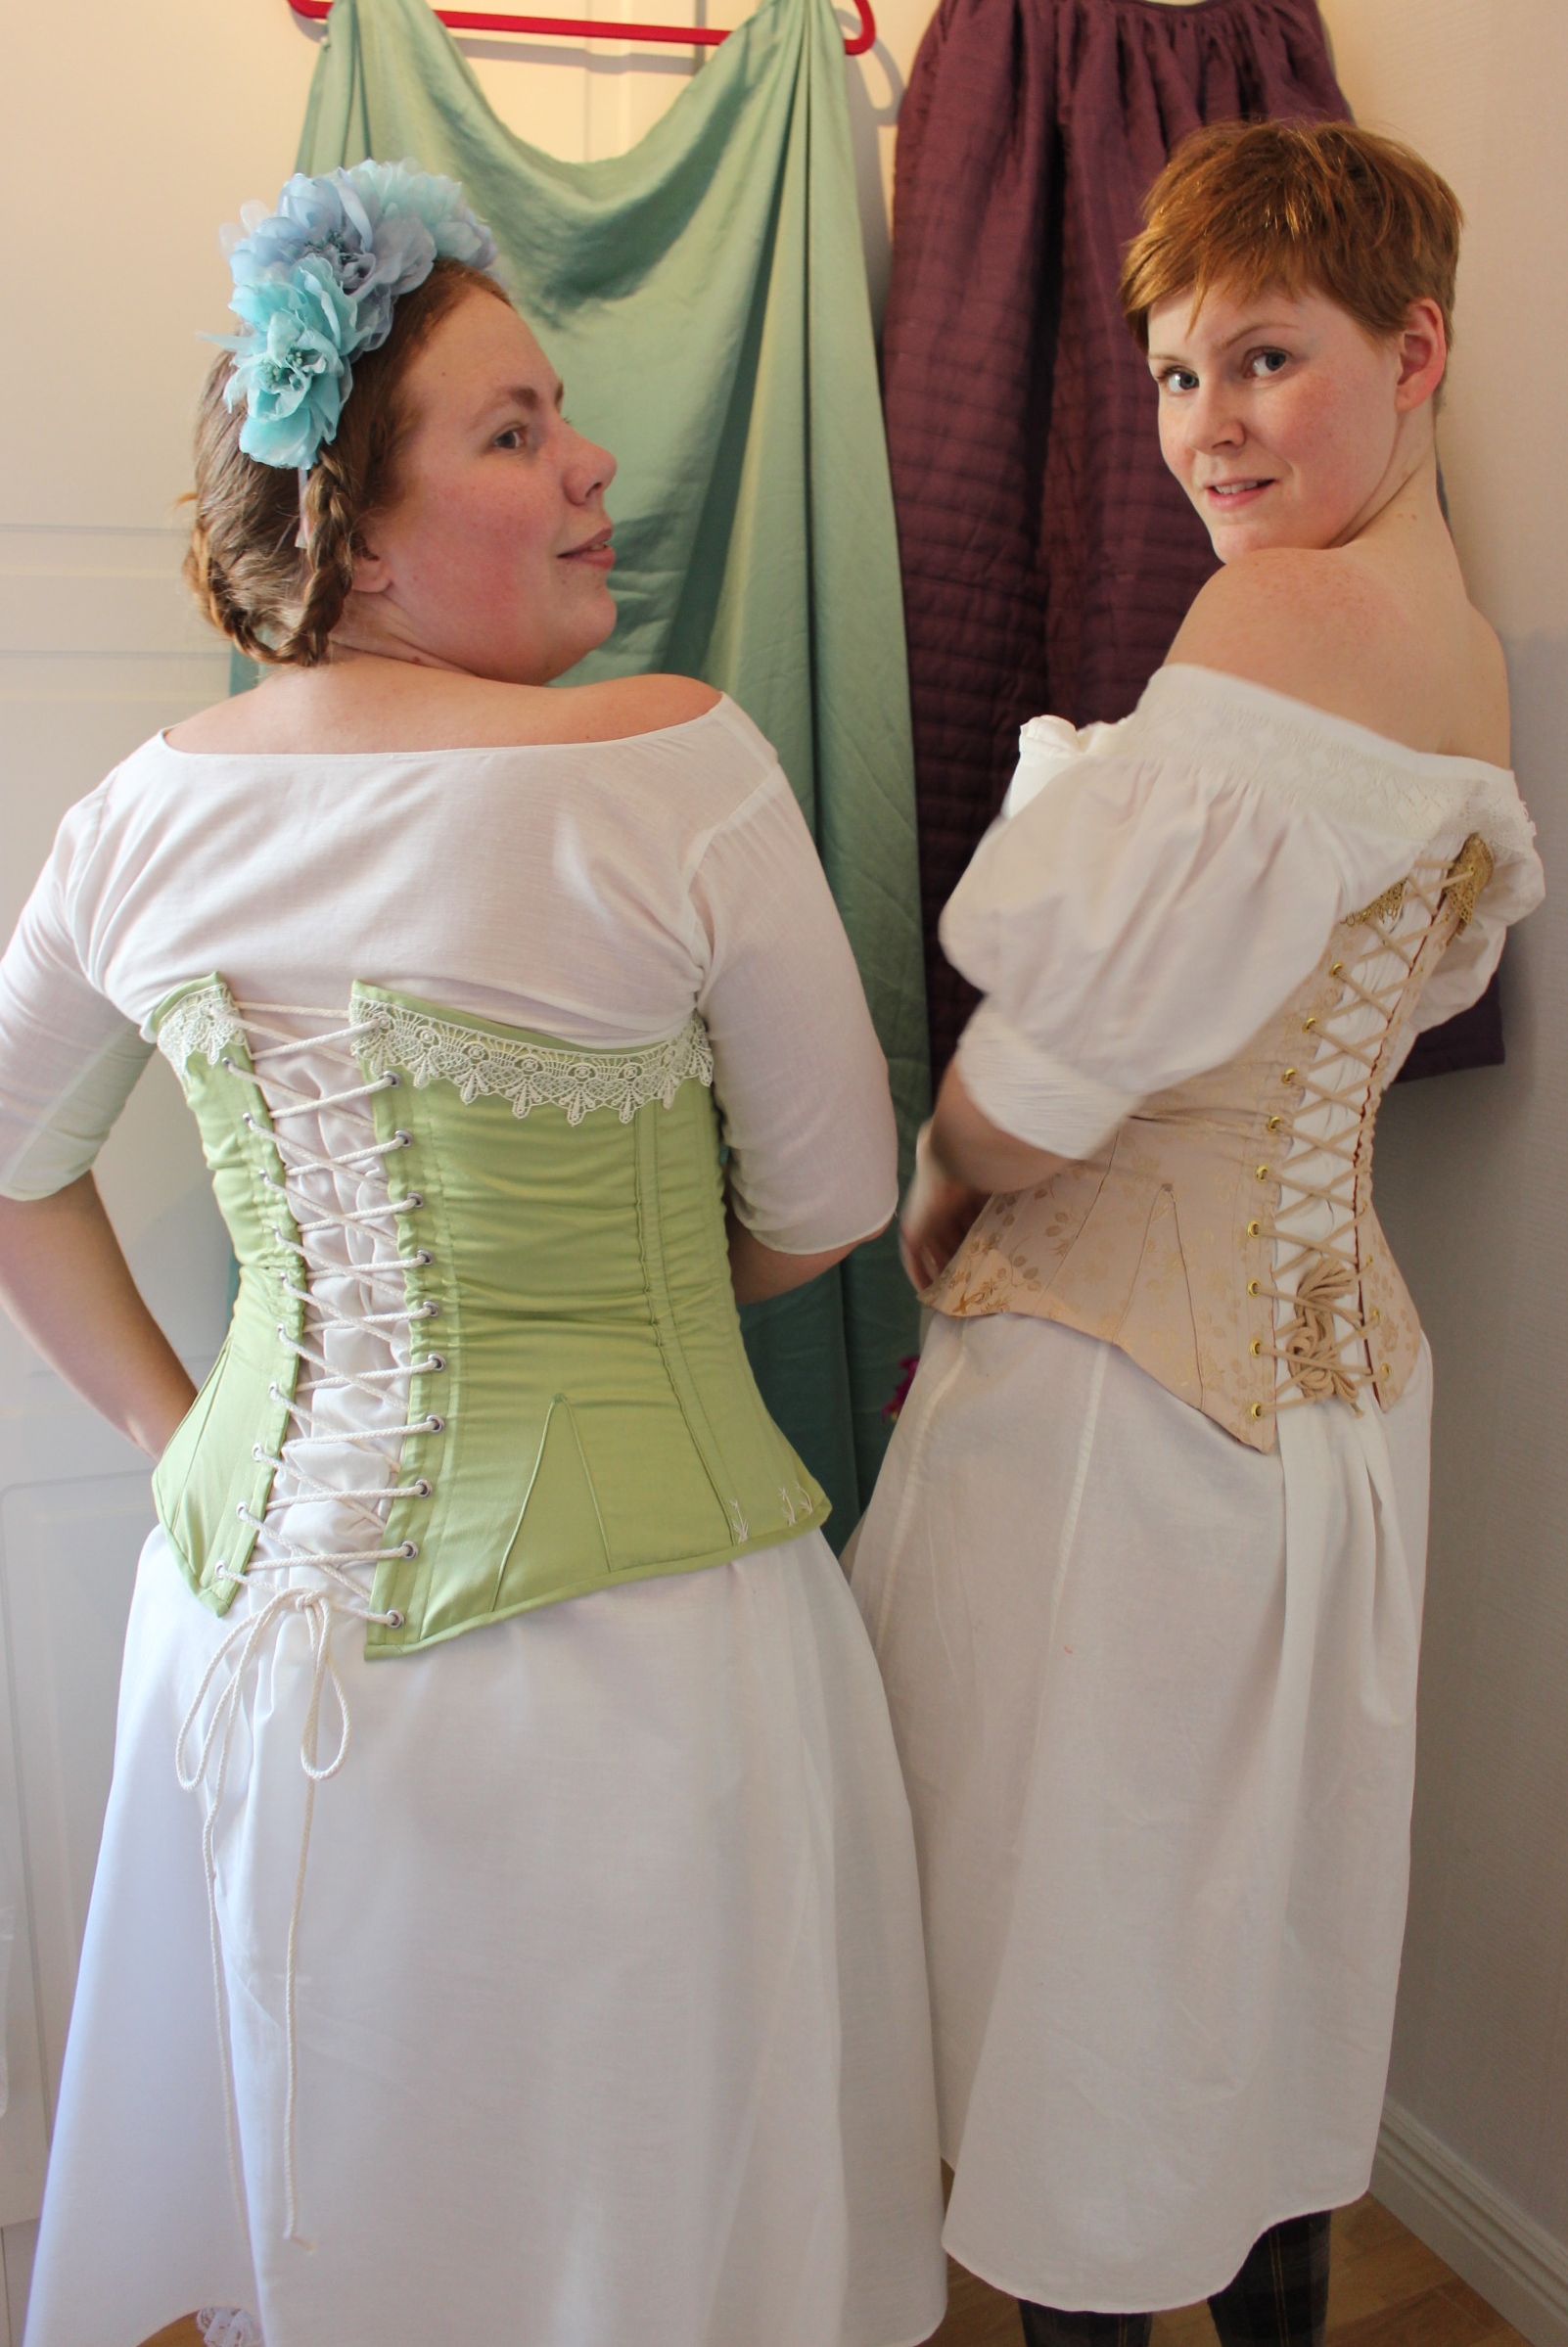
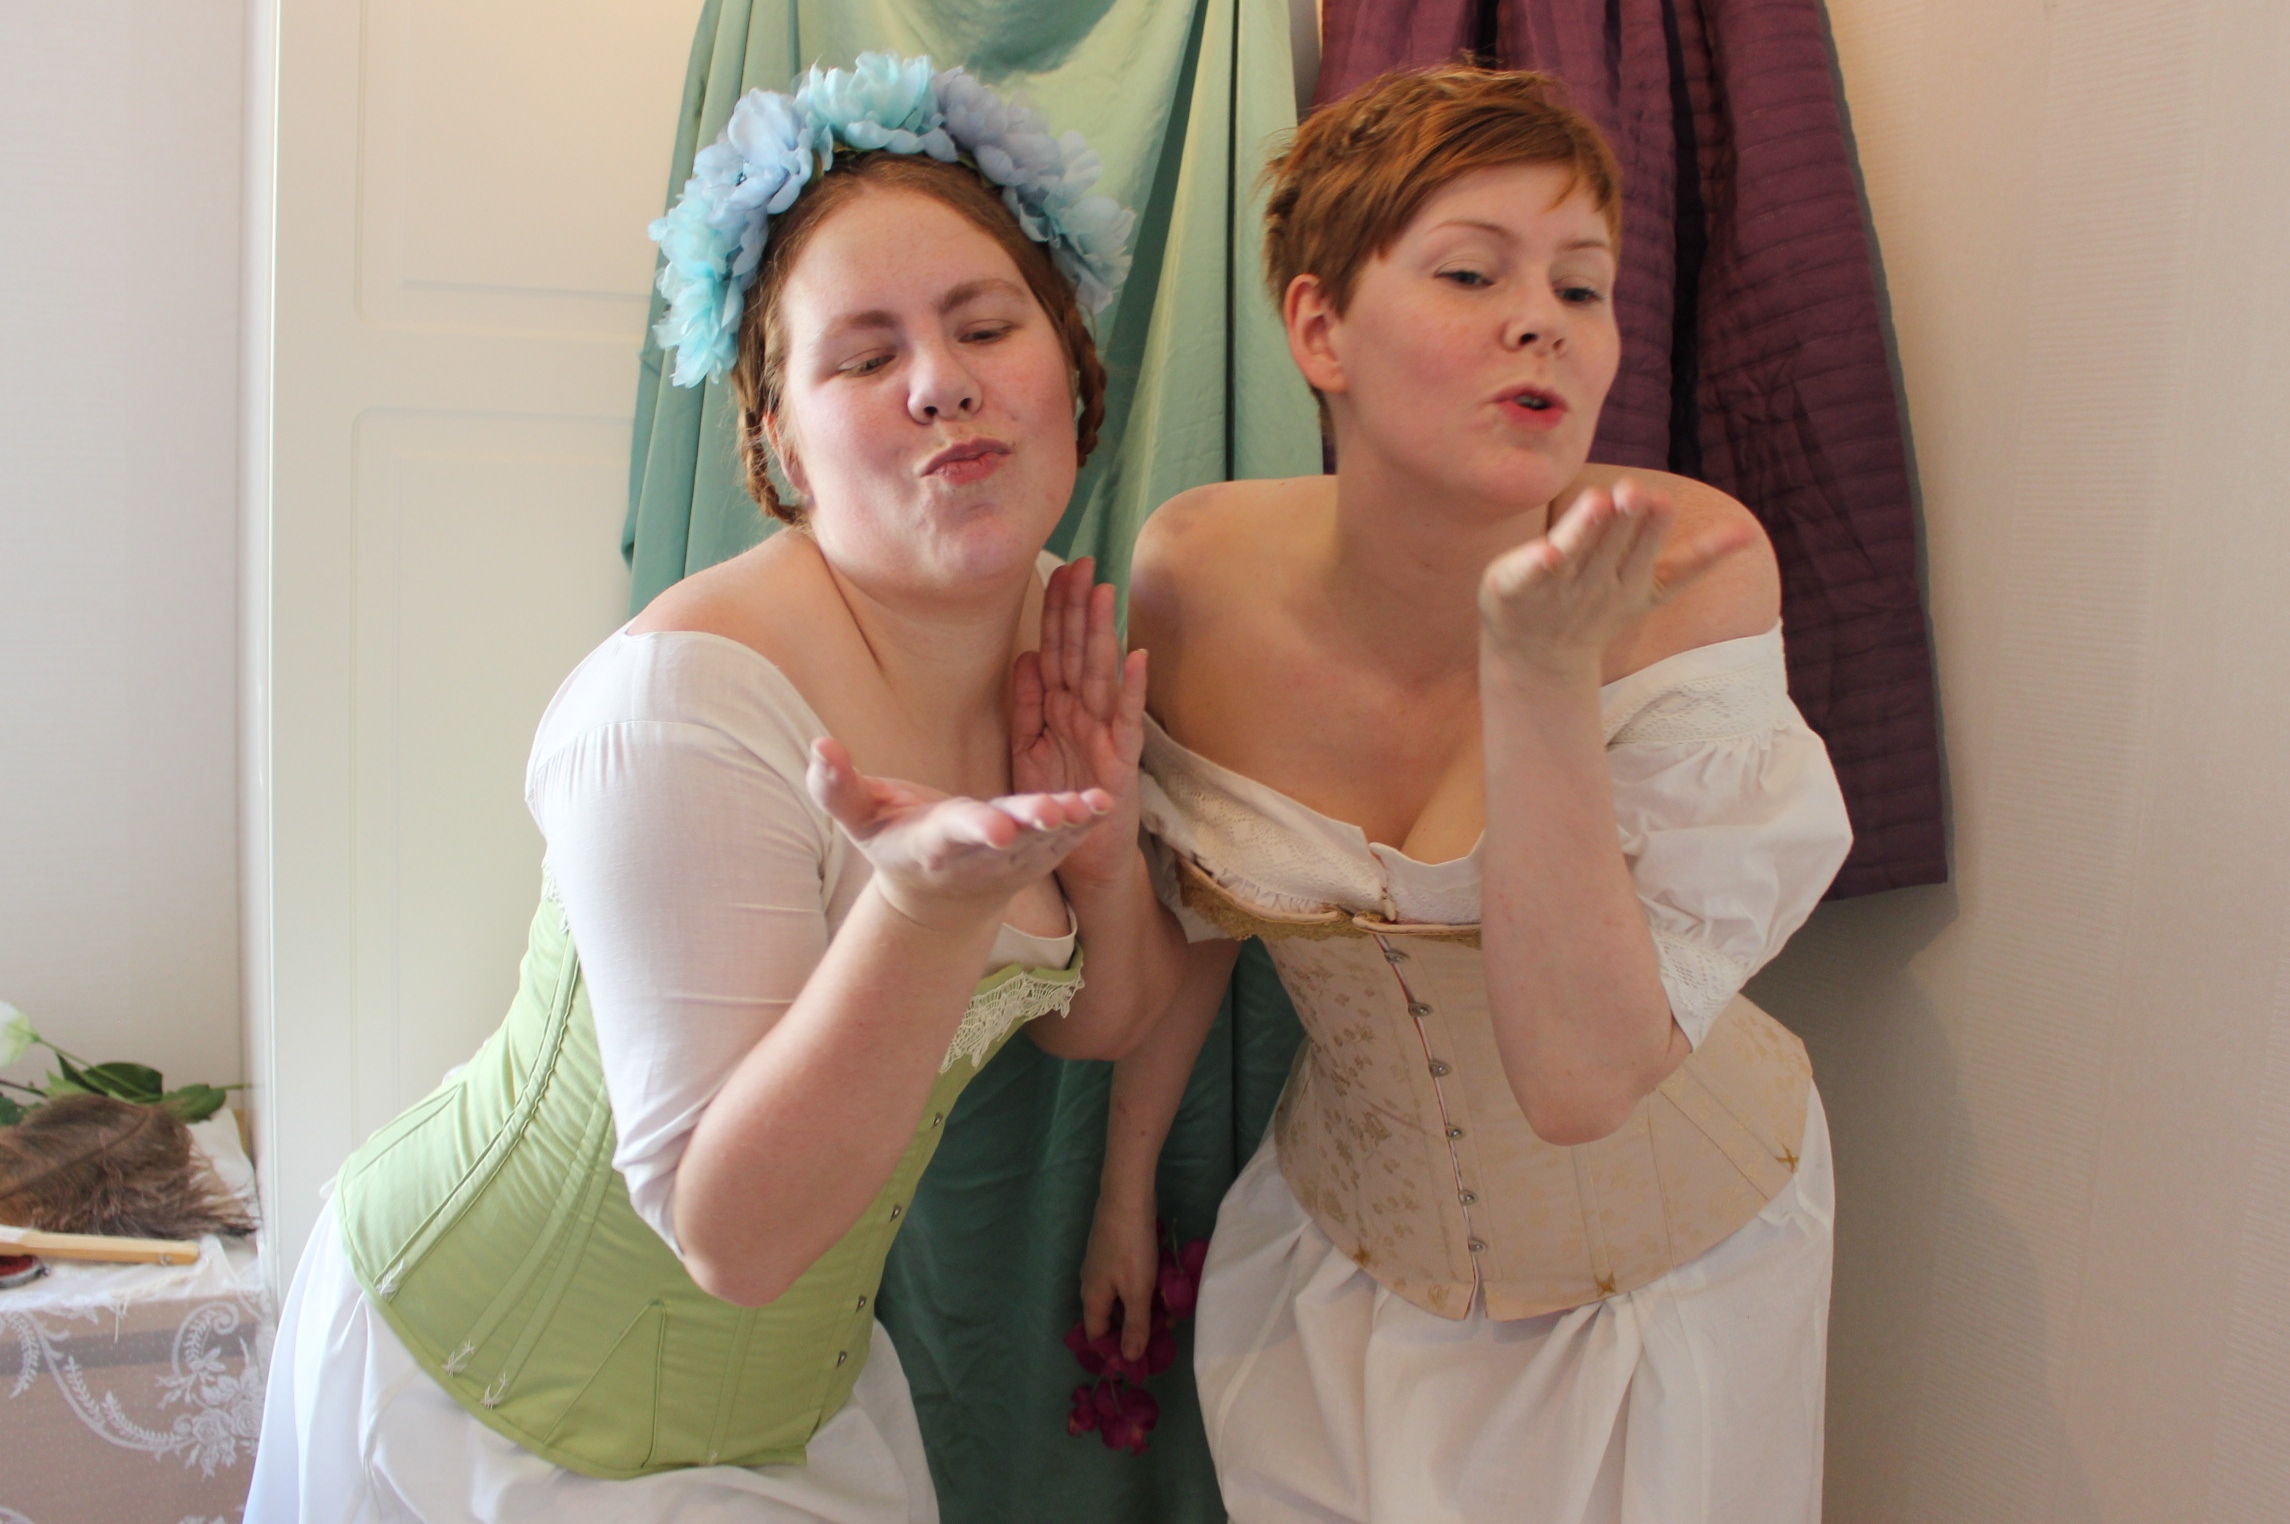
When I had my sister(s) over for the dress-fitting and underwear photoshoot, we also took the opportunity to take some 1860s underwear pics together.
A short warning though – we just can’t keep these things serious….

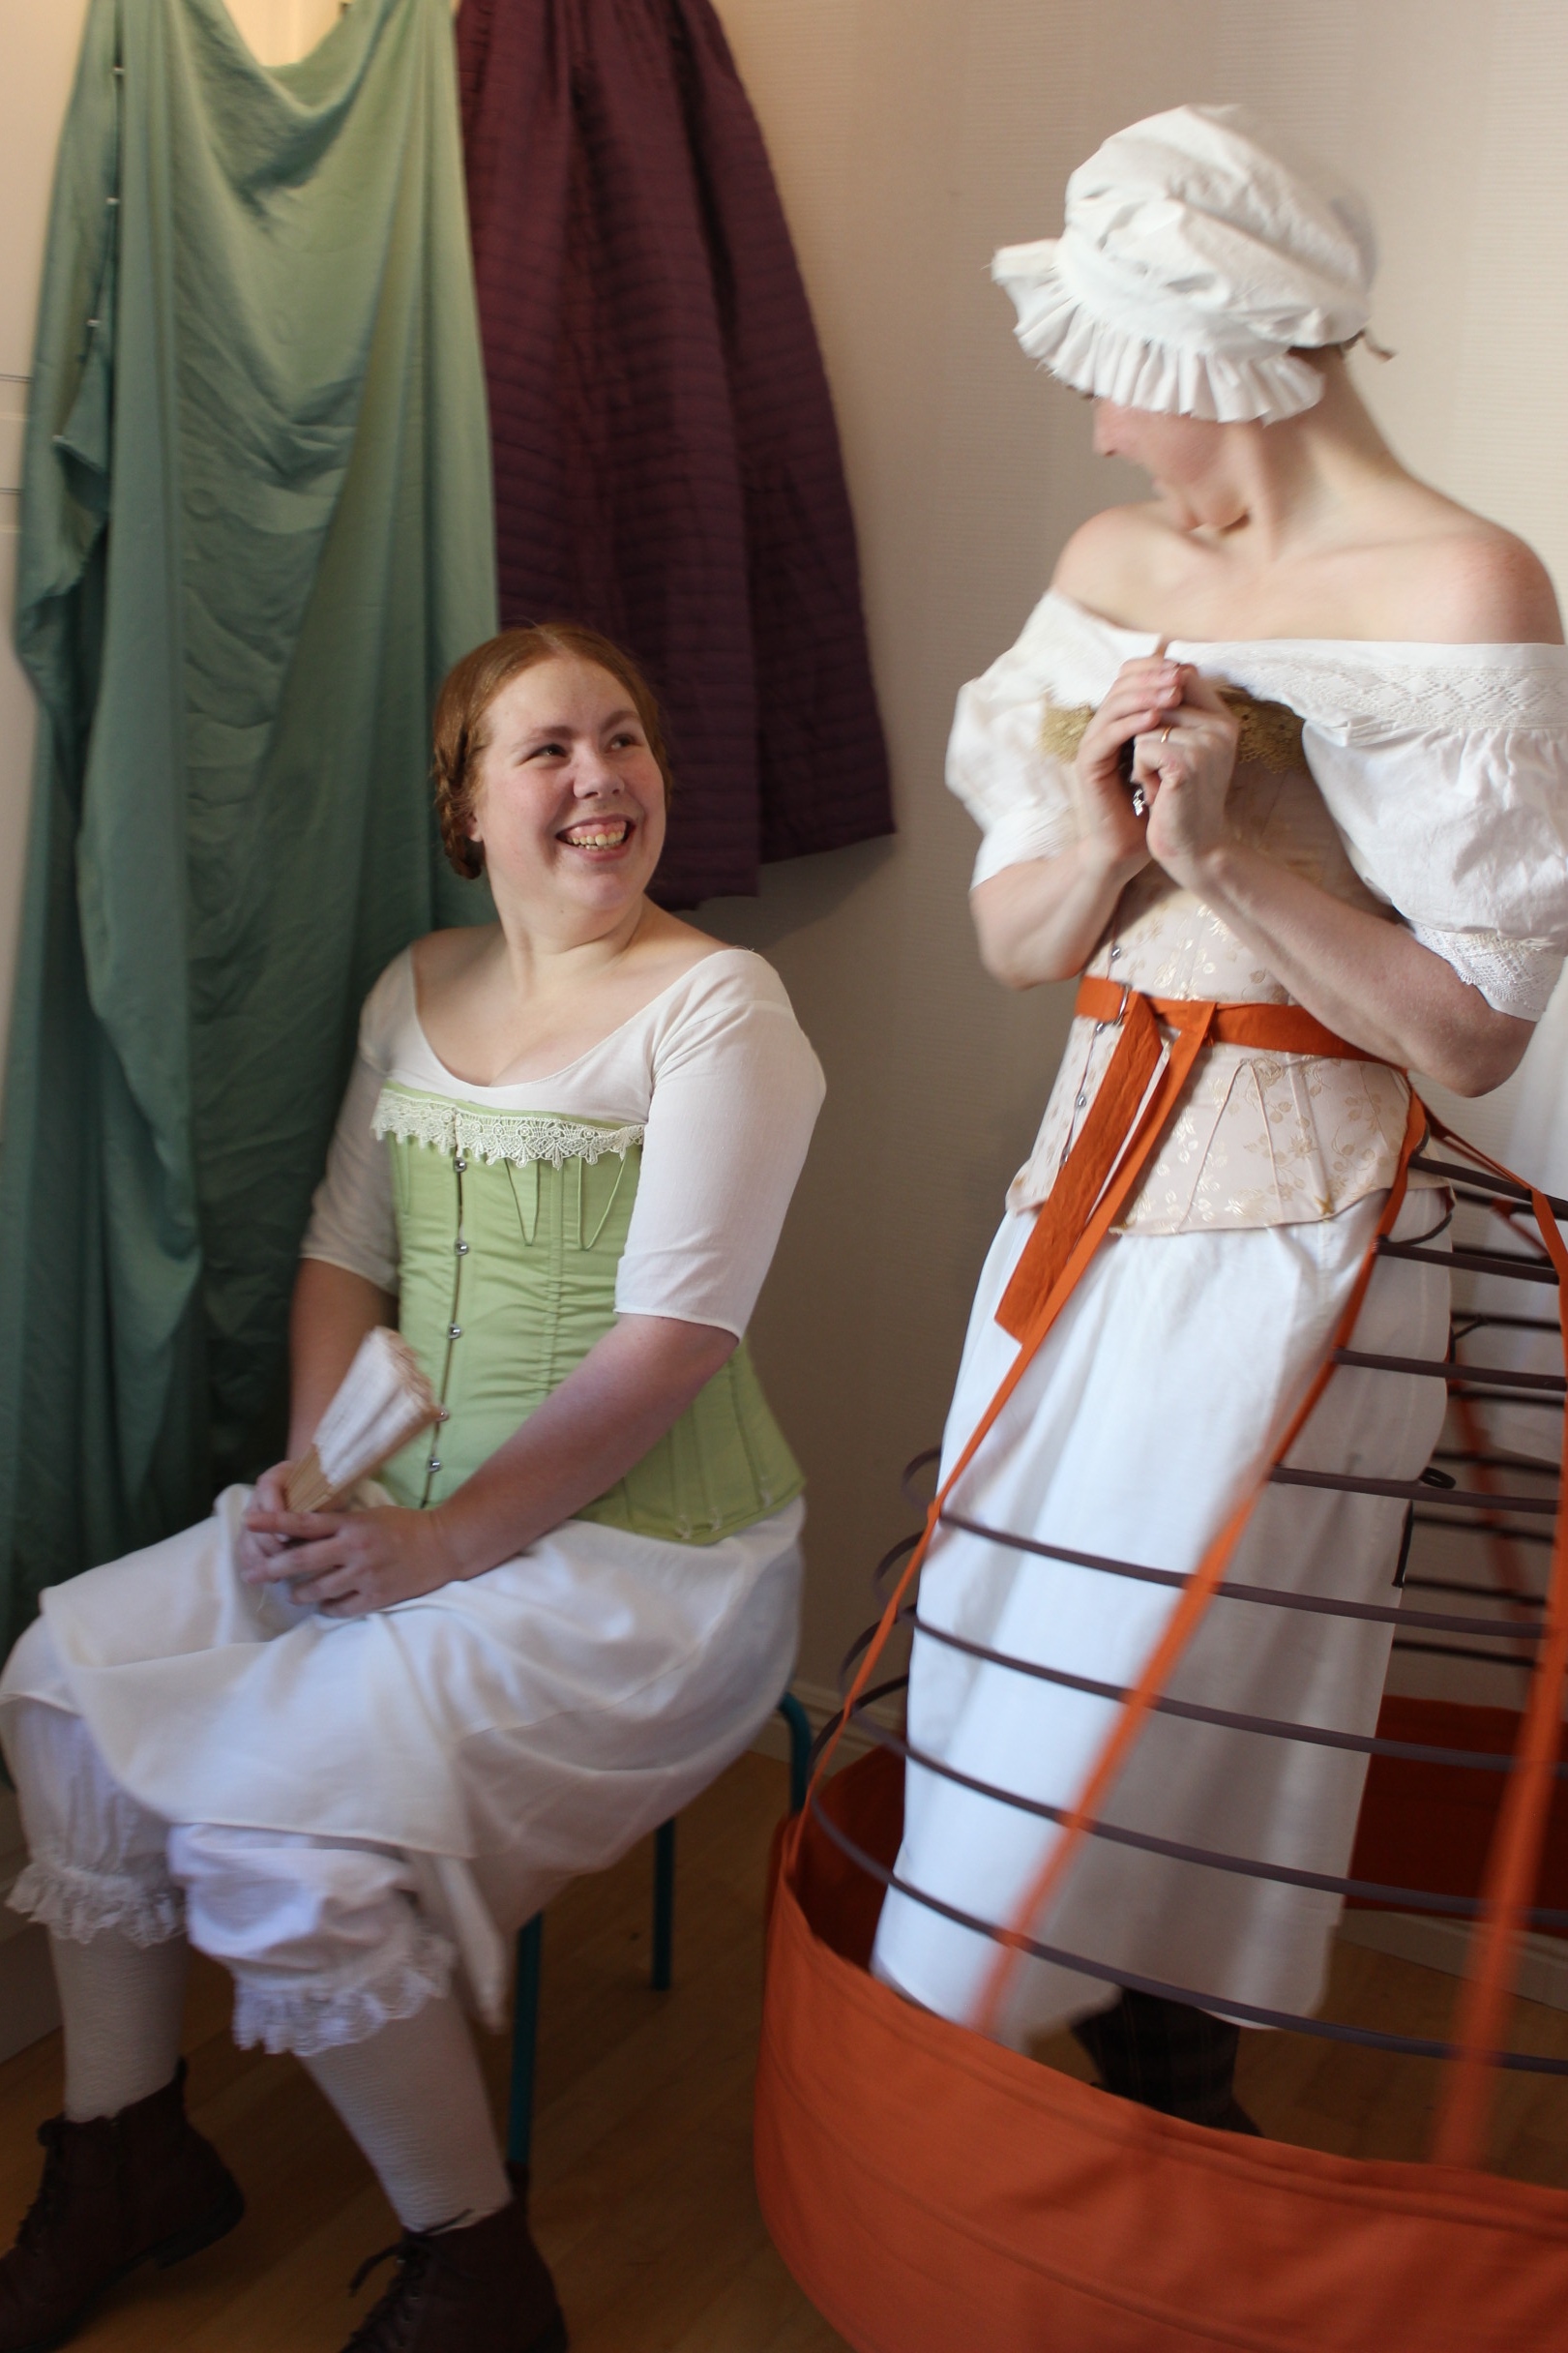

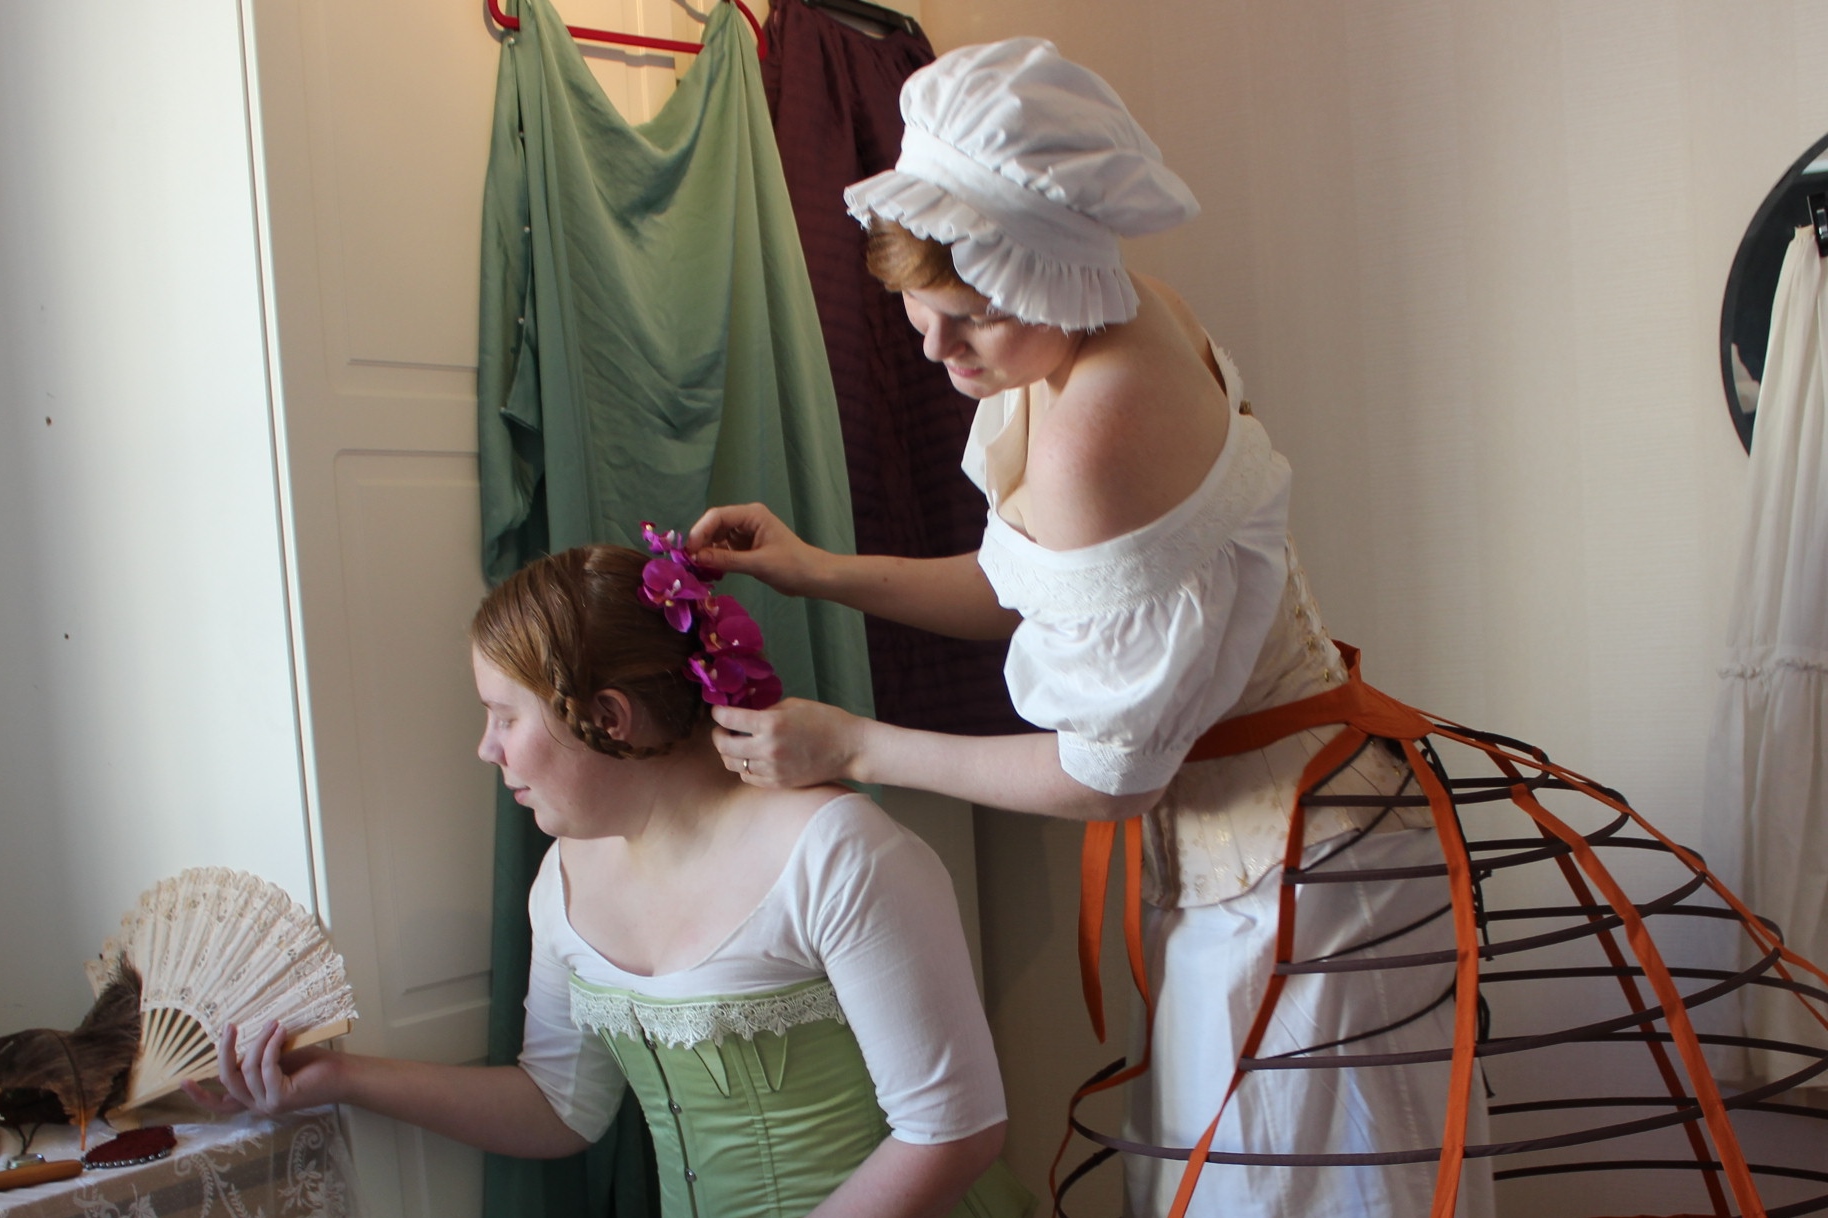

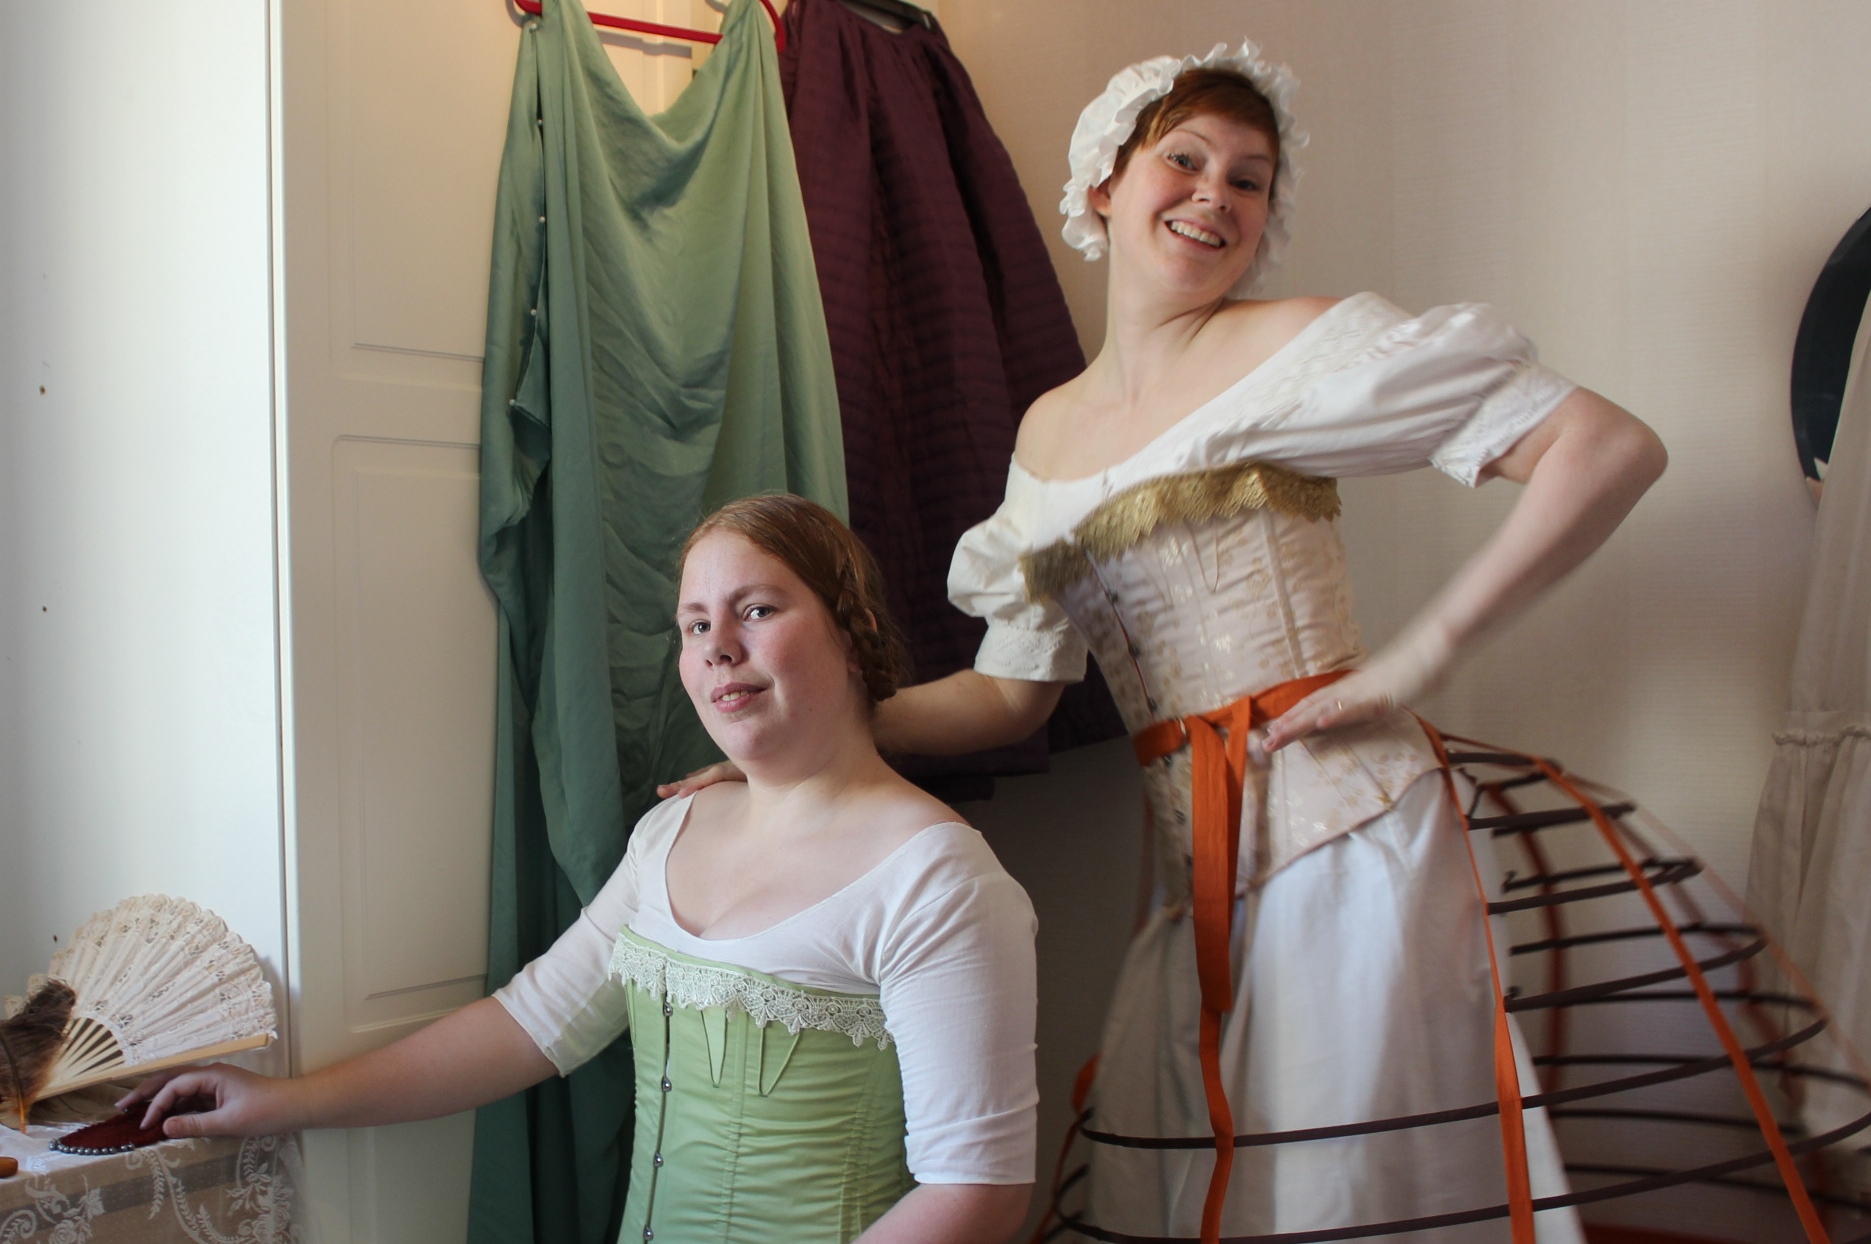
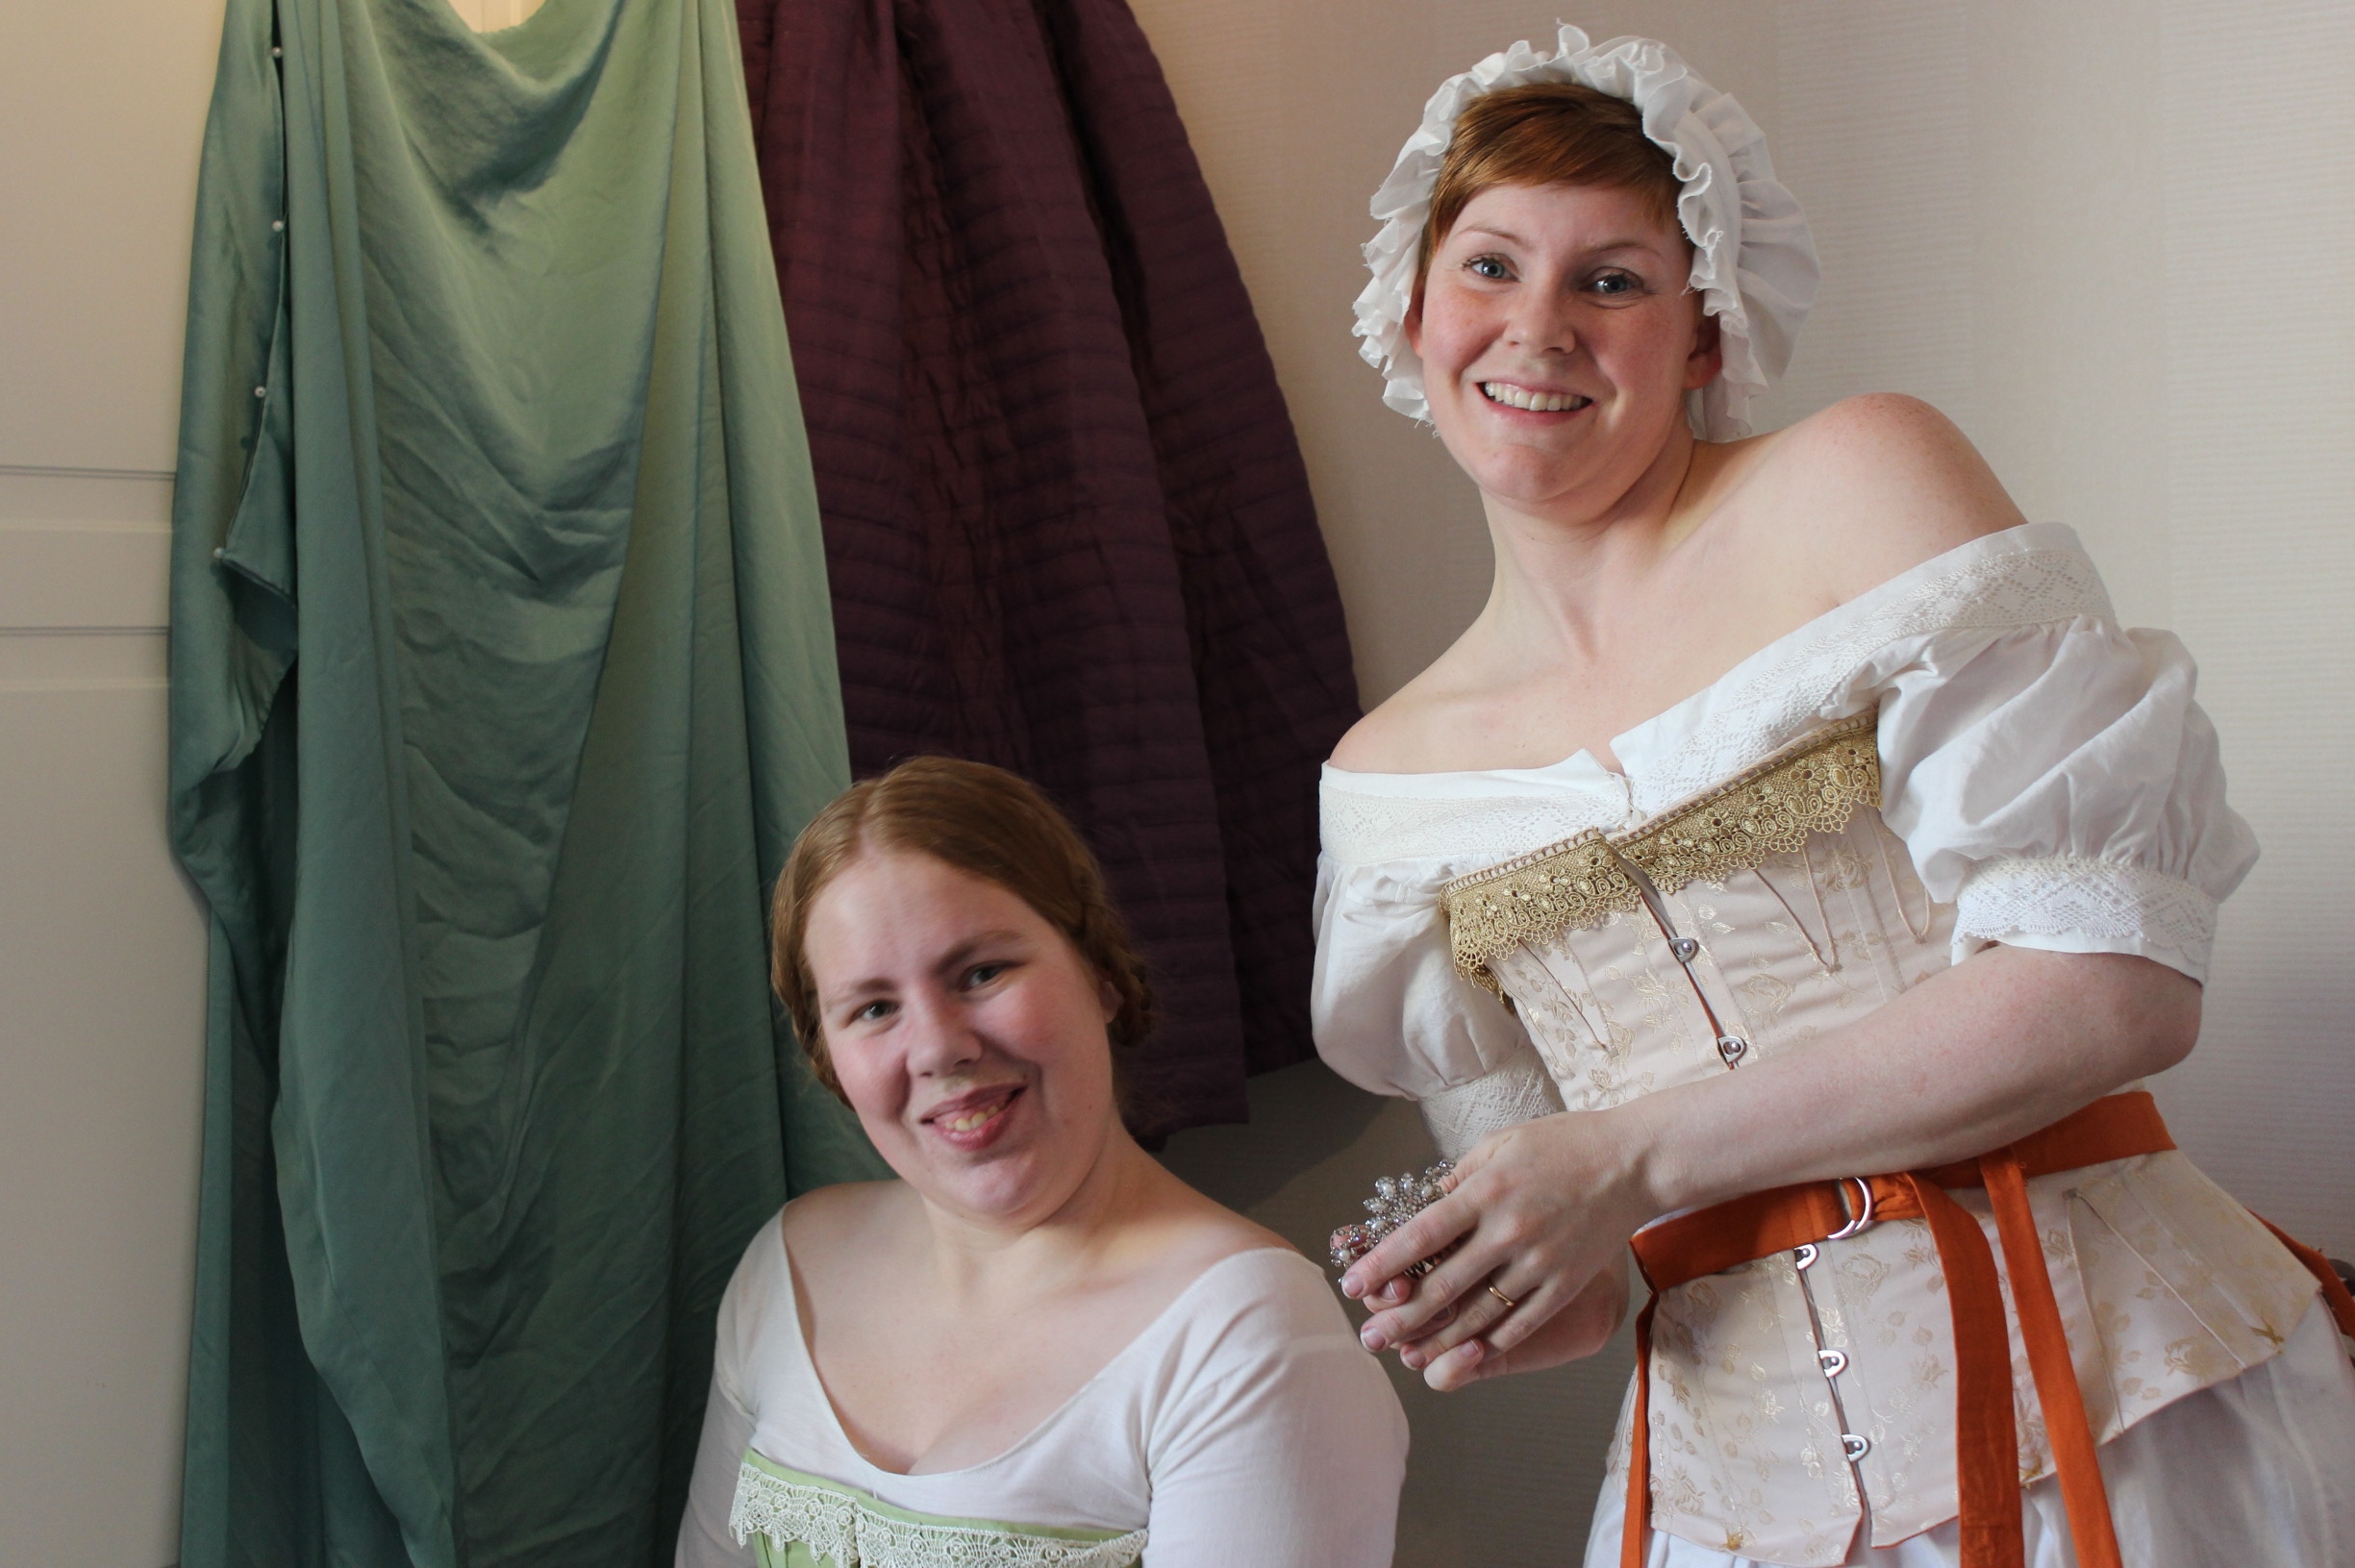
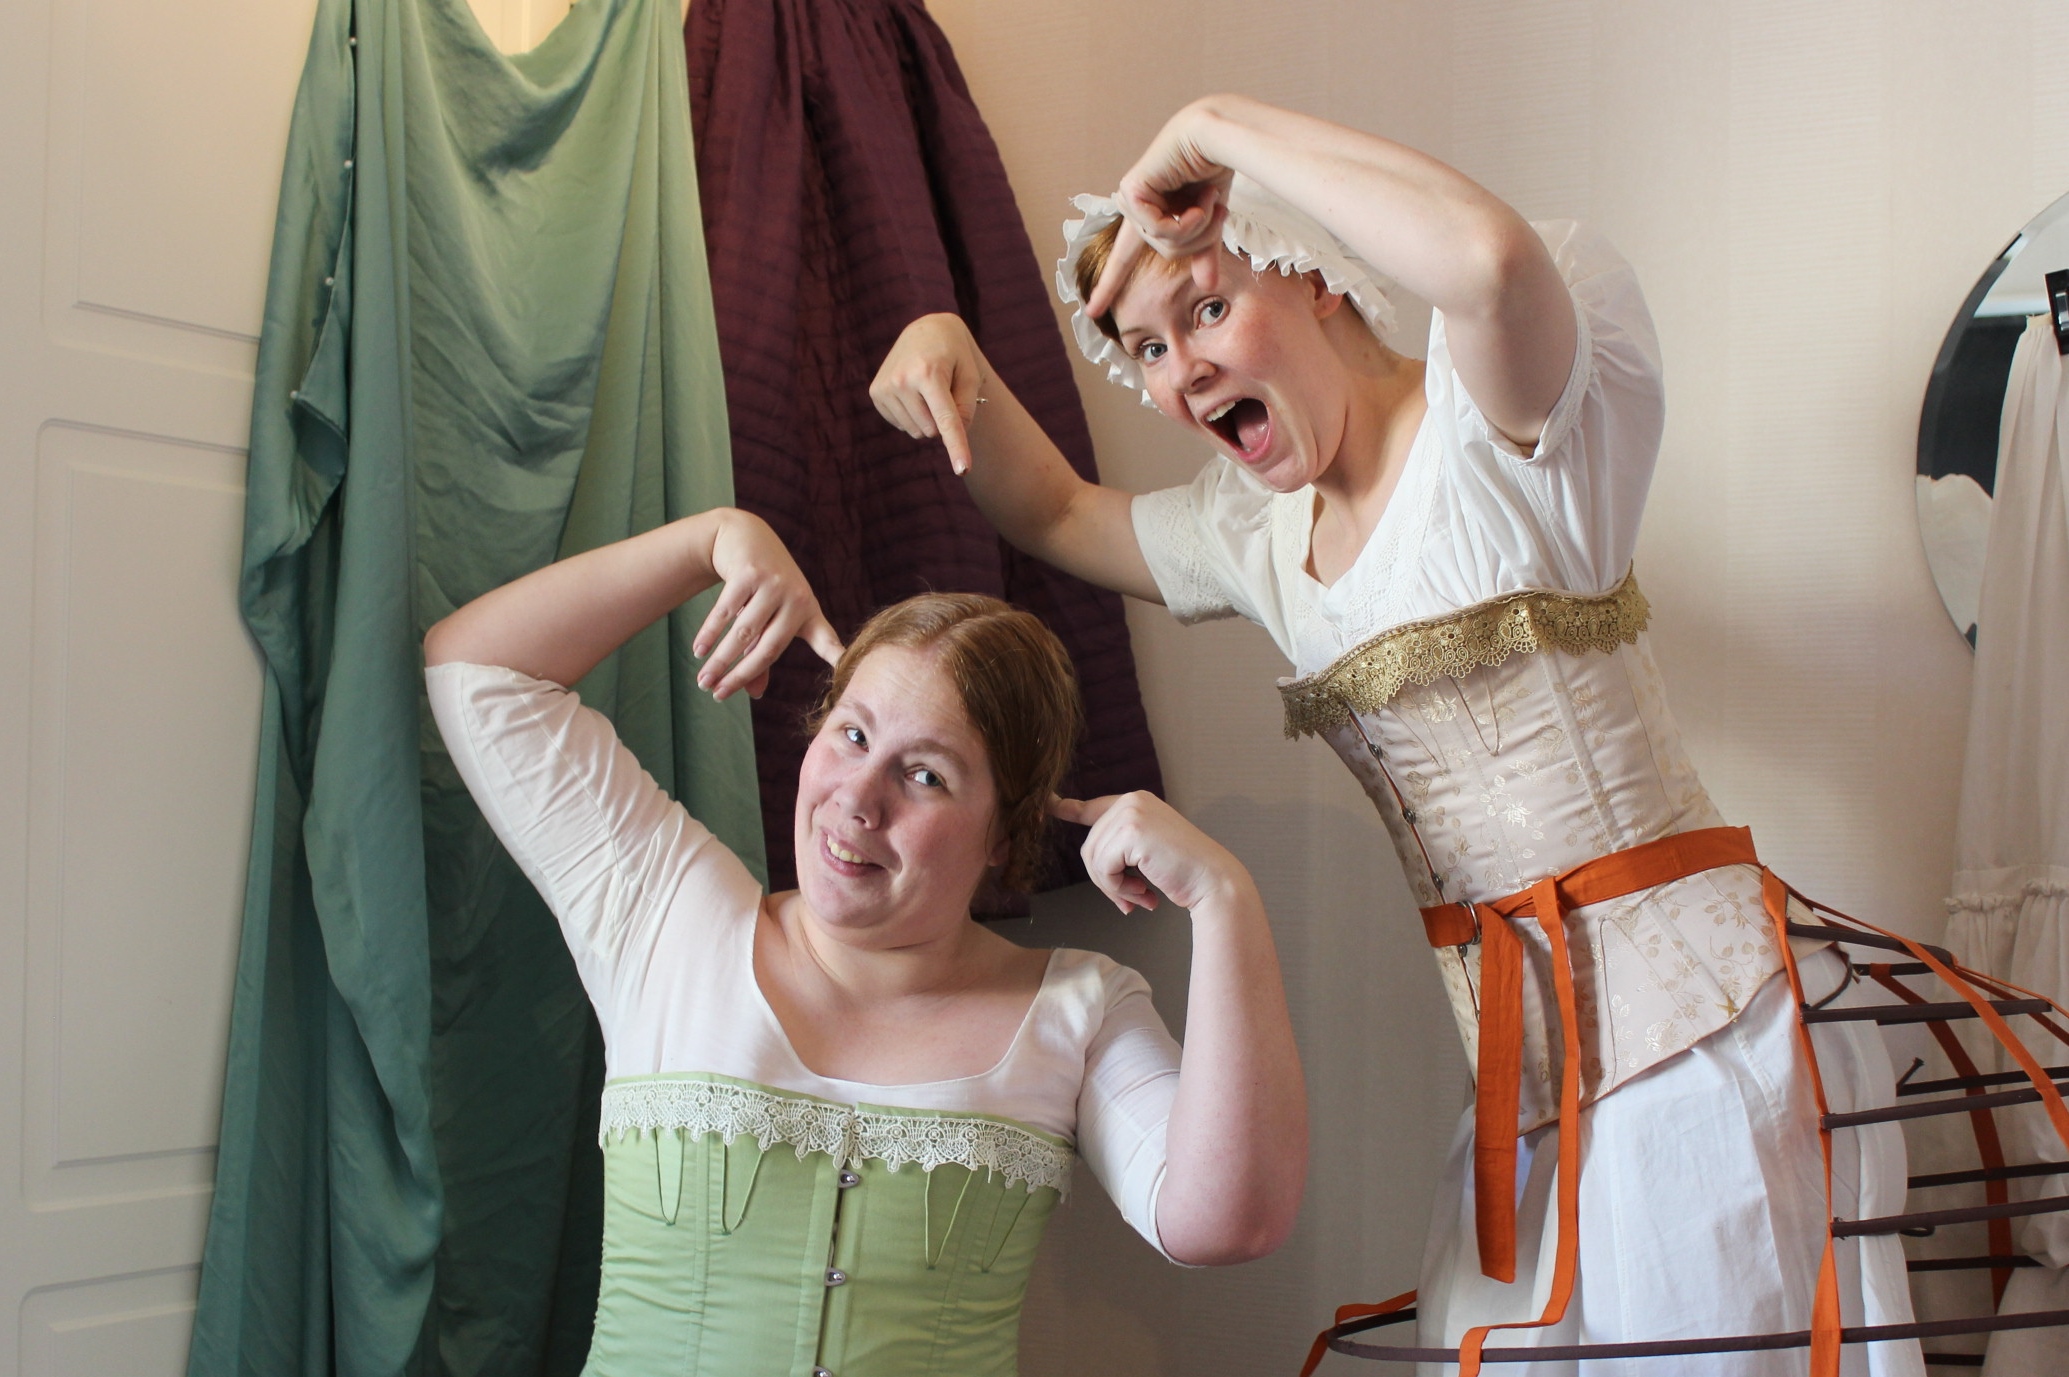

 Photos by: Elin Evaldsdotter
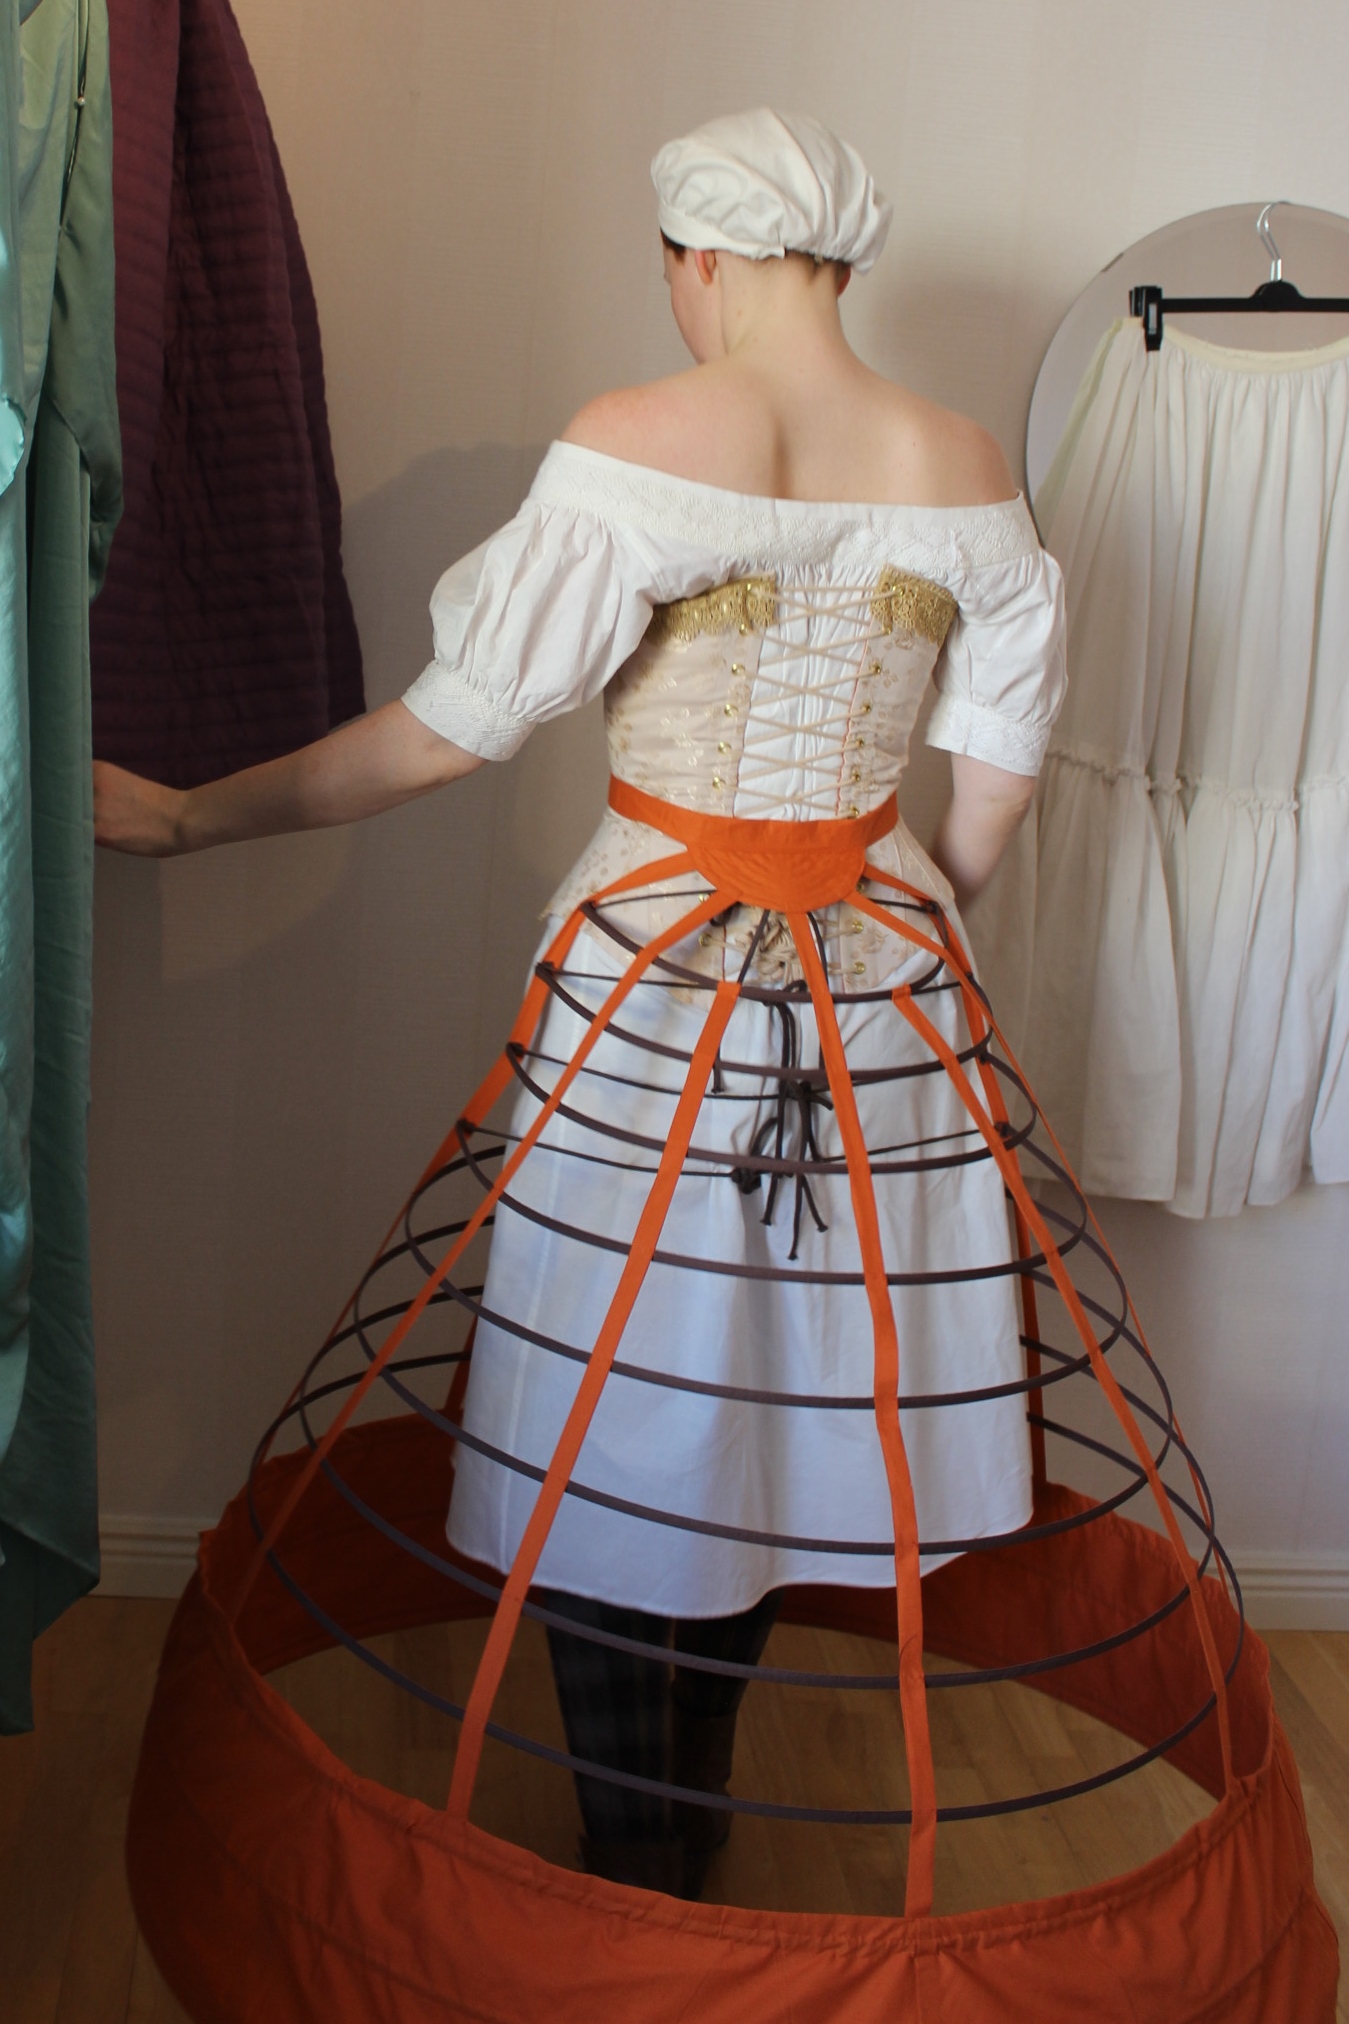
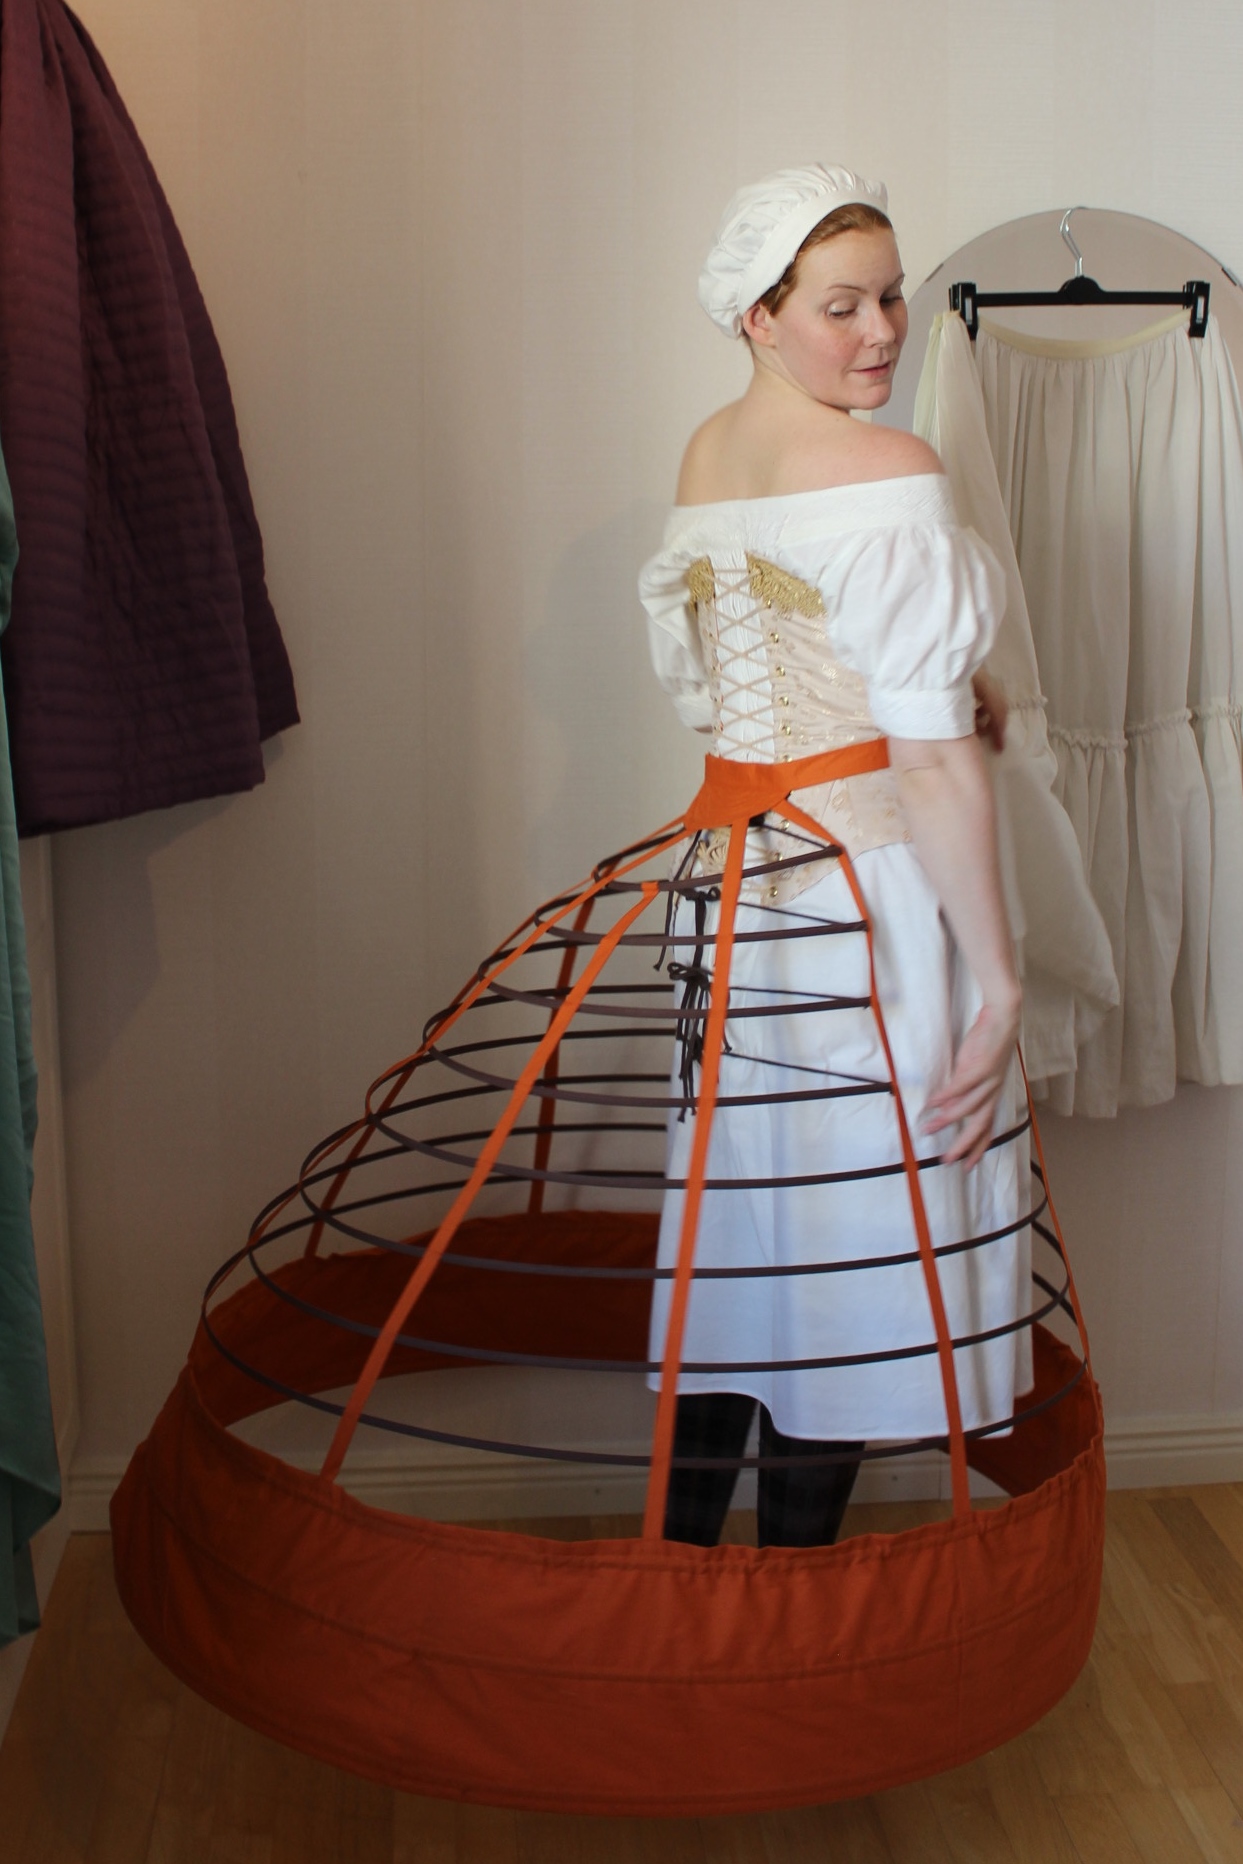
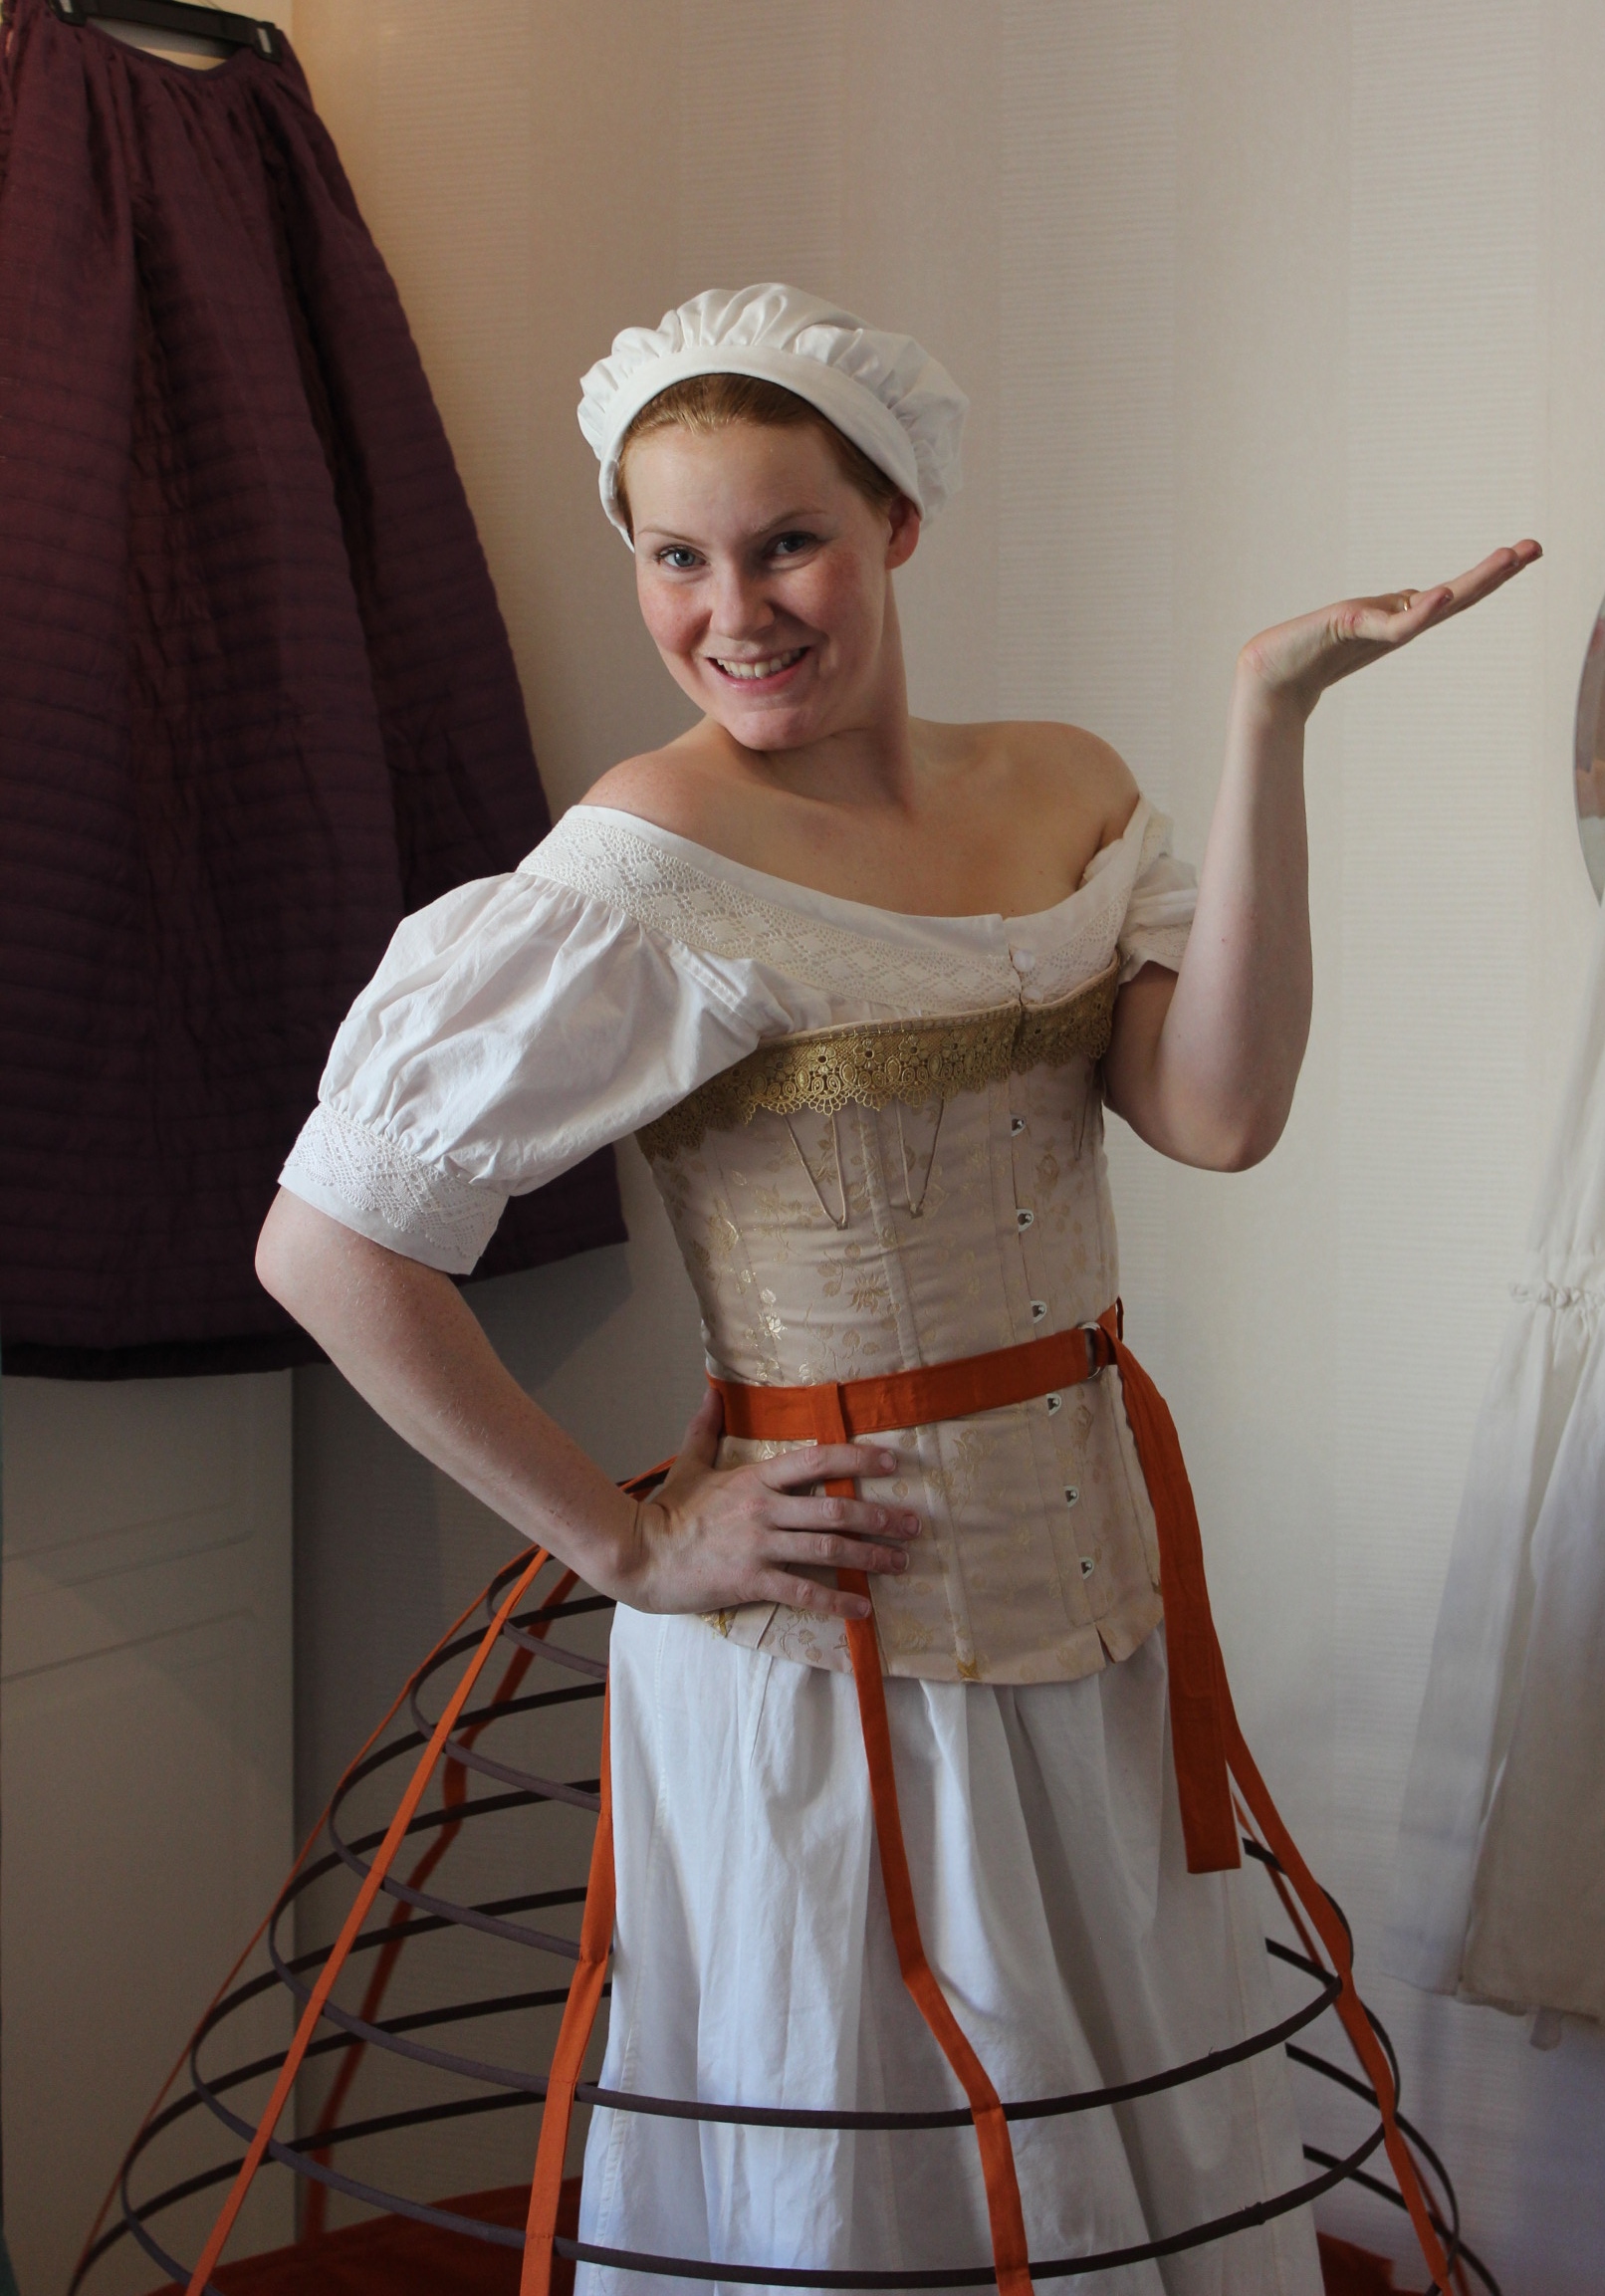
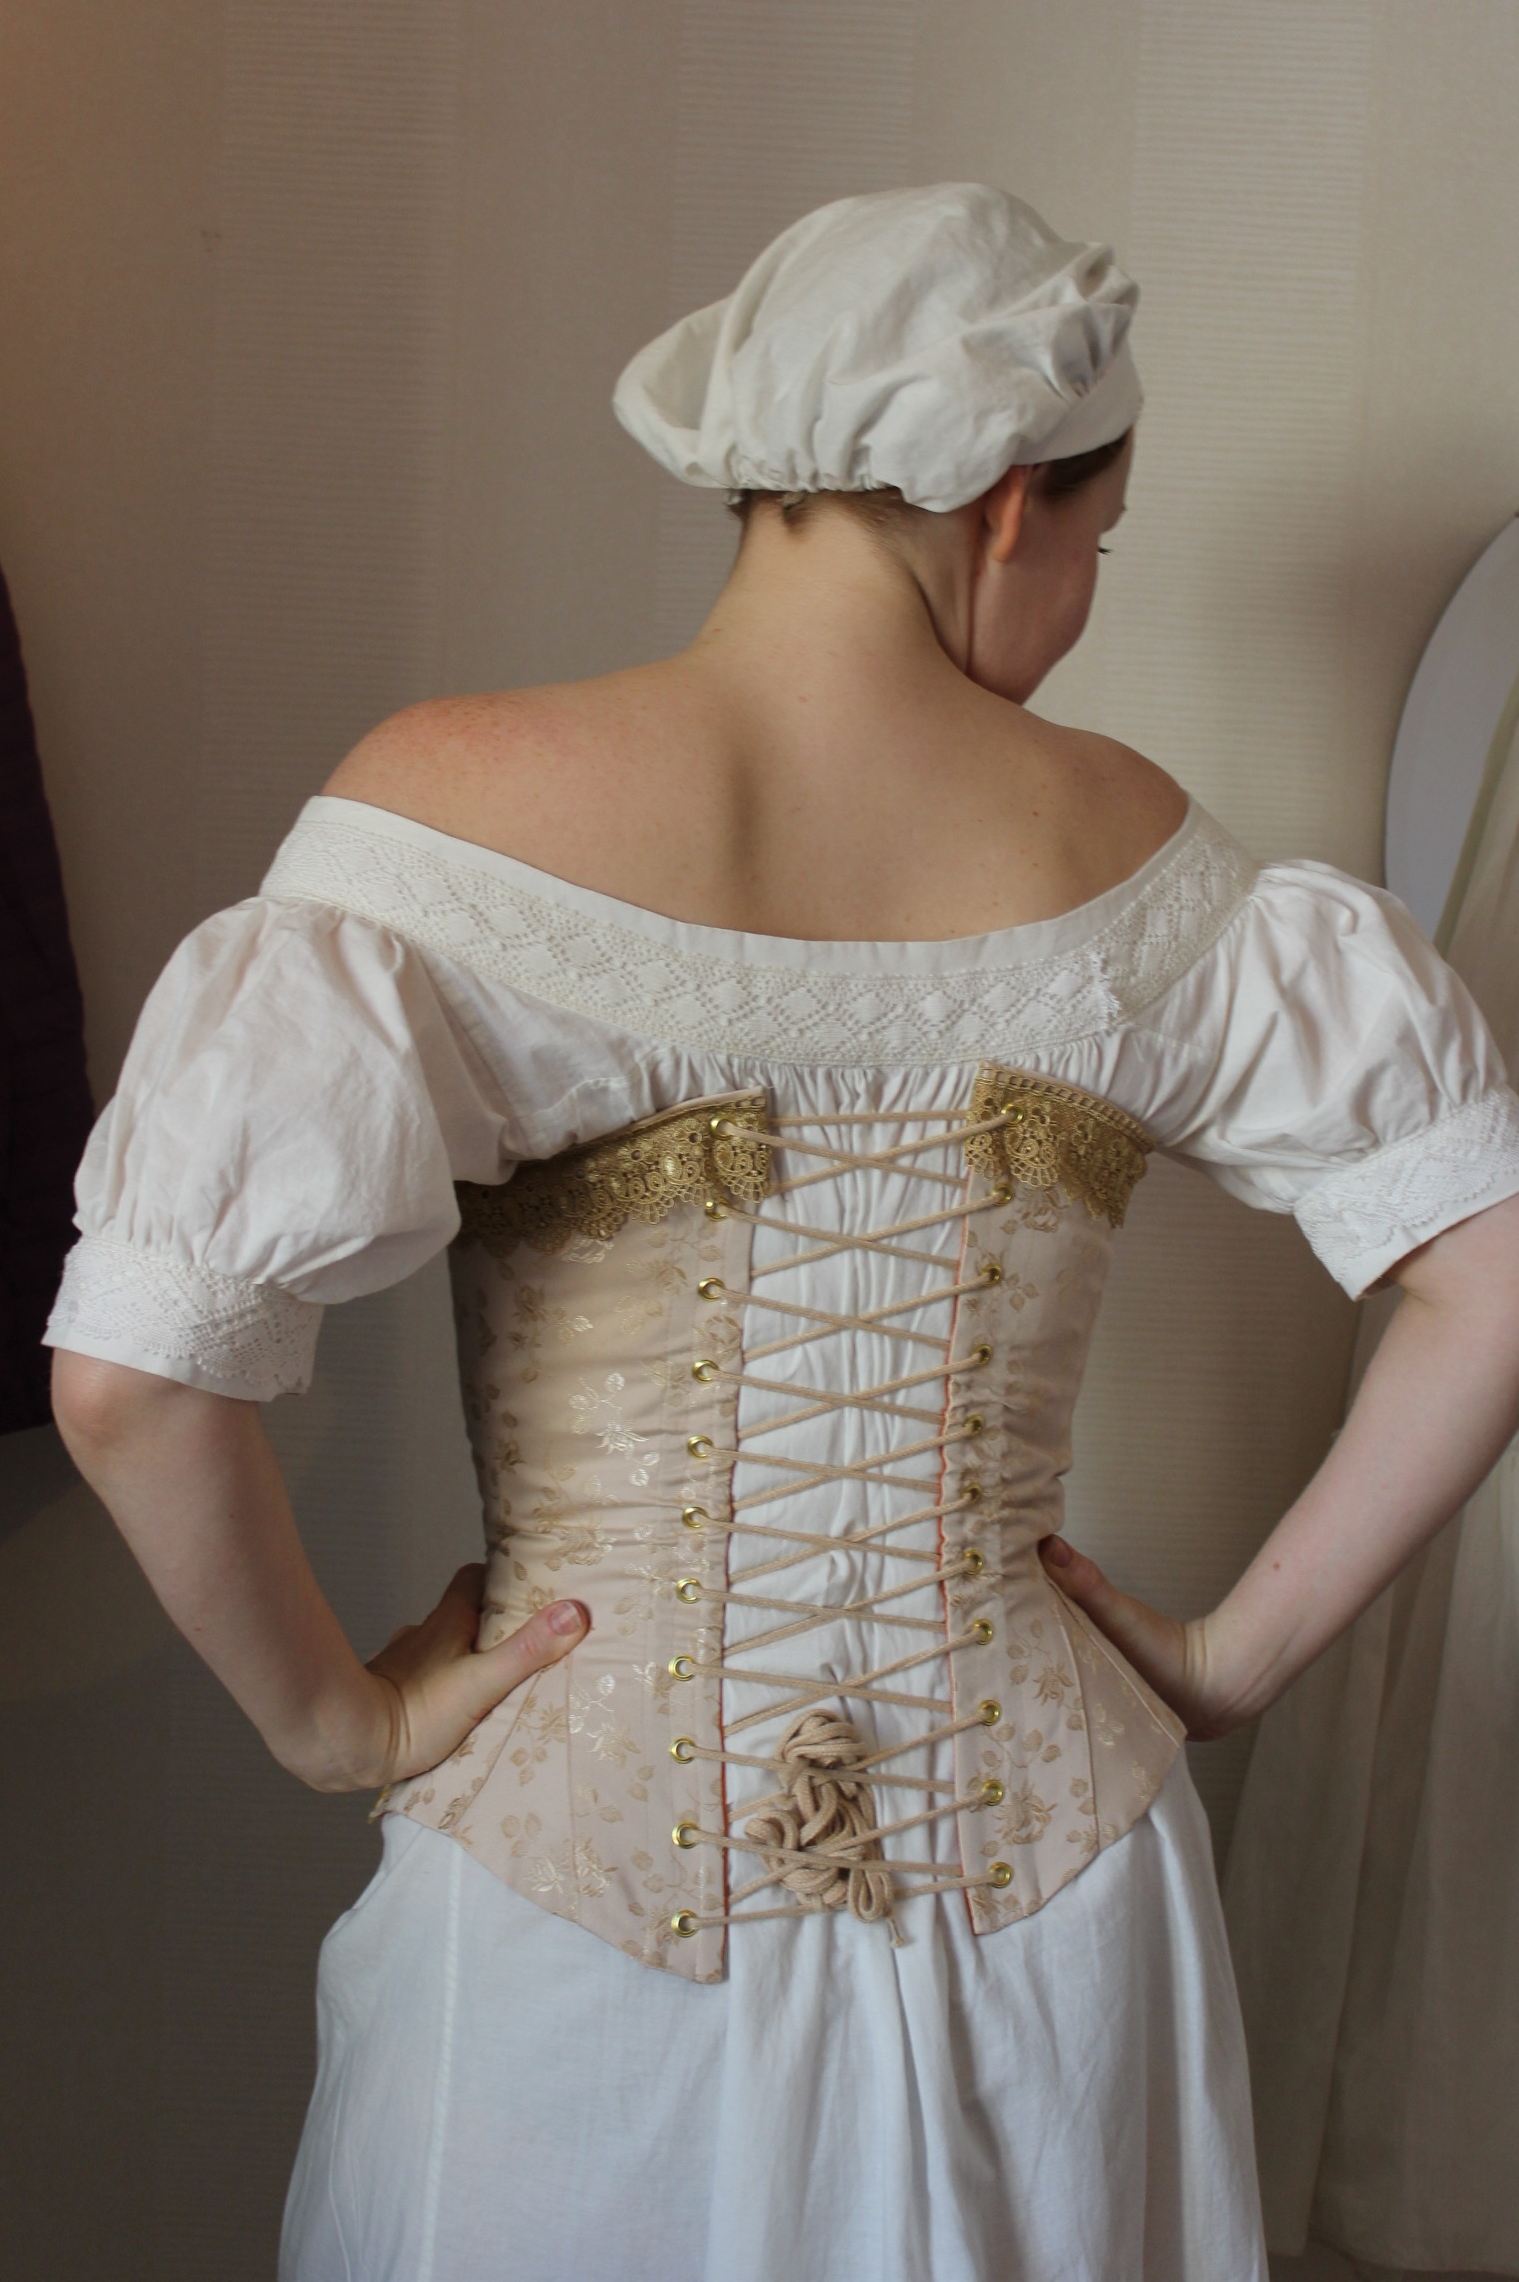
Here’s some photos of me in my new 1860s golden corset and the Huge Orange Crinoline. I’m also wearing my mid victorian chemise, bloomers, stockings and lace up boots.


 And here´s when my baby entered the room


 Photos: Elin Evaldsdotter
As I mentioned in an previous post about my sisters 1860s corset, I couldn’t resist the temptation to make one for myself (even though I didn’t need one and really didn’t had the time for it). I tried to convince myself that it would be like a workable test-run of the pattern for my sisters corset. But since I both started (and finished) it after my sisters was already done, that argument fell kind of flat.
But anyhow, I did make one for myself :-).
Using the same pattern, and initially also the same mock-up I got to work.
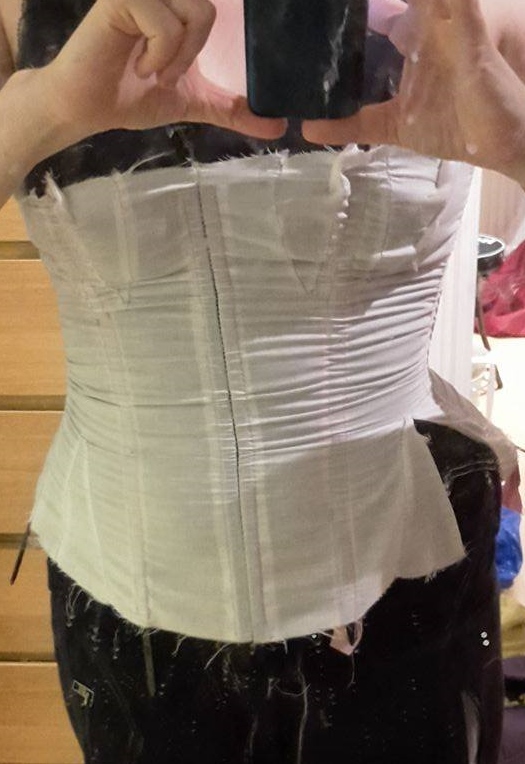
Terrible first mock-up
Wanting the fitting just right, I also made a second mock-up – based on my own measurements (instead of my sisters).
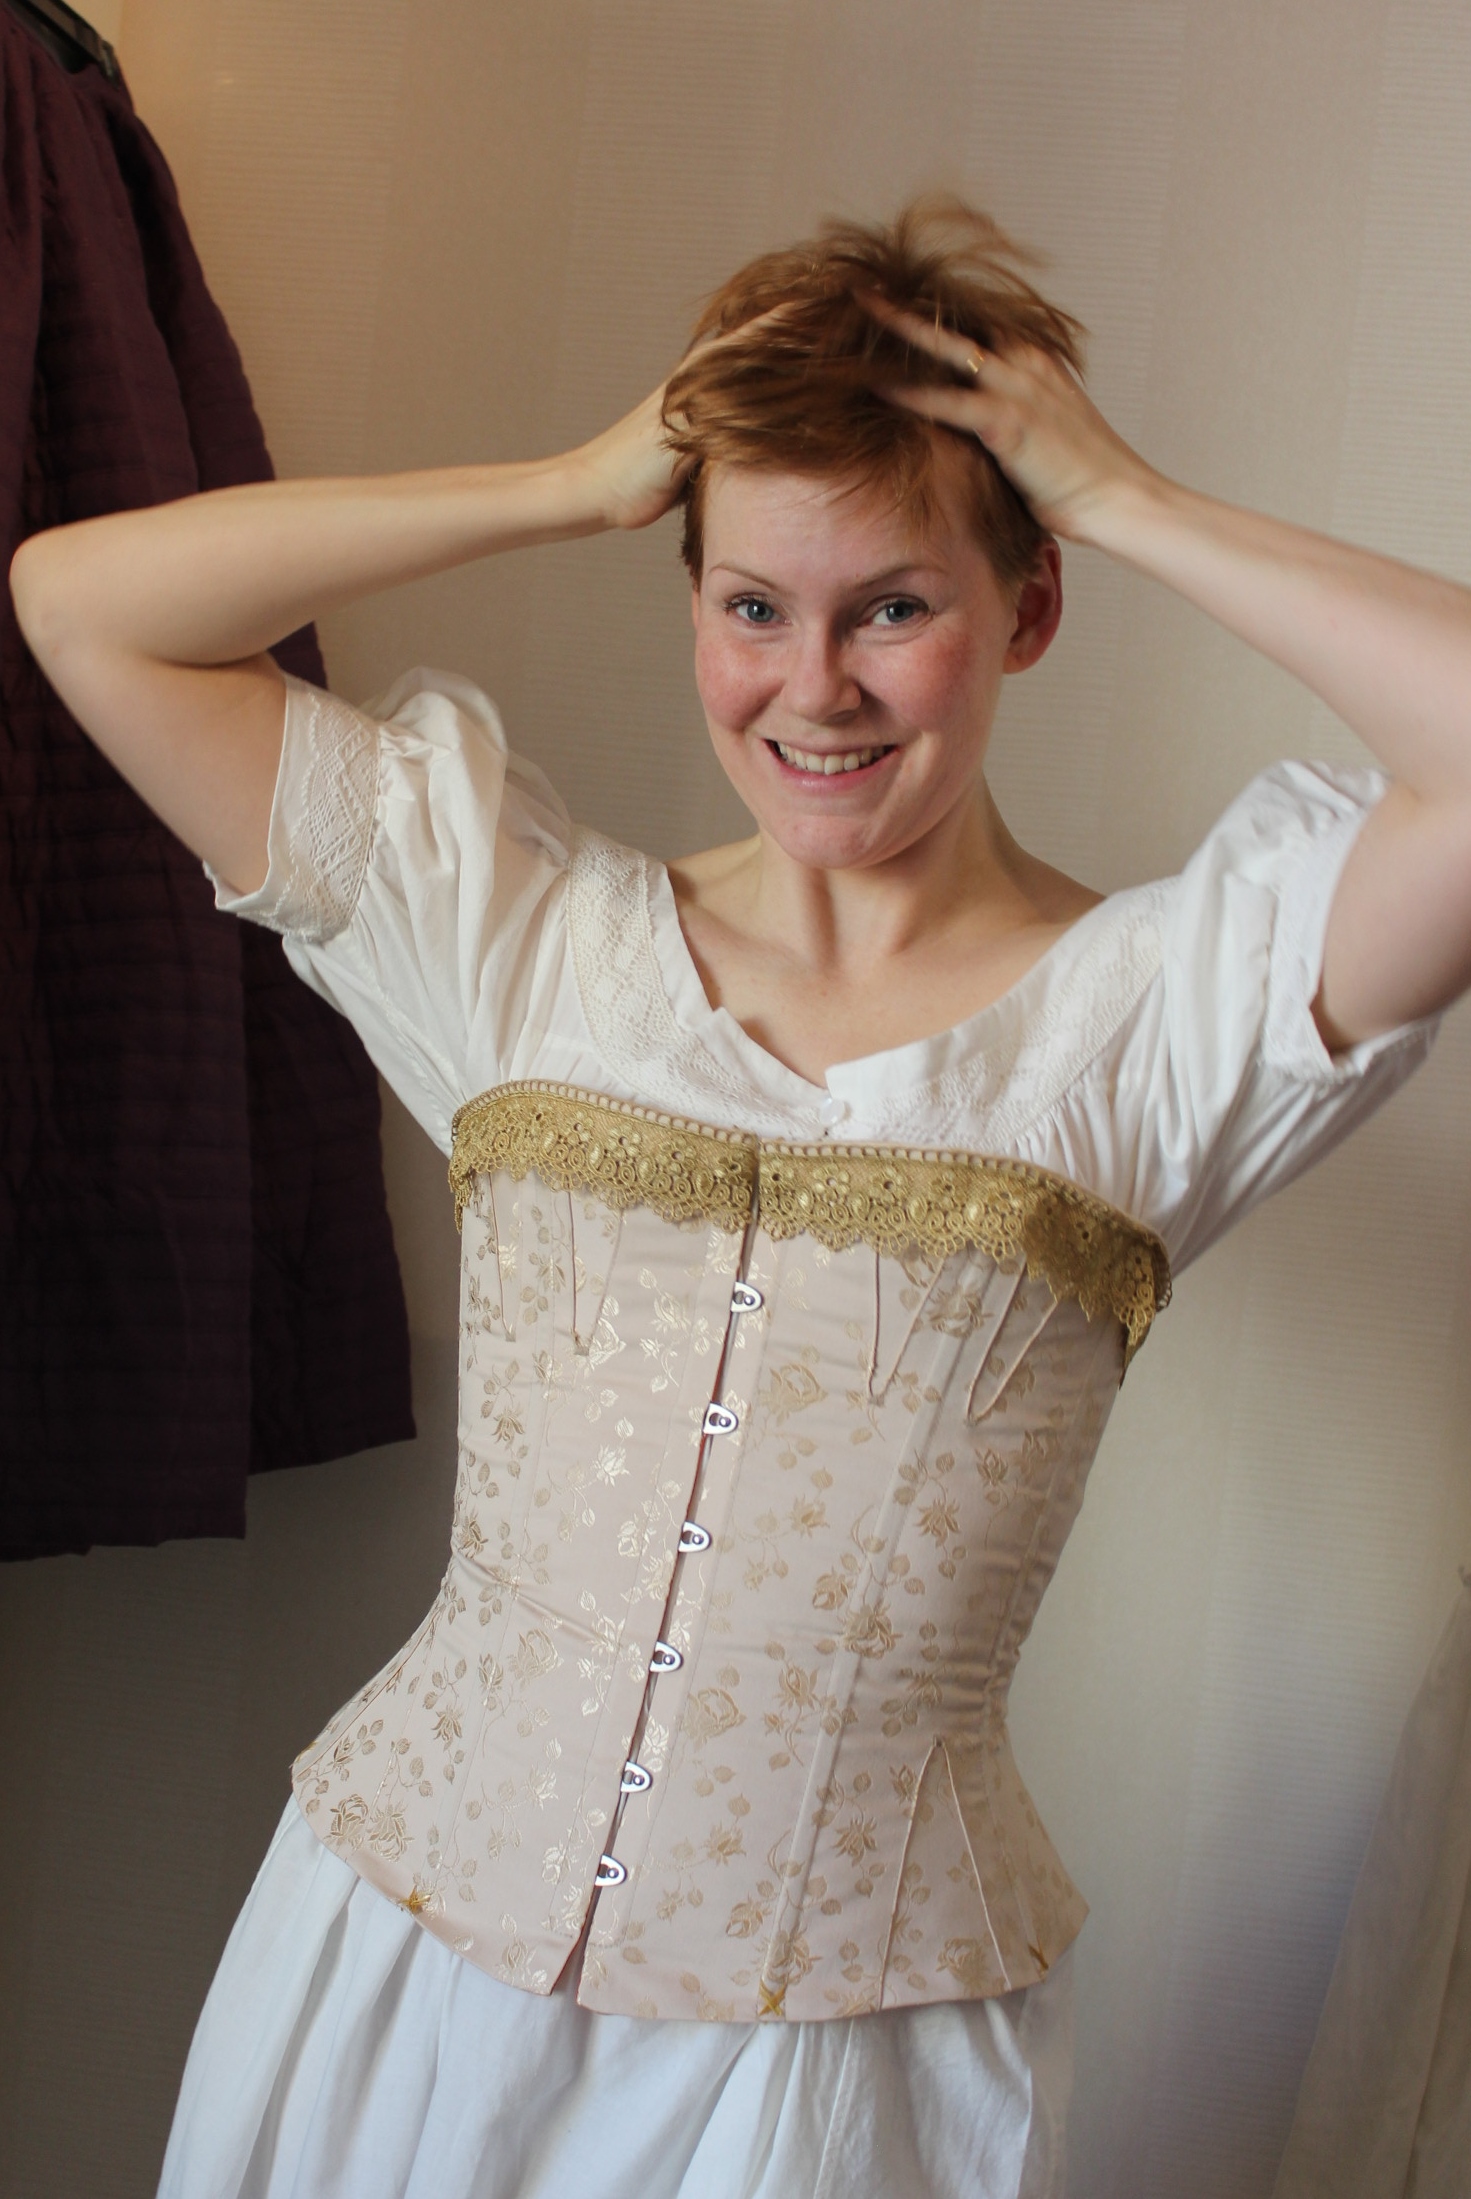
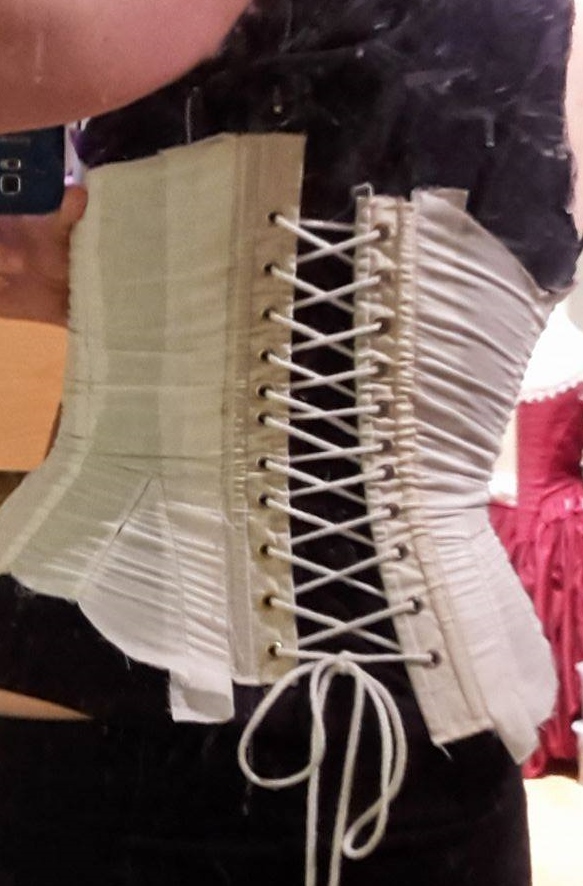
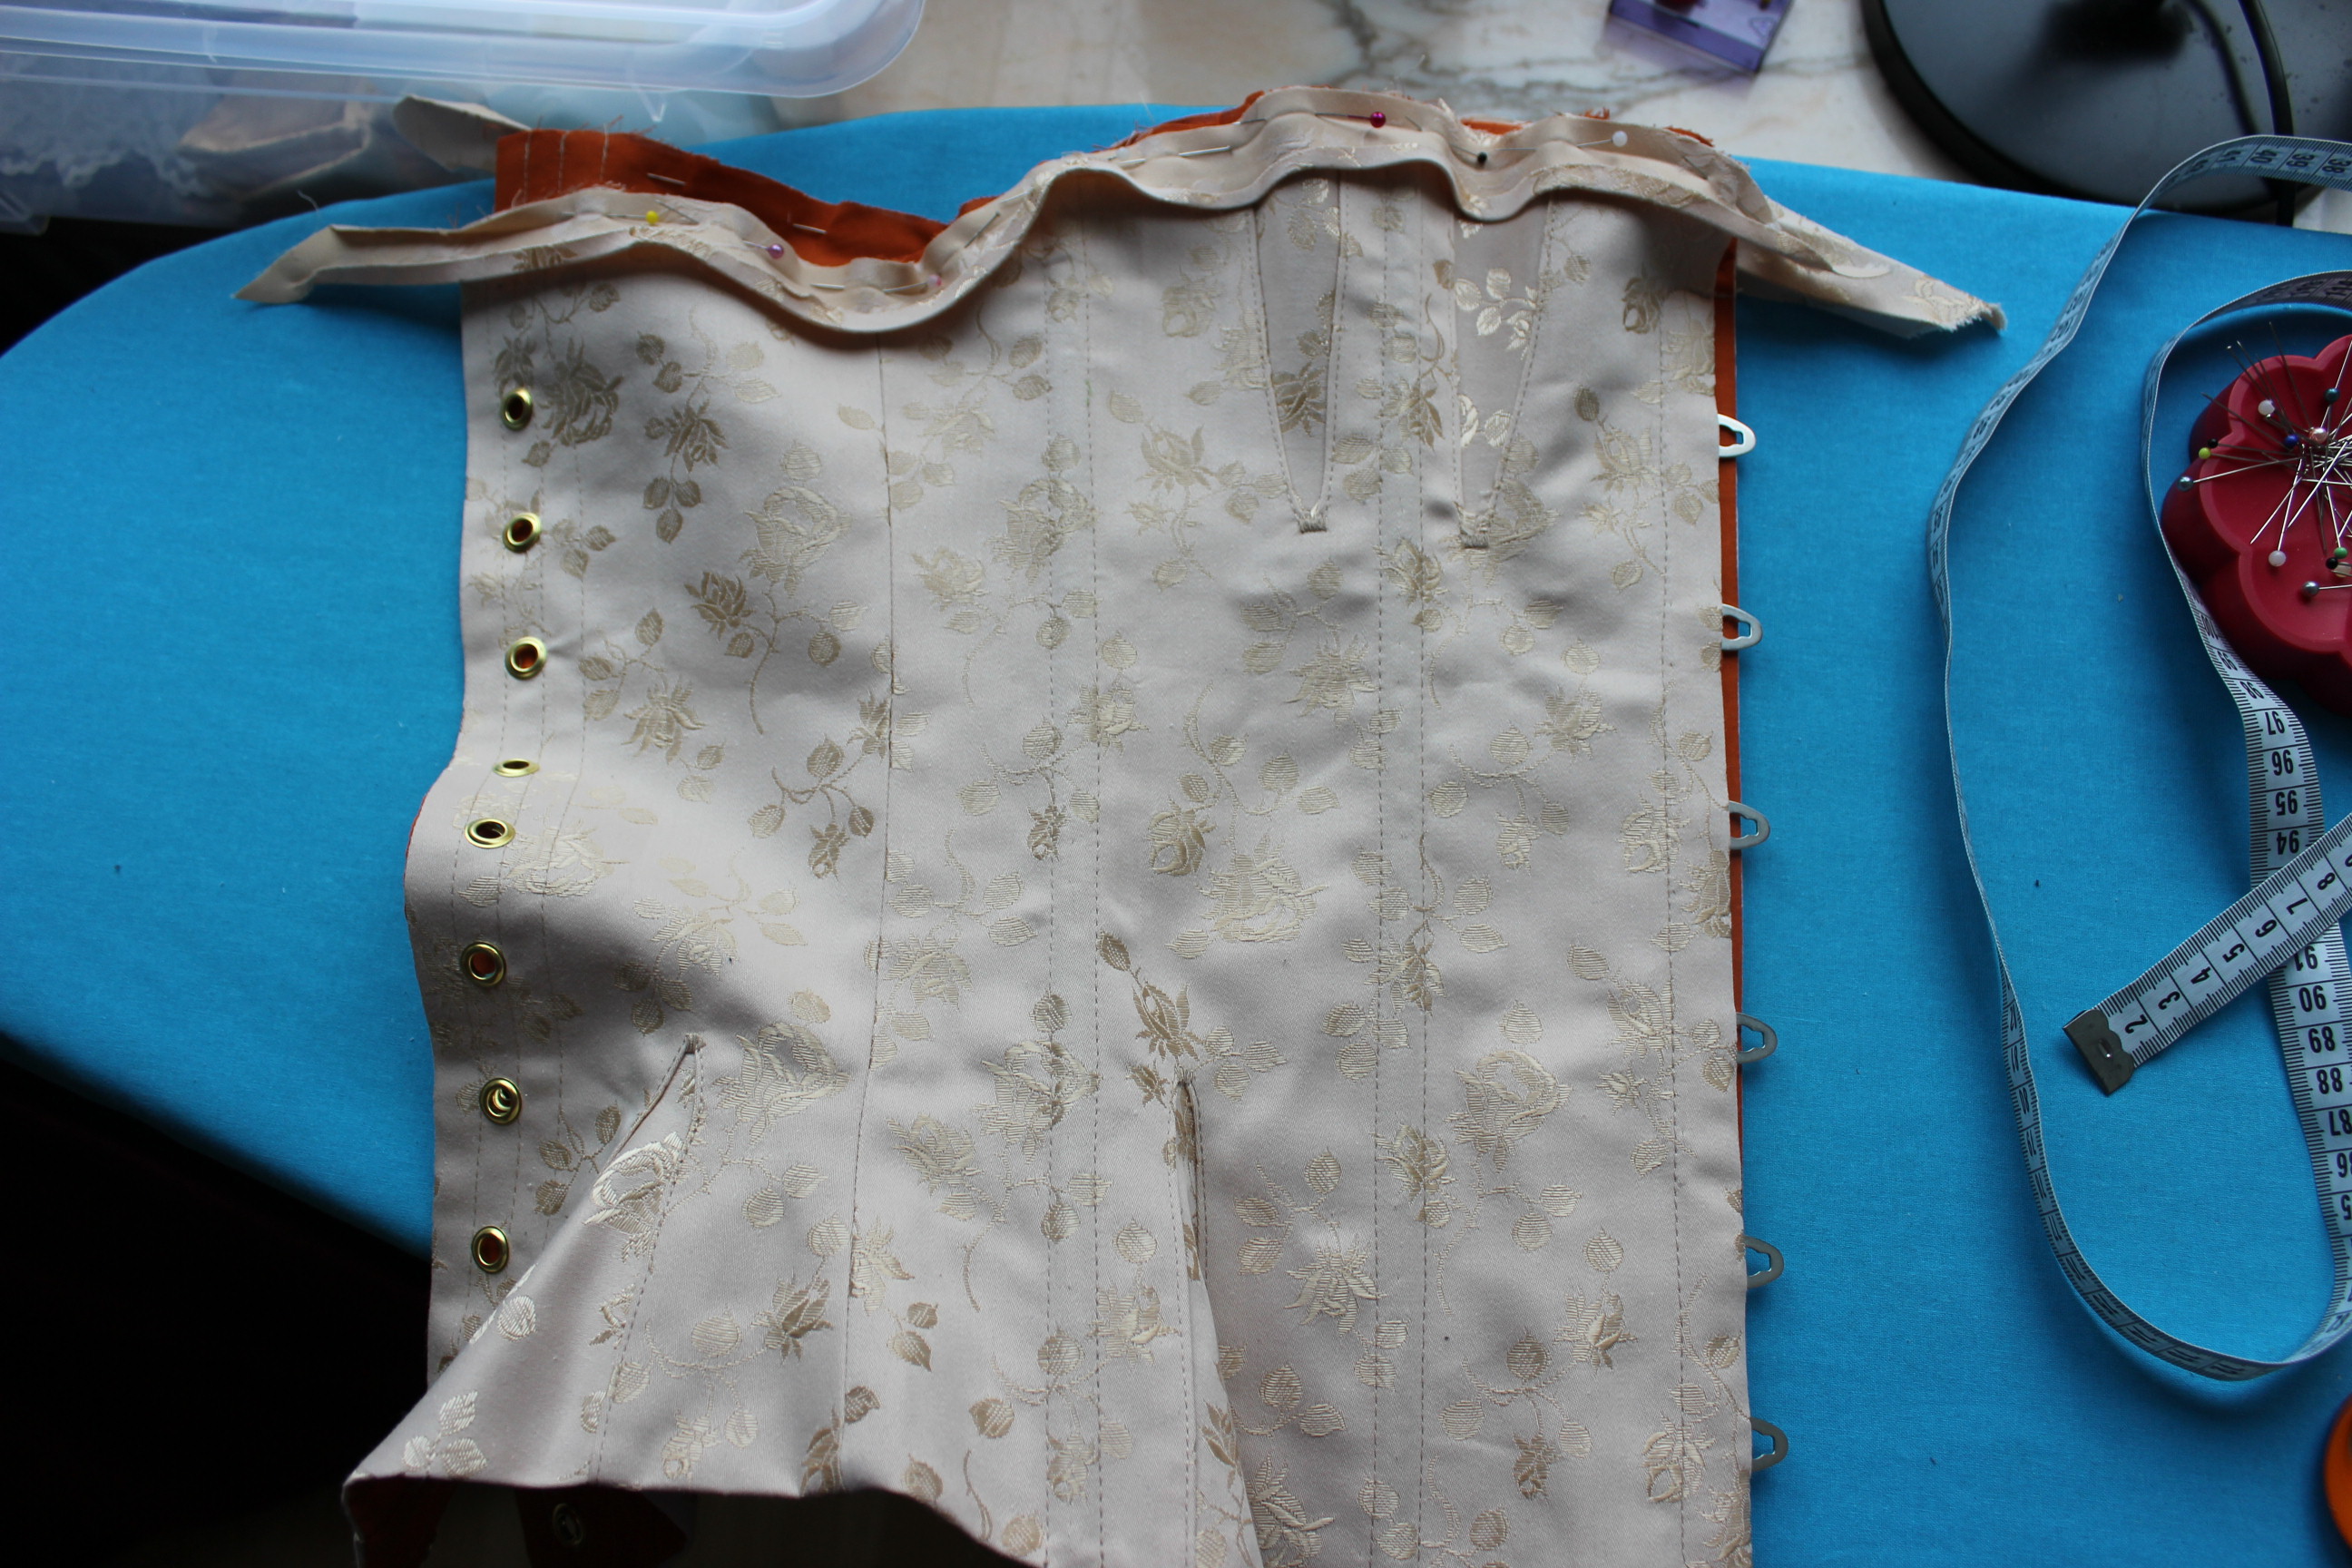
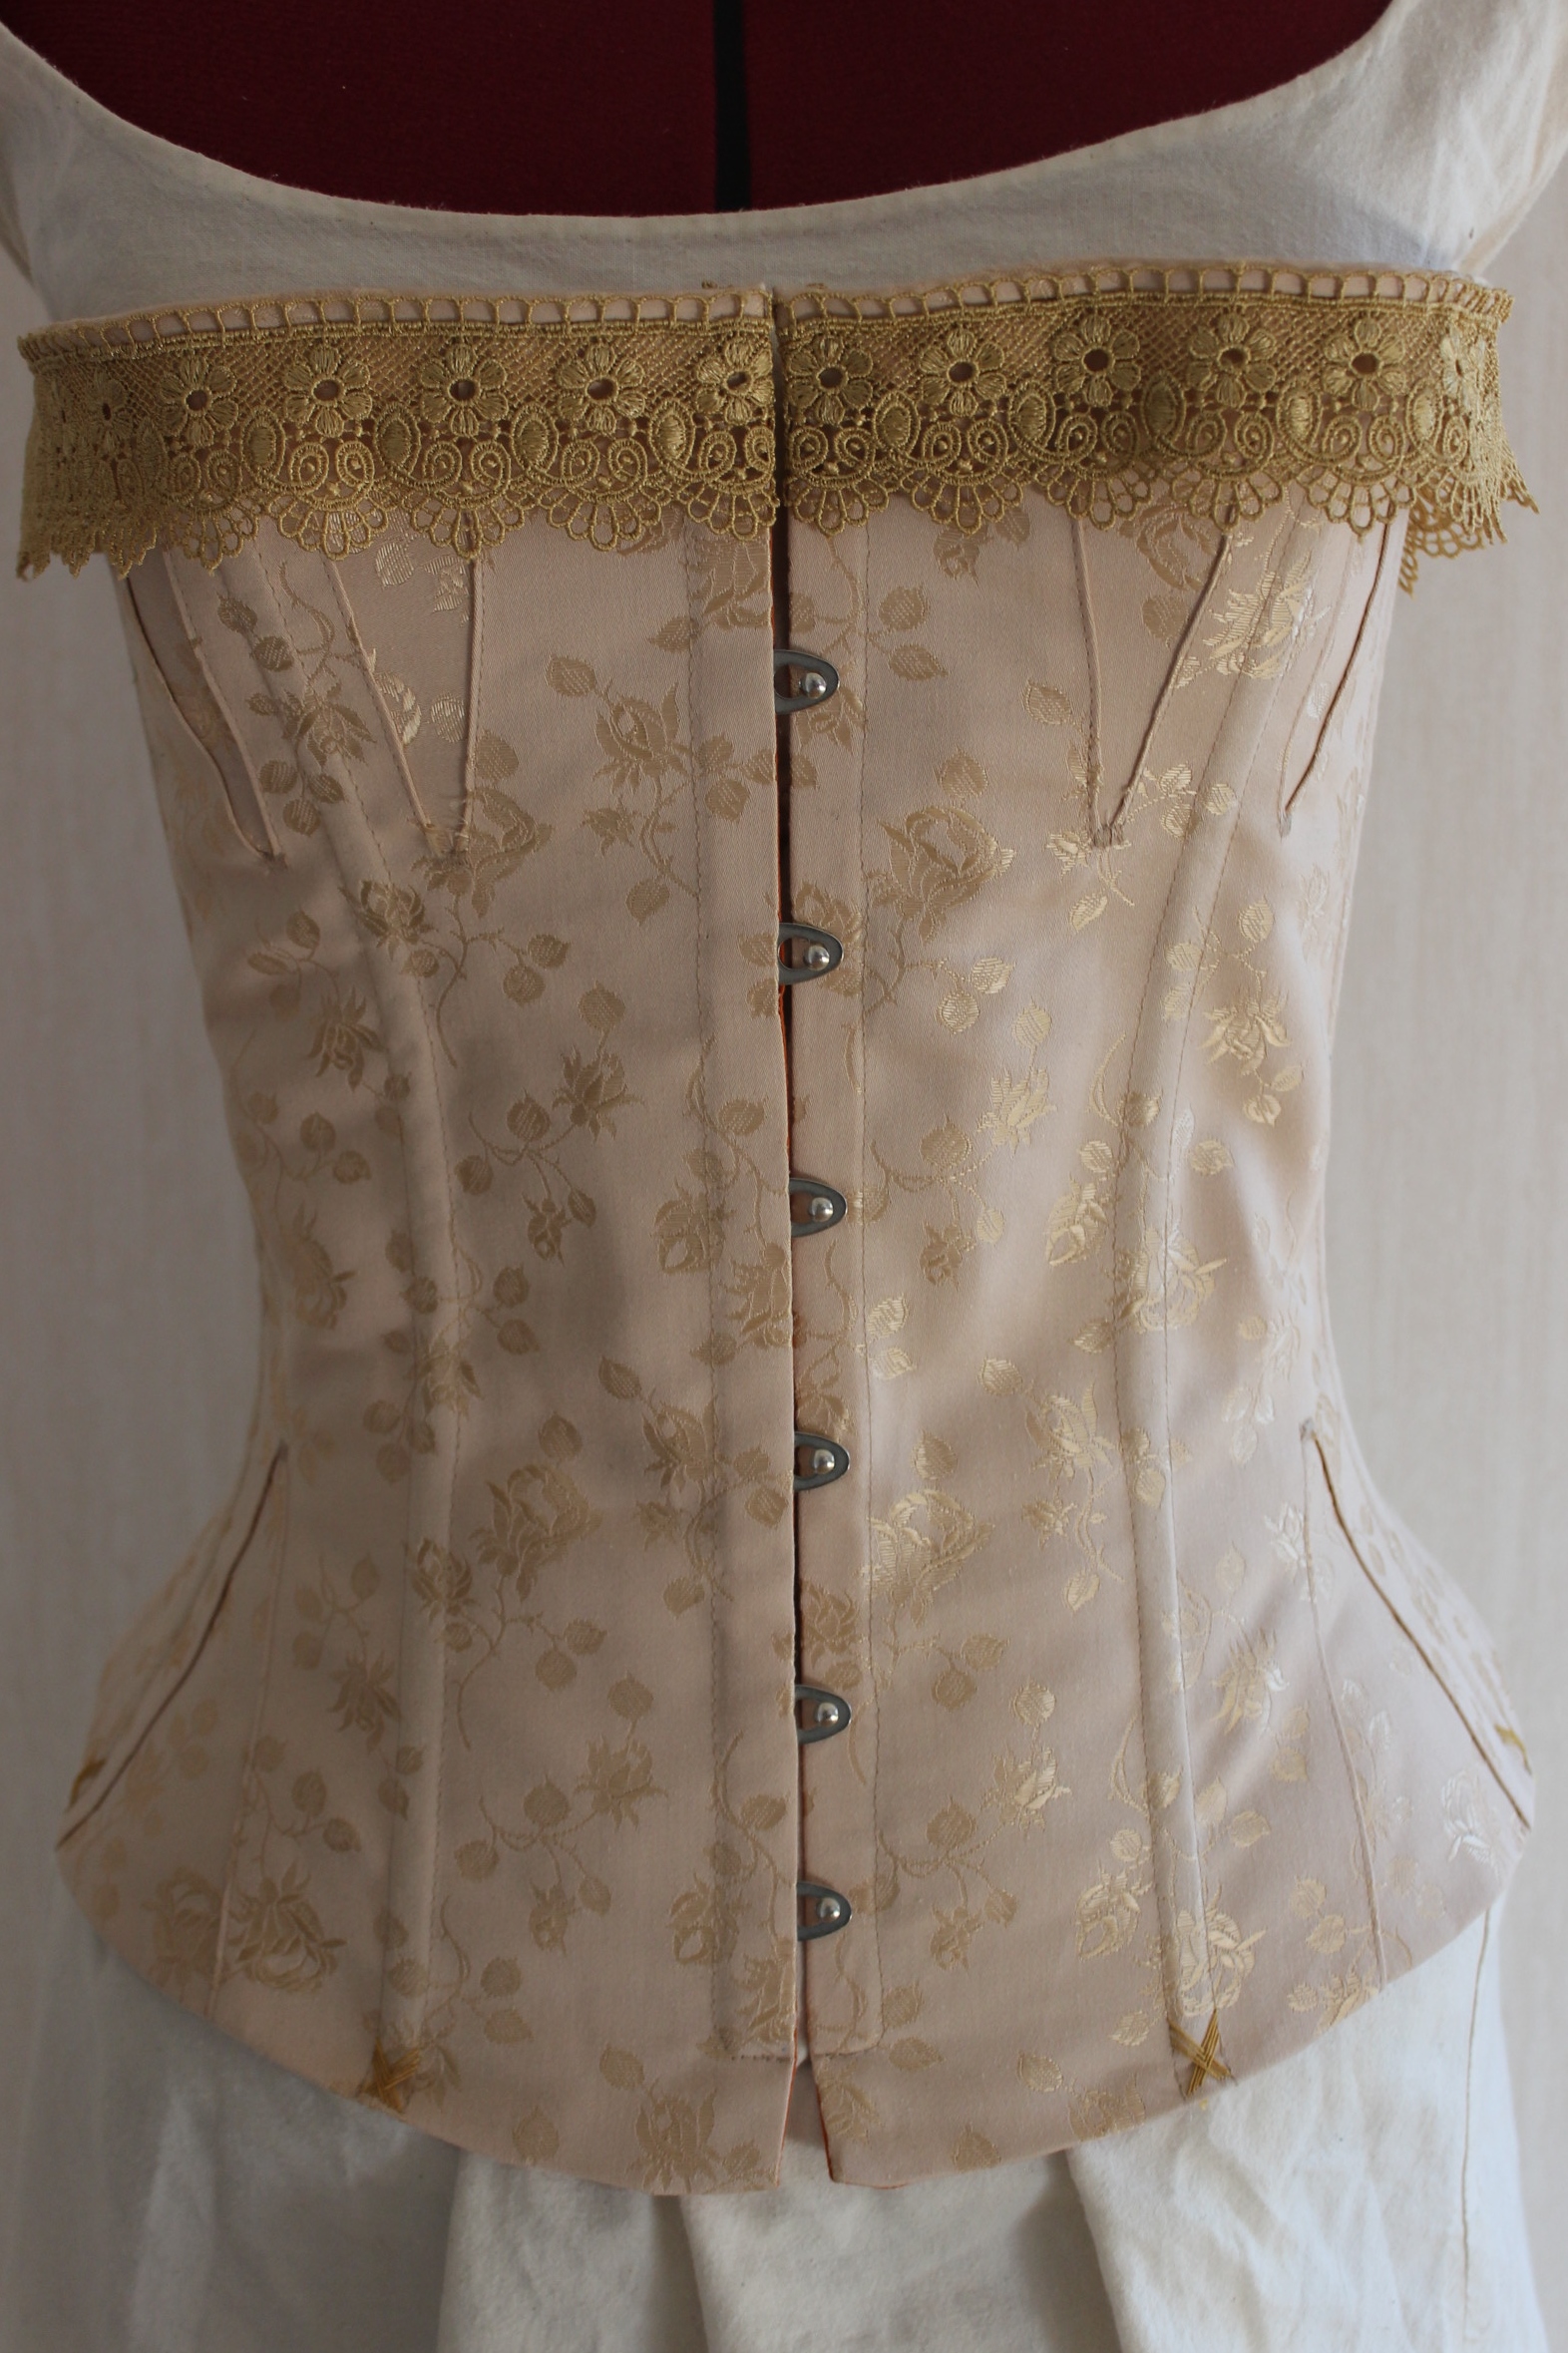
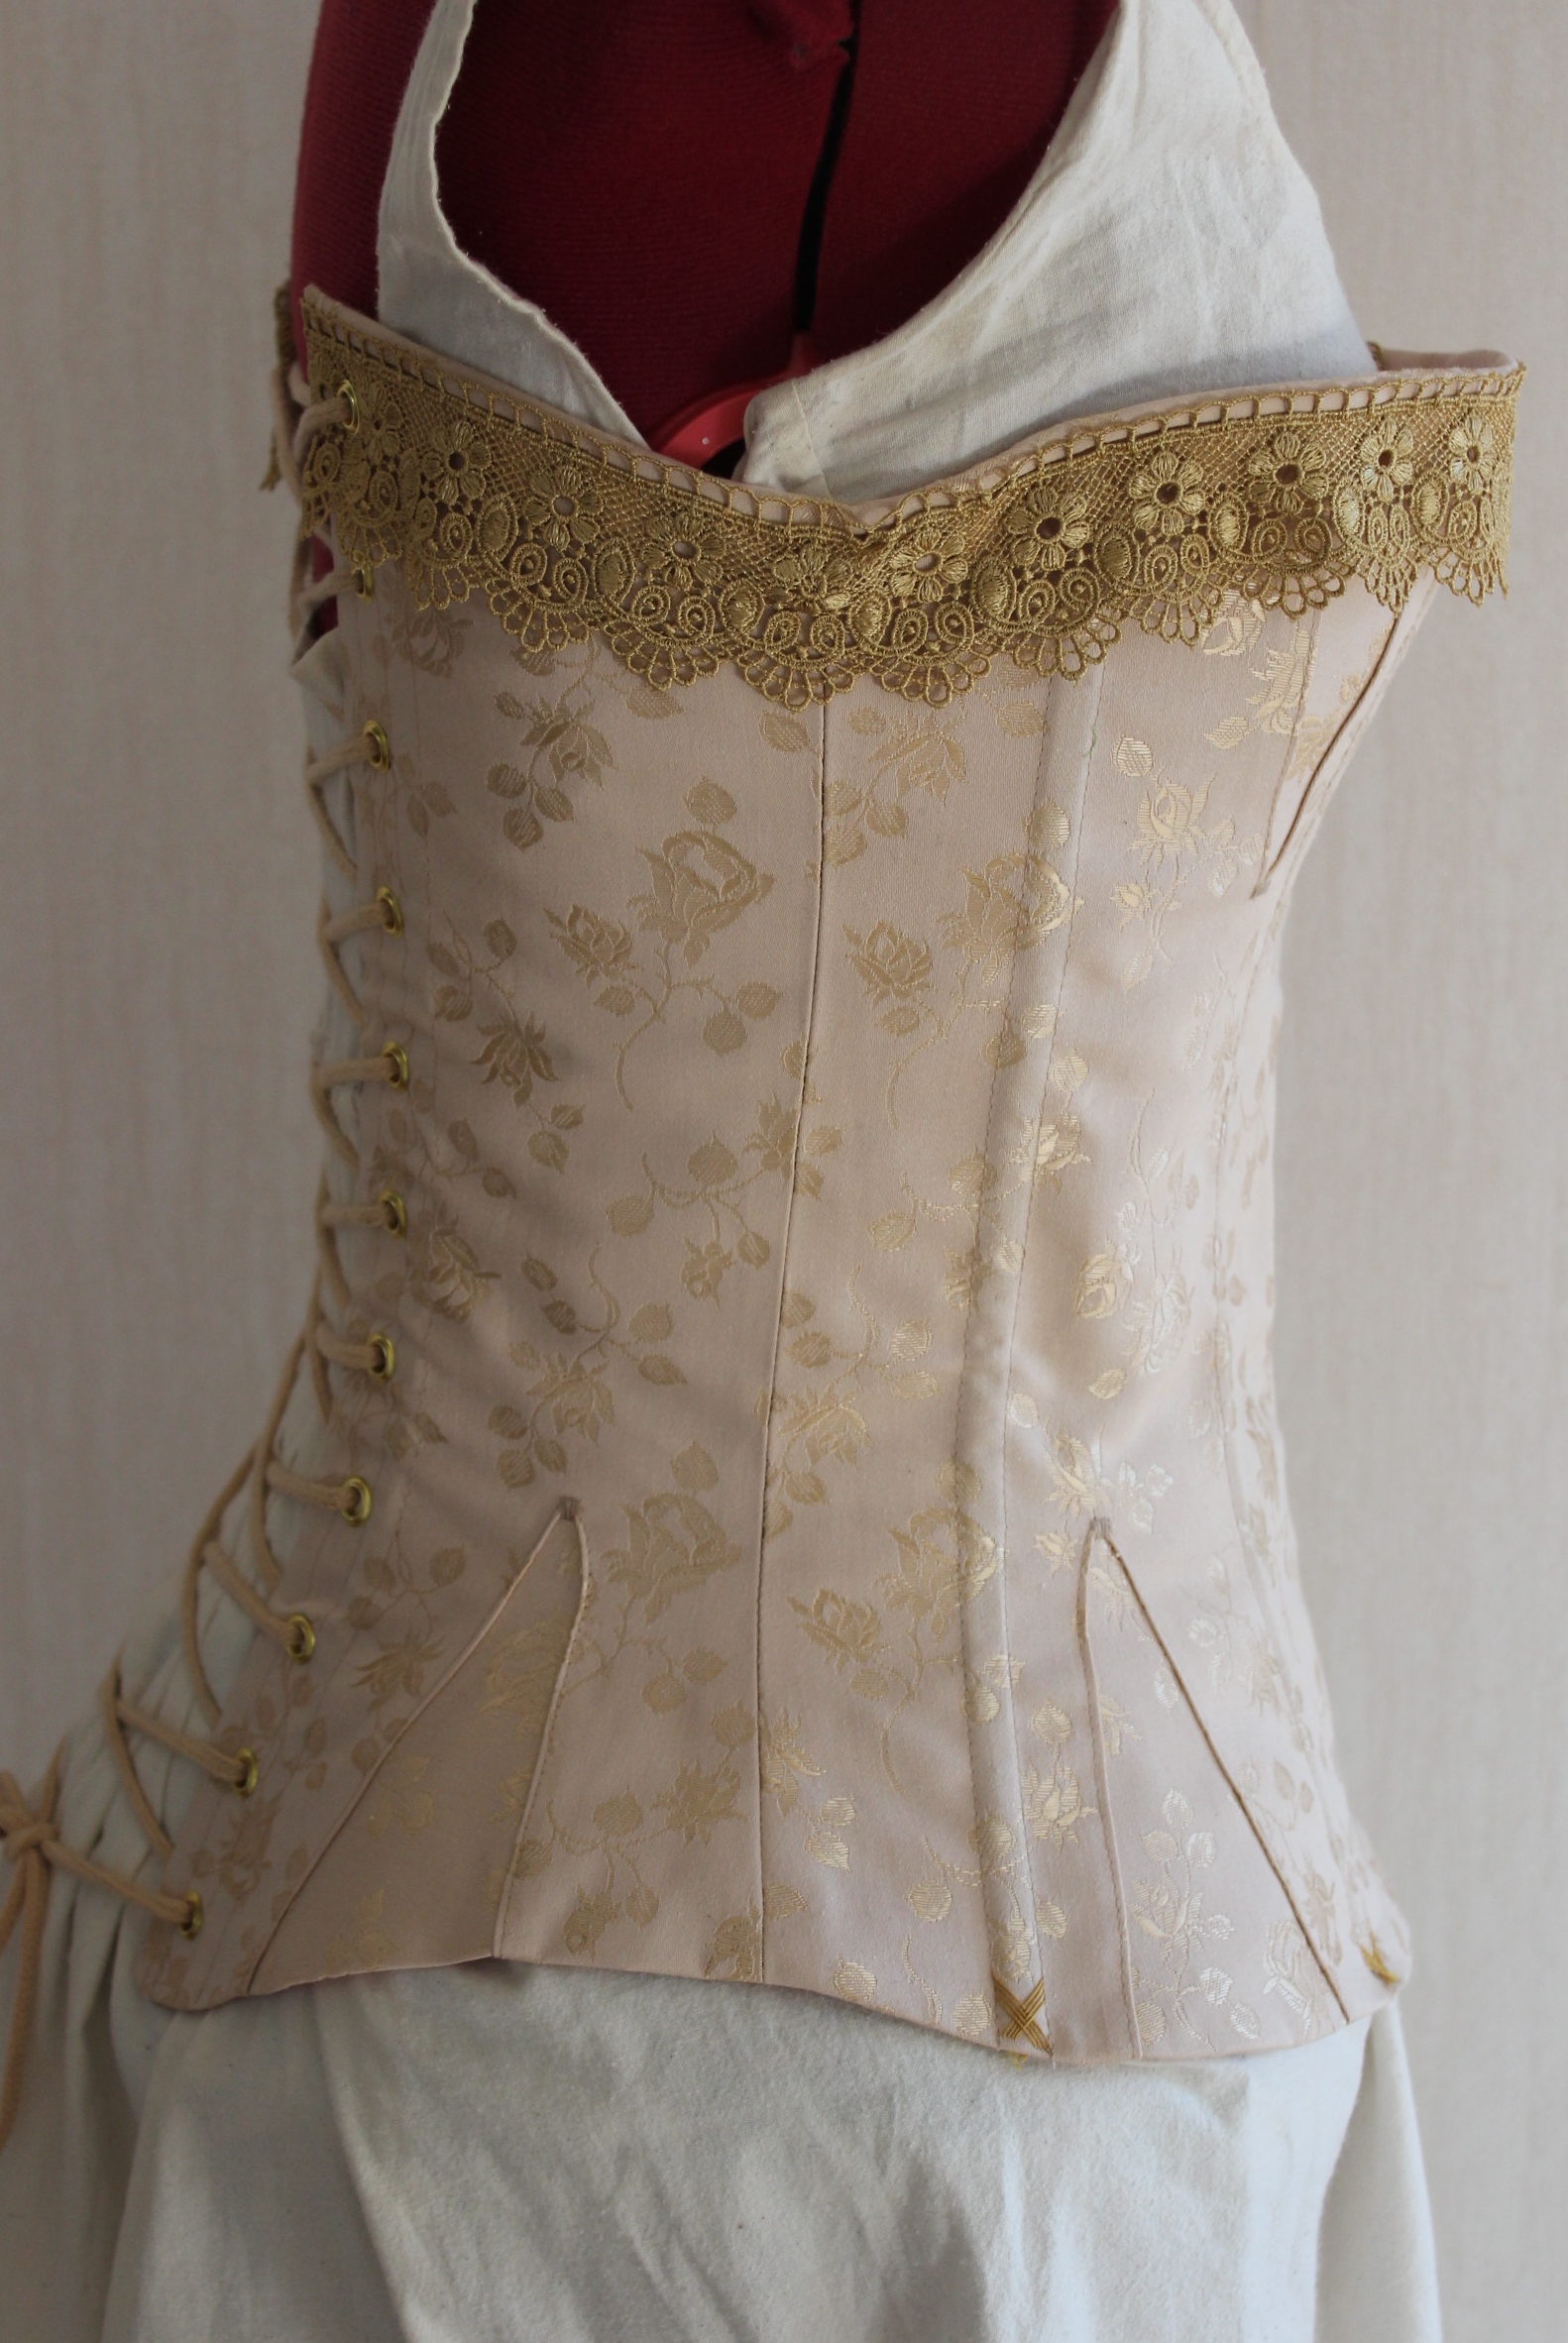
Using a beautiful cream/golden coutil from “Vena Cava designs”, and a orange cotton sheet for lining.
I sewed it up in the same way as my sisters (but I didn’t need any additional alterations), so it went faster.
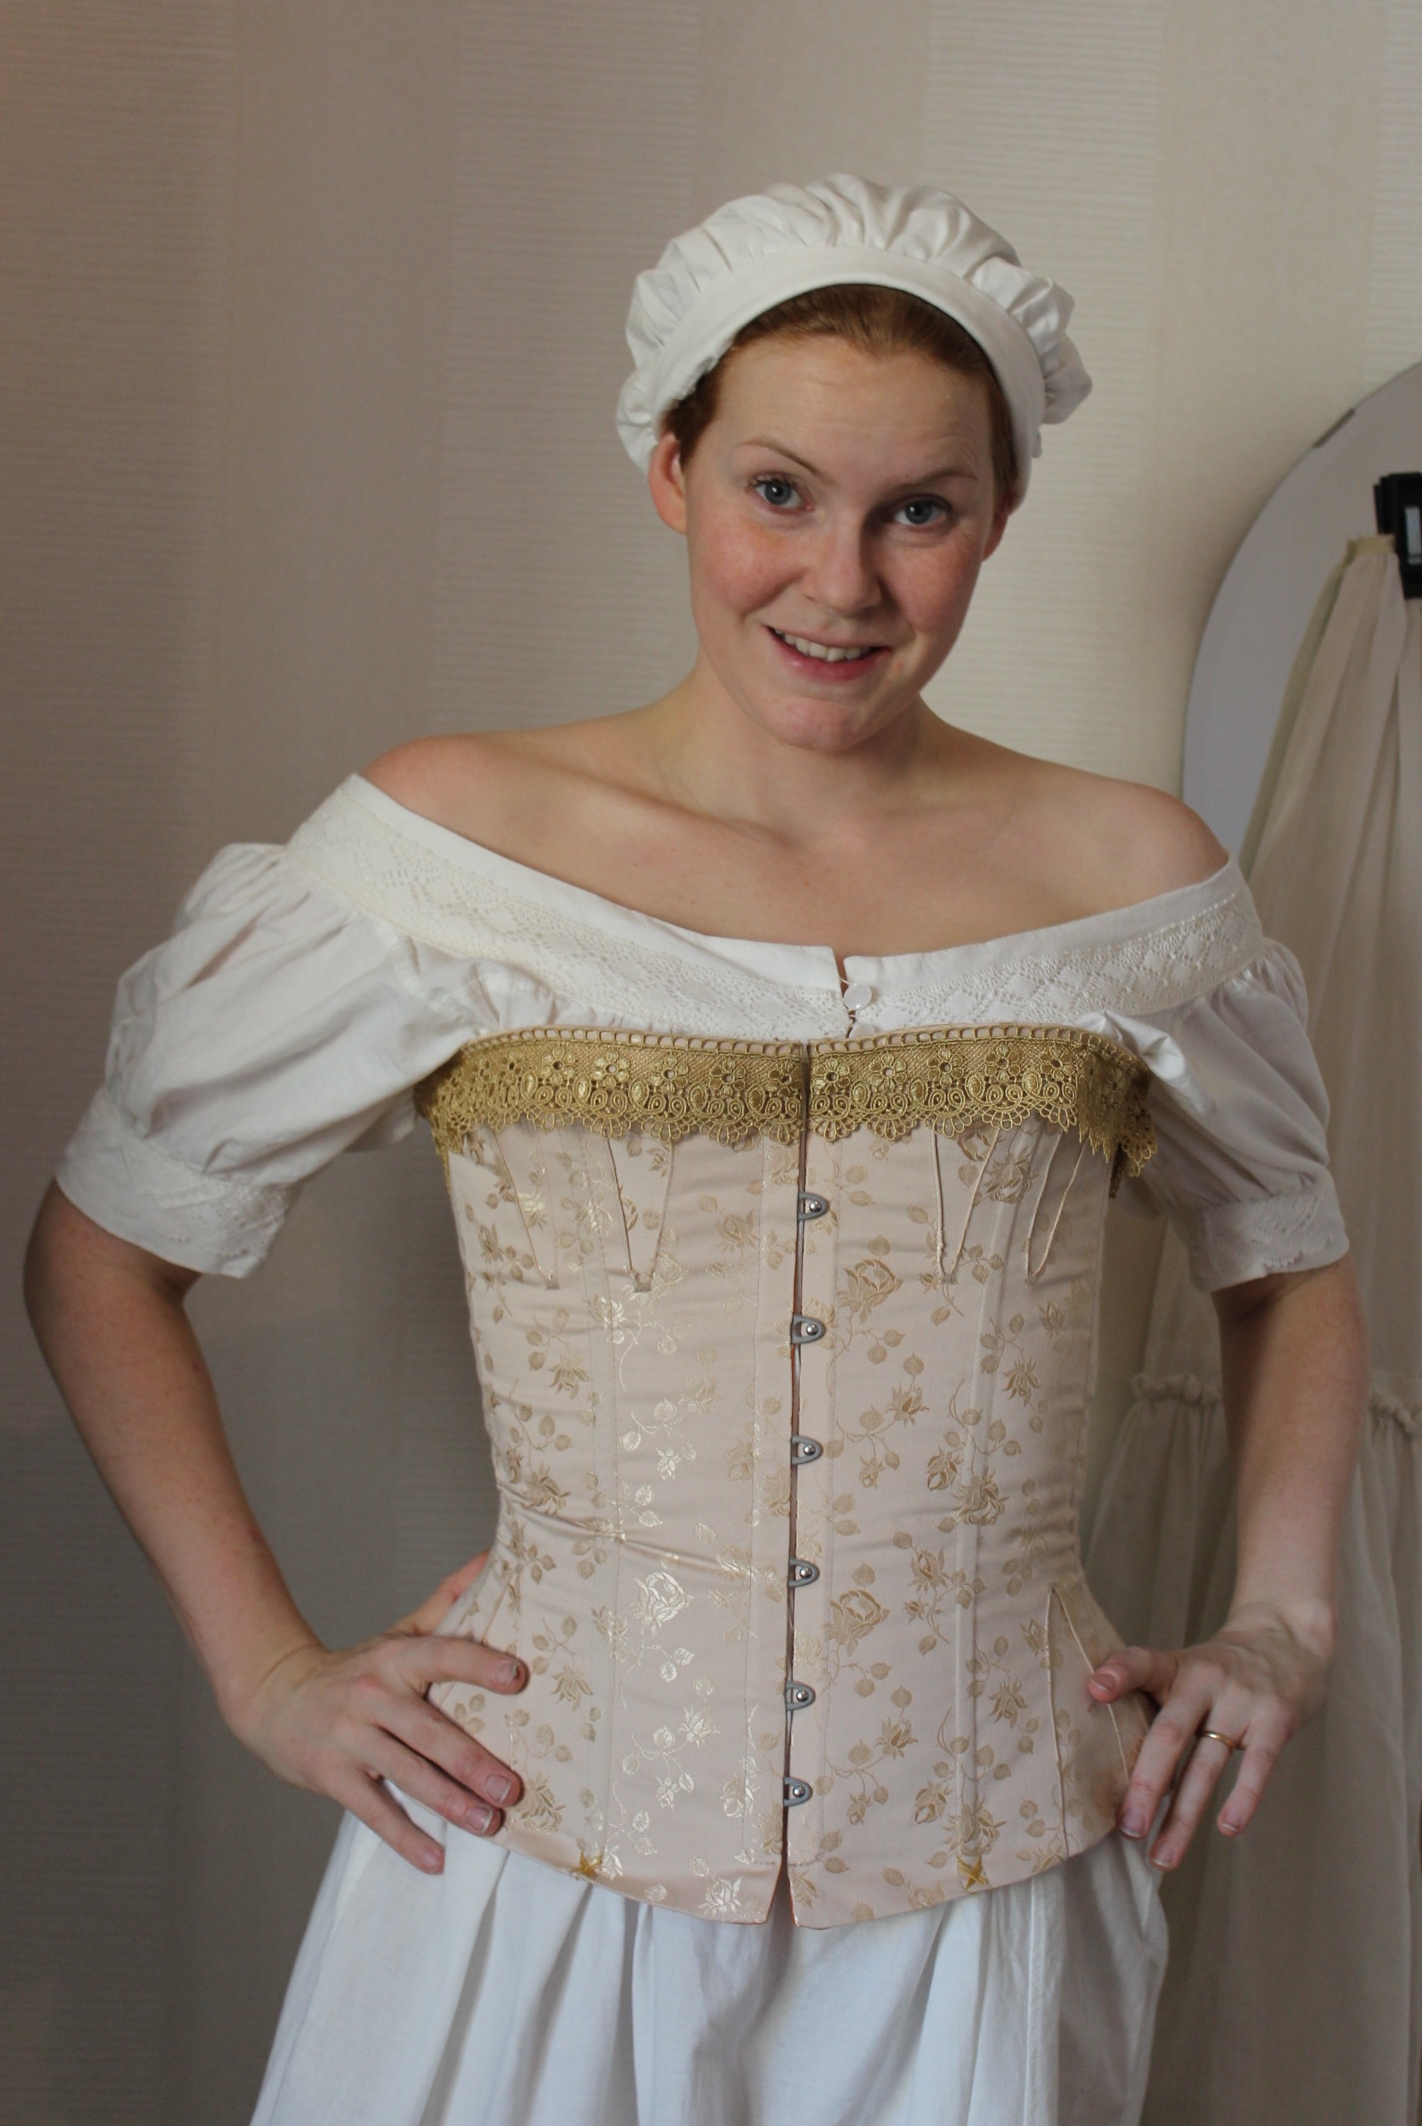
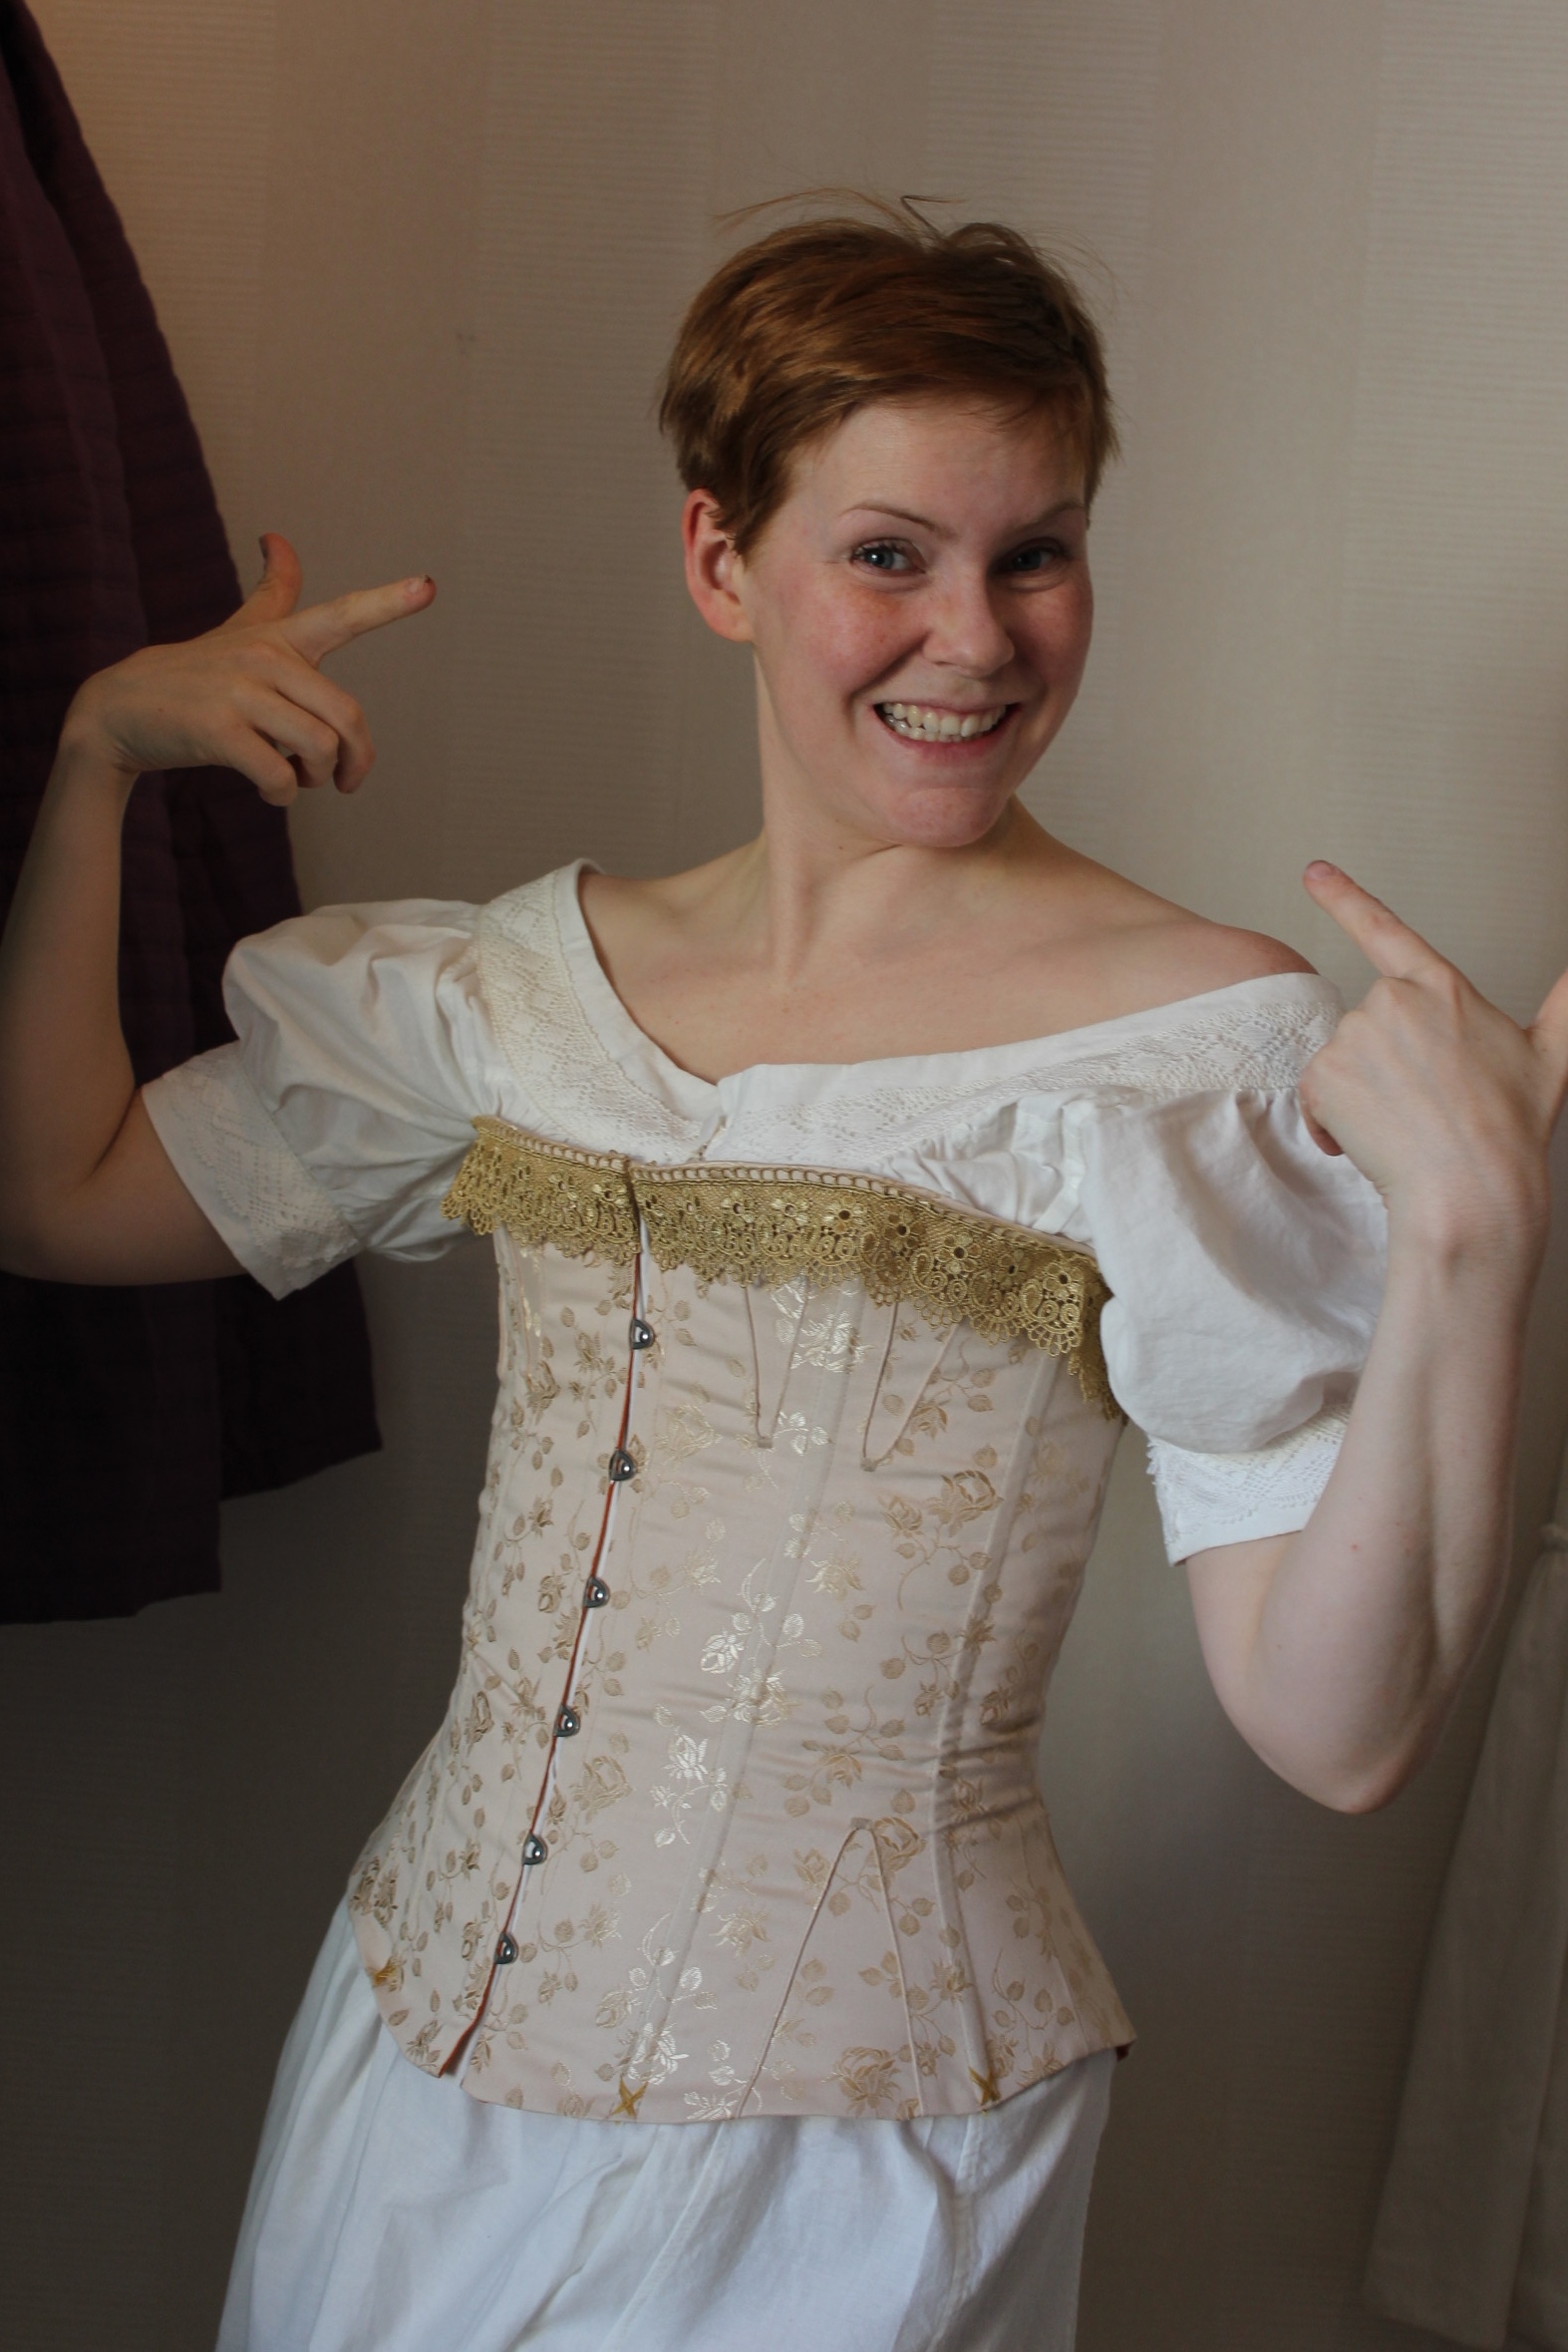
 Attaching the busk to the beautiful golden fabric
Oh, how I wished I’ve gotten the tad more expensive golden busk on my last order.
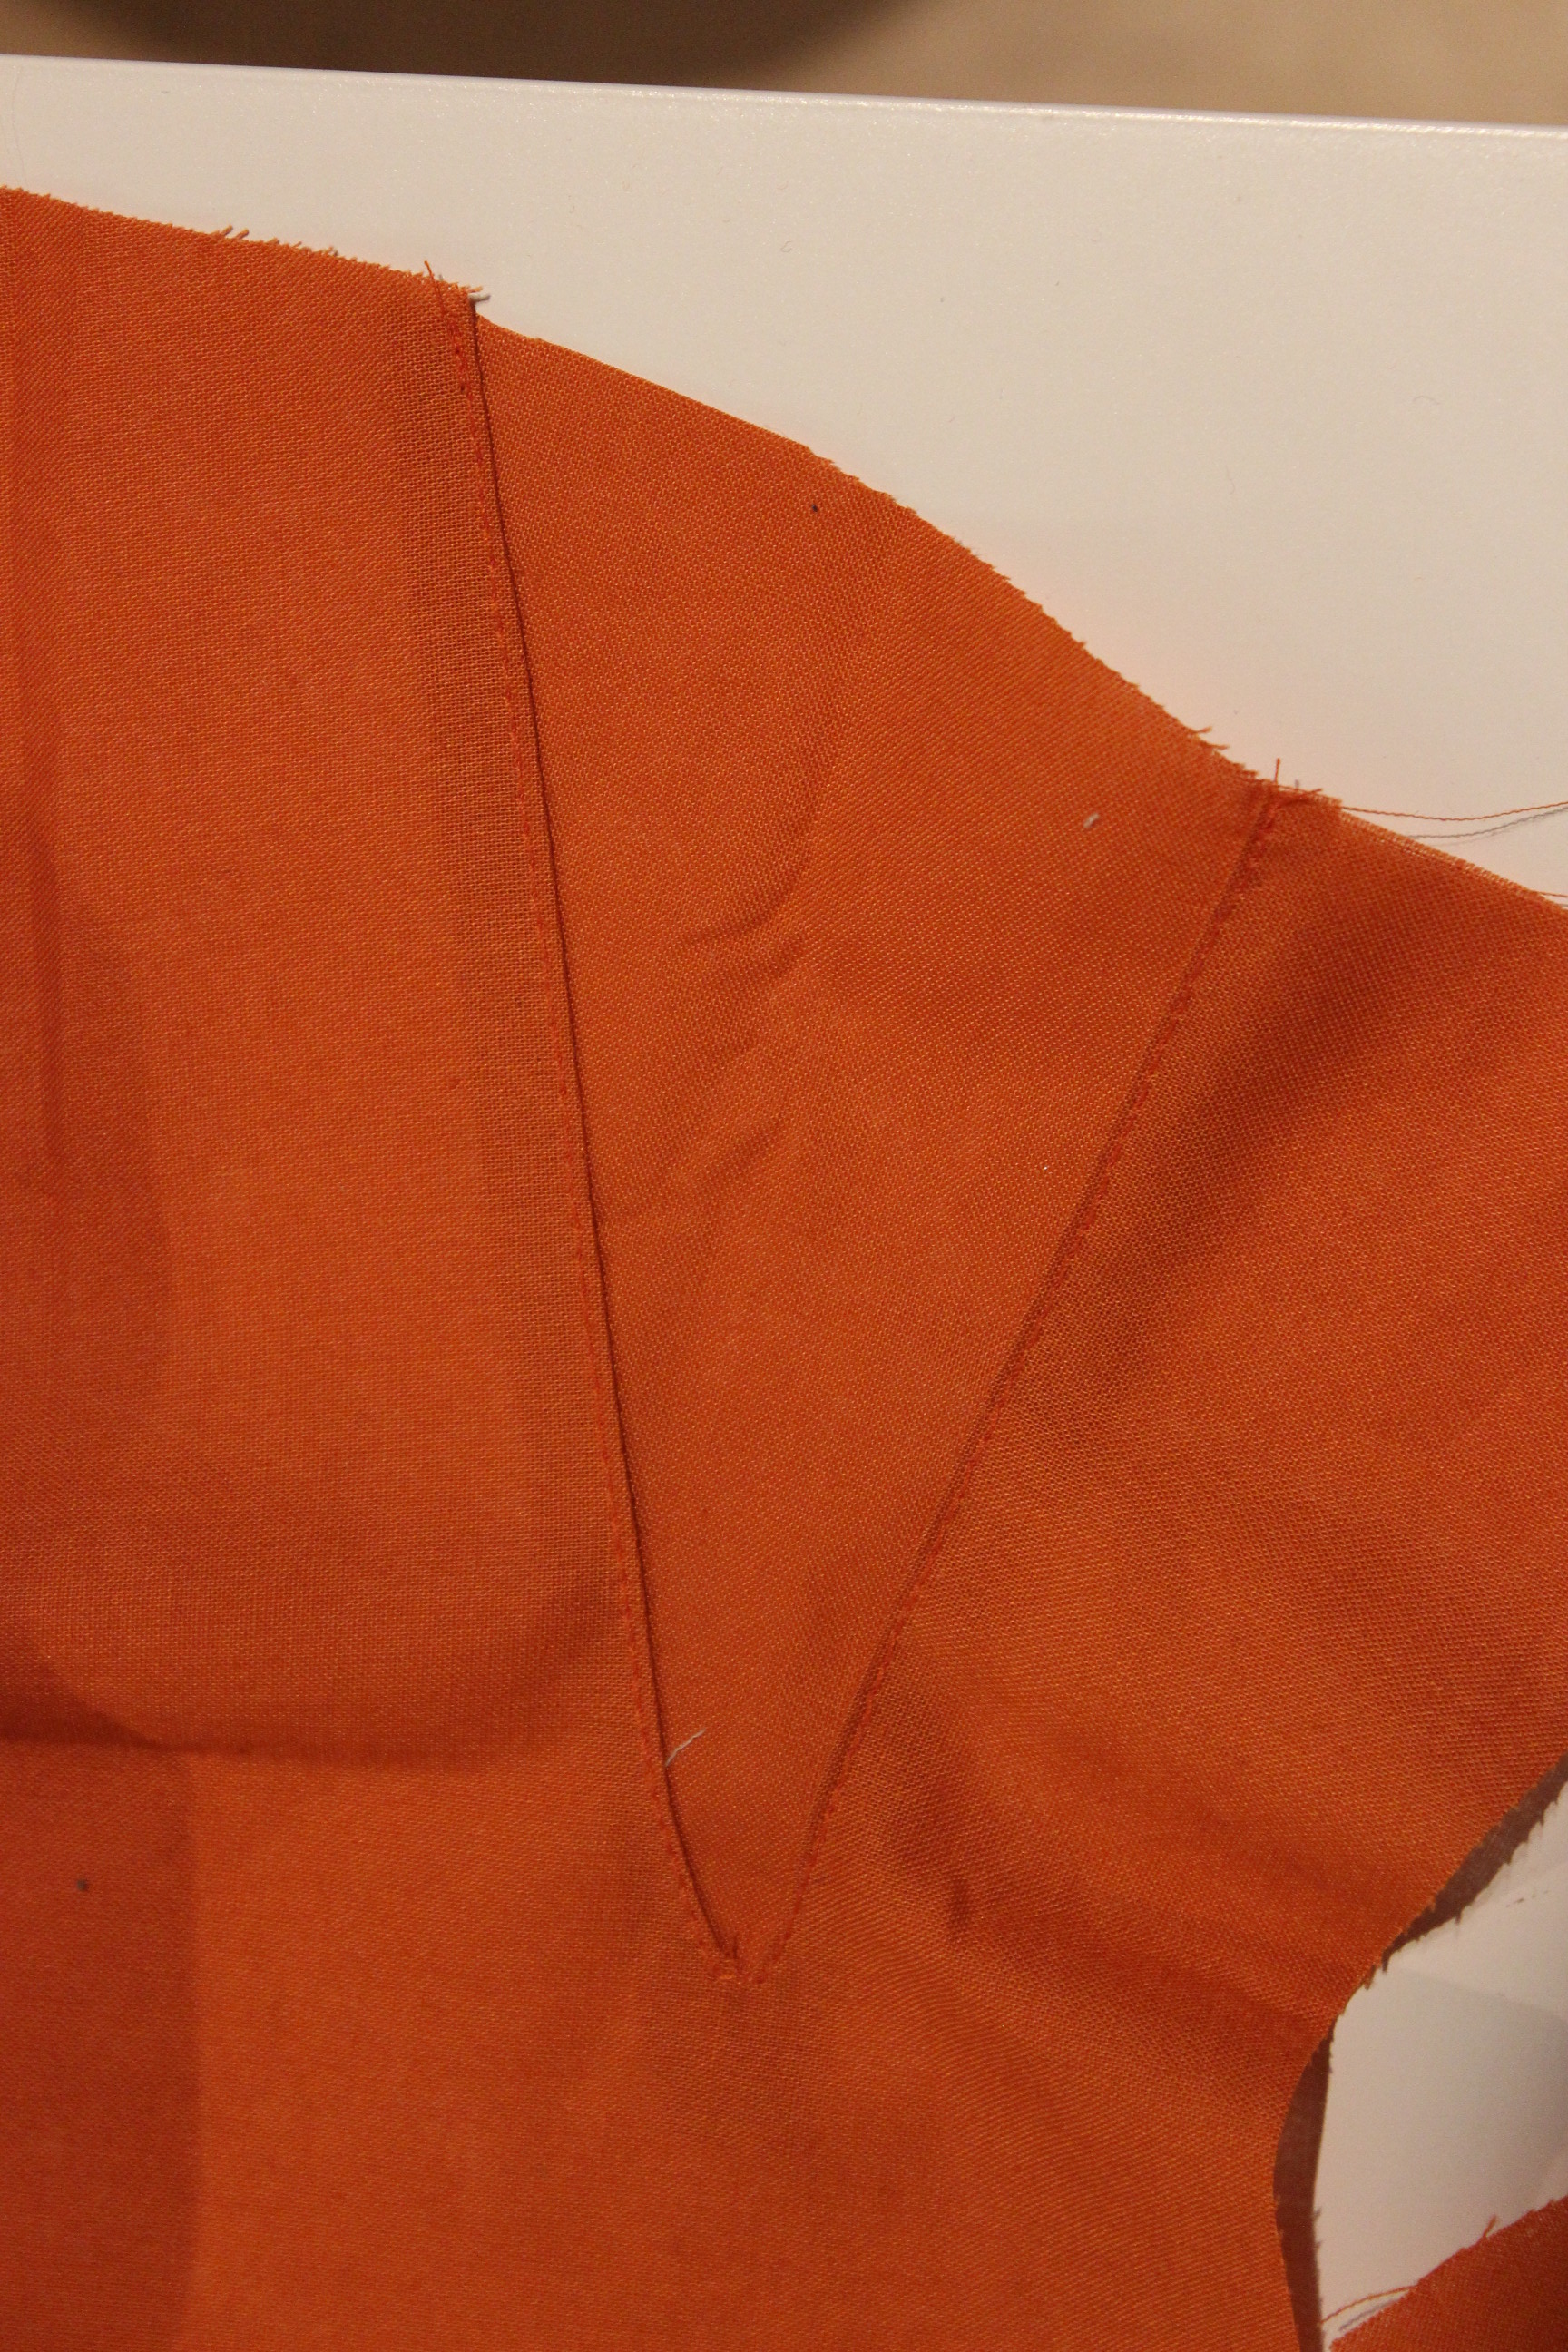
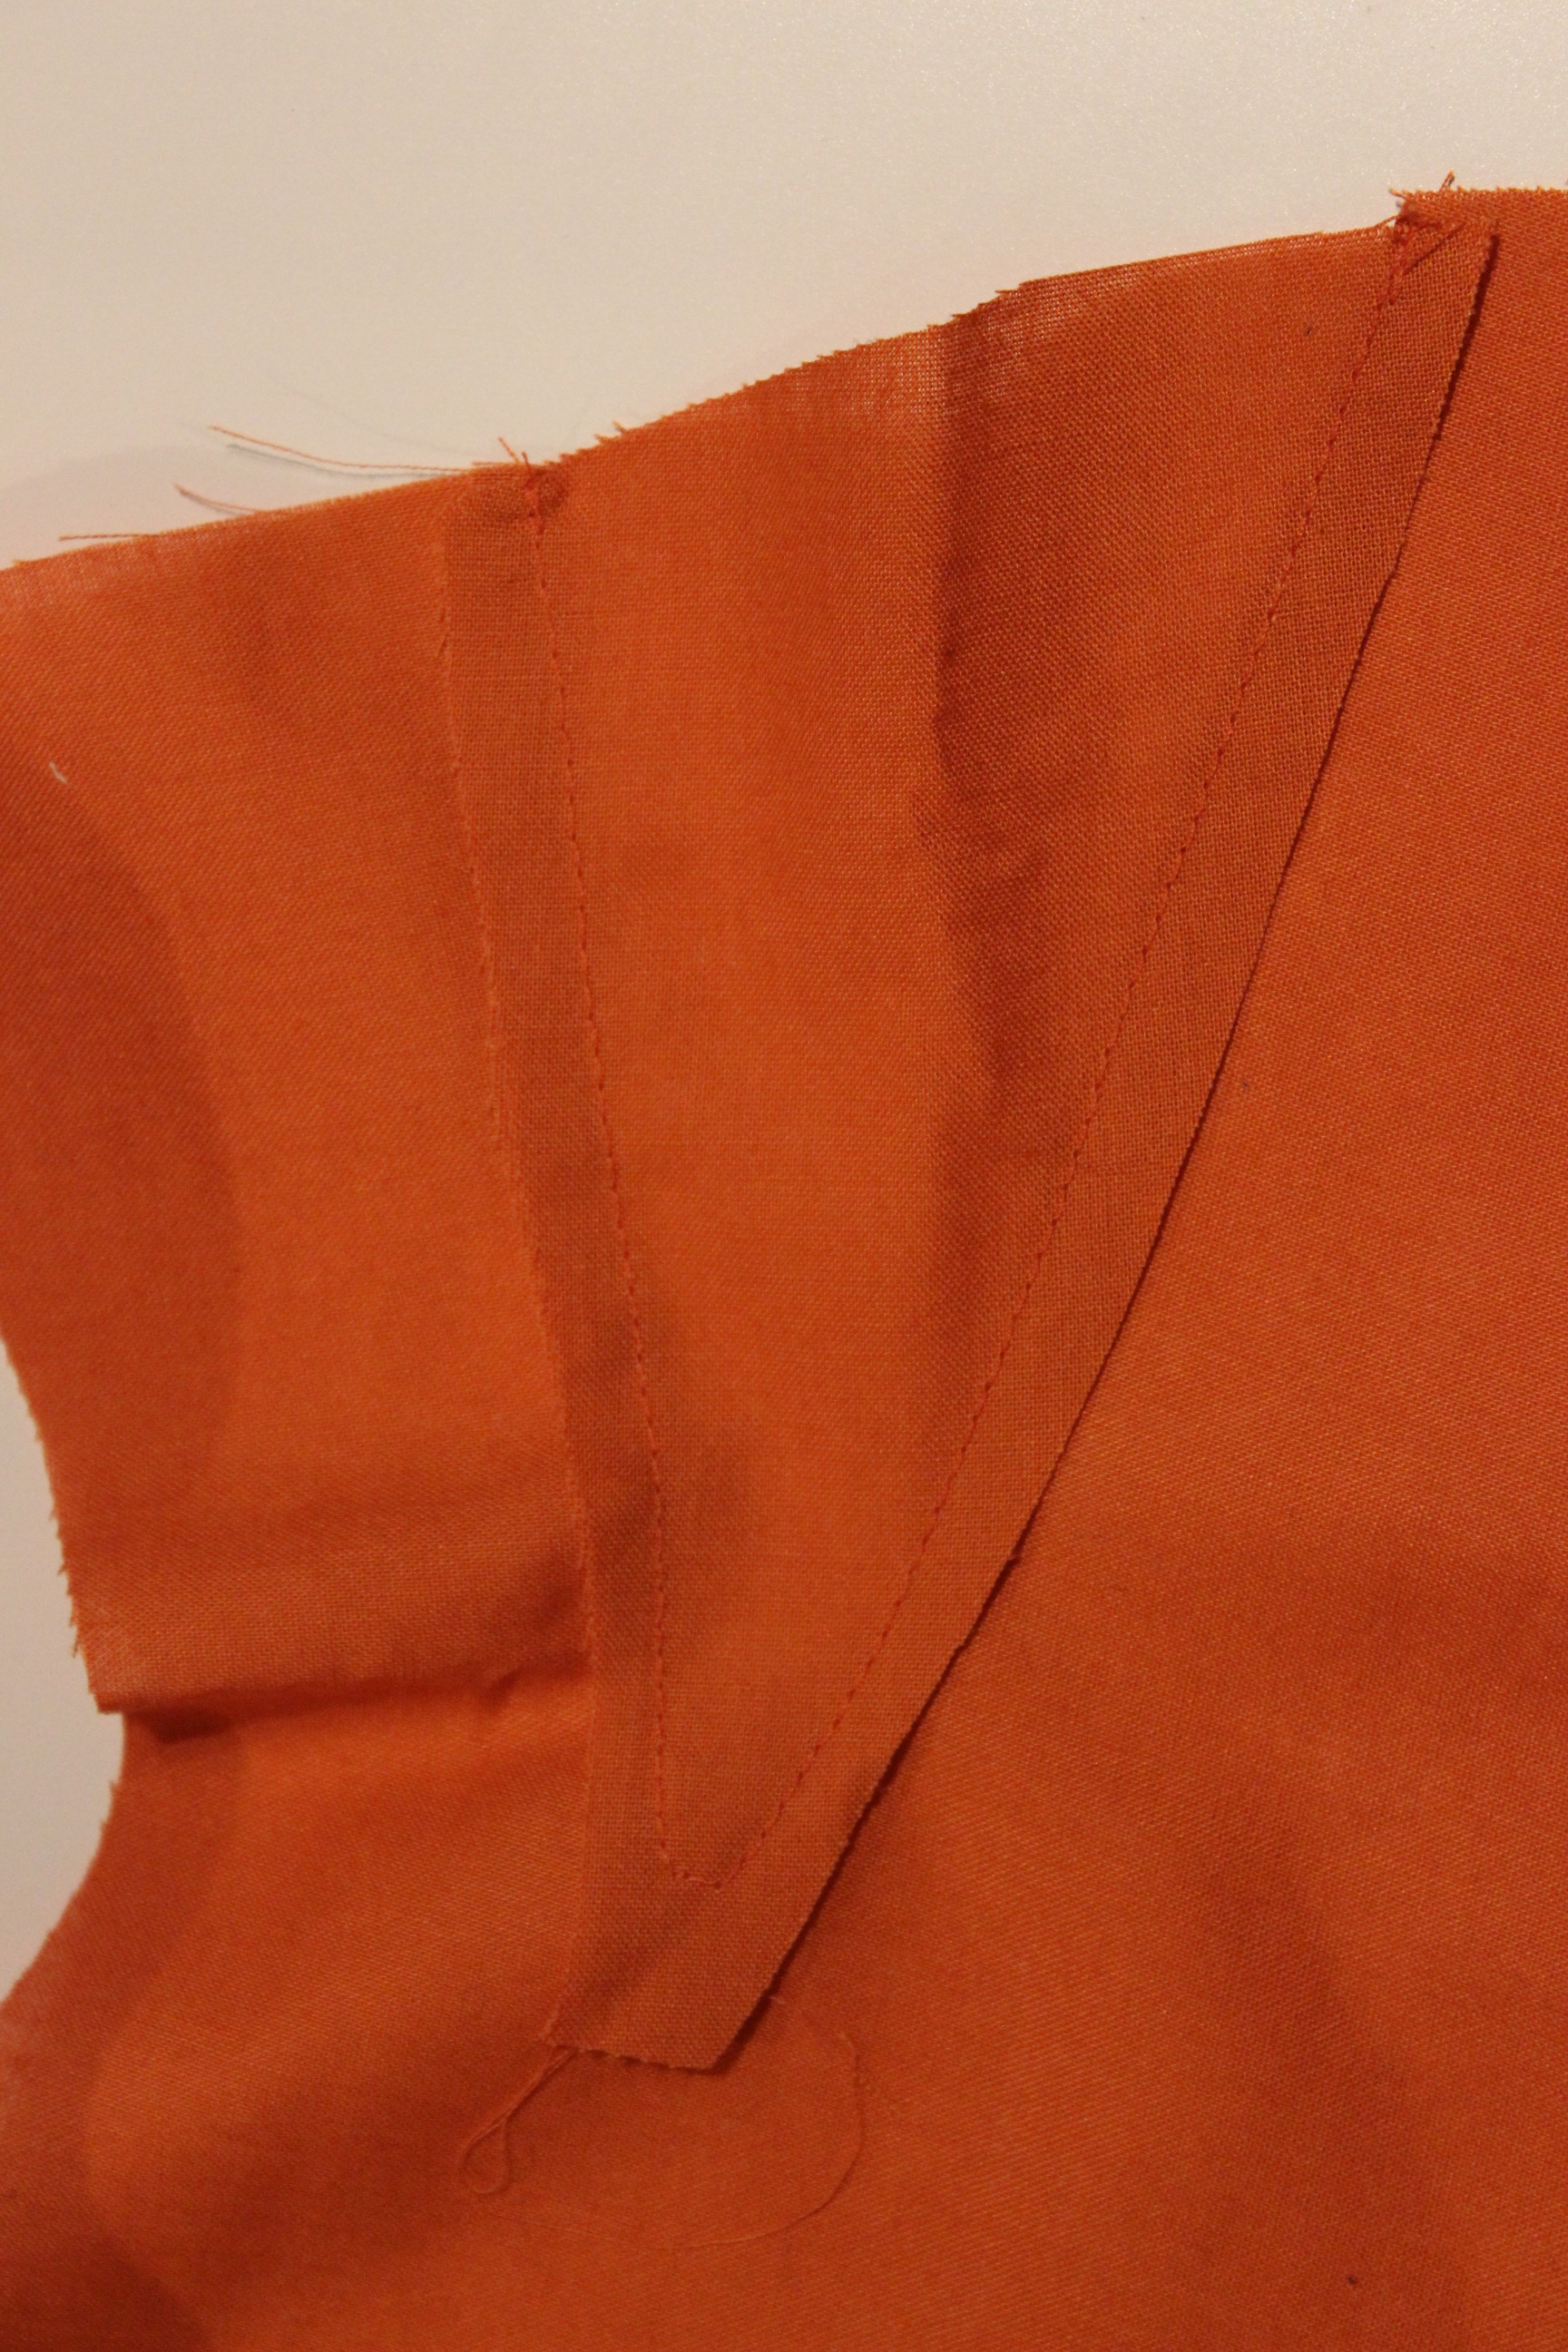
Front and back of the guessets
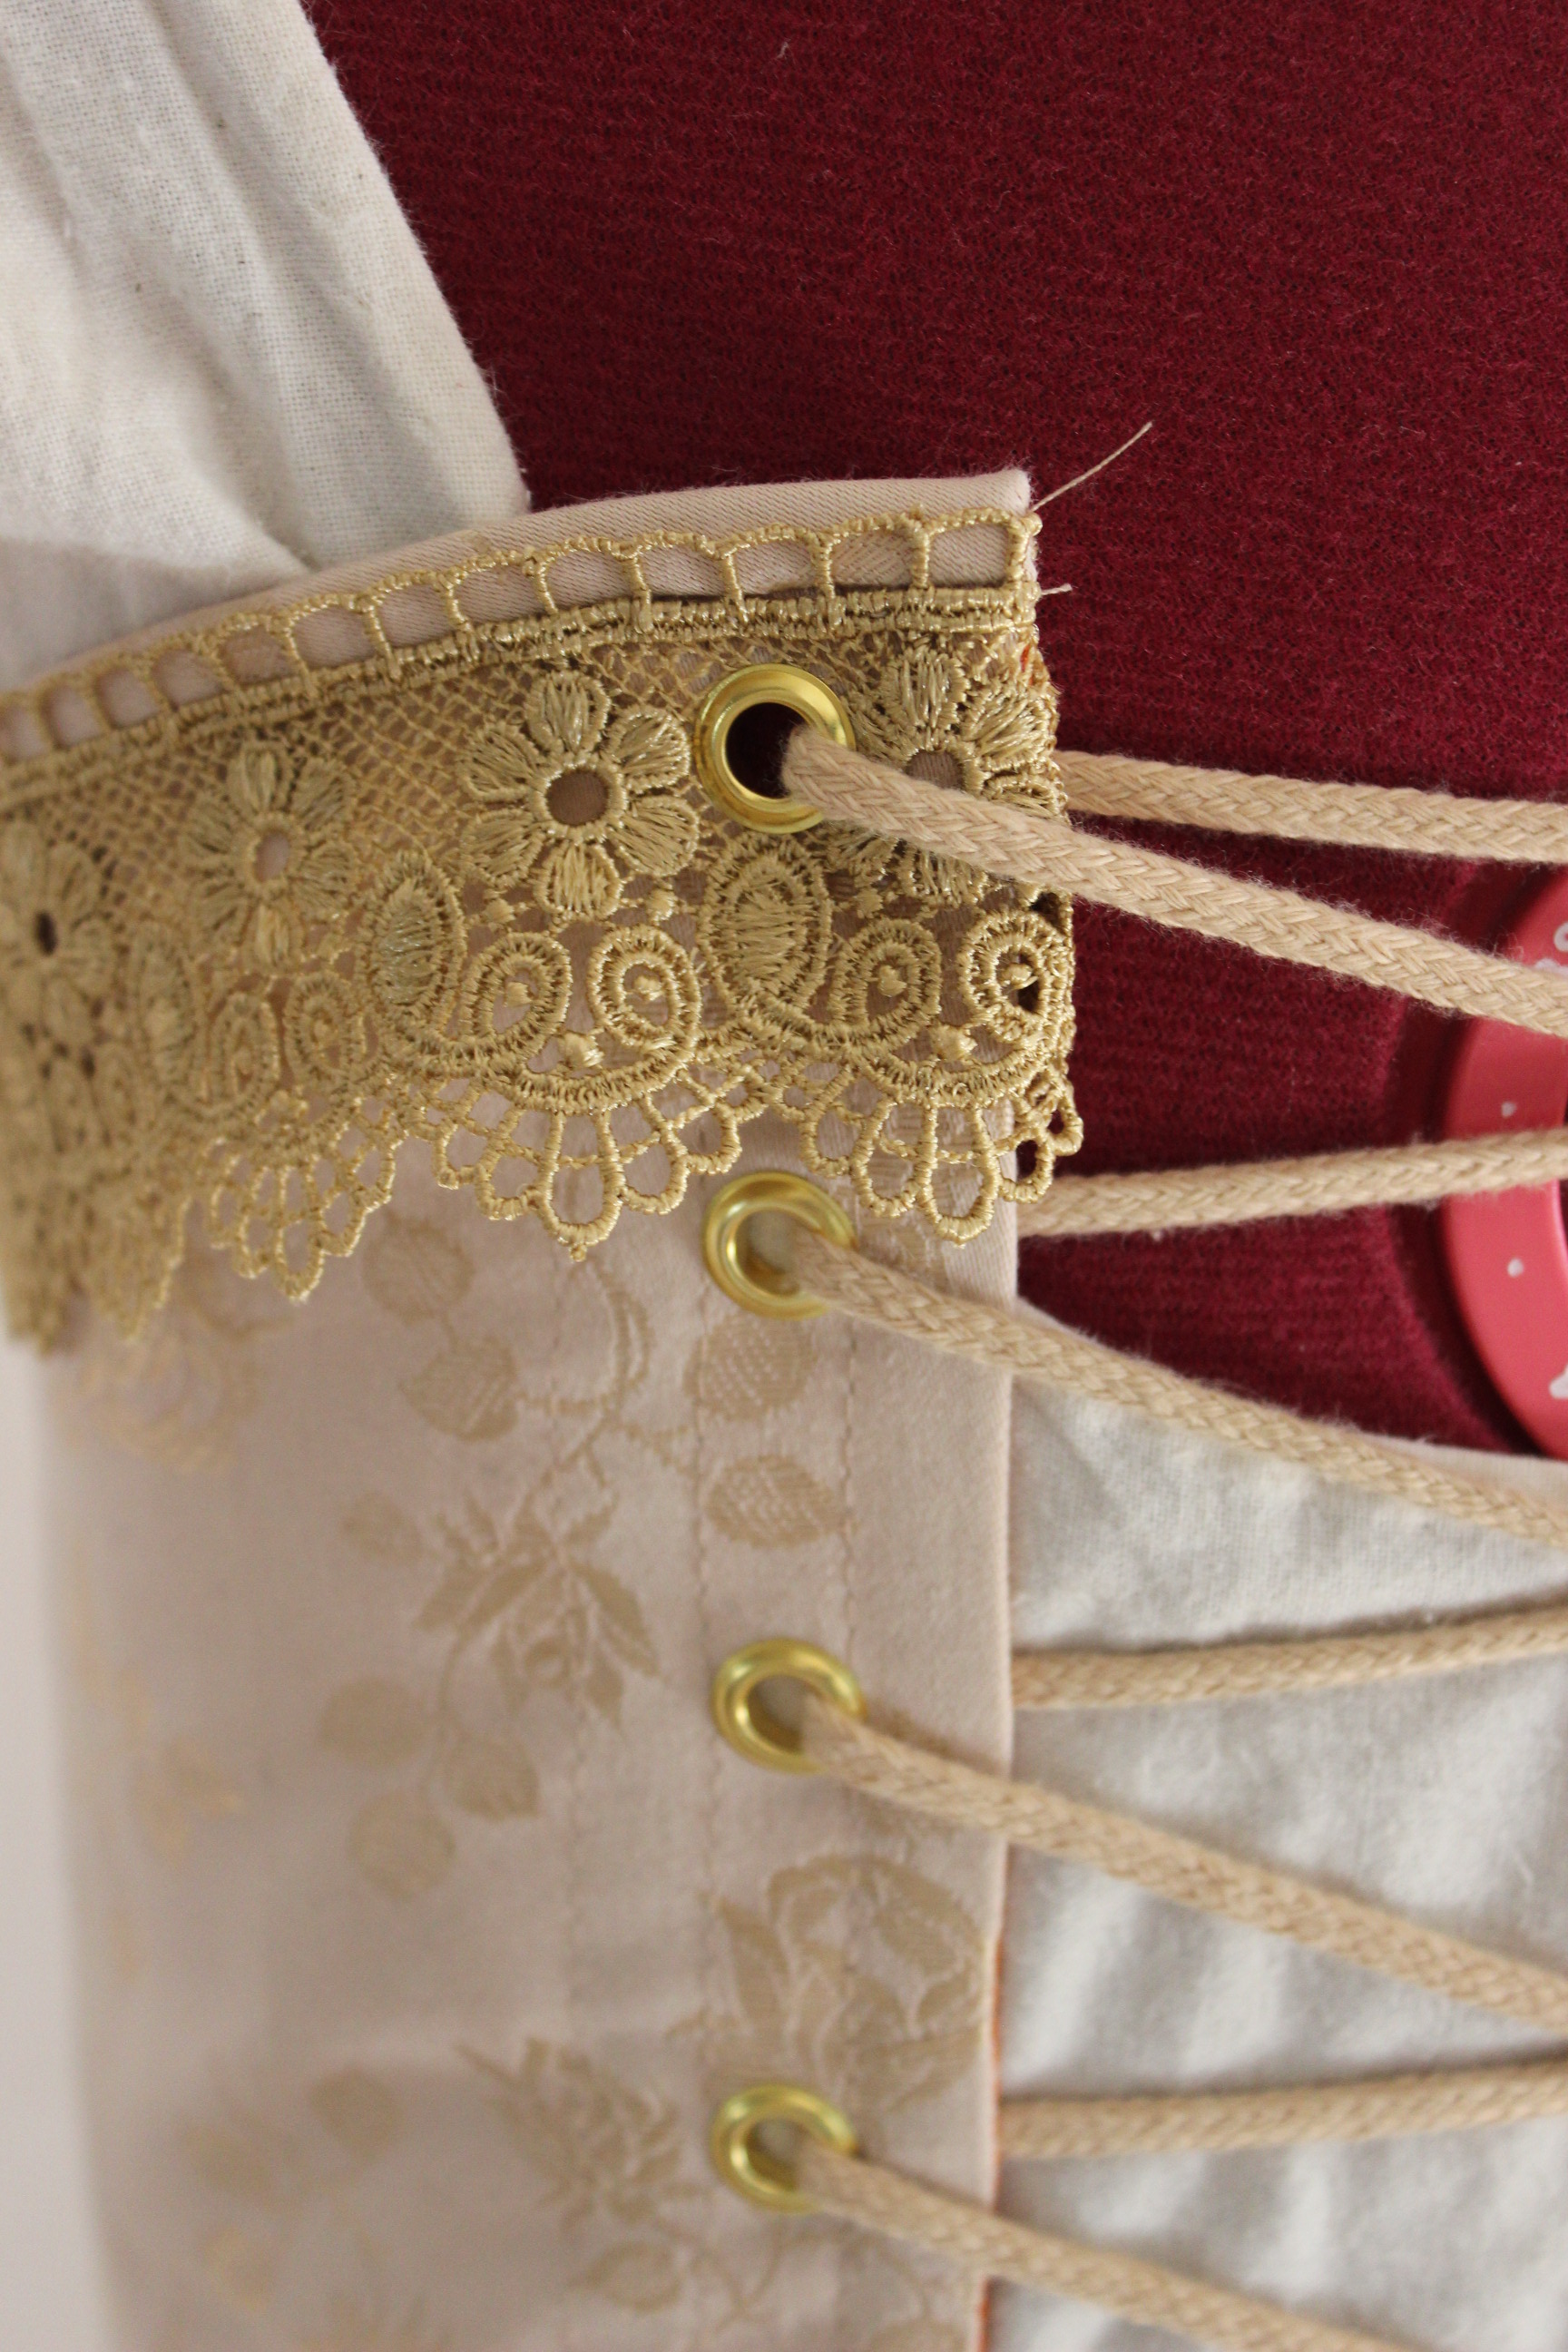
I stitched the whole thing together, adding bone casings, grommets and bones. I made my own bias tape using pieces of main fabric and used it to bind the top edge.
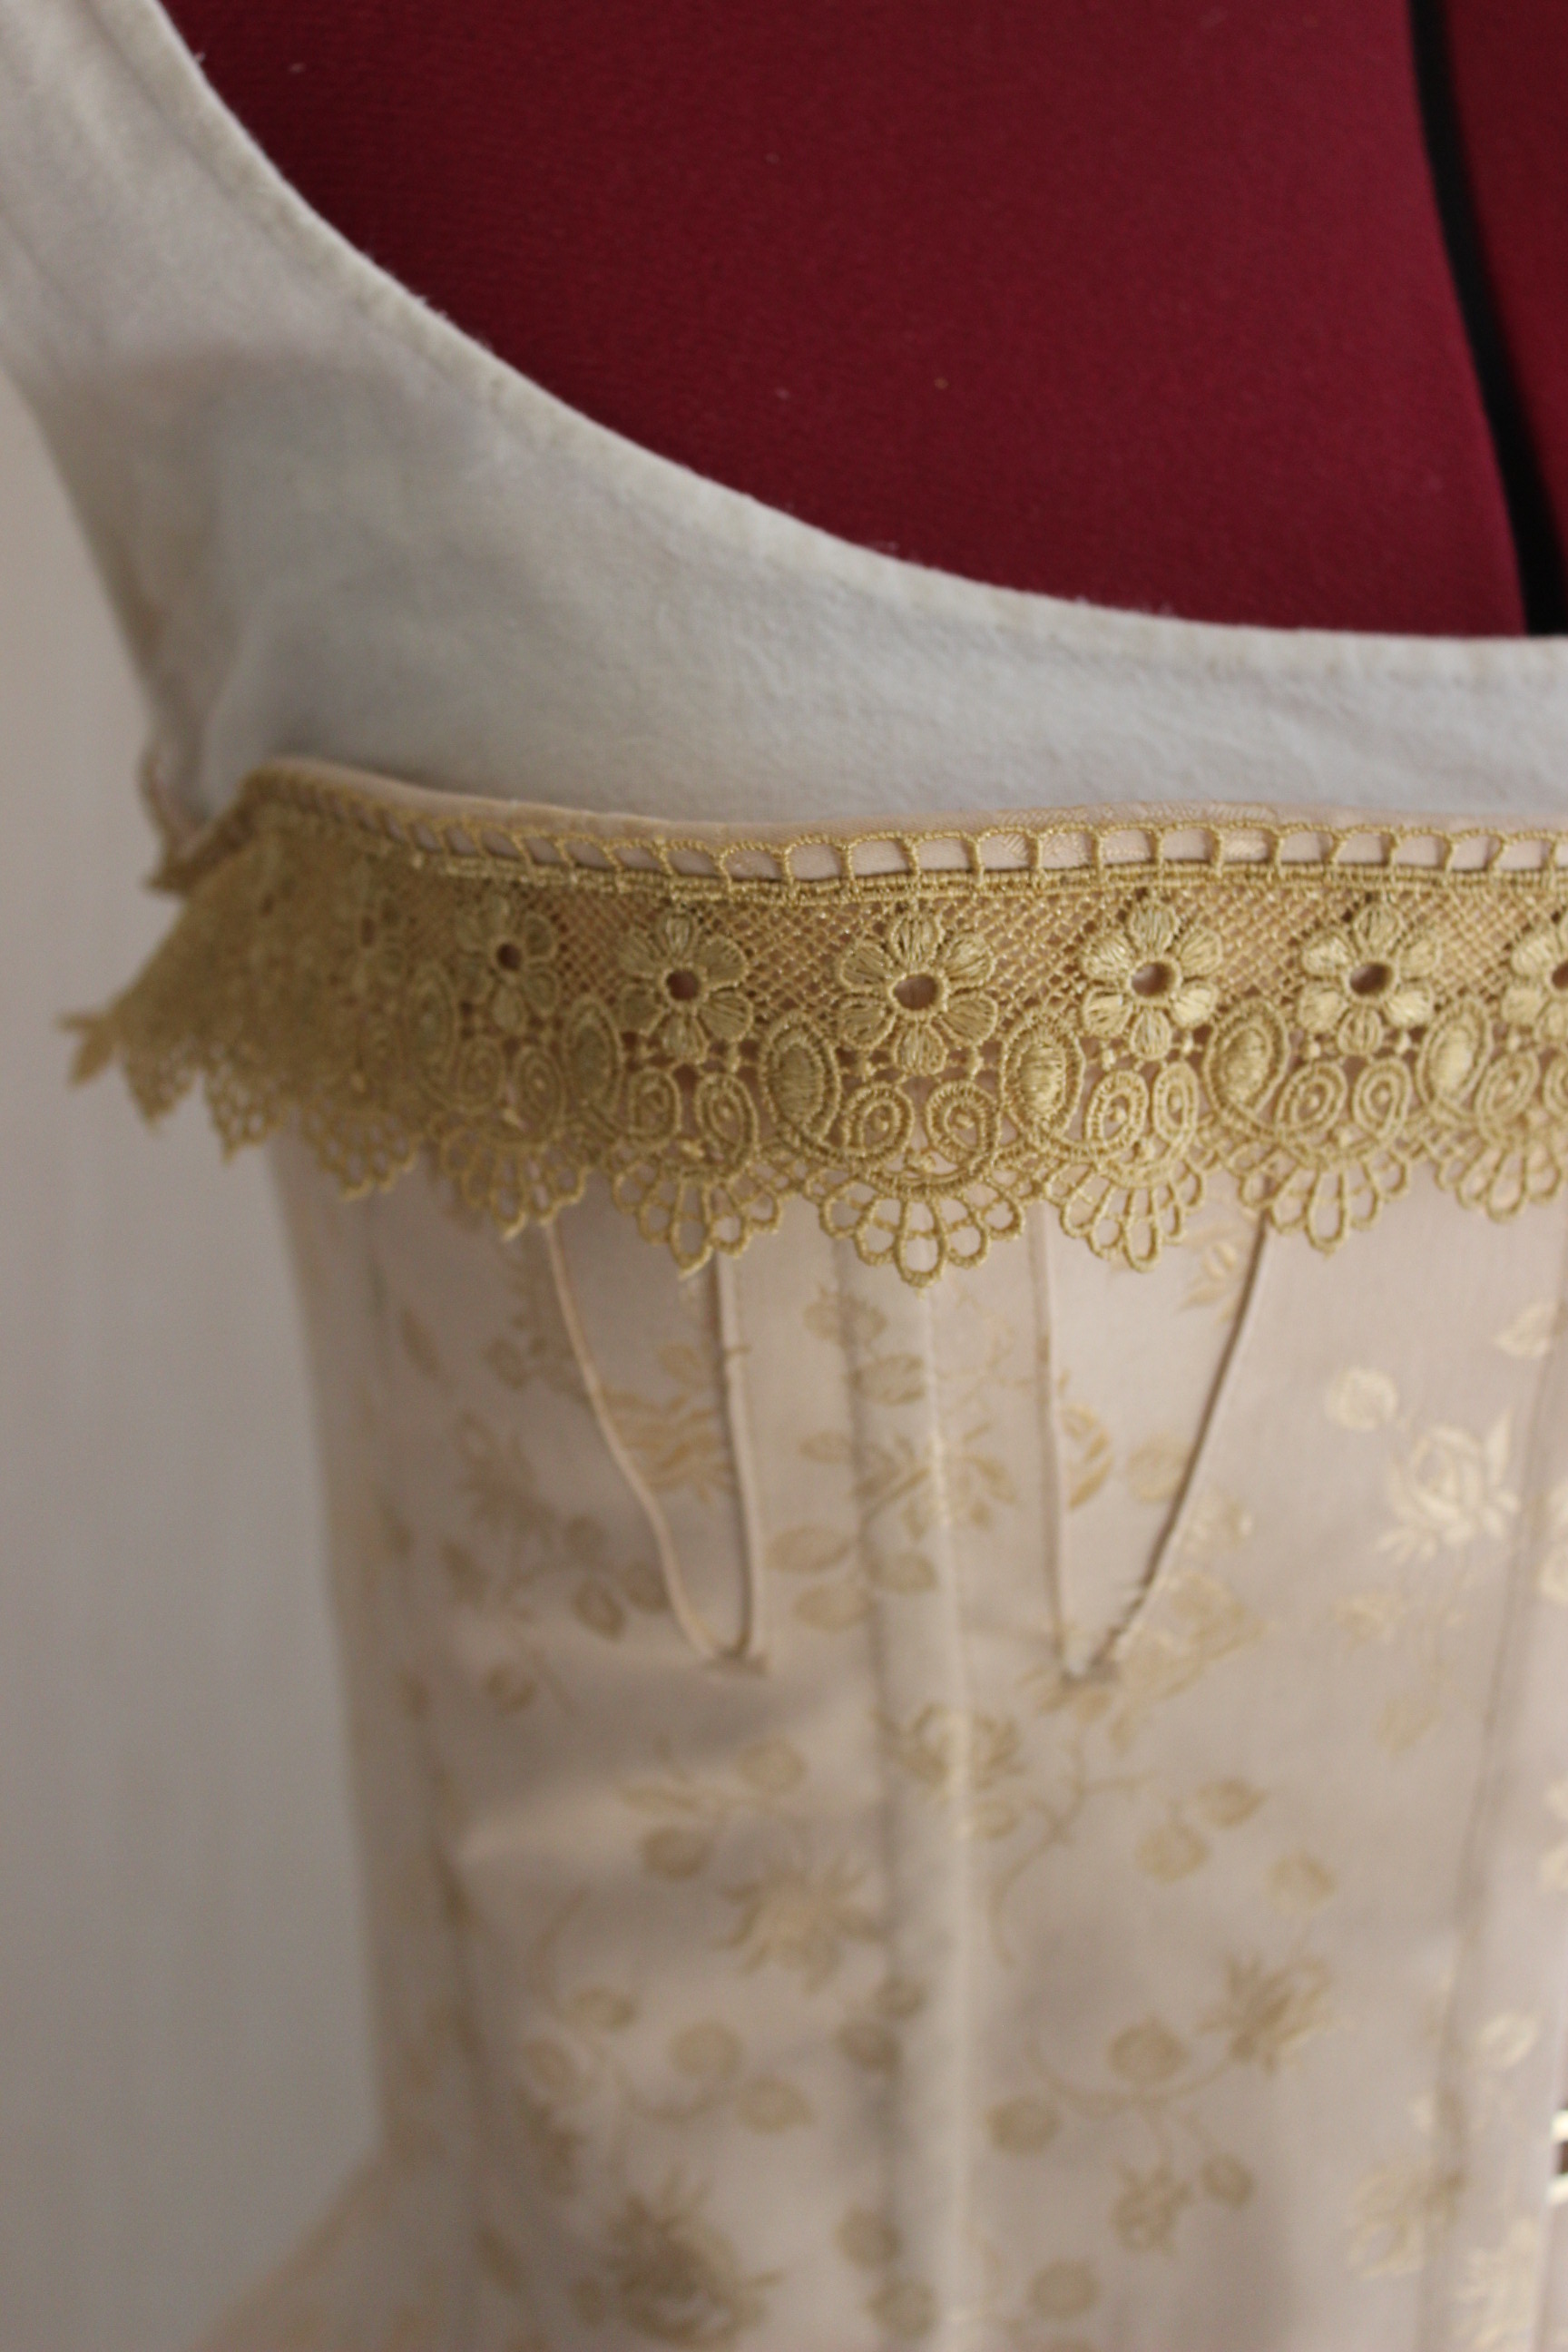
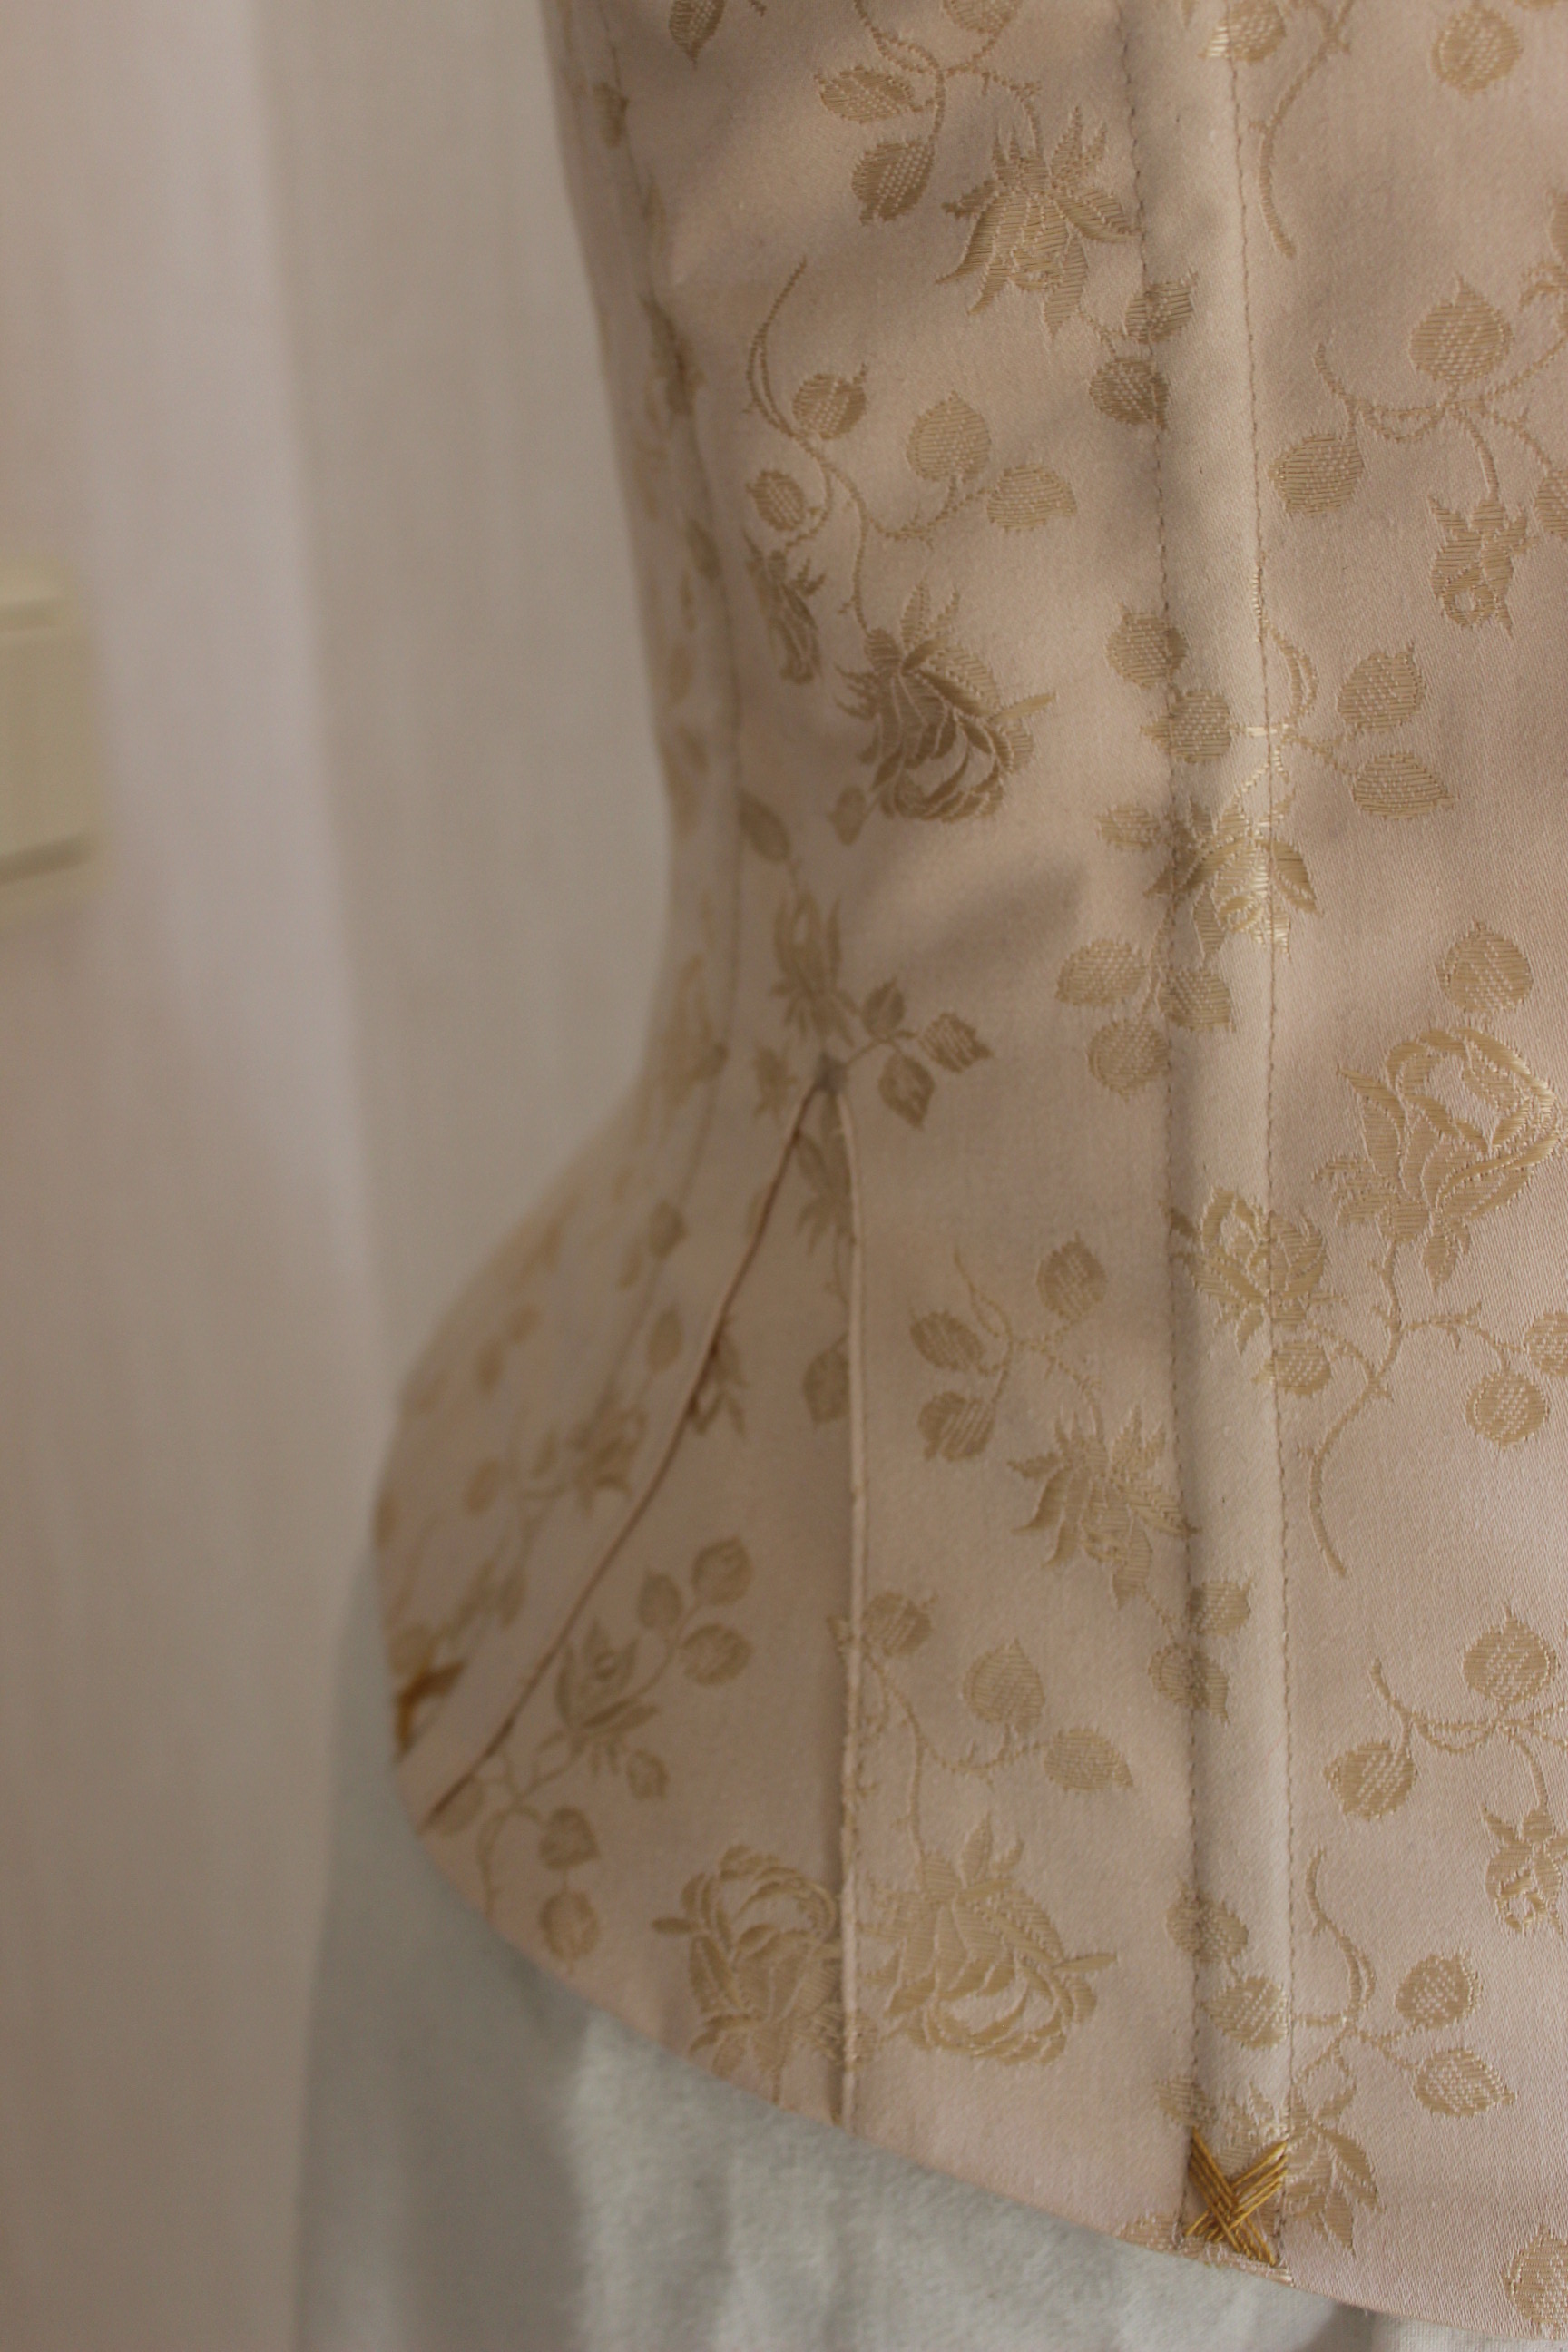
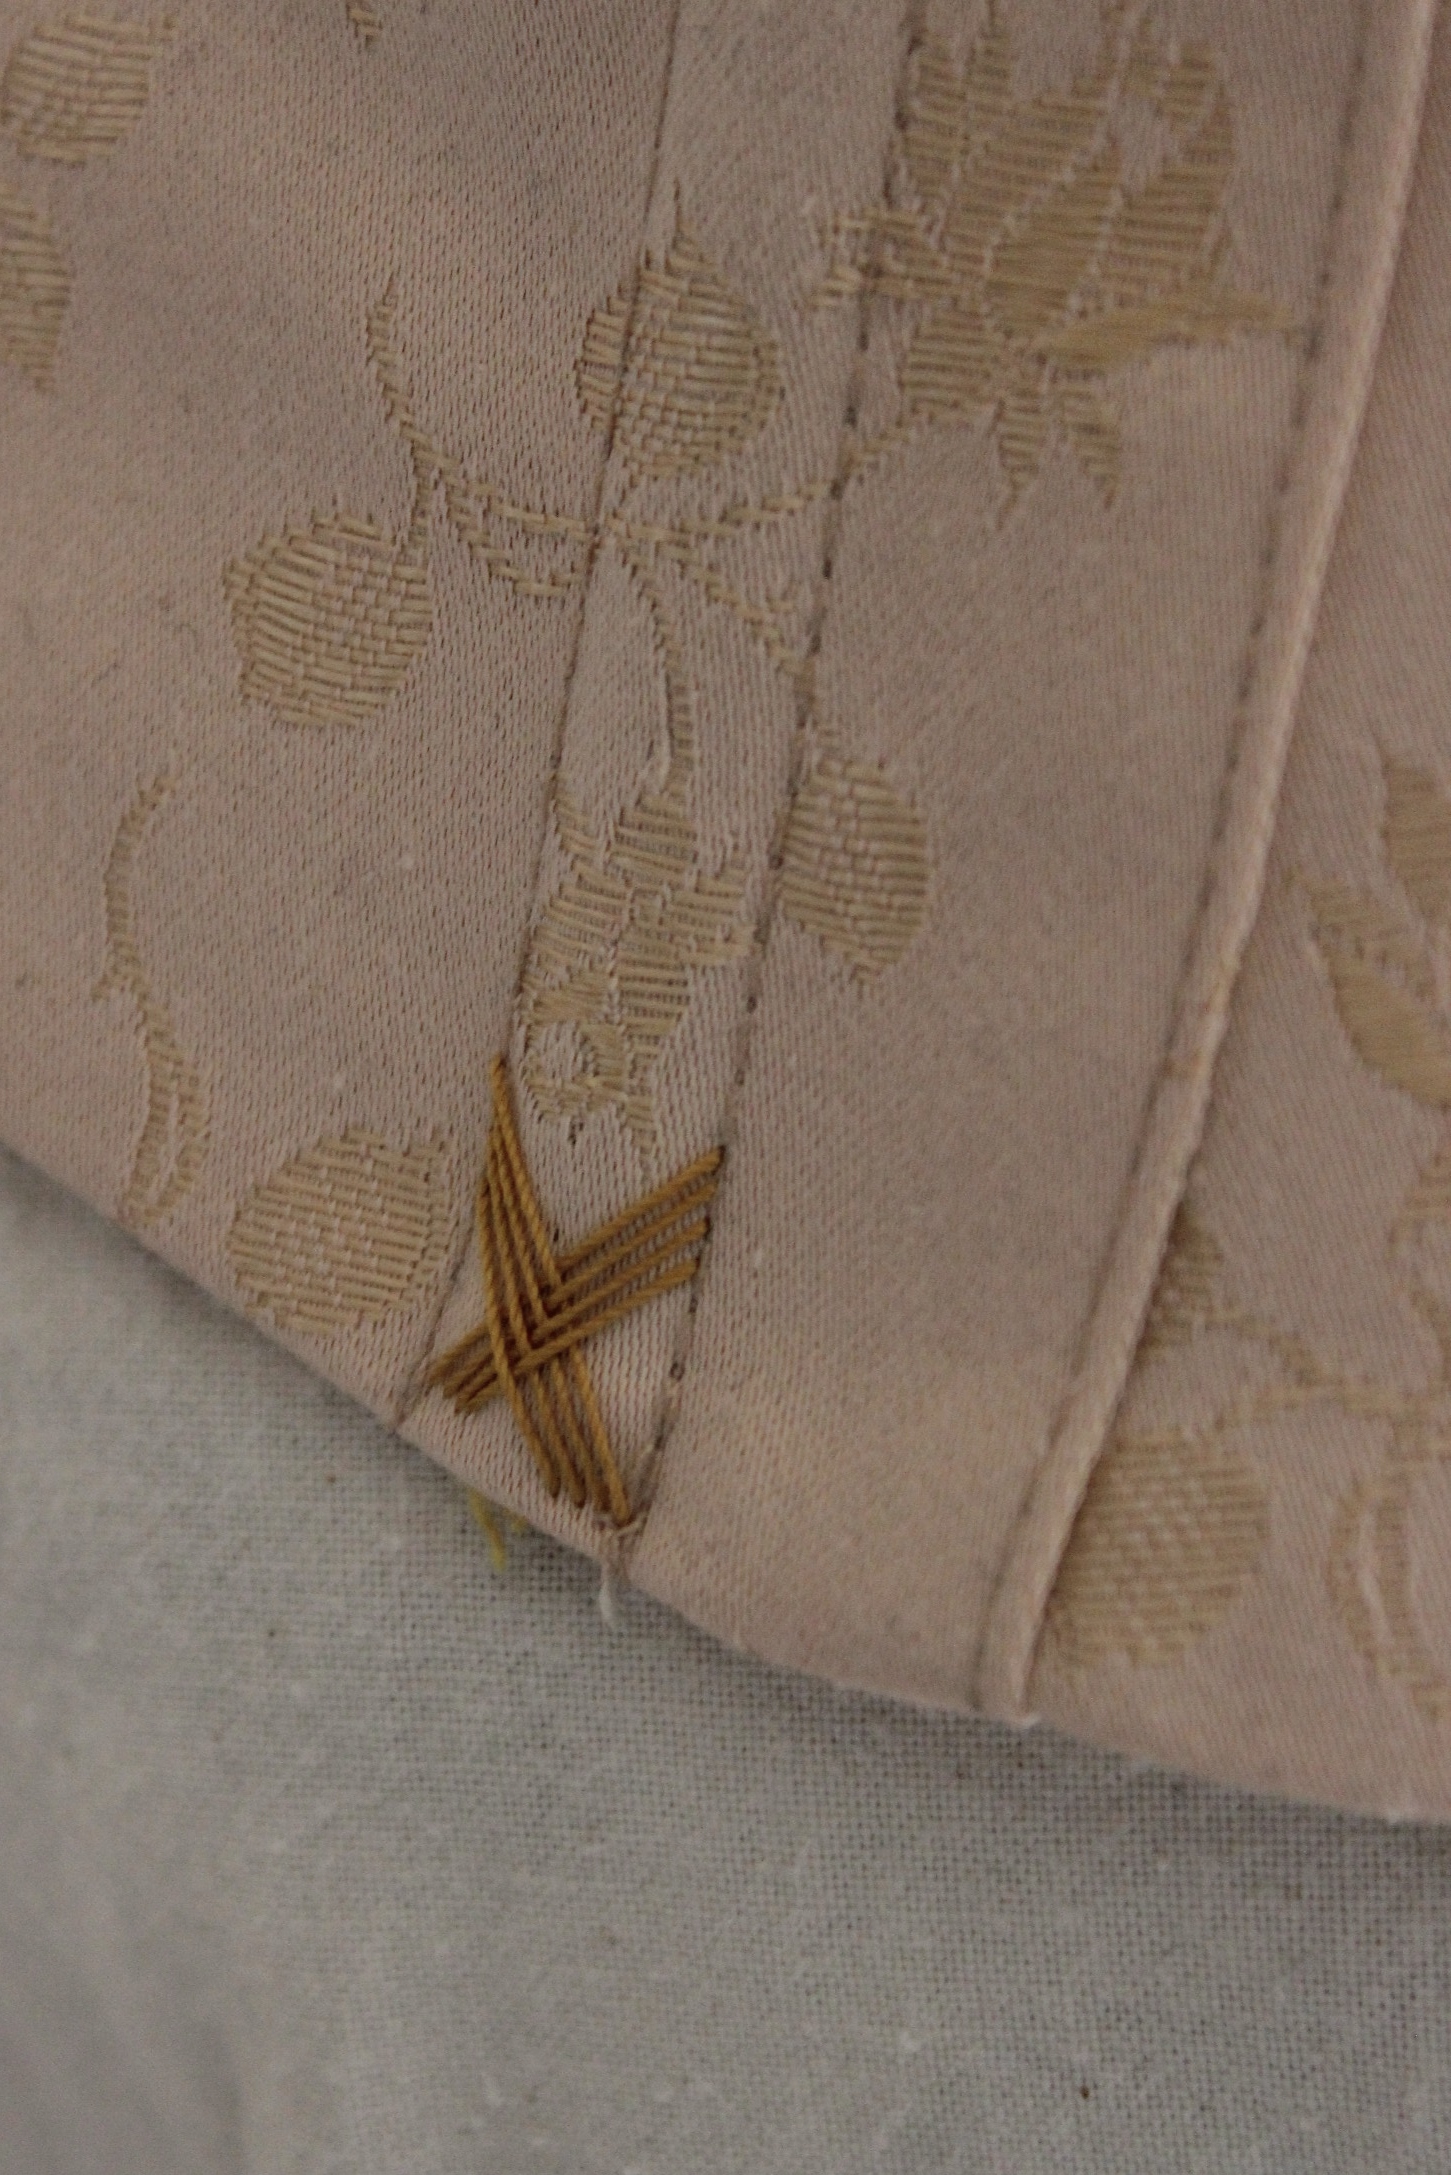
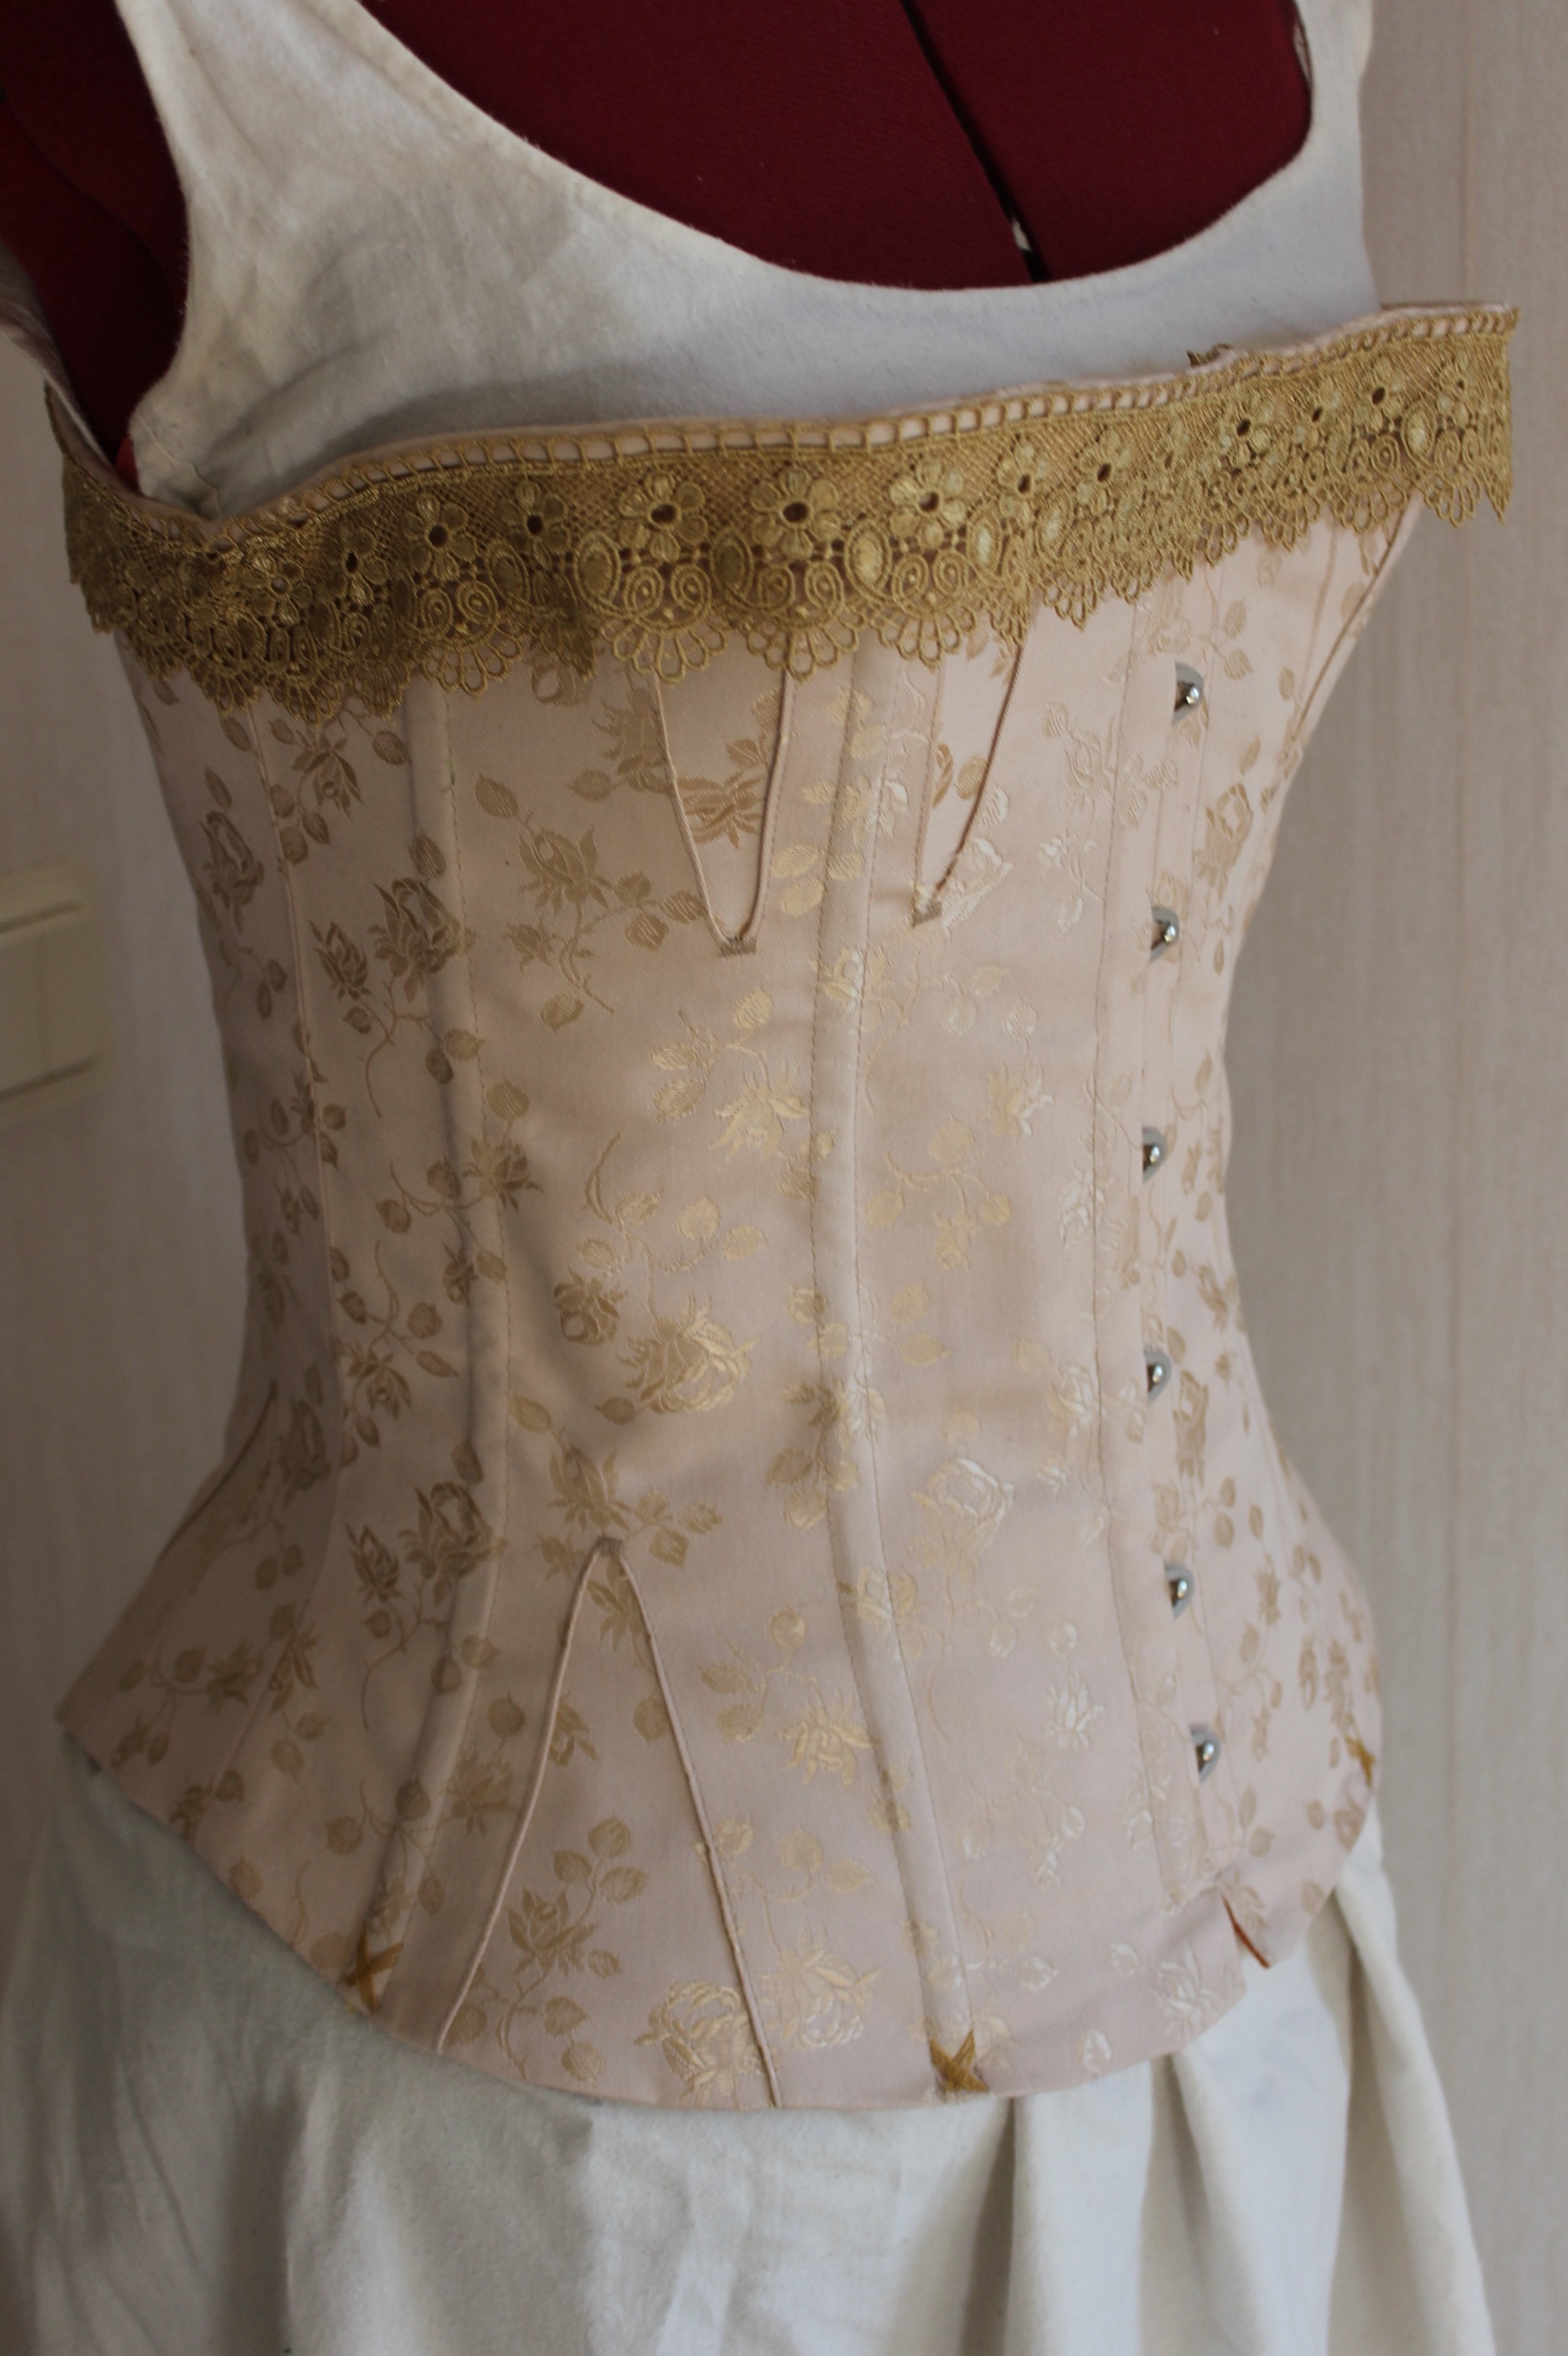
Then all that was left was to add the decoration Time for lace and flossing
Isn’t it amazing when your stash yields everything you need for a beautiful composed corset 🙂 (or maybe that a sign I got to much stash? Neh 🙂 )
The finished corset:


The facts:
Pattern: “Past pattern” 1860-1880s corset
Fabric & Notions: 0,5 m cream coutil, 0,5m orange cotton for lining, 1 busk, grommets, boning (plastic and metal) 4 m cotton cord, 1 m golden lace, thread, buttonhole thread for flossing.
Time: About 7 hours – pretty fast and easy
Cost: everything came from stash, but bought new probably 350 Sek (32 Usd)
Final Thoughts: I’m in love with this corset. It’s so light yet really strong, and it’s really comfortable, and on top of that I think the colors are delightful. 🙂
