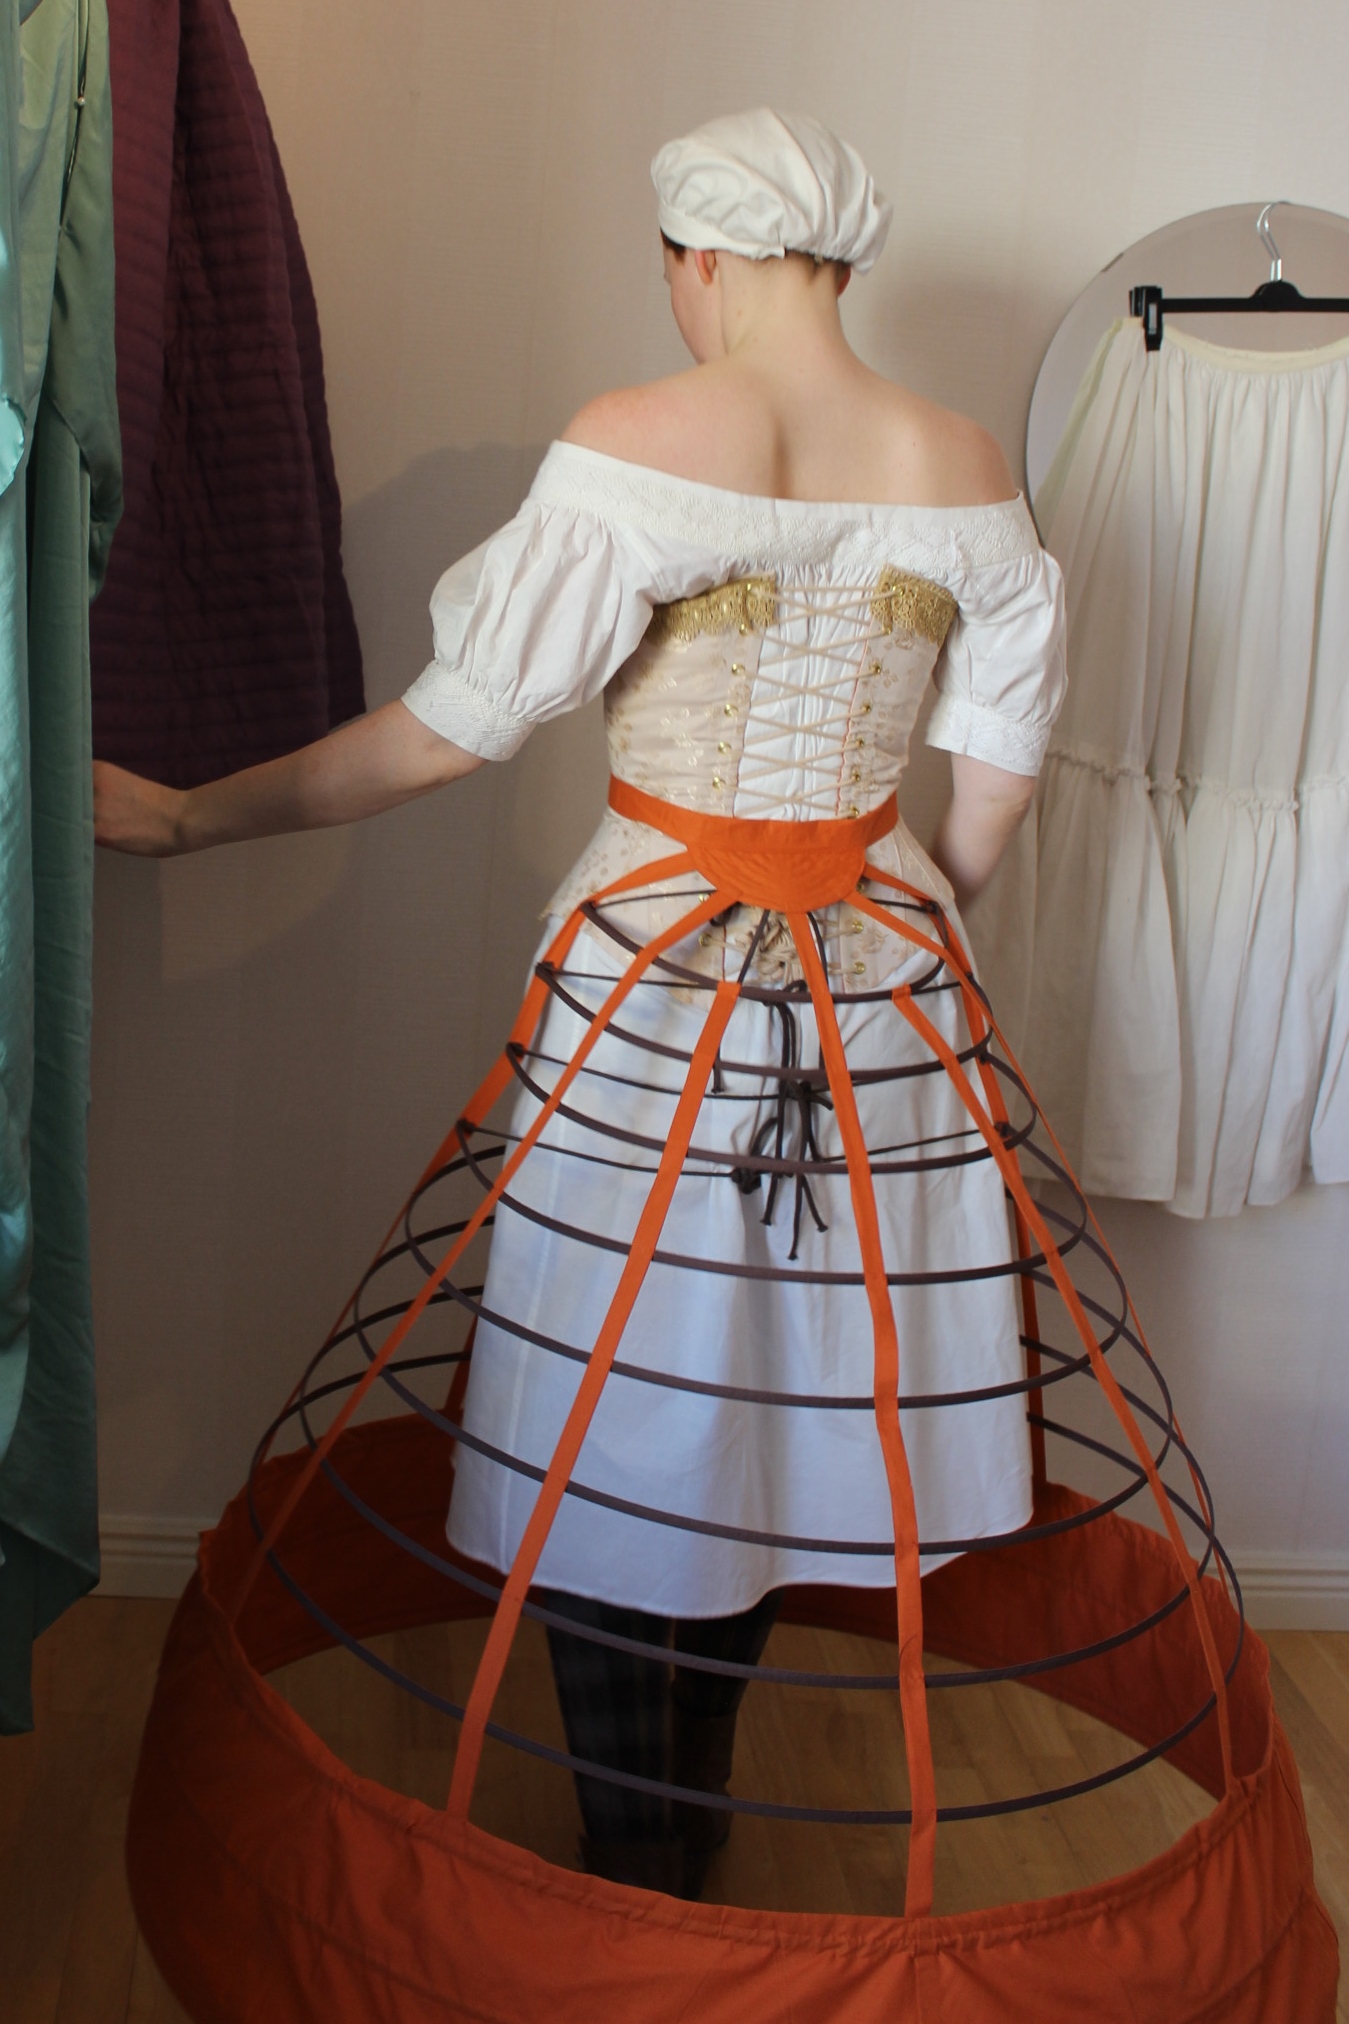
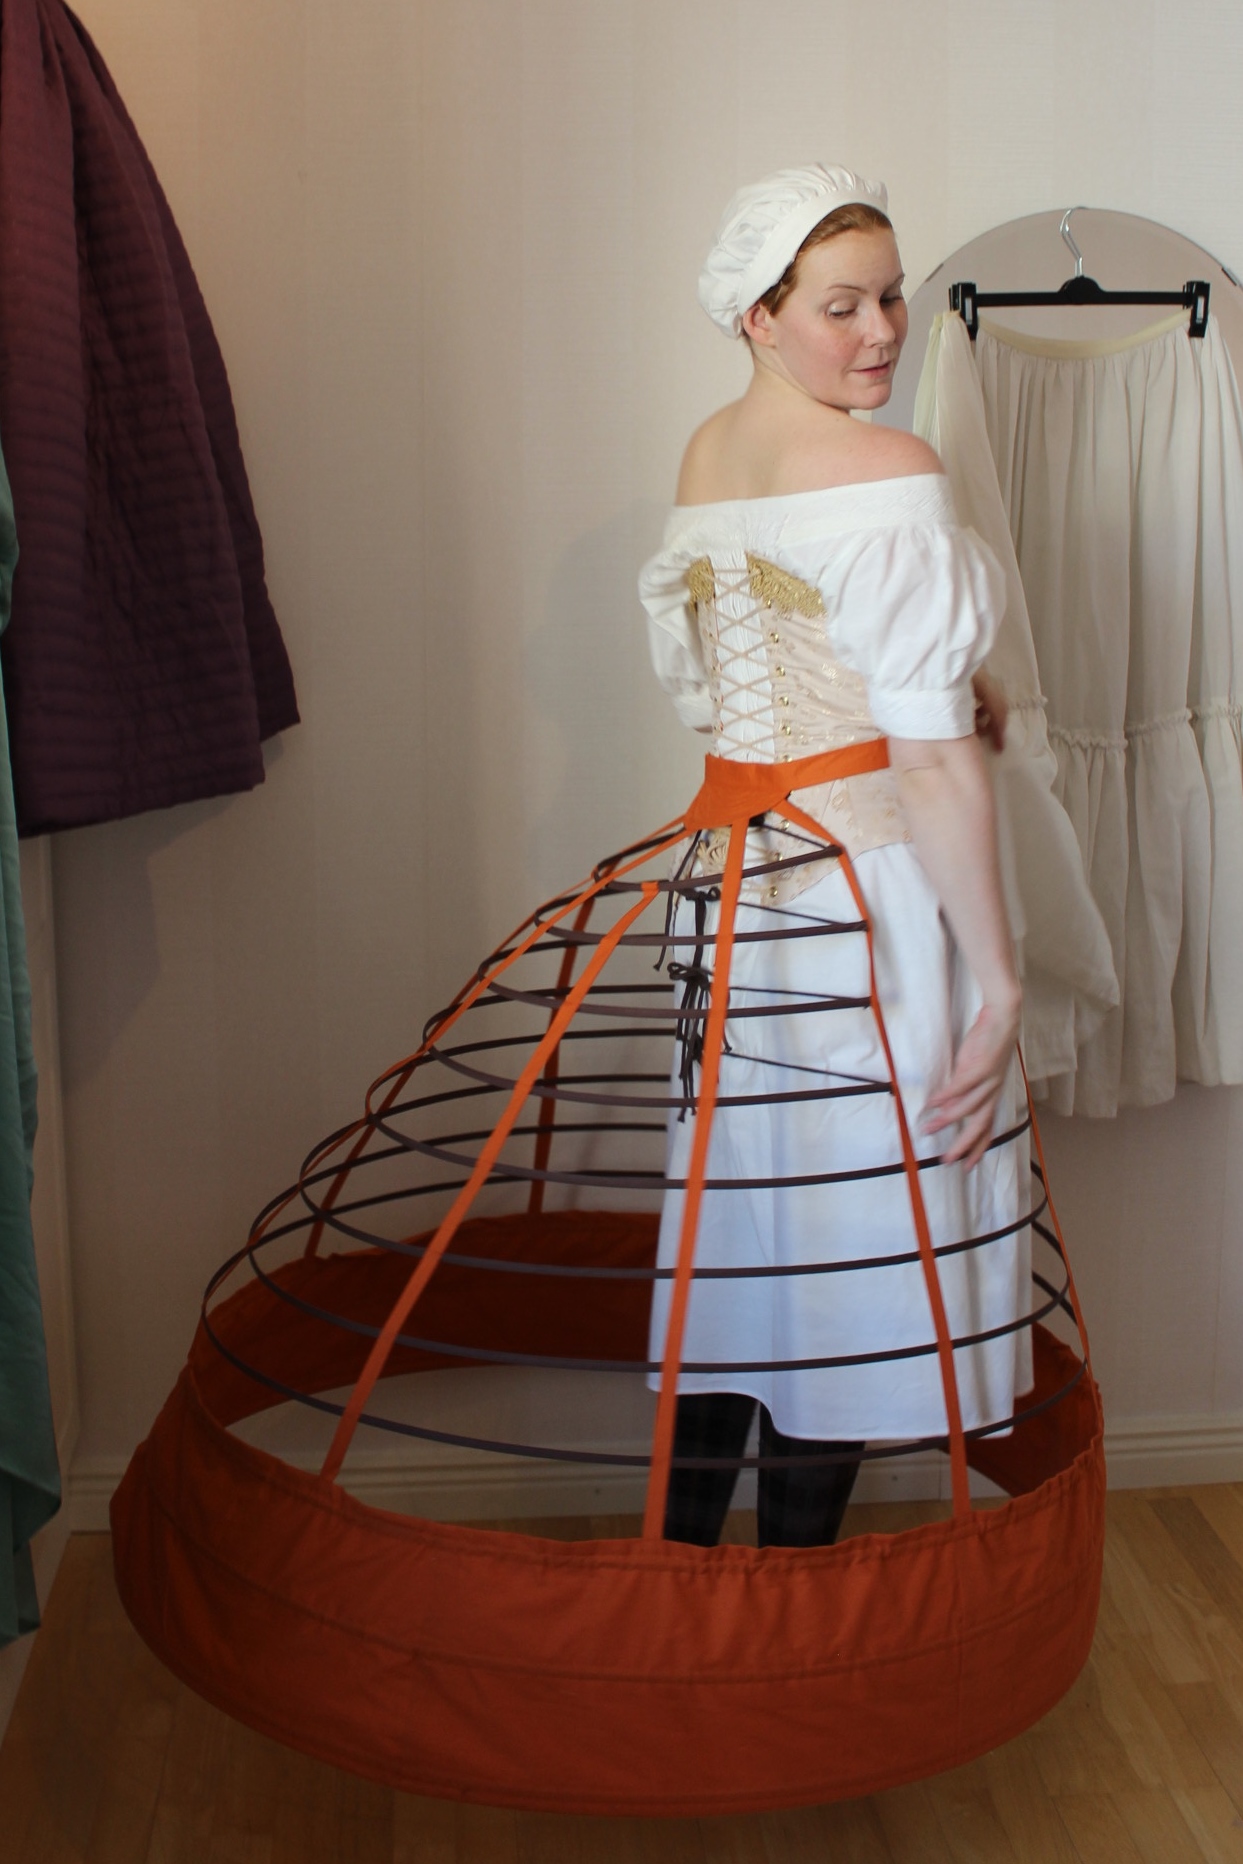
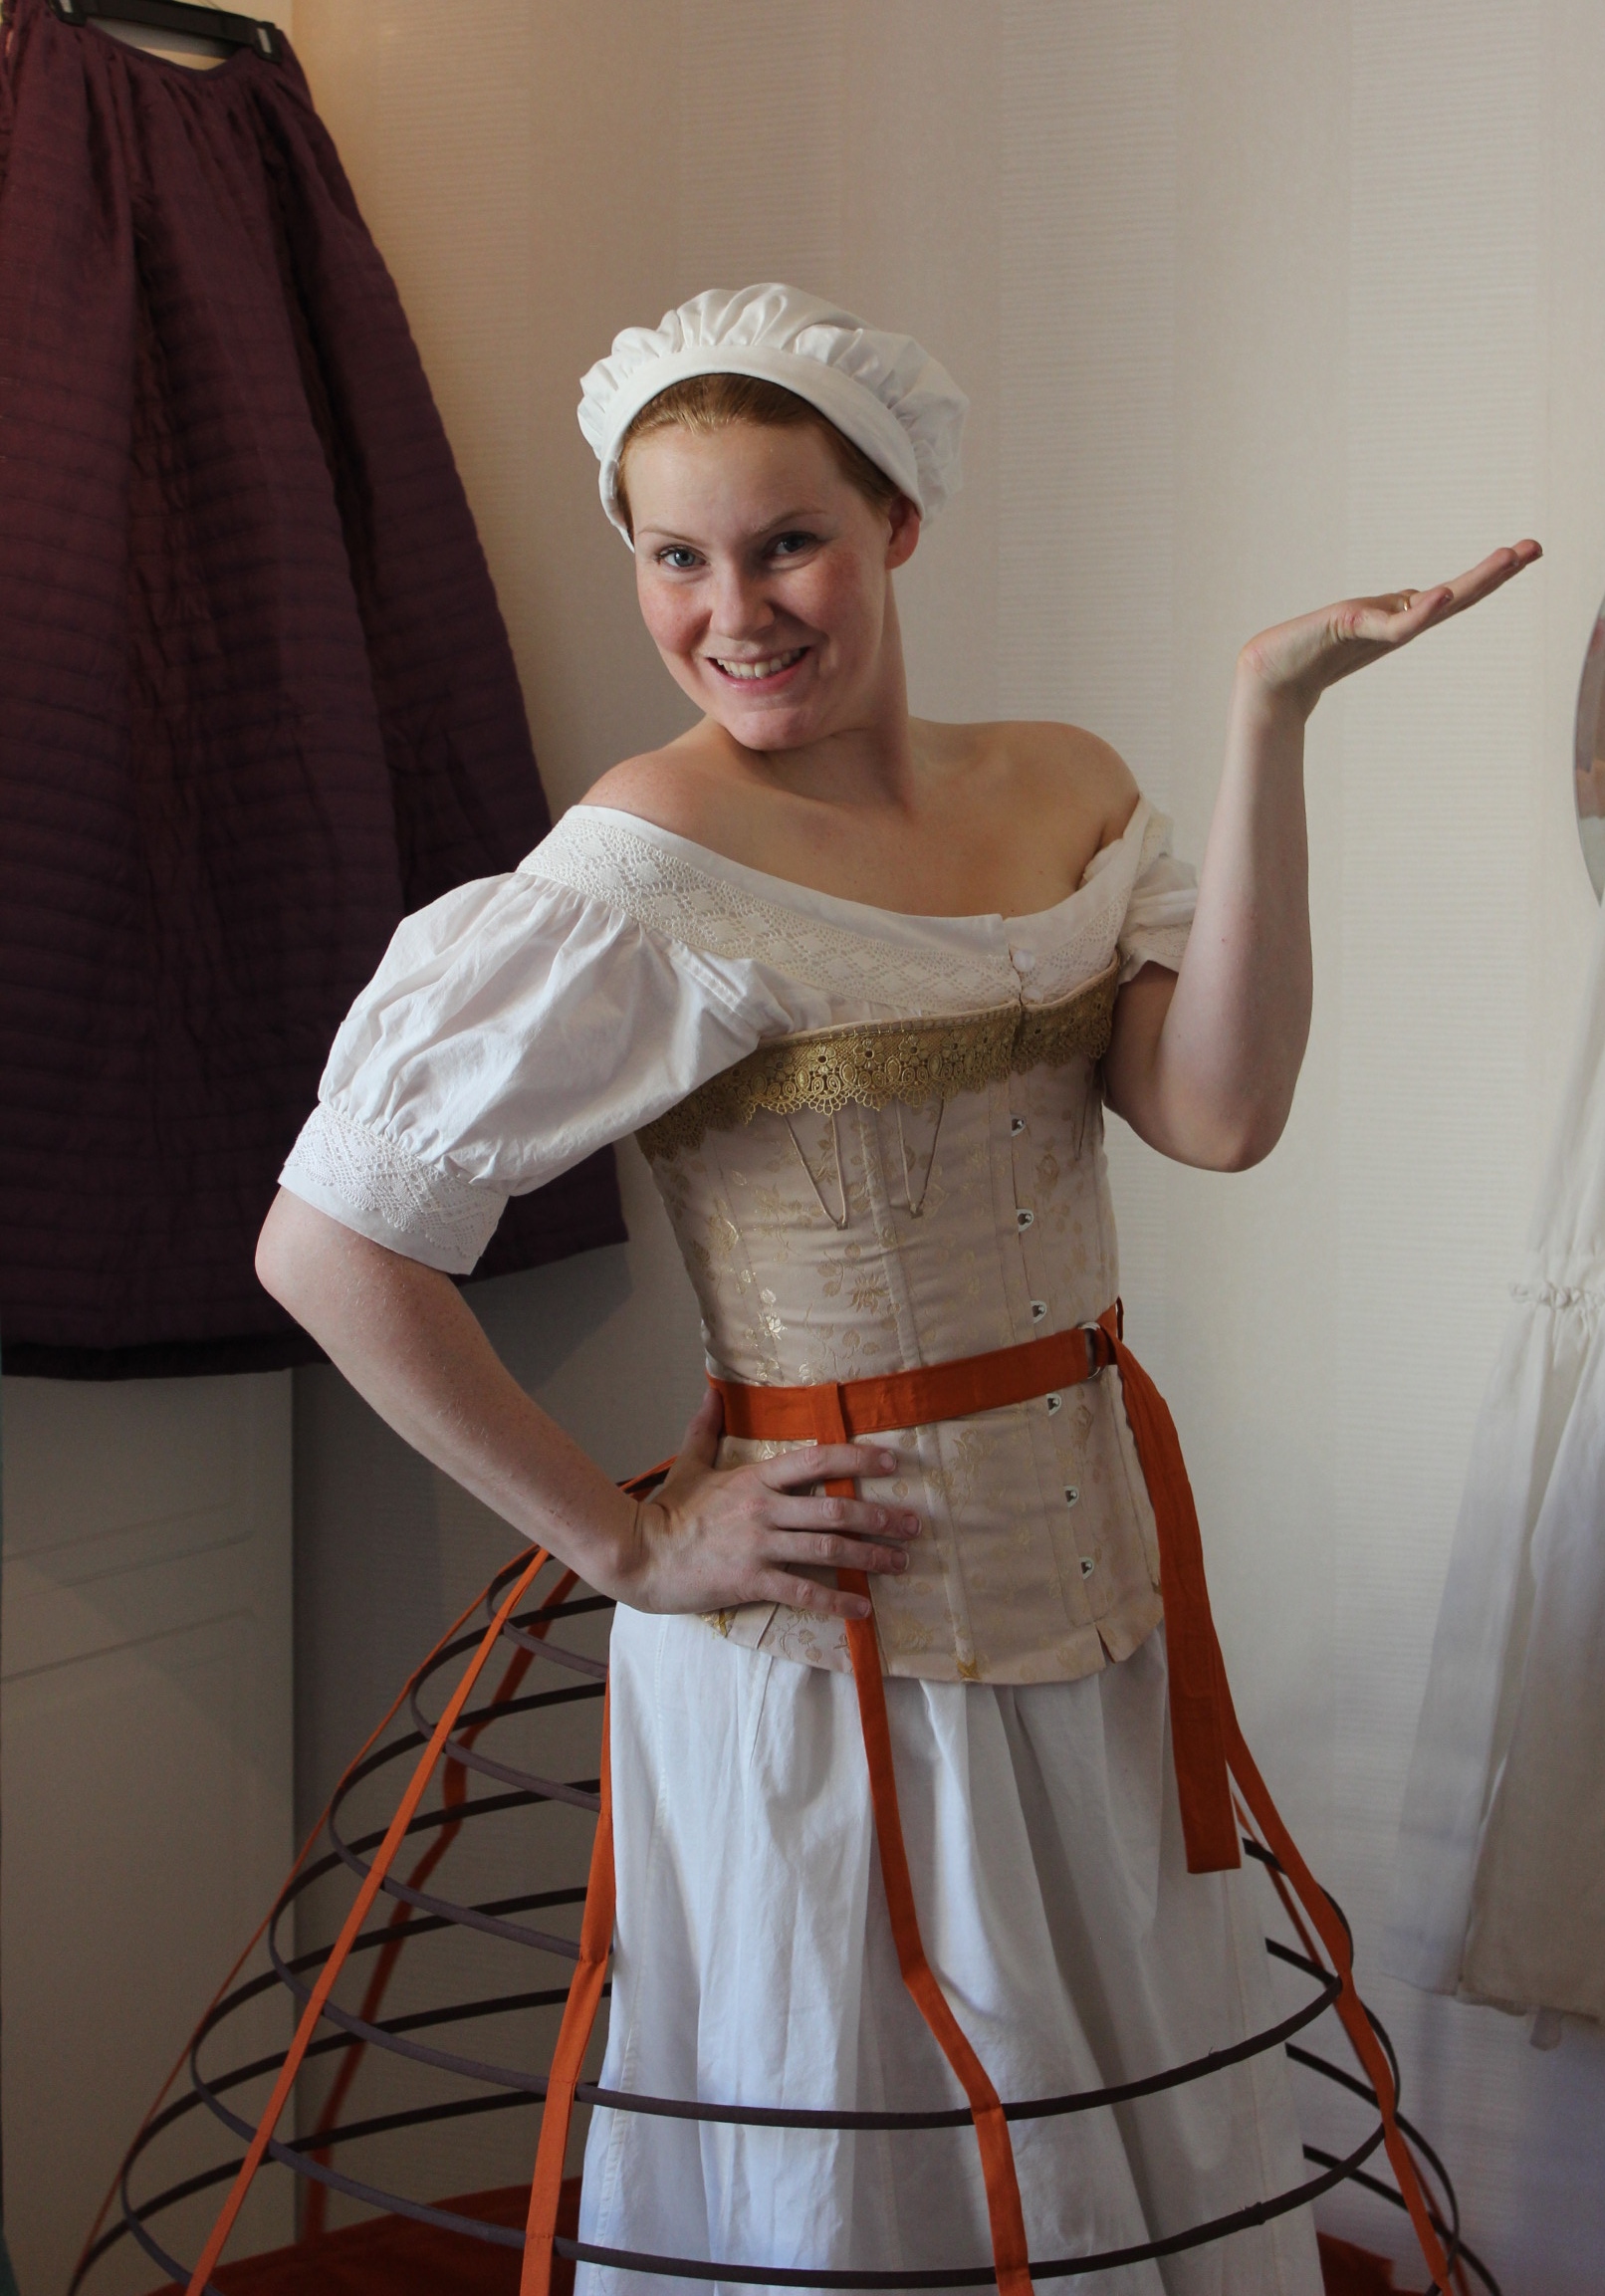
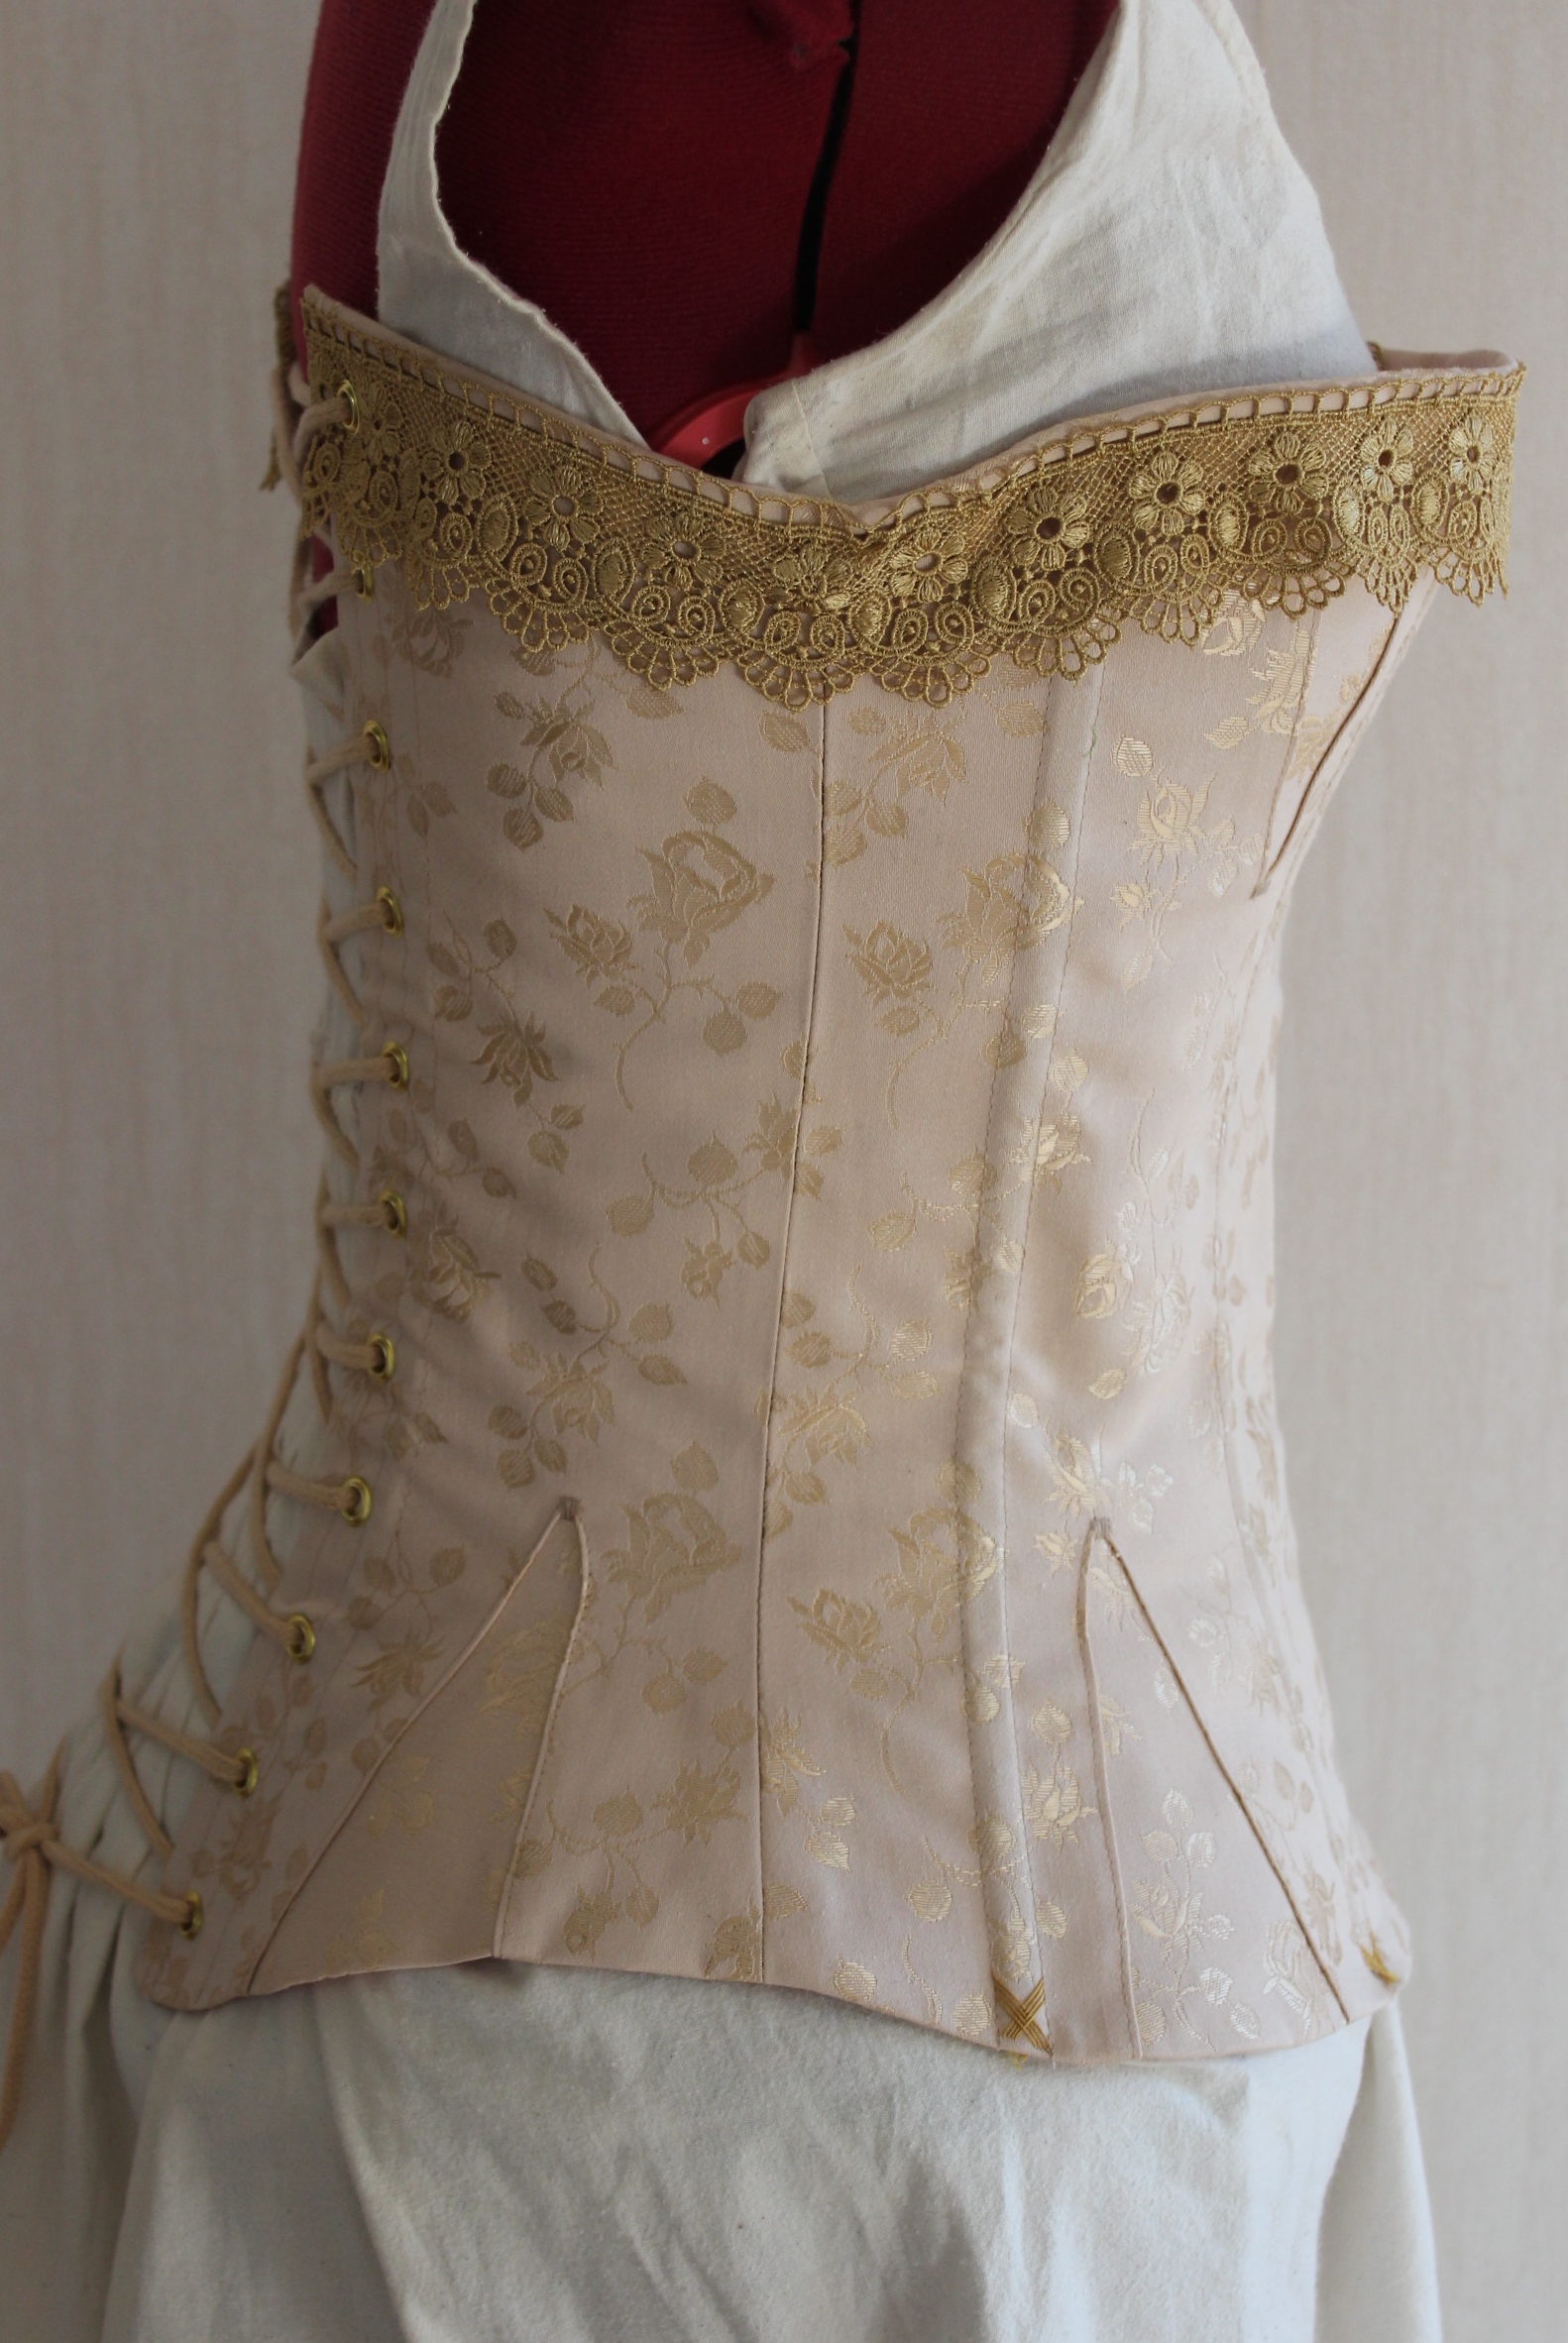
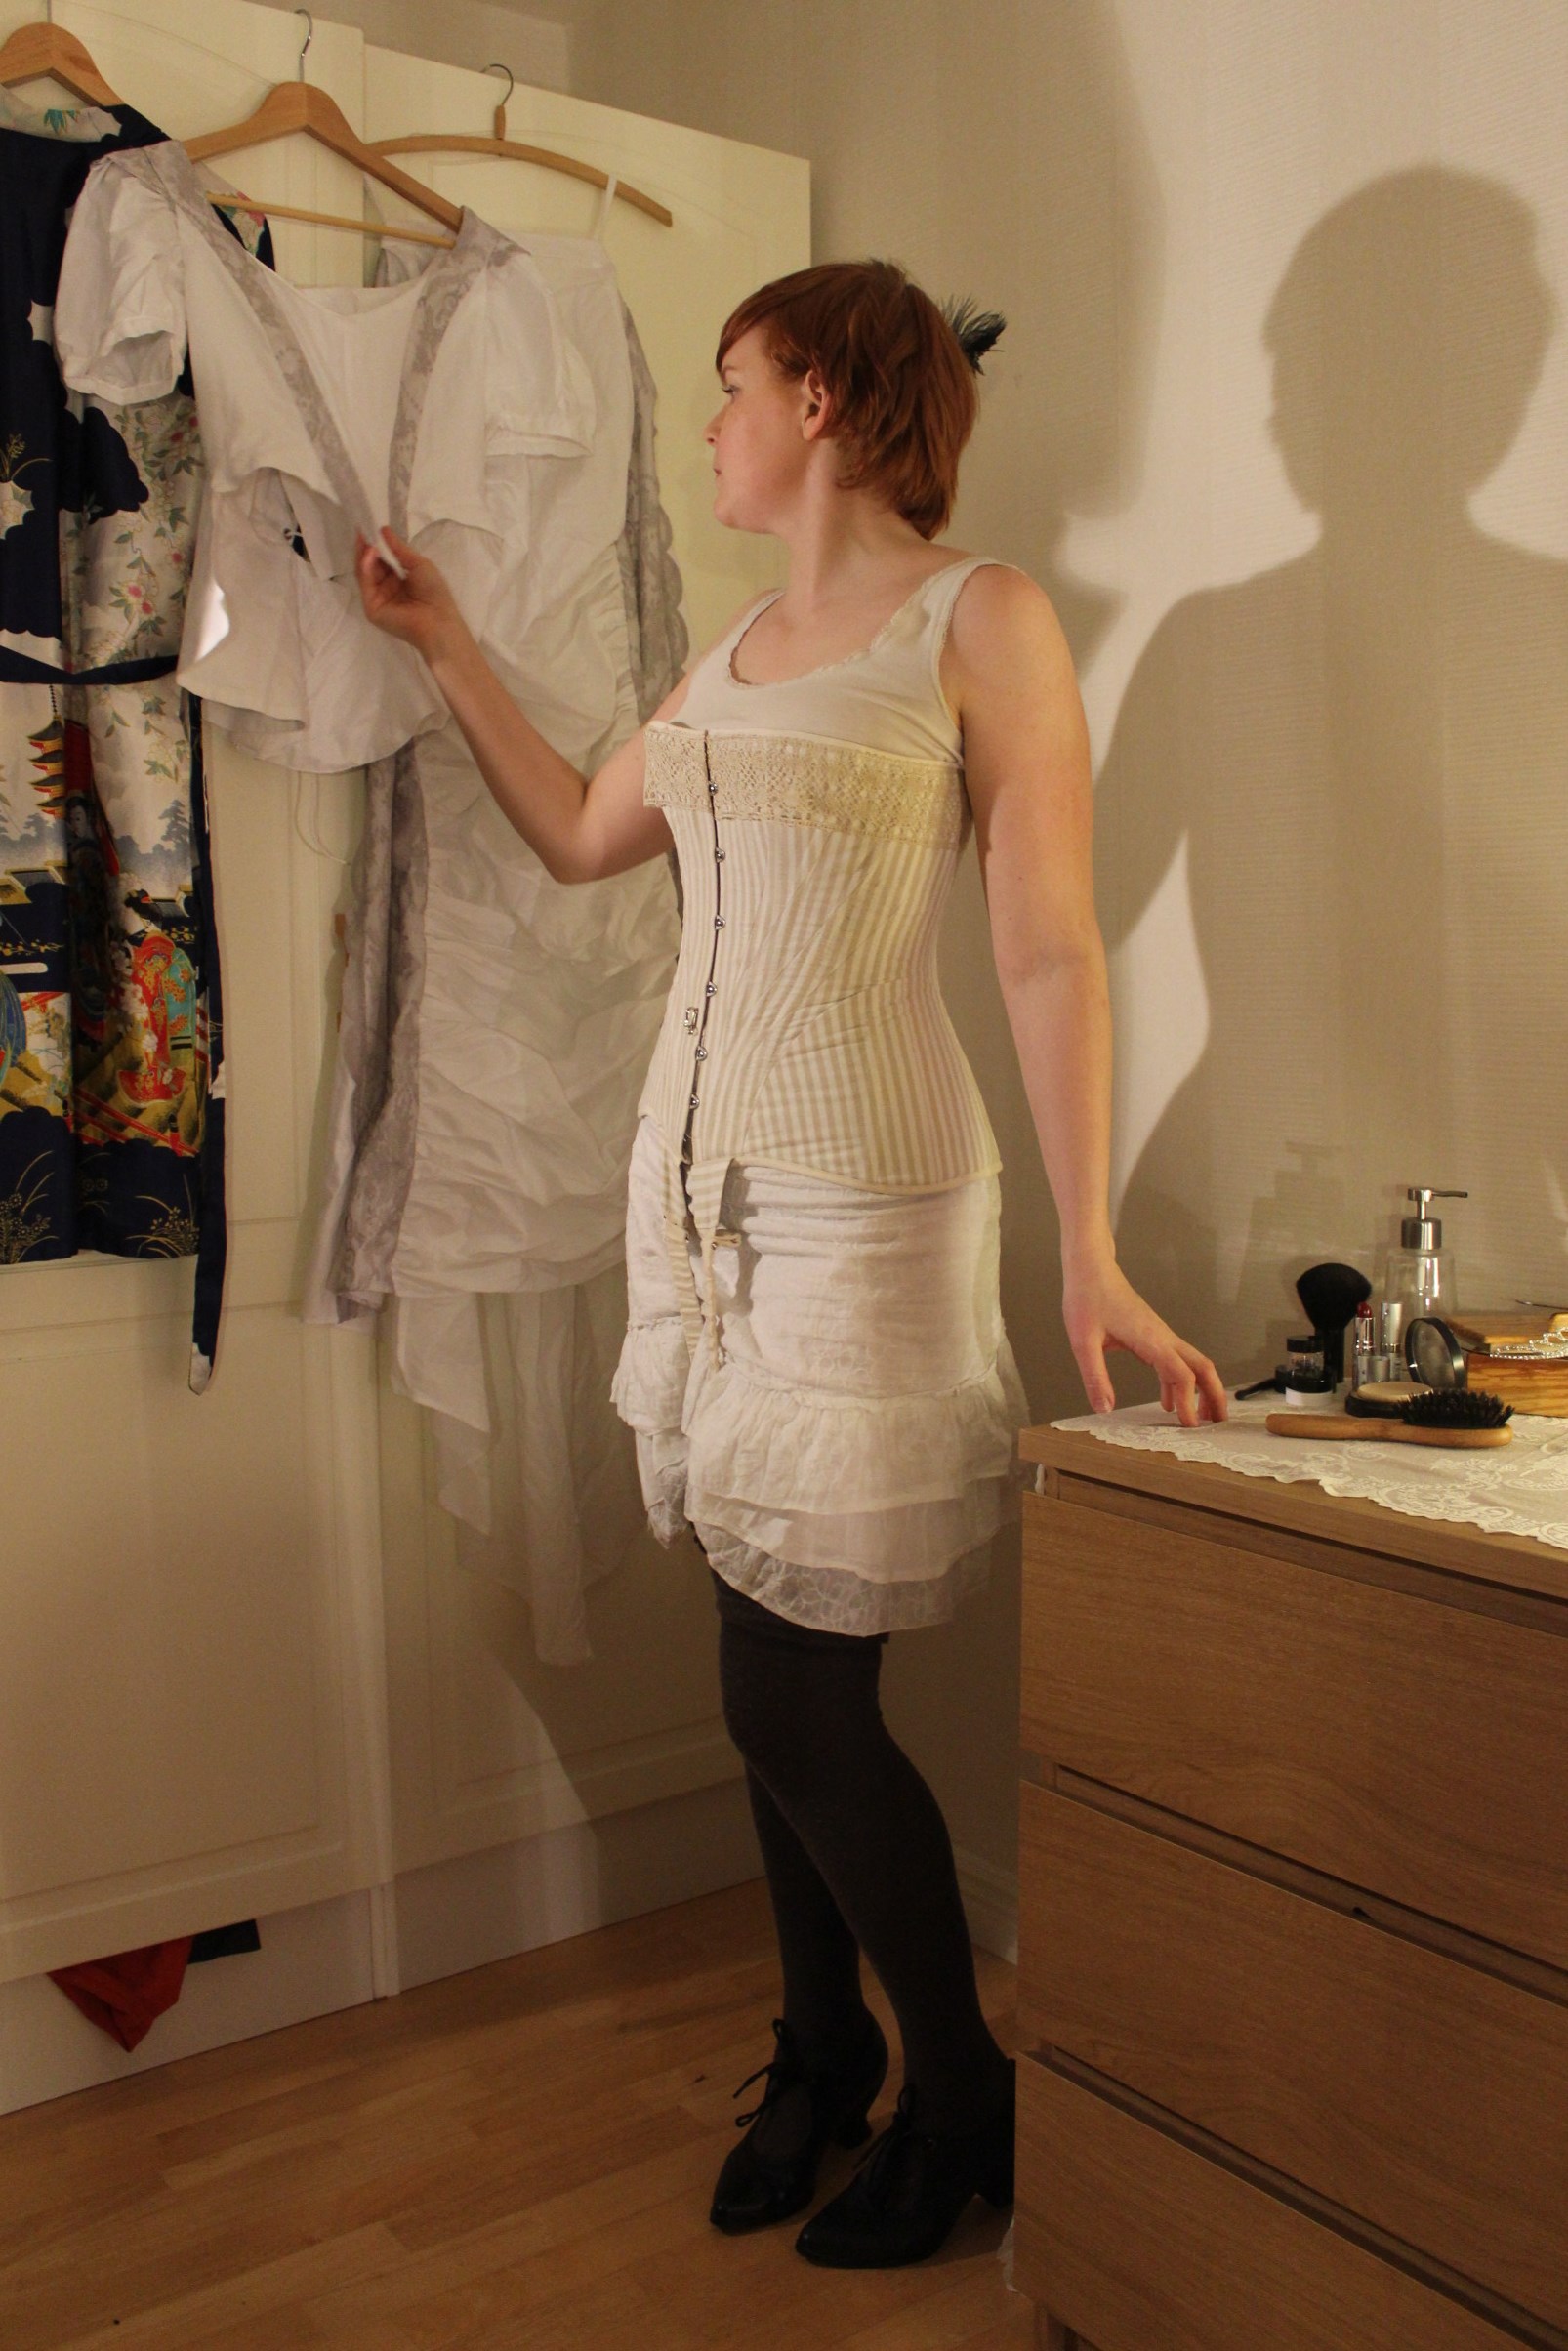
Here’s some photos of me in my new 1860s golden corset and the Huge Orange Crinoline. I’m also wearing my mid victorian chemise, bloomers, stockings and lace up boots.


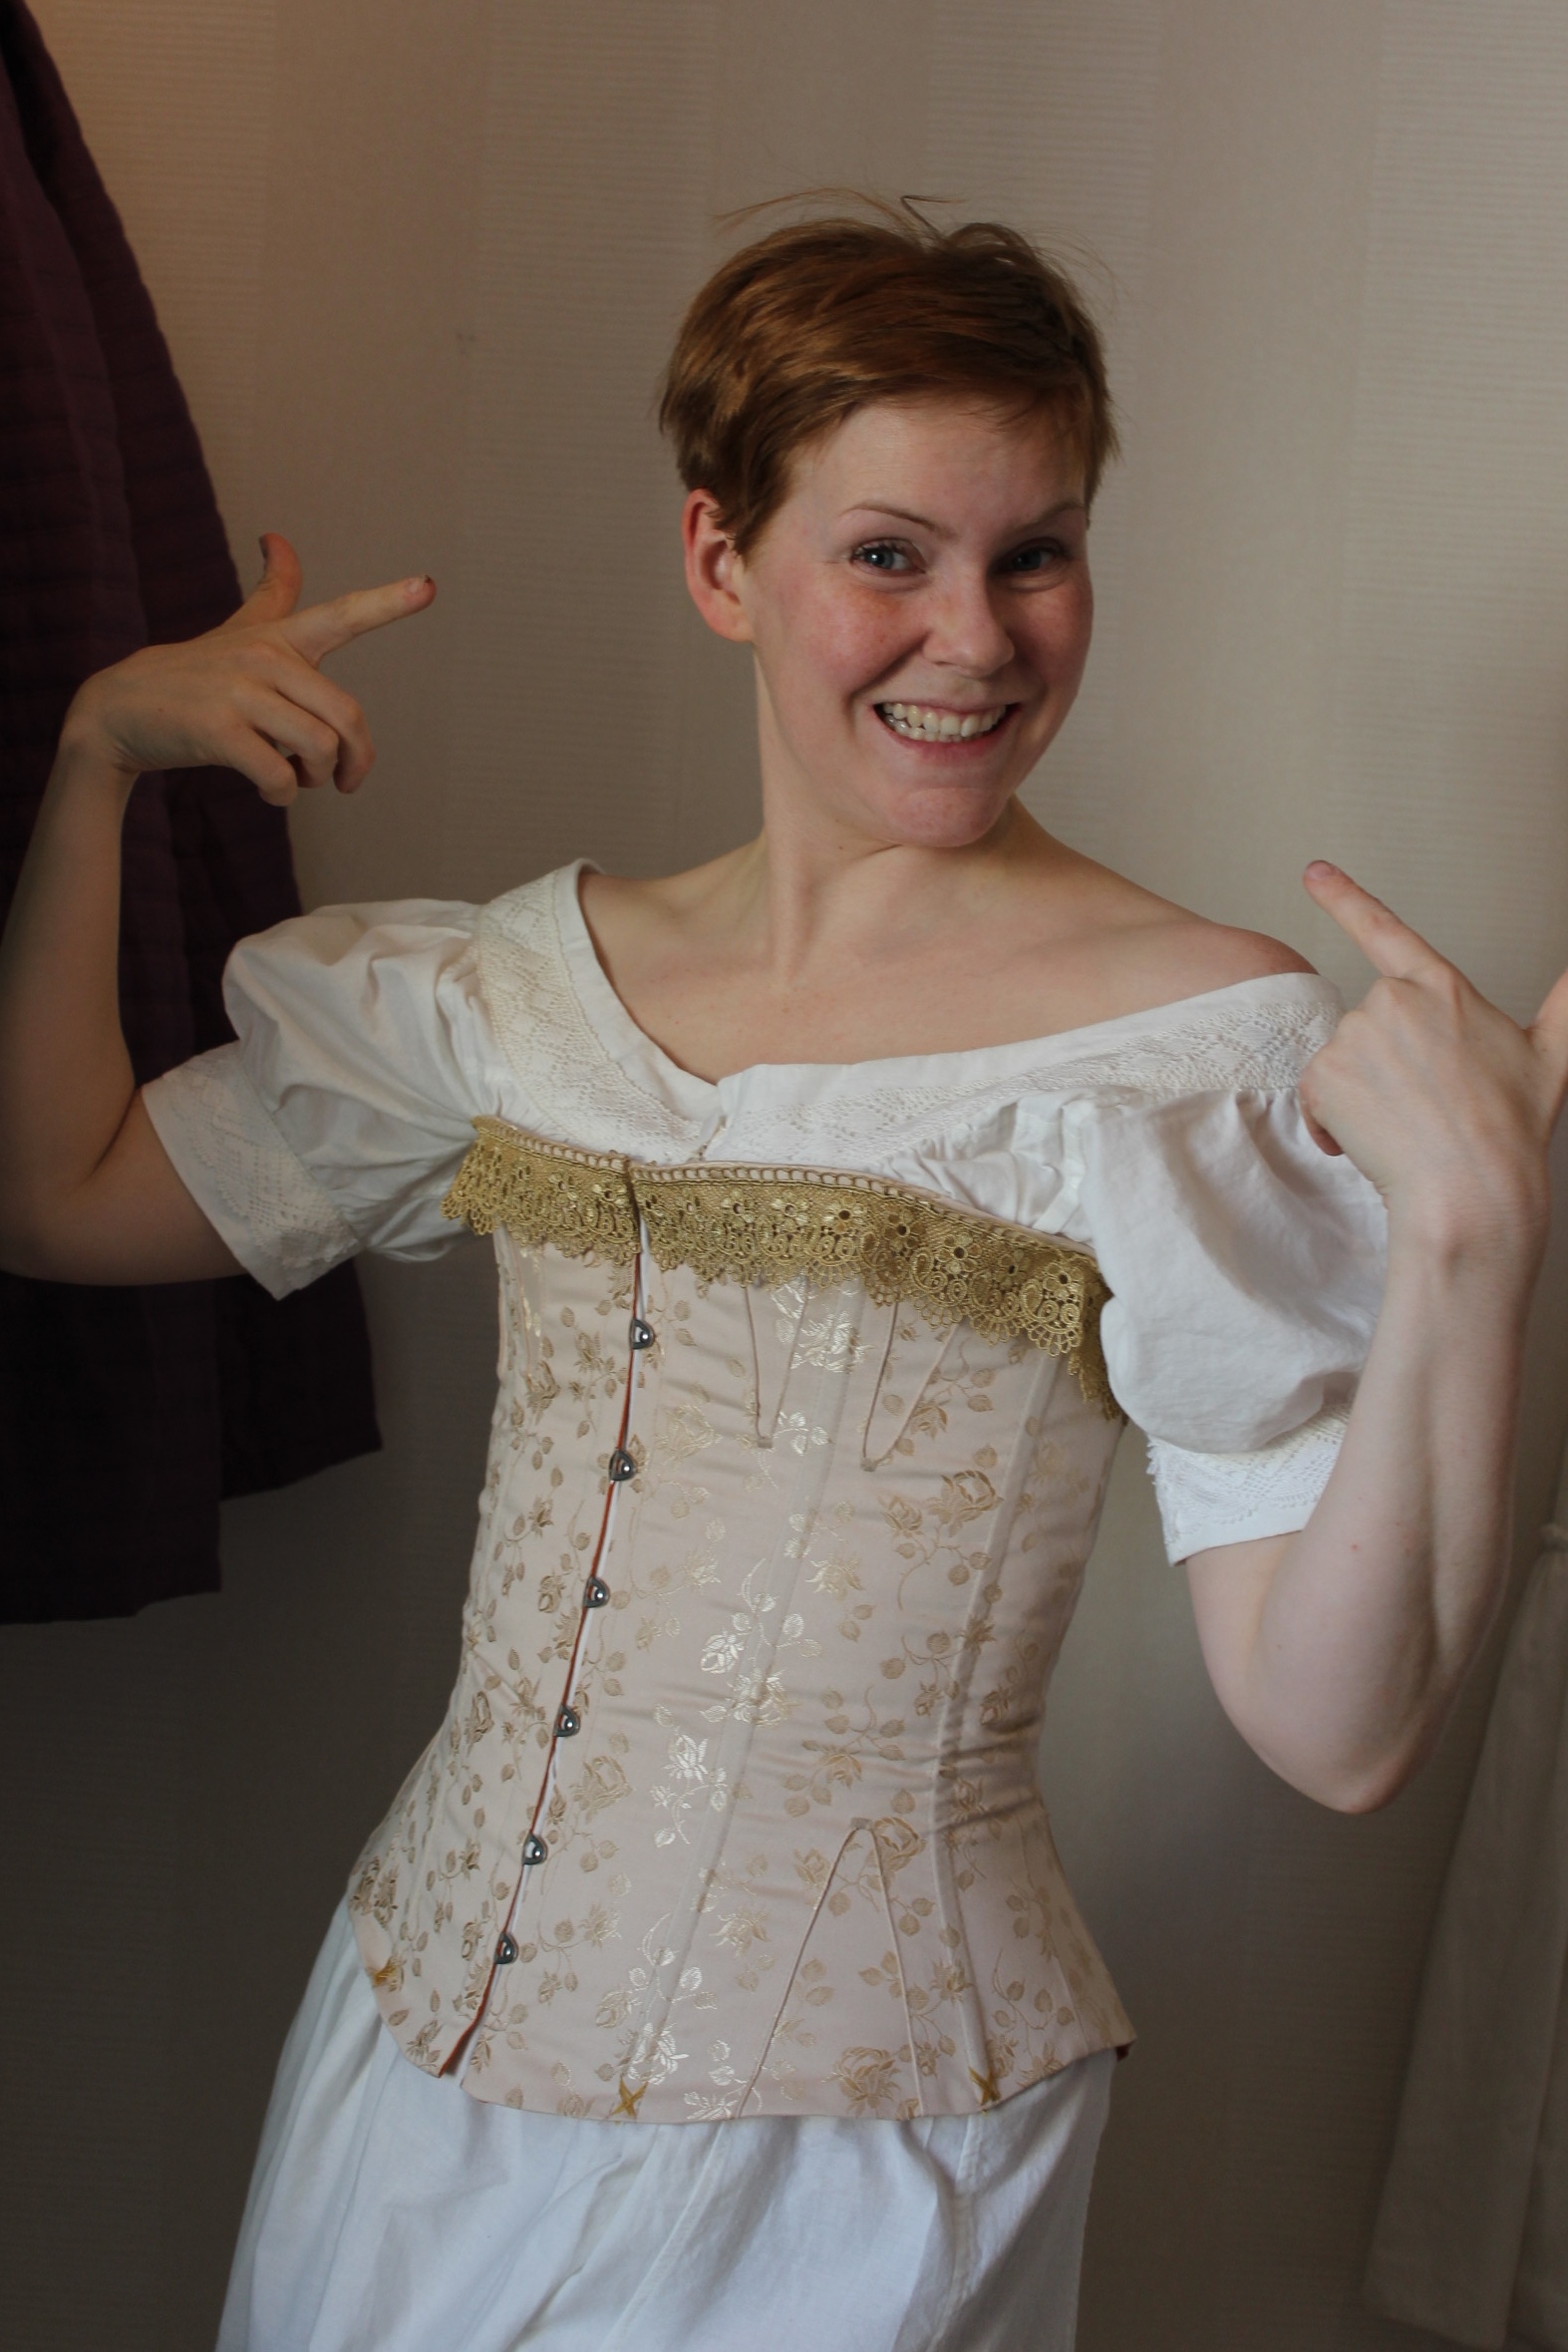
 And here´s when my baby entered the room


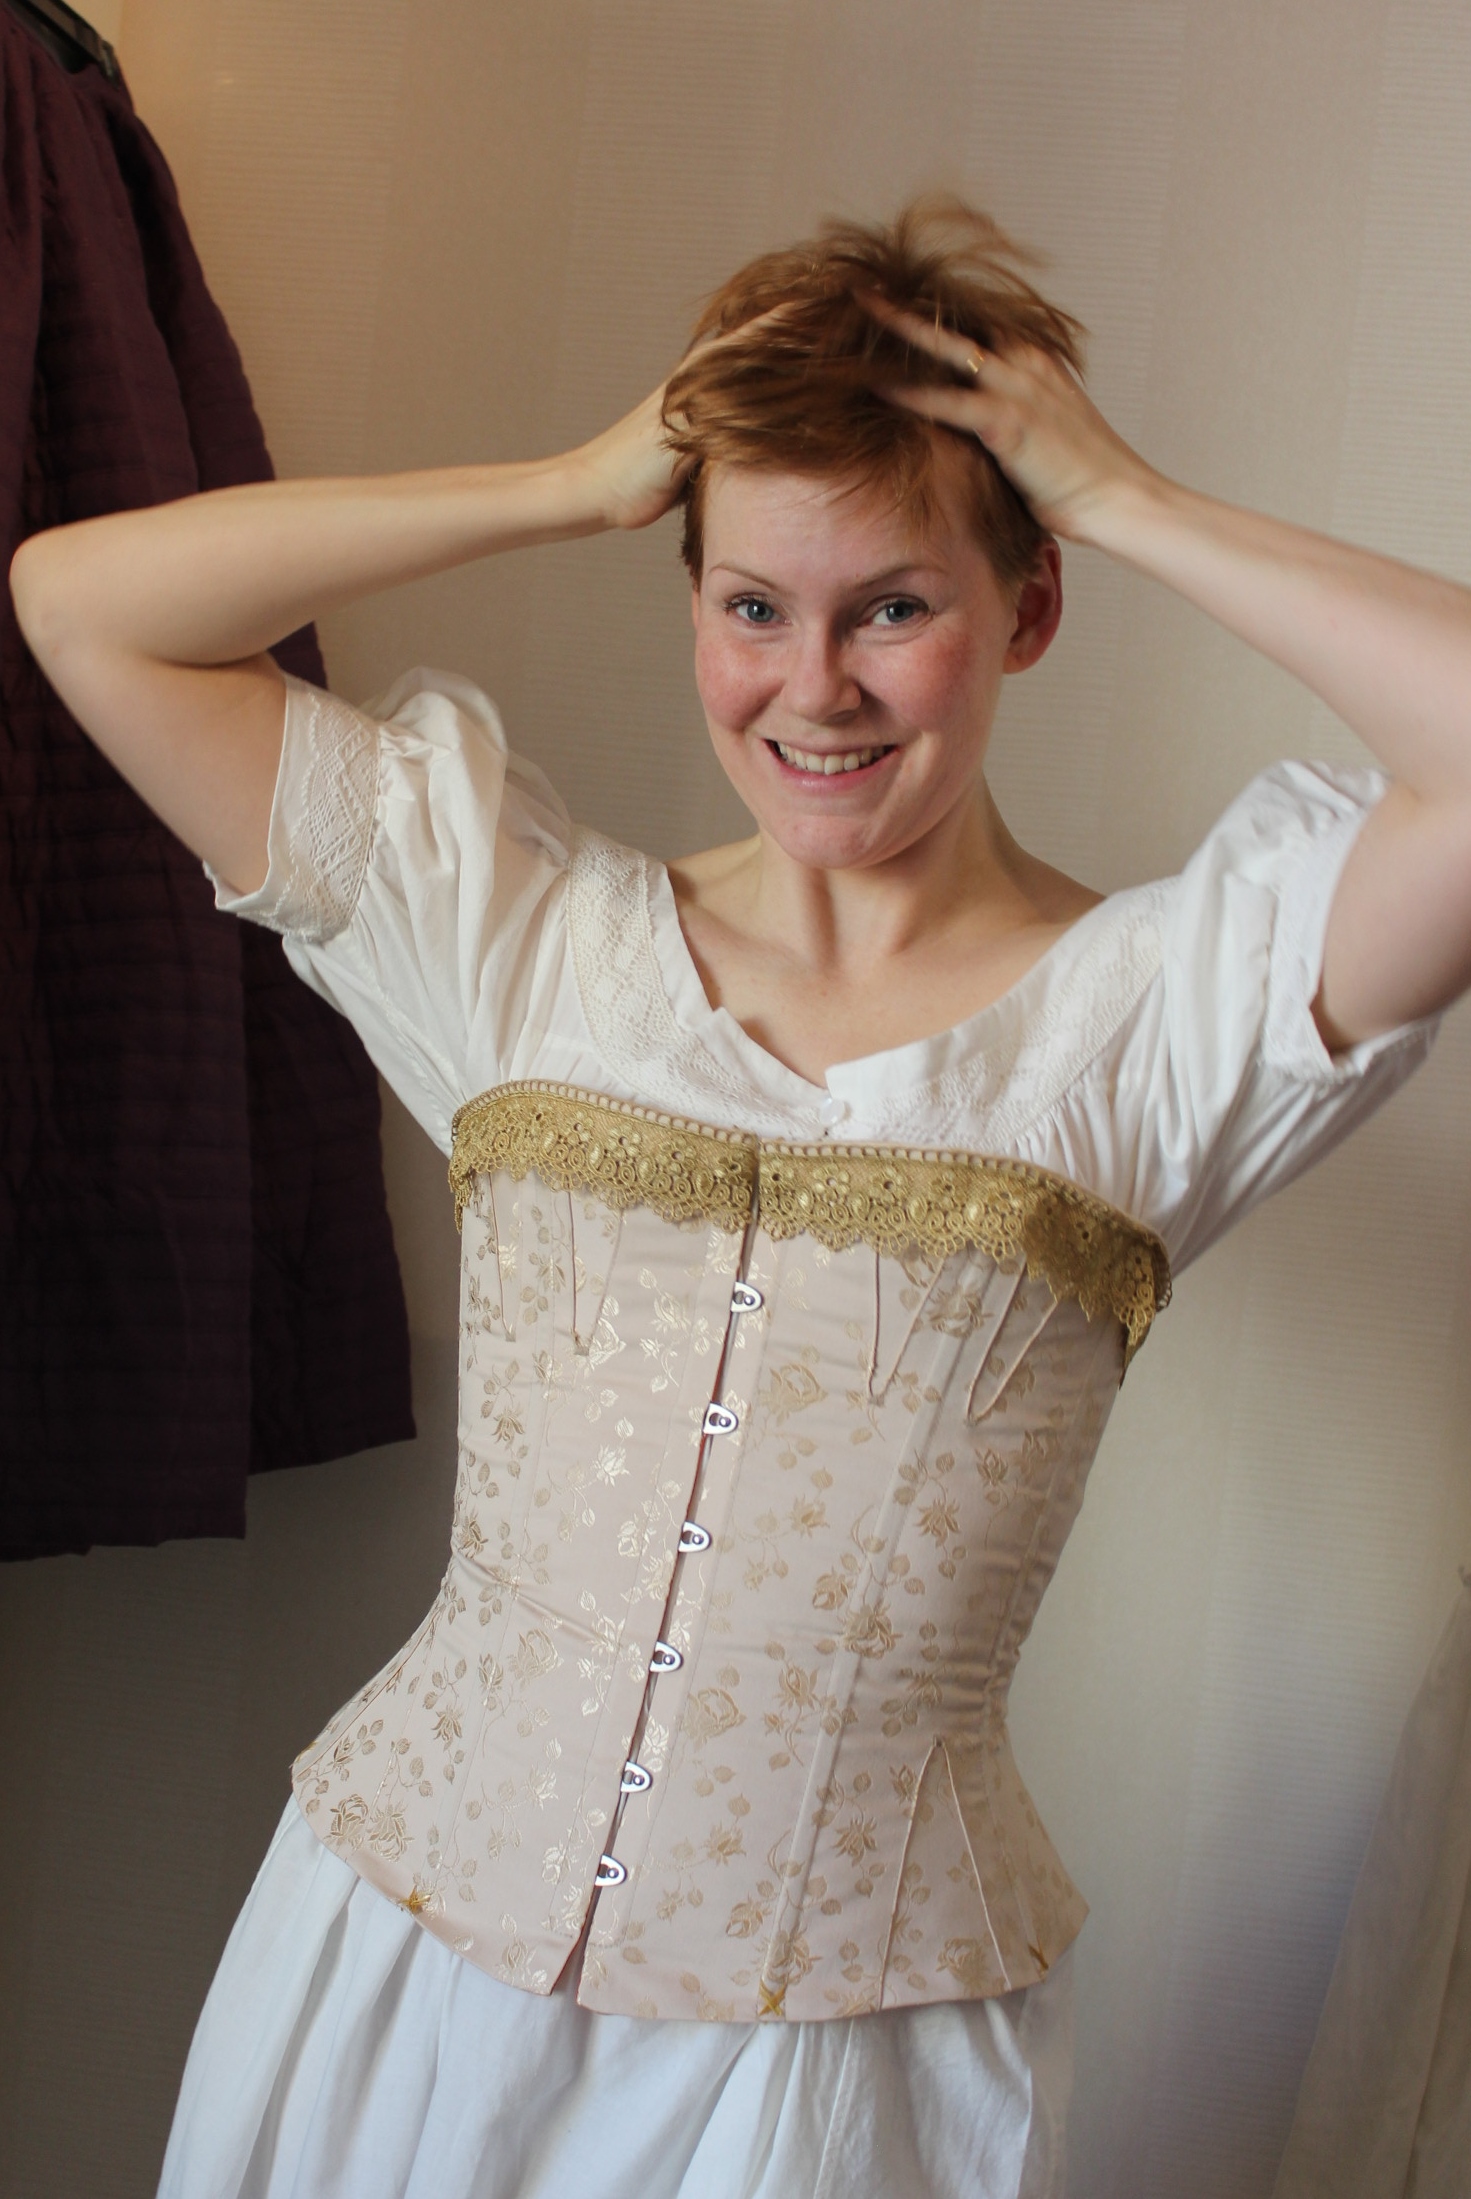 Photos: Elin Evaldsdotter
Here’s some photos of me in my new 1860s golden corset and the Huge Orange Crinoline. I’m also wearing my mid victorian chemise, bloomers, stockings and lace up boots.
And here´s when my baby entered the room
Photos: Elin Evaldsdotter
As I mentioned in an previous post about my sisters 1860s corset, I couldn’t resist the temptation to make one for myself (even though I didn’t need one and really didn’t had the time for it). I tried to convince myself that it would be like a workable test-run of the pattern for my sisters corset. But since I both started (and finished) it after my sisters was already done, that argument fell kind of flat.
But anyhow, I did make one for myself :-).
Using the same pattern, and initially also the same mock-up I got to work.
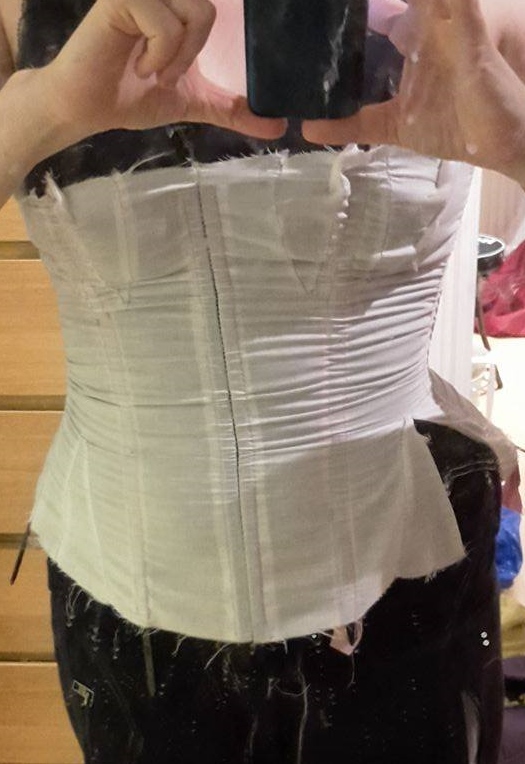
Terrible first mock-up
Wanting the fitting just right, I also made a second mock-up – based on my own measurements (instead of my sisters).
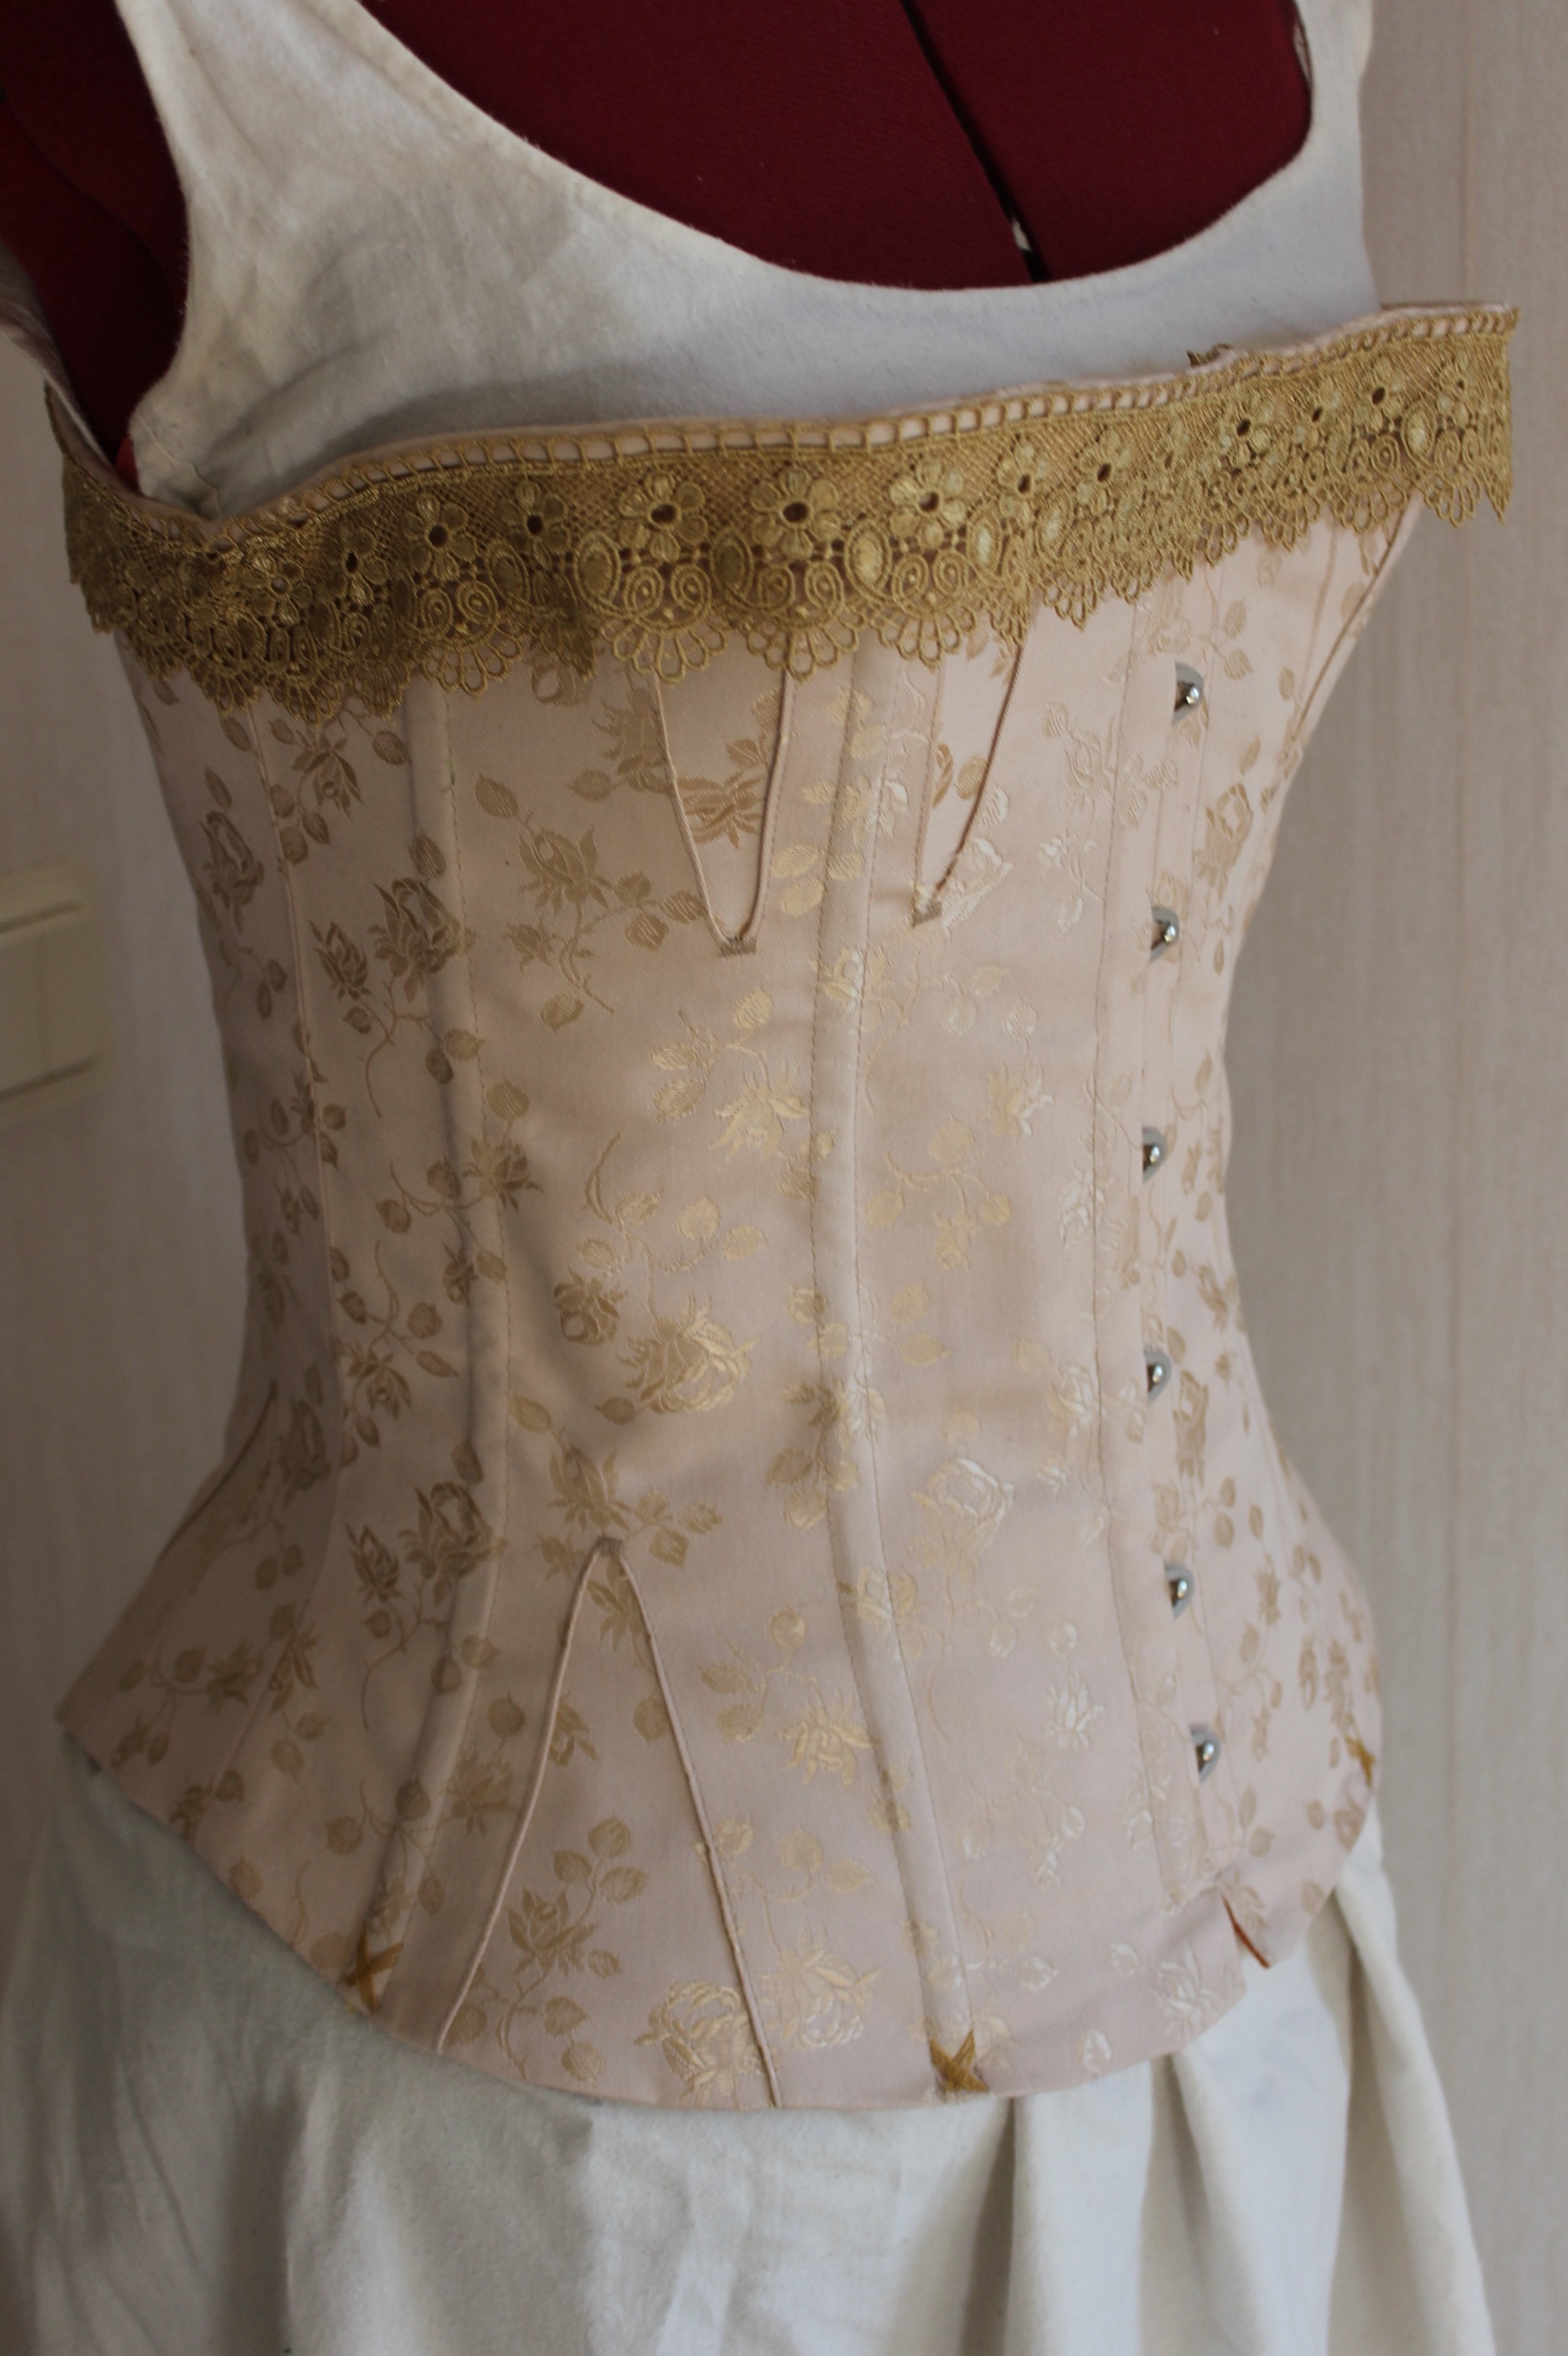
Using a beautiful cream/golden coutil from “Vena Cava designs”, and a orange cotton sheet for lining.
I sewed it up in the same way as my sisters (but I didn’t need any additional alterations), so it went faster.
 Attaching the busk to the beautiful golden fabric
Oh, how I wished I’ve gotten the tad more expensive golden busk on my last order.
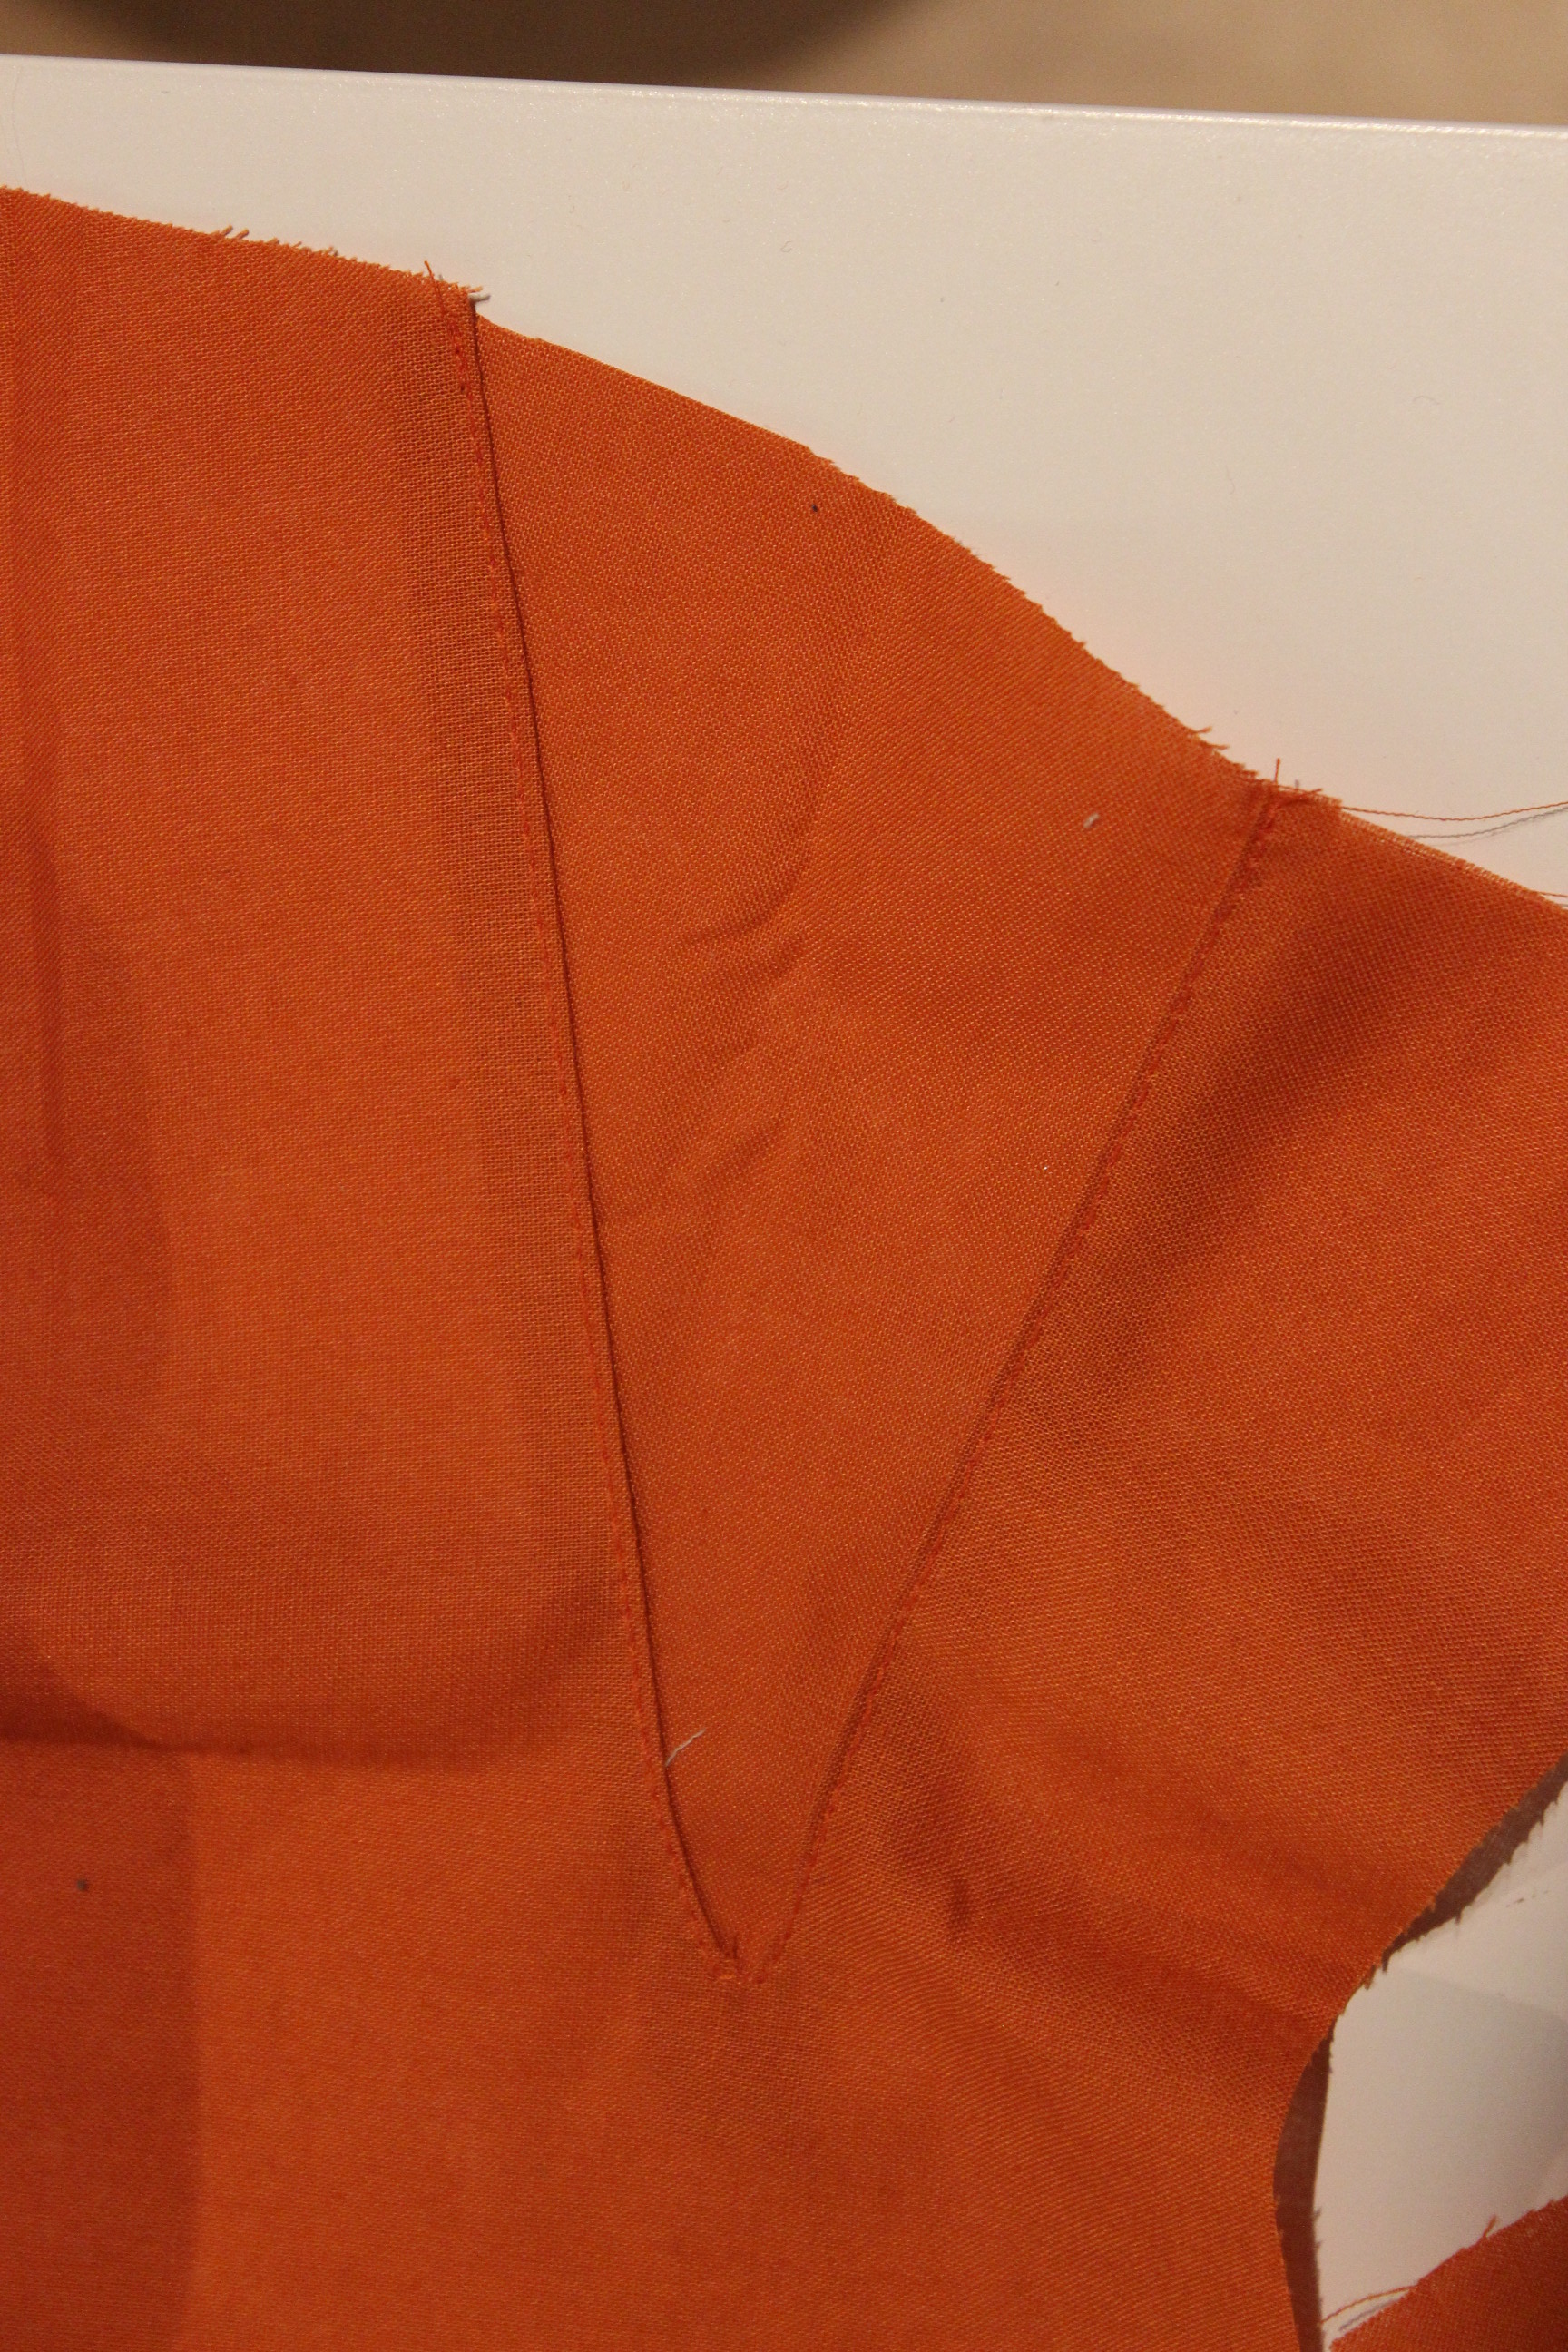
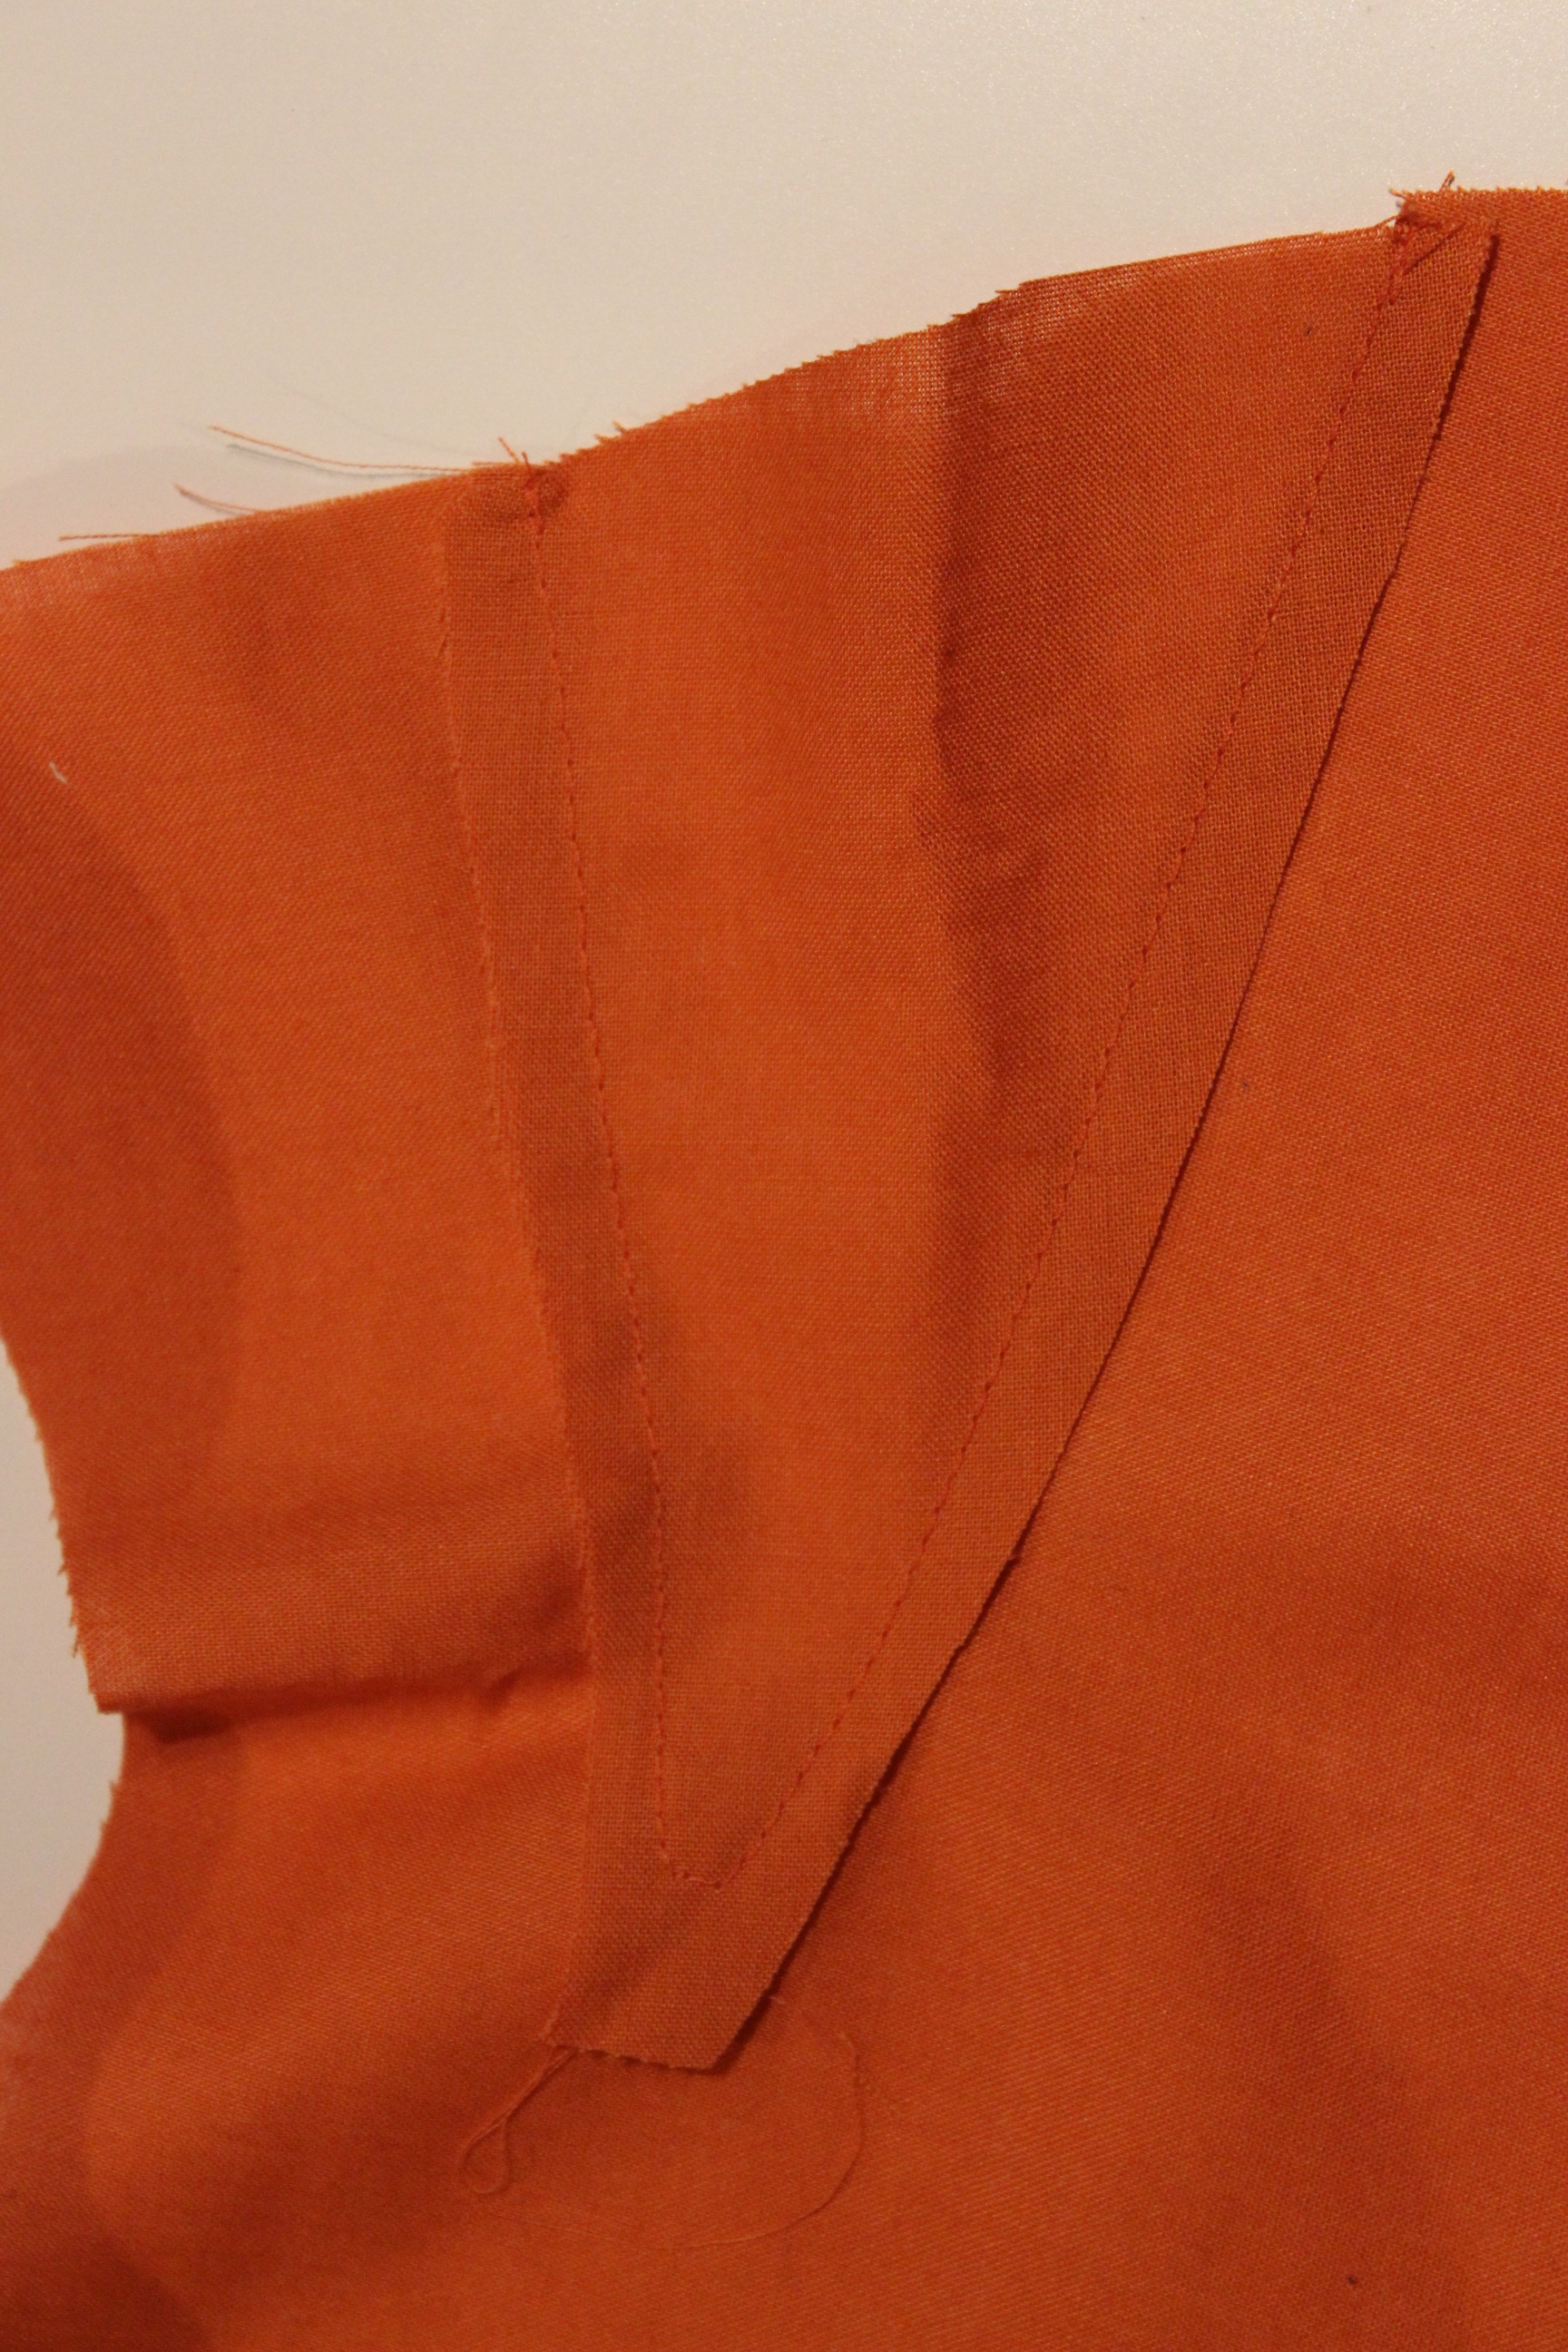
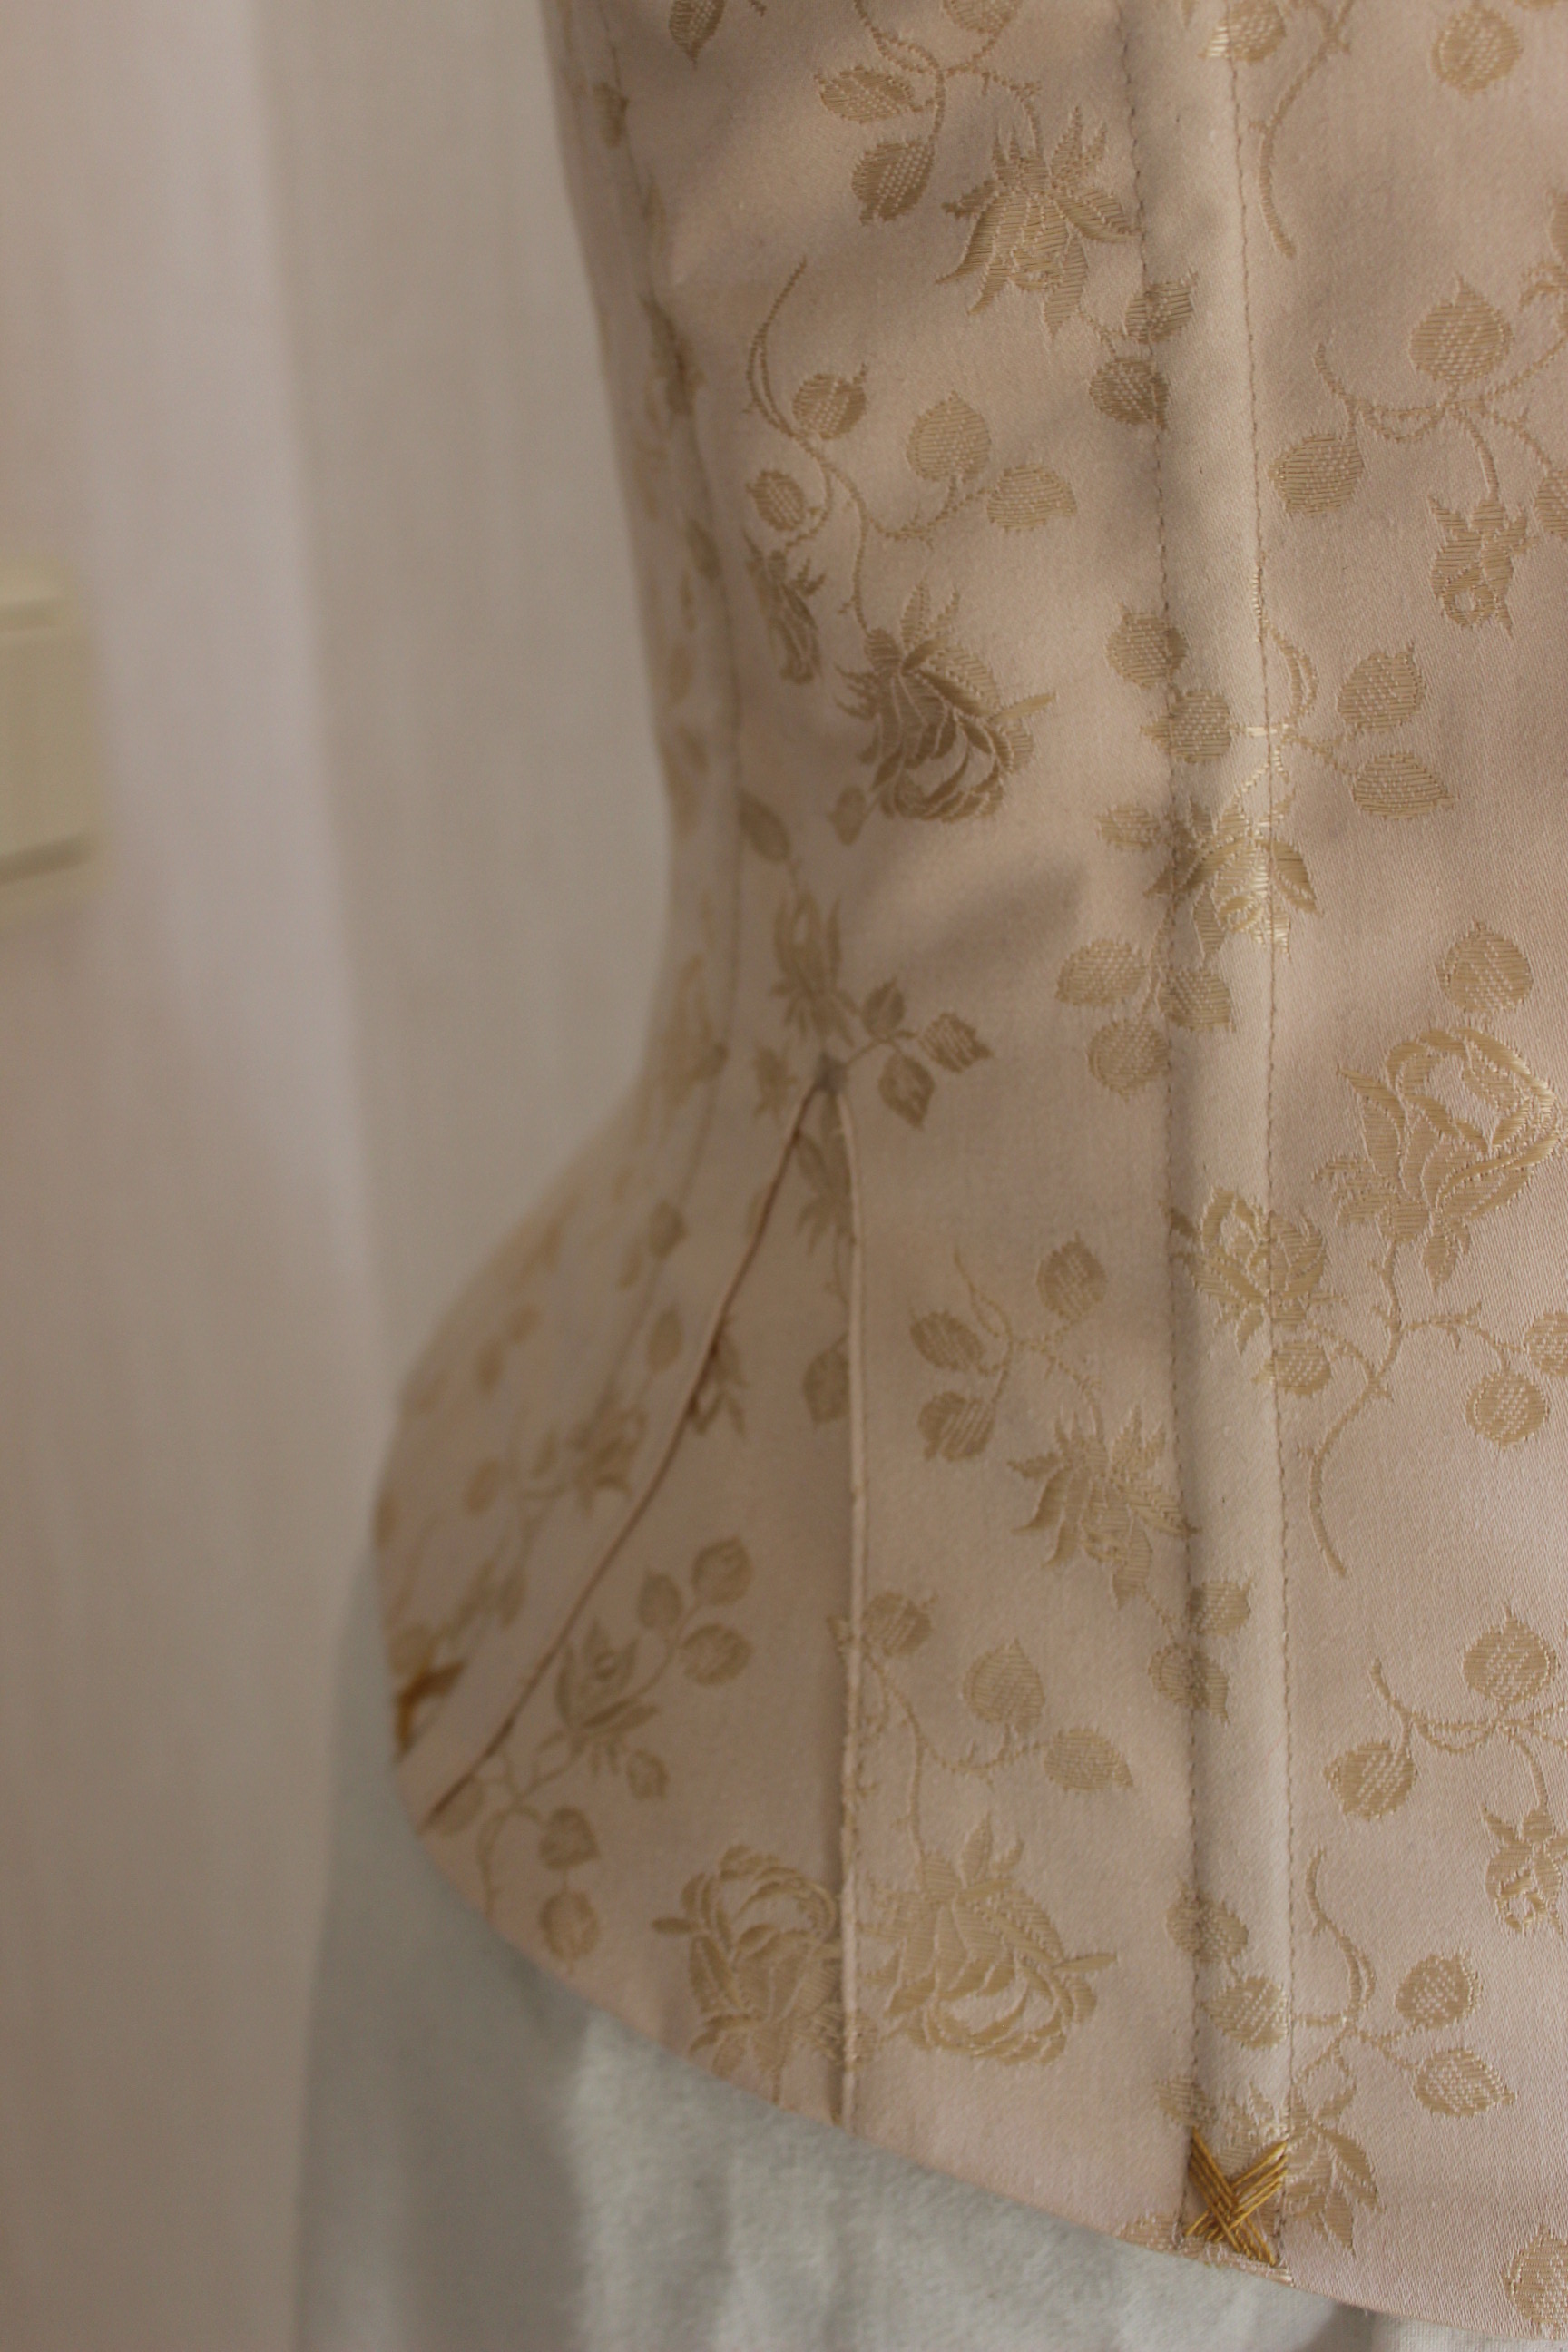
Front and back of the guessets
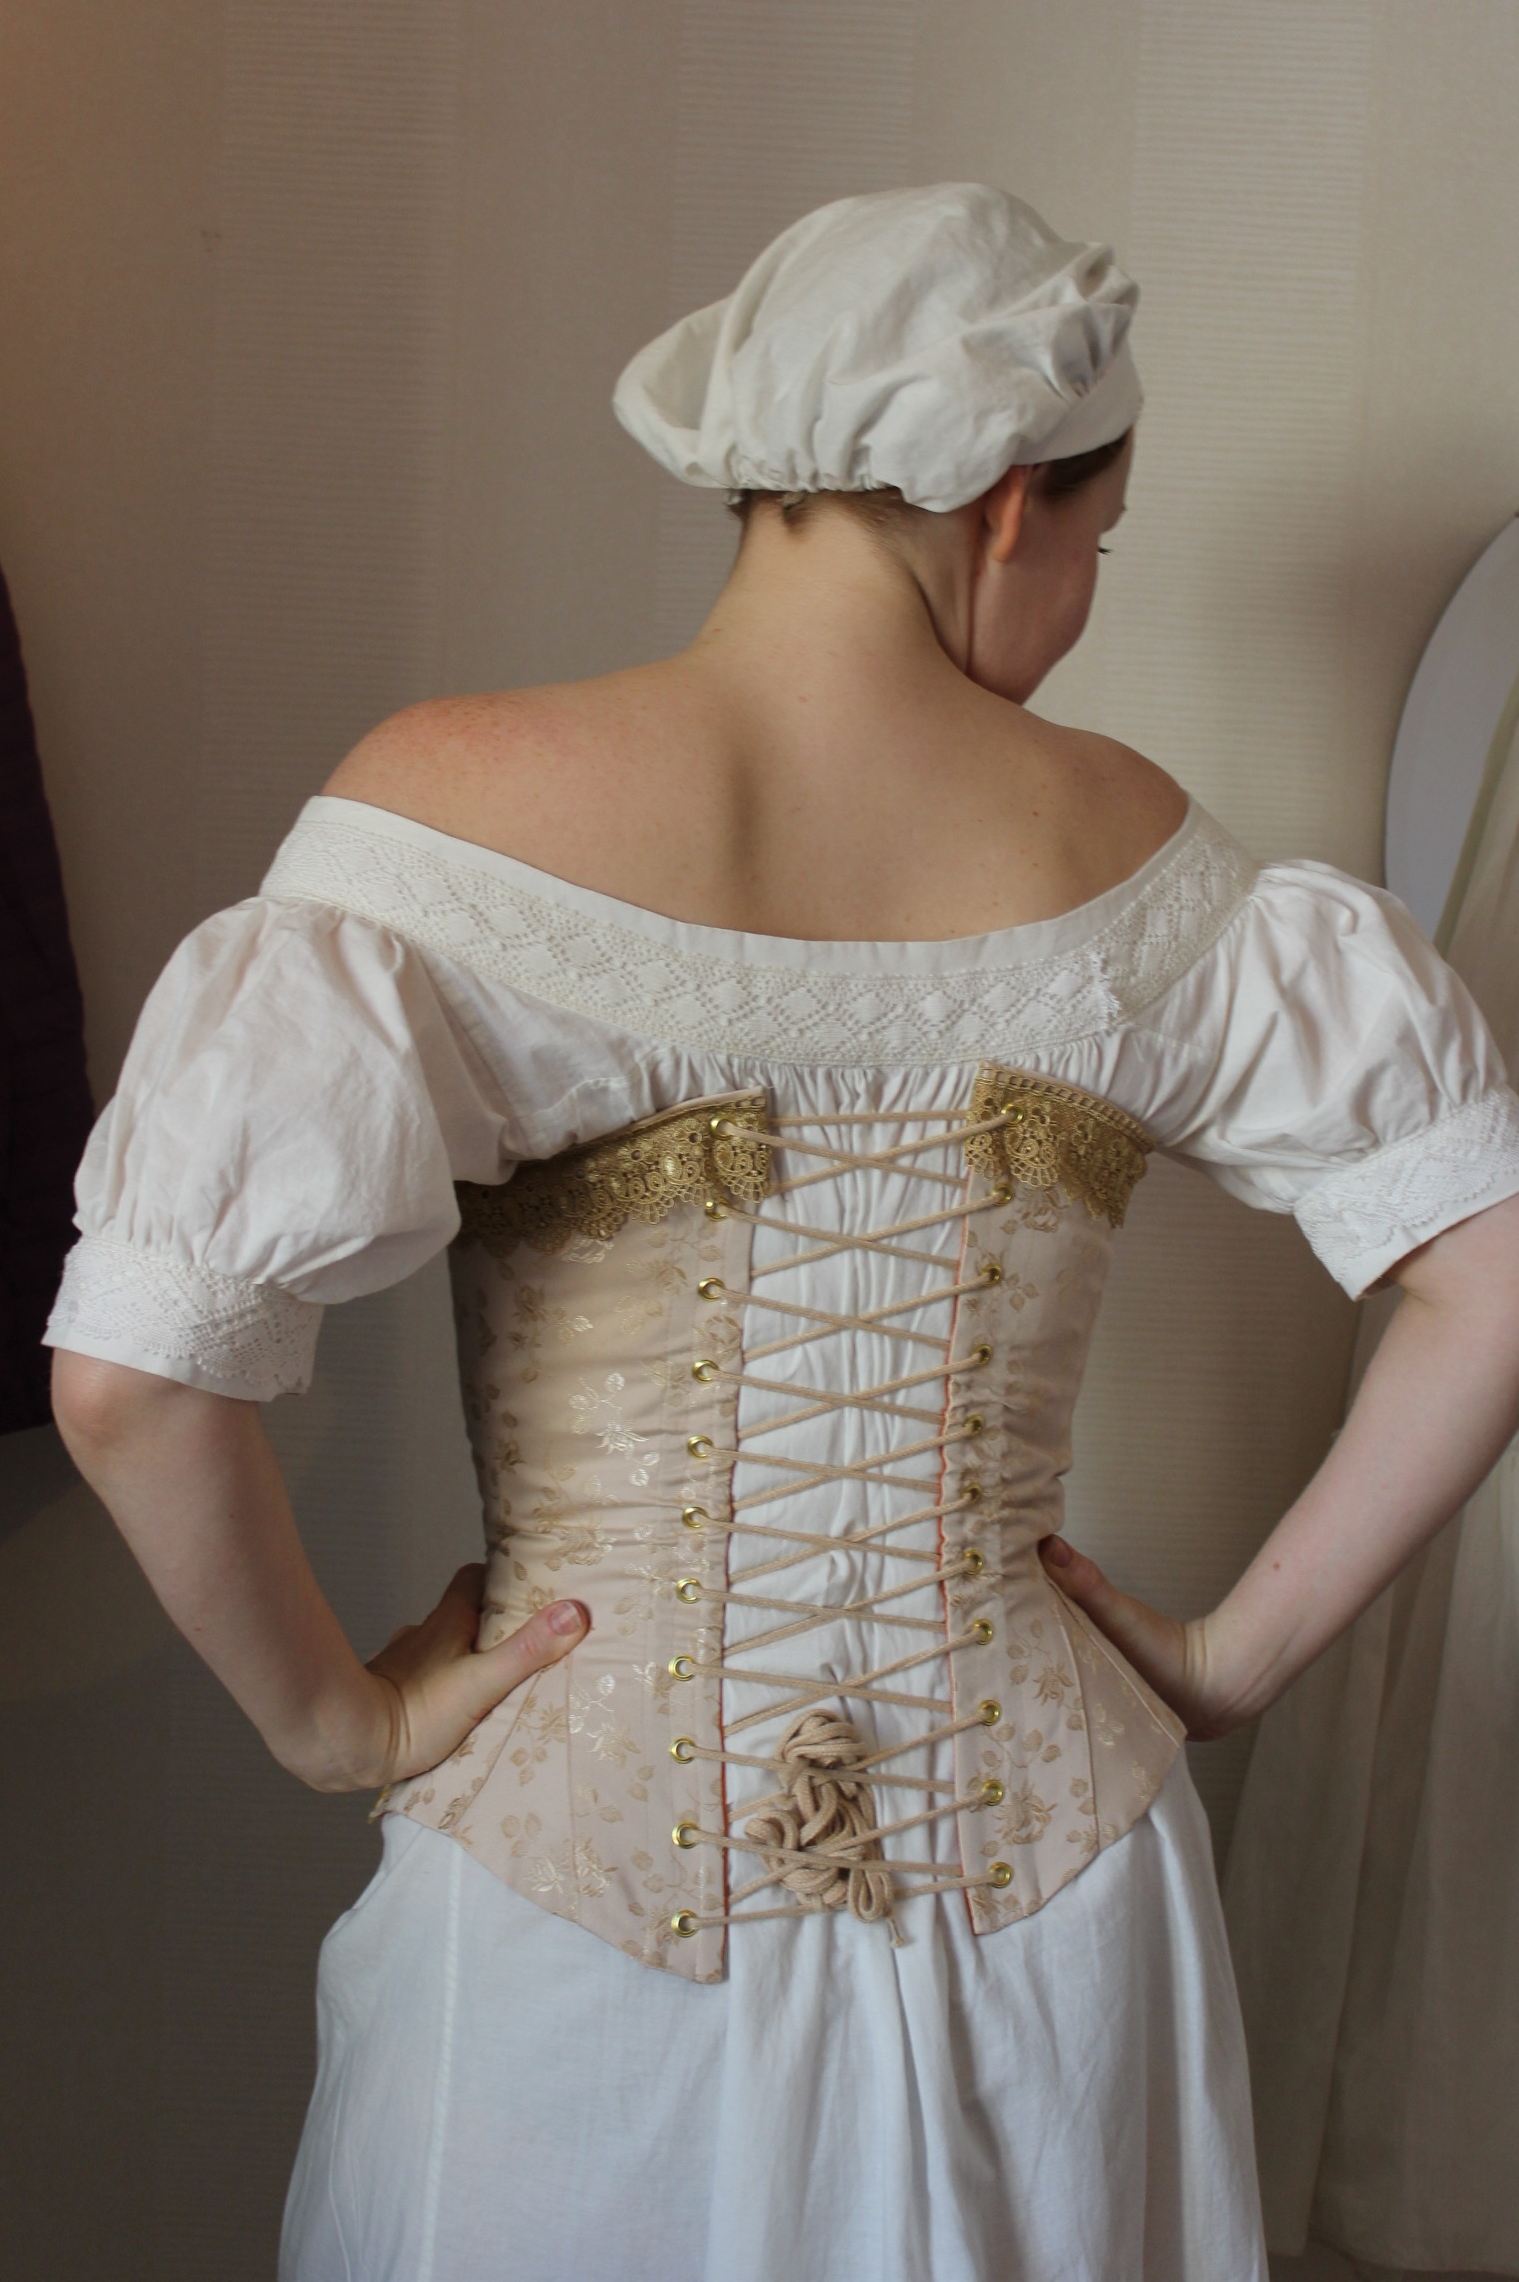
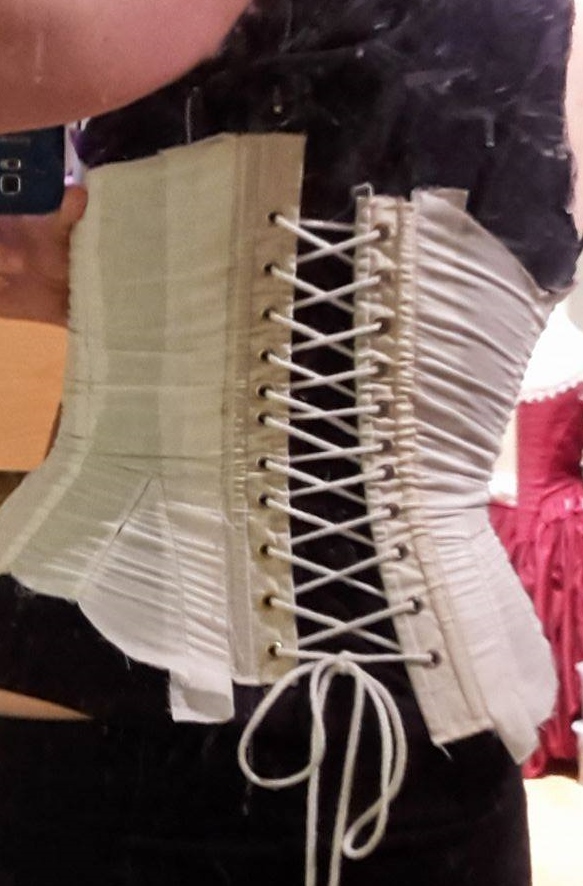
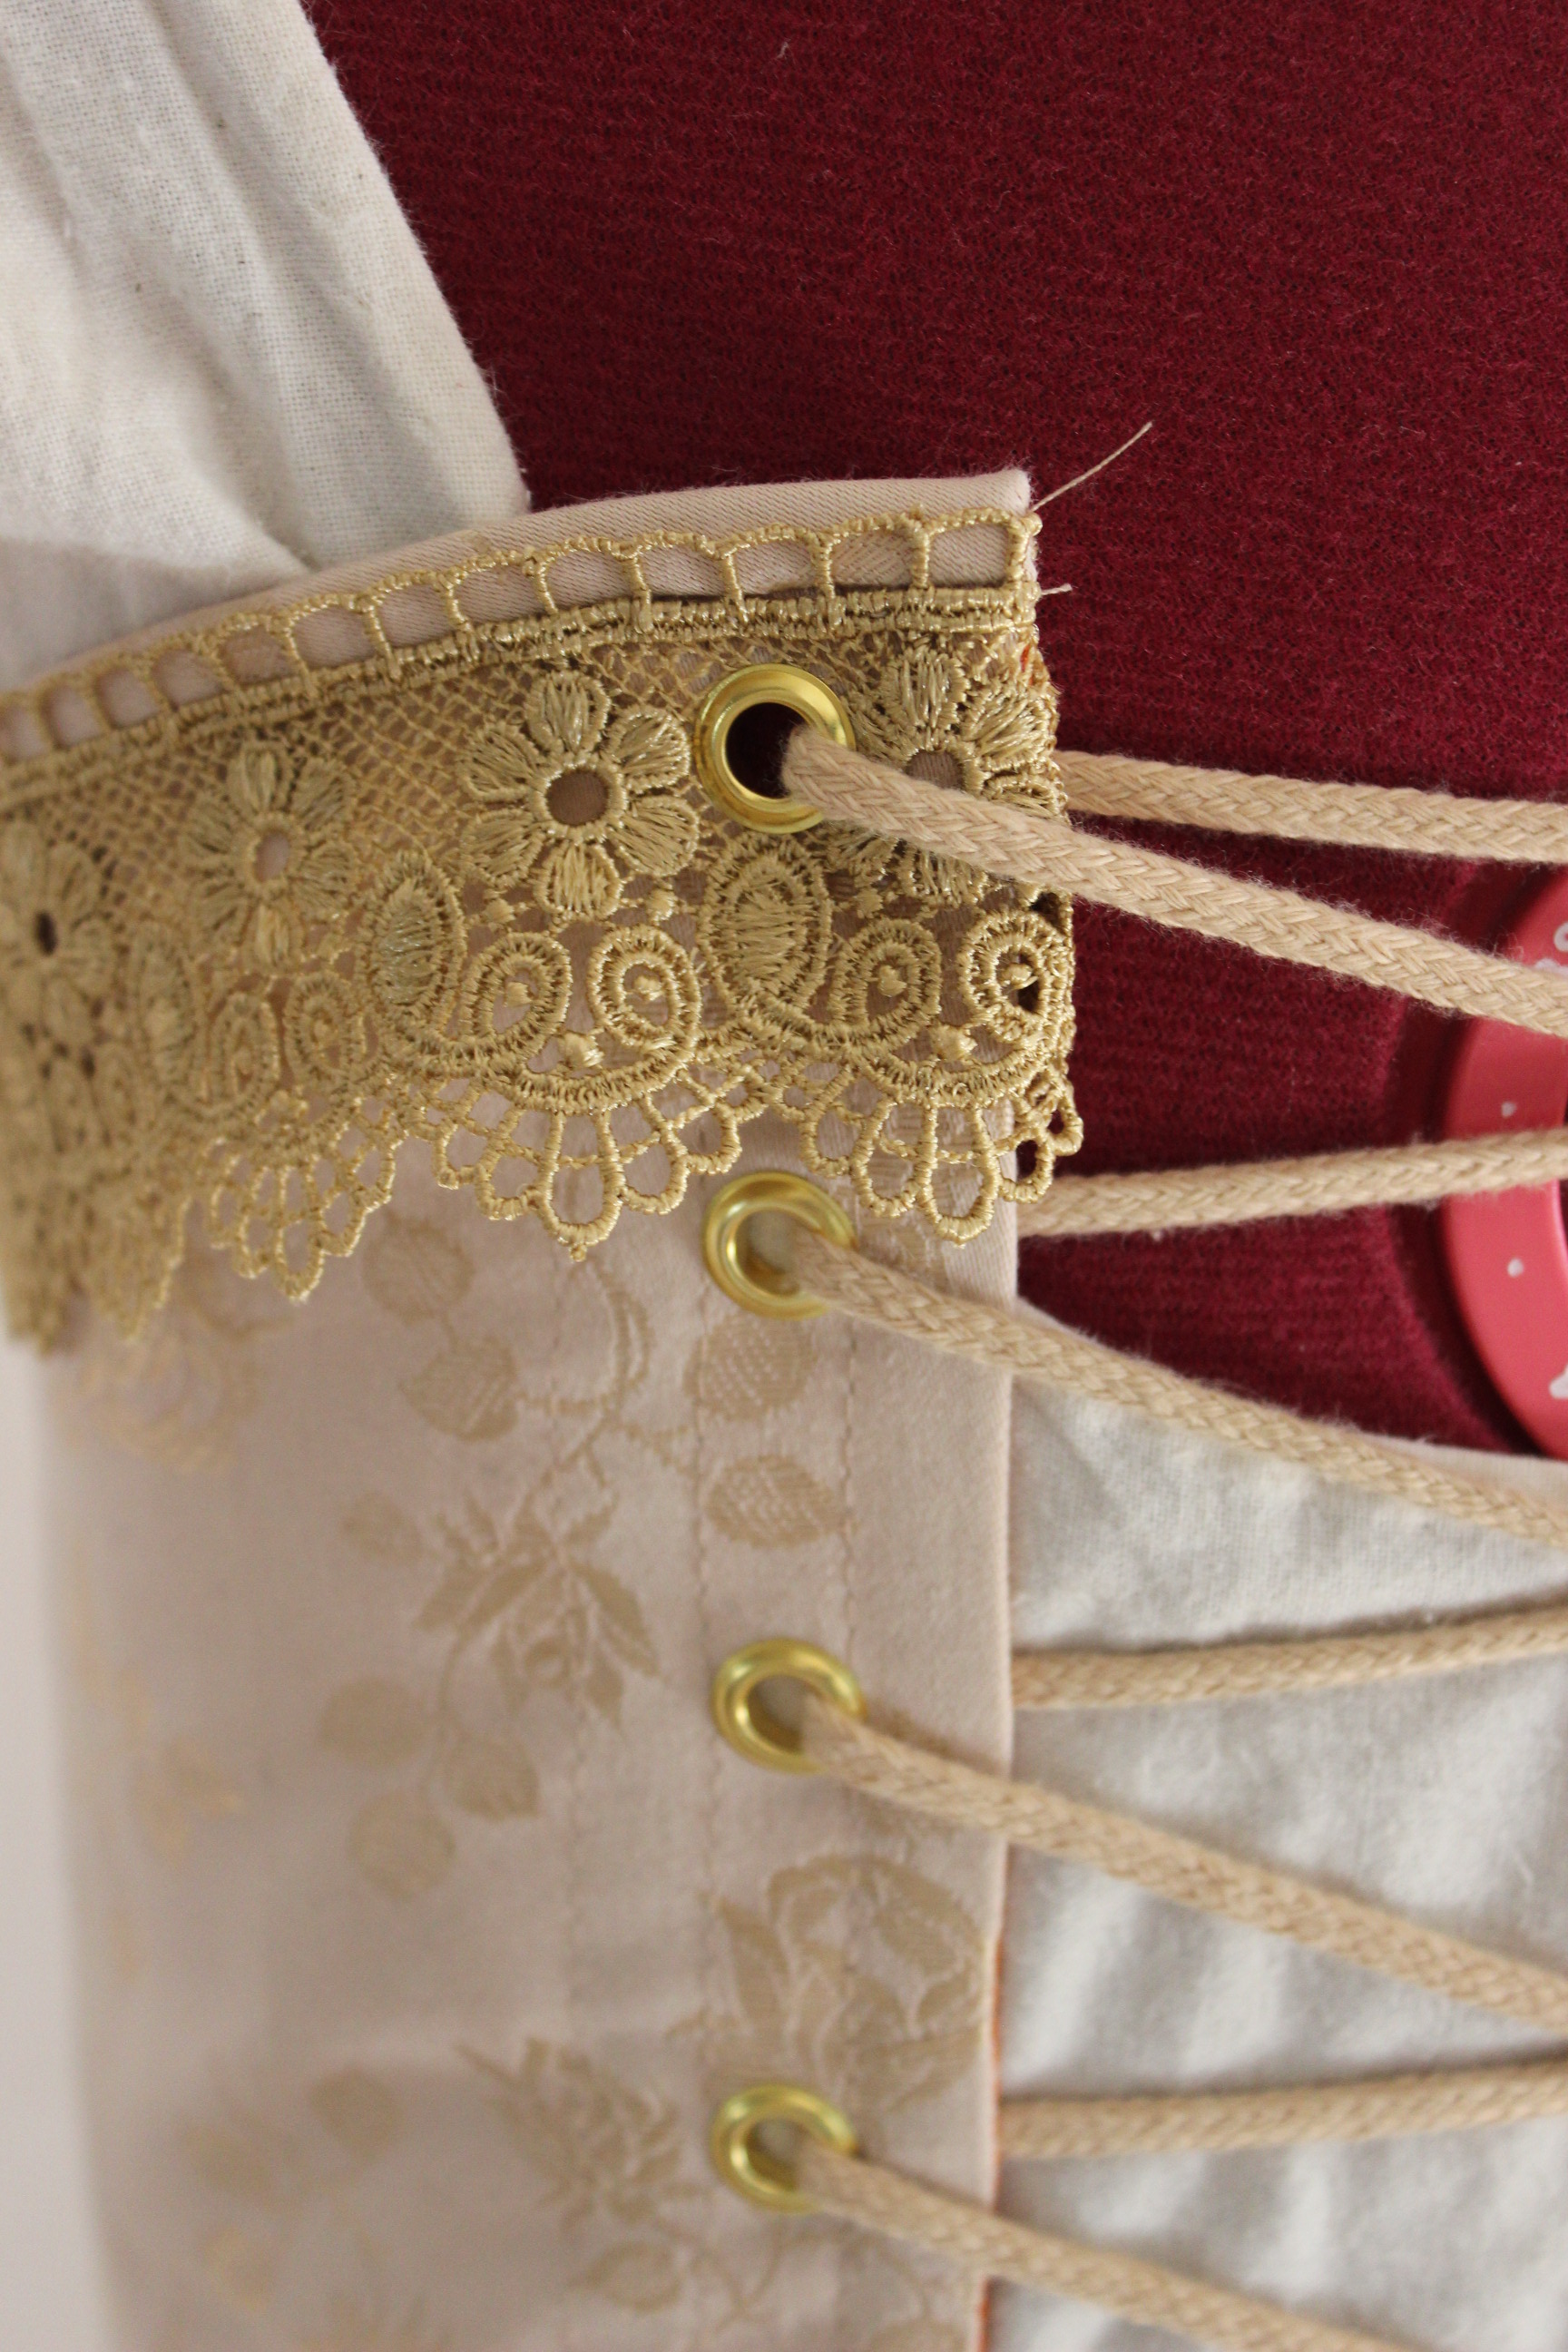
I stitched the whole thing together, adding bone casings, grommets and bones. I made my own bias tape using pieces of main fabric and used it to bind the top edge.
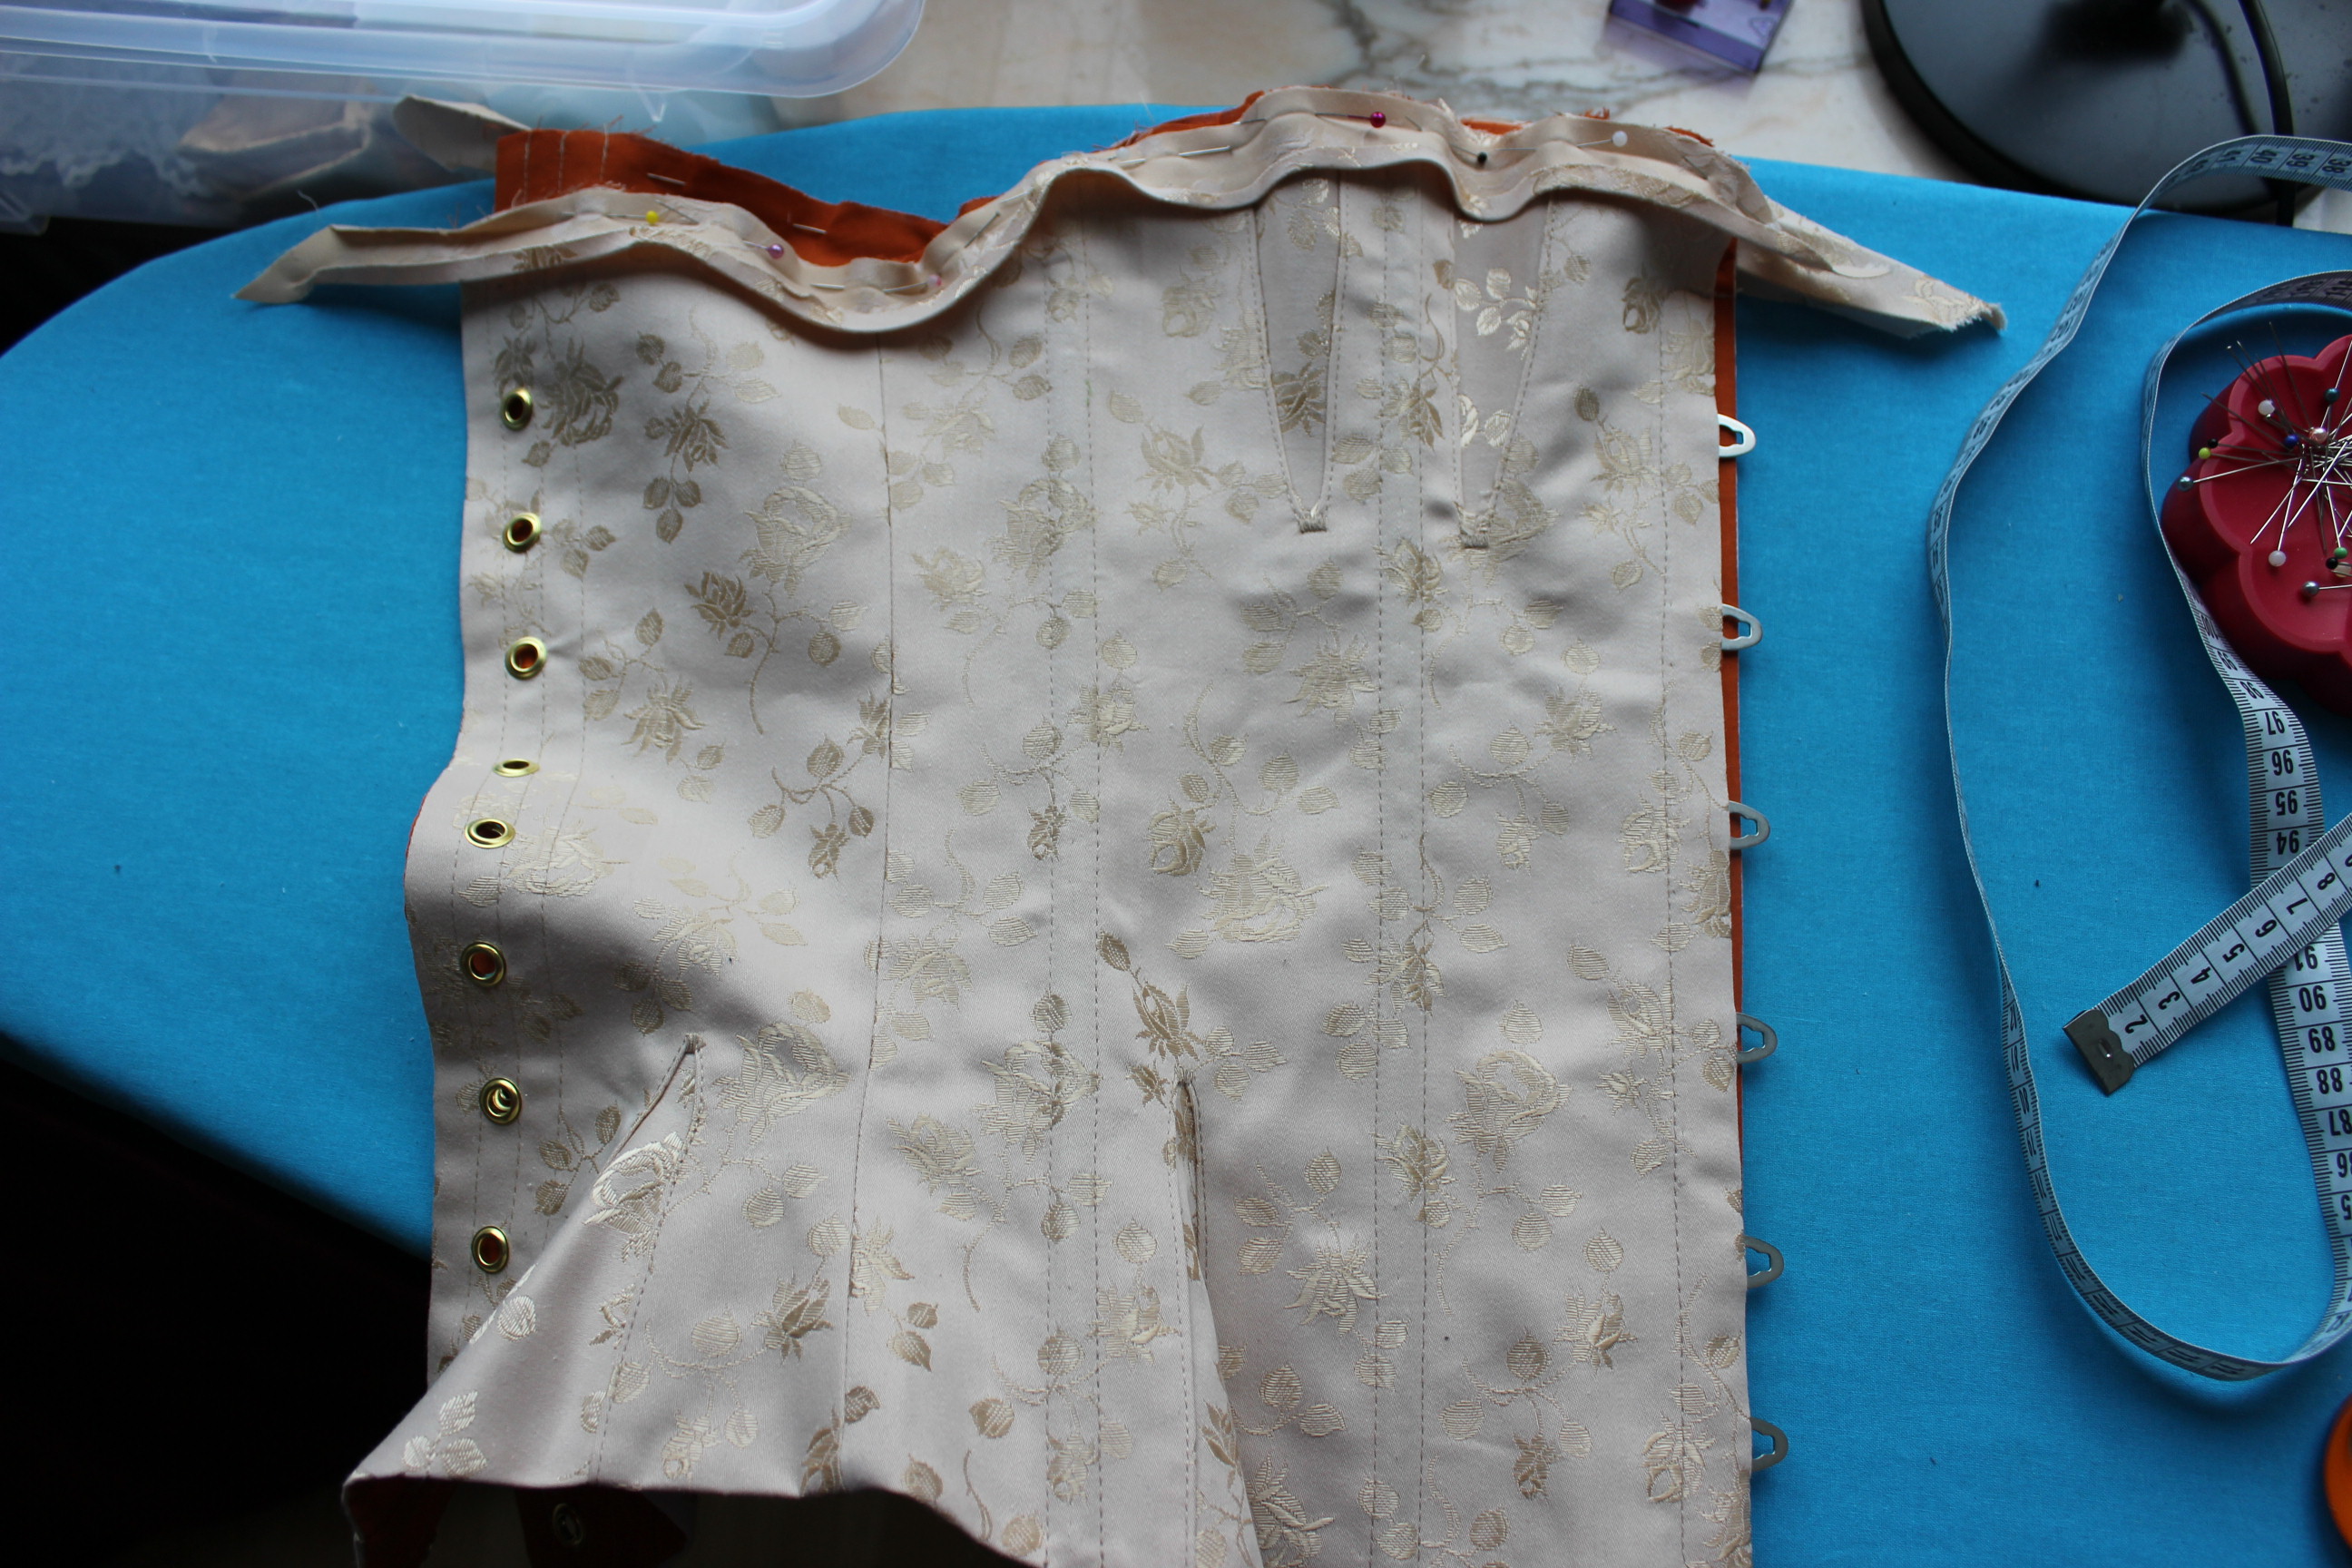
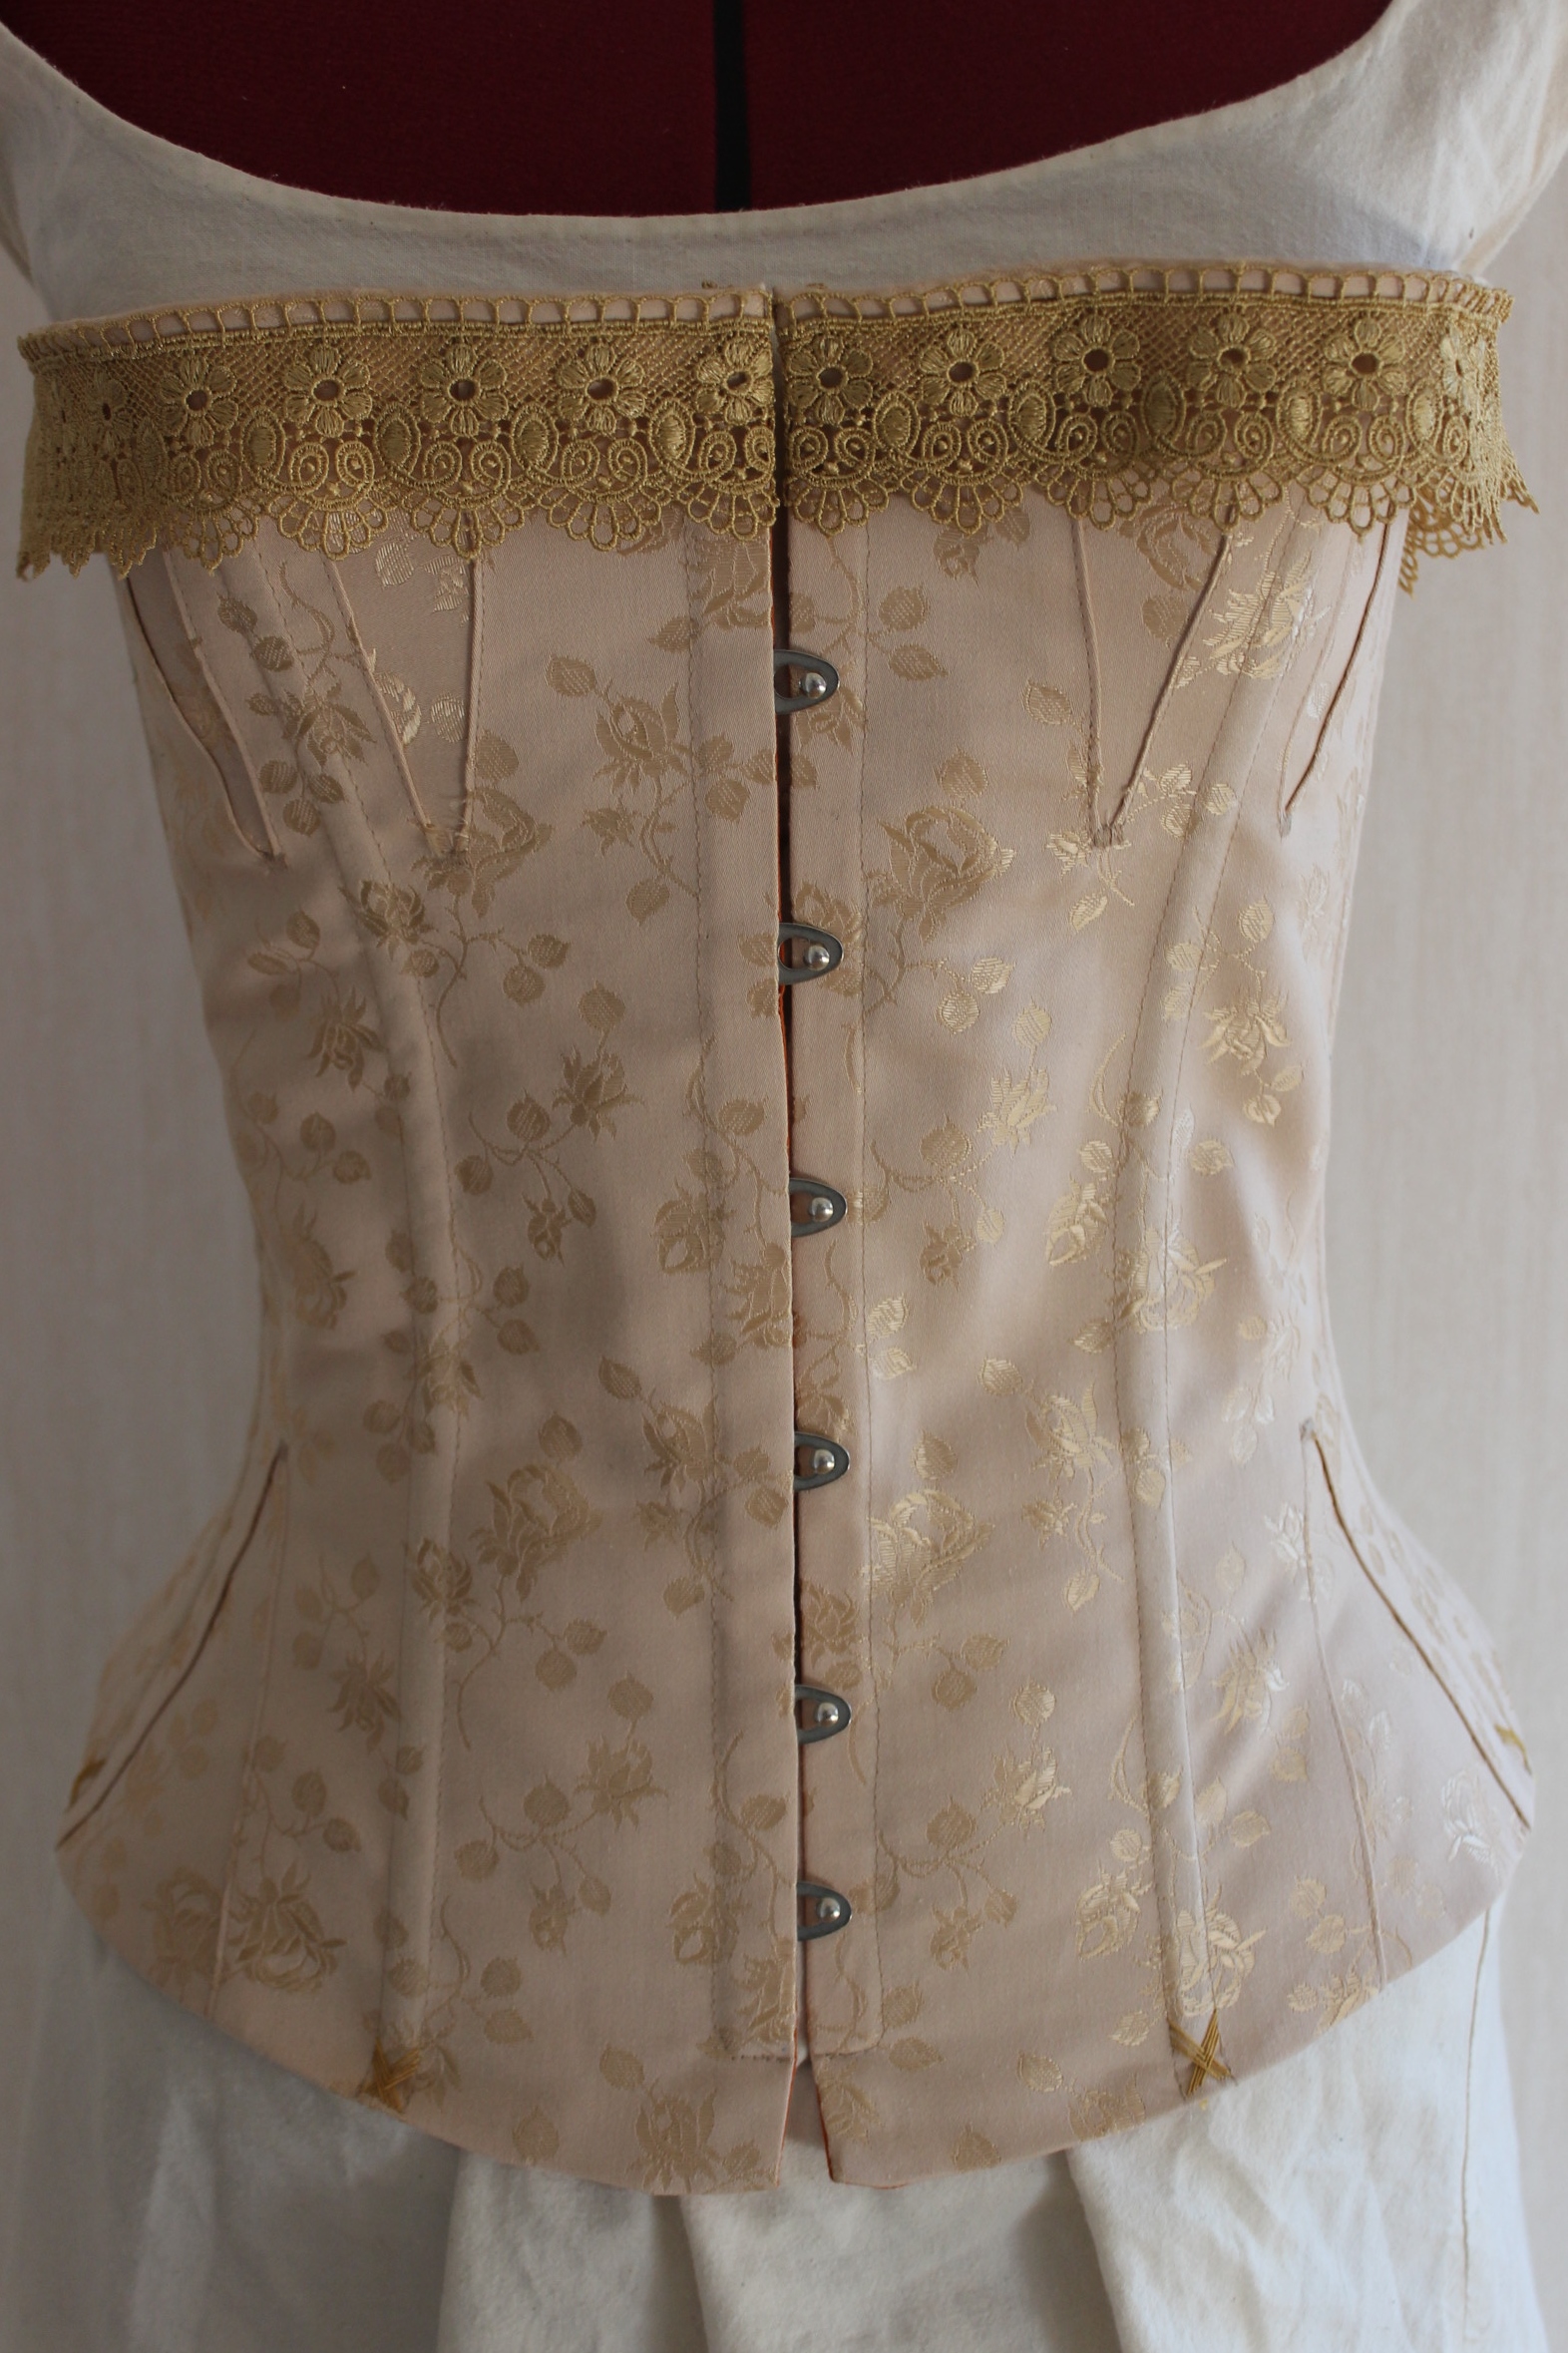
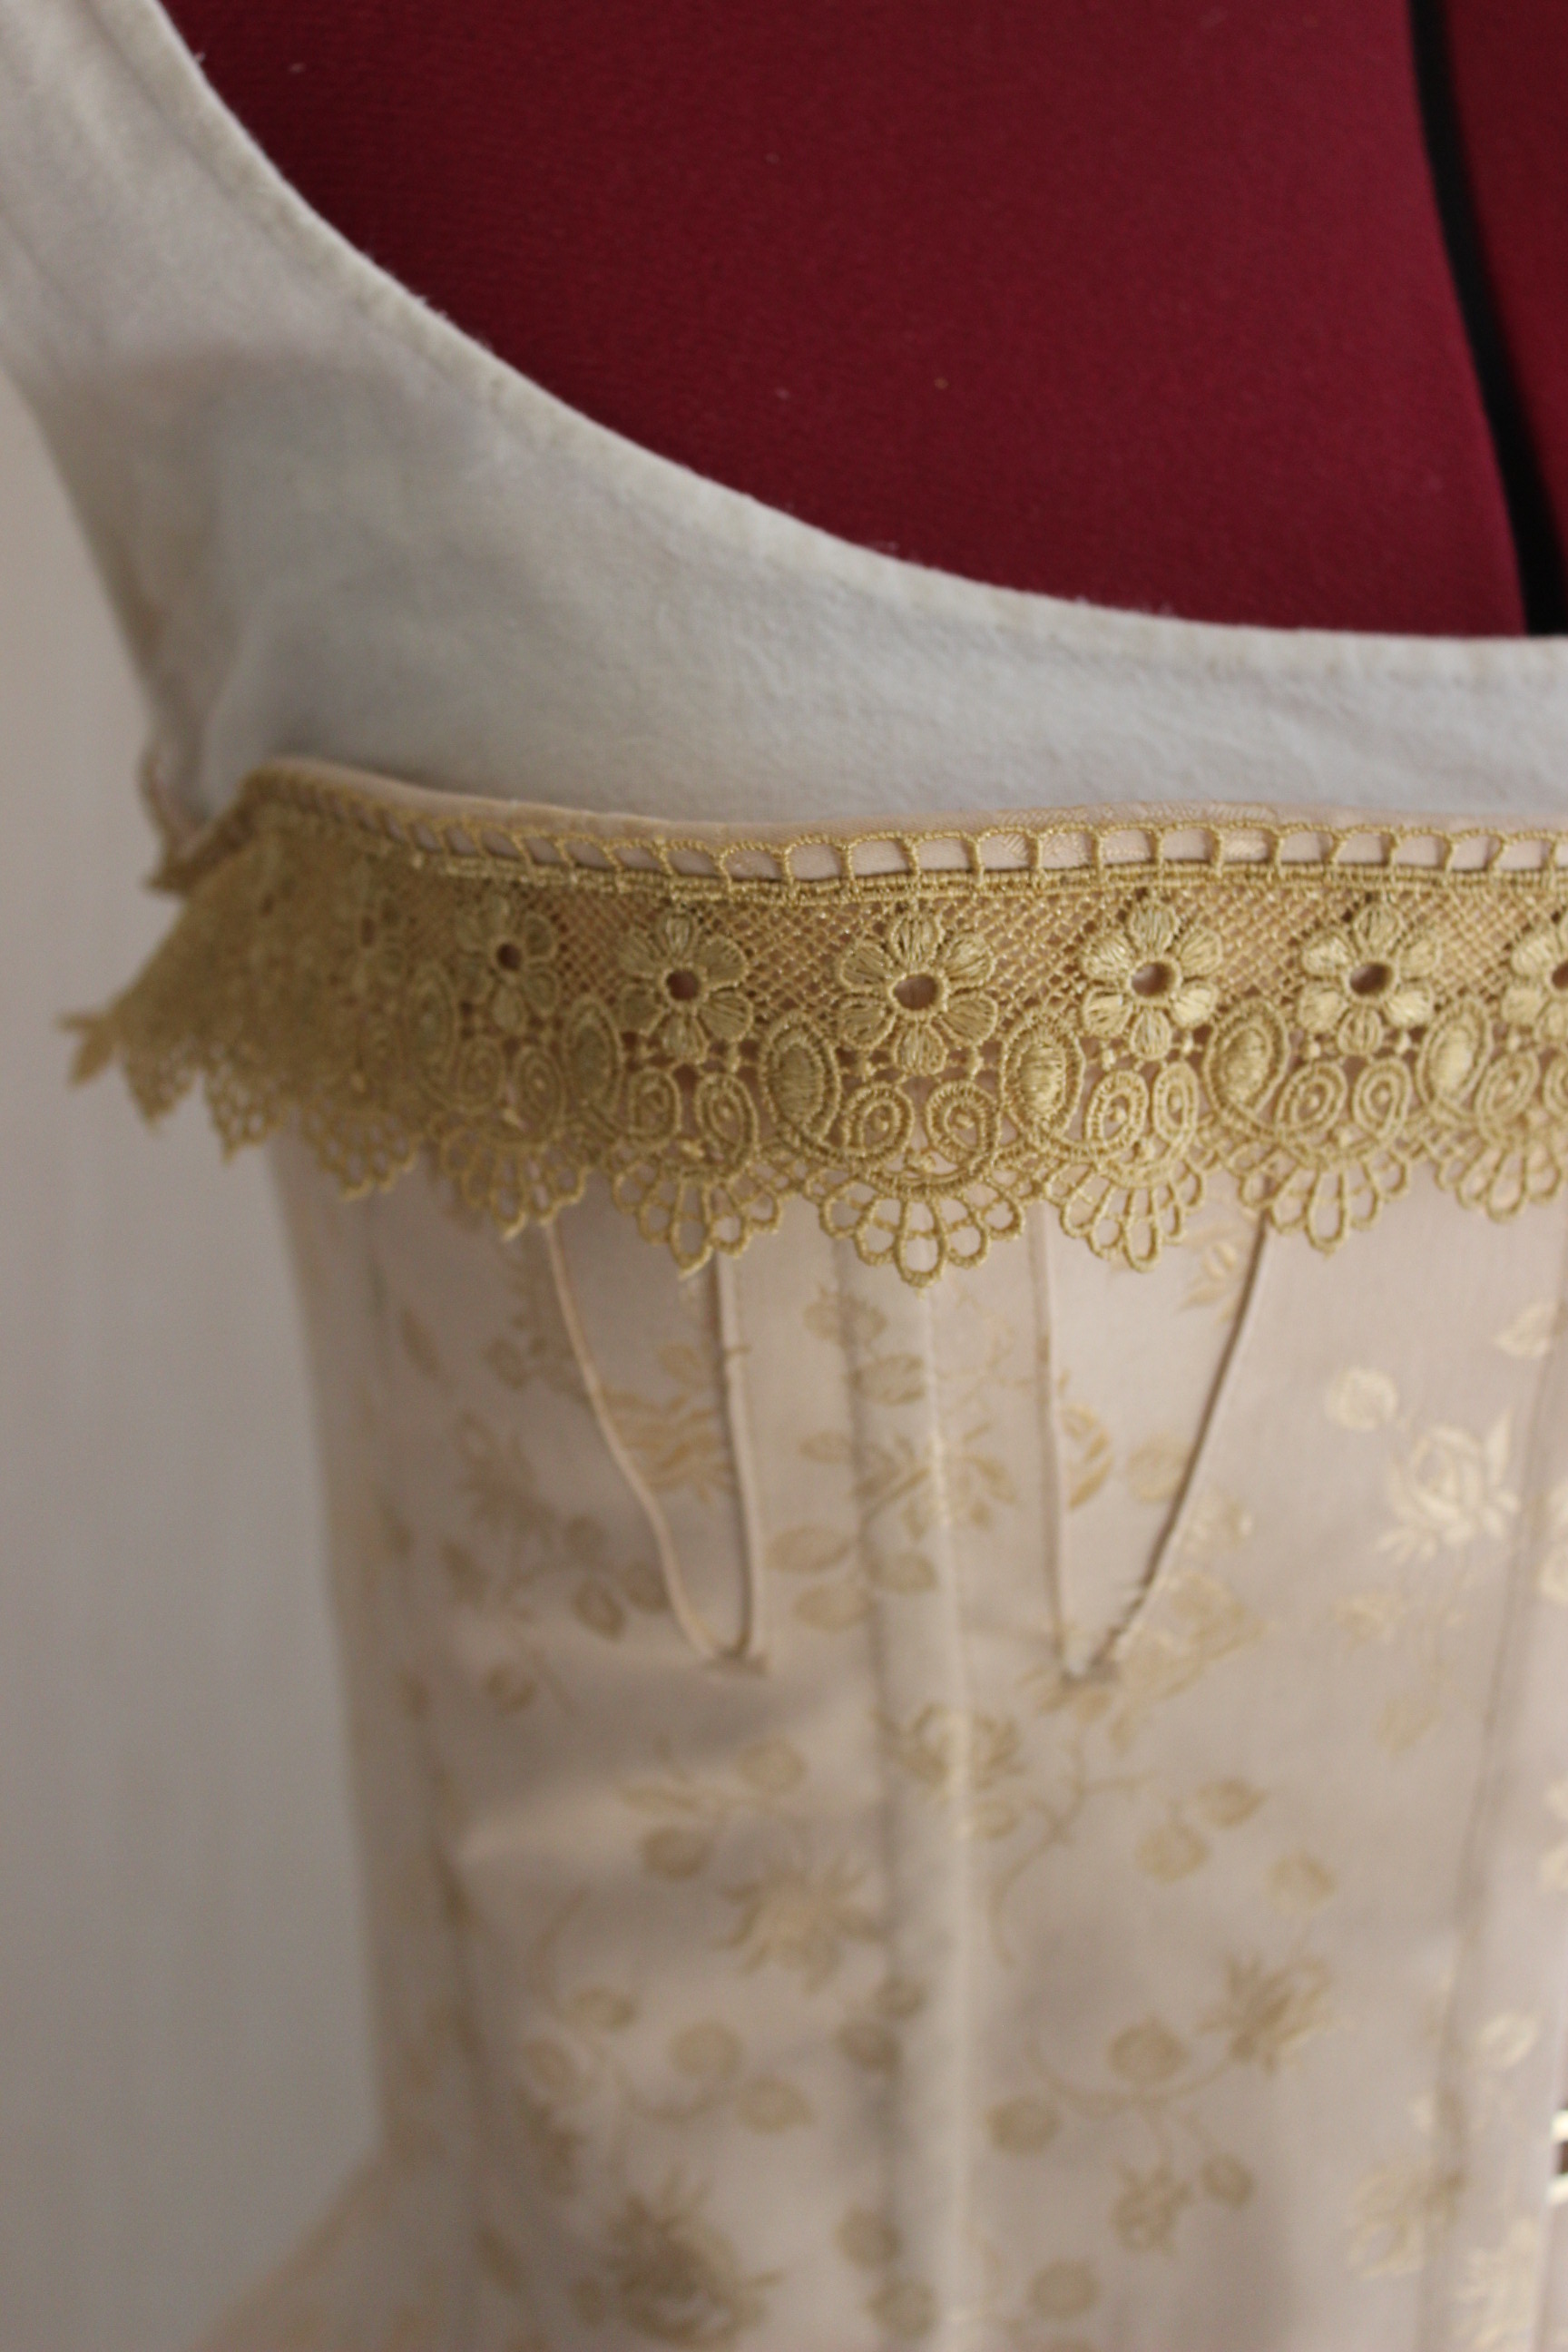
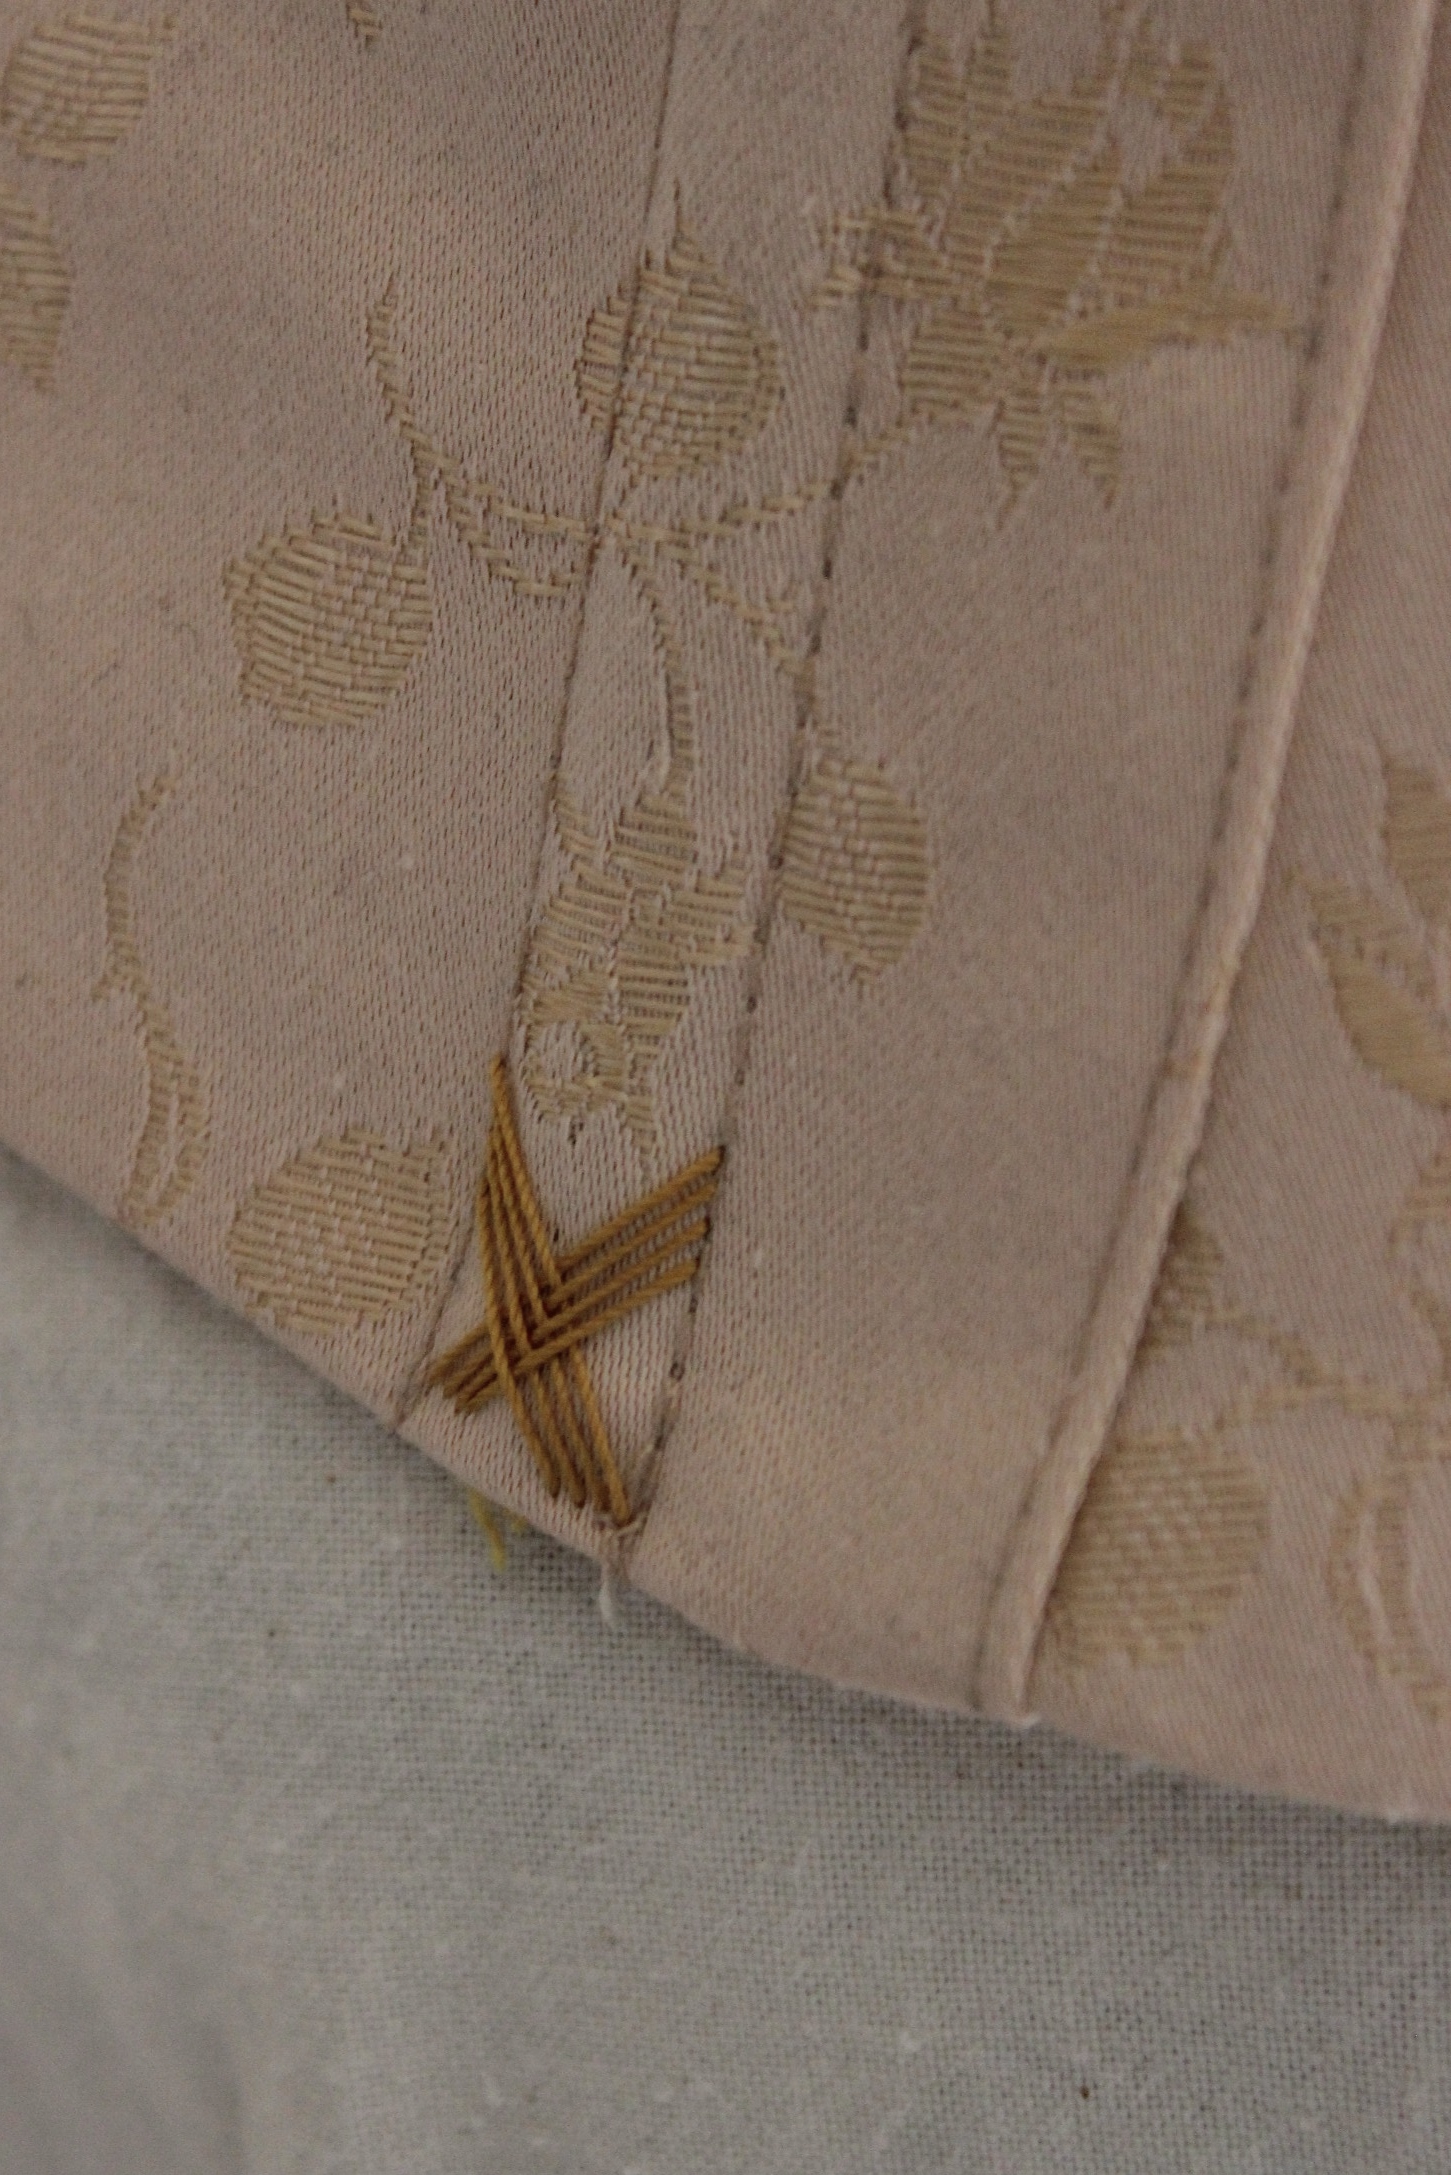
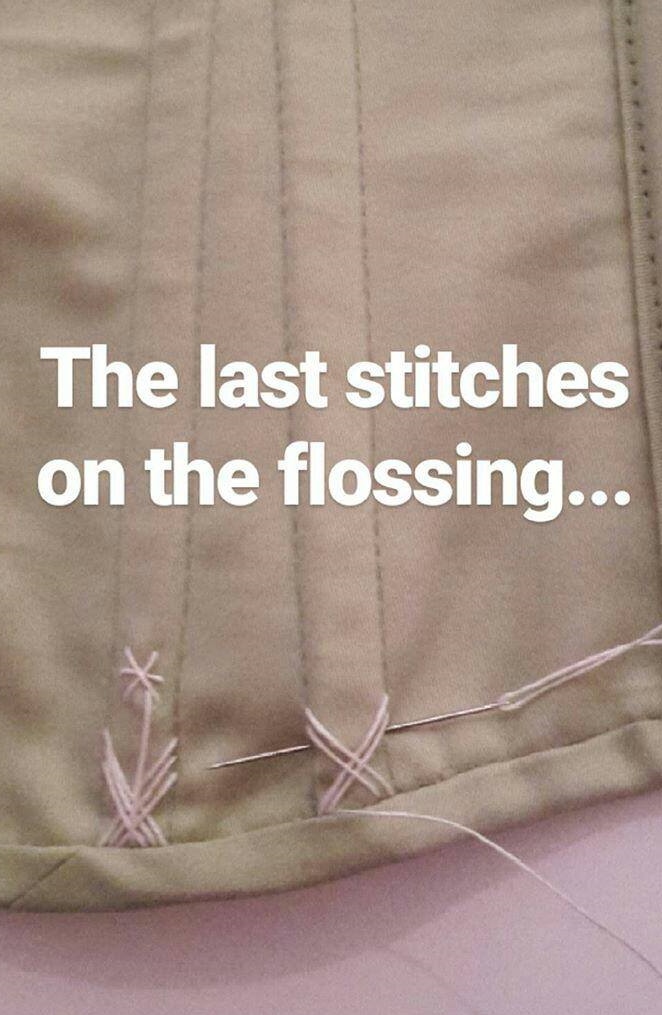
Then all that was left was to add the decoration Time for lace and flossing
Isn’t it amazing when your stash yields everything you need for a beautiful composed corset 🙂 (or maybe that a sign I got to much stash? Neh 🙂 )
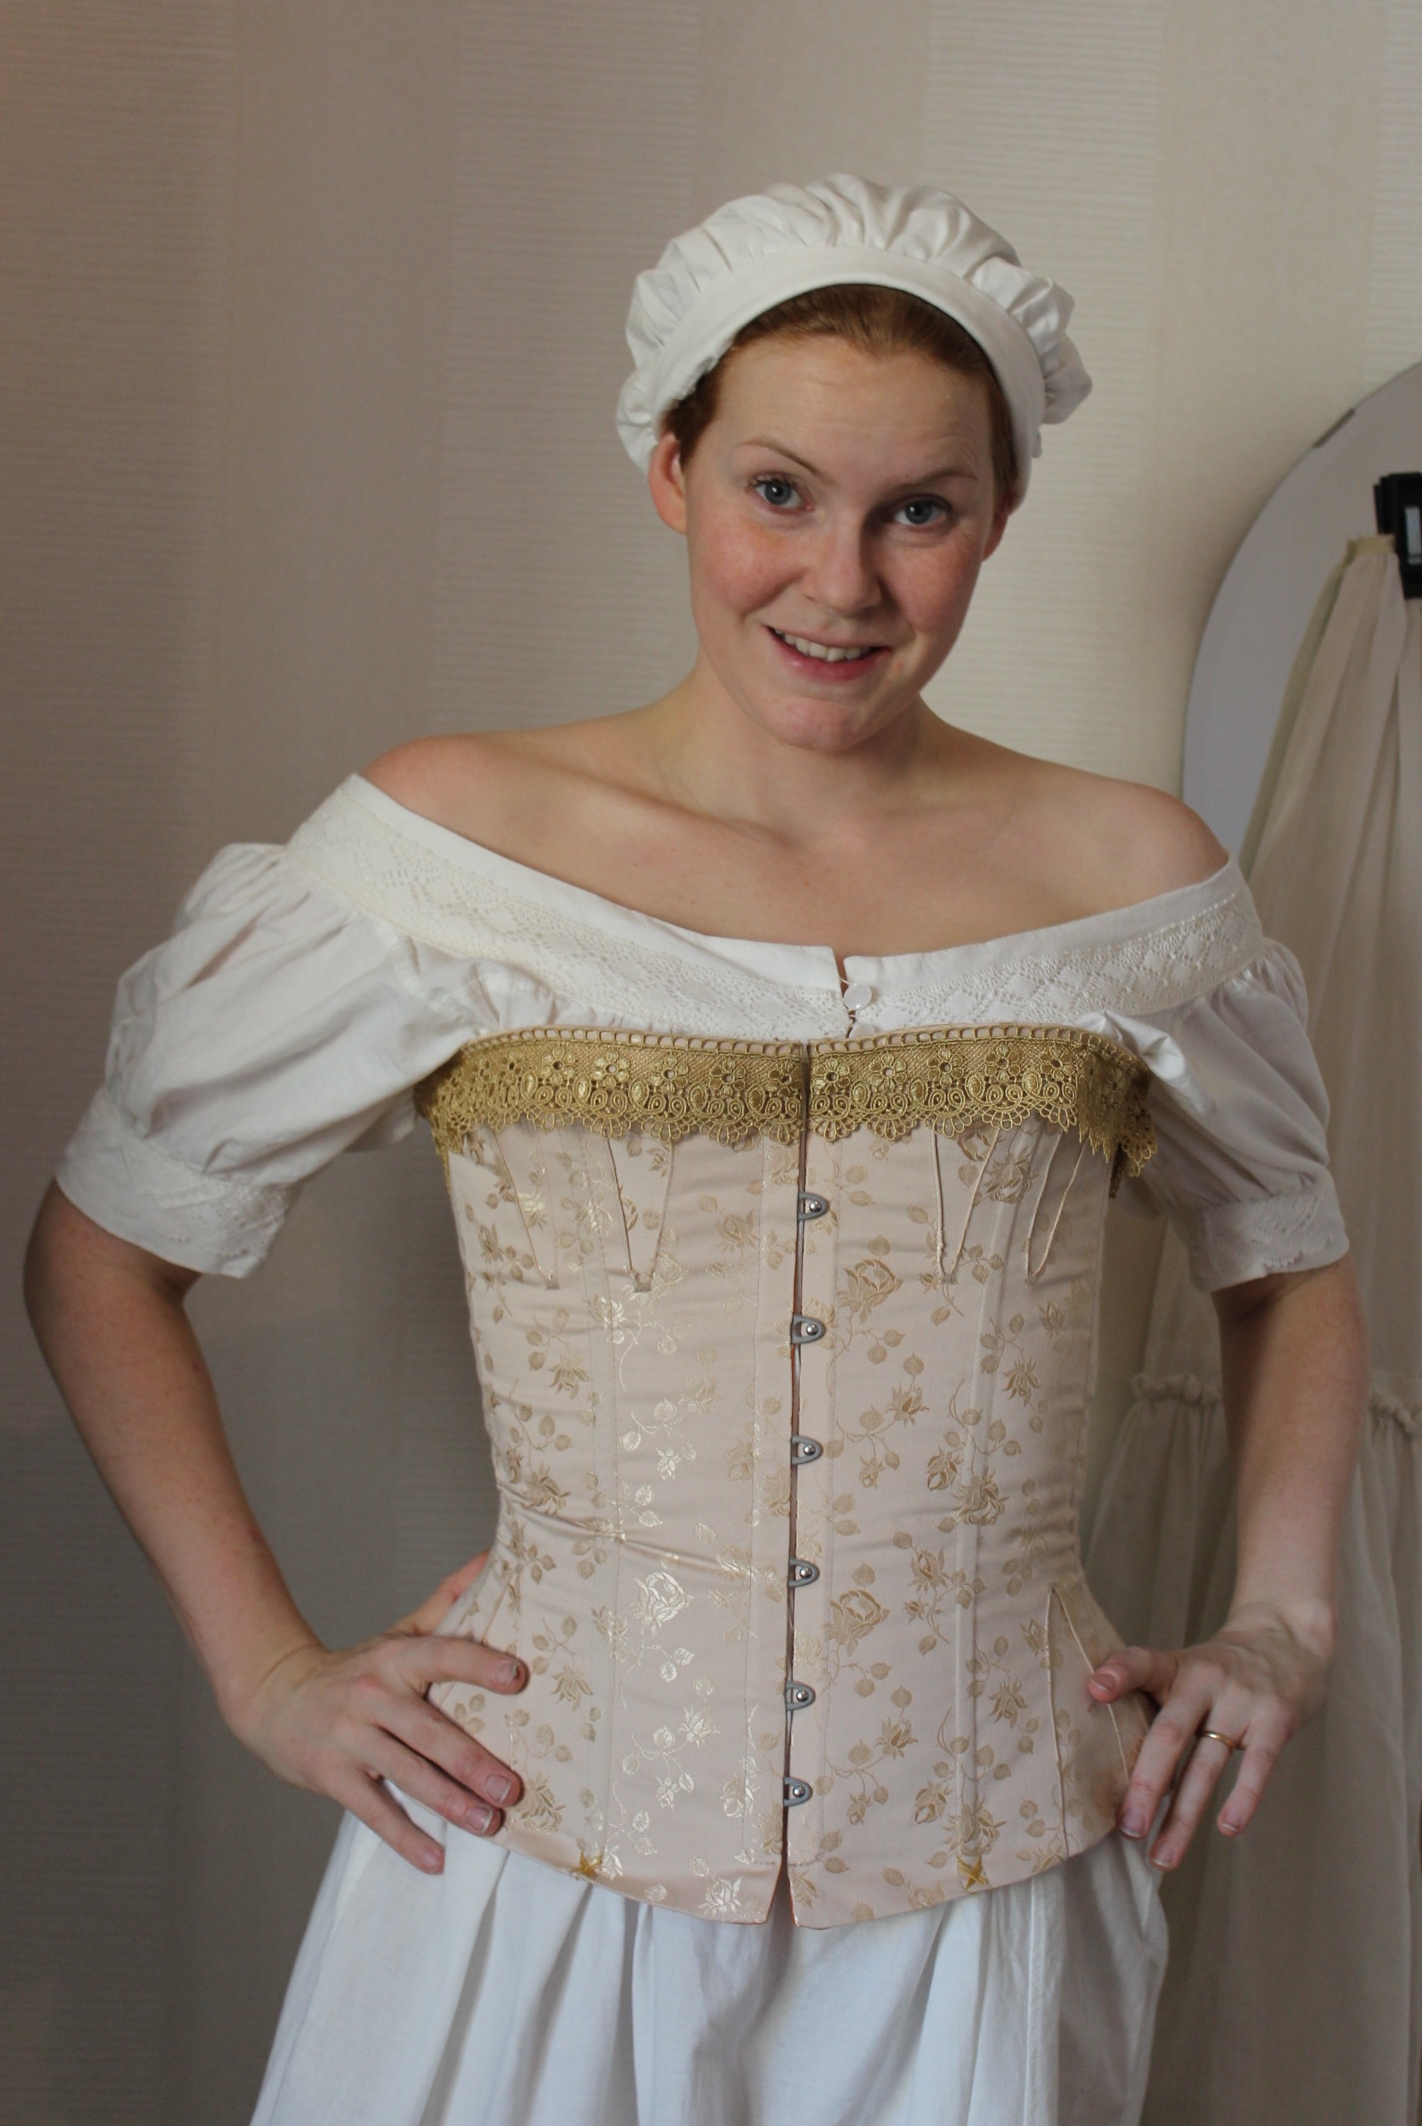
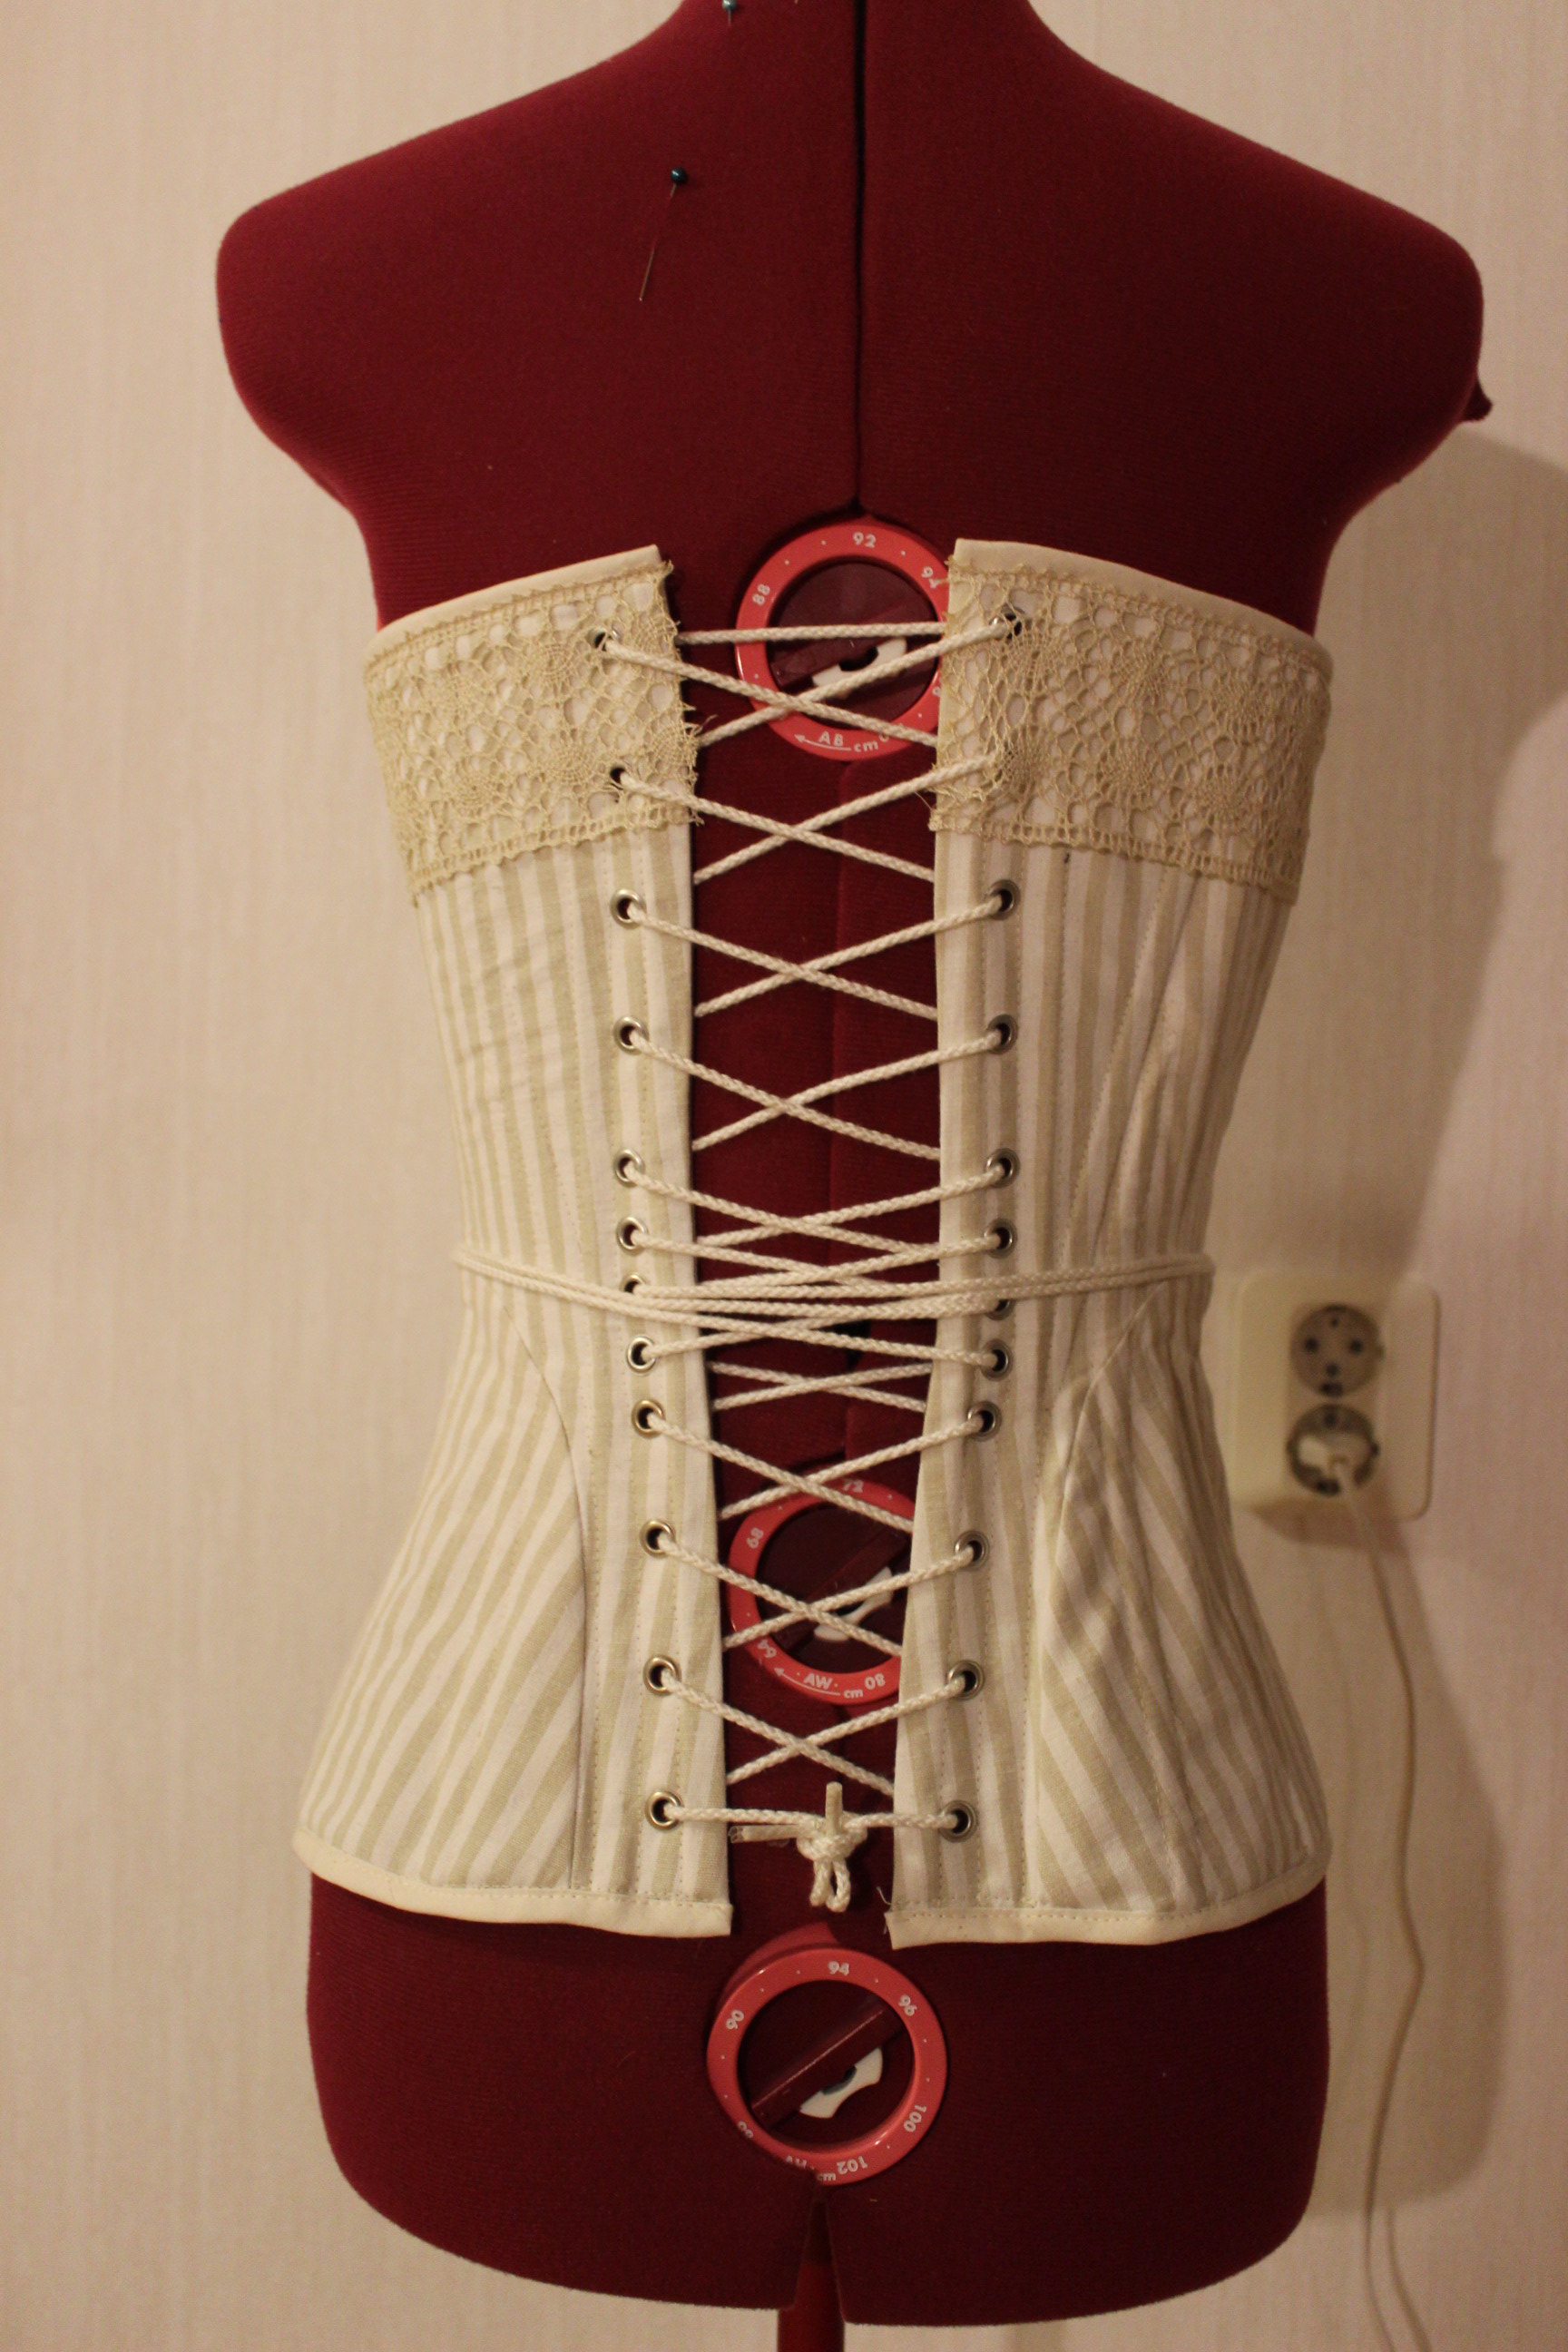
The finished corset:


The facts:
Pattern: “Past pattern” 1860-1880s corset
Fabric & Notions: 0,5 m cream coutil, 0,5m orange cotton for lining, 1 busk, grommets, boning (plastic and metal) 4 m cotton cord, 1 m golden lace, thread, buttonhole thread for flossing.
Time: About 7 hours – pretty fast and easy
Cost: everything came from stash, but bought new probably 350 Sek (32 Usd)
Final Thoughts: I’m in love with this corset. It’s so light yet really strong, and it’s really comfortable, and on top of that I think the colors are delightful. 🙂
Who knew it could be so much fun sewing guesses?
When I started working on the 1860s corset from “Past Patterns”, for my sister back in January I dreaded what was to come.
All the Guesses…
4 on each side = 8 on the outer fabric
+ 8 on the lining =16
Phu…
Then of course there was the question of the Mock-up = another 8
And me, my crazy as decided that a second mock-up was needed = another 8 guesses
I must say I lost count by now, but I’m not finished yet…
For once I started on my sisters corset, I of course wanted one of my own… (but that’s for a later post)
I think the final counting (including a few that needed re-setting) lands at about 60 or so.
But lets take this from the beginning.
This winter I got an invitation to my dance groups yearly historical ball, that was to be held in May.
I immediately asked my sister if she would like to join – which of course she would.
Then we started debating what to wear.
The timespan set for this ball was 1750s-1850s, so a pretty big gap and quite an ocean of possibilities.
I decided to postpone the difficult decision for myself a few months – after all I have a wardrobe full of dresses that would do (more on my thoughts on this dilemma in a later post).
But my sister only had one or two things from previous events, which non would work for this occasion.  Quickly drawn sketches of possible ways to go.
And since The time I had to spend on her dress was limited by both my family and my work, we needed to find something relatively simple to make.
So after some debating back and forth, we (despite better judgment) decided to make her a complete set of 1850-1860s evening attire.
Of course…:-0
Starting with the corset.
And here we are.
I drafted the pattern from “Past Patterns” mid 19th century stay pattern, with some alterations for my sisters and made a mock-up.
Silly me, thinking that the few bones in this corset would hold upp the cheap cotton I use for most of my toiles. No It wont do. So I made a second mock-up in a much sturdier upholstery fabric (a friend bought at IKEA and gifted to me).
Sorry no photos of the second fitting, but it looked much better.
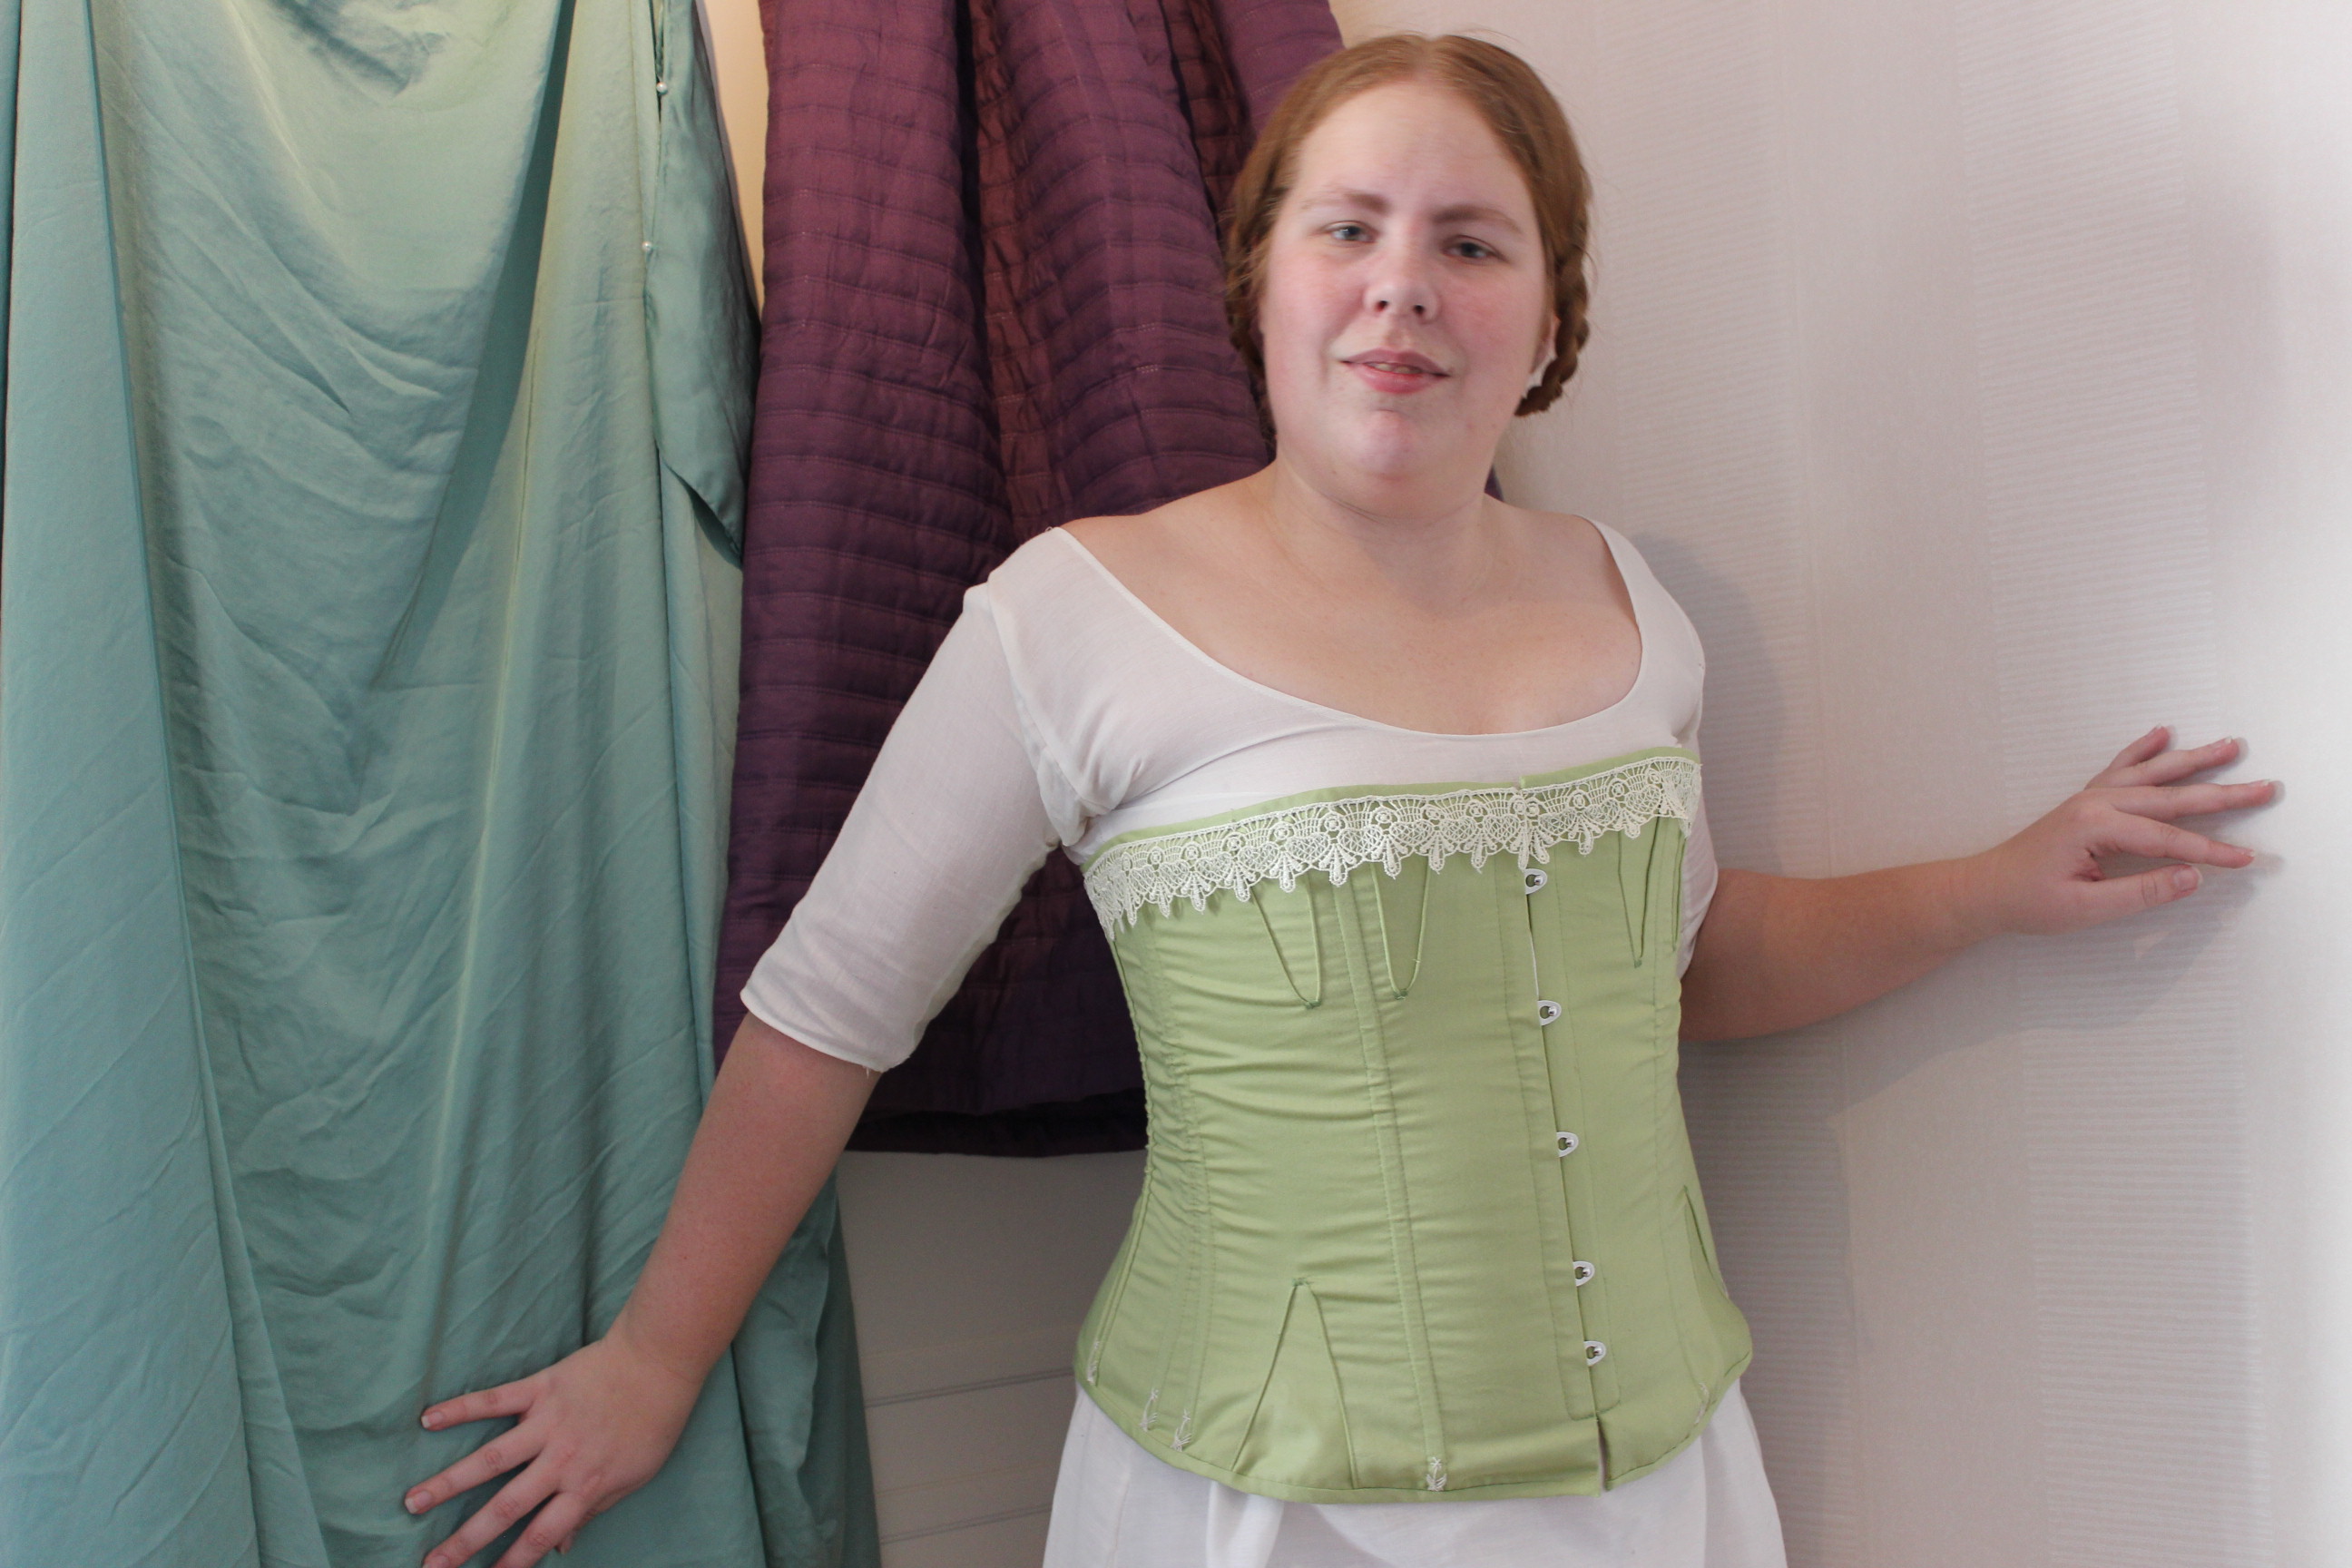
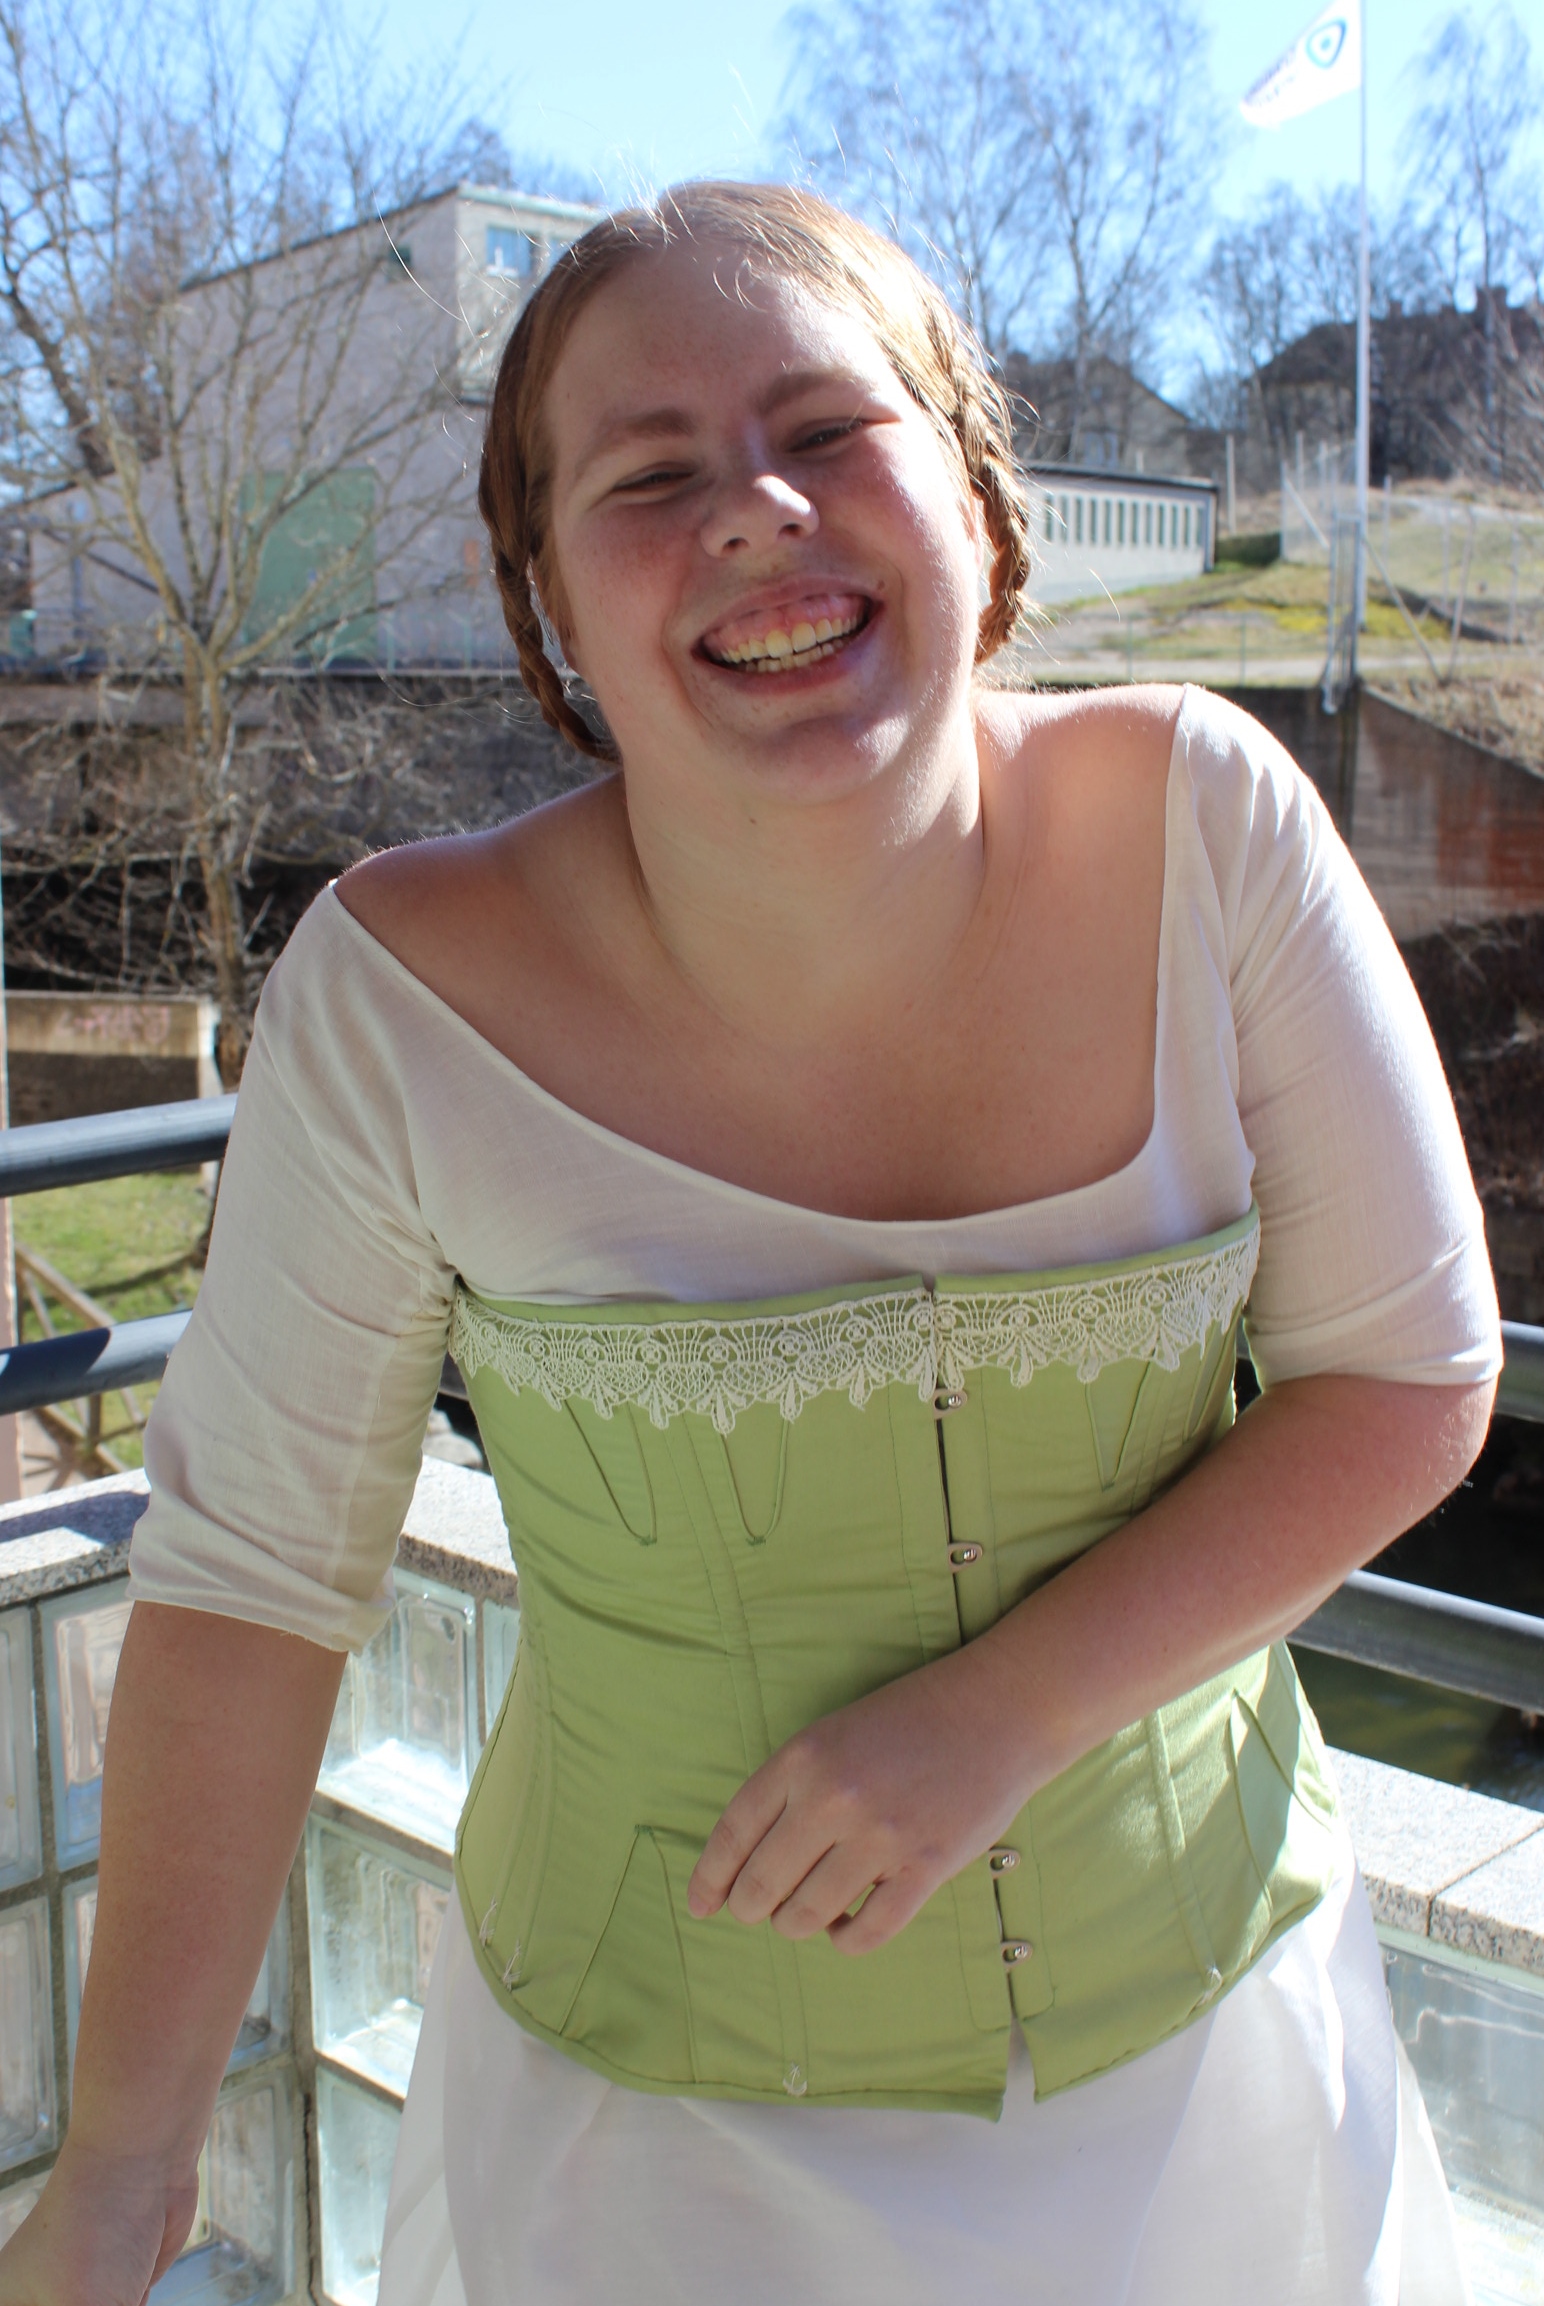
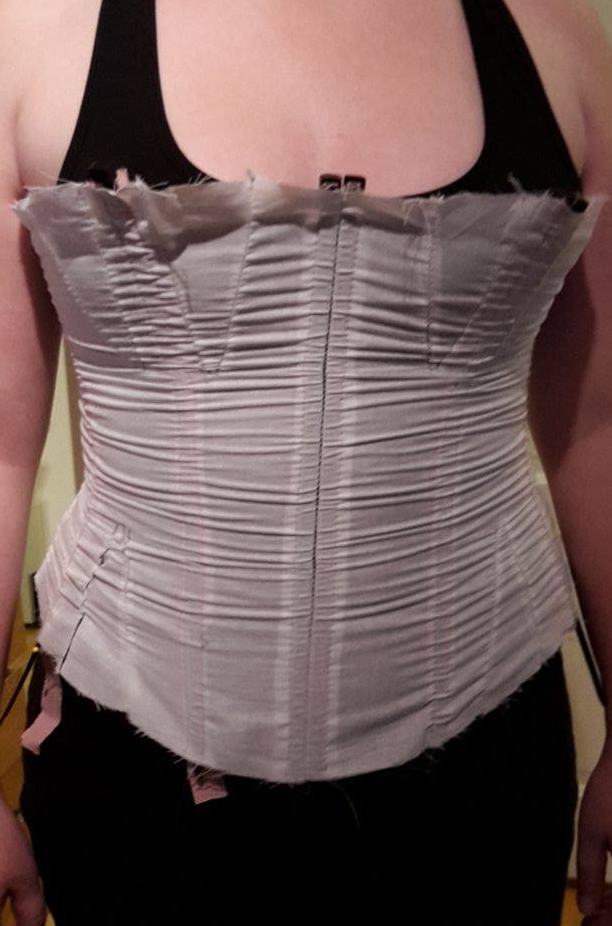
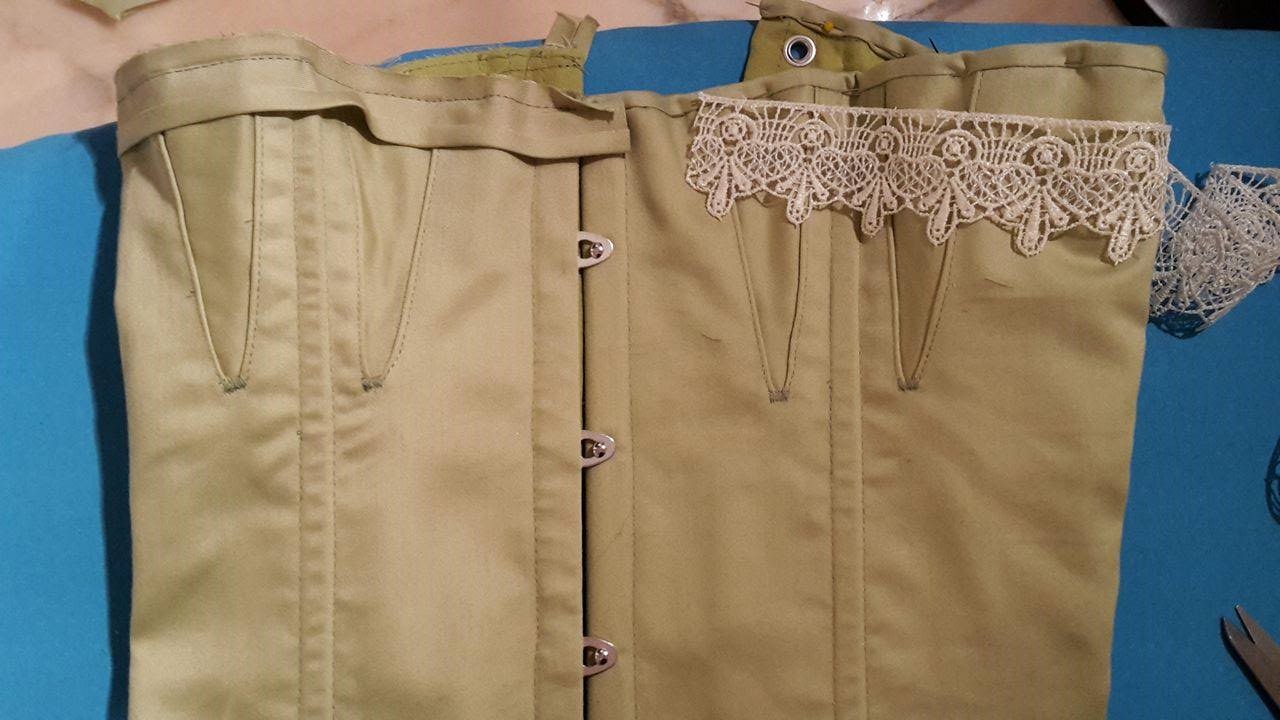
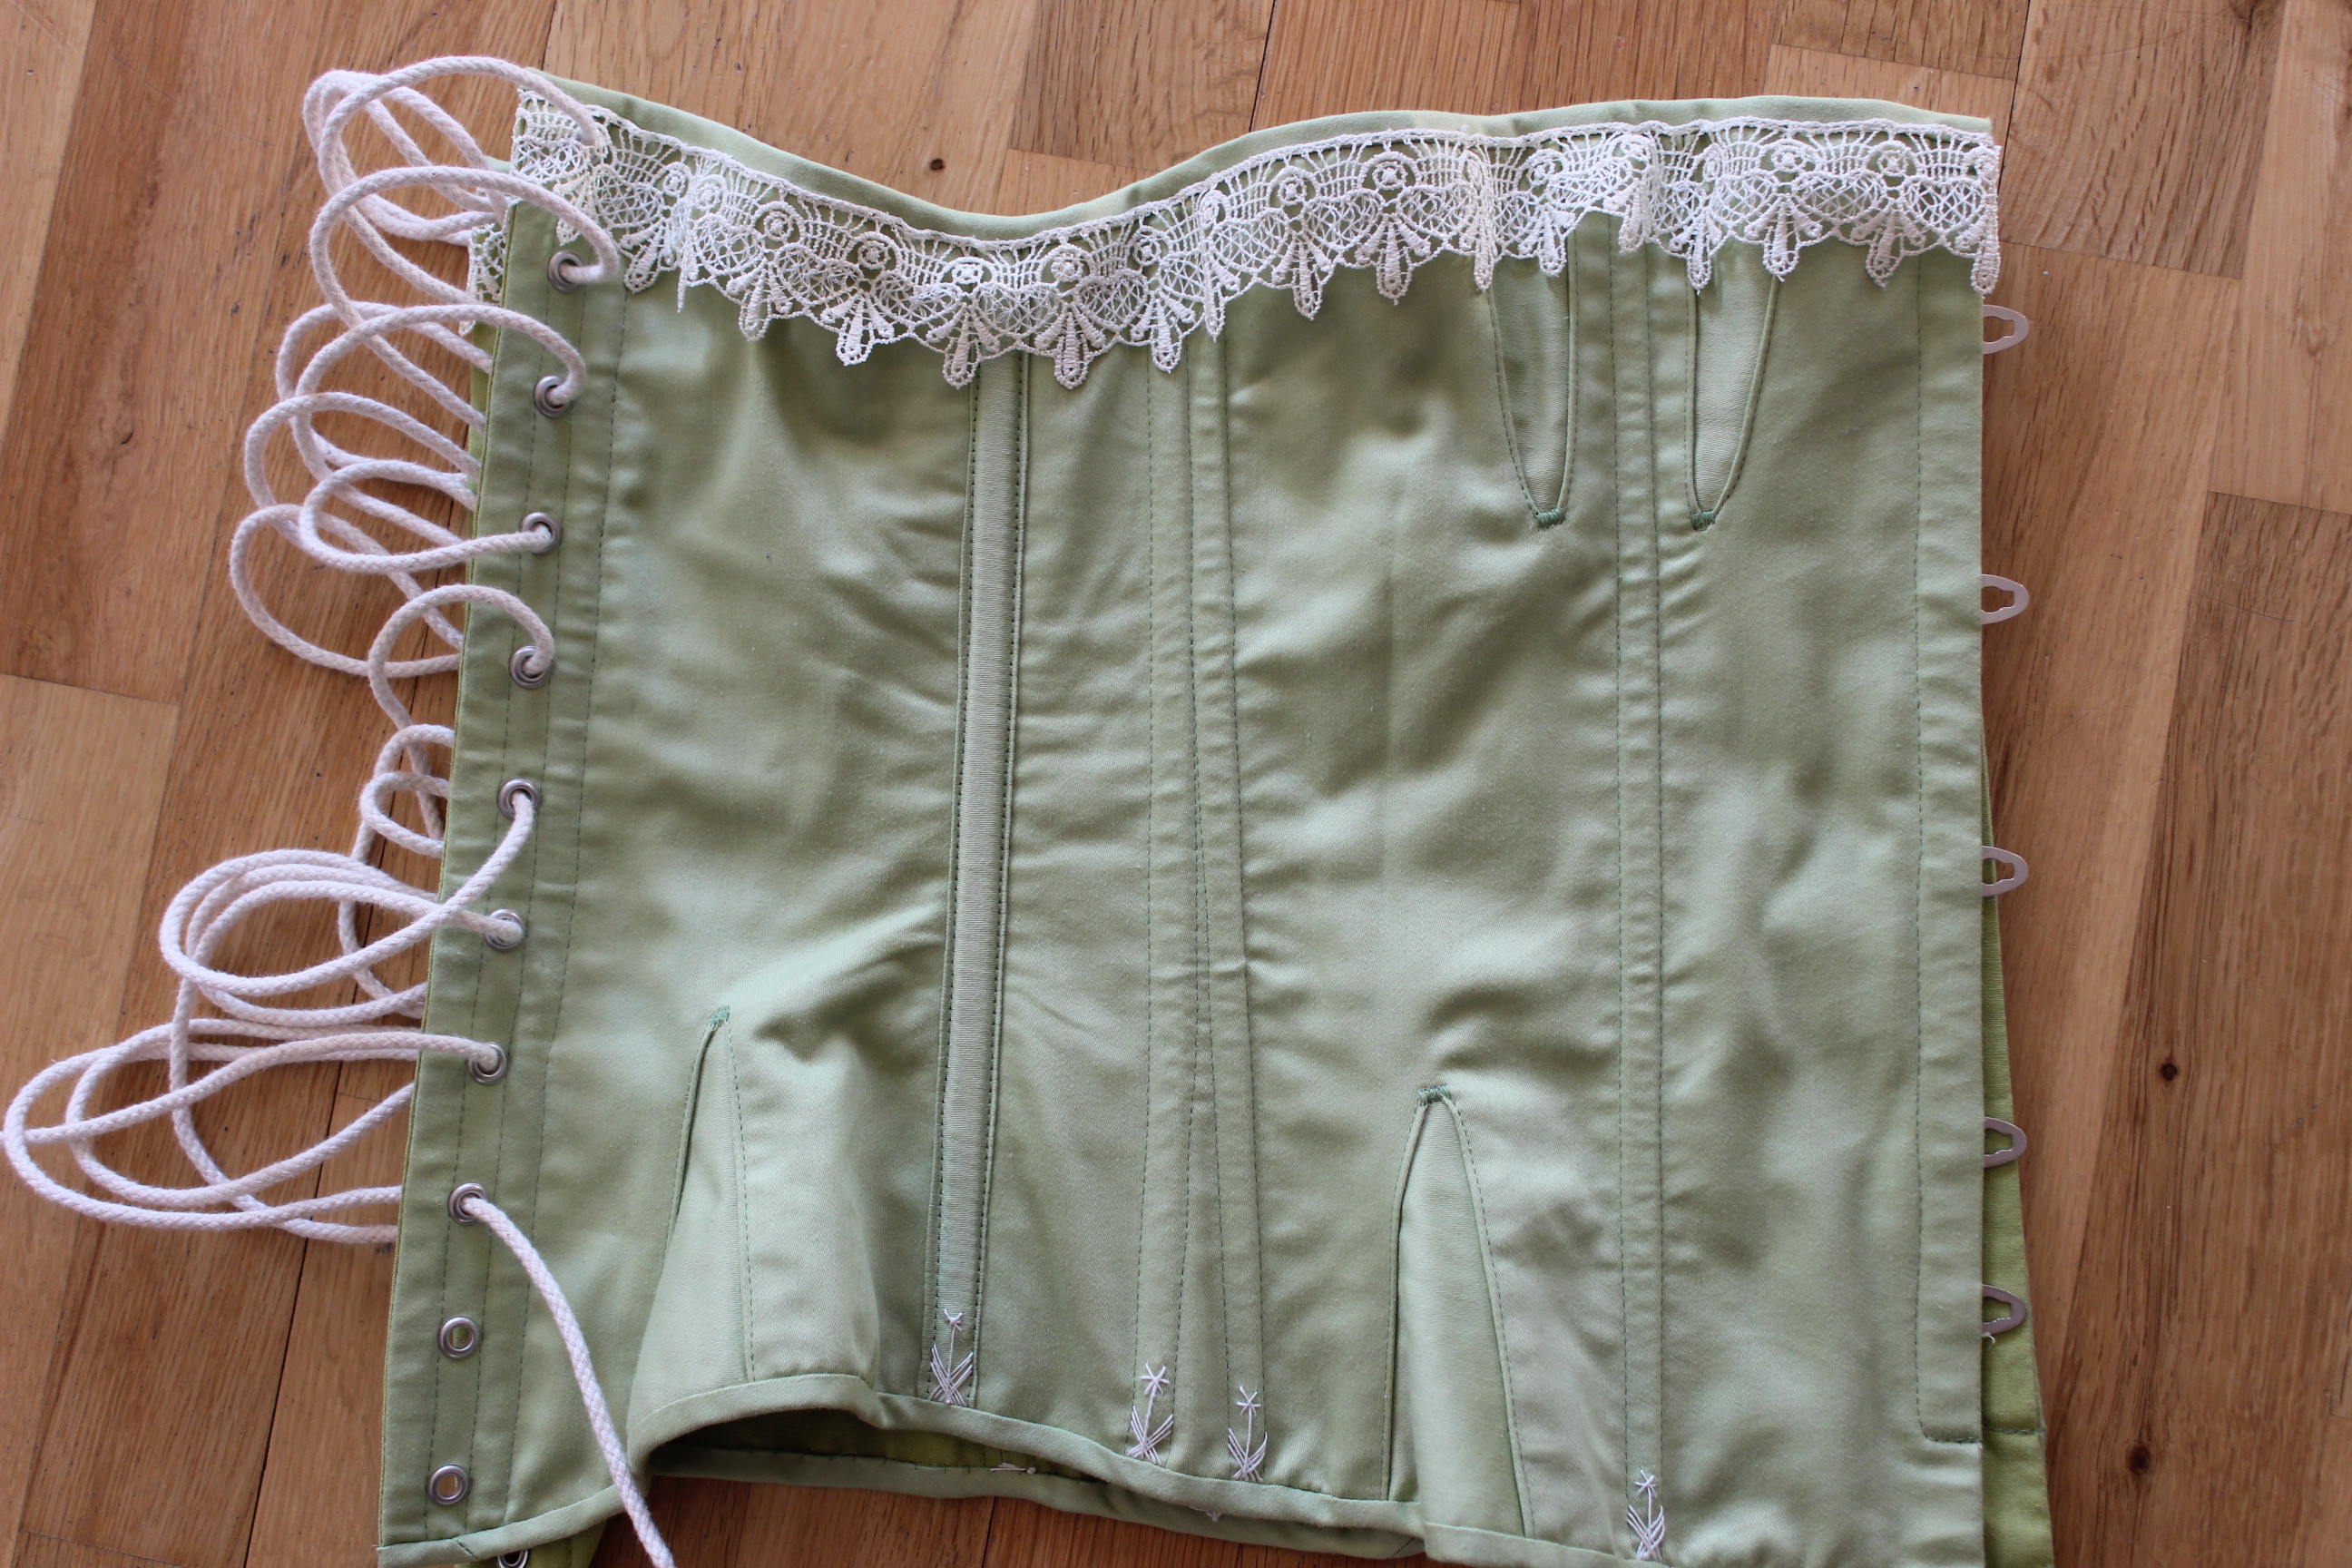
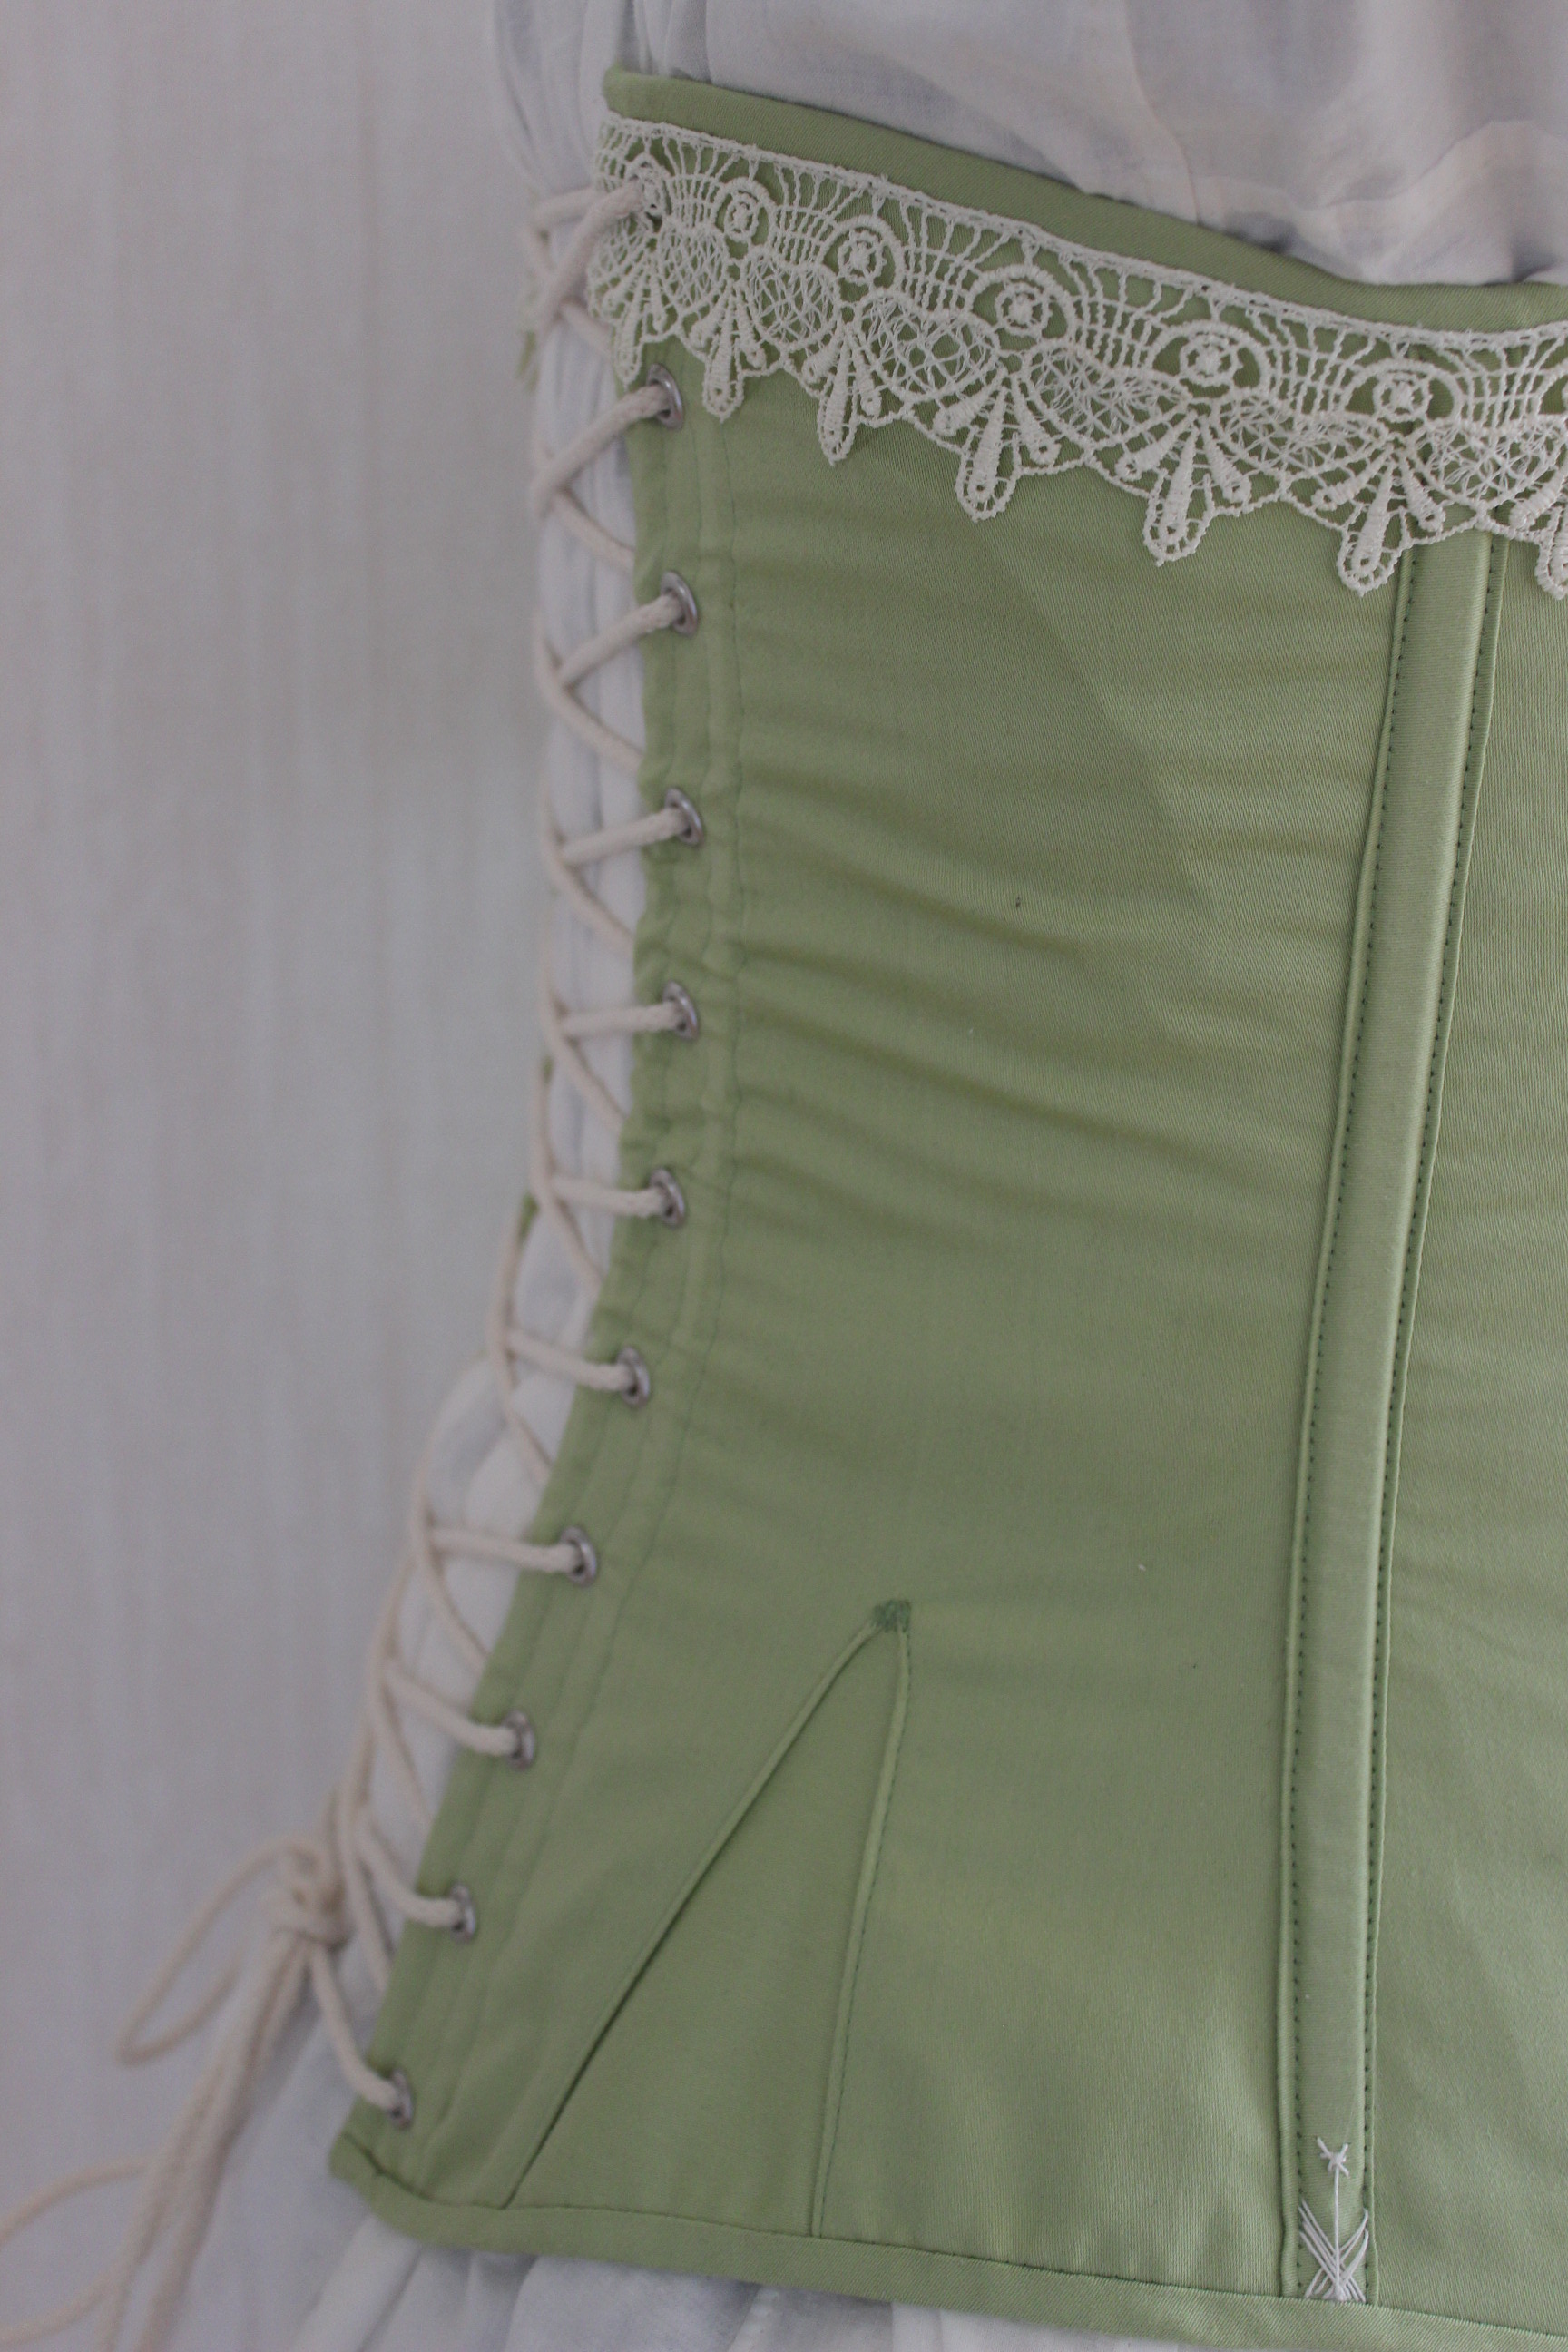
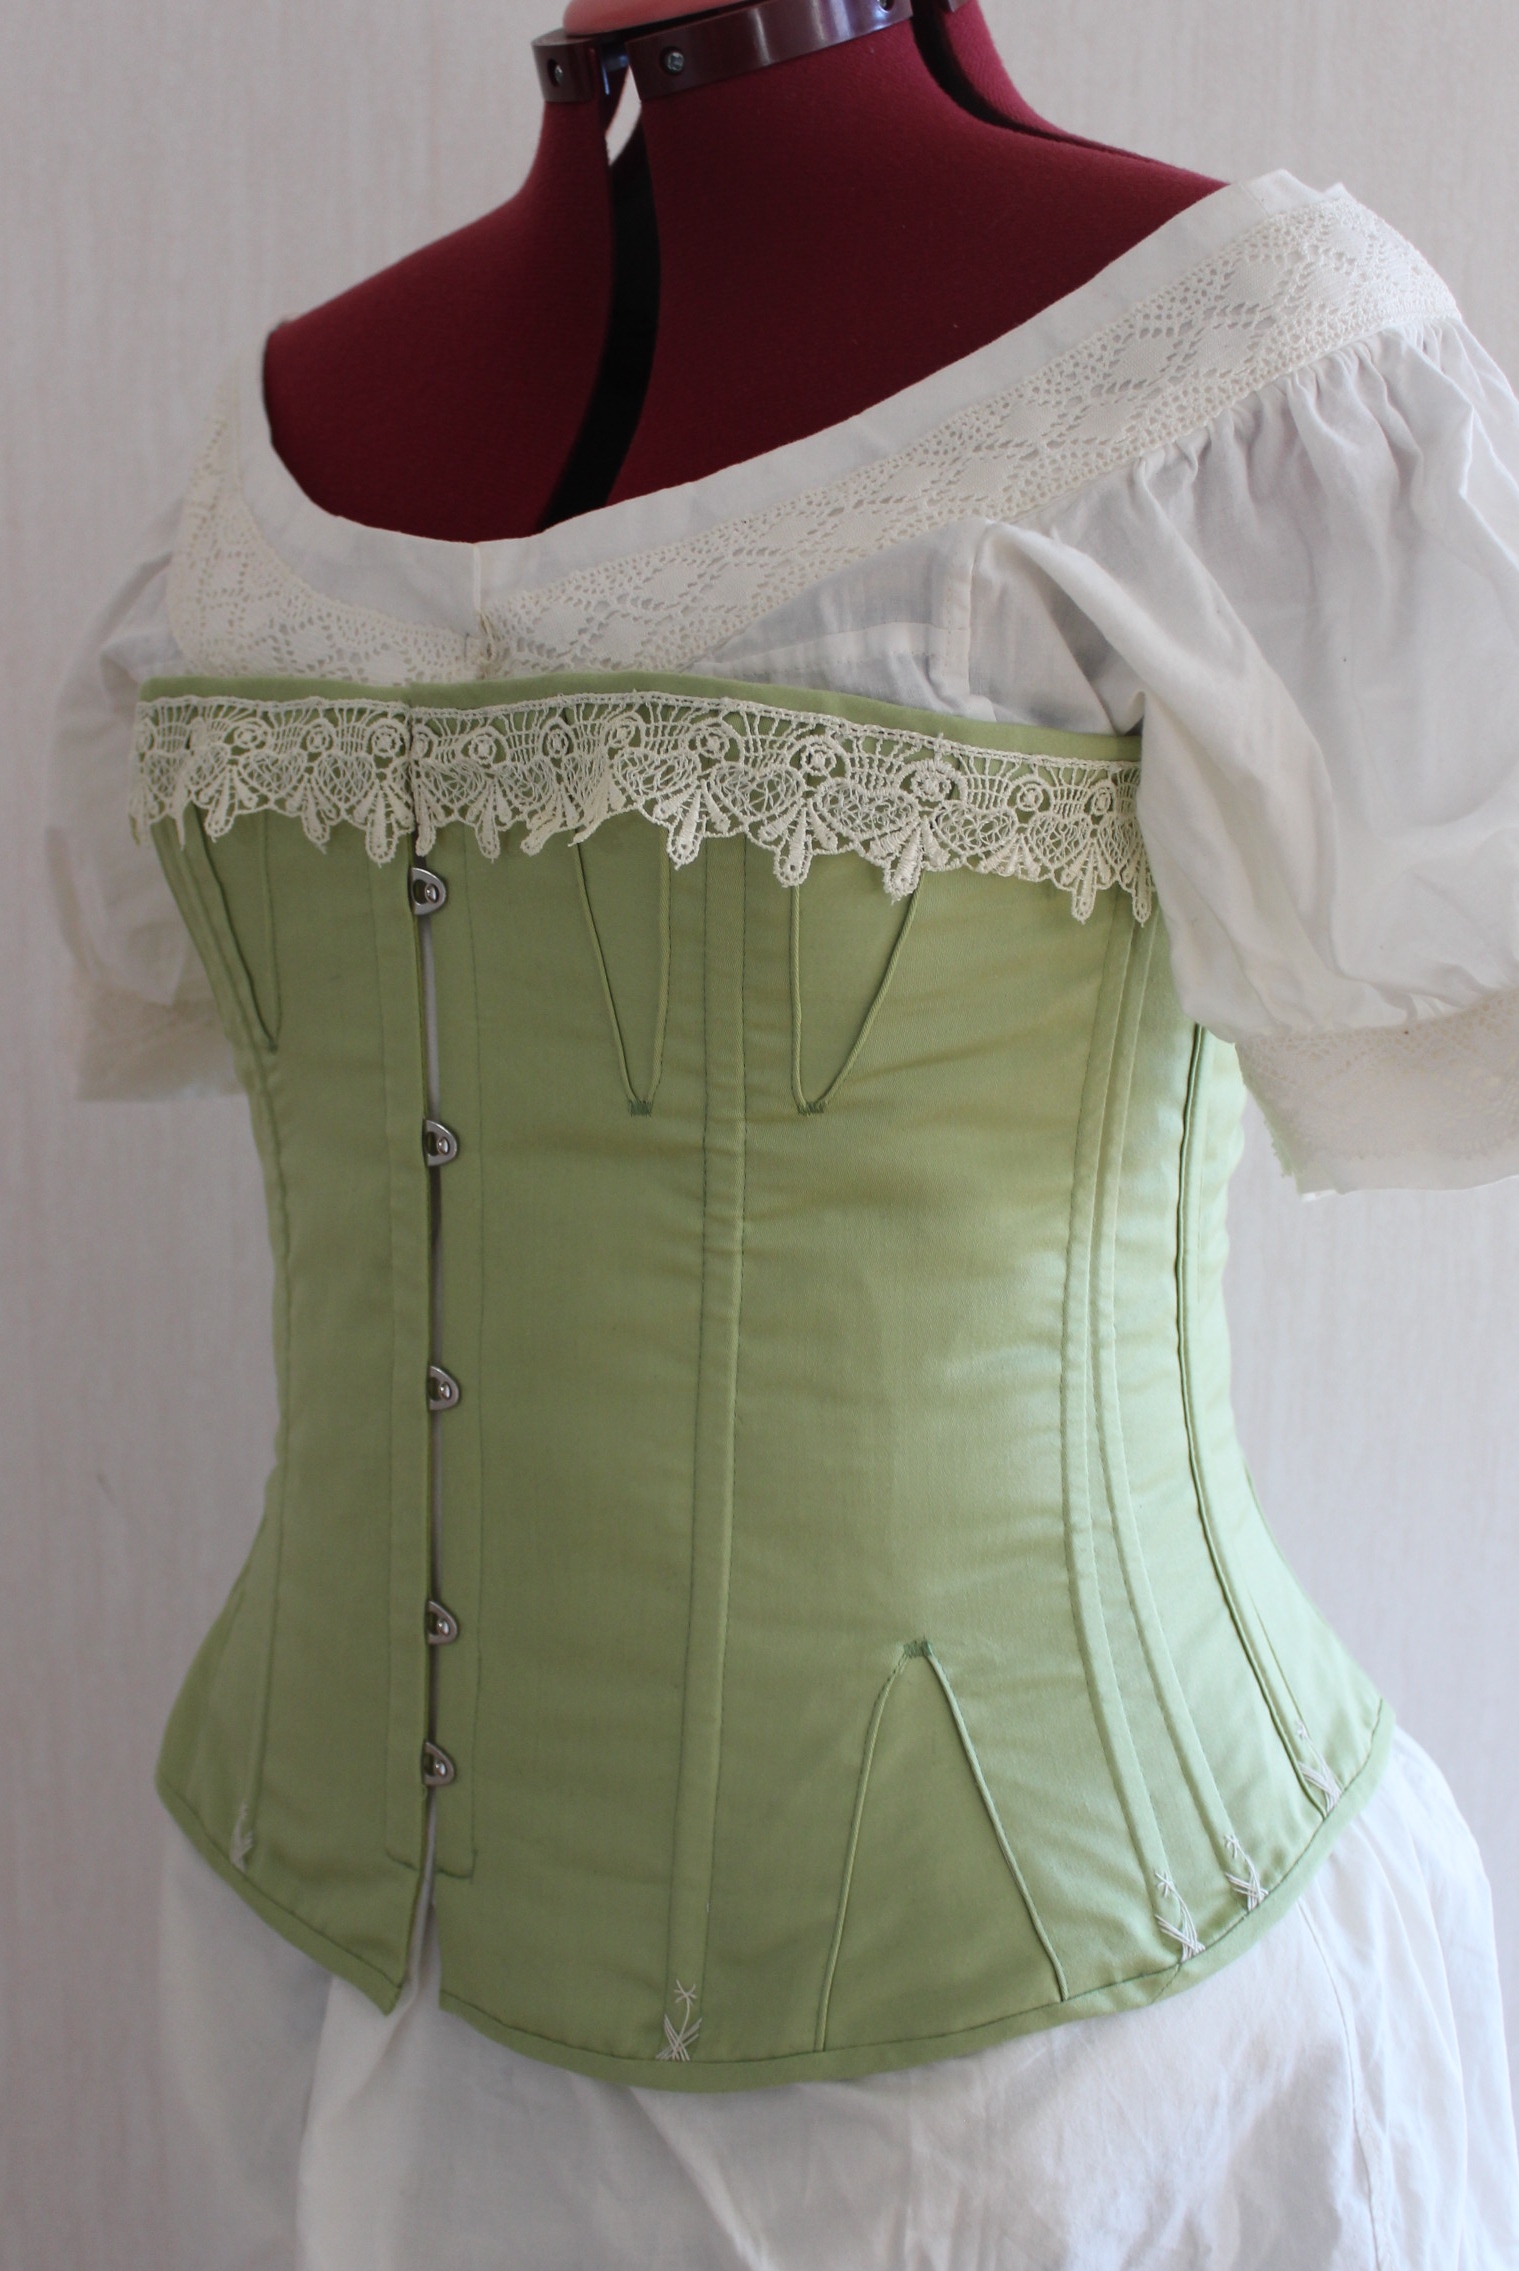
So I cut the fabric, a beautiful light green satin I got a few years back for exactly this purpose (well, it was intended for my corset, but what do you do – sometimes sisters need pretty fabrics to ;-)).
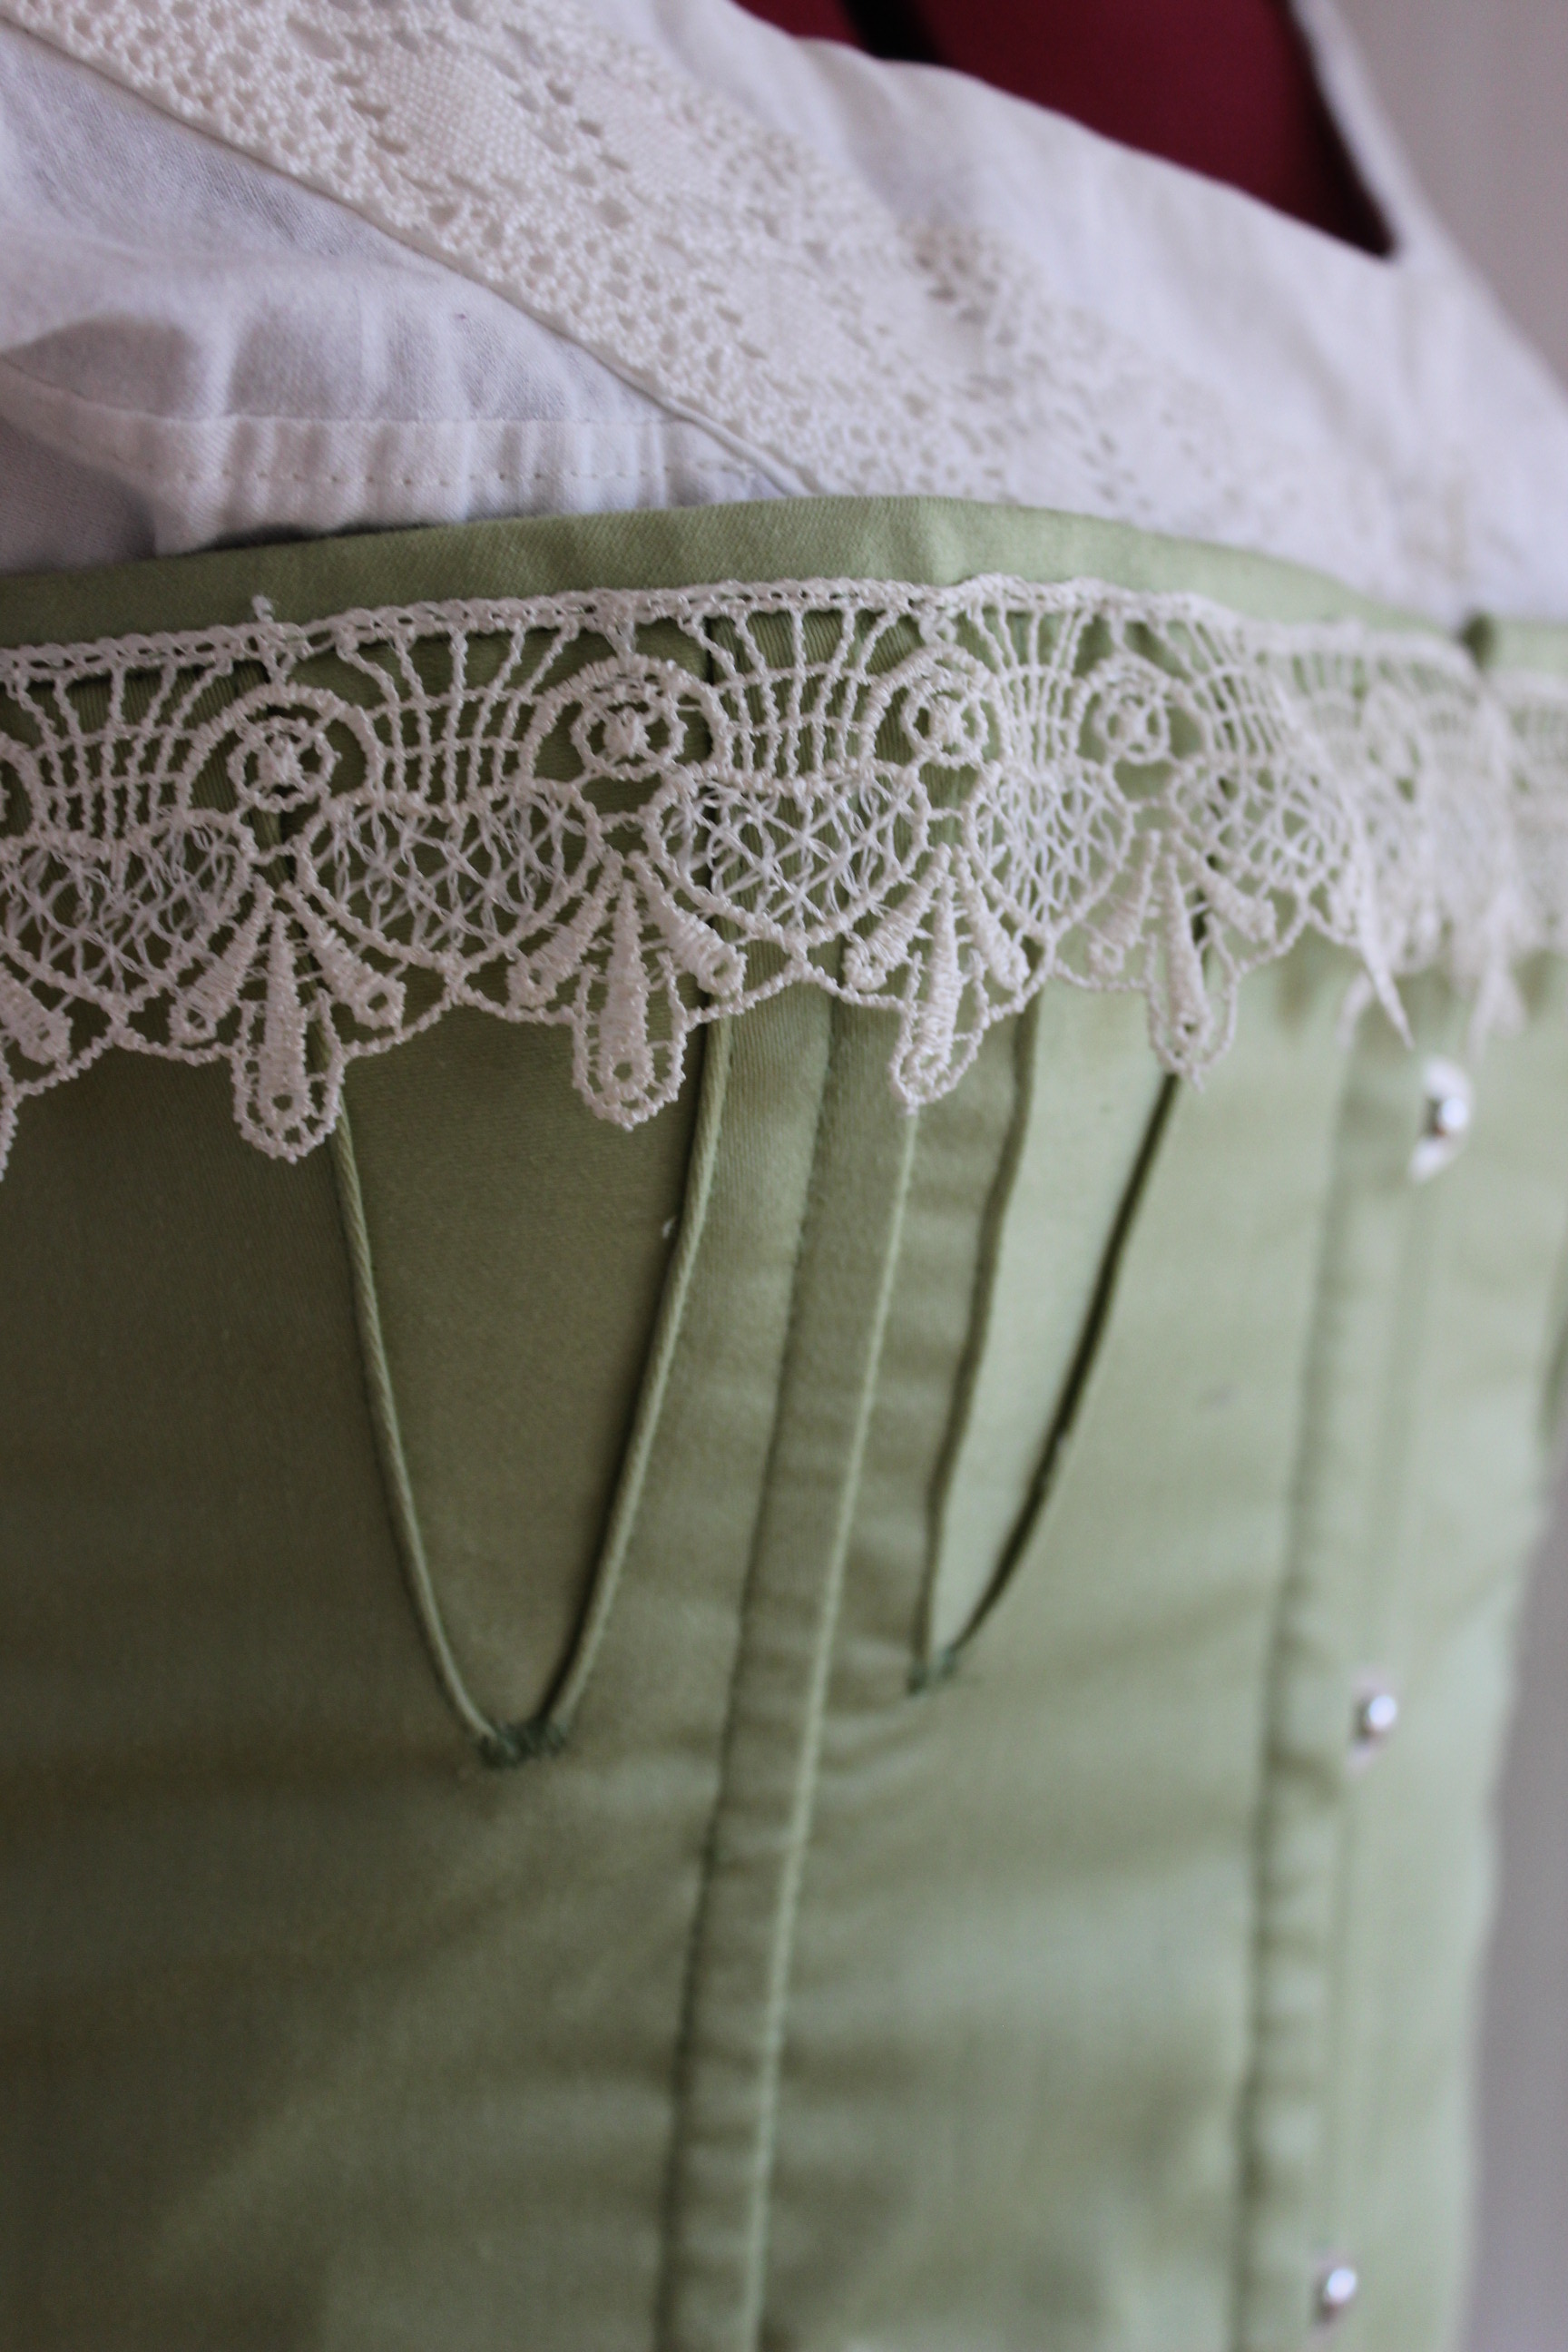
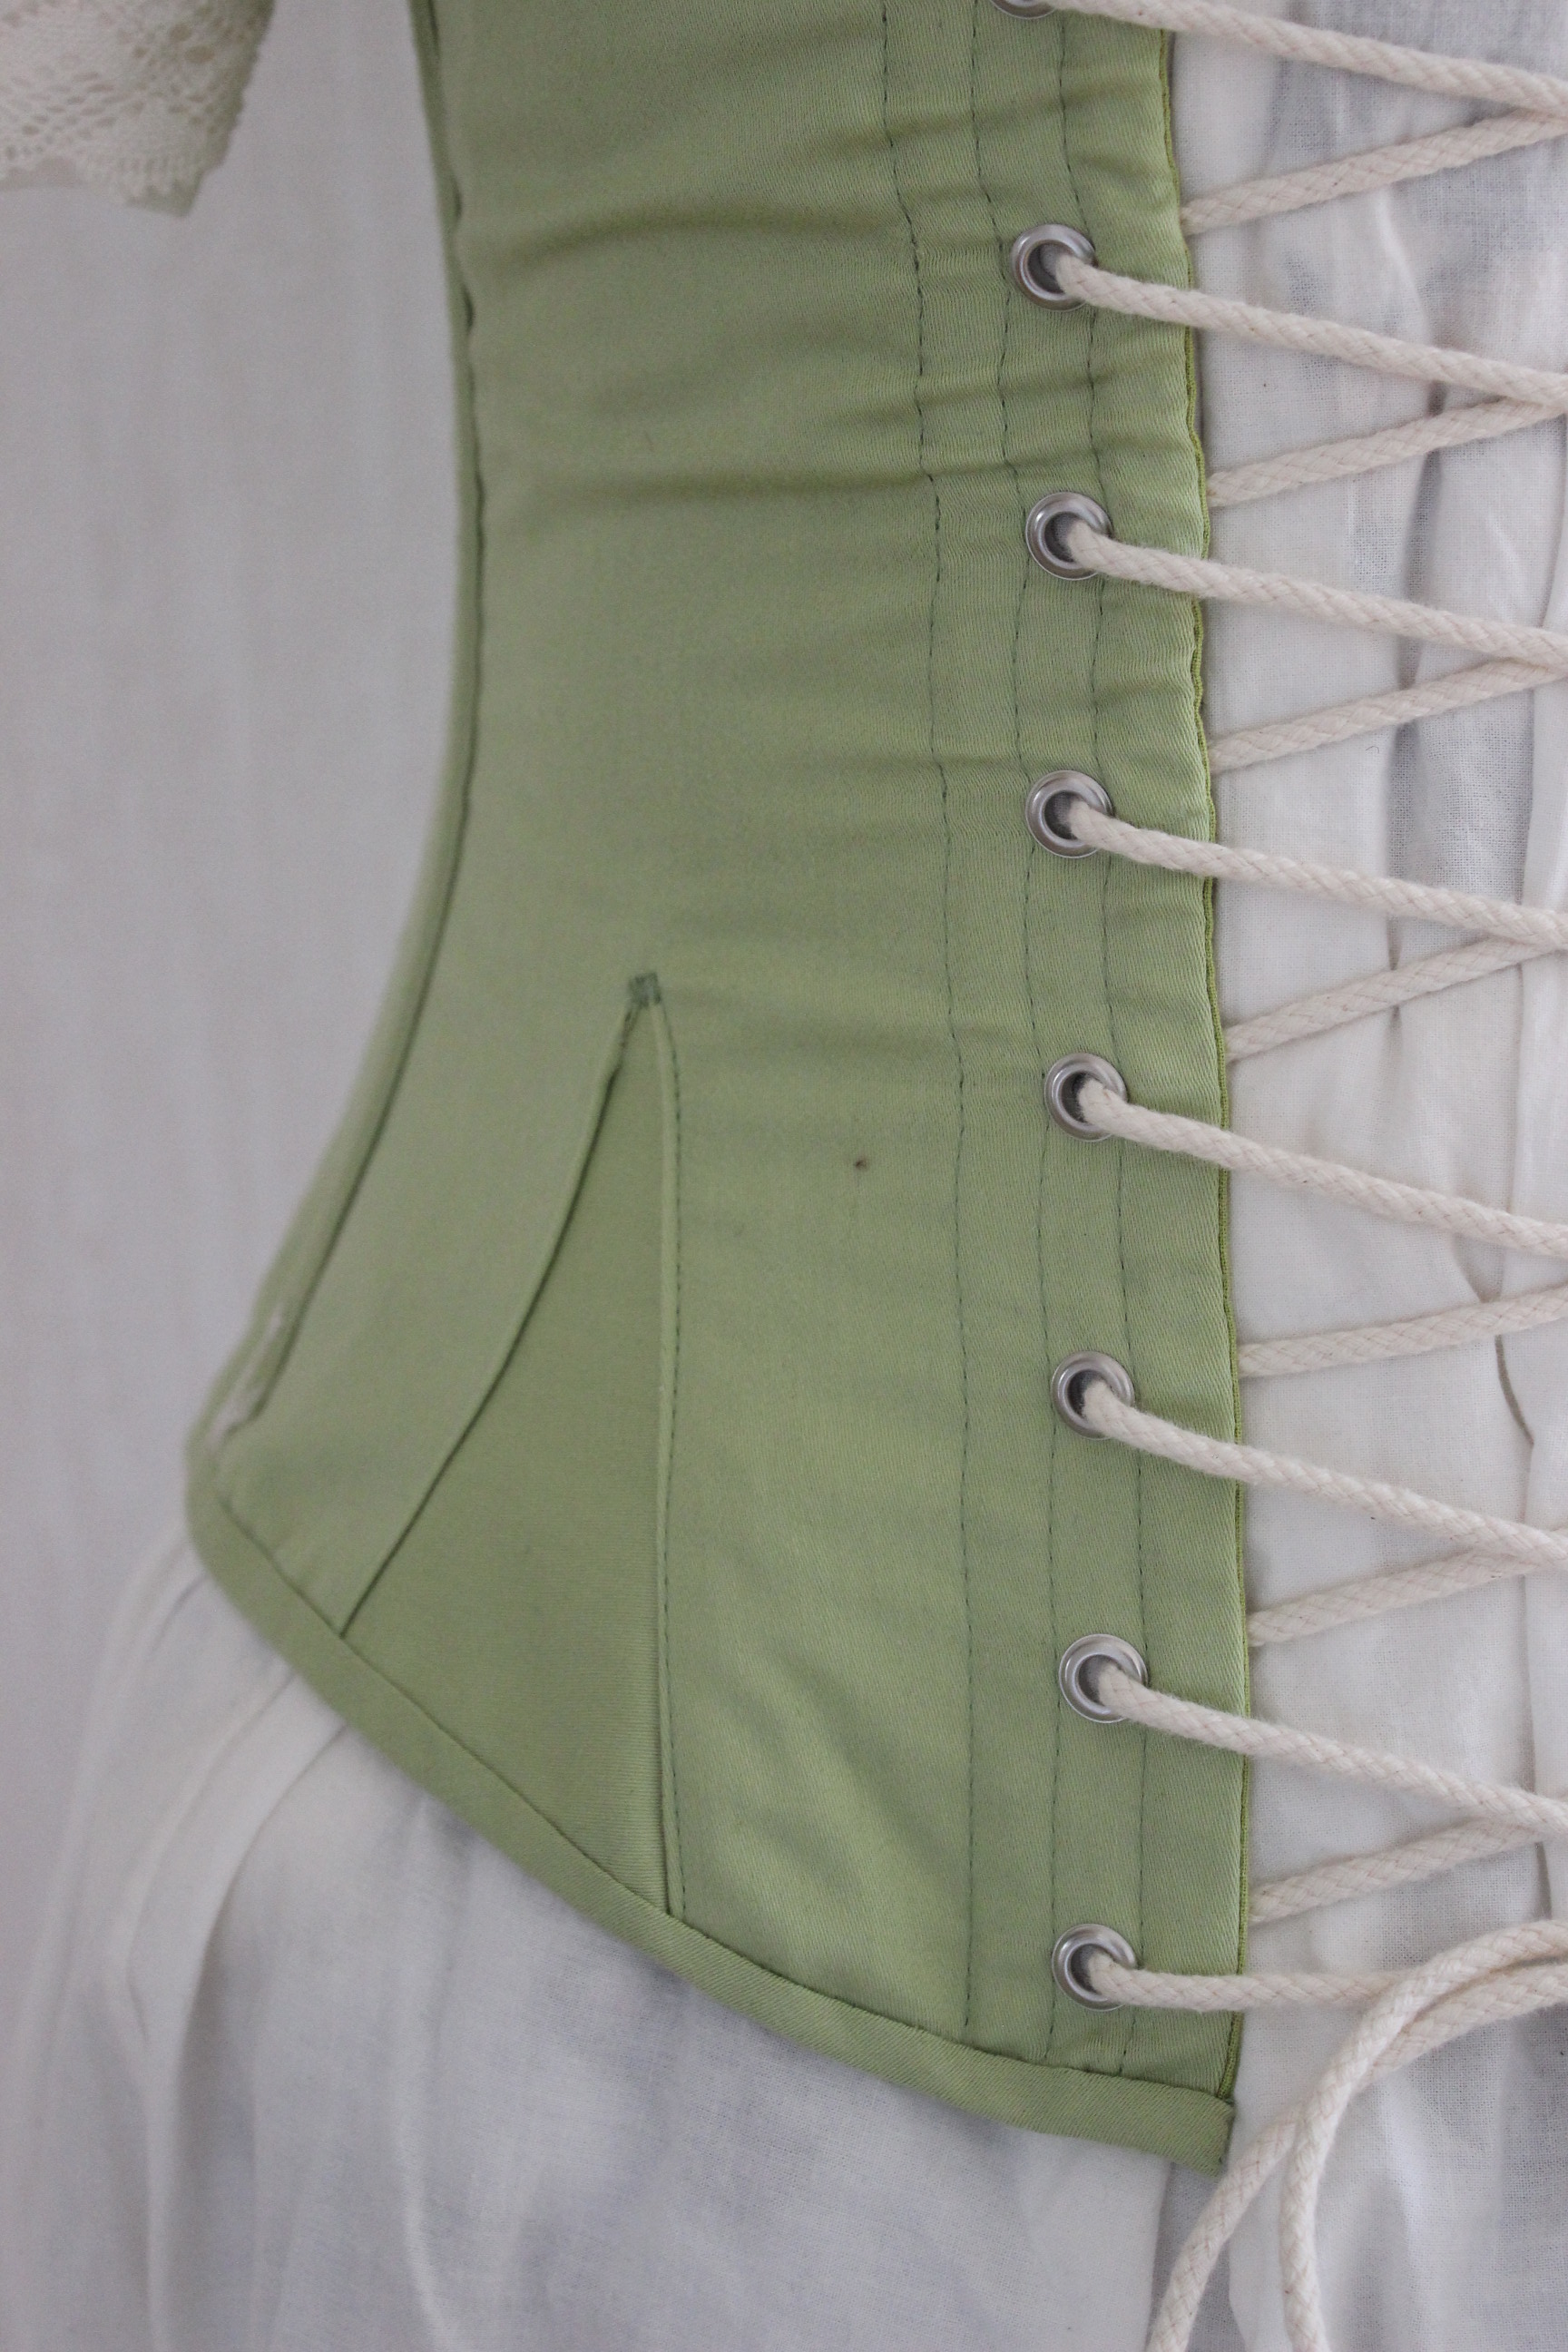
I interlined it with a sturdy cotton in a similar color from stash, and started on the gussets. 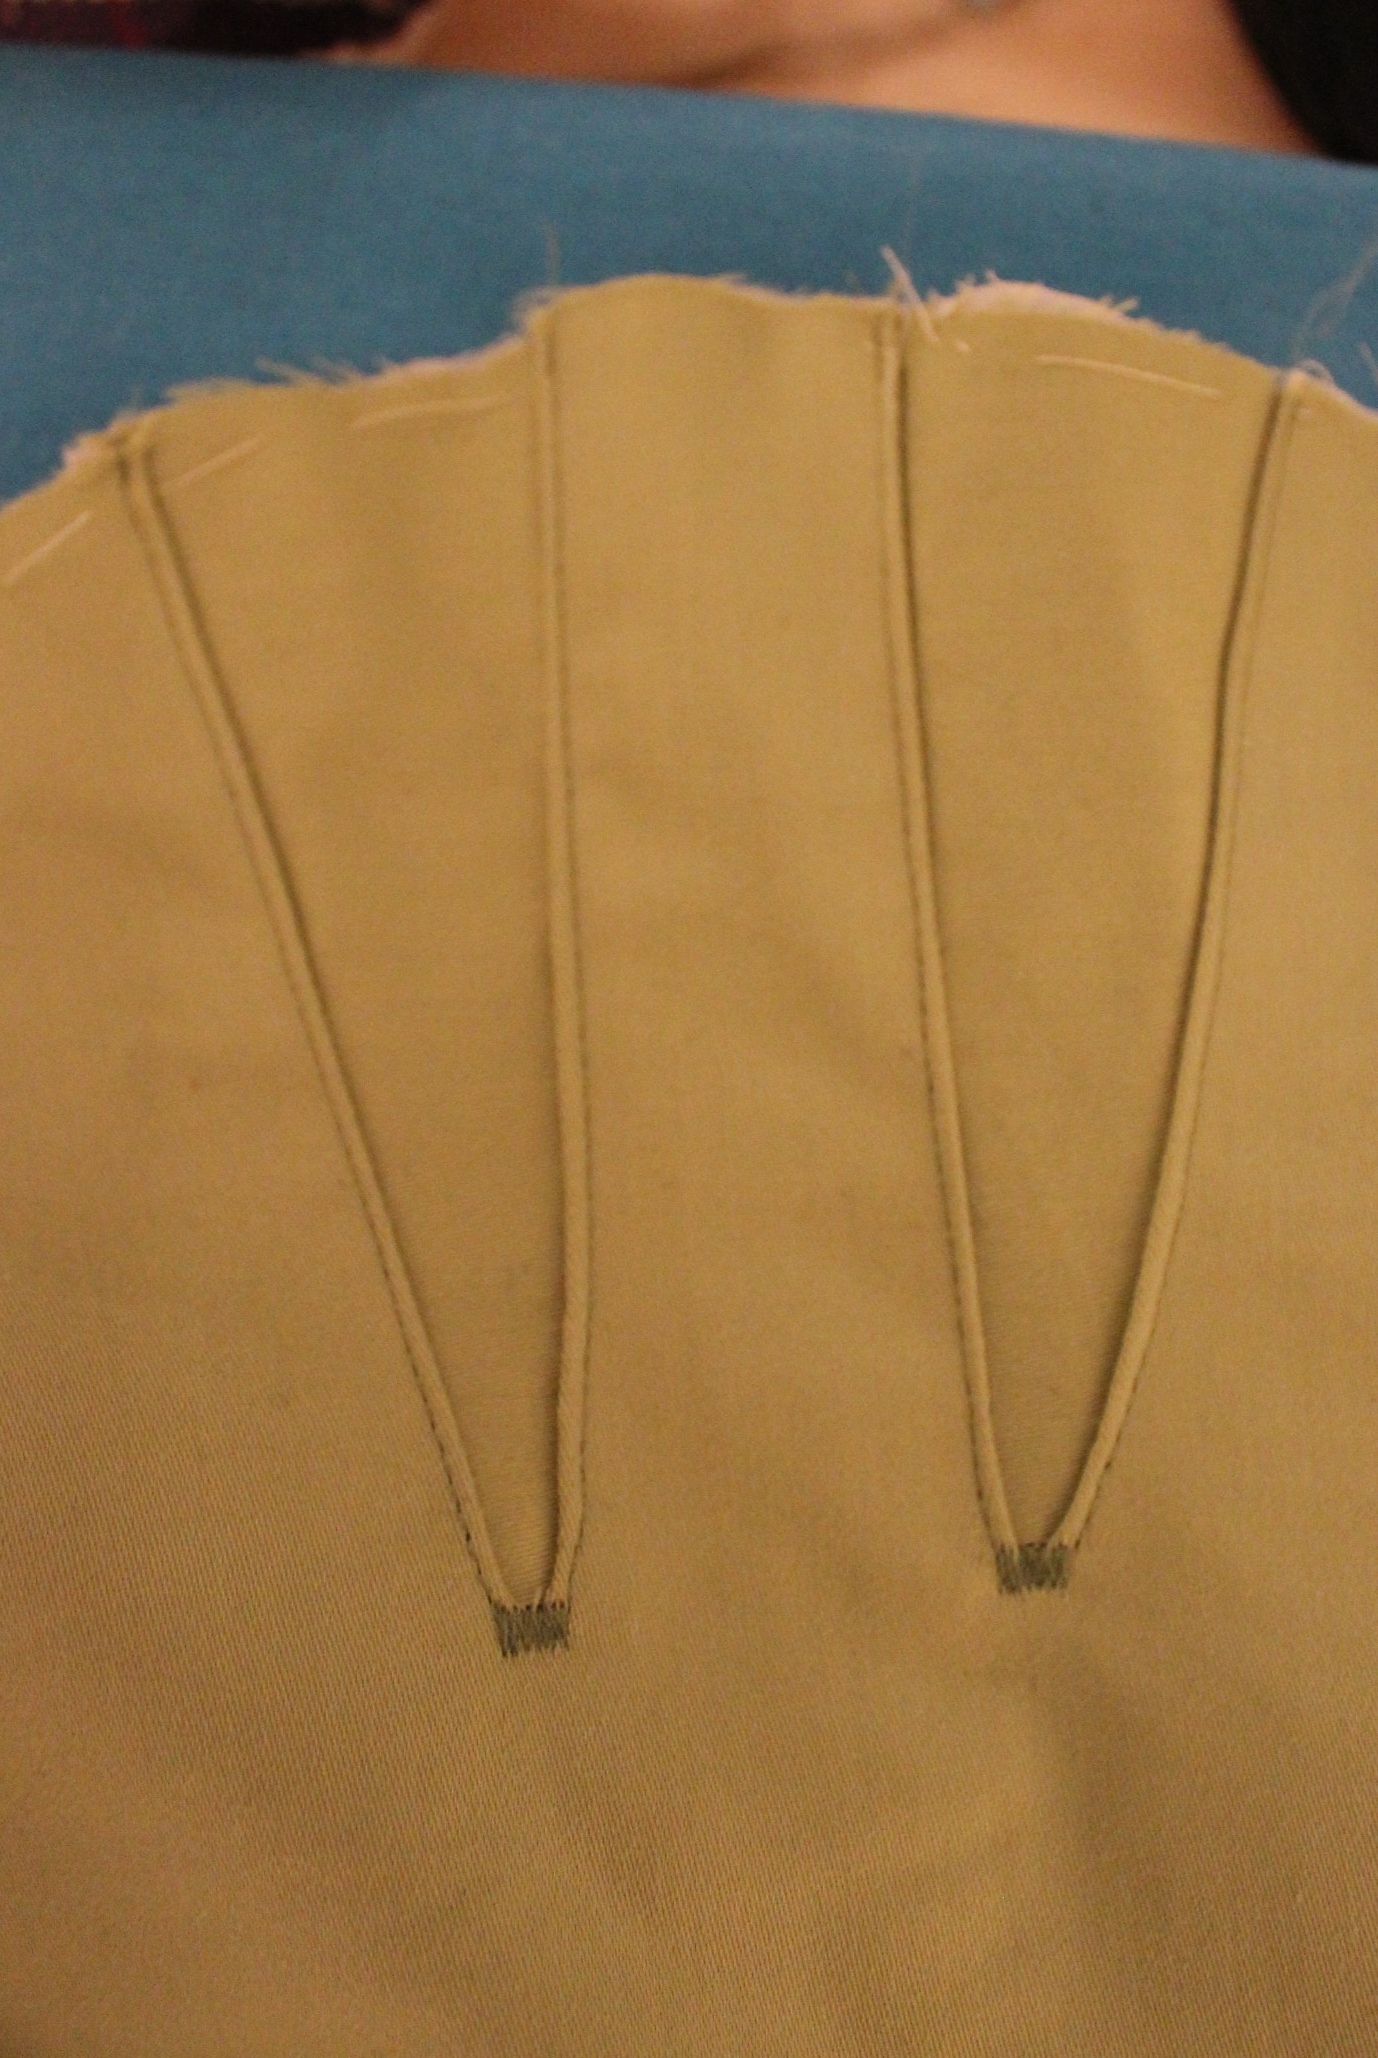
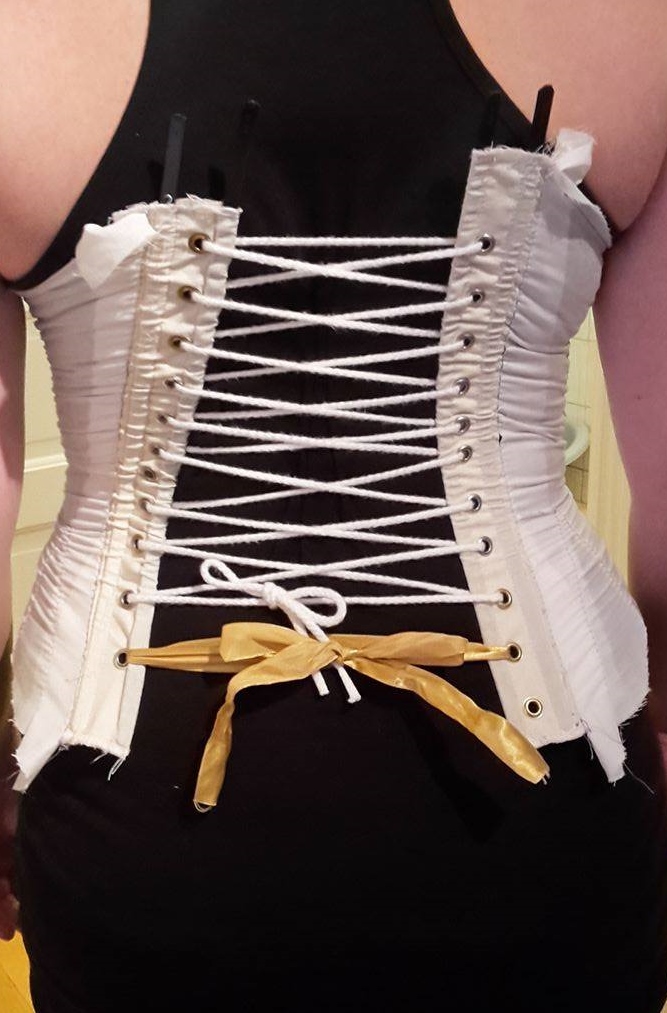
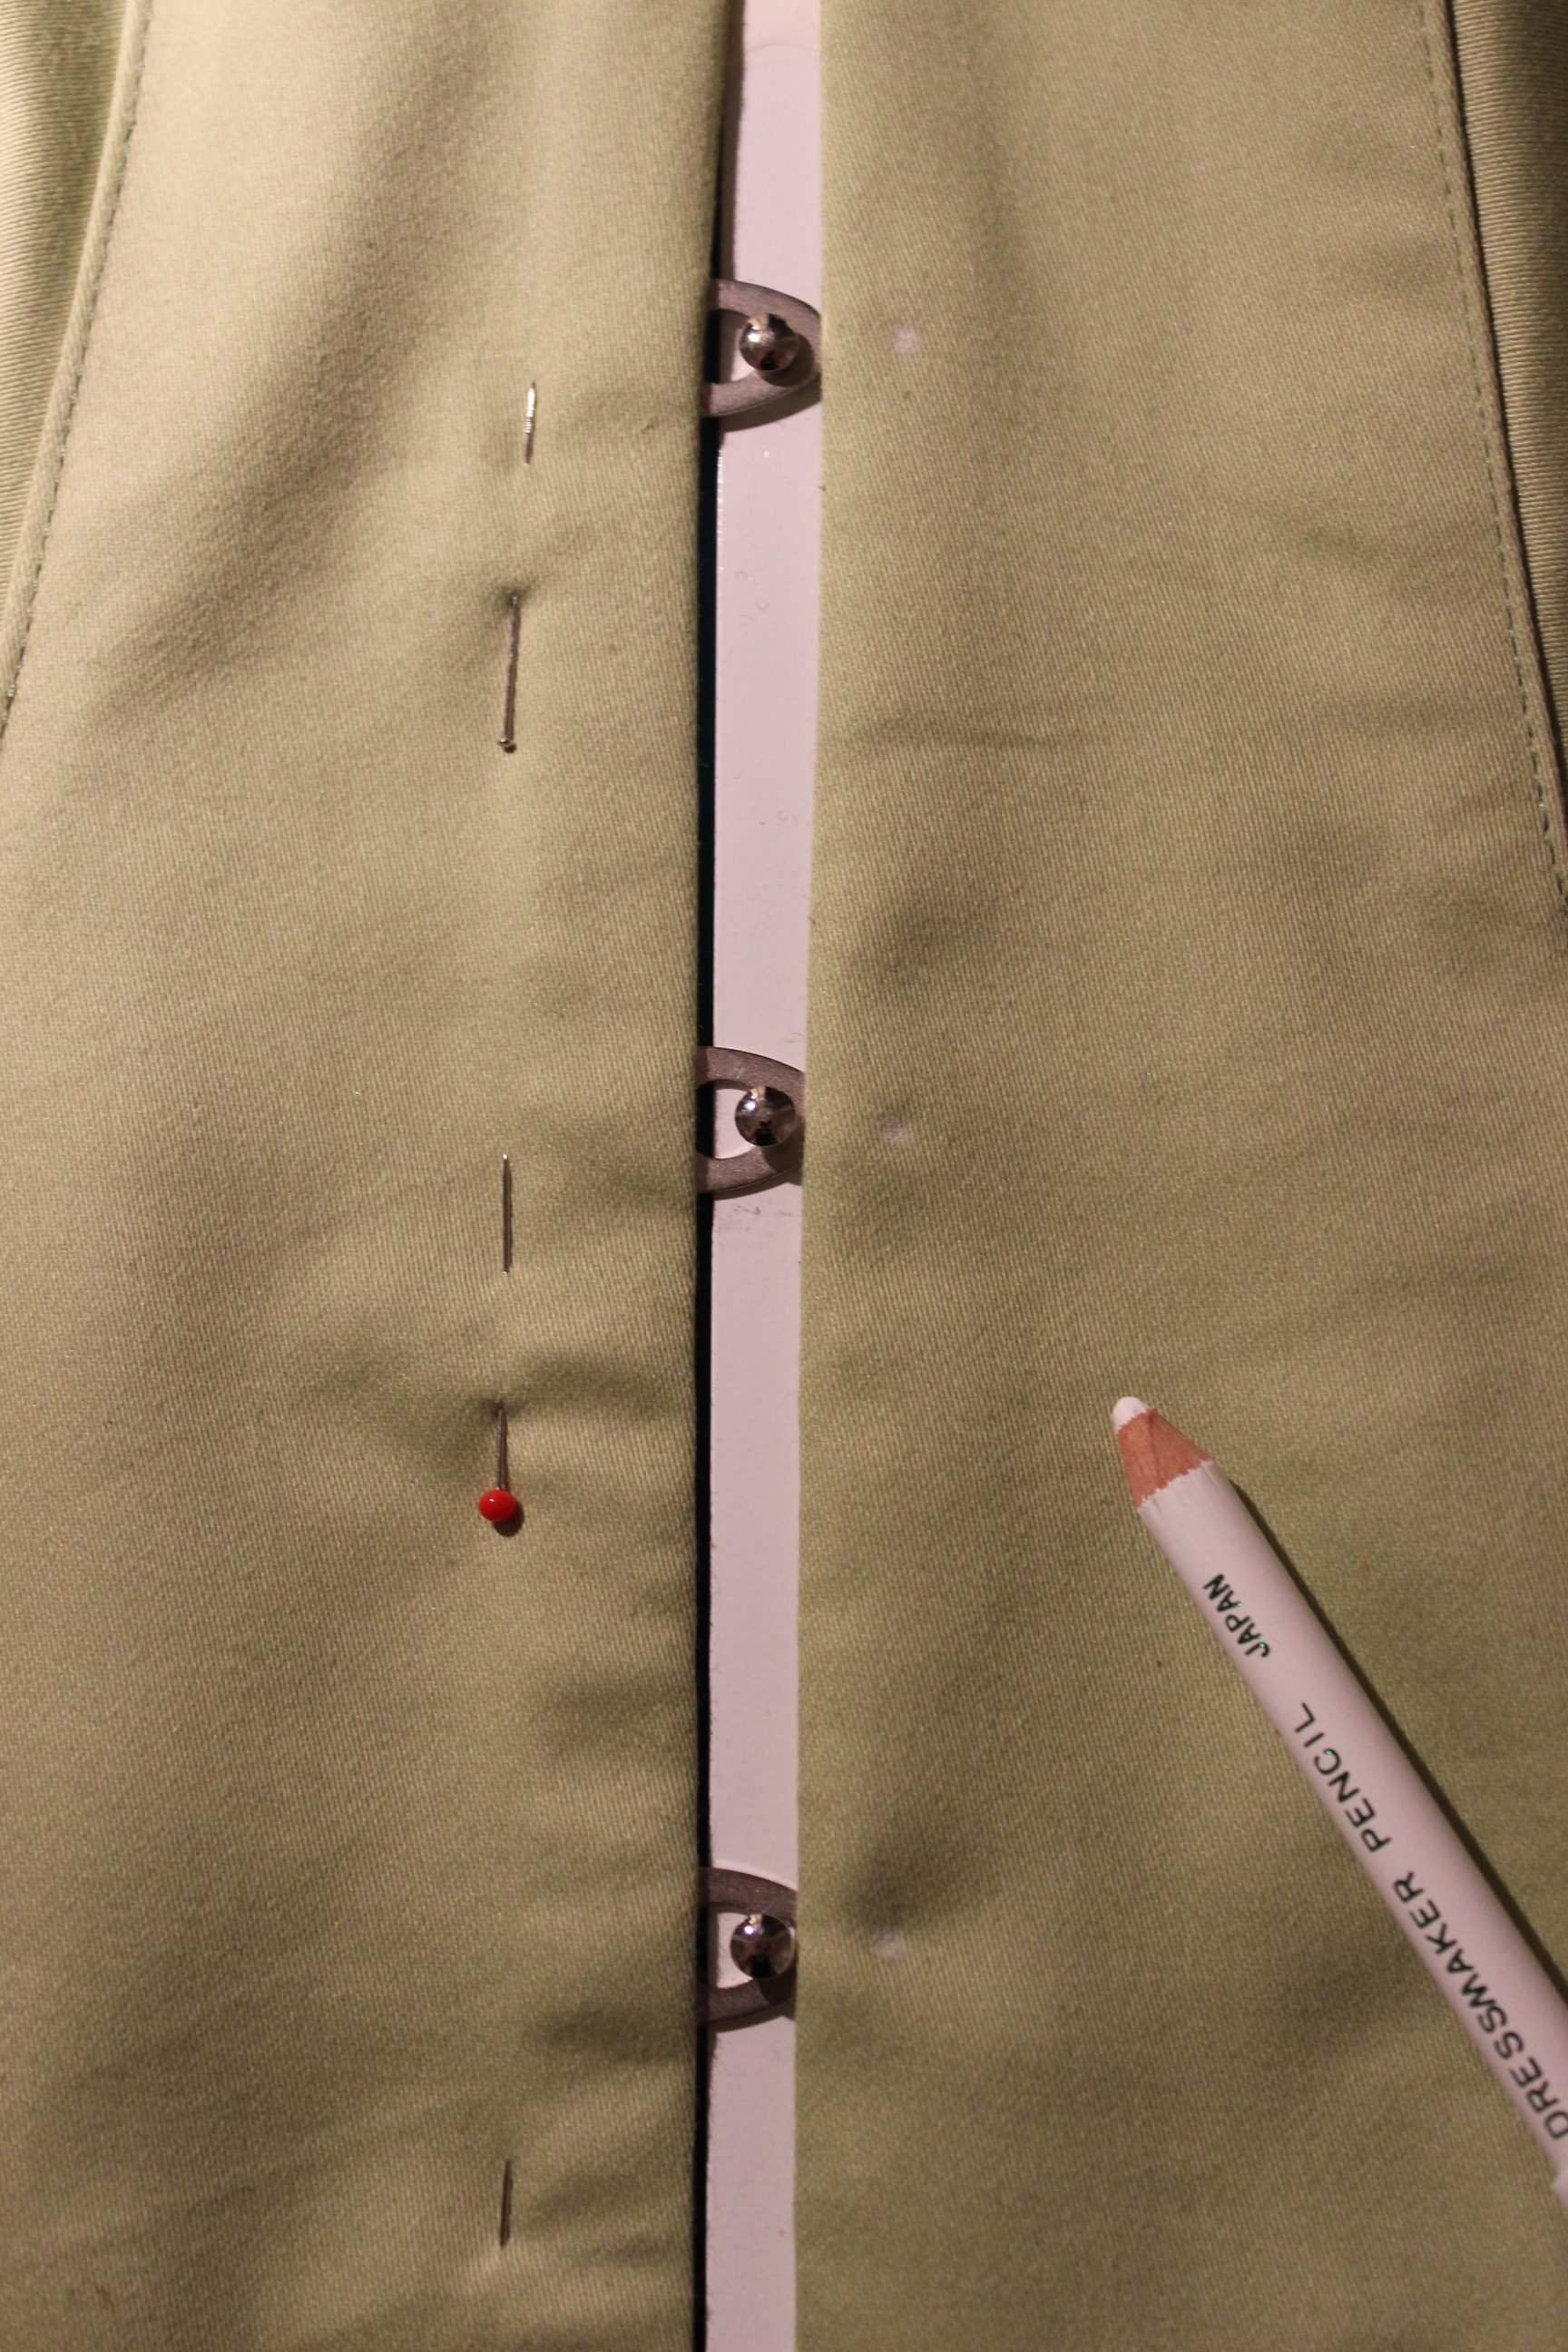
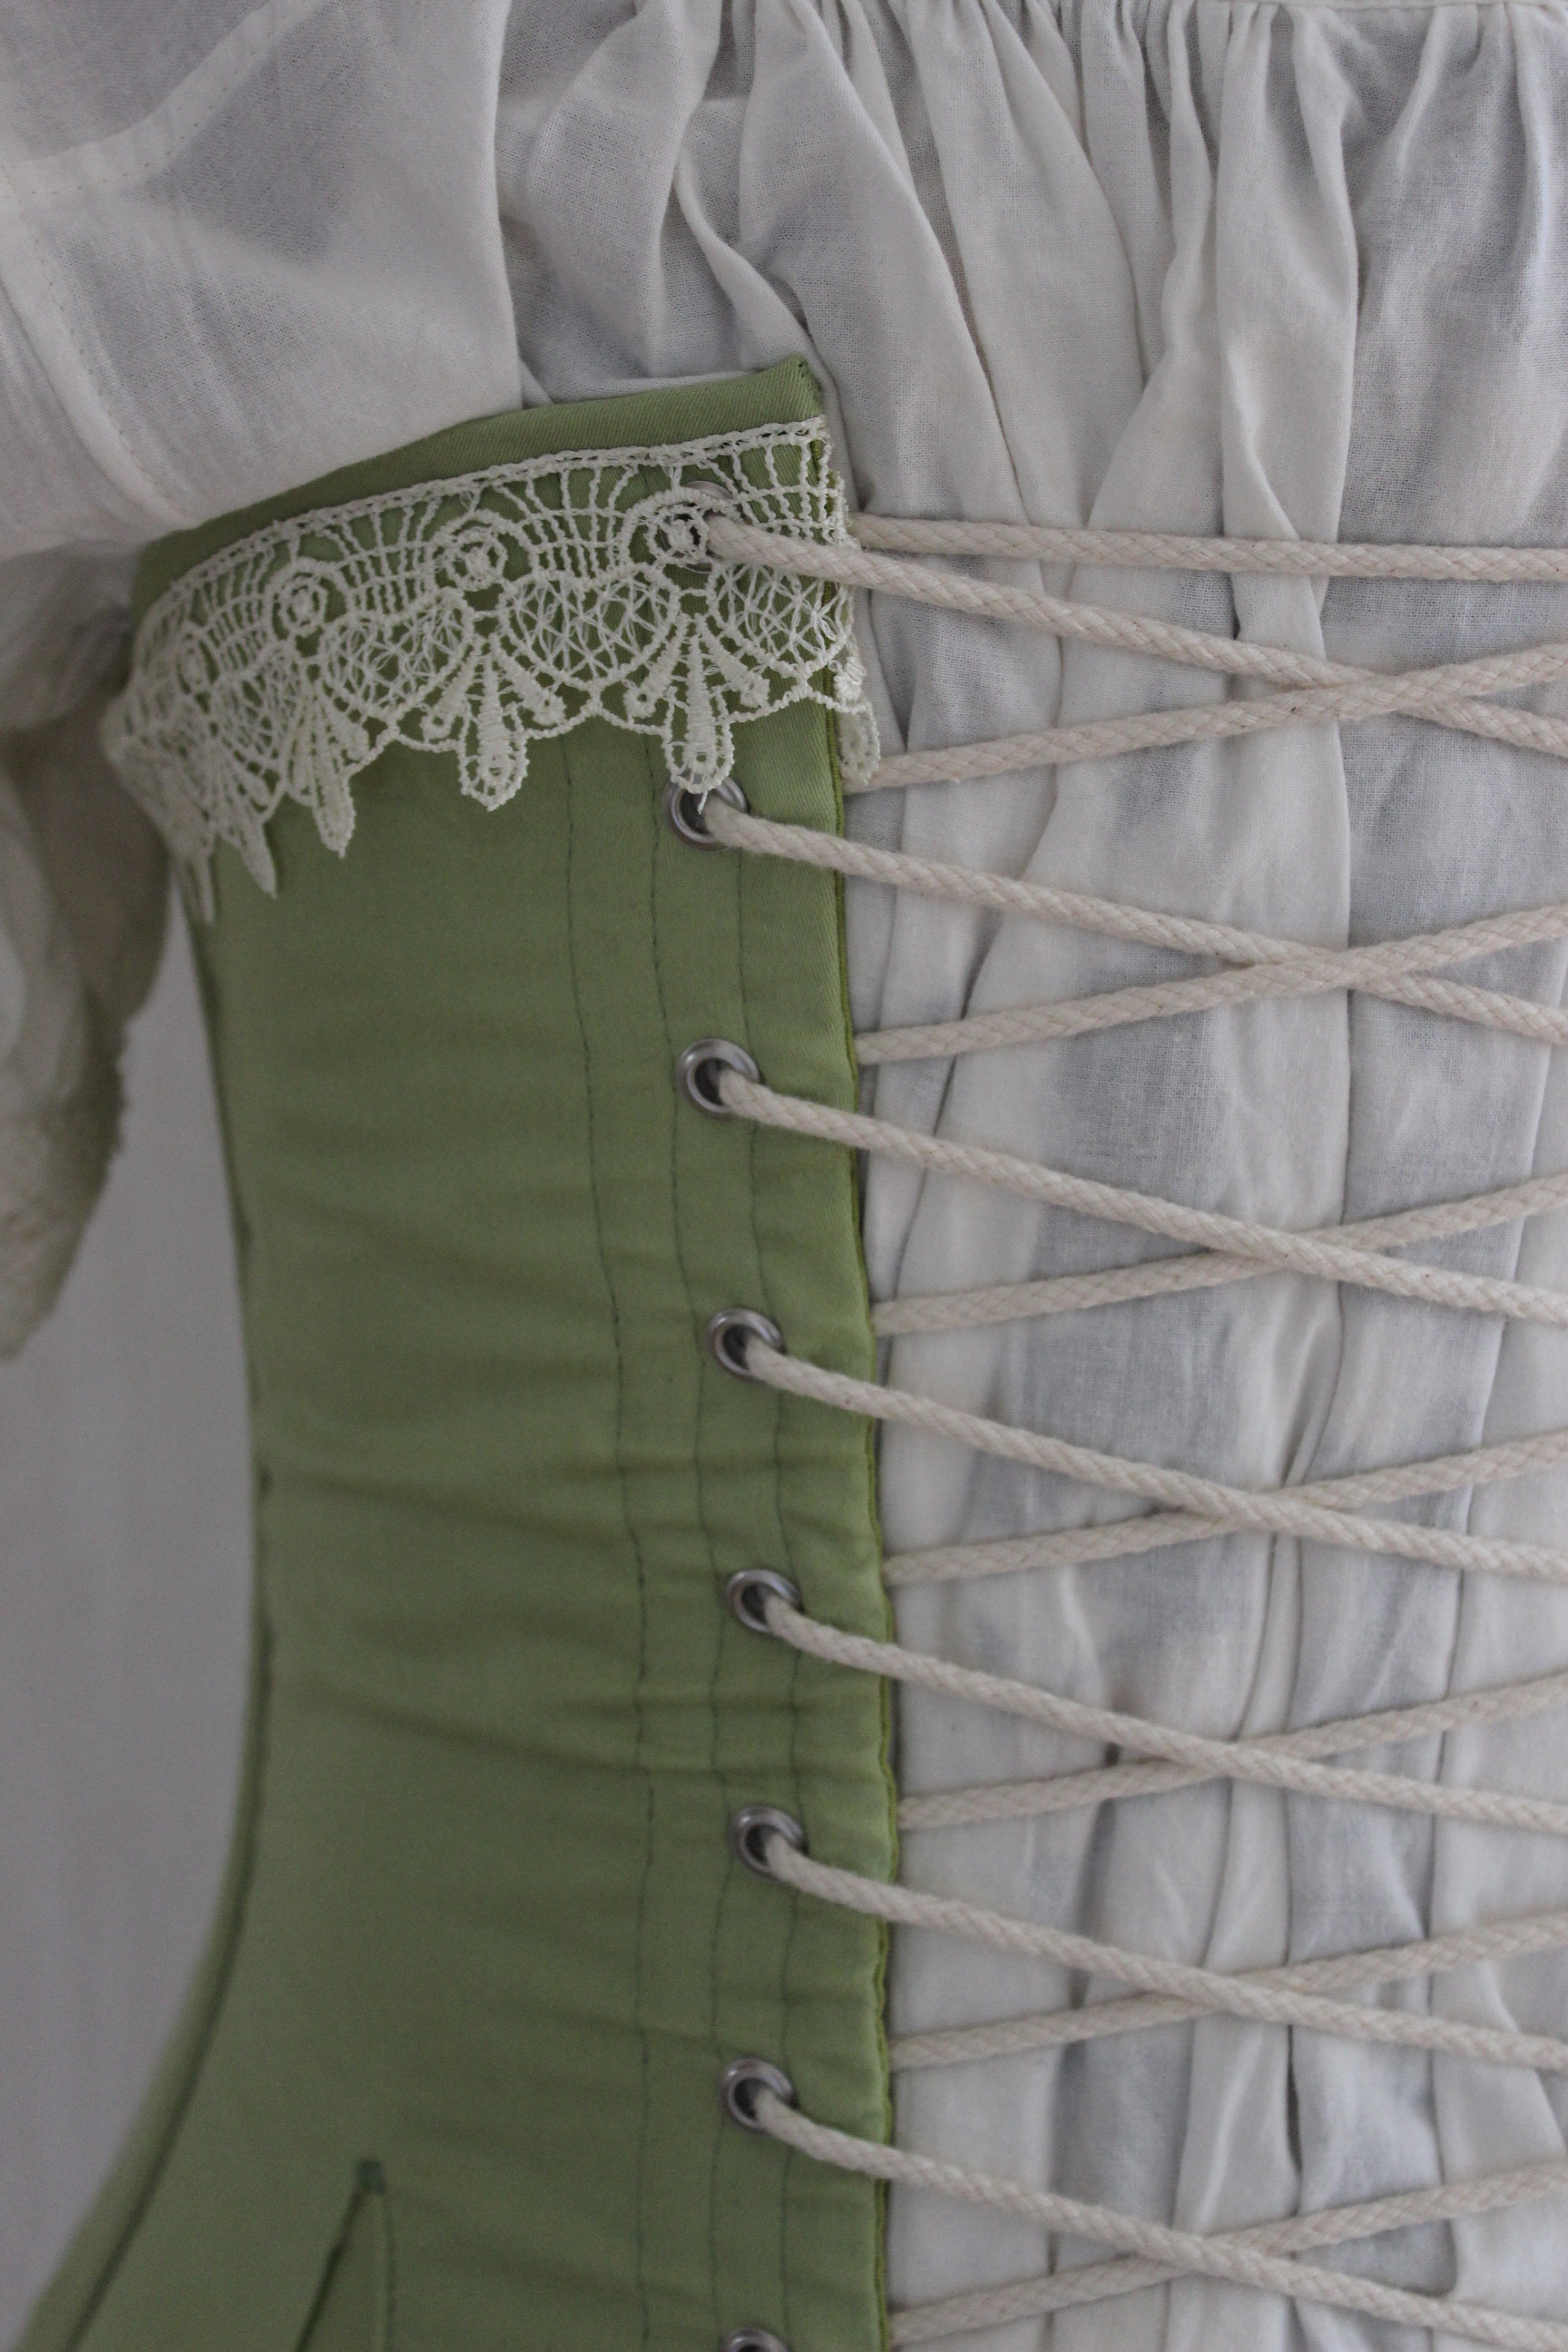
I stitched the boning channels, set the grommets and added the busk.
Then I did another fitting, which I usually never bother to do, but since we where to meat for a cup of coffee I figured, why not.
That was a good call, since some adjustments still needed to be made.
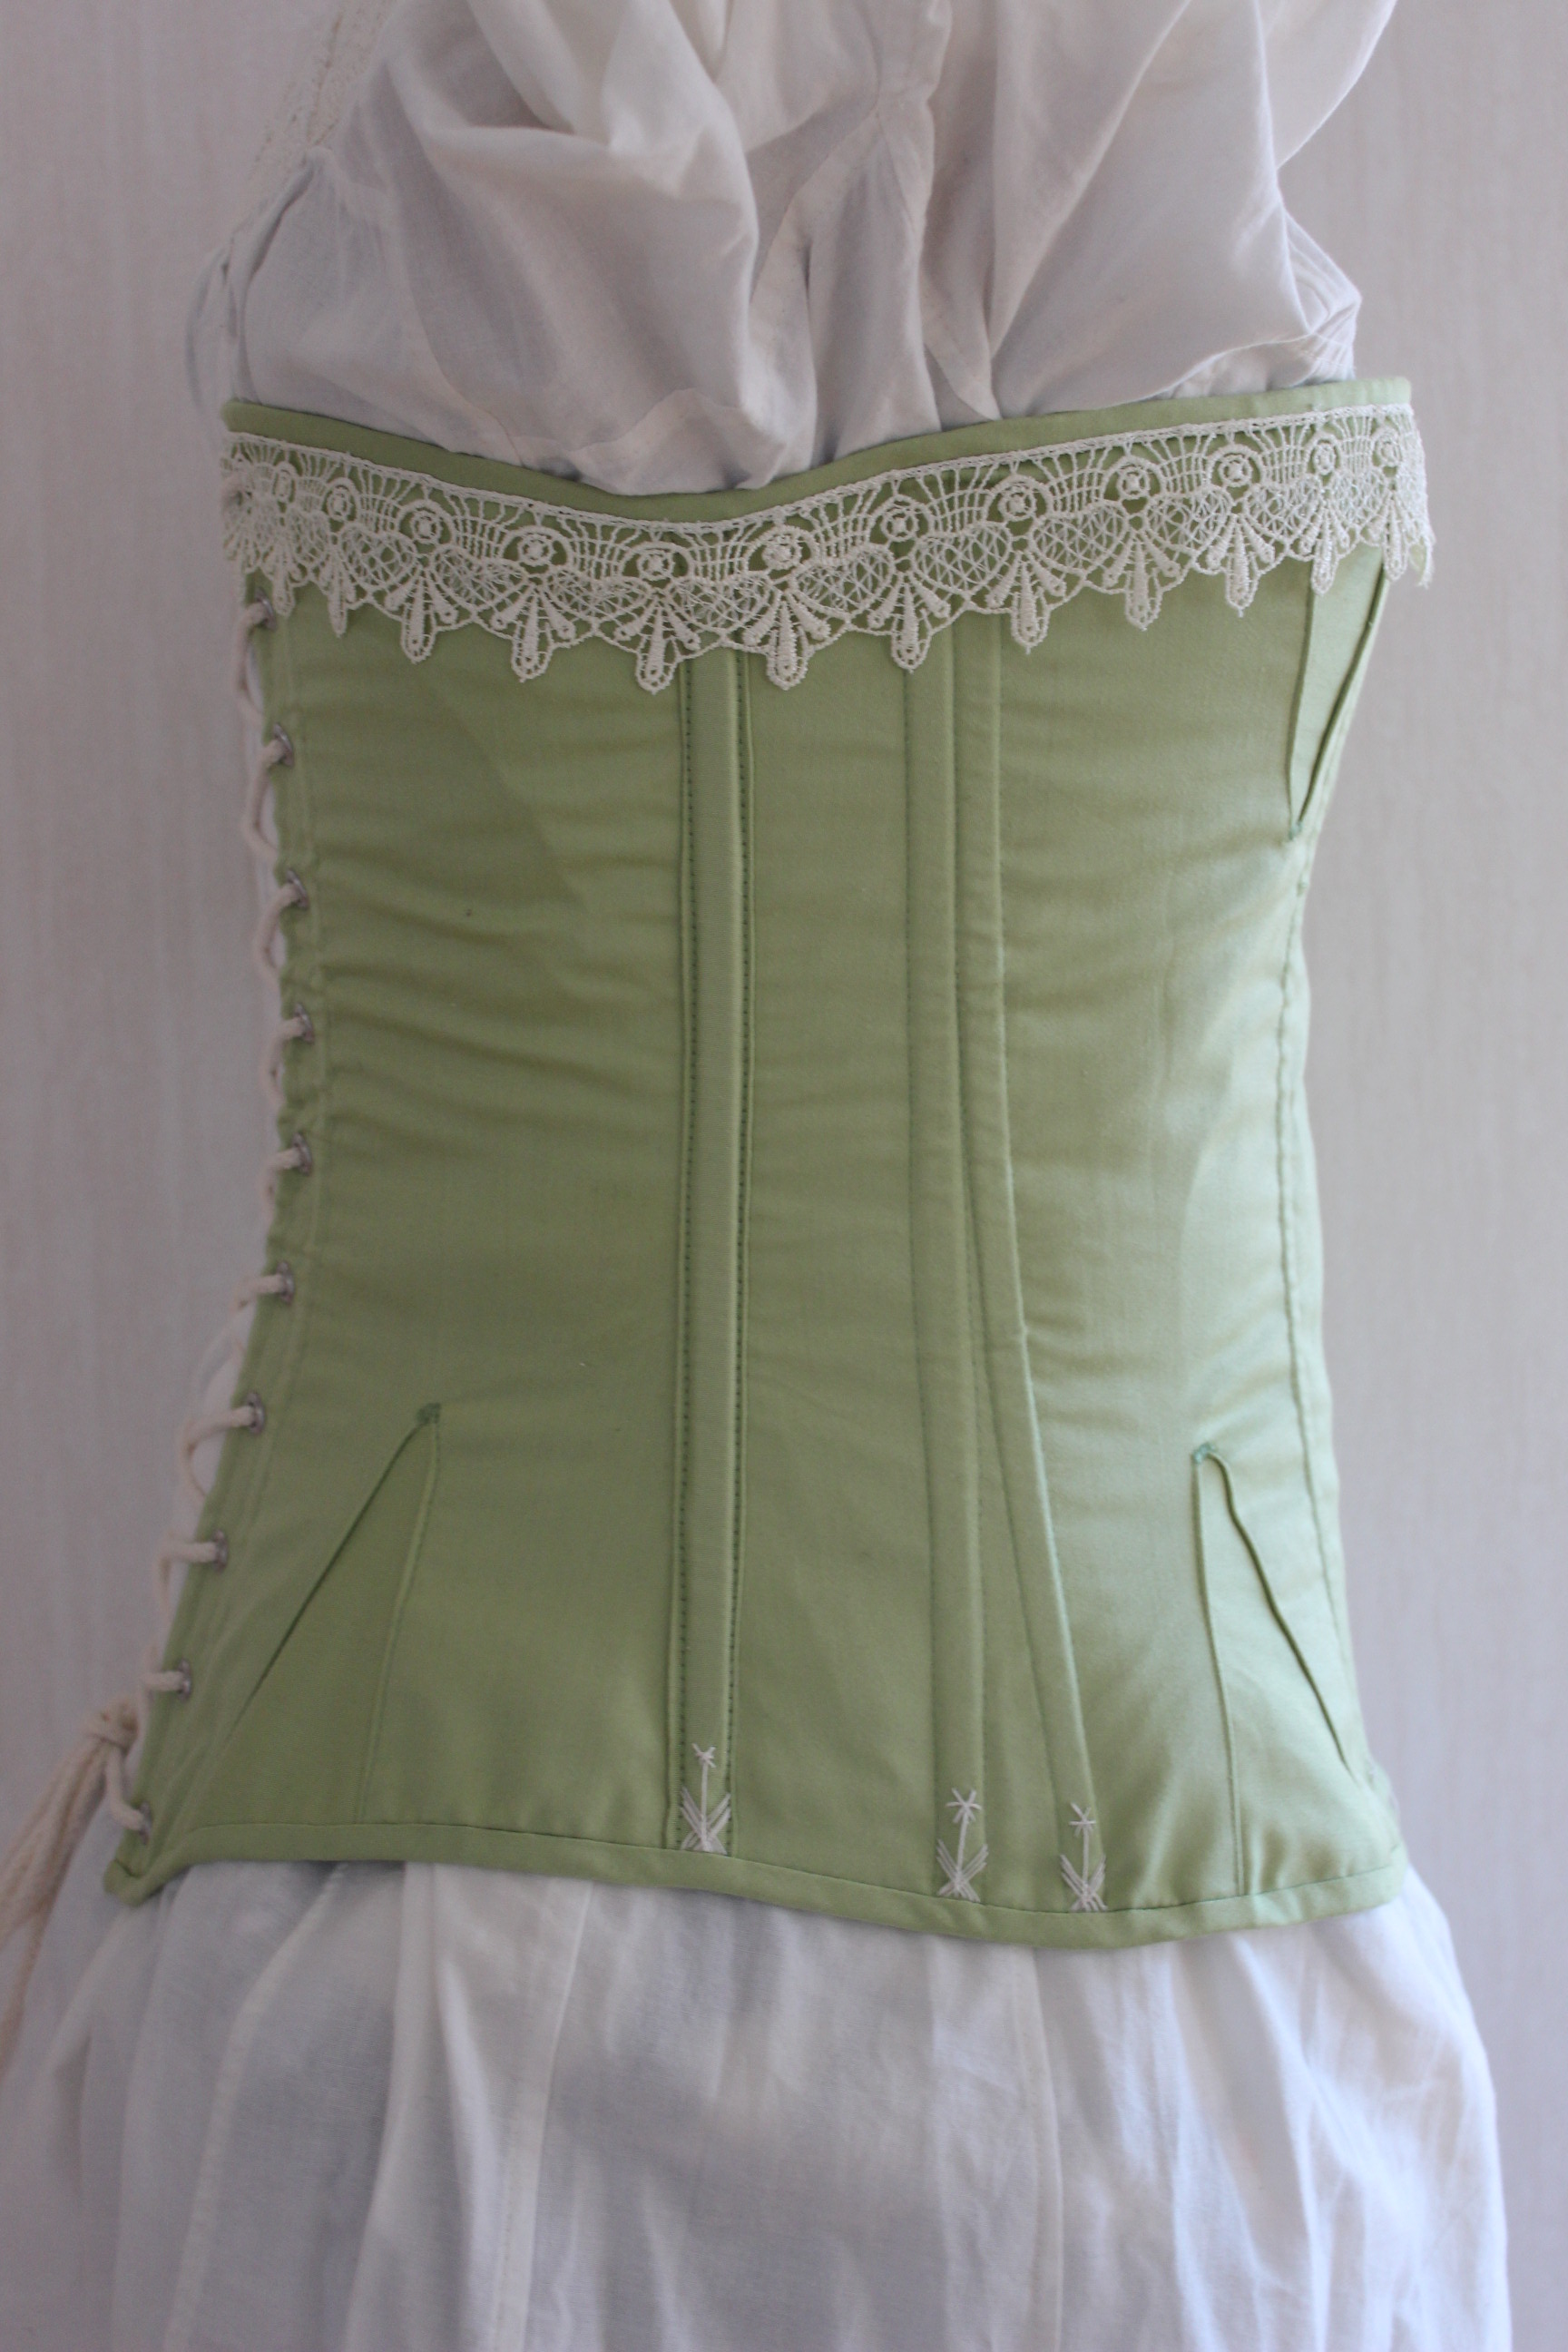
I took it in a few cm at the top, let out a few at the bottom, shortened the whole thing a bit and added two extra bones on each side.
 Only the bone in the middle is from the pattern.
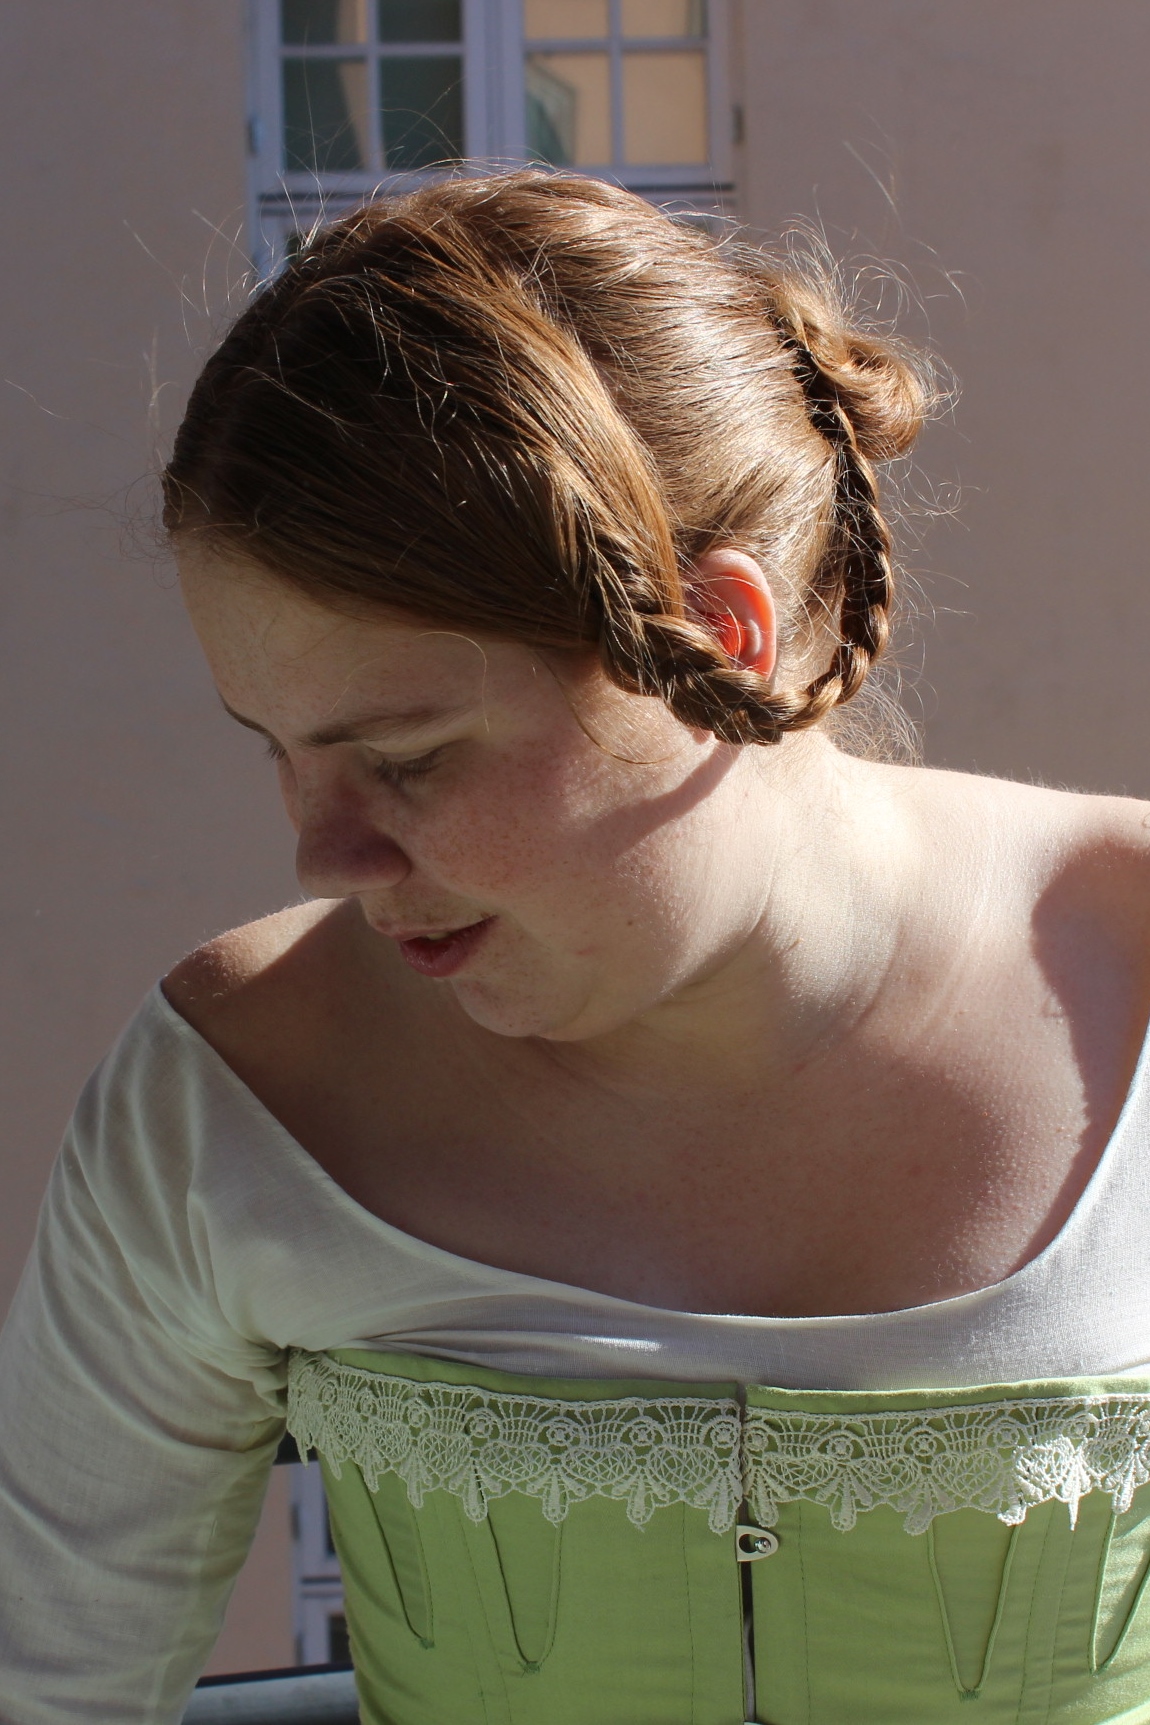
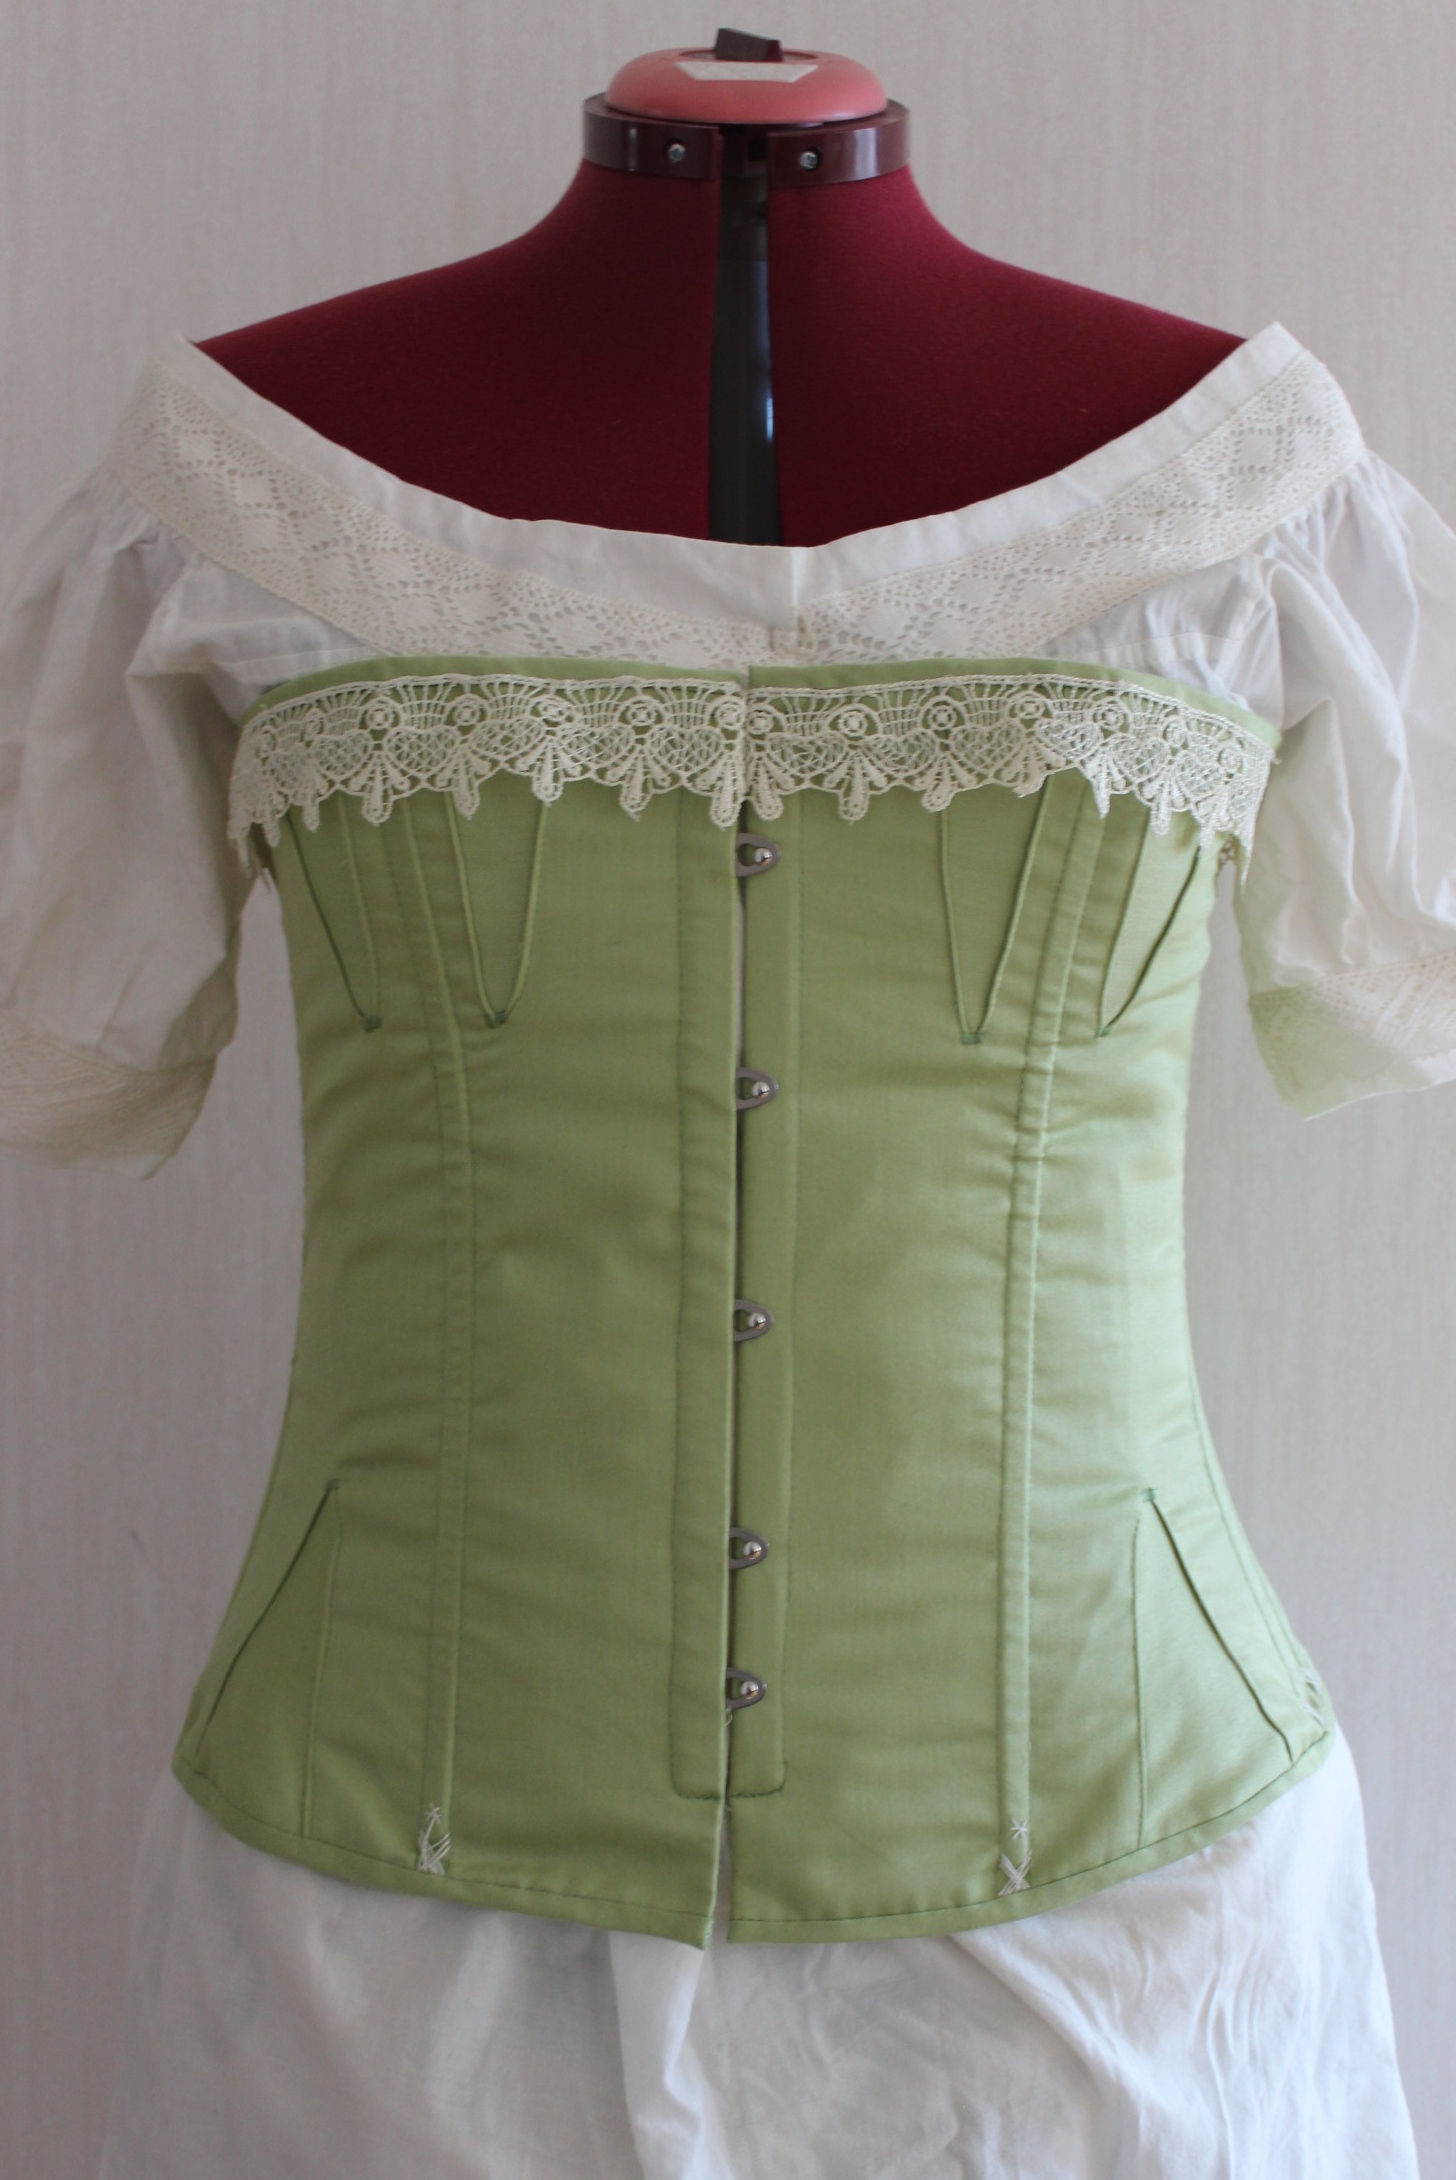
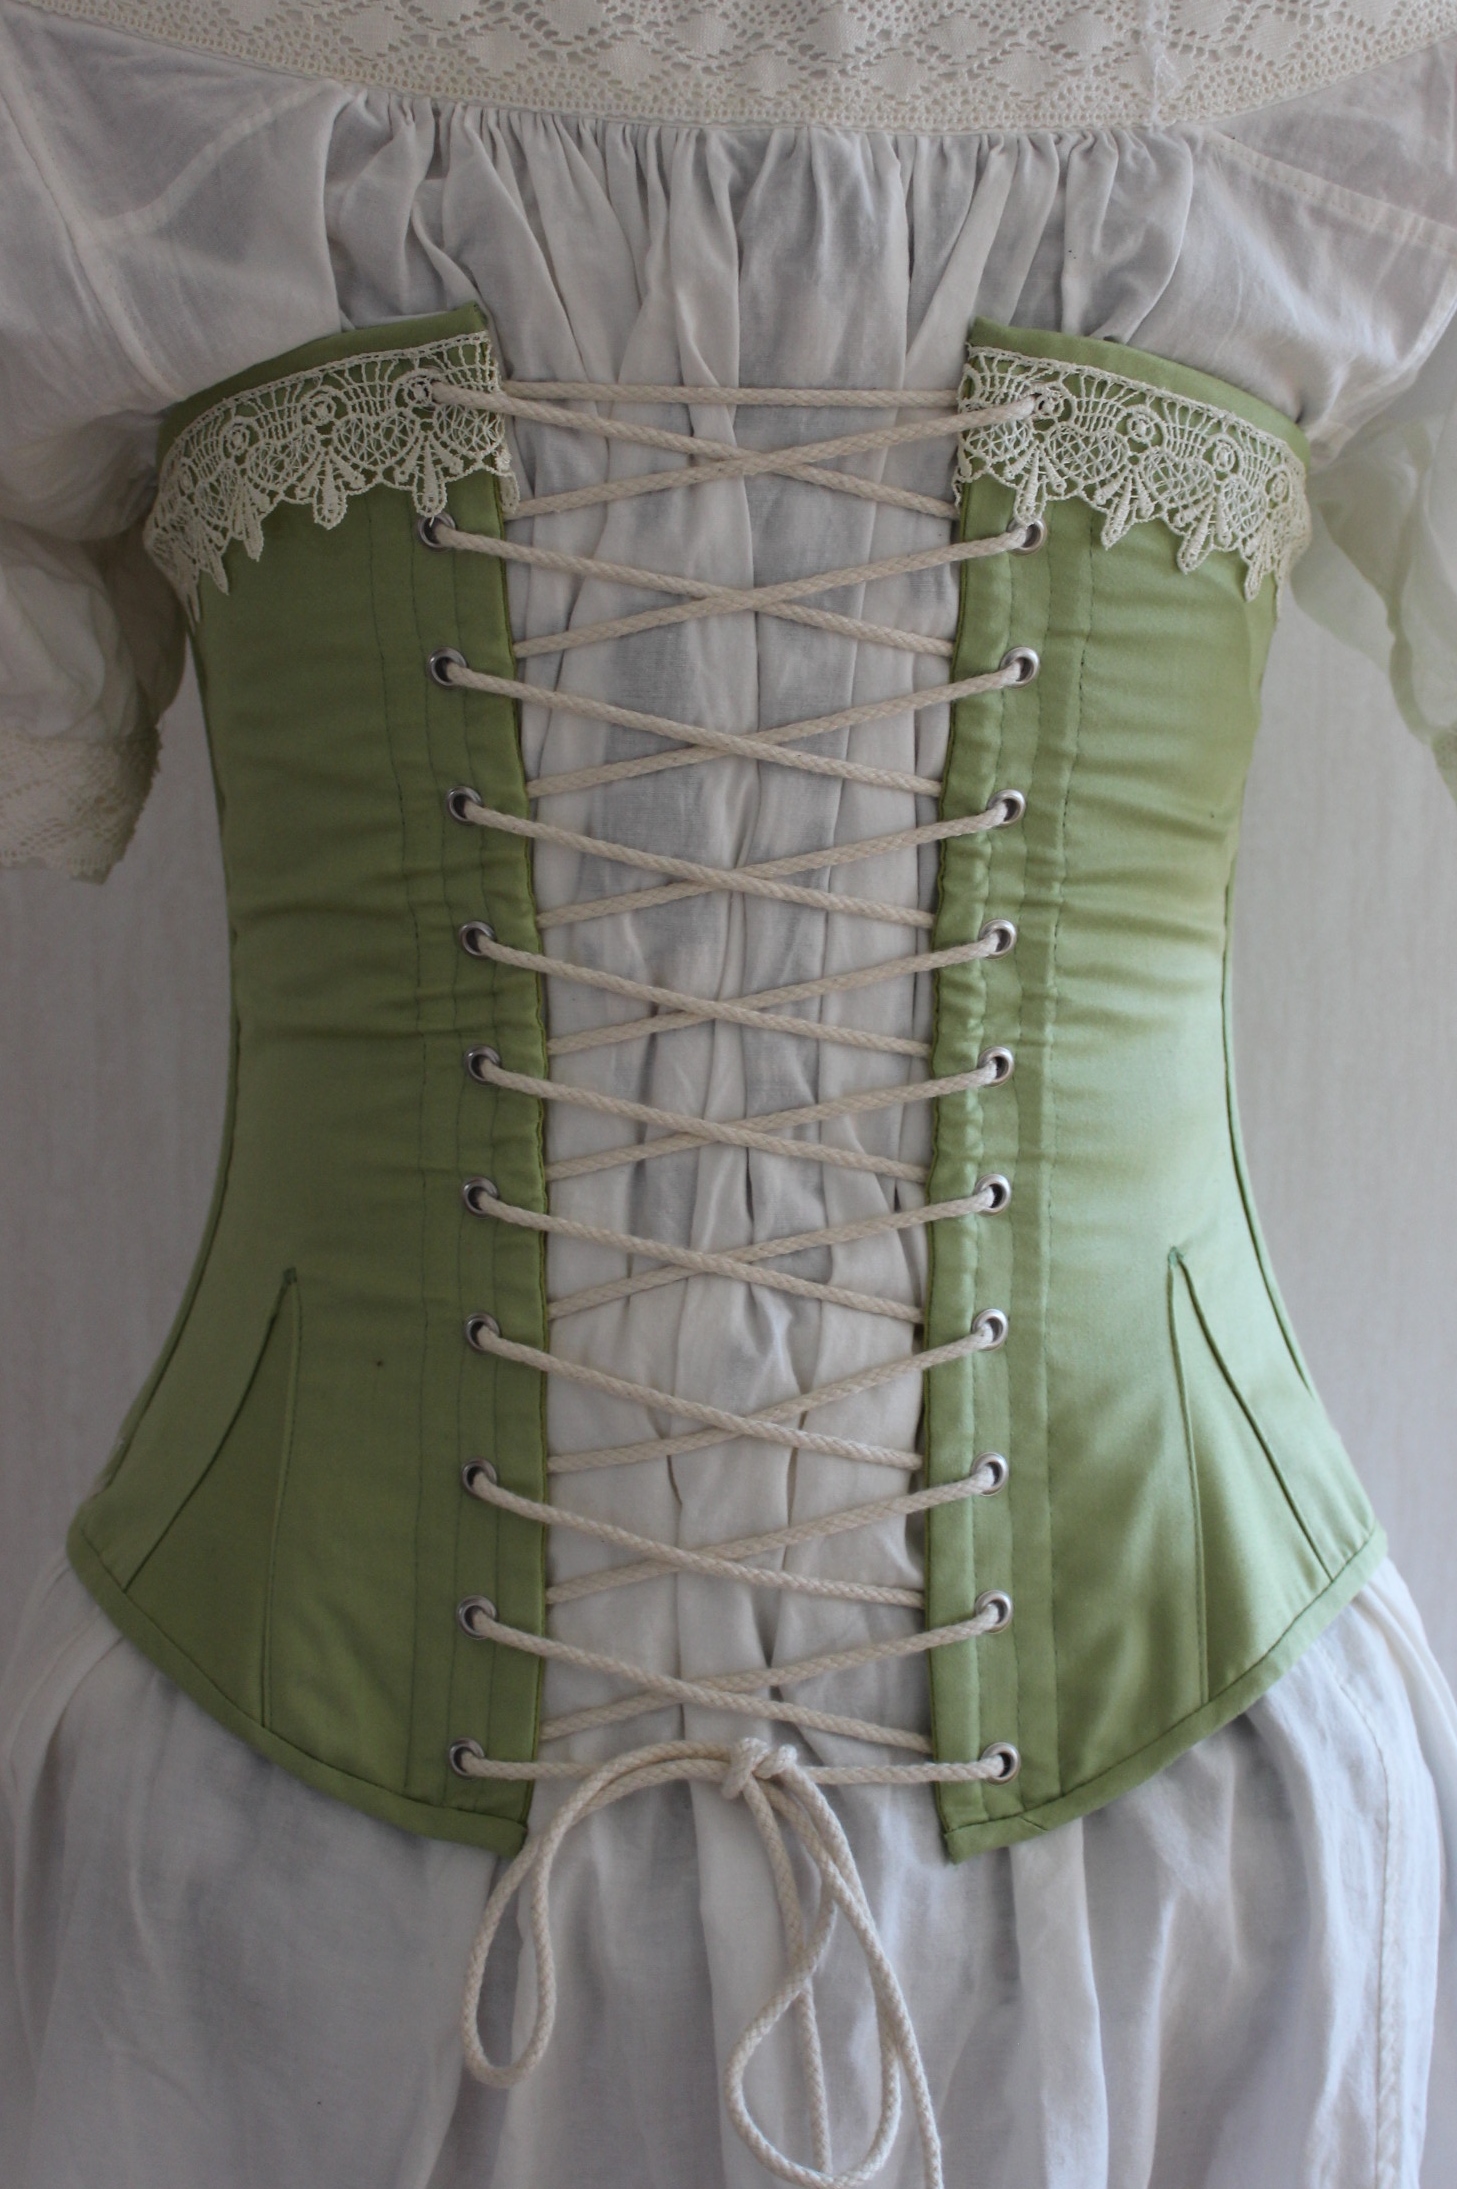
Then I wrapped it up by adding the bias binding (made from the same fabric as the corset), lace and working some flossing on the bones.
Now it fit much better! 🙂
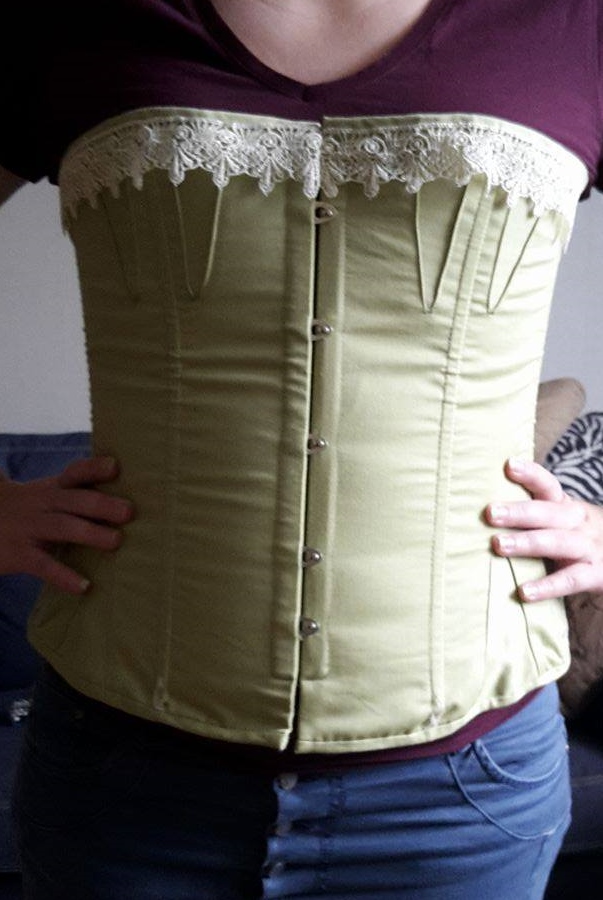
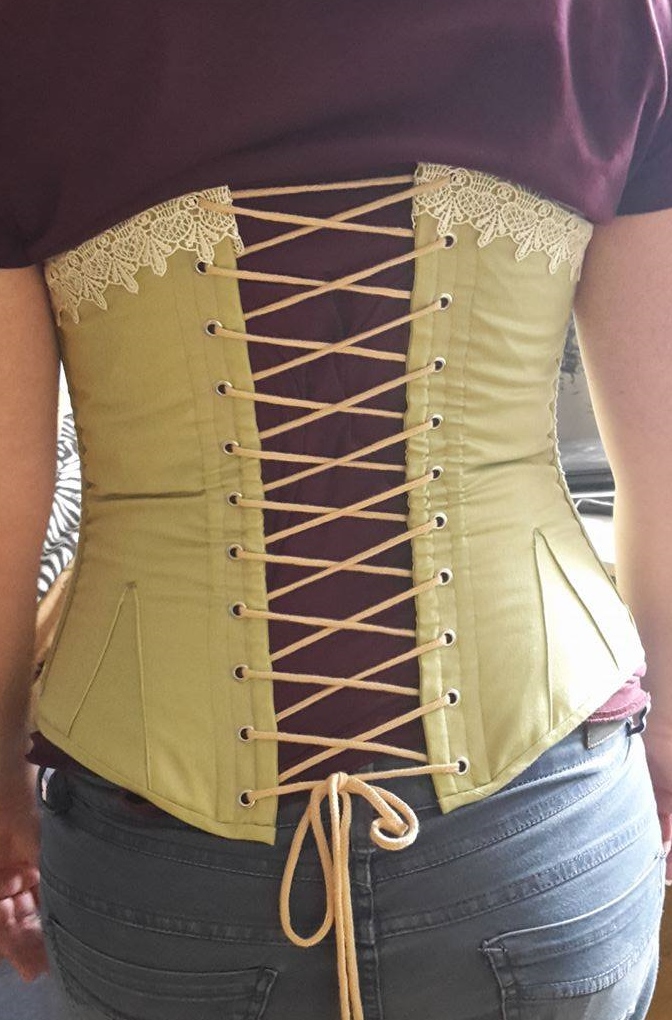
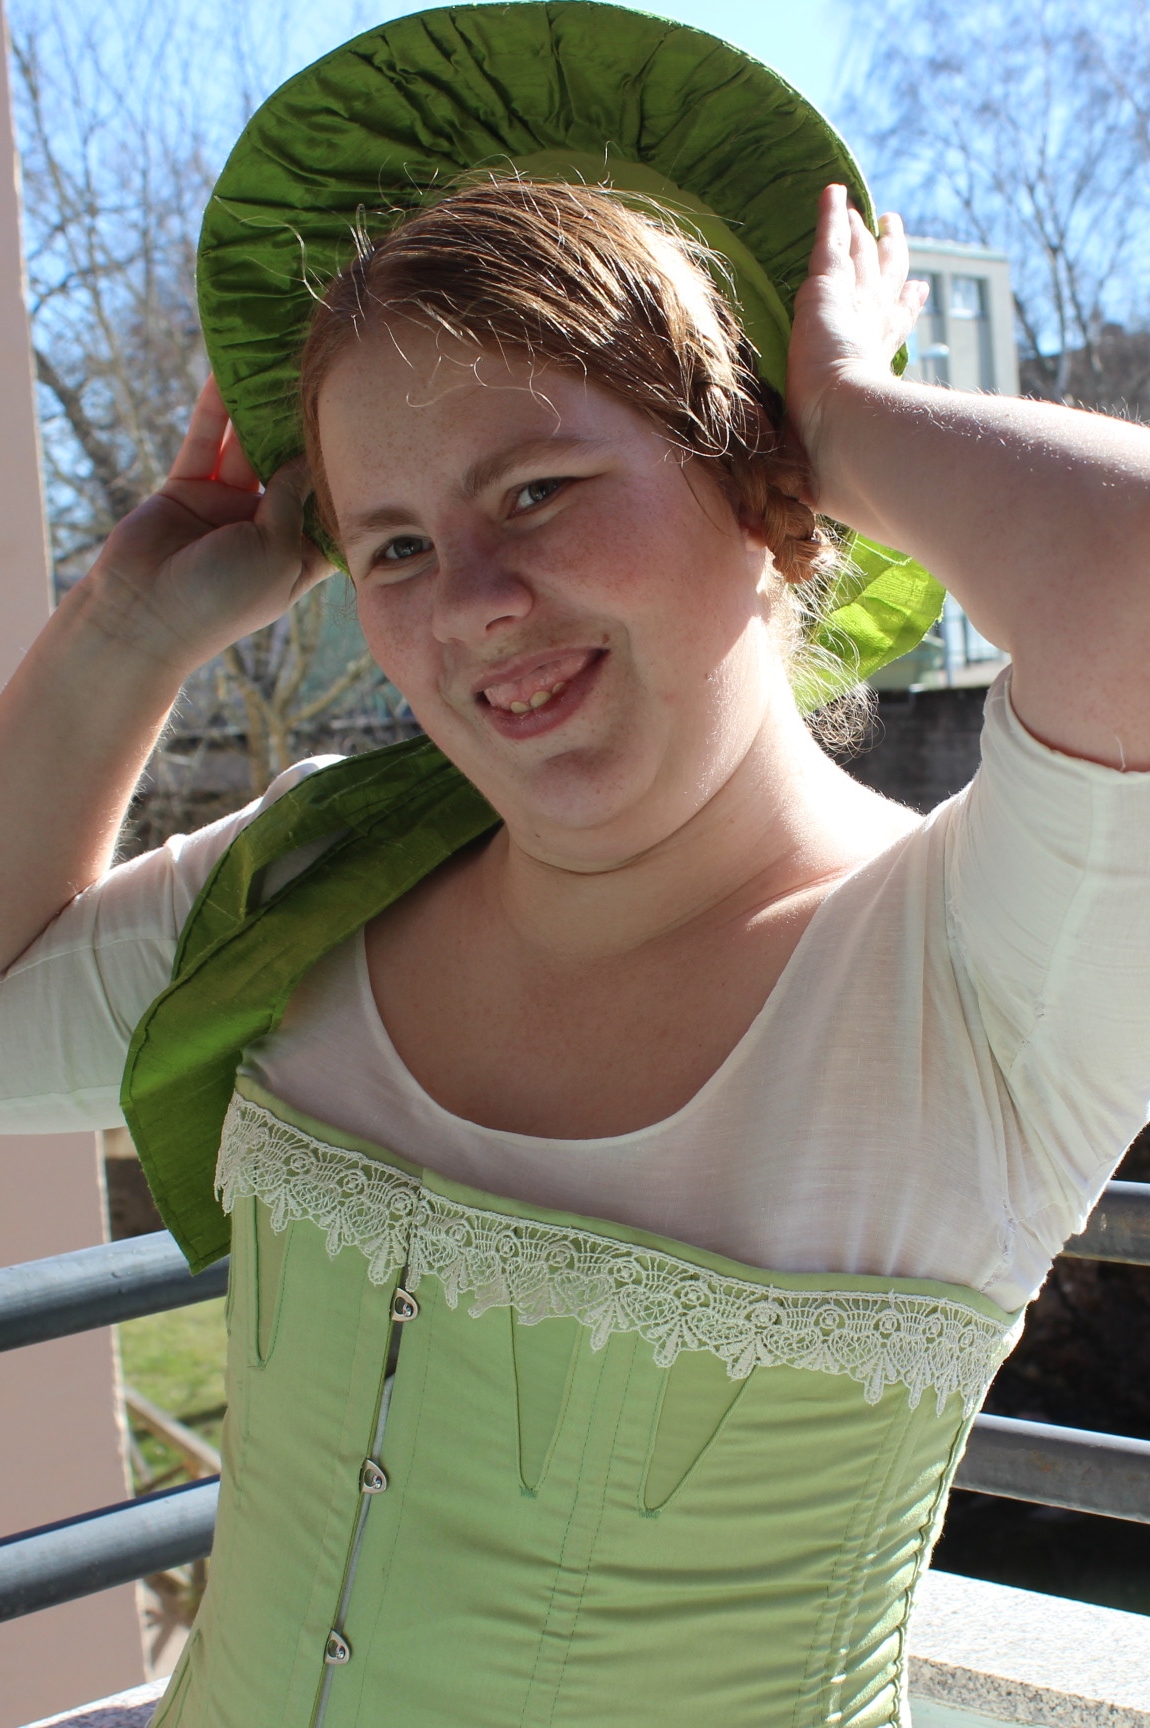
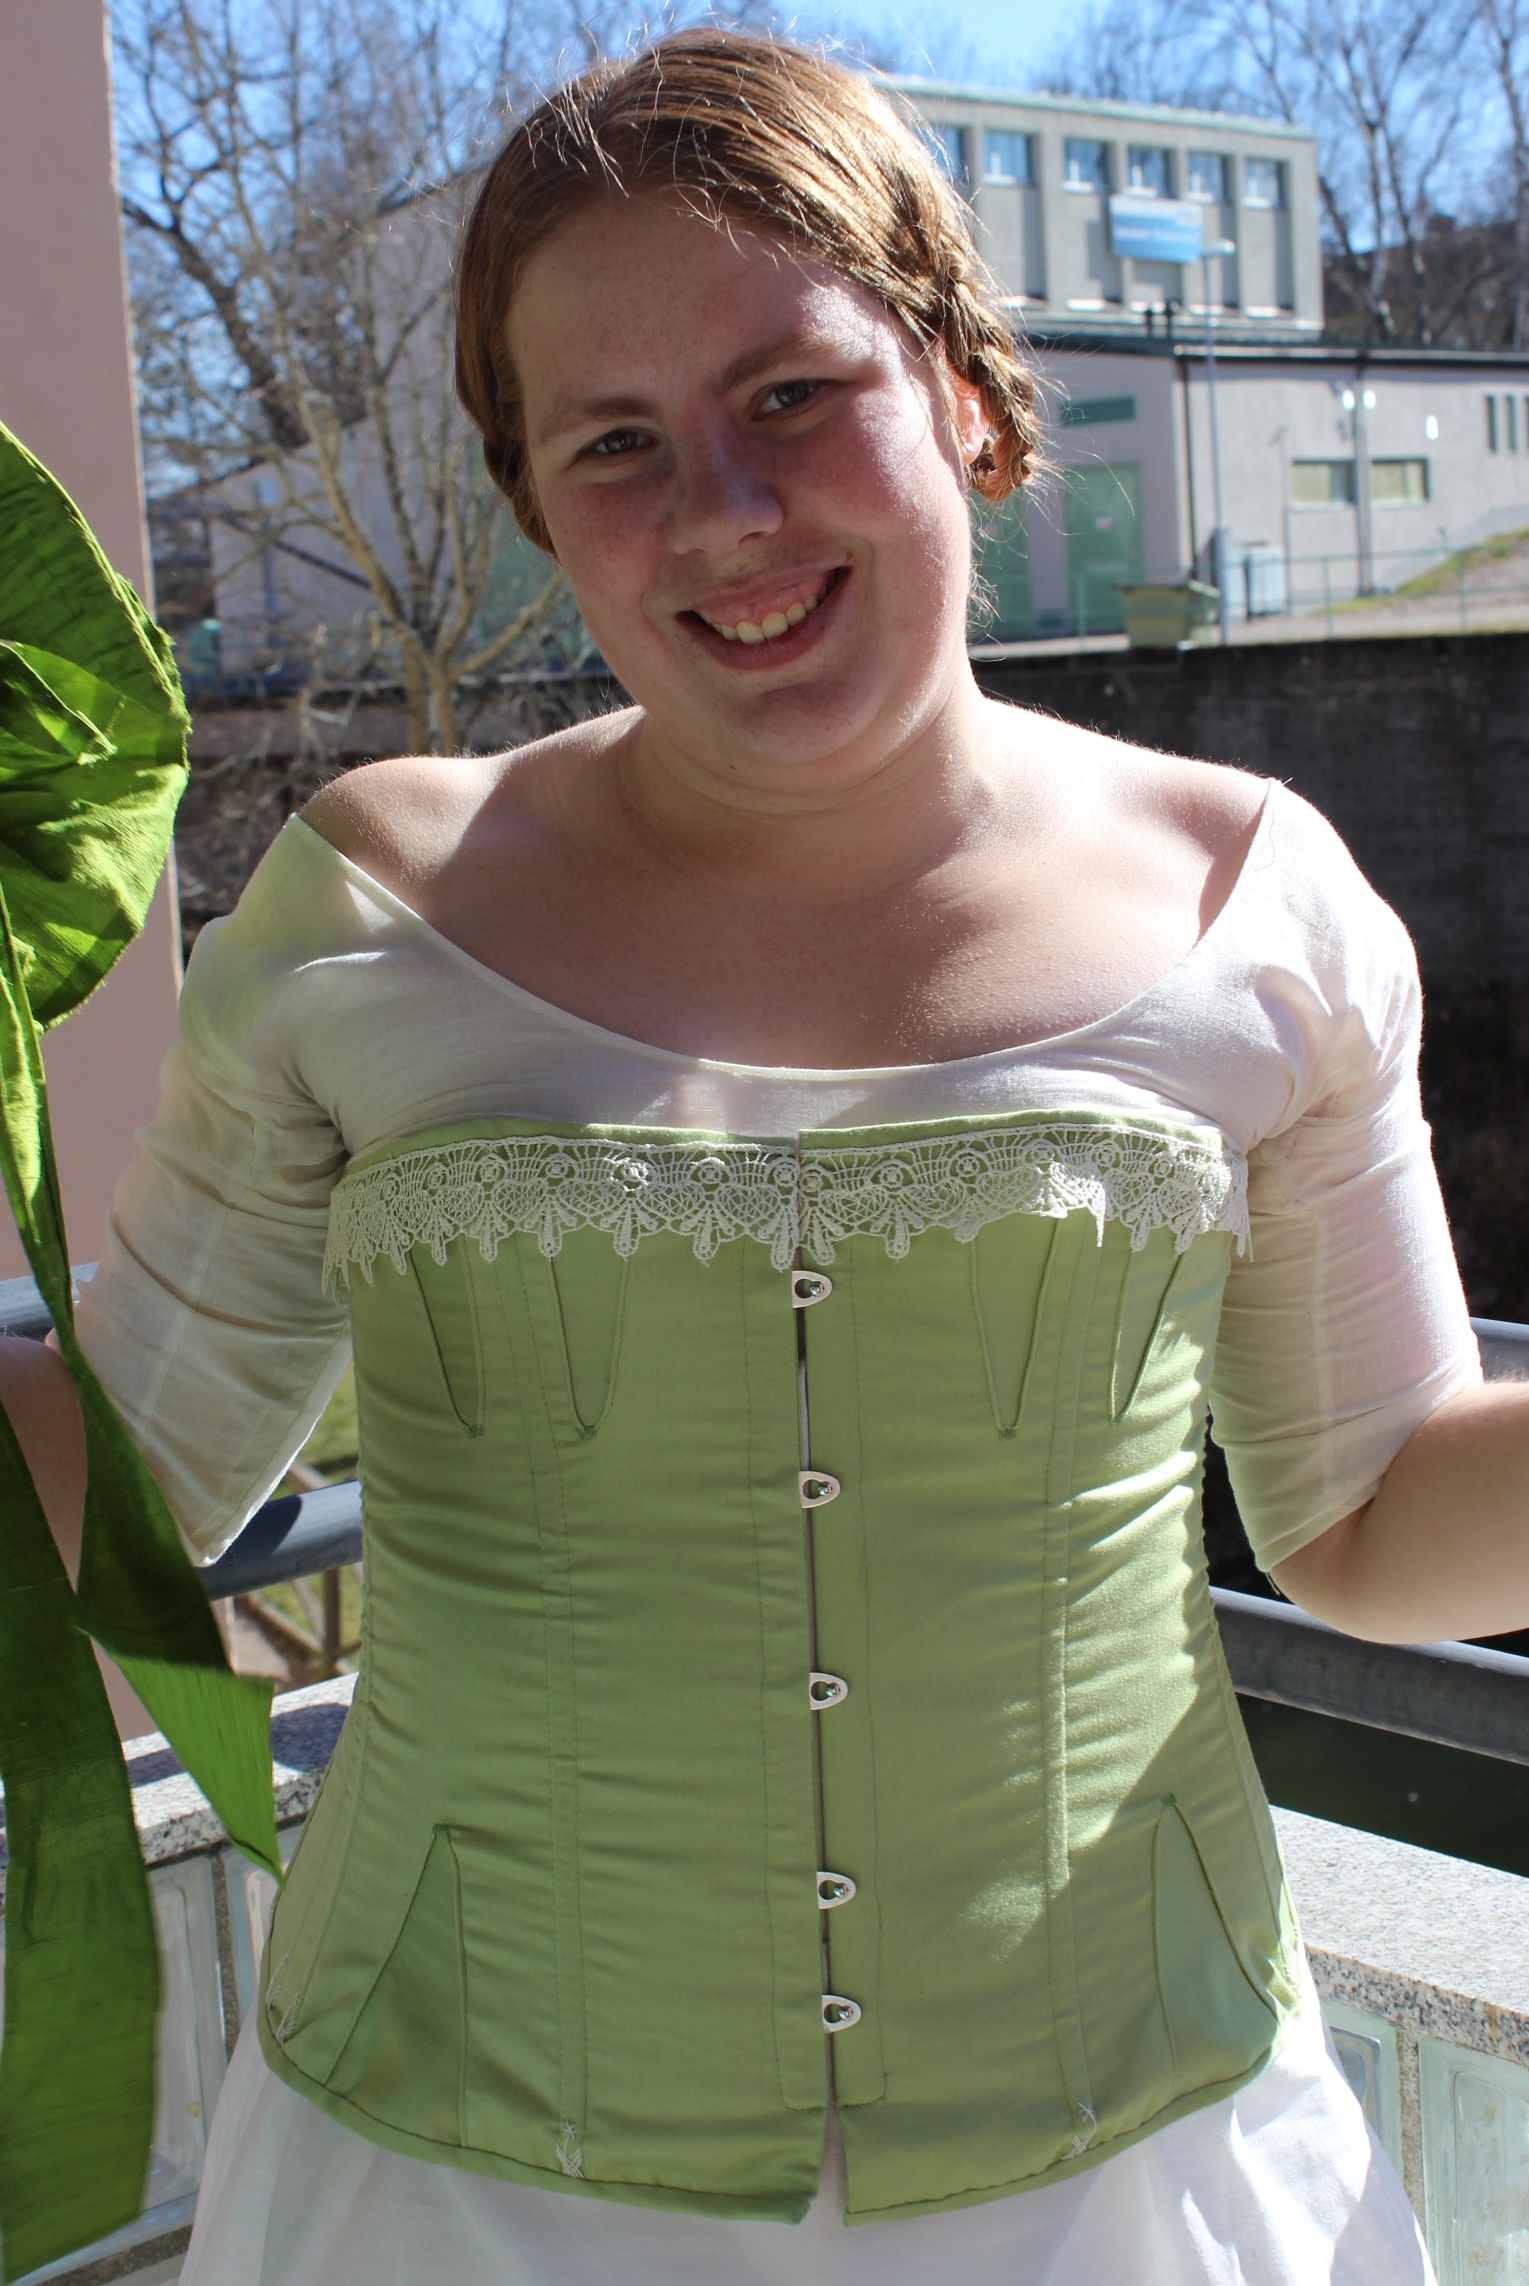
The finished corset:


The facts:
What: a 1850-1880s corset
Pattern: “Past Pattern” nr. 708 – Mid 19th century stays
Fabric & Notions: 0,5 m green cotton sateen, o,5 m cotton interlining, 0.5 m green cotton for lining. Thread, 1 busk, boning (plastic and metal), grommets, buttonhole thread for flossing, 1 m ivory lace, 4 m of cotton cord for lacing.
Time: With the many fittings, and short work sessions late at night it took about 10 hours.
Cost: Everything came from stash (fancy that!), but bought new about 300 Sek (25 Usd).
Final thoughts: I think it came out really well, and my sister loves it. Lets just see how well it holds up on the ball room floor…
I tend to think these “make-do/repair/re-make – challenges” are pretty boring. And I never know what to make and feel kind of uninspired by the whole thing.
But then something always happens.
I guess it’s due to my ever growing costume wardrobe, and my inpatients (often pressed by deadlines) to get stuff finished, that I always end up with several entry’s for the “re-make” HSM challenges.
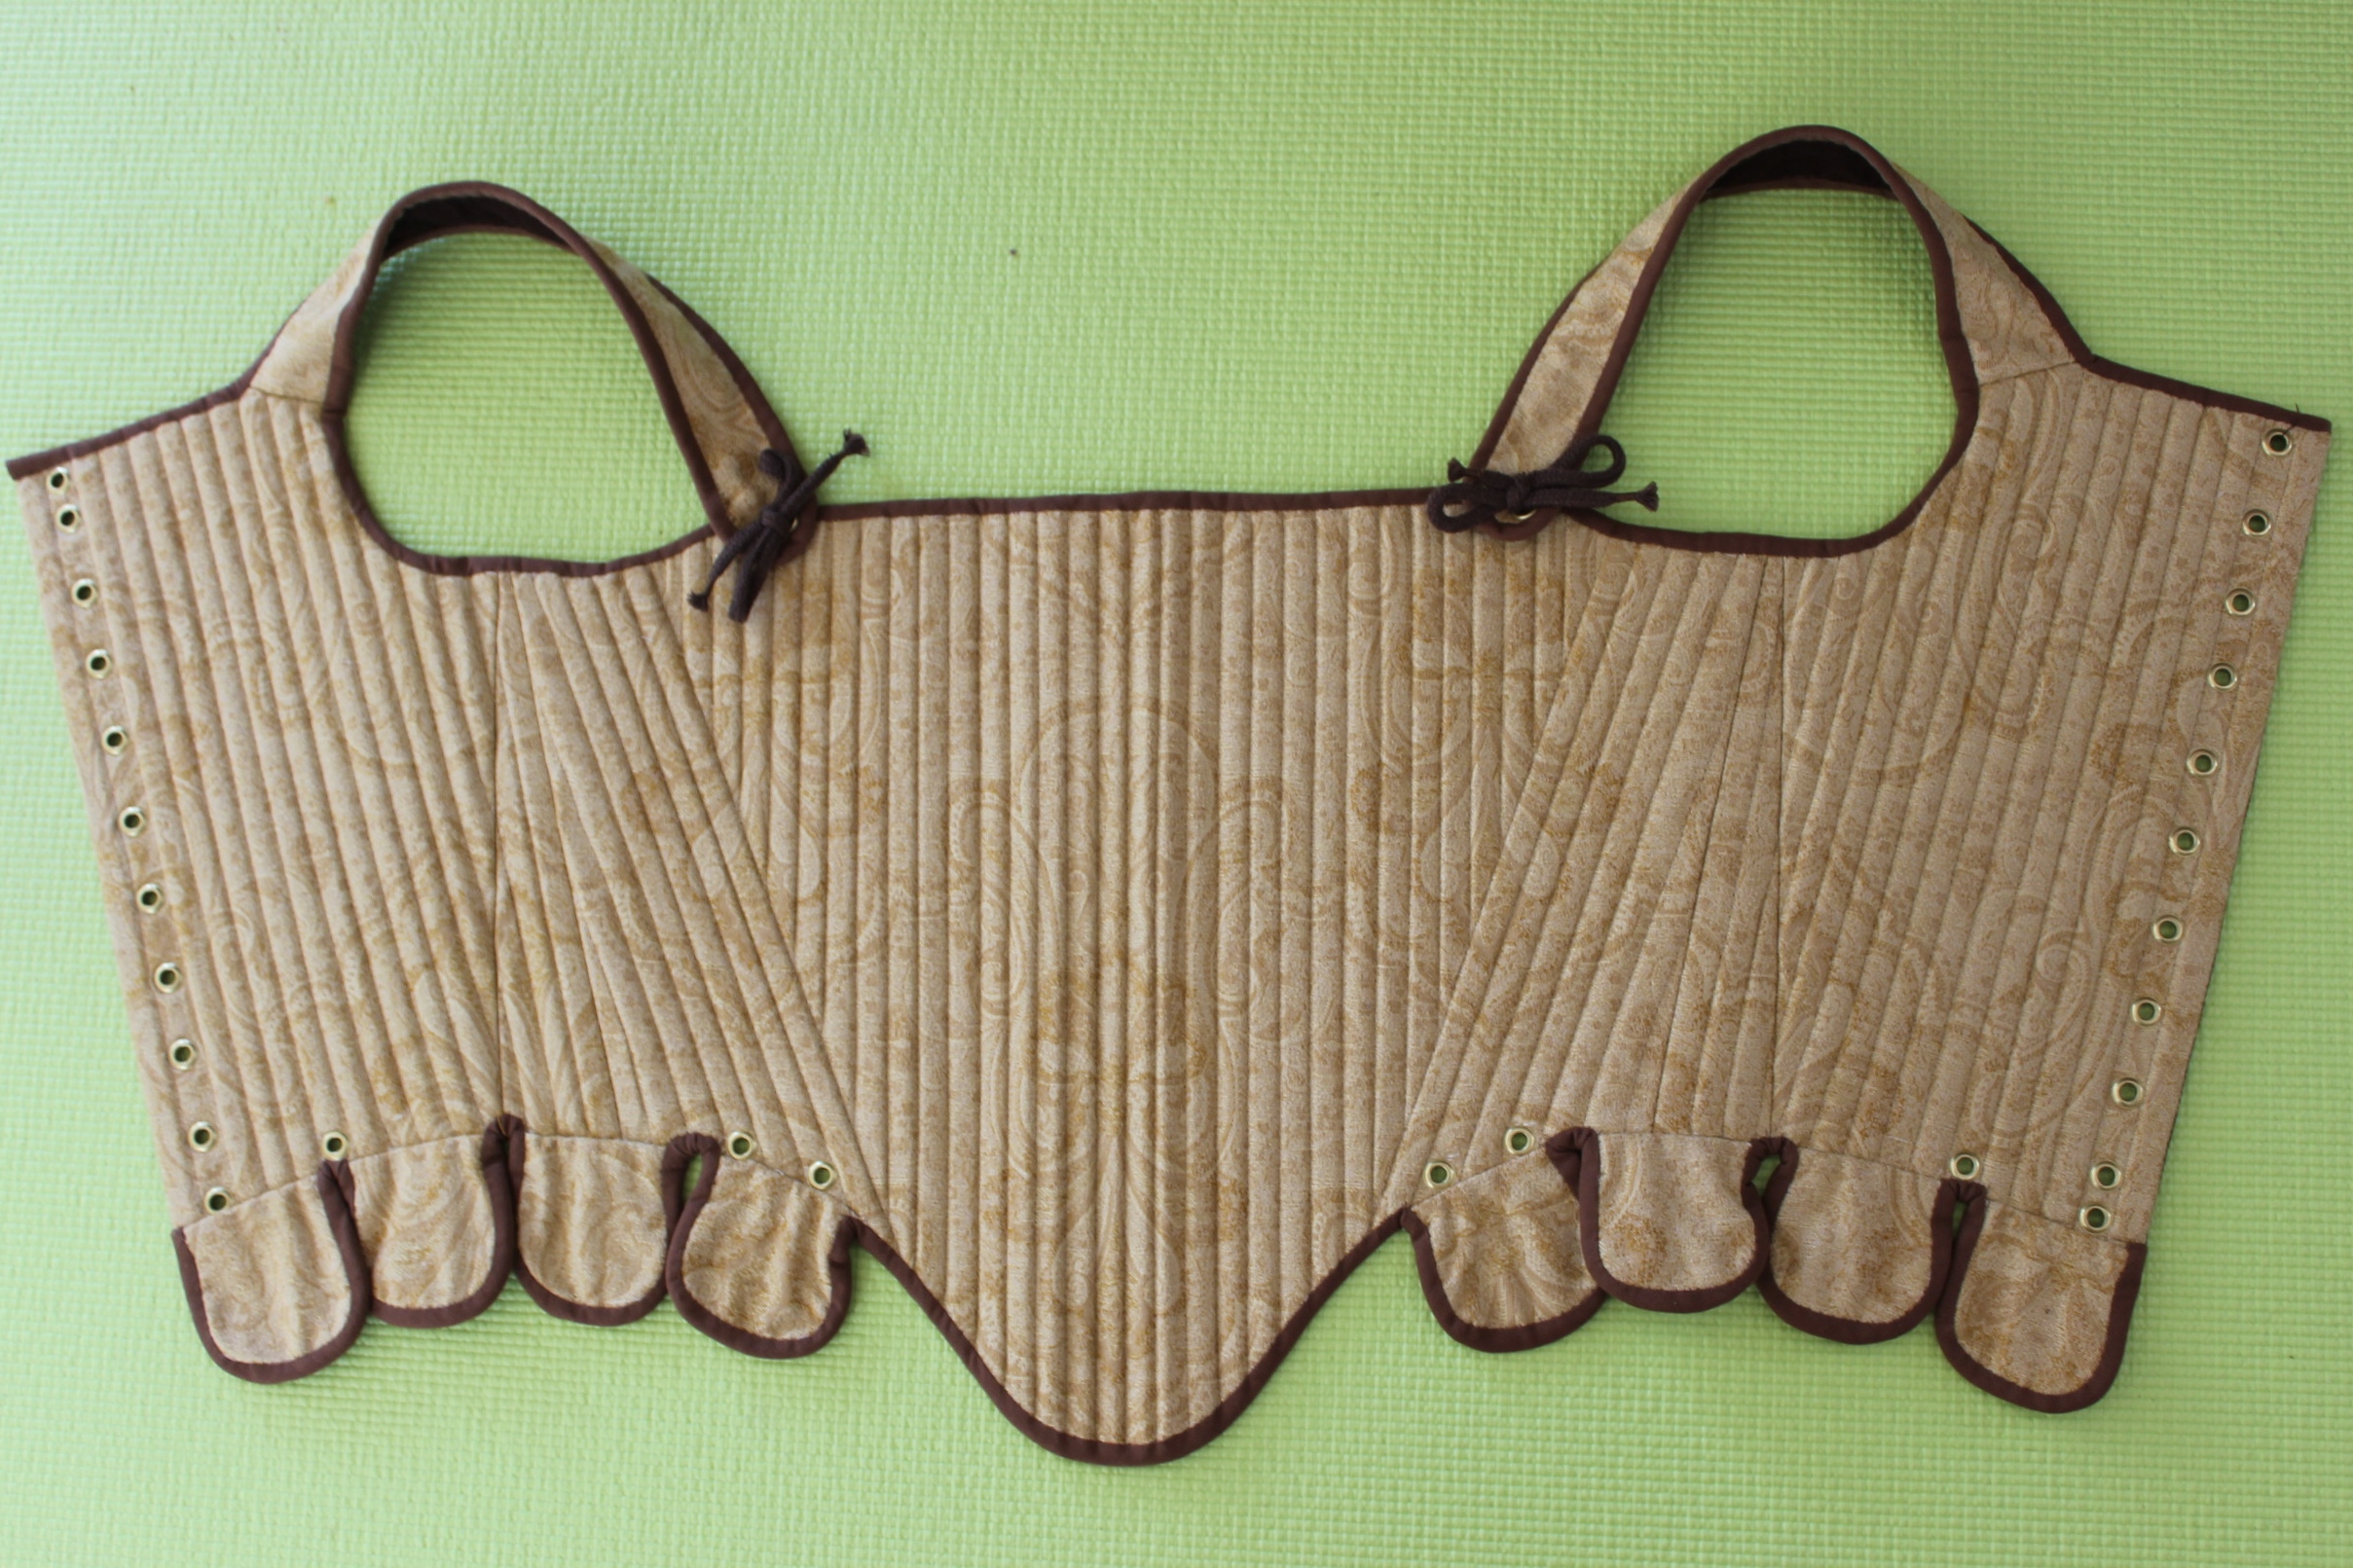
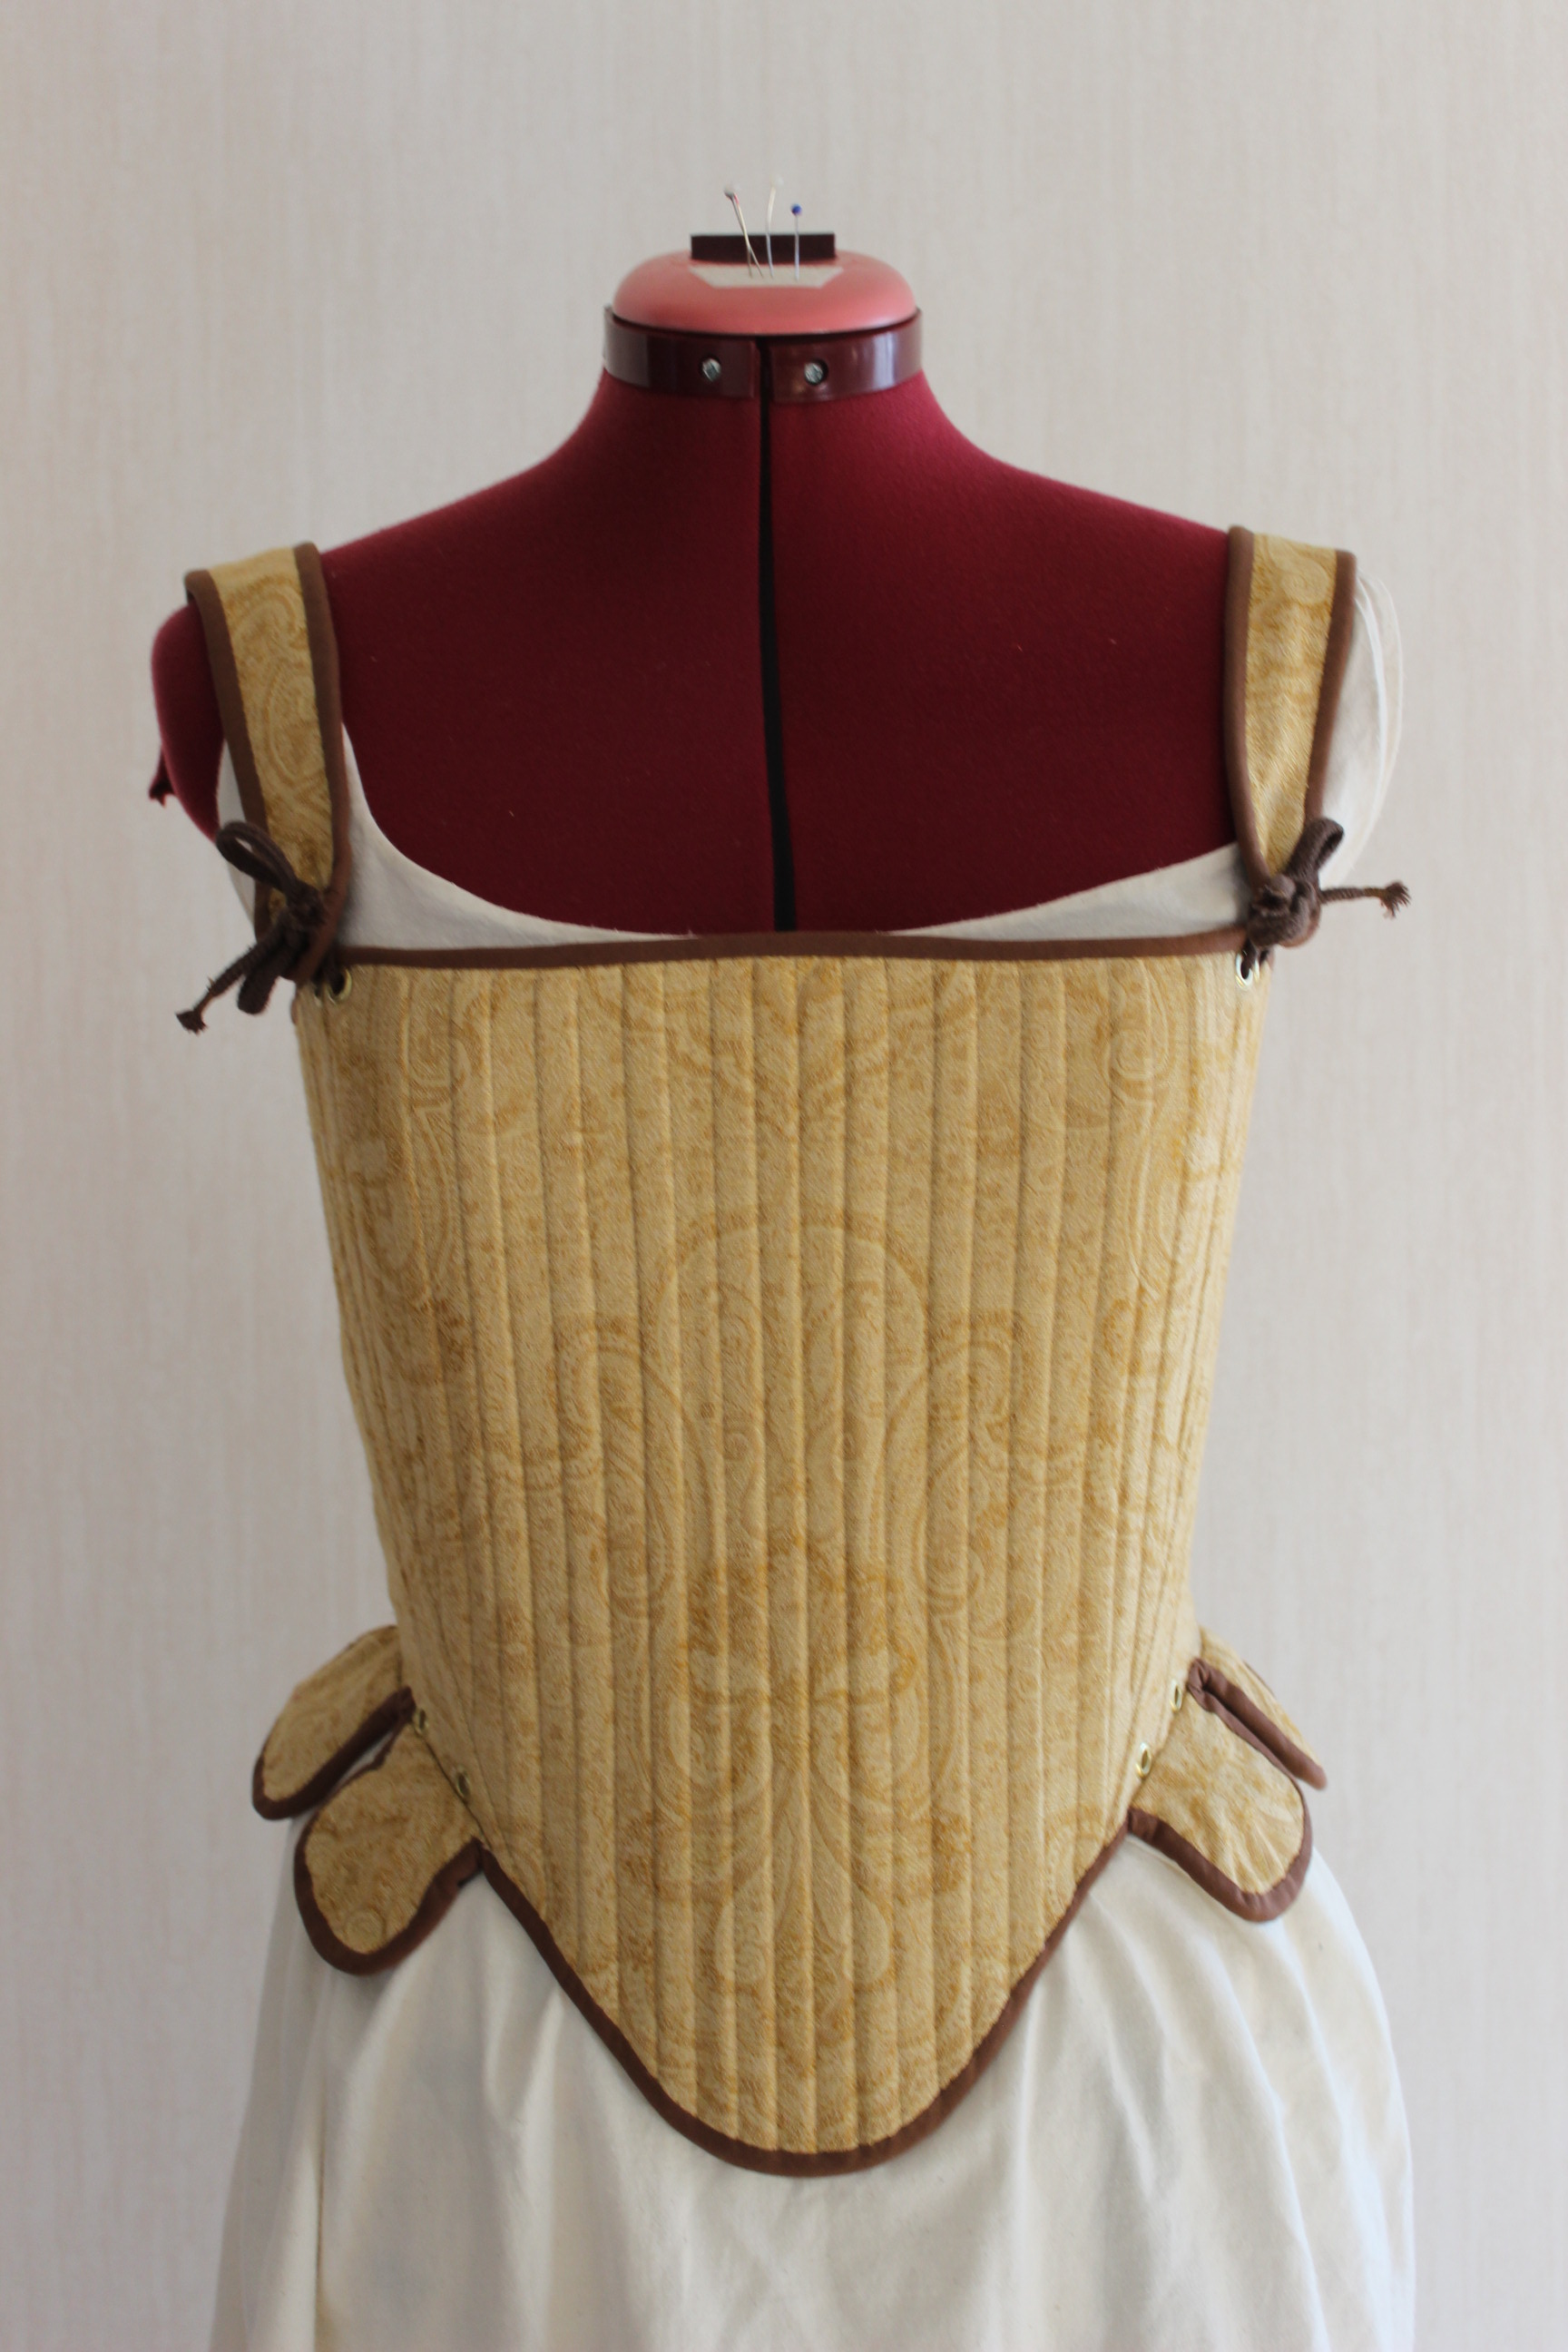
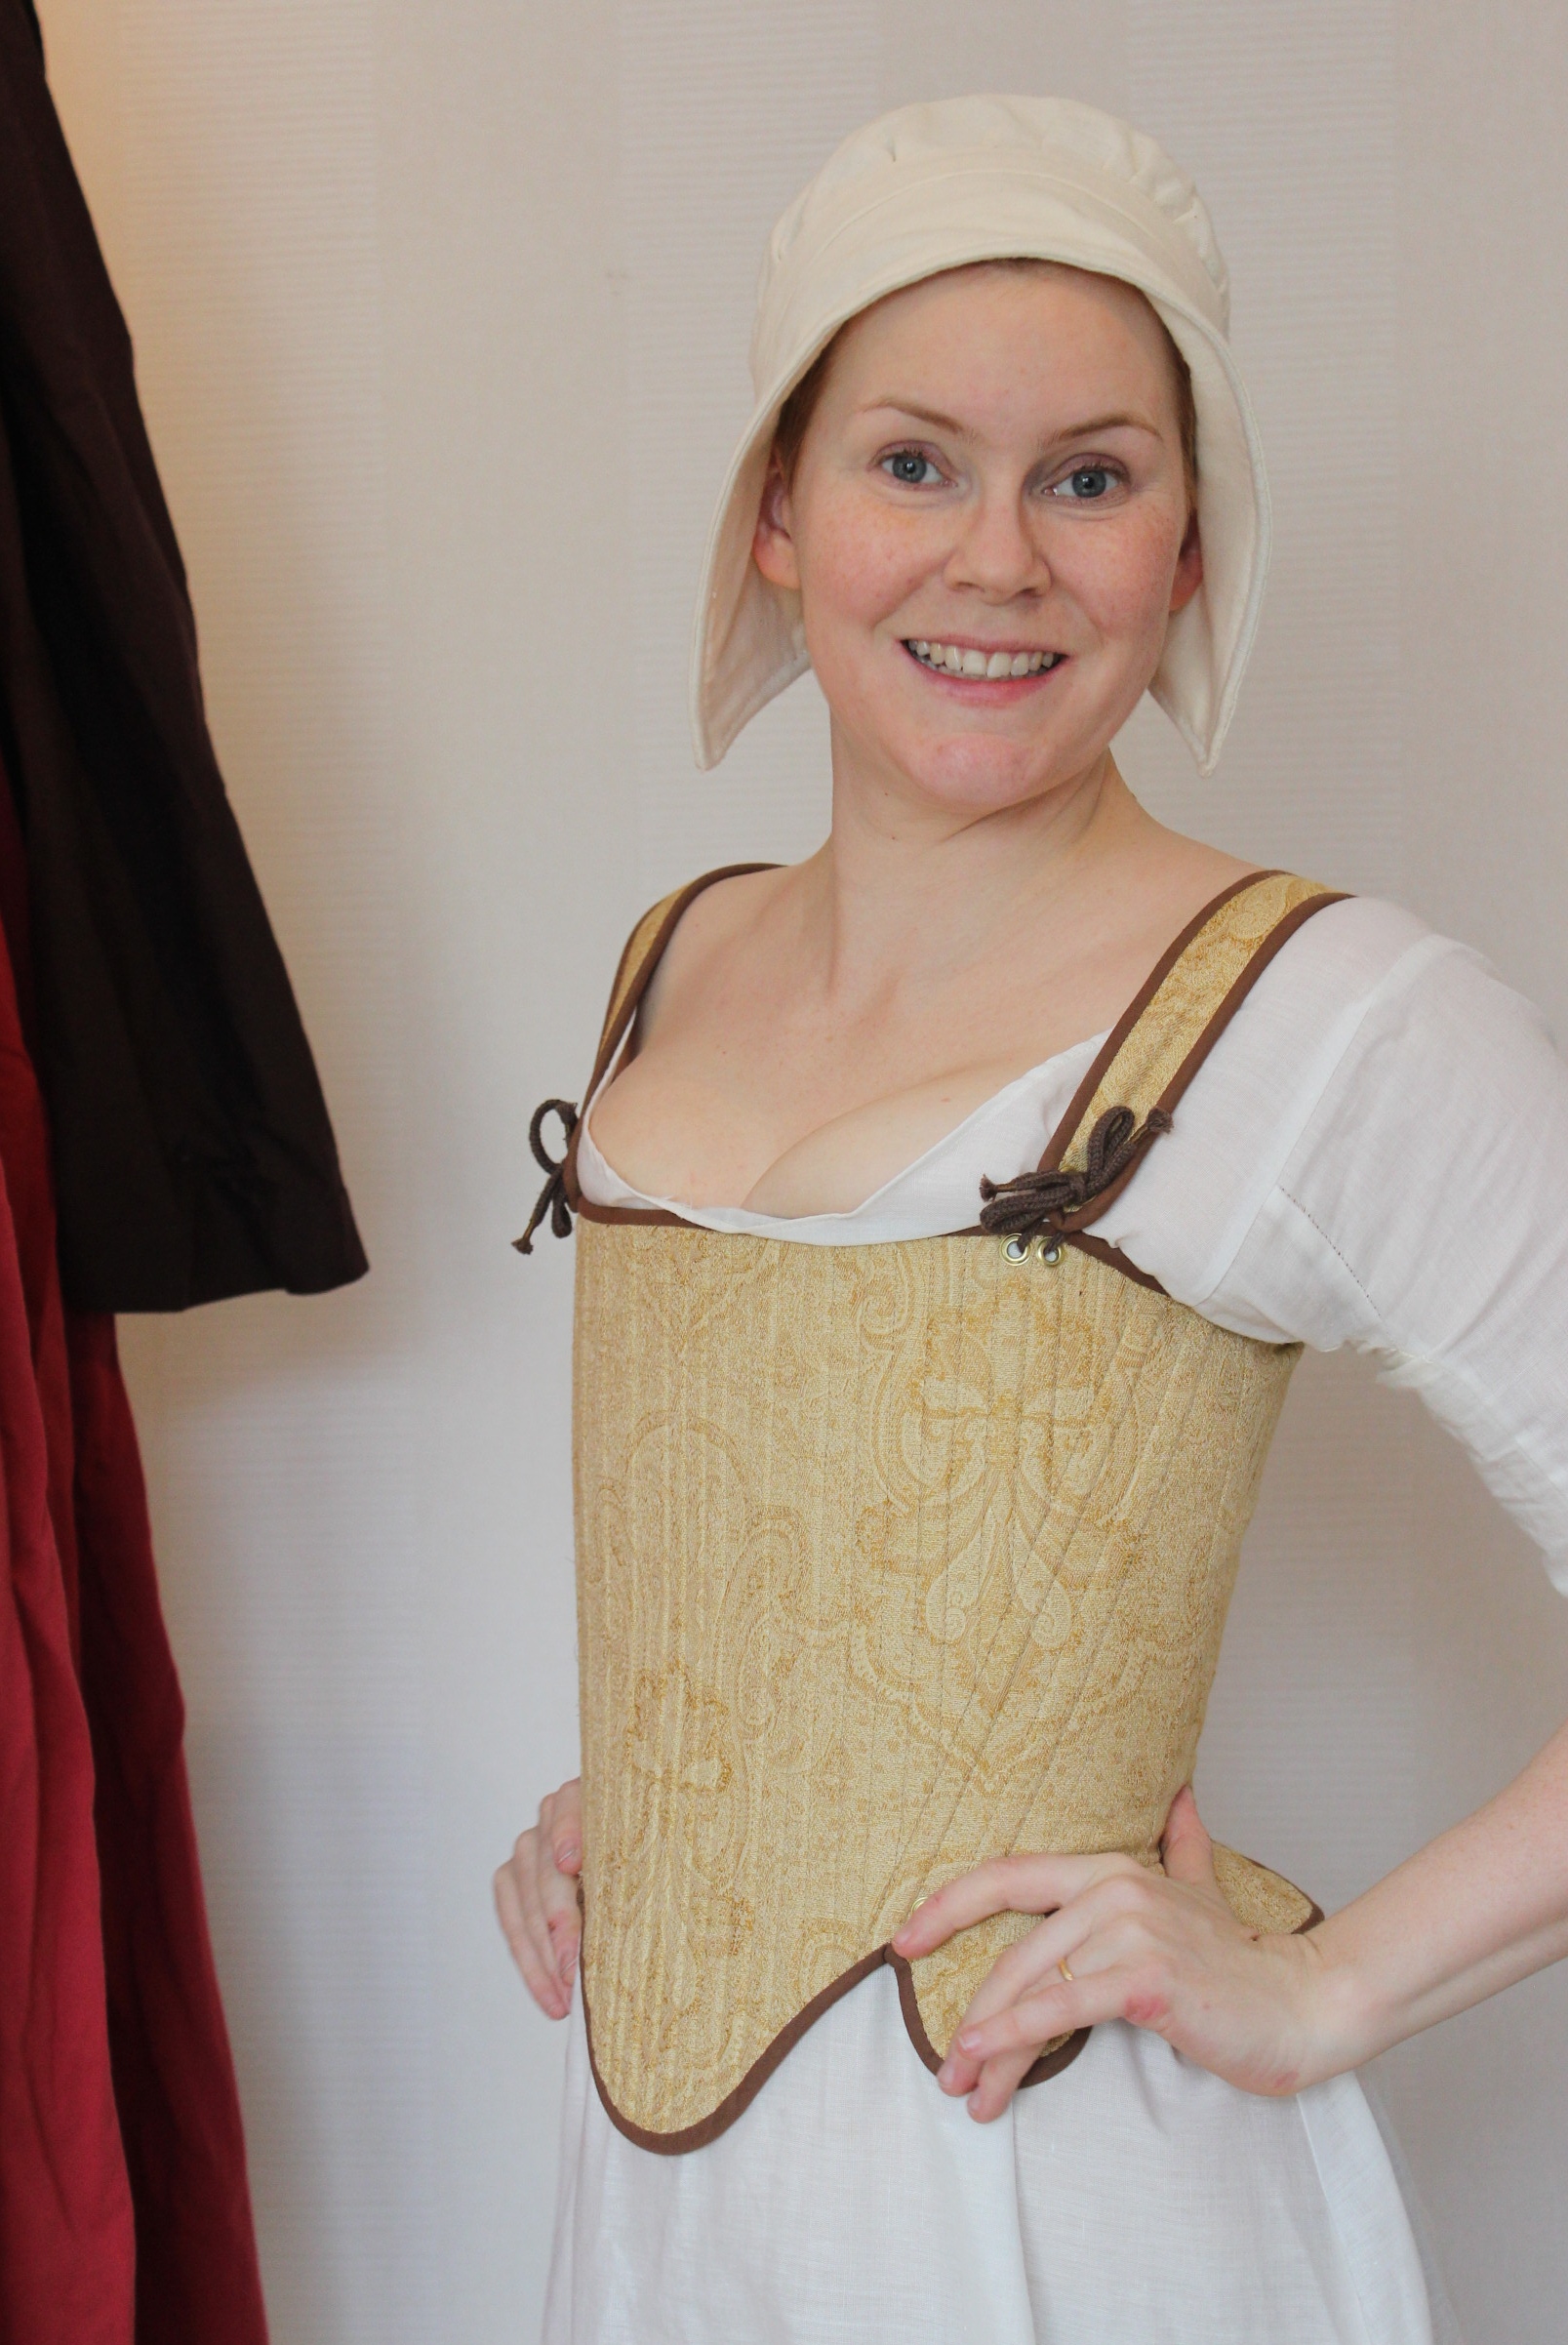
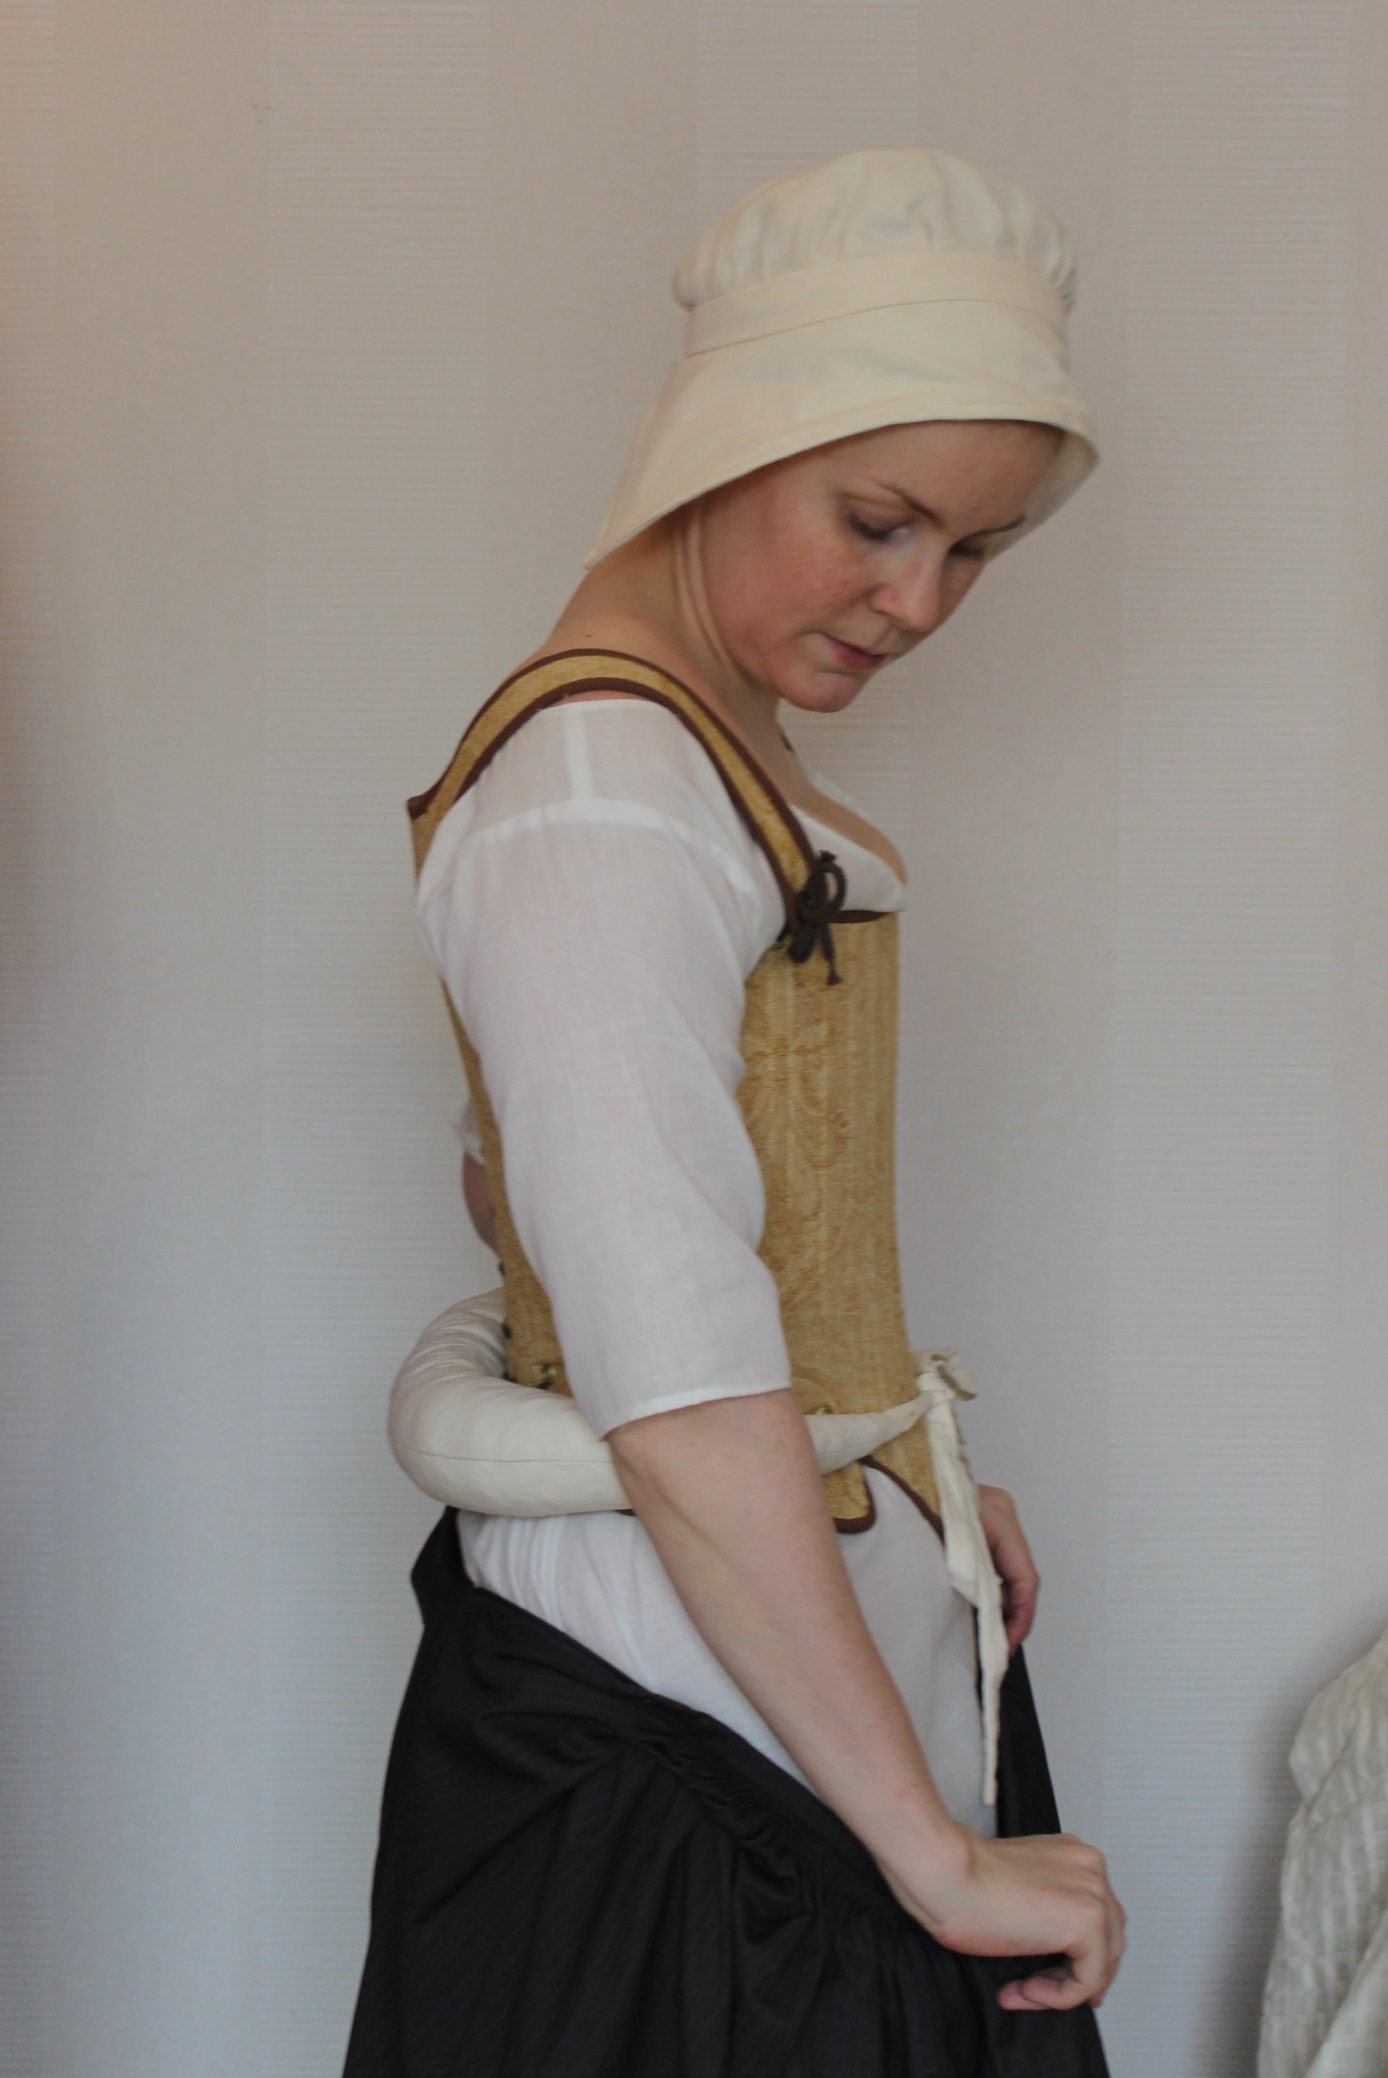
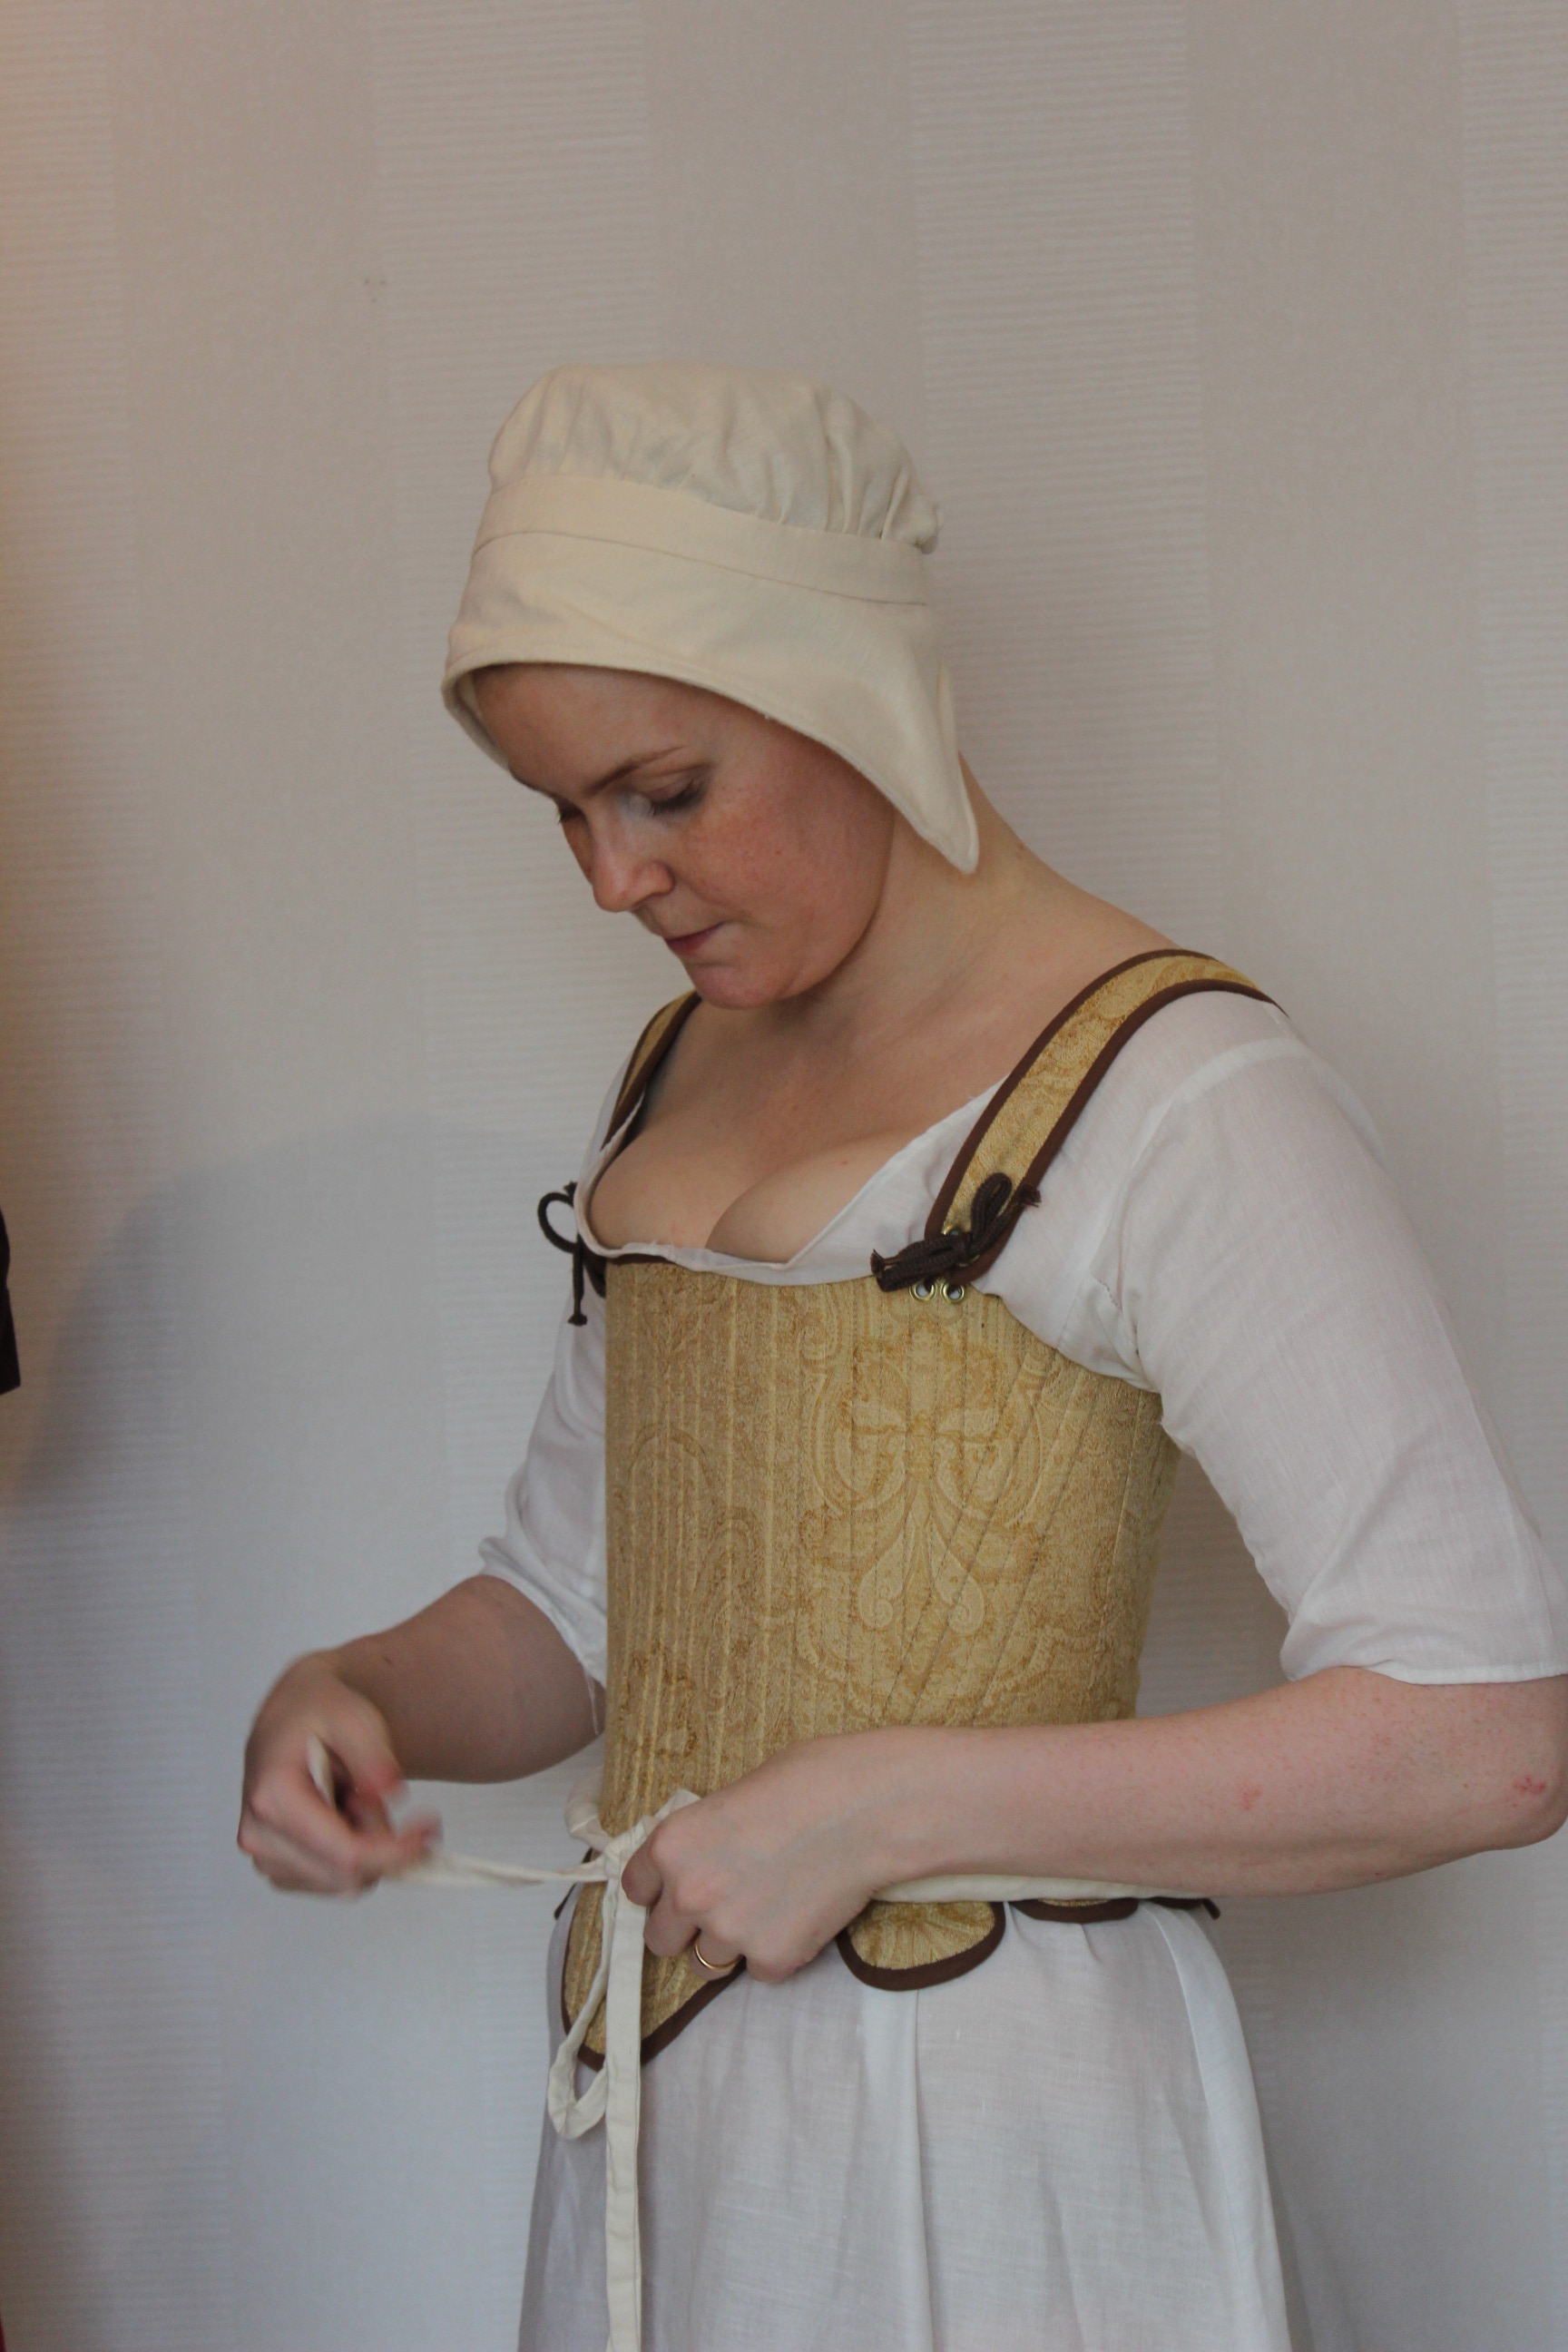
The first one, this time, is the fixing up of my 16th century “Pair of bodice” (corset) that I made as one of my first historic pieces back in 2013.
 Mighty proud back then
Since I’ve long been dreaming of expanding my 16th century wardrobe (and just recently got both patterns and a lovely black wool for a robe) I decided it was time to go through the existing pieces to make sure they where up to speed.
 2013, and just starting to ventur into the world of historic costuming

February 2017, and still a novice (tough a bit more knowable)
The corset fit me almost the same as back in 2013, but that was not enough anymore.
It needed to be fixed.
Here is how it looked before I dug my seam-ripper into it.

The first thing I did was to take my measurements, and they tuned out (as I expected) to be the exact same with and without the corset on. I know that the 16th century silhouette don’t call for any sliming of the torso, but a column to get the right look of the garment. But despite that I wanted to minimize my “column” as much as possible – Oh the vanity…
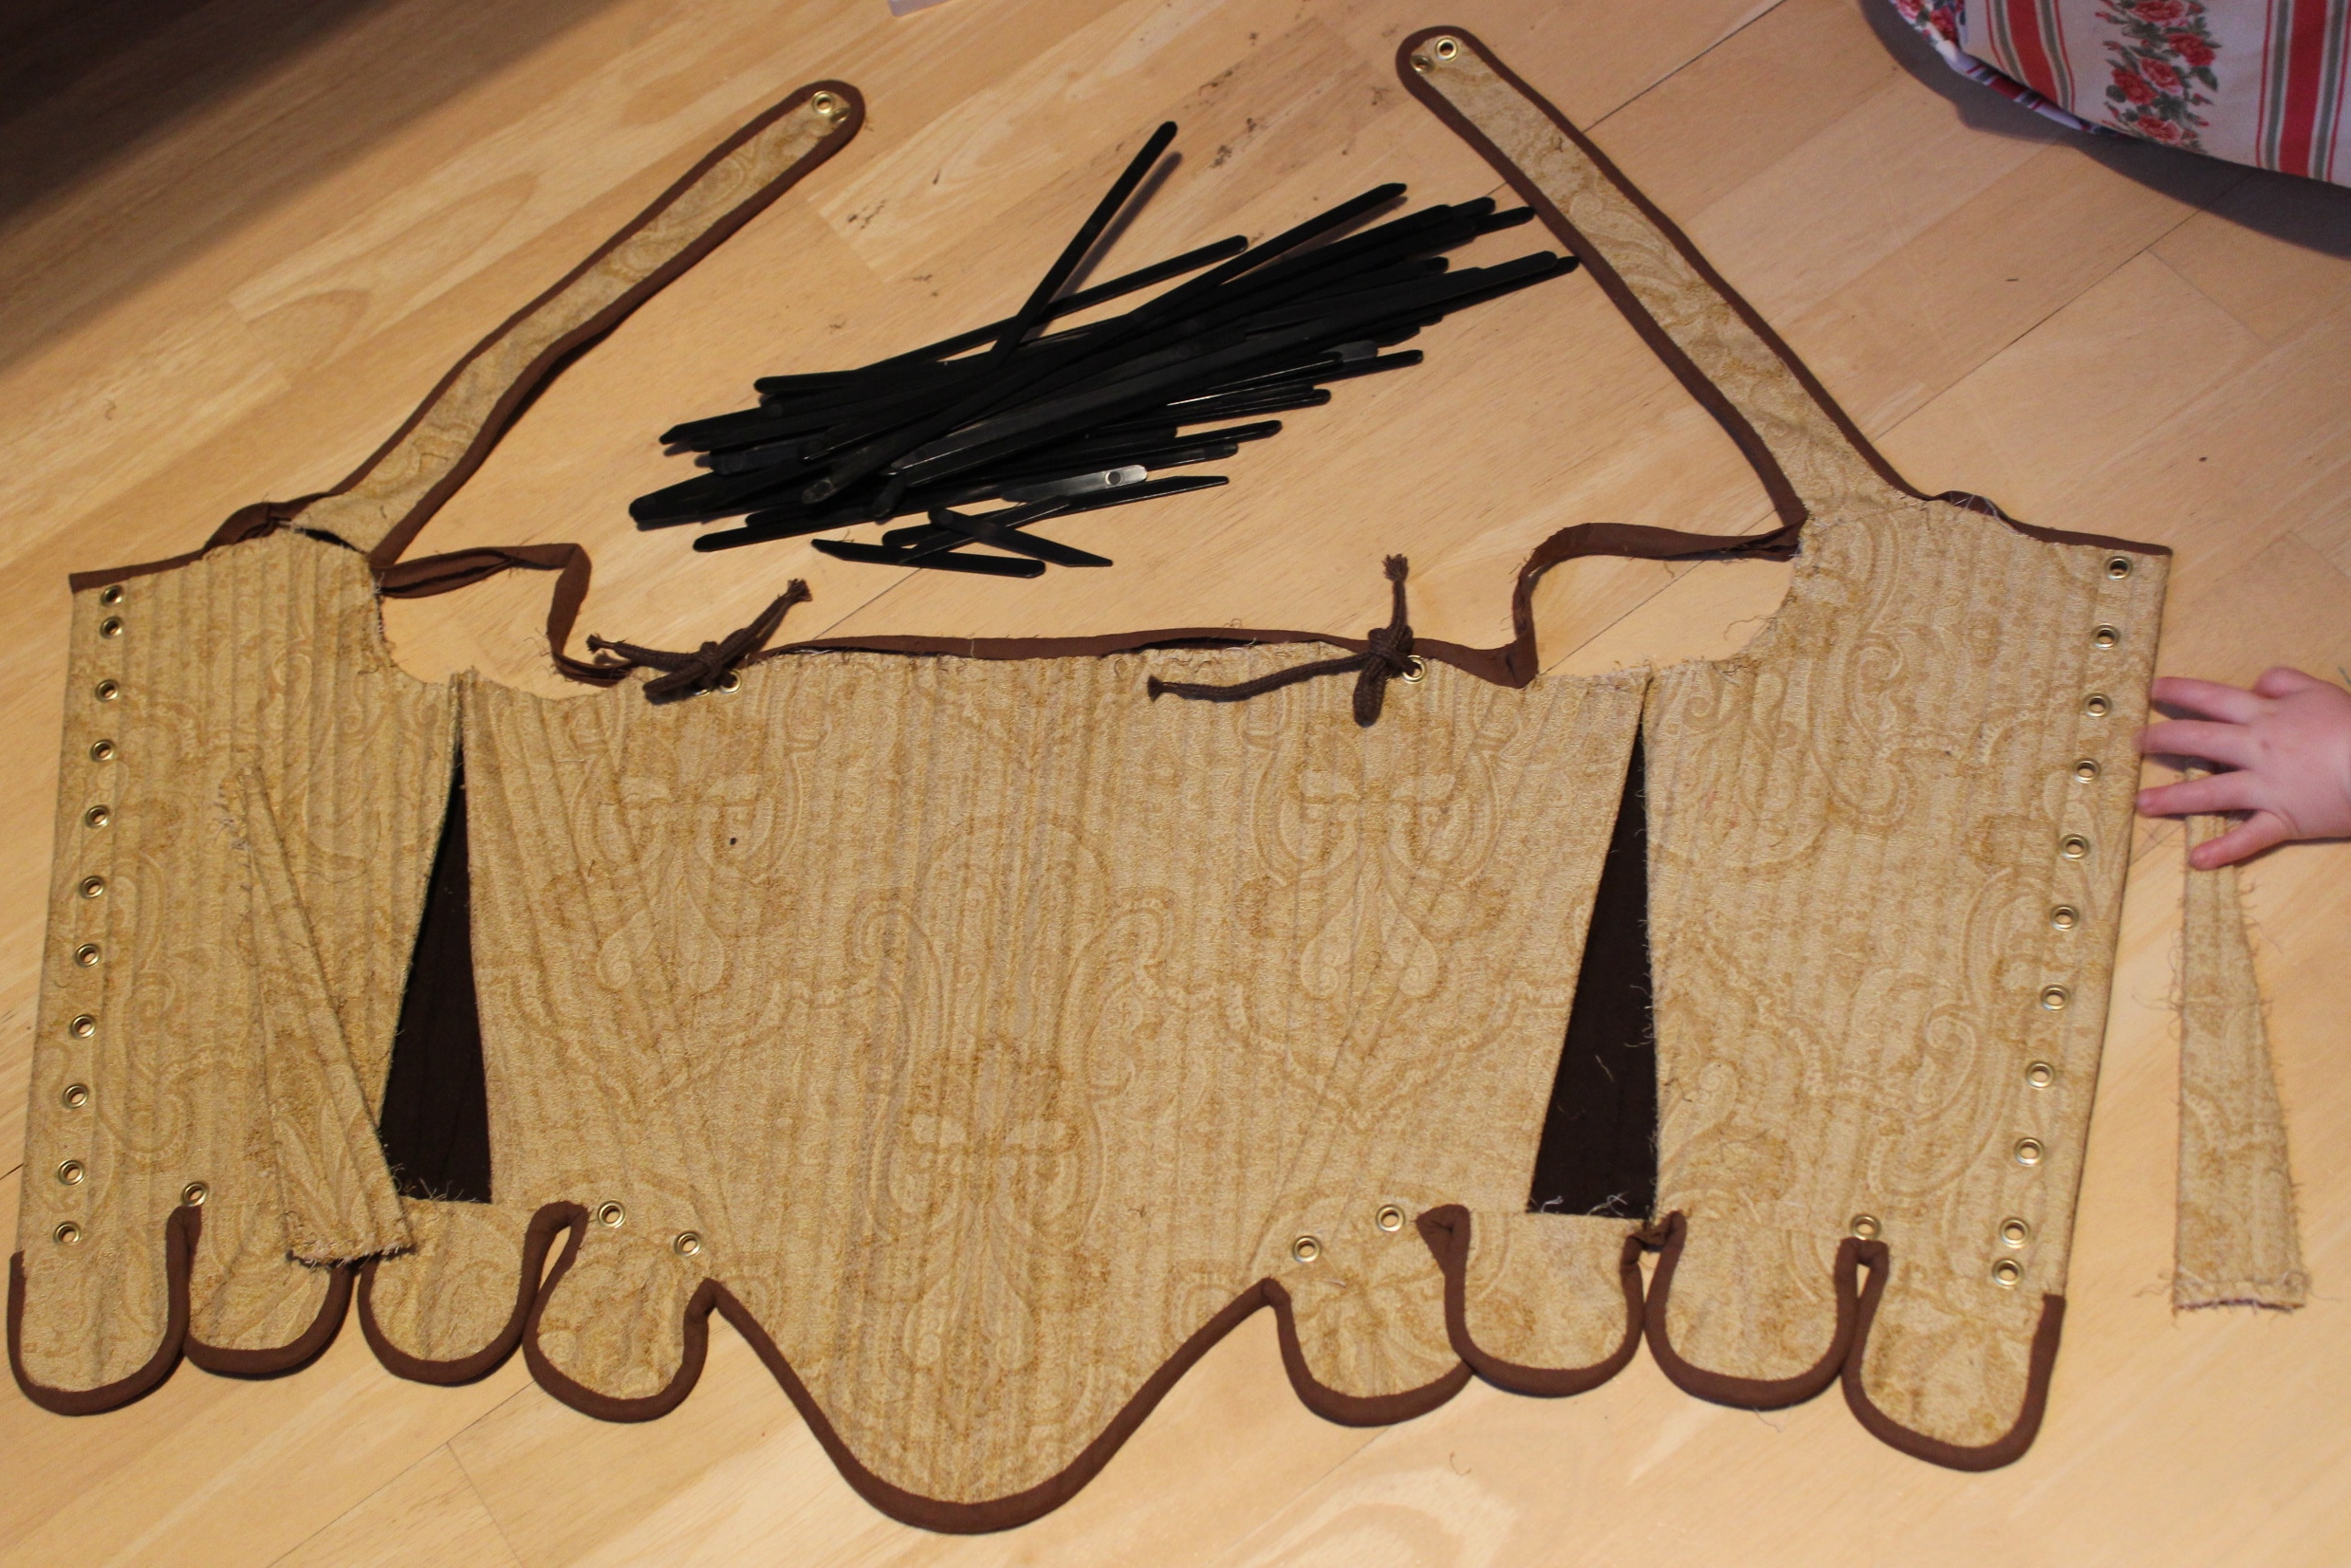
One of the biggest problem in this was the thick (2-3mm) plastic zip-ties I used to completely bone the bodice.
They build on to the outside of the corset to give me the bigger/same size as un-laced.
So they had to go.
Or at least most of them.
After I unripped the bias tape covering the upper edge, I removed every other bone at the front, all bones at the sides and only left a few ones a the back. I also cut the remaining bones down a god cm to make them fit better into the channels.
 Cutting down the plastic boning.
Once the bones was gone I faced another problem – now the whole thing was a bit to big…
So I grabbed my seam-ripper, and got to work removing the piecing I added for exactly the same (opposite?) reason when I made the bodice. 
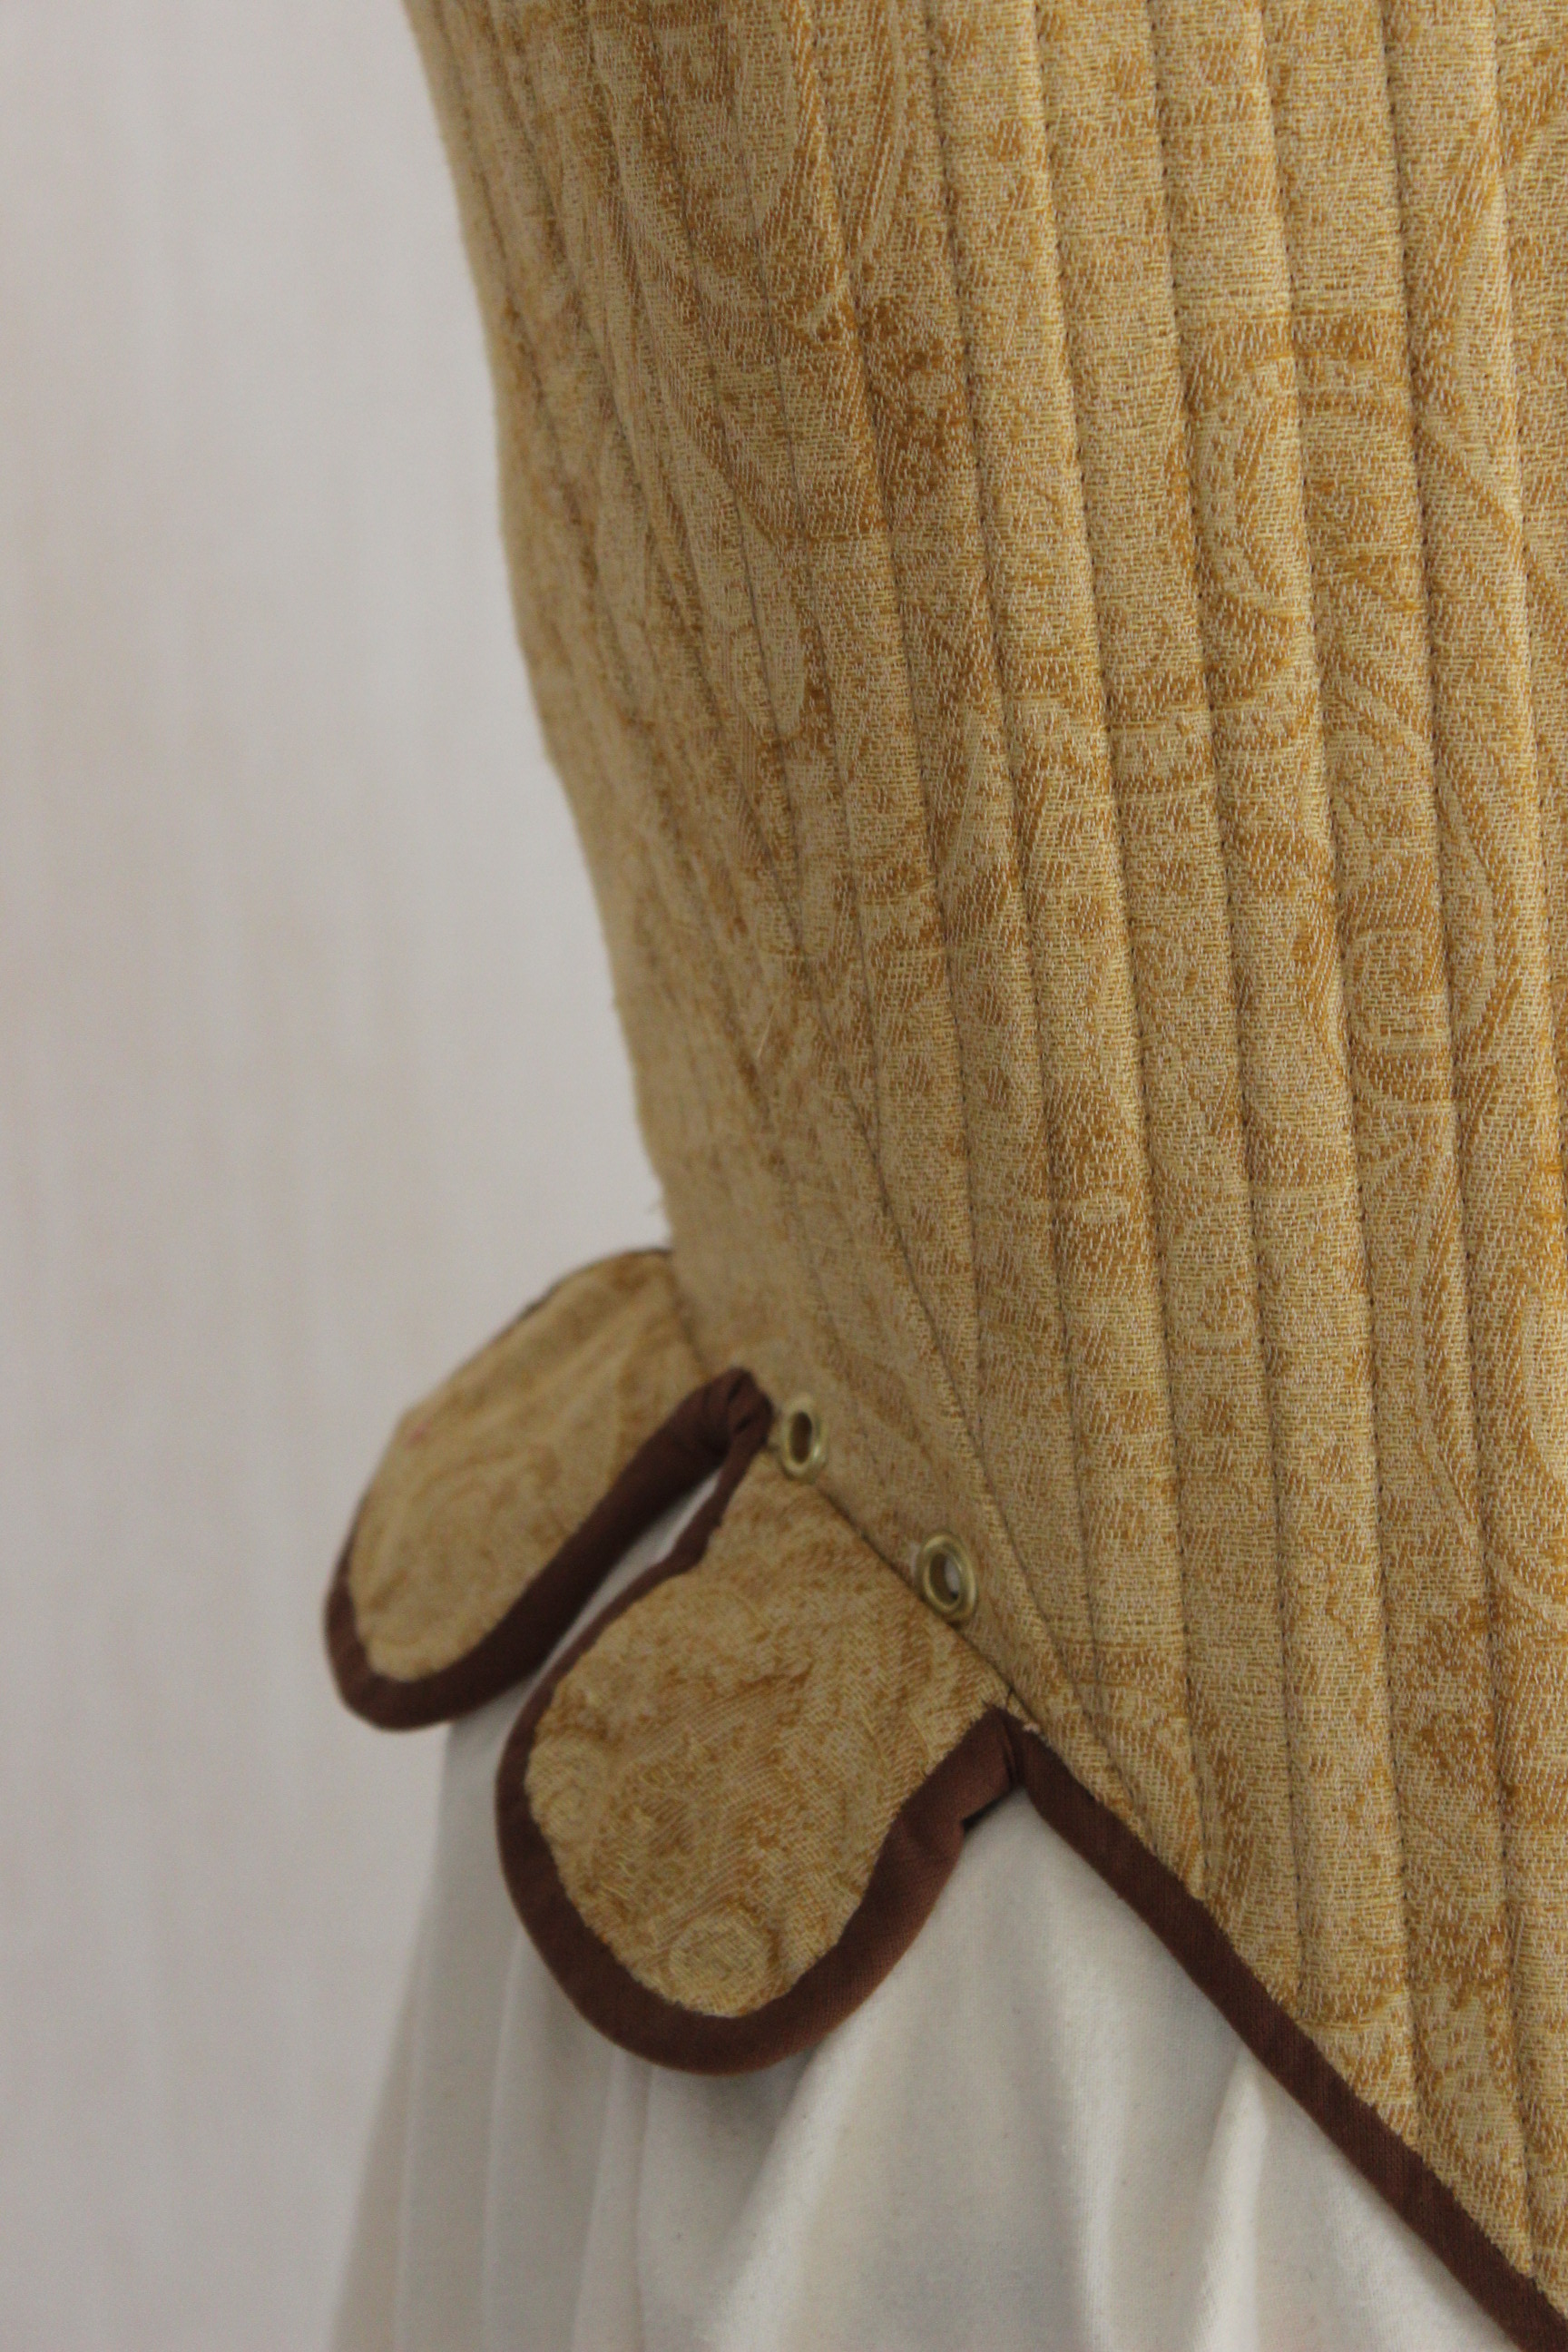
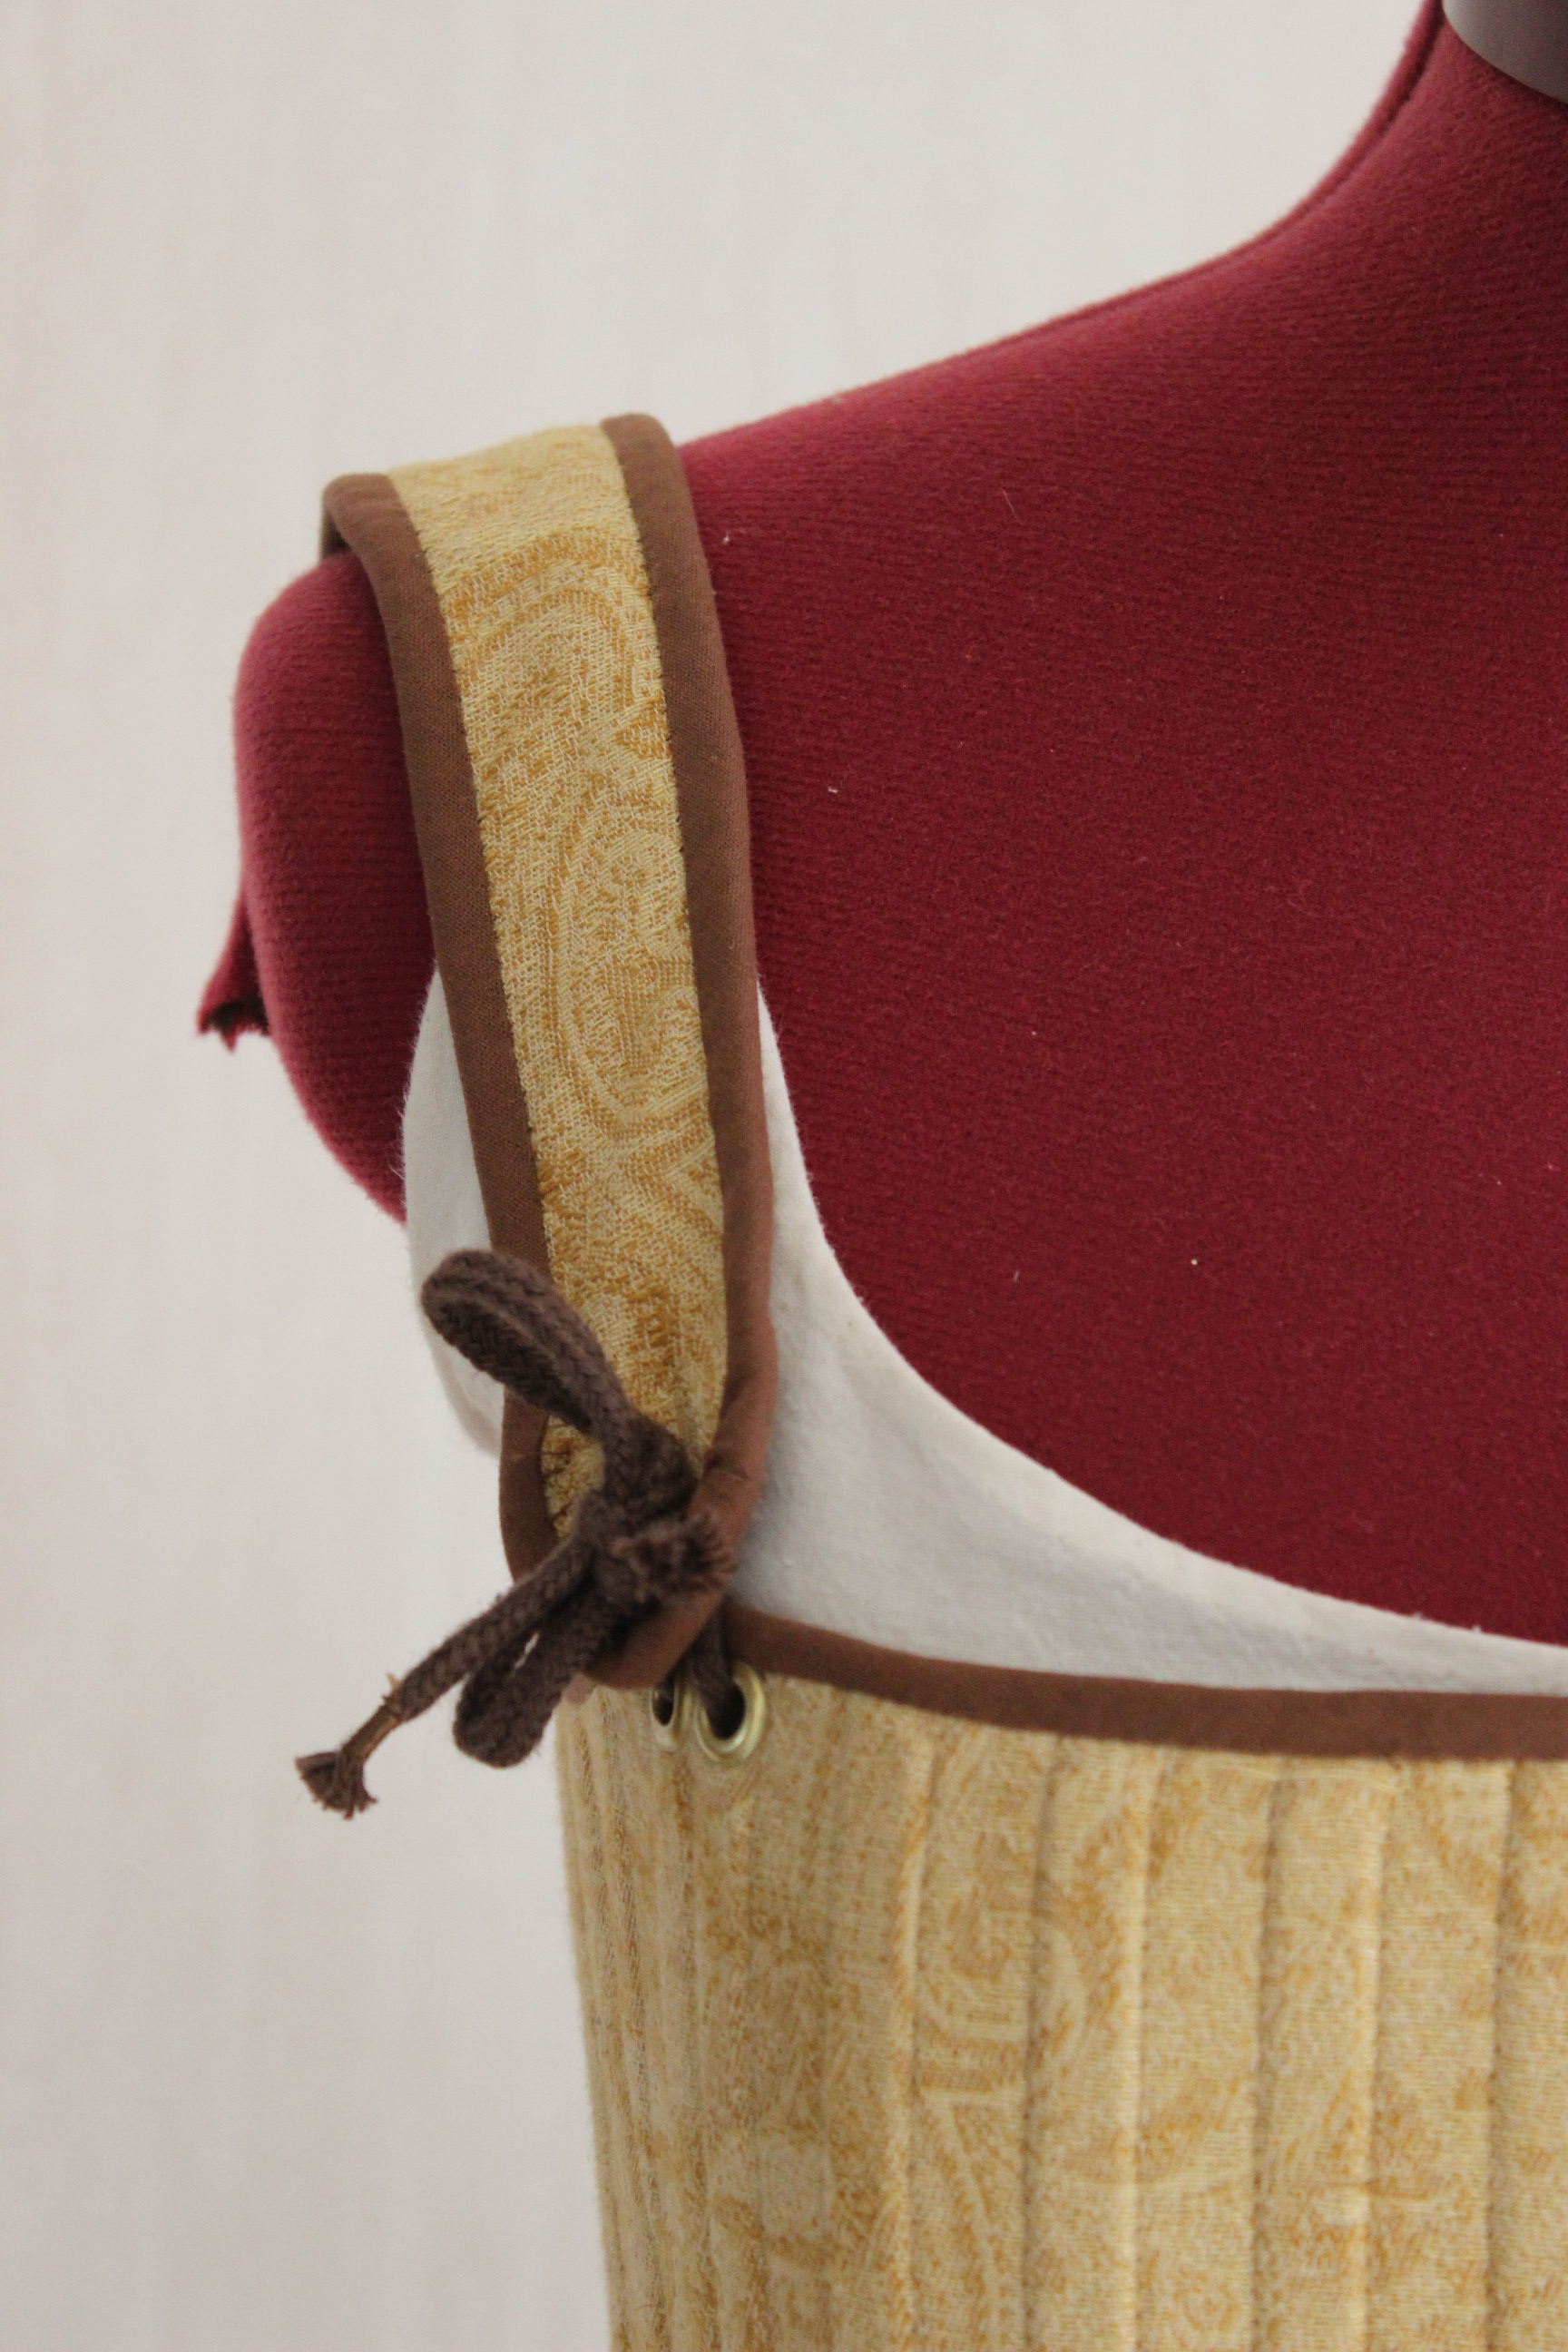
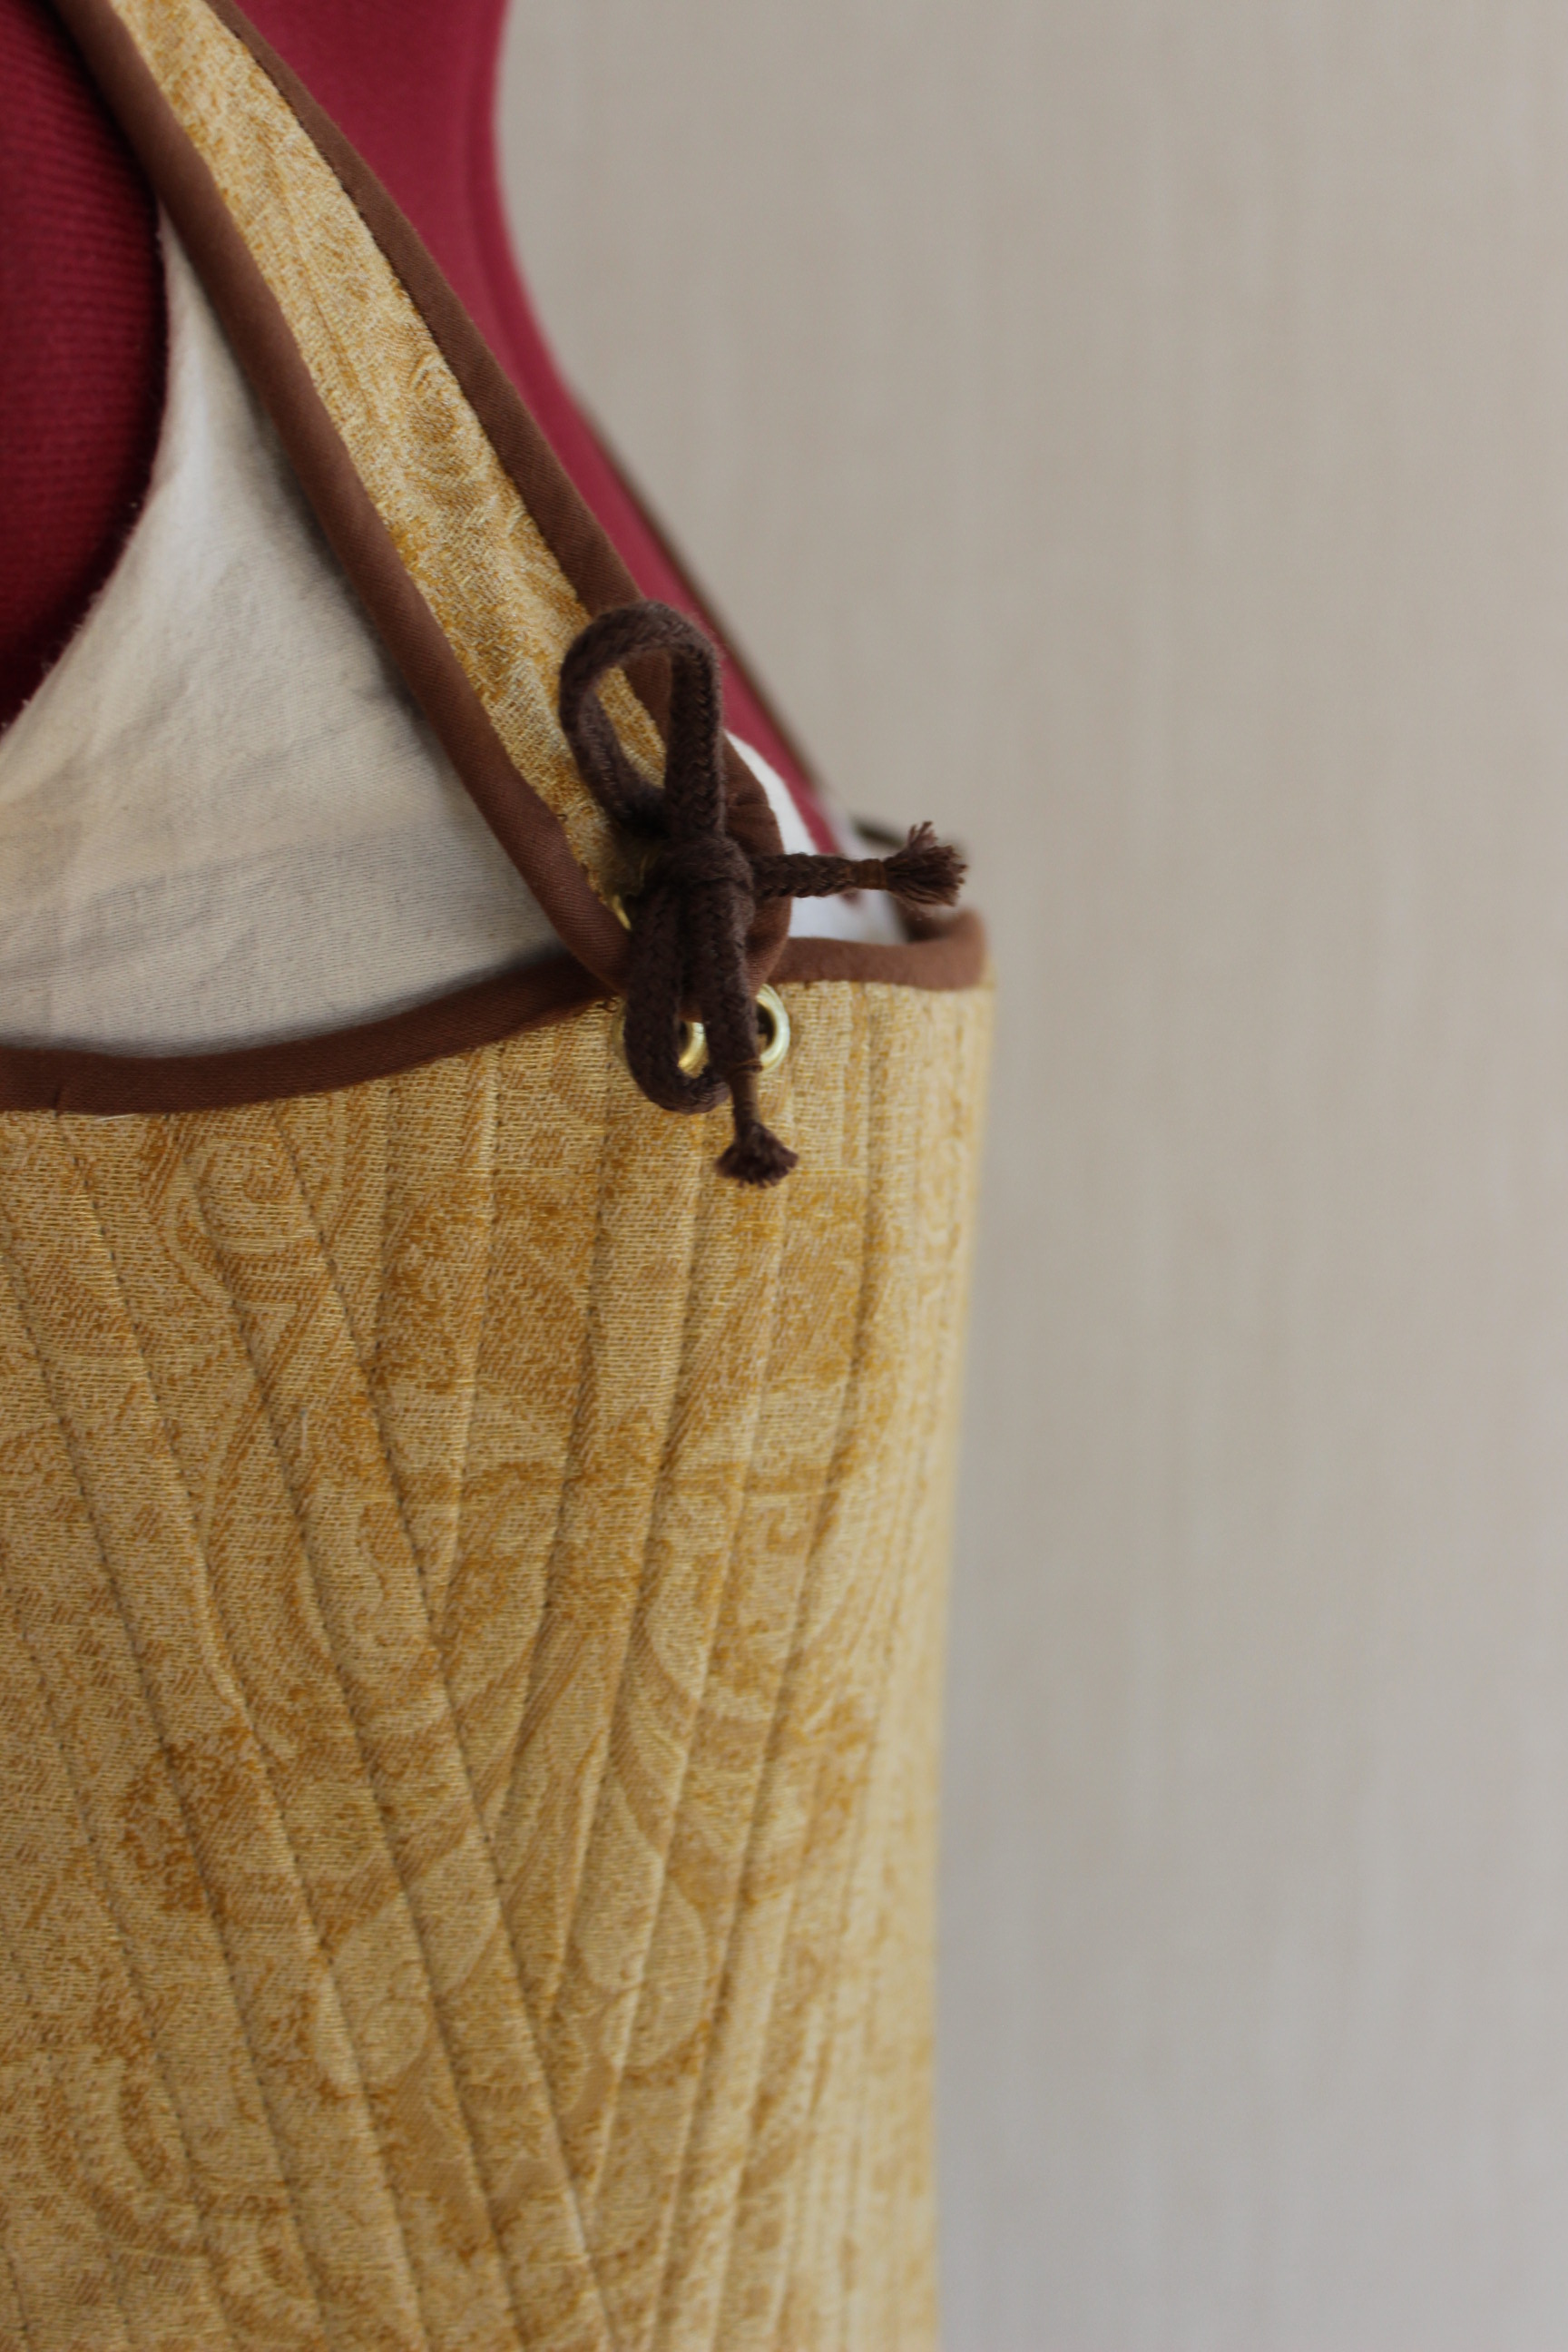
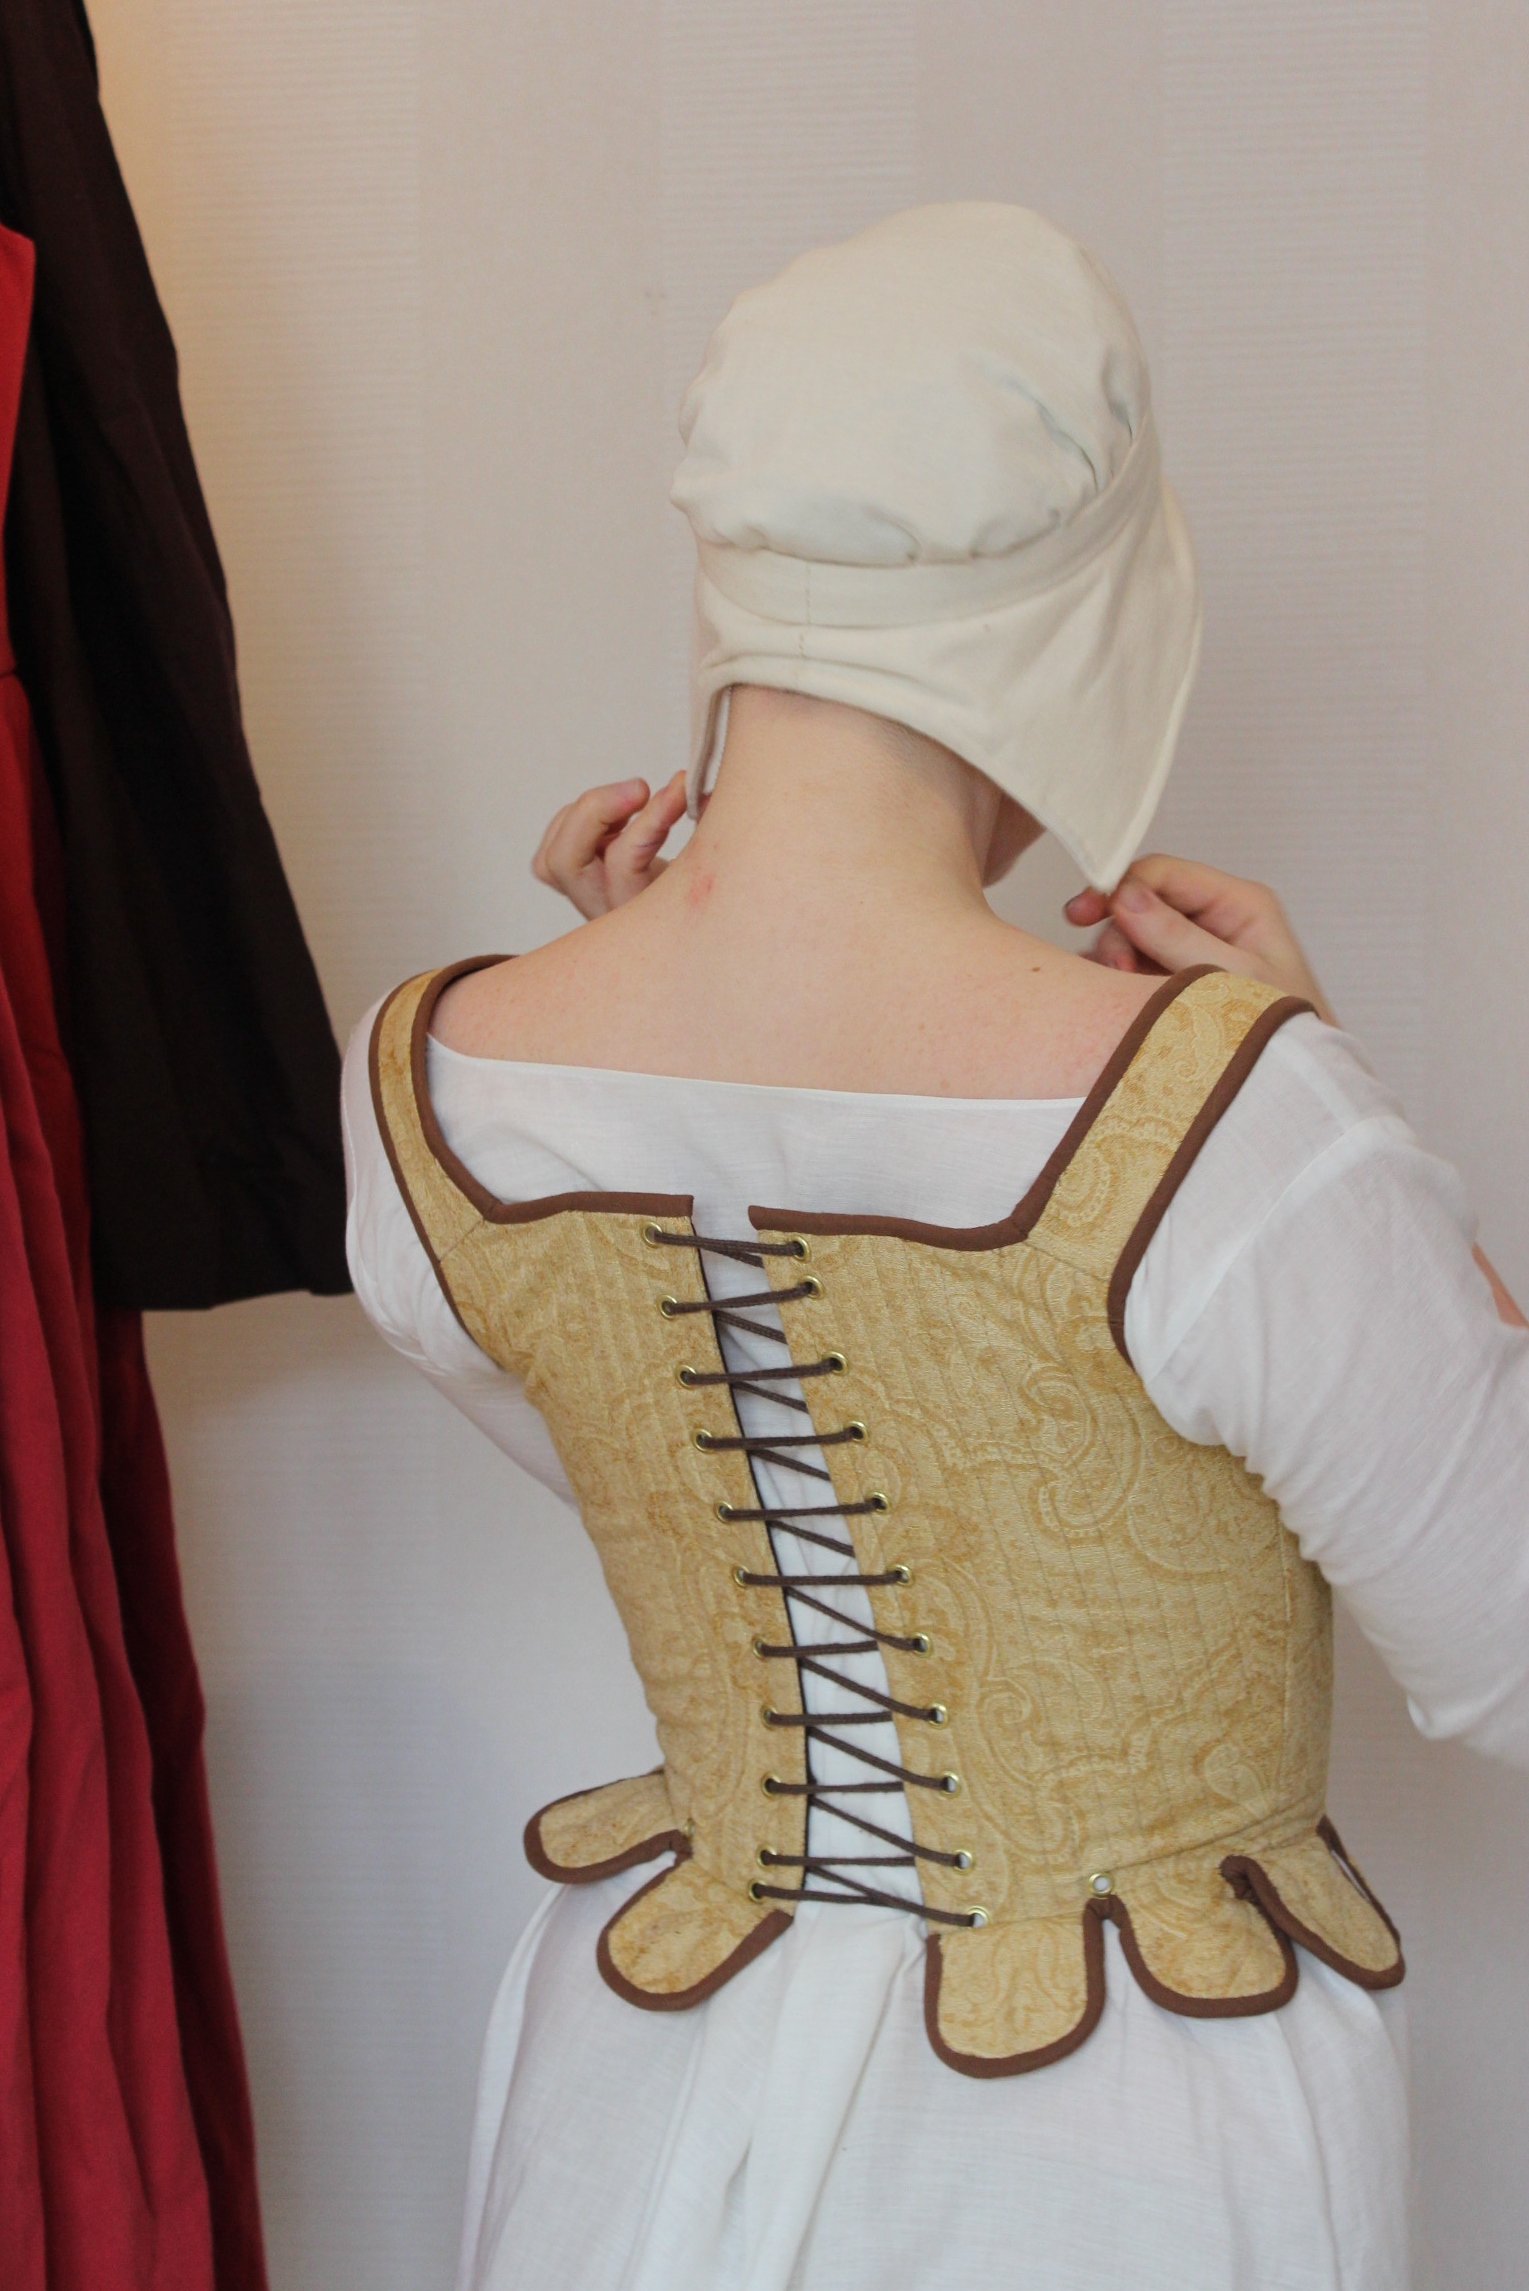
Once almost all the upper binding was removed, I also took the opportunity to shorten the shoulder straps.
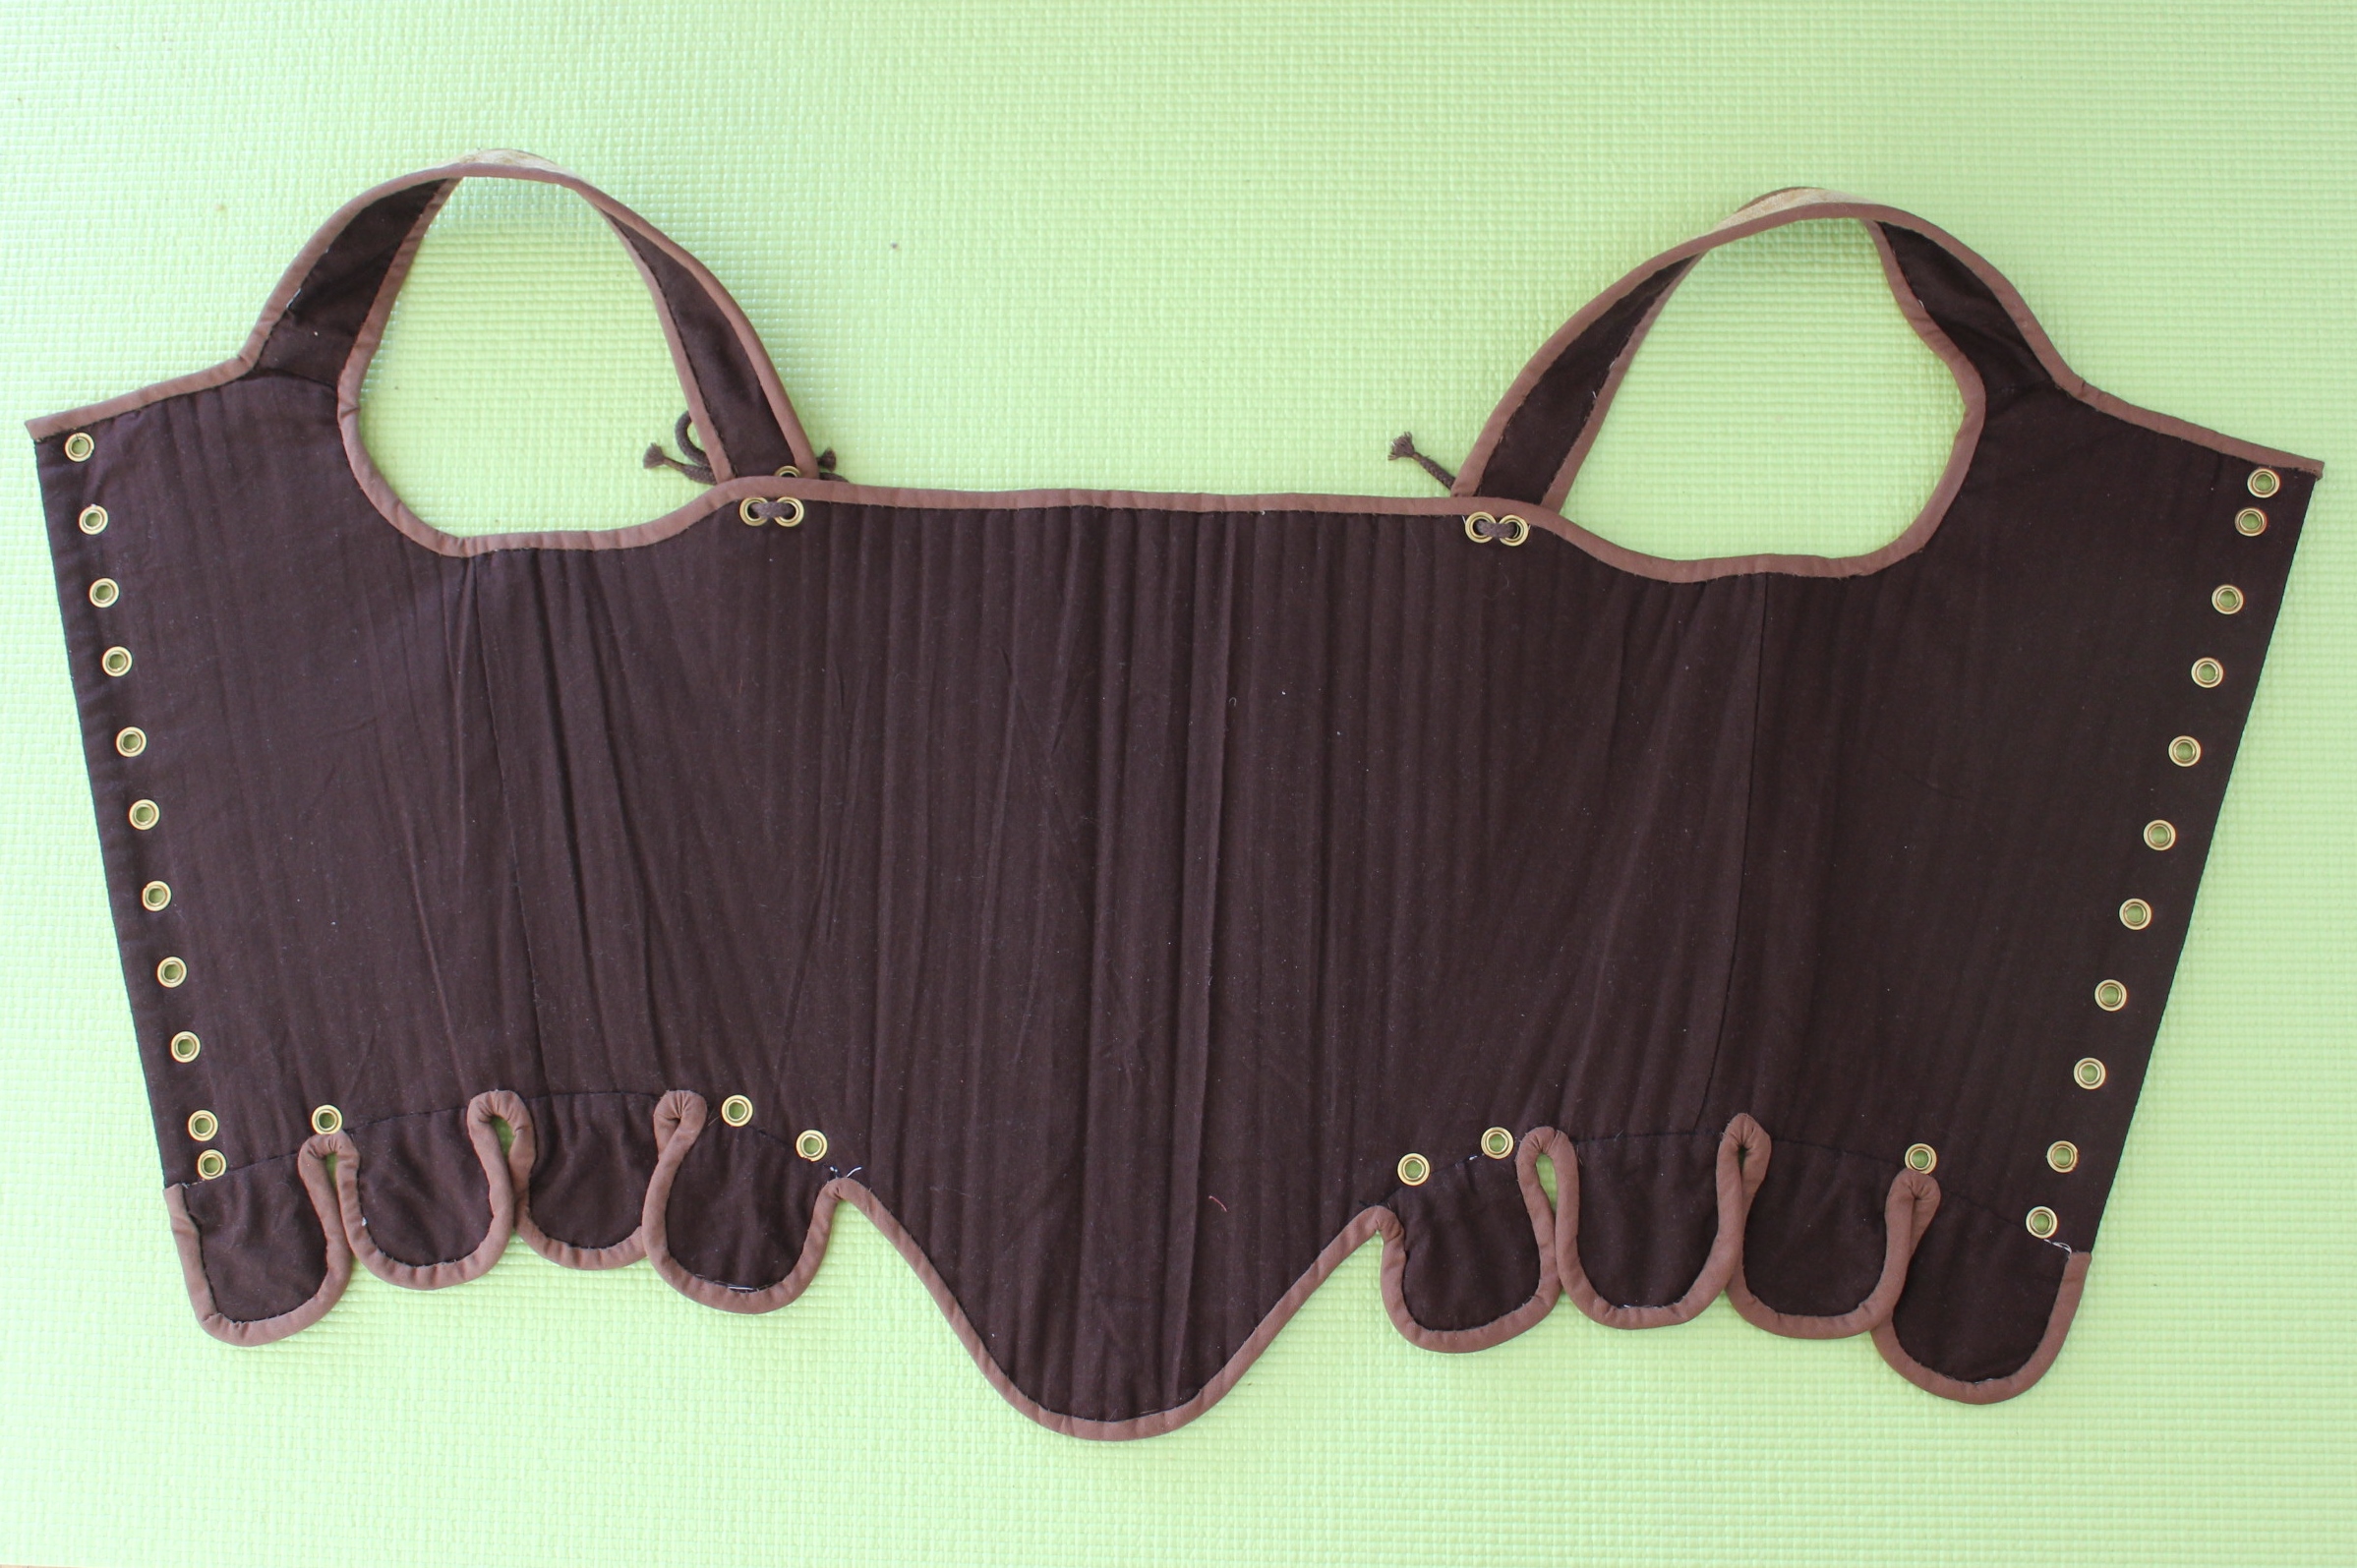
By now the corset looked like some kind of roadkill, with everything hanging lose and the big pile of boning sticking out.
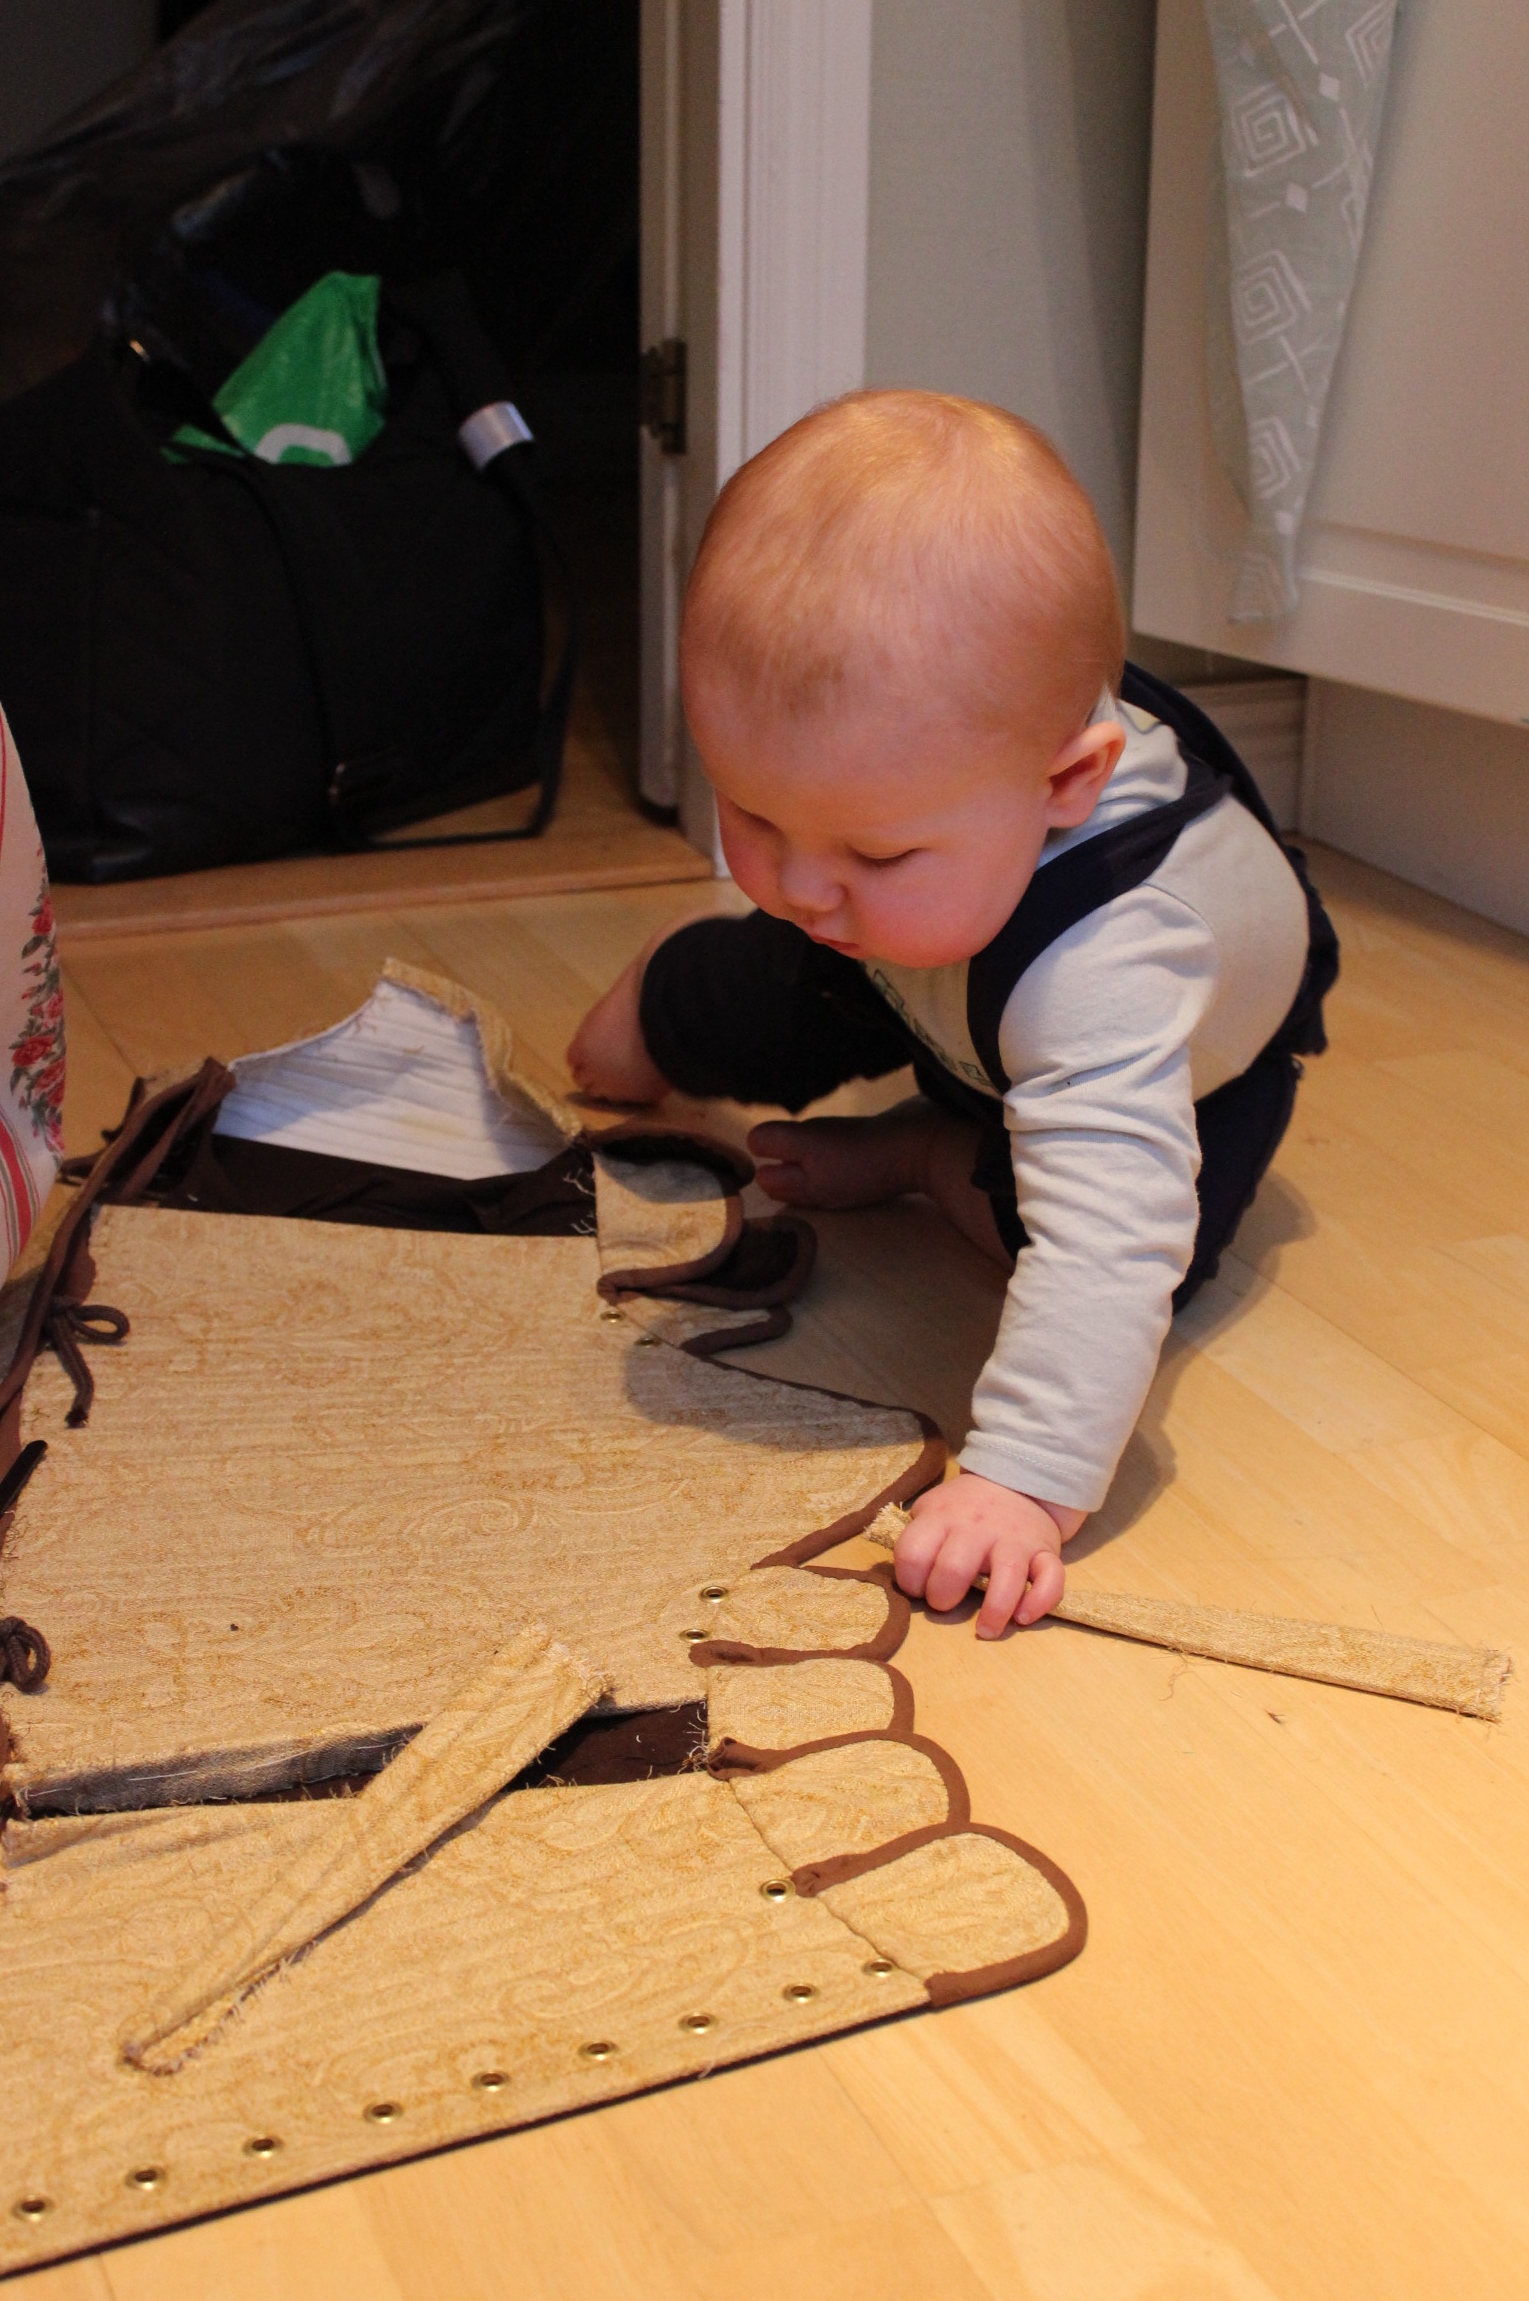 Quality control by my tiny “helper”
Then all that was left was to stitch everything back again.
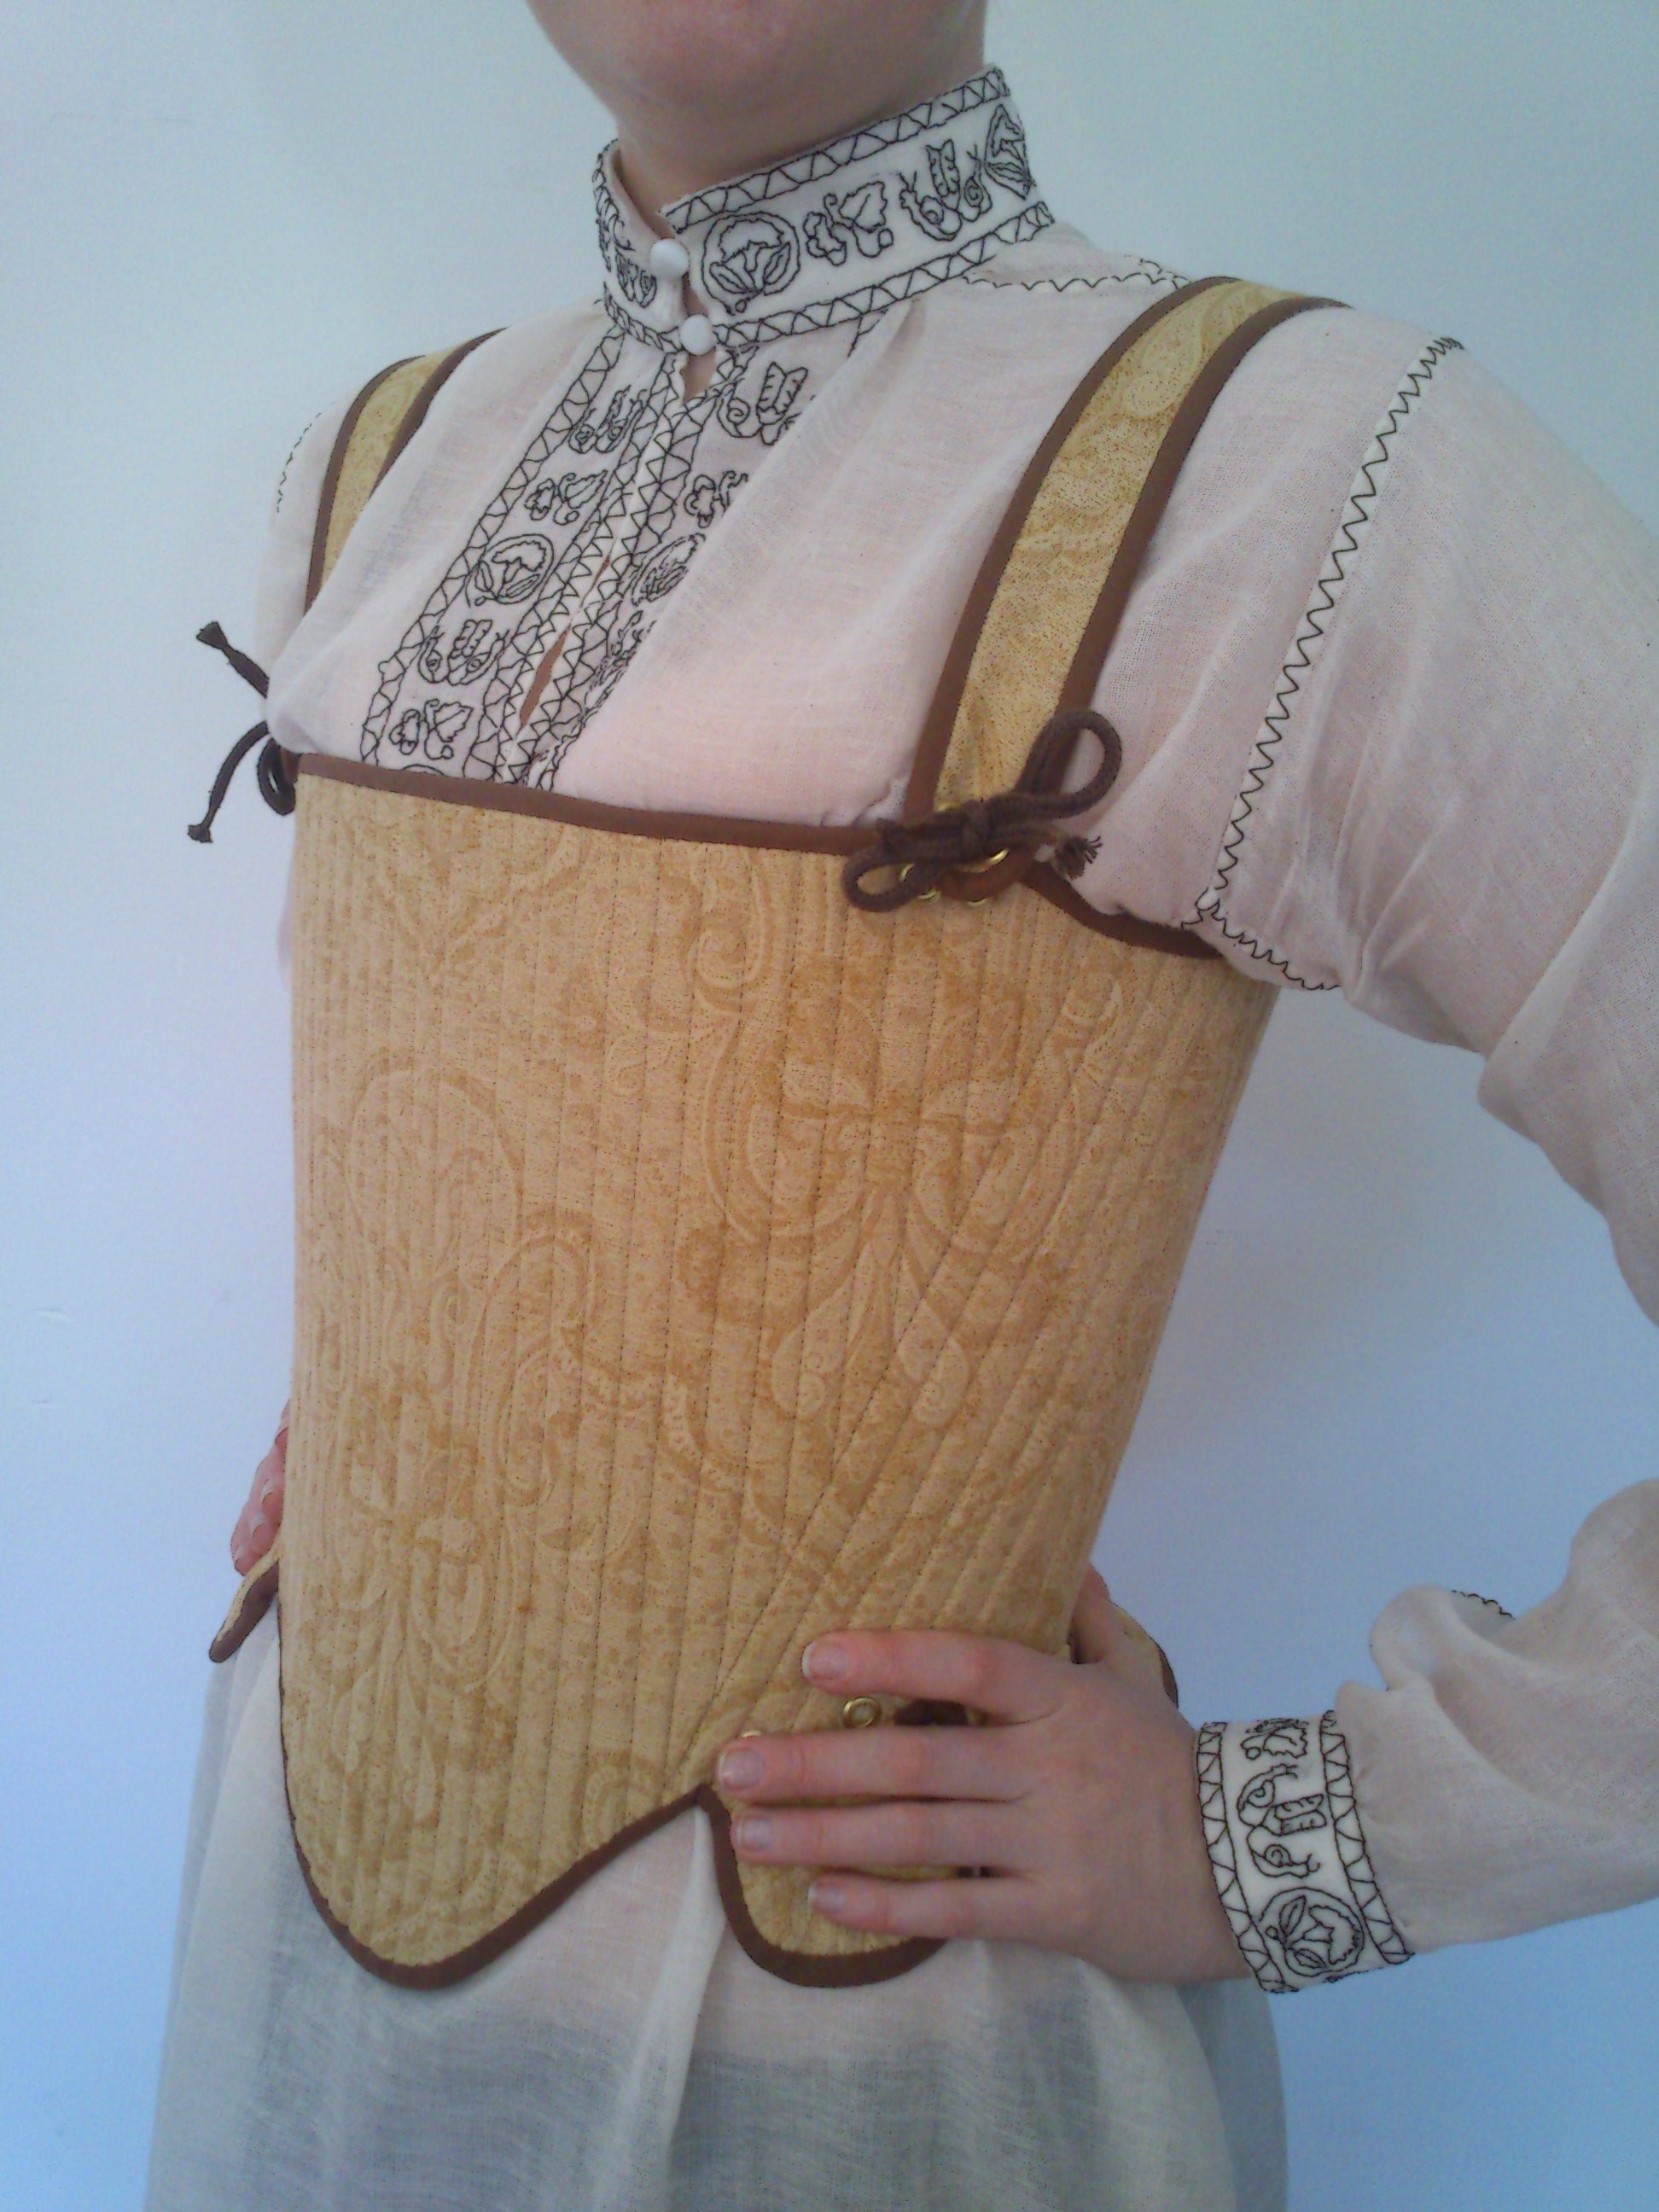
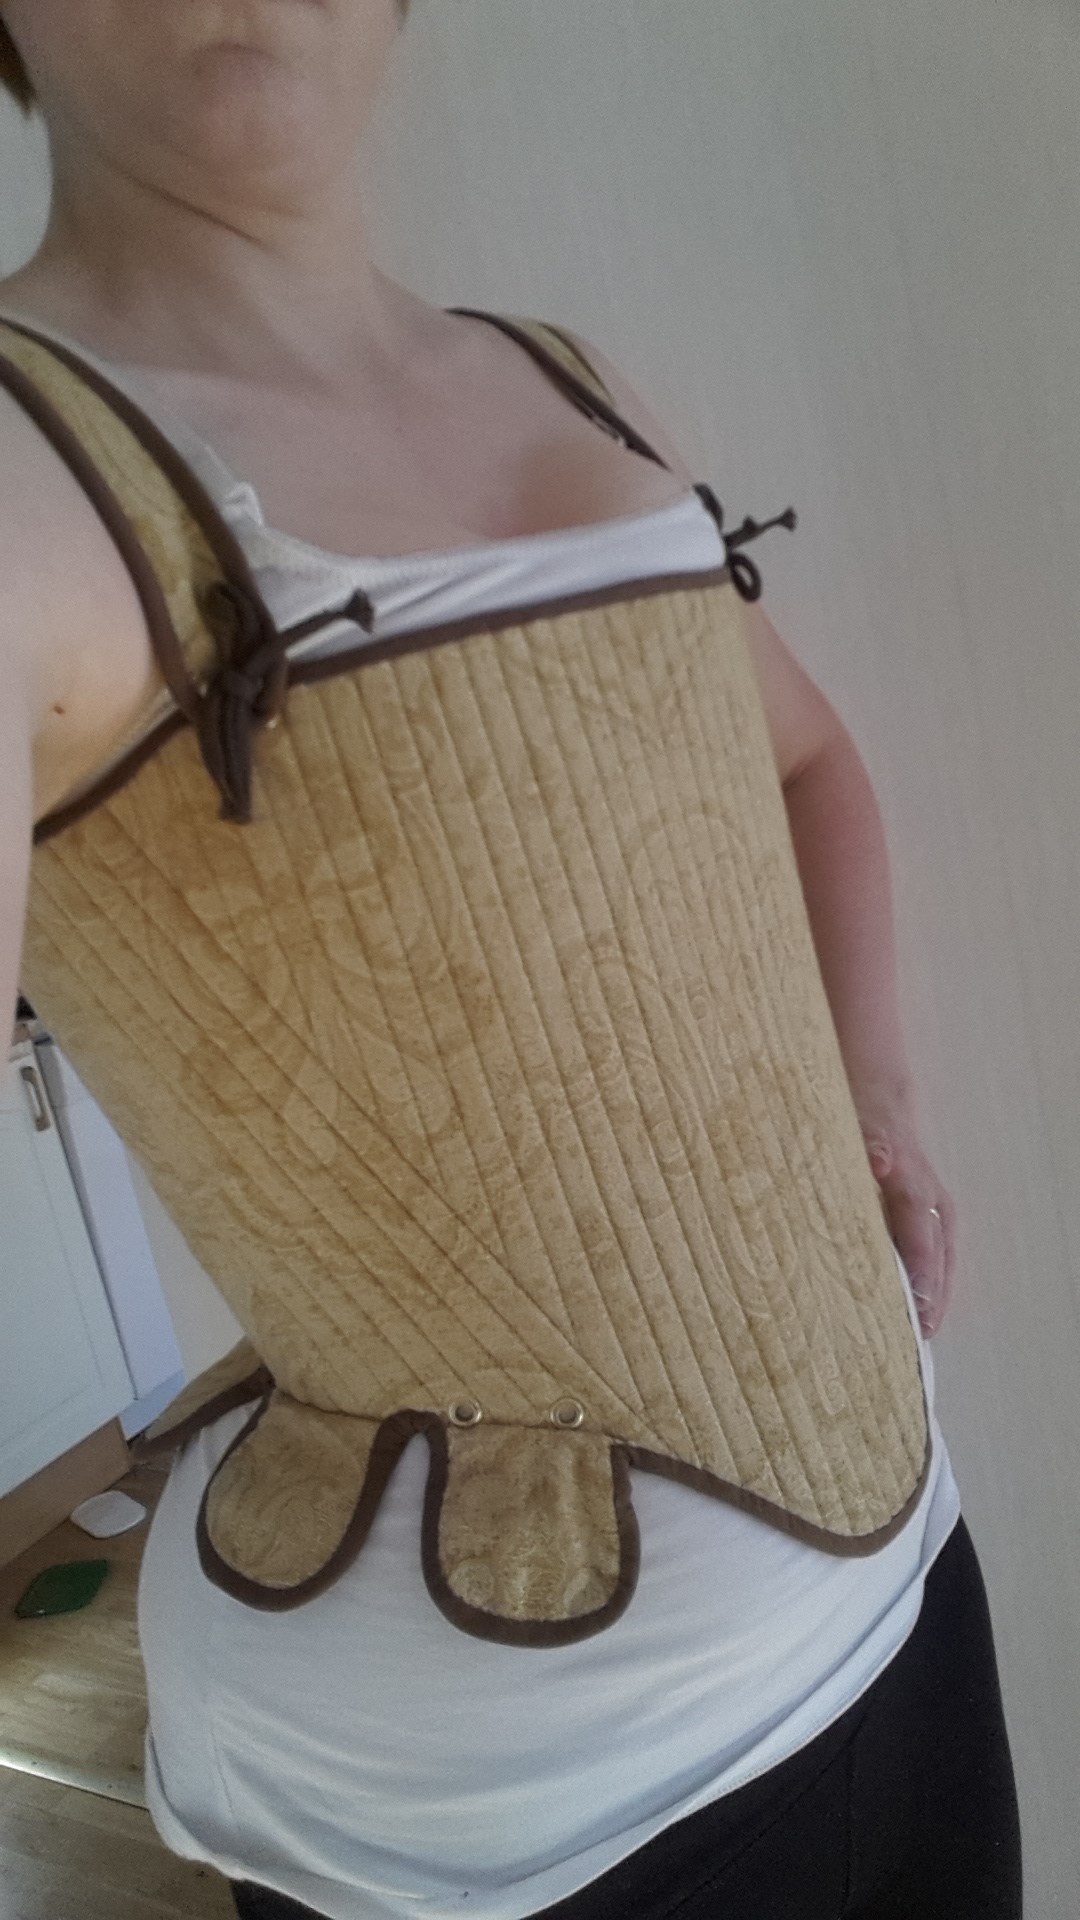
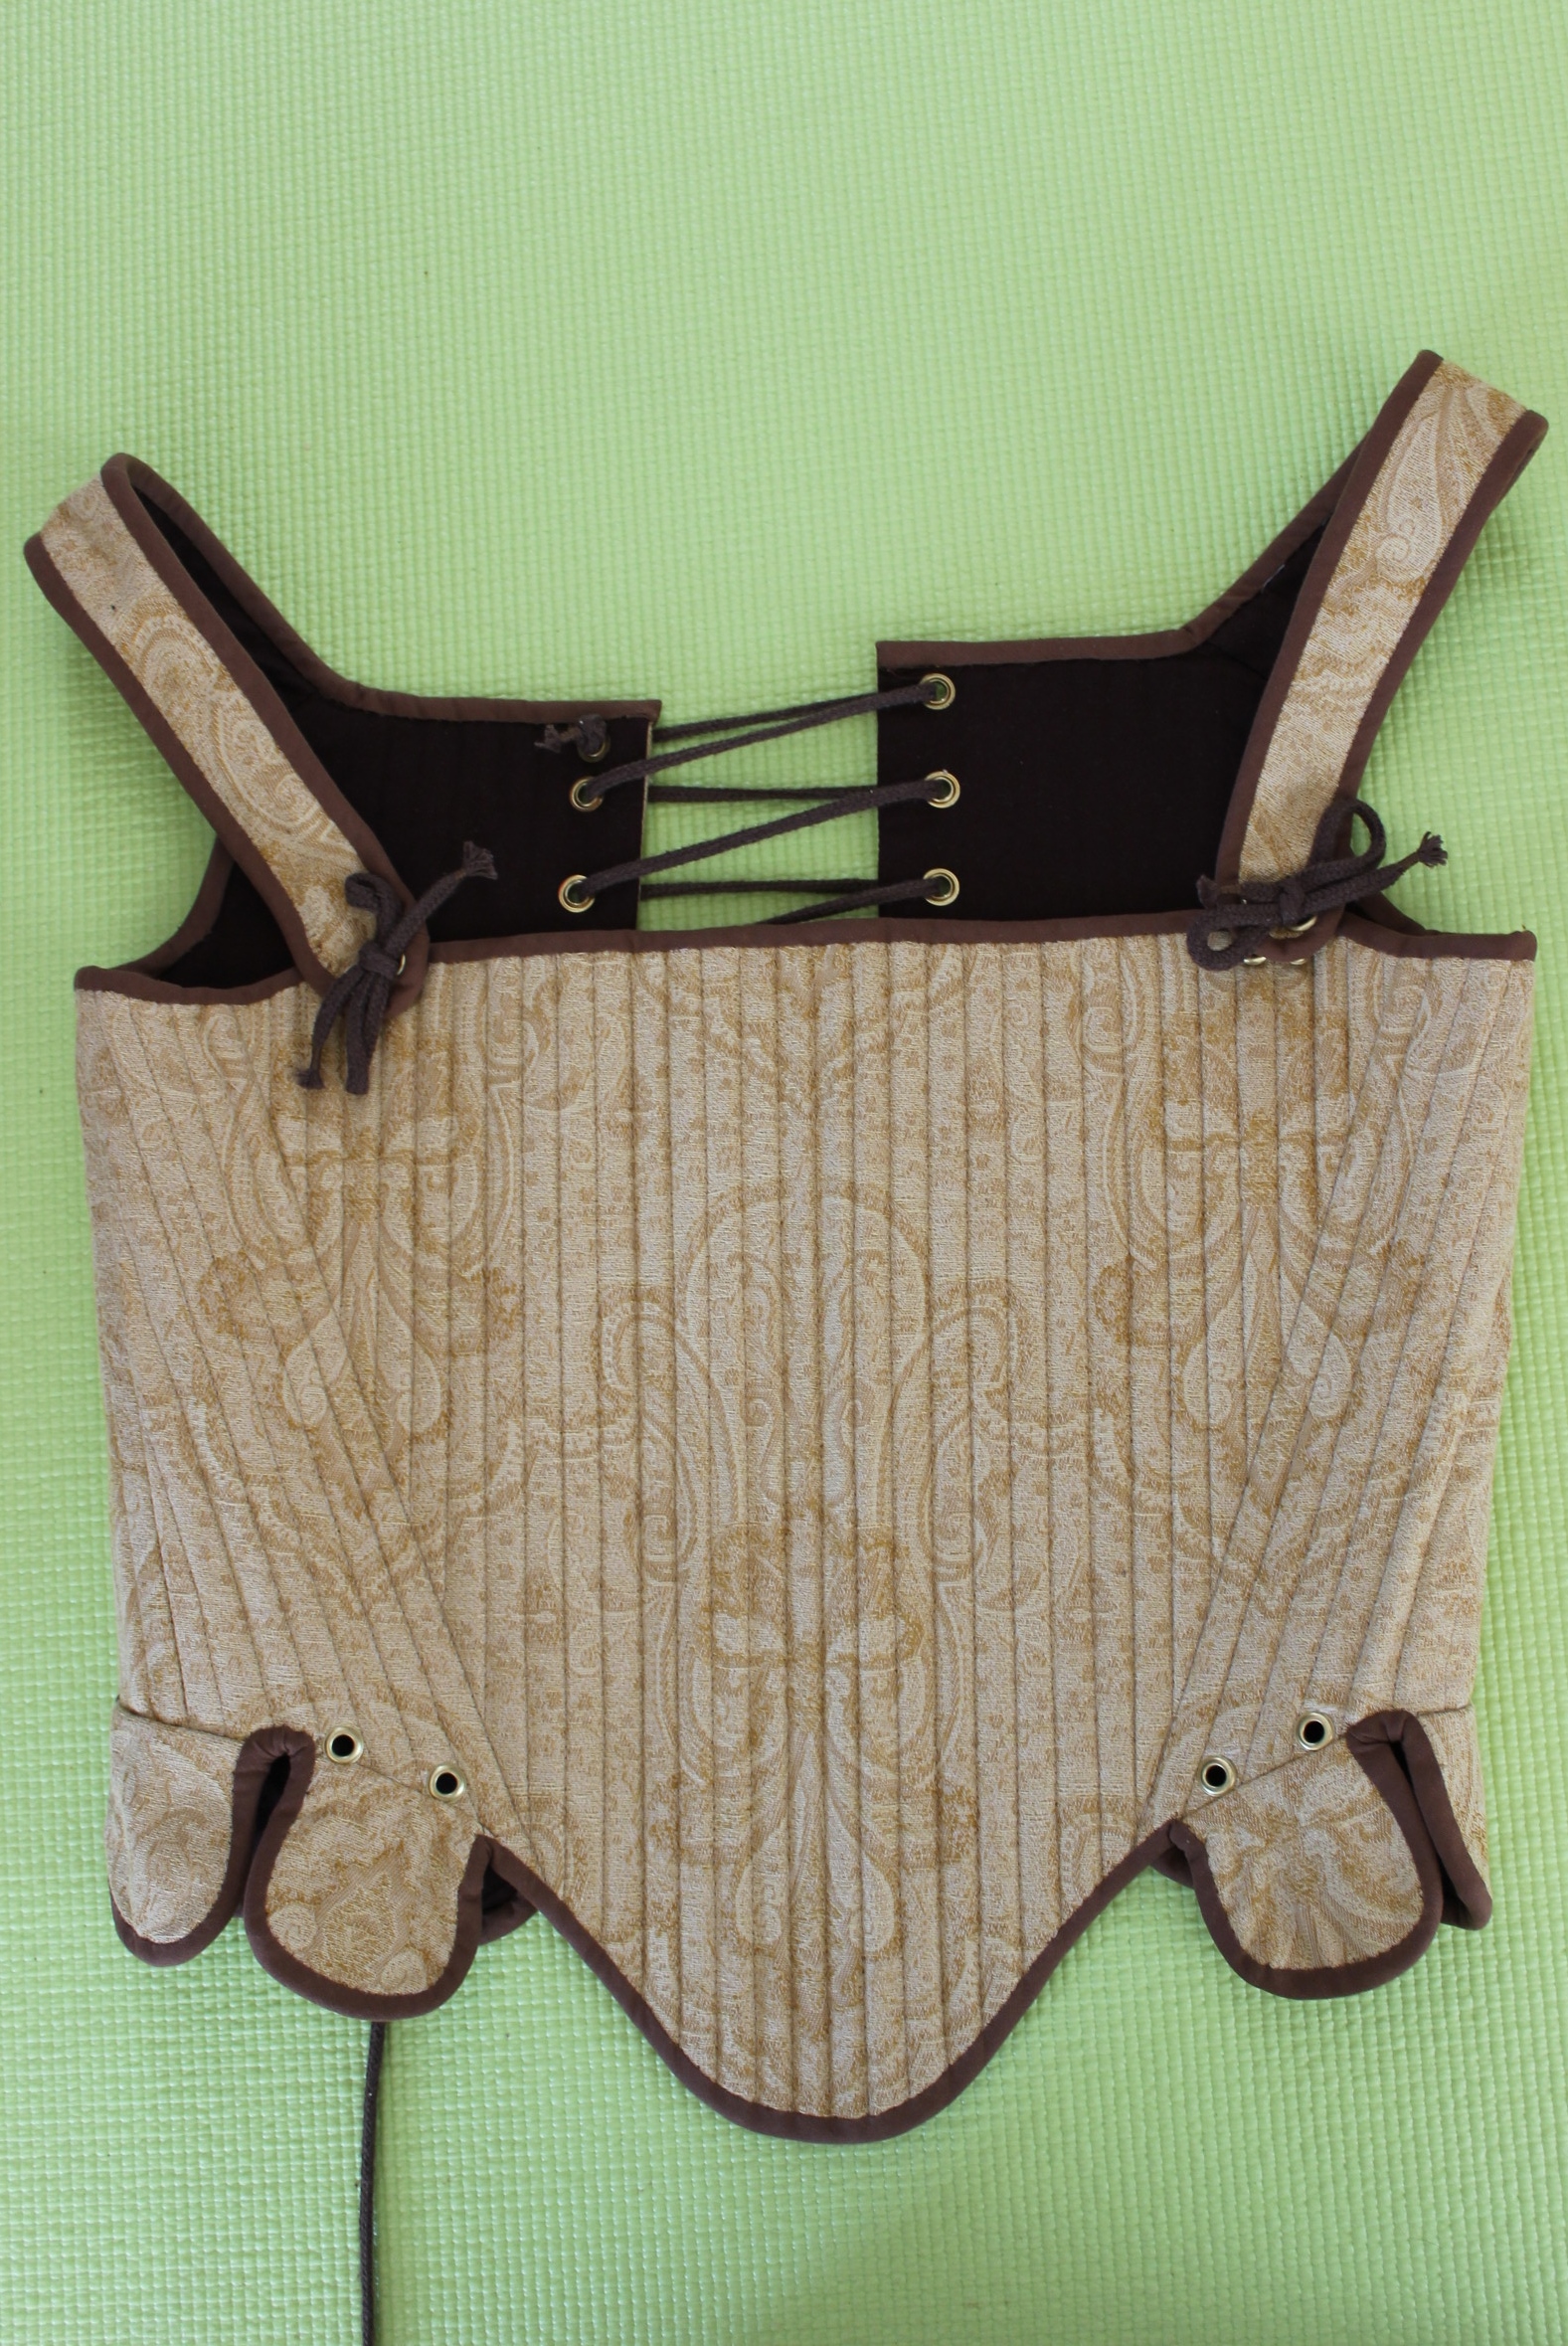
The finished Pair of bodice:

All the facts:
Challenge: nr 2/2017 – Re-make
What: The re-make of my 16th century “Pair of bodice”
How It fit the challenge: I re-made the pair of bodice to better fit my current skill and body, making it a lot more likely I will actually wear them. I also got a lot leftover boning from the fix-up, that I can use for other projects down the line.
Pattern: None
Fabric/Notions: Thread
How historical accurate: Not at all except the shape. The whole thing is made with machine, in synthetic brocade using both plastic boning and metal eyelets (so sorry you guys…). But it is a clear example of how my knowledge and skill have grown and since they will never be seen, it don’t bother me as much as it probably should. about 3/10.
Time/Cost: About 3 hours and it didn’t cost me a thing (of one thing I gained a few cents with the opportunity to re-use the left over bones).
First worn: Beginning of Mars for photos
Finished thoughts: I’m happy that I now might finally wear them 🙂
***
And here’s a complimentary “striptease” 🙂
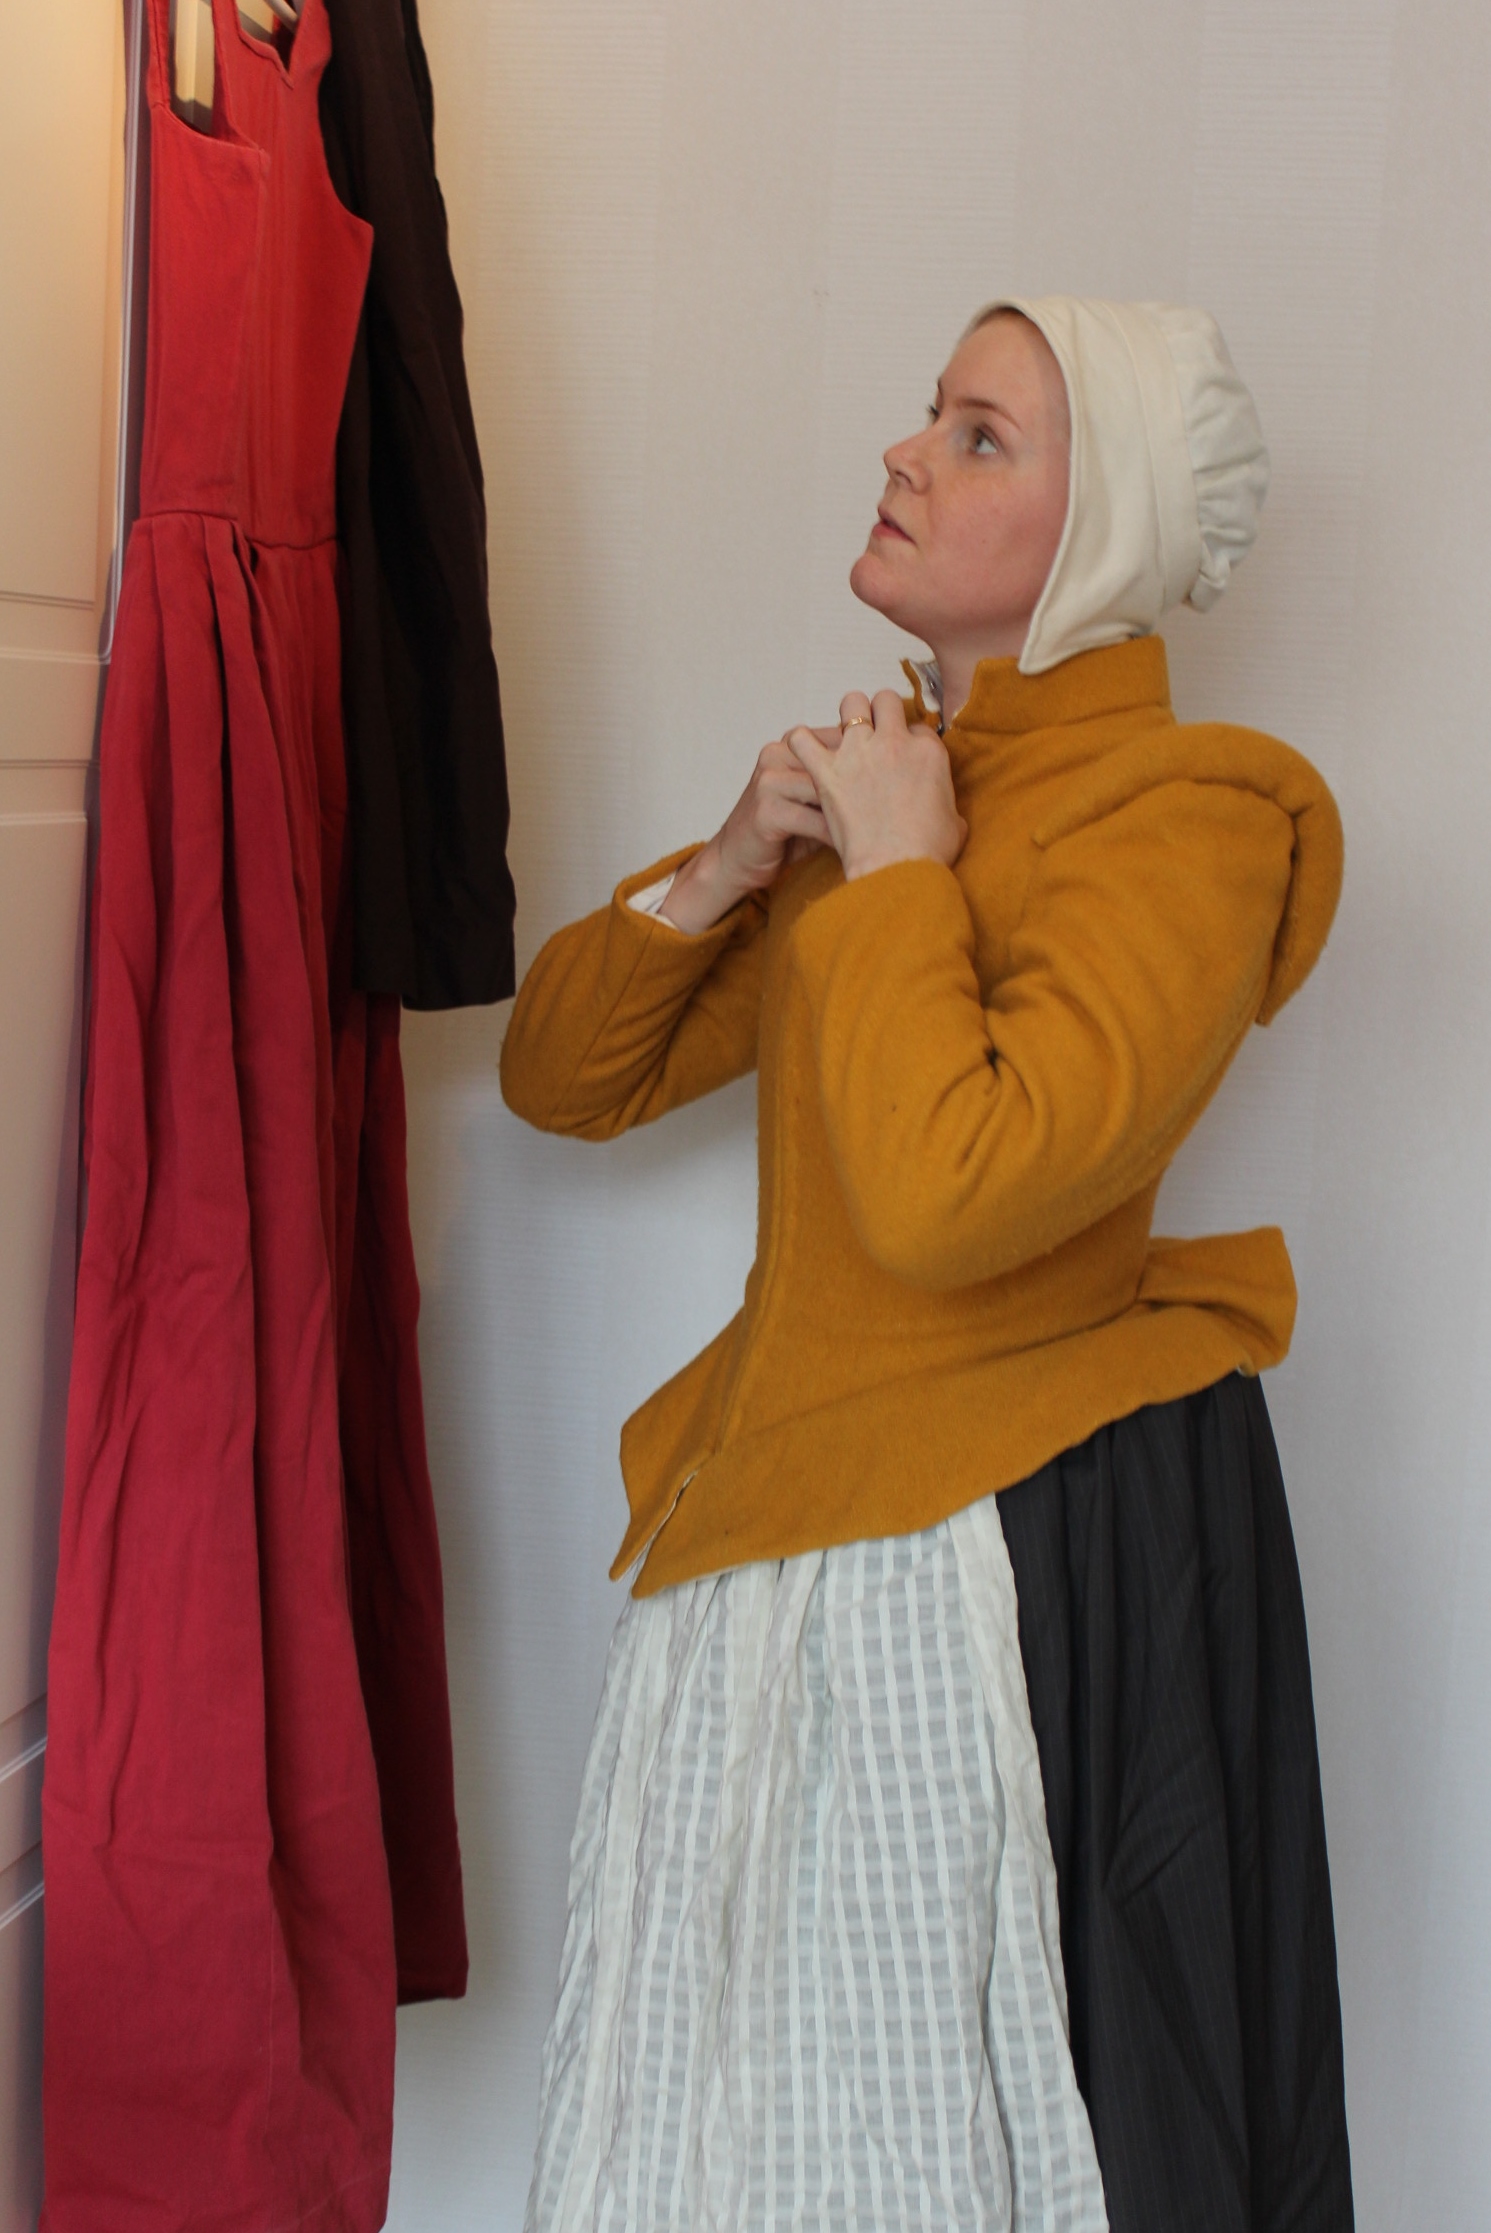
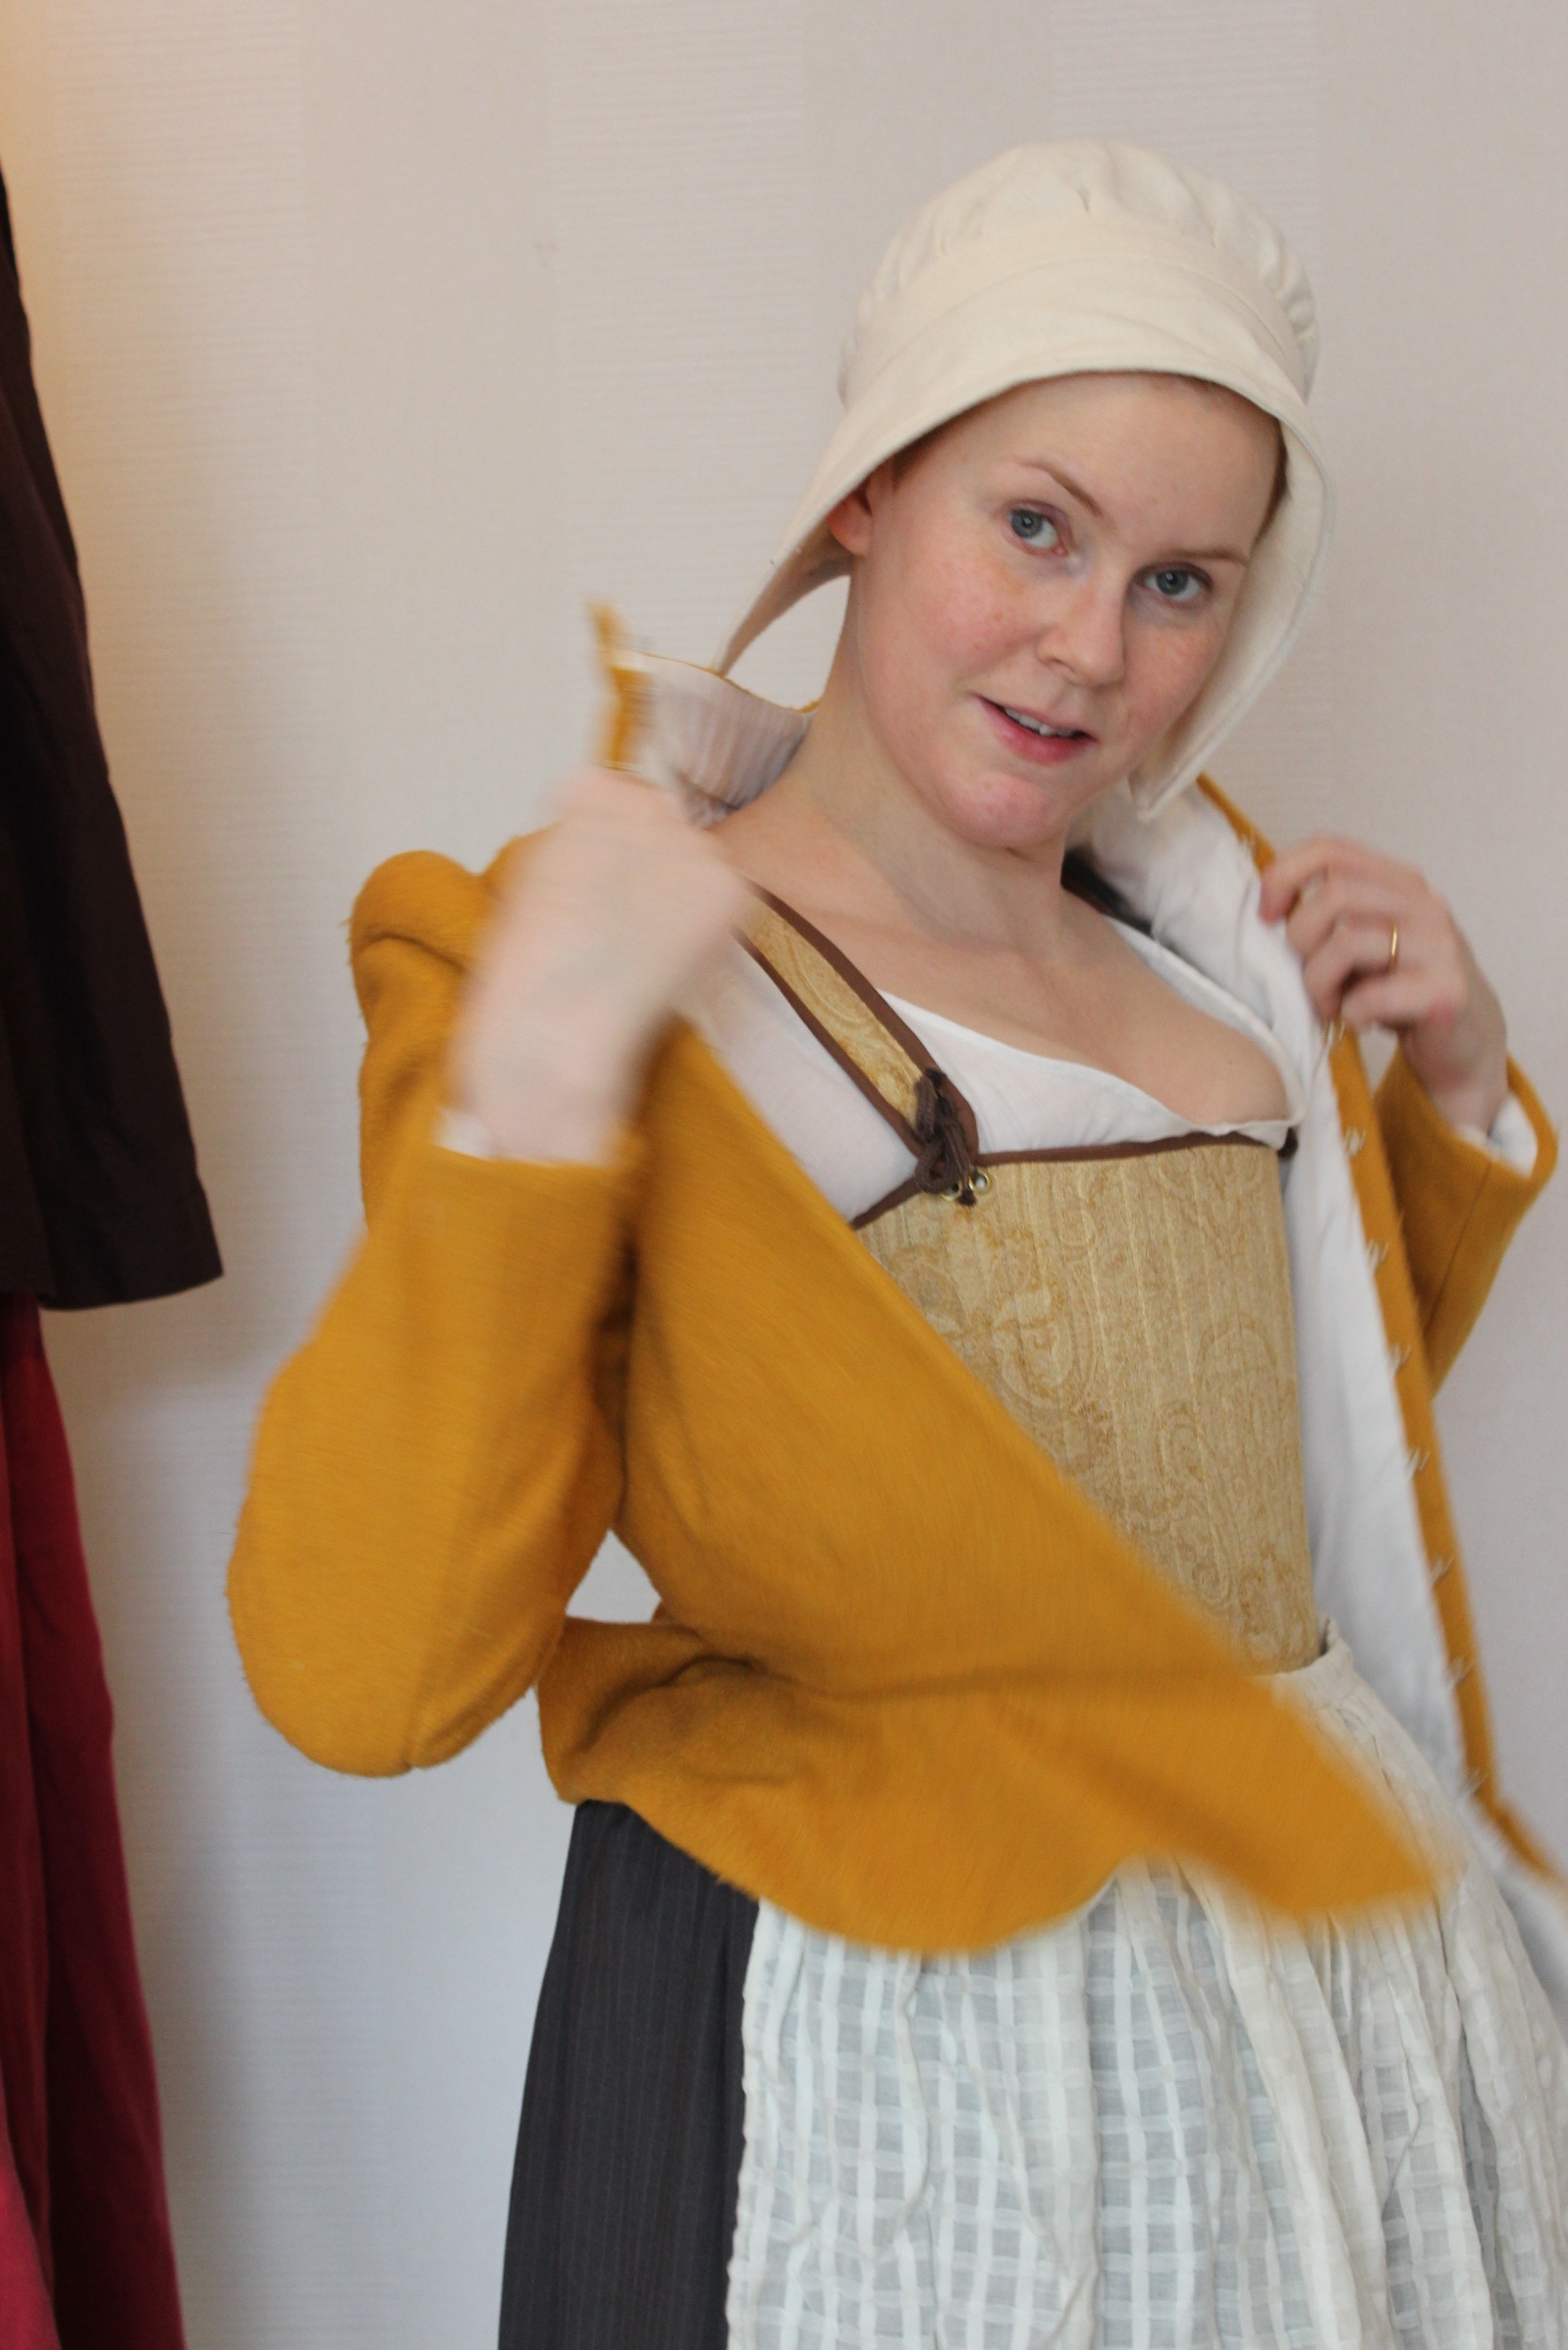


 photos by: Elin Evaldsdotter
Here comes another batch from last years Halloween photoshoot.
This time we are doing the classical vampire in my Edwardian lingere getup.
 Inspiration 1.
Sadly I couldn’t get anyone to play Lestat, so we had to manage on our own 🙂
 Inspiration 2.
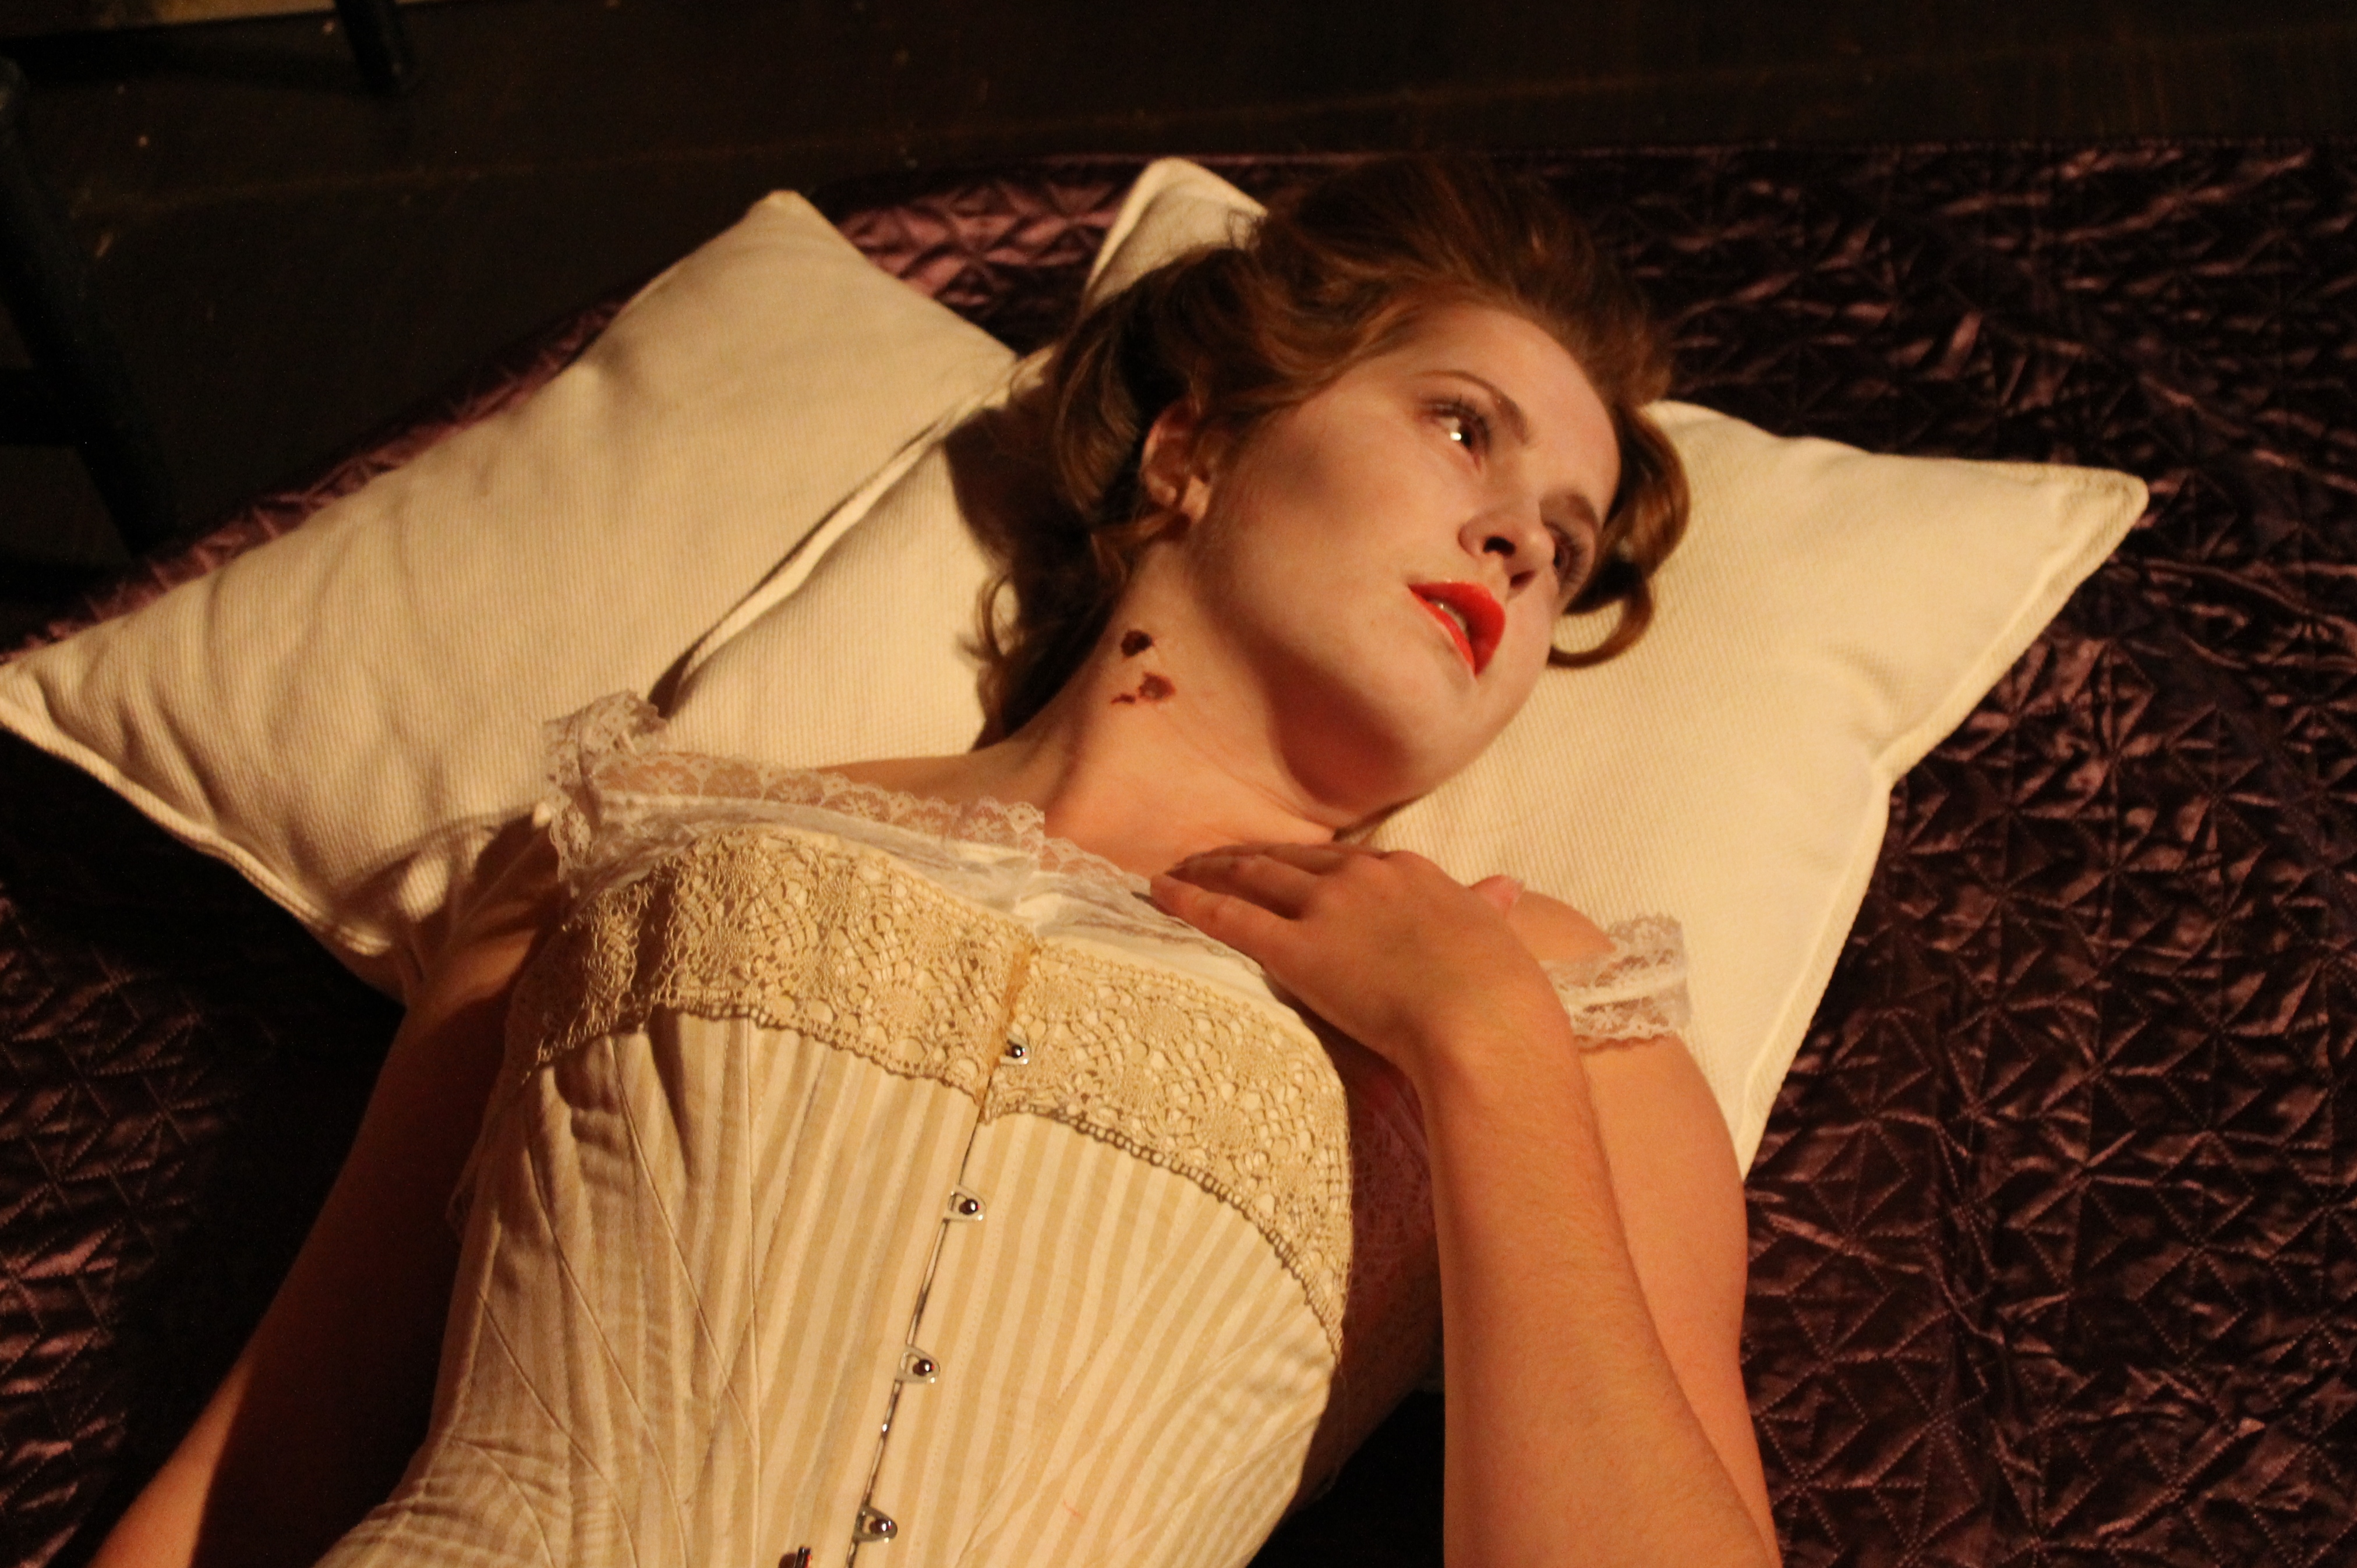
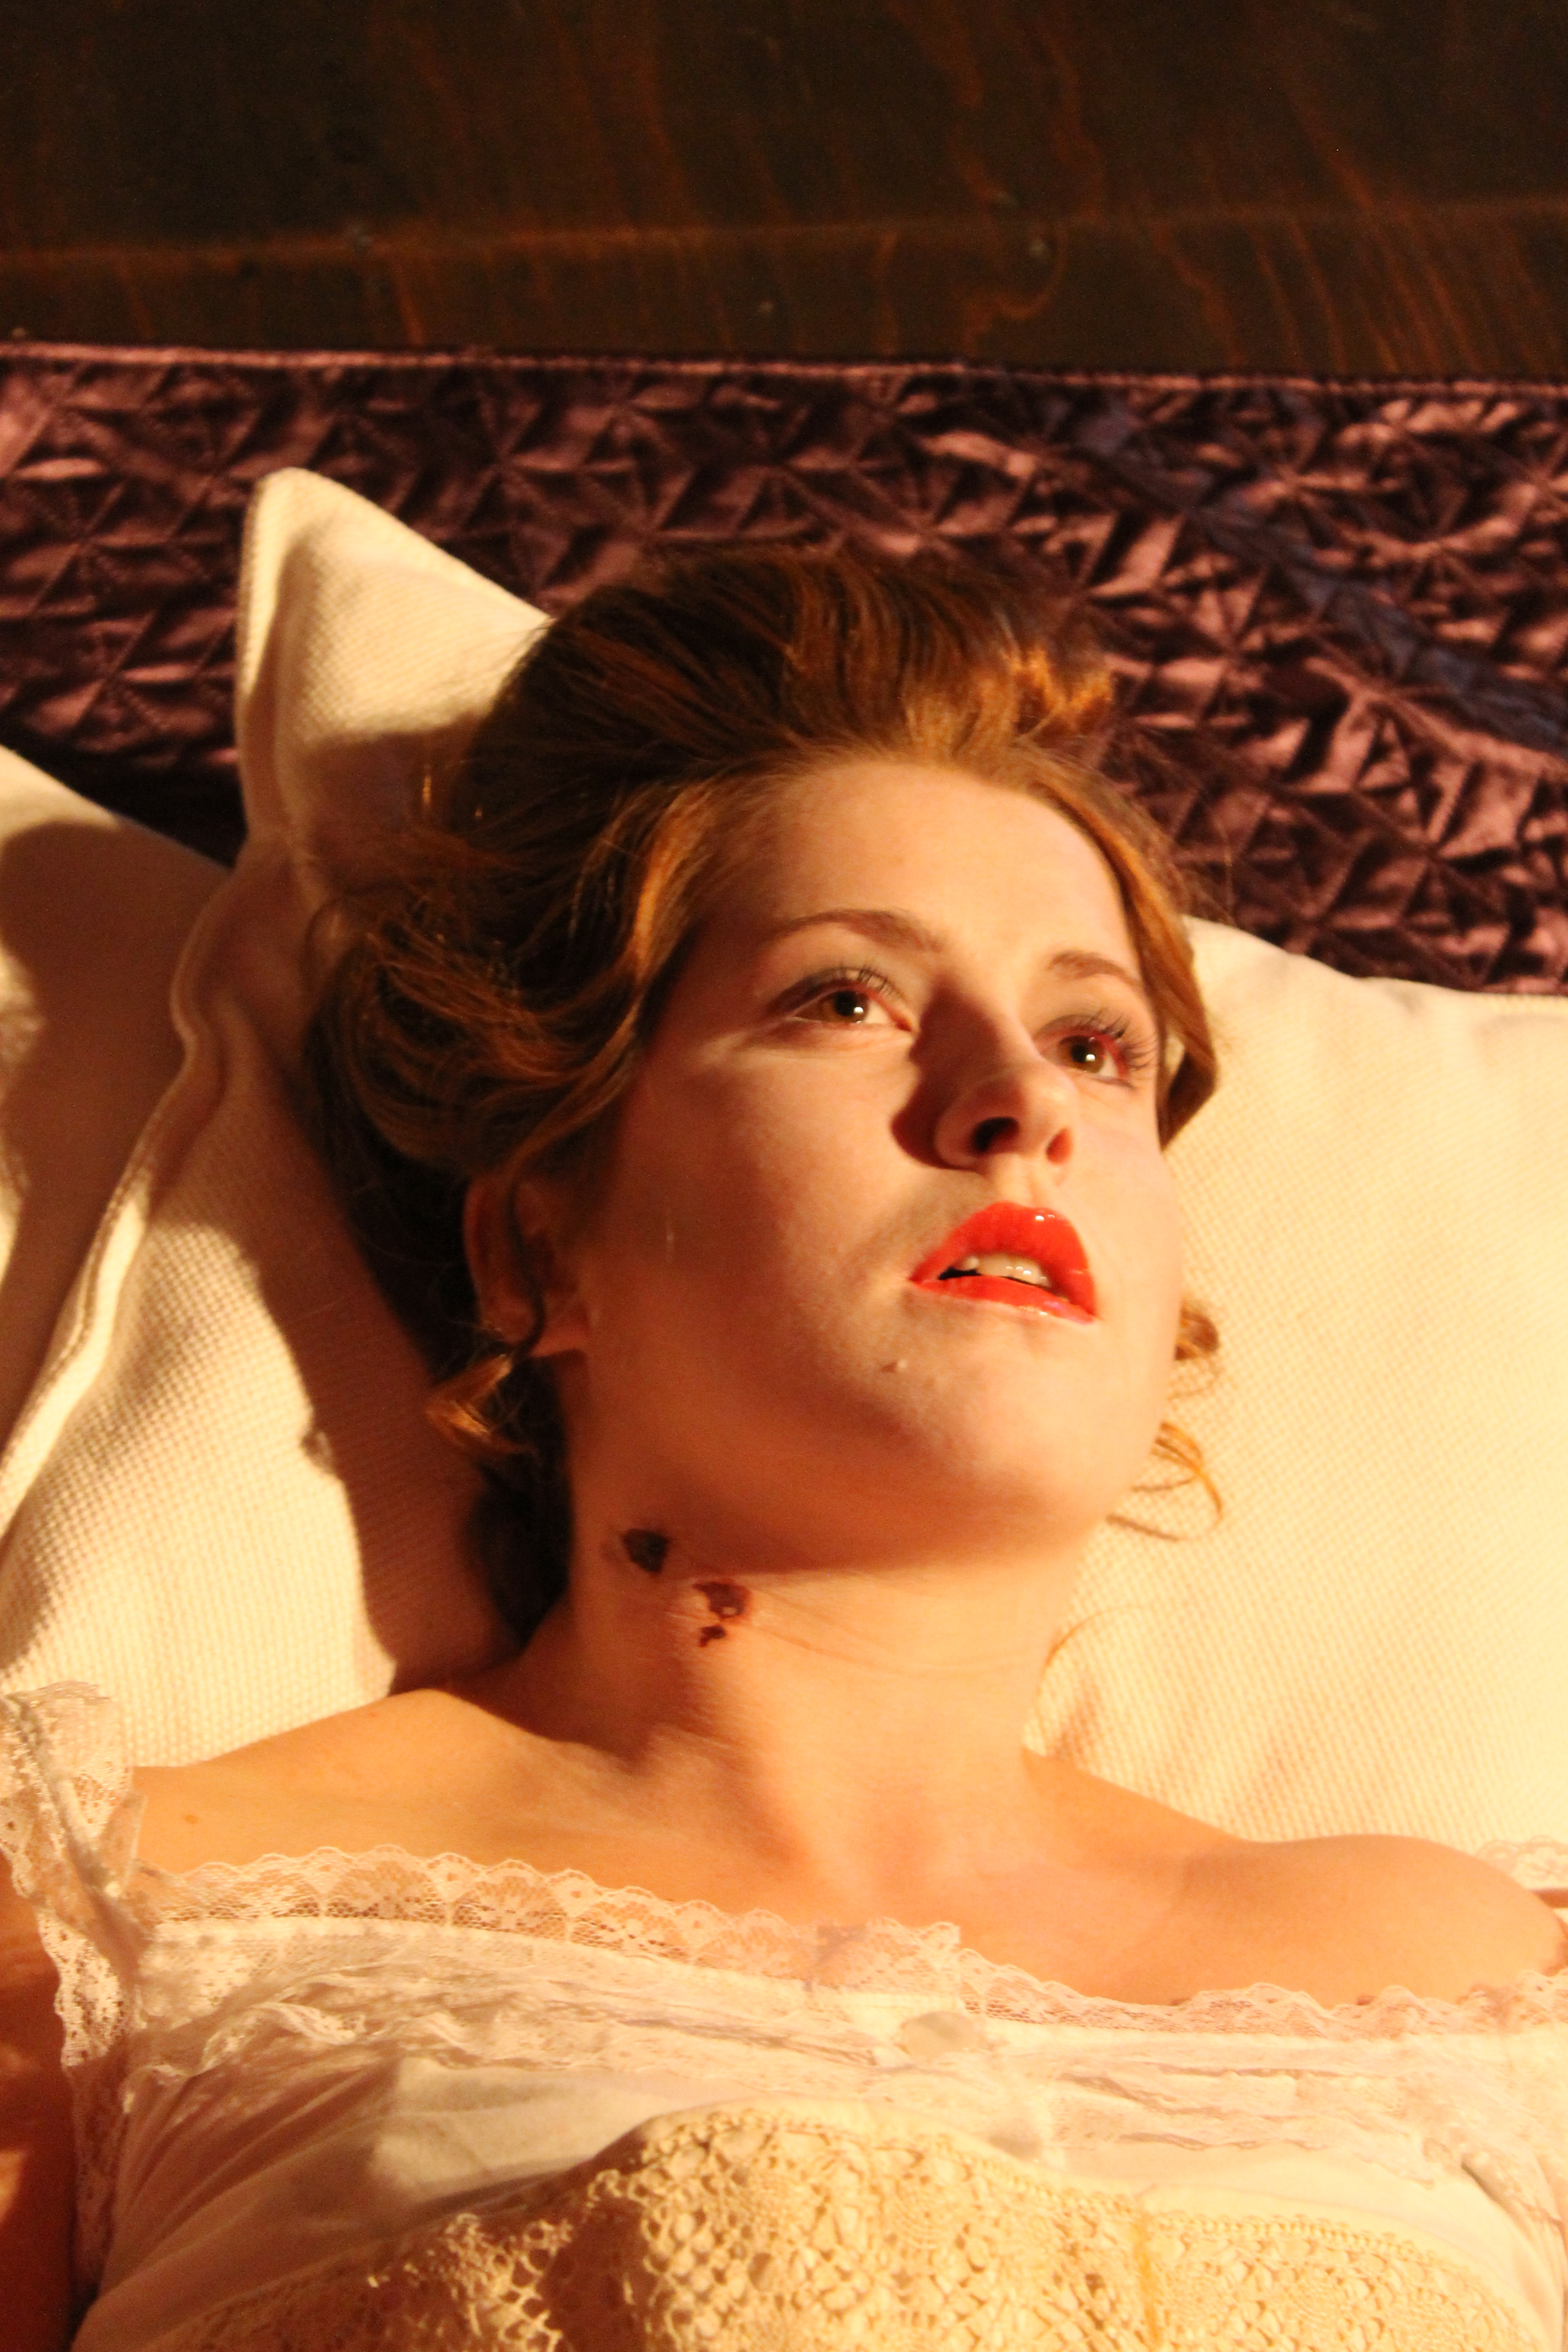

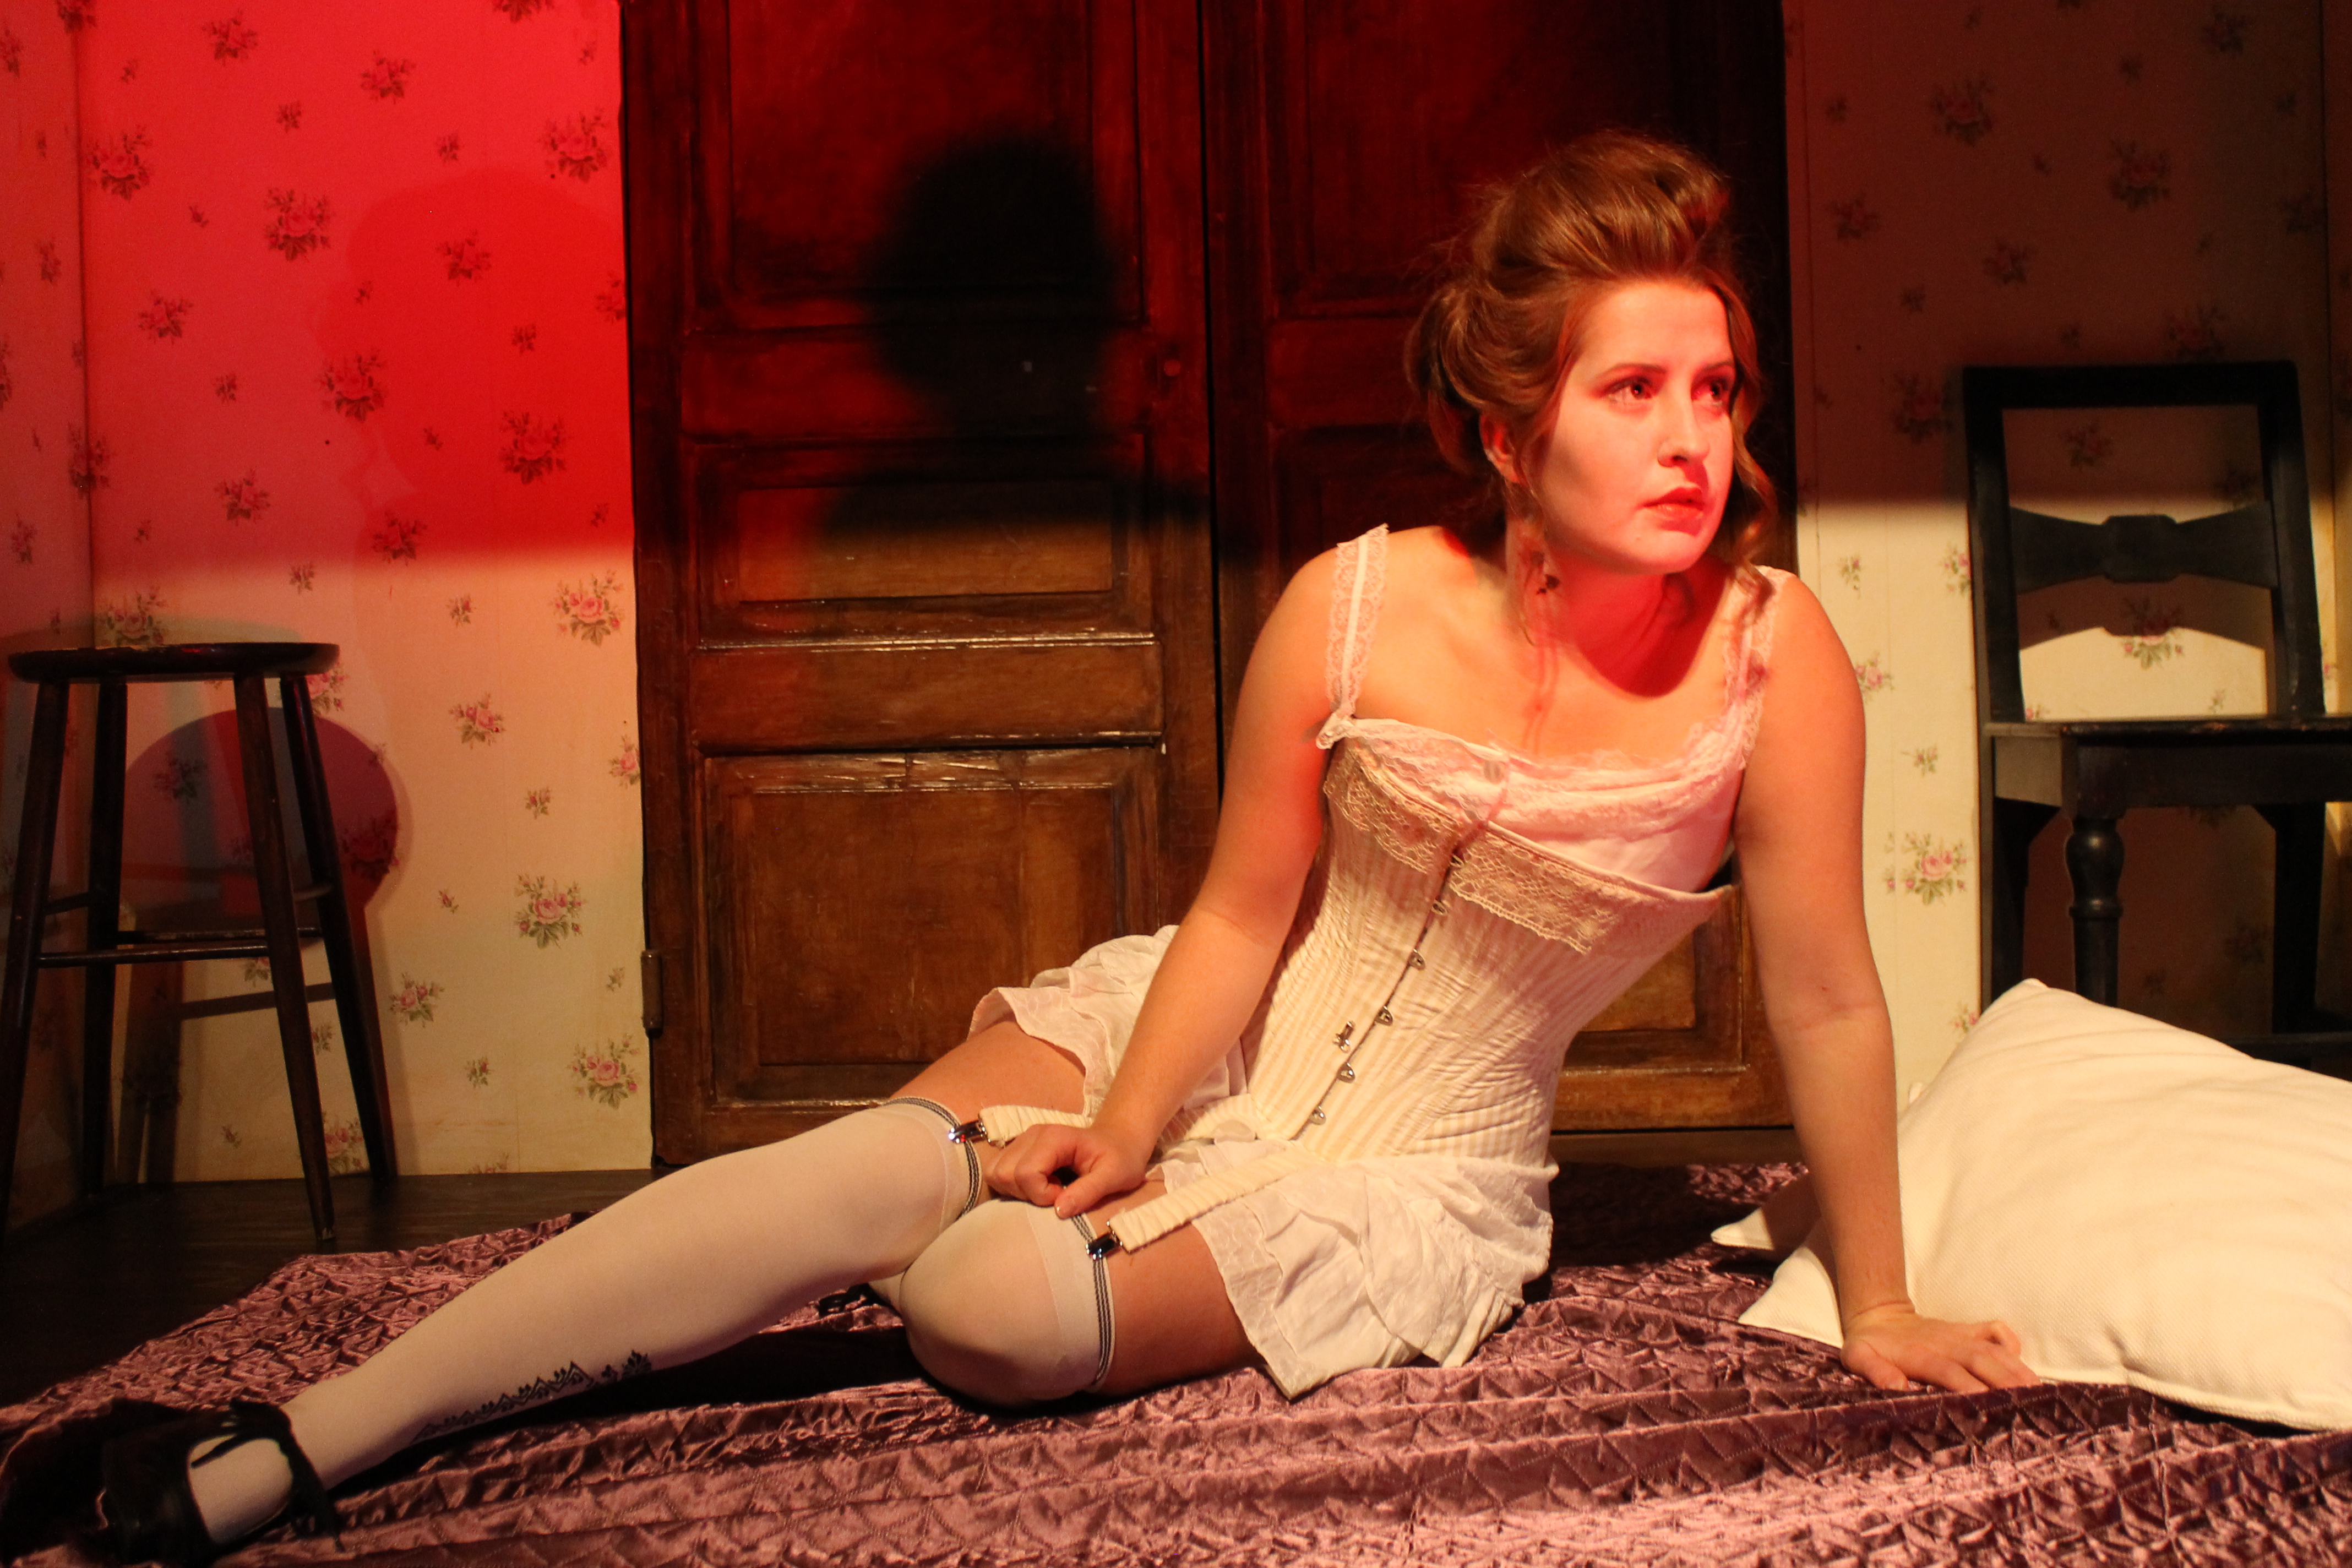


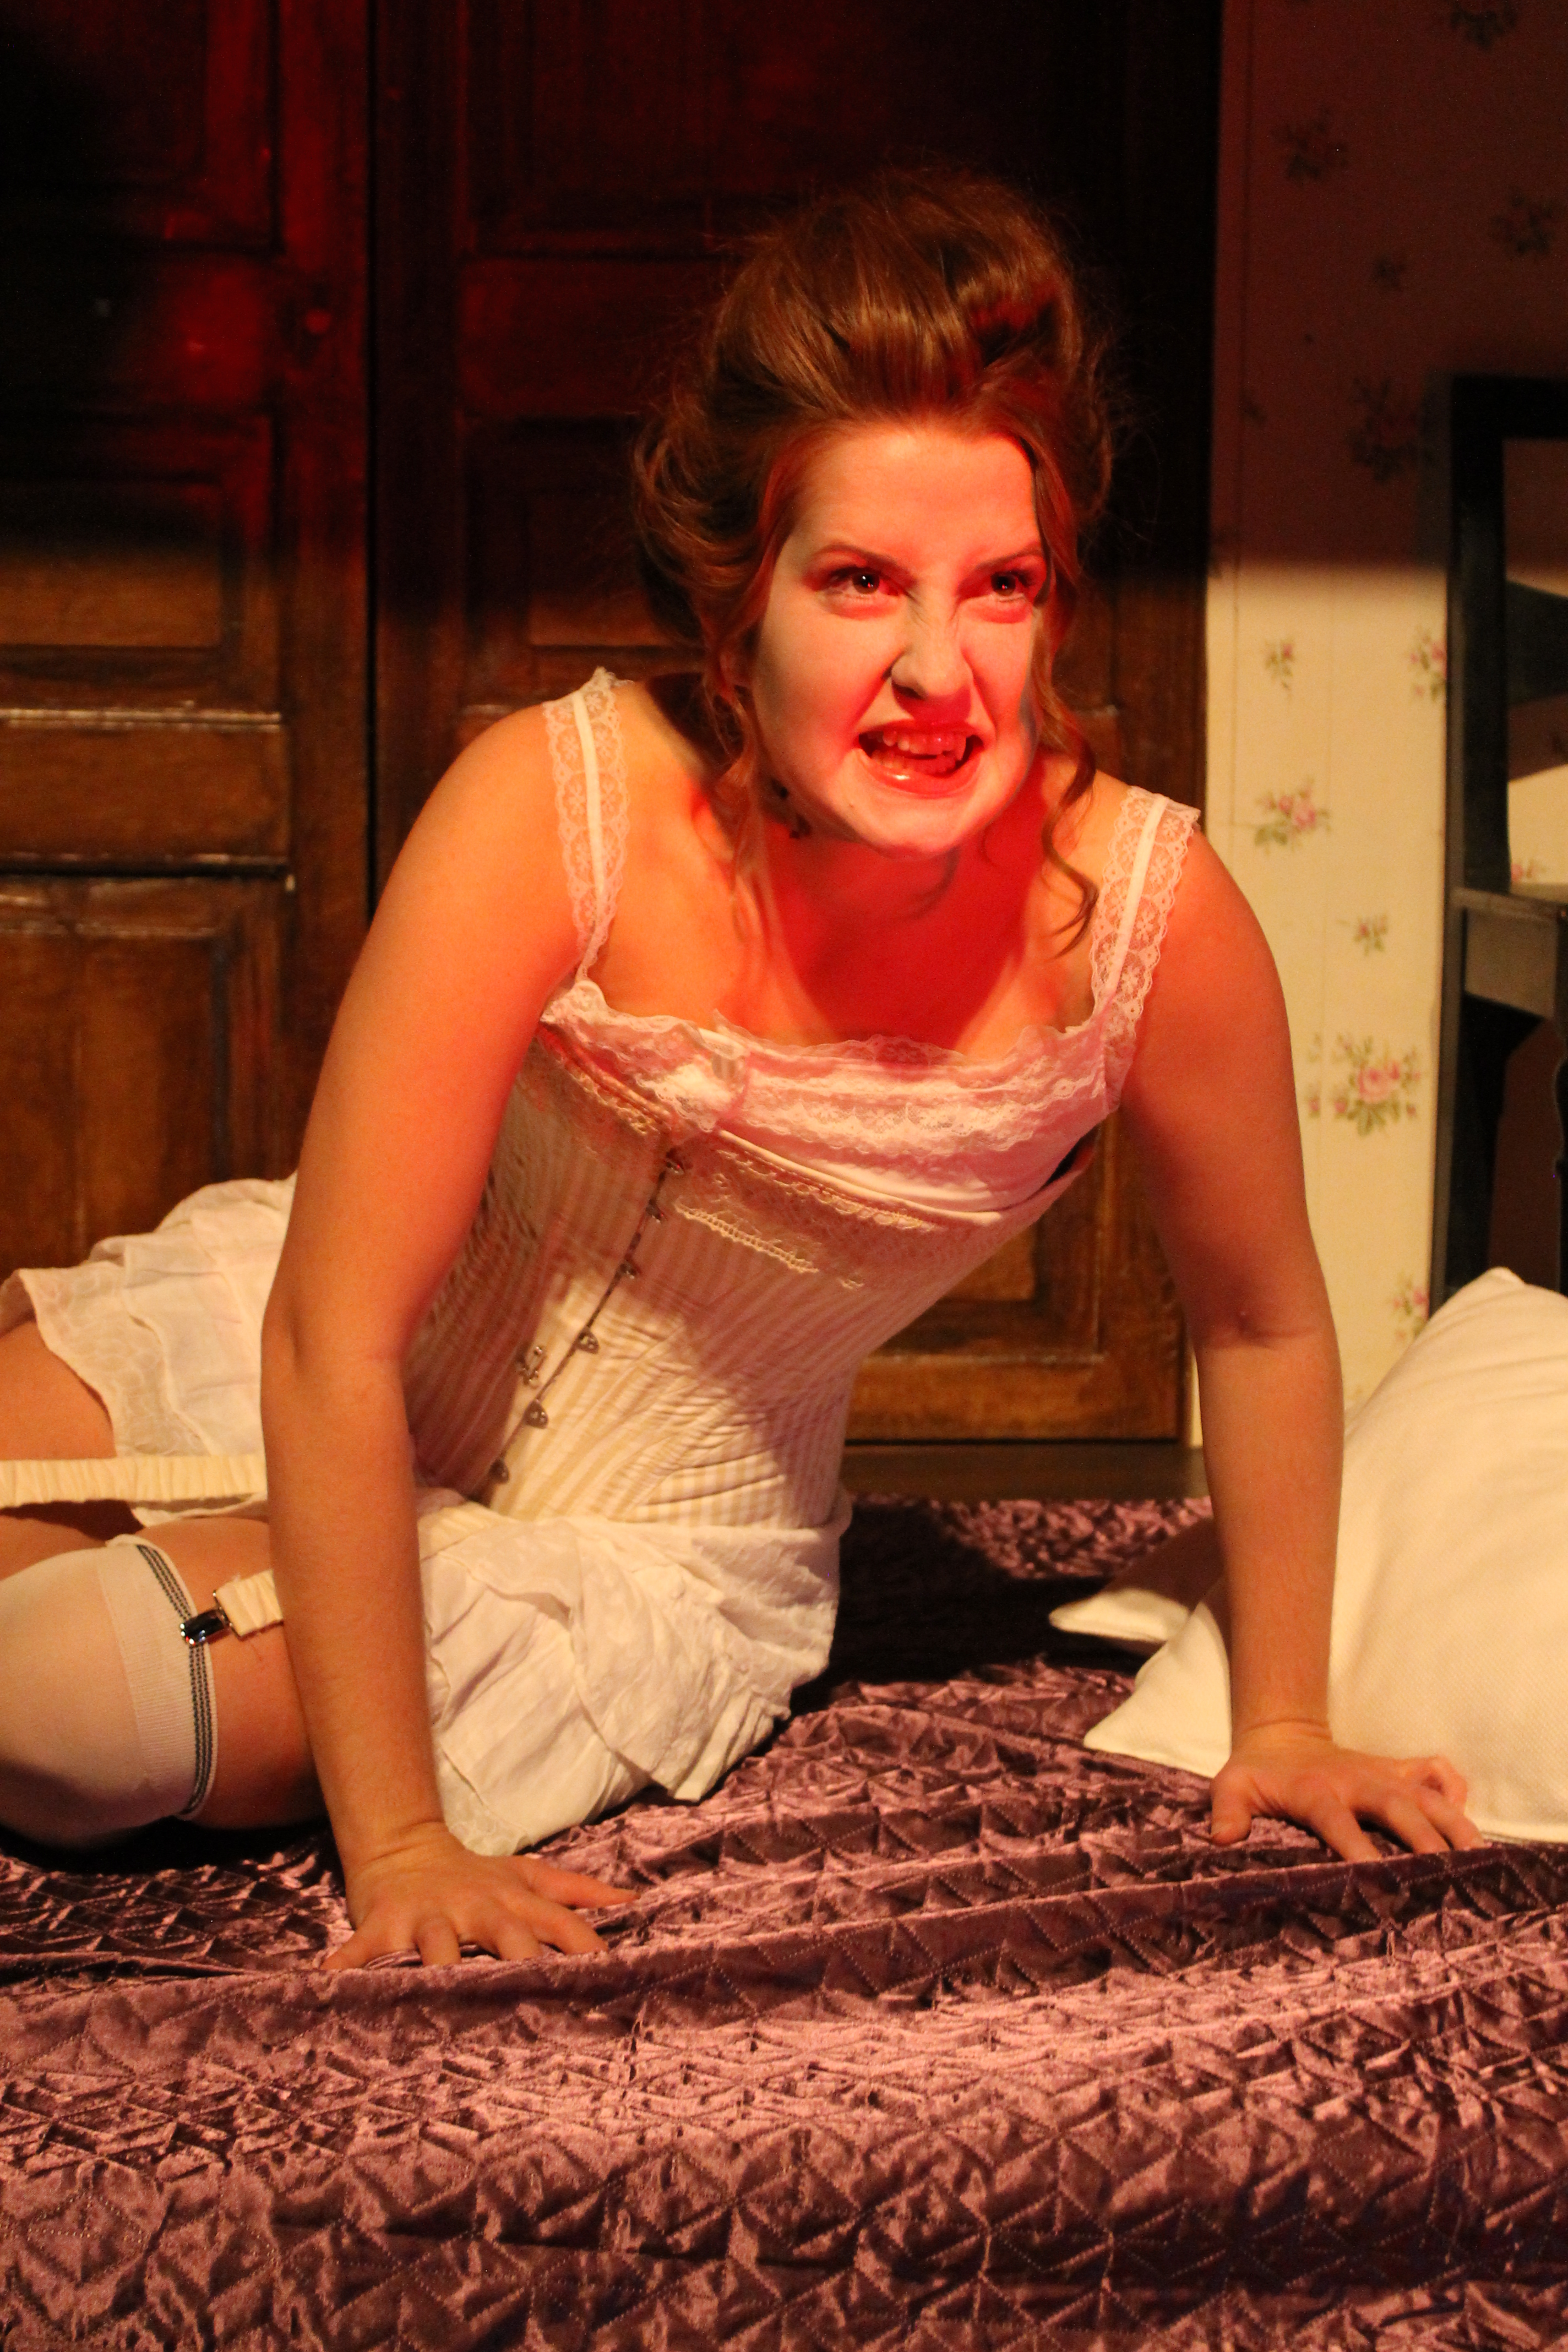
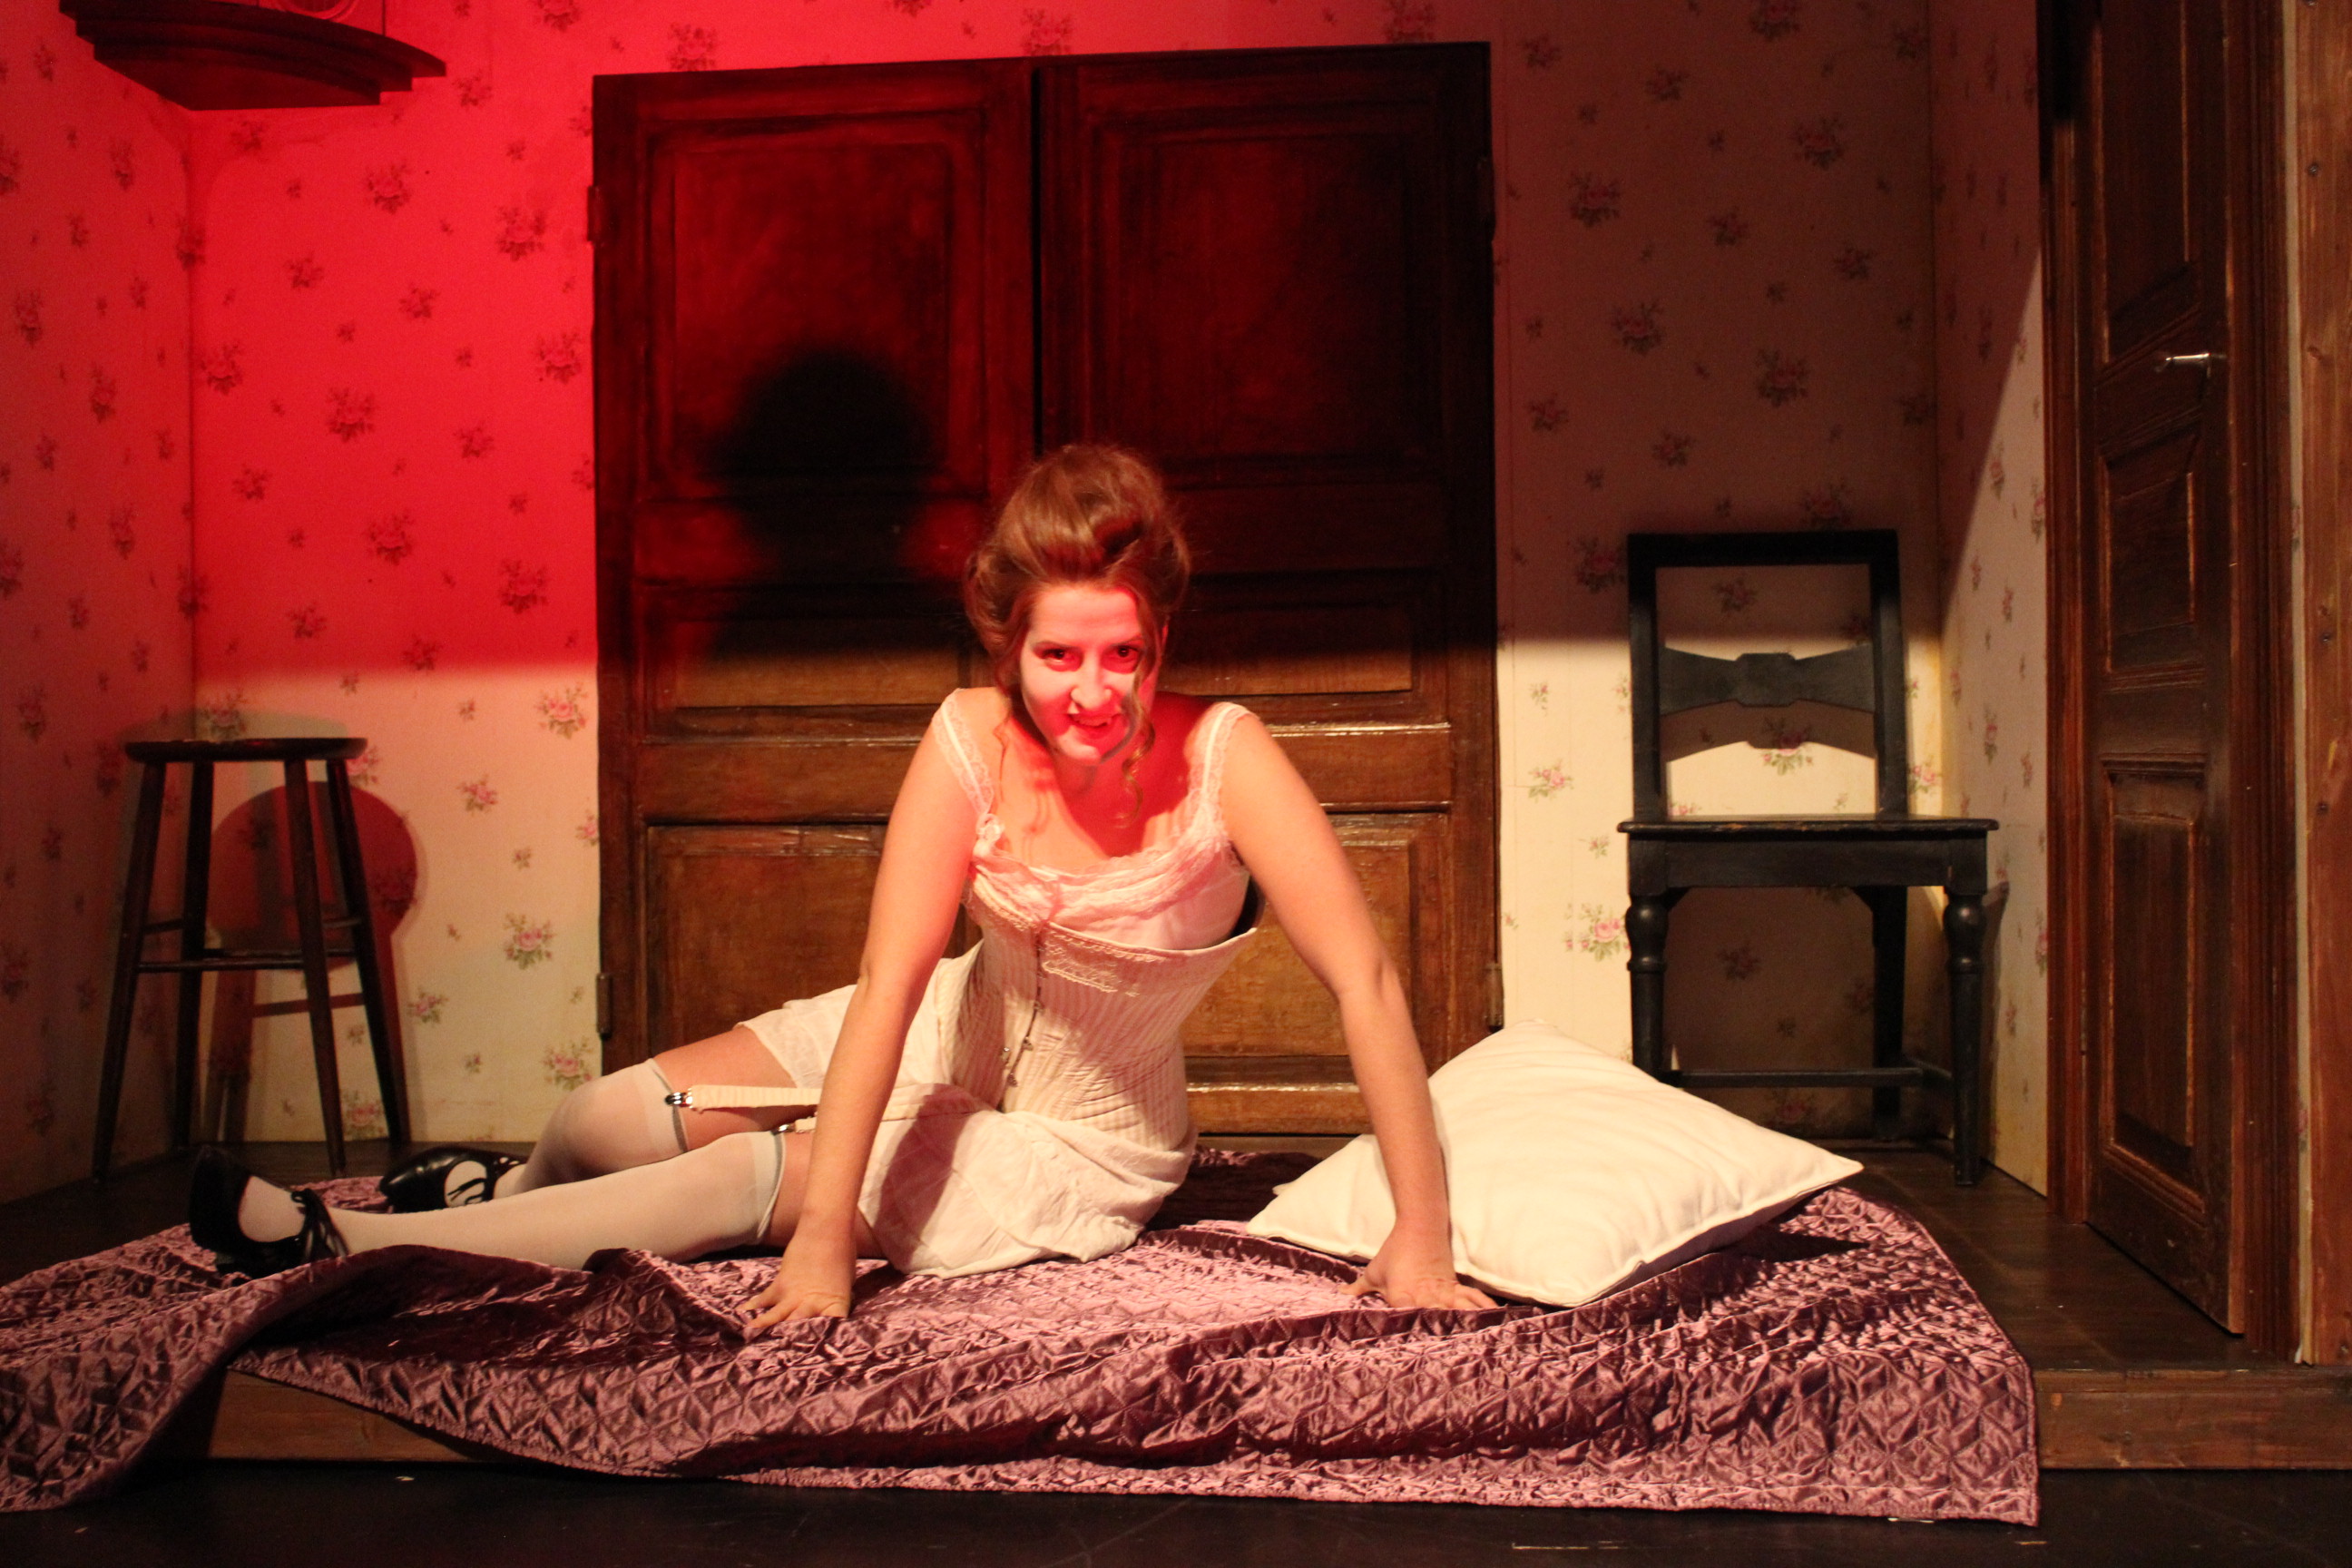 Model: Jessie Lewis Skoglund
Photo: Elin Evaldsdotter
Costume & Concept: Fashion through History
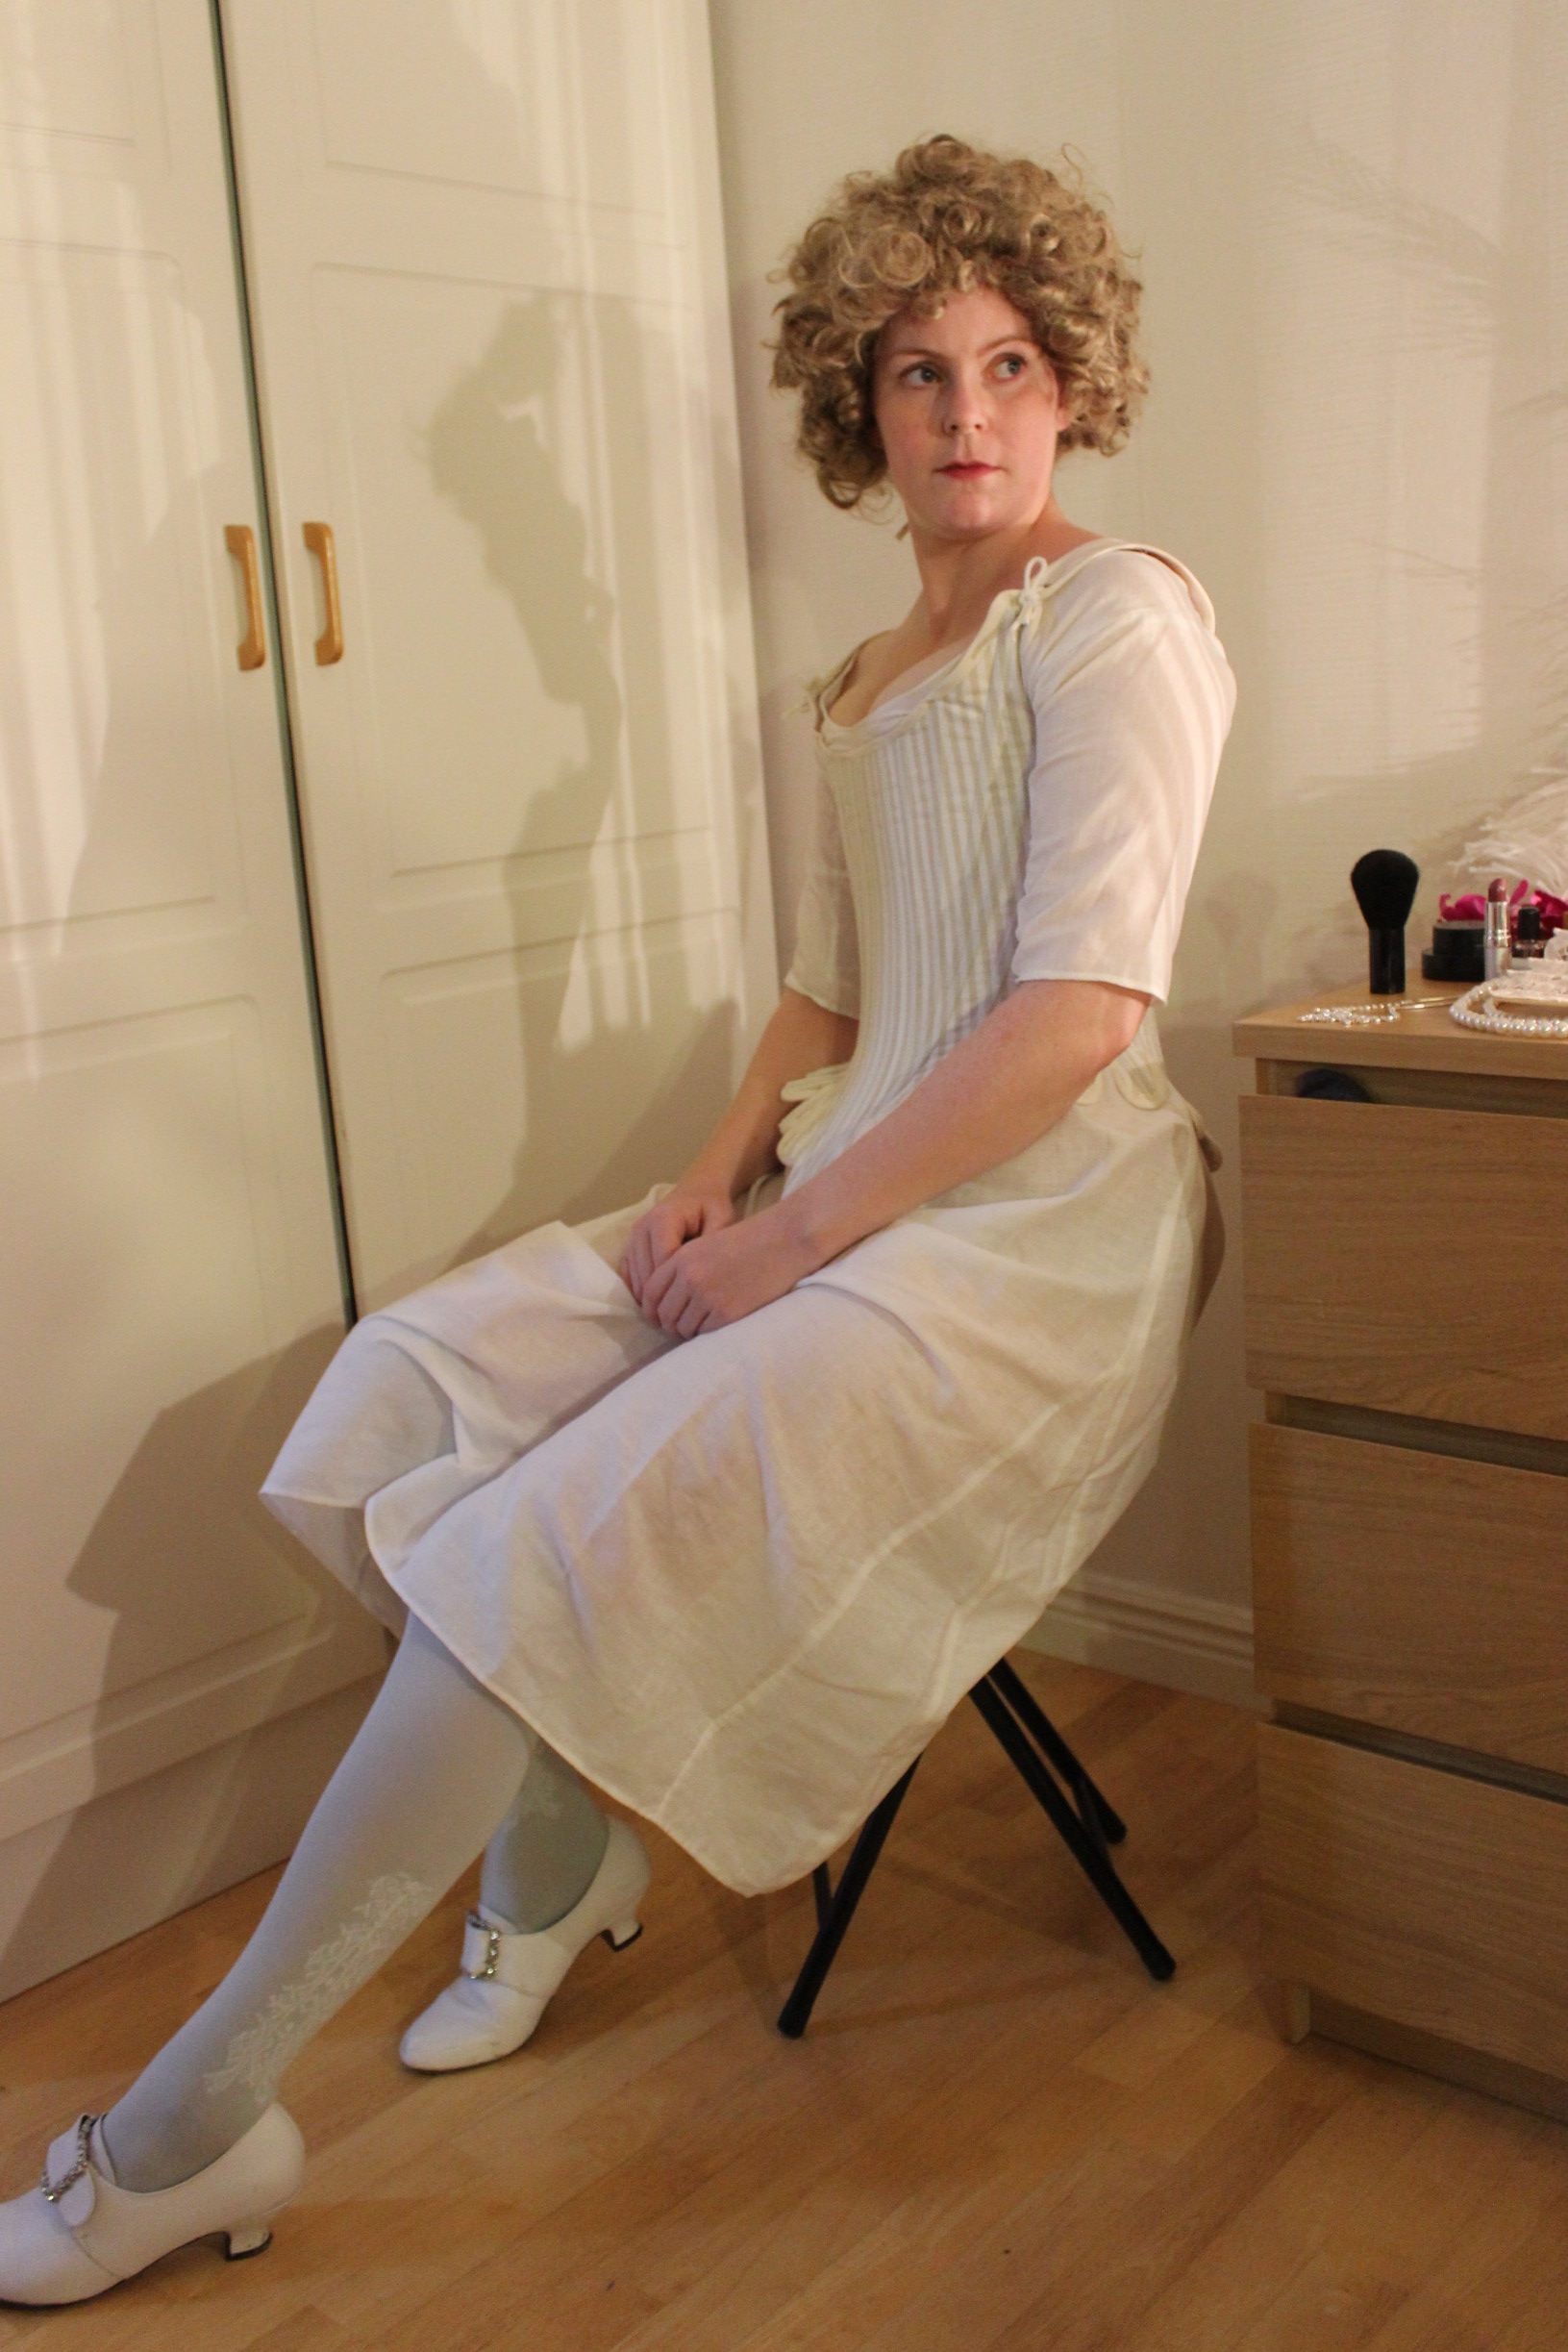
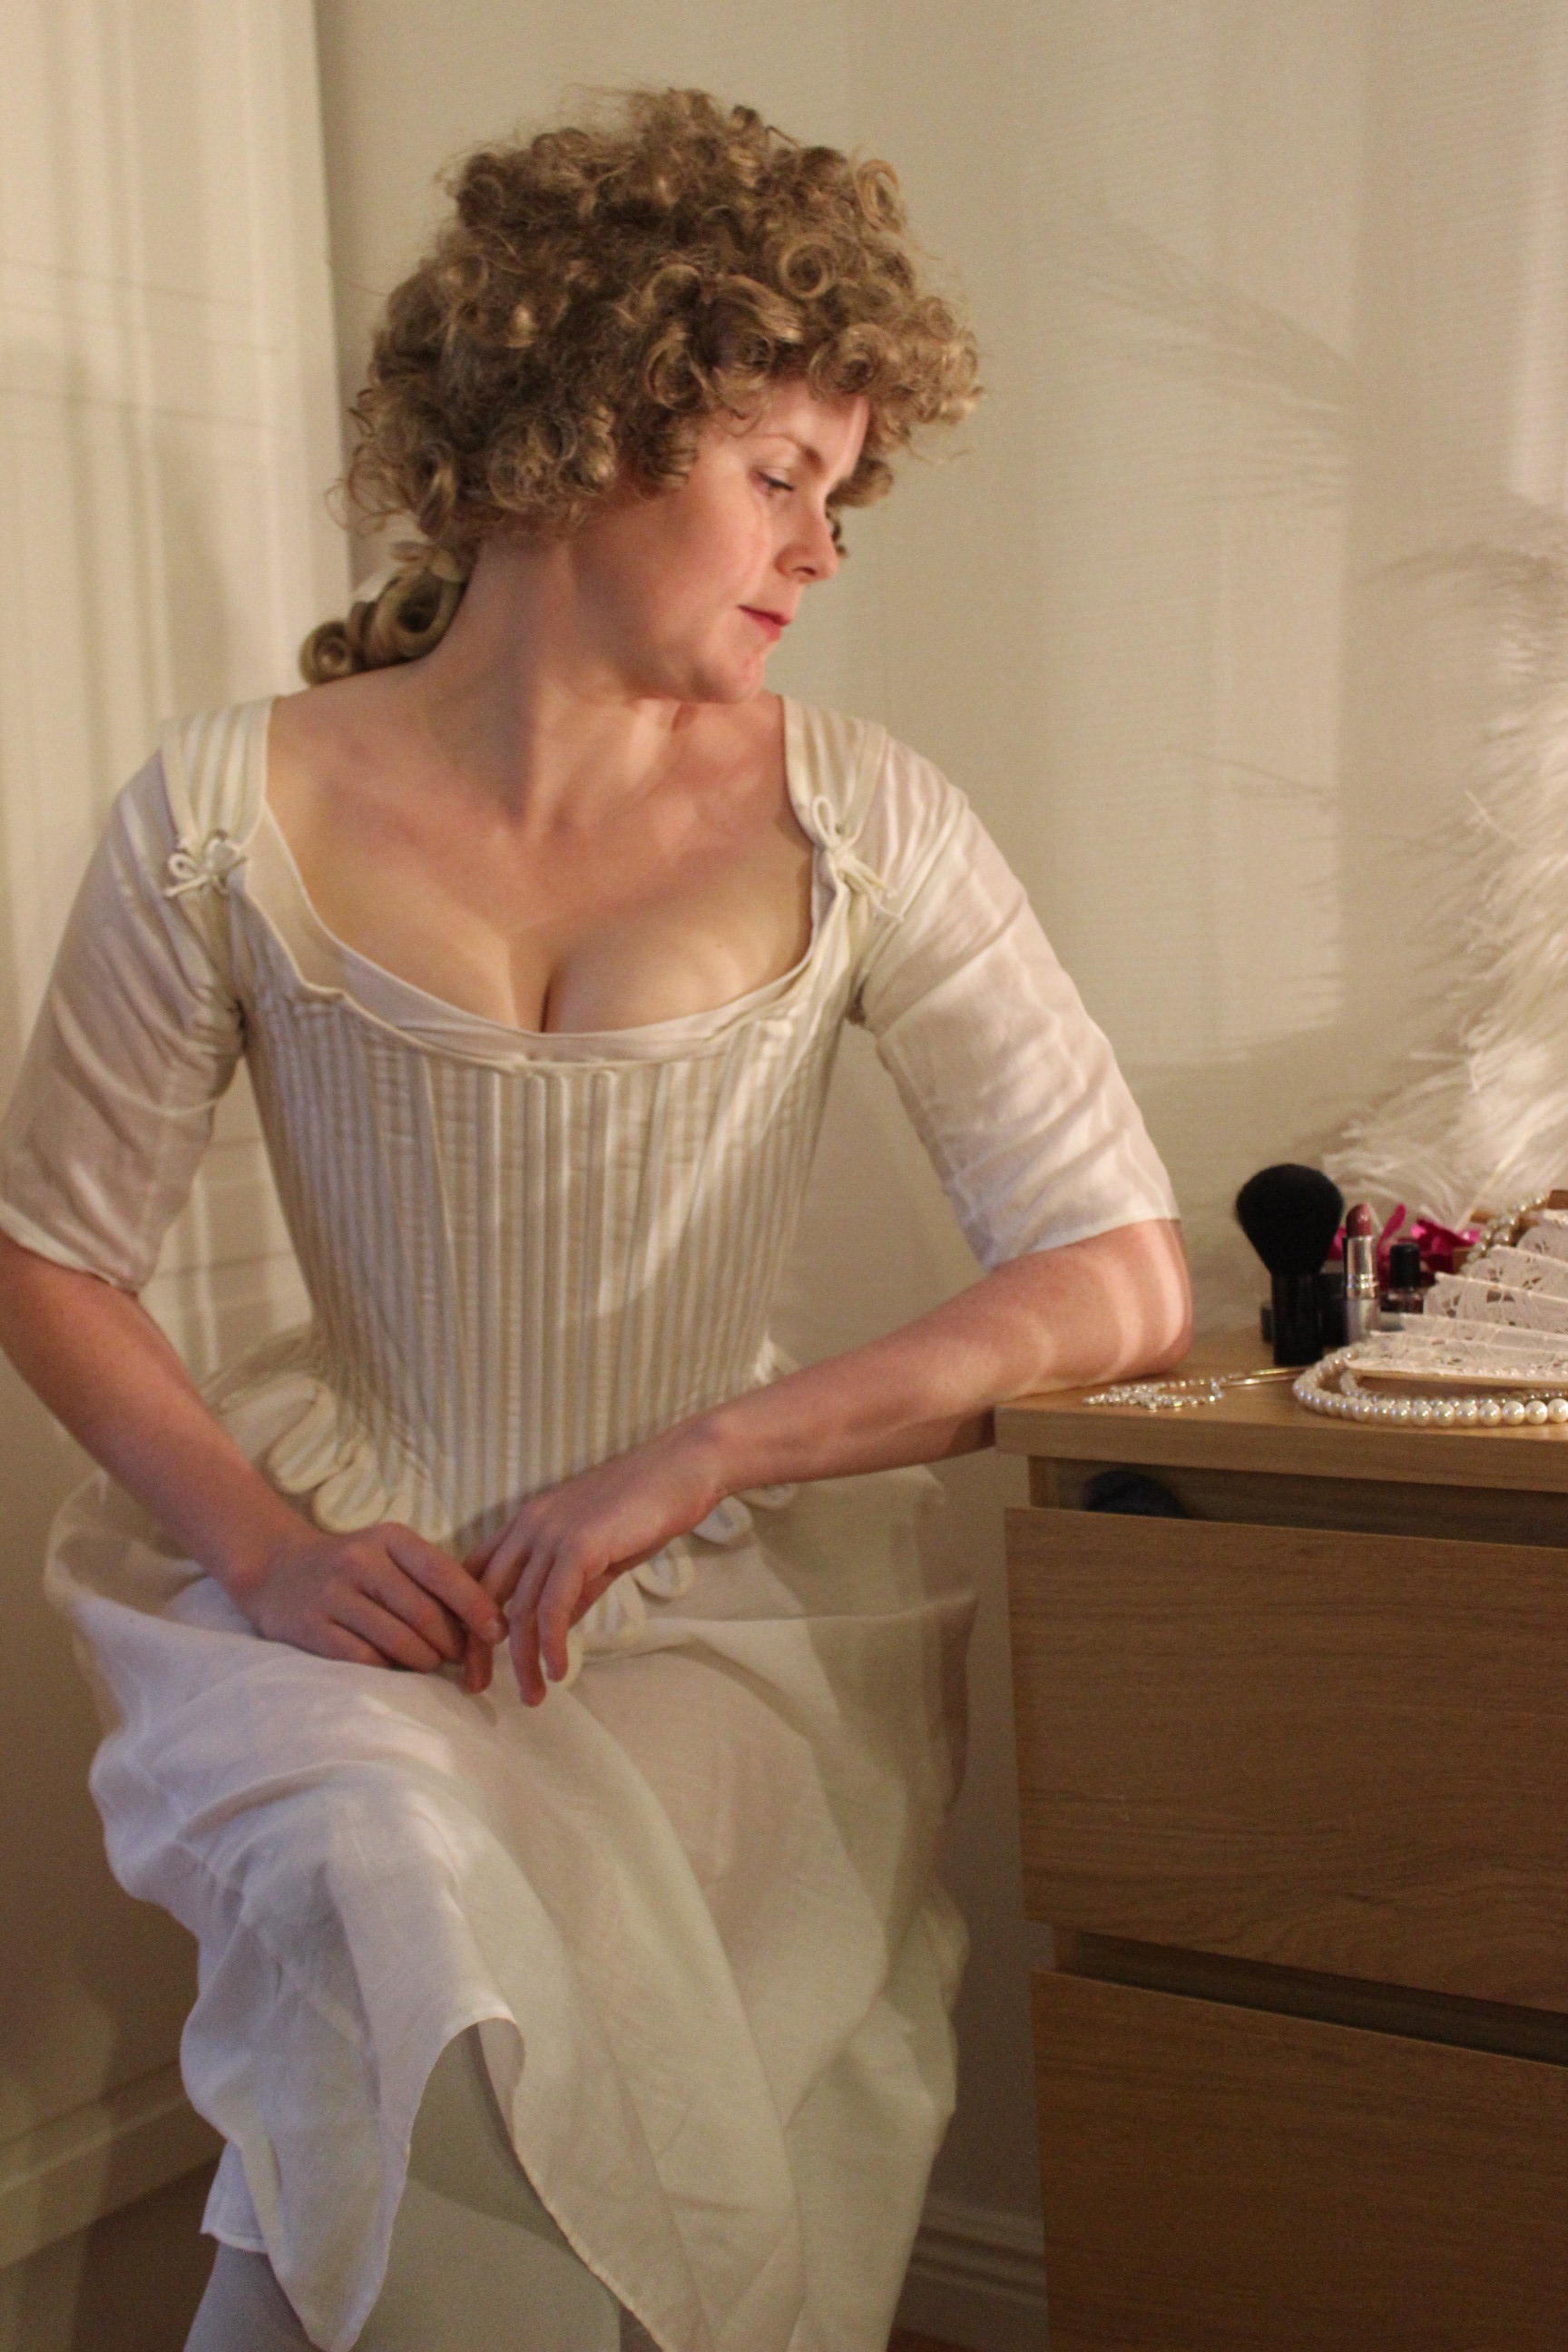
My original plan for the 16th HSF challenge – Terminology, (making something from “the-great-historical-fashion-and-textile-glossary“) was to make a regency round gown, but as the deadline approached I found an old UFO in my sewing pile causing me to changed track completely.
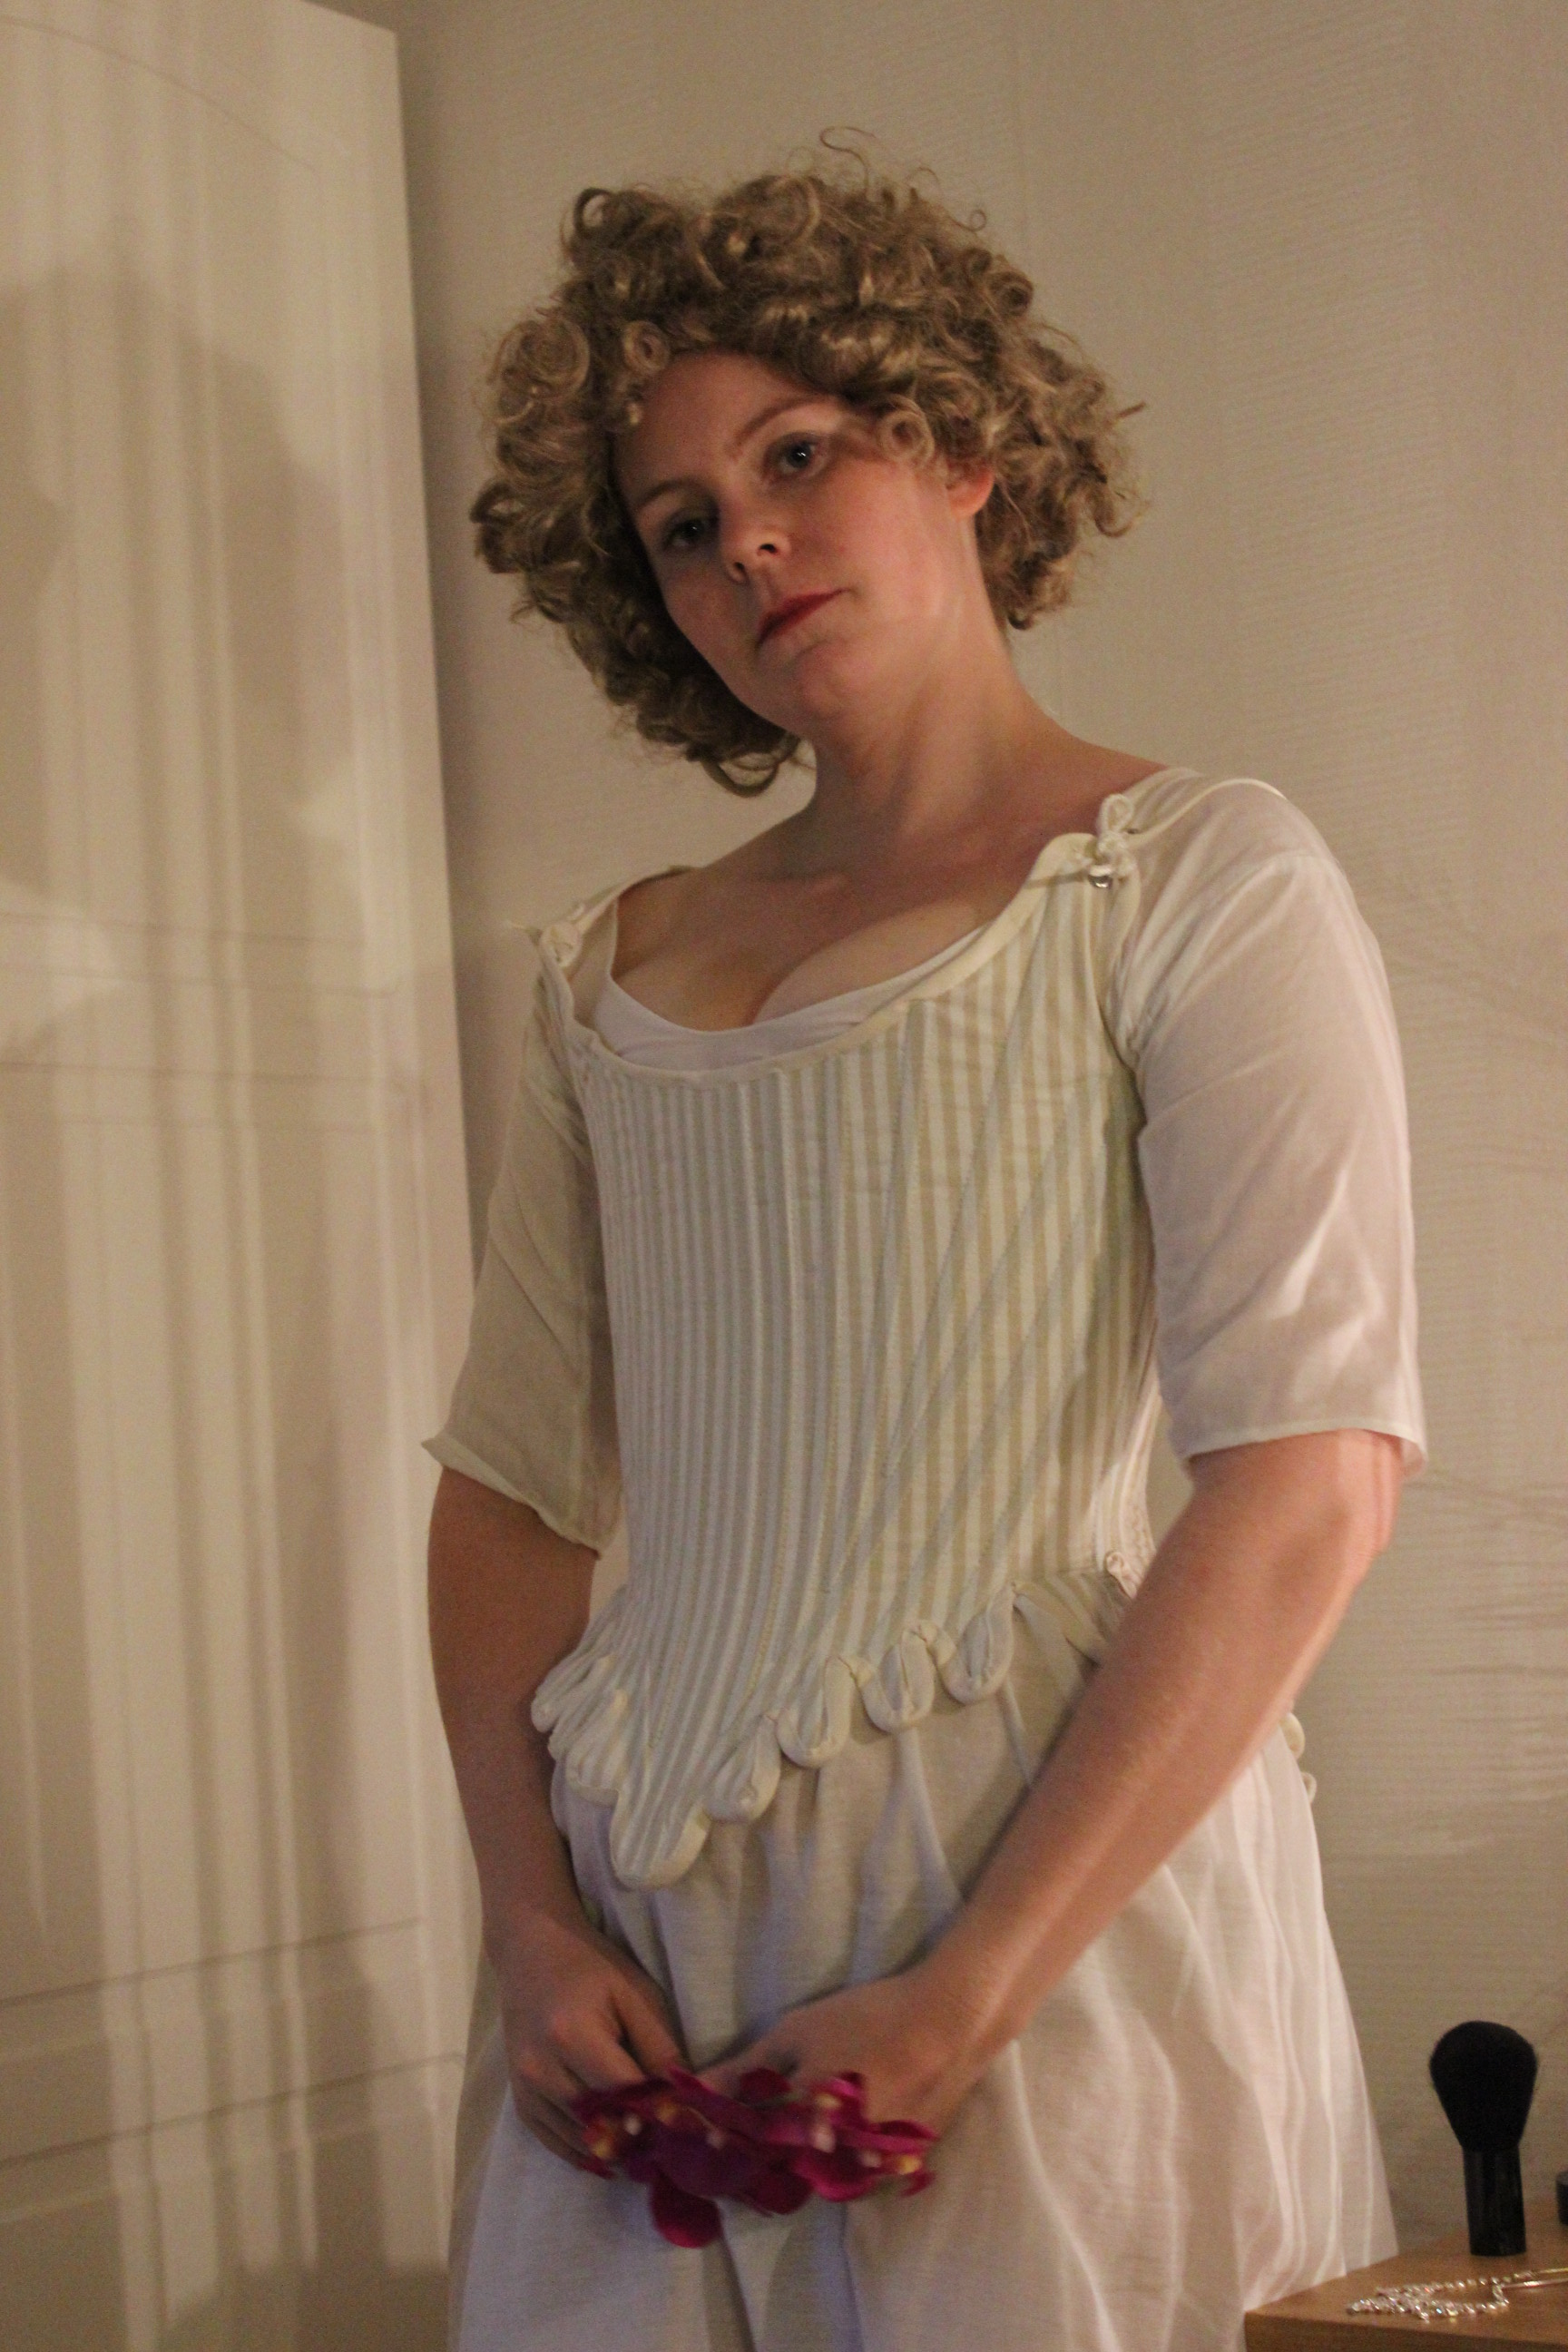
The item that now got my sewing nerve tingling was the 18th century half boned stays from Nora Waughs Corset and Crinolines.  I’d started the project about a year ago, scaled and printed the pattern, took measurements and altered the pieces . Then I left it in favor for some other, more pressing costuming need. And that’s how I found it.
So I searched “The Glossary” for some useful article and found just the one: Stays.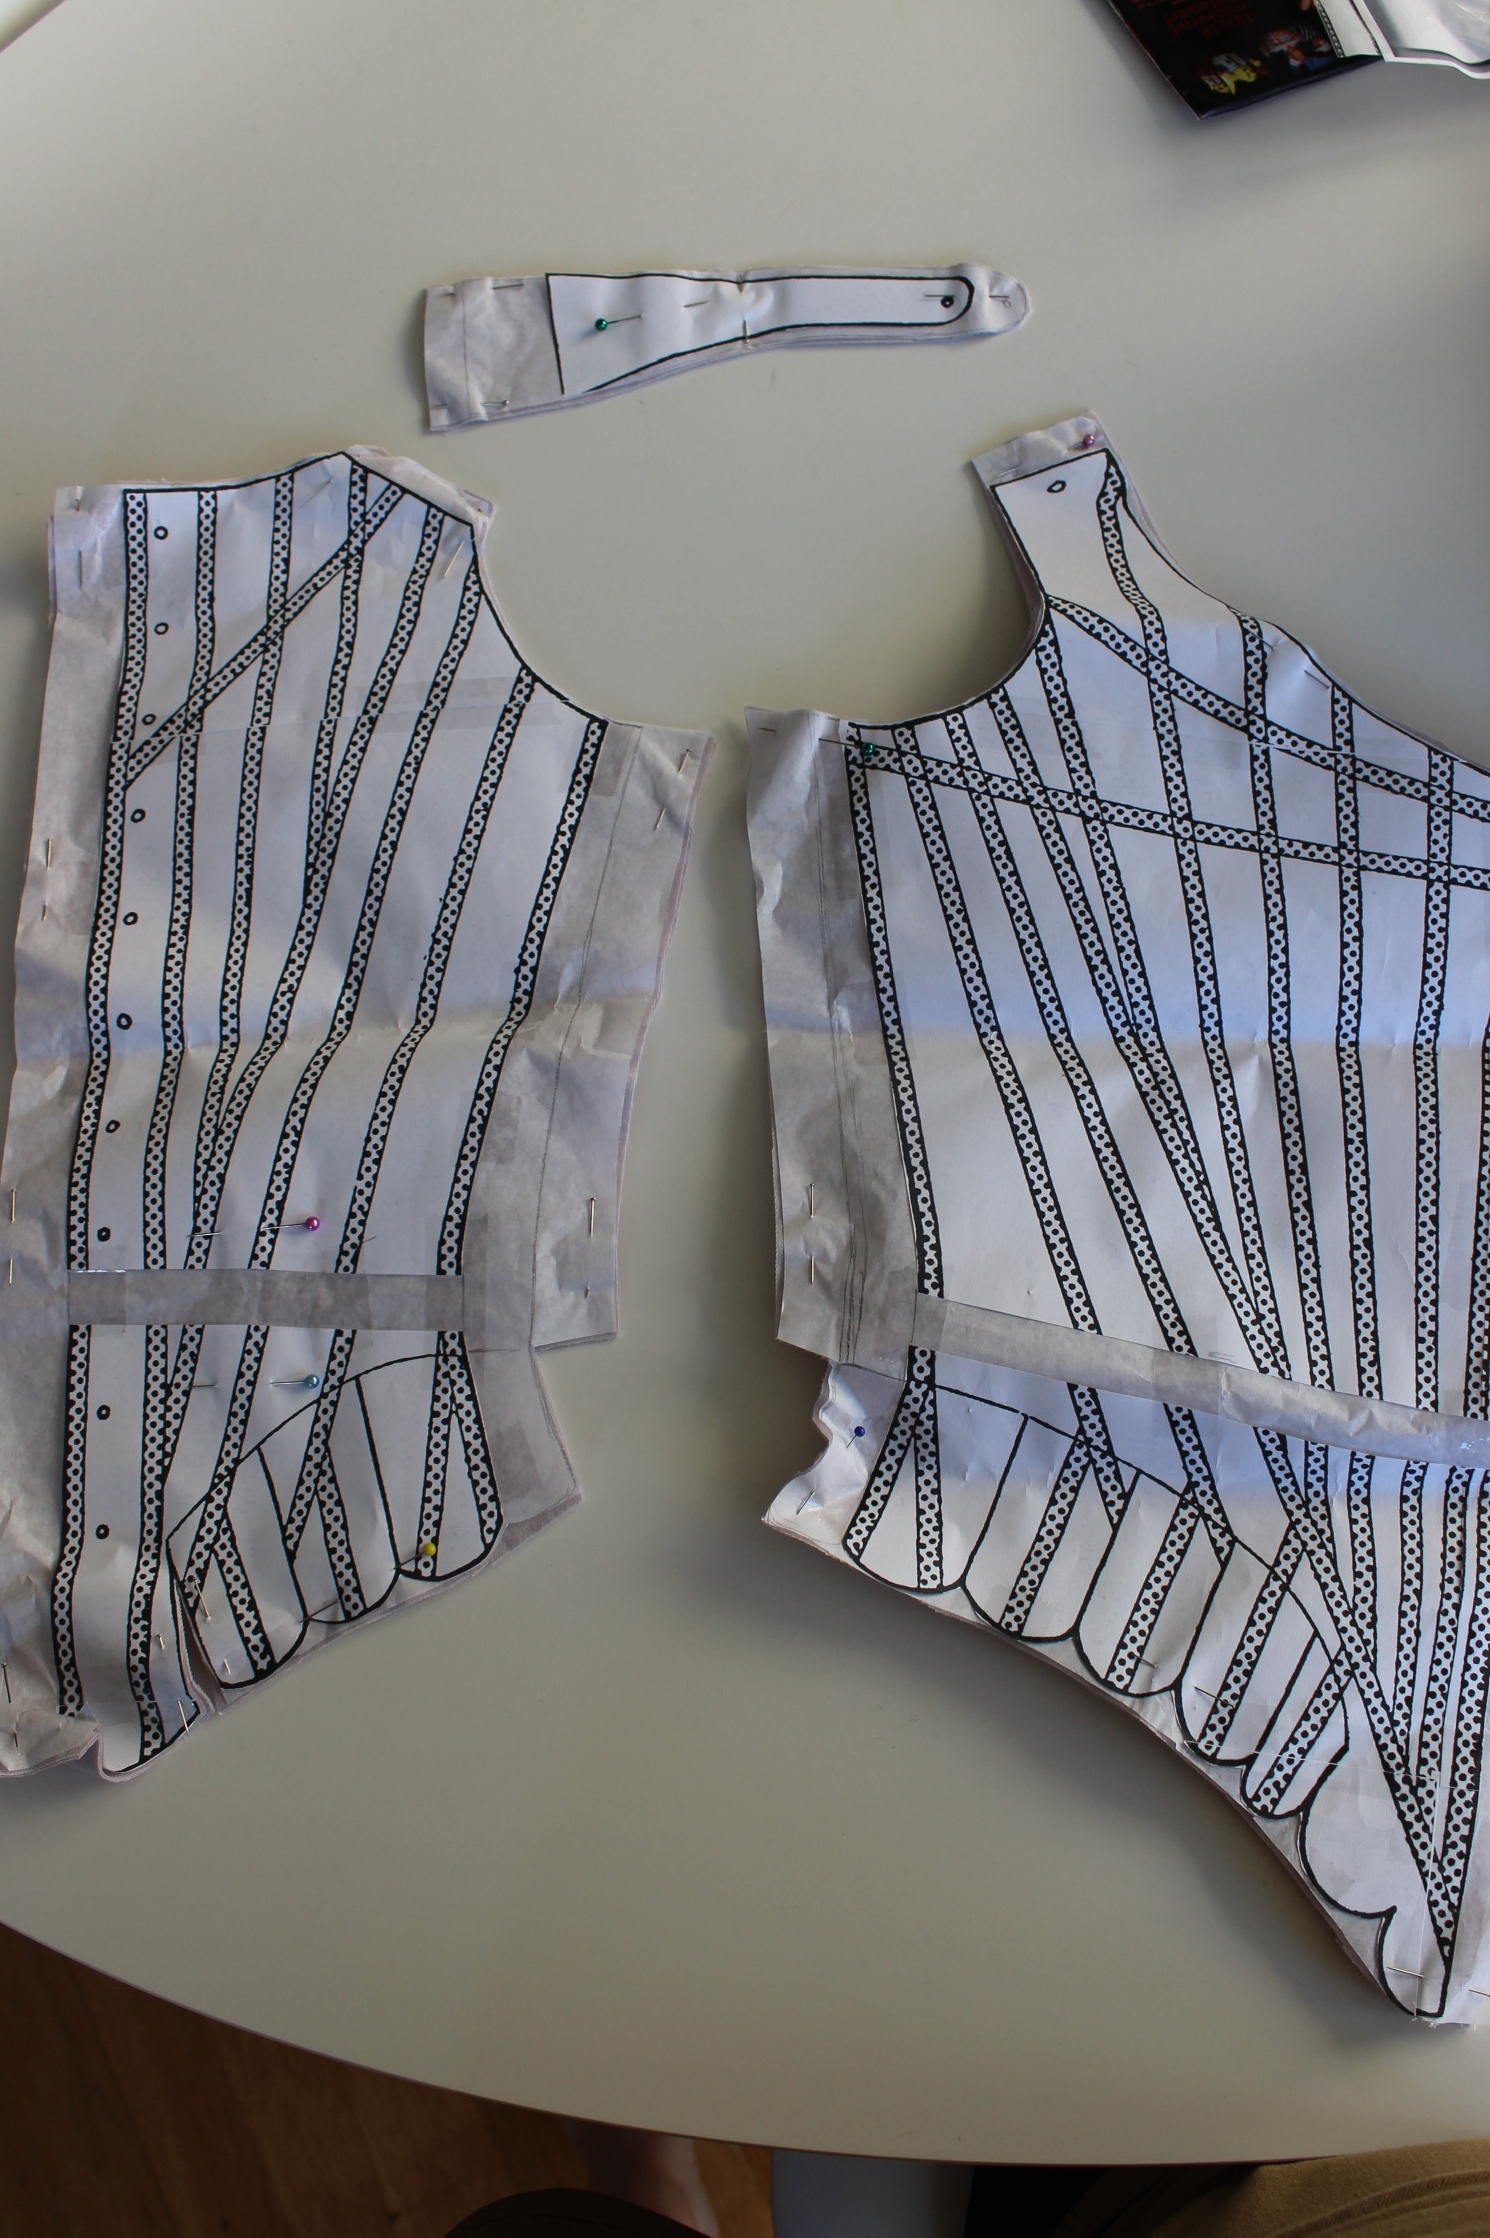 The pieces already altered for my measurements.
I decided to keep the pieces as they were (one year old measurements and all), and pinned them to the old cotton sheet I use for mock-ups.
I stitched the mock-up together and made some basic boning chanells down the front, sides and back.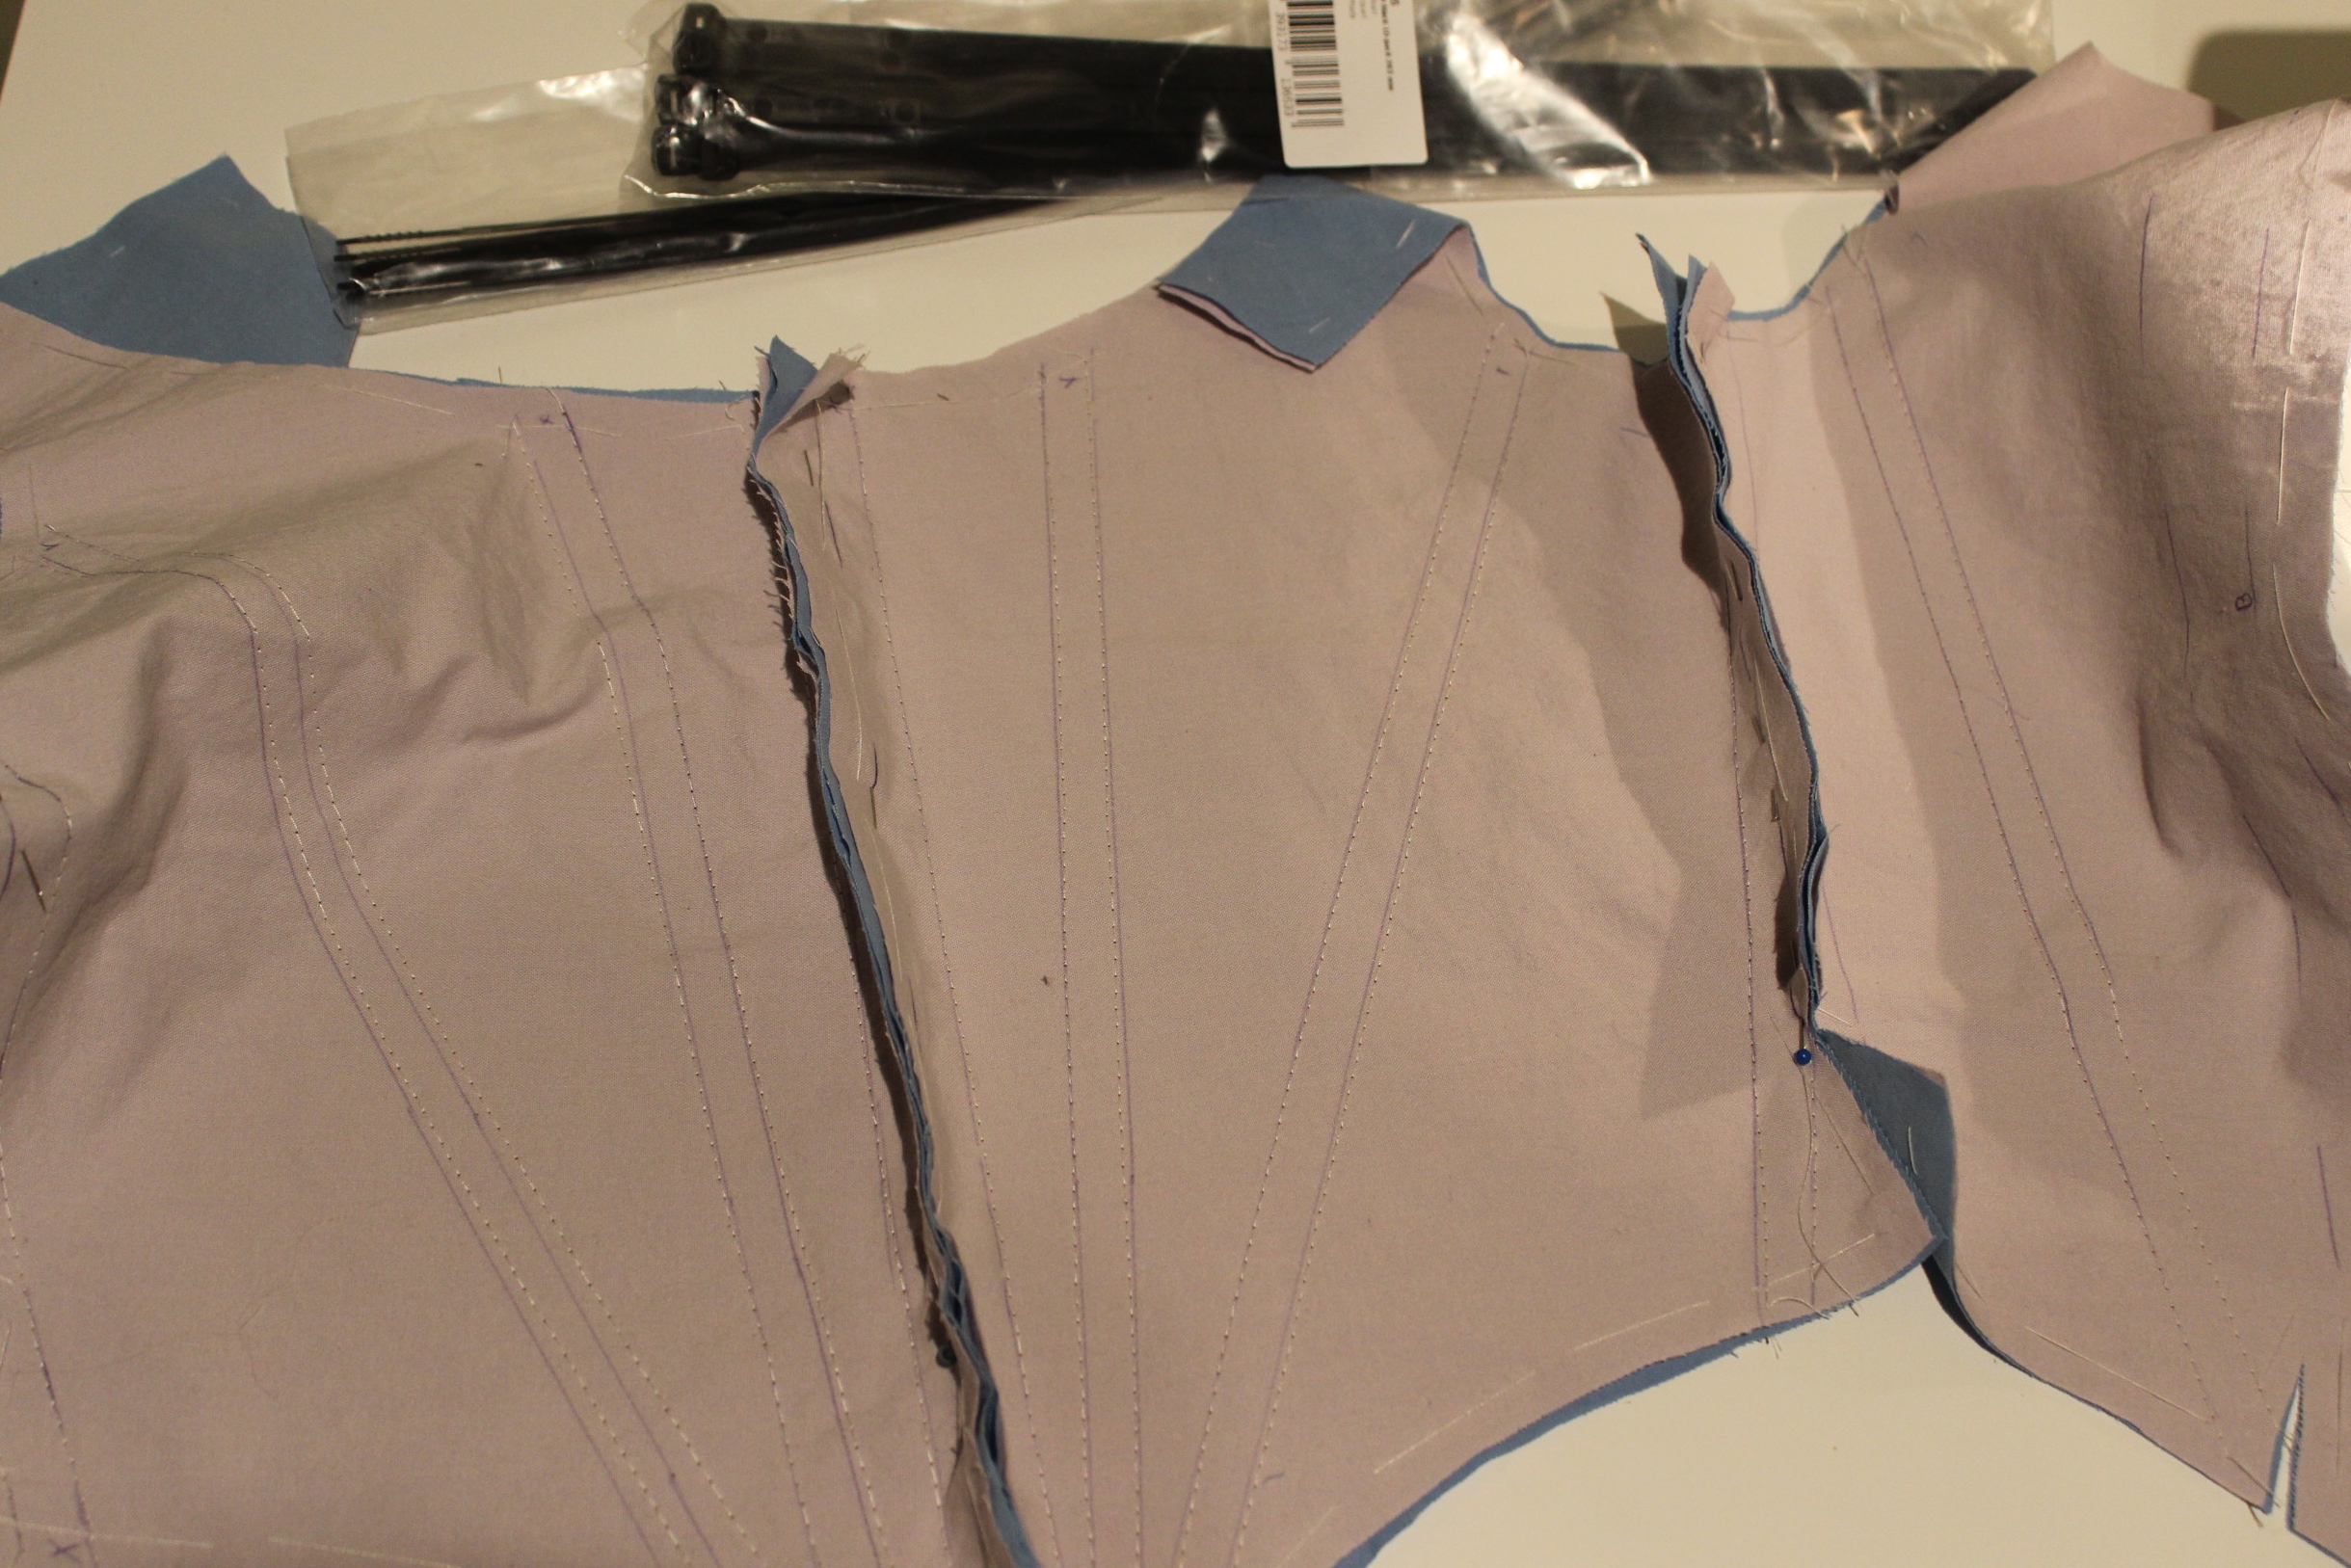
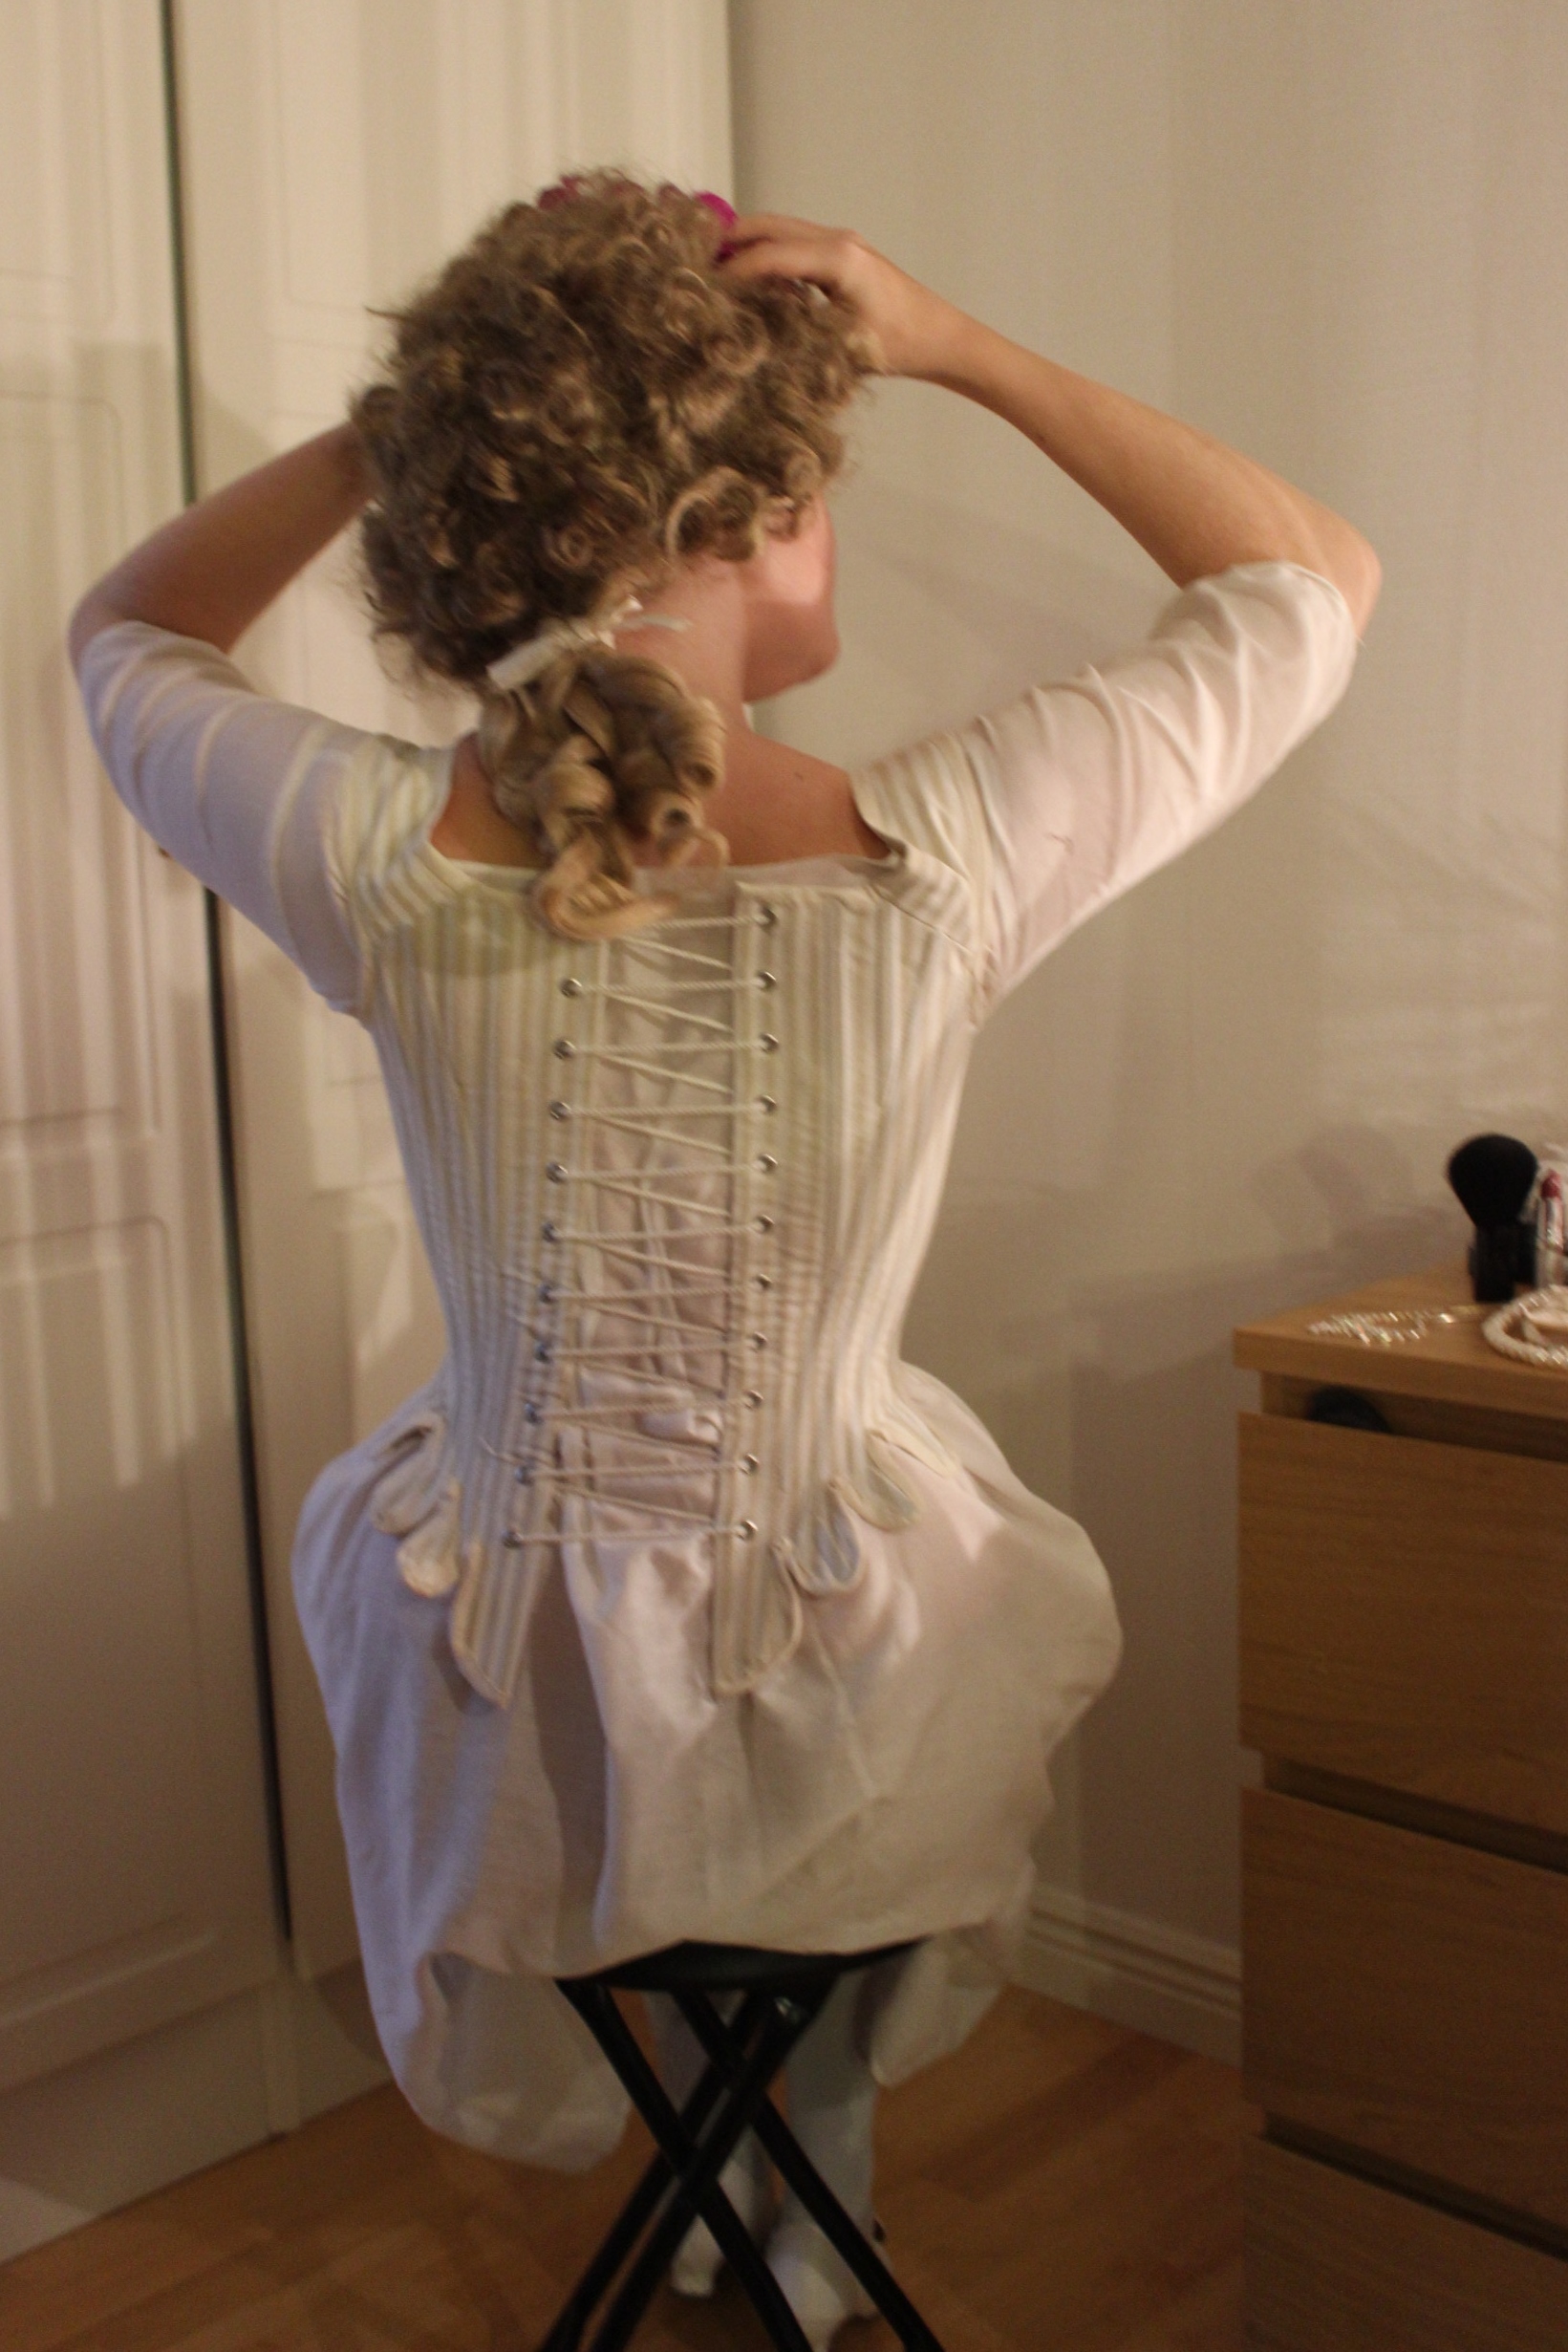
Then I put in some boning, and attached my old lacing strip to the back. Not very pretty, but functional.

The fit was pretty good, and the only alteration I made was to make the whole thing 5 cm smaller – to get some more flexibility for size in the lacing.
So, on to the fashion fabric.
I used the leftovers from my previous corset en-devour (1900s S-shape). Pinning the strong sateen interlining.
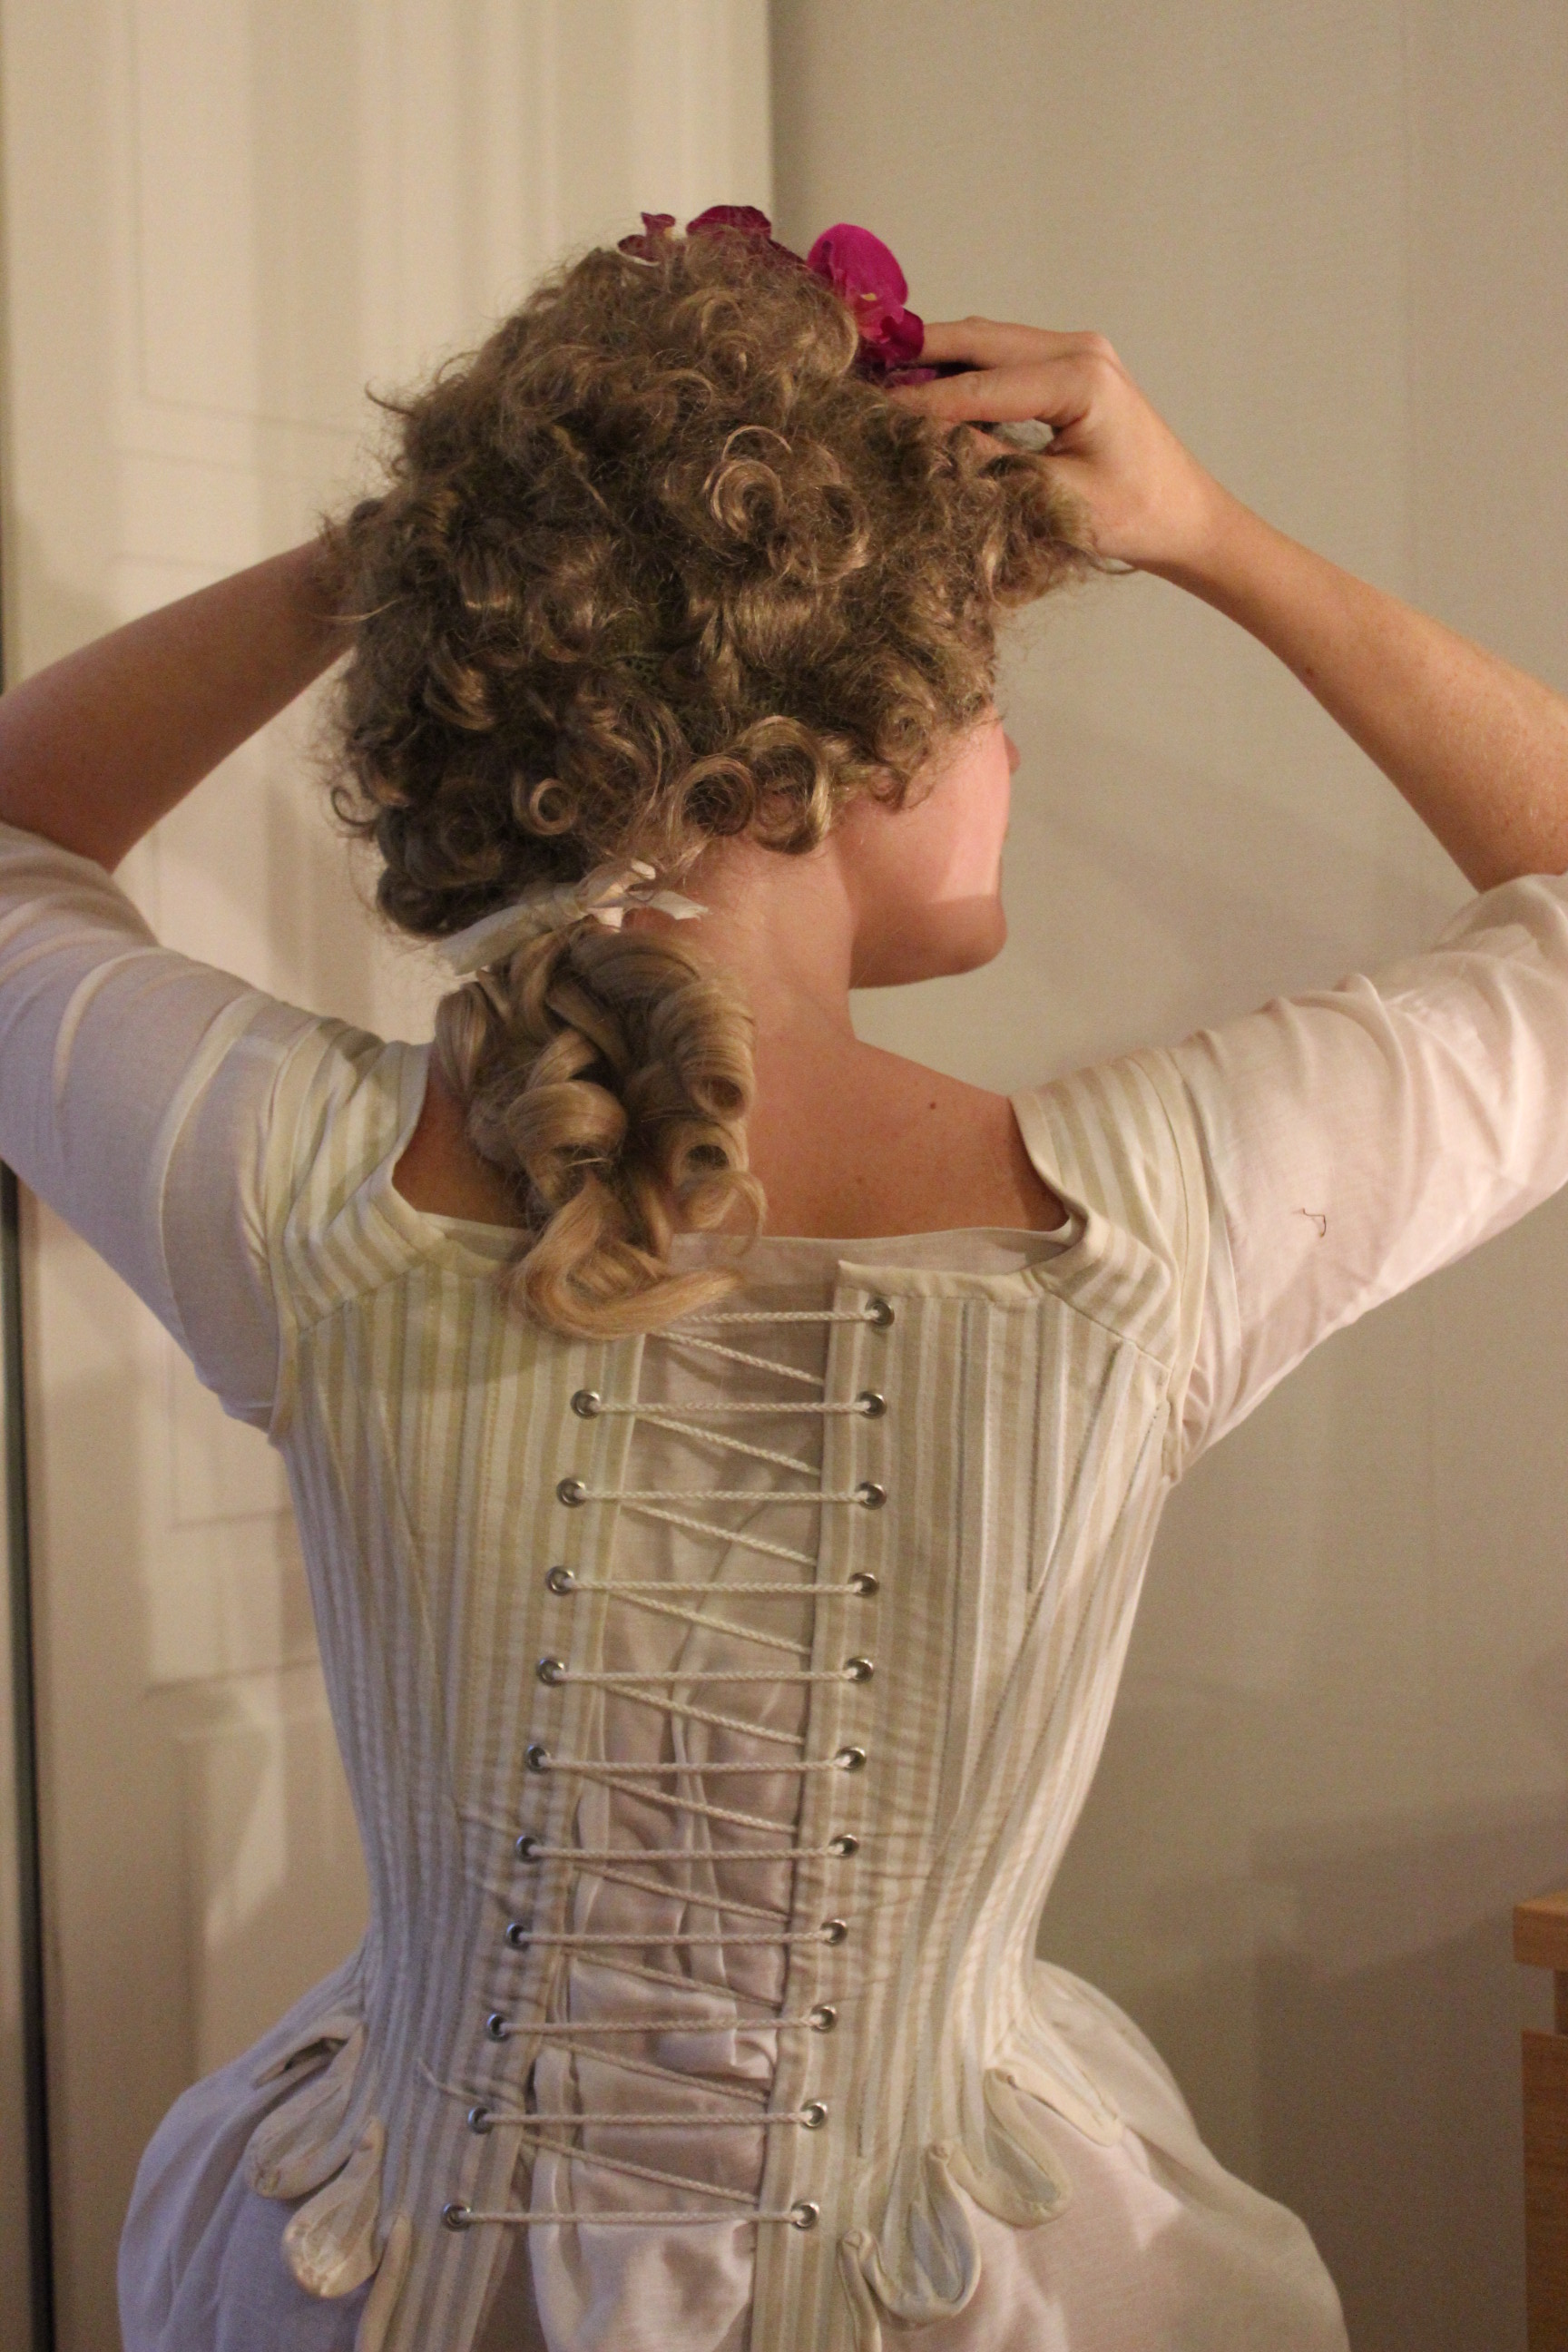
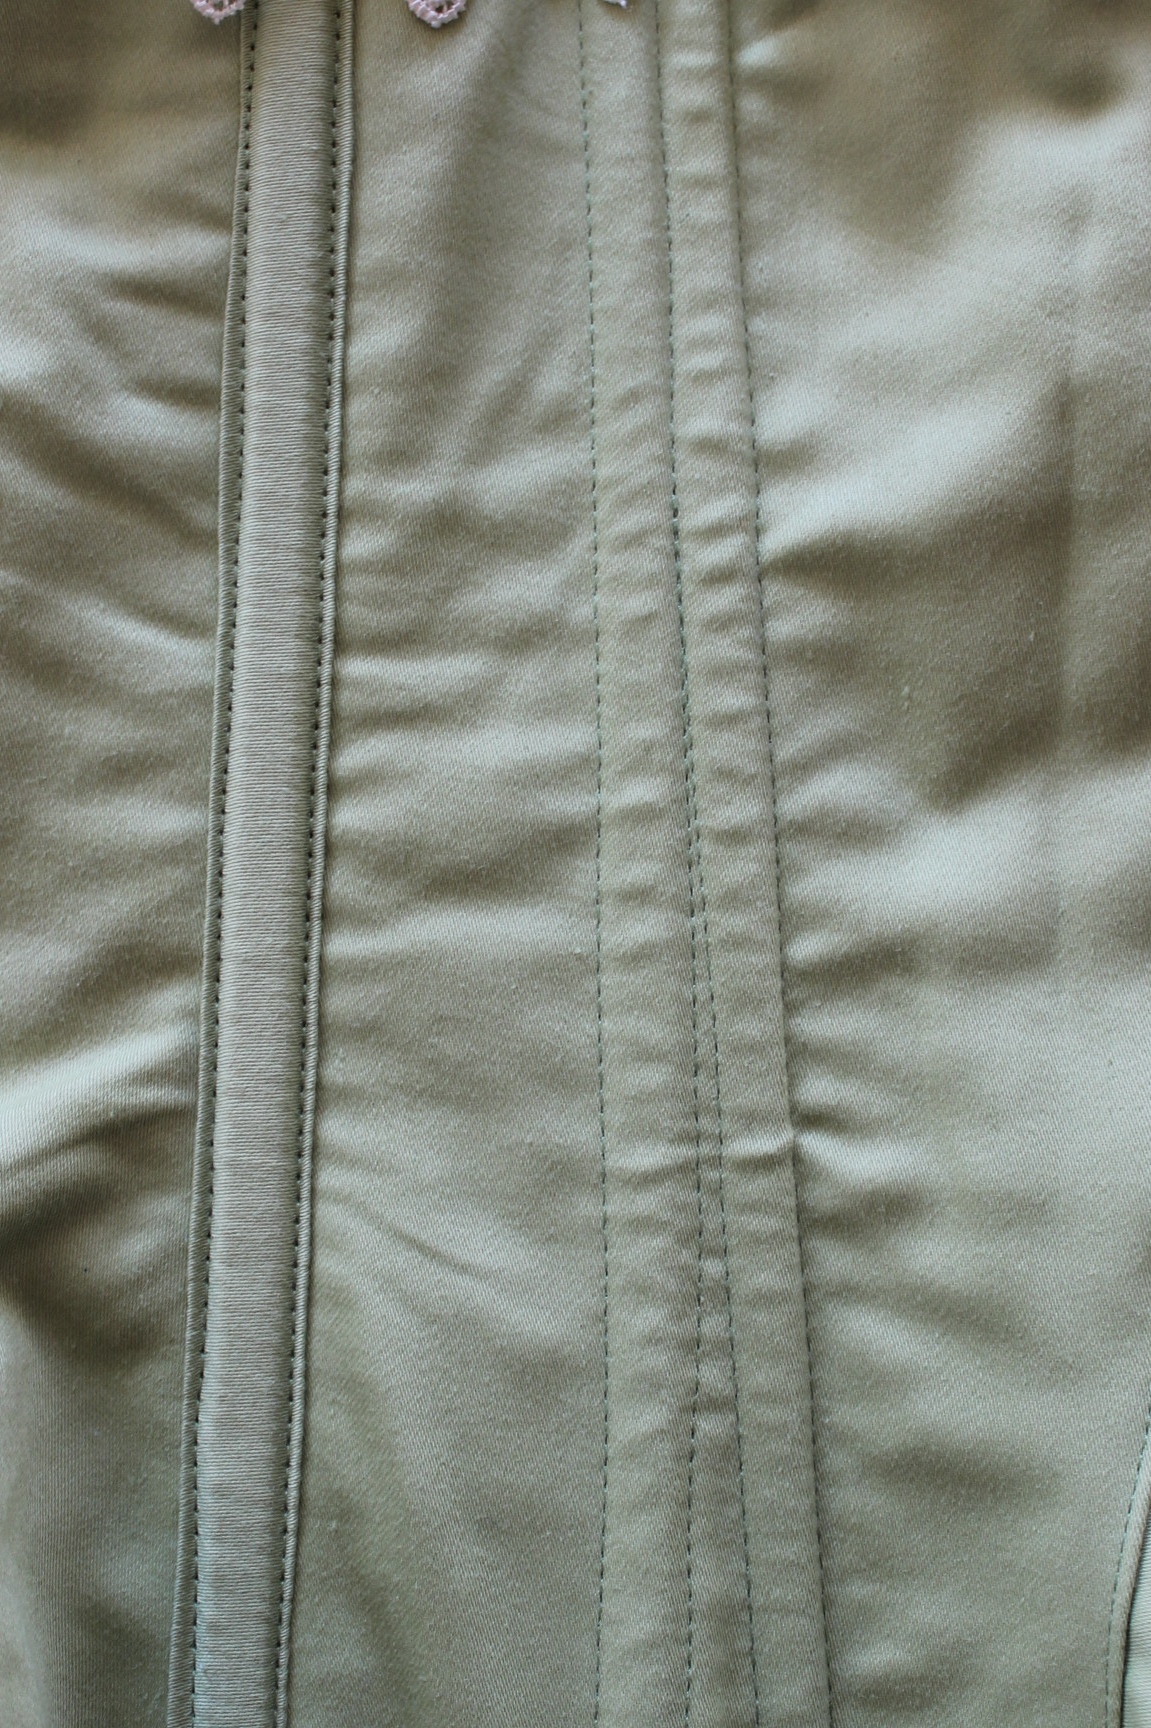
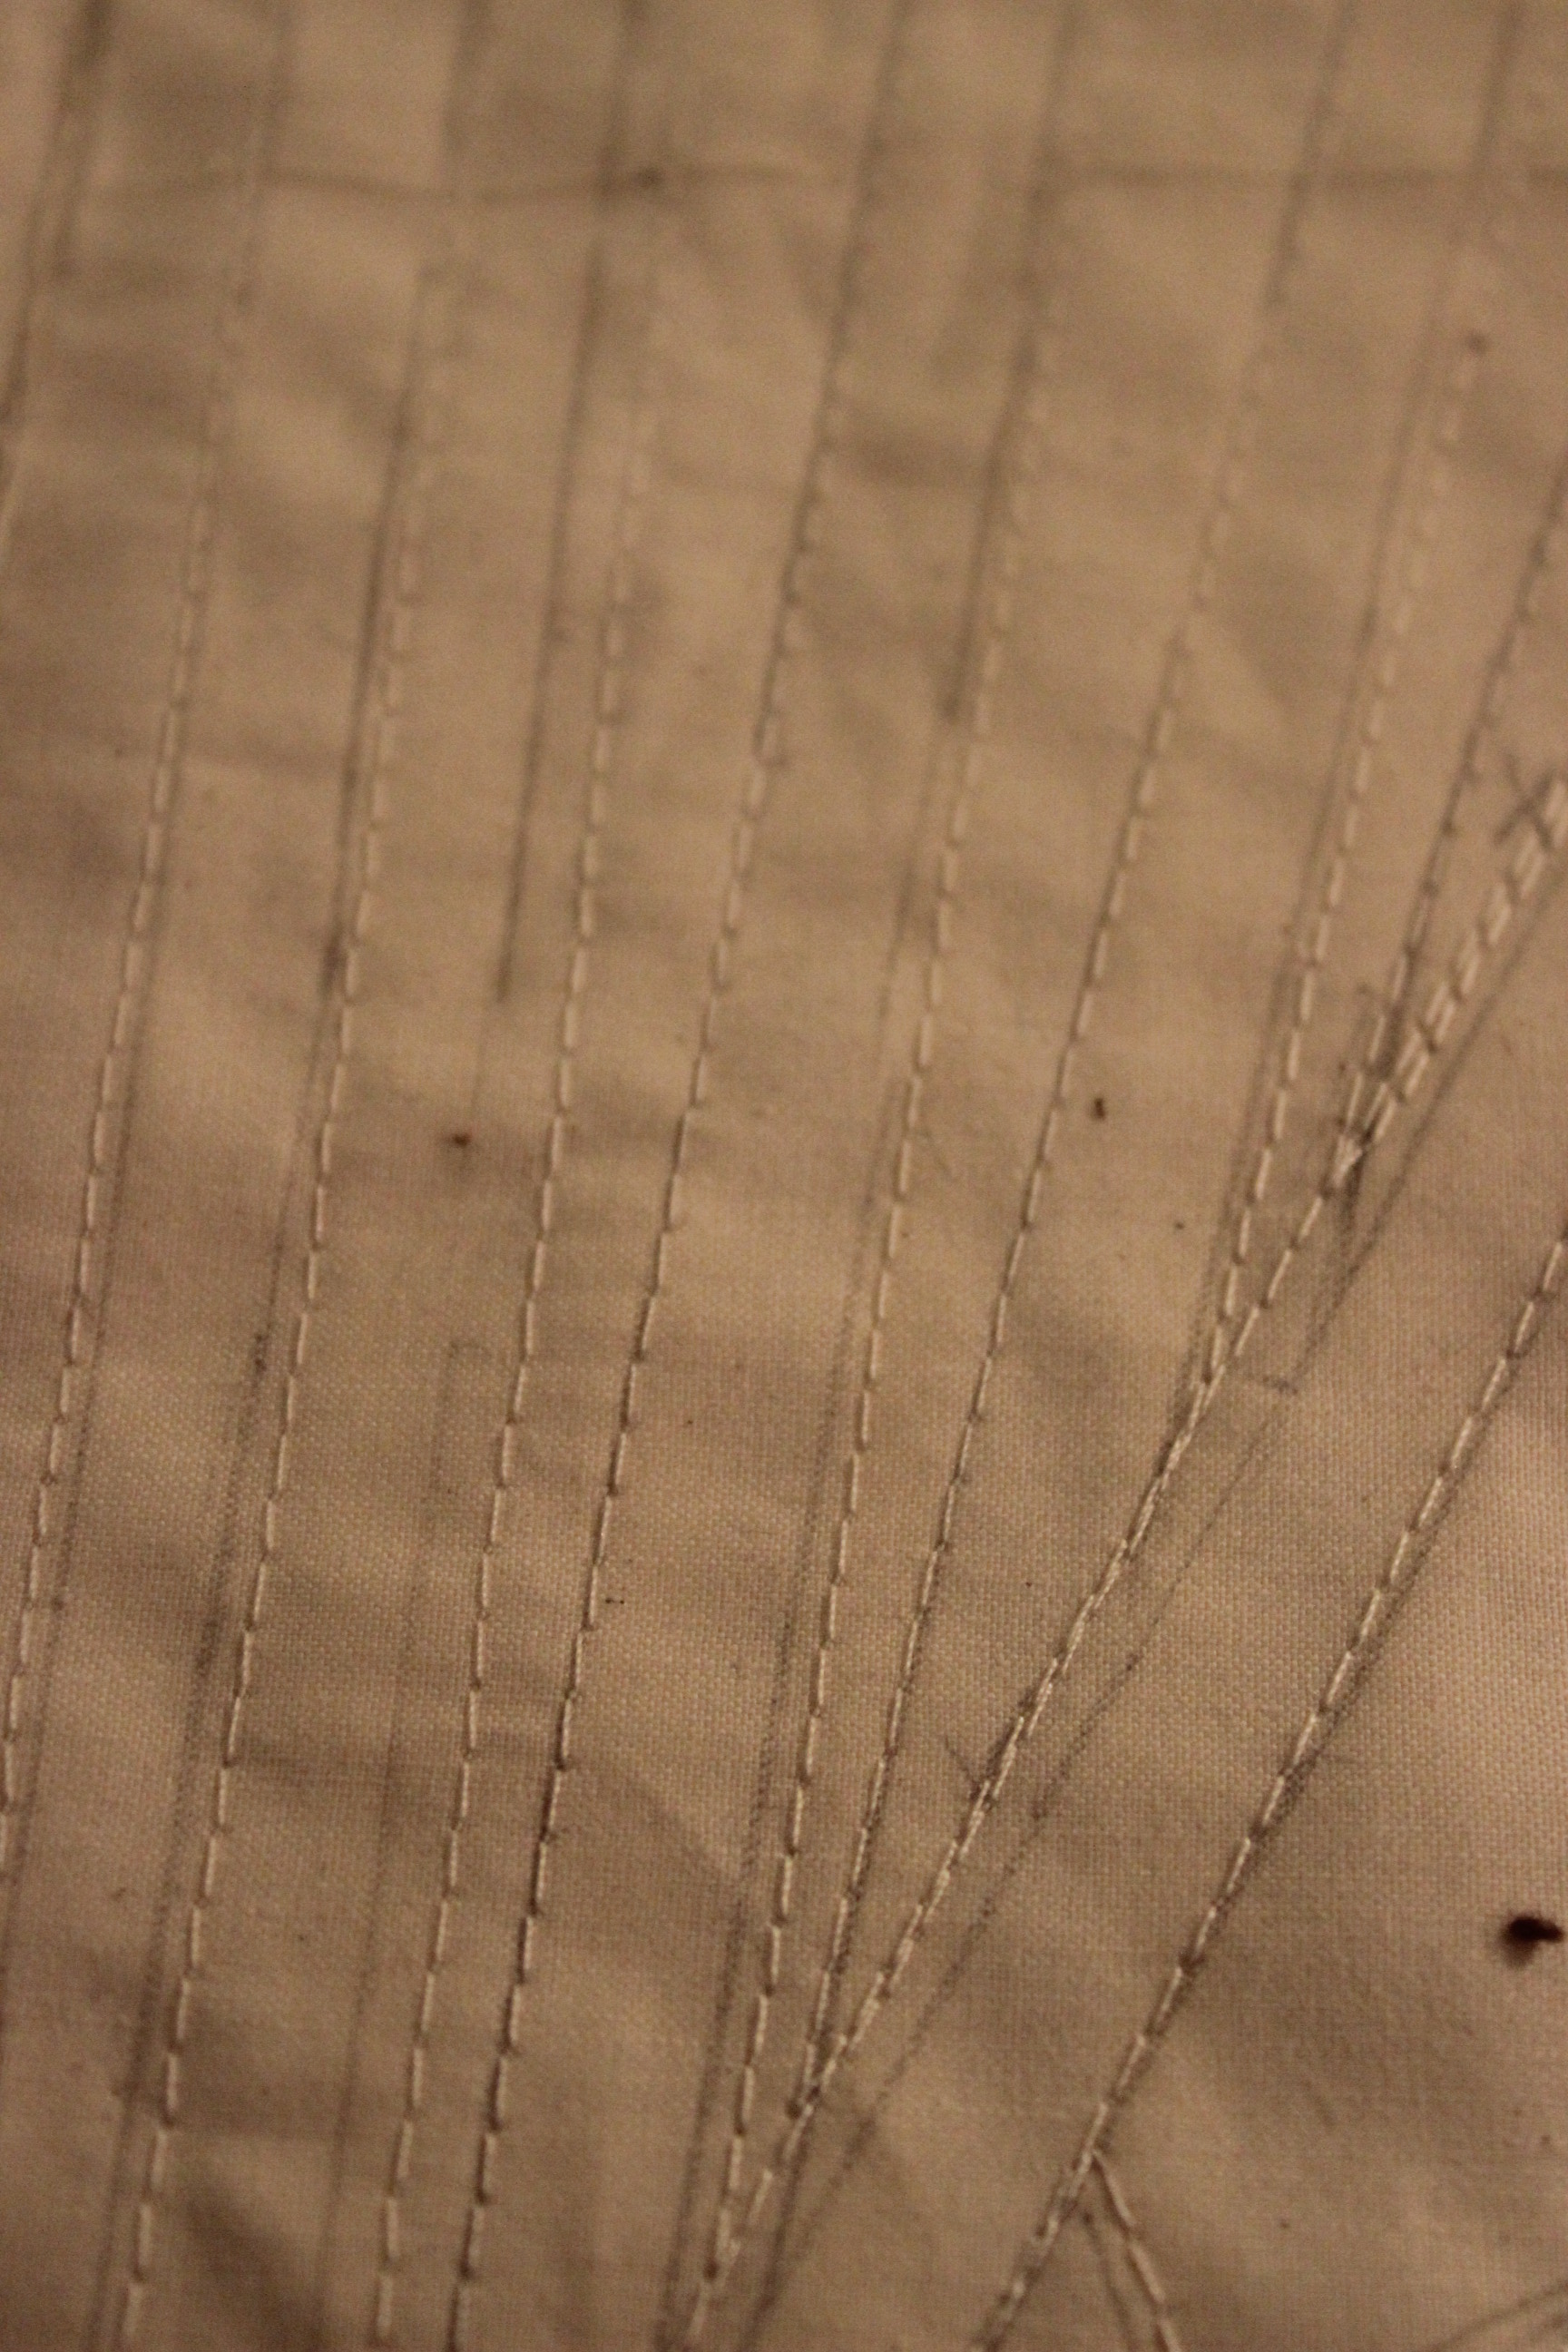
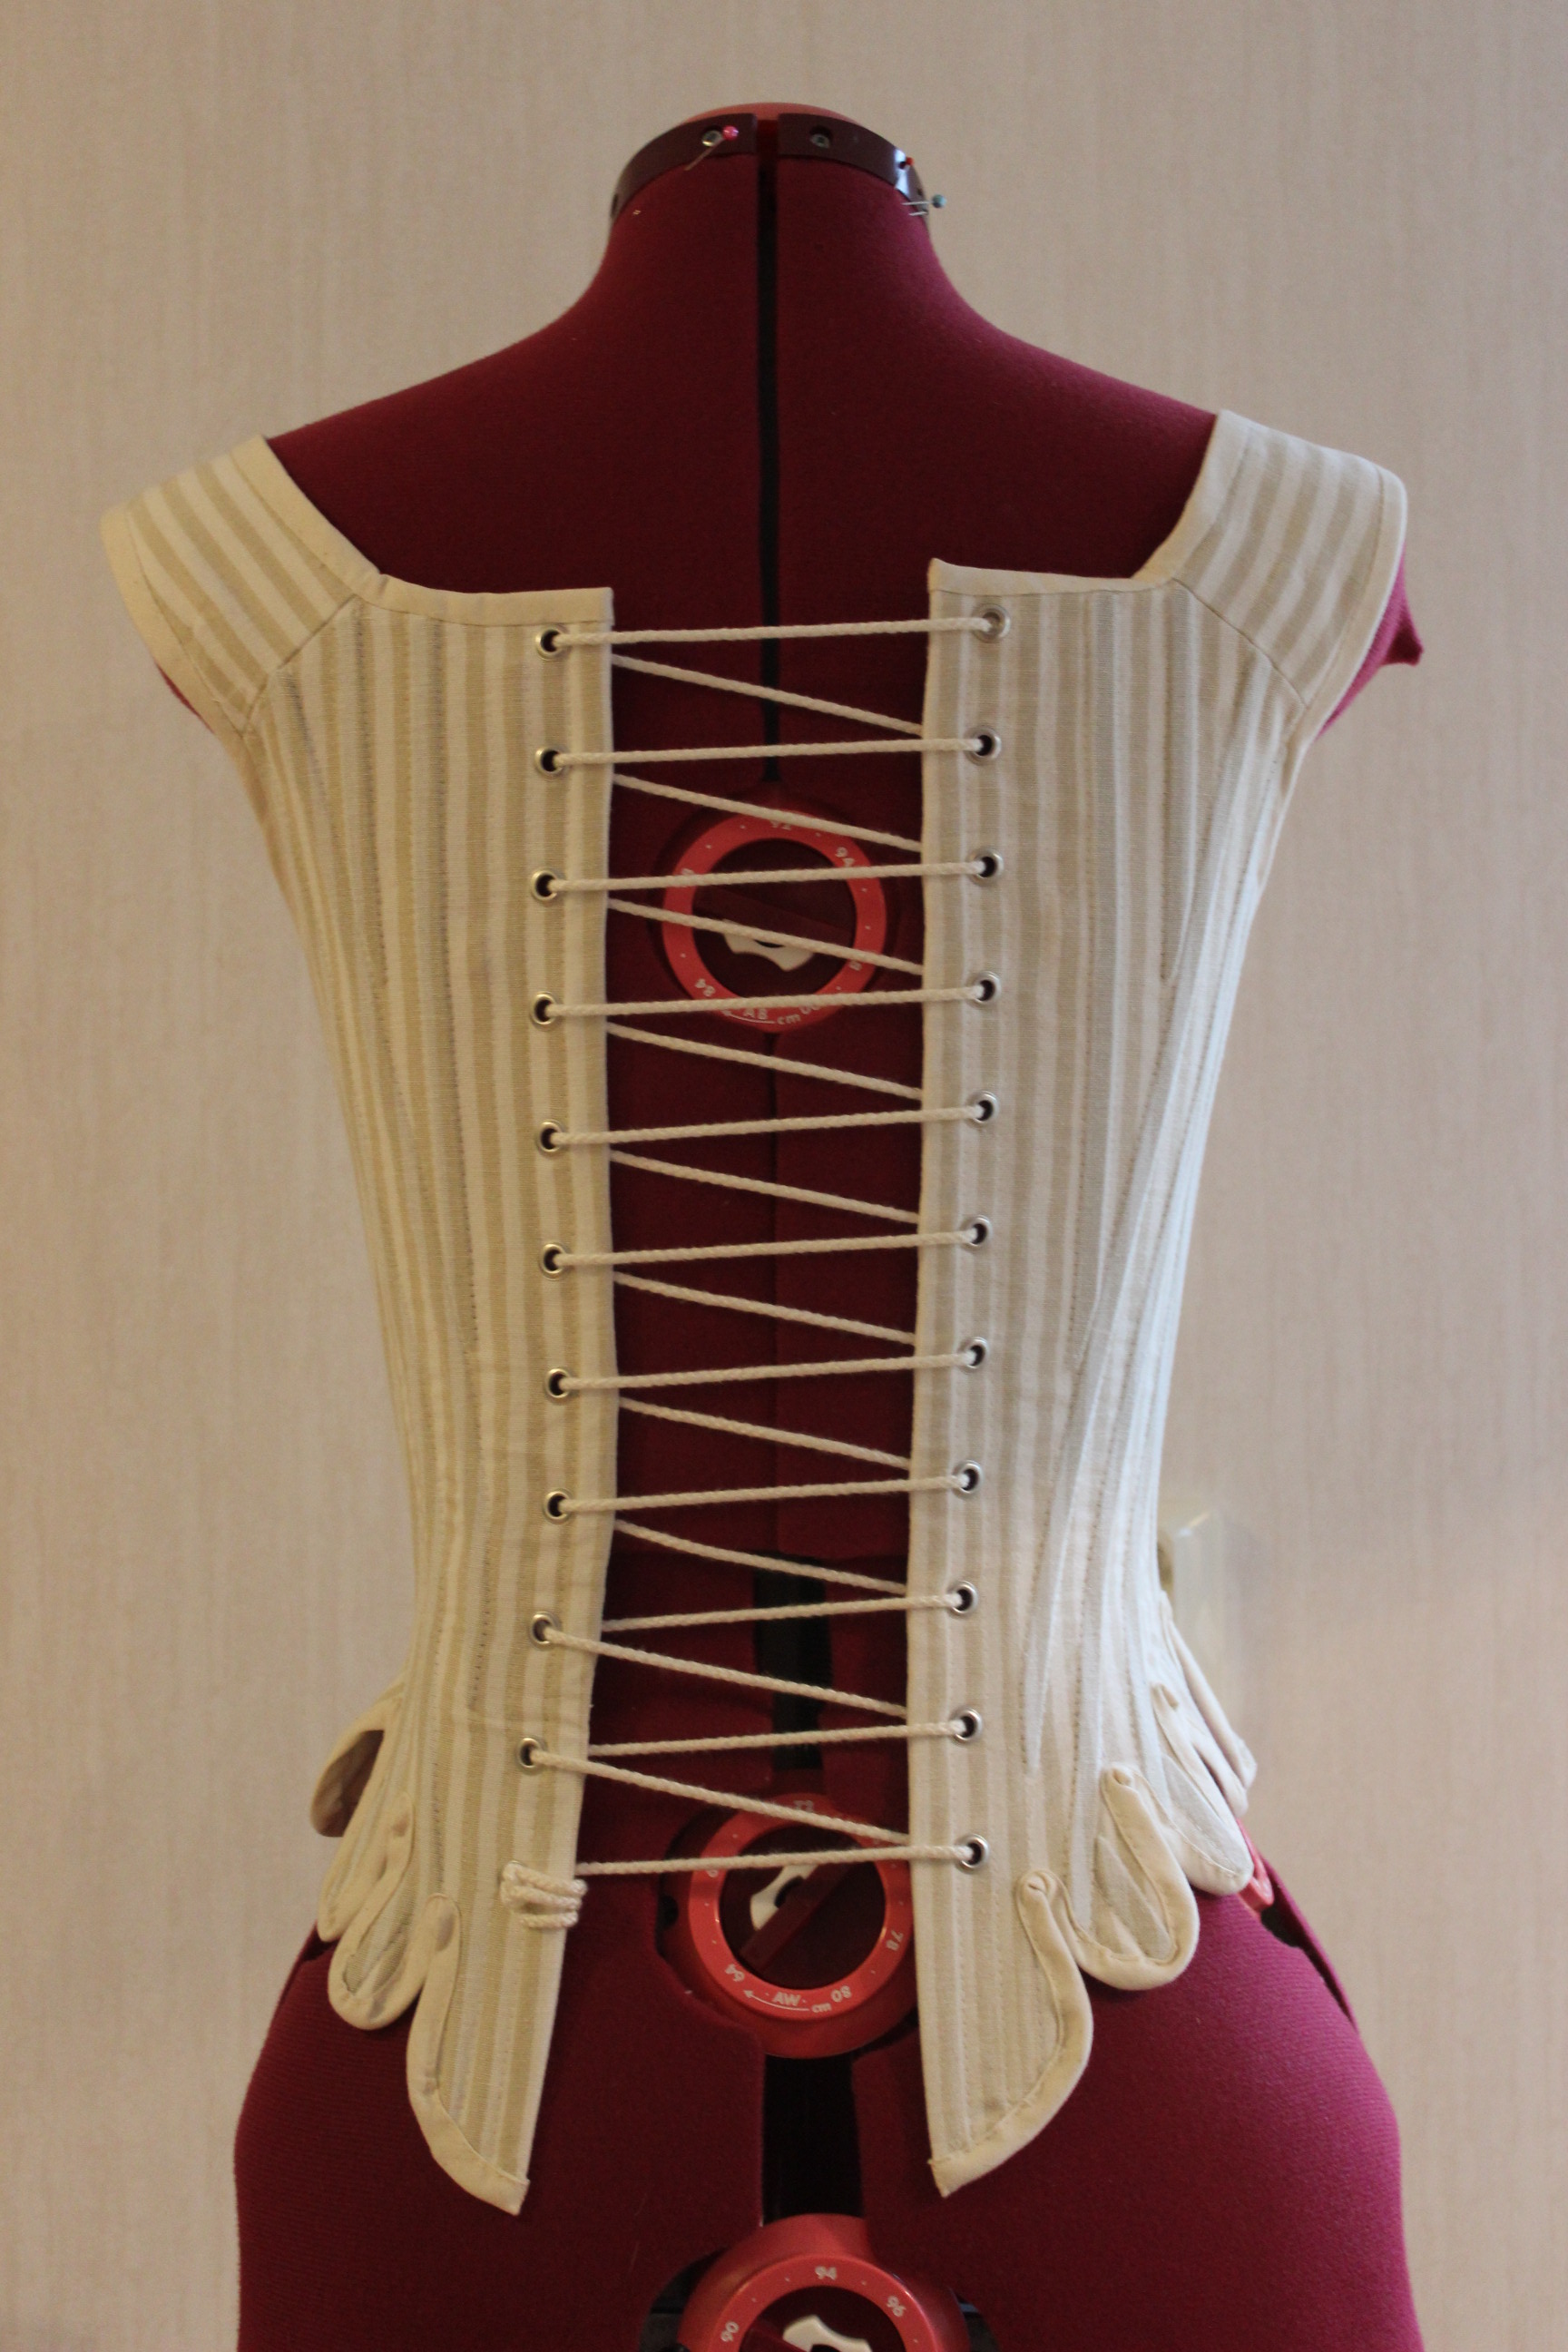
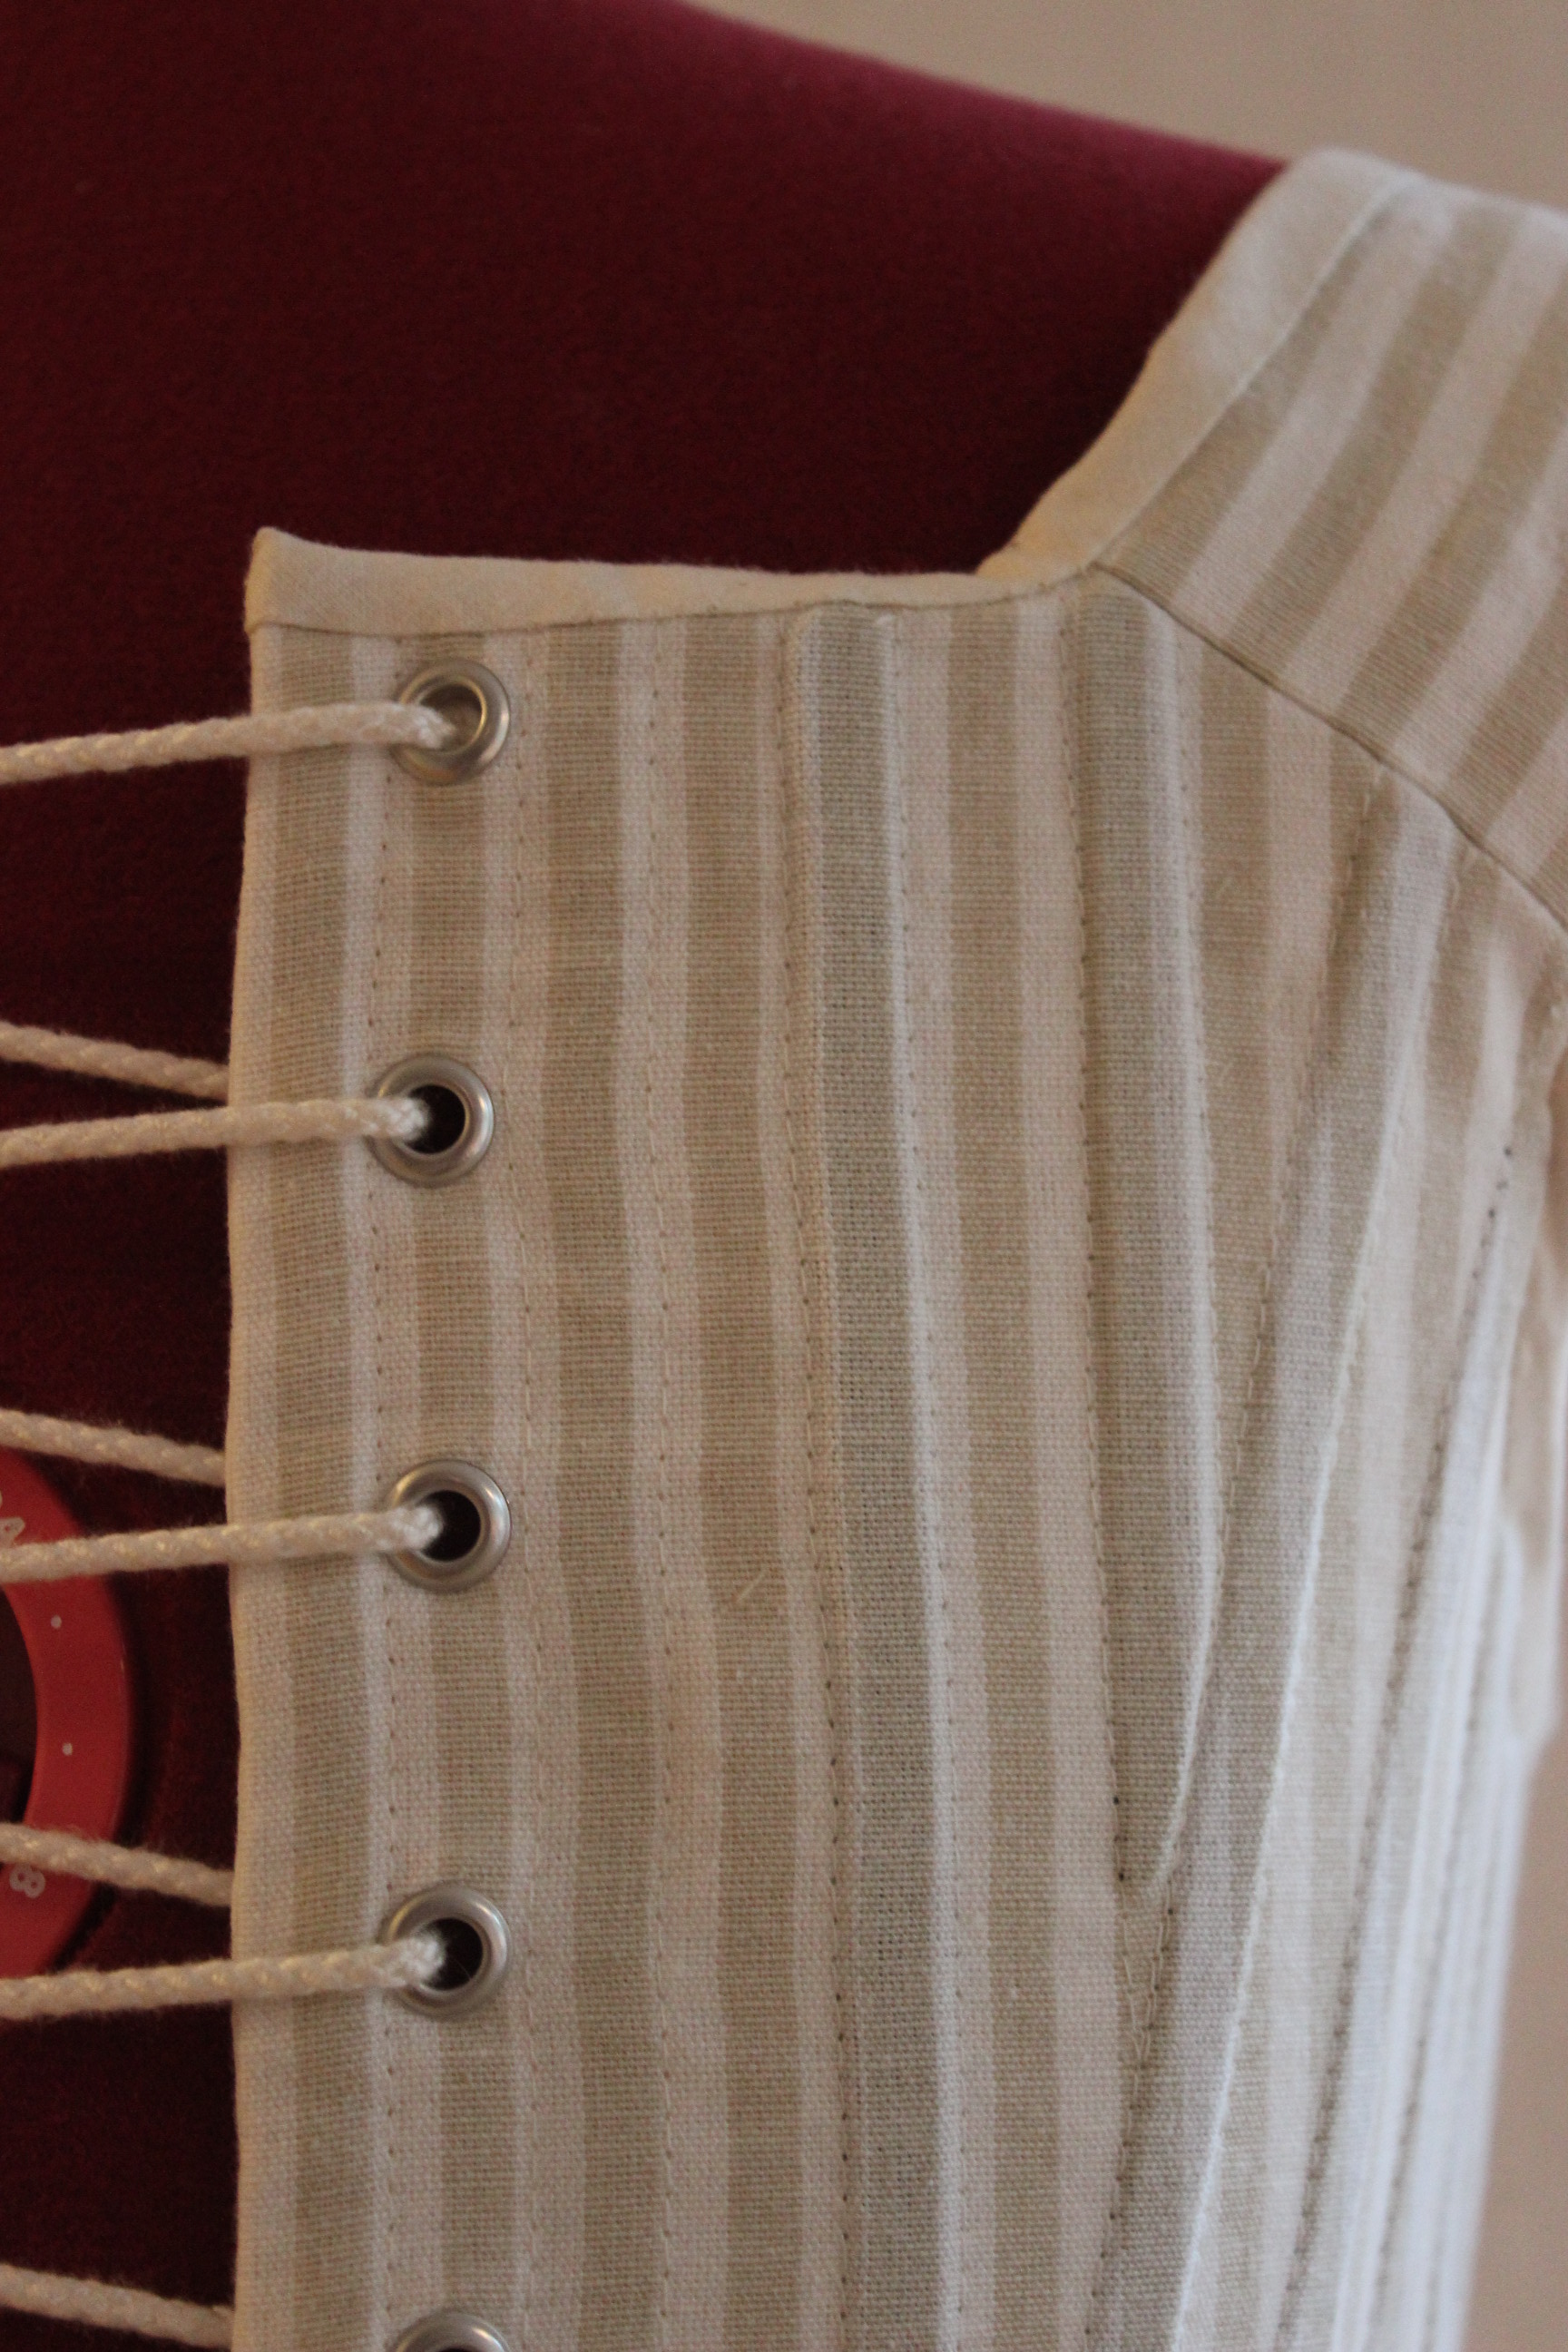
I started by sewing the lining to the back piece.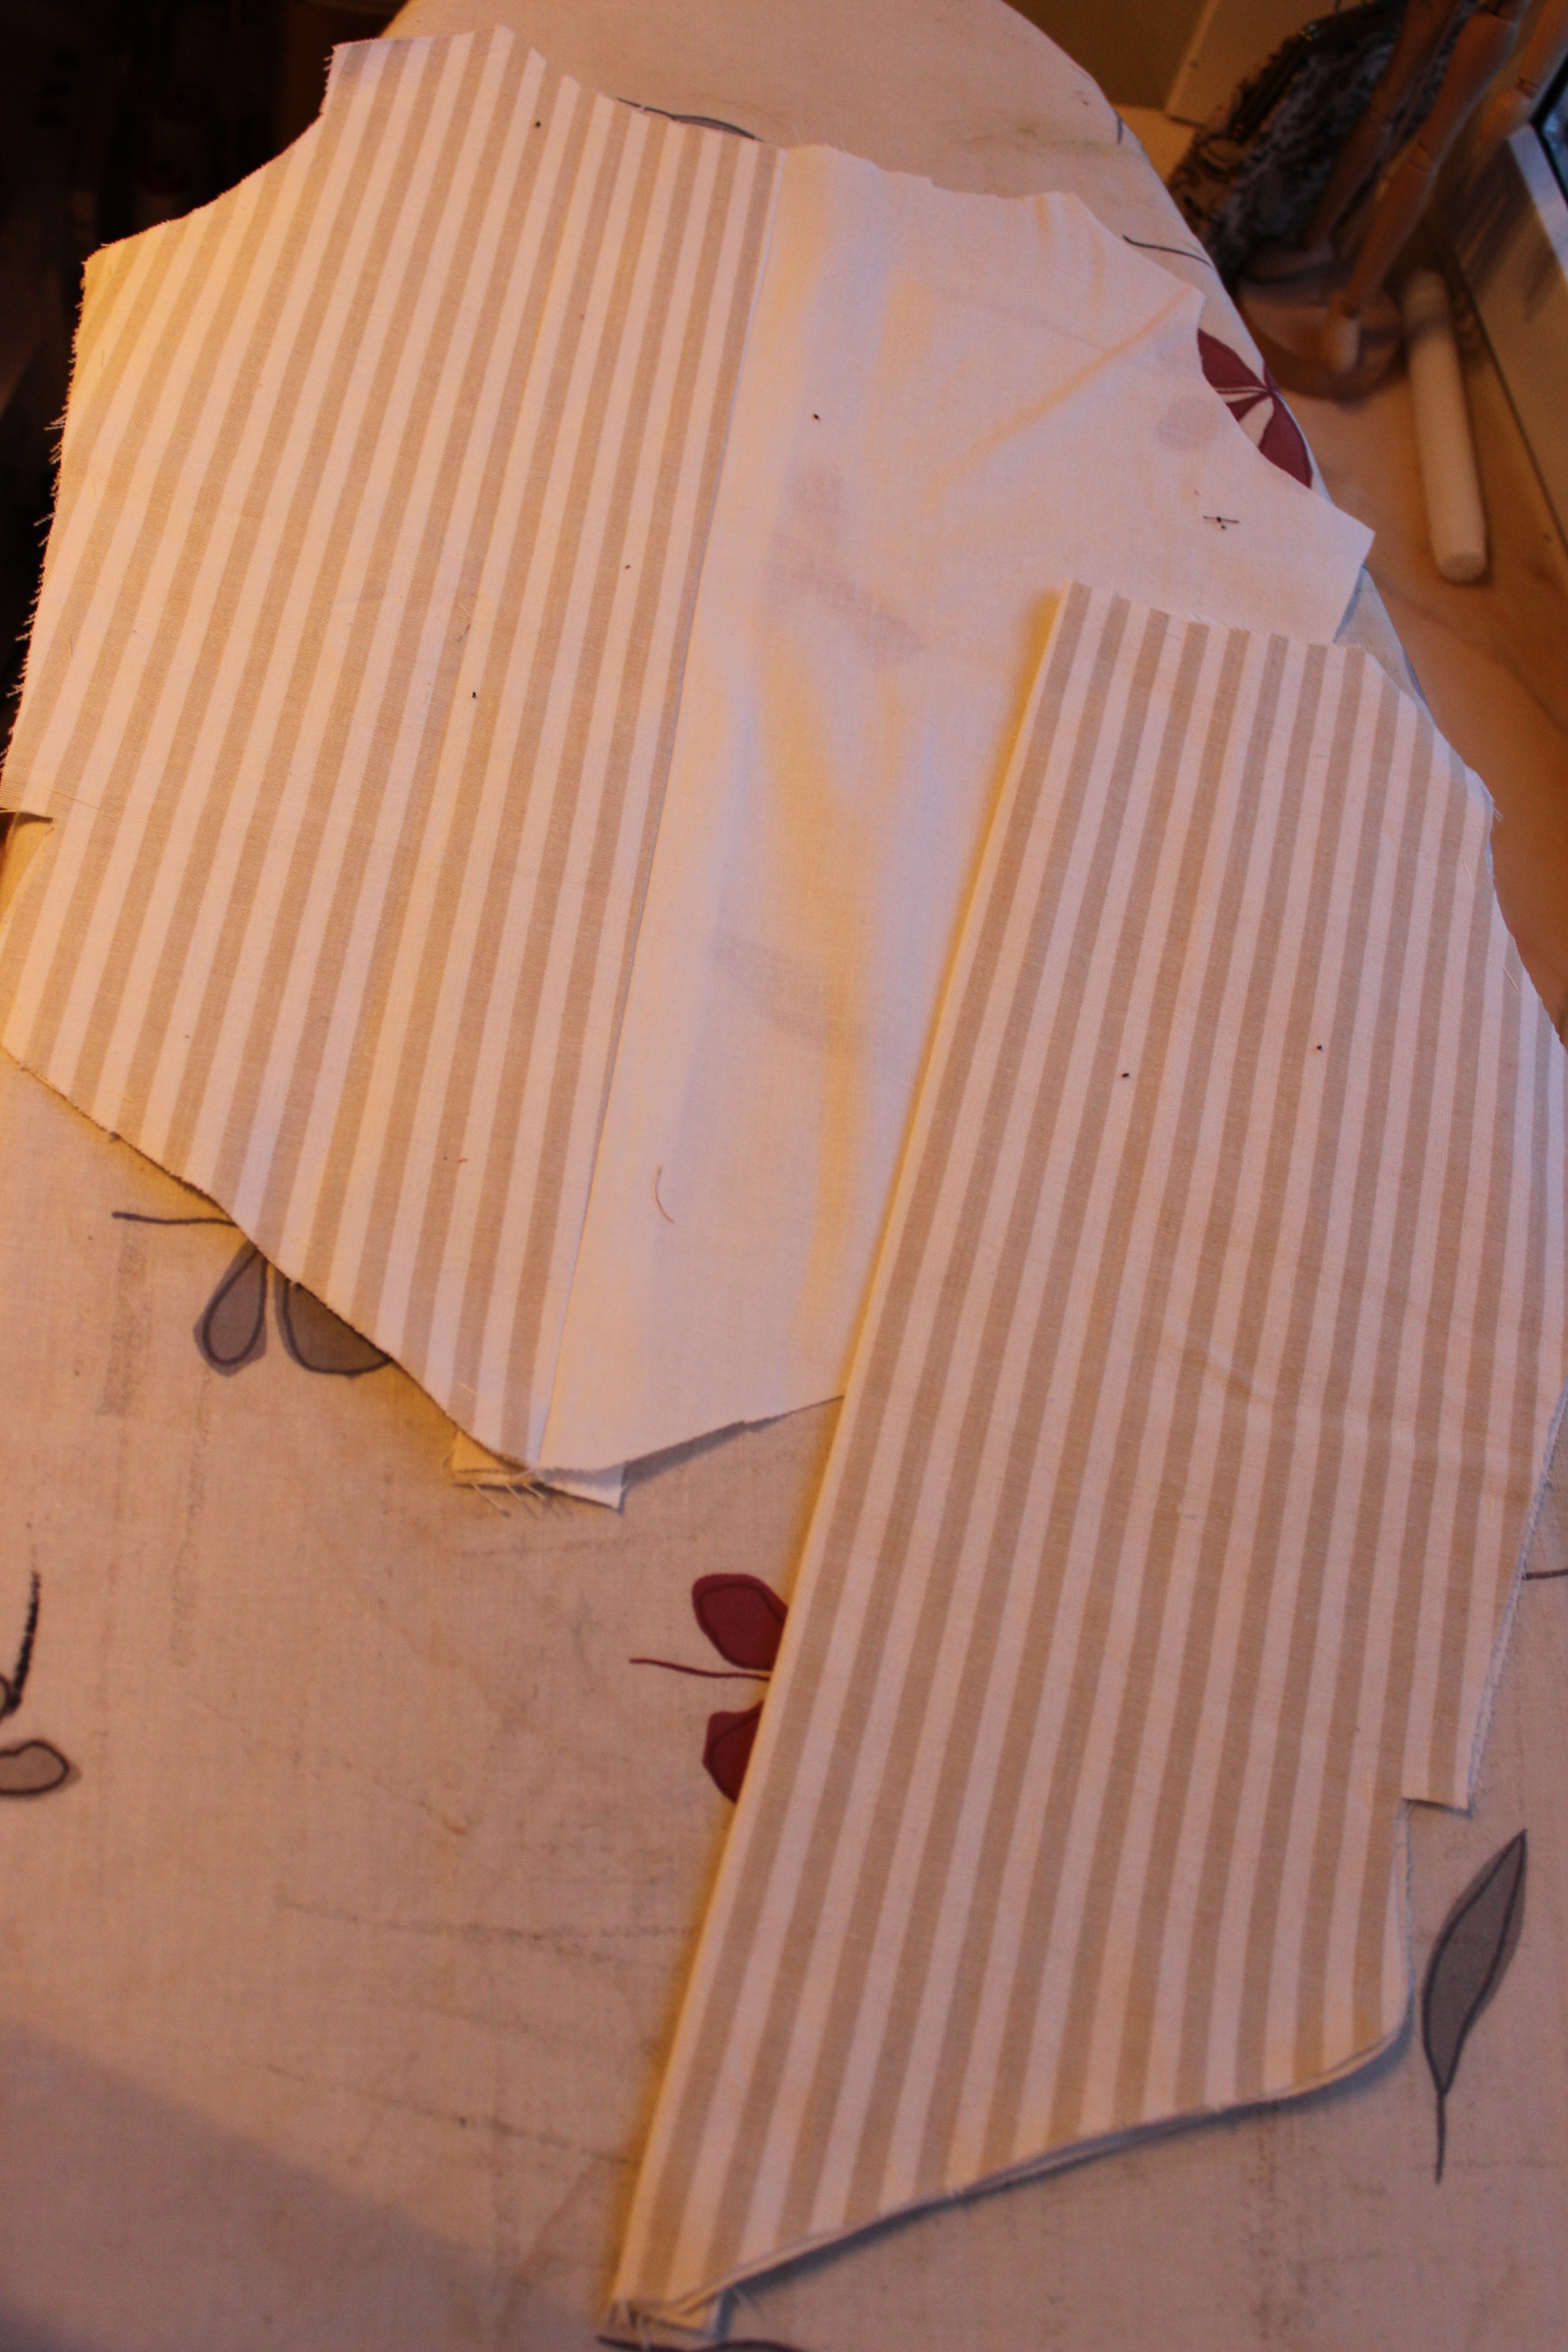 Then I stitched the lacing channels close to the edge, making three spaces for boning and eyelets.
Before getting down on to sewing all the channels, I made sure to mark them with pencil to the interfacing.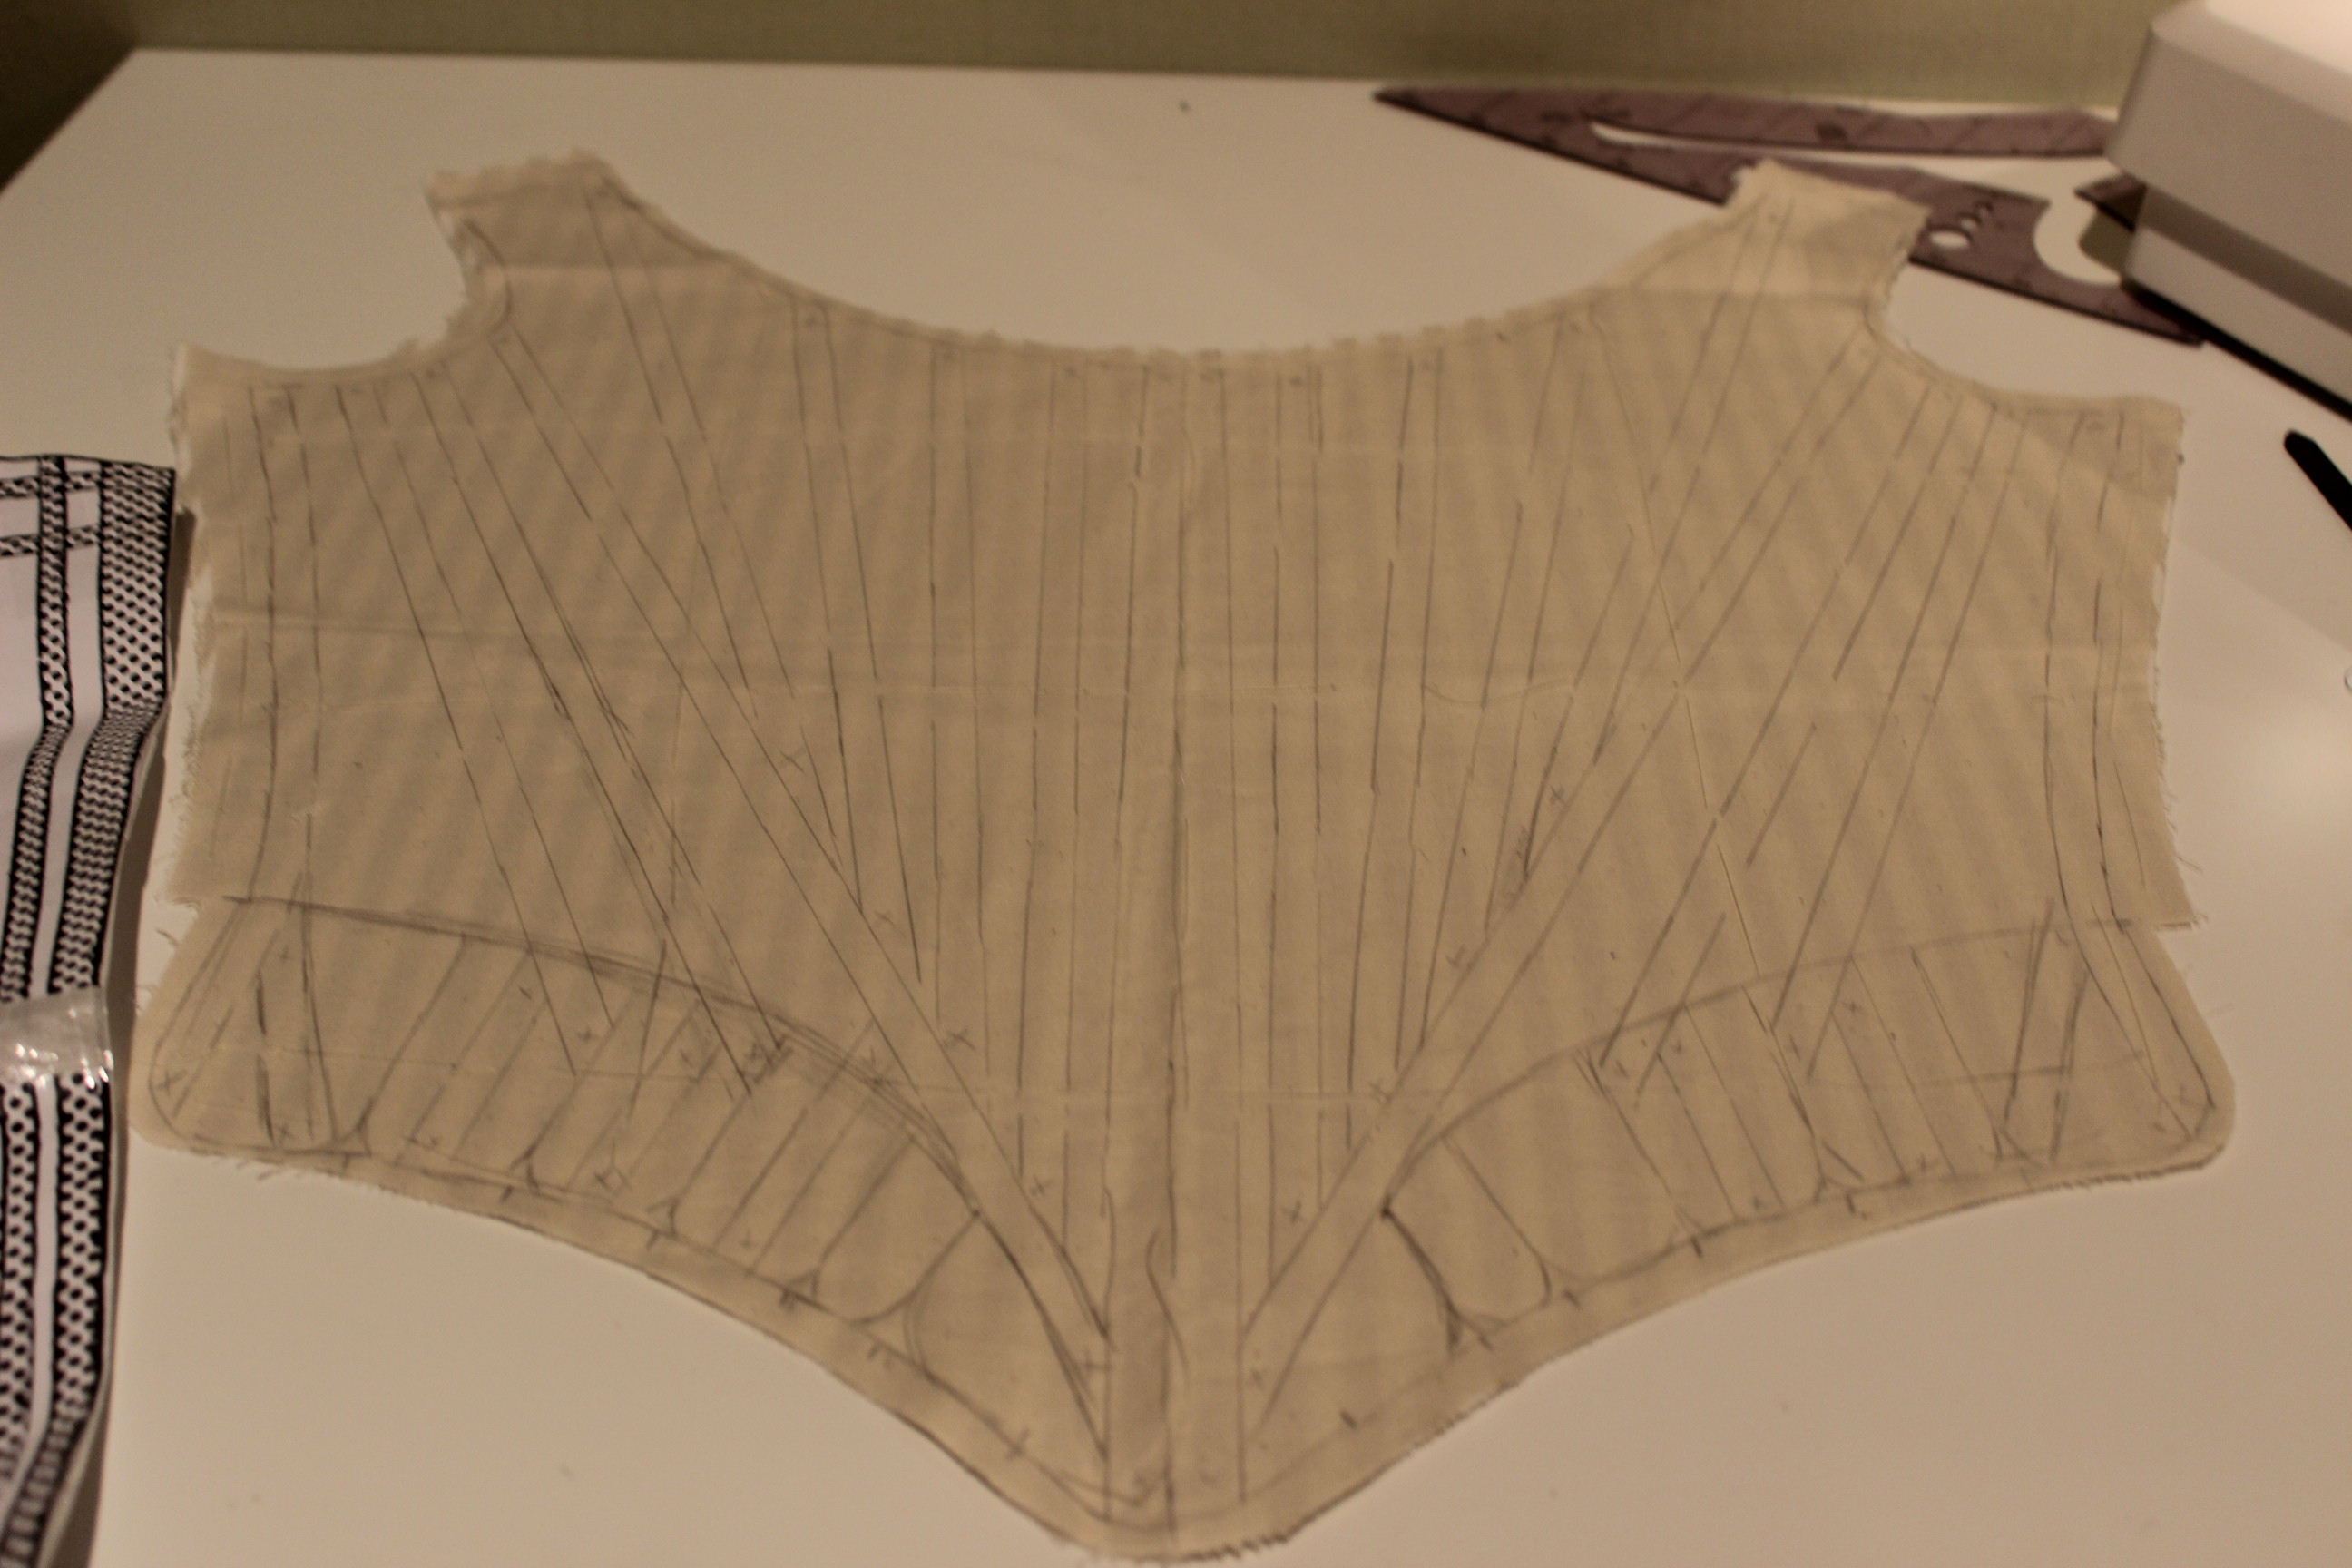
As you can see the lines are not exactly perfect.
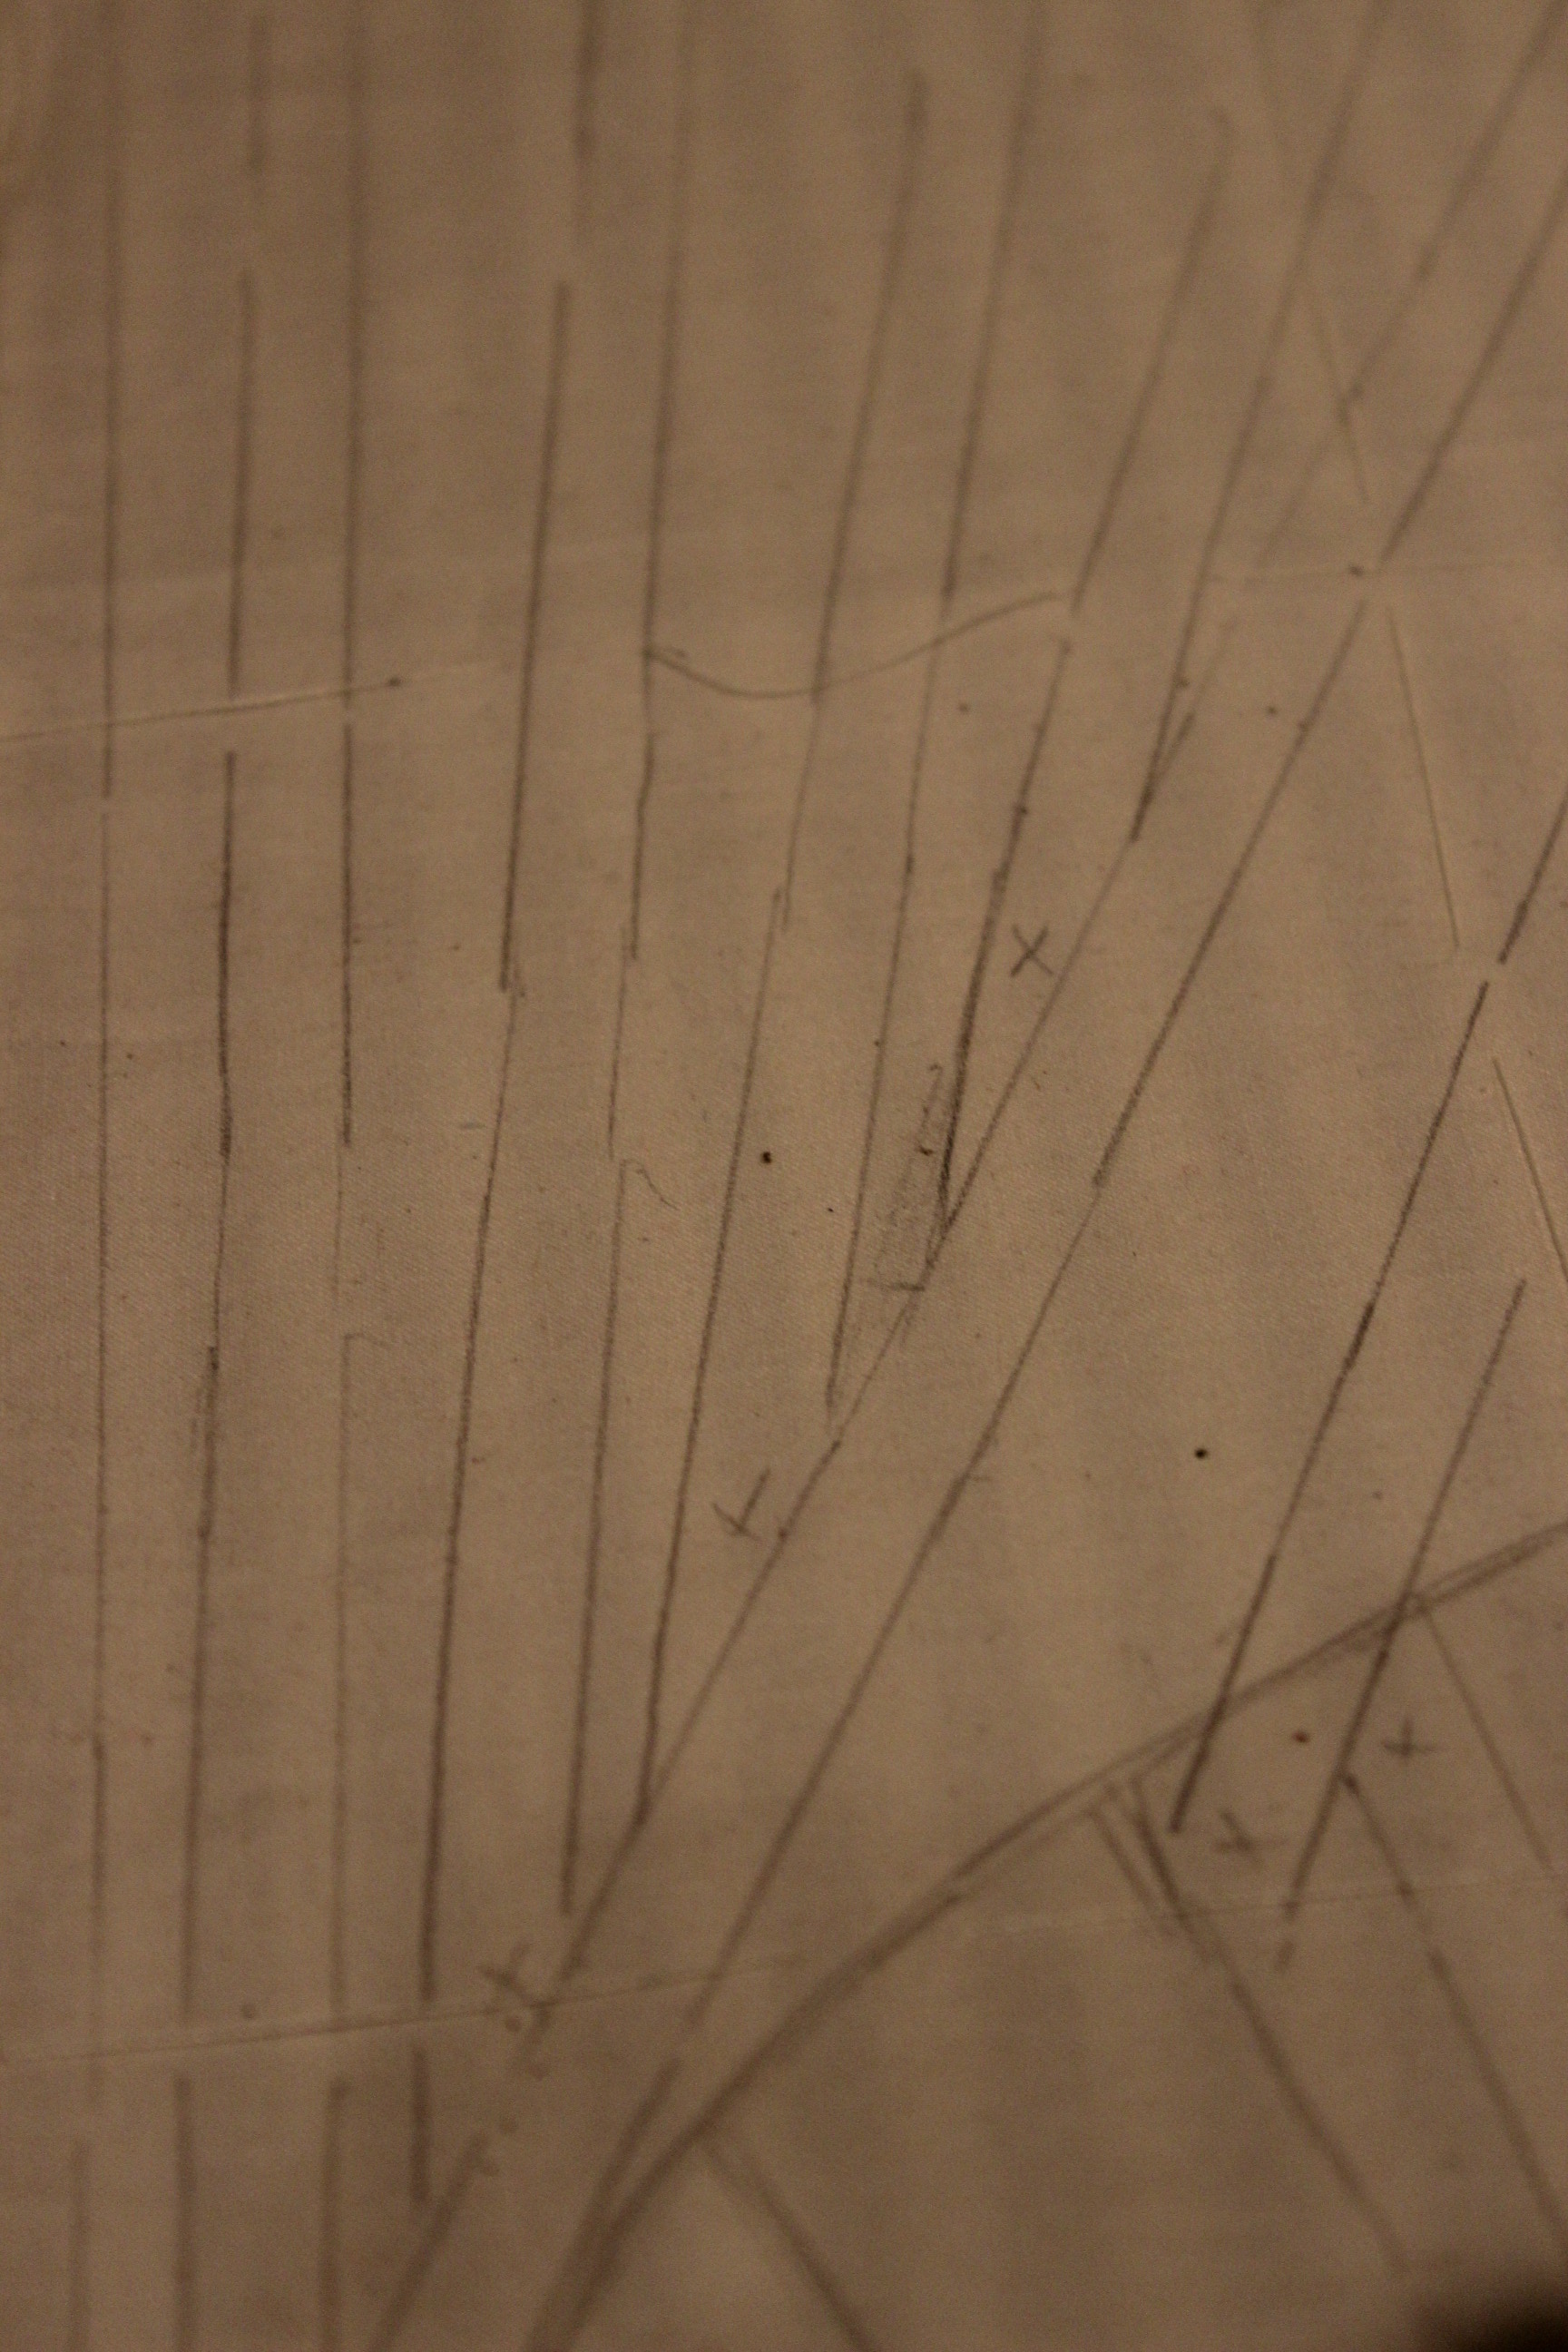
And neither are the sewing lines.
But the pencil markings was just meent as a general guide to keep the left and right sides even.
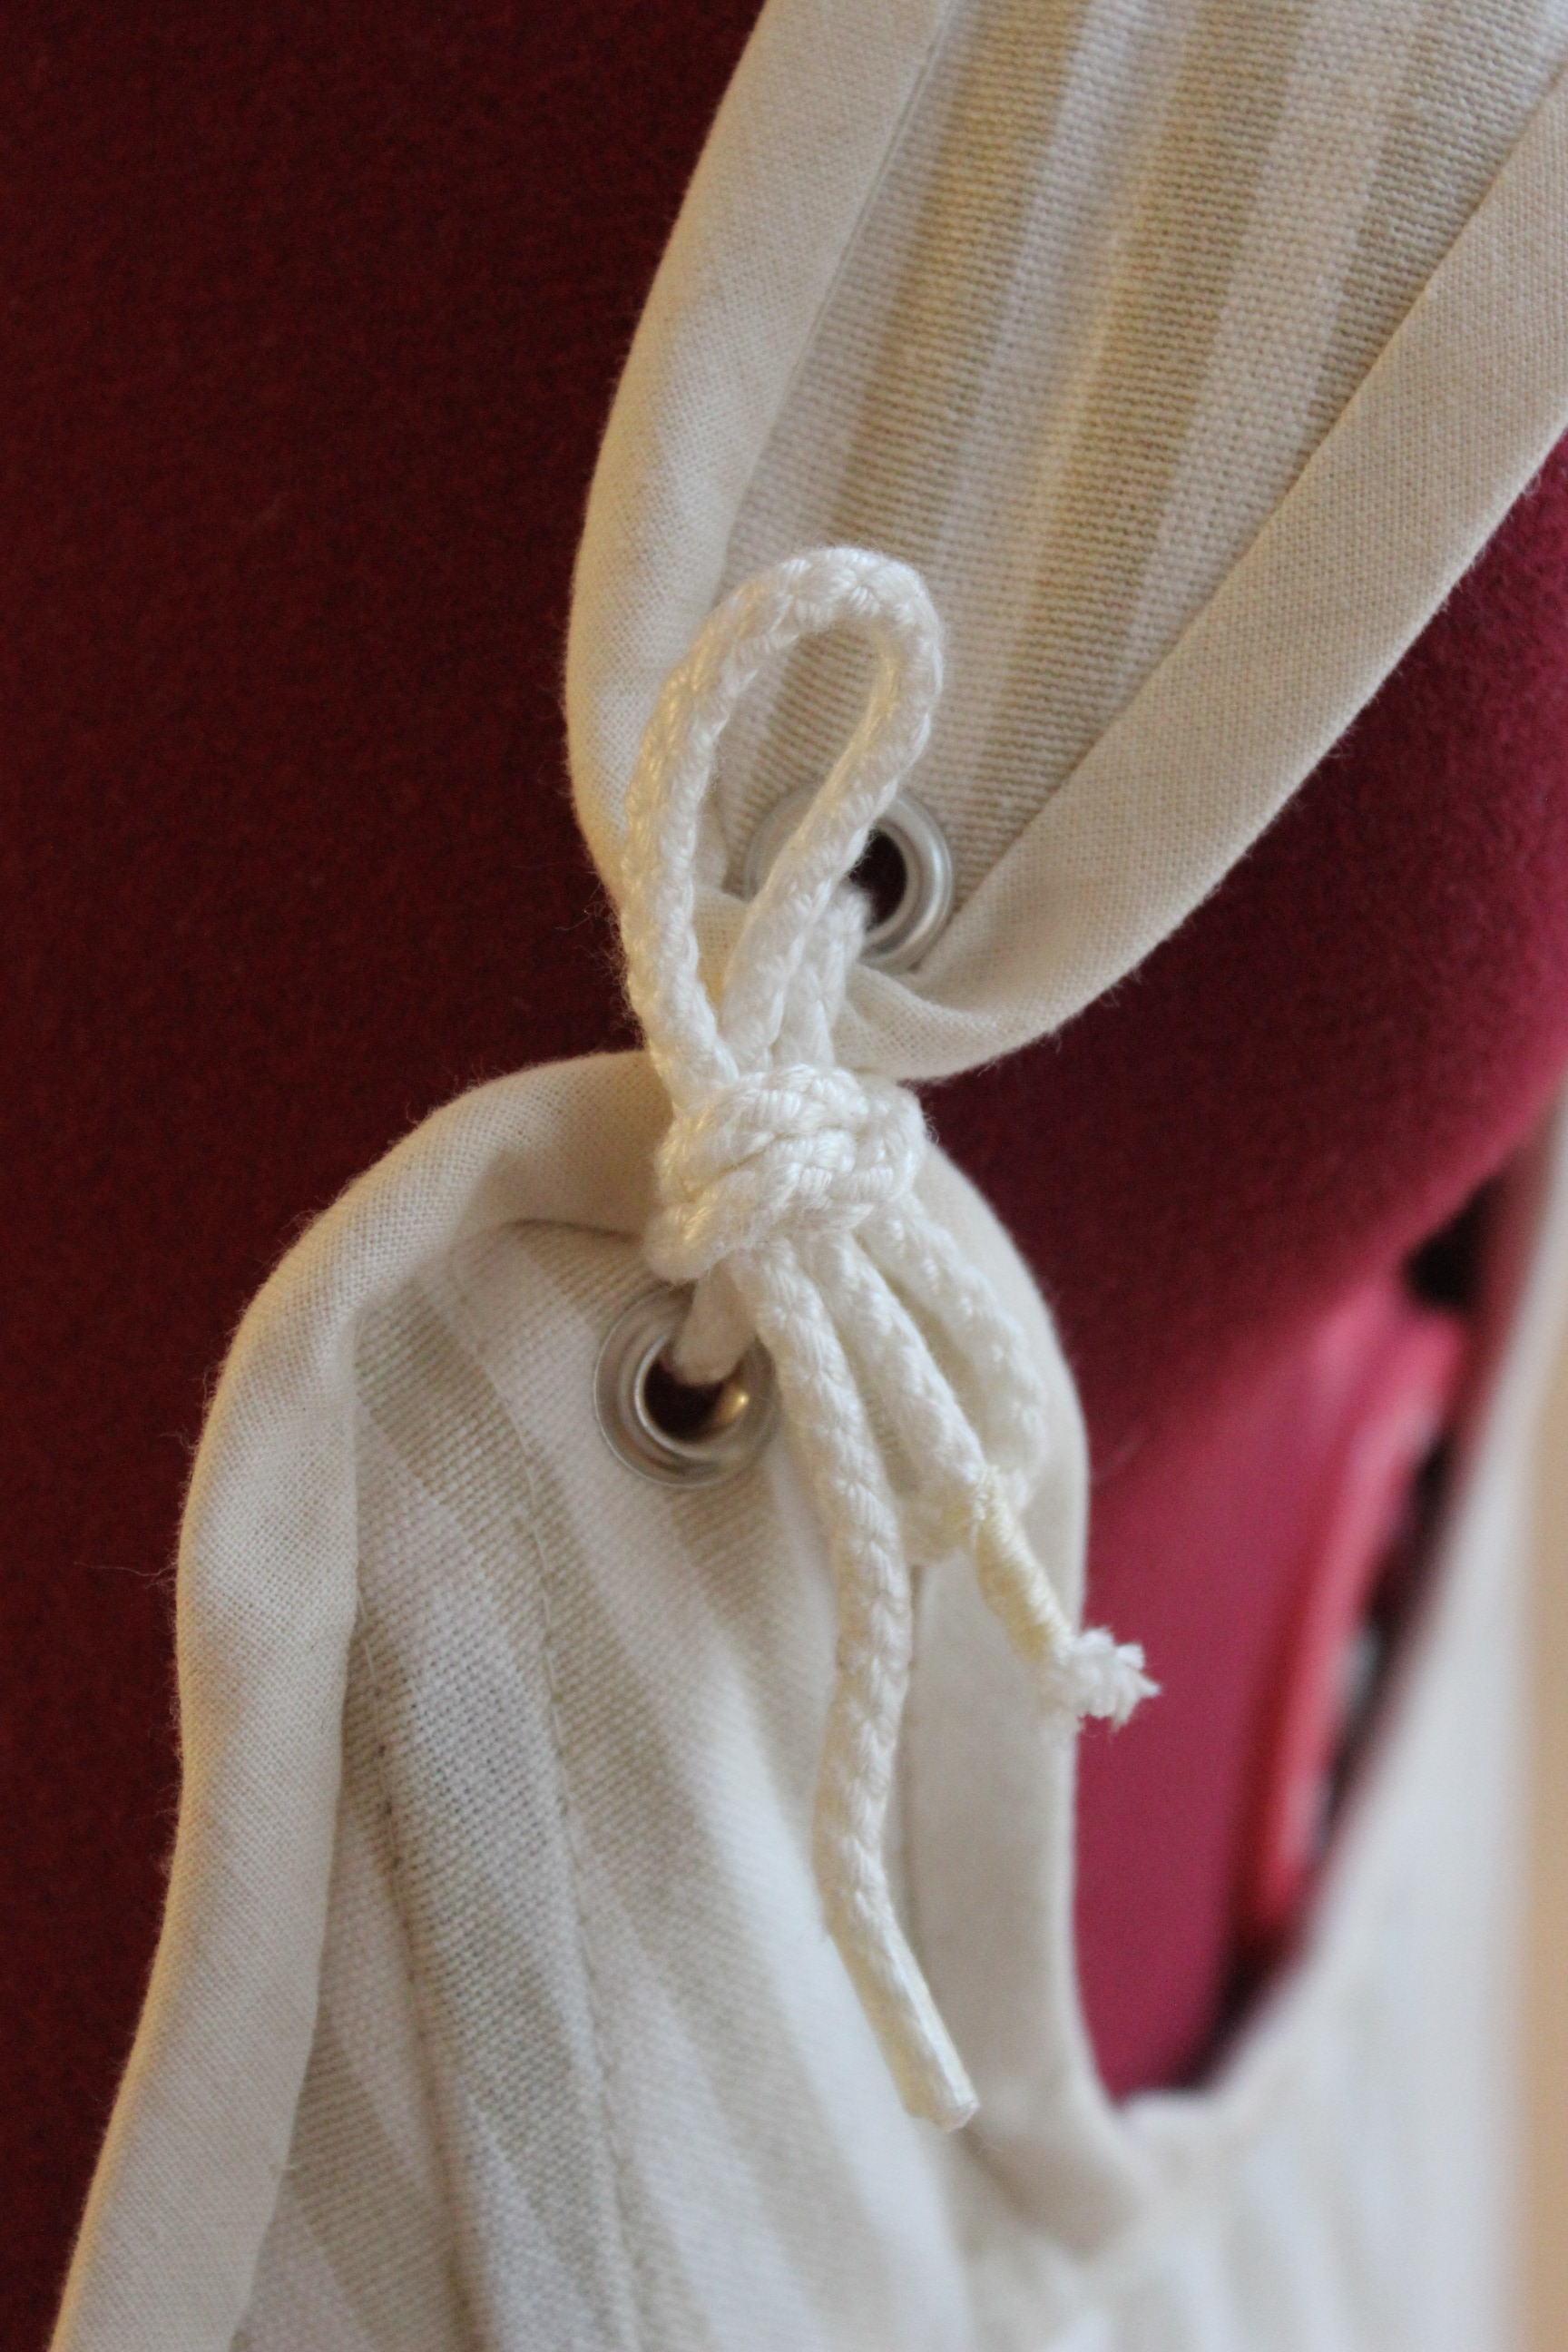
Then it was on to the eyelets.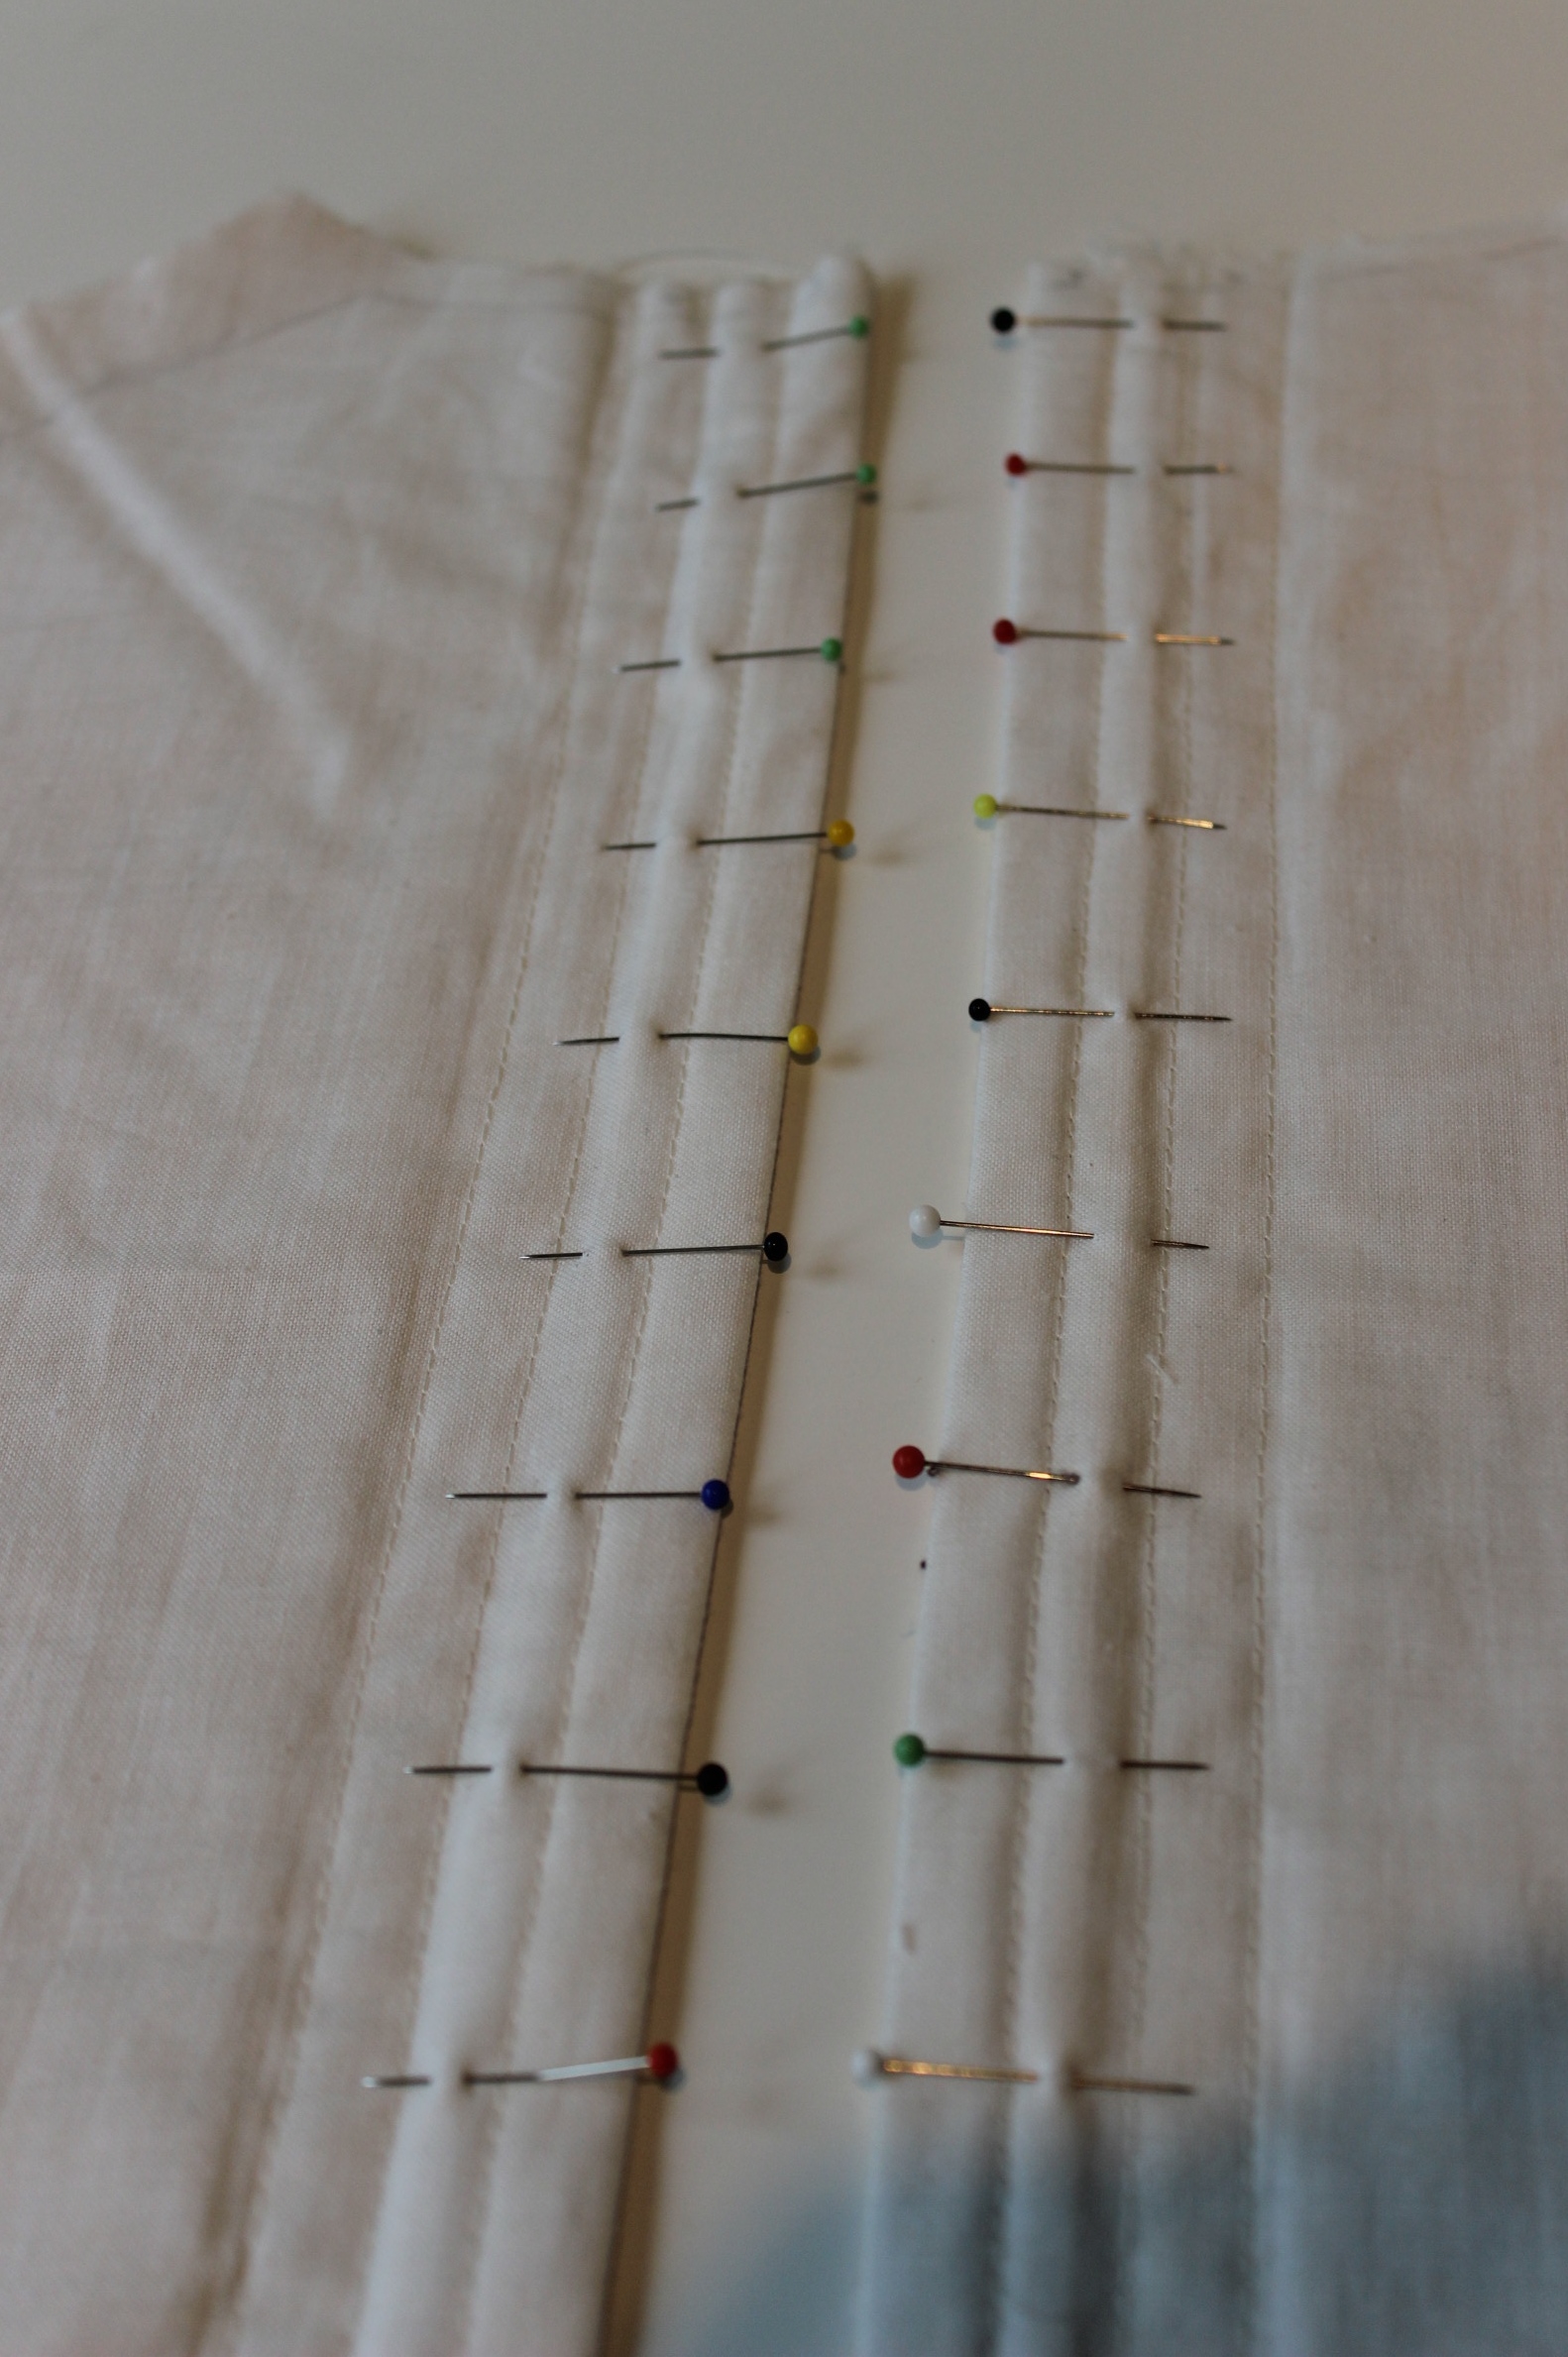 Marking the spaces.
I used my hole puncher to get the get the grommets through the fabric.
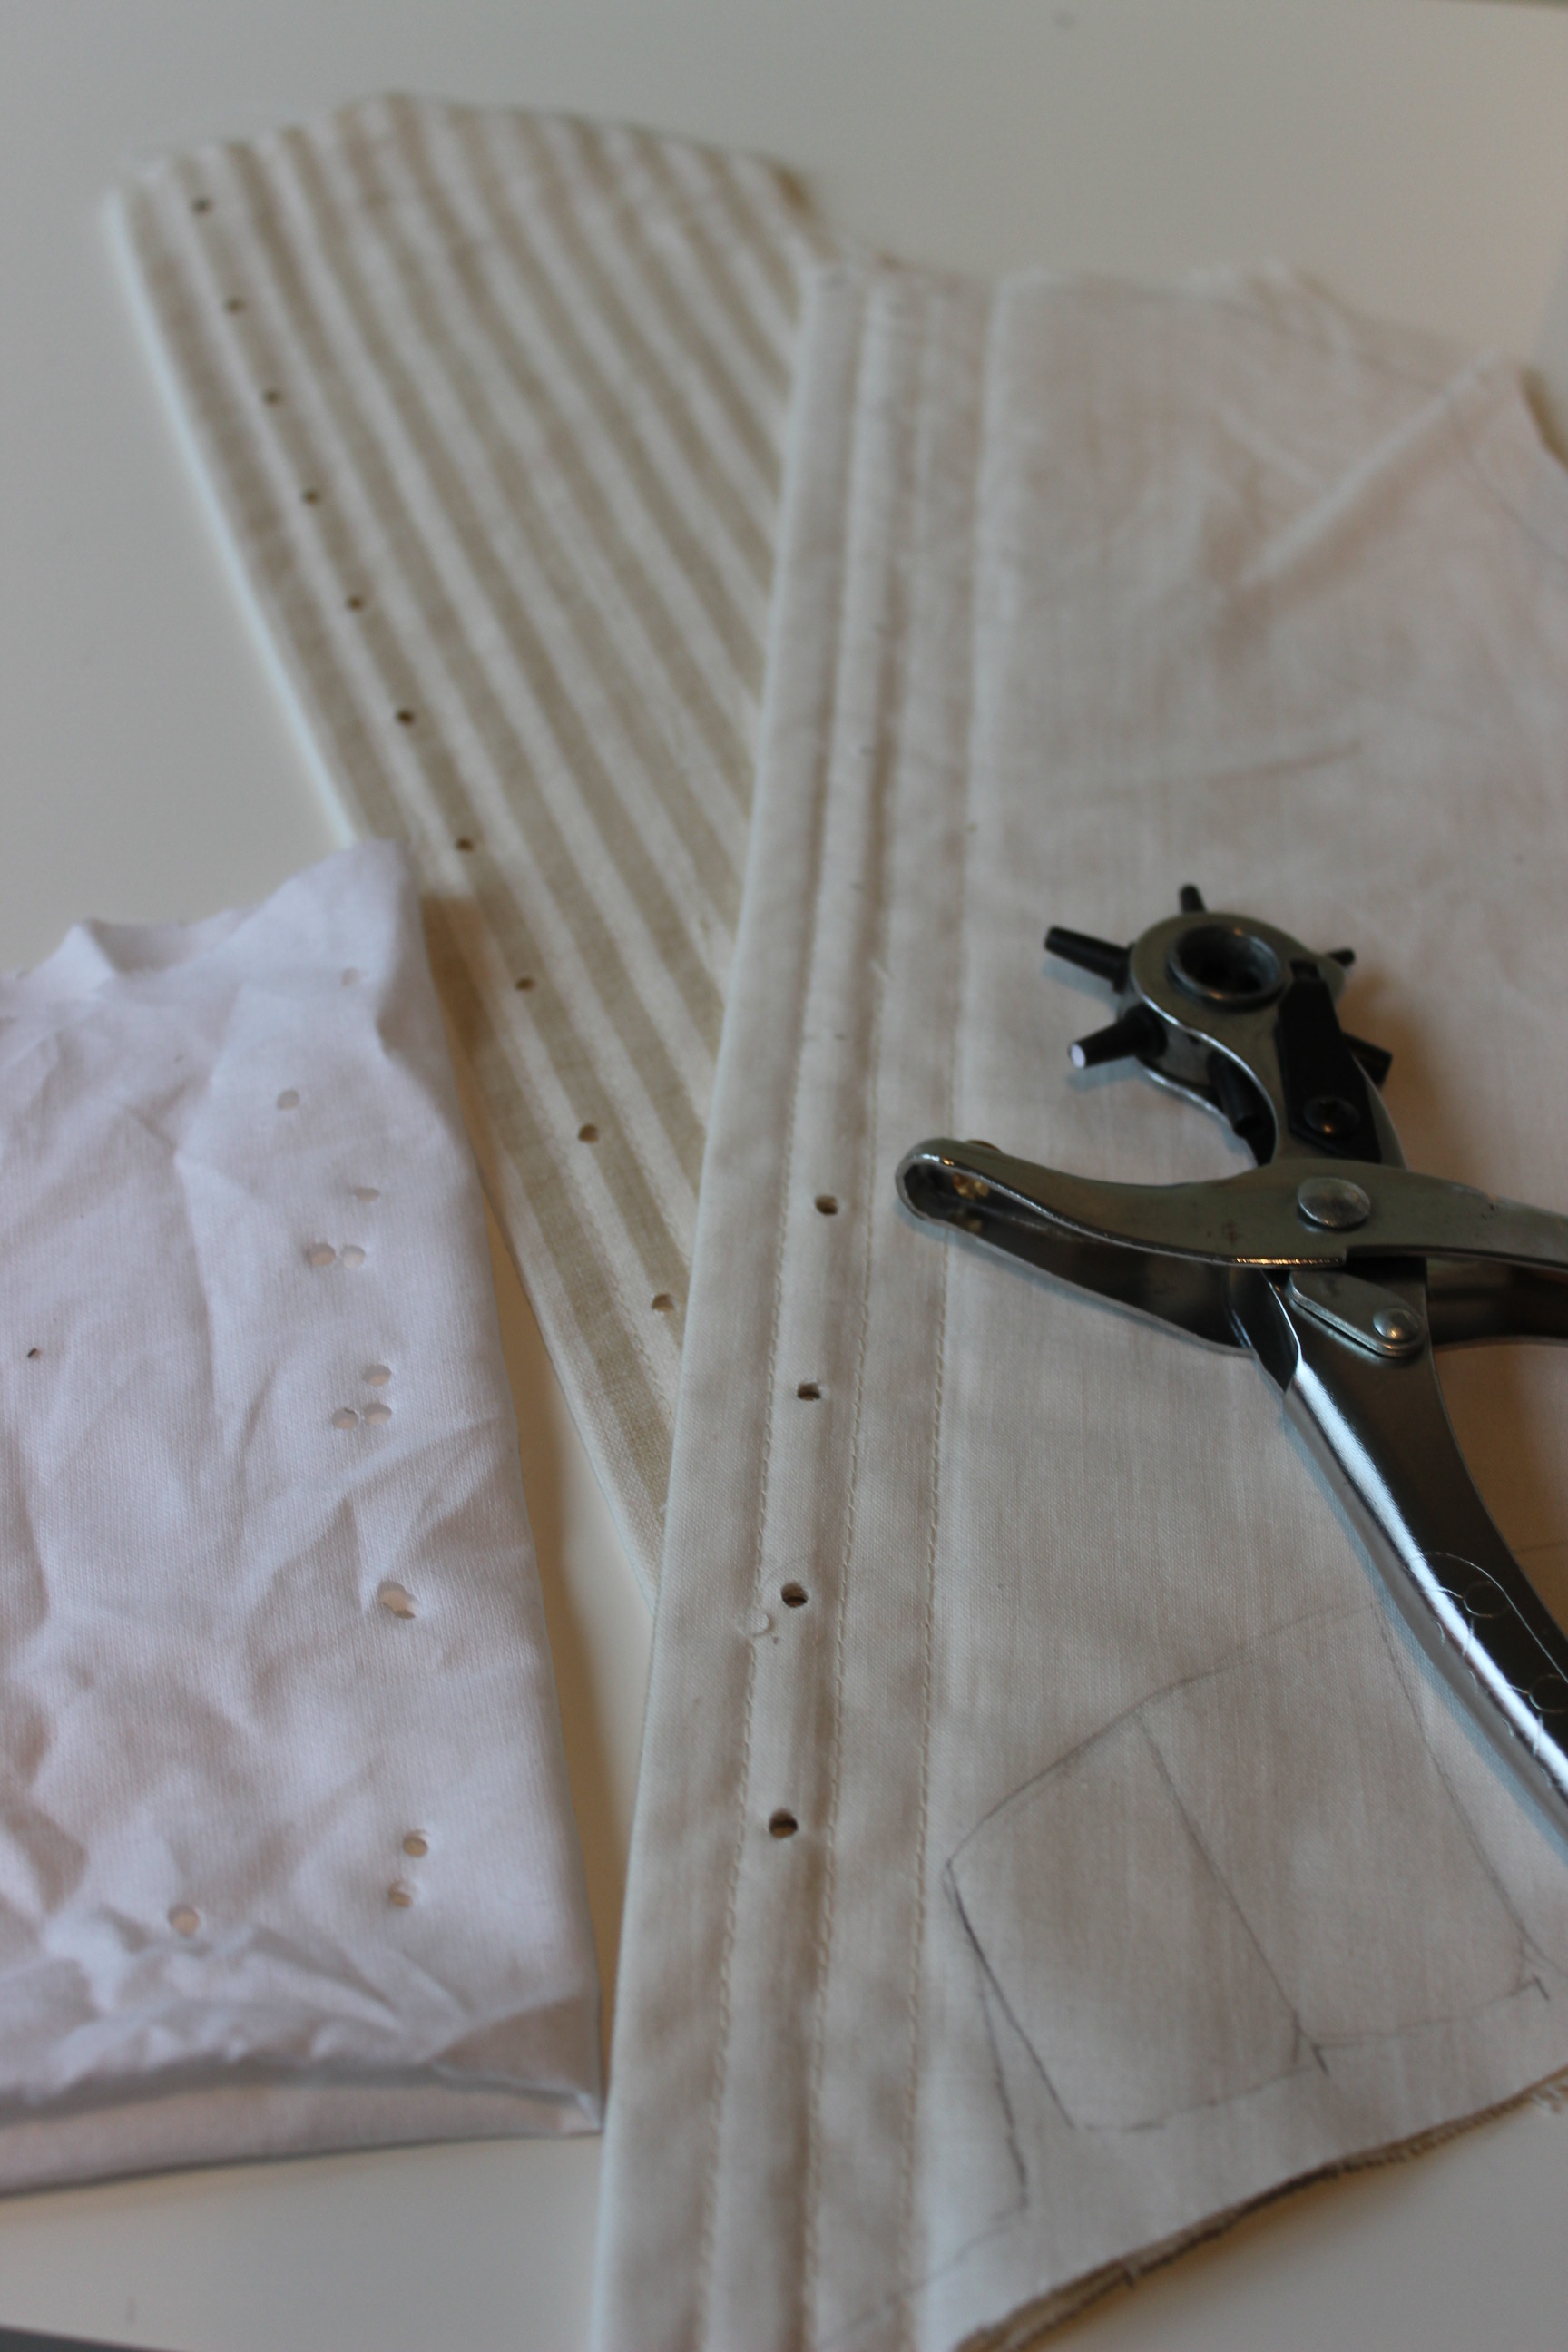
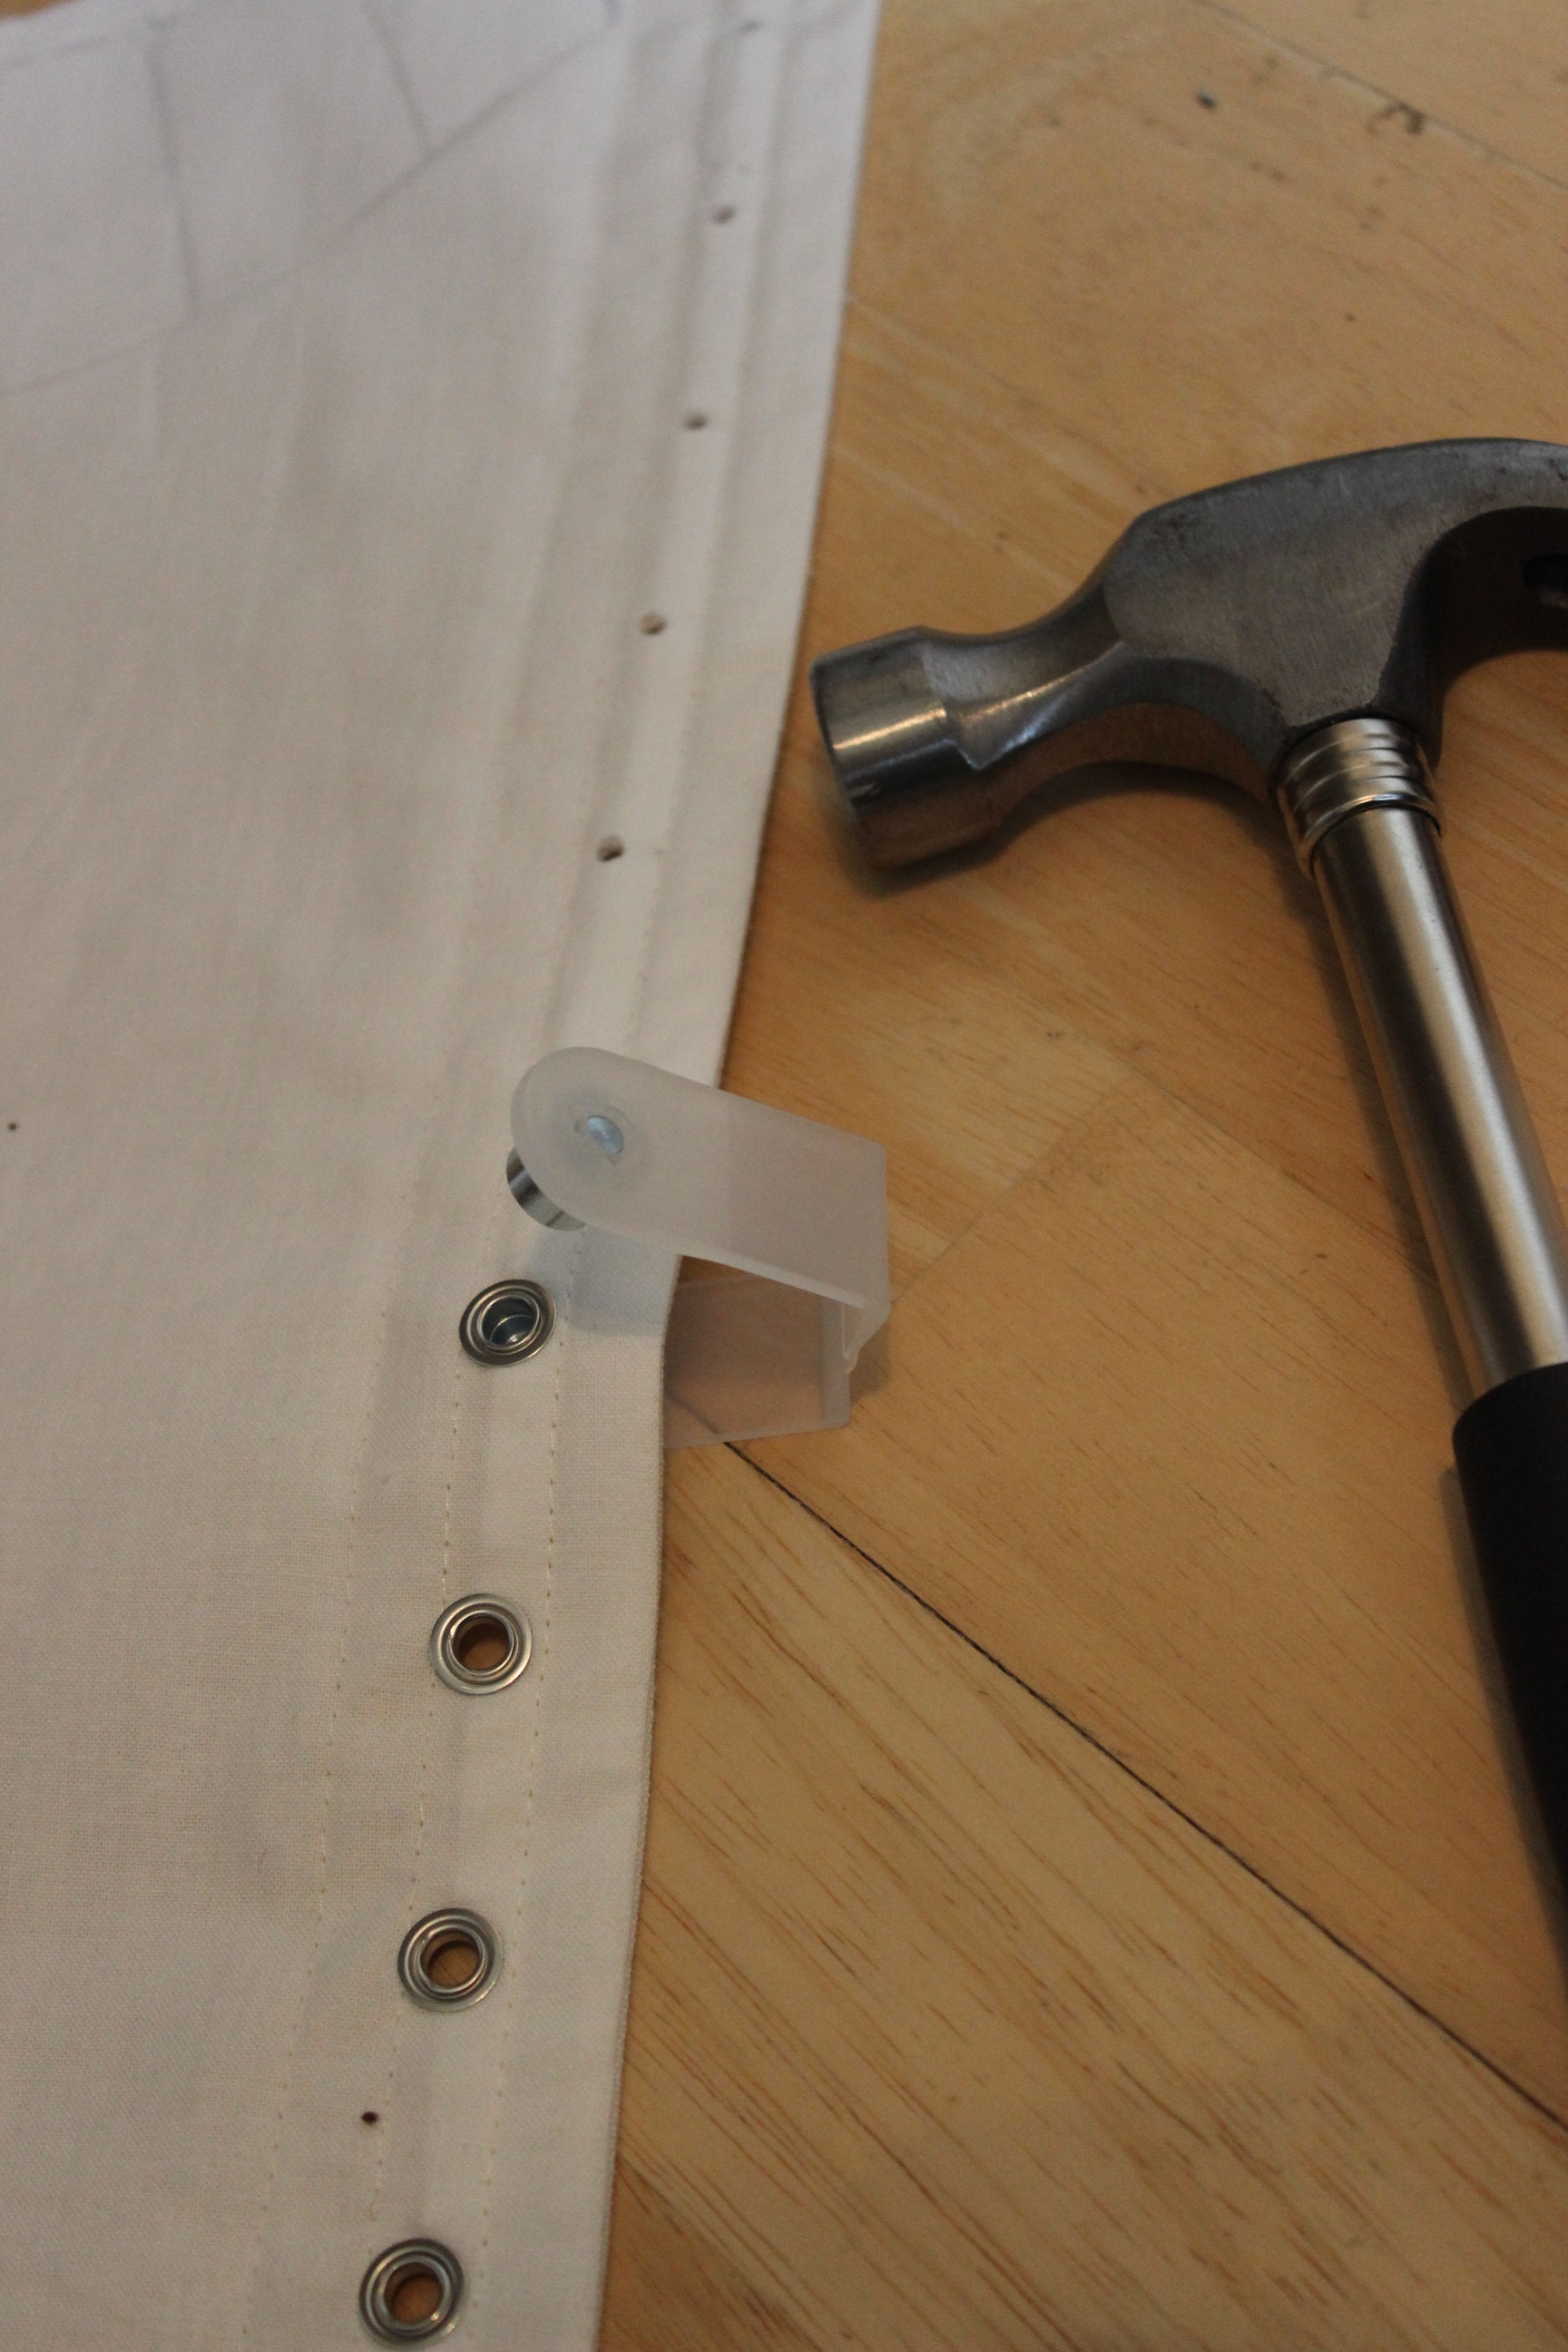
And a hammer to get them to stick.
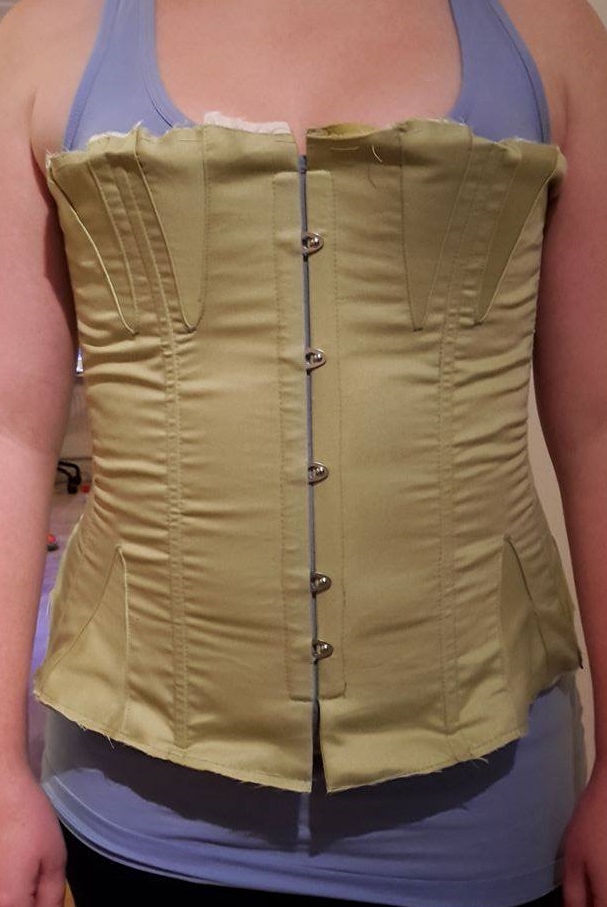
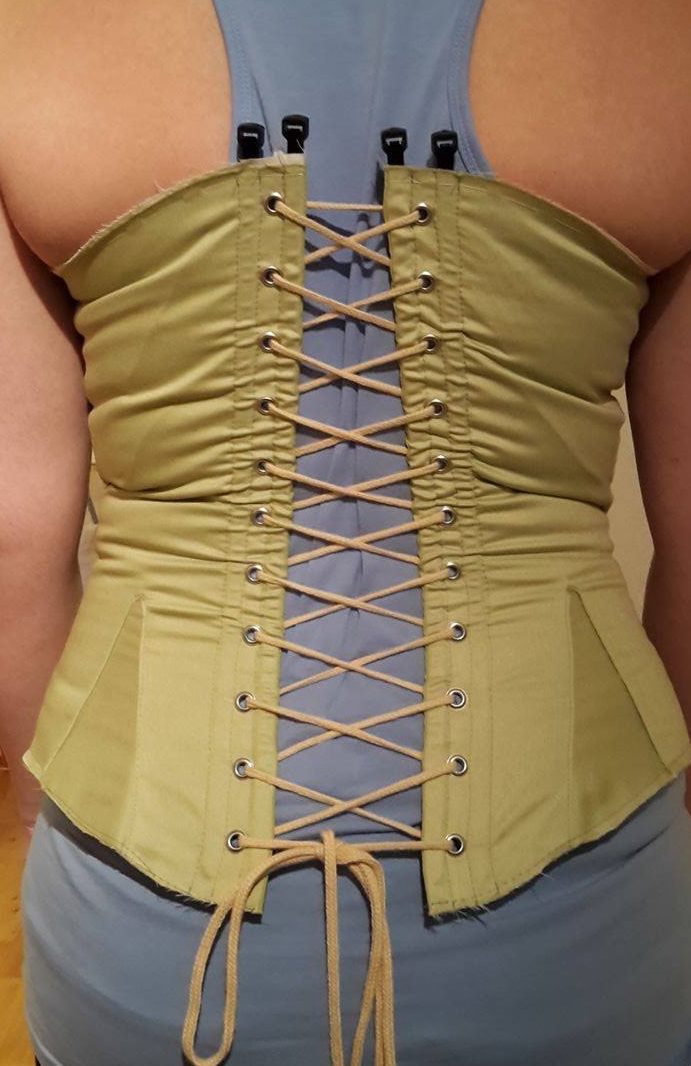
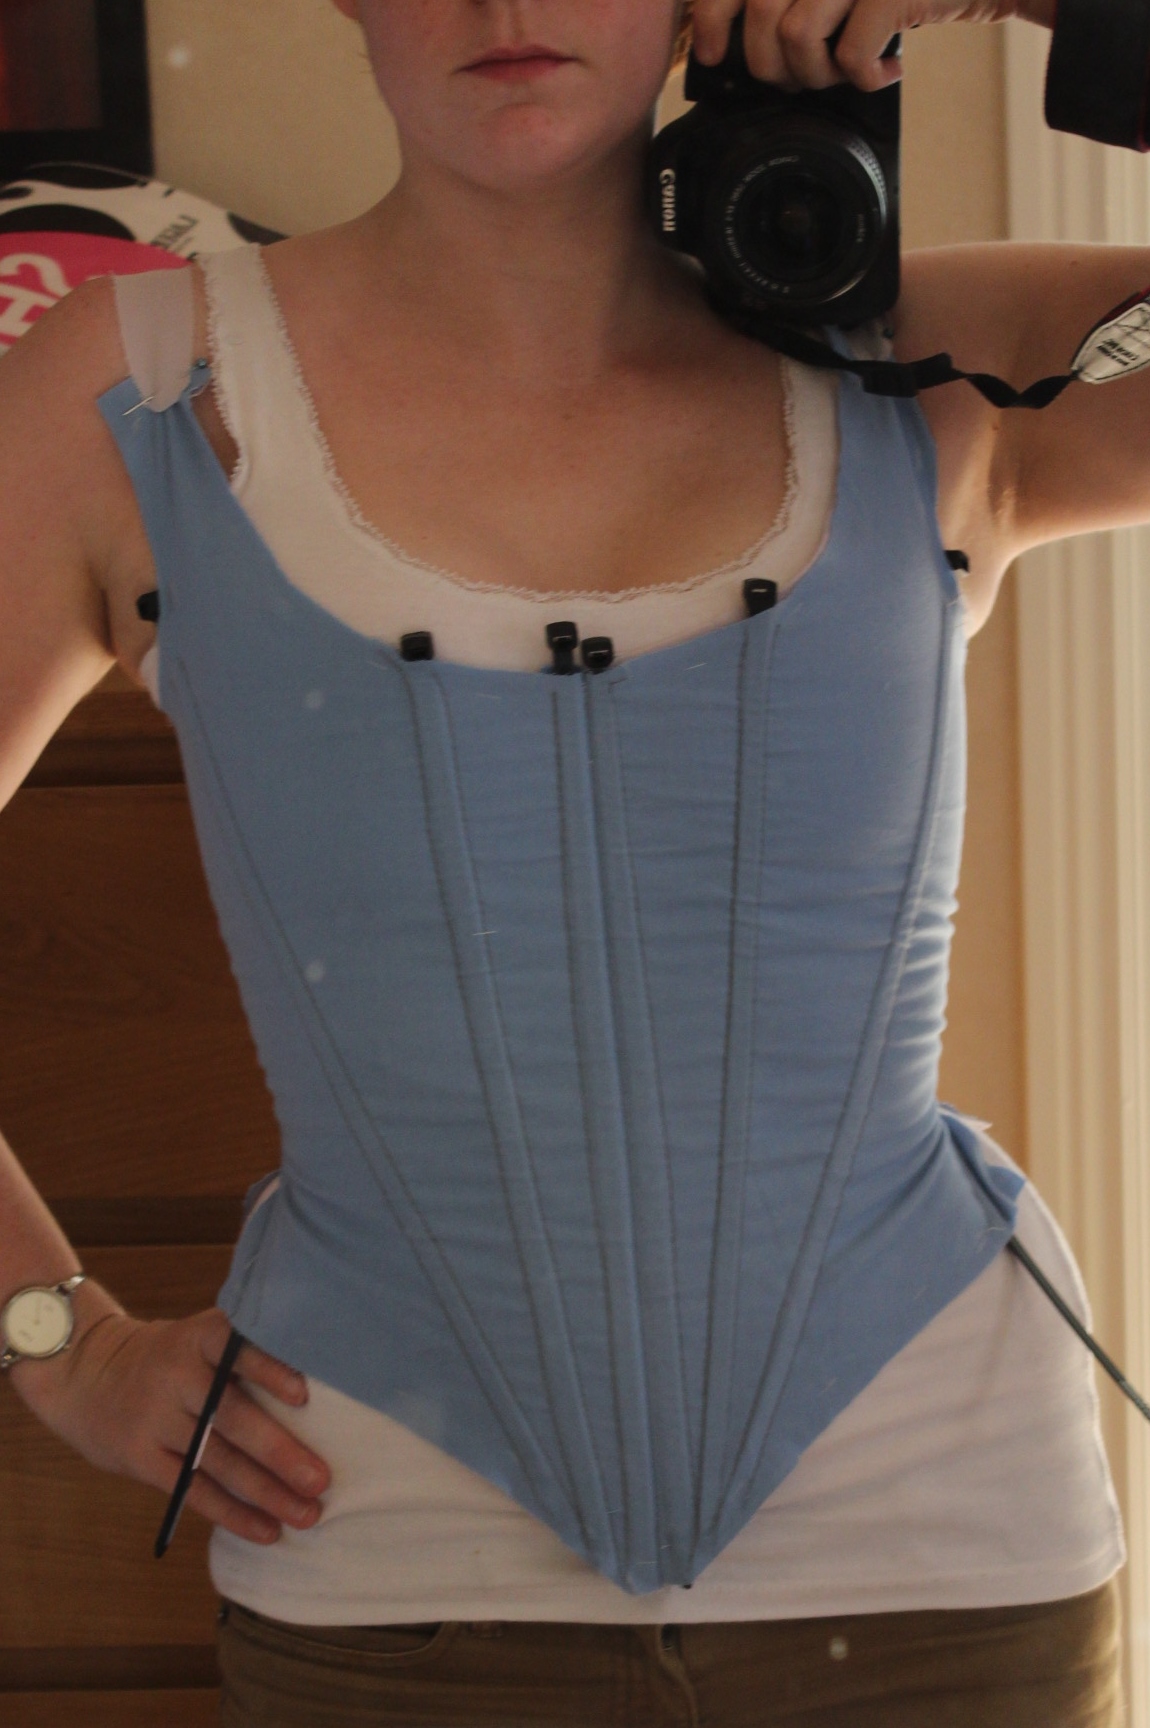
Then it was time to stitch the pieces together.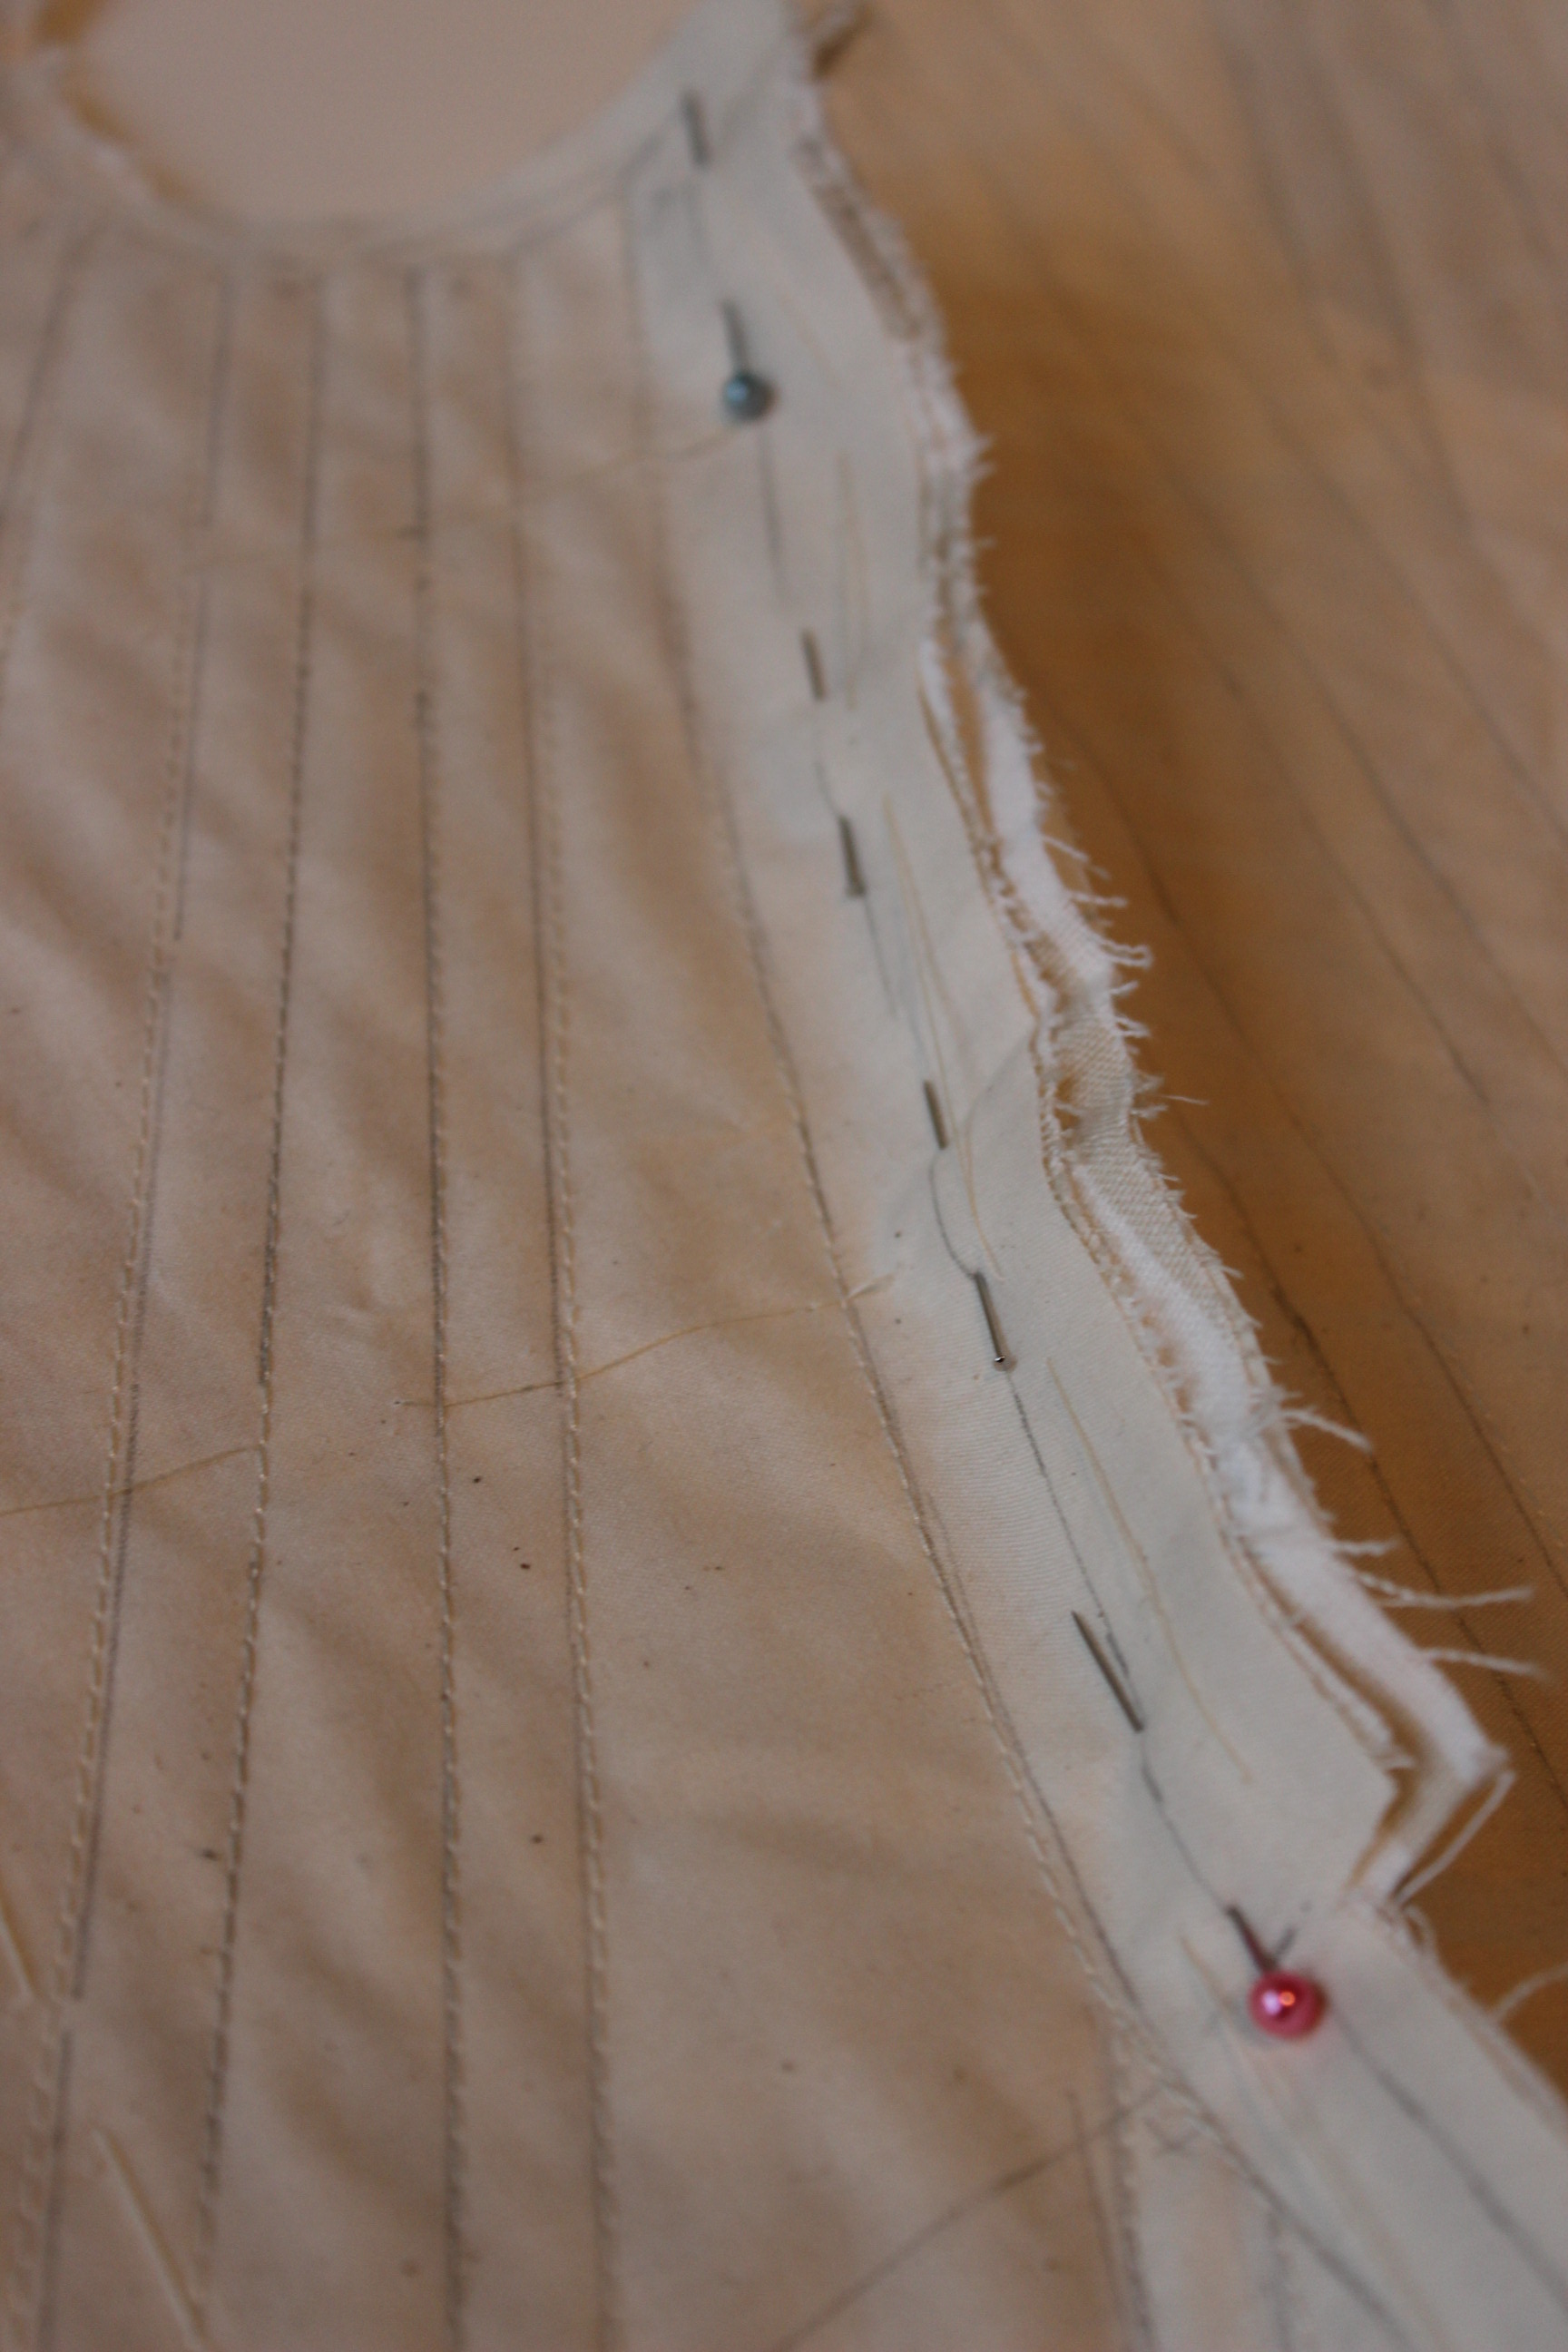
And to insert some of the boning.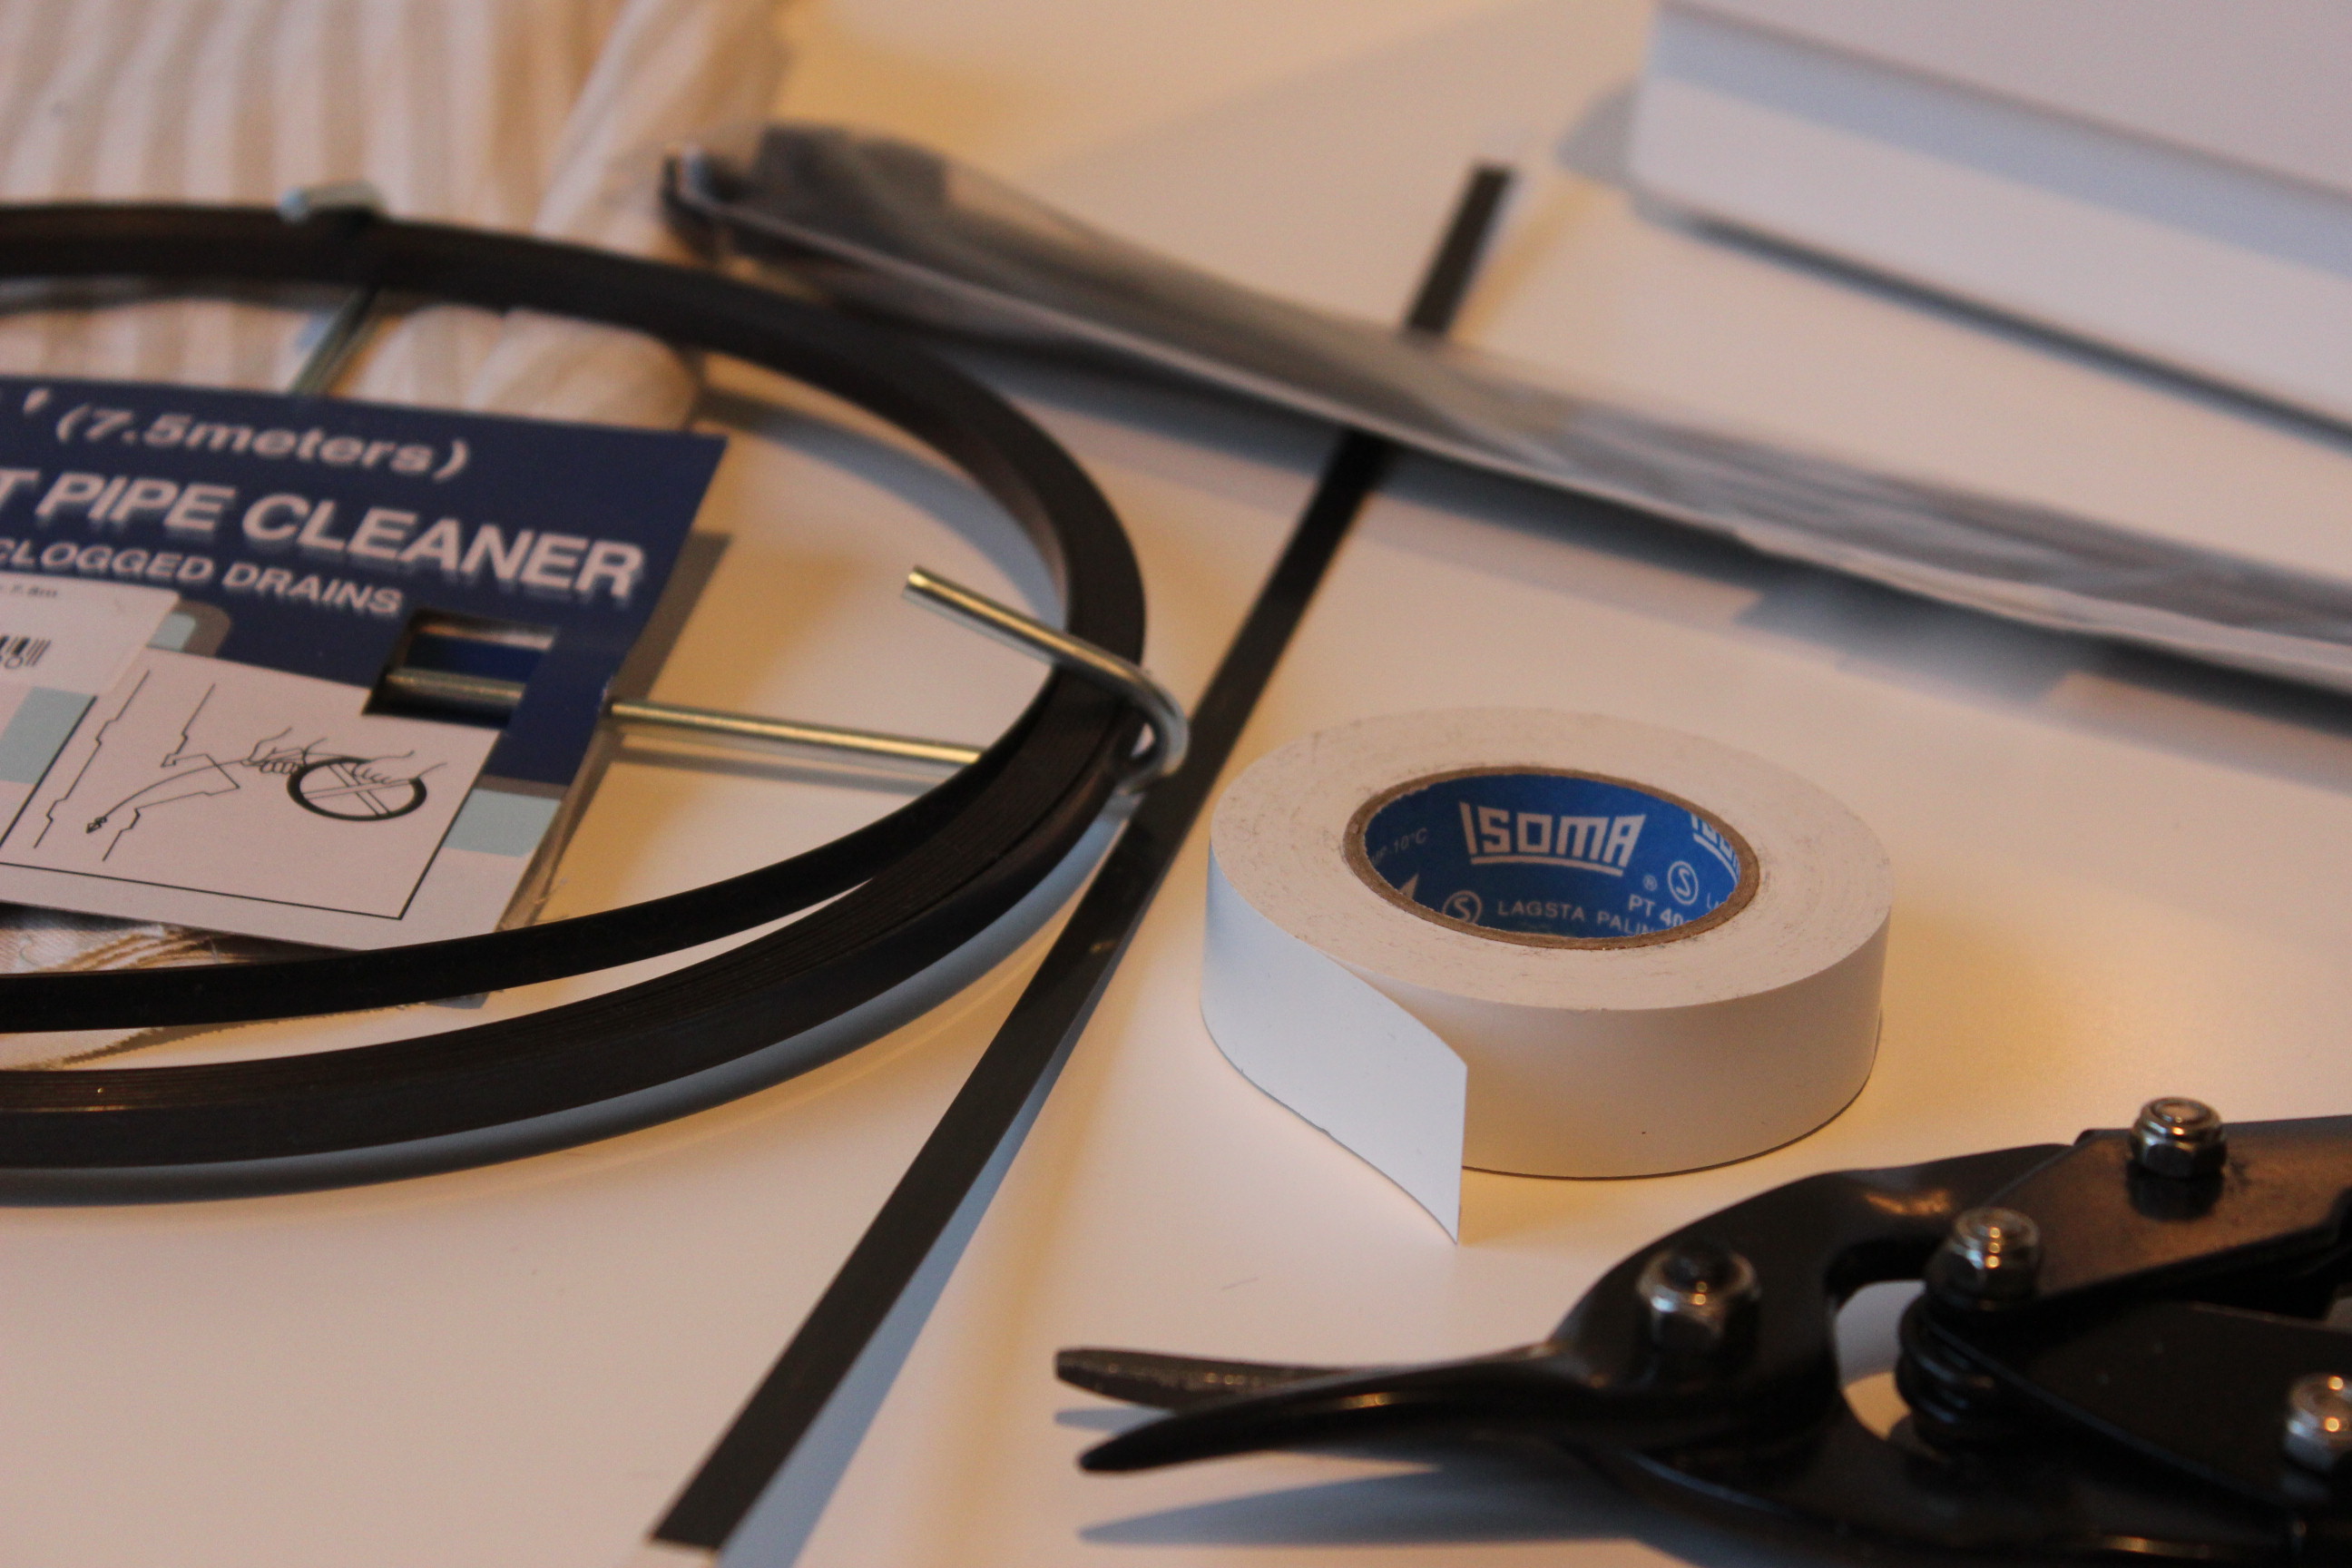
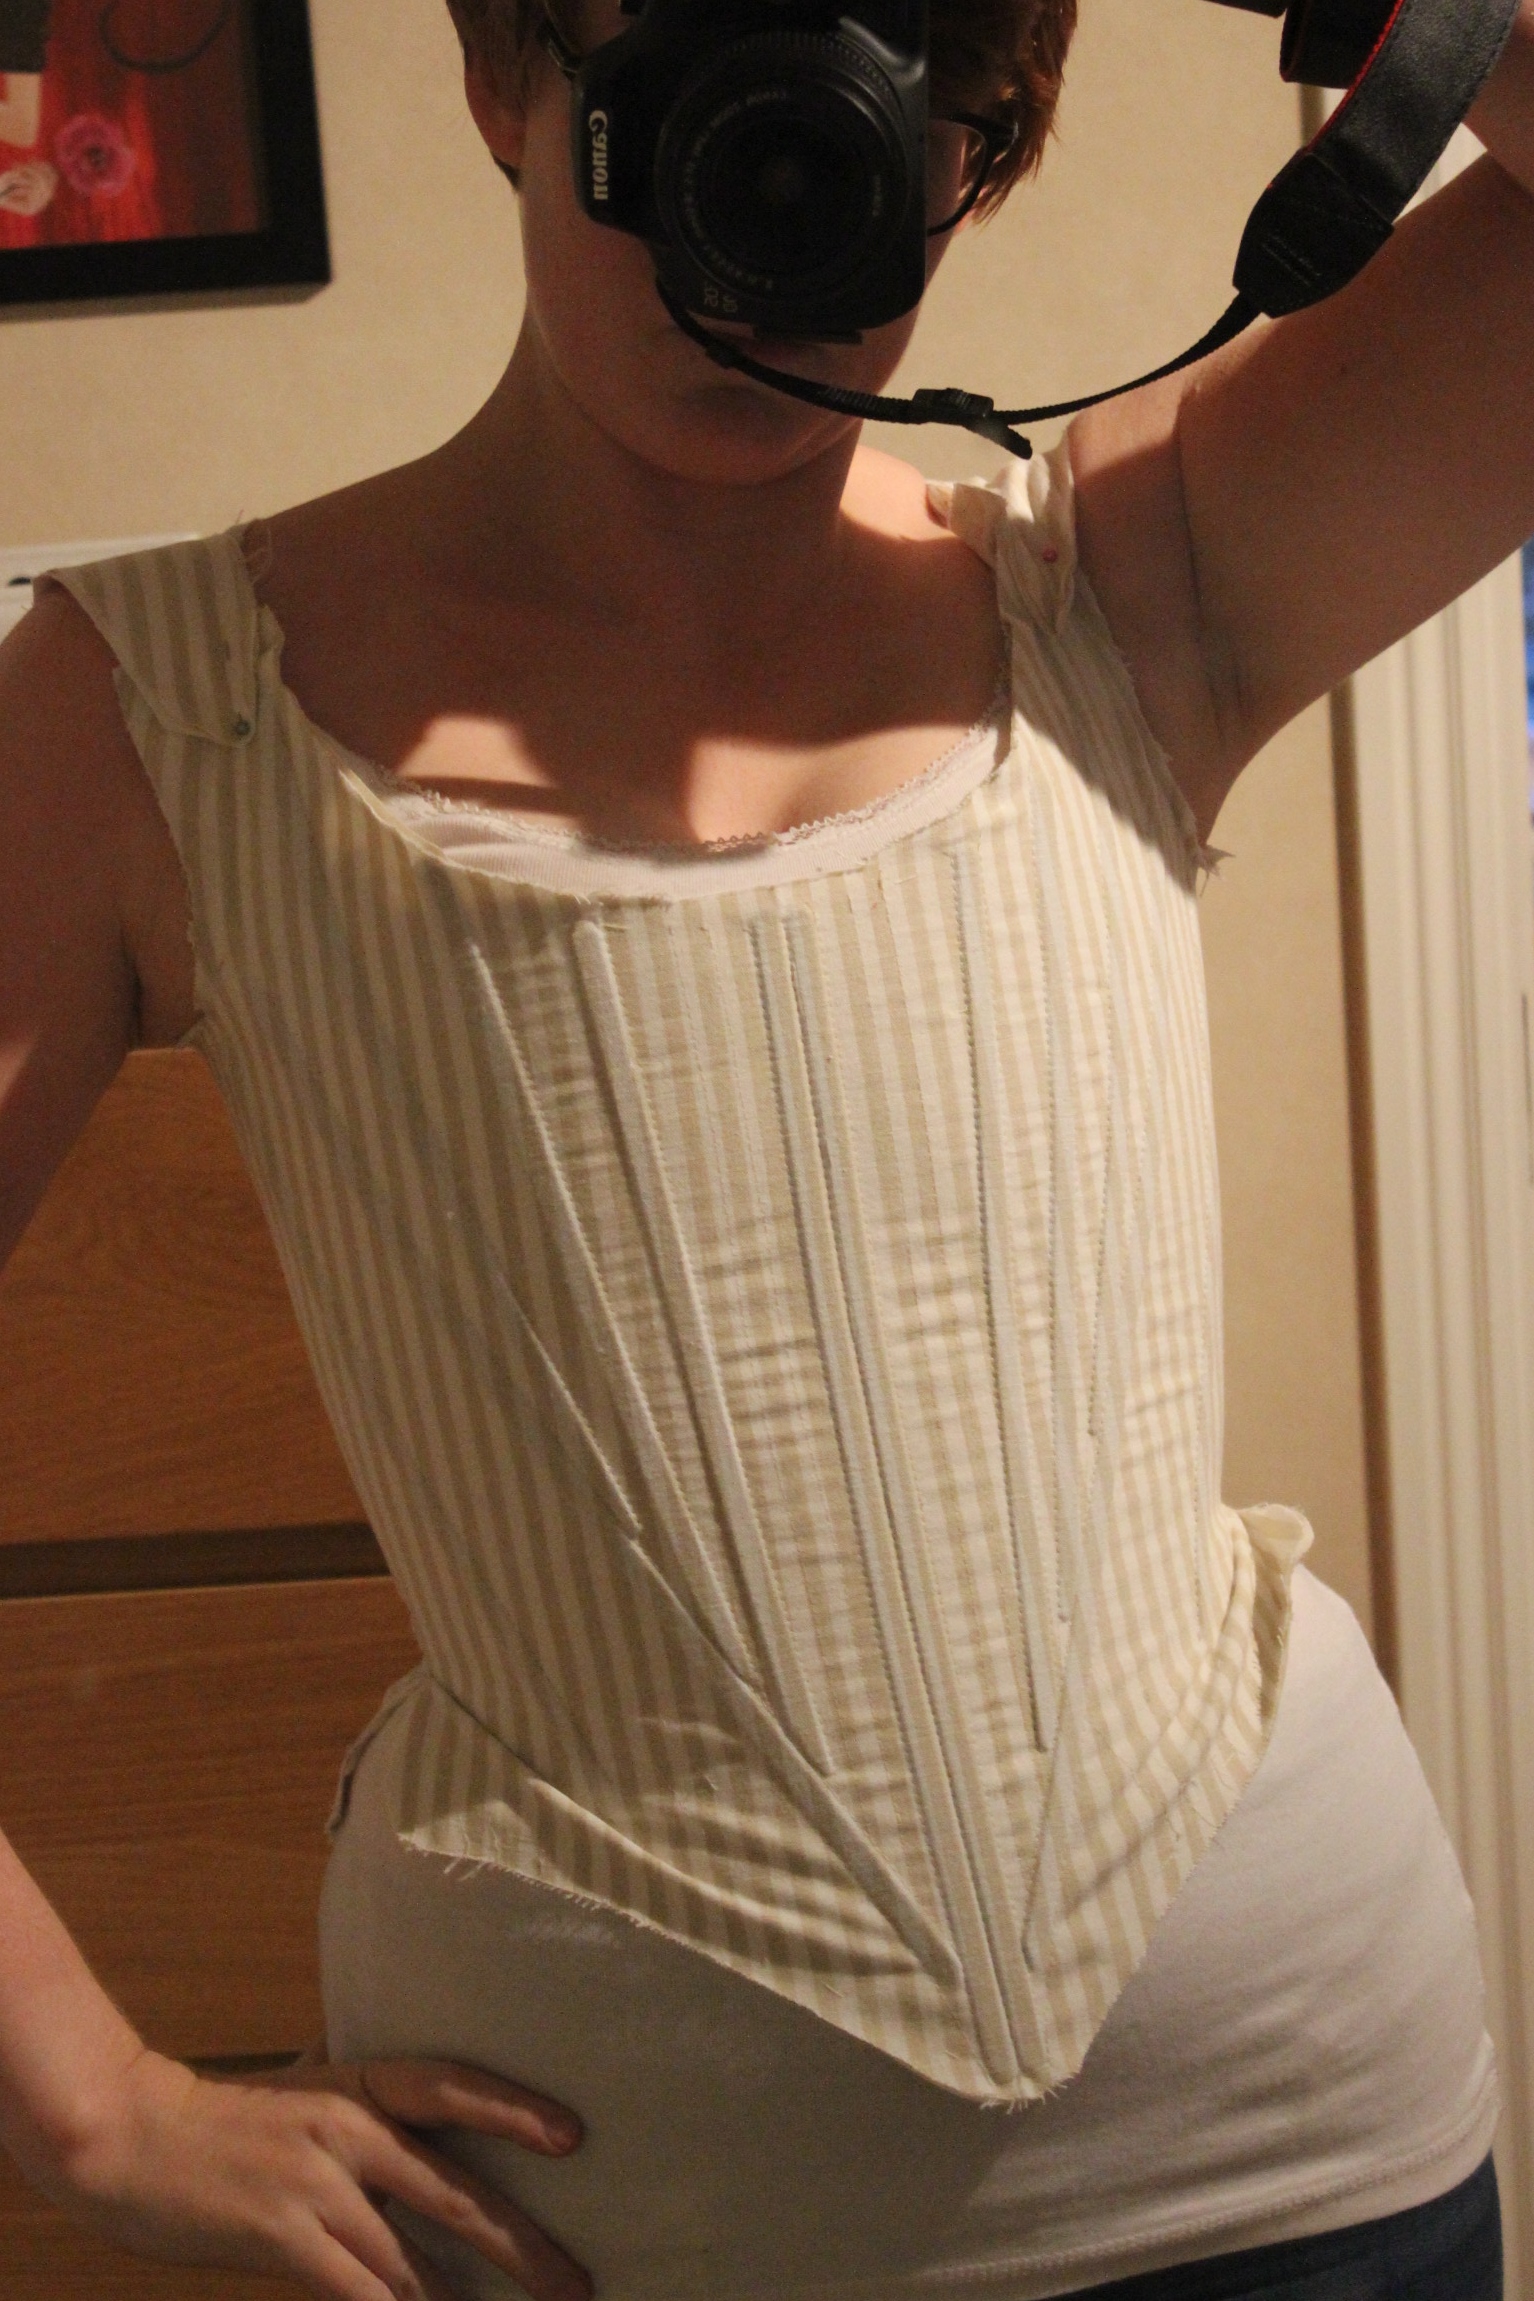
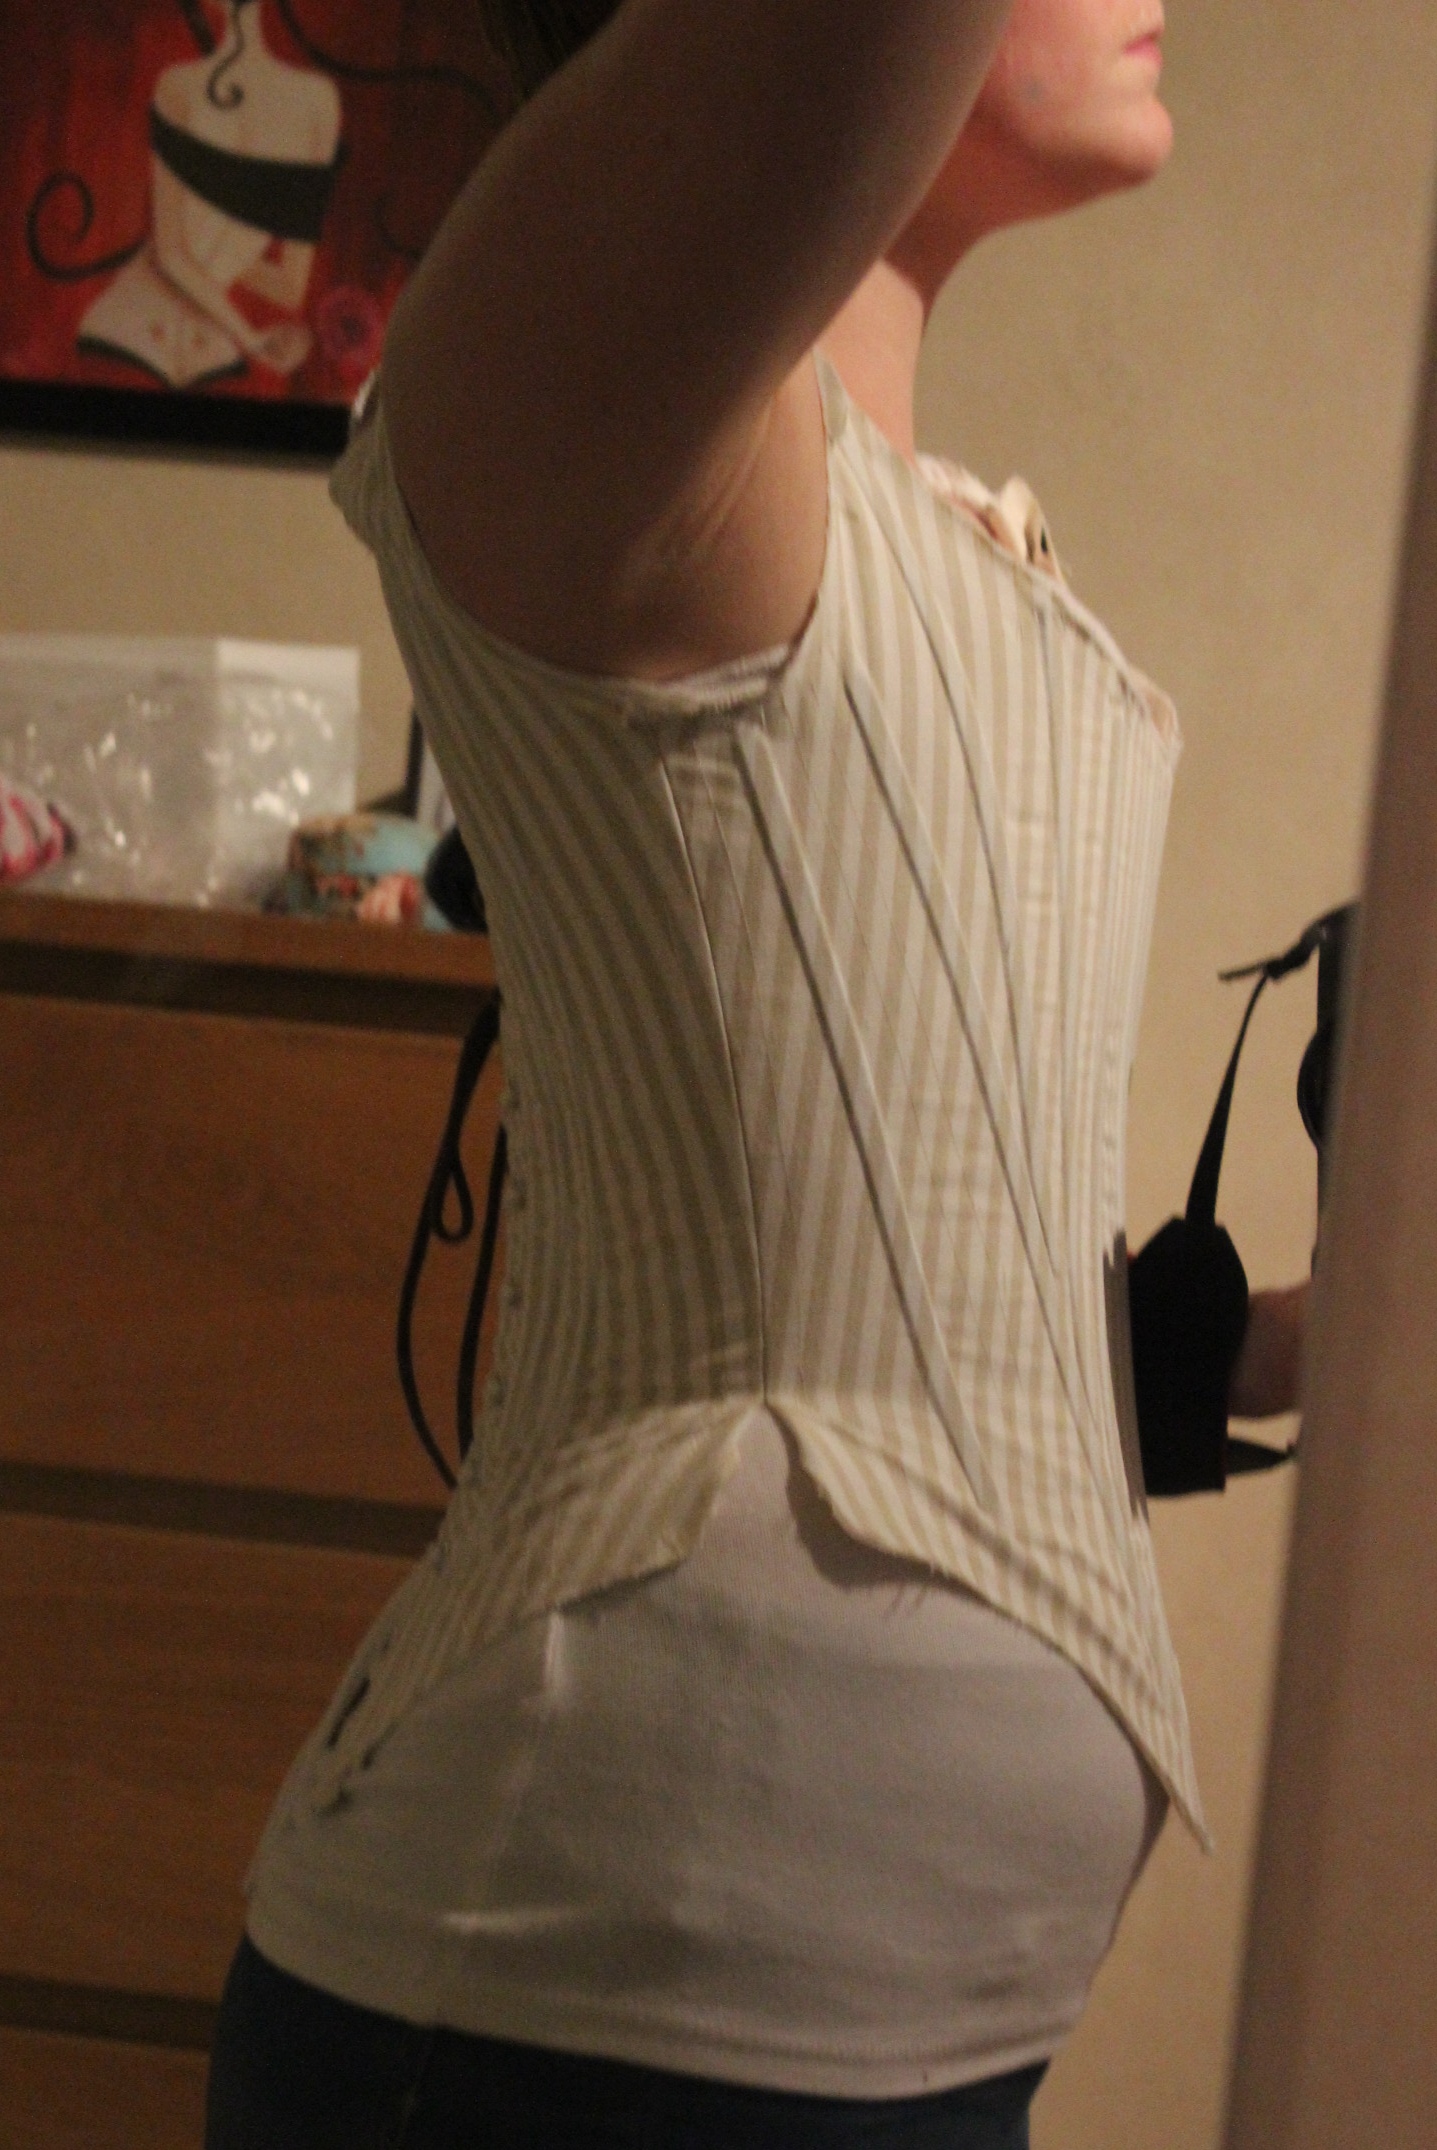
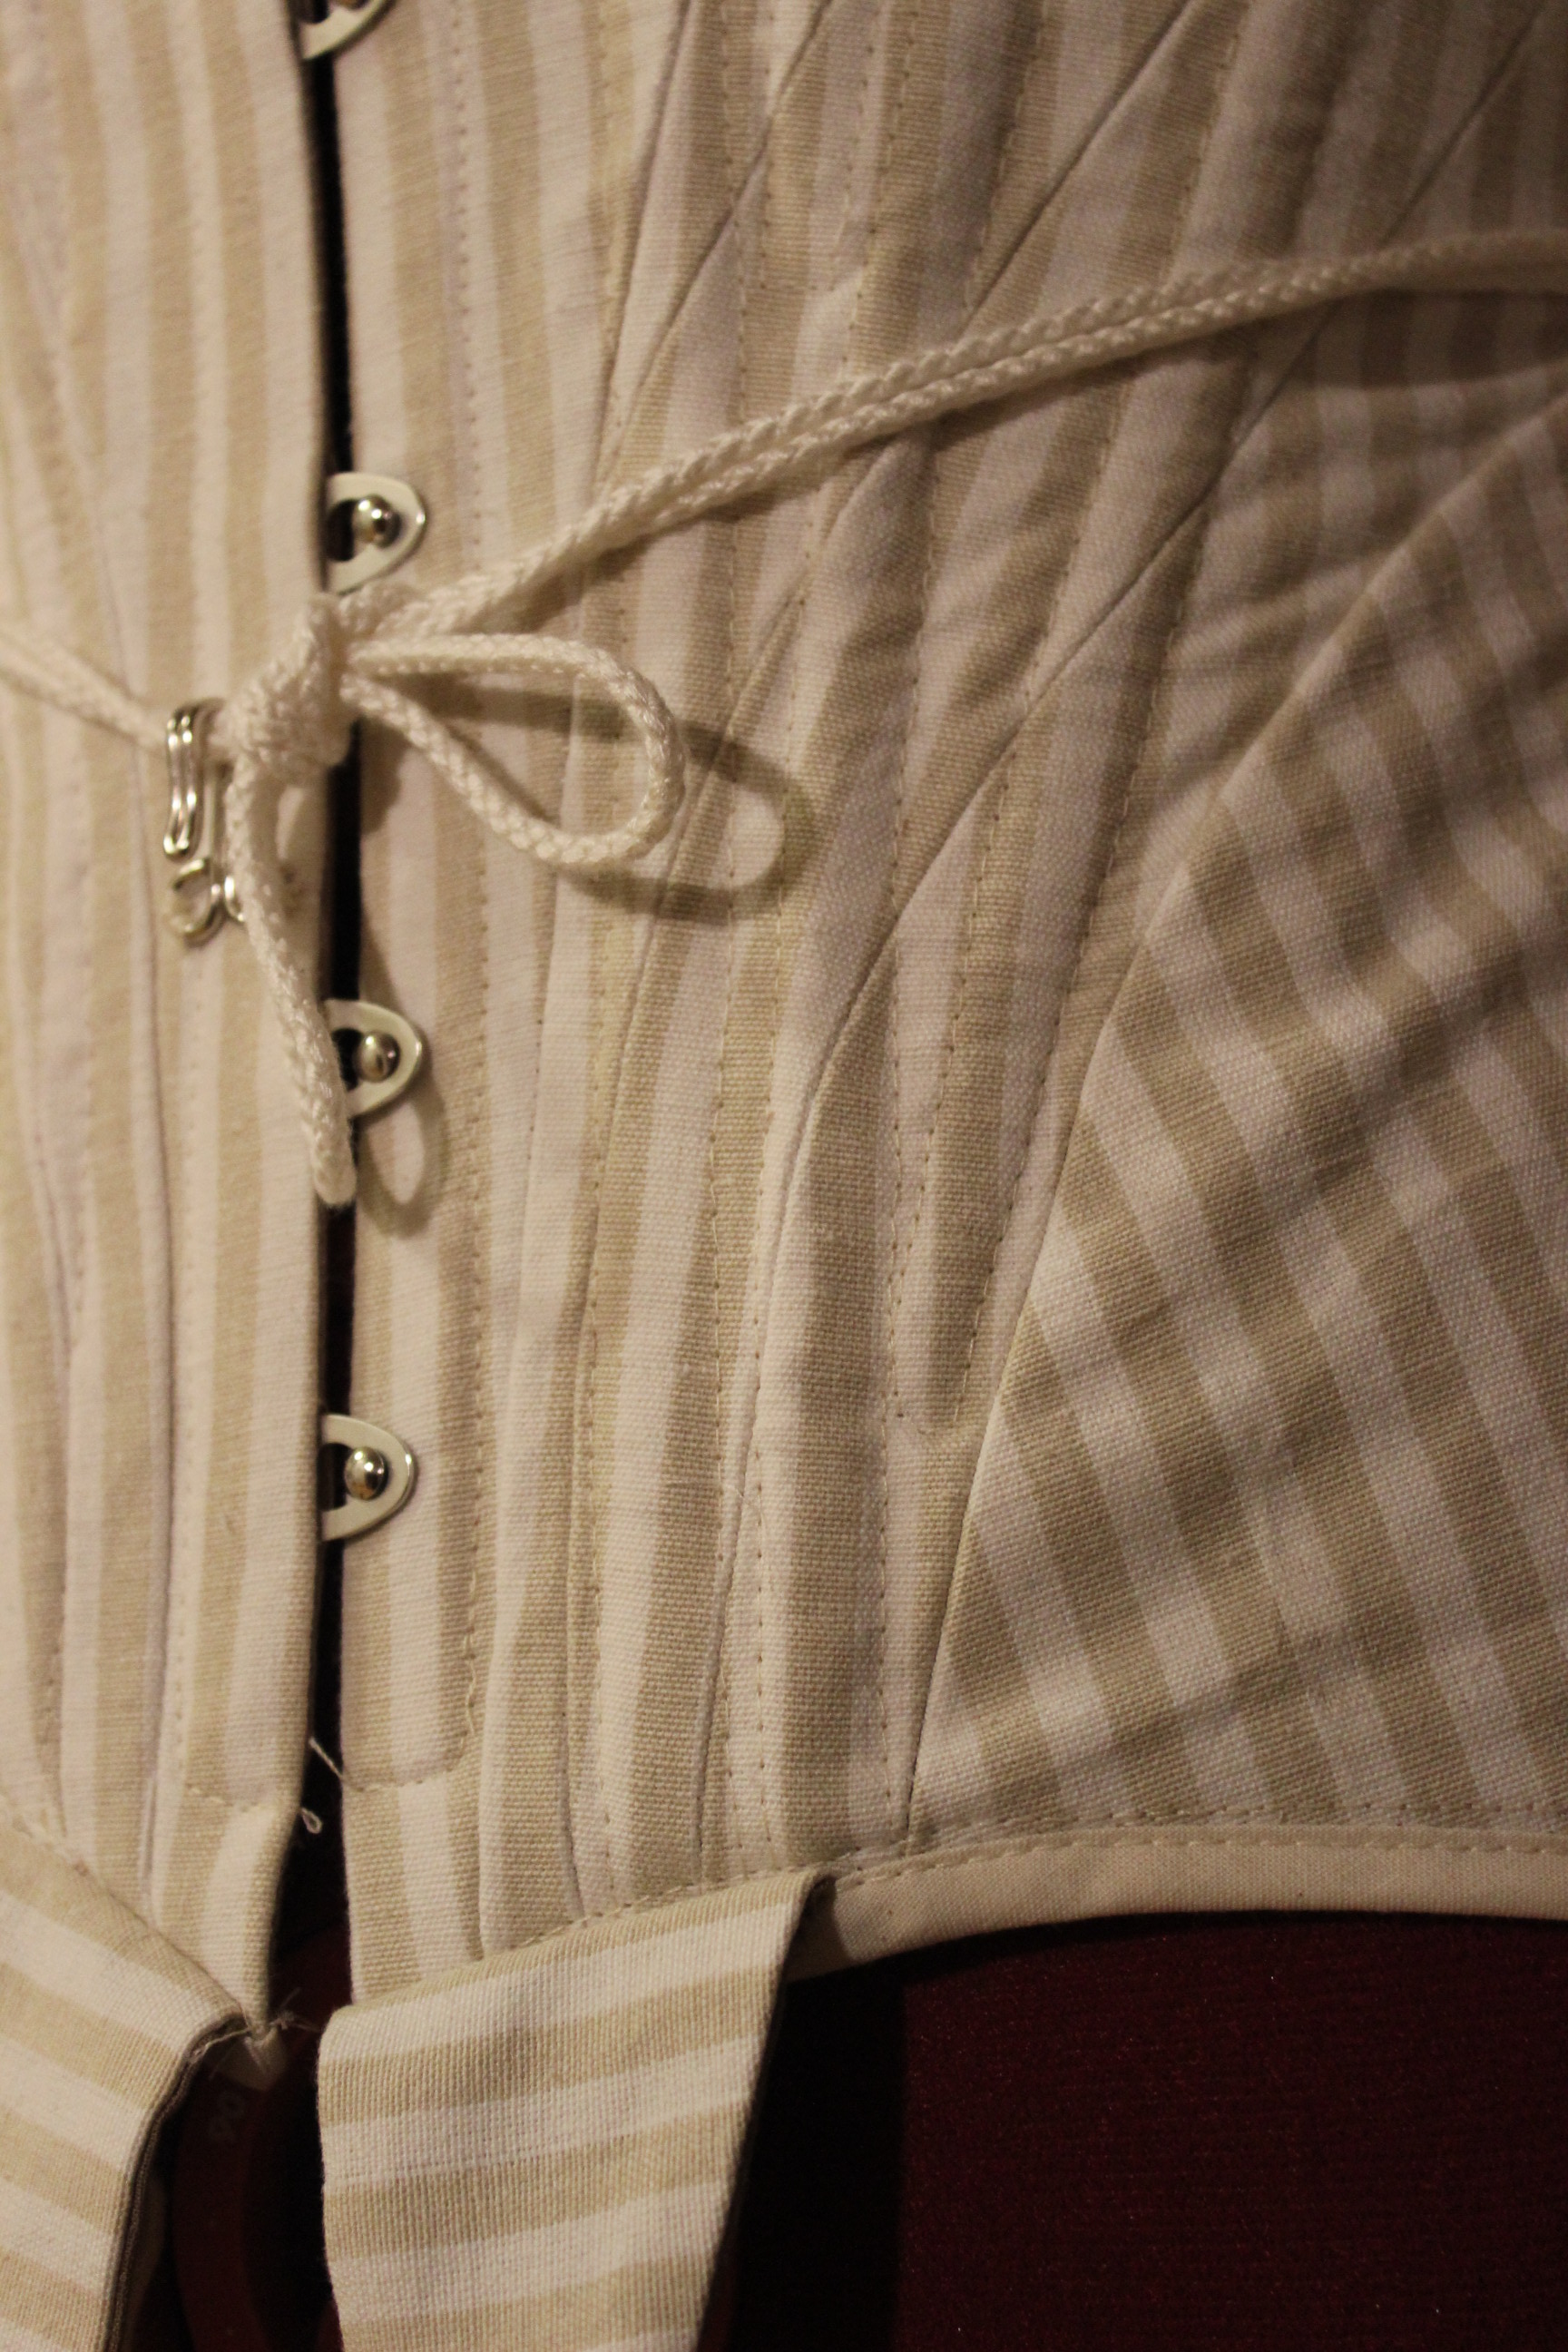
The shape and fit looks really good. The wrinkles at the waist comes from the so far uncut tabs. Please ignore the different color laces – I could’t find any long enough.
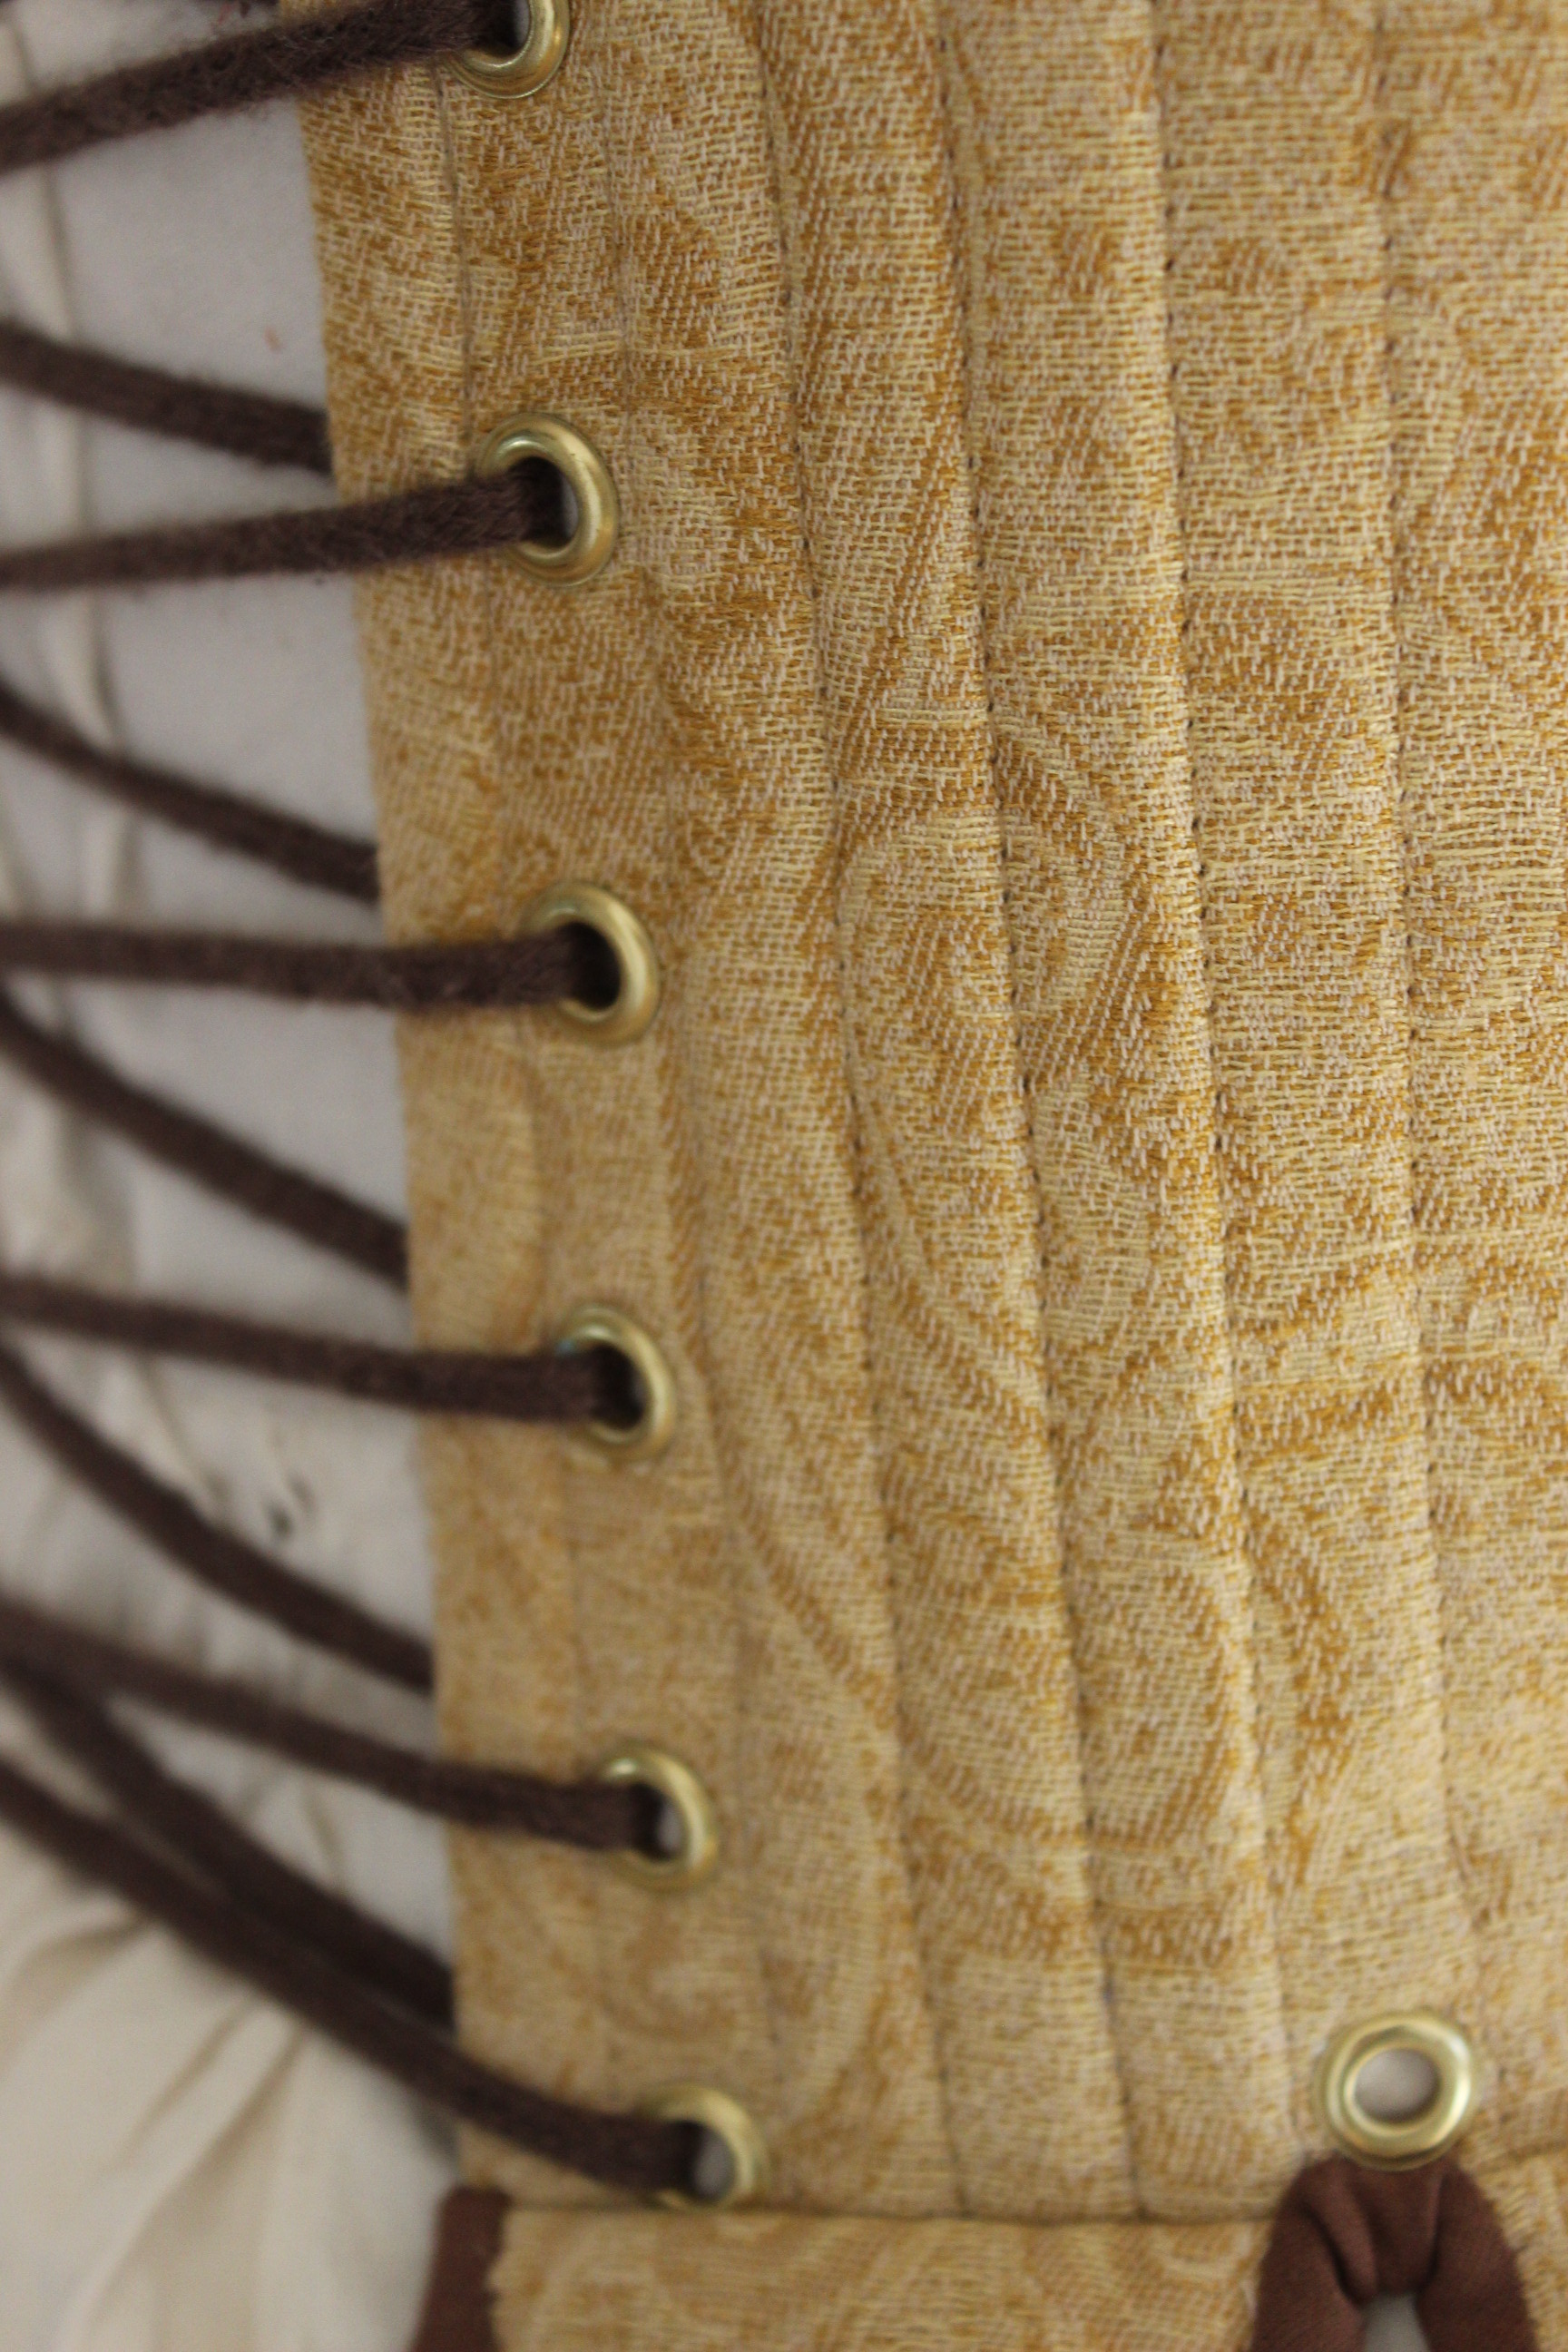
After the fitting I inserted the rest of the boning, making sure the sharp edges was cut down and rounded of.
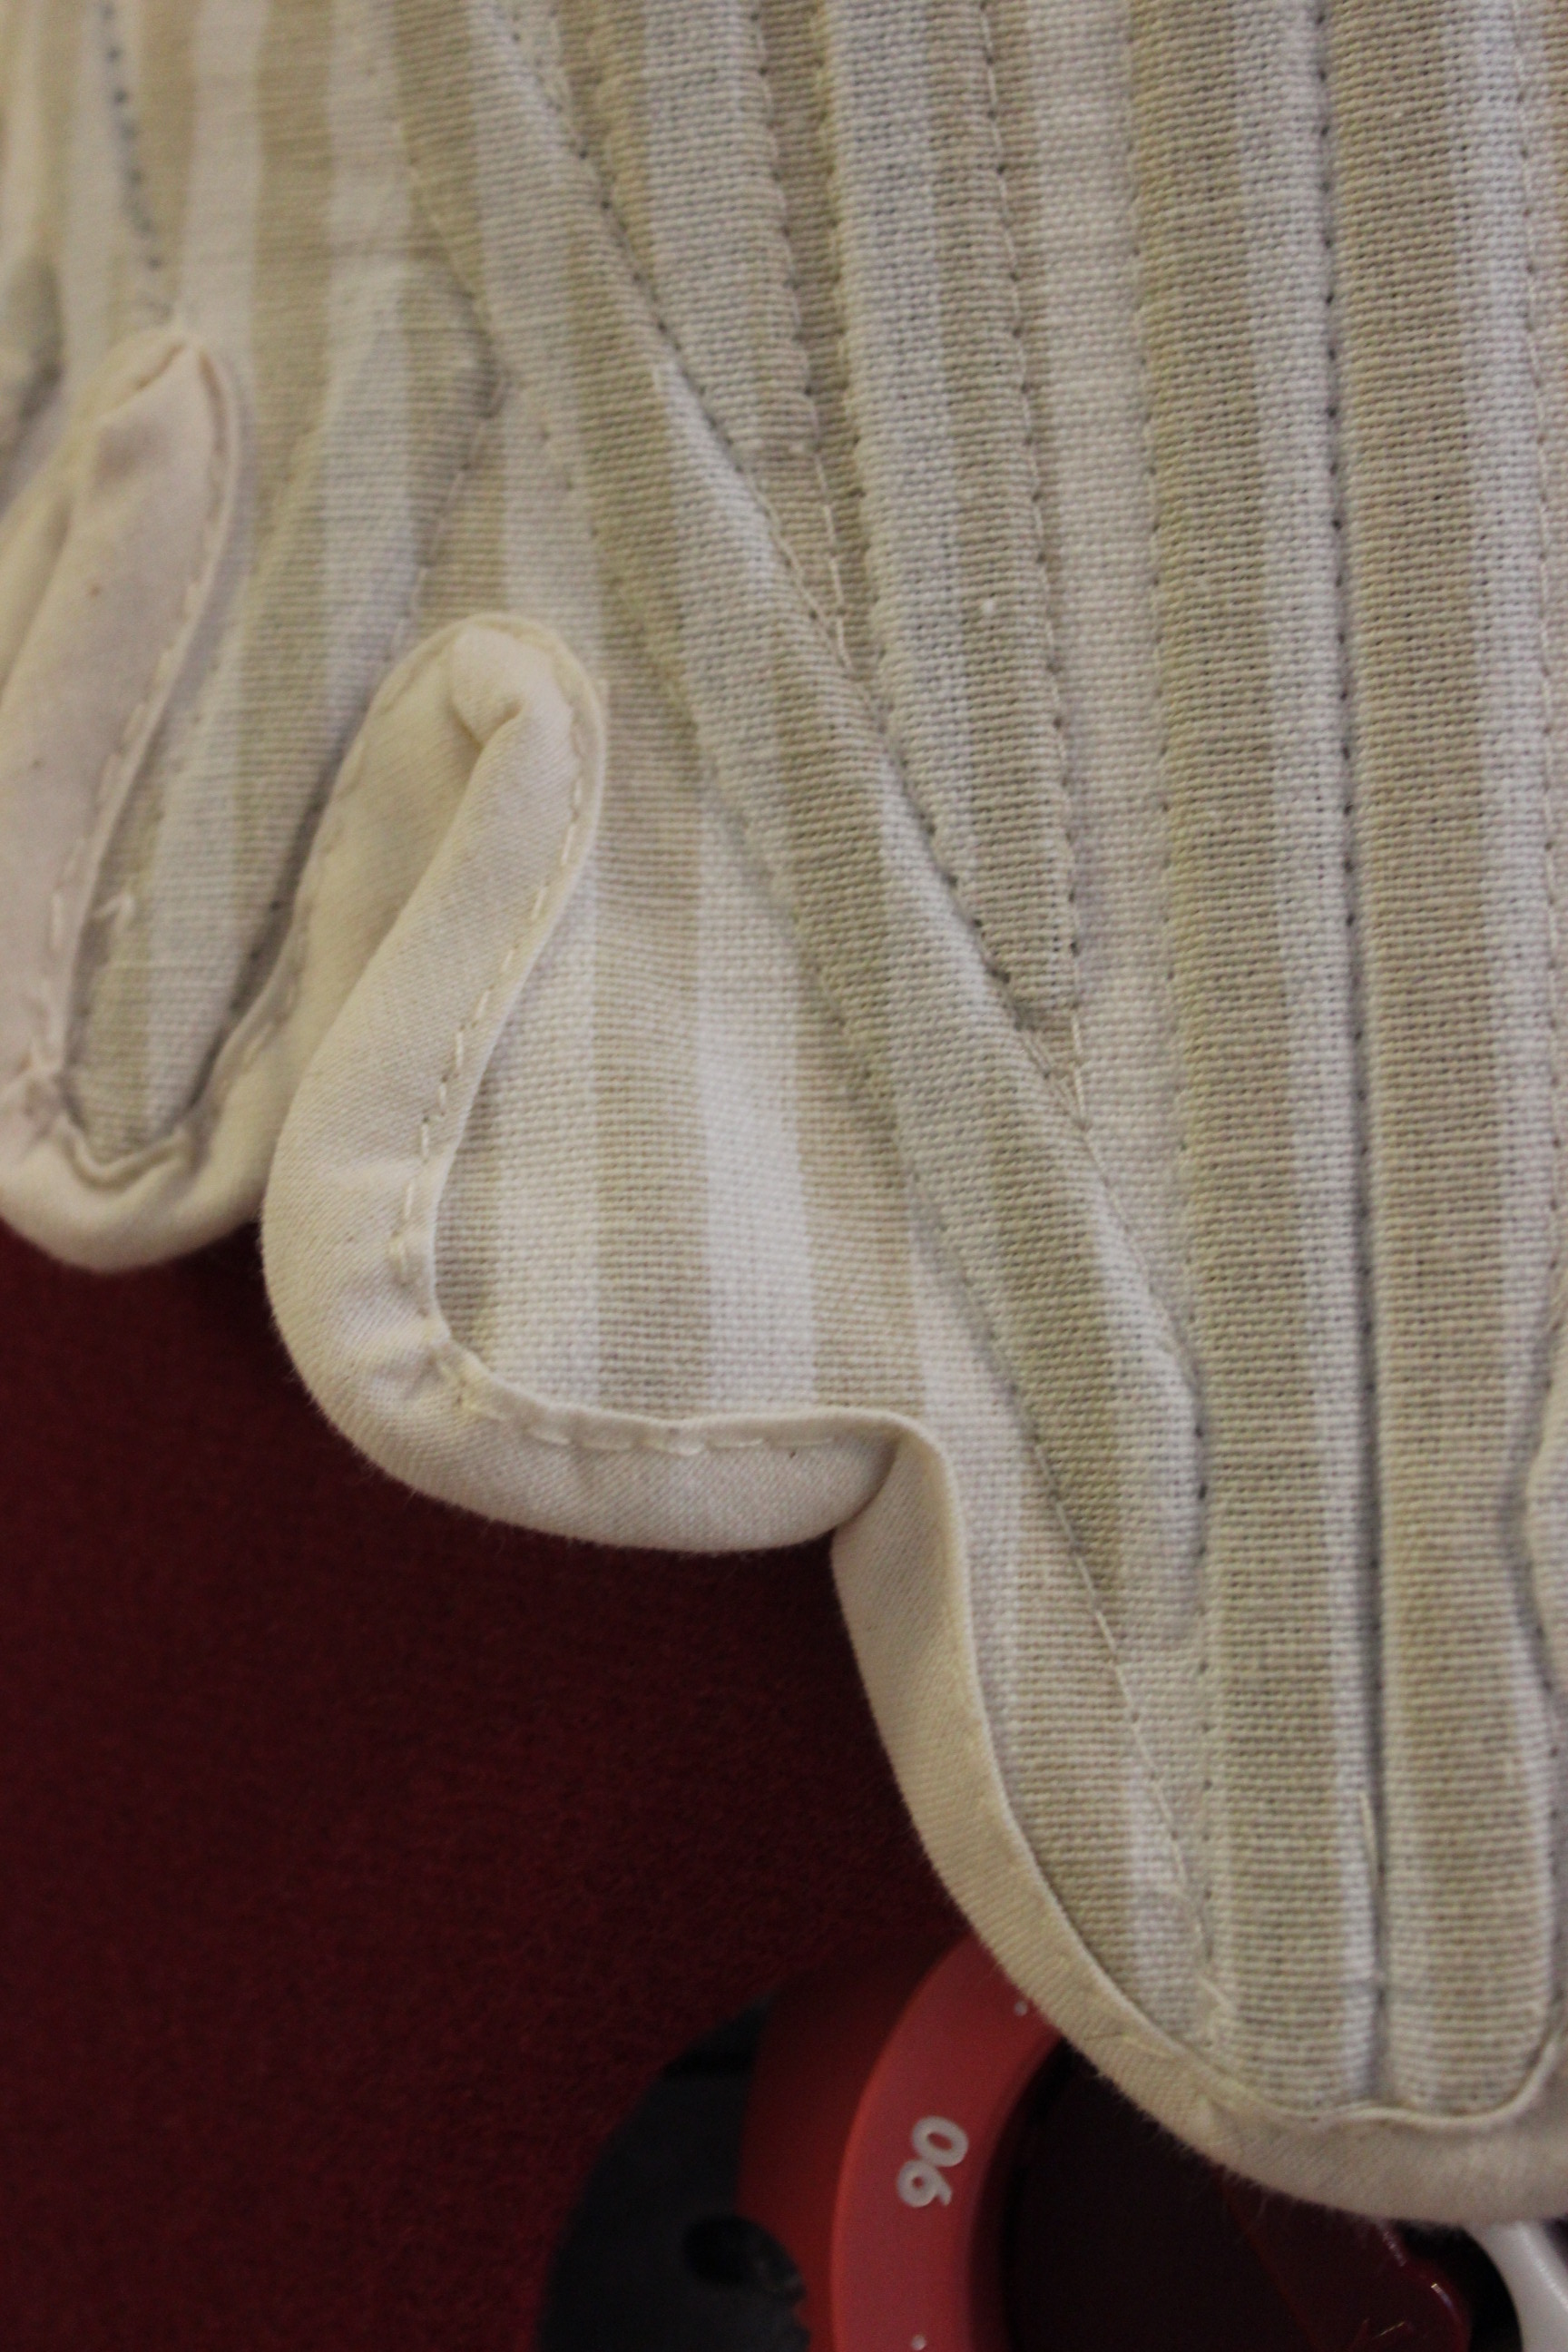
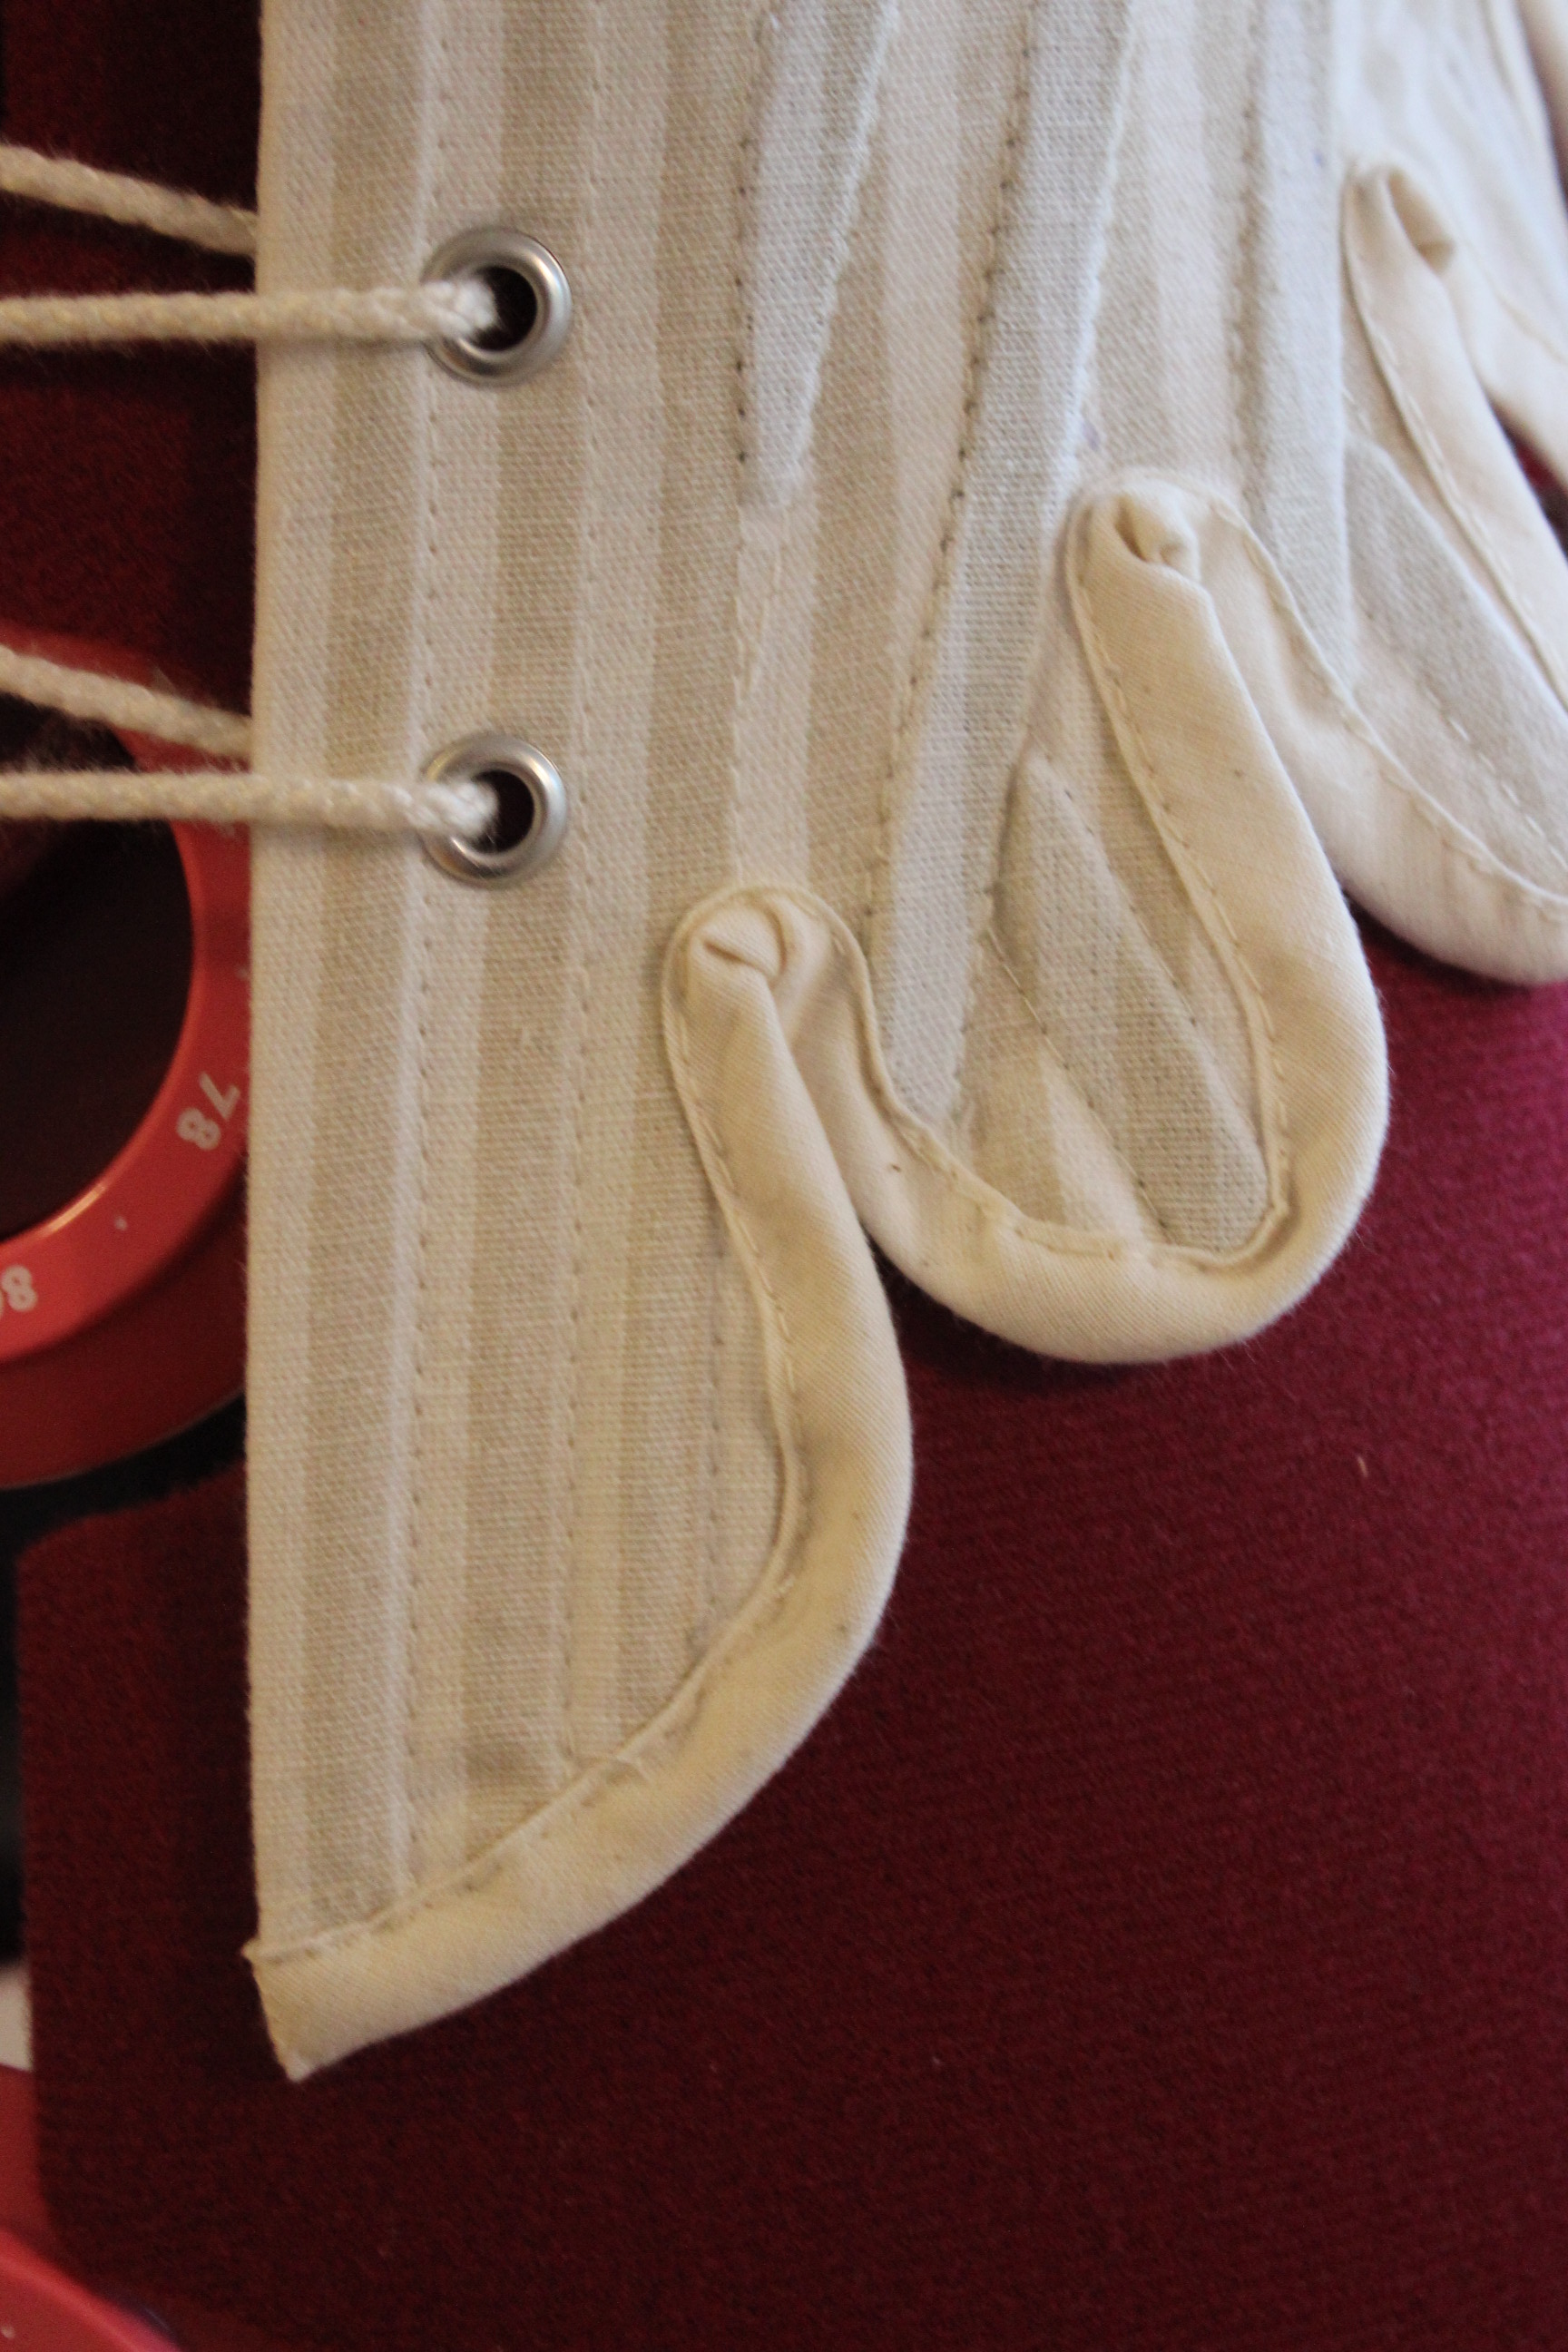
I needed to use some bias tape and hand sewing to get the channels for the horizontal bones in place.
They show a bit from he front, but not enough to be a problem.
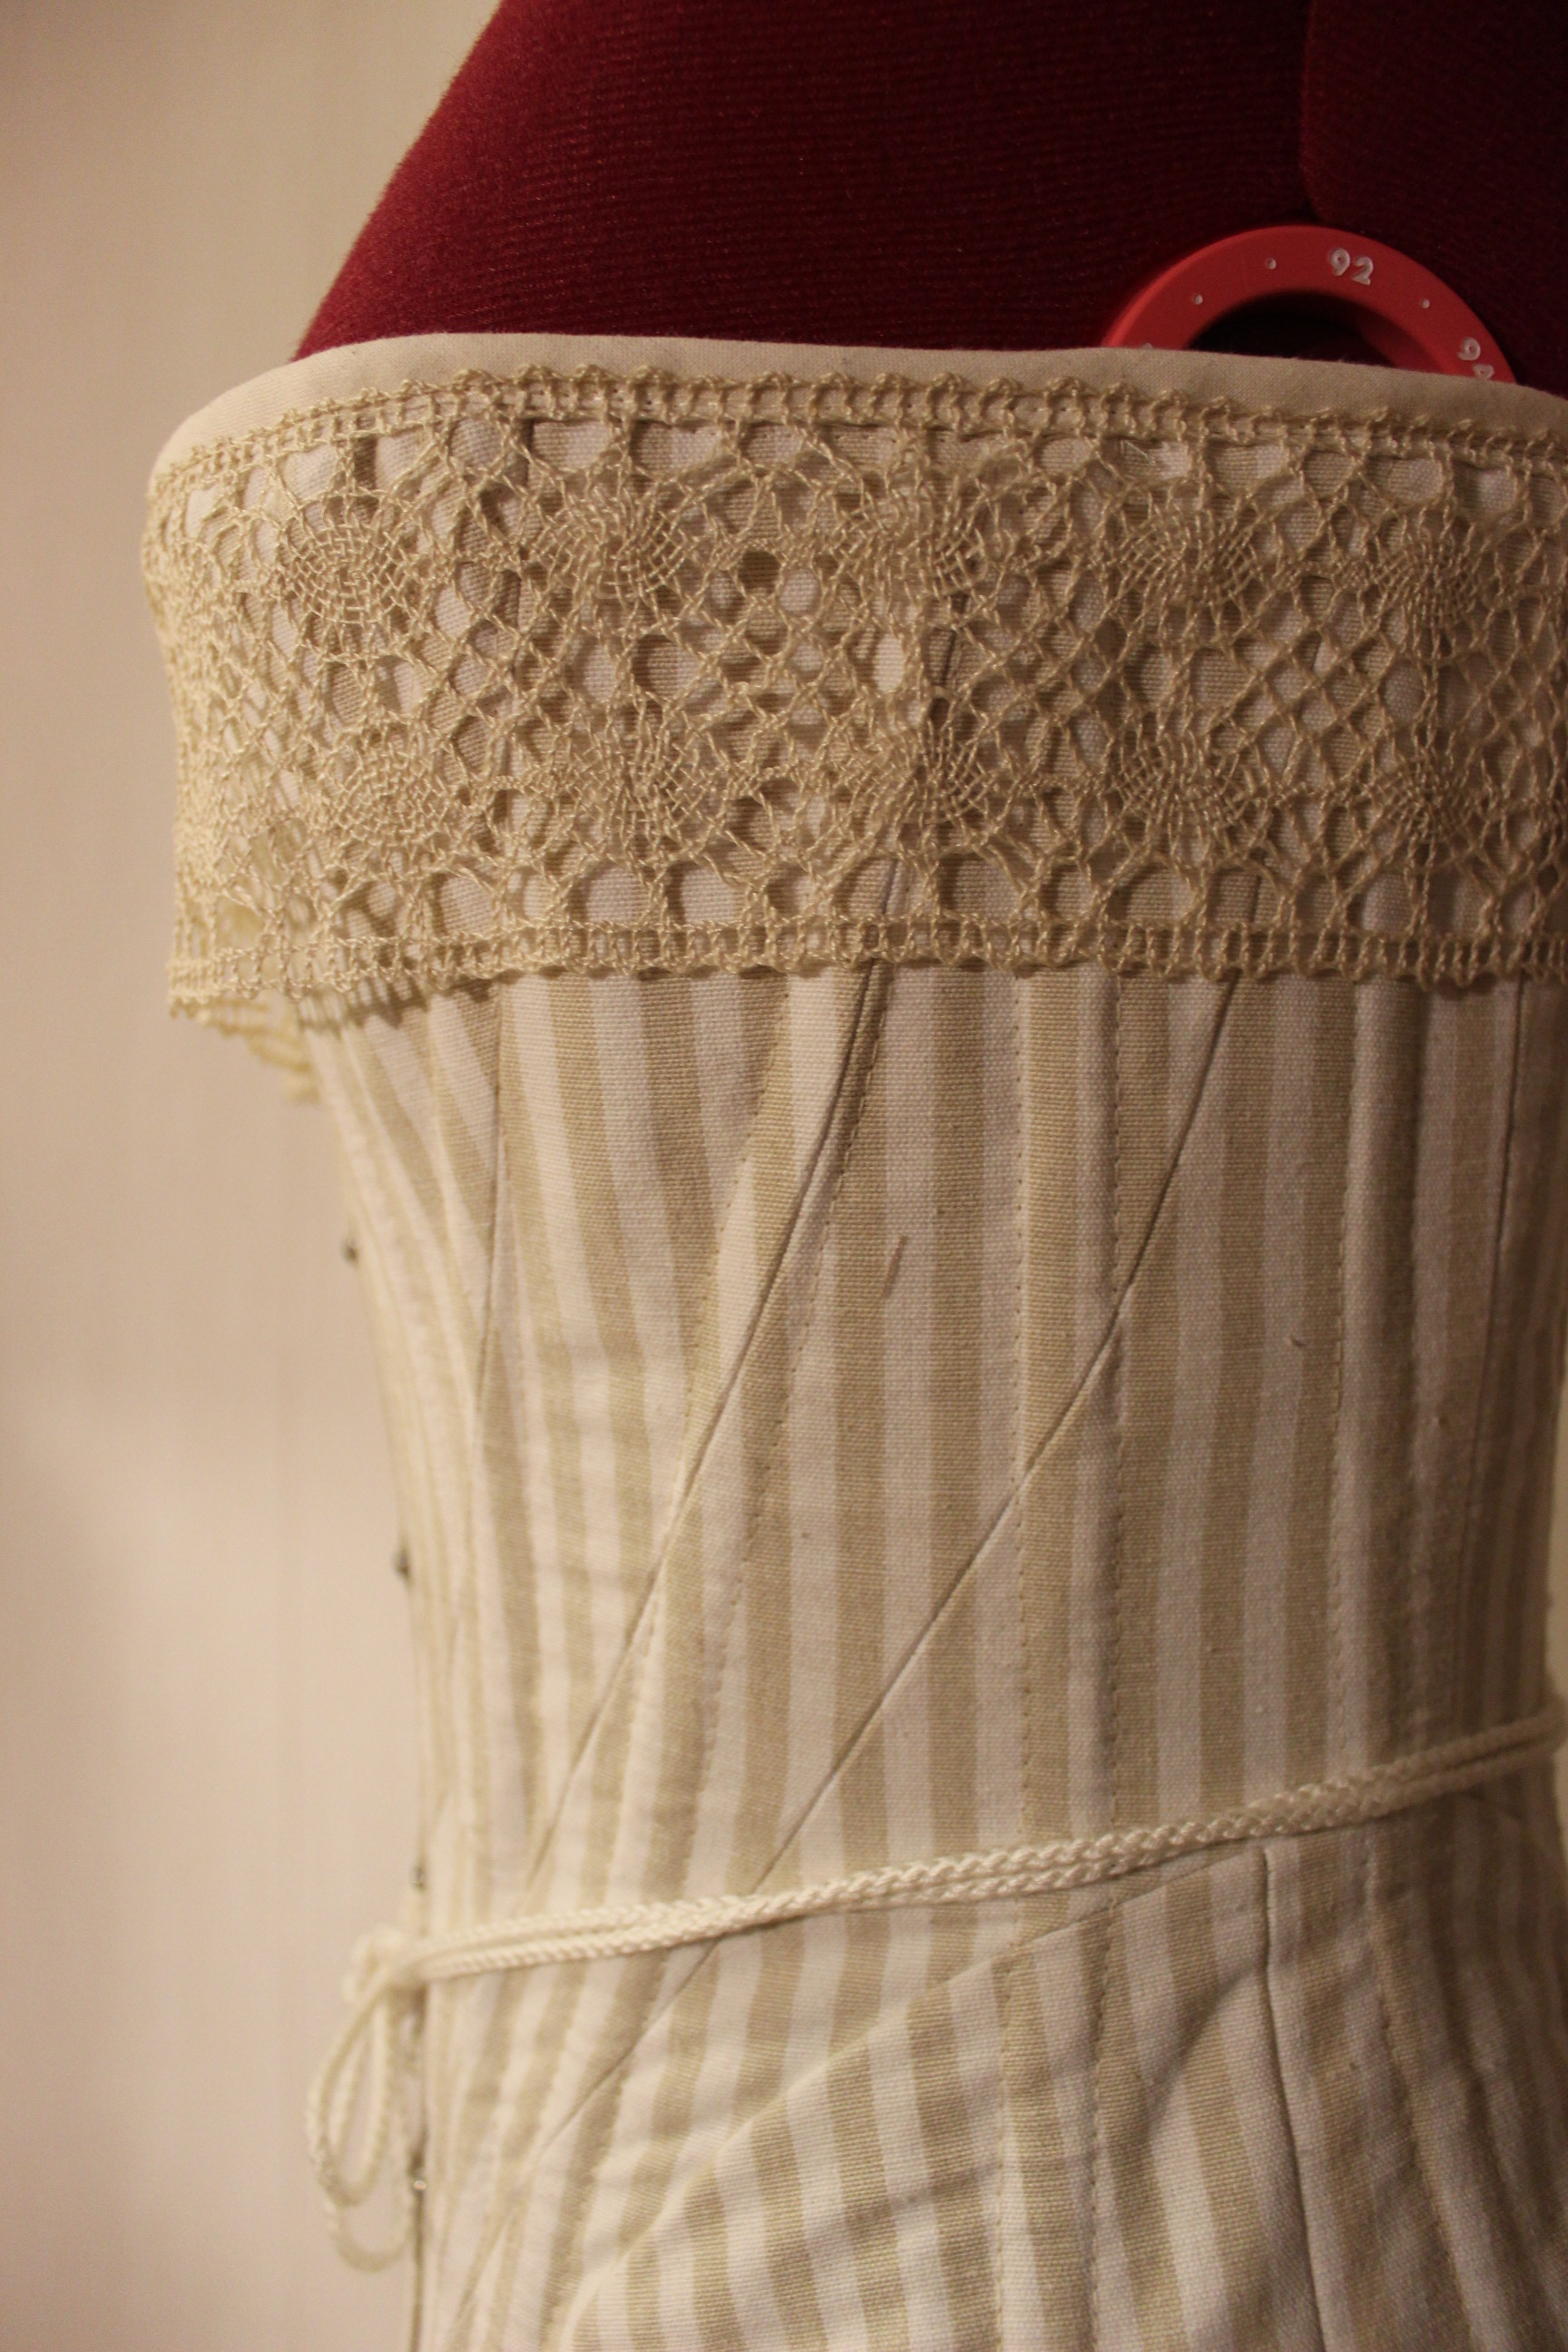
I then pinned on the lining, sewing it down to the selvages and basting it round the top and bottom. 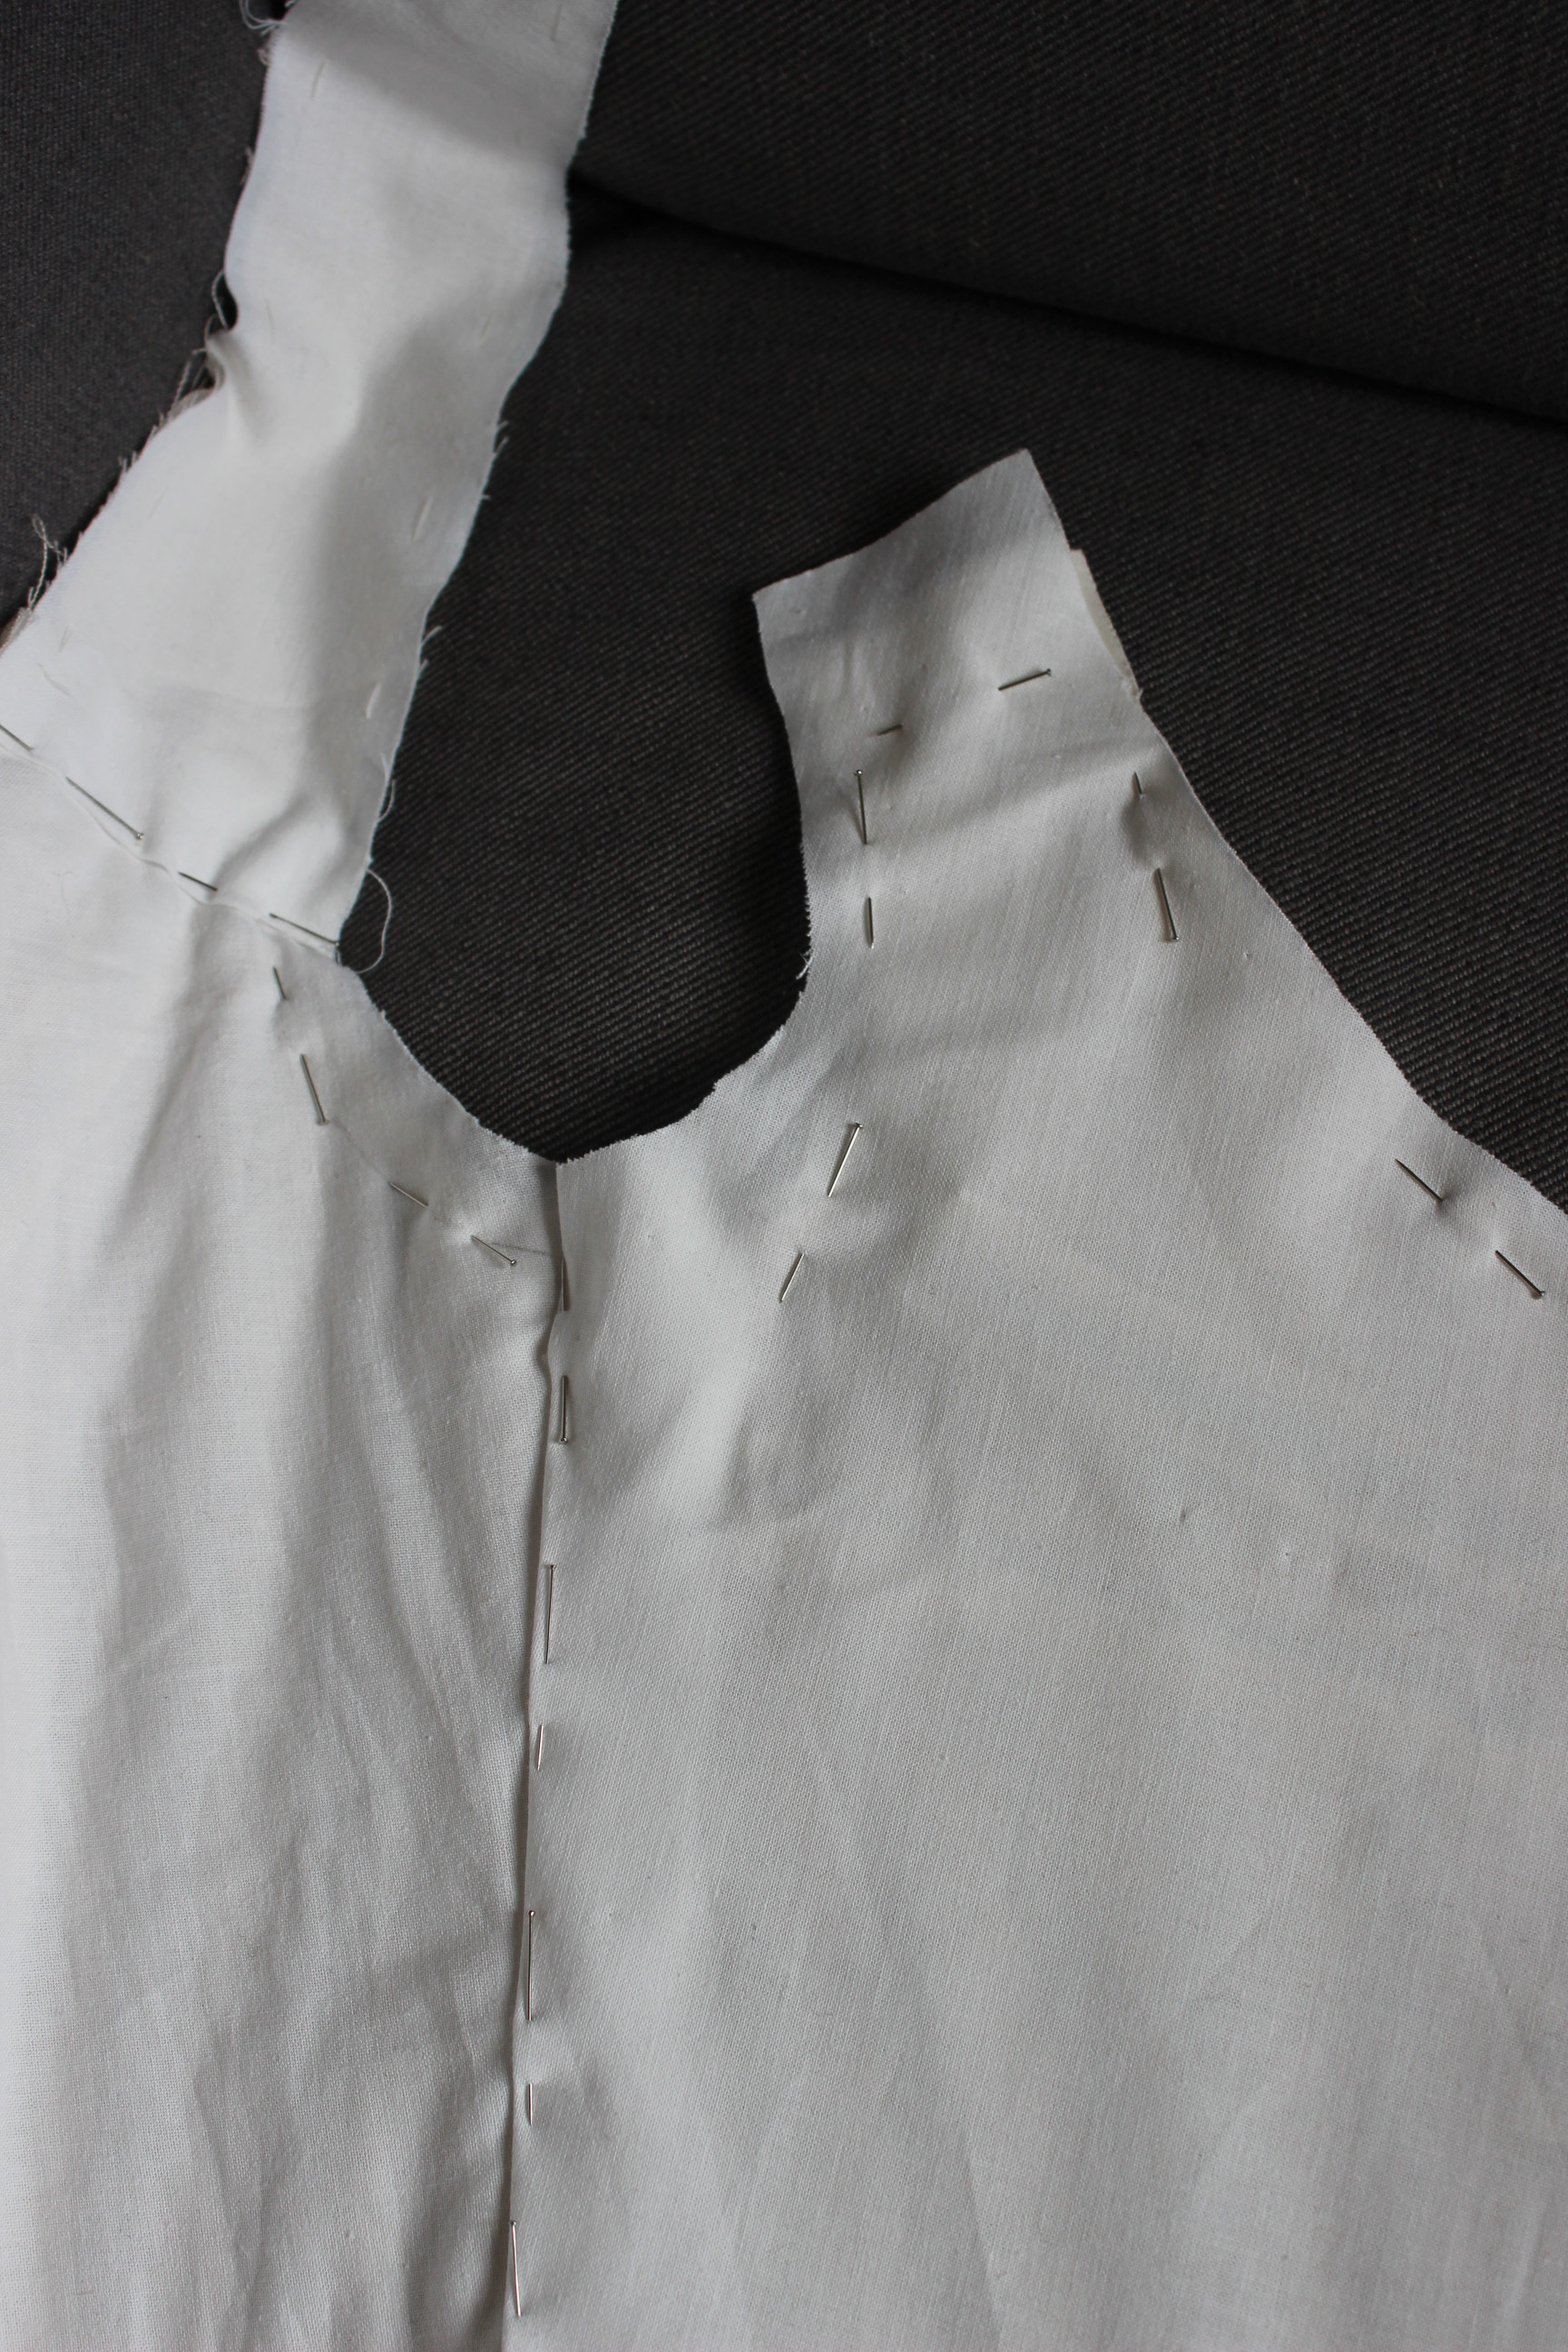
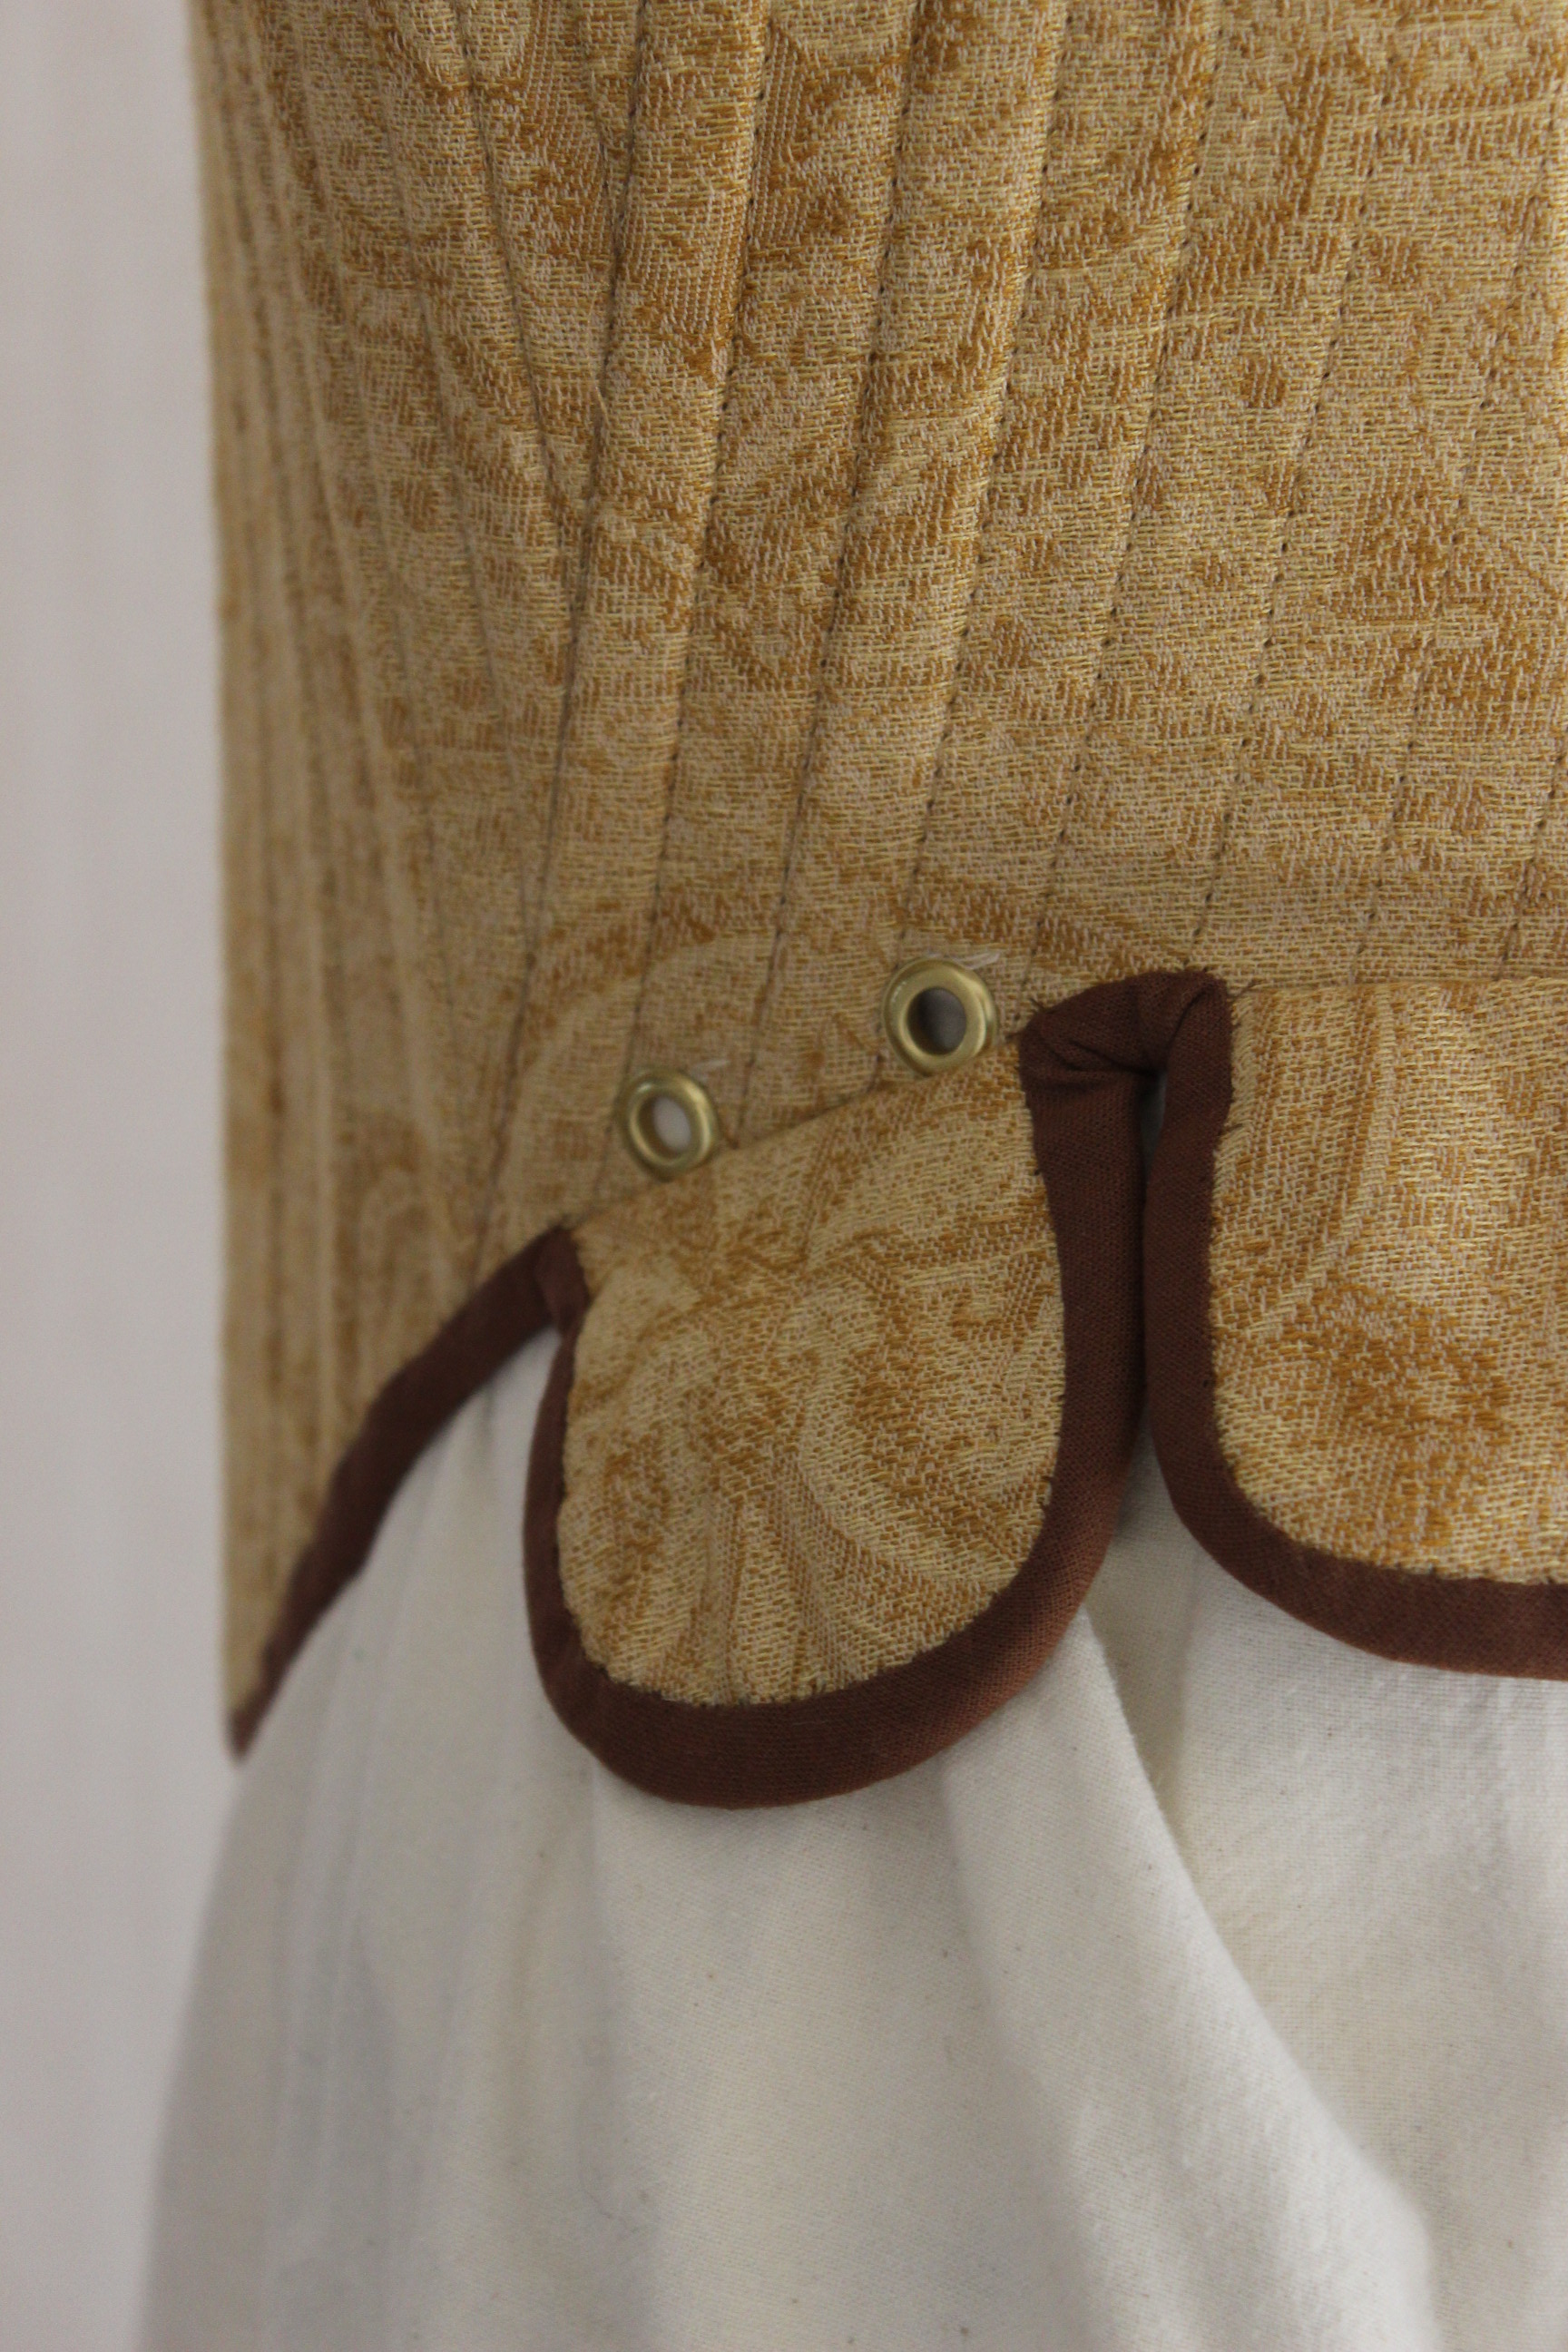
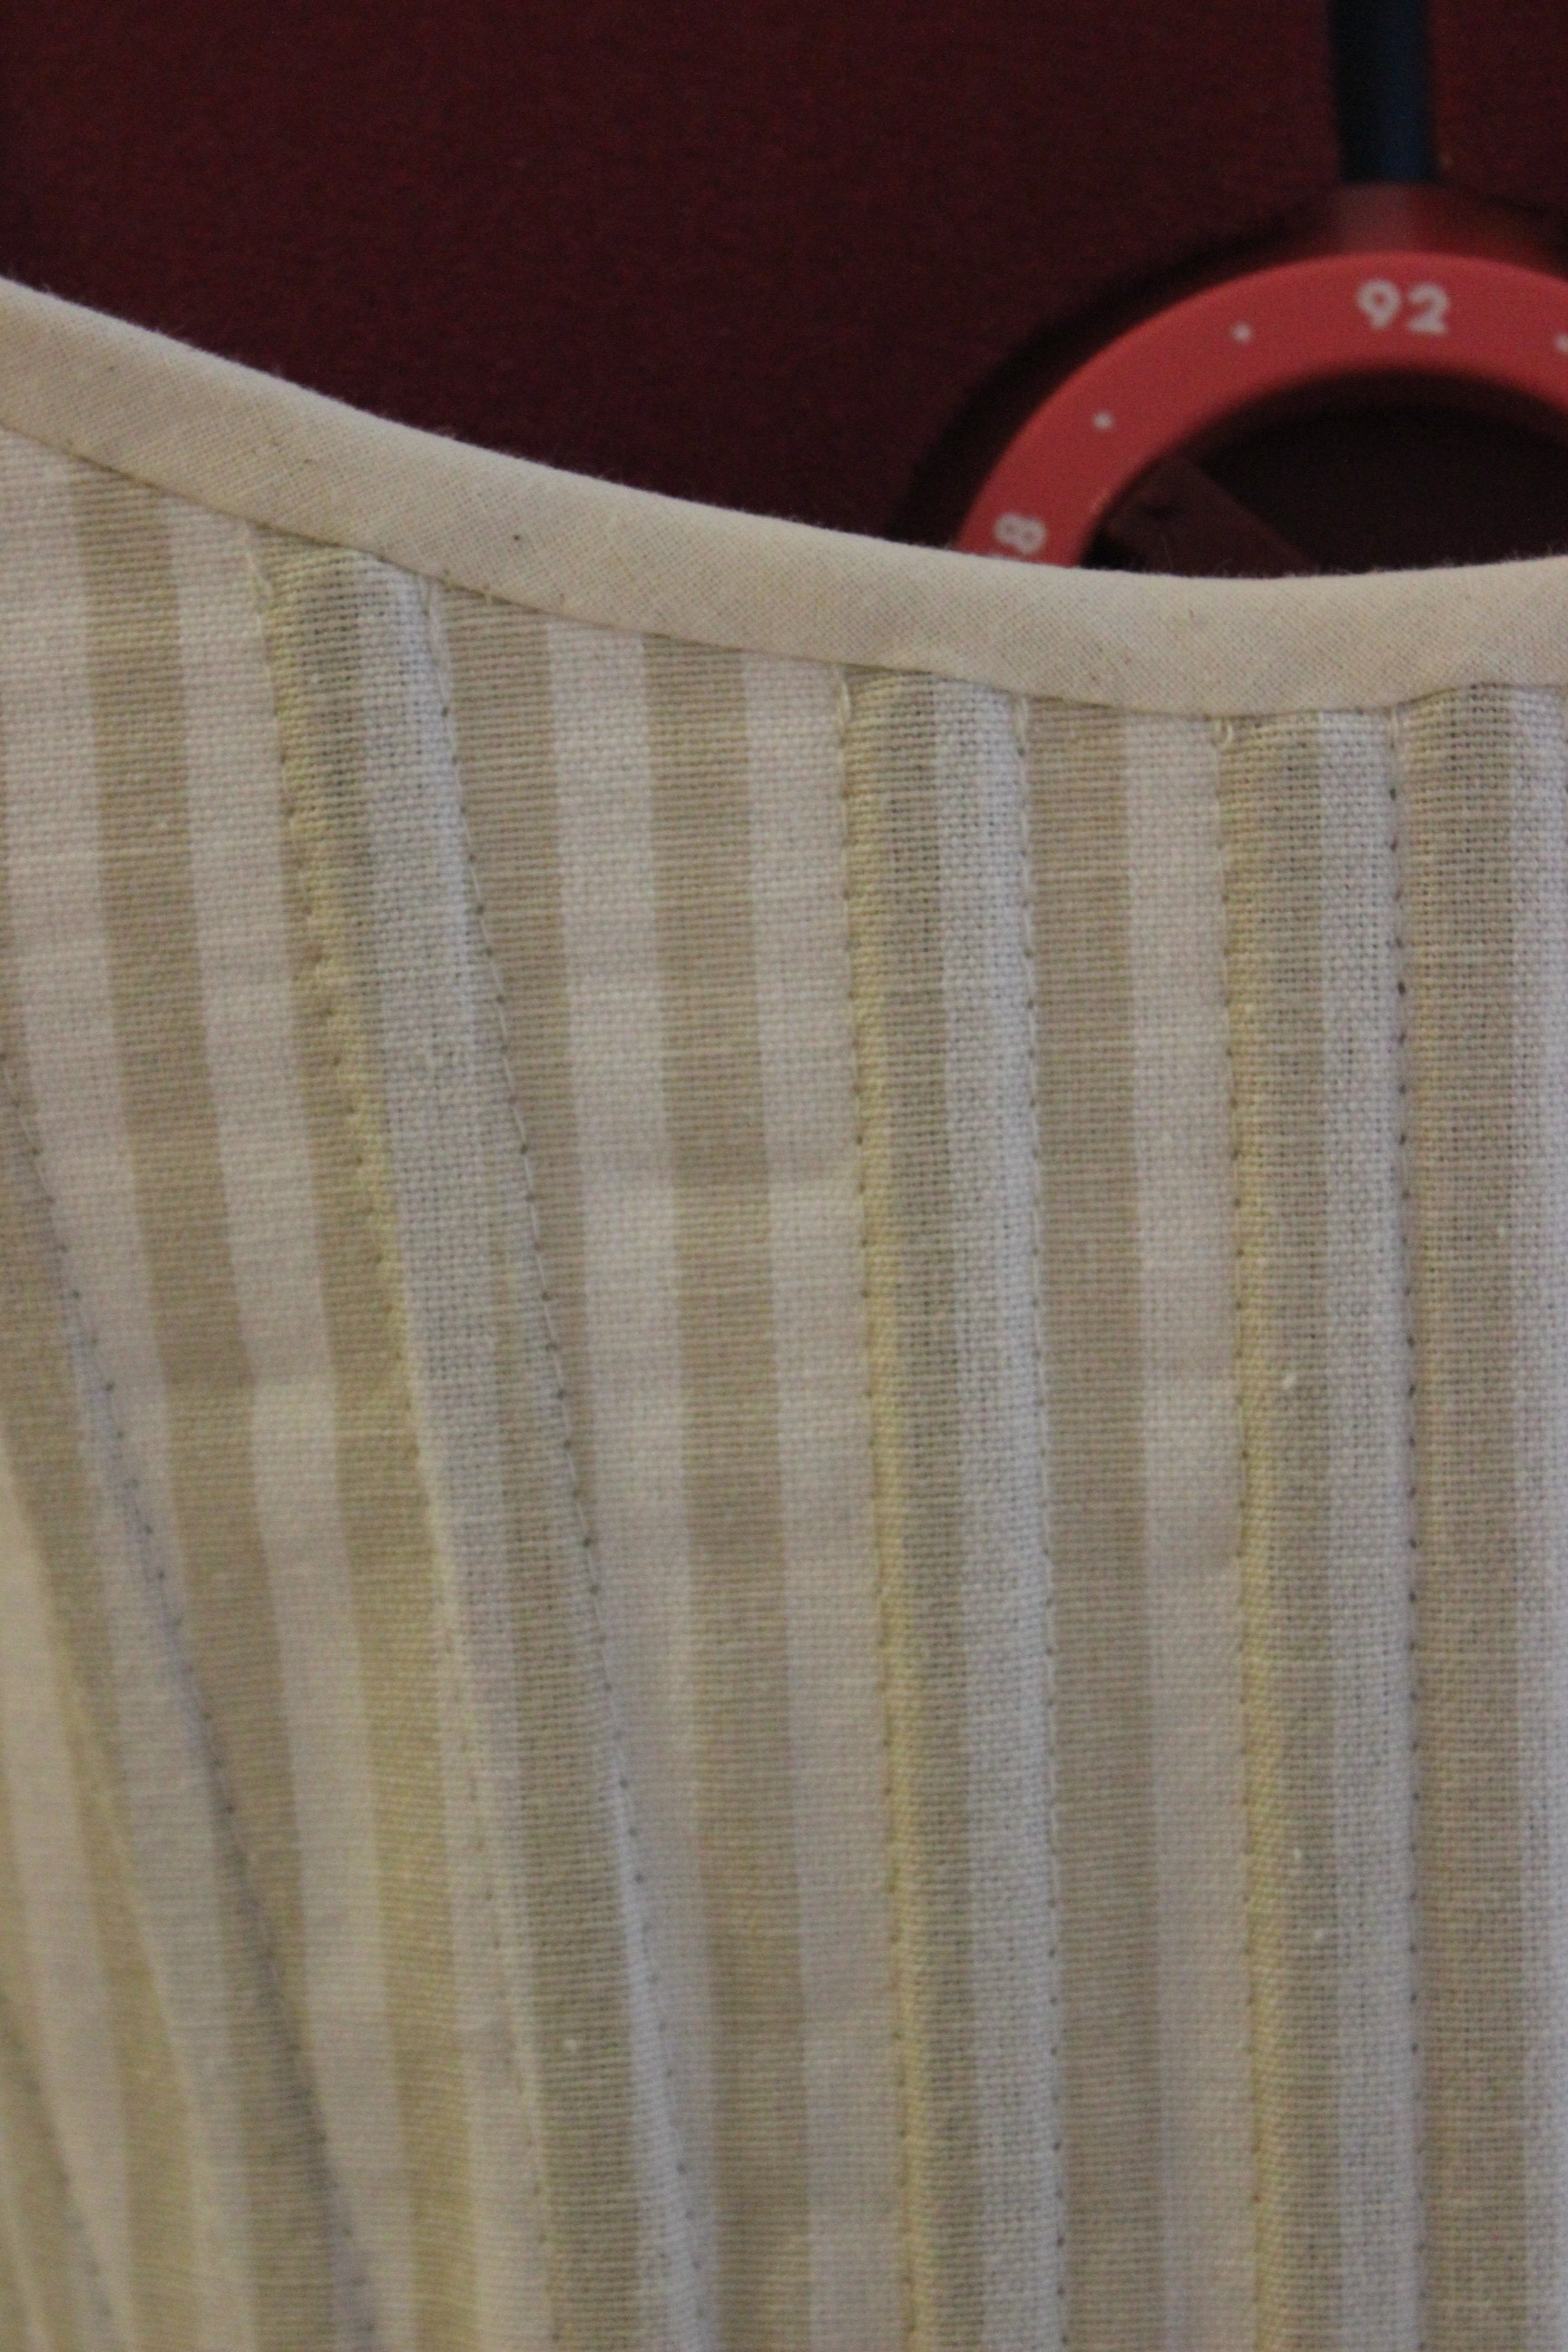
Then it was time to cut the tabs, bind the edges.
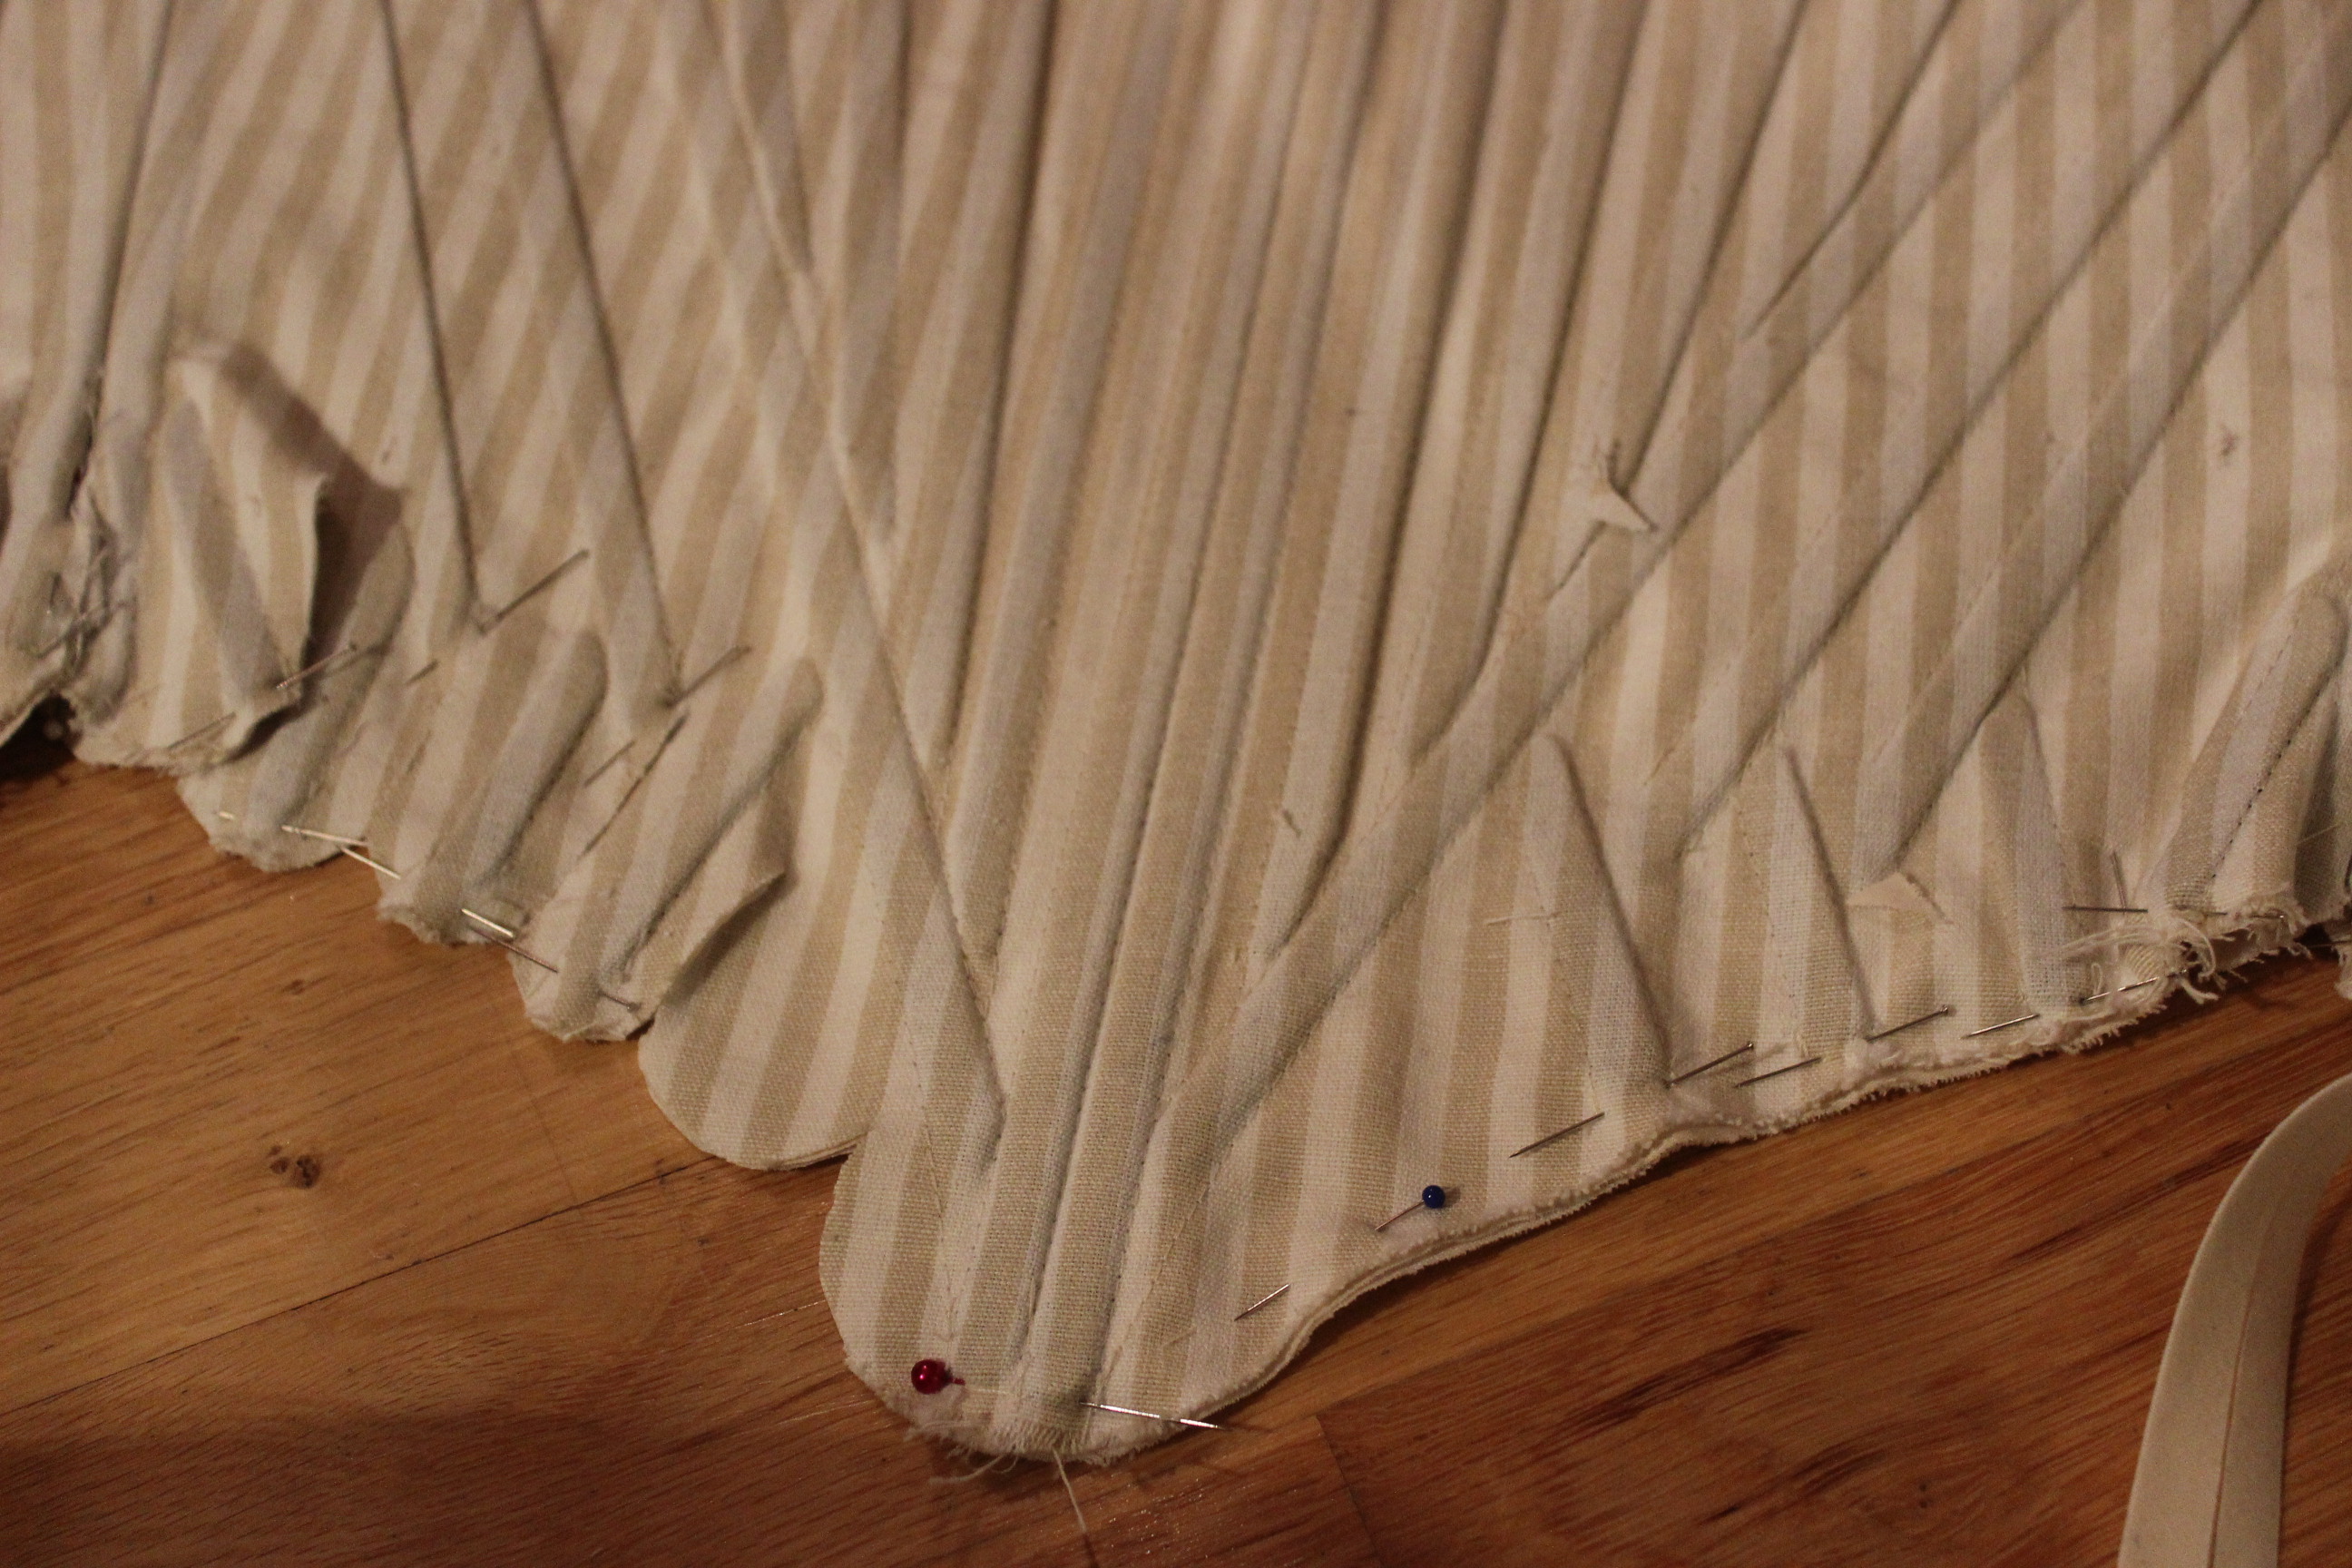
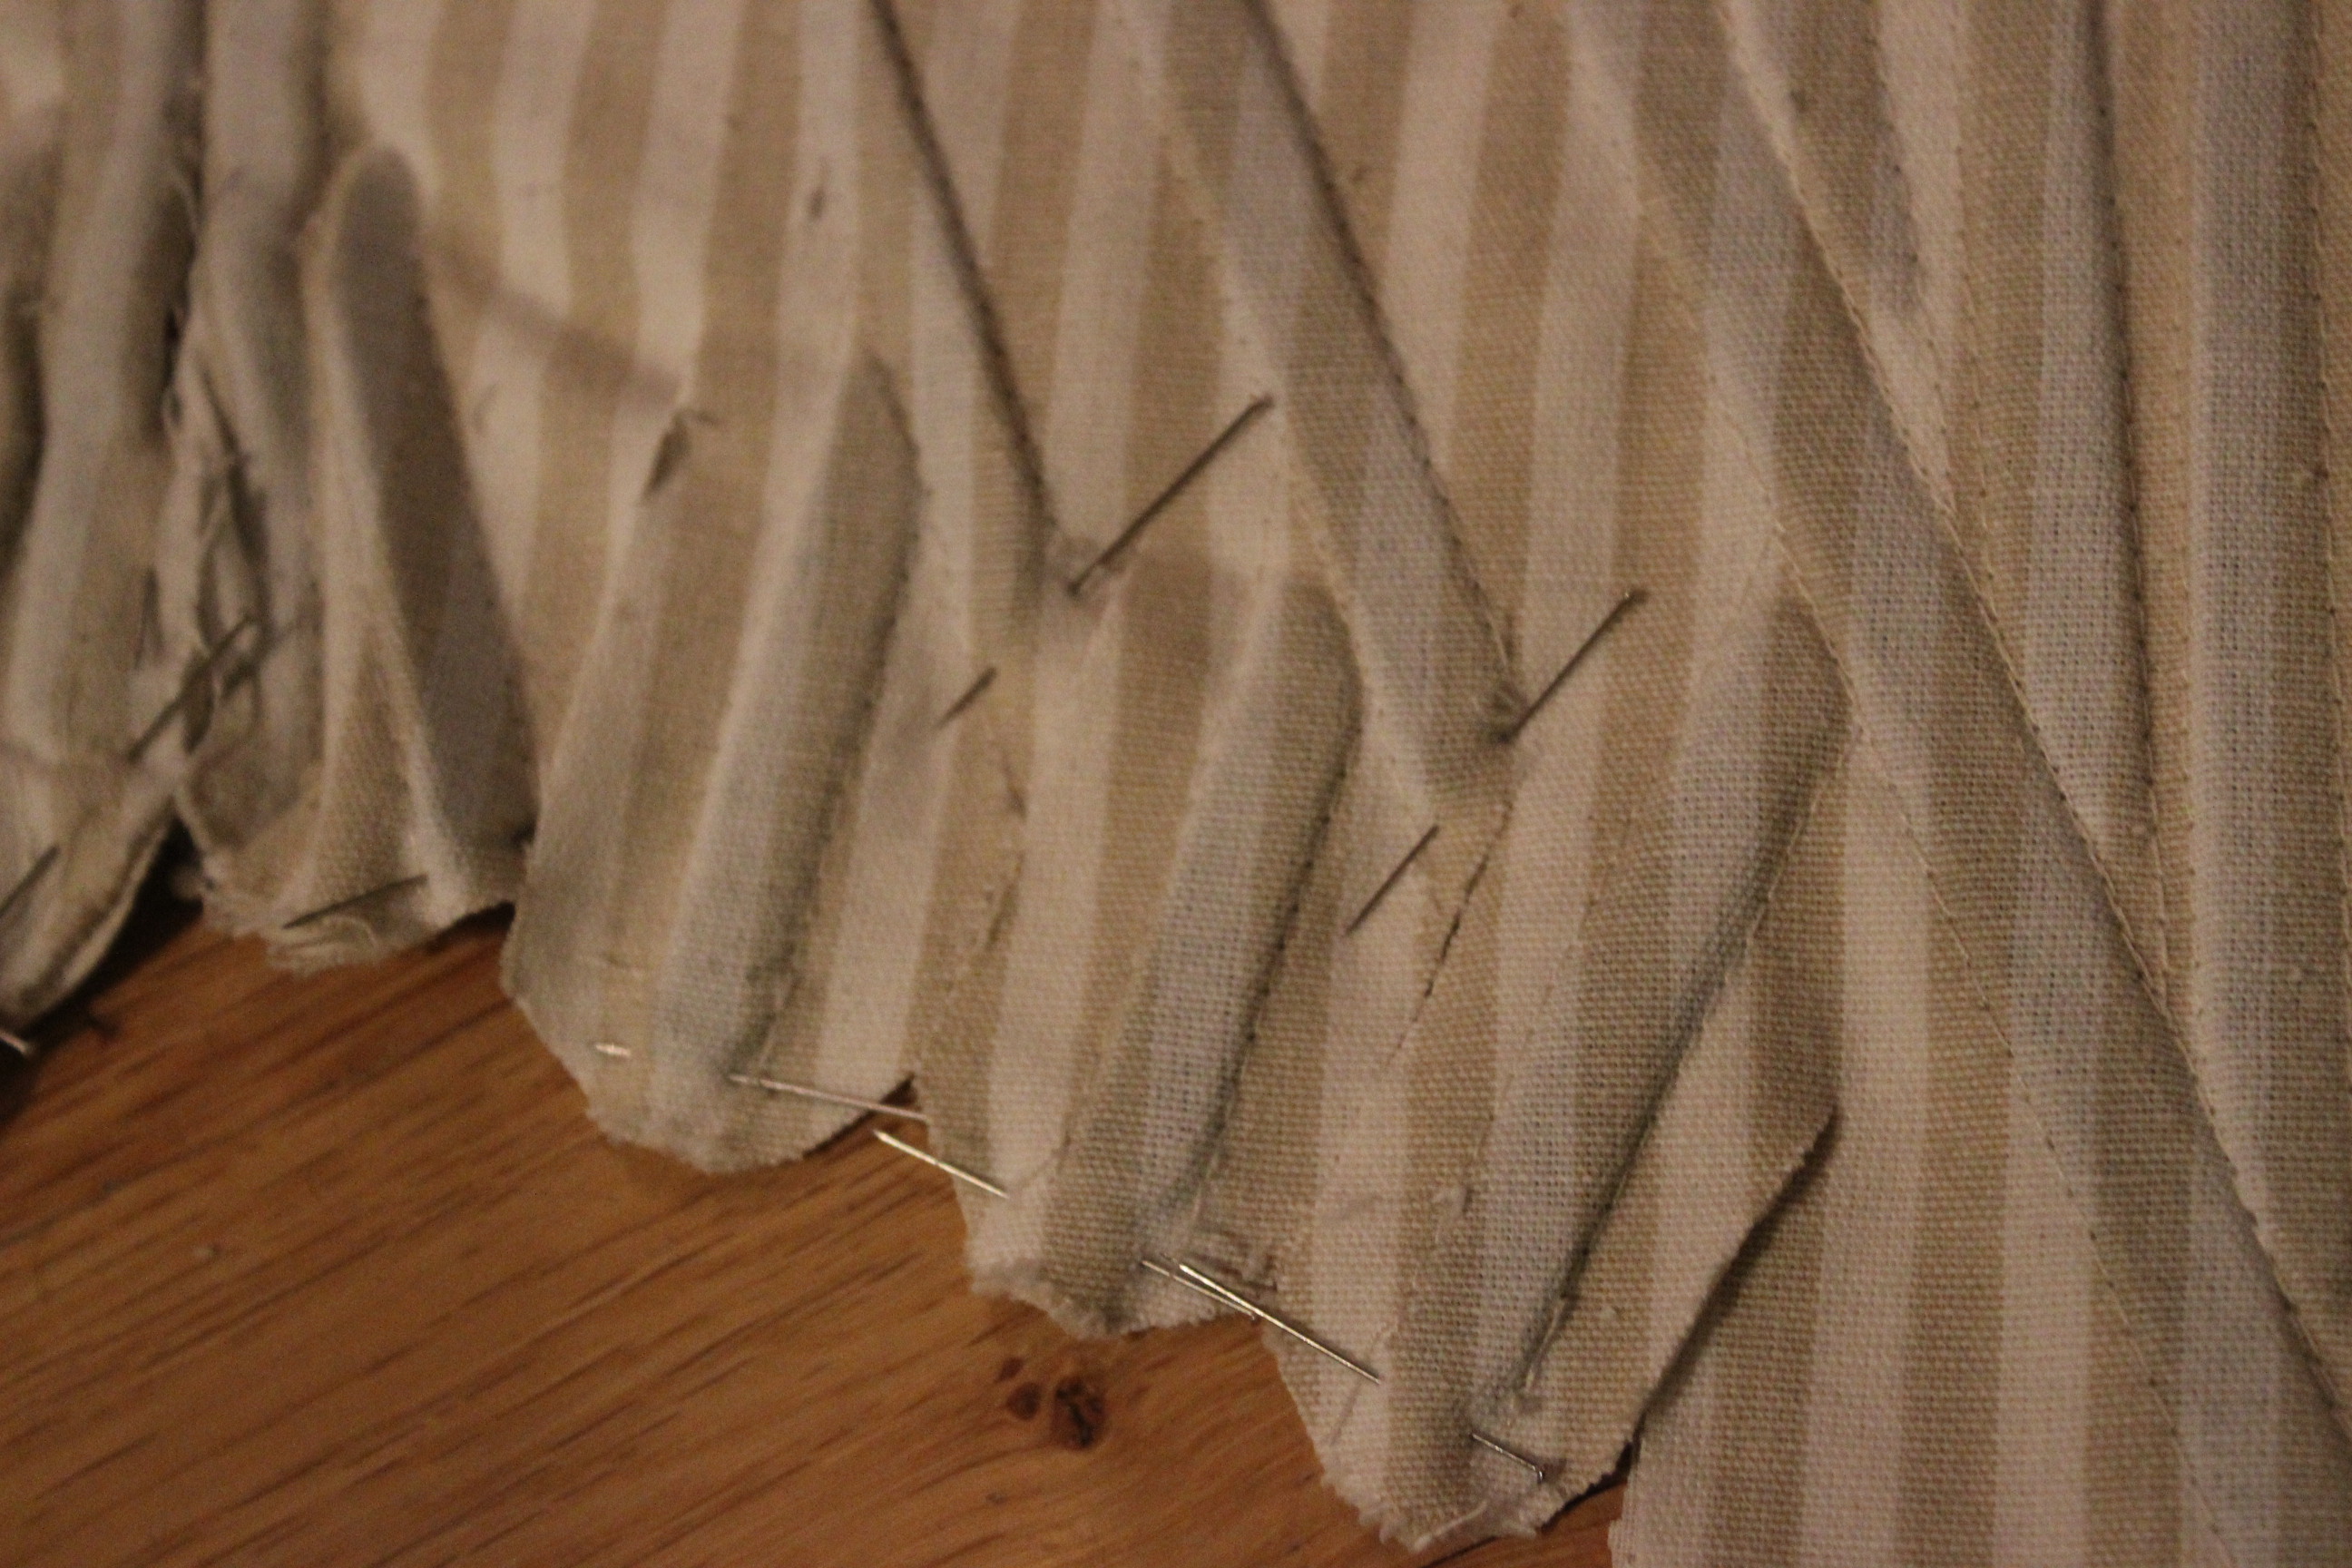
I put pins, to keep the bones from sliding from their places.
Fortunately I’d made the top edge first, because binding all those tabs were the worst part of the process. And if I hadn’t I’m not sure I wold have pulled through.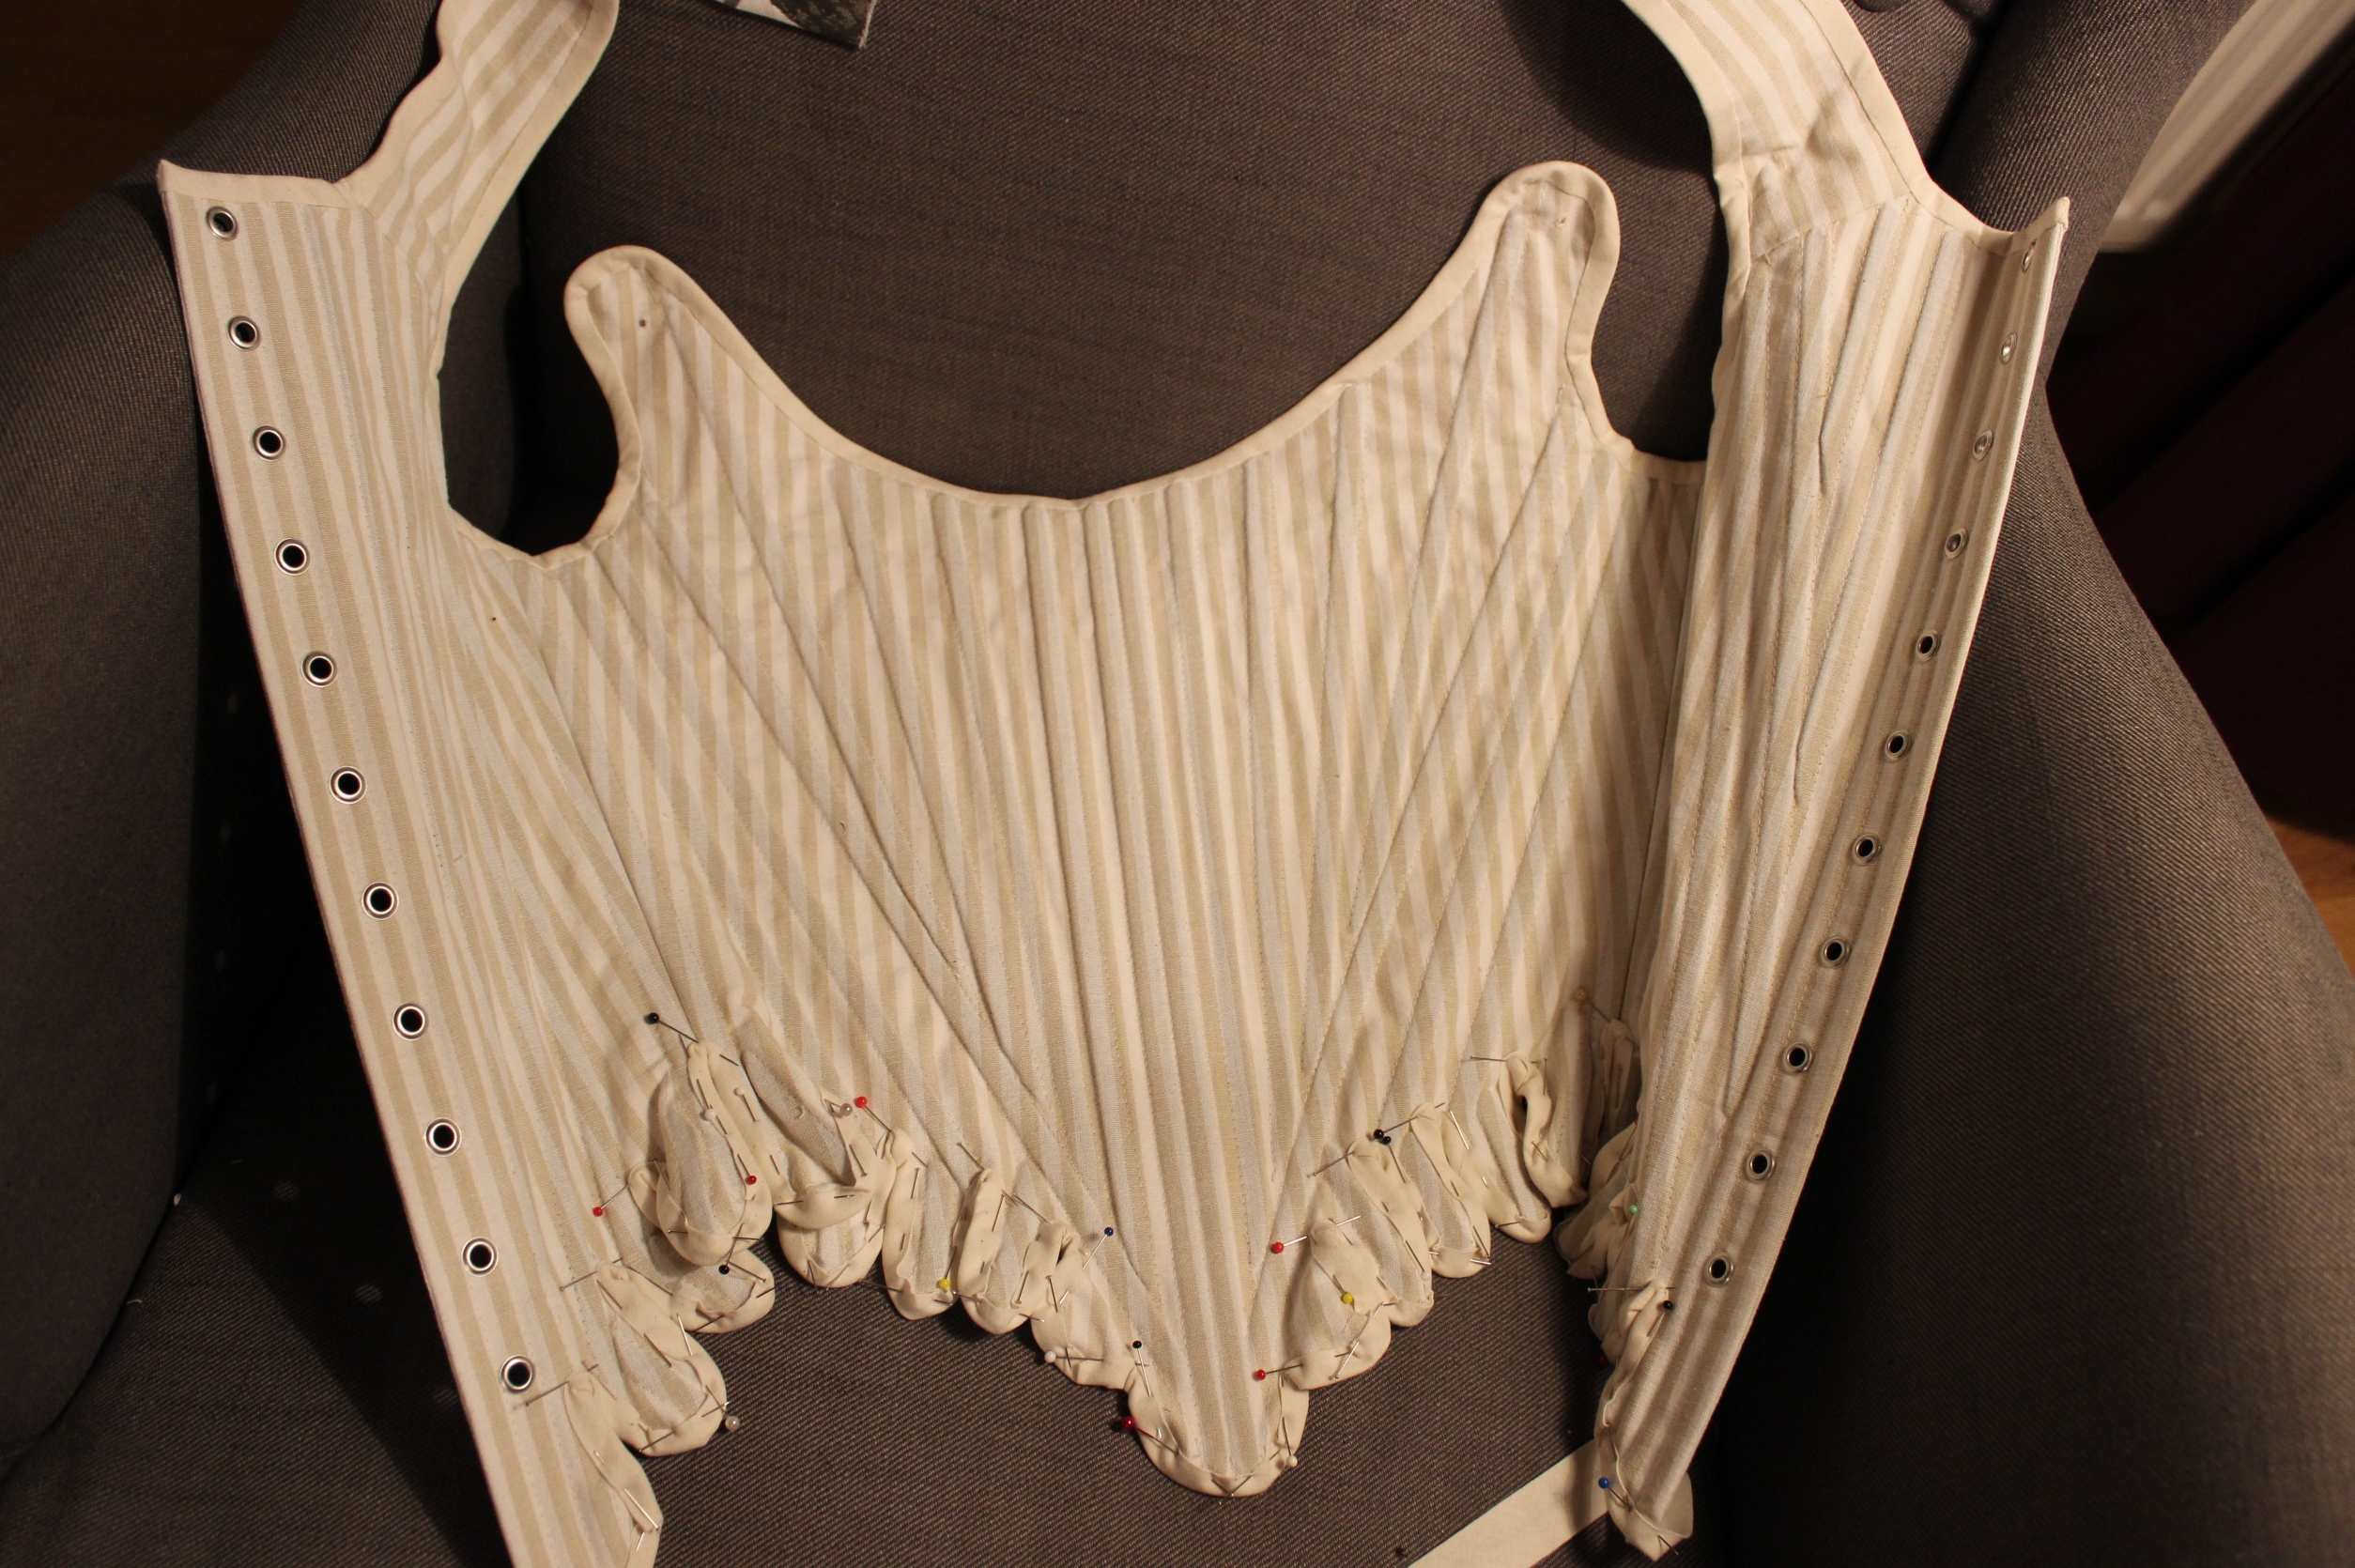
I stabbed myself countless times on the pins, and had lots of troubles getting the corners nice and smooth.
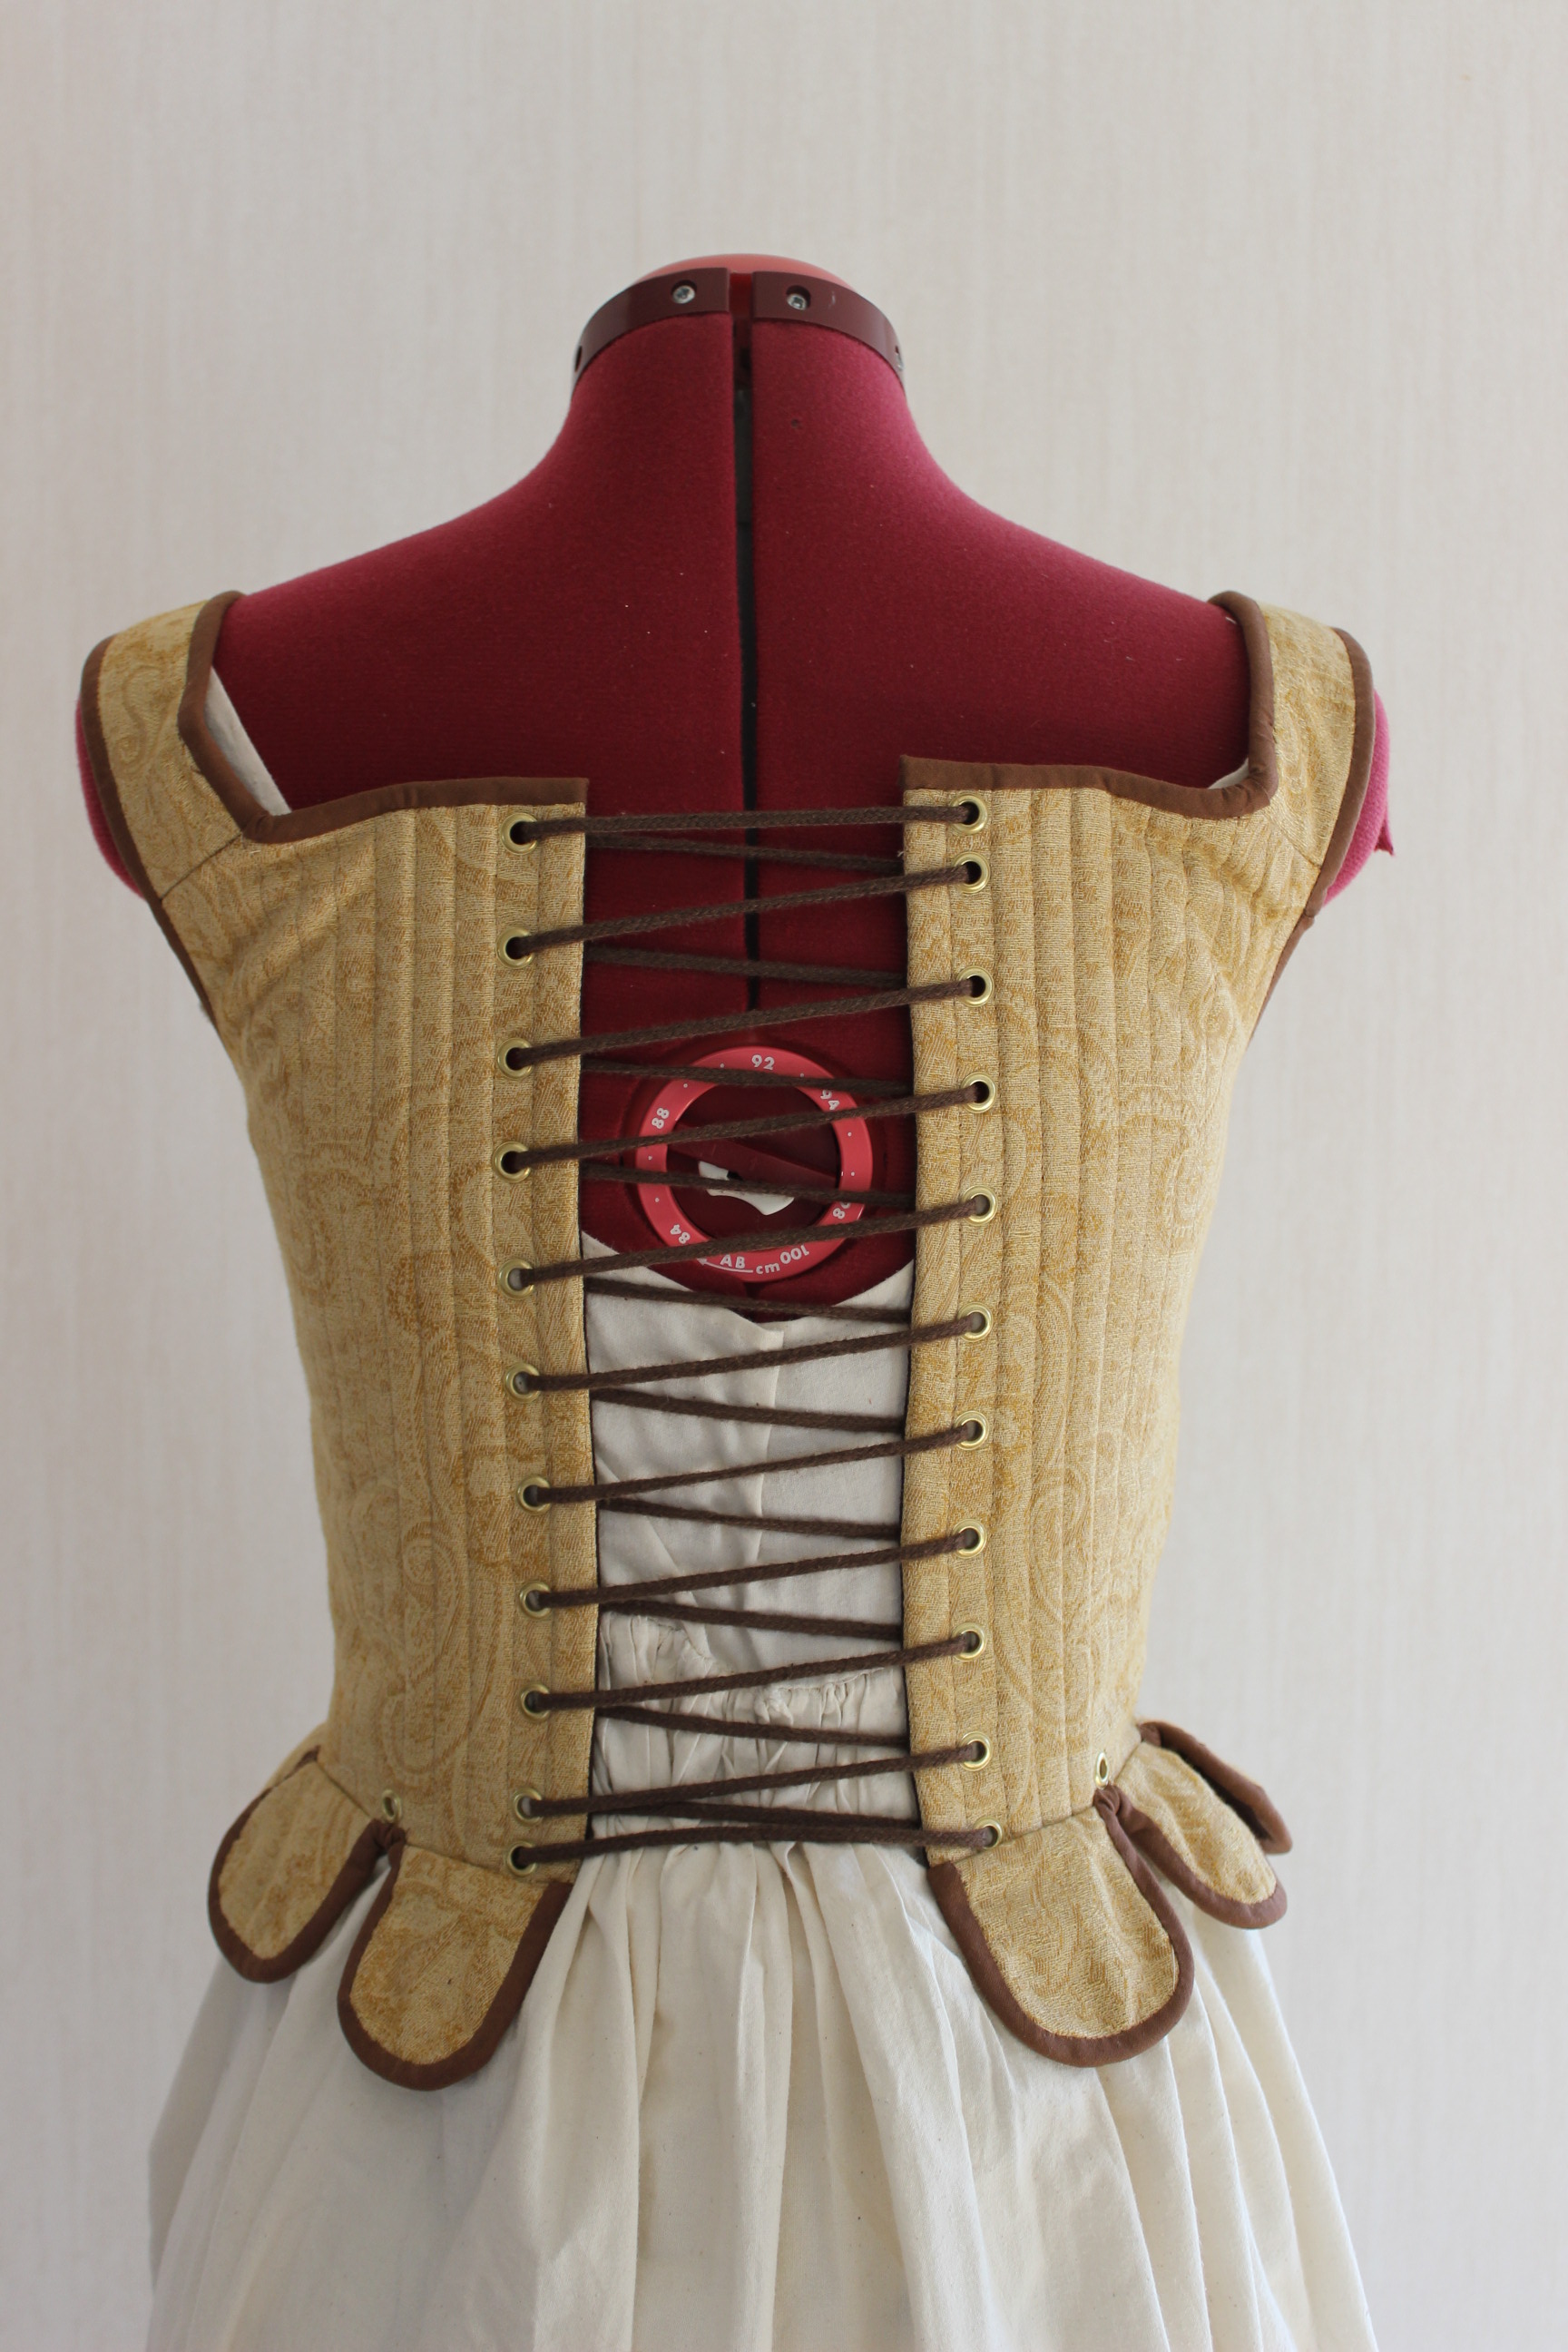
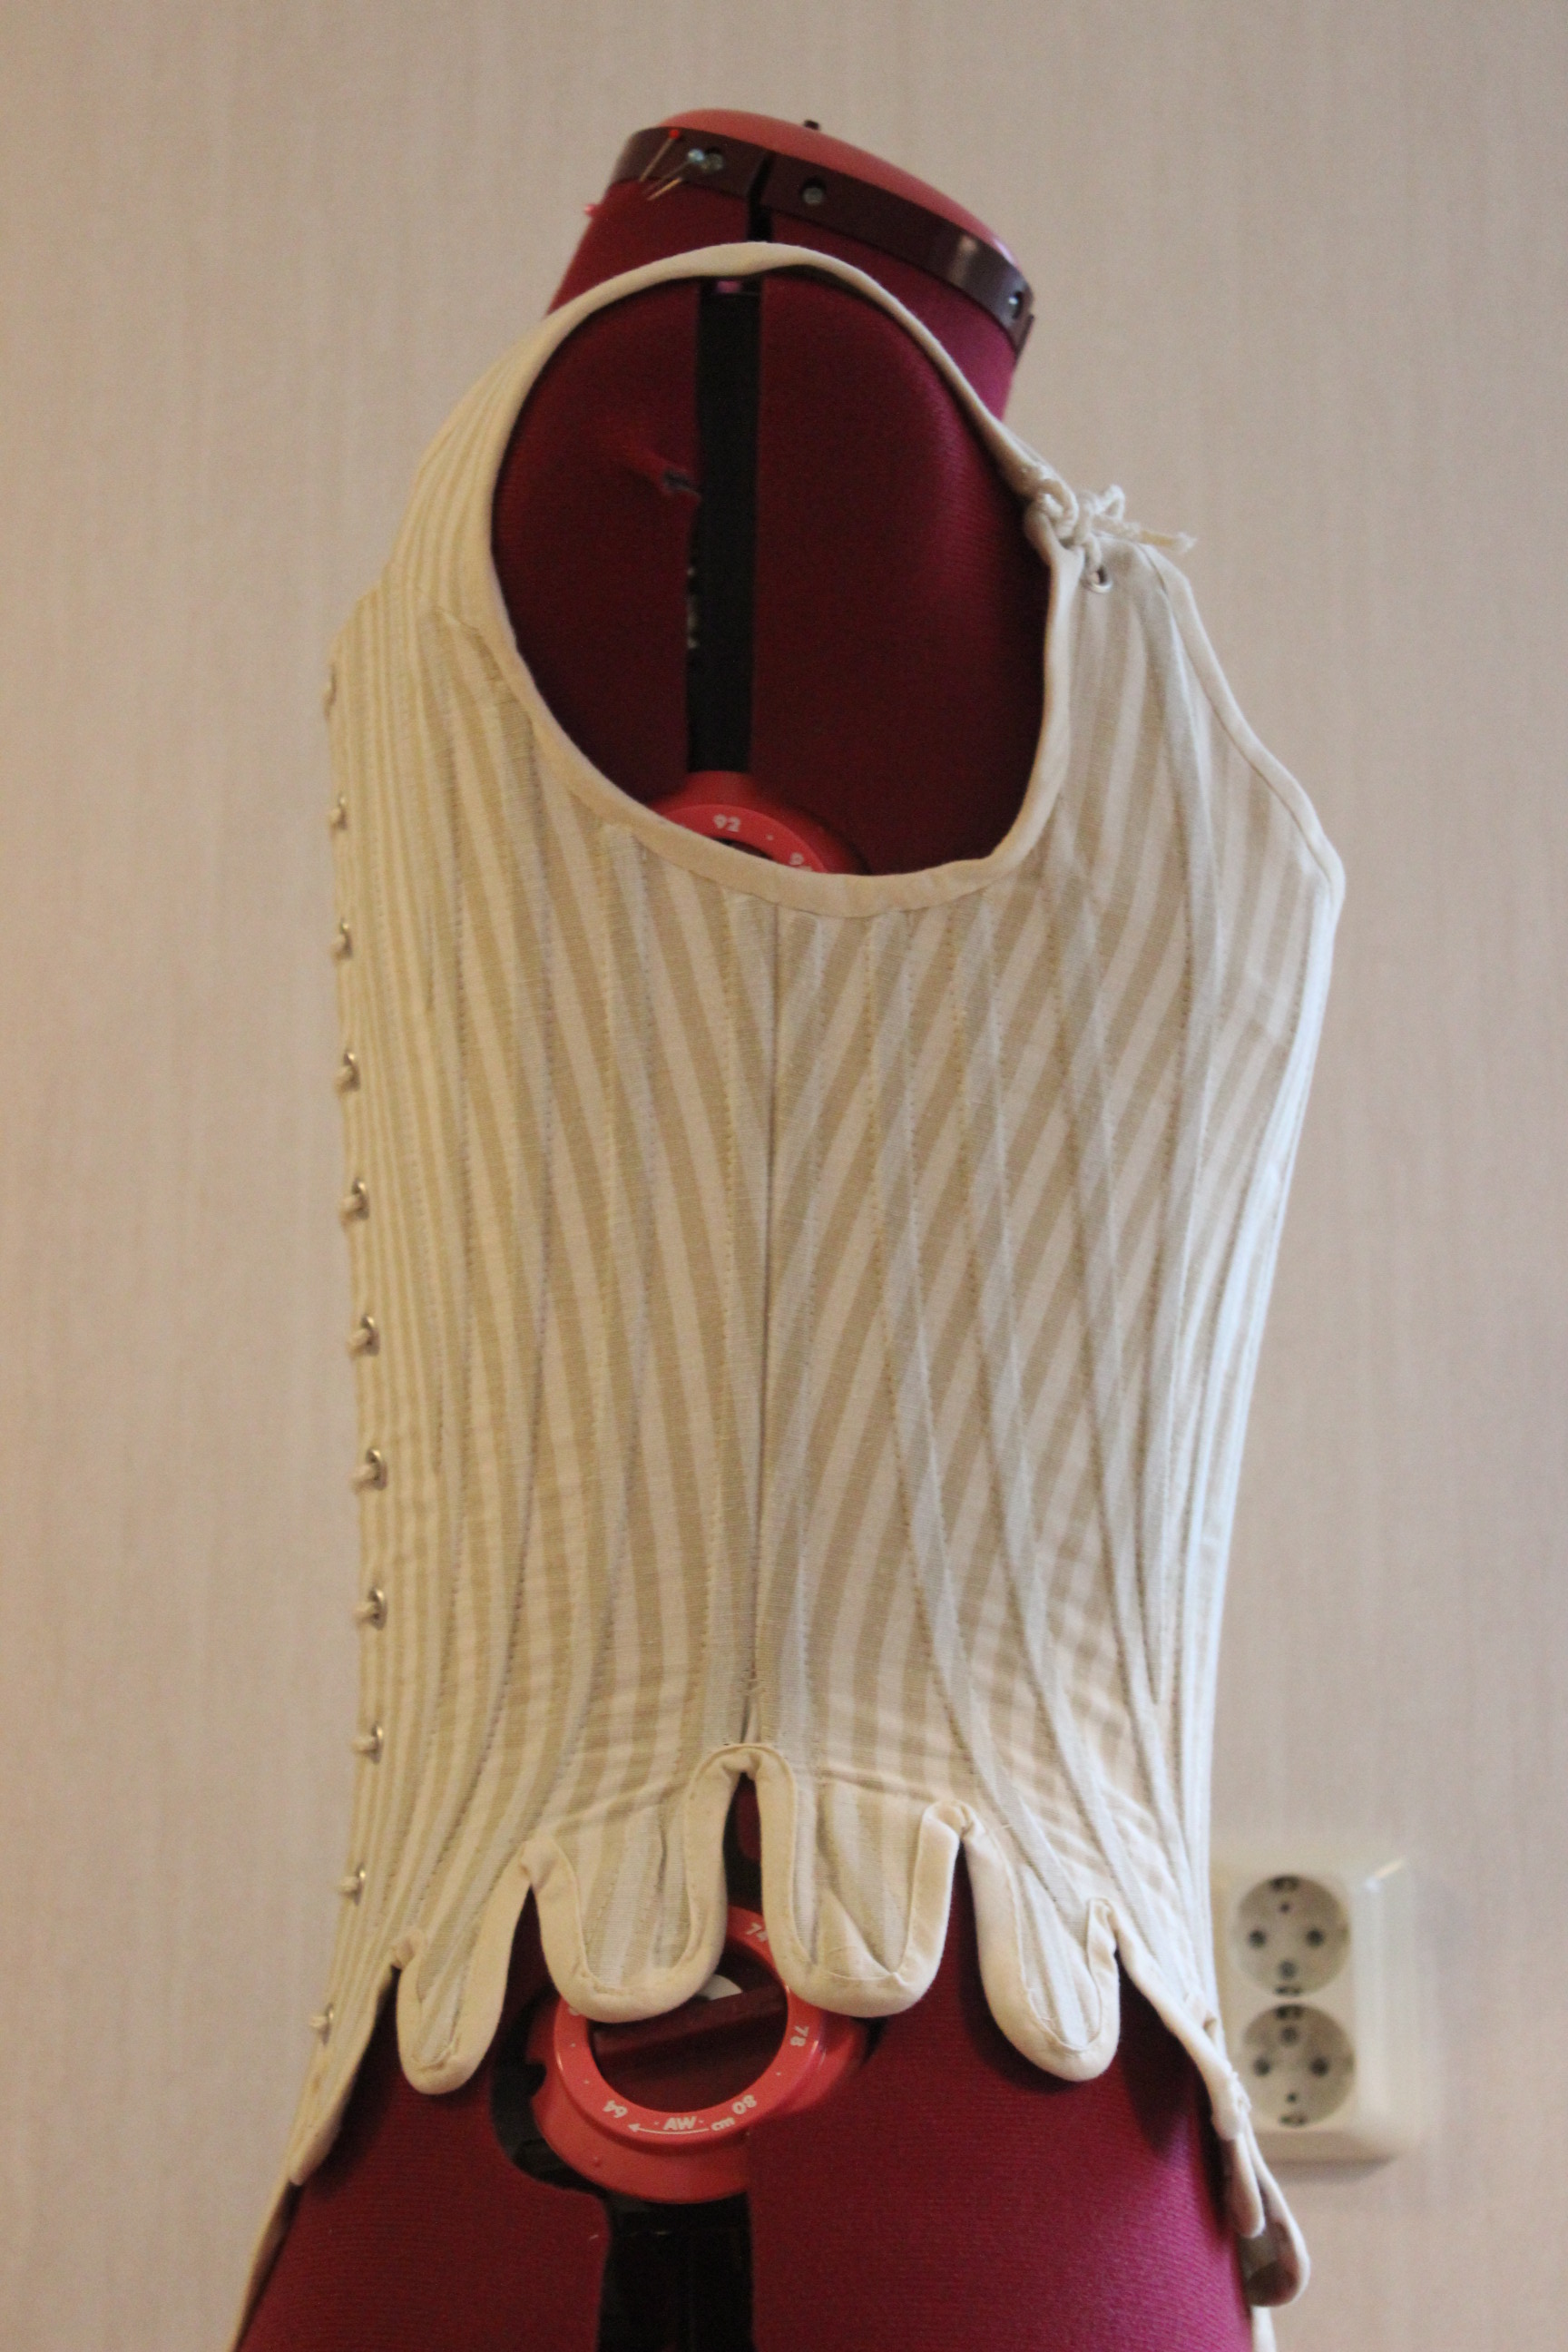
But I managed to get it done in time for deadline and photoshoot. 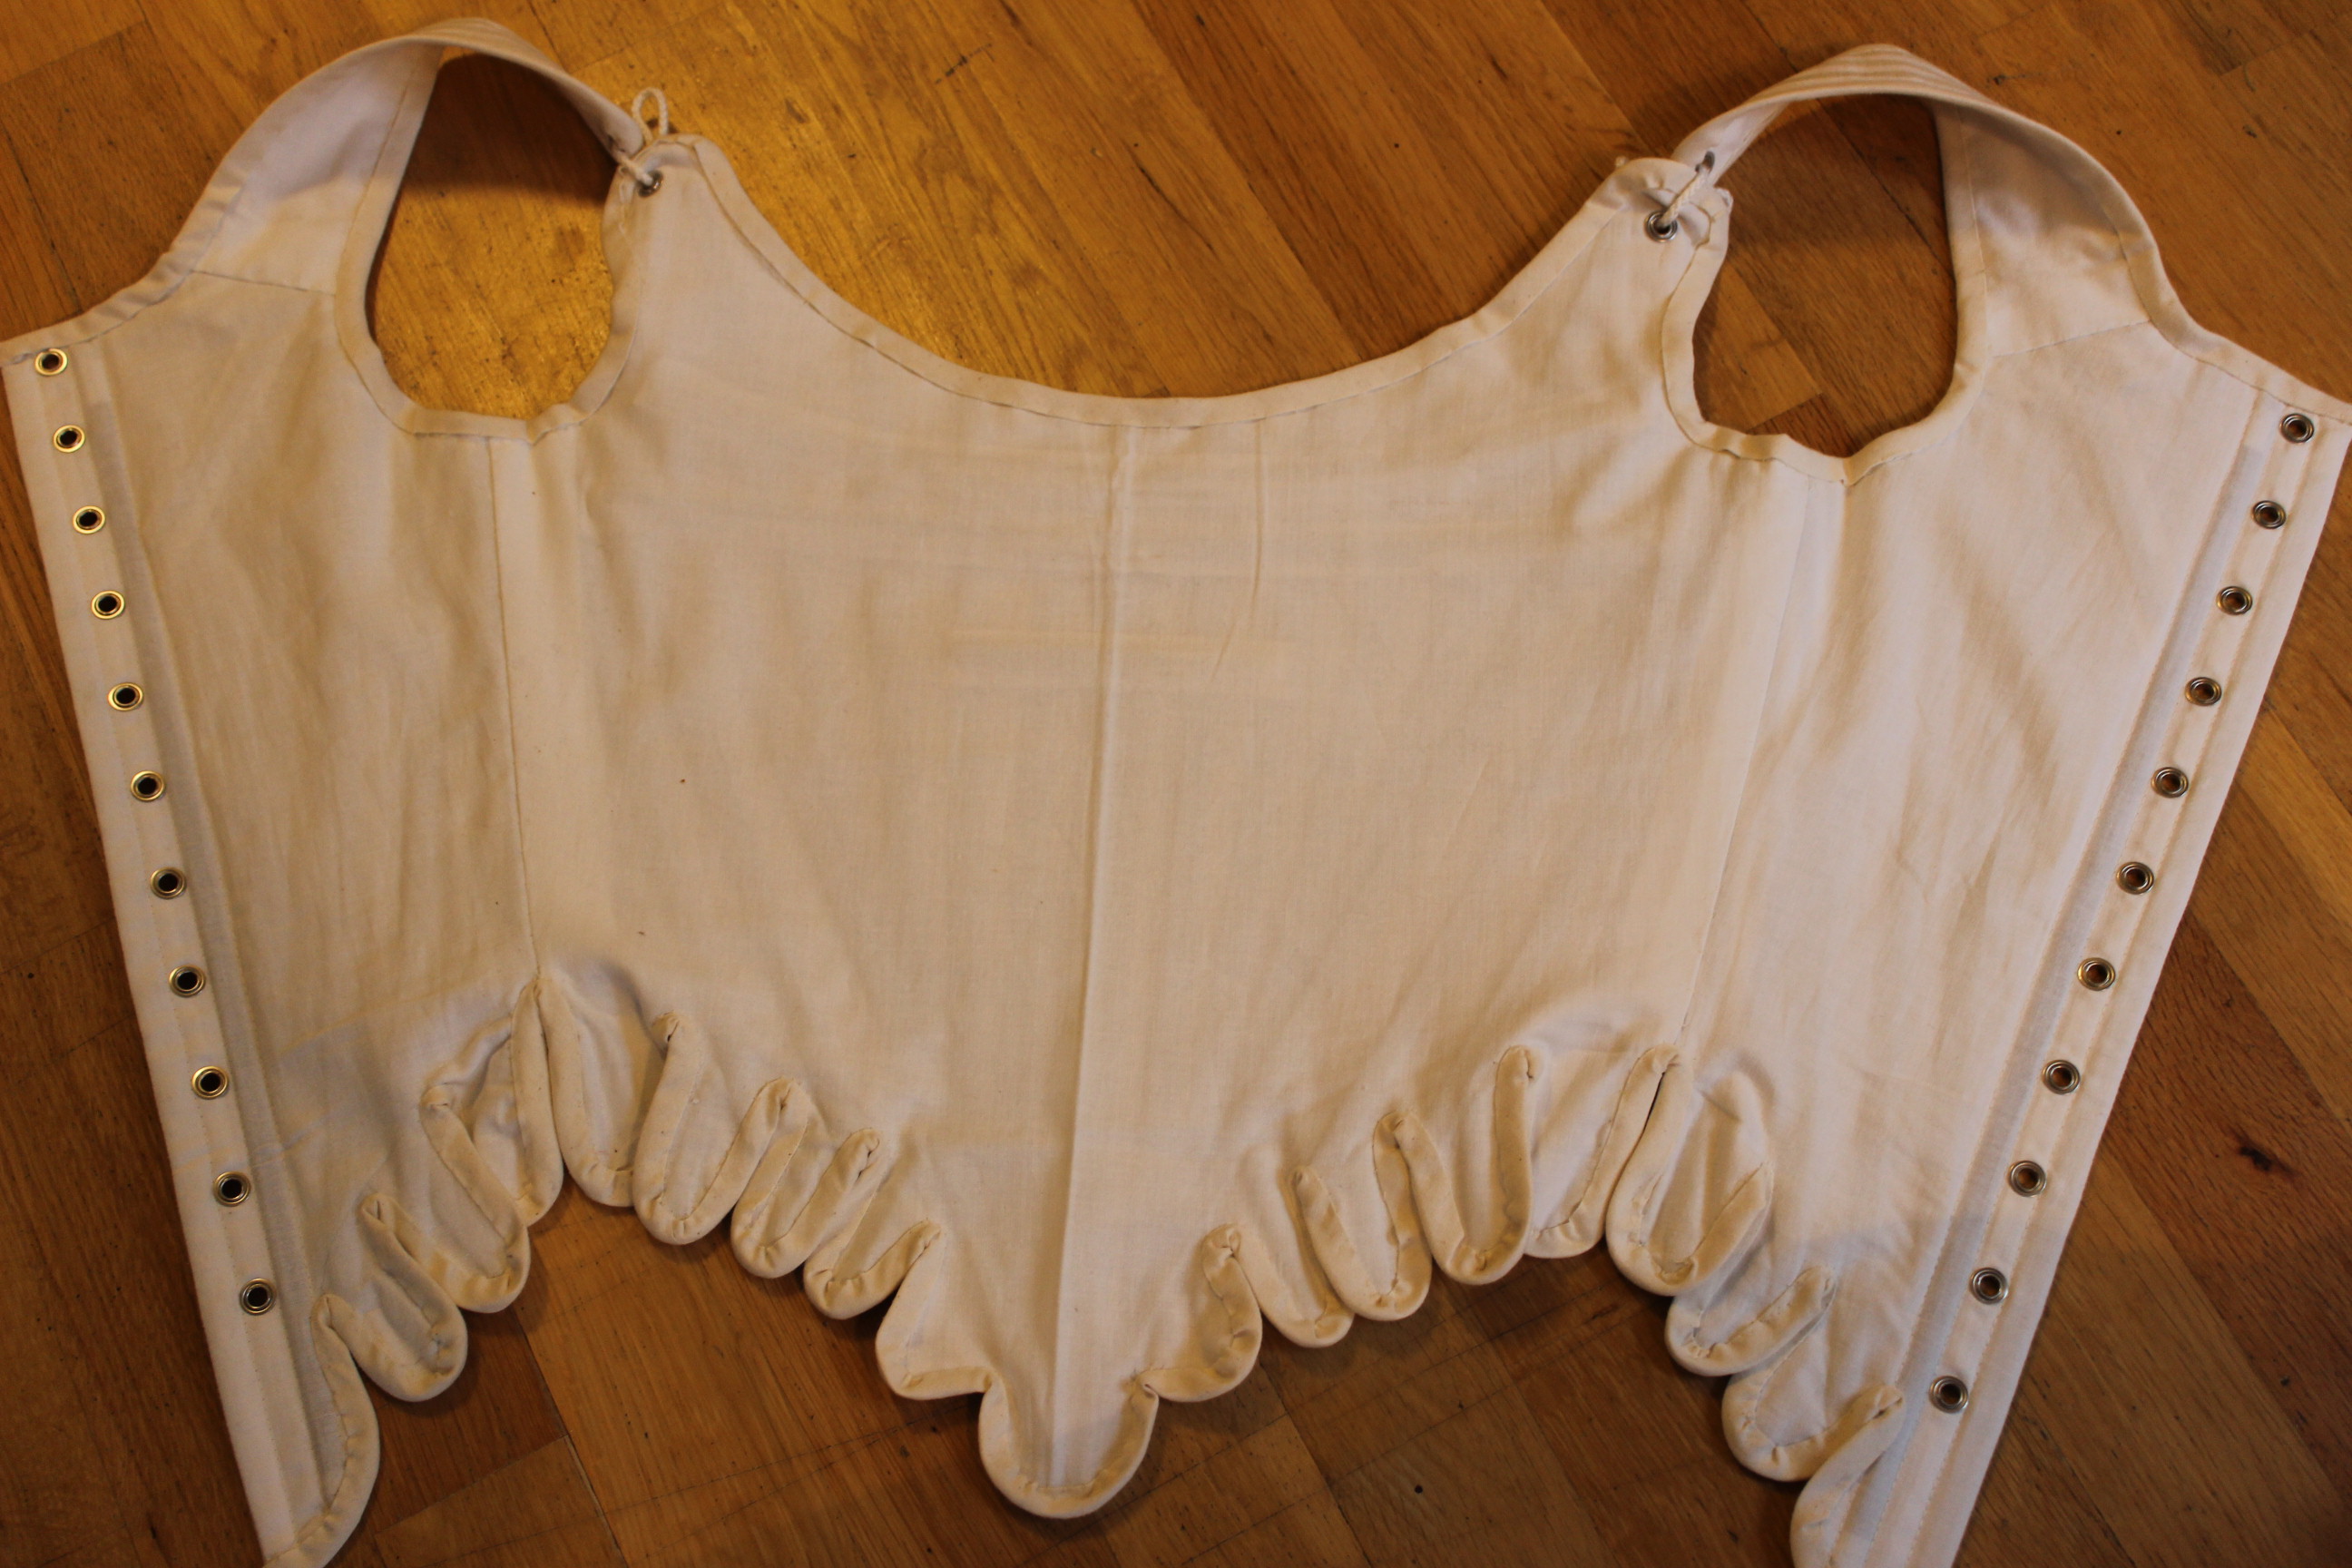 The inside of the finished stays.
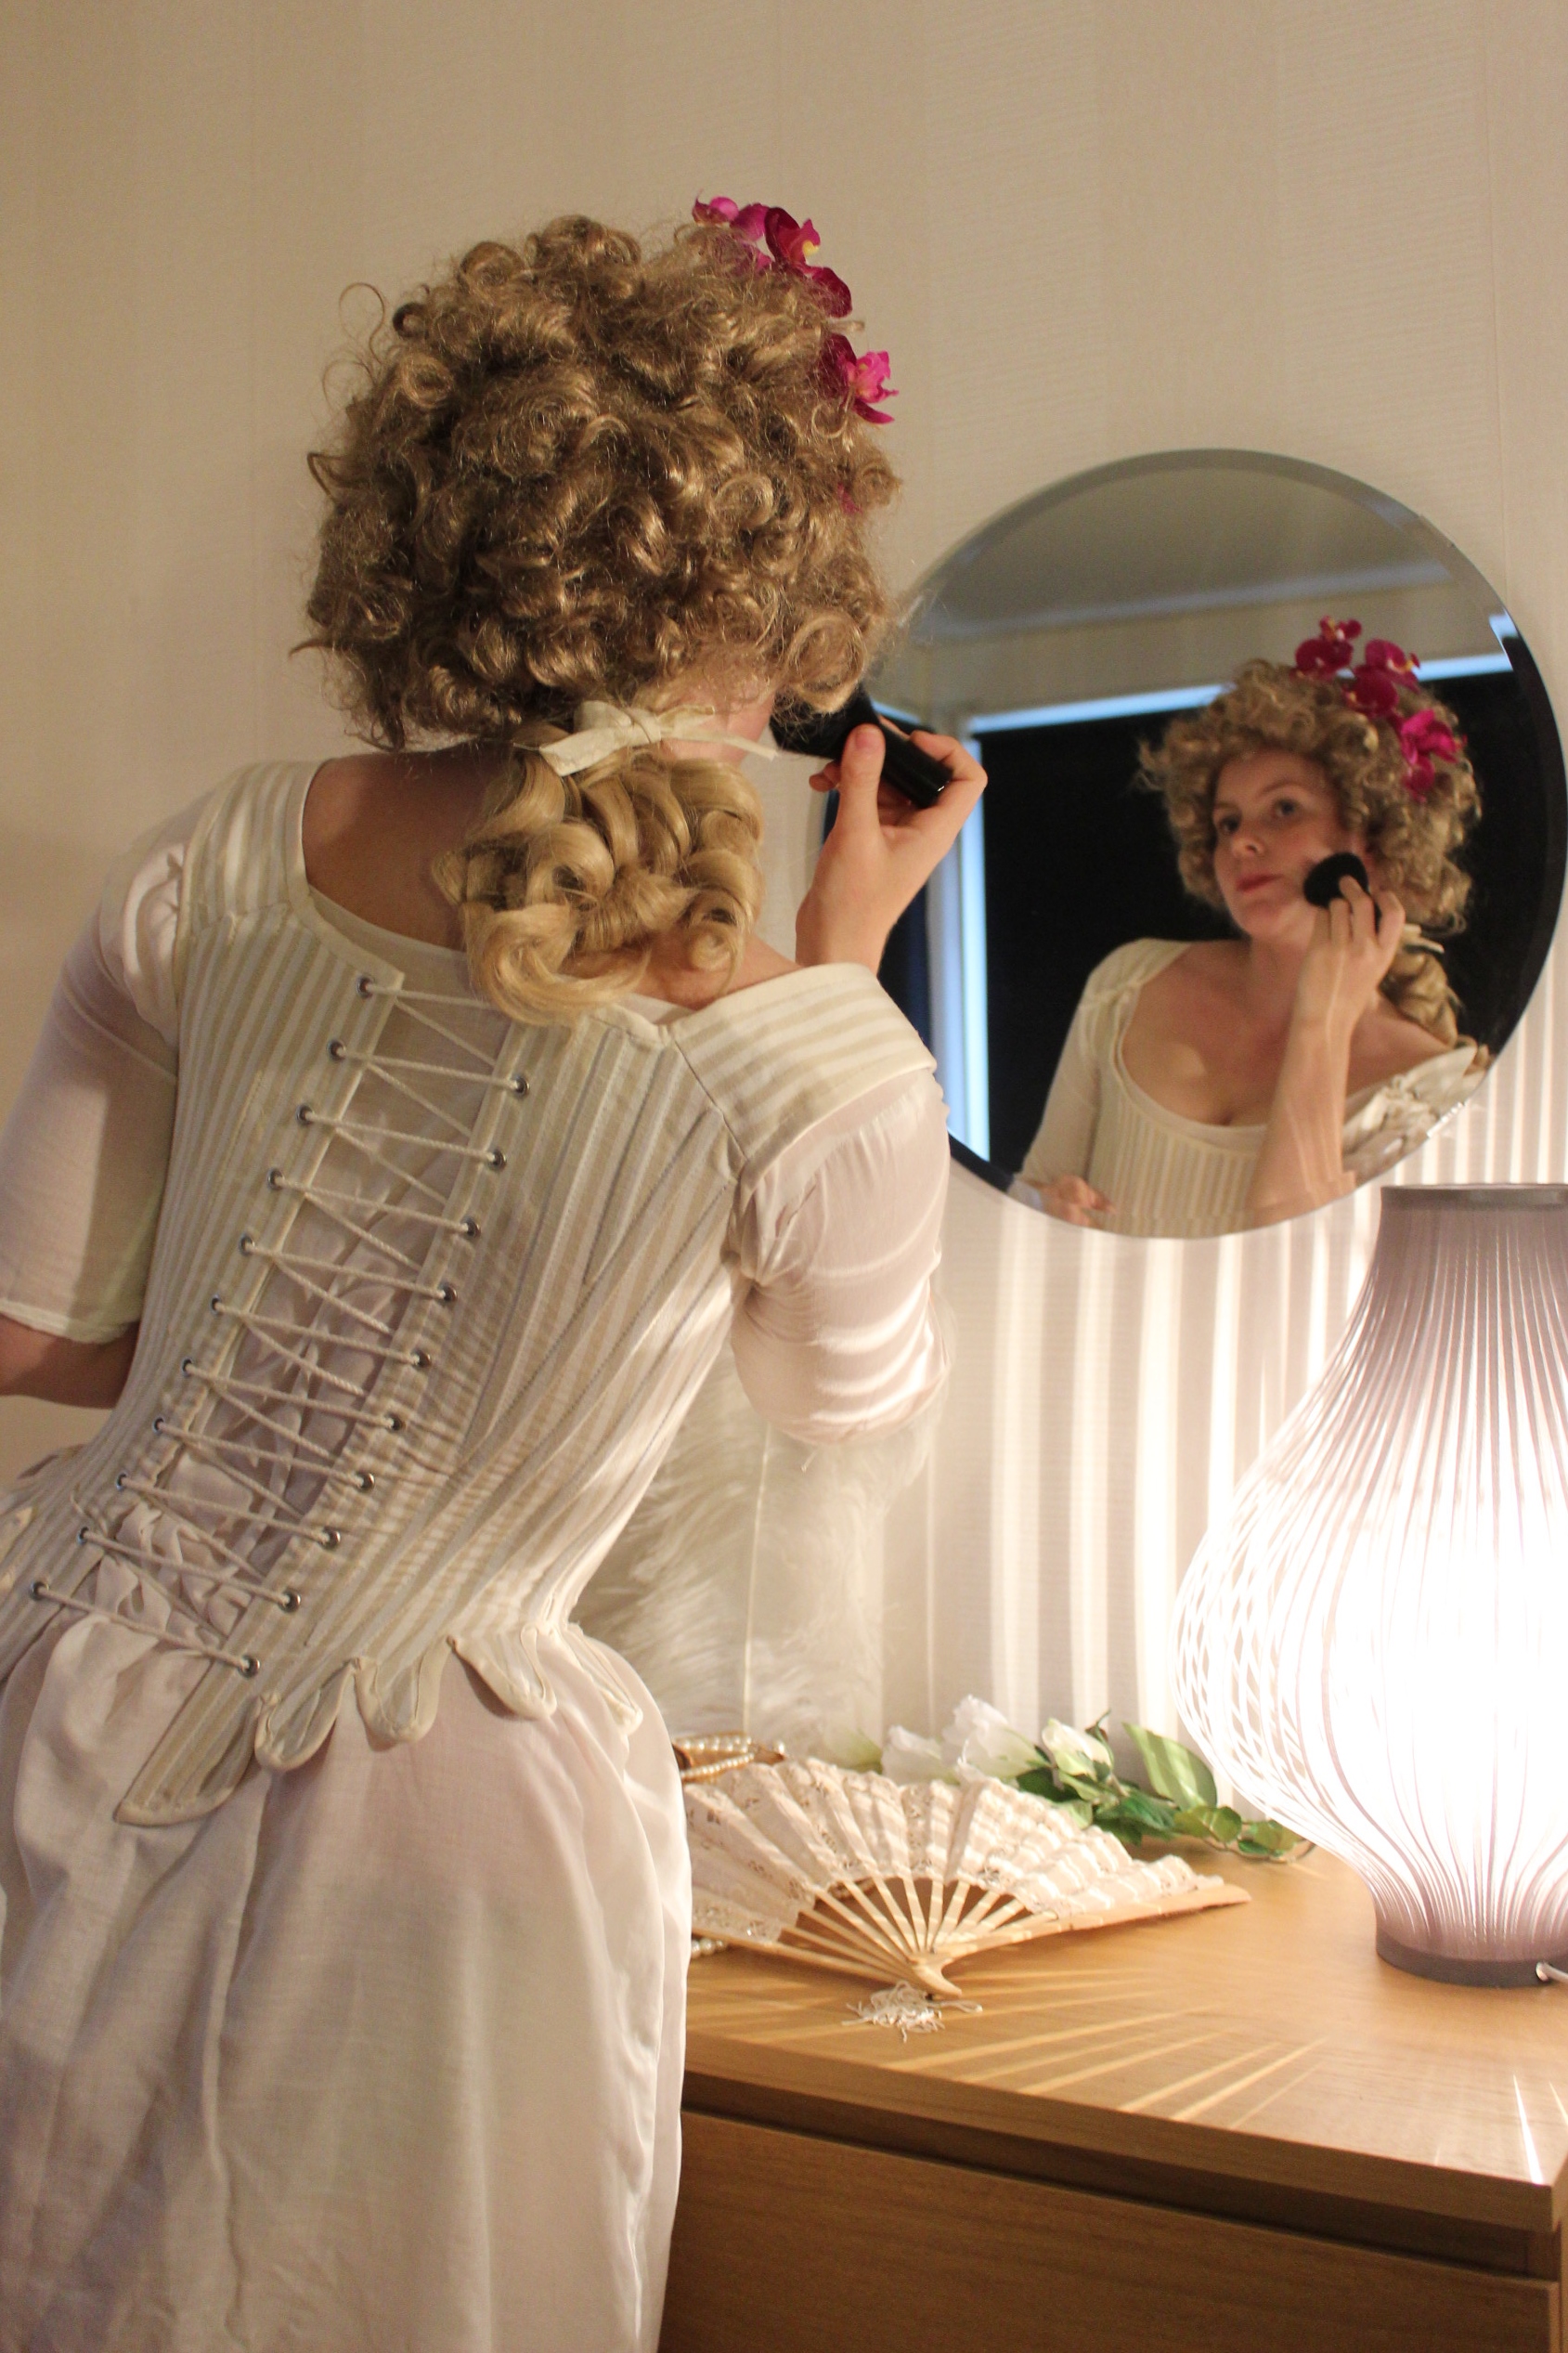
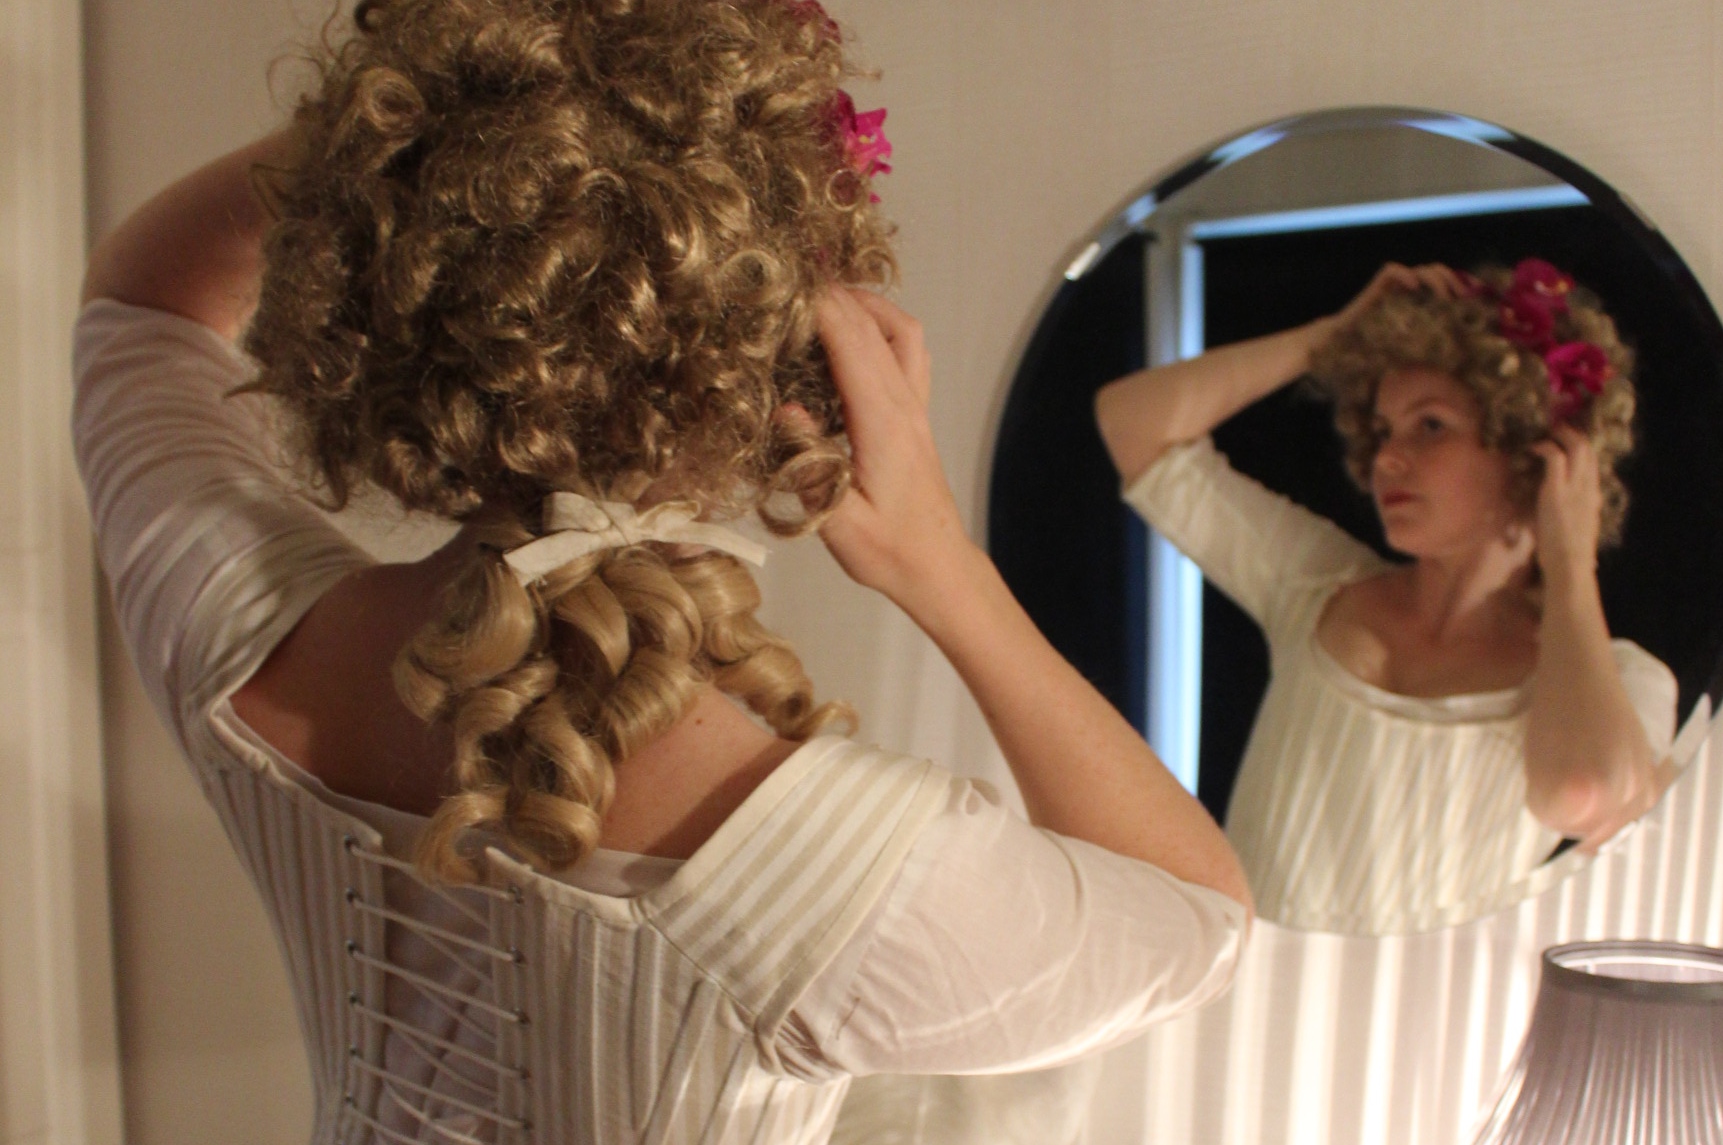
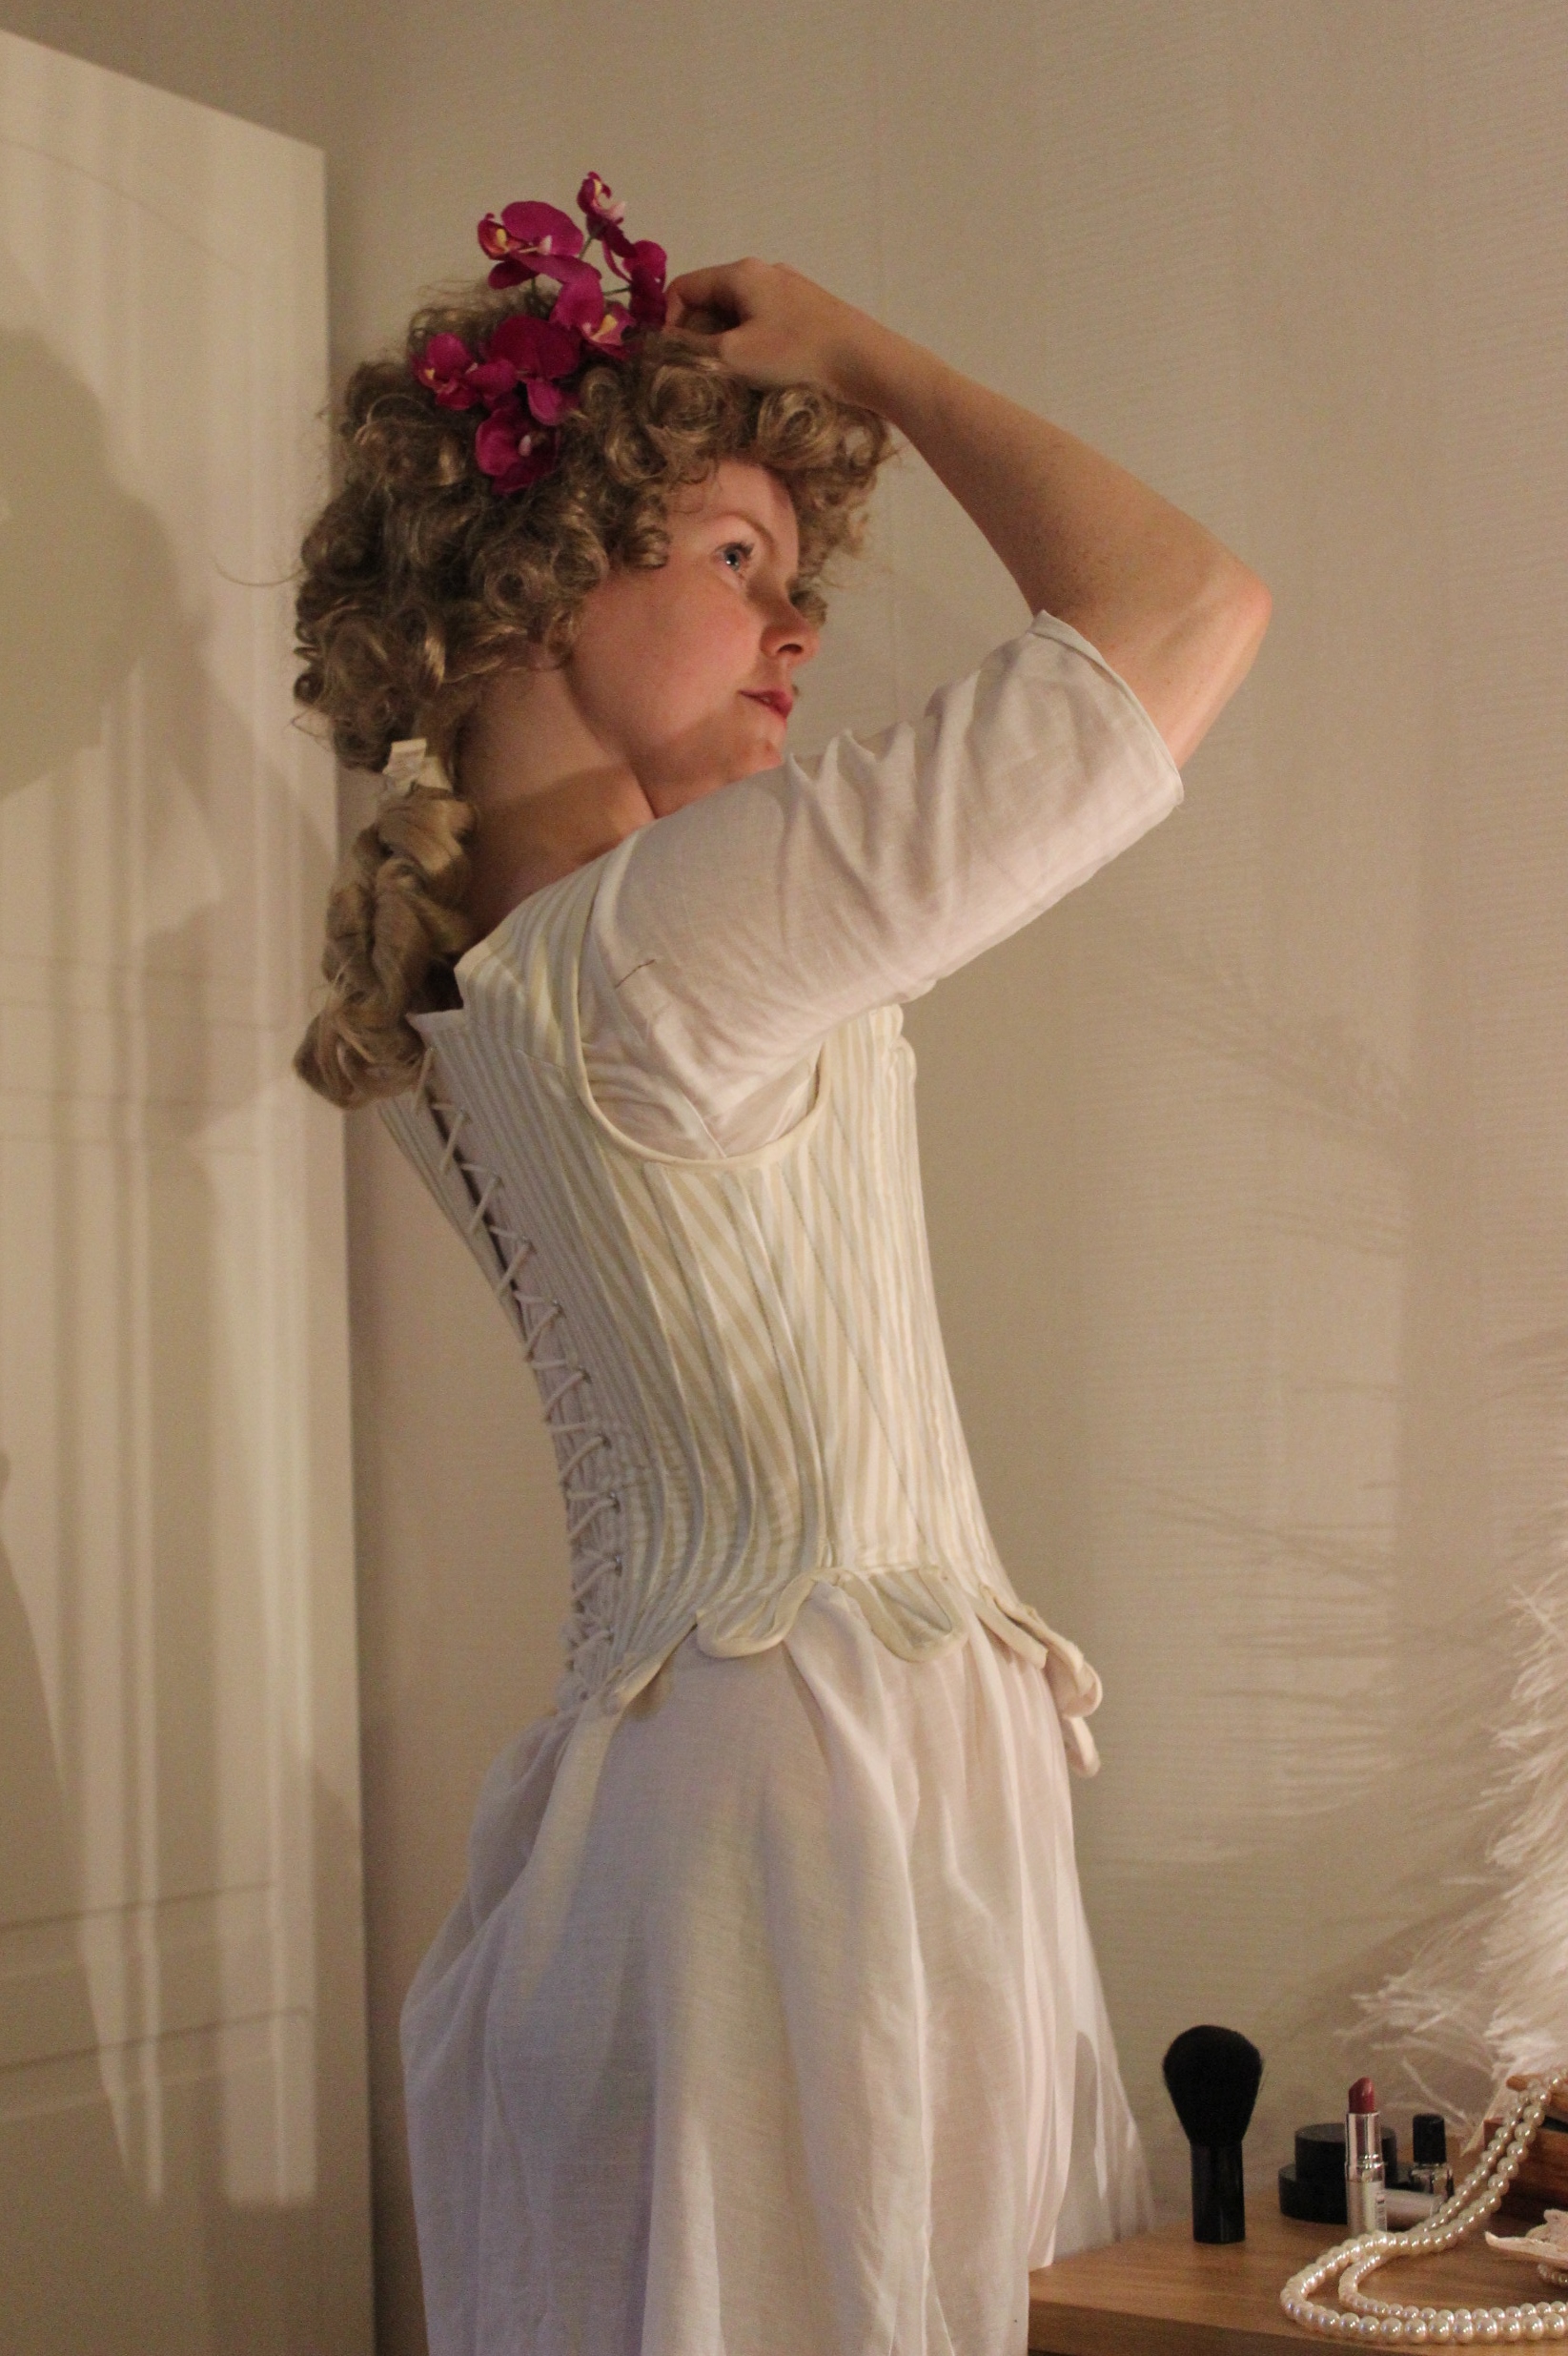
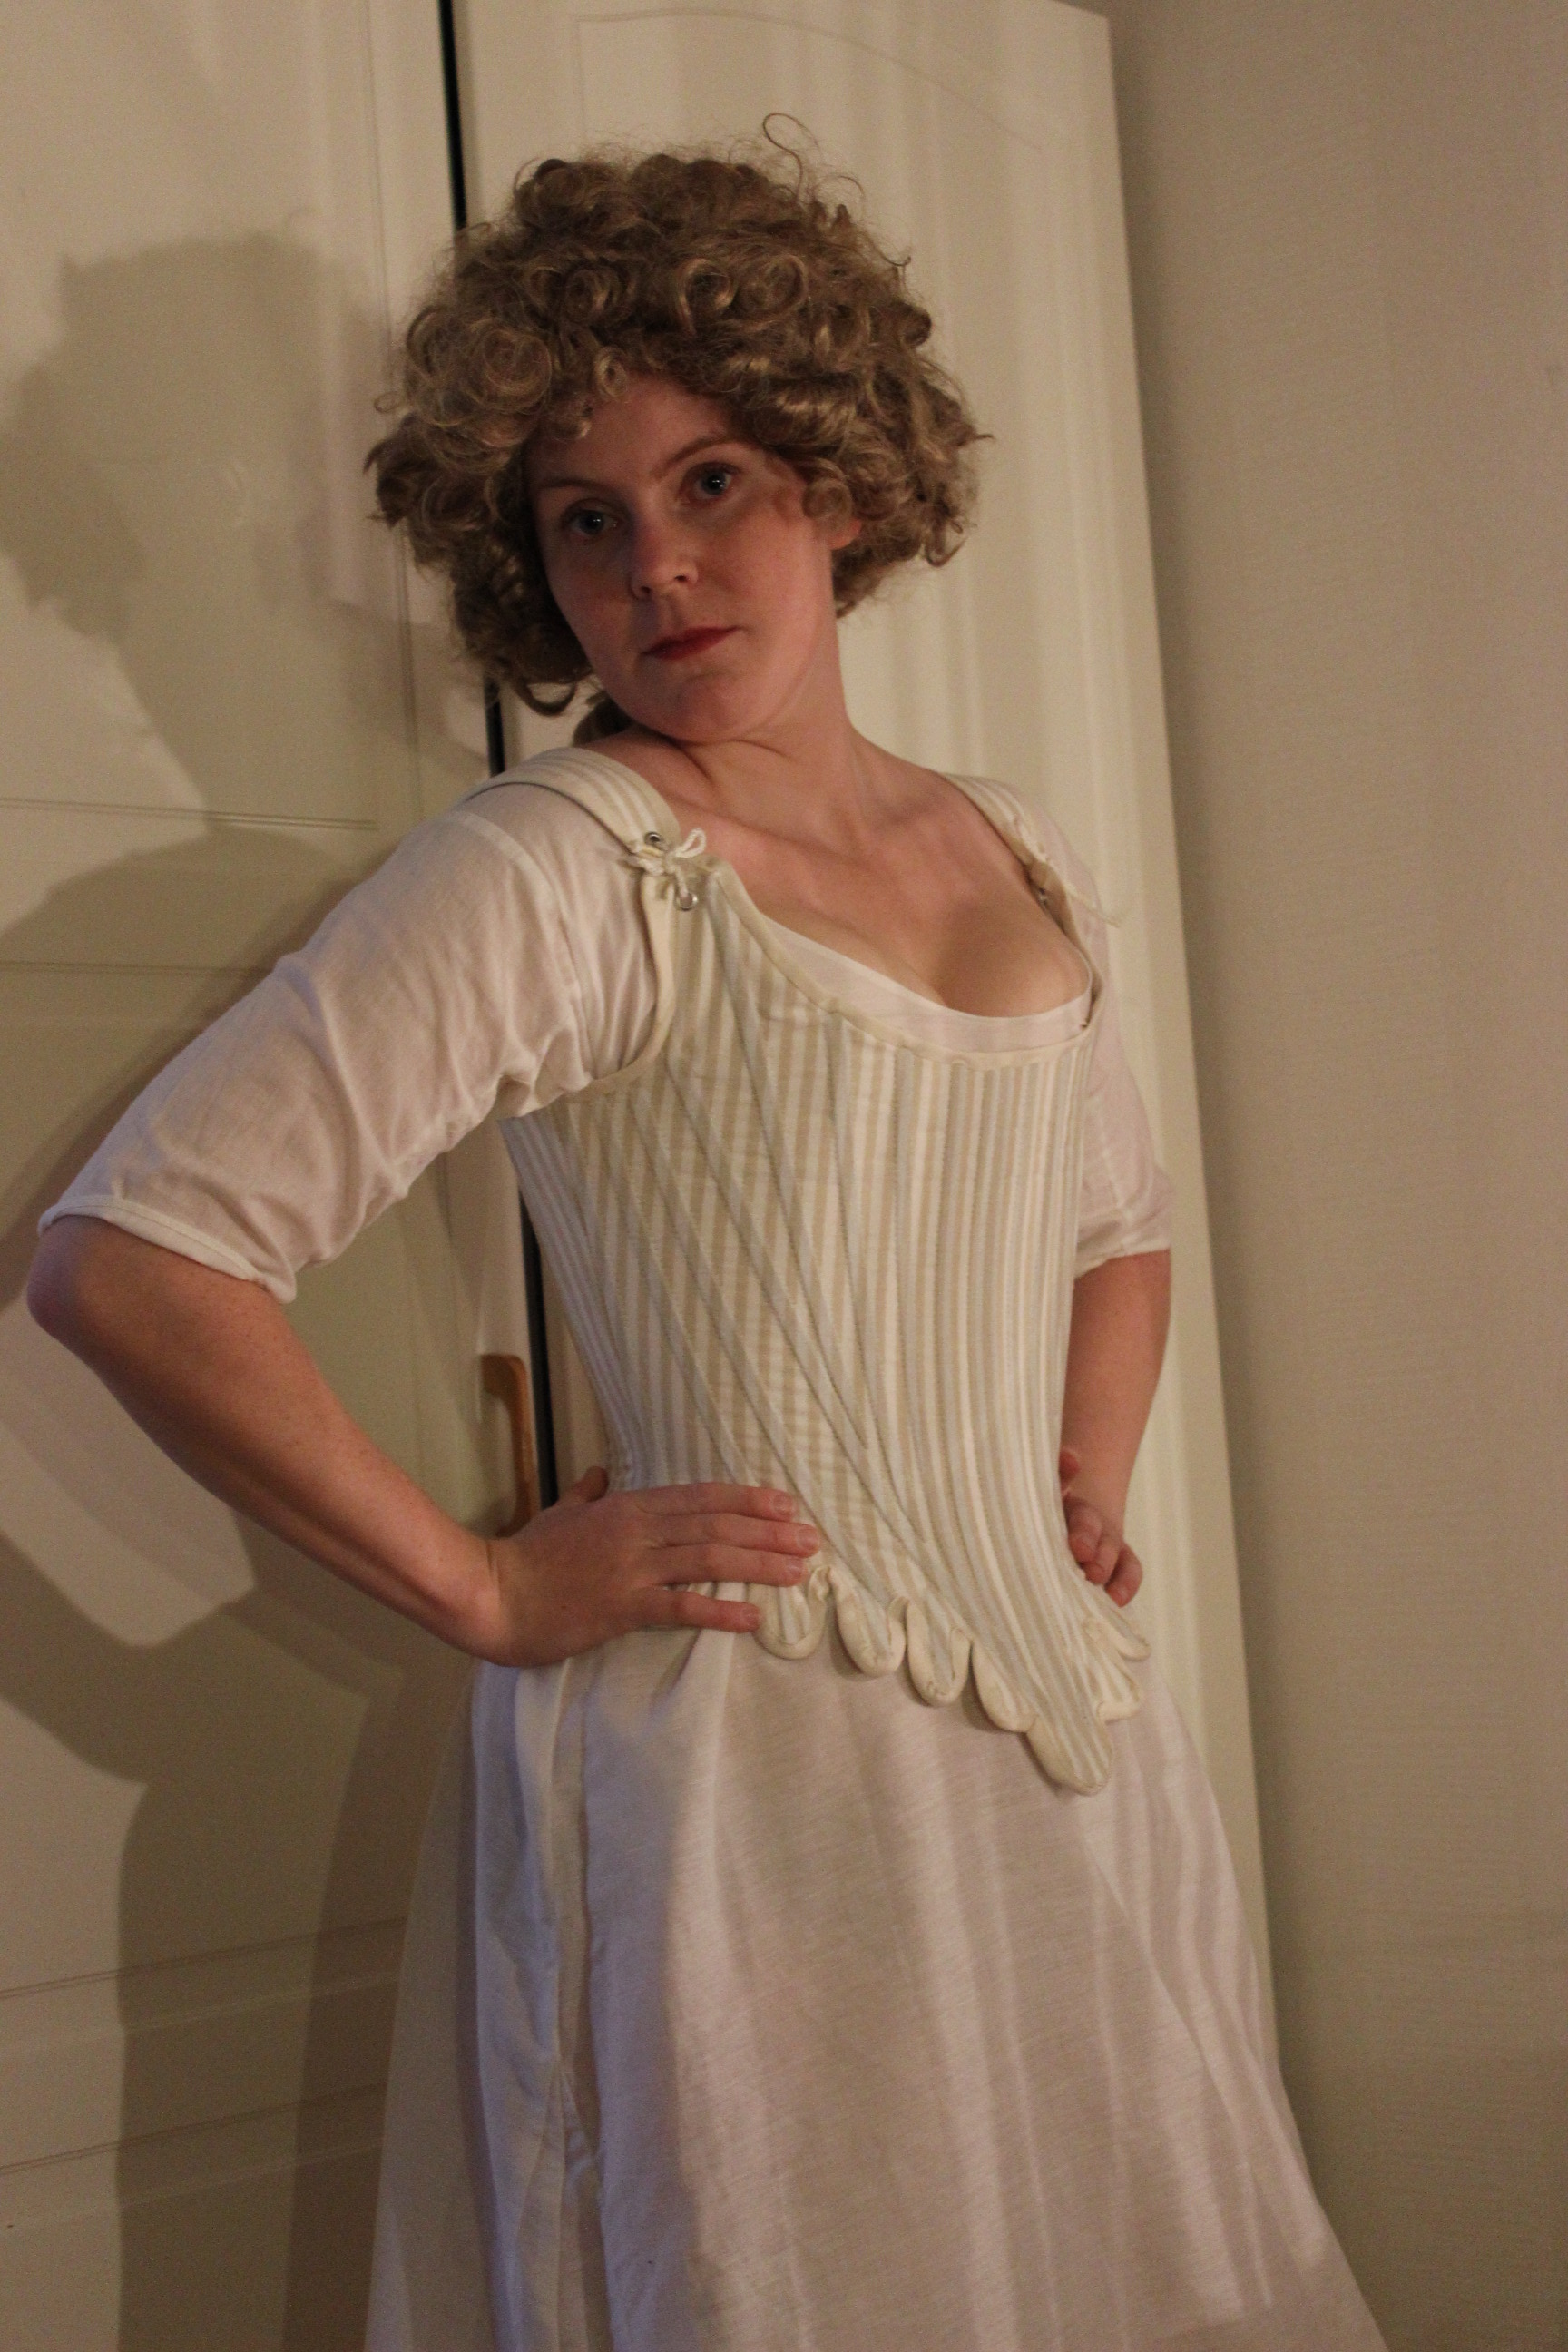
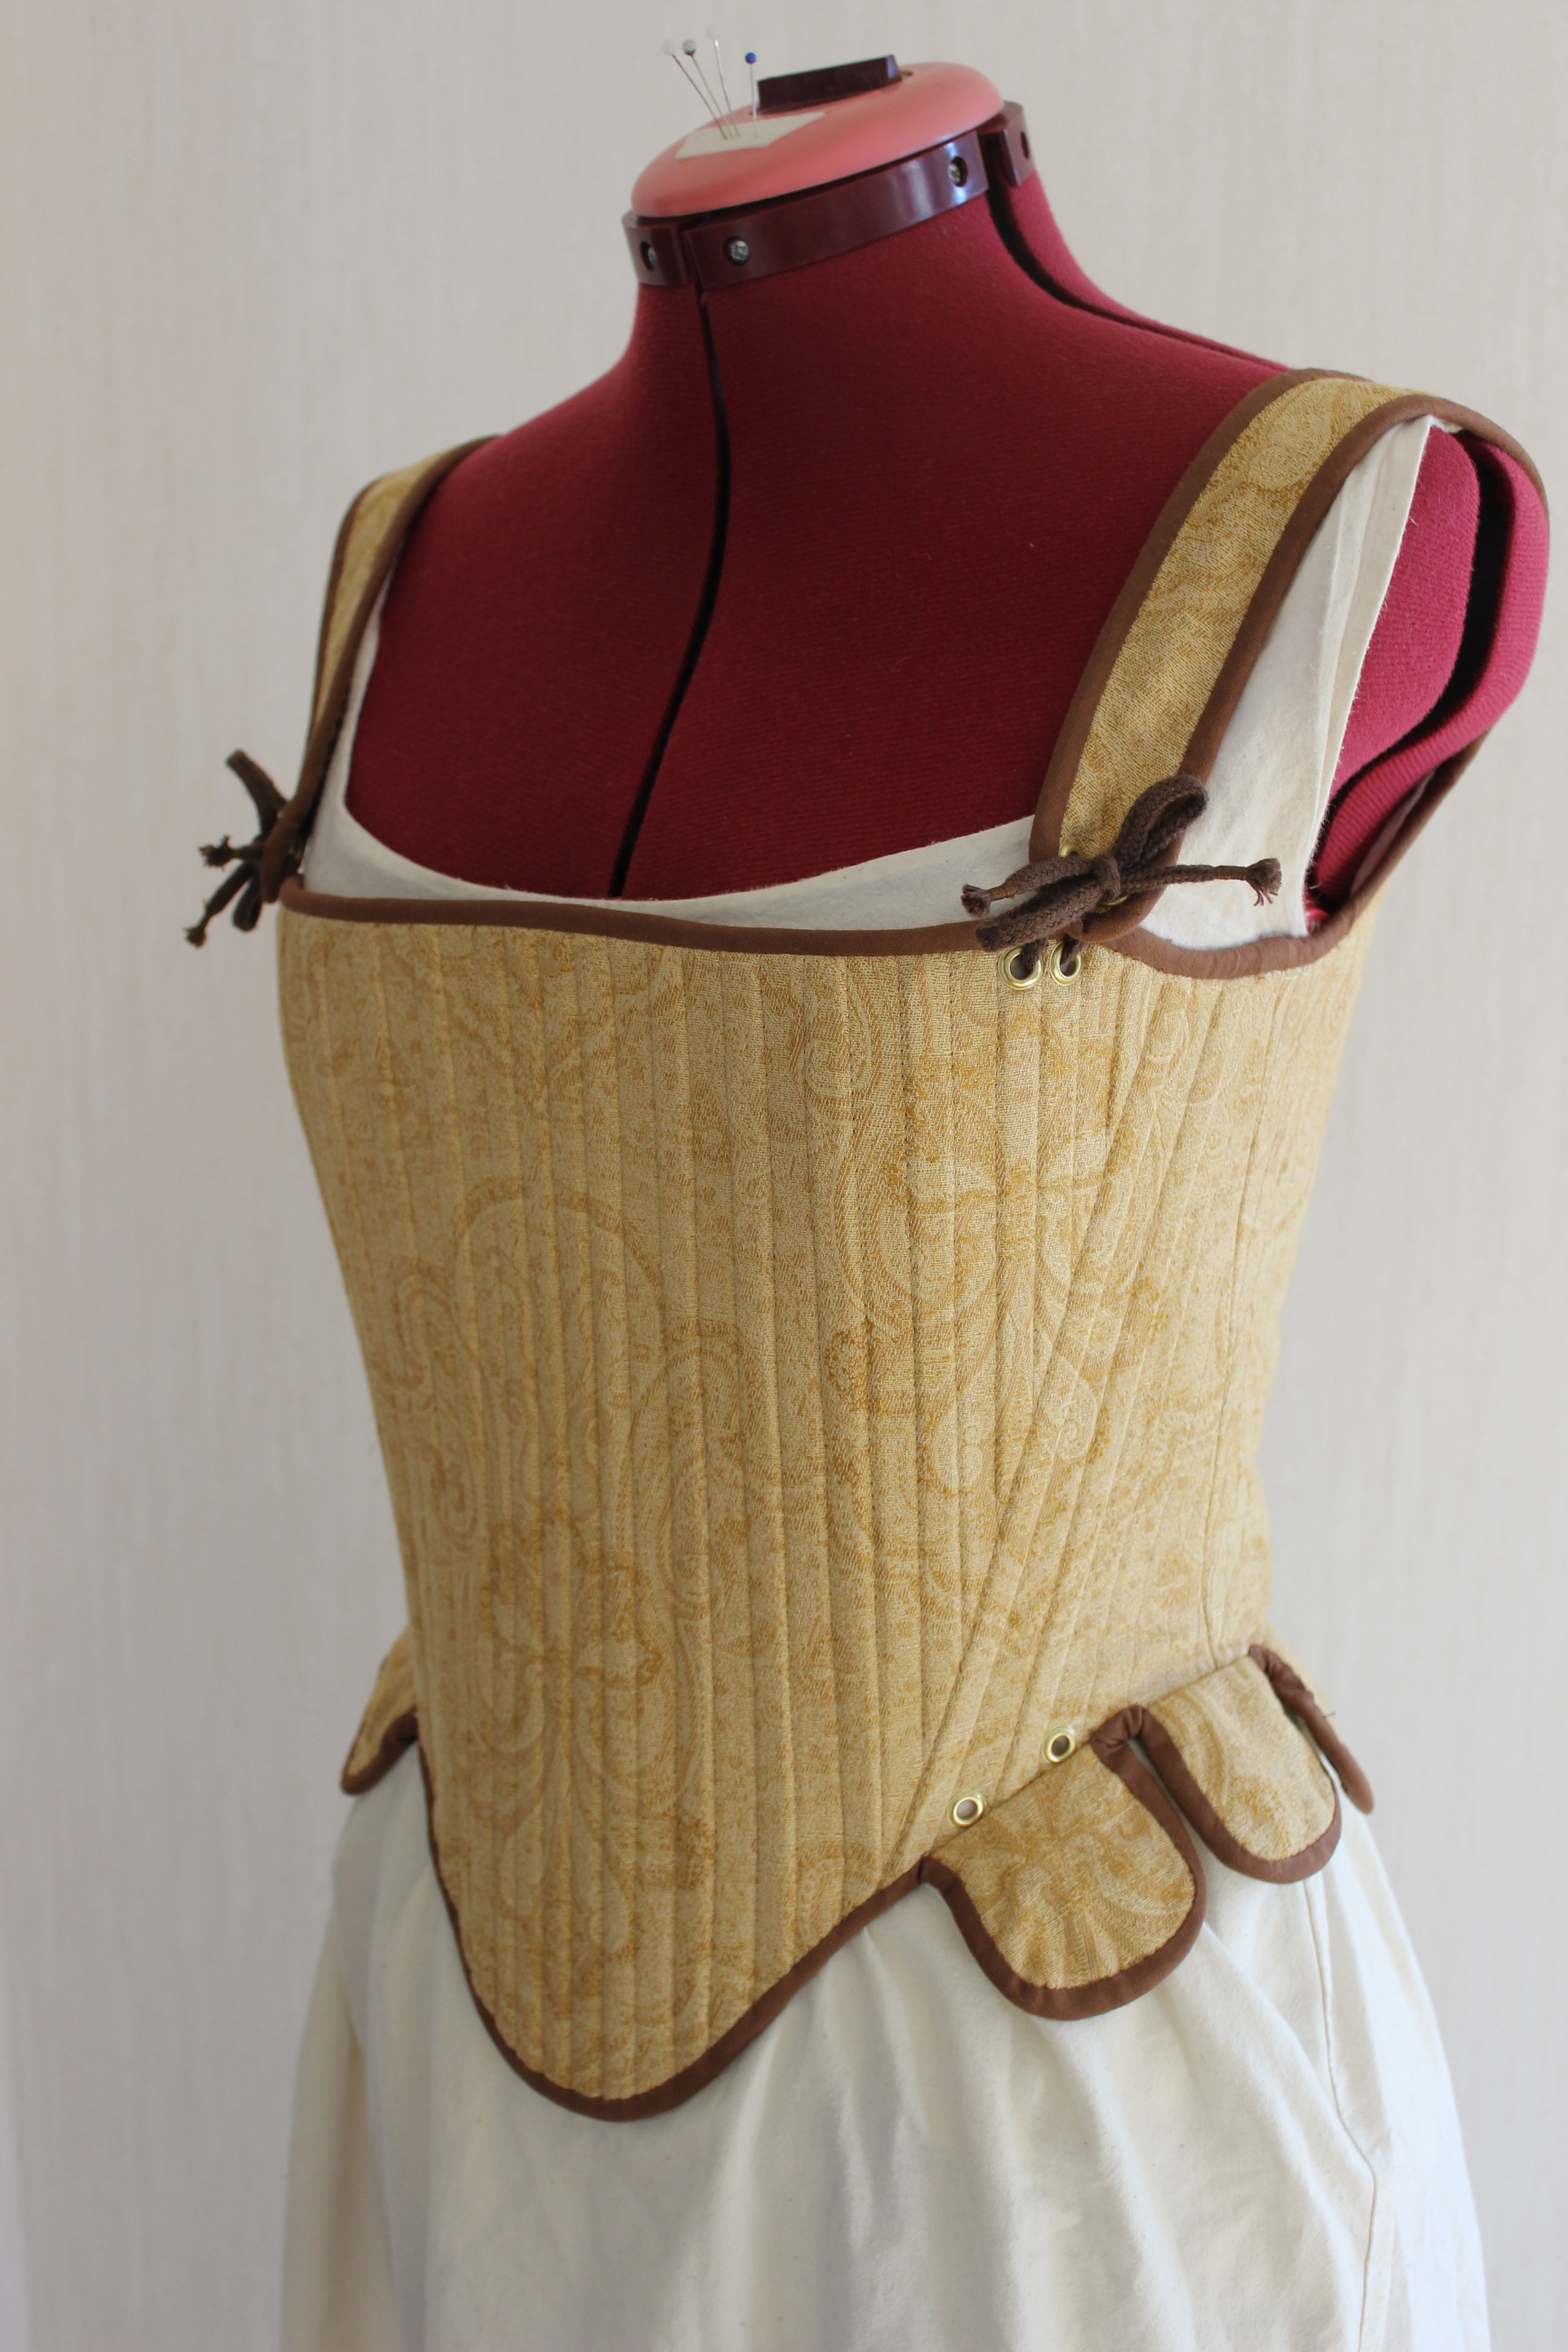
The finished Stays:
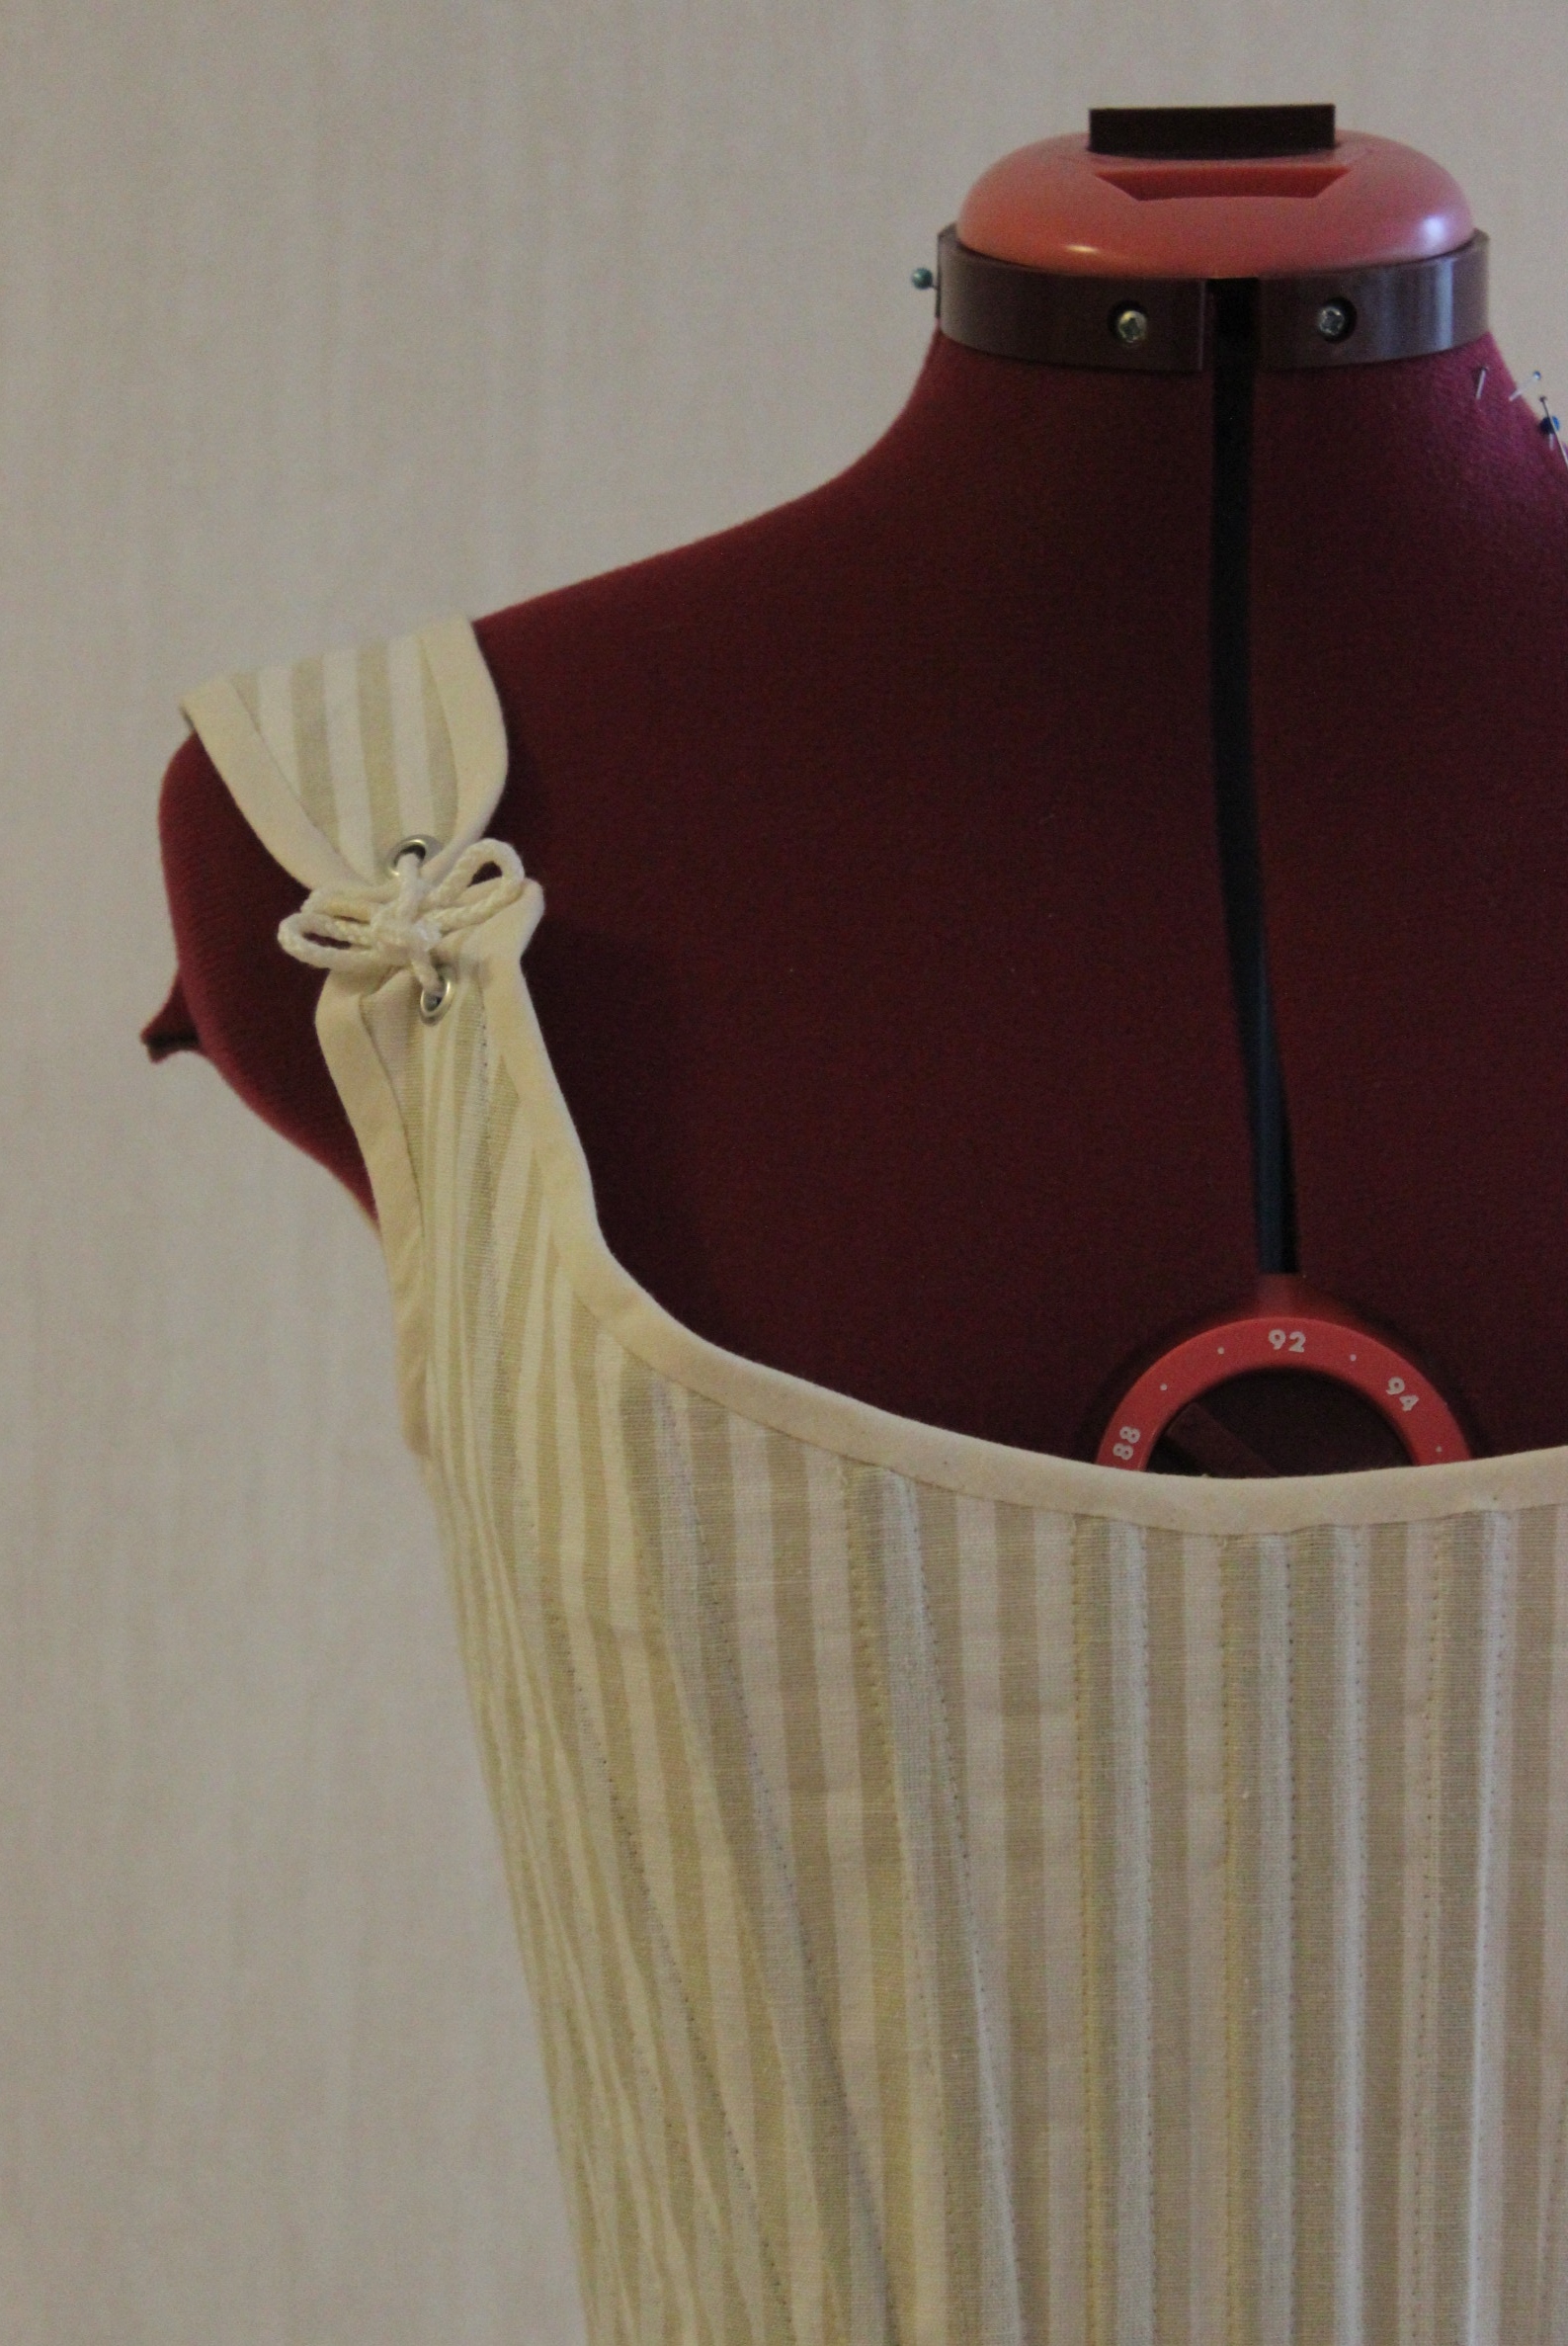


Sneak a peak of the photoshoot: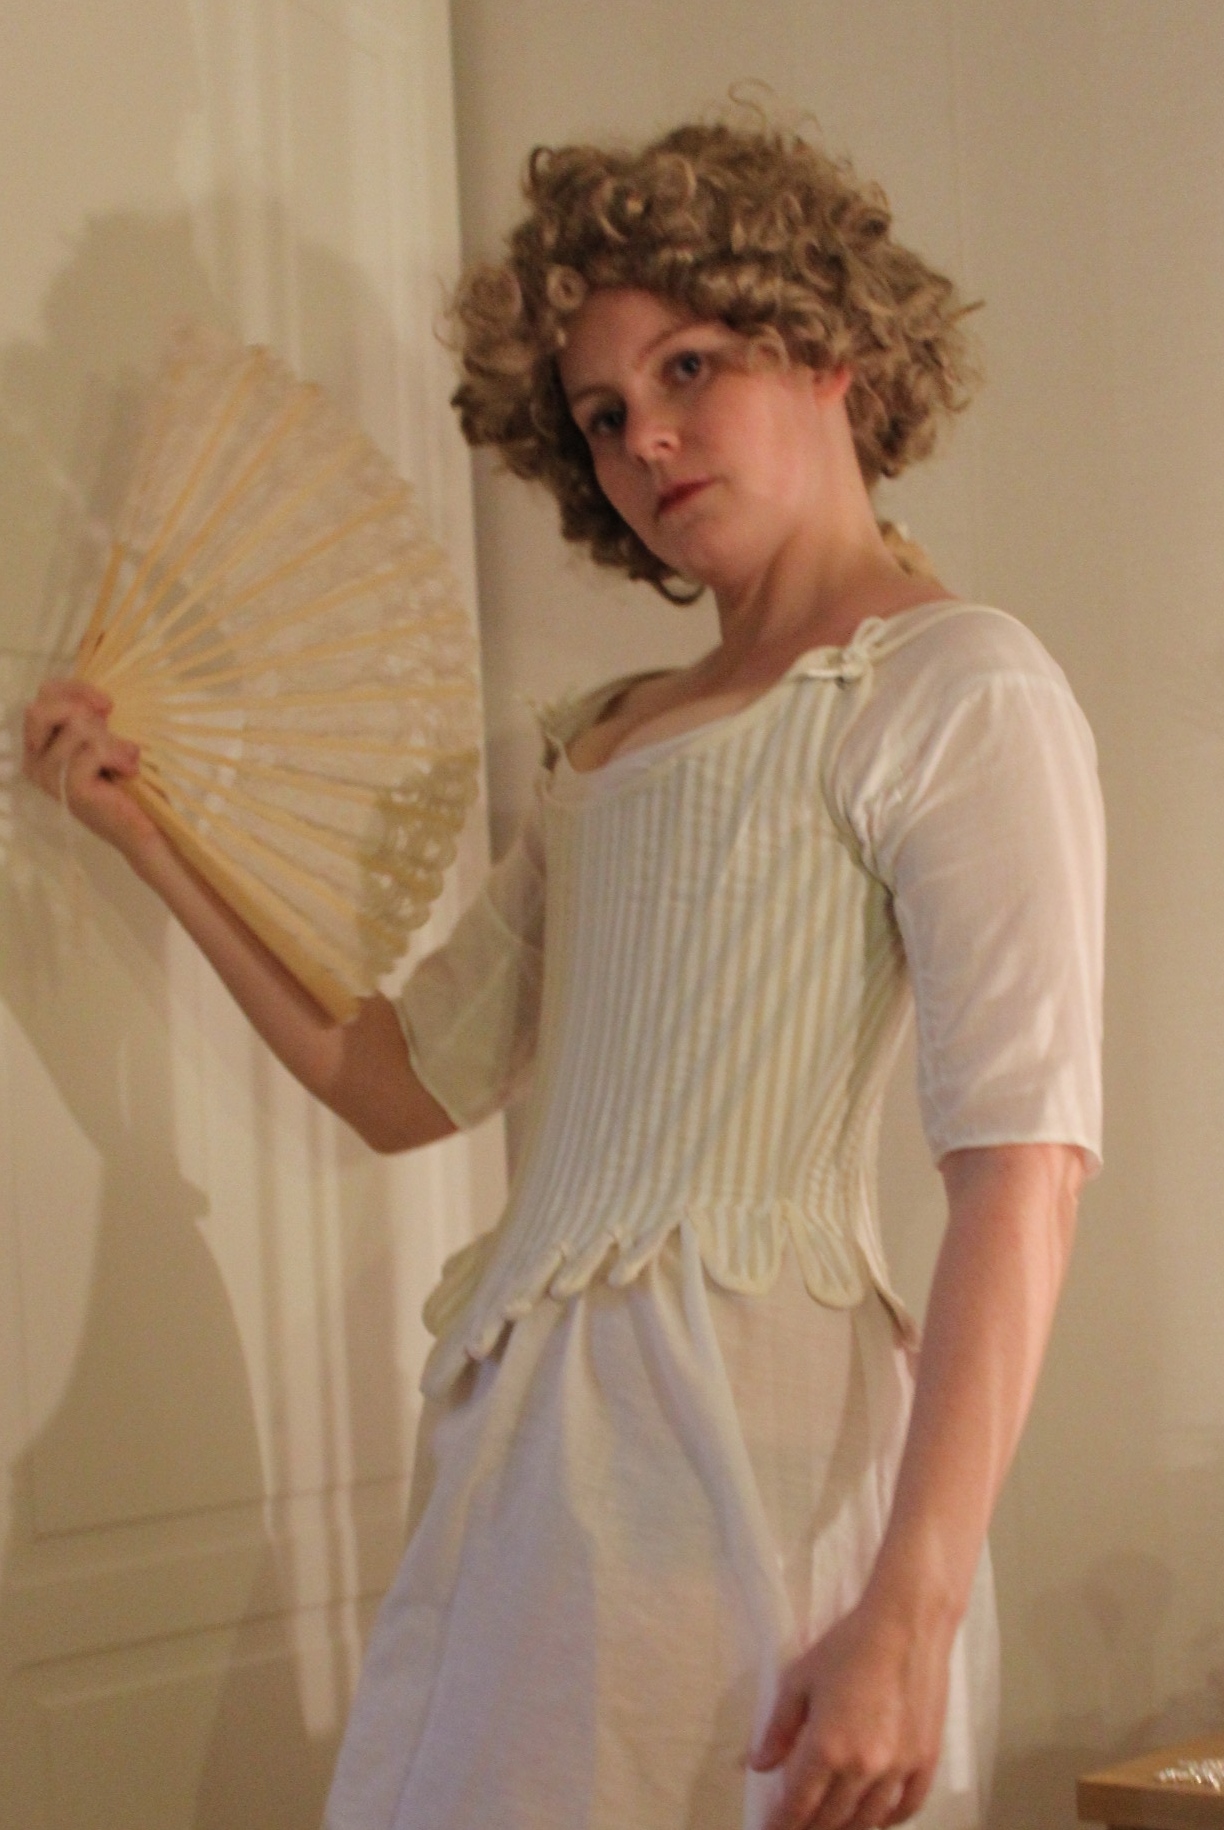
Just the facts:
Challenge: nr 16 – Terminology
What: a pair of 18th century half boned stays. Read more about the origin of the word (and what differs Stays from Corsets on: http://thedreamstress.com/2013/08/terminology-whats-the-difference-between-stays-jumps-a-corsets/
Pattern: 1770s Stays pattern from Nora Waughs Corset and Crinolines.
Fabric: 0,5 m of striped cotton, 0,5 m of tightly woven cotton sateen and 0,5 m of white cotton sheets.
Notions: Thread, 13 pairs of gromets, 5 m lacing cord, 4 m of cotton bias tape, 1 m of metal boning and about 30 pieces of plastic cable ties.
How historical accurate: The pattern, material and shape of the stays are correct. But I sewed them on my machine and used metal grommets, plastic boning and modern construction techniques. So maybe 4/10
Time: About 15 hours – binding the tabs took like forever.
Cost: About 200 Sek (32 Usd). But since most of the material came from stash and was leftovers from previous projects I didn’t pay that much. More like 80 Sek.
First worn: For photos yesterday, and hopefully for an upcoming 18th century event n a few weeks.
Final thoughts: I really love the look of these stays, but they are really uncomfortable.
I need to make some alterations to make them fit better, and I’m not sure that will help, since I made them to long in the waist. I wore them for about 1 hour this weekend and the boning poking in to my hips and back was really noticeable.
And on top of fixing the ill fitting part, I accidentally burst one of the side seams of the stays while sneezing during the photoshoot (ups)…
The item for challenge 4 of the HSF14 was quite simle to decide – Looking at my intended “sewing list” where a 1900s evening gown is the next big thing, I of course needed the proper undergarmnents.
Since this is a new era for me (I’ve done 1980s and 1910s, but they are not at all the same) I needed to start from the bottom. So a corset it is.
Looking through the internet for inspiration I really liked this one. 
And amongst my patterns I found the 1901s corset from Nora Waughs “Corset and Crinolines”. 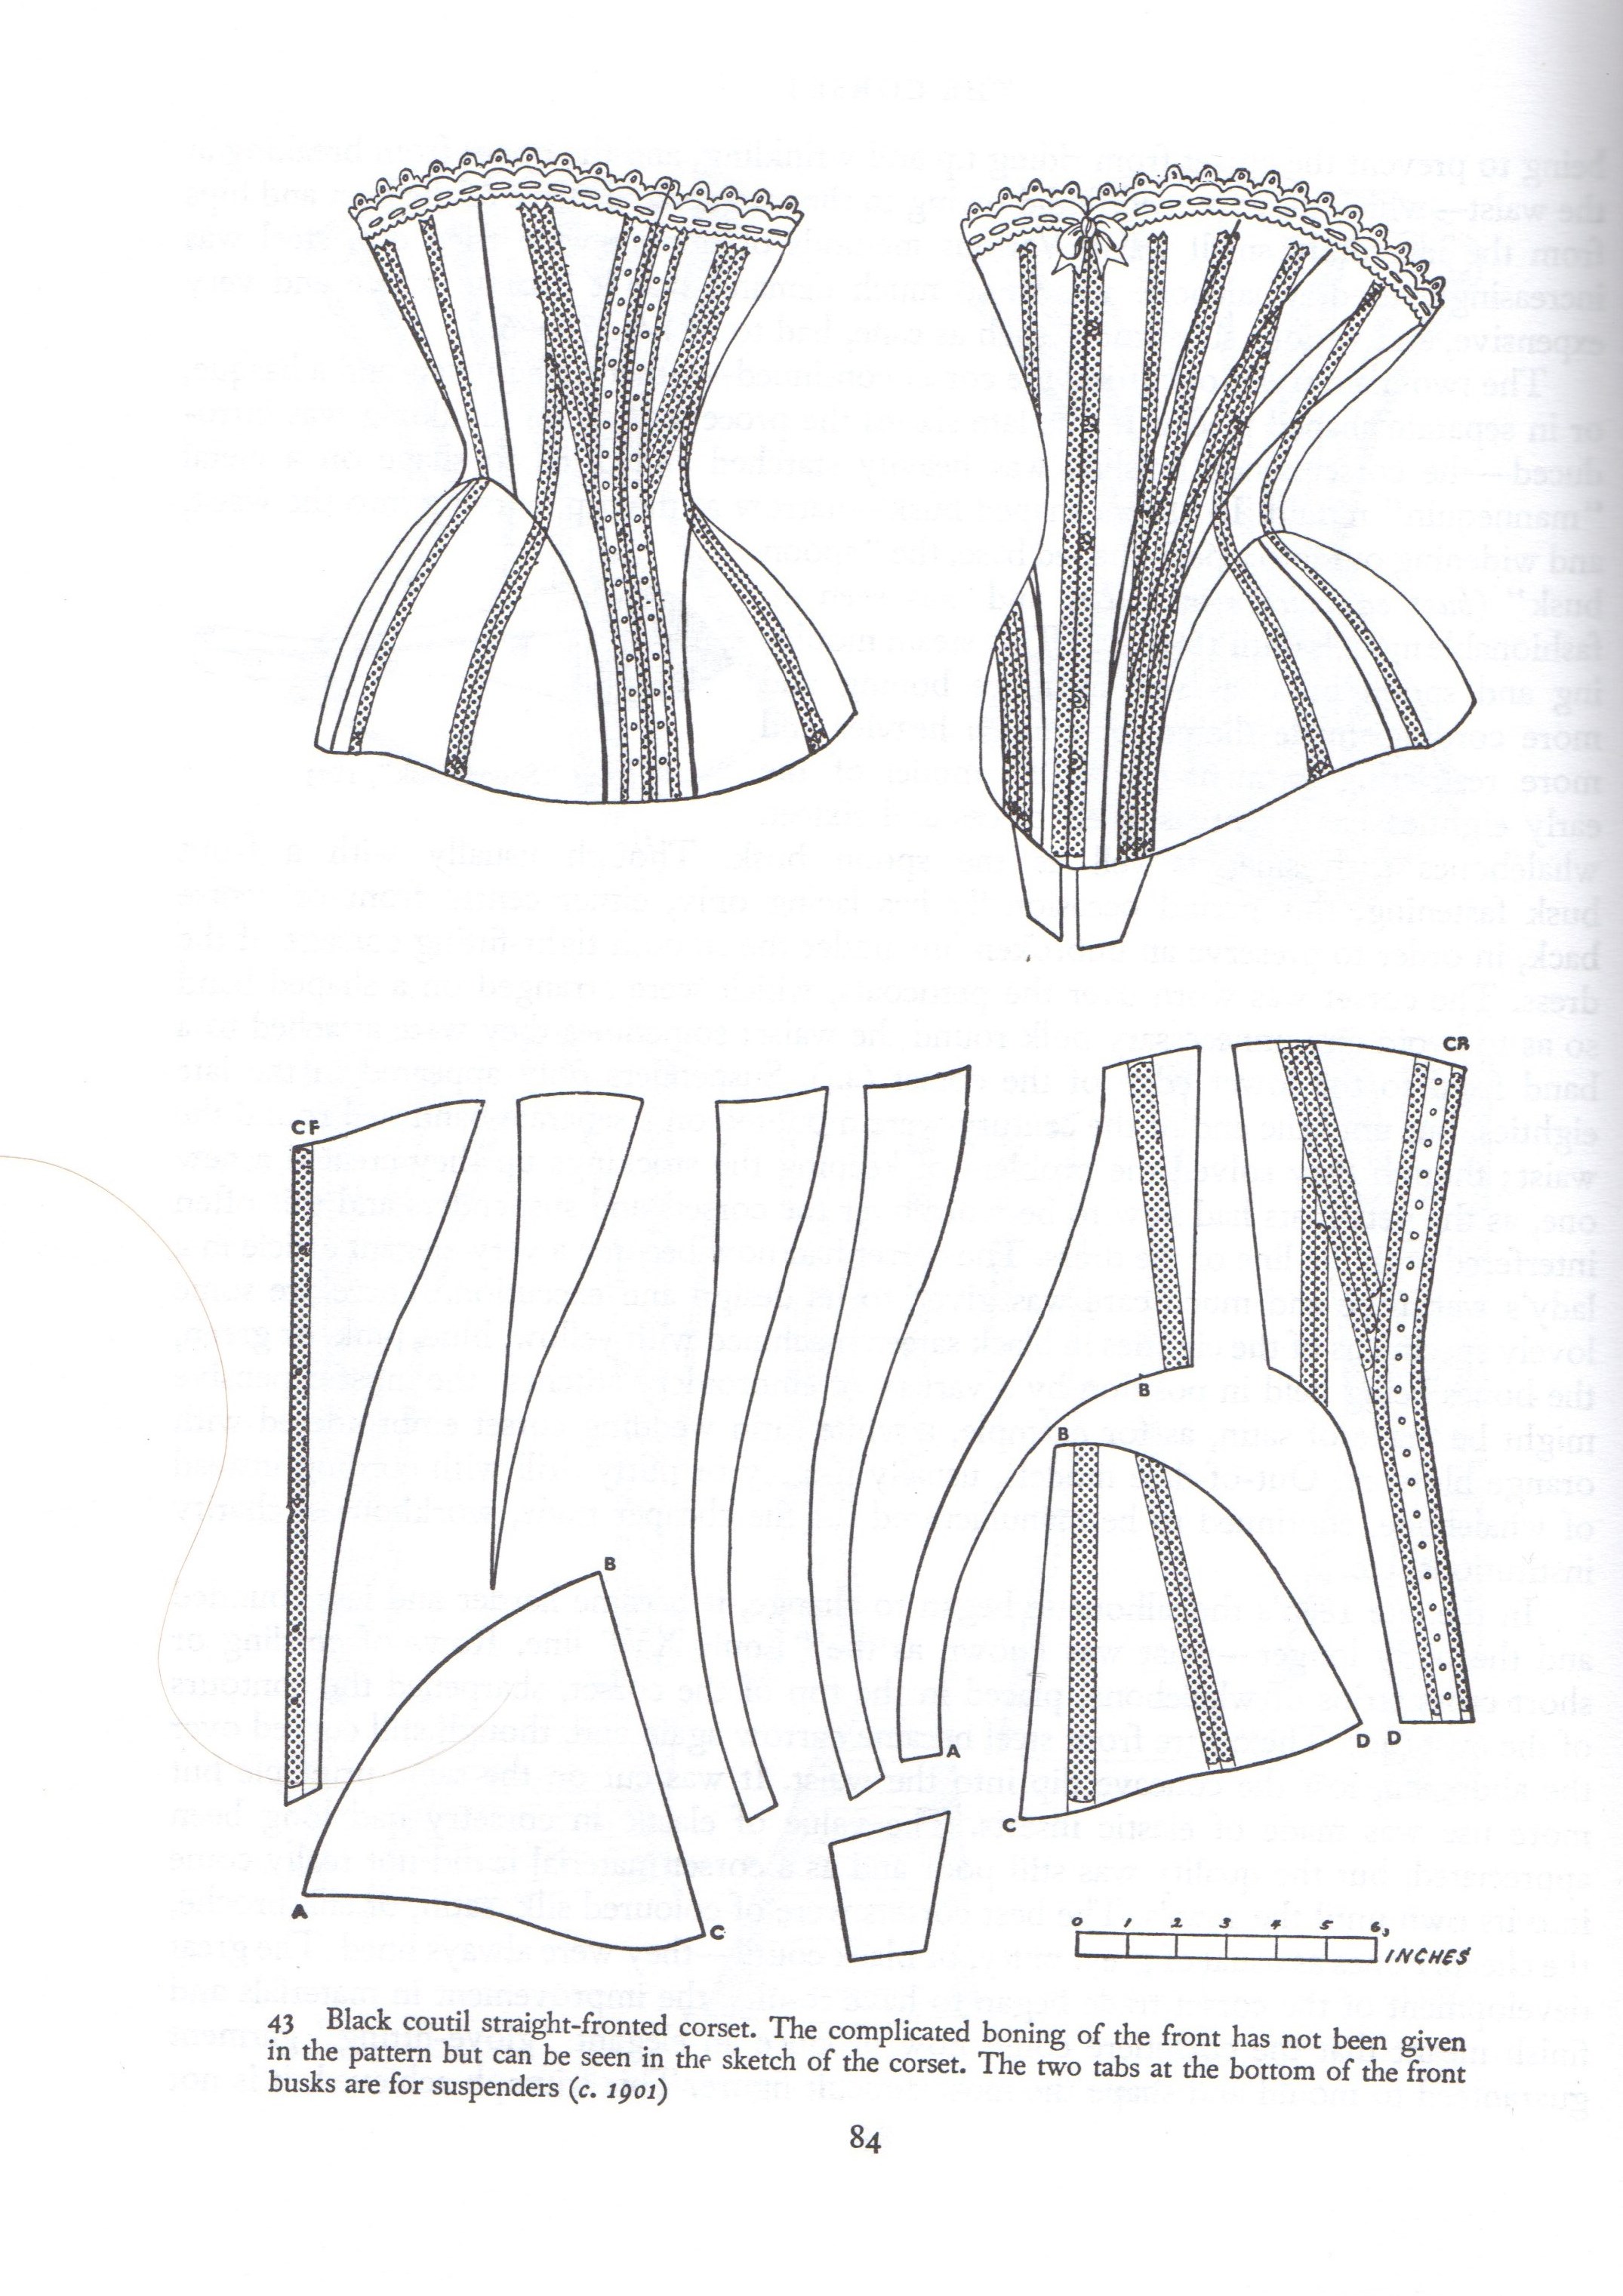
My original thought was to make the corset in ivory cotton sateen, but when searching my stash I discovered it was all gone (I’ve already used it all on a couple of other corsets). And the only other strong ivory colored fabric I had was a rough unbleached cottonblend. So on to the fabric store I went, finding this nice striped cotton upholstery fabric instead. 
I had wished to make this a quick and dirty stash busting prject, but found I already had had to many of those lately – thous leaving my stash of notions almost empty (sigh). So I also needed to buy gromets, lacing cord, suspender grips and plastic boning (the planchett and decorational lace thankfully already in stash). 
I originaly started this project 9 months ago till the HSF13 “White” challenge – before I realised I had other more pressing costuming needs.
So the pattern and the toile was already prepeared. And since I had absolutly no idea of the measurments I used making the mock-up, I just tried it on.
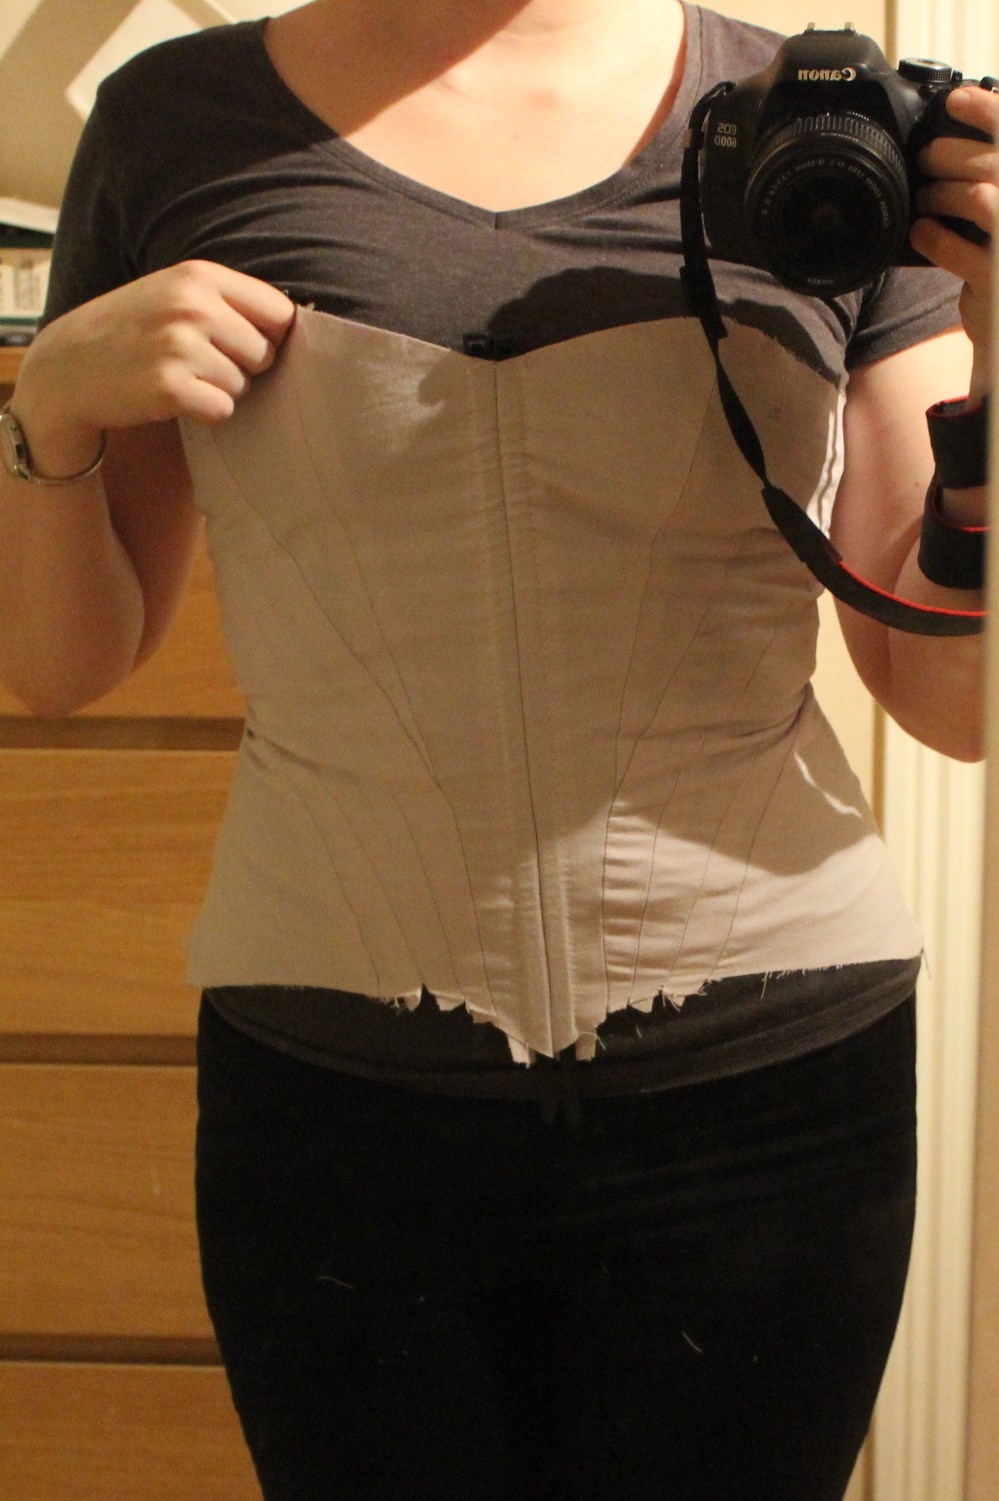
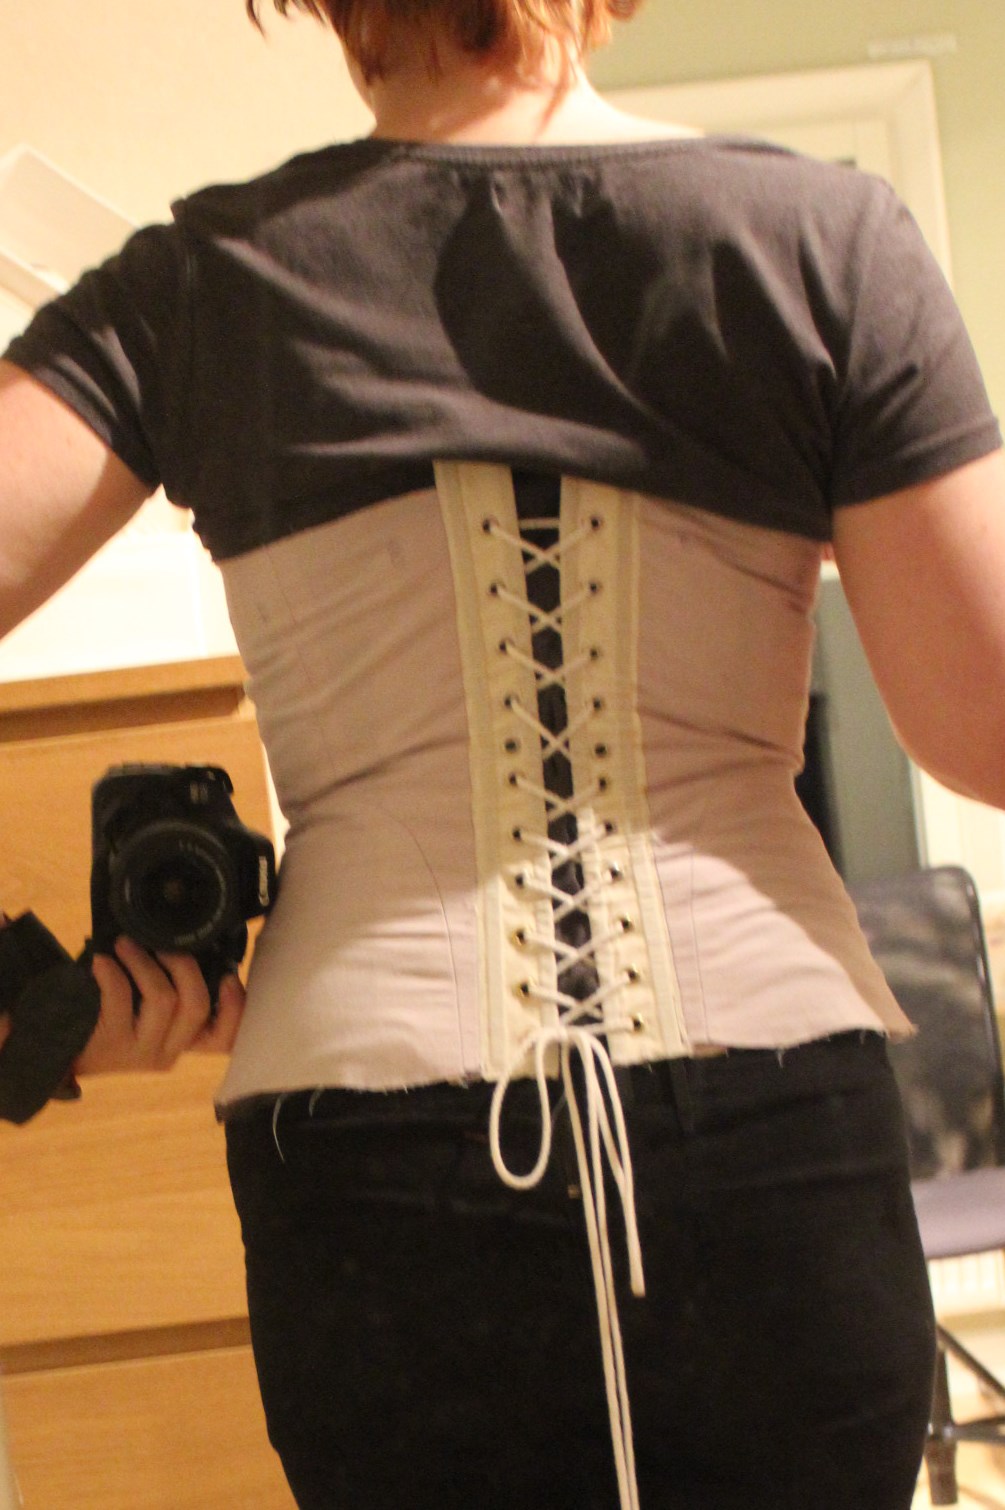

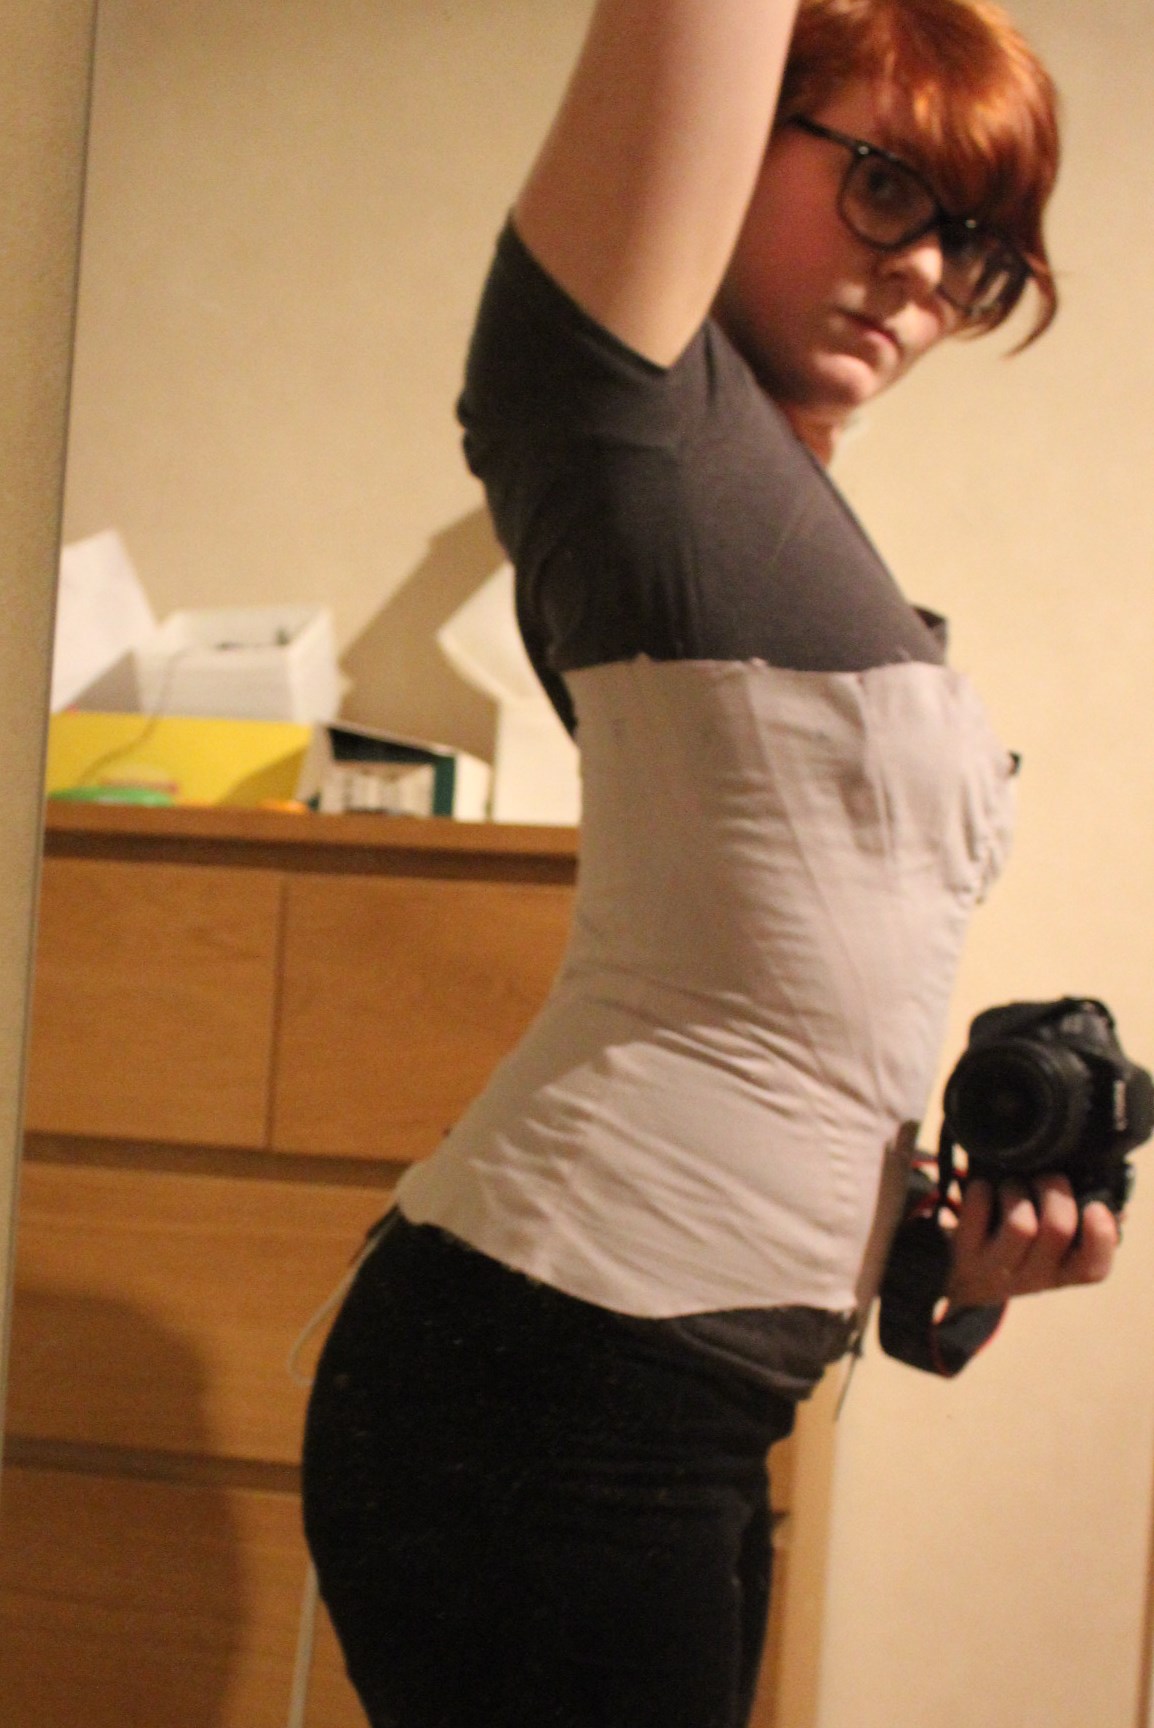
And as could be expected, it didn’t fit at all.
So I took out a total of about 10cm on the size, and added some lenght to make the front bottom smother. The rest of the fitting isues will be corrected once made up in a sturdier fabric and properly boned (I hope).
After the adjusments had been done, I cut the fabric, linning and interlining. Using as litle fabric as I posibly could. 

Then I started to sew it togehter, begining with the narrow side pieces. 
And continuing on to the busk…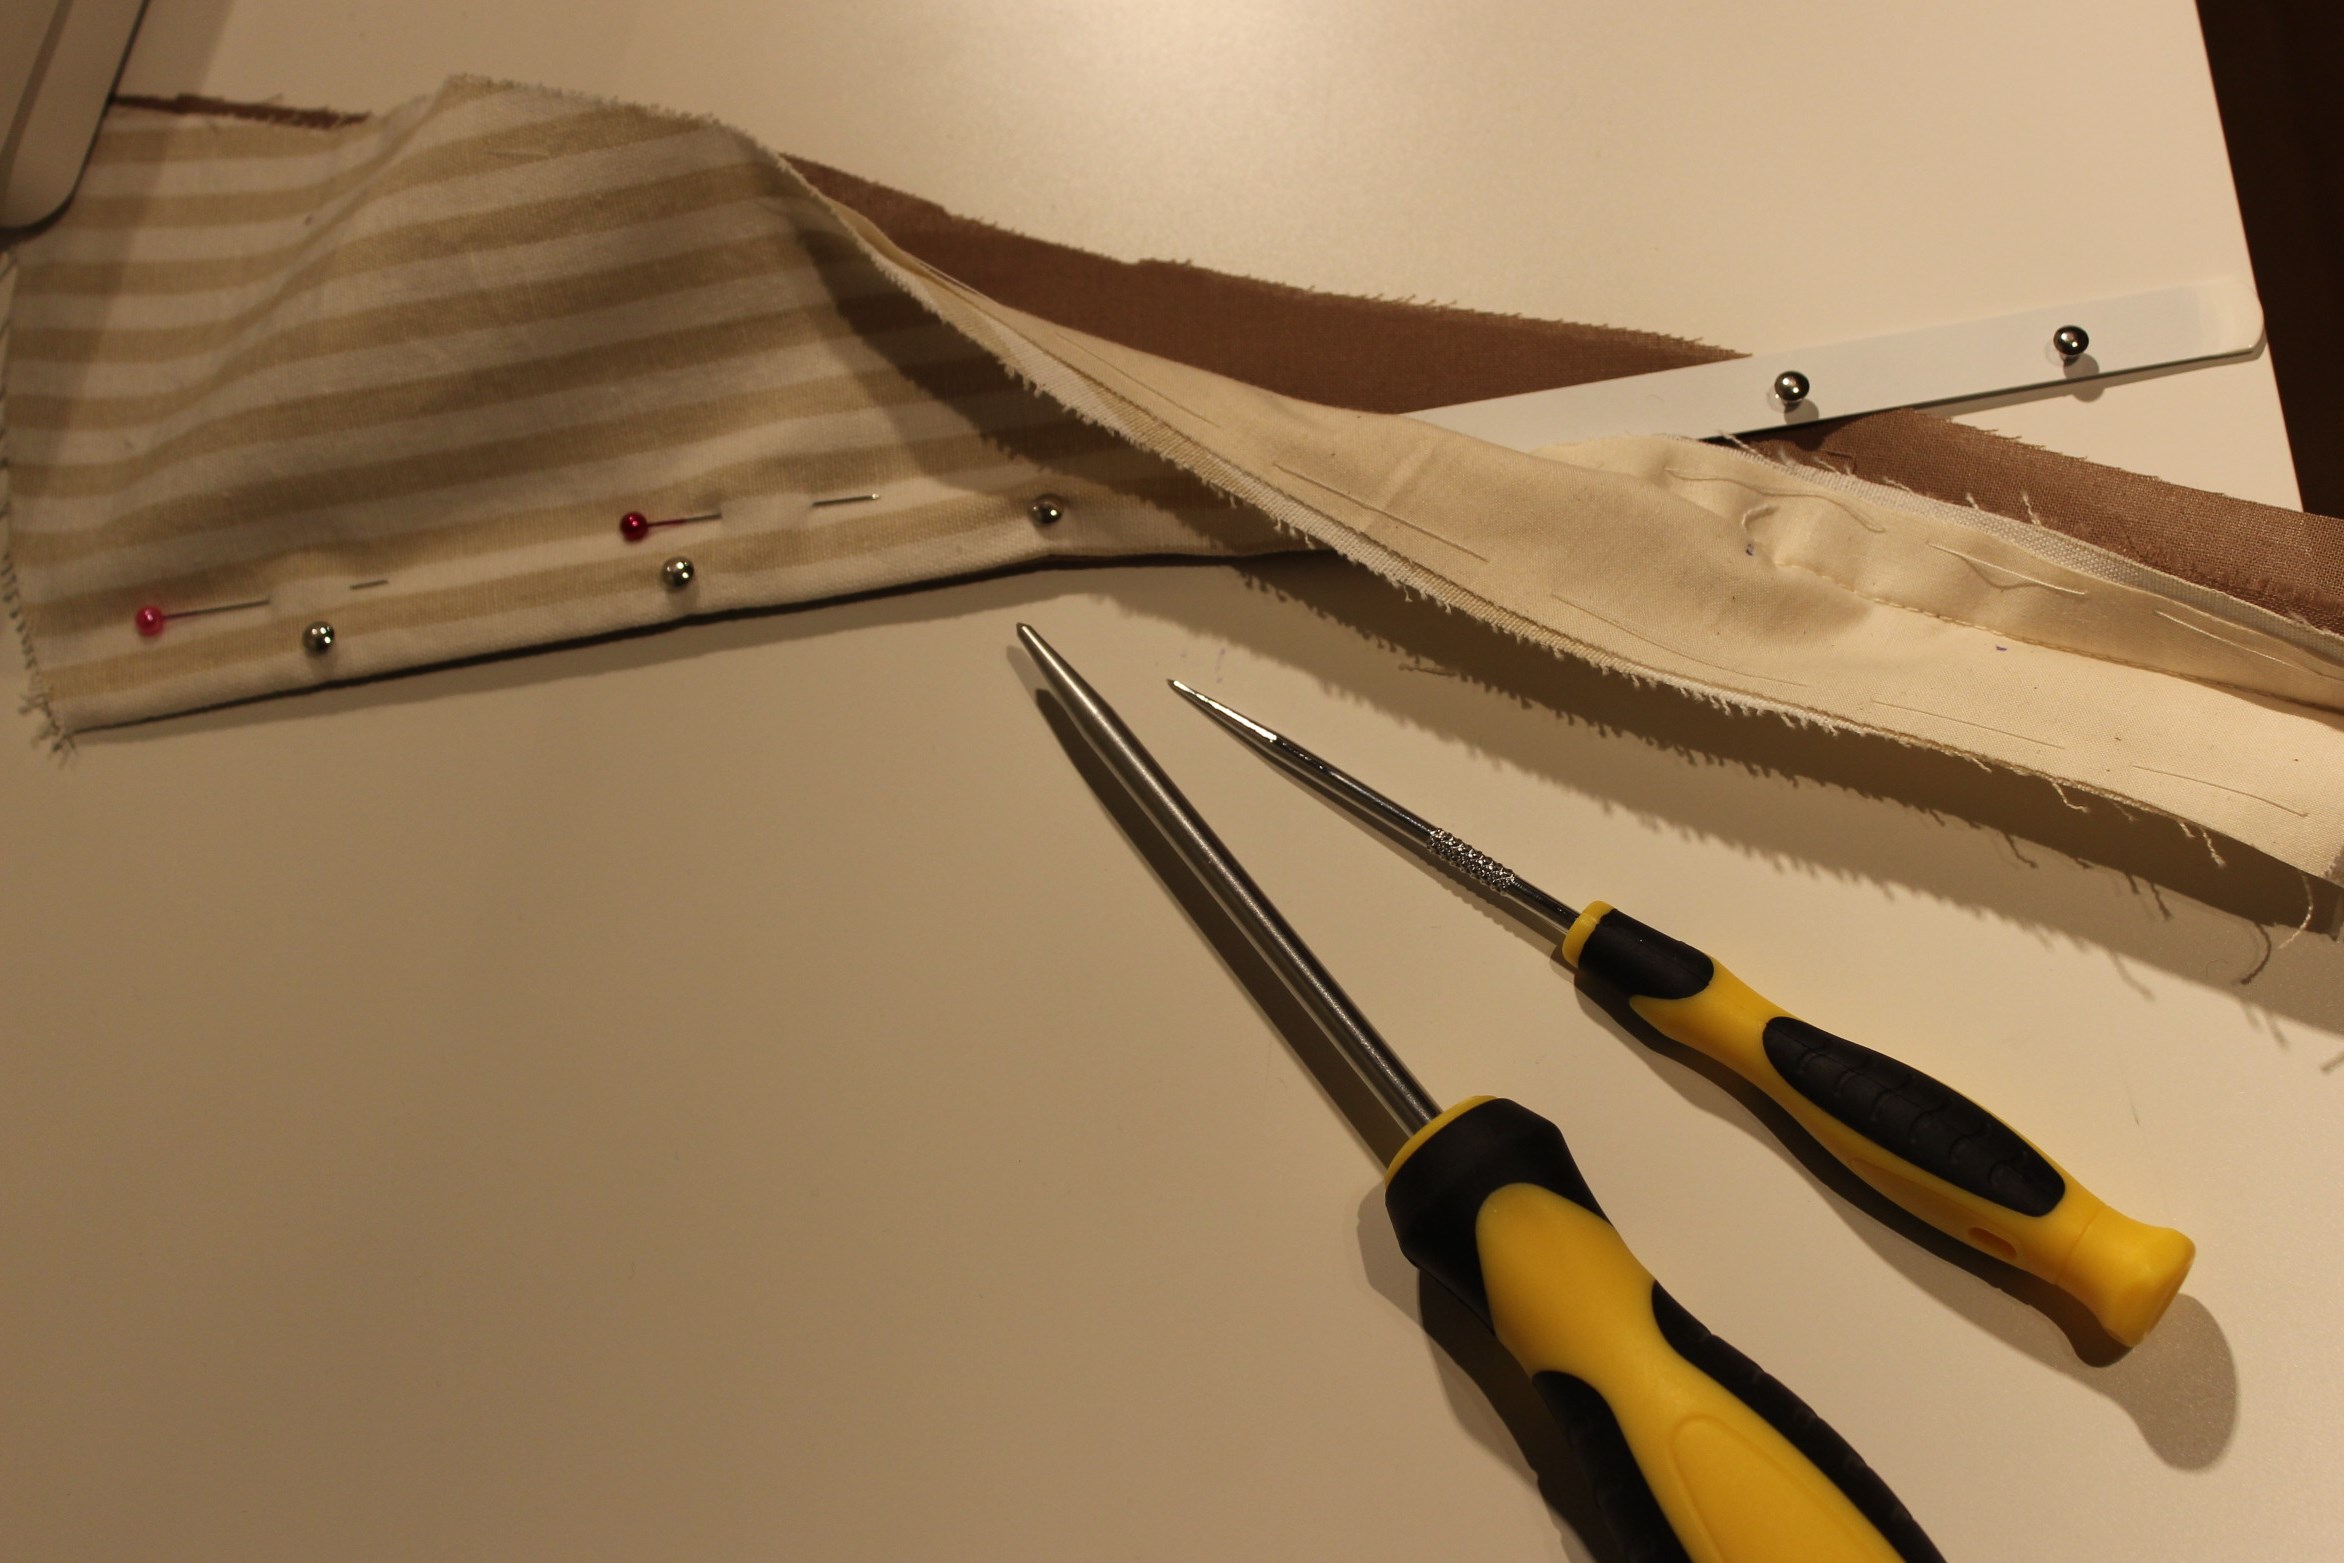
…and the gromets… 
Realising to late I’ve put the gromets to far appart.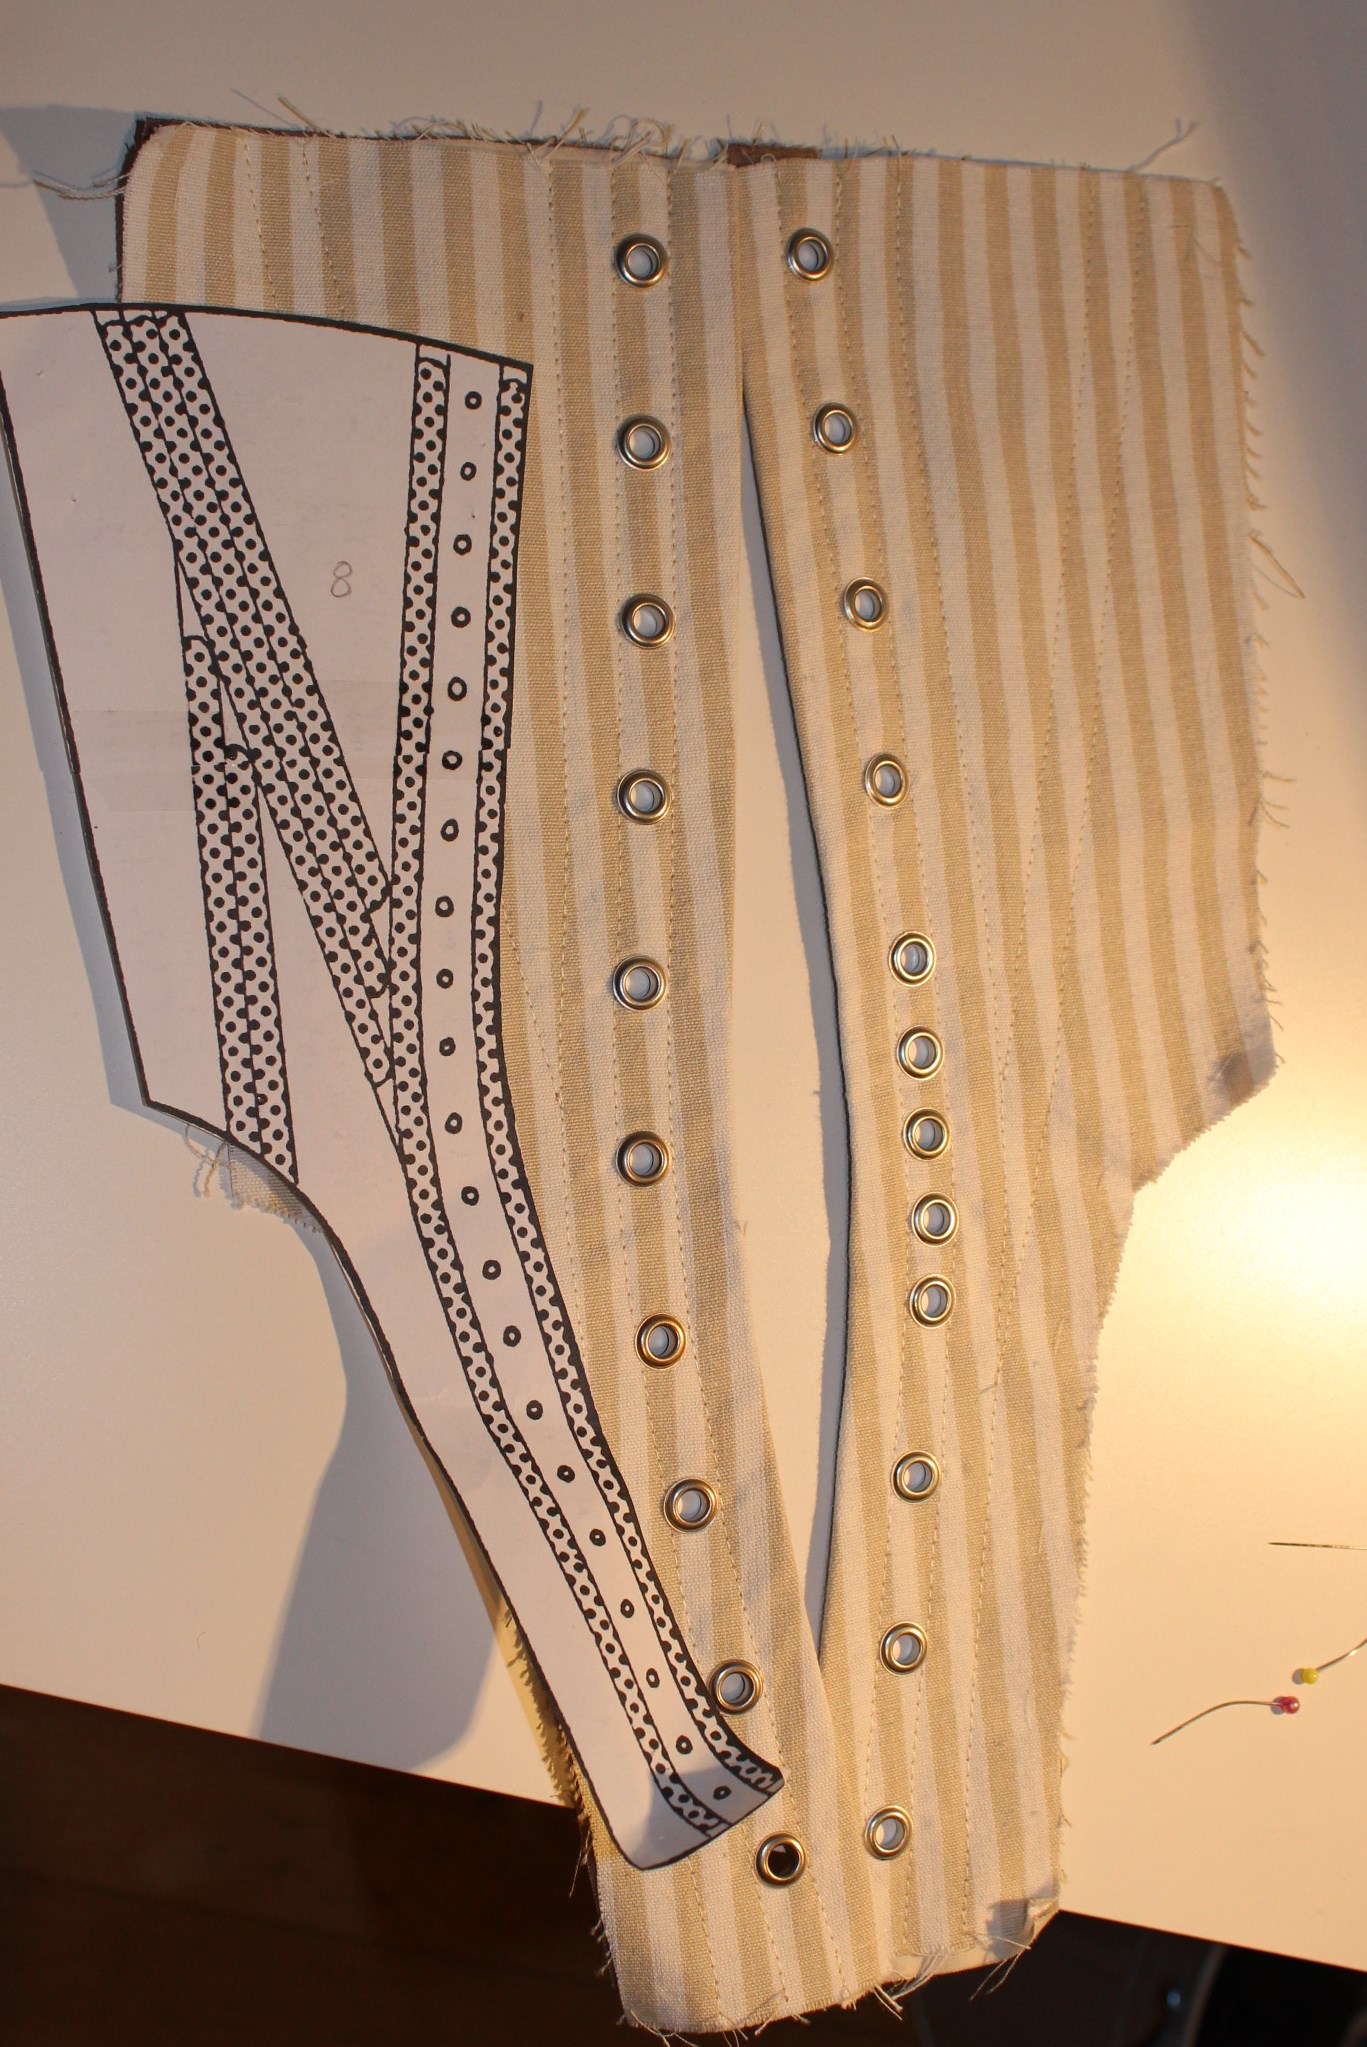 I tried to fix it by putting some extra gromets at the waist (as in 1880s corsets).
Then I sewed the pieces together and made the boning chanels, using self made bias tape, and sewed them on. 
When all the boning was inserted I sewed and trimmed down the top and bottom of the corset, prepeared it for the biastape.
Then I stiched on the pretty lace (which I picked from my “Lace box“).
Finished:


And being worn: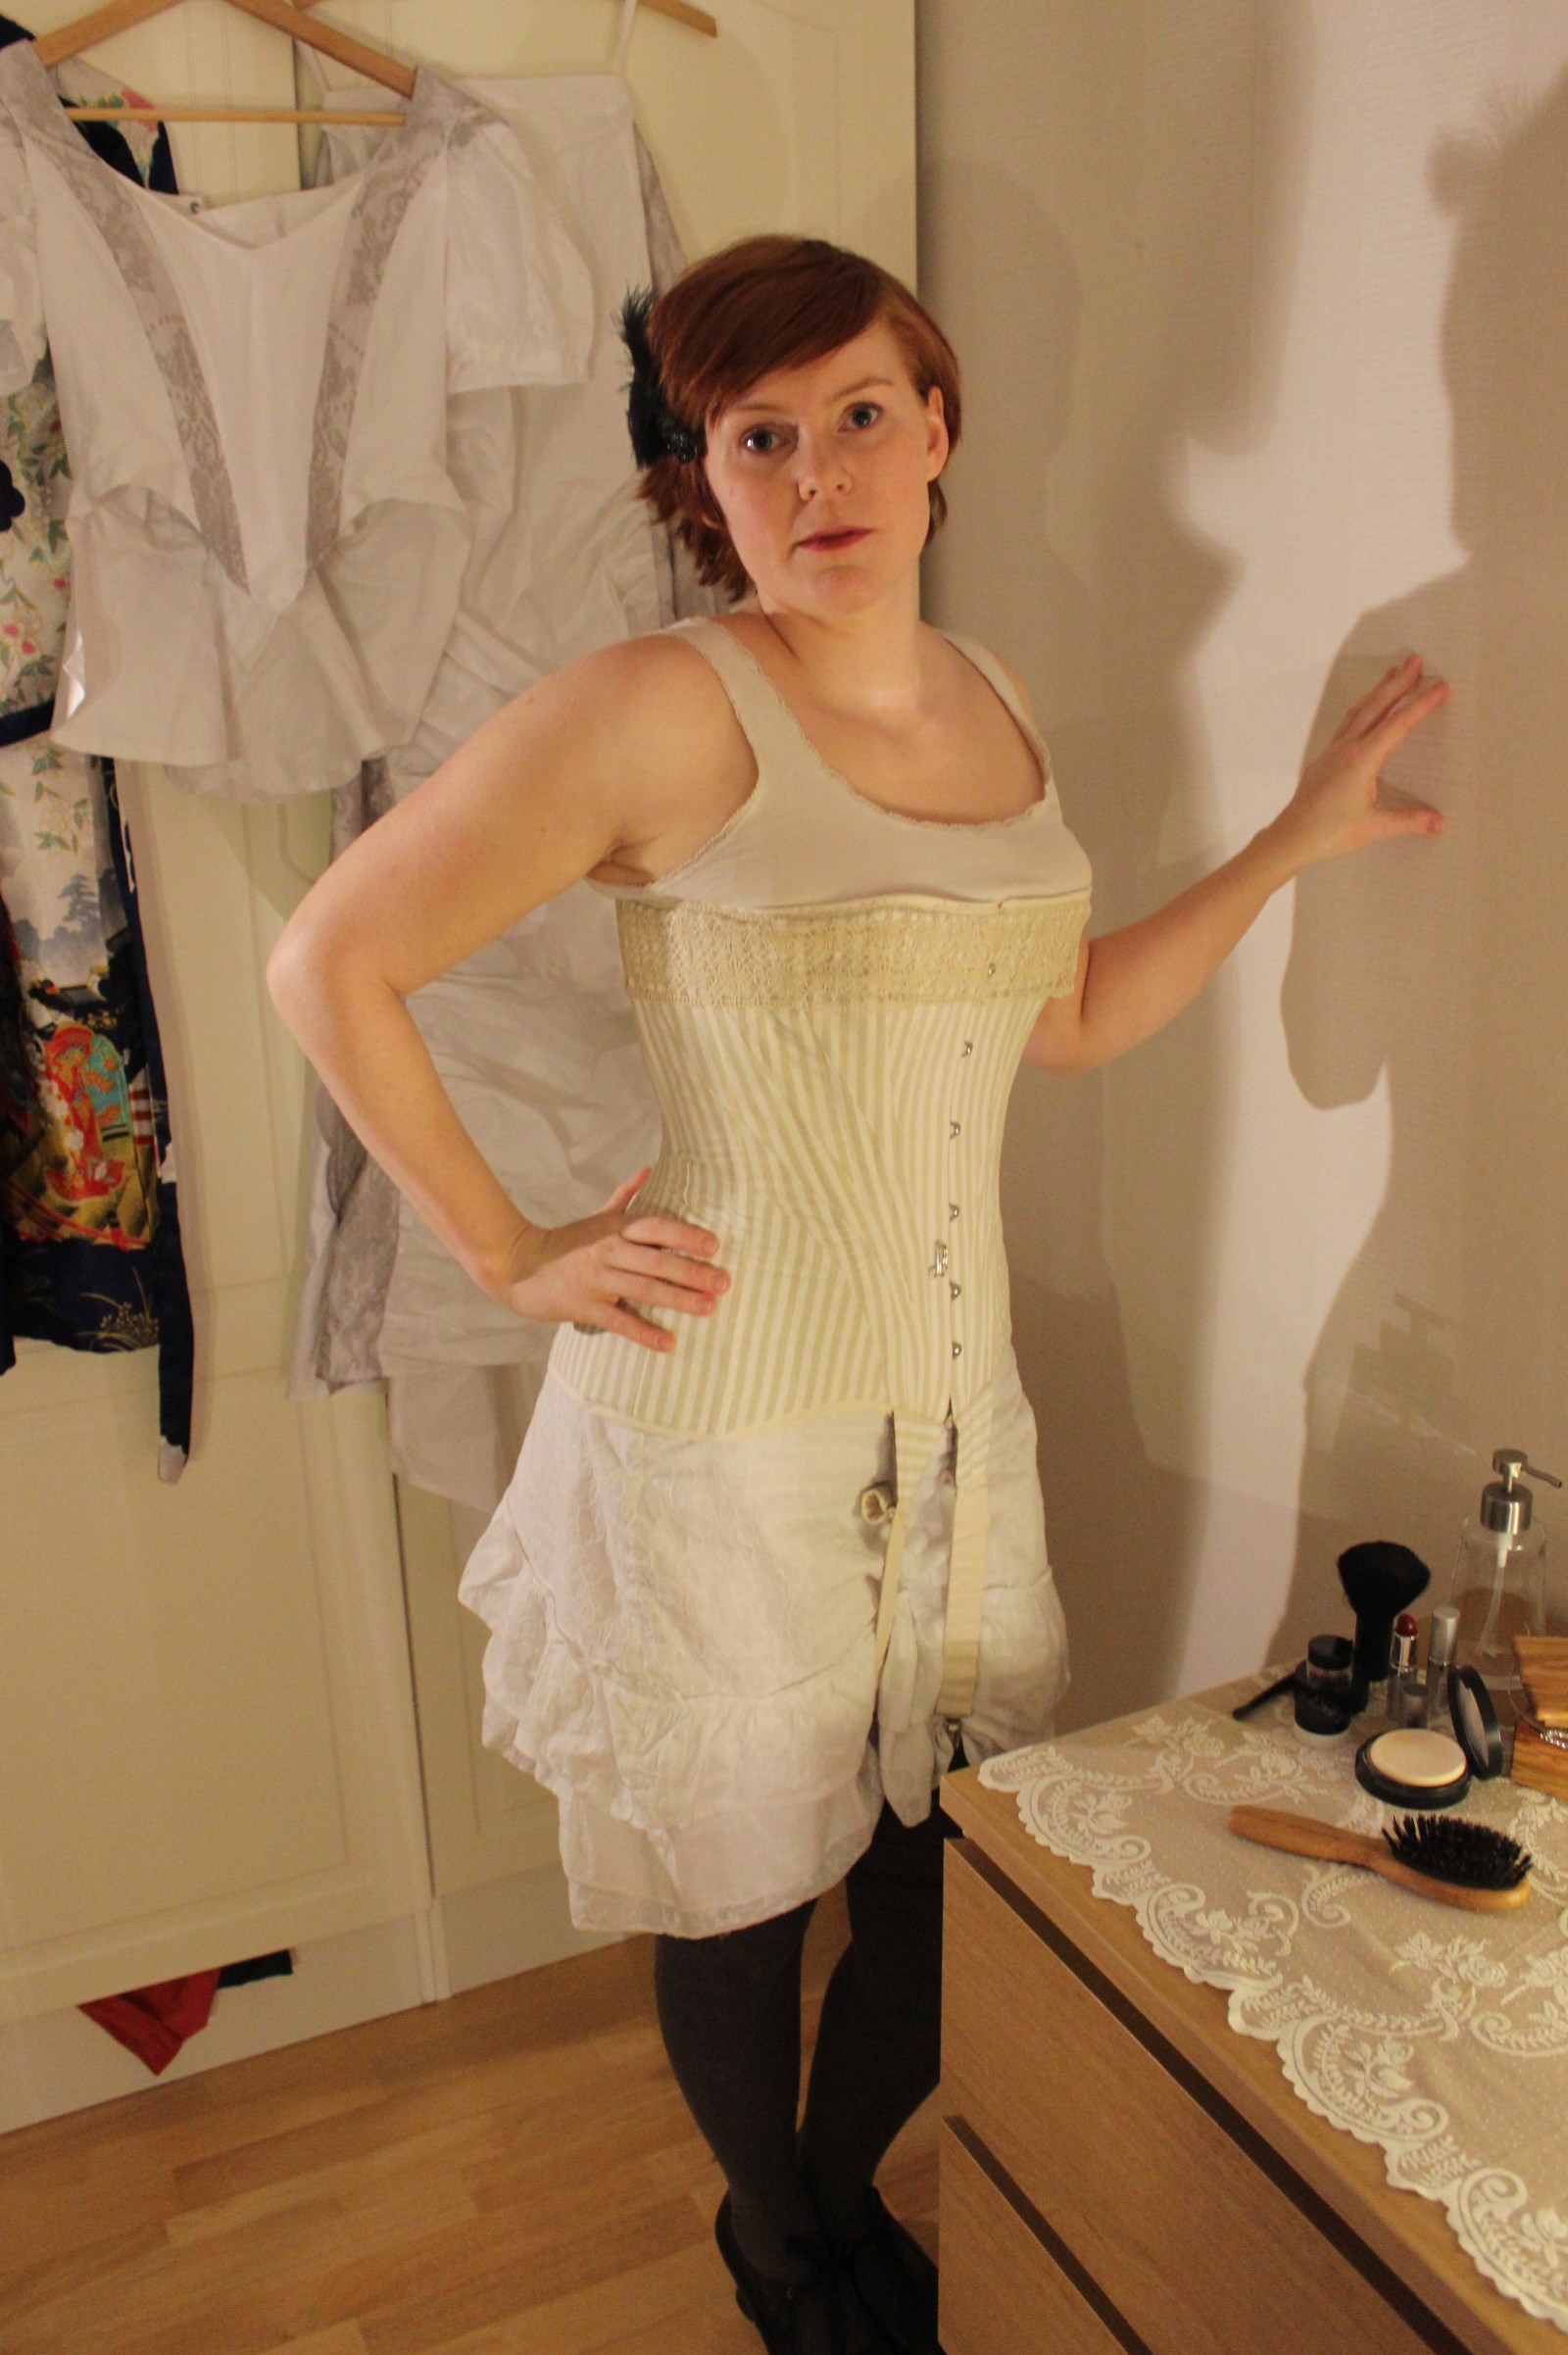


Just the facts:
Challenge: 4 – Under it all.
What: a 1900s S-shaped corset.
Pattern: Nora Whaugh’s 1901s corset from “Corset and Crinolines”.
Fabric: 0,5 of striped cotton upholstery fabric (50Sek), 0,4 m of nougat cotton lawn for lining and 0,5 m ivory cotton satten (used on bed-bolsers) both from stash.
Notions: Thread (stash), 32cm Busk (80Sek), 20 gromets (35Sek), 4m of lacing cord (50 Sek), 2 m of ivory biastape (stash), 5m selfmade biastape for boning chanels (stash), 5m plastic cable ties for boning (30sek), 2m steel boning (stash), 1 m lace (stash), 0,5 m elastics (stash) and 2 suspender-grips (50Sek).
How historical accurate: The fabric and pattern are all good. But the plastic boning and the construction tecninques are modern. so maybe 6/10.
Time: About 12 hours.
Cost: Money spent: 275 Sek (42Usd). Actual cost (including stash worth): about 400 Sek (61Usd).
First worn: For photograps 1 mars. But hopefully on some suffraget events and some summer picknics.
Final Thoughs: I’m pretty happy with it, but I think I will need to add some stuffing at the bum to get a more pronounced S-shape.
As the classic book nerd I am, I constantly hunt for new (or old) titels to add to my “libary”. I love the feeling of flipping through a well reserched costume book, just as much as I love droling over the beautiful ones made for the coffee tables.
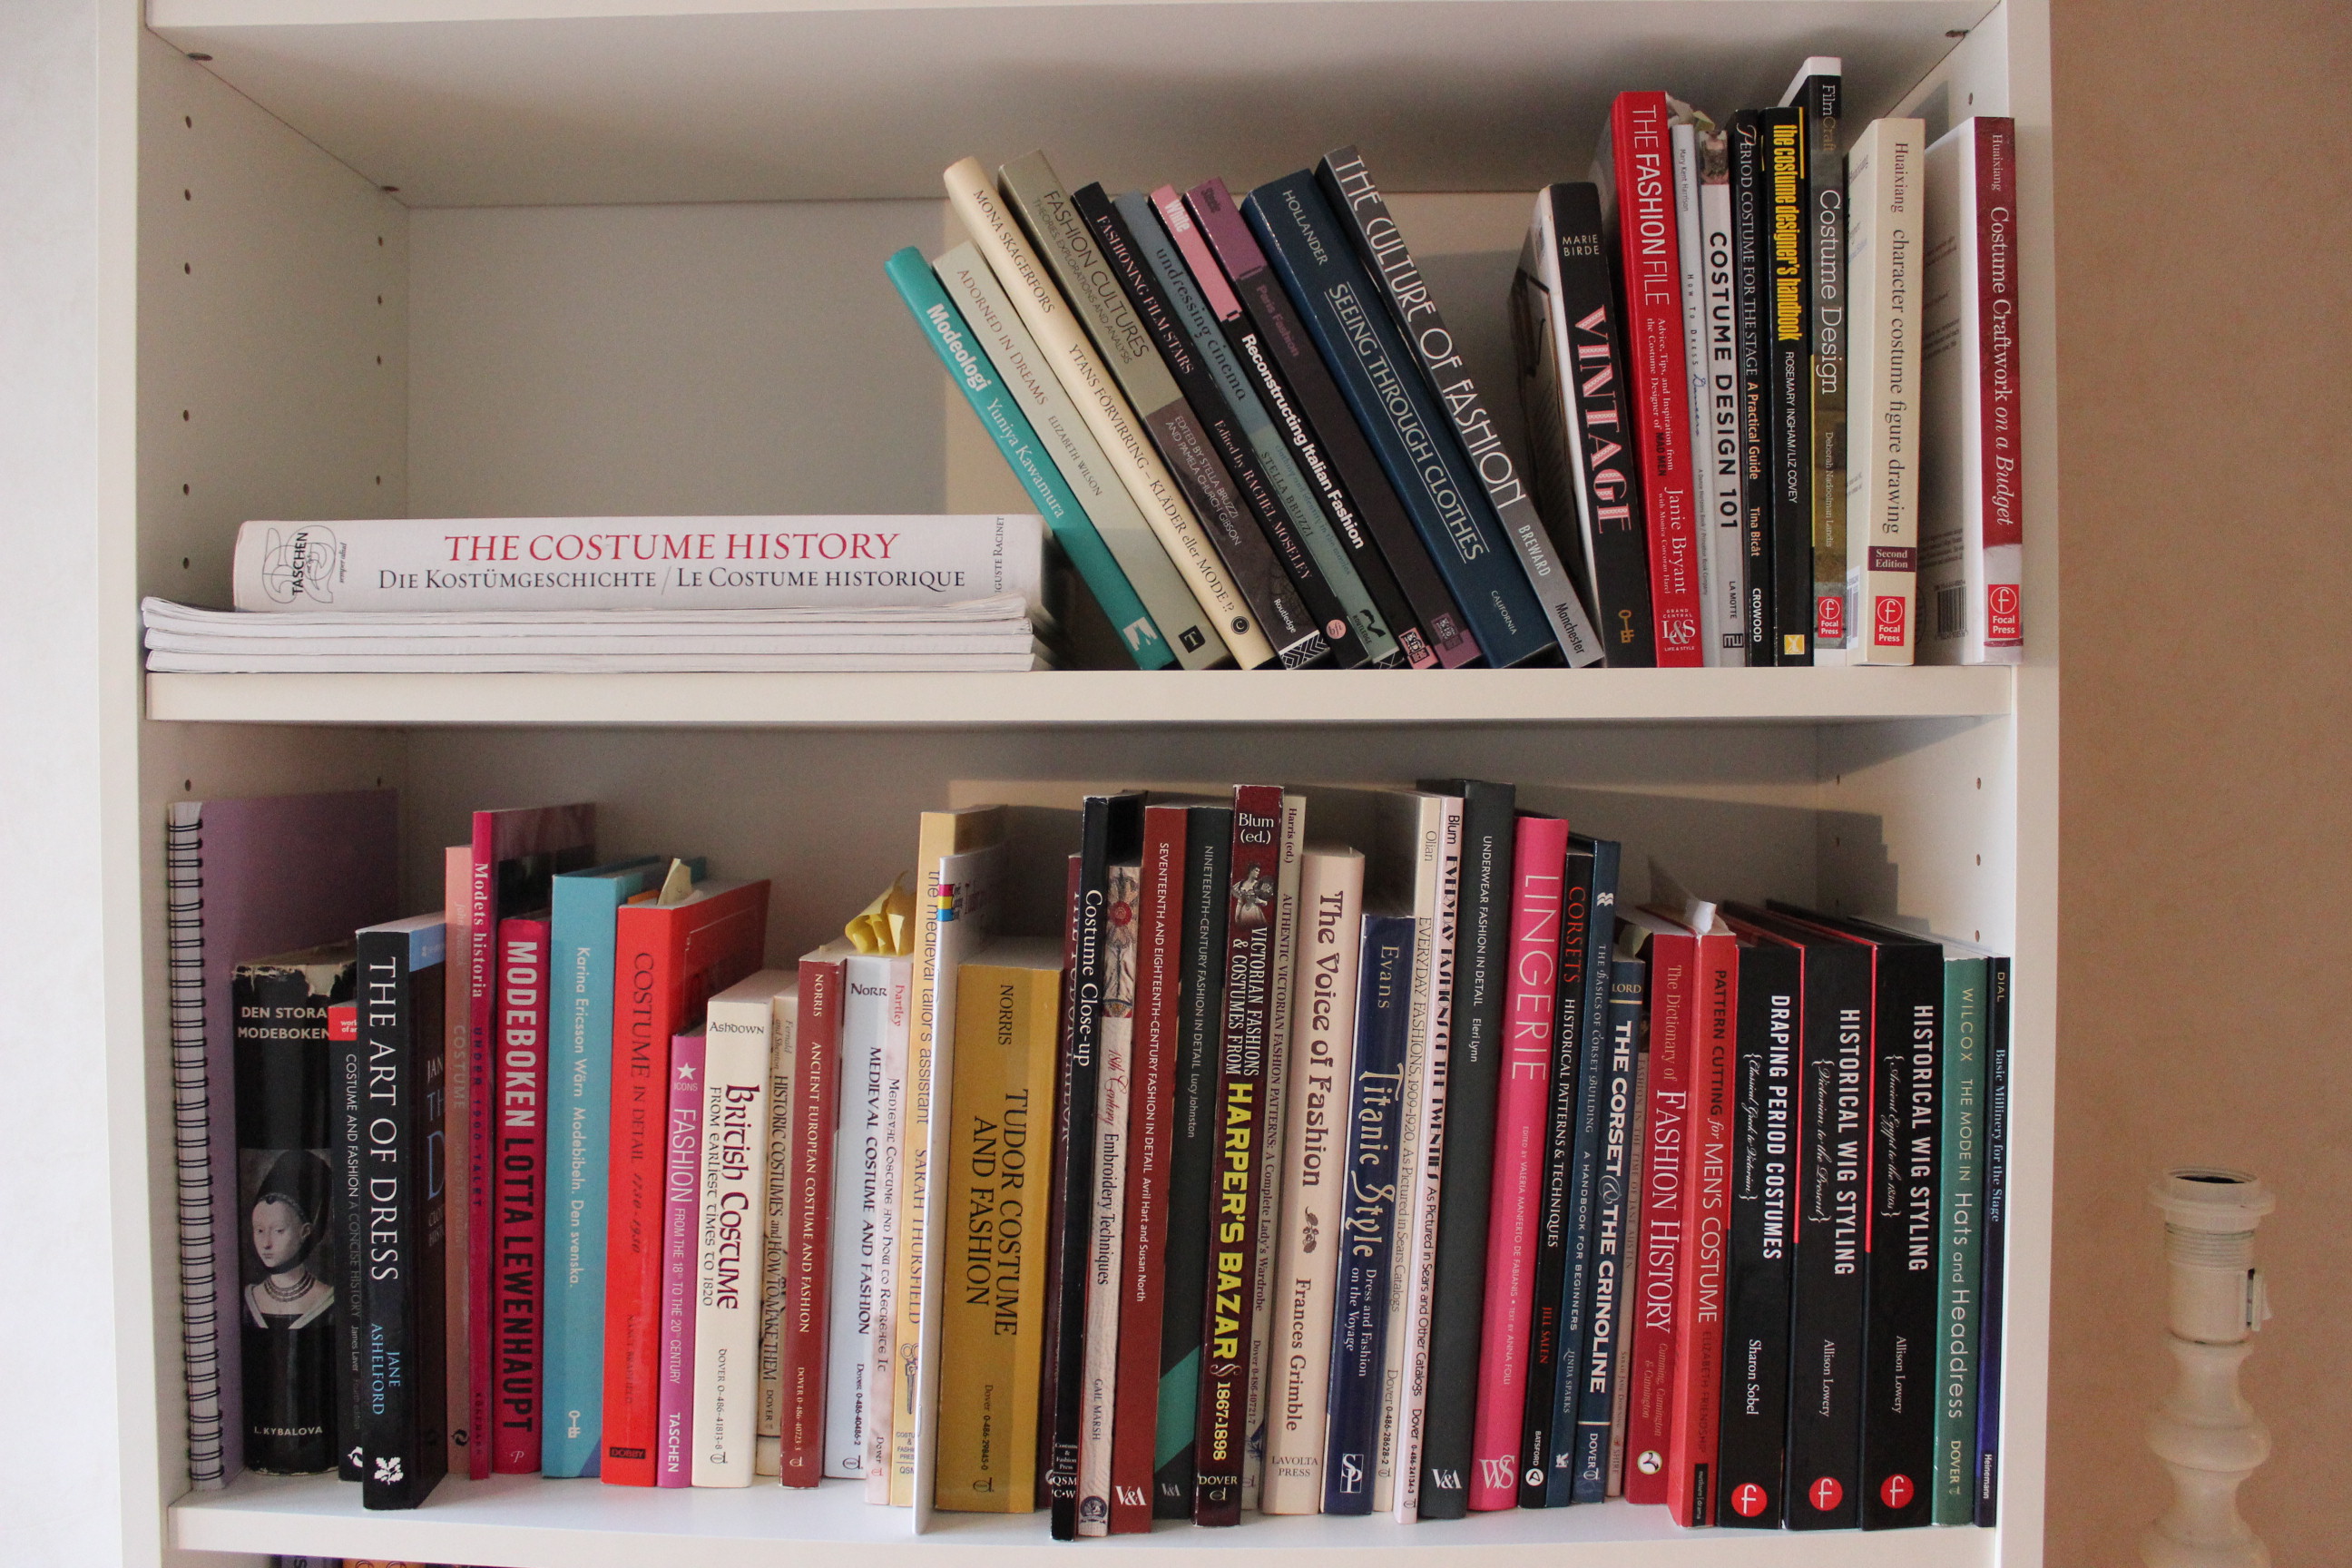
And as such a sucker for book-candy I also love to read about and find new wounderful titles.
In my town (and probably in the rest of Sweden) it is really had to find good costuming books at the store/libary. So often you need to buy the book on-line, and don’t get the chans to flipp through it before deciding. Most often I just read the reviews on Amazon before I buy a new book on-line, but since I love when fellow costumers recomend a title I decided to try to give some back.
So this post will be the first in a series of reviews.
And the first book will be a “old goodie” that I’ve had lots of use of.
Corsets – Historical Patterns and Techniques by Jill Salen

Facts:
128 pages.

23 patterns (including 1 pregnancy stays, 1 child and 1 dolls corset).
Construction instruction for 2 different corsets.
Prize: About 200 sek (45Usd).
Pros:
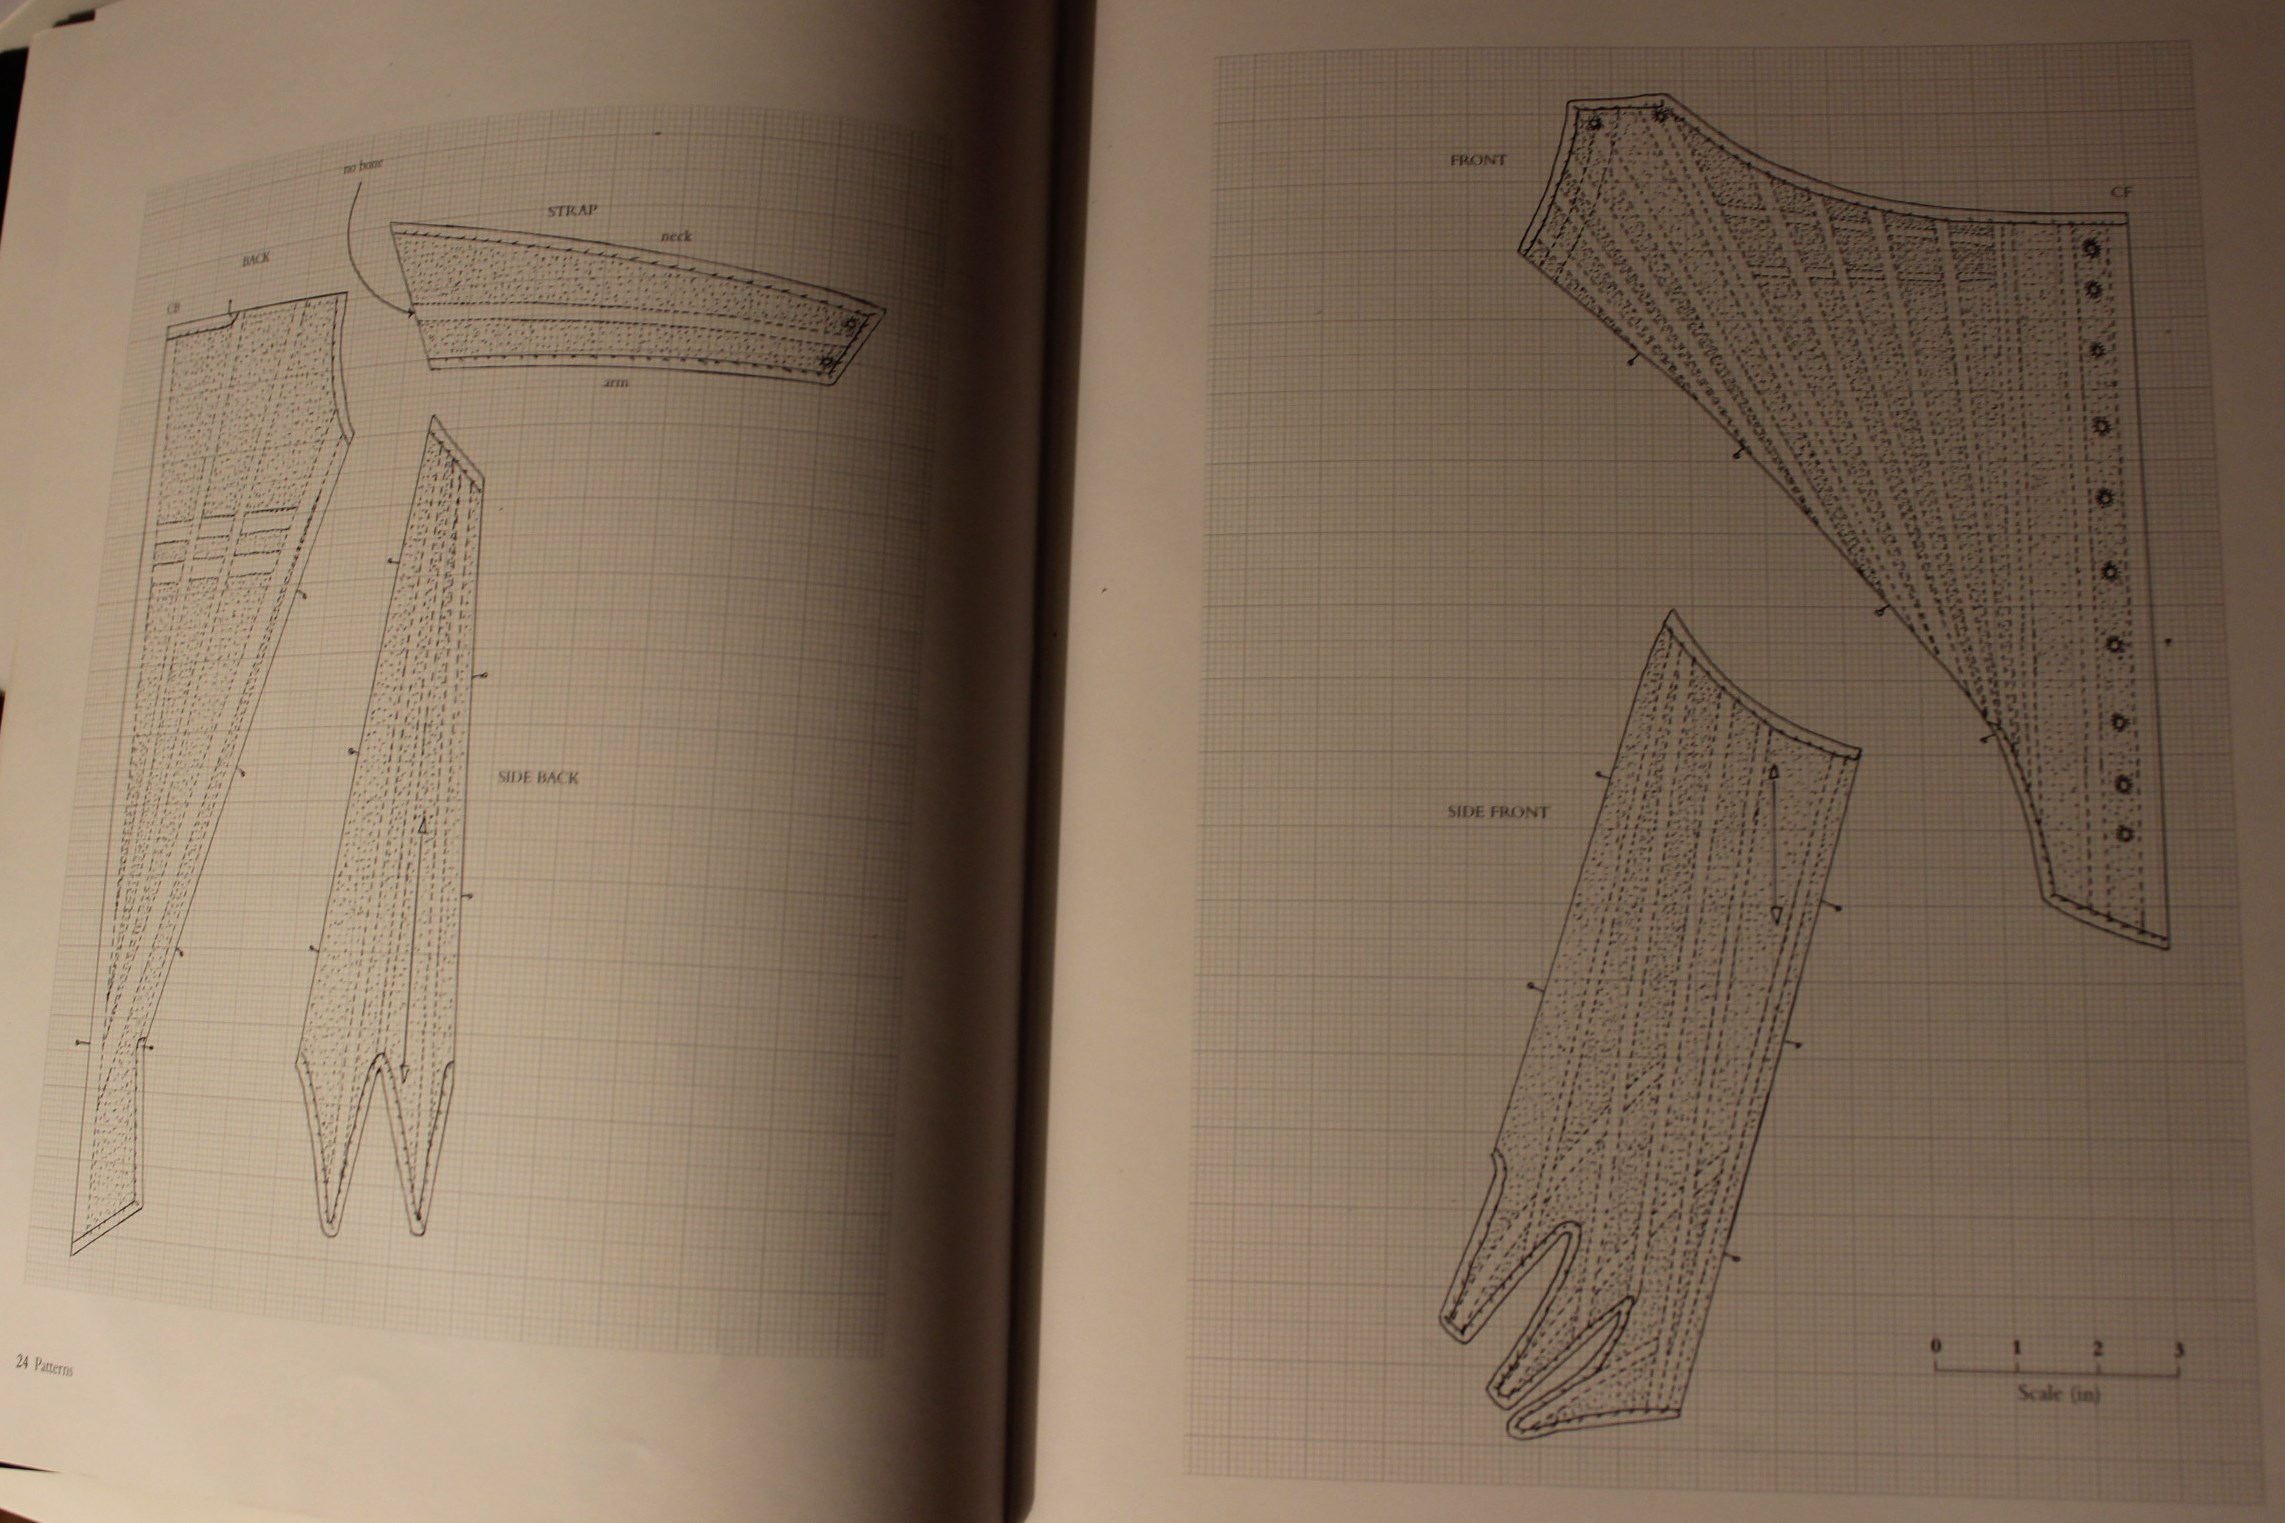
The book is very beautiful and contain lots of great patterns. The layout have a nice and clear way of showing both the real corsets, the descriptive texts and the patterns.

The pattern are pretty easy to scale to full size using the chekered background as a guide. I scanned the pattern to my computor and then printed it to the right size. So simple.

I’ve used two or three of the patterns in the book and found them to work very well (but you might have to do some heavy scaling to take in account our larger modern body size).

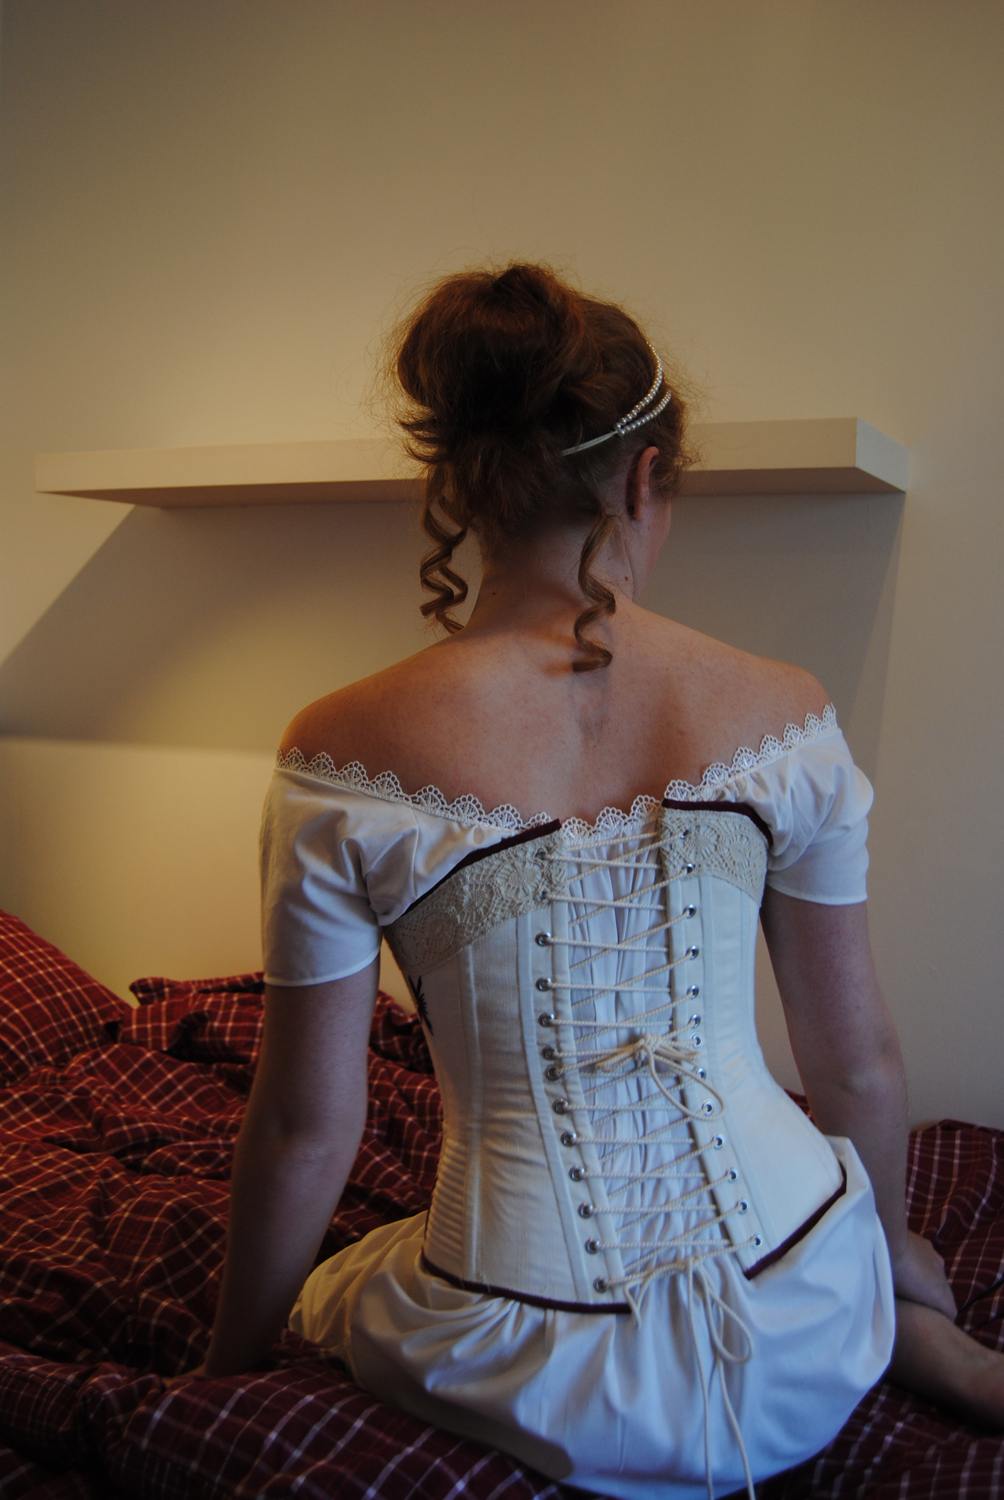
 Both of these corsets are made with the “Brown Jean Corset 1790” pattern. The one to the left is in original size (really, really smal), and on the right one I have moved the lacing to the back and adjusted the fitt a bit more to my sisters body. (If you look at the different shoulder positions of her body you can really tell the different between the “original” pattern and the adjusted one).

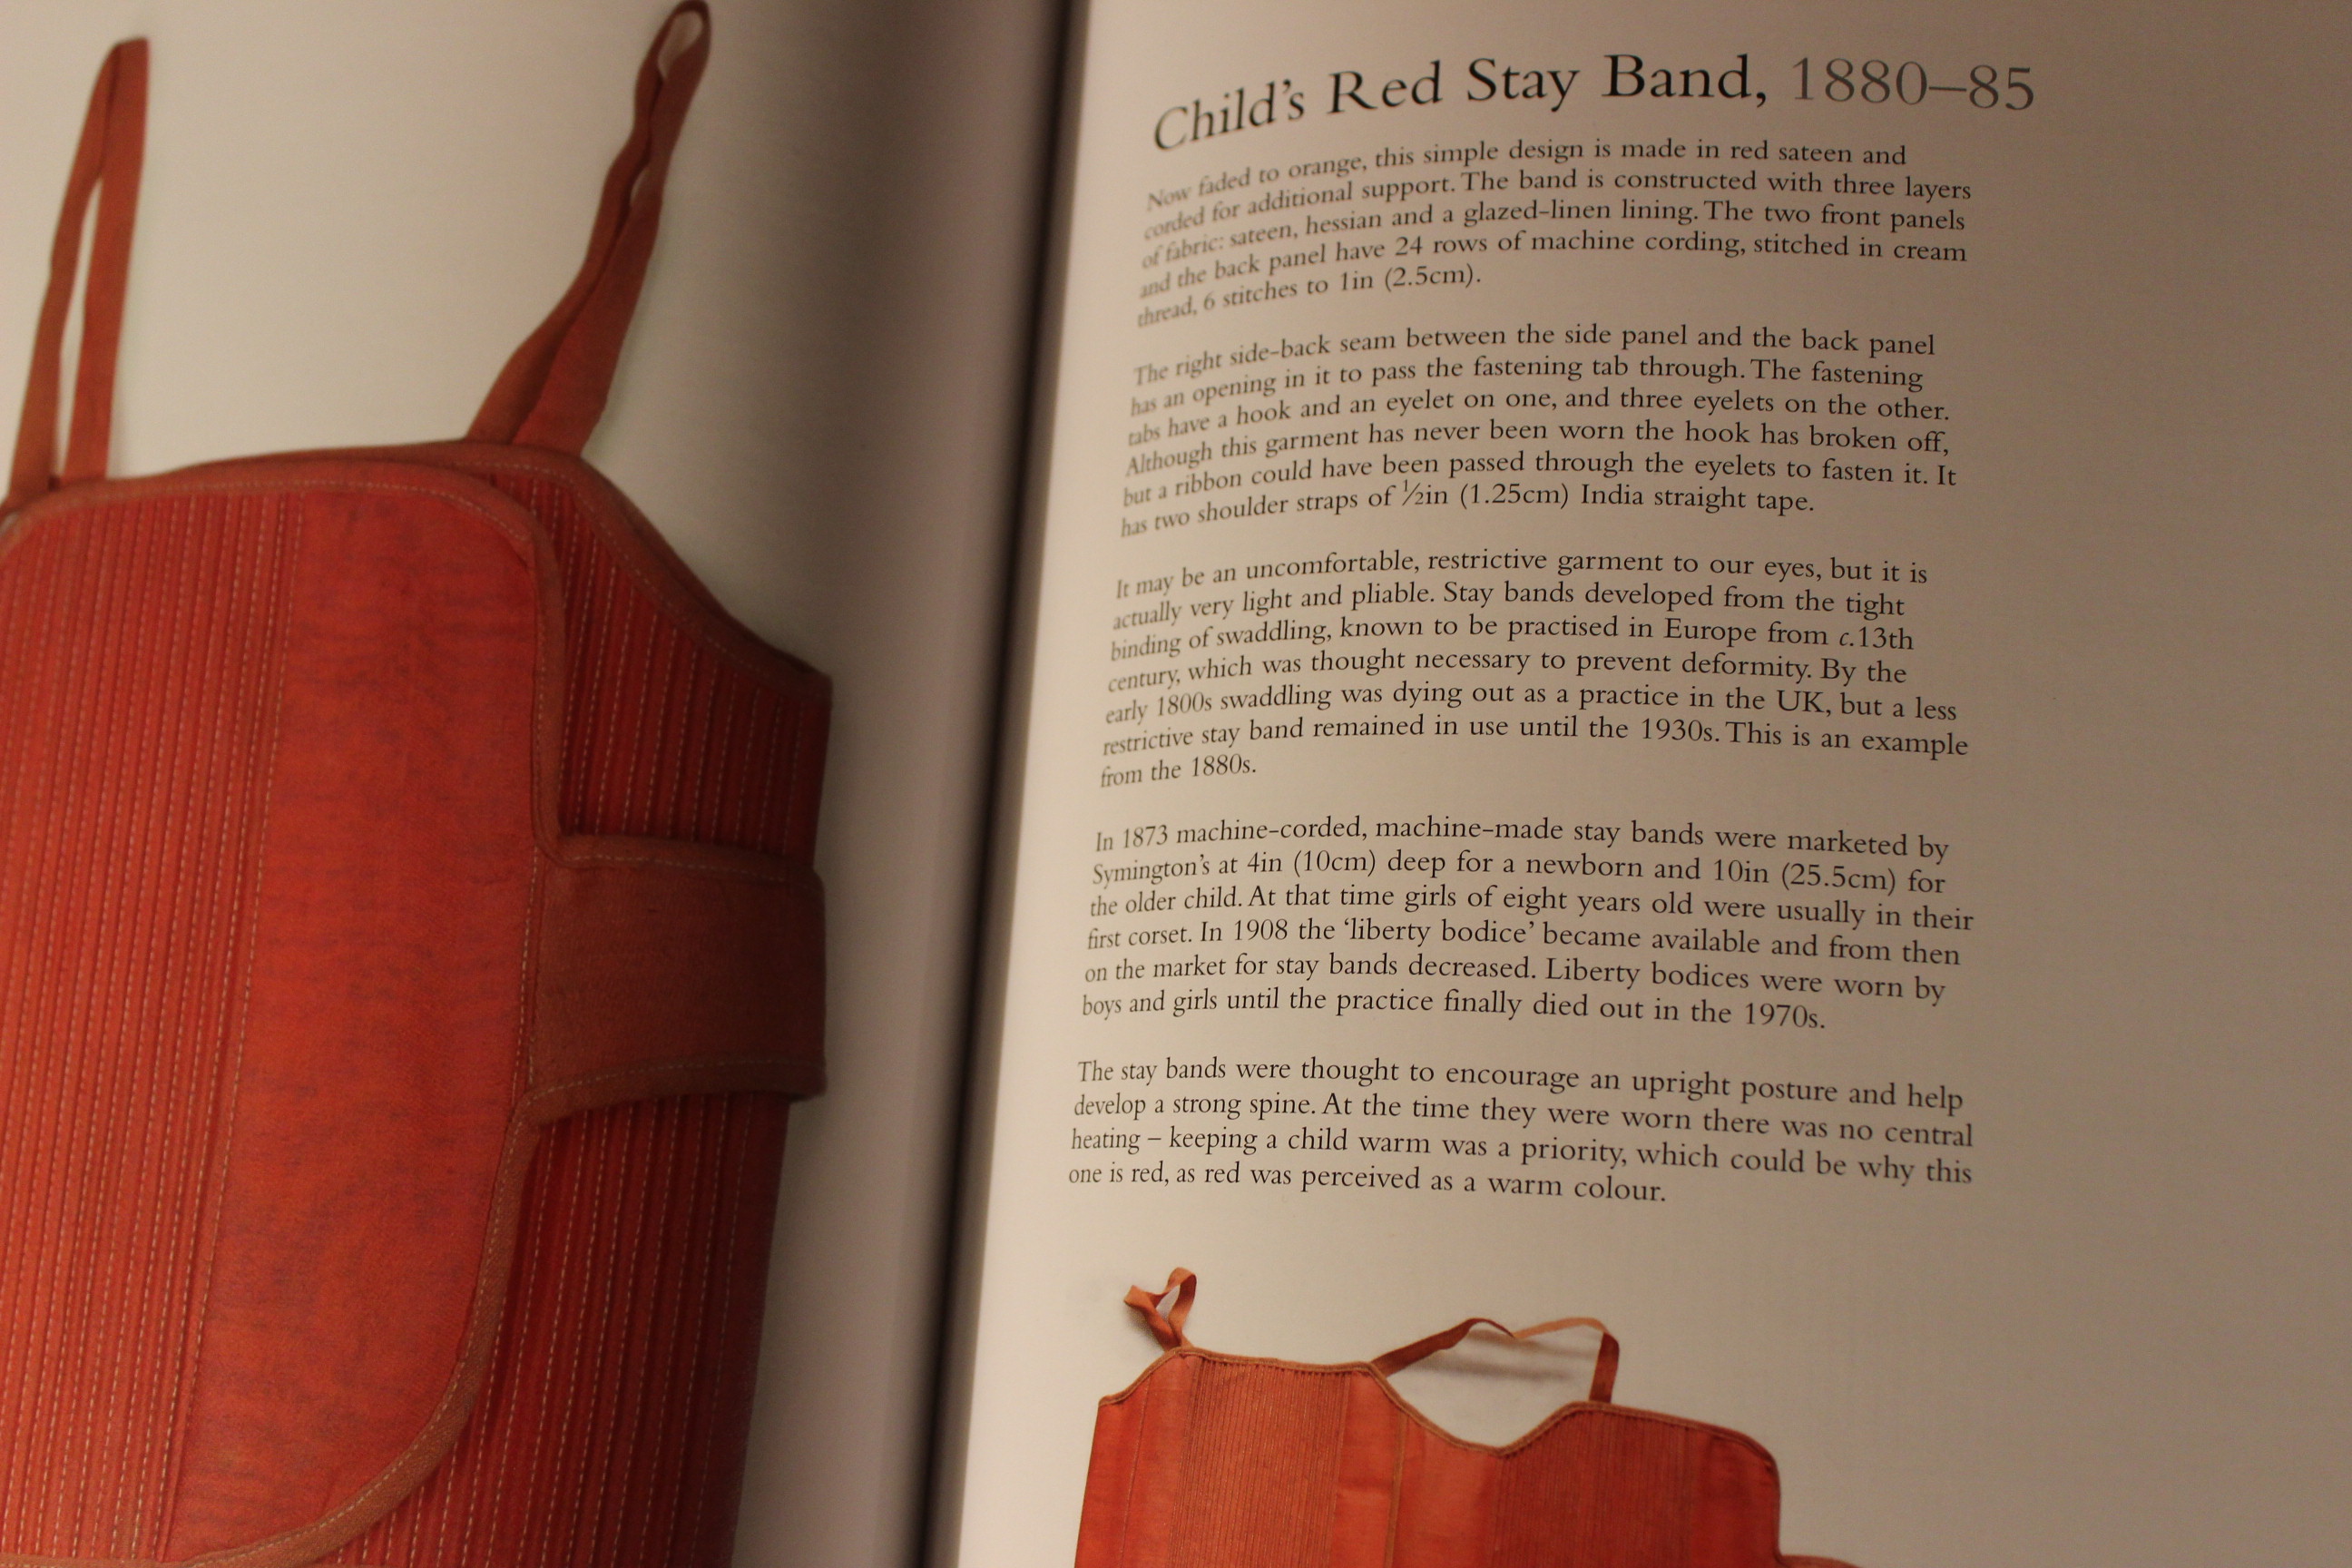
I think the information about each corset are nice and informative and give a good feel for what kind of person would wear the particular item. Like in what way was it worn, and what did the wearer do while wearing it (work, stay at home, dance ect.).
 This corset is one of my first ones, and are made using “Pretty Housemaid corset 1890s”. The fitt is good but the sewing and assembly of it was really tricky to figure out.


I learnt a lot of new things about corsets and the way people of the past lived from this book. (Did you know that smal children made their first practice corset to fitt their dolls, then later moving on to the “real stuff”).
Cons:
I really do love the book but do think it have some flaws.
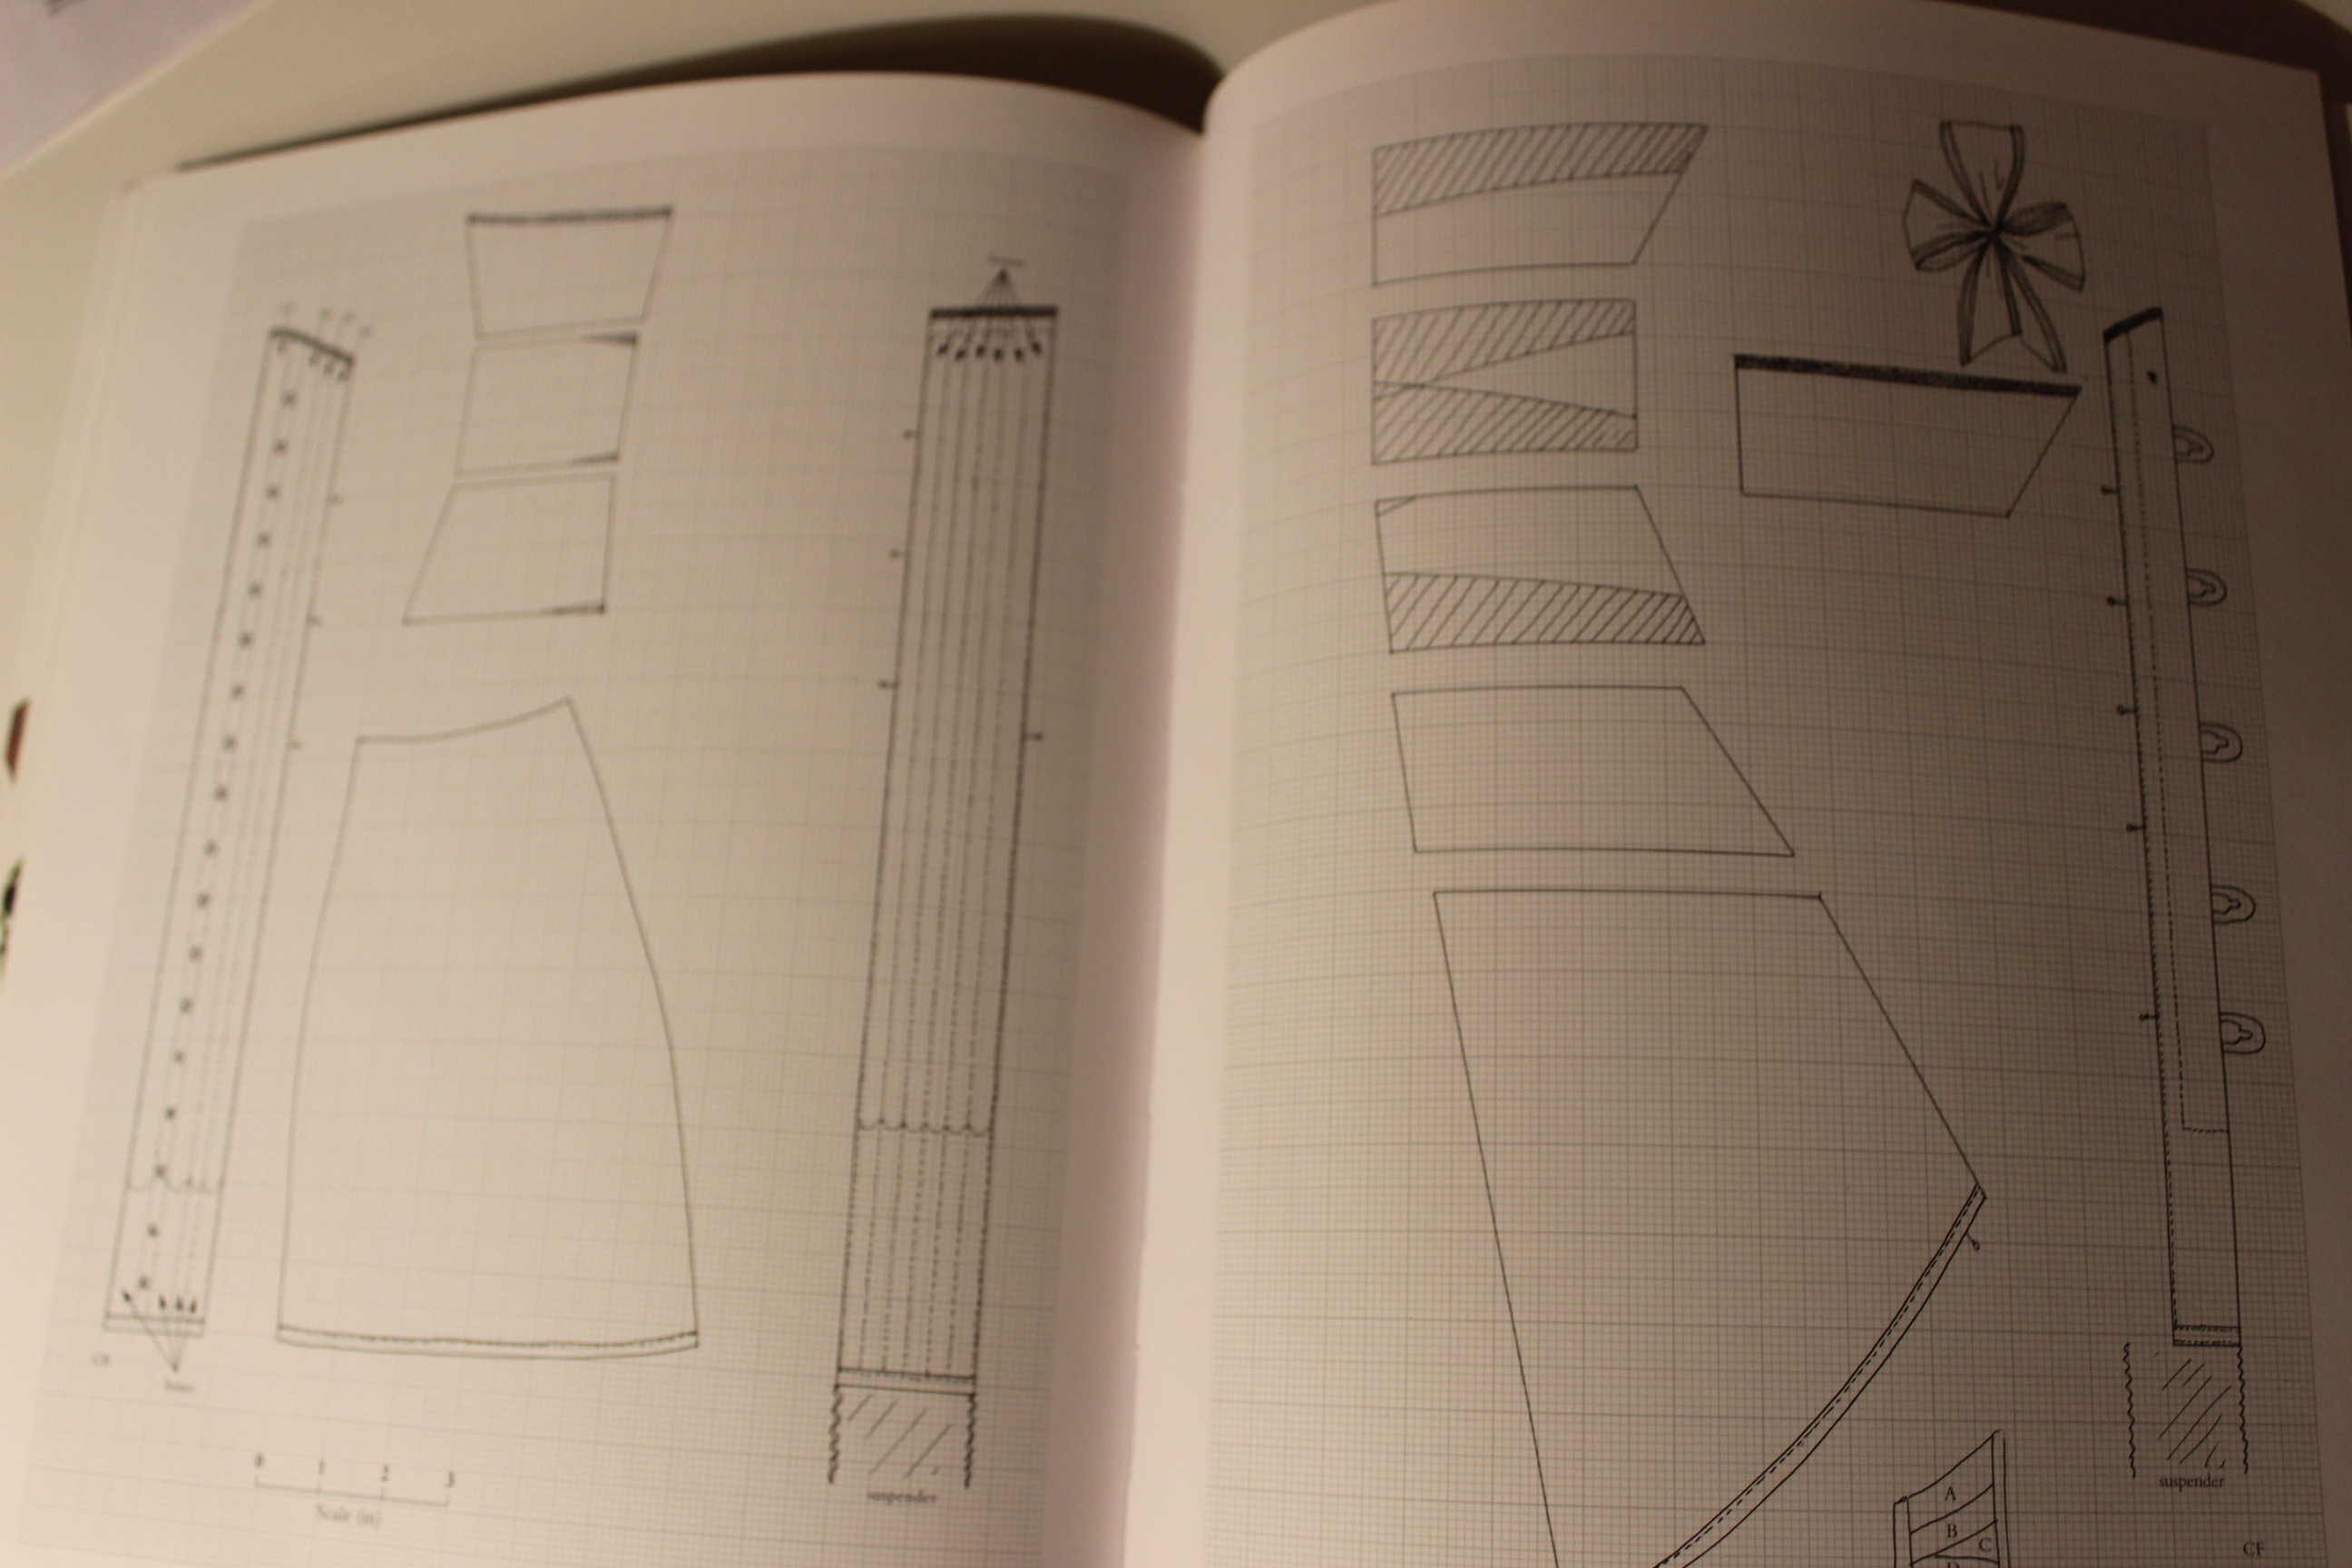
I for one think the choise to include the patterns for 3 ribbon corsets, 2 childs and 1 dolls corset is a bit strange. Even though I understand the desire to include lesser known pieces, most of the costumers would want a good variety of patterns and to make them fit a real body.

I also think the basic sewing and assembly techniques could use a bit more elaboration. The author do state in the preface that the book is mainly for the “experienced” costumer/semstress, and is not ment to be a sewing book. But it still could have used some more tips and tricks in assembeling the different styles.
 I really like the flossing diagram though.
I also would have liked to have the mesurments of the real corset (and patterns) writen out. Of course, you can measure the pieces and scale them up to the right size, but it would have been nice to be able to know the aproximate size of the corset at a glance.
Would I recomend it?
The book is a lovely addition to any costumers libary.
It is a perfect compliment to the famous “Corsets and Crinolines”, but also do very well on its own.

I do think the book is a bit complicated if your not very familiar with corset construction.
But if you want a pretty, cheap, book about historical corsets – you have found the one.