
In October last year I got a group of friends together for a Halloween themed photoshoot, then life happened and I never got around to post the photos.
So finally – here are my Halloween-inspired 17th century gown.
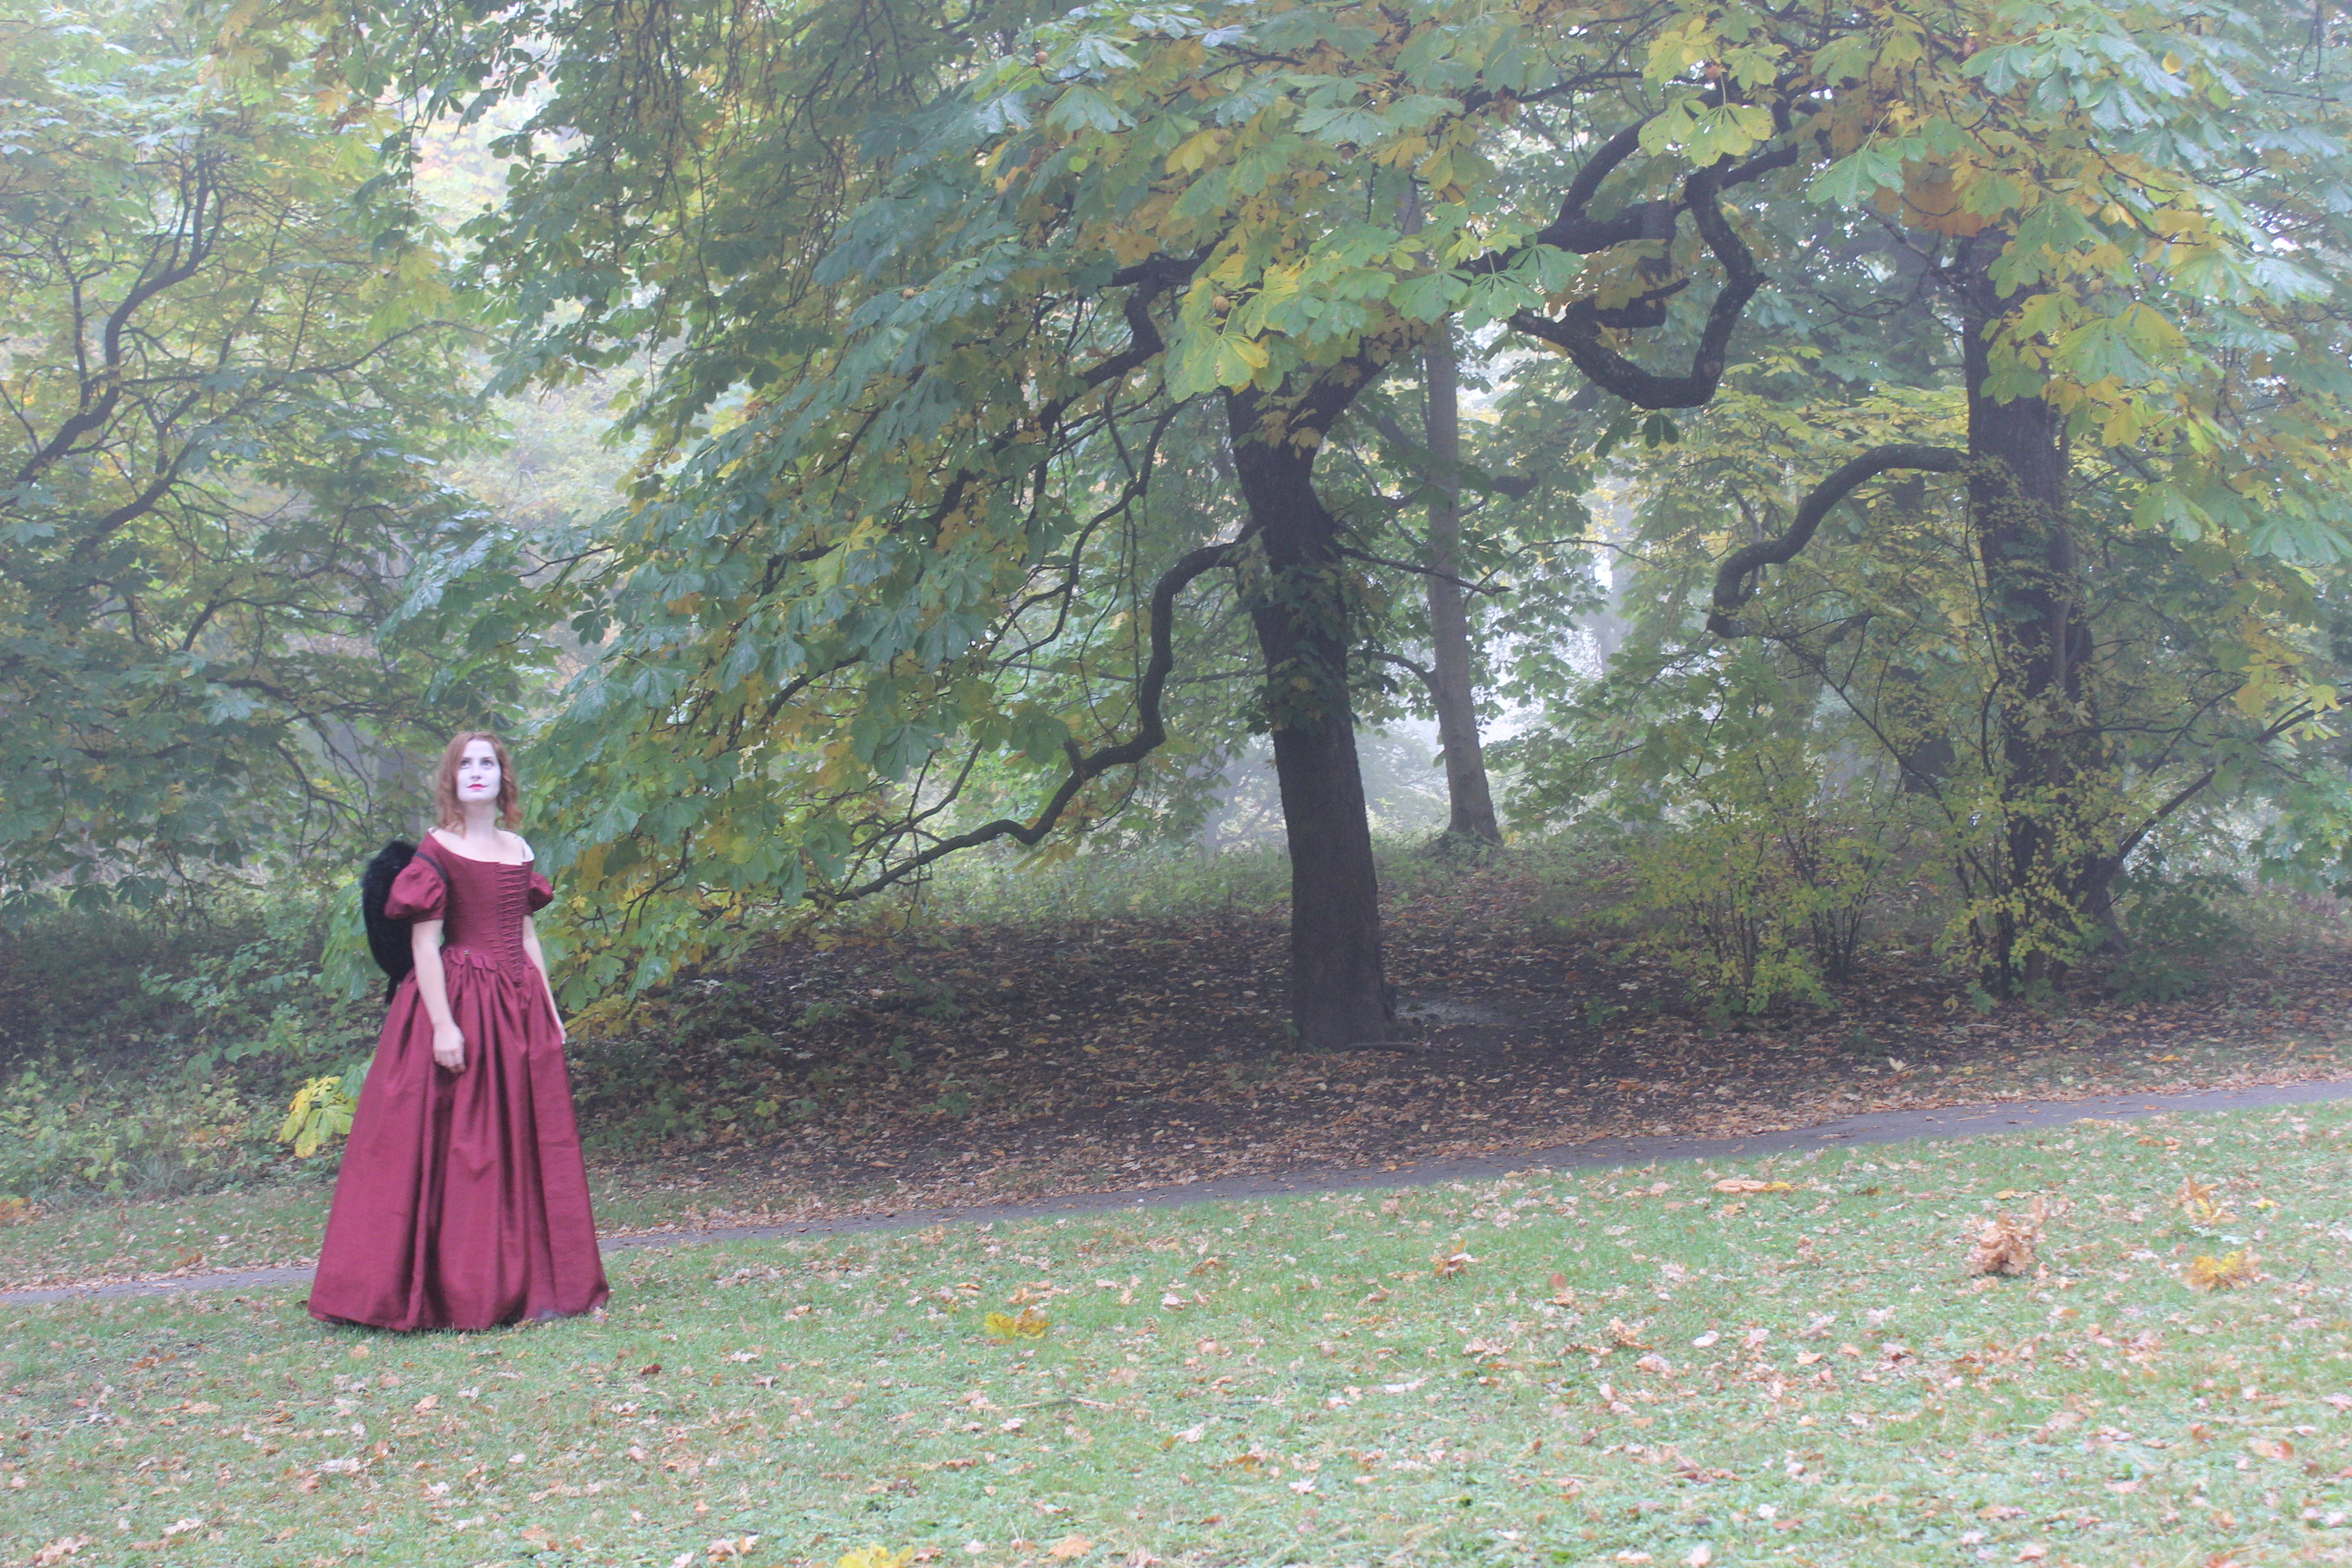

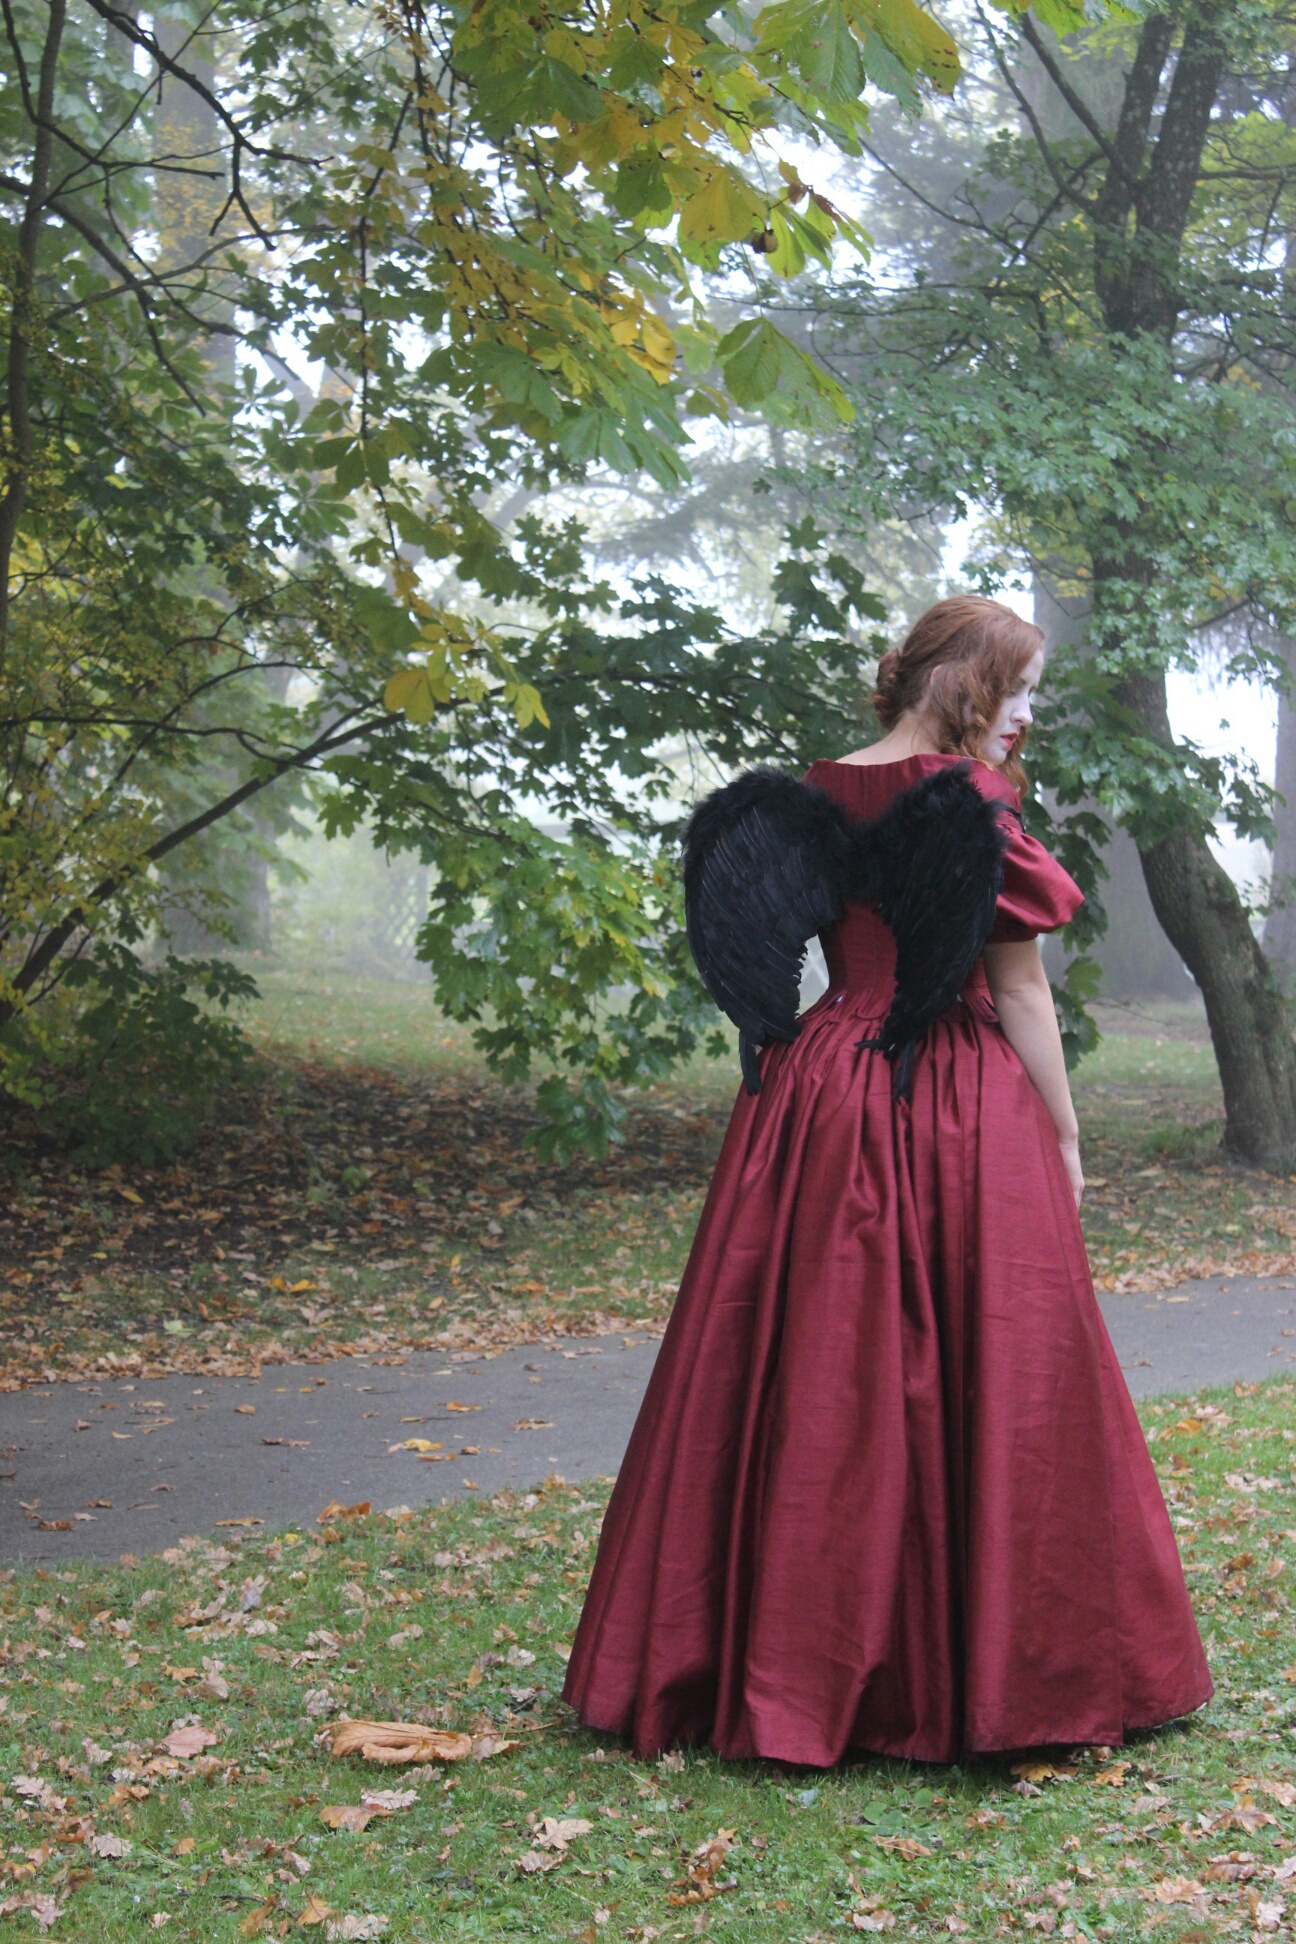
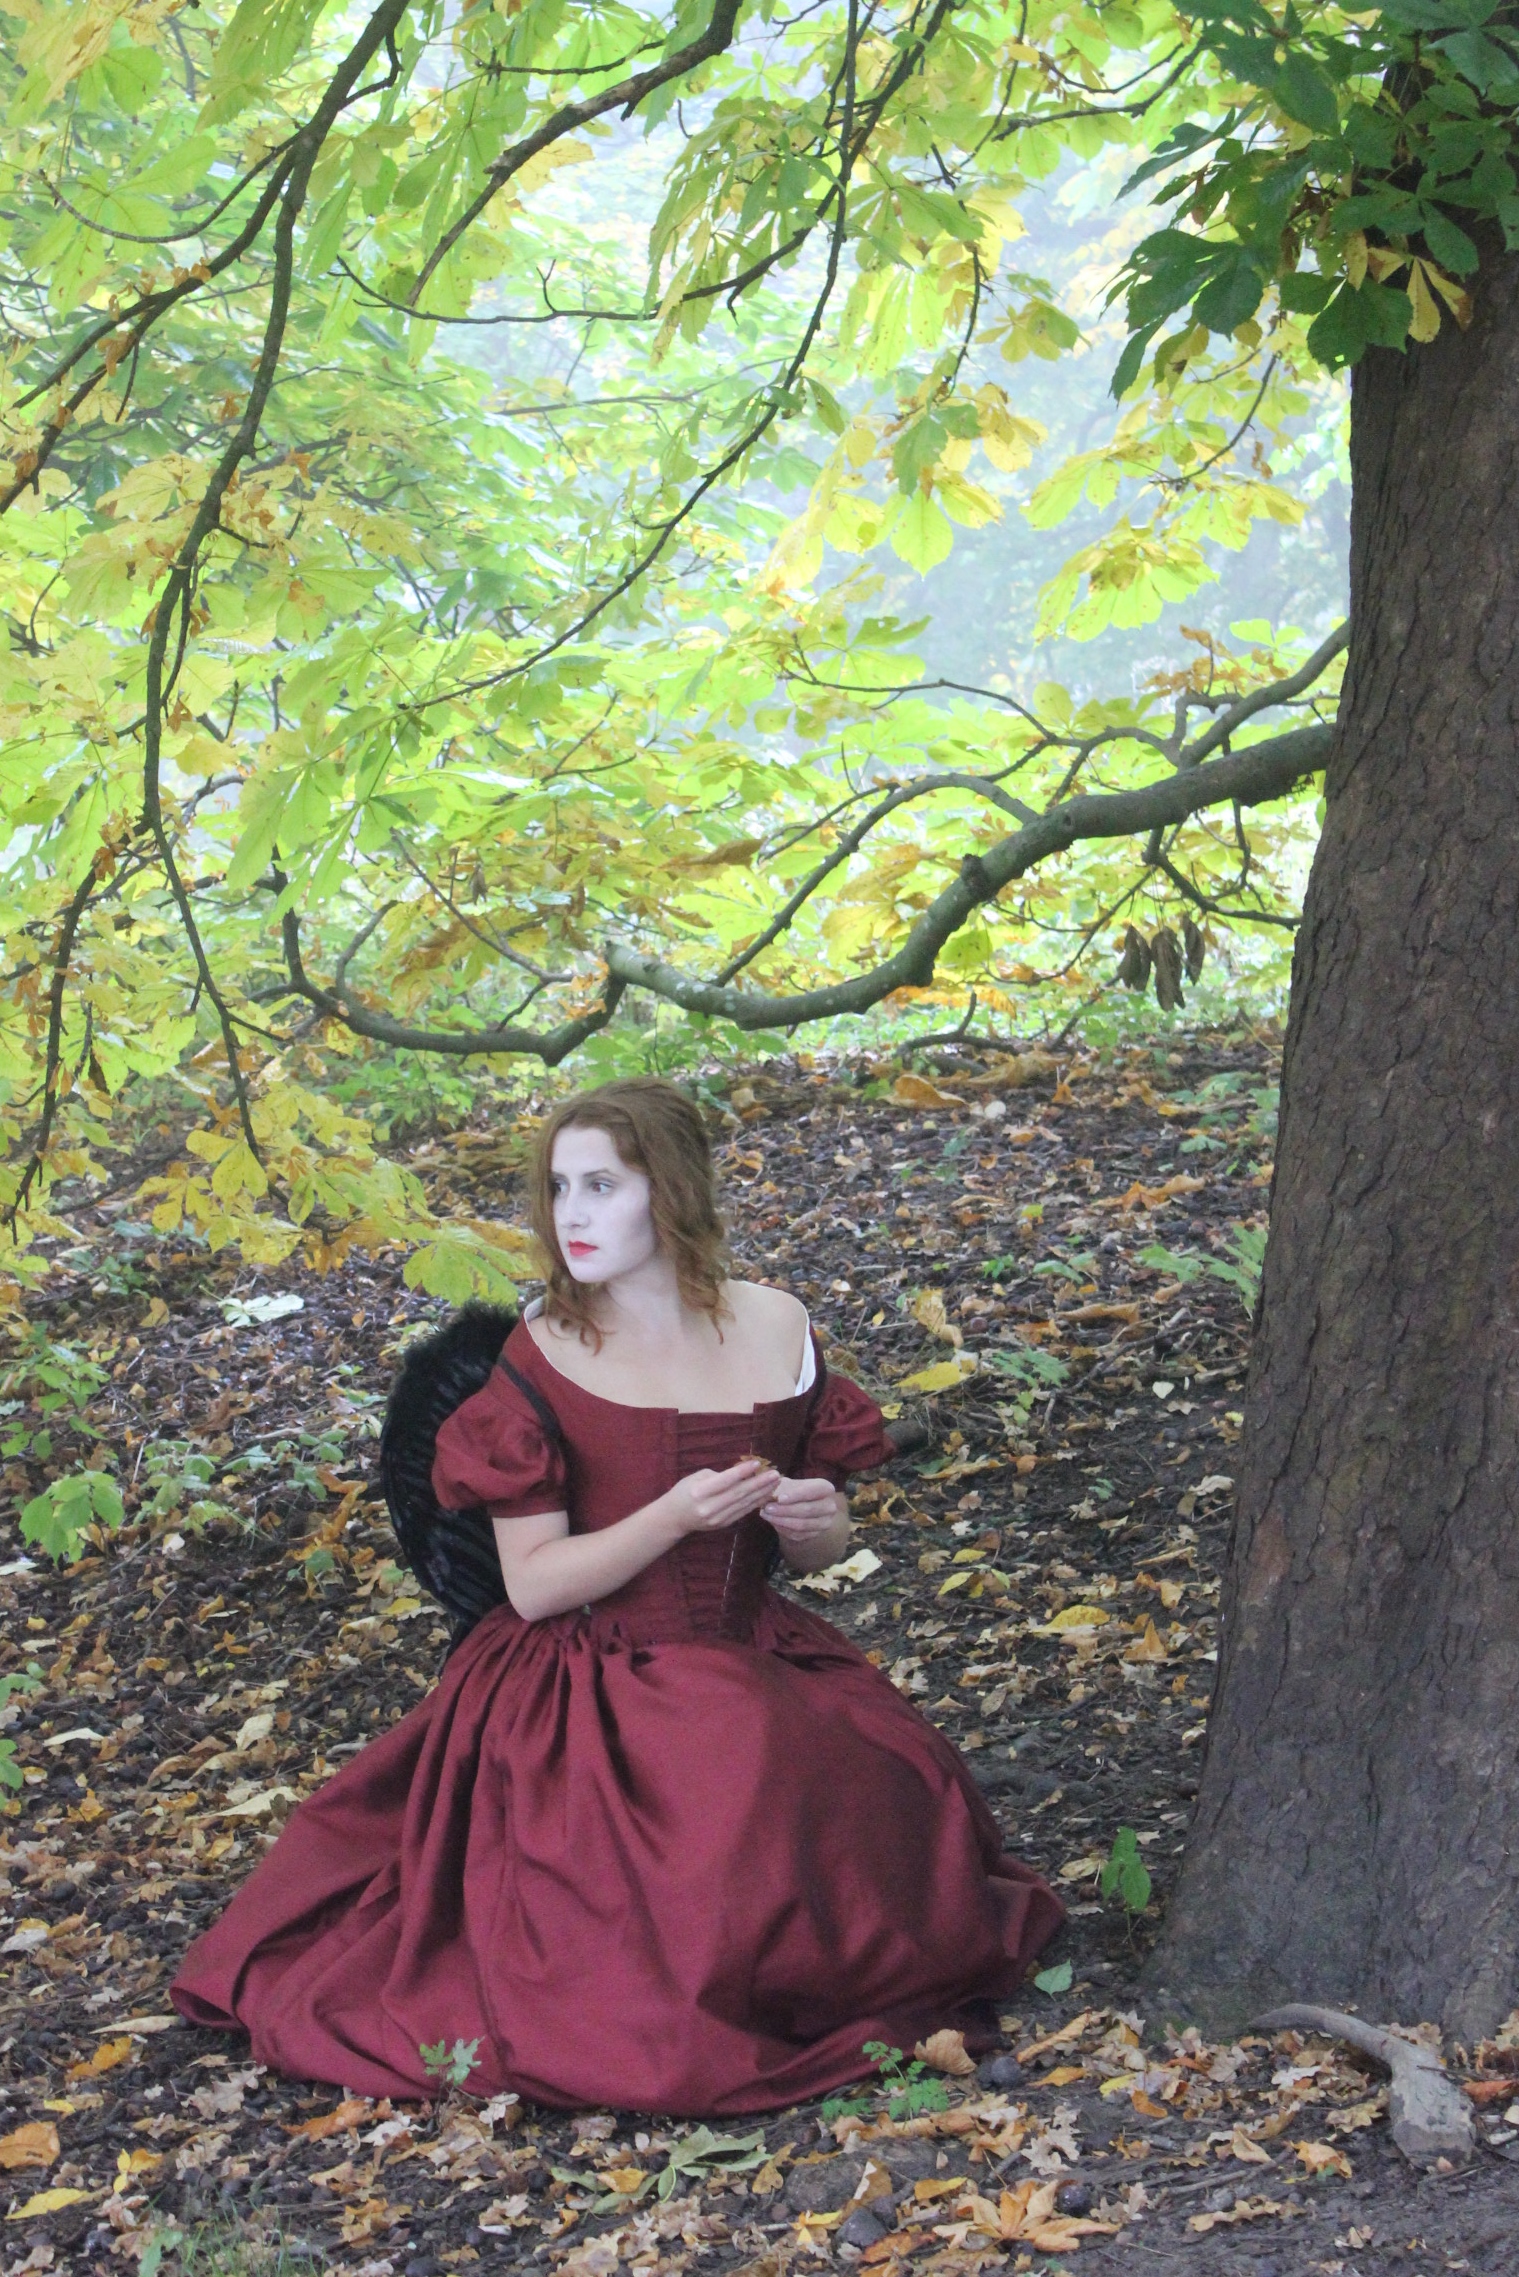
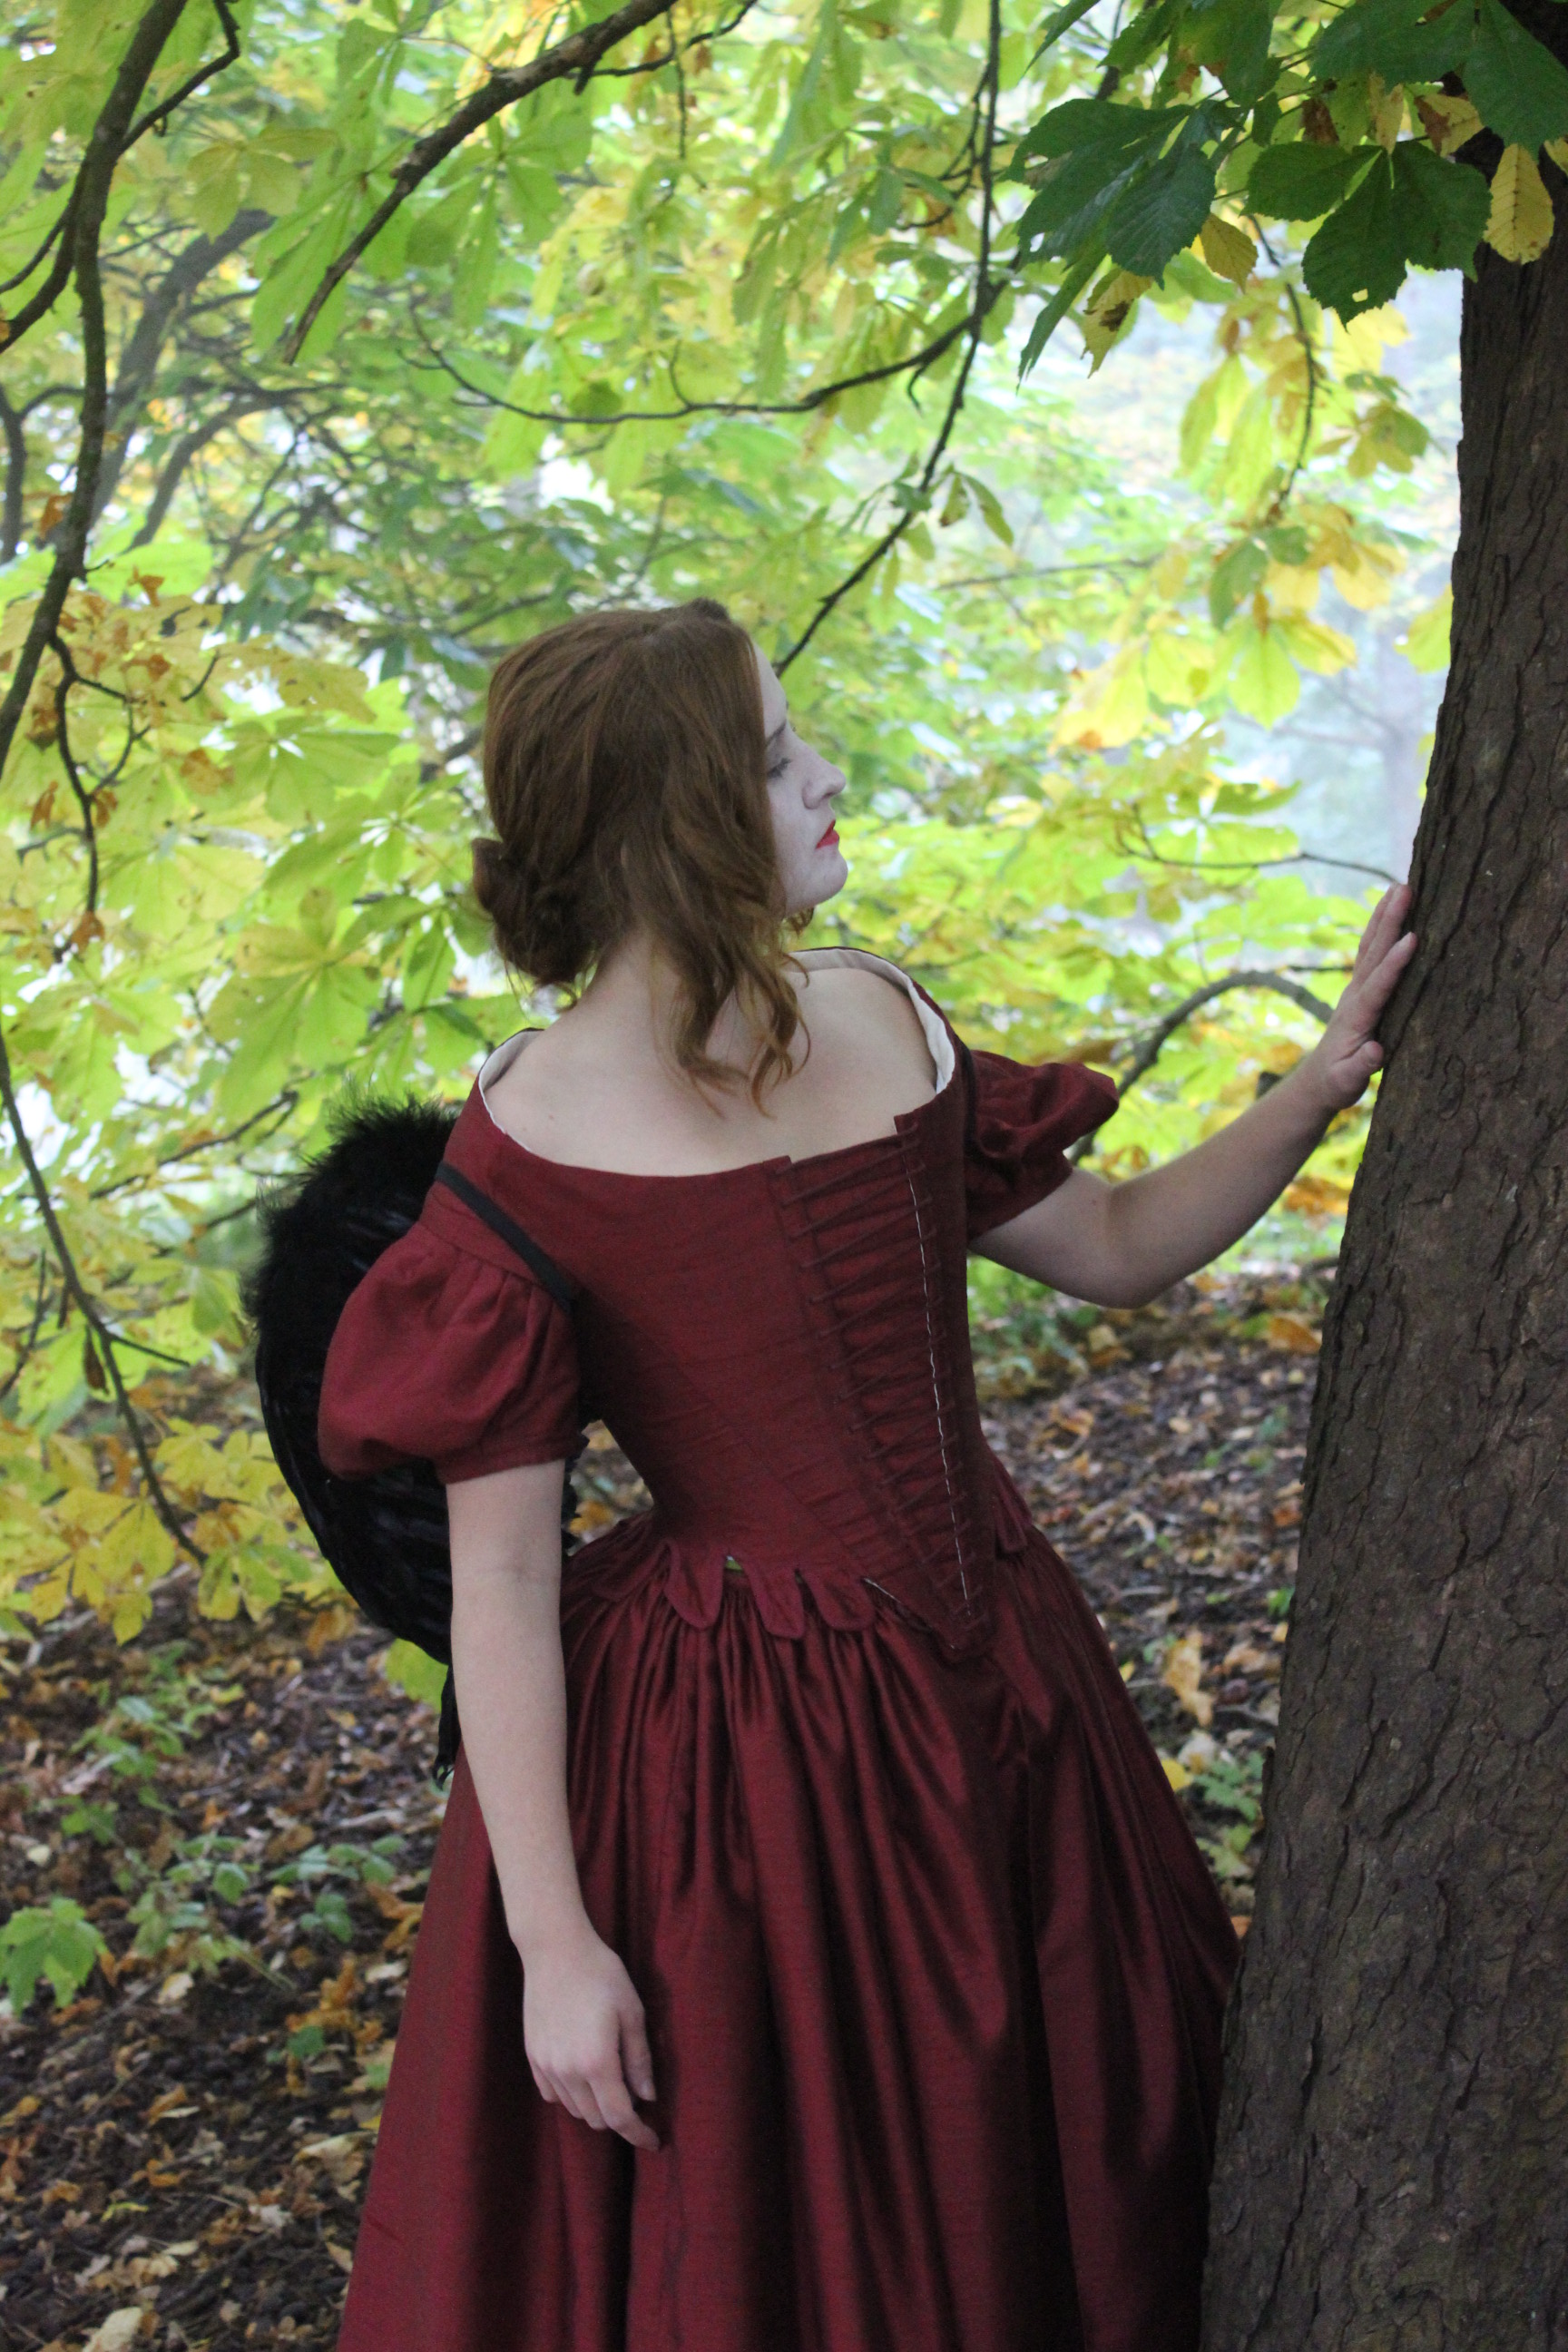
 Modell: Jessie Lewis Skoglund.
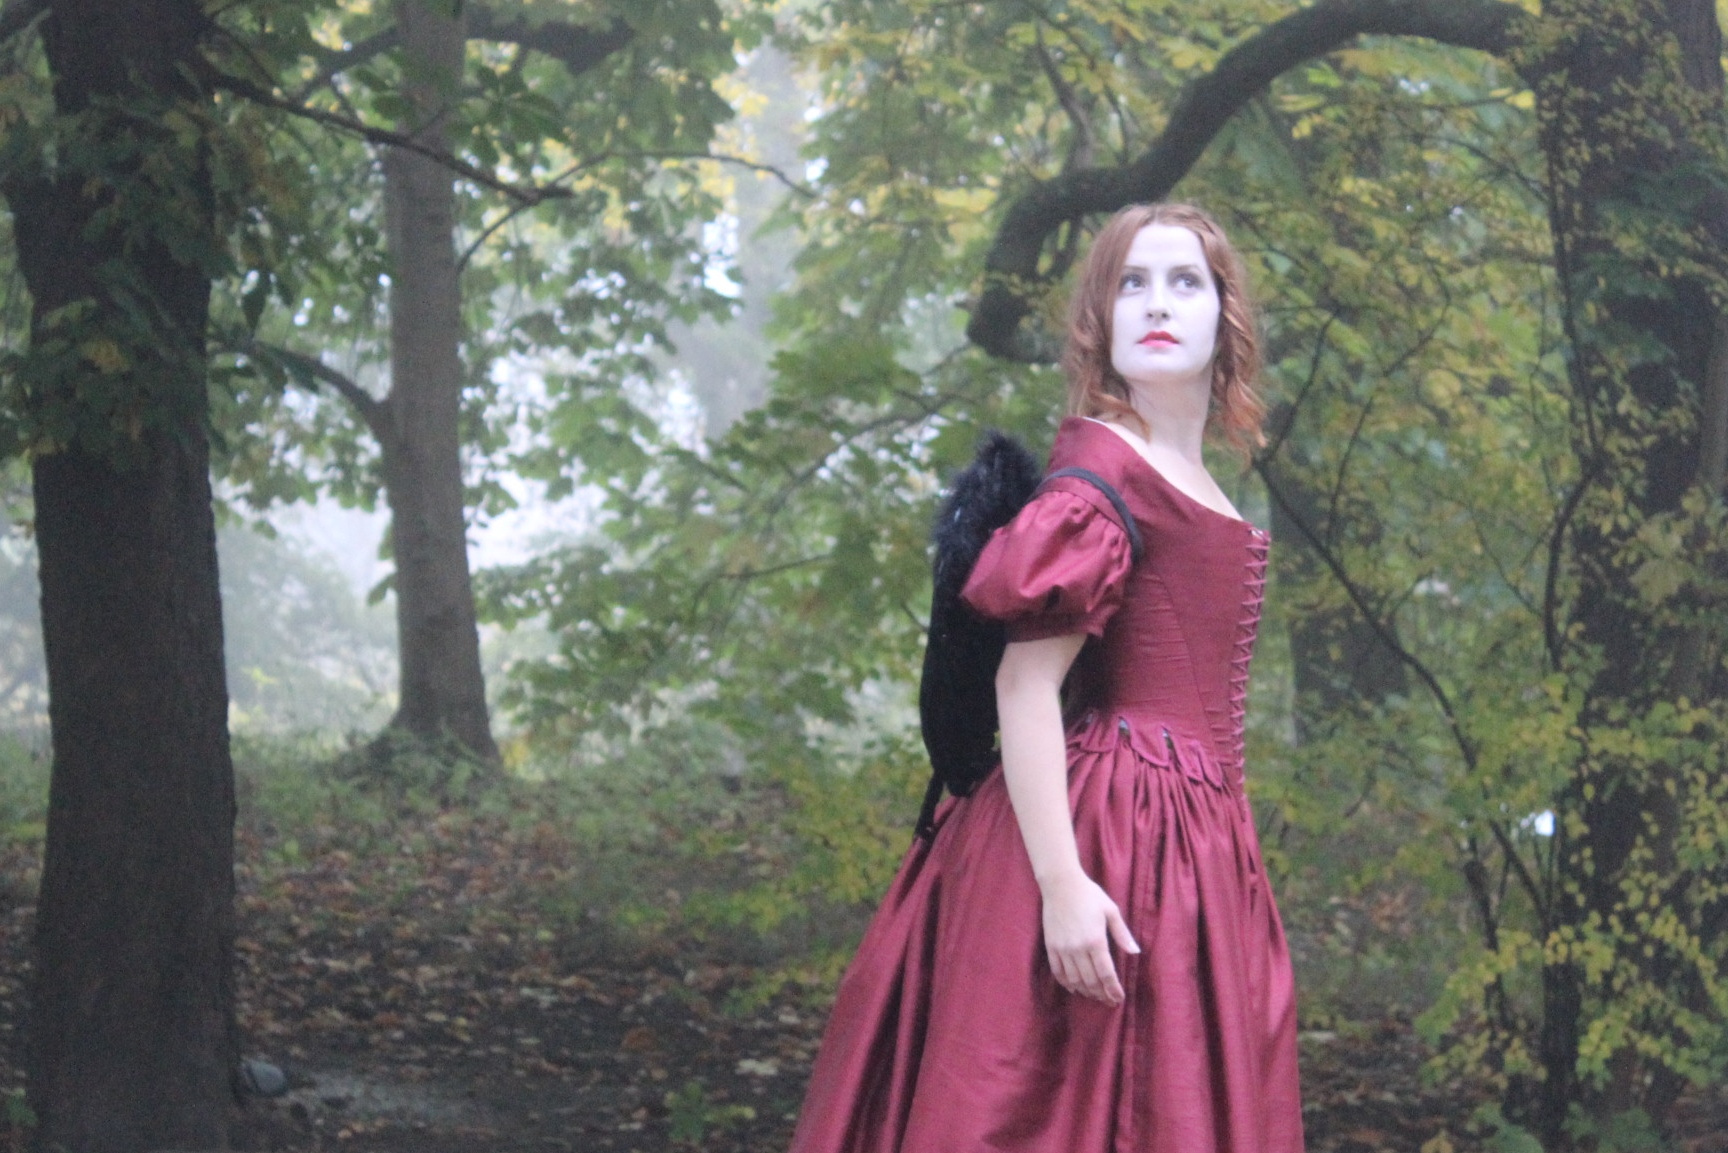
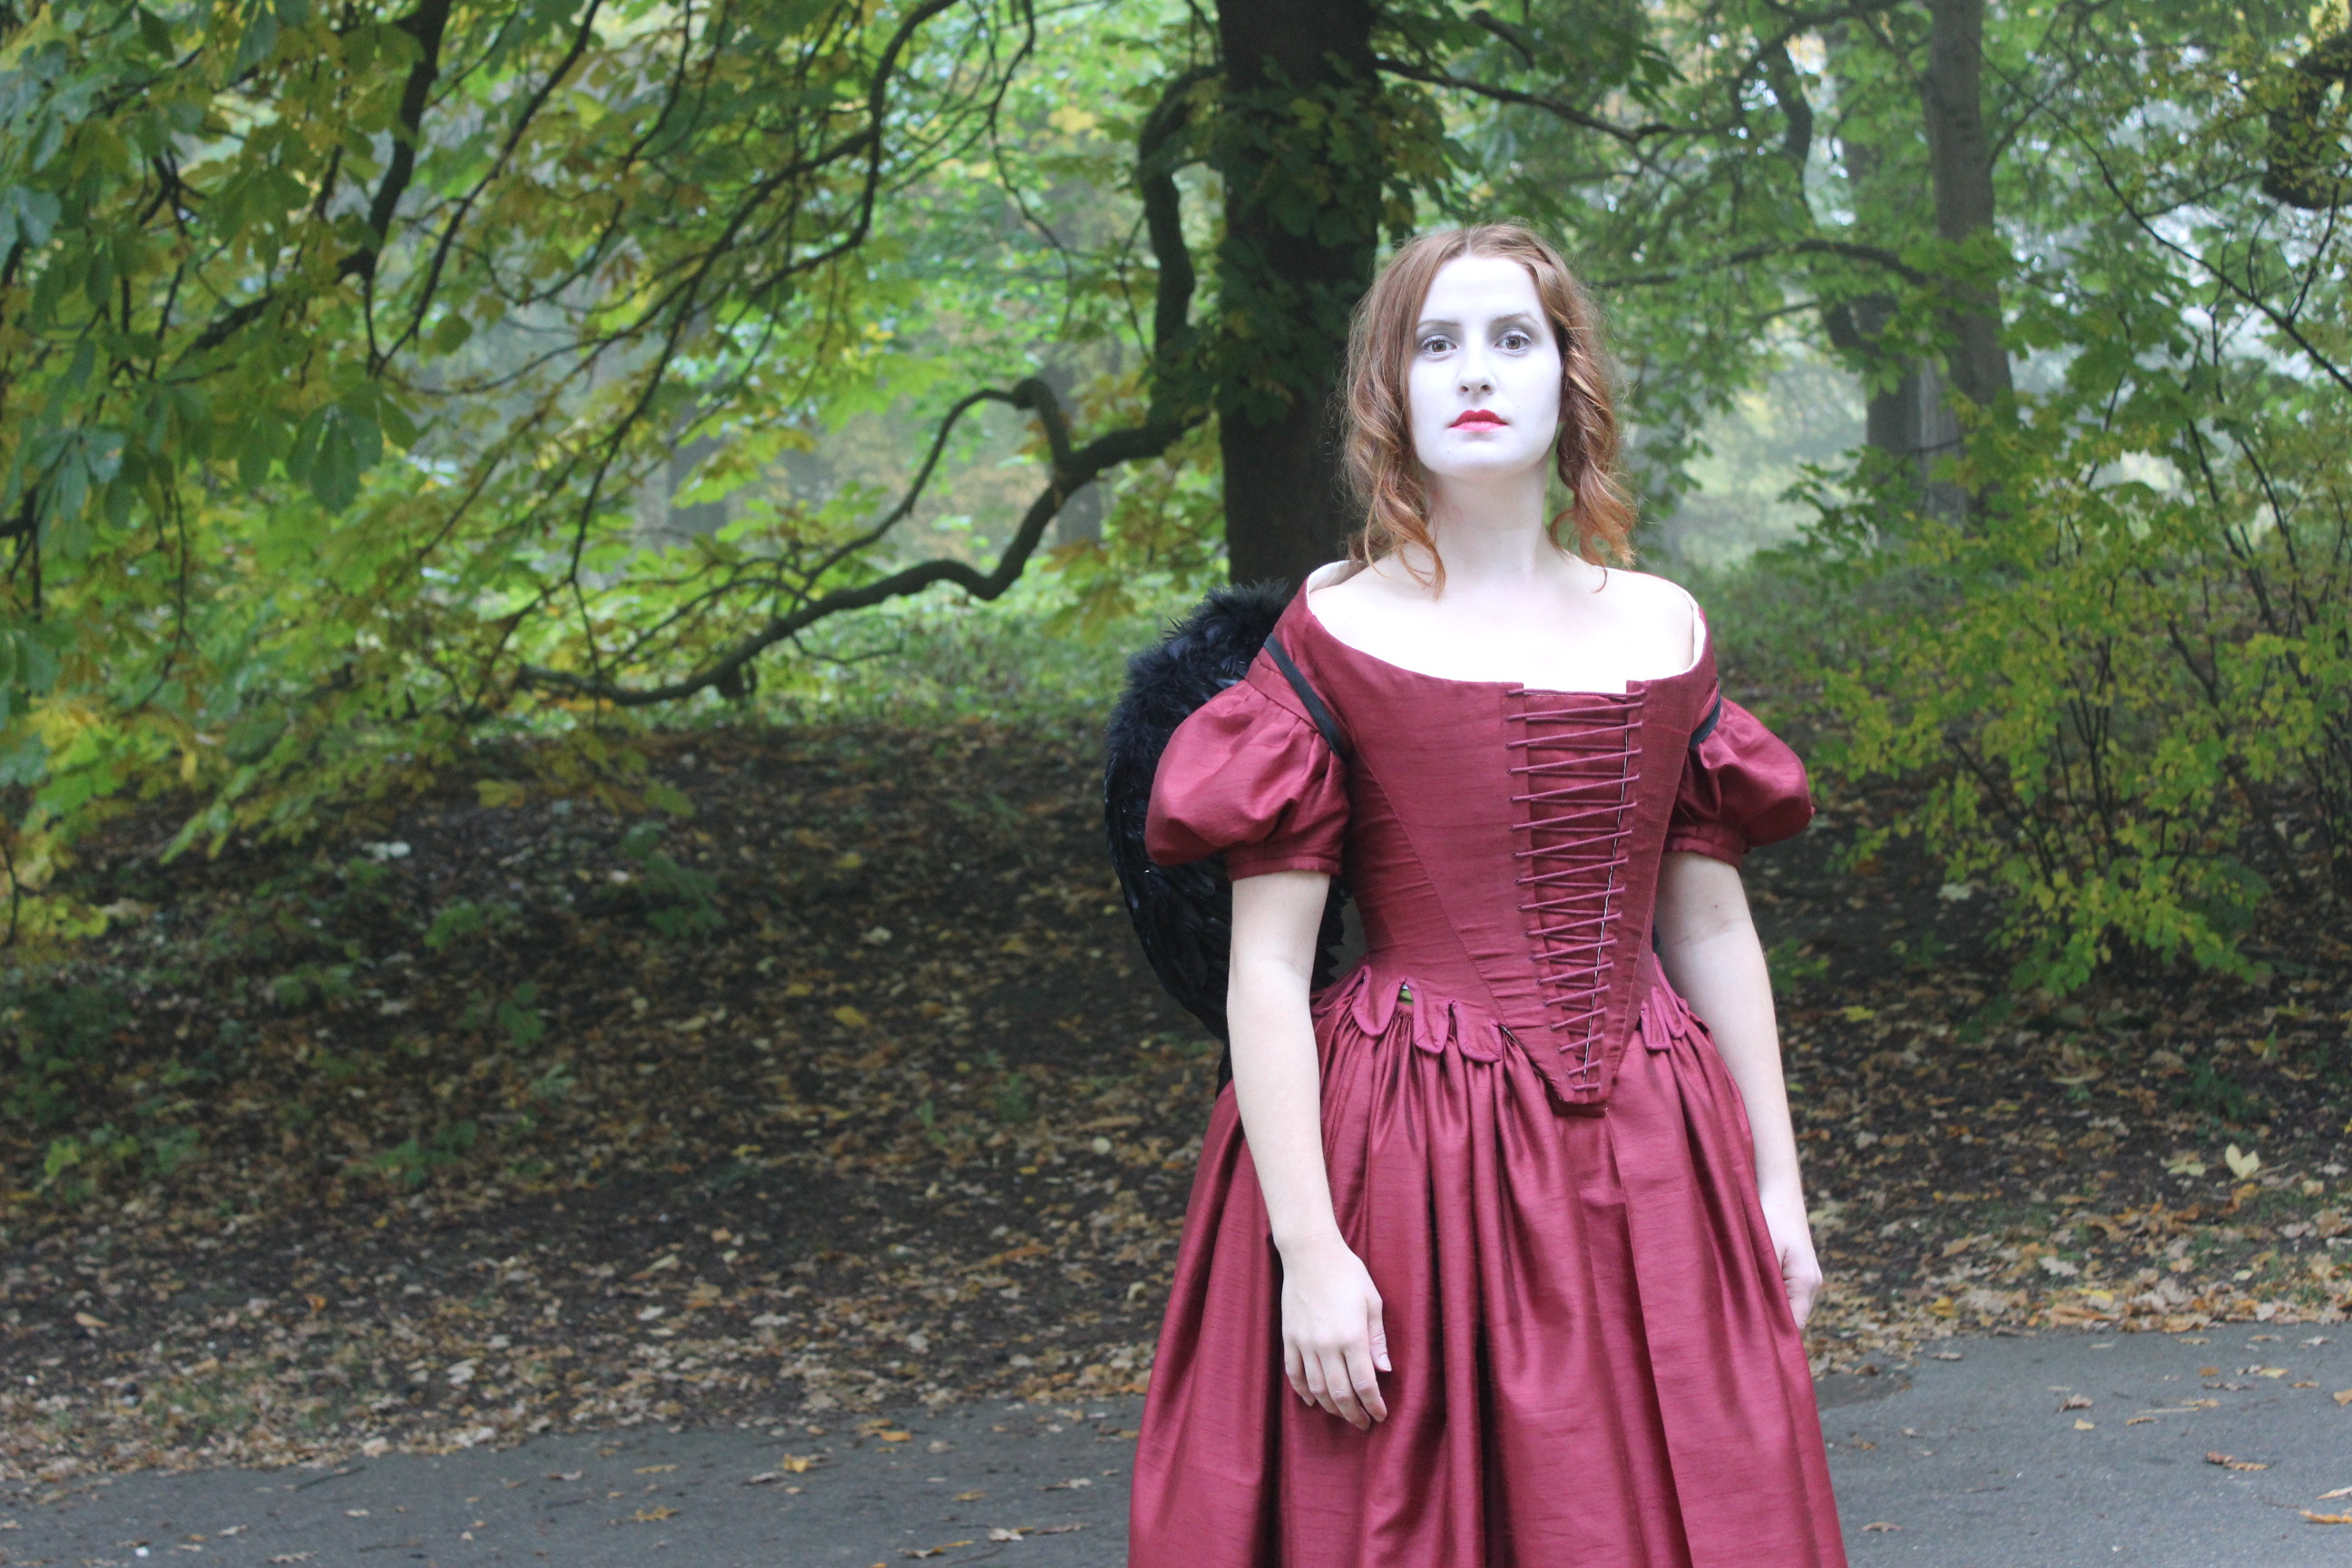
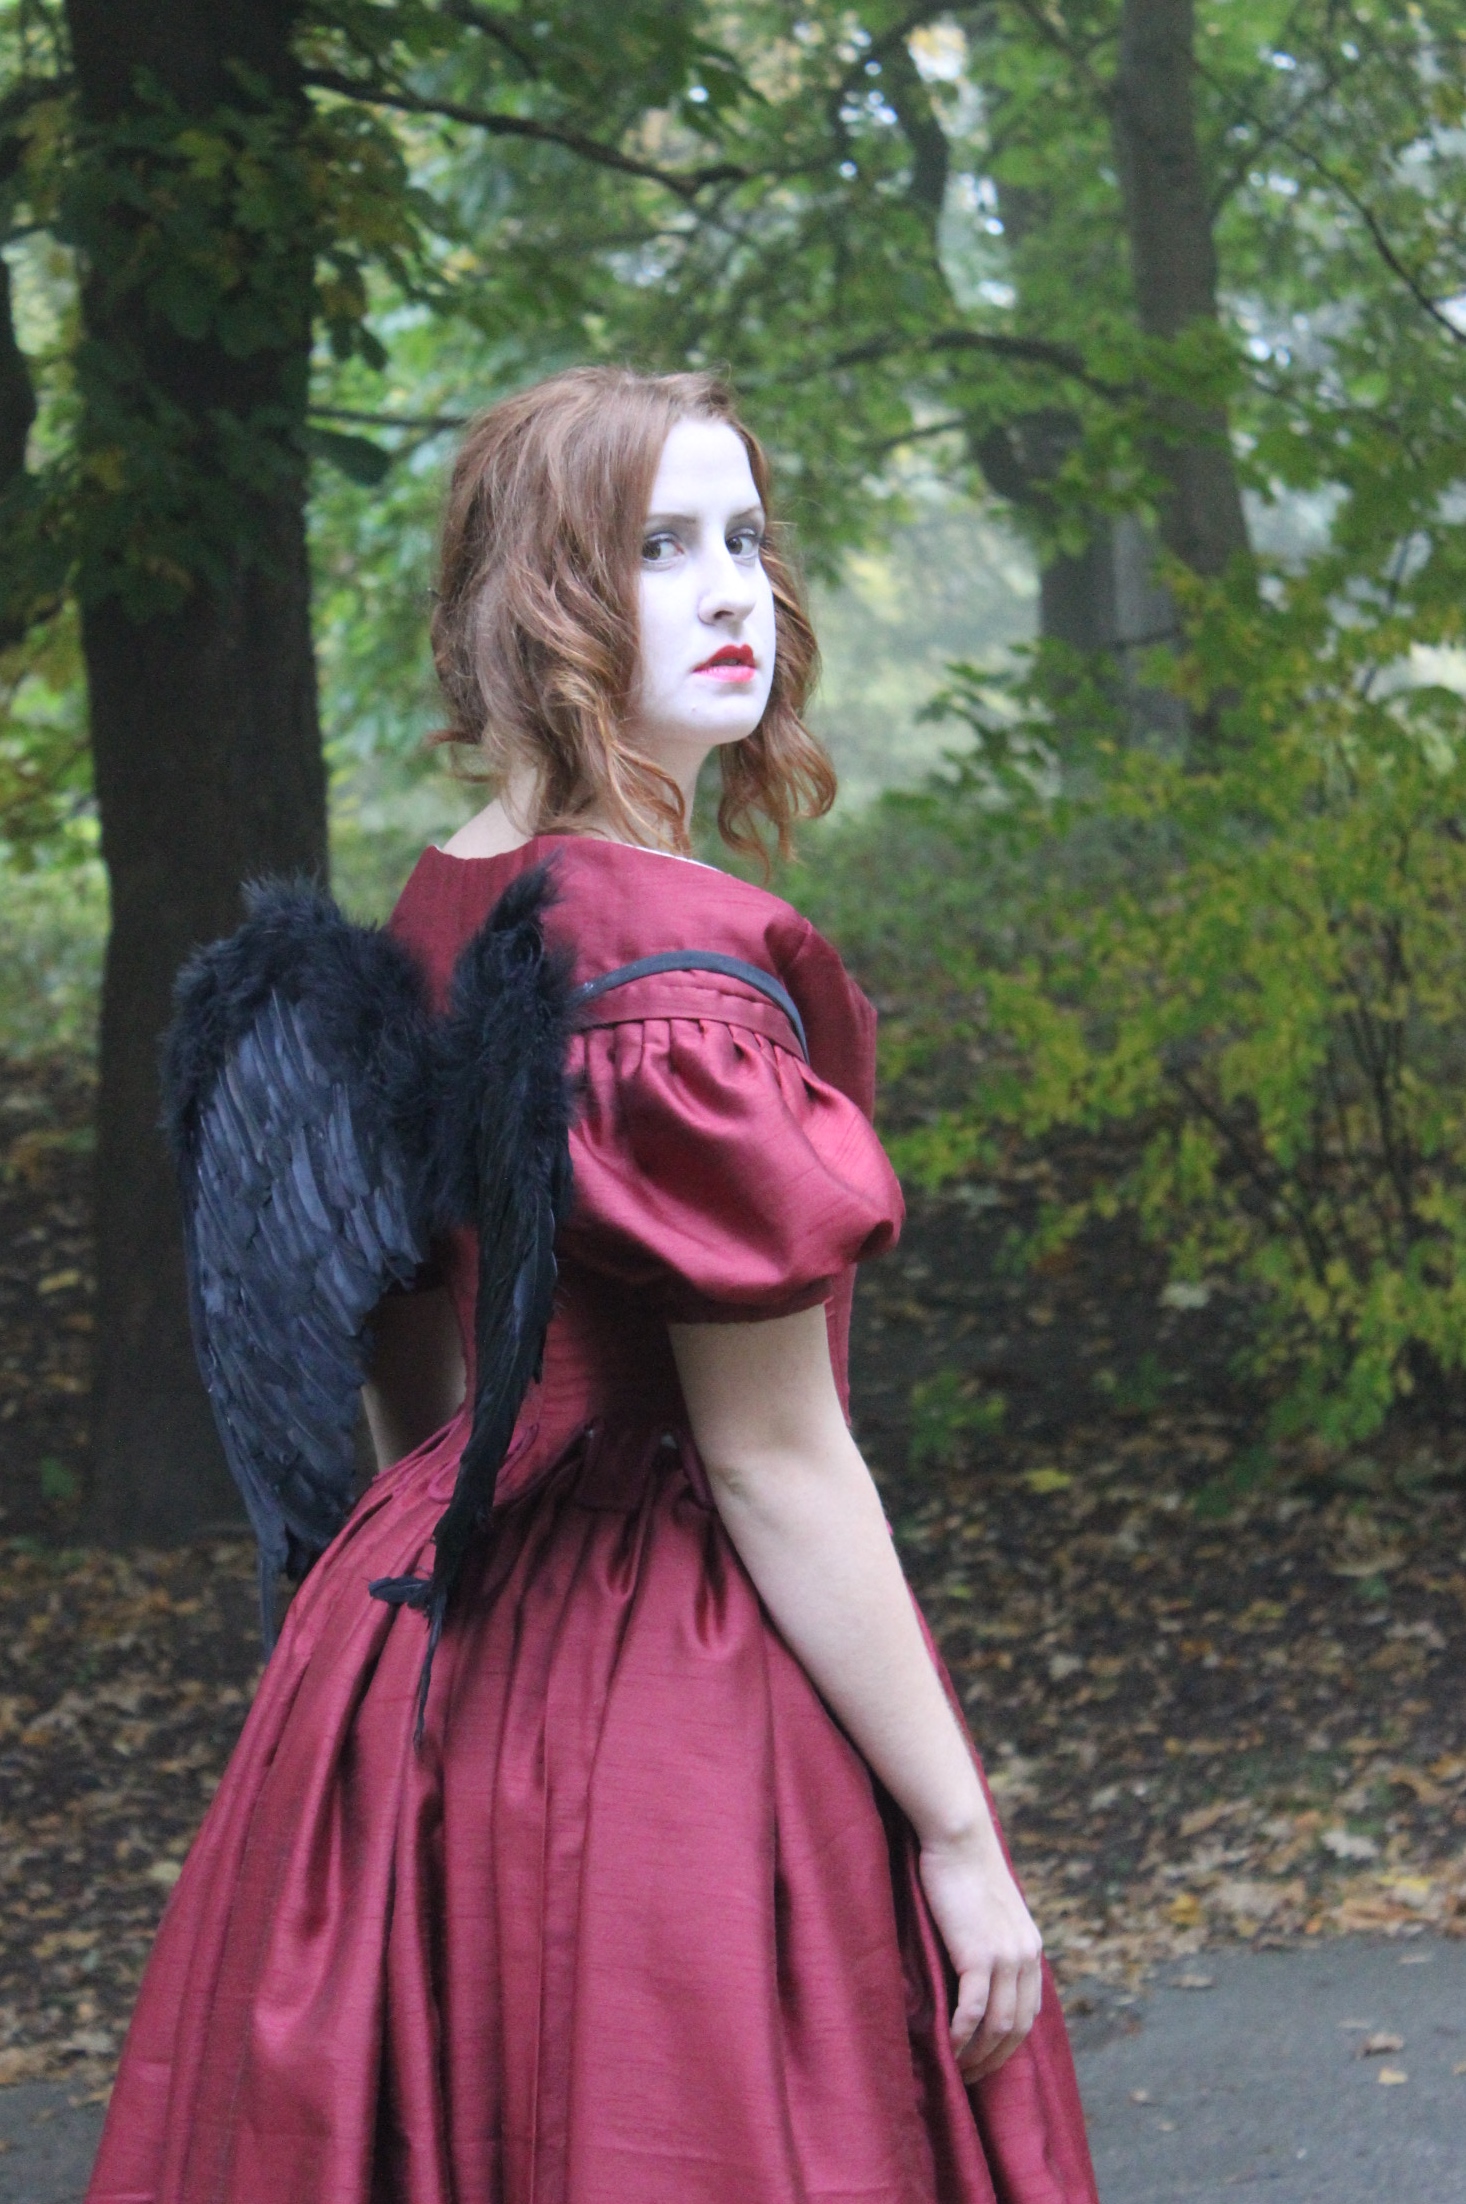
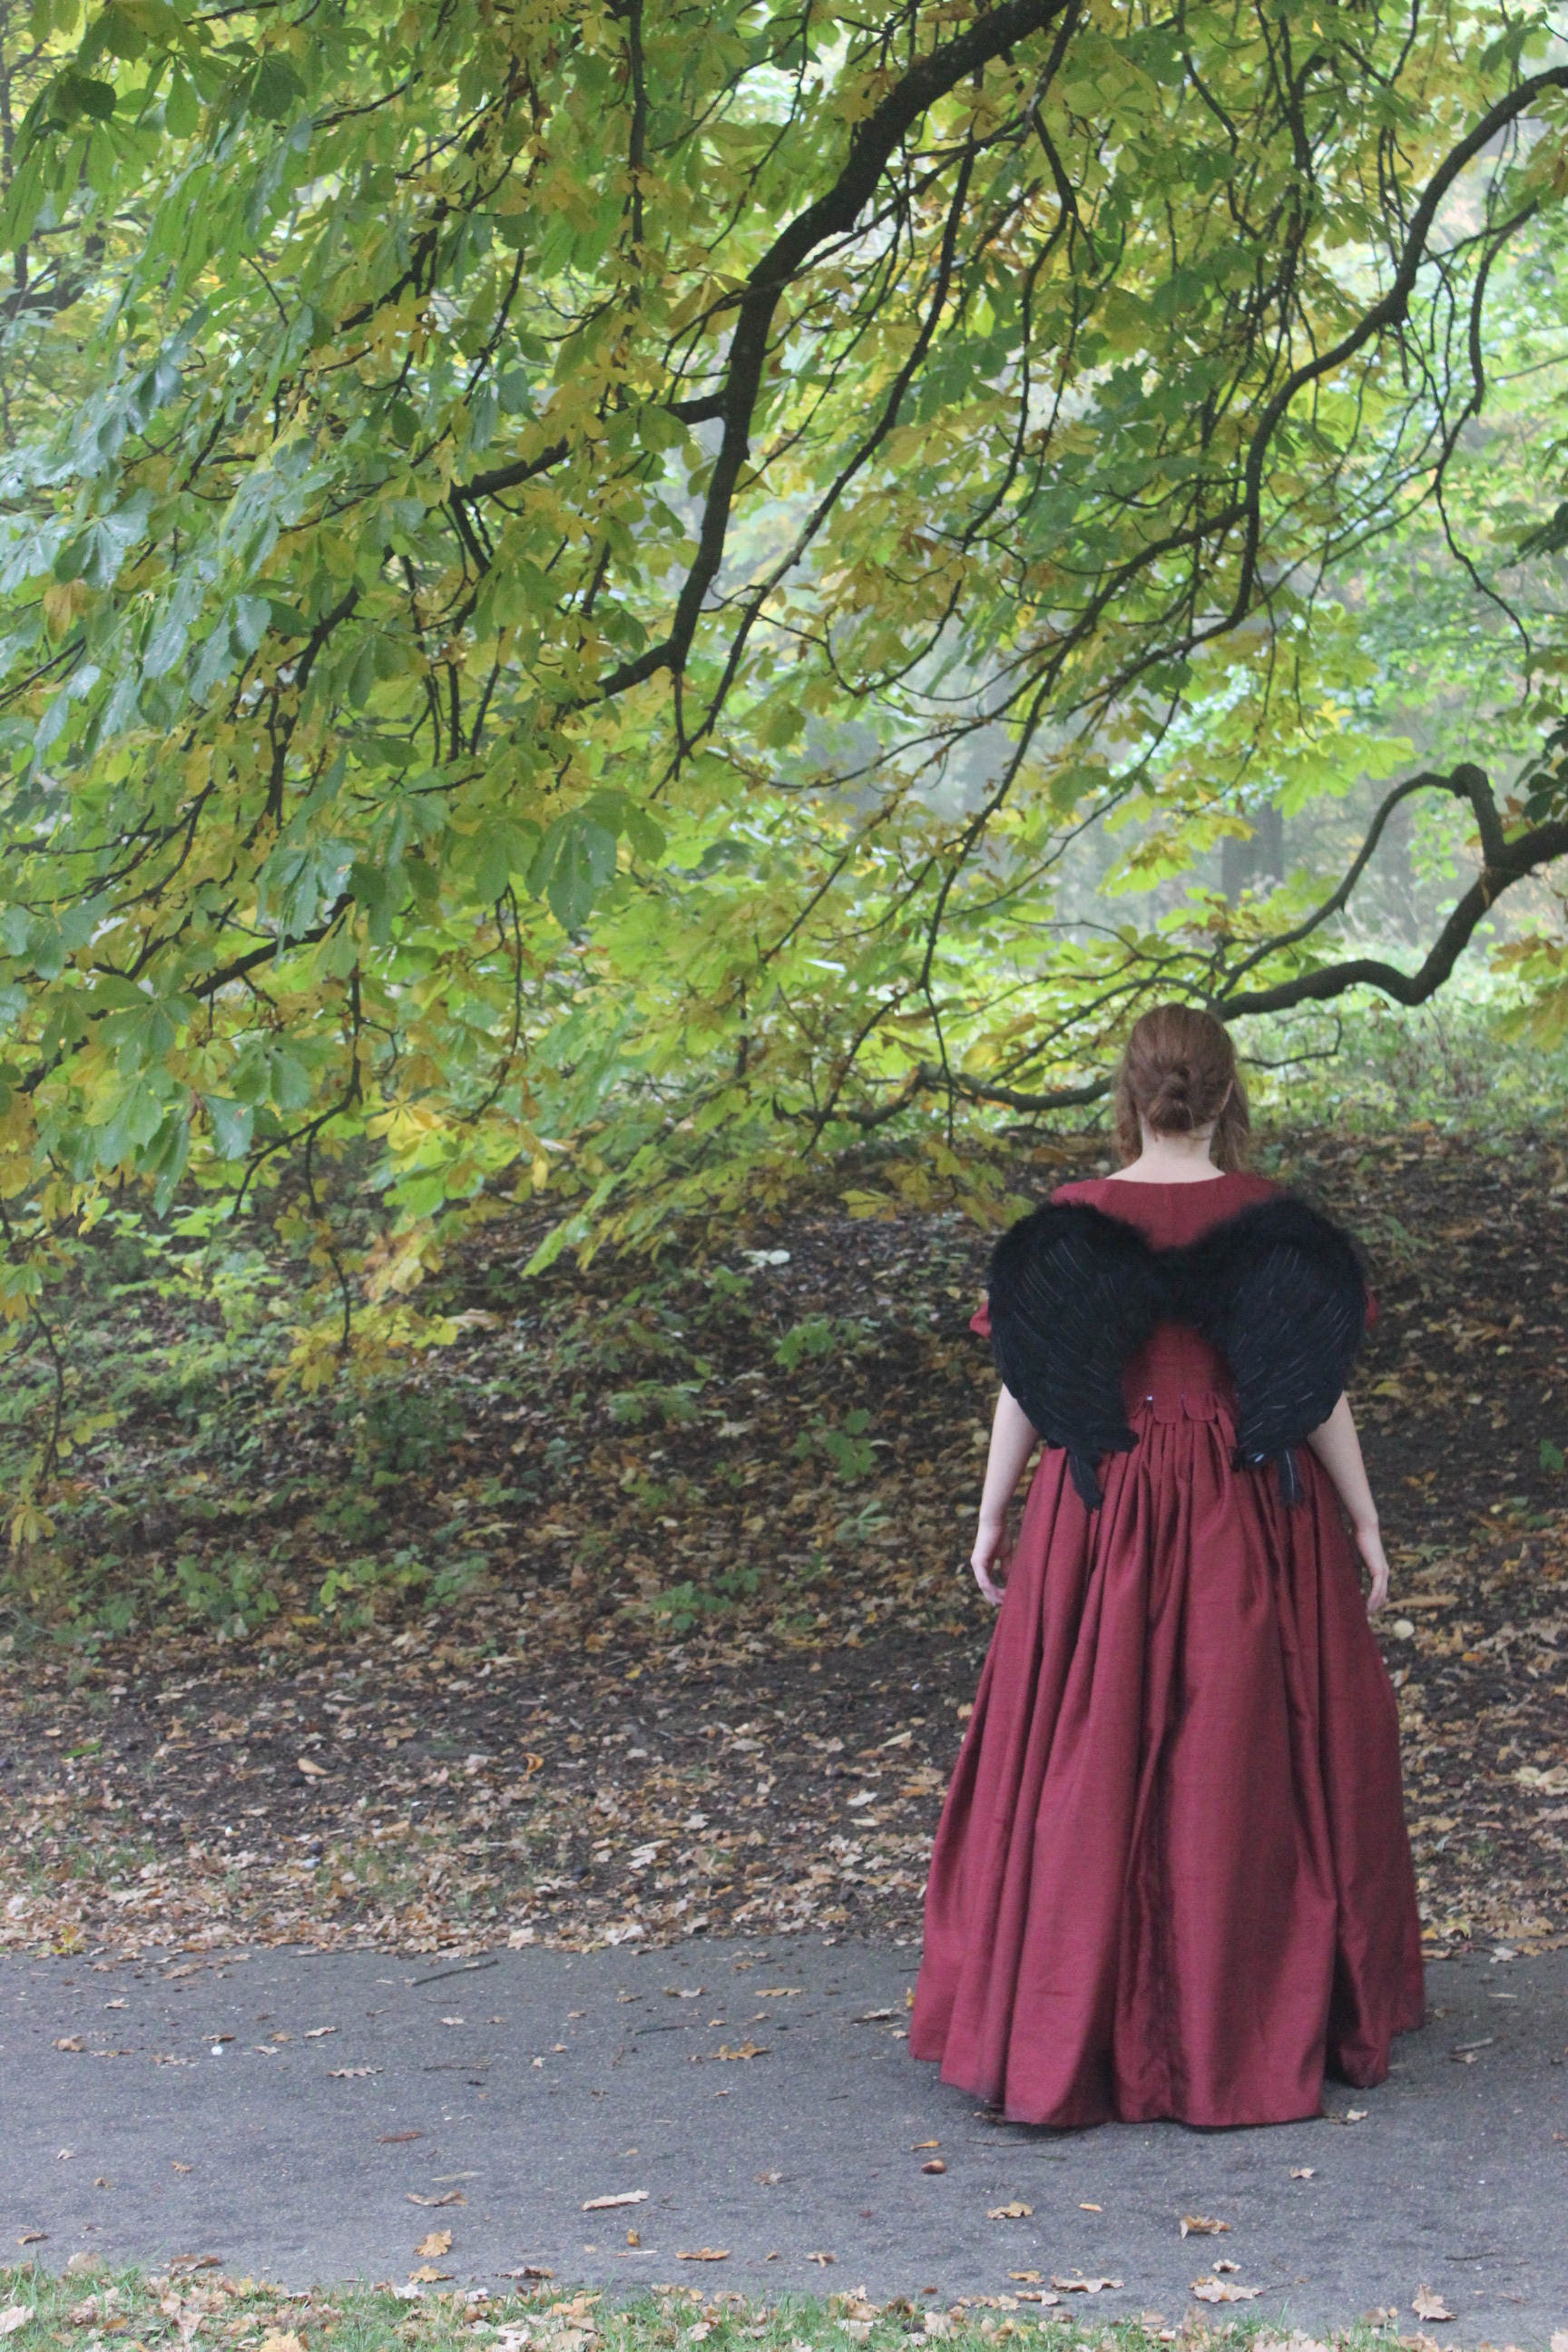
In October last year I got a group of friends together for a Halloween themed photoshoot, then life happened and I never got around to post the photos.
So finally – here are my Halloween-inspired 17th century gown.
Modell: Jessie Lewis Skoglund.
As soon as I laid eyes on this fashion plate I knew I wanted it
(and of course the costume ;-))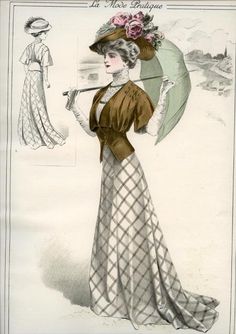
Jen at Festive Attyre made the most fabulous recreation of it a while back. And even though I knew I could never match her skill or perfect Edwardian look, I really wanted a similar look.
So when the HSM challenge 9 – “Brown” approached I scouted out my stash for the perfect brown and plaid wool fabric, and got to work.

I drafted the pattern using Nora Waughs “The cut of women’s clothes”
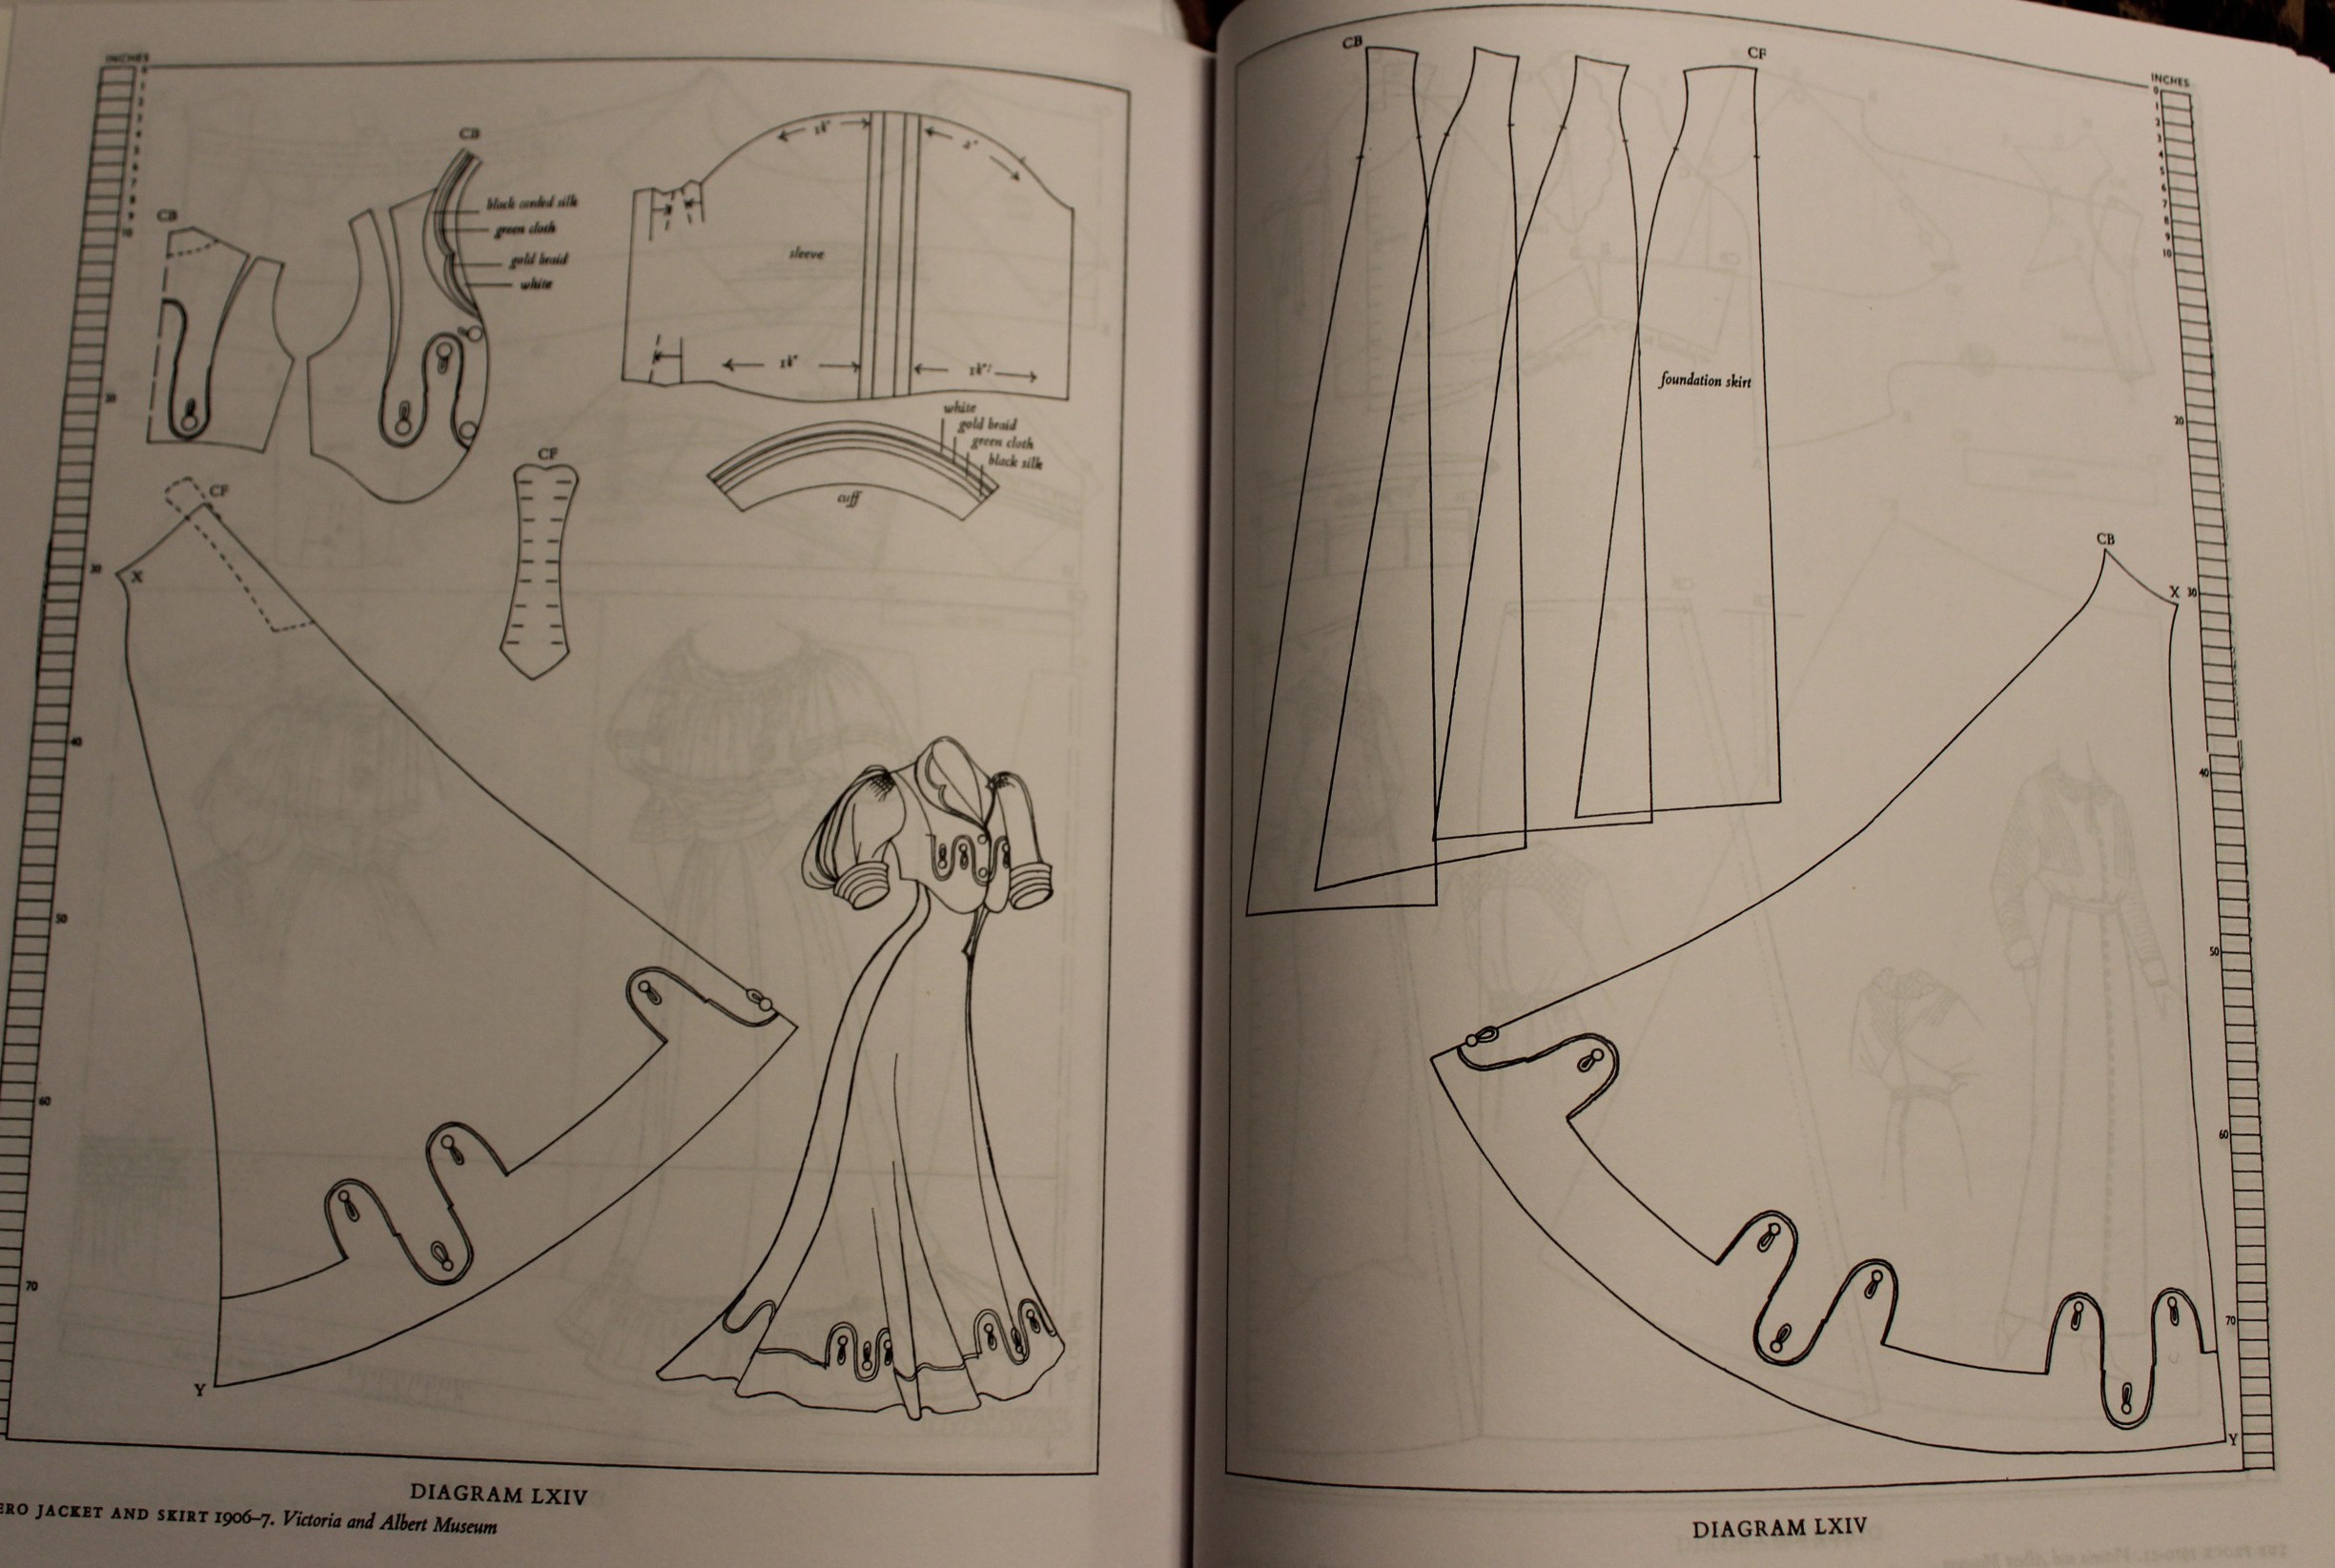
I cut the pieces on the bias, carefully matched the plaid to meet at an angel at the seams.
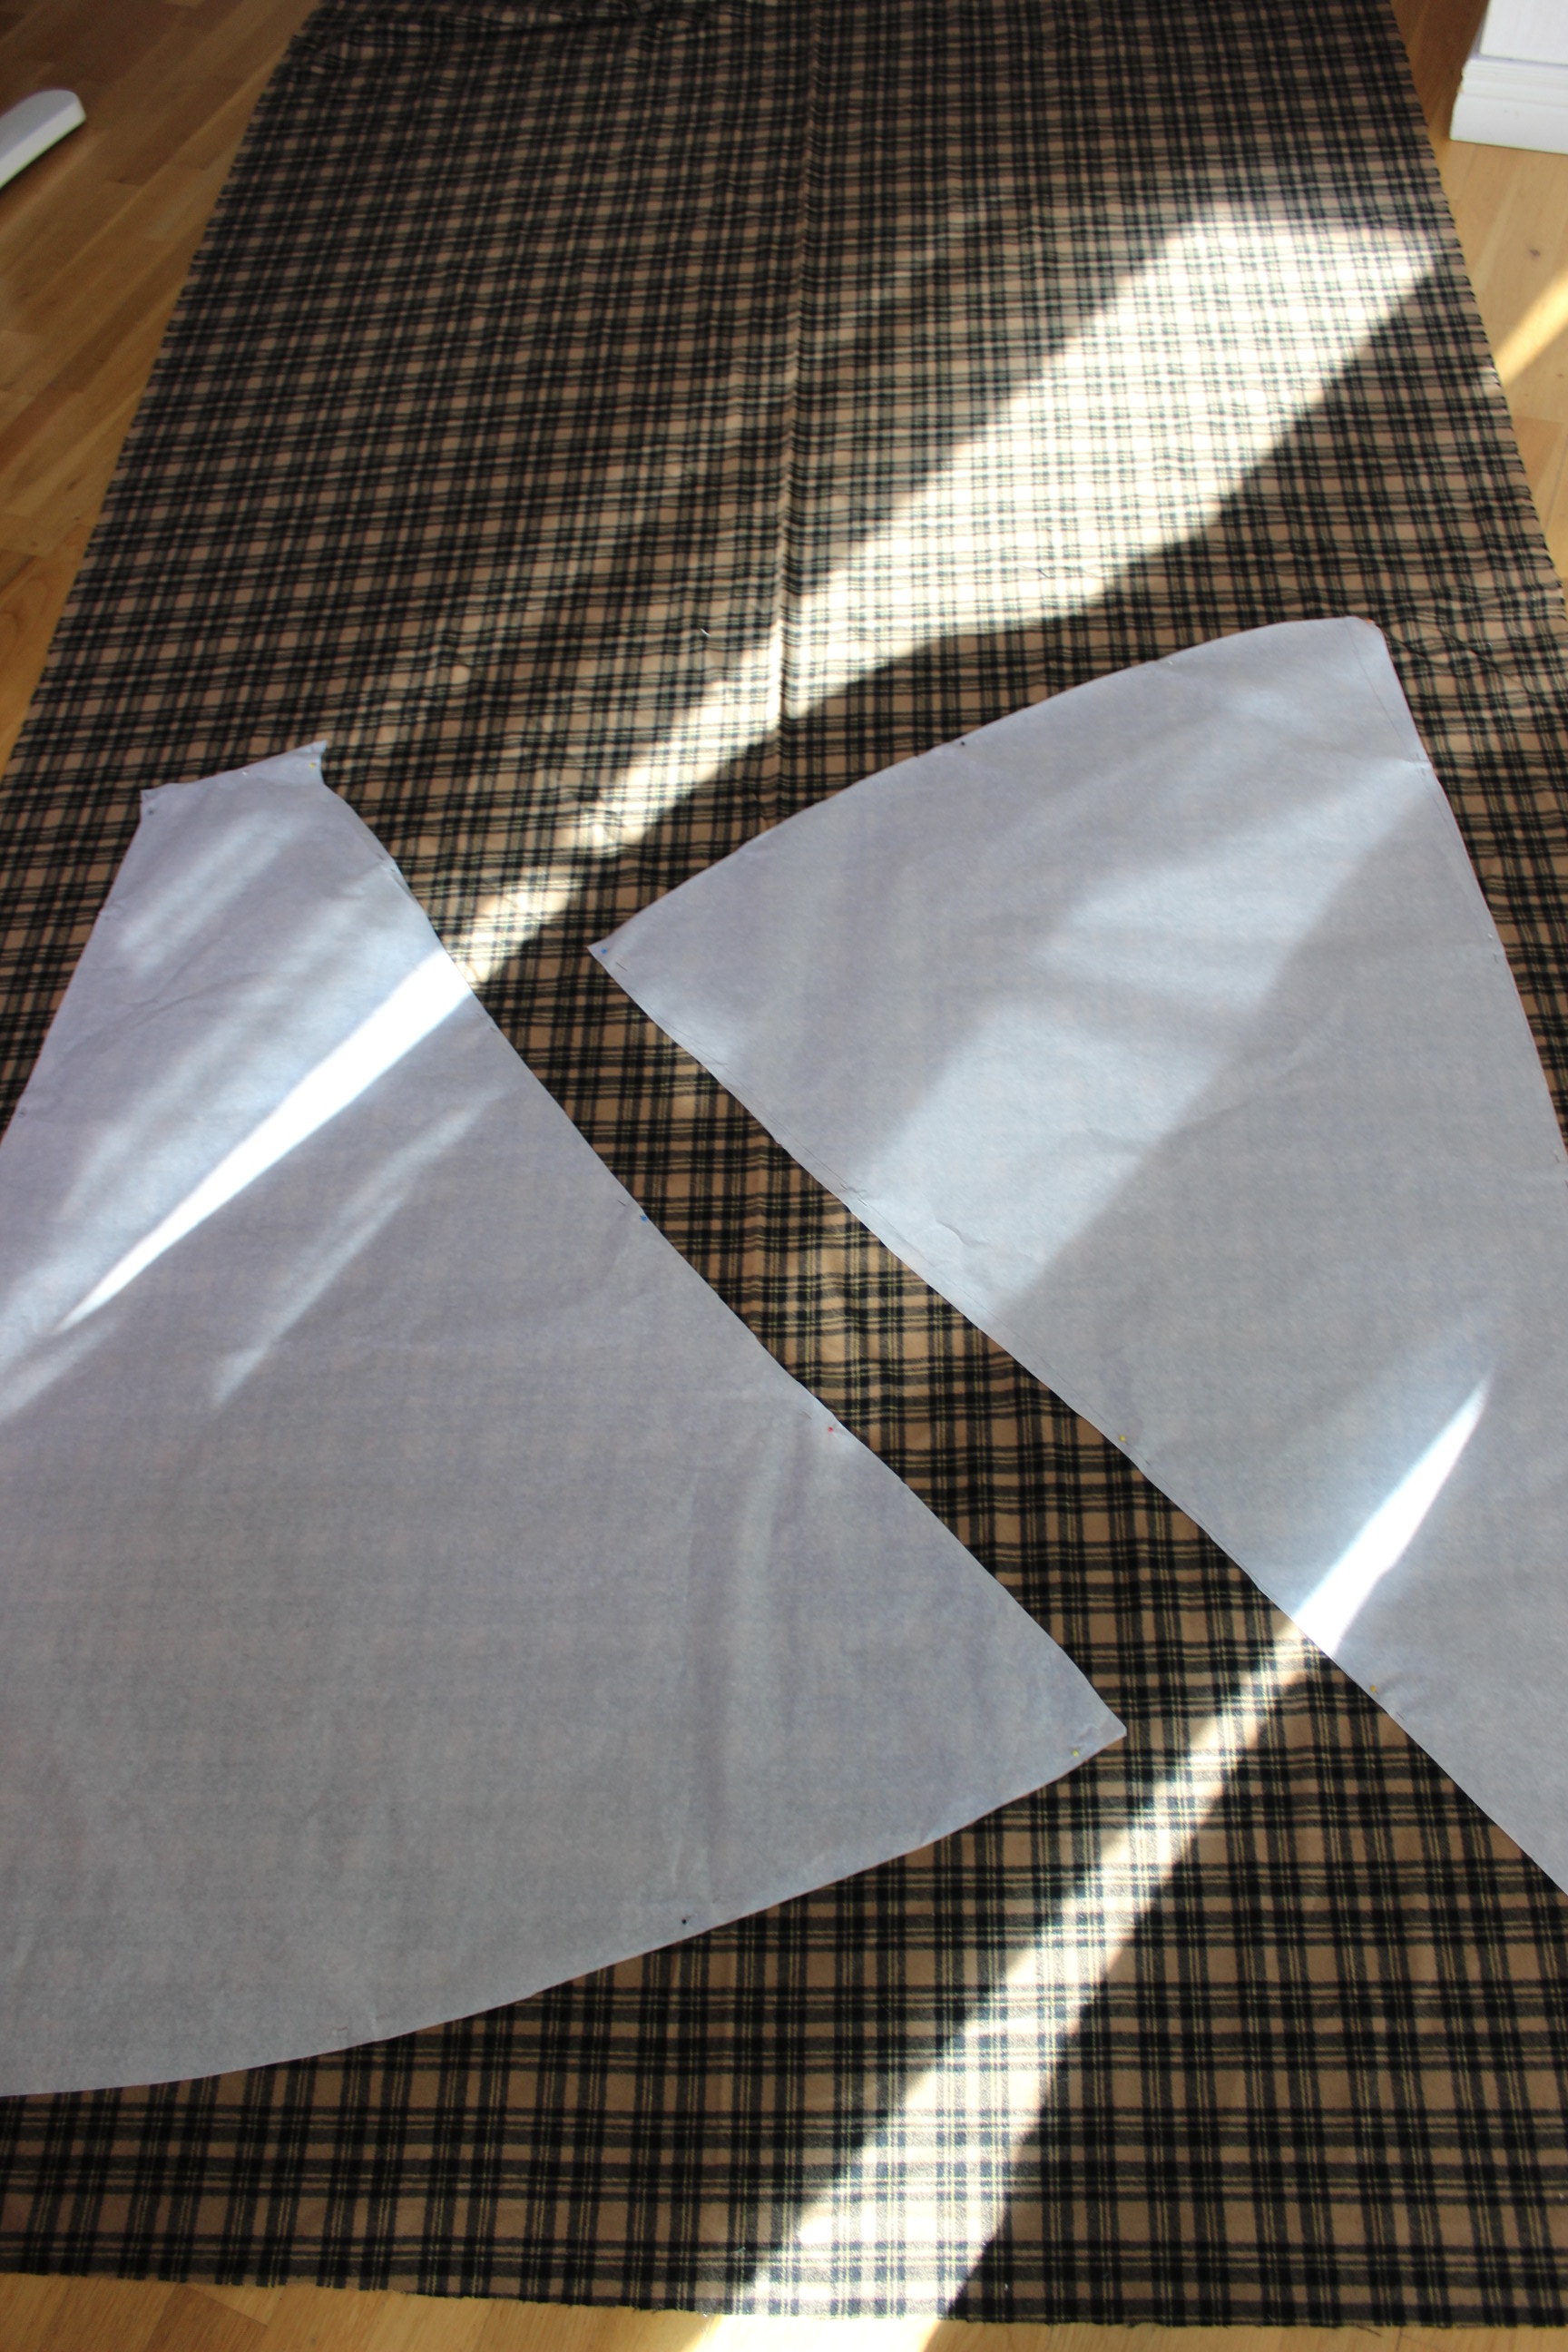
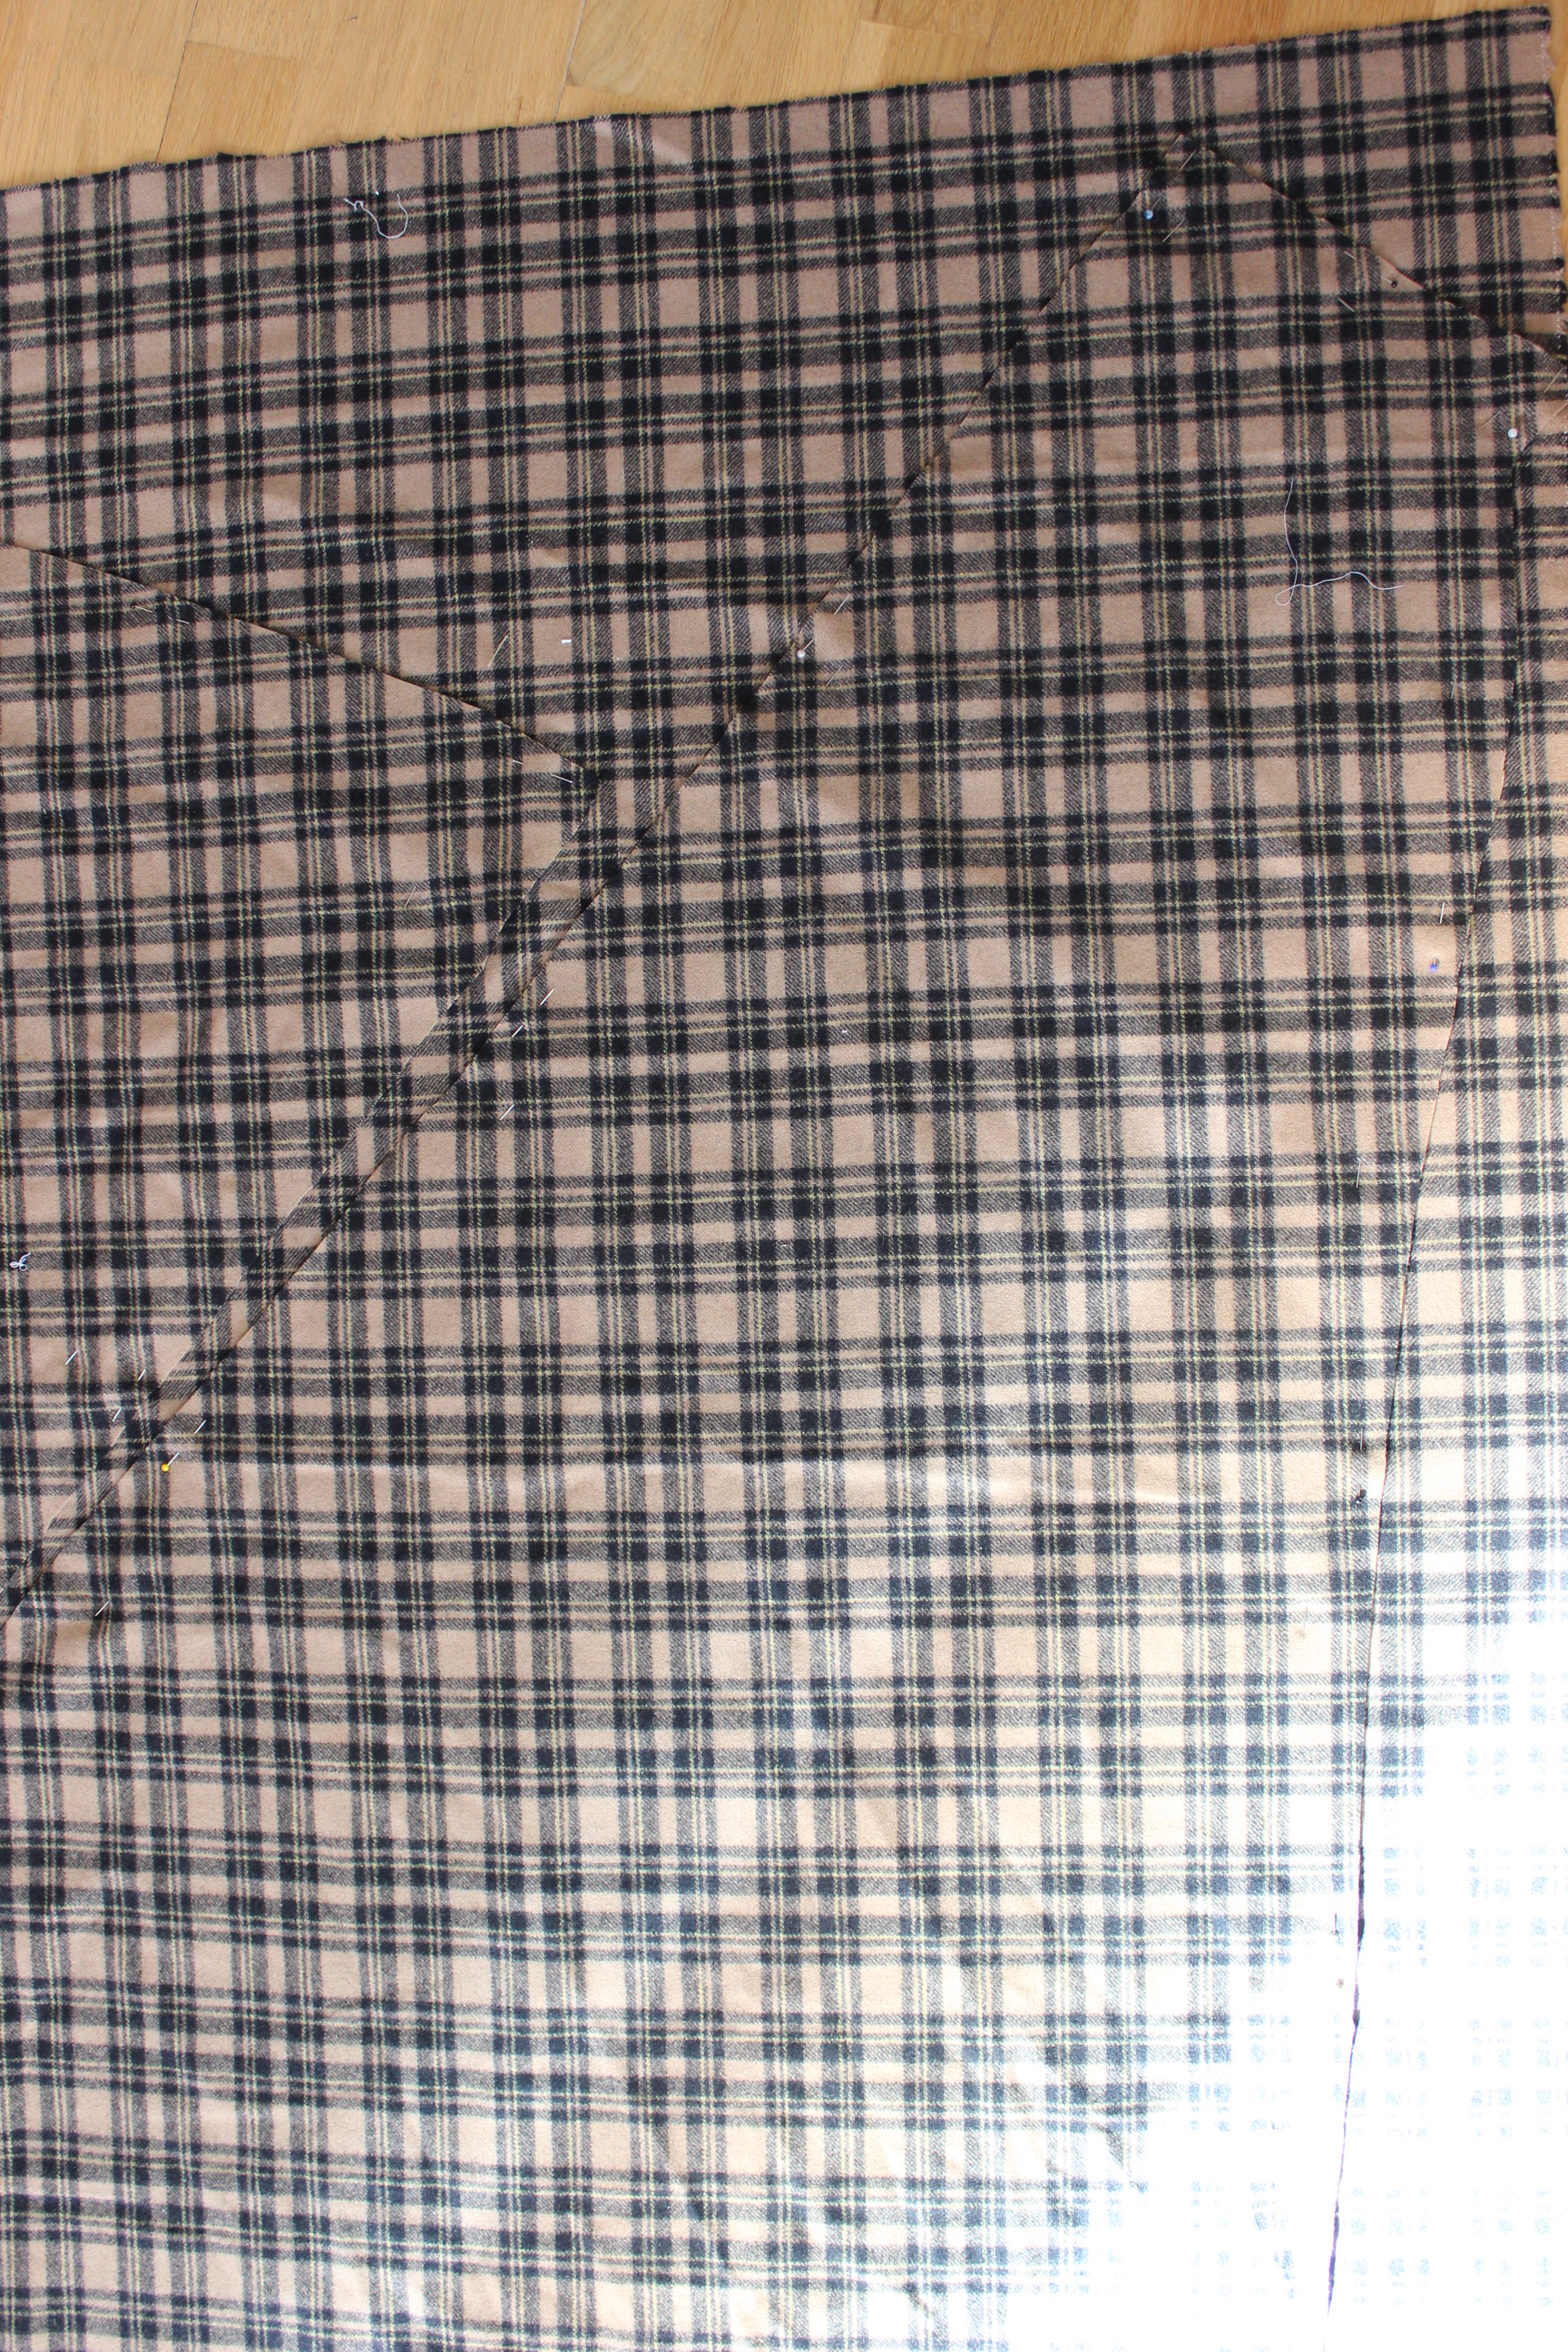 Matching the plaid
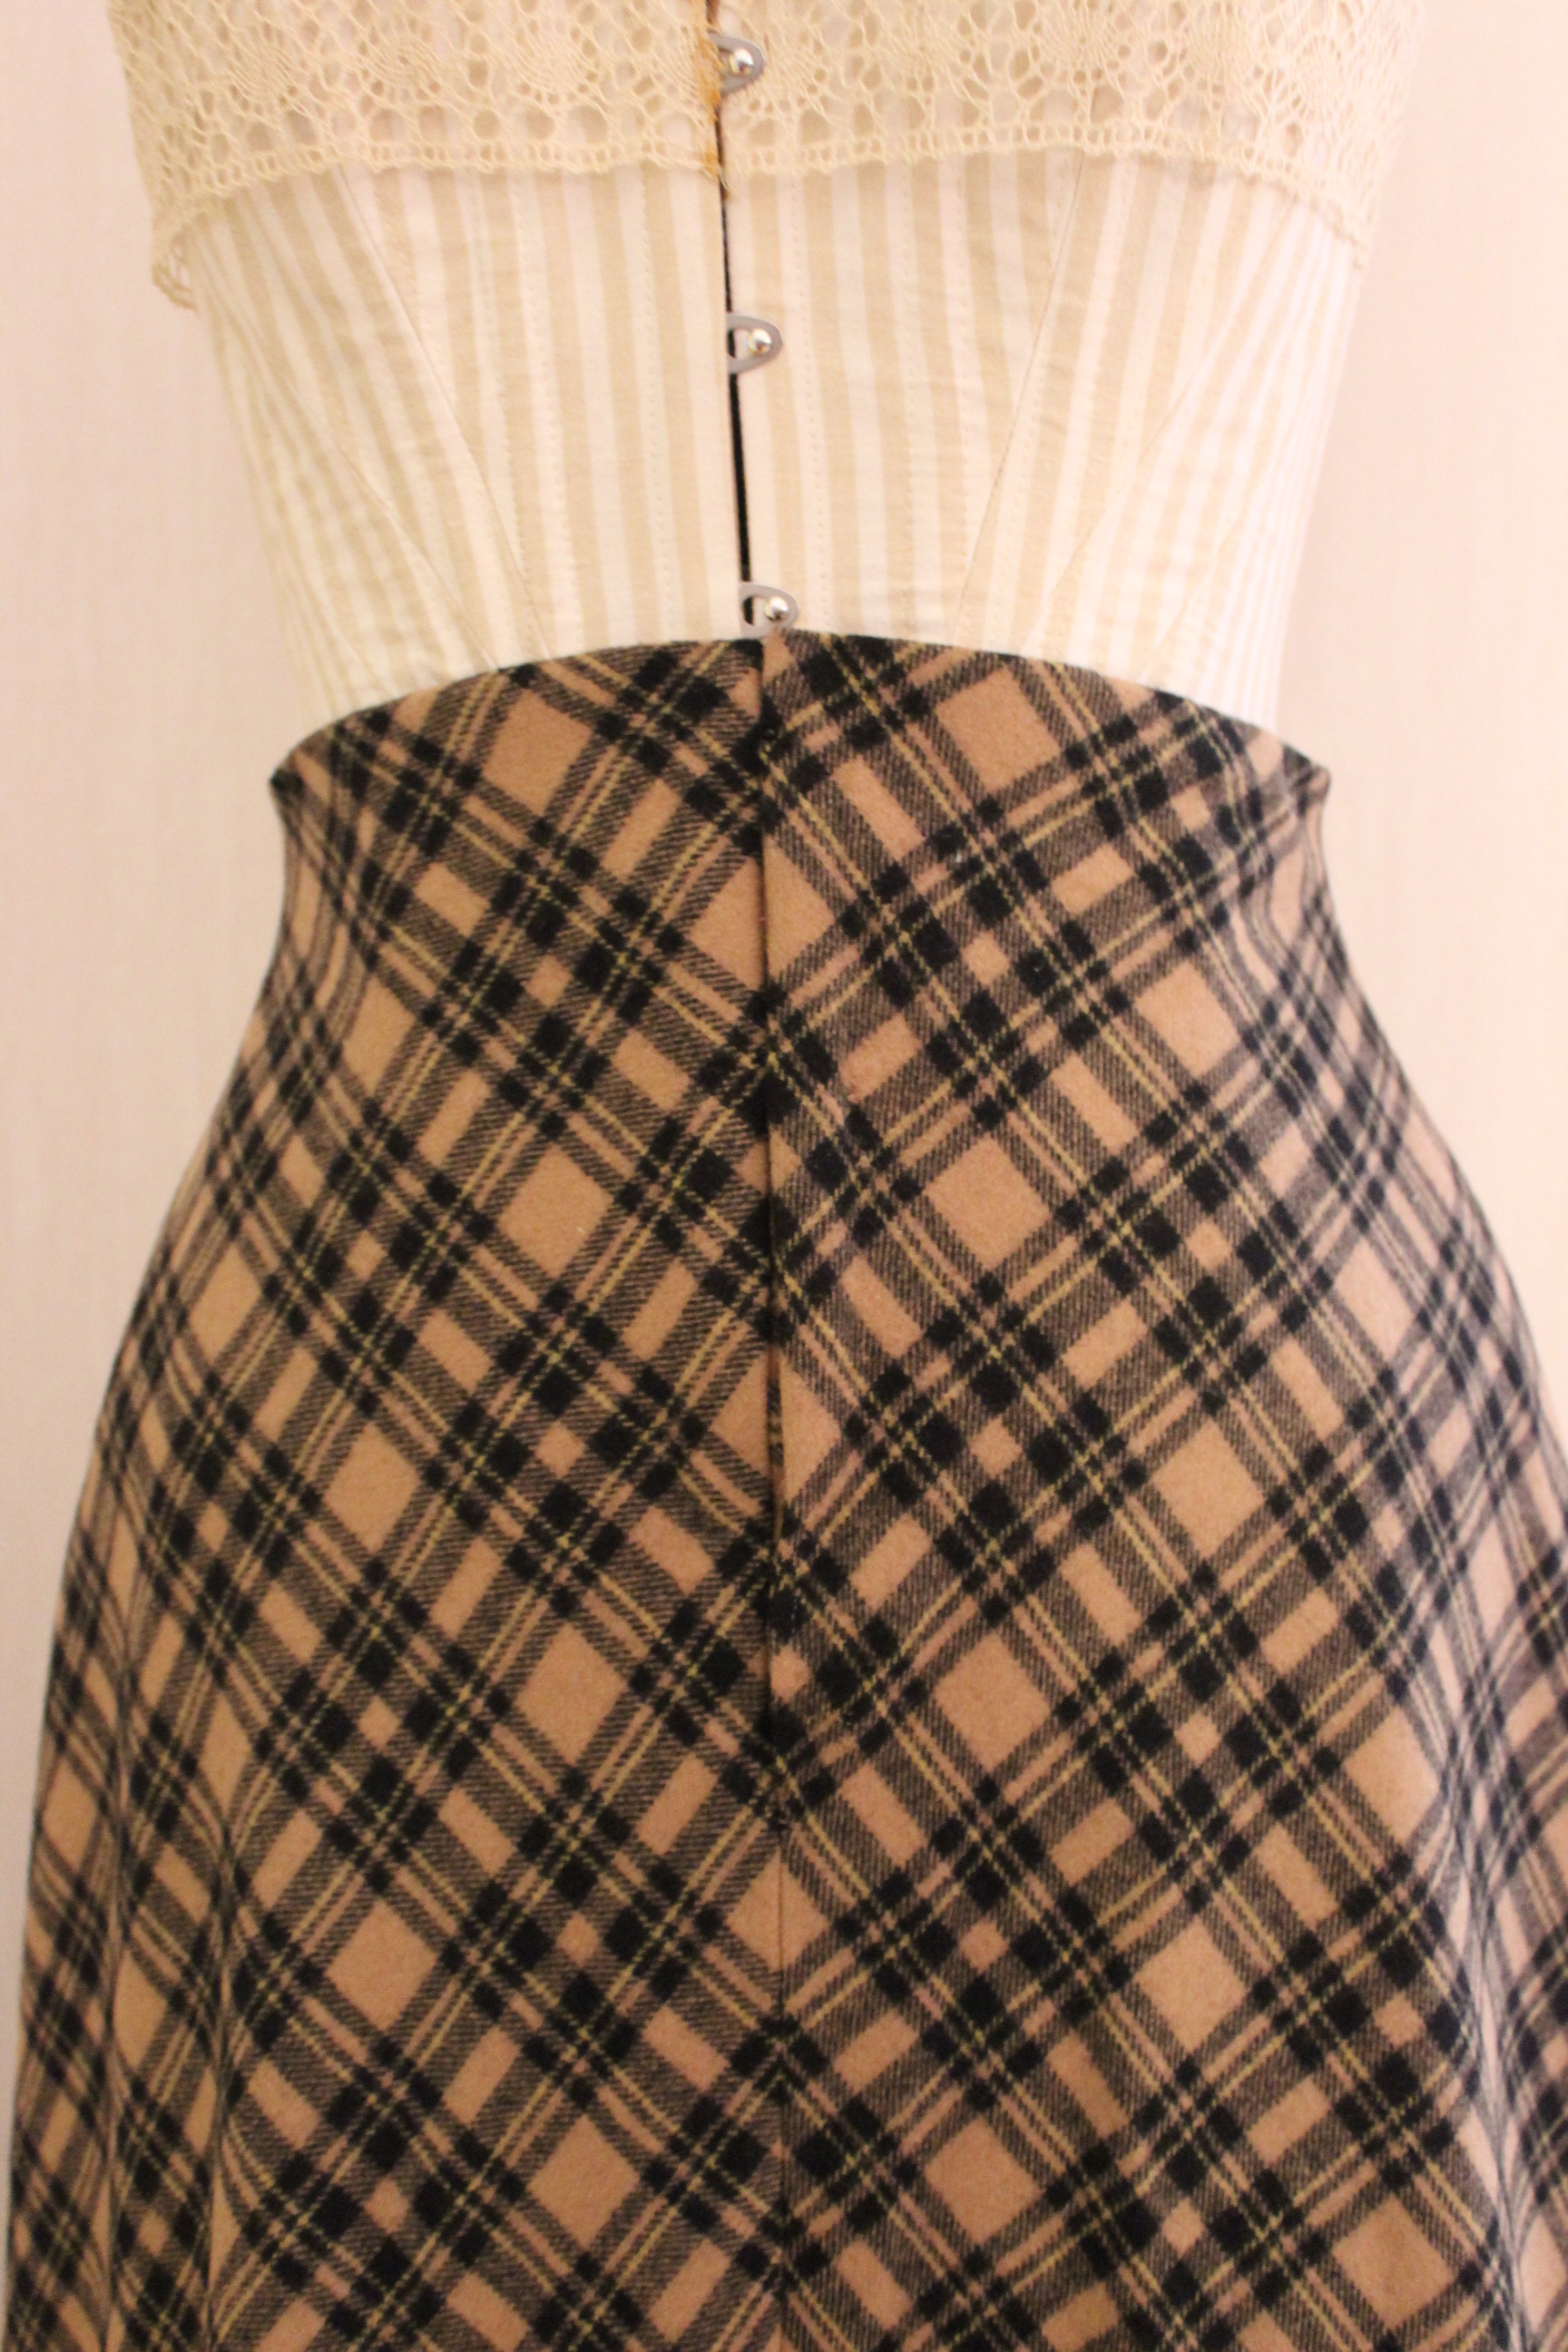
I used some white cotton for the foundation and stitched bias-tape to make boning channels to get that nice body-hugging look of the corseted skirt of this era.
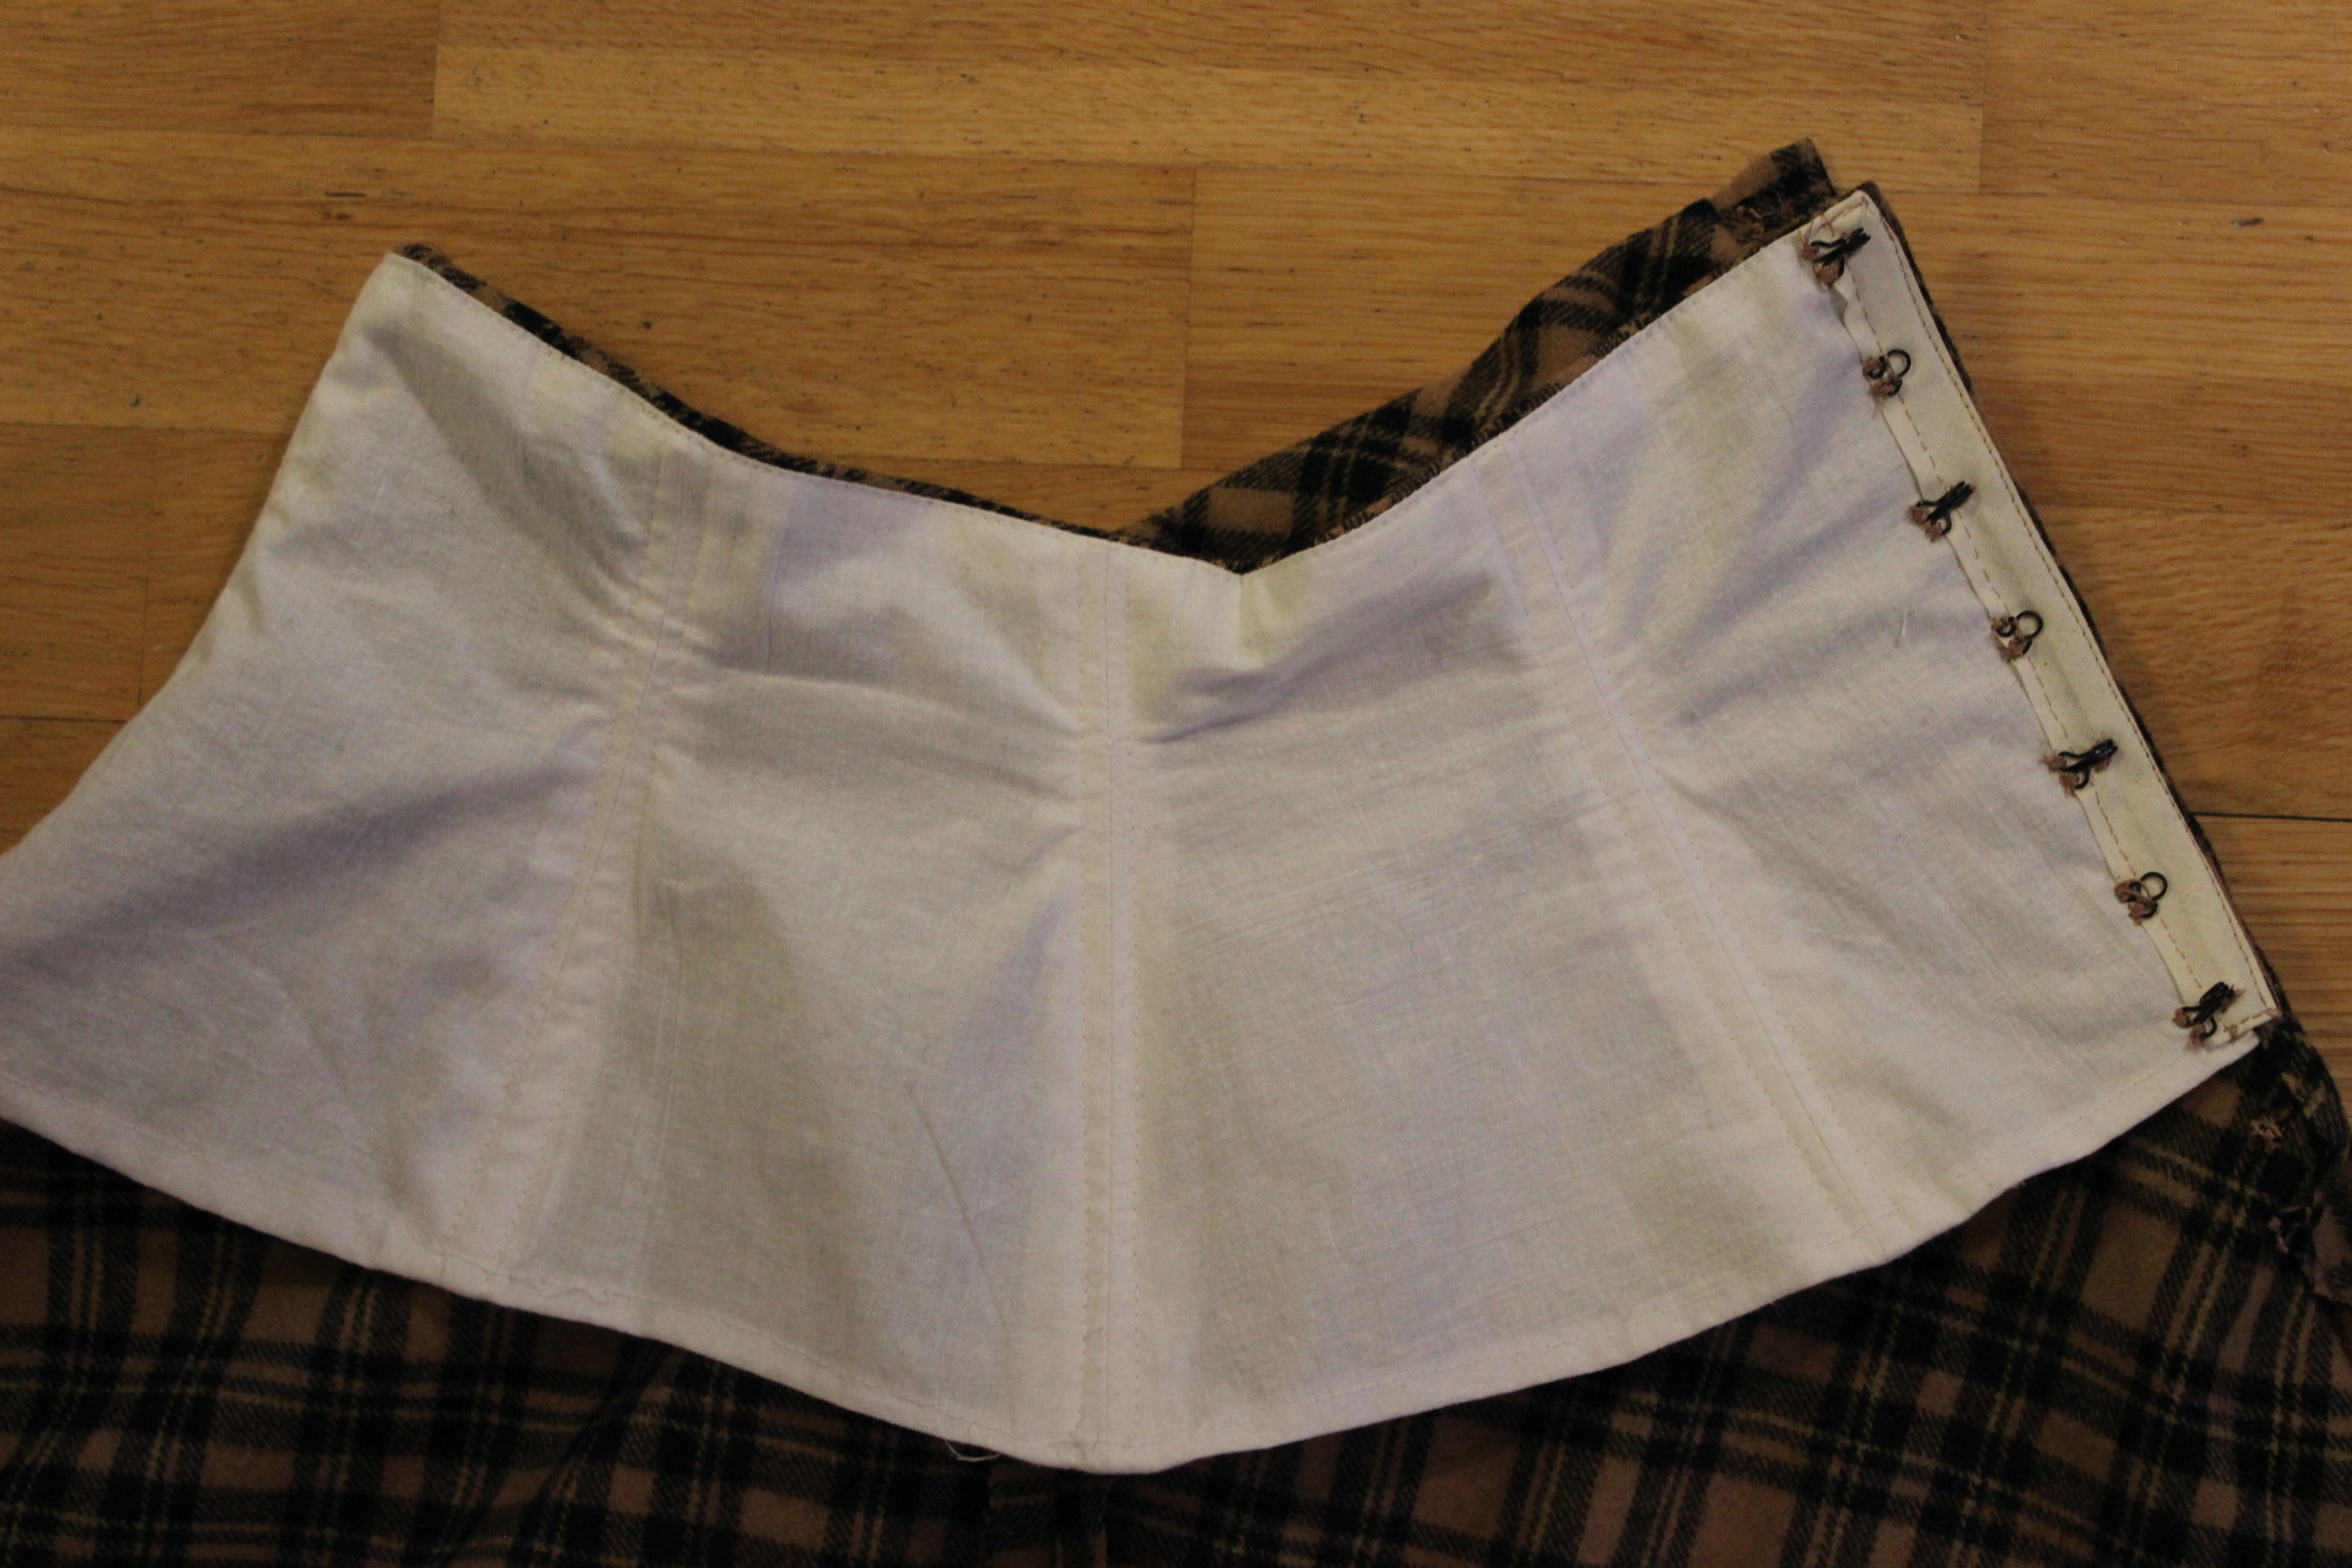
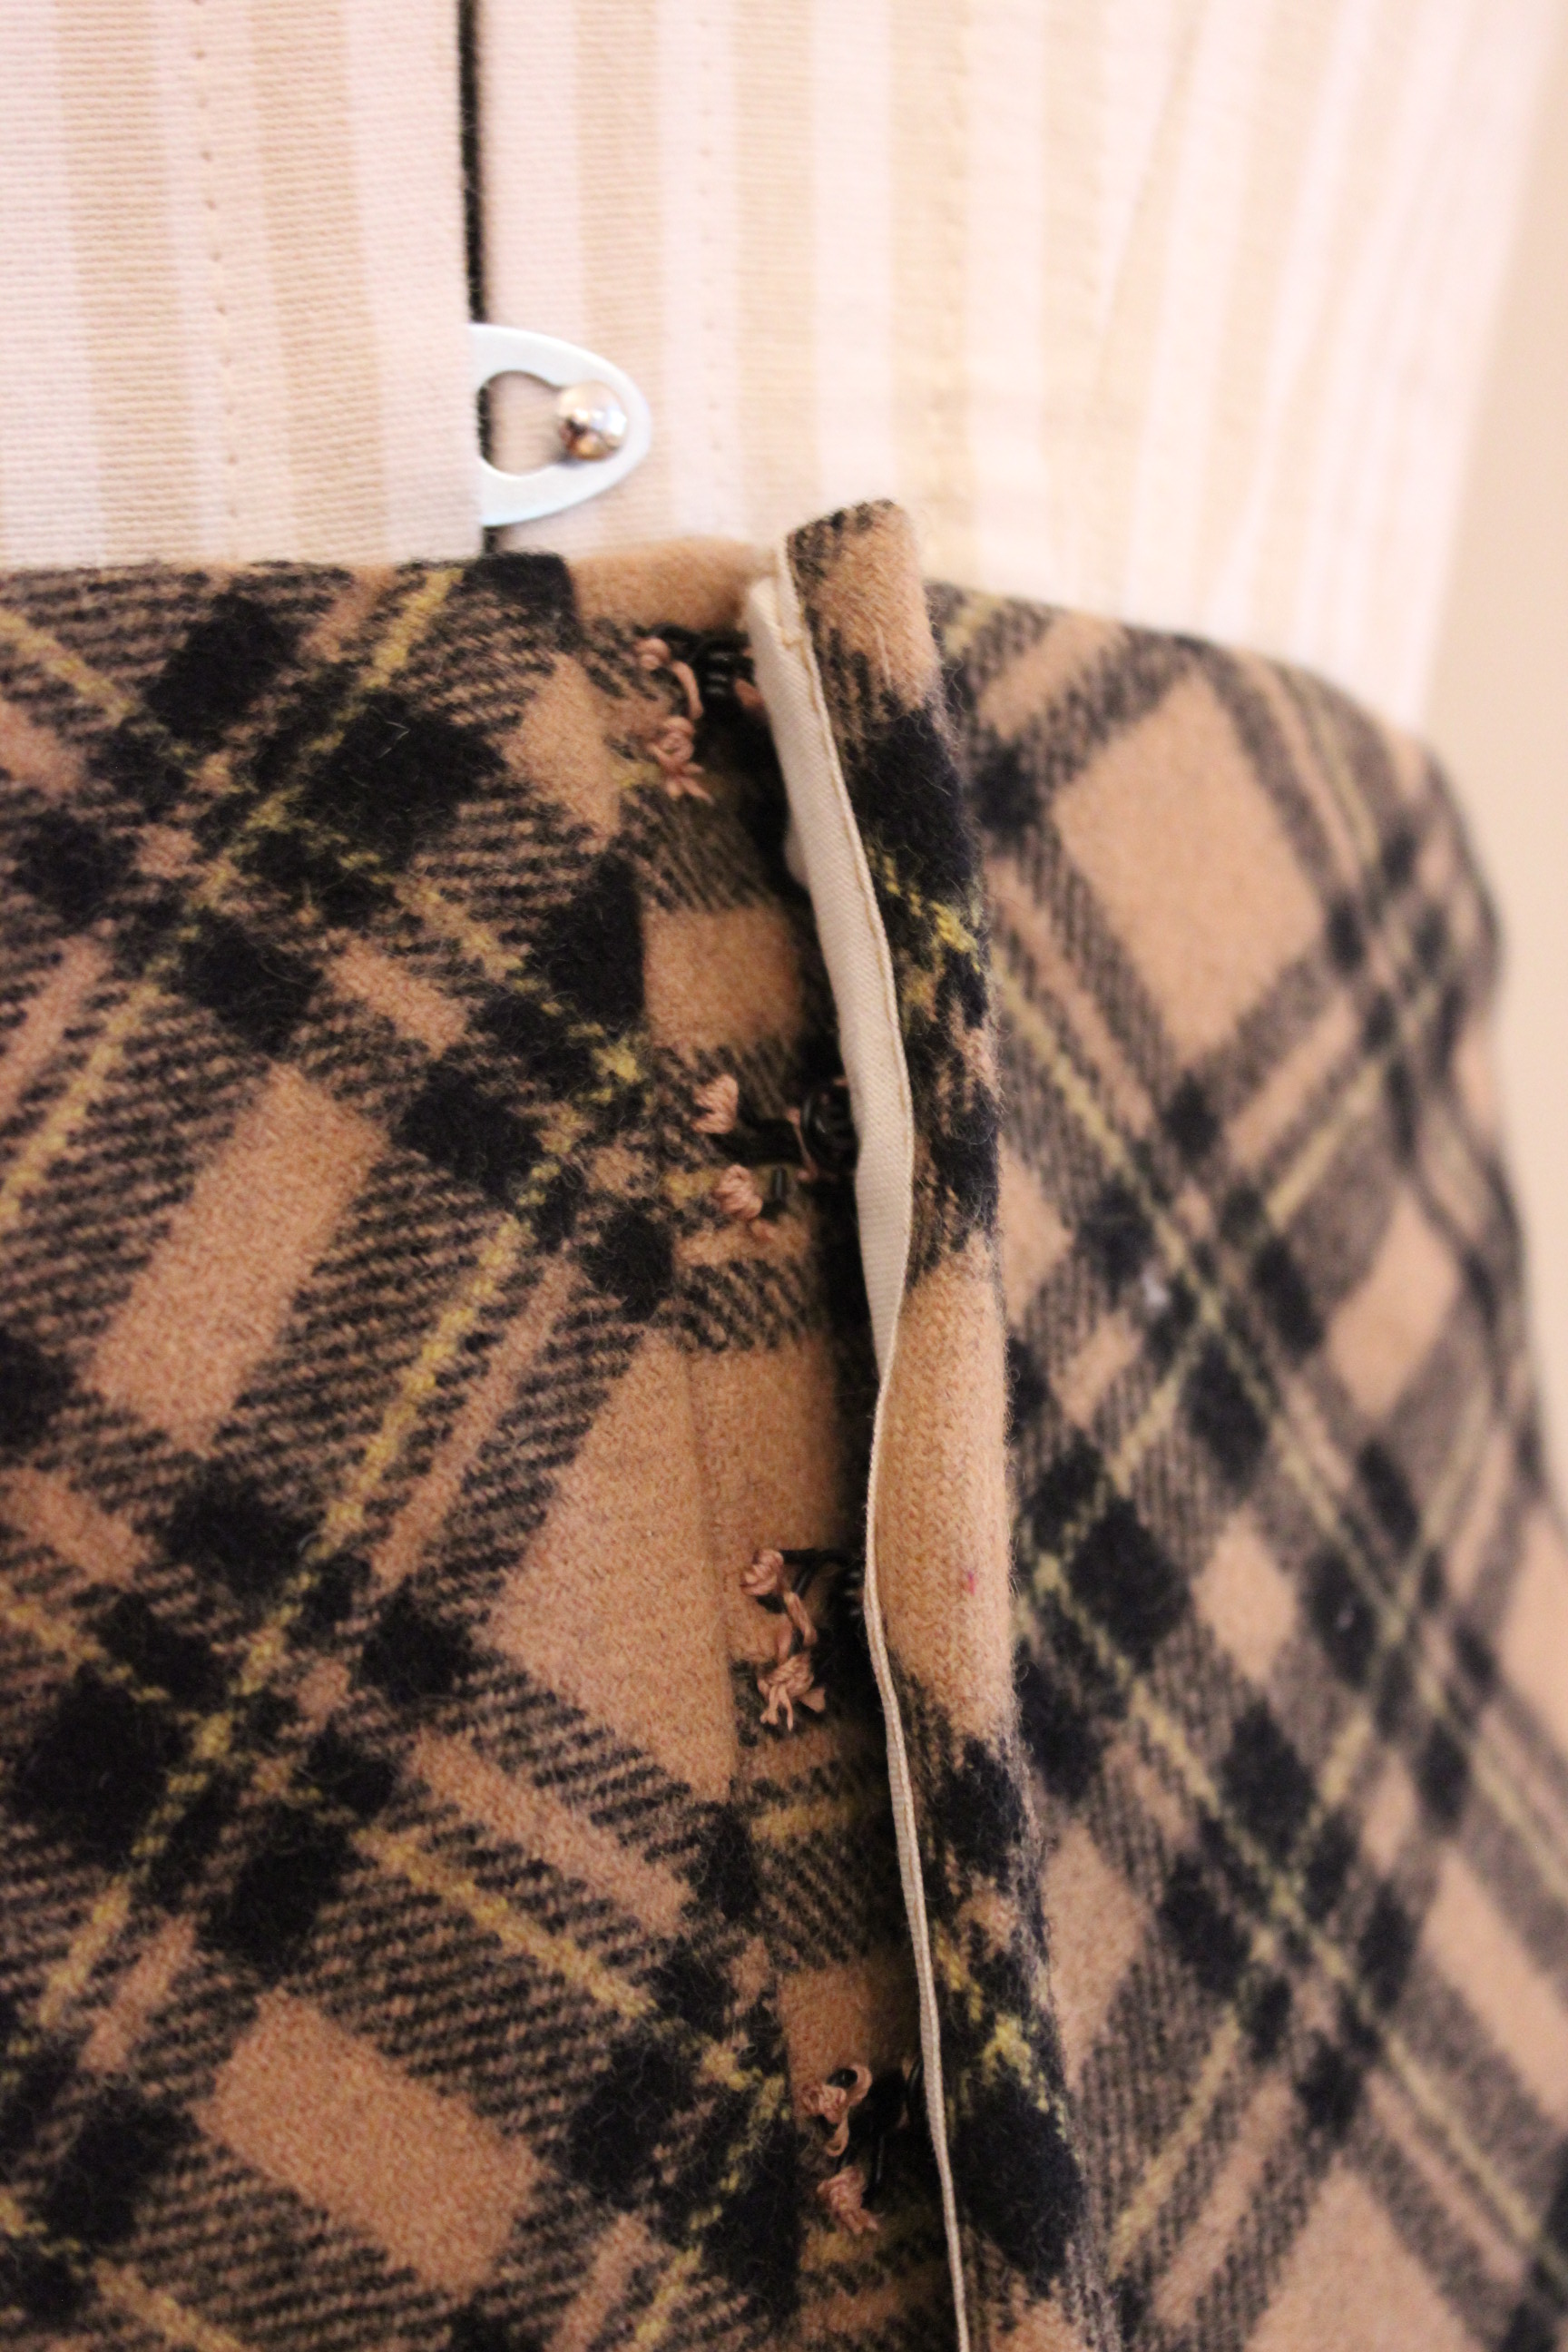
The skirt closes at the front with hooks and eyes, over a placket and secured with another pair of bones.

I finished by hemming the skirt using a 10 cm wide strip of beige cotton for hem-facing.

And that’s it. The skirt from the inside
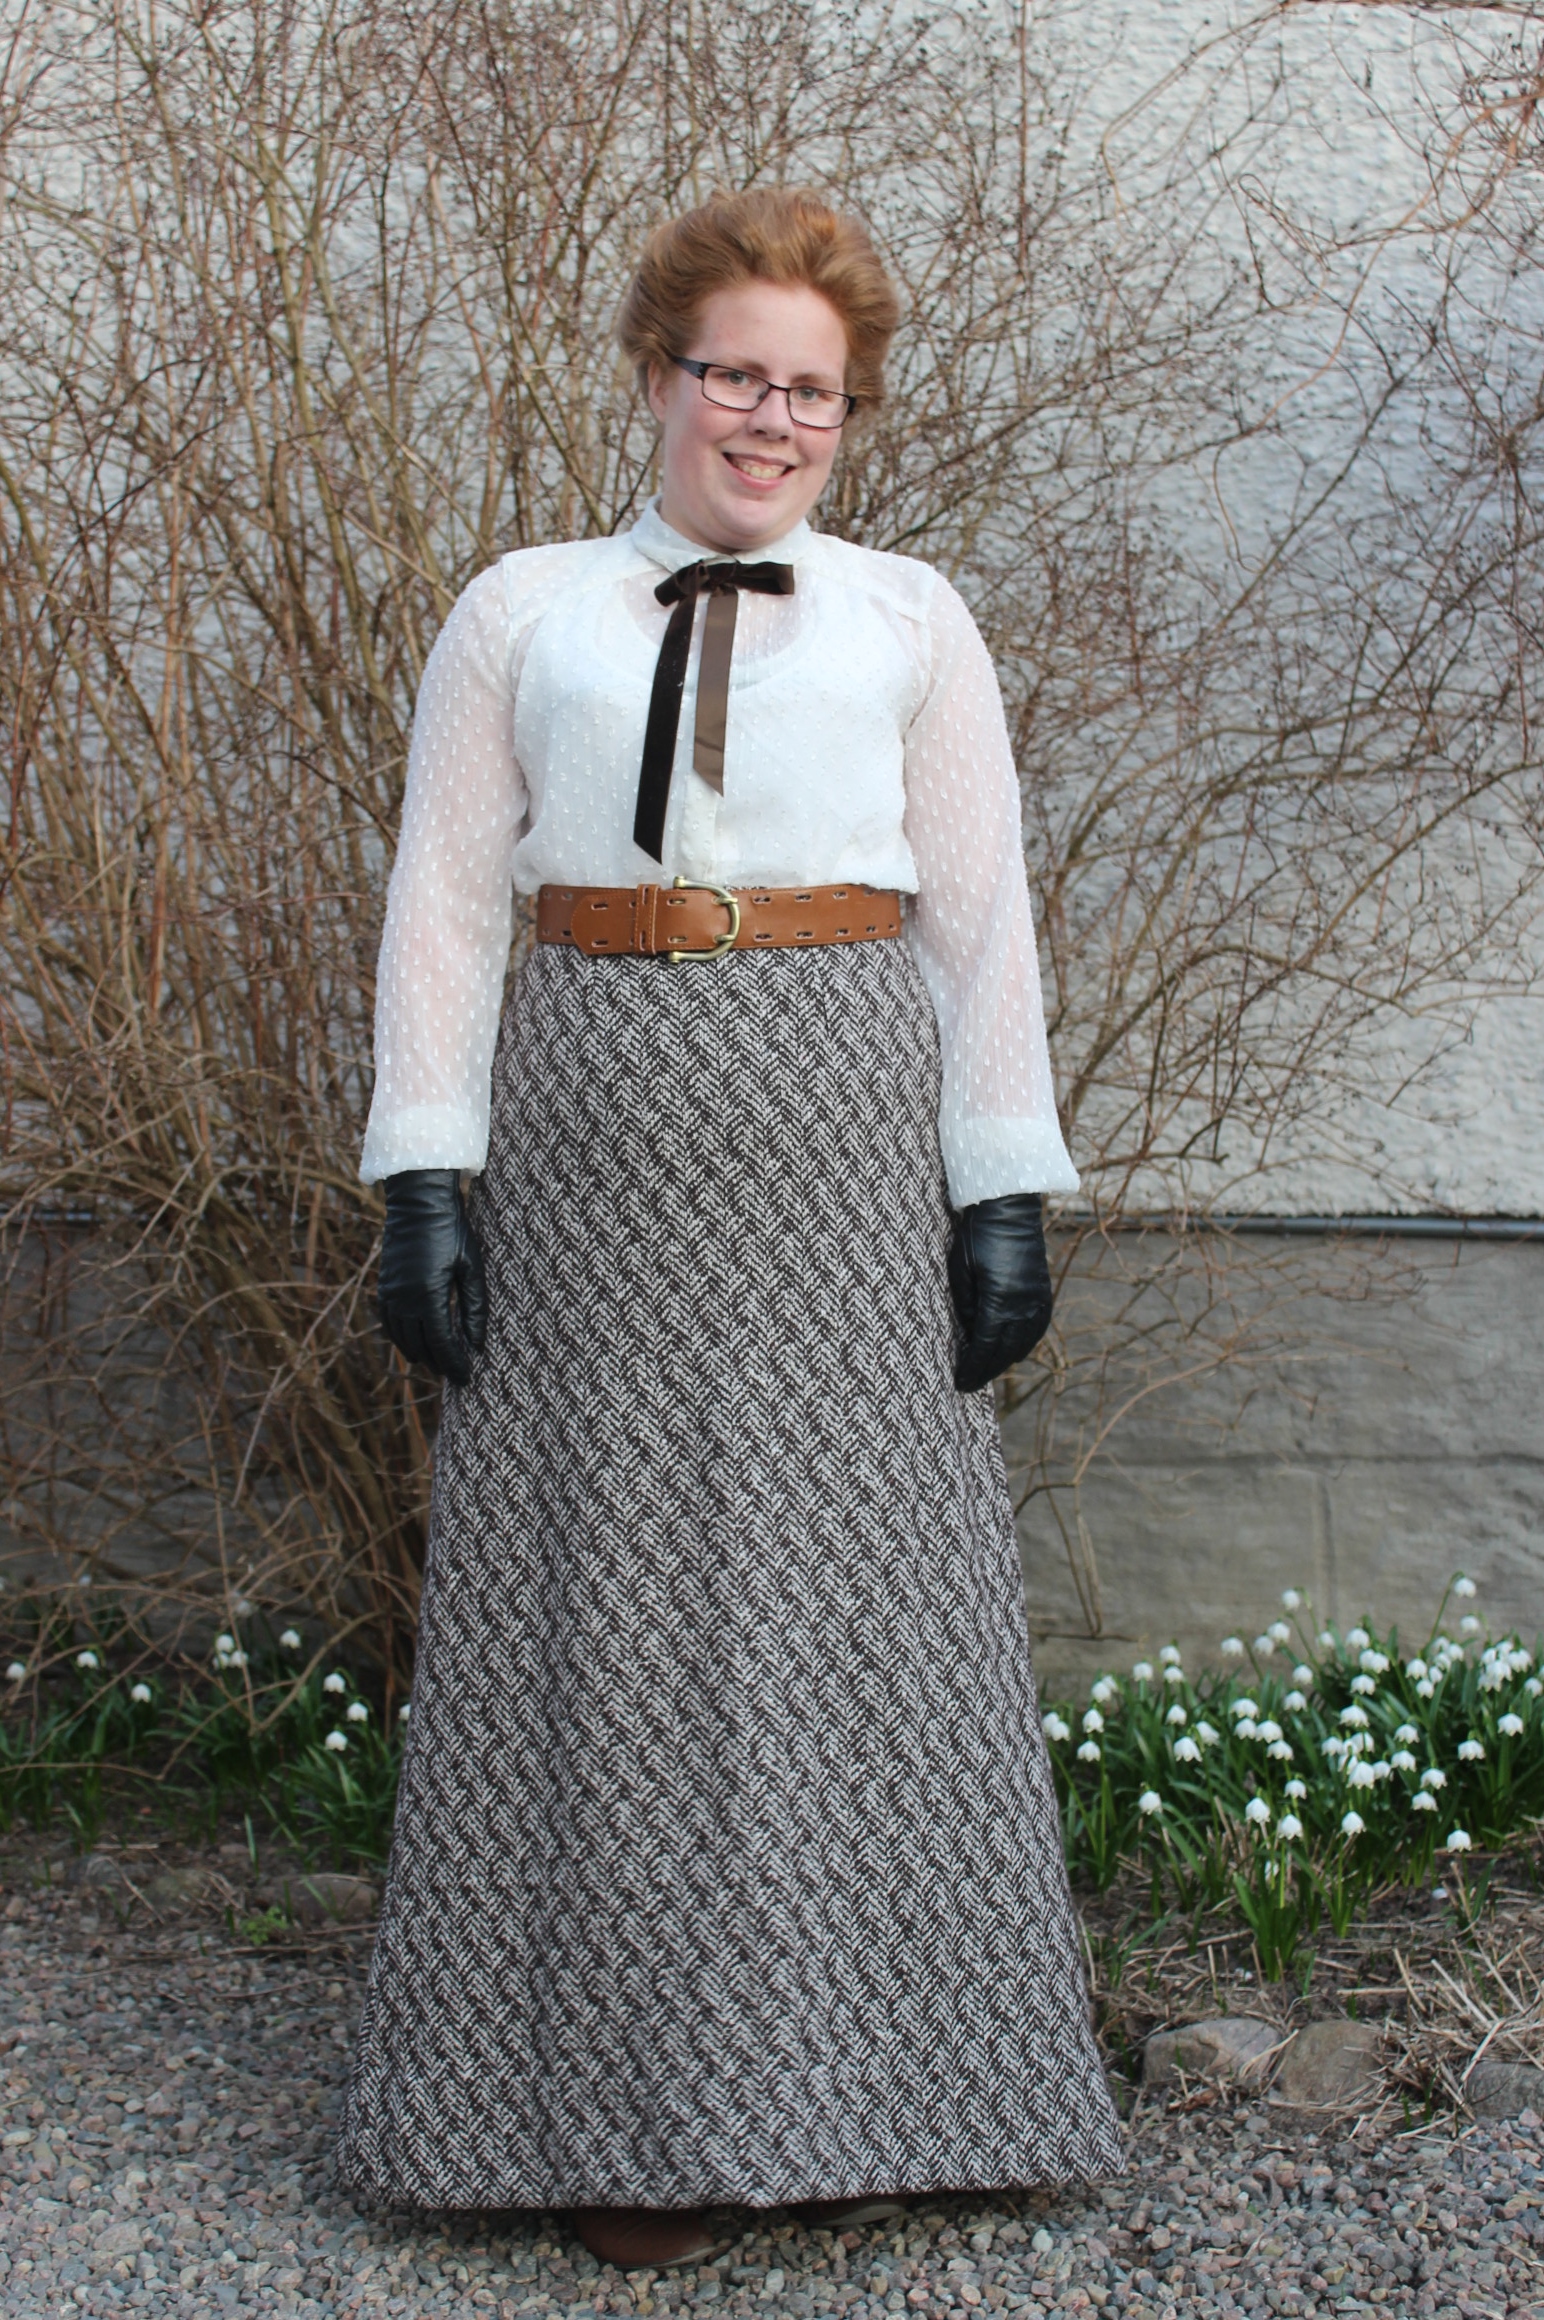
The finished Skirt:


Just the facts:
Challenge: HSM15 nr 9 – Brown
What: A 1900s brown/plaid walking skirt.
Pattern: I drafted my own using Nora Waugh’s “The cut of women’s clothes”
Fabric: 3 m of plaid wool an bits and scraps of cotton for interlining and hem-facing.
Notions: Thread, 2 m of bias-tape, 2m of boning, and hooks and eyes for clouser.
Time: About 10 hours – the fabric matching and hand stitched hem took more time then usual.
Cost: About 200 Sek (32Usd) – all material came from stash but I bought this fabric on sale about a year a ago with a similar project in mind.
How historical accurate: Pretty good. The fabric and pattern are all good. Even though most of the skirt is made by machine the finishing are hand-stitched, as it should be fr this period. I did use some modern techniques on the foundation piece. I’d give it a 7/10.
First worn: Will be worn for photos on October 4th.
Final thoughts: I like how it came out, both the sweep of the skirt and the pattern matching looks really nice, but I’m not completely happy with the raised waistline and I might go back to tweak it a bit later on. But a ll in all it’s a nice piece to have in the costume wardrobe.
This months theme for HSM/15 is “Brown”.
The Dreamstress whites:
it’s not the most exciting colour by modern standards, but brown has been one of the most common, and popular, colours throughout history. Make something brown.
I actually like brown.
It’s a great color that (in my opinion) accentuates almost any other color. Its softer then black and cooler then white when making color combinations. Brown also comes in a lot of different shades from dark chocolate to golden and soft nougat. It’s also been a (more or les=) popular color throughout history.
Here are some of my brown pieces I’ve added t my historical wardrobe theses past years:
 One of my favorite dresses is this 1780s robe a la Anglaise in a lovely flowery cotton matched with a golden petticoat and brown stockings.
 1850s lend itself great to the brown color pallet.
This walking dress in printed cotton makes an impact on everyone around.
 The dress also comes with an evening bodice.
 A photo from 1929 inspired this simple cotton dress, the brown boots and white collar ads perfectly to the authenticity.
 Who knew a 1880s evening gown in brown could be so glamours. The light teal skirt, white gloves and the dark brown fringe perfectly sets of the nougat in the gown.
 The same 1880s trained bodice, paired with leather pants and heavy duty boots, also works for a softer Steampunk style.
 Simple rural 18th century woolen bodice in light nougat/dark beige perfectly matches the plaid in the skirt and the softness in the nature all around.
 18th century menswear in a wide spectrum of brown hues, with the coat as the obvious focal point, matched with golden/brown waistcoat and beige/brown suede breeches.
 A simple white shirt made fabulous with the help of a nice brown 1990s woolen skirt and cola colored belt.
 This dark chocolate 18th century skirt reads as black, but makes a softer contrast to the white apron and stockings then black. The bodice is actually yellow with purple stripes, but can very well be read as brown.
 Dark wine paired with chocolate brown makes for a serene medieval picture.
 Golden poly knit makes for a nice Egyptian masquerade costume.
I’ve also made several accessories to my costumes:
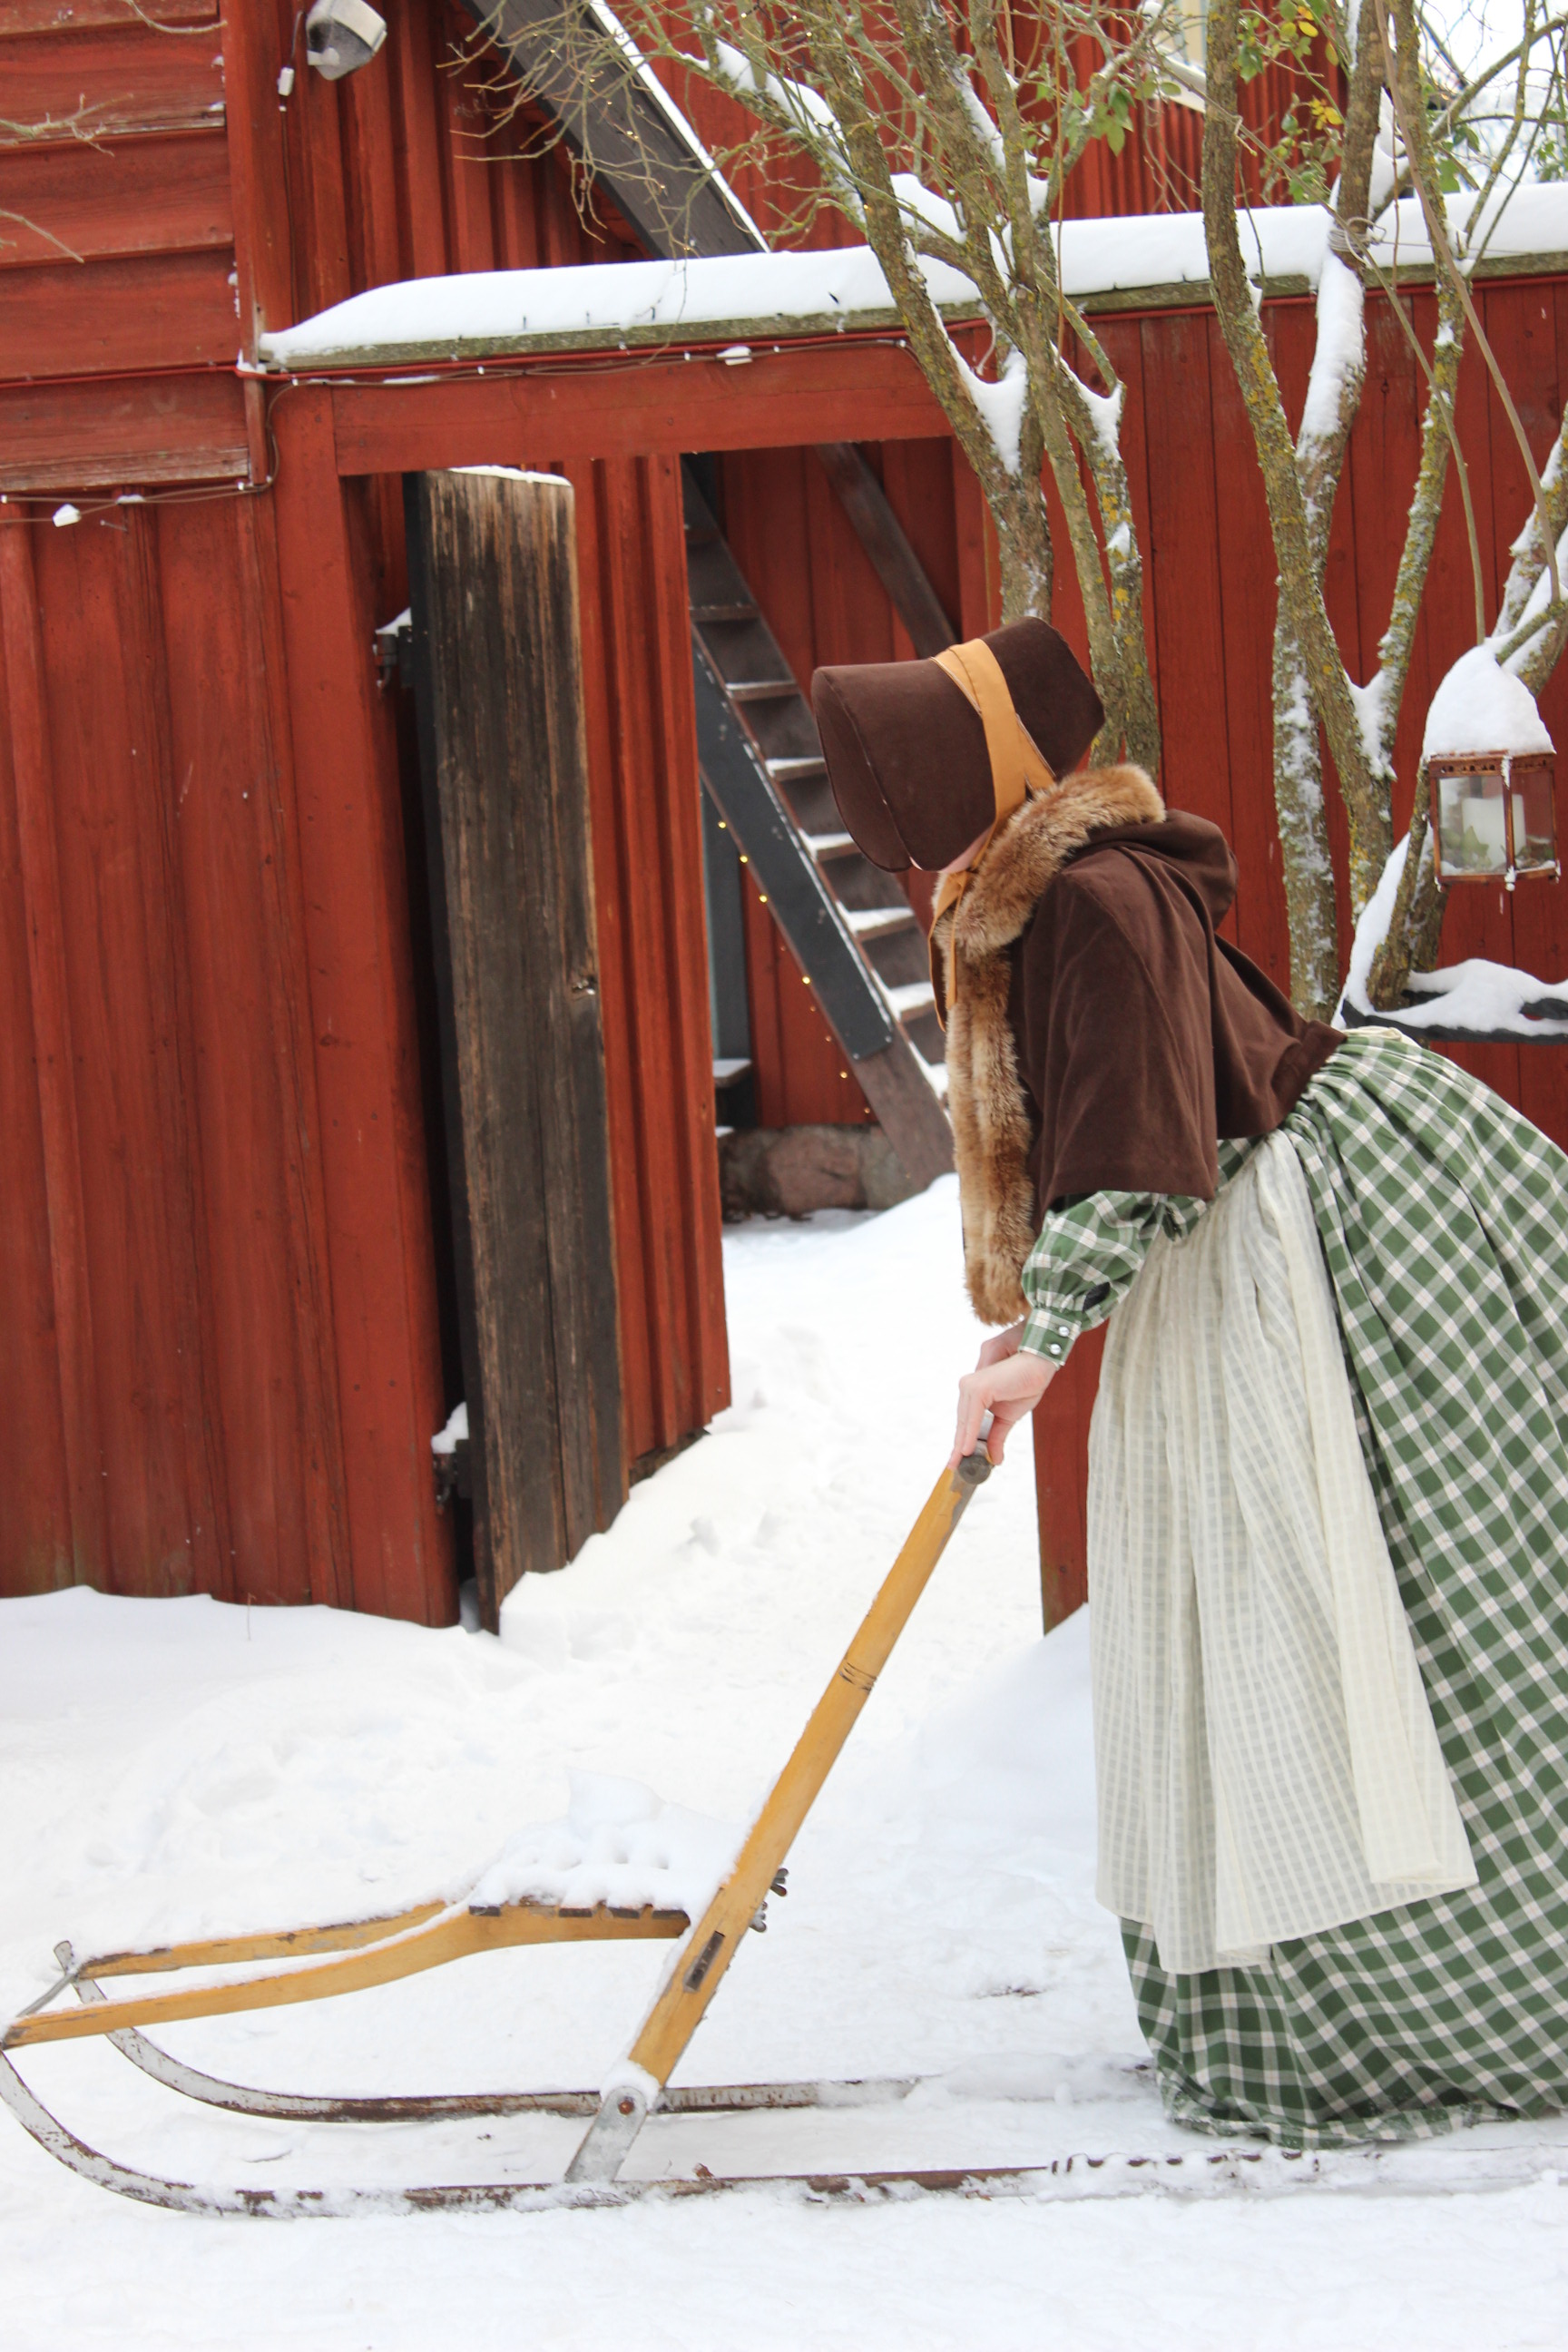
 Brown fake fur hat, matched with bought fake fur muff and fox stole, worn with my 1900s walking outfit.
 A 1660s (or any period really) fake fur stole/shawl.
 Chocolate velvet sleeveless spencer, made to go with my yellow regency gown.
 Velvet cape trimmed with fake fur and 1840s velvet bonnet, make for some pretty Dickensien winter picture..
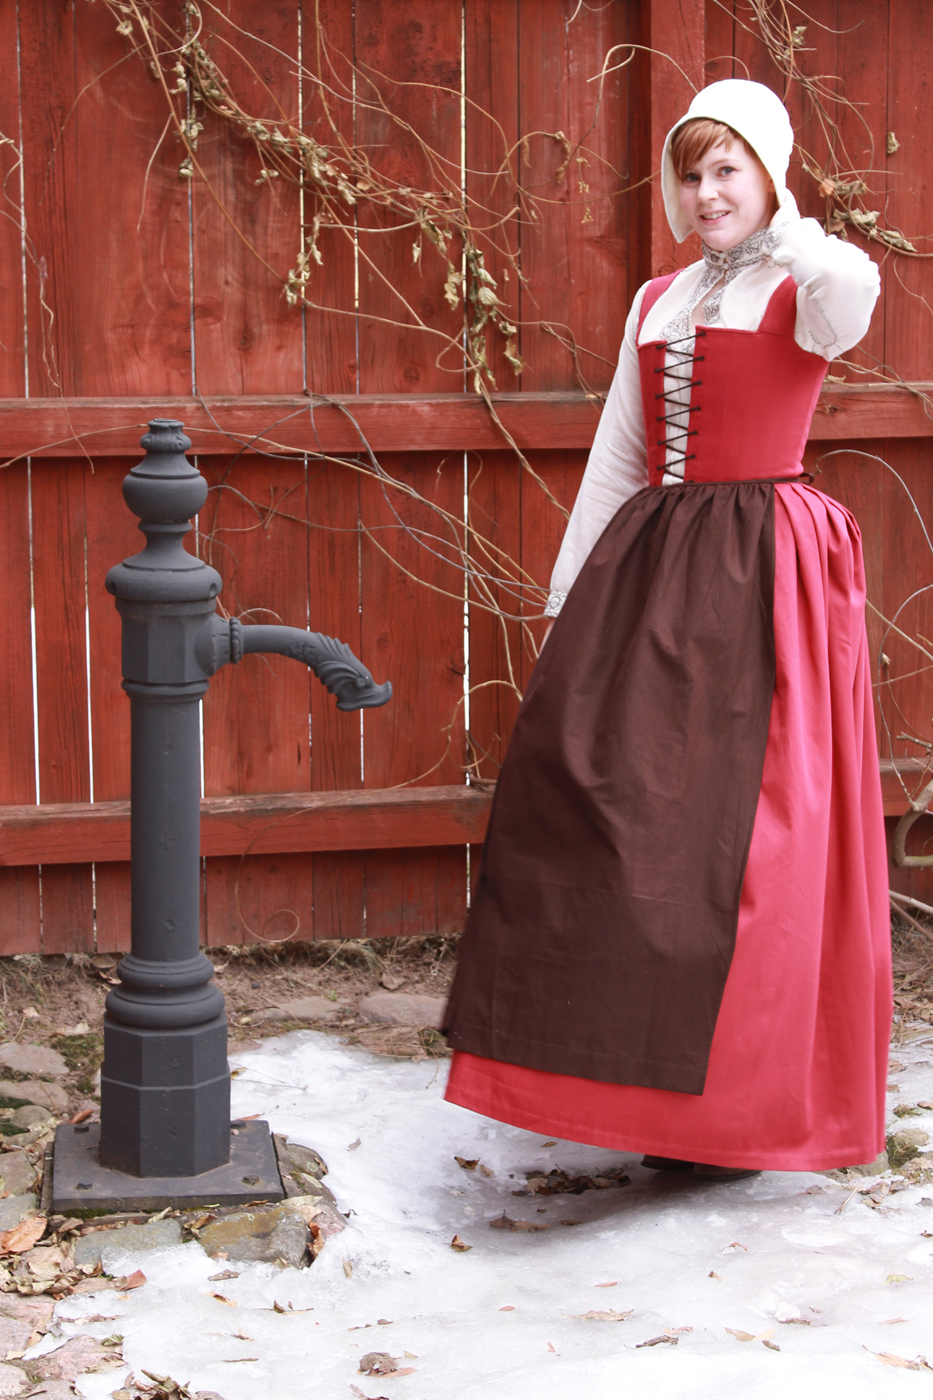 Sometimes the simplest of items make a huge different, This 1550s outfit wouldn’t be complete without the brown apron.
What do you think of the color brown?
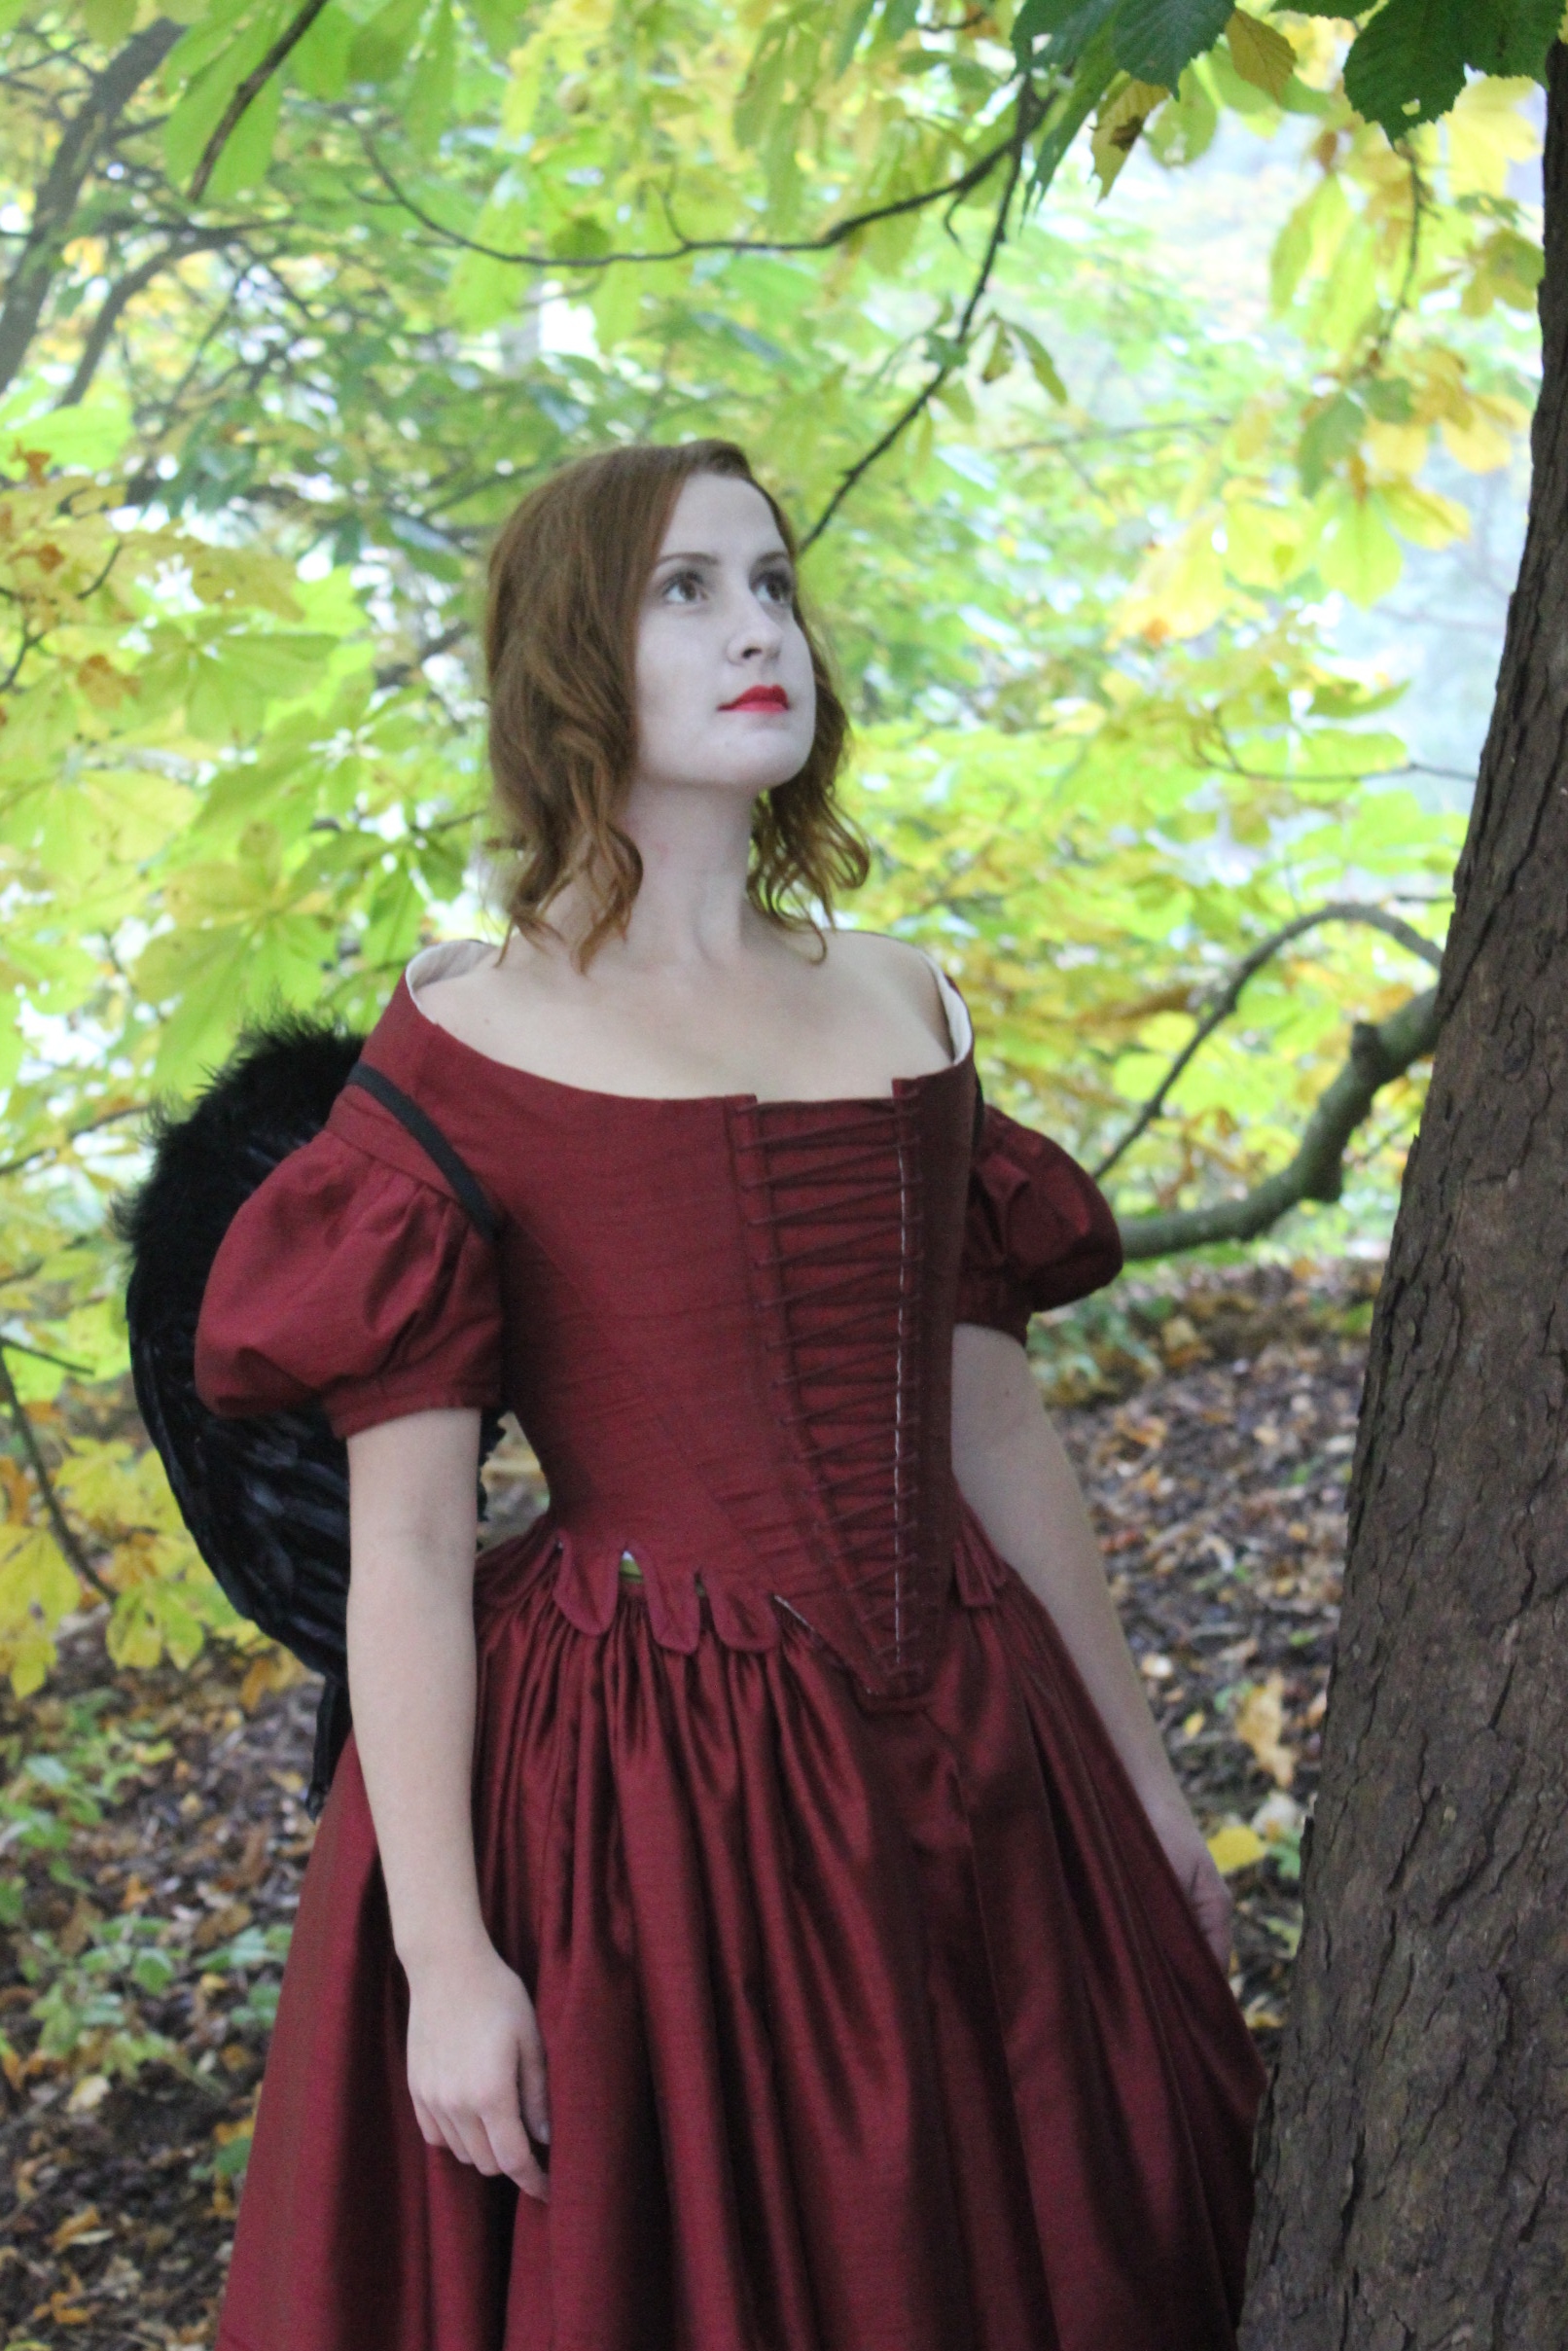
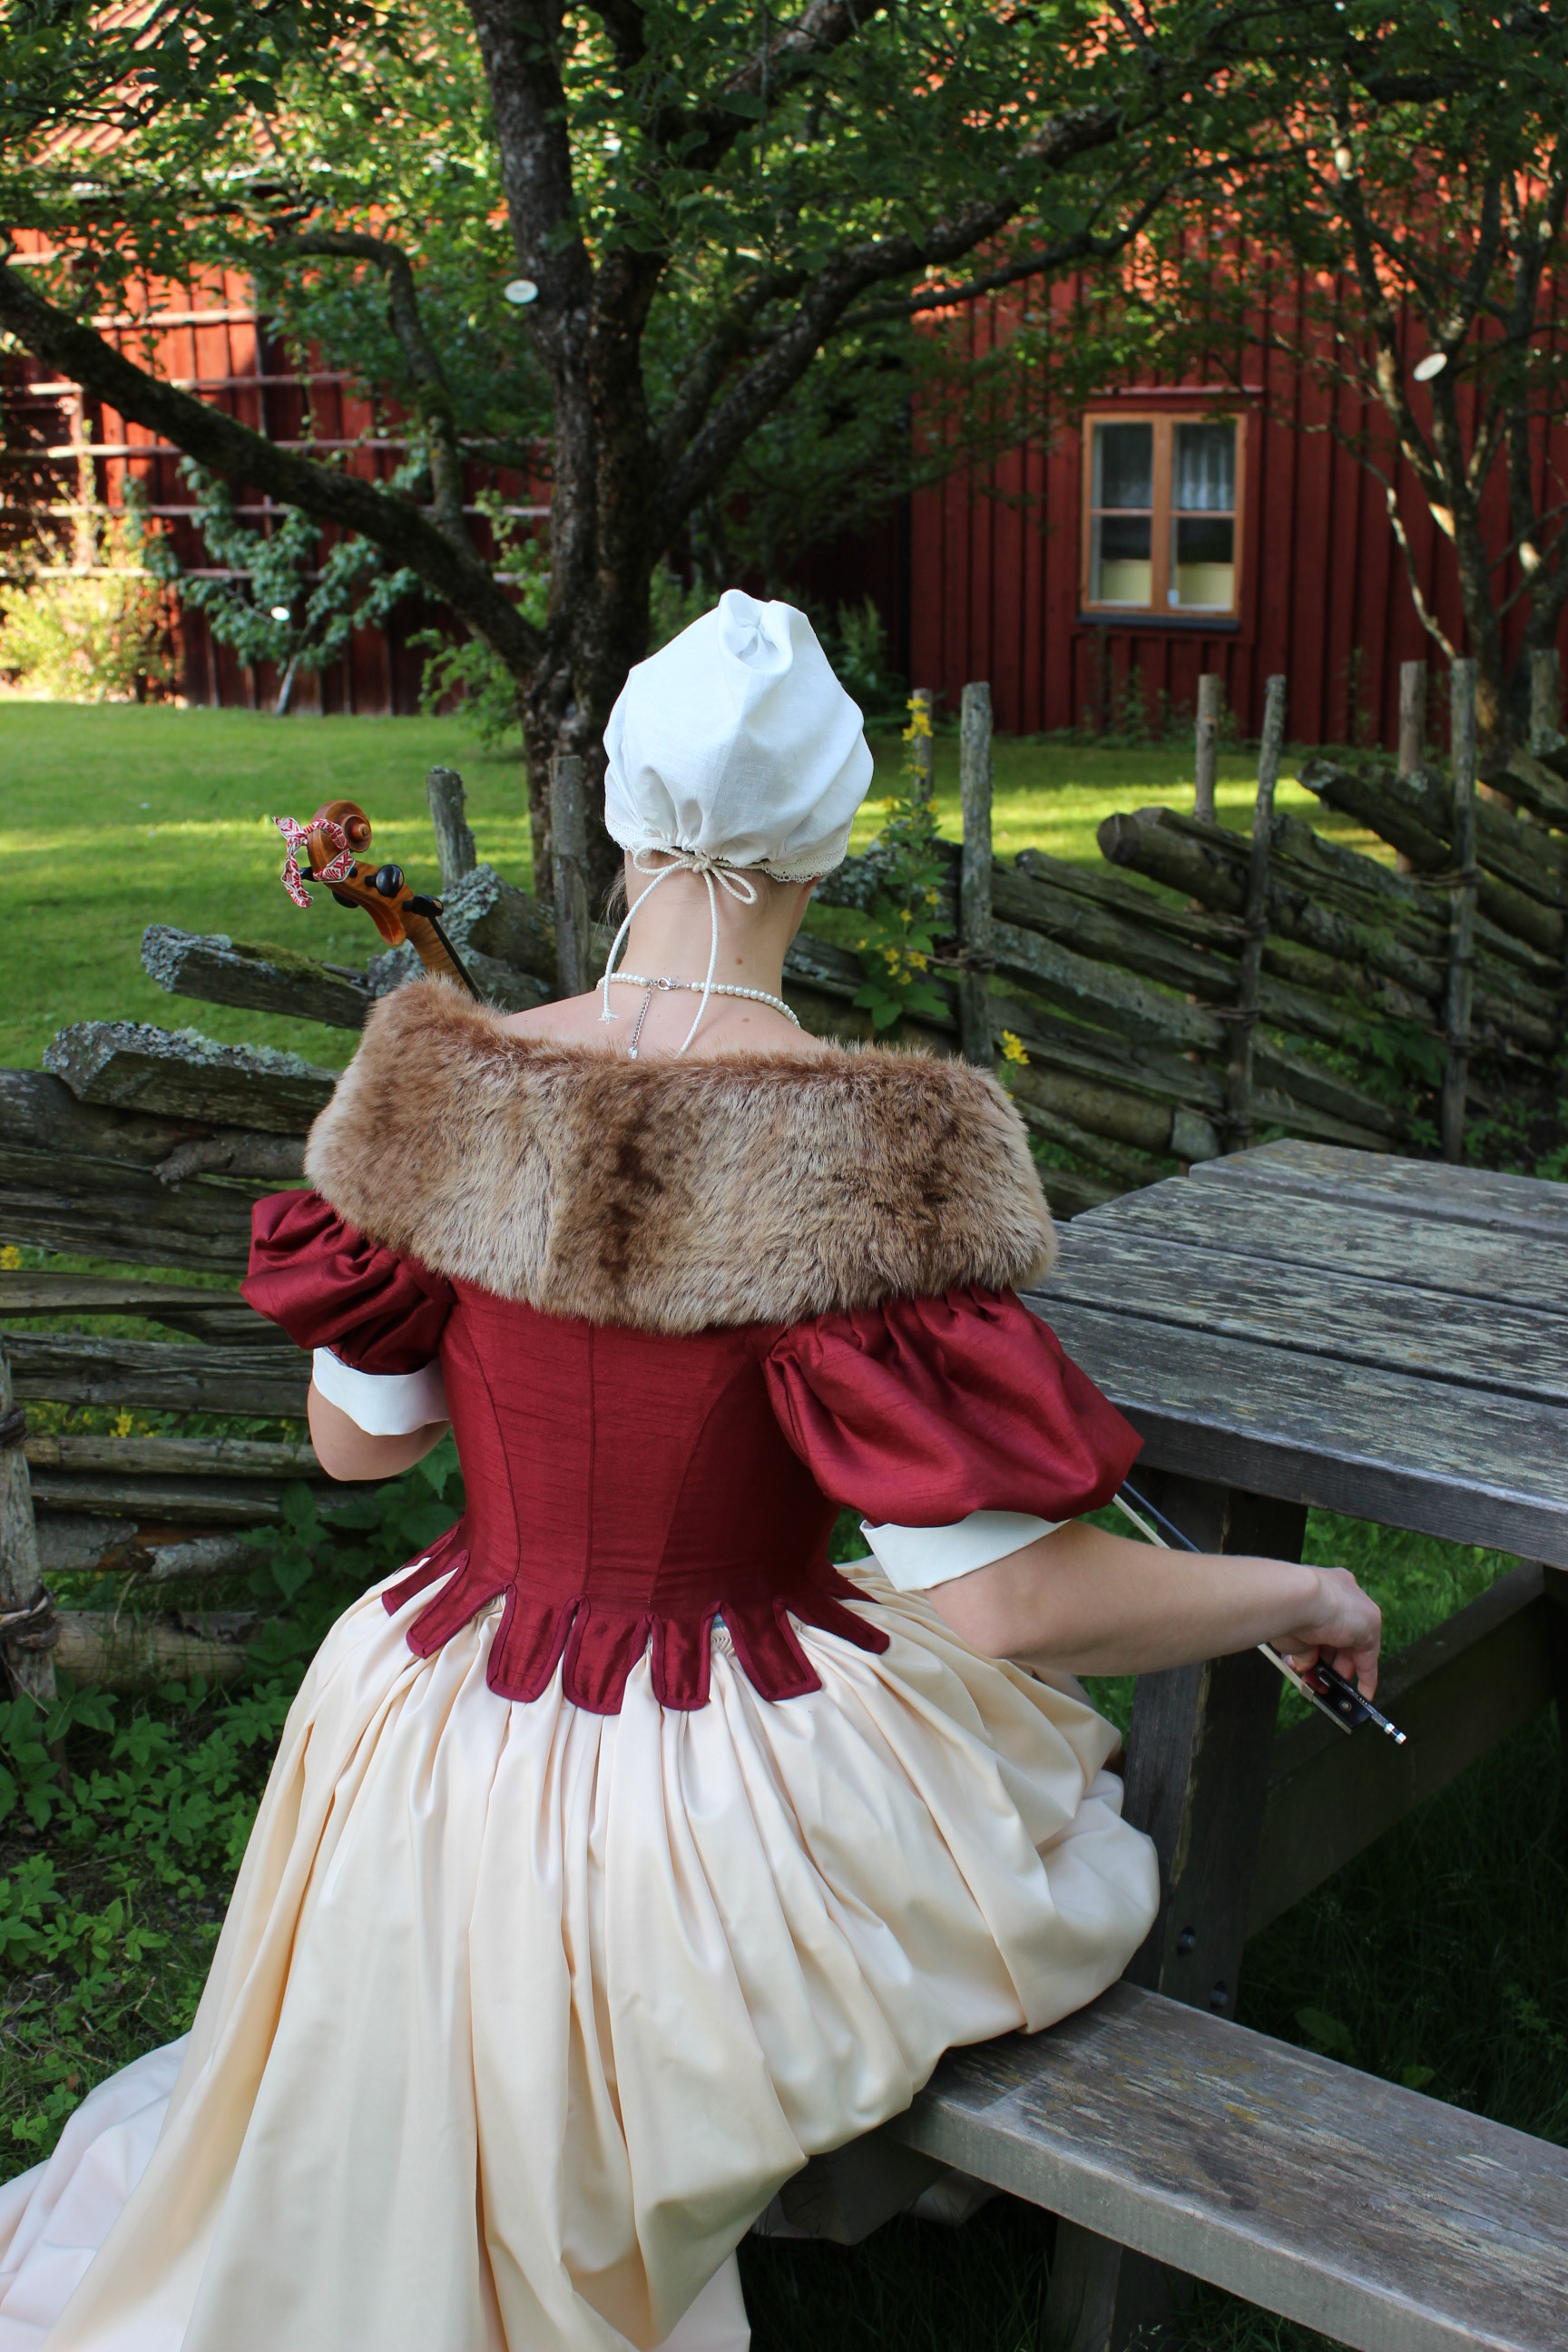
For the photoshoot I got some help from my friend, modelling my new 17th century outfit.
She wore the 17th century bodice, skirt, coif and fur over my quilted petticoat, accessoriced with a string of pearls and a Violine.
Here are the result:
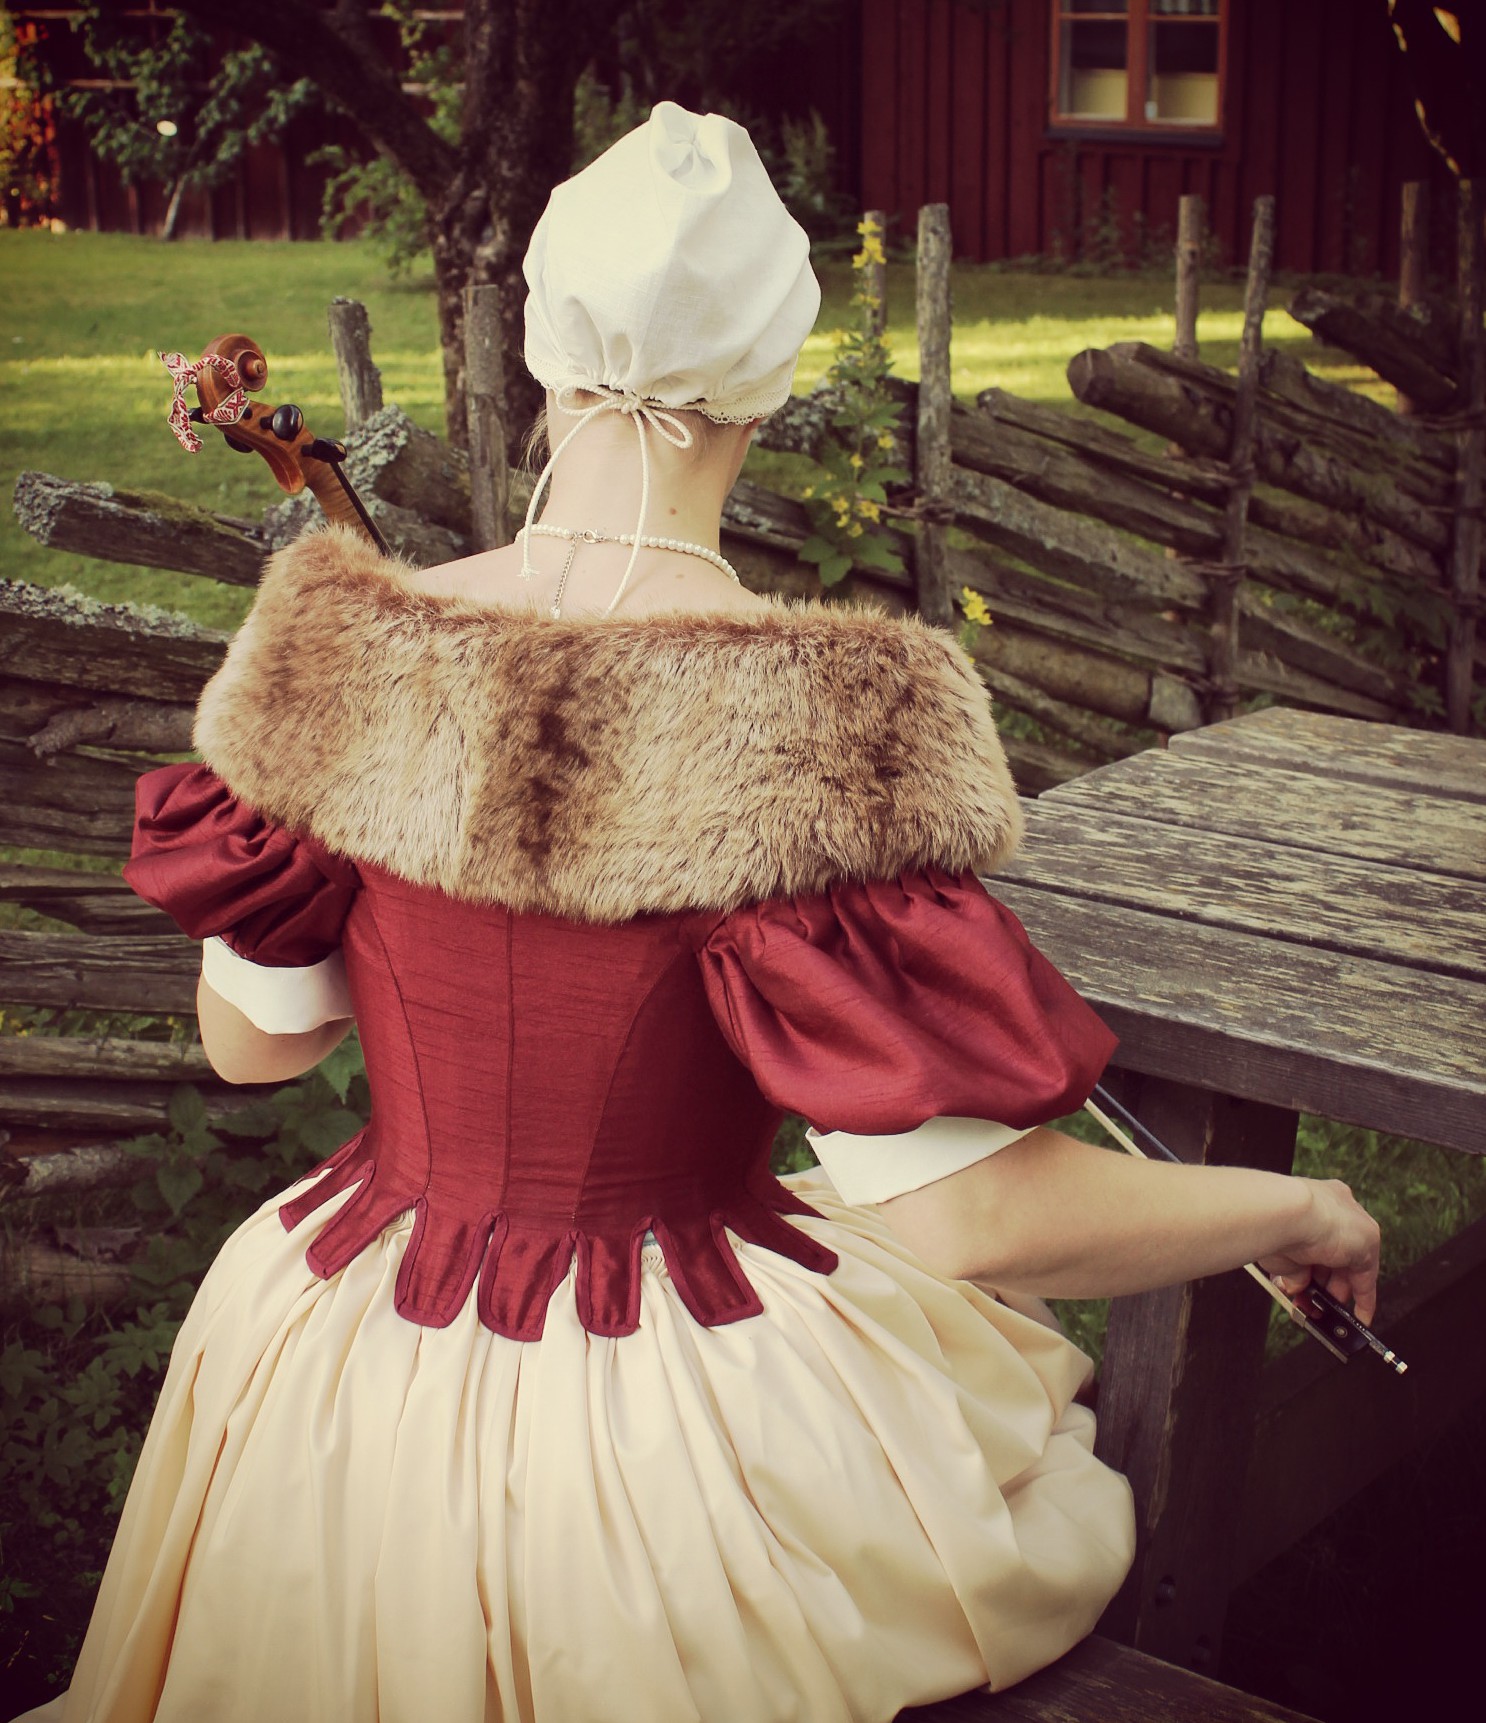

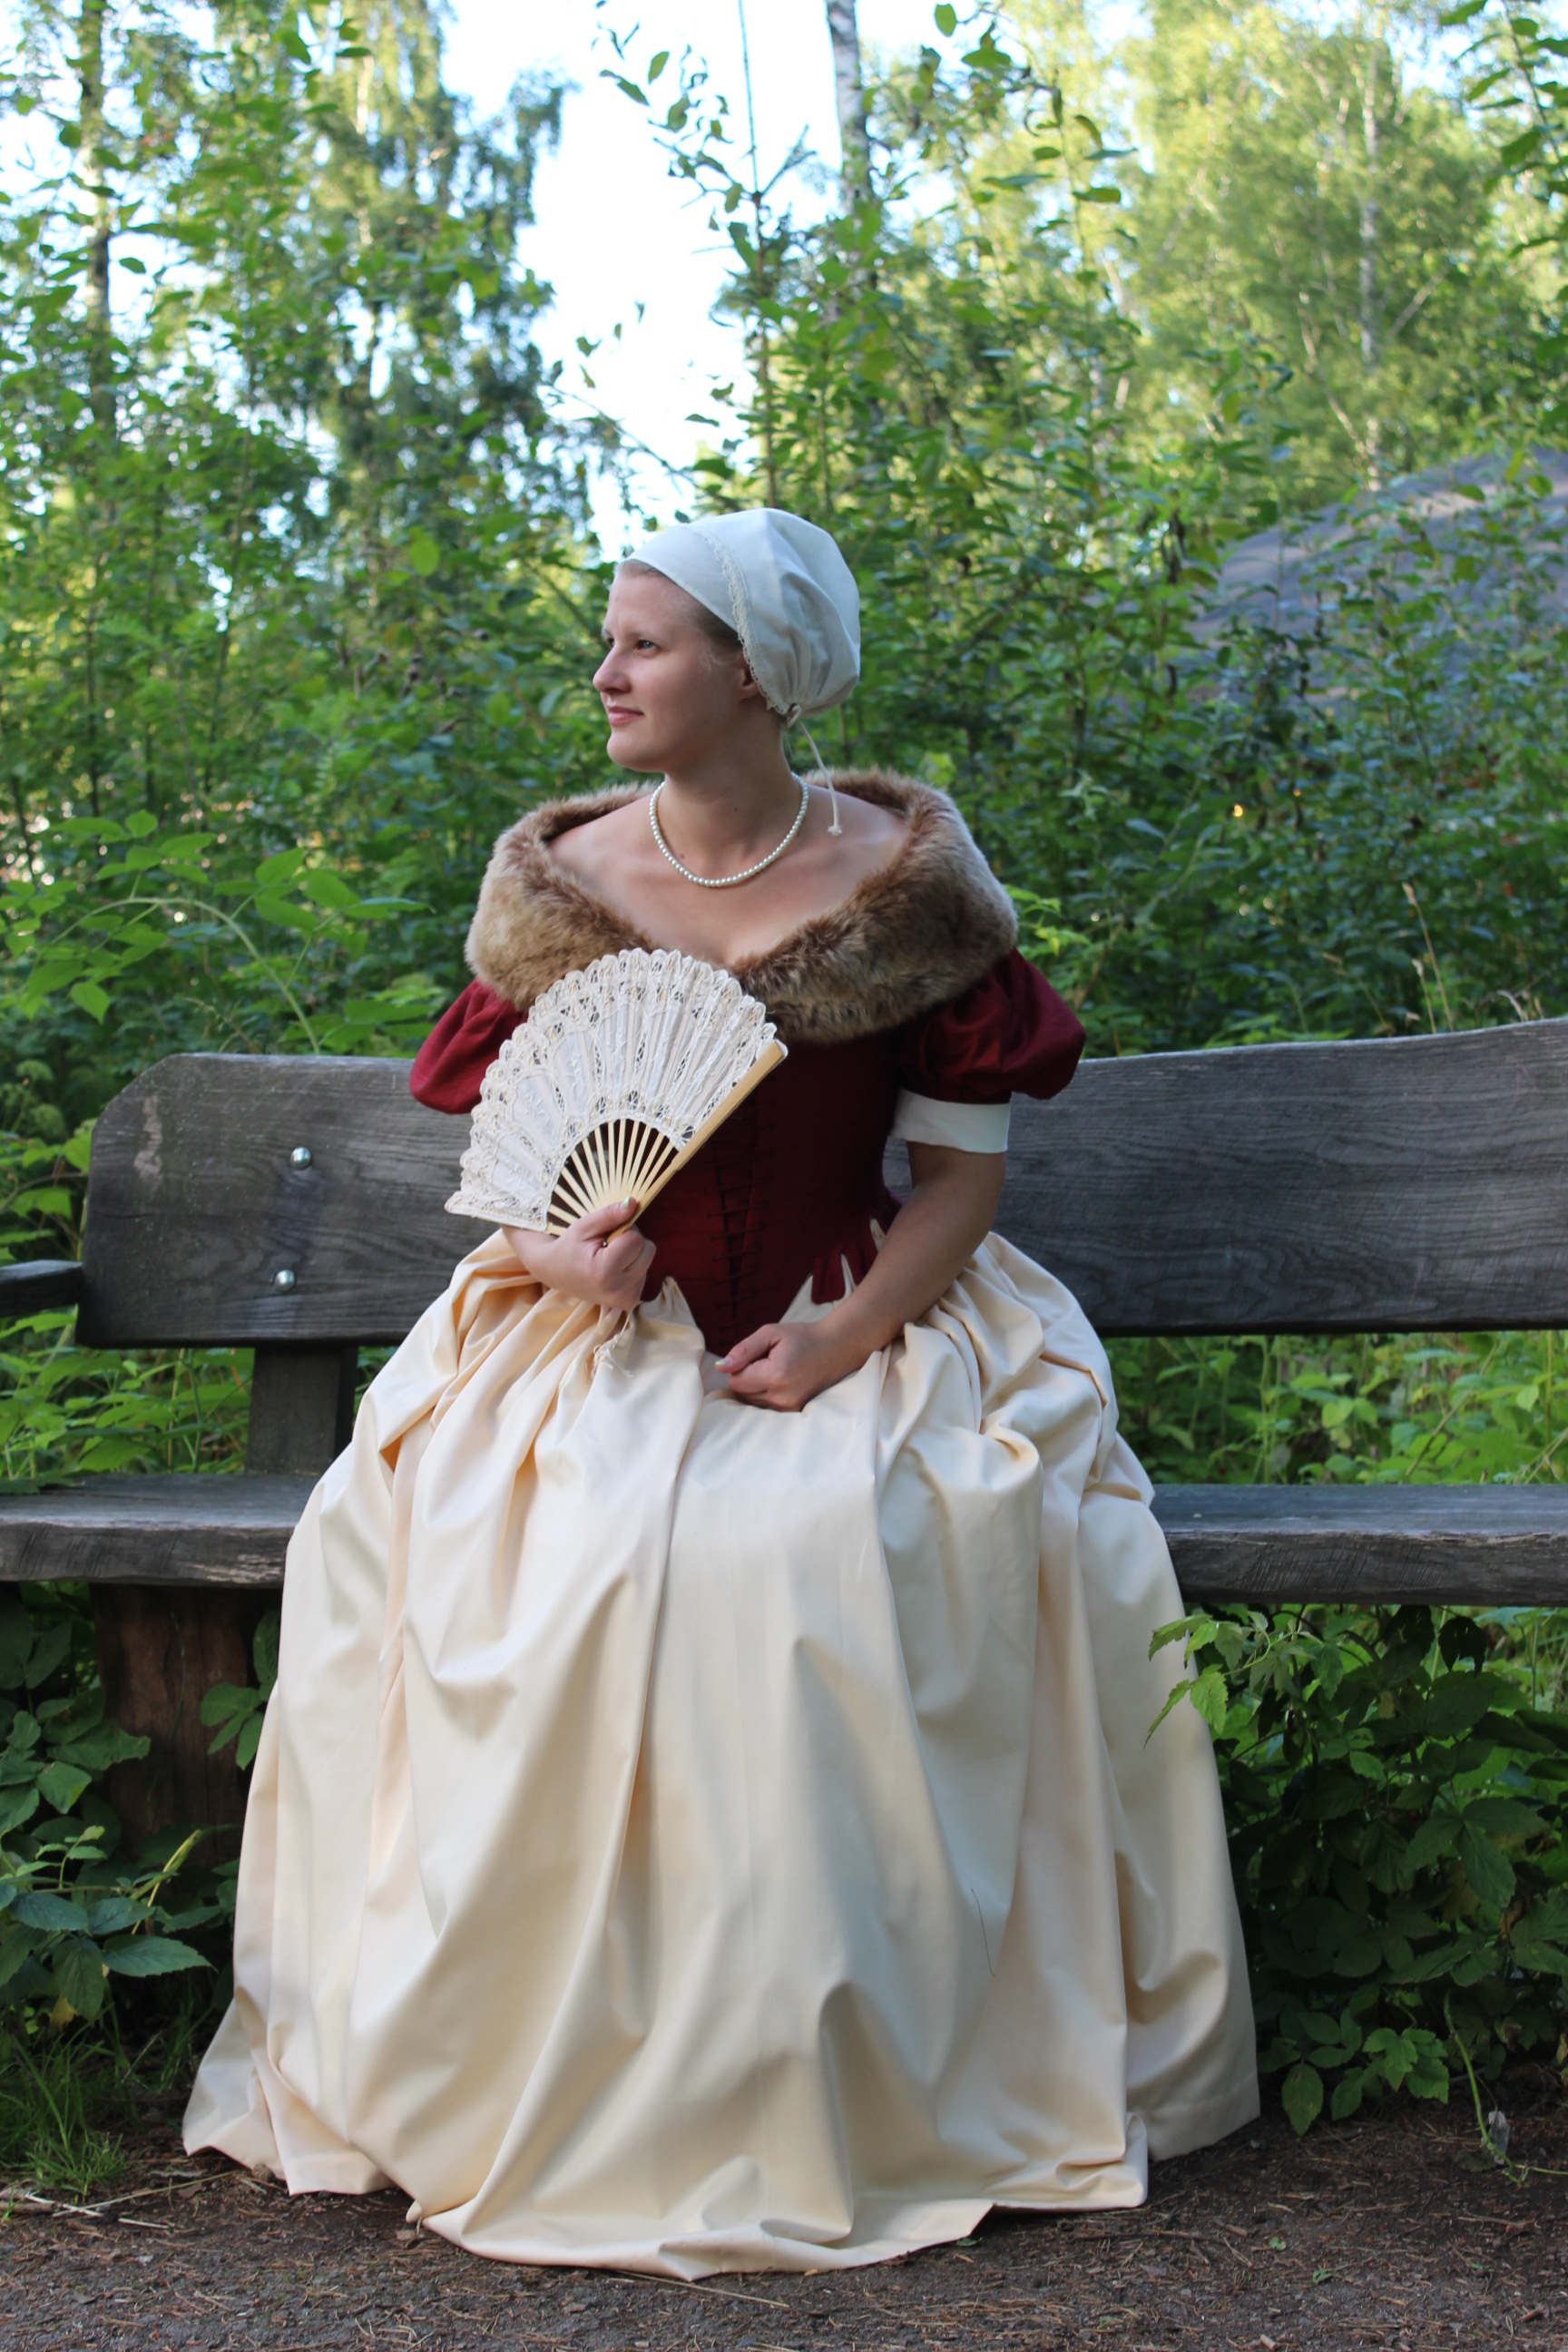
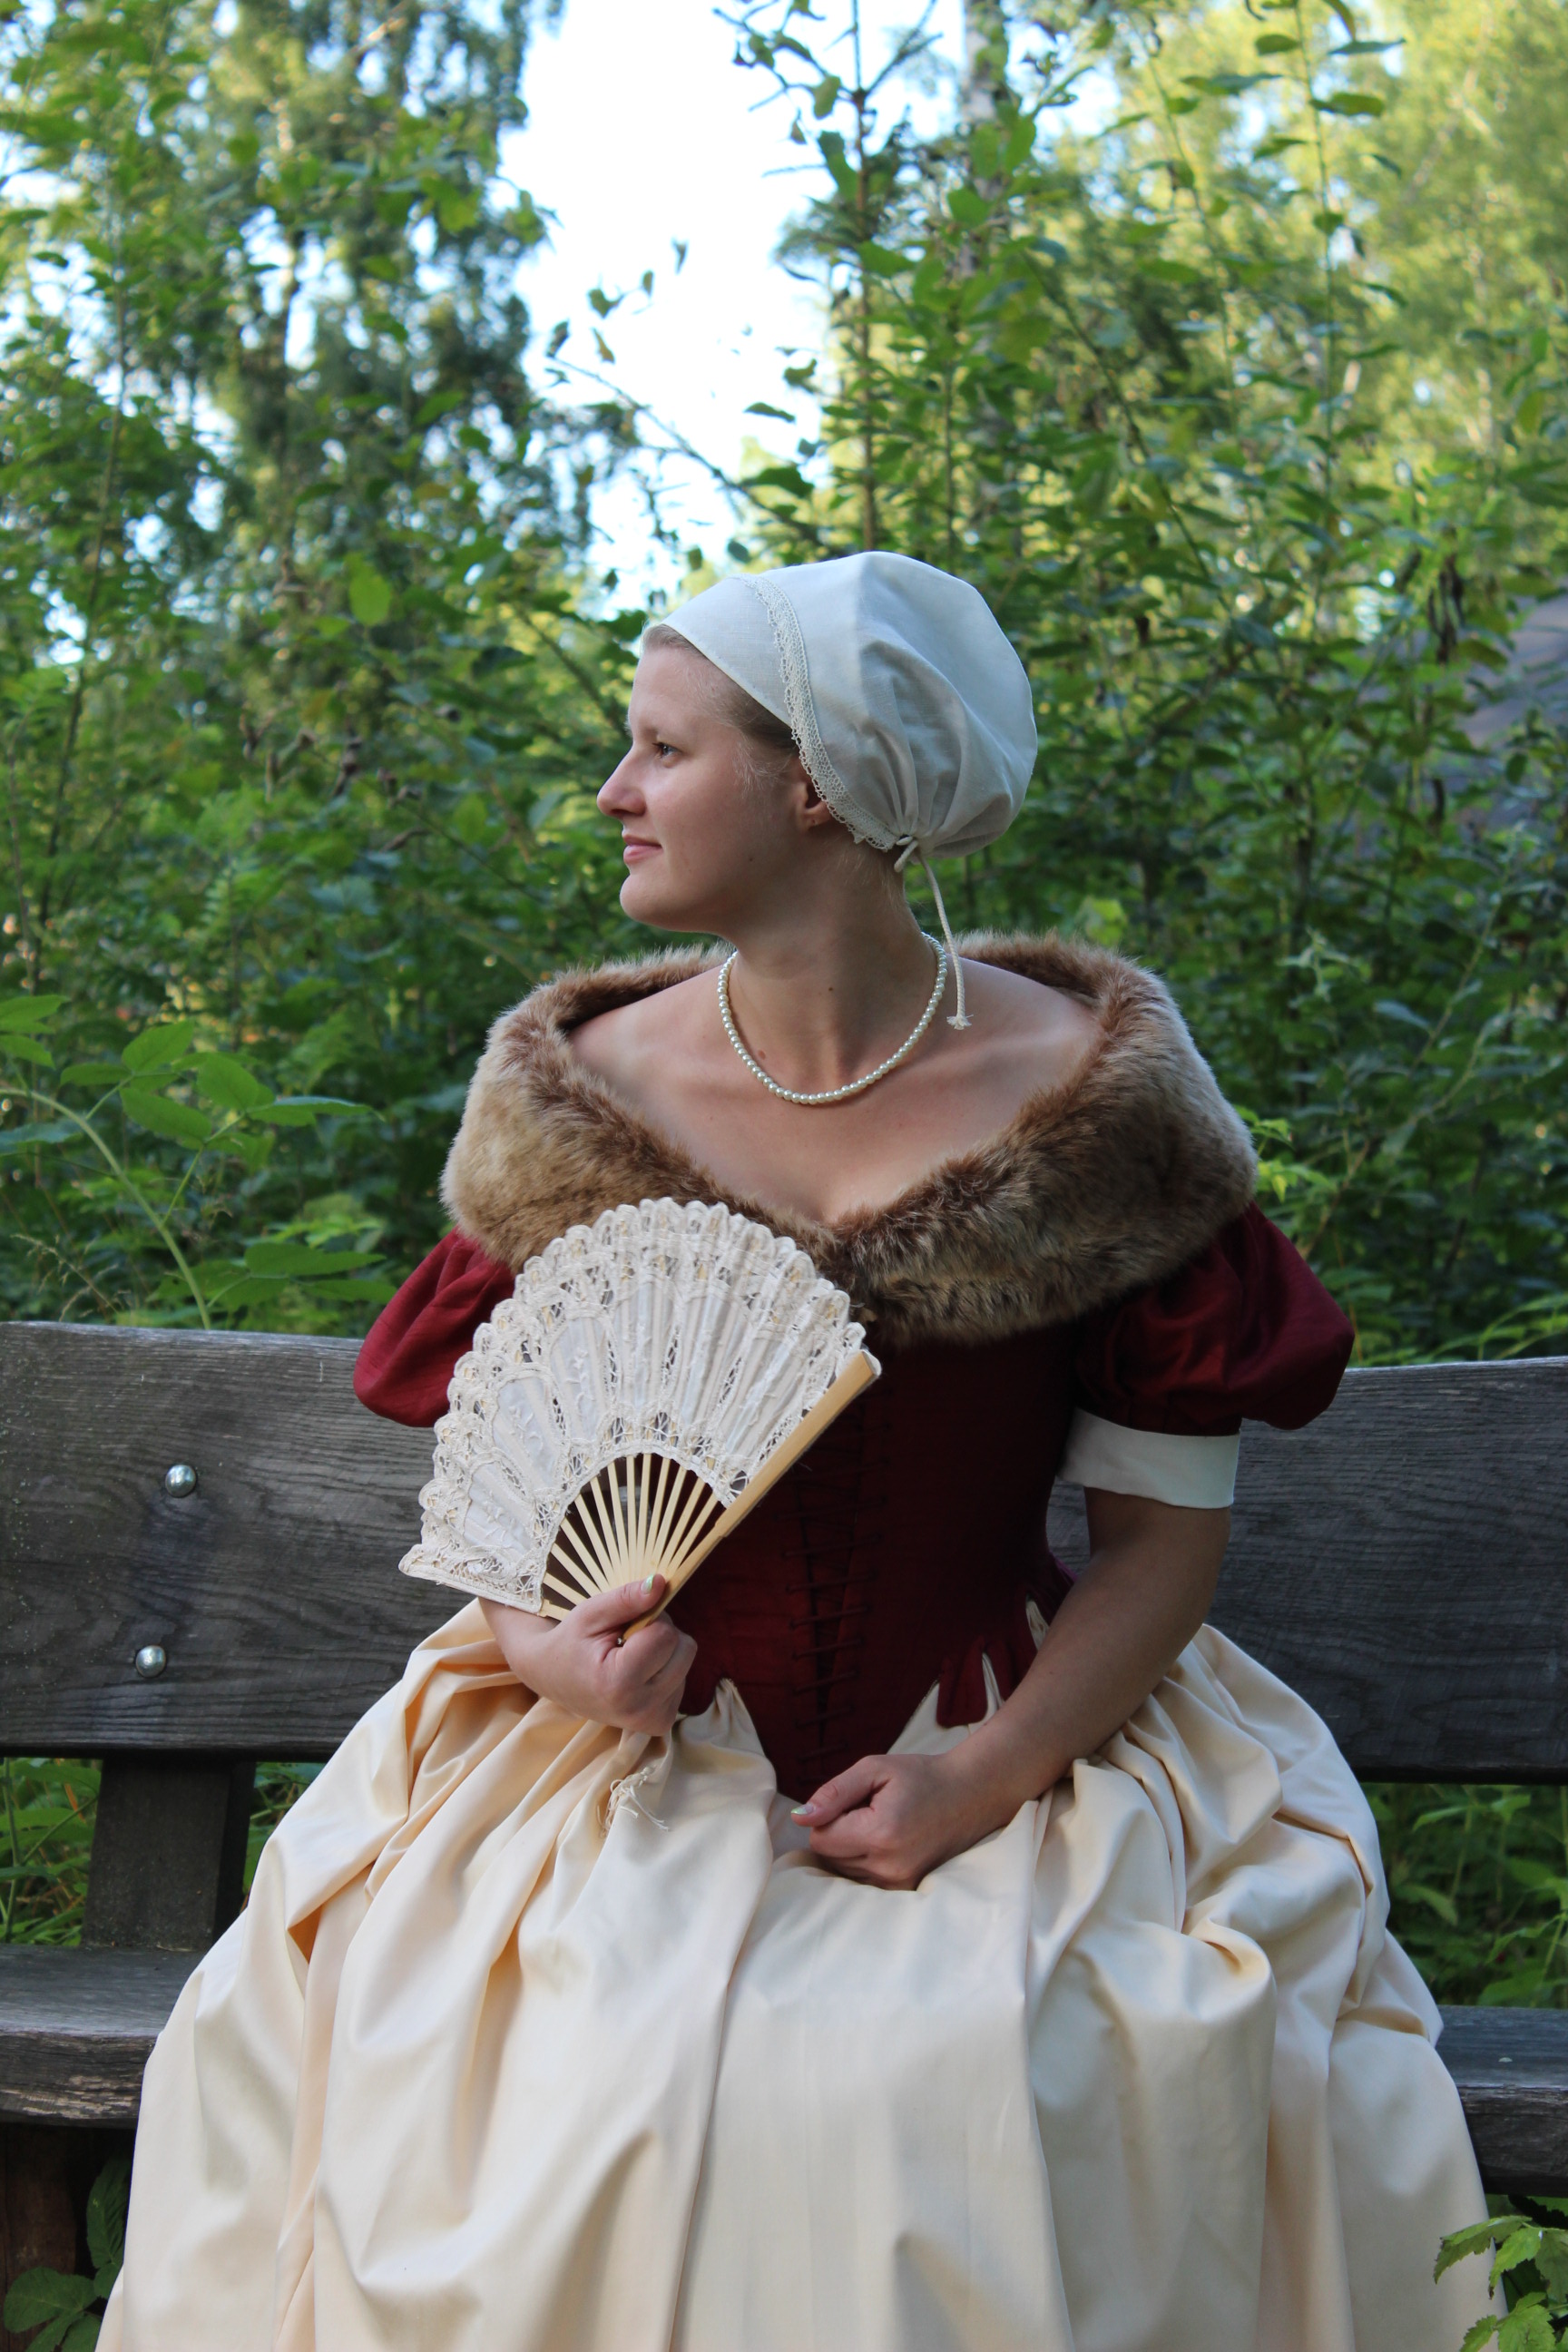
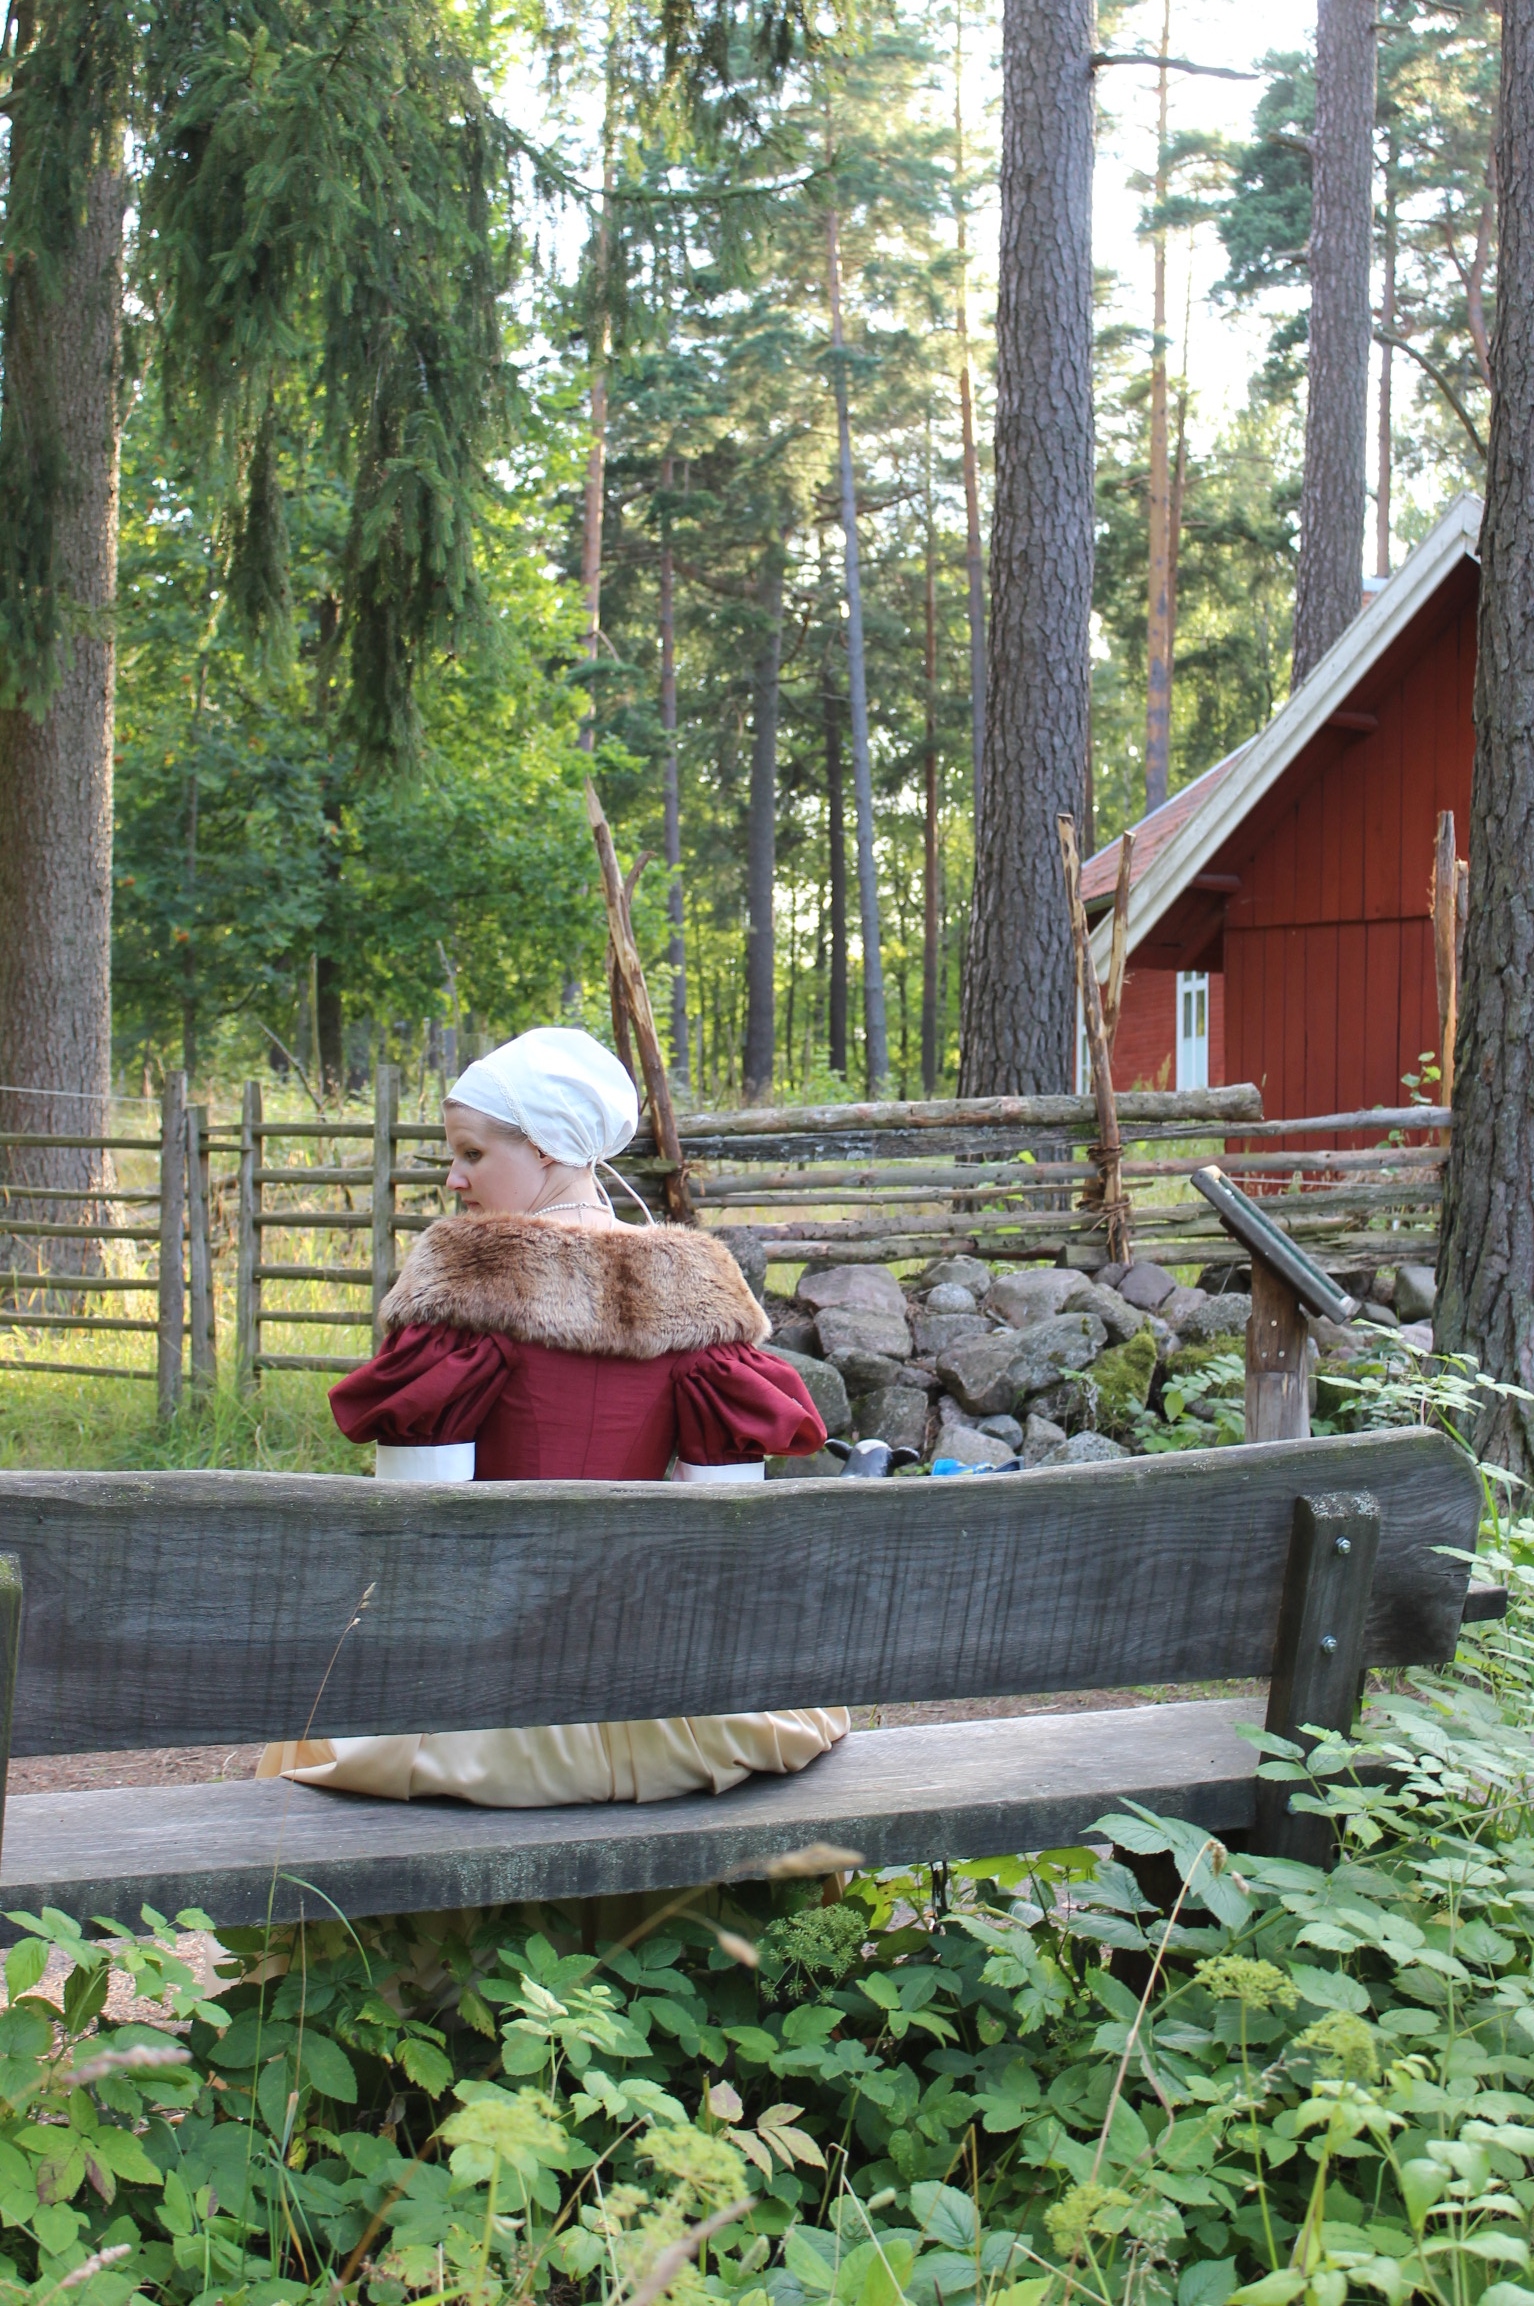
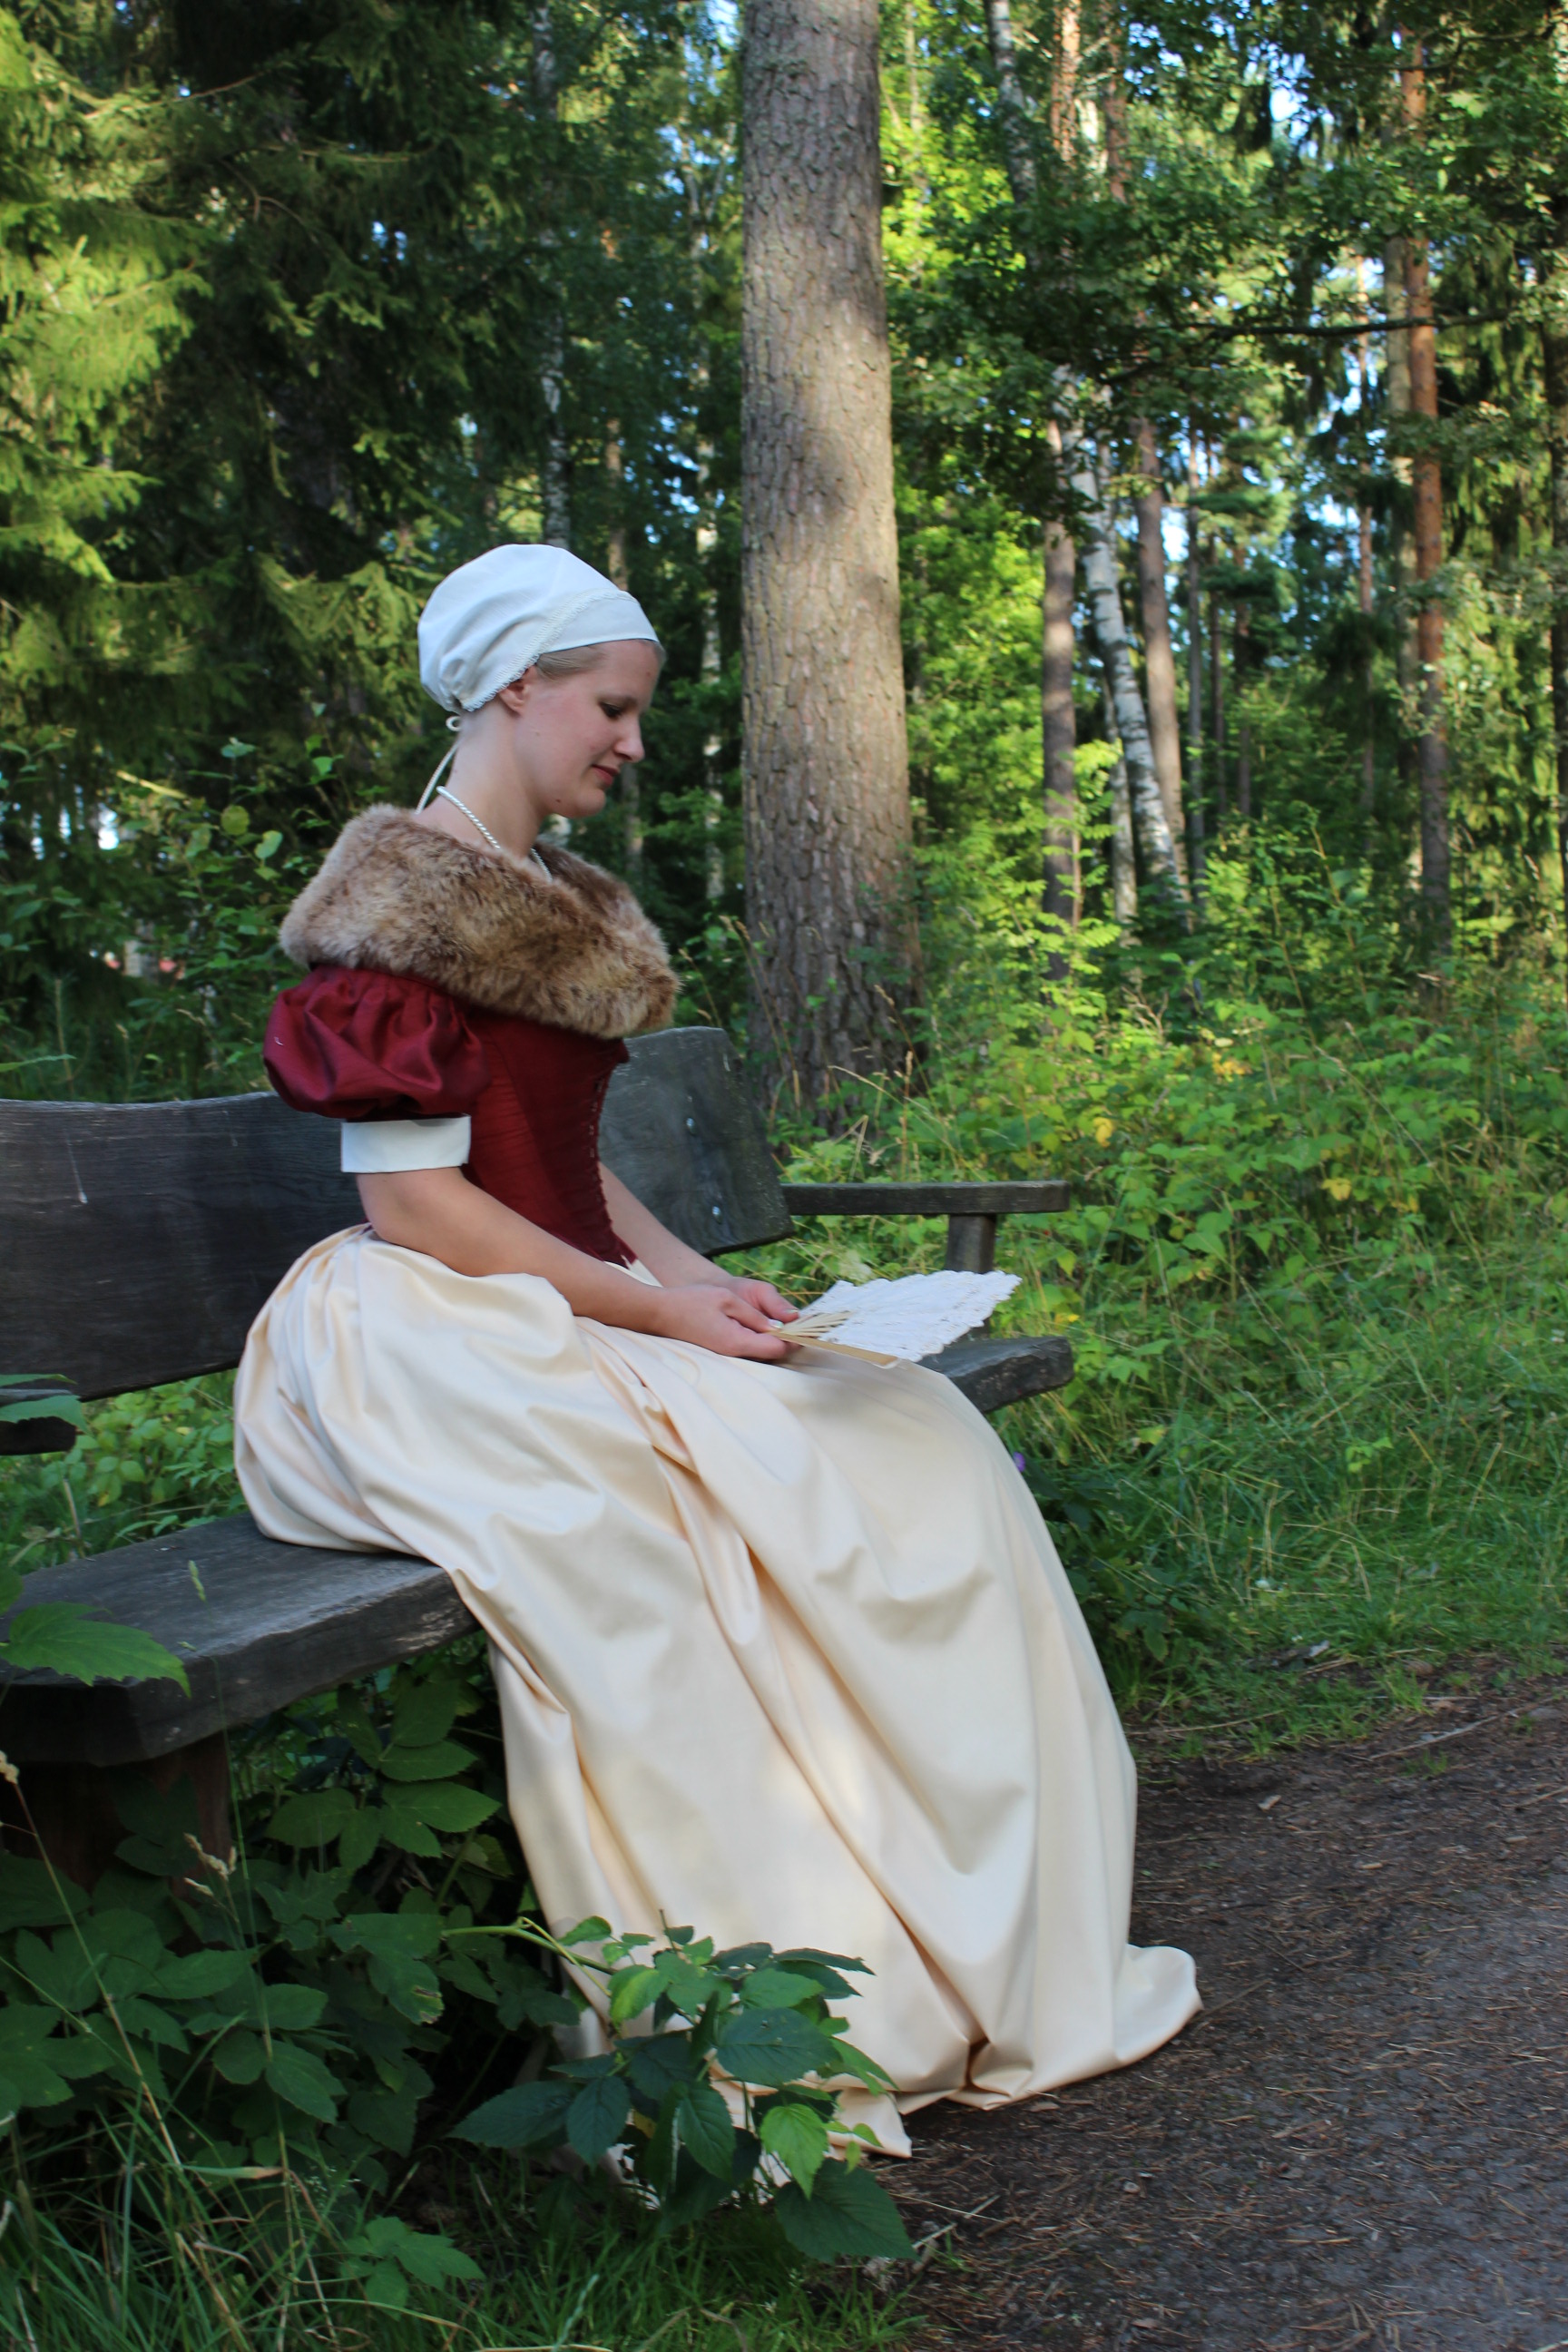
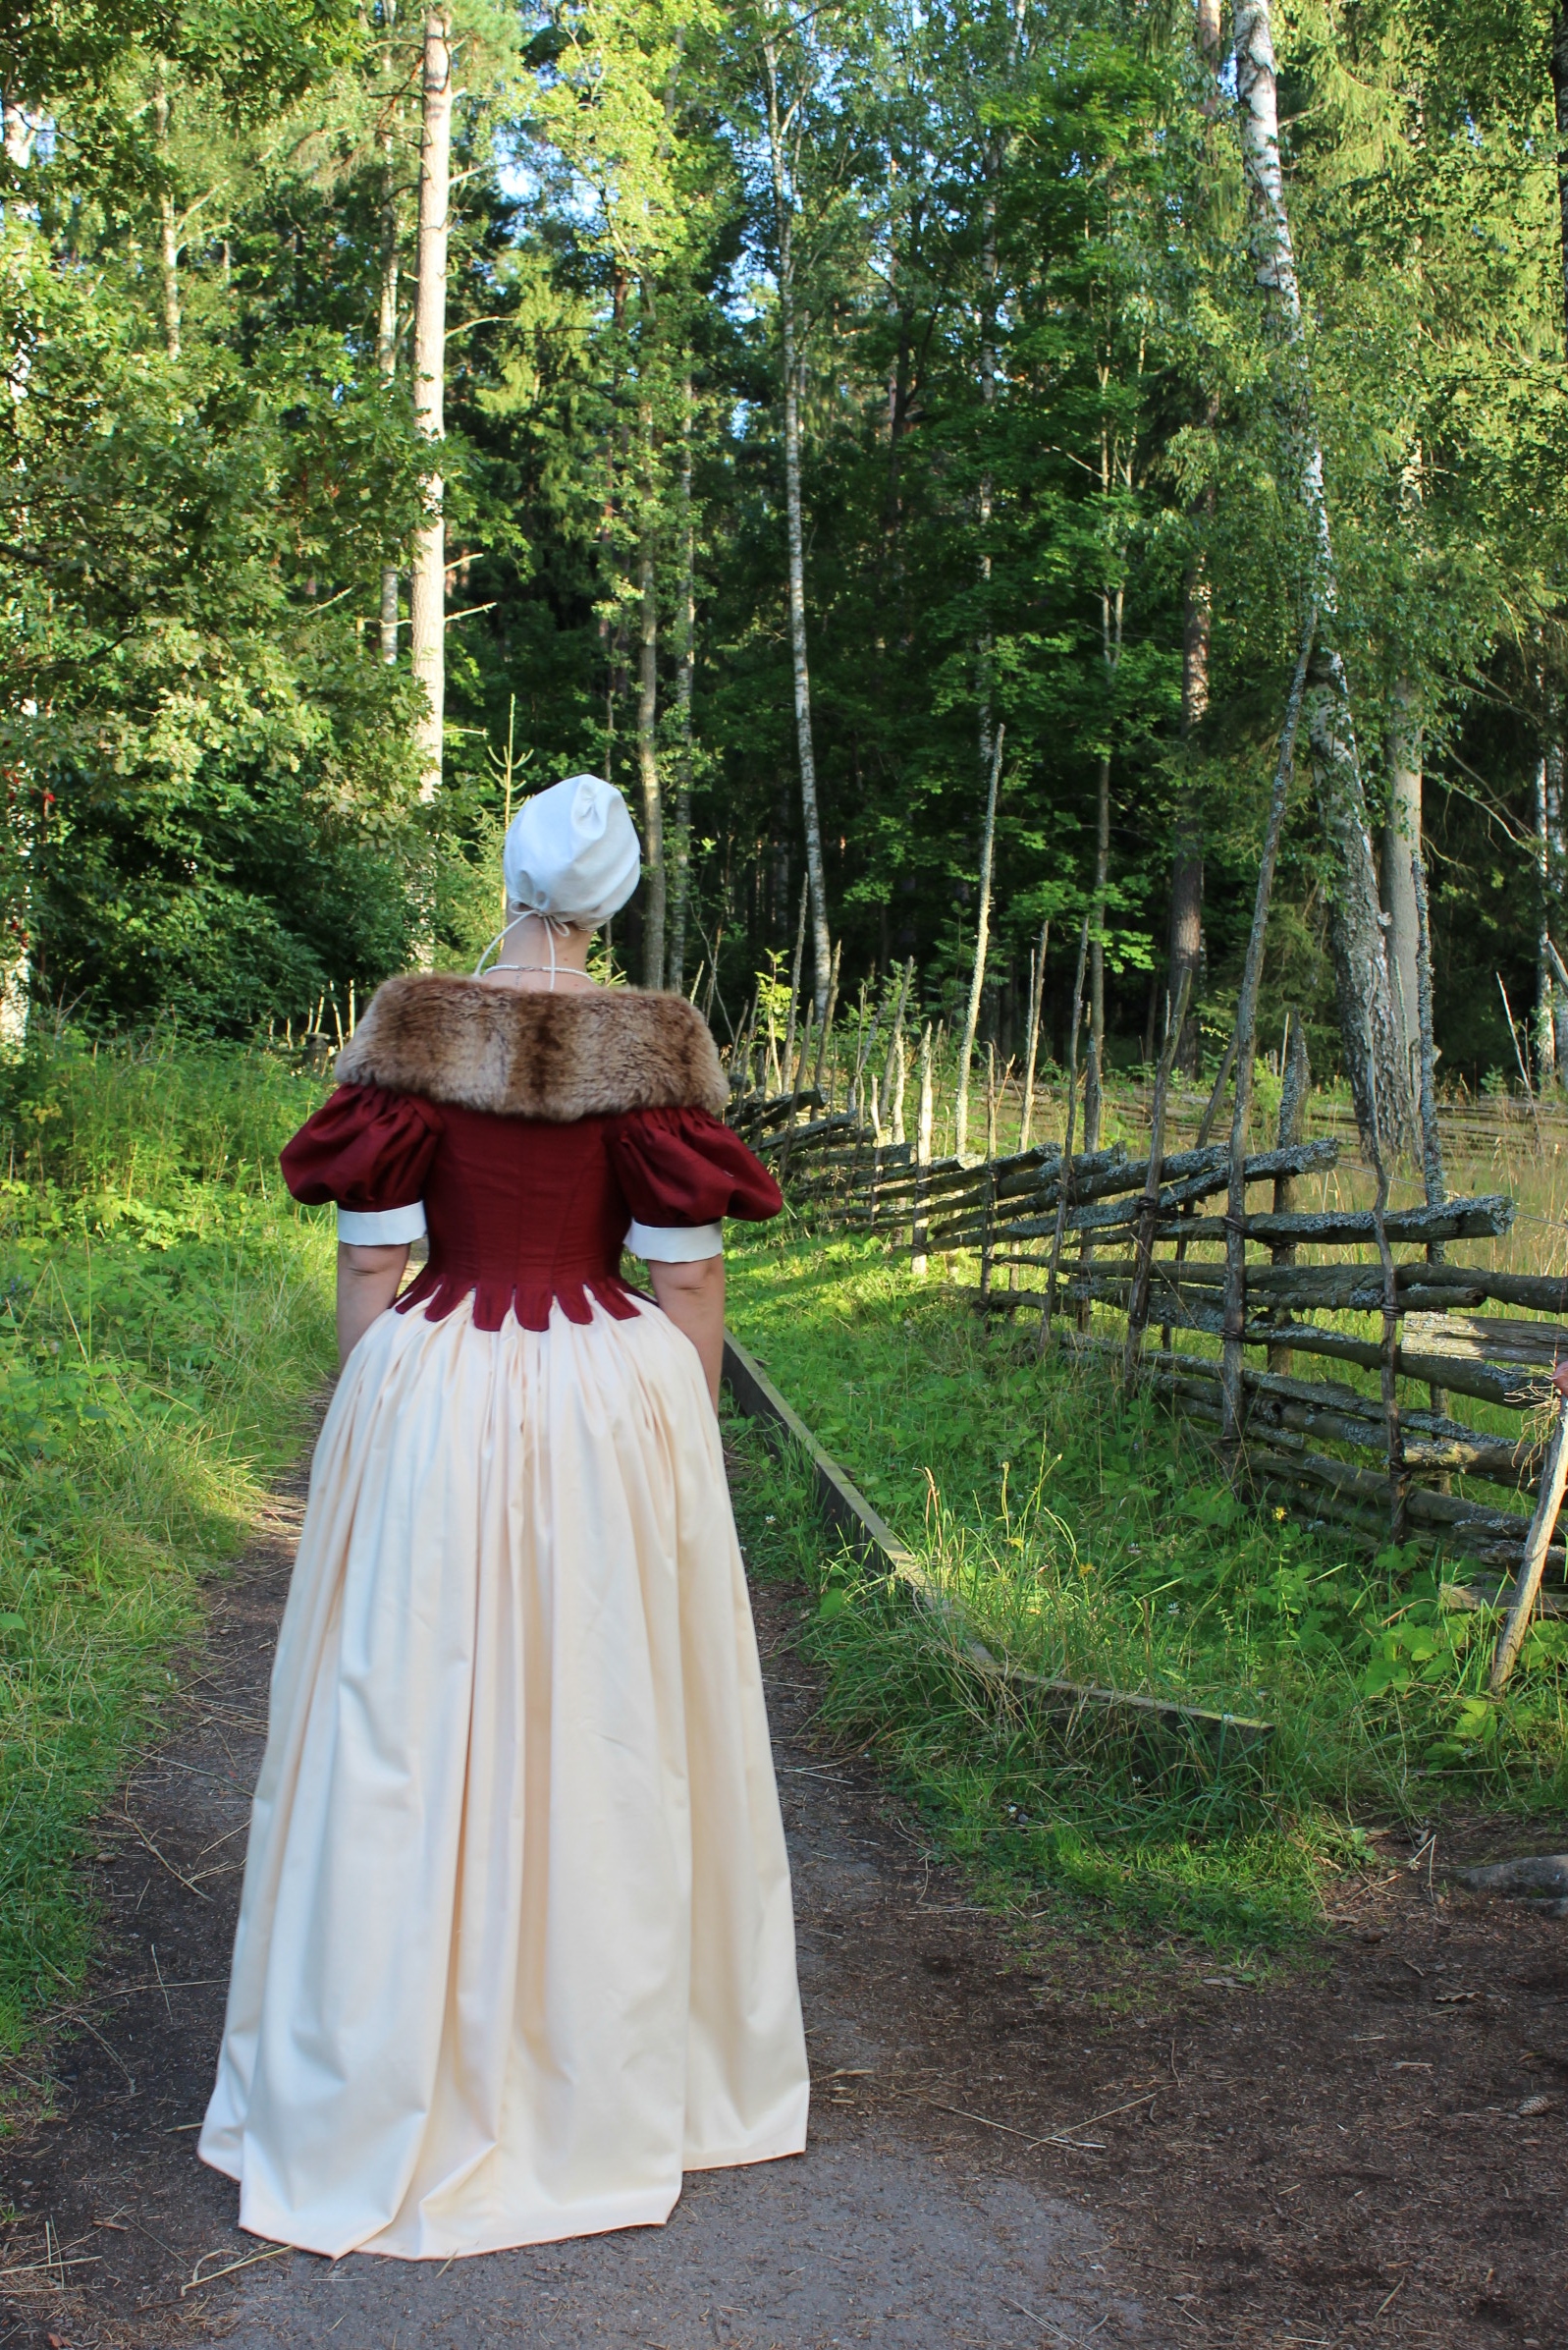
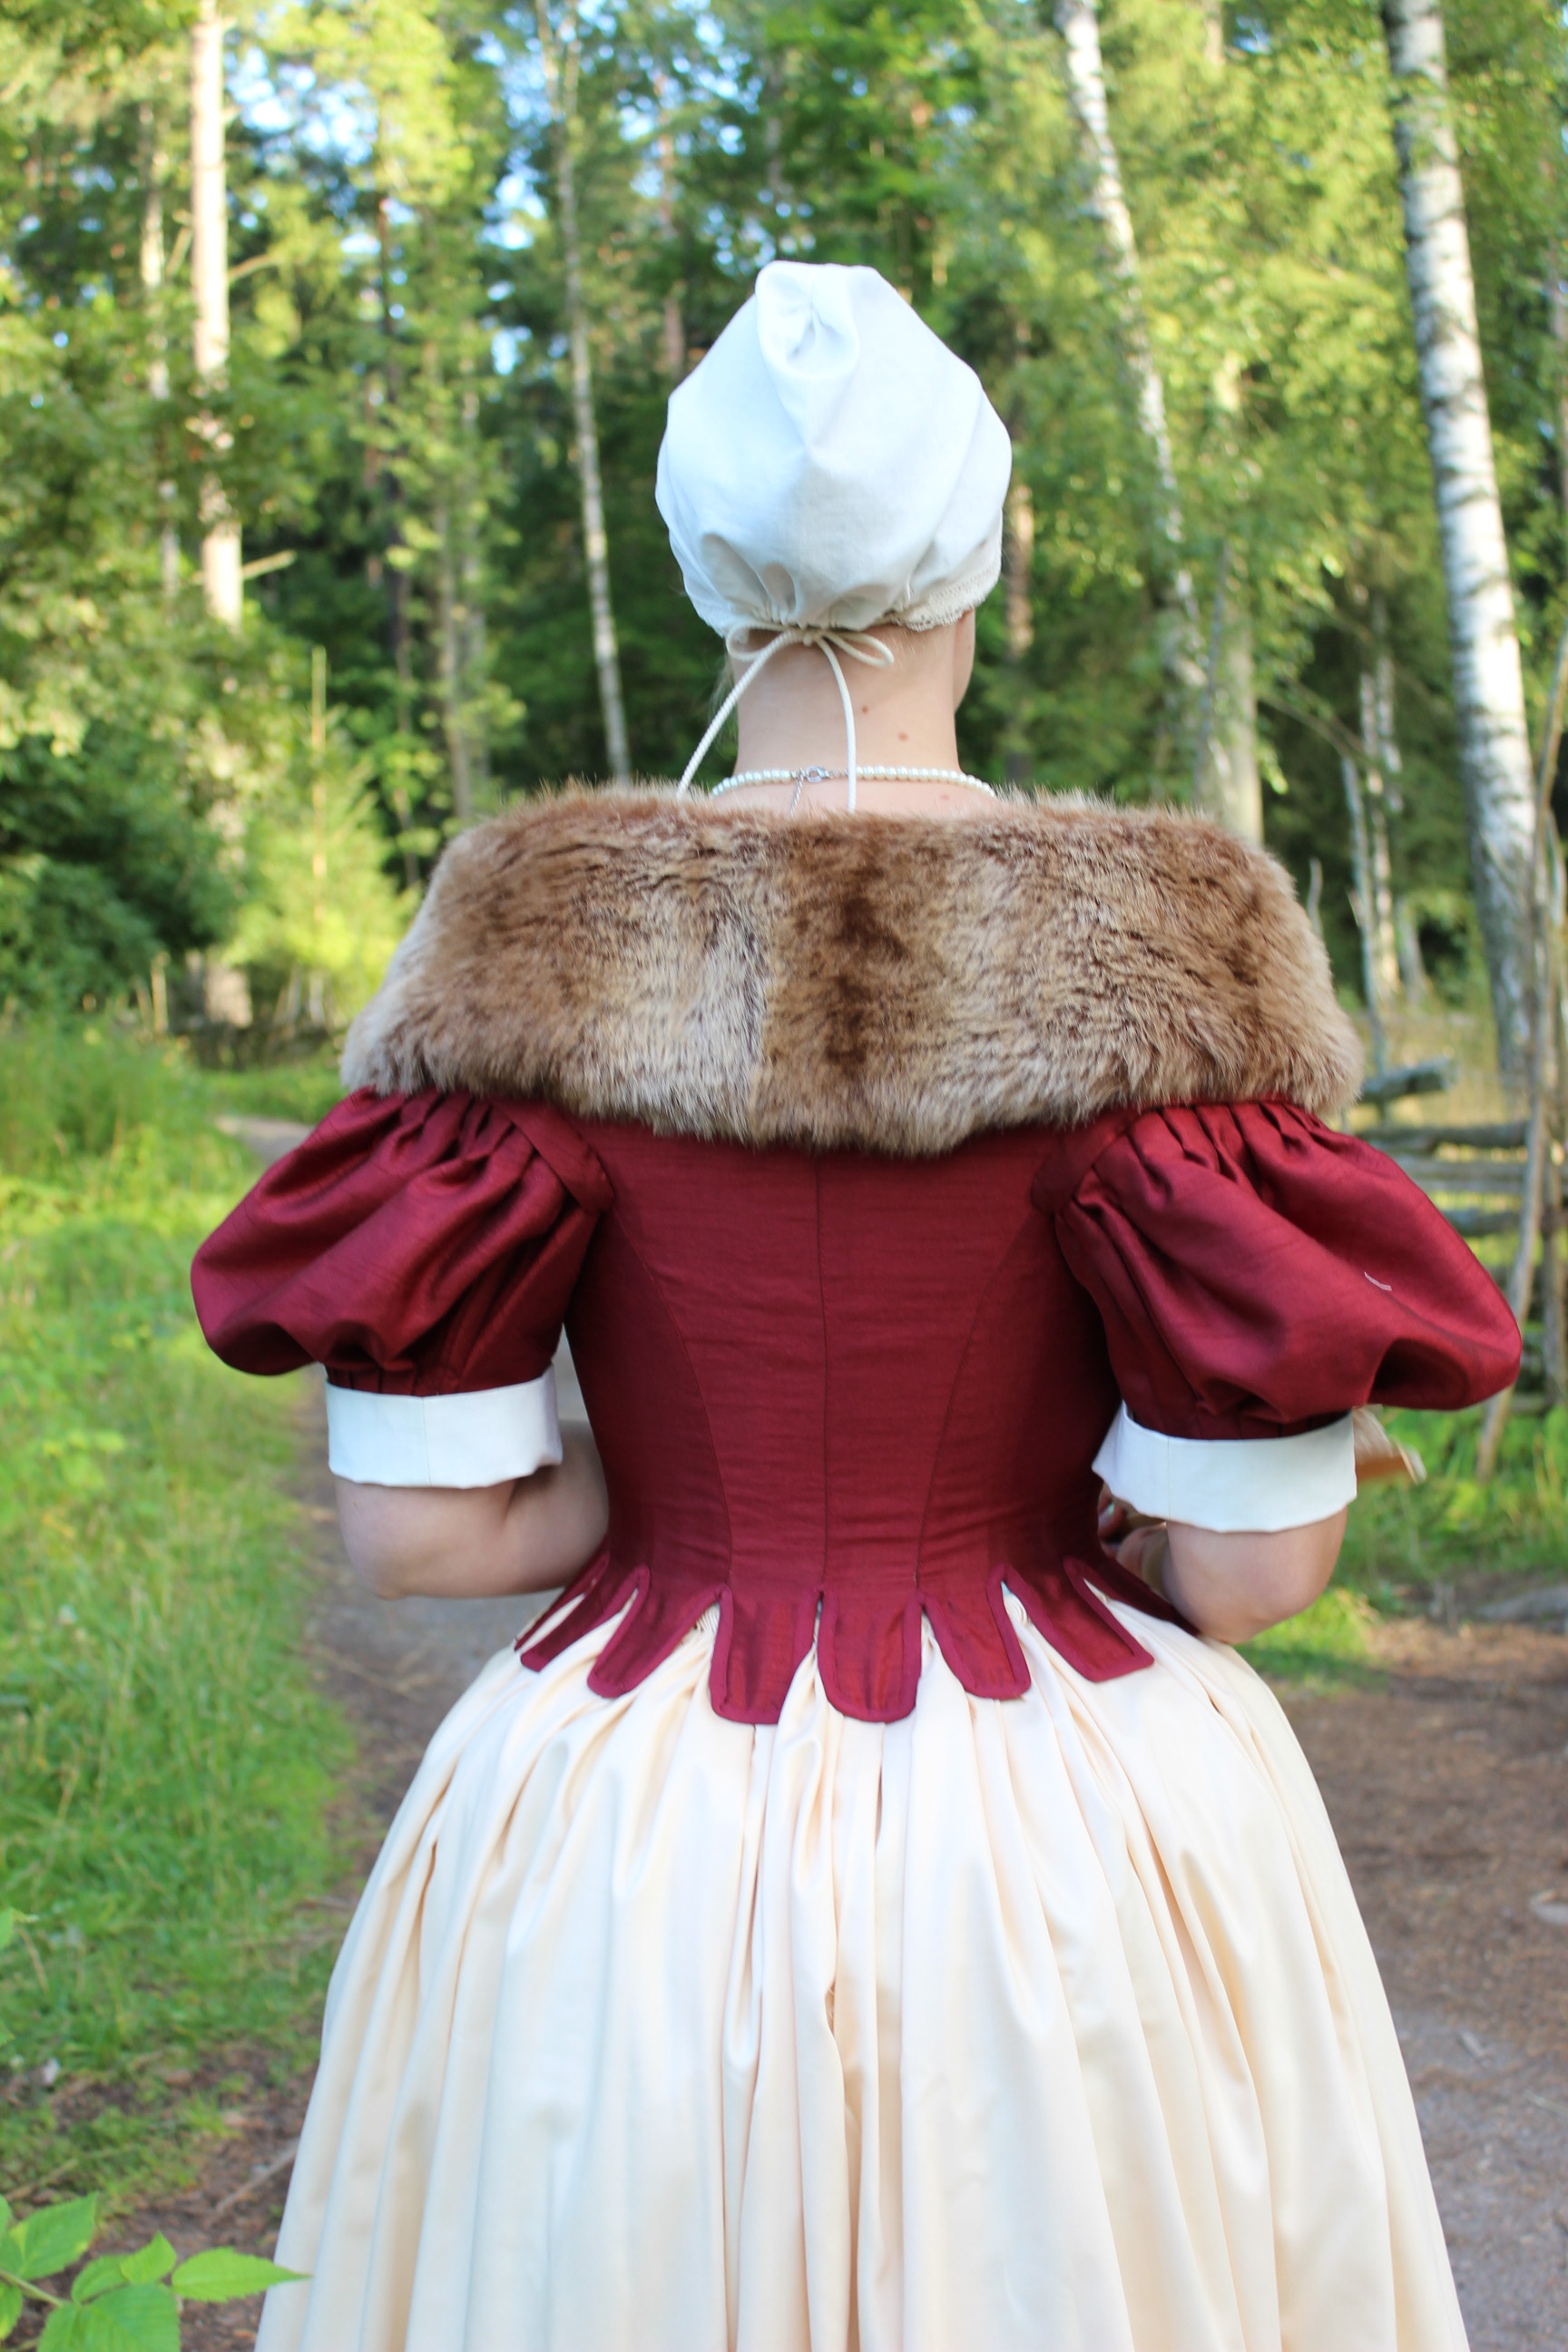
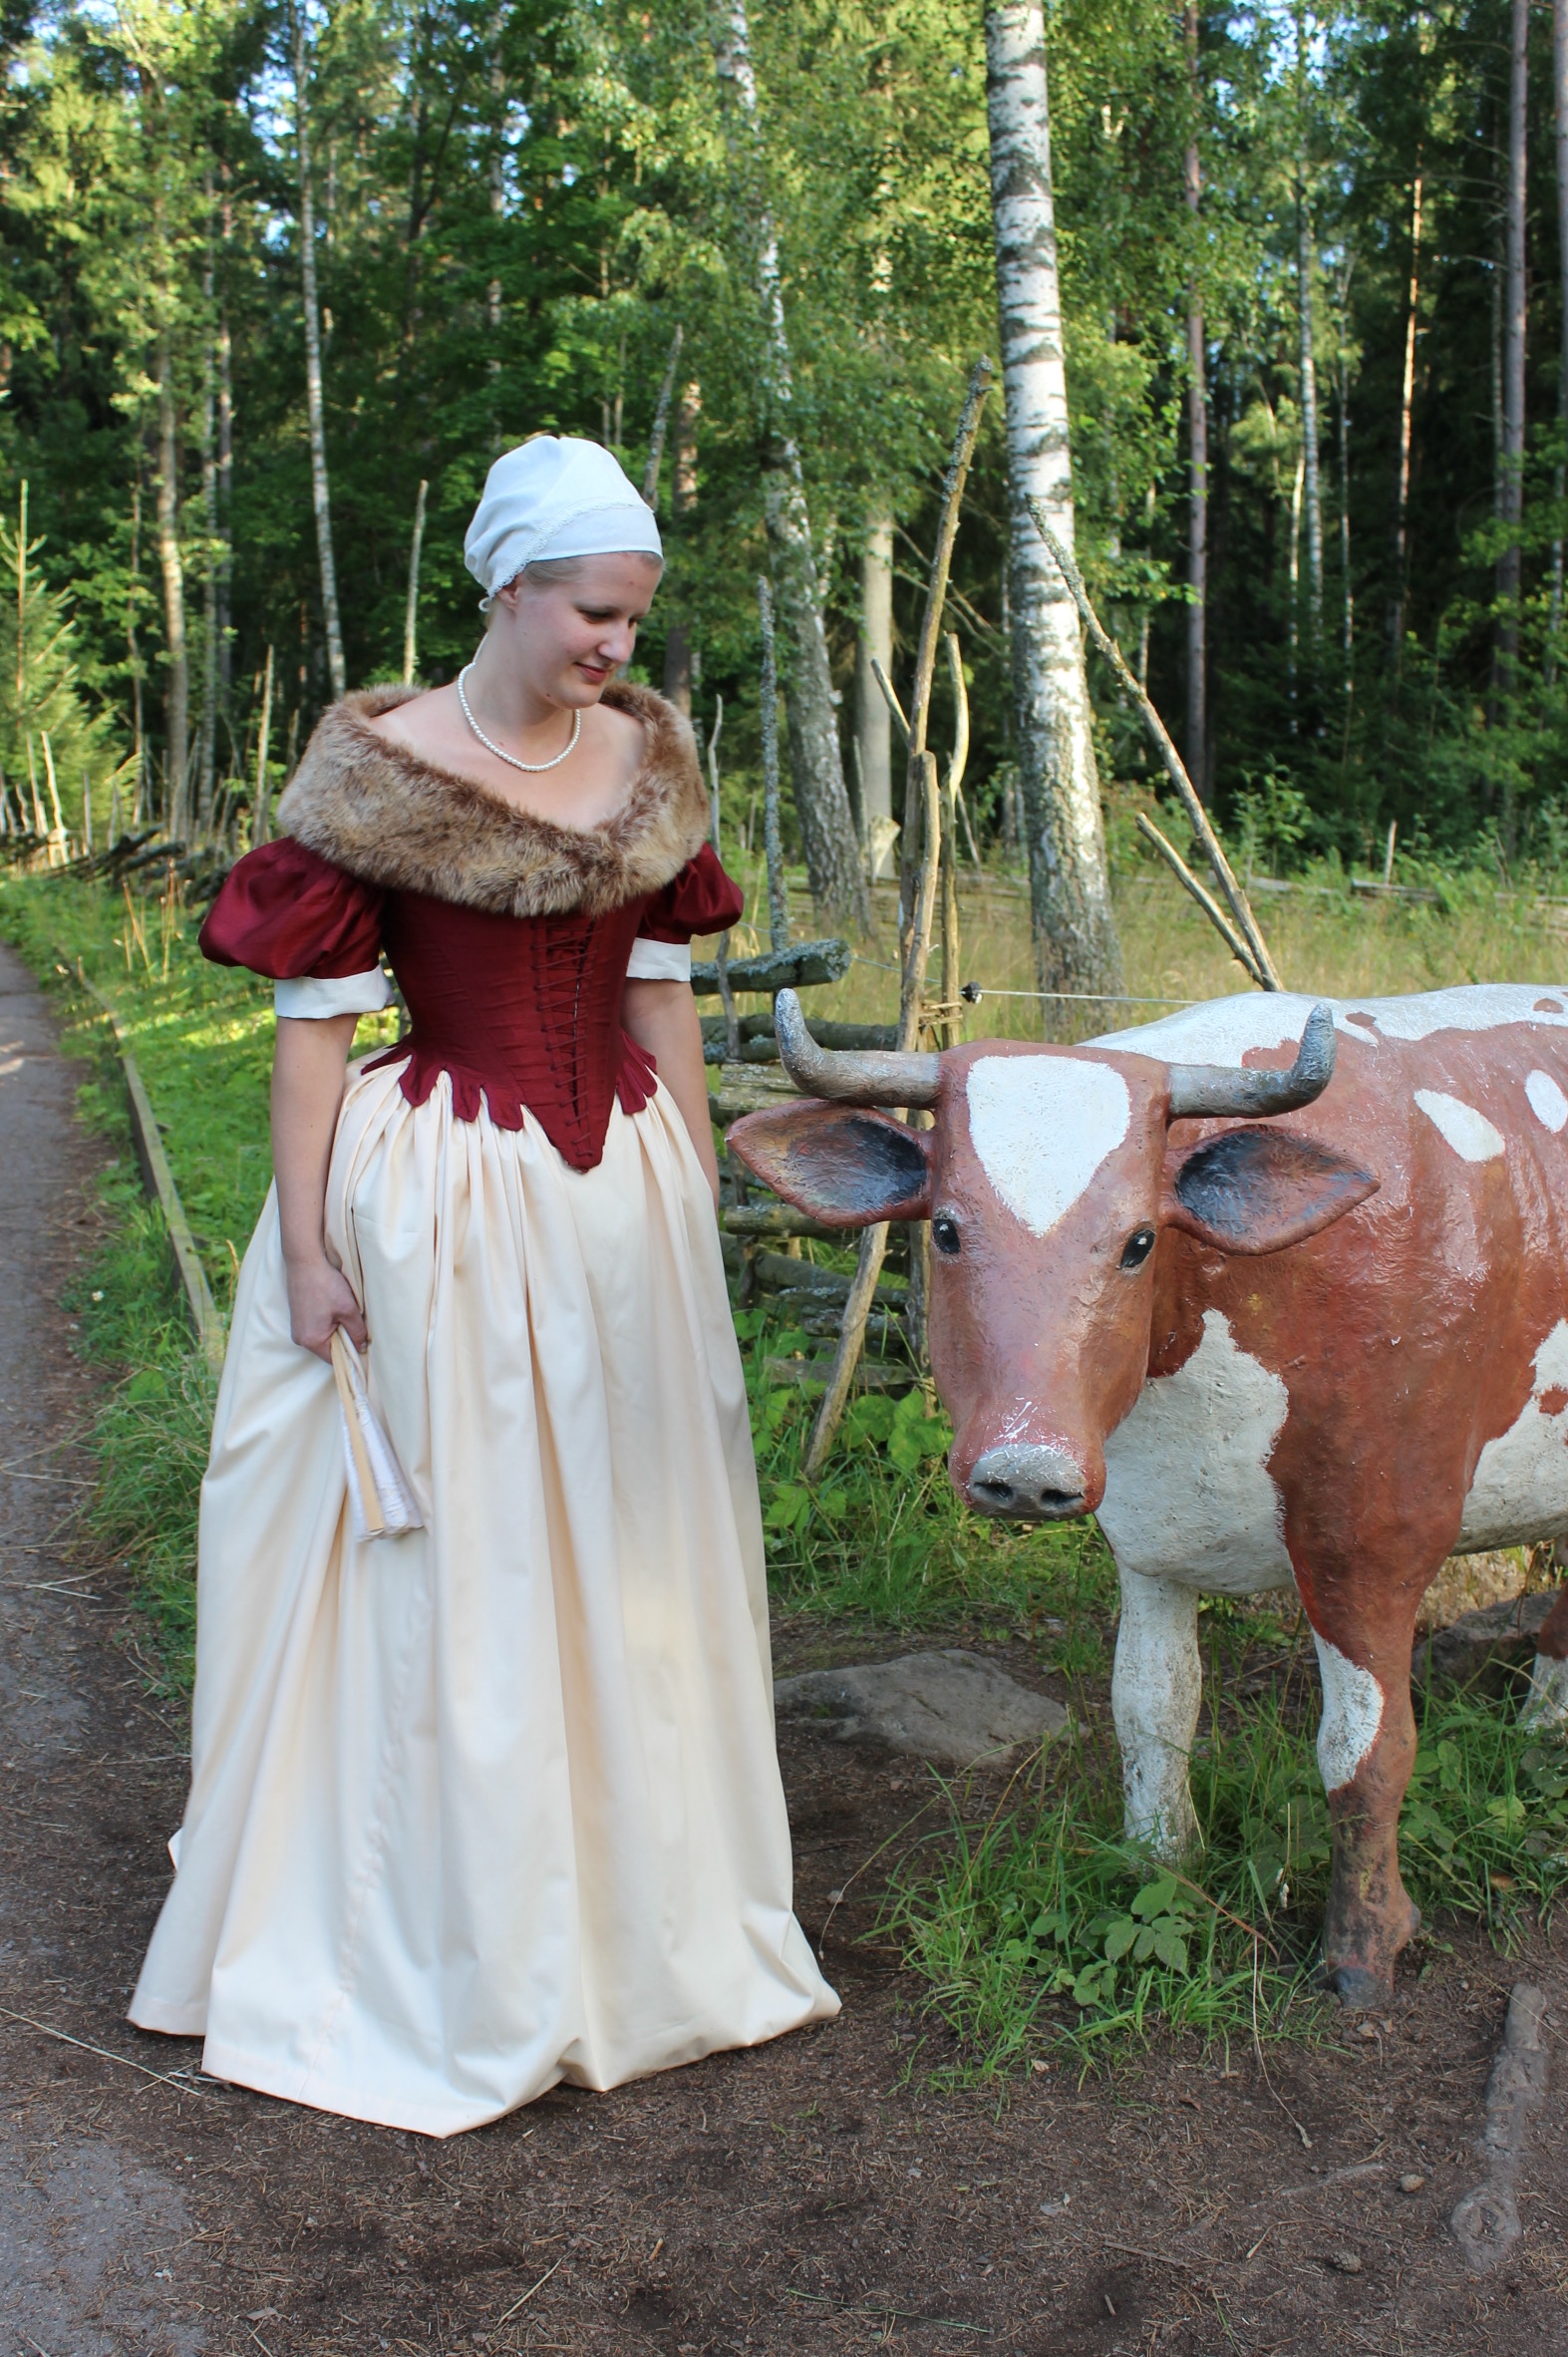
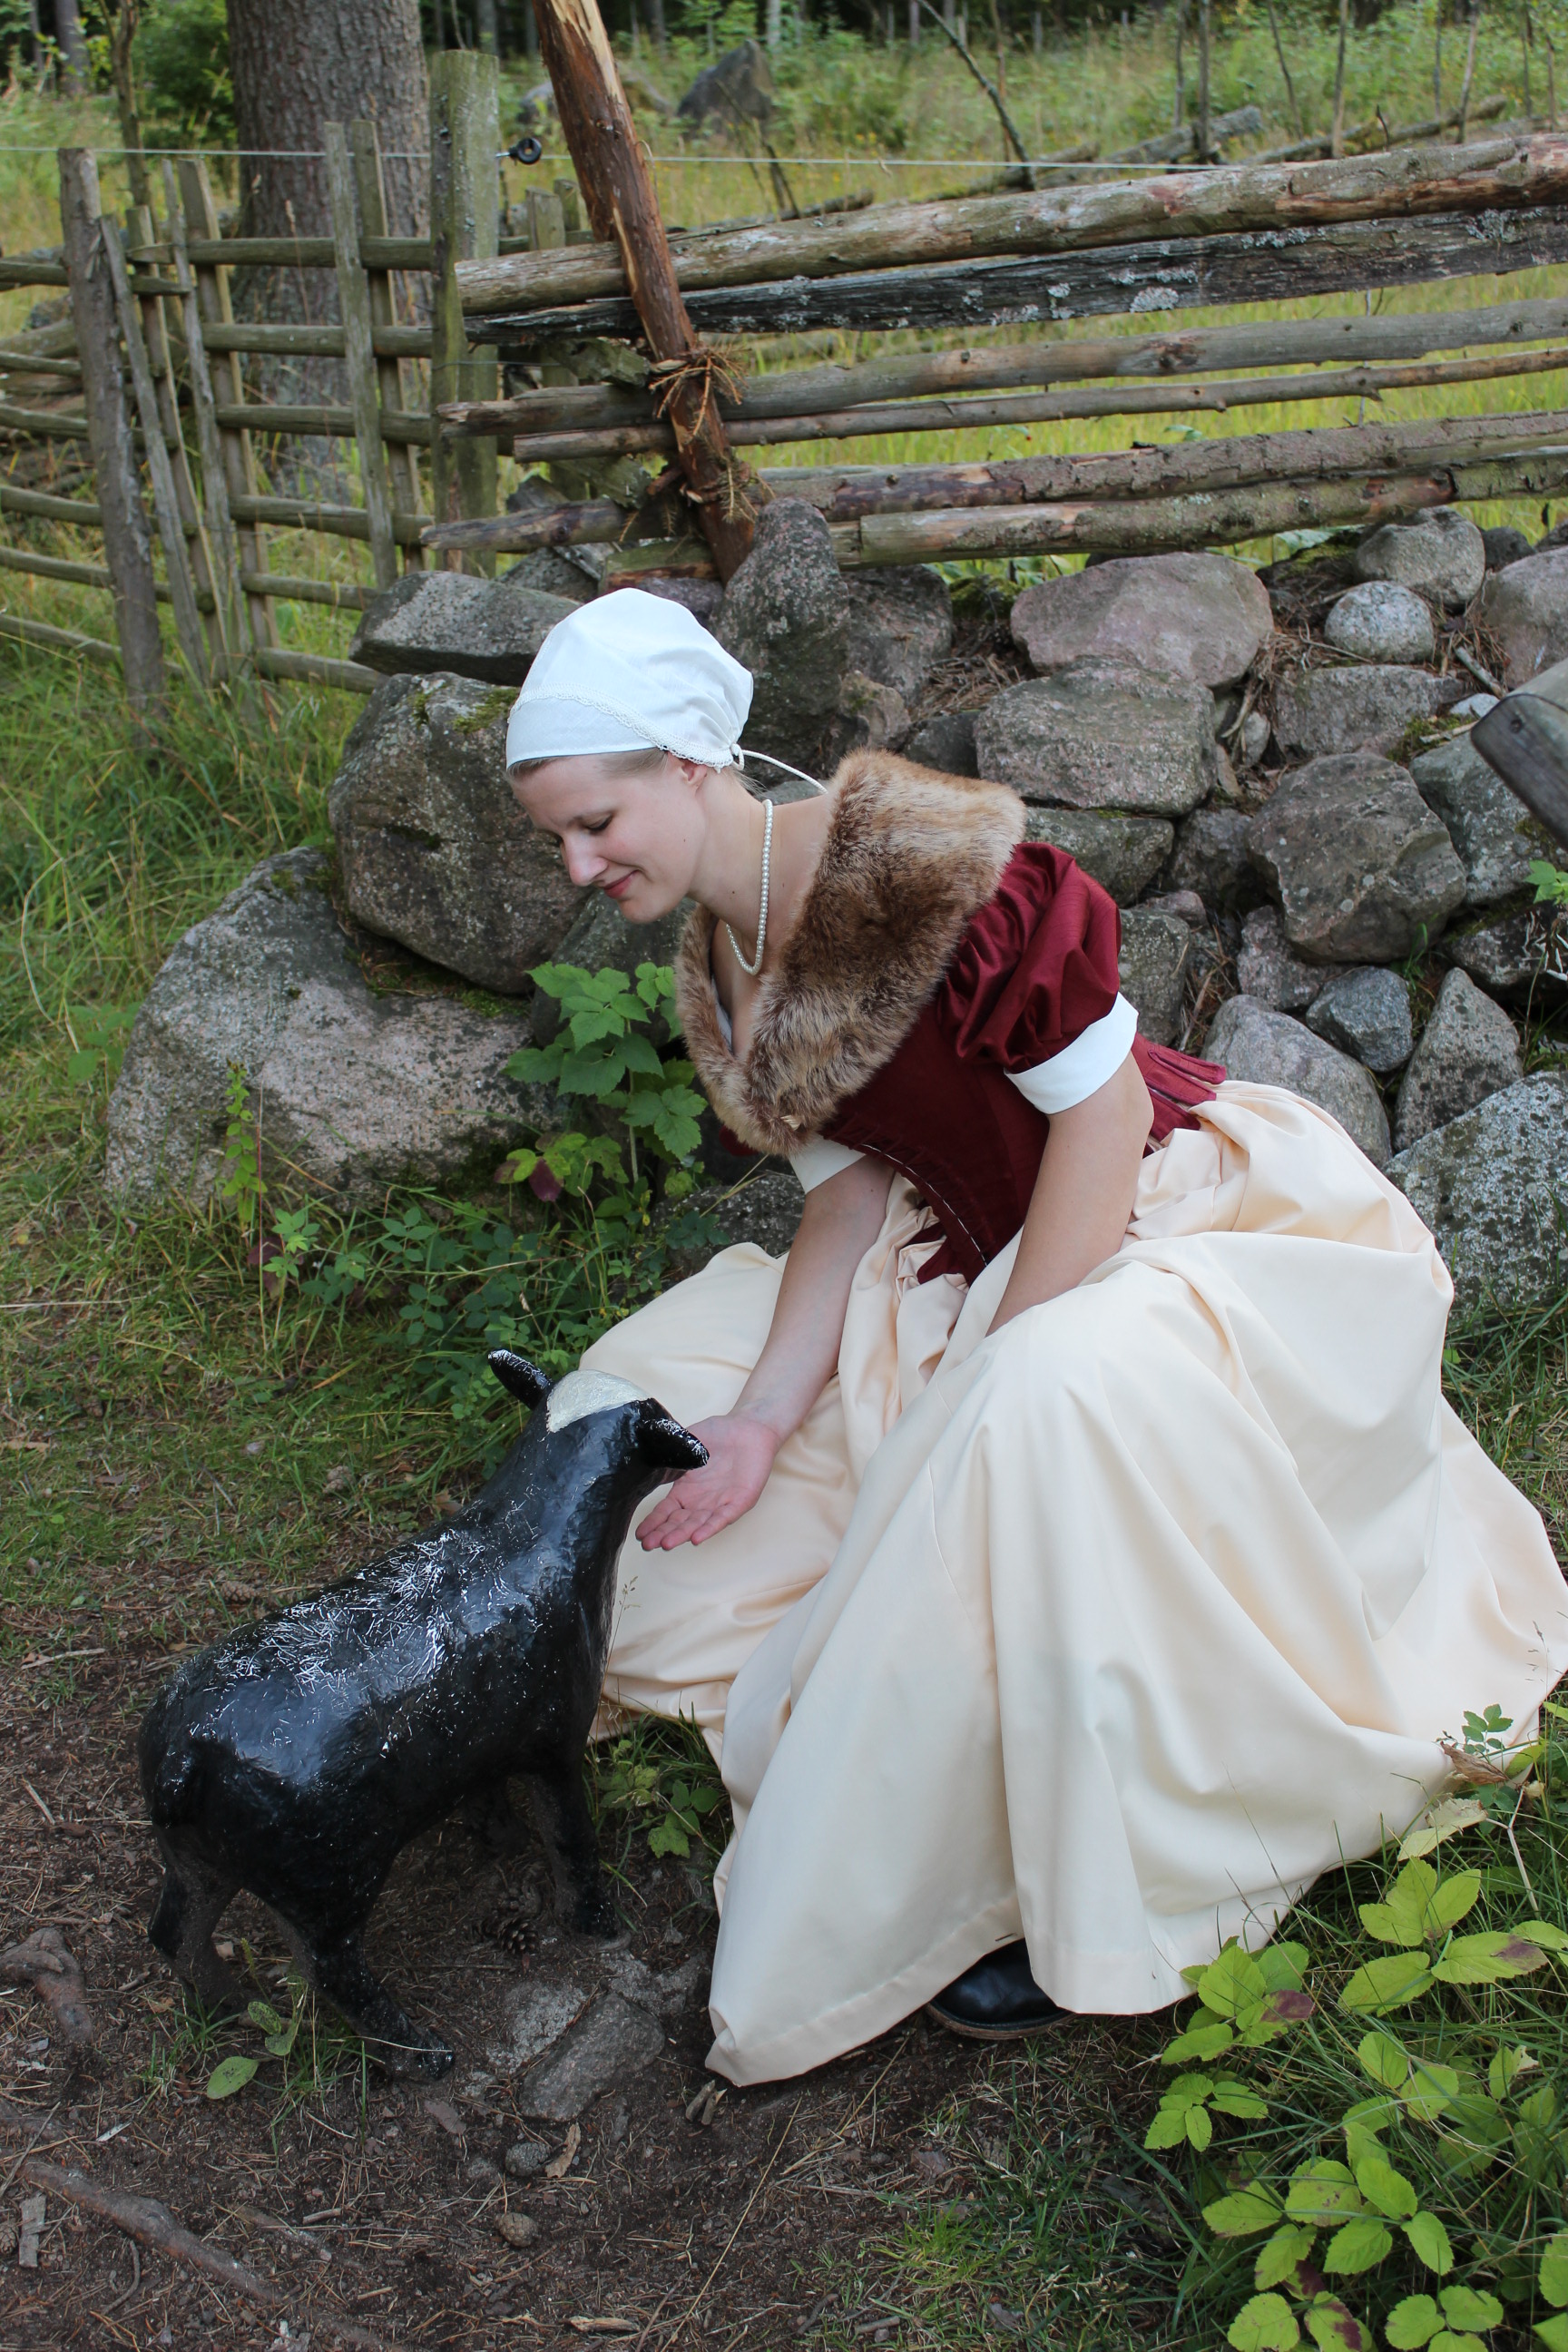
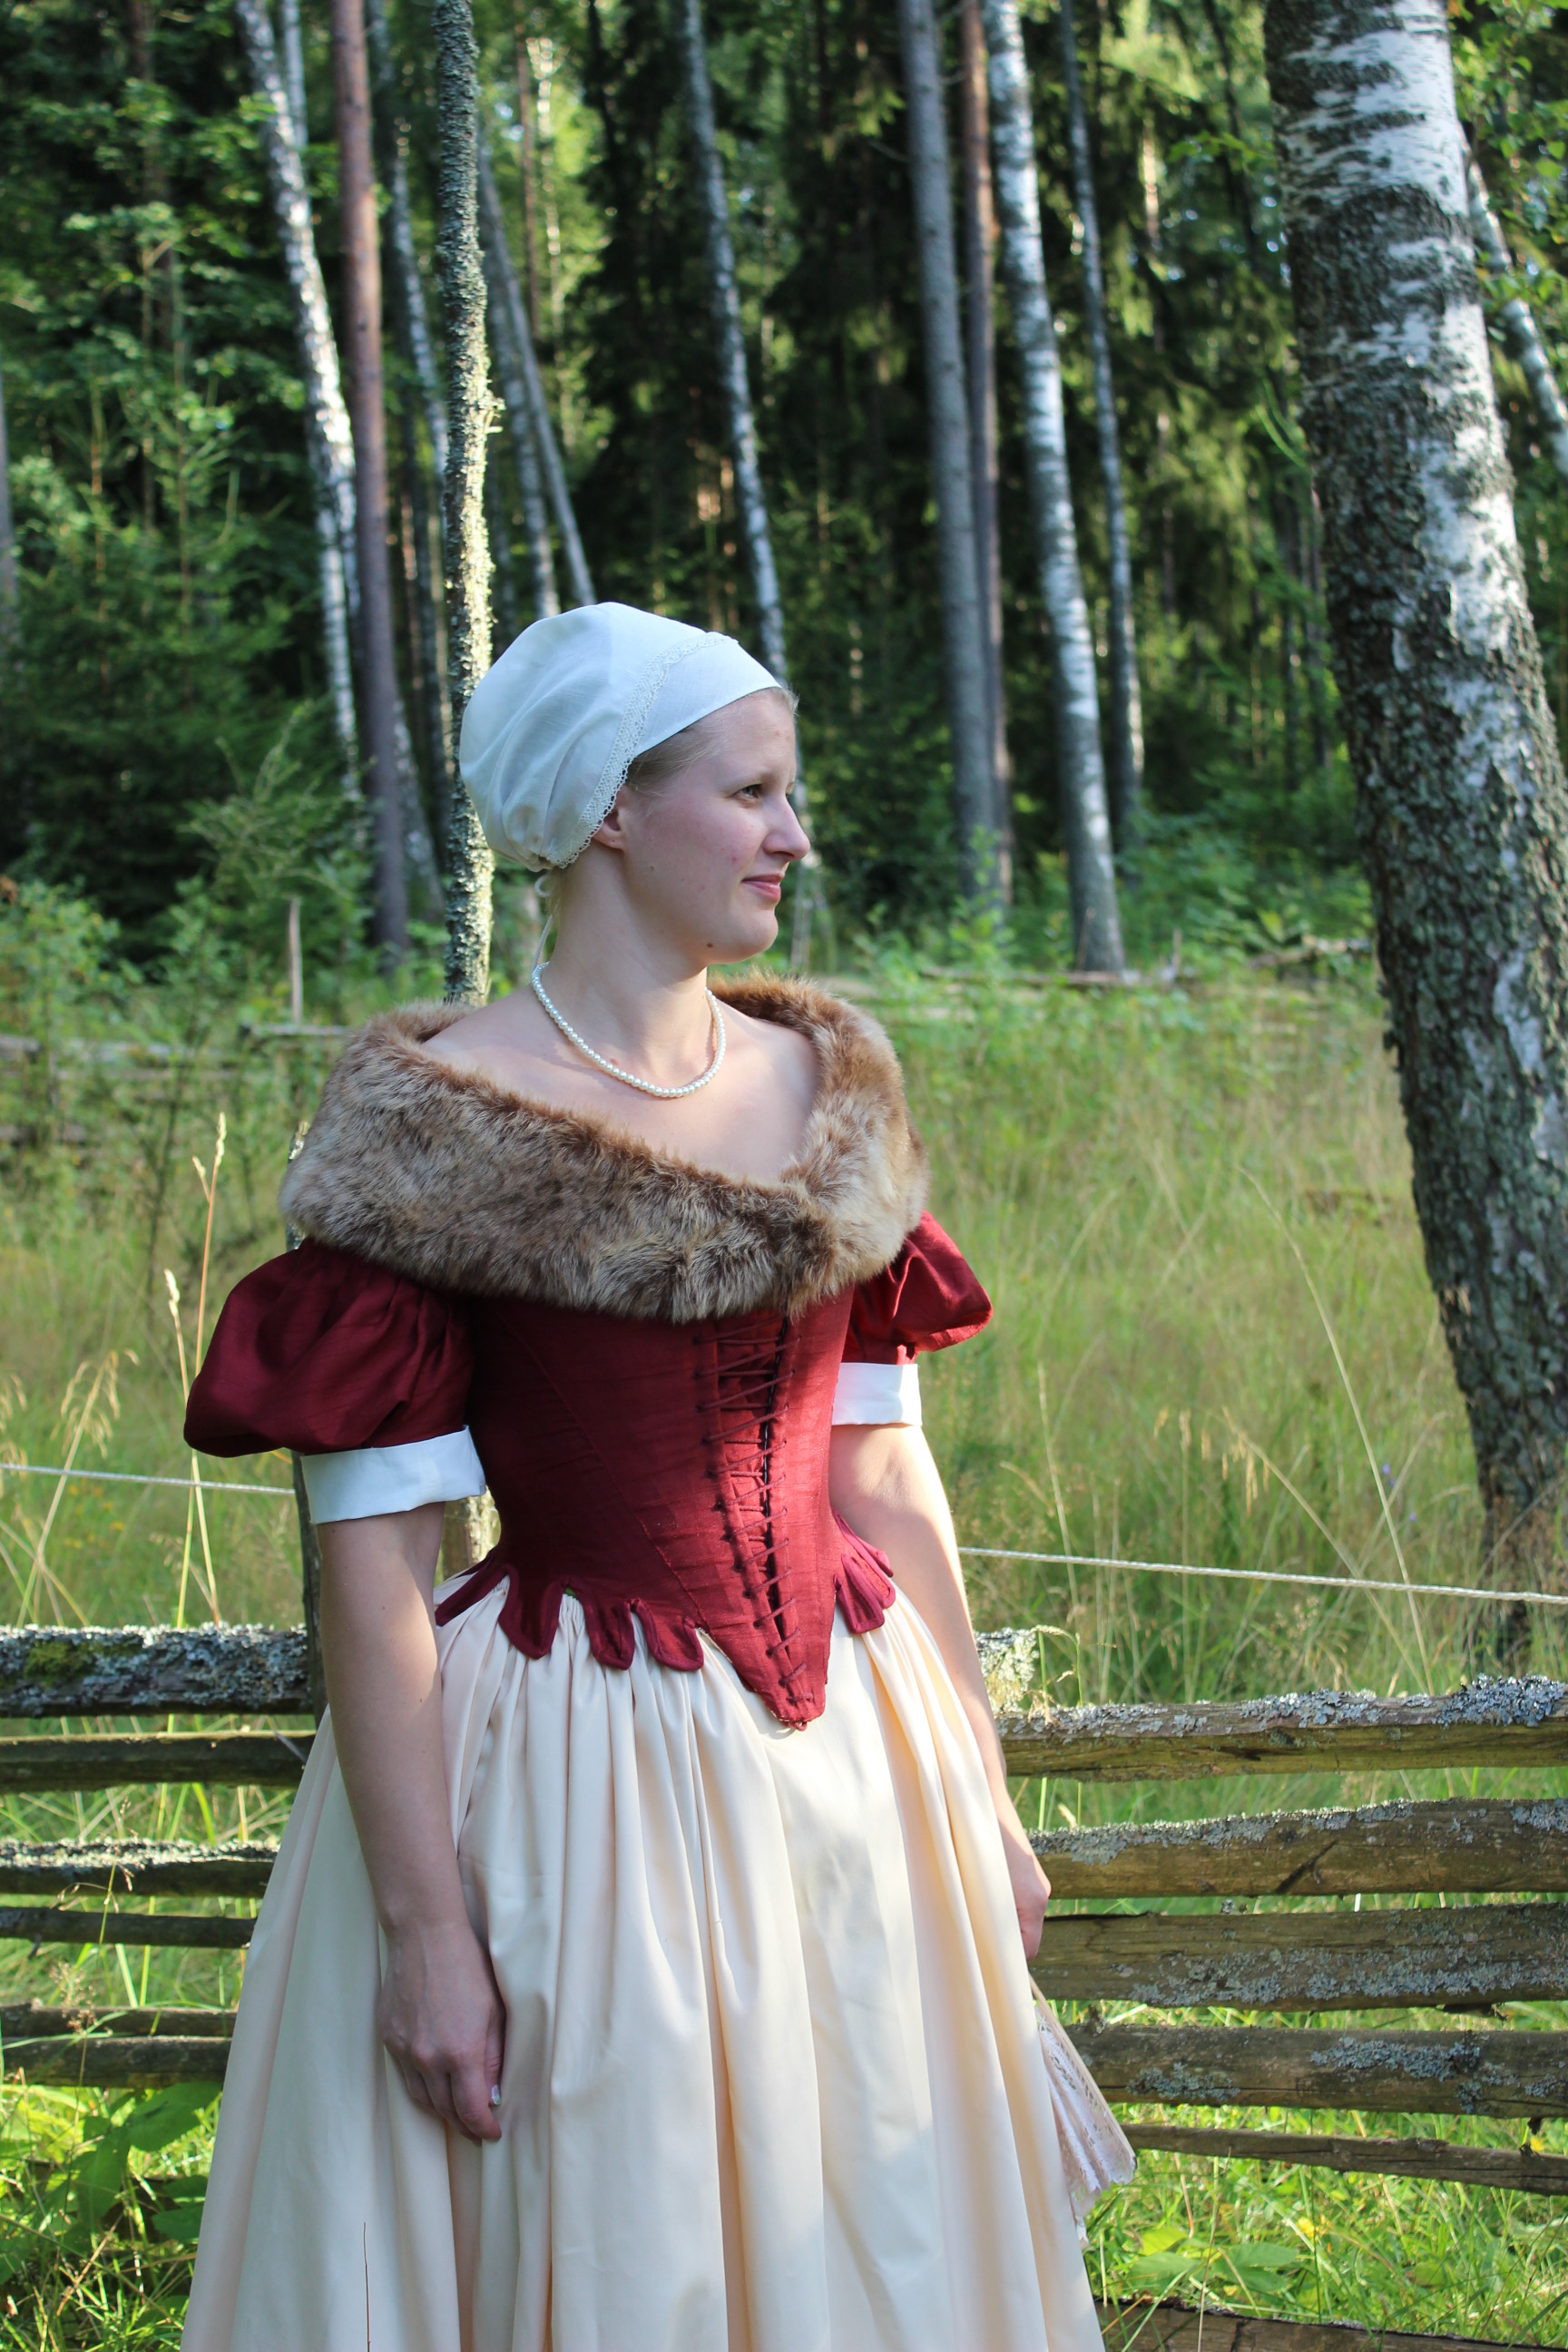
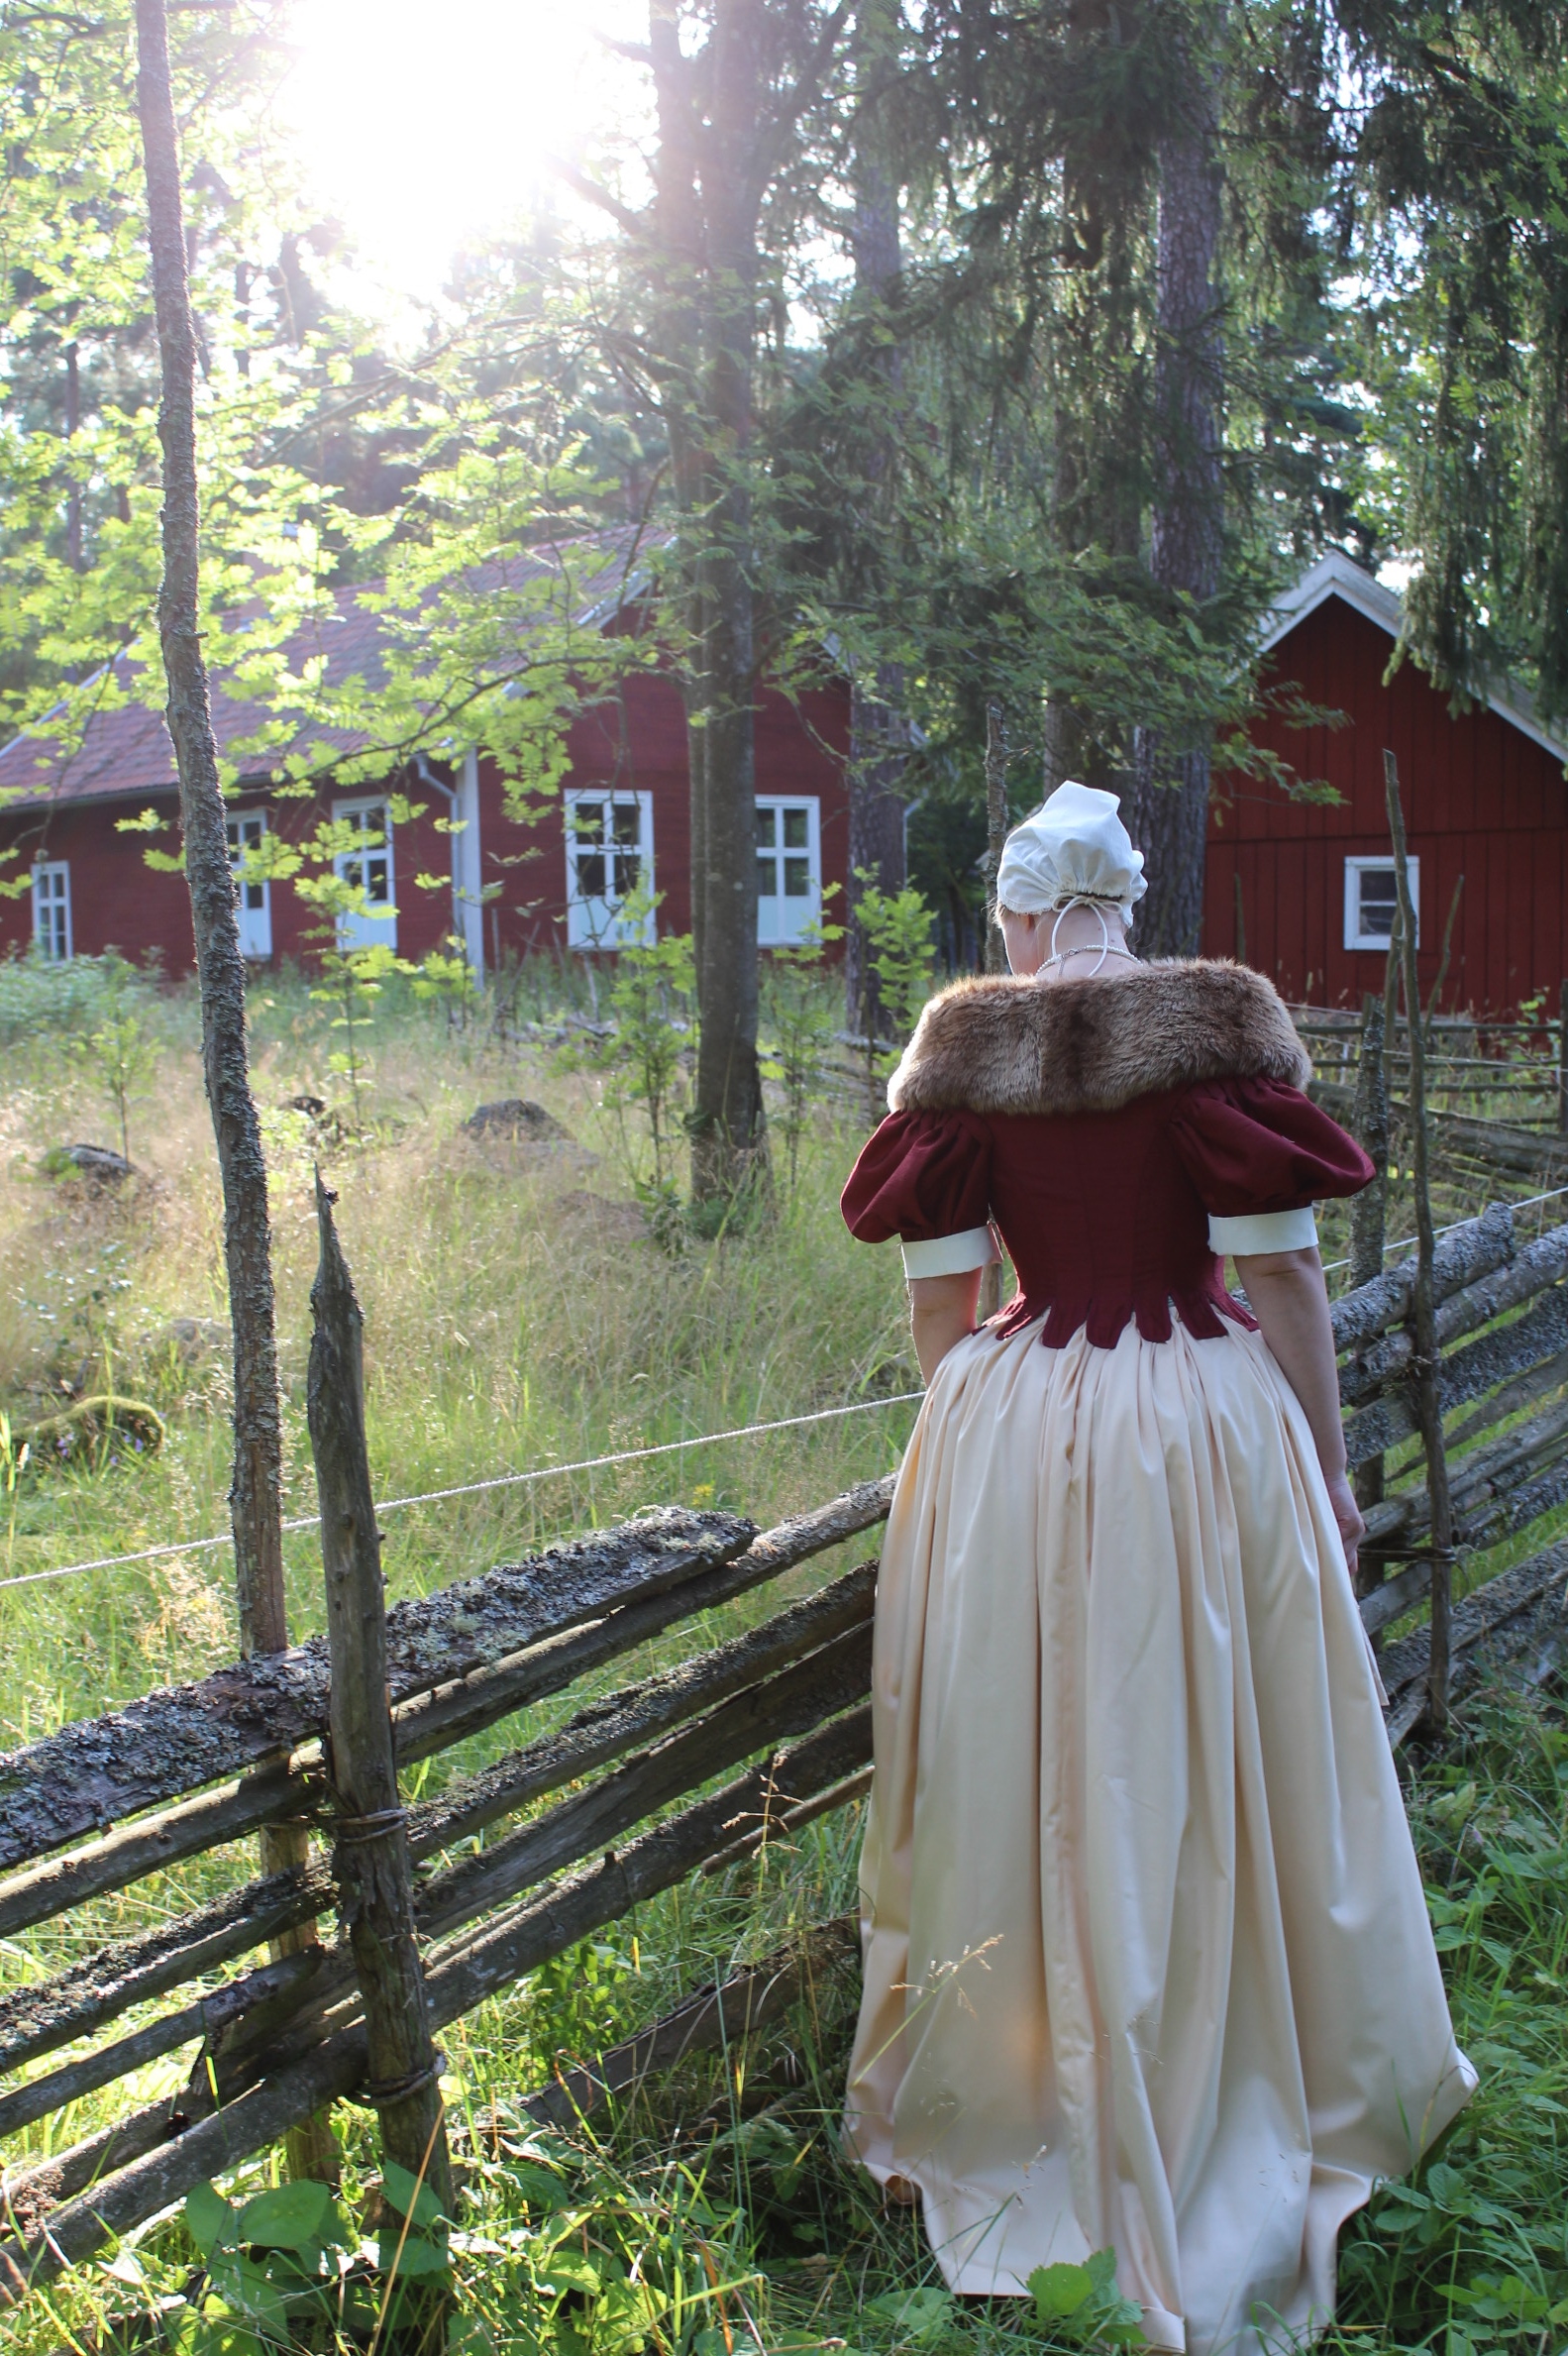
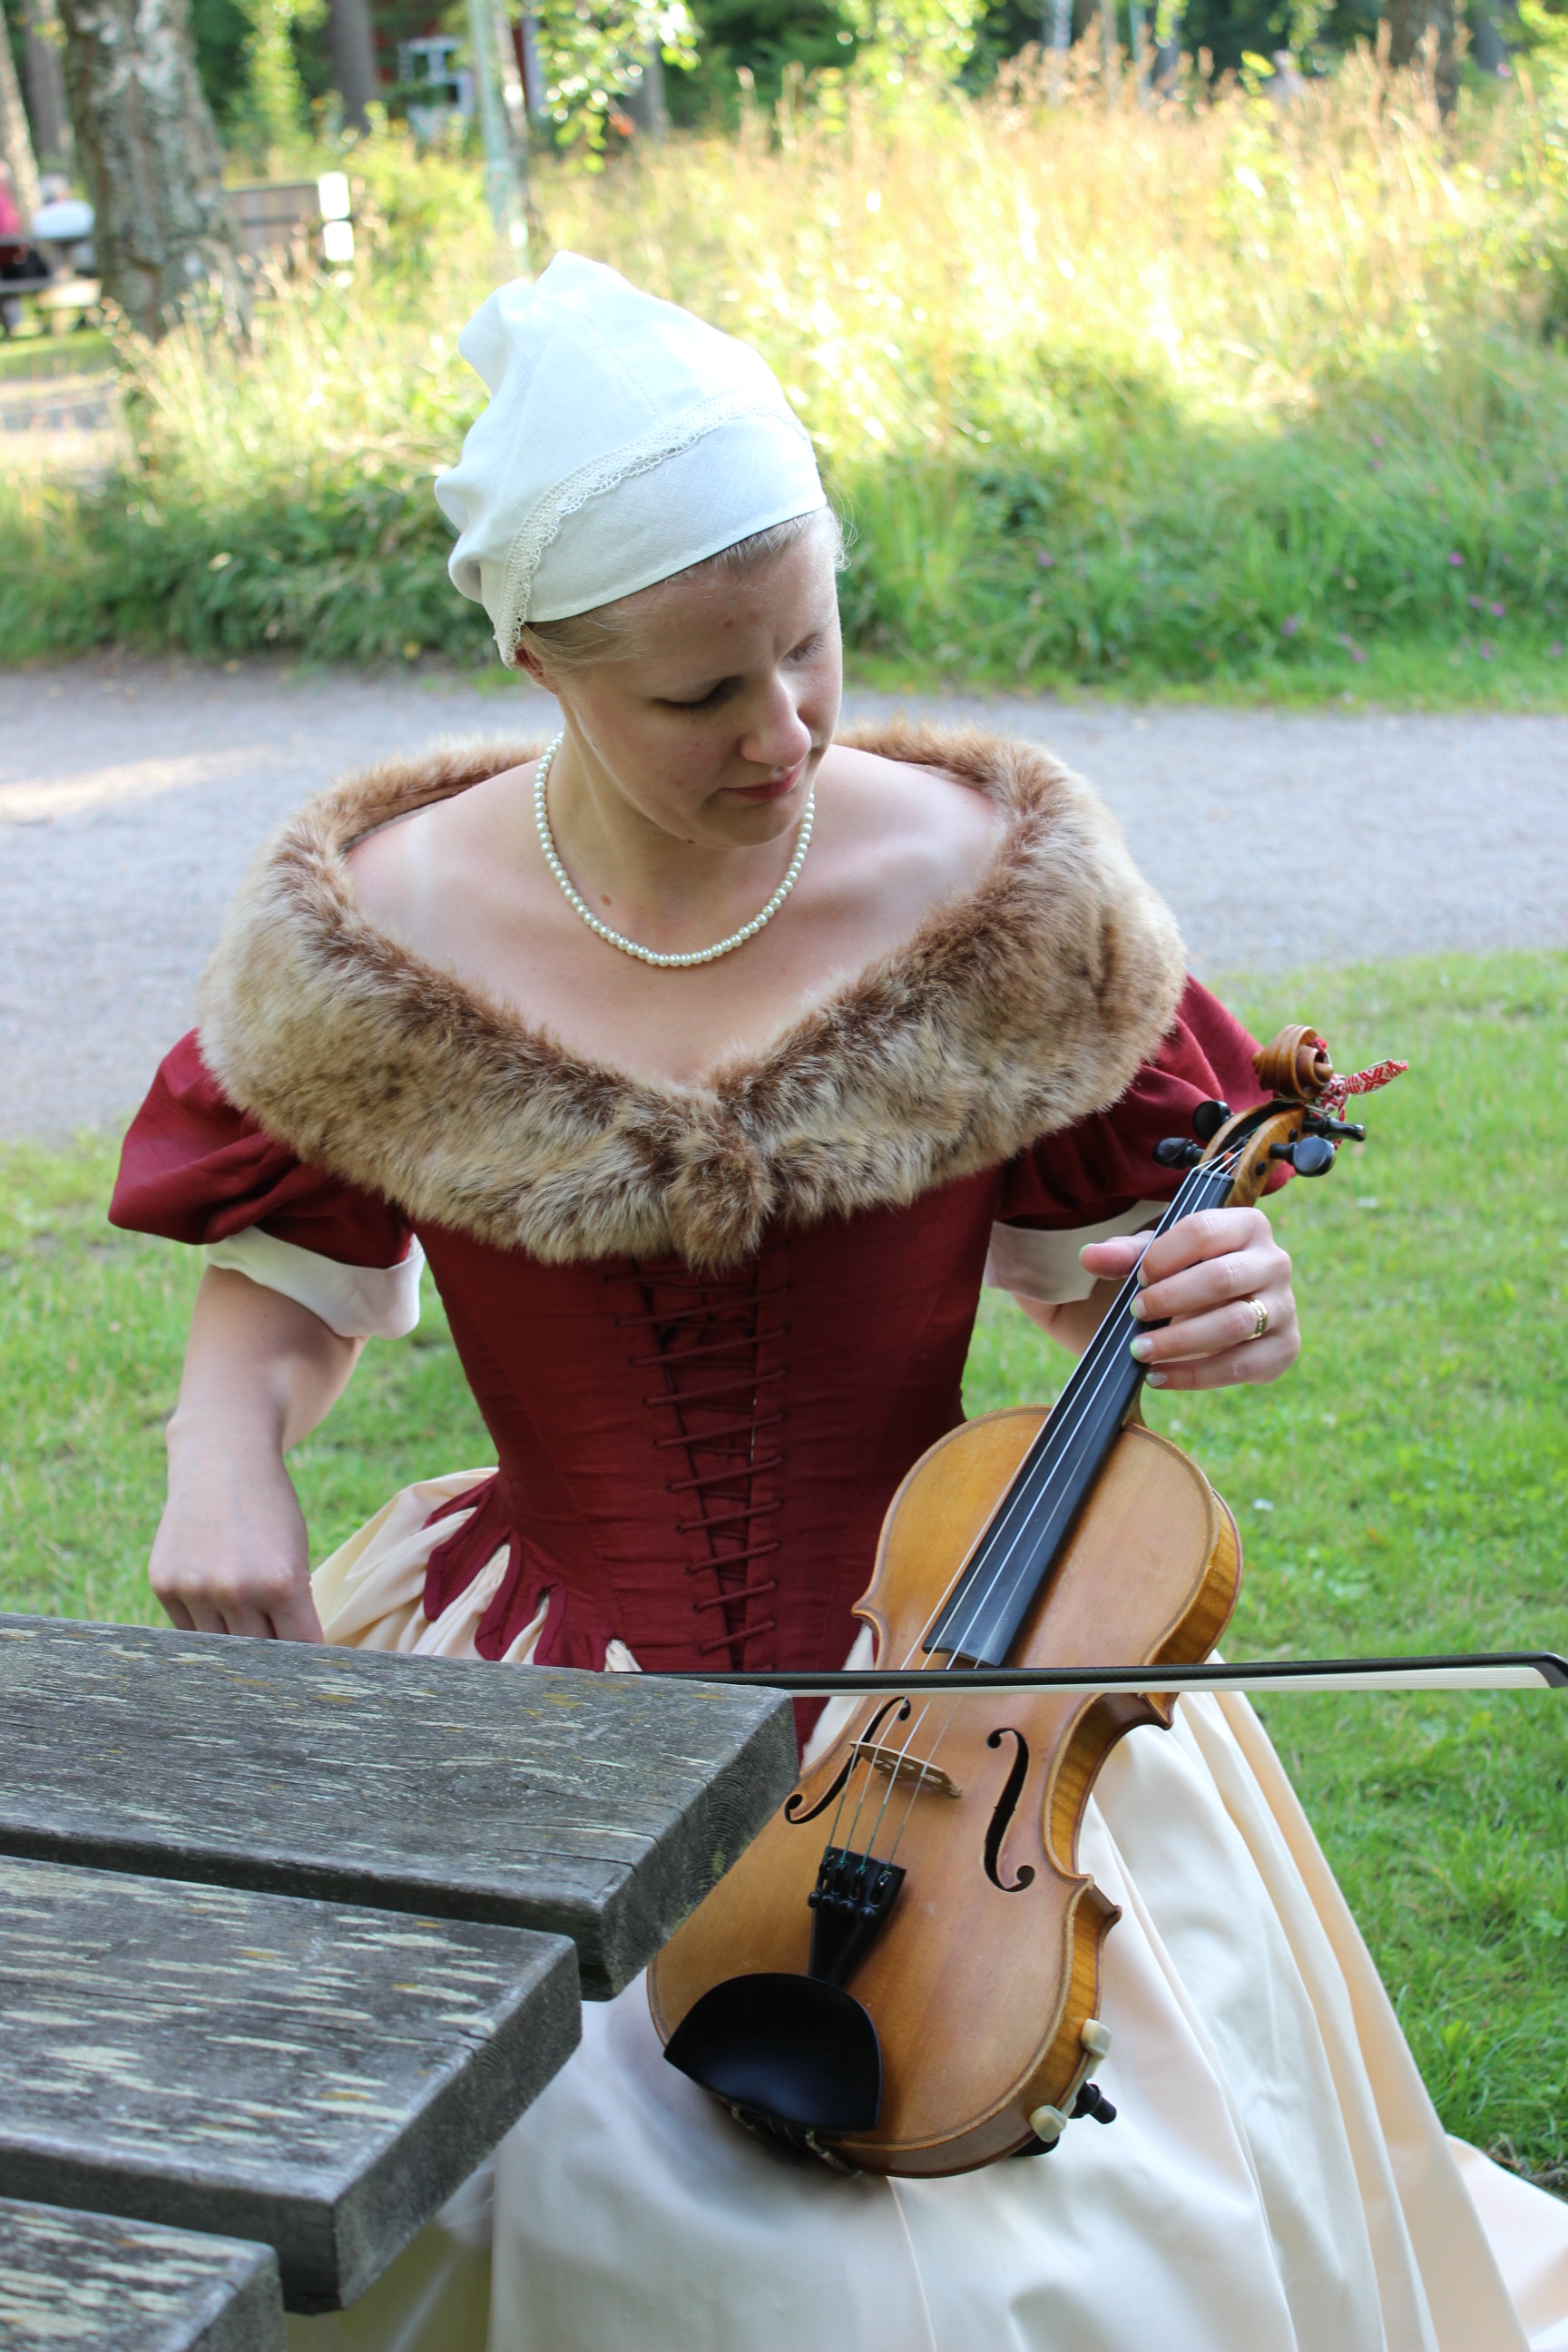
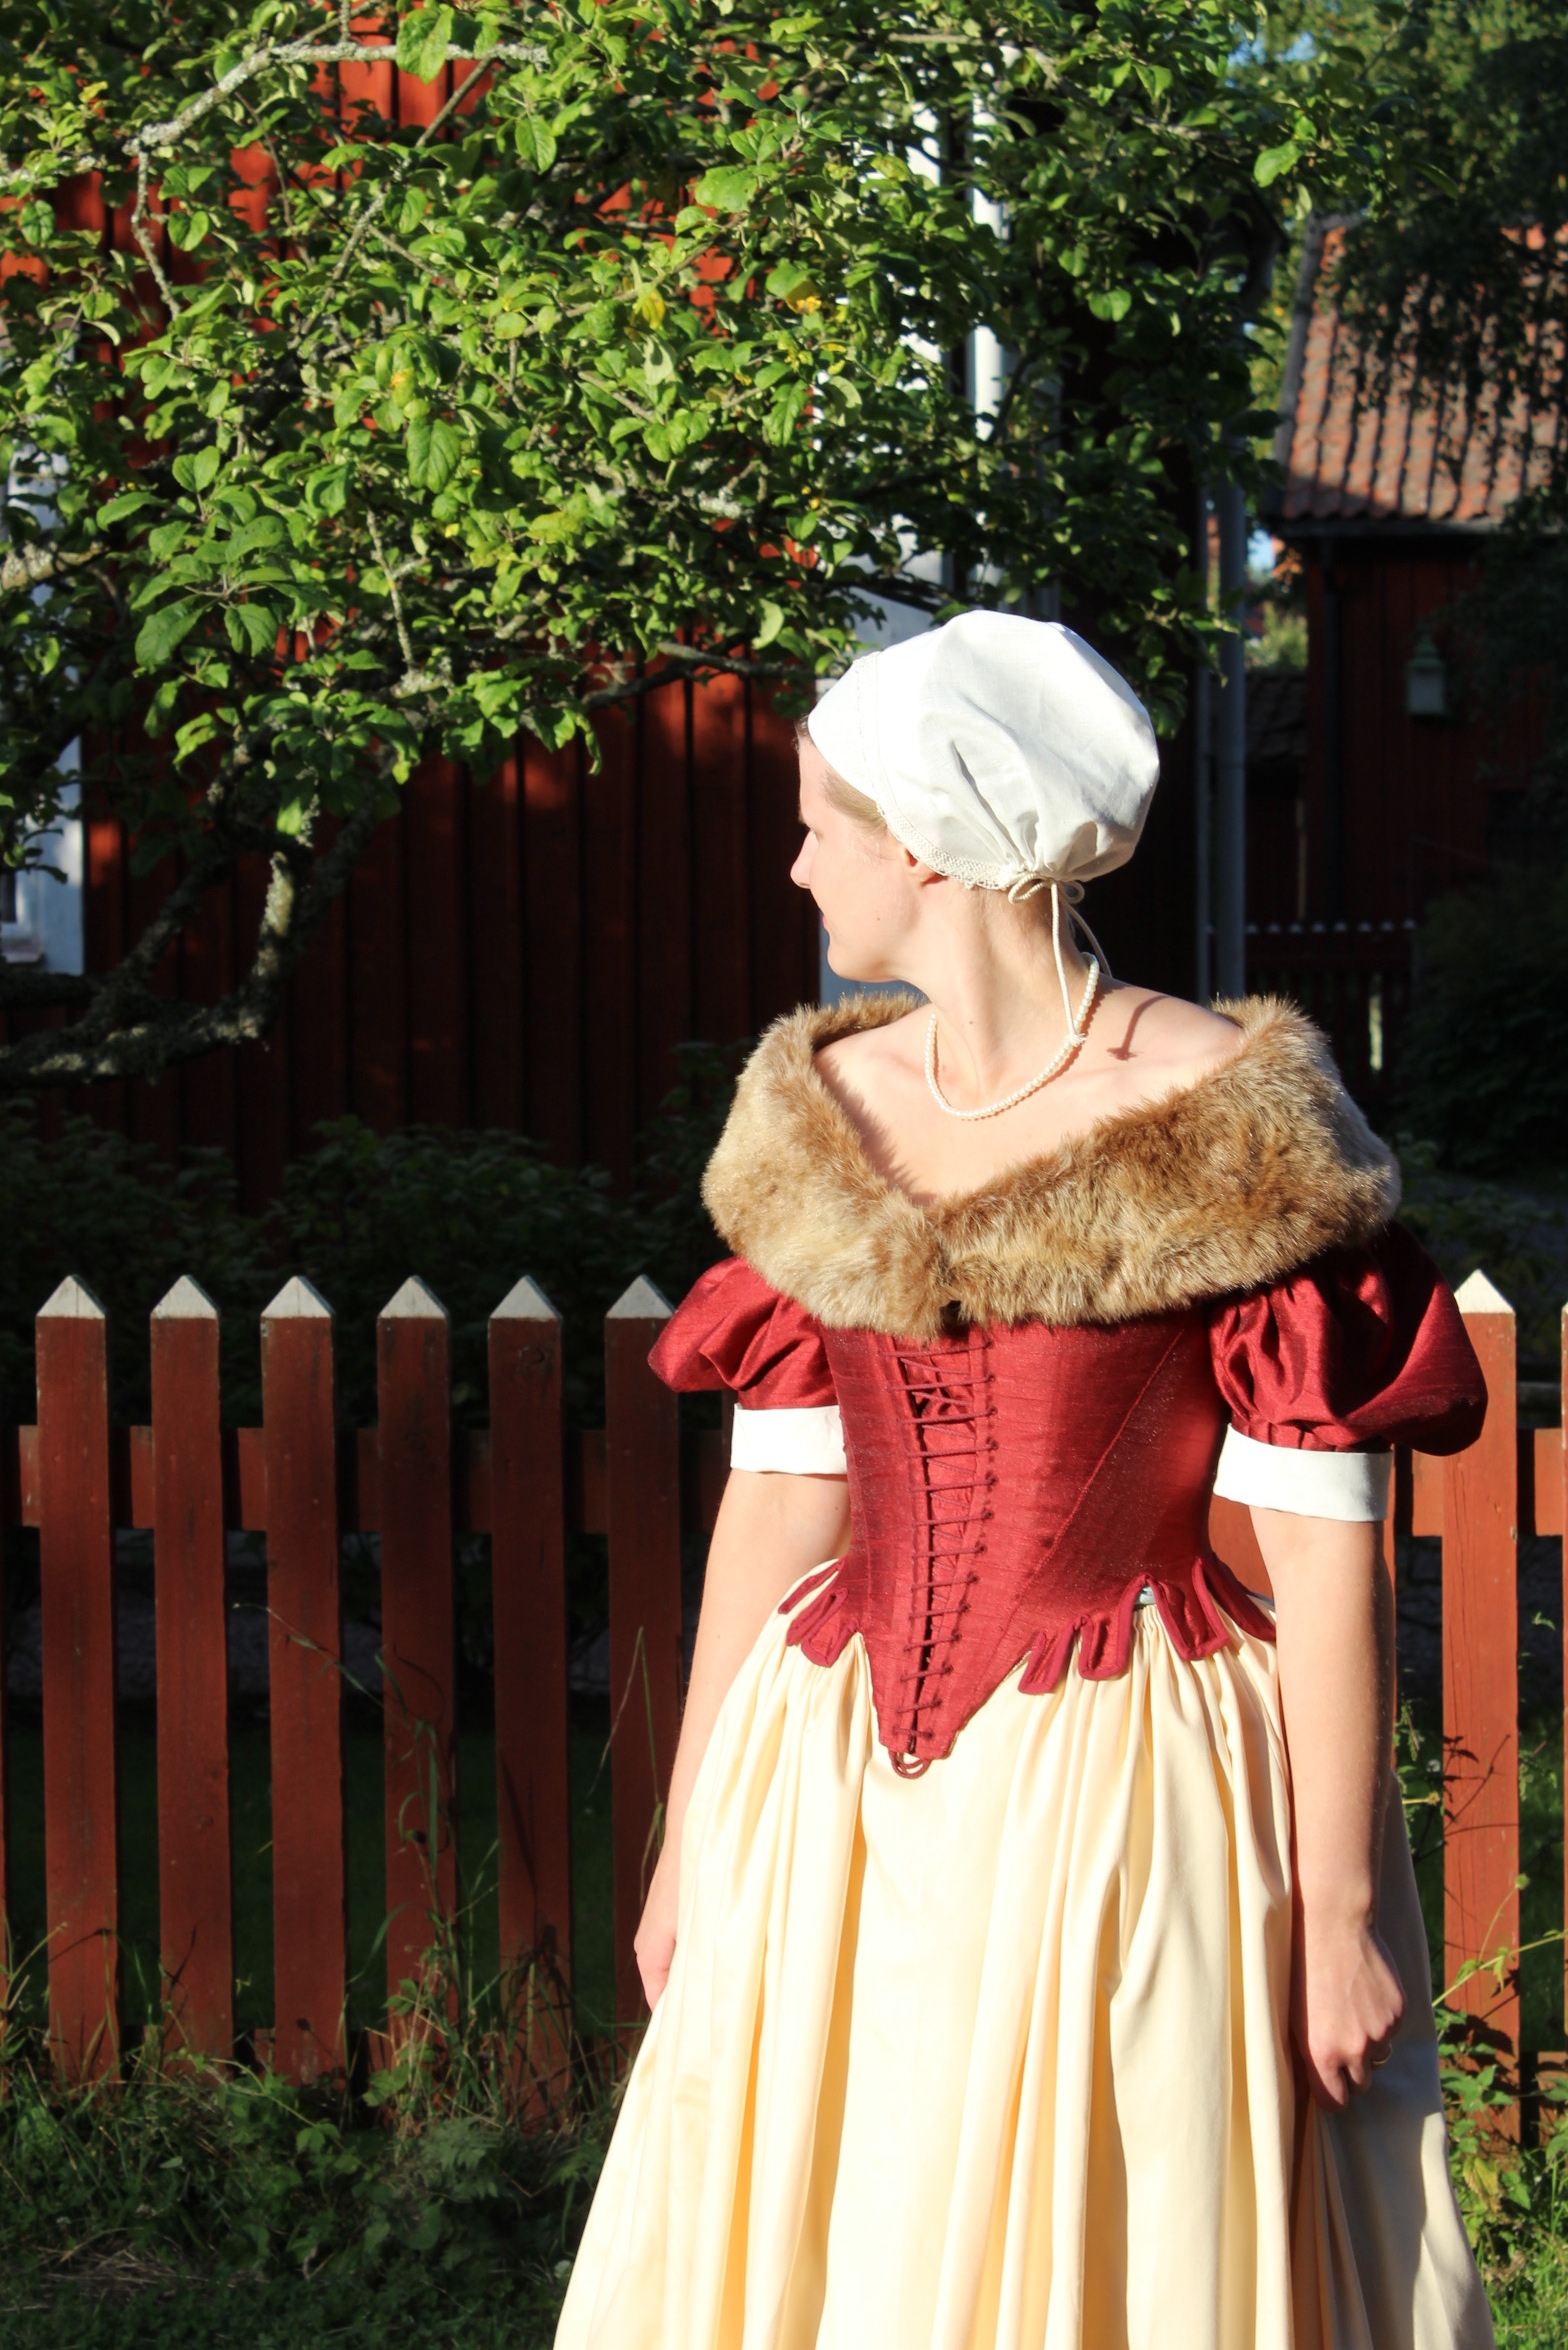
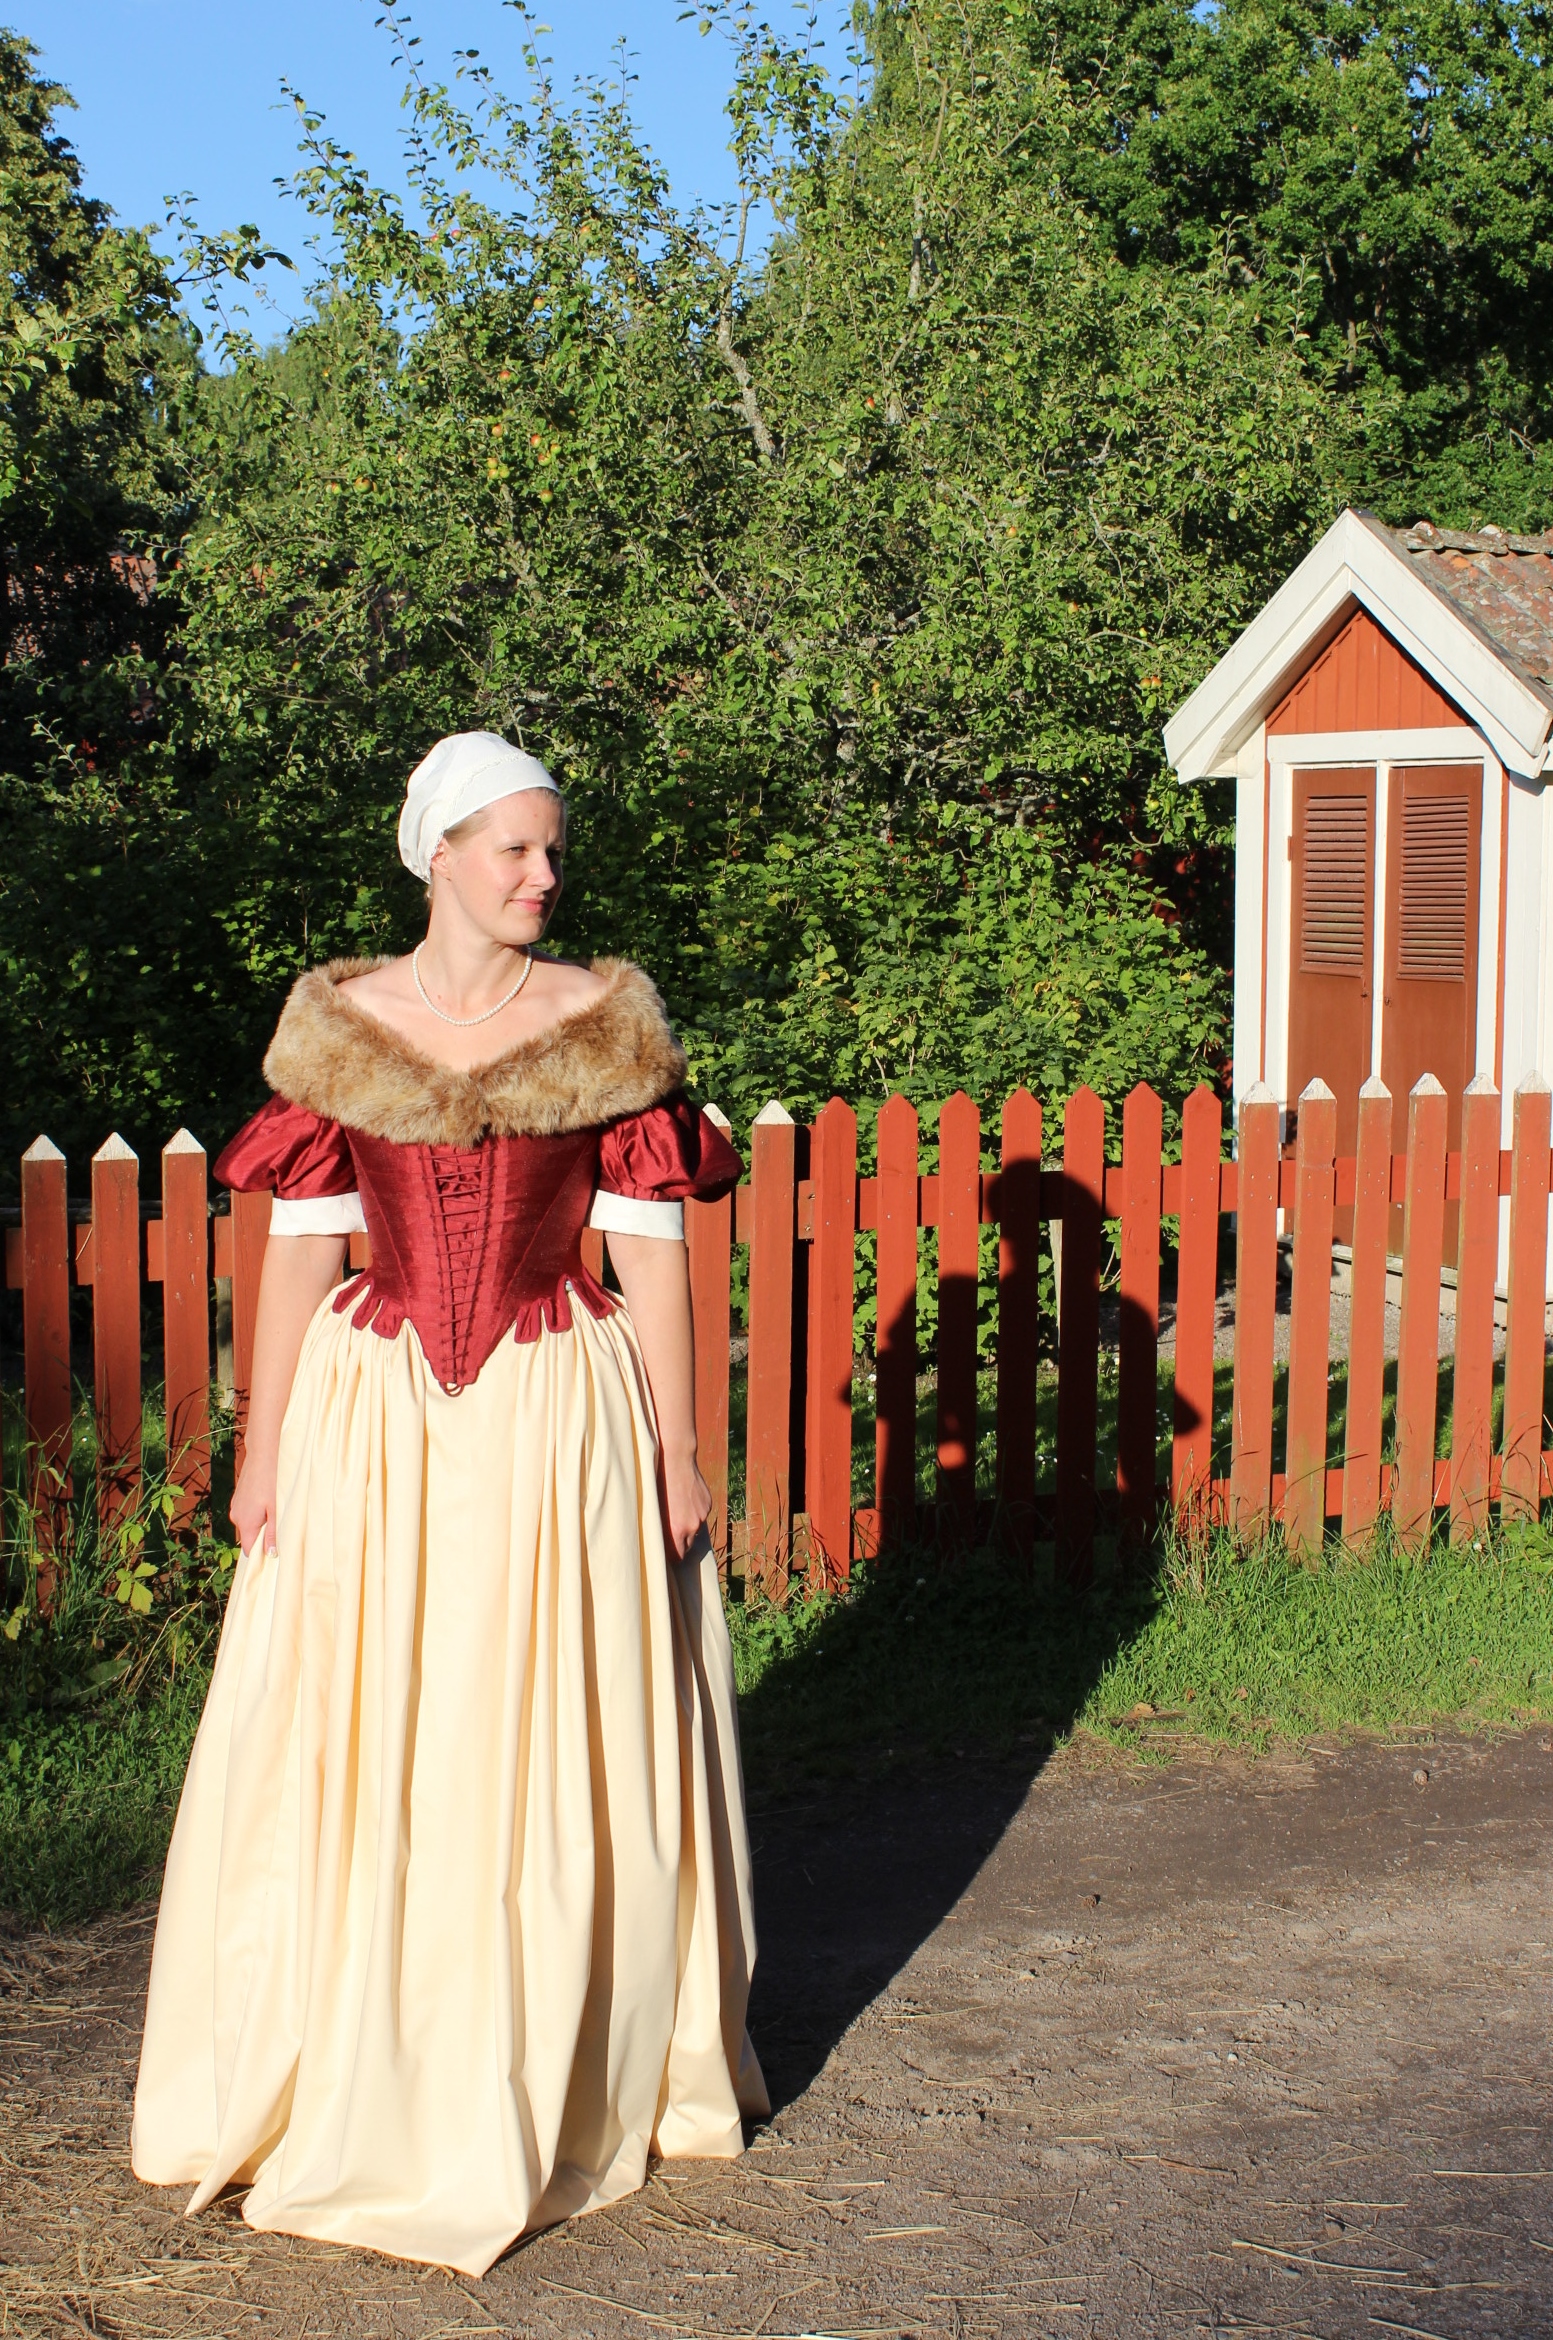
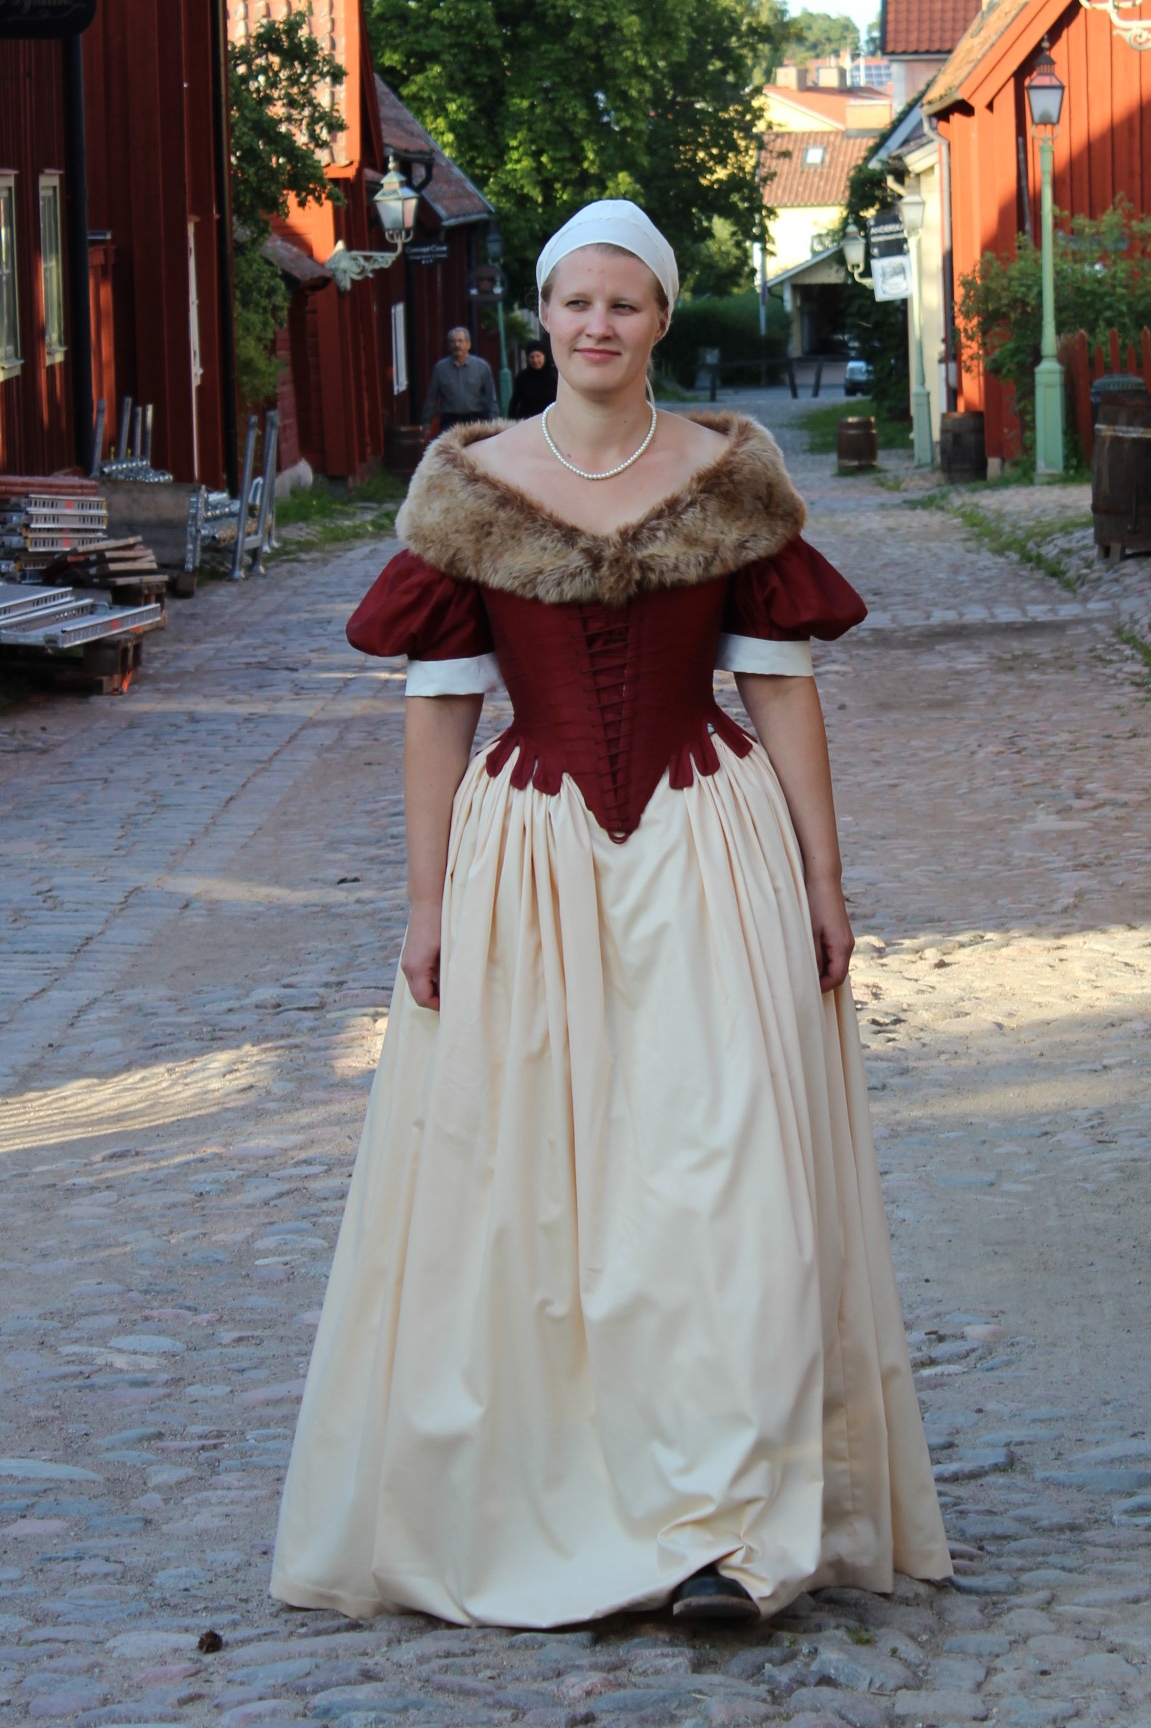
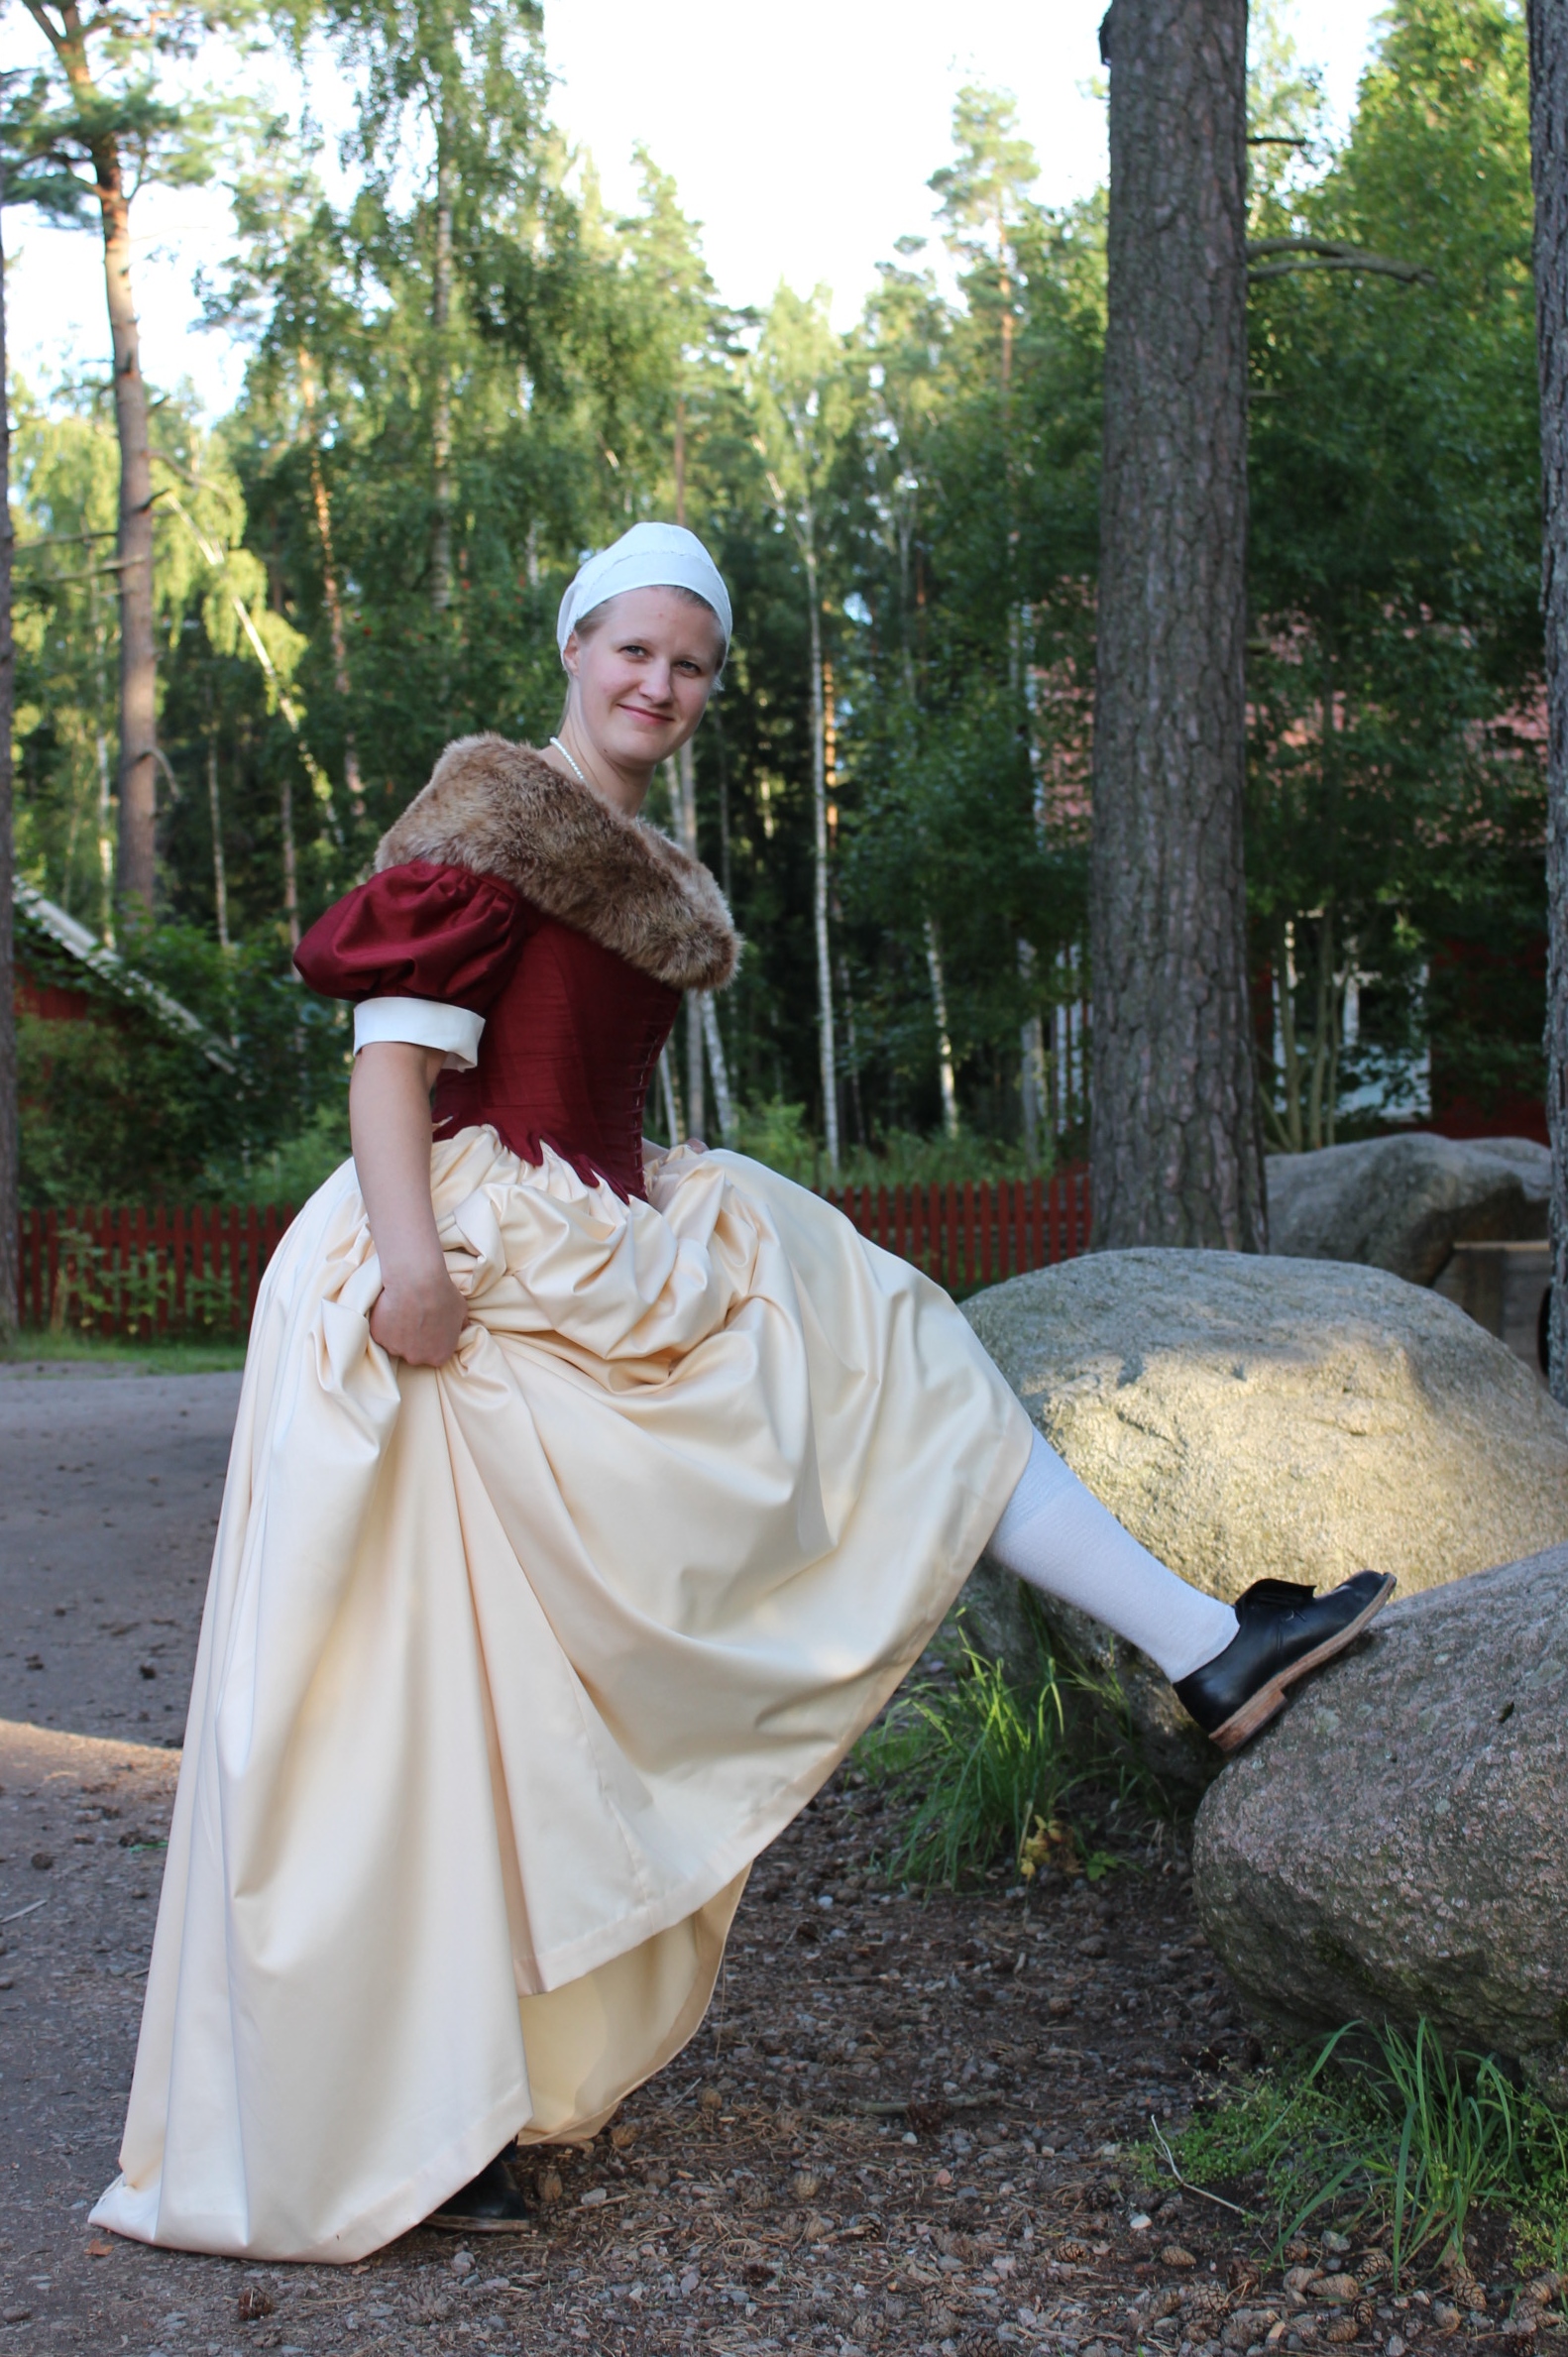
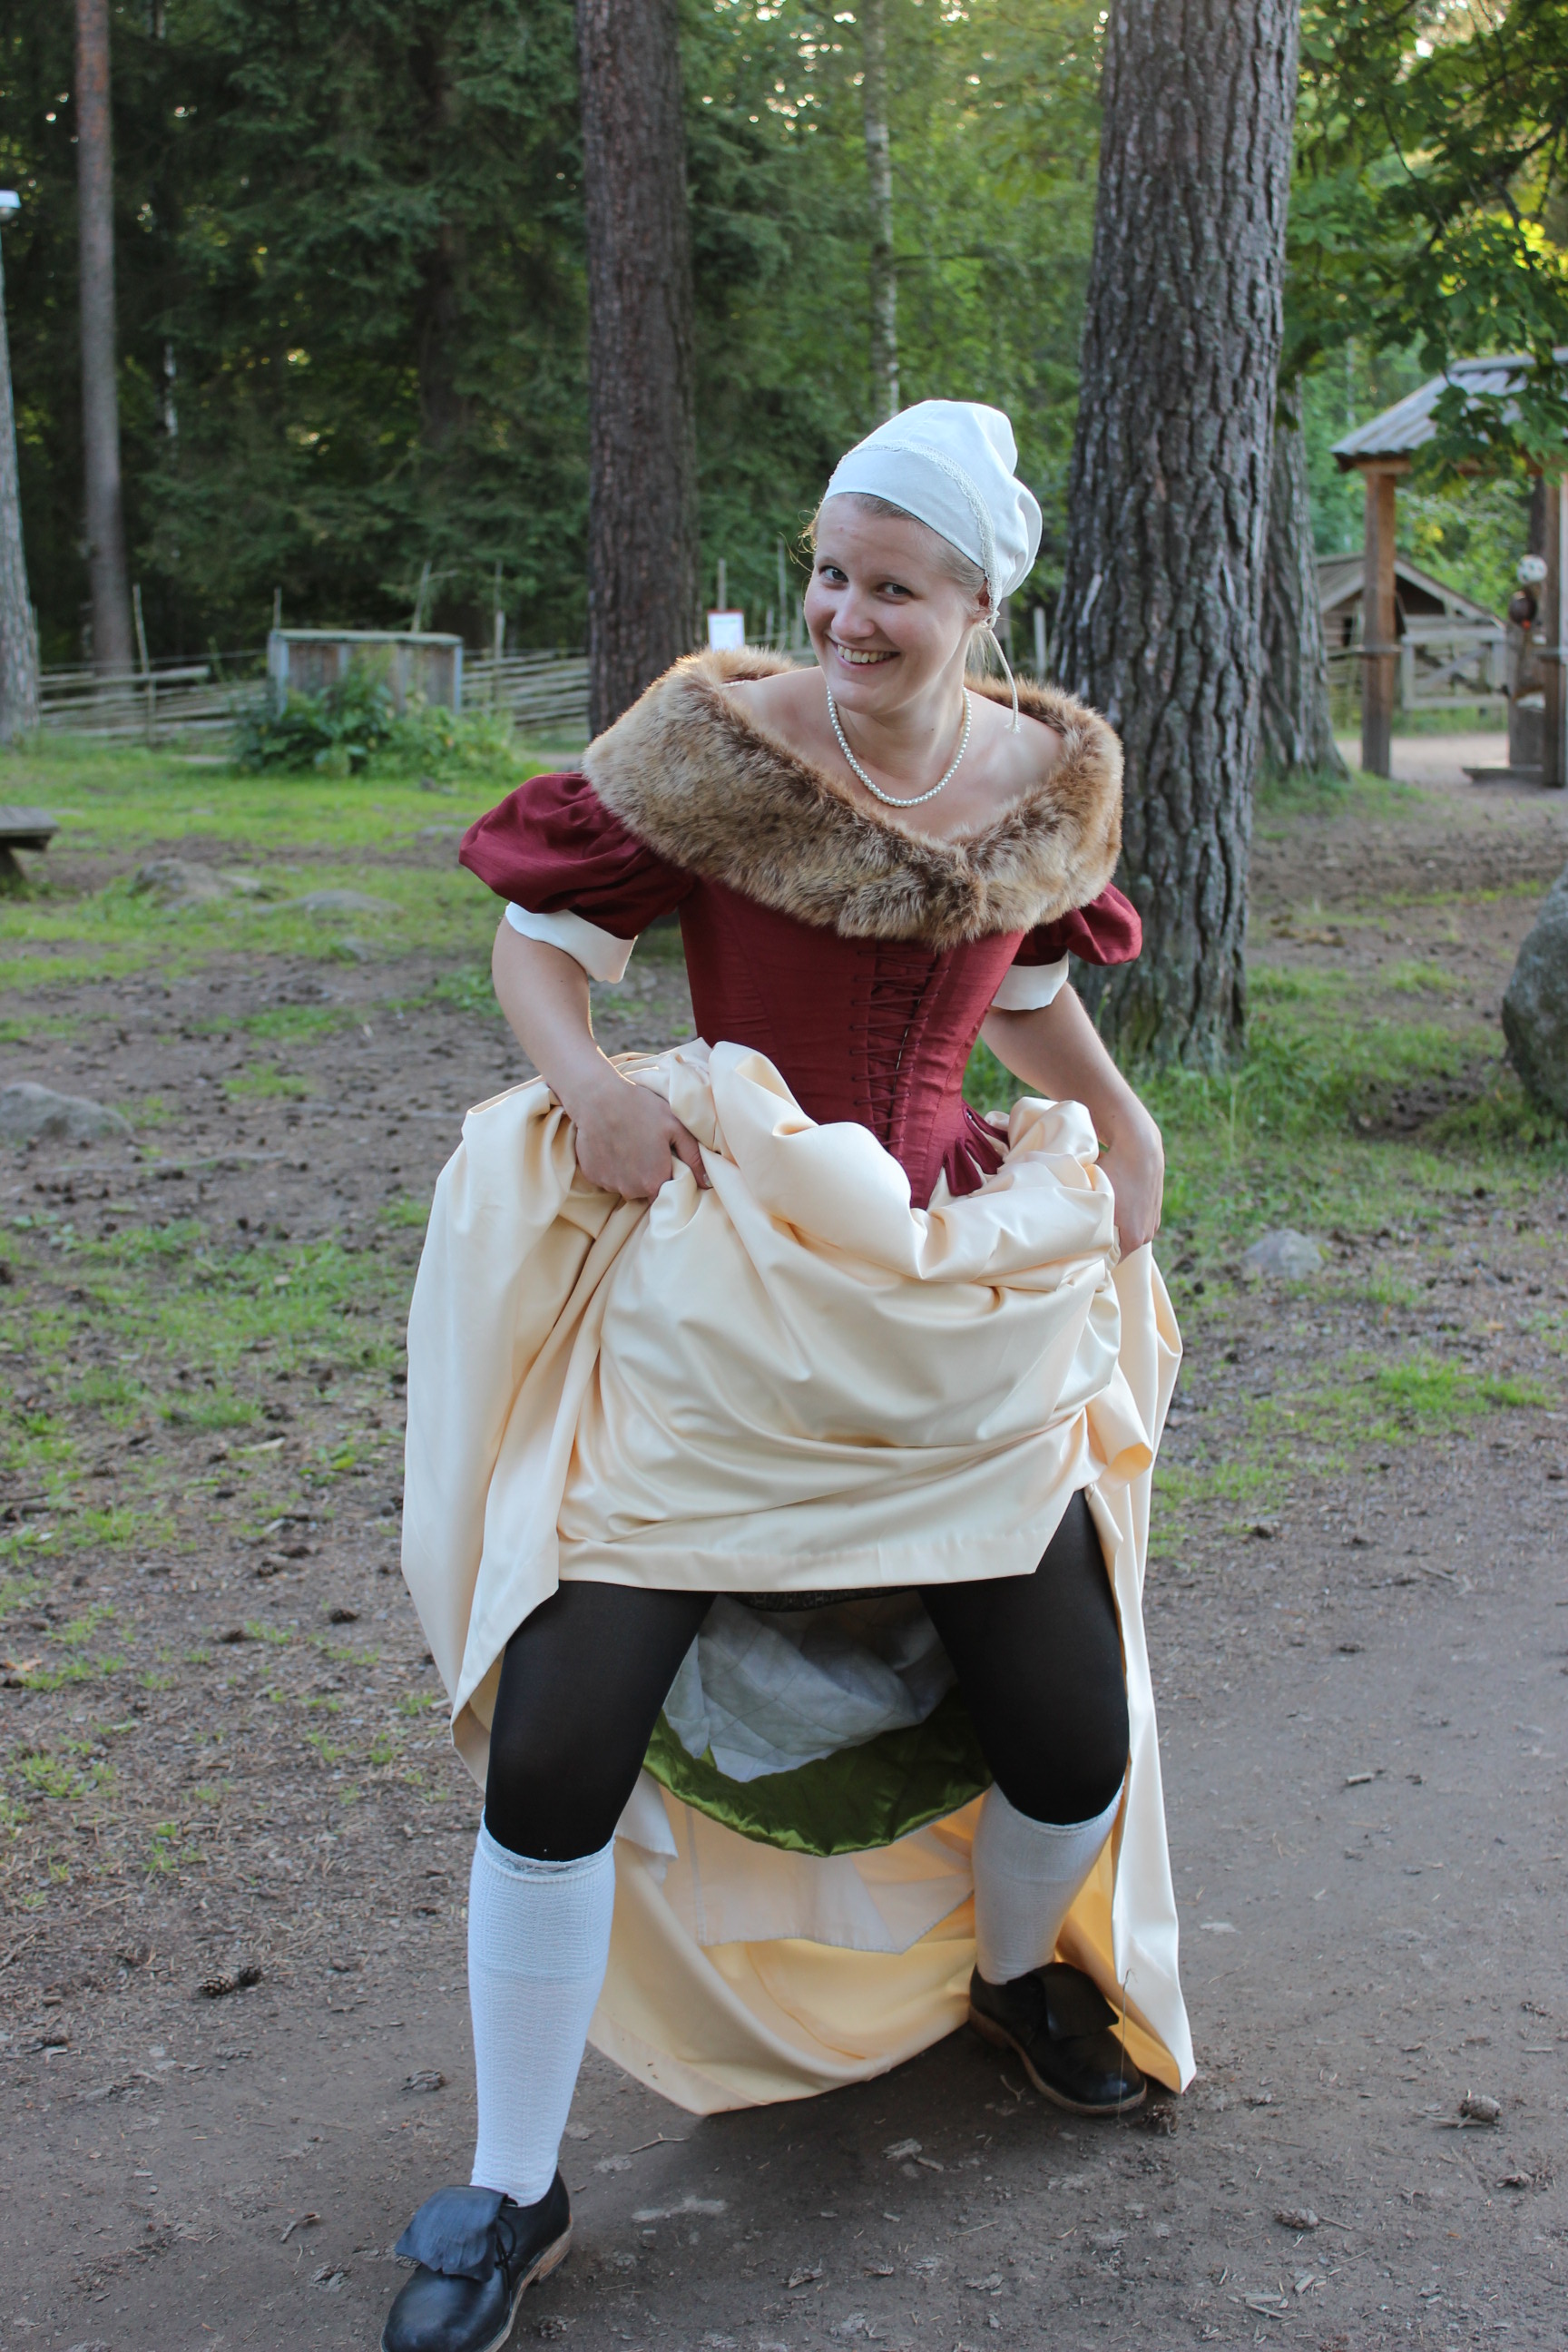 Model: Annika Siljat
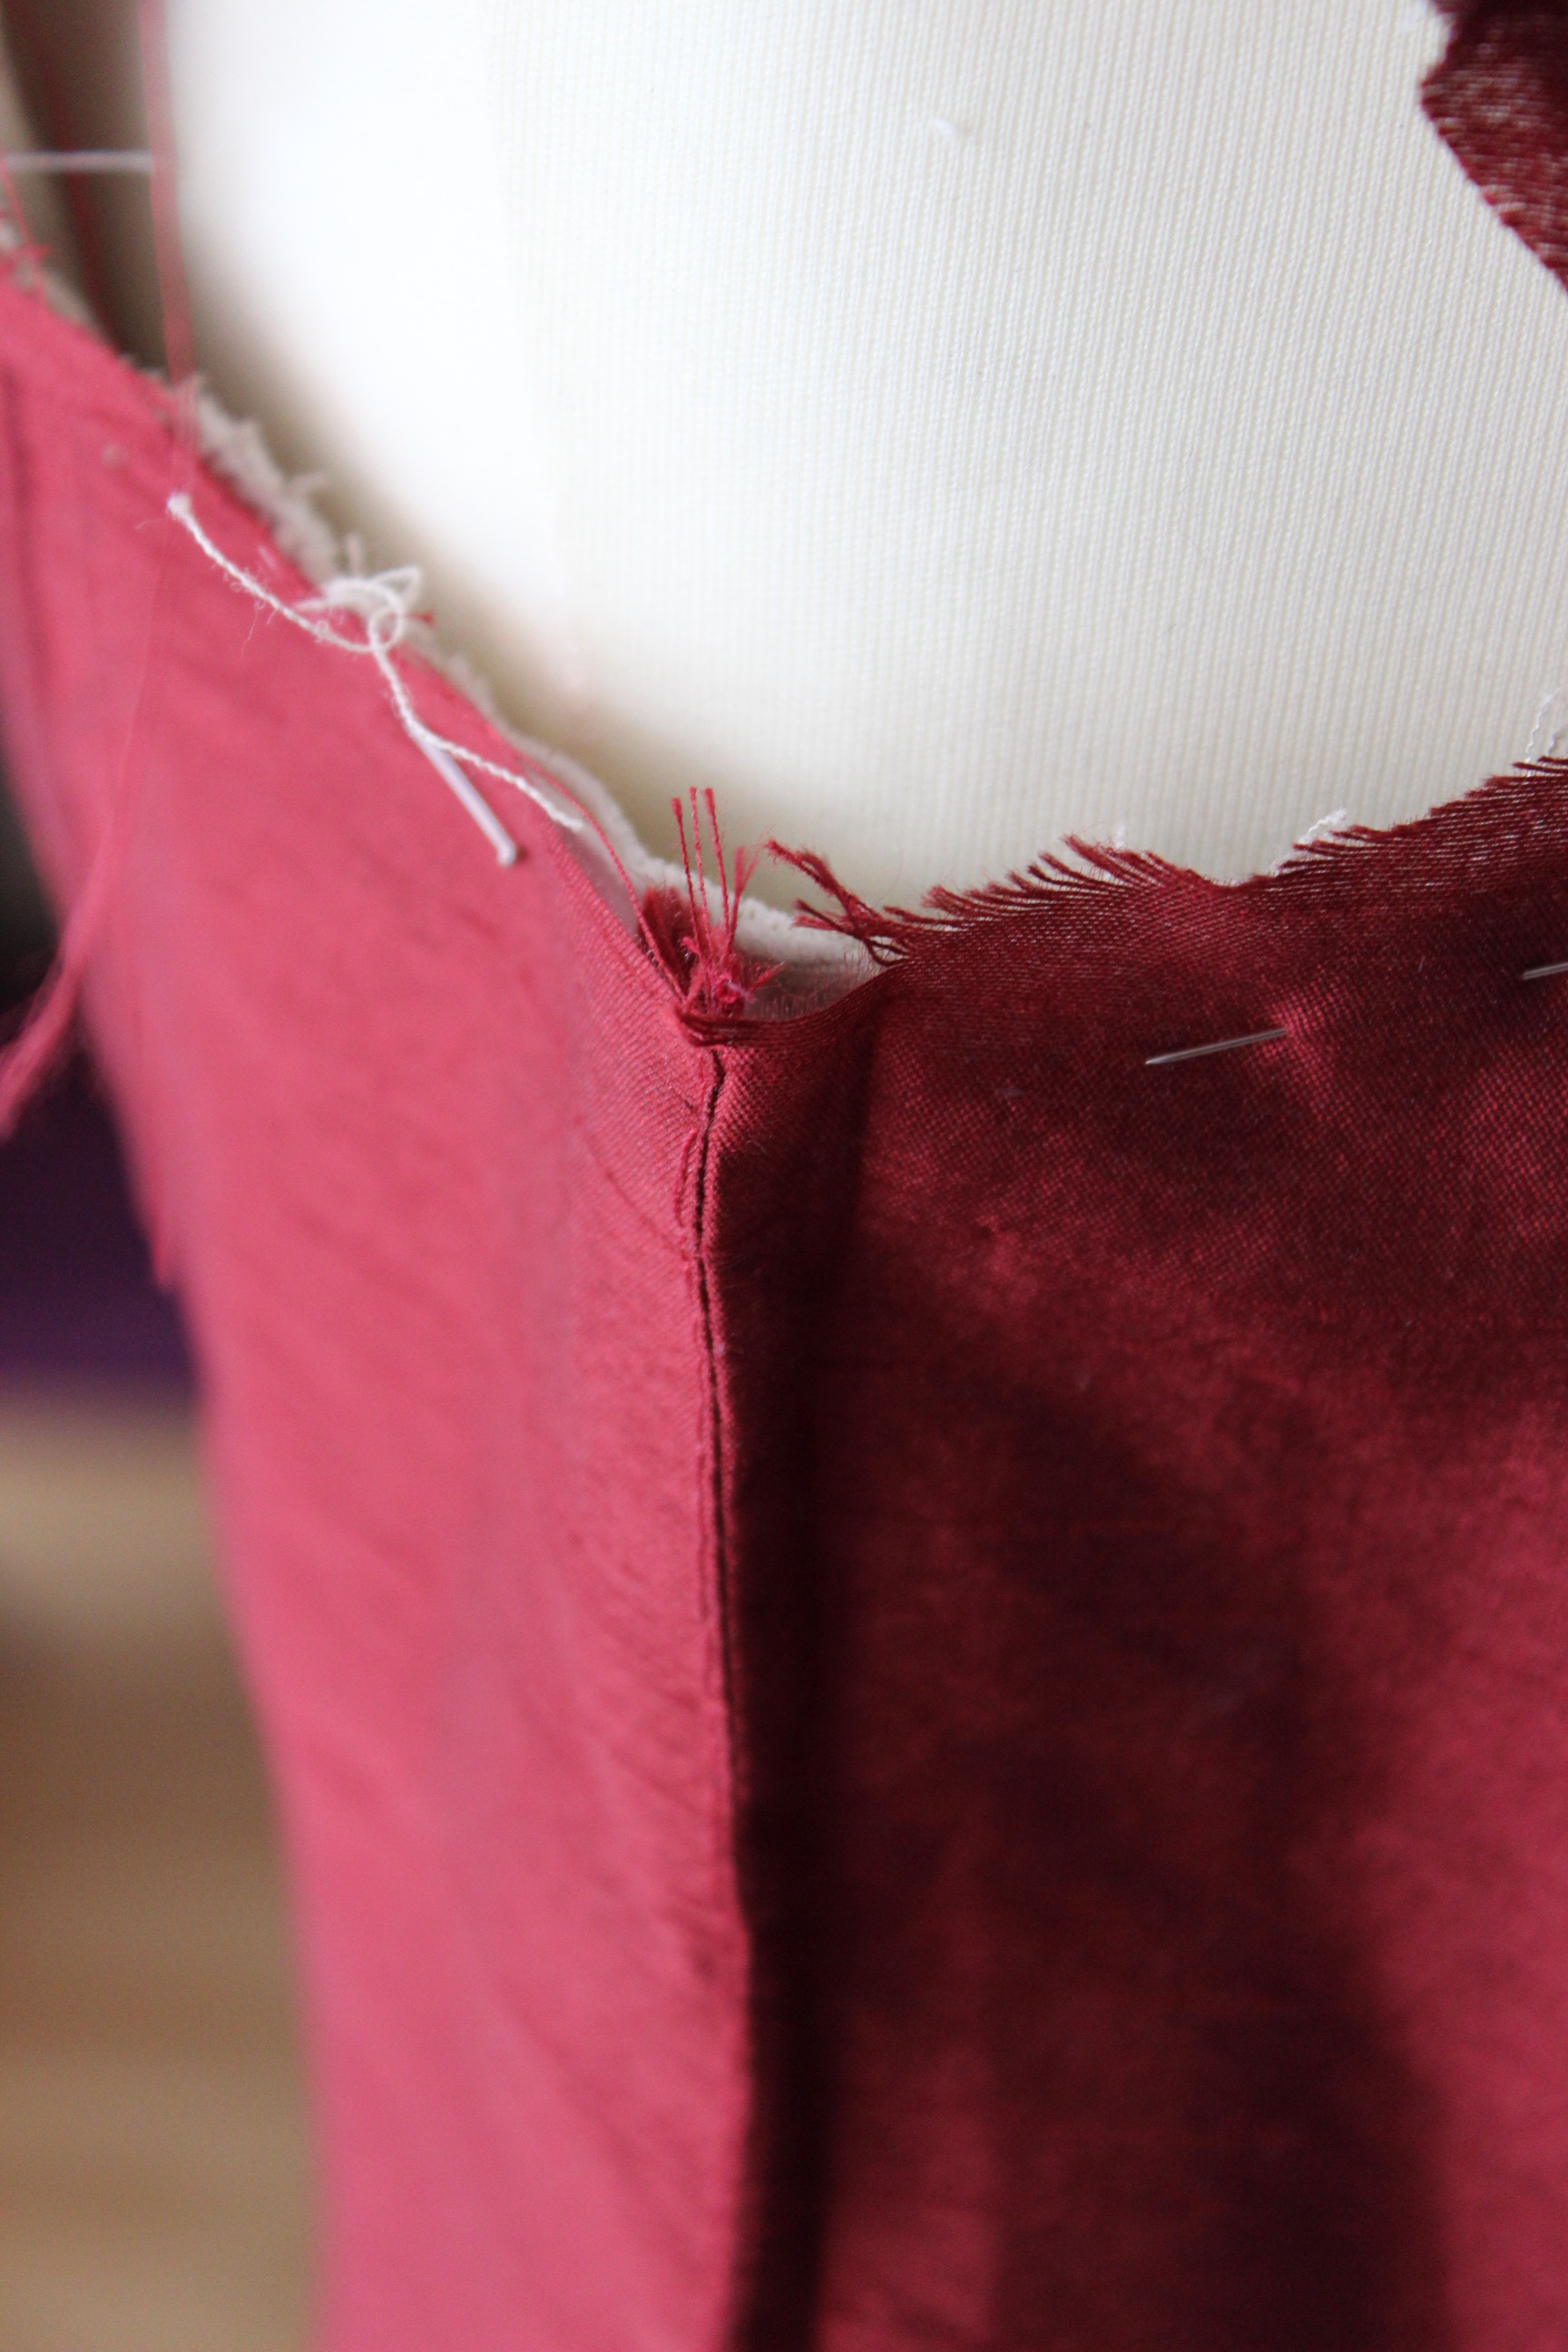
And here comes the final part of the making of my new 17th century bodice. (Part 1 & 2)
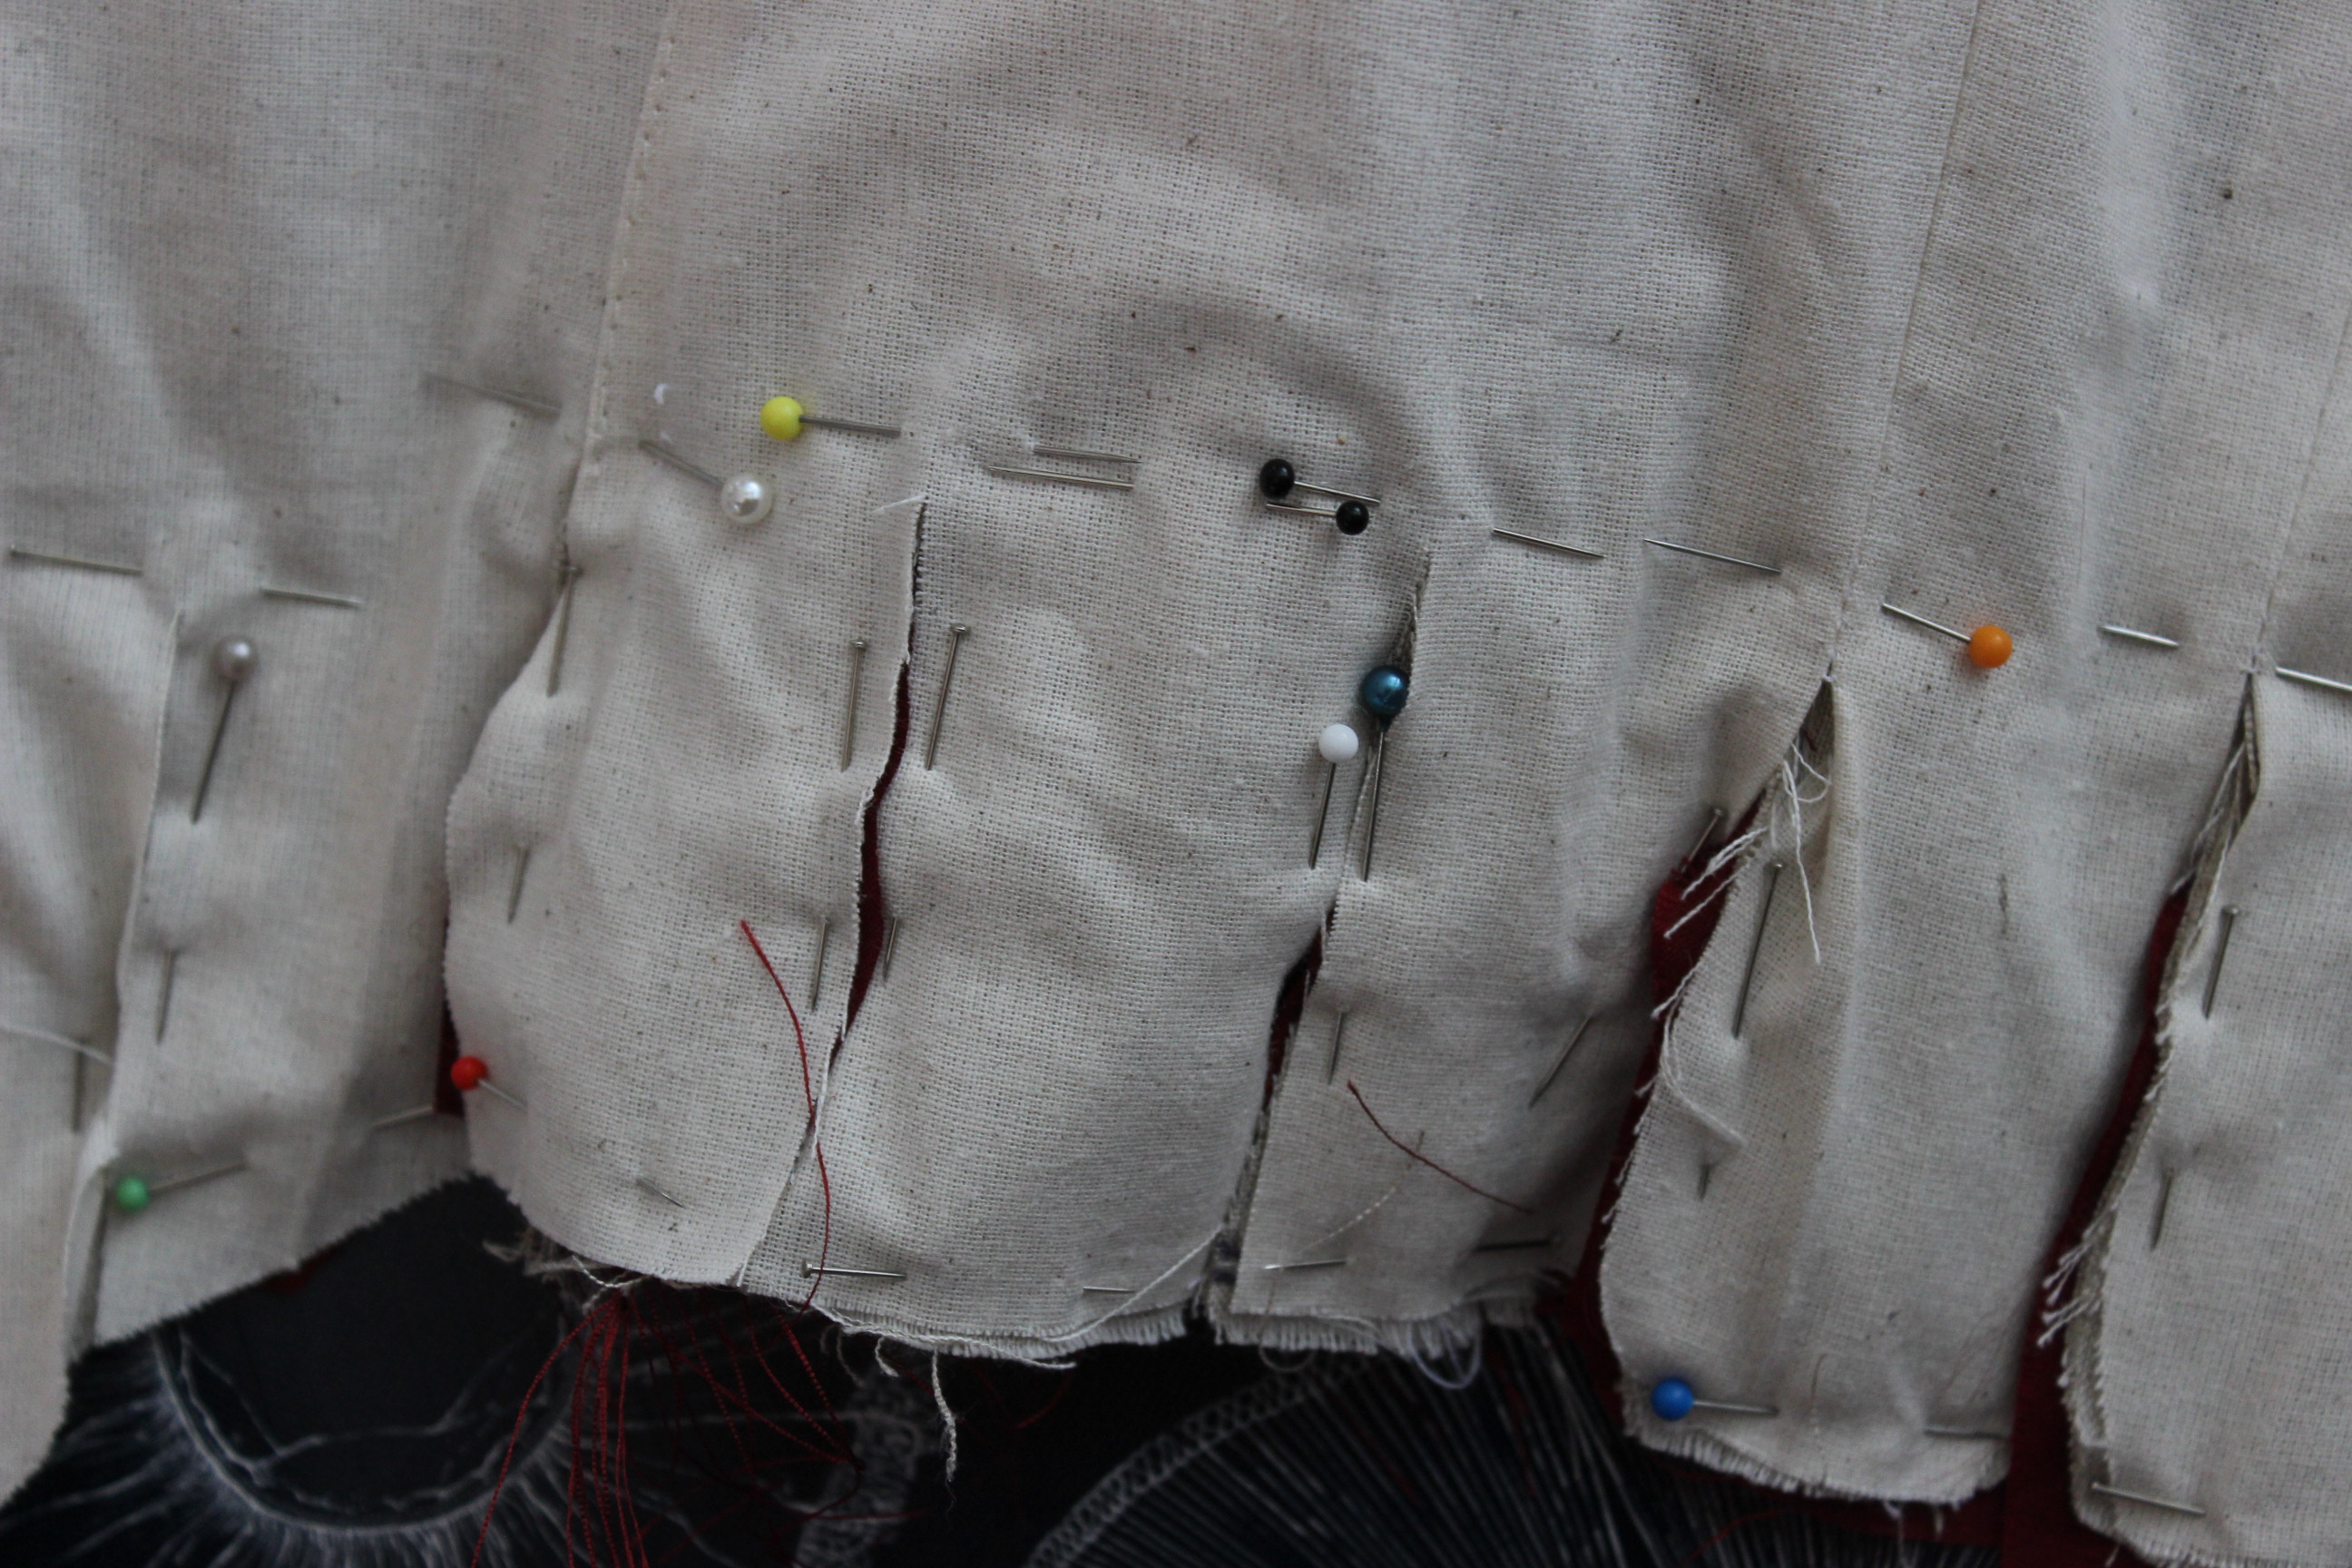
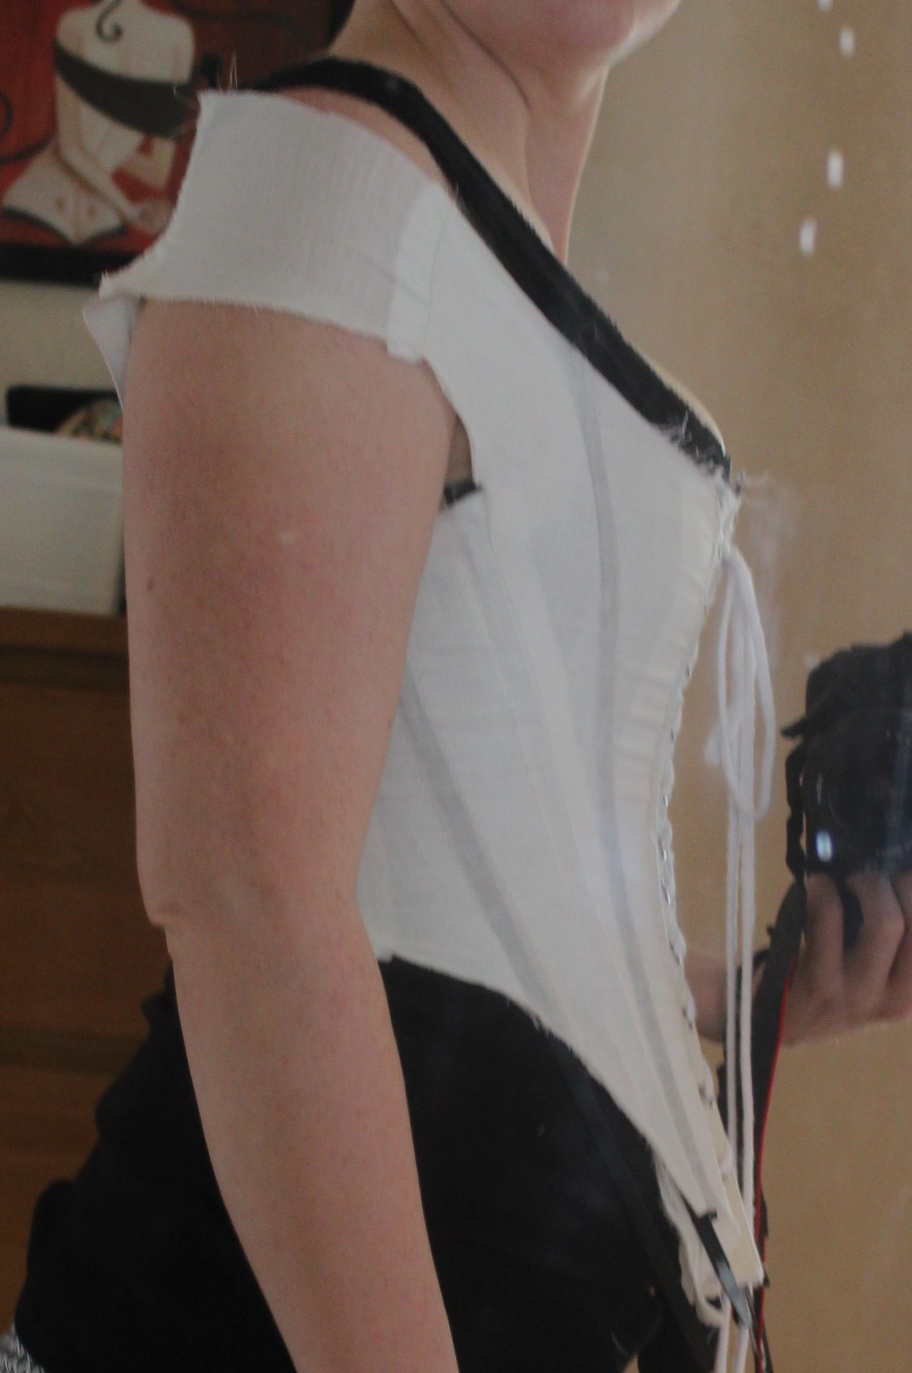
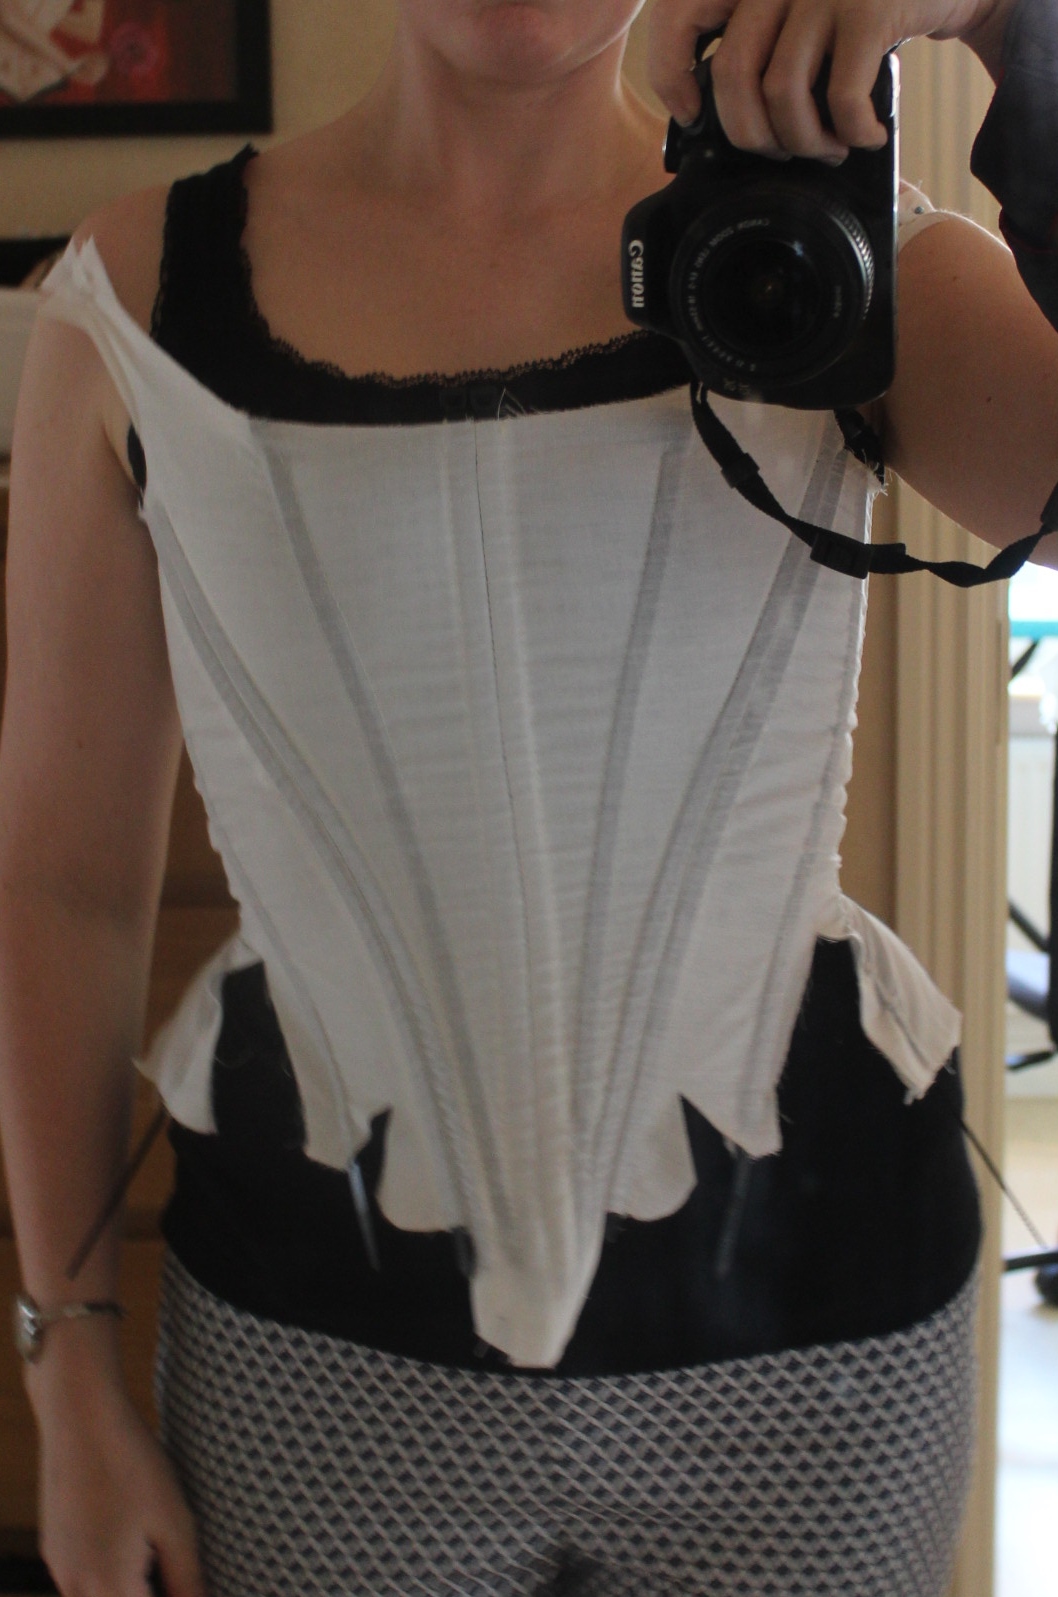
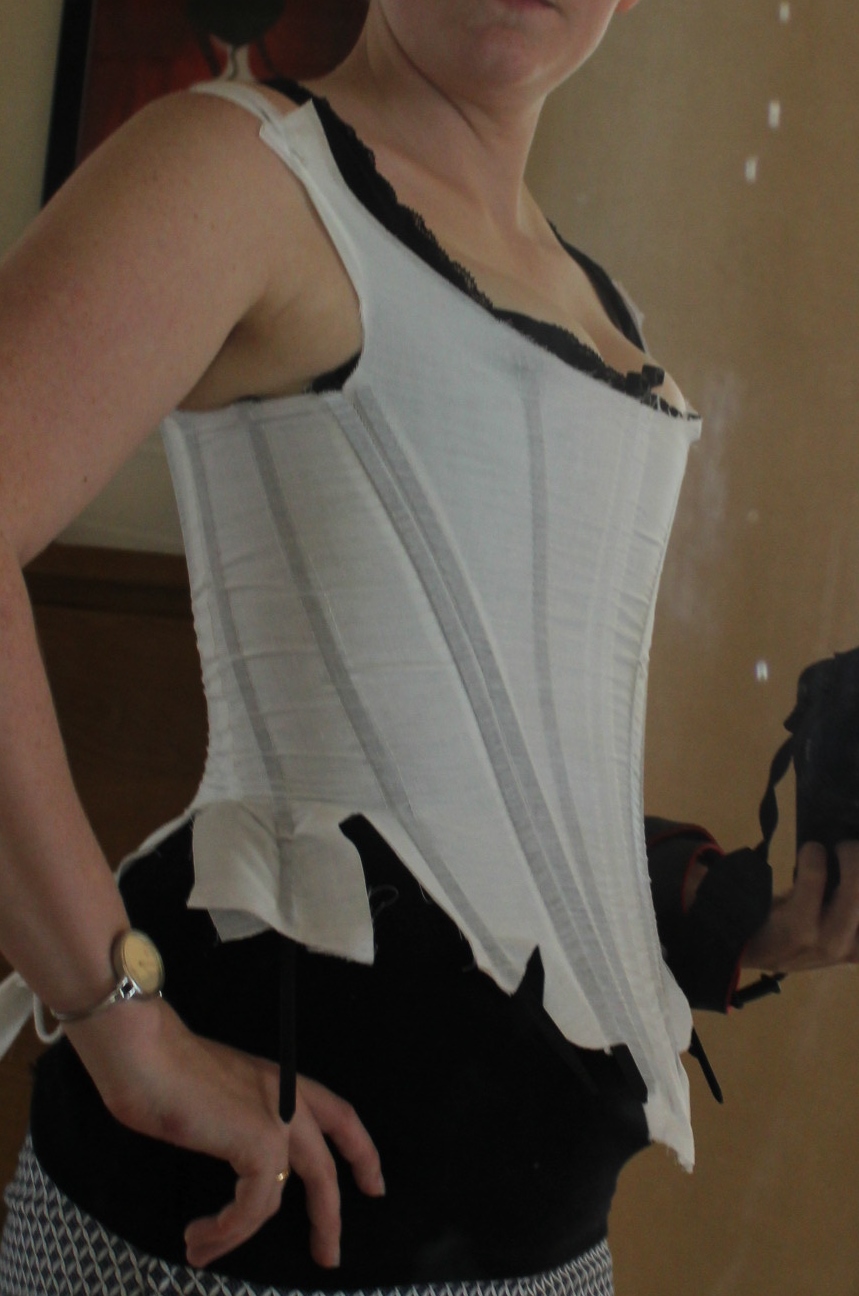
Once the outer fabric, lining and sleeves where set it was time to deal with the tabs.
(Every stay makers dread)
I started by cutting them open and then I pinned the three layers together, and basted
I ran into some problems when turning the front edges under, and no matter what I did they came out awful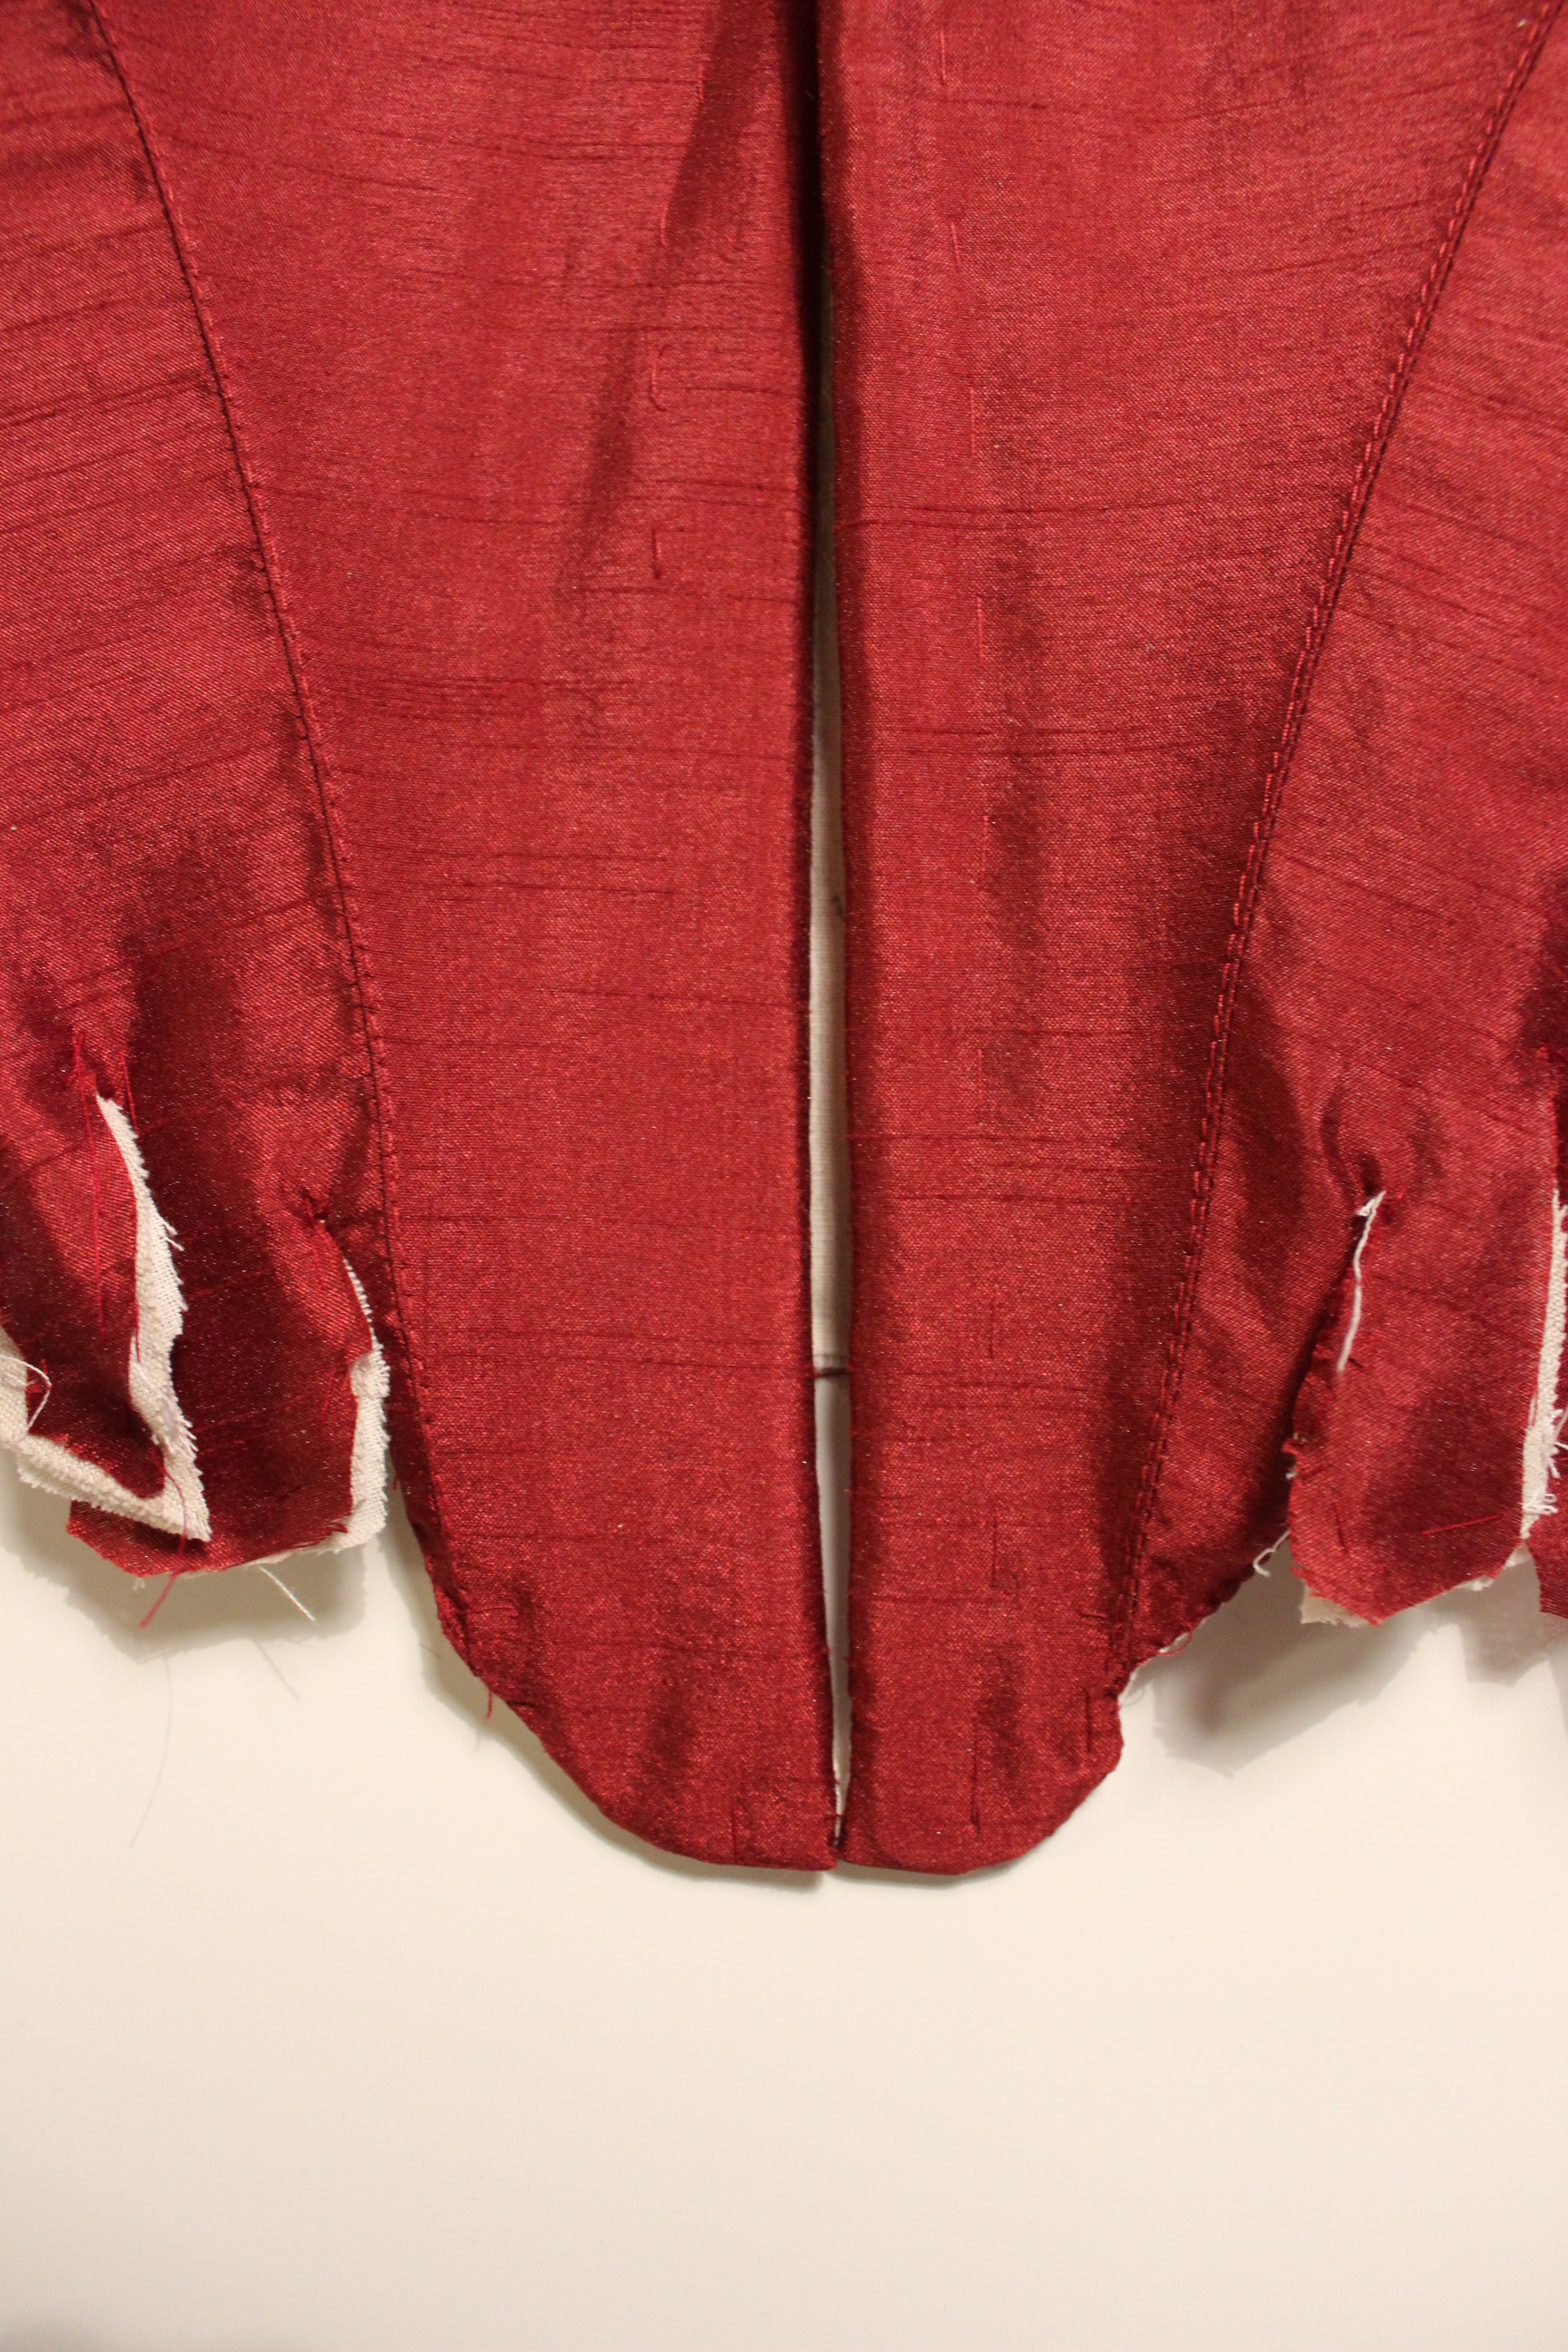 This is seriously my third re-do, and unfortunately the best of my tries.
I had no idea how to fix i and the problem caused me to loose steam (and love) for the project.
After some nights to cool of and think, I figured to just hide it.
So I went trough my stash and found some lovely golden lace, to see if that would do the trick.

In the end I decided not to use the lace, even though I still think it looks stunning (maybe something for a later date).
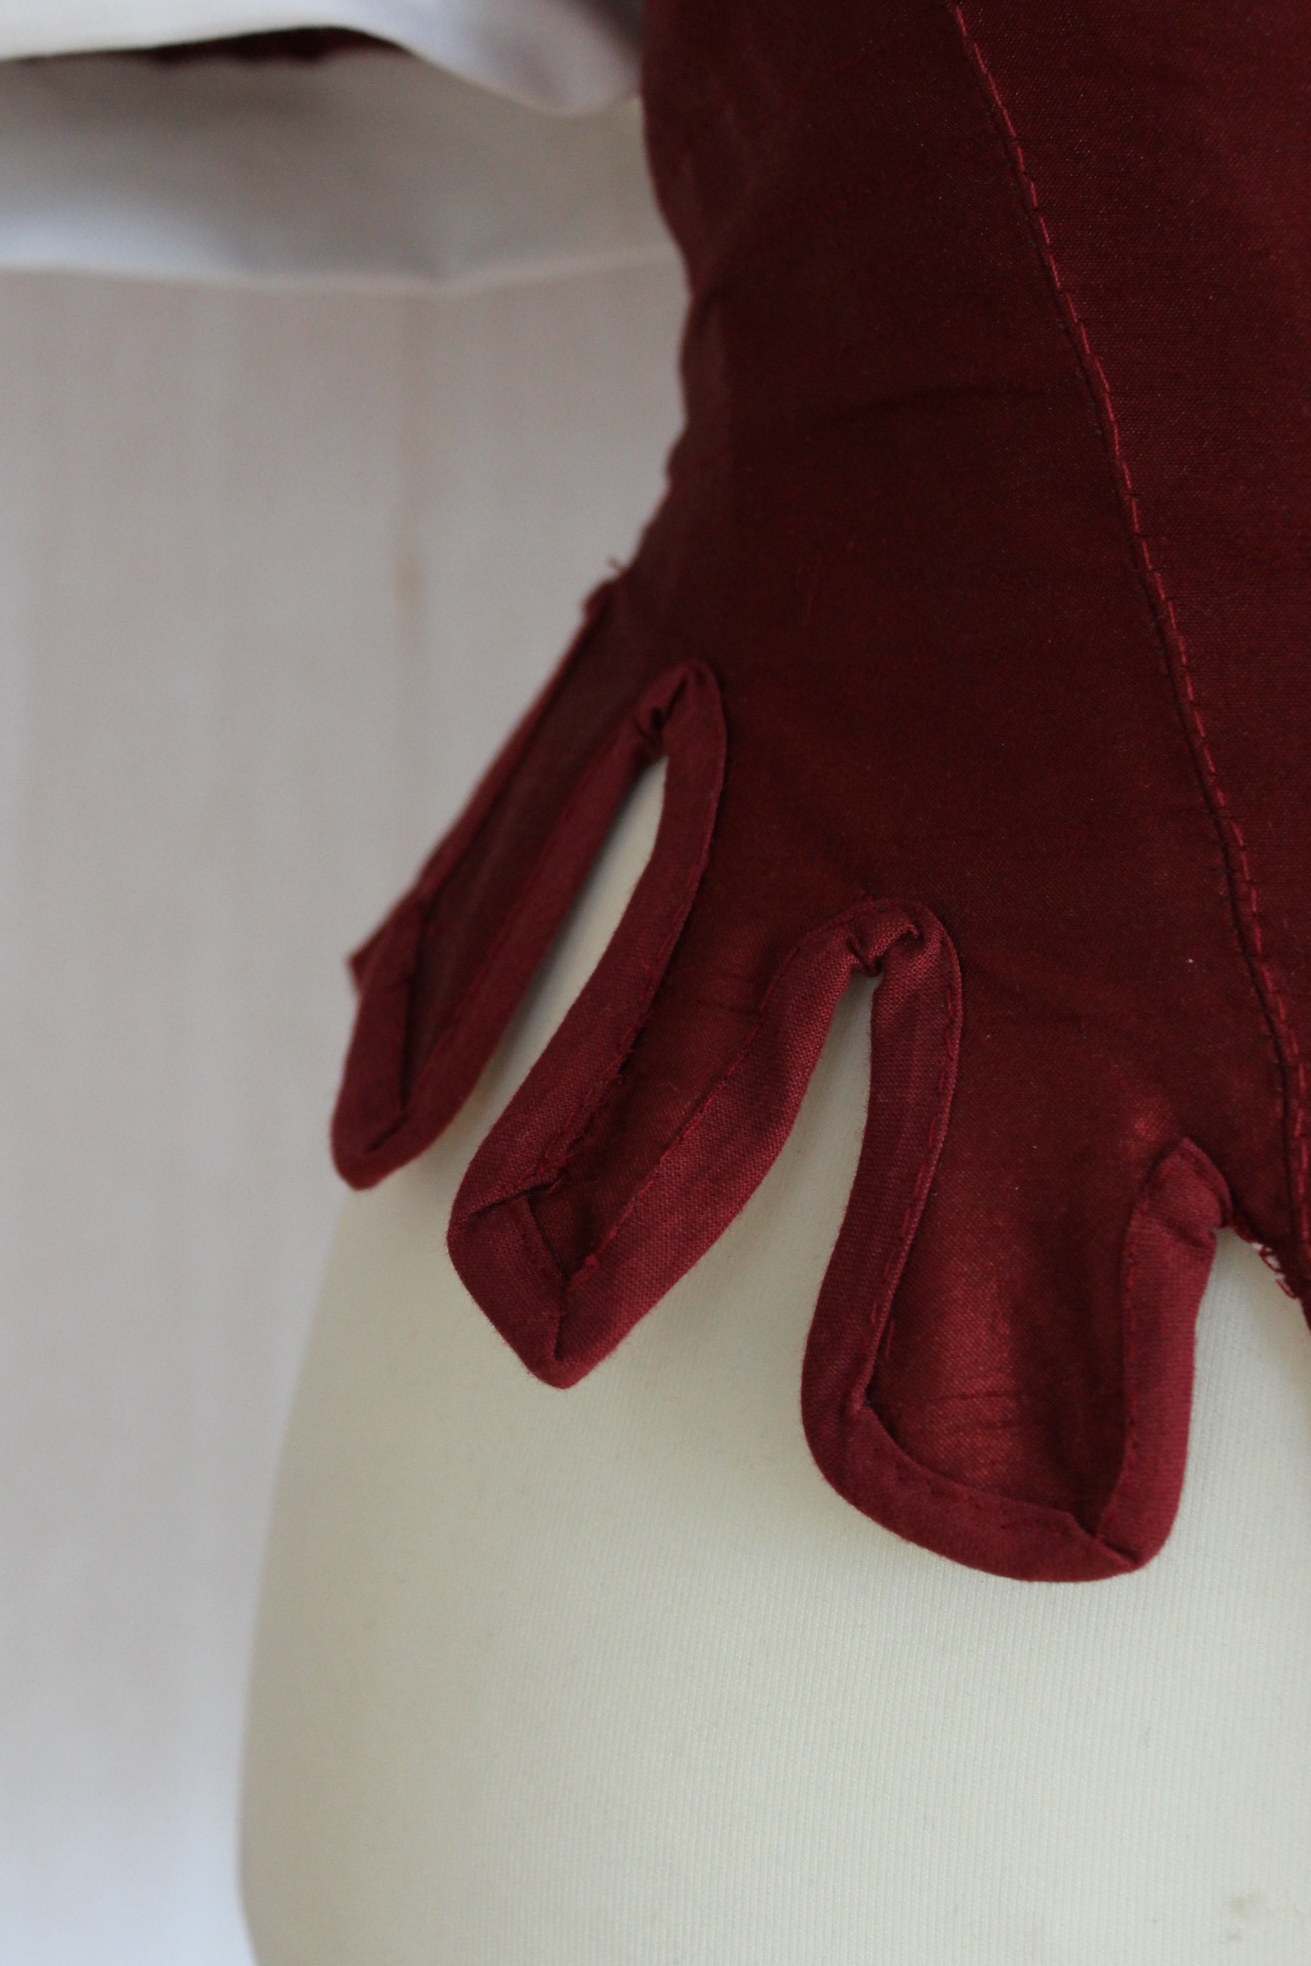
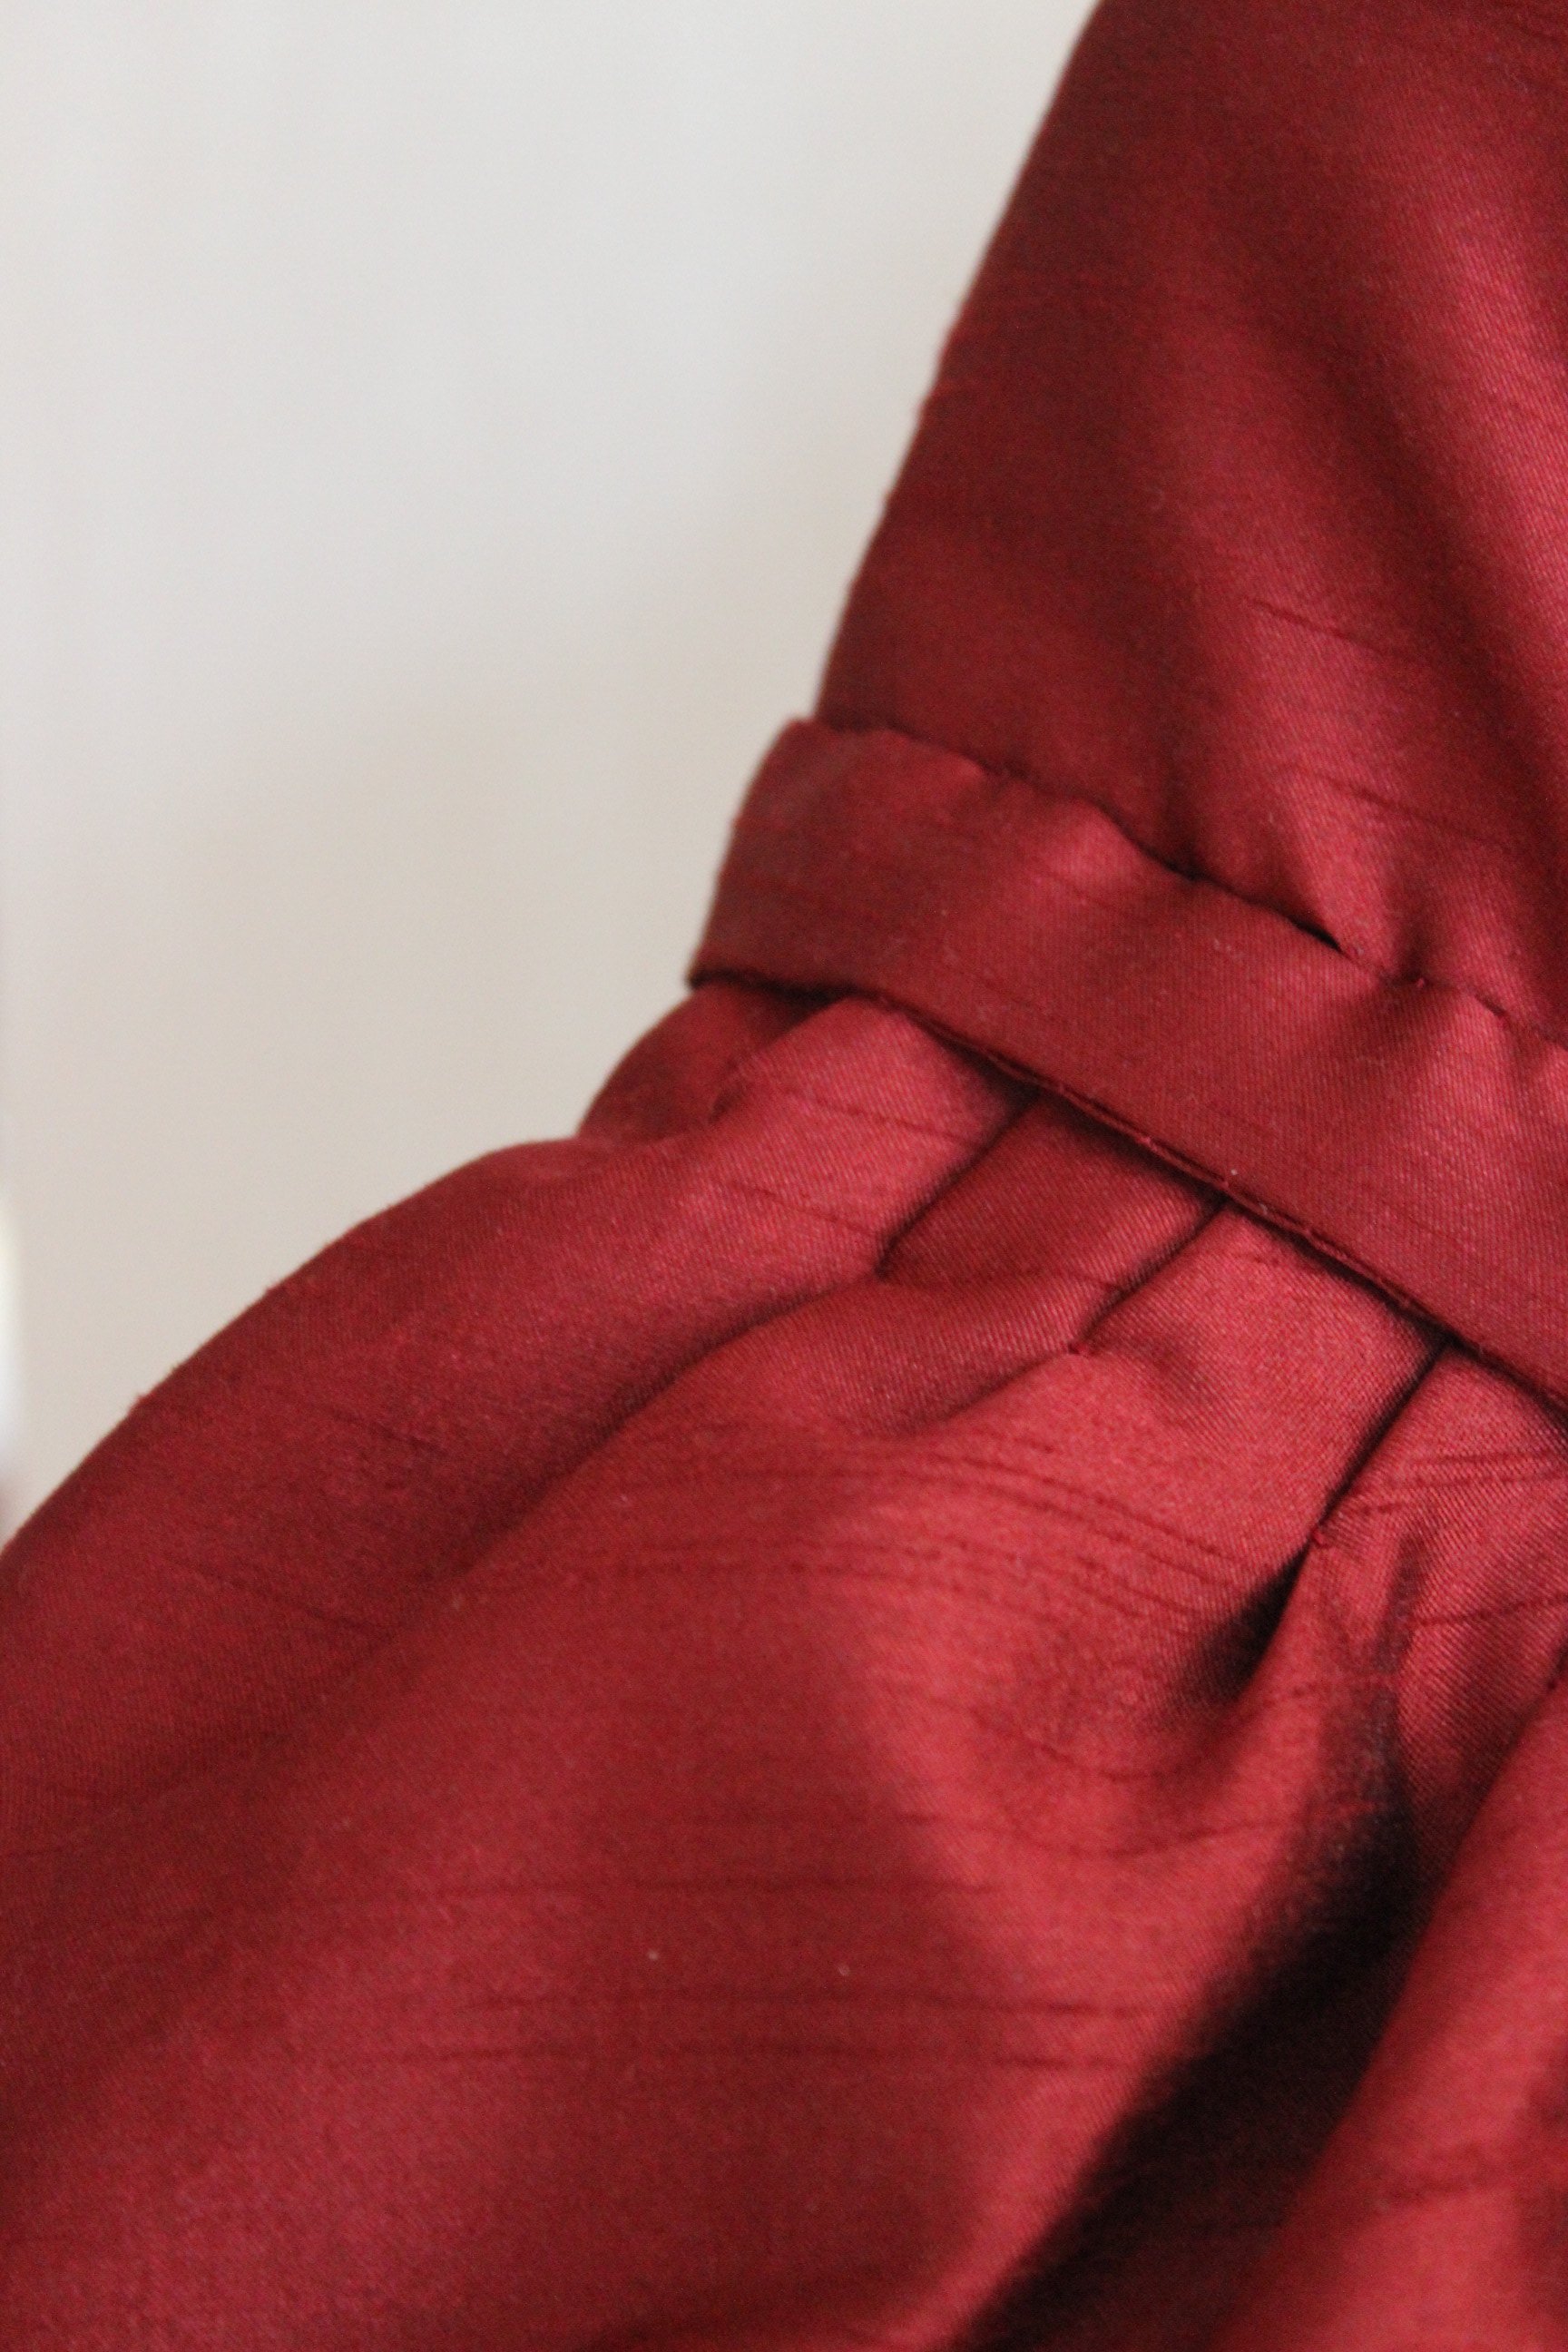
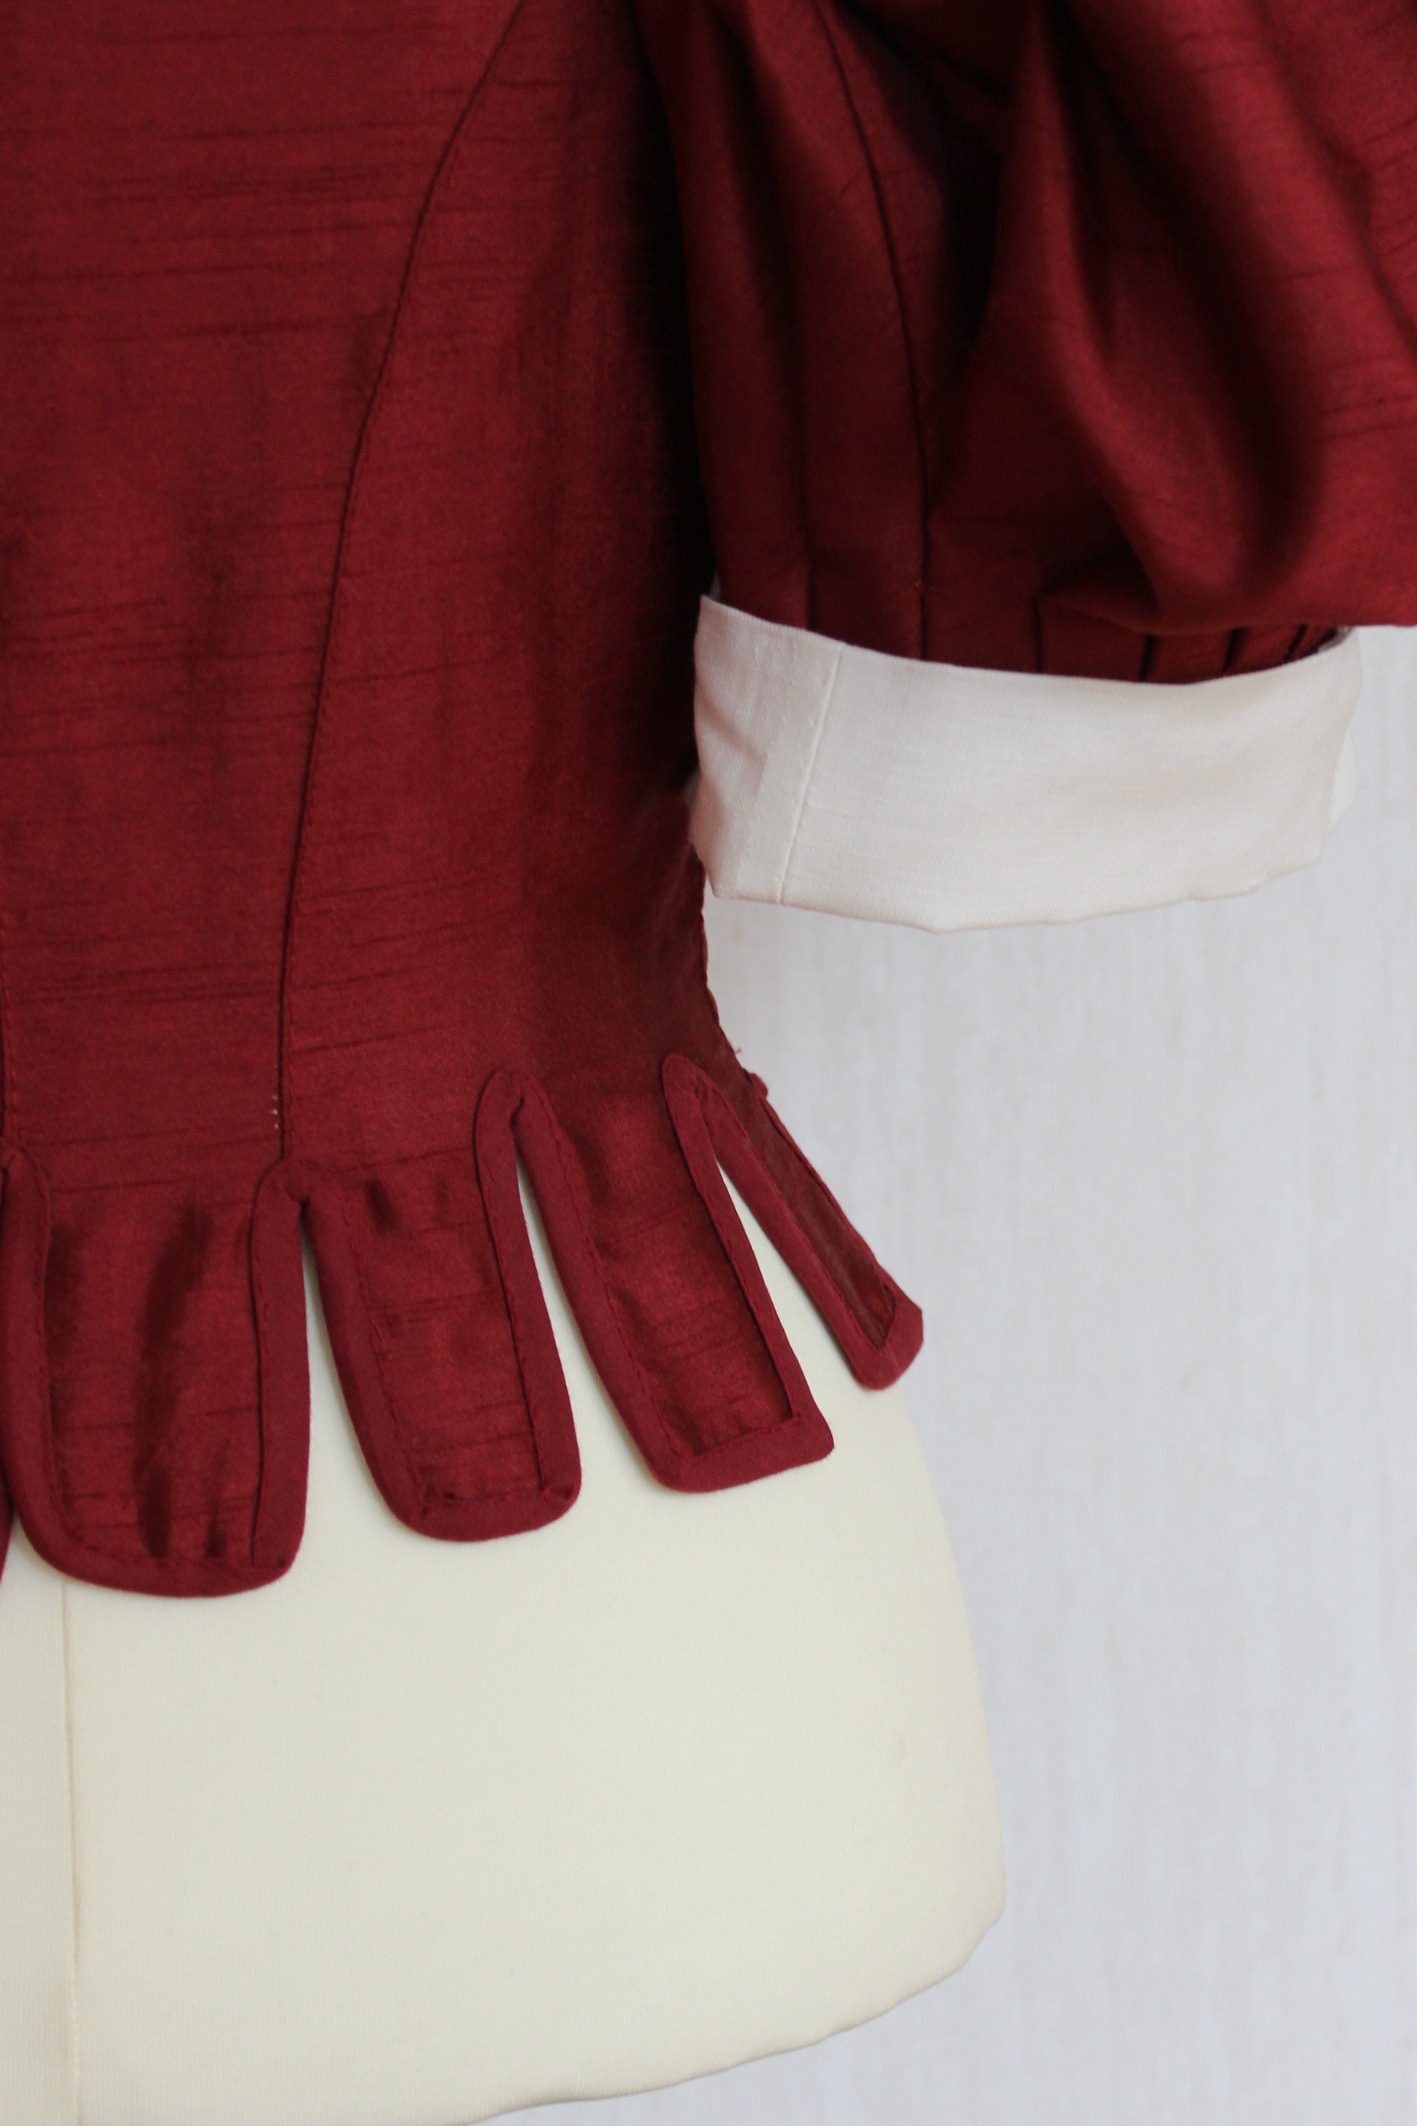
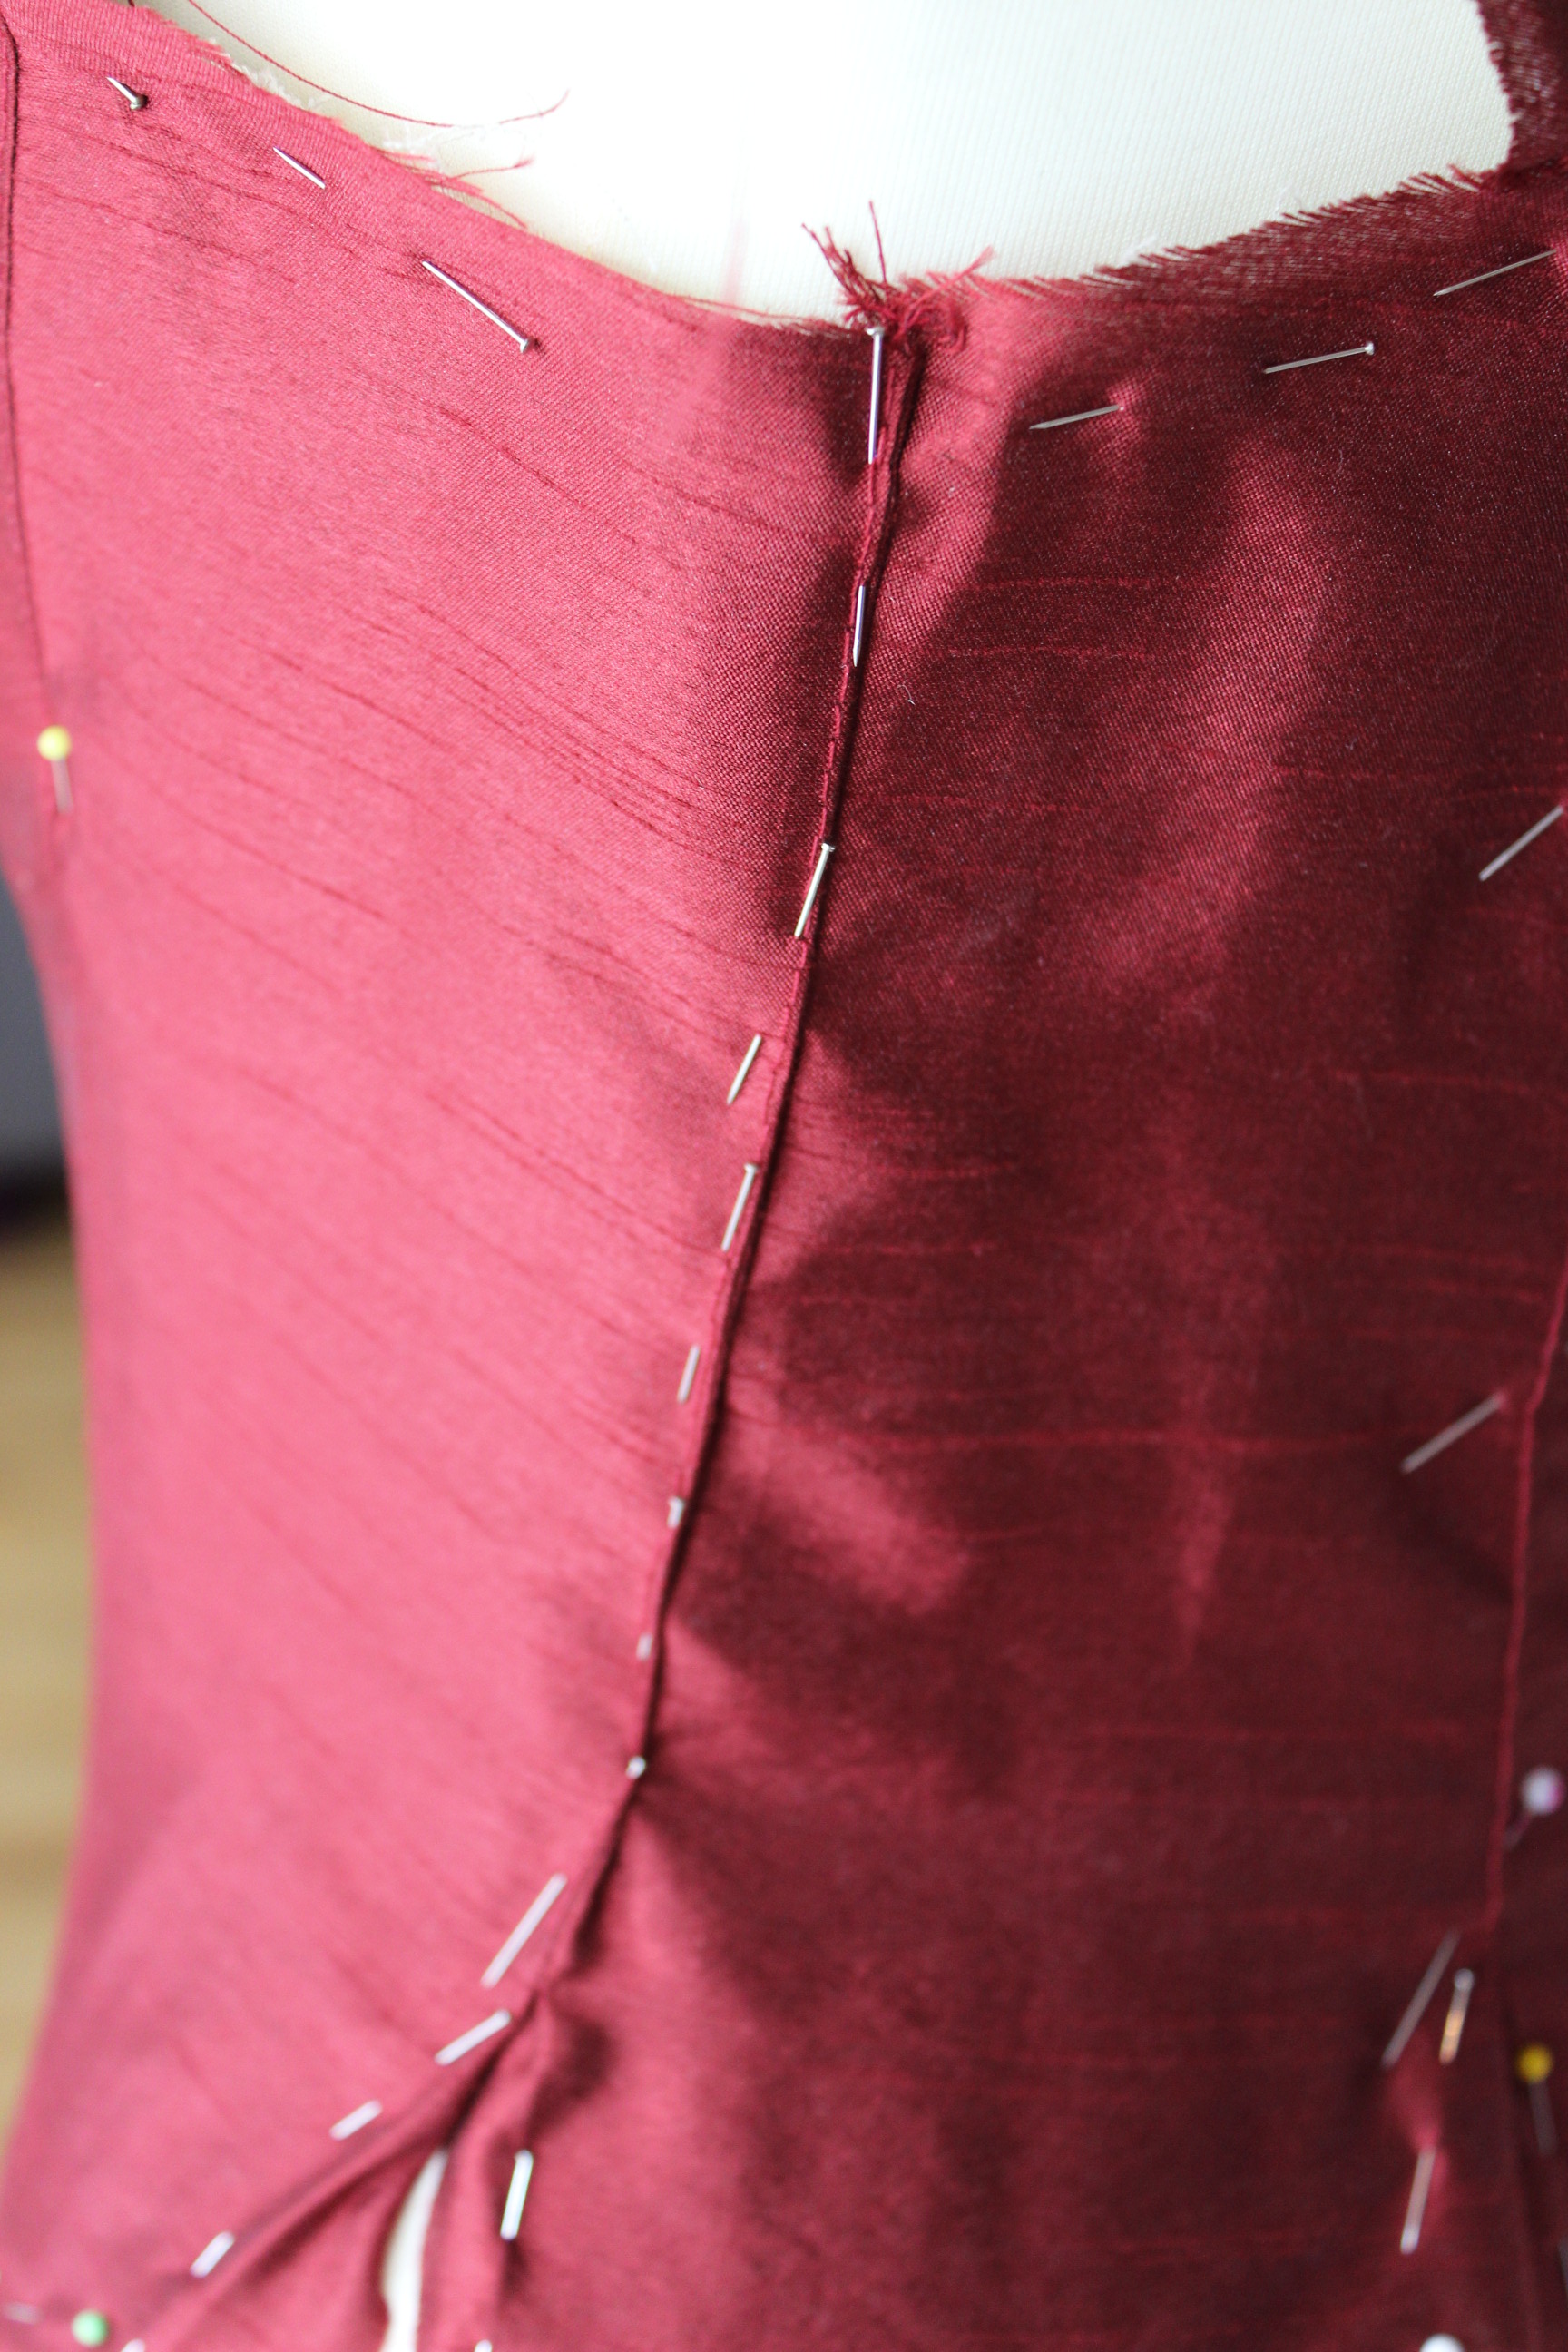
Once I excepted the less then perfect front, it was time to start covering the tabs.
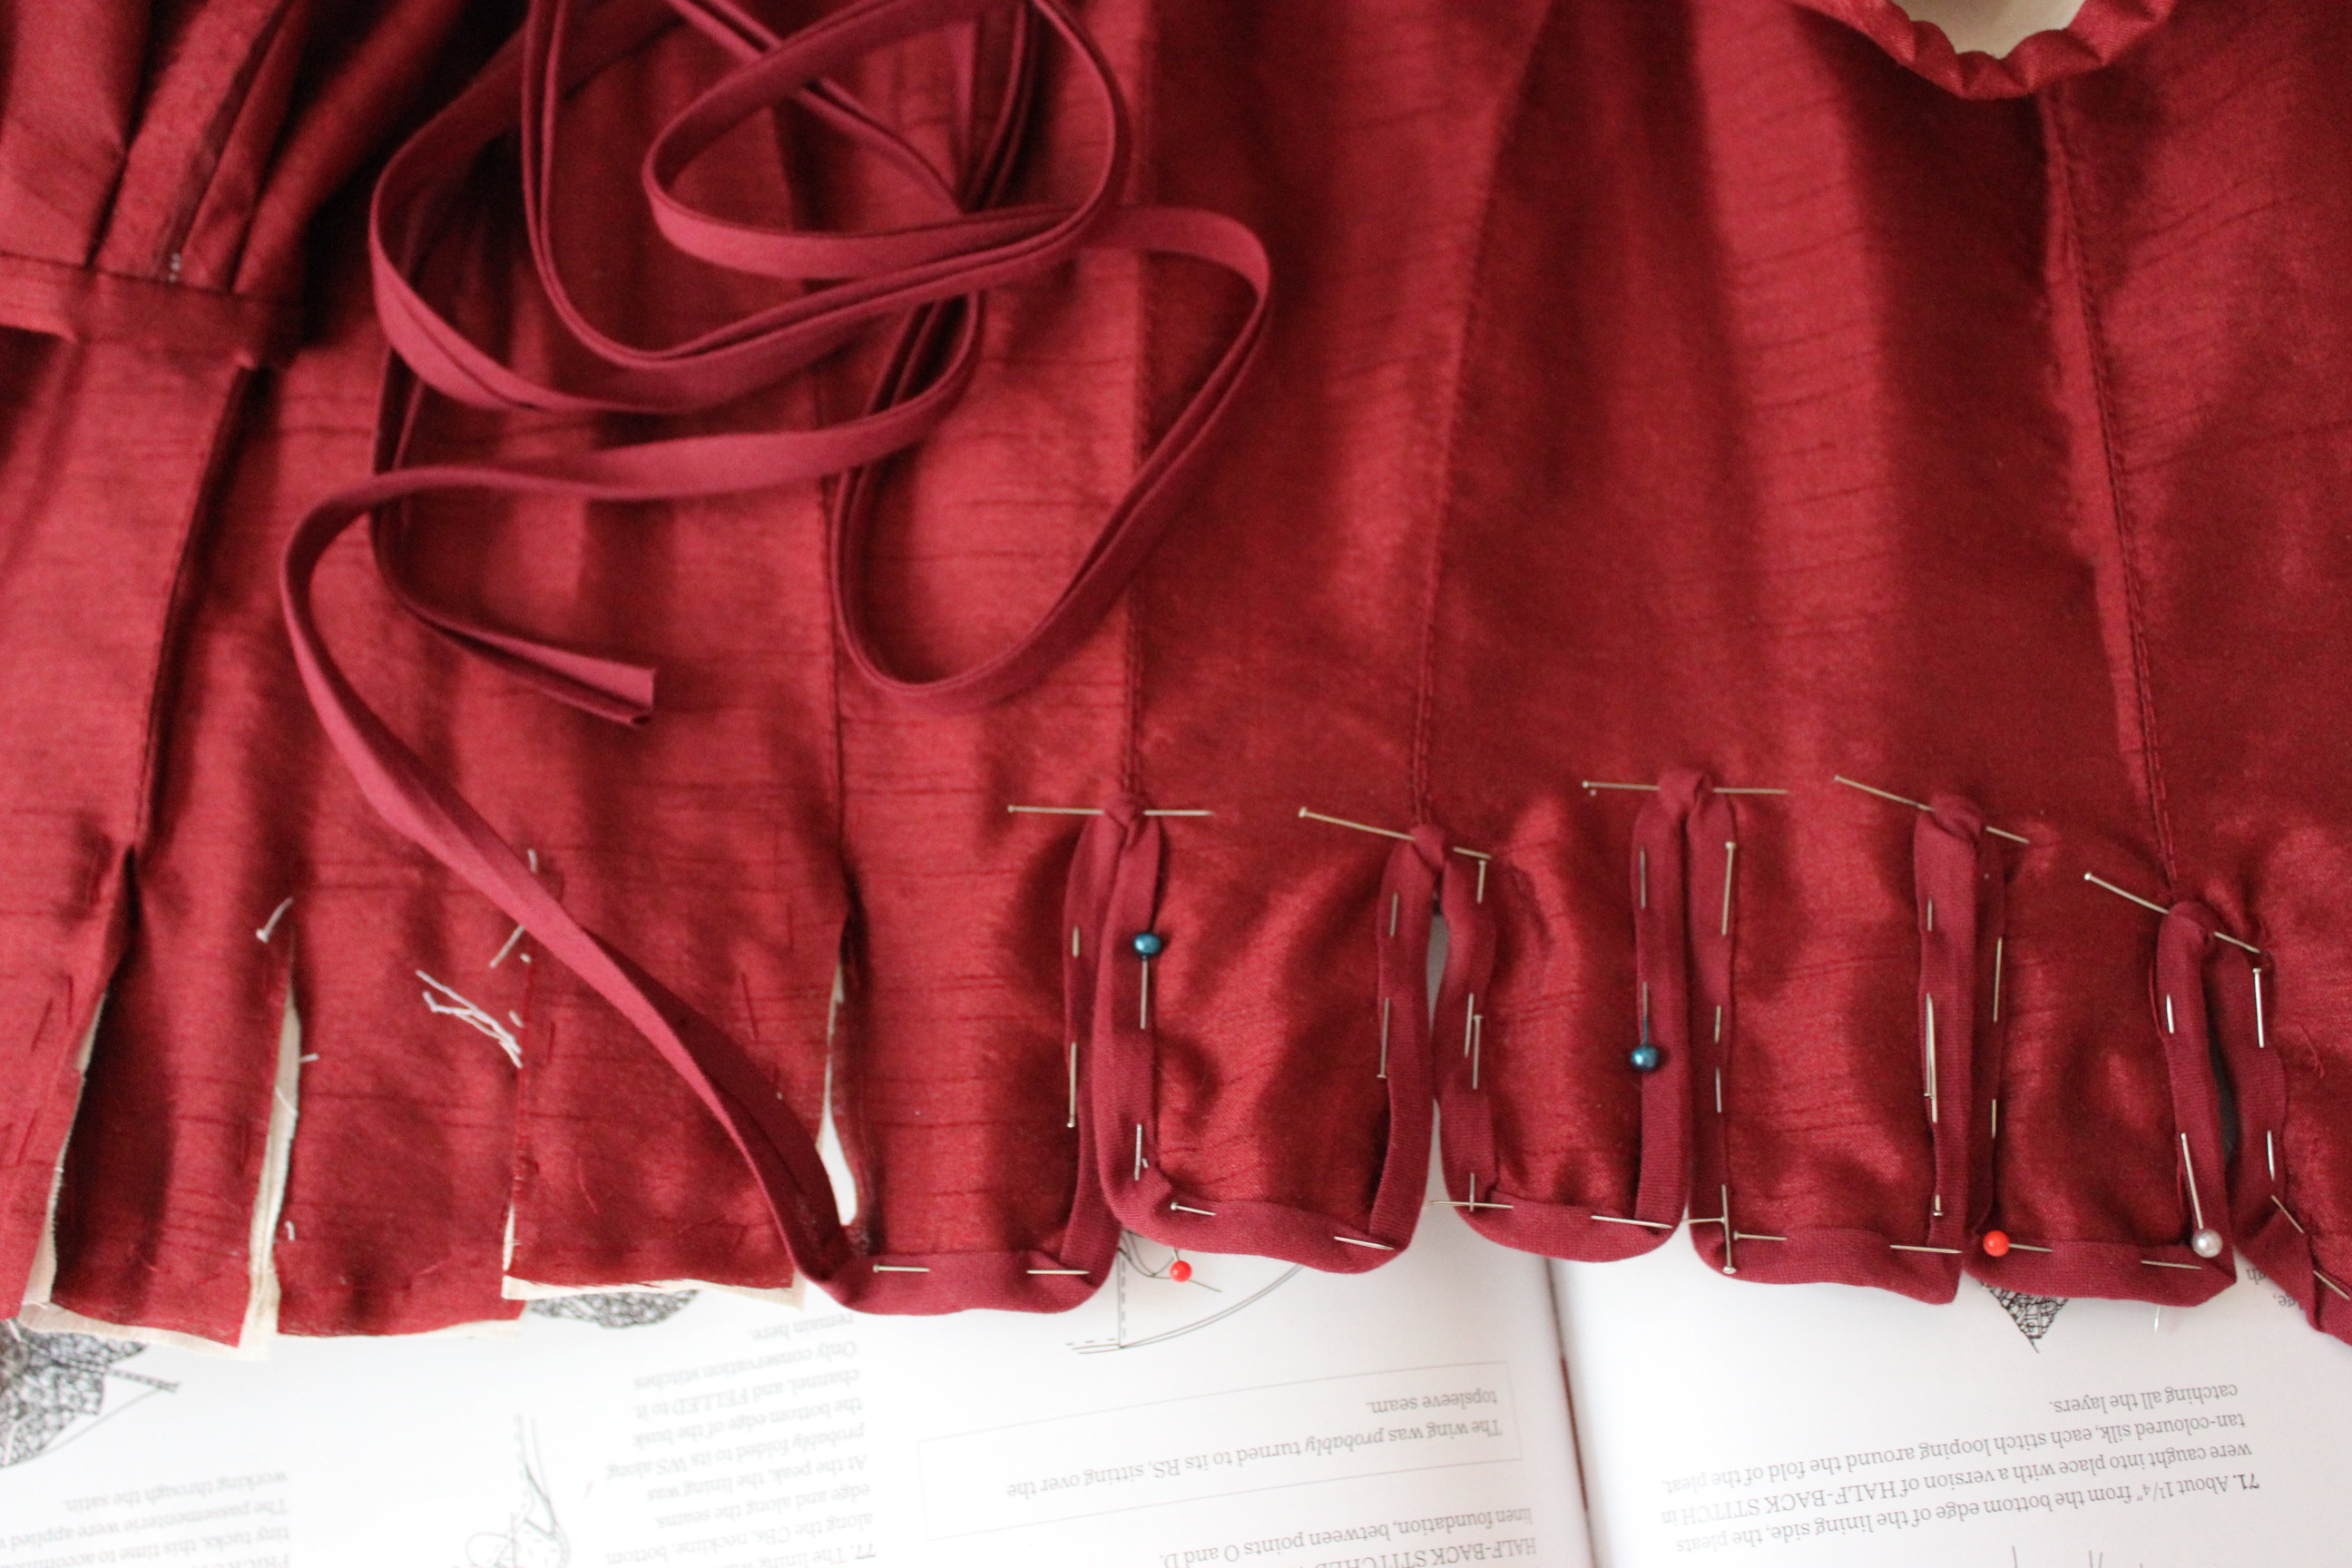
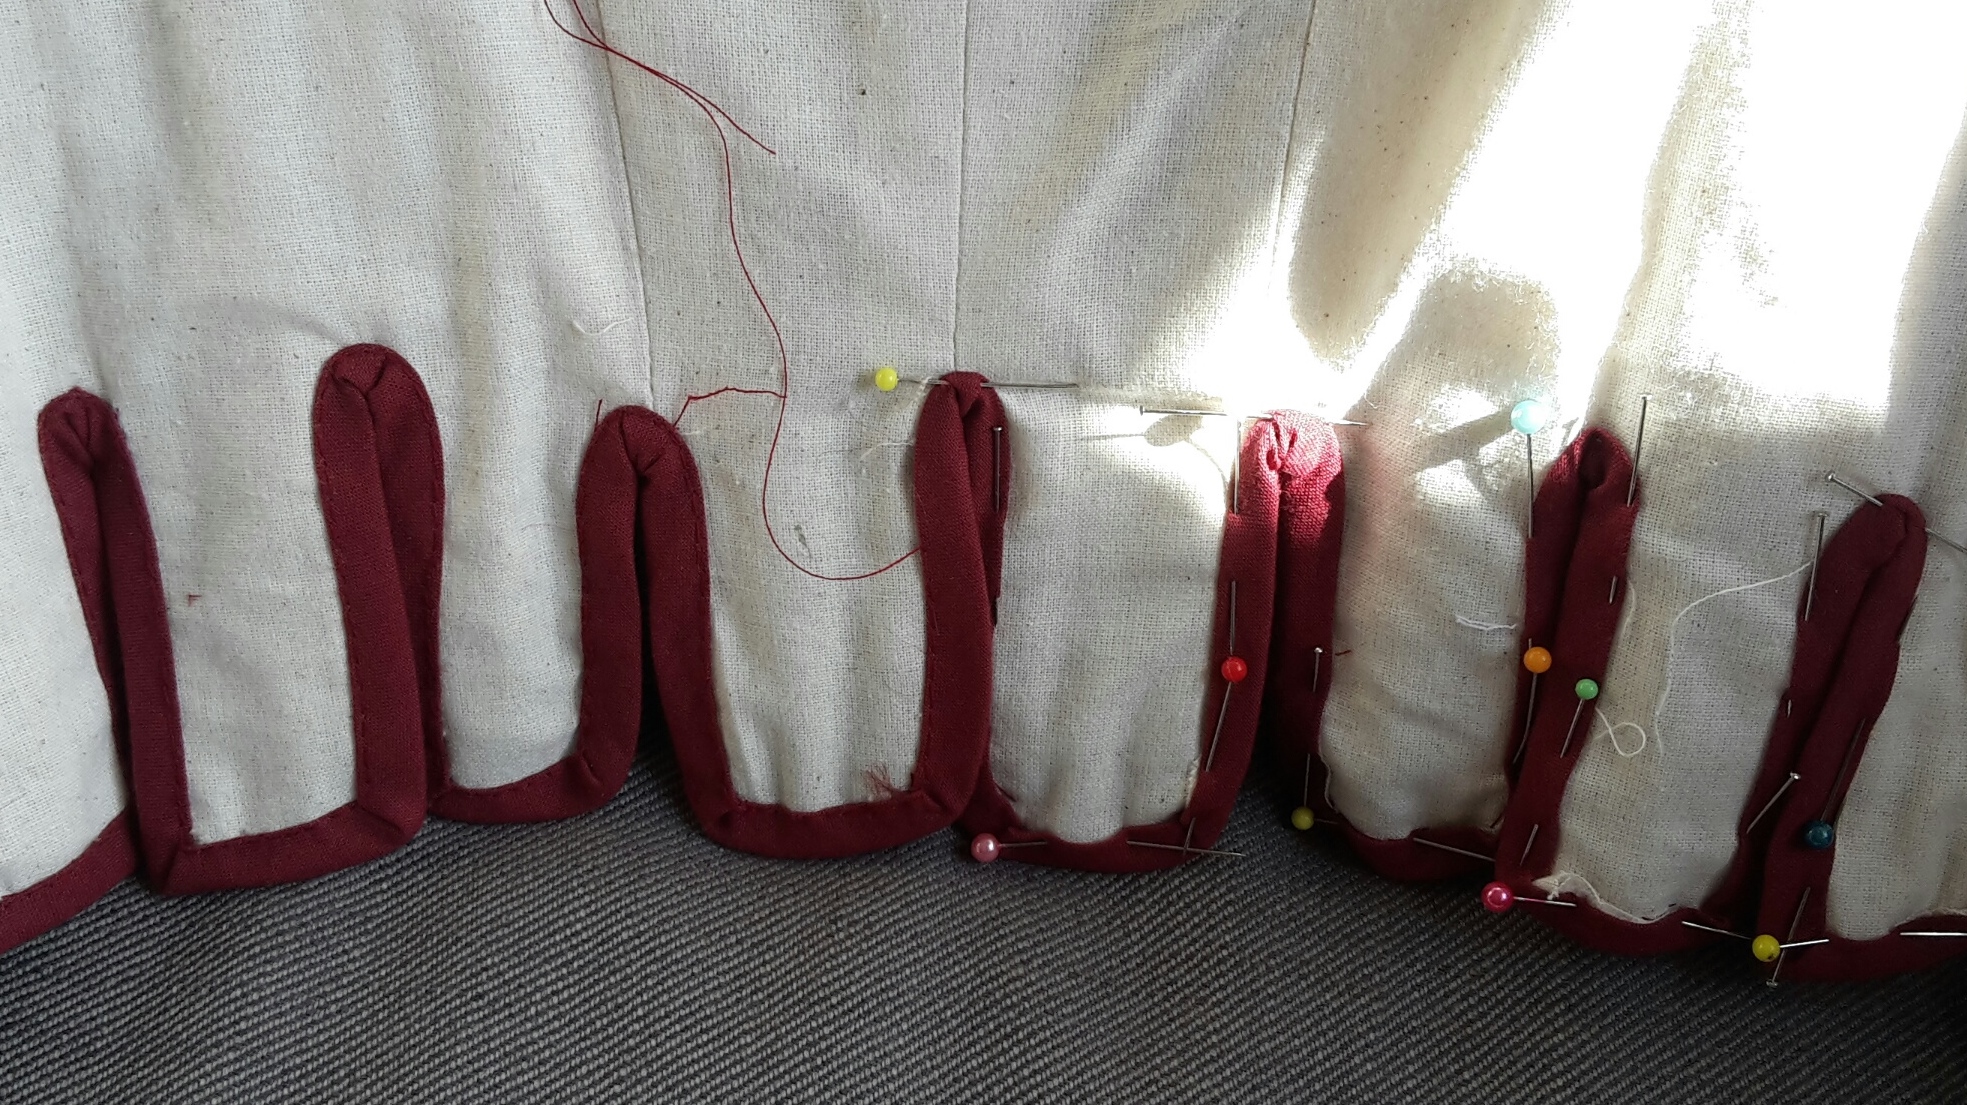 I used red cotton bias-tape cut to a smaller size.
Starting to look like something….
But a lot of work remained.
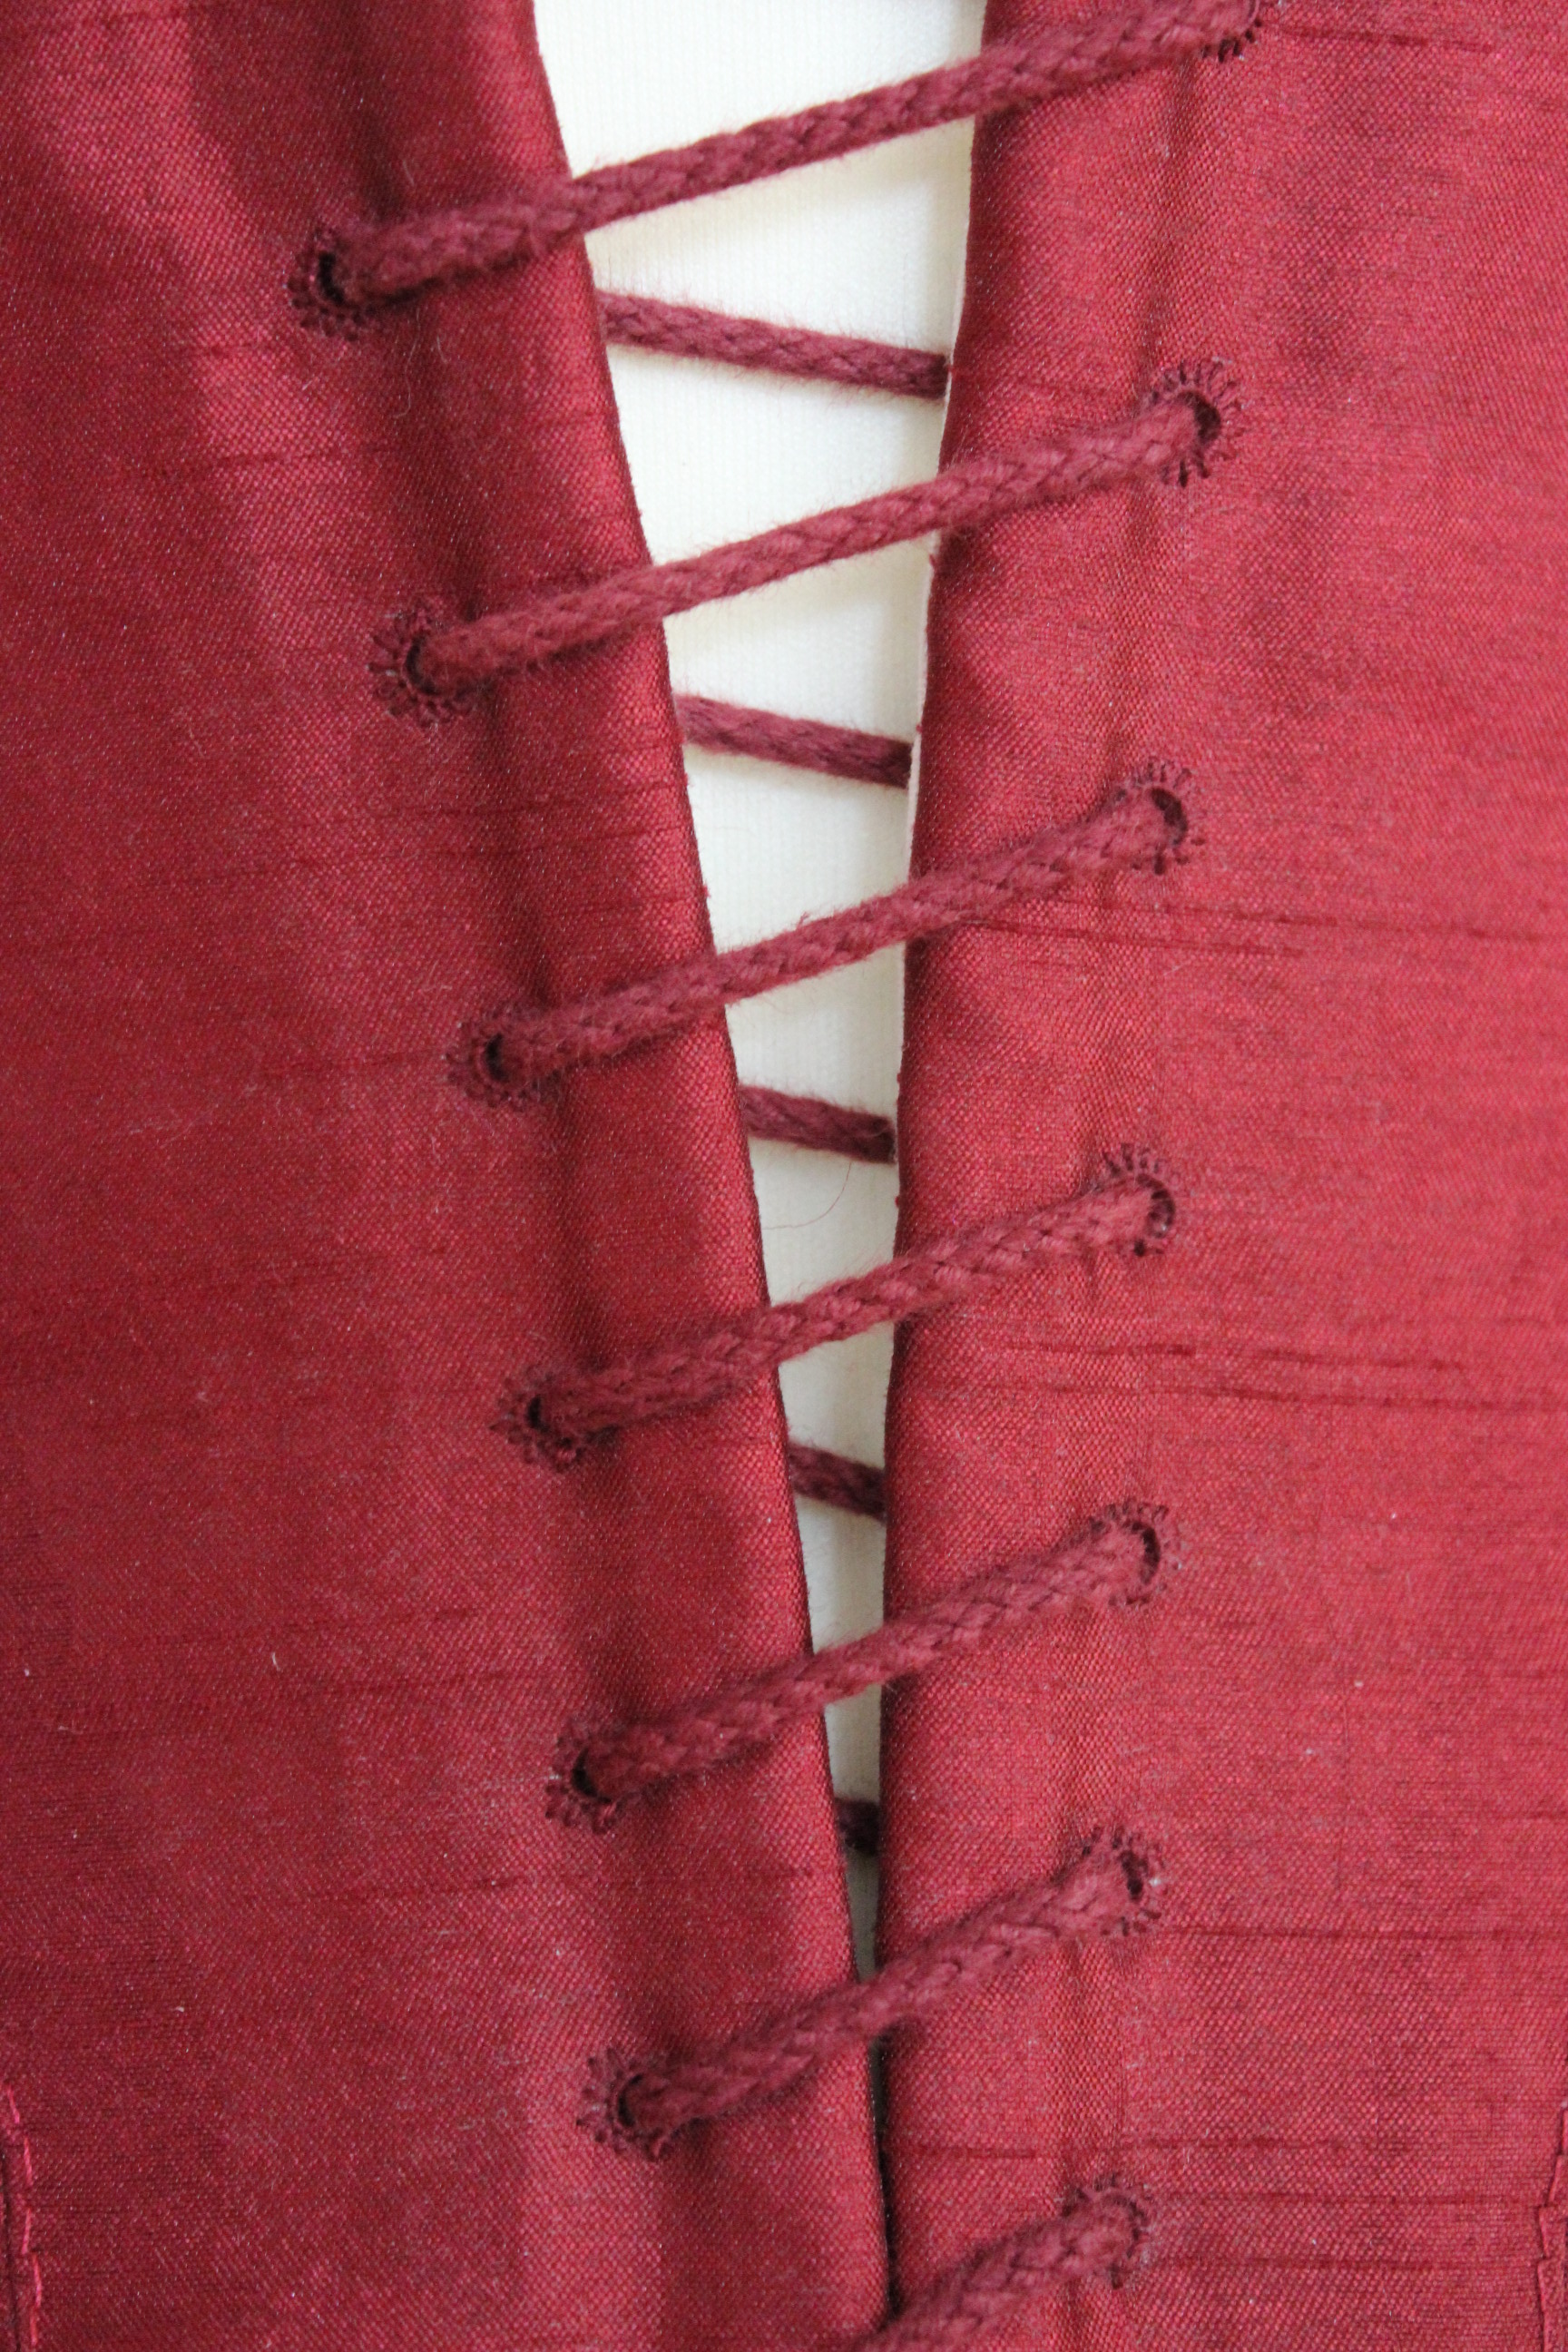
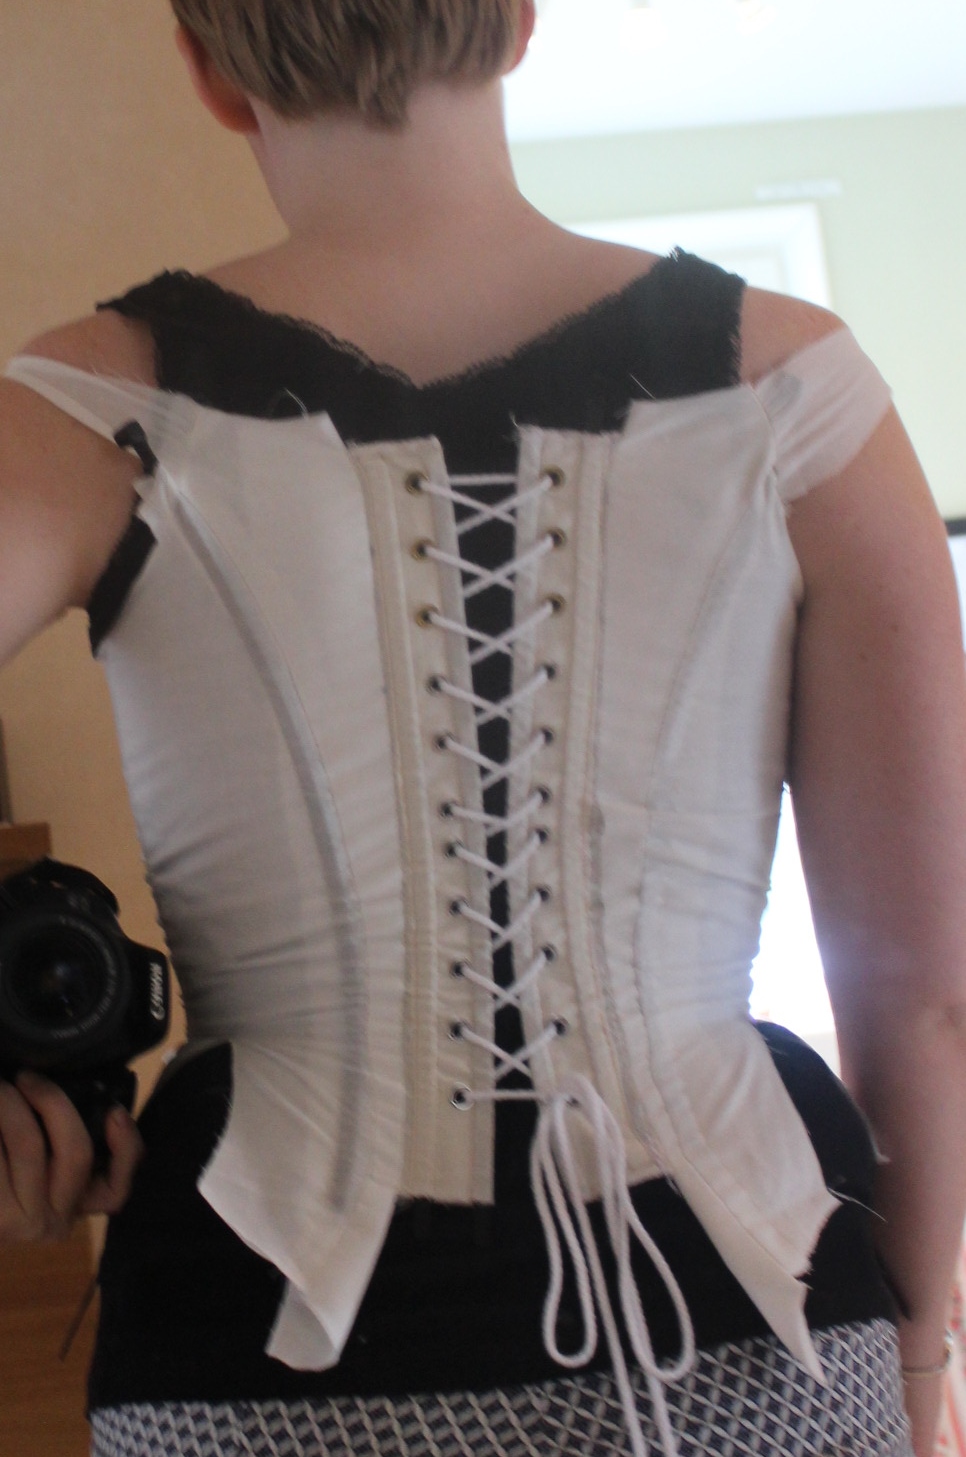
The last thing to do on the bodice was to make all the lacing holes.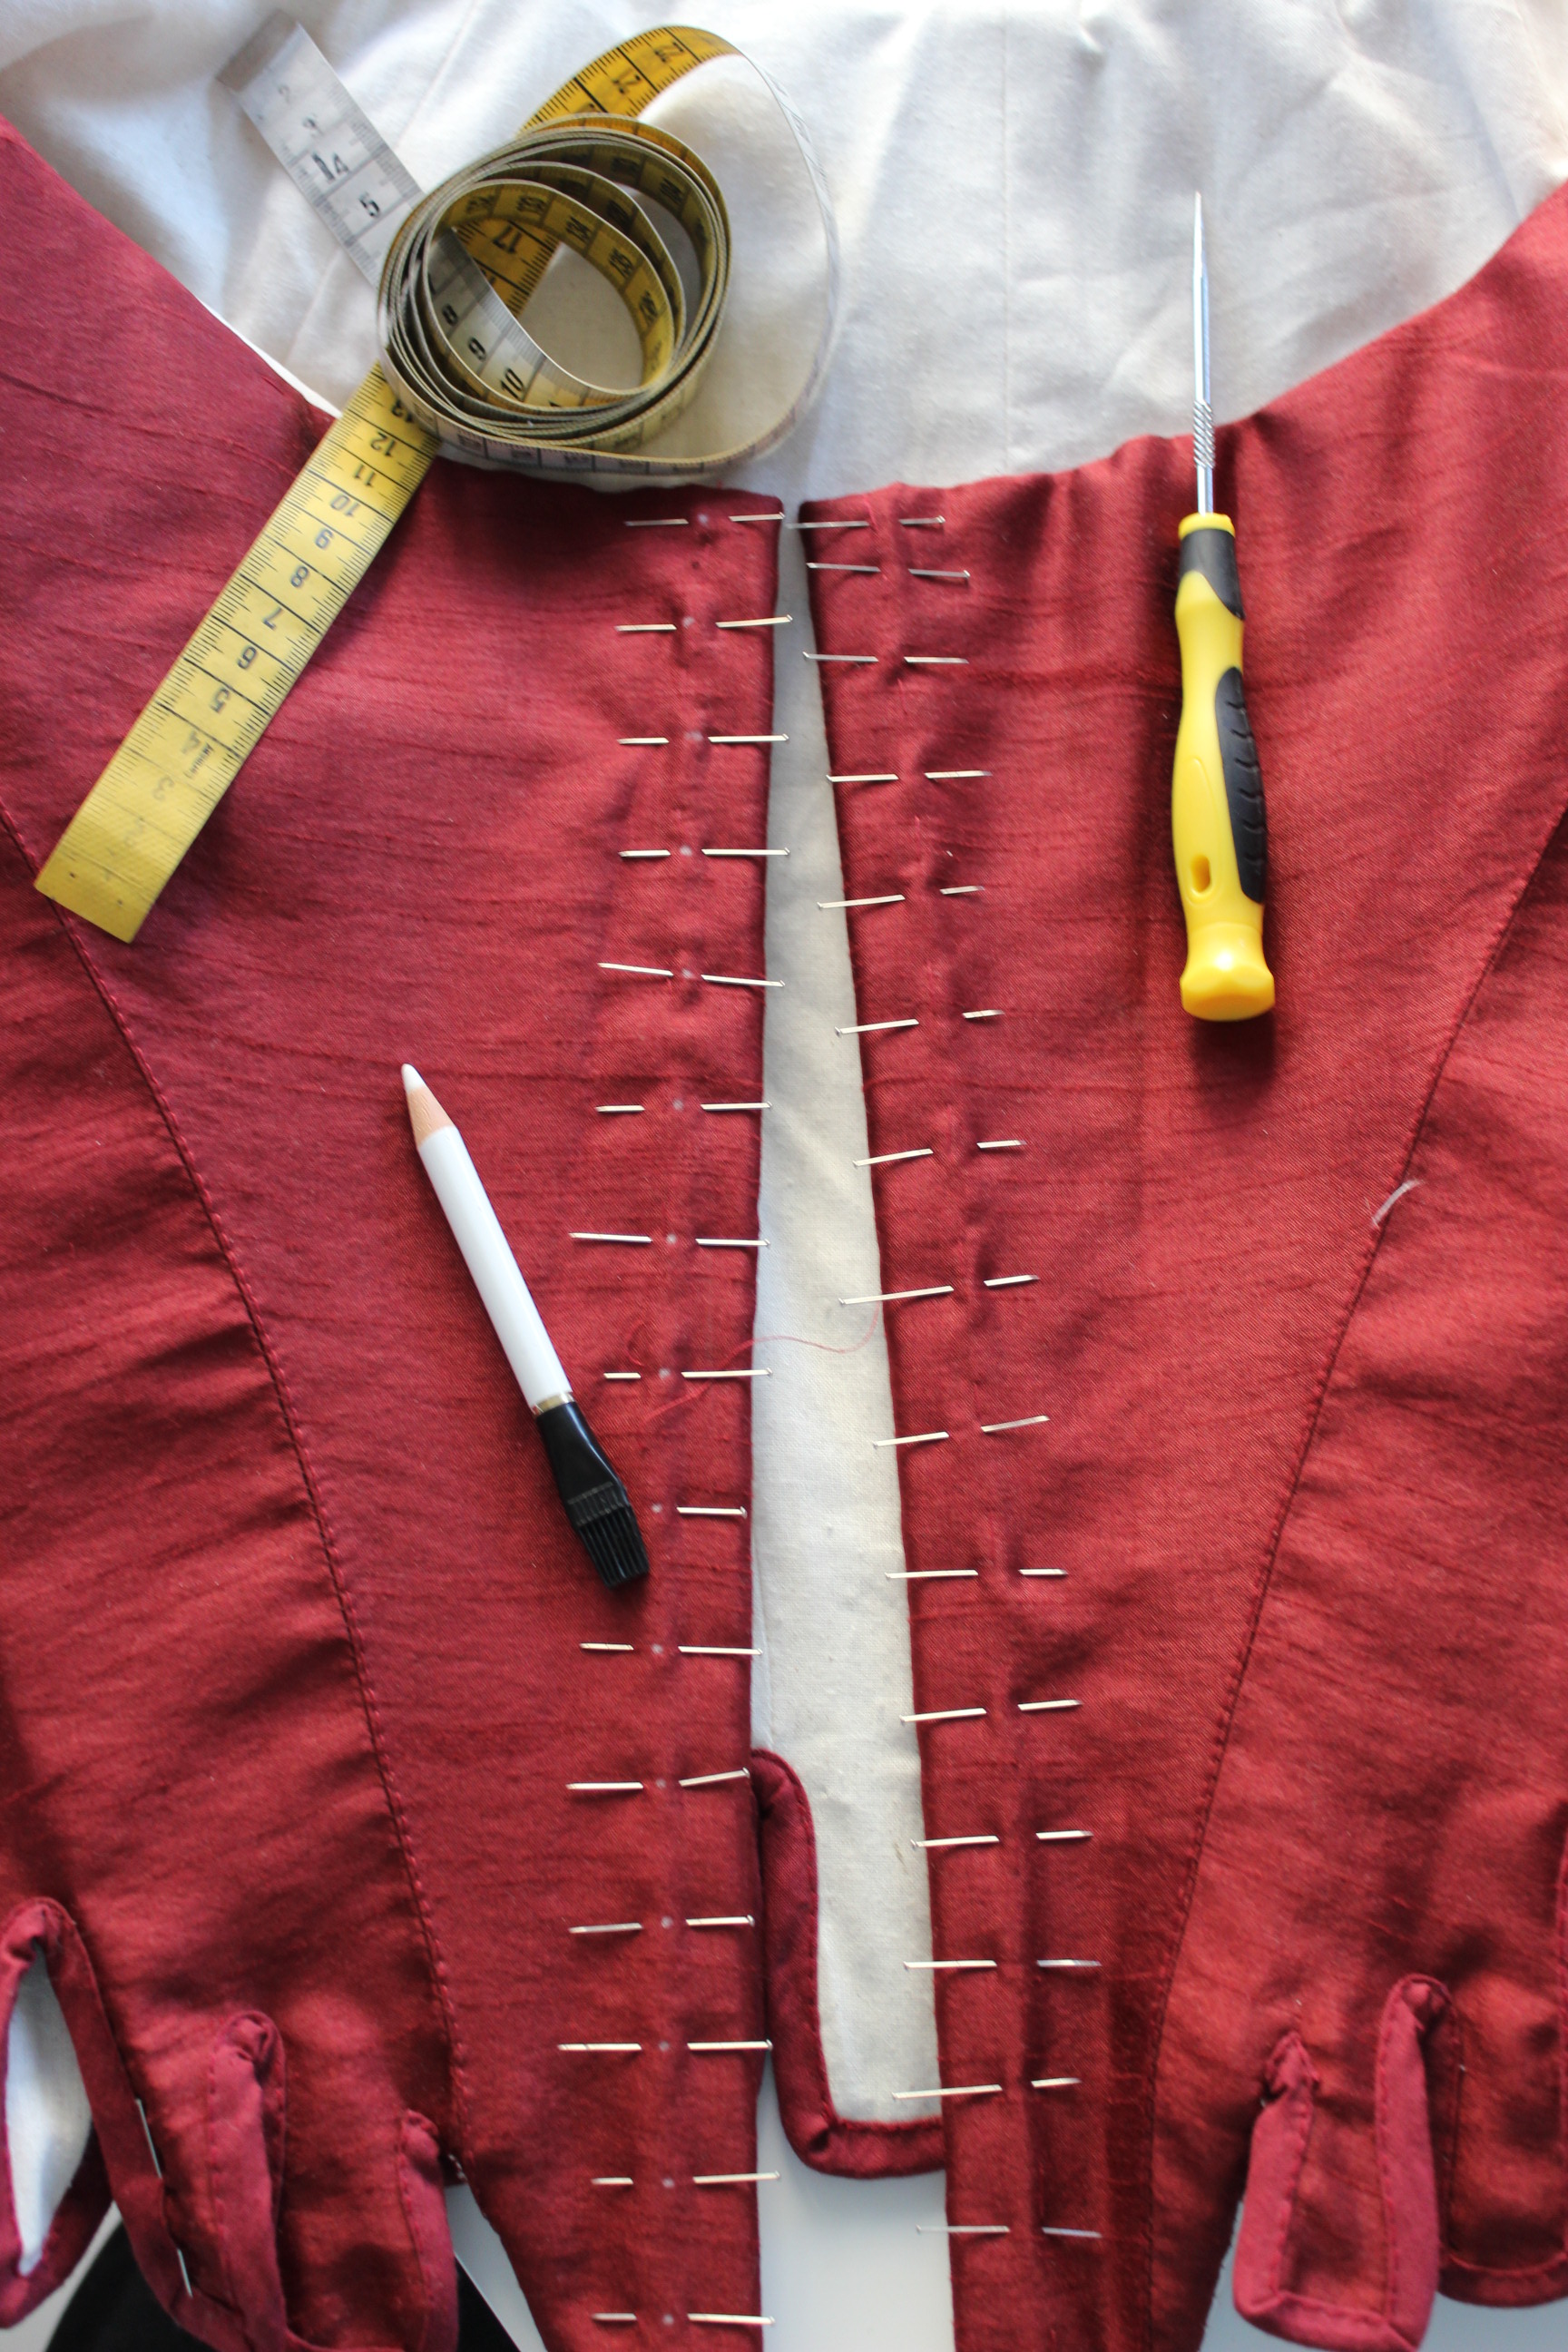 I use pins to mark the distance before I use my chalk-pen
 Practice makes perfect.
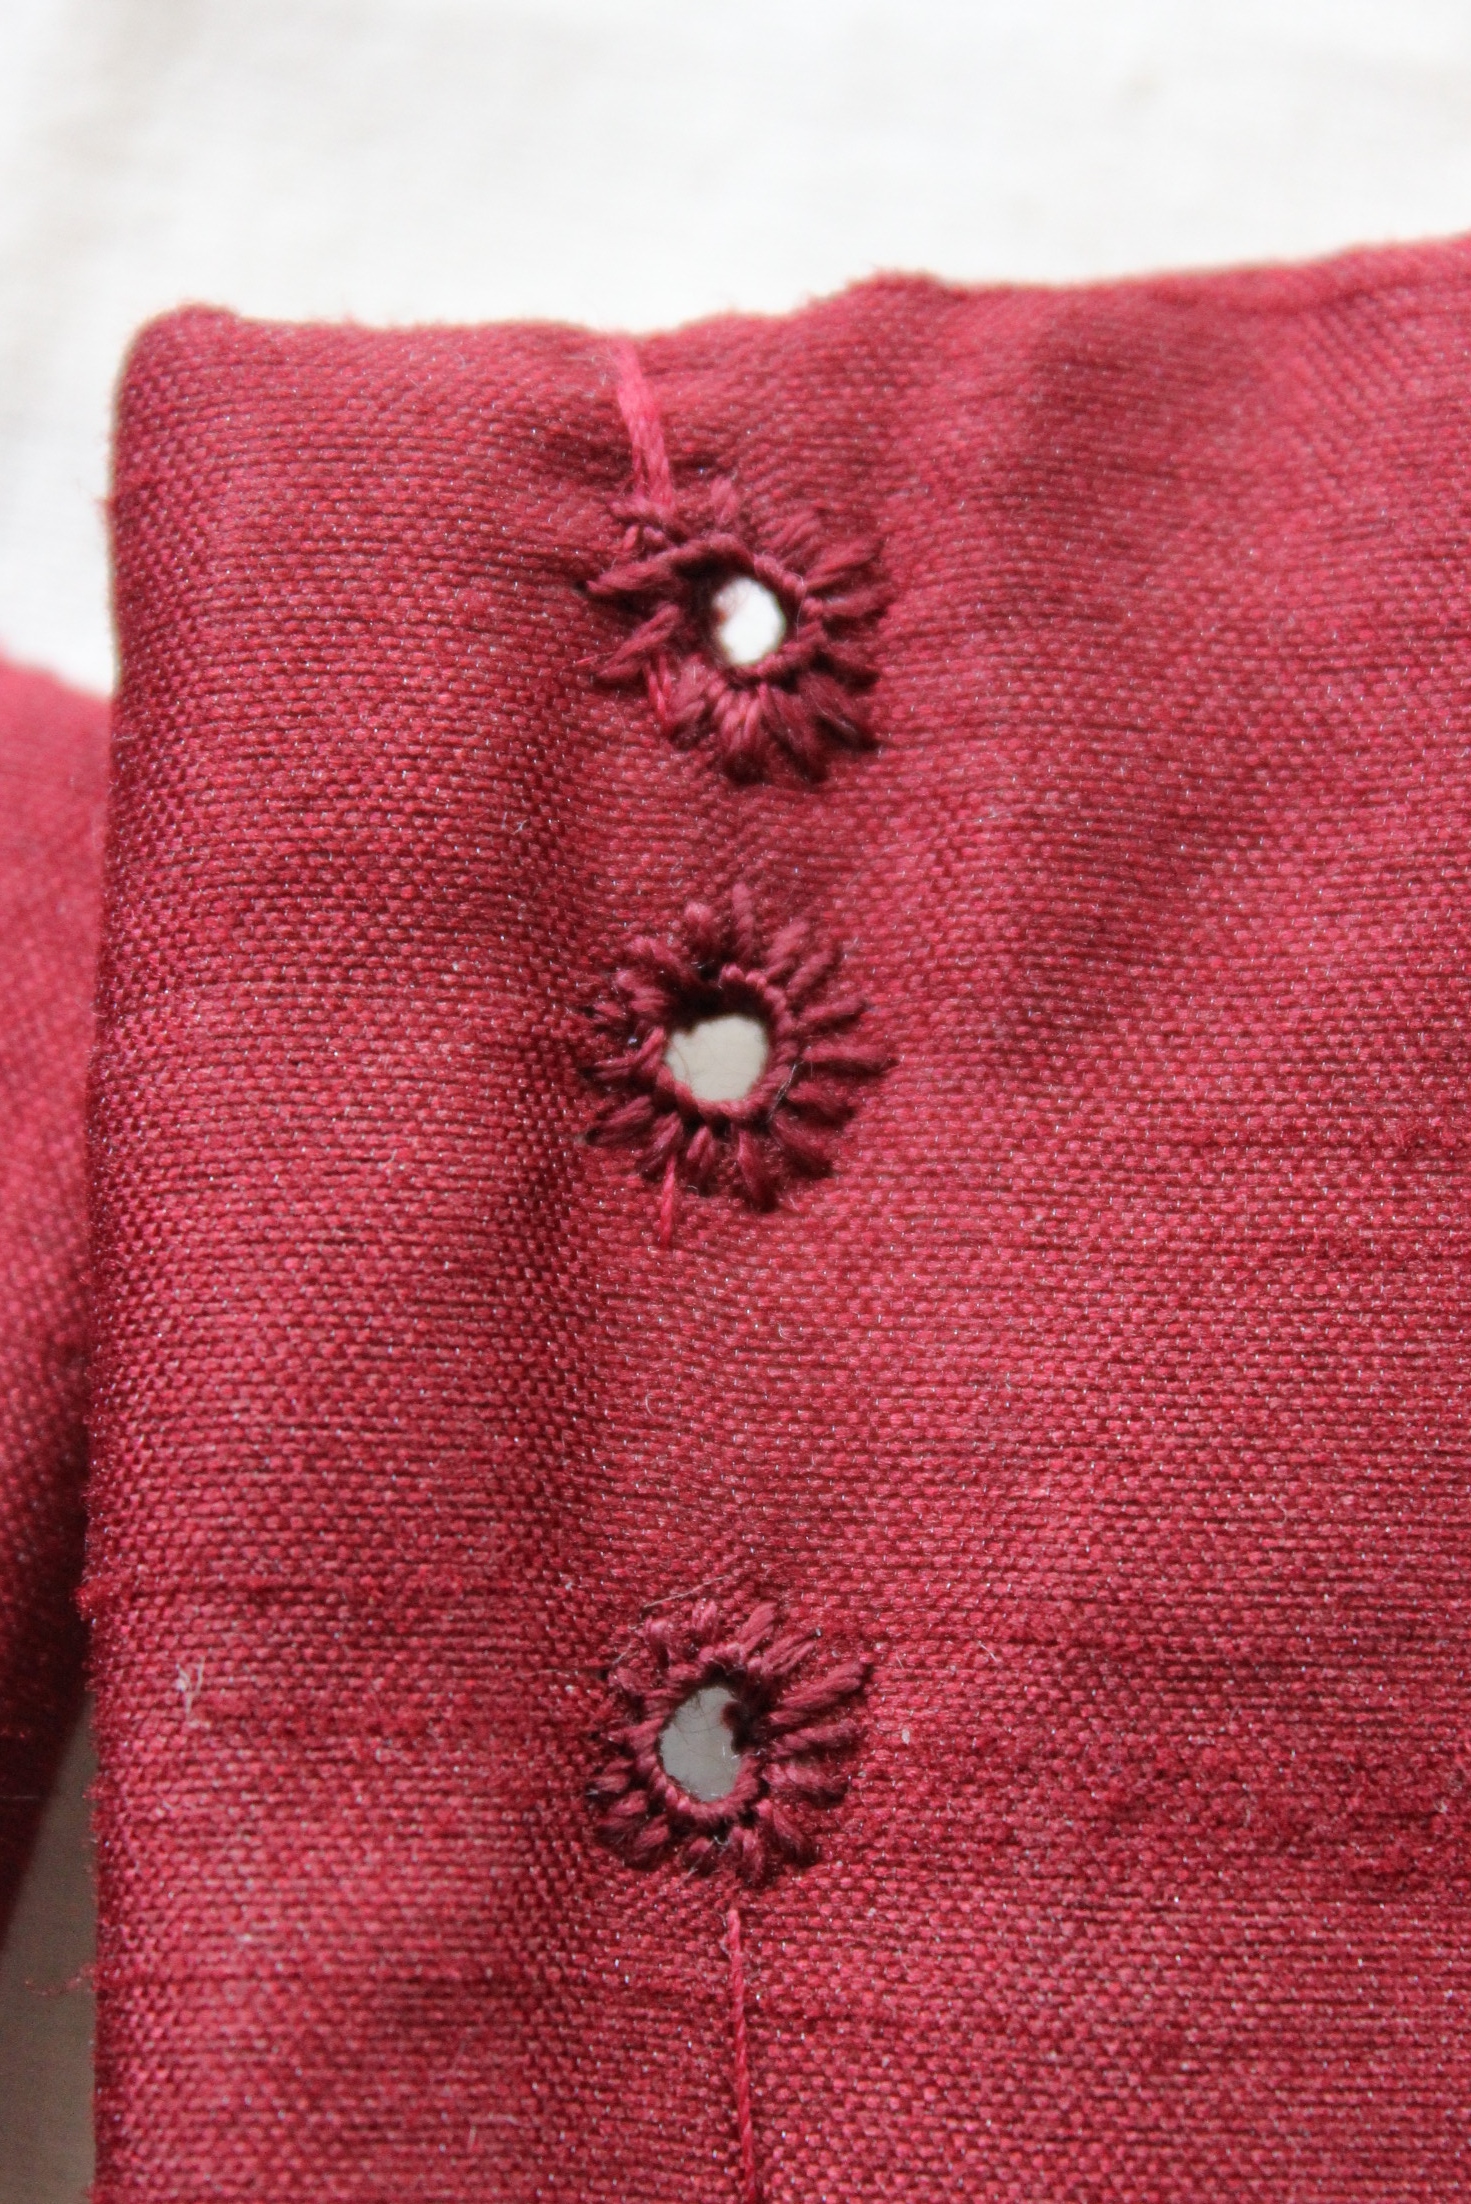
Ok, not yet perfect but pretty decent looking eyelets if I may say so myself.
Then the only thing left to do was to try it on a last time… Crap…
Crap…
Yup, that’s the sad truth – the bodice I to small, and not “If I lace a bit harder it might work” to small, but “There is no way in hell I can close this sucker” to small.
Luckily my inspiration painting’s only shows the back of the bodice, so hypothetical there is a chance the girls wear a open laced bodice over a stomacher – far fetched I know, but at his point there was no way I would redo it or try to ad to the sides. And logically they must have size shifting back then too, right?
So I will make a stomacher for this bodice before the next wearing, but for now I’m considering it done.
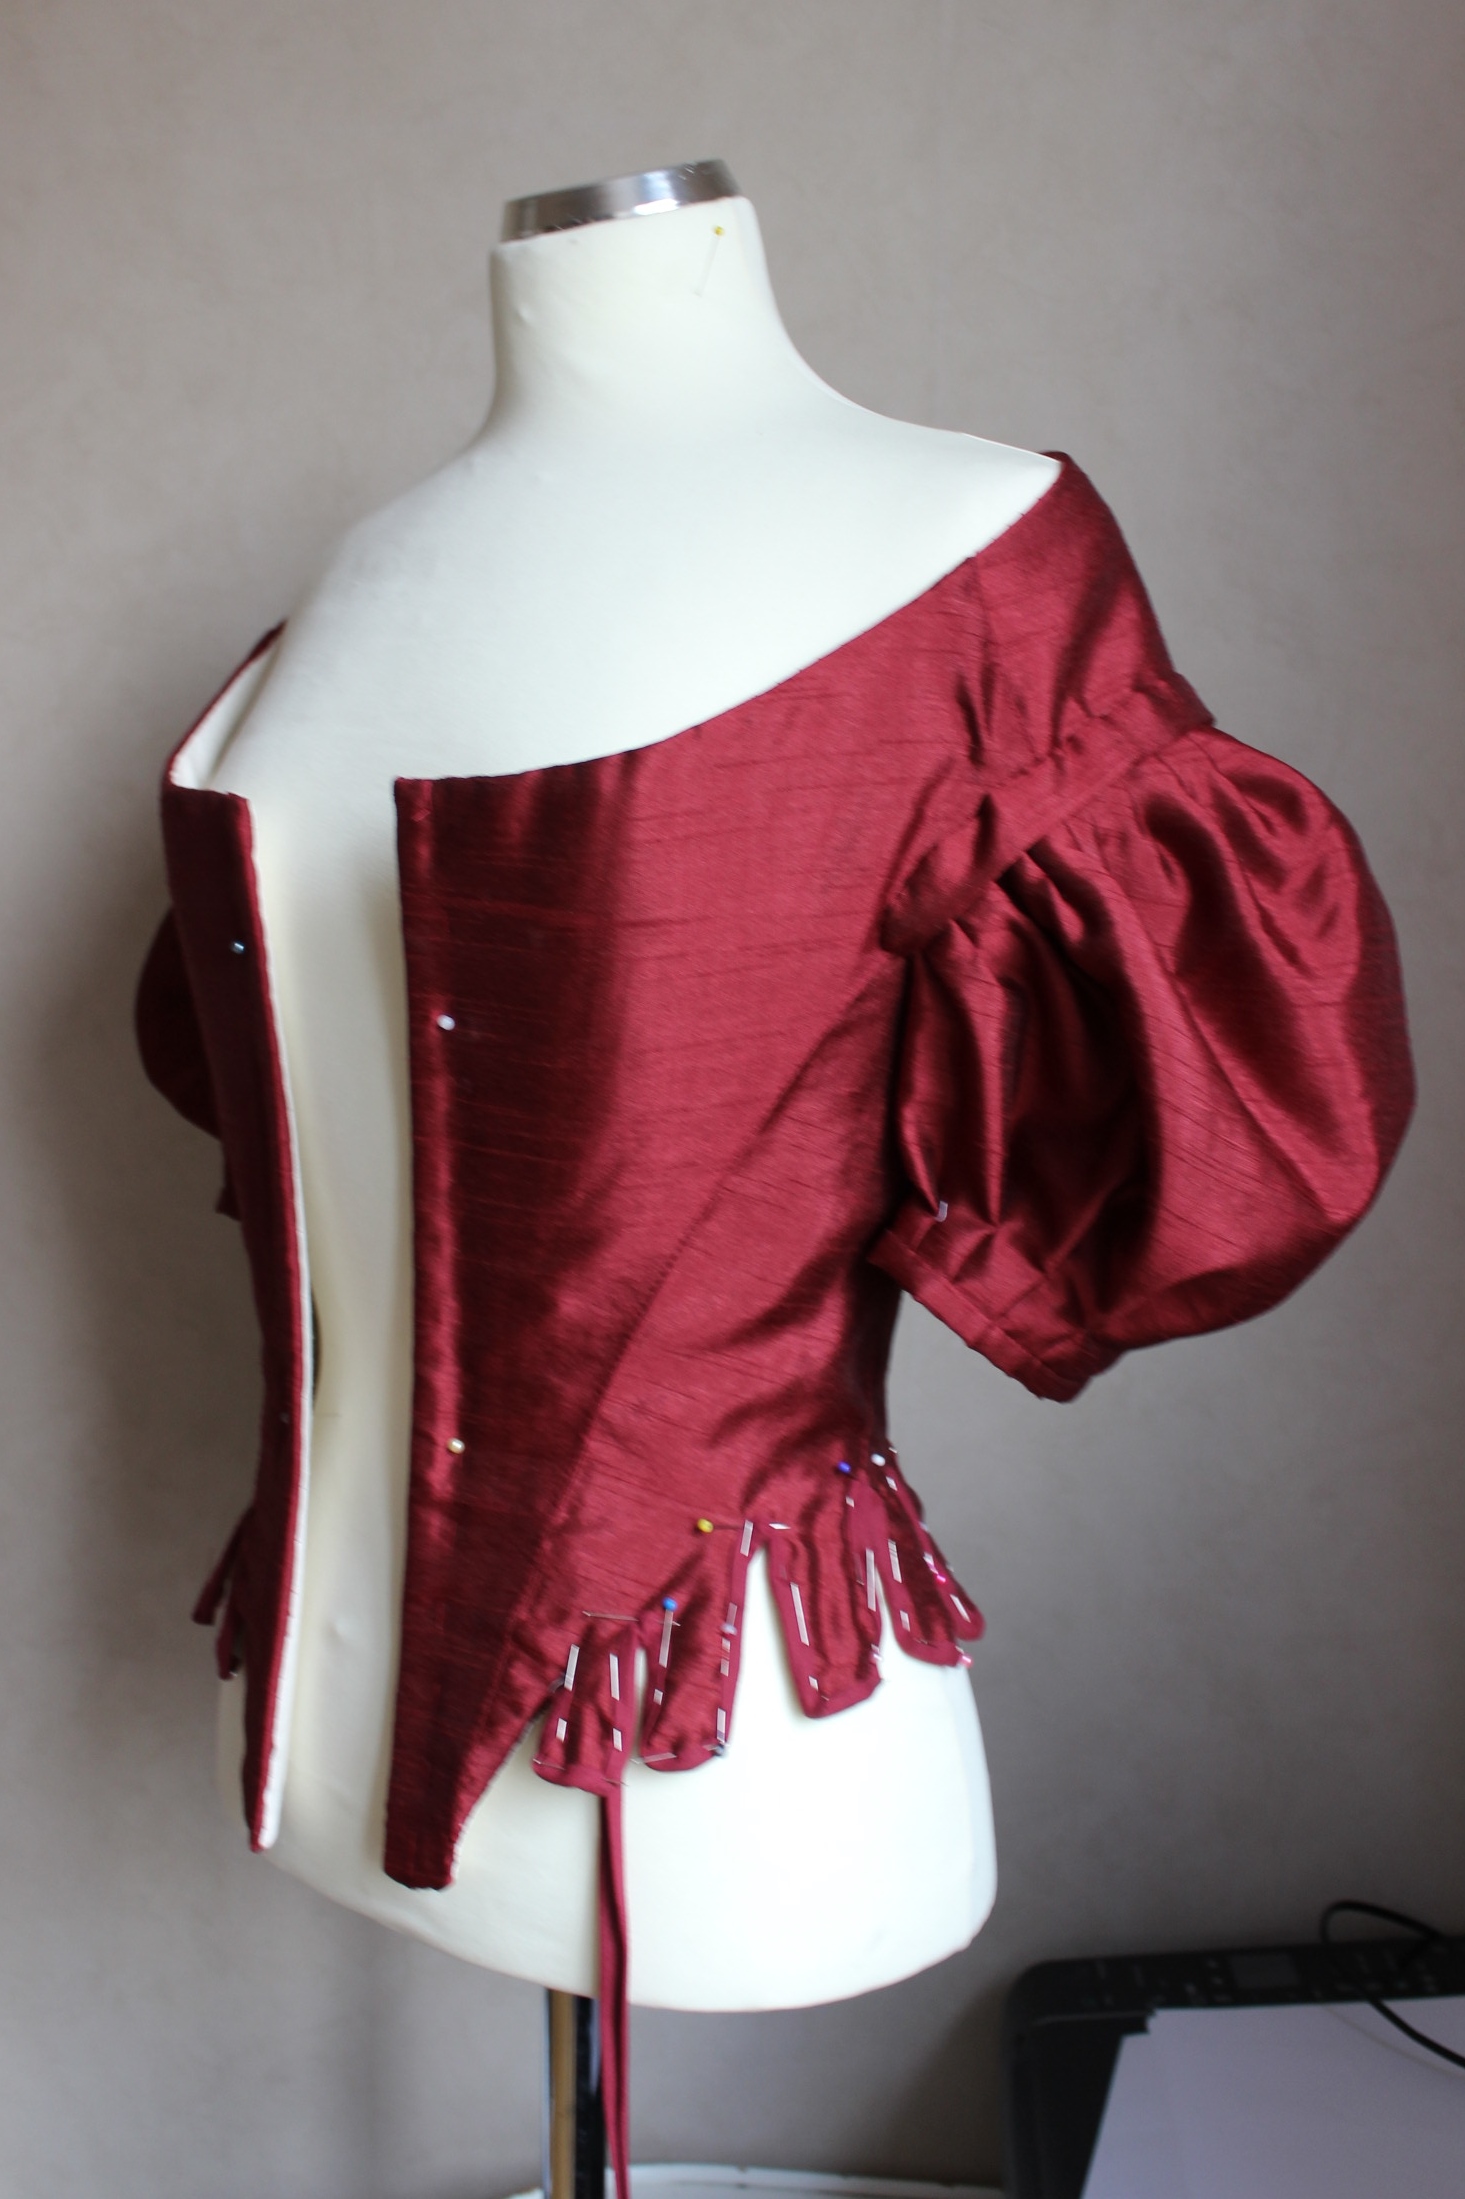
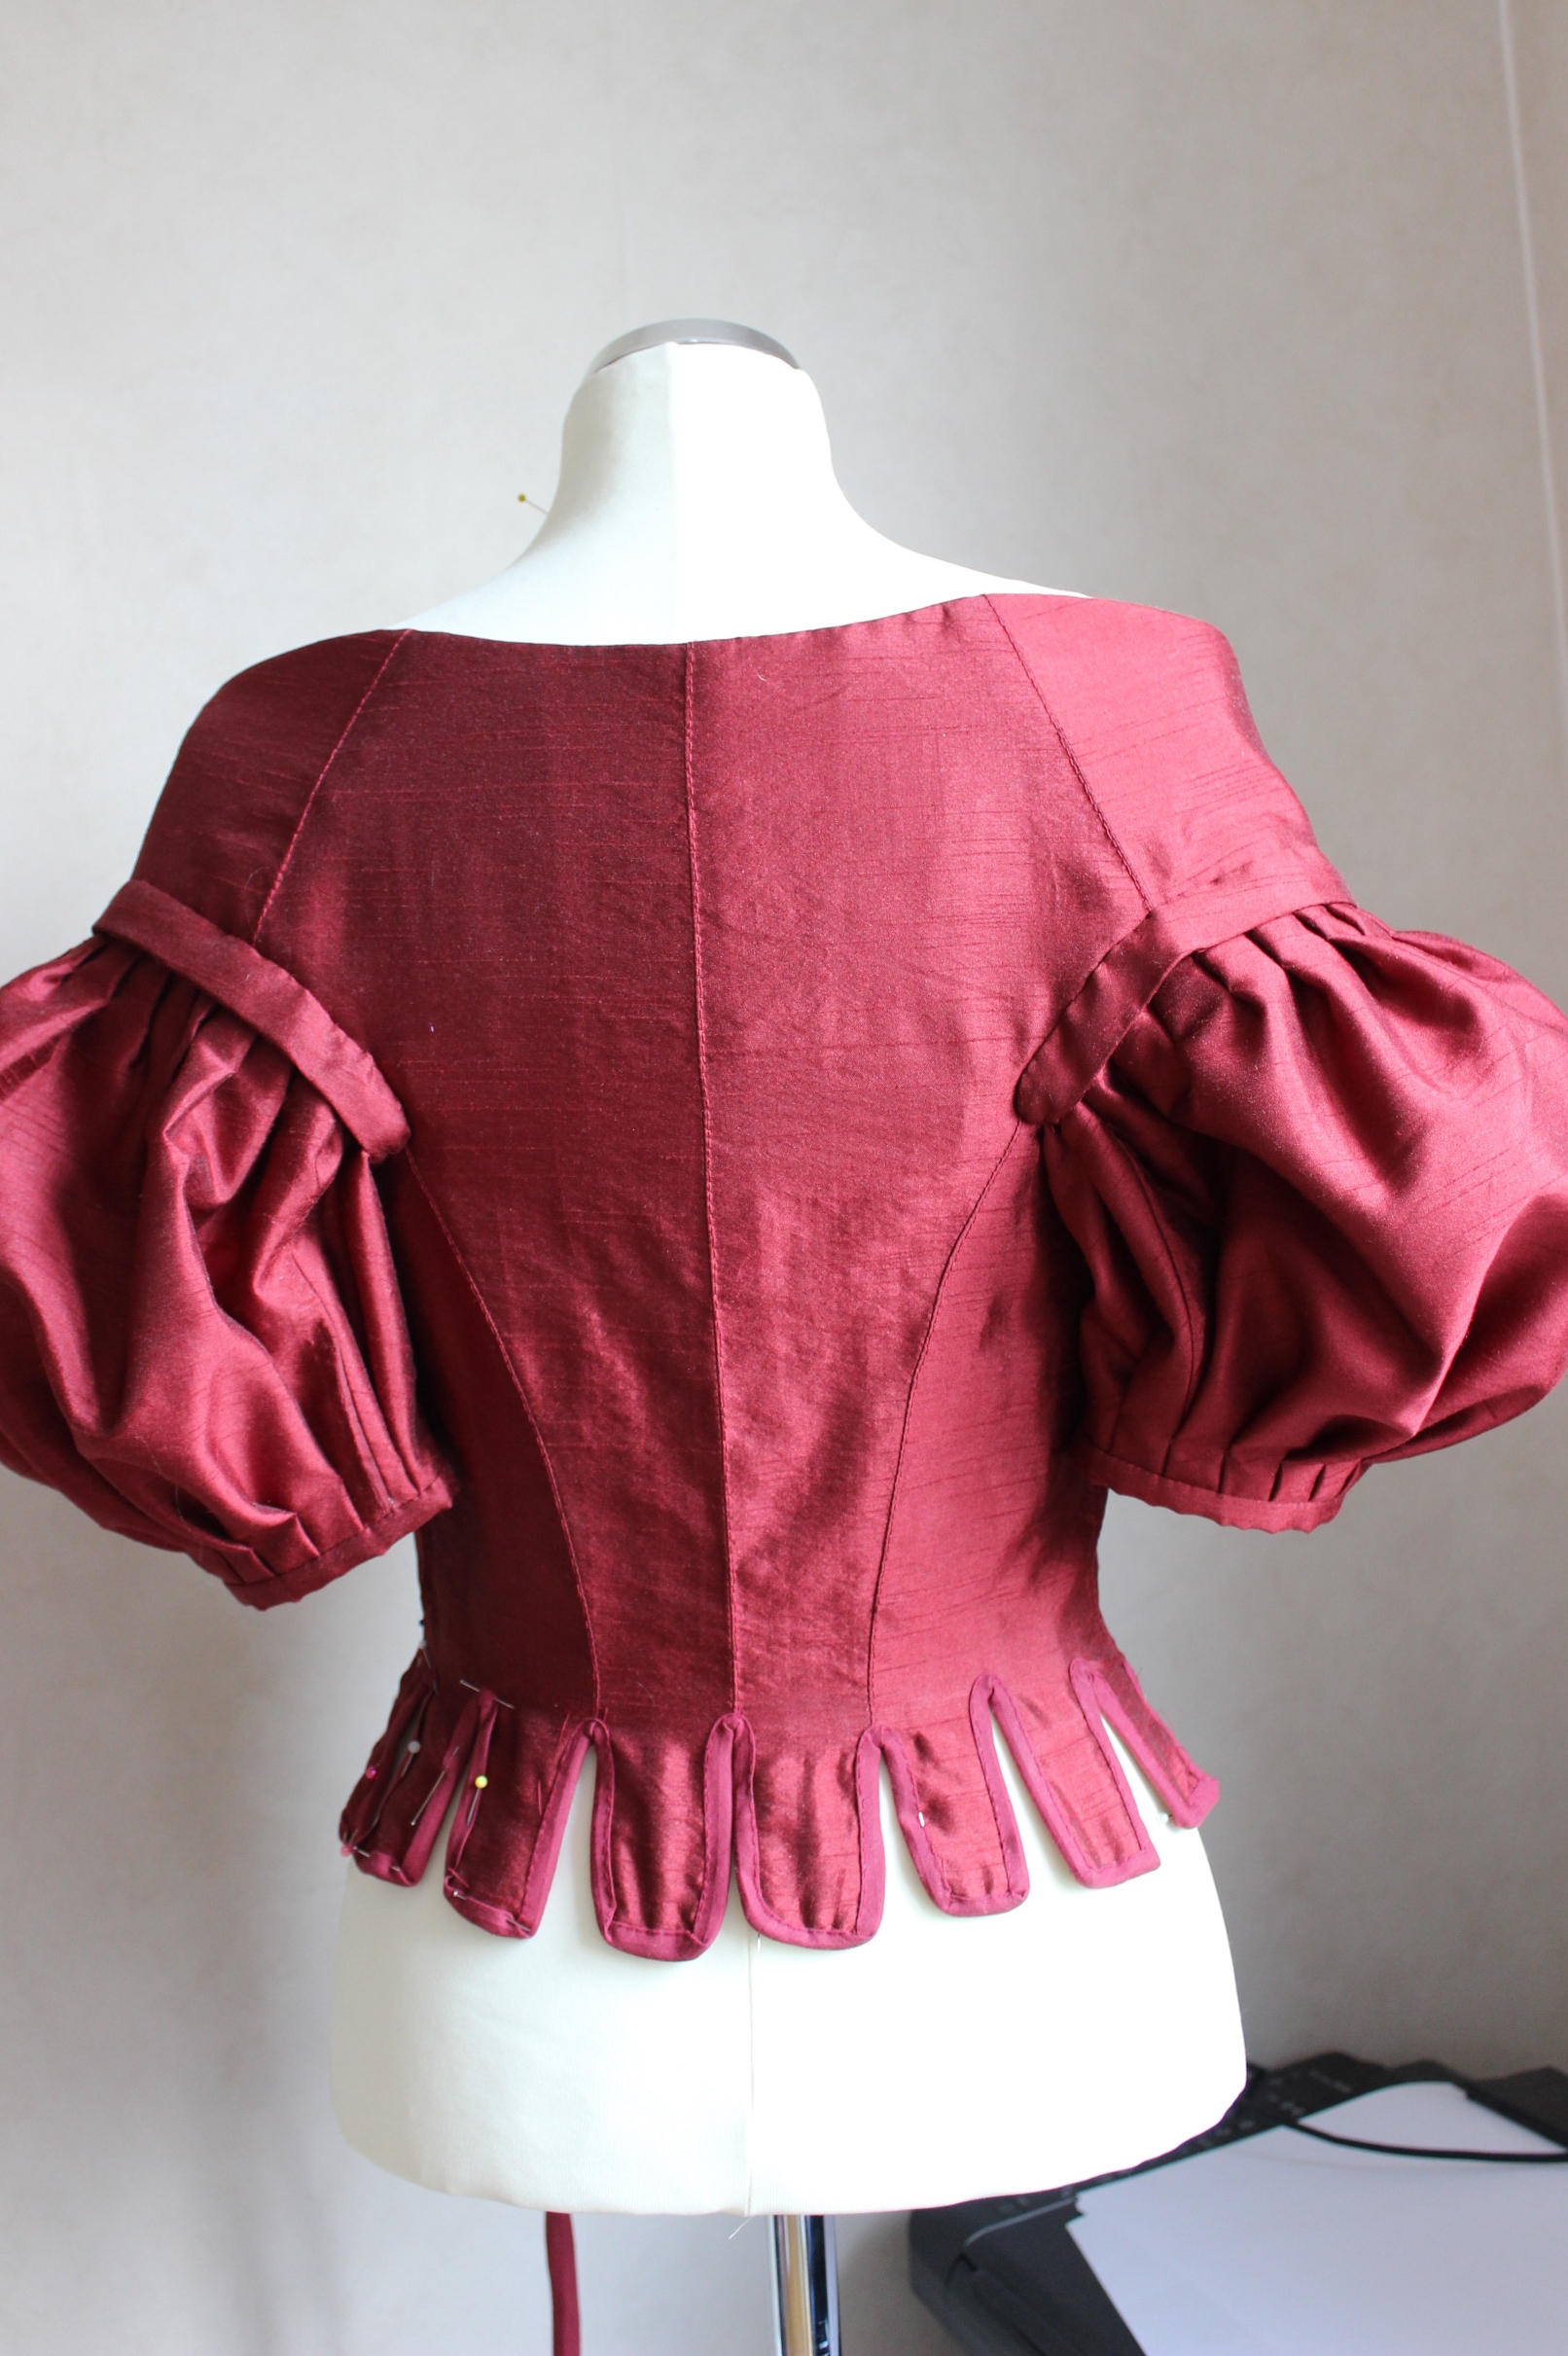
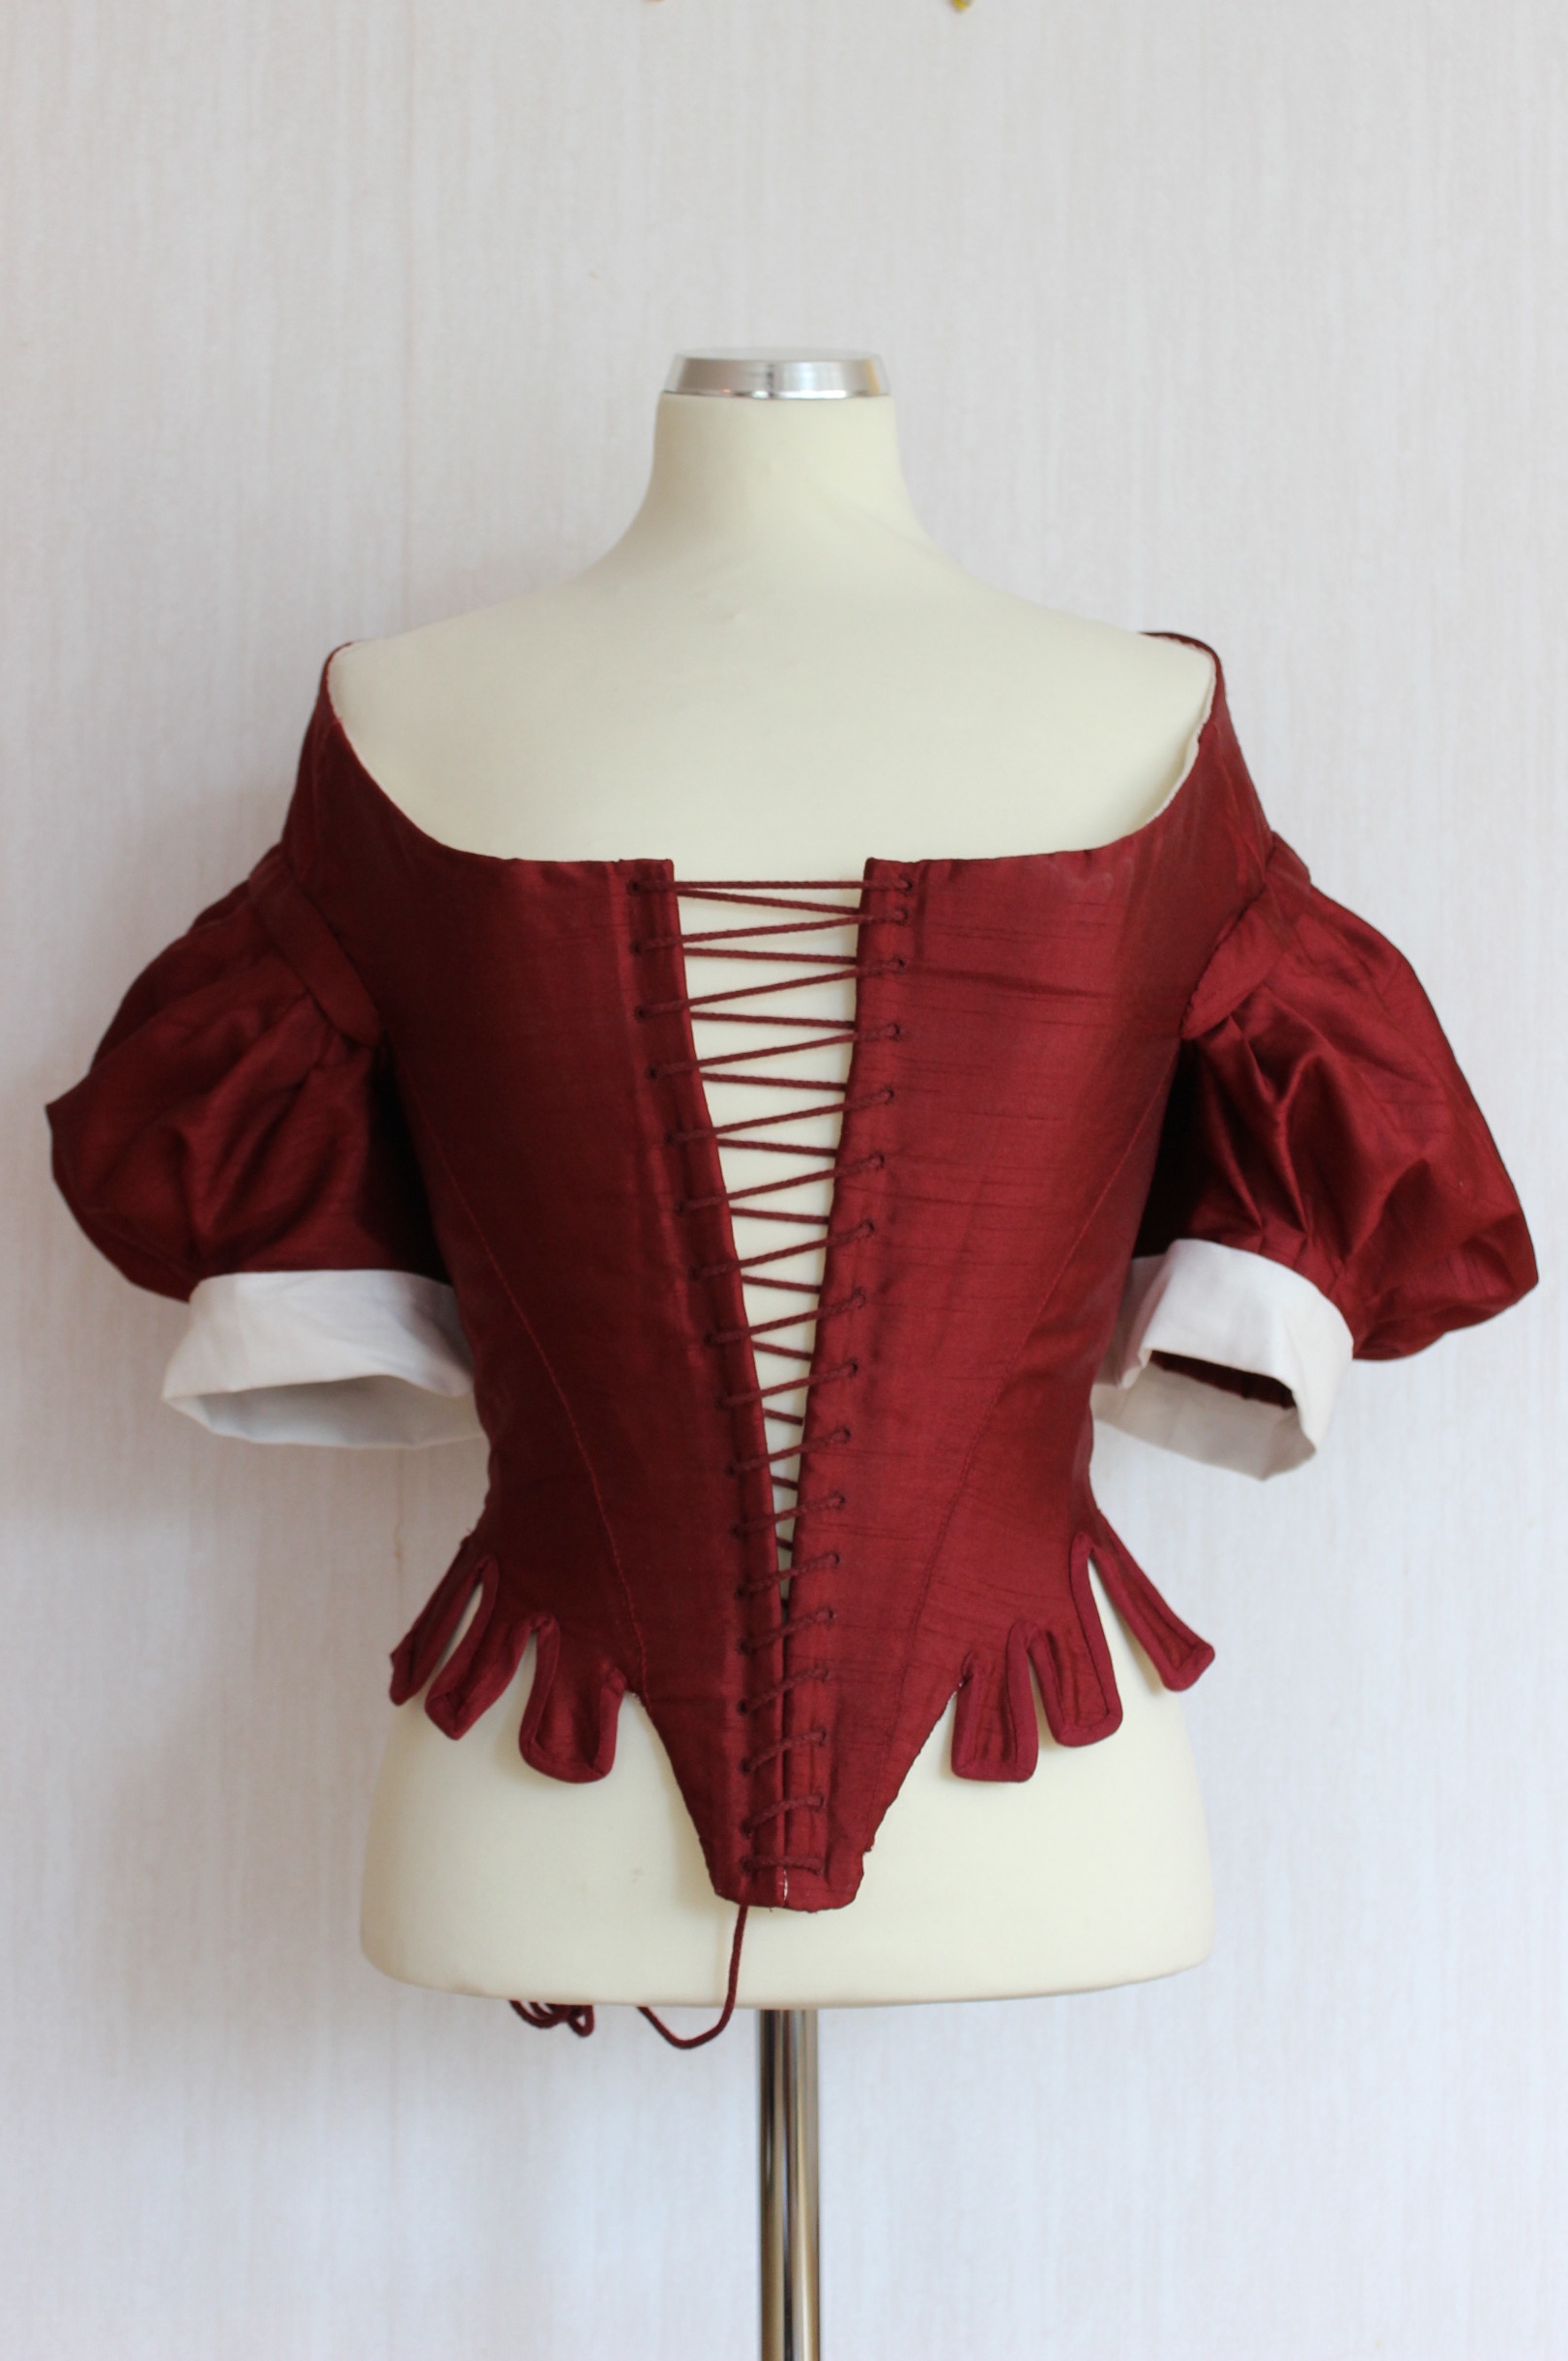
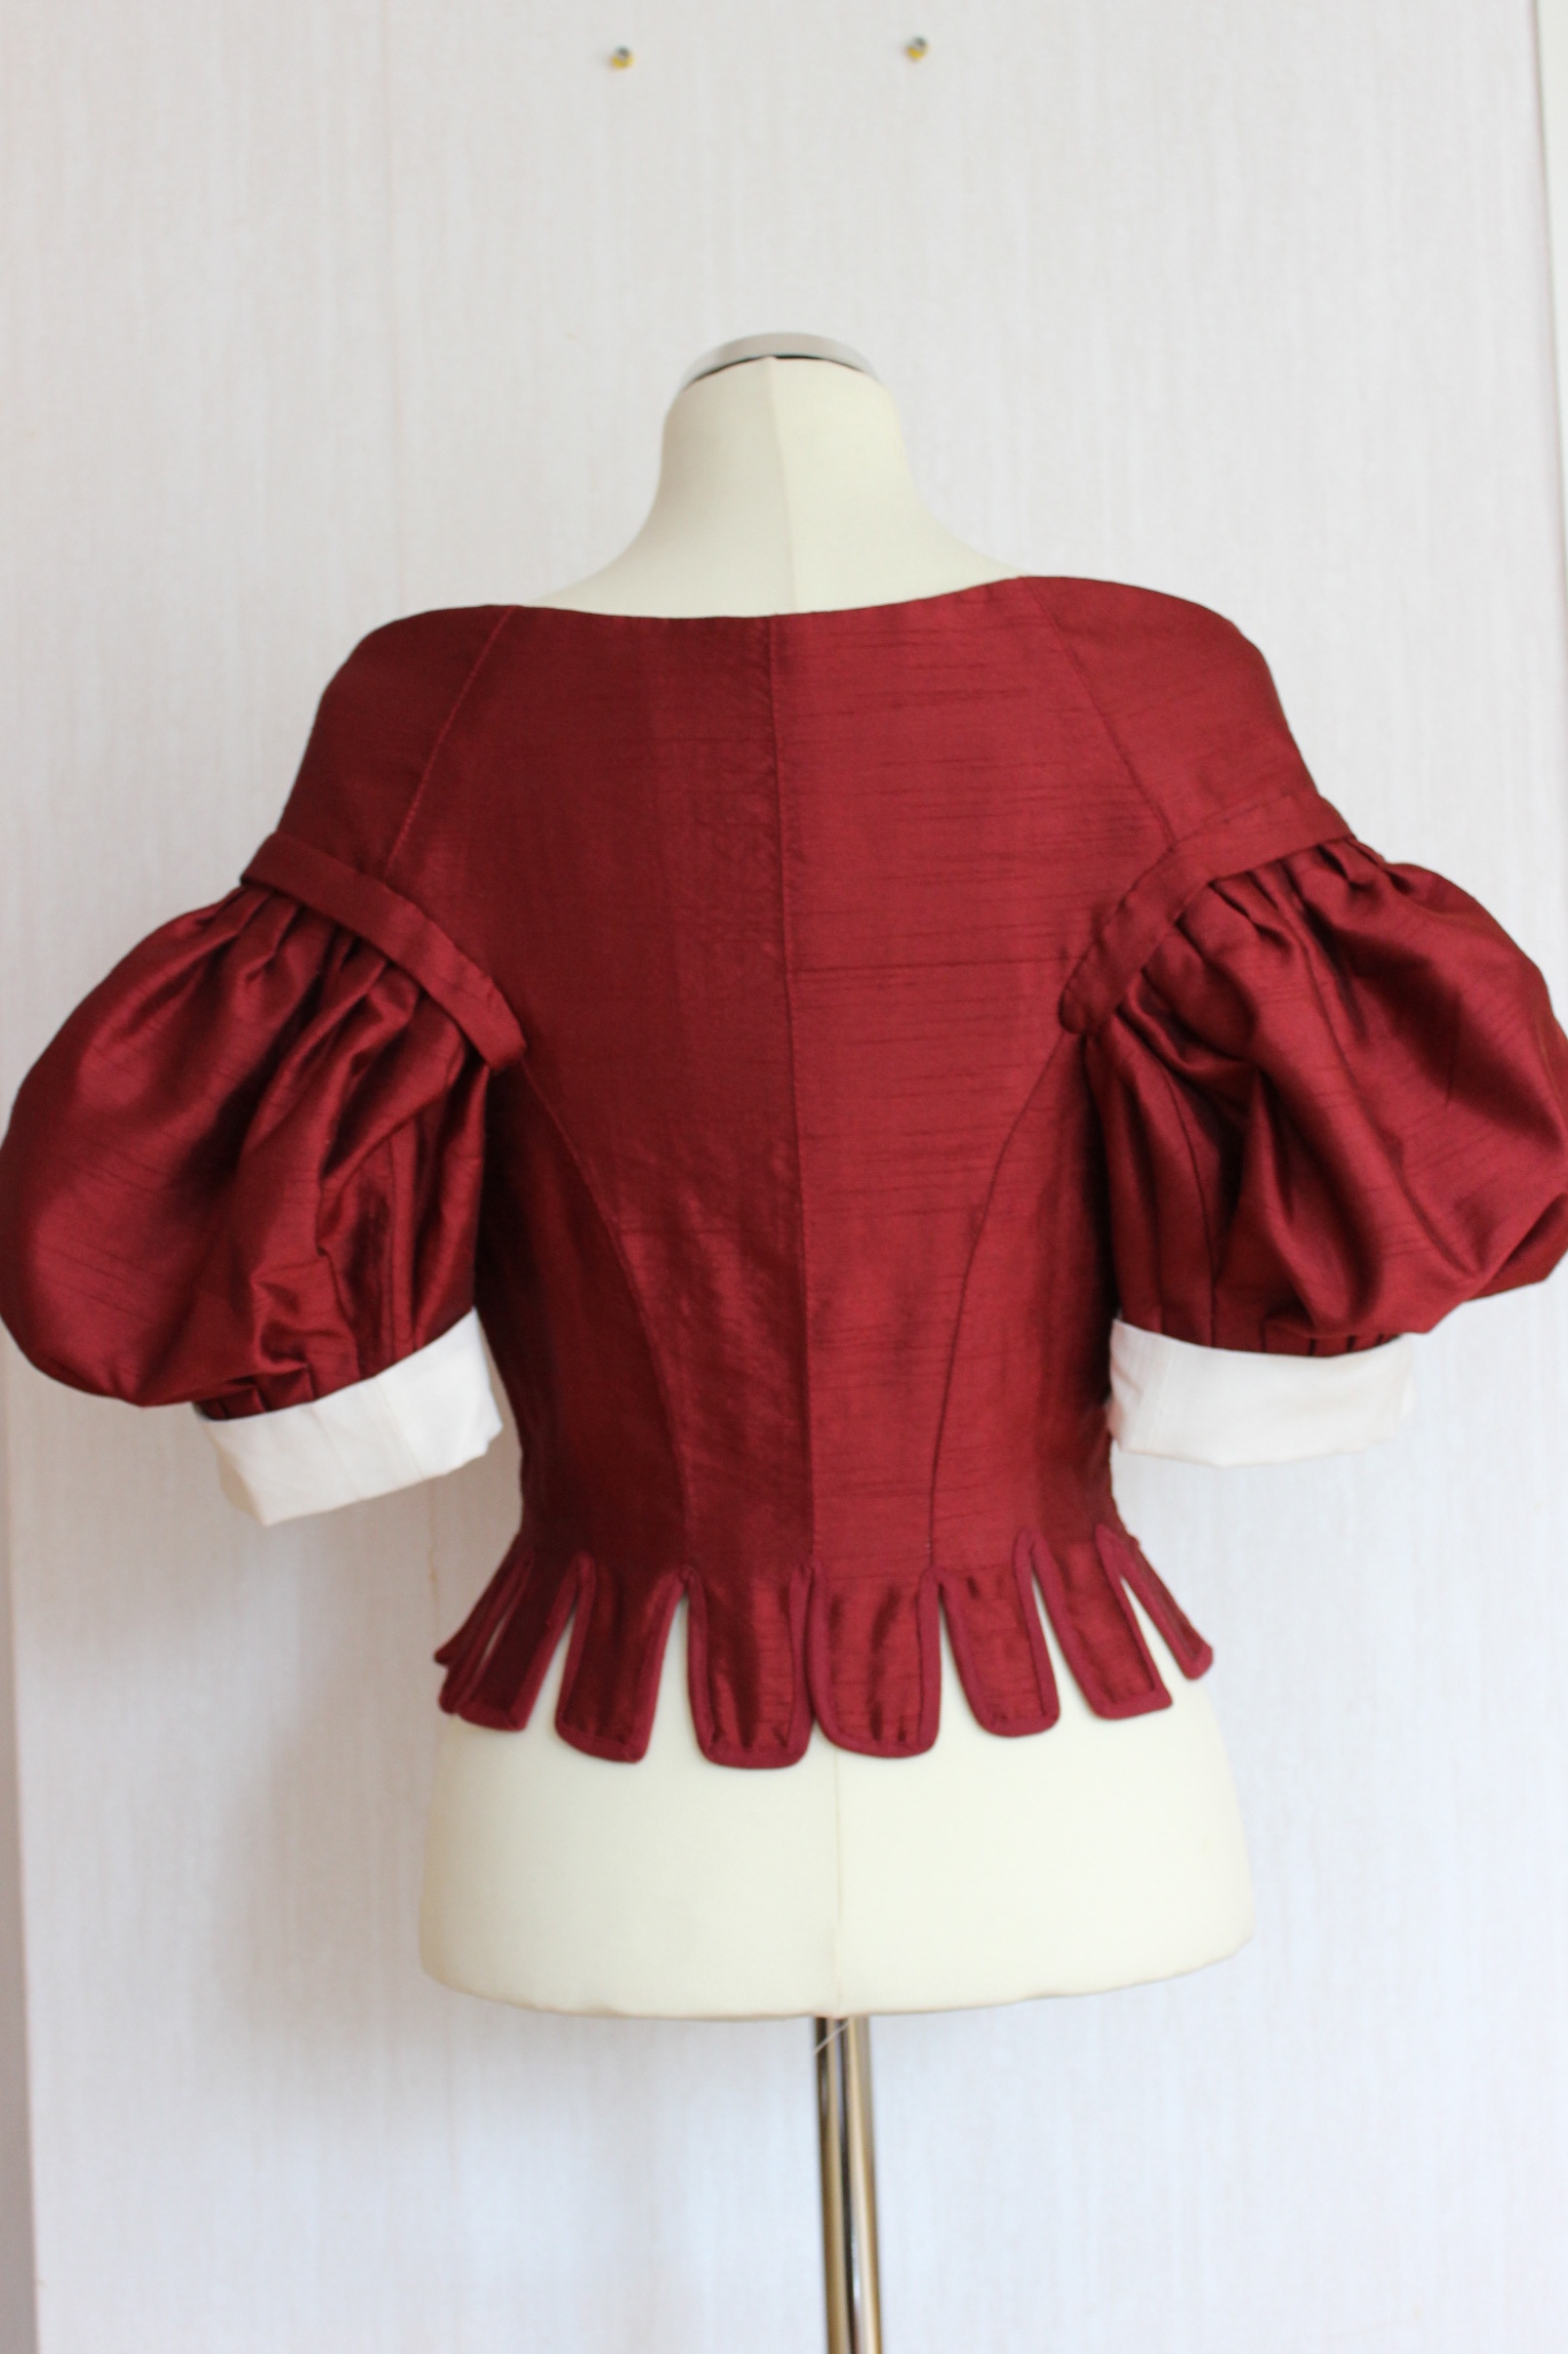
The finished bodice:


Just the facts:
Challenge: nr 6/HSM15 – Out of your comfort zone
What: A 1660s bodice
How it fit the challenge: This is my first venture into 17th century, and even though I made both bodices and stays before the way this garment combines the two was a new experience for me.
Pattern: “1660s bodice lining” from Waugh’s “Corset and Crinolines”, with some alterations.
Fabric: 1,5 m red polyester “silk”, 1,5m white cotton/linen blend for lining and 1 m un-bleached sturdy linen for interning and foundation.
Notions: Thread, button-hole thread, 15m plastic whalebone for boning, 5m cord for lacing, 60cm white bias-tape for edging the sleeves and 3 m red bias-tape for binding the tabs.
How historical accurate: So so, the bodice is made 50% on machine with all the outside seams made by hand. The fabric is modern but the shape and look of the garment is good for the time period. About 7/10
Time: A lot! probably about 60 hours – I worked on this for most of the summer.
Cost: About 300Sek (45Usd)
First worn: At old town beginning of August for photos, and I’m thinking on using it next weekend for a “all times” dance recital.
Final Thoughts: I’m so happy with the look and feel of it. My only concern is the size – Why do I keep making things to small? And no, I have not gained weight – I’m just constantly over estimate my “squeeze factor”, and underestimate the difference boning and extra fabric layers make to the size.
And if it ever is to be worn again I might have to redo the front, or just slap some trim over it…
Lets continue on with the bodice:
(read the previous posts in this series here: costume analysis, skirt, coif, fur shawl, bodice part 1)
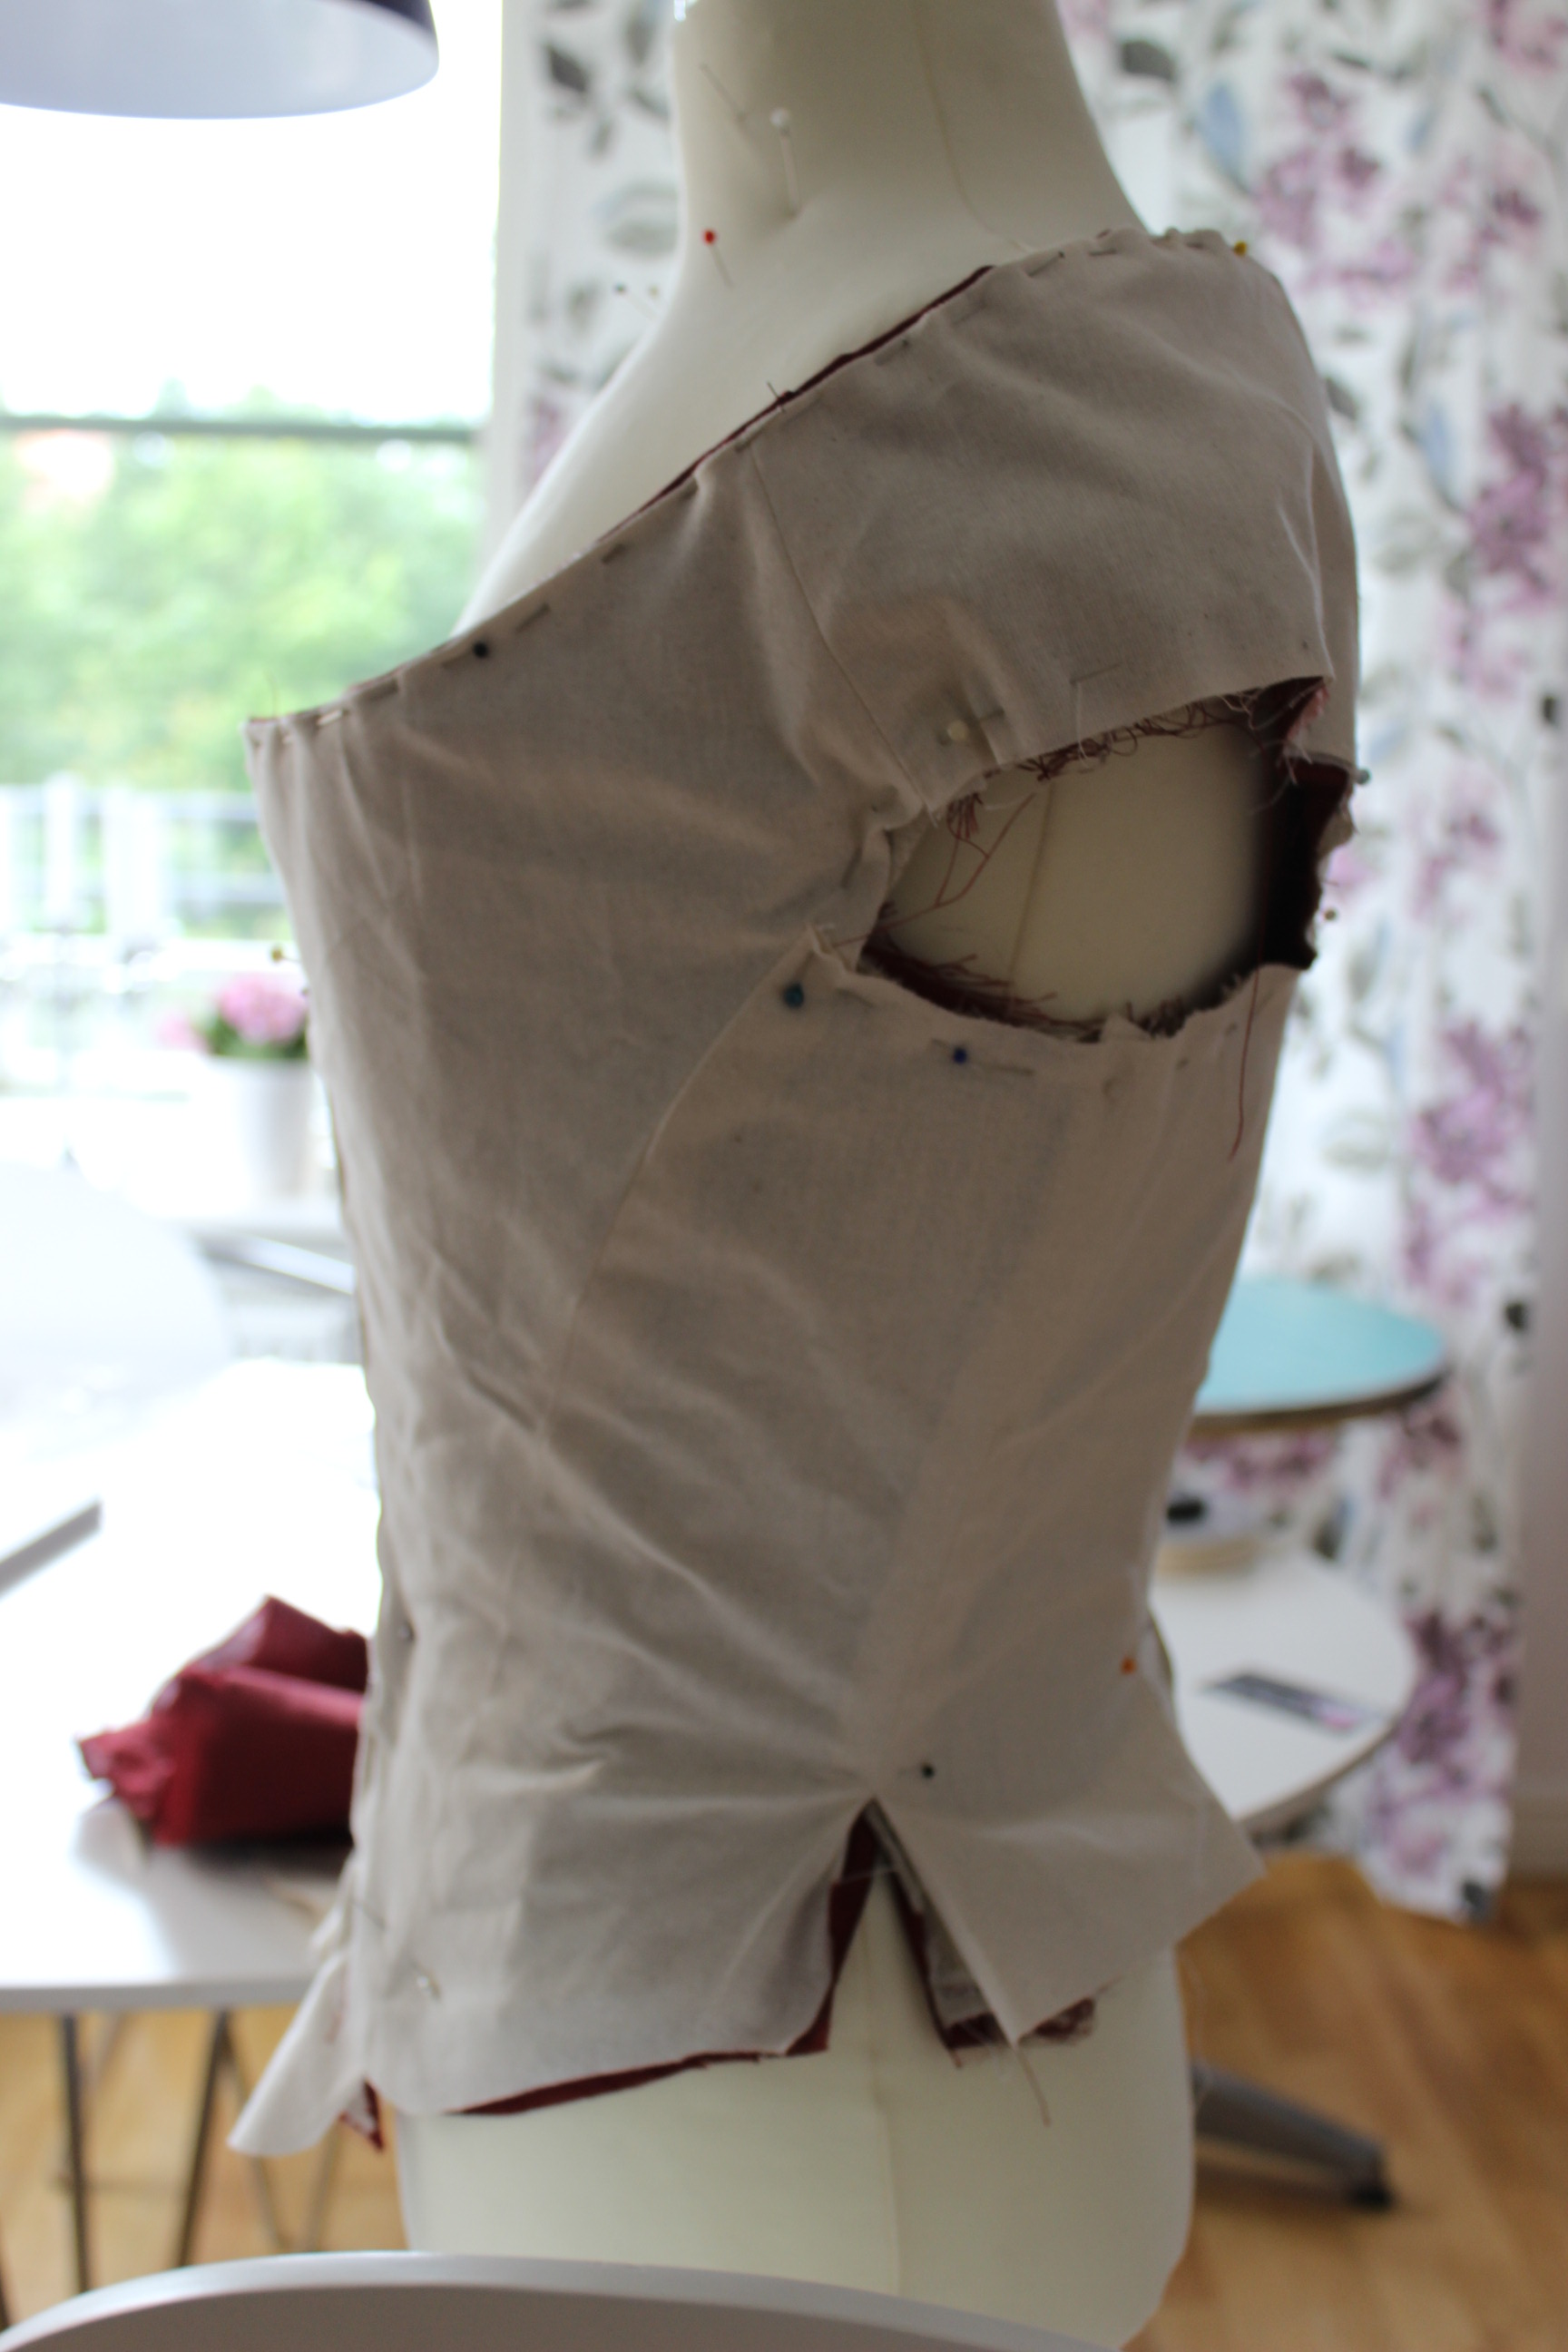
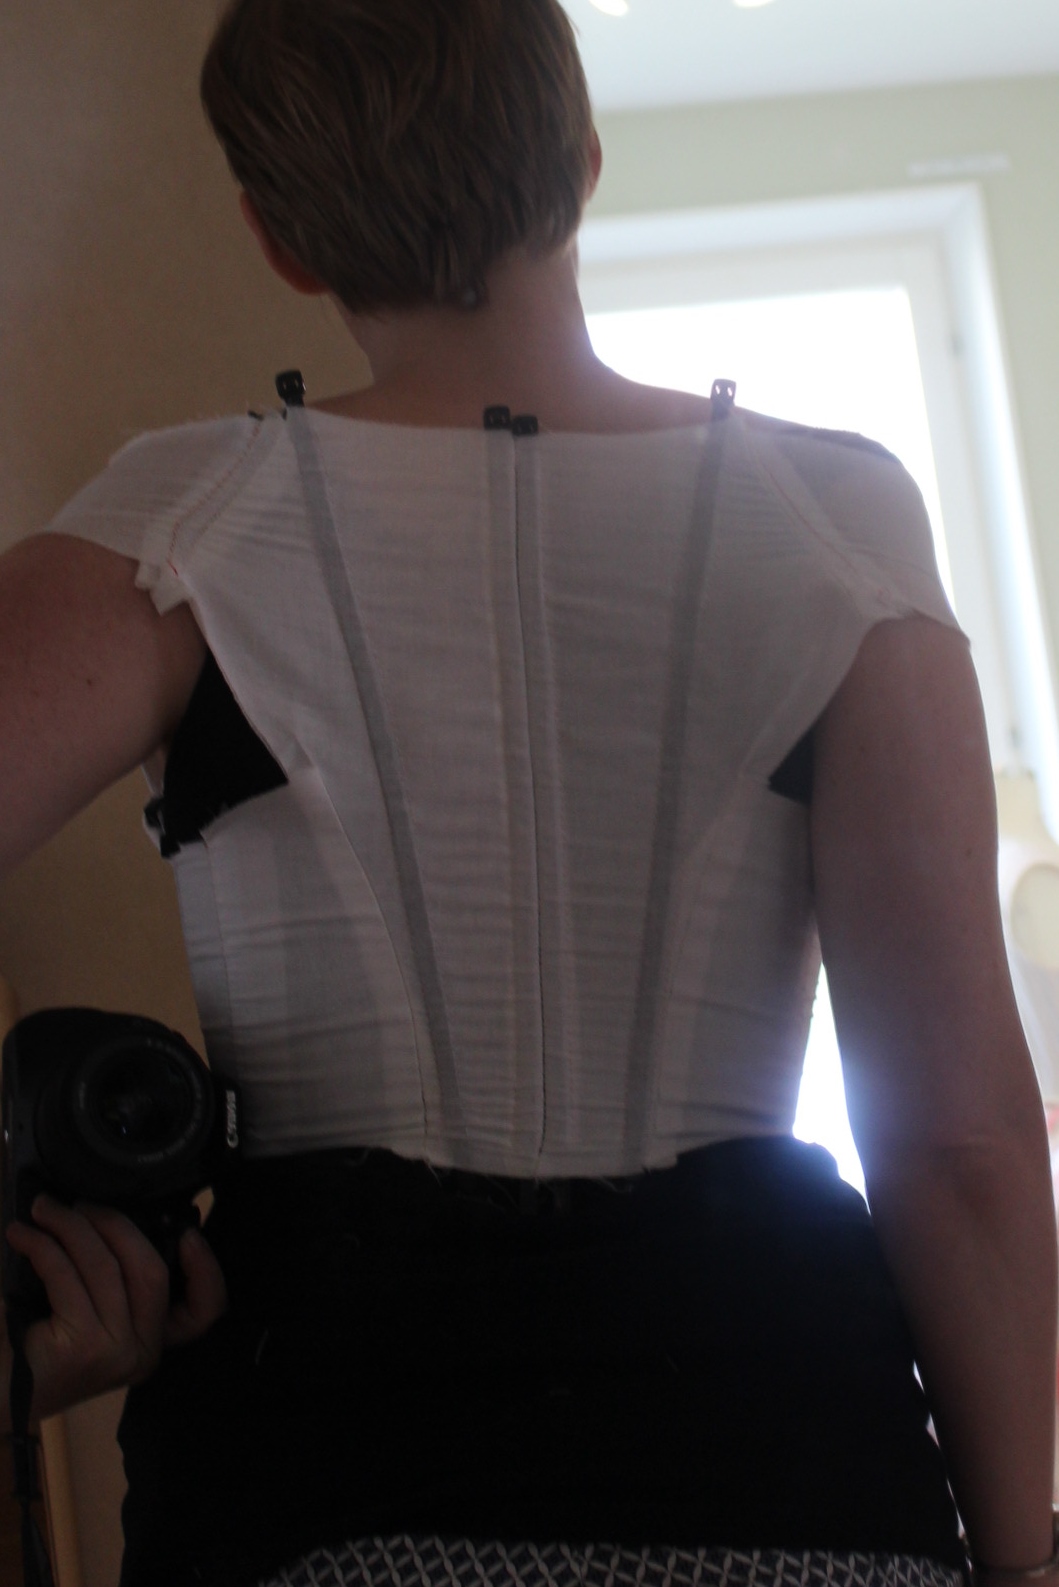
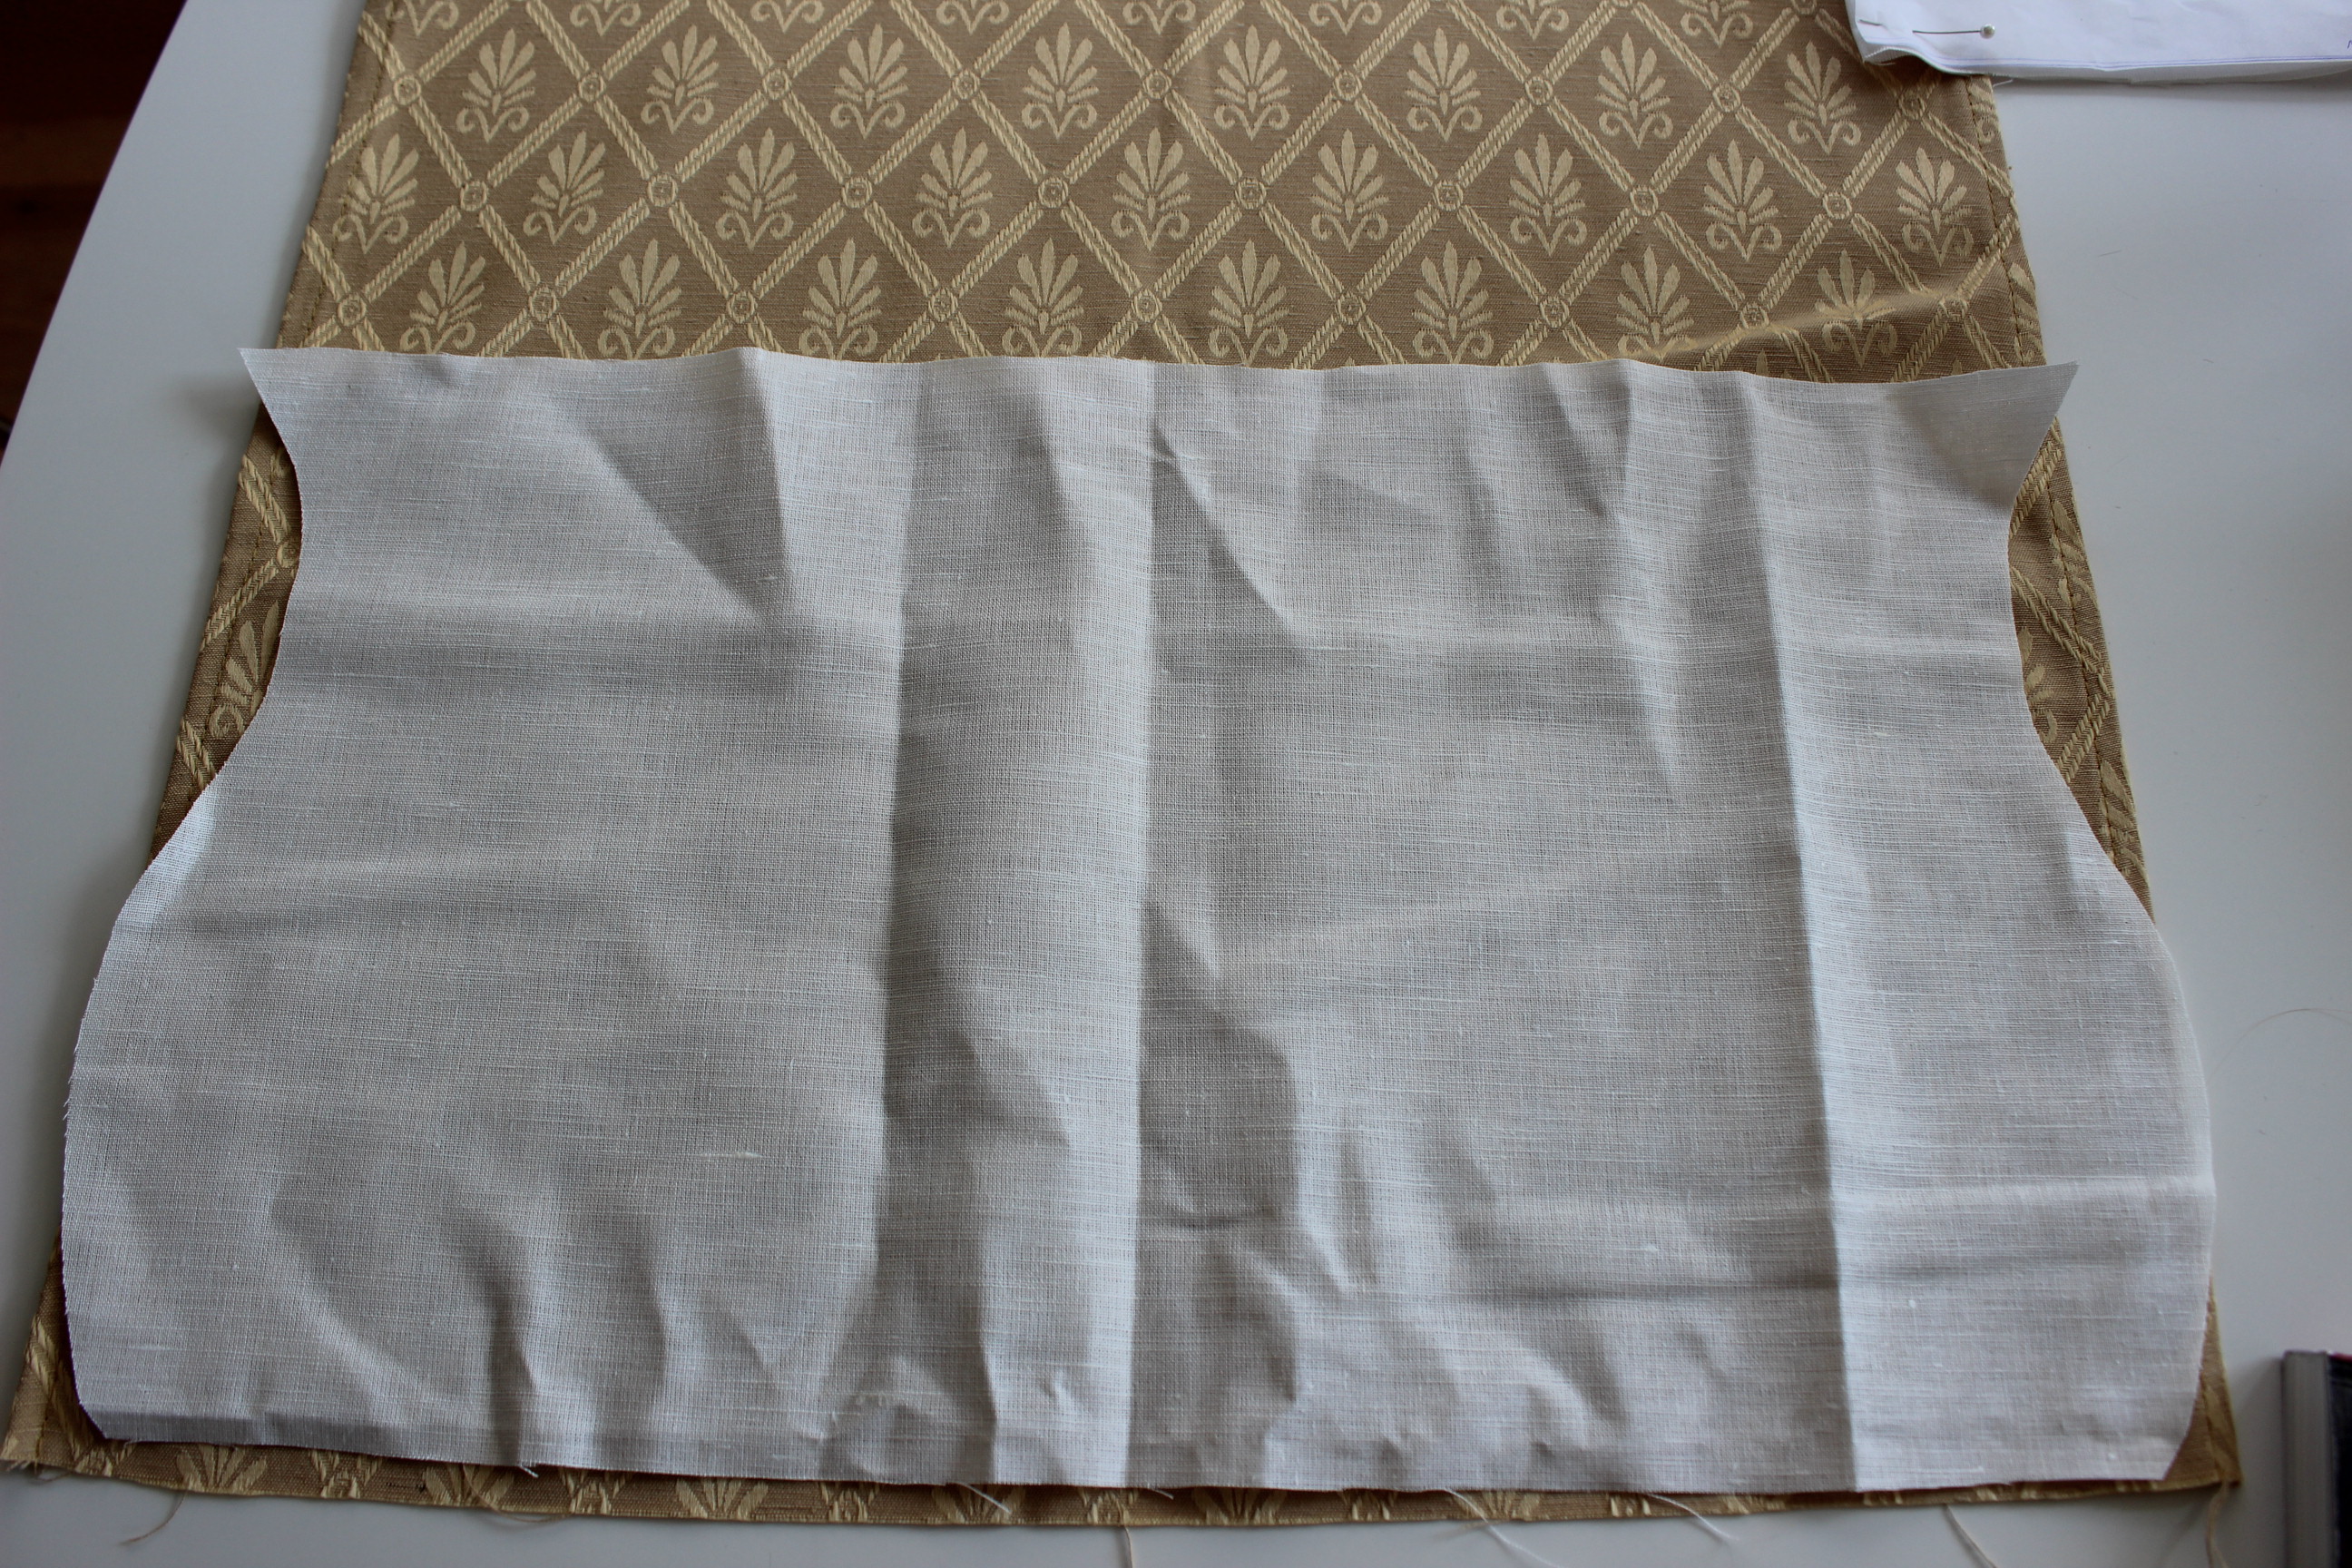
The first thing to do (once I had a working pattern) was to make the foundation for the bodice.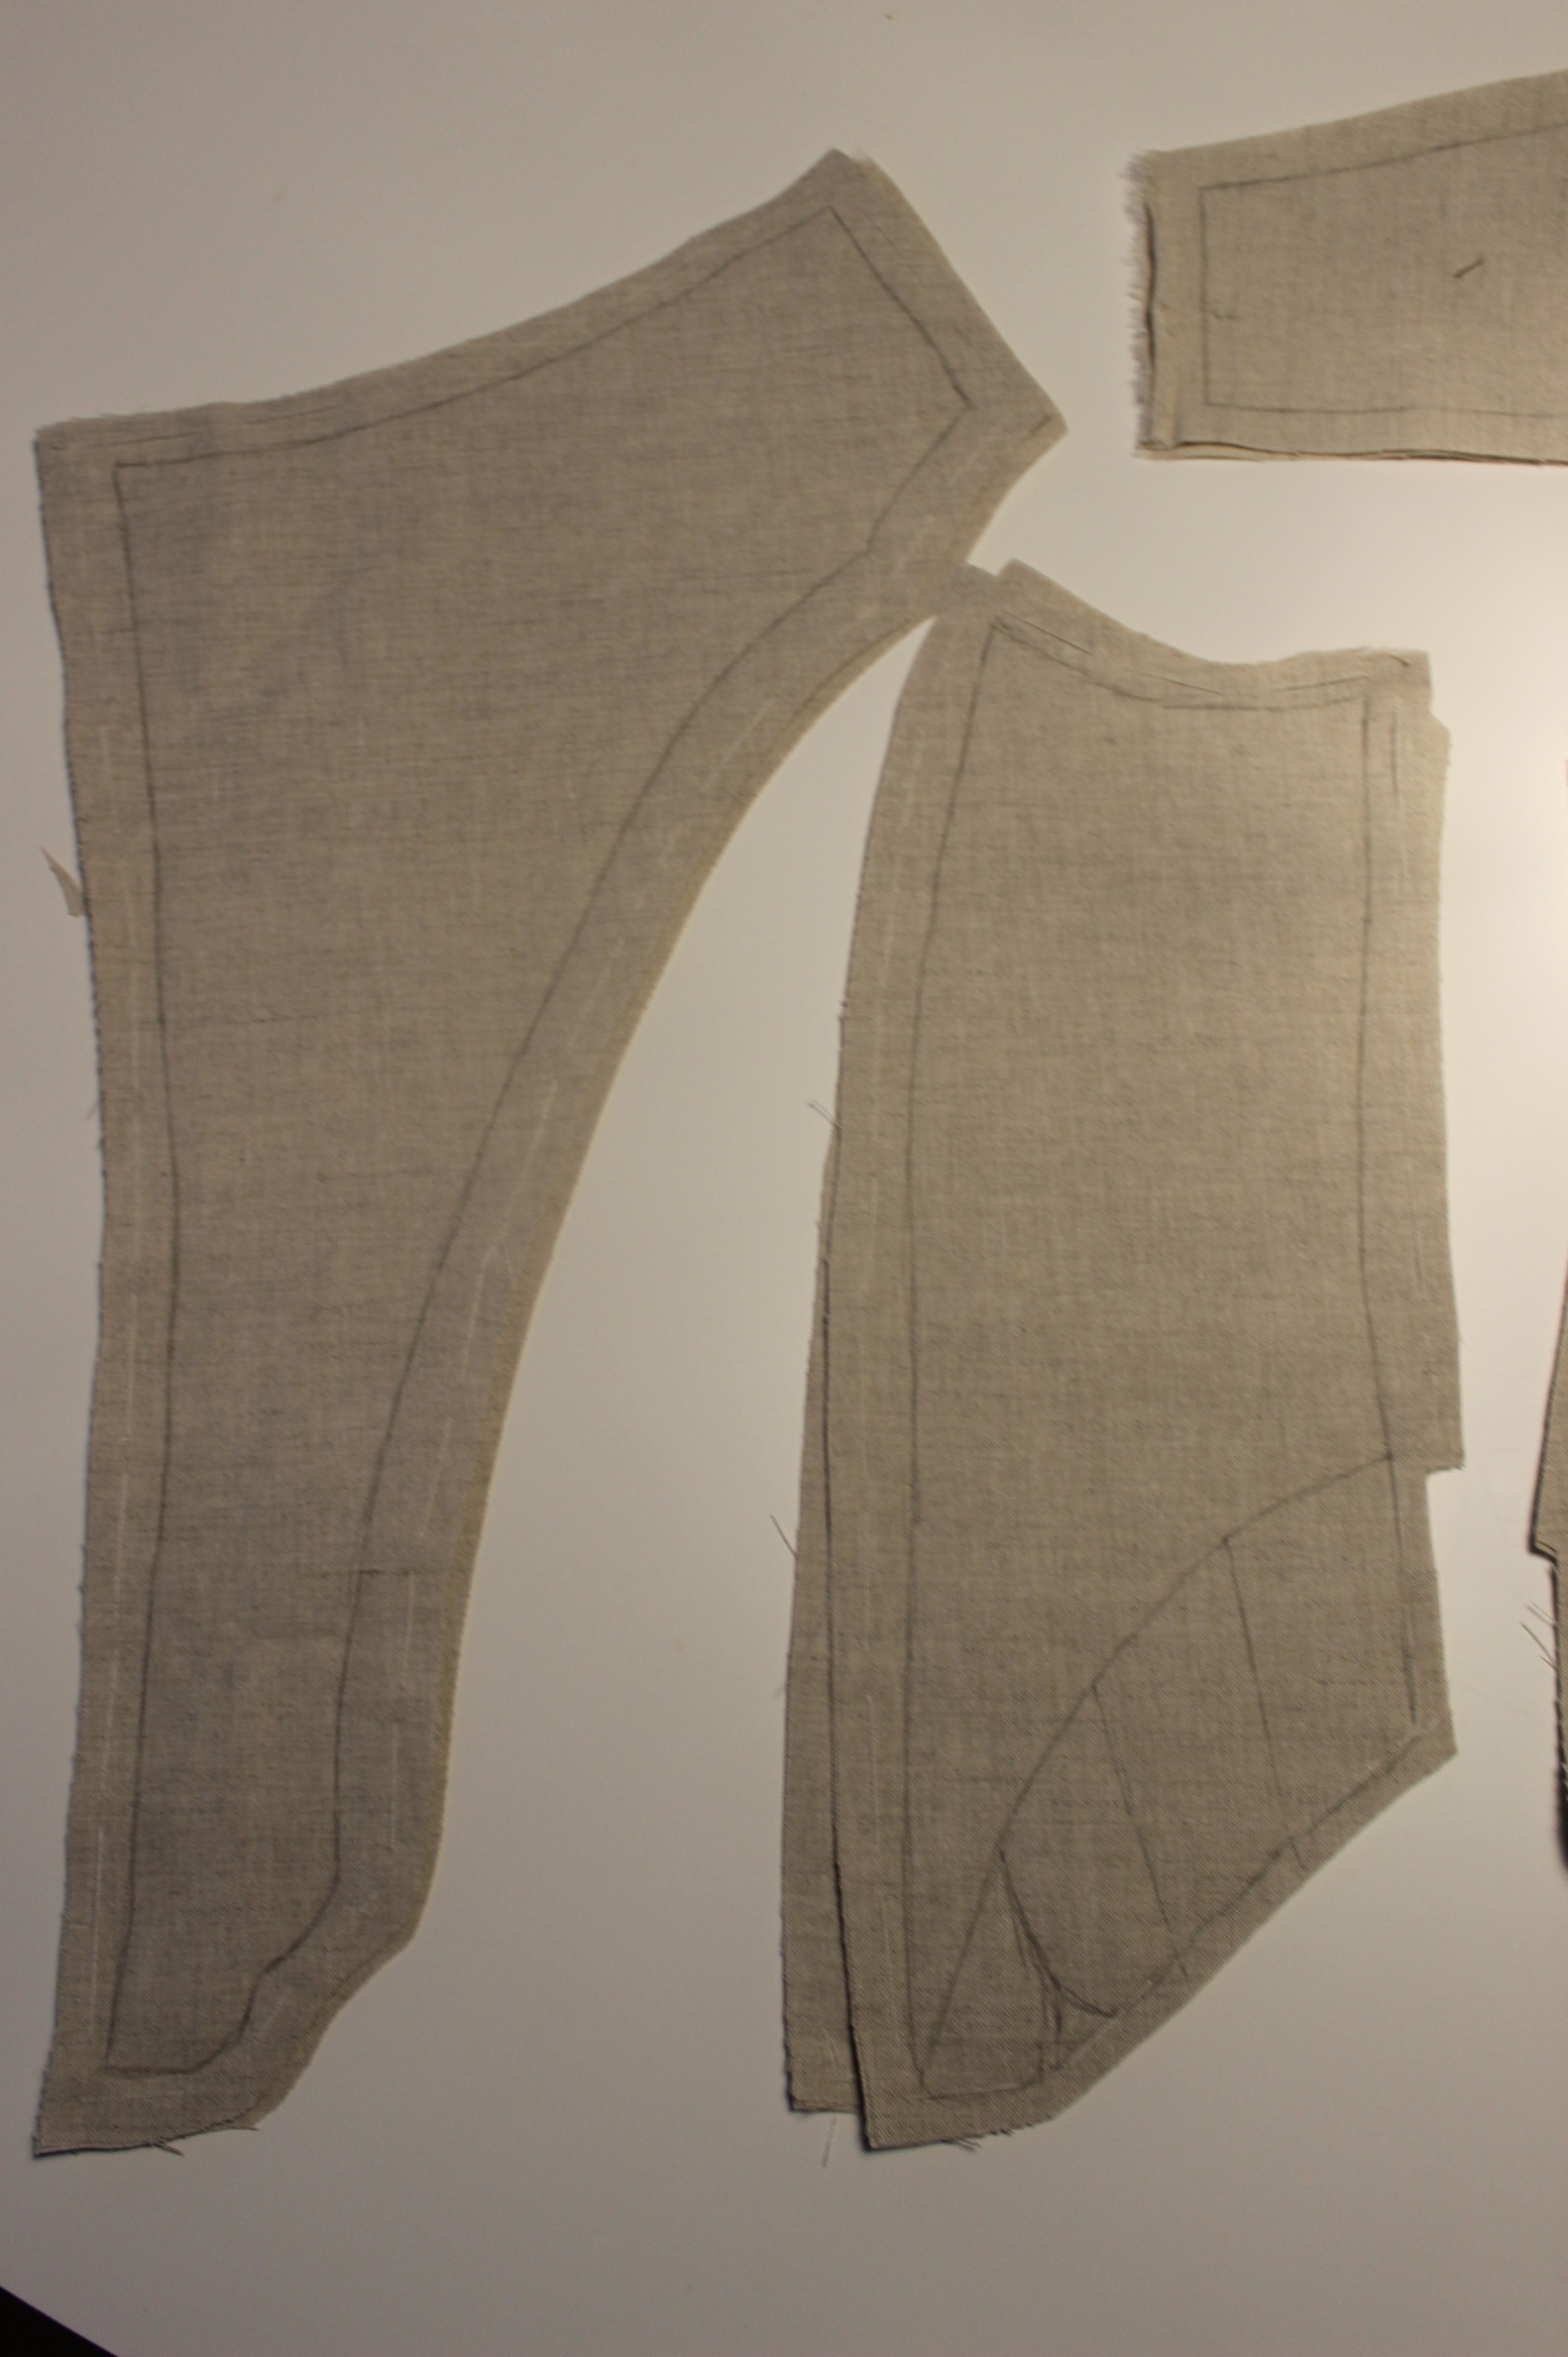 So I cut two of every piece in a sturdy unbleached linen, and basted them togeter.
Then I penned the boning channels (using some of my books as guides).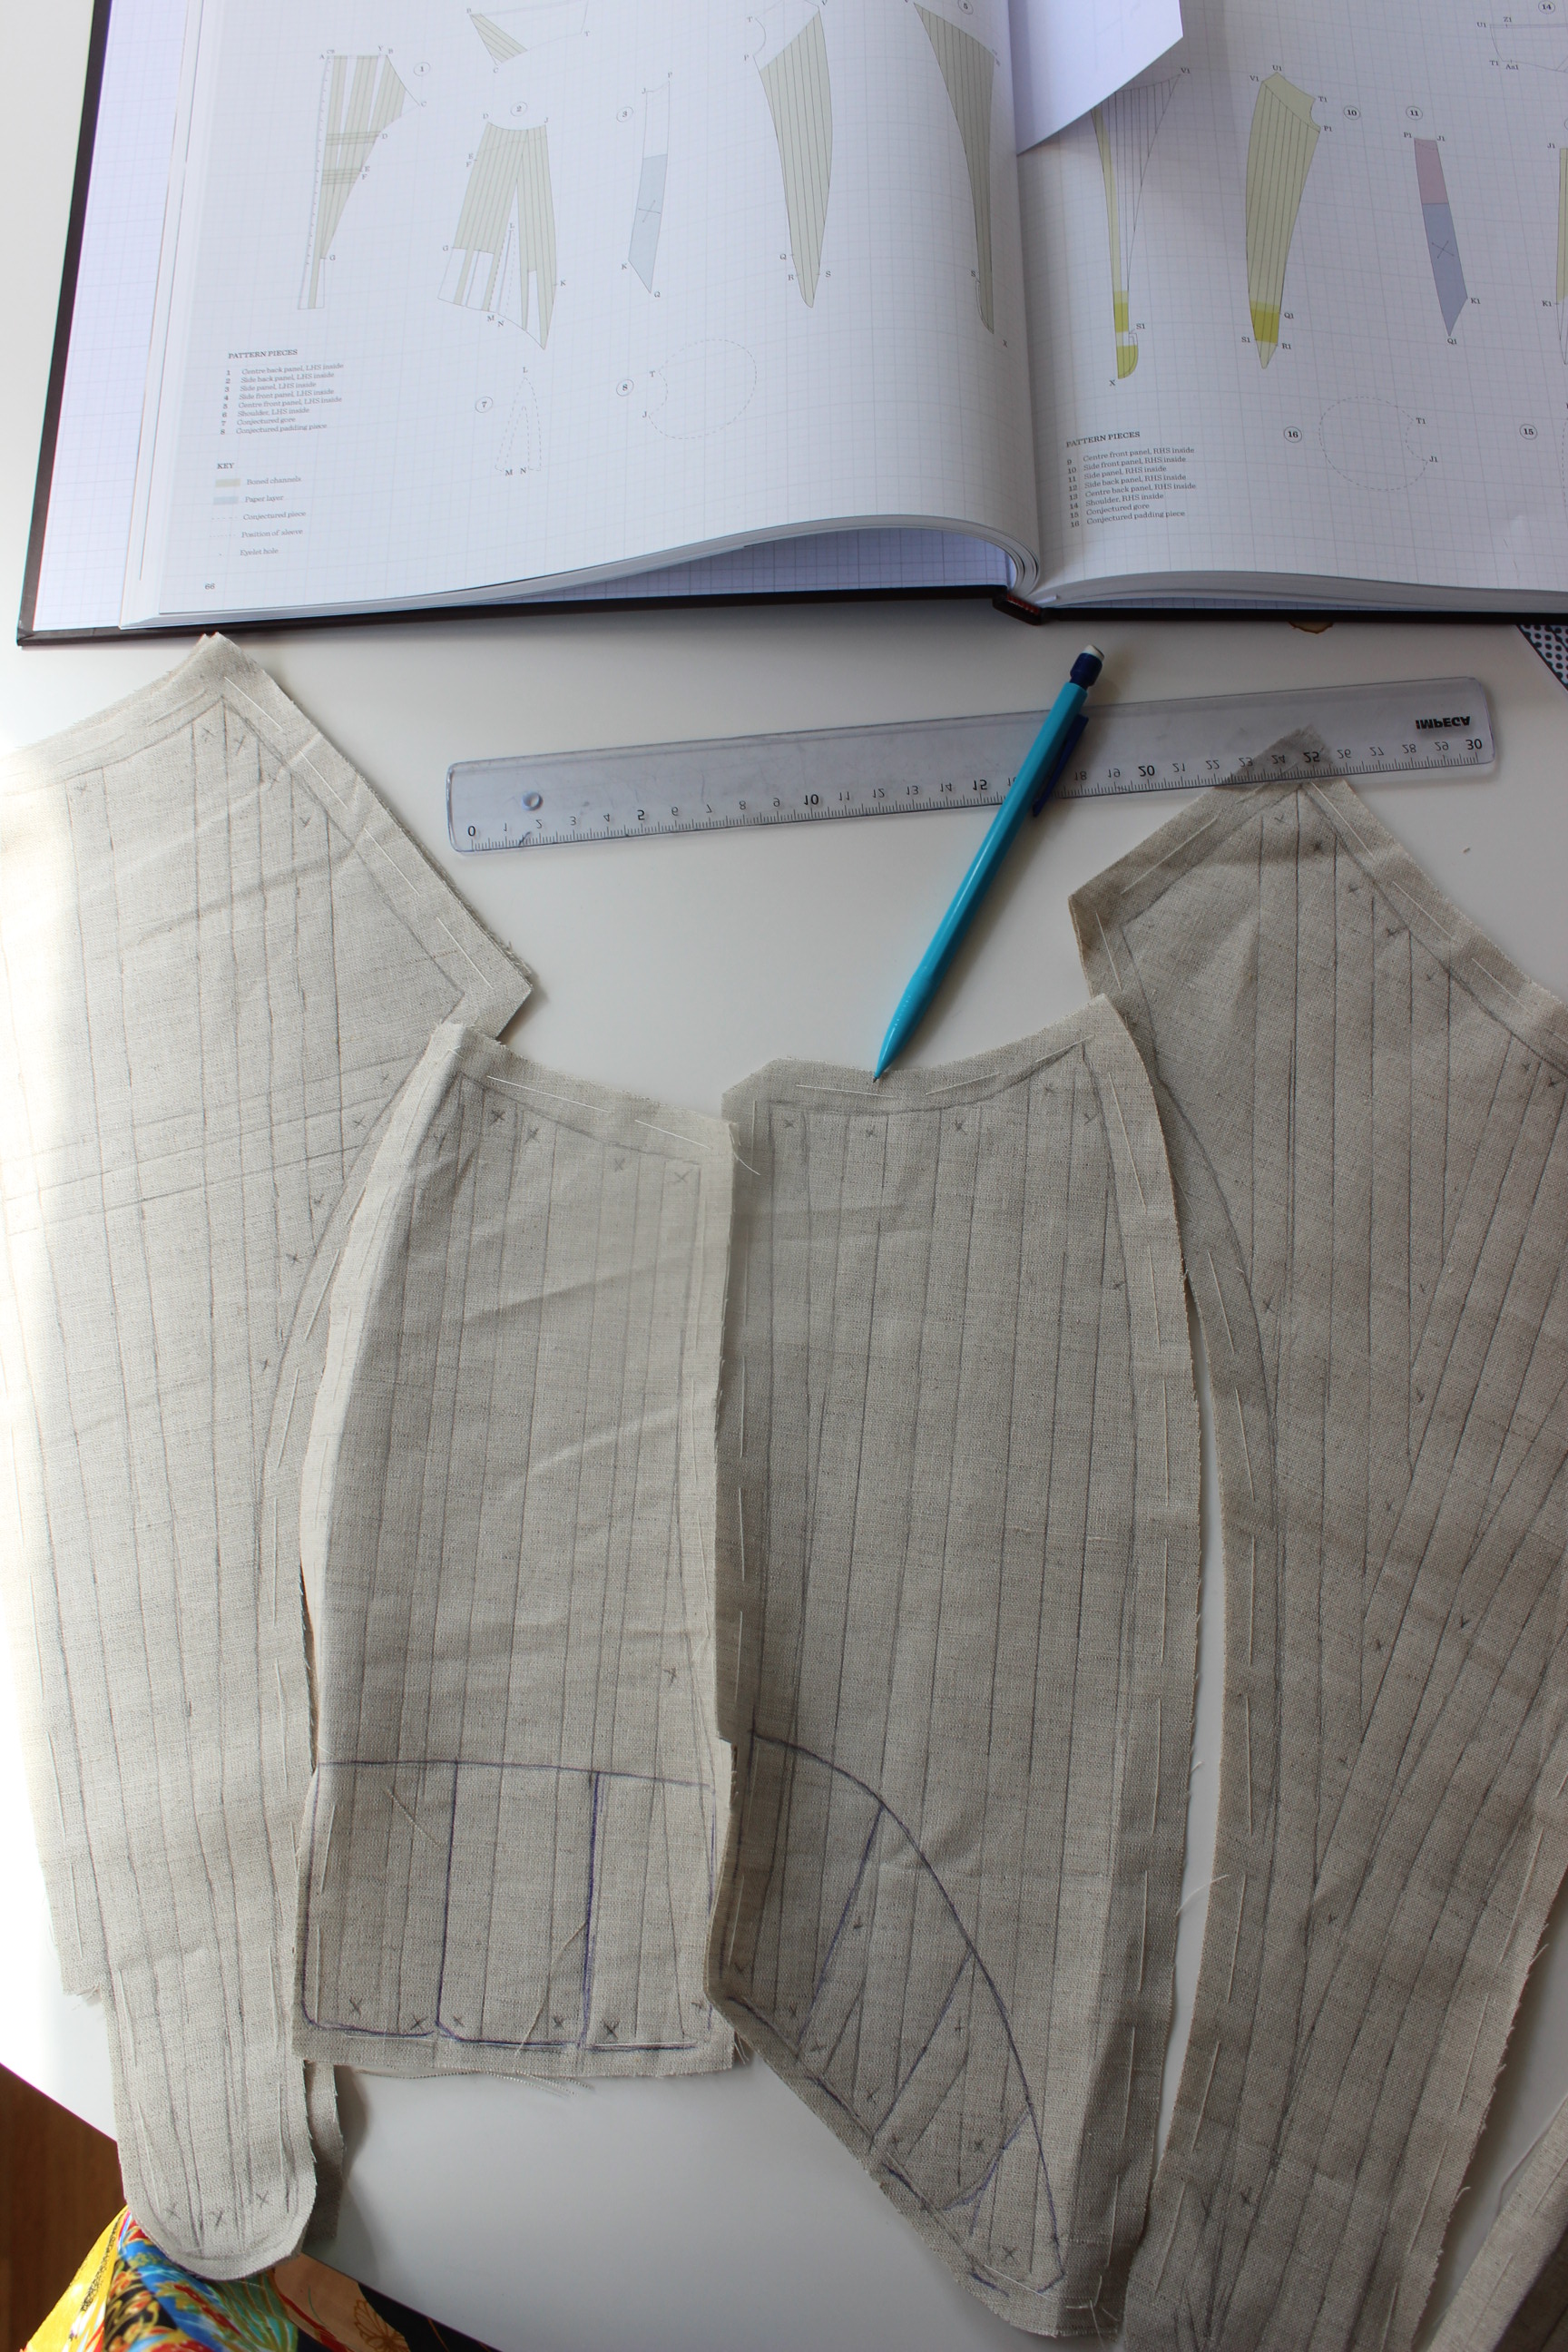
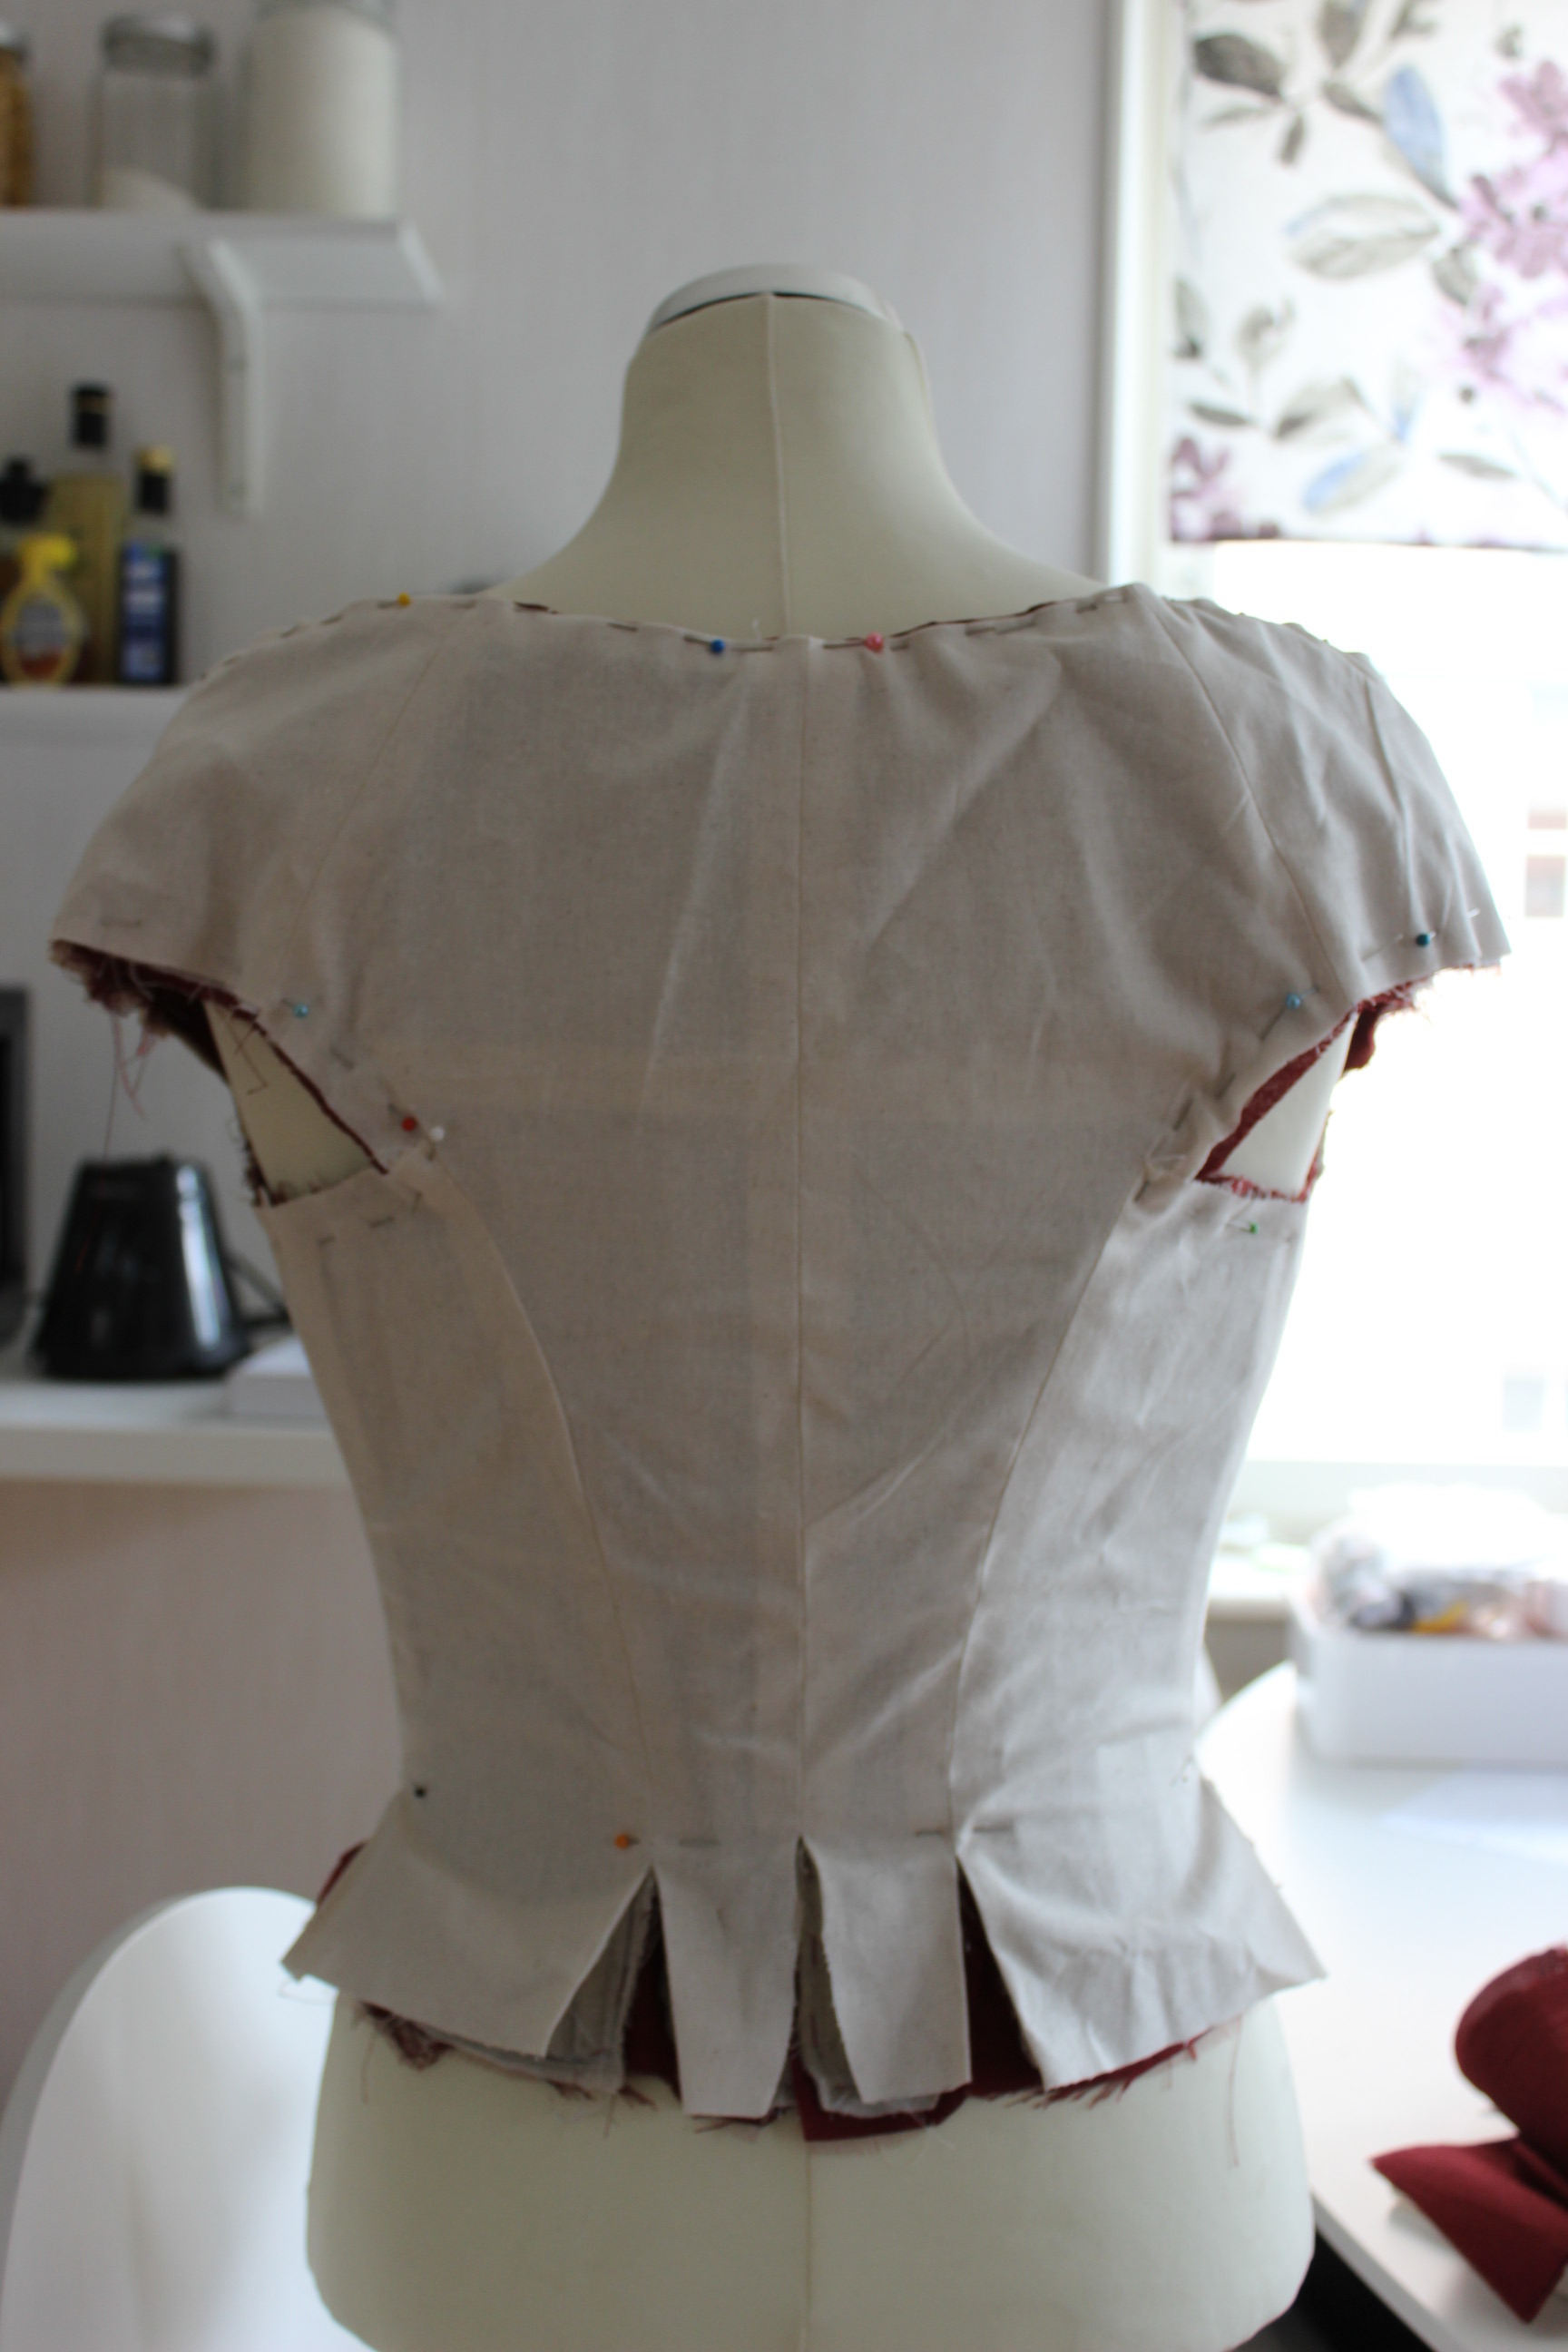
I stitched all the channels and then attached the pieces to each-other.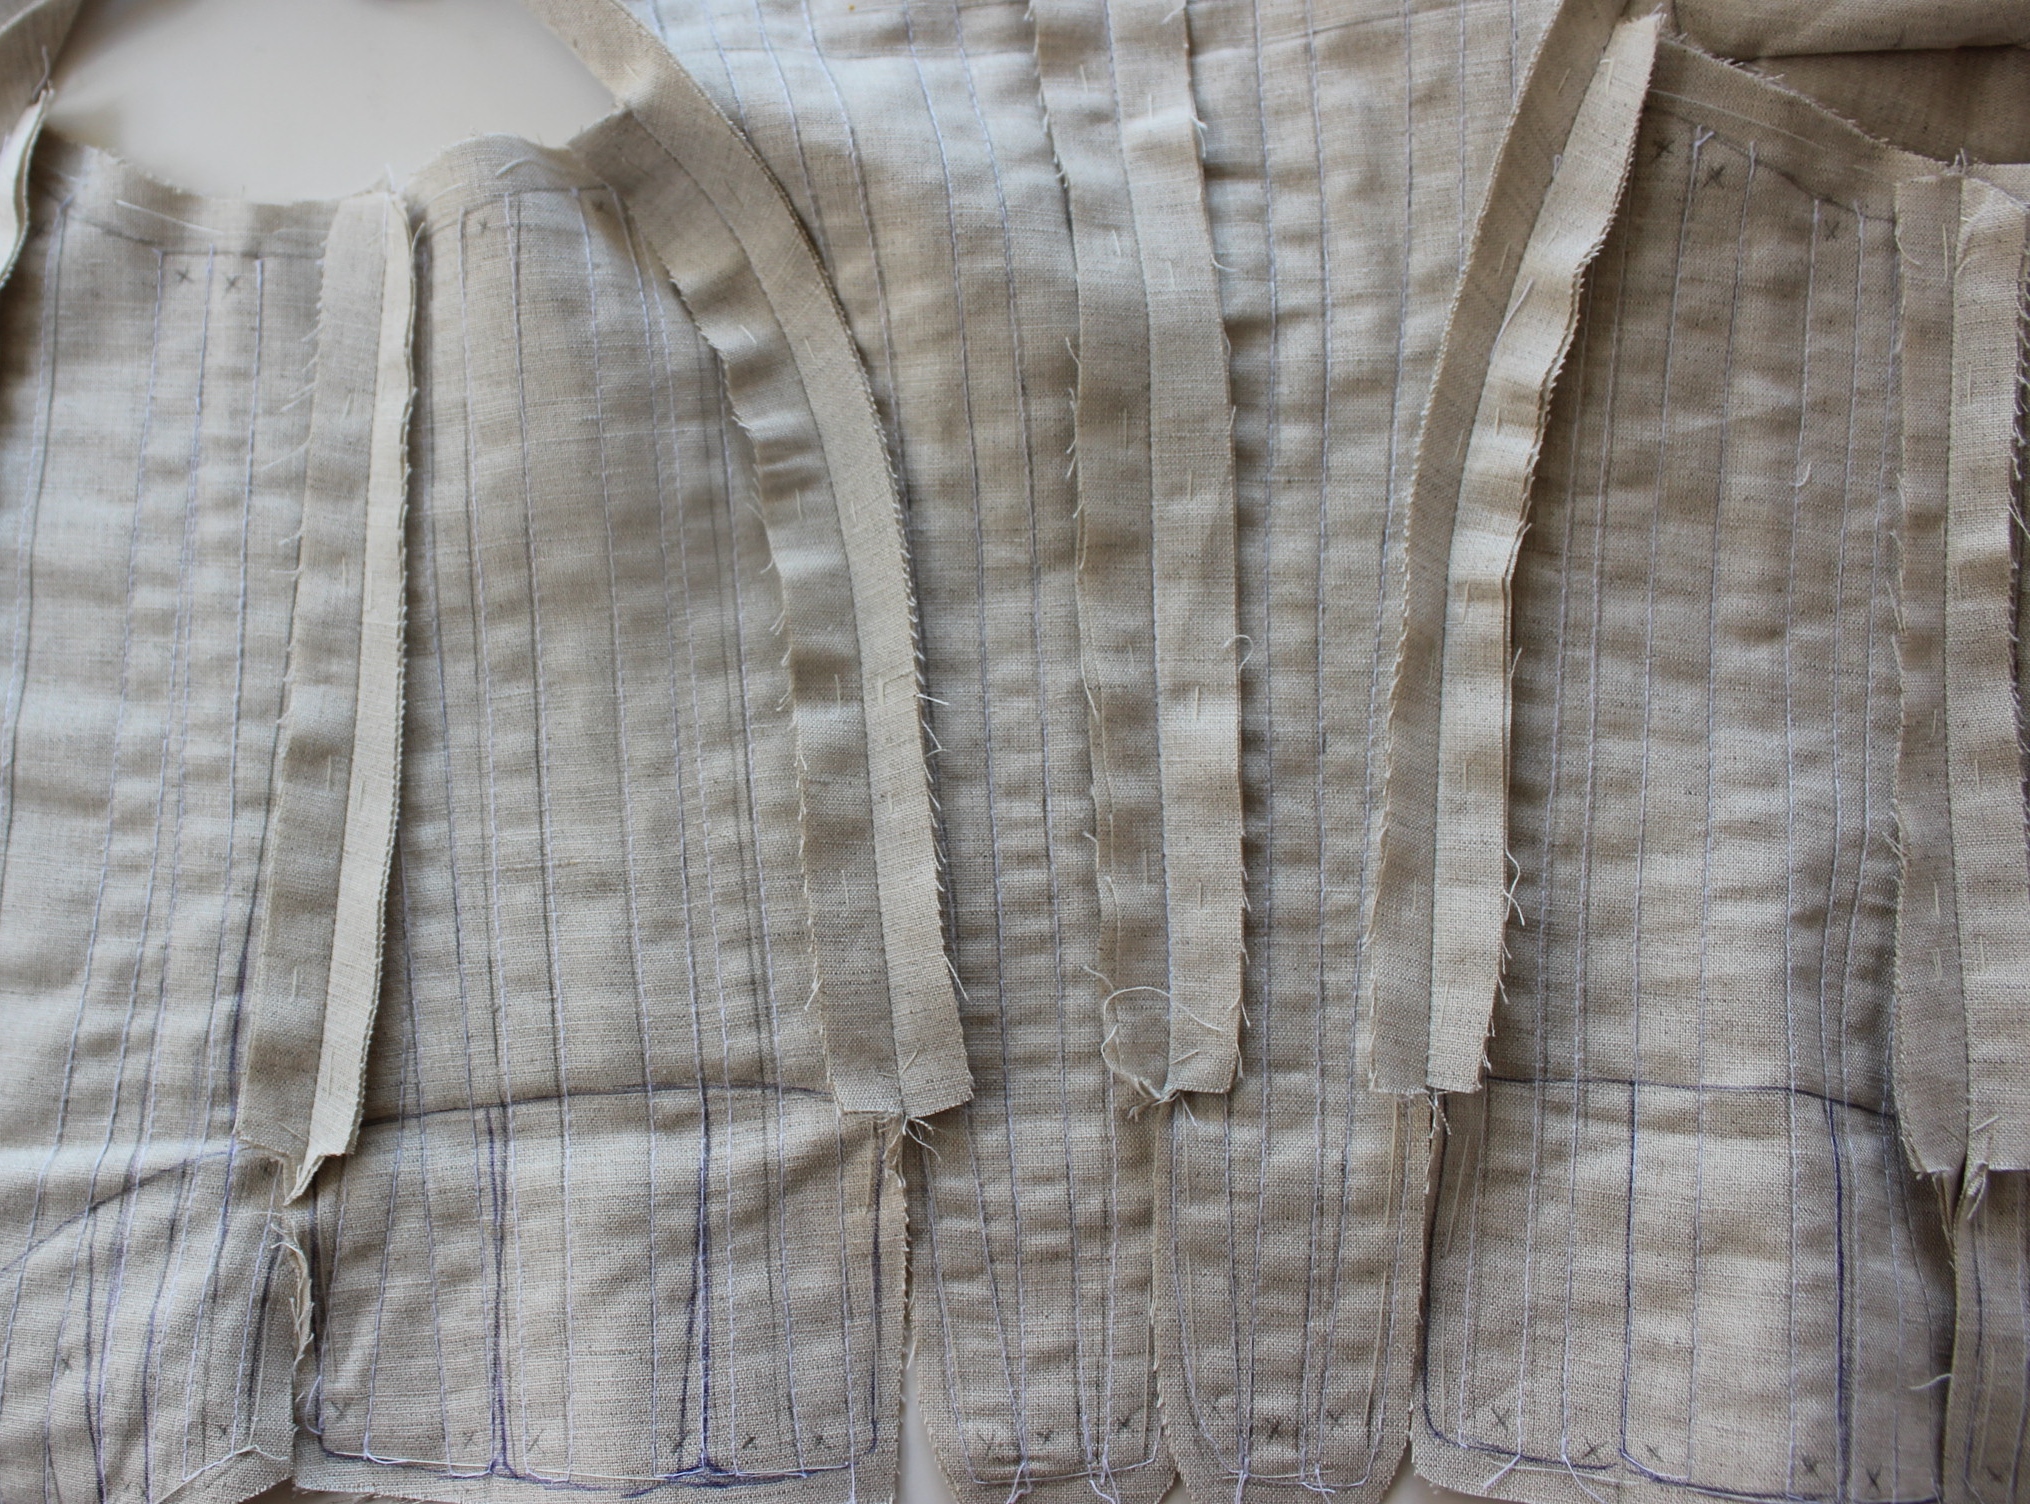
Then it was time to ad the boning.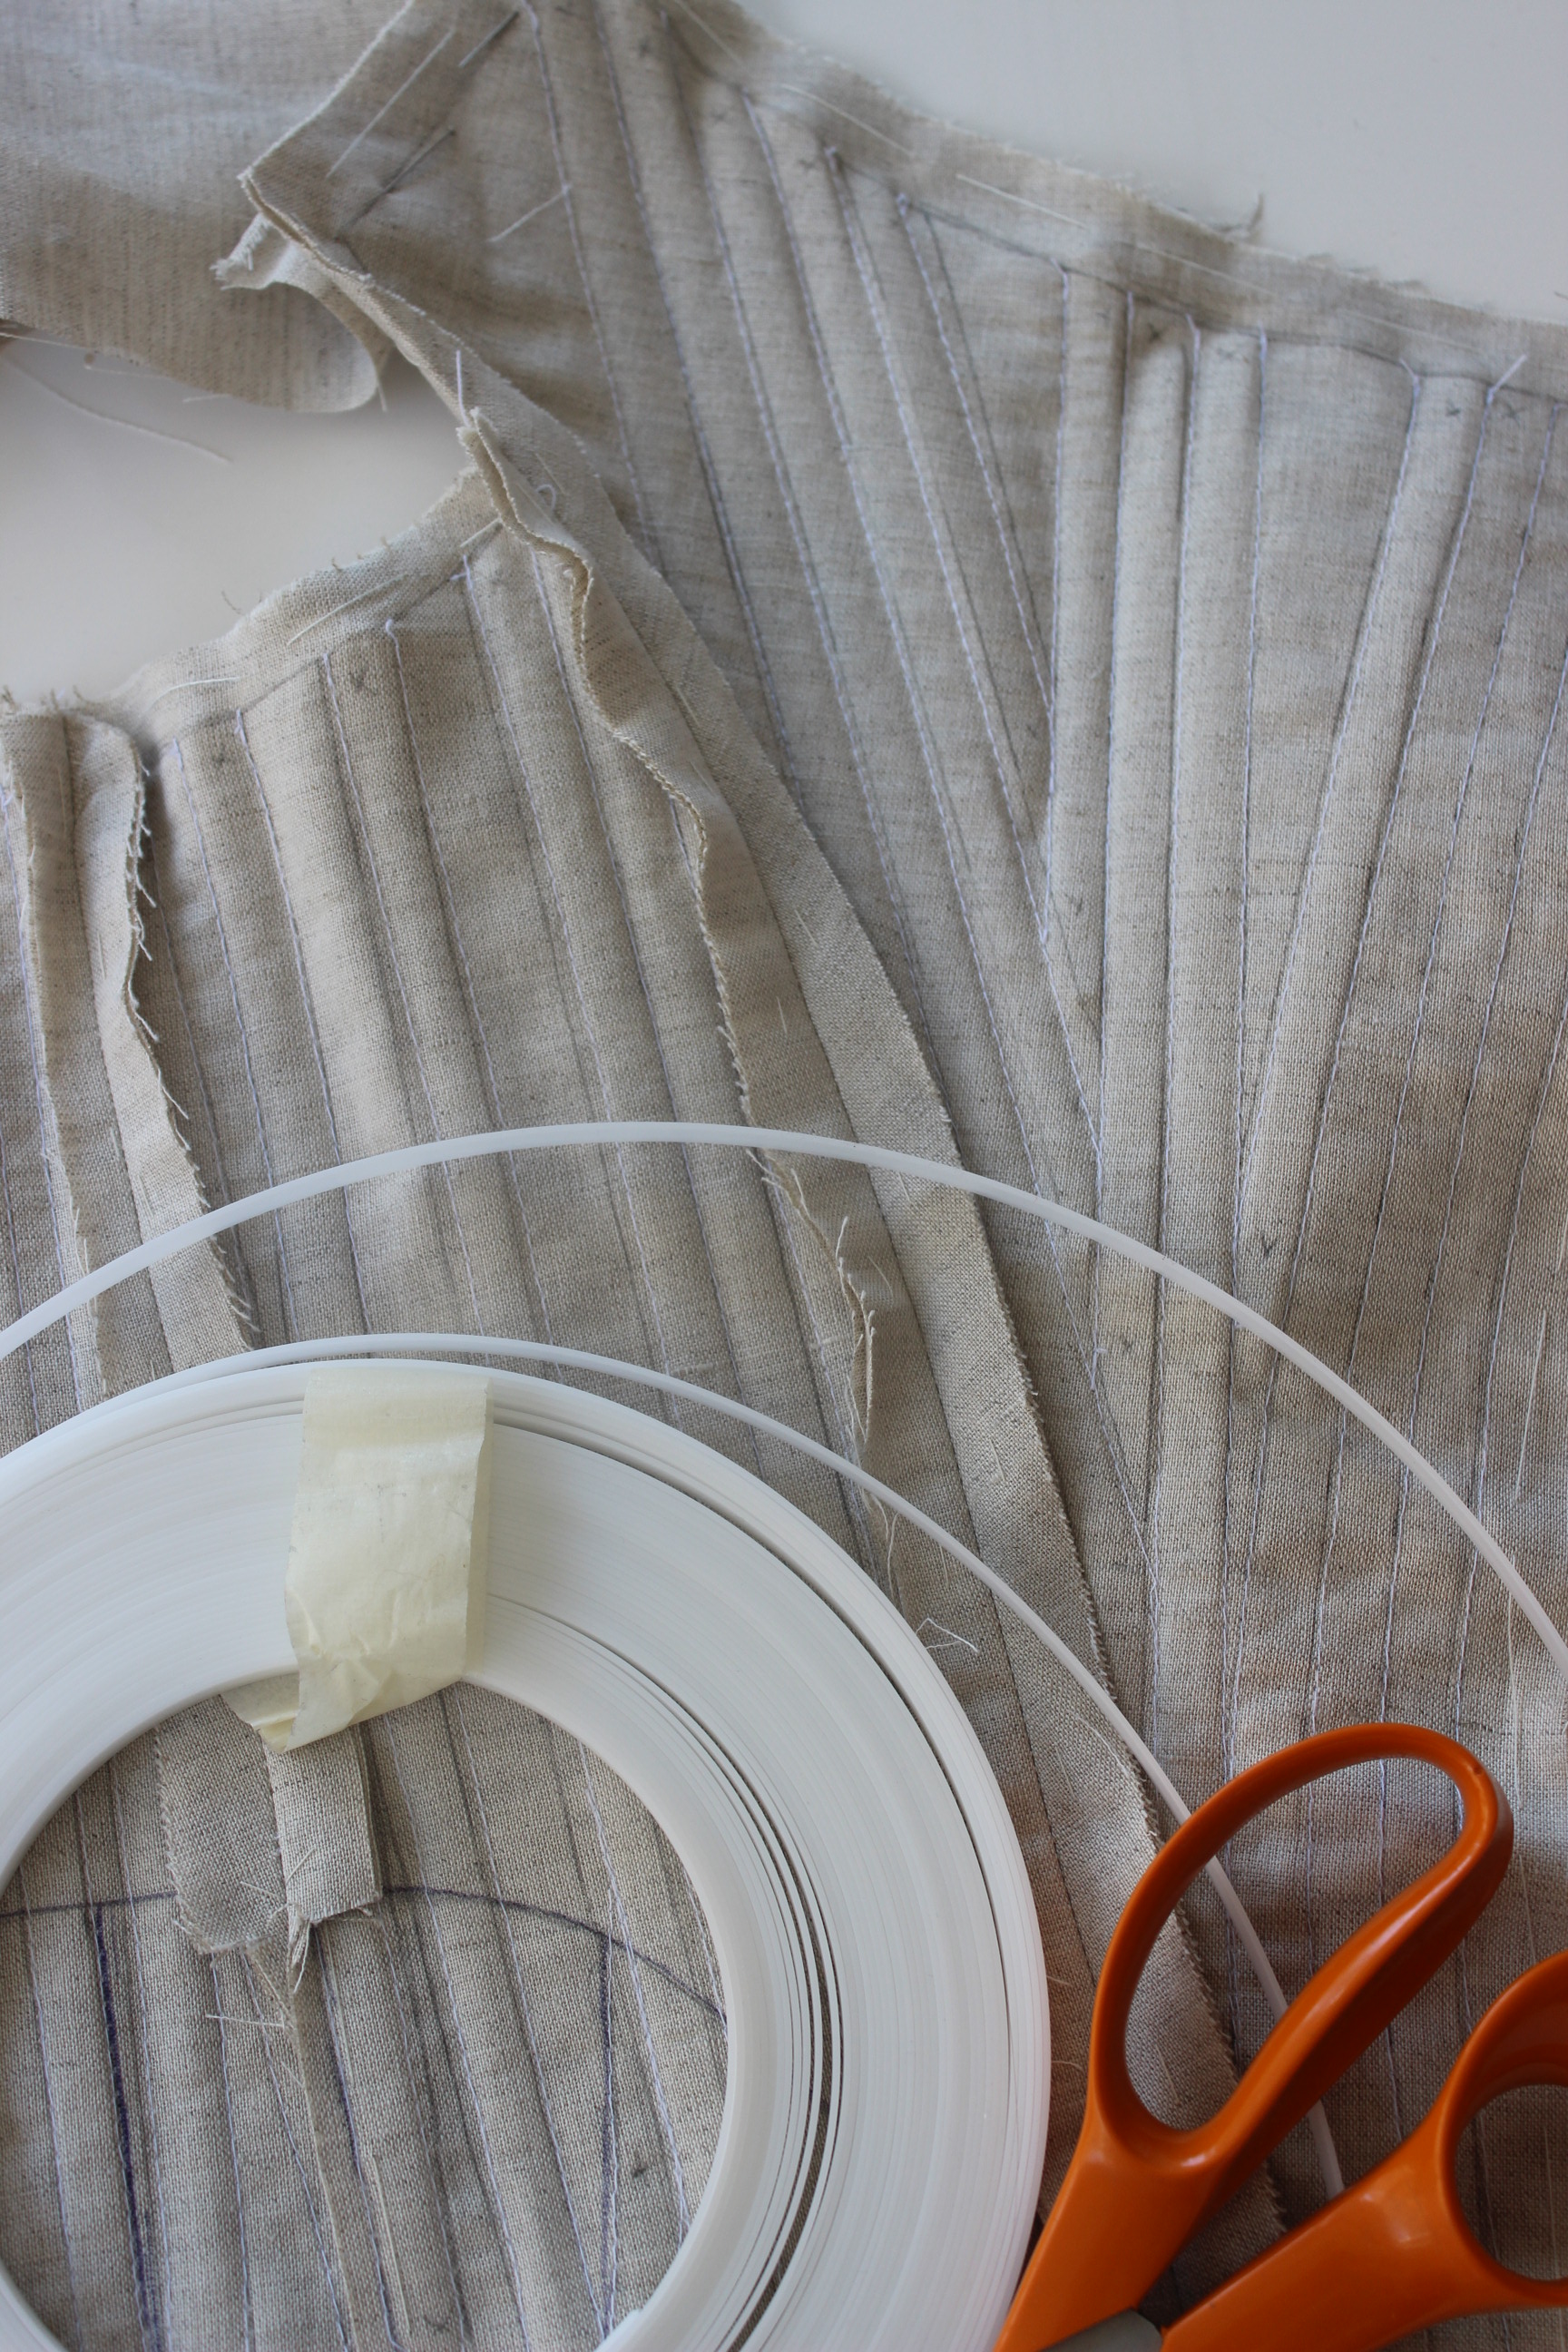 I used synthetic whalebone, and cut each piece to match the channels.
The whalebone itself is not as strong as metal or reed, but it is lightweight and in a fully boned bodice like this the thin quality is to prefer (in my opinion)
The one thing that worried me most was the “shrinkage” almost always caused by adding boning.
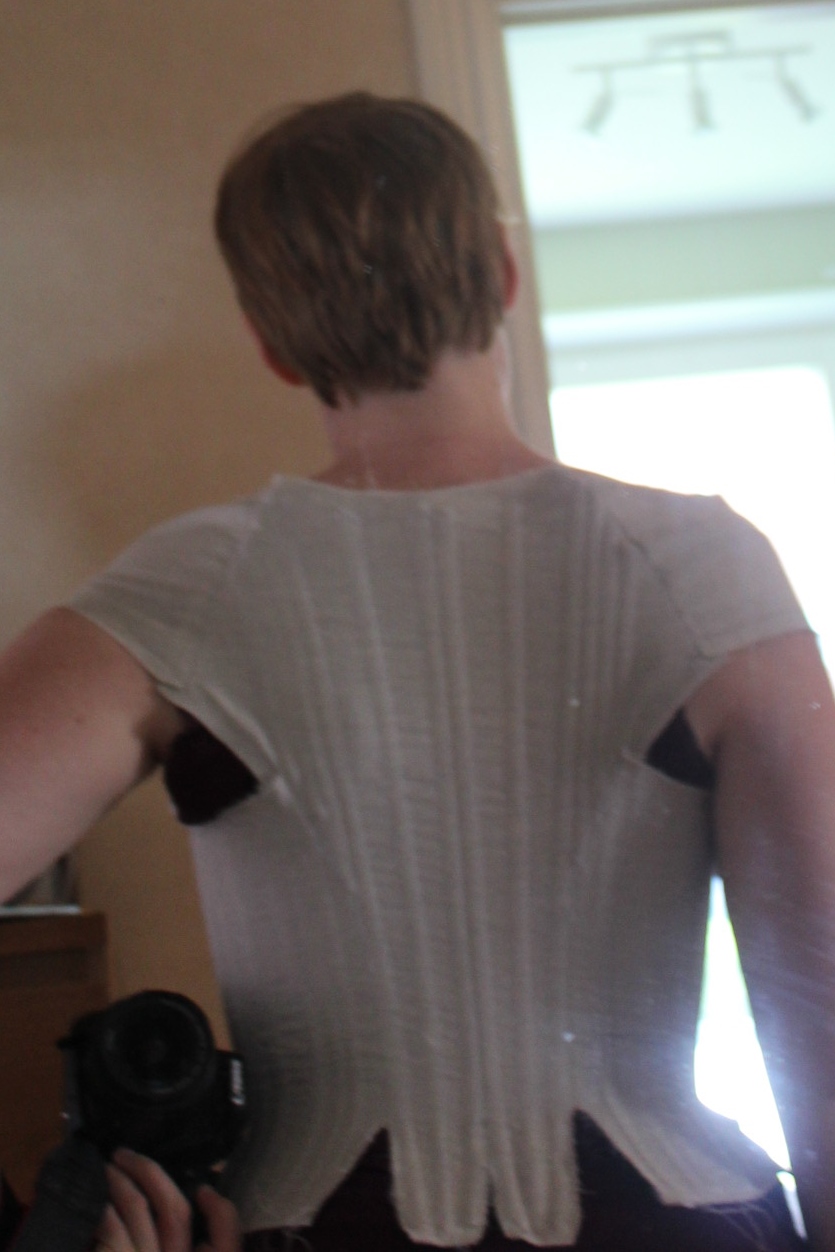
The thinness of the whalebone was really necessary to keep the difference in size as small as possible (the thicker the bones the bigger the size difference).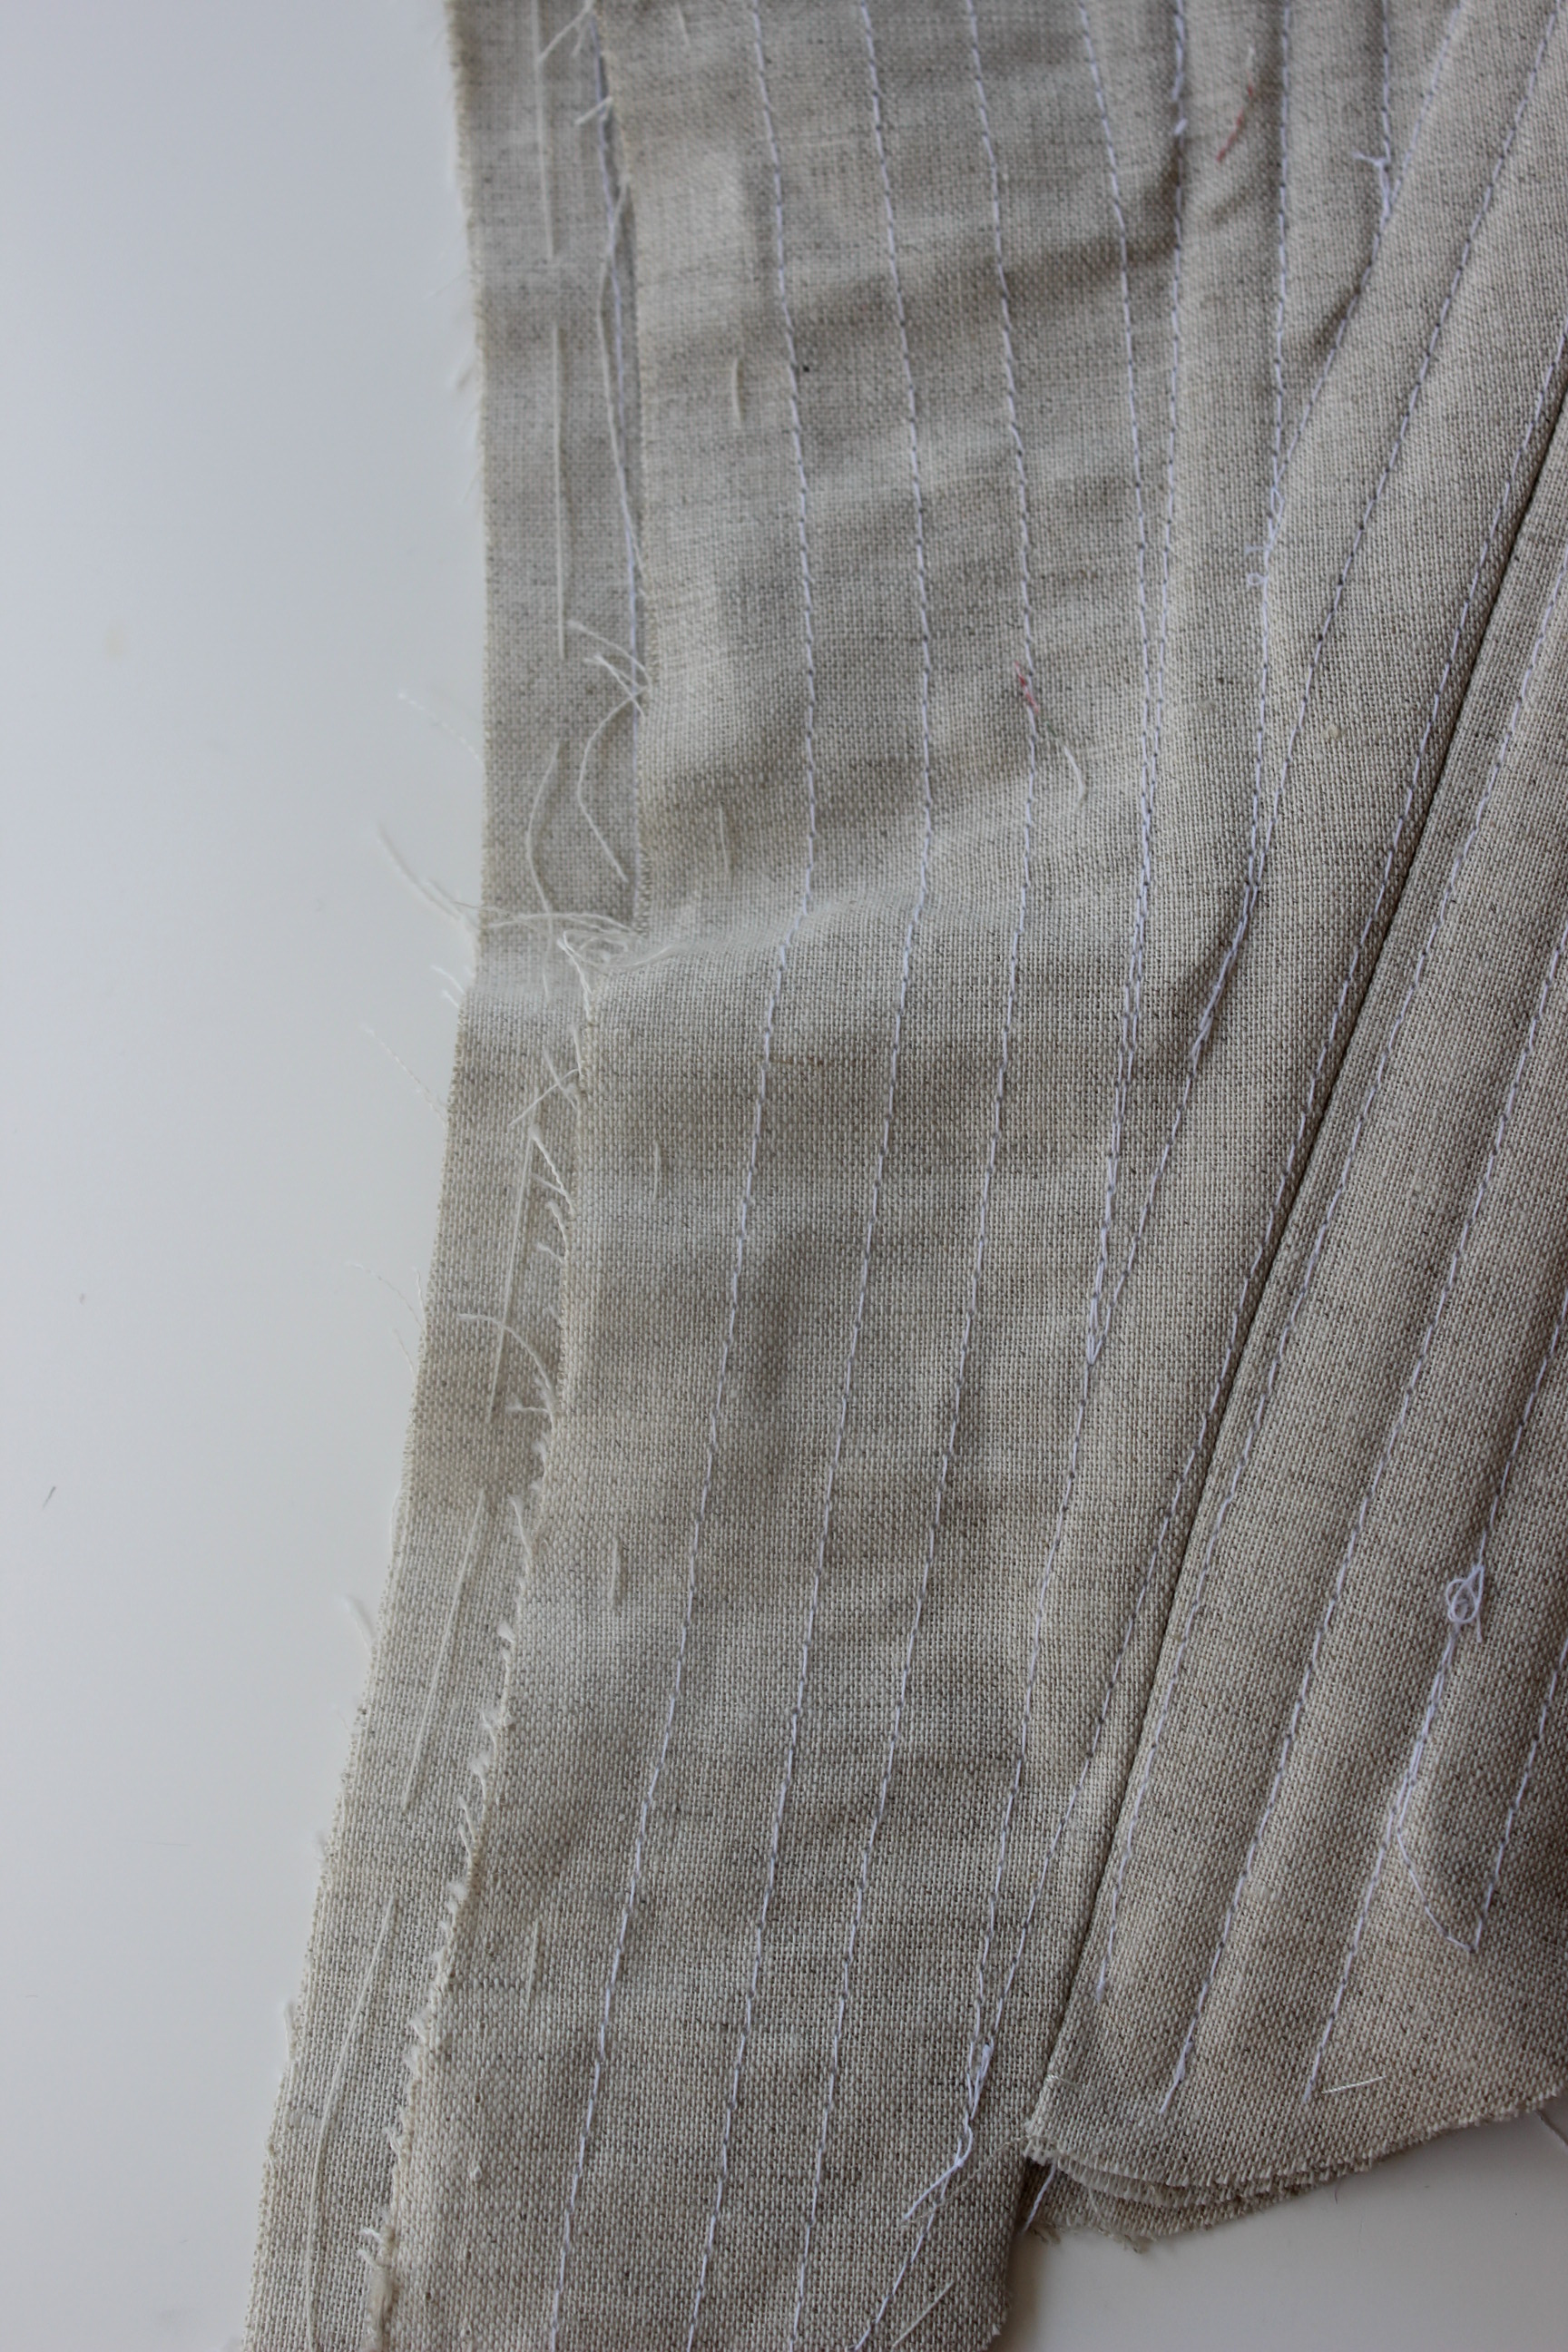 You can clearly see the difference from left side (boned) to right side (un-boned) in this picture.
Once all the bones was inserted, I put it on for a try.
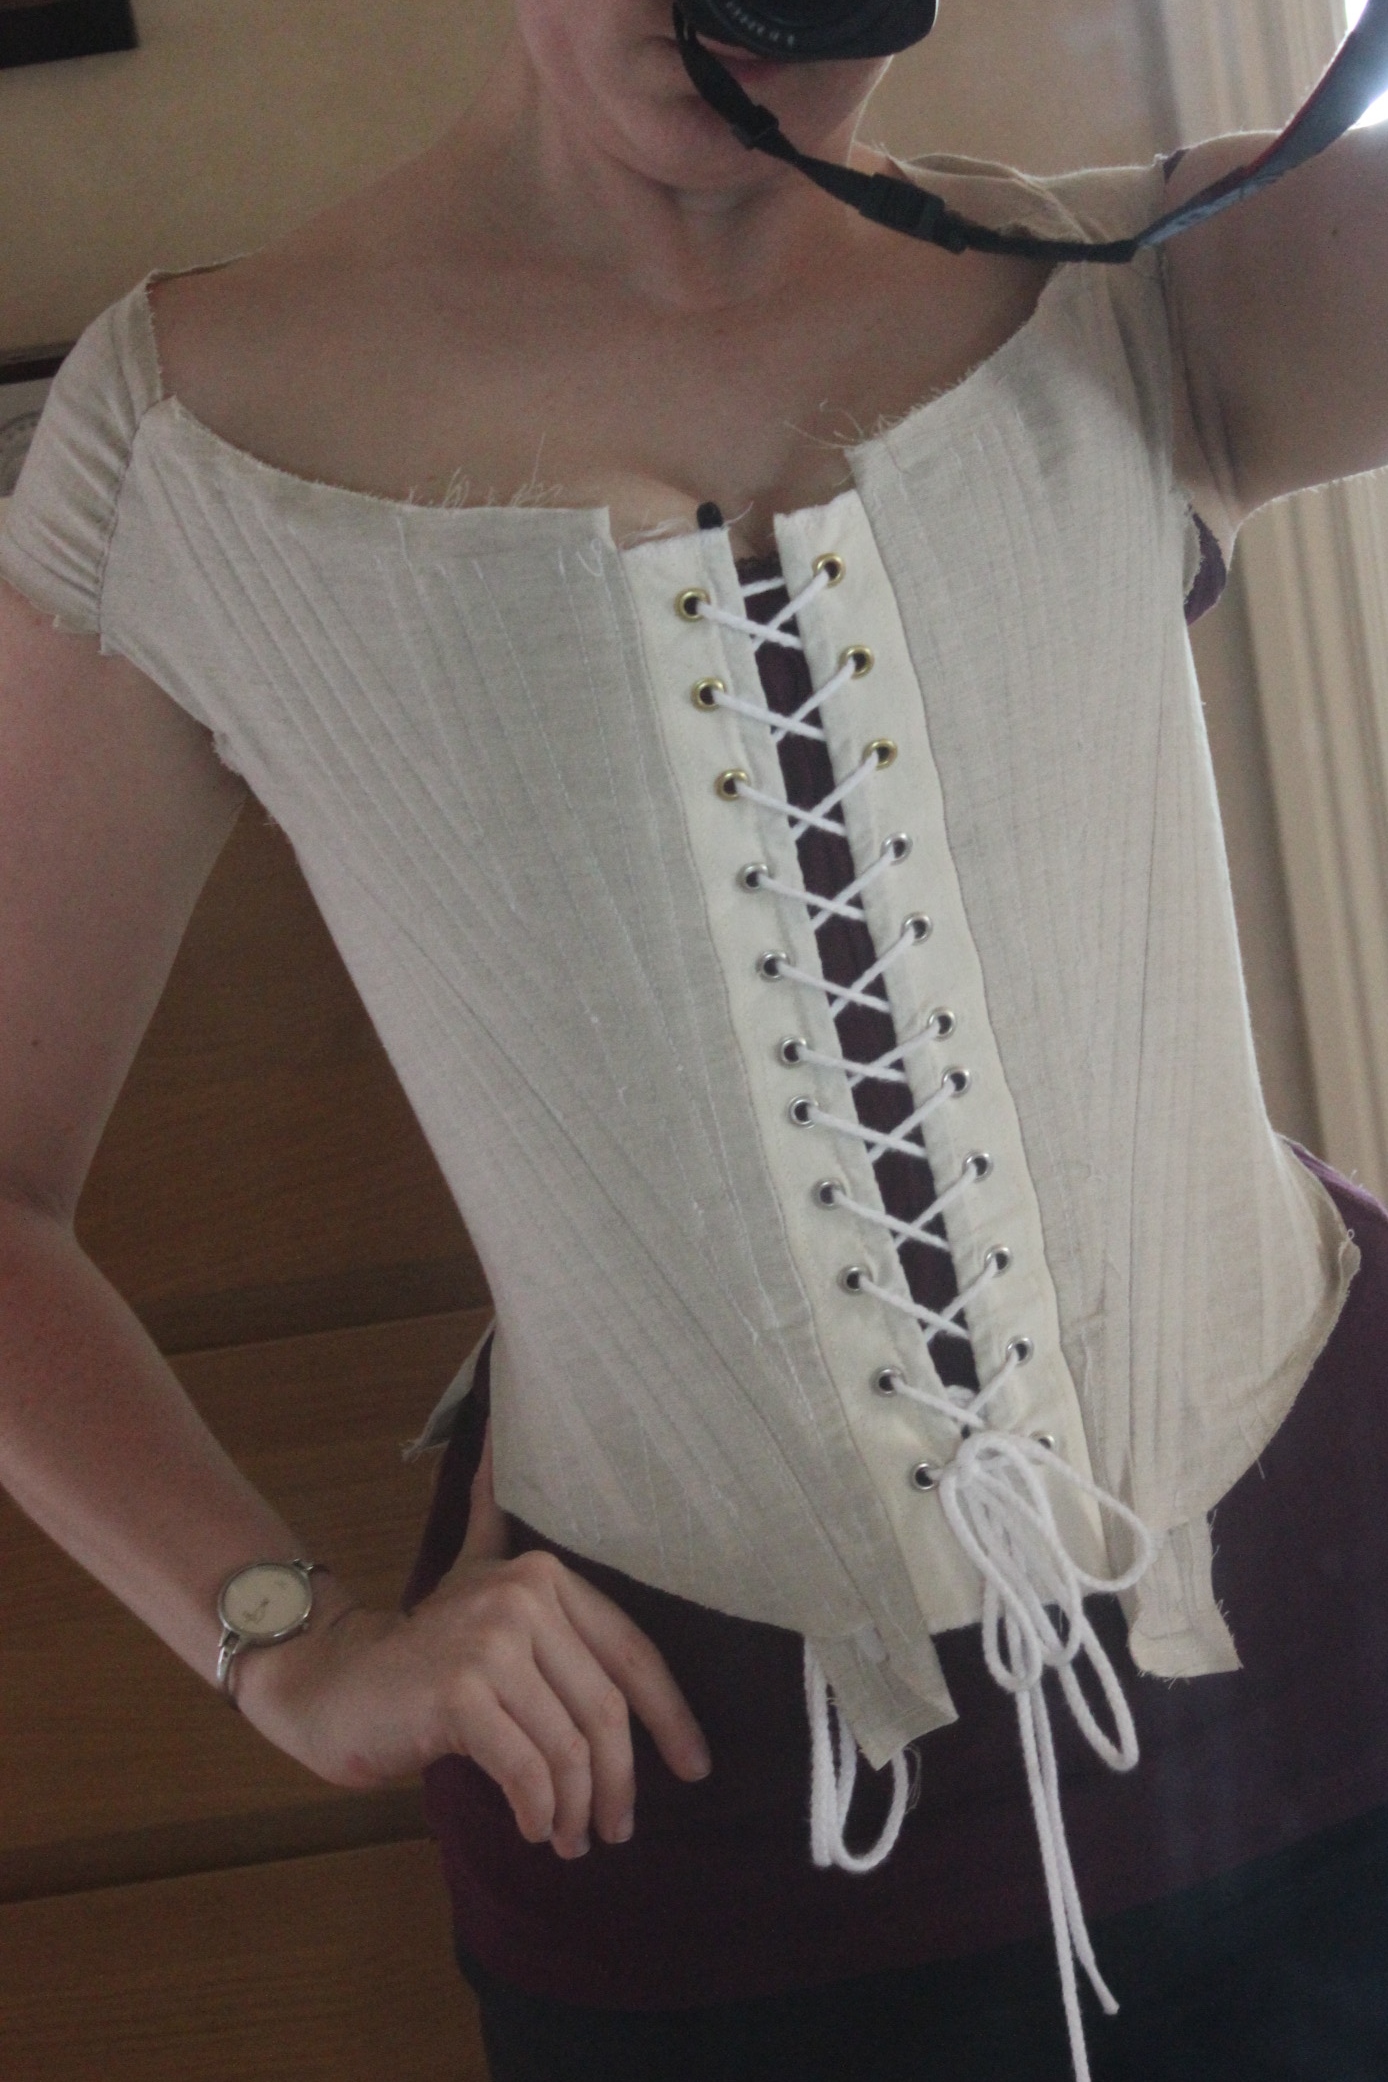
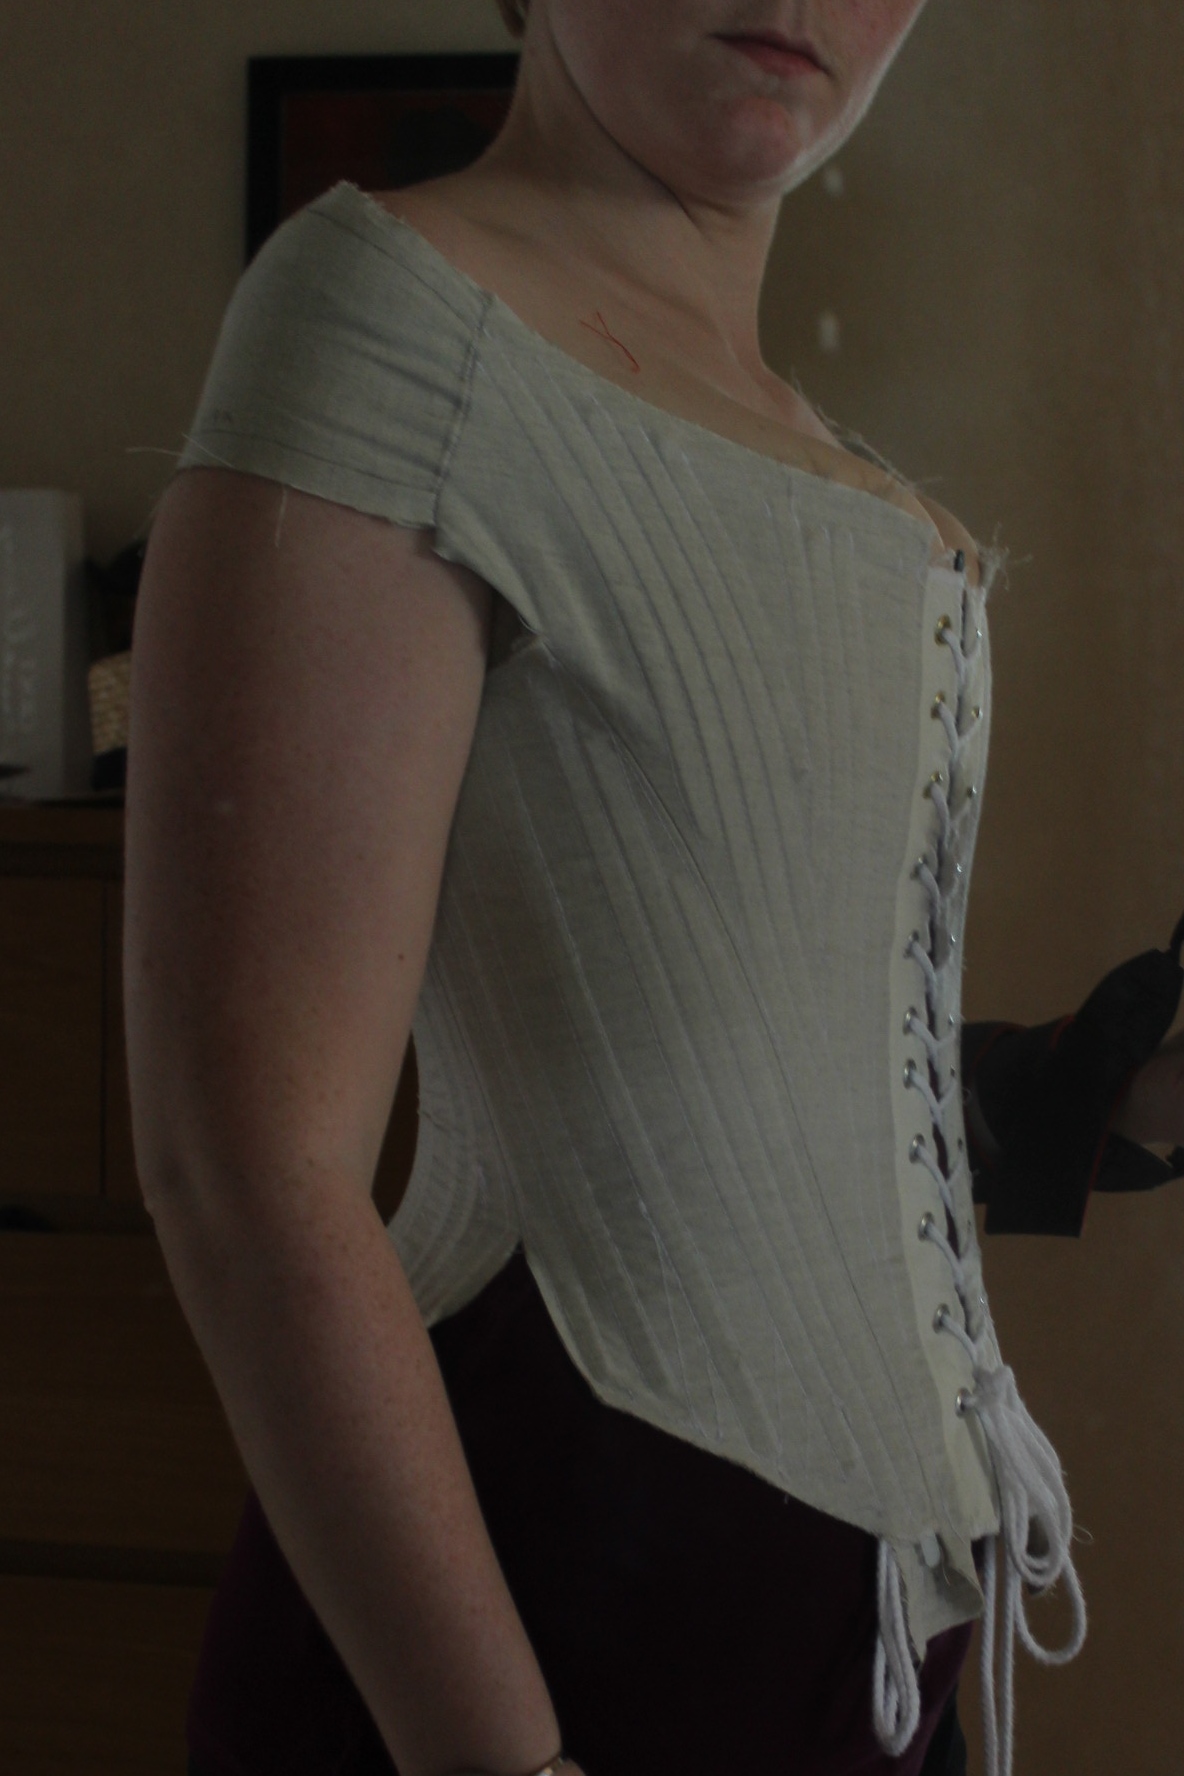 It looks awesome, and with some minor adjustments (like adding a few more bones to the front and back) I was good to go.
I love how beautiful the interior is before being covered up. 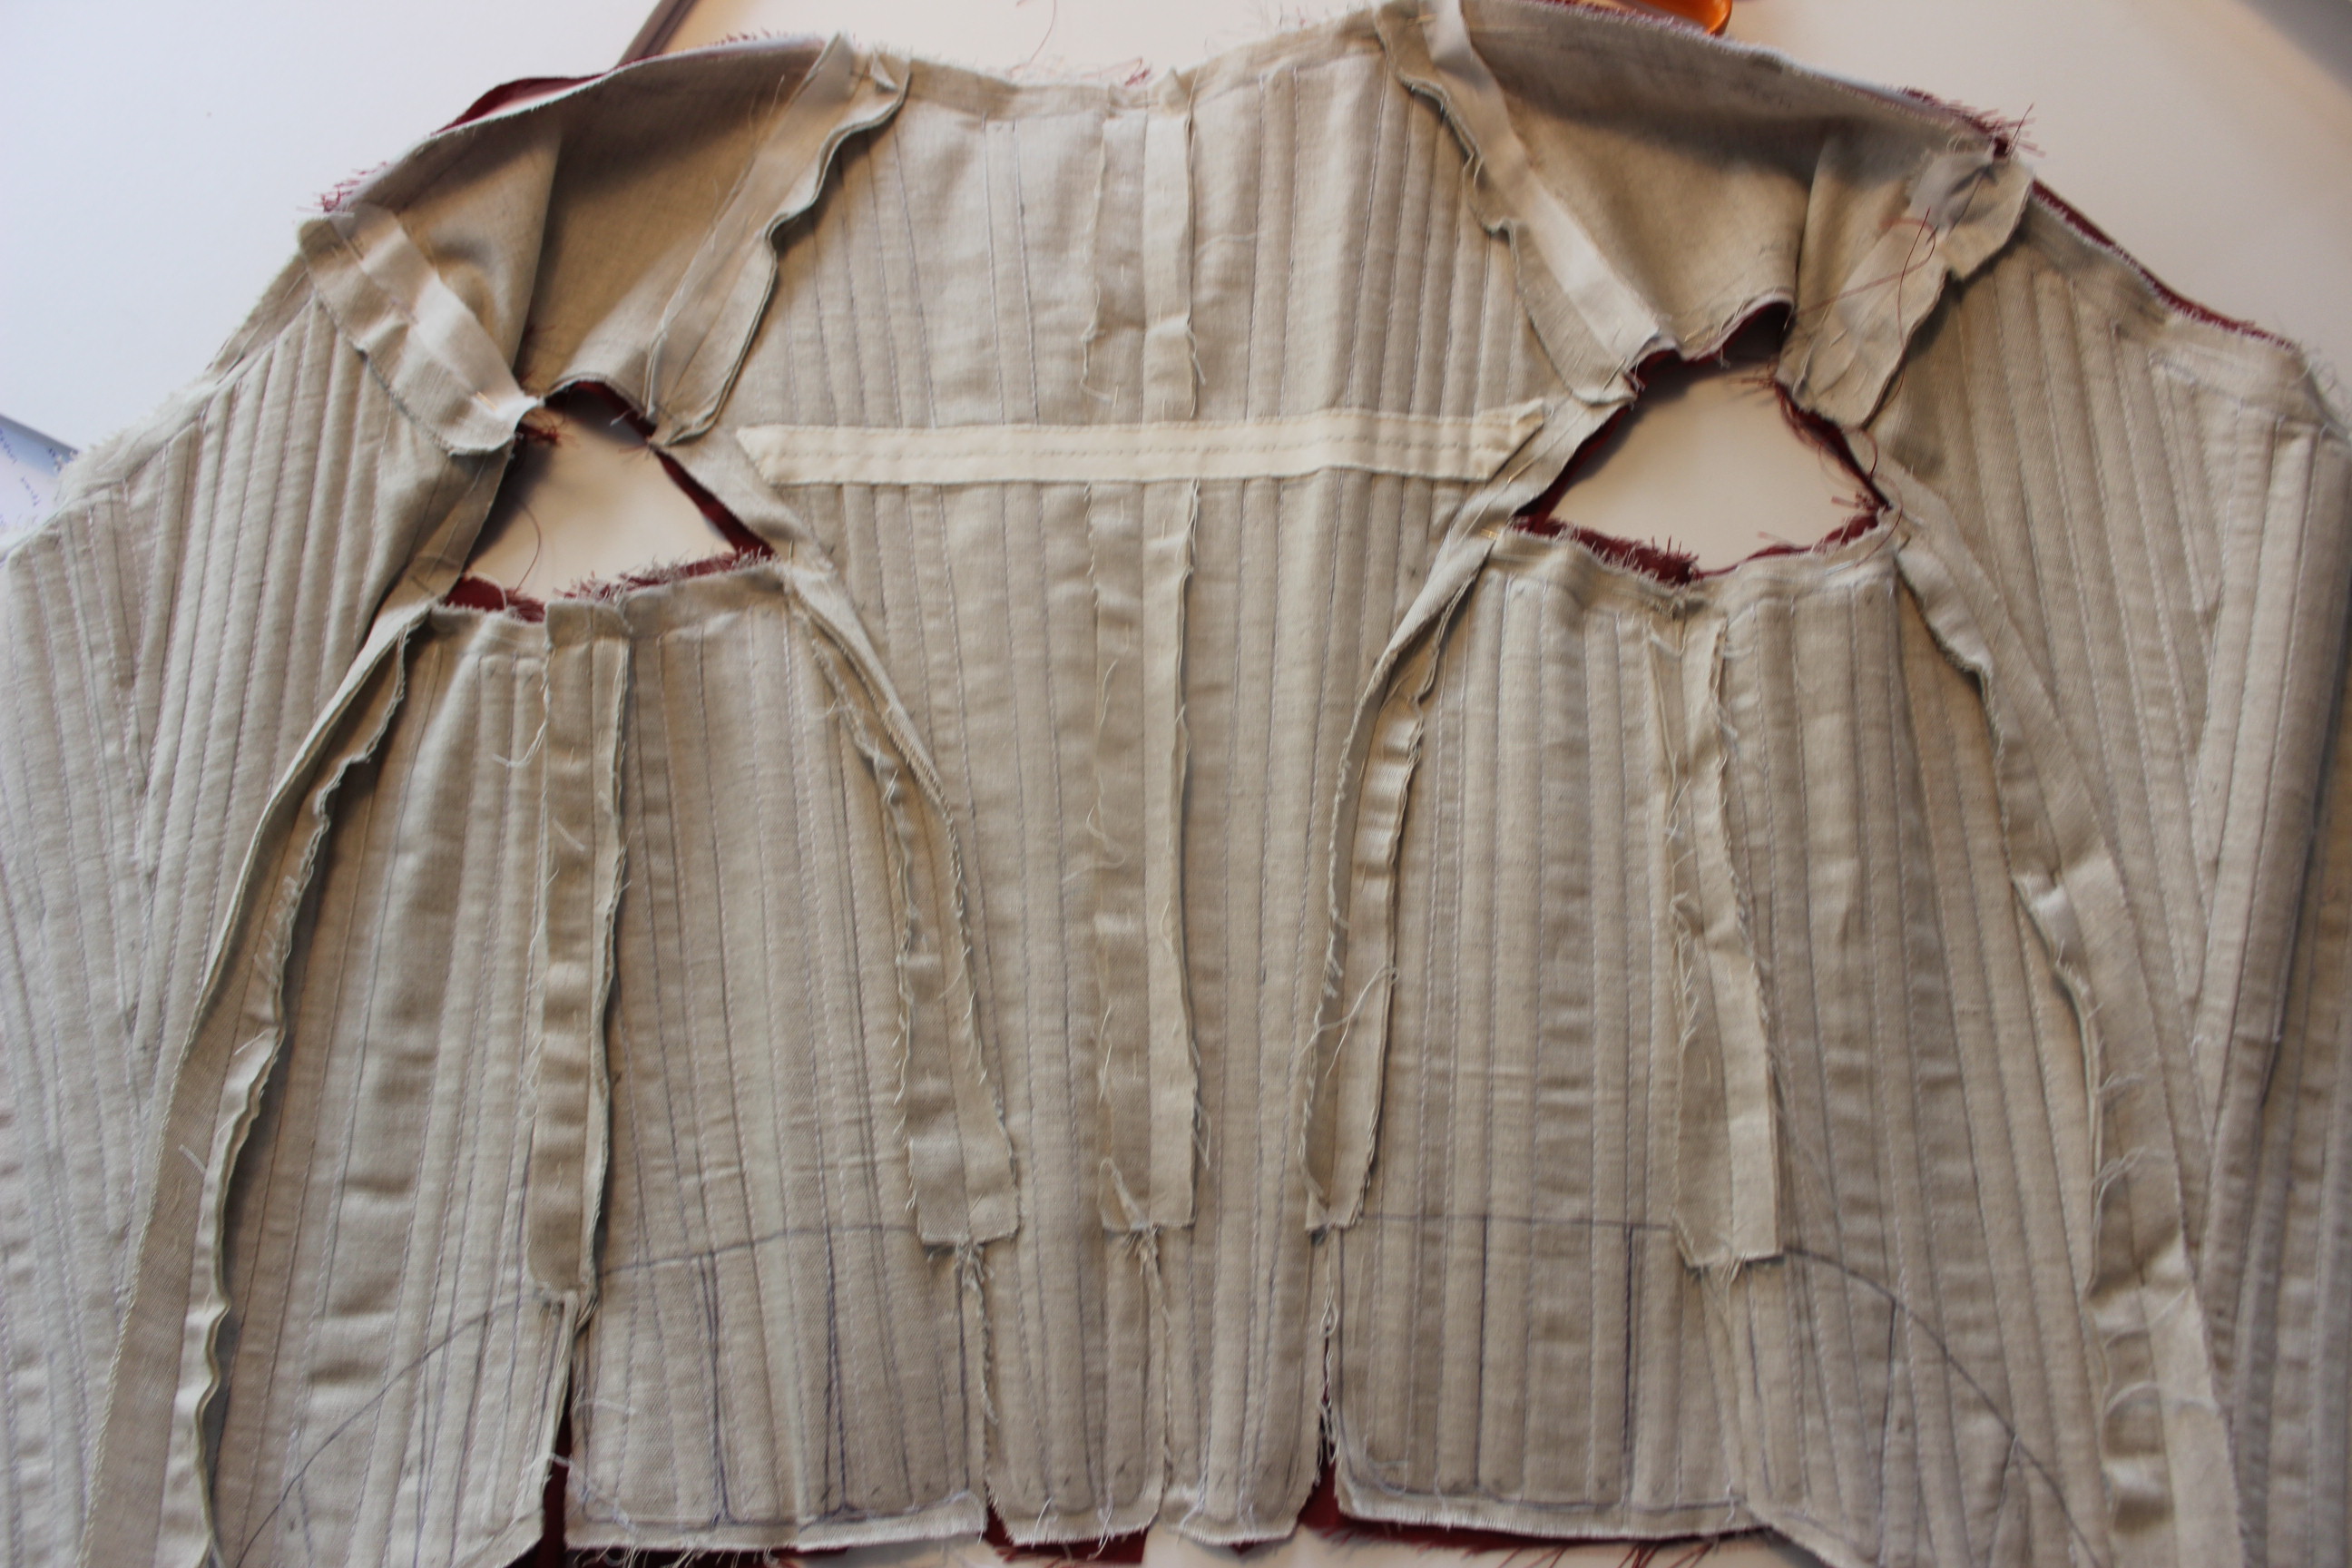
Then it was time to start on the exterior fabric.
After keeping my eyes open in my local fabric store since January, in June, I finally decided to take the 1 hour trip to the next towns fabric store (which is awesome by the way).
And I did not regret it.
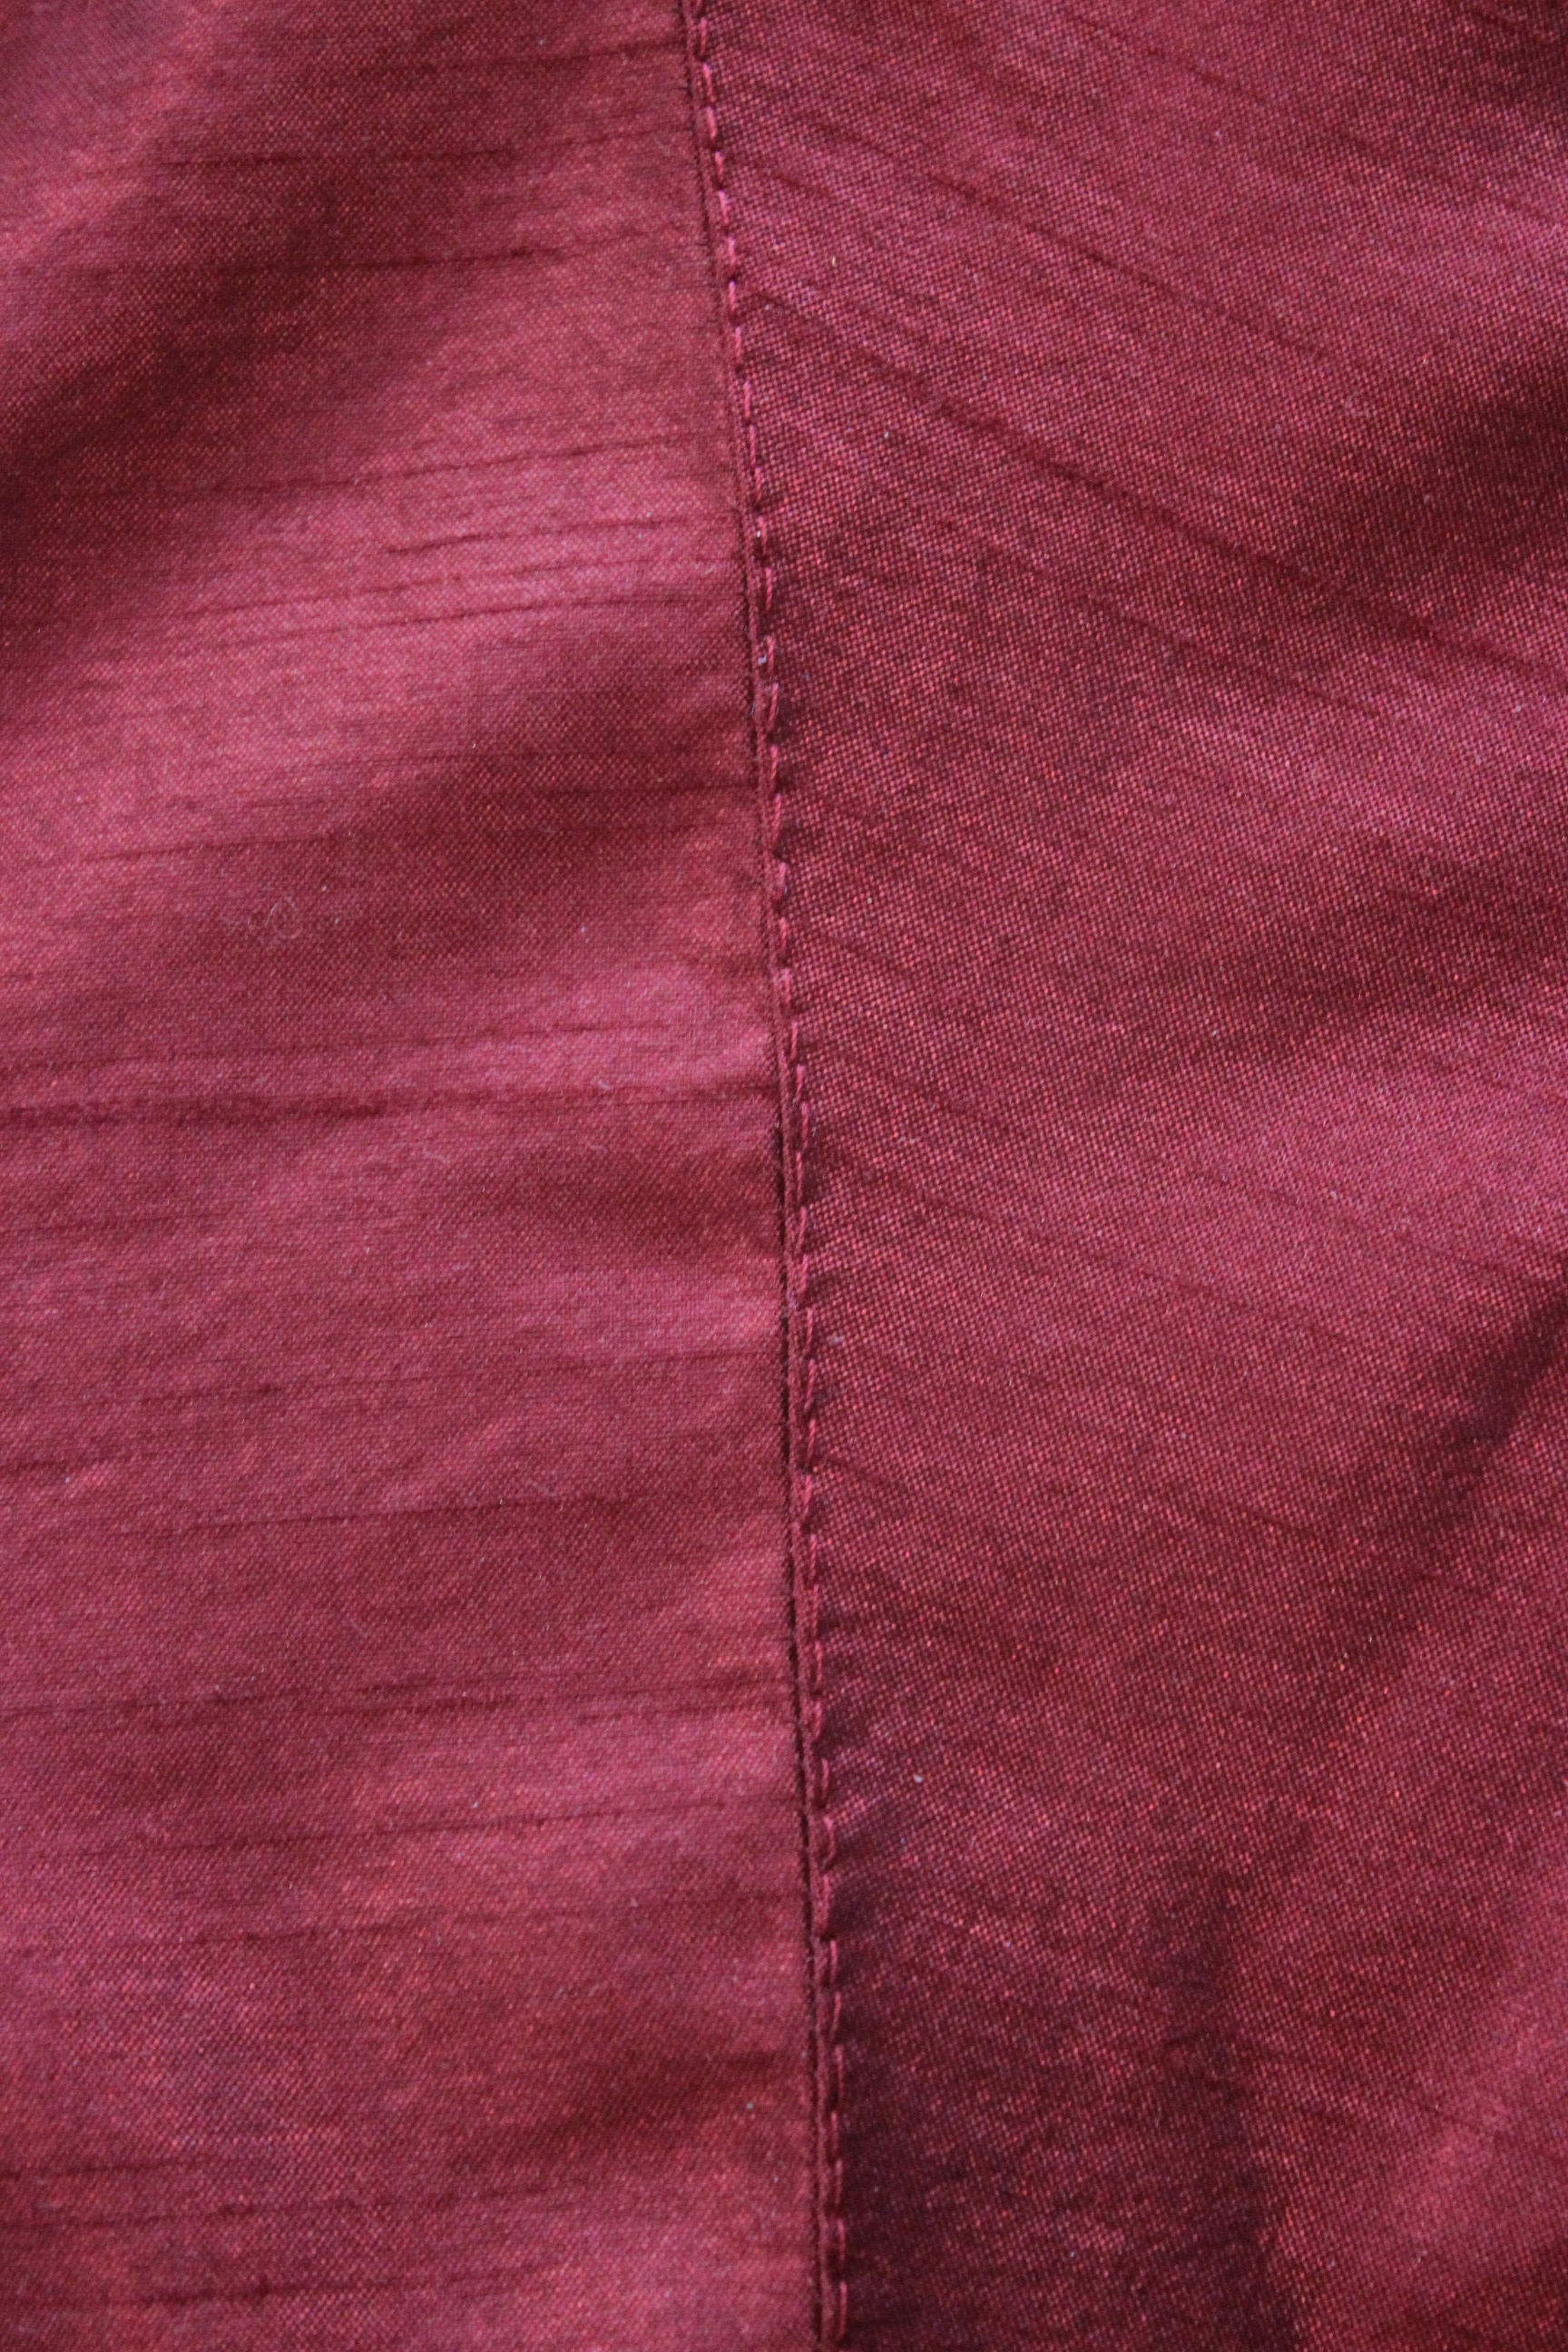
Not only did I find lots of delicious taffeta’s and viscose, I also found this perfect dark red synthetic silk.  It’s a bit darker in real life
Since the fabric was a bit slippery and thin, I decided to stitch it together using my sewing machine before adding the strengthening and decoration hand finishing on top.
Then it was time to cover the foundation in red faux silk.
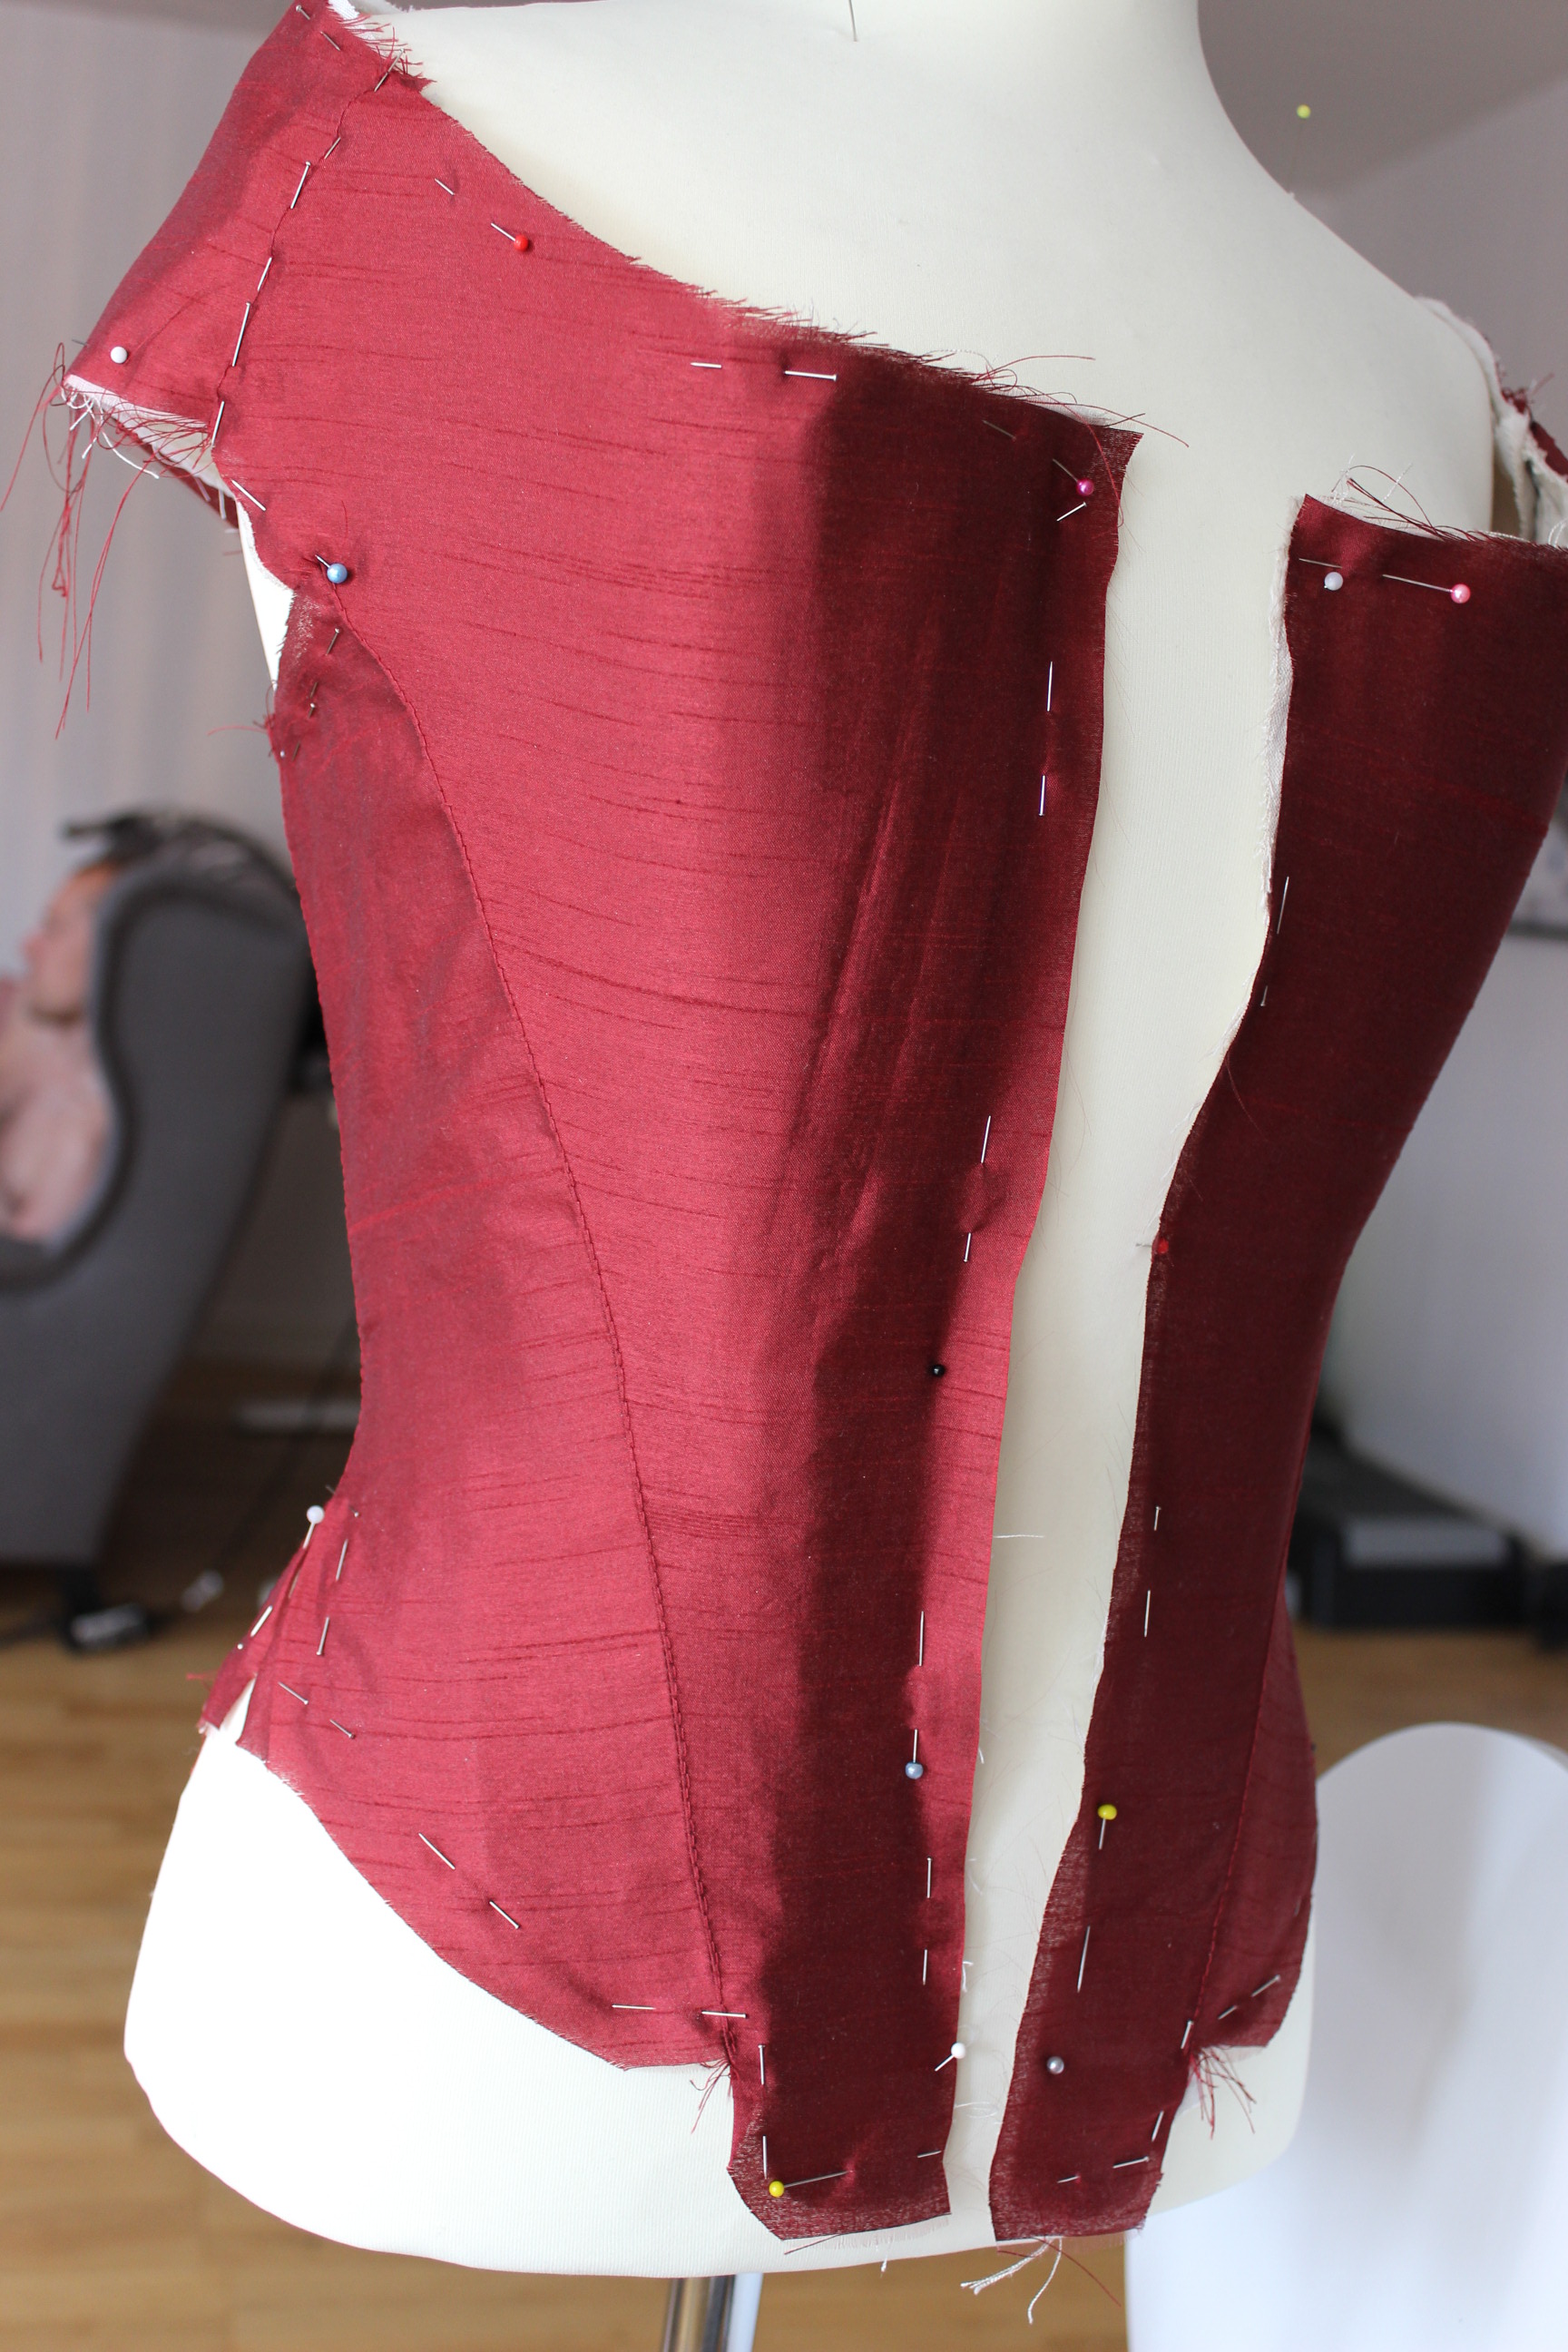
I’d accidentally made the outer layer a bit to big at the side seam, and tried to pin it down to fit.
After some fiddling I decided to let it be for now, and to take the excess in later if needs be – better to big then to small.
(a very wise choice as it proves later on)
The linen lining was a bit easier to fit into the bodice.
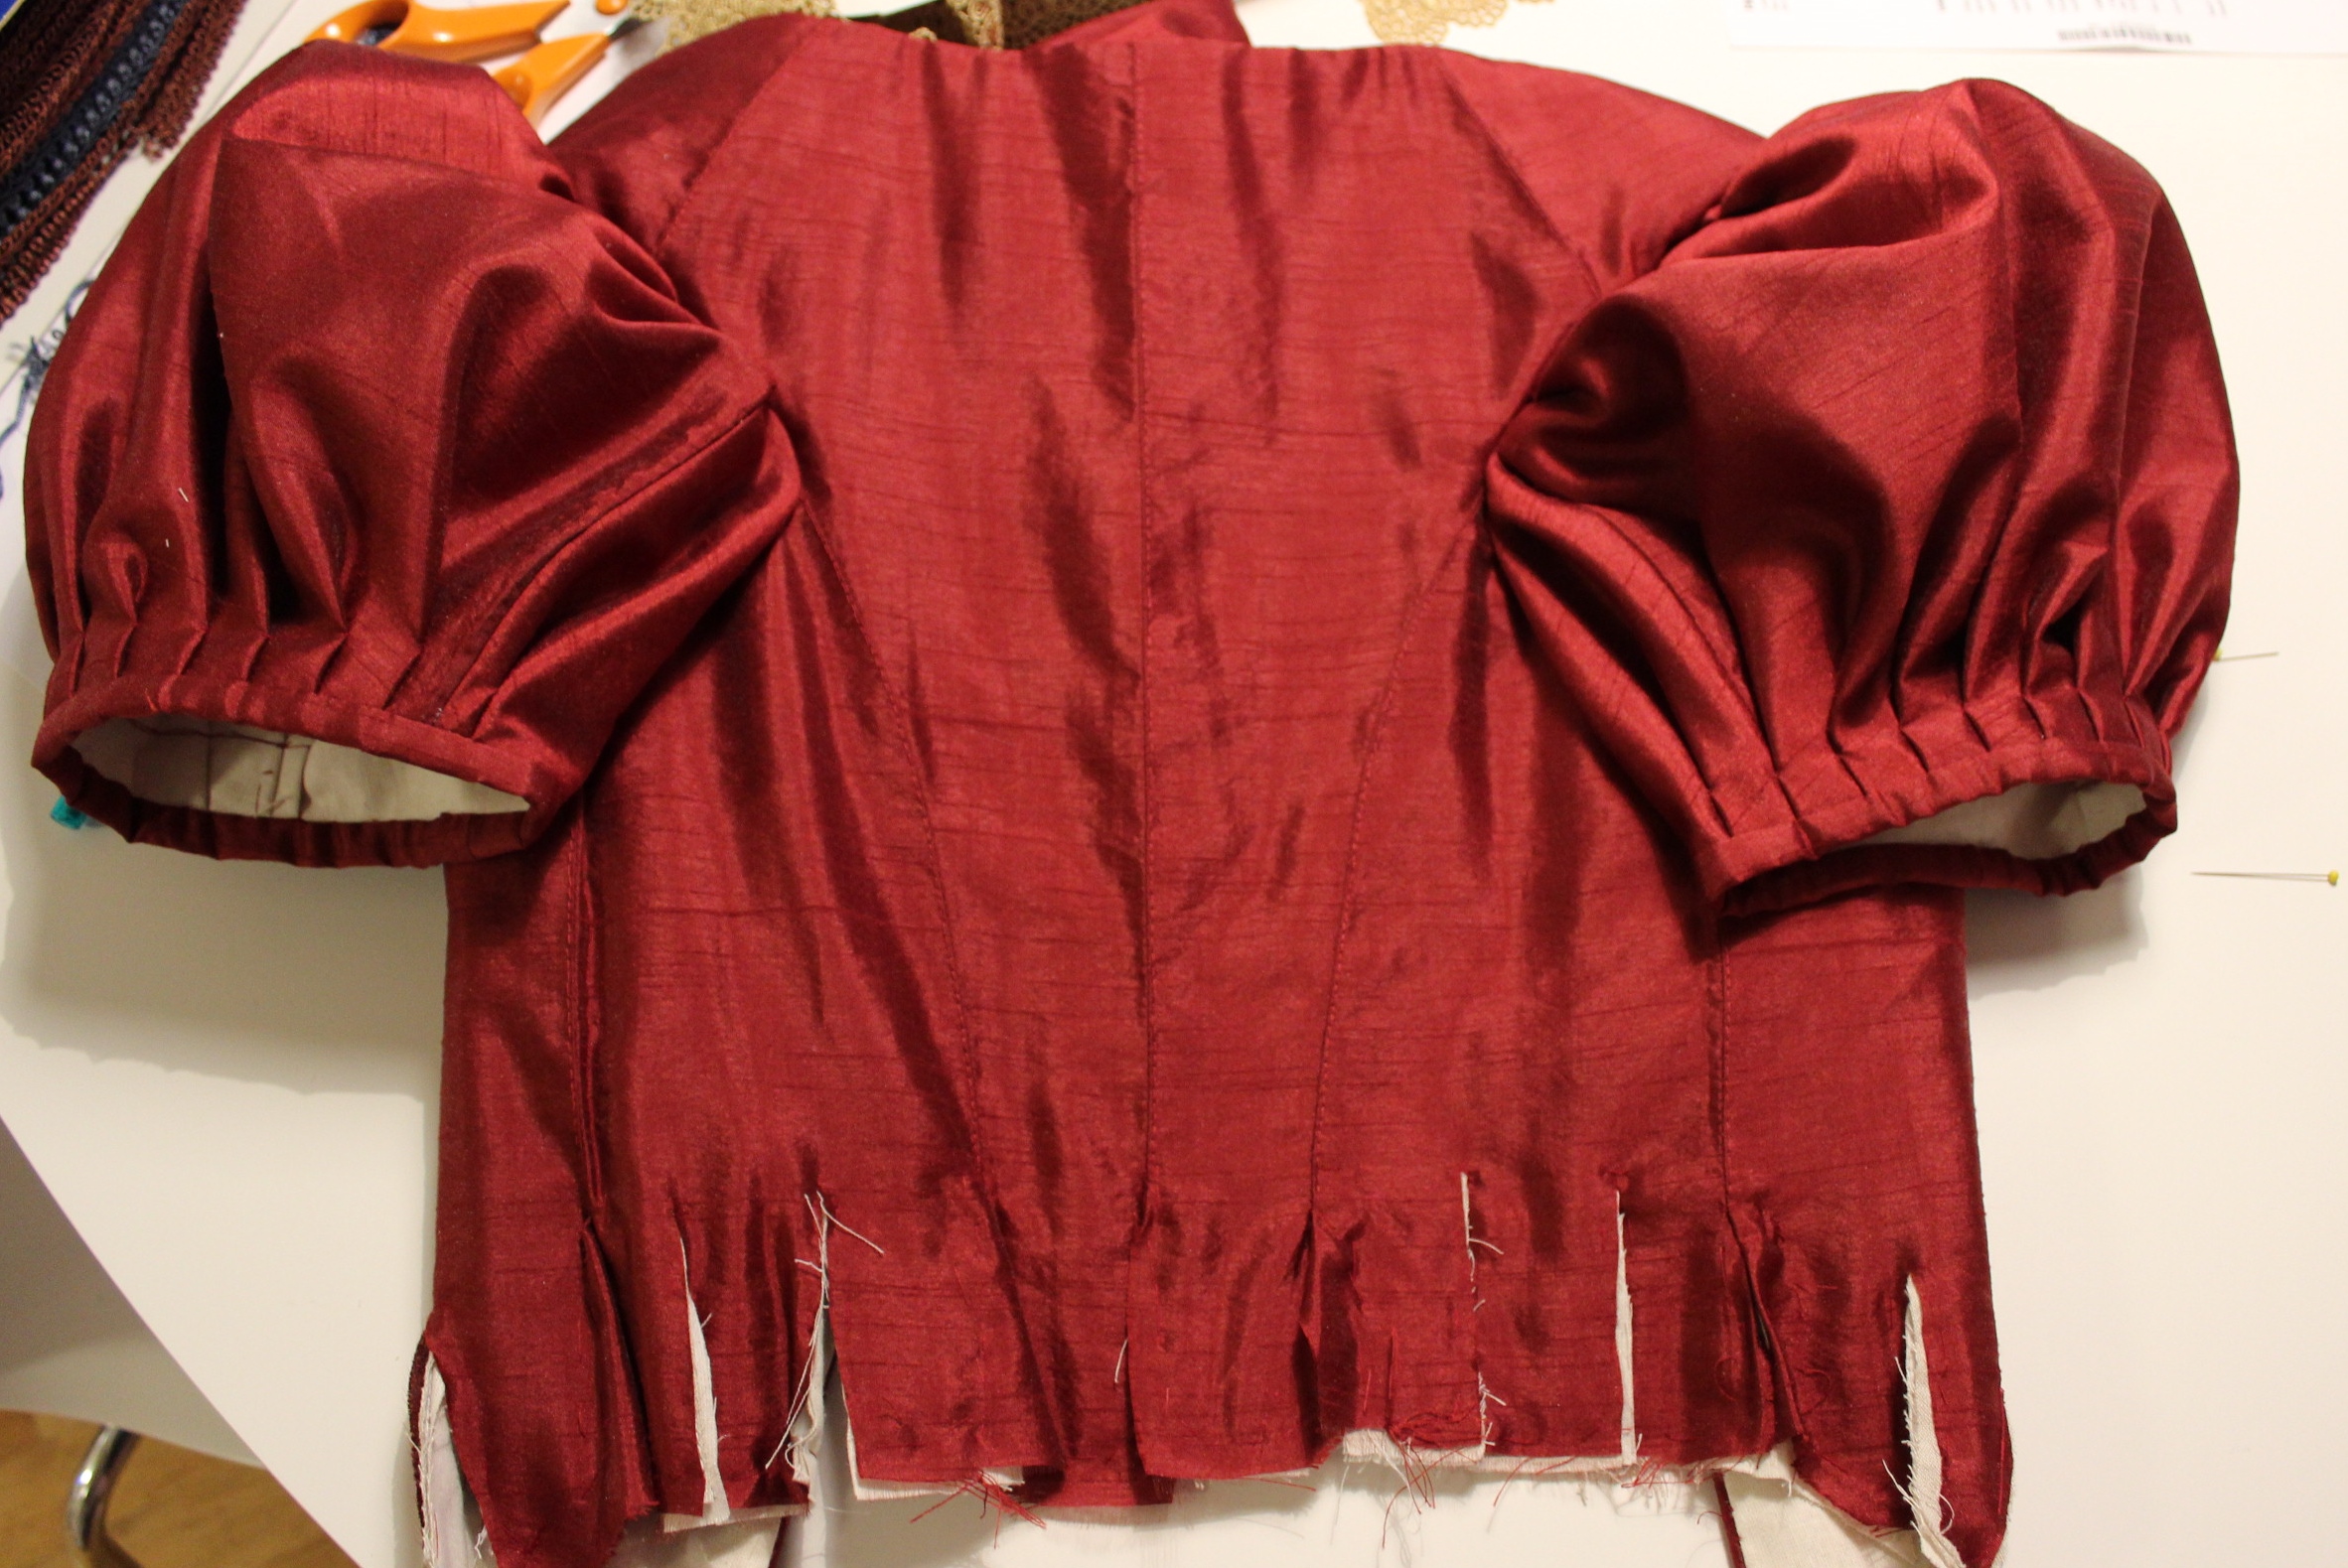
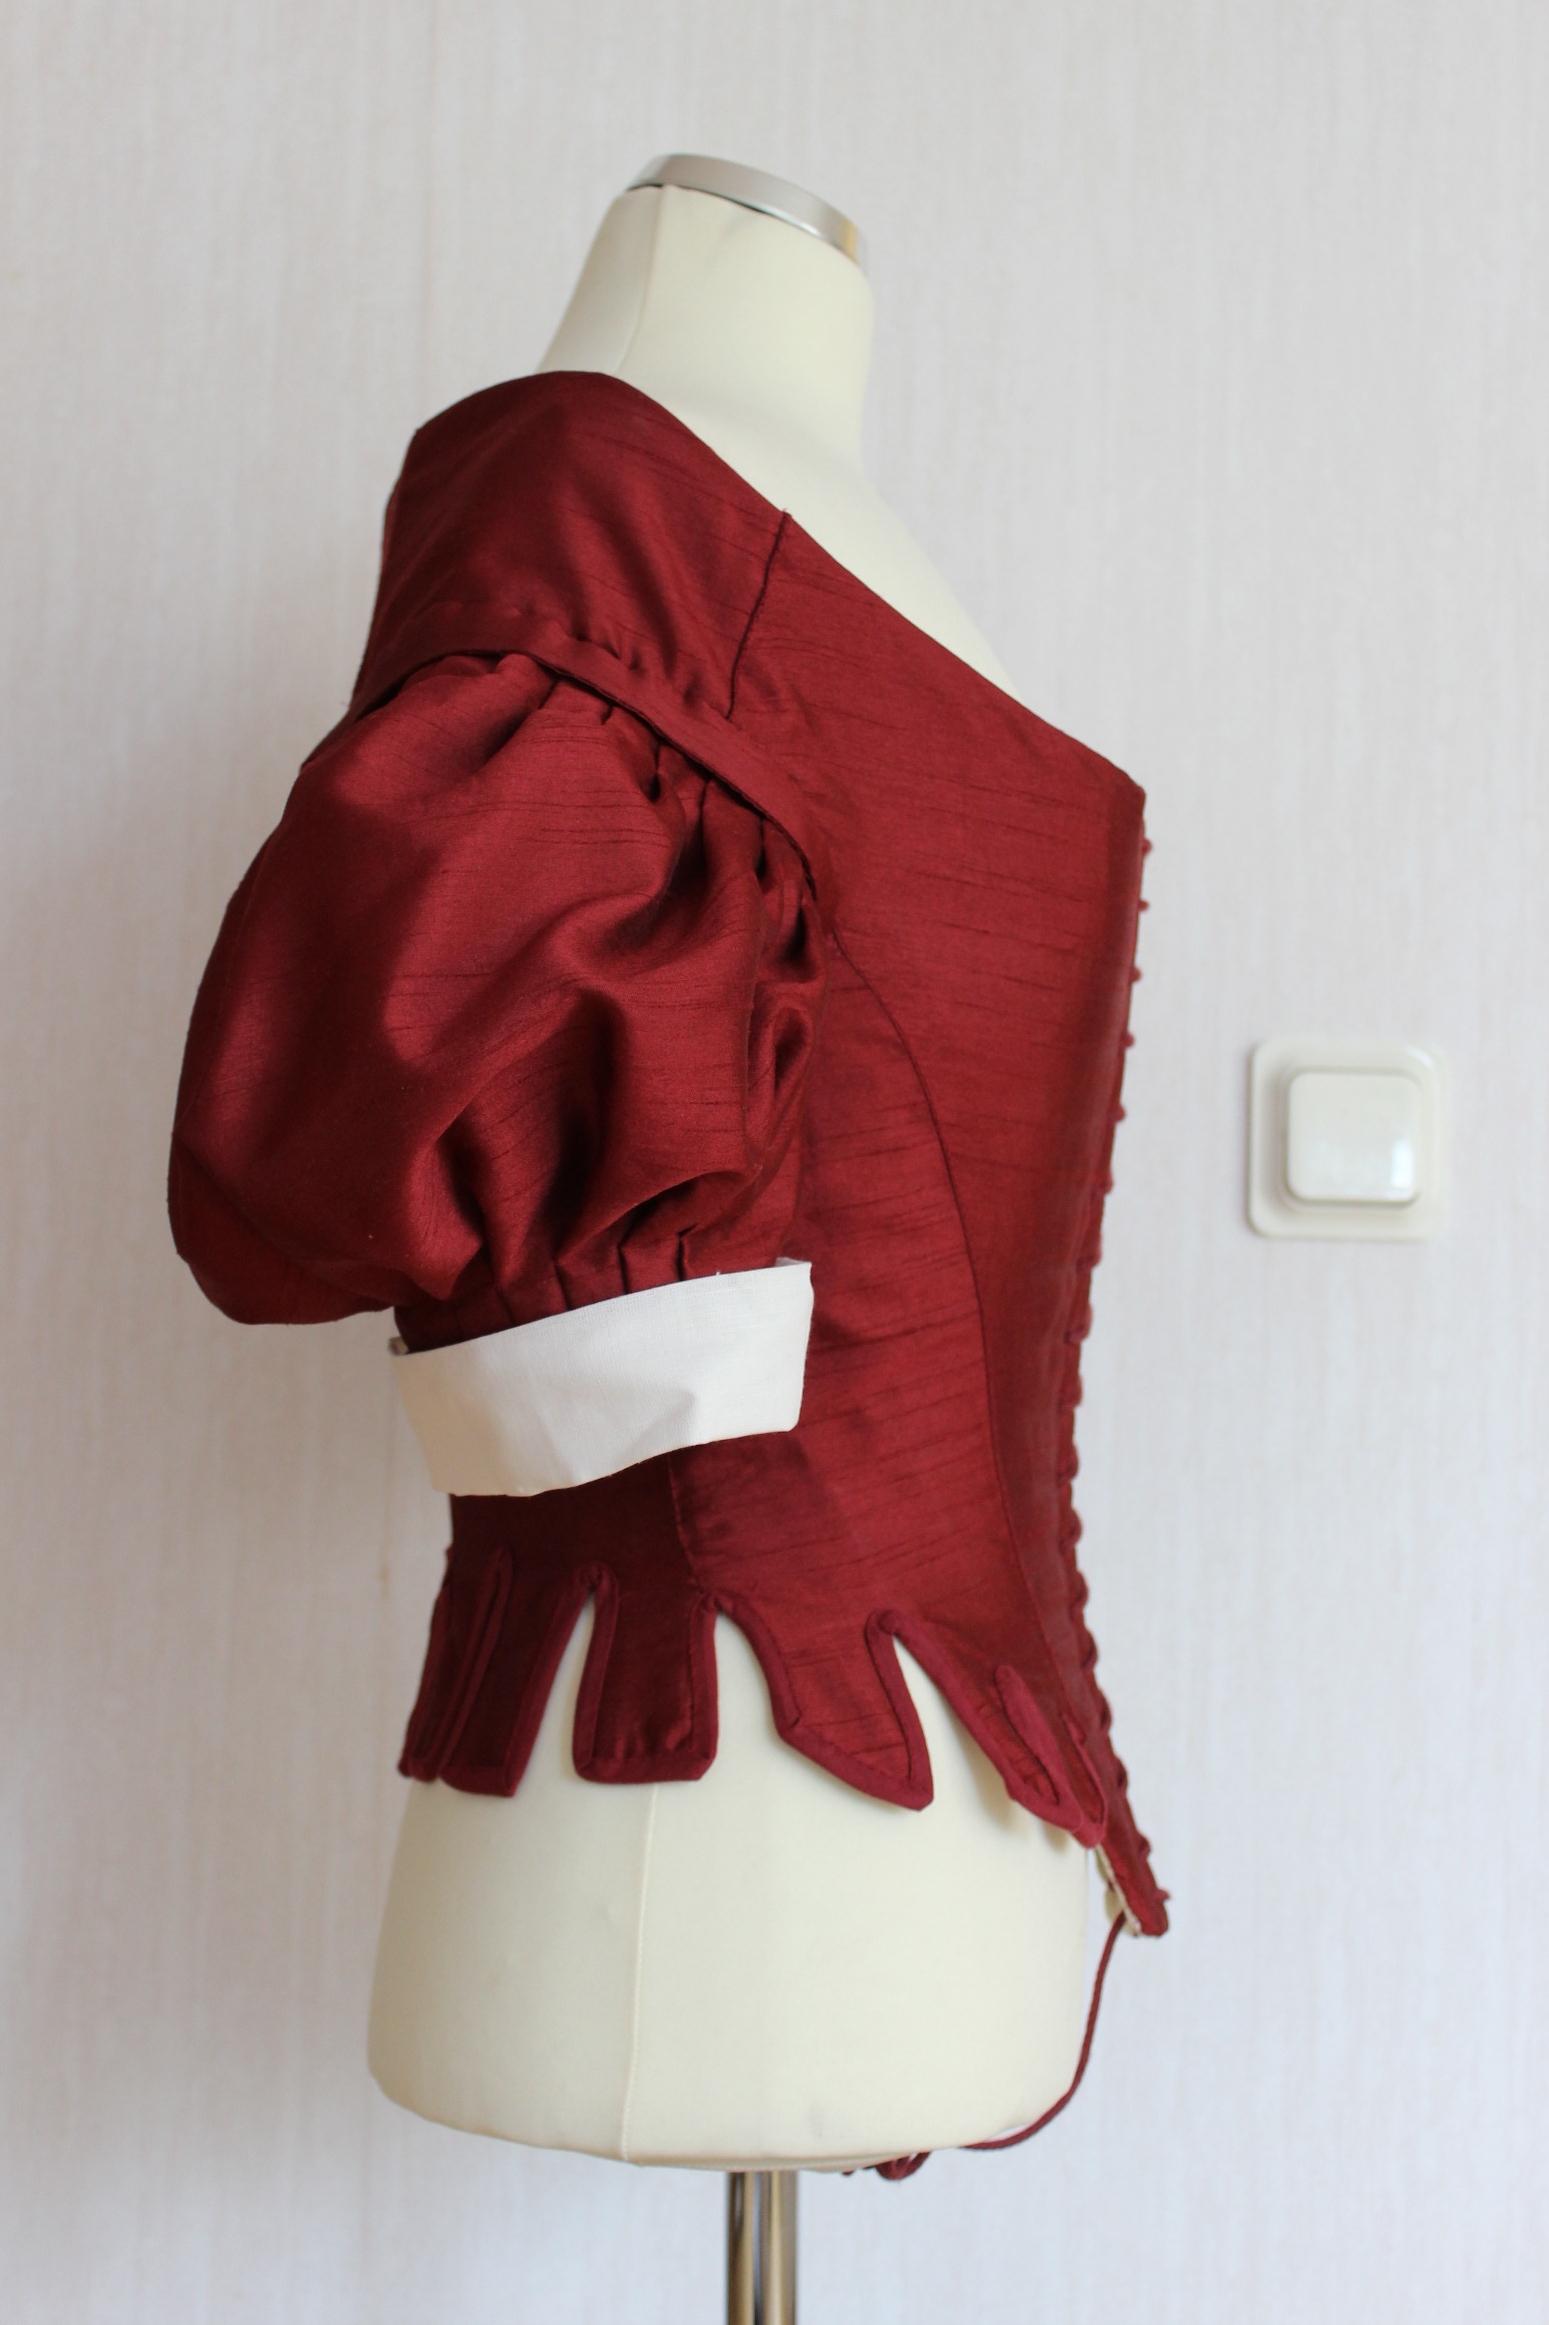
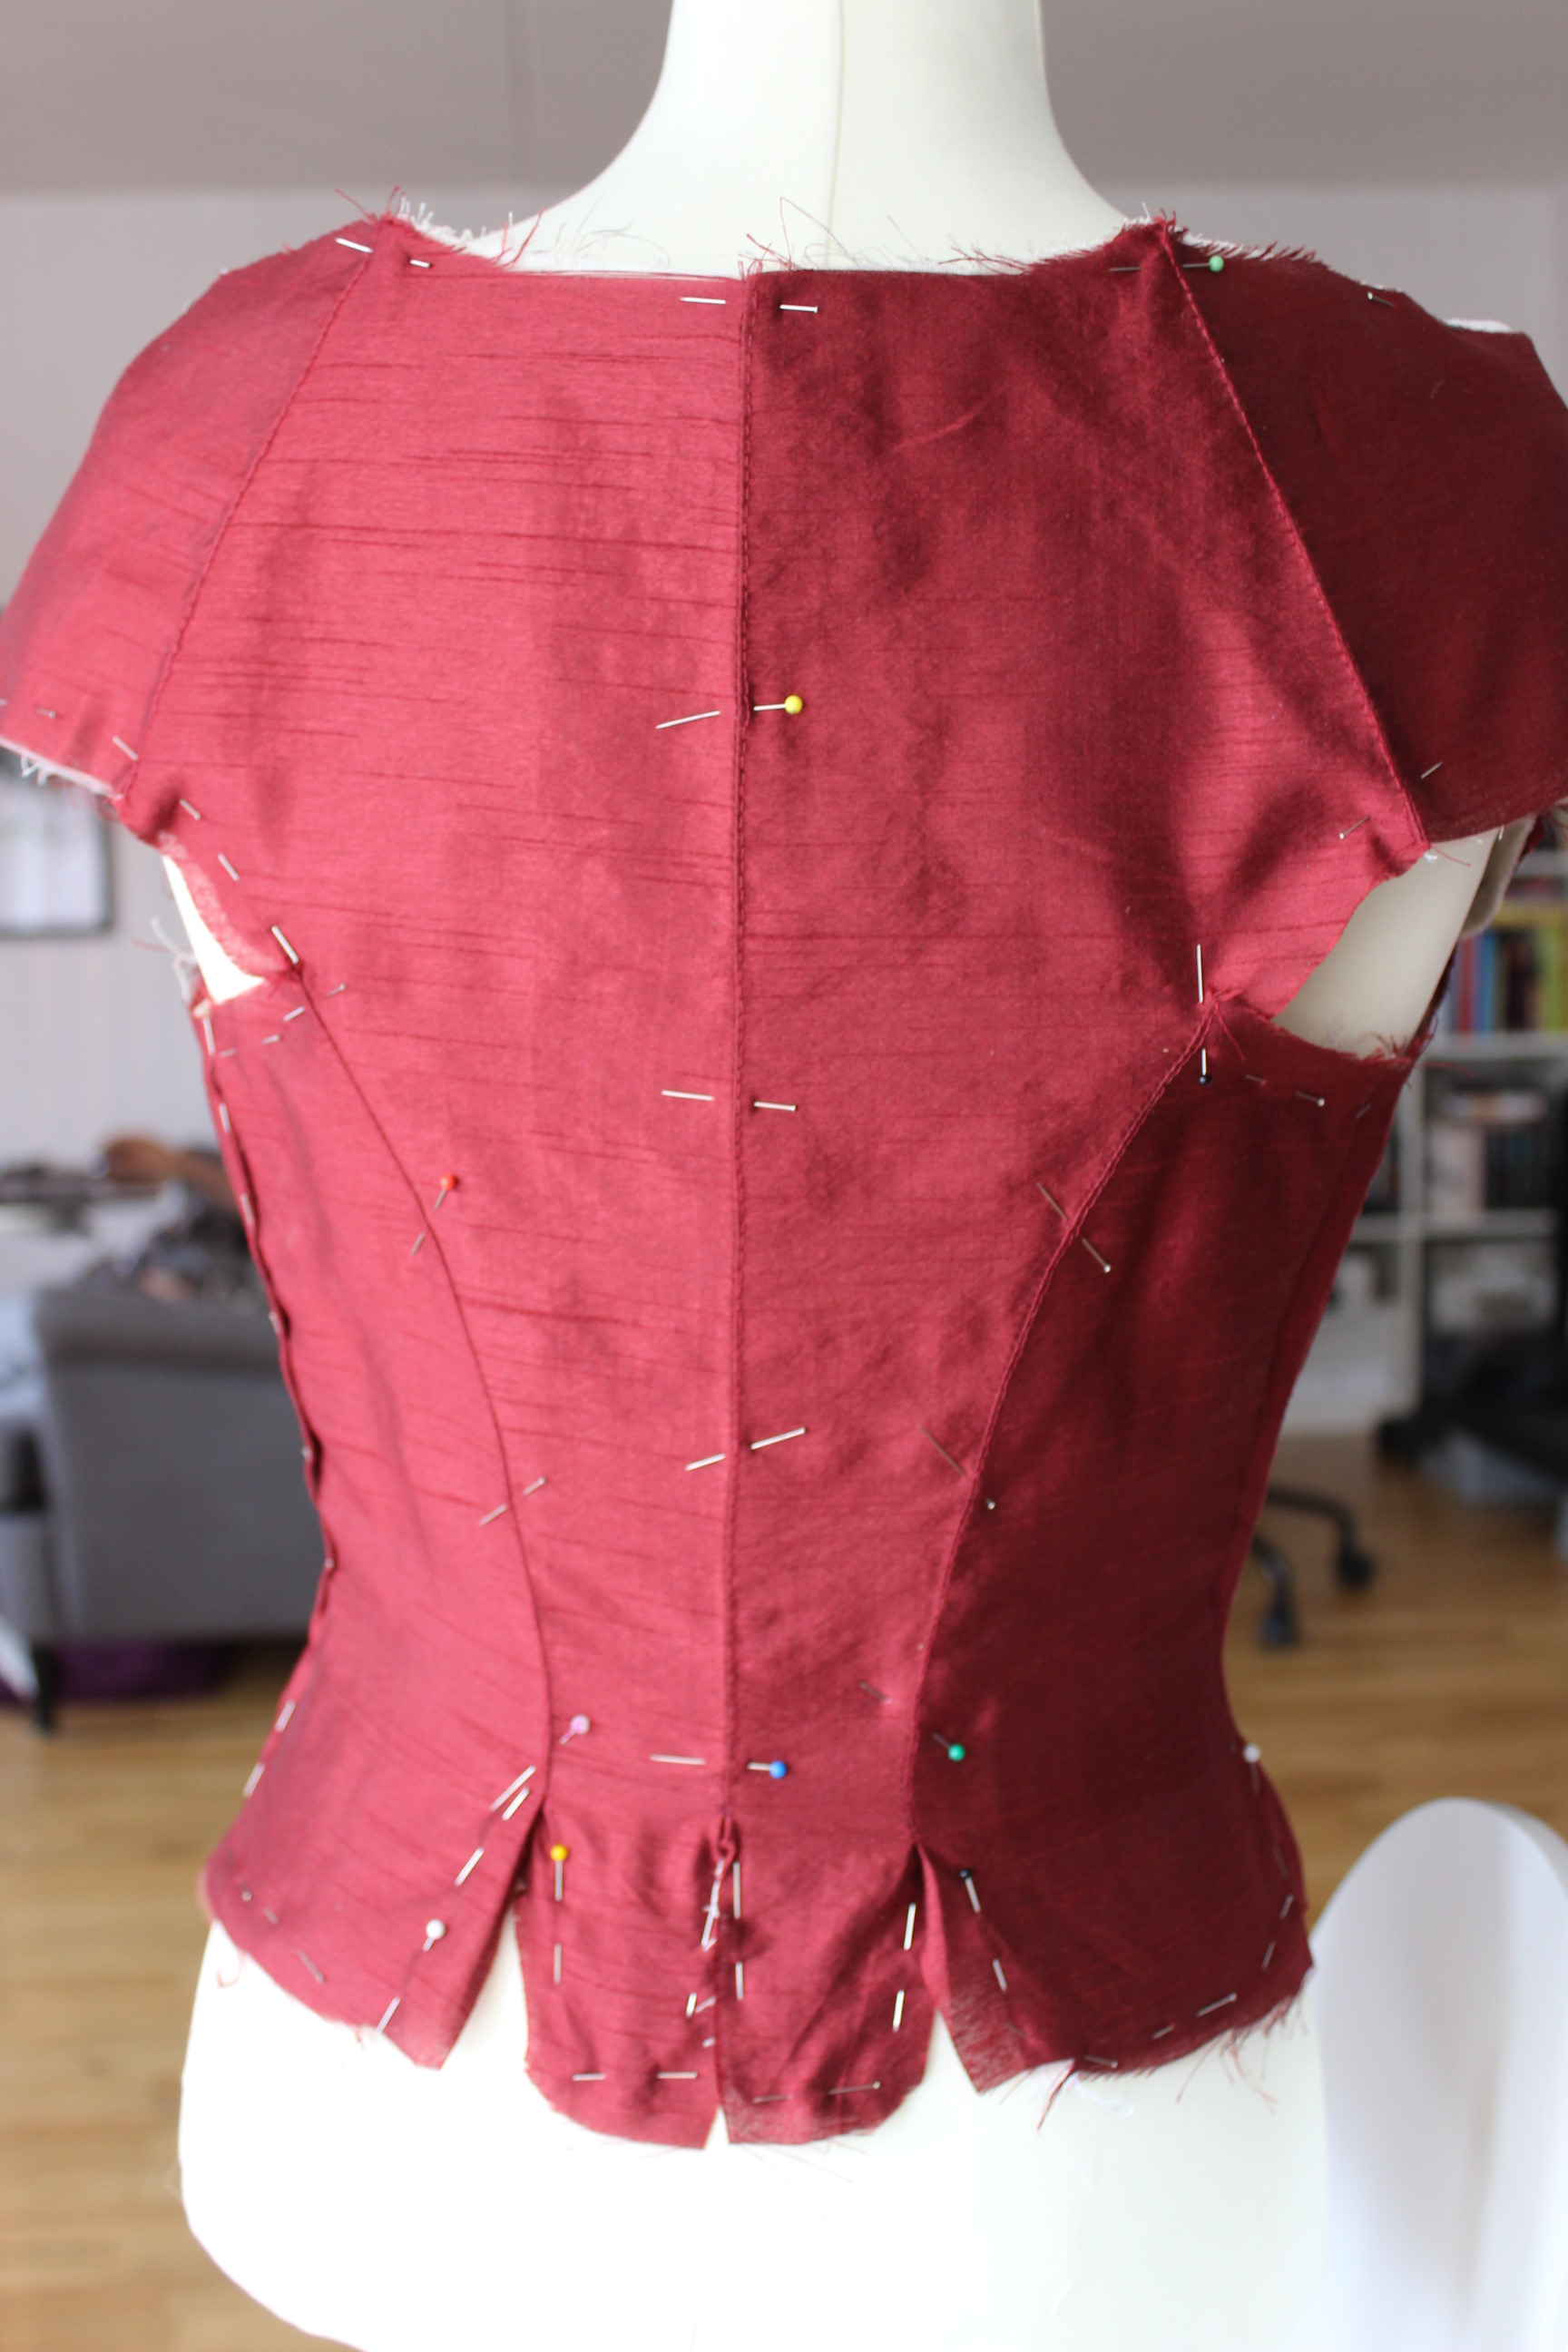
Once the main bodice pieces was basted down I started working on the sleeves.
Drafting the pattern using my books as a guide.

Then I just basted the red fabric to the interning (aka lining), stitched the seam together and pinned the pleats.
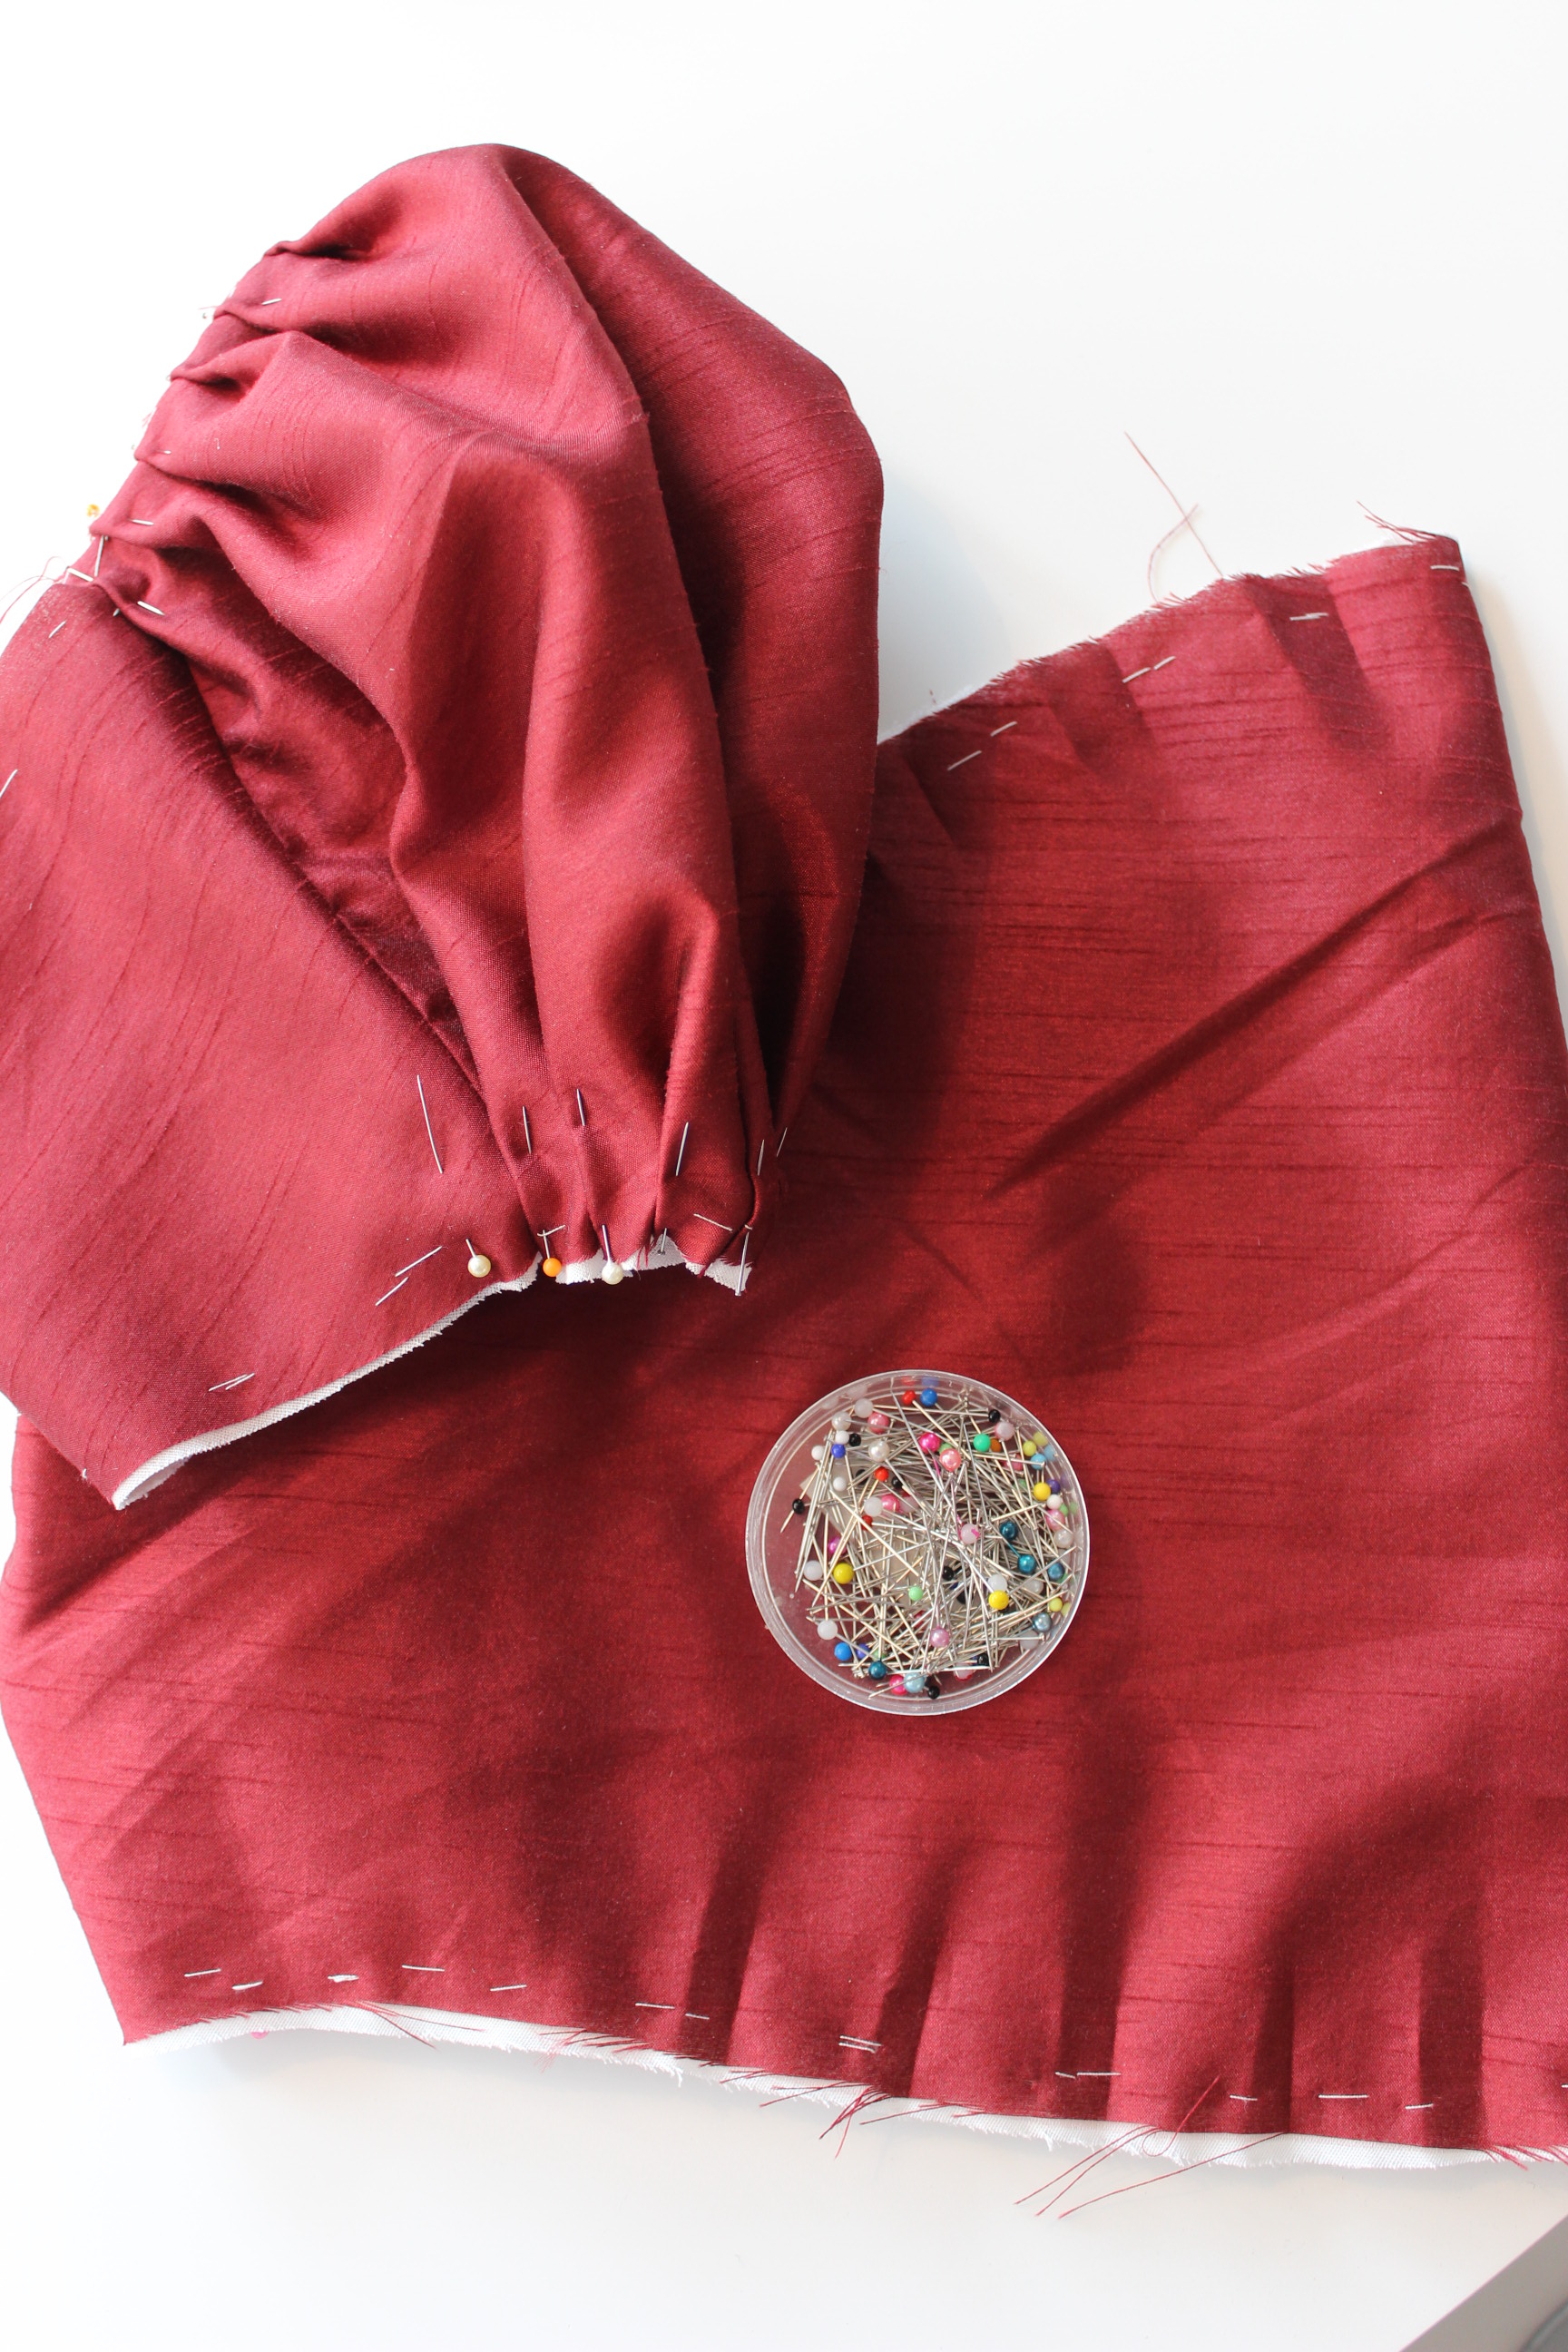
I pleated the sleeves by hand, and sewed chains of thread to keep the pleats in place.
And finished them of by folding some self fabric trim round the lower edge.  The sleeves ready to be set.
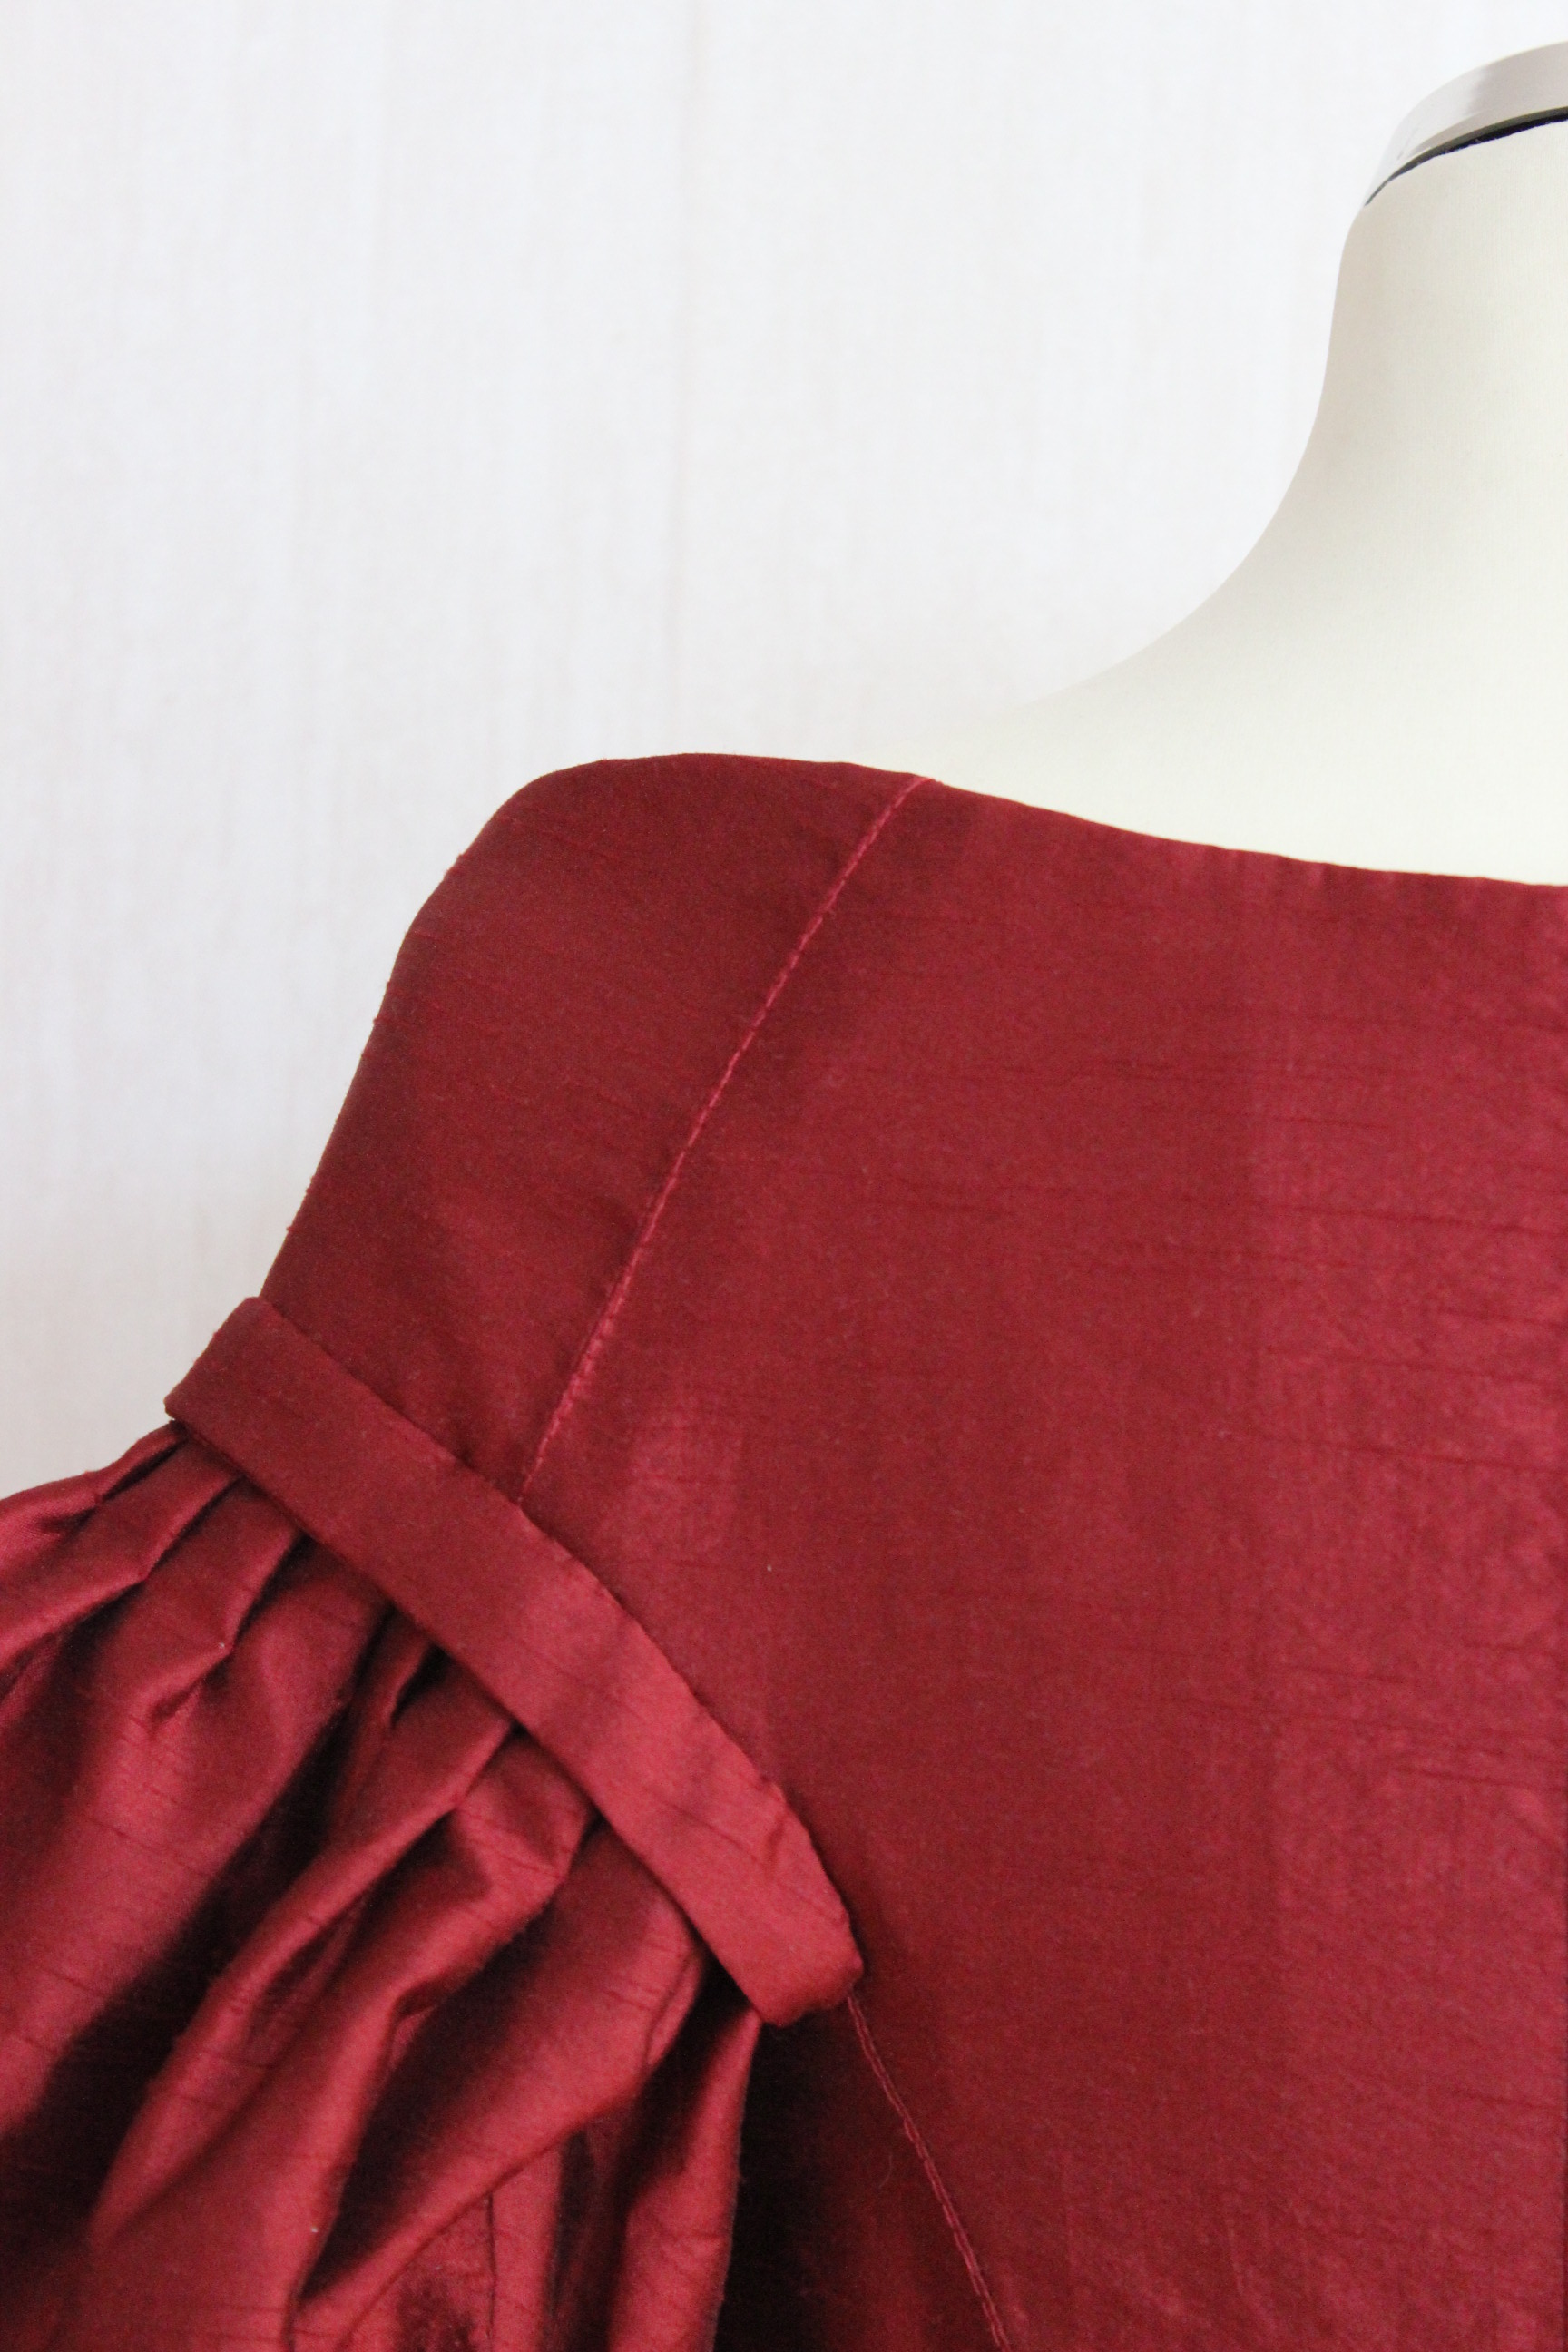
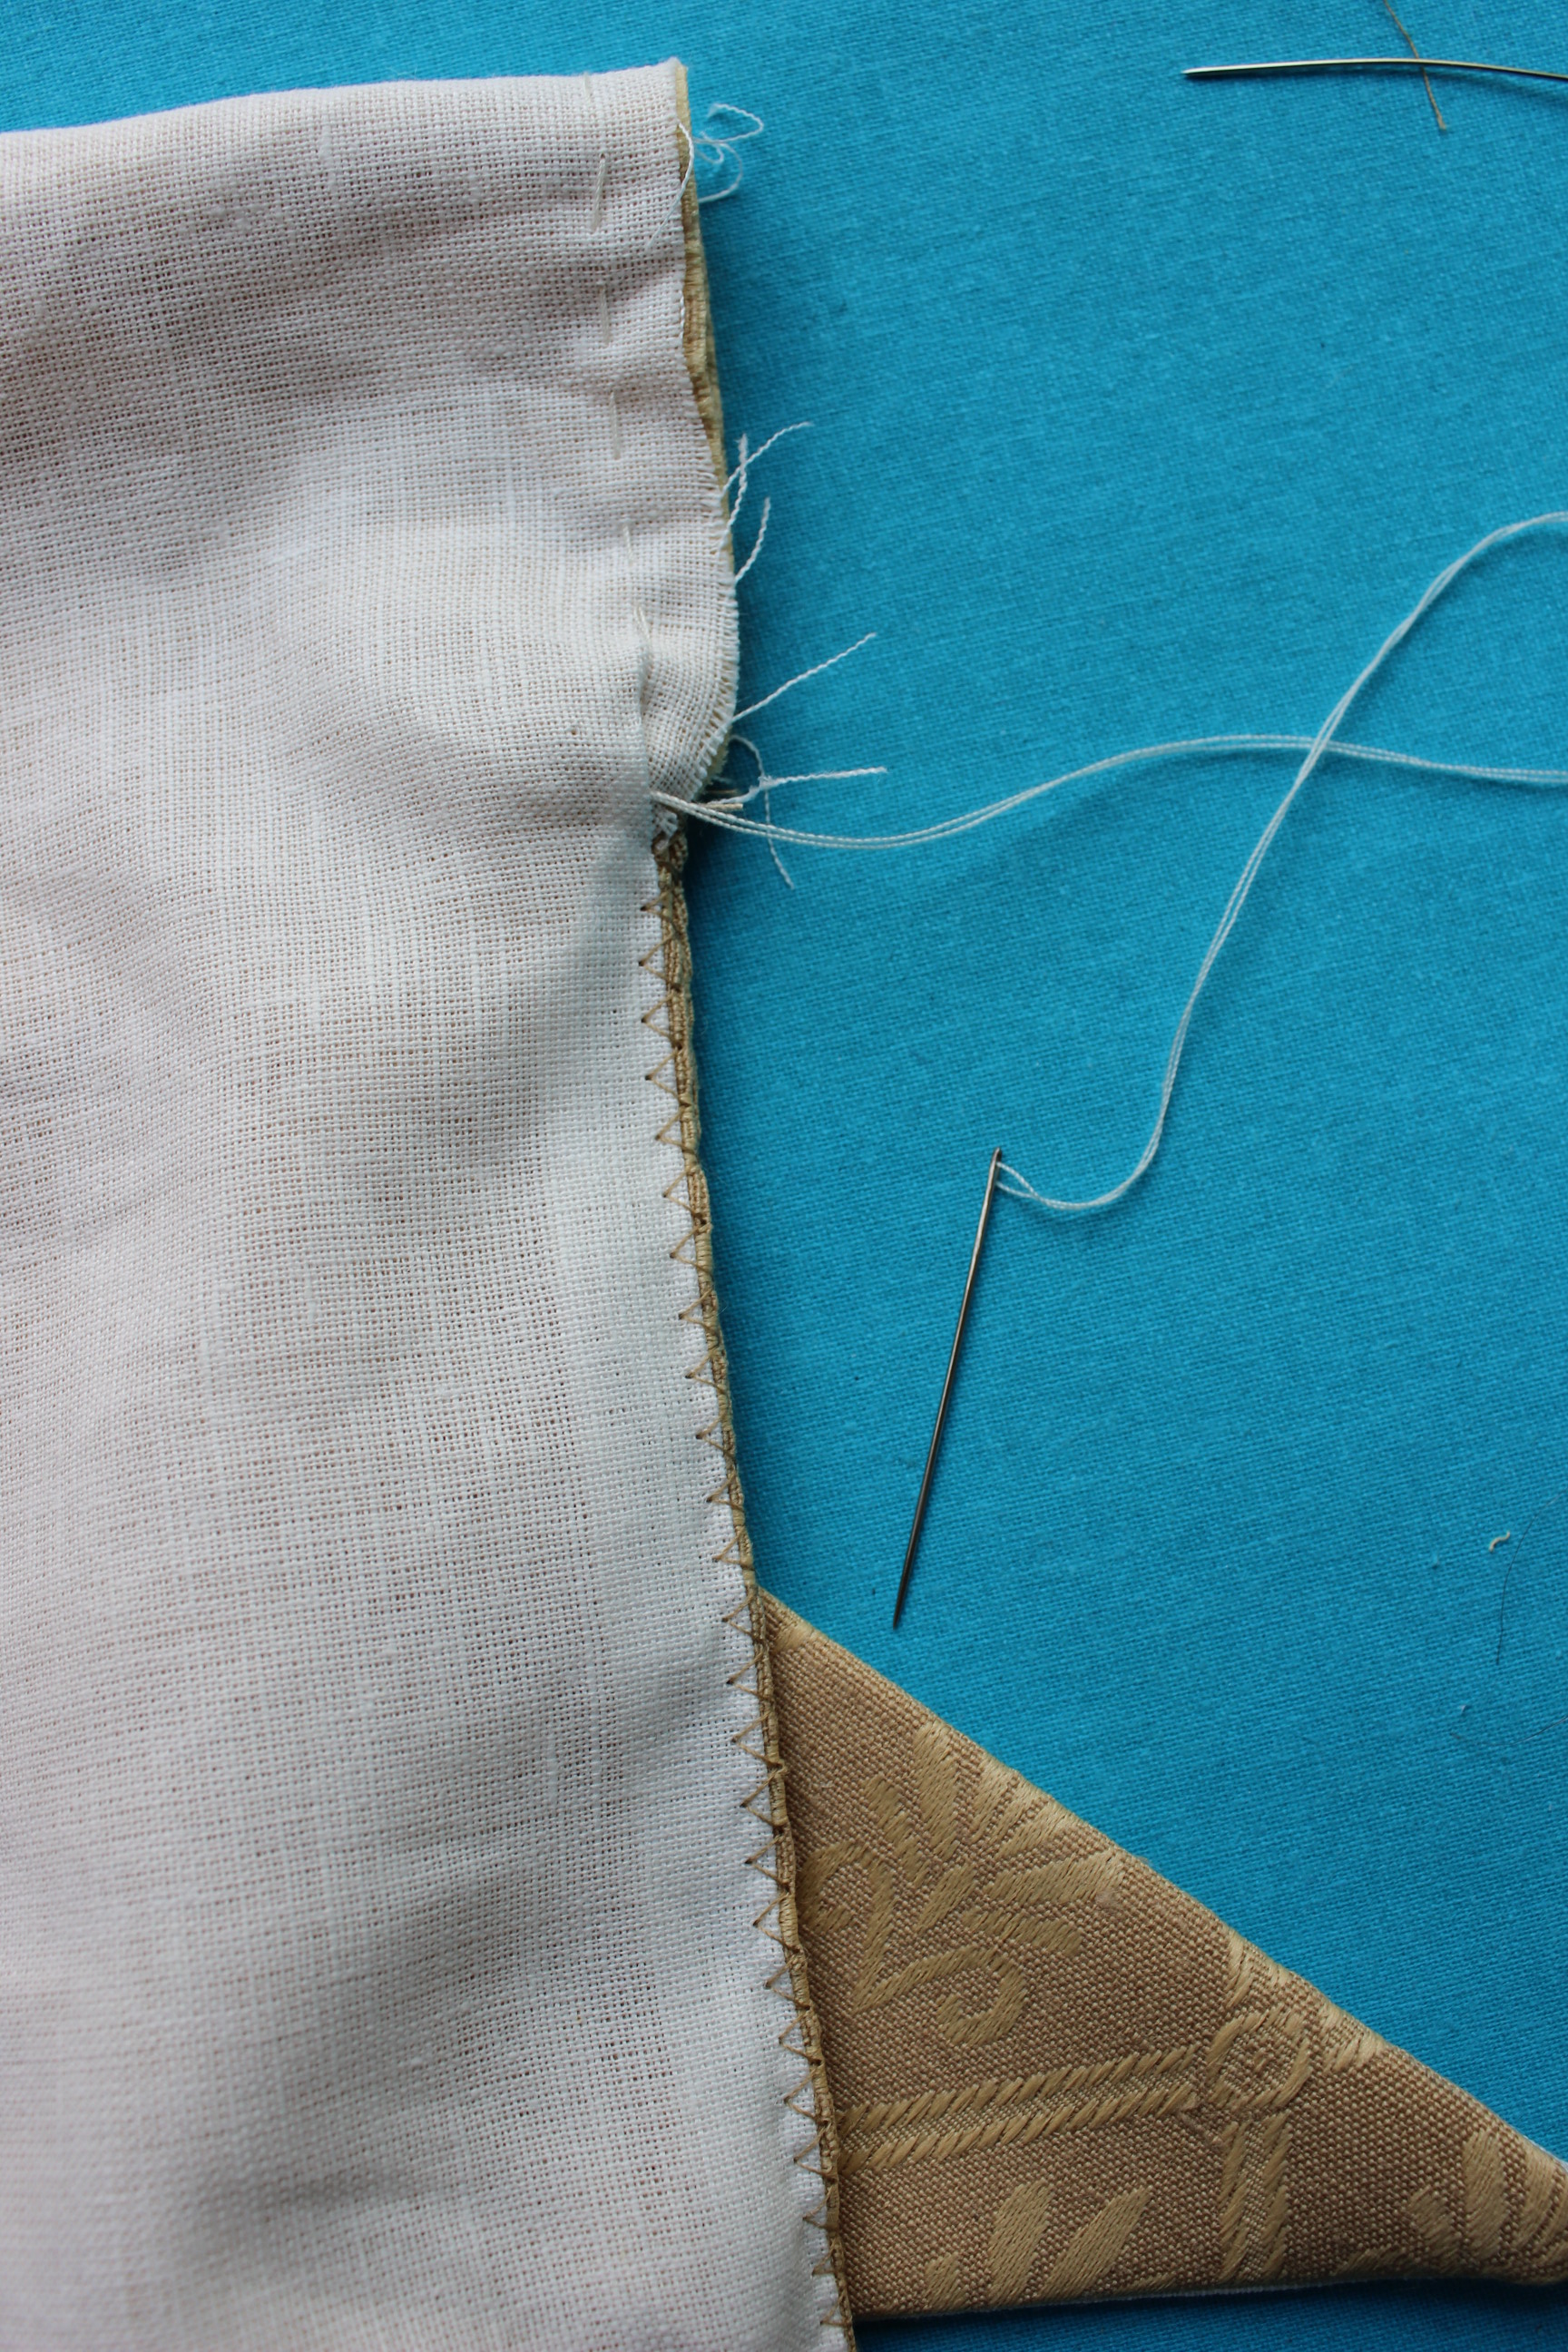
Then I set the sleeves to the bodice and finished by binding the arm holes using bias tape.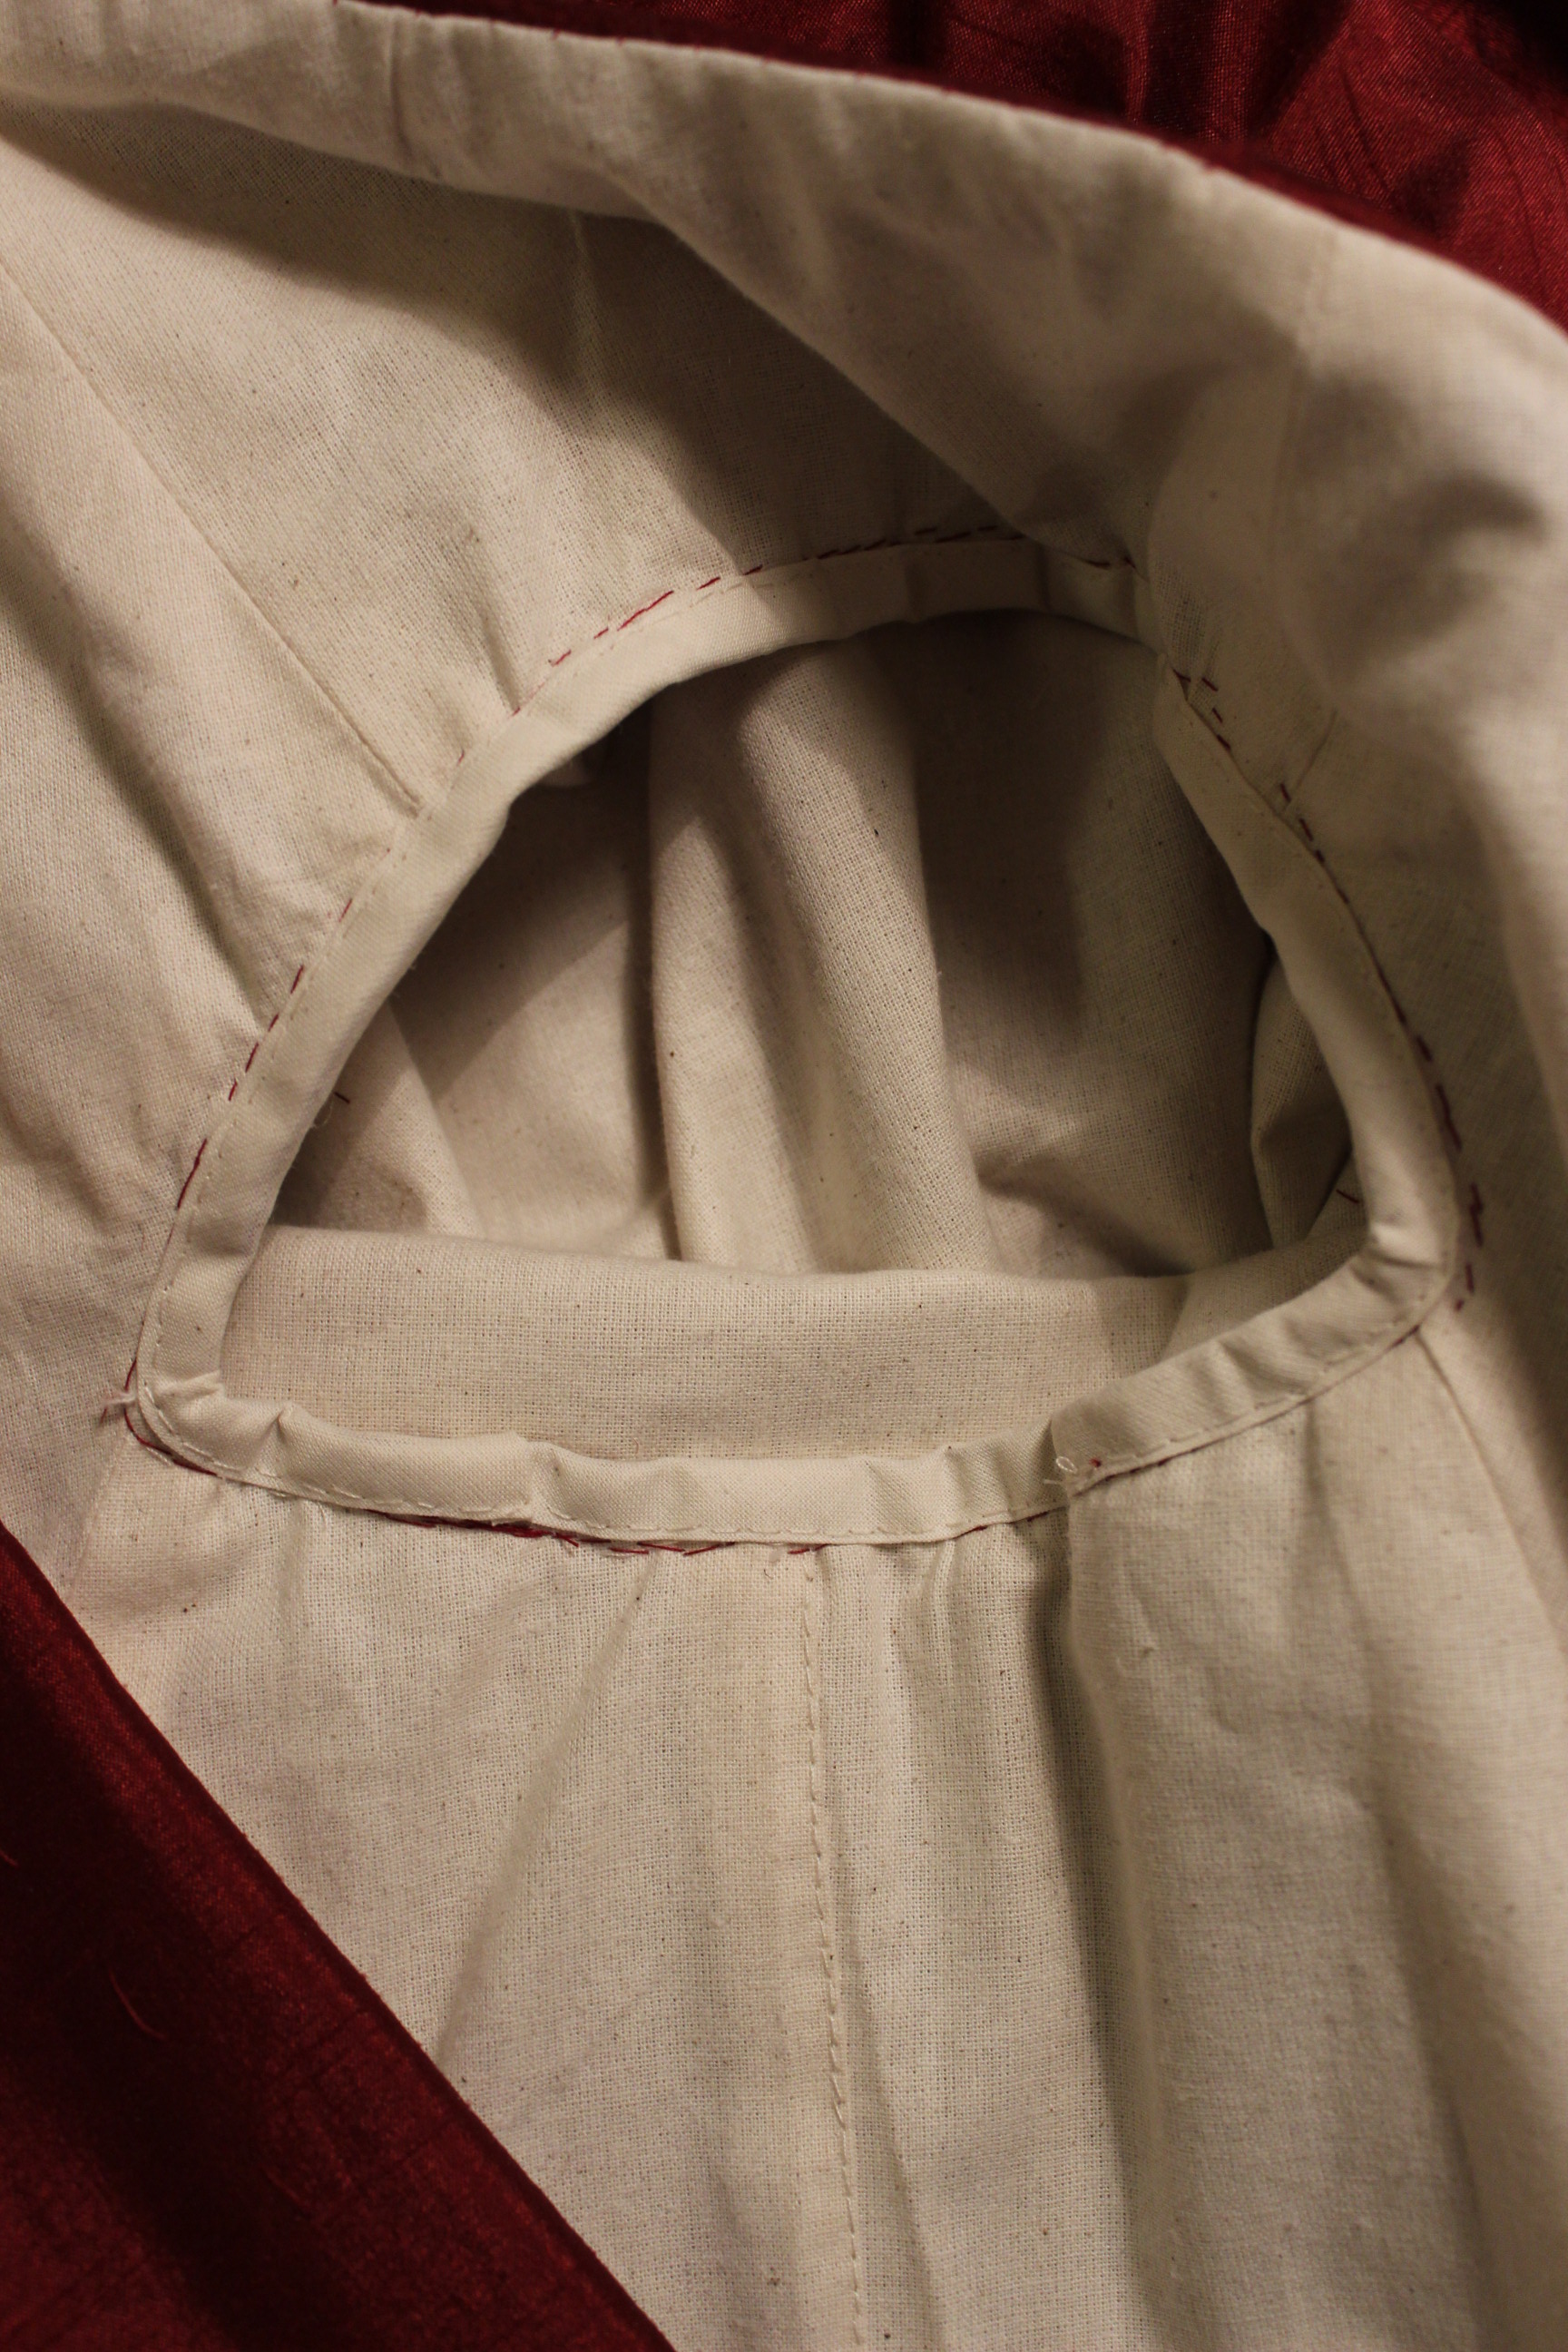
Next up – the finishing touches
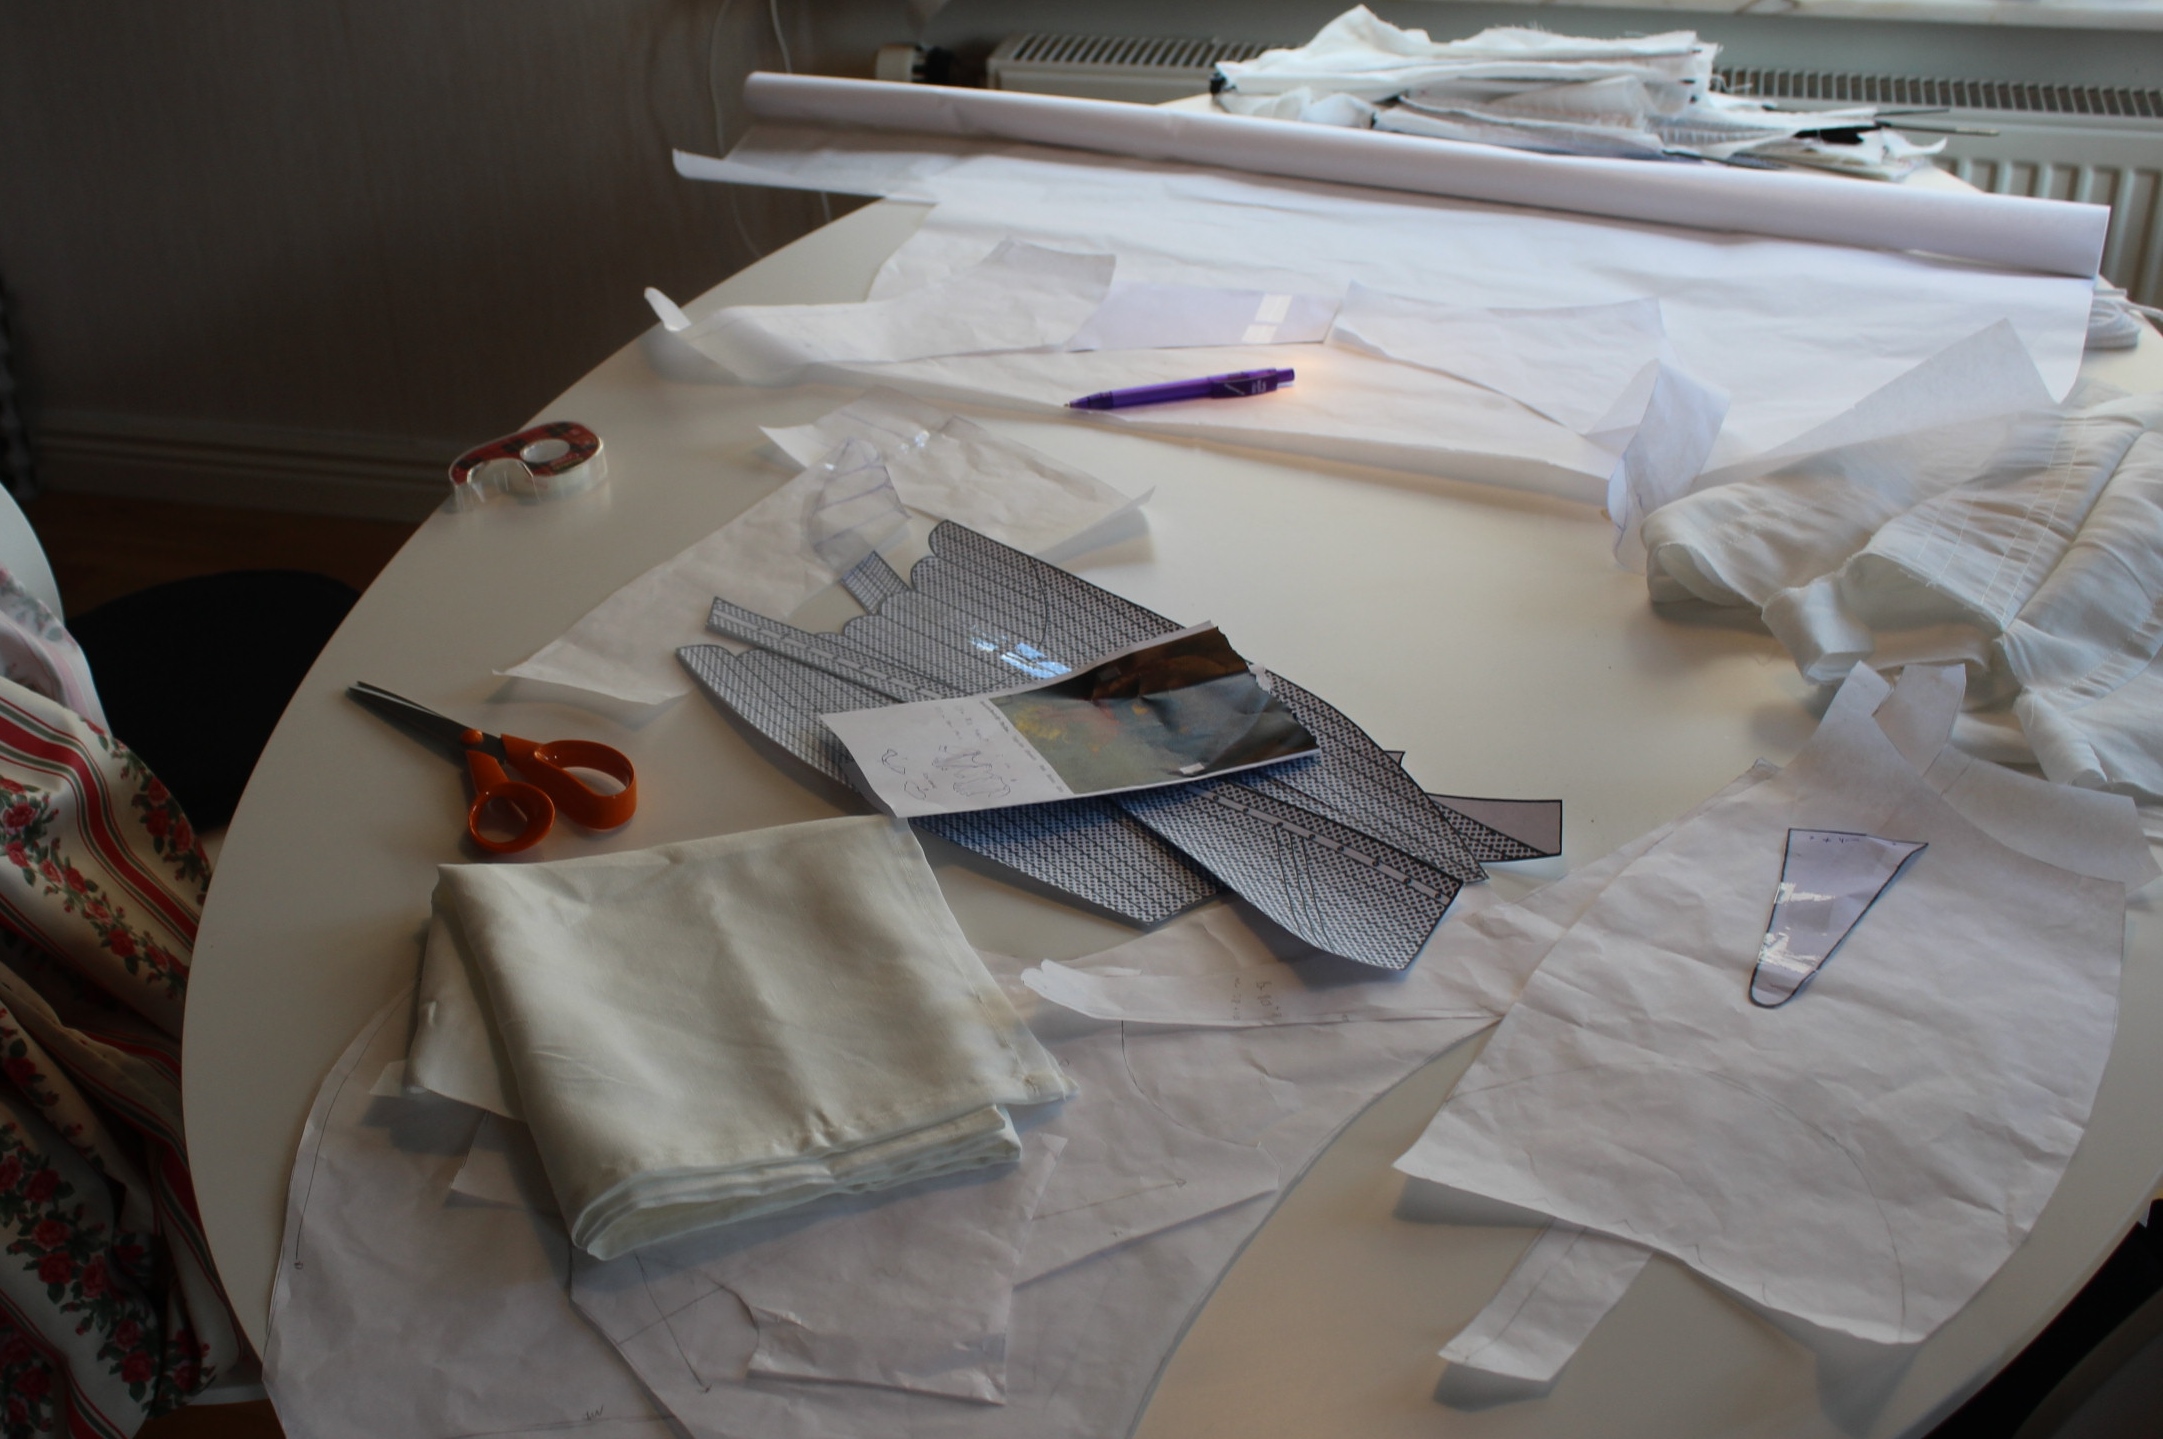
The last piece I needed to complete the “Sew 17th century challenge” was also the main piece – the bodice.
Read about the other garments here: Skirt, Cufs,Coif, Fur Shawl
And to make this post a bit lighter I’ve cut it up in a few manageable pieces.
First up – The Pattern

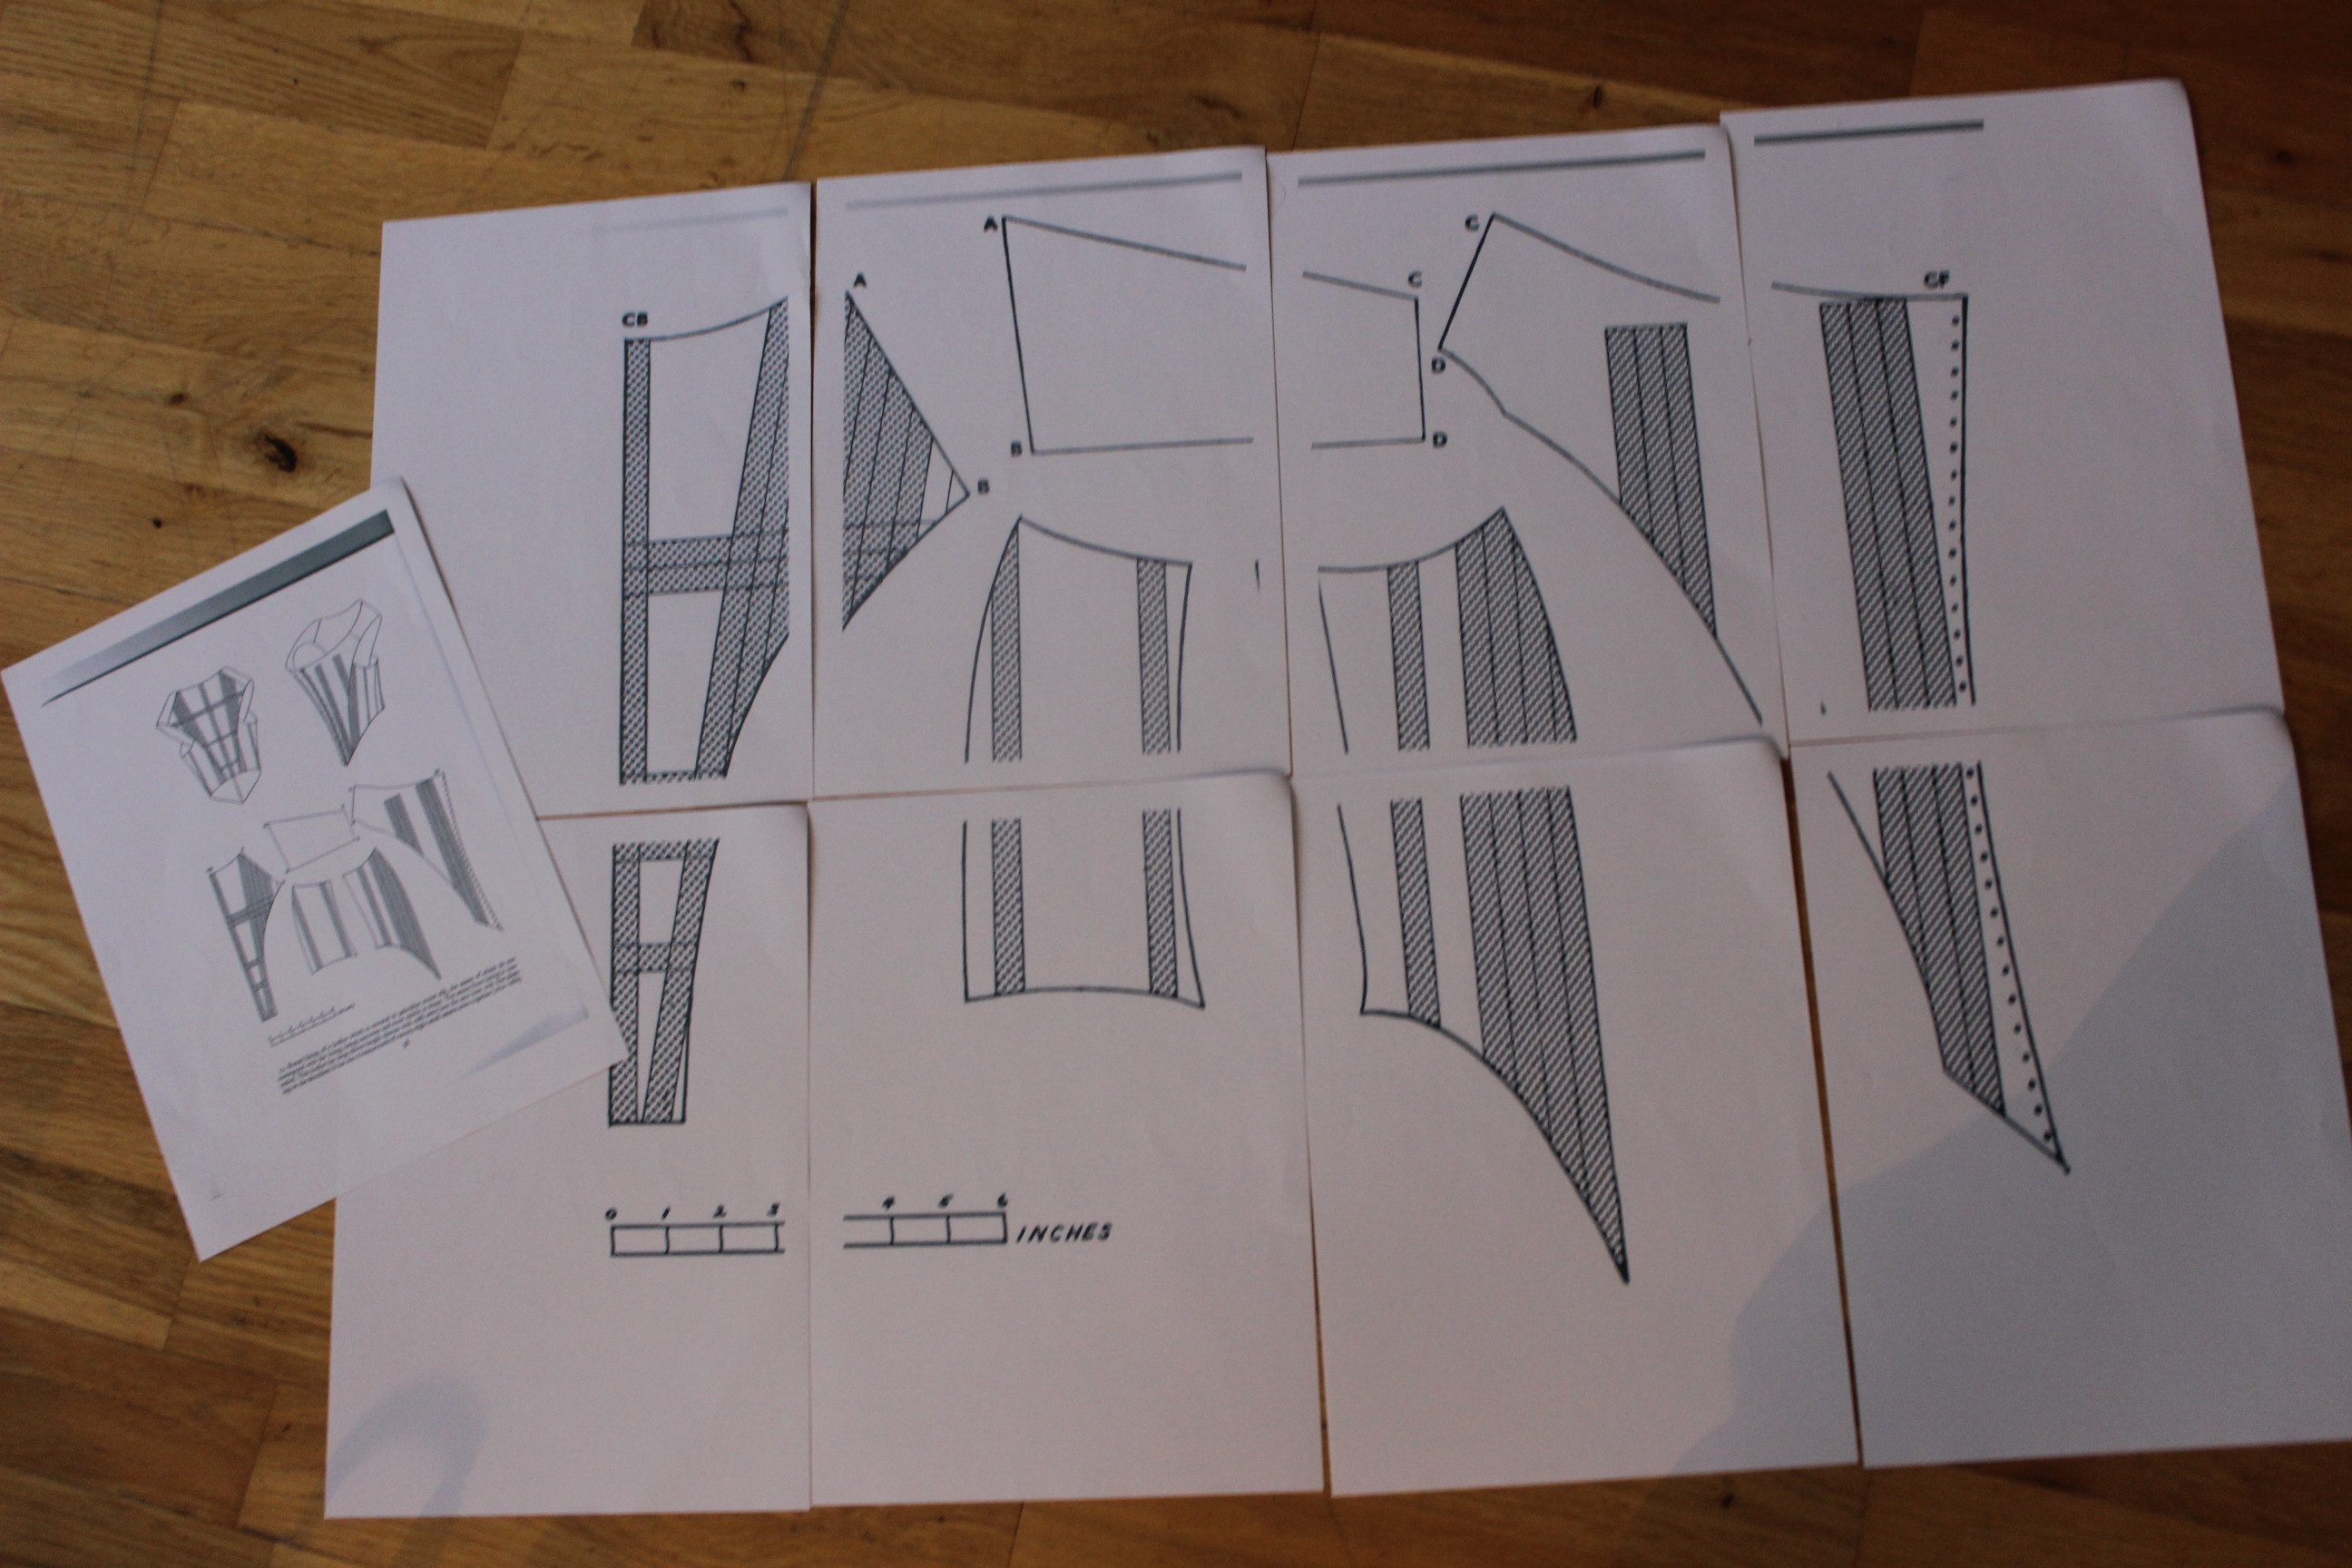
When researching the bodice I found several different patterns*, and after some narrowing things down, I ended up with two finalists to make into mock-ups. Both from Waughs “Corset and Crinolines”
The first pattern I picked was “1660s bodice lining”
It has the perfect neck scope and shoulders, and the much need lacing down the front.
The only thing I’m missing is the tabs down the hips.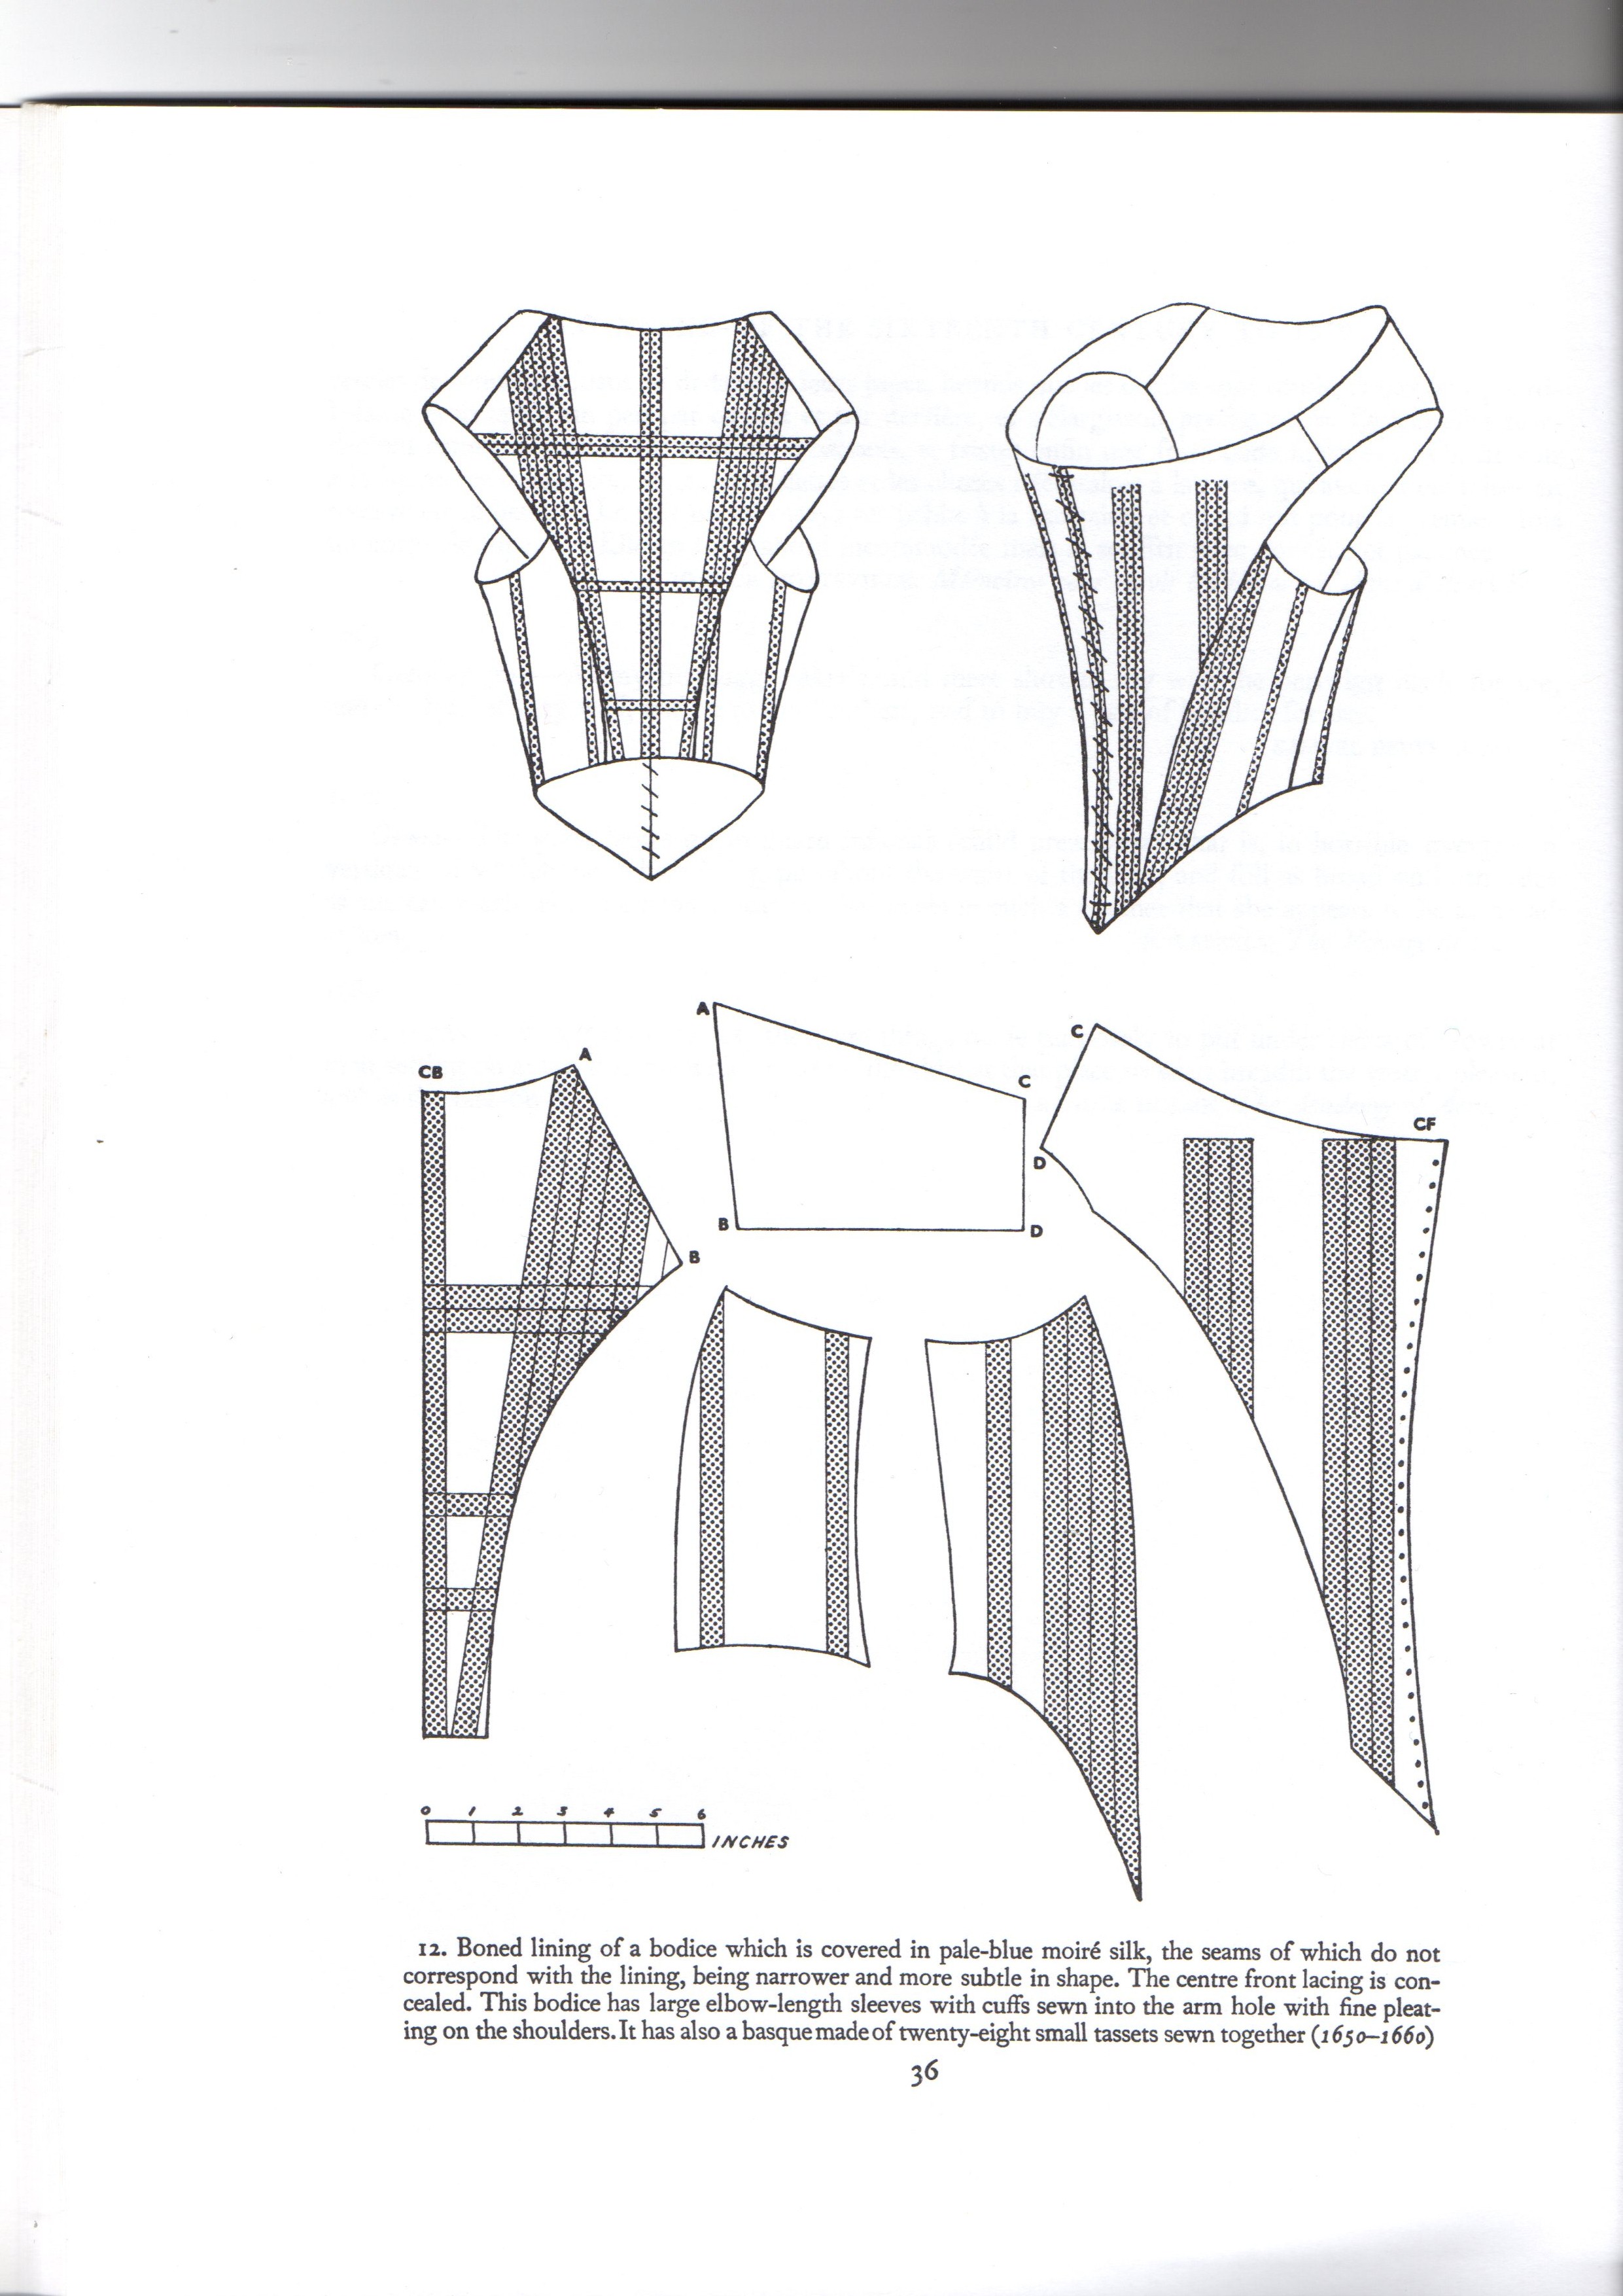
I scanned the pattern, opened it in Paint and changed the printer settings to 400%
Then I cut all the pieces and taped them together. 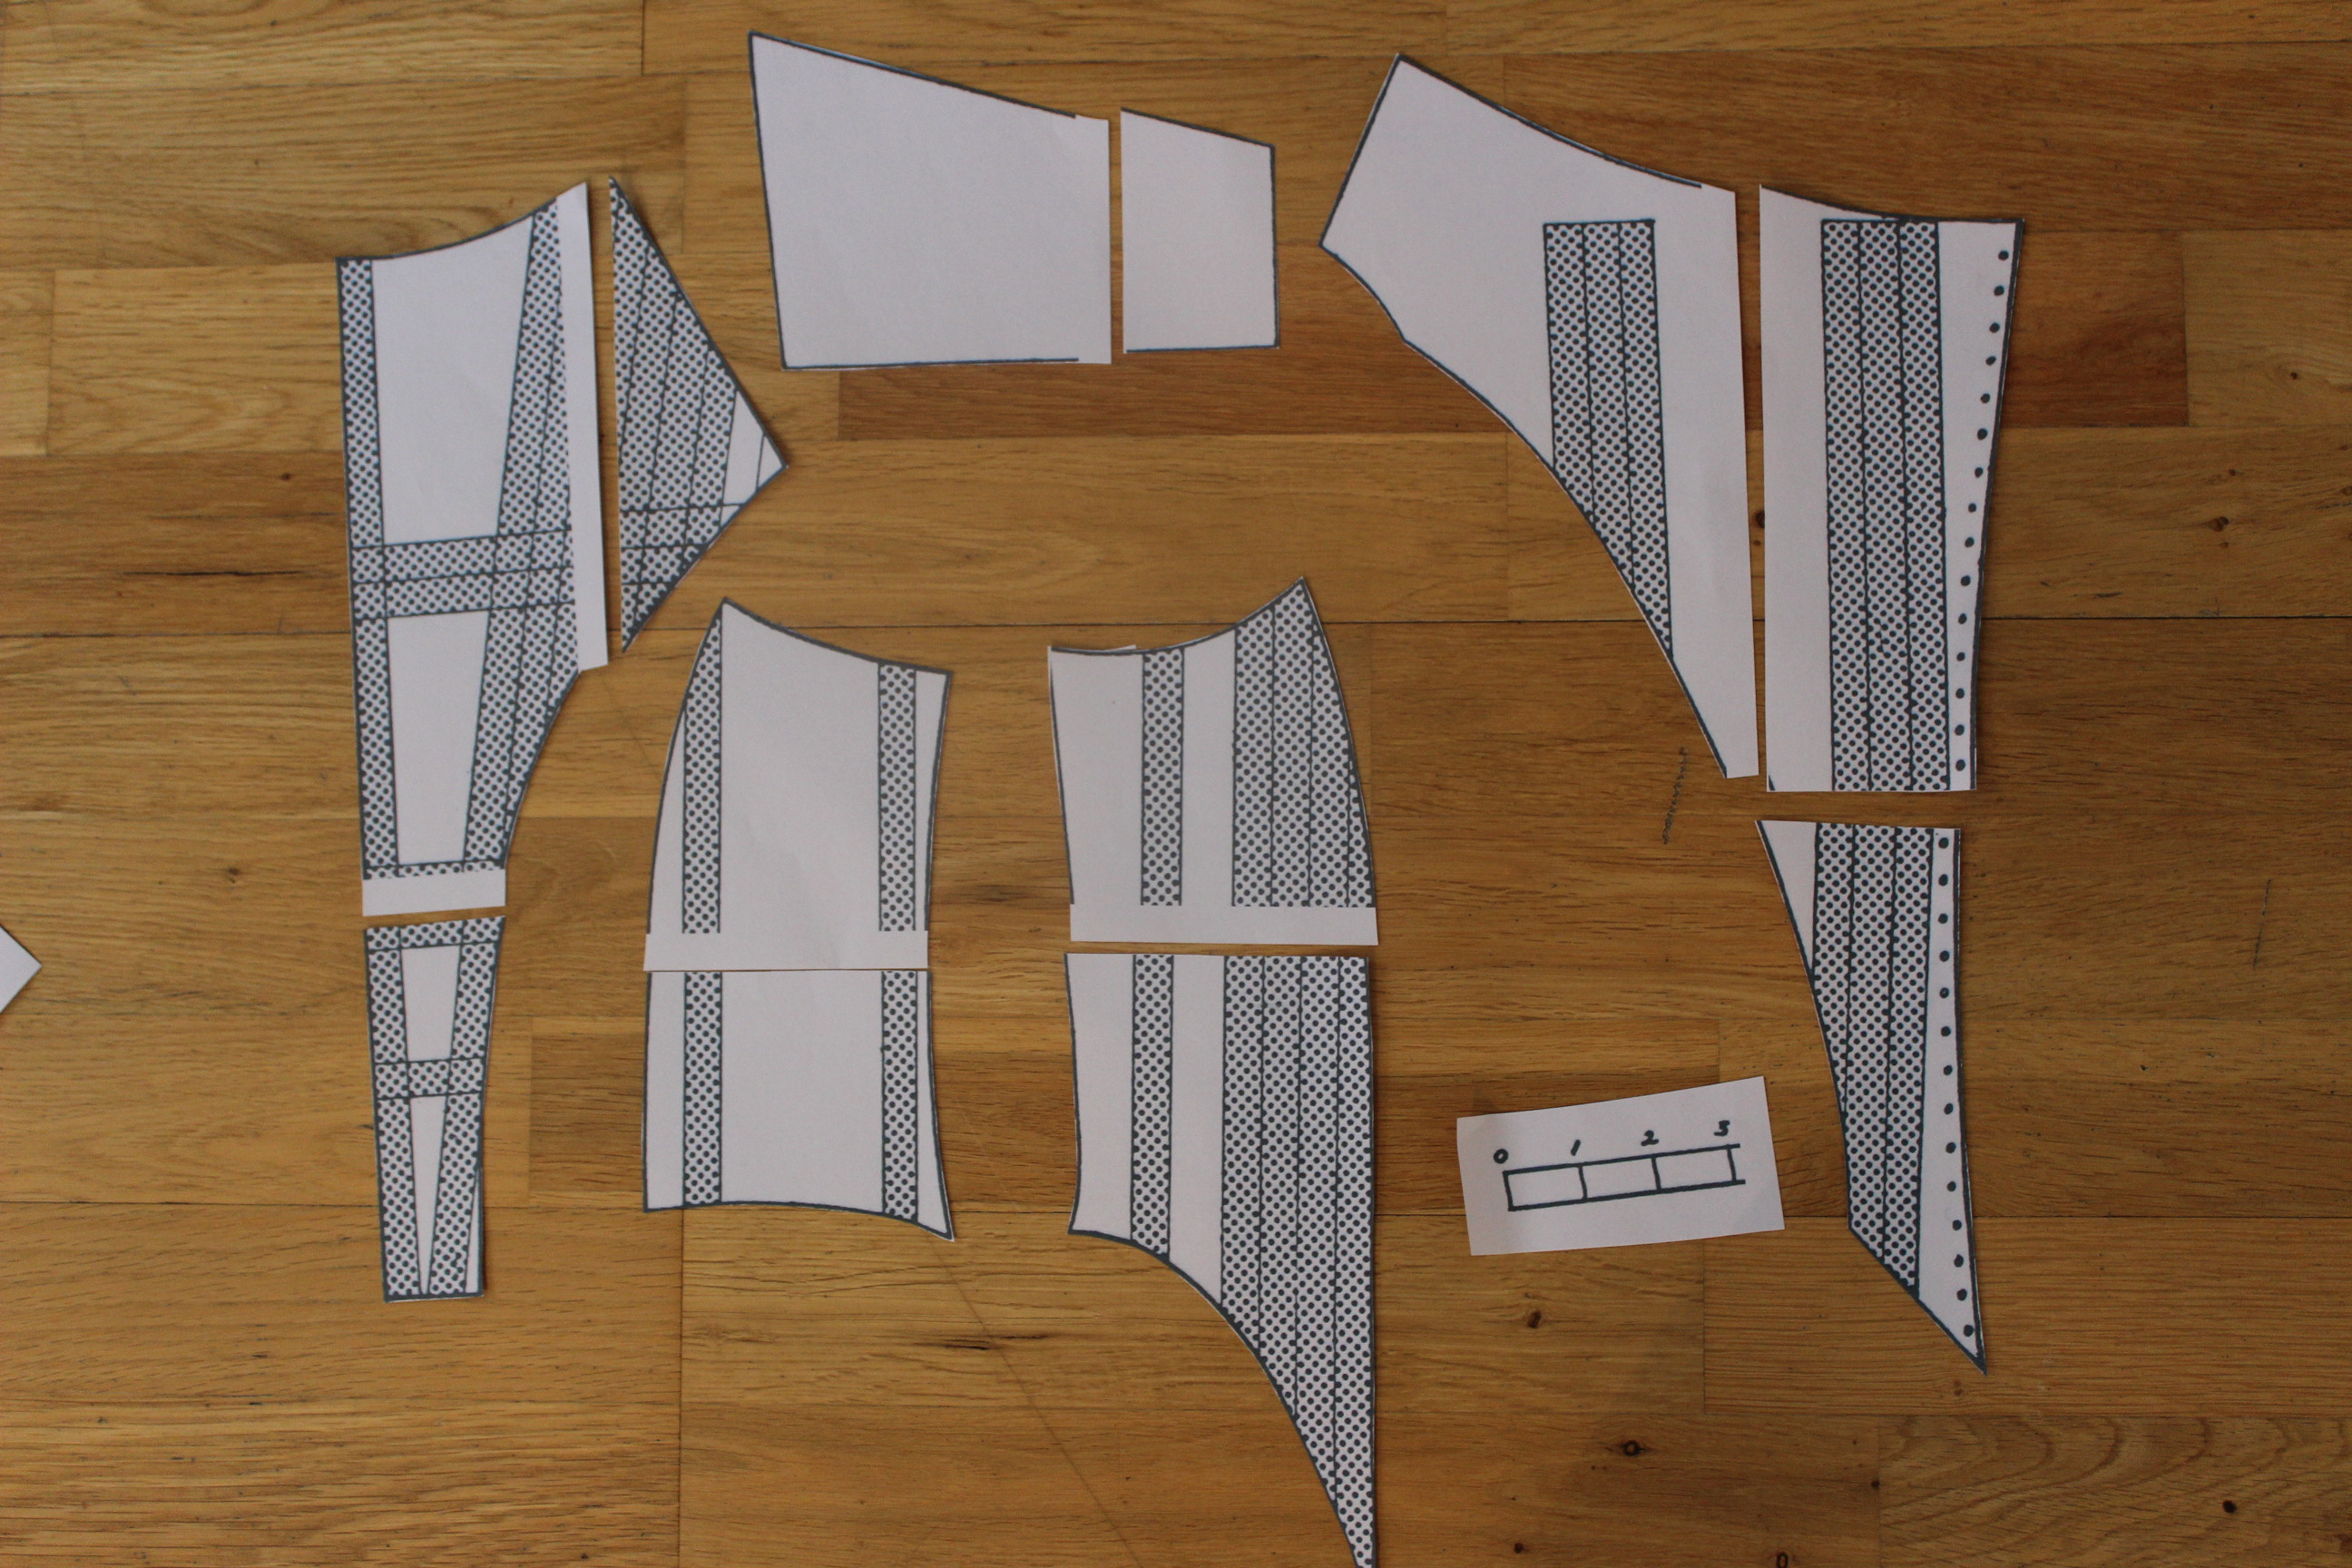
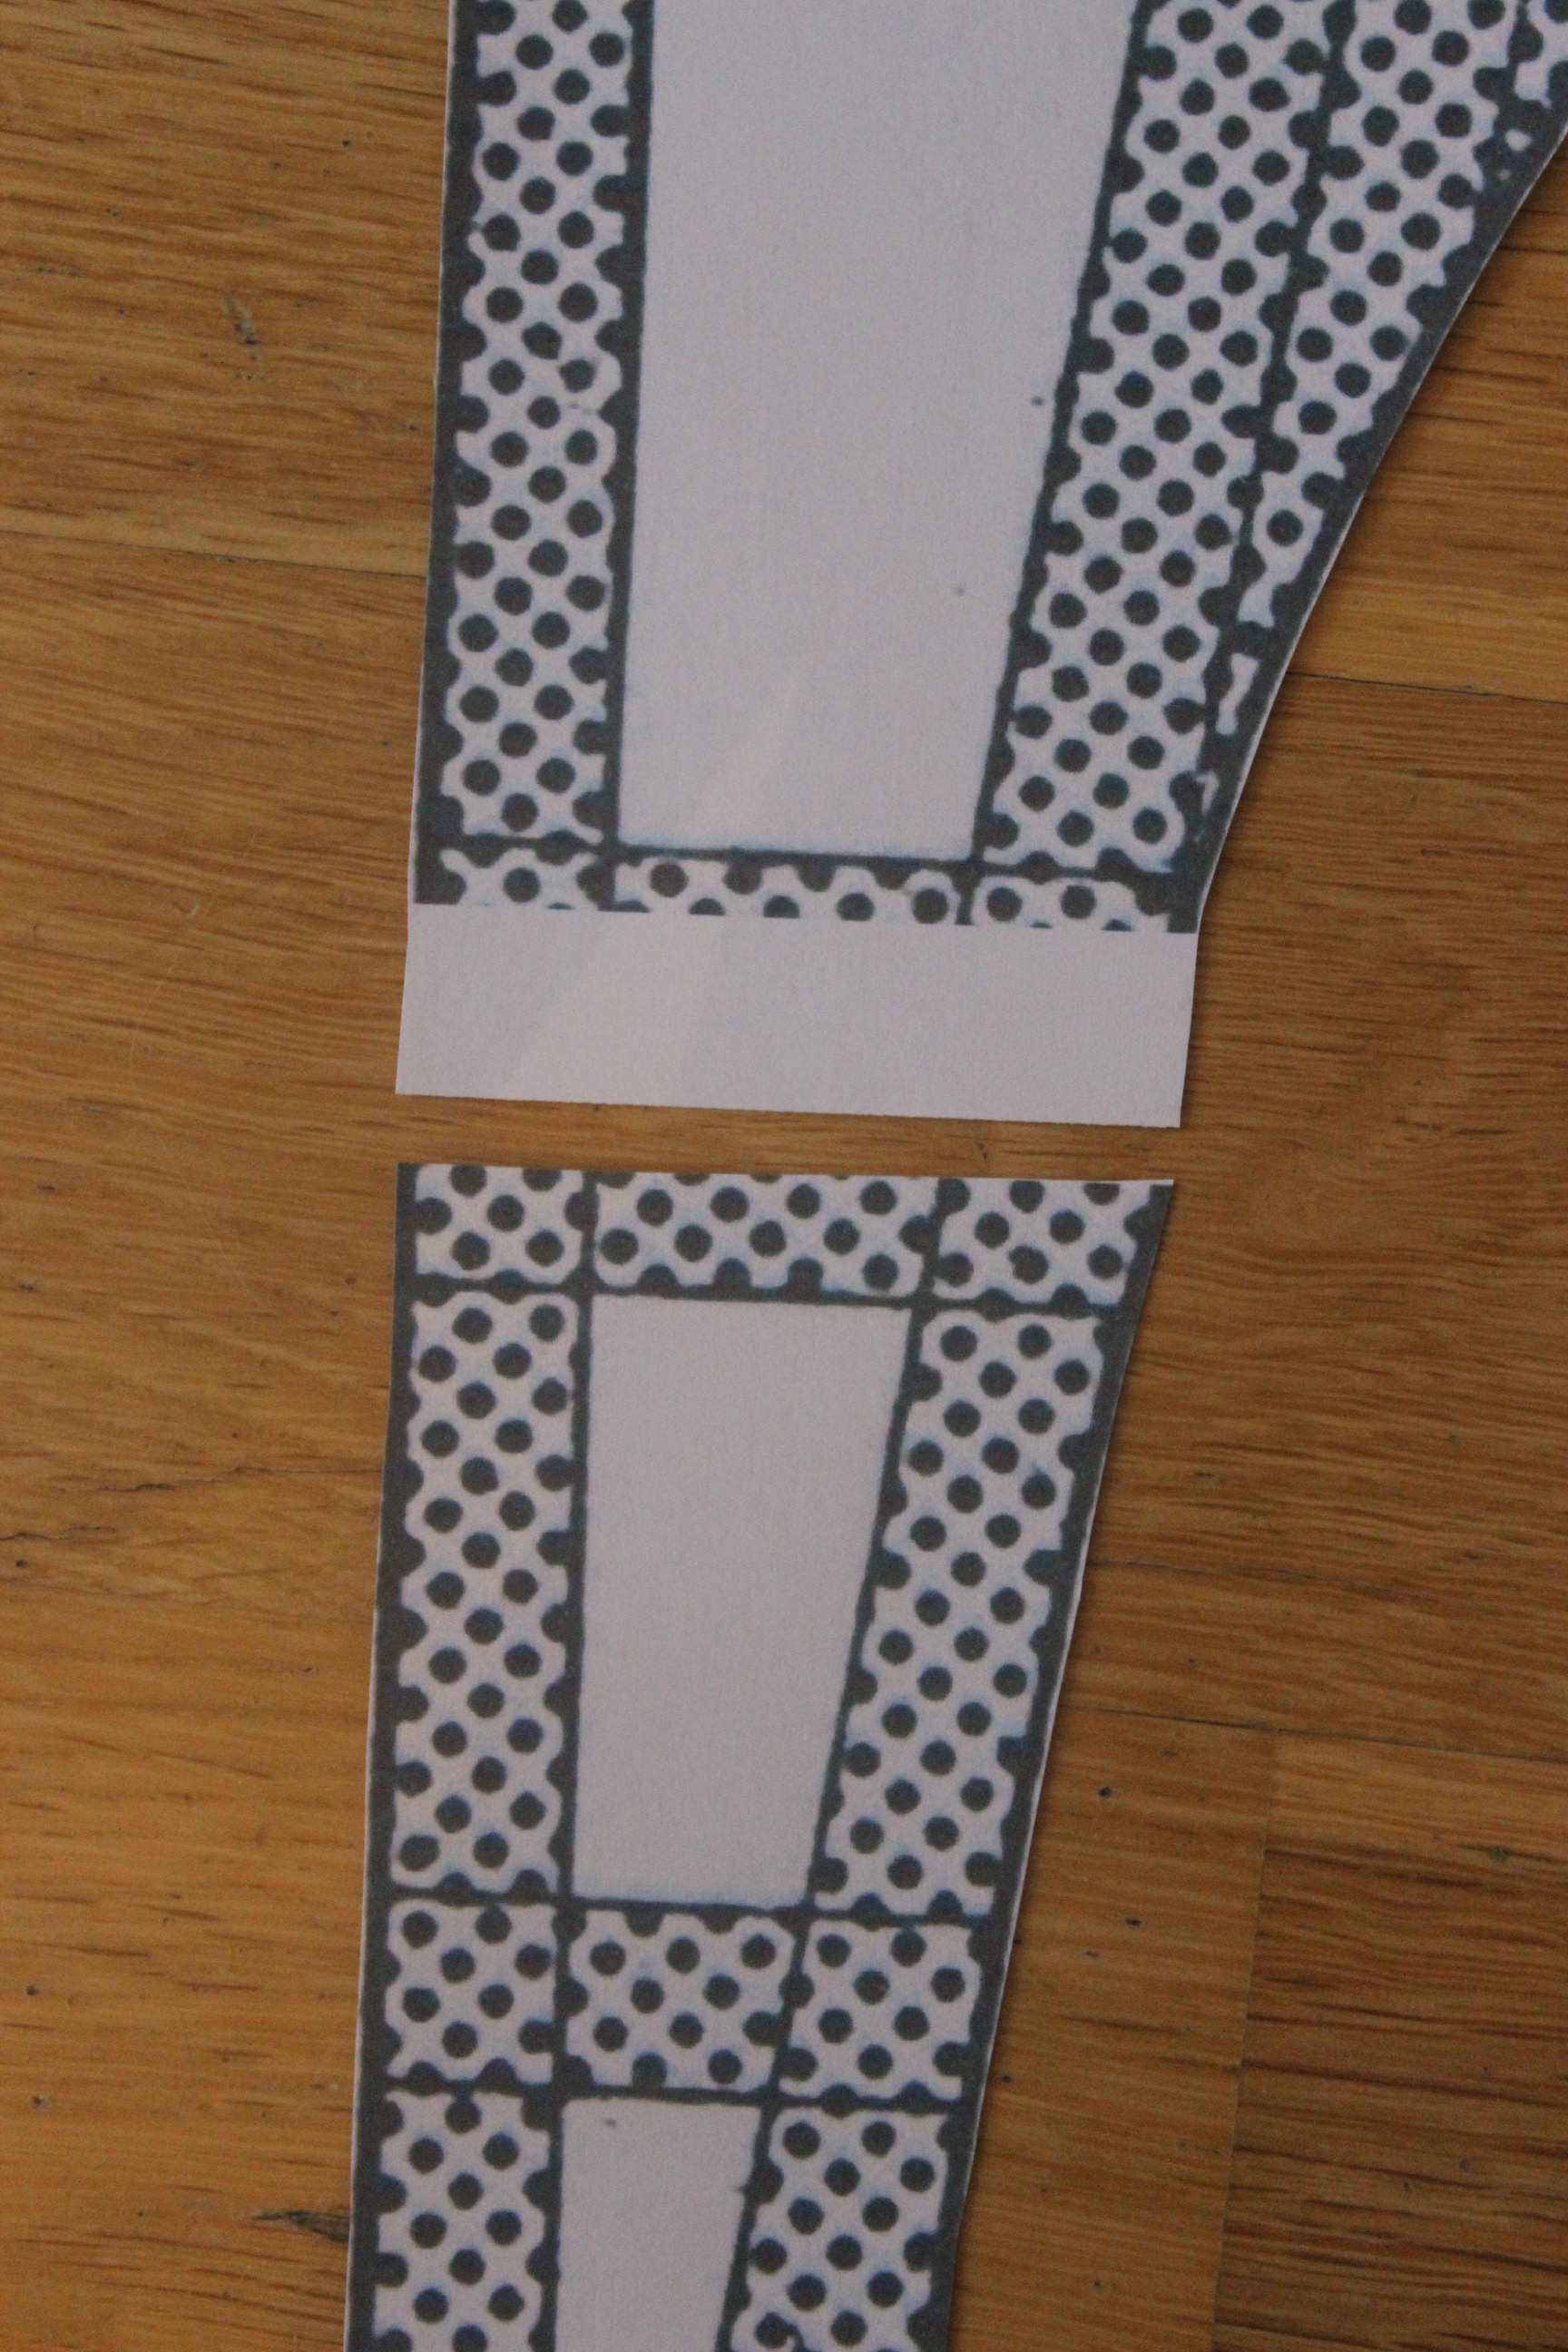
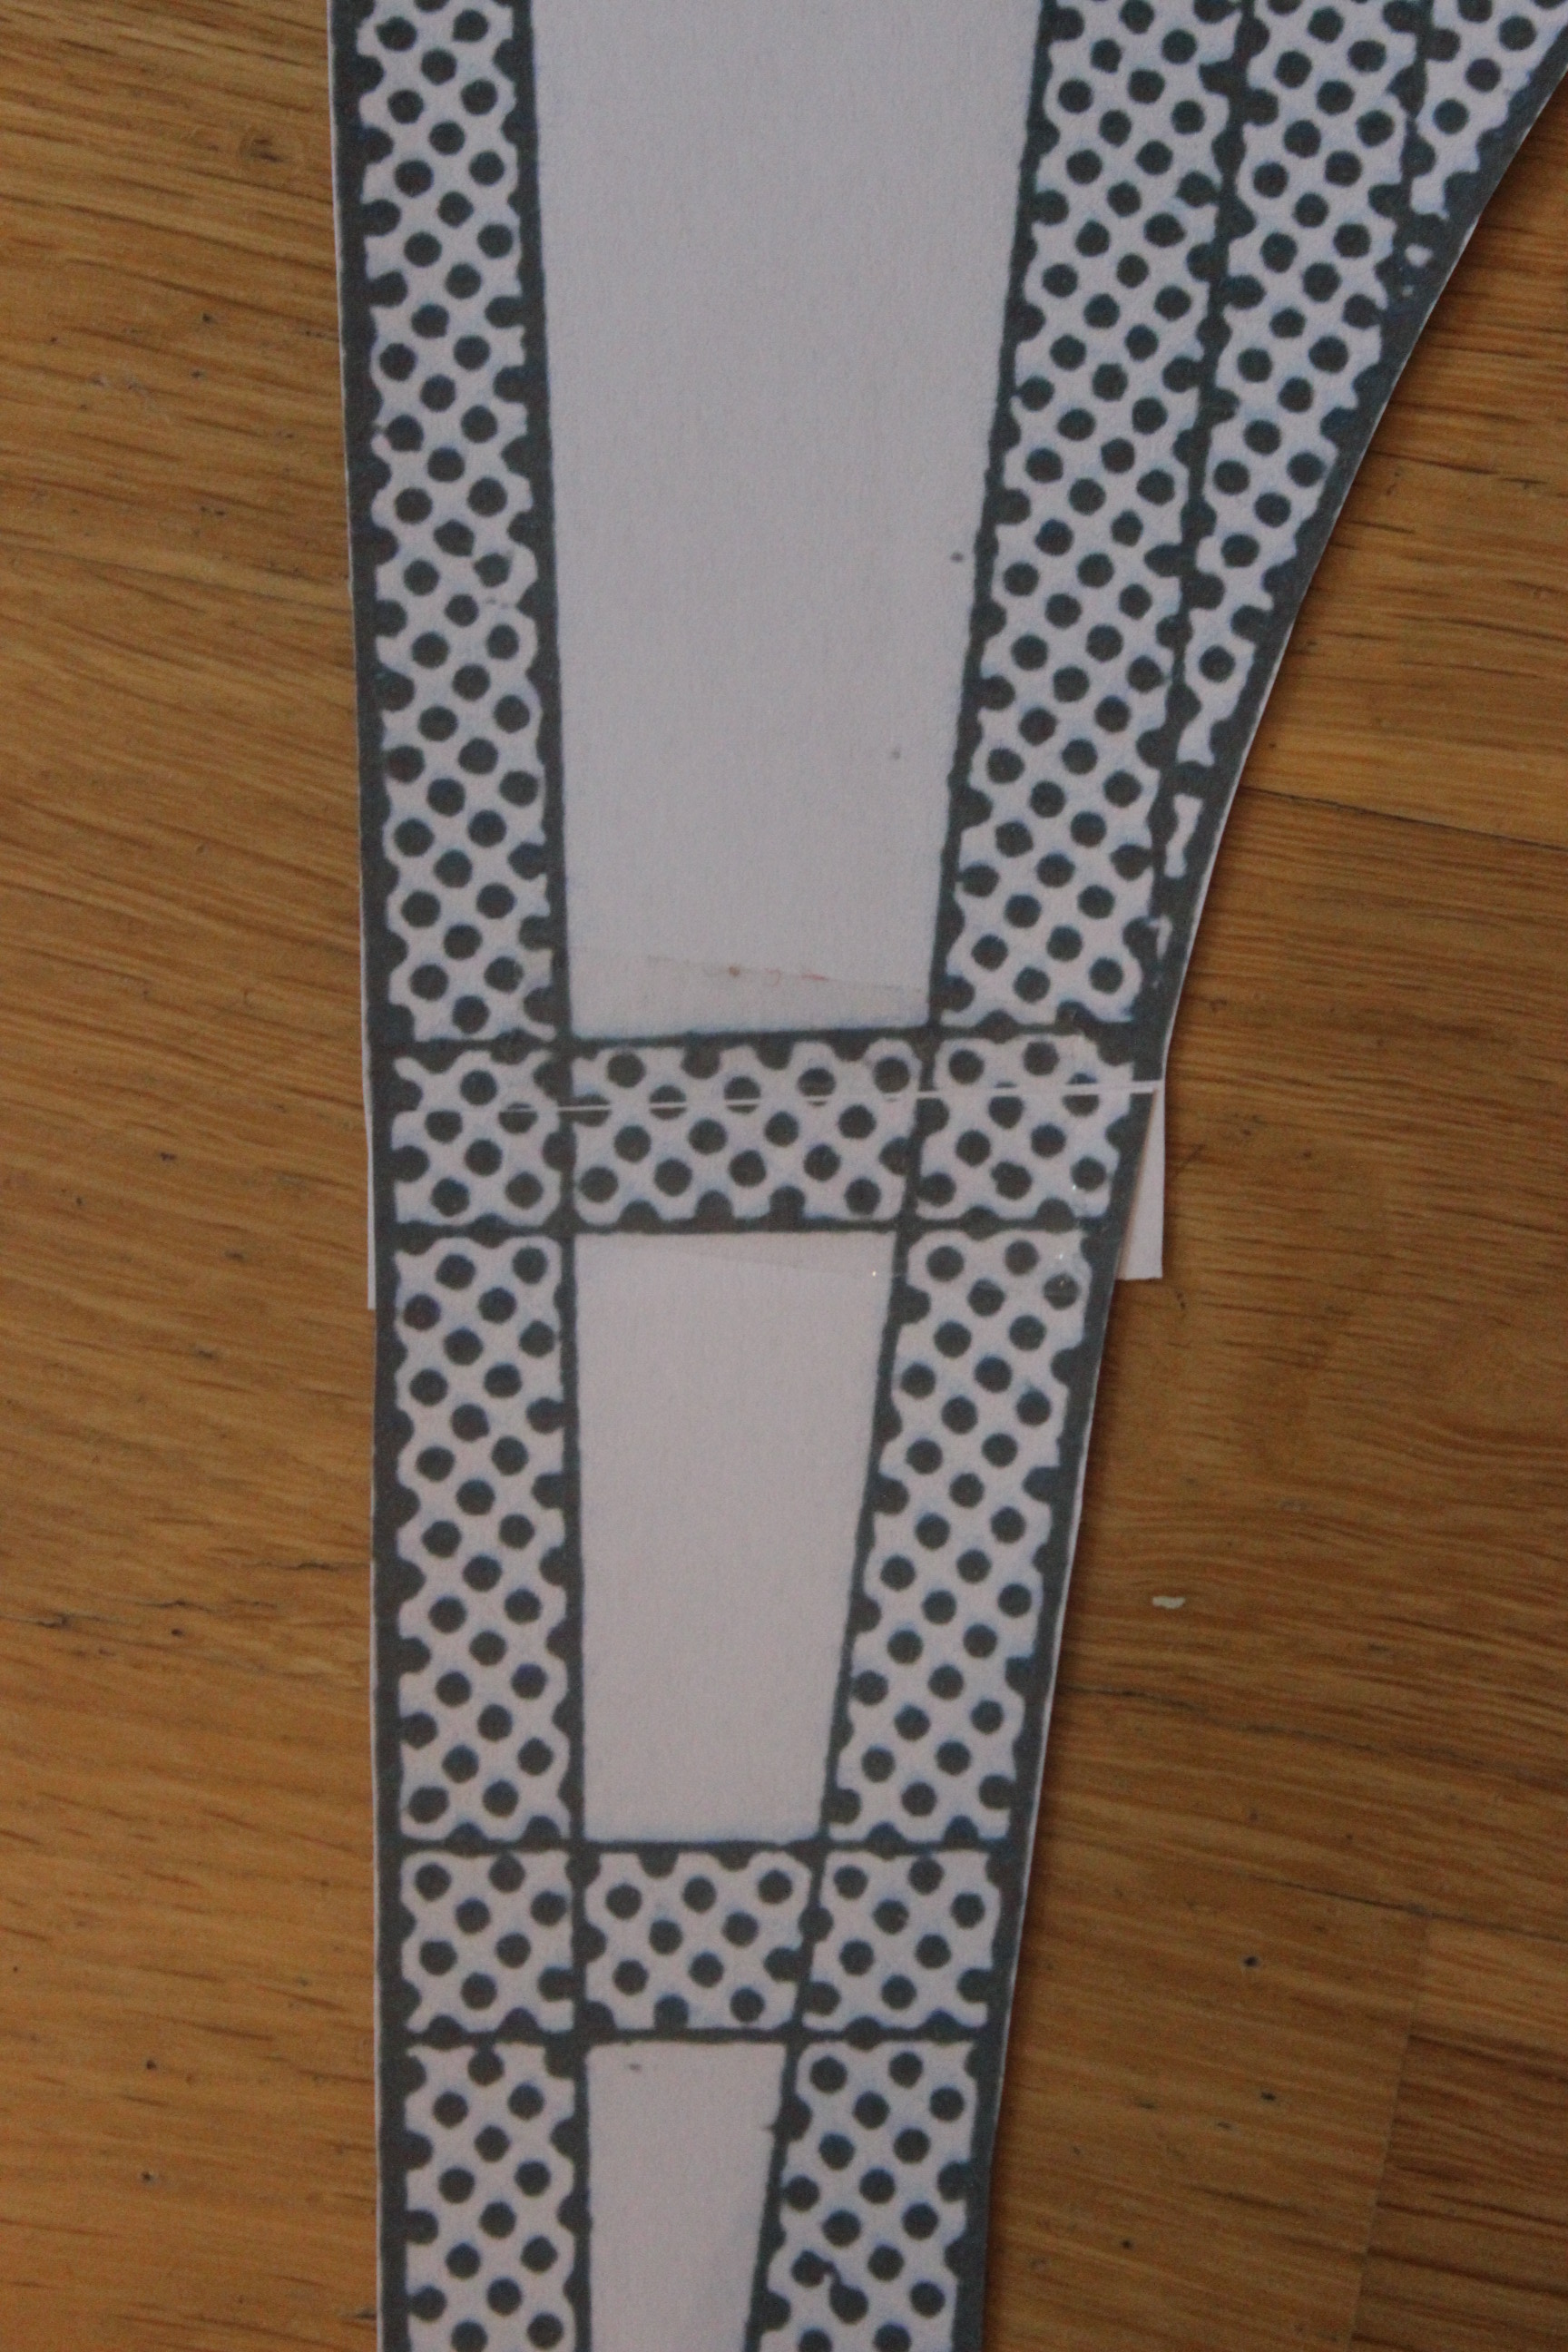
I traced the pieces and made some alteration to my measurements.
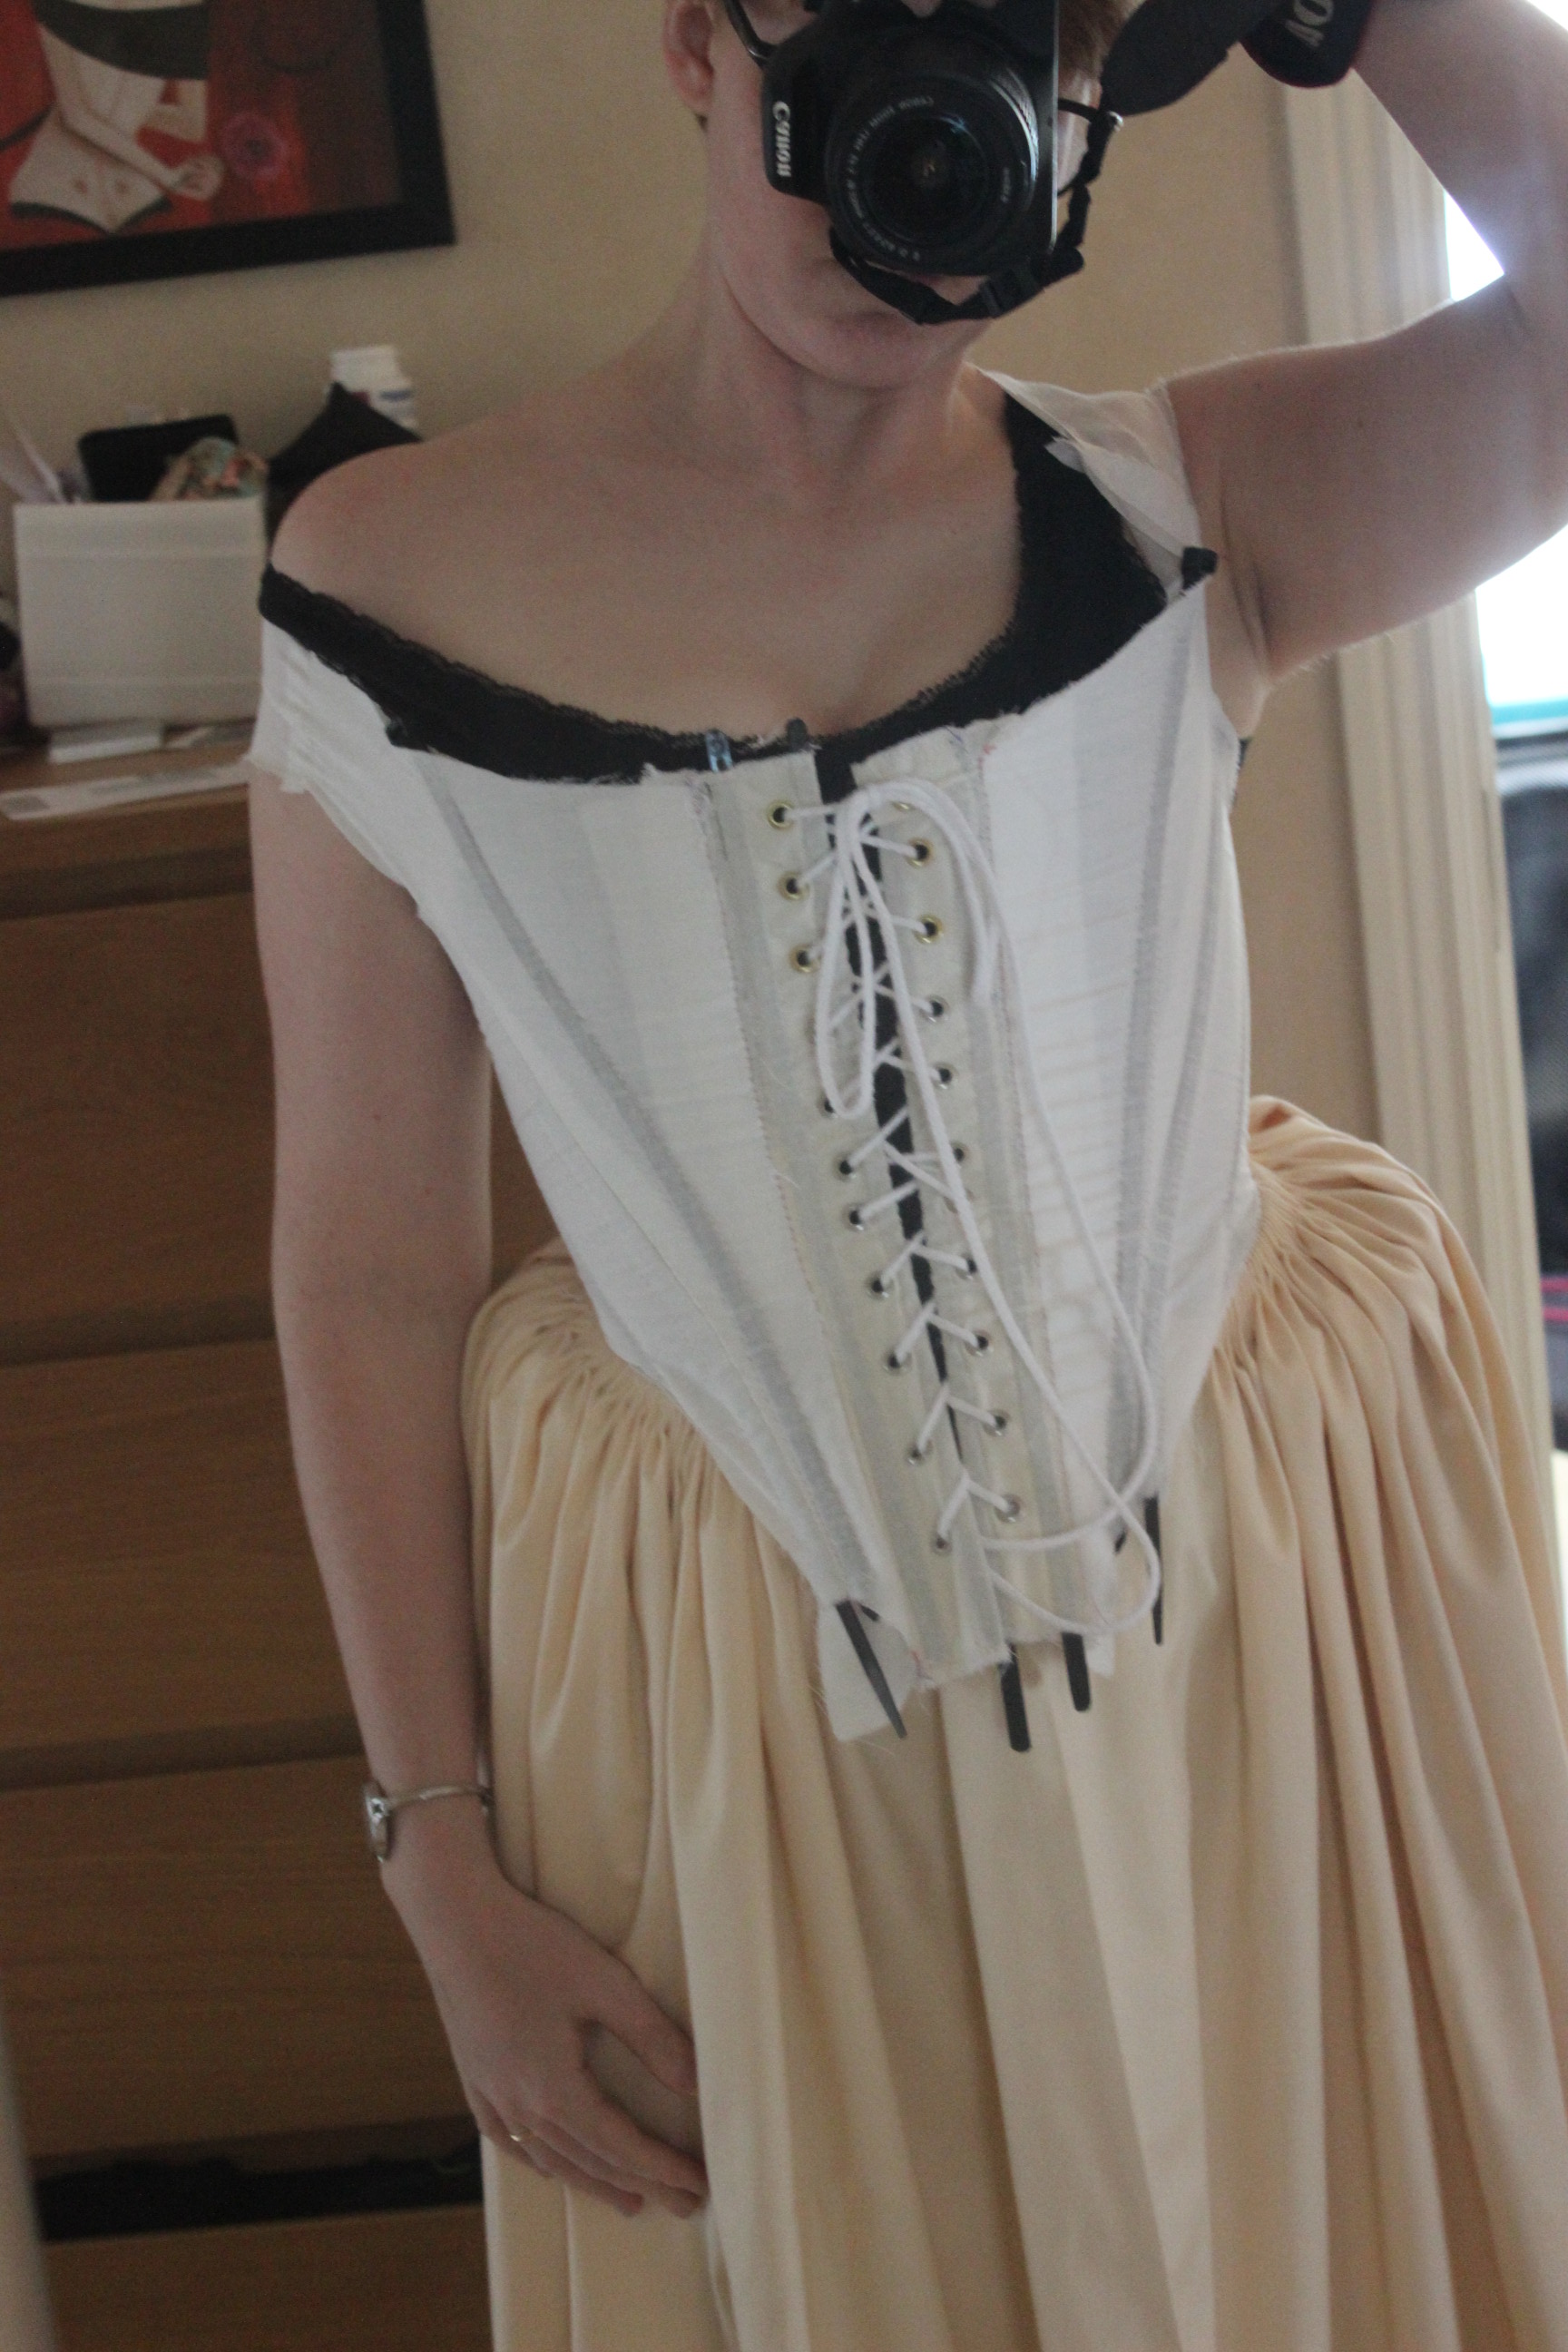
Then it was time to bring out the cotton sheeting to cut the mock-ups.
I added boning at some vital places, and my pre-made lacing strip to the font, to get a more accurate fitting.

 I really liked how the pattern fitted my body – both comfortable and strong.
I also like the look of the off-the-shoulder sleeves, even though I can hardly lift my arms.
The next pattern to try was the “1680s court bodice”.

I printed, attached and sewed the pieces in the same way as before.
 I love the shape it gives me, but It’s not nearly as comfortable as the previous one.
I’ll have to move the lacing to the front on this one, and to do some serious editing to the sleeves and neckline.
Hm, which one to choose…
In the end I opted for the “1660s bodice lining.
 Creative mess, right?
So then it was back to the drawing table to ad some tabs to the otherwise perfect pattern.
 I even tried it on with my (at the time) almost finished skirt.
Pretty rough, but you get the idea if the shape.
*I found patterns for 17th century stays and bodices in almost every book covering this period: Waugh’s “Cut of Womens Clothes”, Arnold’s “Pattern of fashion” and “Seventeen-Century Women’s Dress Patterns” by North & Tiramani.
Next up – making the foundation…
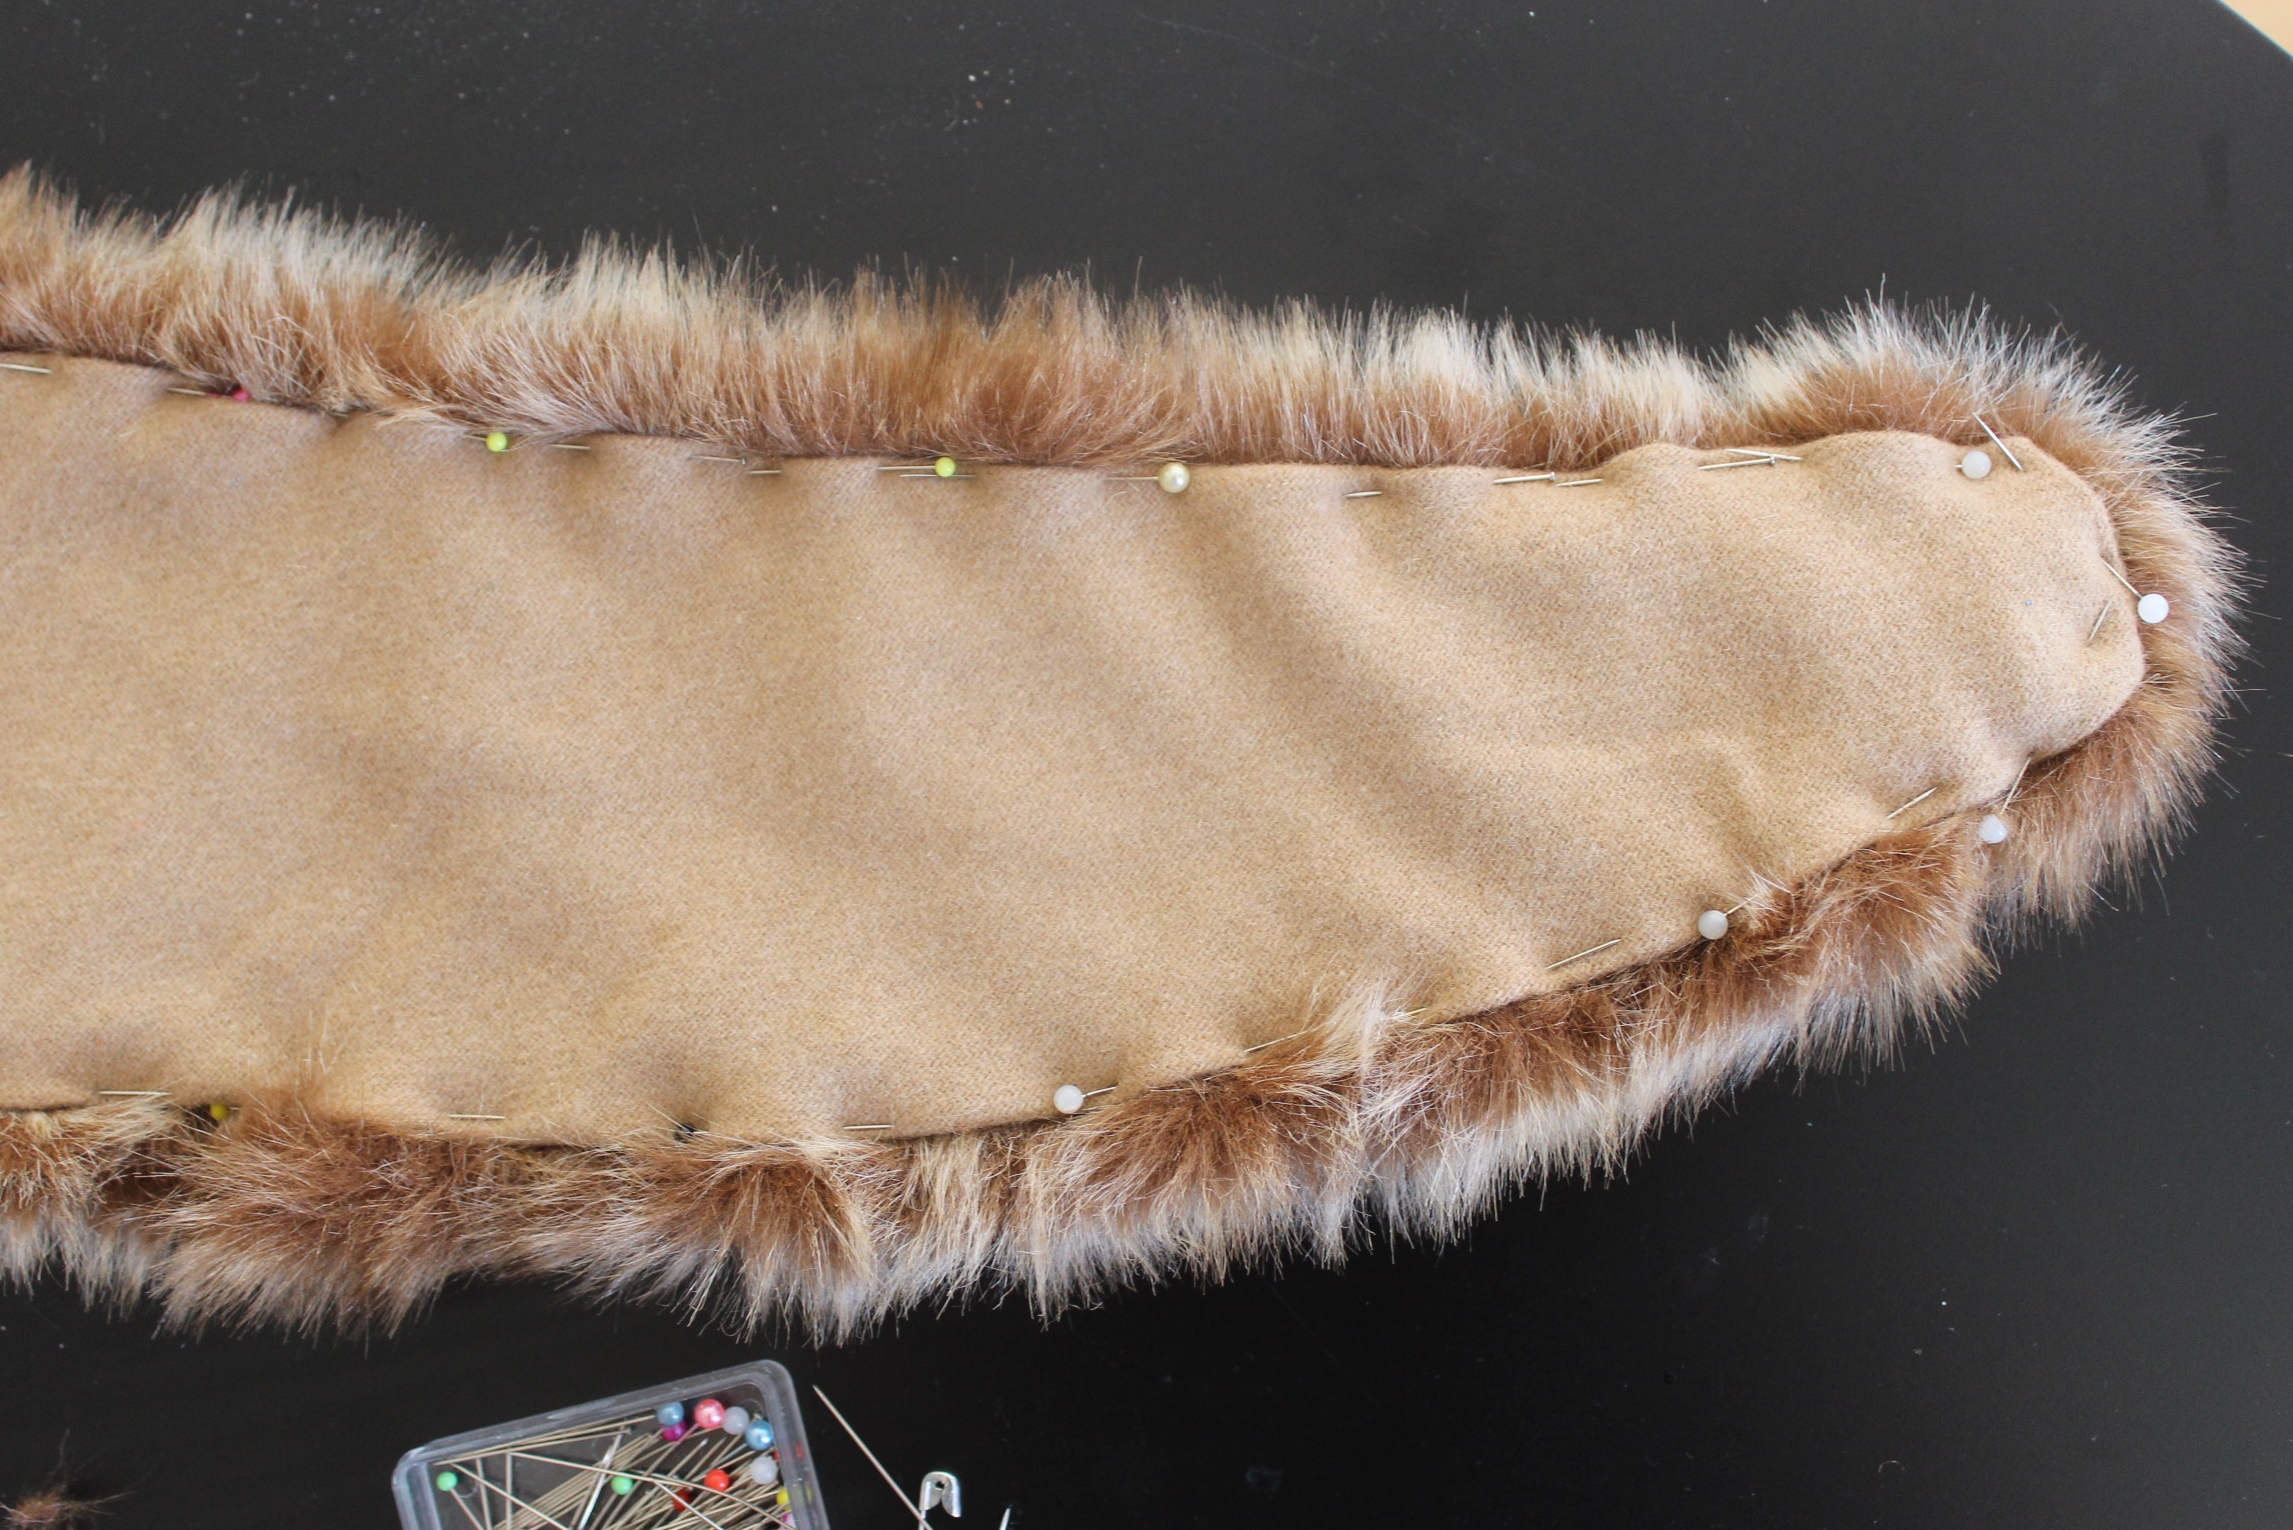
The next thing to be made after the skirt, cuffs and coifs (not exactly but I’m twisting the order of things in my attempt to postpone the unpreventable showing of the bodice) was the fur shawl .

I drafted the shawl pattern using the bodice pieces as a guide.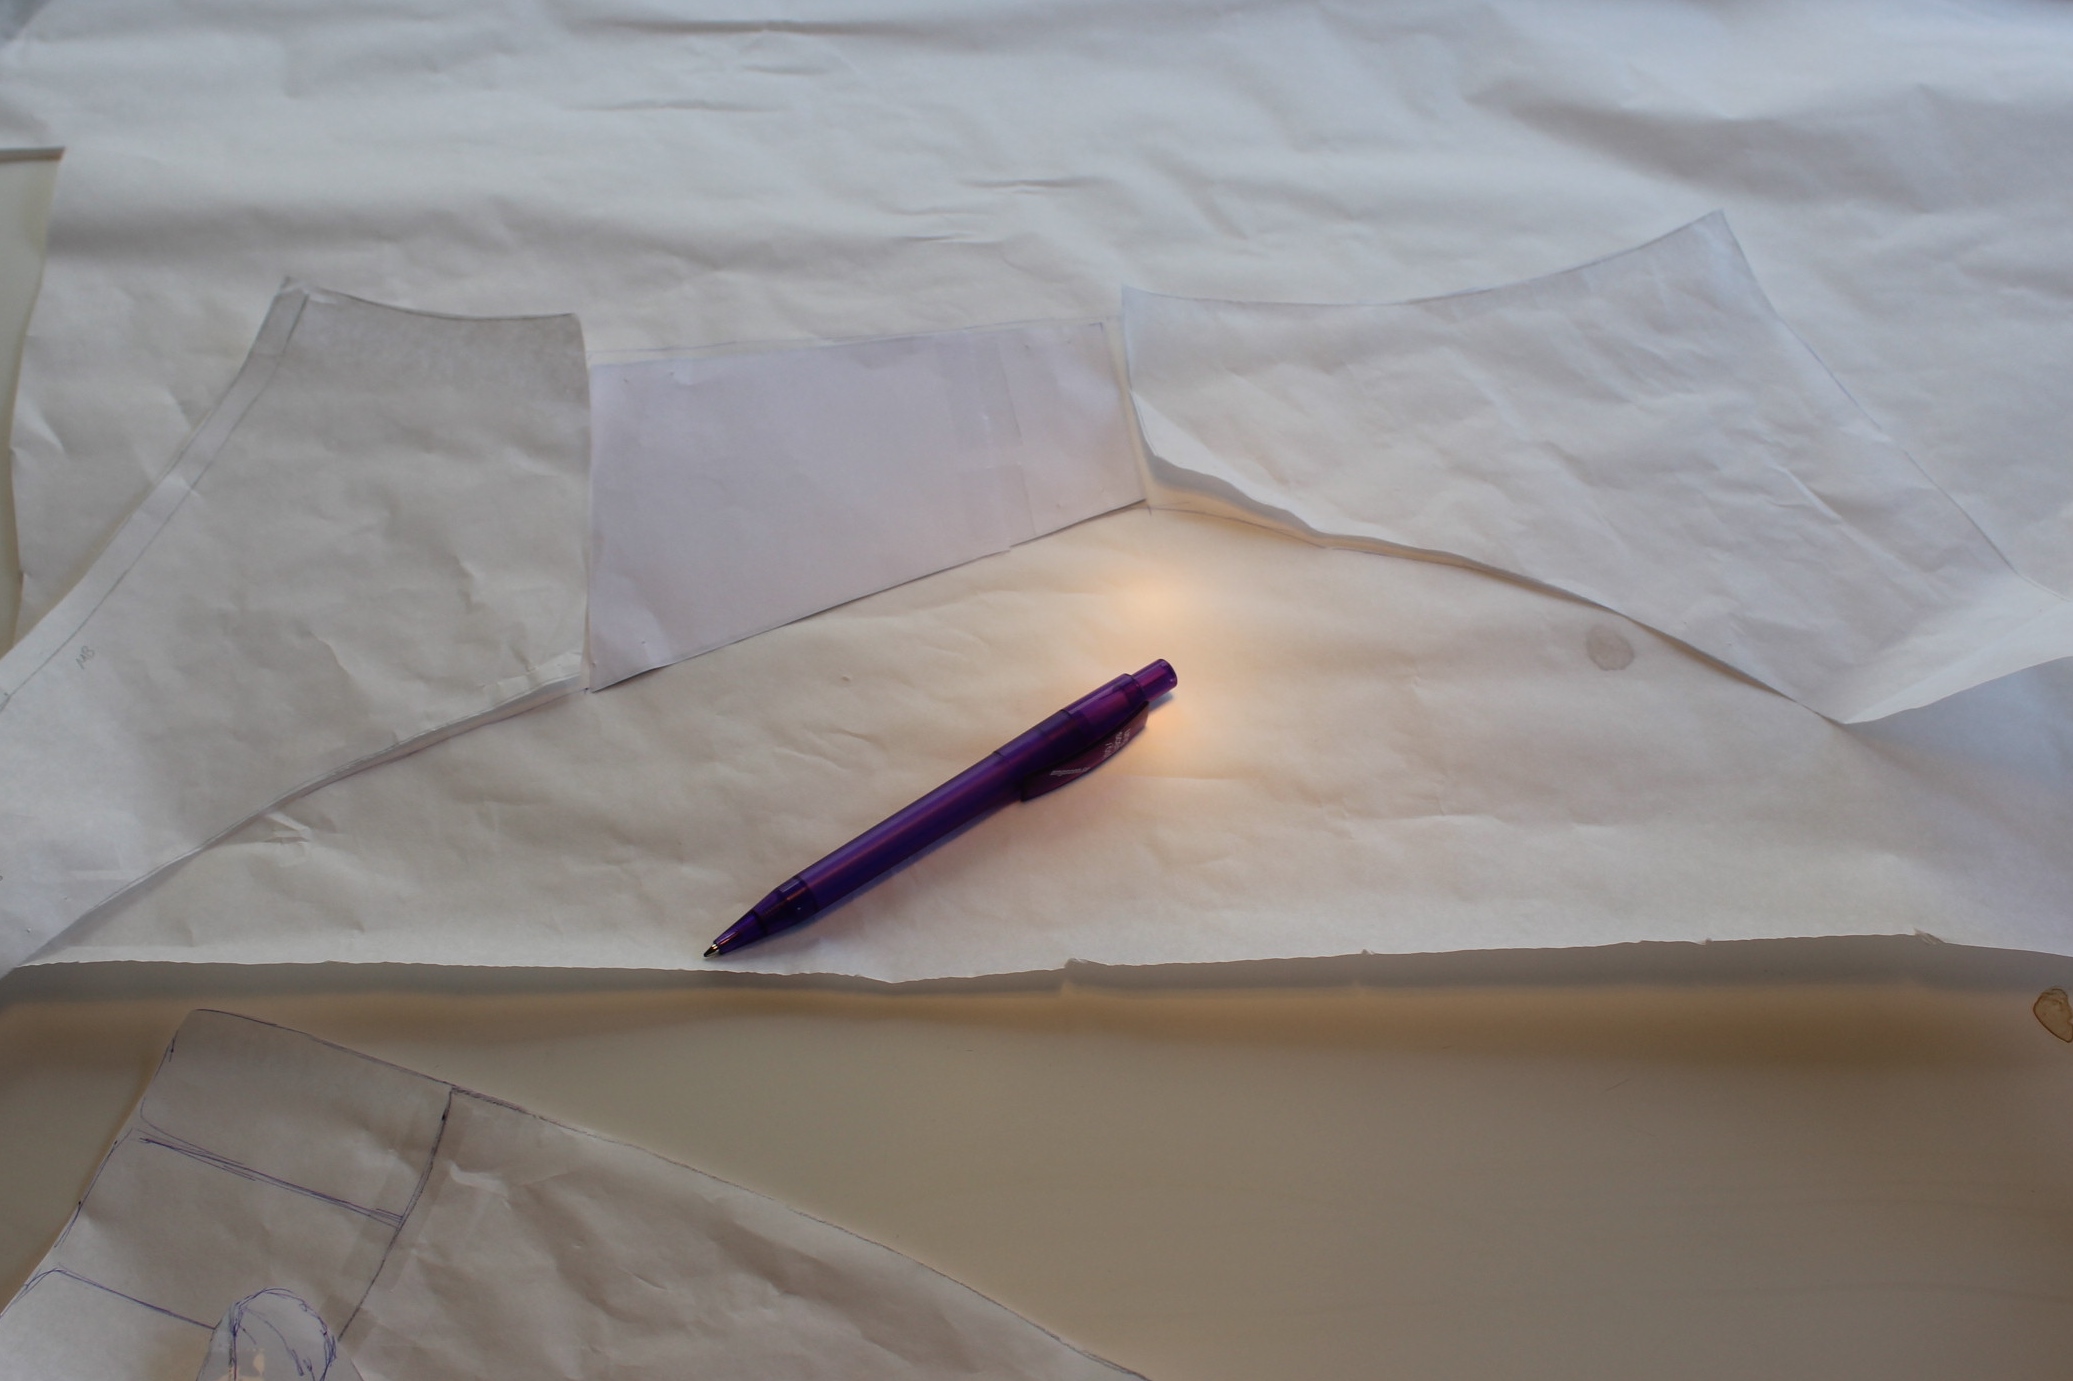 Drafting from the bodice neckline
The only tricky part about the pattern was trying to get the scale right.
I tried the paper pattern over my bodice mock-up.  (Spoiler alert 1 . bodice mock-up)
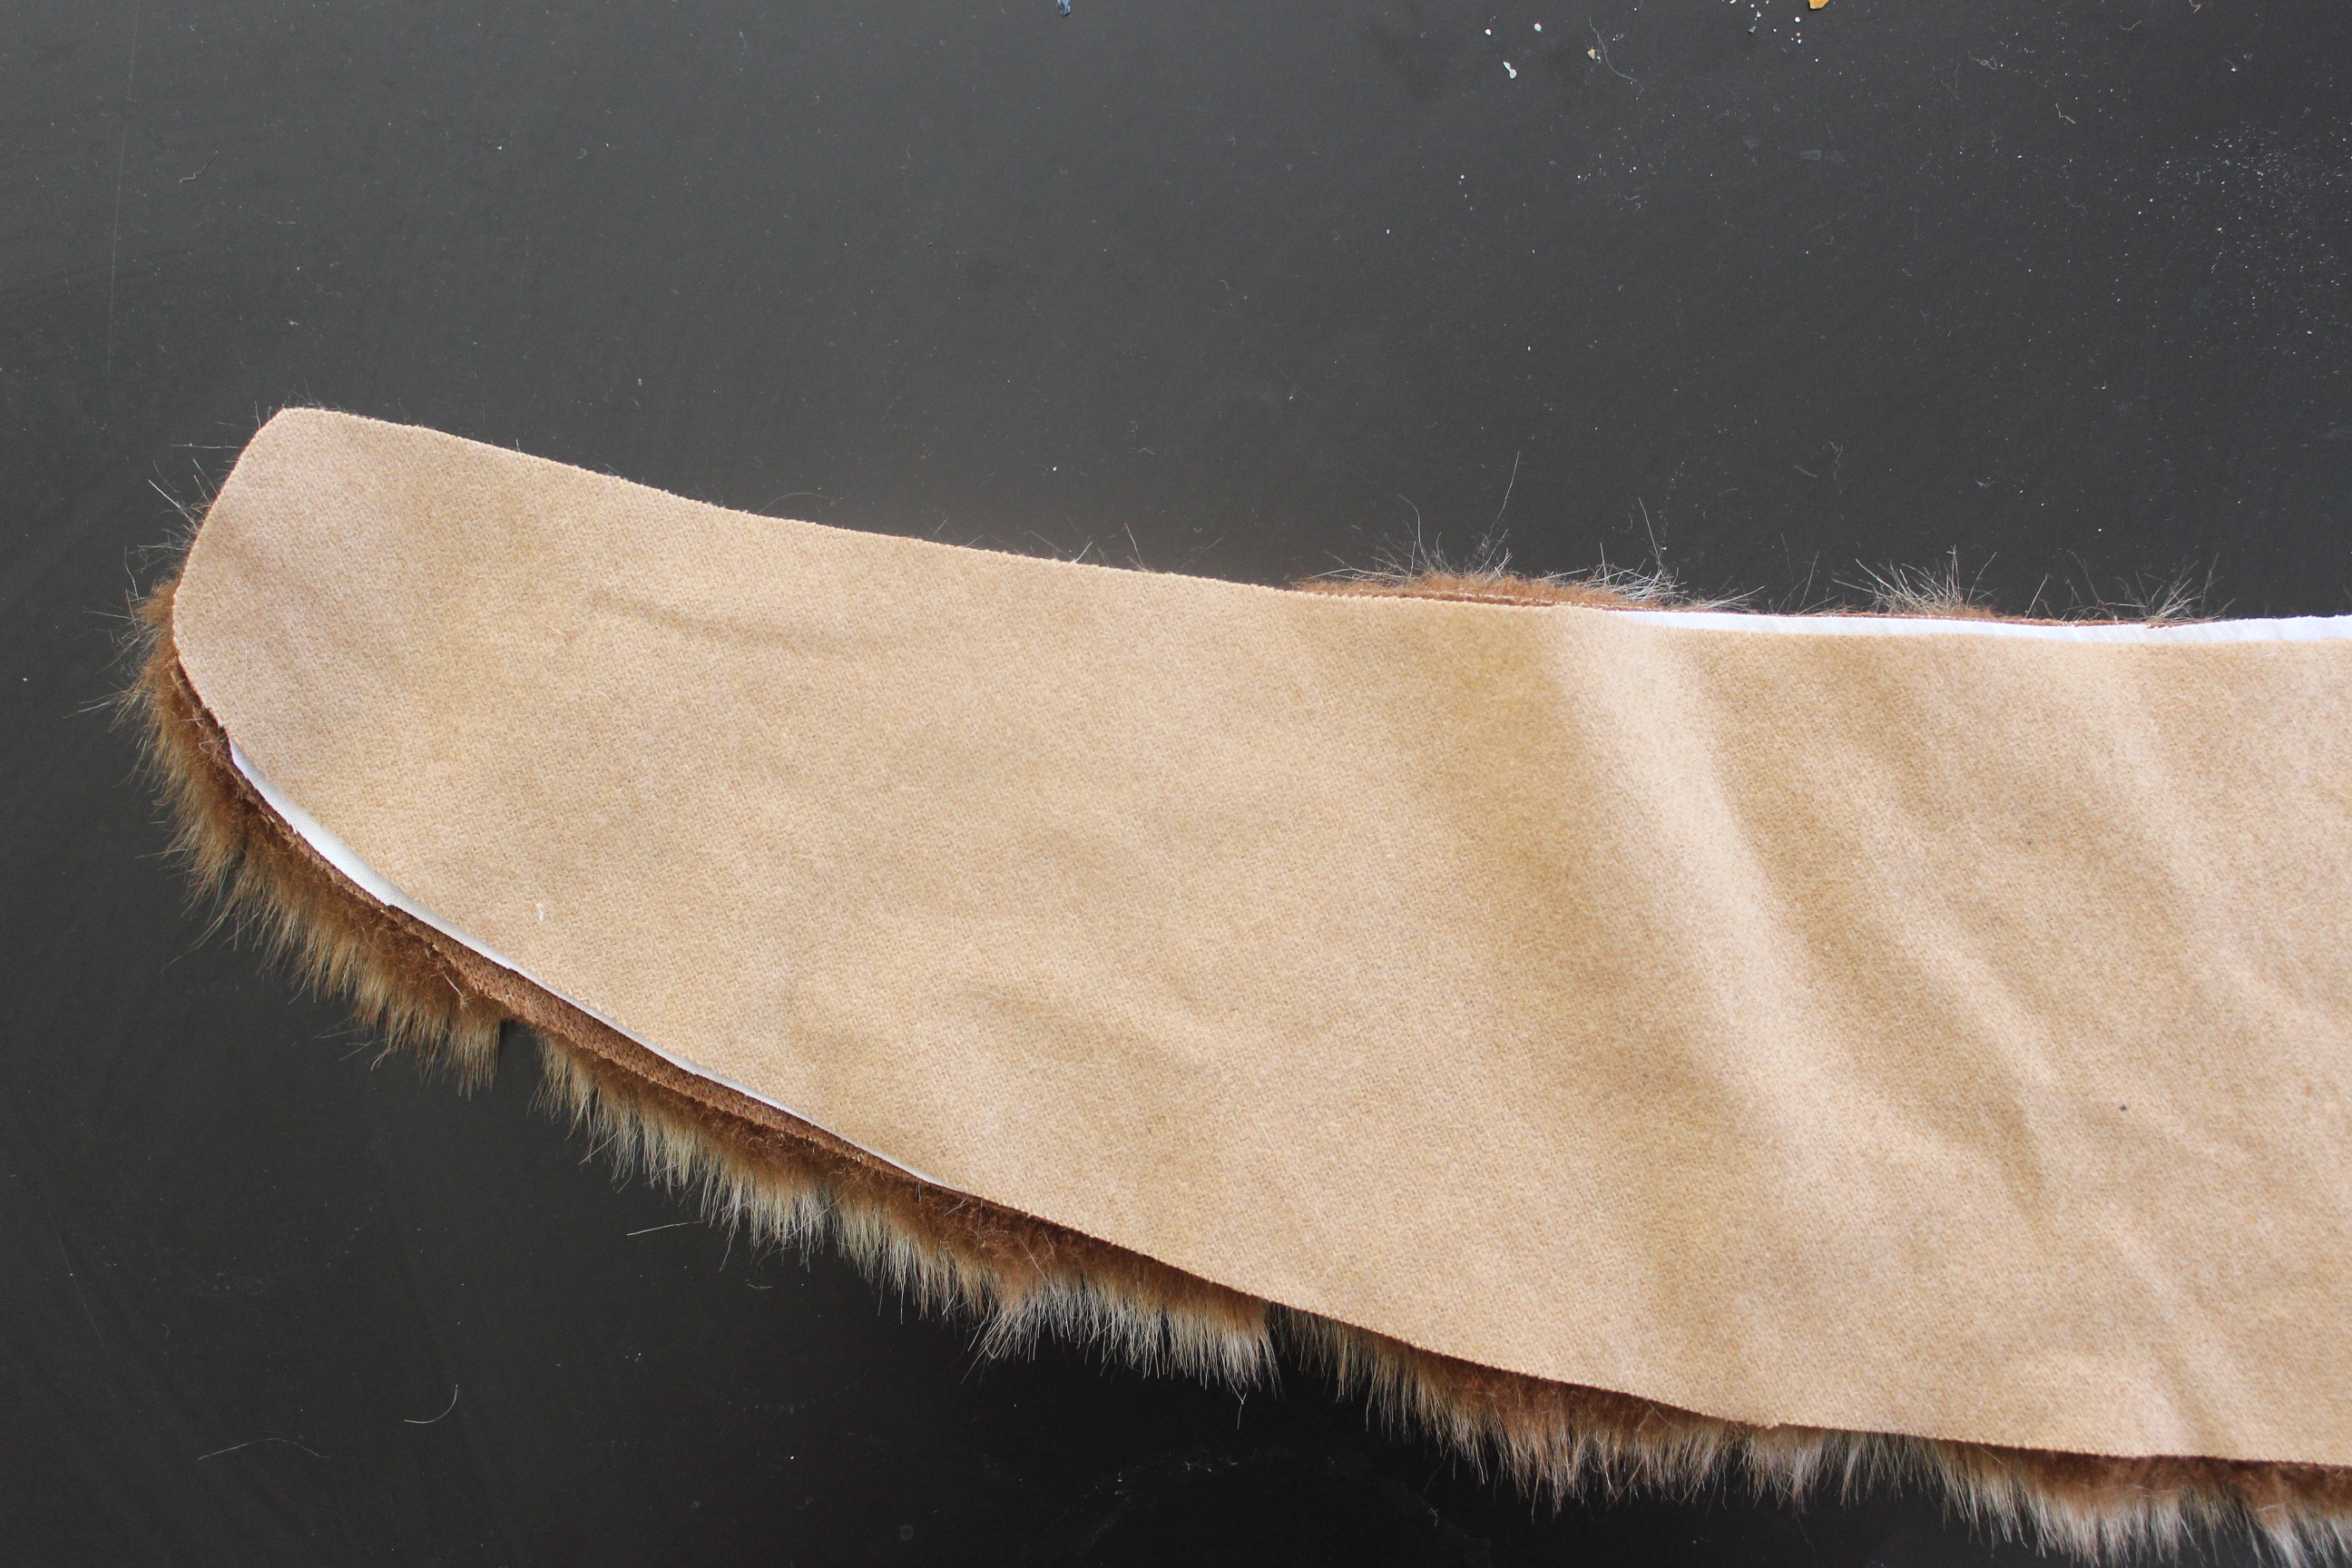
When I was happy with the size I cut the piece in my favorite faux fur fabric
(previously used in my brown velvet cape and 19th century fur hat)
 I also used some leftover linen for interlining and a small piece of lightly brow wool
I started by basting the linen to the fur to get a bit more stability.
Then I pinned and stitched the wool to the fur by hand.
Trying the almost finished shawl on my dresform. 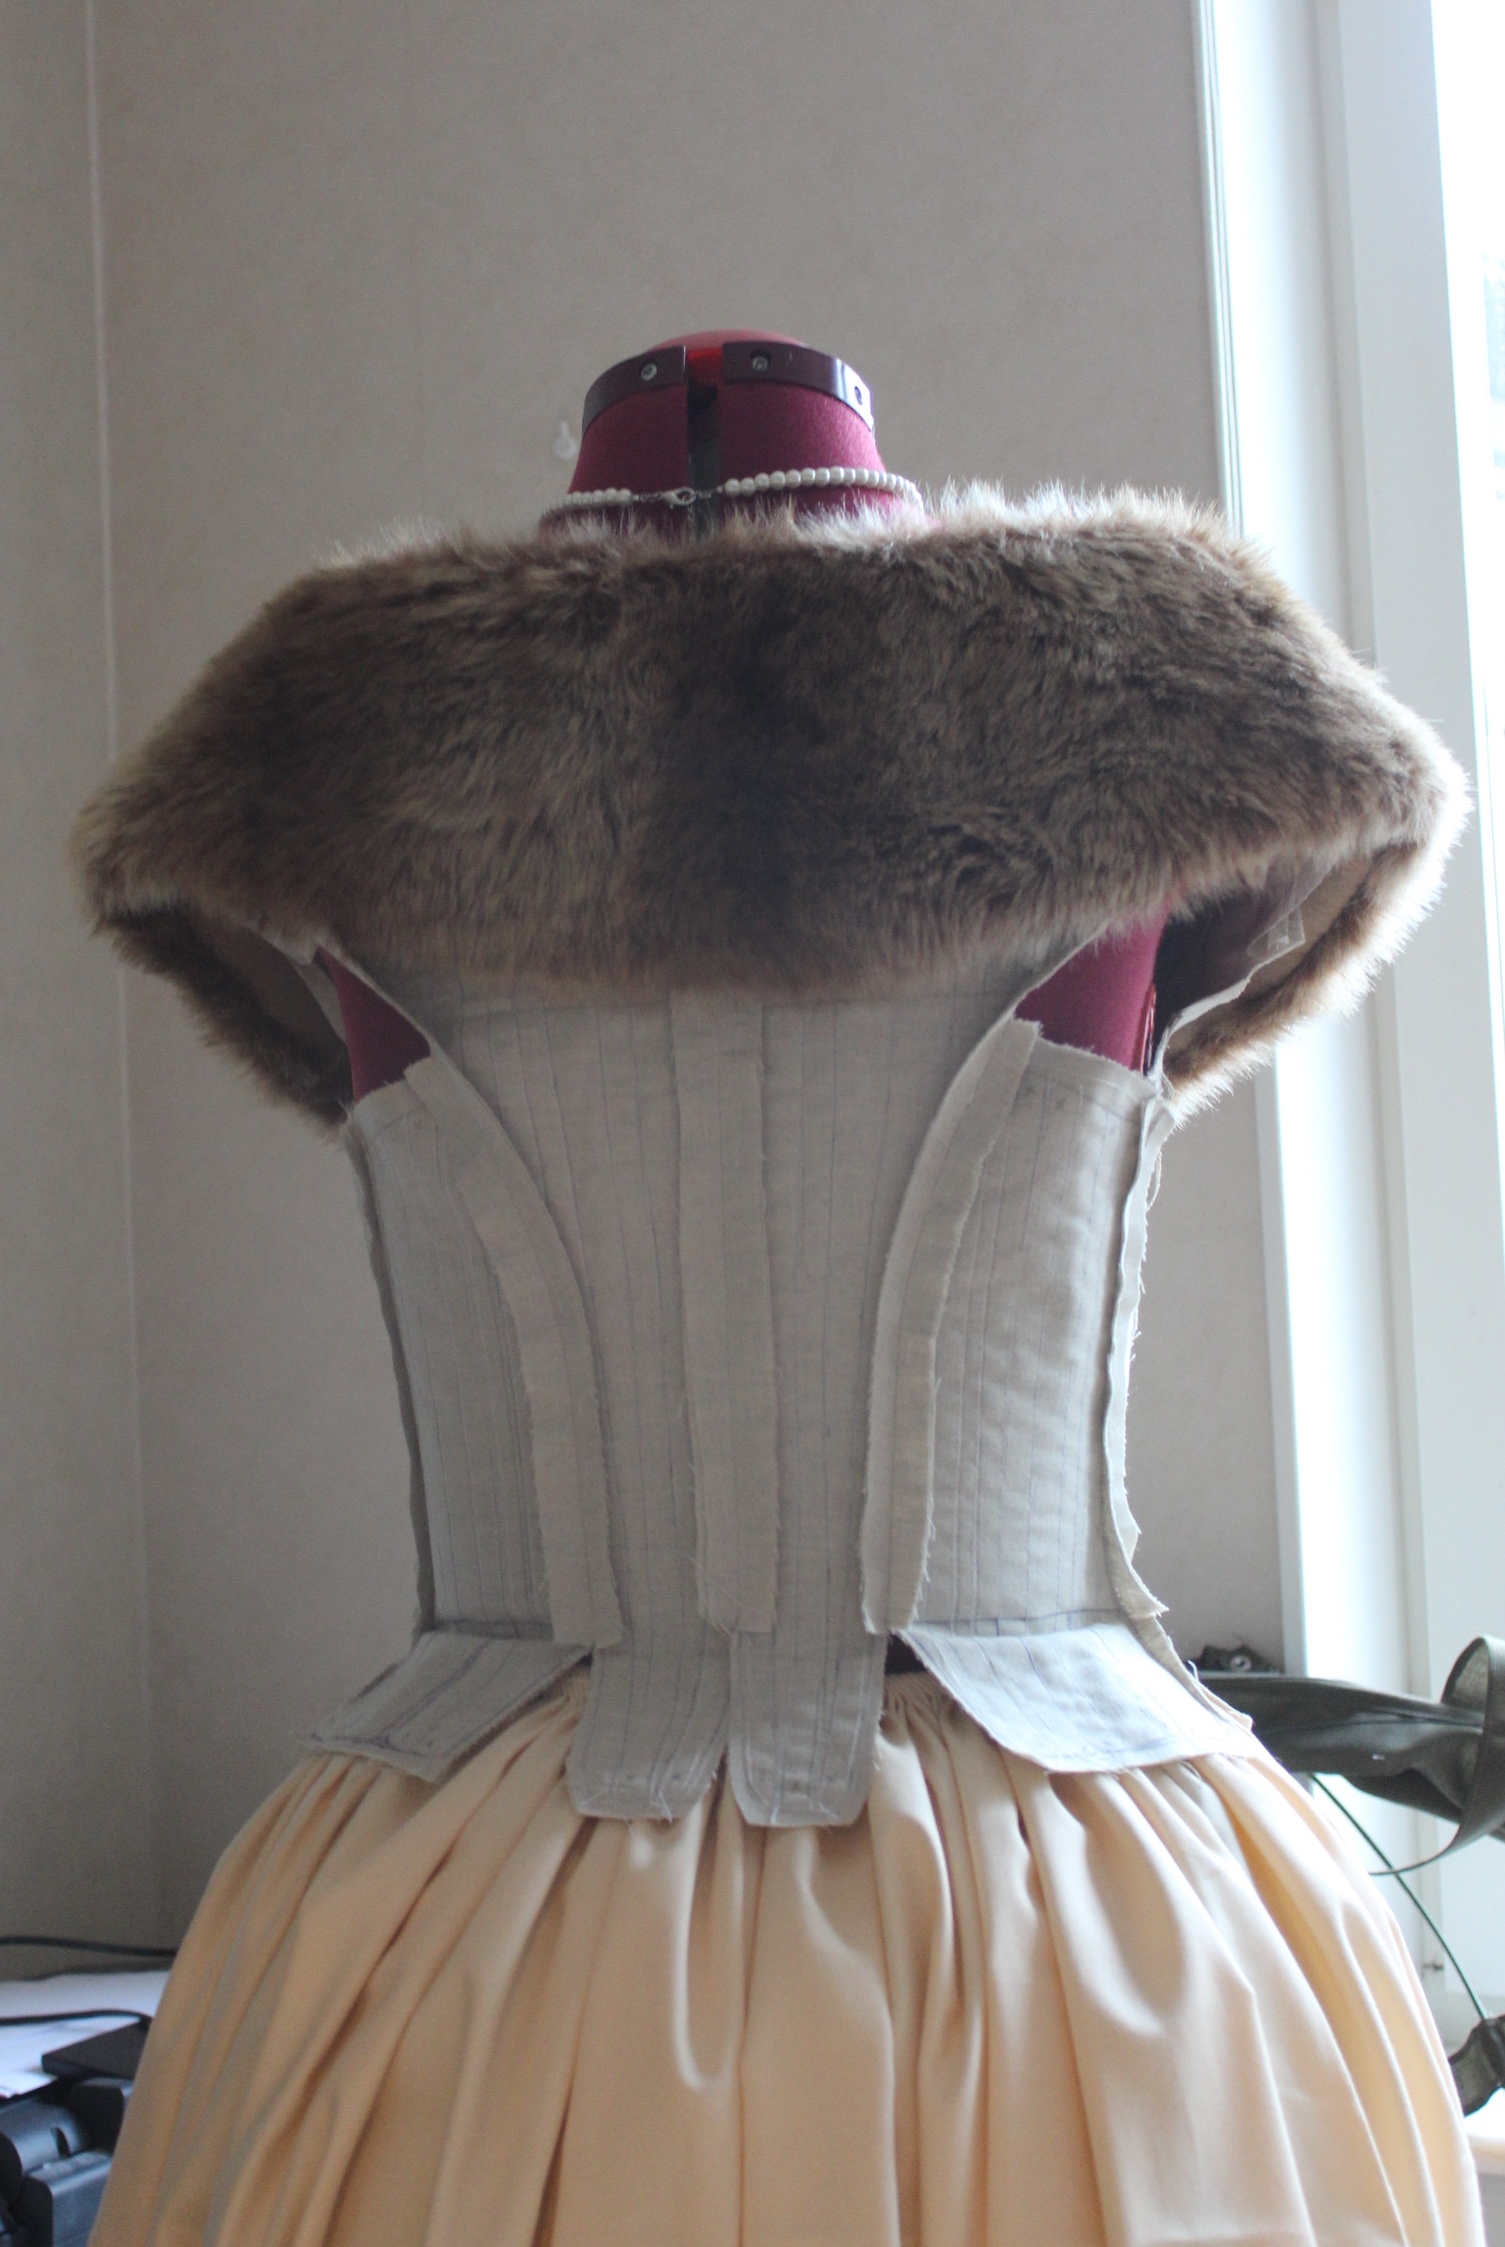 (Spoiler alert 2 – bodice foundation)
The last thing to do was to make some ties form scraps of the skirt material.
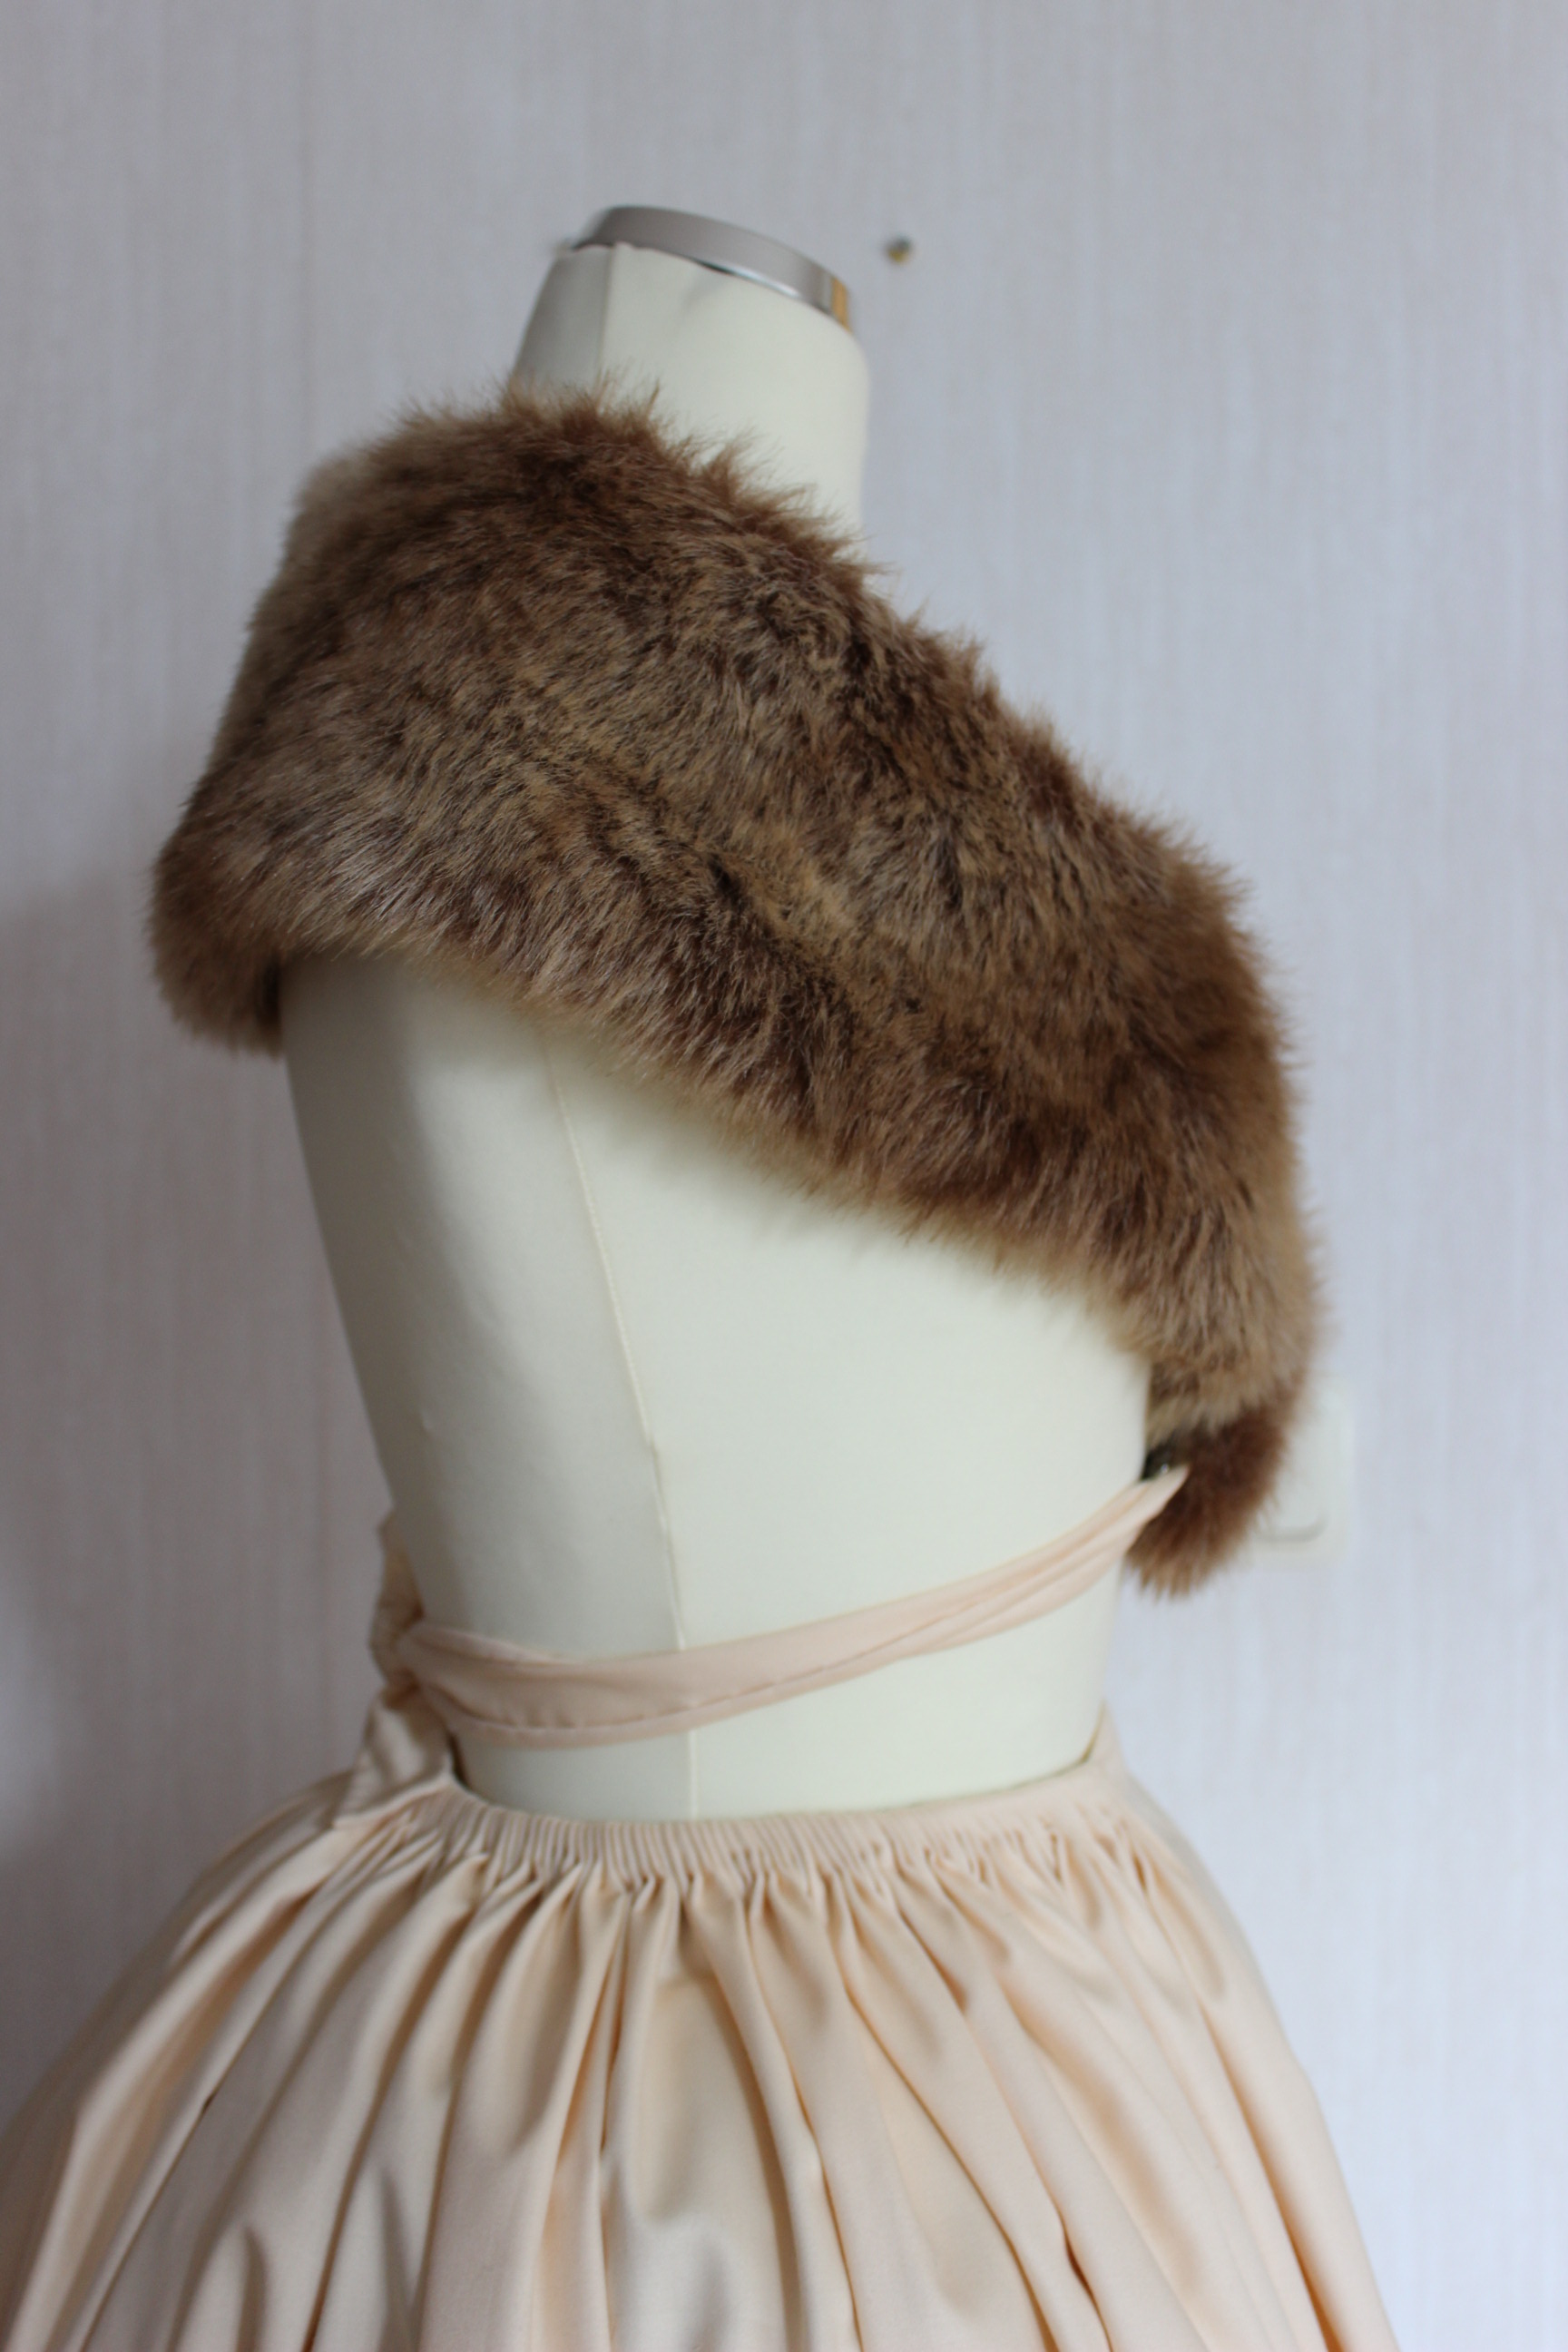
The finished shawl:
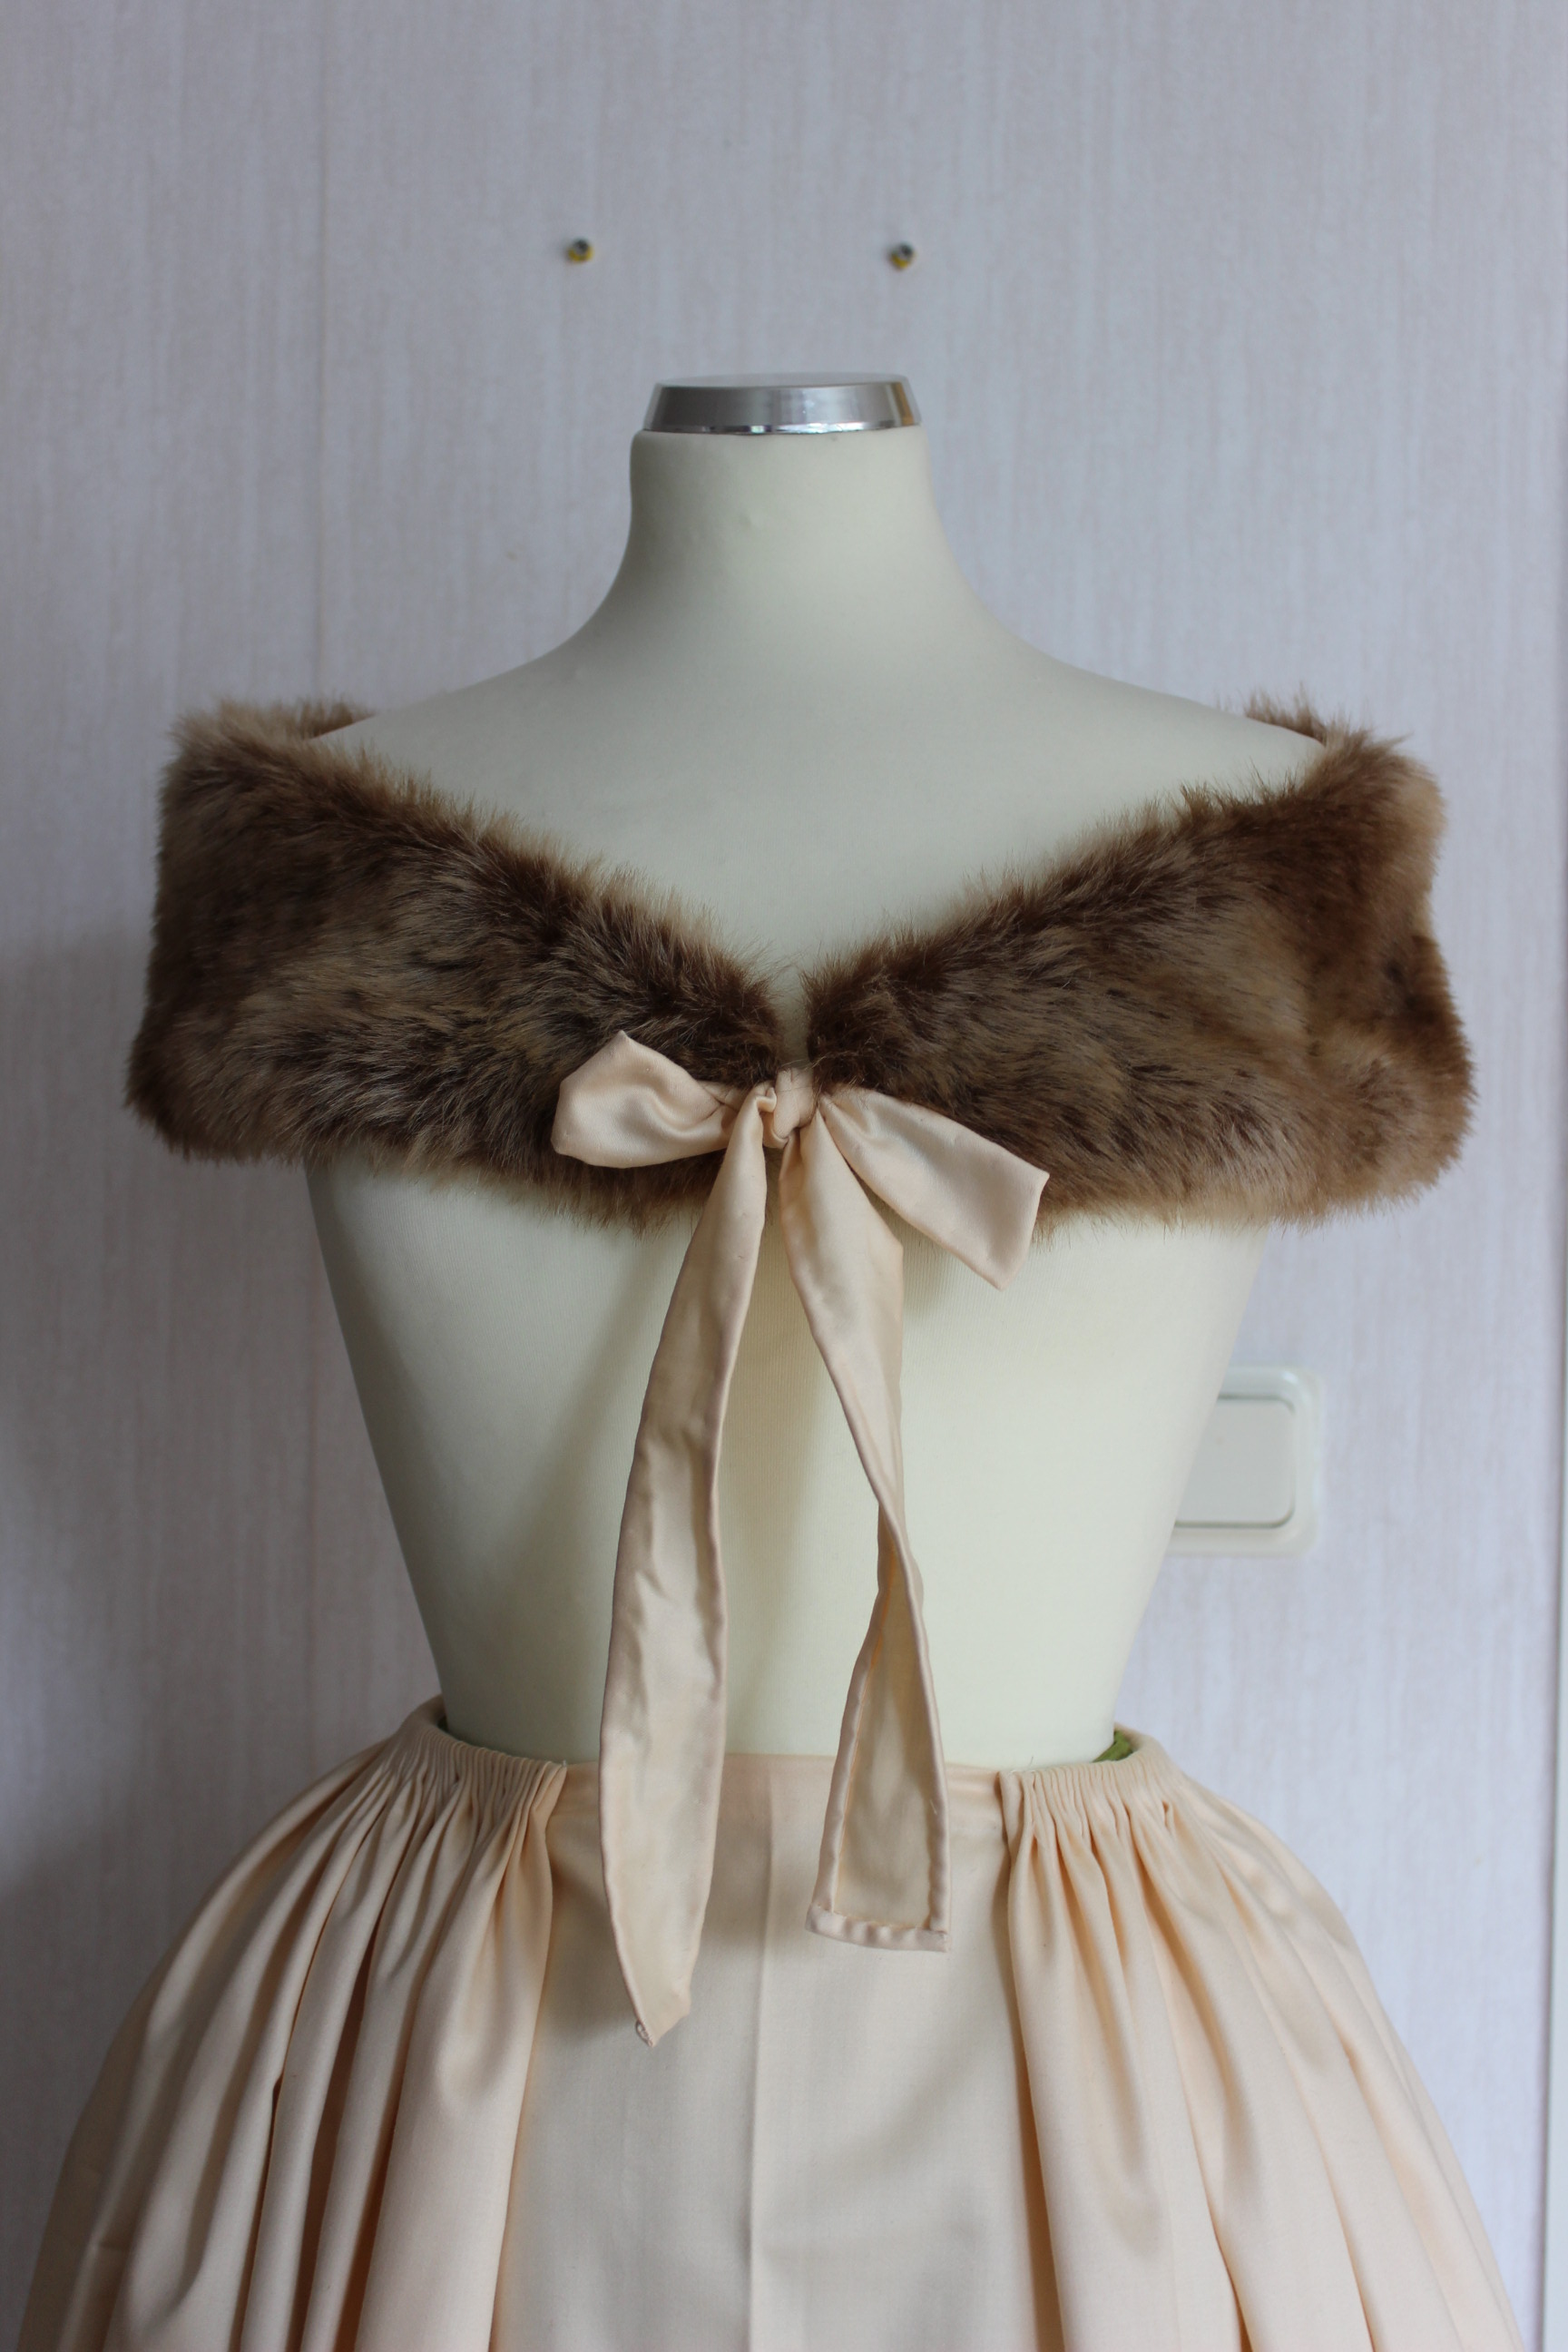

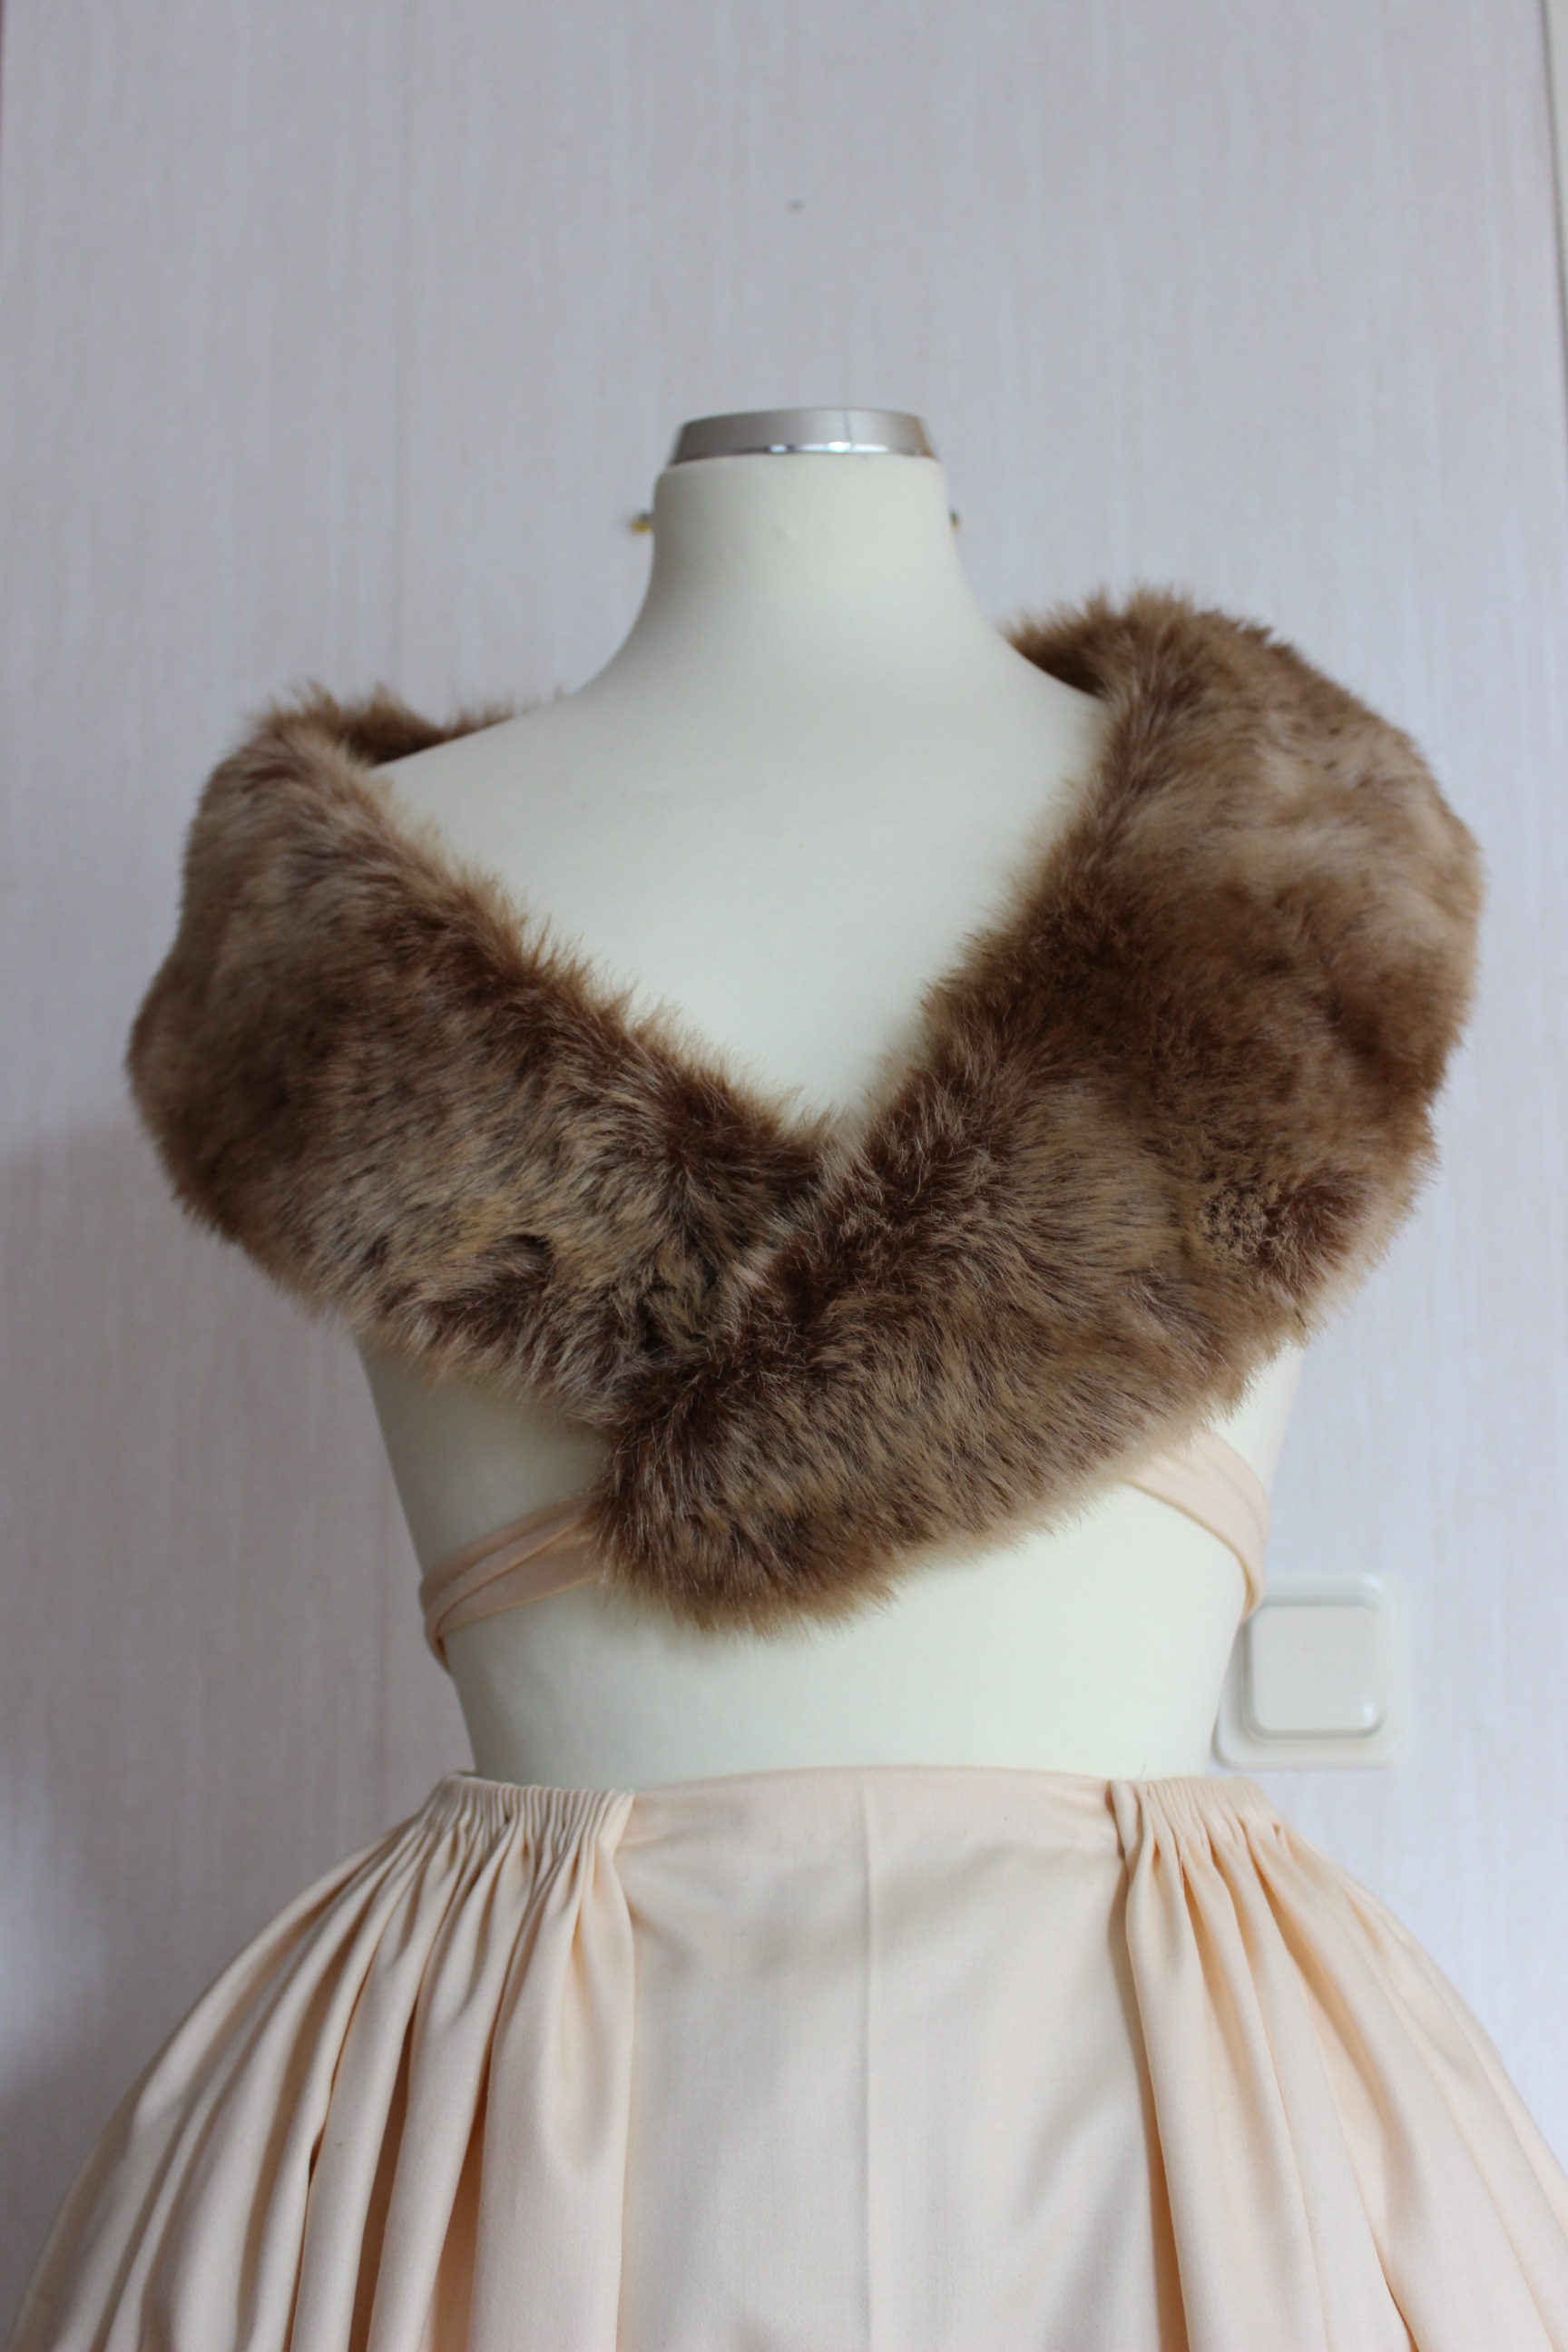

The facts:
What: A faux fur shawl, which work for pretty much every era from 1500-1950s
Pattern: I drafted my own using my bodice neckline as a guide.
Fabric & Notions: 20 cm faux fur, 20 cm linen for interning, 20 cm soft wool for lining, thread, hook and eyes and scraps of fabric for ties.
How historical accurate: Not really. Its pretty obvious the fur is fake, but I did look at originals to copie and used materials (except the fur) and construction techniques. Maybe 5/10
Time: 3 hours – completely hand stitched.
Cost: Nothing, since everything came from stash scraps.
Final Thoughts: I love how simple and fast the whole process went an dhow extremely versatile the shawl is.
It will fit almost anybody in any given timeperiod. Such a perfect garment/accessorie.
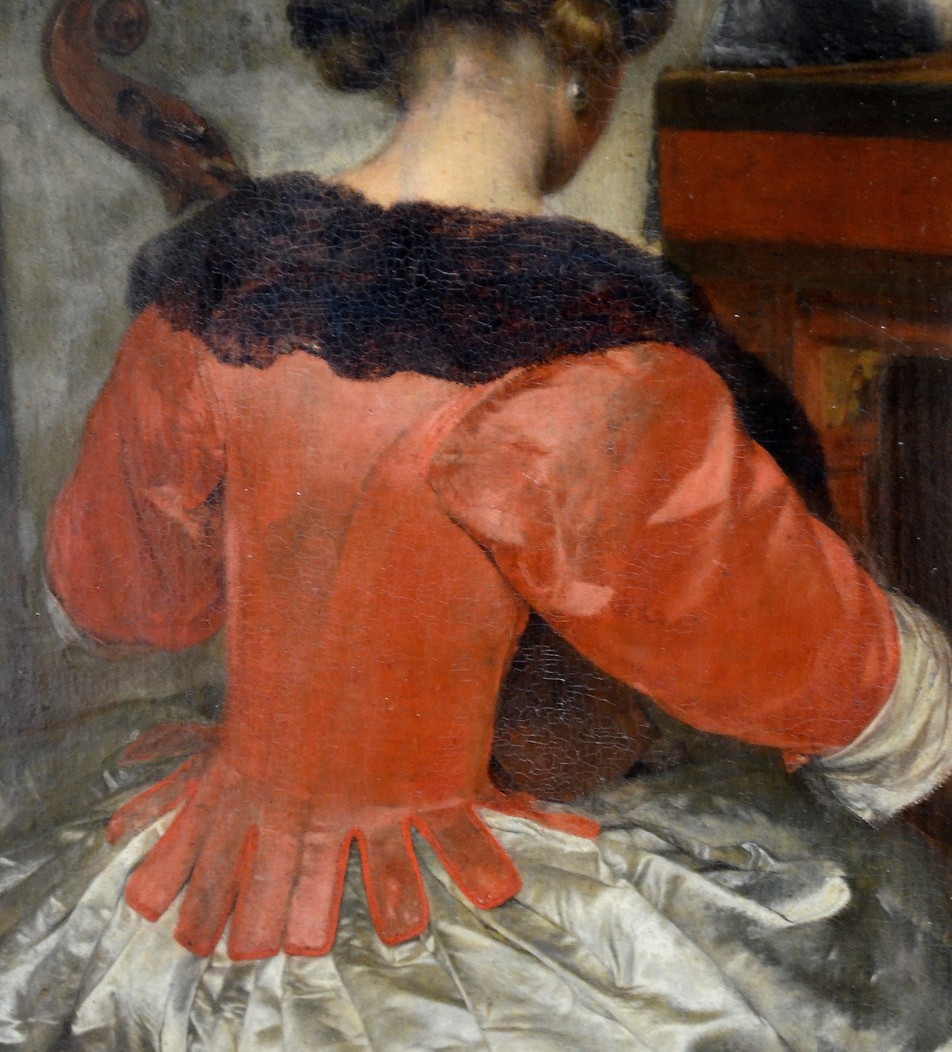
The one thing I felt would be the hardest to replicate in my chosen painting was not one of the clothing pieces, but the girls beautiful hairdo.

My short red modern hairstyle do not lend itself well to even the easiest of historical hairdos.
I’ve tried hairpieces and wigs but never been totally happy with it – try to blend or attach hairpieces to a non existing do, or wear a wig when the small red hair at your sideburns take every opportunity to escape.
No, the only time I feel I actually can get away (barley) with my modern hairdo is while wearing a fully covered head-cloth, hat, bonnet, turban etc.
So what to do?
I needed to find an appropriate head coverage to make.
So on to the ever knowing Pinterest I went.
And found two alternatives that I really liked:
The simple head-cloth with its adorable turned up brim.
And the smaller Coif, which may not cover all of the hair, but probably would work better together with my bodice and fur collar and still giving me some neck.  I almost wish I’ve found this painting earlier, so to make this as my 17th century project instead…
This example is worn with a forhead cloth – perfect for taming my short and flying bangs. 
Patterns for this kind of coif can be found in almost every book covering this period in time.
But I choose to use the great pattern/tutorial from “The pragmatic costumer”

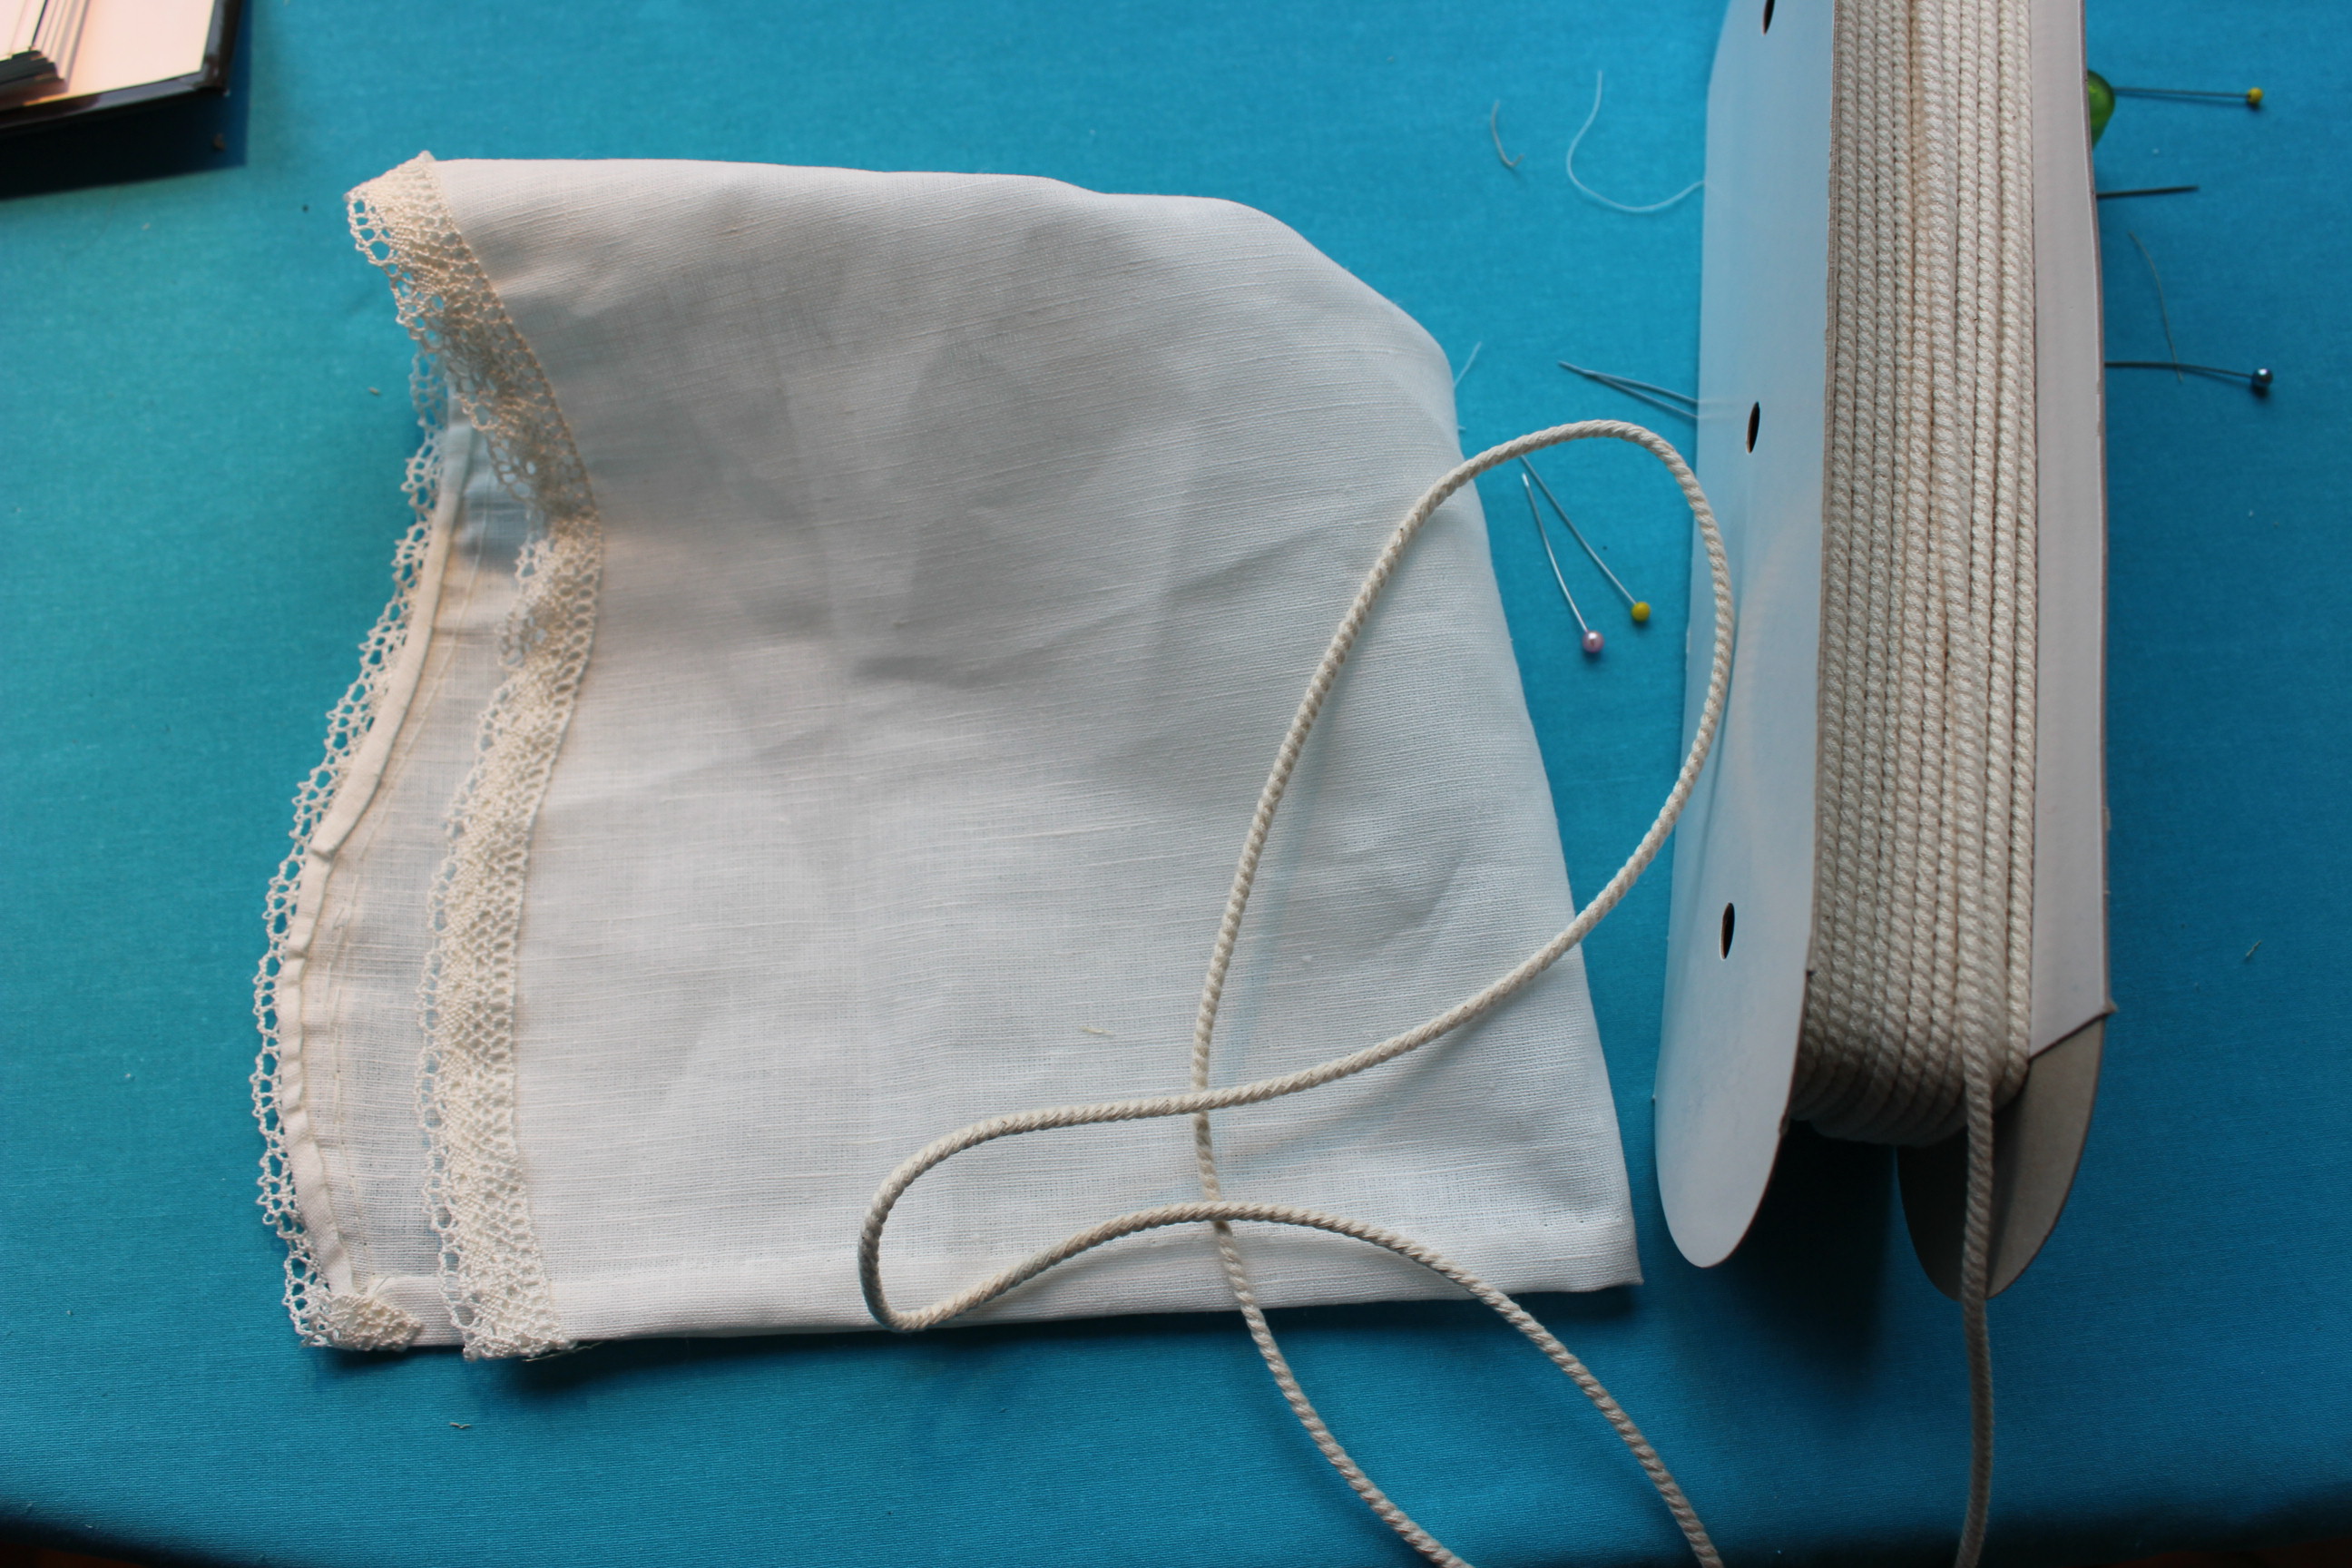
So this weekend I drafted the pattern – following the awesomely easy instructions.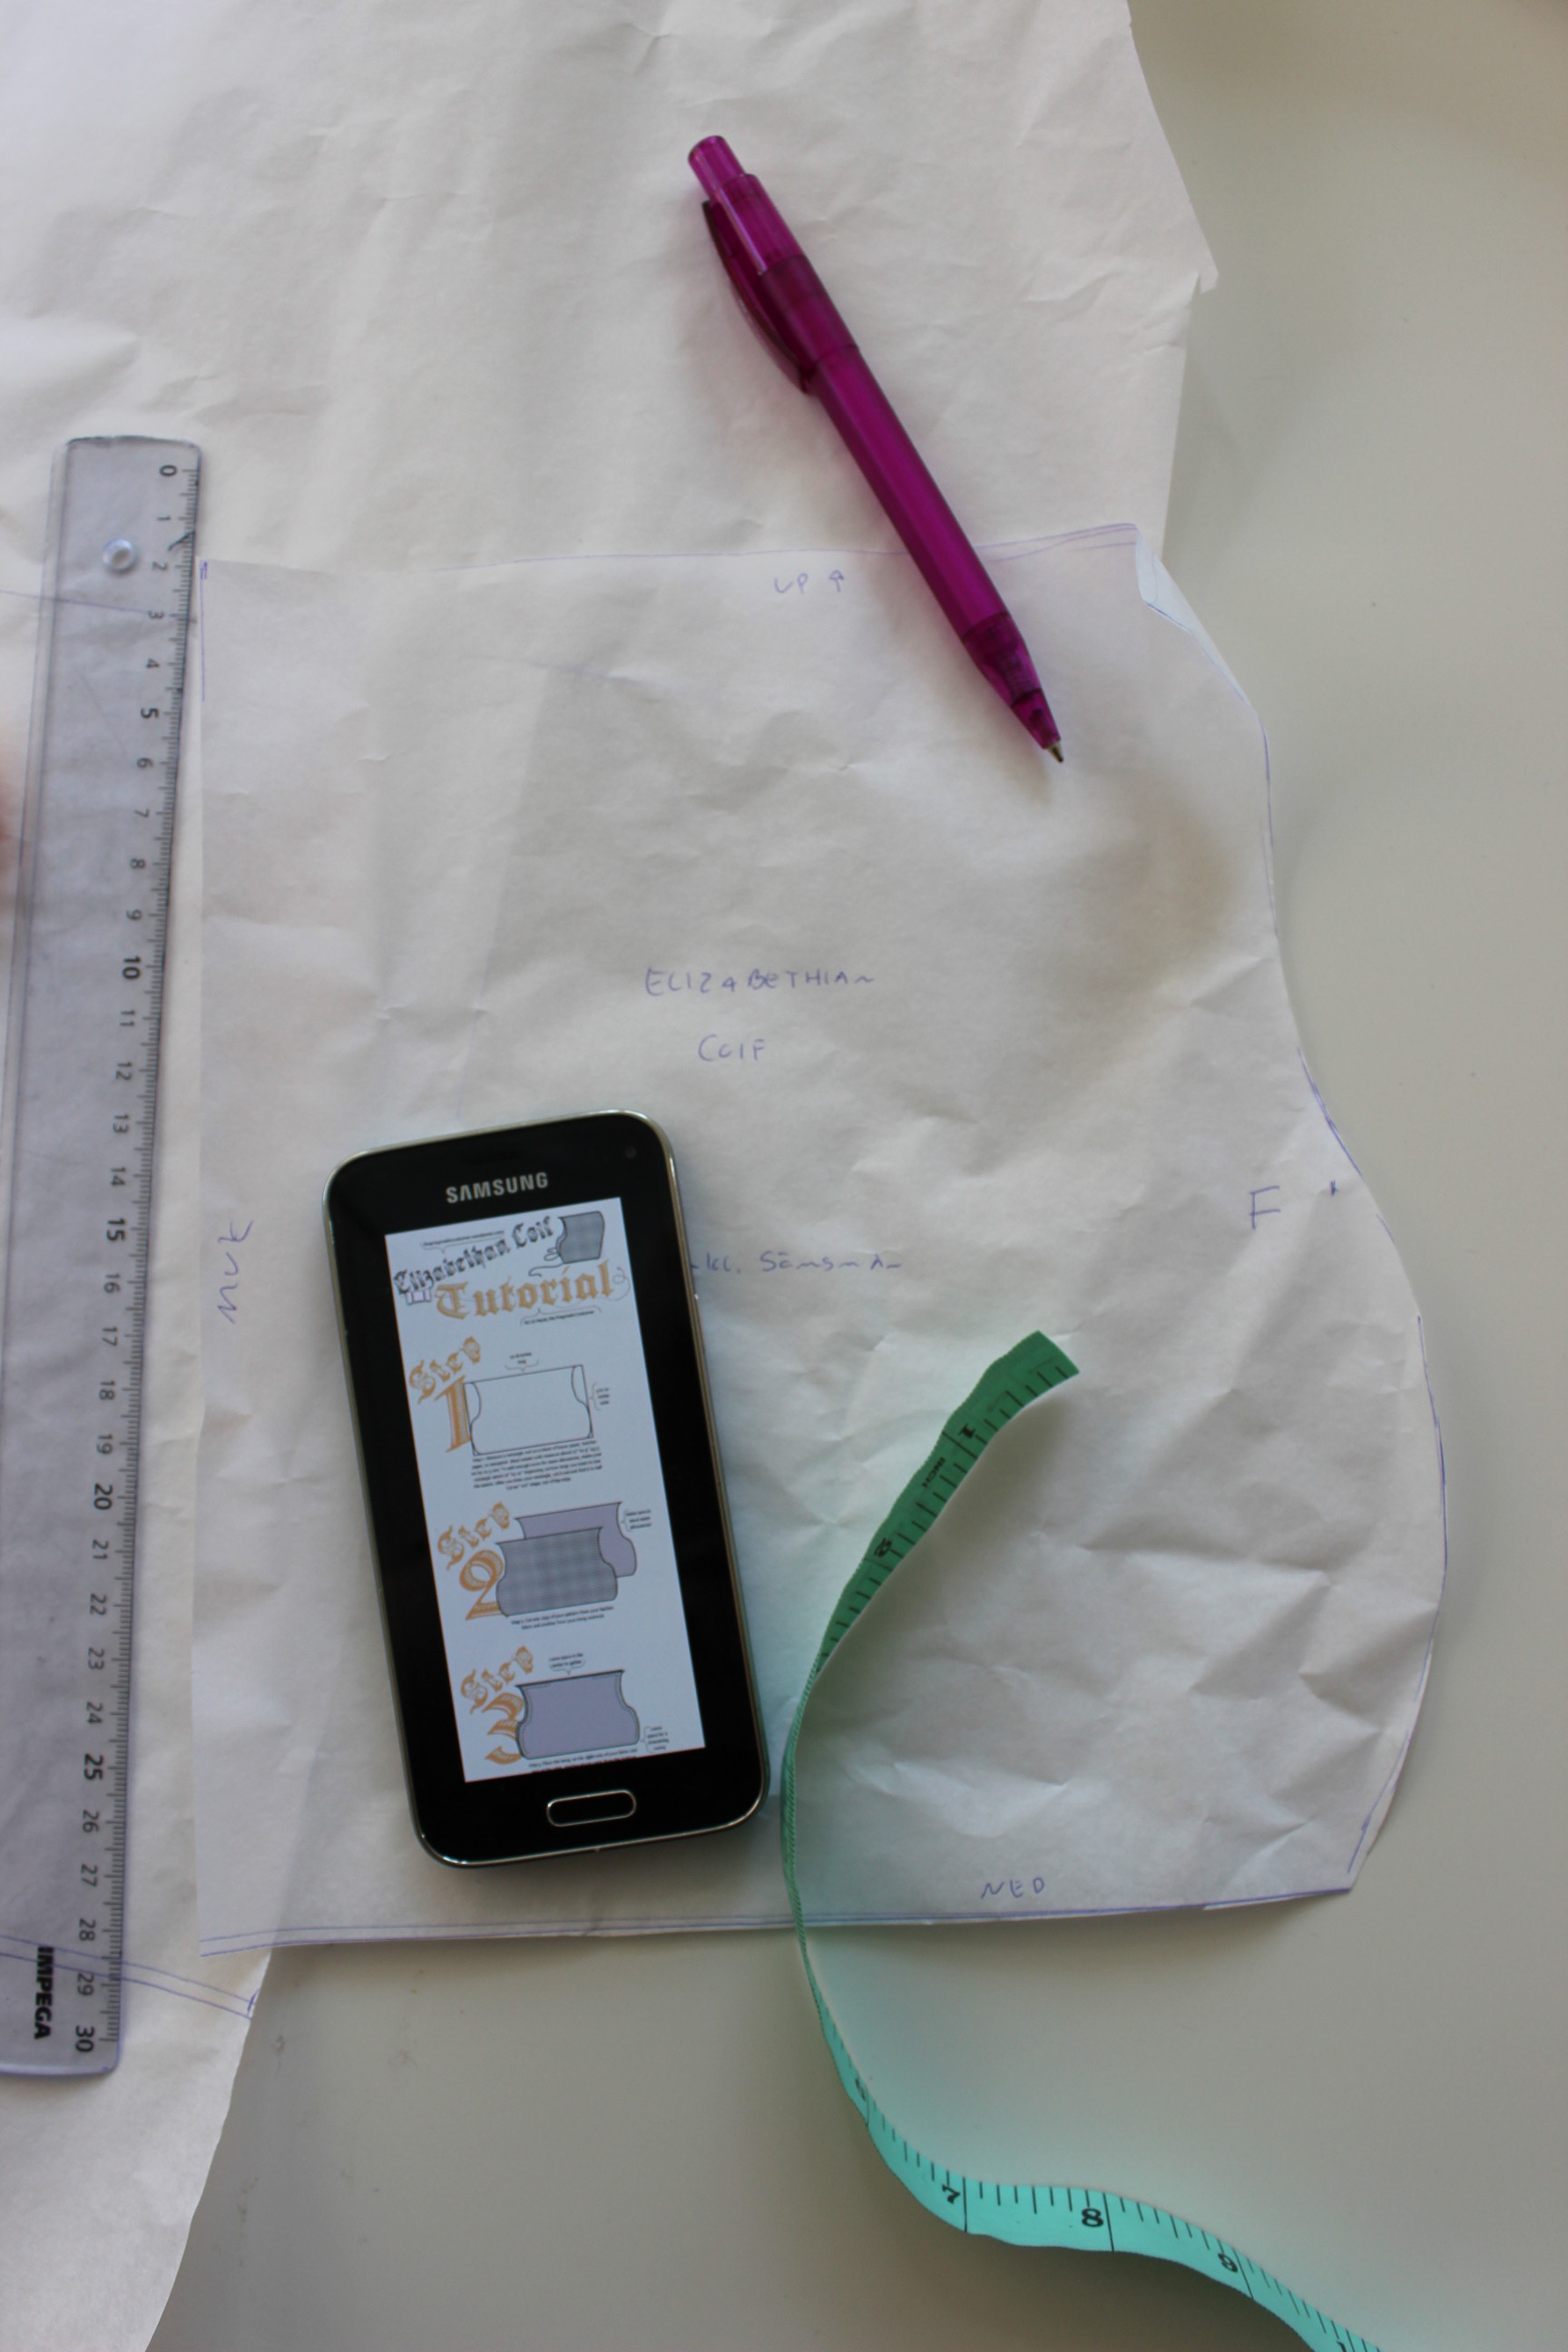
While drafting I decide to not make a mock-up but a kind of working toile instead.
So I dug through my fabrics and found this lovely patterned golden polyester fabric, I’ve bought with 17th century doublet, dress or waistcoat in mind.
 Yep, it’s really that narrow.
So I cut the pieces in golden polyester and white left over linen fabric.
I also added some pieces for the forehead-cloth. 
As a “mock-up” I didn’t wanted to wast any time making it up, so I stitched the whole coif on the sewing machine.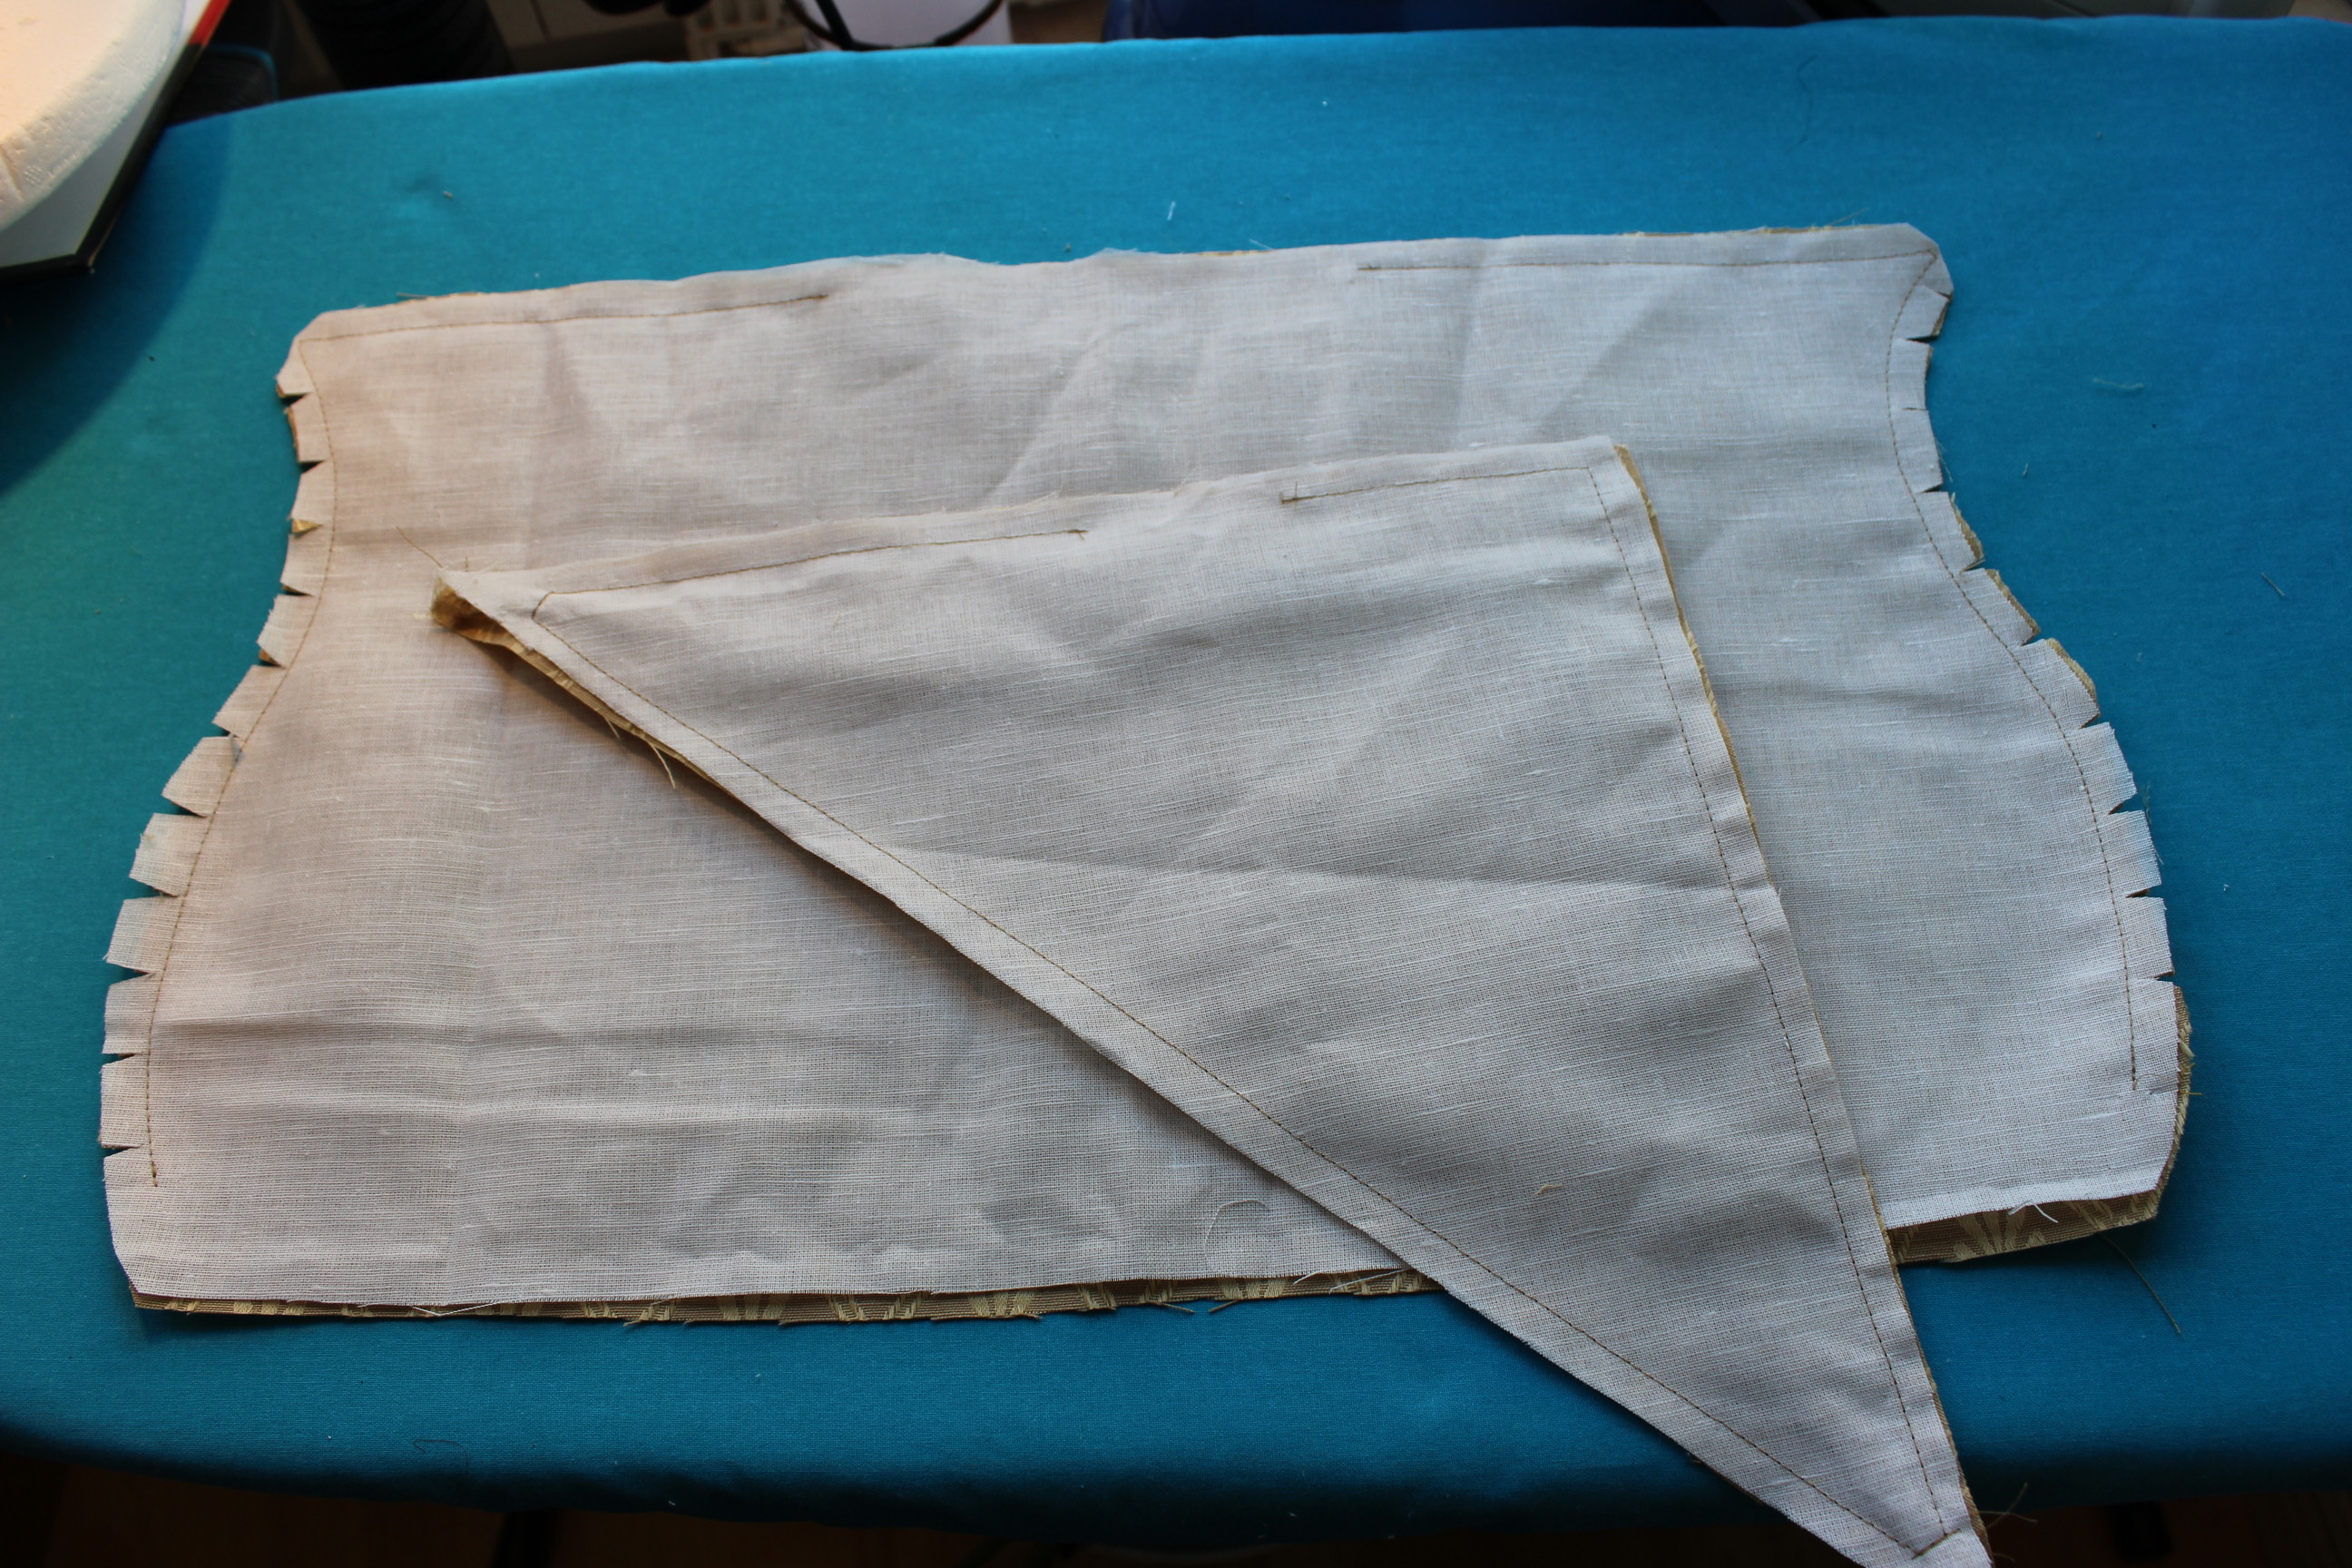 First seams ready, time to turn and press.
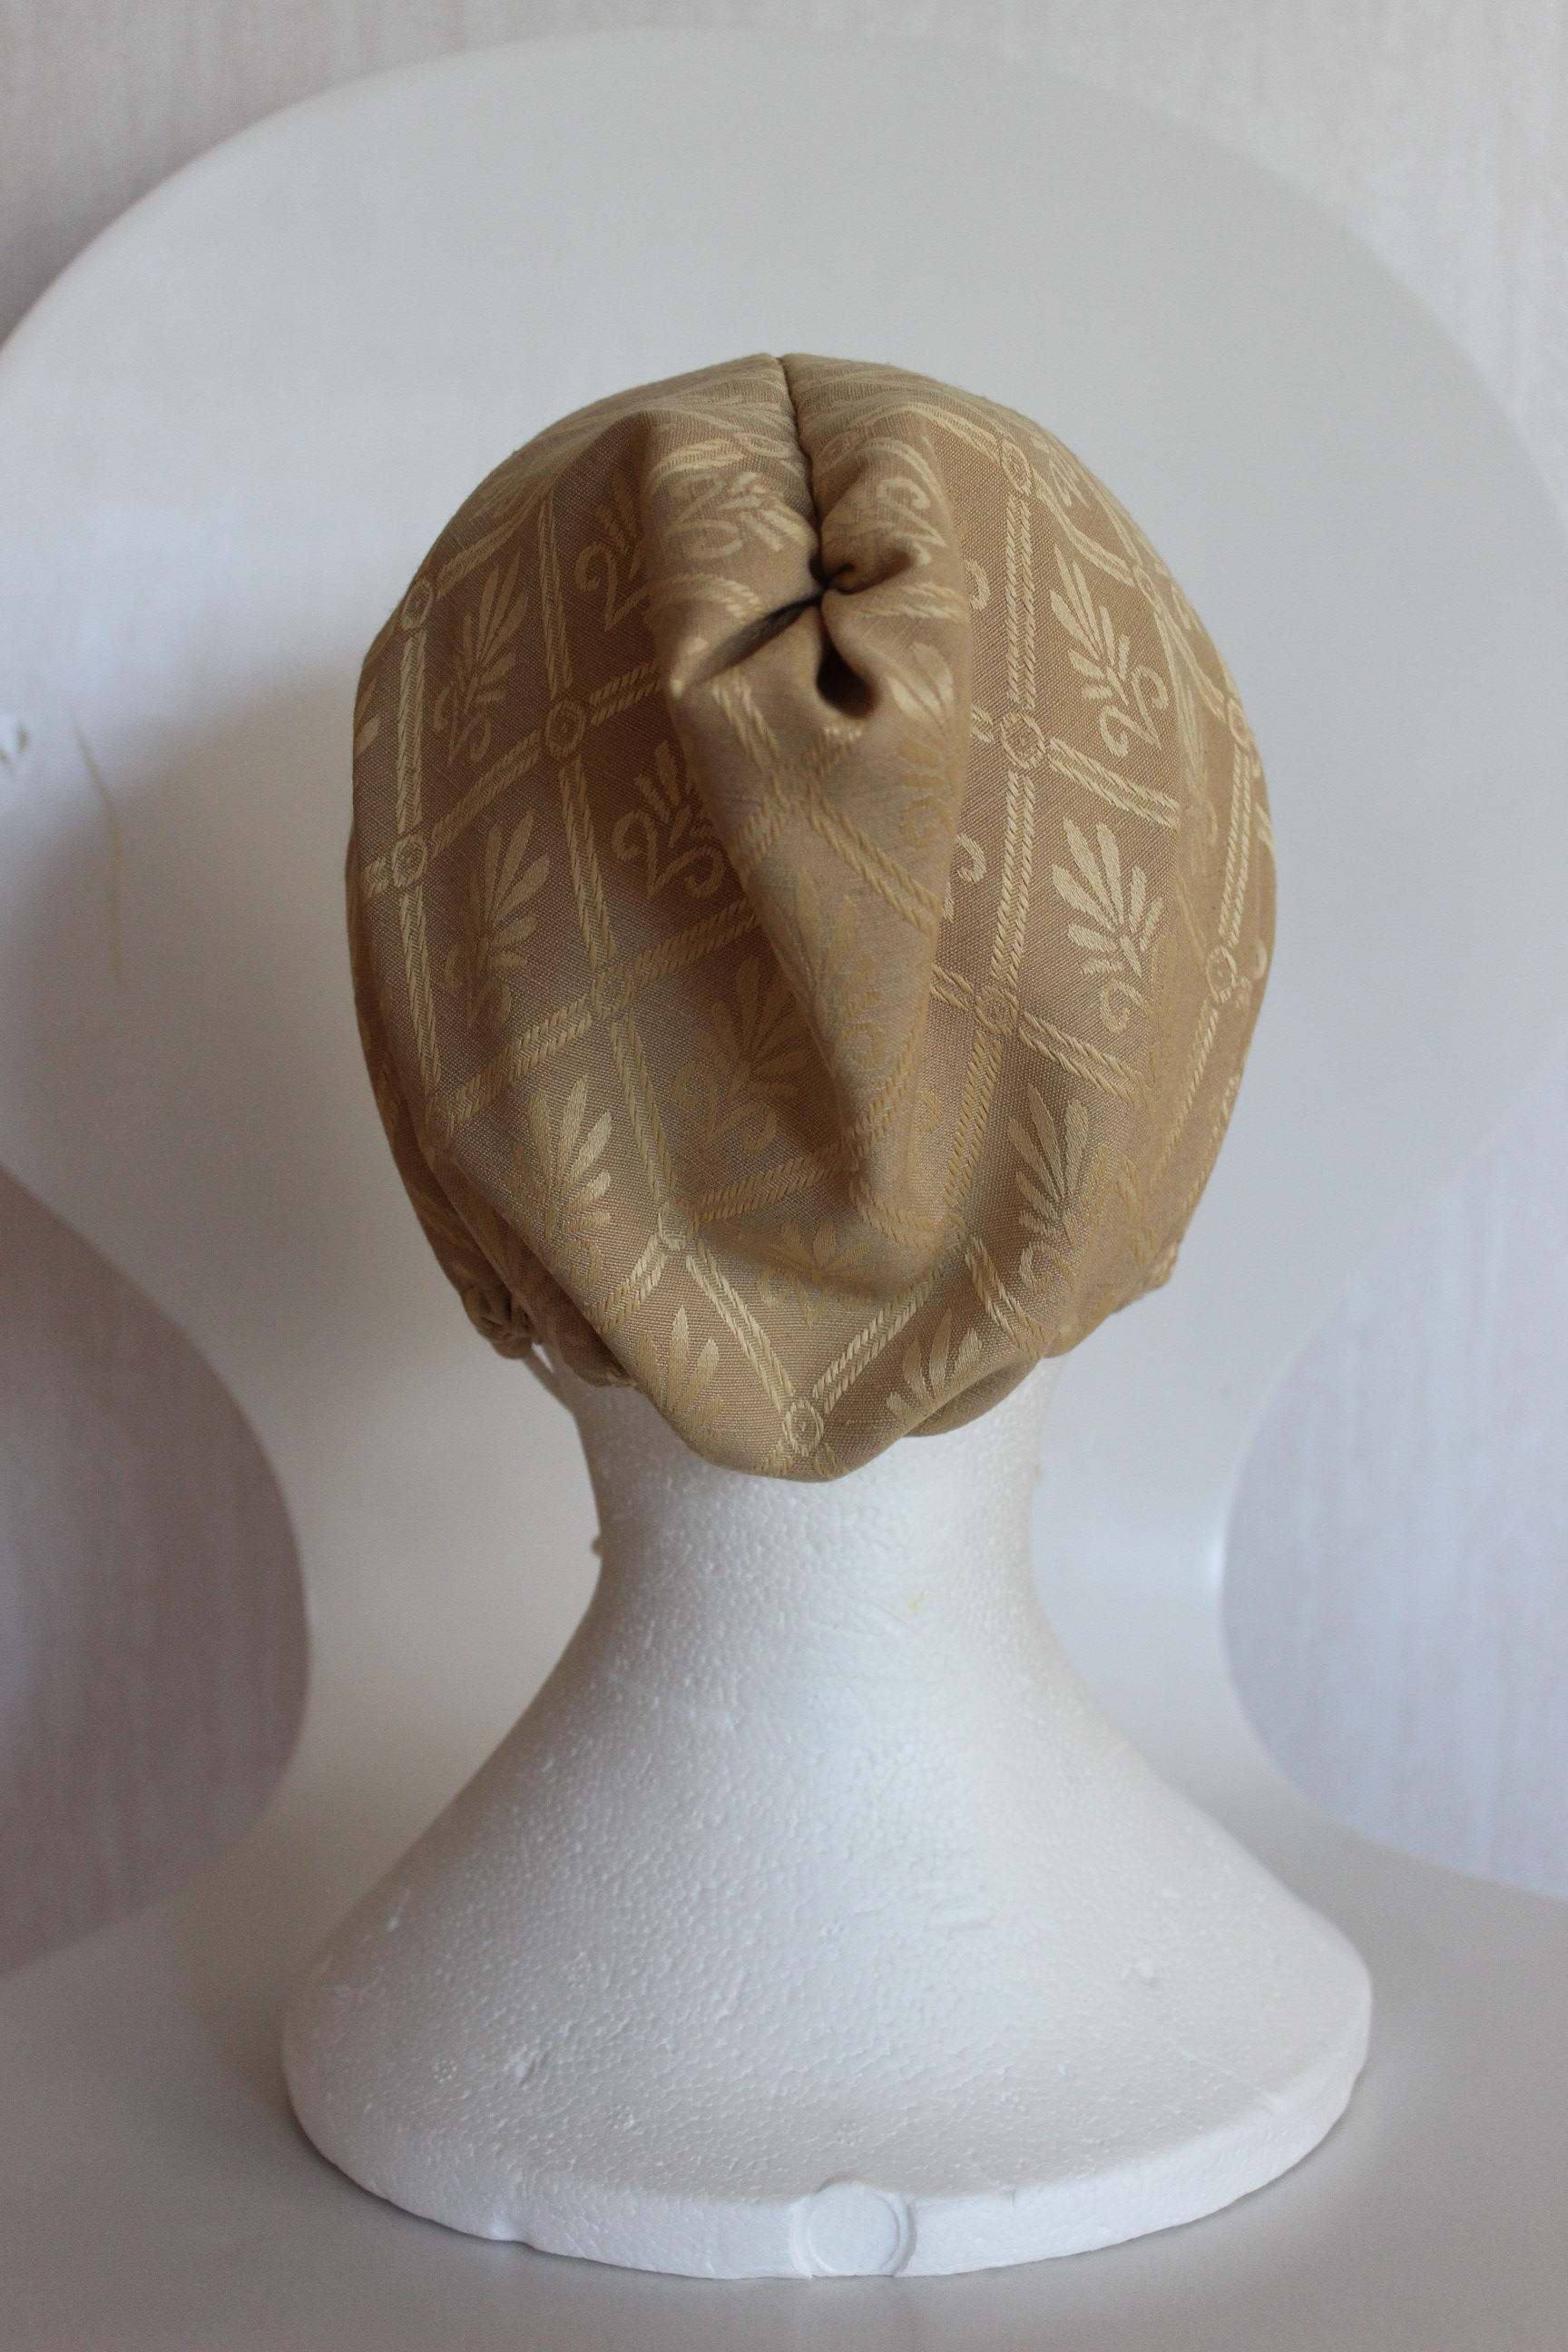
Then I folded the channel for the gathering cord.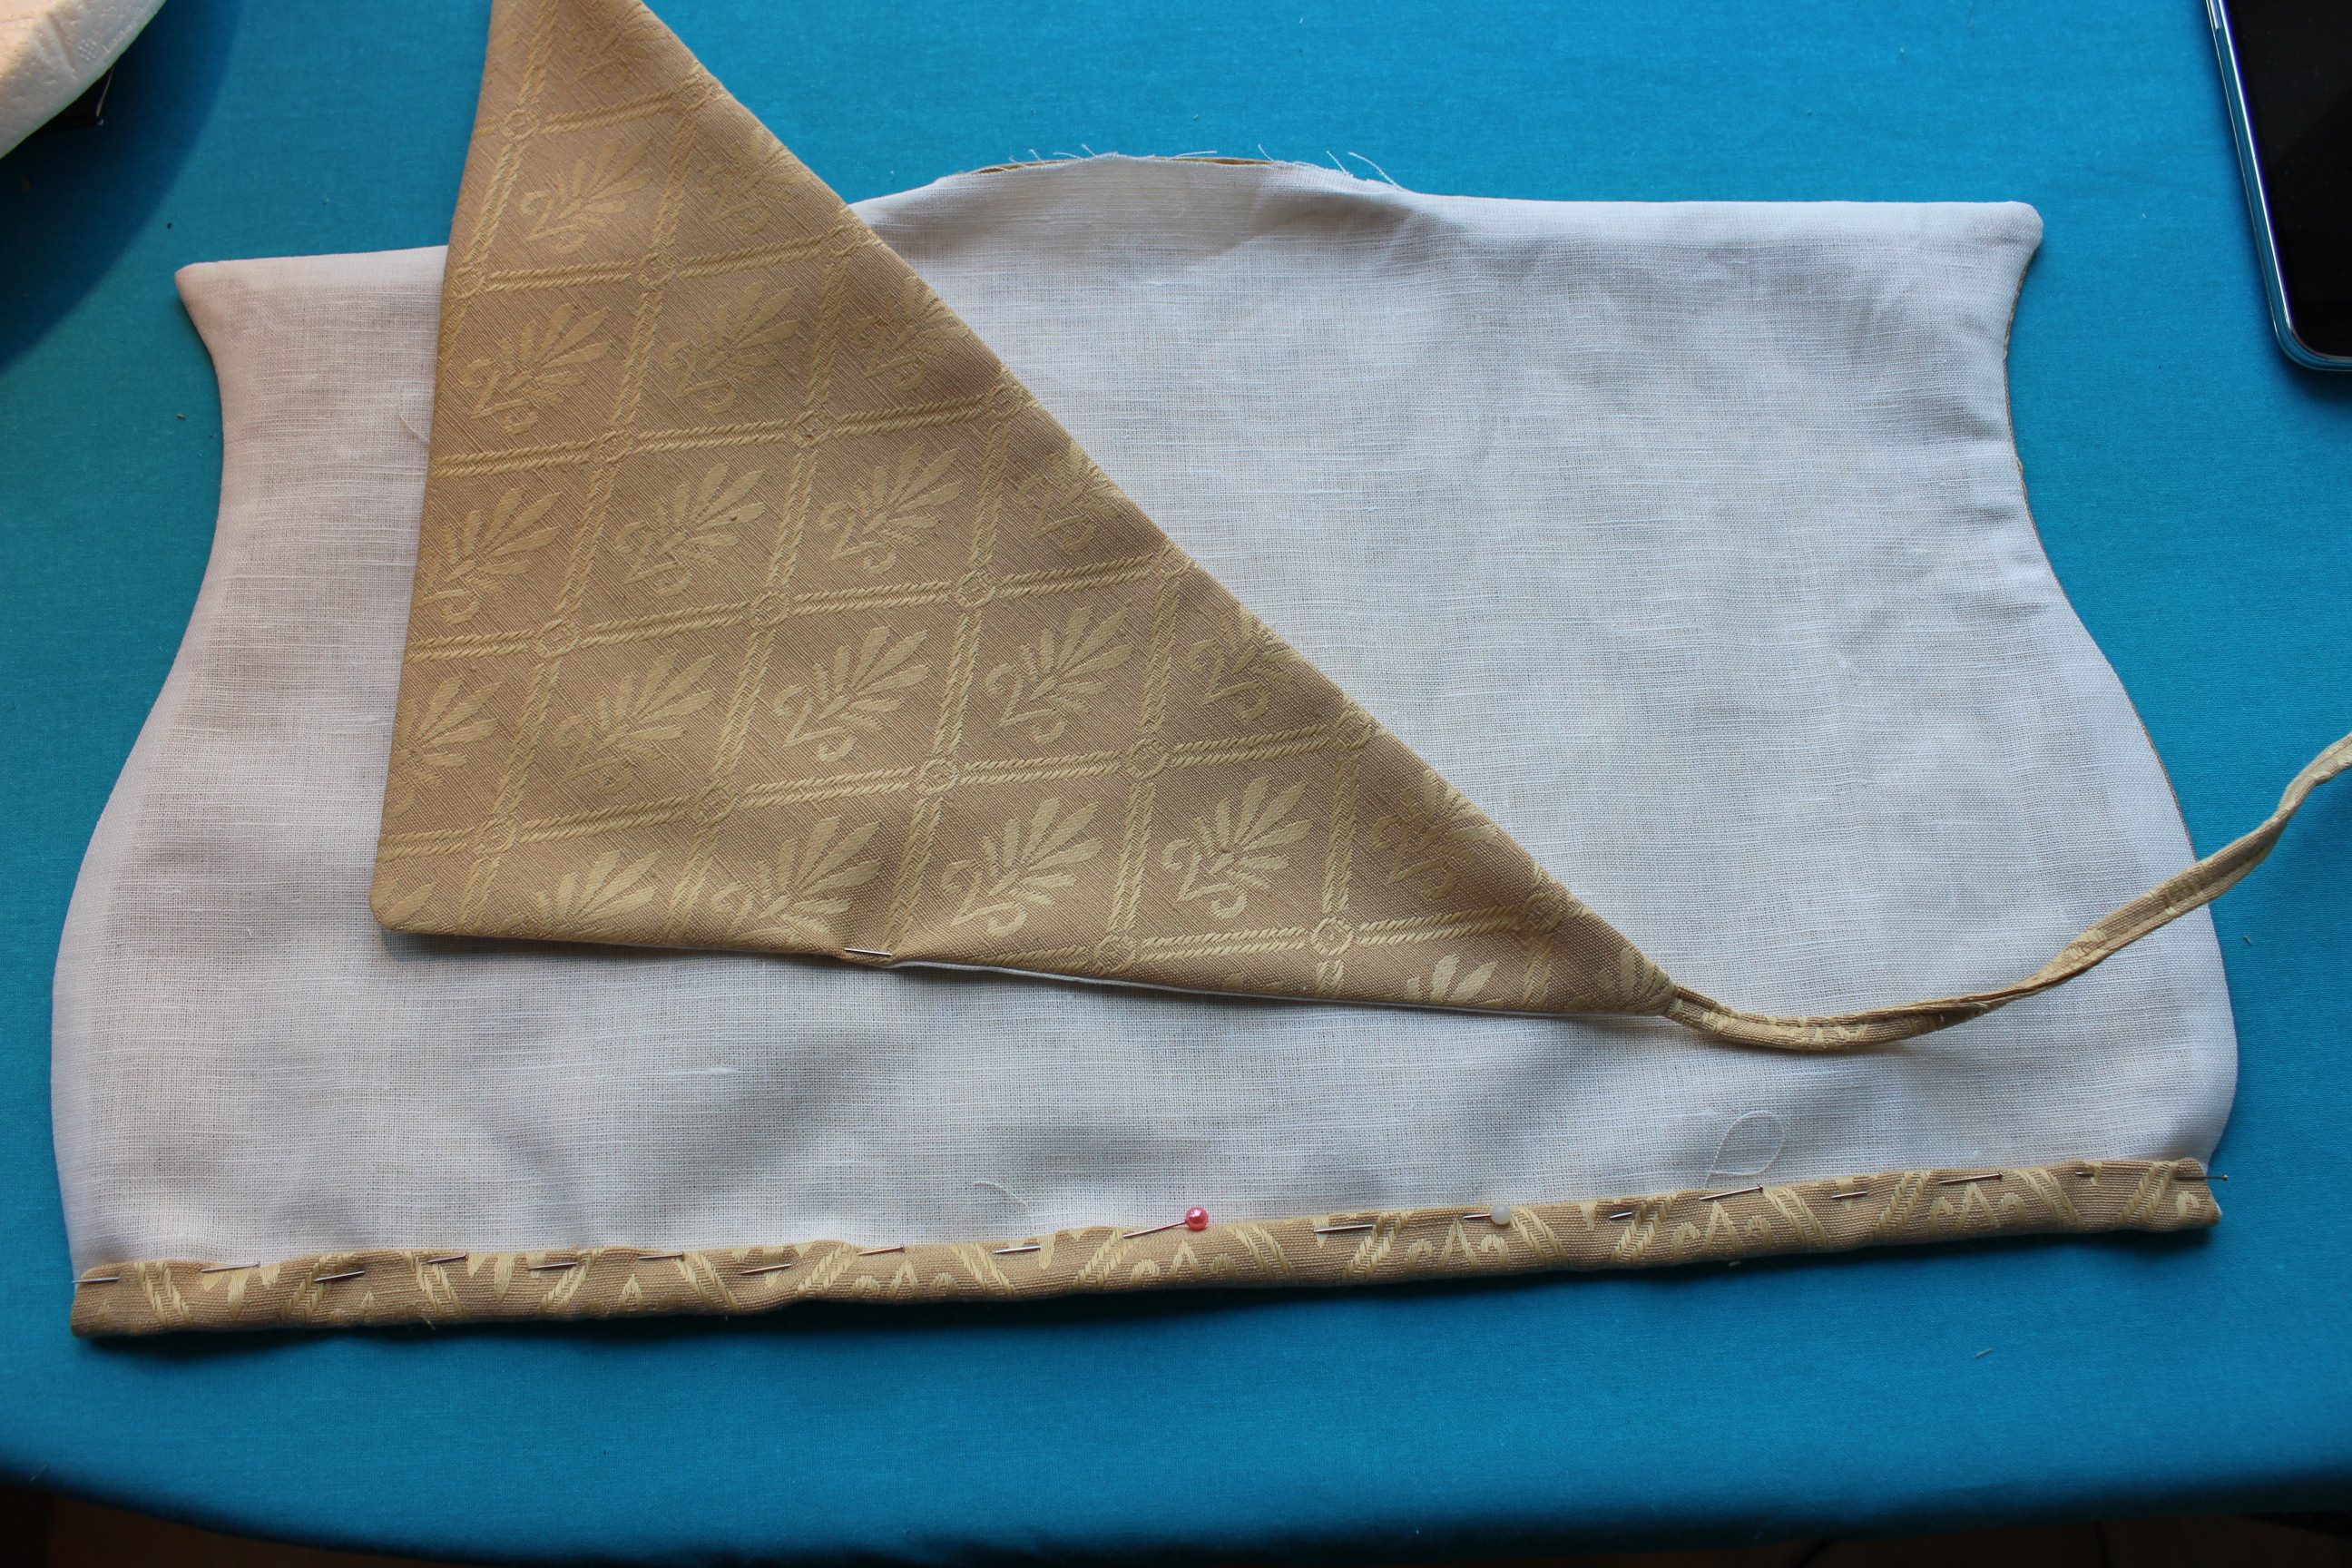
I sigzaged the back seam and basted around the opening to get a nice closed top.

The technique was almost the same as in the hood on my 18th century red riding hood.
And lastly I put in the gathering cord.
 They look so small and cute – and actually quite good in this fabric.
Finished forehead cloth: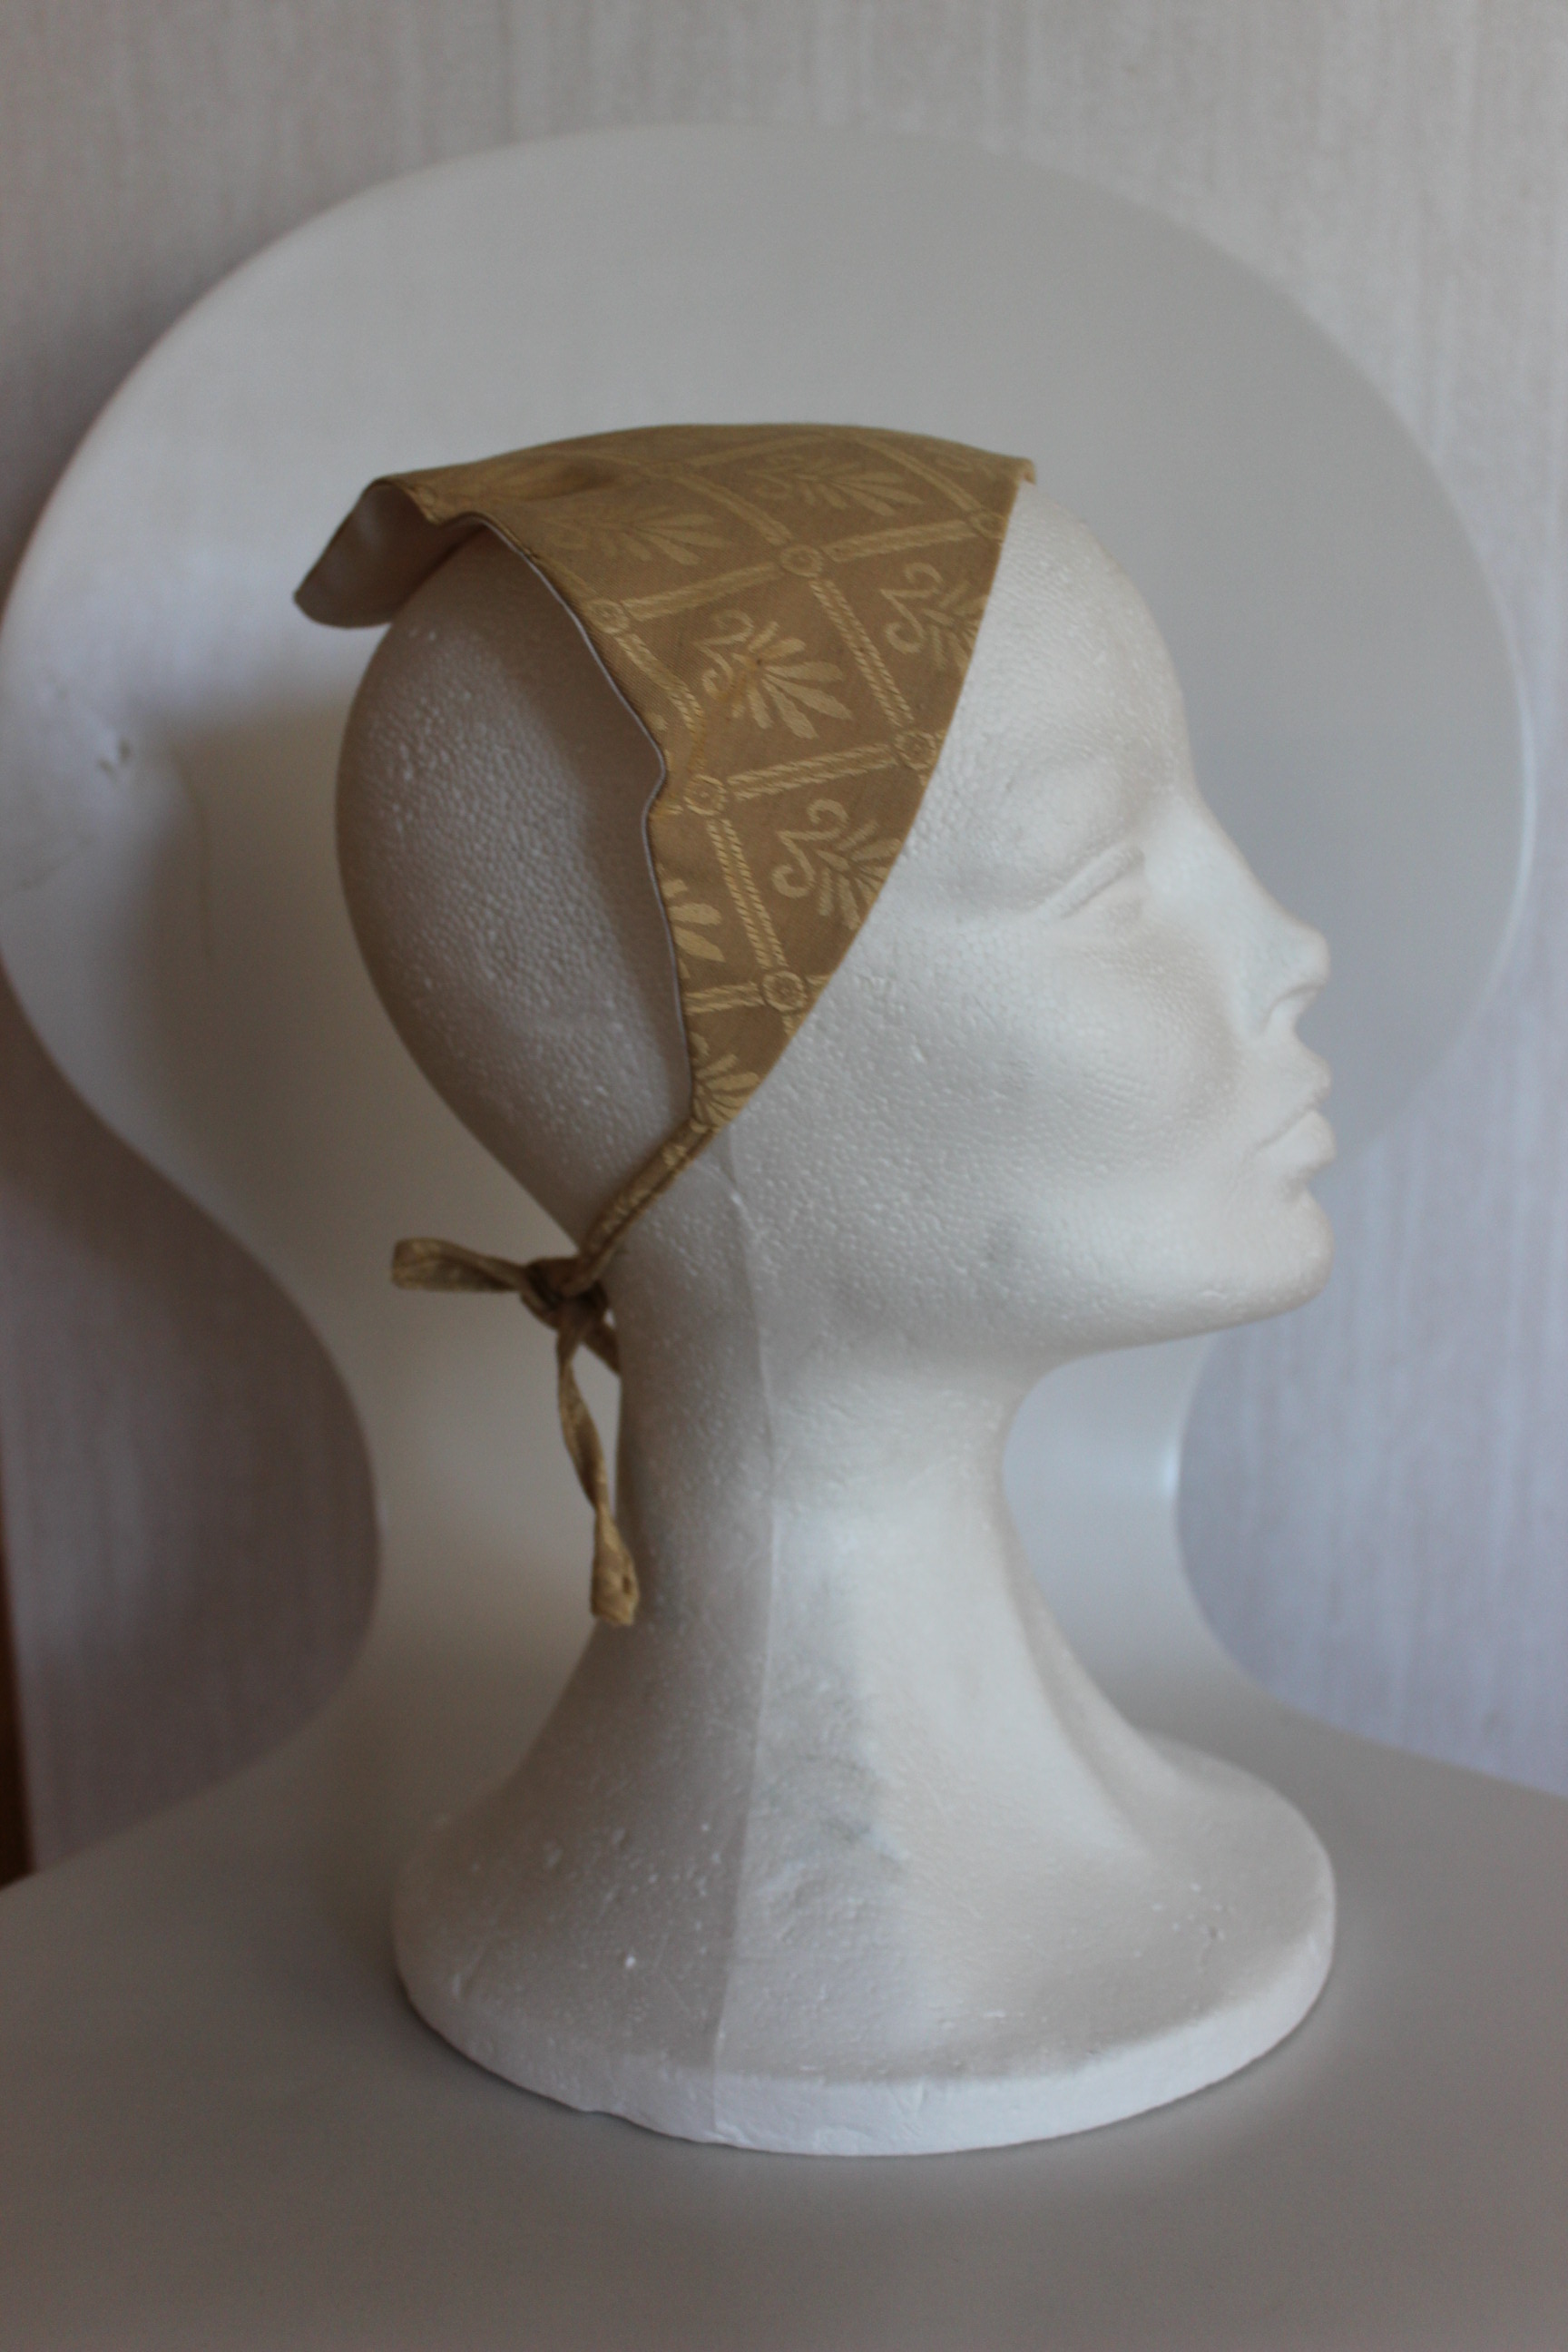
Finished gold patterned Coif:


***
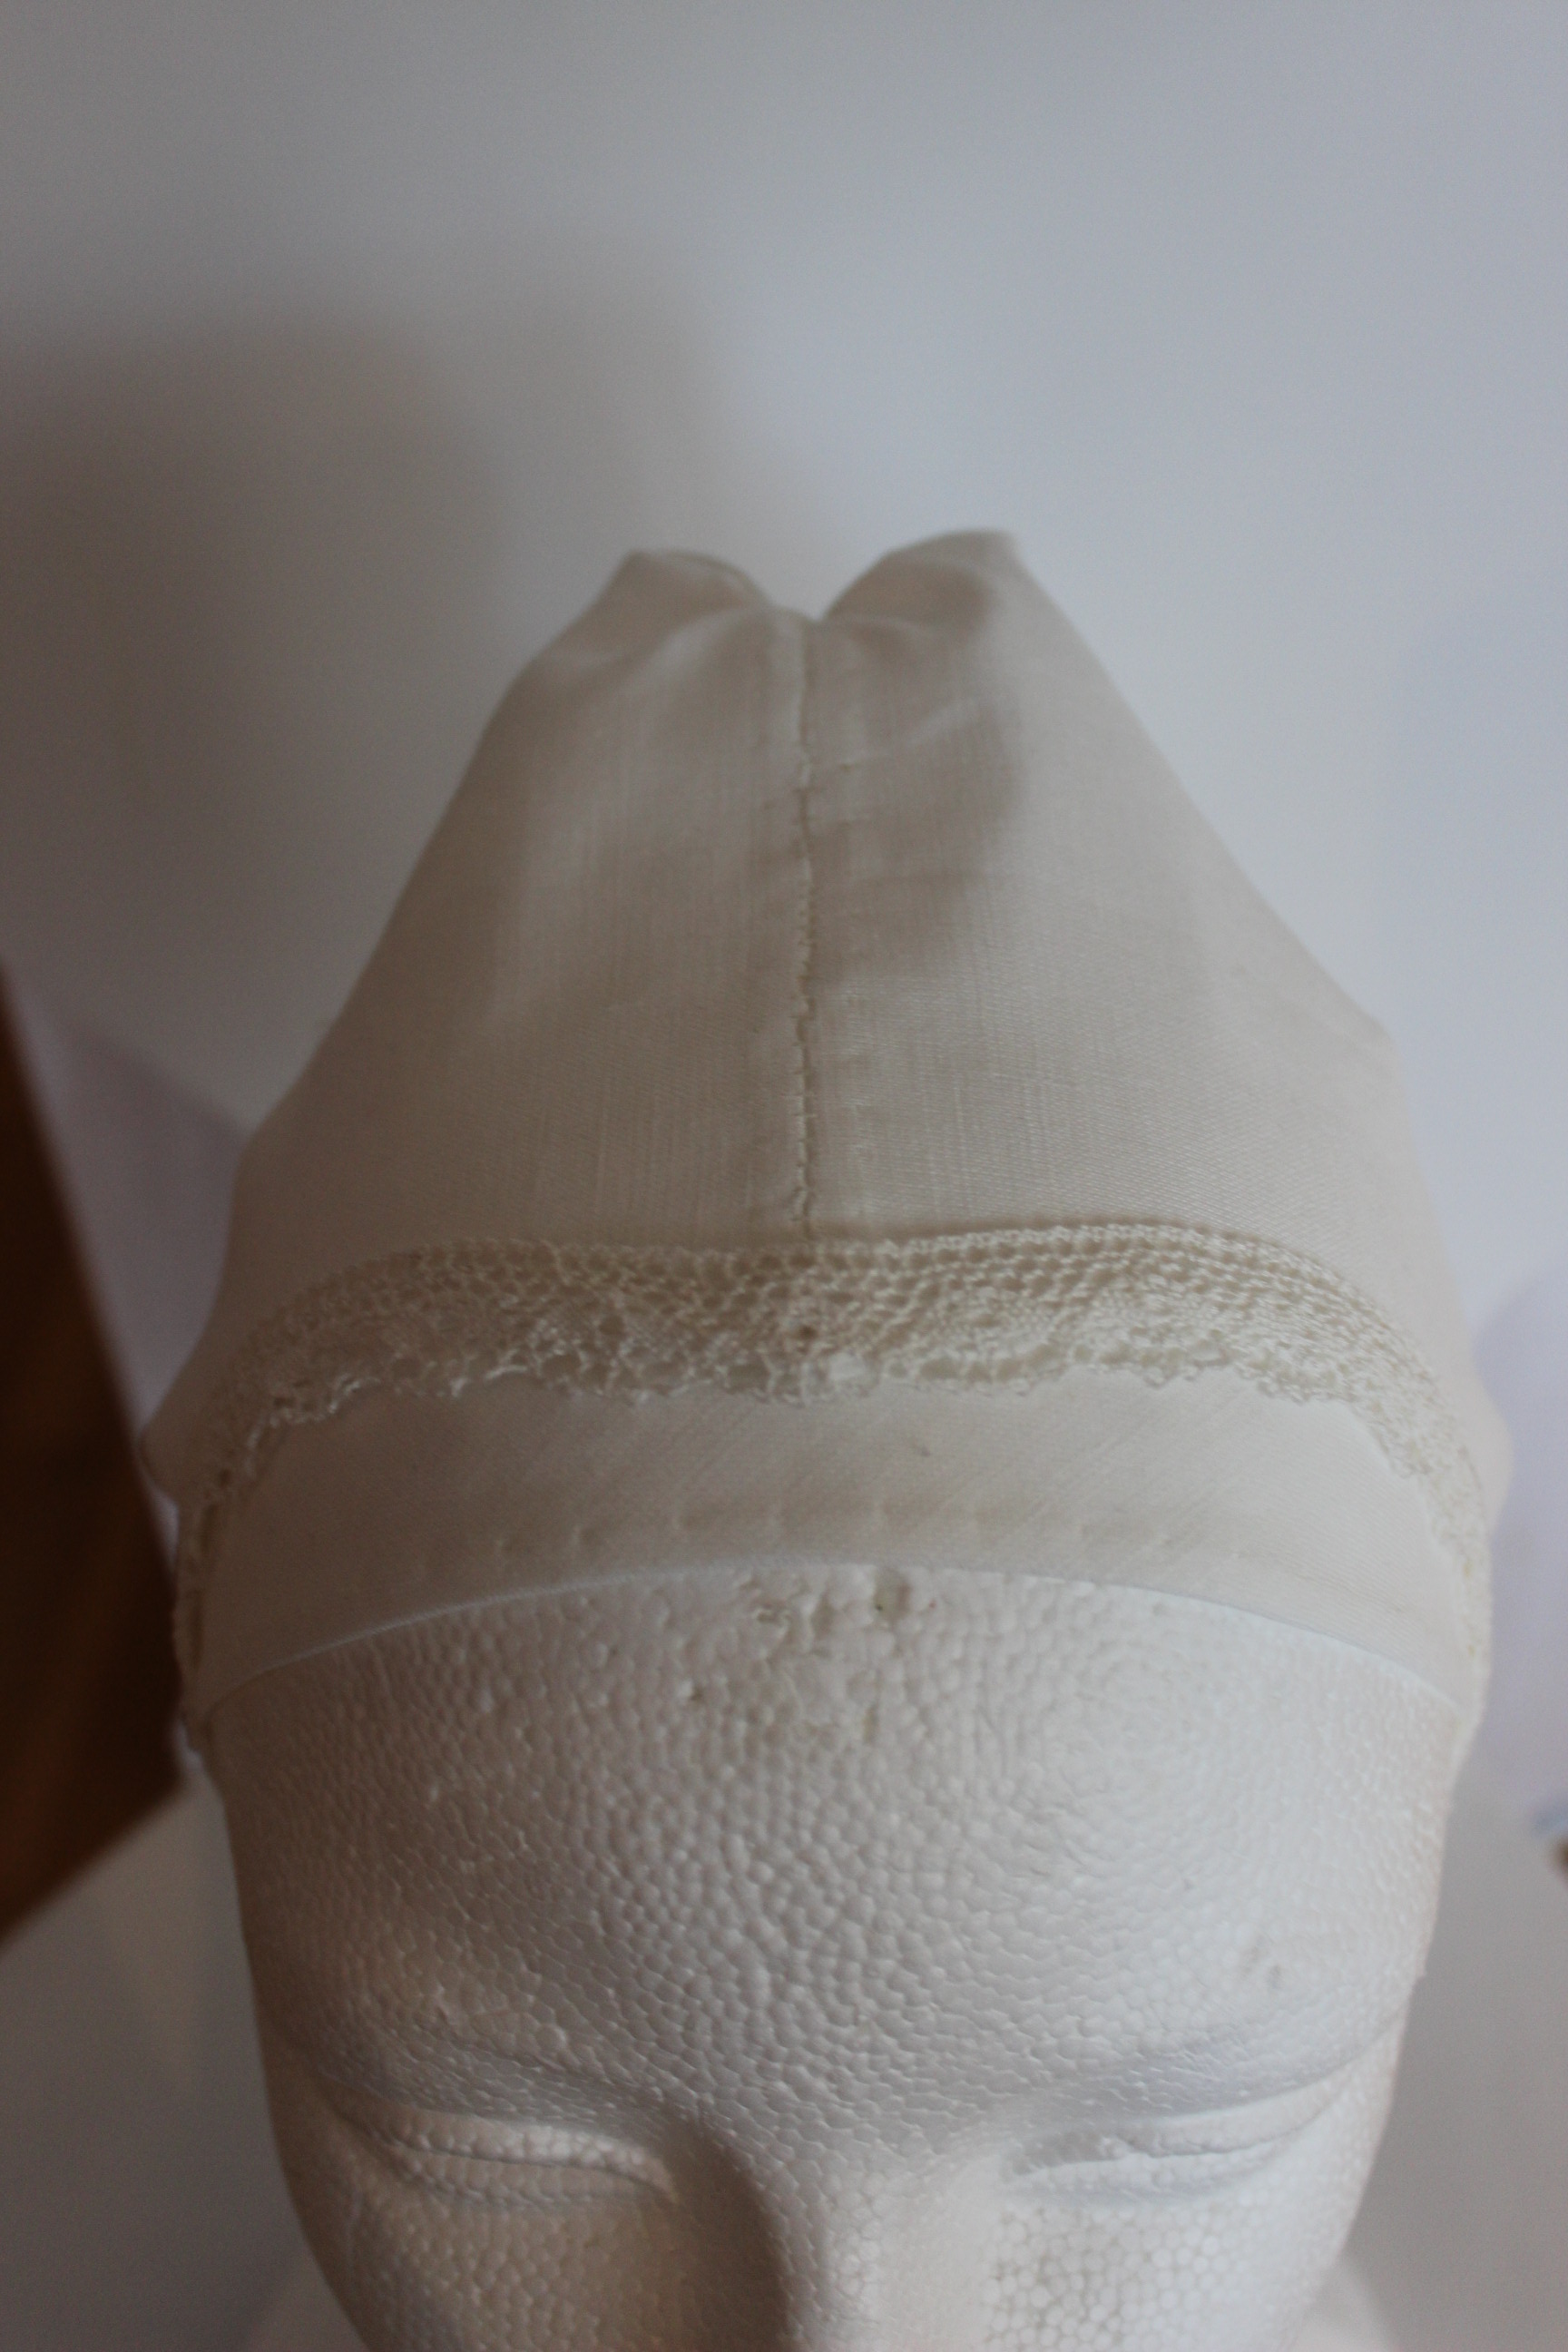
Then it was on to the real deal.
 Nice linen /cotton blend ready for the linen thread and needle.
This time I only cut one of each piece (omitting the lining) to reduce the stiffness and bulky feeling I got from the patterned one.
I just whinged it on the size of the forehead cloth, and it seemed to work nicely on the test run, so I use the same size on the linen one.
One thing I changed on this one was hemming the center back opening before gathering it – this way makes for a much nicer finish.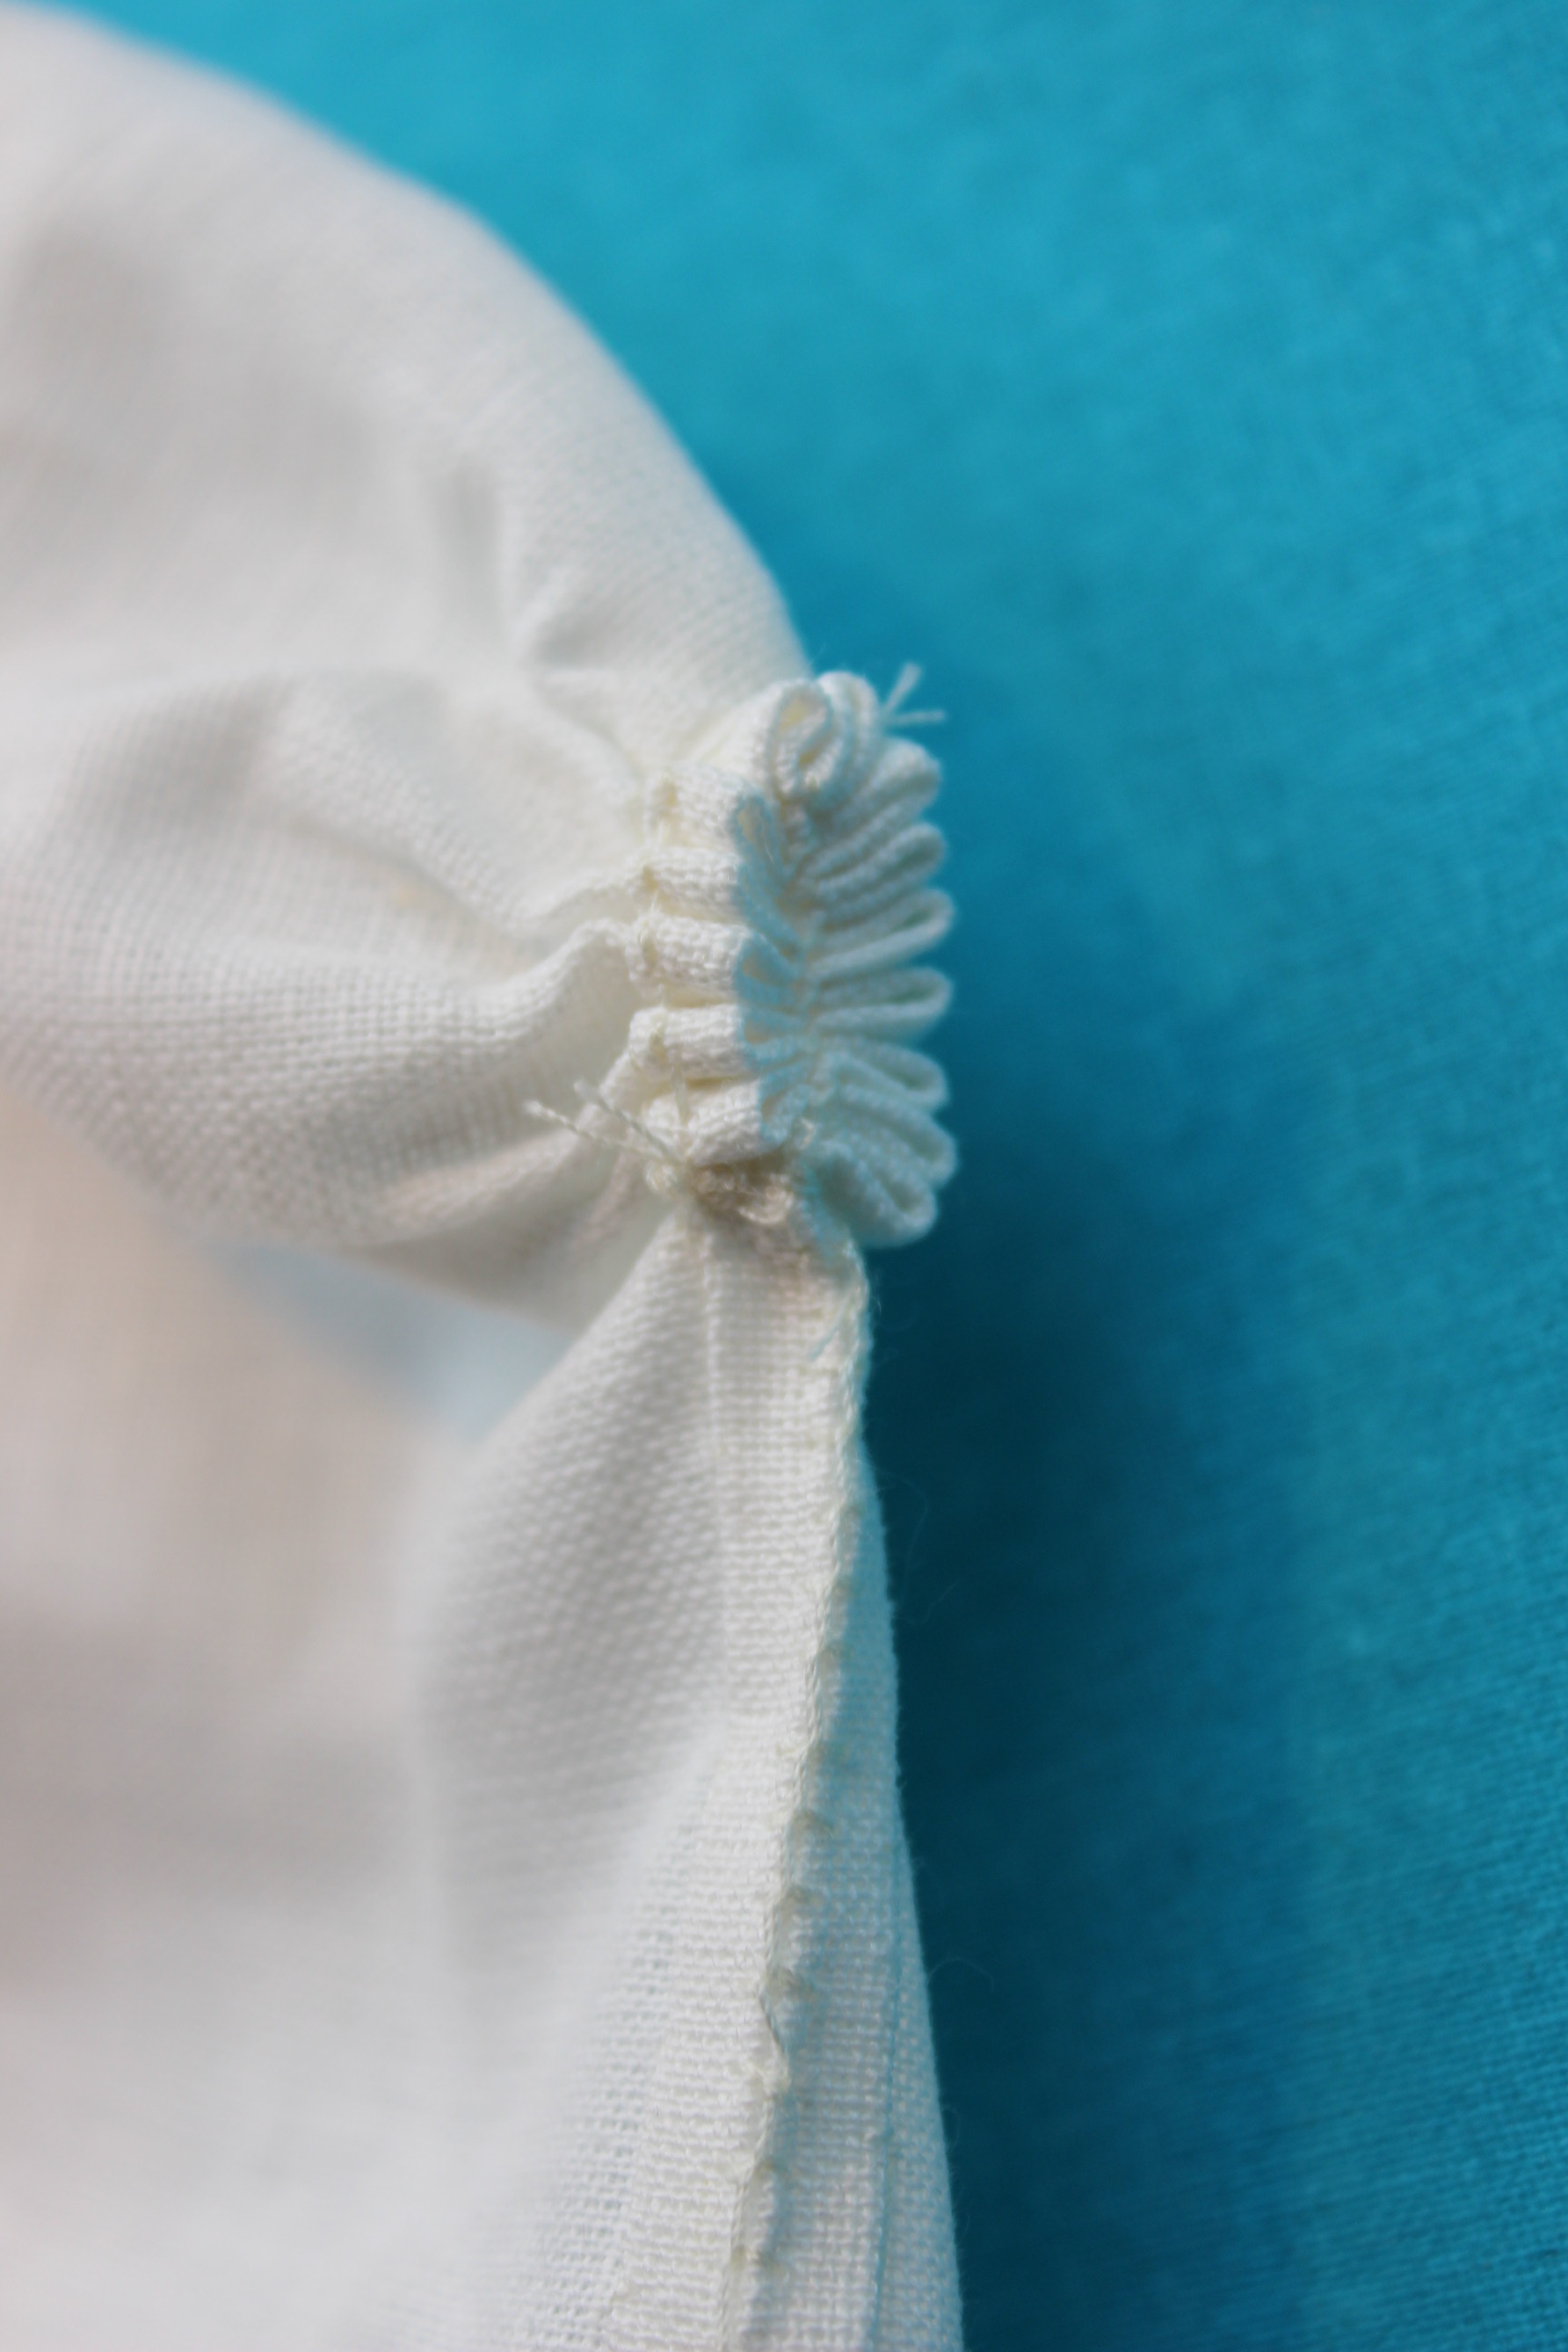
I also added some scrap lace to the outer edge.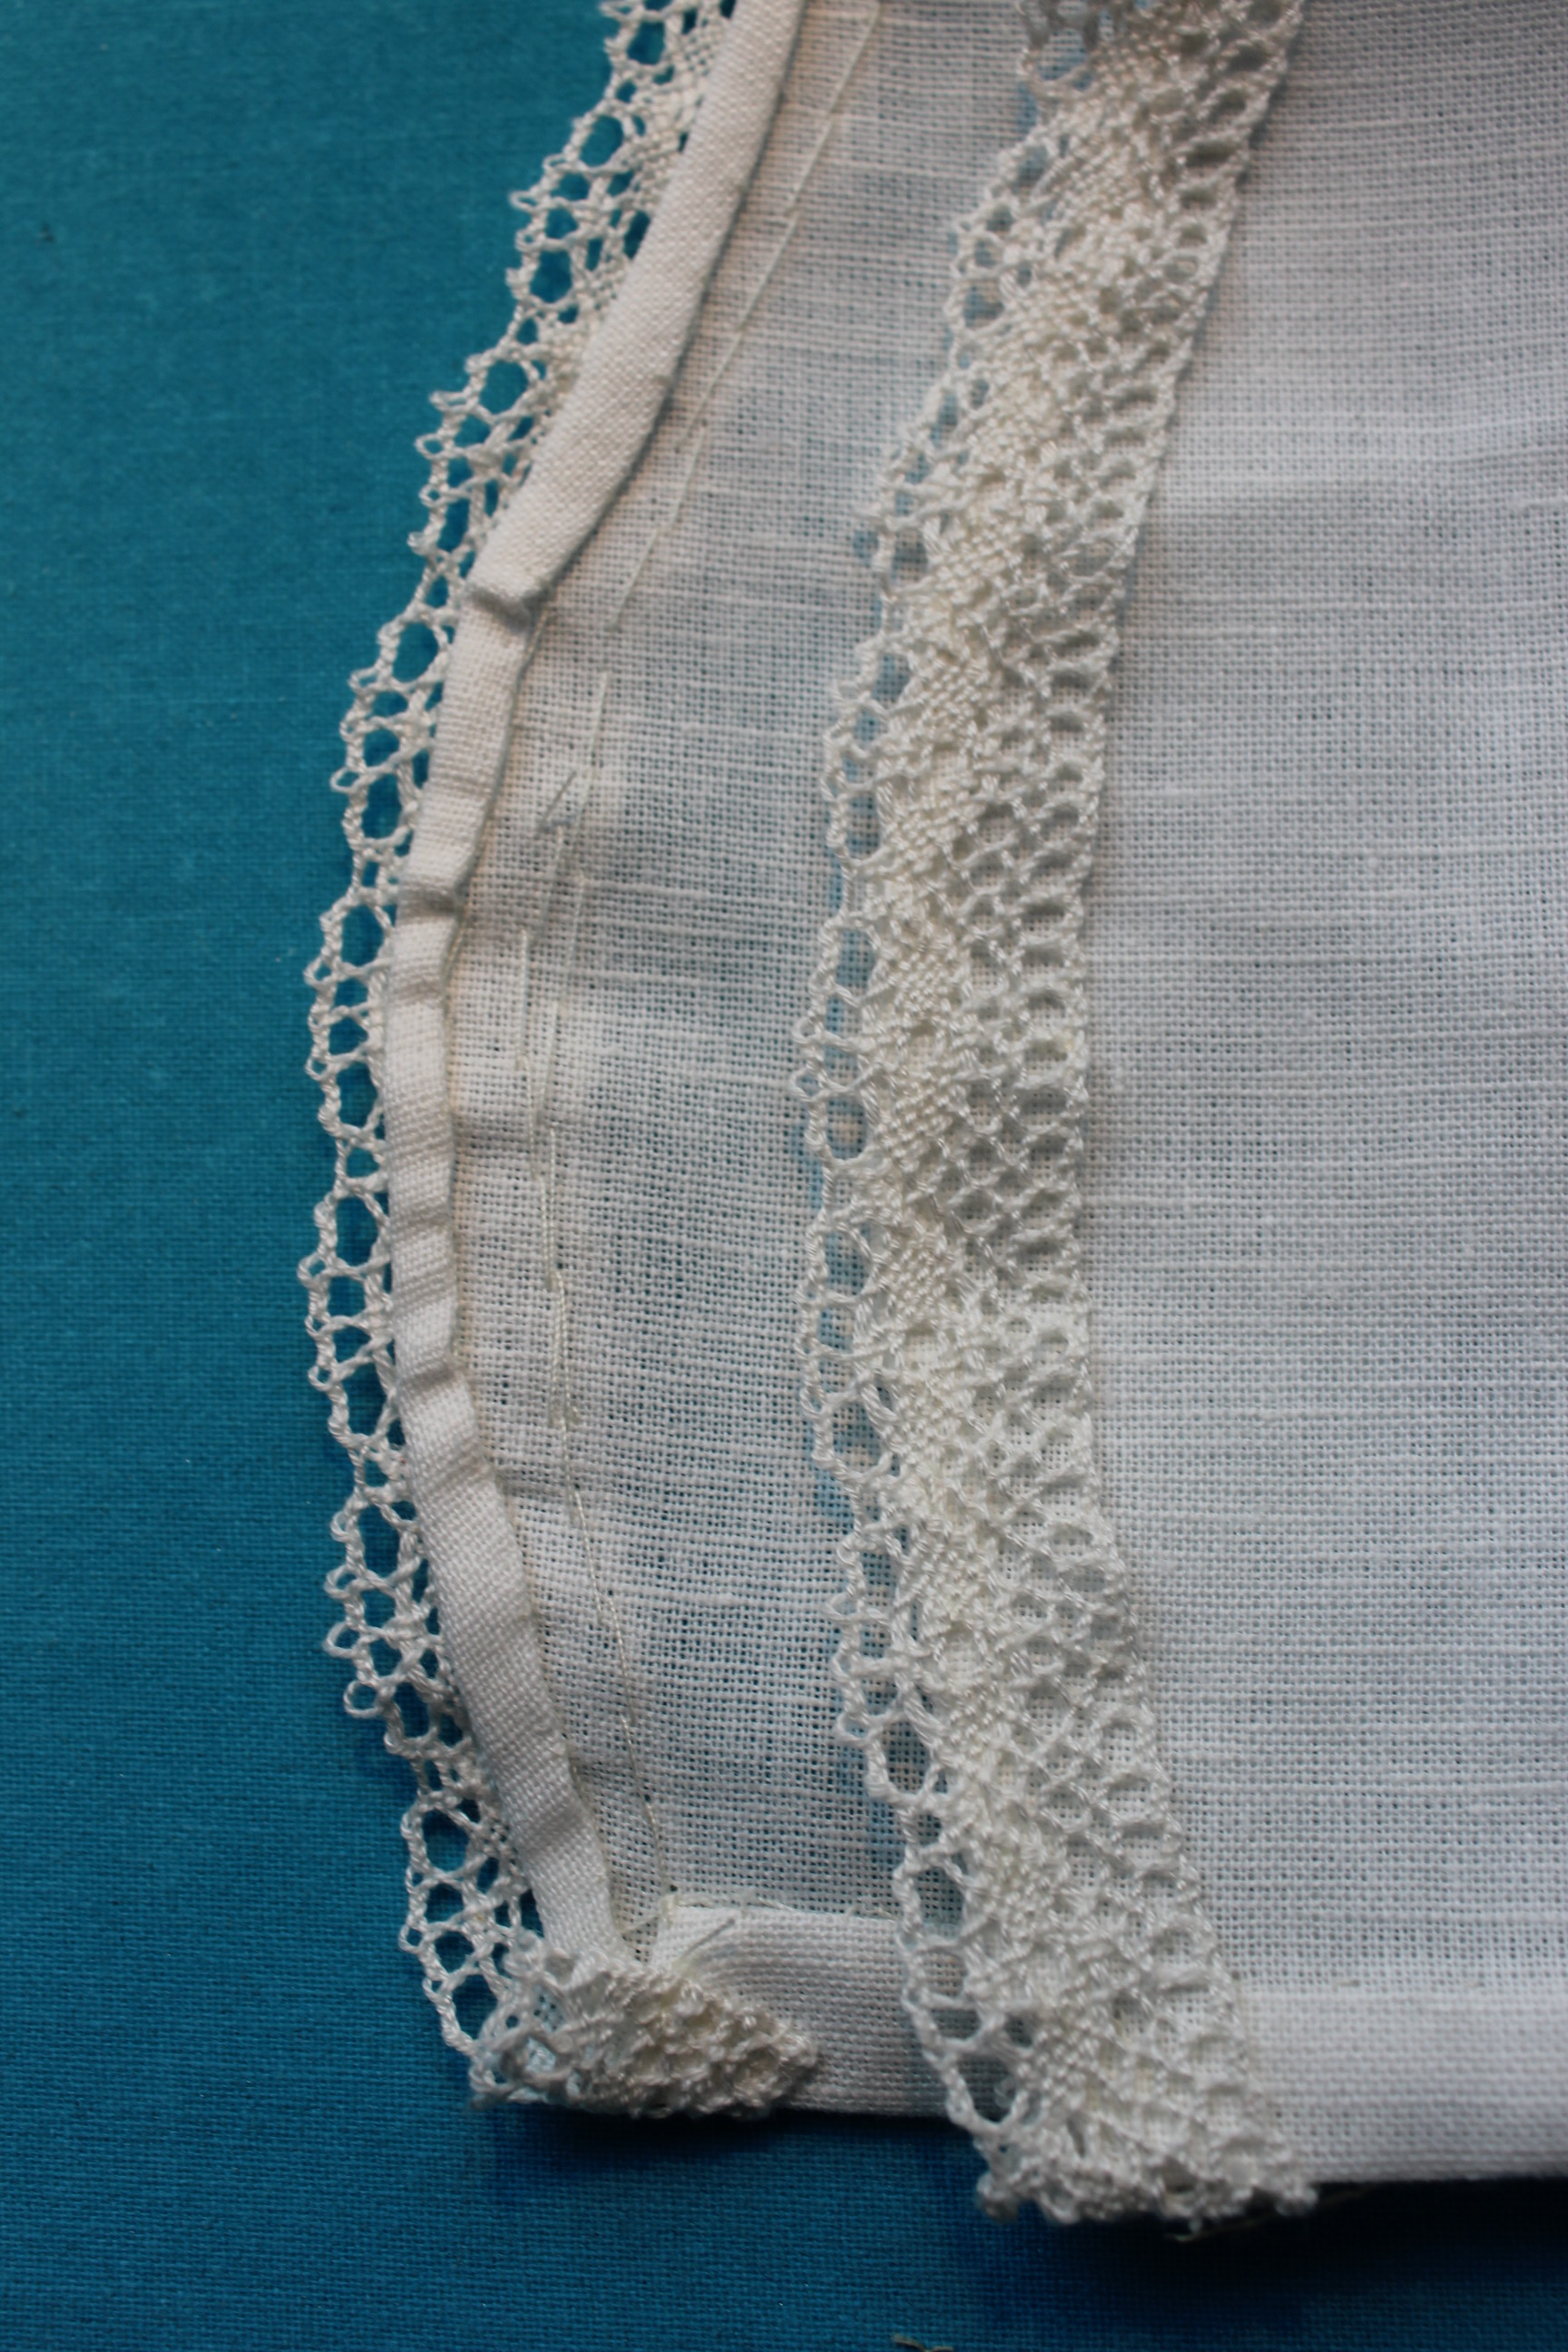
 Getting the gathering cord ready.
 like a baby’s cap…
Finished linen coif: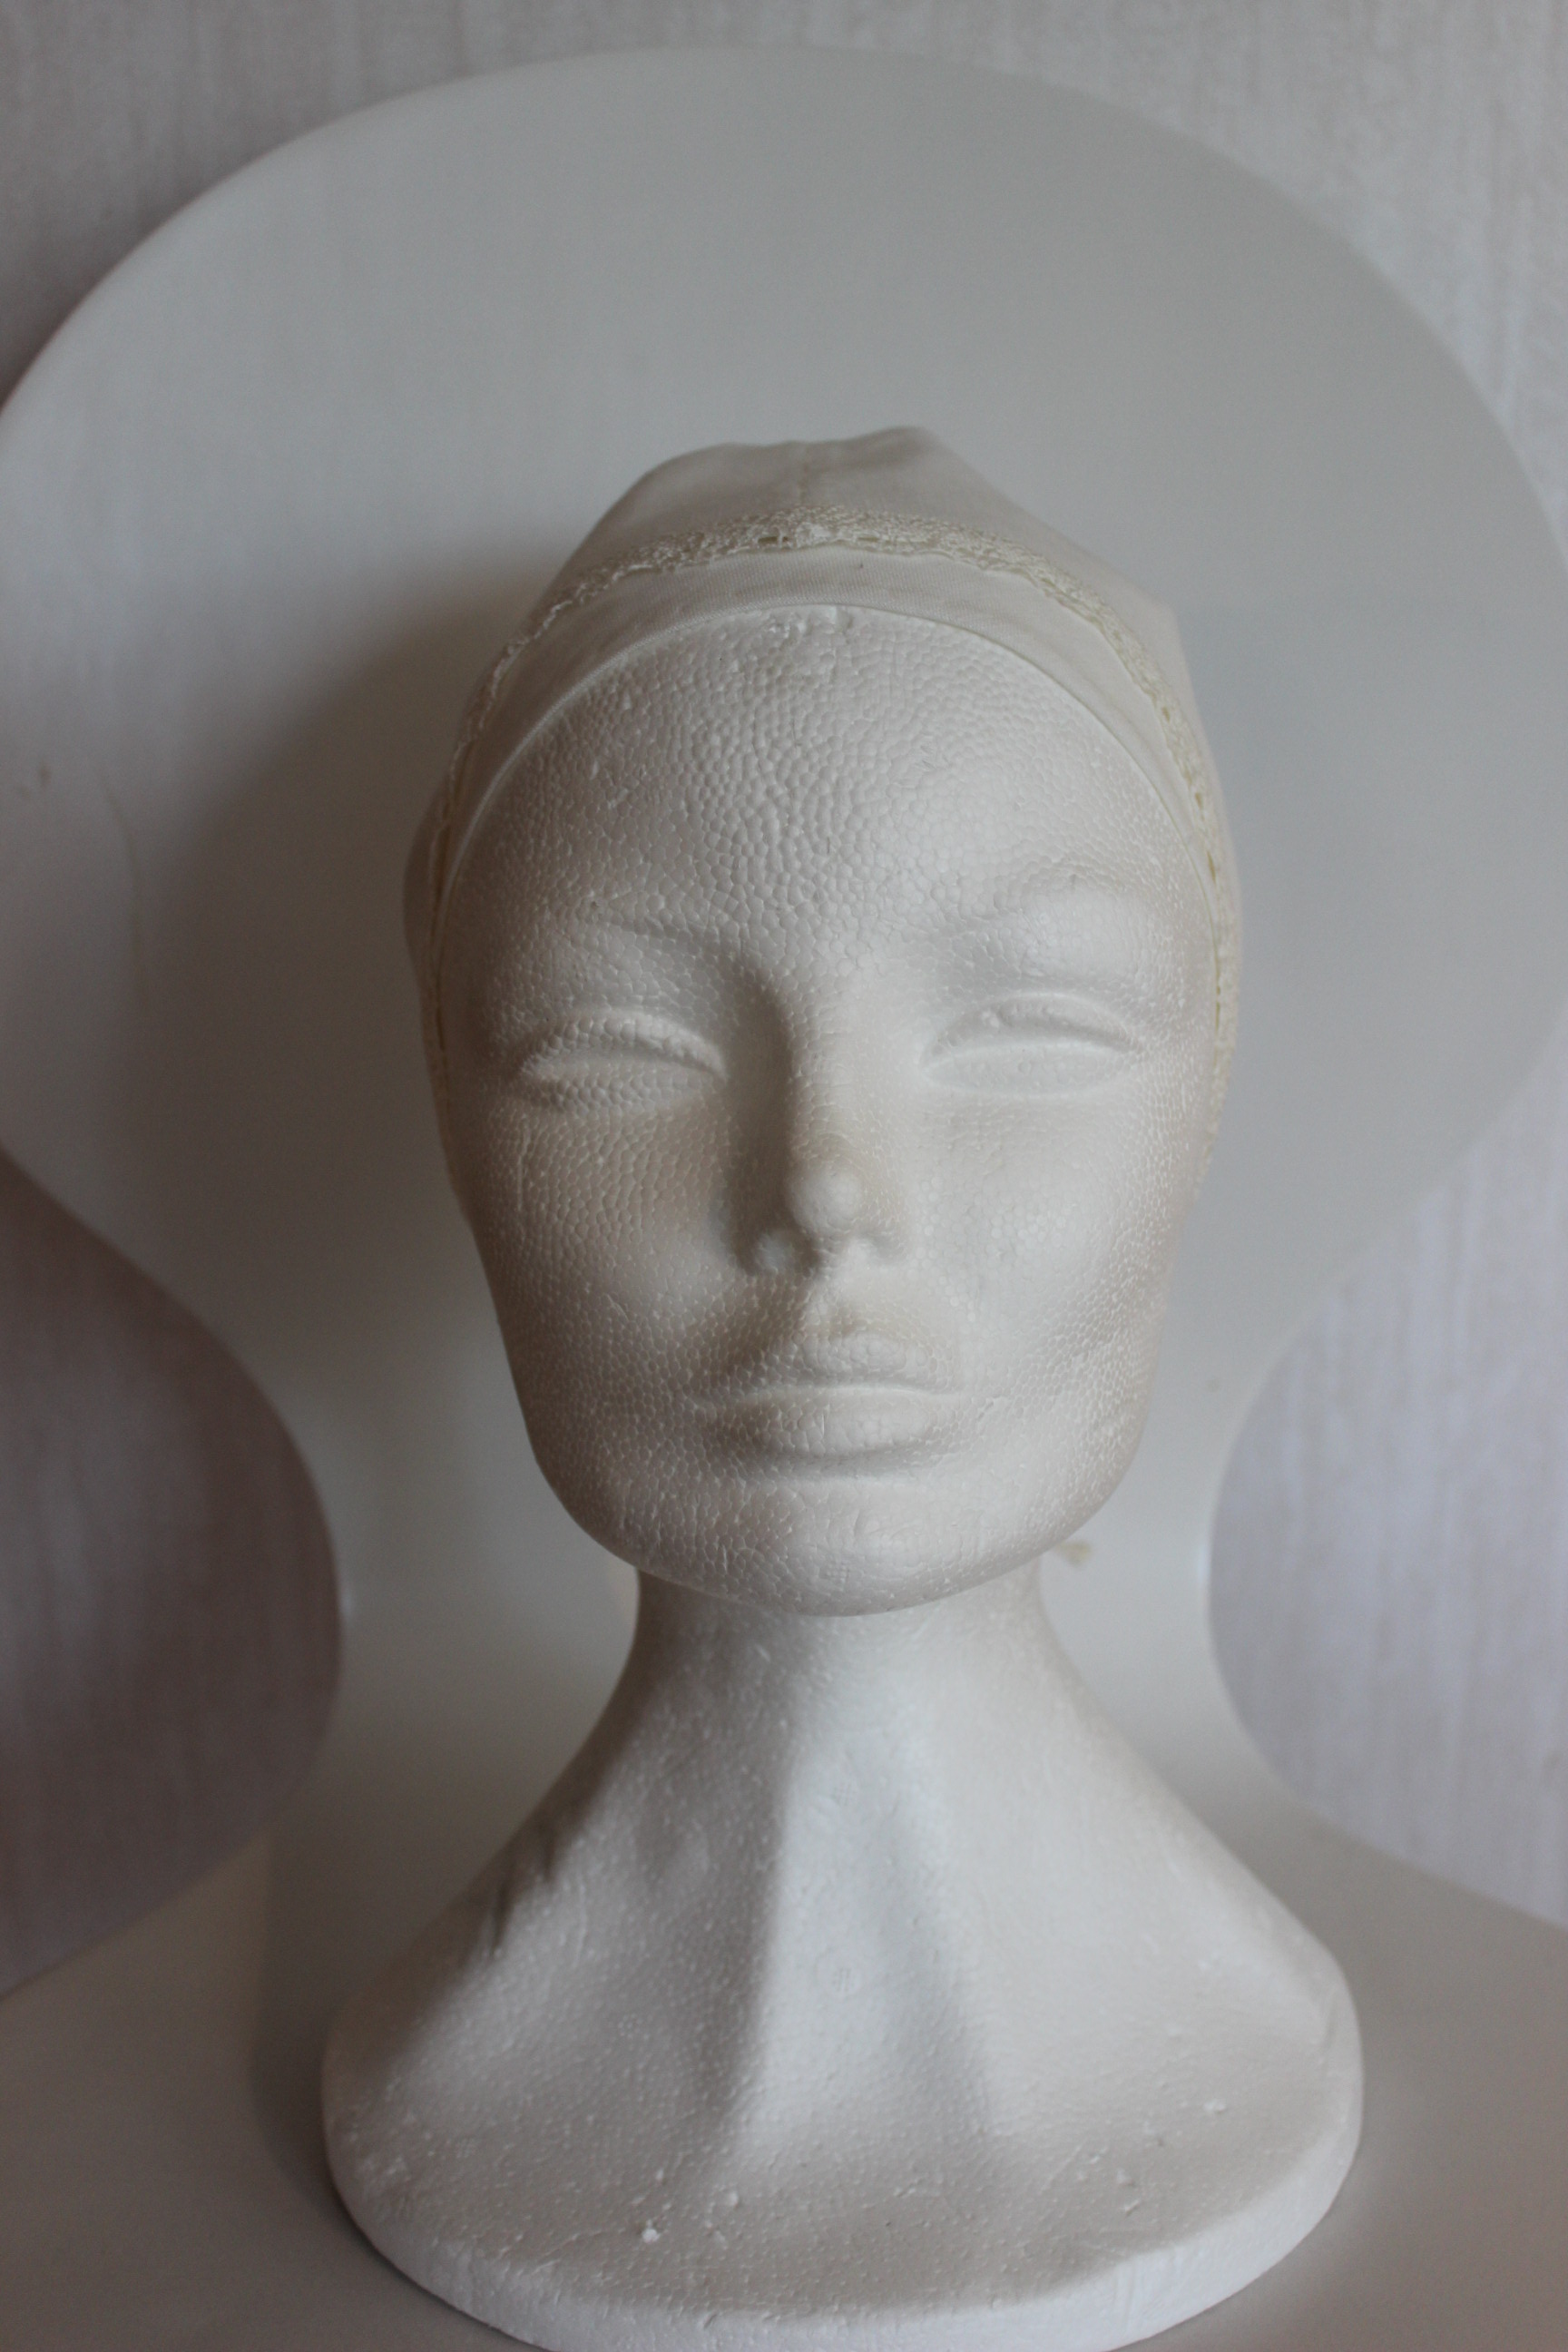


The Facts:
Challenge: nr 7-2015 Accessorize
What: Two 1550-1650s Coif
Pattern: Based on “The pragmatic Costumer”s pattern tutorial (which was awesome)
Fabric & Notions: (for both coifs) 30 cm linen fabric, 30 cm patterned gold polyester fabric, thread, 50 cm (x 2) thin cord and 60 cm small lace.
How historical Accurate: The linen coif are pretty straight on – accurate pattern, material and stitches. About 8/10
The patterned one are completely modern – polyester fabric and machine construction. More like 5/10
Time: 3 hours total for both (linen 2,5 hours, patterned 0,5 hours).
Cost: About 80 Sek (10 Usd) total.
First Worn: hopefully someday soon for photos.
Final Thoughts: I really like the way they both came out. So simple and fast – I even consider the possibility to make and sell these in a near future.
My original plan for the HSF15 challenge 5 – Practicality, a regency day-dress, needed to be postponed so to get time to finish this springs biggest undertaking – a hole new 1850-1860s wardrobe.
So after finishing my not a Garibaldi blouse a few weeks ago, I decided I needed yet another blouse in almost the same style, for my sister to wear at the upcoming “Crinoline day”.
 My main inspiration was this sever looking young lady.
Since time was sparse, I decided to use the simplest way possible in all things for this blouse.
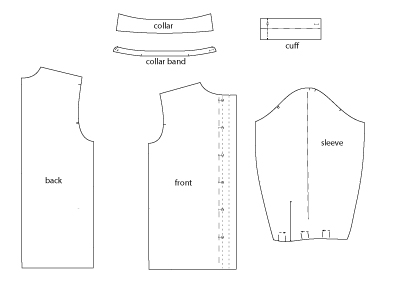
Staring with the pattern, I used the basic pattern blocks for a regular shirt (just like the picture below), and omitted the collar and cuff.
For fabric I used leftovers from my “Chemise a la Lambelle” & ” Ariel/Camille” dresses, A really nice and strong structured cotton voile(?)
Unfortunately I forgot to take any photos of the construction process, but it was so simple and went so smooth that I just kept sewing and finished over one afternoon.
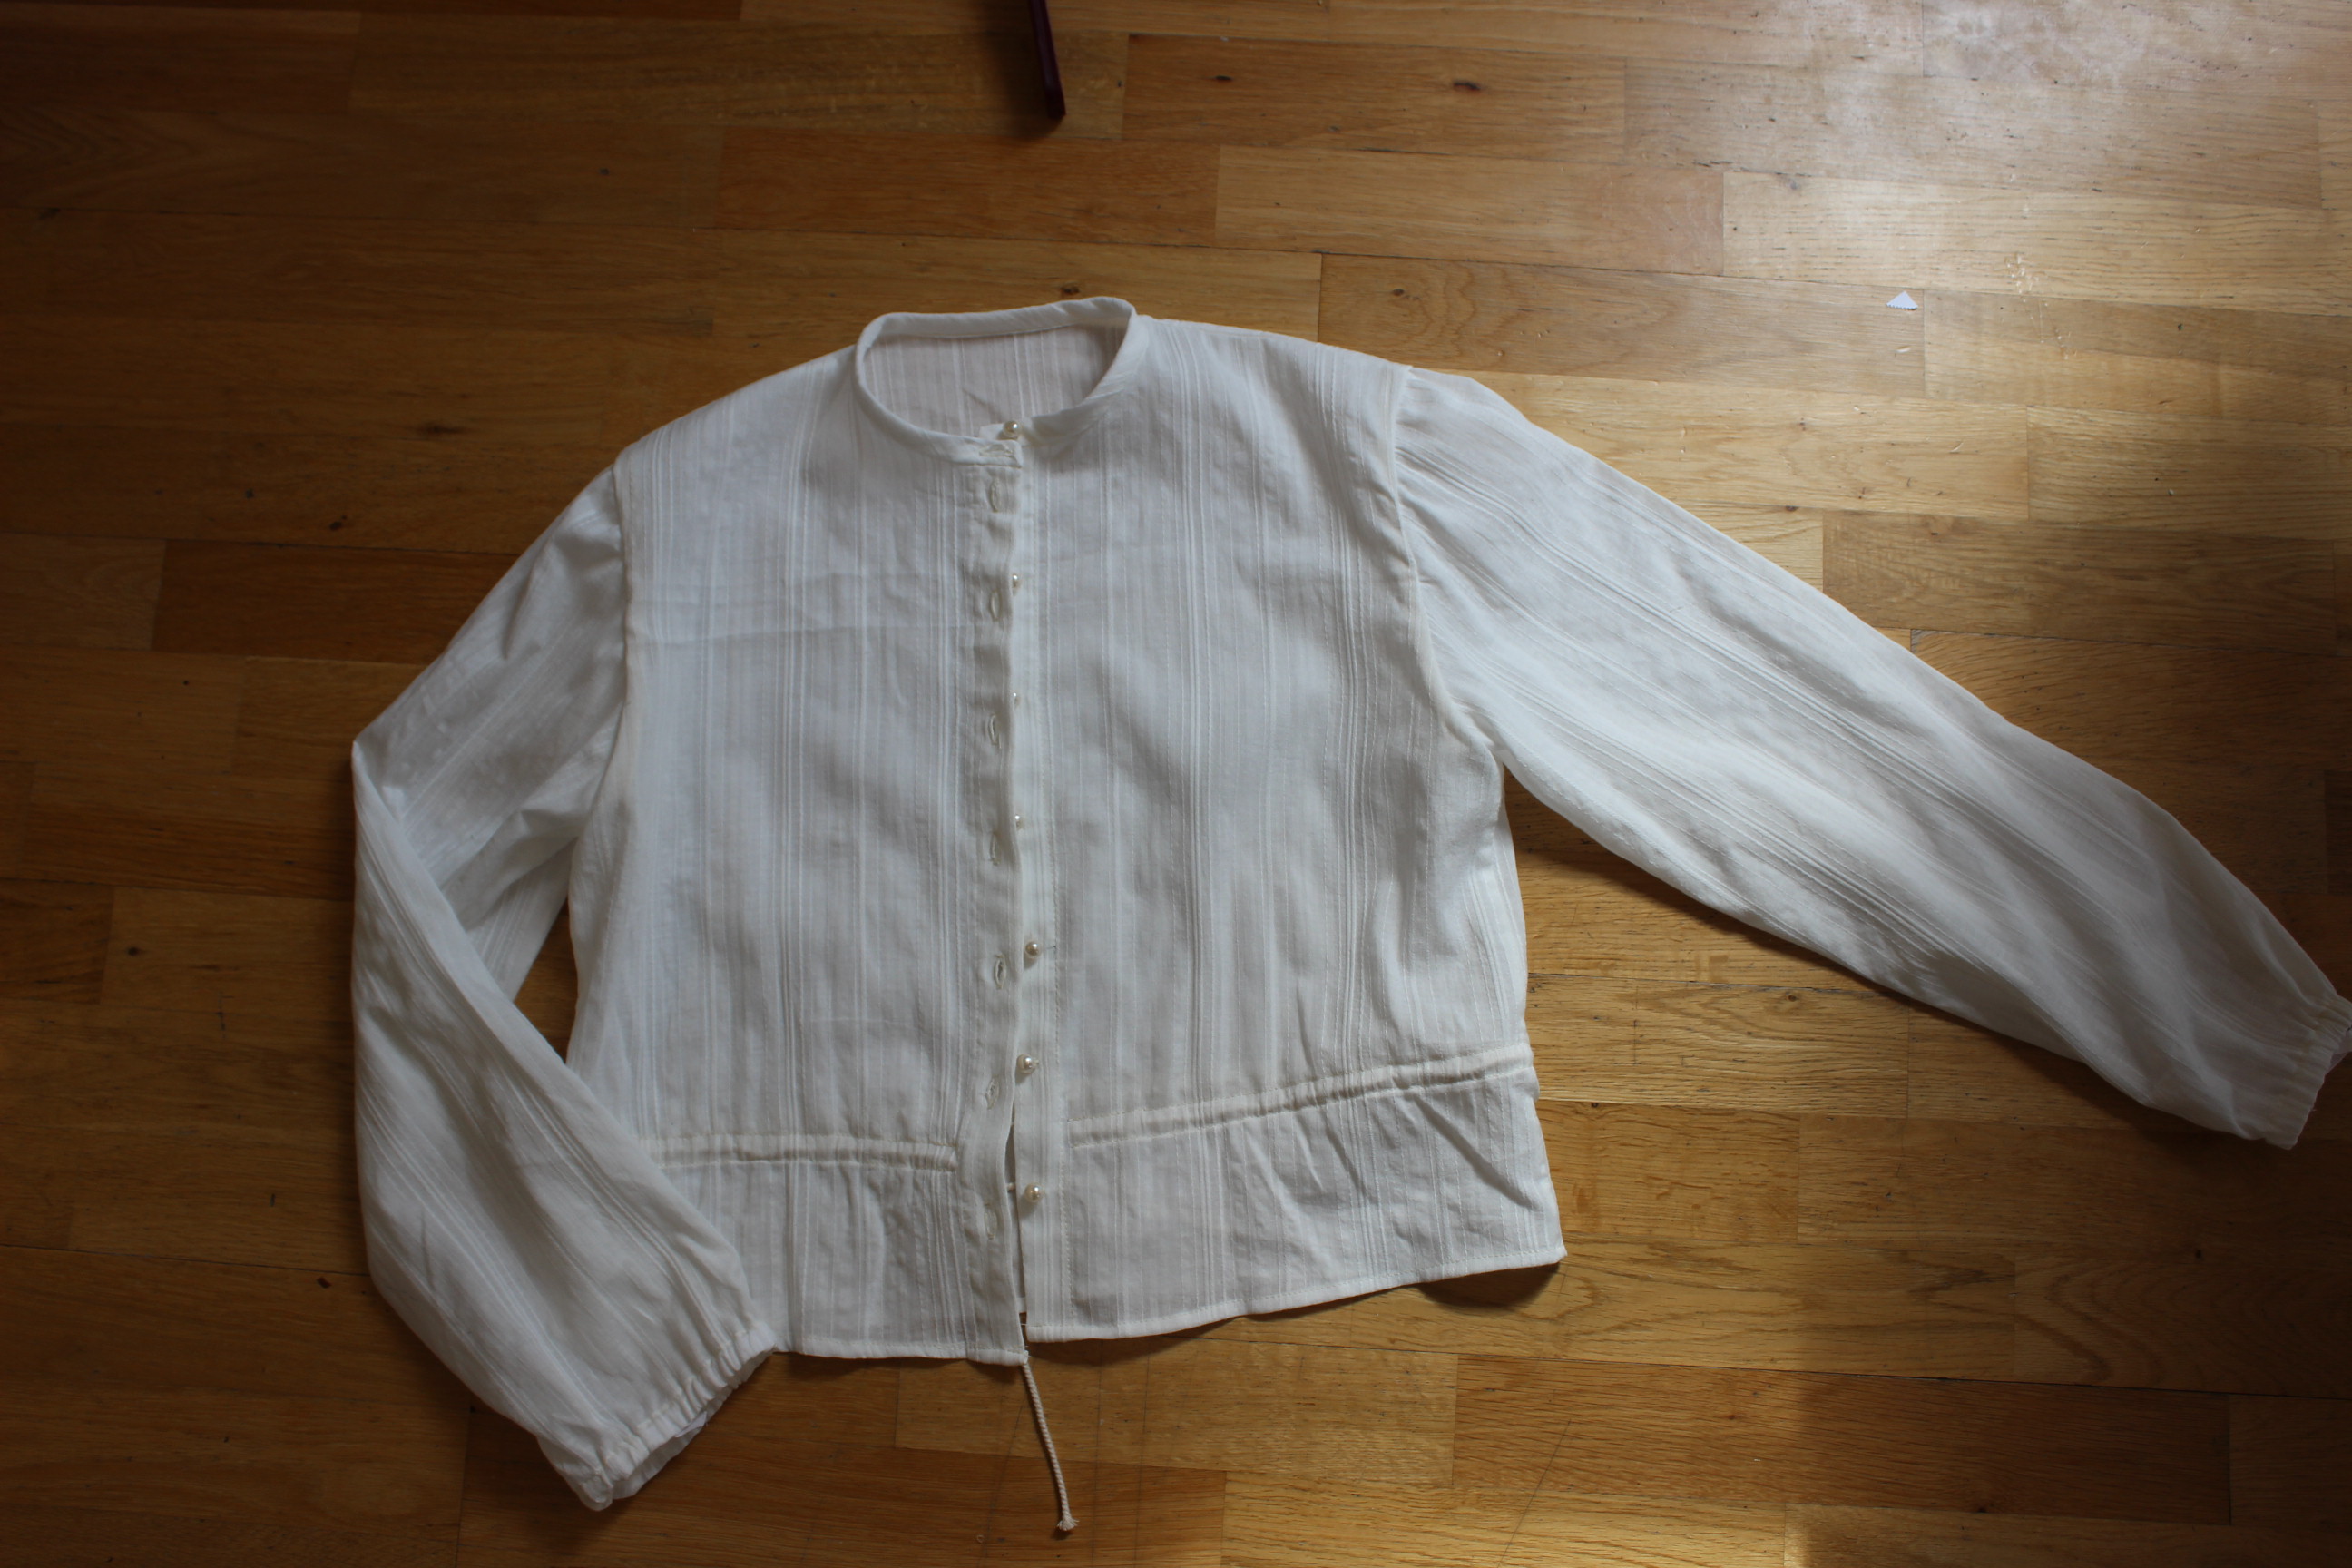
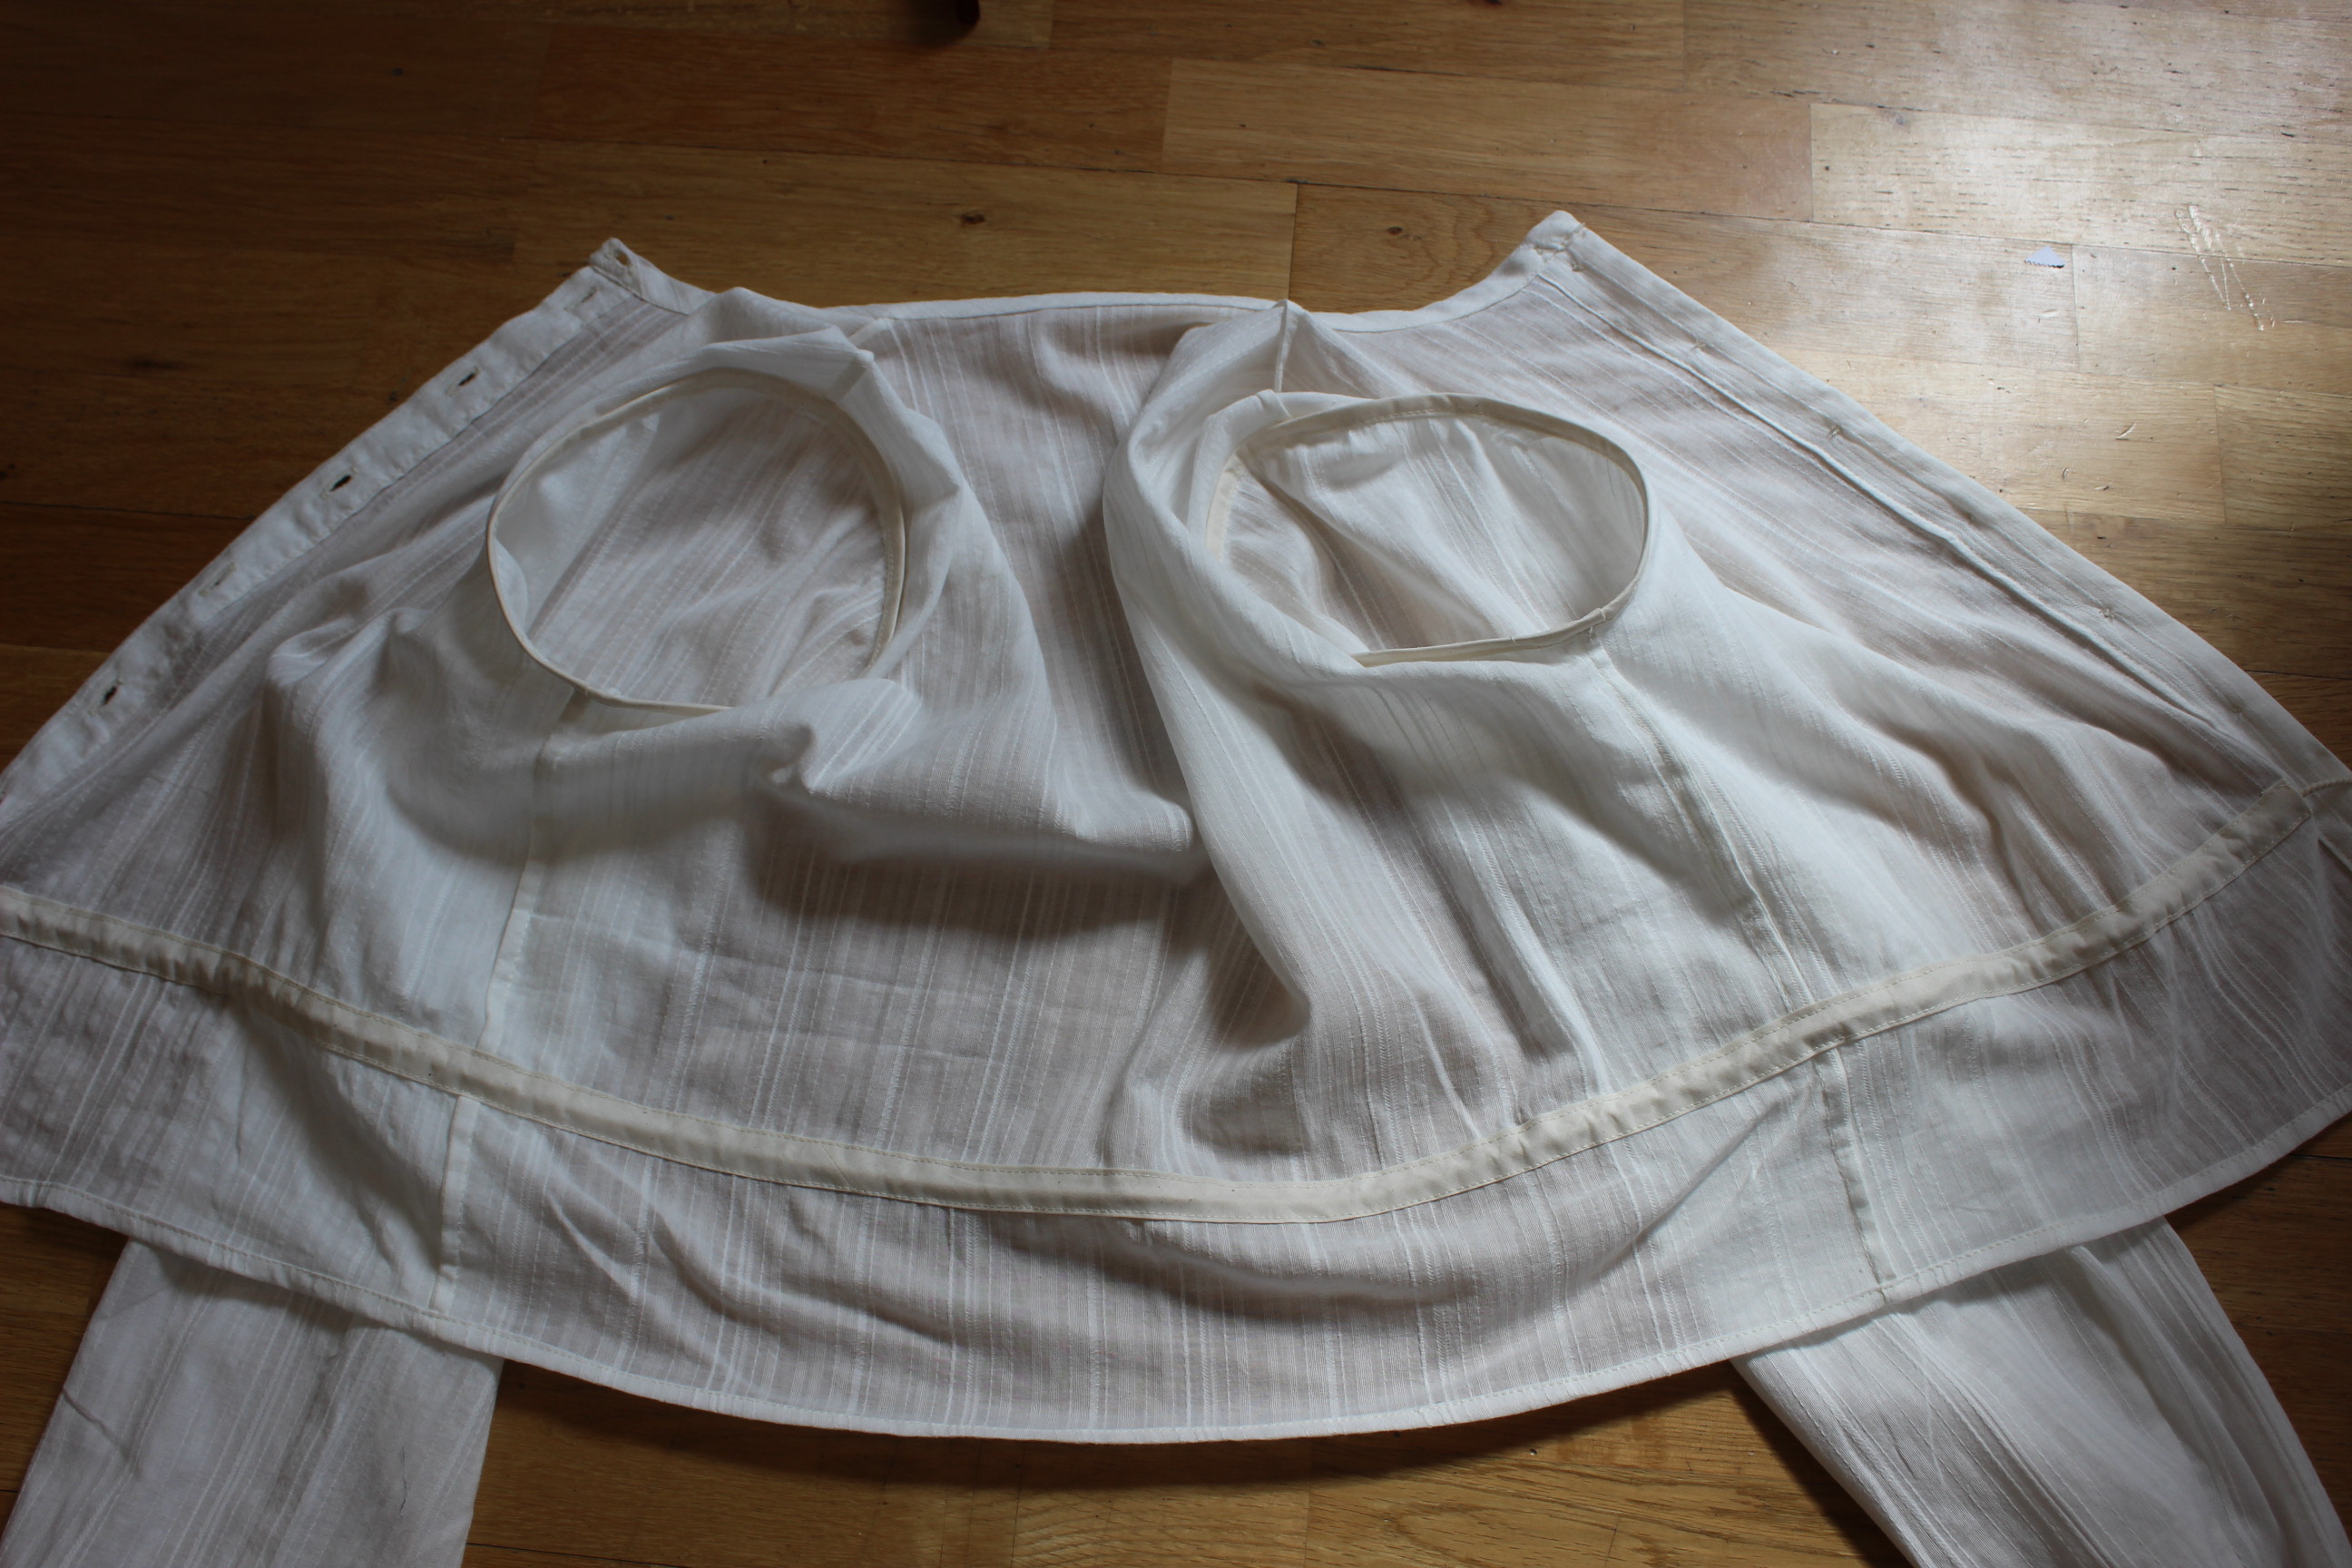
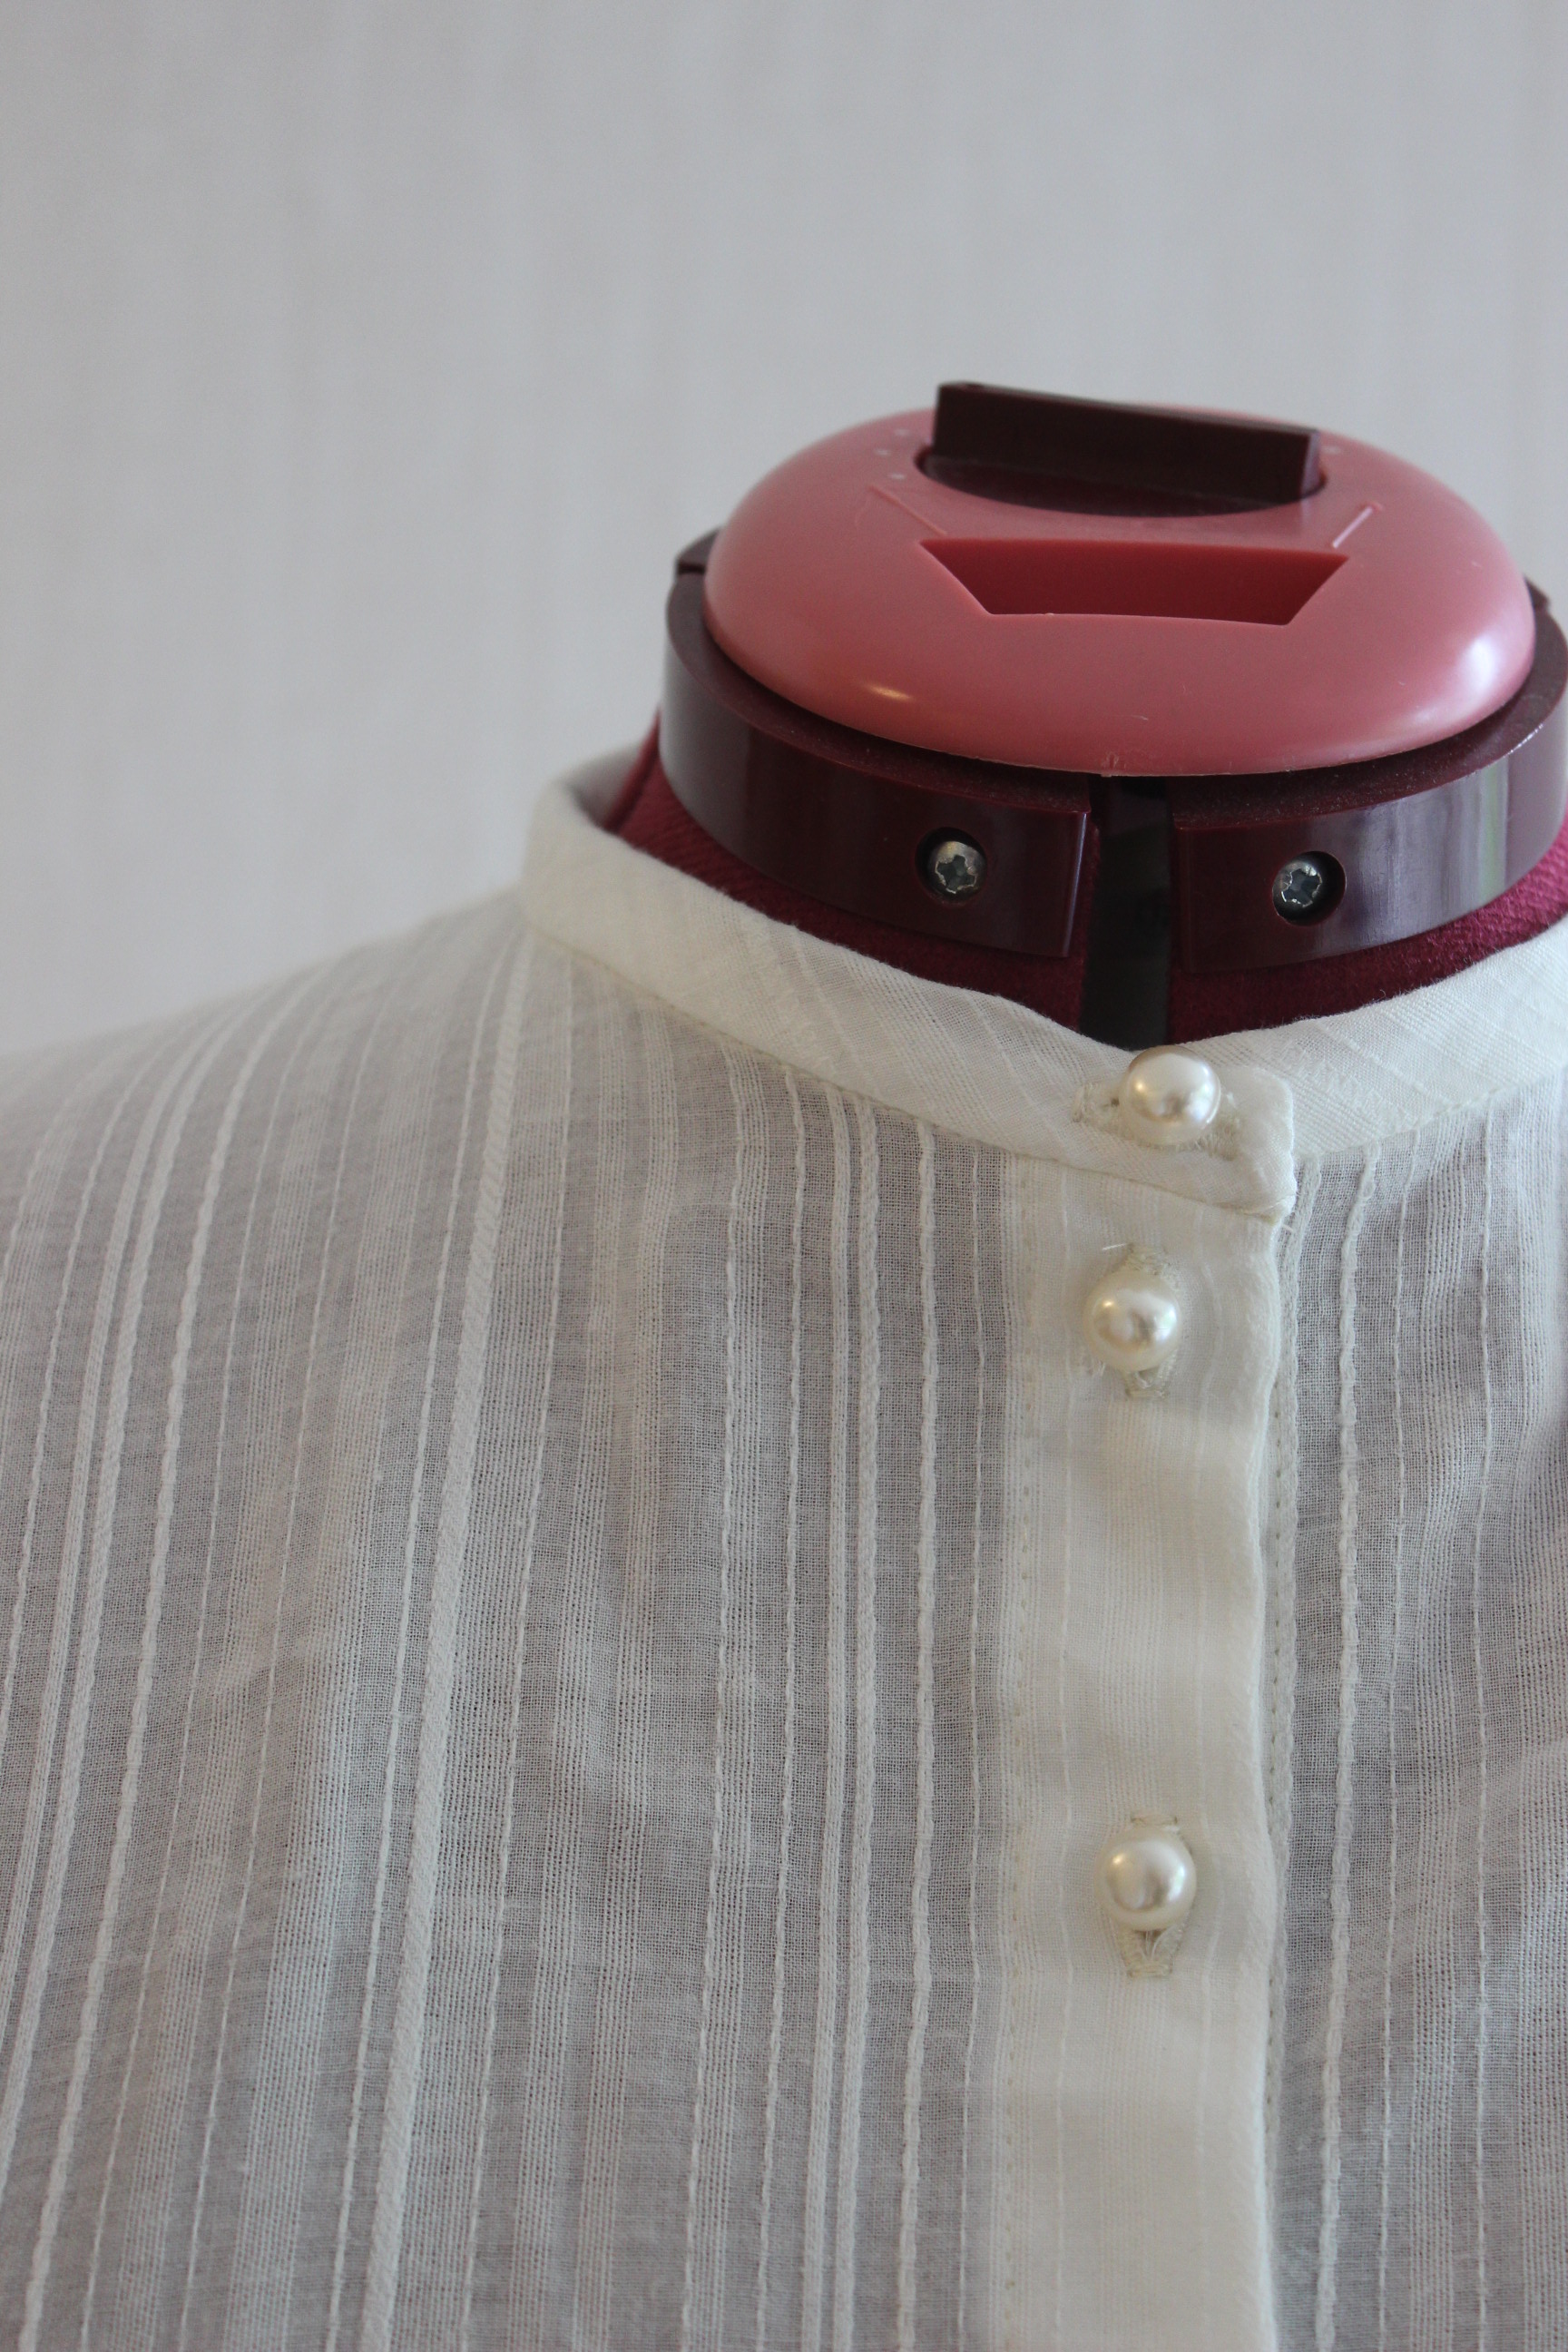
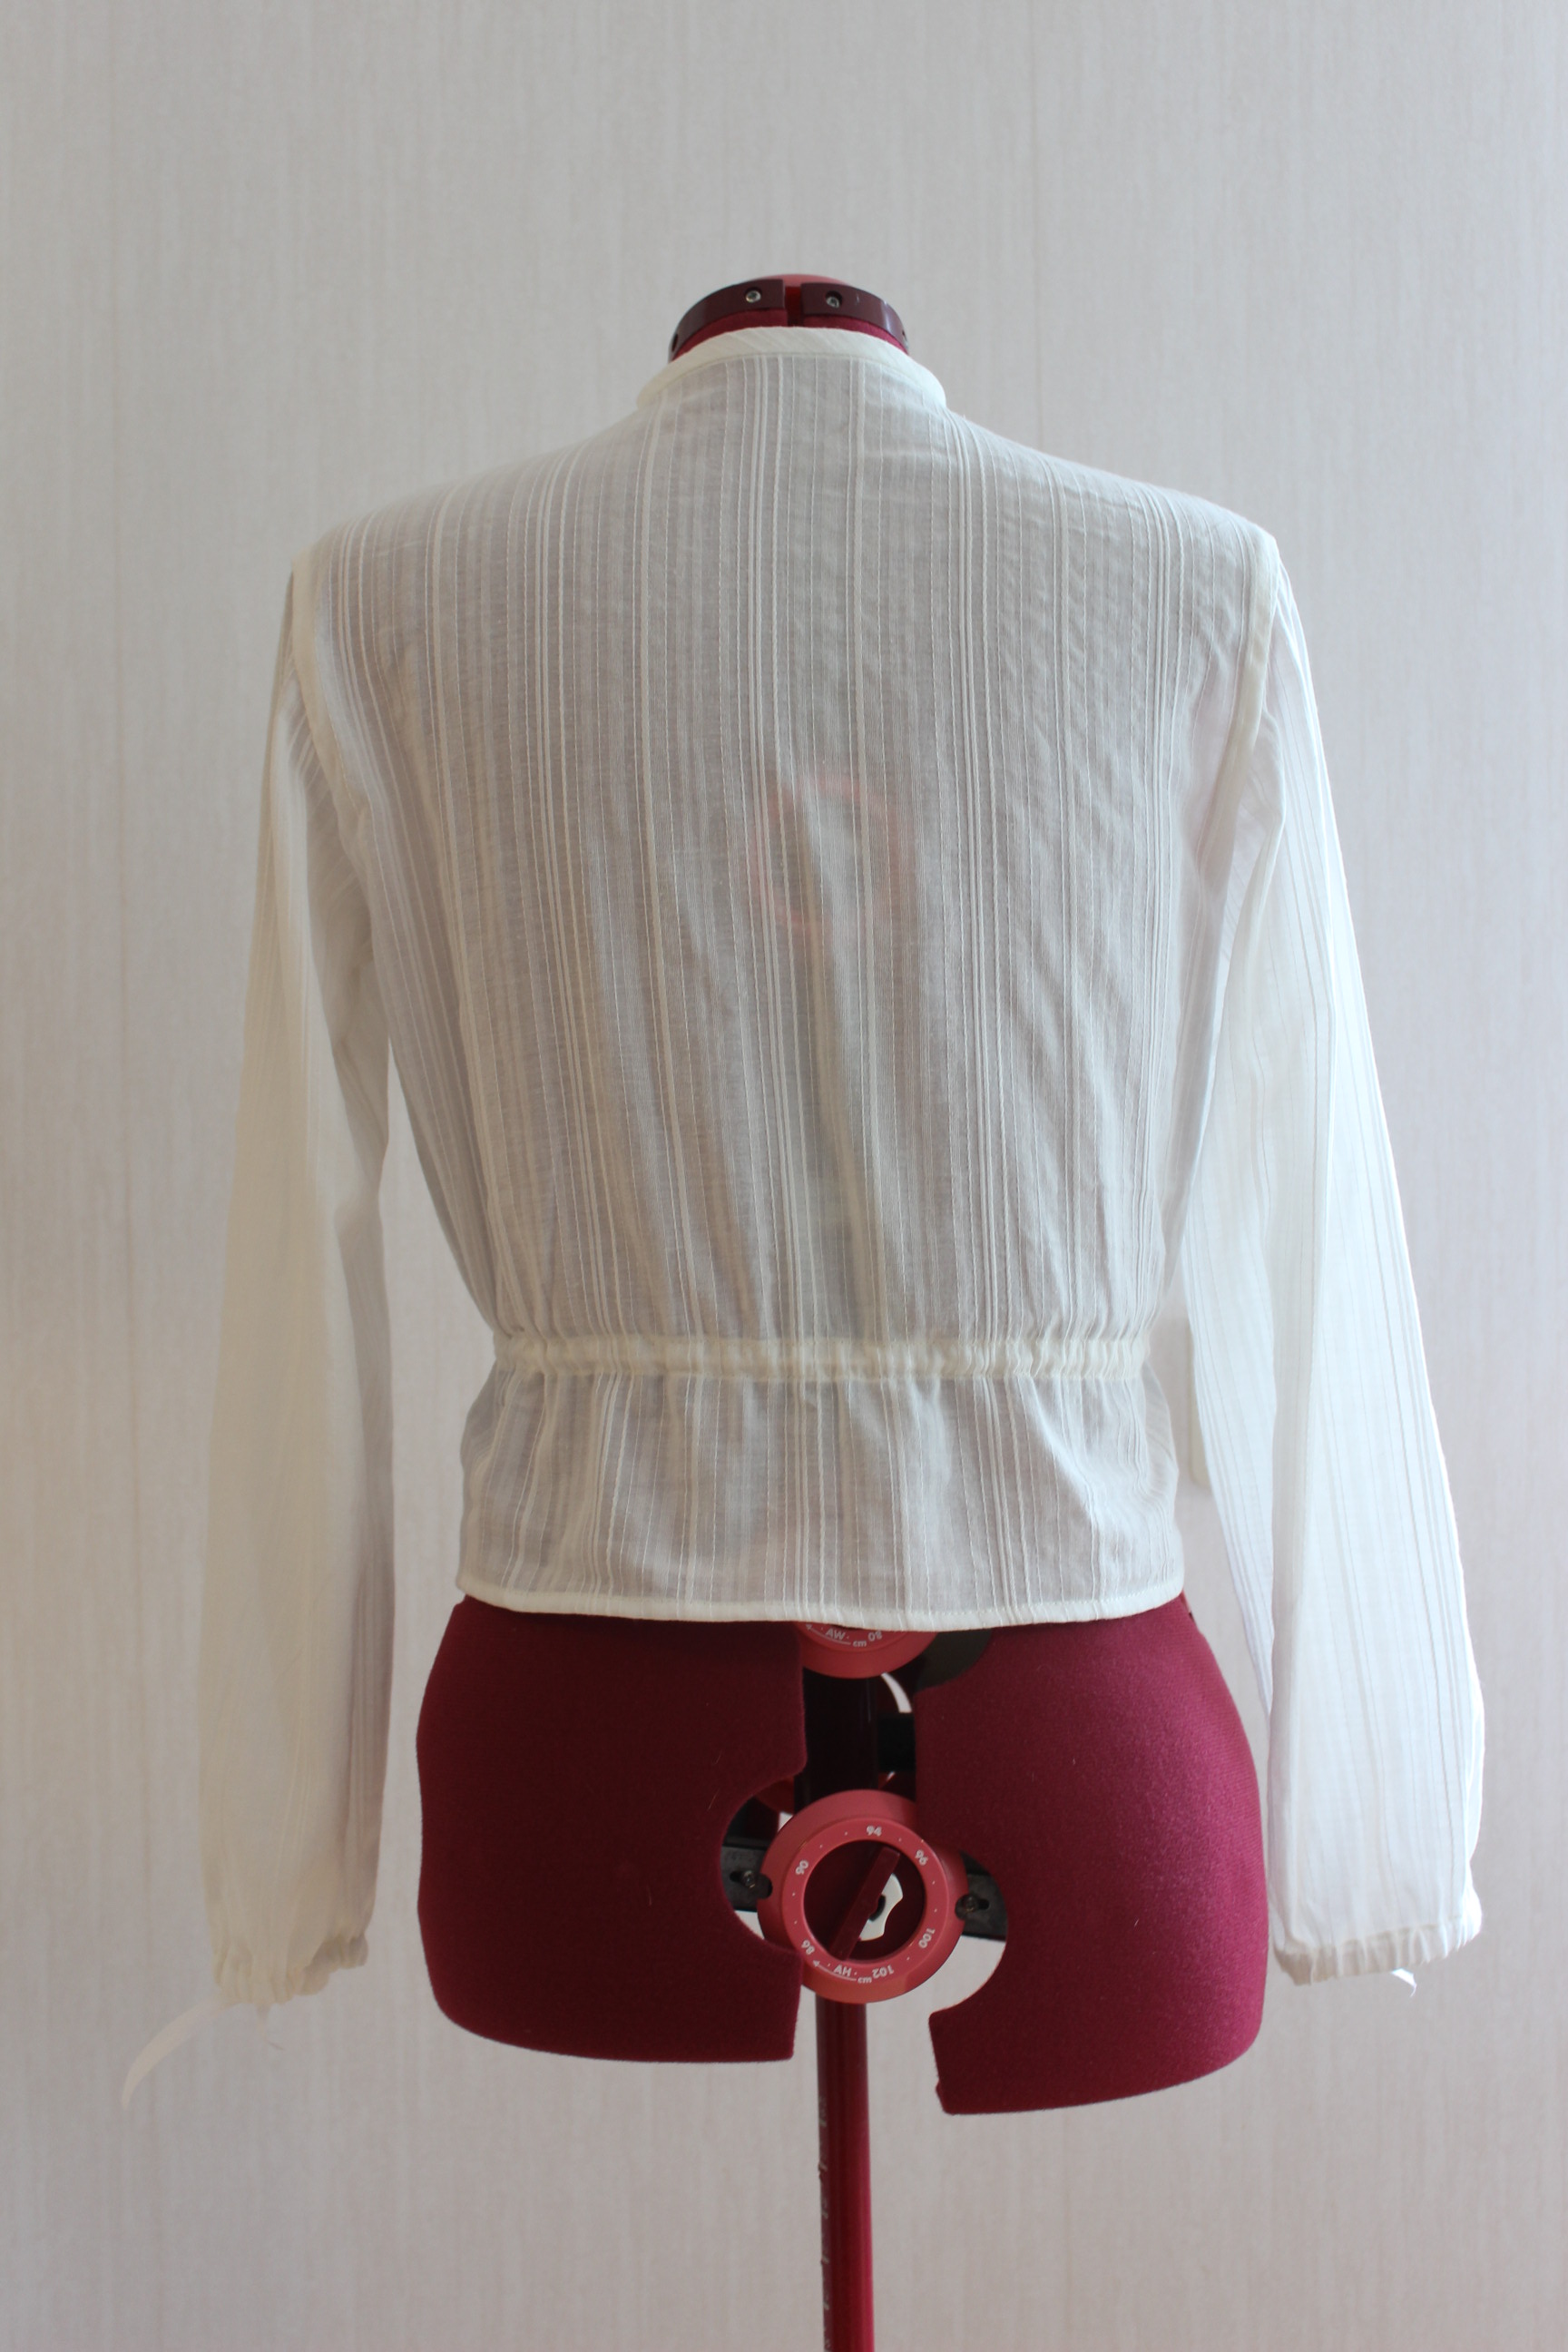
Basically I just stitched the bodice together using french seams, added the small collar, sewed the buttonhole-stand and added buttons and (machined) buttonholes. Sewed and set the sleeves, covering the seams with bias-tape to get a clean finish. Then I hemmed the shirt, added the bias-tape for the drawstring waist.
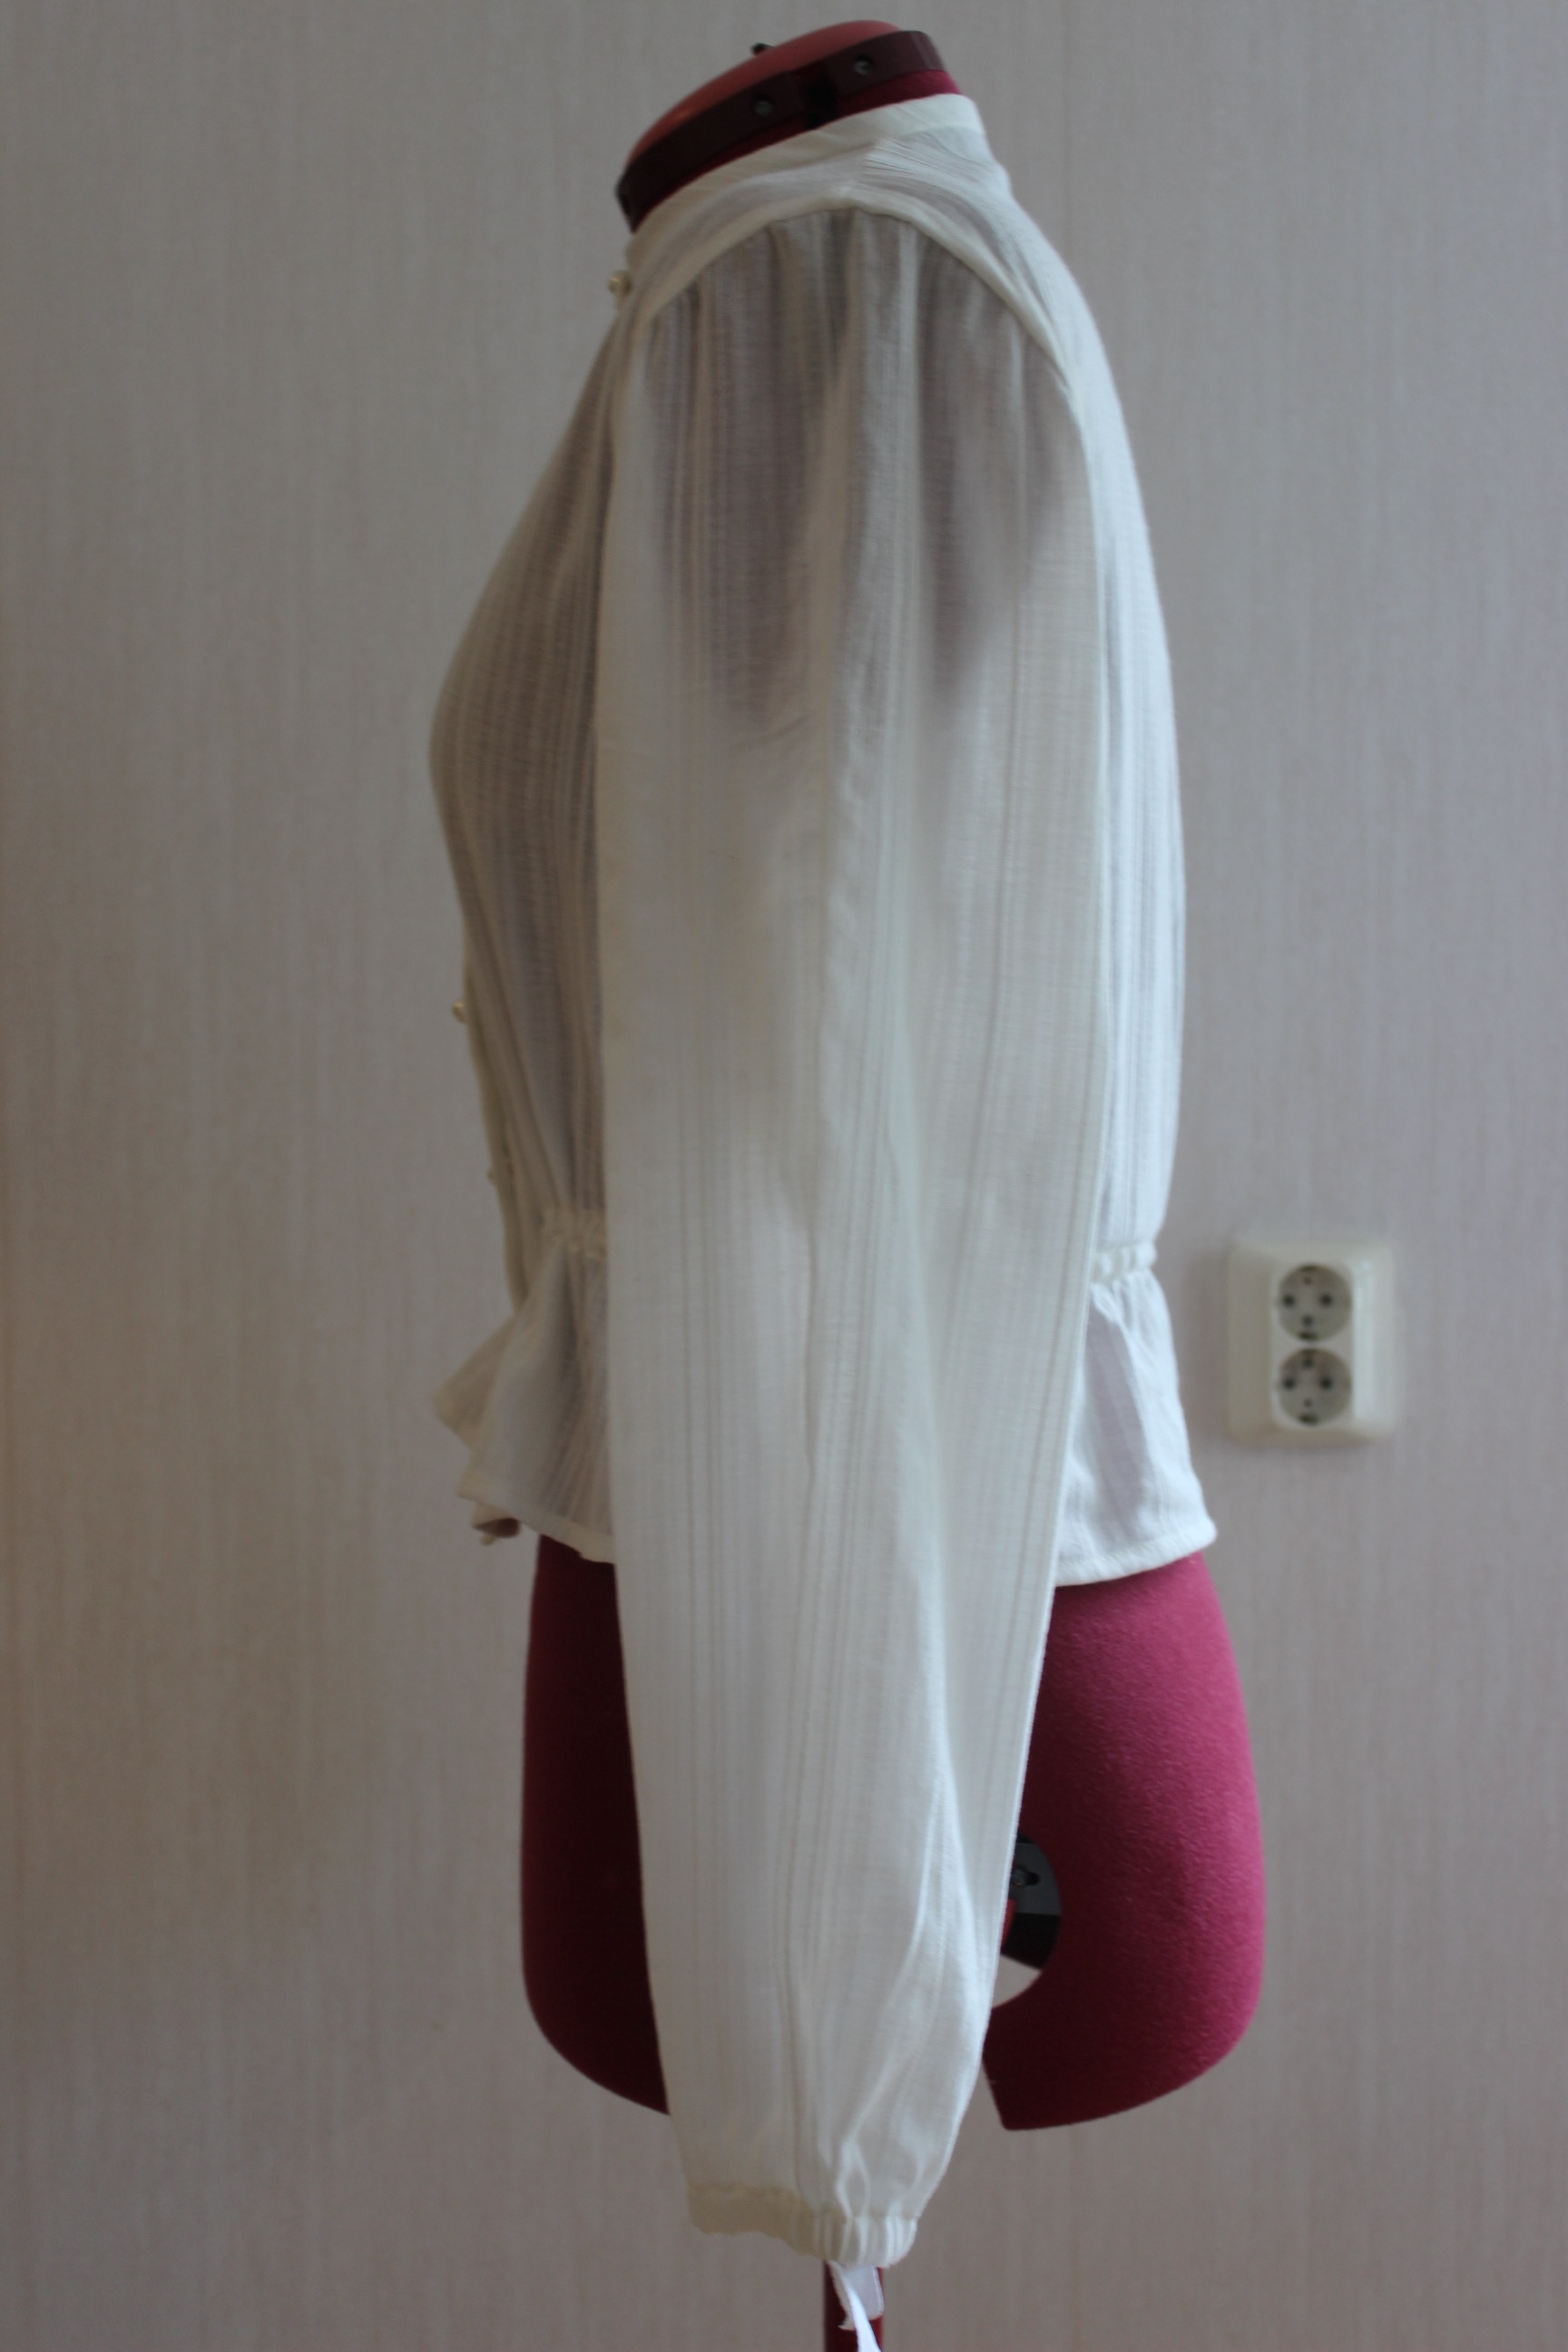
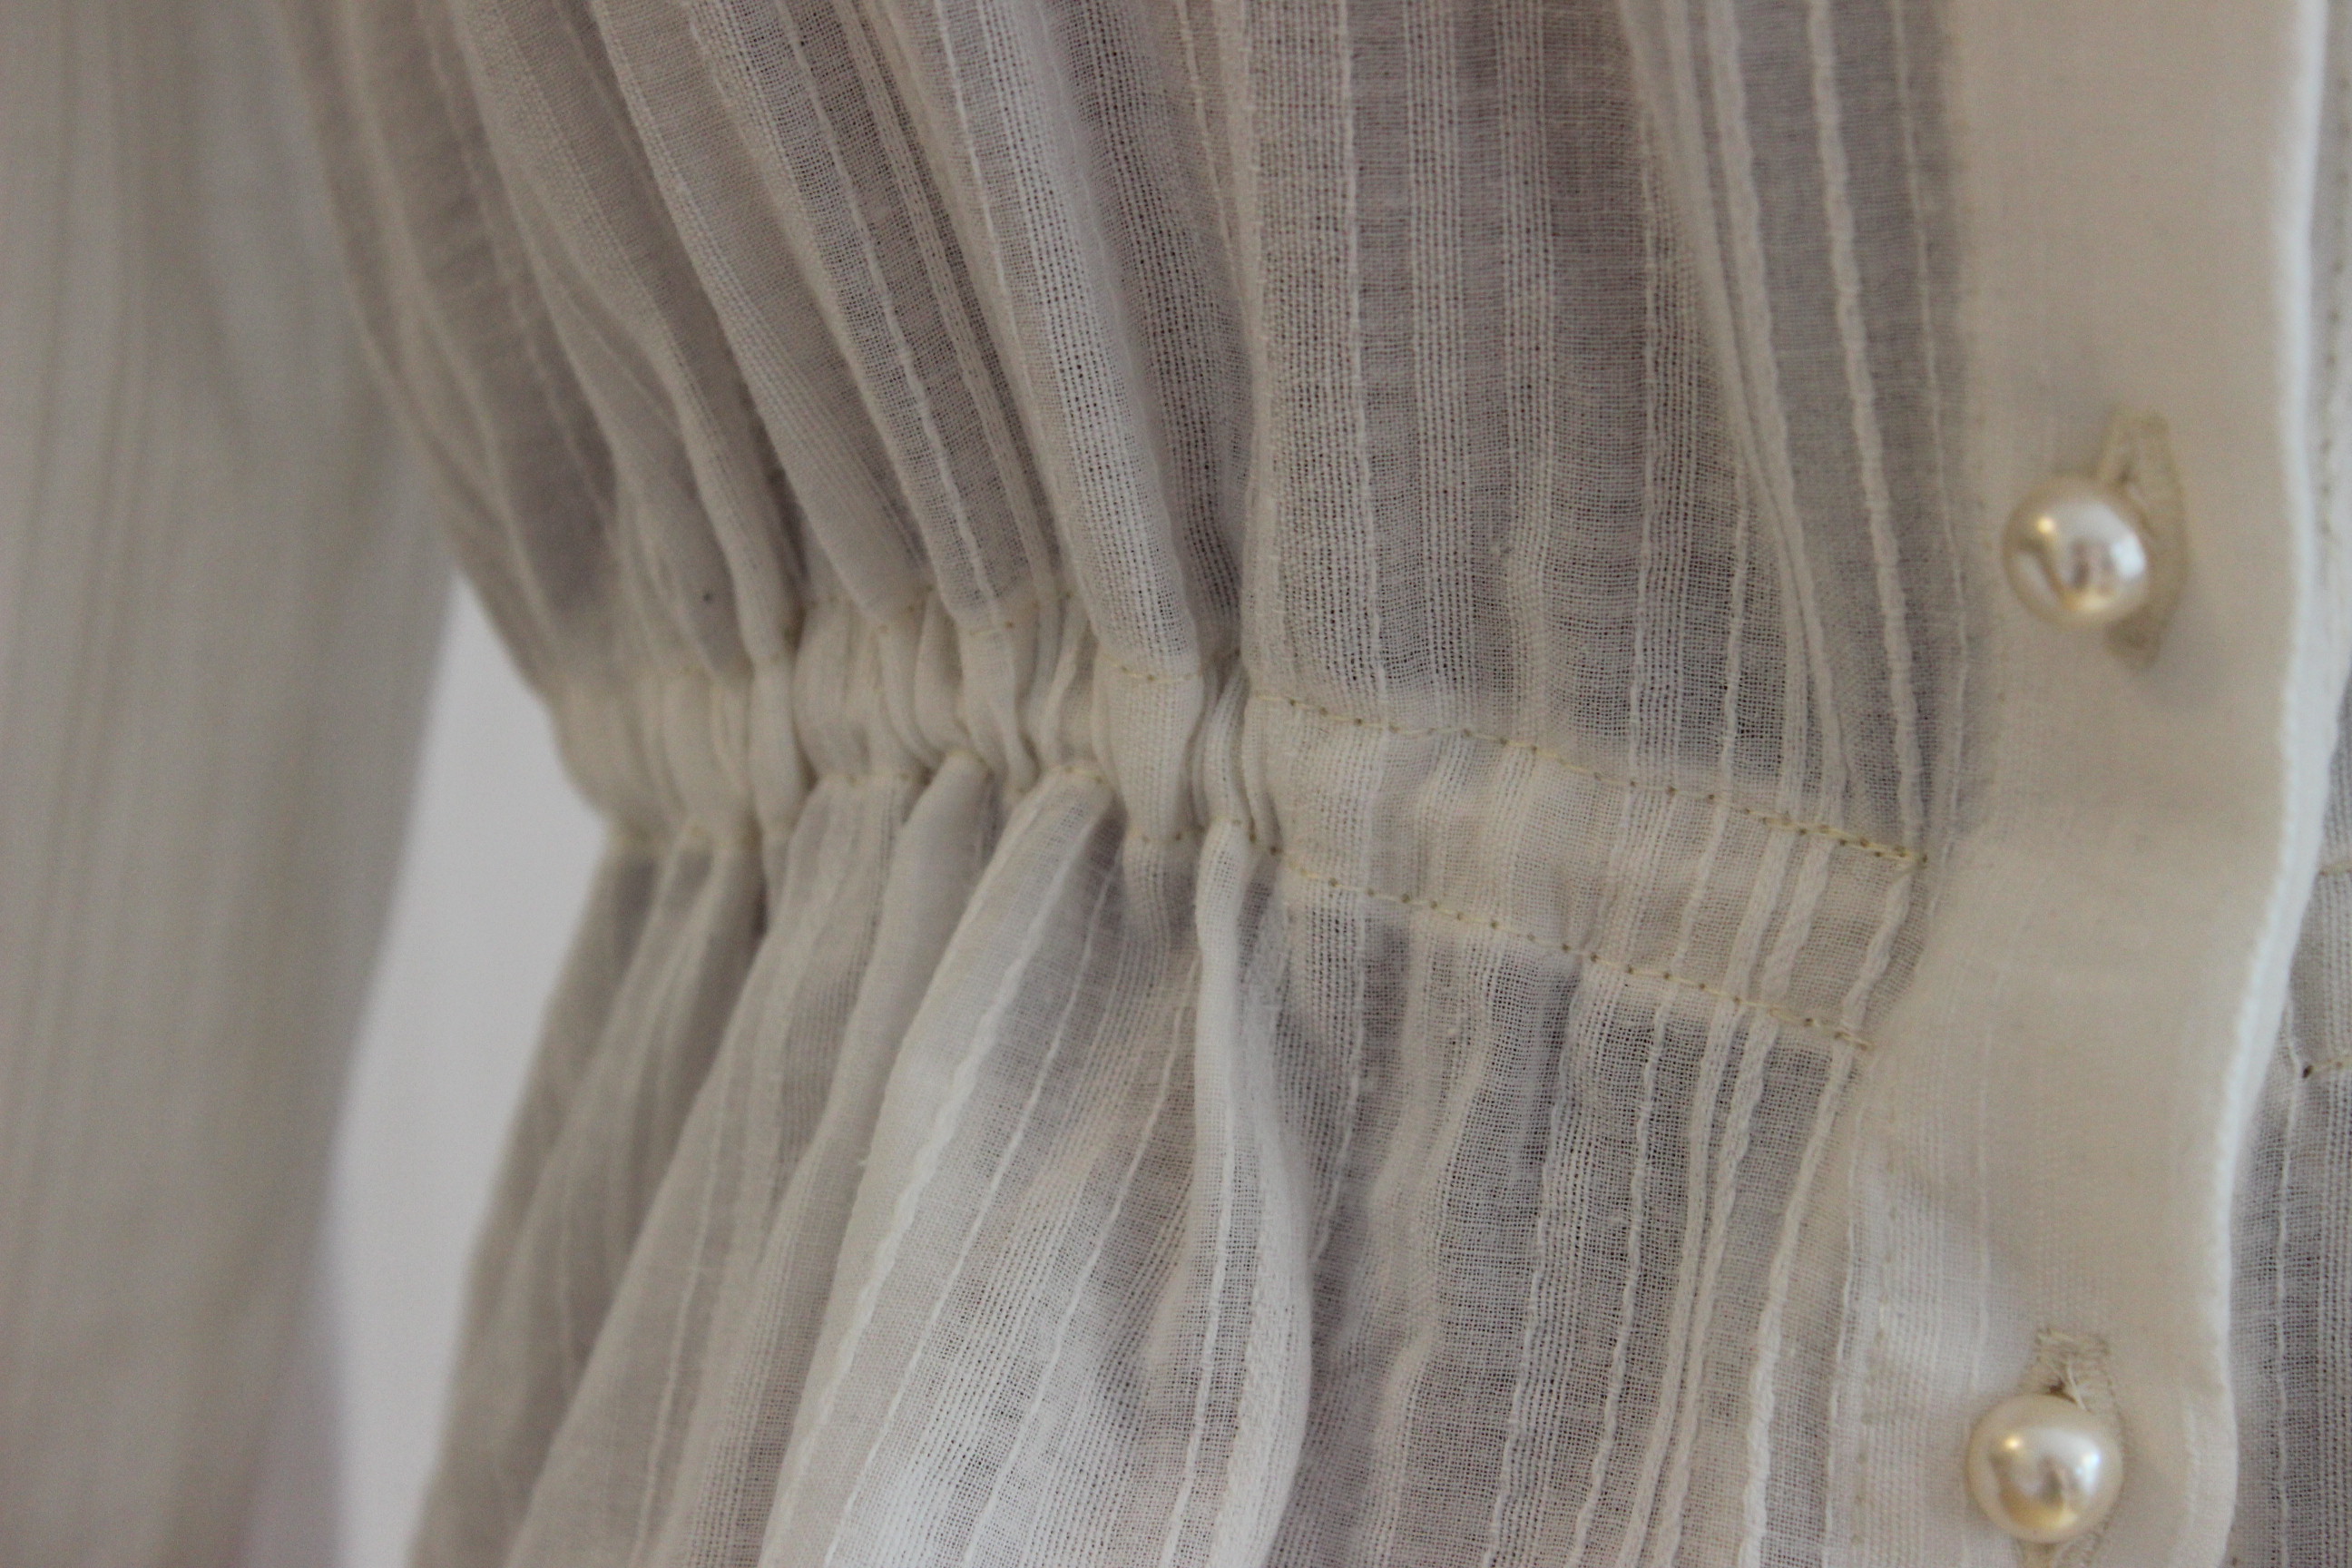
And finished of by folding, stitching and adding the ribbons for the wrist ties. 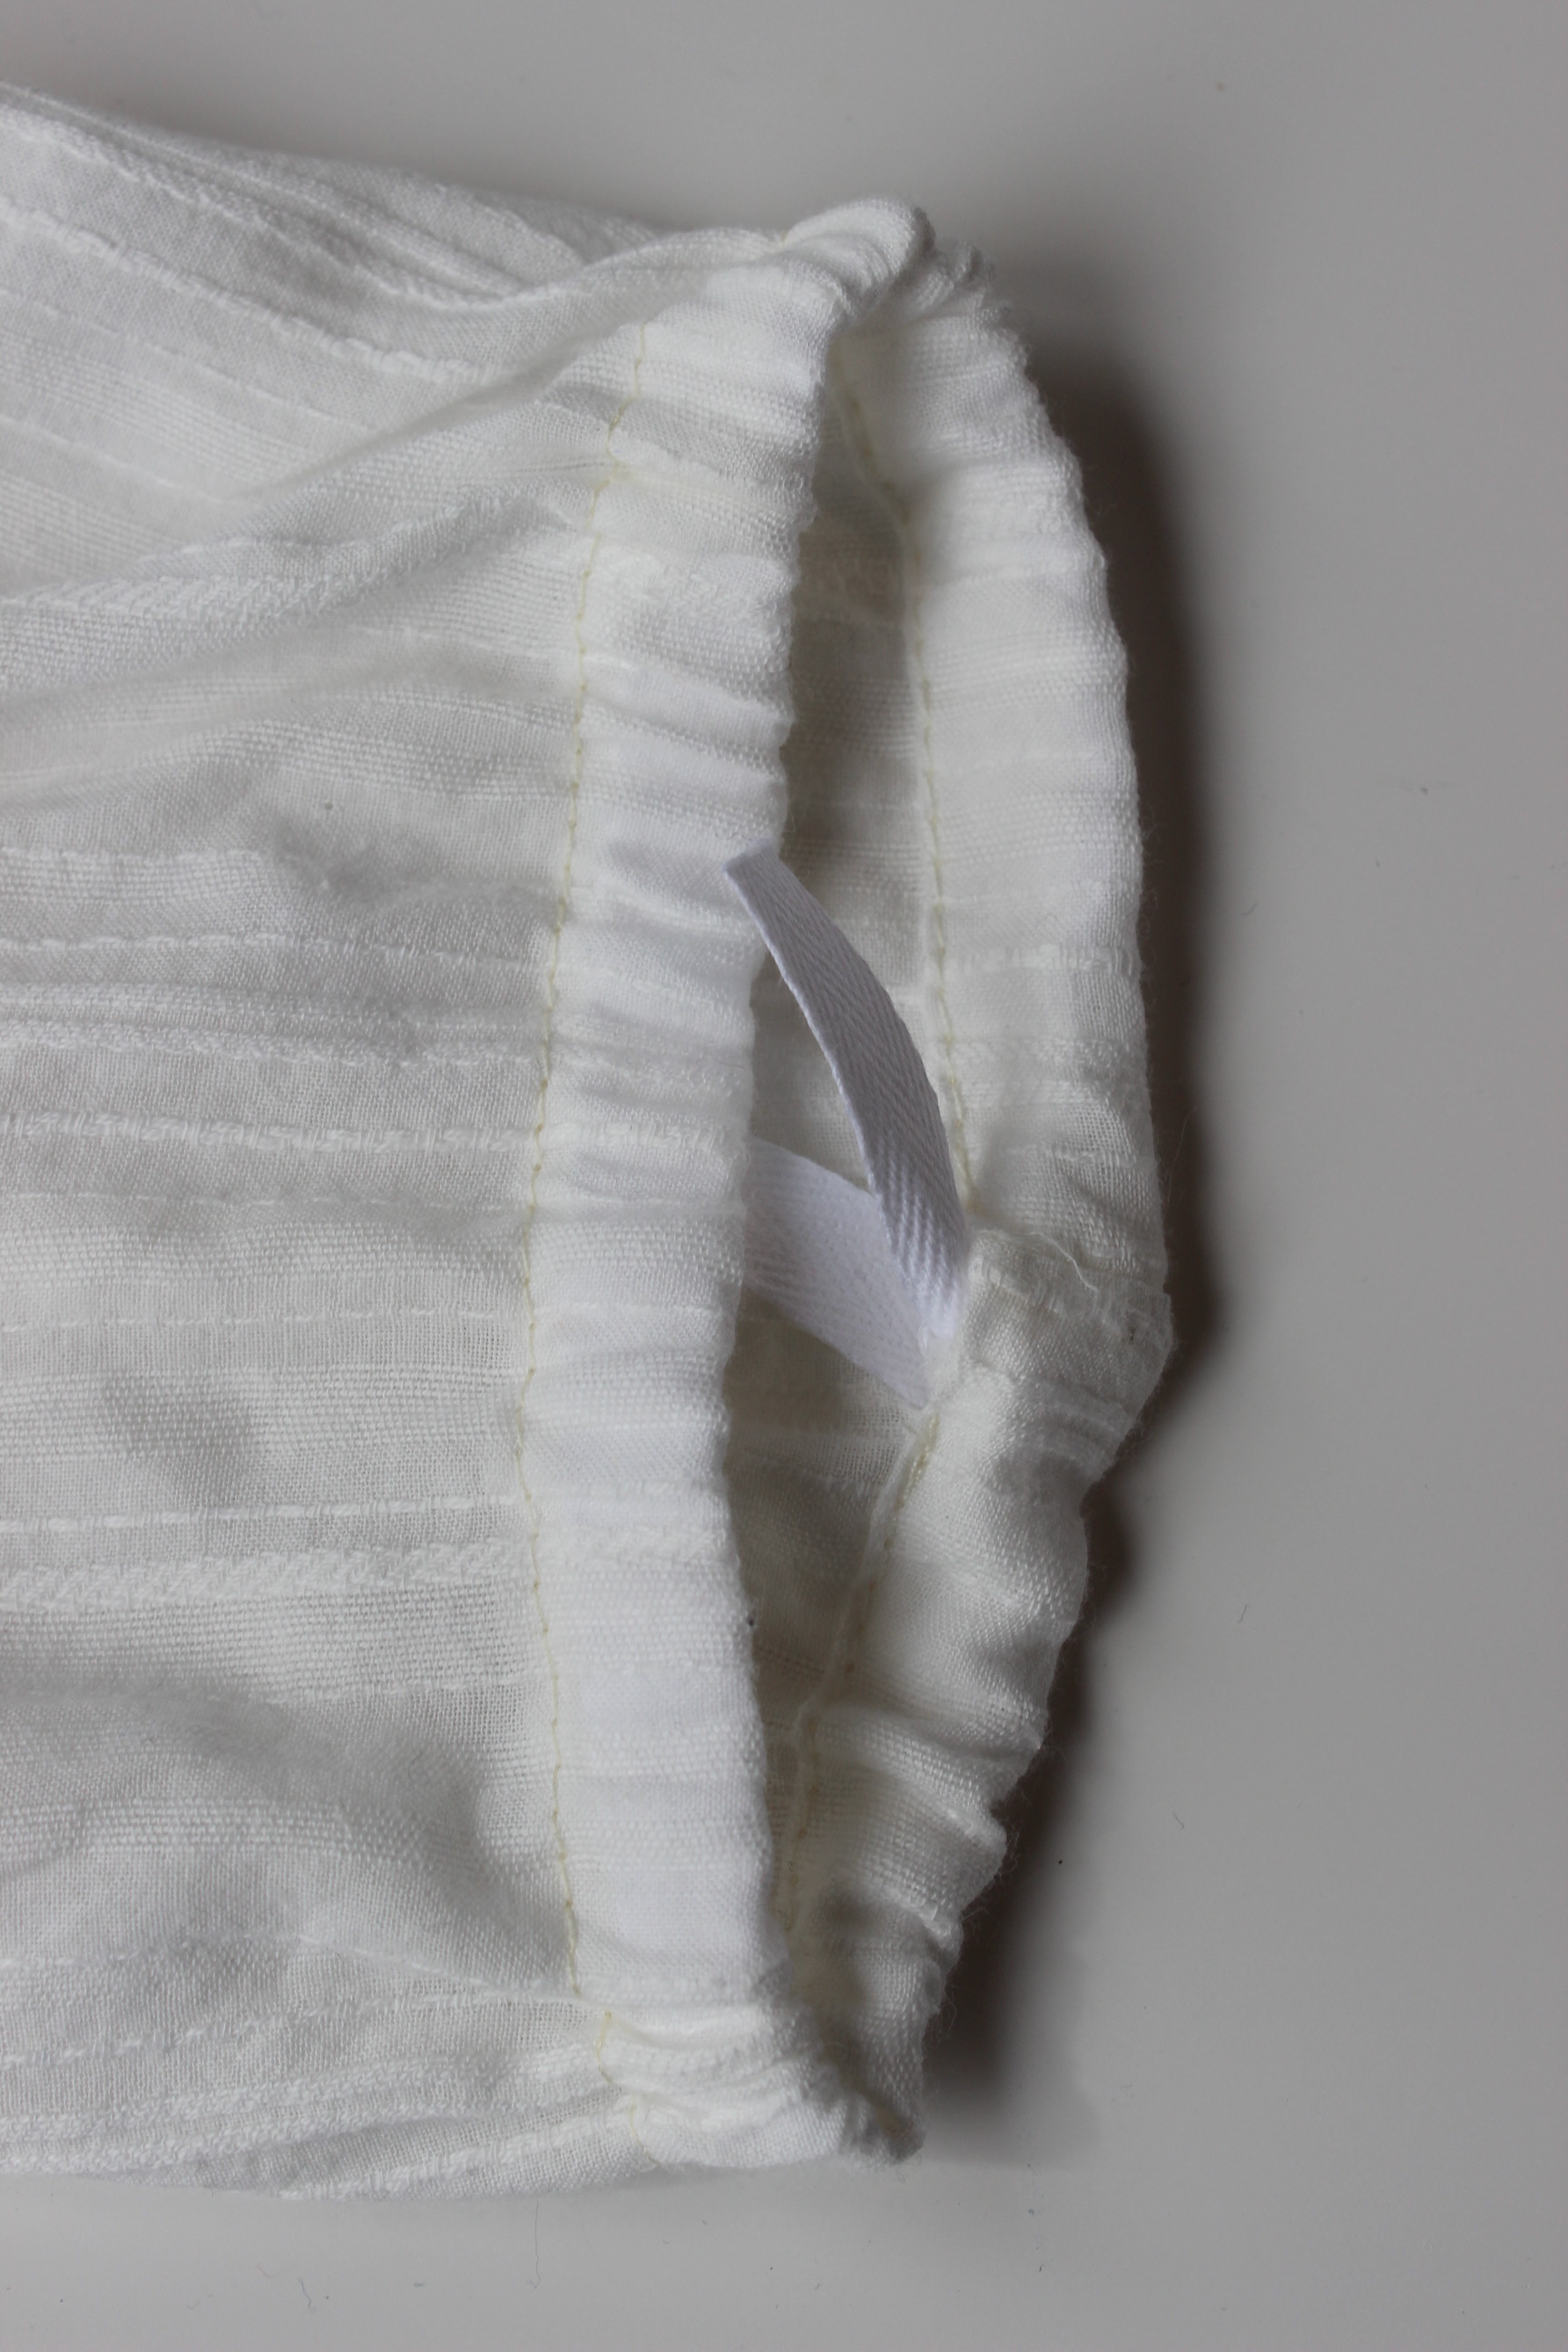
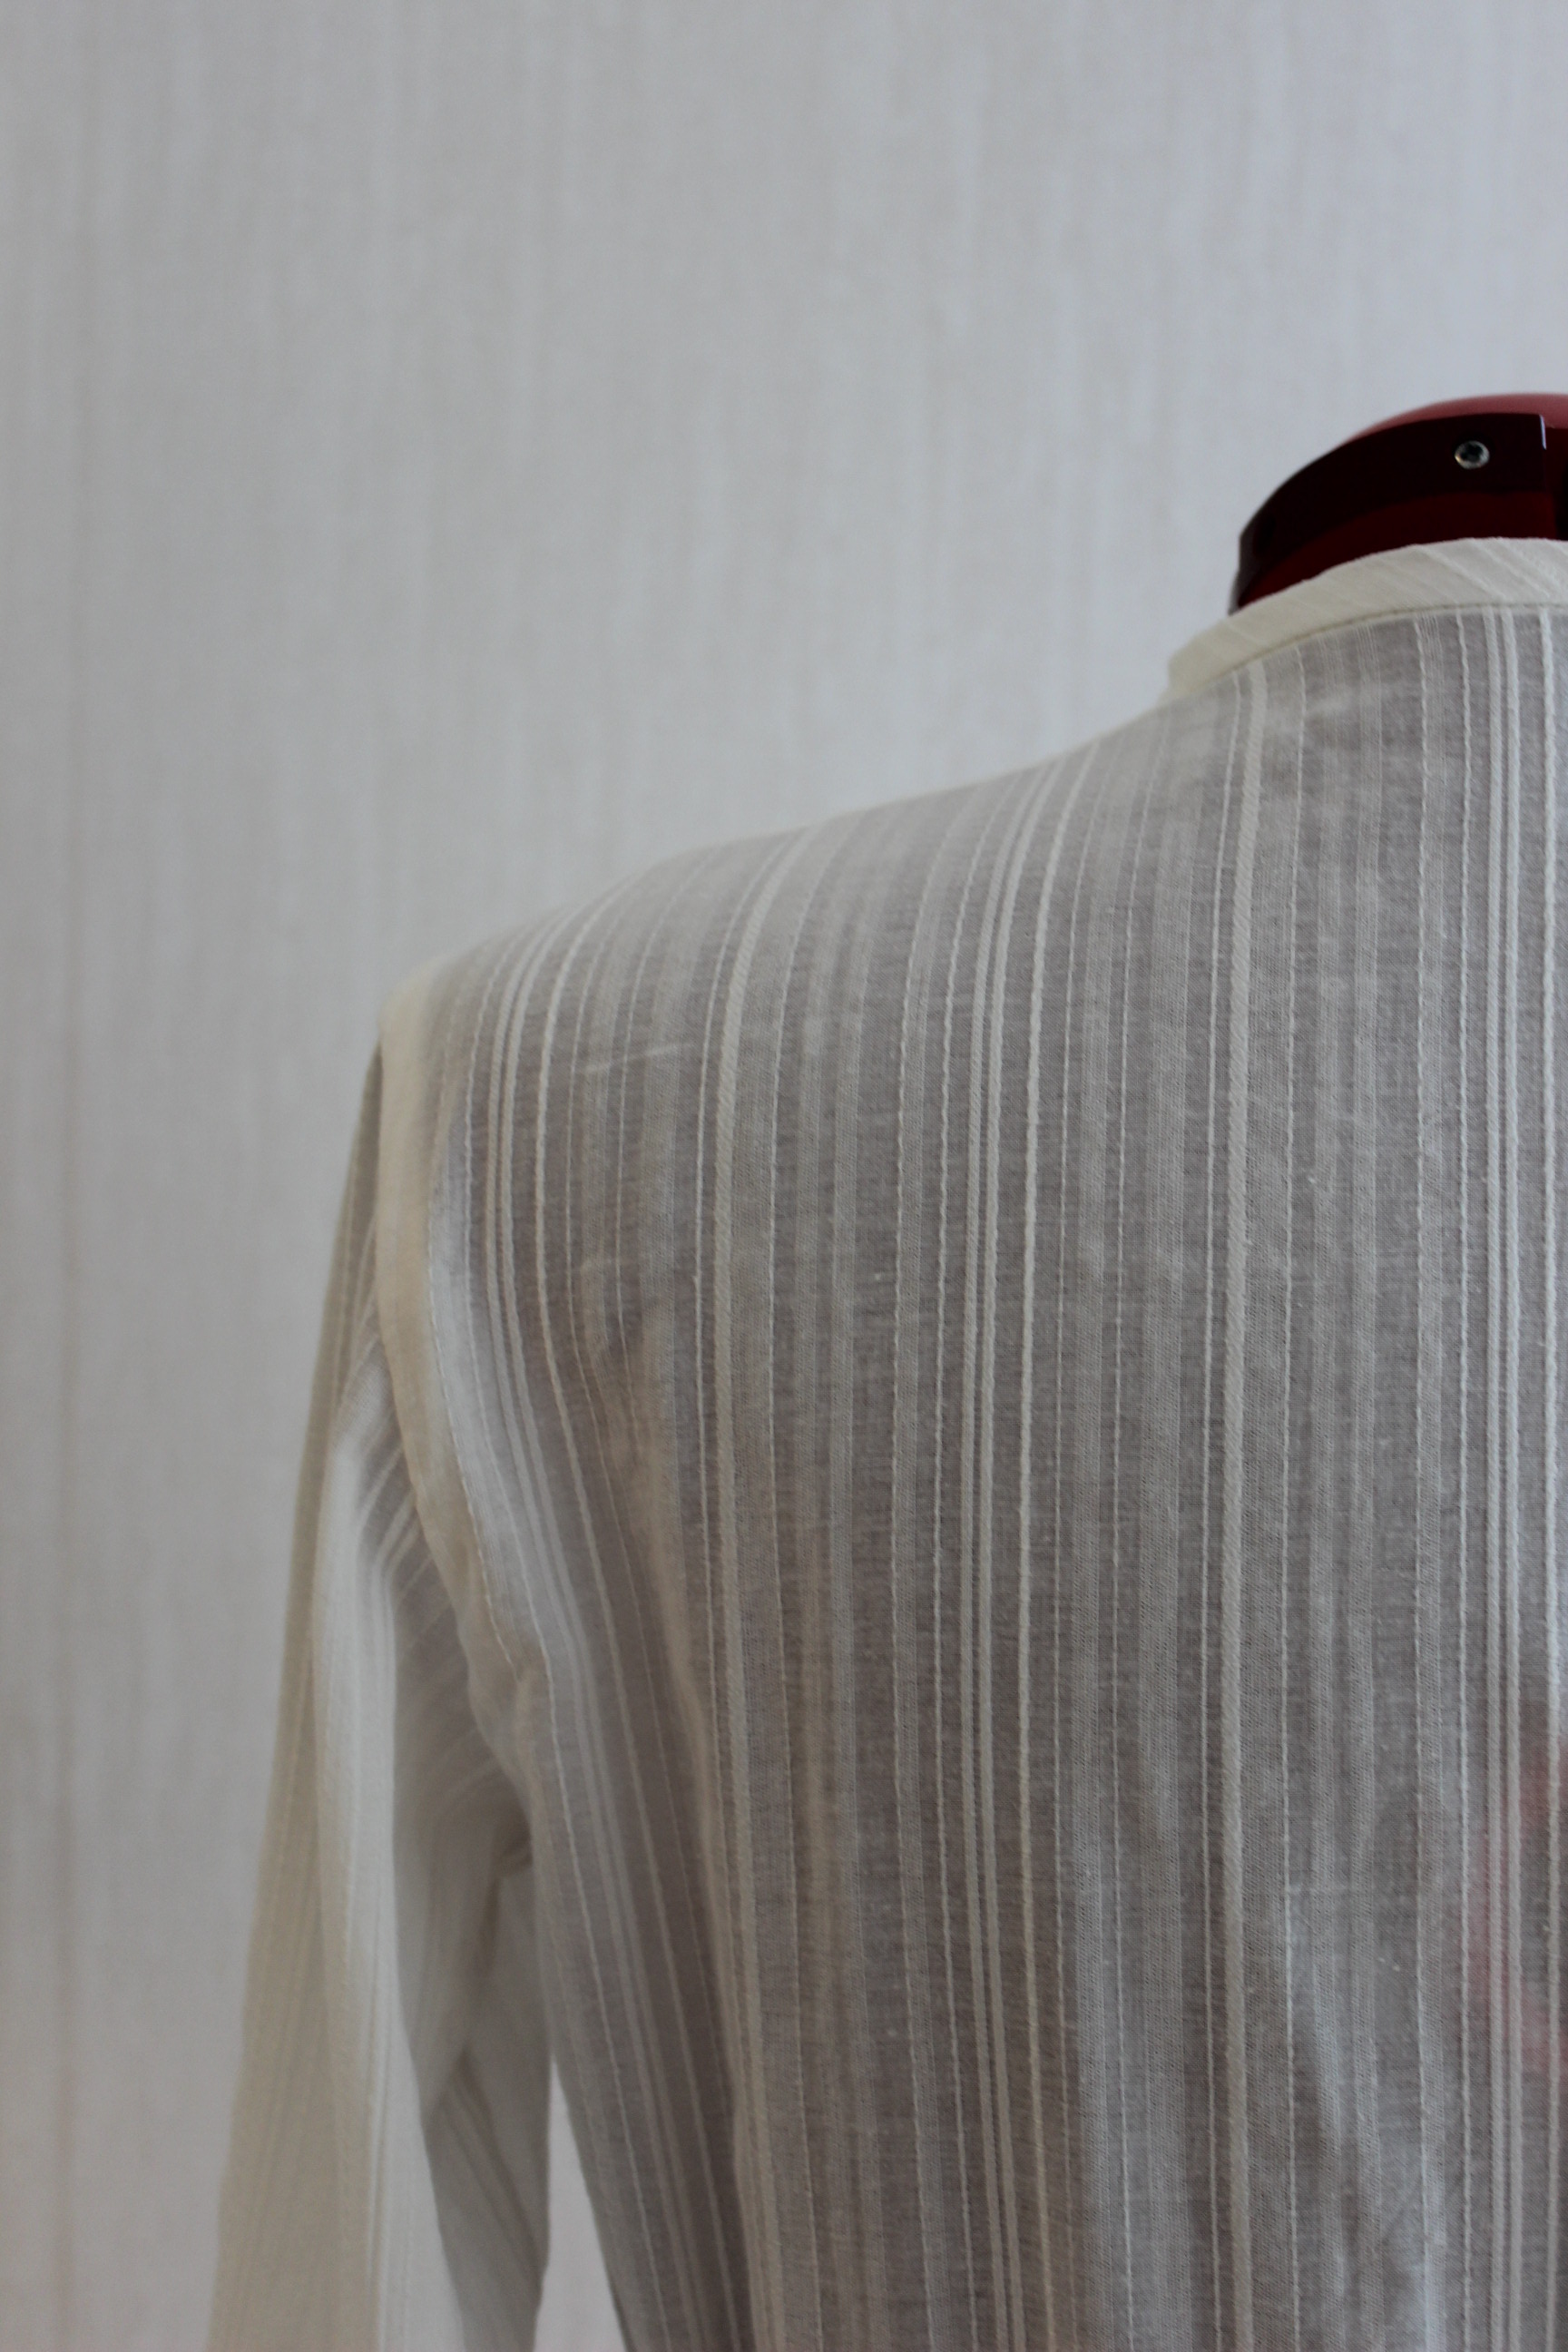
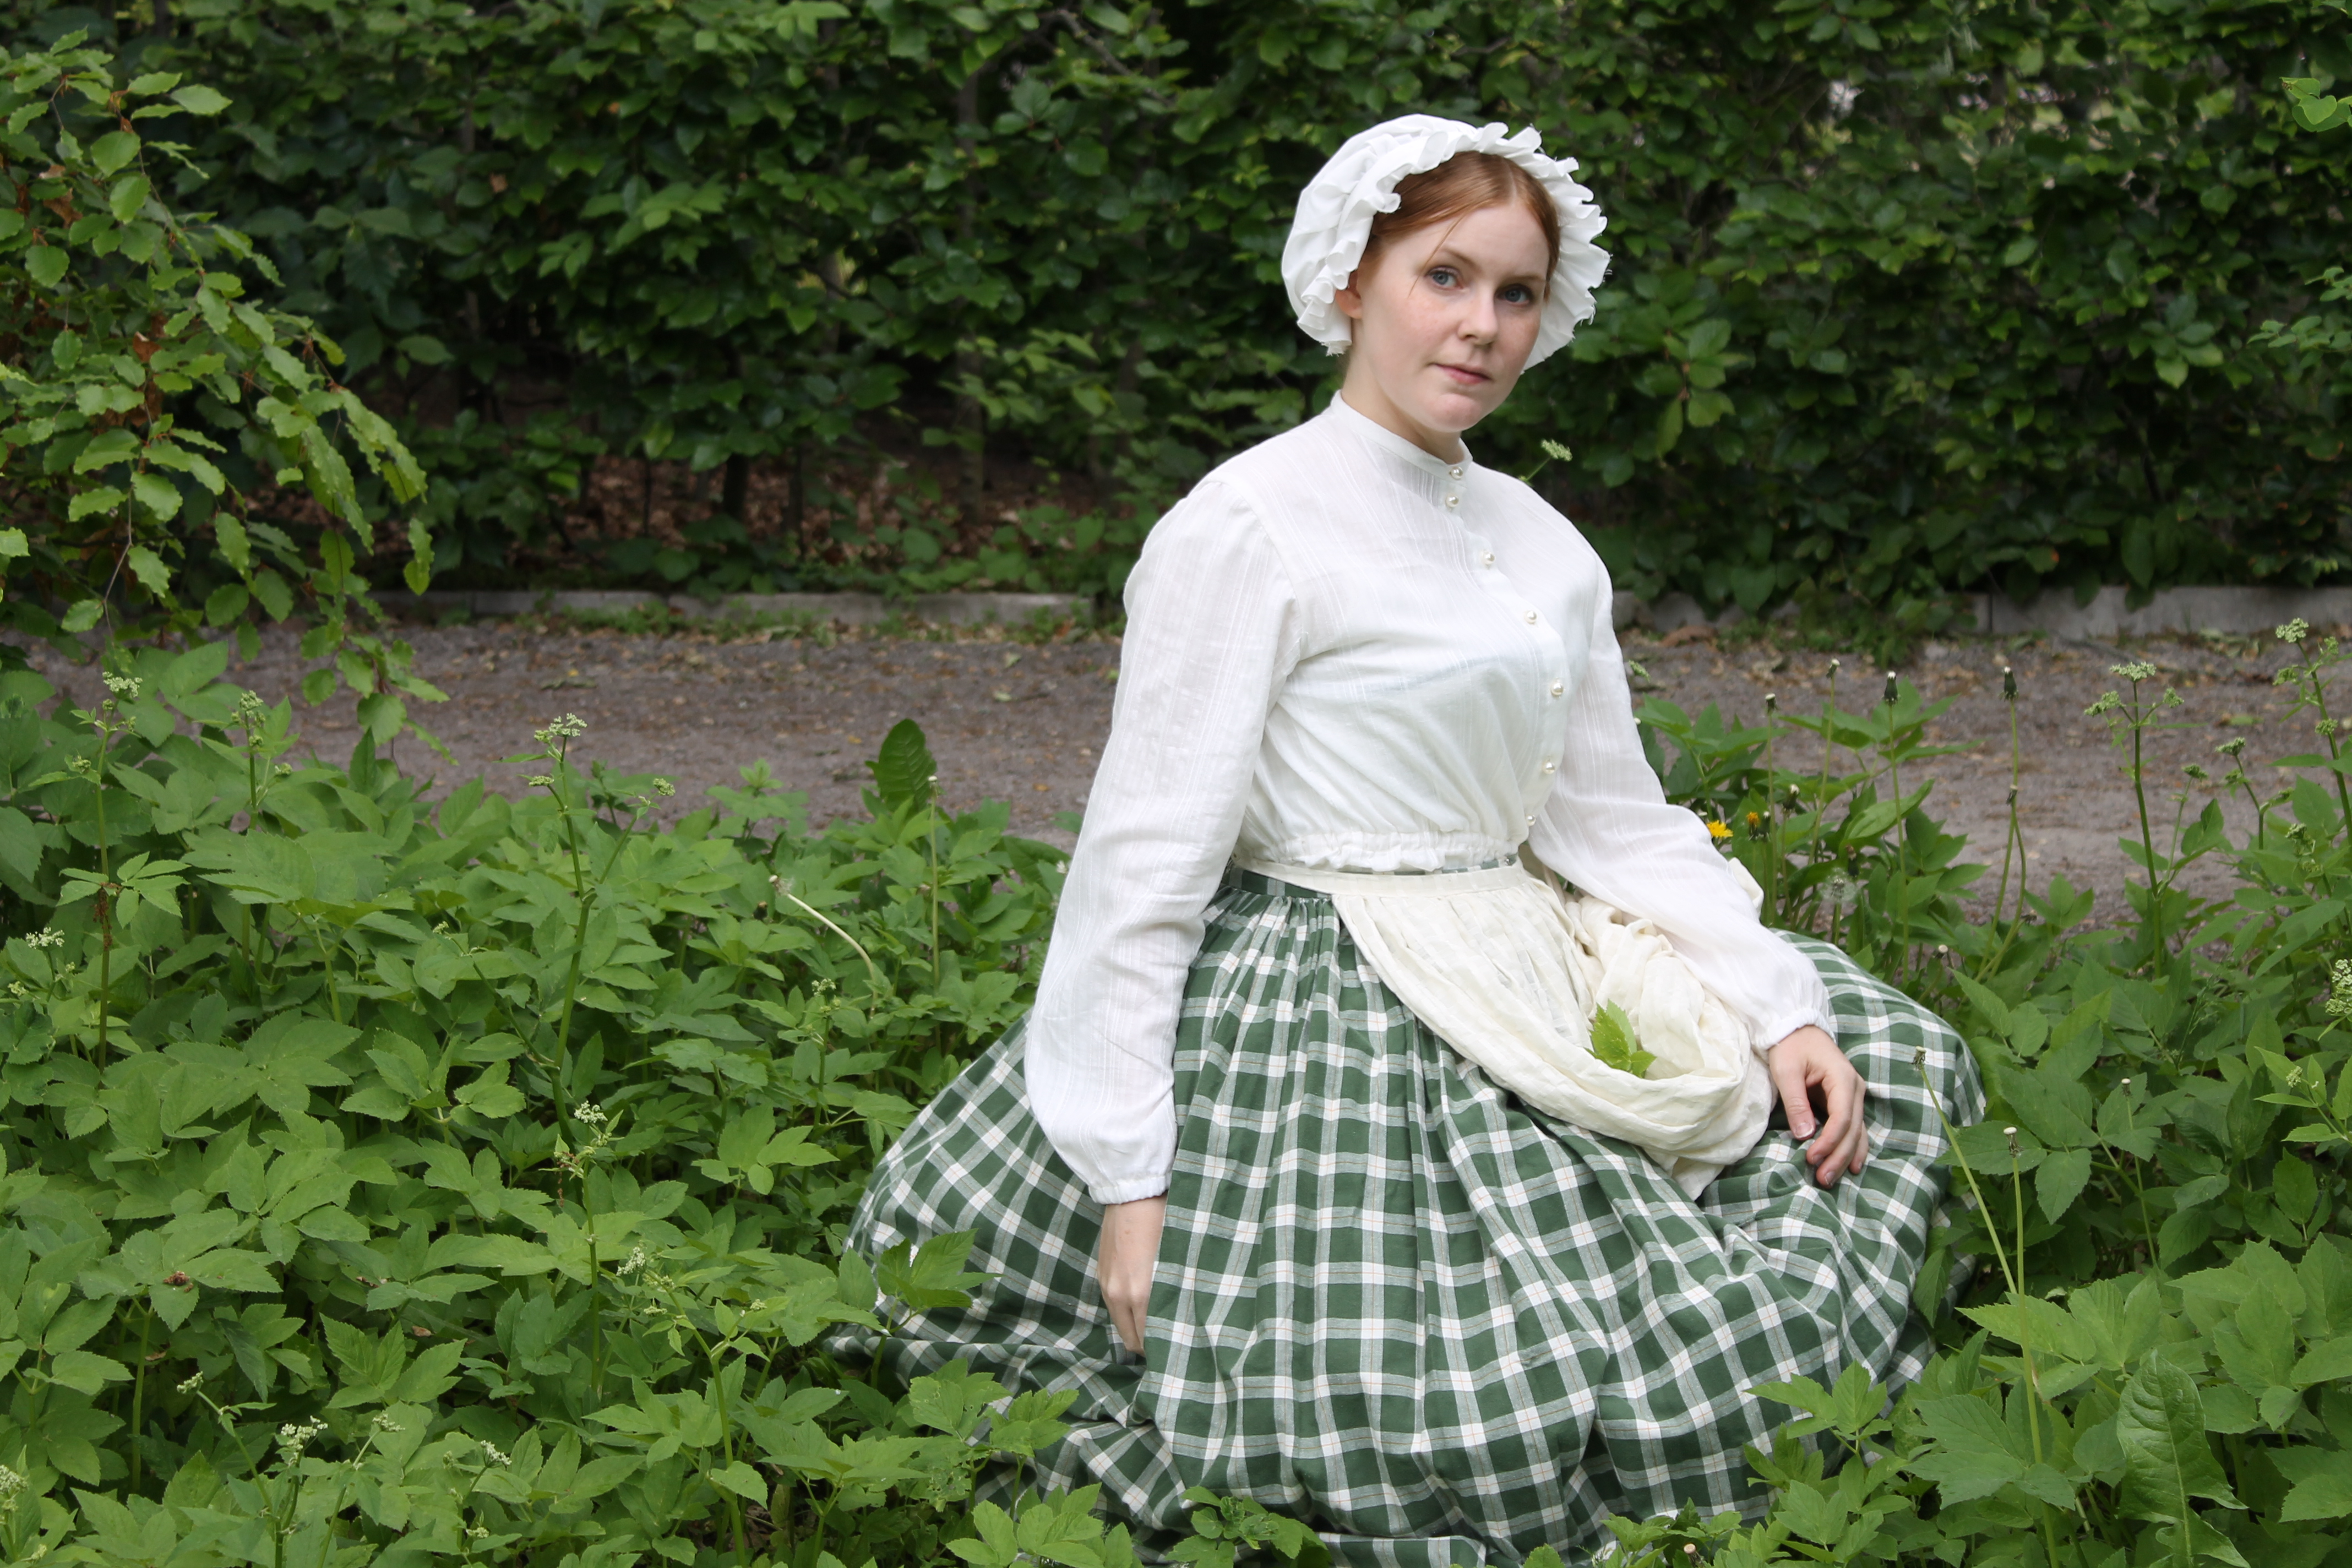
The finished Shirt: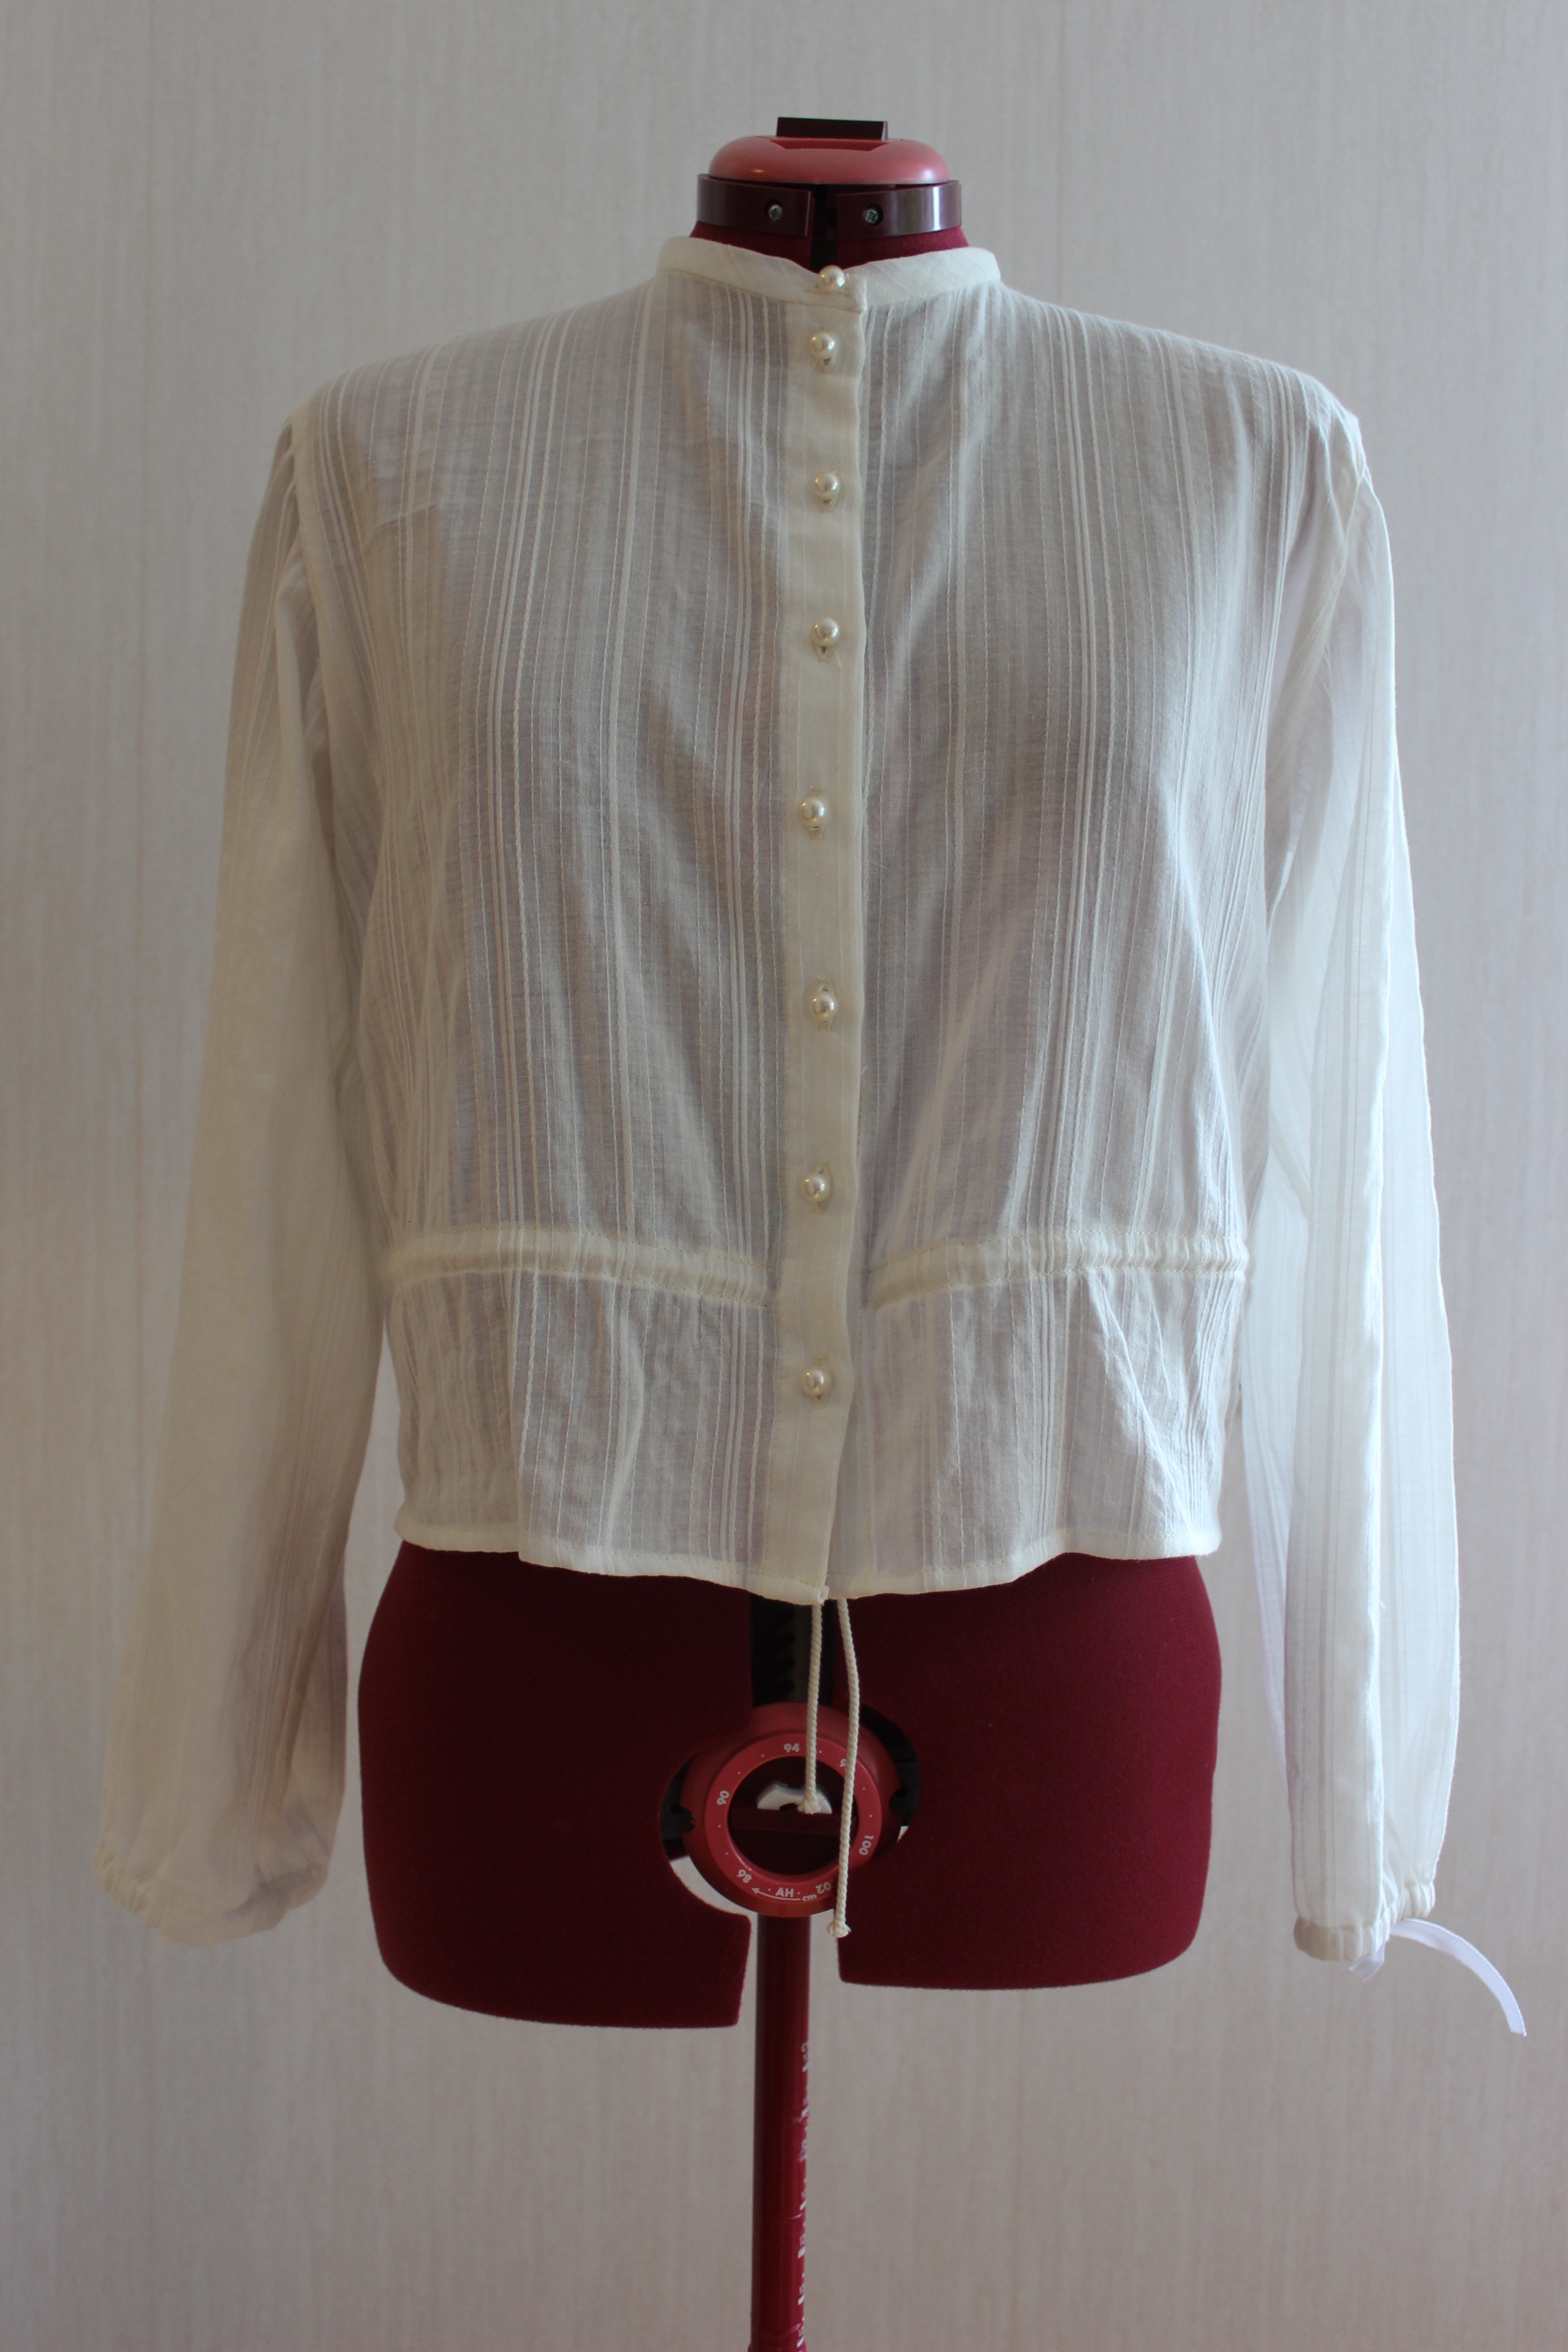 As its biggest size


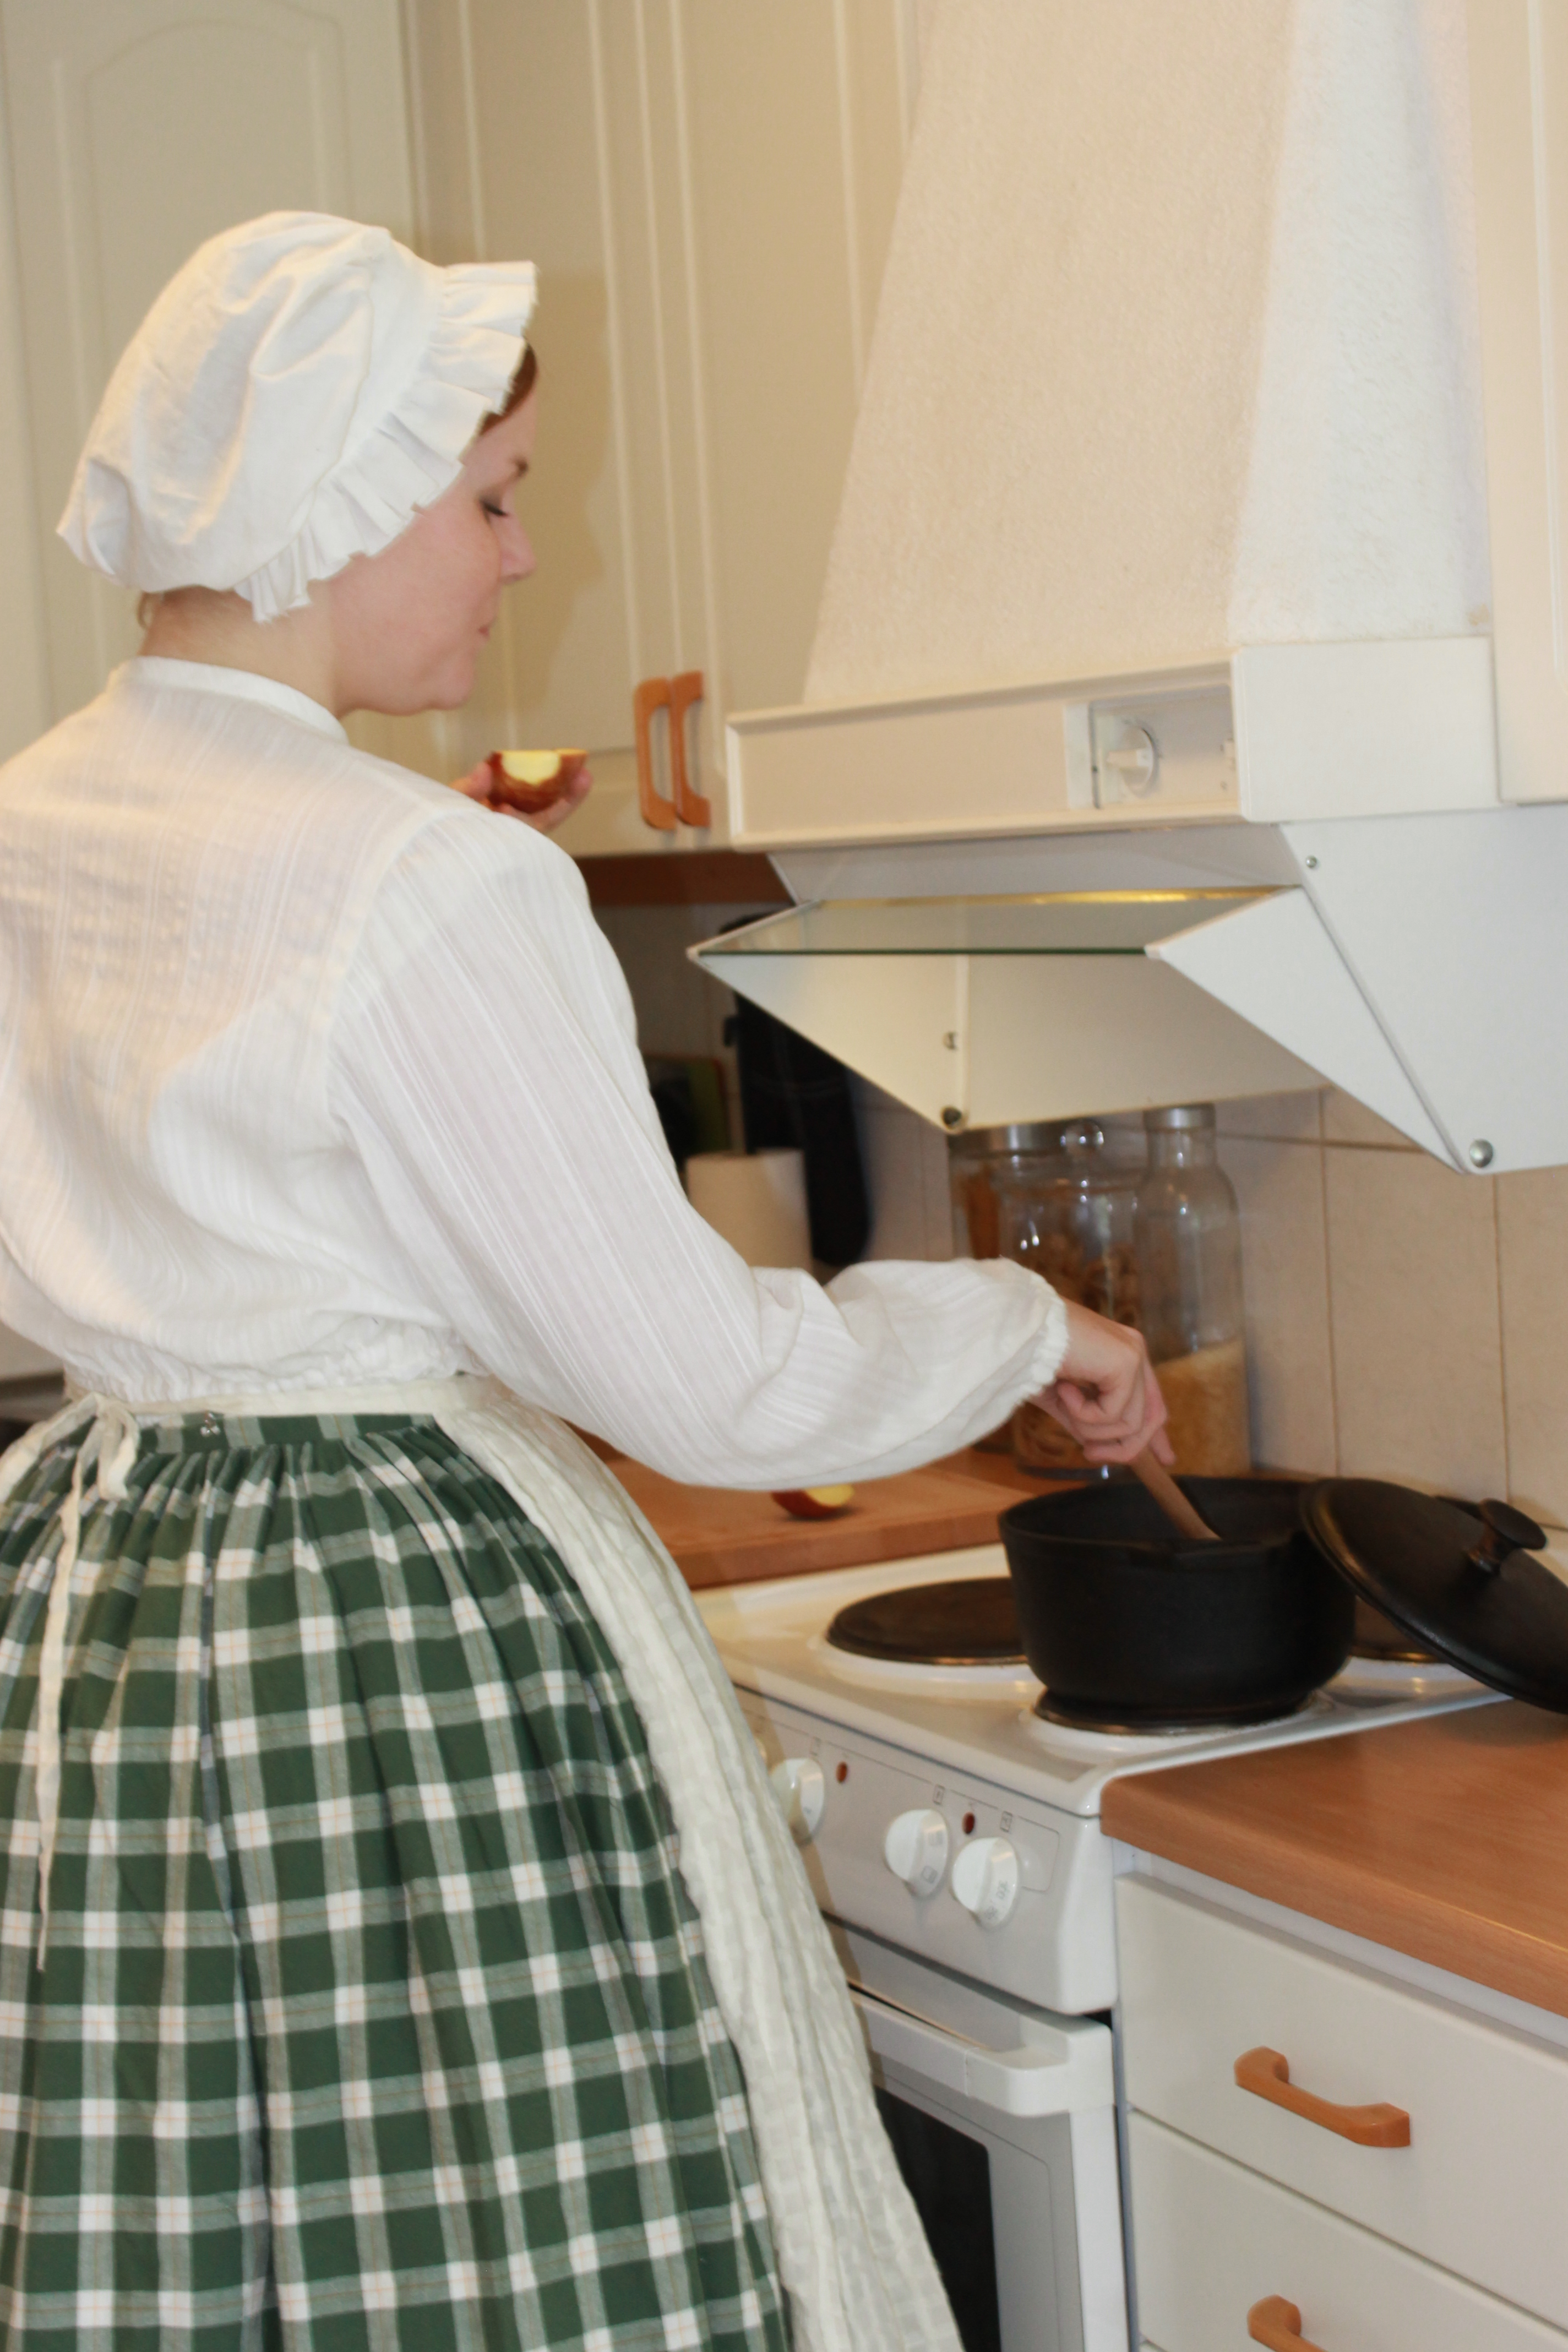
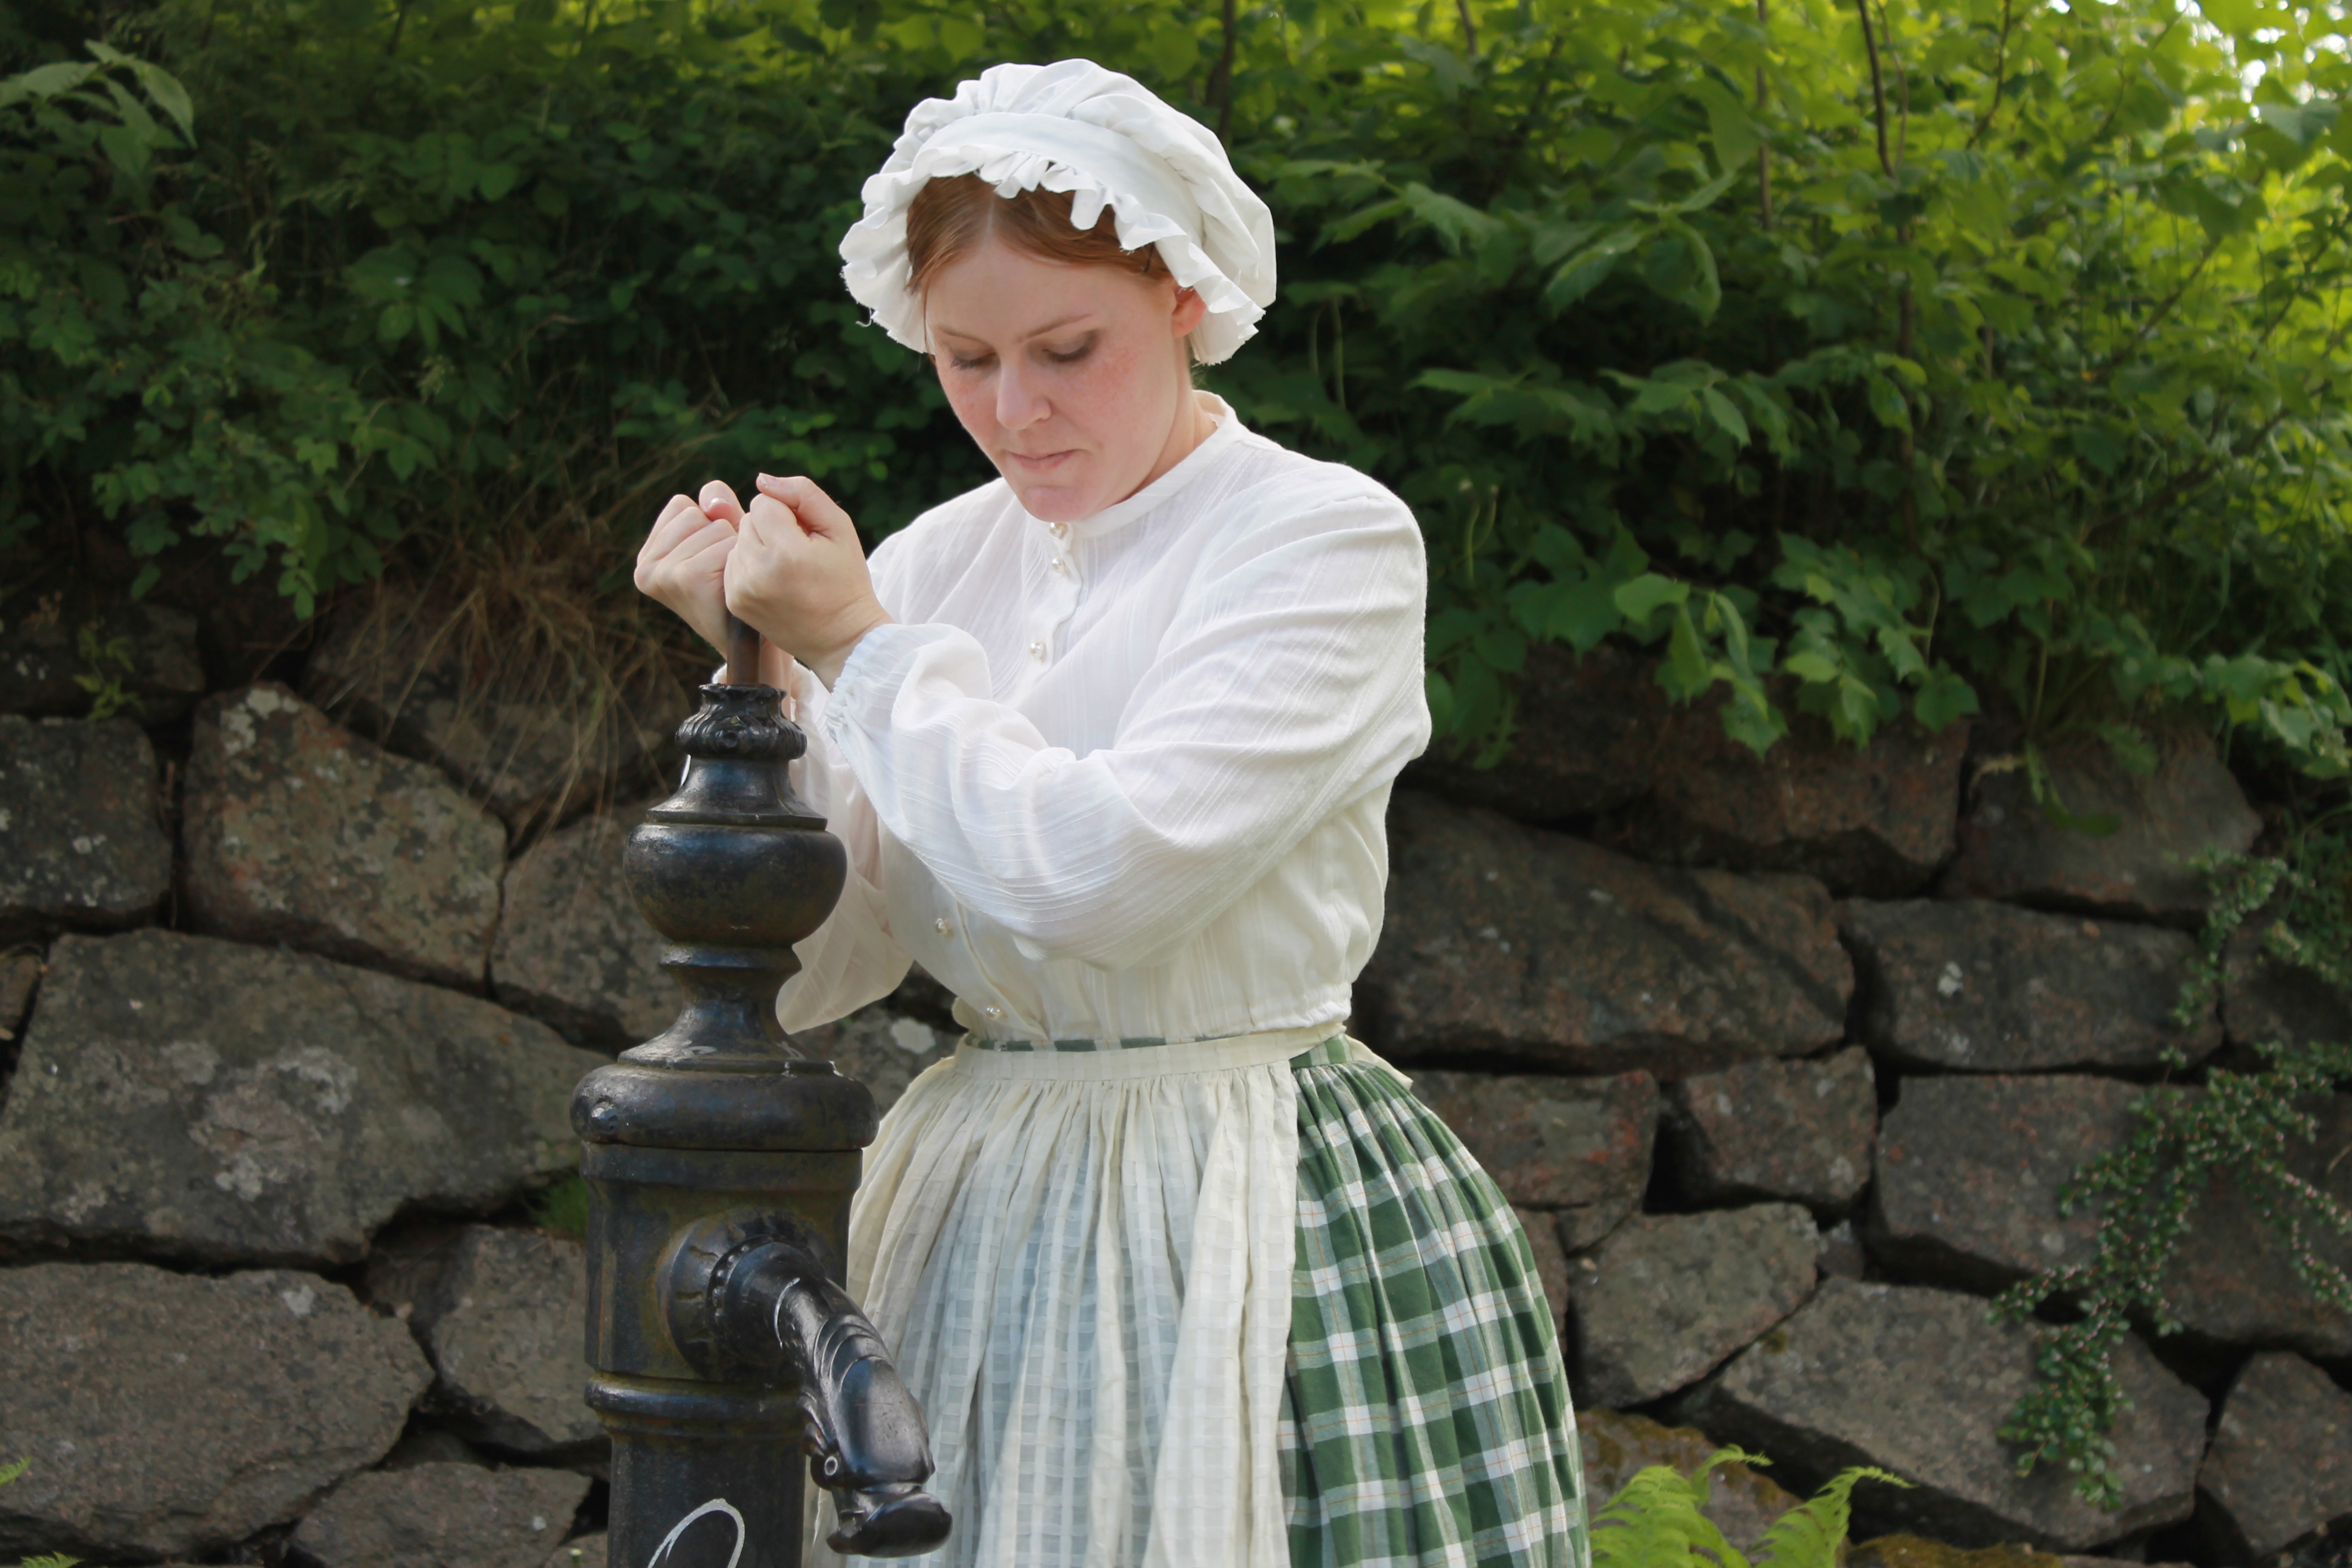
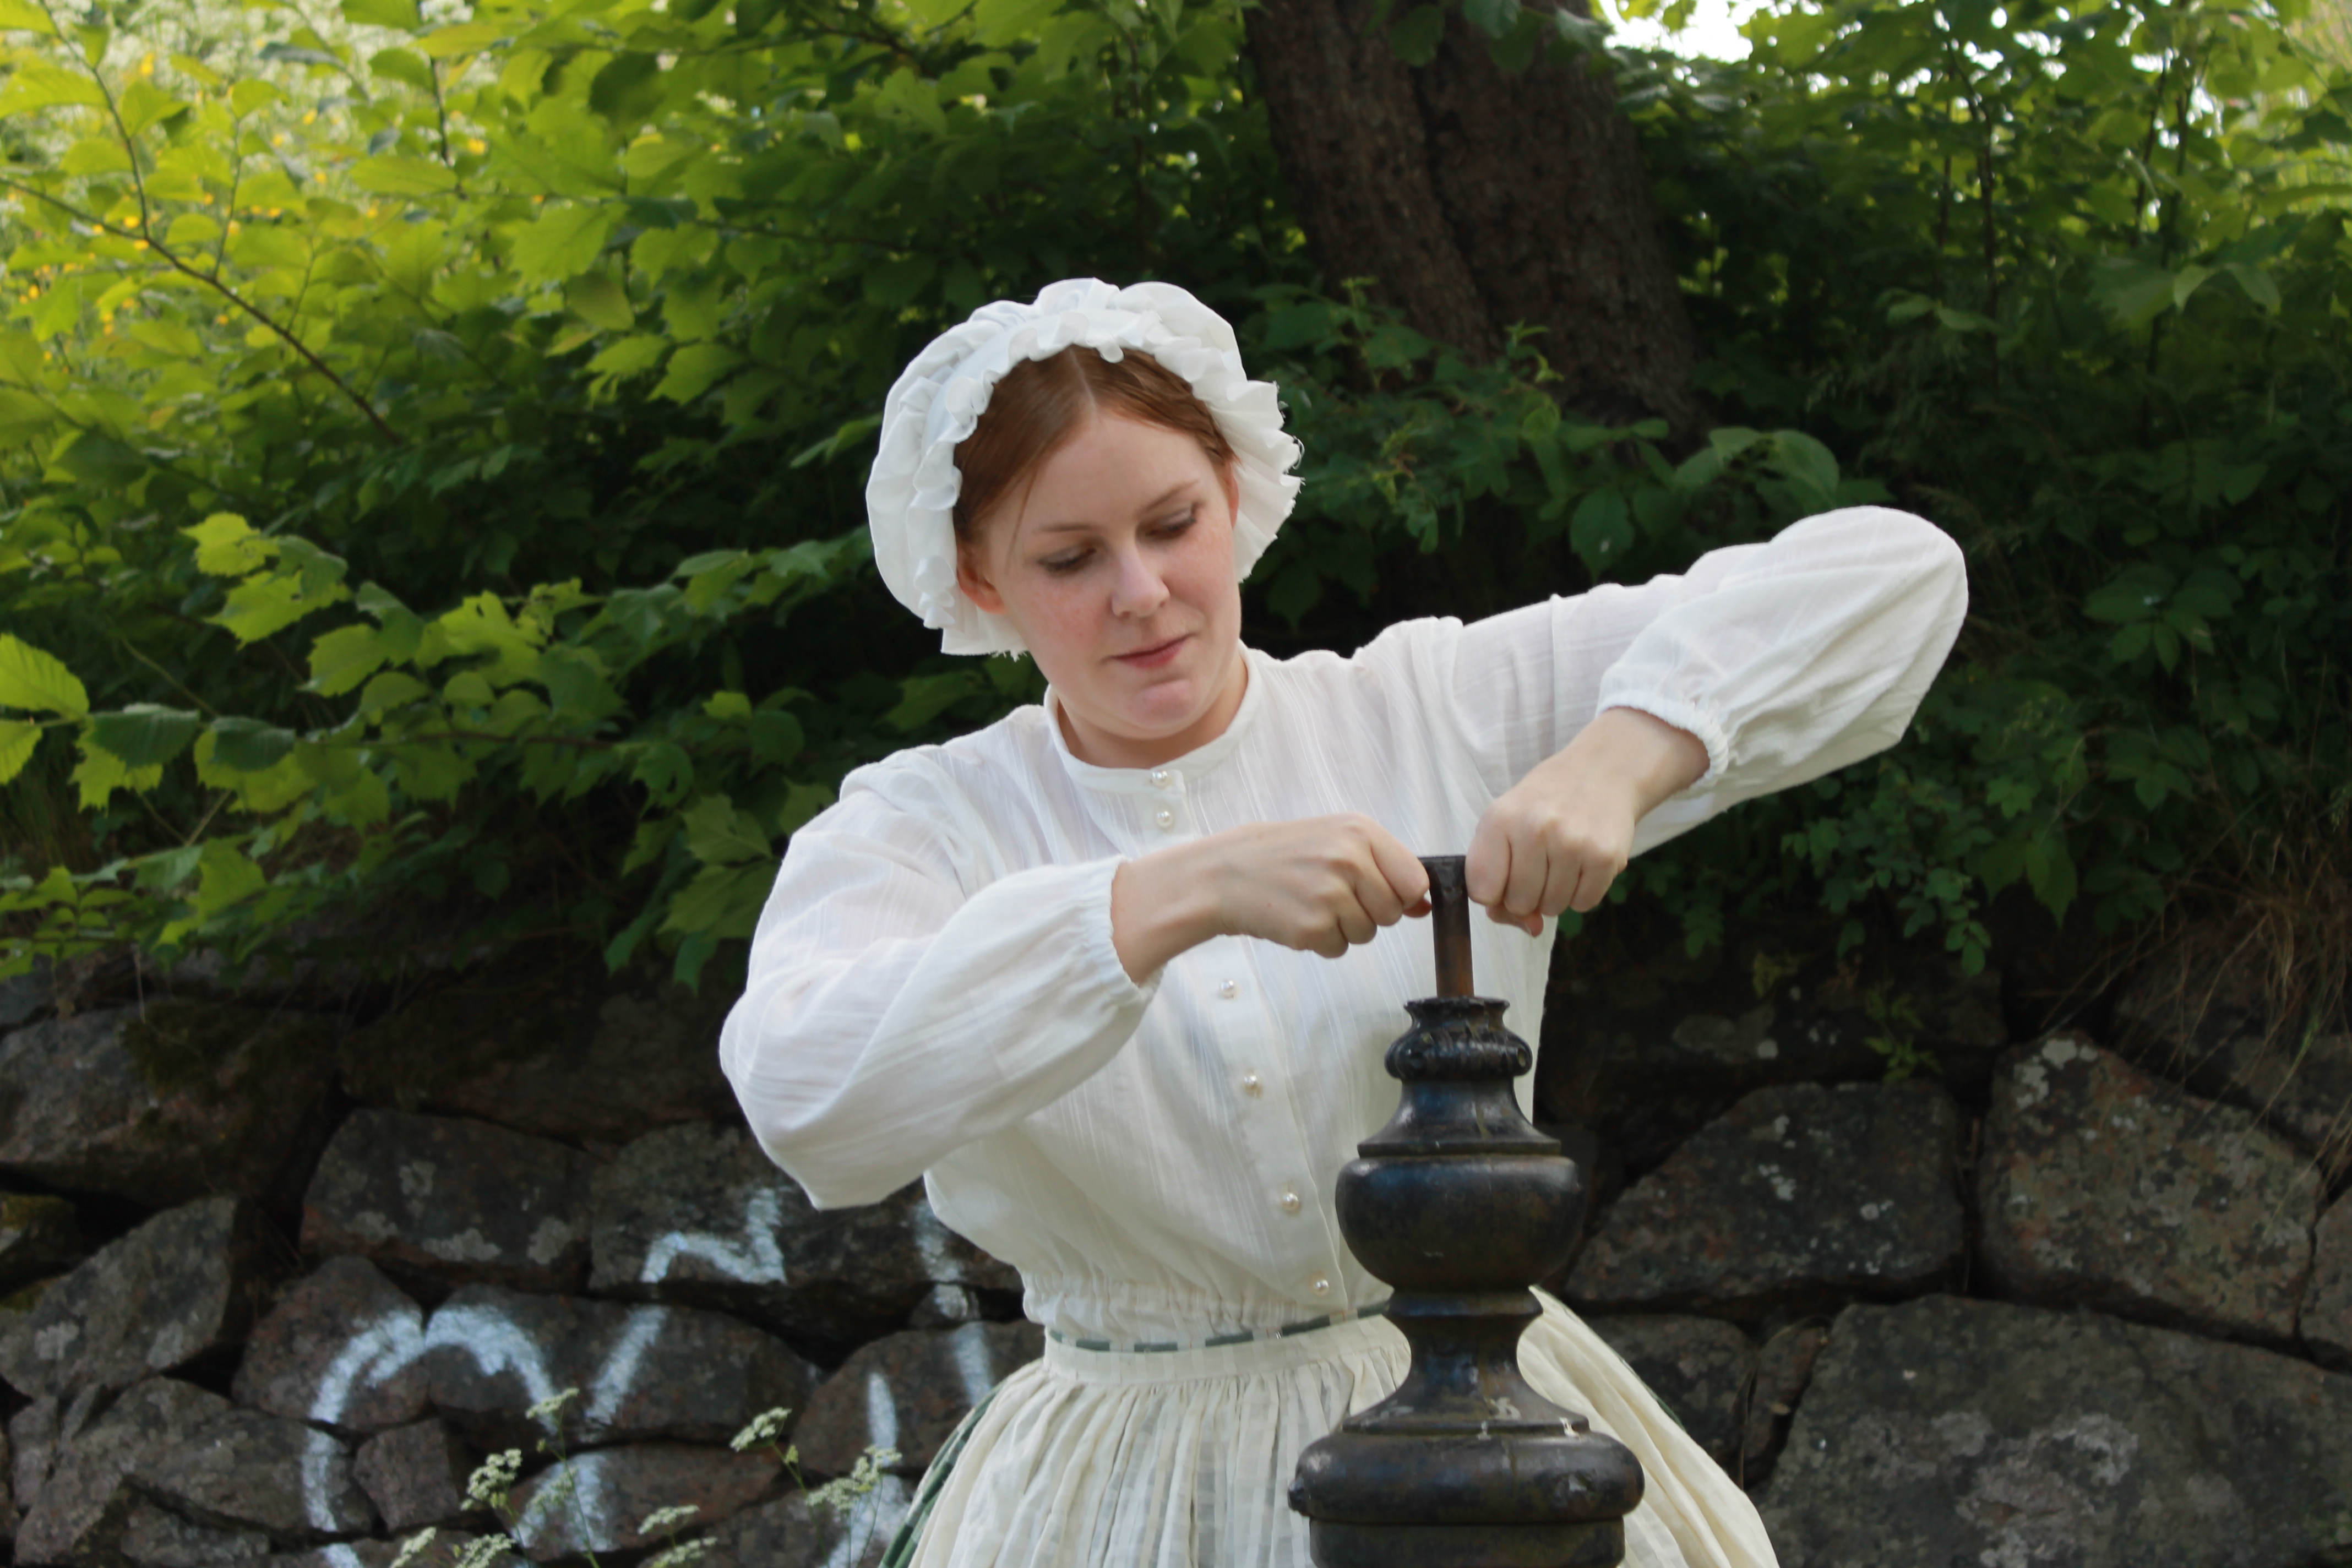
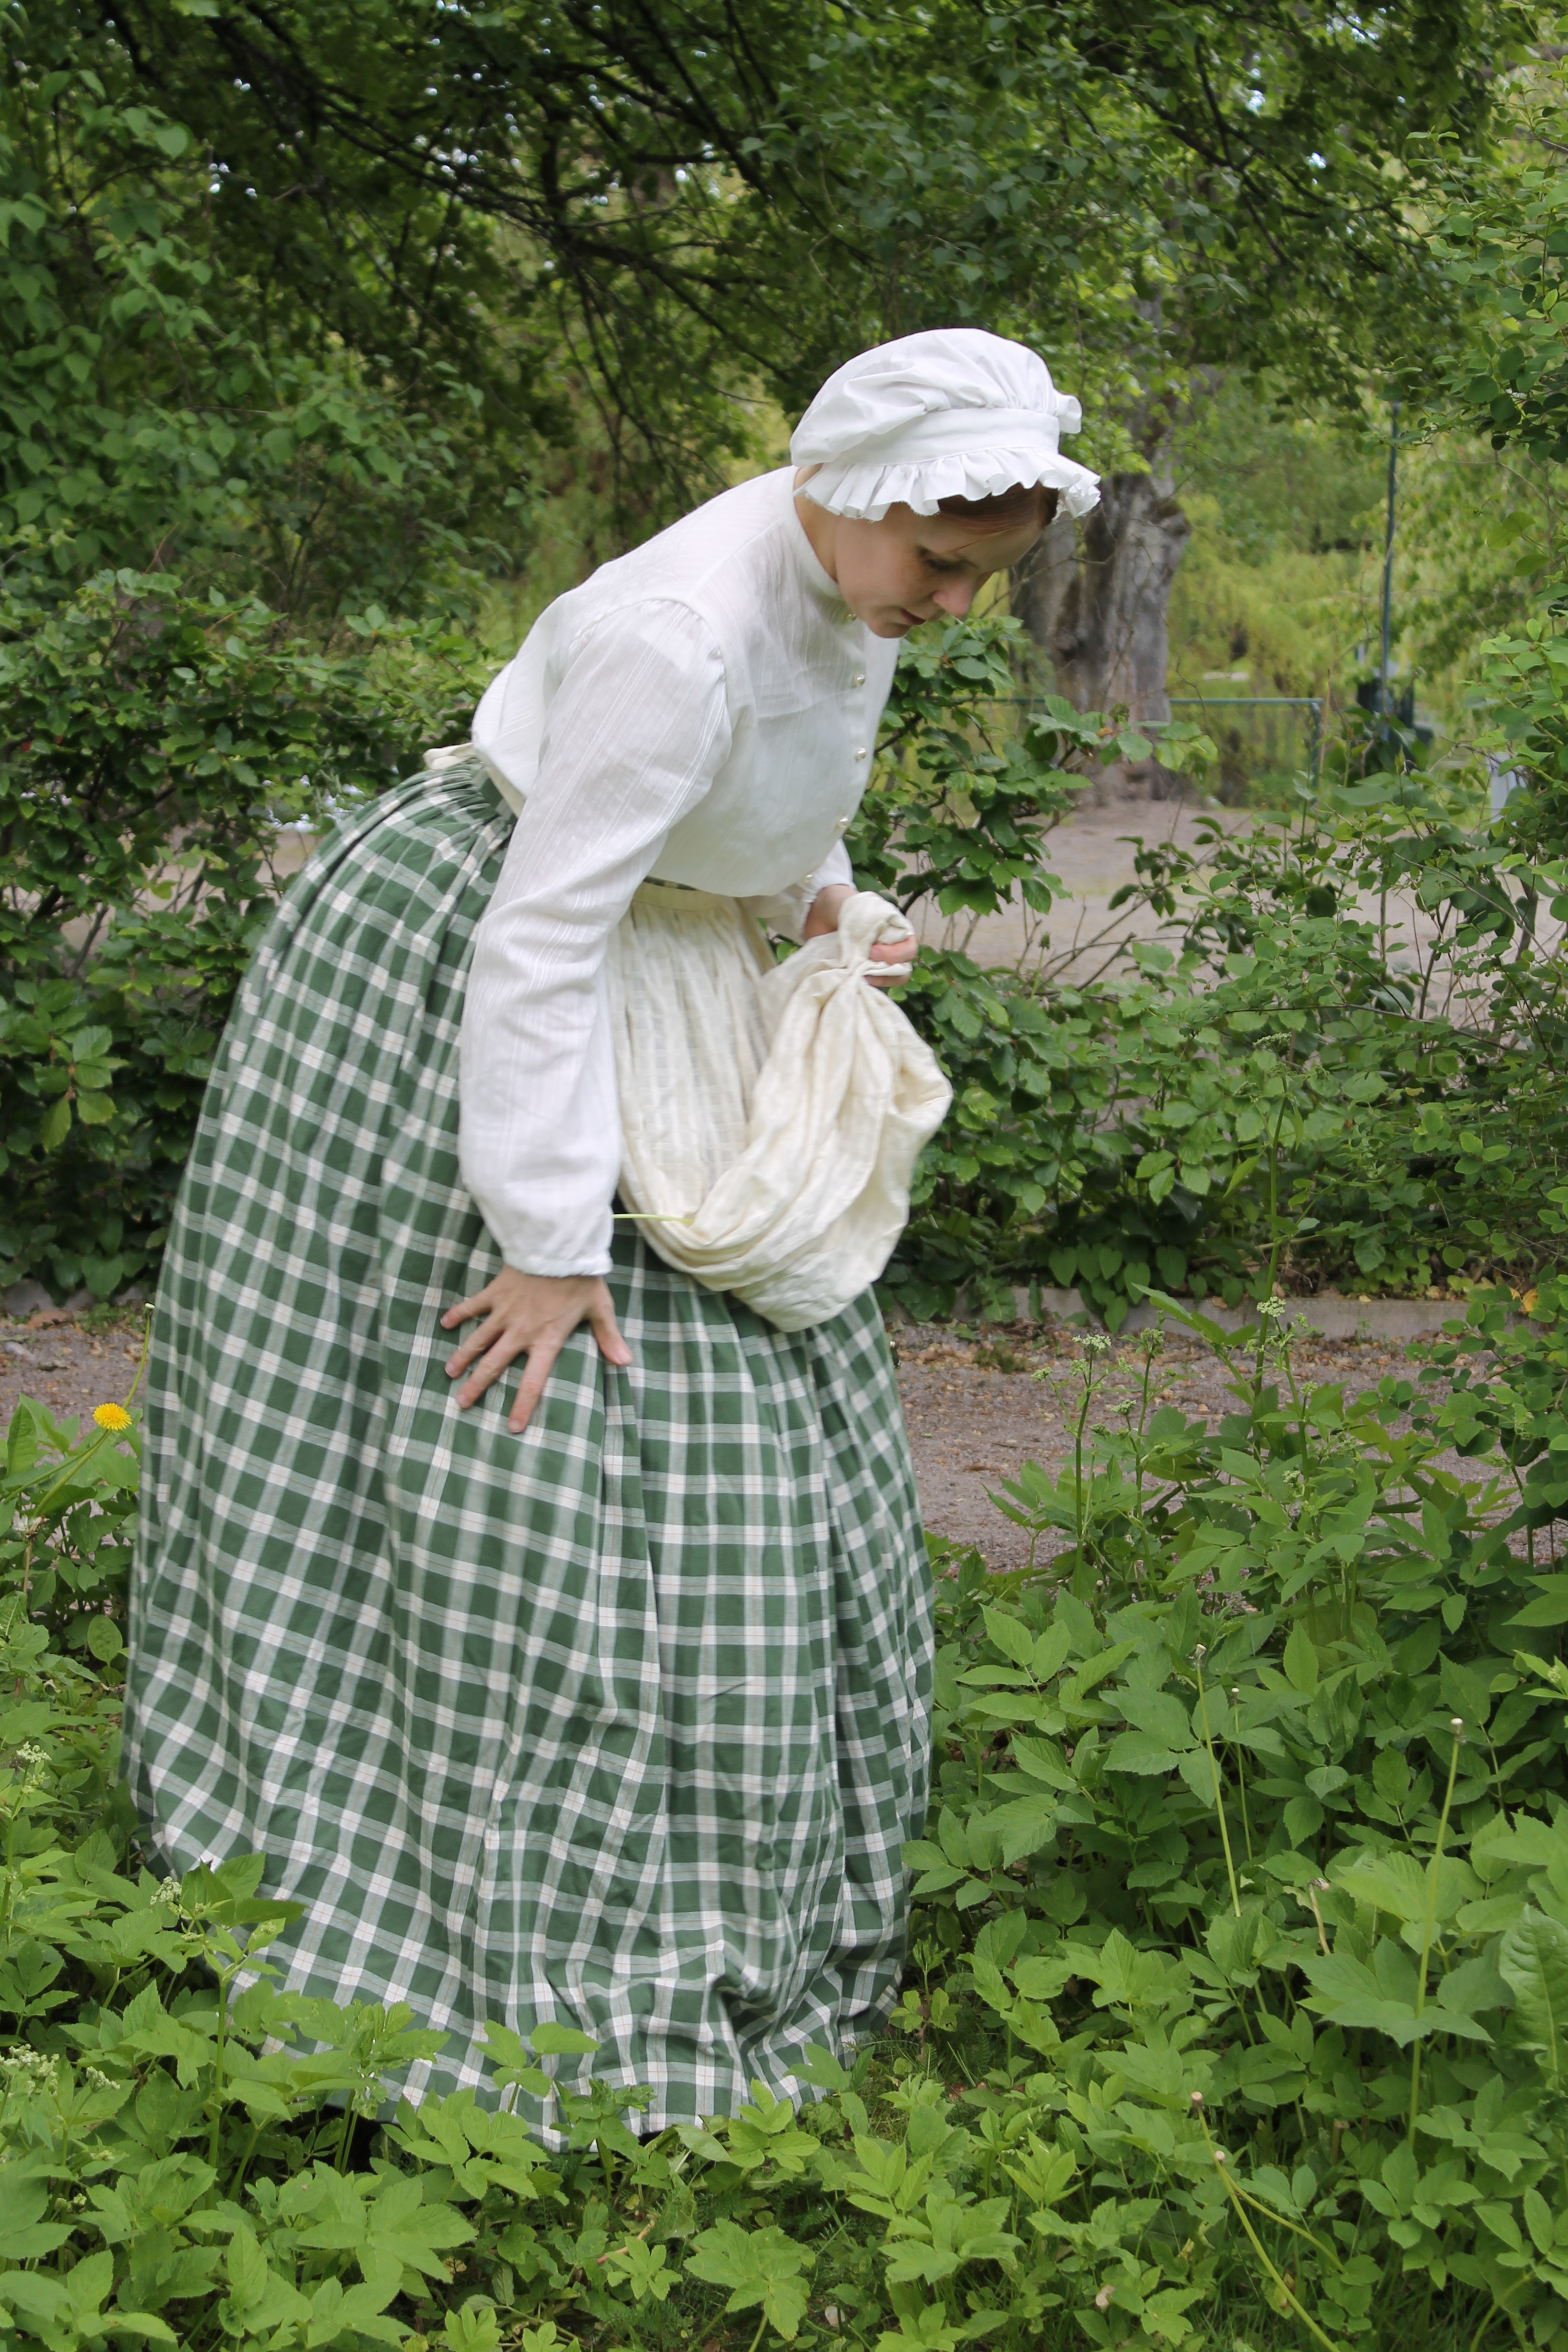
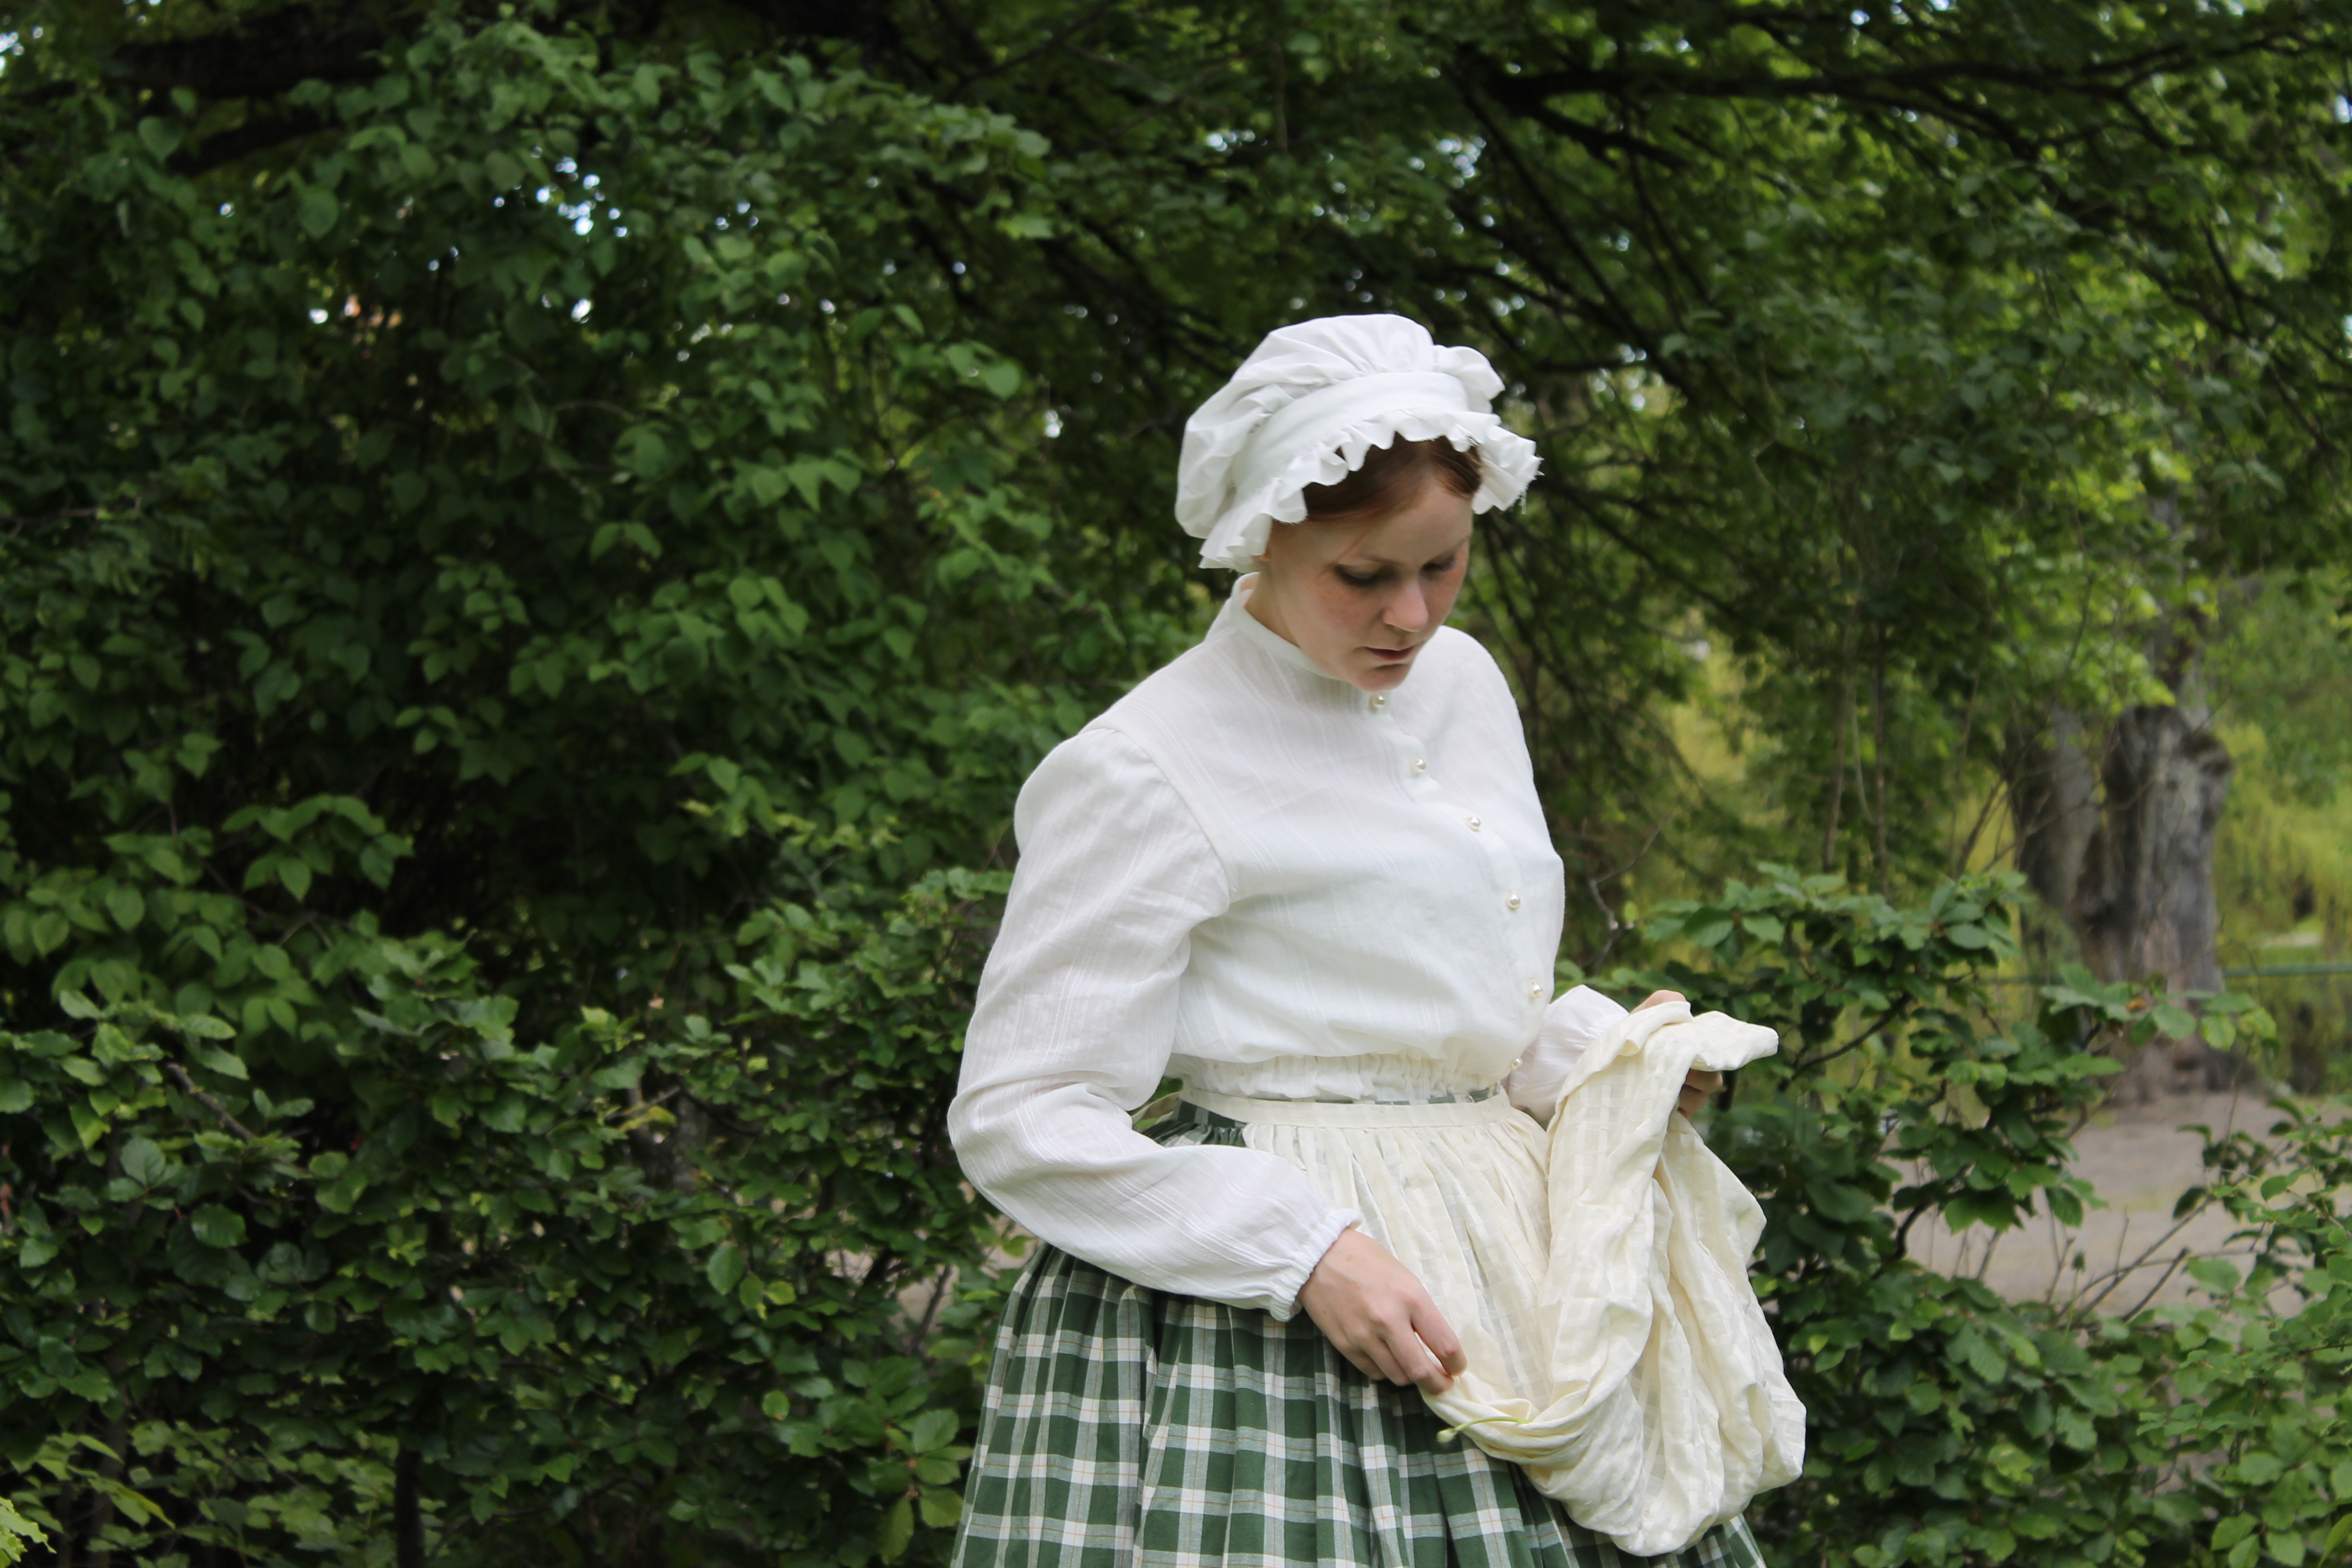
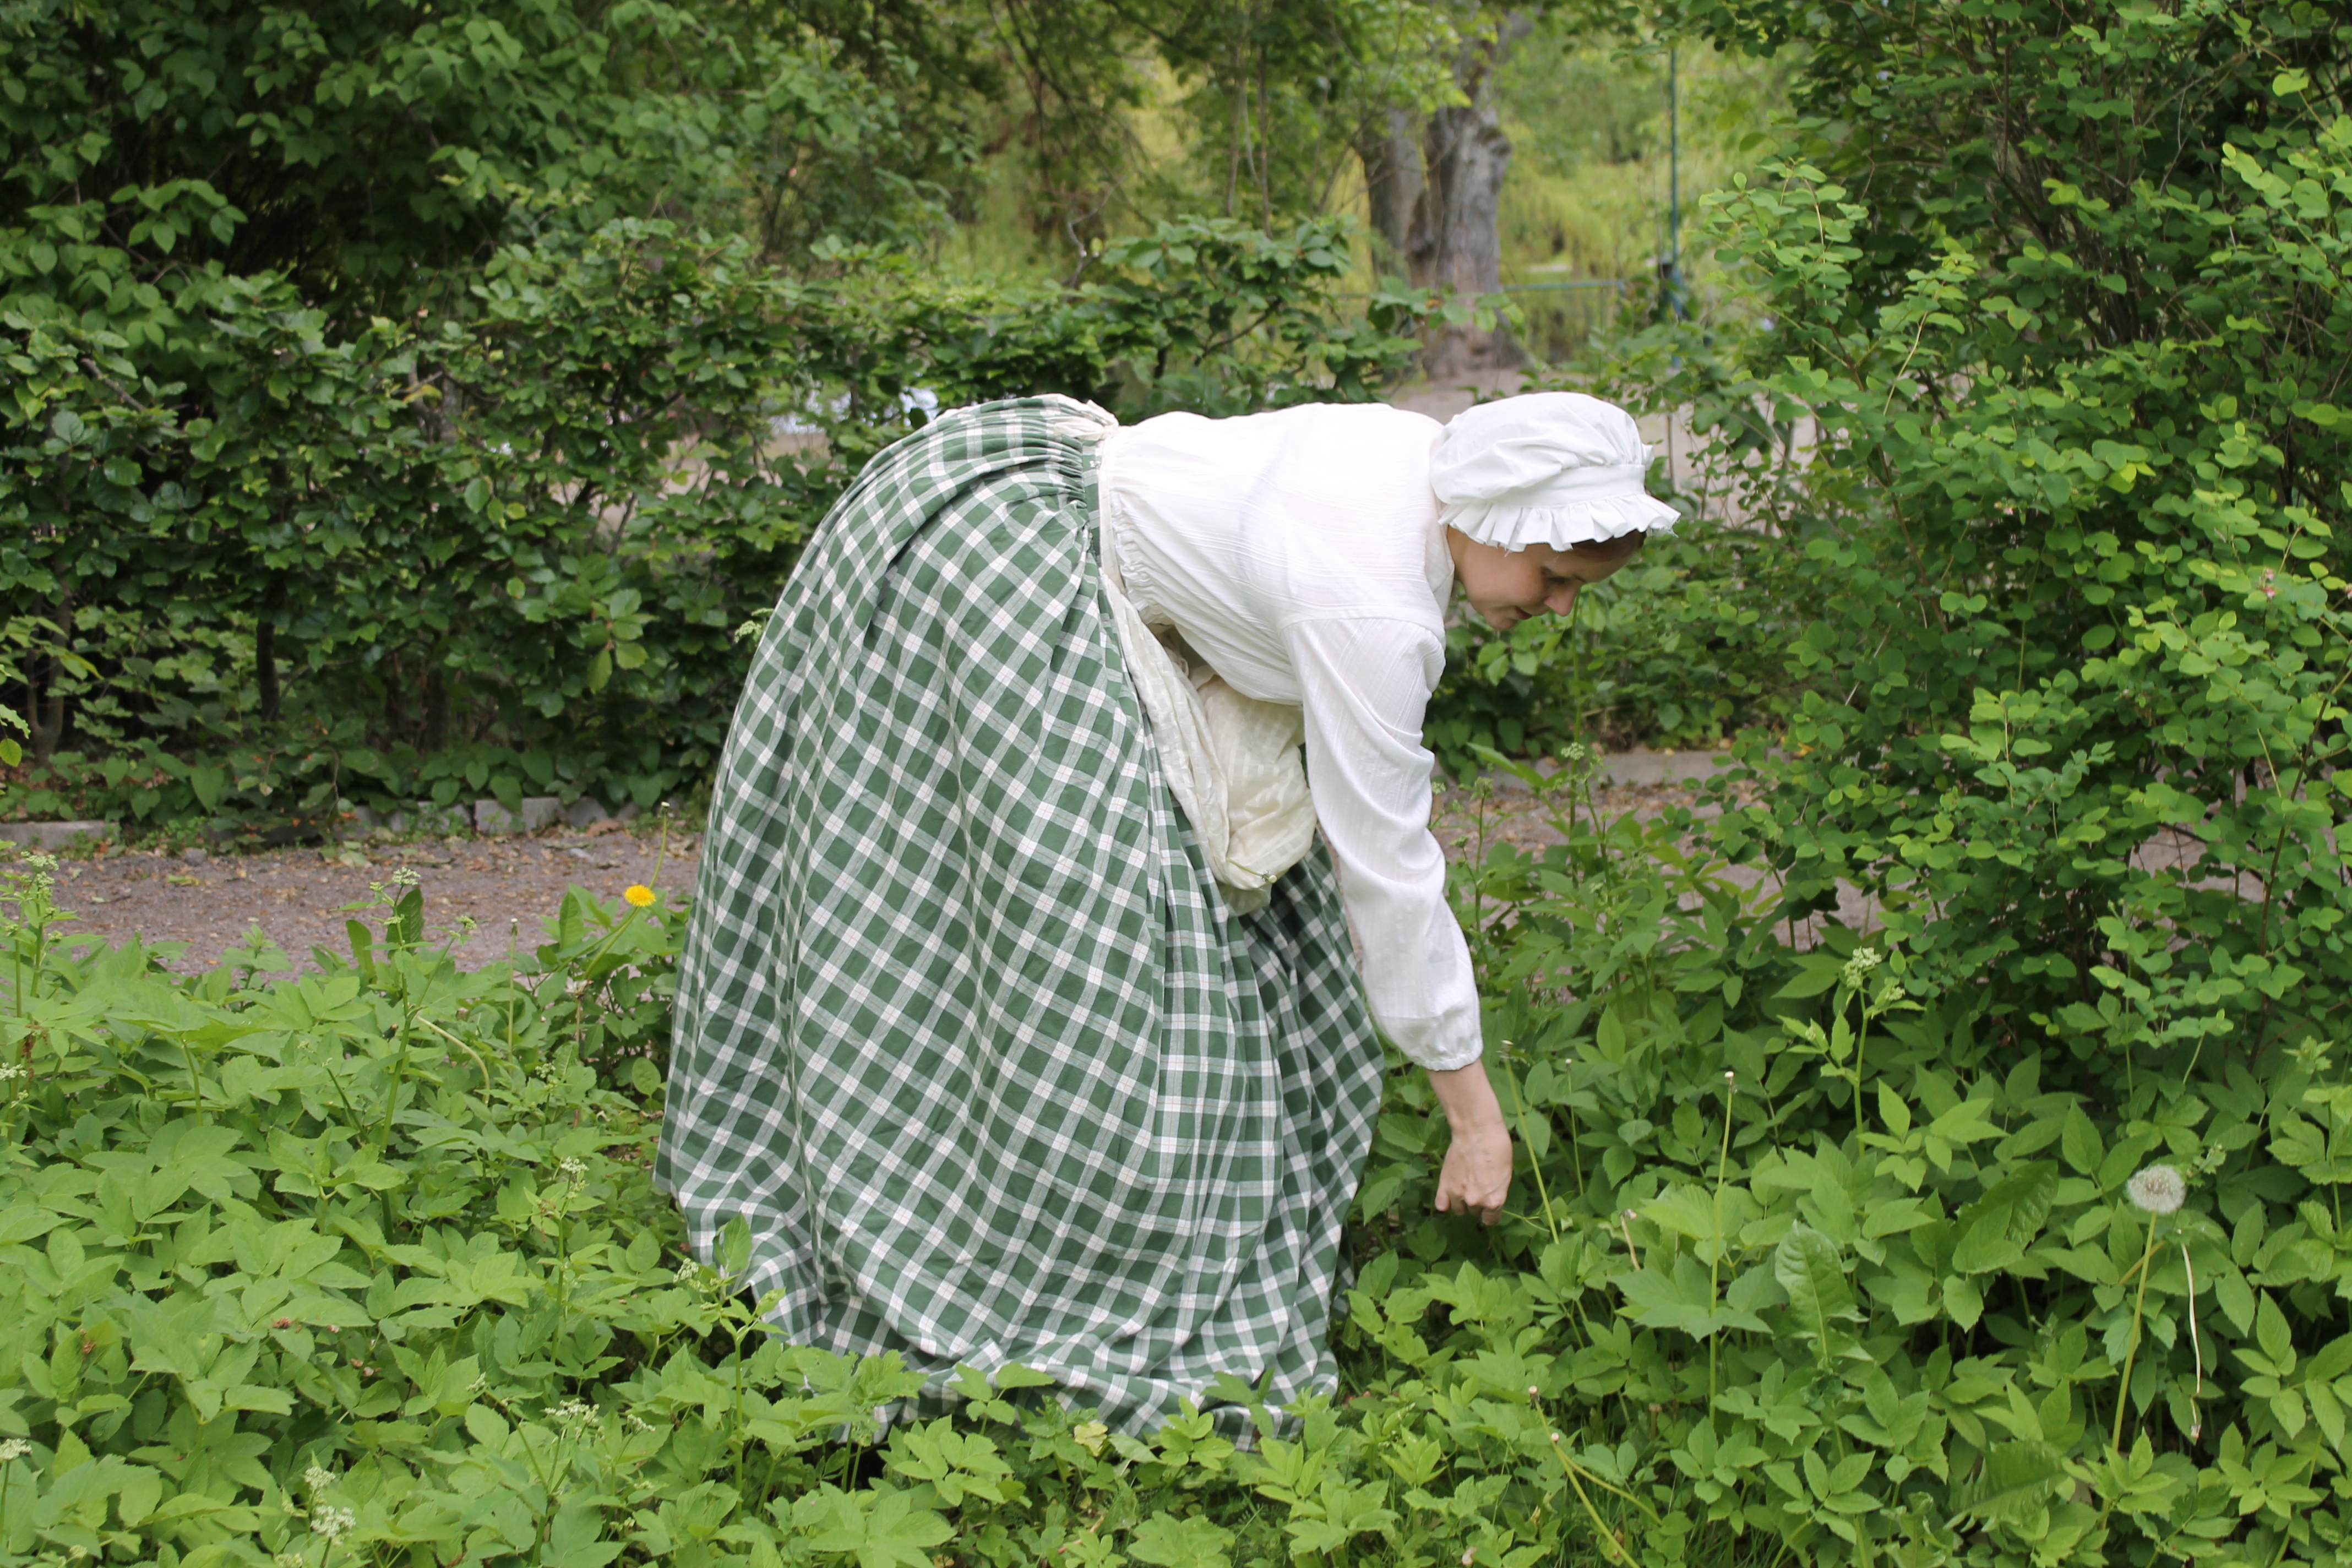
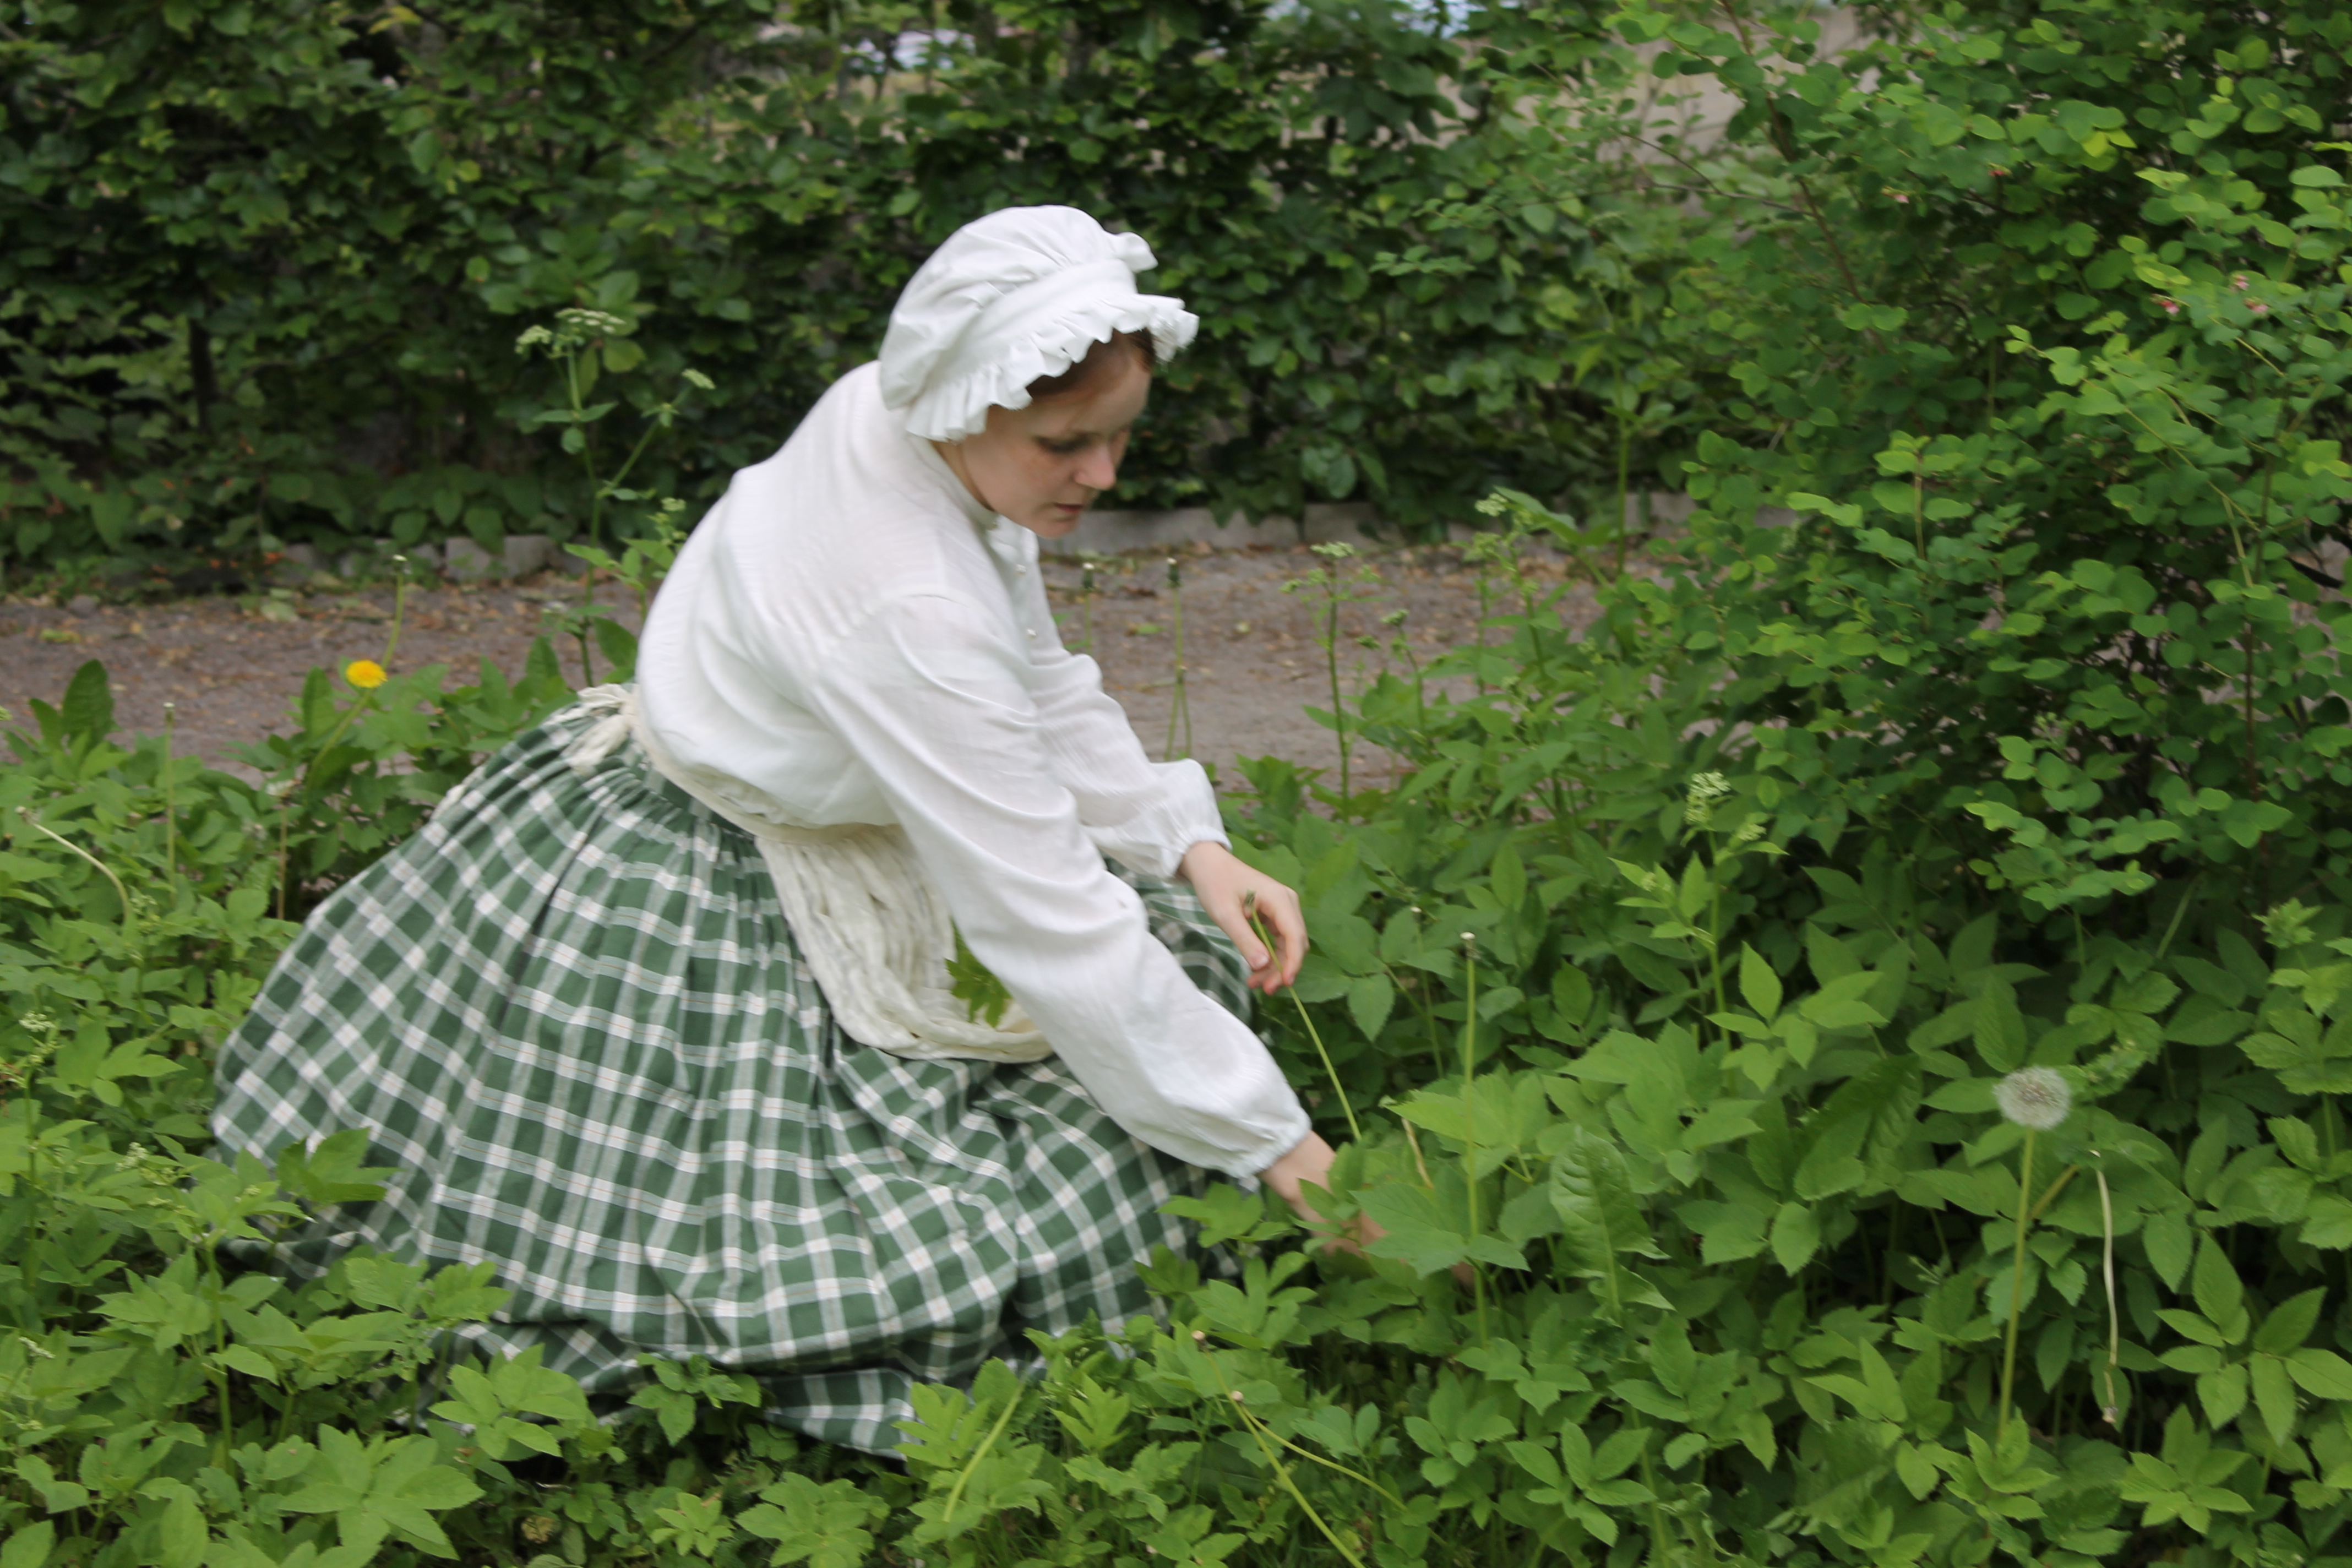
And a quick “practicality” photoshoot: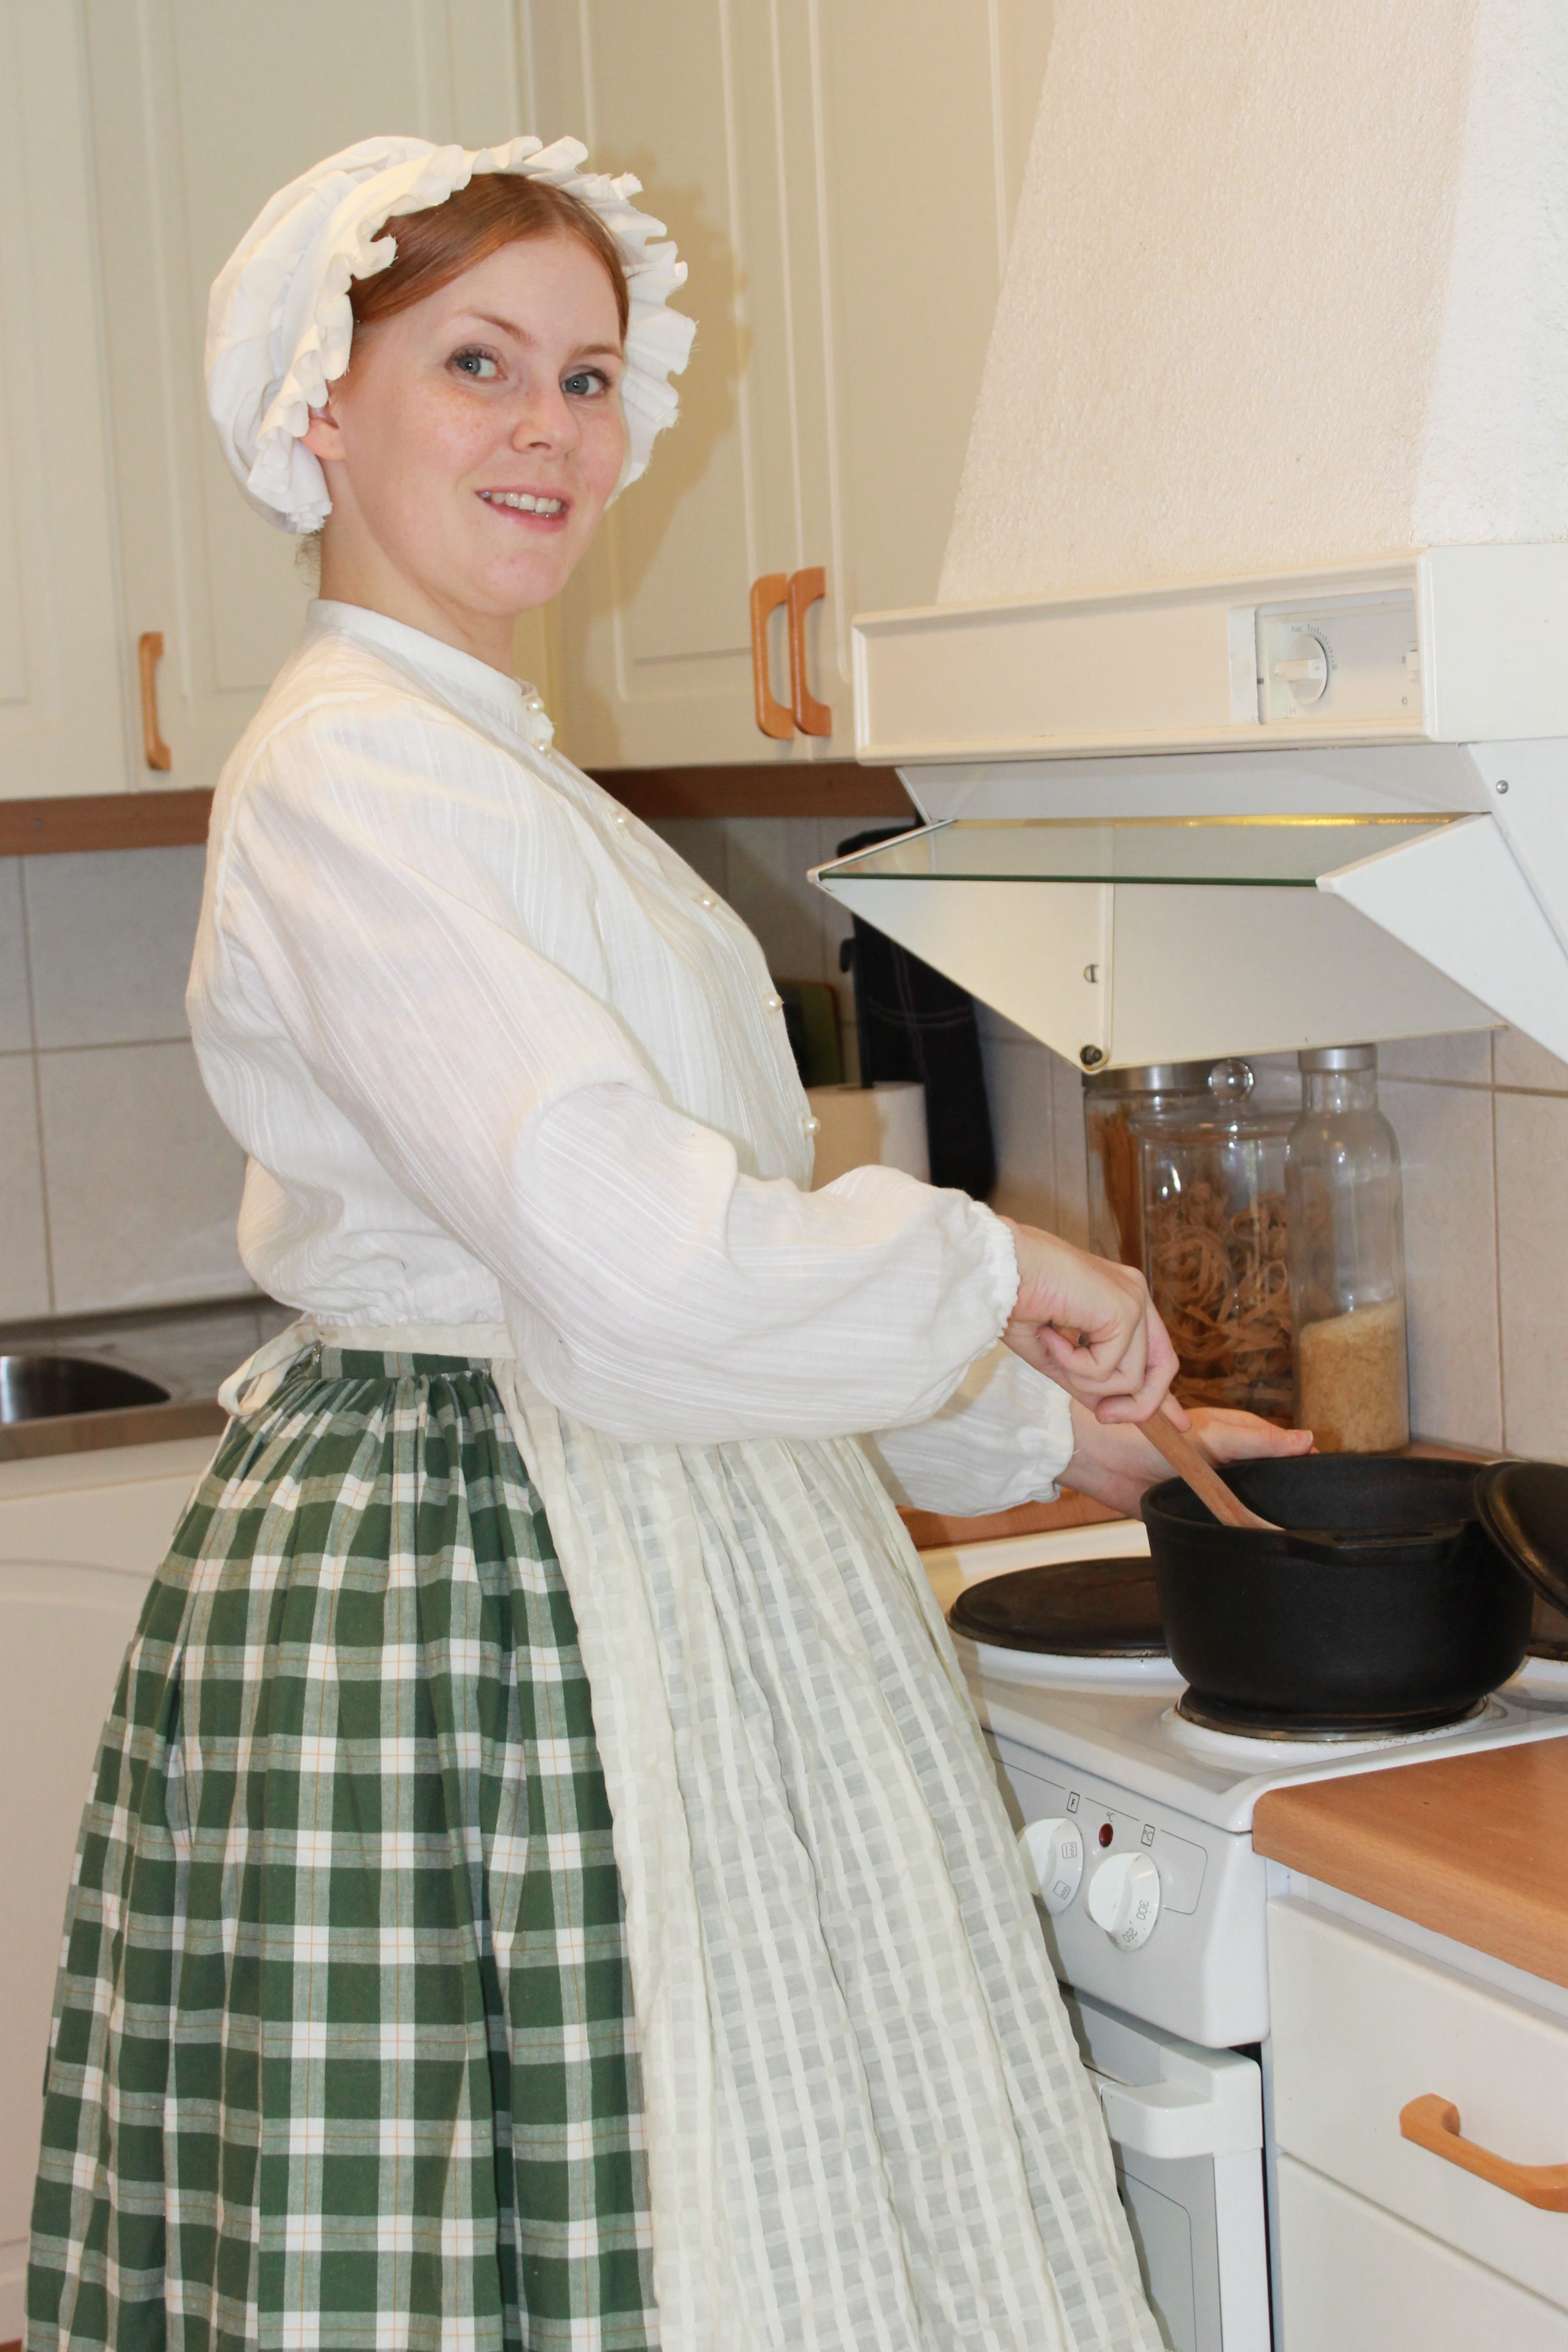 Cocking food in my extremely old fashioned kitchen…
Just the facts:
Challenge: nr 5/2015 “Practicality”
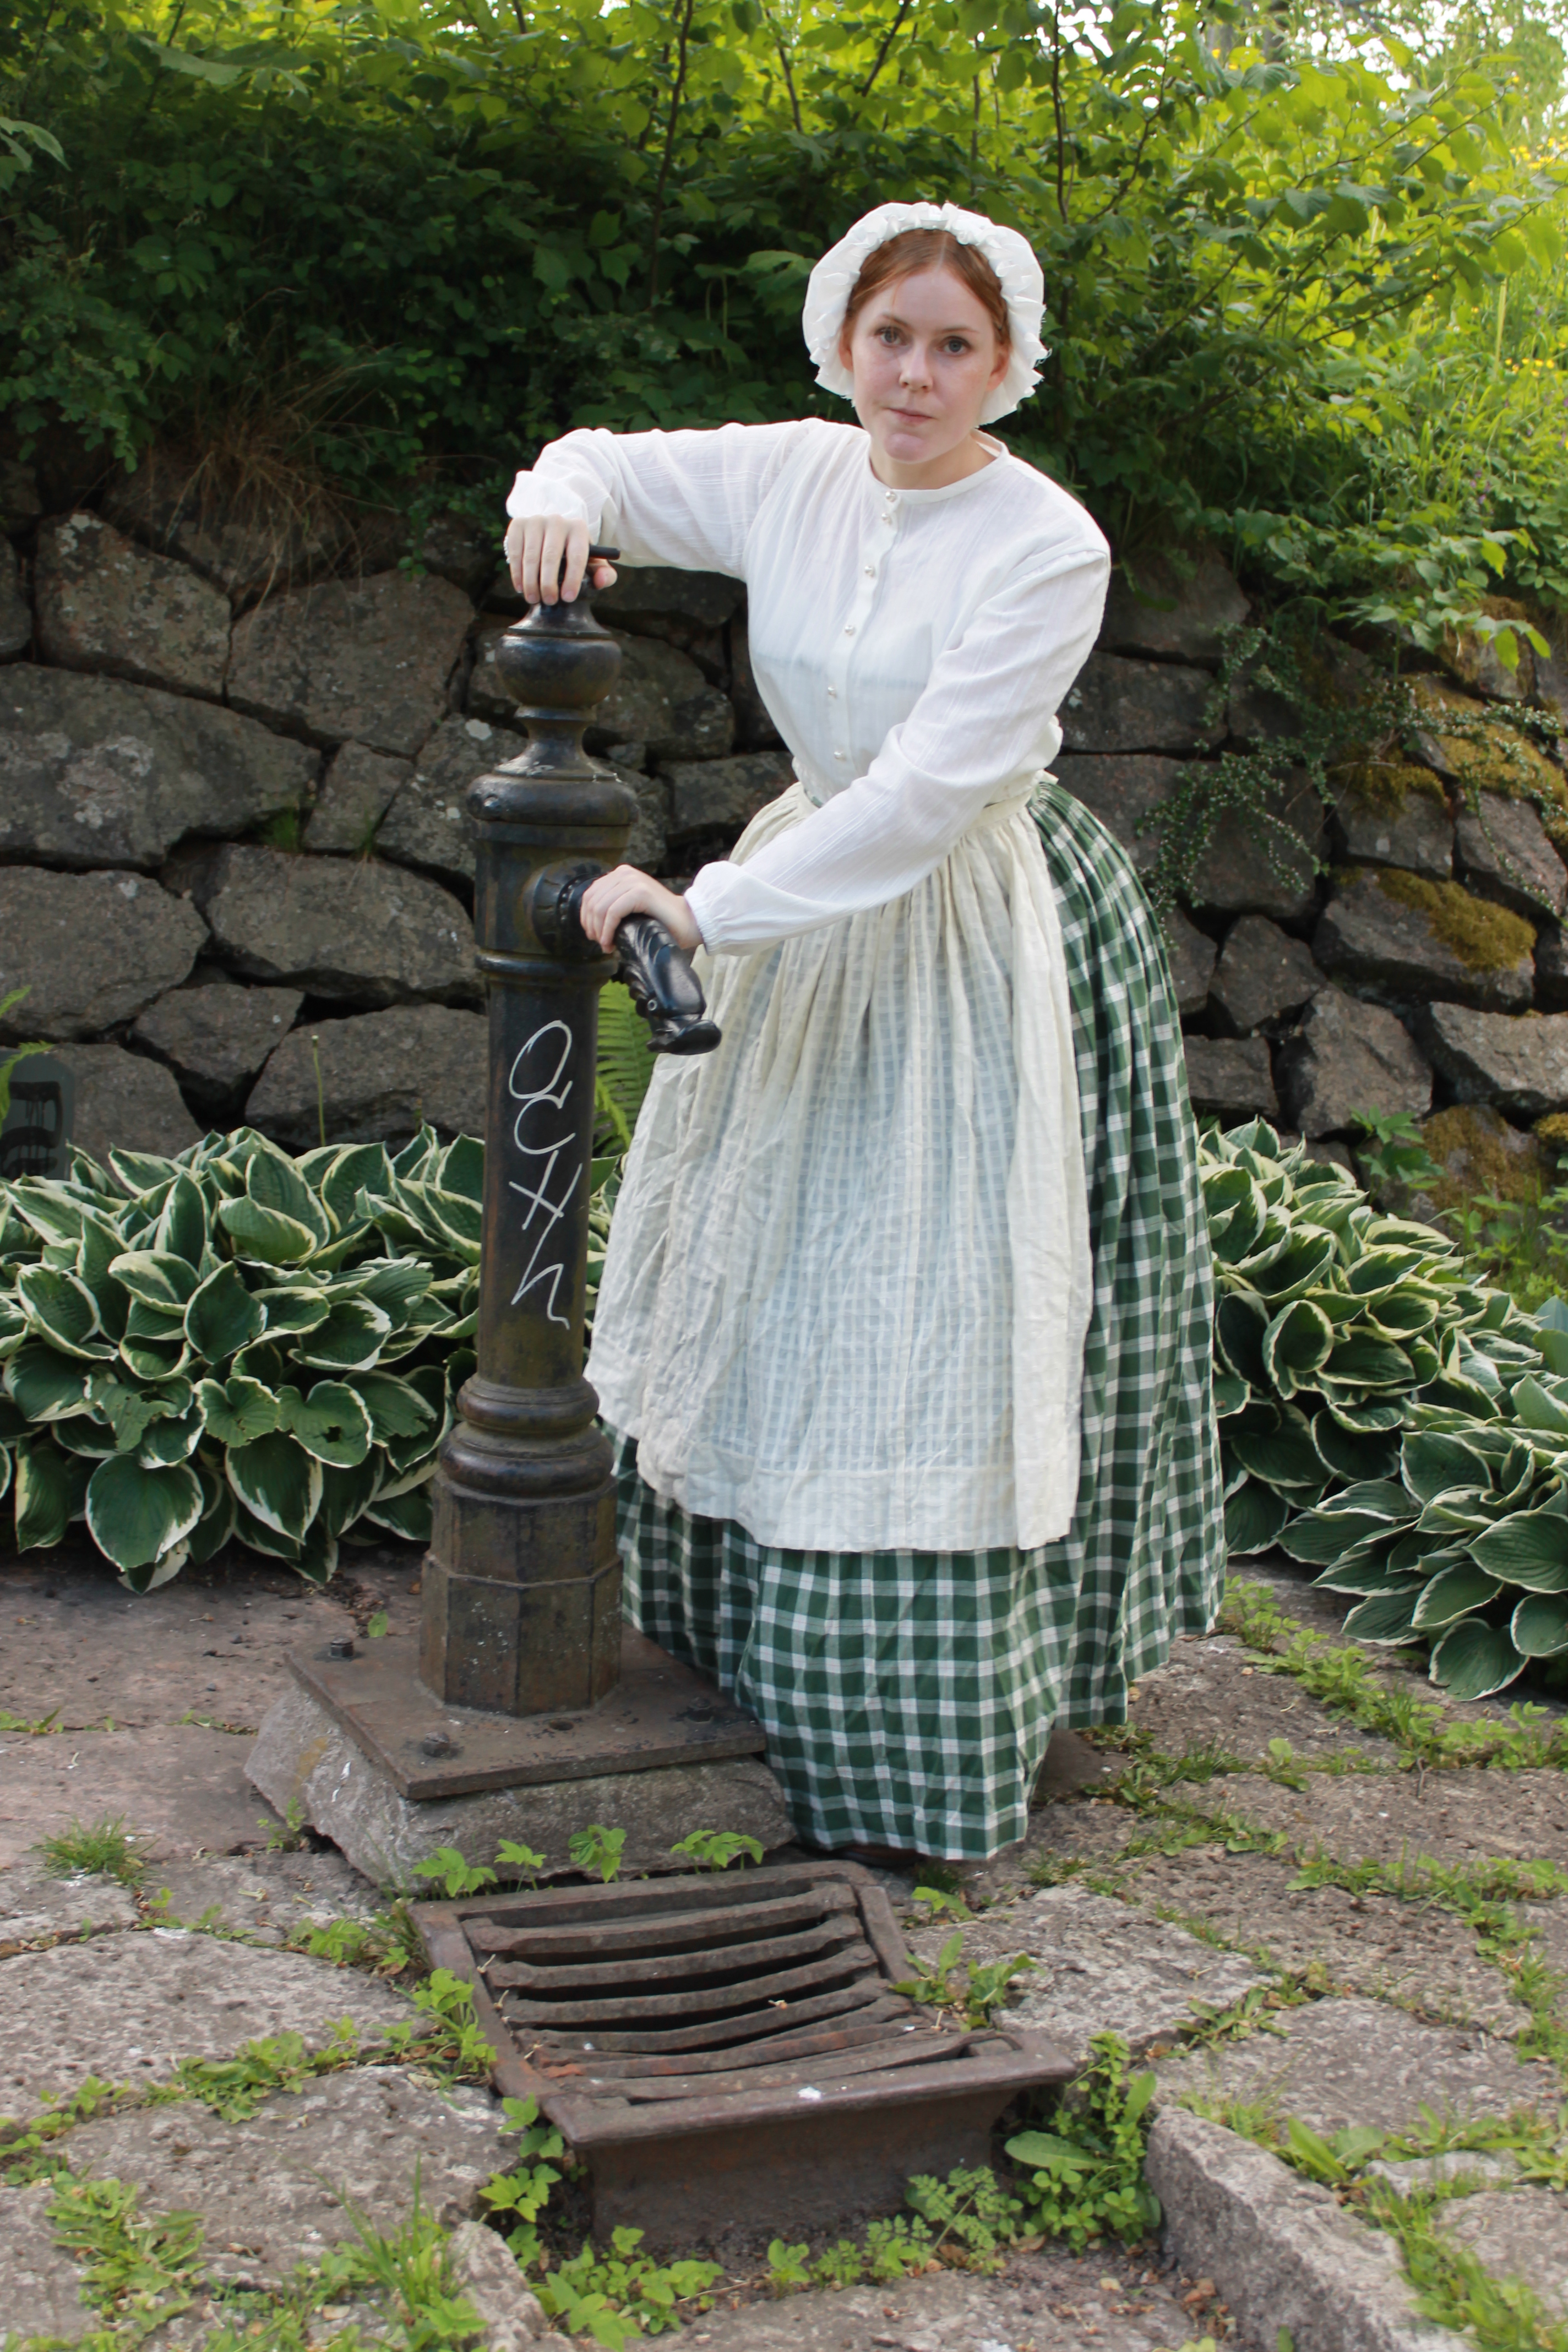
What: a 1850-1860s shirtwaist
How it fit into the challenge: The shirt is perfect for the everyday wear of a lower(or higher) class women doing households chores or taking a stroll in the park. That fabric is durable and easily washable and the style of the shirt with its drawstrings at waist and wrists makes it fit several different sizes of women.
Pattern: None, I just used the basic shapes of any shirt pattern.
Fabric: 1 m of structured cotton voile.
Notions: Thread, buttons, scraps of cotton ribbon at wrists, cotton string and bias tape for waist shaping.
How historical accurate: So so, the garment (and fabric) did exist, but I didn’t used any accurate pattern, and I did sew it all on my sewing machine – even the buttonholes. I would say about 5/10
Time: about 4 hours
Cost: at most 100Sek (16Usd) – Everything was from stash and leftovers from other projects.
First worn: at June 6th for photos, but will get a proper outing June 13 when my sister wears it for our “Crinoline day”
Final thoughts: I loved how fast and easy it went together, and I think it looks great both paired with”Peasant” garb and “finer lady’s” garb (as is the way my sister will wear it).
