
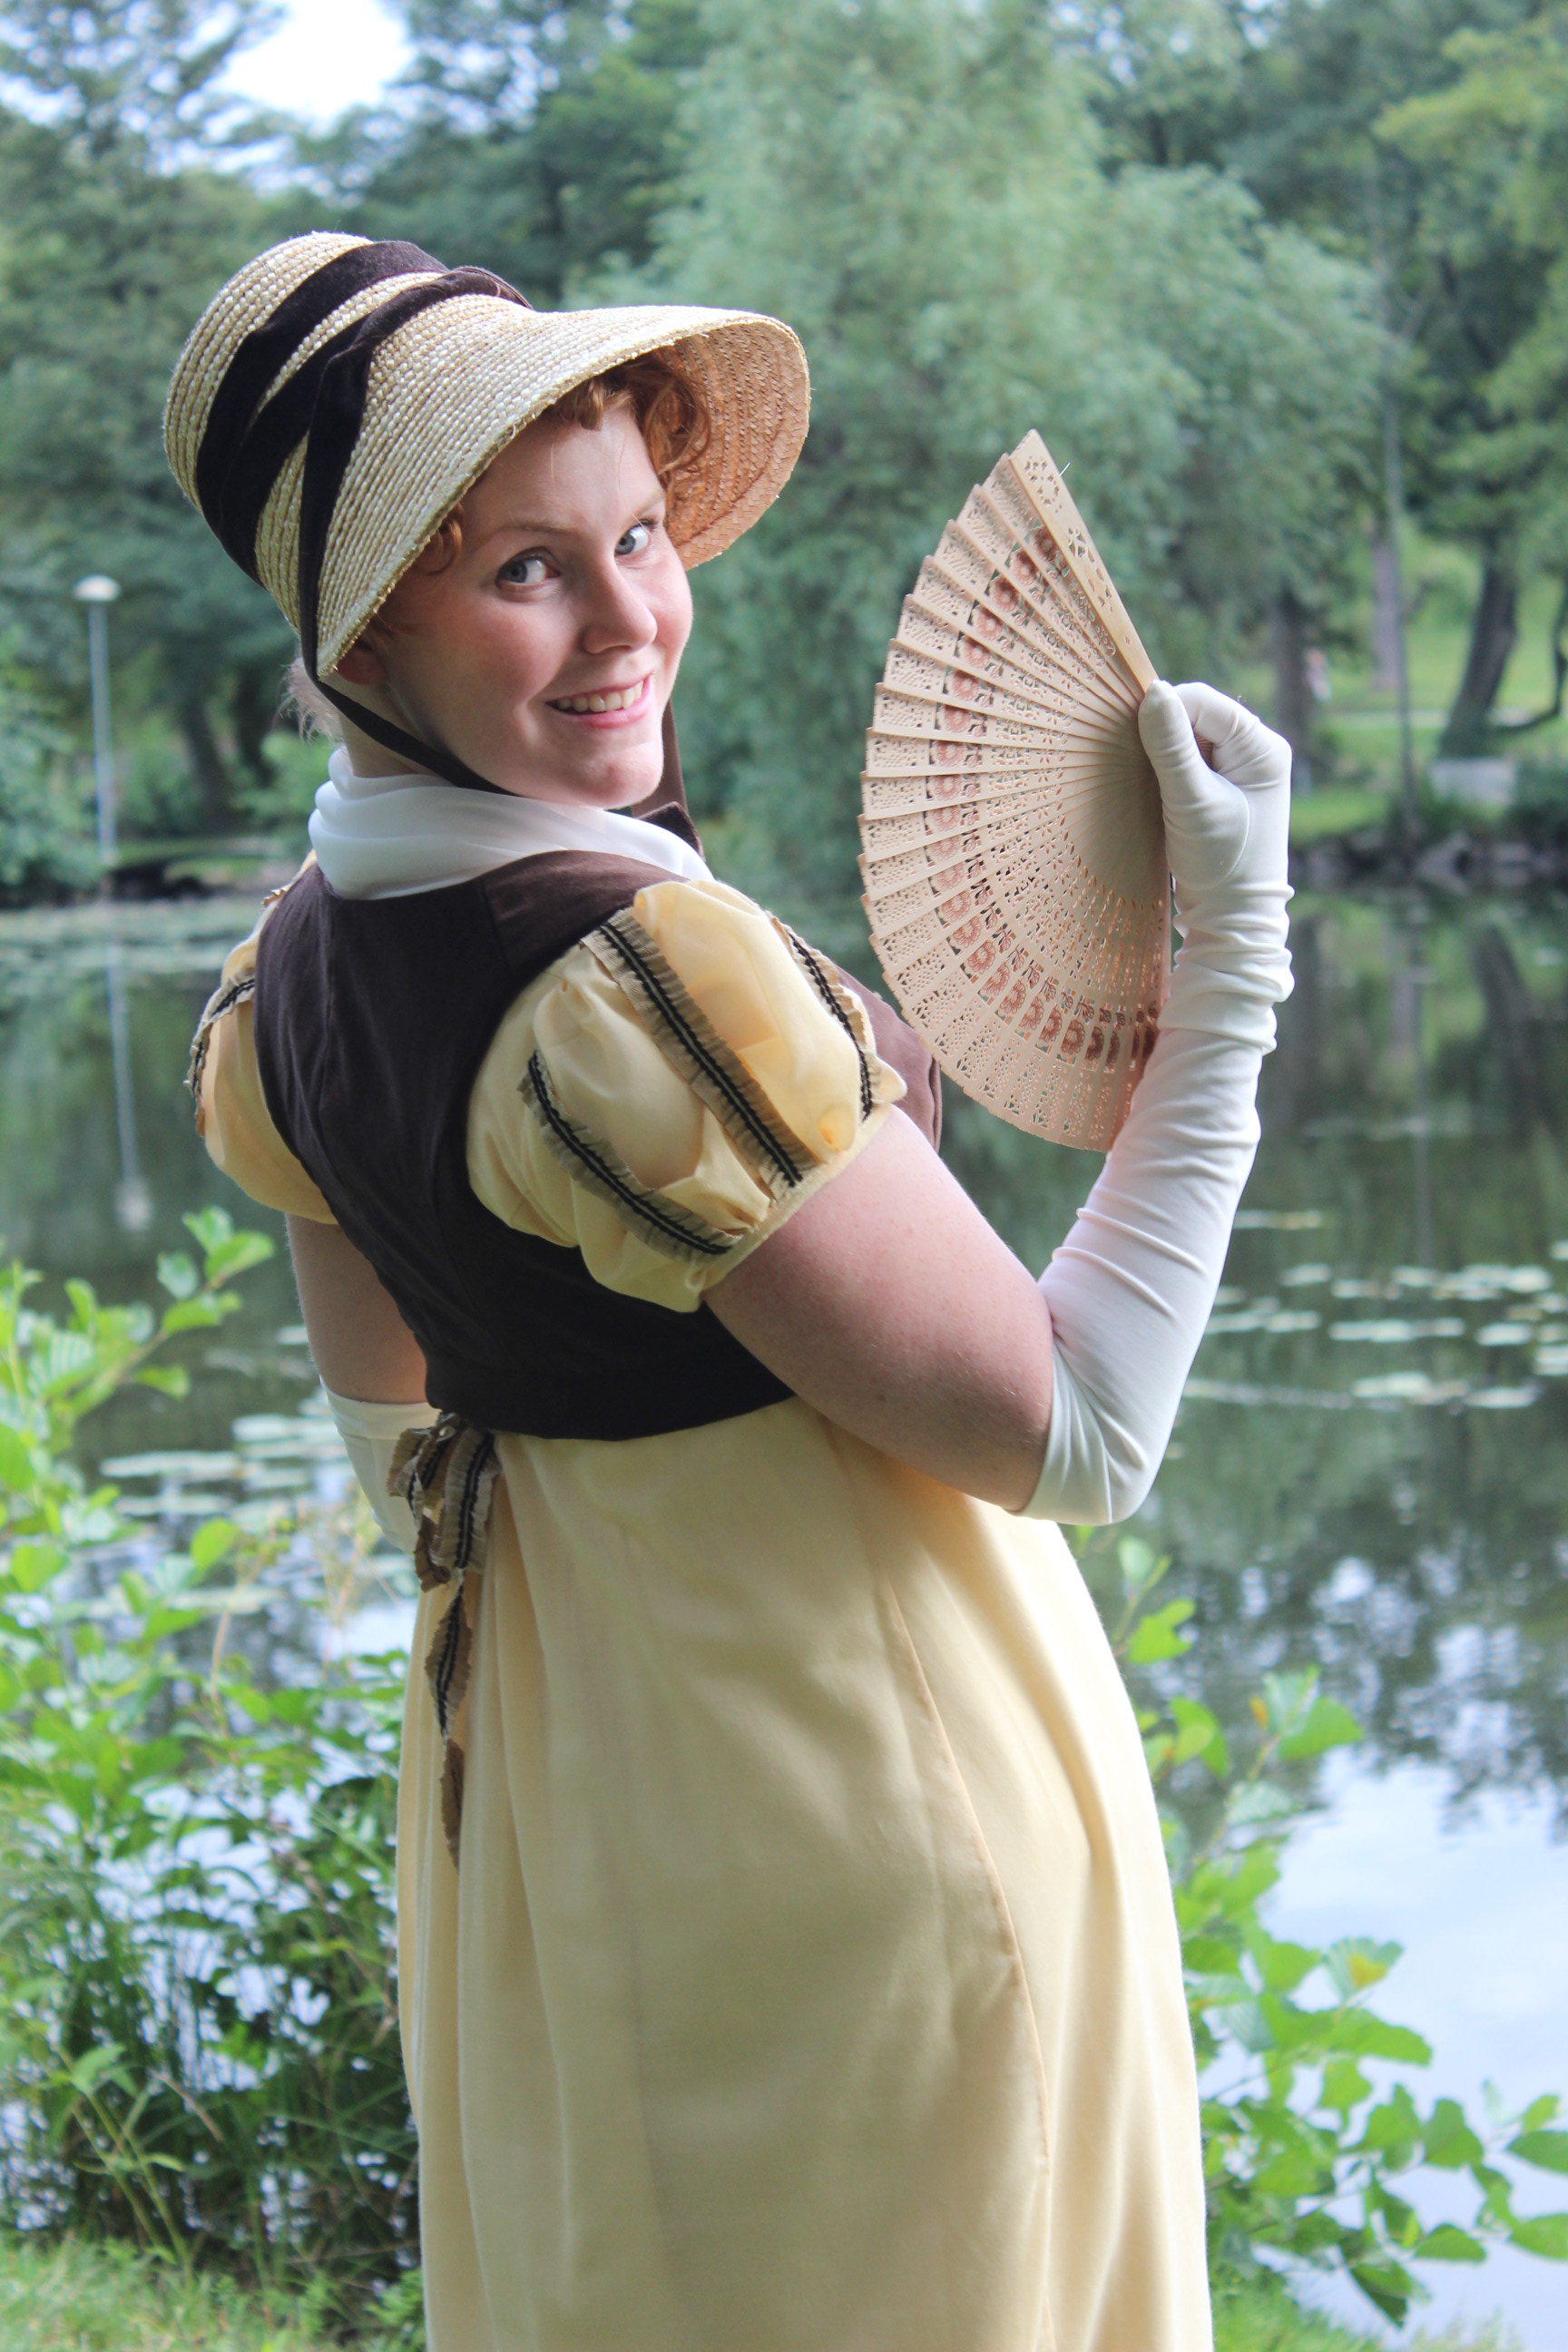
And of course I asked my sister to take some photos of me wearing my new spencer/west paired with my yellow voile gown and new bonnet.

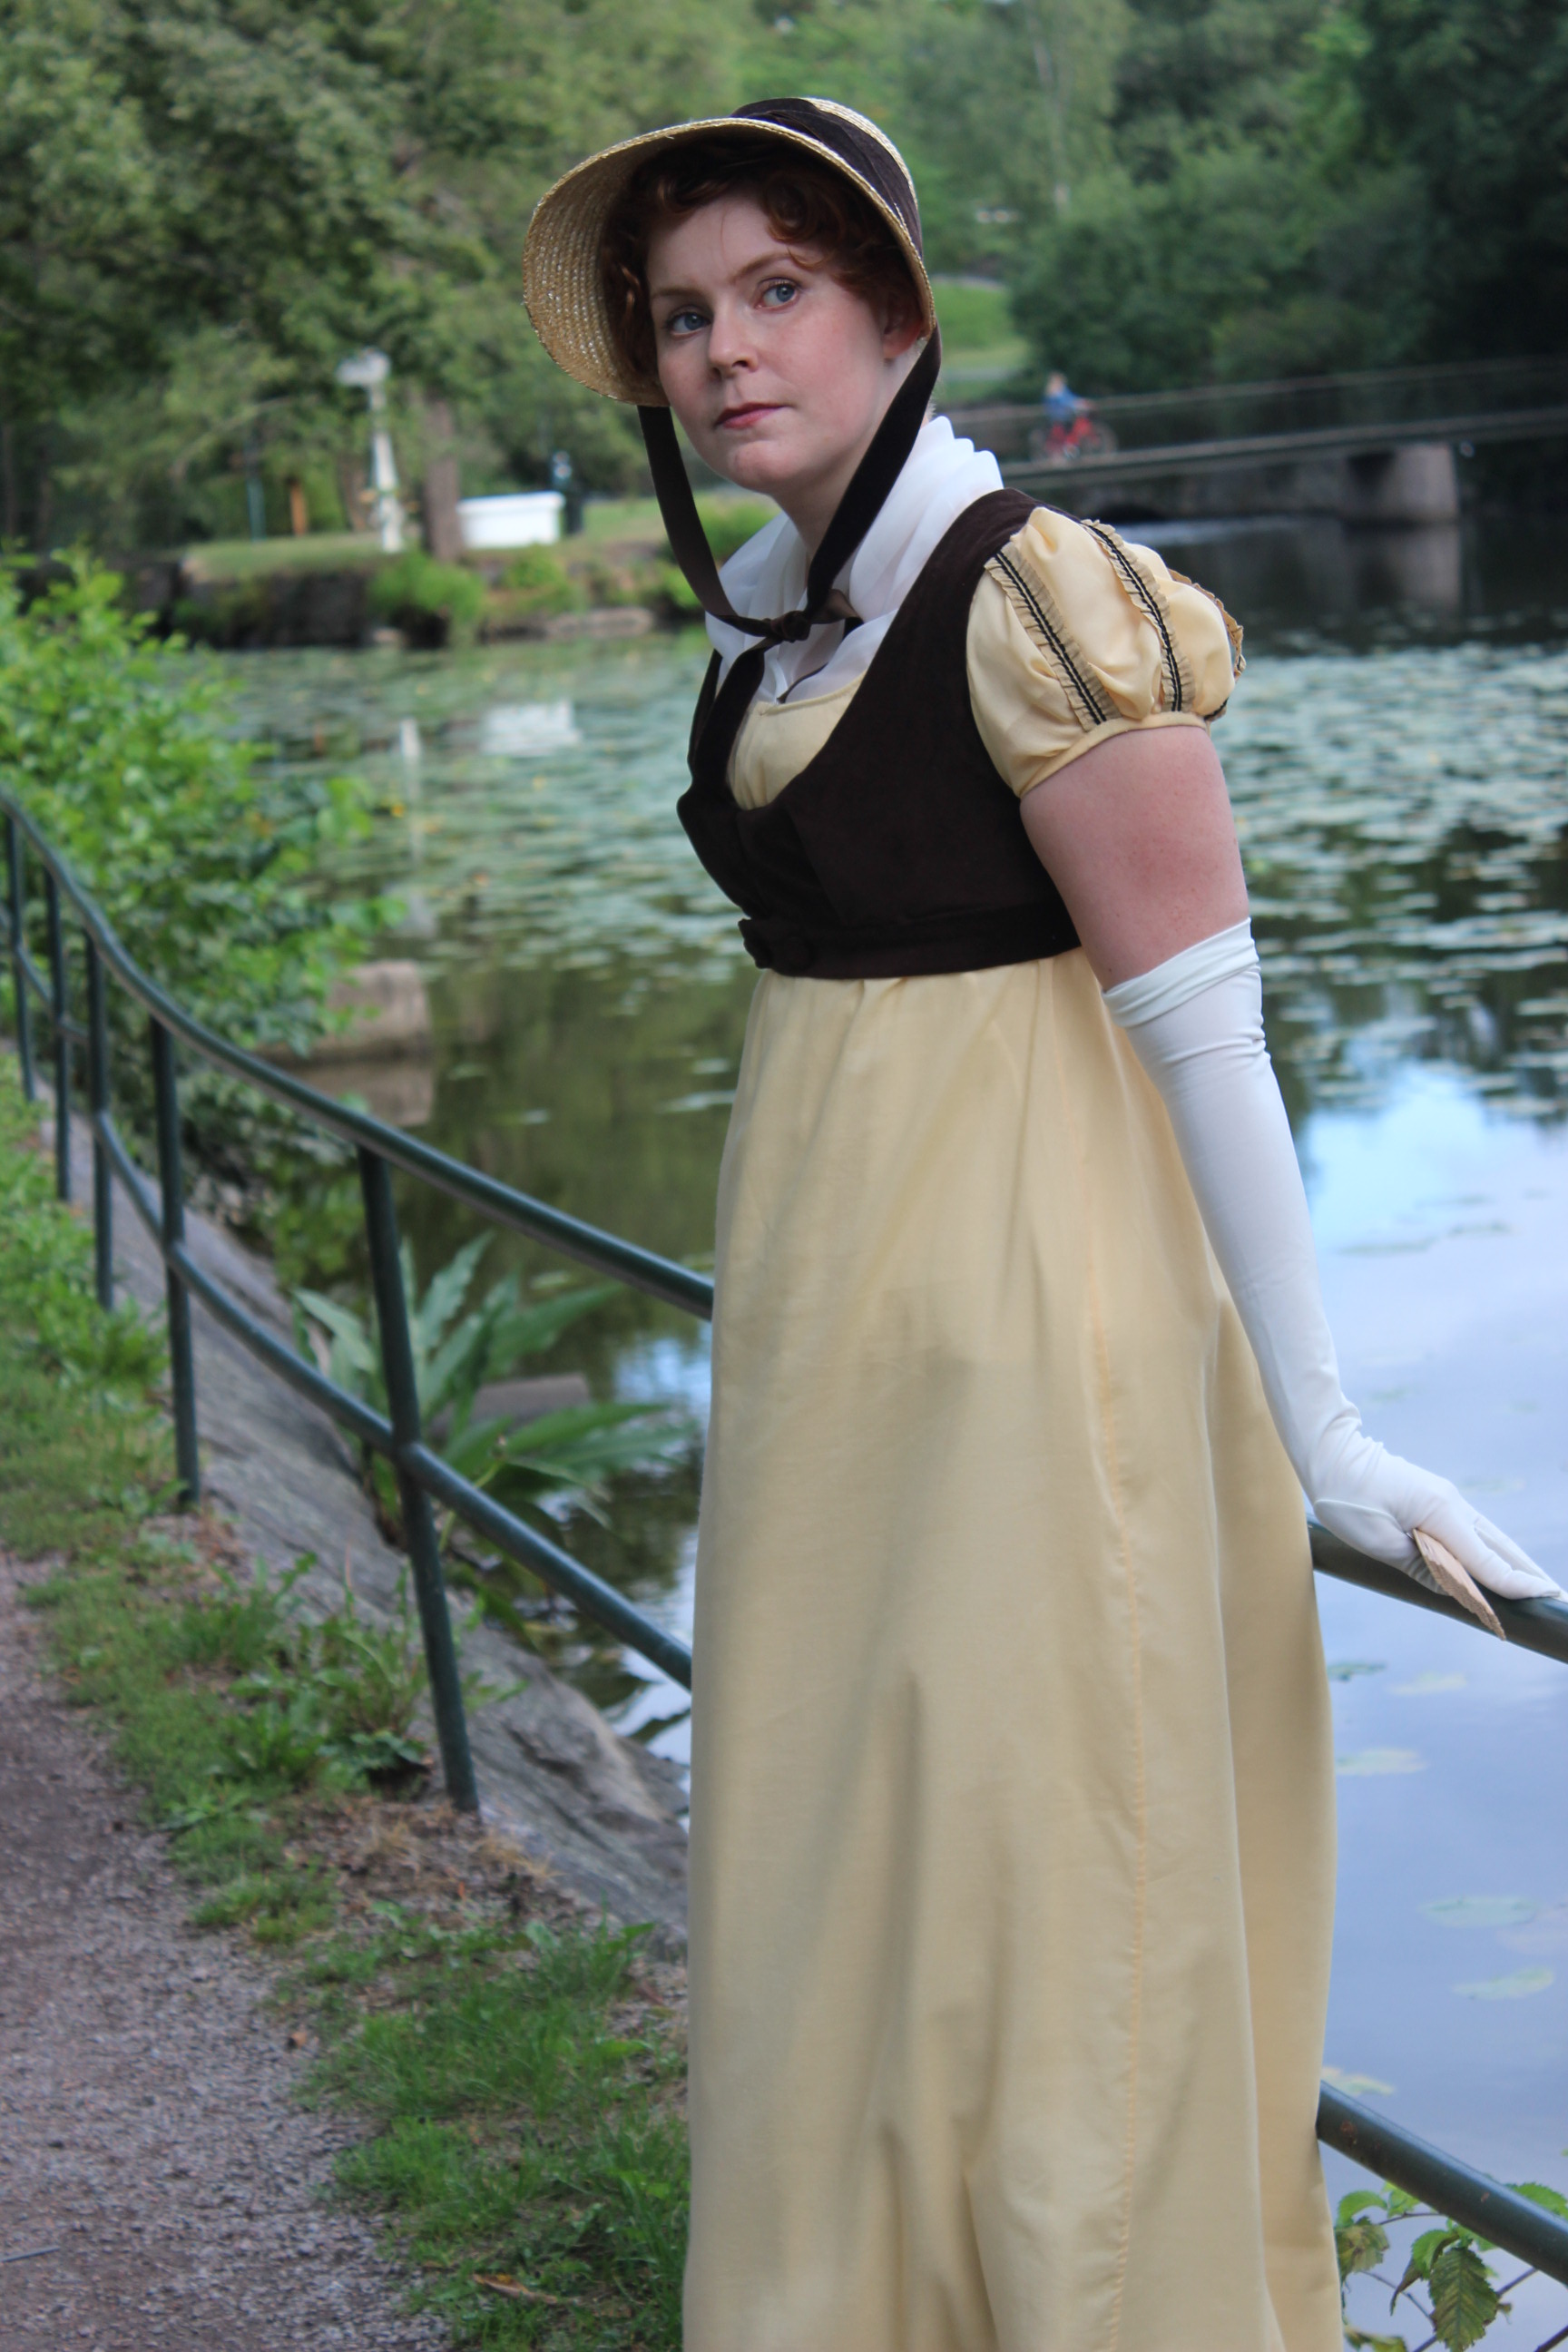

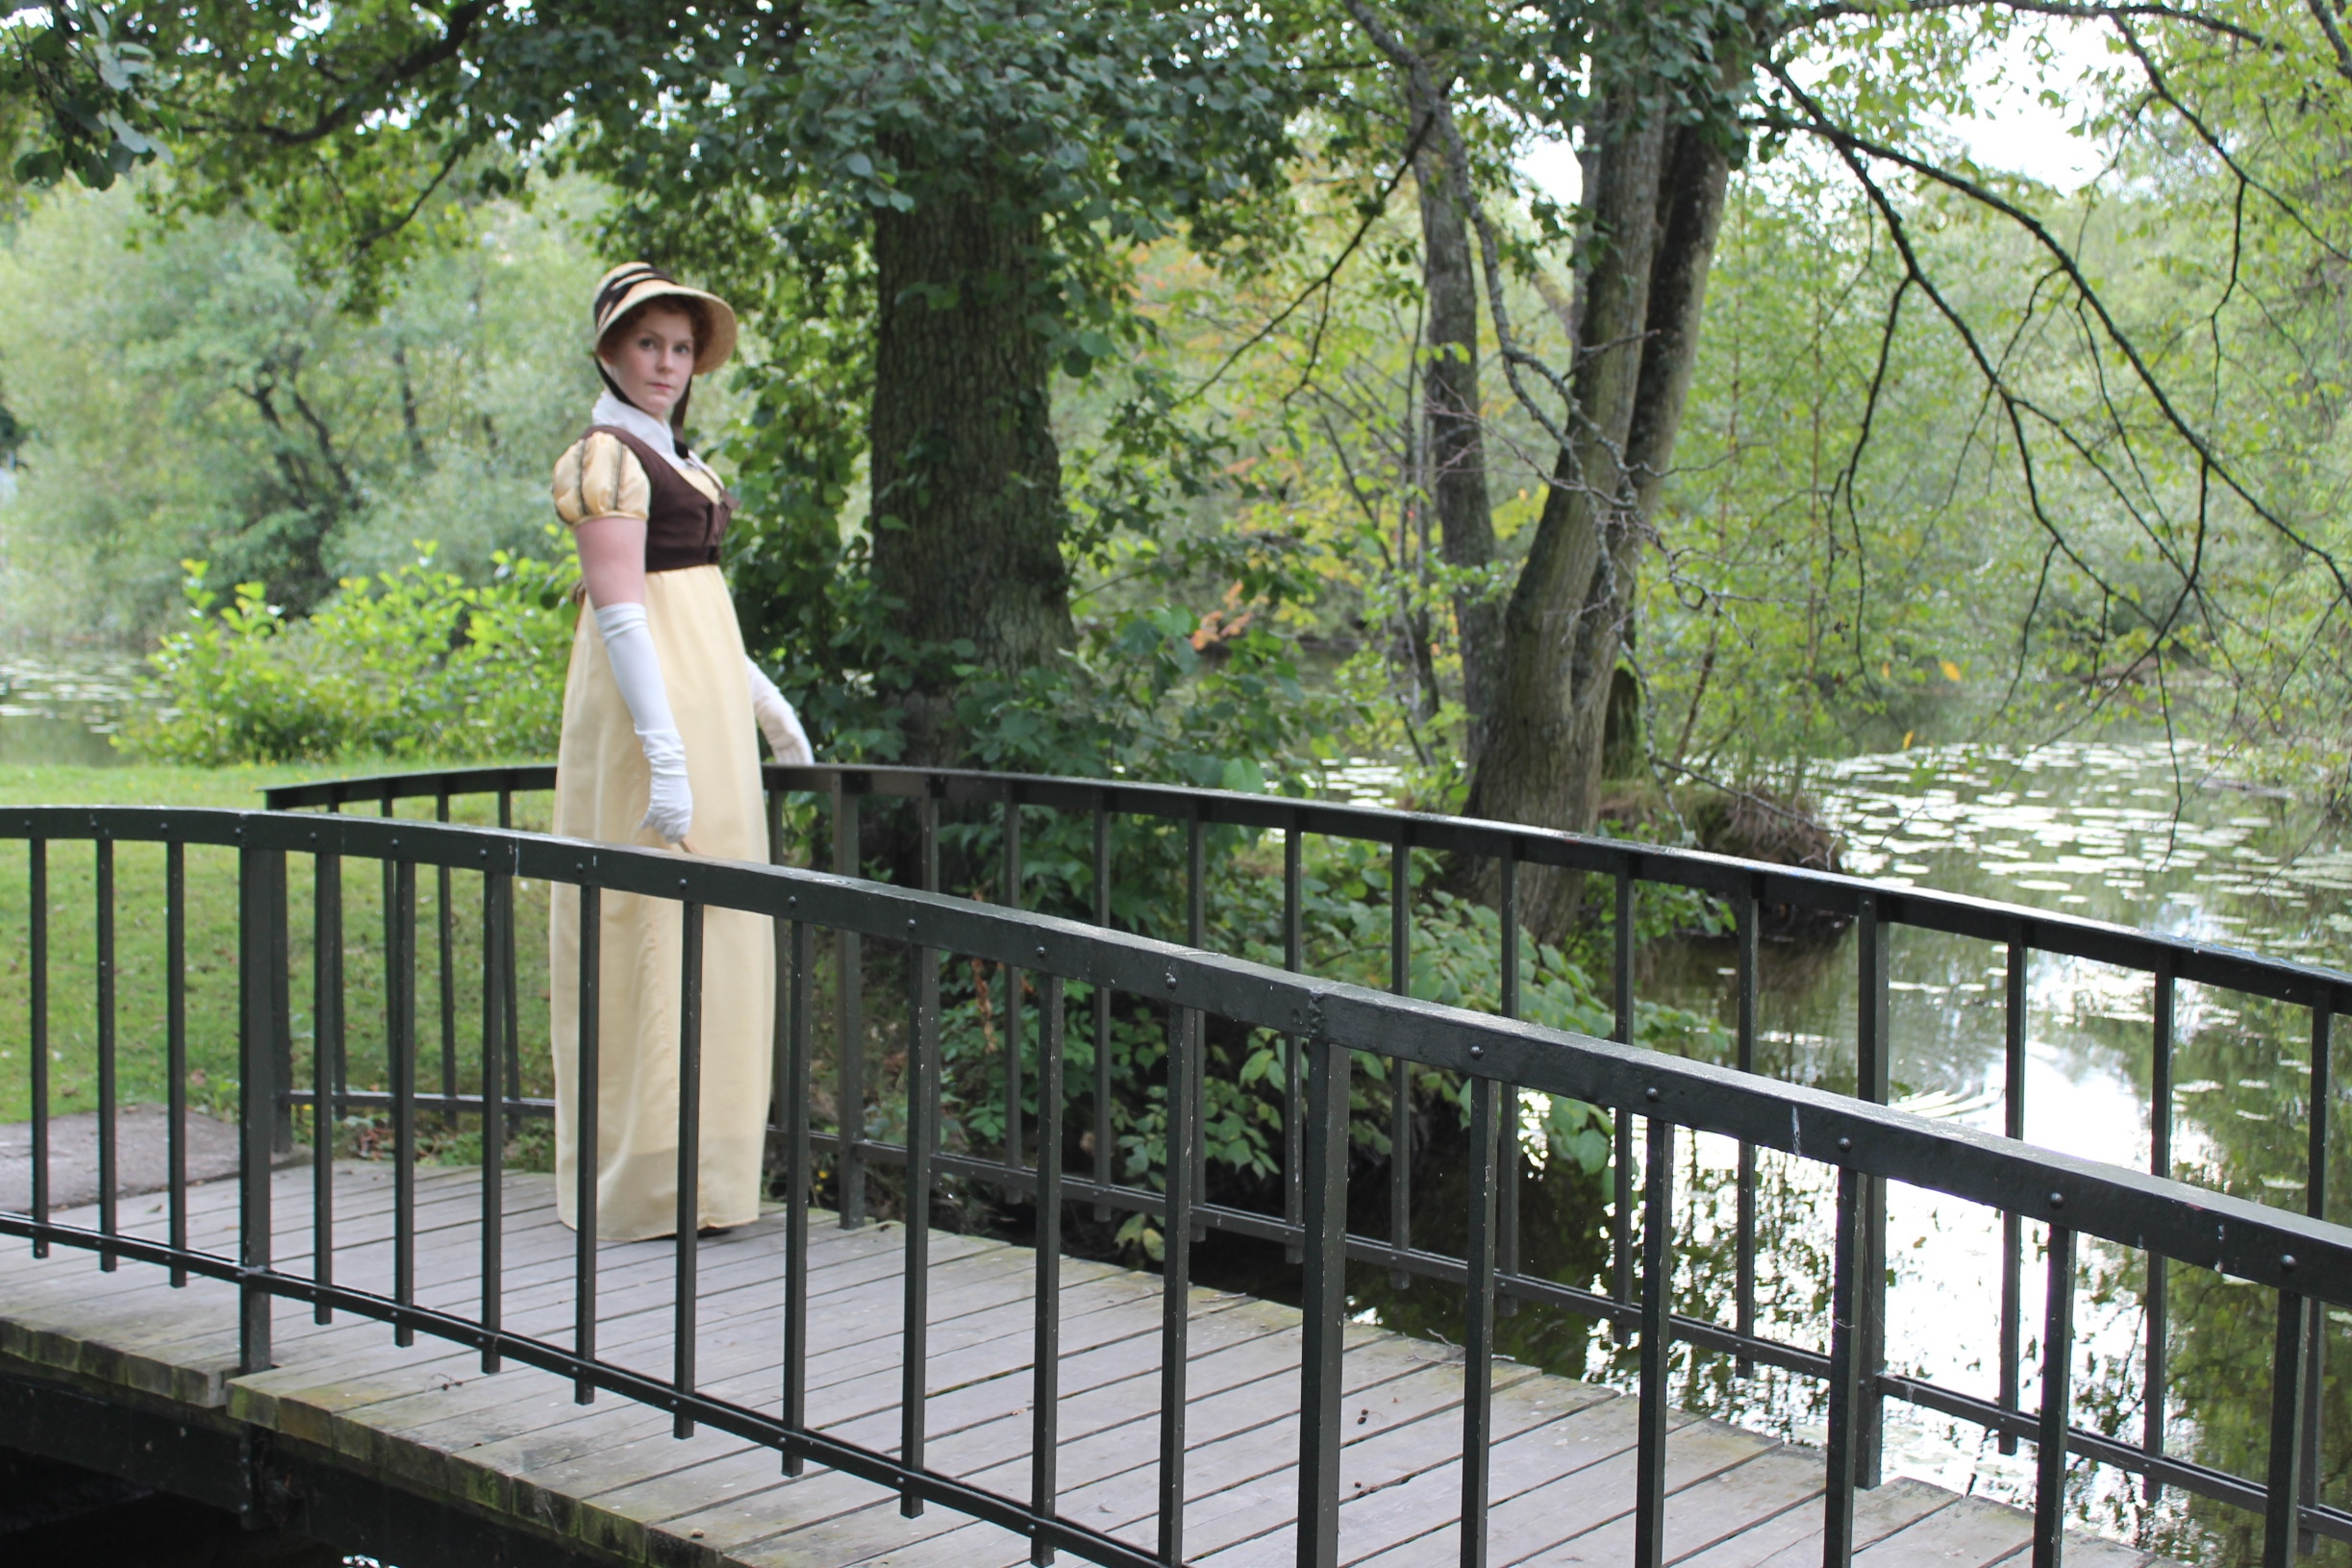
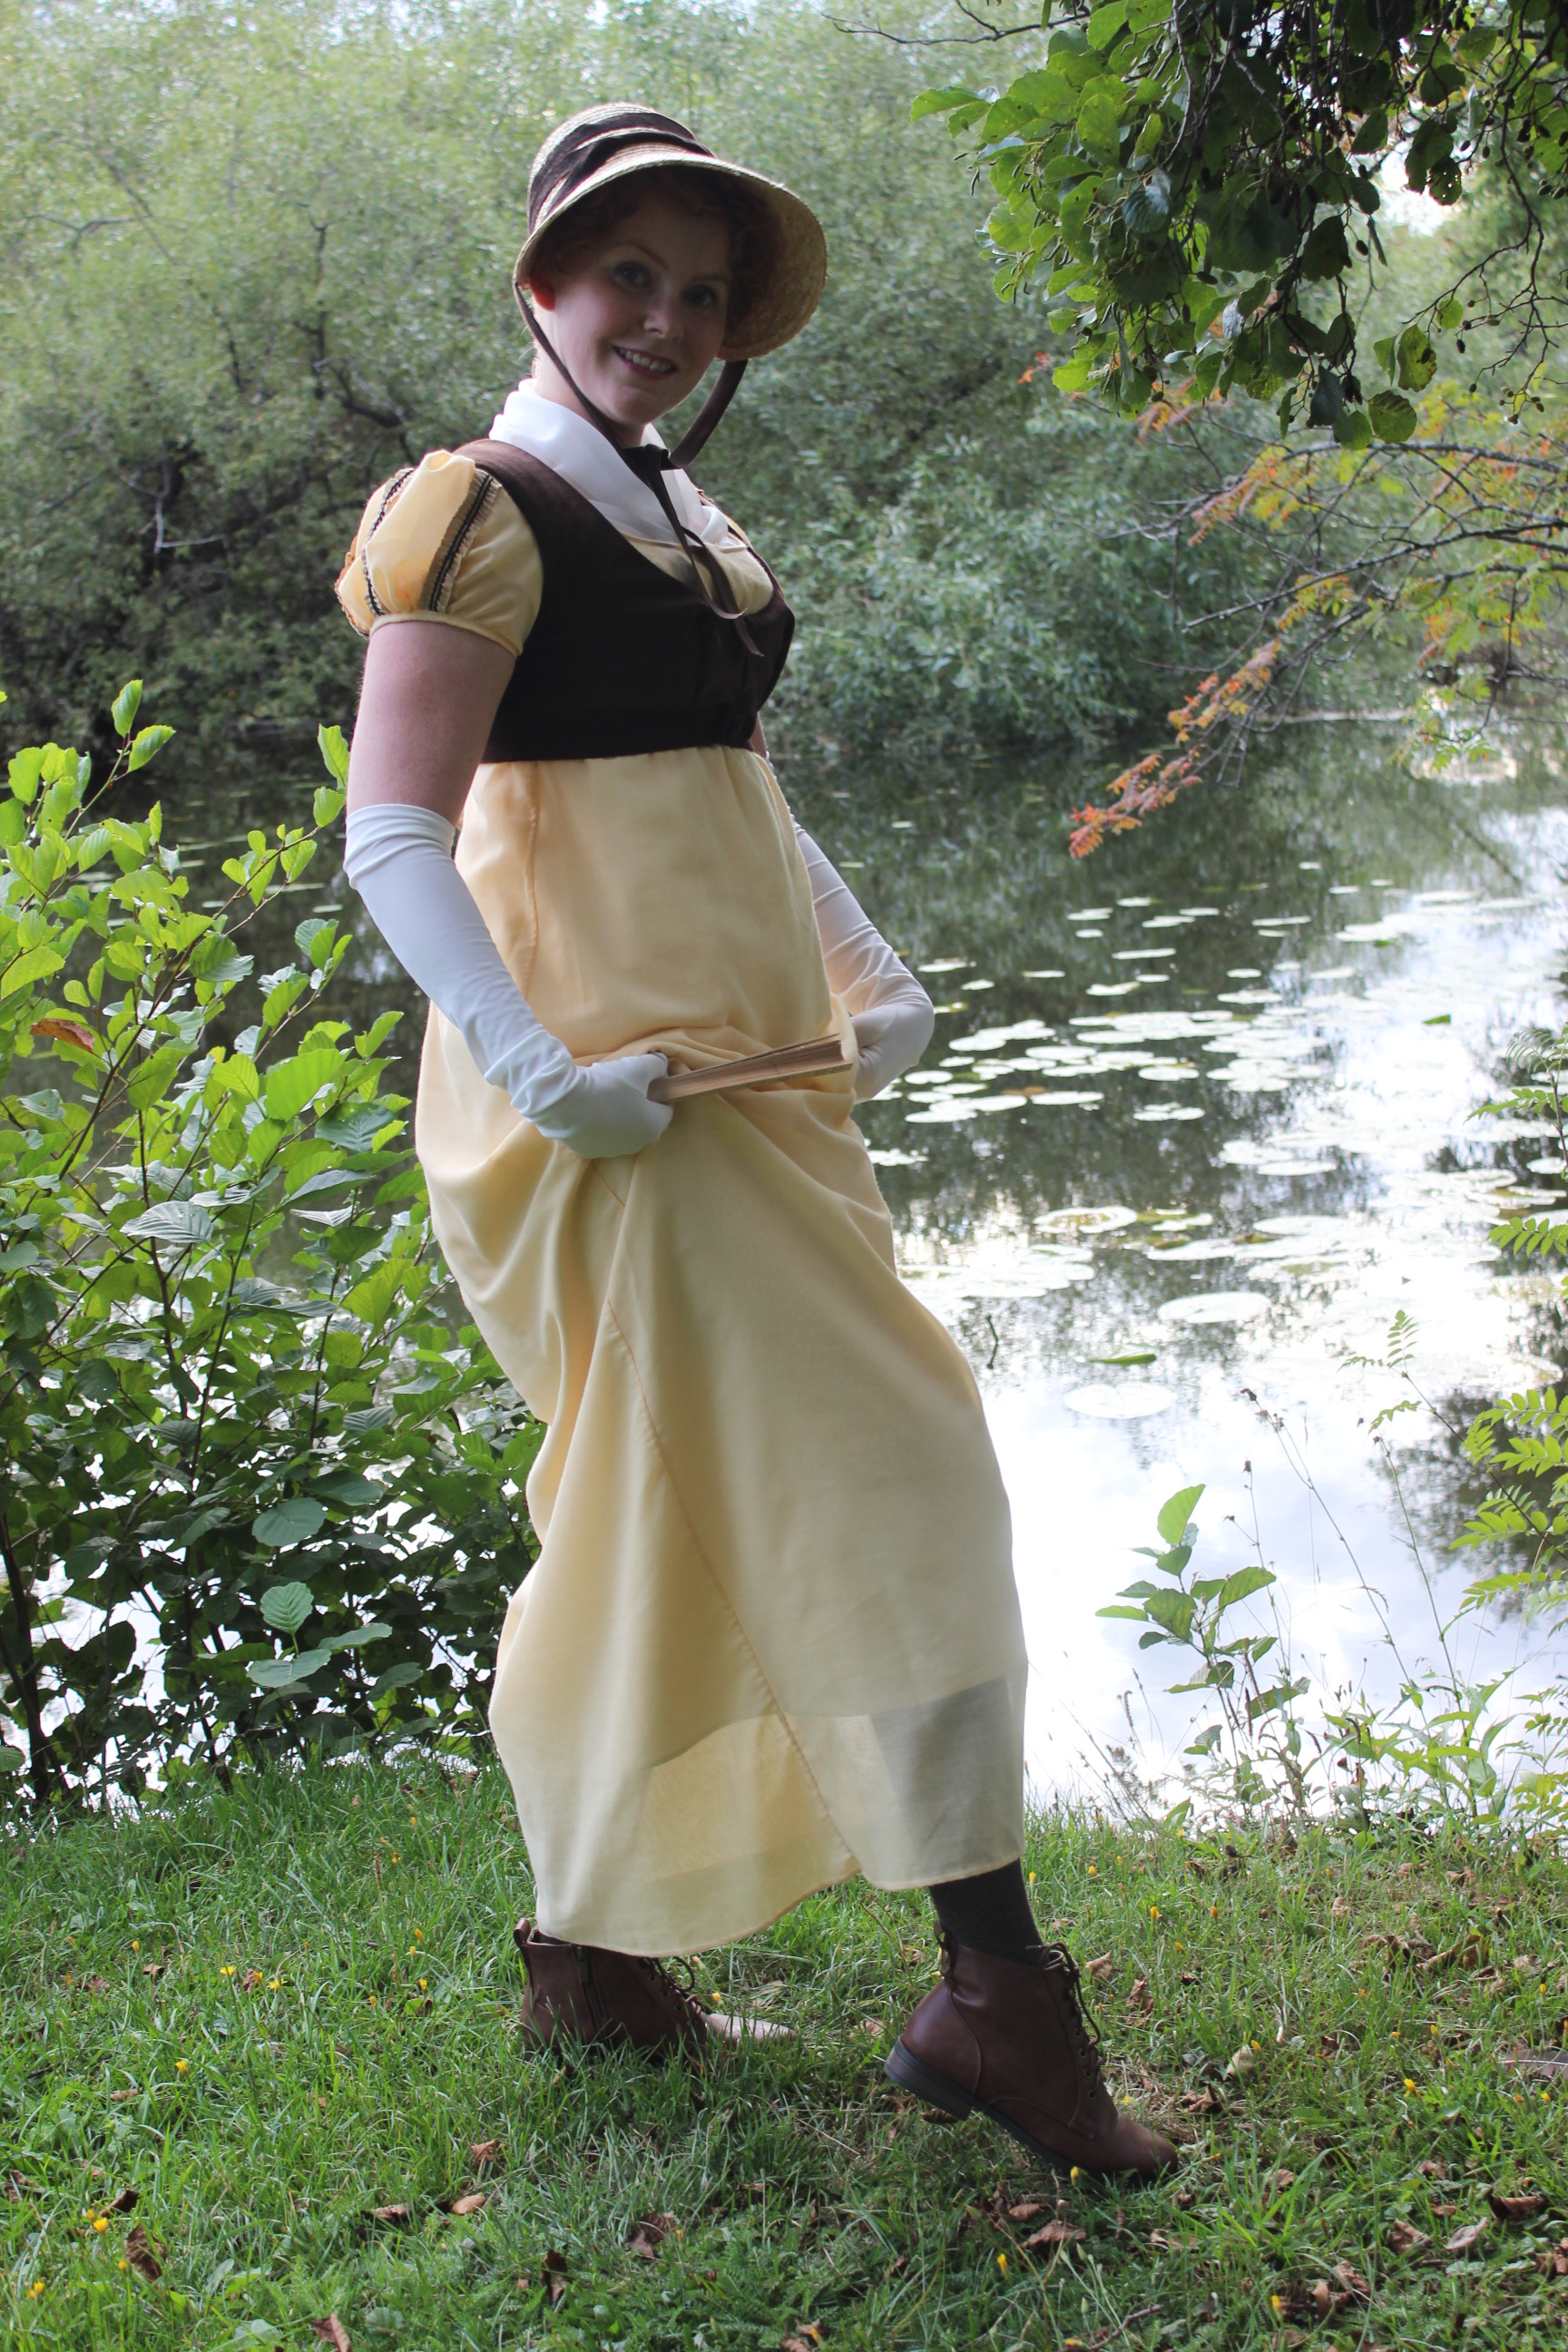

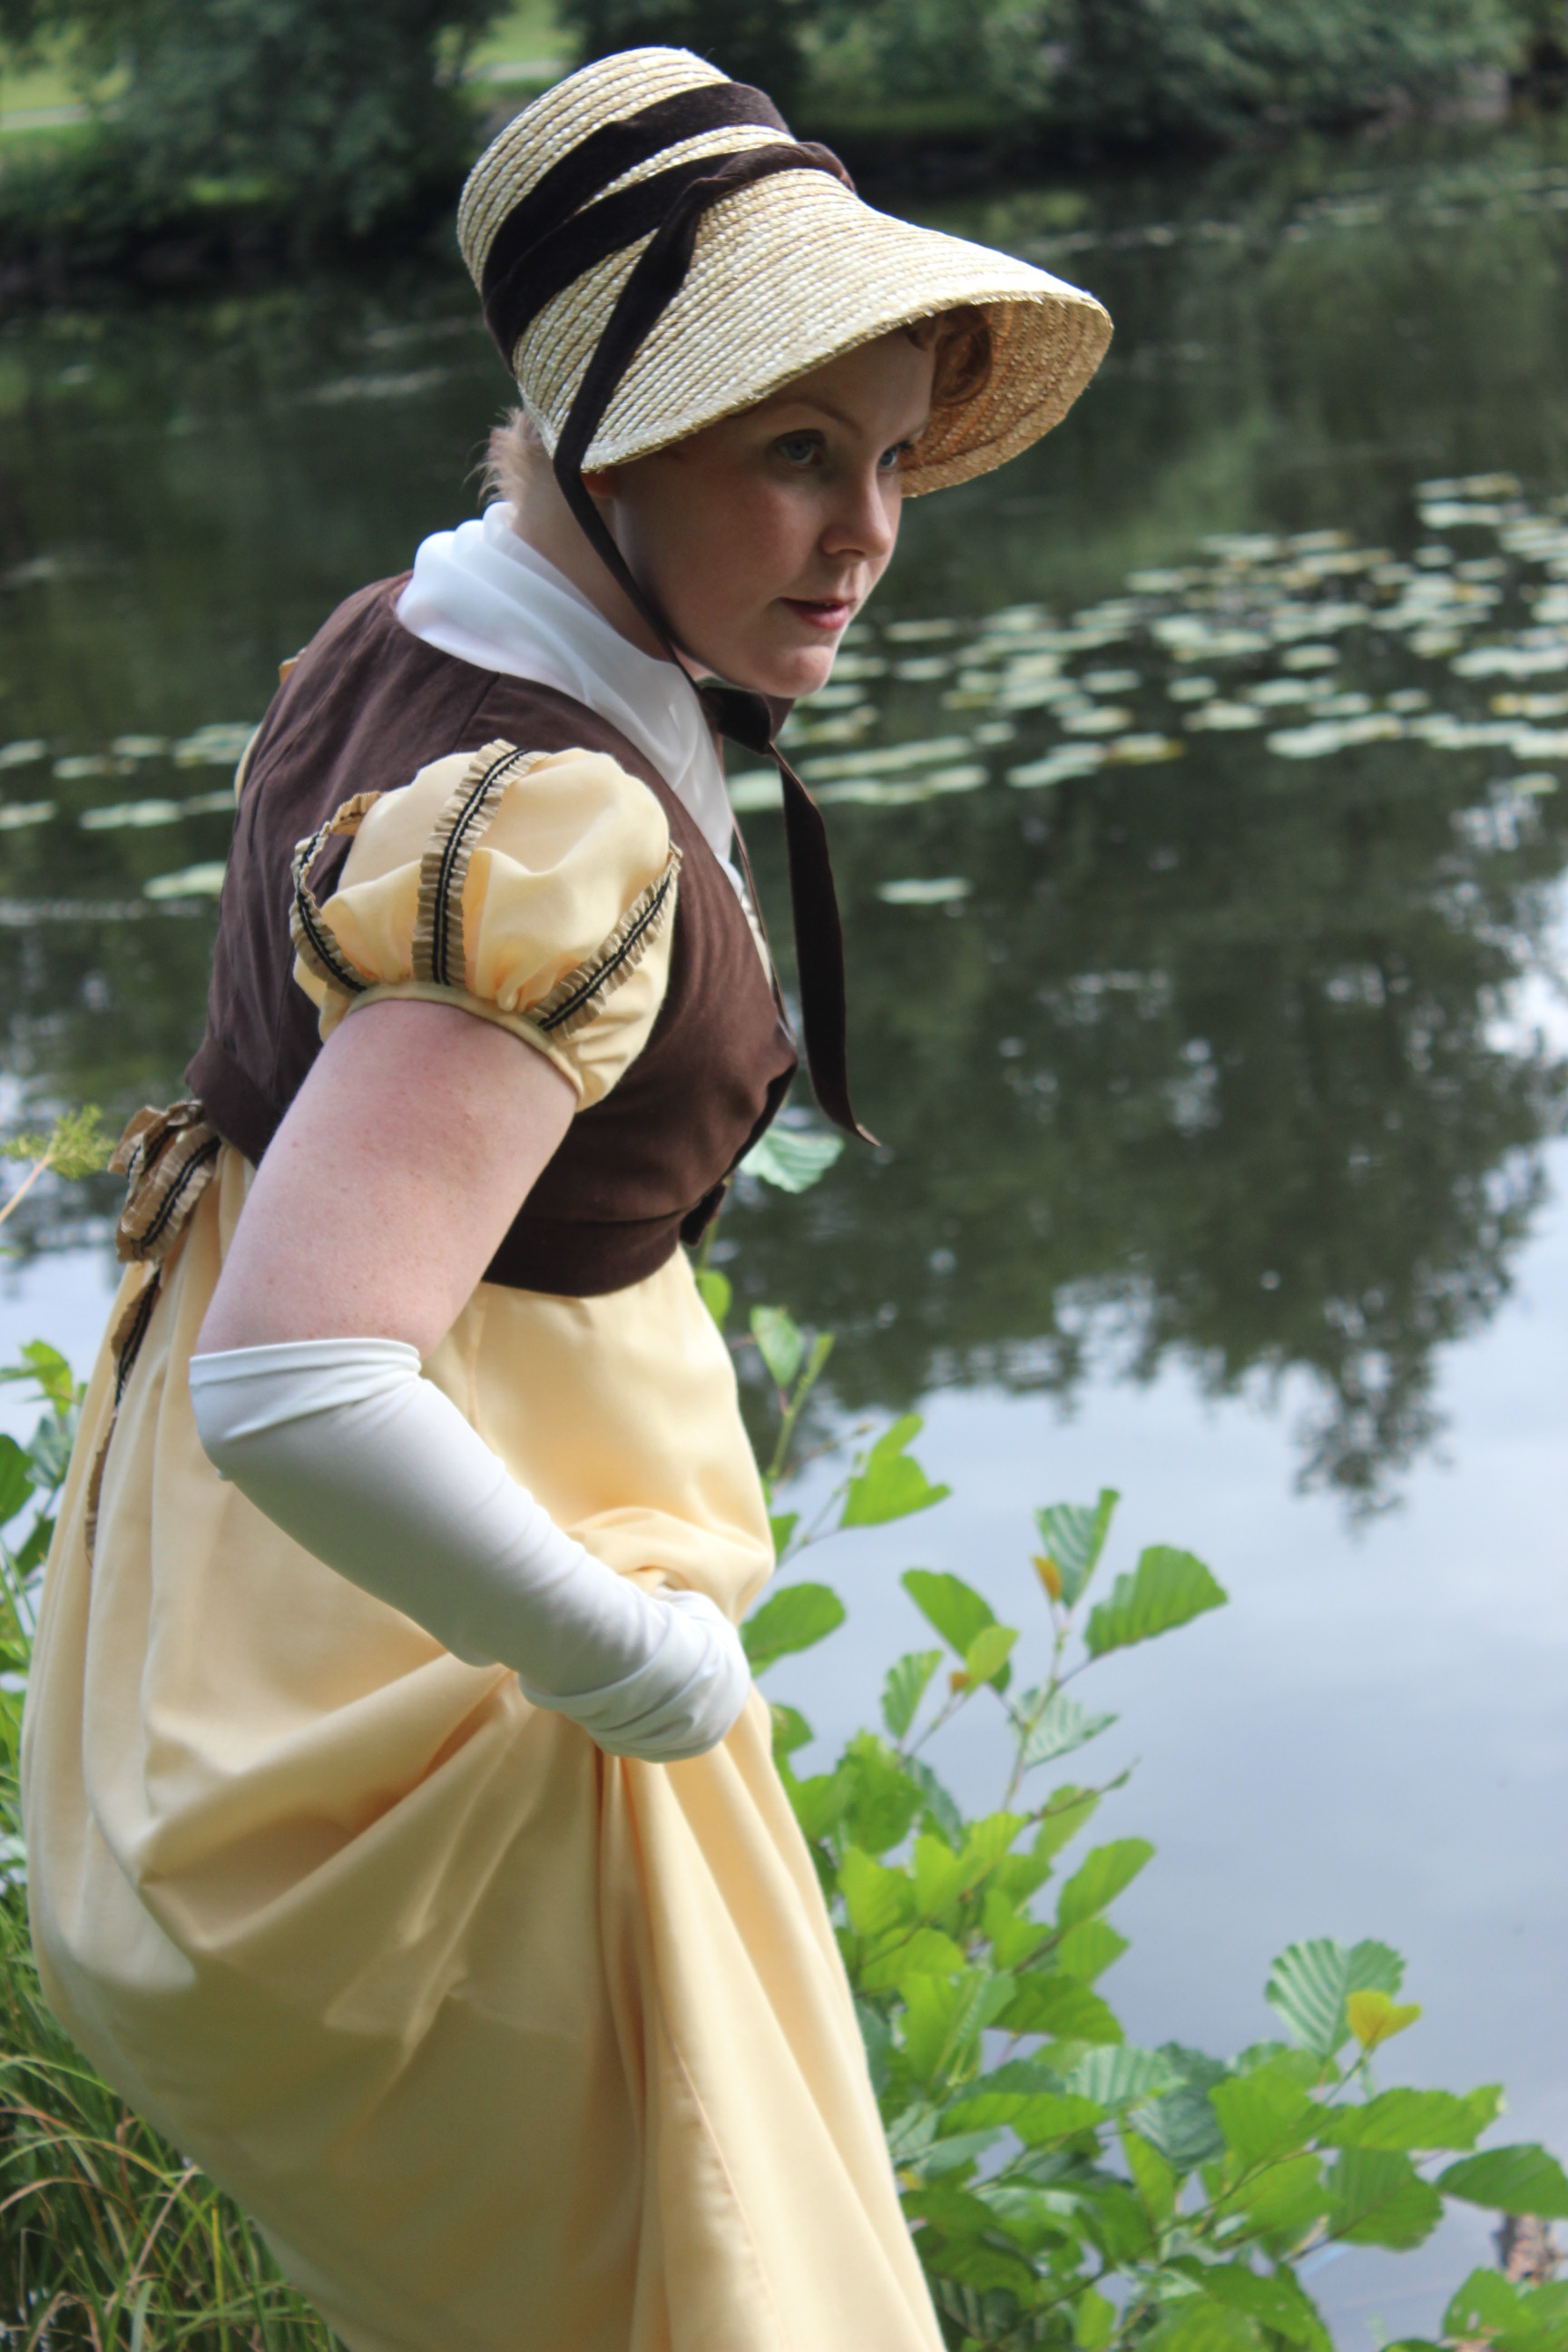


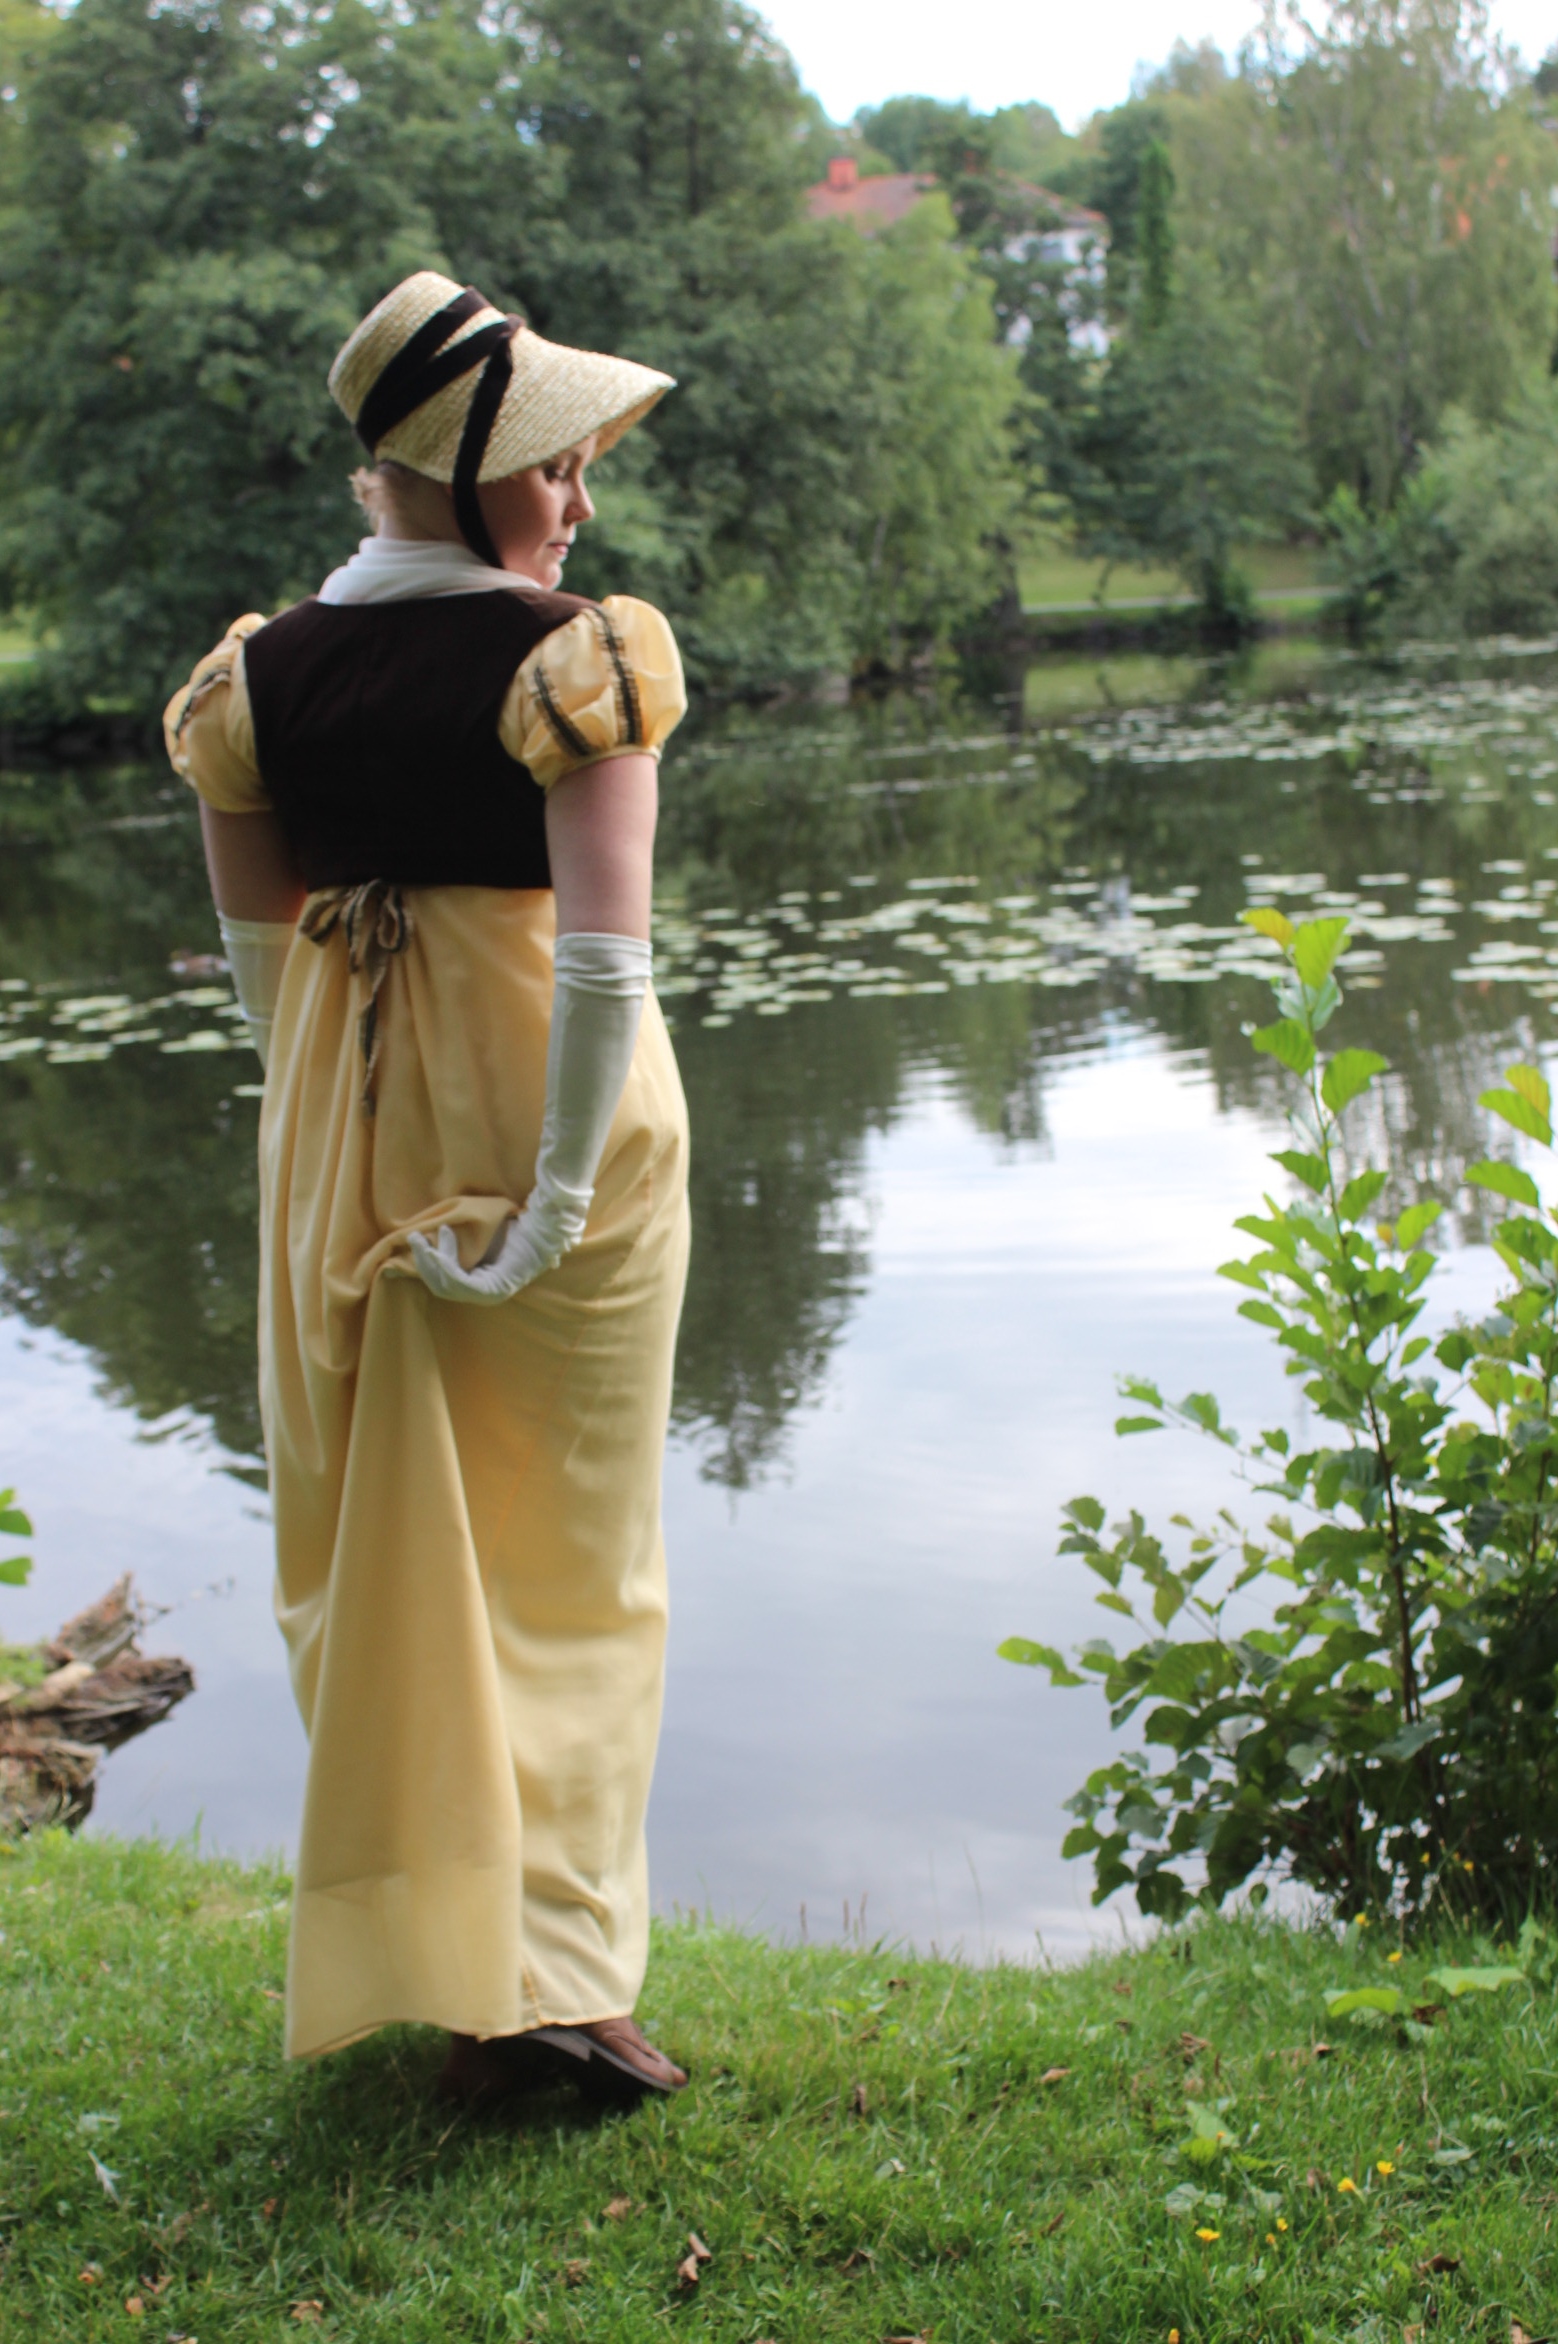


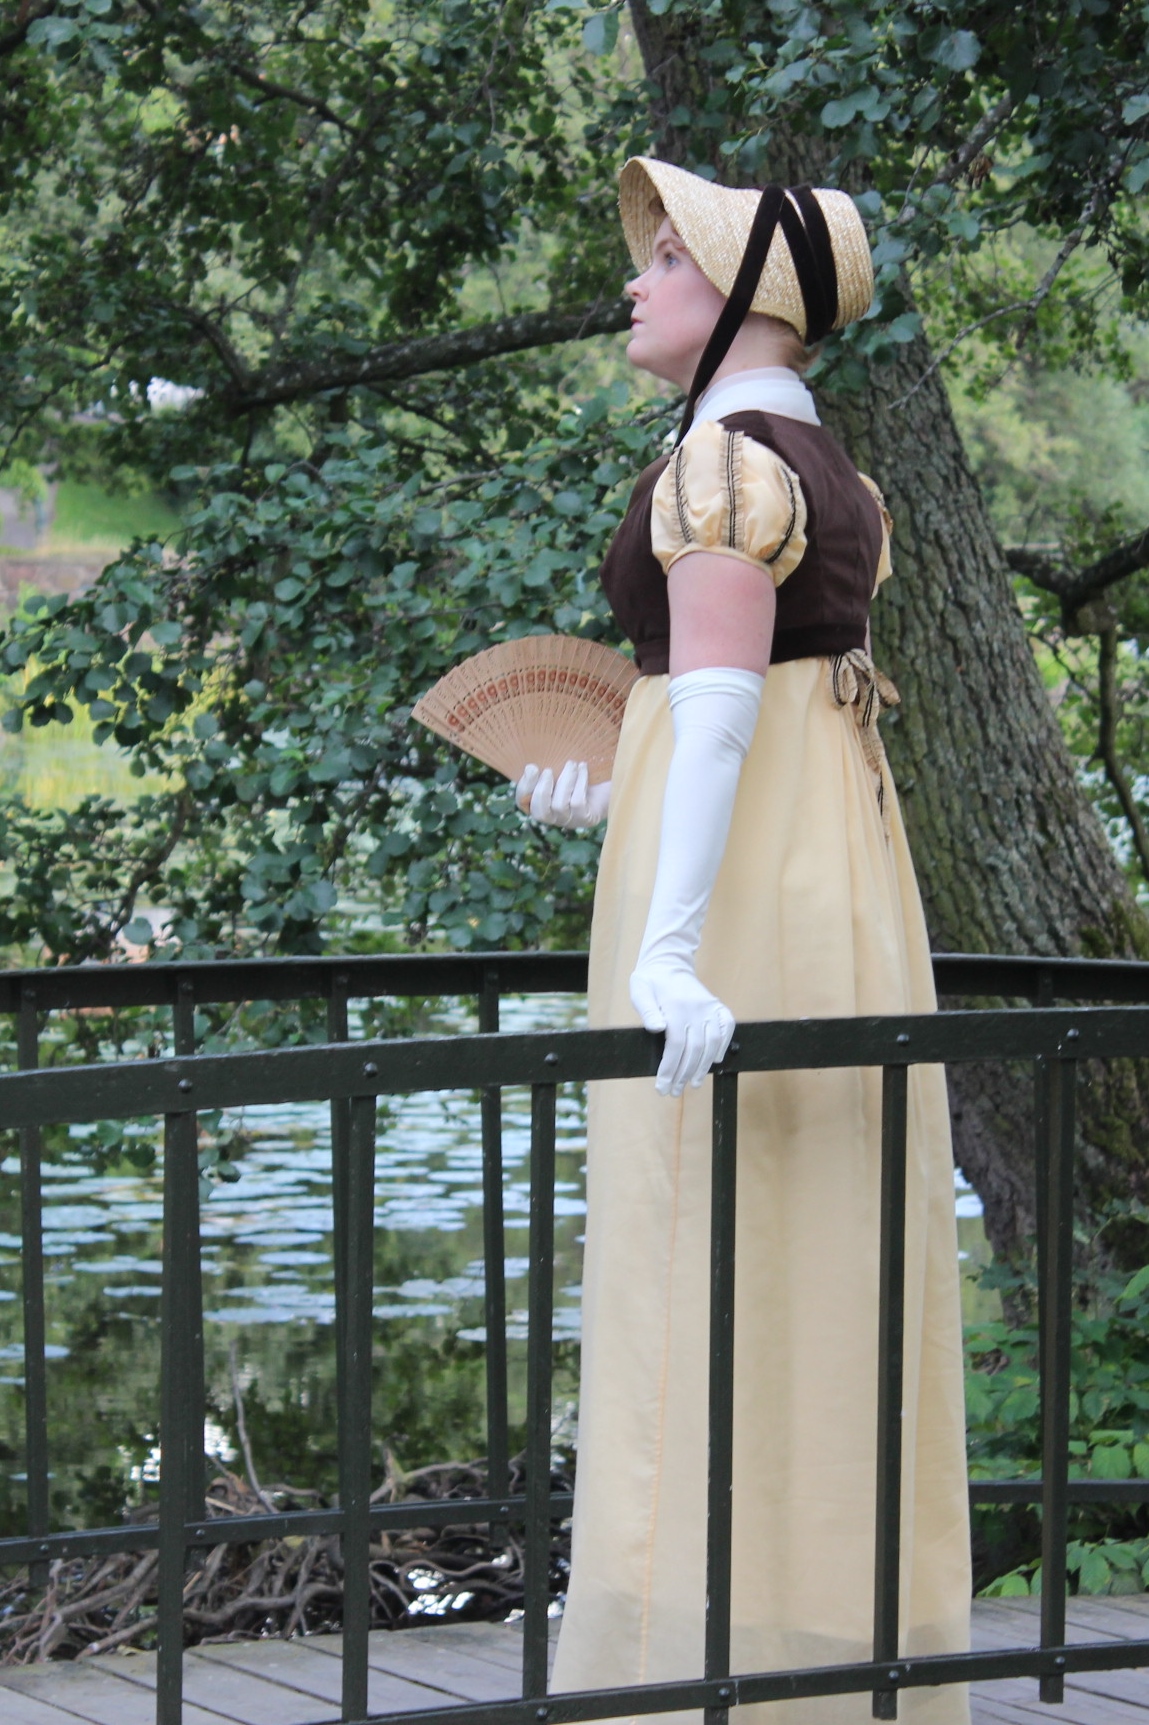
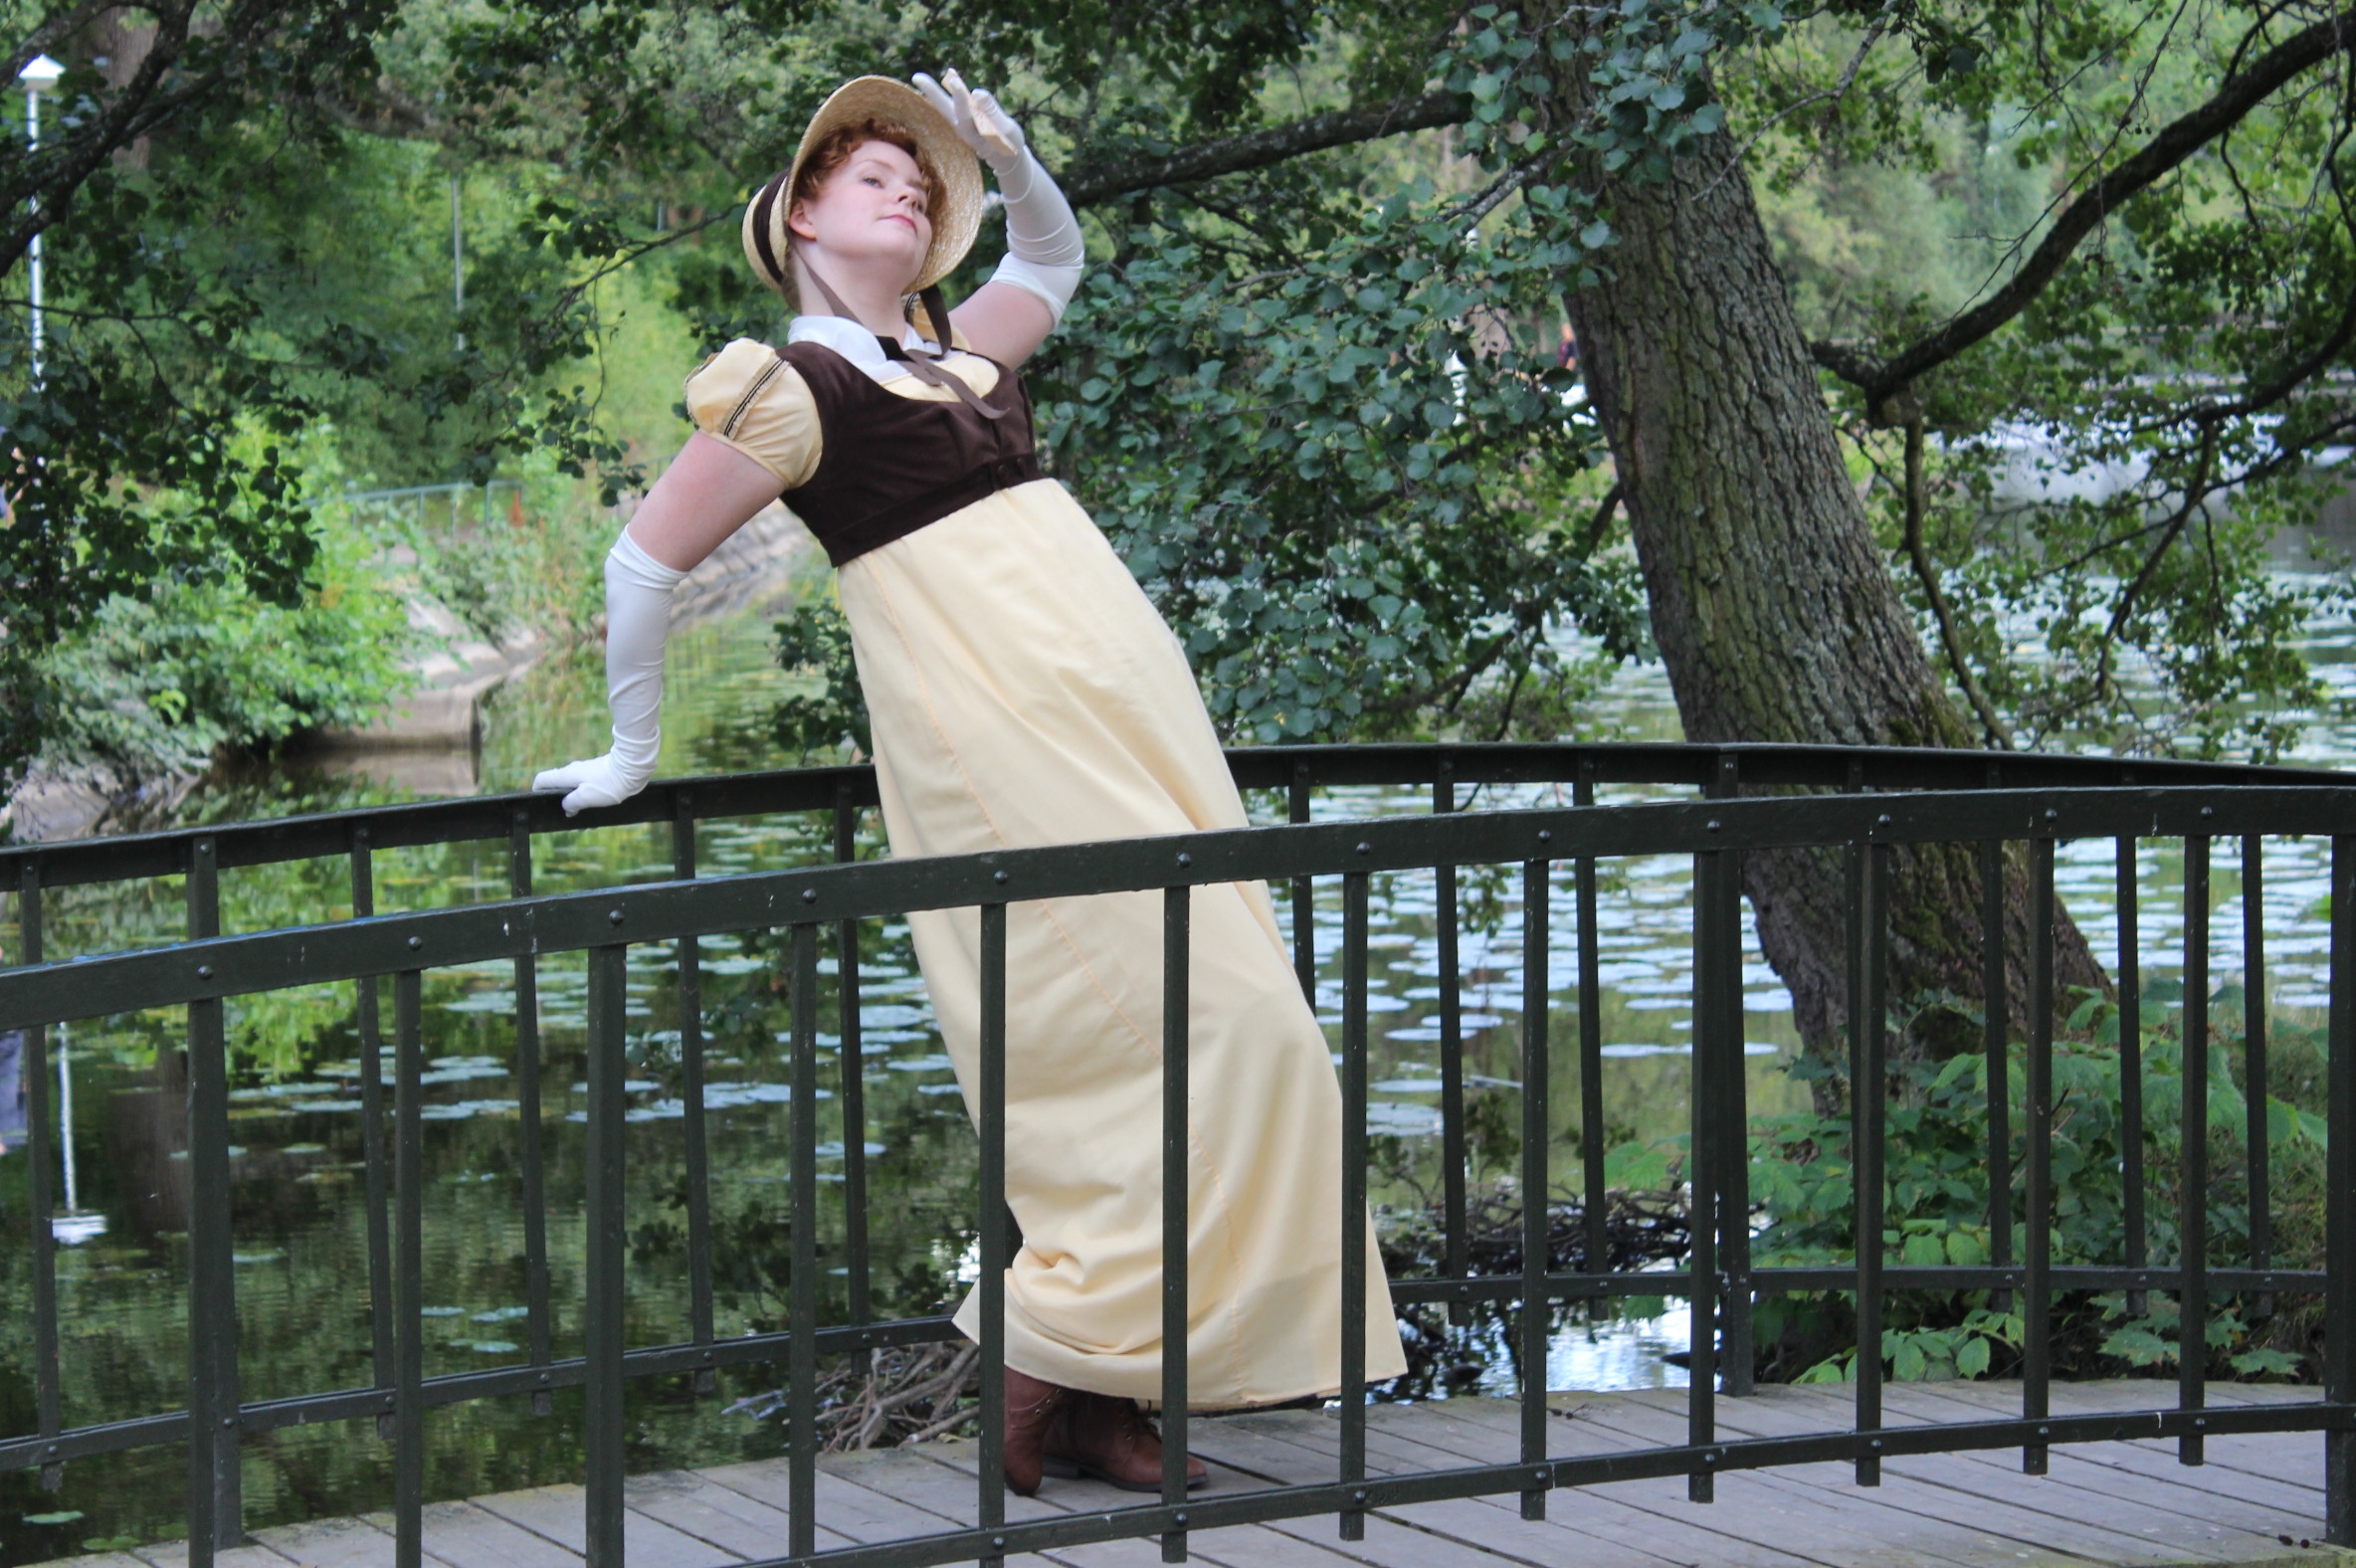
 Photo: Maria Petersson
And of course I asked my sister to take some photos of me wearing my new spencer/west paired with my yellow voile gown and new bonnet.
Photo: Maria Petersson
By the time it came to start on the HSF challenge 15, The great Outdoors, I was pretty drain sewing wise. I knew that if I was going to compleat this year of cahllenges I needed to give myself a break and make something simple once in a while.
So I decided to make something I’ve been thinking about for a while – a regency spencer.
But then I realised that I only had scraps left of lovely brown coton vevet I’ve wanted to use. and I did like the idae of buying even more fabric.
So I re-calculated and decided to make a sleveless spencer instead. And while I was at it why not turn it in to a west compleatly.
I used the Simplicity 4055 as a guide to get the overal line right, since I wanted the west to go over the yellow dress I made from the same pattern. I made some changes, like added a dart and re-shaped the back.
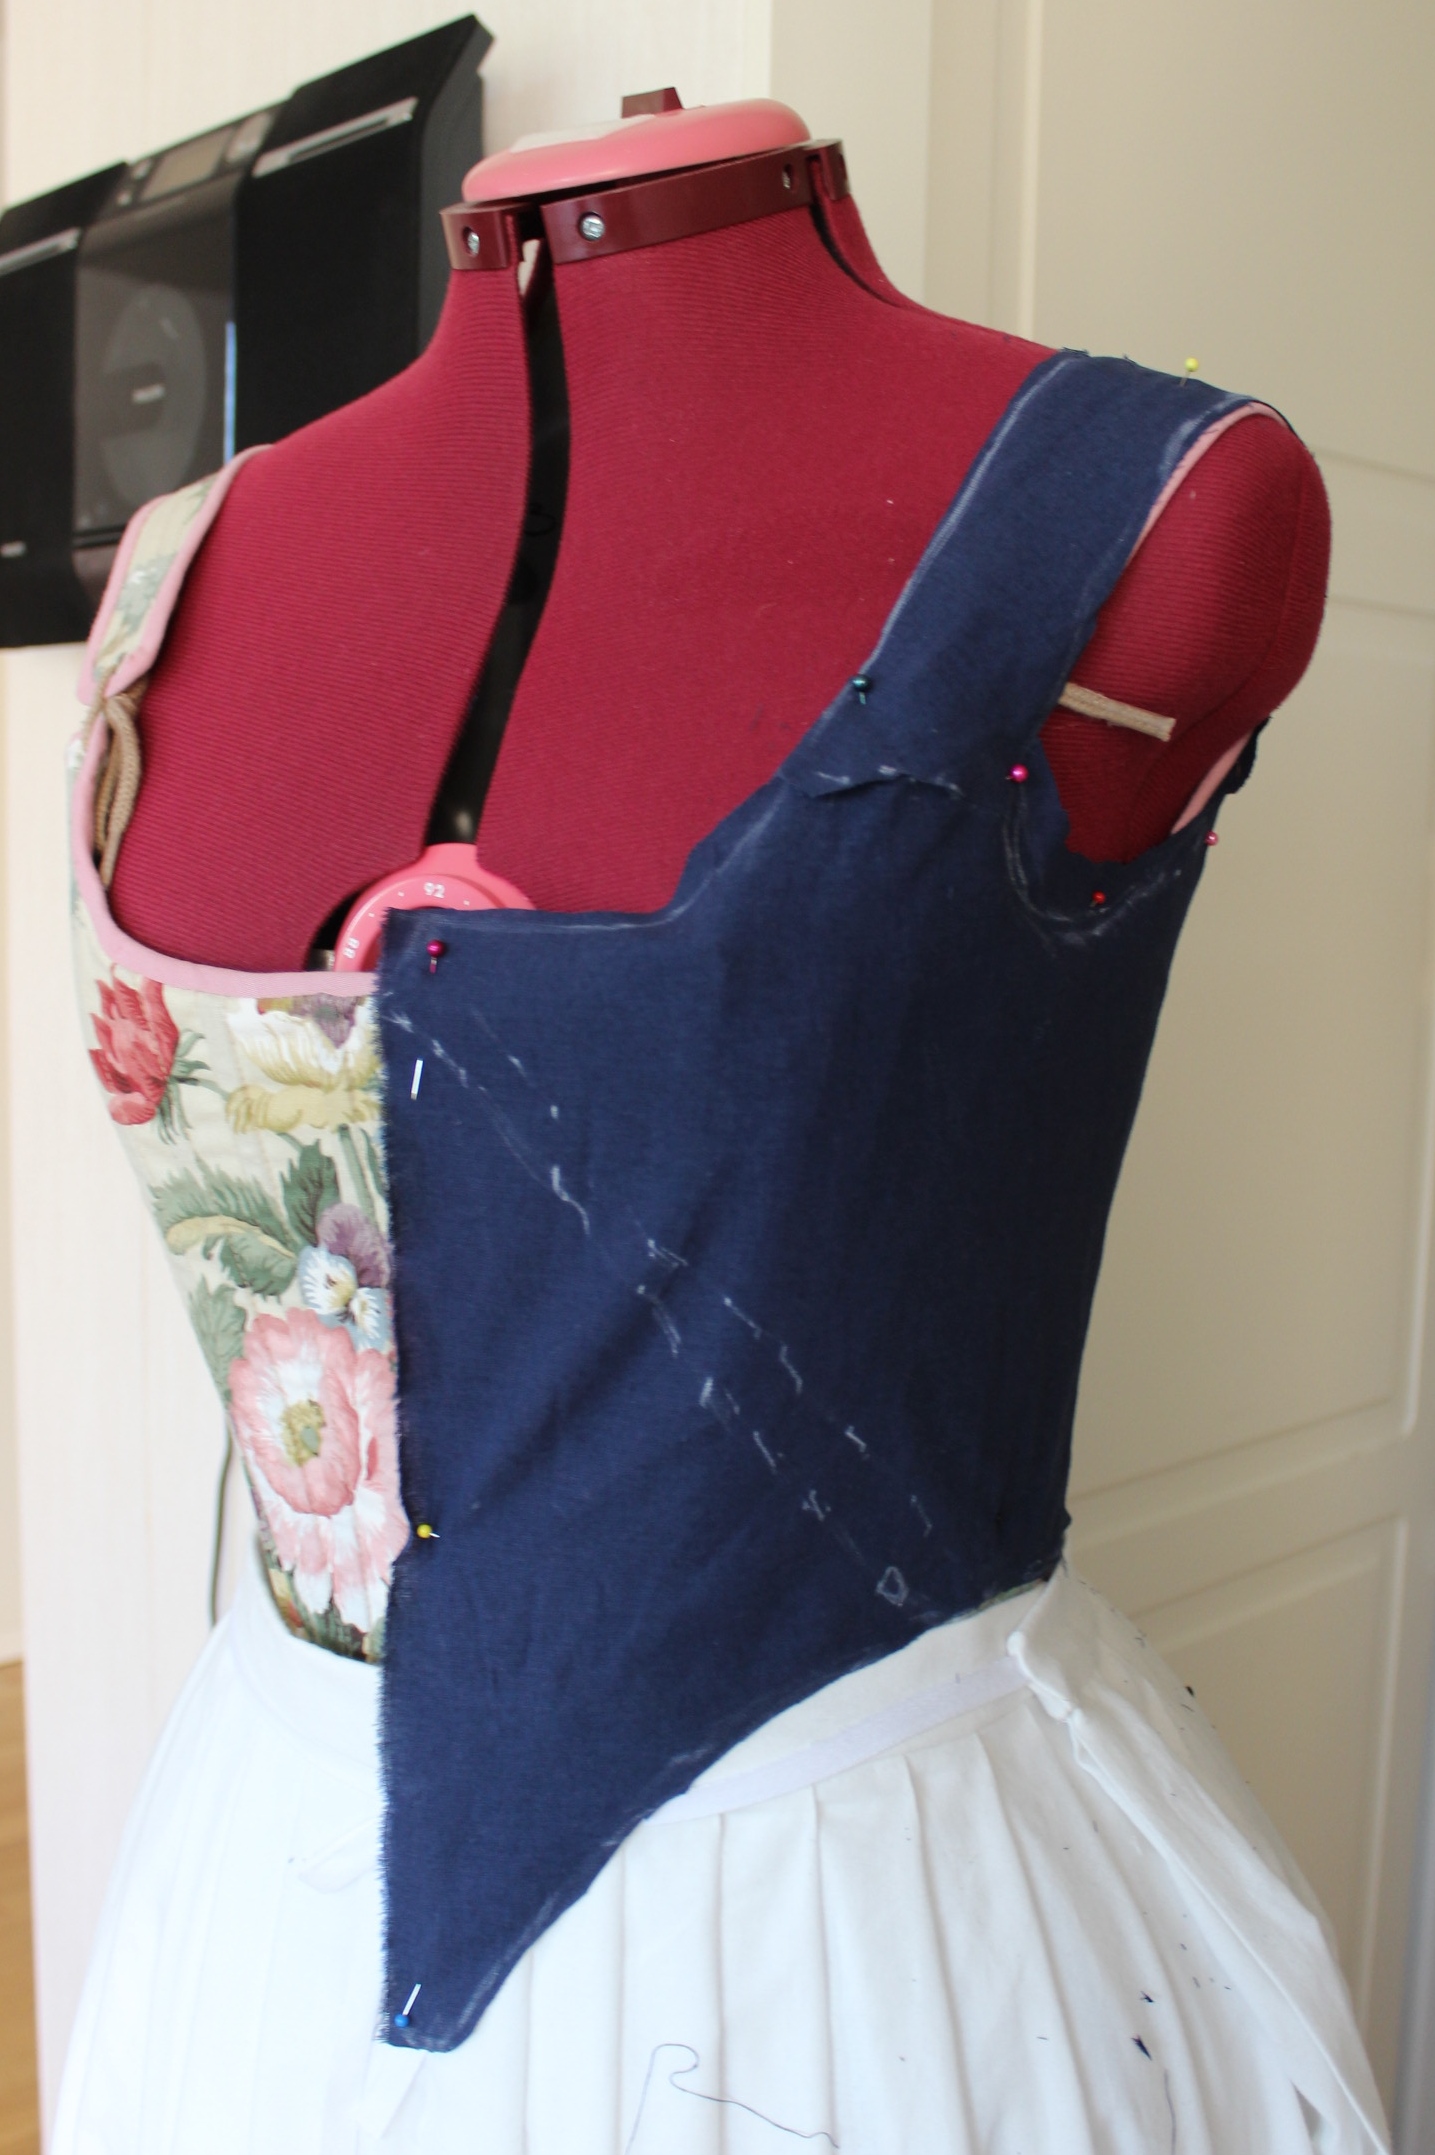
Then I cut it, made a mock-up and tried it on.
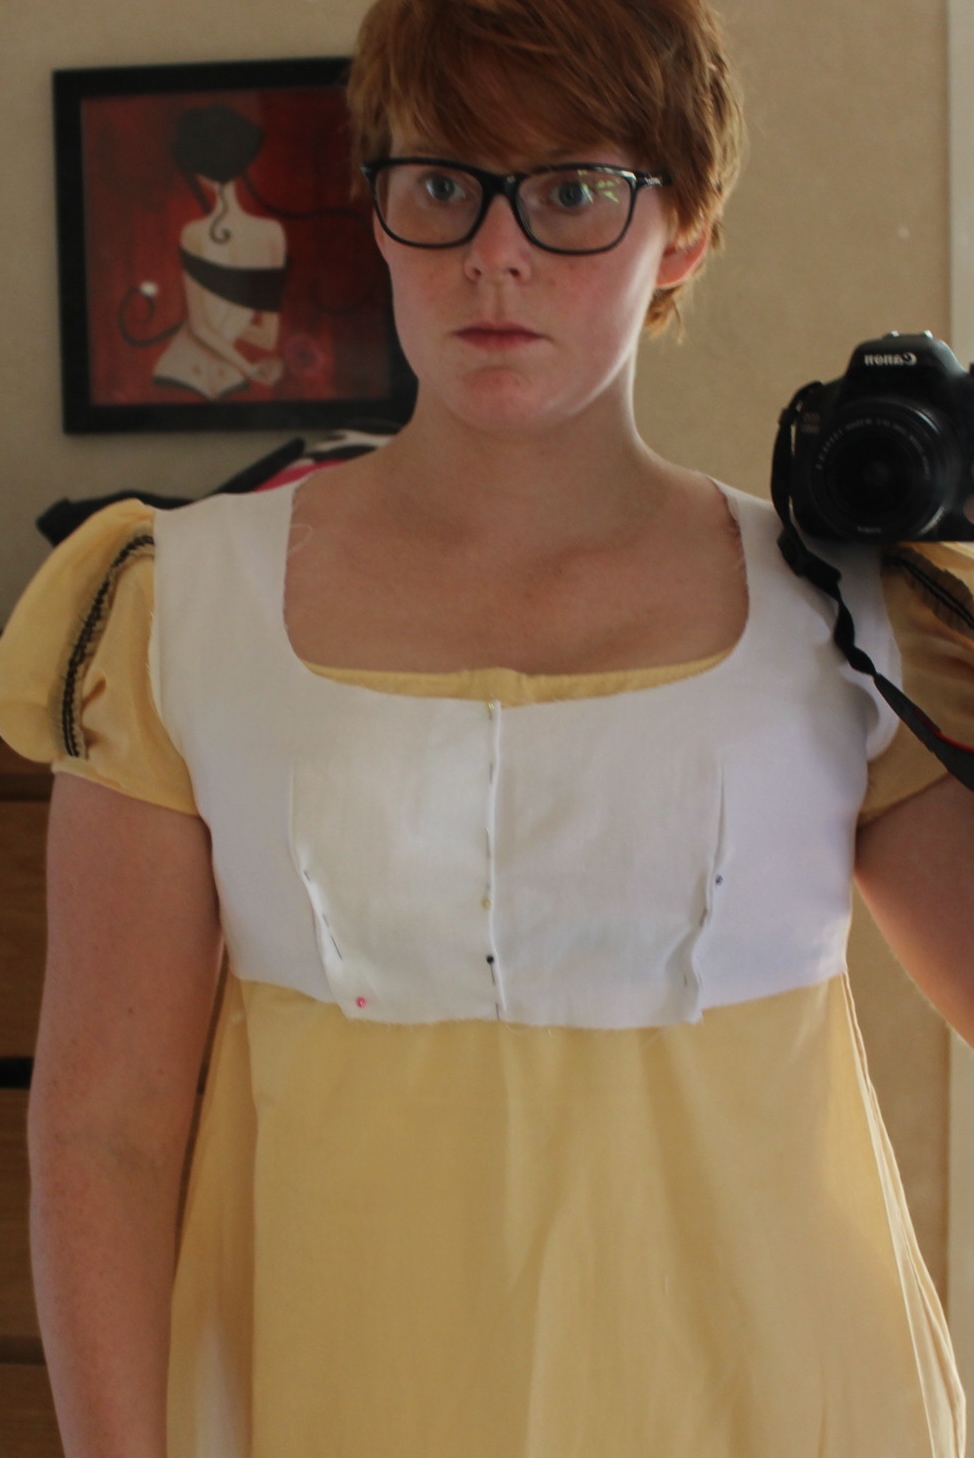

It fit pretty well, but I didn’t really like the high neckline.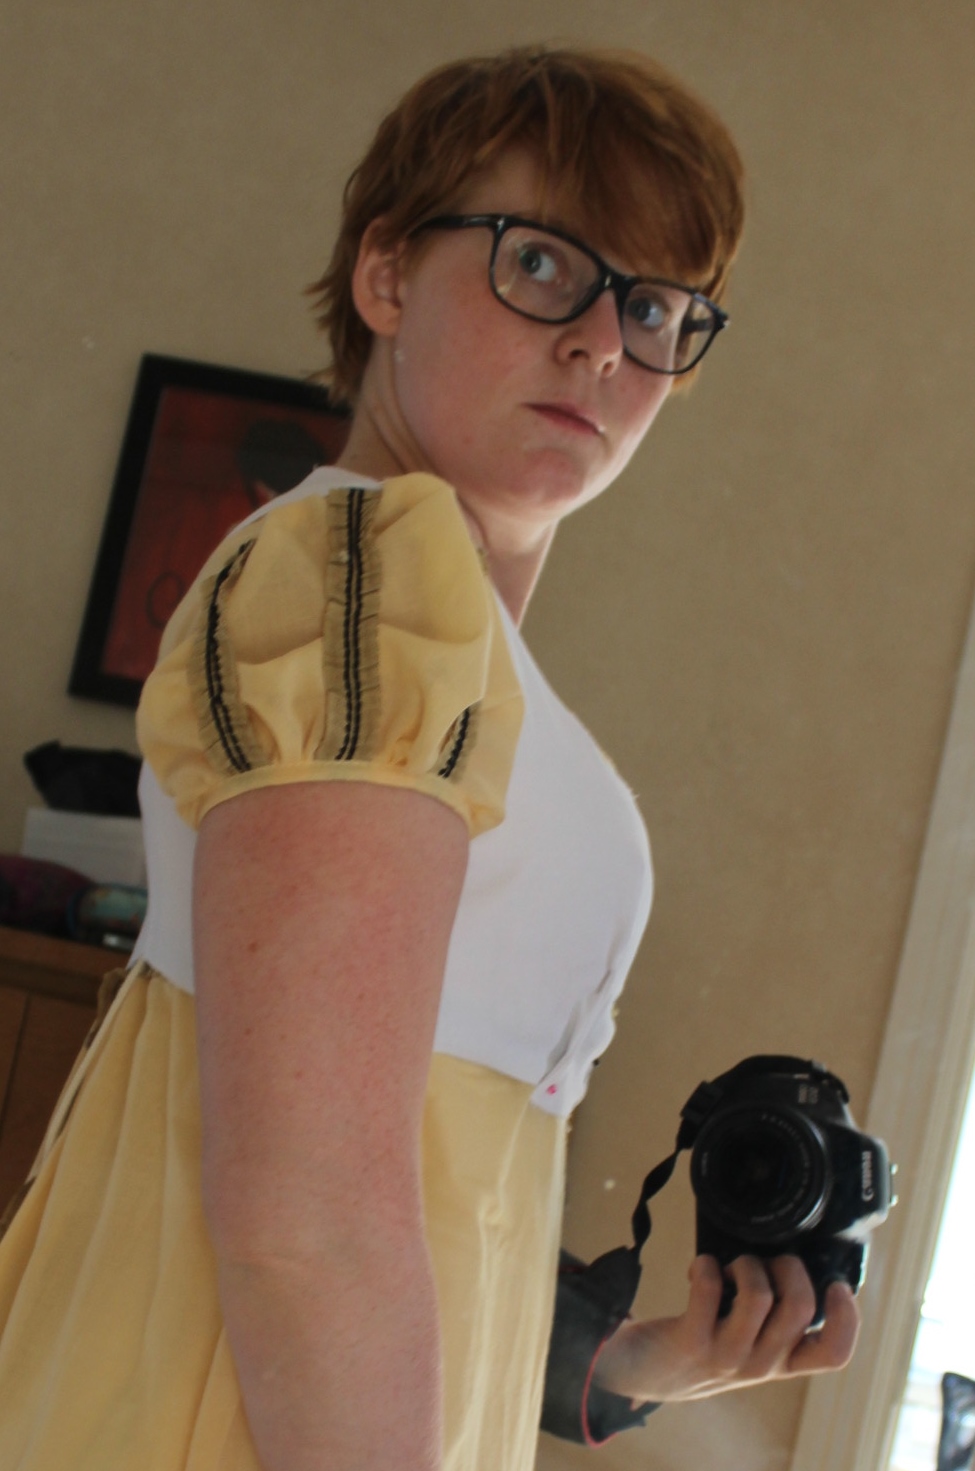
So I marked the new neckline and cut.
Ok, so it looks pretty stupid in these pictures but I like the tought of the lower necline and the dress showing.

When the pattern was fitted properly, I started to cut the fabrics – velvet, cotton lining and cotton twill for interlining.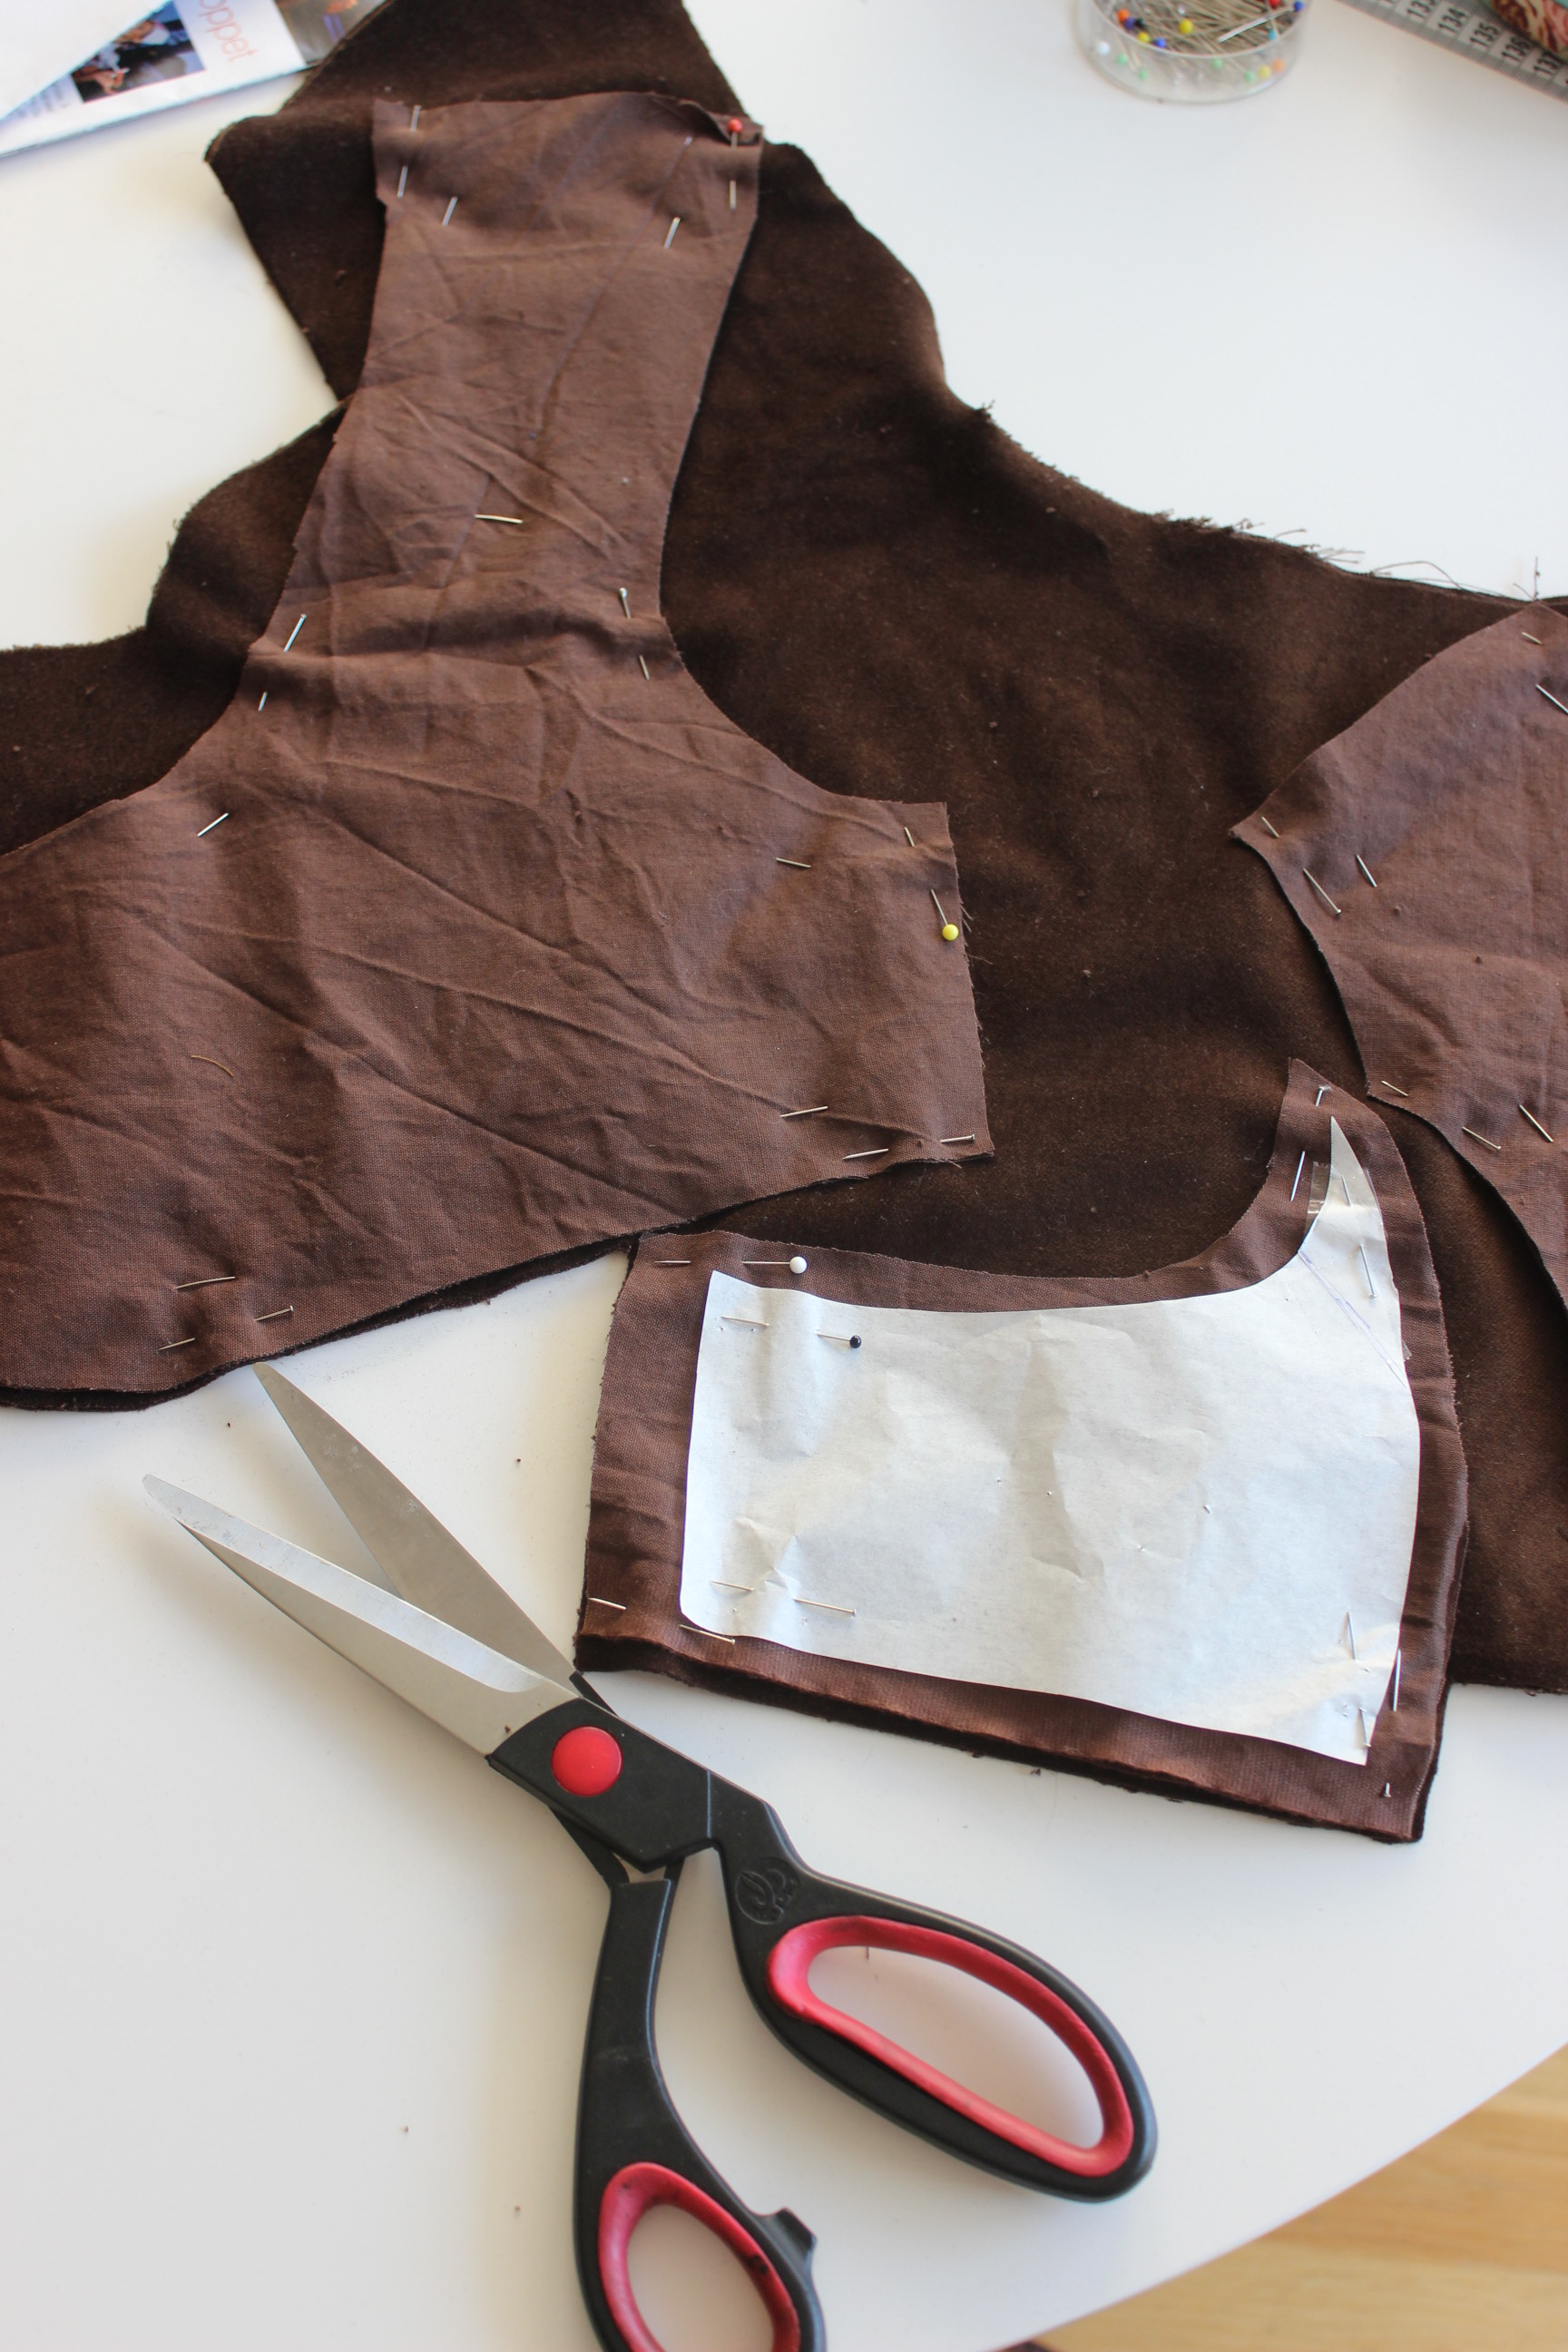
I stiched the back seams and basted the shoulder and side seams together.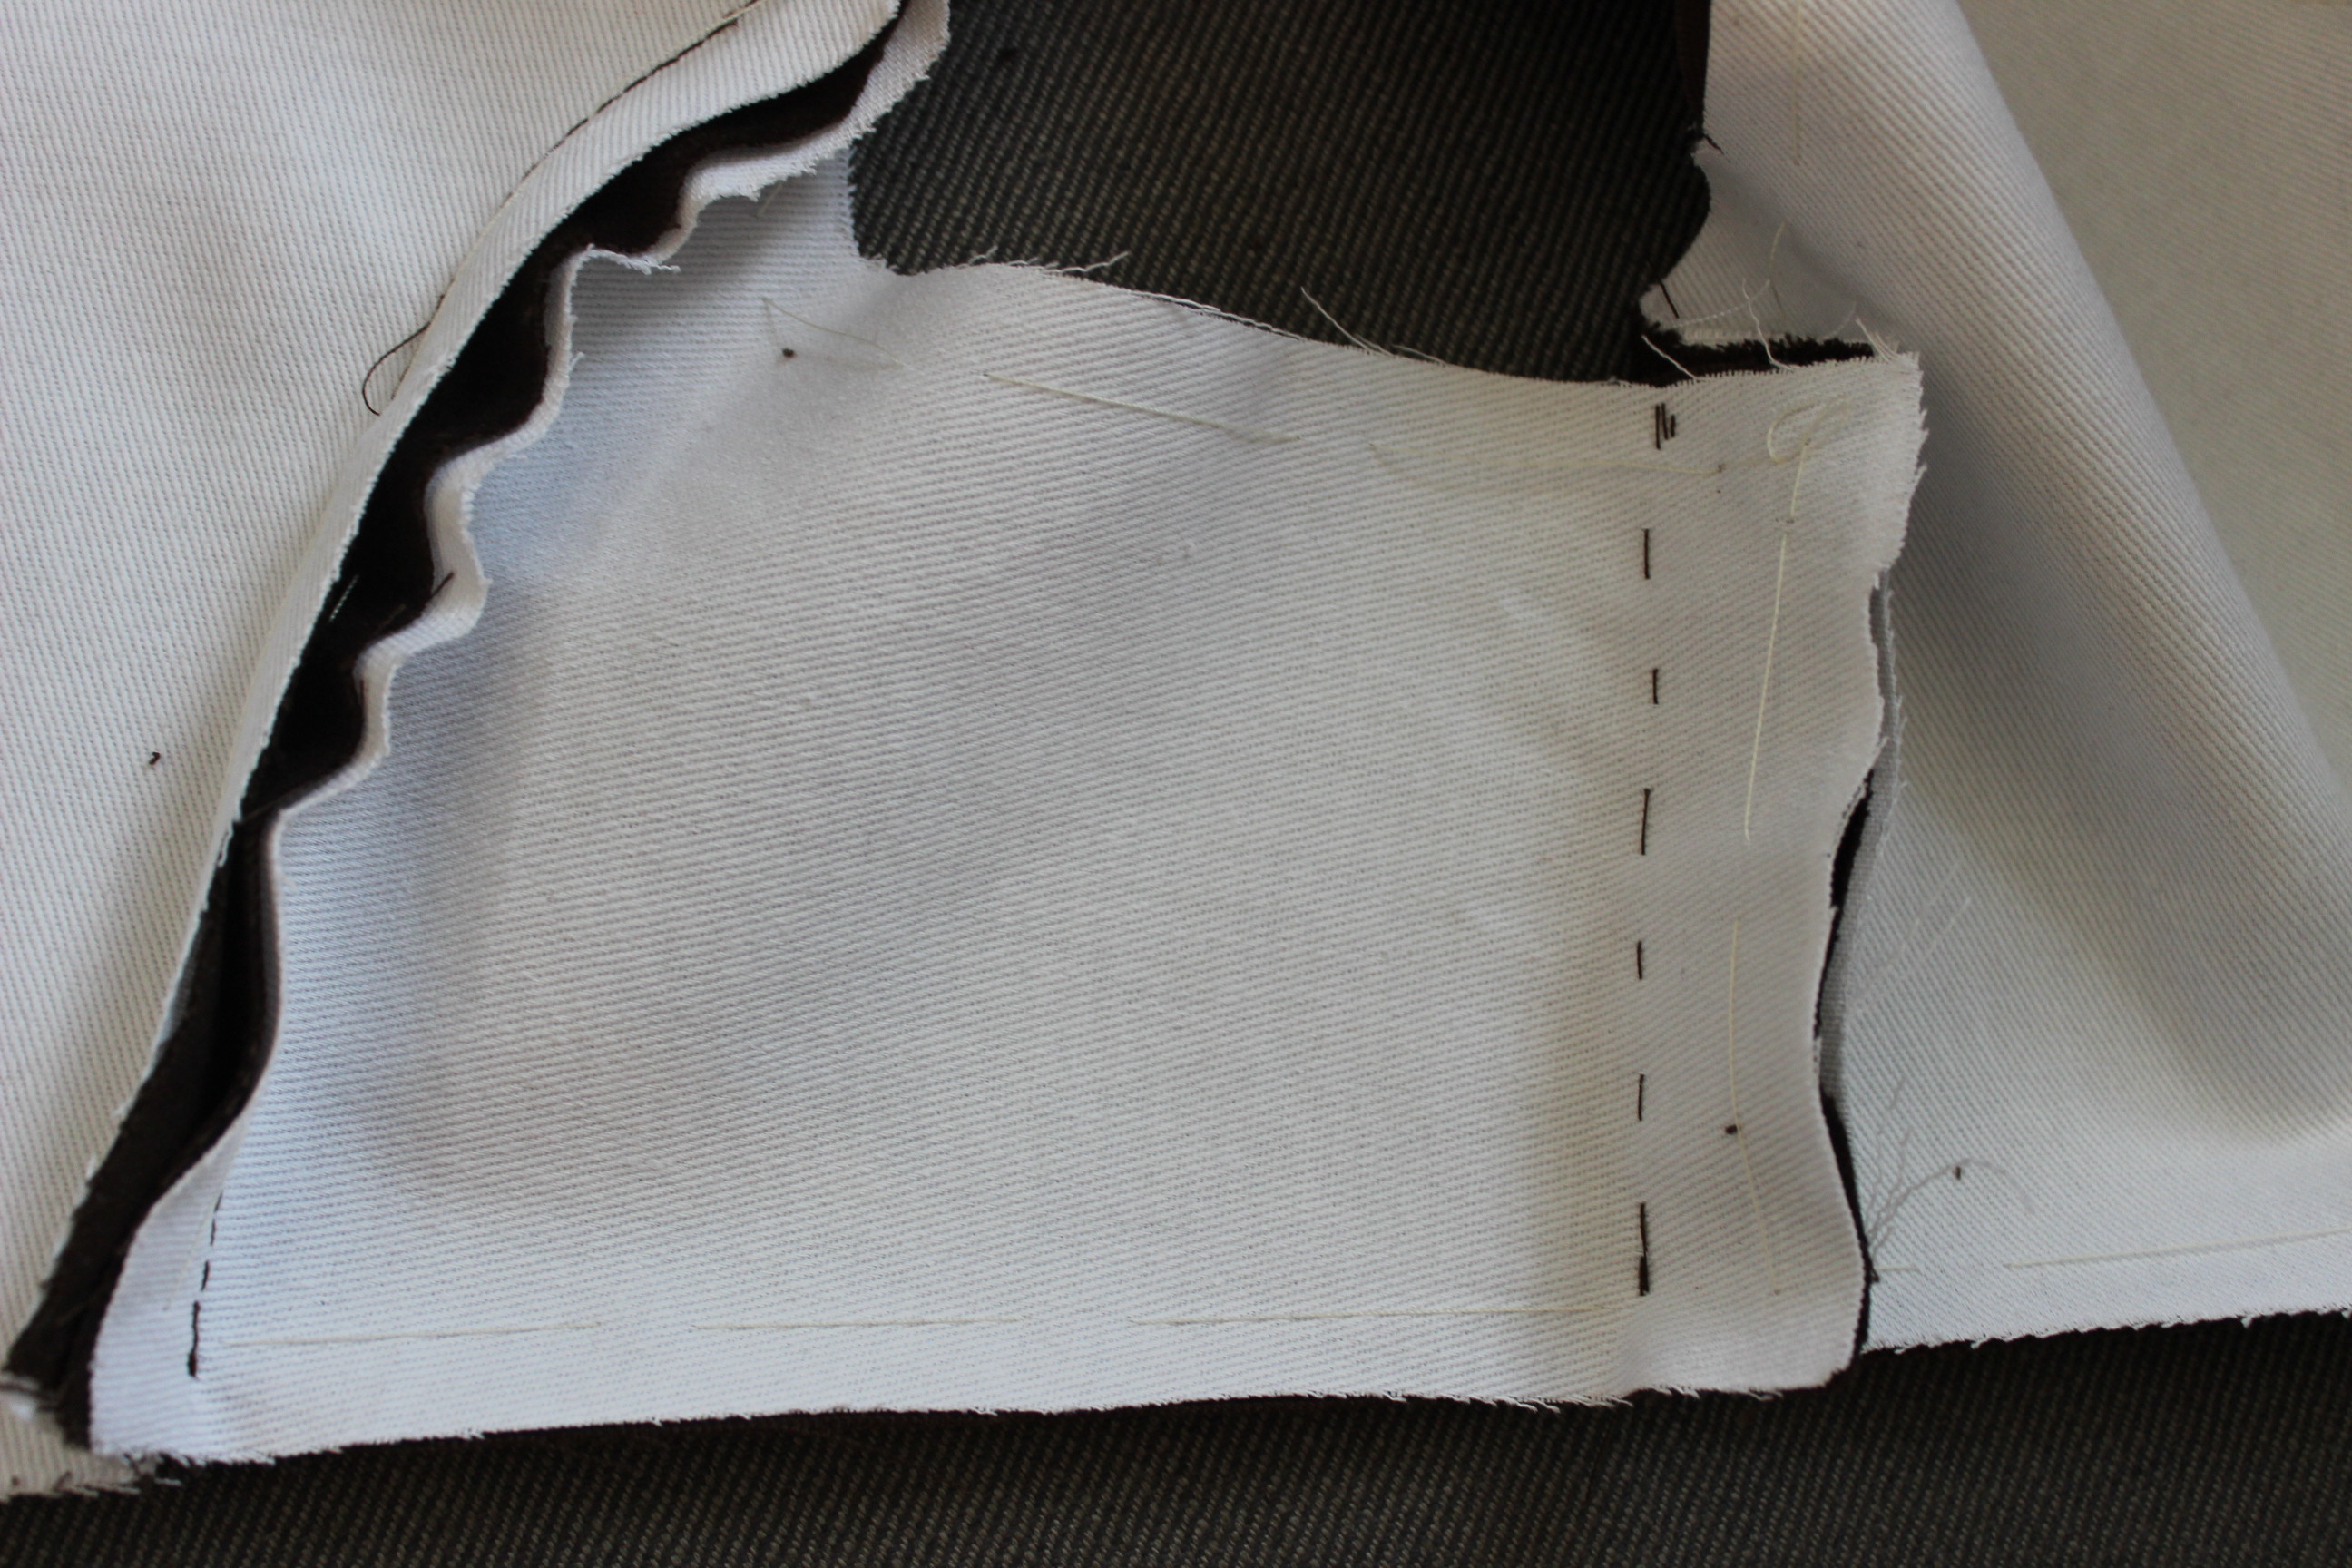
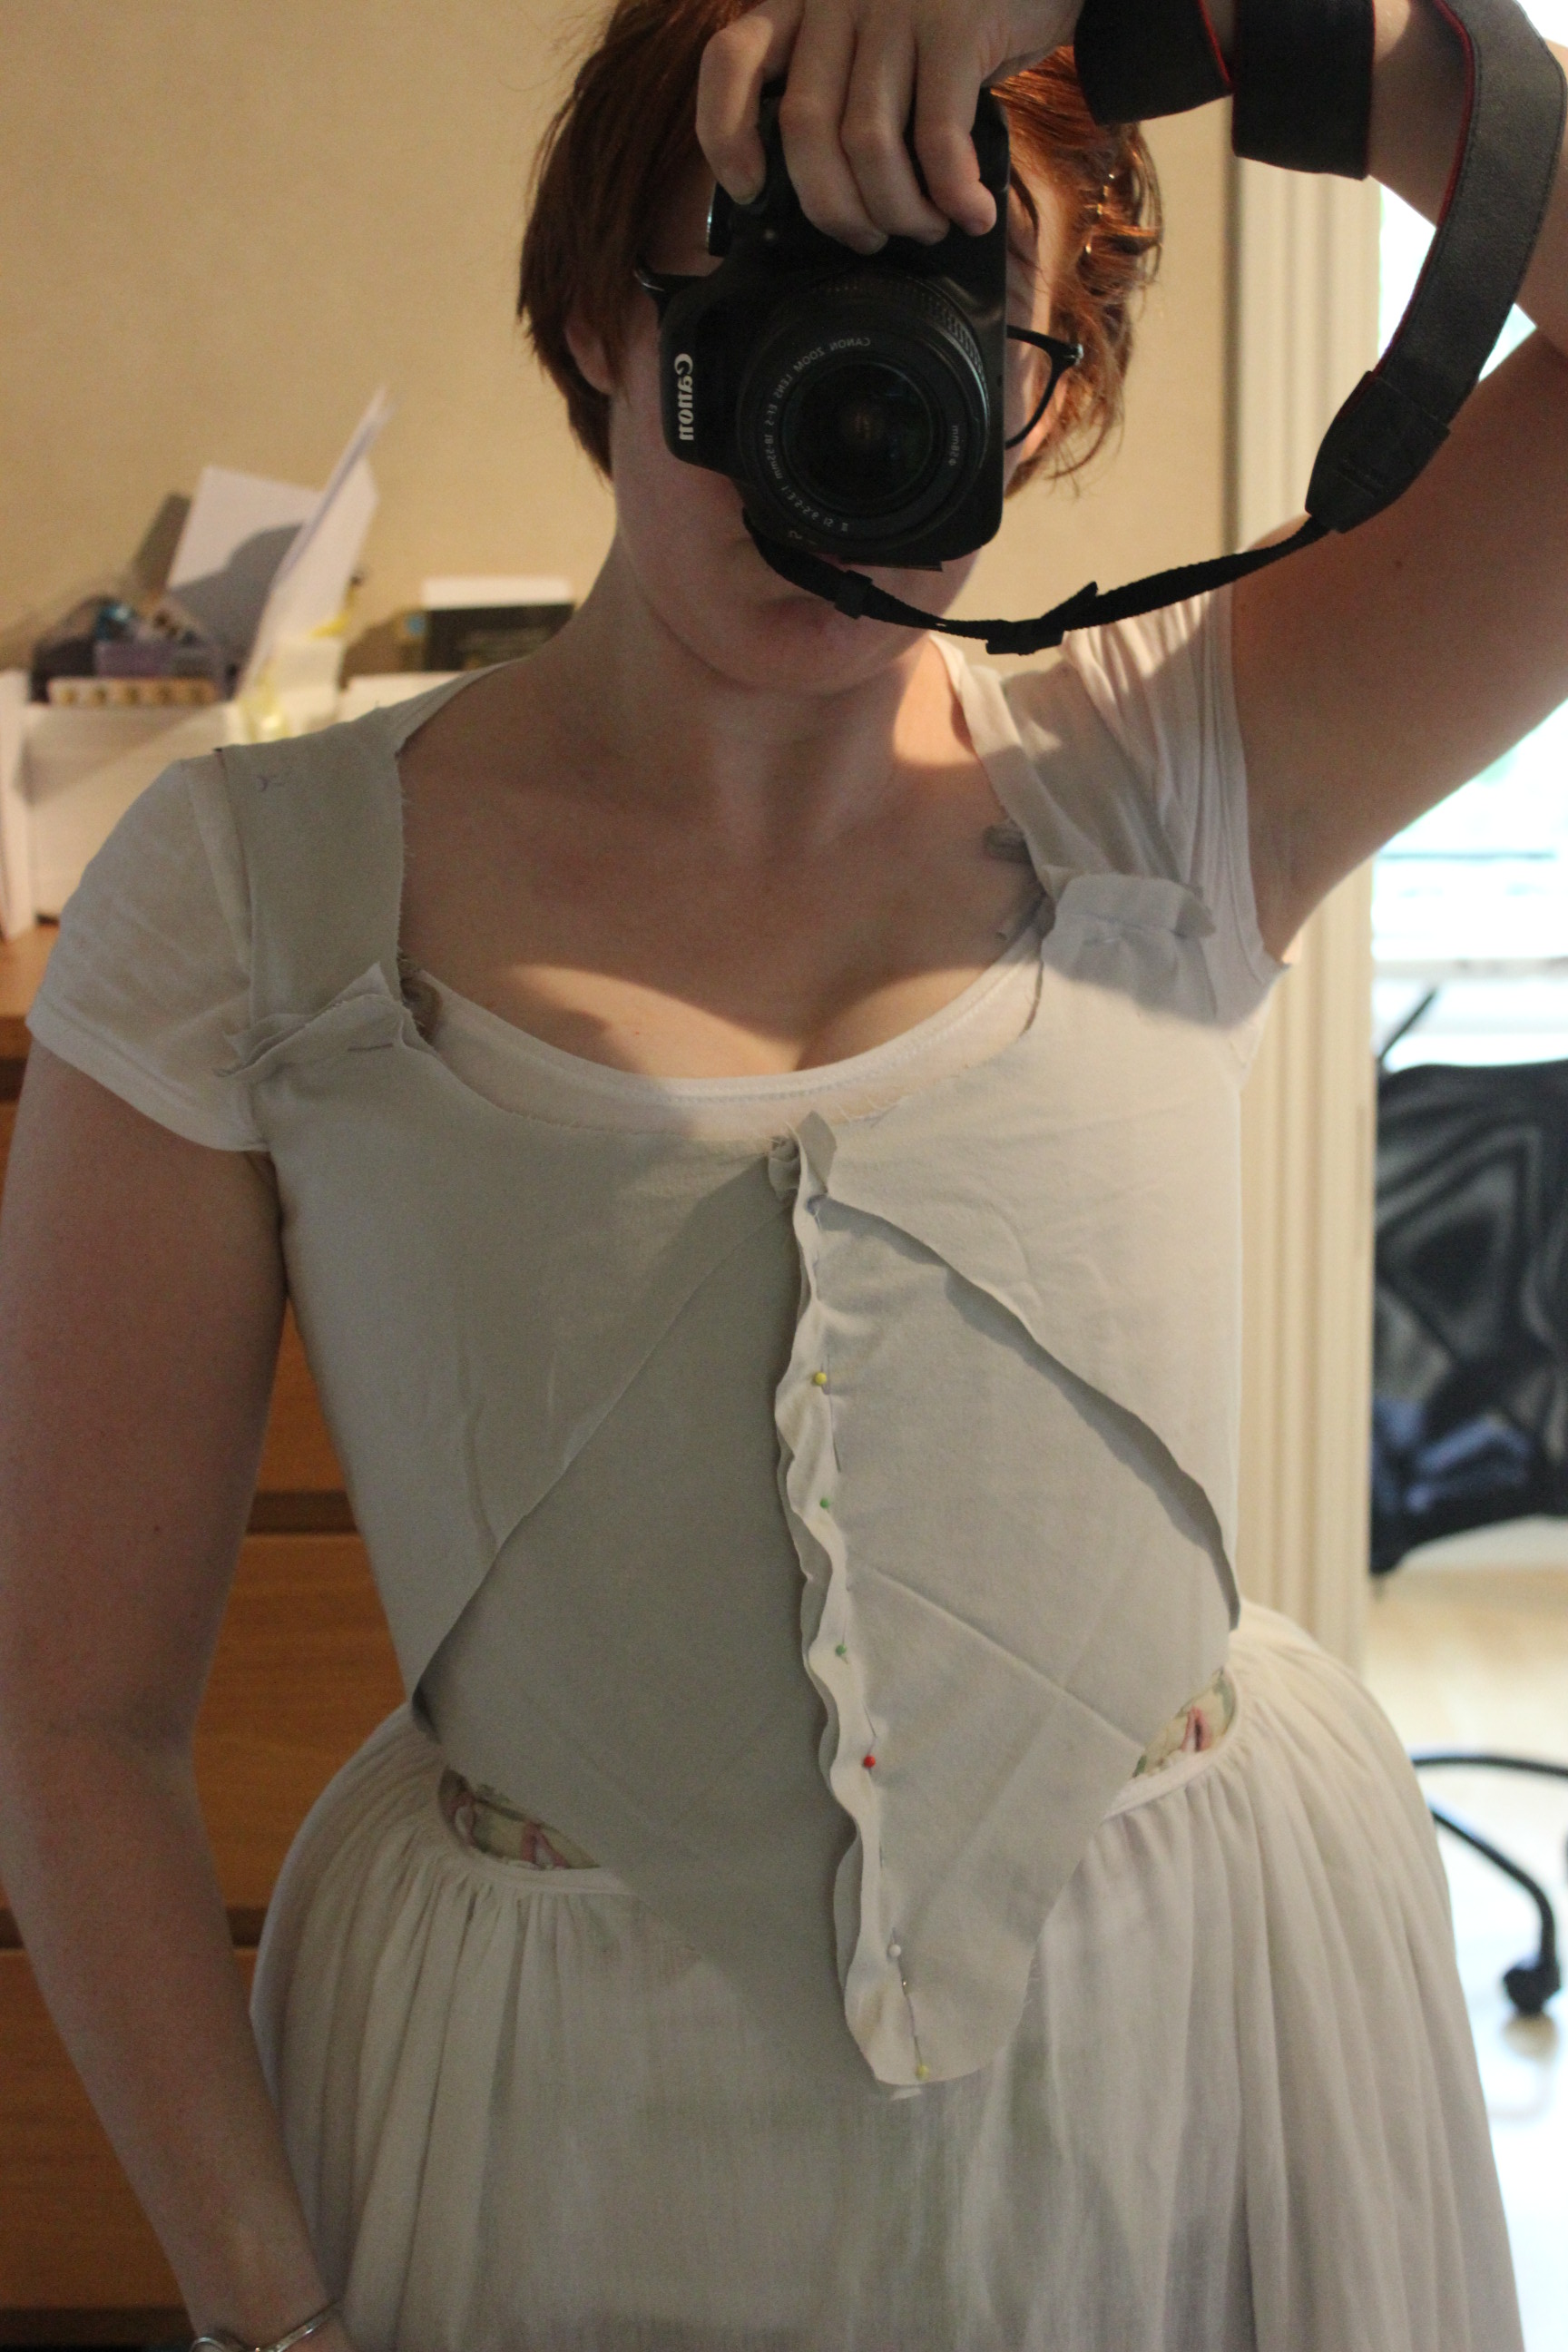
 A first version to try on.


It fit perfectly, even though the new lower neckline didnt really show due to the seam allowence.
 I didn’t like the bust darts though, so I marked hem for shortening.
 I toyed with the idea of skipping the dart and gather the bust instead. But decided it looked to bulky on the velvet. So I restiched the darts instead.
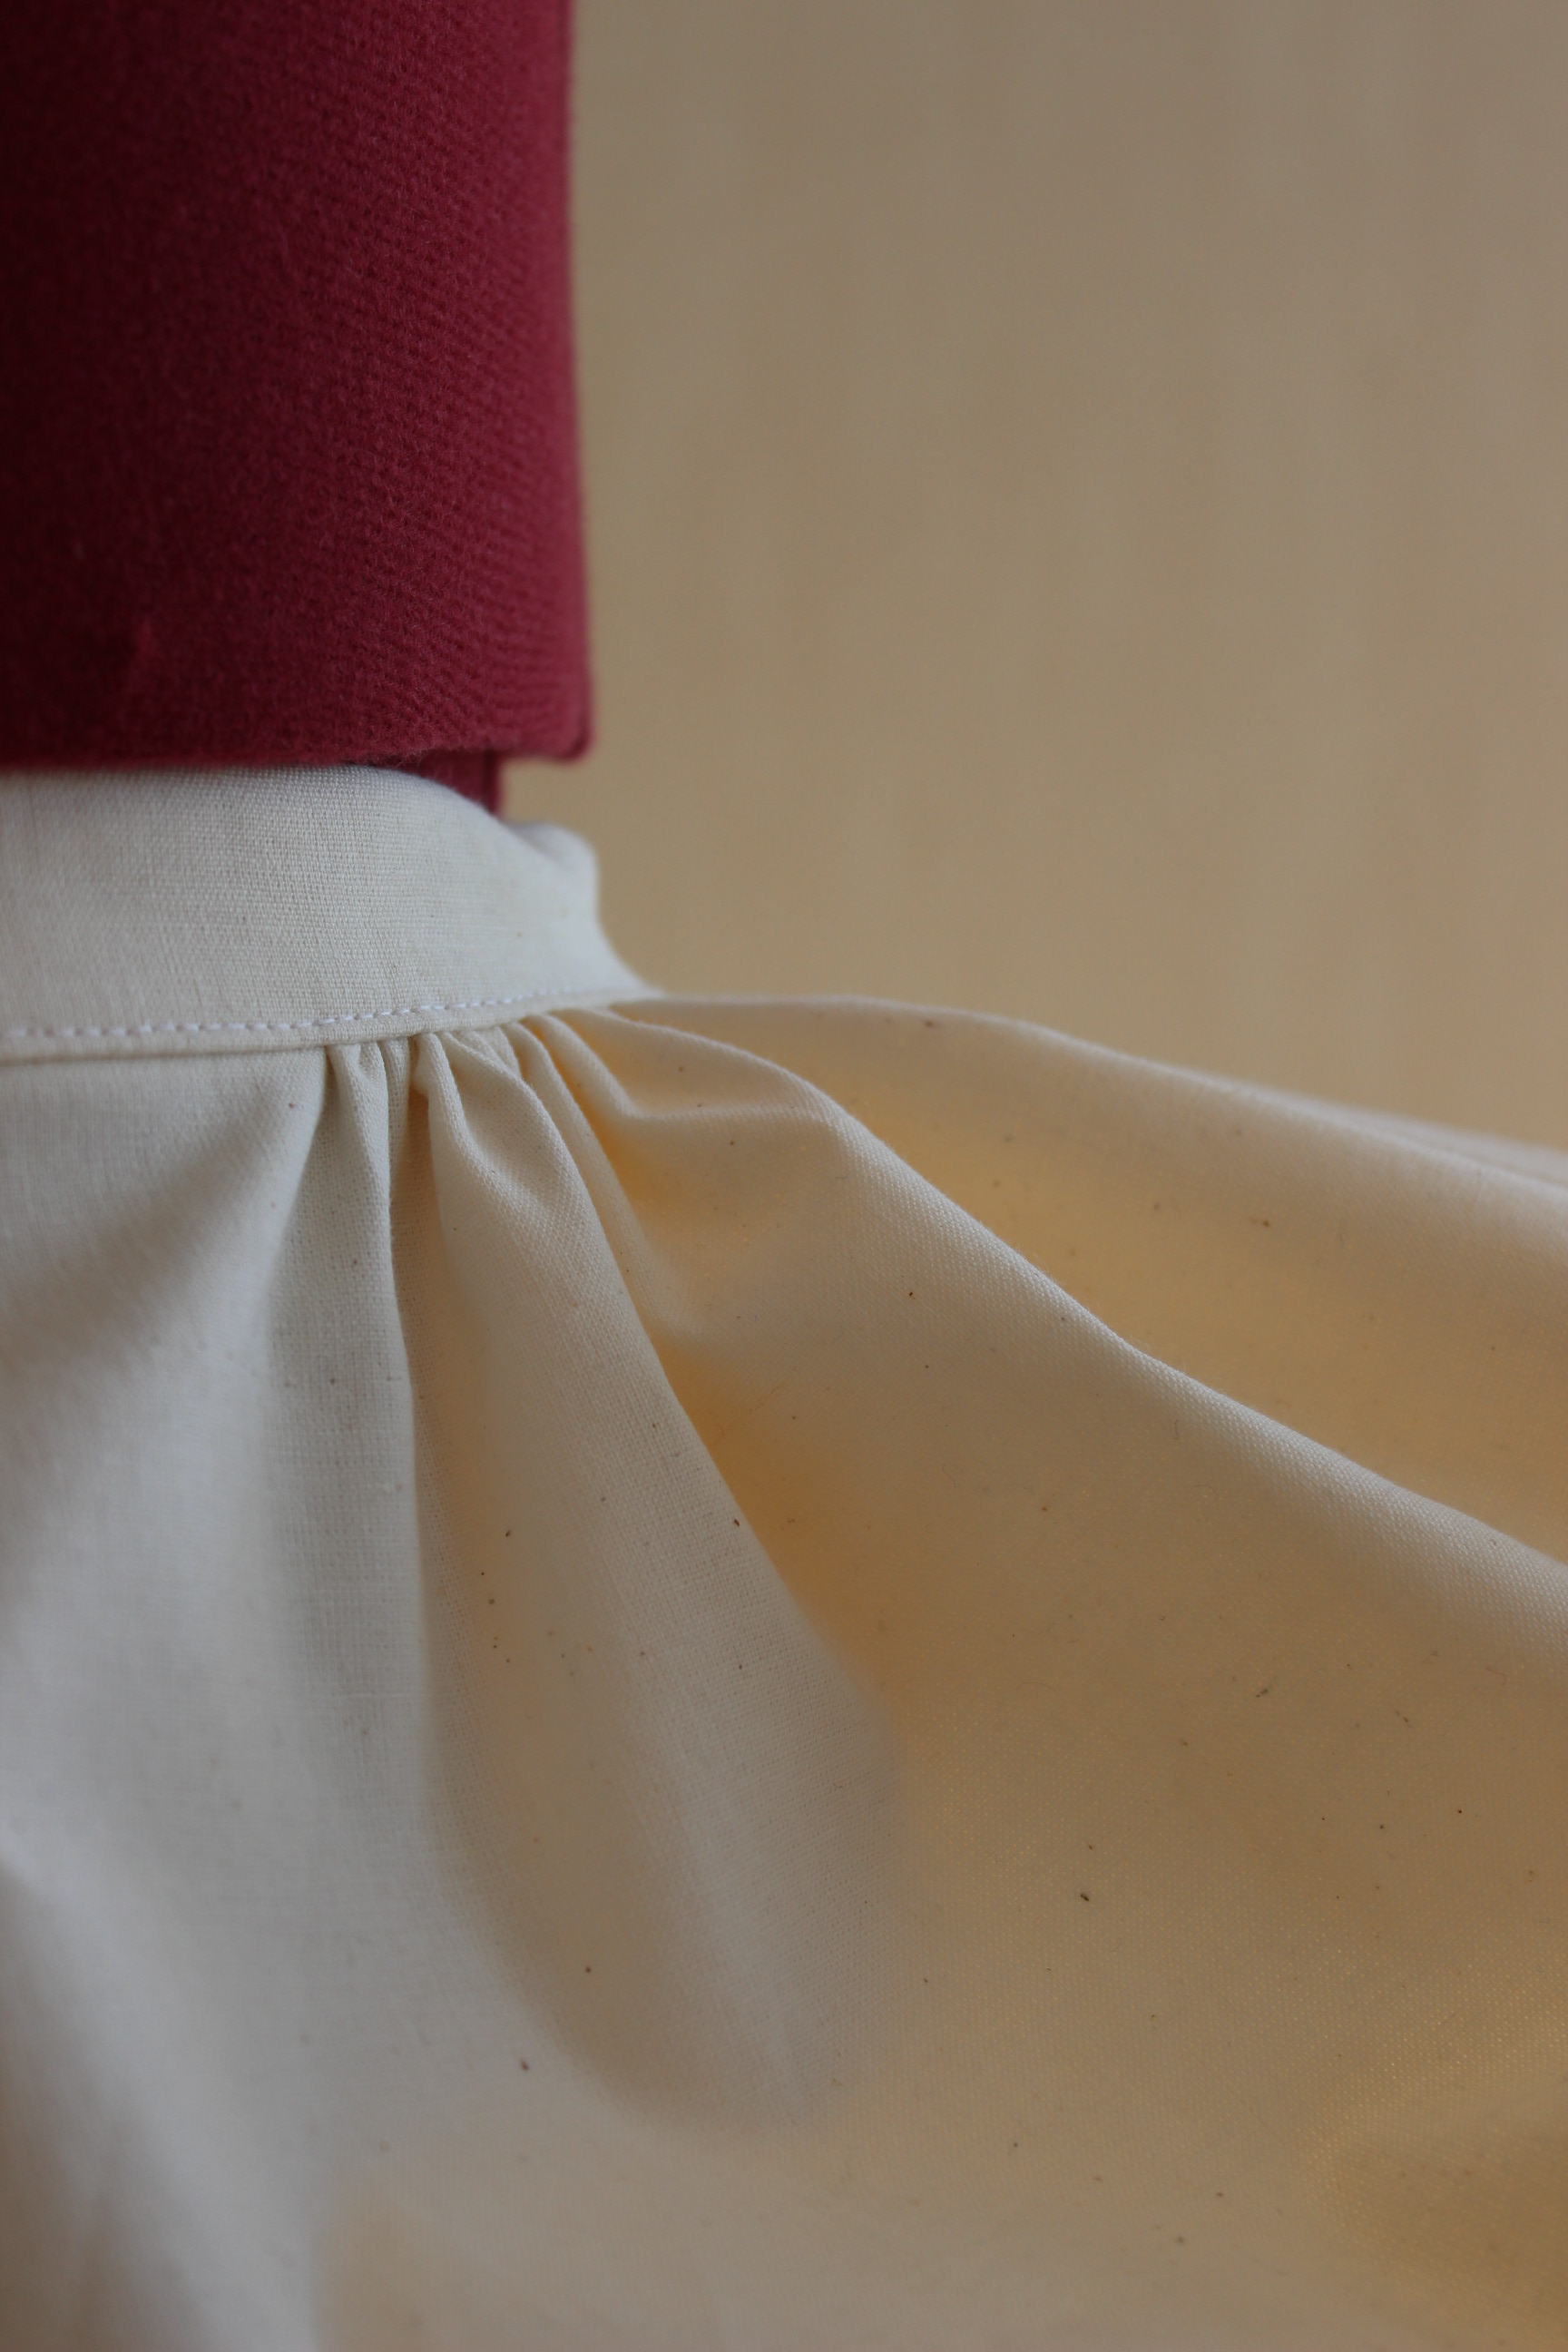
Then I putt in the lining, fideling a bit on the arm holes.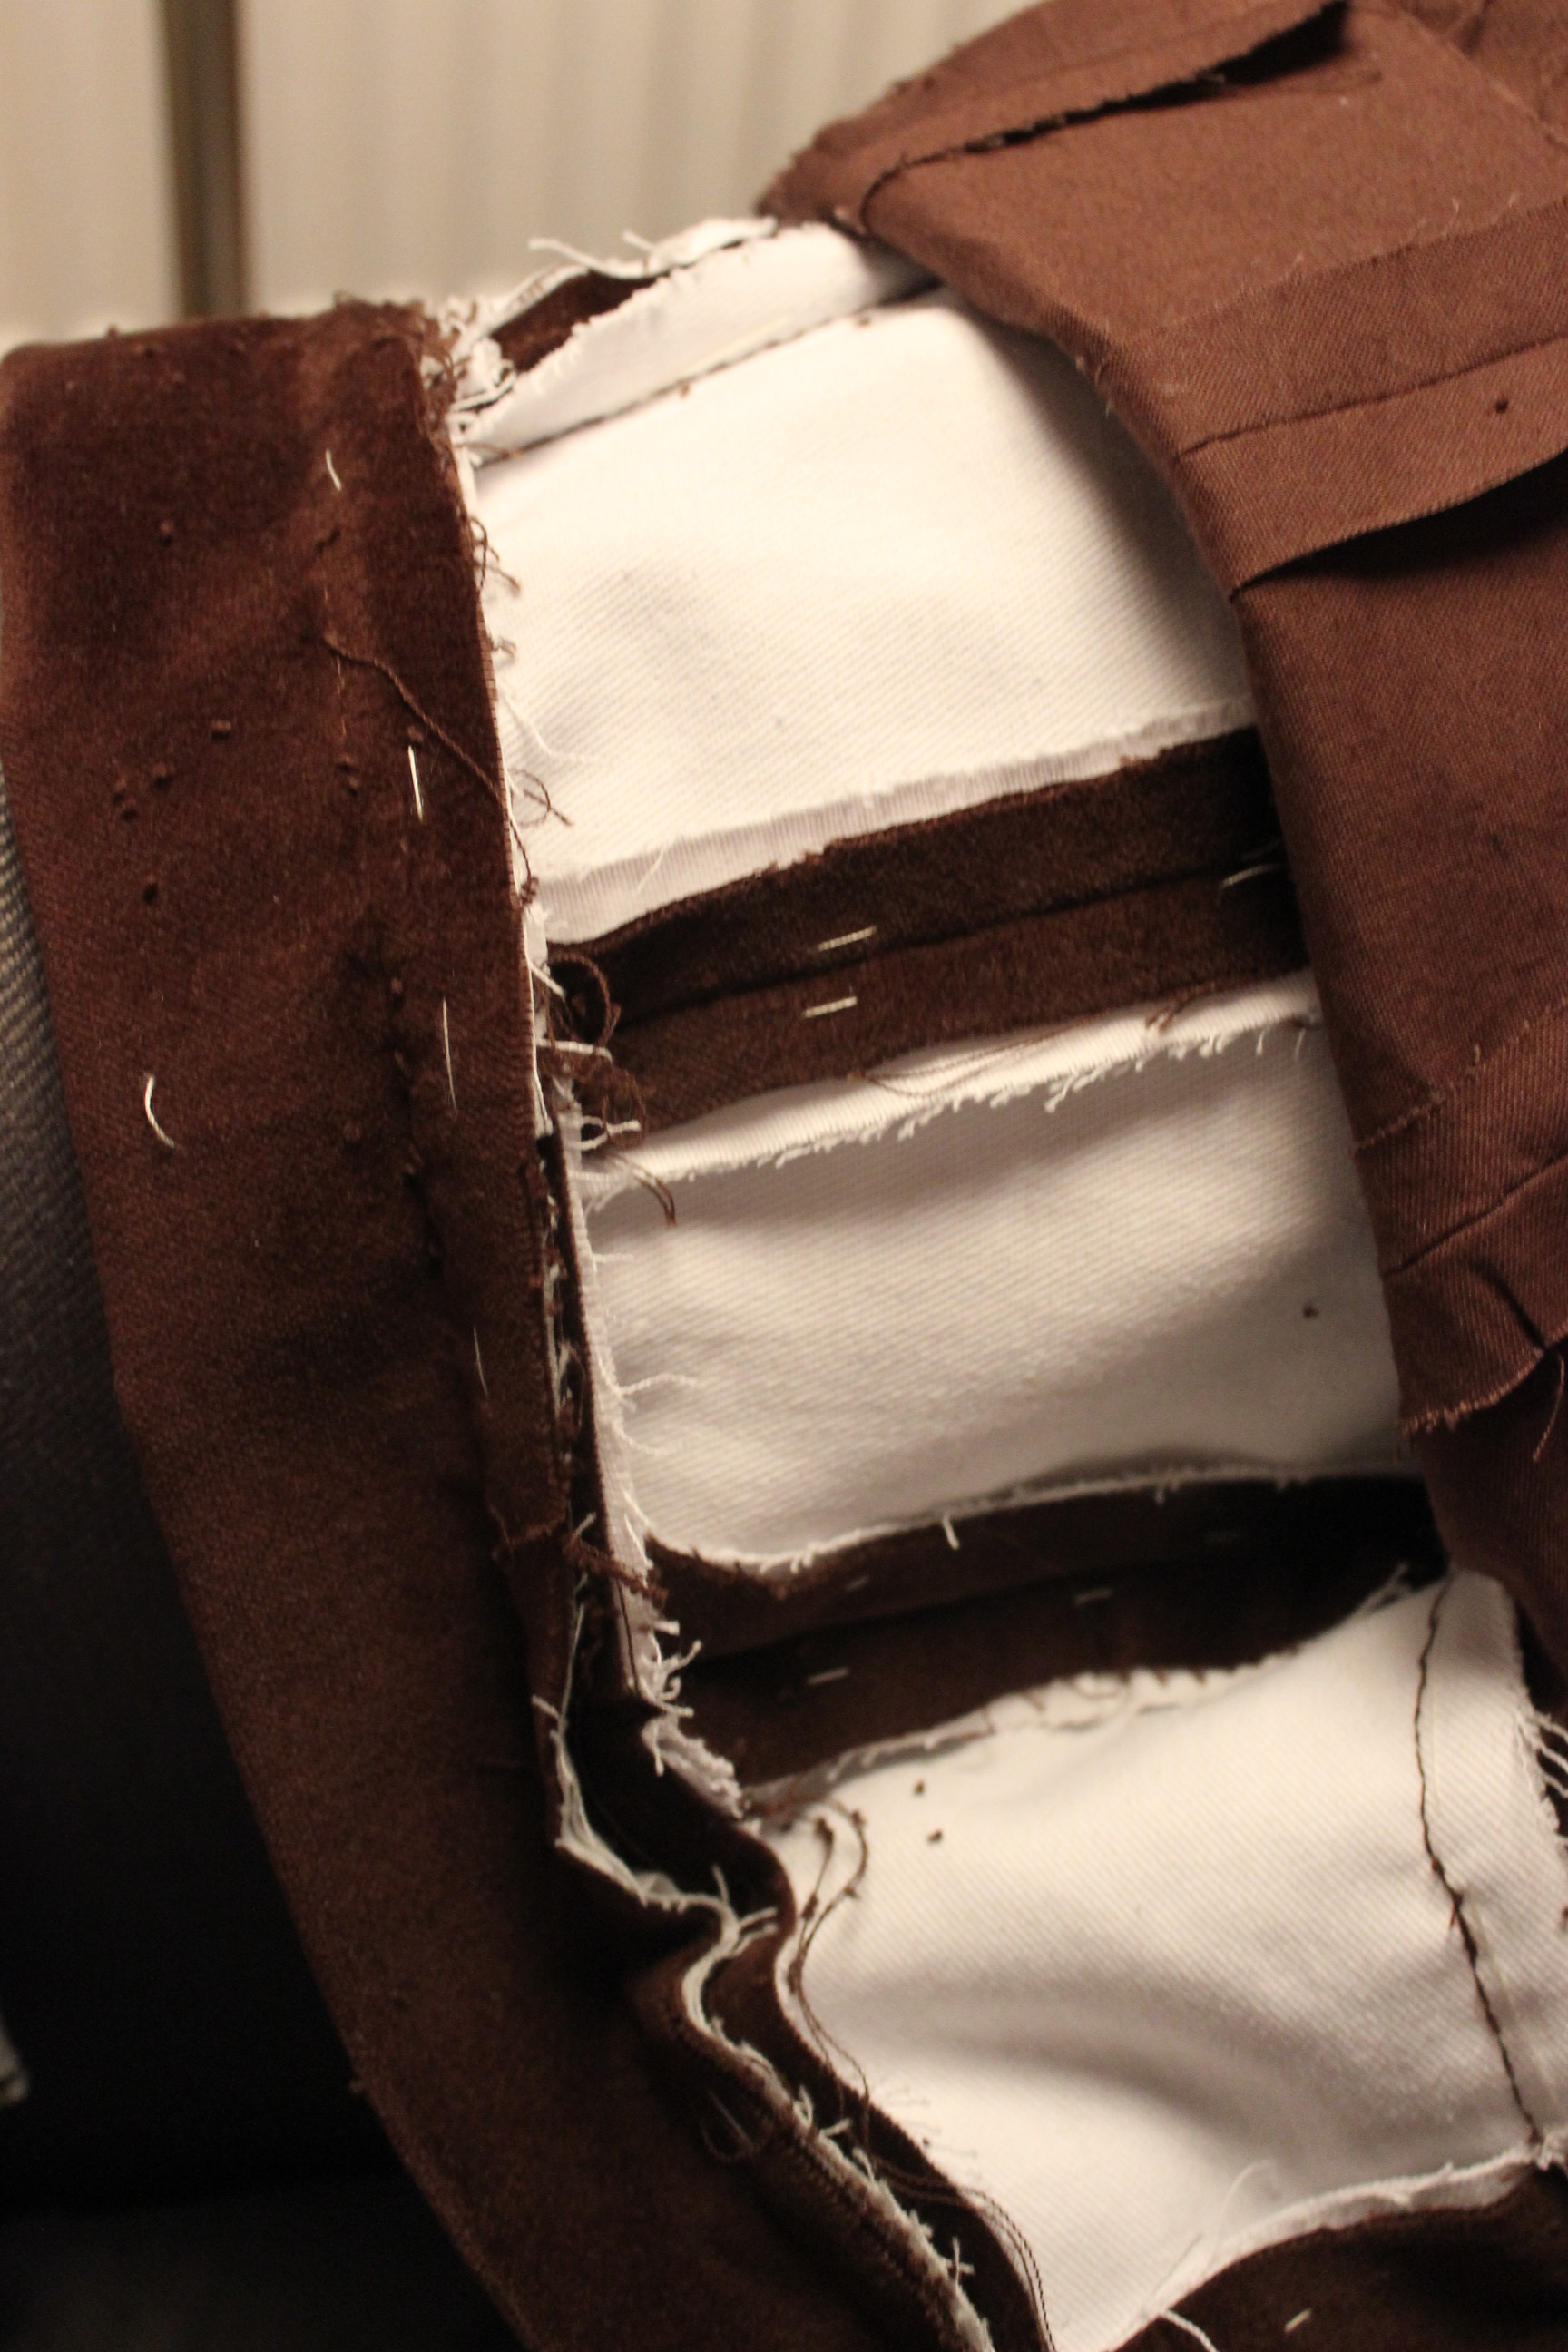 The last piece to attach was the waistband, which I stiched to the lower edge.
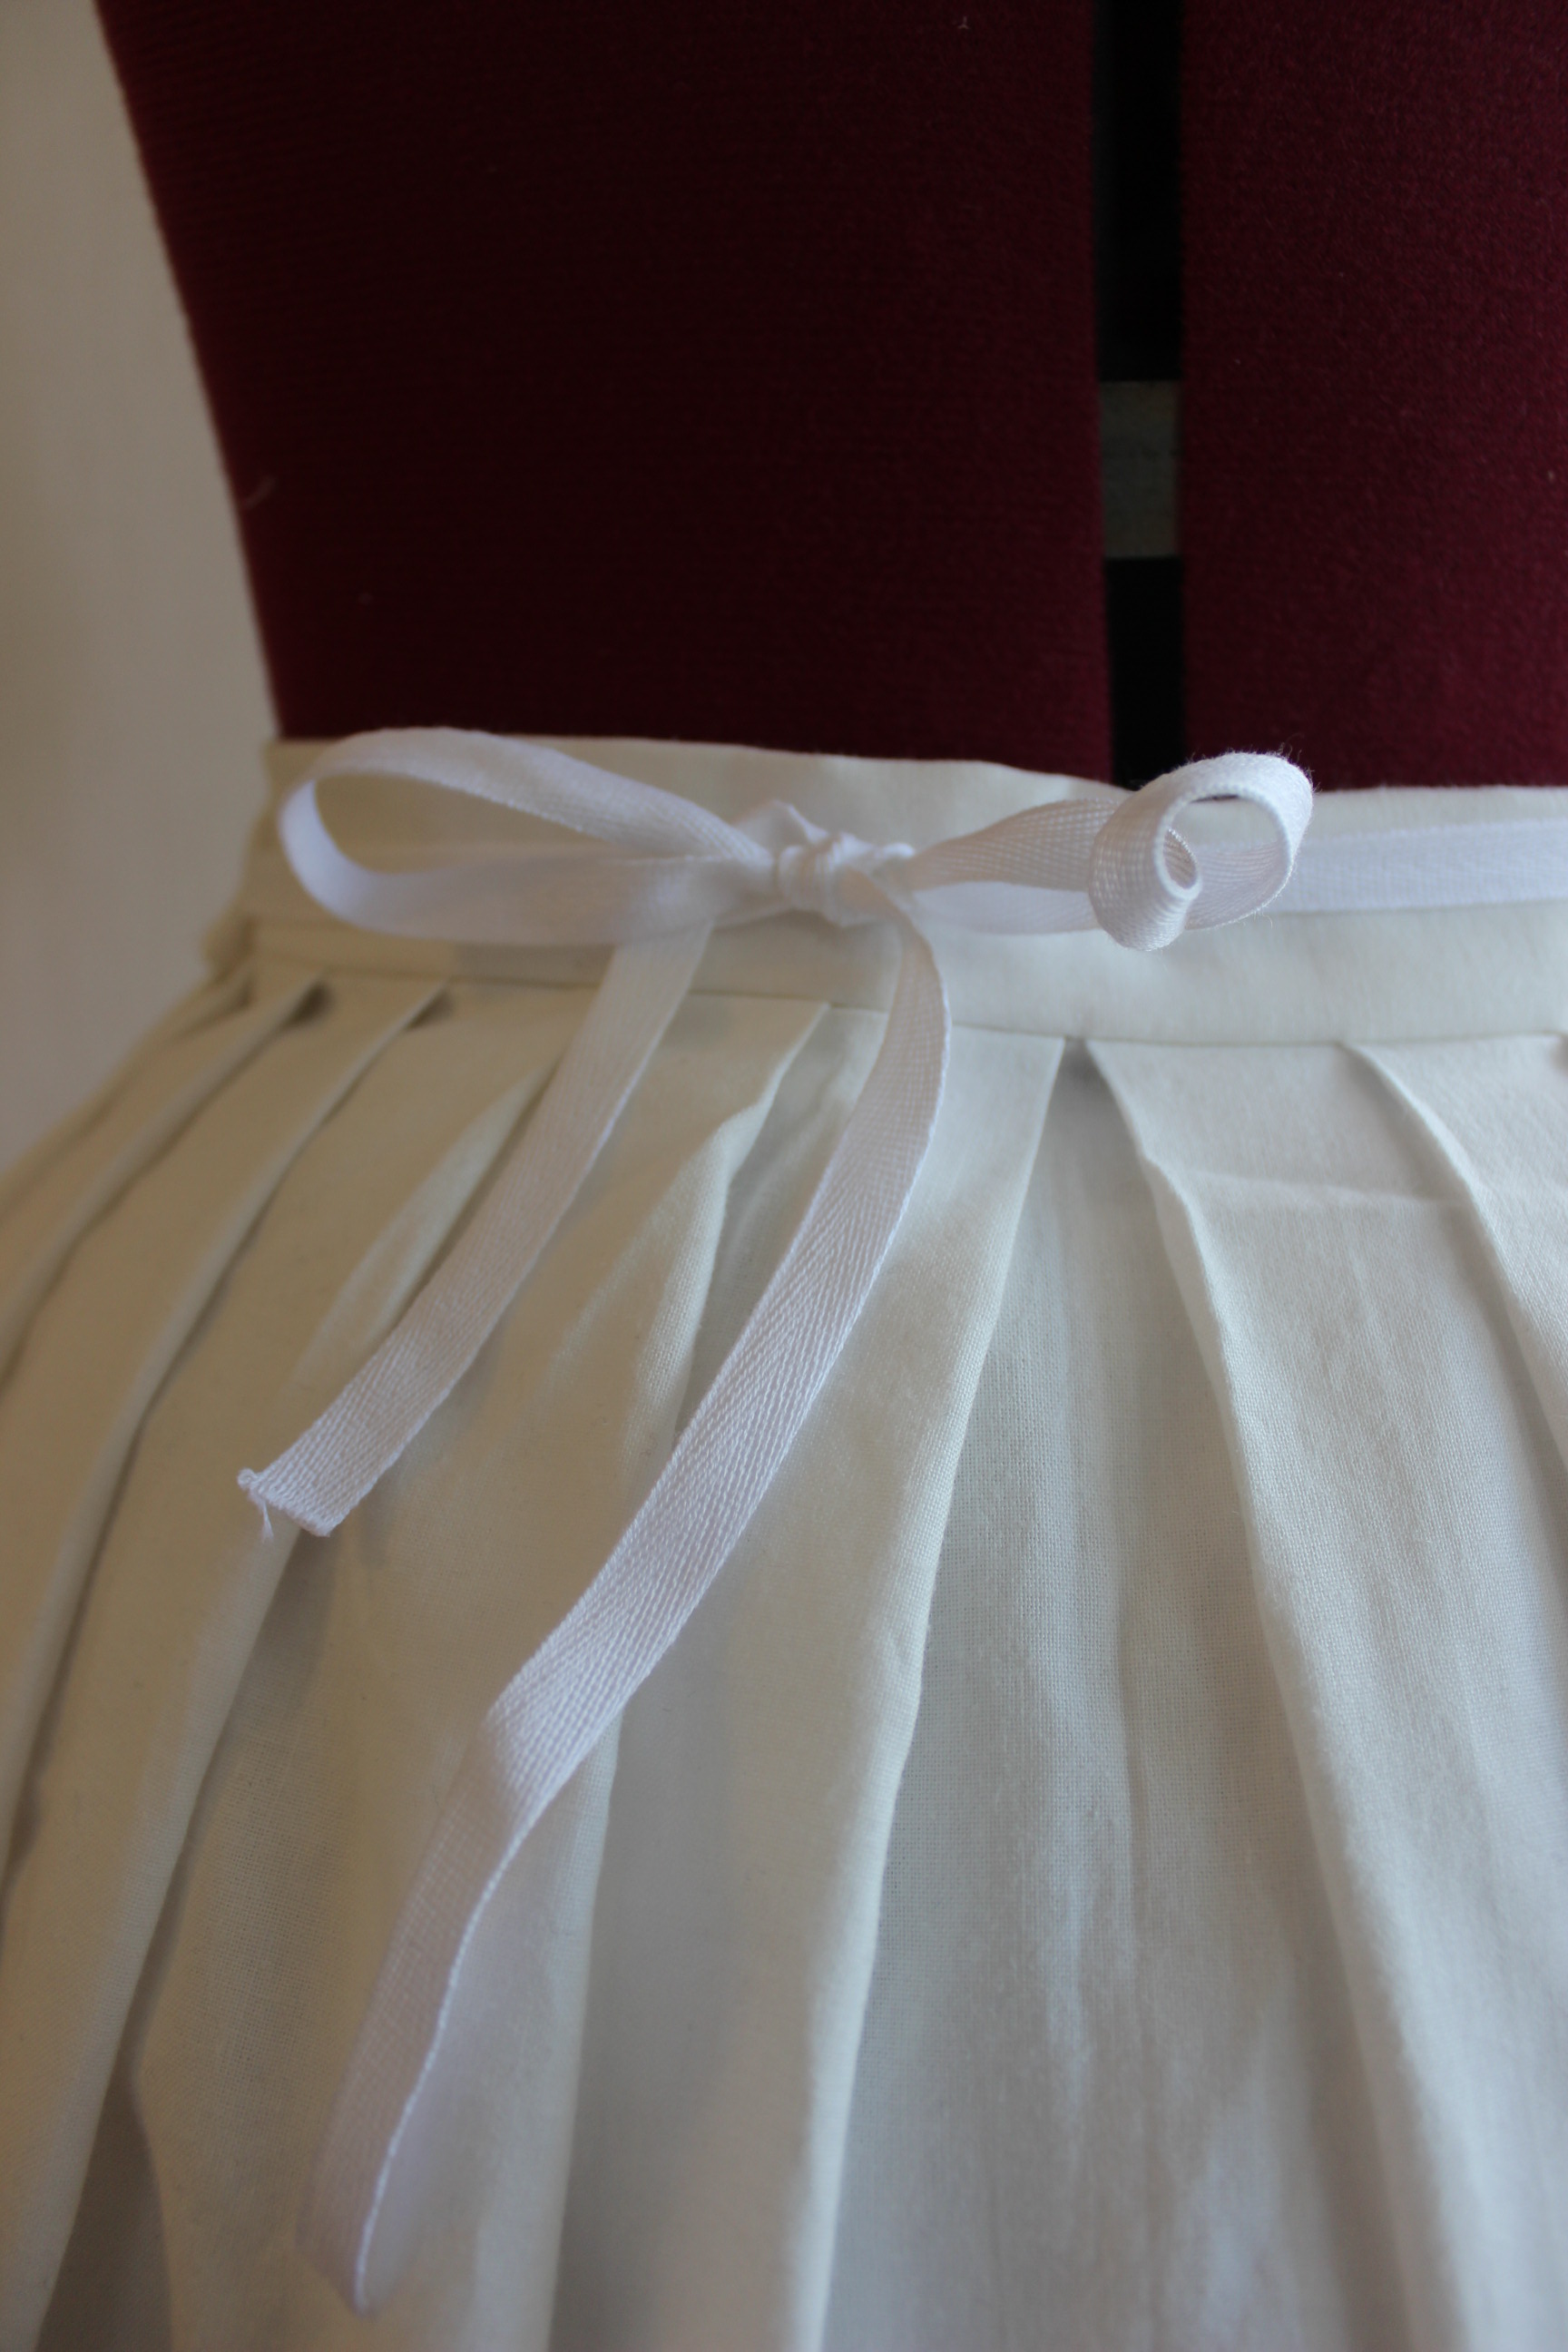
 I made one edge of the wasiband longer to make a cross over clouser.
Before turning the west right side out, I made sure to notch all the curved seams to make everything lay nice and flat. 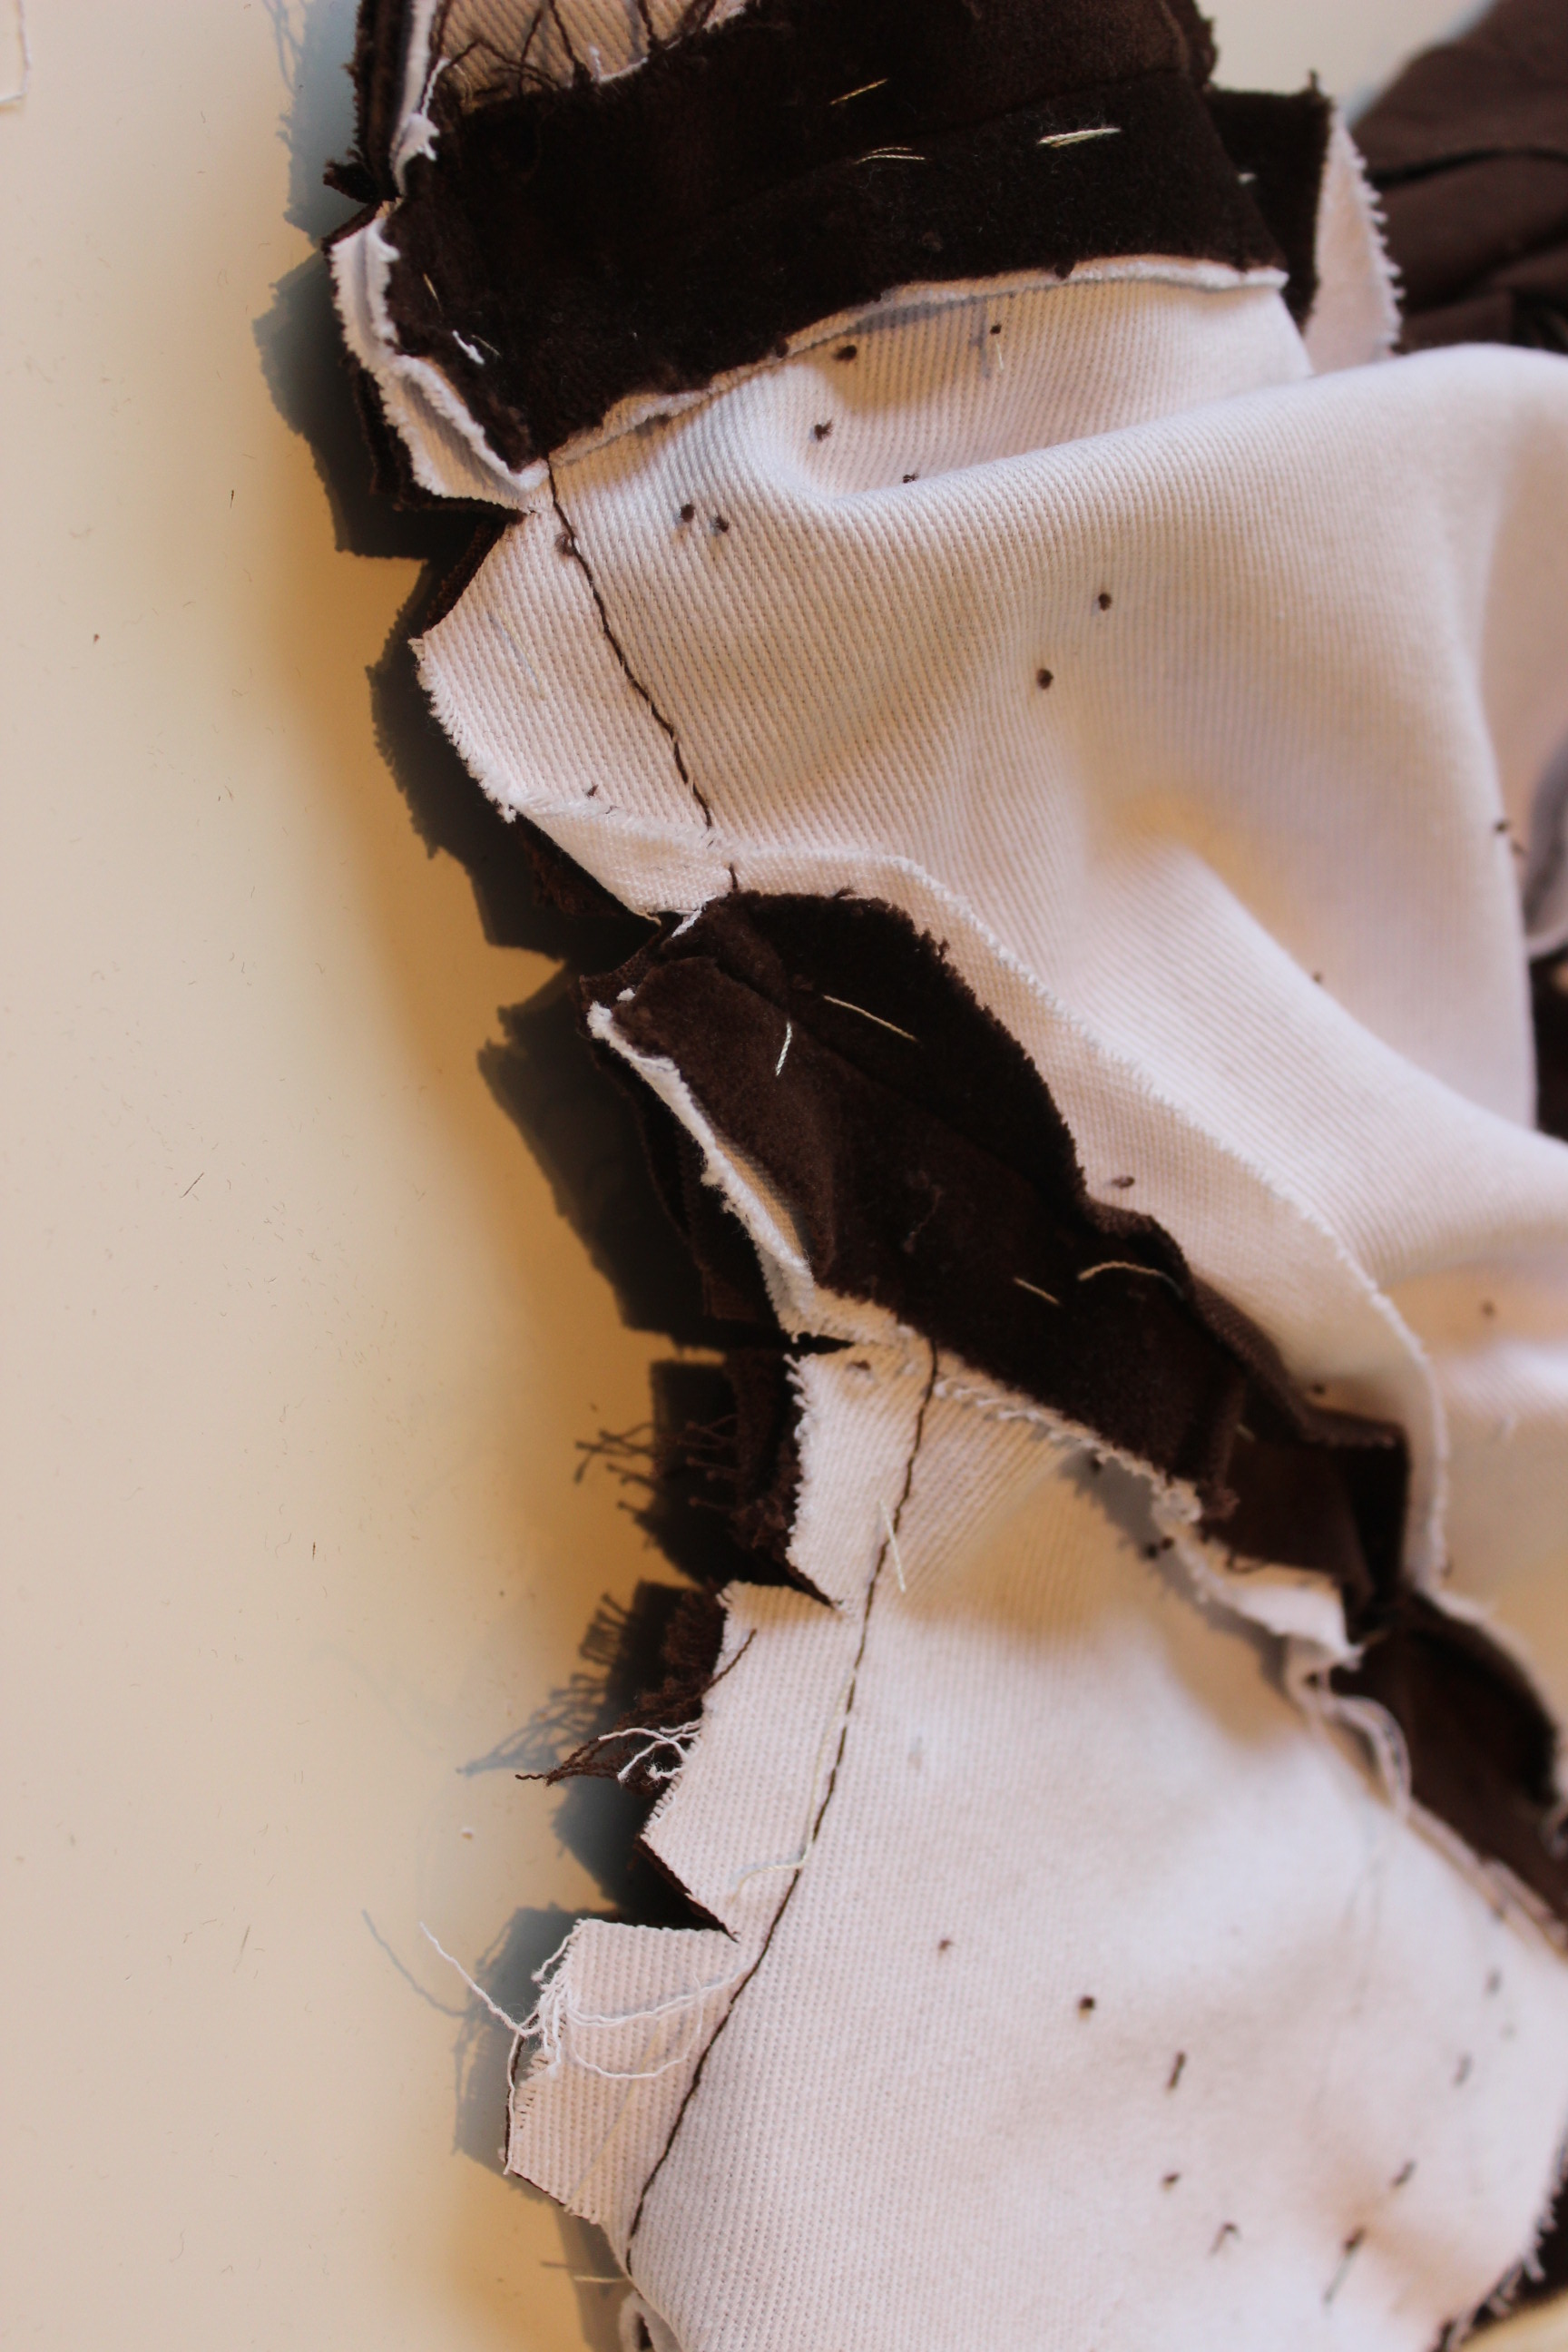
I used a regular bath towel when iron the velvet as to not crush the pile.
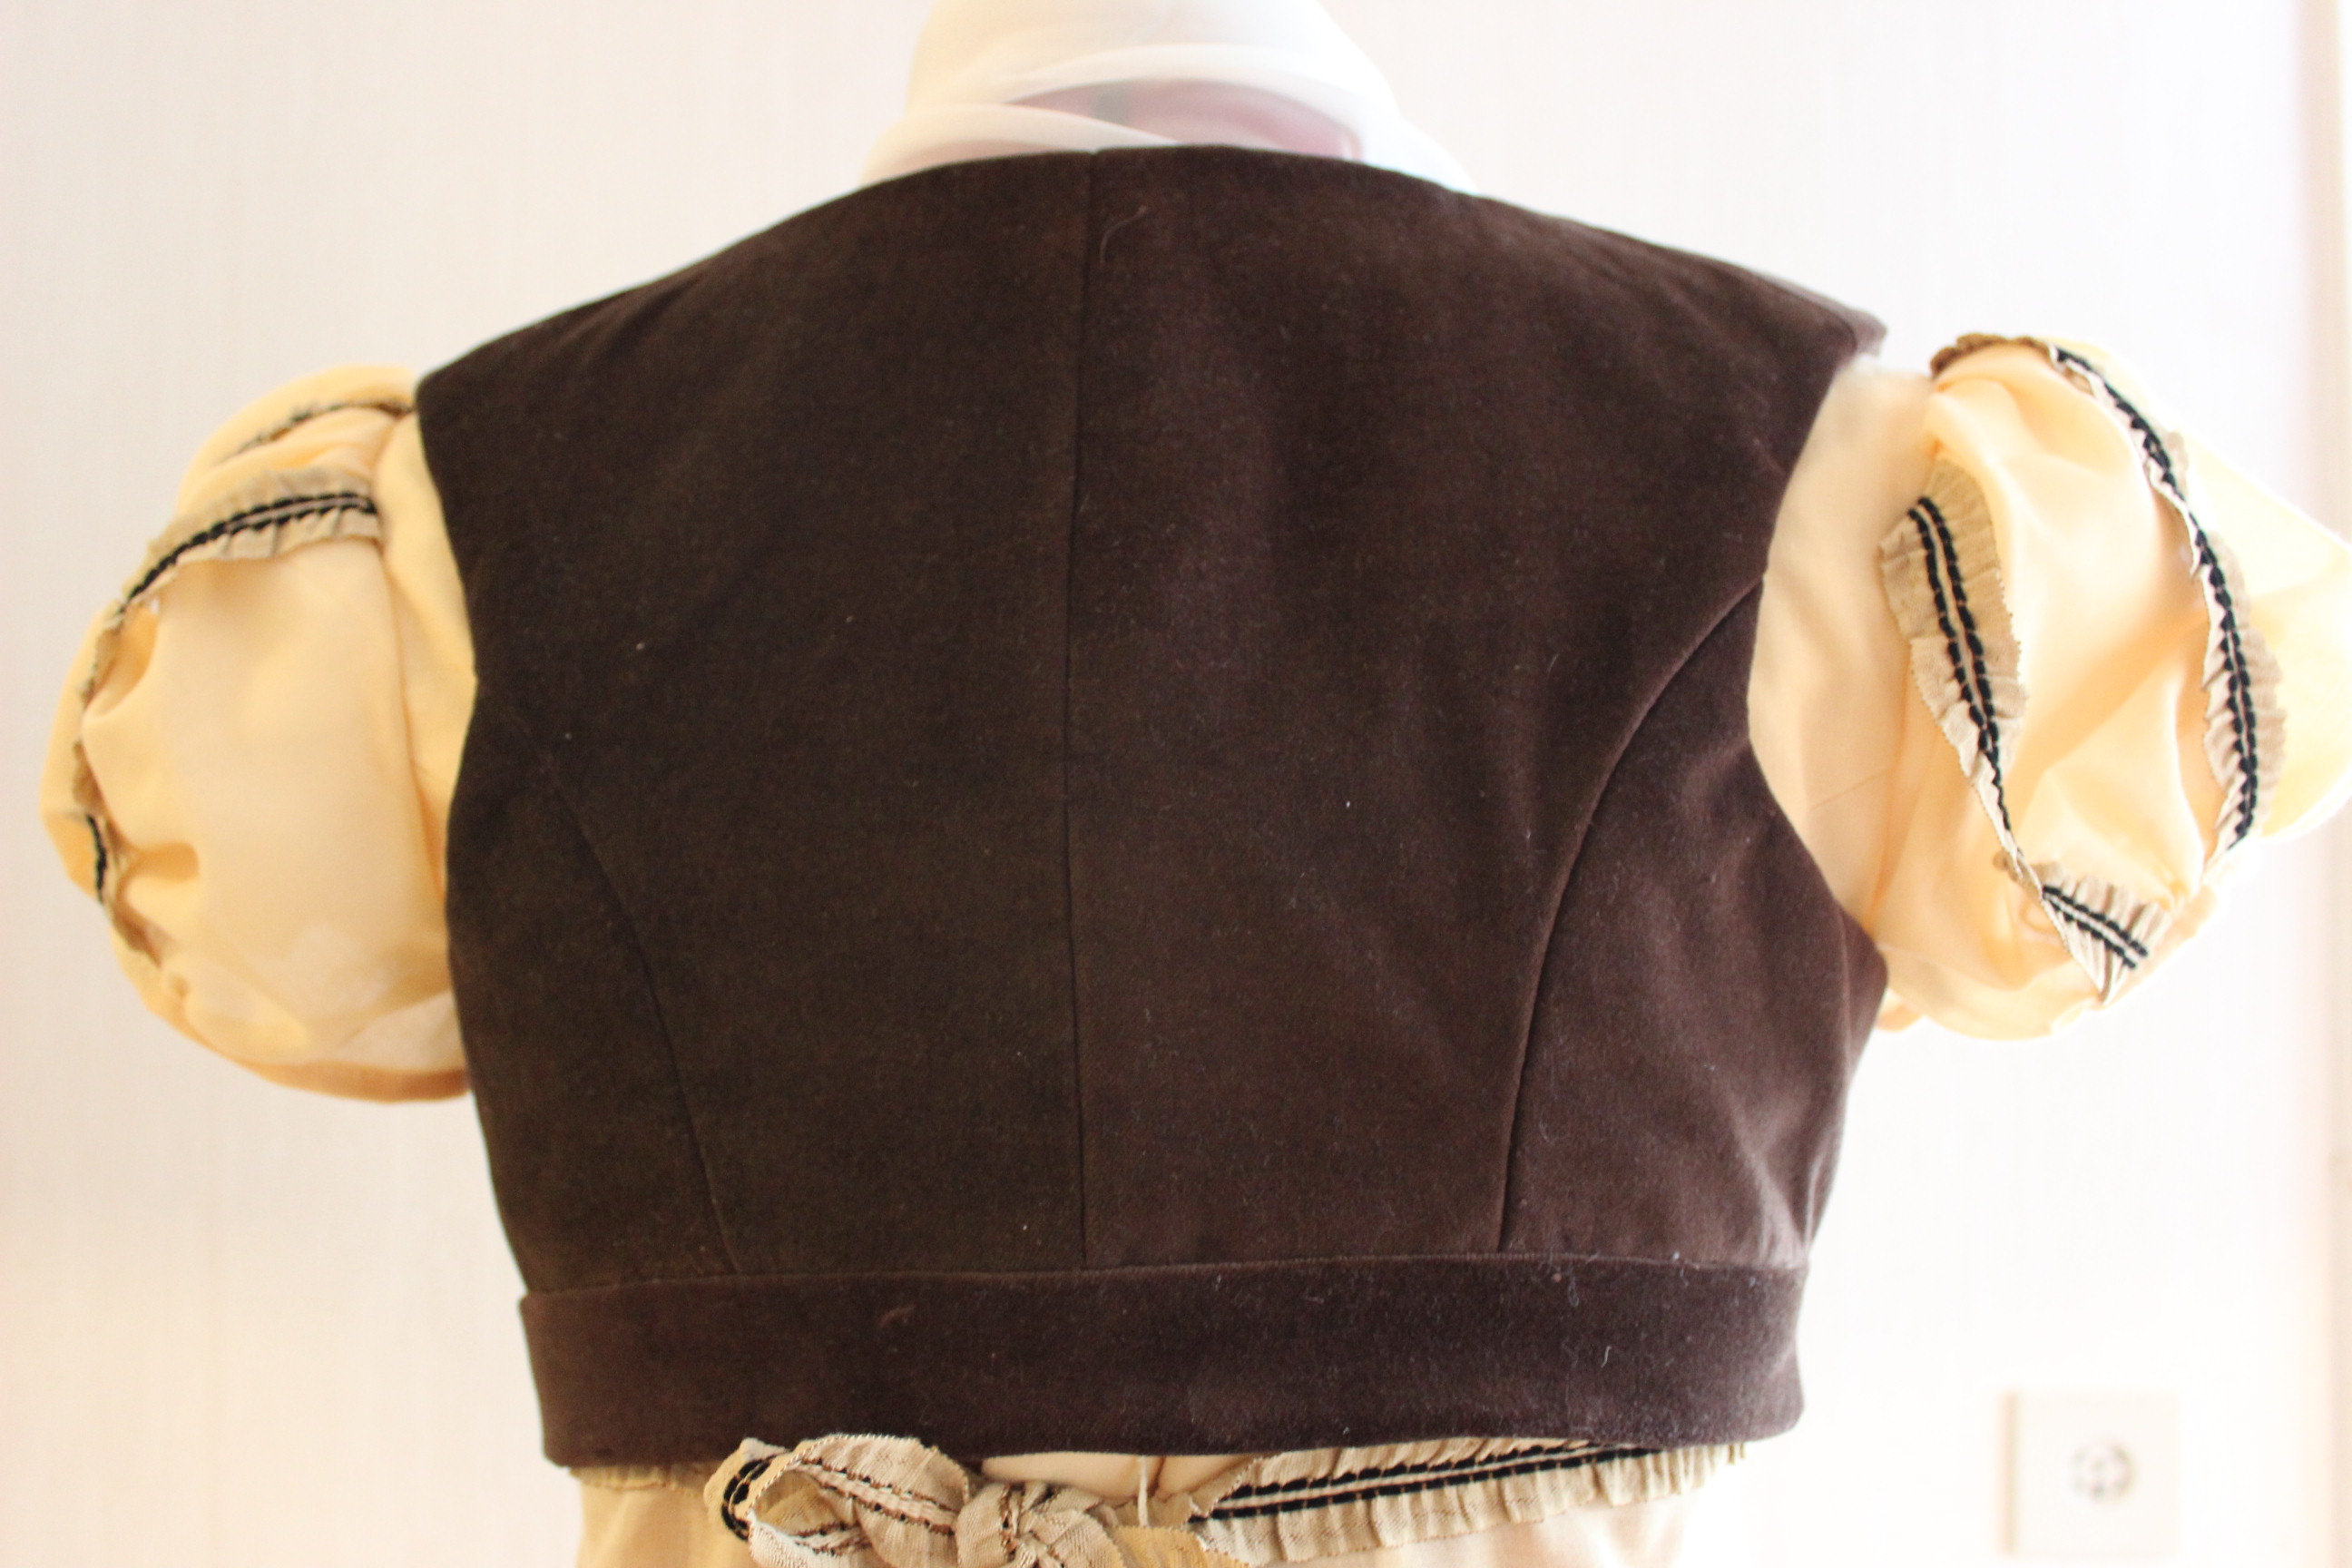
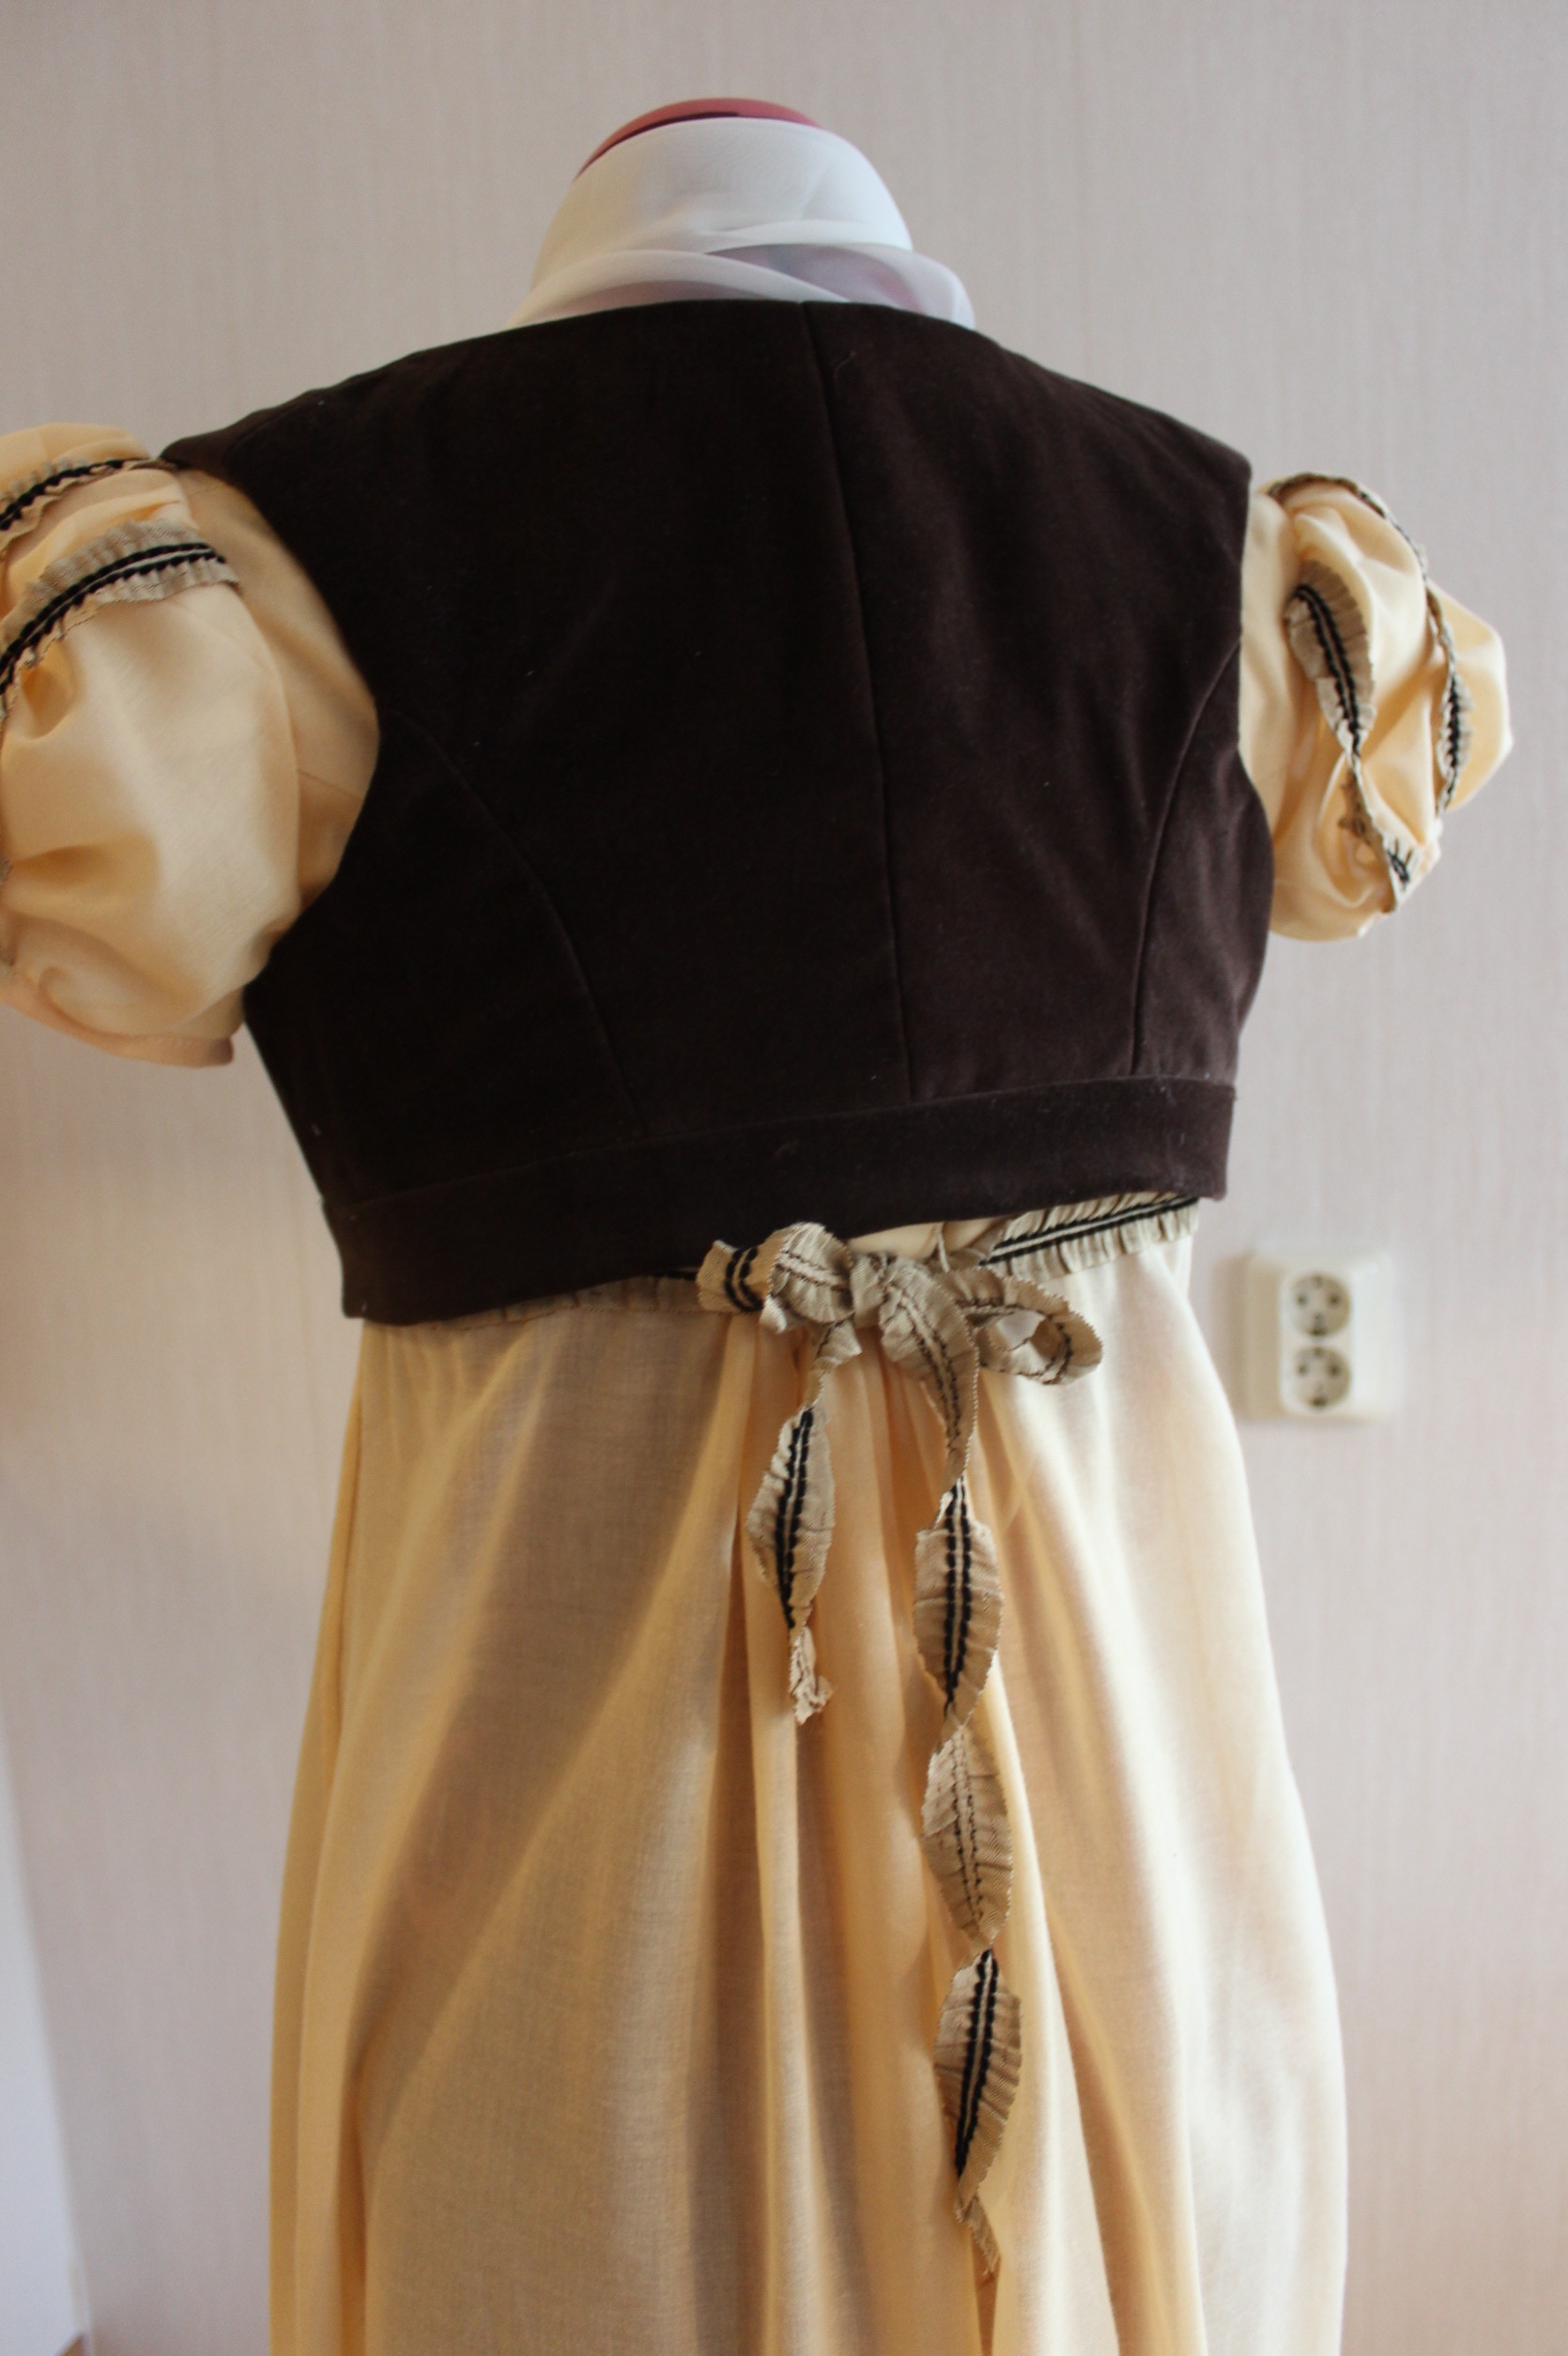
Lastly I attached some buttons and the hooks and eyes for the clouser.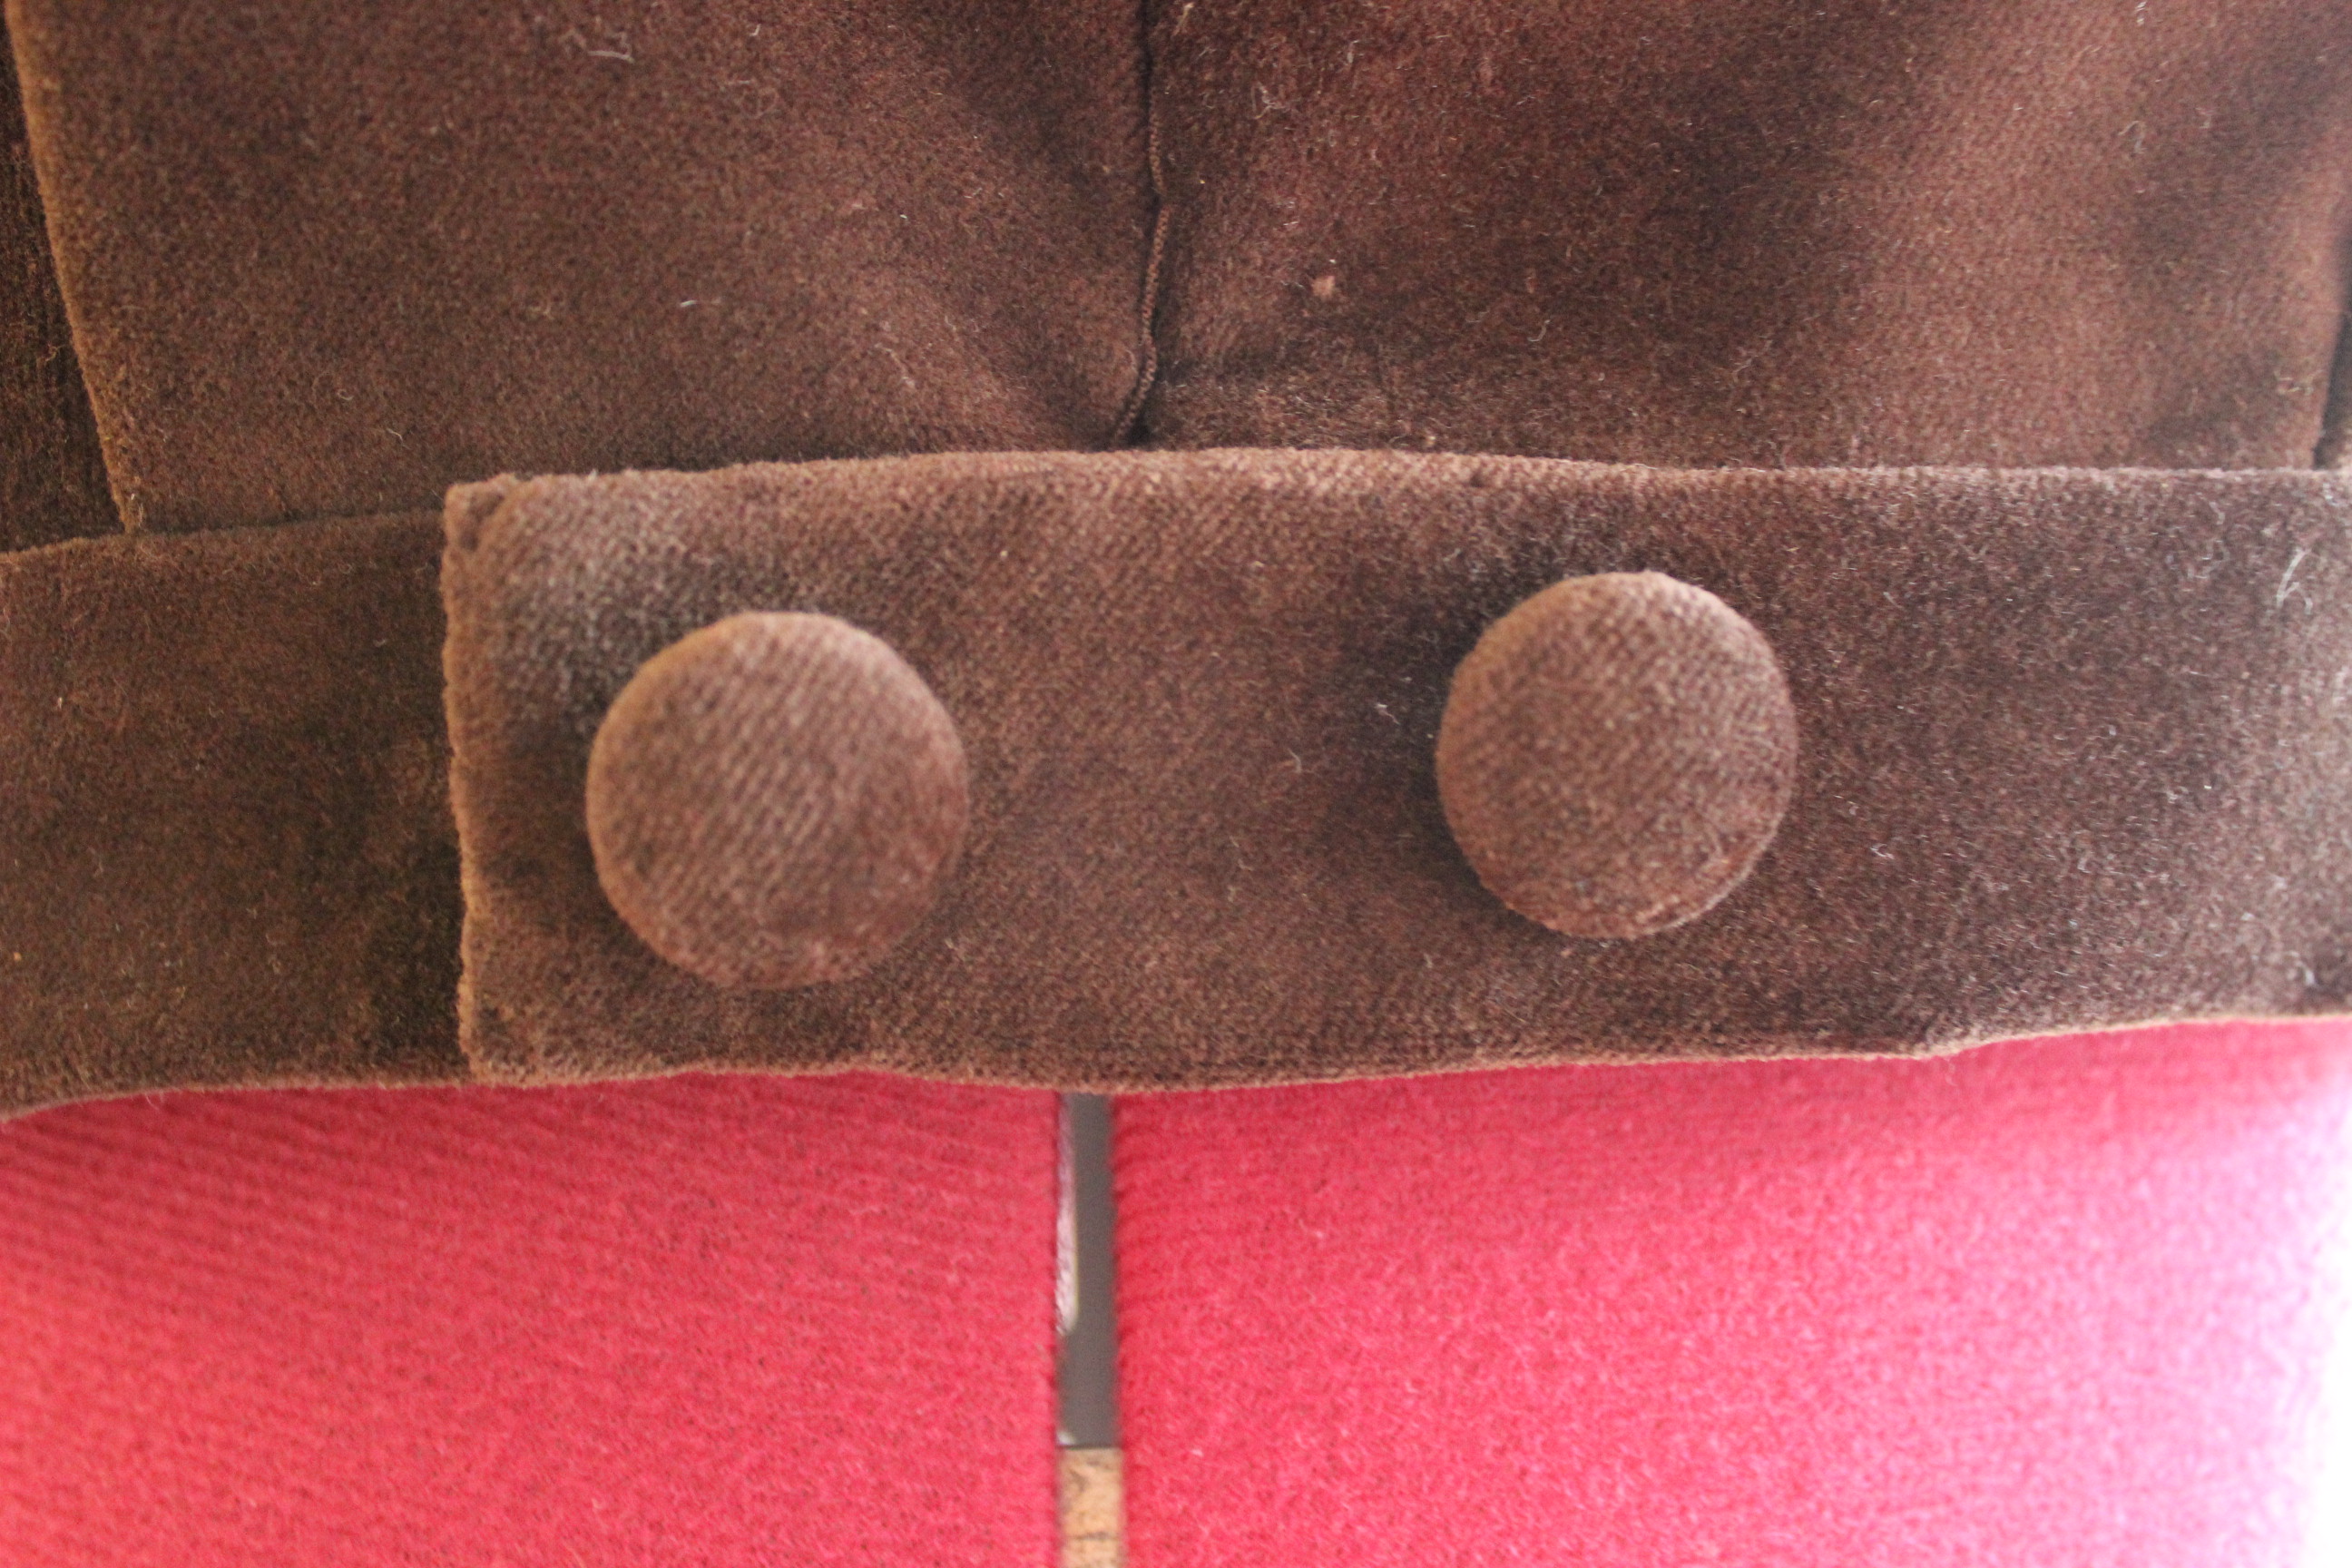
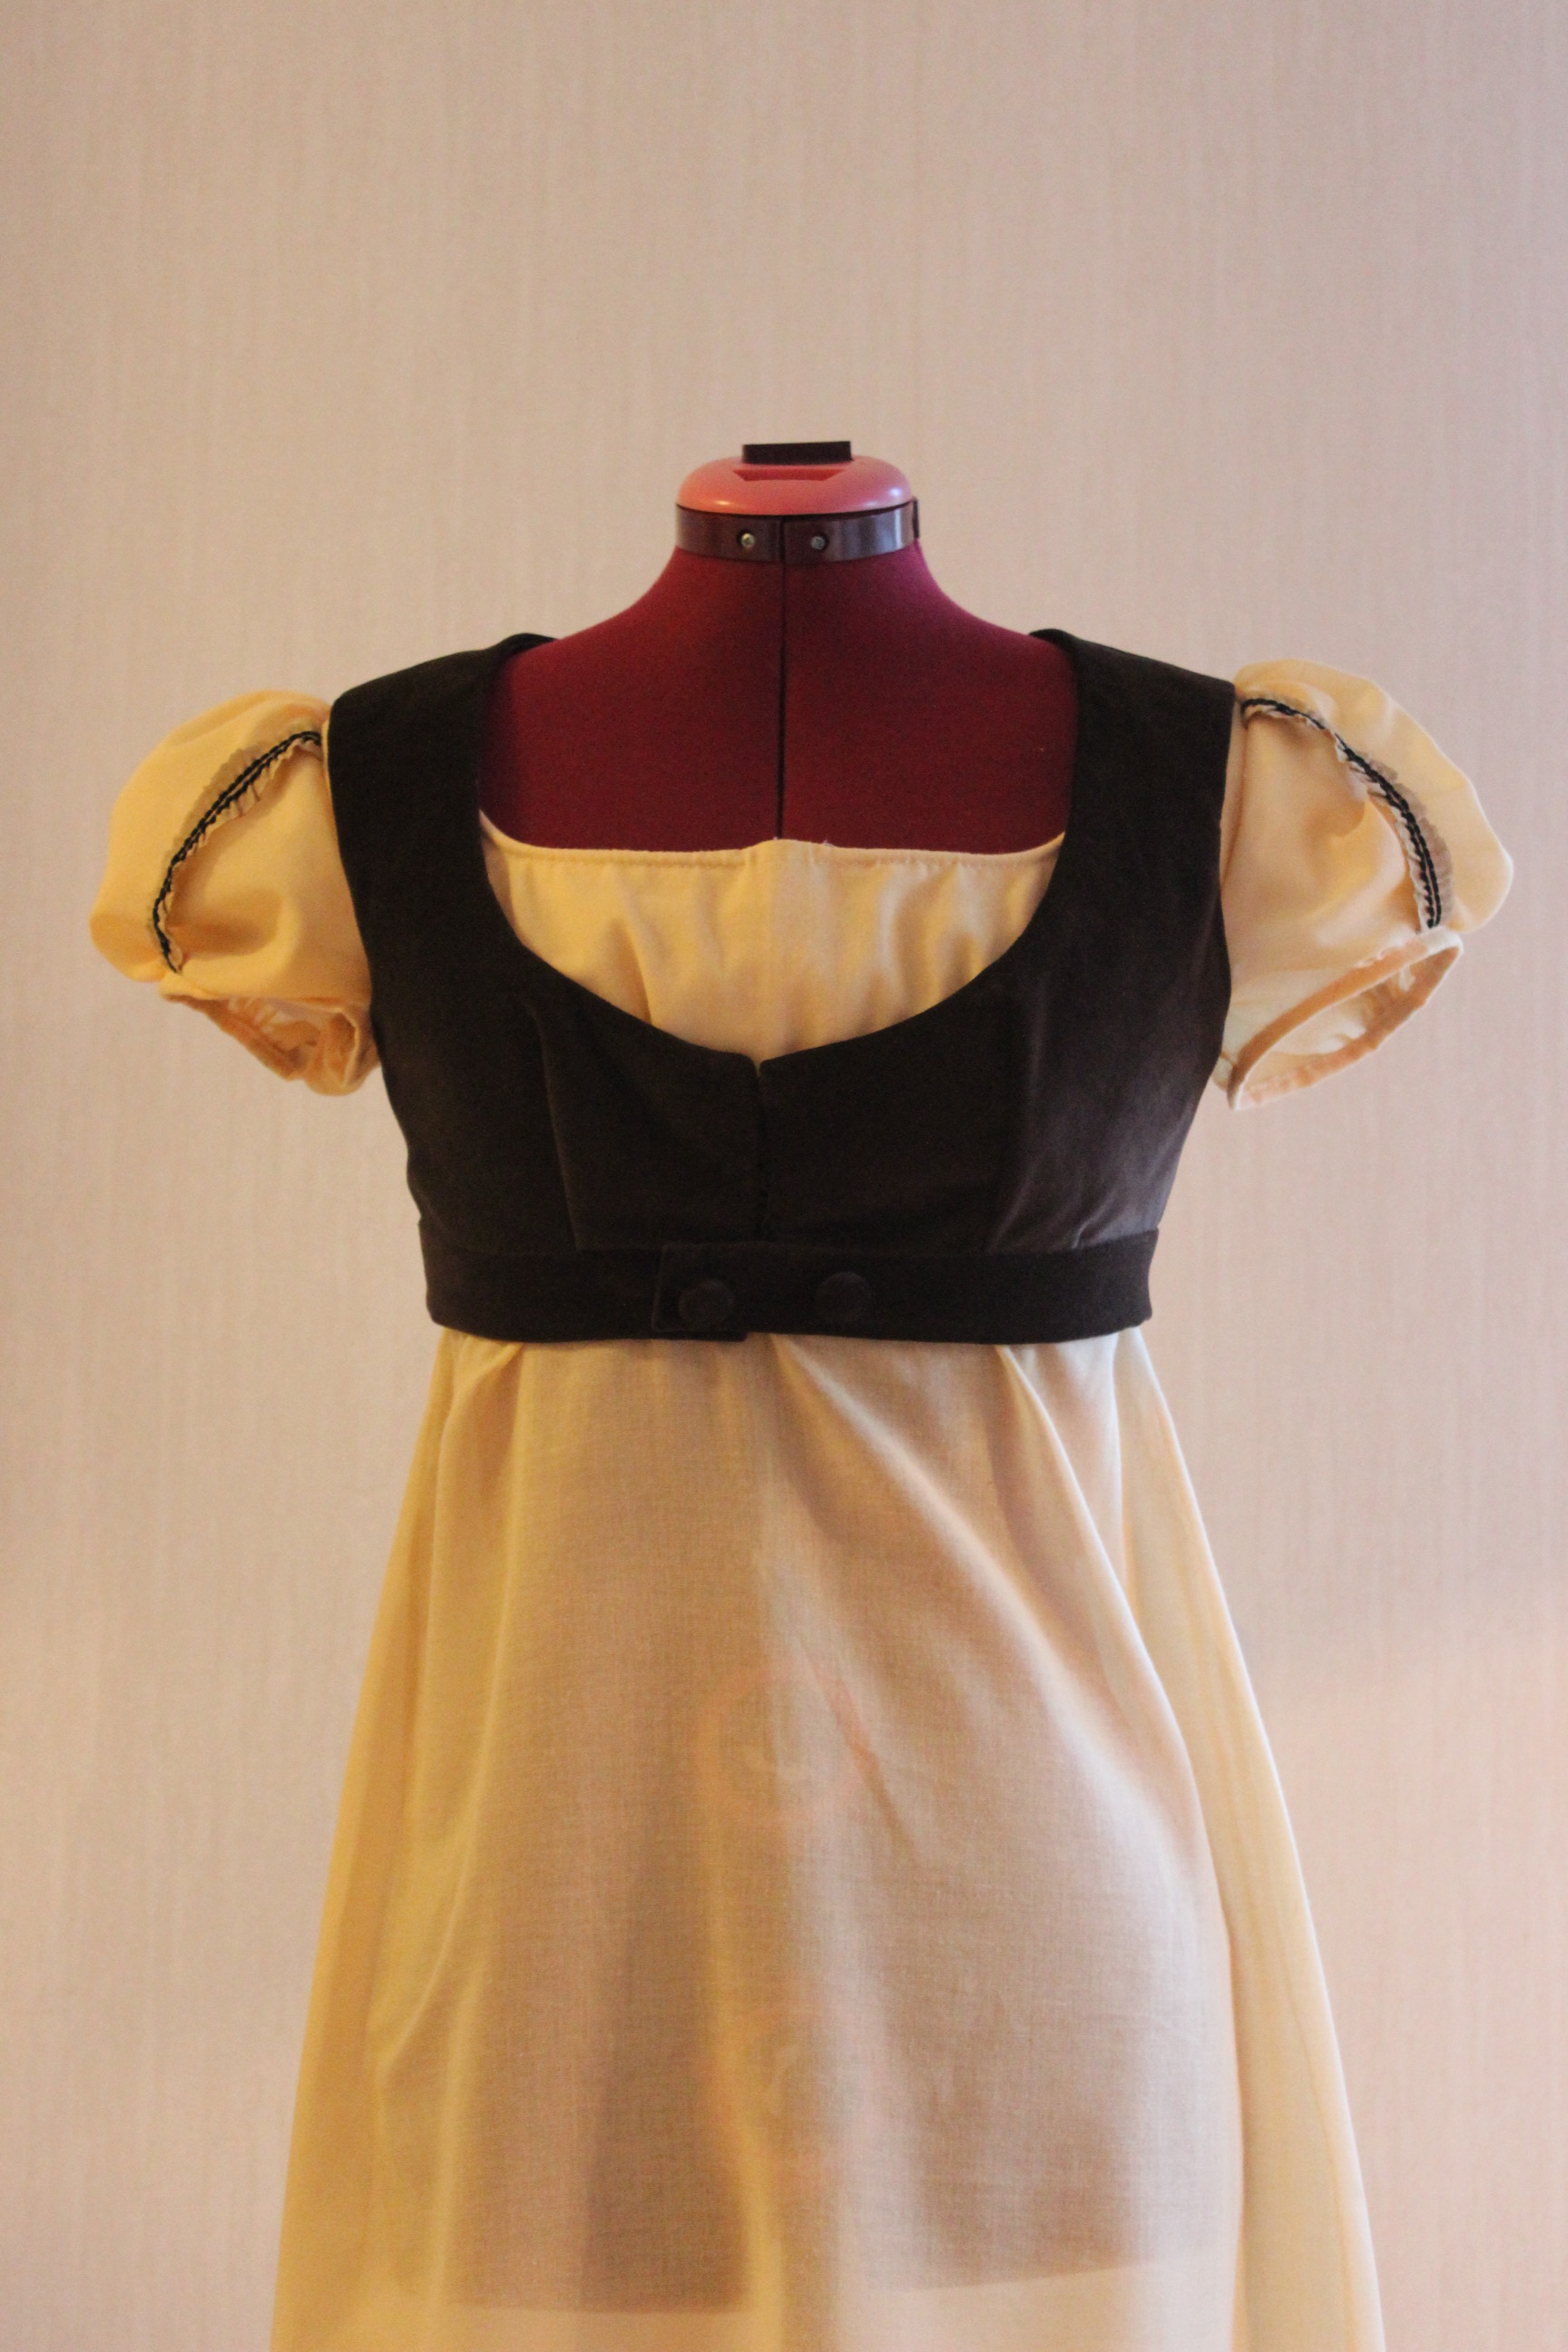
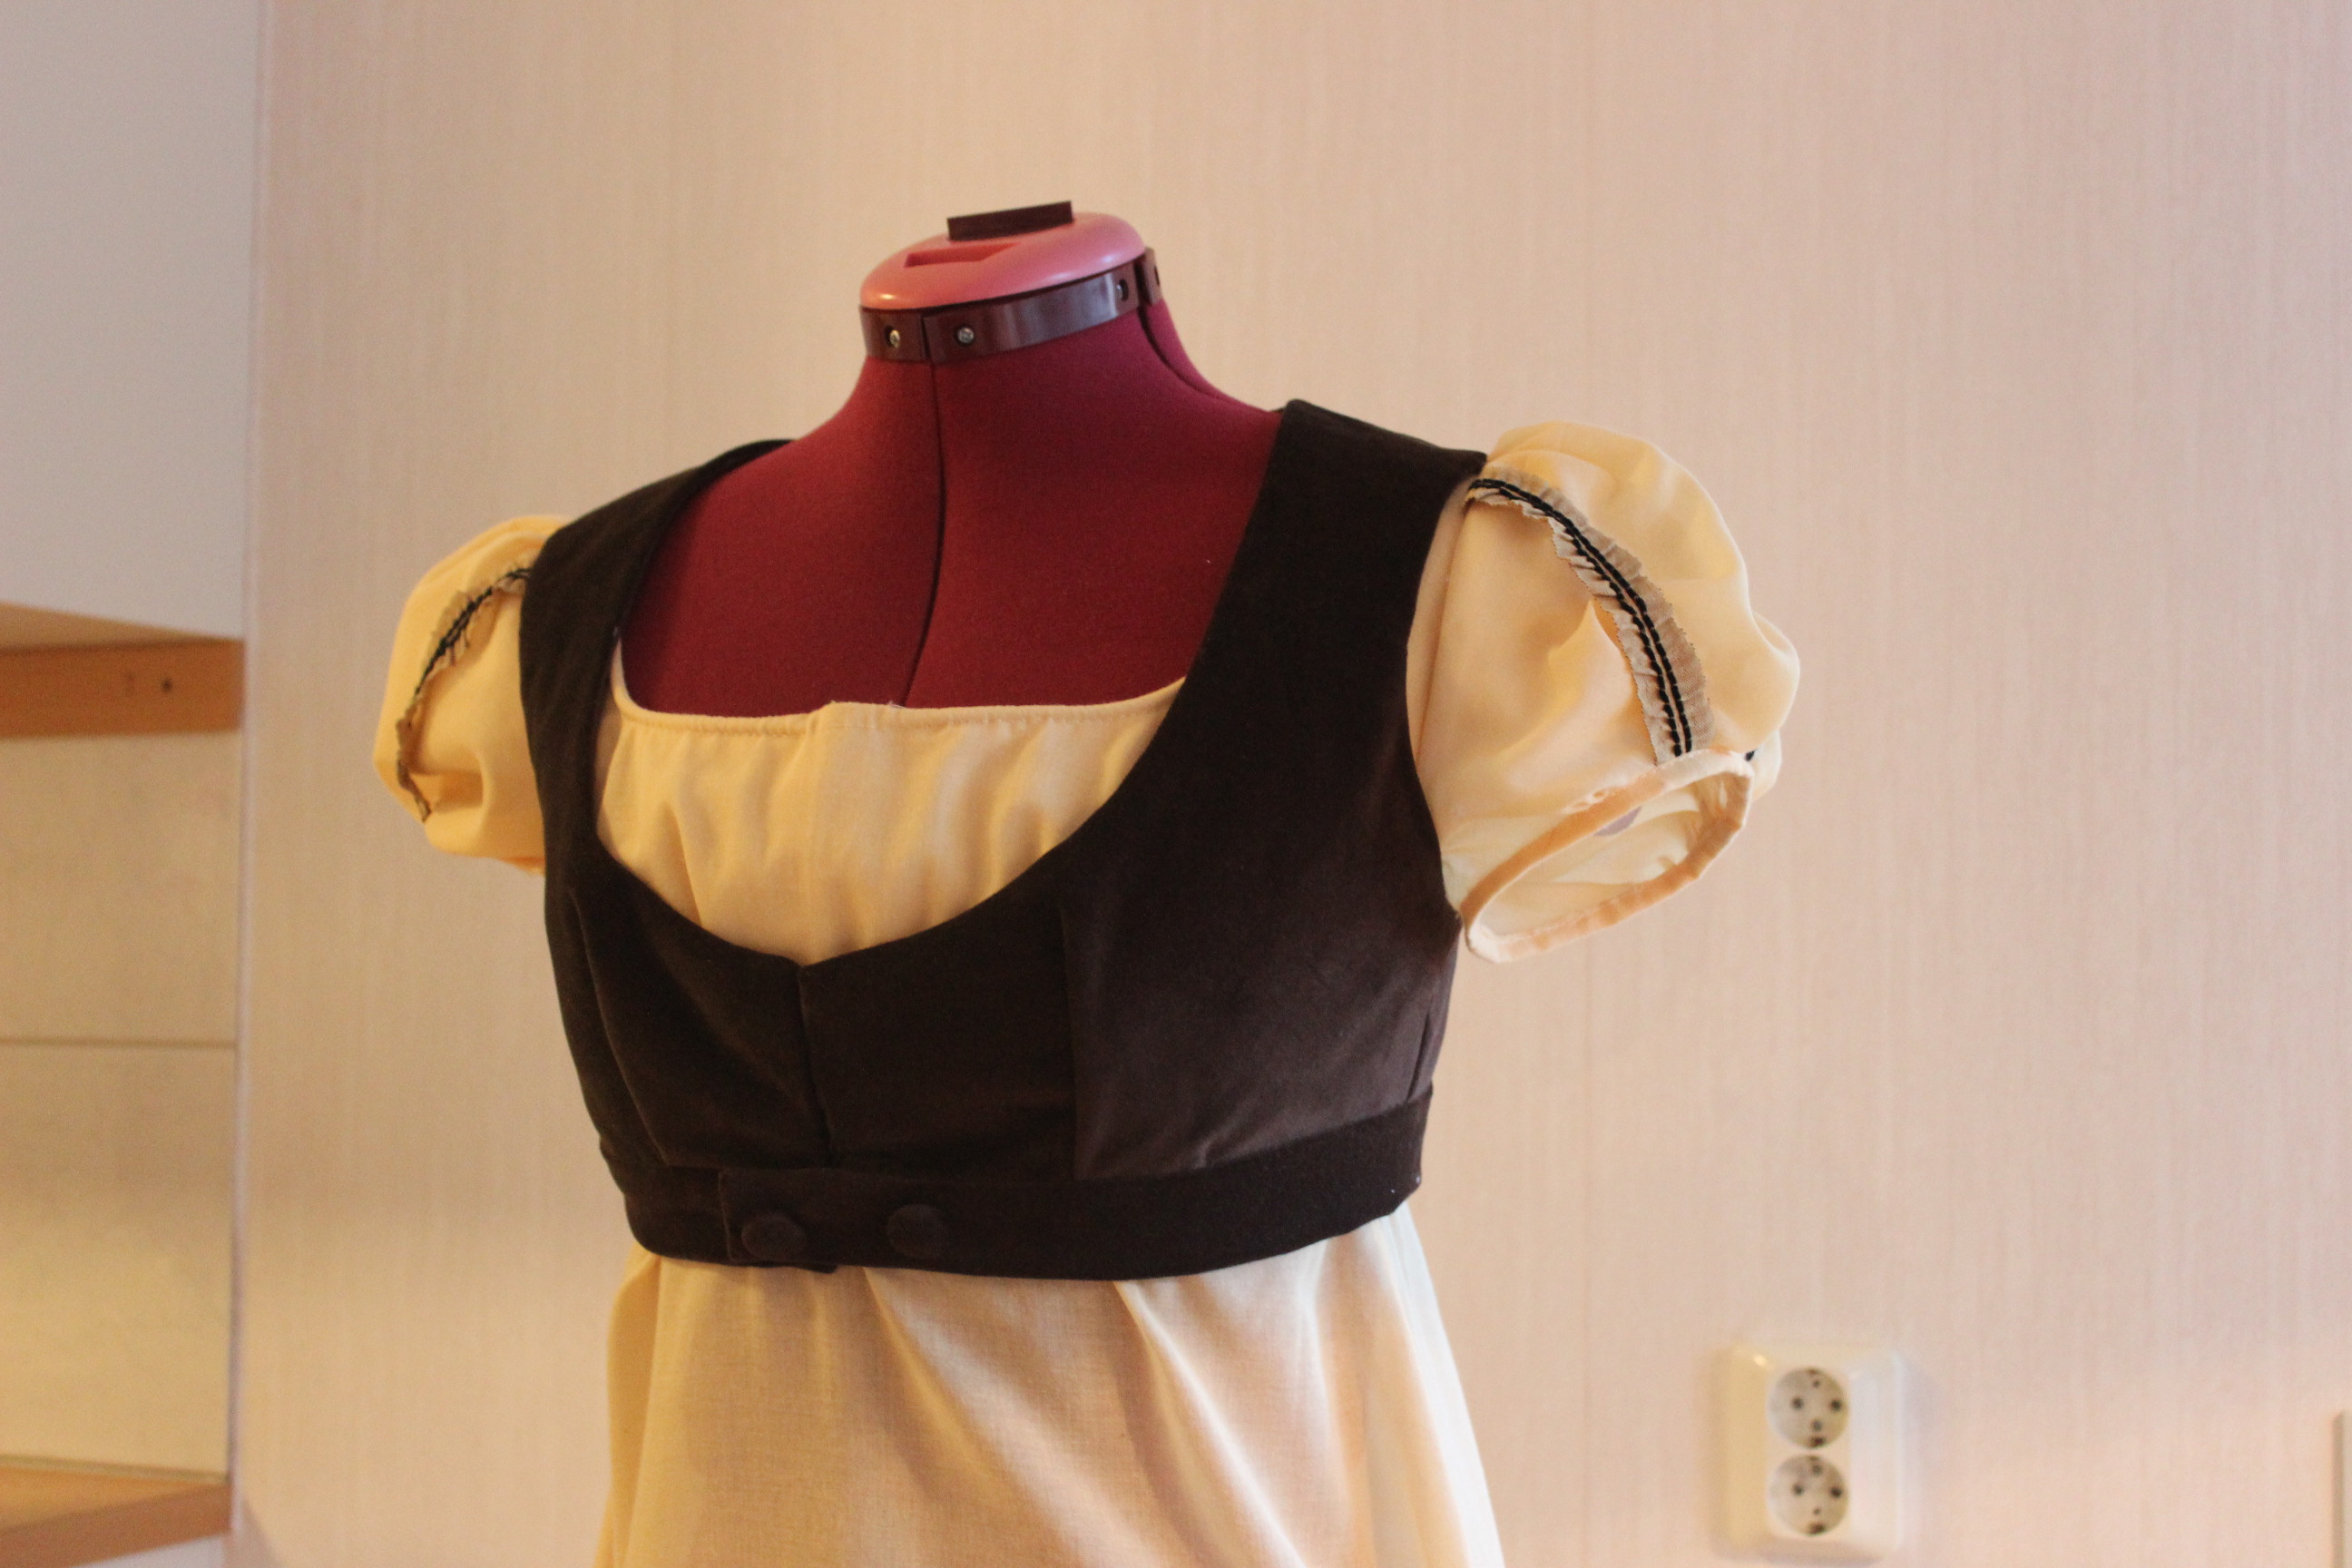
The finished piece (paired with my yellow regency gown):

Just the facts:
Challenge: 15, The great Outdoors.
What: a regency spencer/west
Pattern: I used Simplicity 4055 as a guide, but re-shaped it quite a bit..
Fabric: 0,4 m of brown cotton velvet and 0,4 m brown cotton for lining (both scraps left over from previous projects) and 0,4 m of cotton twill for interlining.
Notions: Thread, two buttons, 5 hooks and eyes.
How historical accurate: not much I fear – even though it is compleatly hand sewed. I havn’t found any sources on this kind of wests.
Time: about 8 hours.
Cost: Basicly free since everything was leftovers from previous projects but if I would have bought it now it would probably be about 150 Sek (22 Usd).
First worn: For photos in the middle of august.
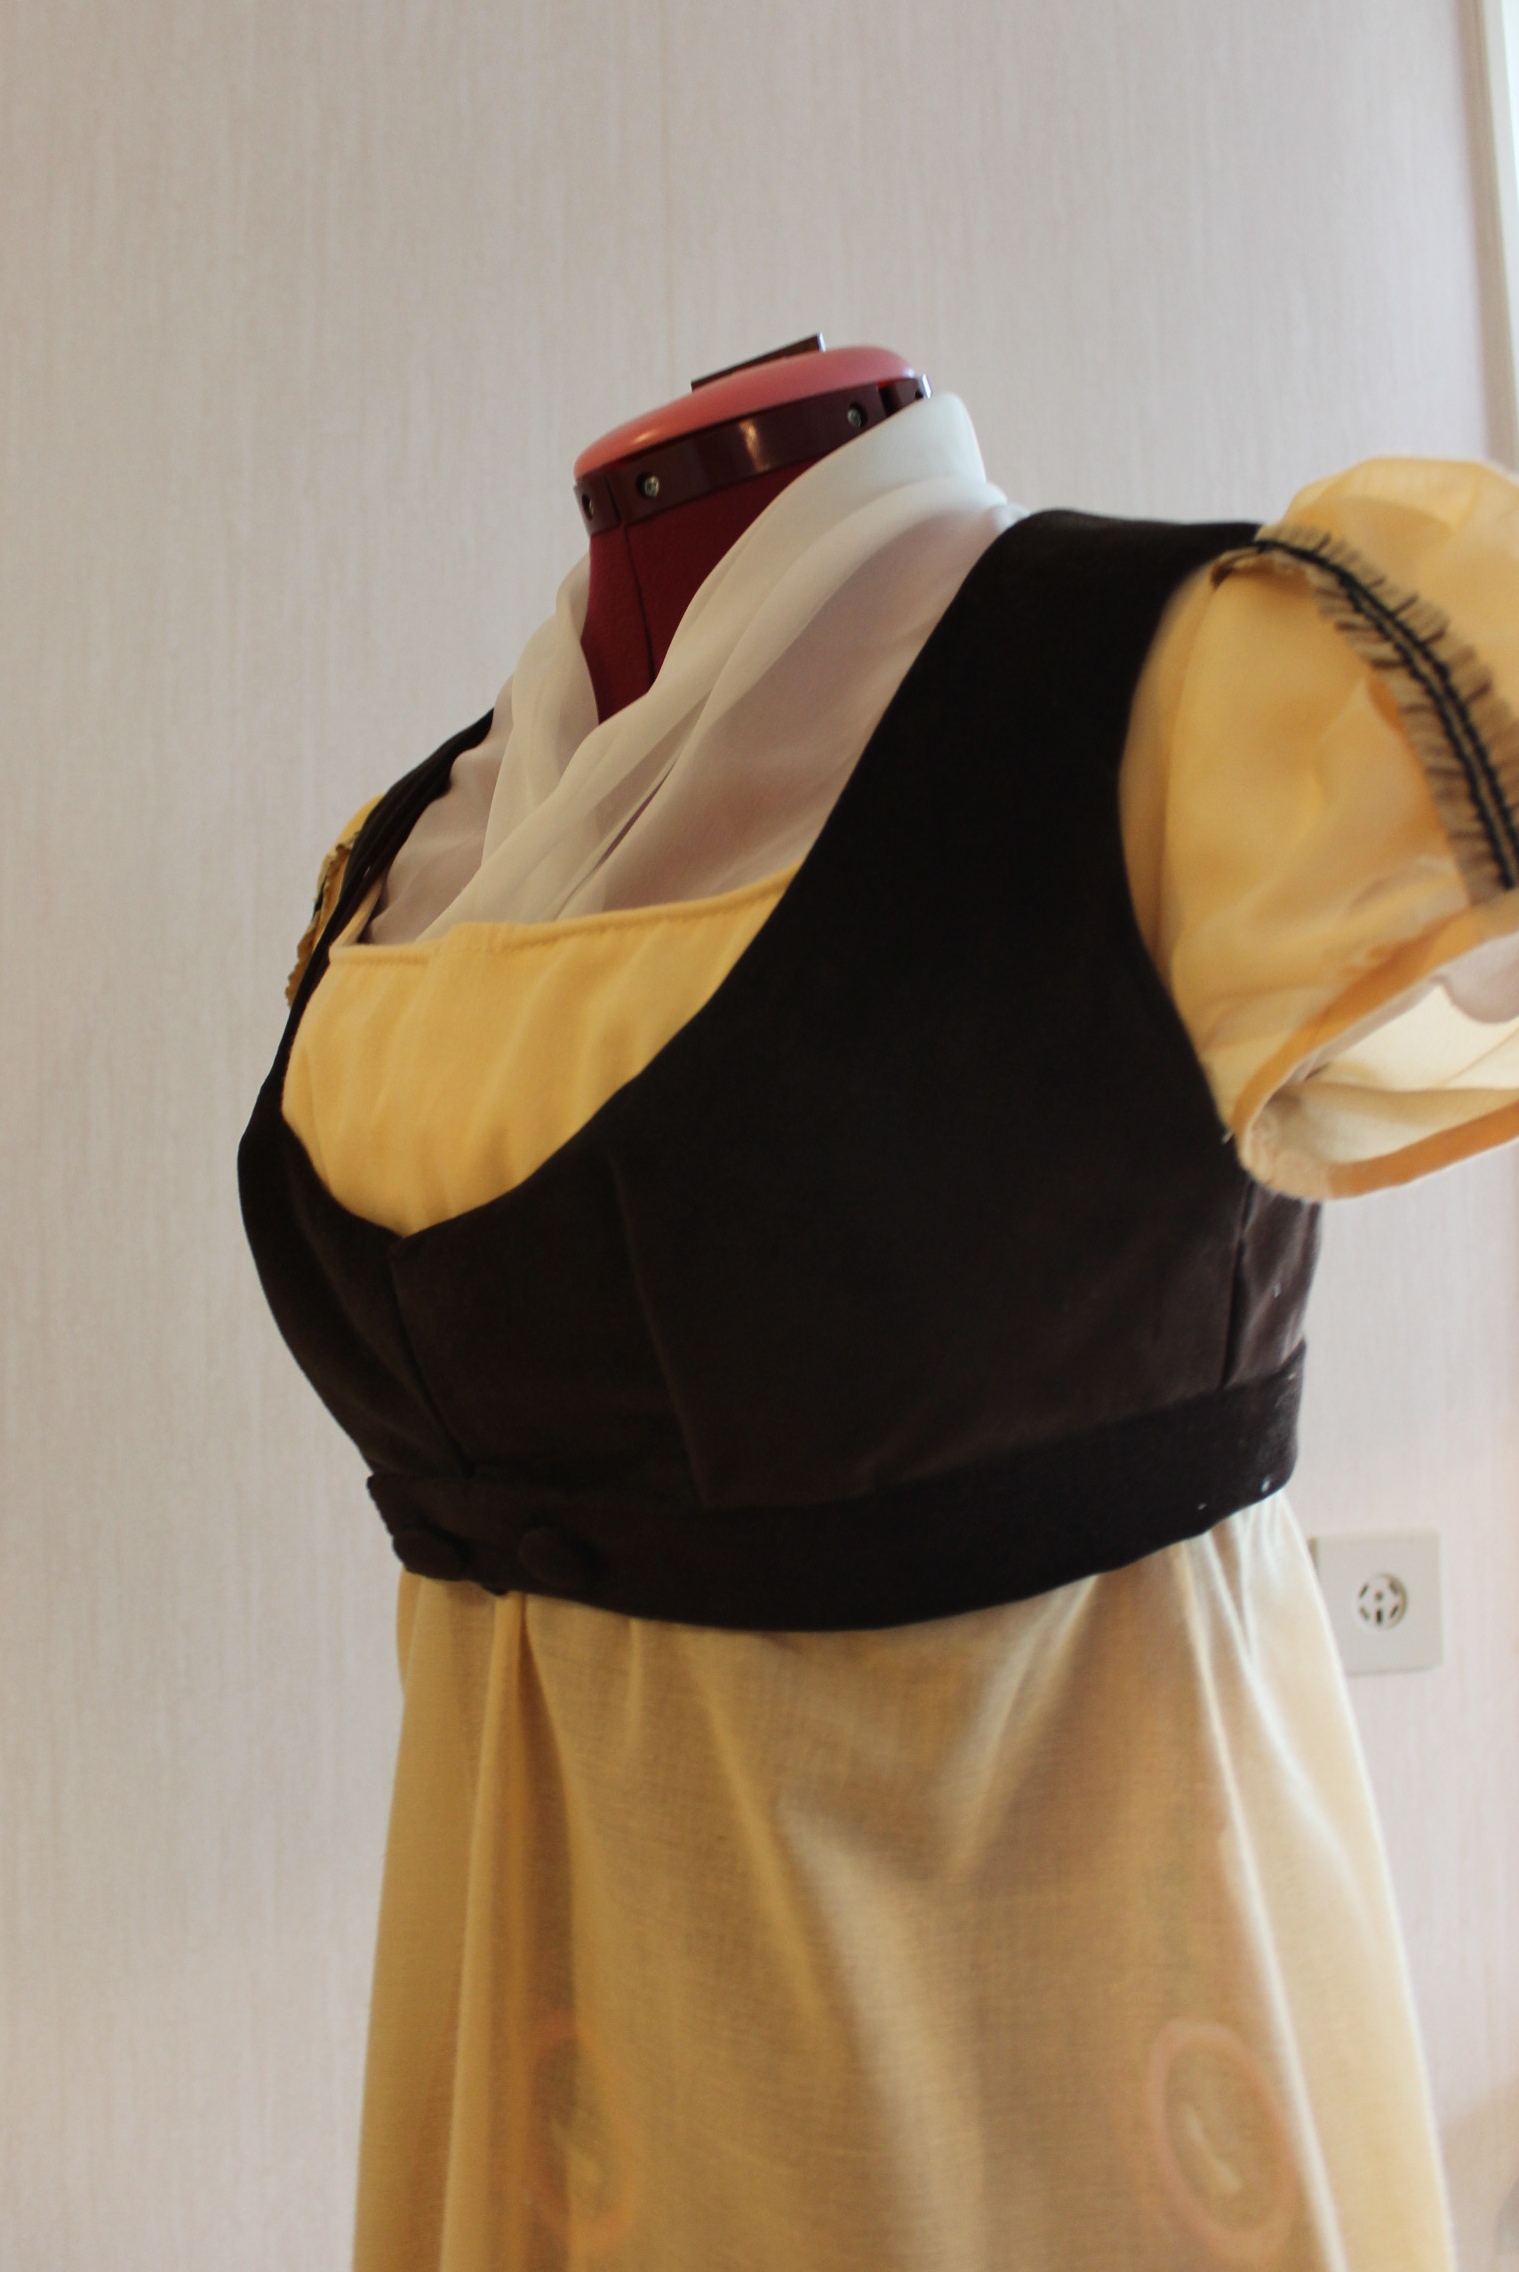
Final thoughts: I’m not happy with the bust. It looks rediculus and I have no idea how to fix it. Perhaps gathering will be my only alternative after all.
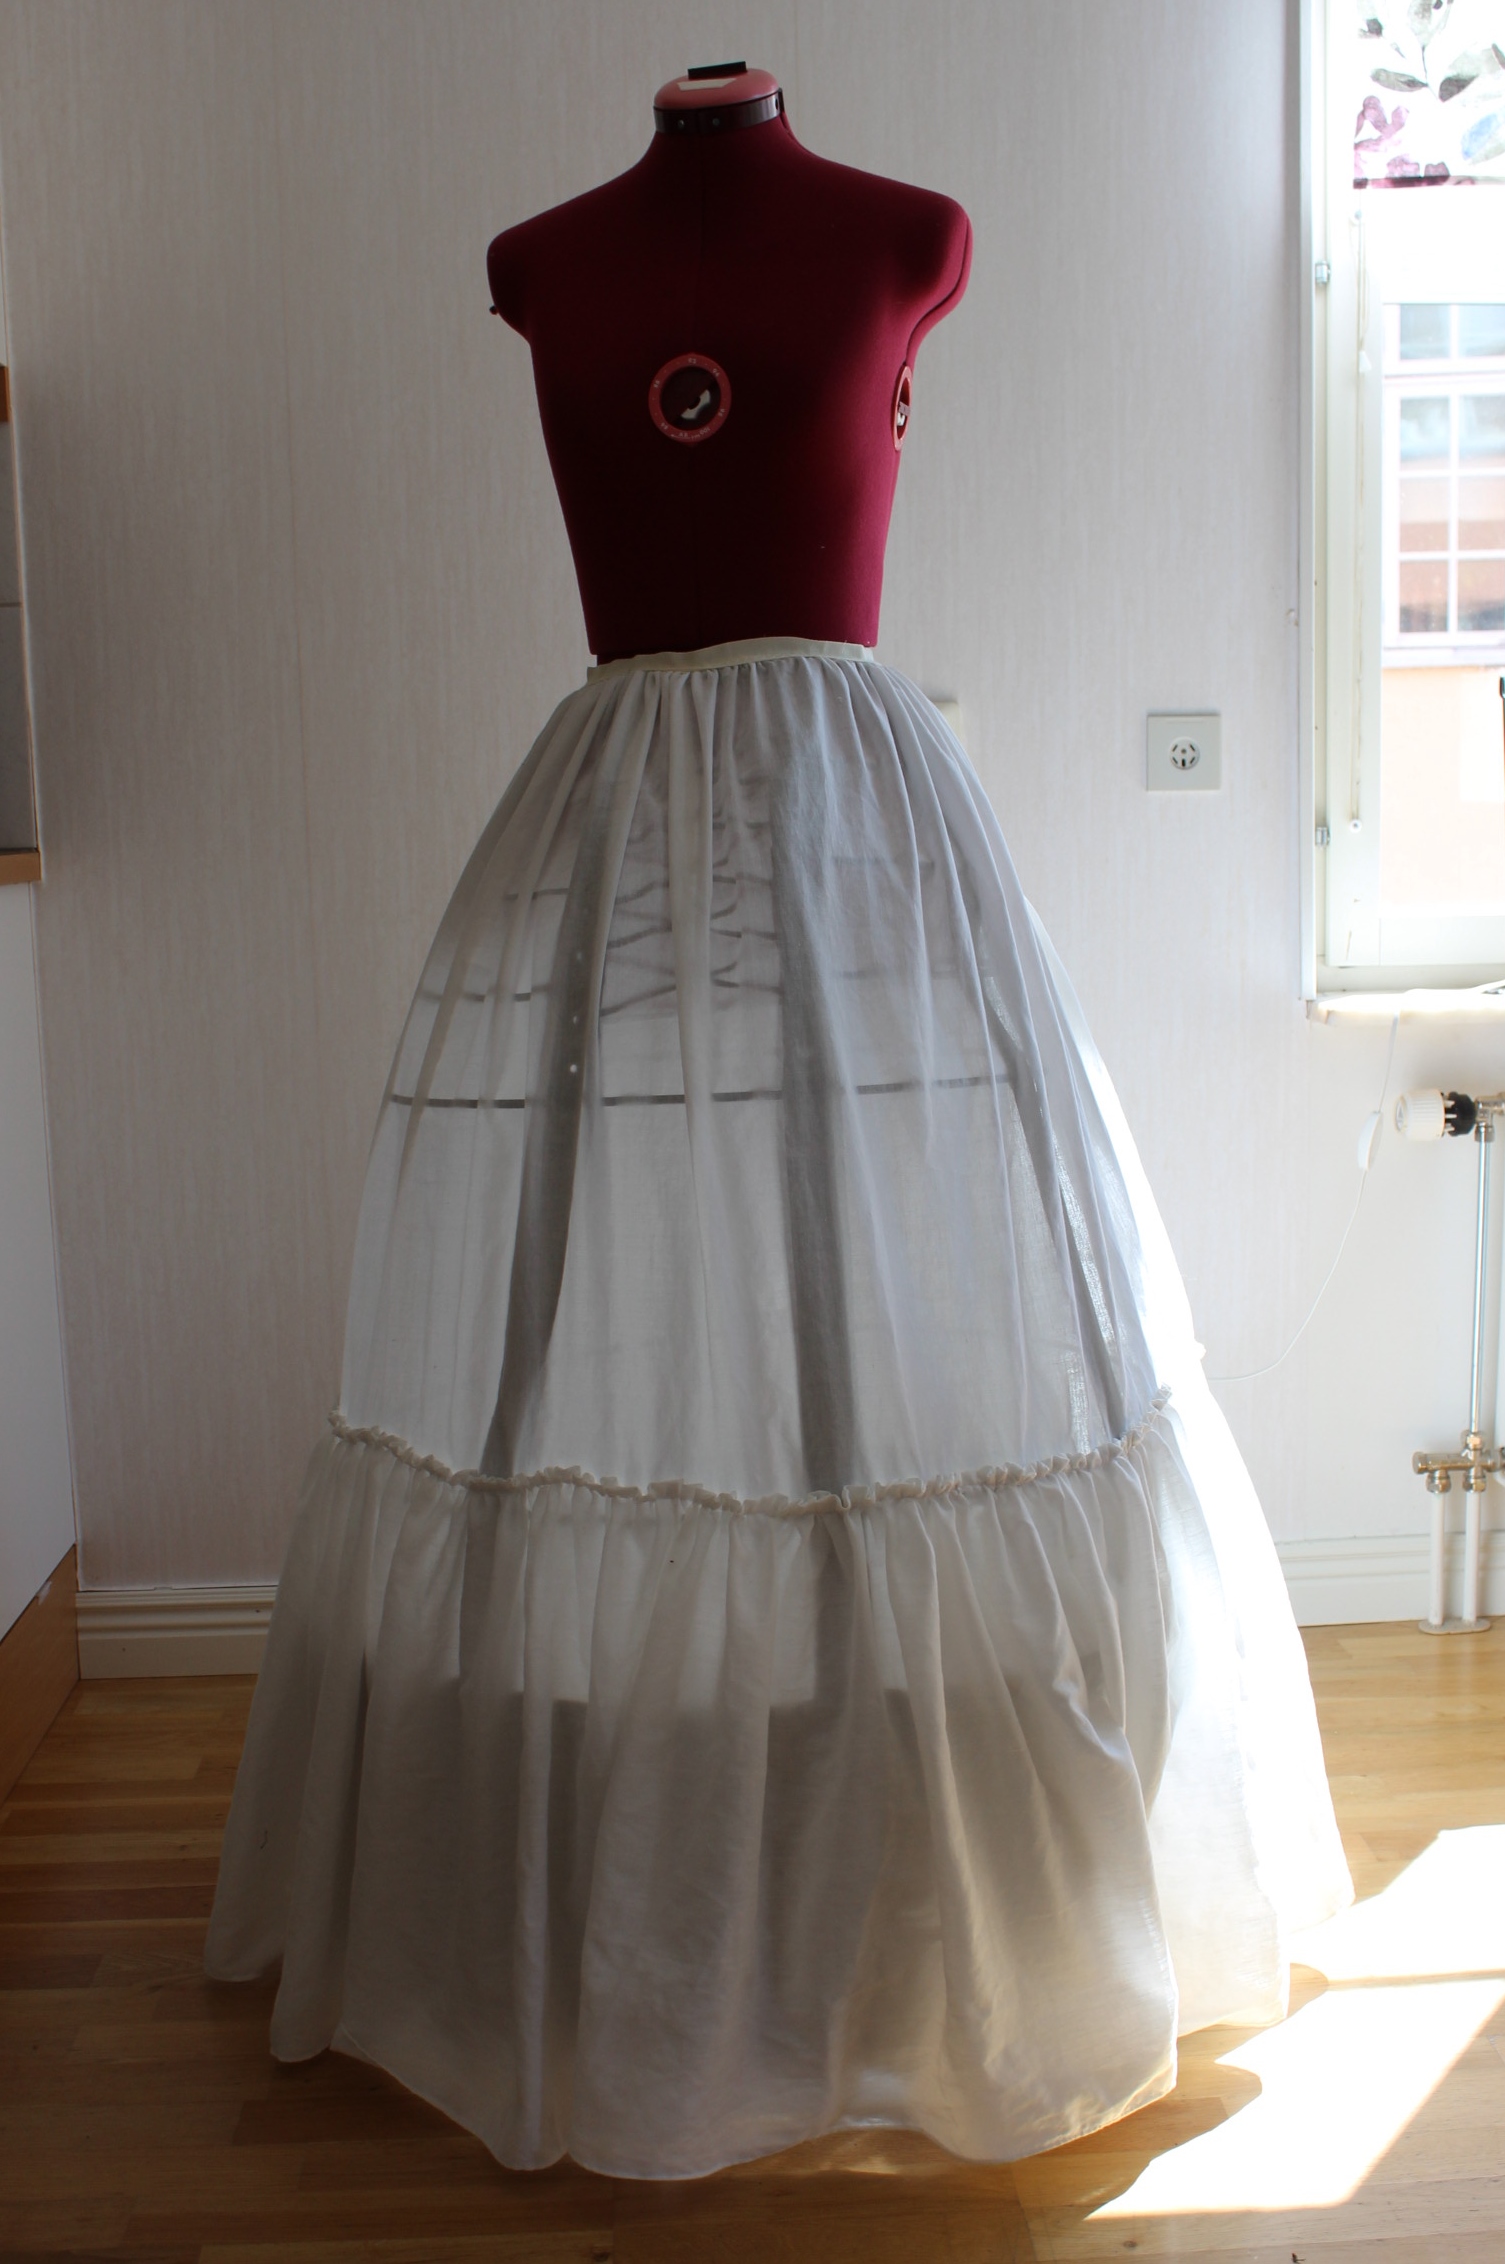
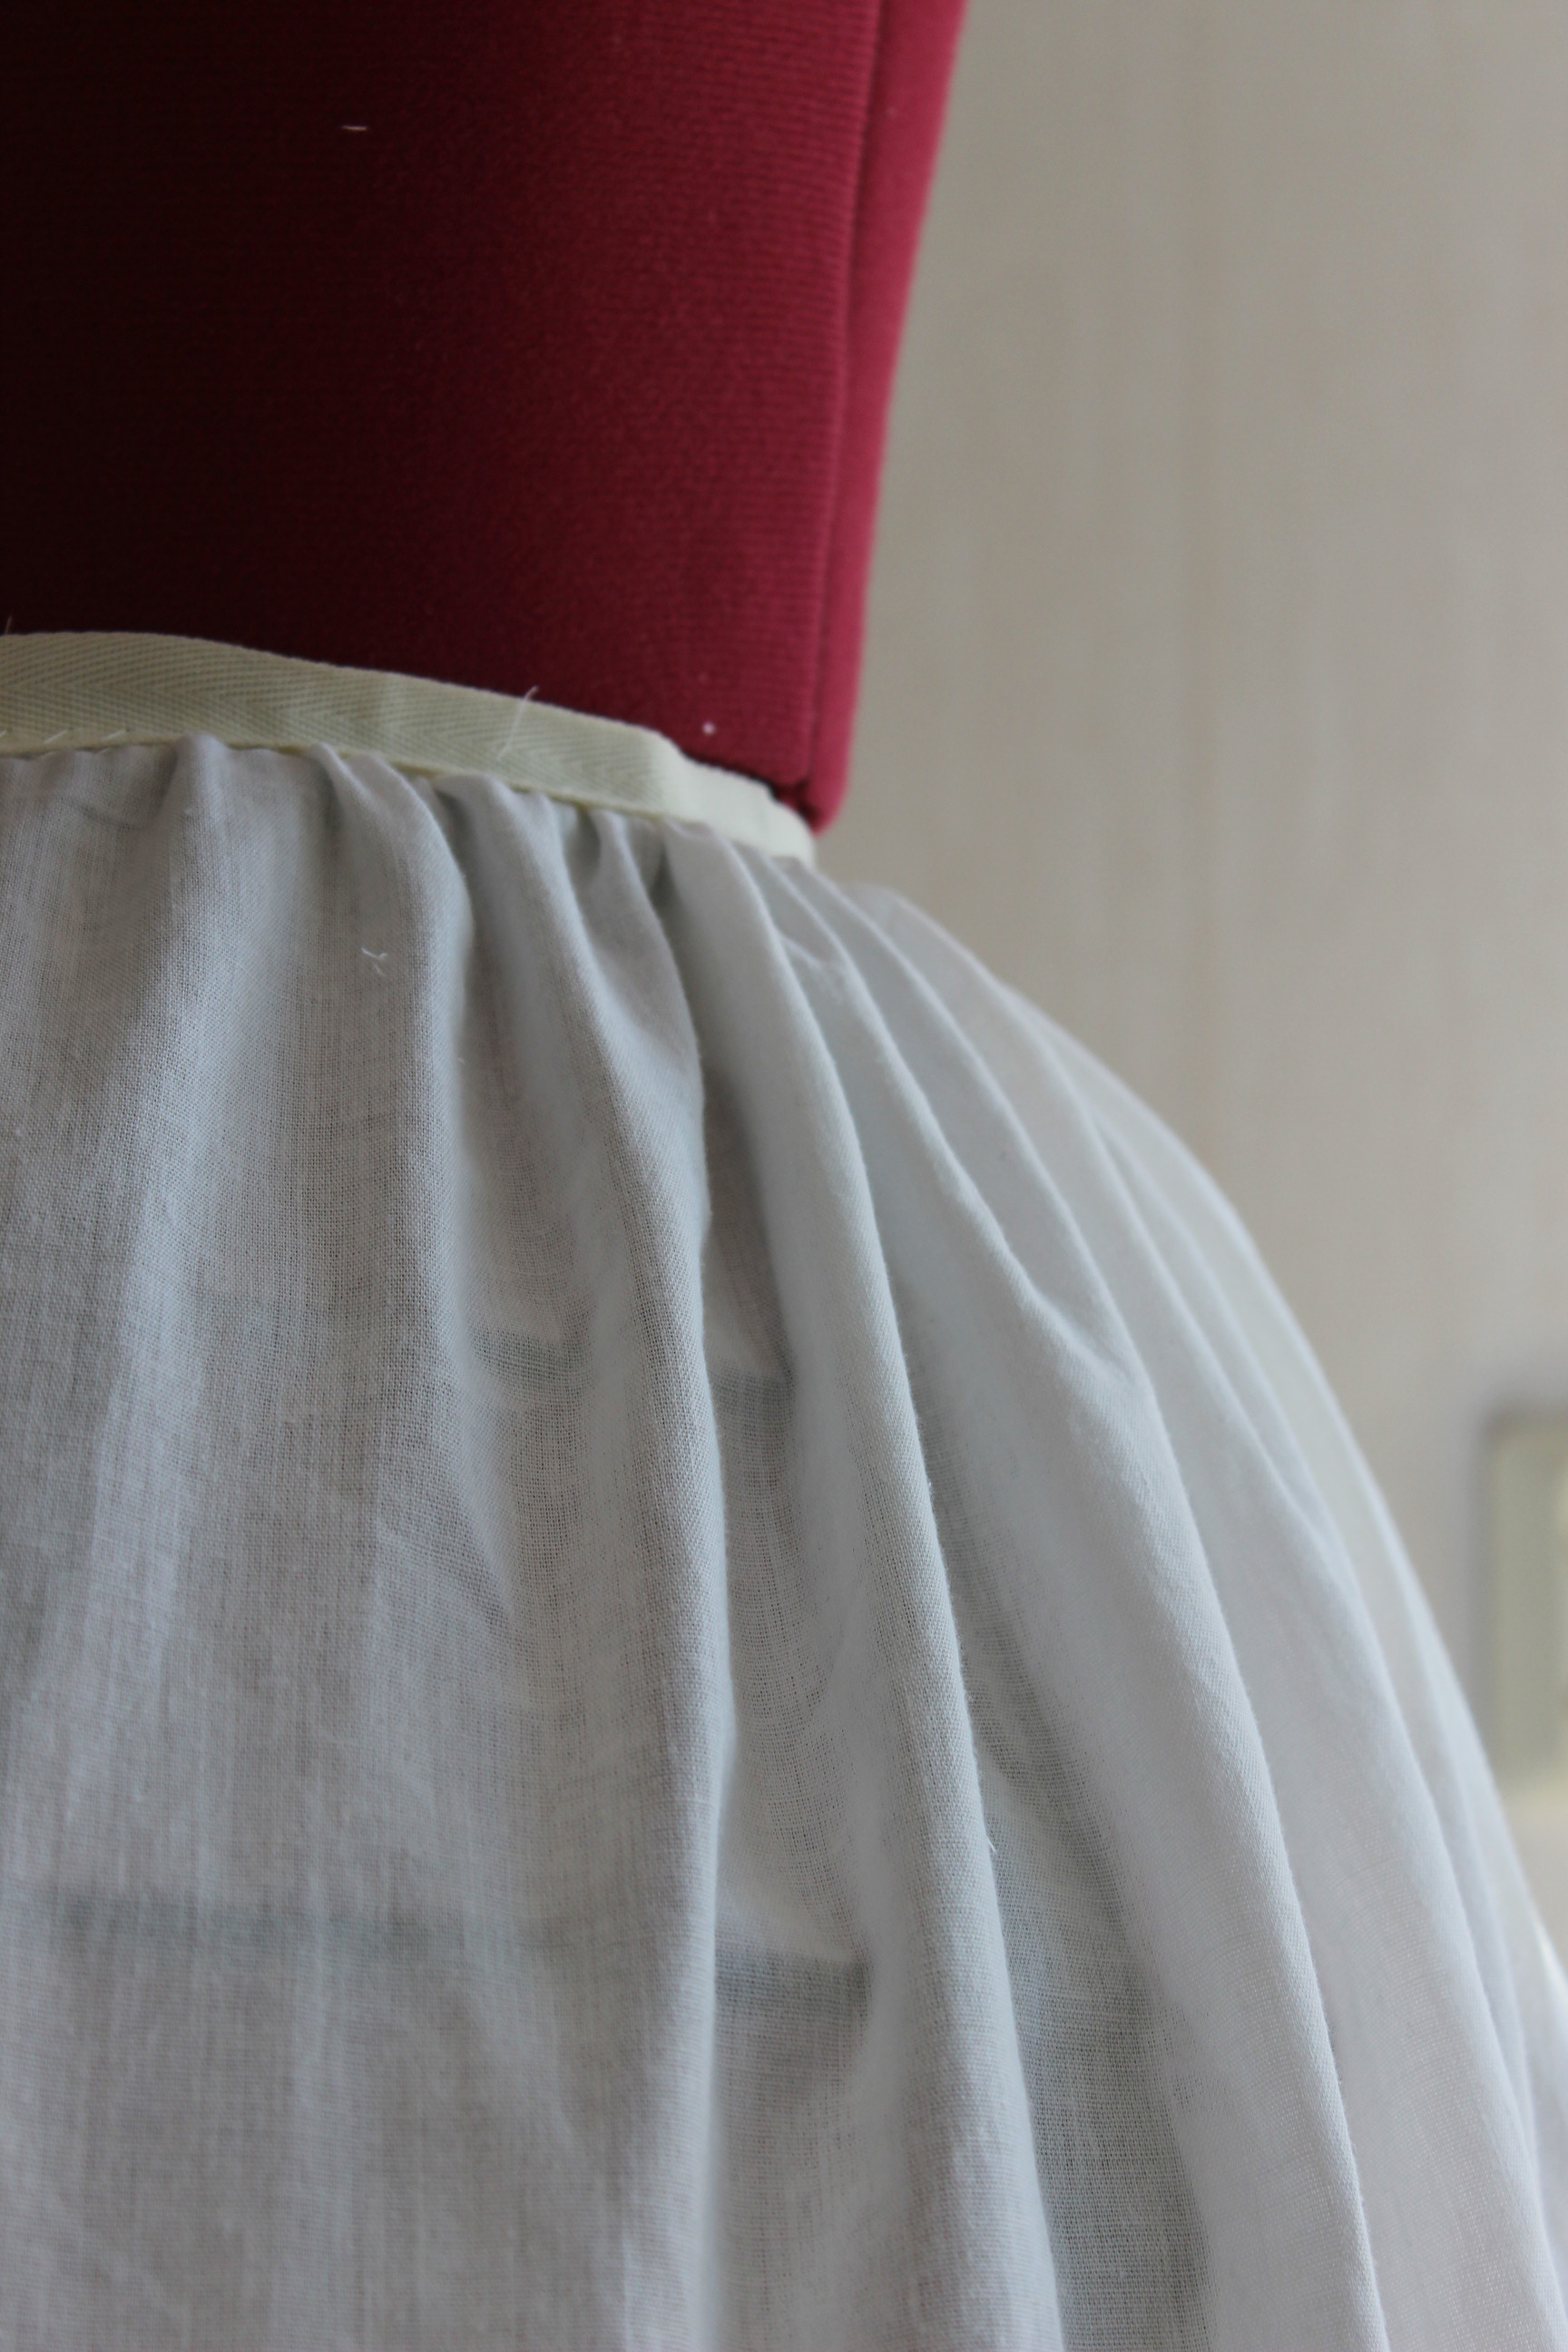
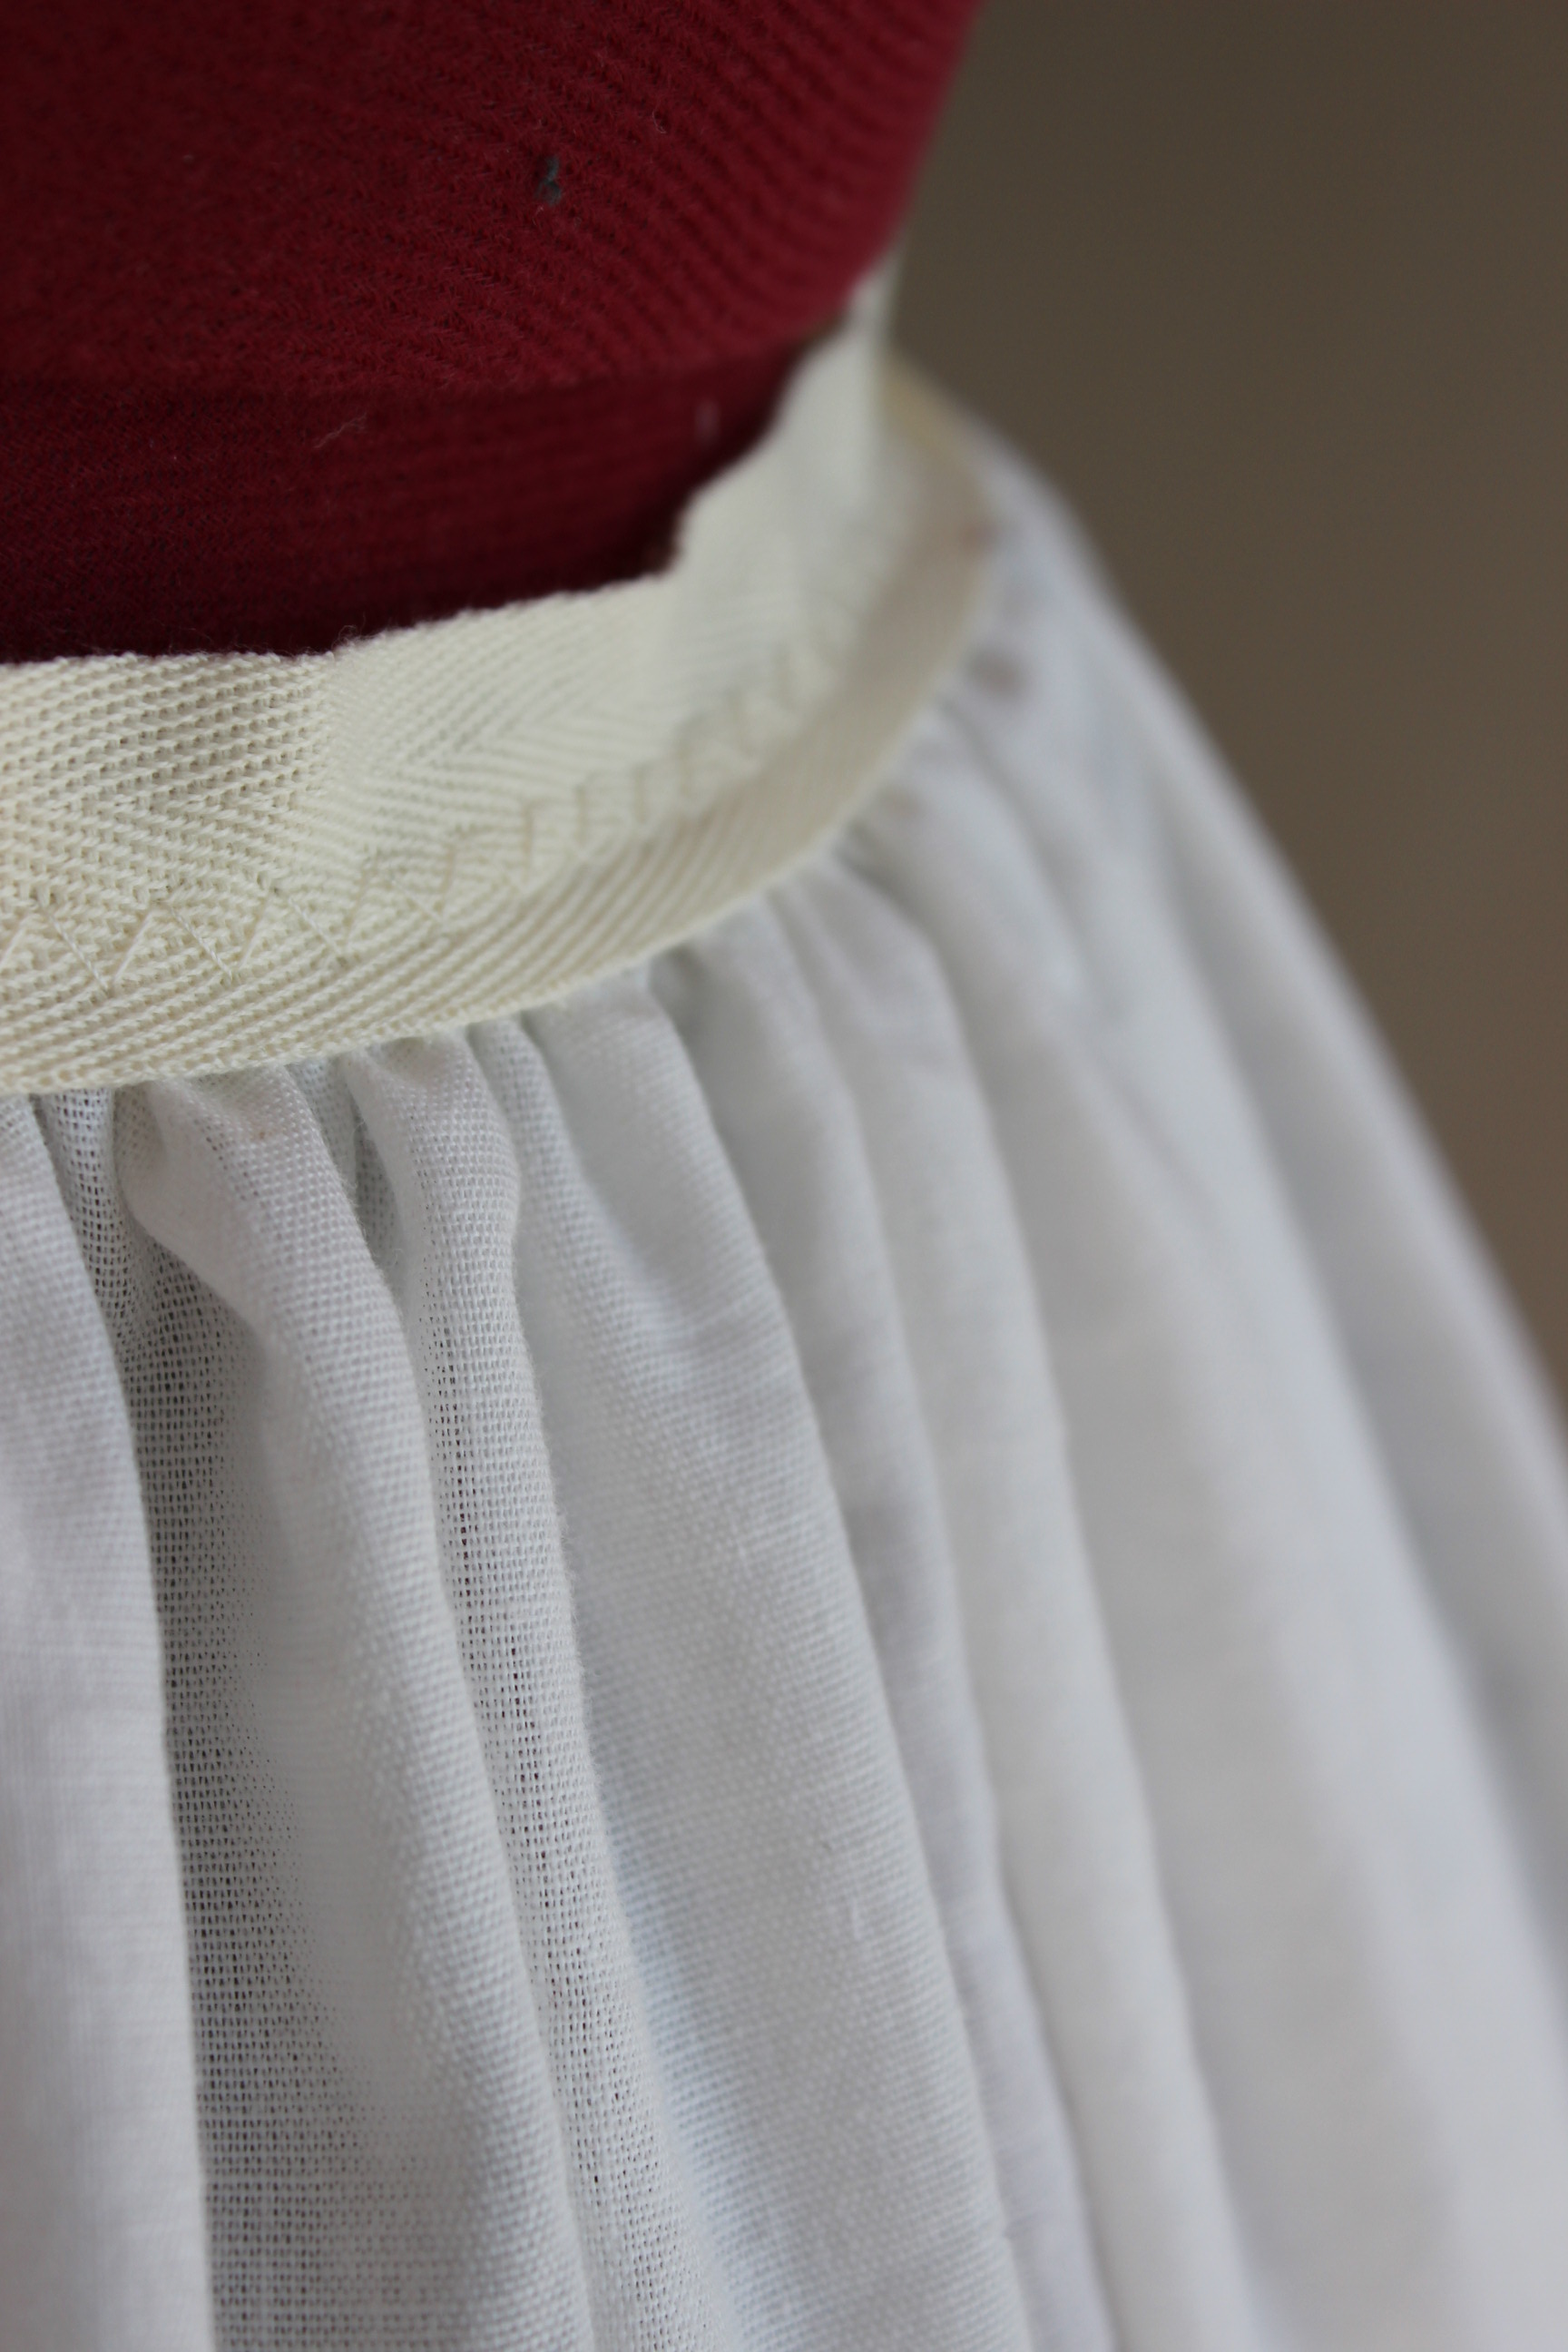
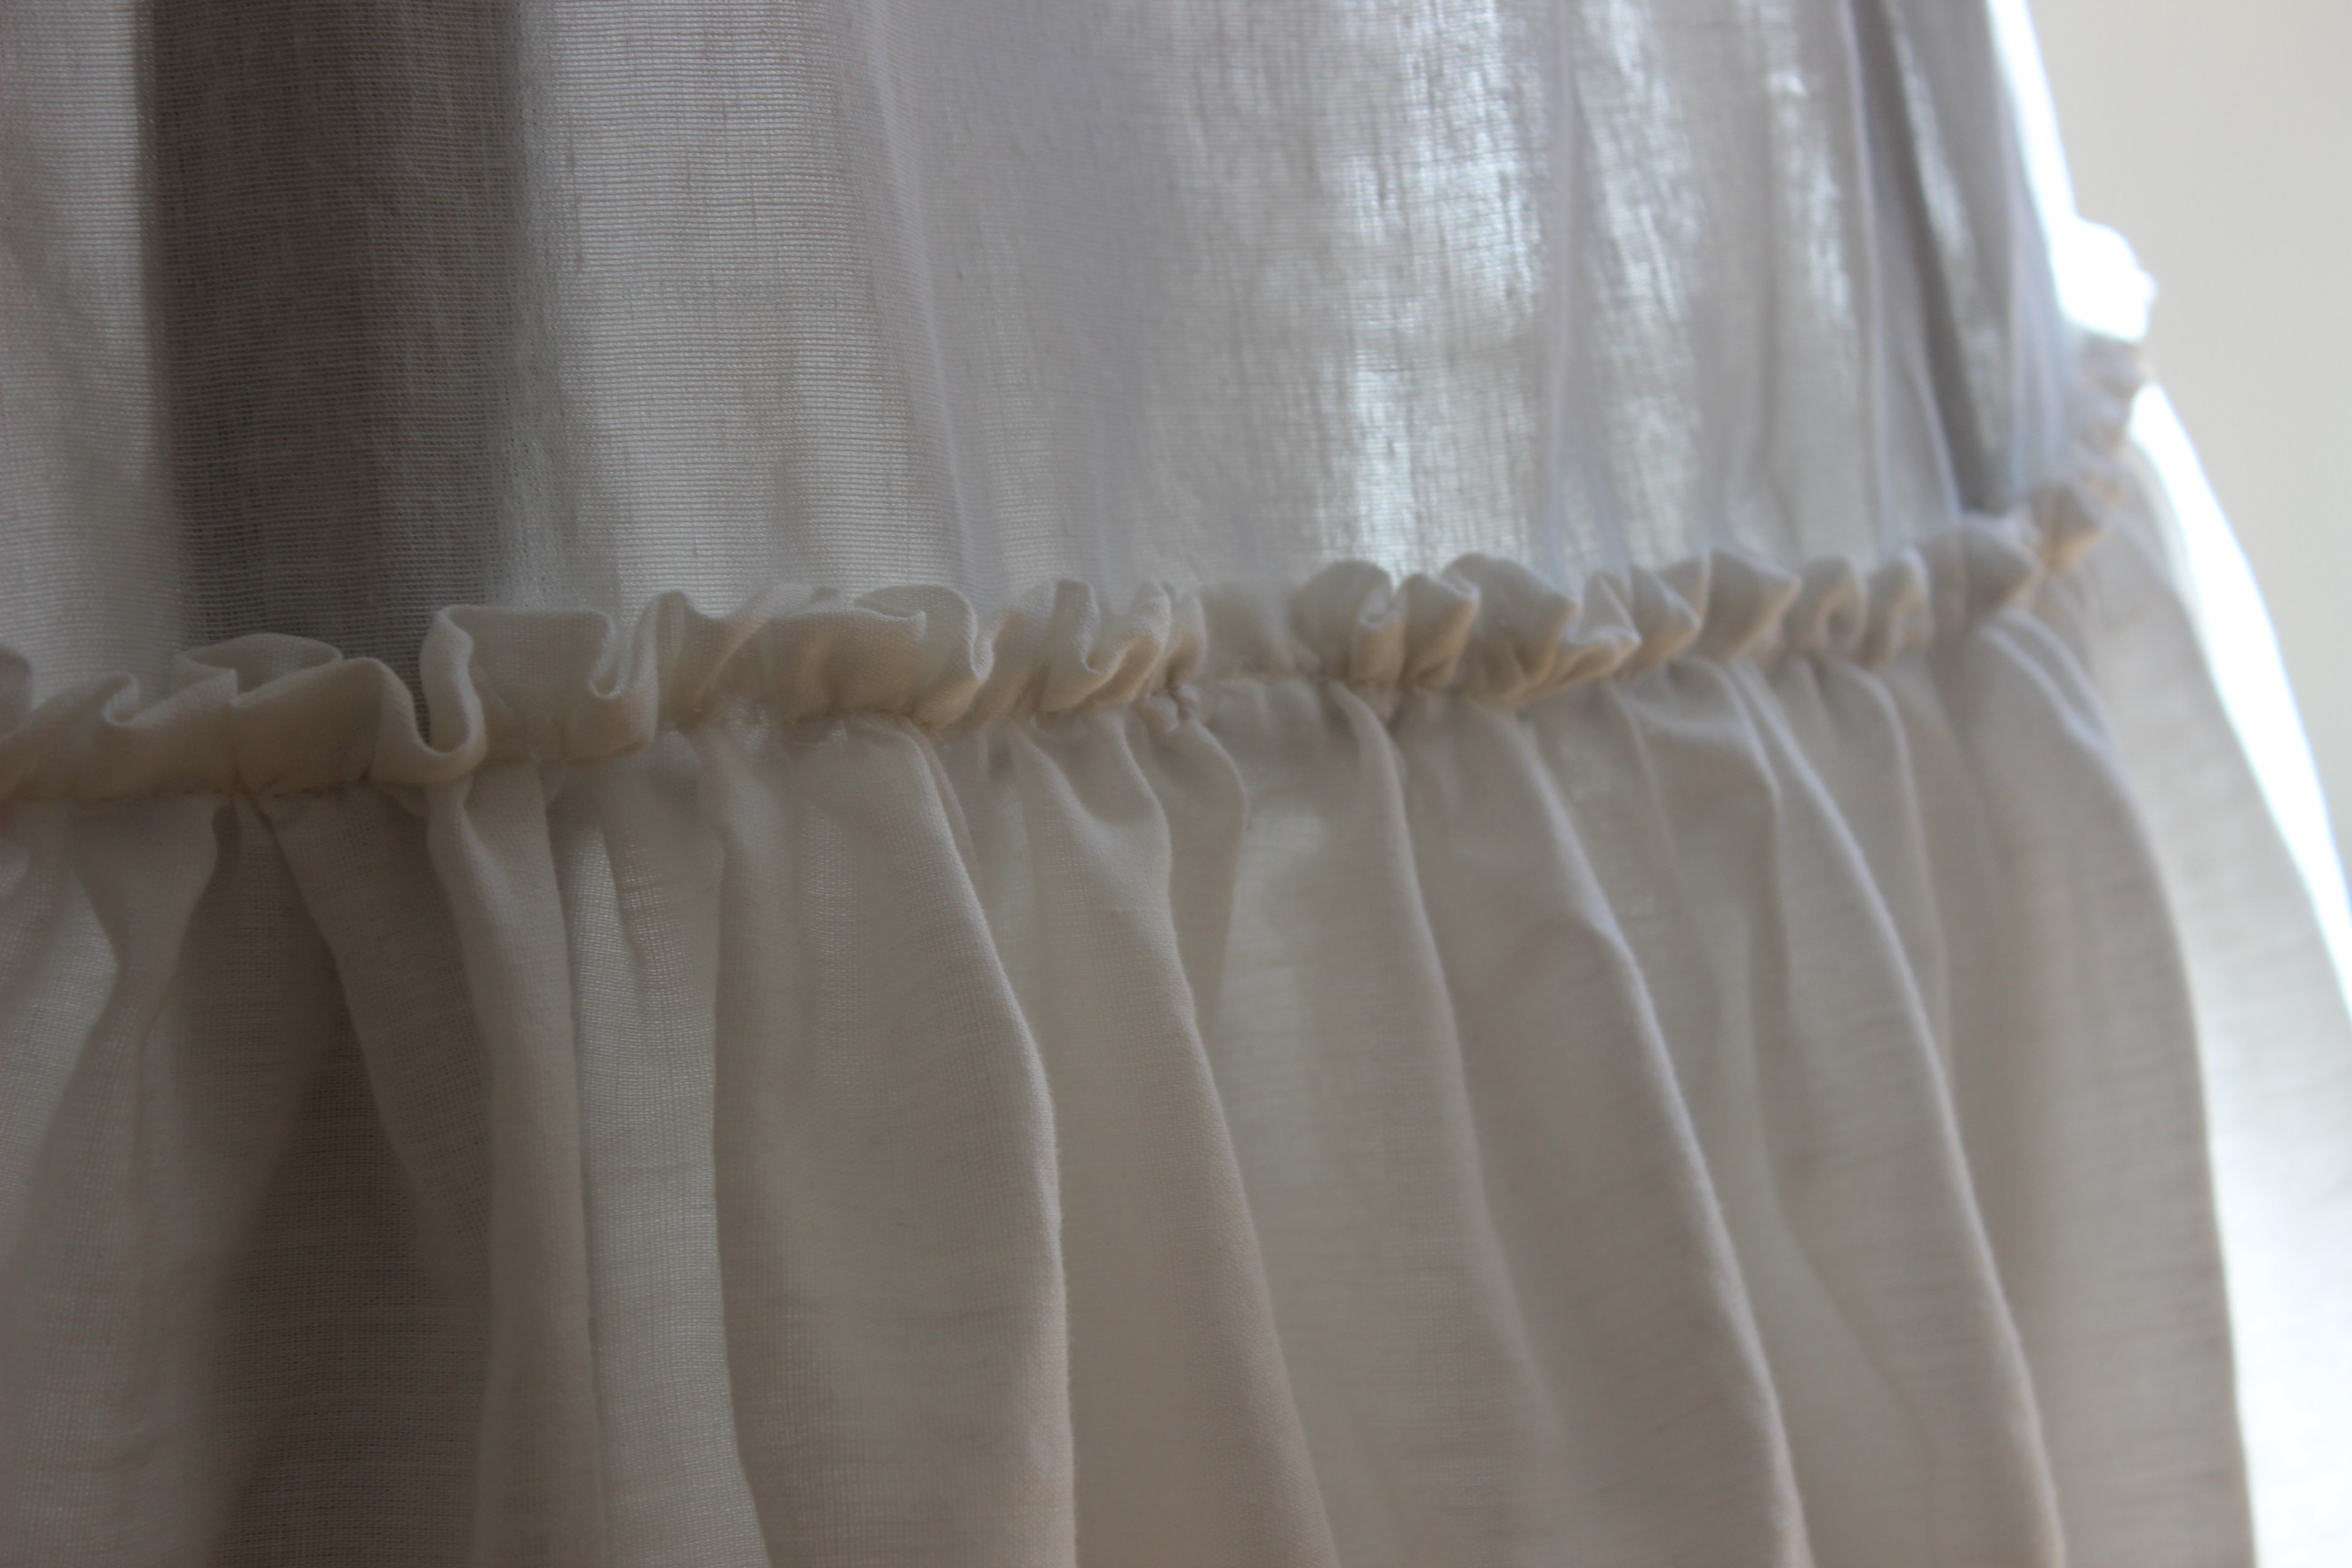
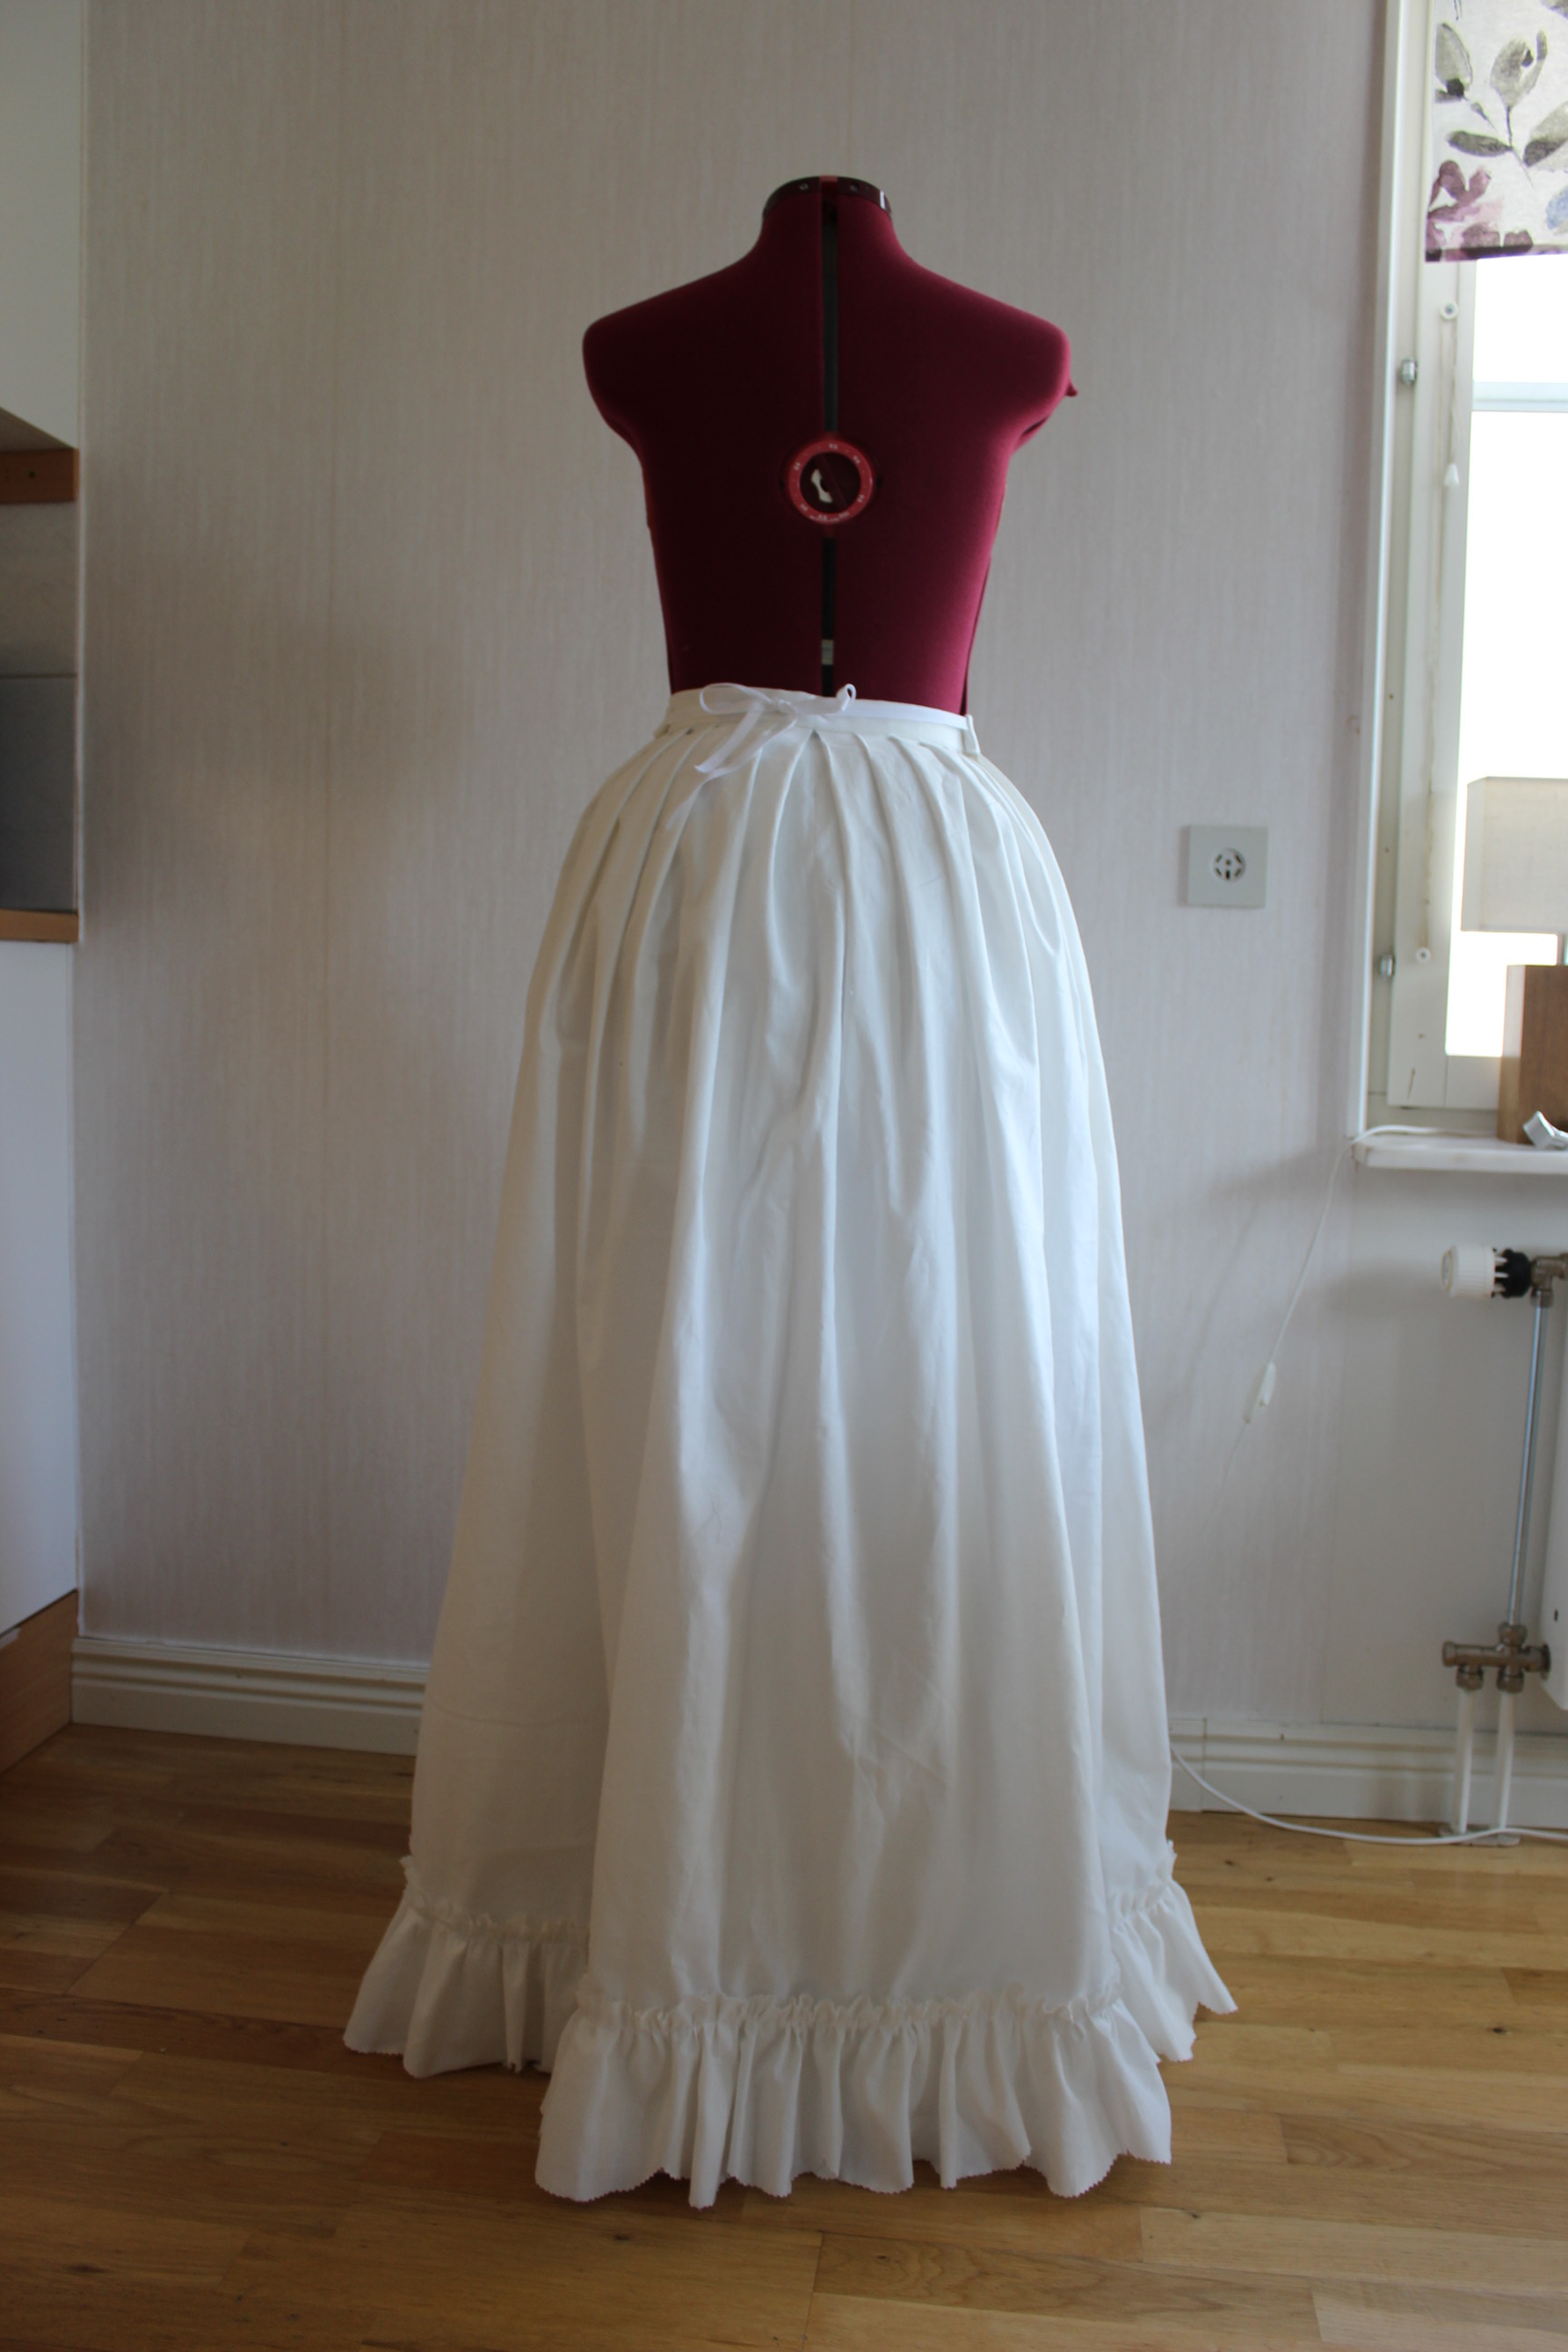
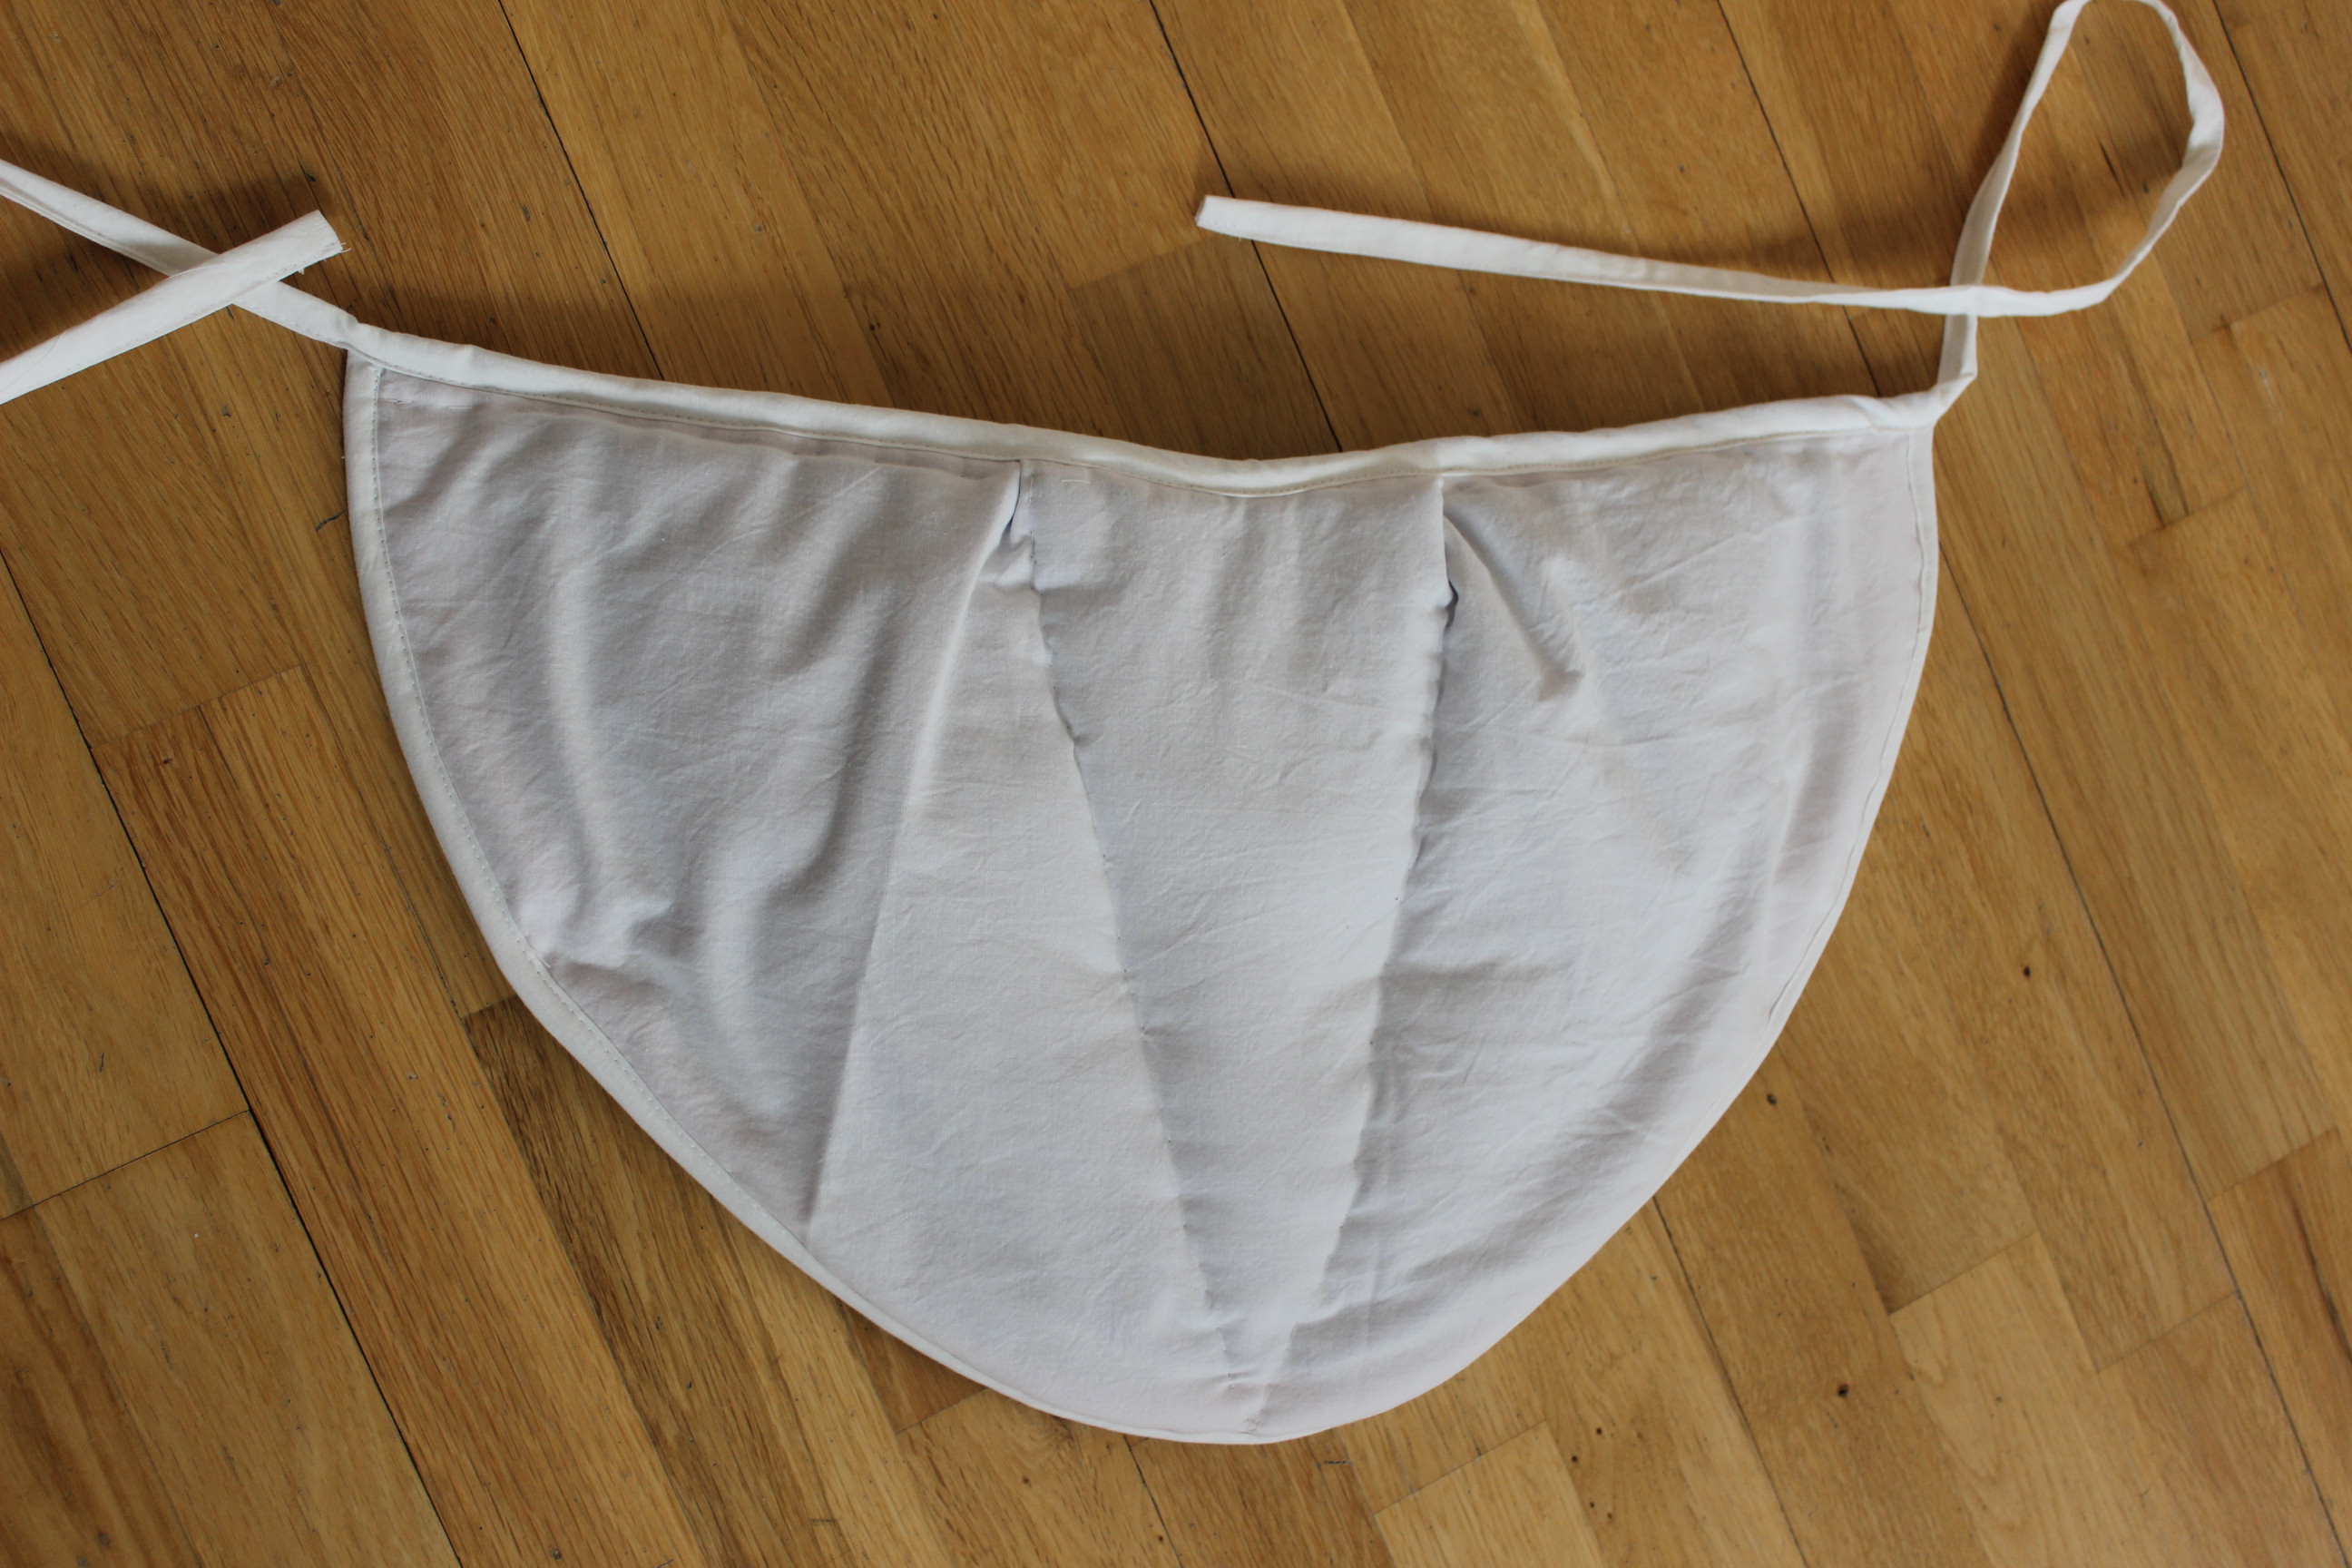
With the sewing steam already up and running there was no use to stop now. So I did a second entry to the HSF Challenge 13 – Under 10 Usd. I decided I needed a flounced pettiocat to wear over my new crinoline, and that was that.
I grabbed two cheap cotton/poyester blends sheets from the linnen cabit and got to work.
Using one as the base, and ripped the other one in four to create the flounce. I originaly planed to have three or at least two rows of flounces but I overestimated how much fabric whent into even one of those poppies.
Full speed ahead as I where I also forgot to take progress pics, but the construction was really simple. Just used straight pieces, sewed them togeter and gathered the waist. Popped on a hook and eye for clouser and that was that..


Pic from the photoshoot: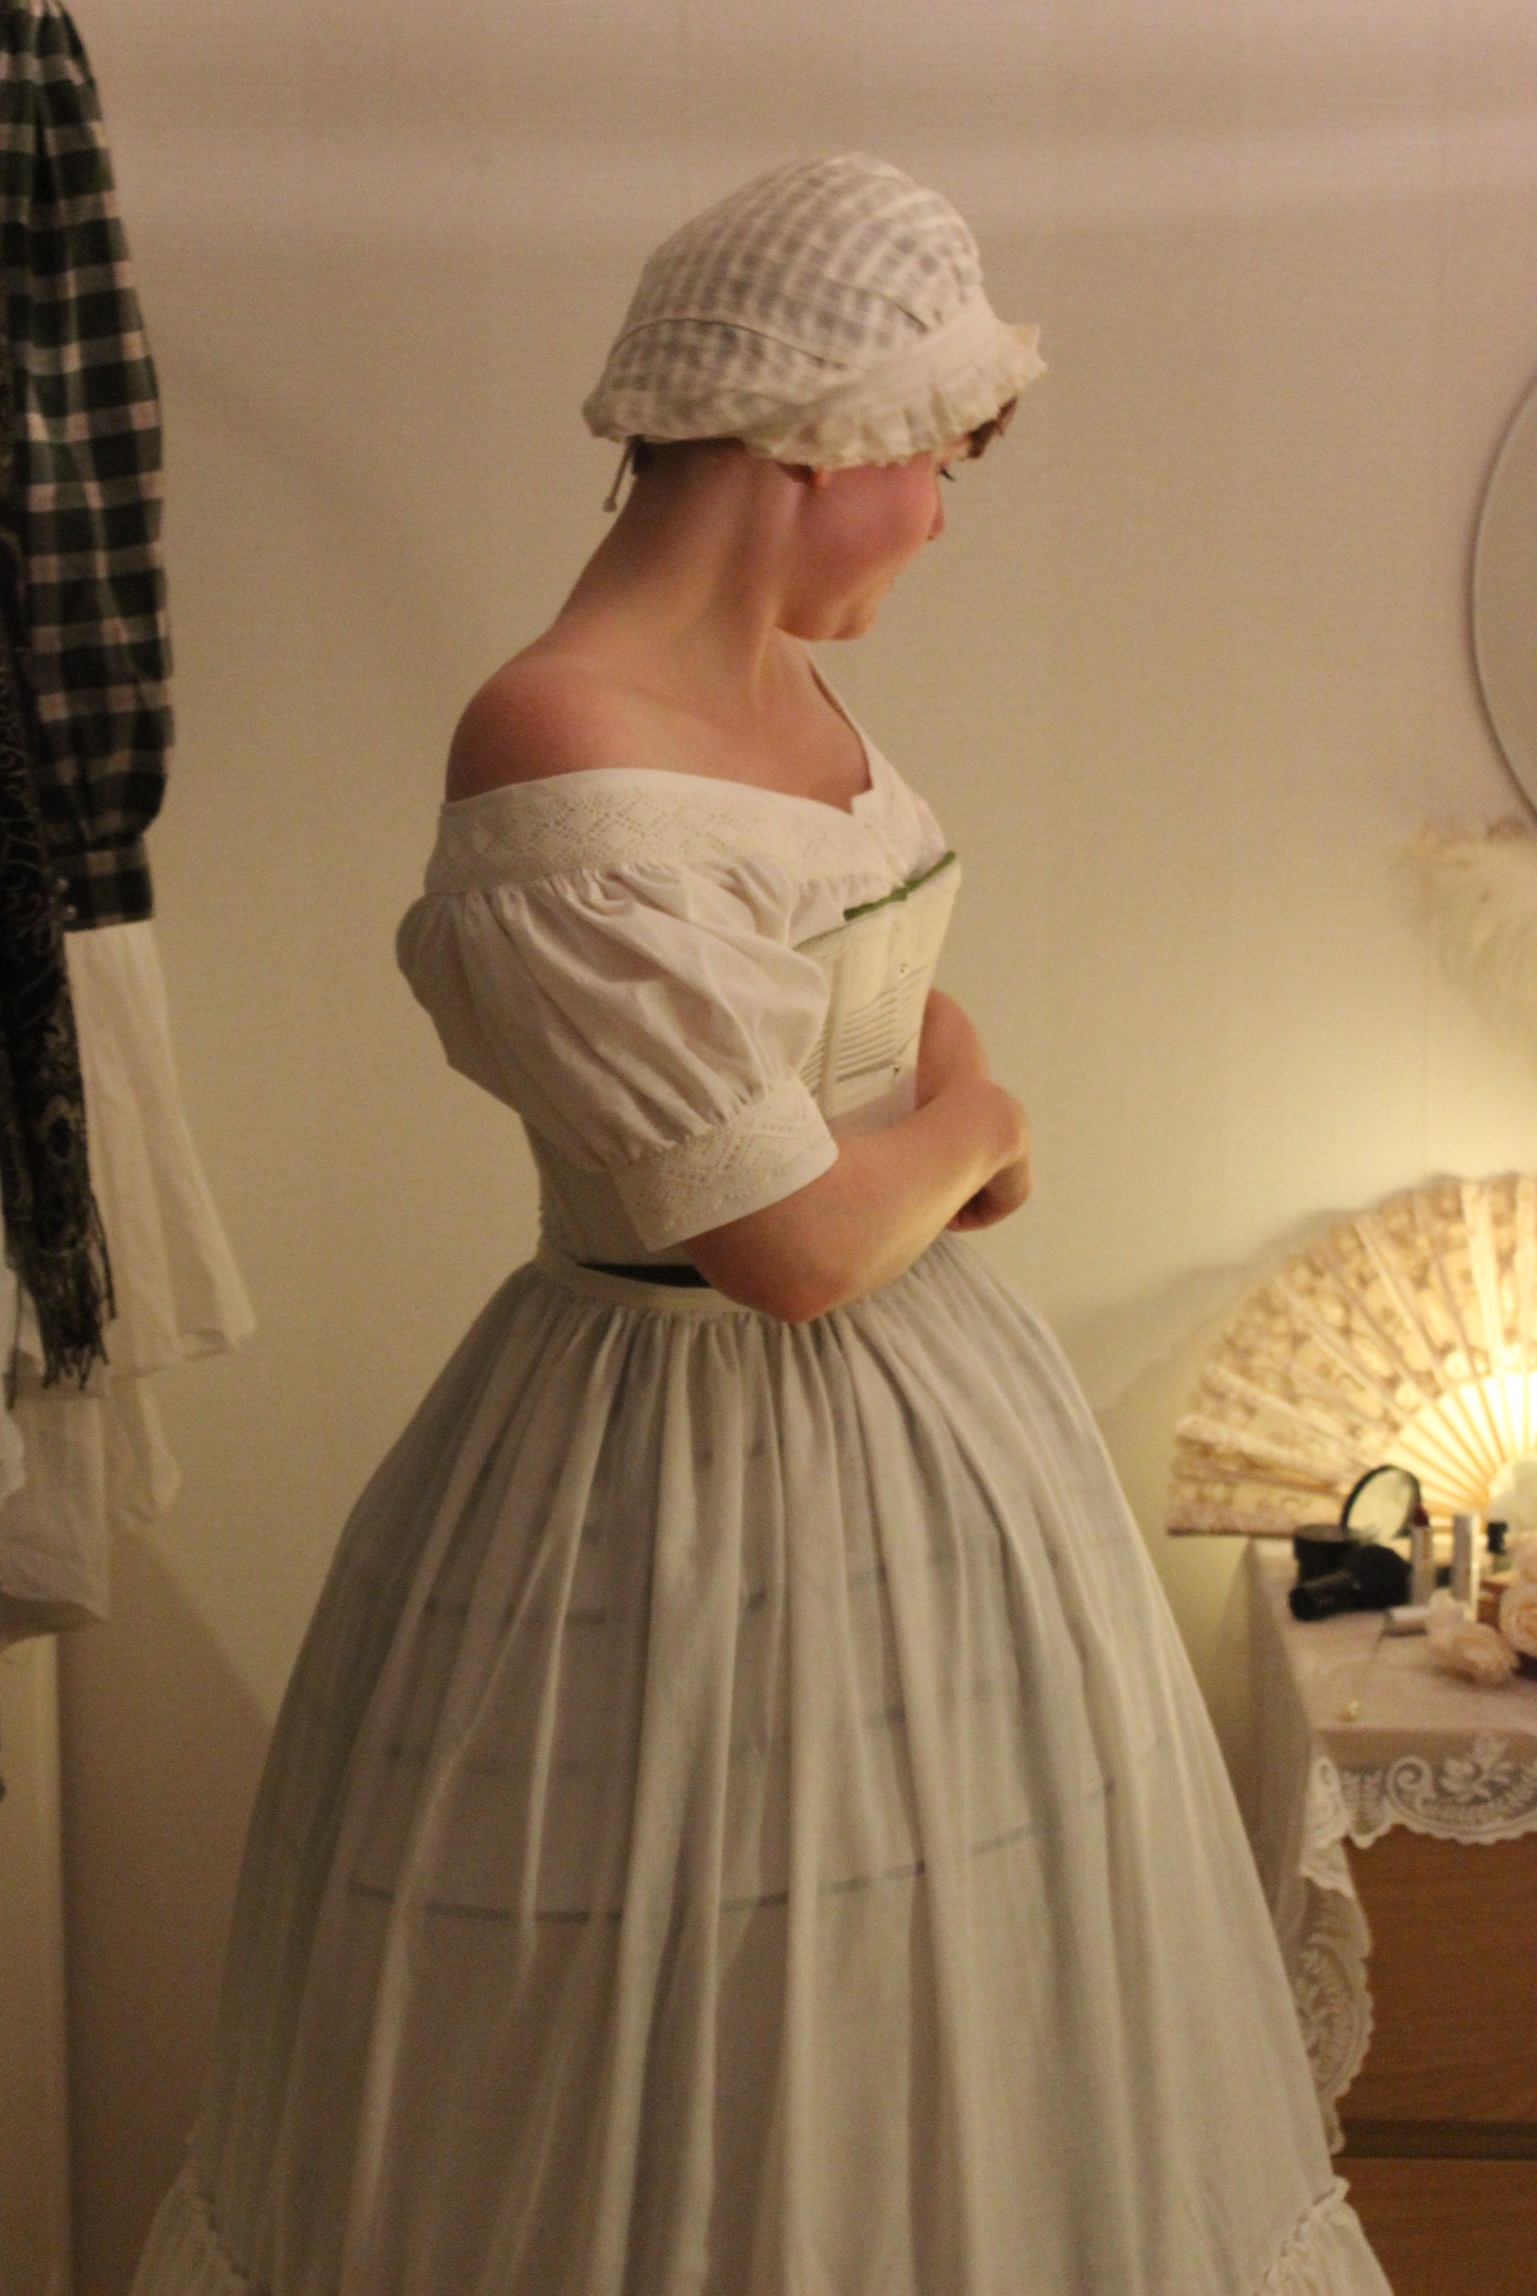
Just the facts:
Challenge: 13 – Under 10 Usd
What: a 1850s petticoat.
Pattern: None, just cut stripes and sewed.
Fabric: 2 cotton bed sheets.
Notions: Thread, 80 cm of twill tape, hook and eye.
How historical accurate: Exept for the use of sewing machine I think the accuracy is pretty good. The fabric, method and shape are all about right. 7/10
Time: 2 hours.
Cost: 65 Sek (10 Usd)
First worn: Around the house for photos.
Final thoughts: I wished I had had some more fabric to make two more rows of ruffels from, but then it would have been to exensive and wouldn’t have fitted the challenge. Anyhow I think it looks pretty good and works just fine.
As I had my sewing steam up from the crinoline and bustle challenge, I decided to push on and start on the next HSF challenge as well. I had no previous plan for the nr 13. Under 10 Usd. When setting the sewing/HSF schedule for this year I figured it depended on what I was in the mood/need for at the moment.
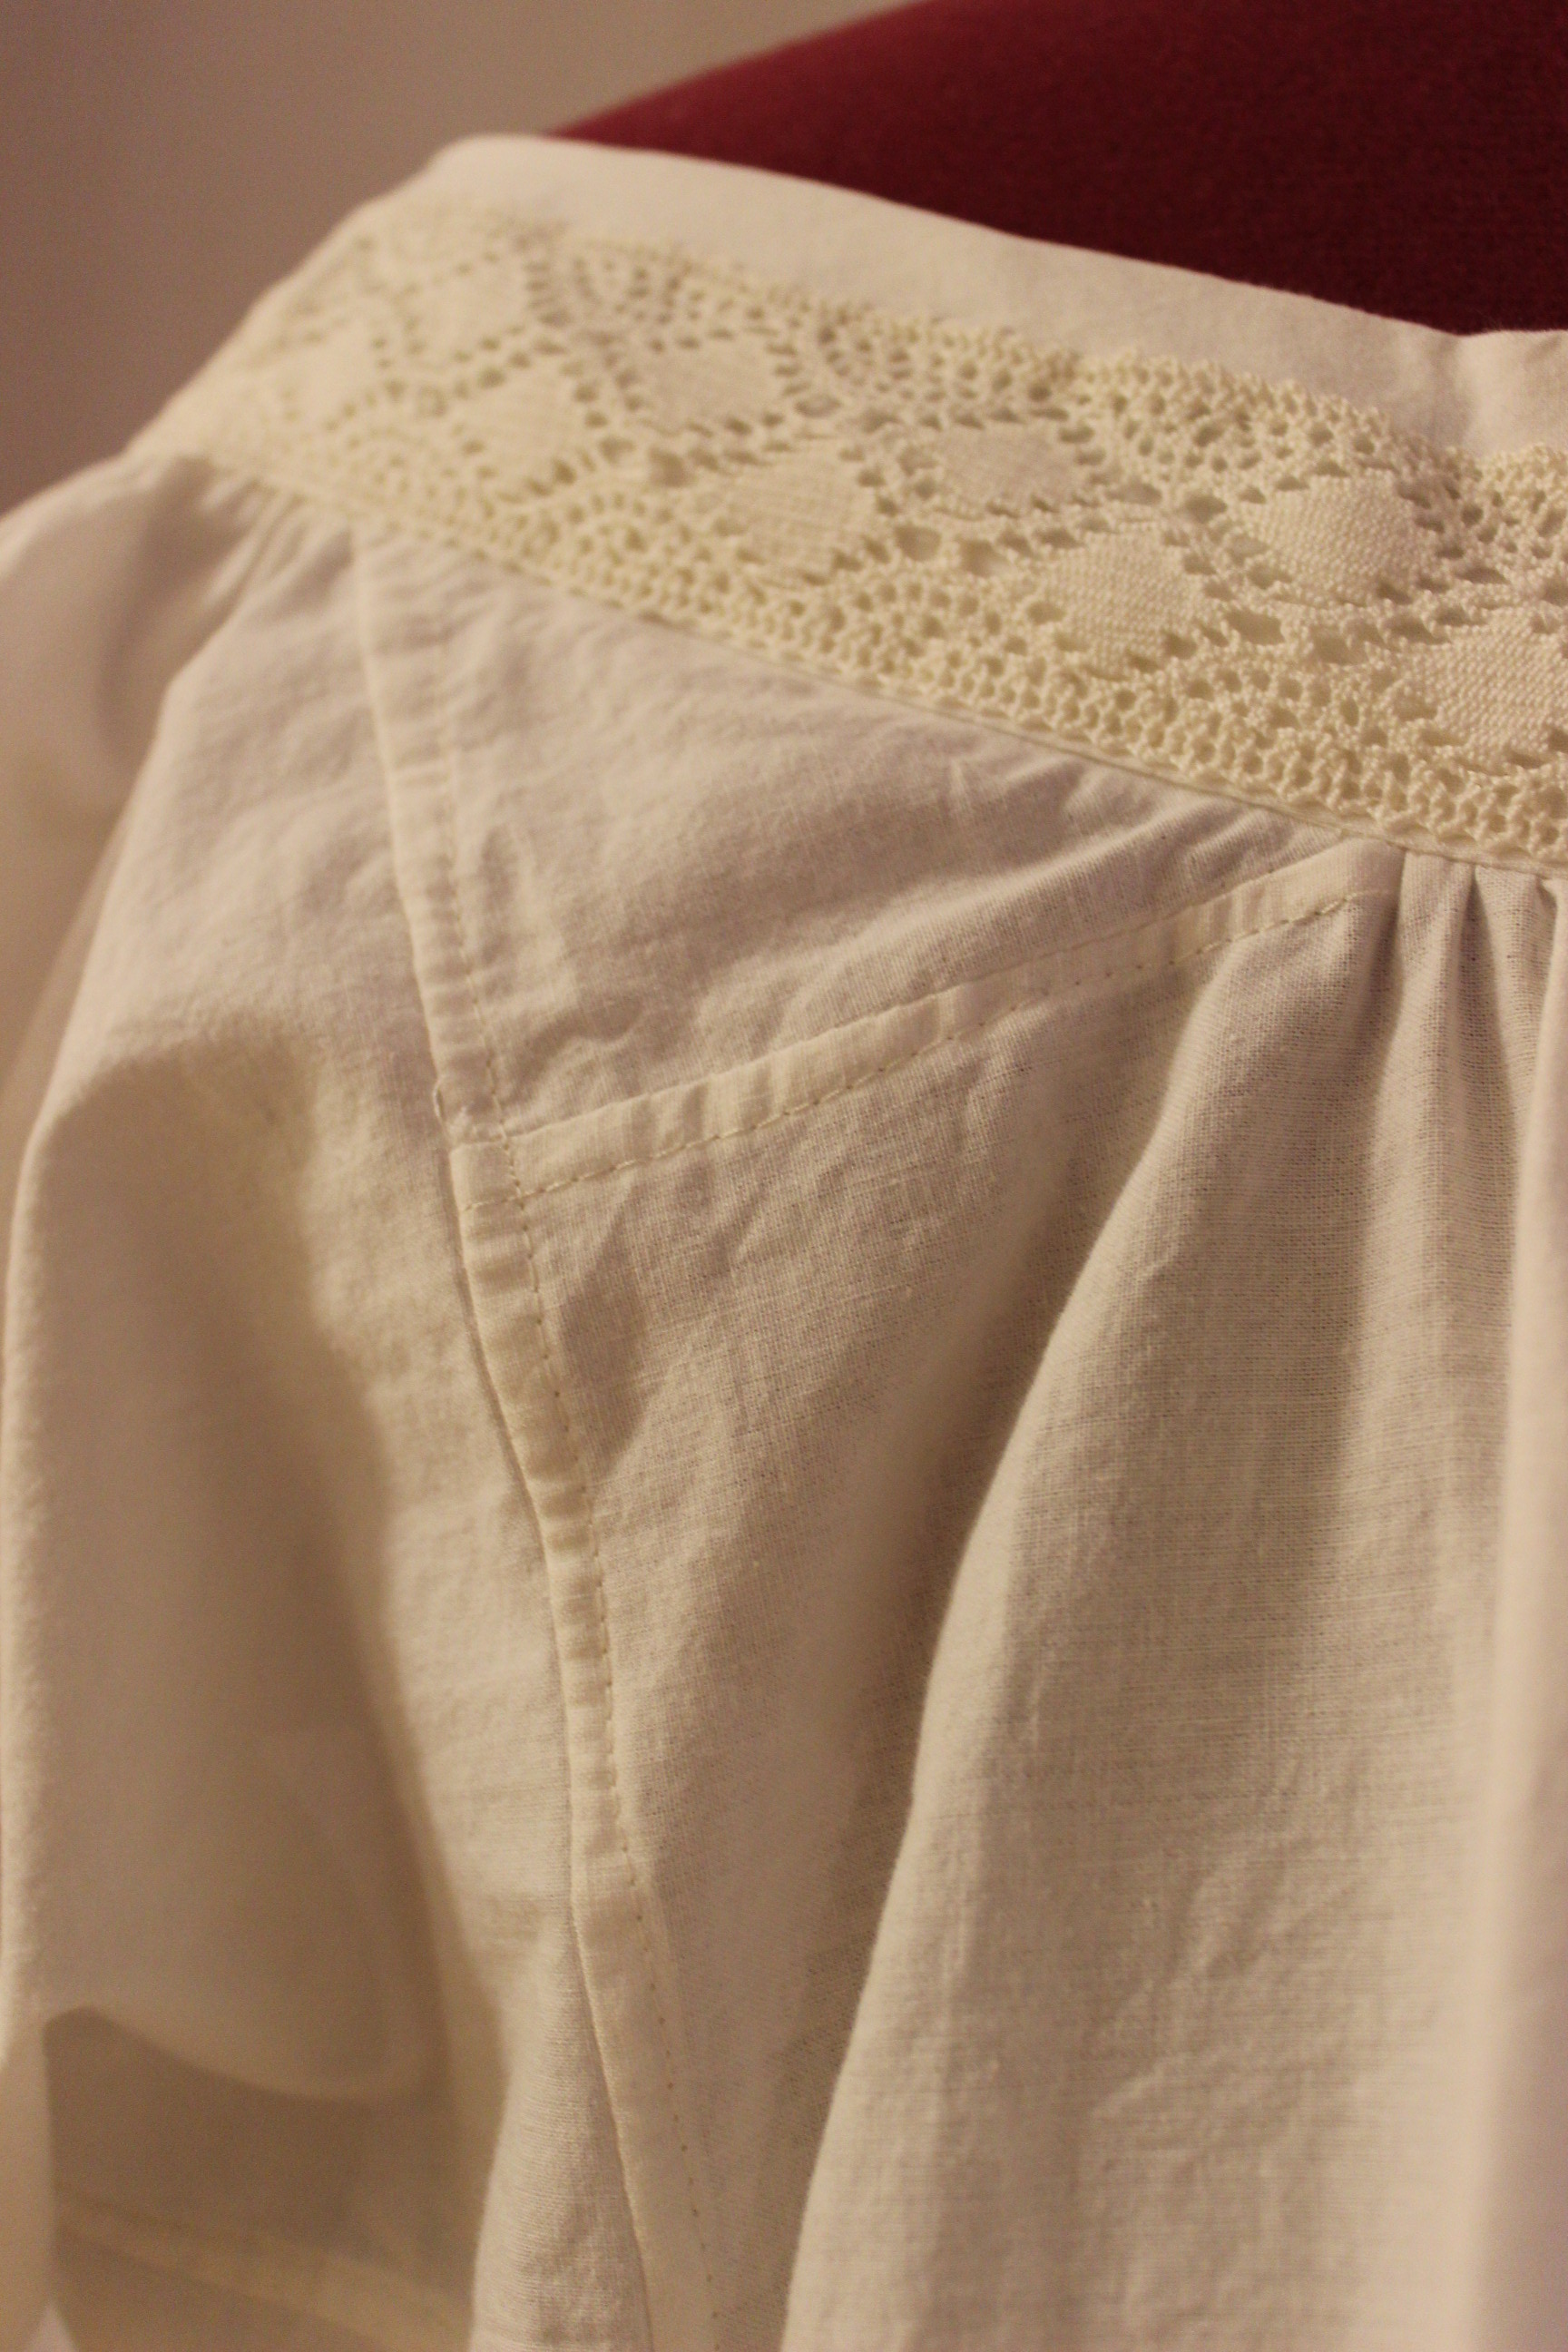
And what I was in the mood for now was a 1850s chemise.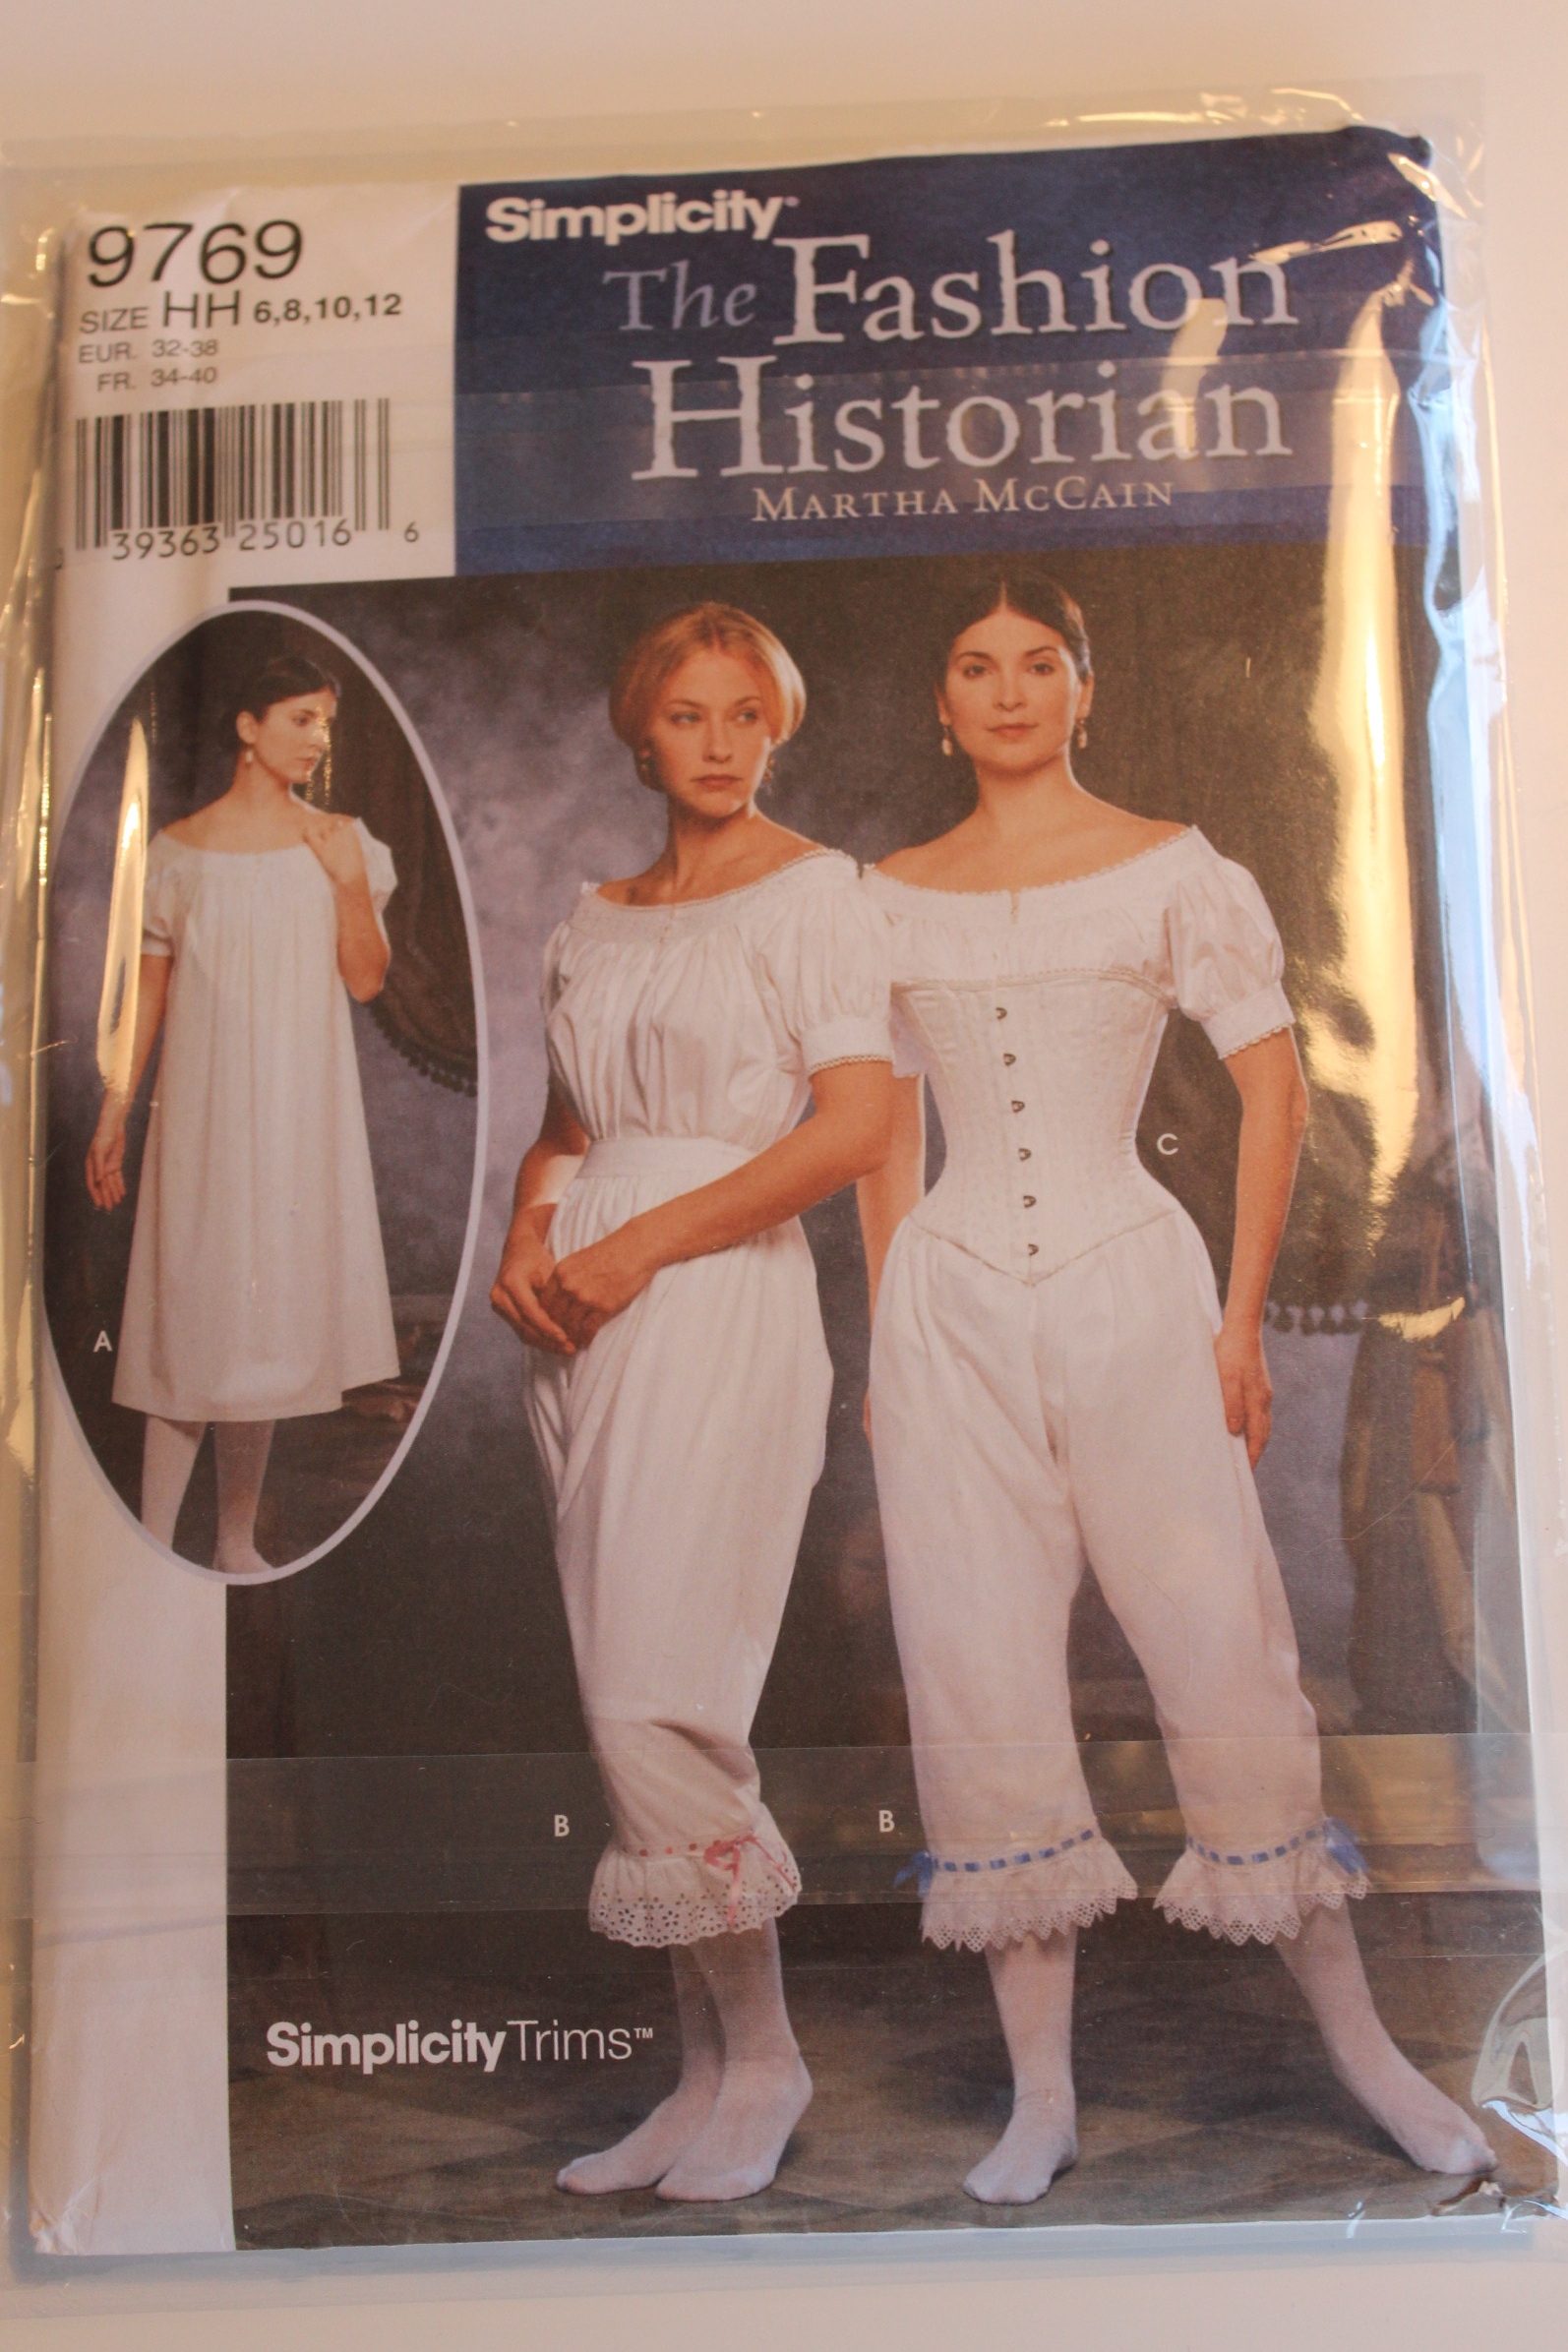 I bought this pattern from a friend clearing her sewing bits, and emediatly knew it would fit the challenge.
The purpose of this challenge was to make something really cheap, and to take in account the cost of fabric and notions in the past.
The fabric I choose was an old cotton sheet bought from IKEA a while ago (6 Usd).
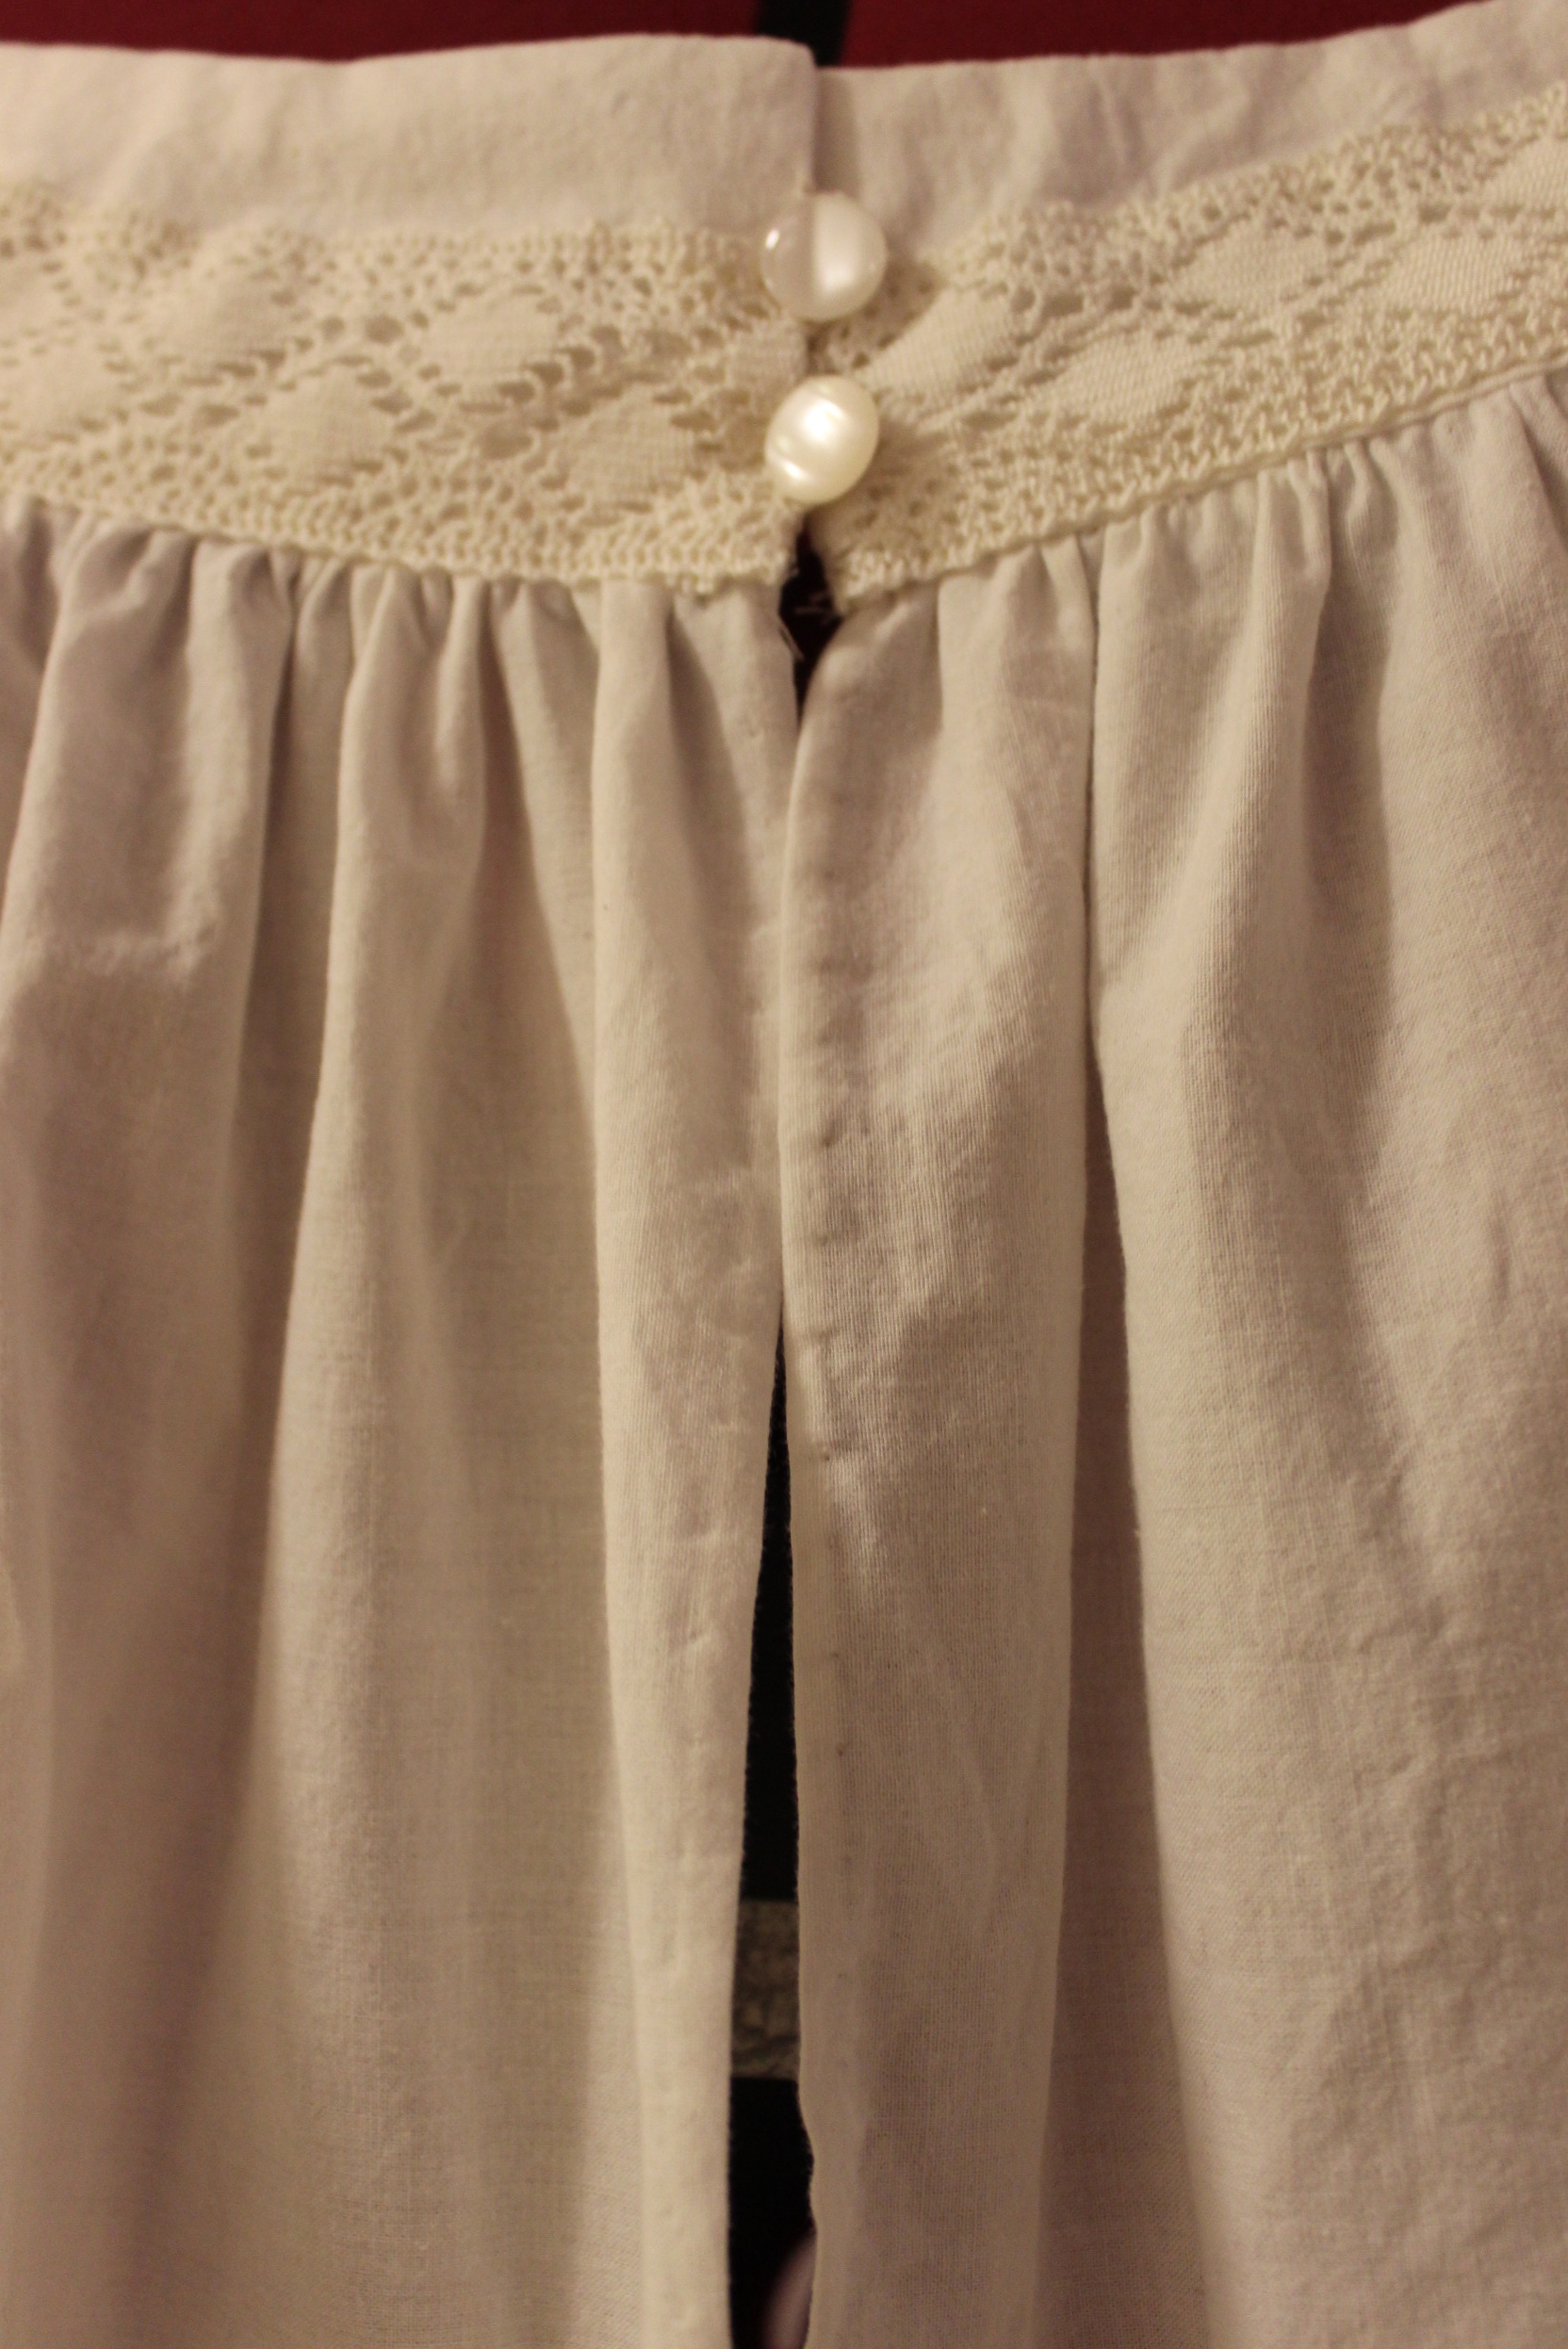
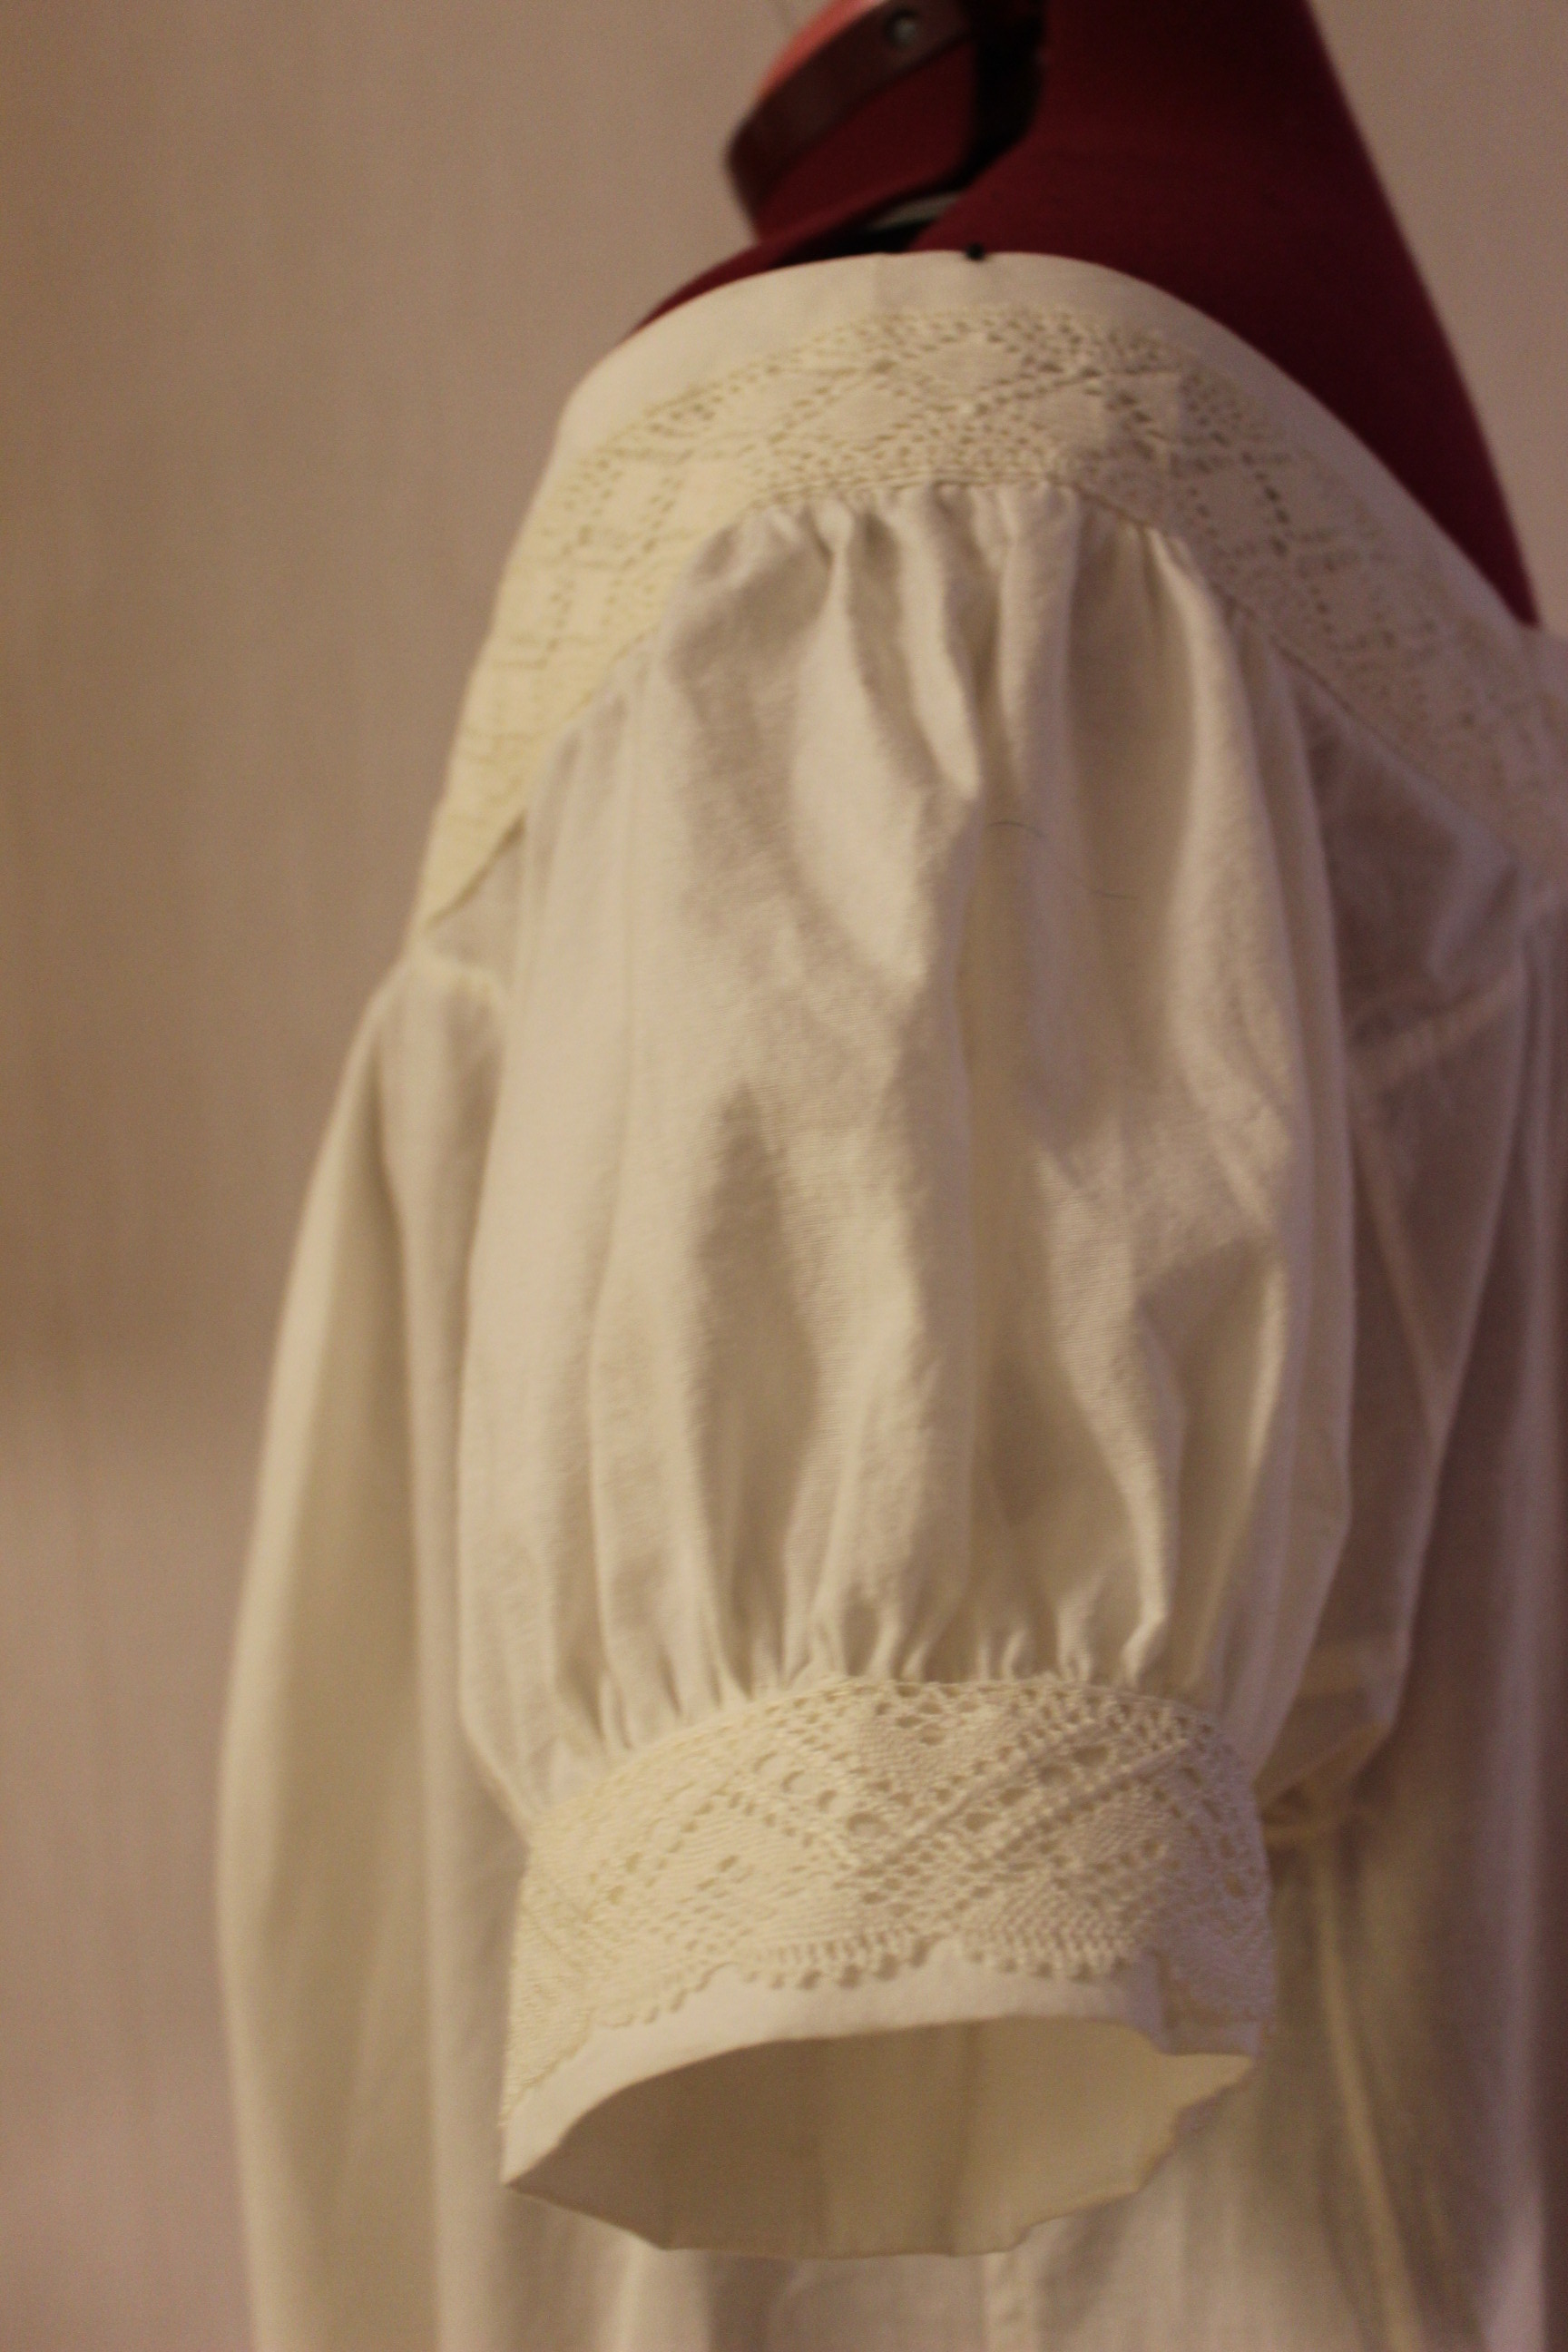
I forgot to take process pics of this chemise, but here it is sewn togeter and only missing the neckpiece. 
The side gores was a bit un-nececary I think, but since I followed the pattern (more or les) they had to be there.
For decoration I used some of the vintage lace I bought a box ful of this winter. The two pieces of lace I picked may have cost me 0,5 Usd at the most.
Finished photos:


From the photoshoot: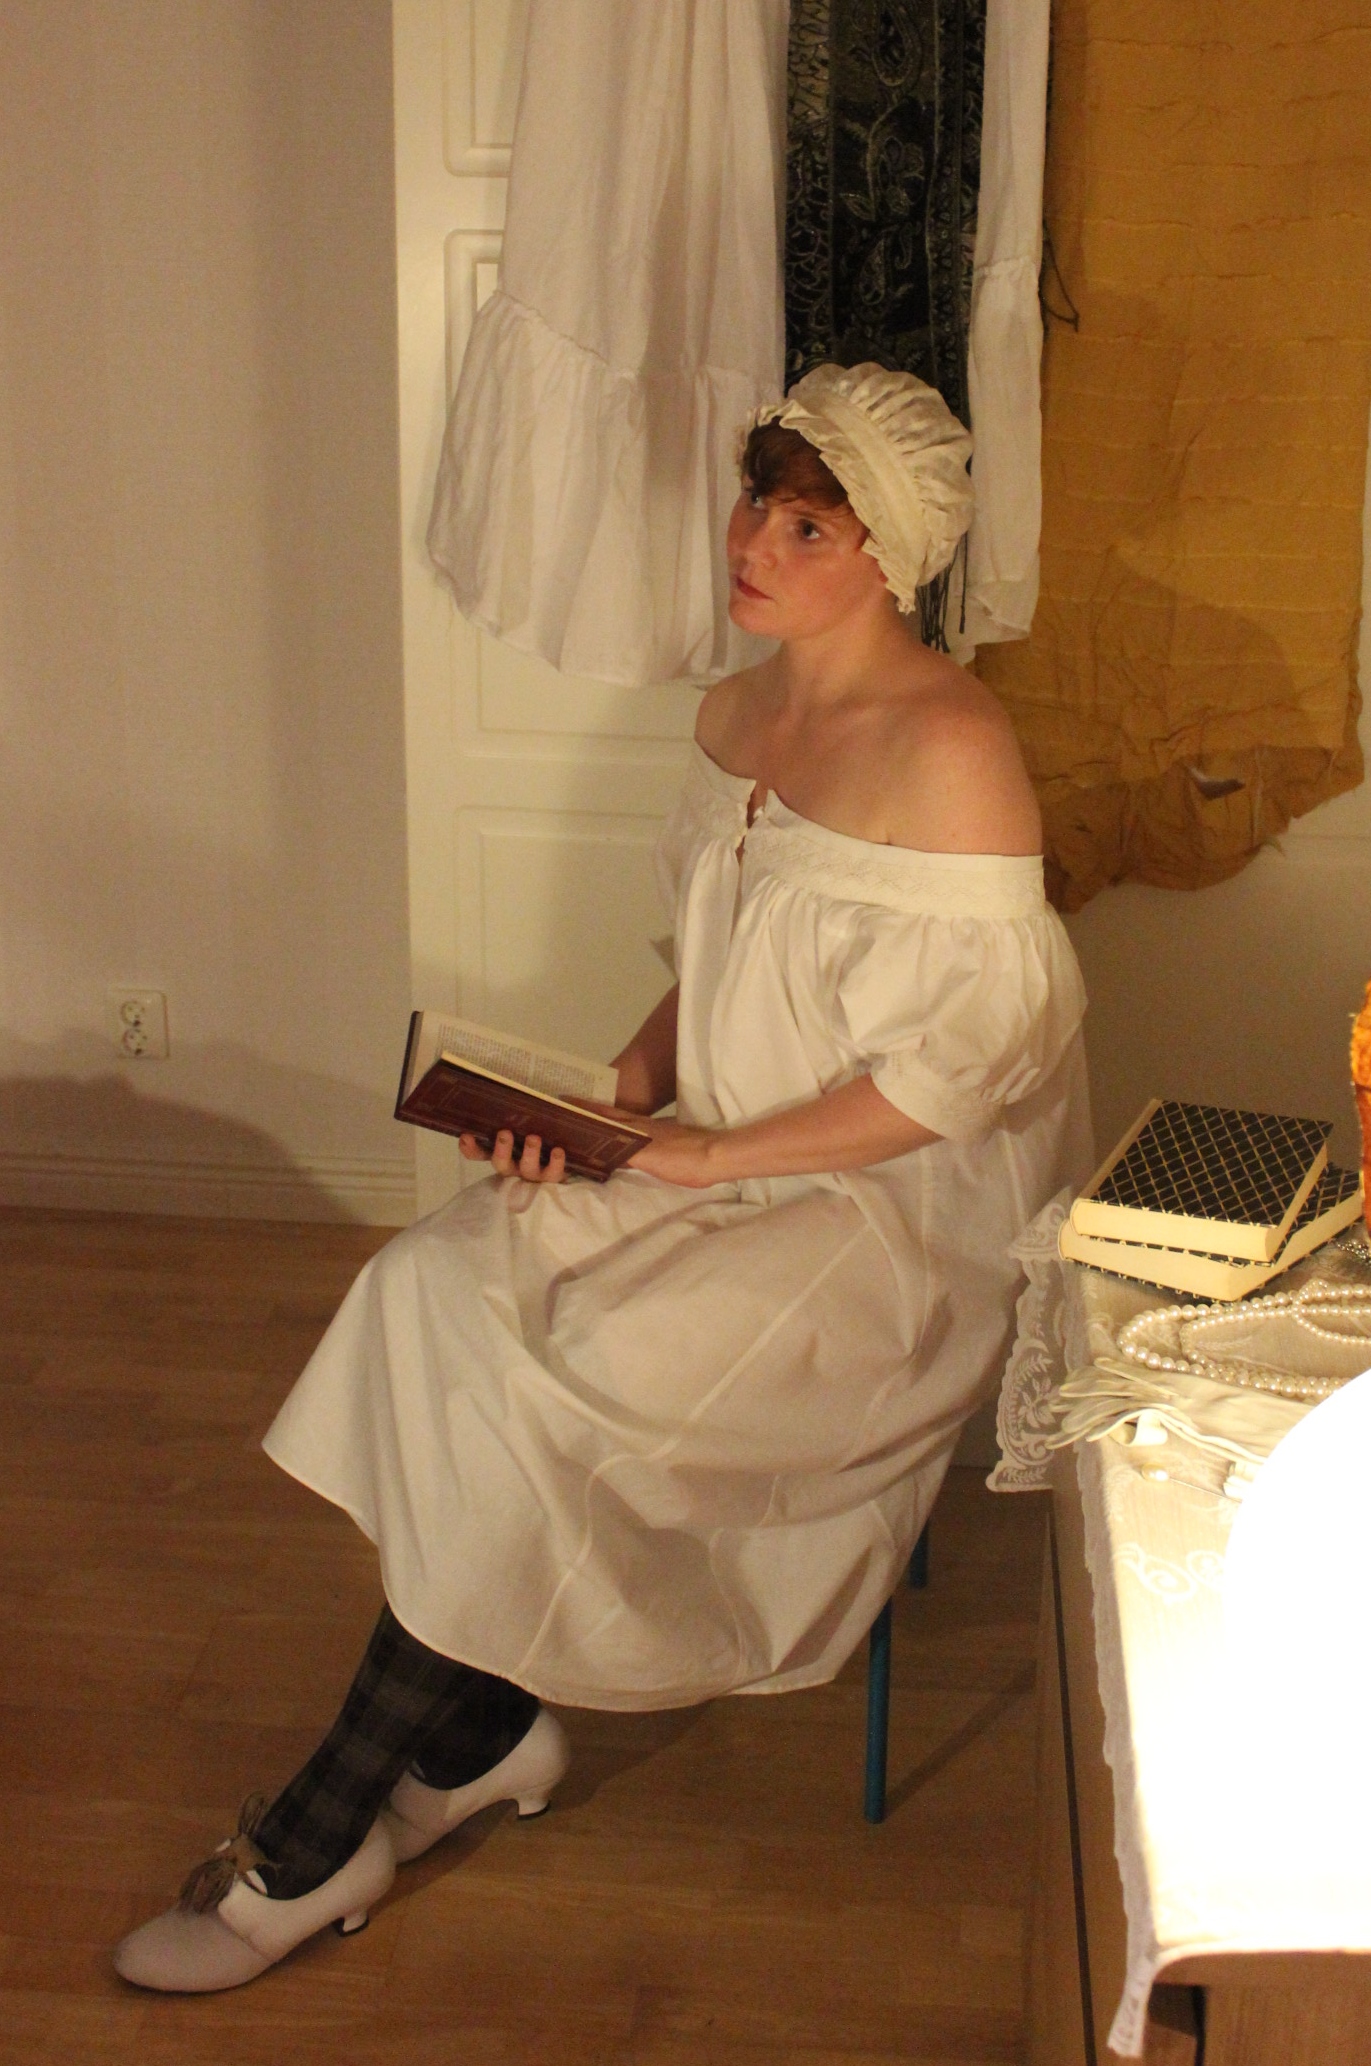
Just the Facts:
Challenge: 13 – Under 10 Usd
What: A mid to late 19th century Chemise
Pattern: Simplicity 9769
Fabric: One cotton bedsheet.
Notions: 1,5 m of lace, thread and 2 smal buttons.
How historical Accurate: Pretty good. For 1850s not so much – machine sewn, but for 1880s (which I aslo will use it for) it’s perfectly legit. The pattern claims to be accuarte and the fabric are good too. So maybe 7/10.
Time: About 4 hours.
Cost: 10Usd or 65 Sek (100 Sek including the pattern)
First worn: Around the house for photos, but I know I will get good use out of it.
Final thoughts: It is so comfortable. I would have totaly have worn it to bed if my boyfriend hadn’t given me a quer look. 🙂
When planing the HSF items earlier this year, I decided to try to make a mid 19th century Crinoline for nr 12 Shape & Support.
I’ve wanted one for about a year, and now there was no exuse not to make one.
I searched the internet and came up with two variations I liked. 
 1860s, so a bit late but you get the idea.
I decided to do a mash-up of the two – keeping the first ones shape, but adding the fabric of the lower section in the second one.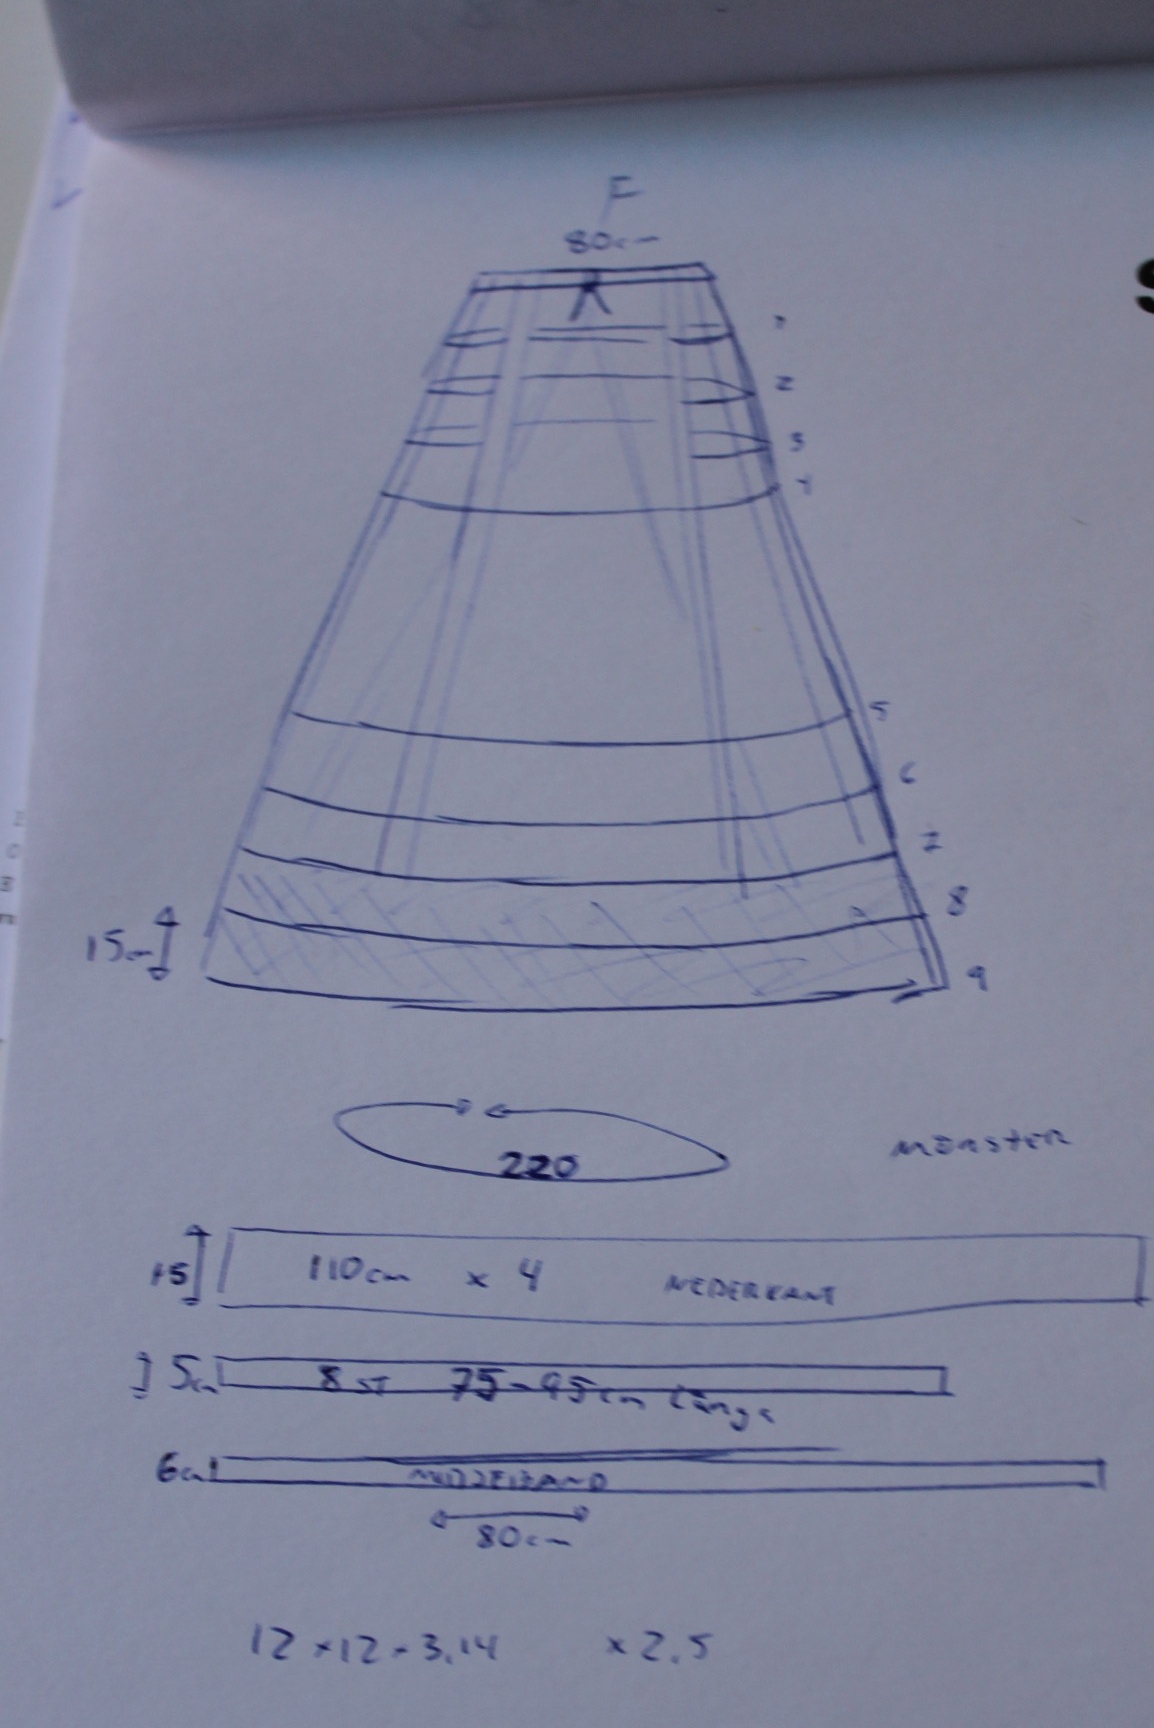 I didin’t use any pattern but made some calculations of the size and amount of rectangles I would need.
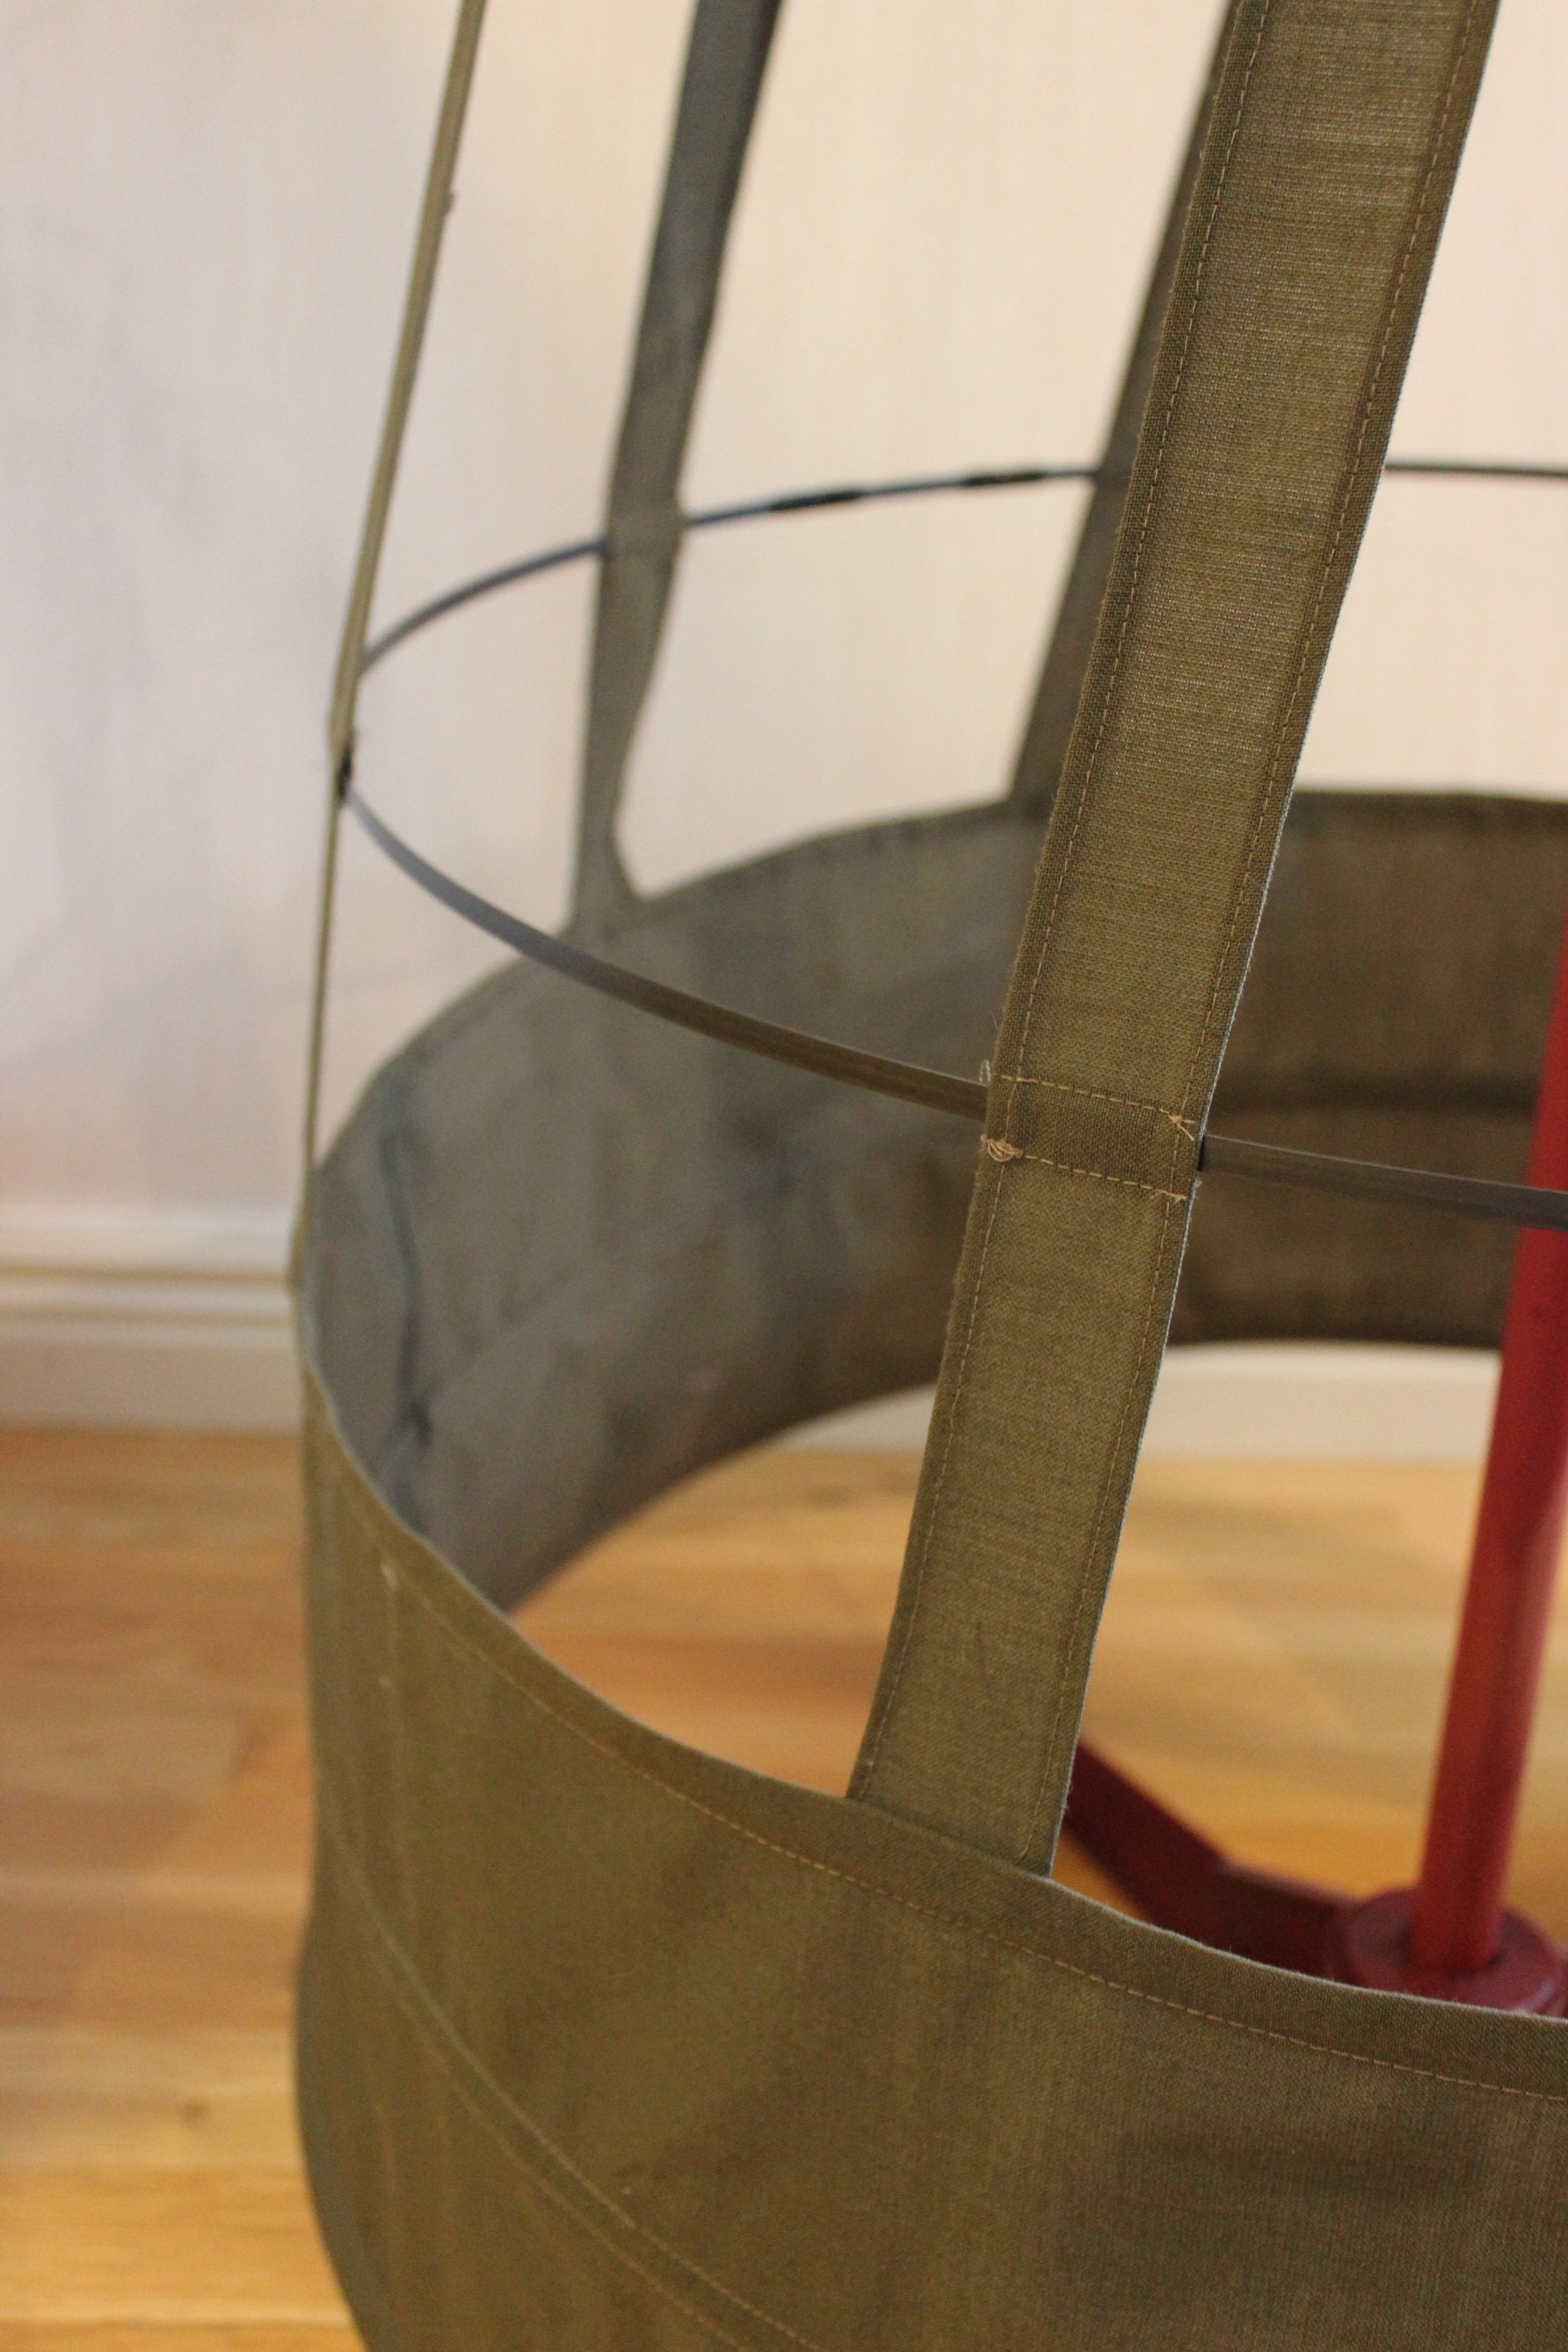
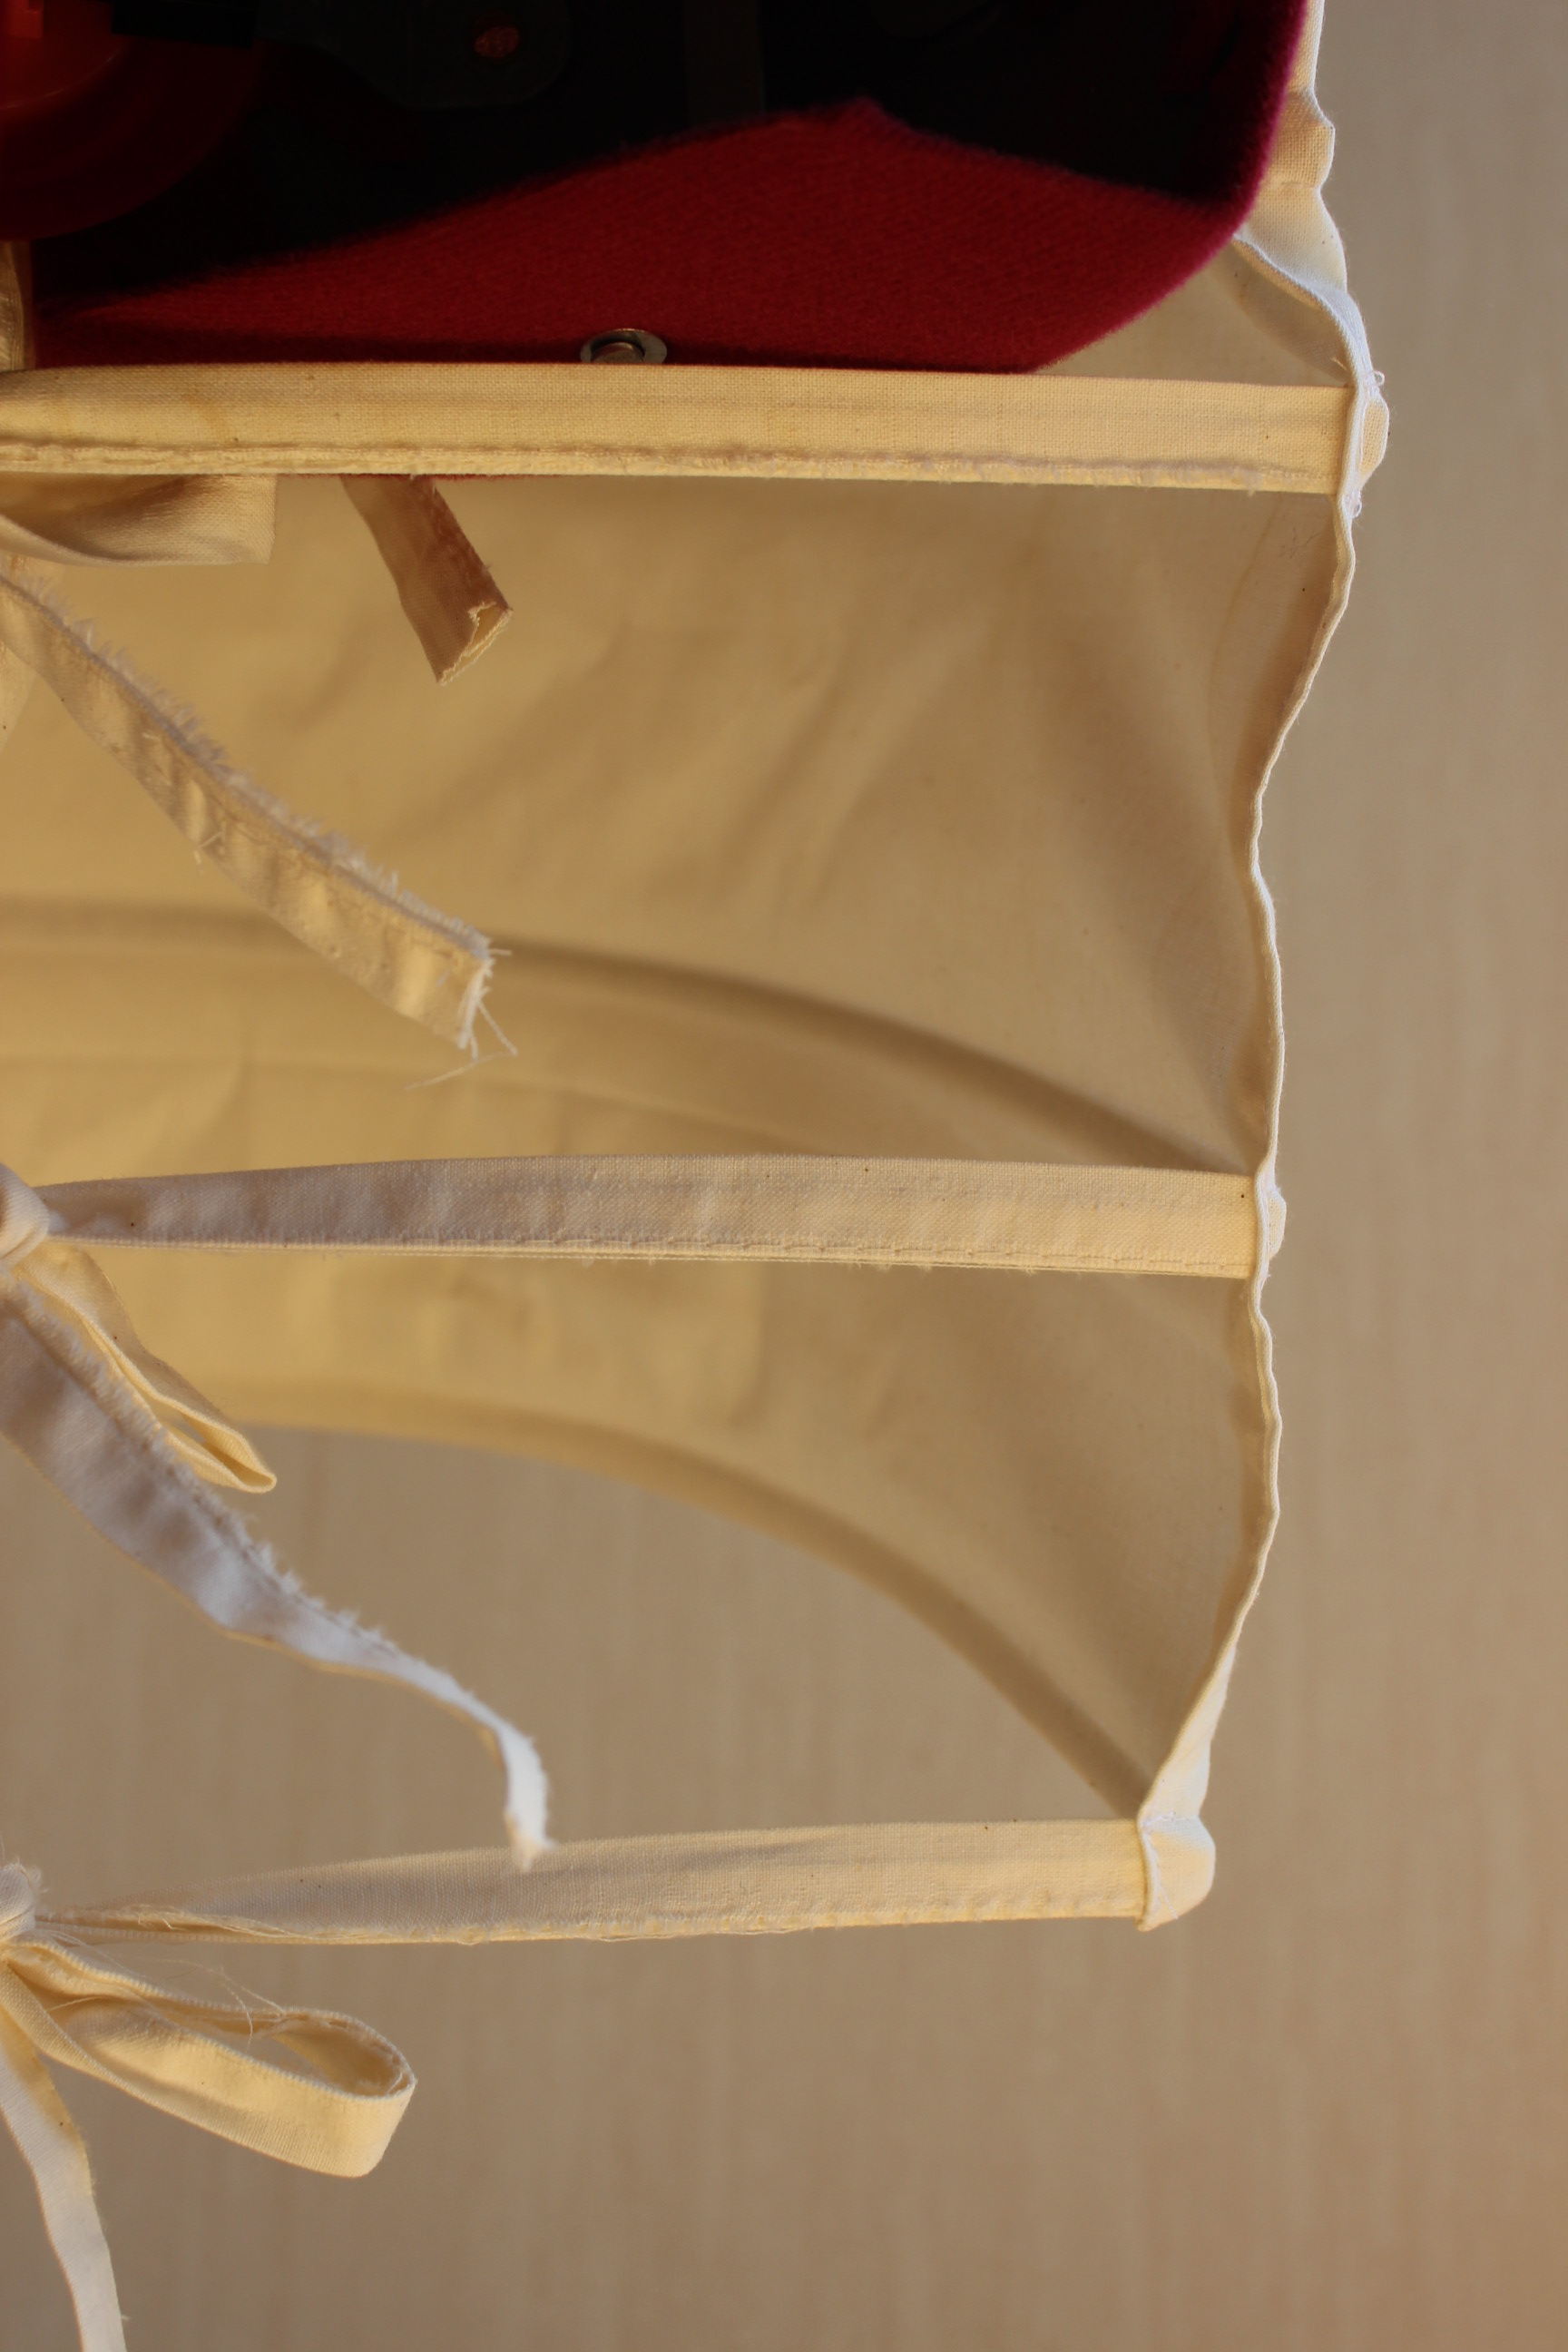
I found this thick green polyester in my stash, and figured why not. I cut the pieces letting the widht of the fabric decide the size of the bottom of the finished crinoline (220 cm).  From left: Vertical ribbons, bone casings, bottom part, smal pieces of chanels and a waistband at the right.
Then I pressed the long ribbons to turn them in to bone-casings.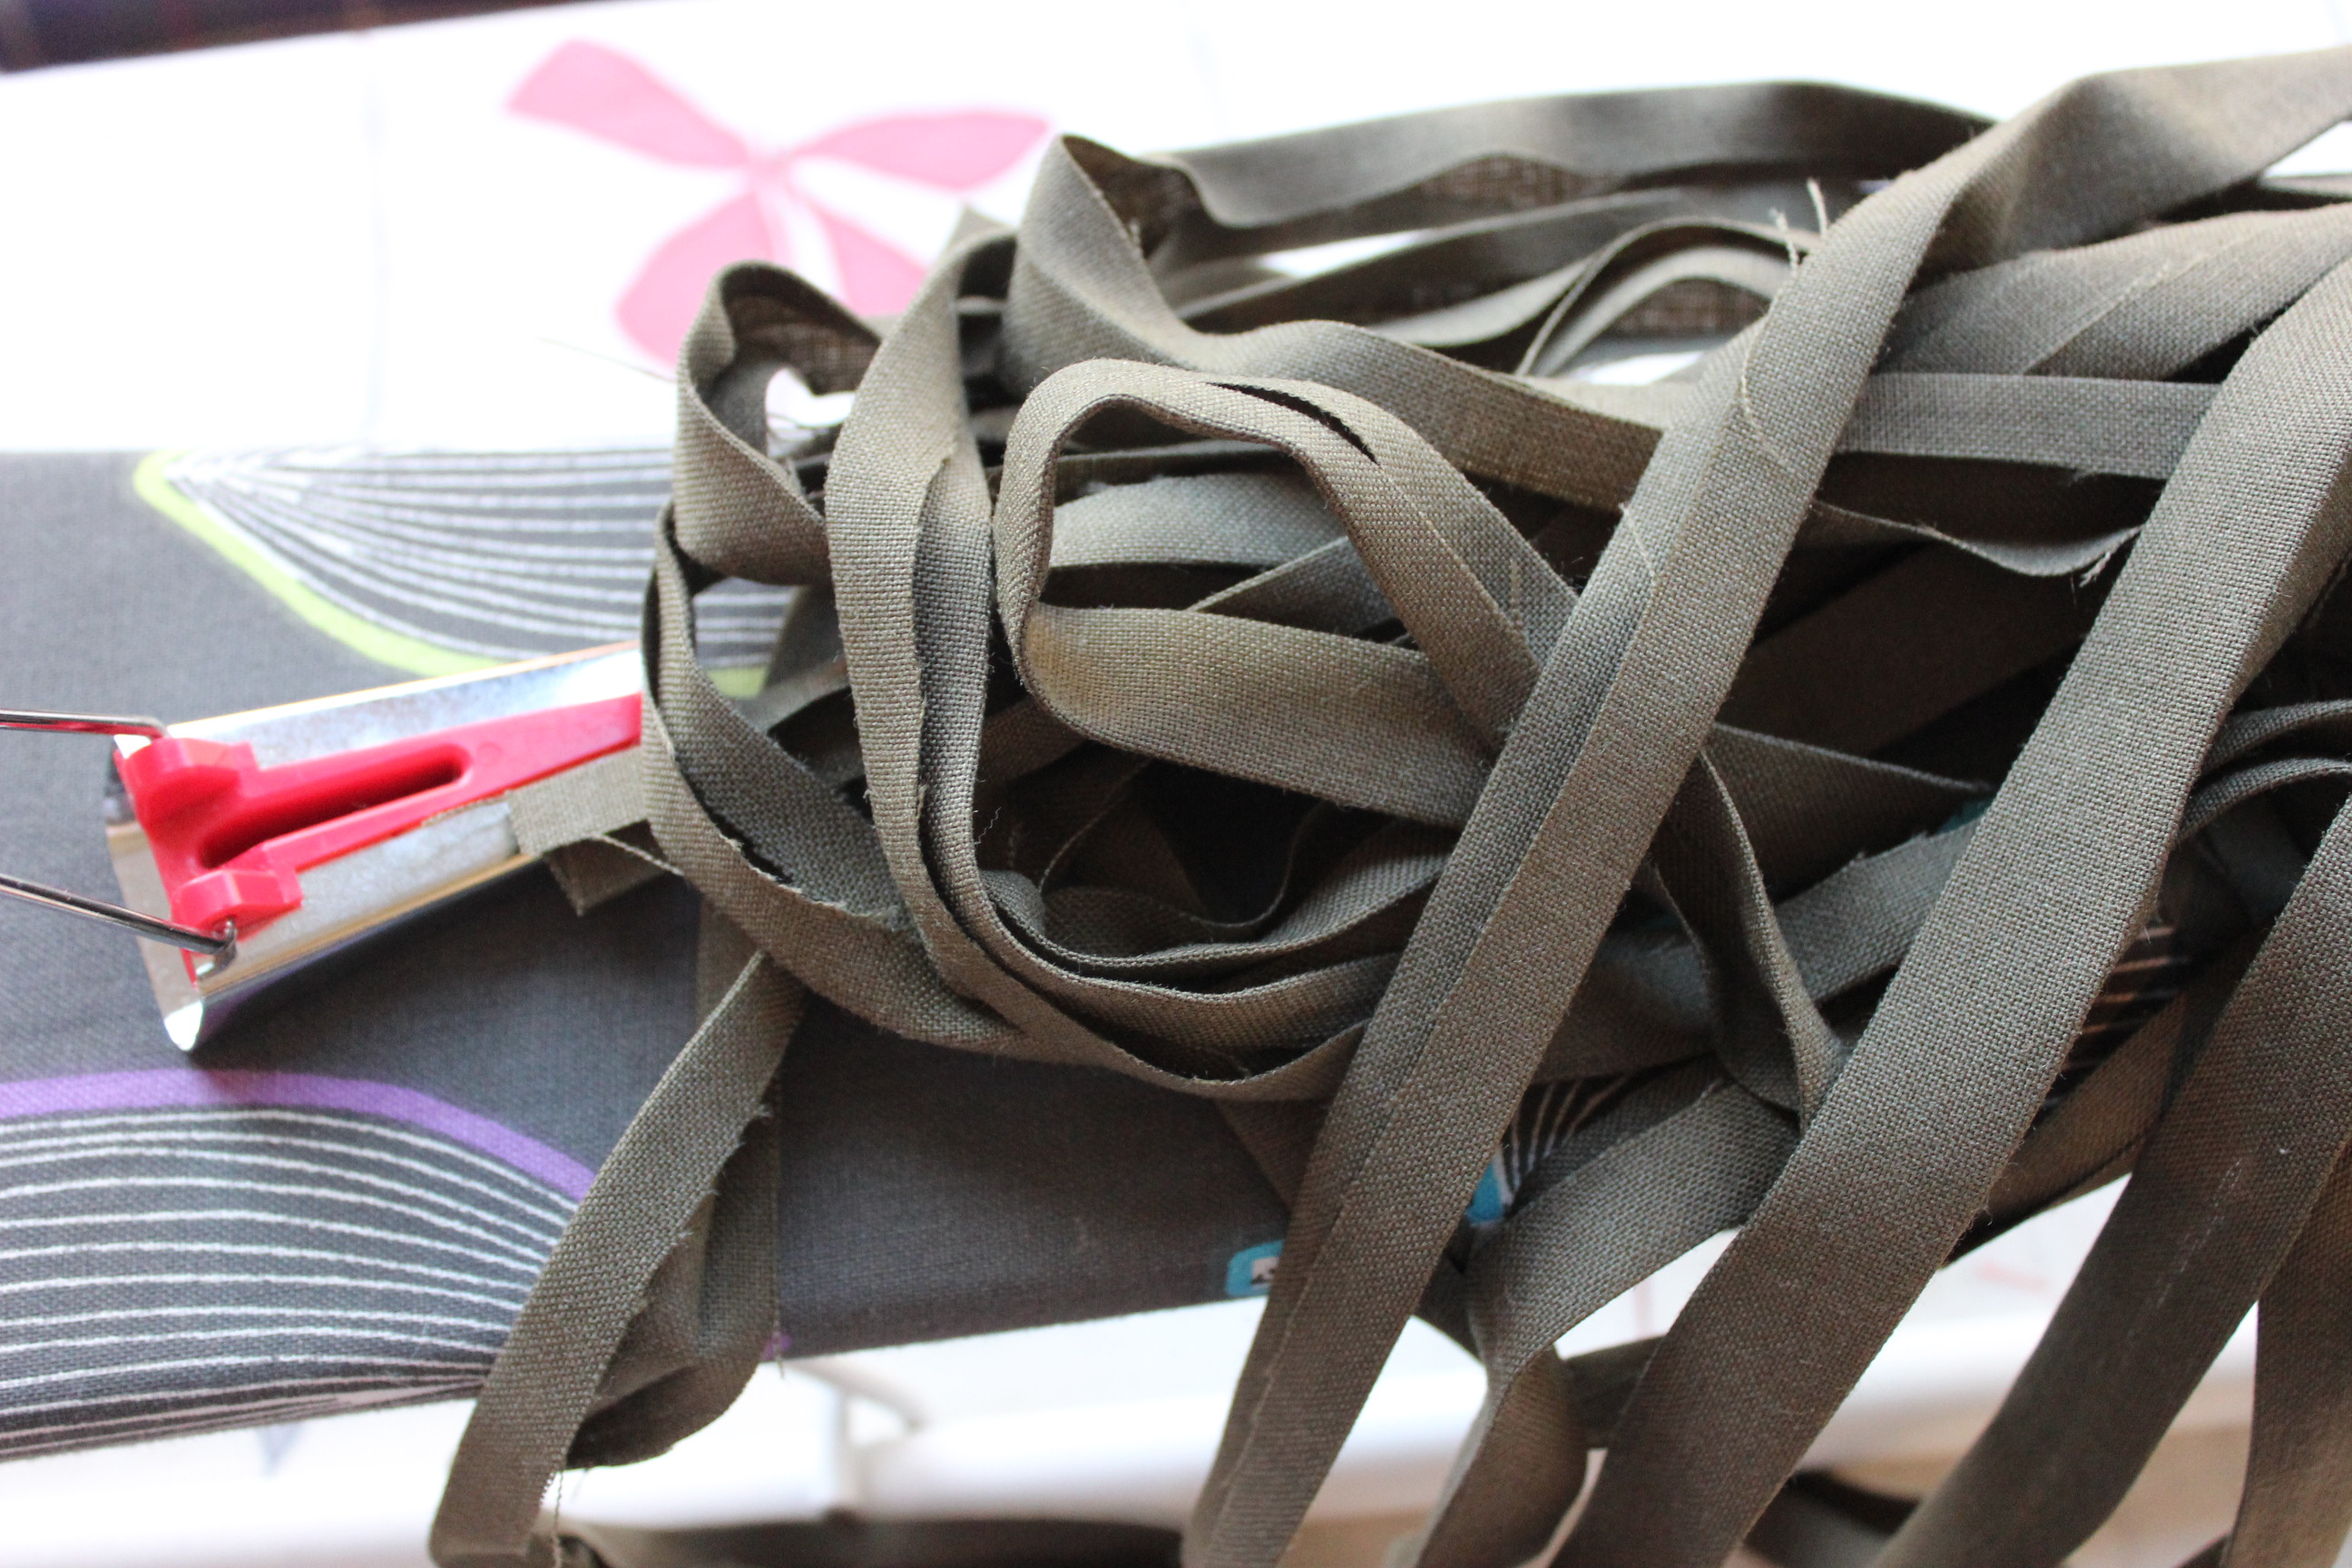 About 6,5 m or so.
Then I sewed the boning chanels to the pieces to create the bottom part of the crinoline.


The chanels shown from the wrong side and the right side.
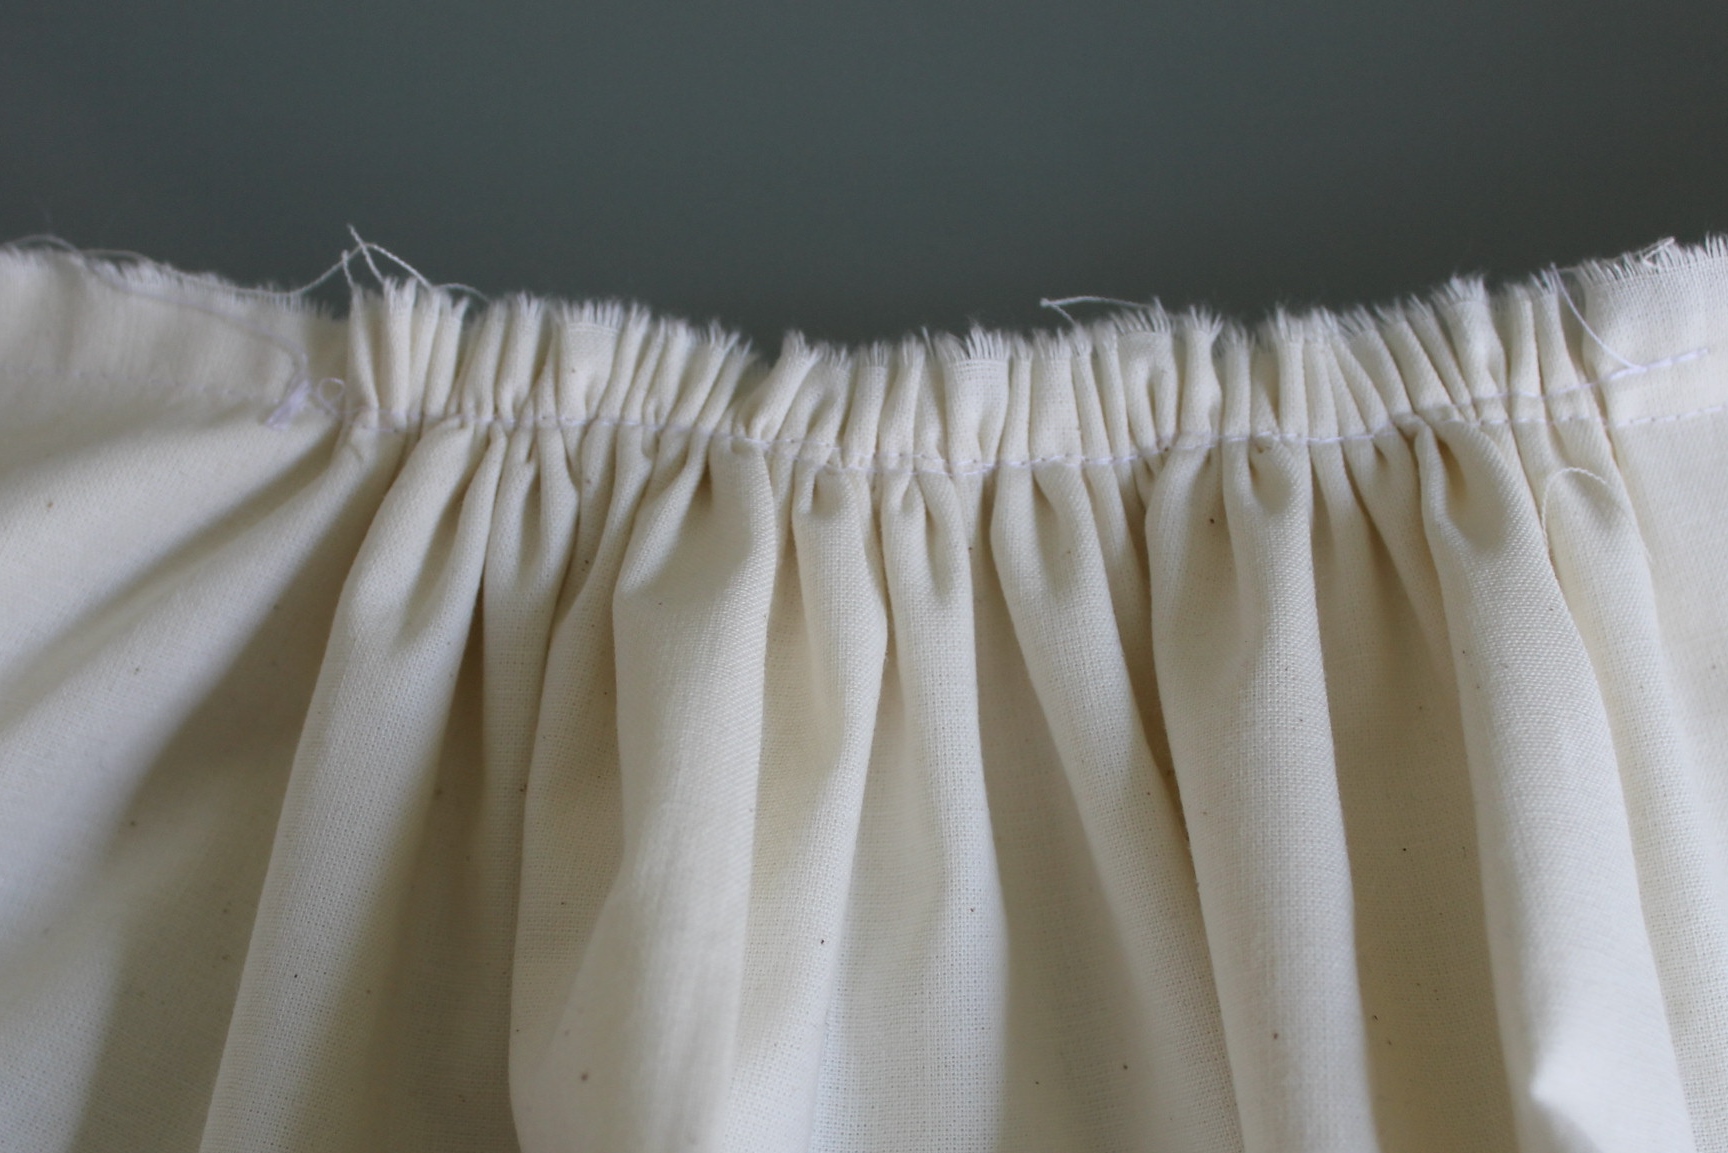
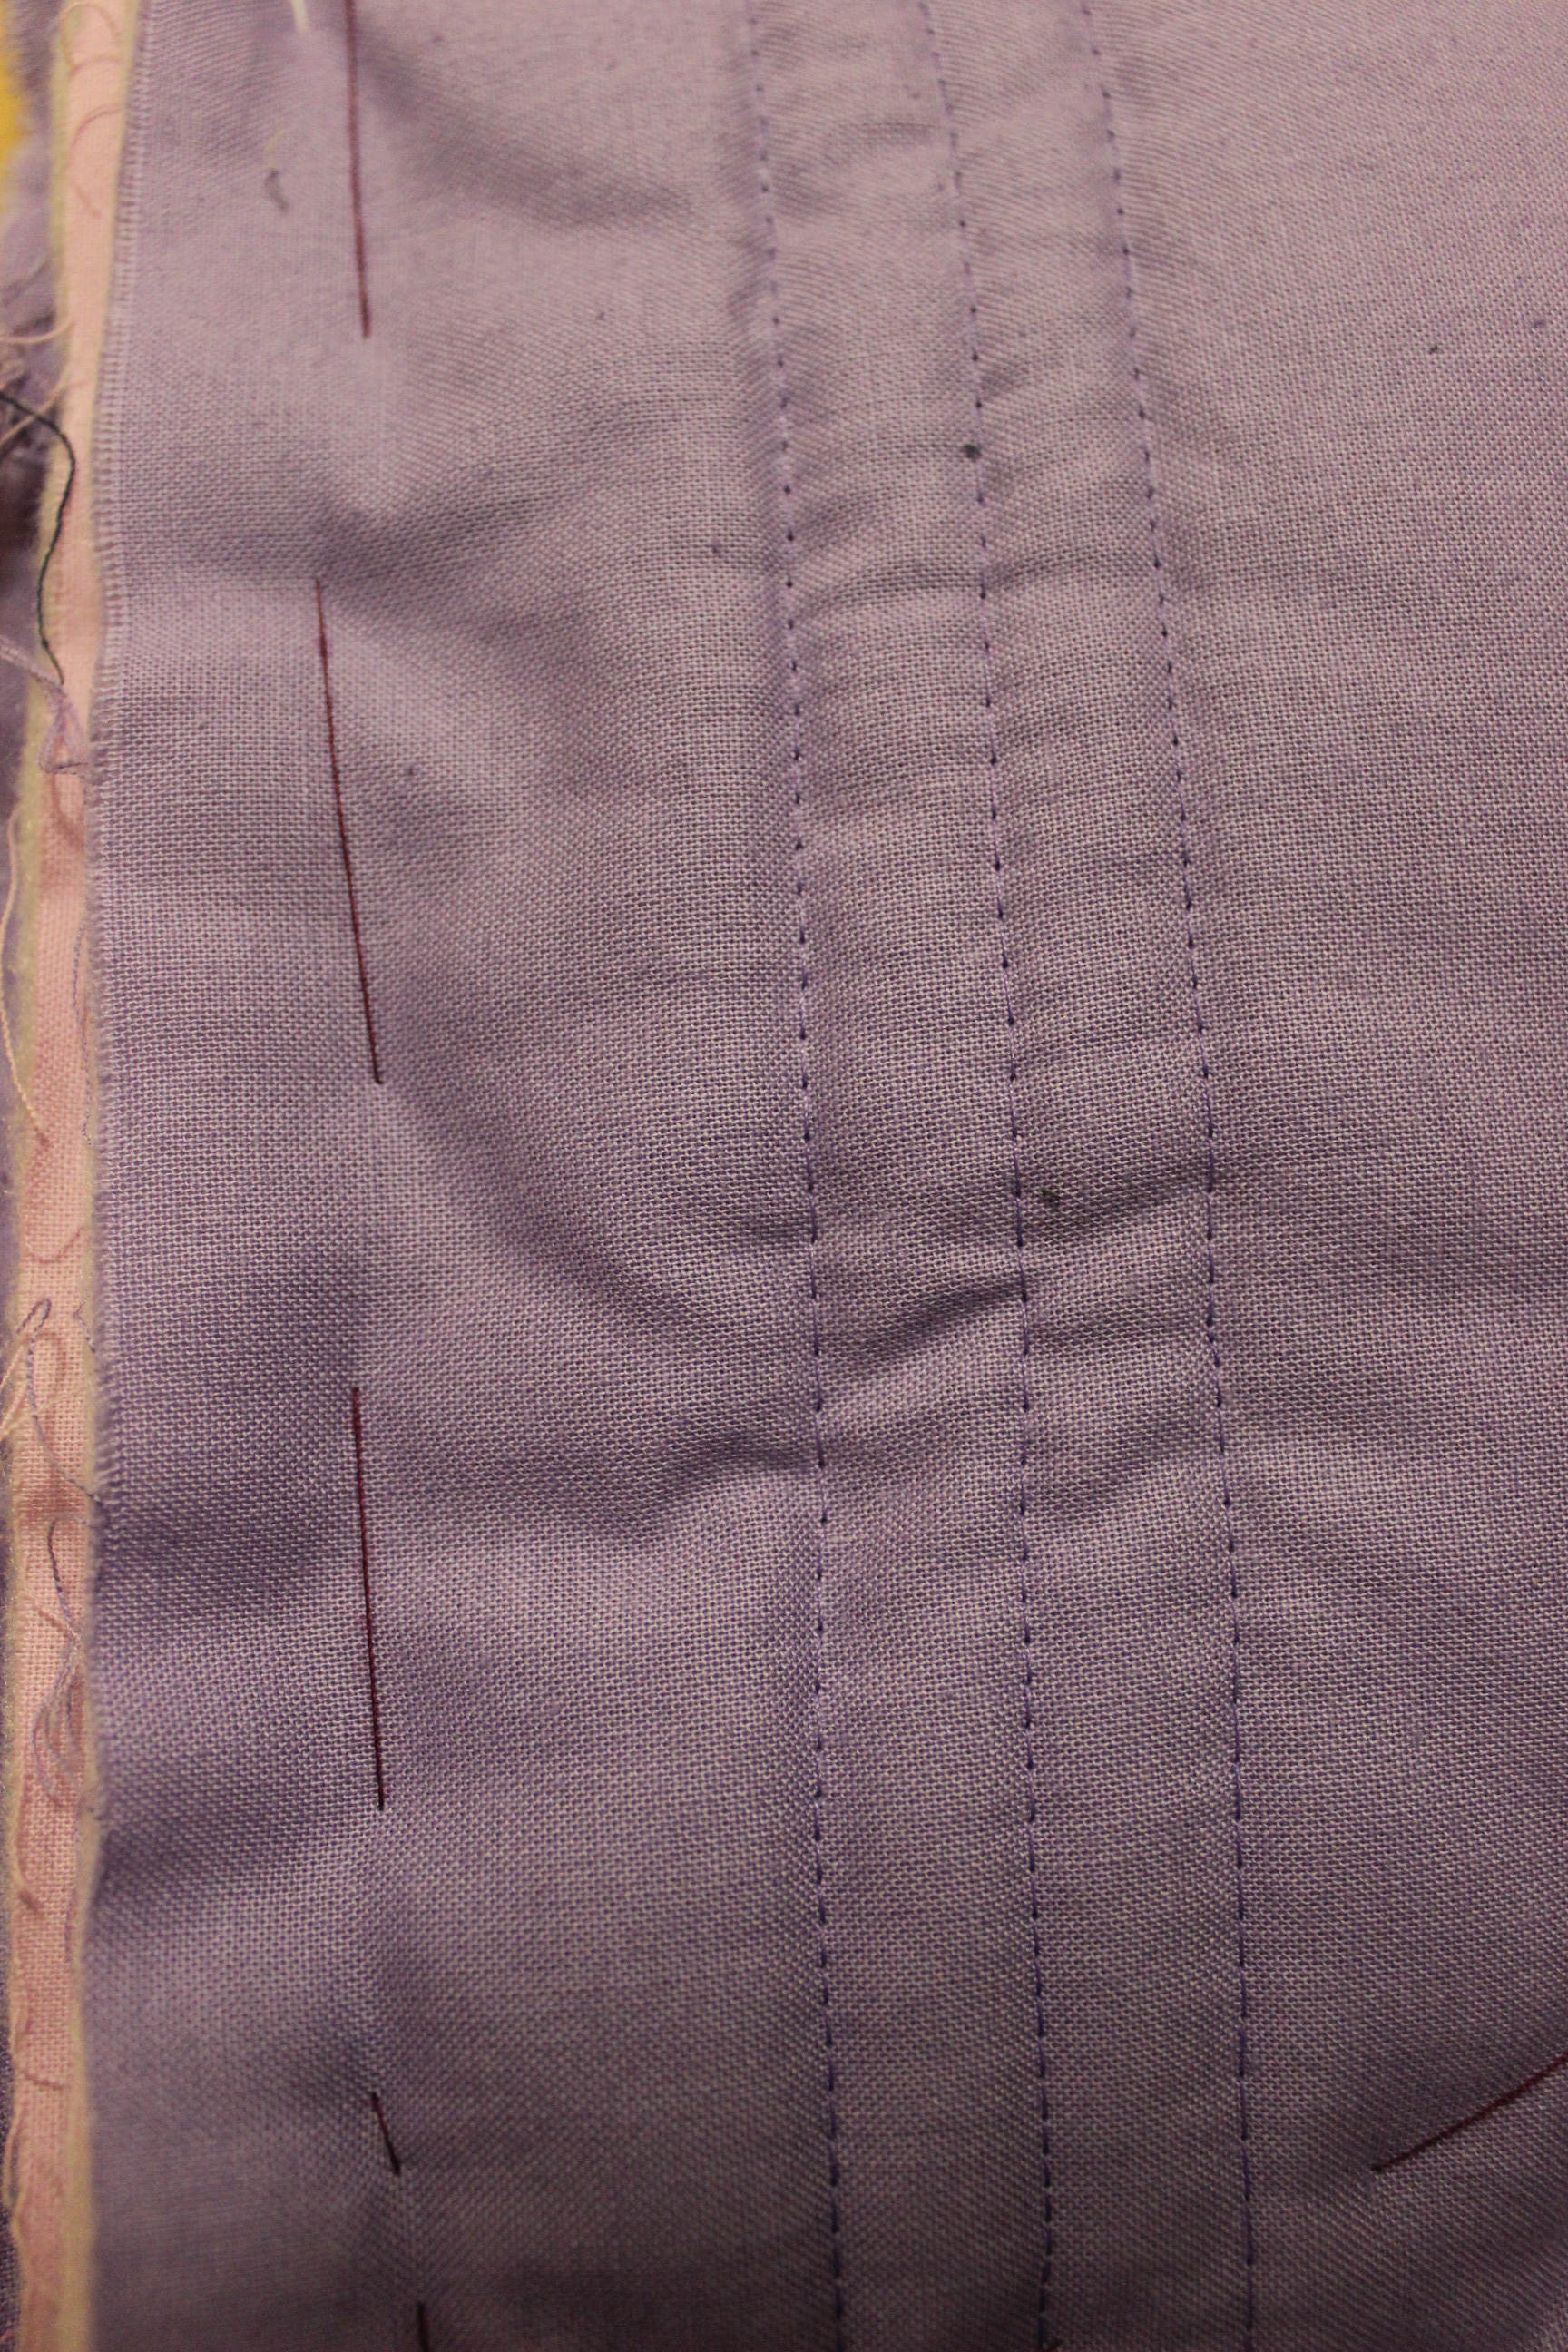
Then I hemmed the pieces creating the vertical support ribbons.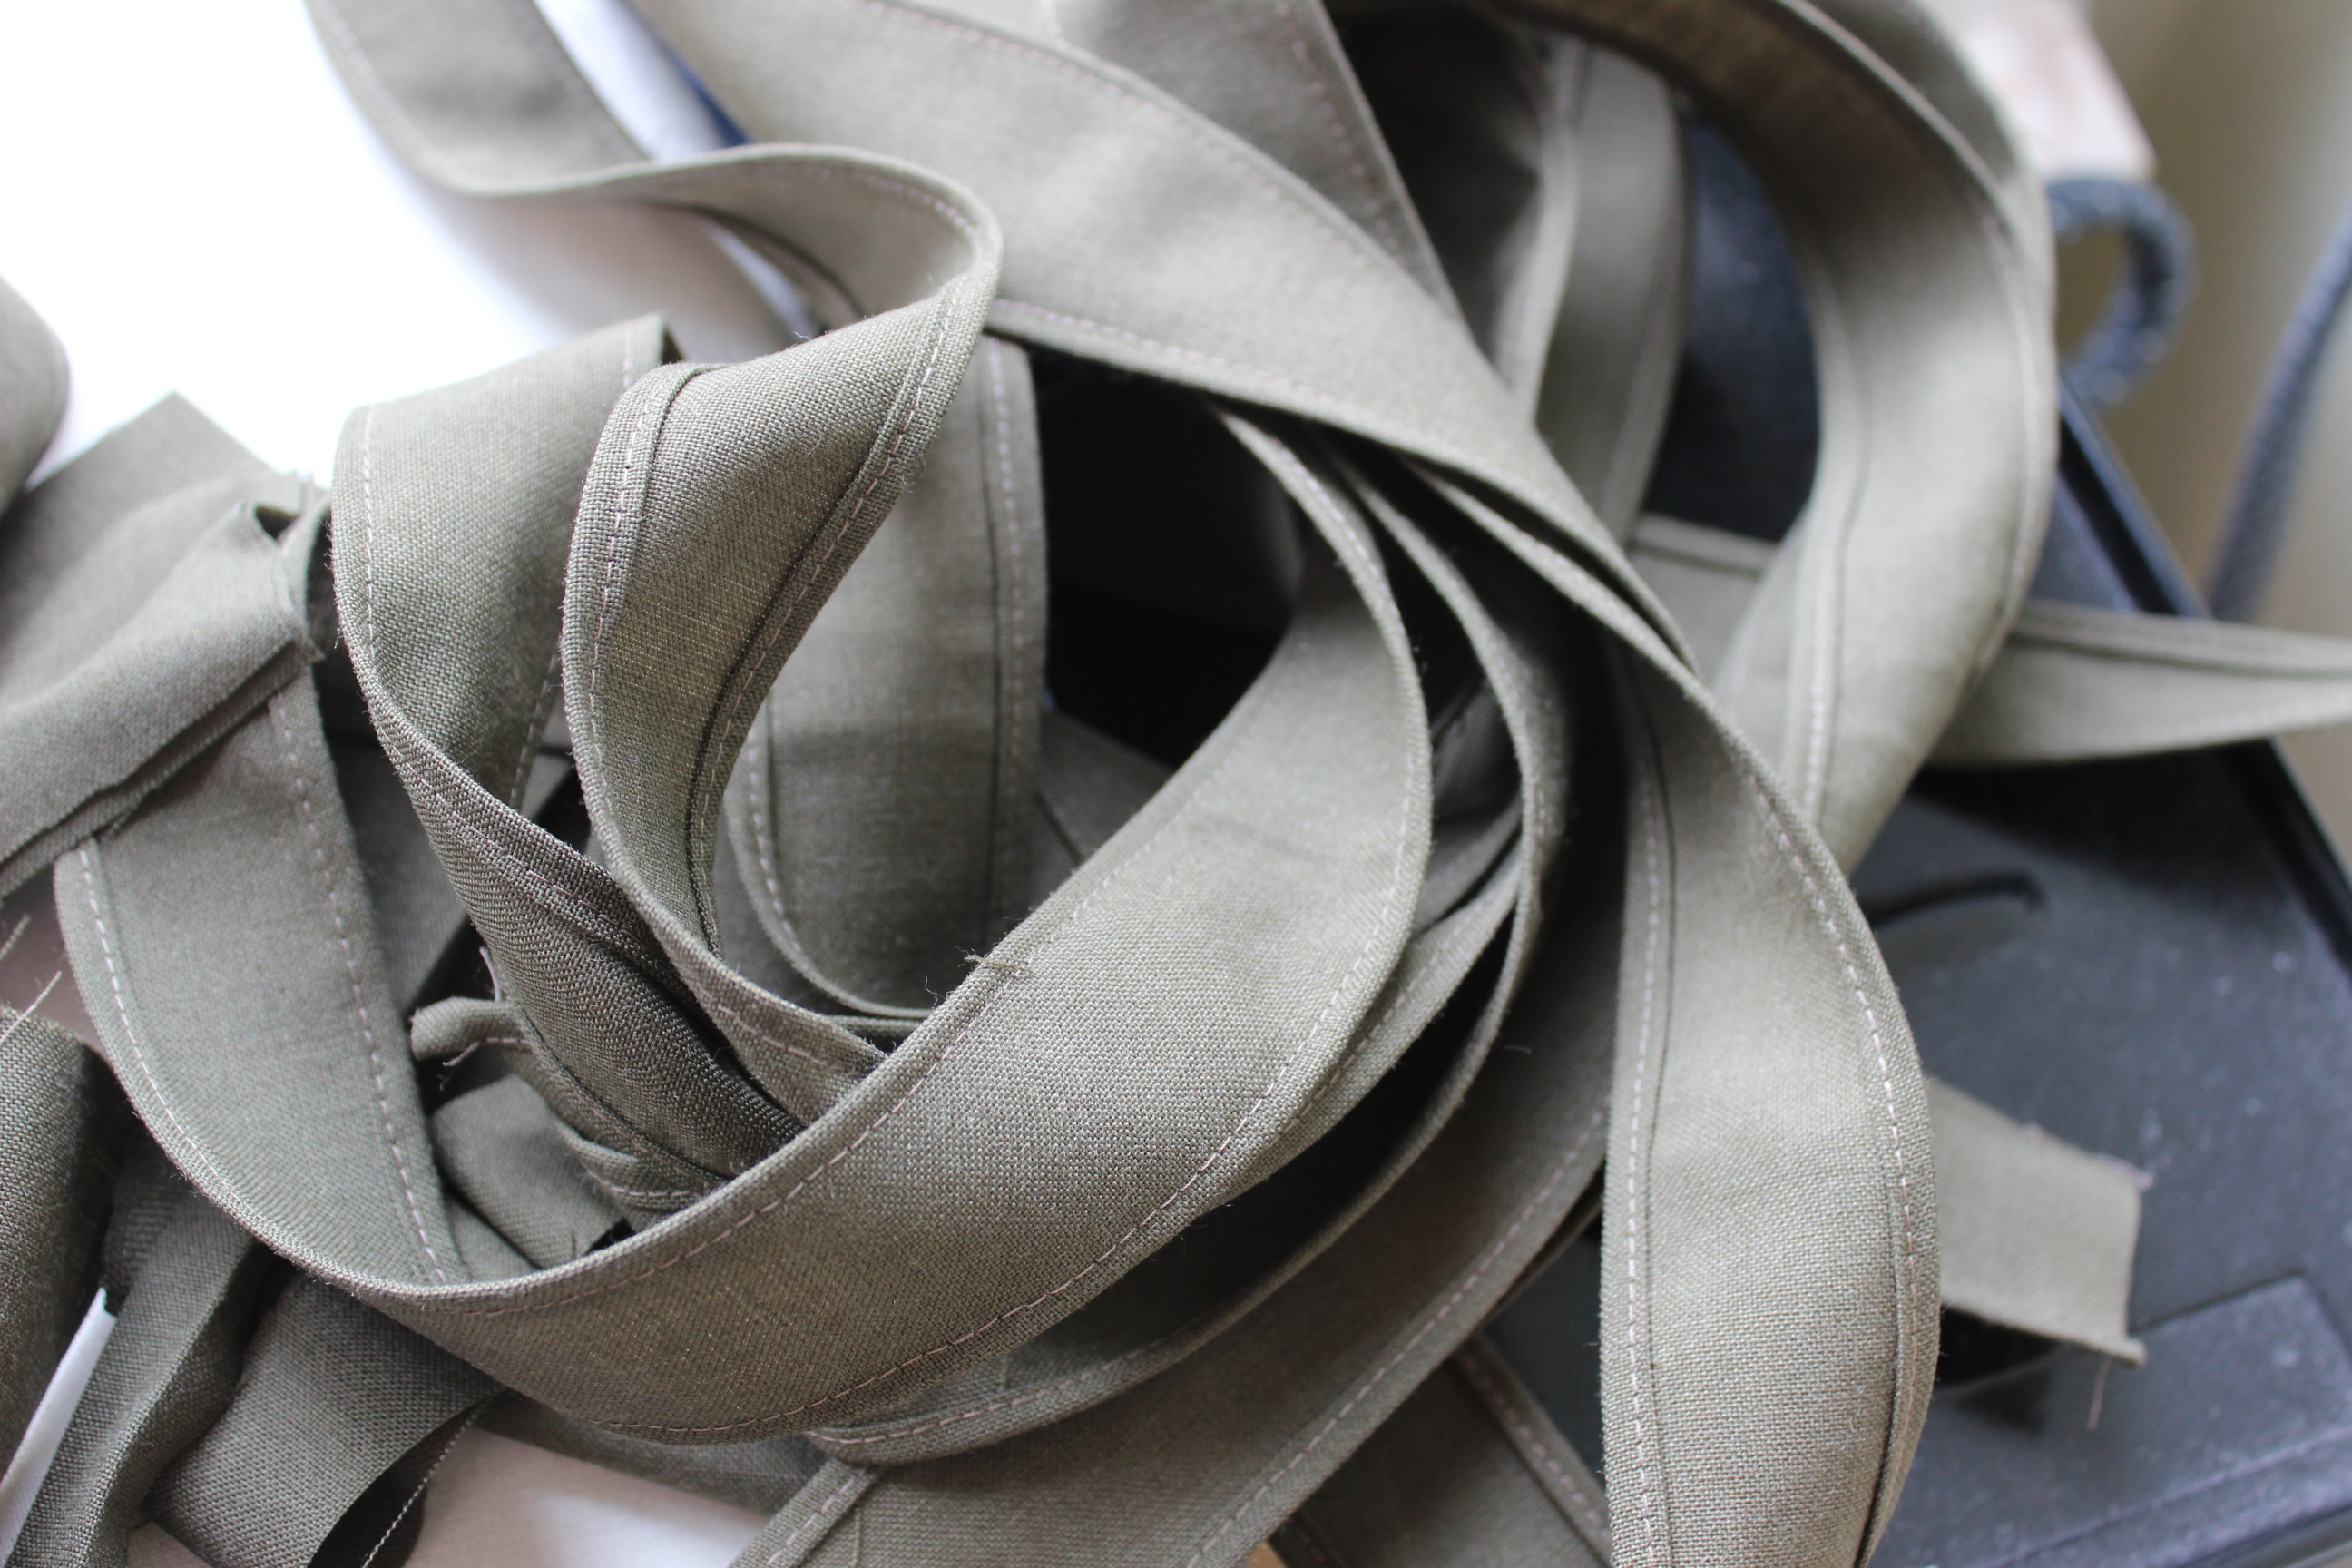 There are eight of them at 1 m a piece = about 16 m of hemming (its a good thing I decided to make this one on the machine).
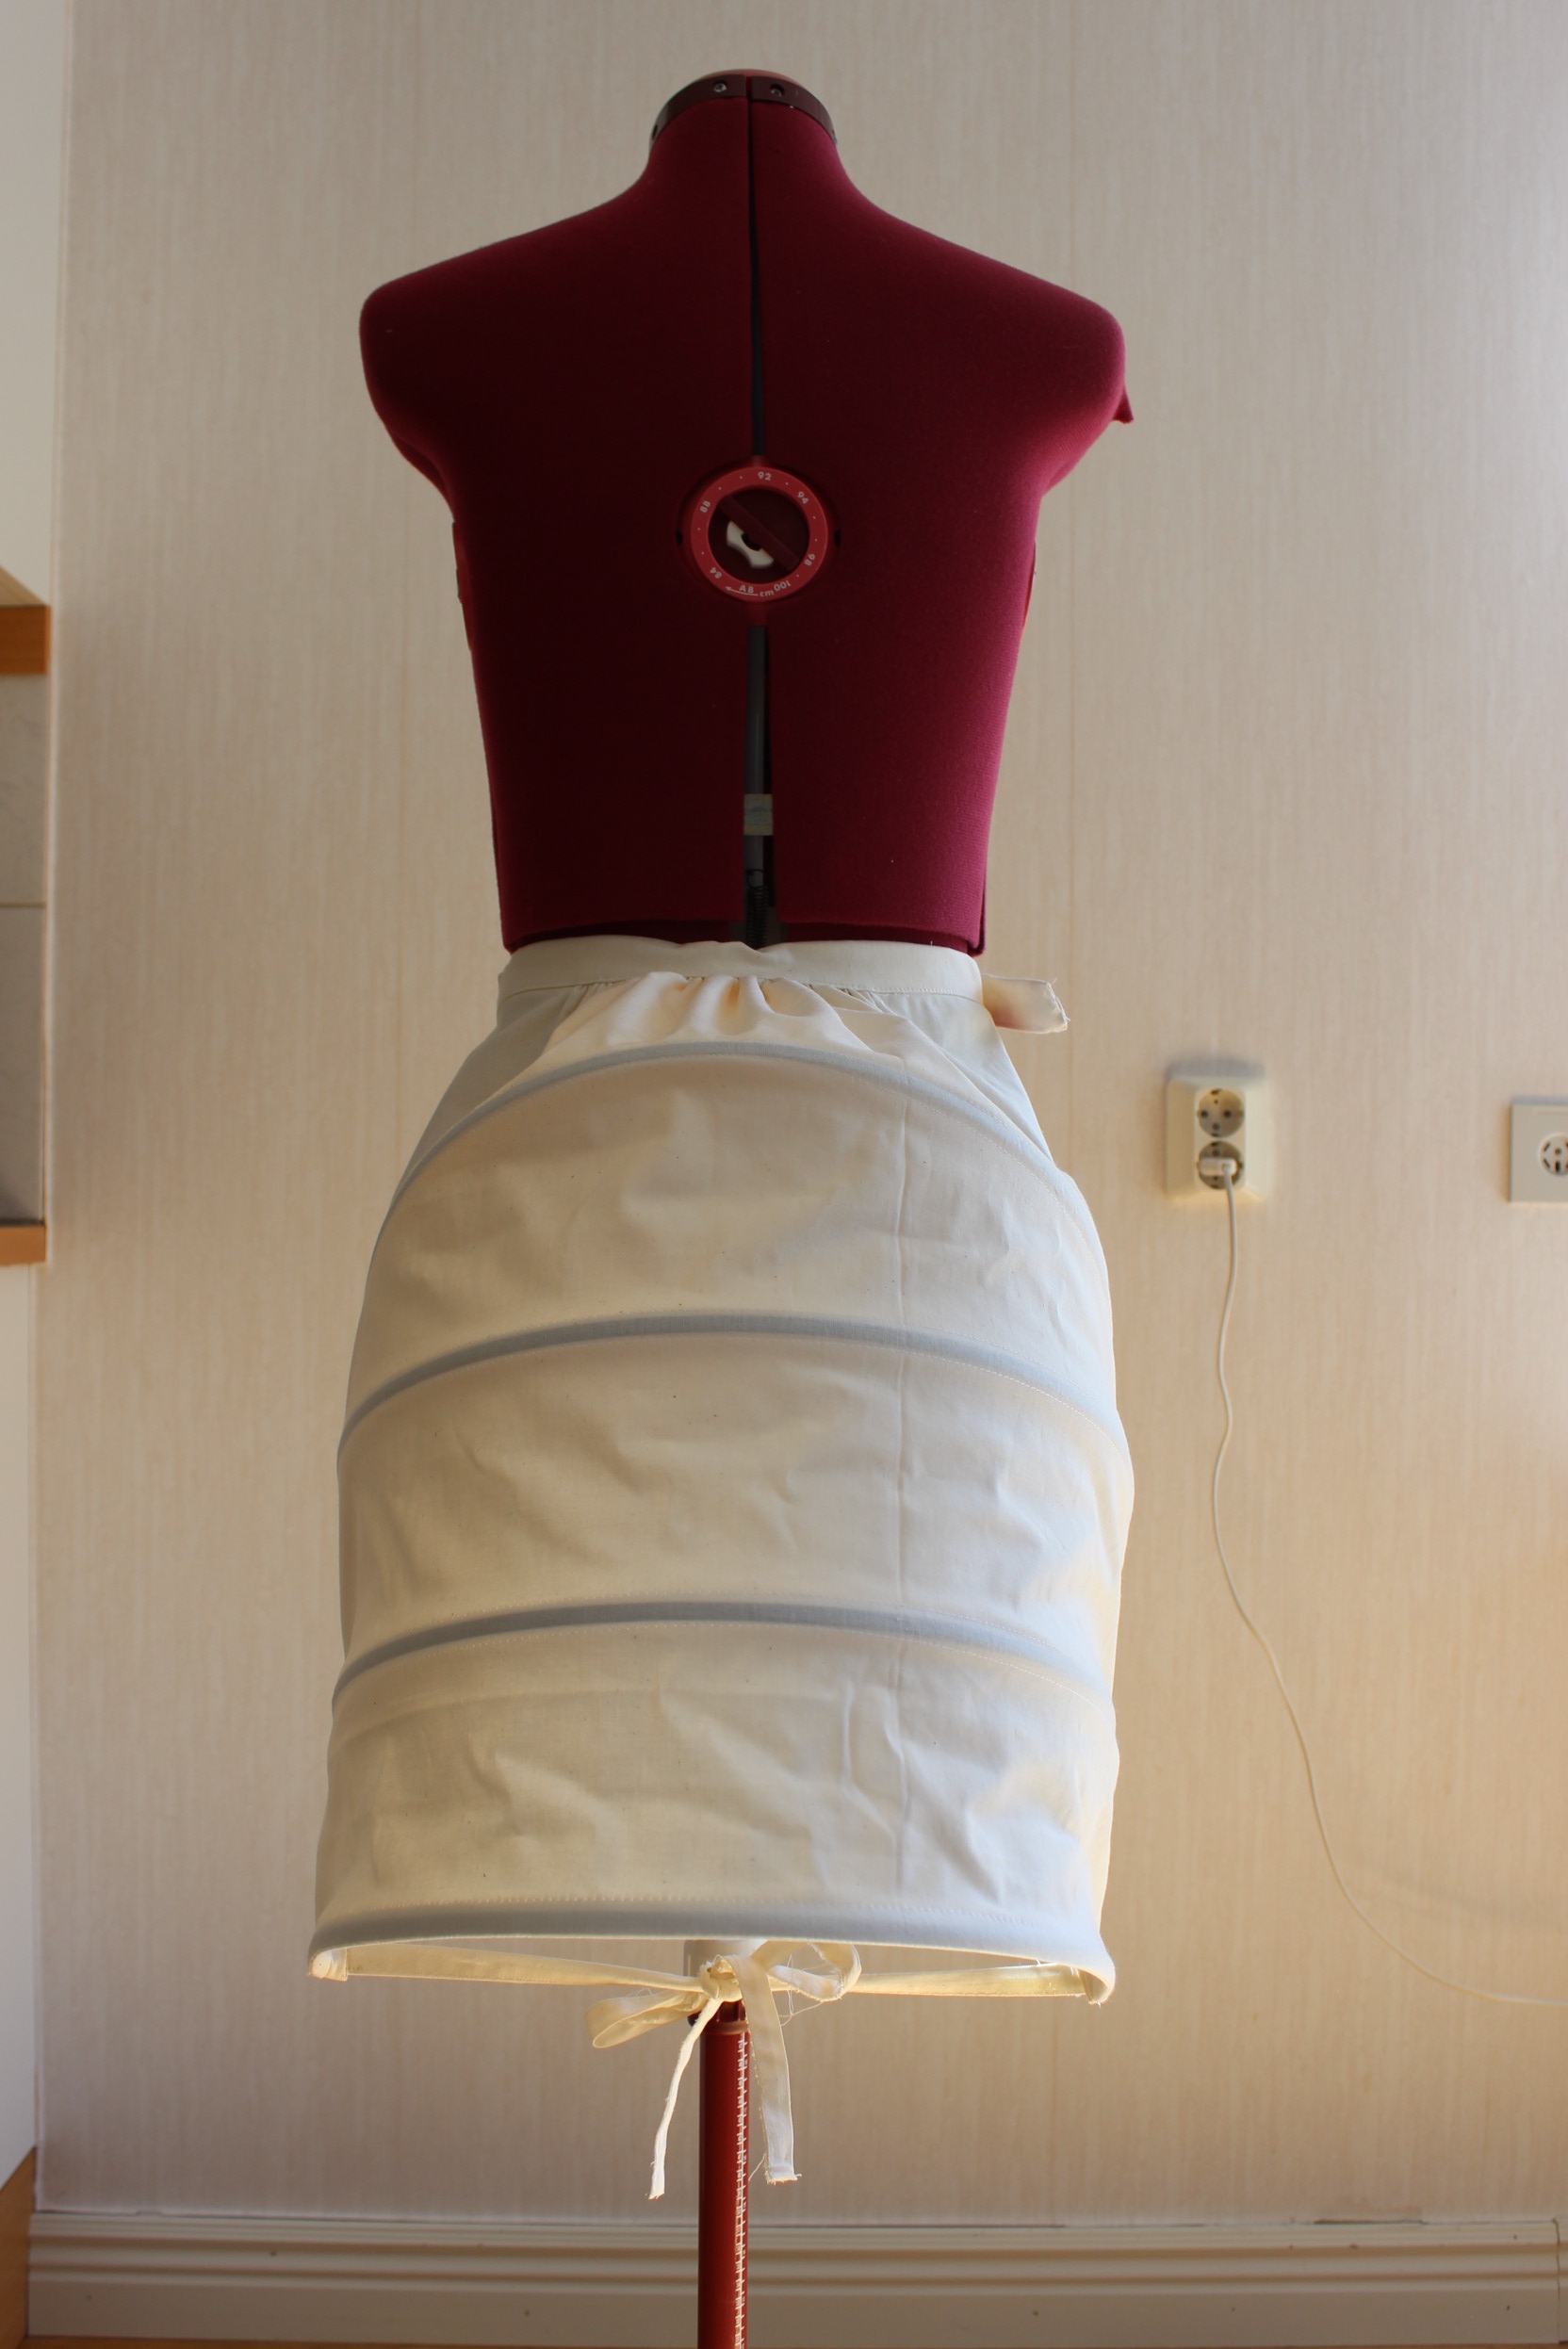
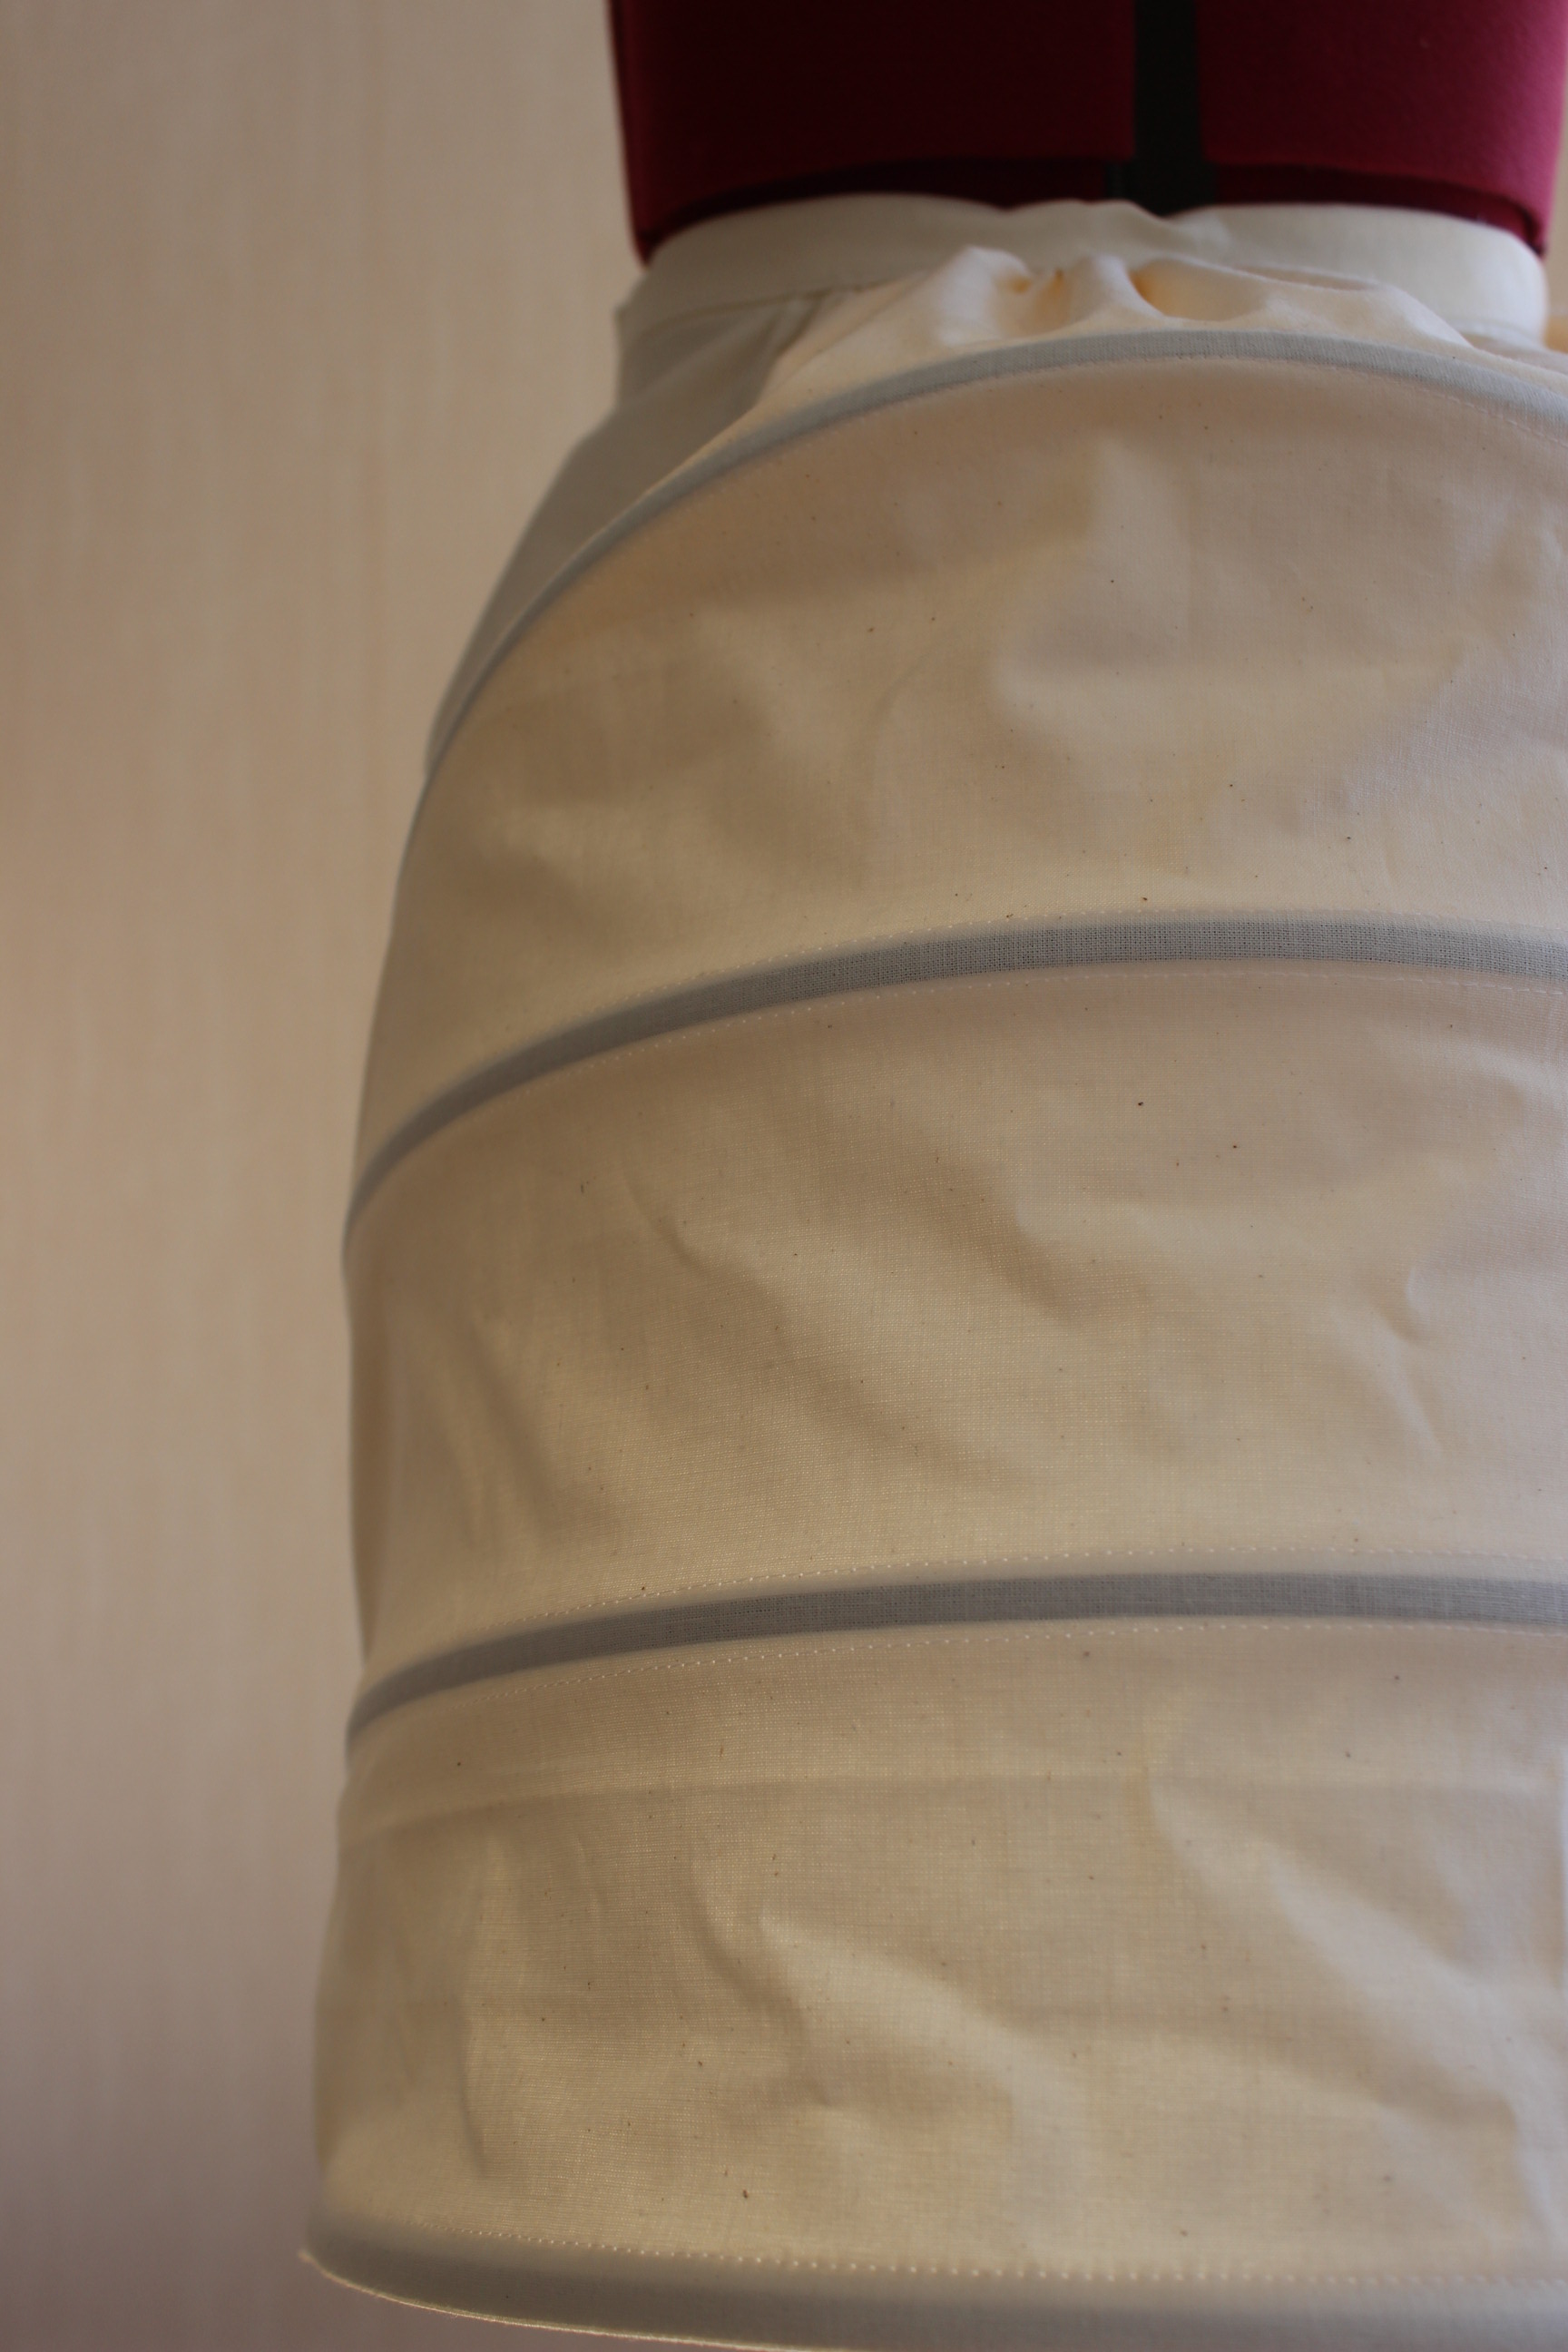
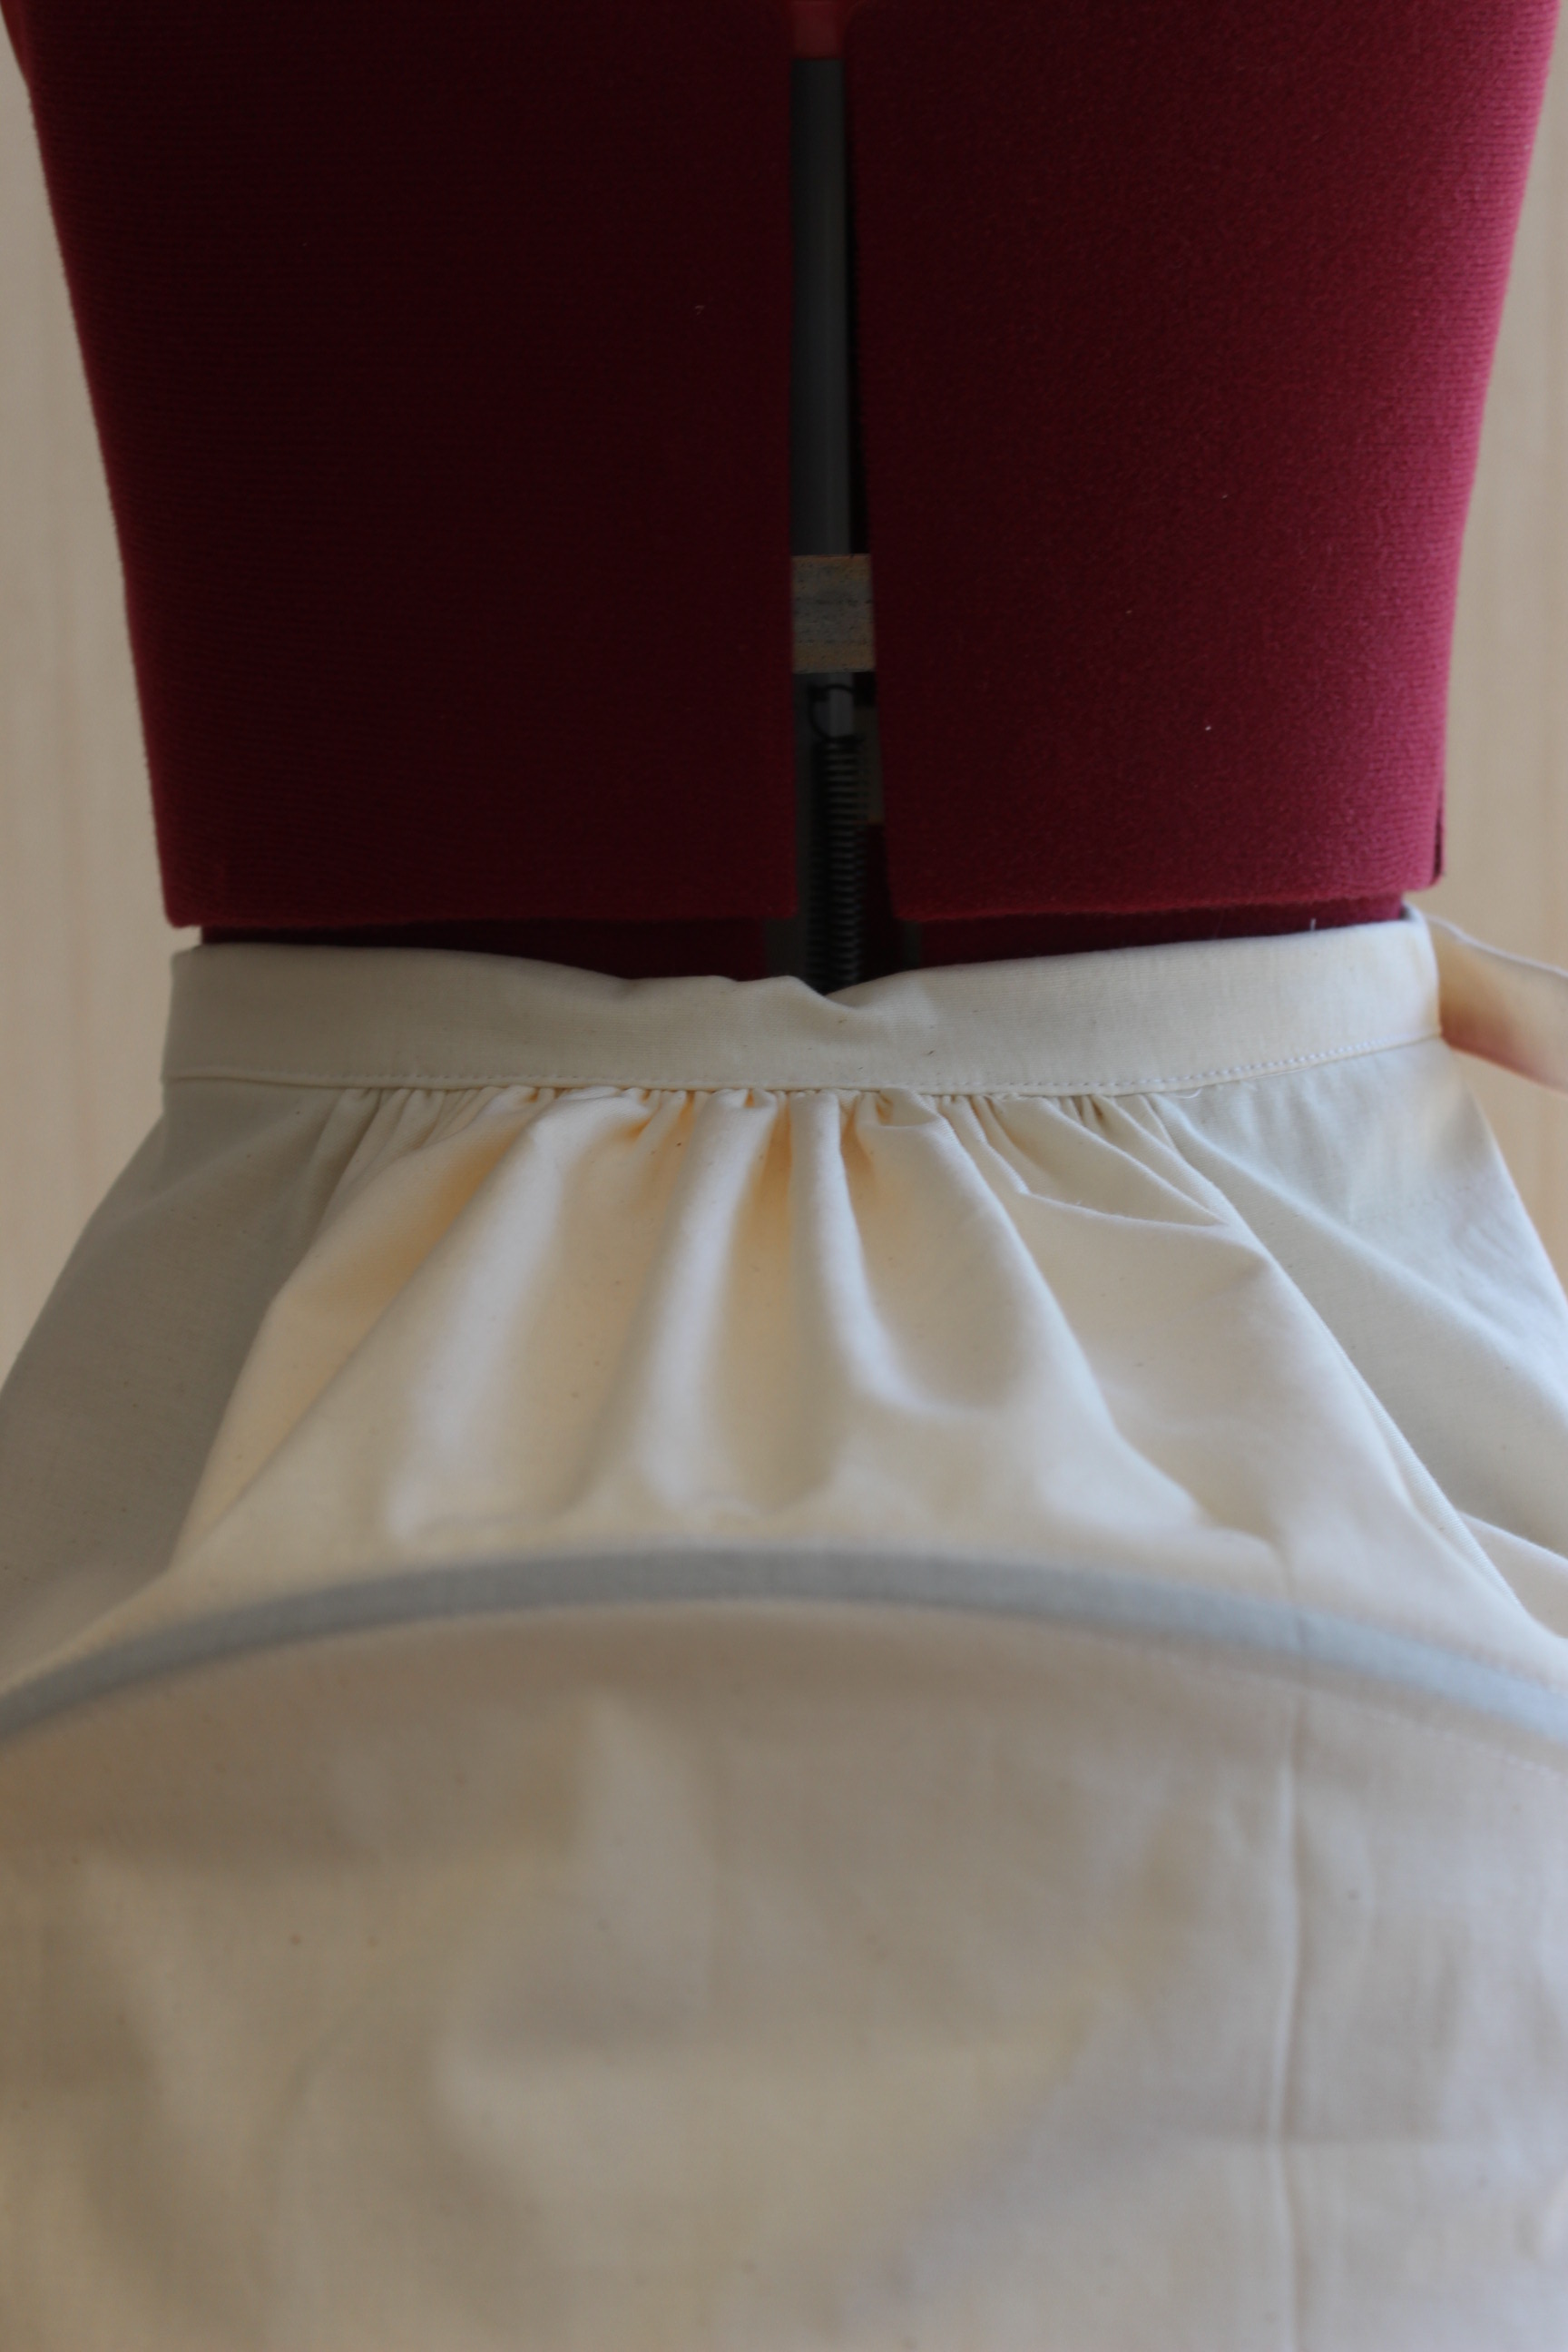
Then I lay it out on the floor to decide the size and placement of he ribbons.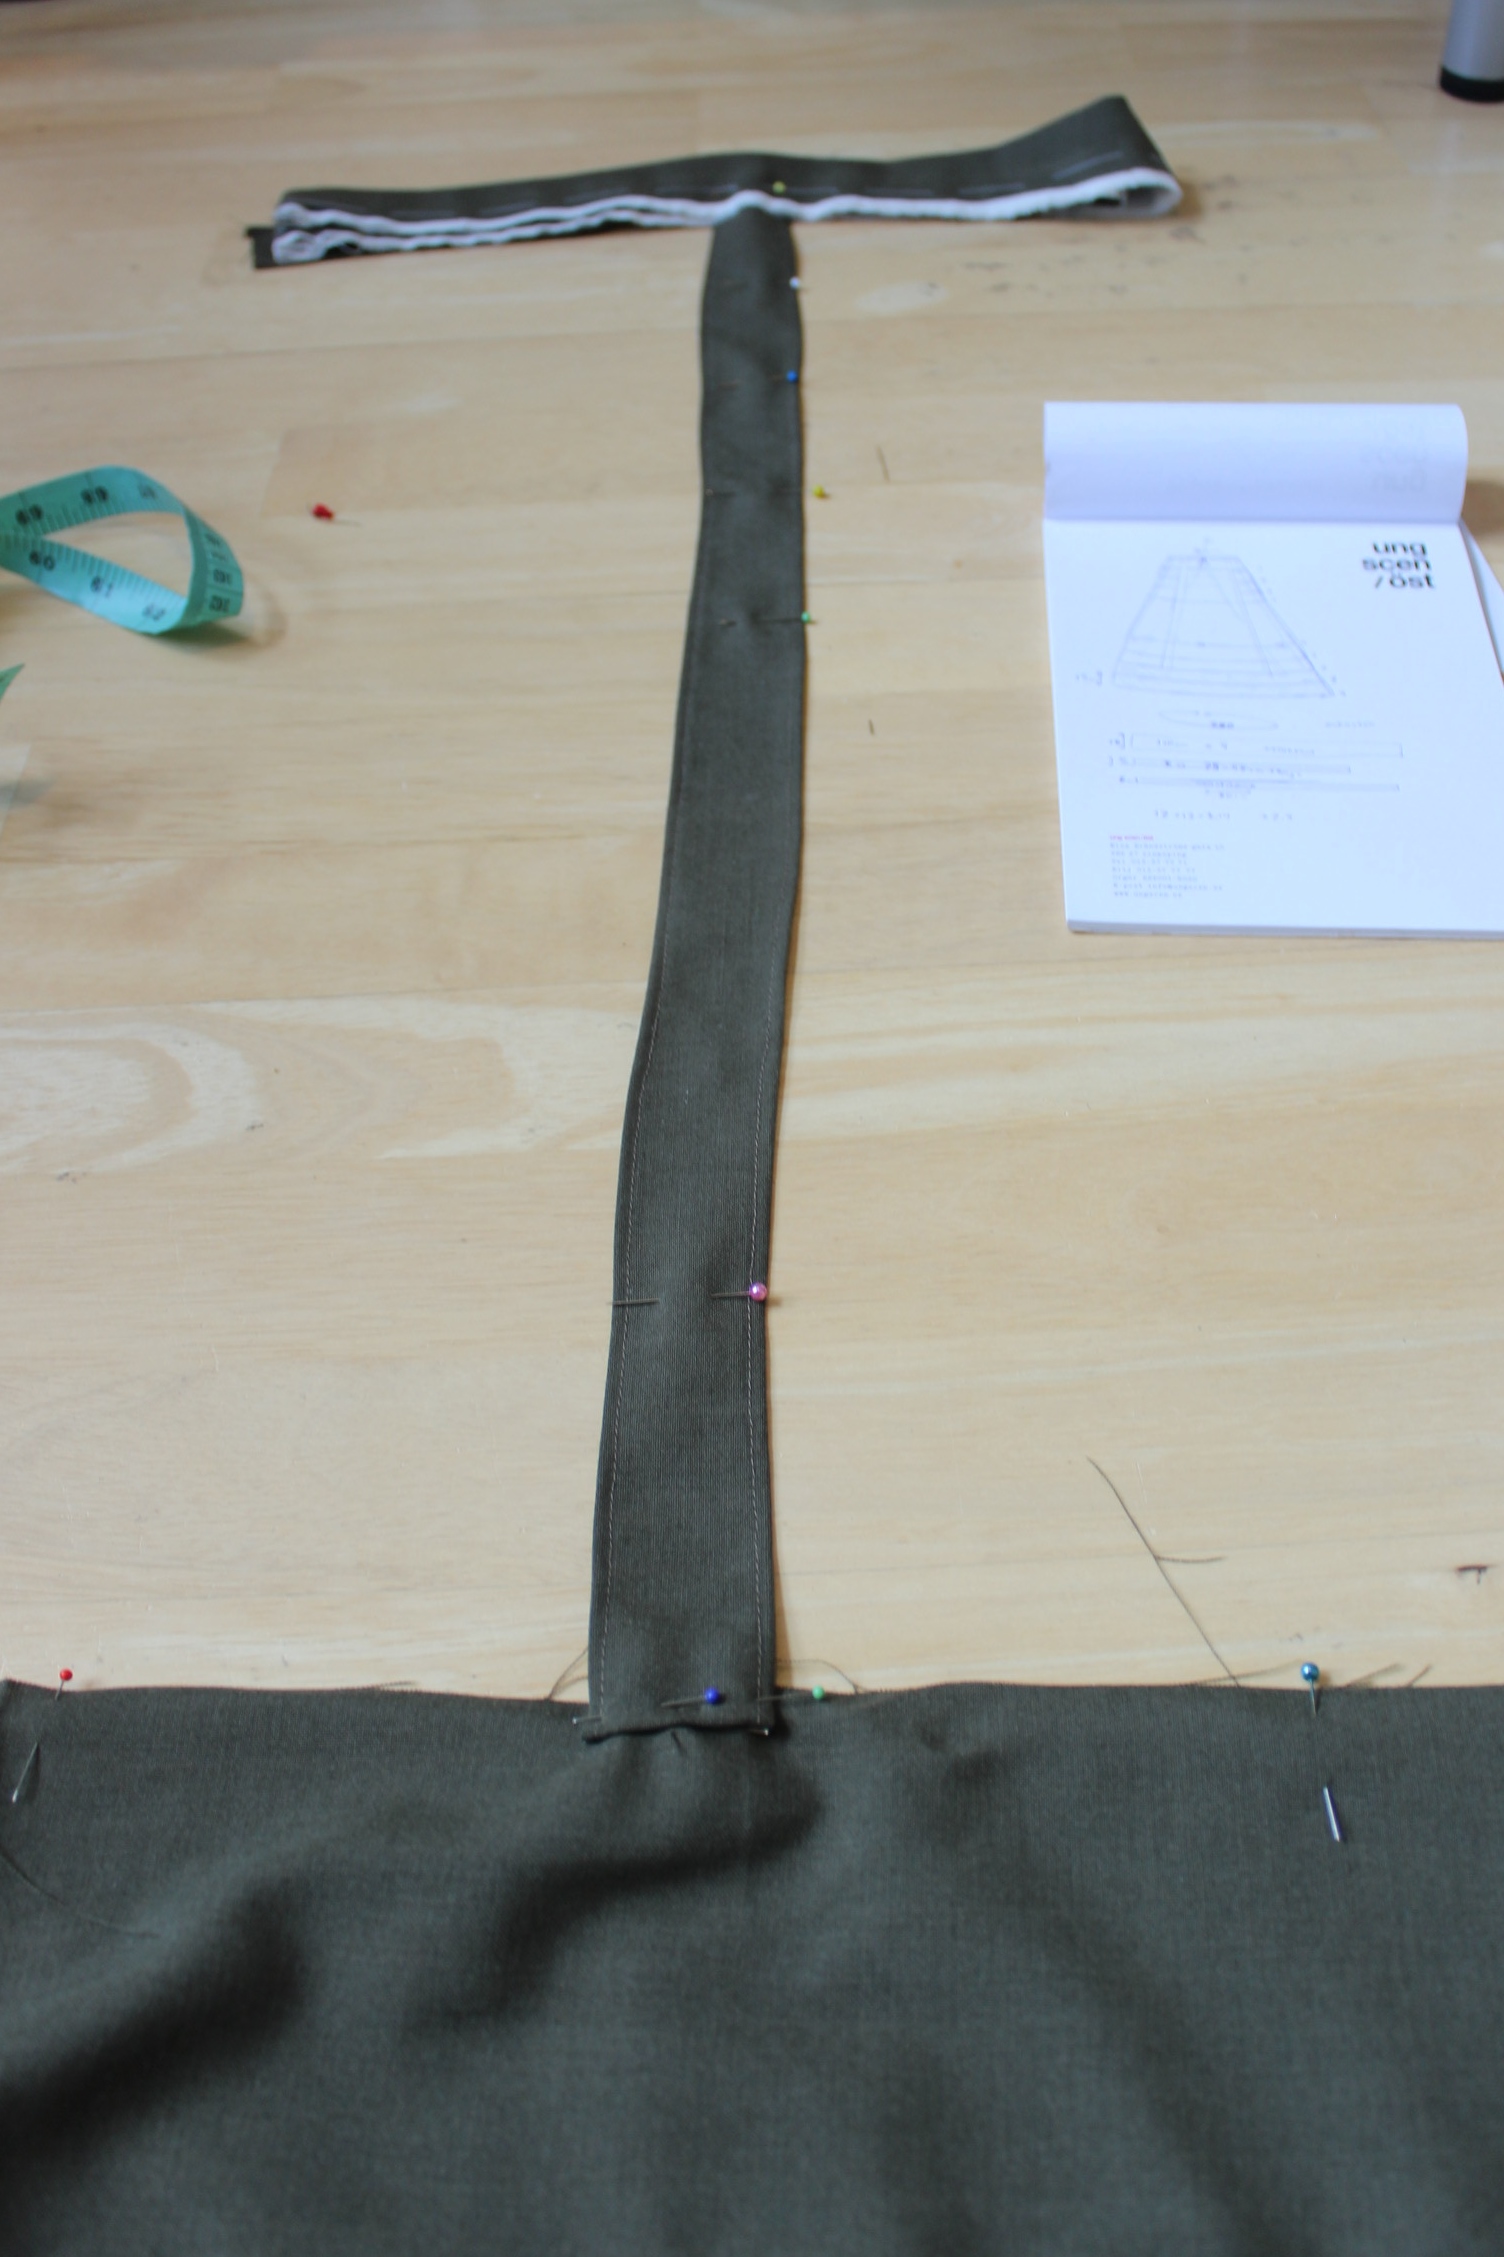
I put it on my dressform to make sure everything looked even. And stitched the ribbons down to the wasitband and lower section of the crinoline.
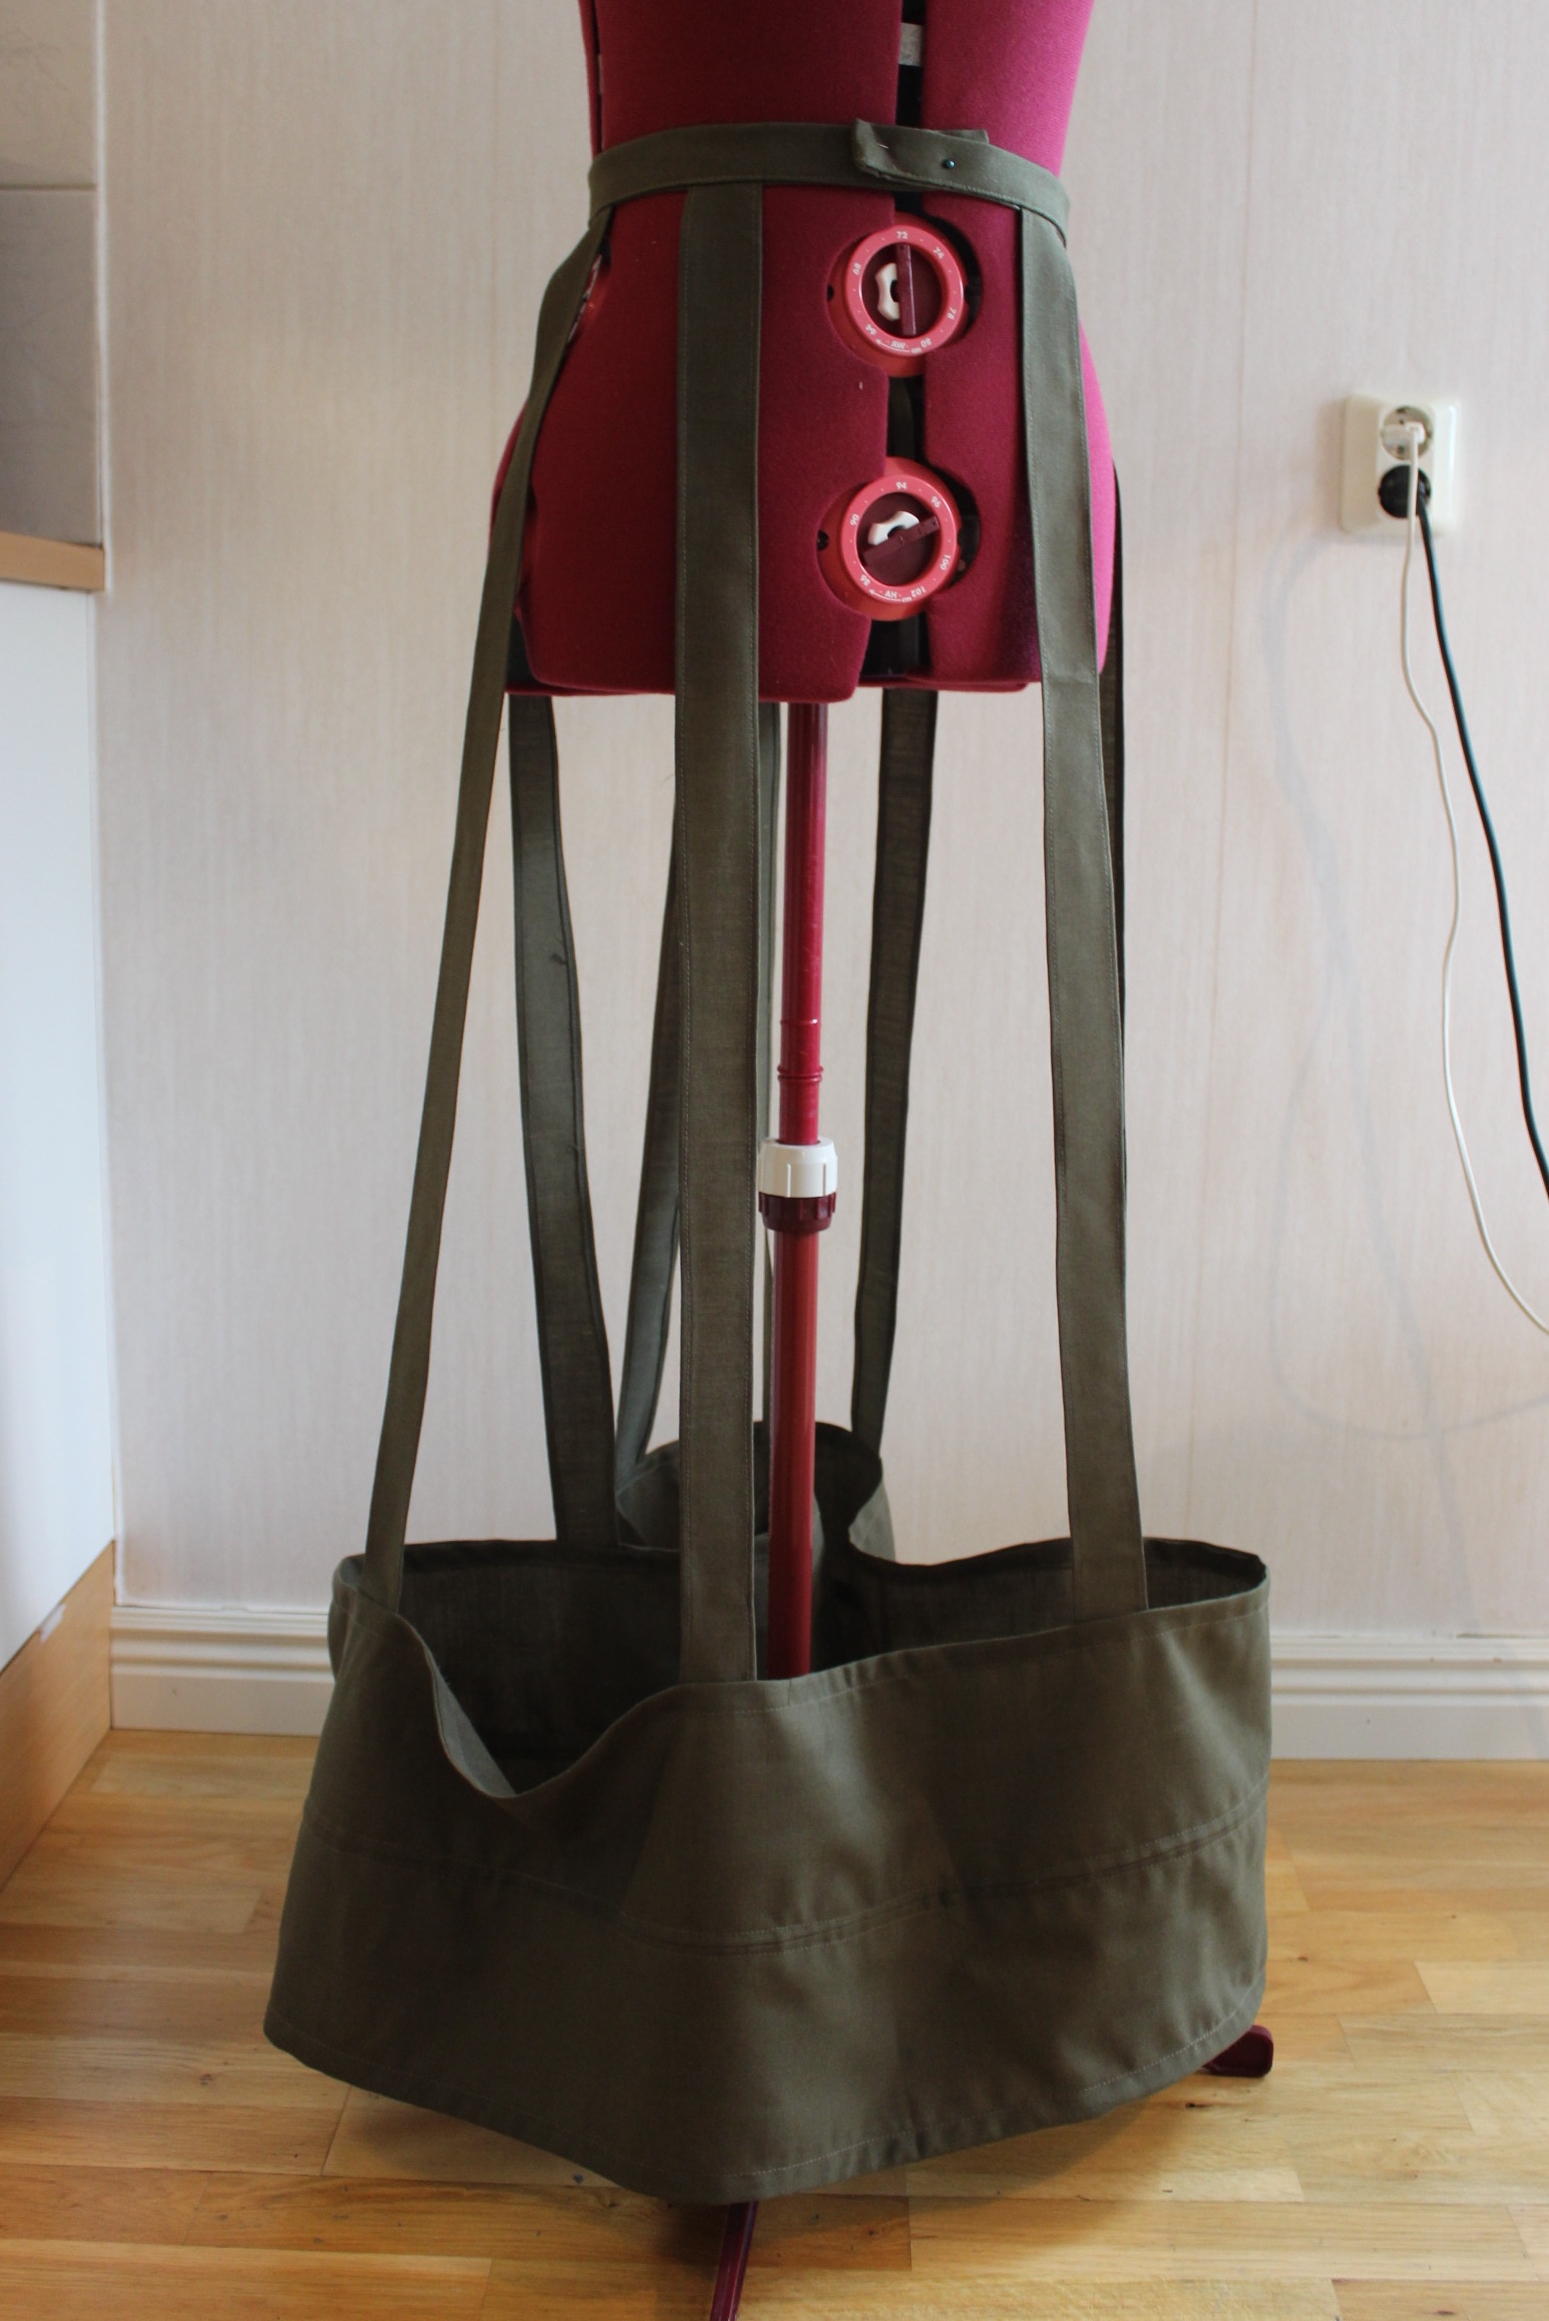 Looks kind of stupid without the boning.
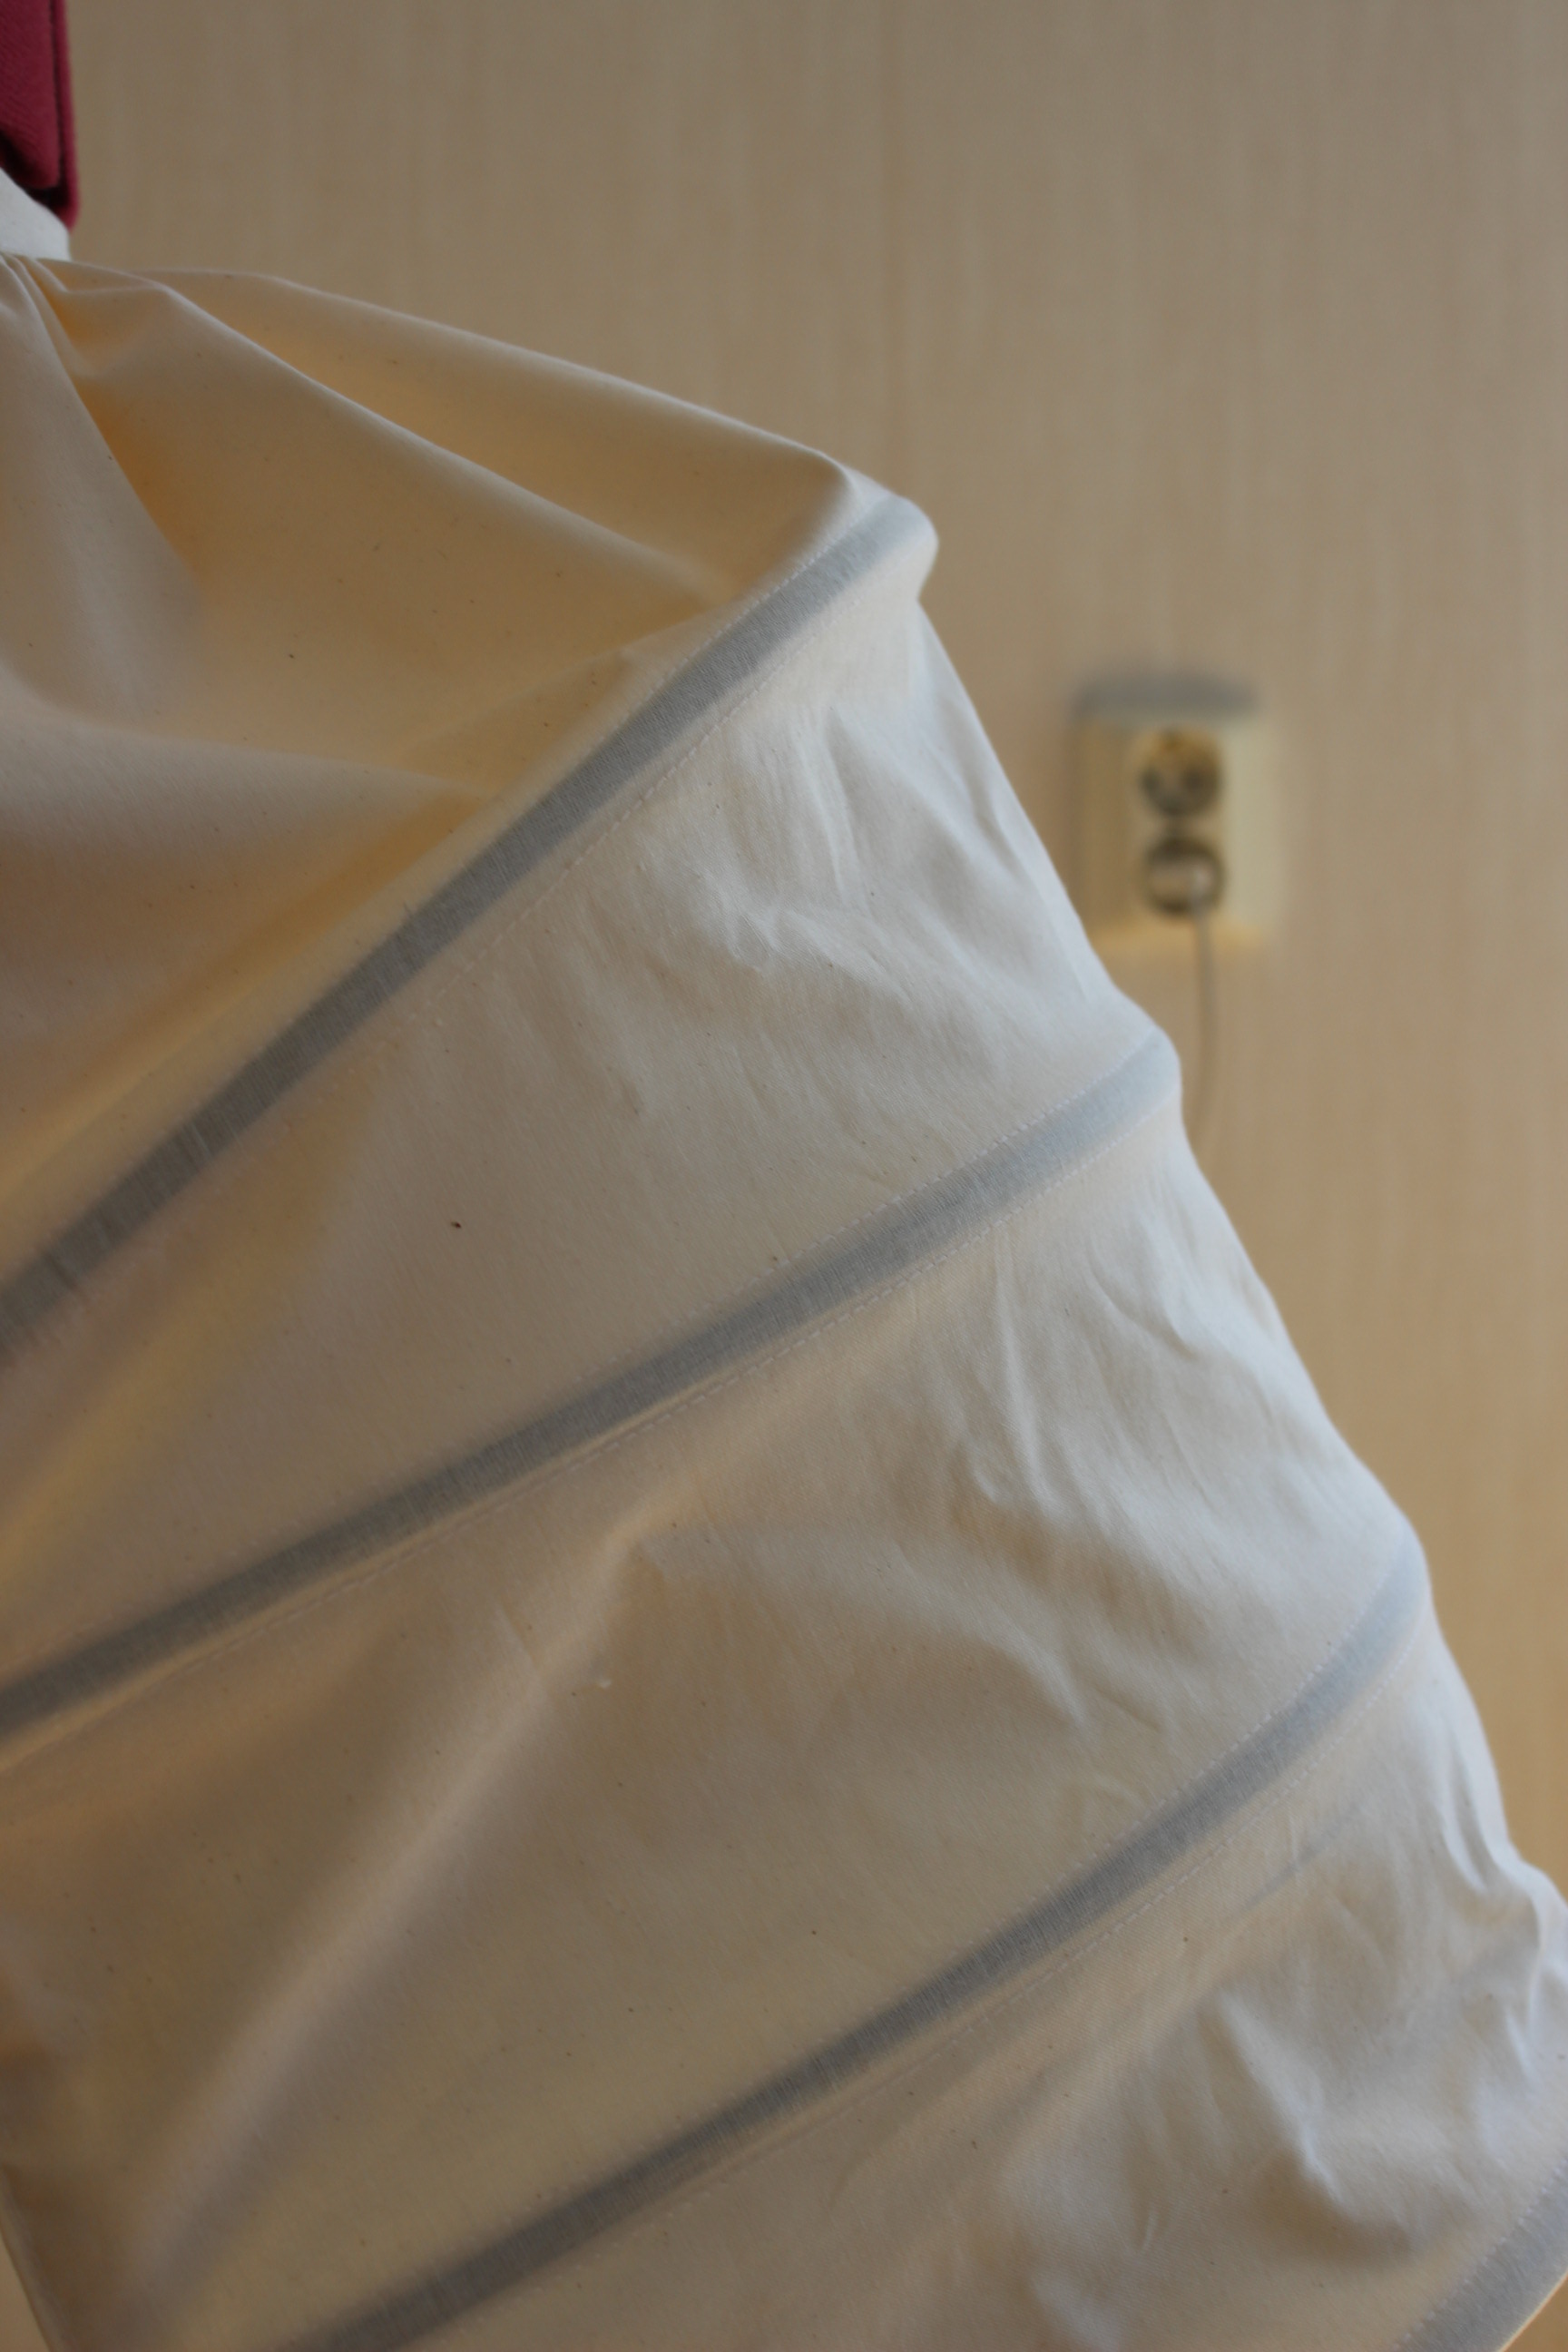
Then I pressed the smaler pieces to boning chanels about 3 cm long. I then stiched these on to the vertical ribbons, making places for the bones to conect to the foundation.
Then it was time for the boning.  I used about 11 m of steel wire, originaly ment to be used to un-plug stop in the drain.
I used some electrical tape to cover the sharp edges, and taped the ends togeter inside the chanels in the bottom part of the crinoline.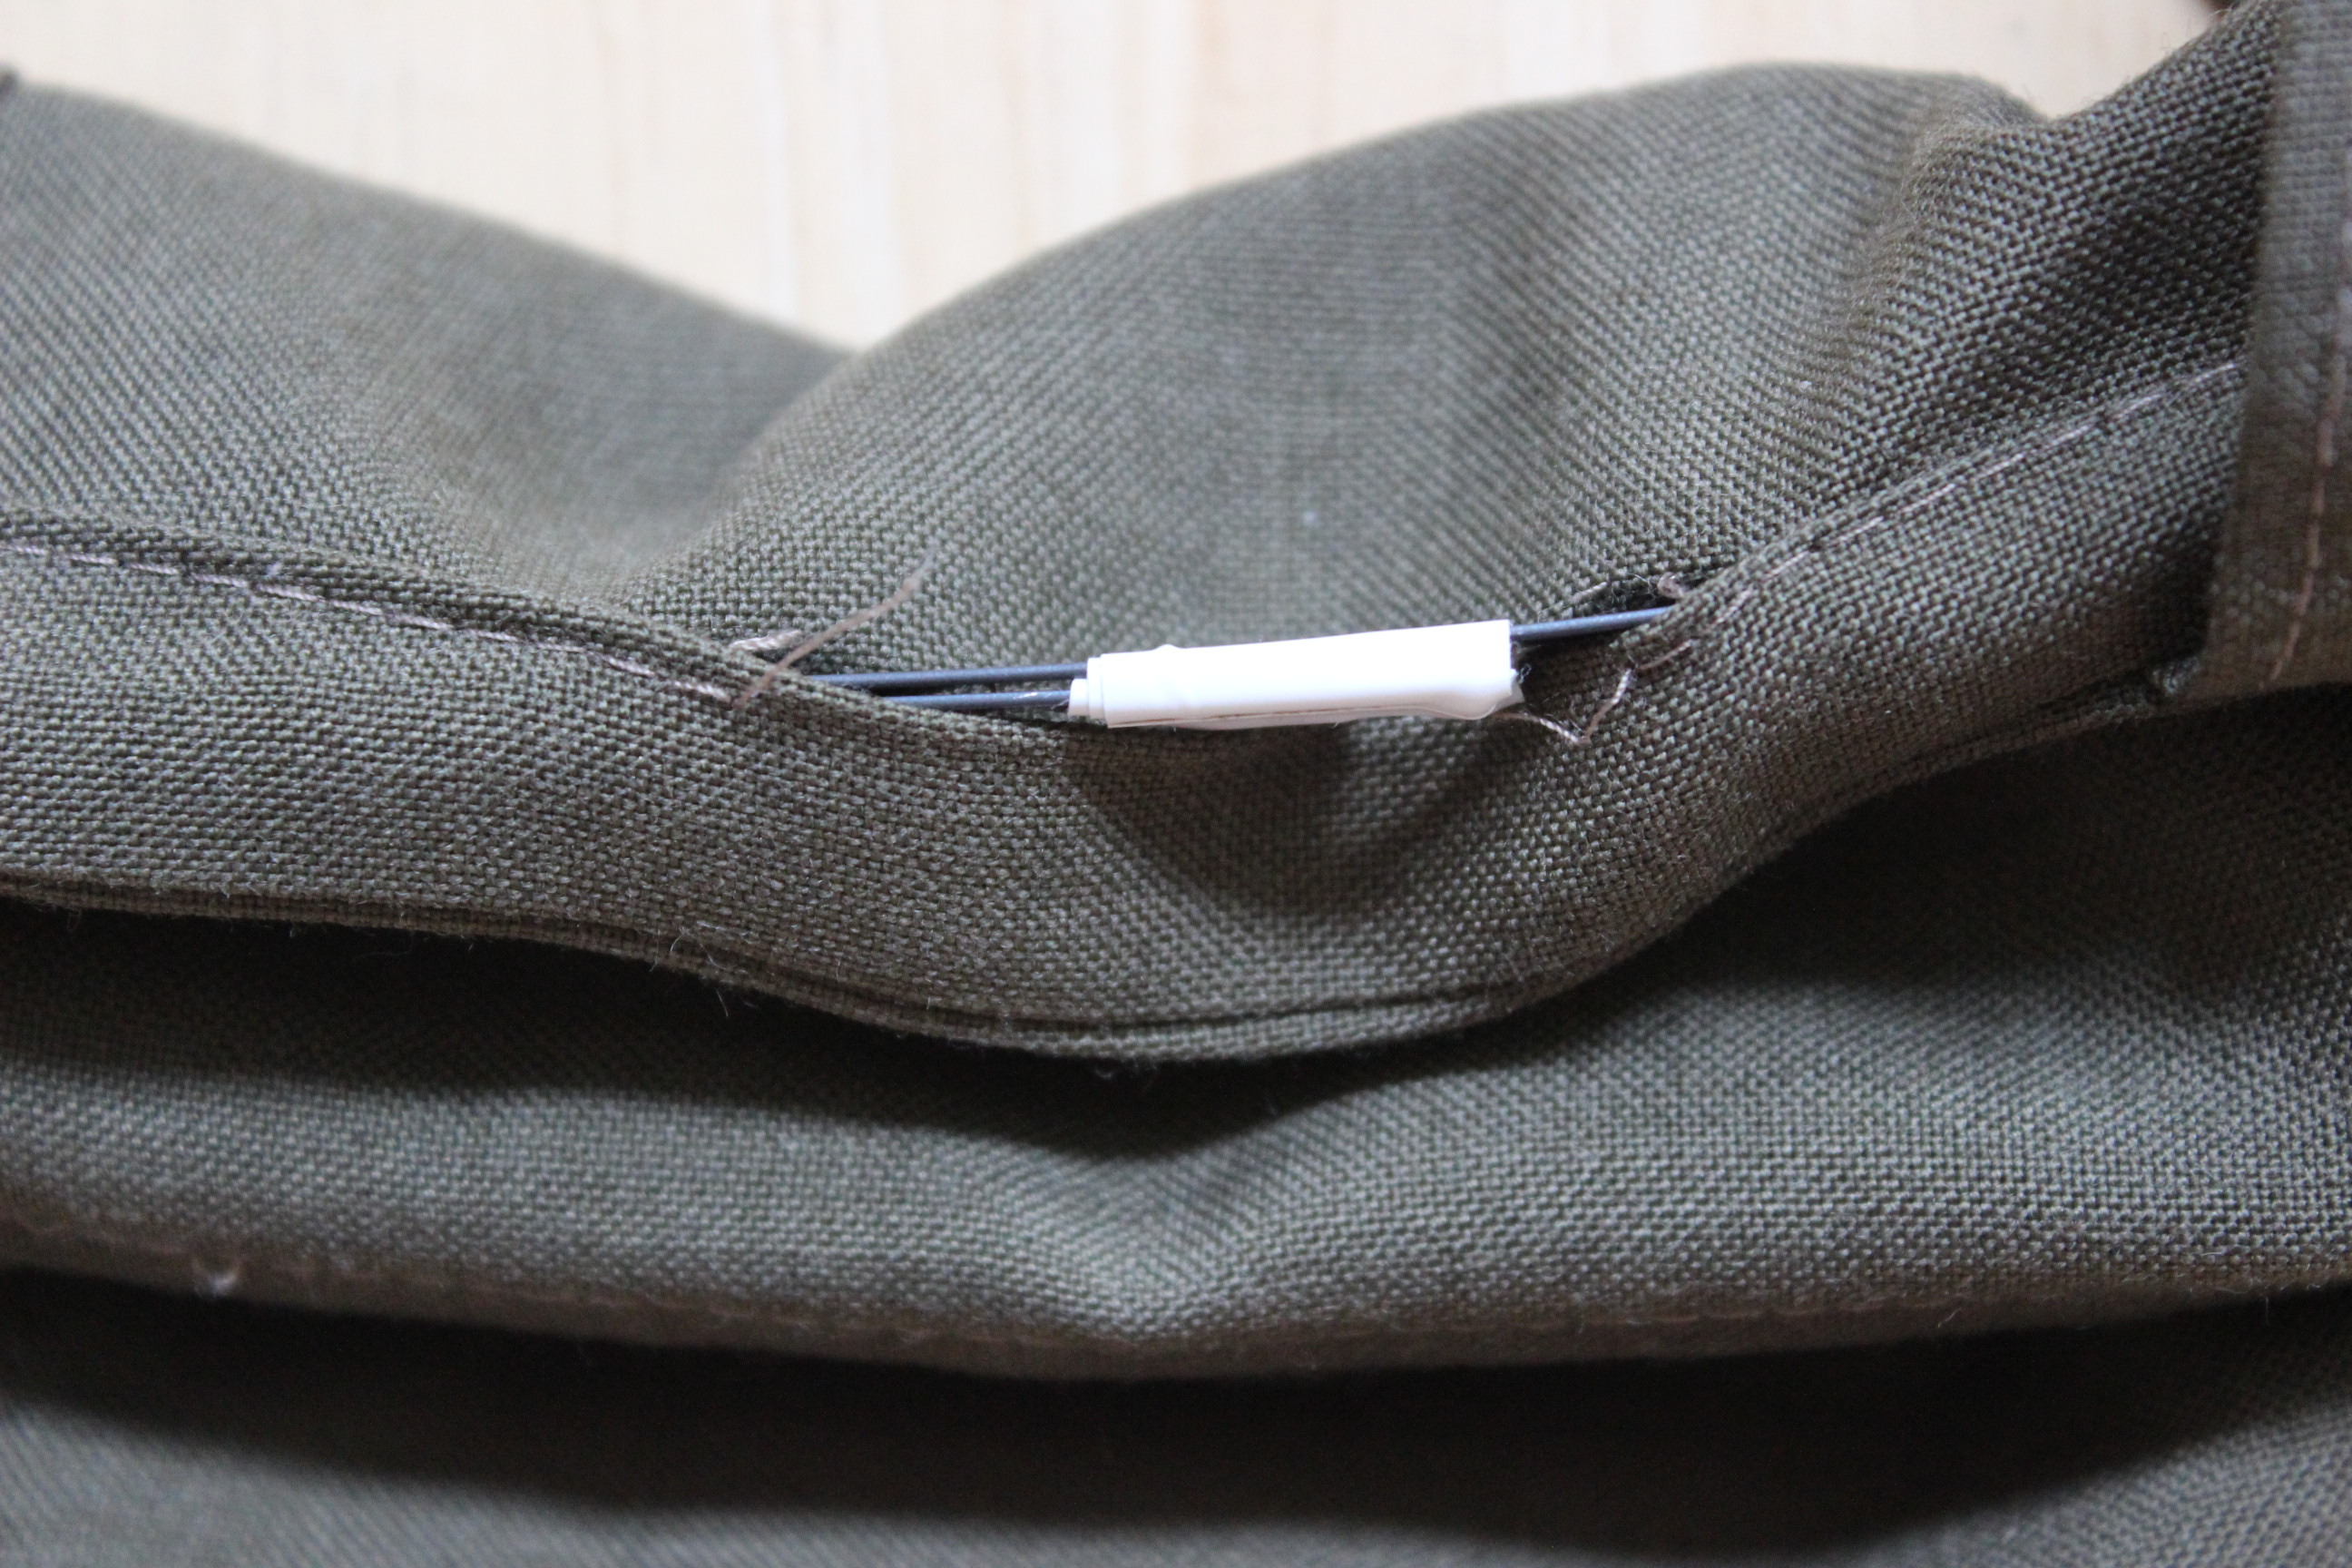
 Here you can se the places in which I taped the wires togeter. I then stiched the holes back up.
Working my way up from the bottom I inserted the boning and closed each hoop before moving on to the next.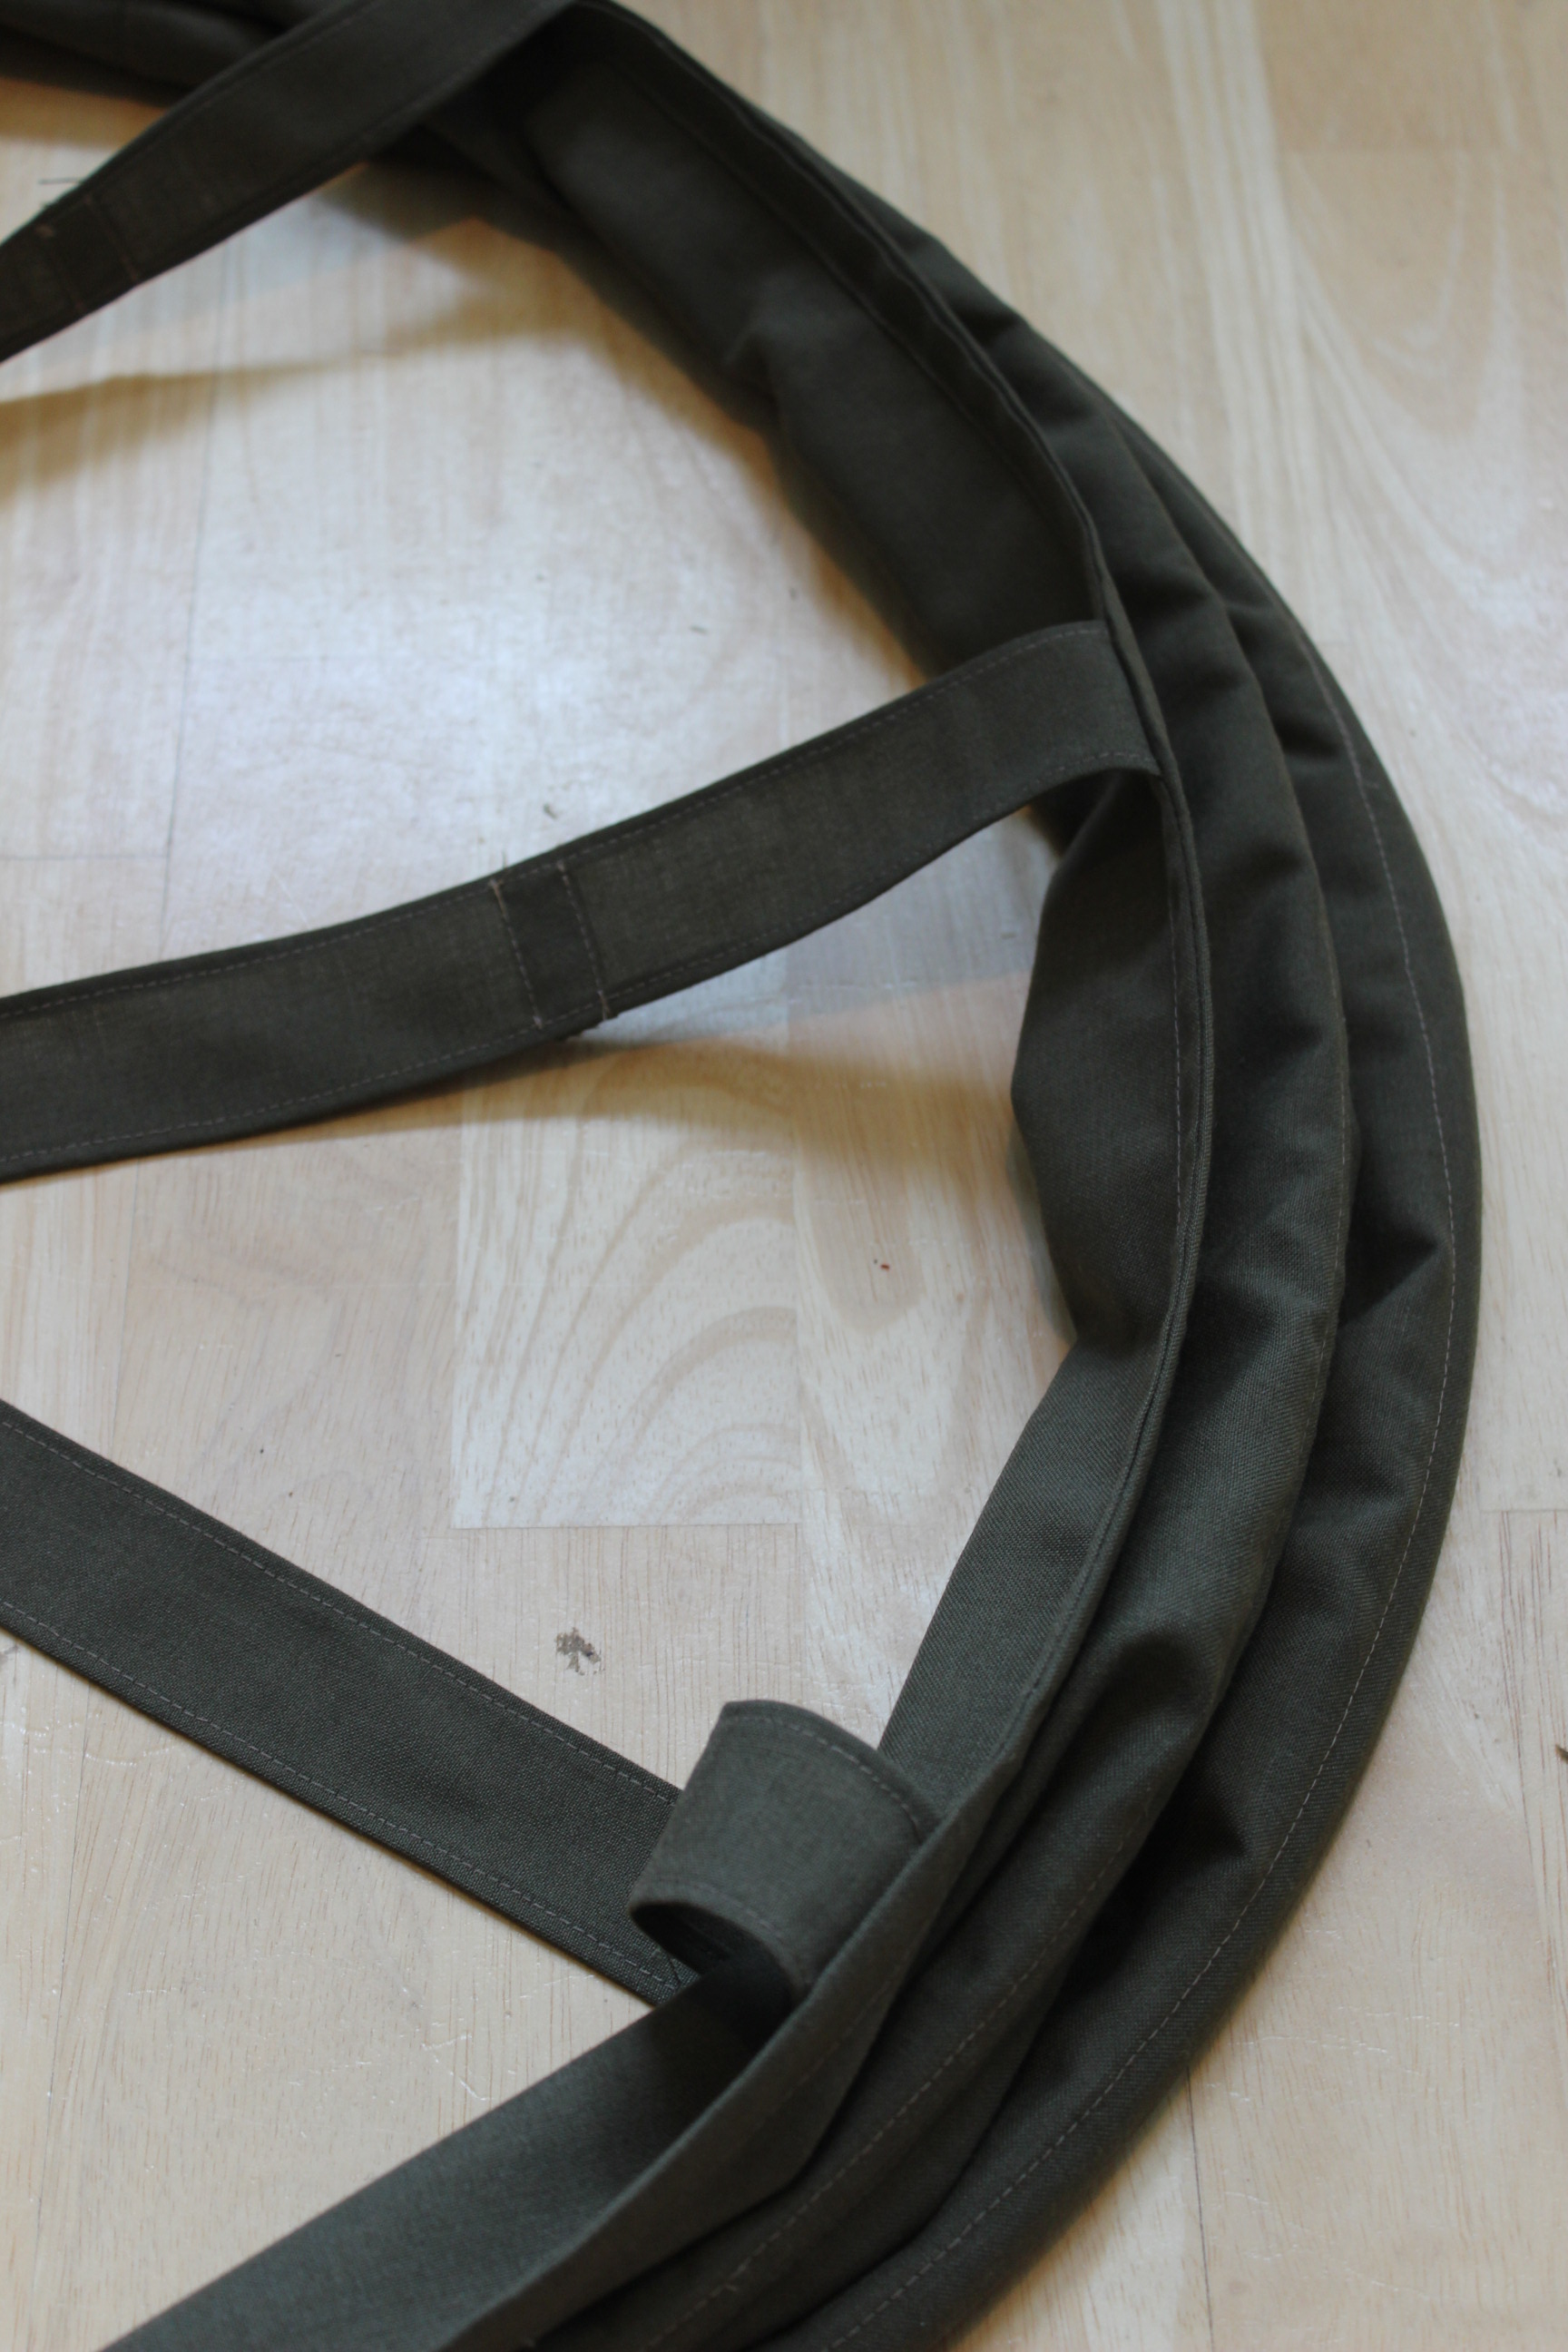 Three bones inserted.
When I got to the “free” bones I inserted them into the smal chanels at each vertical ribbon, and taped the hoop shut at the end.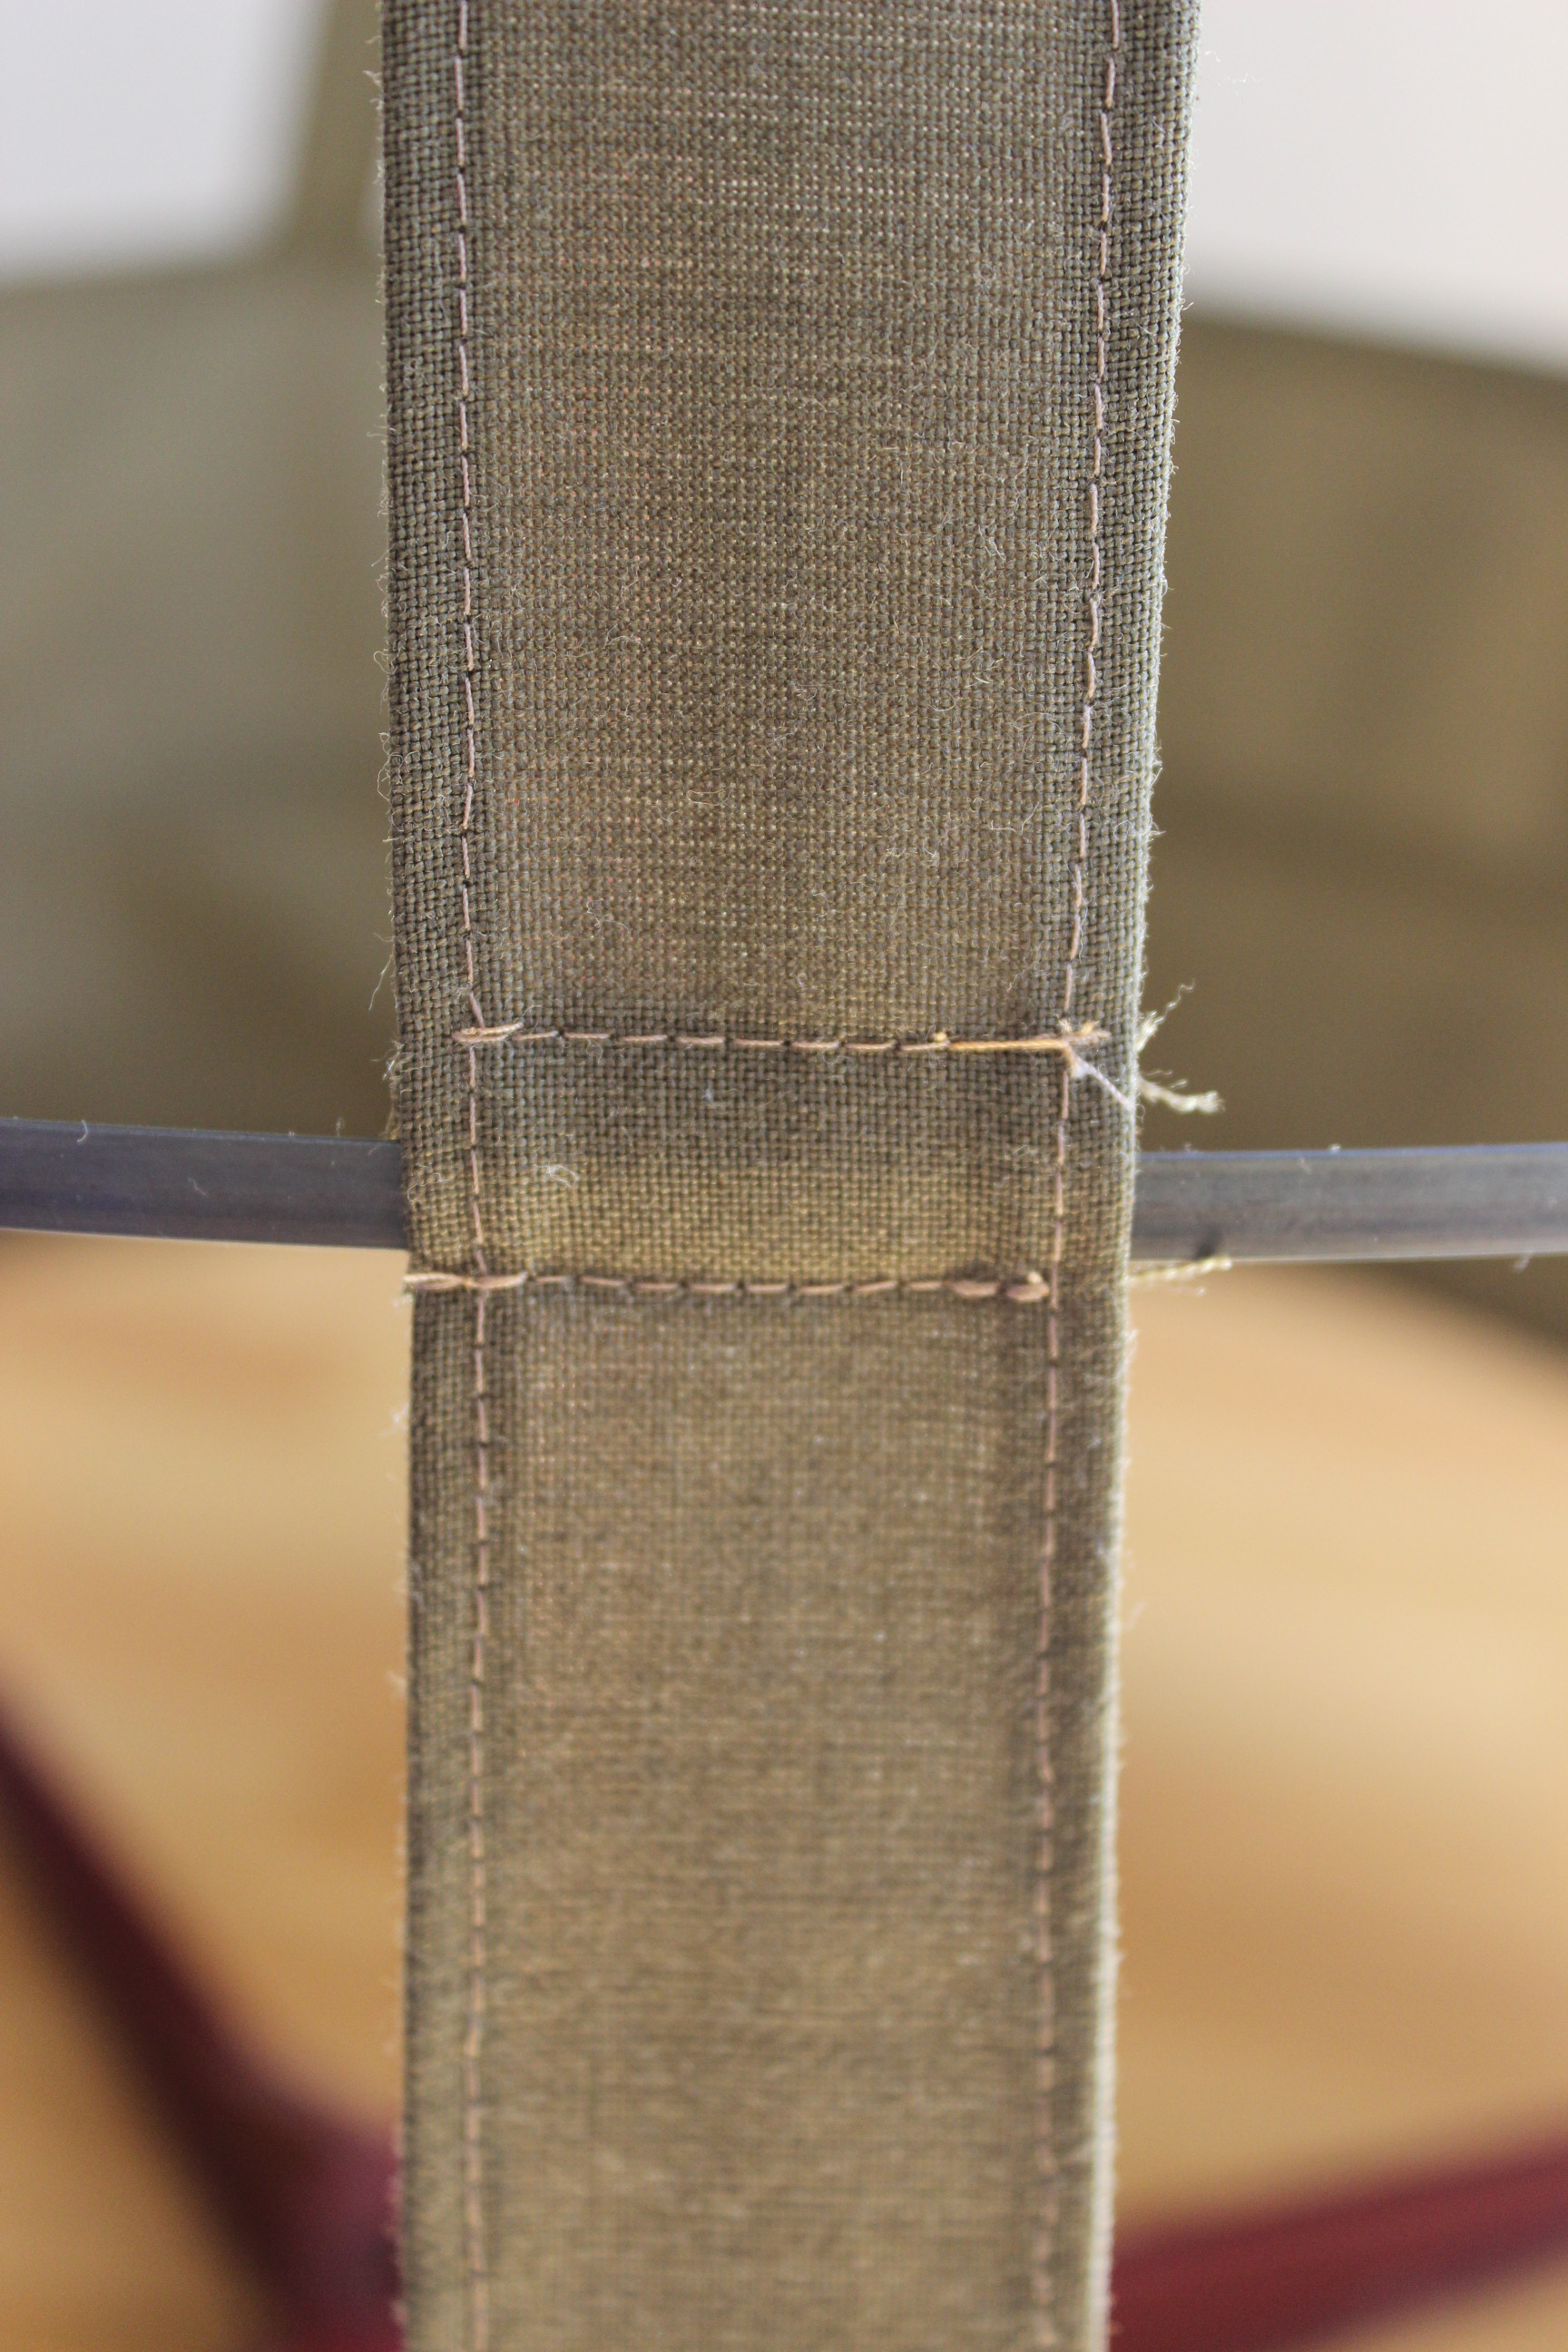
Then I tried it on to get a better look of how it would look.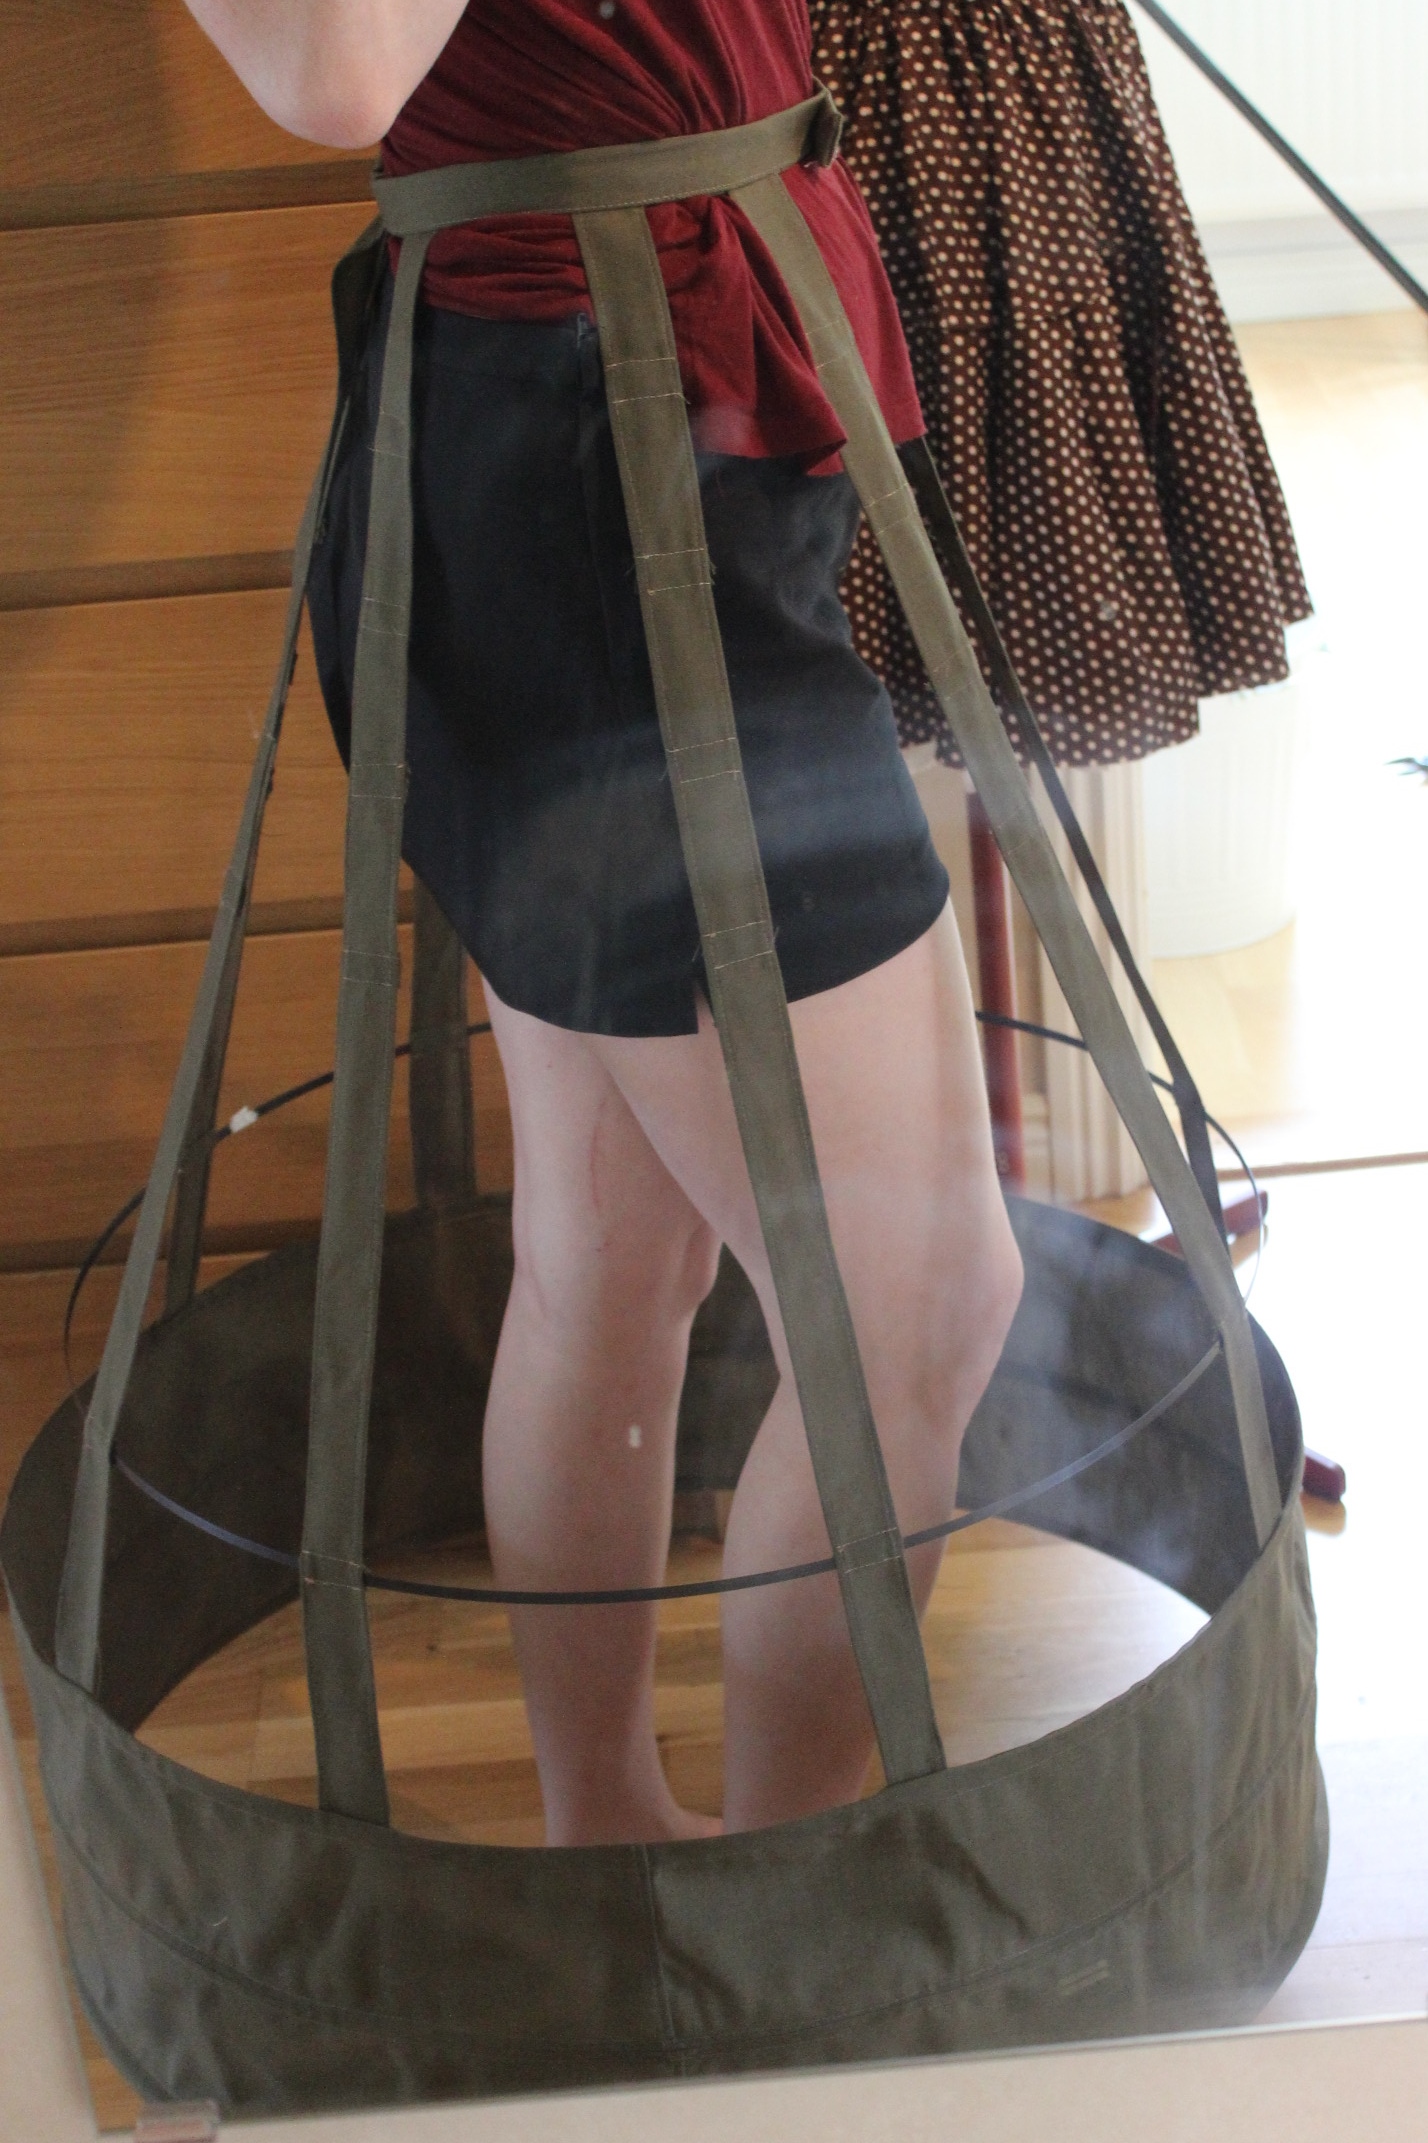 Pretty cool, but still 4 more bones to go.
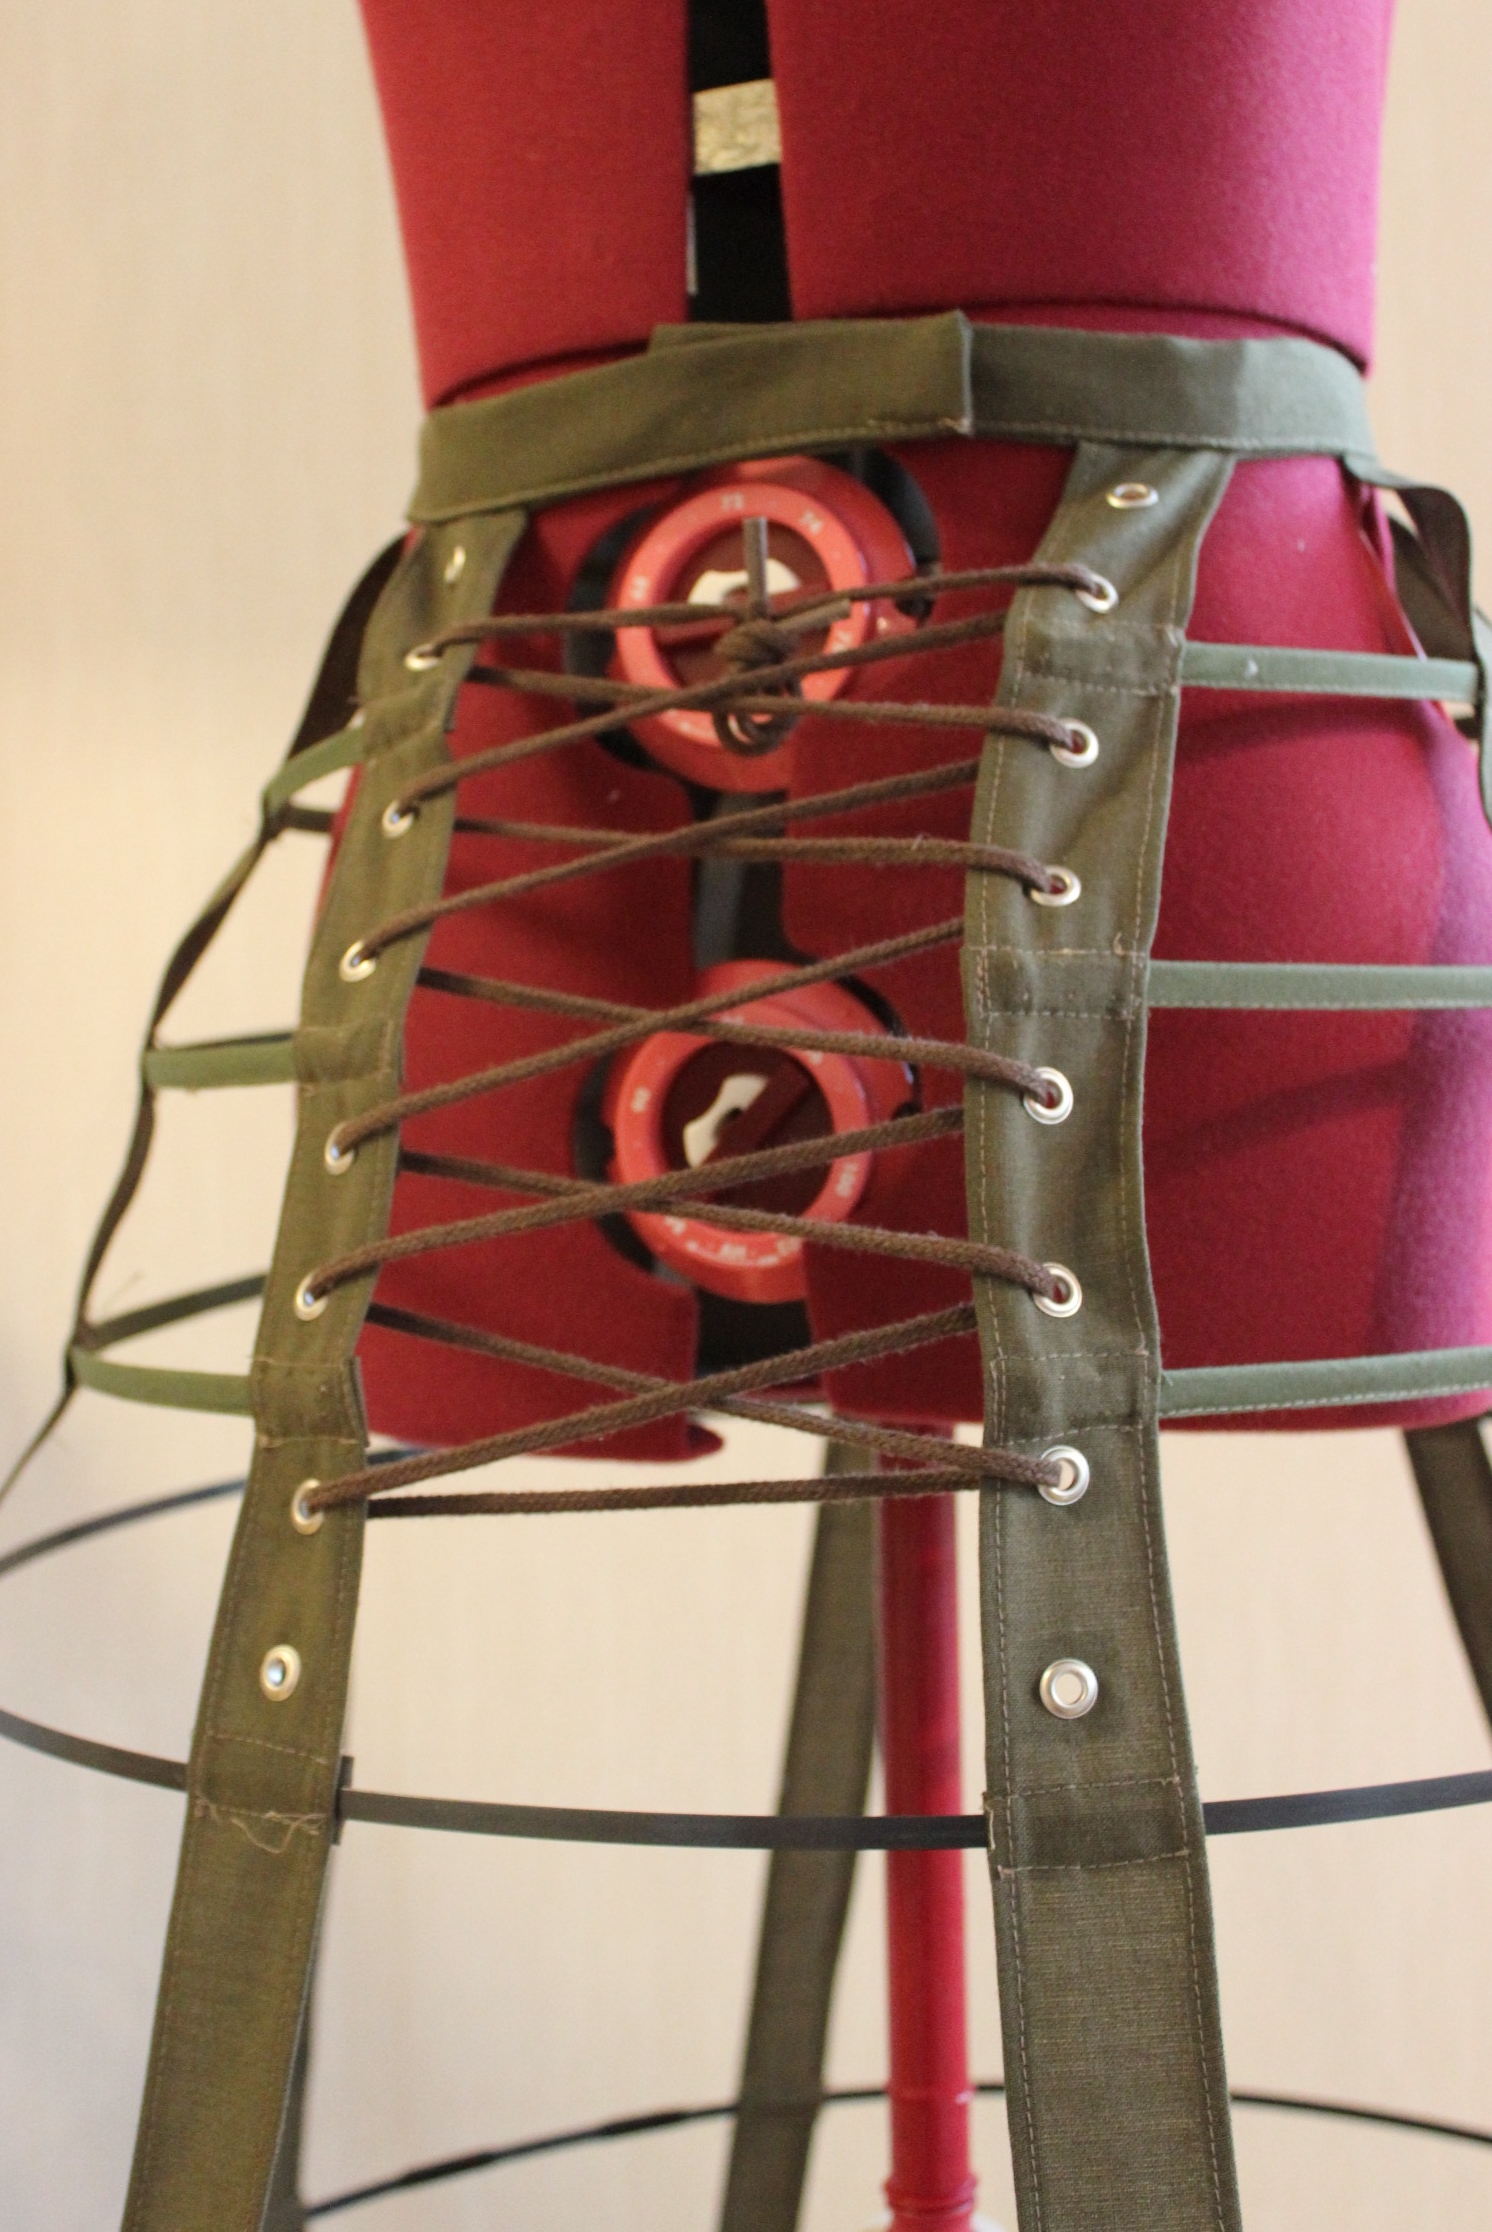
I left the top front open and free of bones to be able to get in and out of the skirt.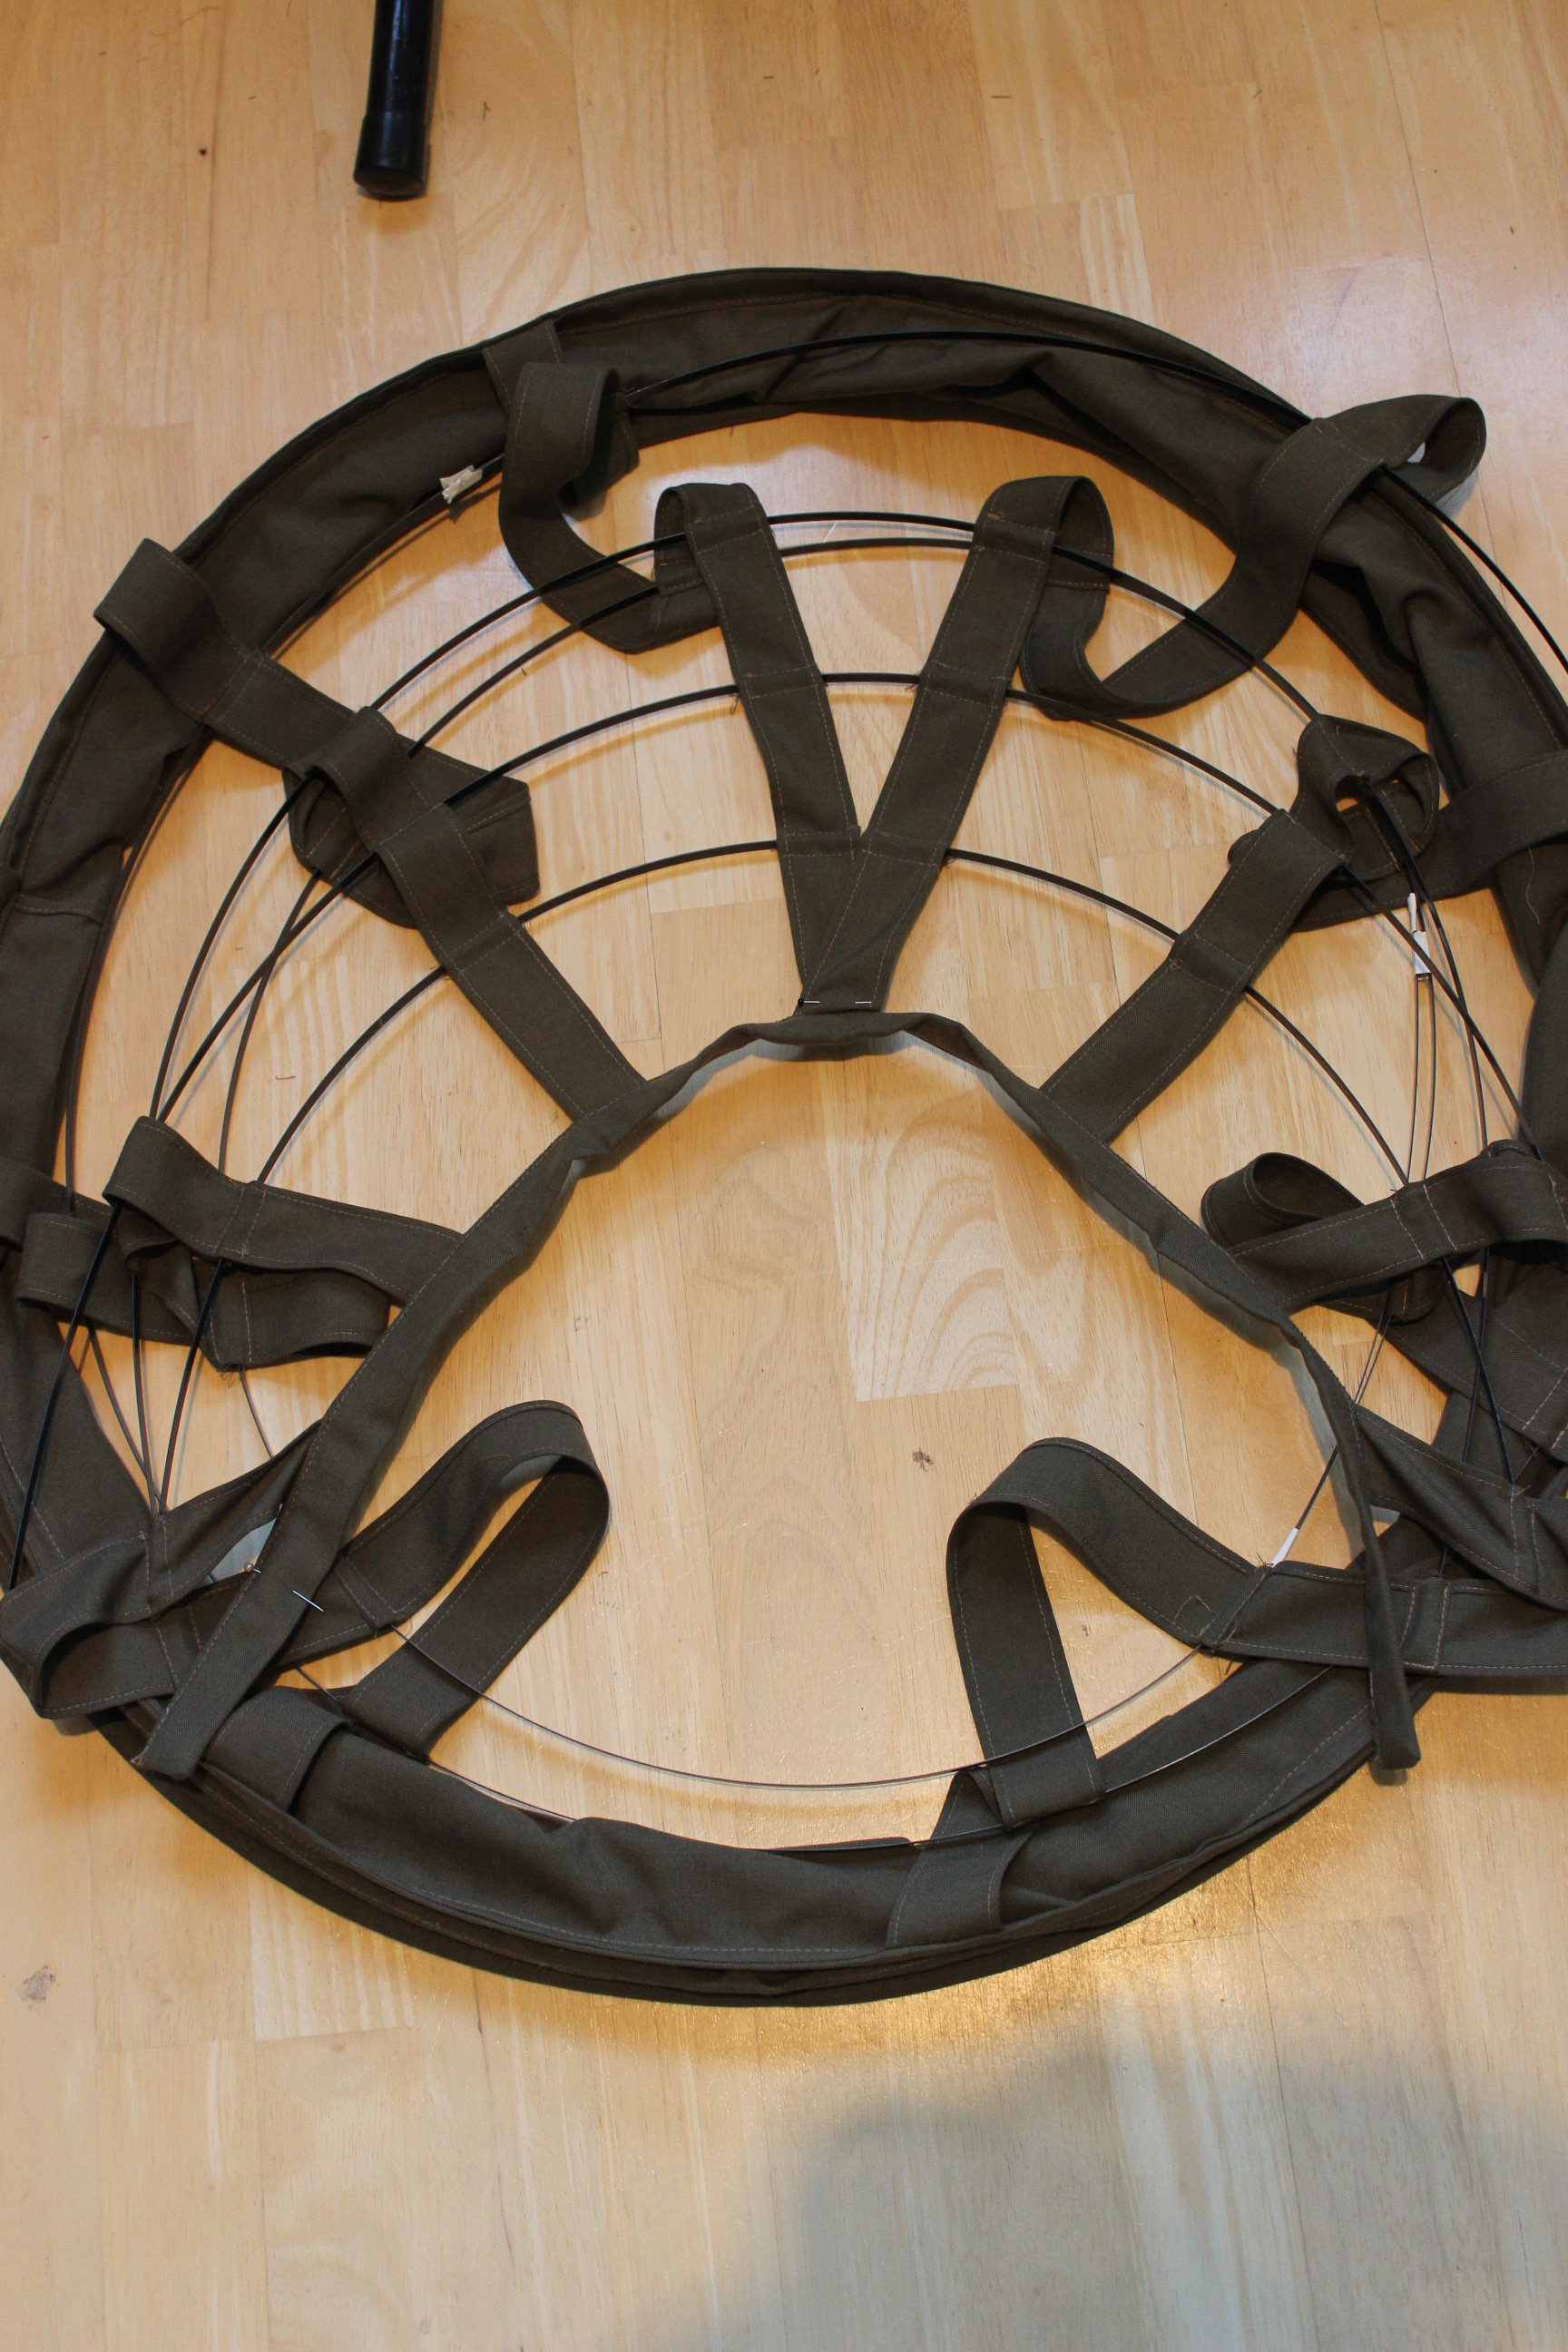
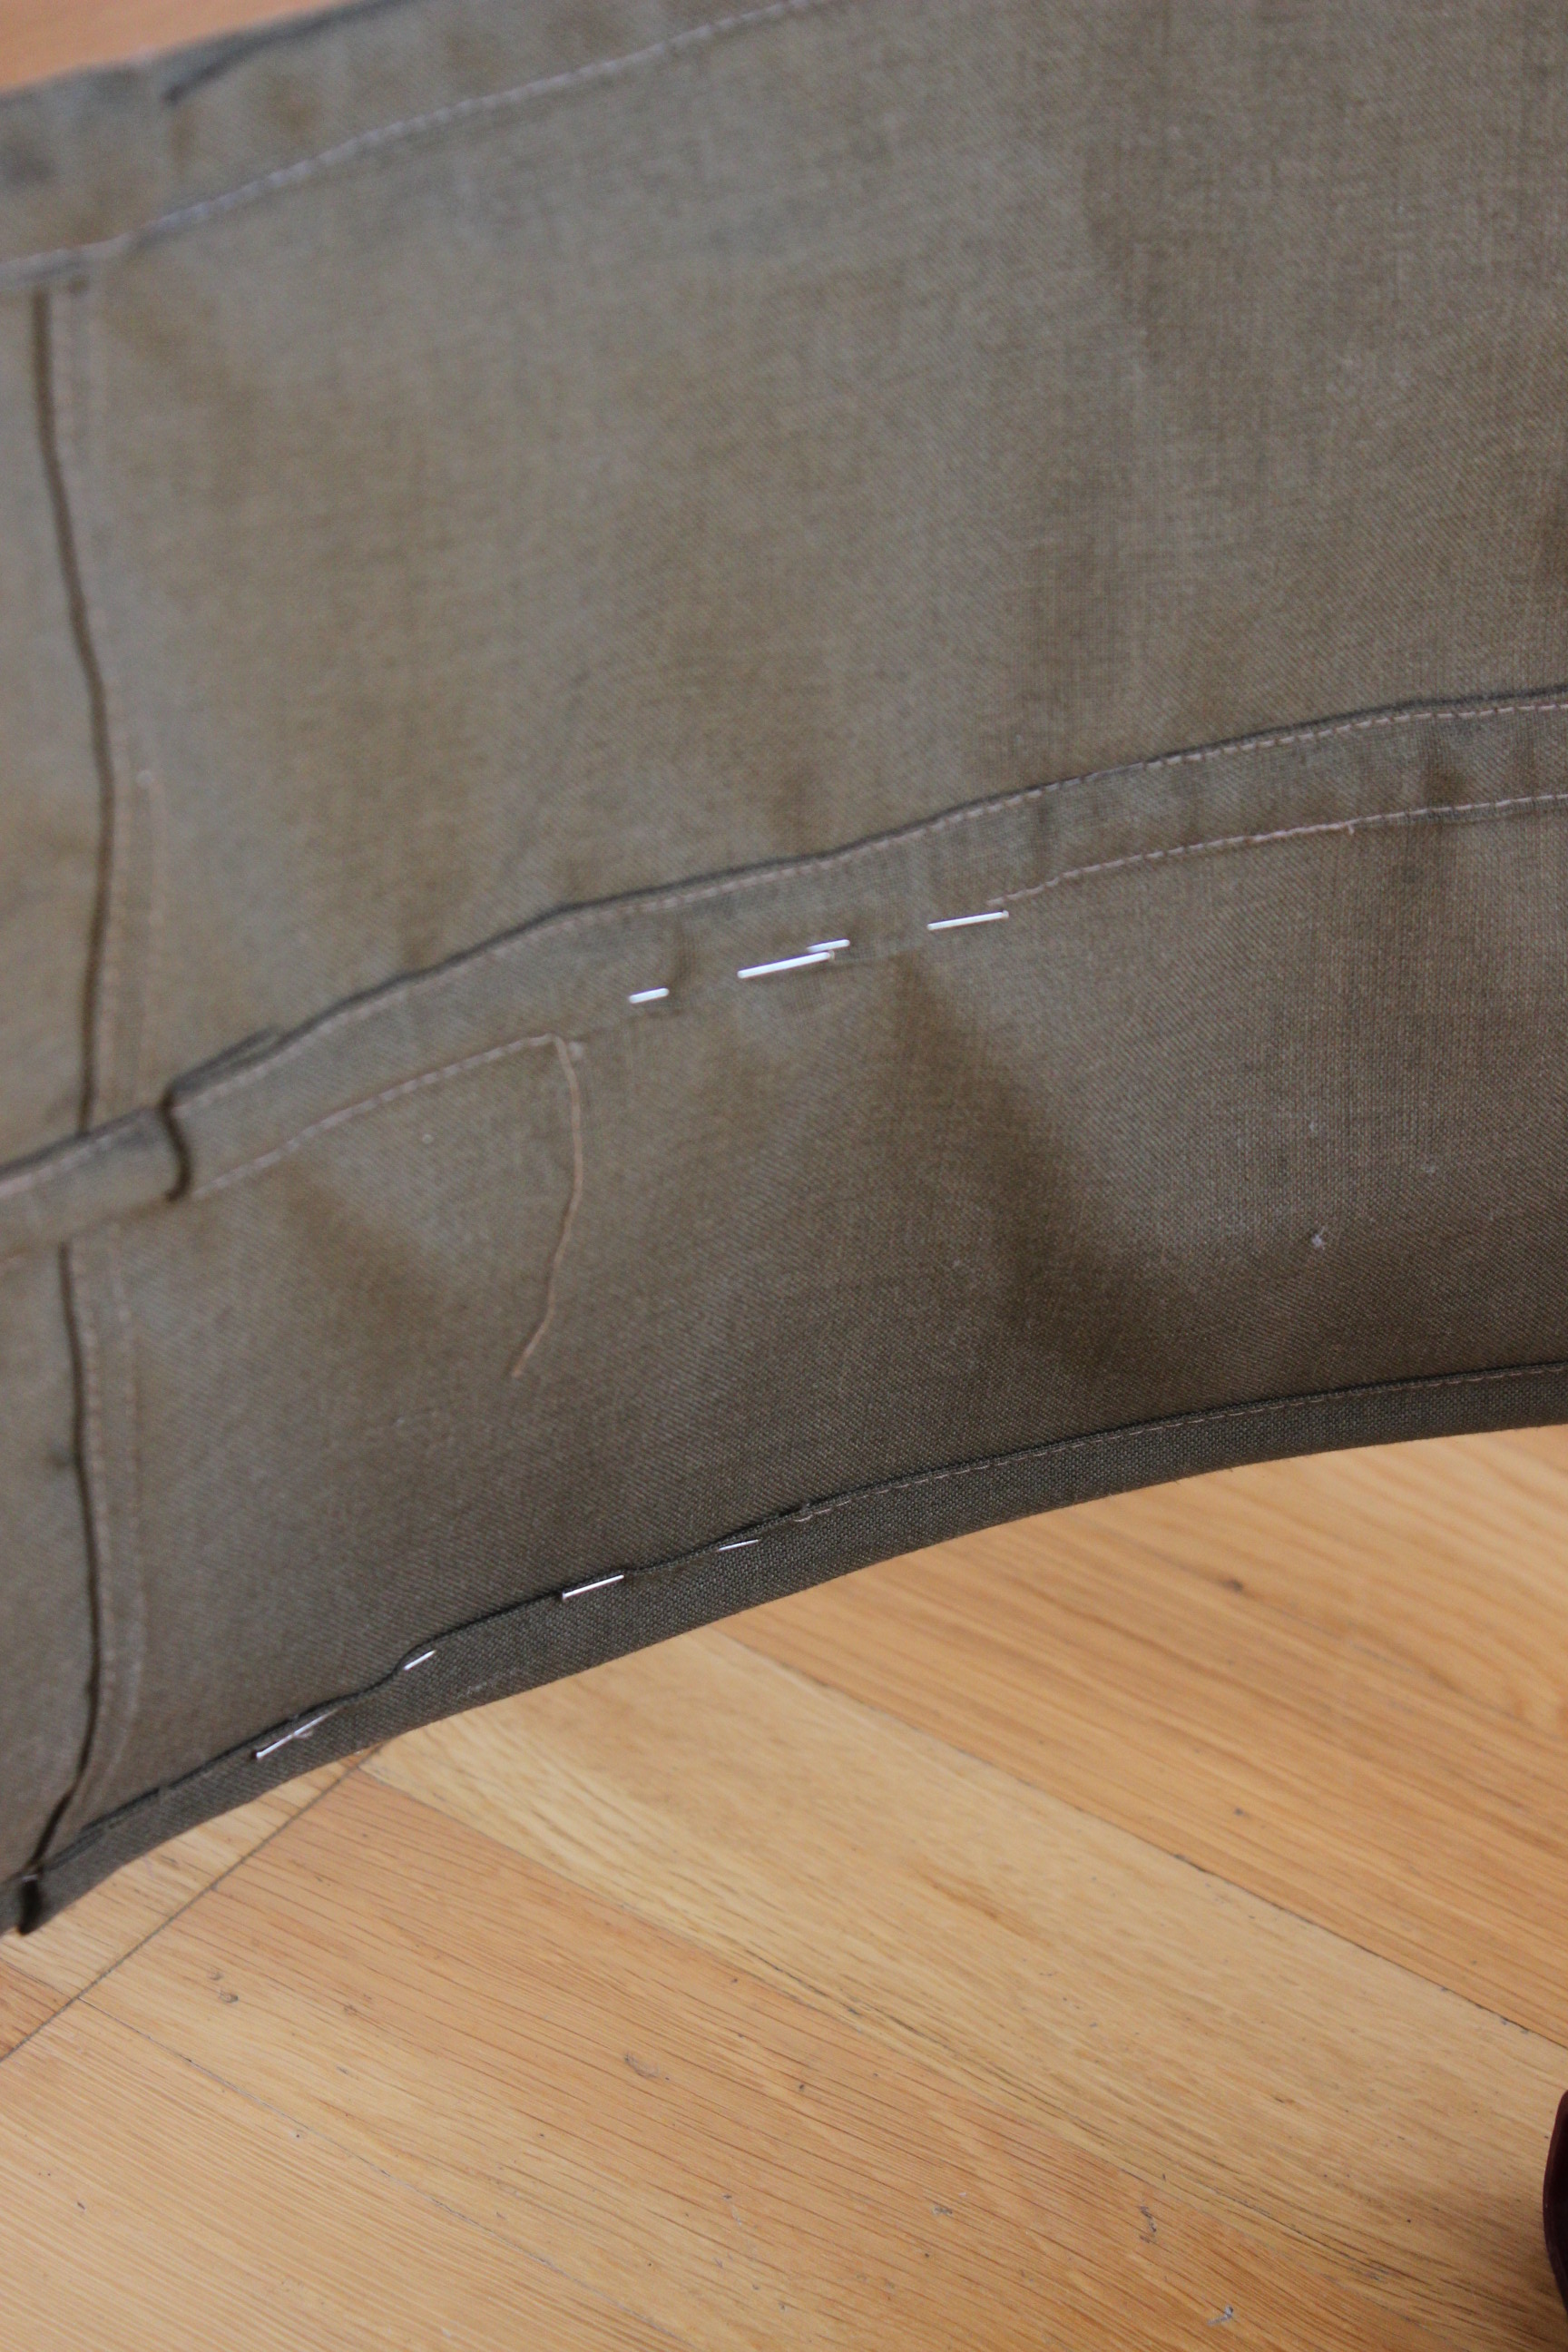
I inserted some gromes to make the skirt lace up the front. You can also see where the boning stops at the front ribbon.
 Looking pretty on my dressform.
But one problem remaind. The bones very easyerly left the casings, and wandered away in other directions.
To solve the problem I decided to make holes in the boning and casing, to tie them togeter at the ends.
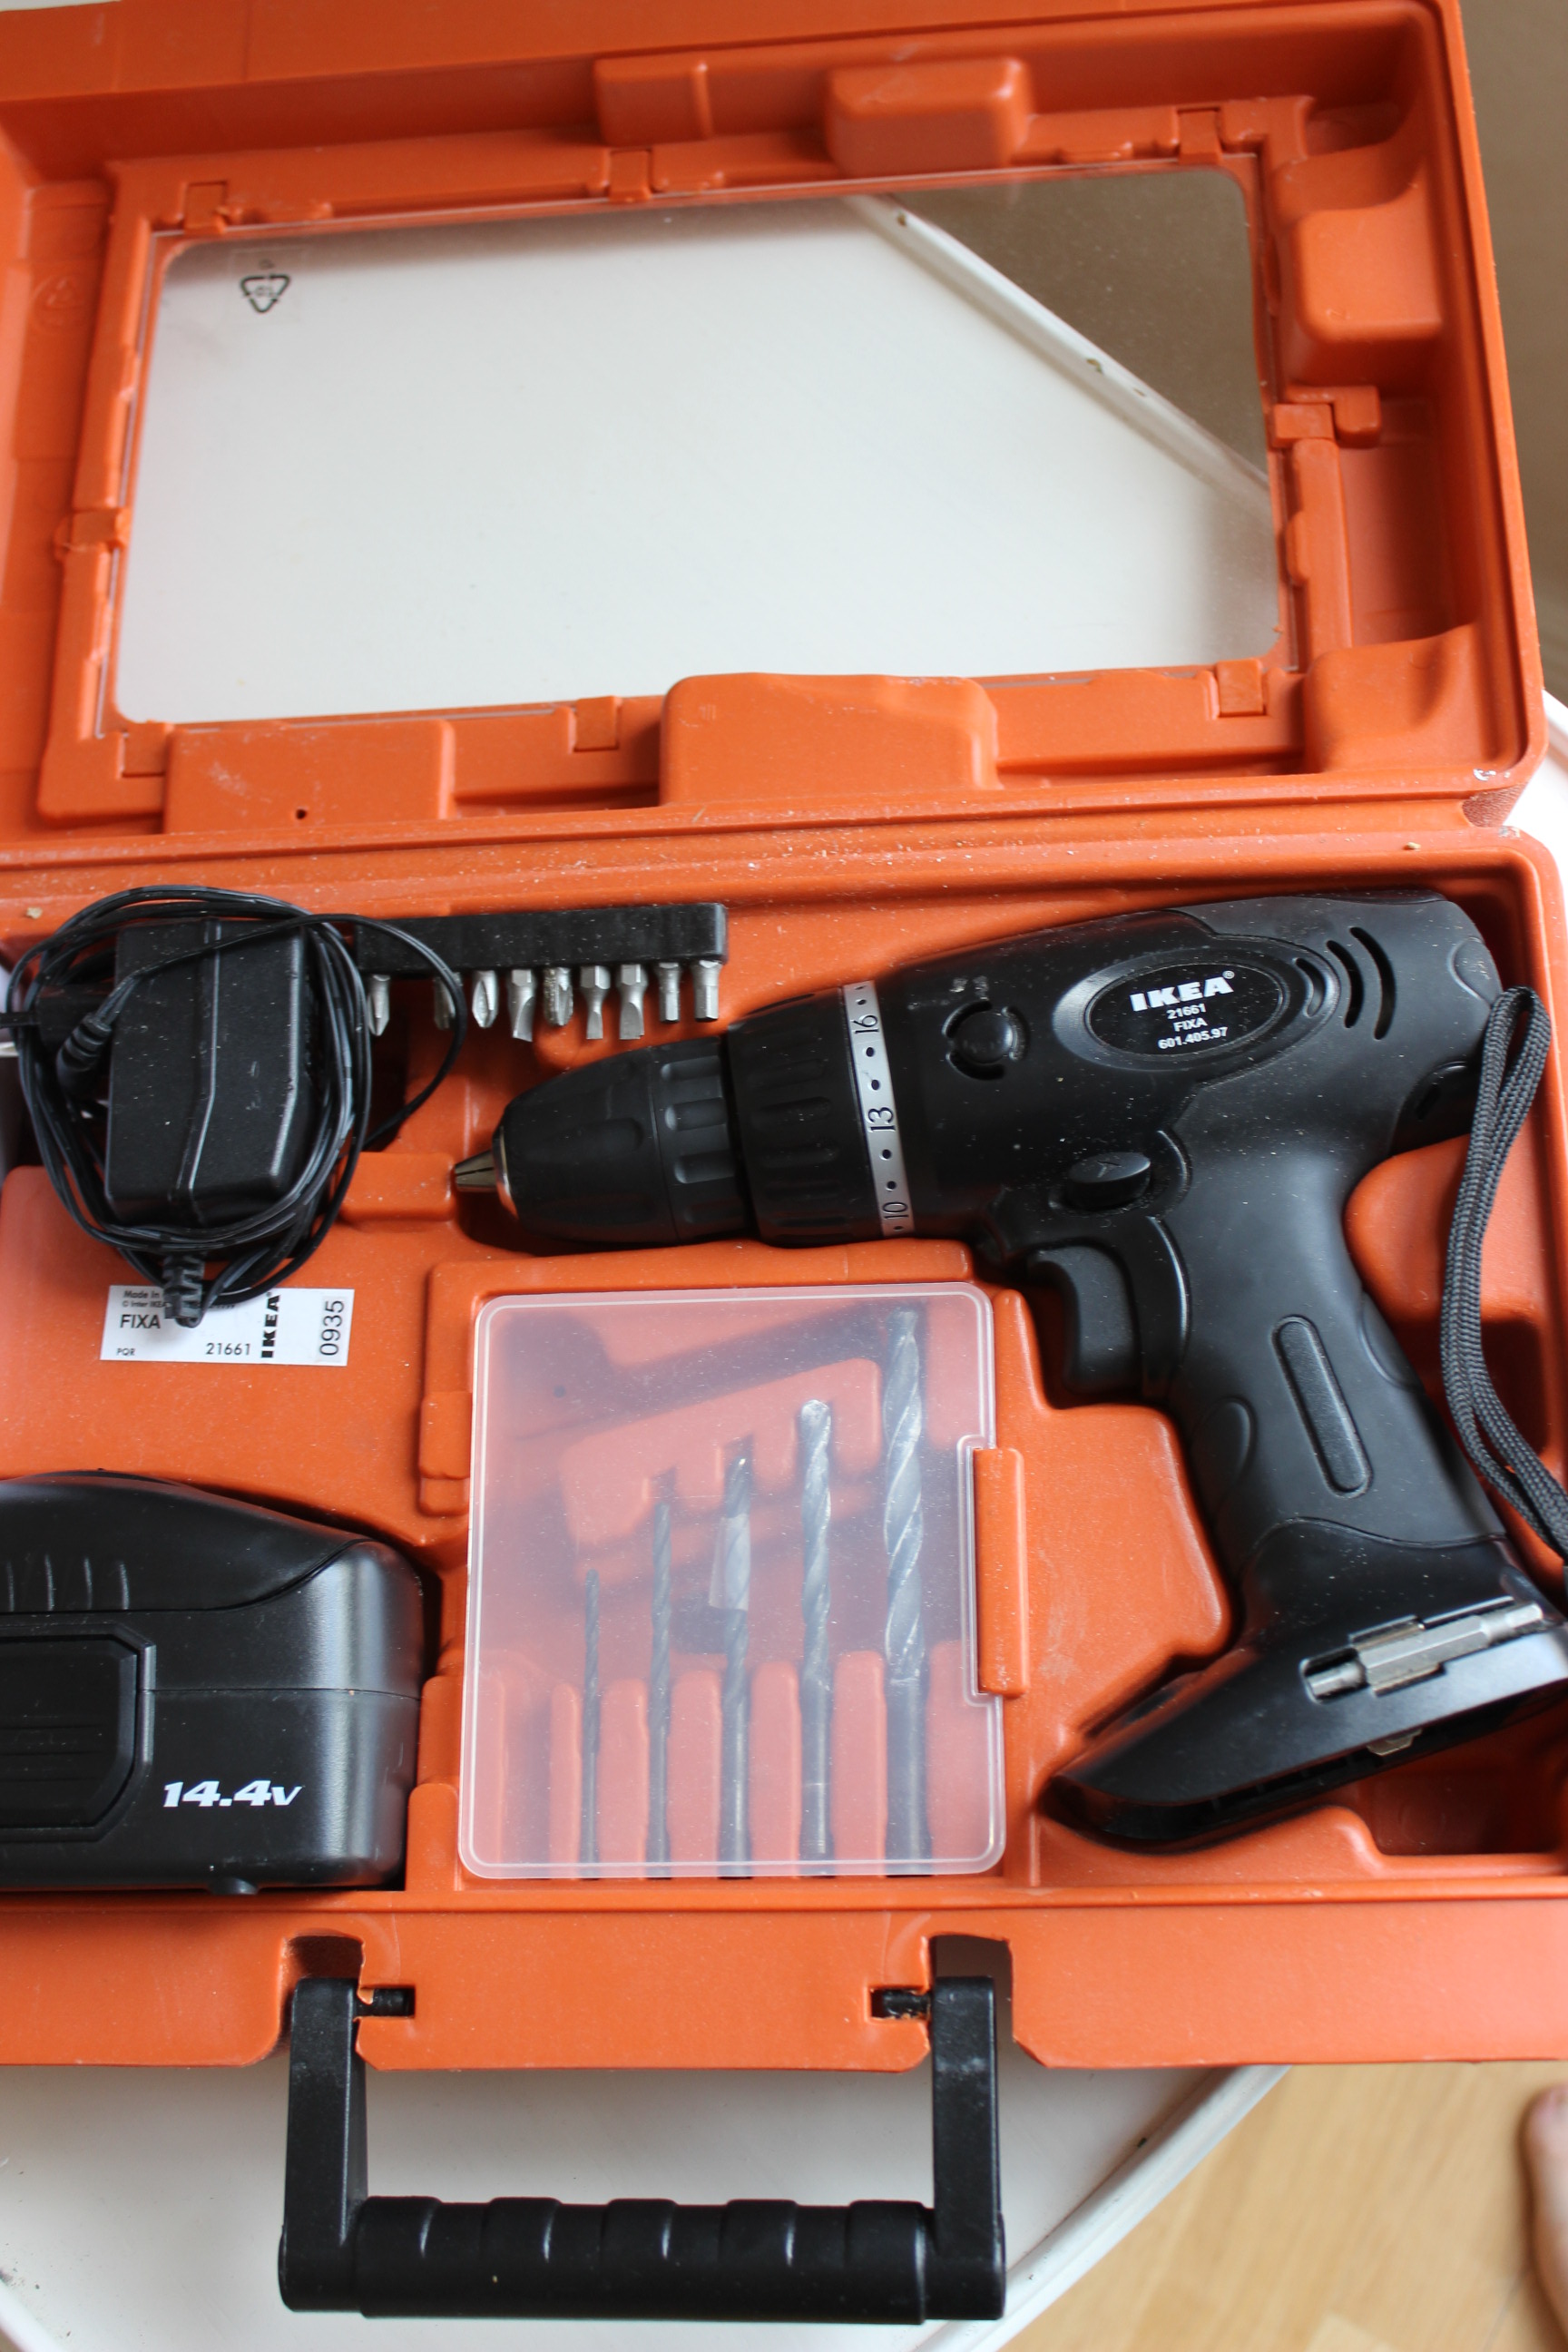 I borrowed my fathers elecric drill, but alas, not even a notch on the steel boning. Dead end.
My other solution worked better. I bought bias-tape, aproxemently the same colour as the fabric, and made them into boning casings.
Insering the boning and sewing of the ends, left me with three grren fabric covered lenghts of steel.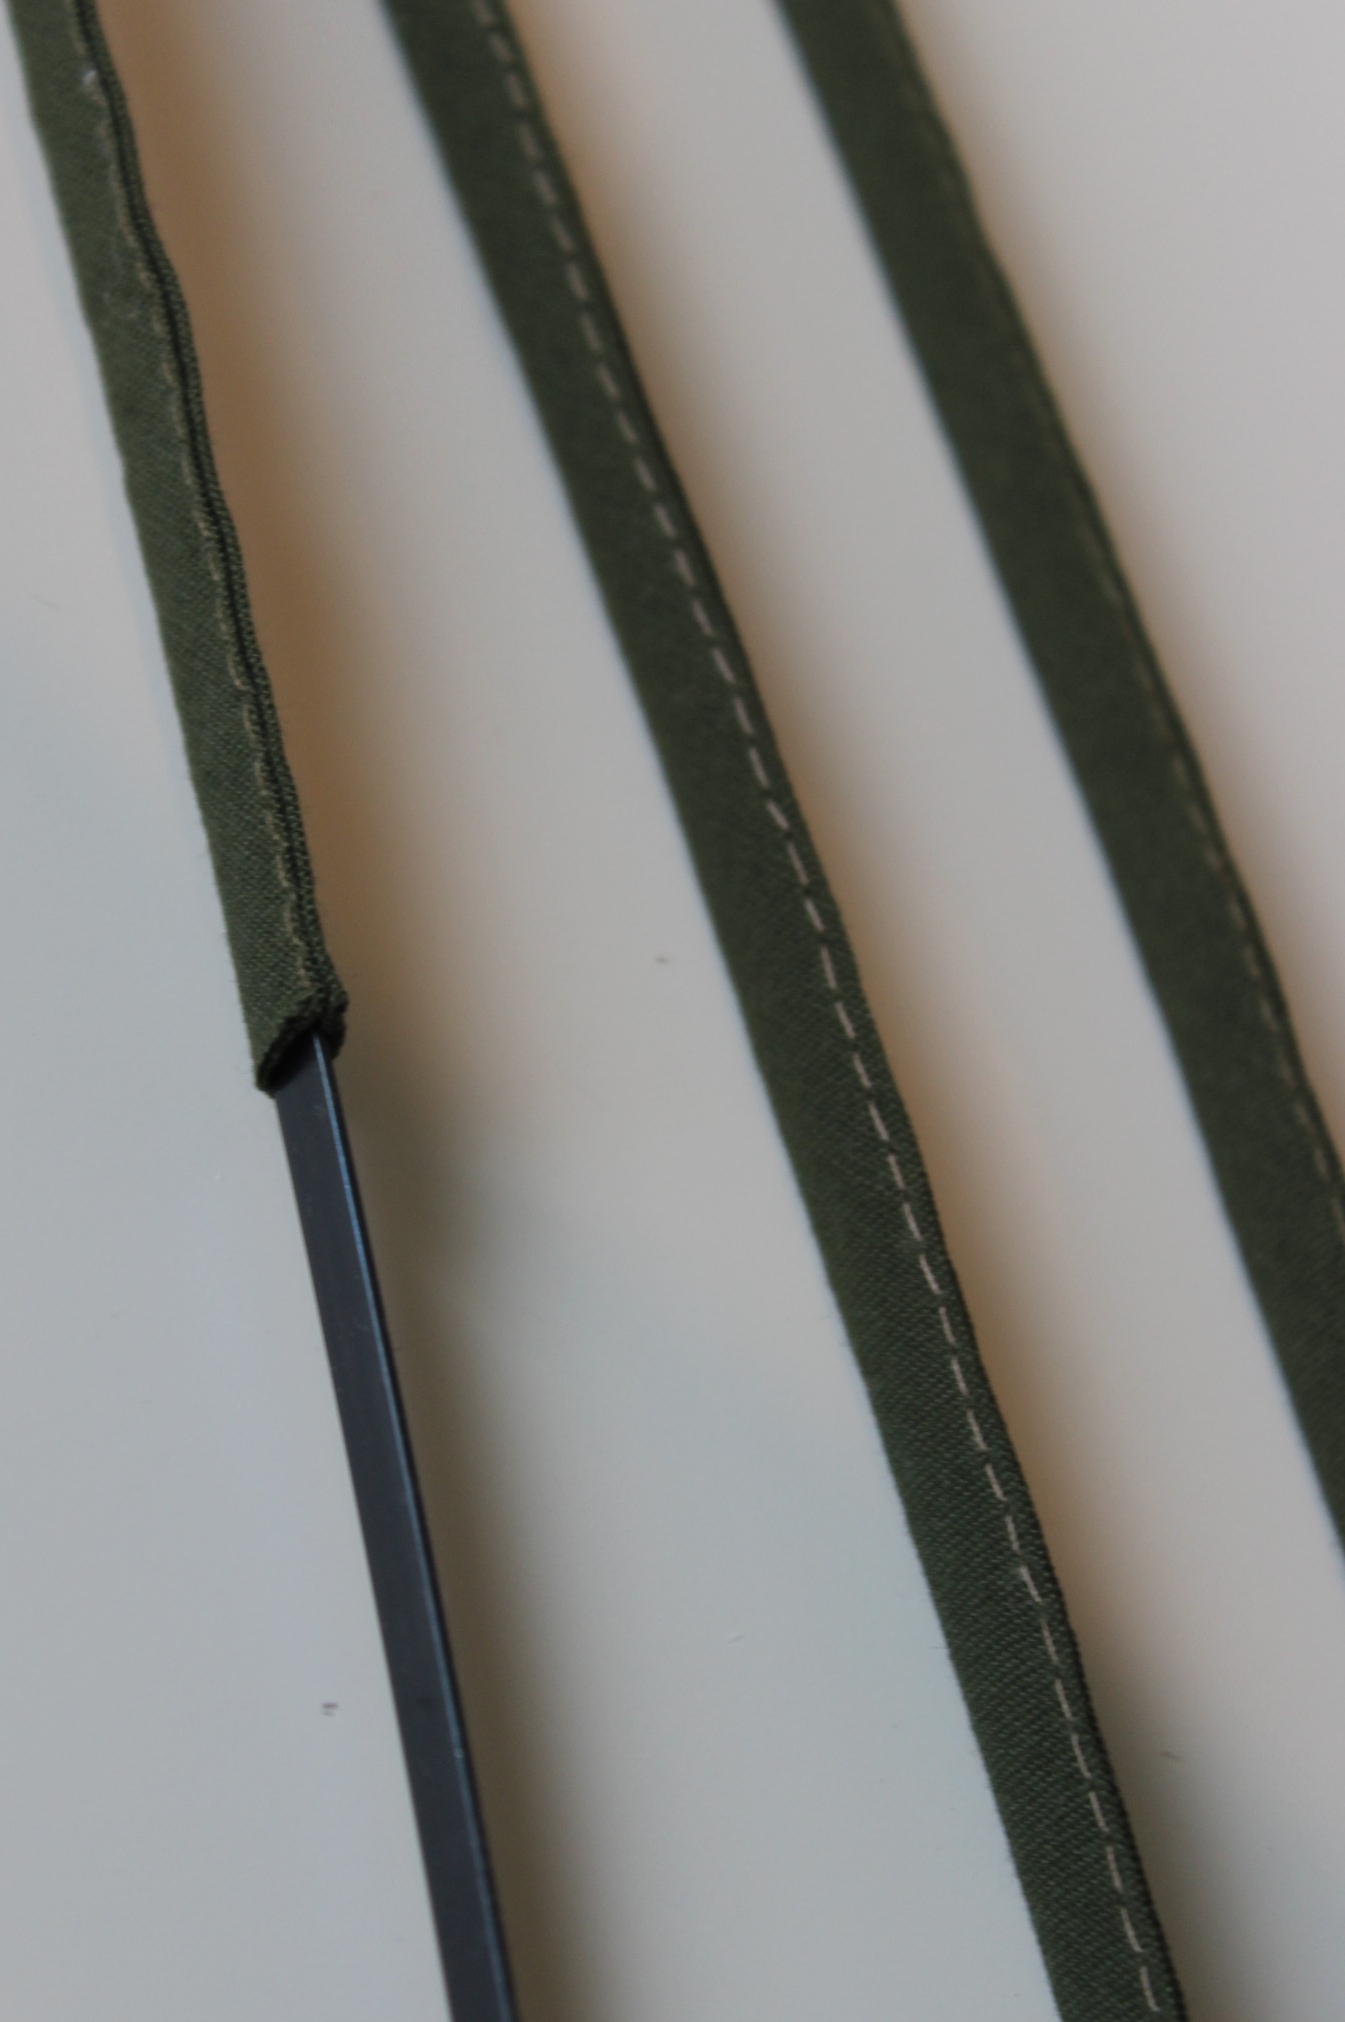
I then inserted the fabric covered boning in the chanels and stiched the ends down inside the chanel ends. And that was that.
Finished photos:


And a sneak a peak of the photoshoot: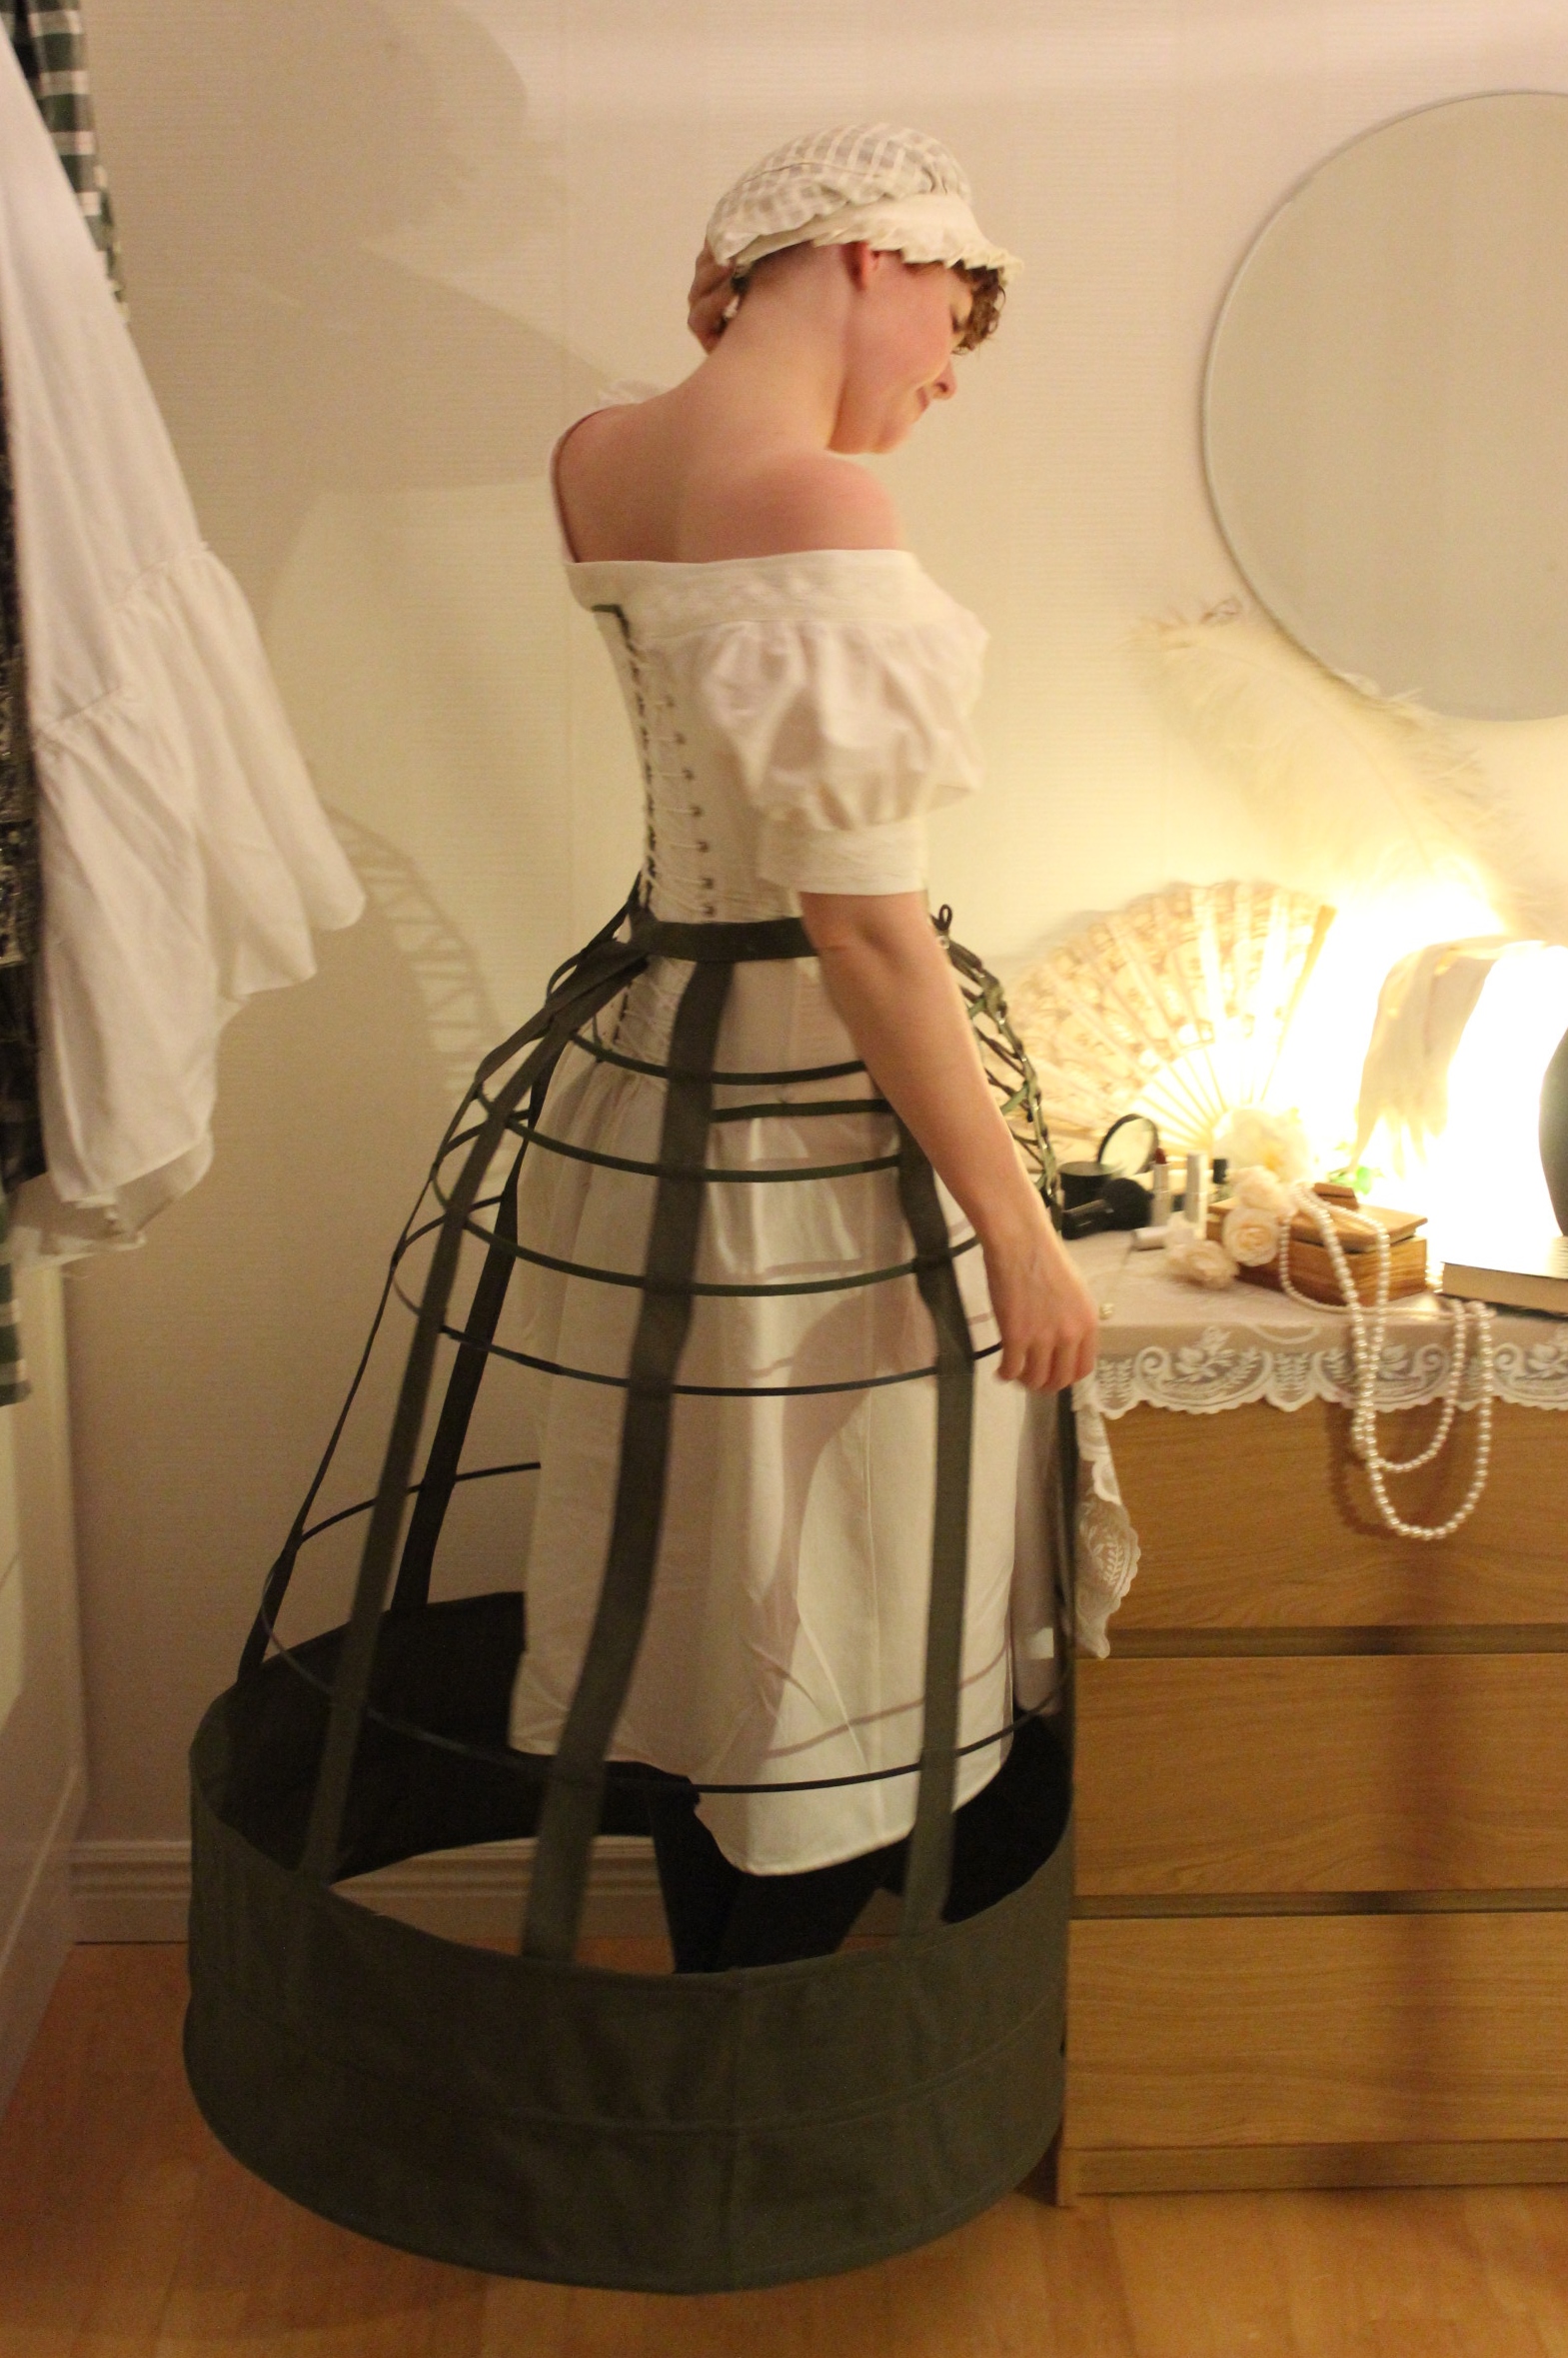
Just the facts:
Challenge: 12 Shape and Support
What: A 1880s cage crinoline
Pattern: None – Just measured and cut stipes in desired lenght.
Fabric: 1 m of green cotton.
Notions: 11 m of steel bone, 1 spool of thread, 16 gromets, 2 m of green biastape (I didn’t had enough fabric to make my own), black duck tape, 3 m brown cotton cord and hook and eye for closuer at the wasitband.
How historical accurate: I don’t really know. Not that good I supose. The type of metal is wrong and I’m sure they did’n use biastape for bone-casings back then. I do think the over all look is ok, and worn with several layers of petticoats I think it will look very period. Maybe a 4/10
Time: About 8 hours.
Cost: Almost everything was from stash, but I have bought it at some point. I think it ads up to about 200 Sek (32Usd) all in all.
First worn: Just around the house for photos so far. But I would love to wear it out on a picknick this summer.
Final thoughts: I’m pretty happy about it. The hoopskirt went togeter more easy then I thougt an dit ws great fun watching it take form. I liked wearing it and strutted around the house a long time after finishing it. The size is really nice – not to big or to smal, and hopefull I can use this for both 1850s, Tudor and bridal wear.
For the HSF challenge nr 12, I decided to make an “light” entry as well as my original (which I will tell you about next time).
I’ve been pondering some different ways to get my upcoming steampunk outfit to bustle out nicely without the use of petticoats and big bustle cages. I’ve tried it on using my relativly smal “Lobster buste“, but that didn’t work since the bustle showed to much – I needed a smaler one.
So I decided to make a taveling mini-bustle to use for this costume, and since you can never have to many underthingies it’s a go.
I looked at some inspiration on the internet and liked this one. Only I couldn’t figure out how to get the bones to attached without drilling hole through the metal (more on the tomorrow).
I also like this one.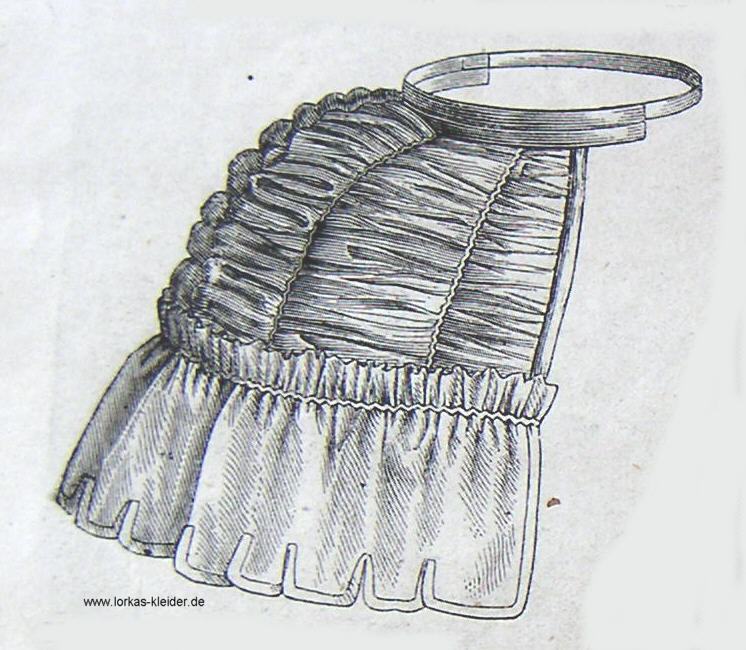 Making those ruffels shouldn’t be so hard, and as long as you have a regular bustle foundation beneath I think I could pull it of.
But in the end I decided to skip the ruffels and just concentarte on the foundation – much like this one, but shorter and without the side panels.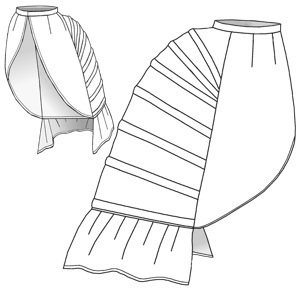
So I pulled out an old sheet and got to work.
I didn use any pattern, but just cut two rectangels the lenght x the width of the finished bustle.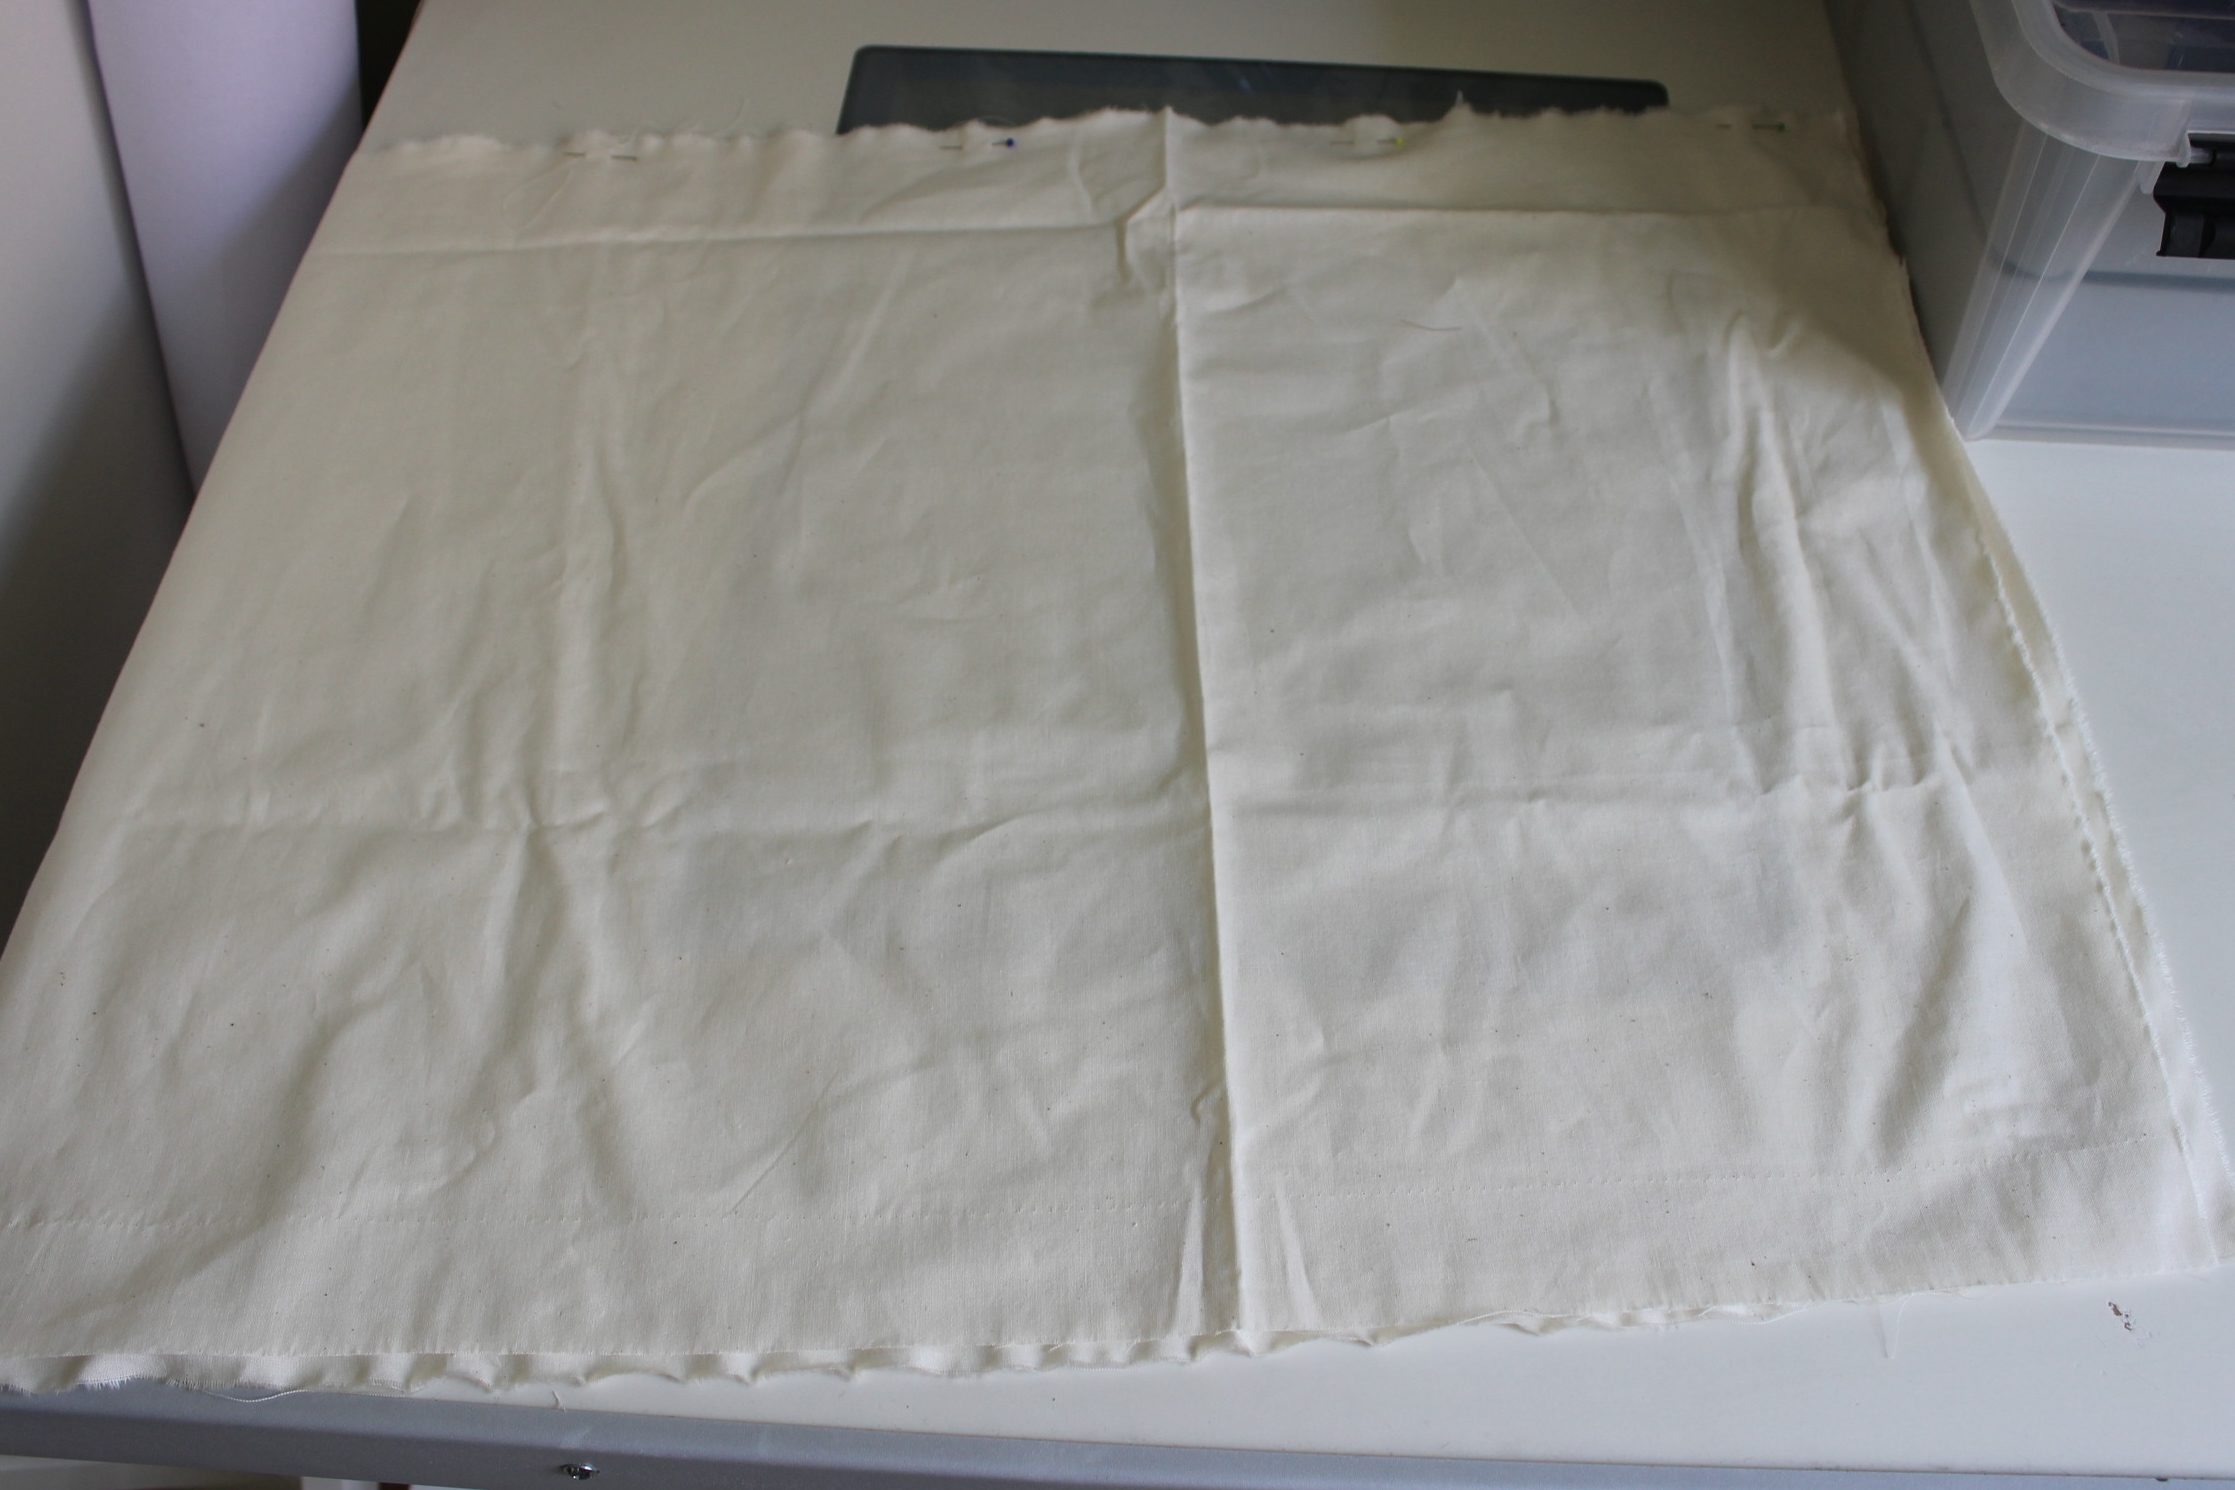
I also saved, and cut the sewn selvages on the sheet to use as ties.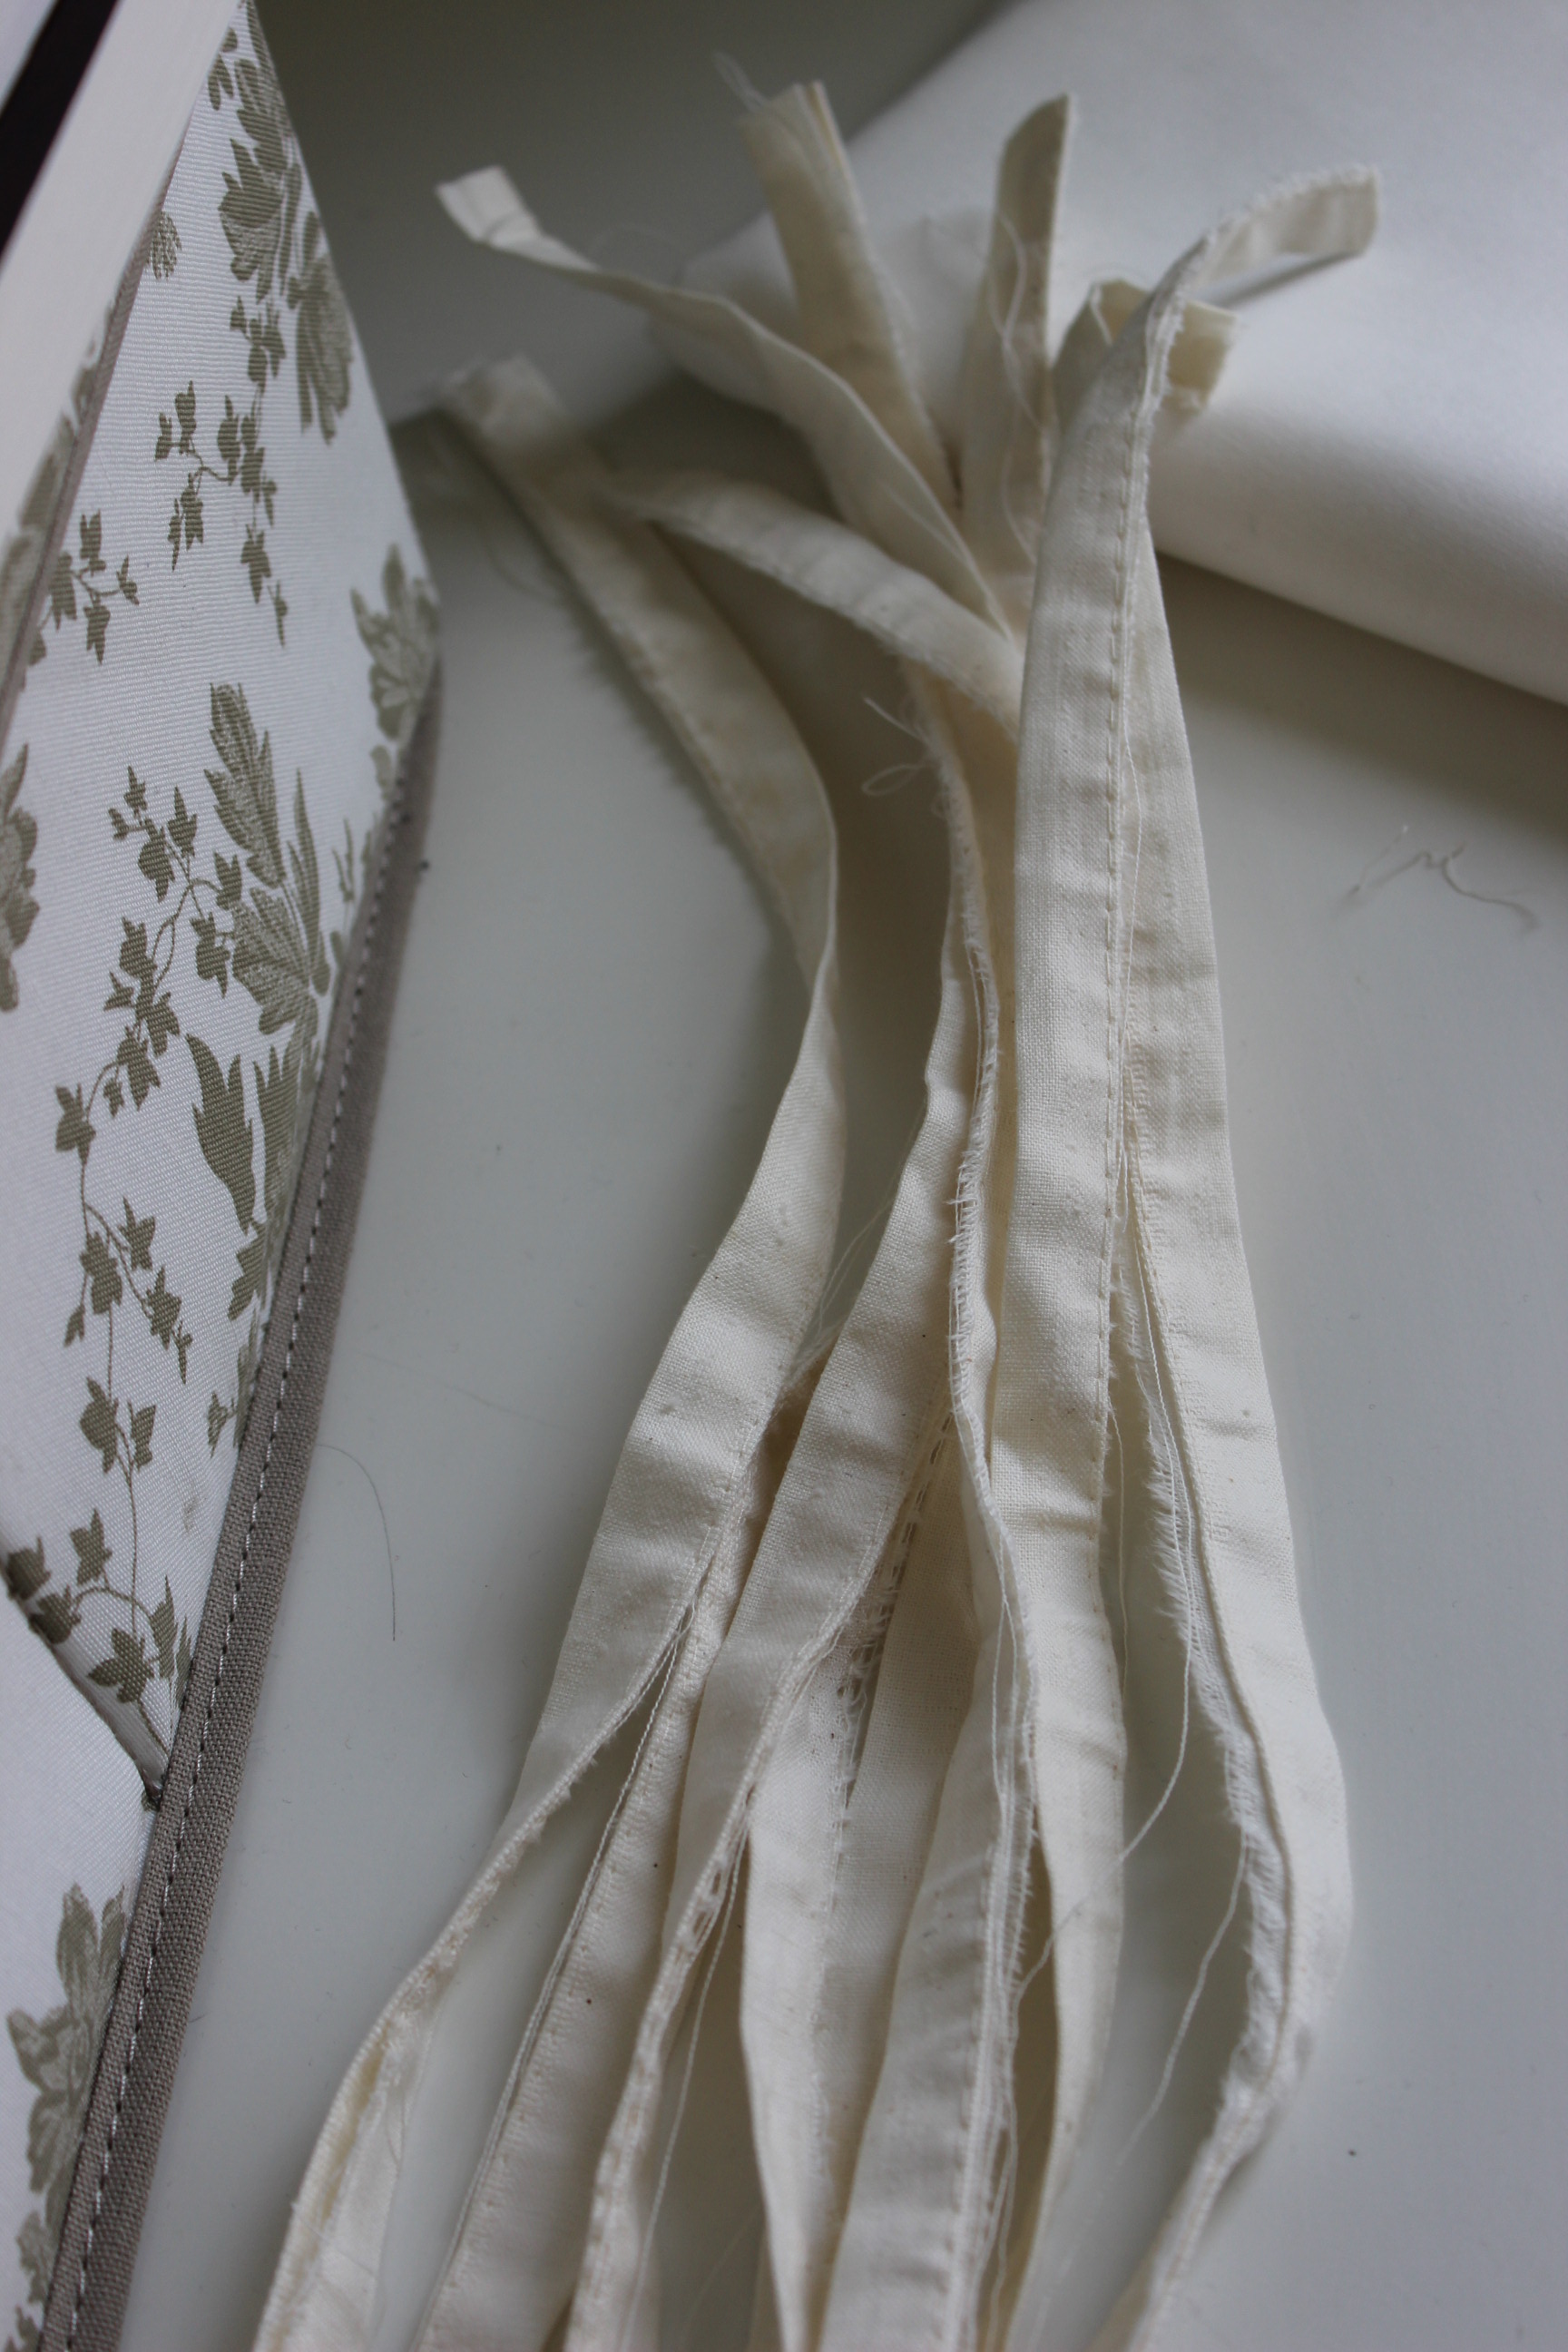
I then stiched the main pieces (right sides togeter, at the bottom) turned it over and sewed the boning chanels. 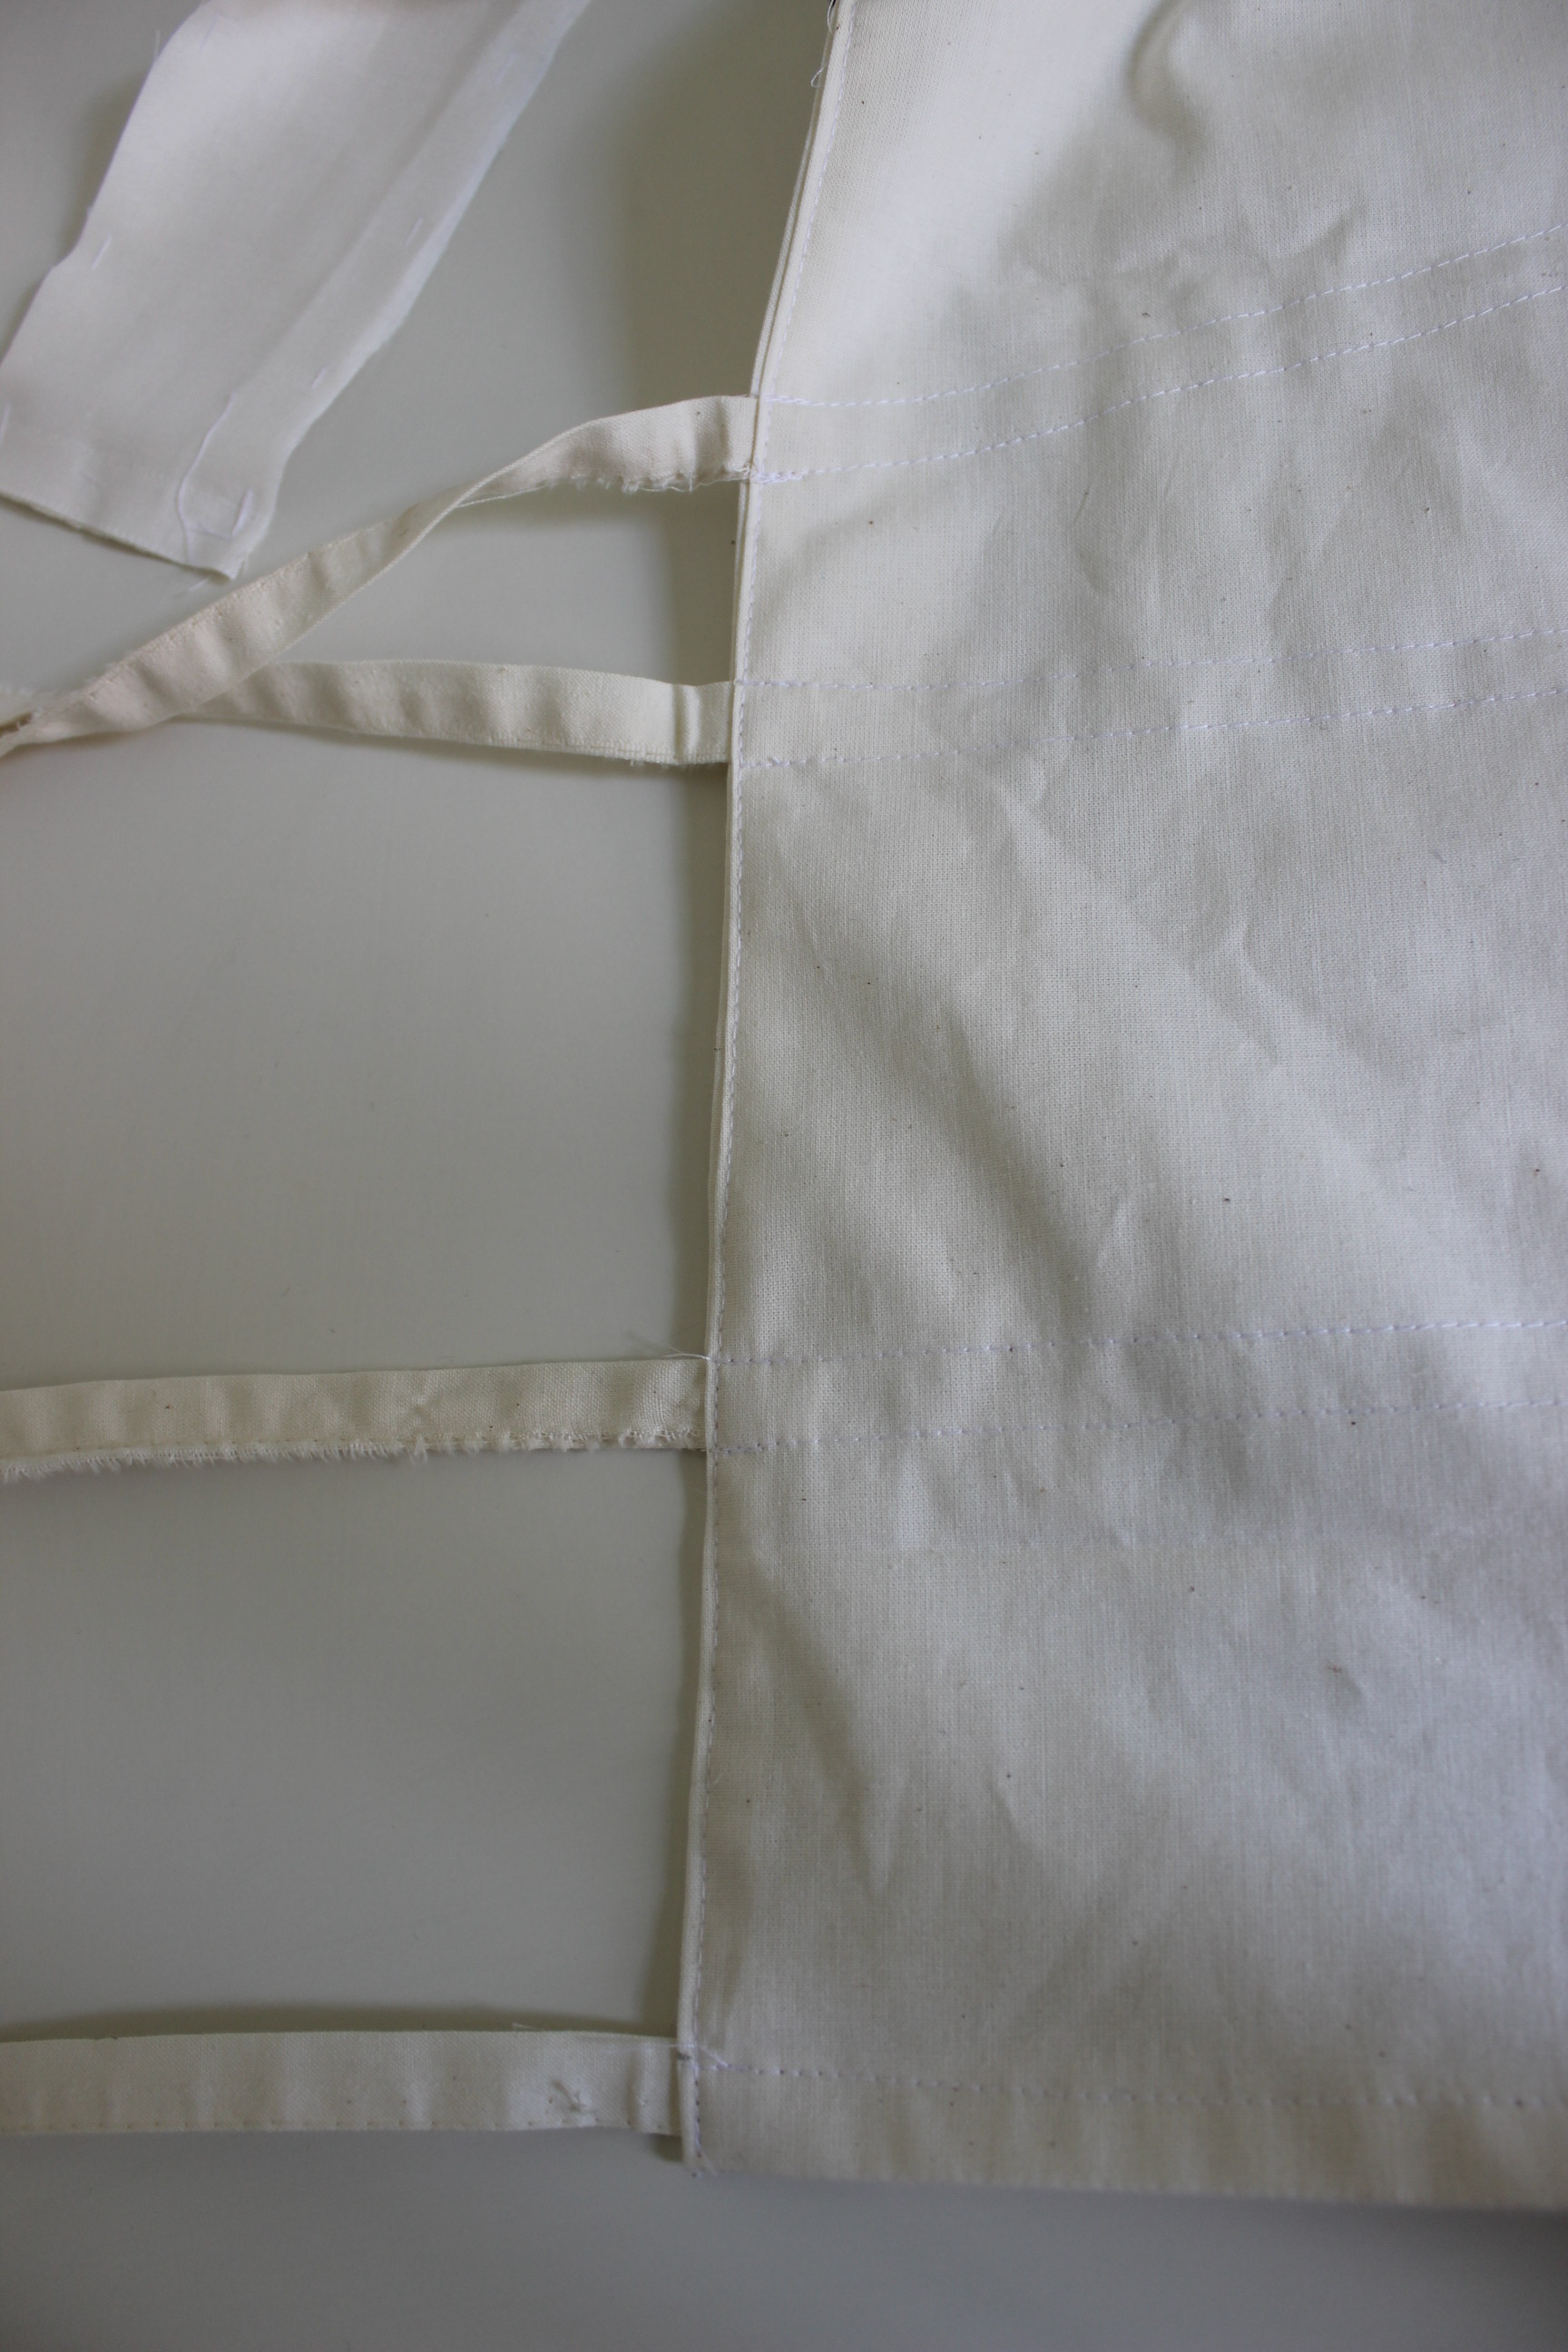 At the same time I folded the edges under, and attached the ribbons. Making sure one side was open for the bones to go in.
Then I cut and basted the waistband.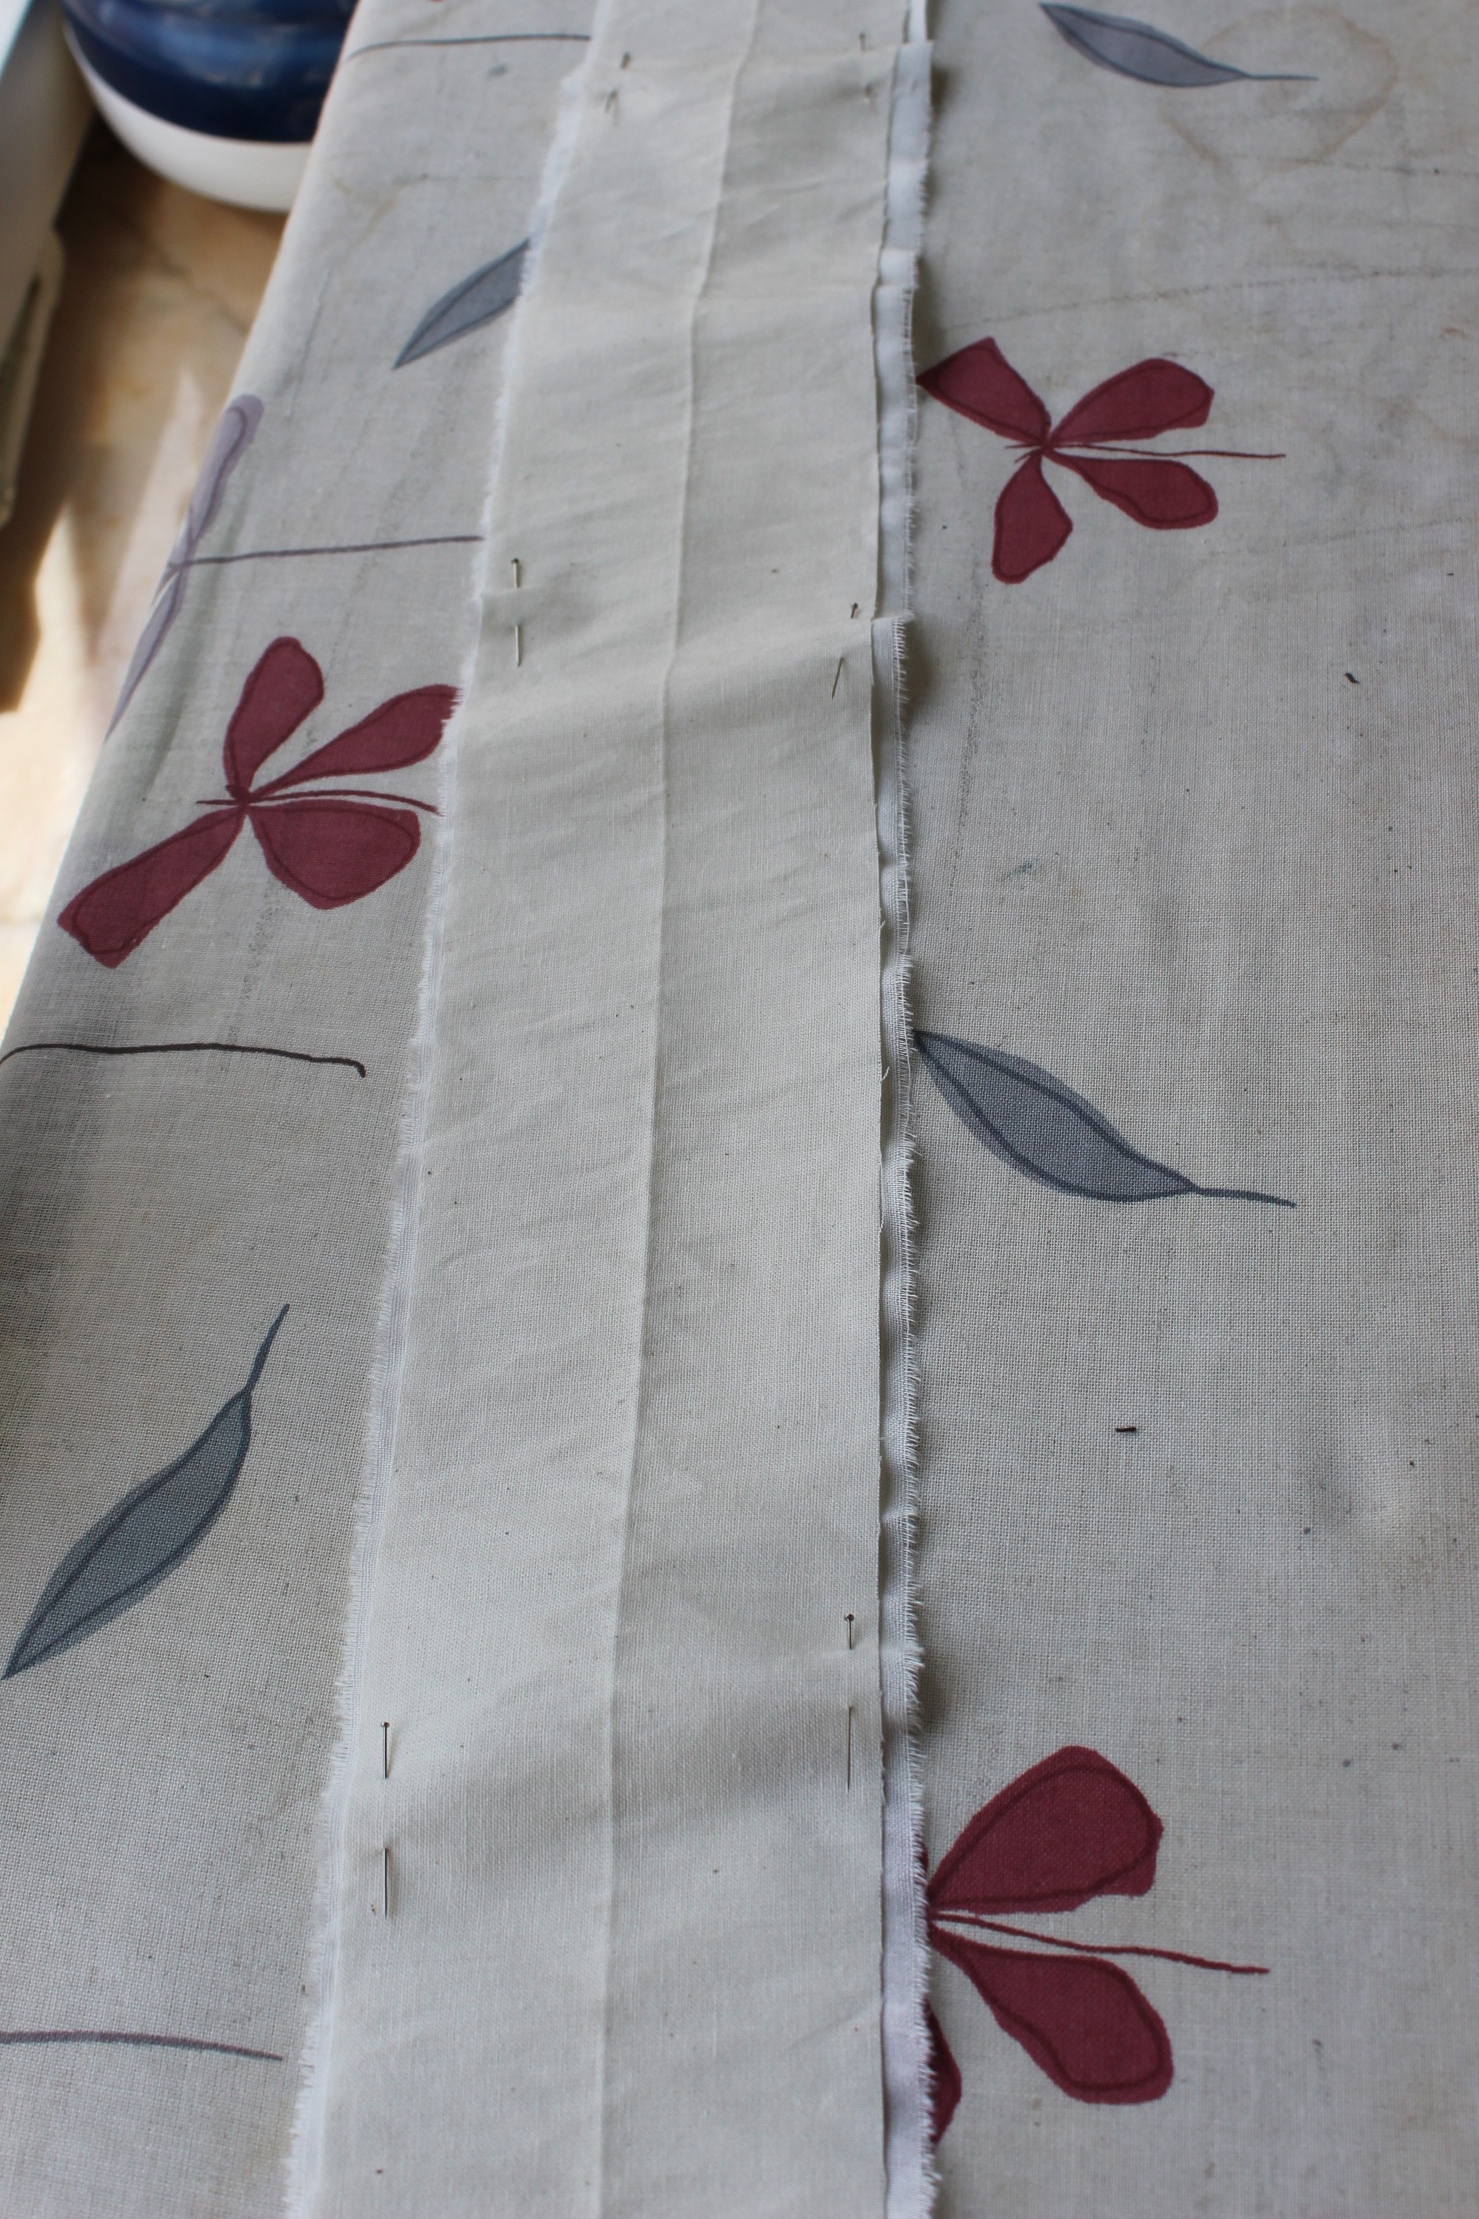
I sewed a gathering thread to the top edge, working the two layers as one. And gathered the center part to get the desired width, leaving about 10 cm at each side un touched.
 Close up of the gathers.
Then I attached the wasitband, folded it over and stiched it down.
Lastly I inserted the boning, sewed the chanels shut and attached the metal rings for clouser to the wasitband. Then I tied the ribbons into rosets and had a finished worka ble mini bustle.
All in all this project took me about two hours to make, and it was so simple and fun.
Finished photos: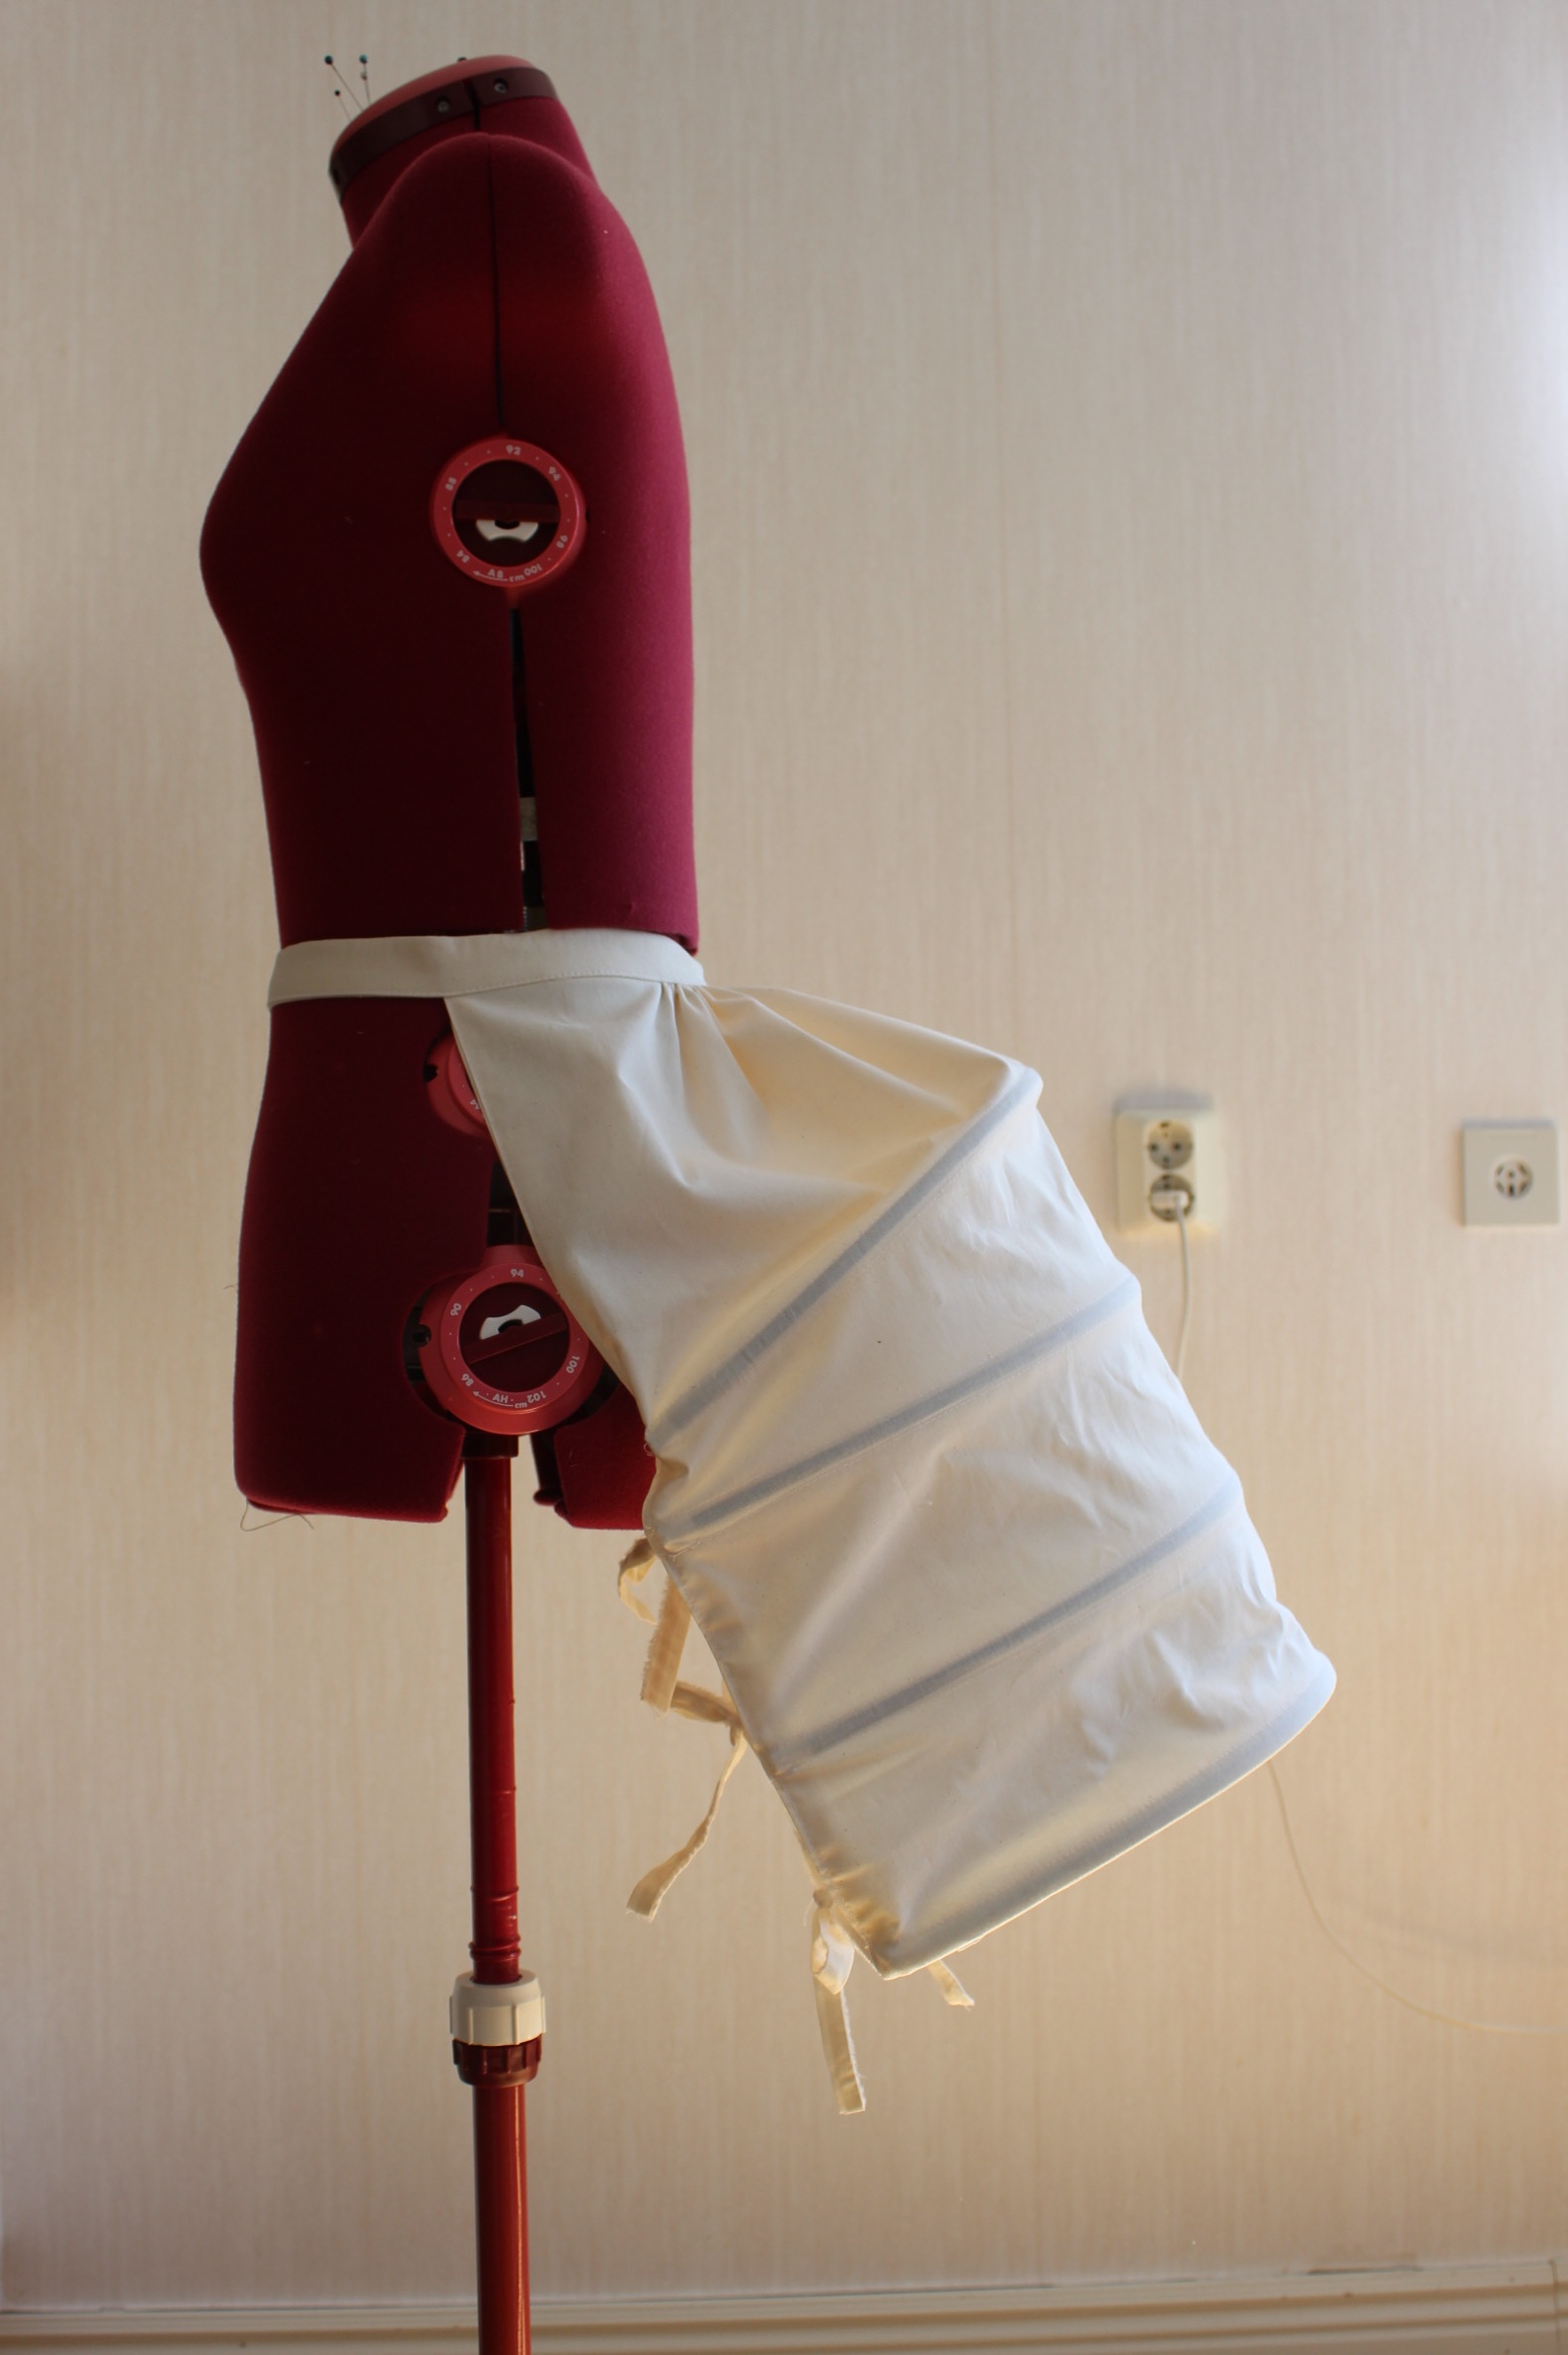


And a sneak a peak of todays photoshoot:
Just the Facts:
Challenge: 12 Shape and Support (Light Entry)
What: A smal traveling bustle ca 1880s.
Pattern: None. Just one rectangel shaped piece and a waistband.
Fabric: 1 m of cotton sheet (donated to me a long time ago).
Notions: Thread, Belt hooks, 3,5 m of steel wire.
How historical accurate: Not sure but I think it is pretty good. Both the material and the sewing tecniques was used during he period. And since this seems to be the simplest and most straight forward way of making a bustle, I’m sure some peolple back then must have done so.
Time: 2 hours.
Cost: 50 Sek (8Usd) at the most. (Guess it fits into next weeks challenge to ;-))
First worn: only for photos around the house so far. But I’m planing to use it as part of my upcoming steampunk outfit.
Final thoughts: lookin at the pictures now I se that I should have made the top edge shorter, to bring thewhole thing up a bit thous making the top chanal sit a bit higher.
But all in all this was such a cheap and quick project. I loved how easy it went togeter, and it really helped me get past my recent sewing block.
This weeks challenge for the HSF was nr 11 and called “The politics of Fashion”.
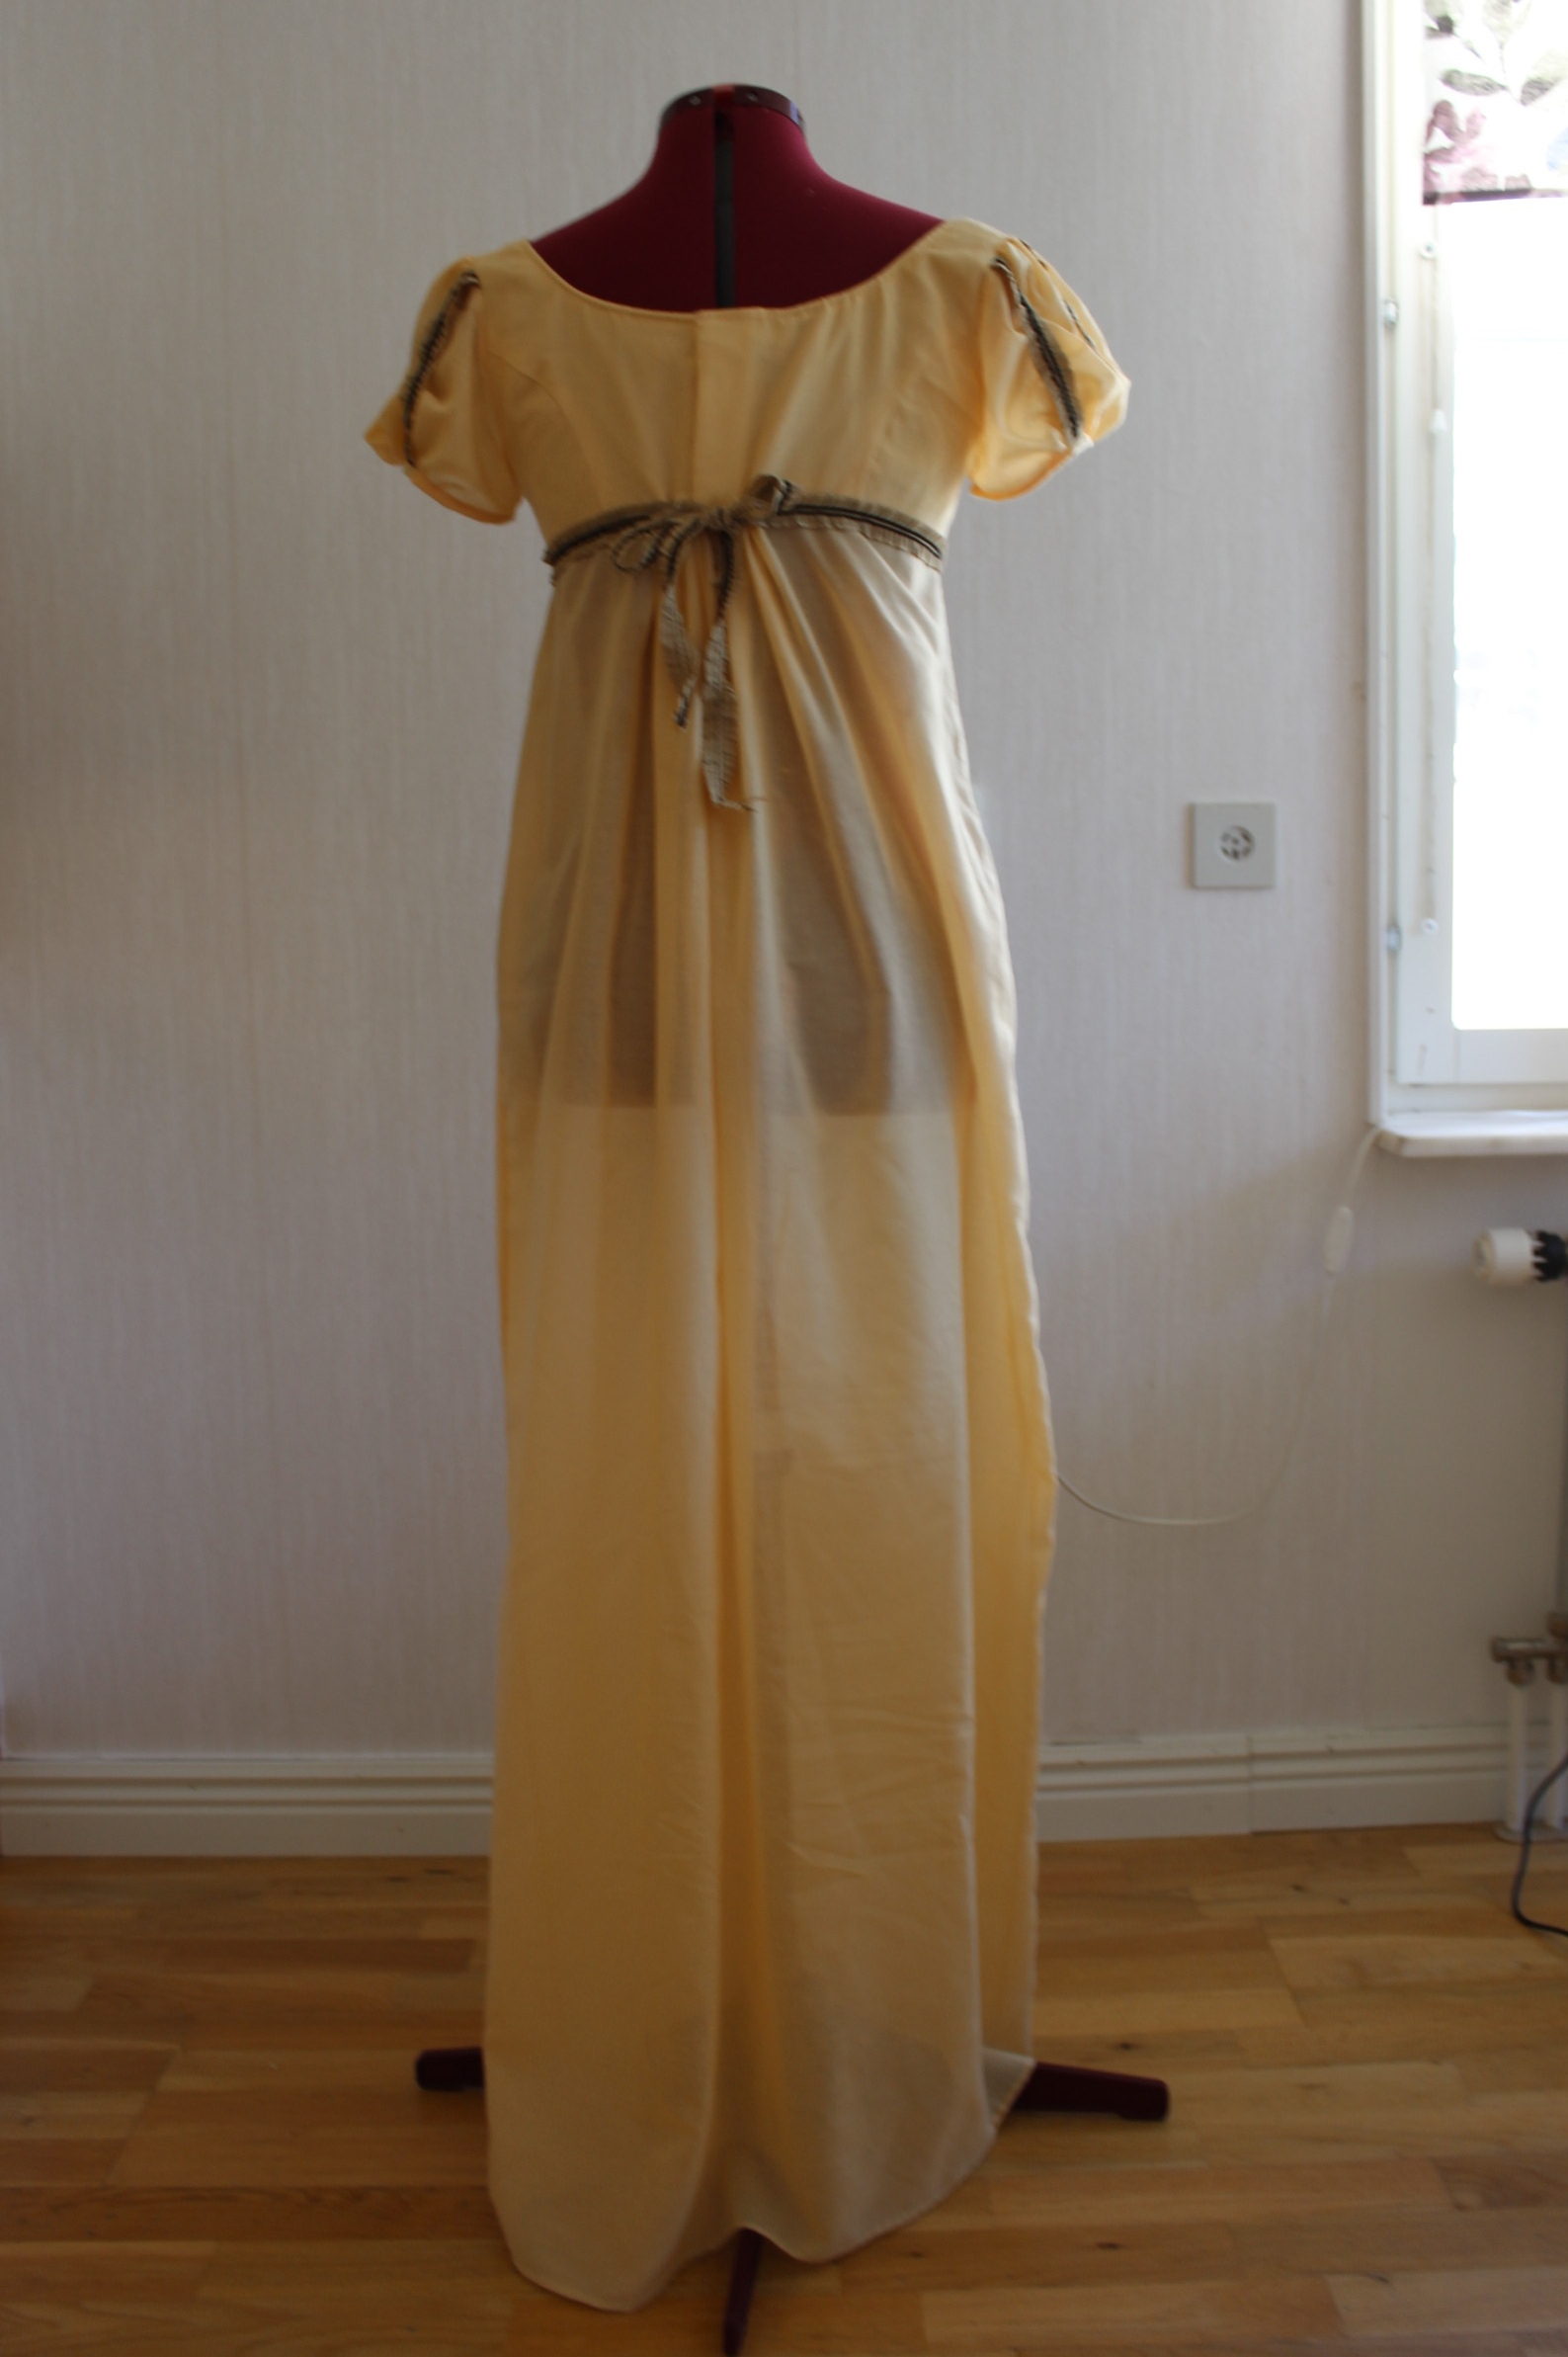
Going into this years sewing I already knew I wanted a new regency dress, and since I can’t even look at the sheernes of the empir-gowns without thinking about the french revolution, Napoleon and everything in between, the choise of challenge was an easy one.
For those who don’t know, the style emerged from a mash up of: ladies freeing themself from the restrictive fashions of the 18th century, and the dream of a democratic state most like the one in ancent greece.  (The fact that the two citys Pompeii and Herculanum was just discovered beneath the ashes of mount Vesuvius, did their part in the sudden cravings for everything greek/roman styled I’m sure).
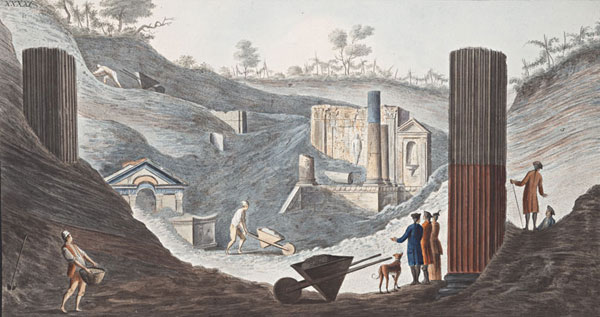
I also had one other reason for picking this style of dress: I needed to try out some patterns for the regency sewing course I will be hosting this autumn.
So, after some searcing for suatable dress types, patterns and fabrics, I decided on this lovely yet stylistic shape as inspiration for my gown.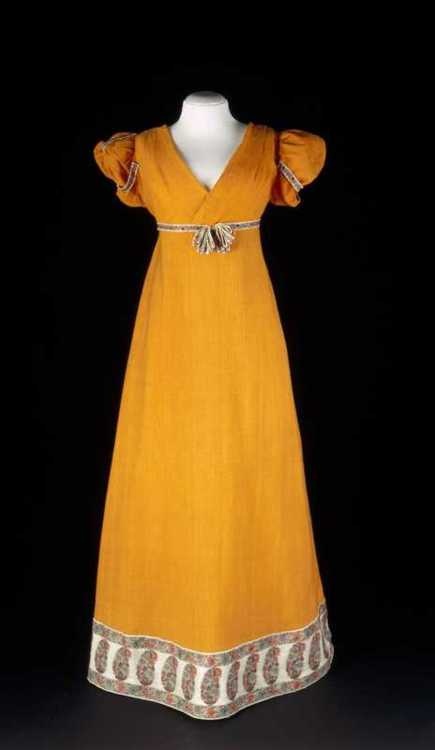
Using the Simplicity 4055 pattern. 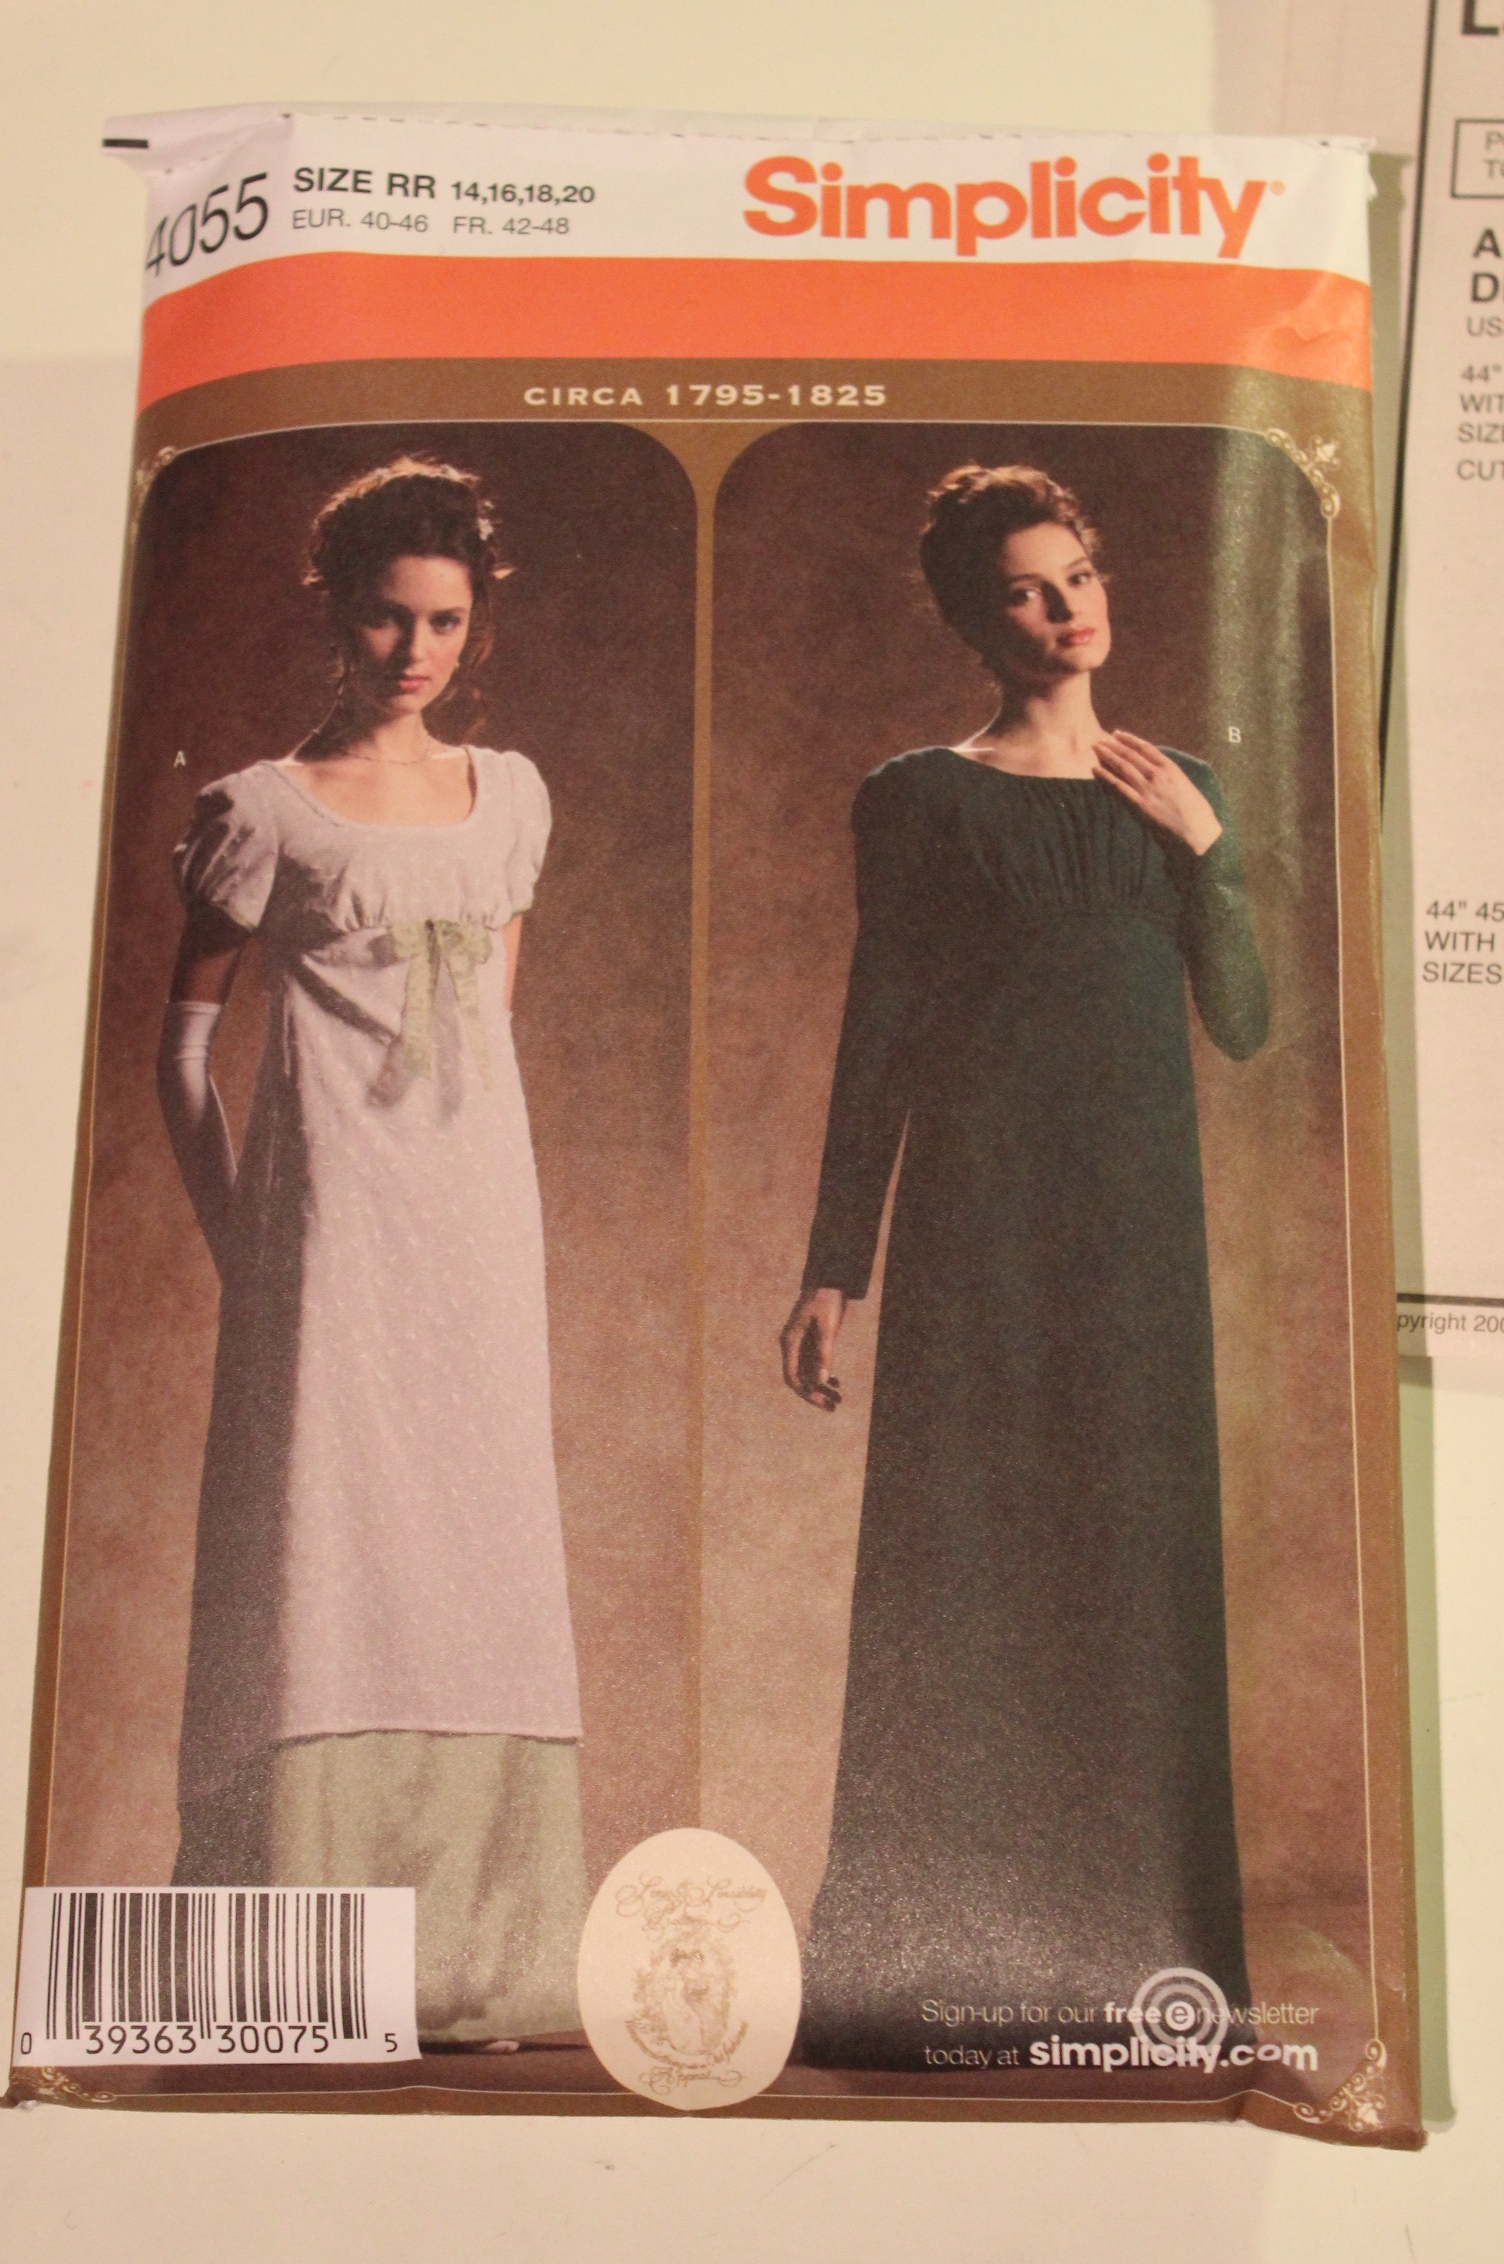
And a soft light yellow cotton voile I found in my stash.
Since this was my first time using a comercial pattern in about 10 years, and thinking of my would be students, I decided to follow the instructions to the point.  Well that didn’t happend, but at least I read them through…
Or rater I did read them, but only after I discovered the back bodice pieces didn’t even come close to match up.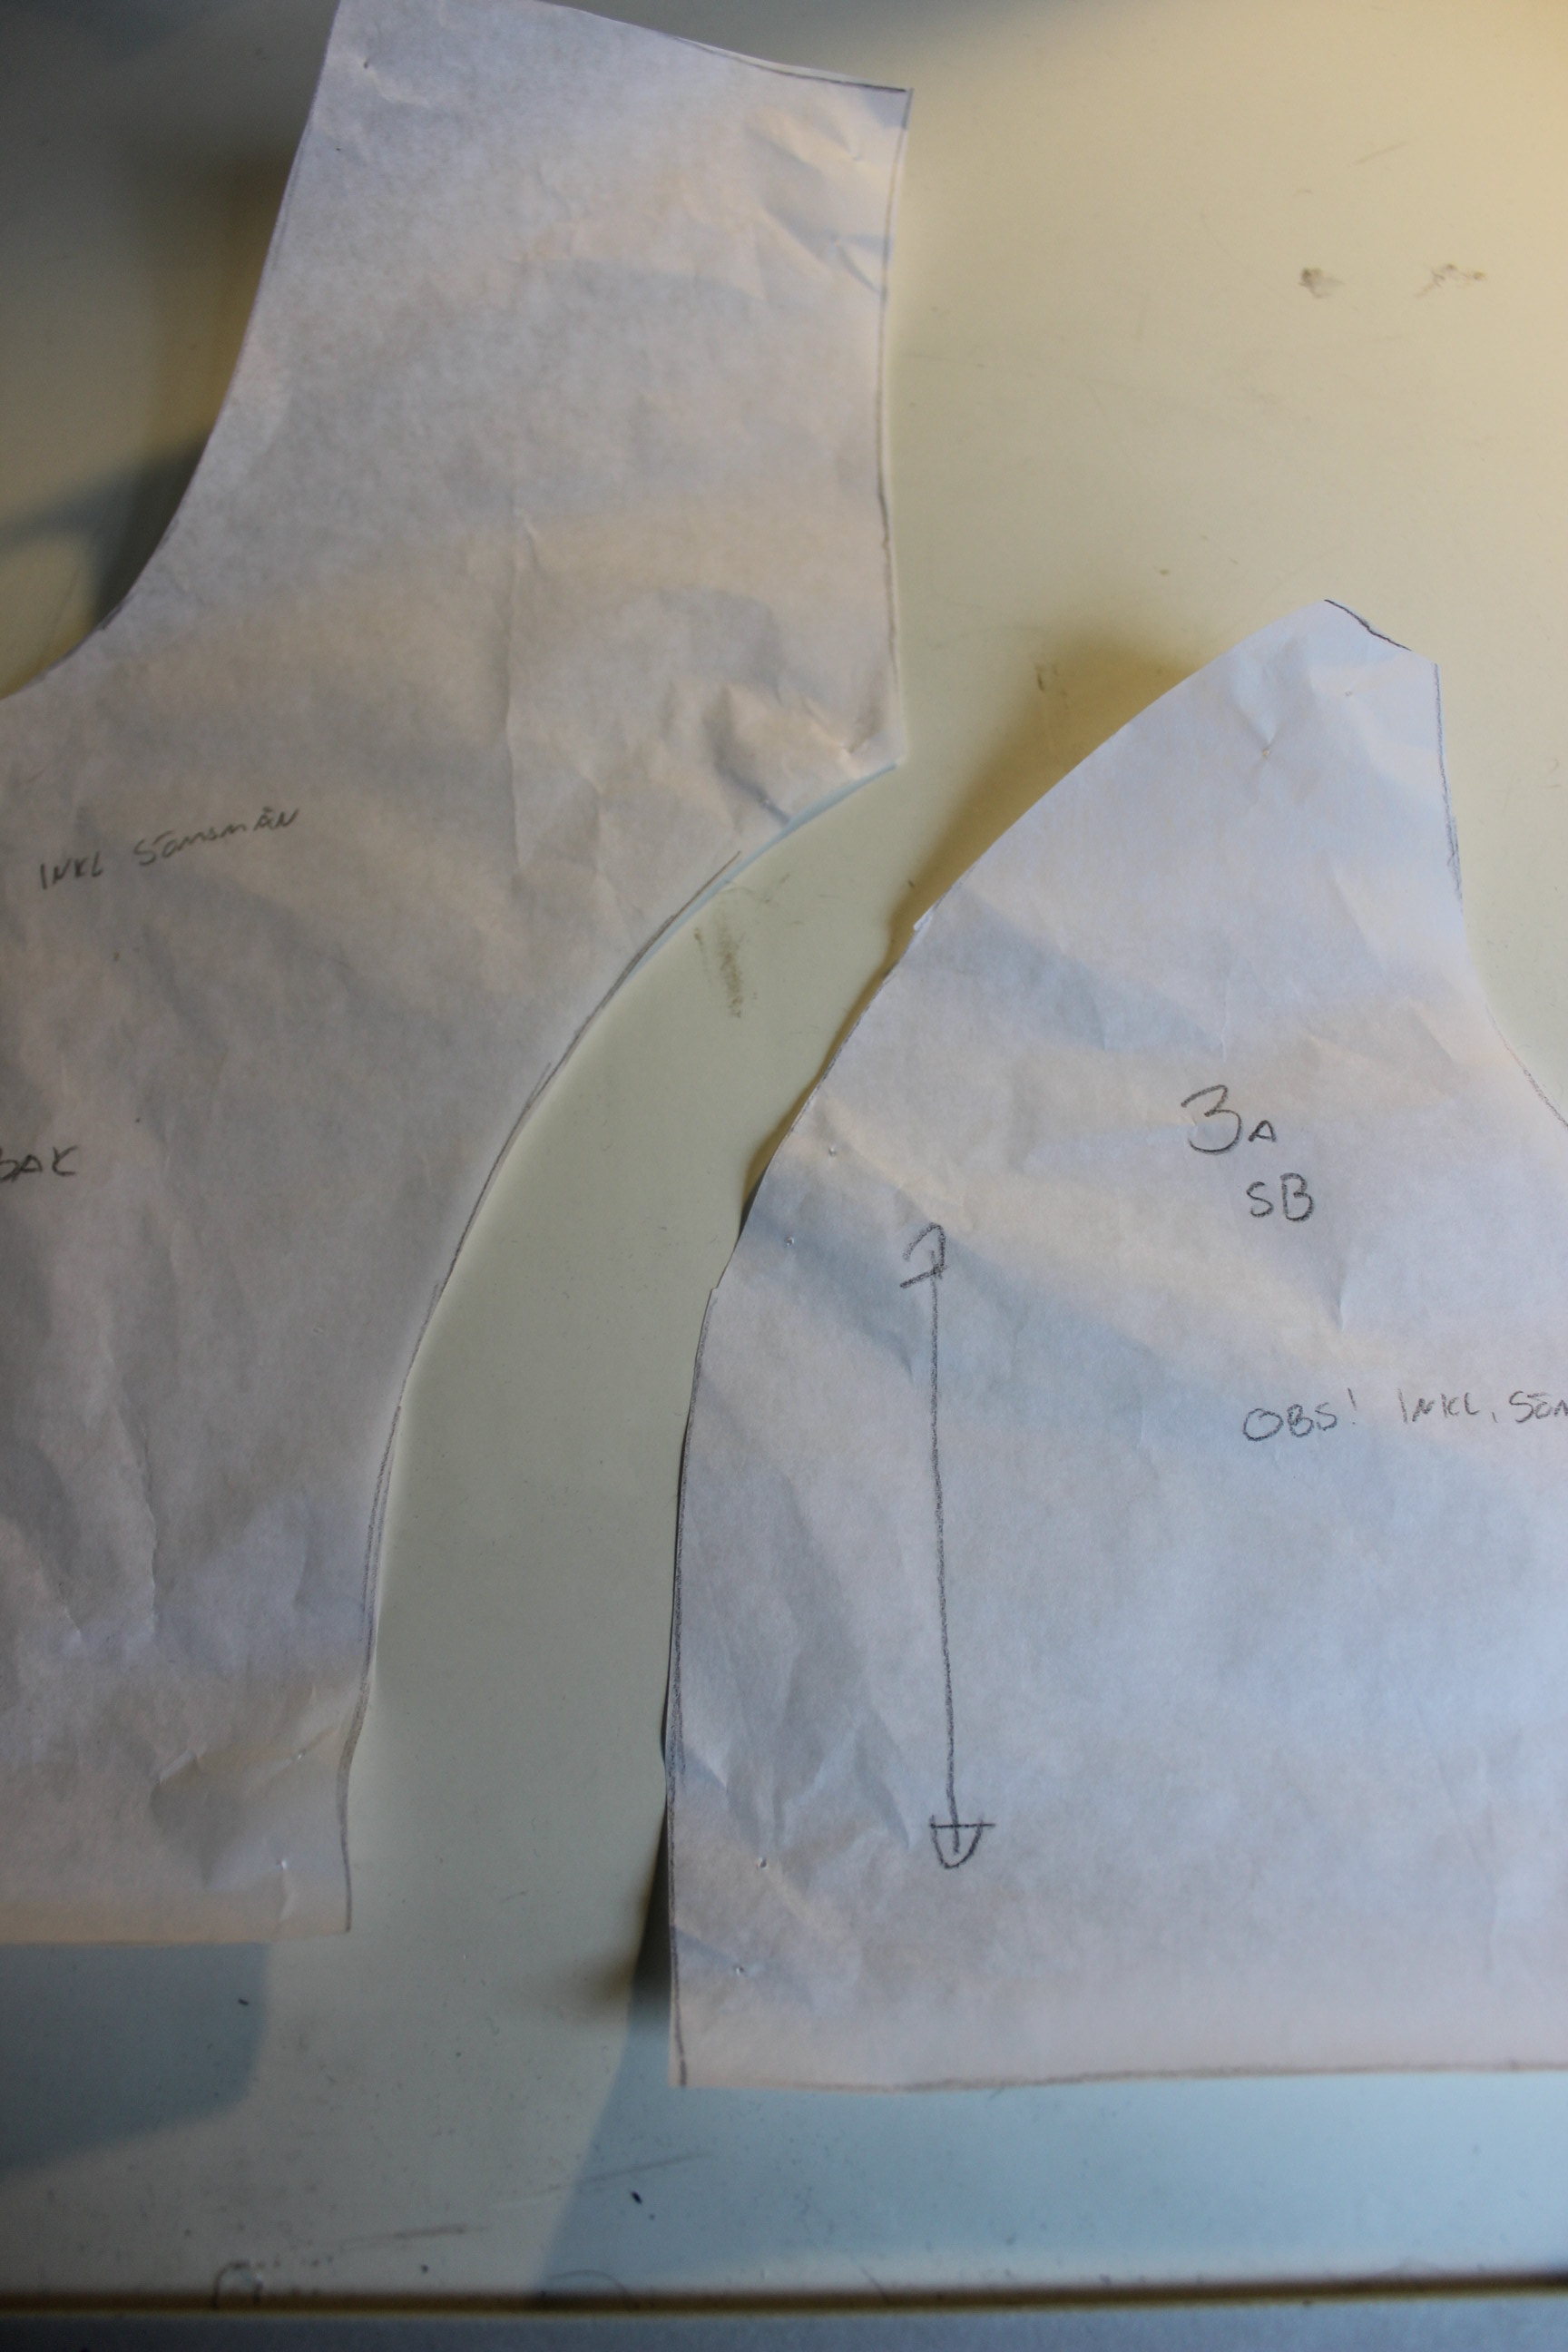 After some iritation about “bad constructed comercial patterns” I discovered that the pattern company had included all the seam allowence beforehand. So cutting of my added allowence I sewed the back up – and it matched perfectly. Ops…
Putting that aside, I continued making the mock-up, and tried it on.


It looked pretty good, and only needed some smaler tweeks.
So on to the fashion fabric. And since I only had about 1,5 m of the voile, I relinquised from the pattern and drafted a slim skirt with only a litle gatering at center back (instead of the large skirt panels originaly recured).
Then I cut the bodice , basted the soft ivory cotton used for interlining to the bodice pieces, and pinned everything togeter.
My ambition was to make the wole dress by hand, so I stiched the skirt, bodice and sleeve pieces togeter and felled all the seams.
I gatered both the skirt waist, the bust draping and basted the puffsleves.
Then I run out of time.
And when I realised, the day before the dance recidal, that I sewed two right back pieces, I gave up and treaded my machine.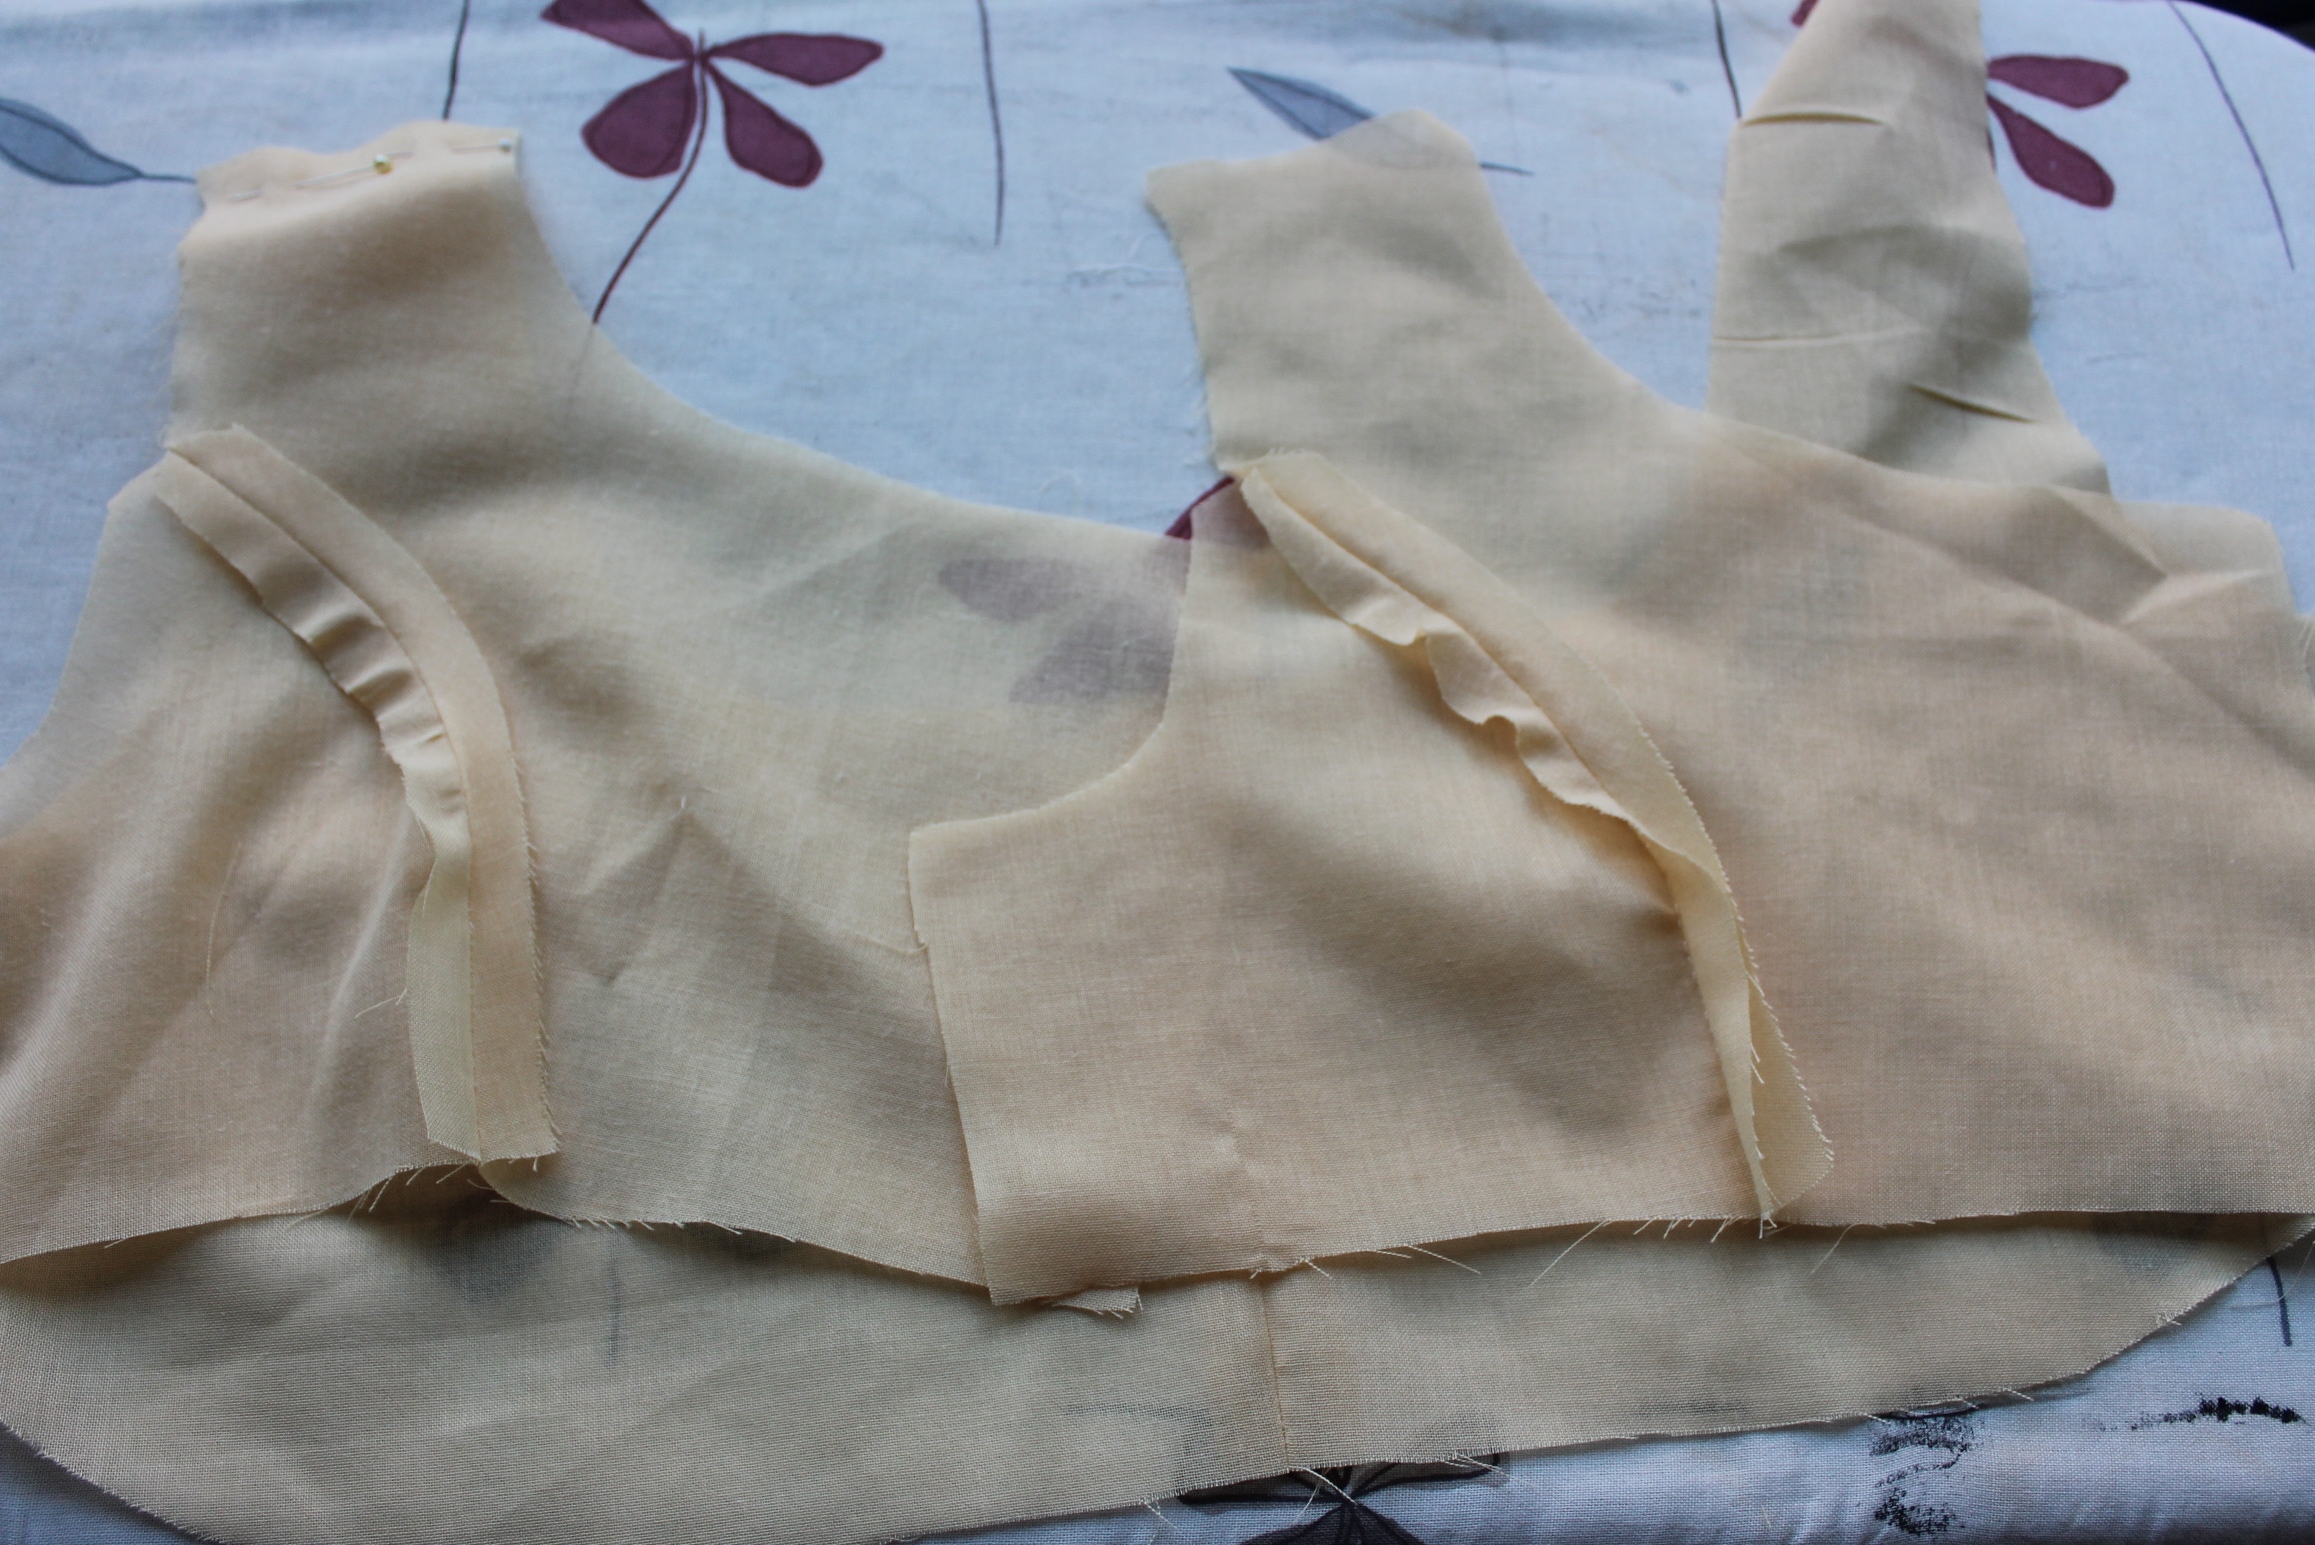 From there on it went pretty fast.
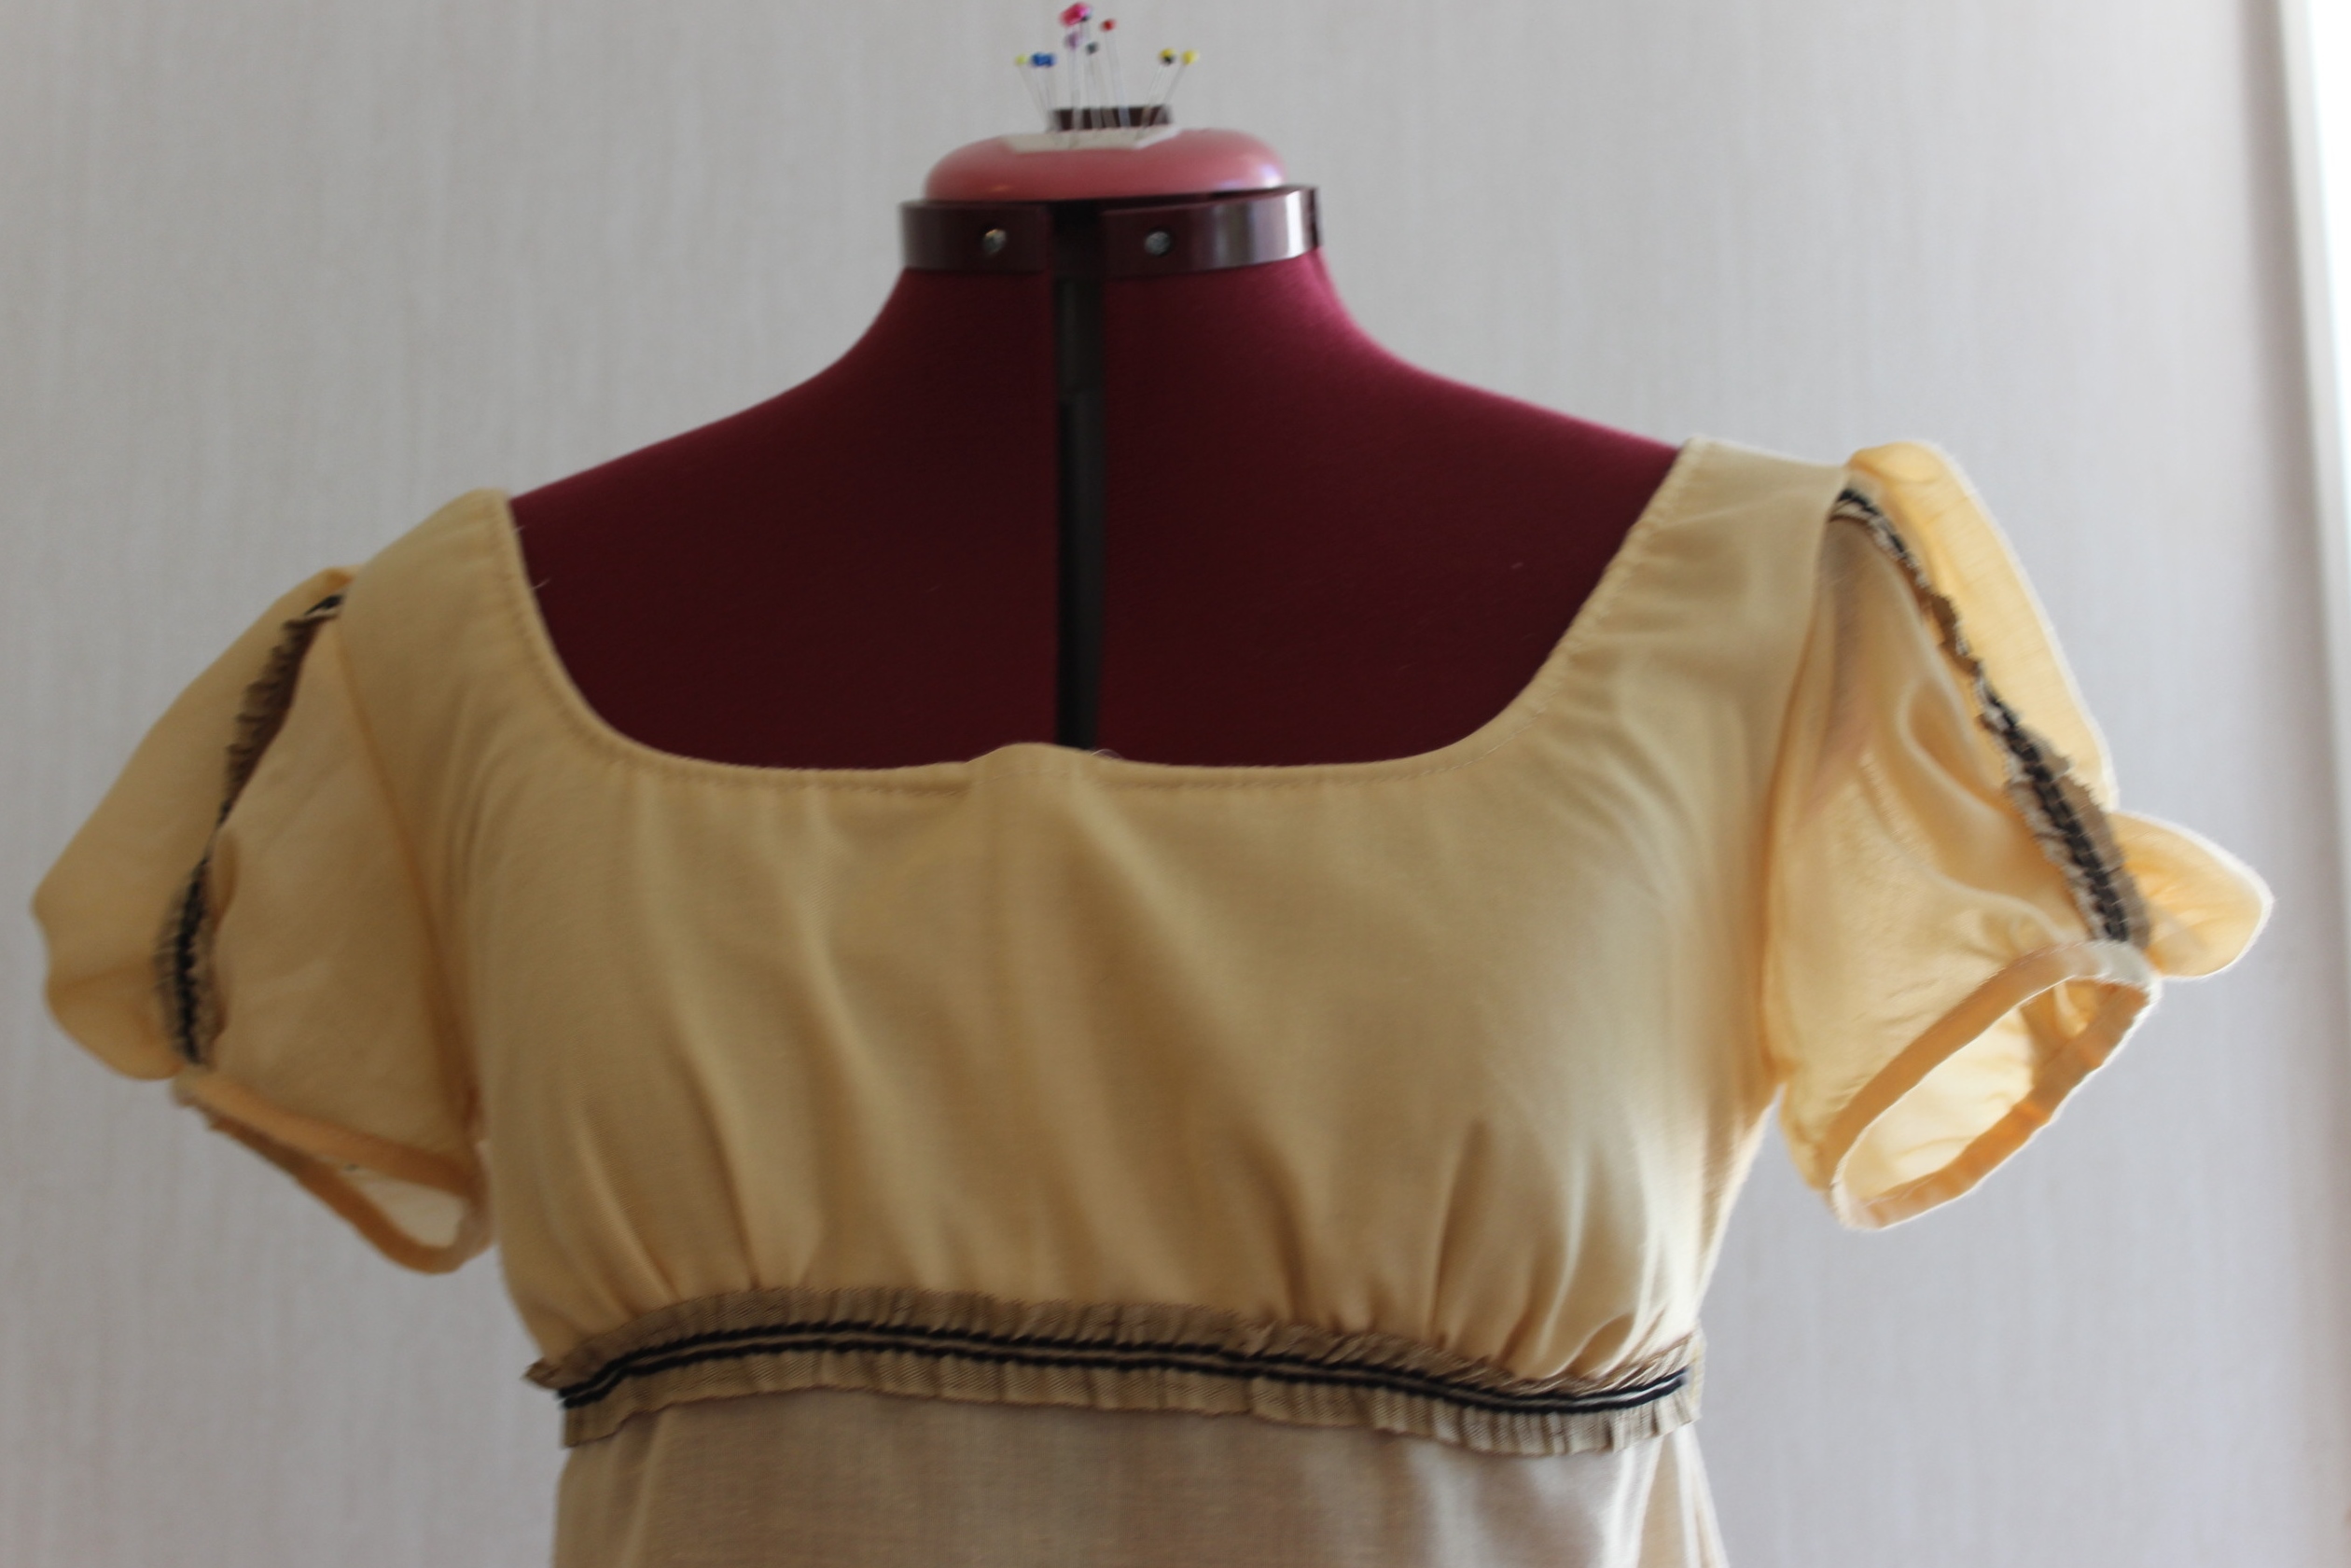
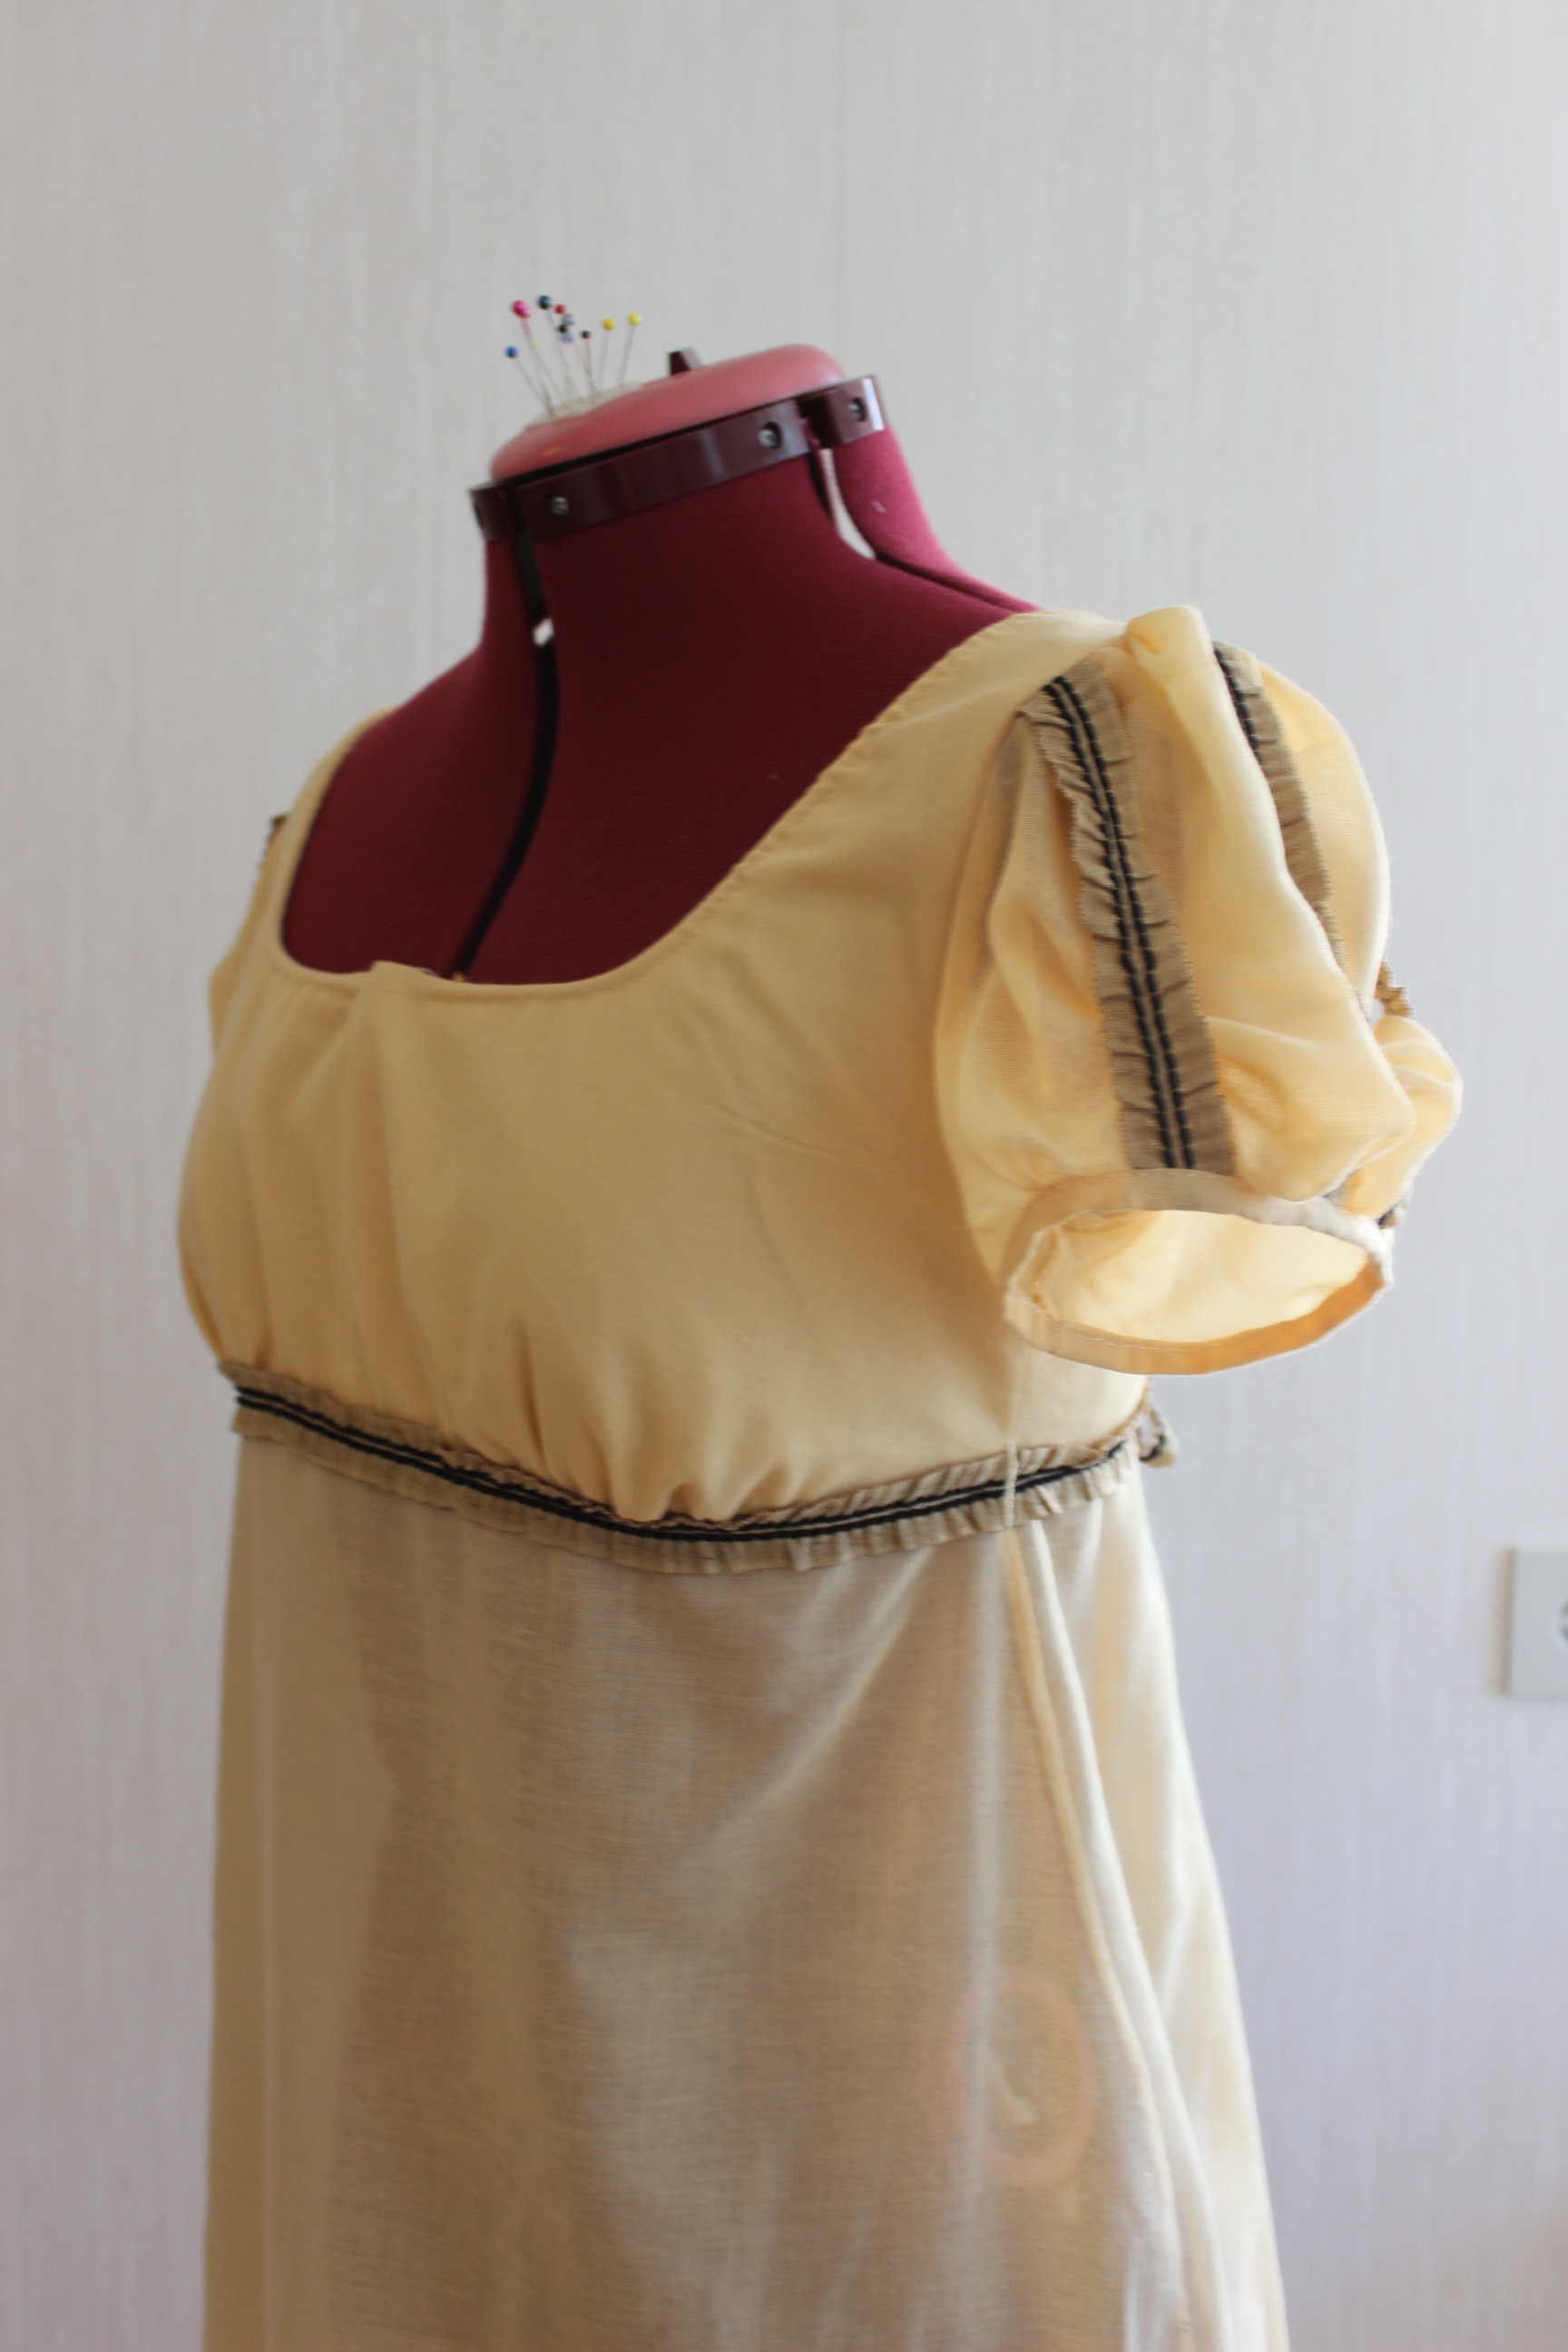
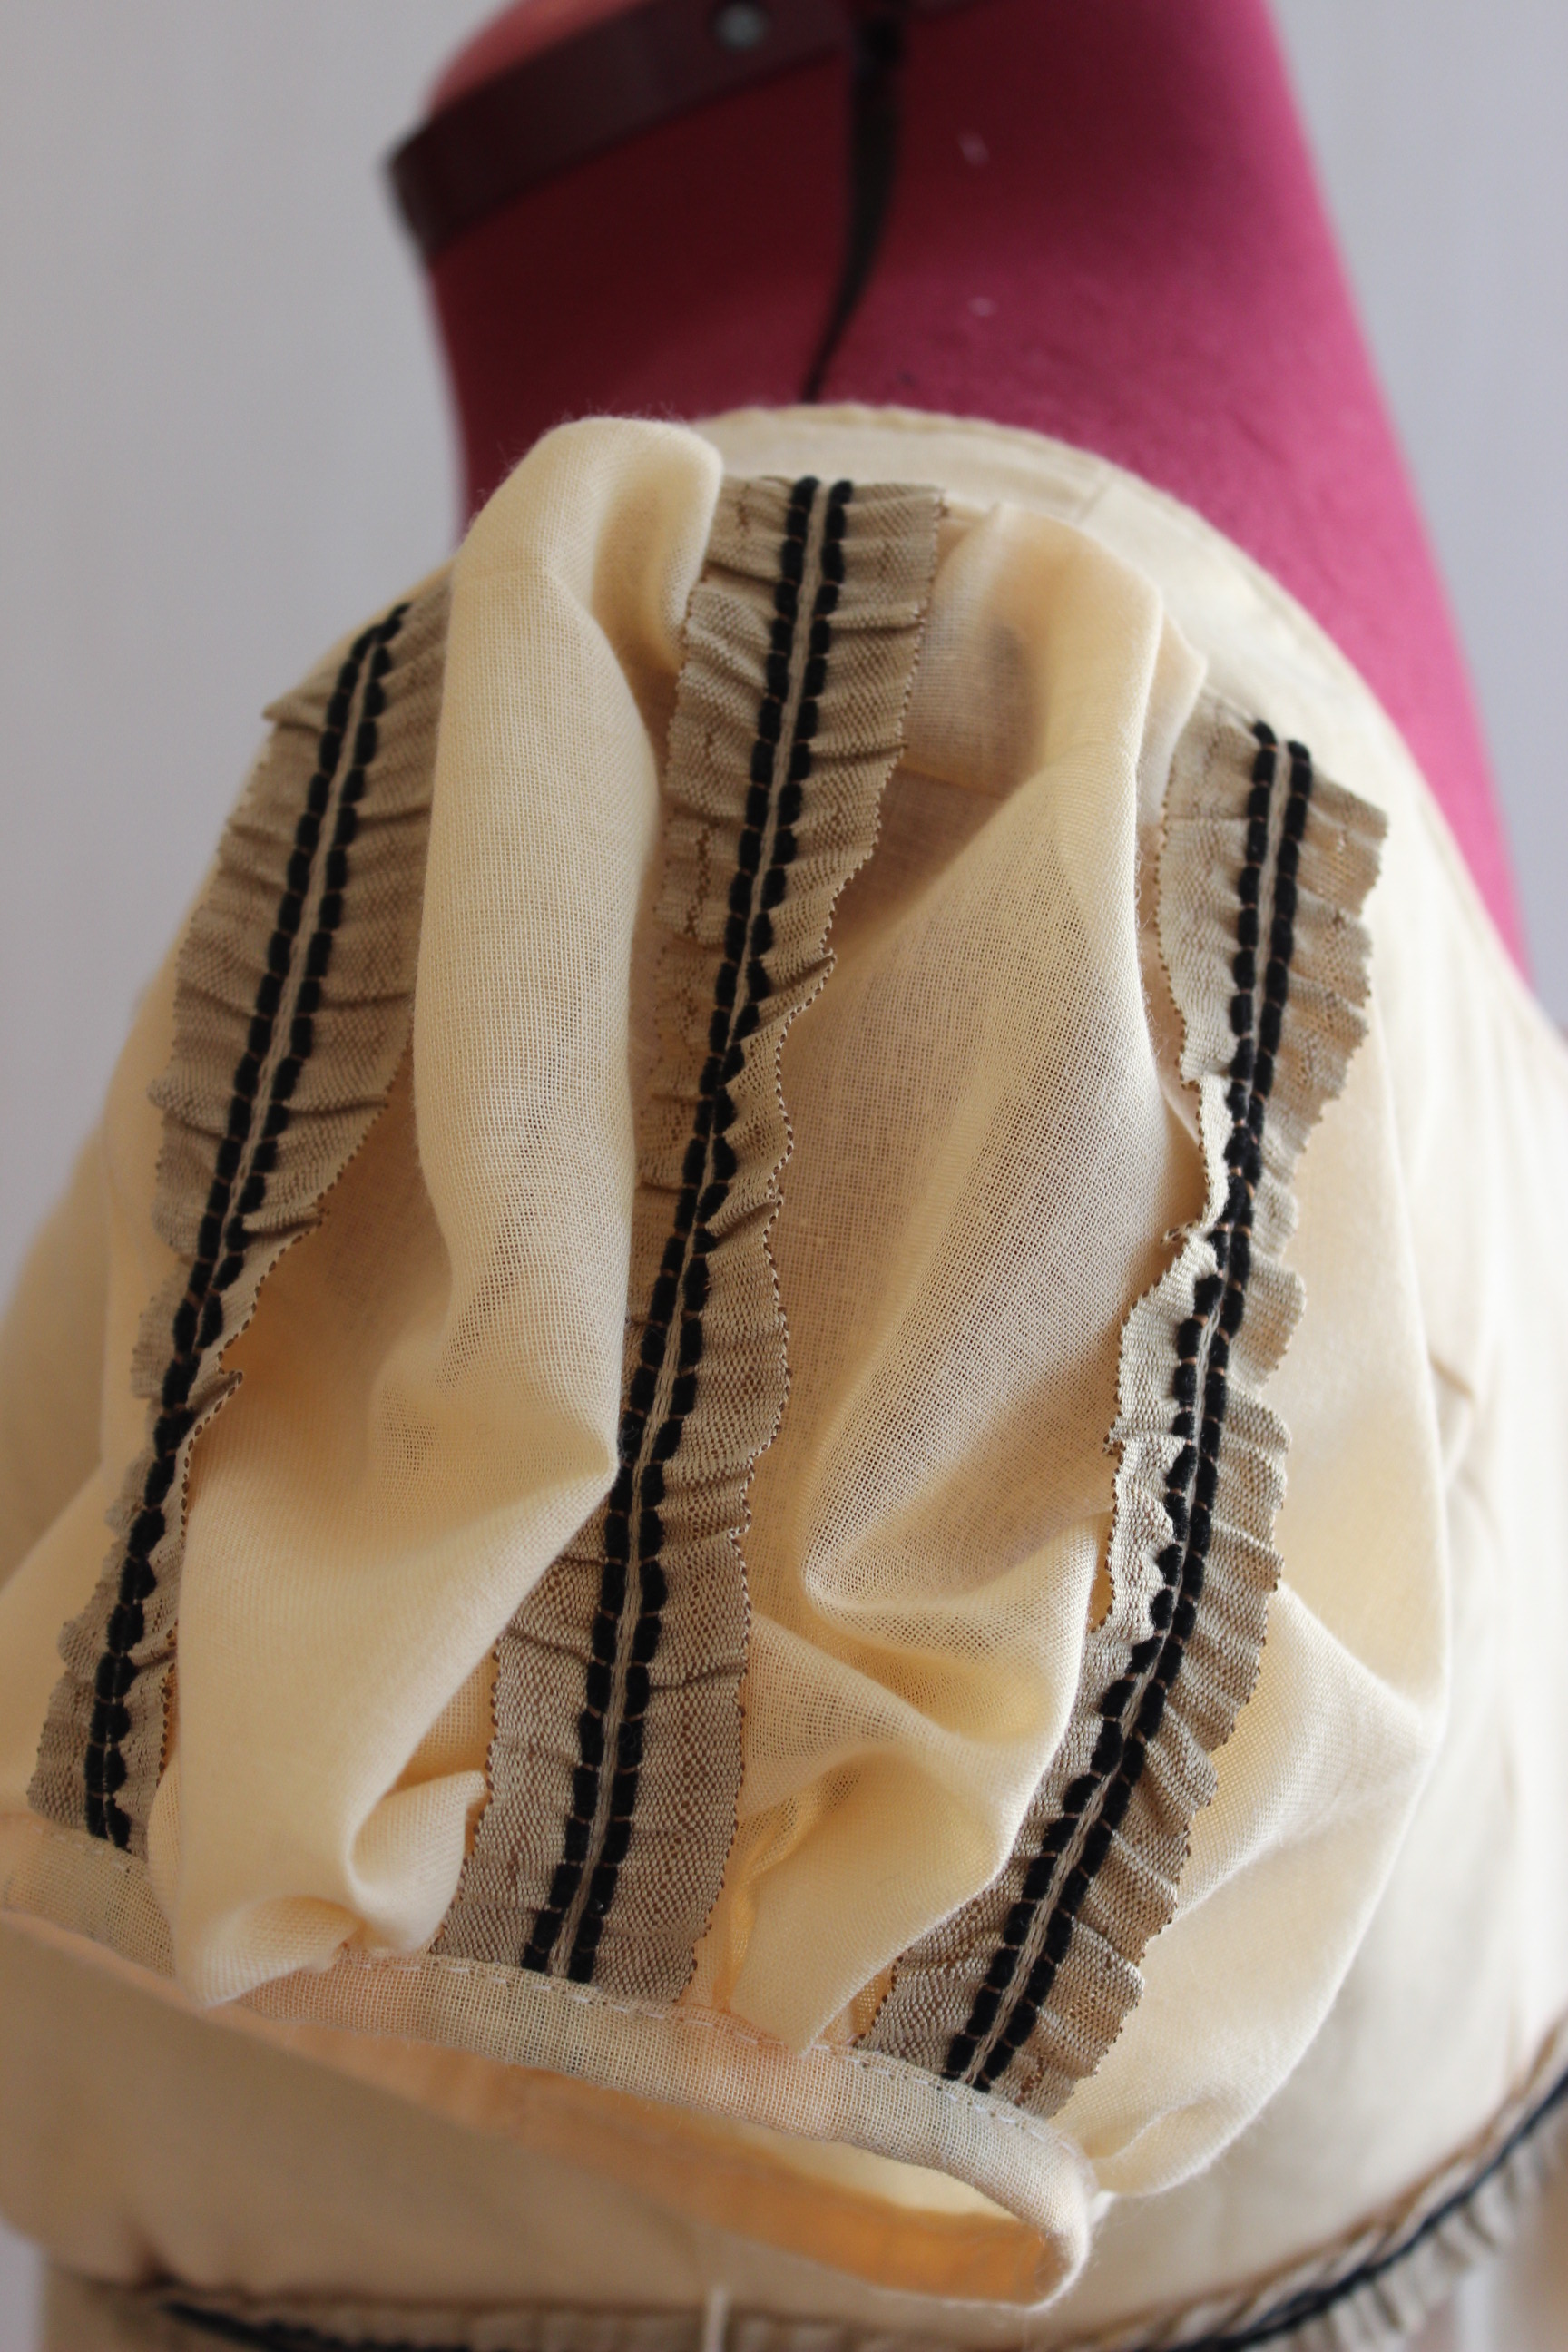
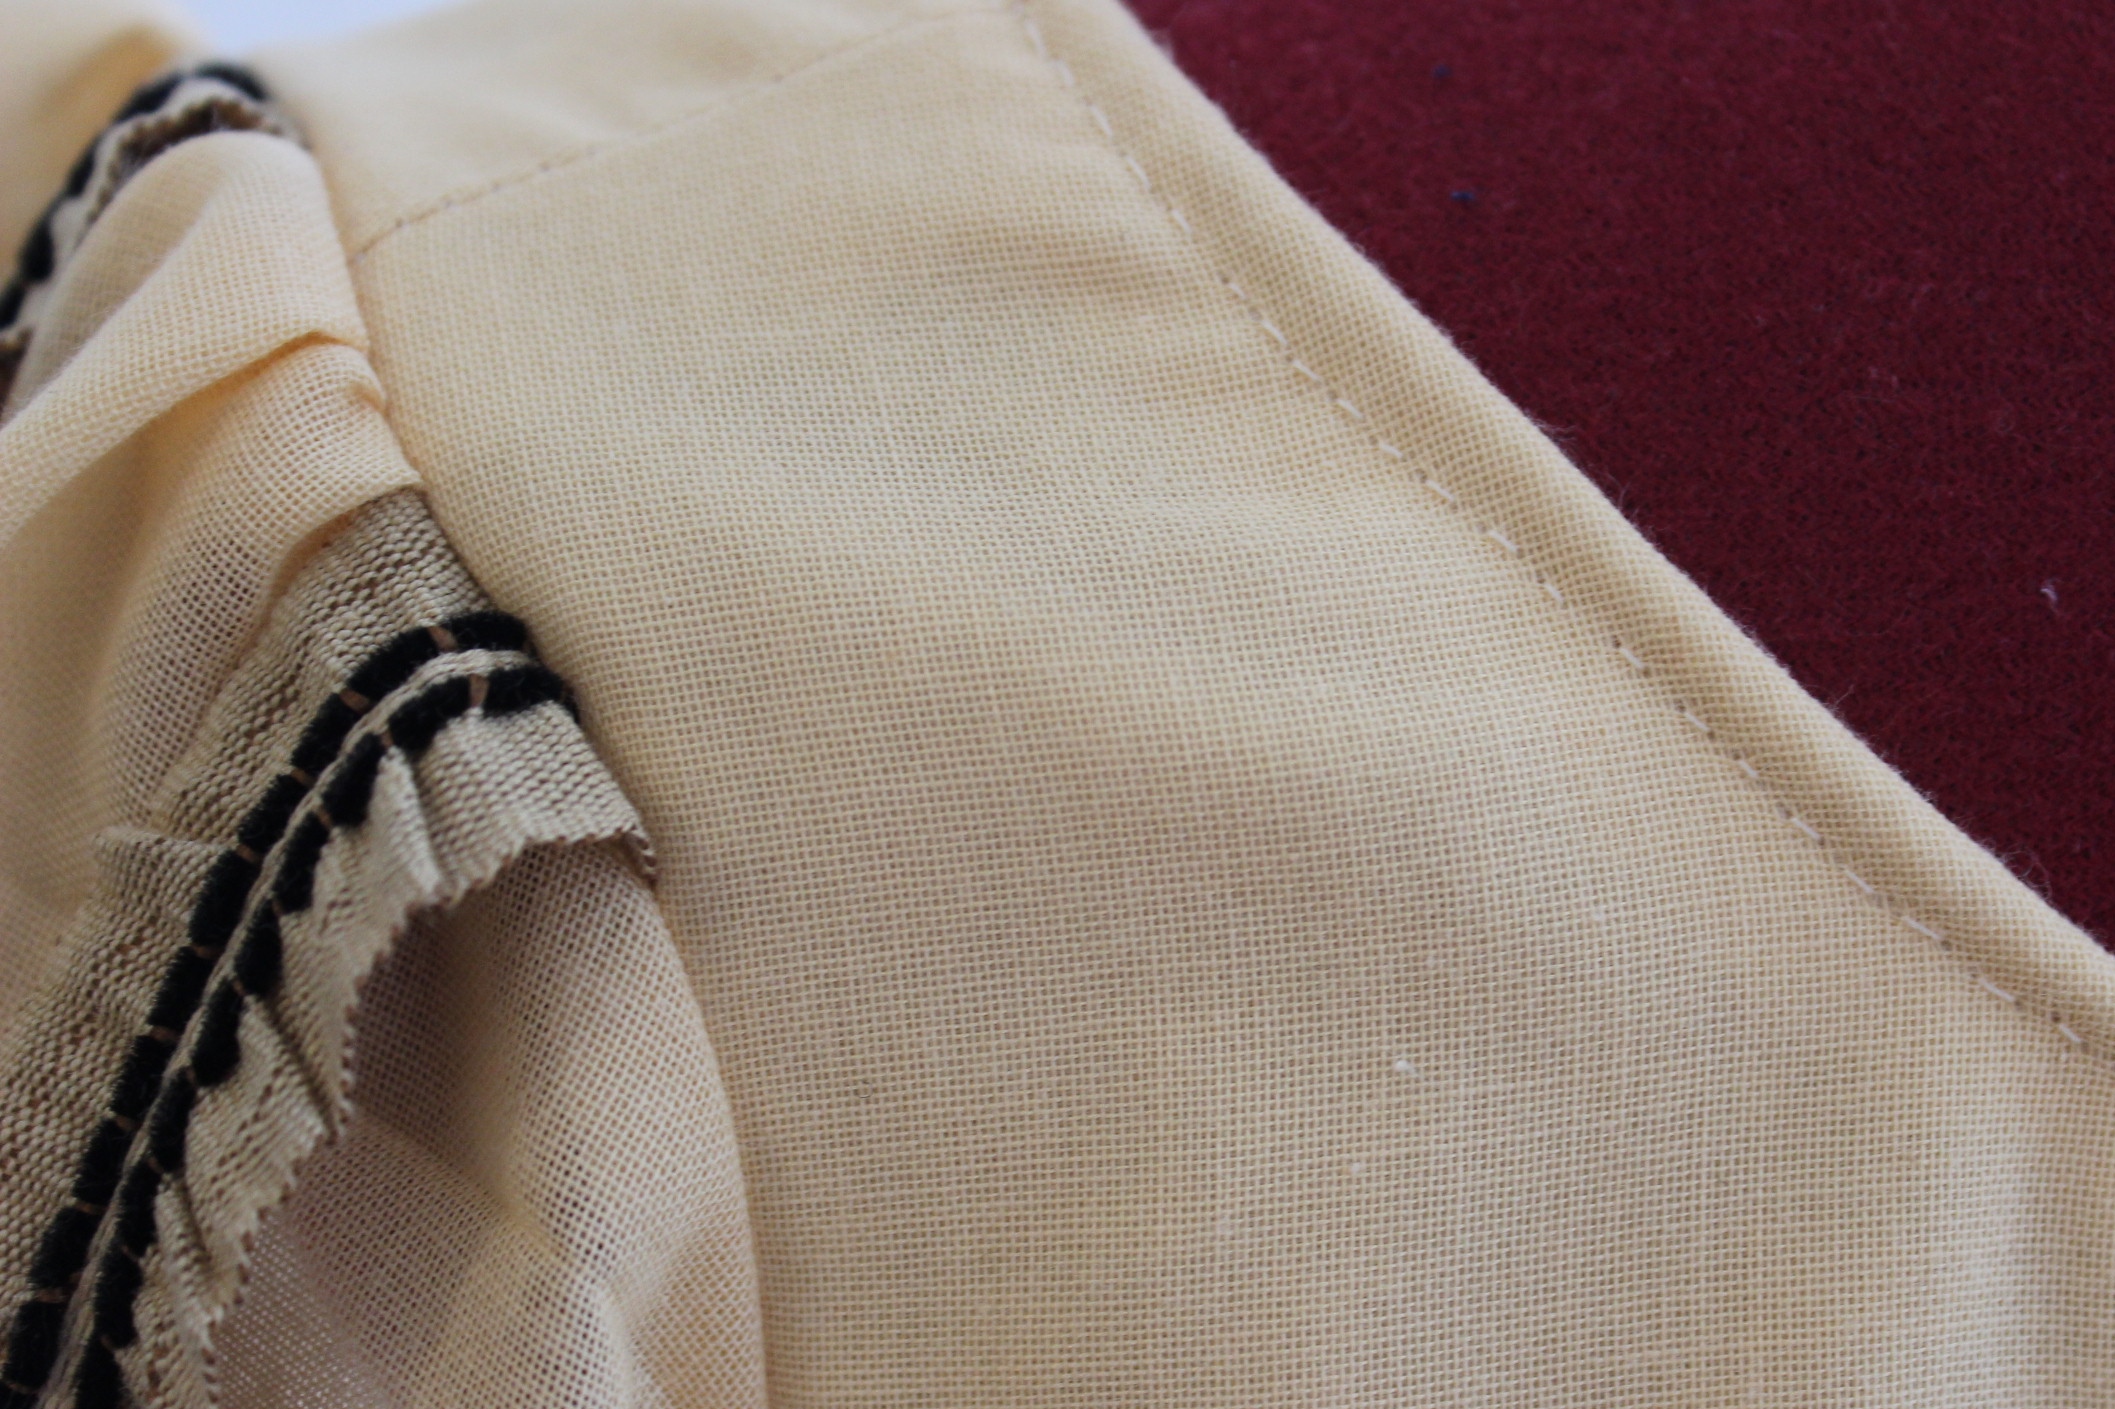
I sewed he bodice to the lining and set the sleeves. Decorating them with rows of trimming to make them even puffier, and ending them in smal self made bias strips.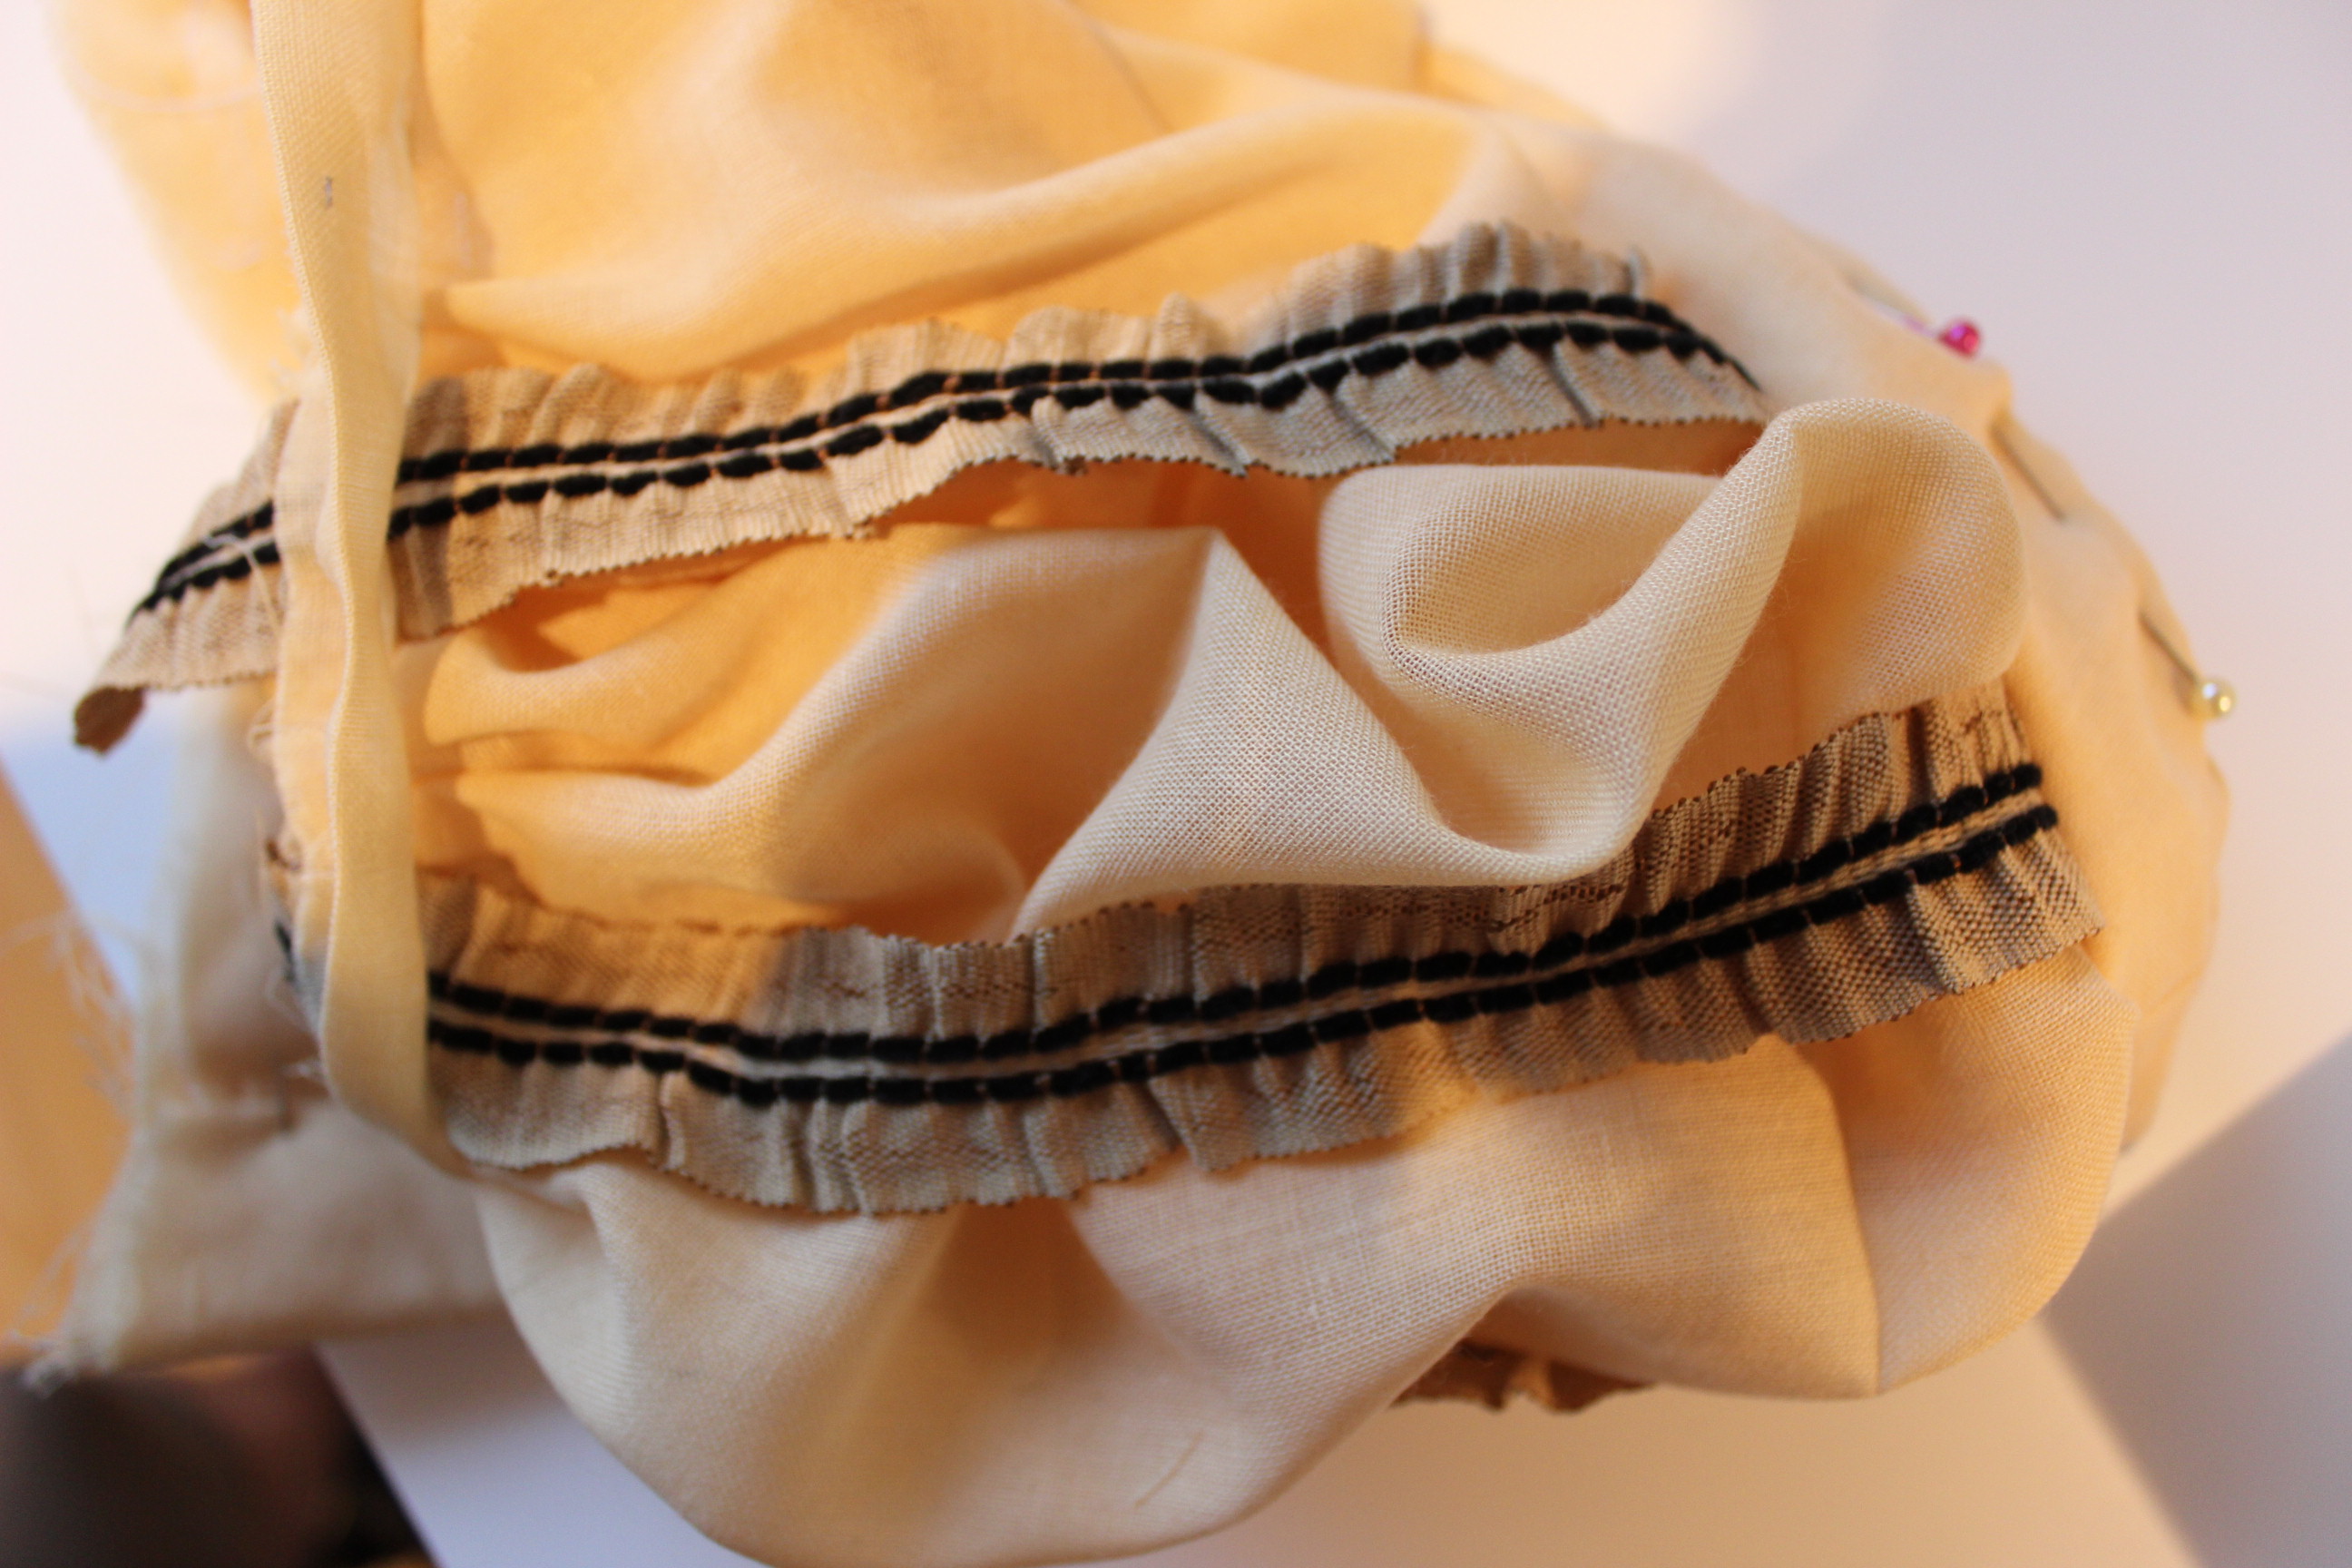
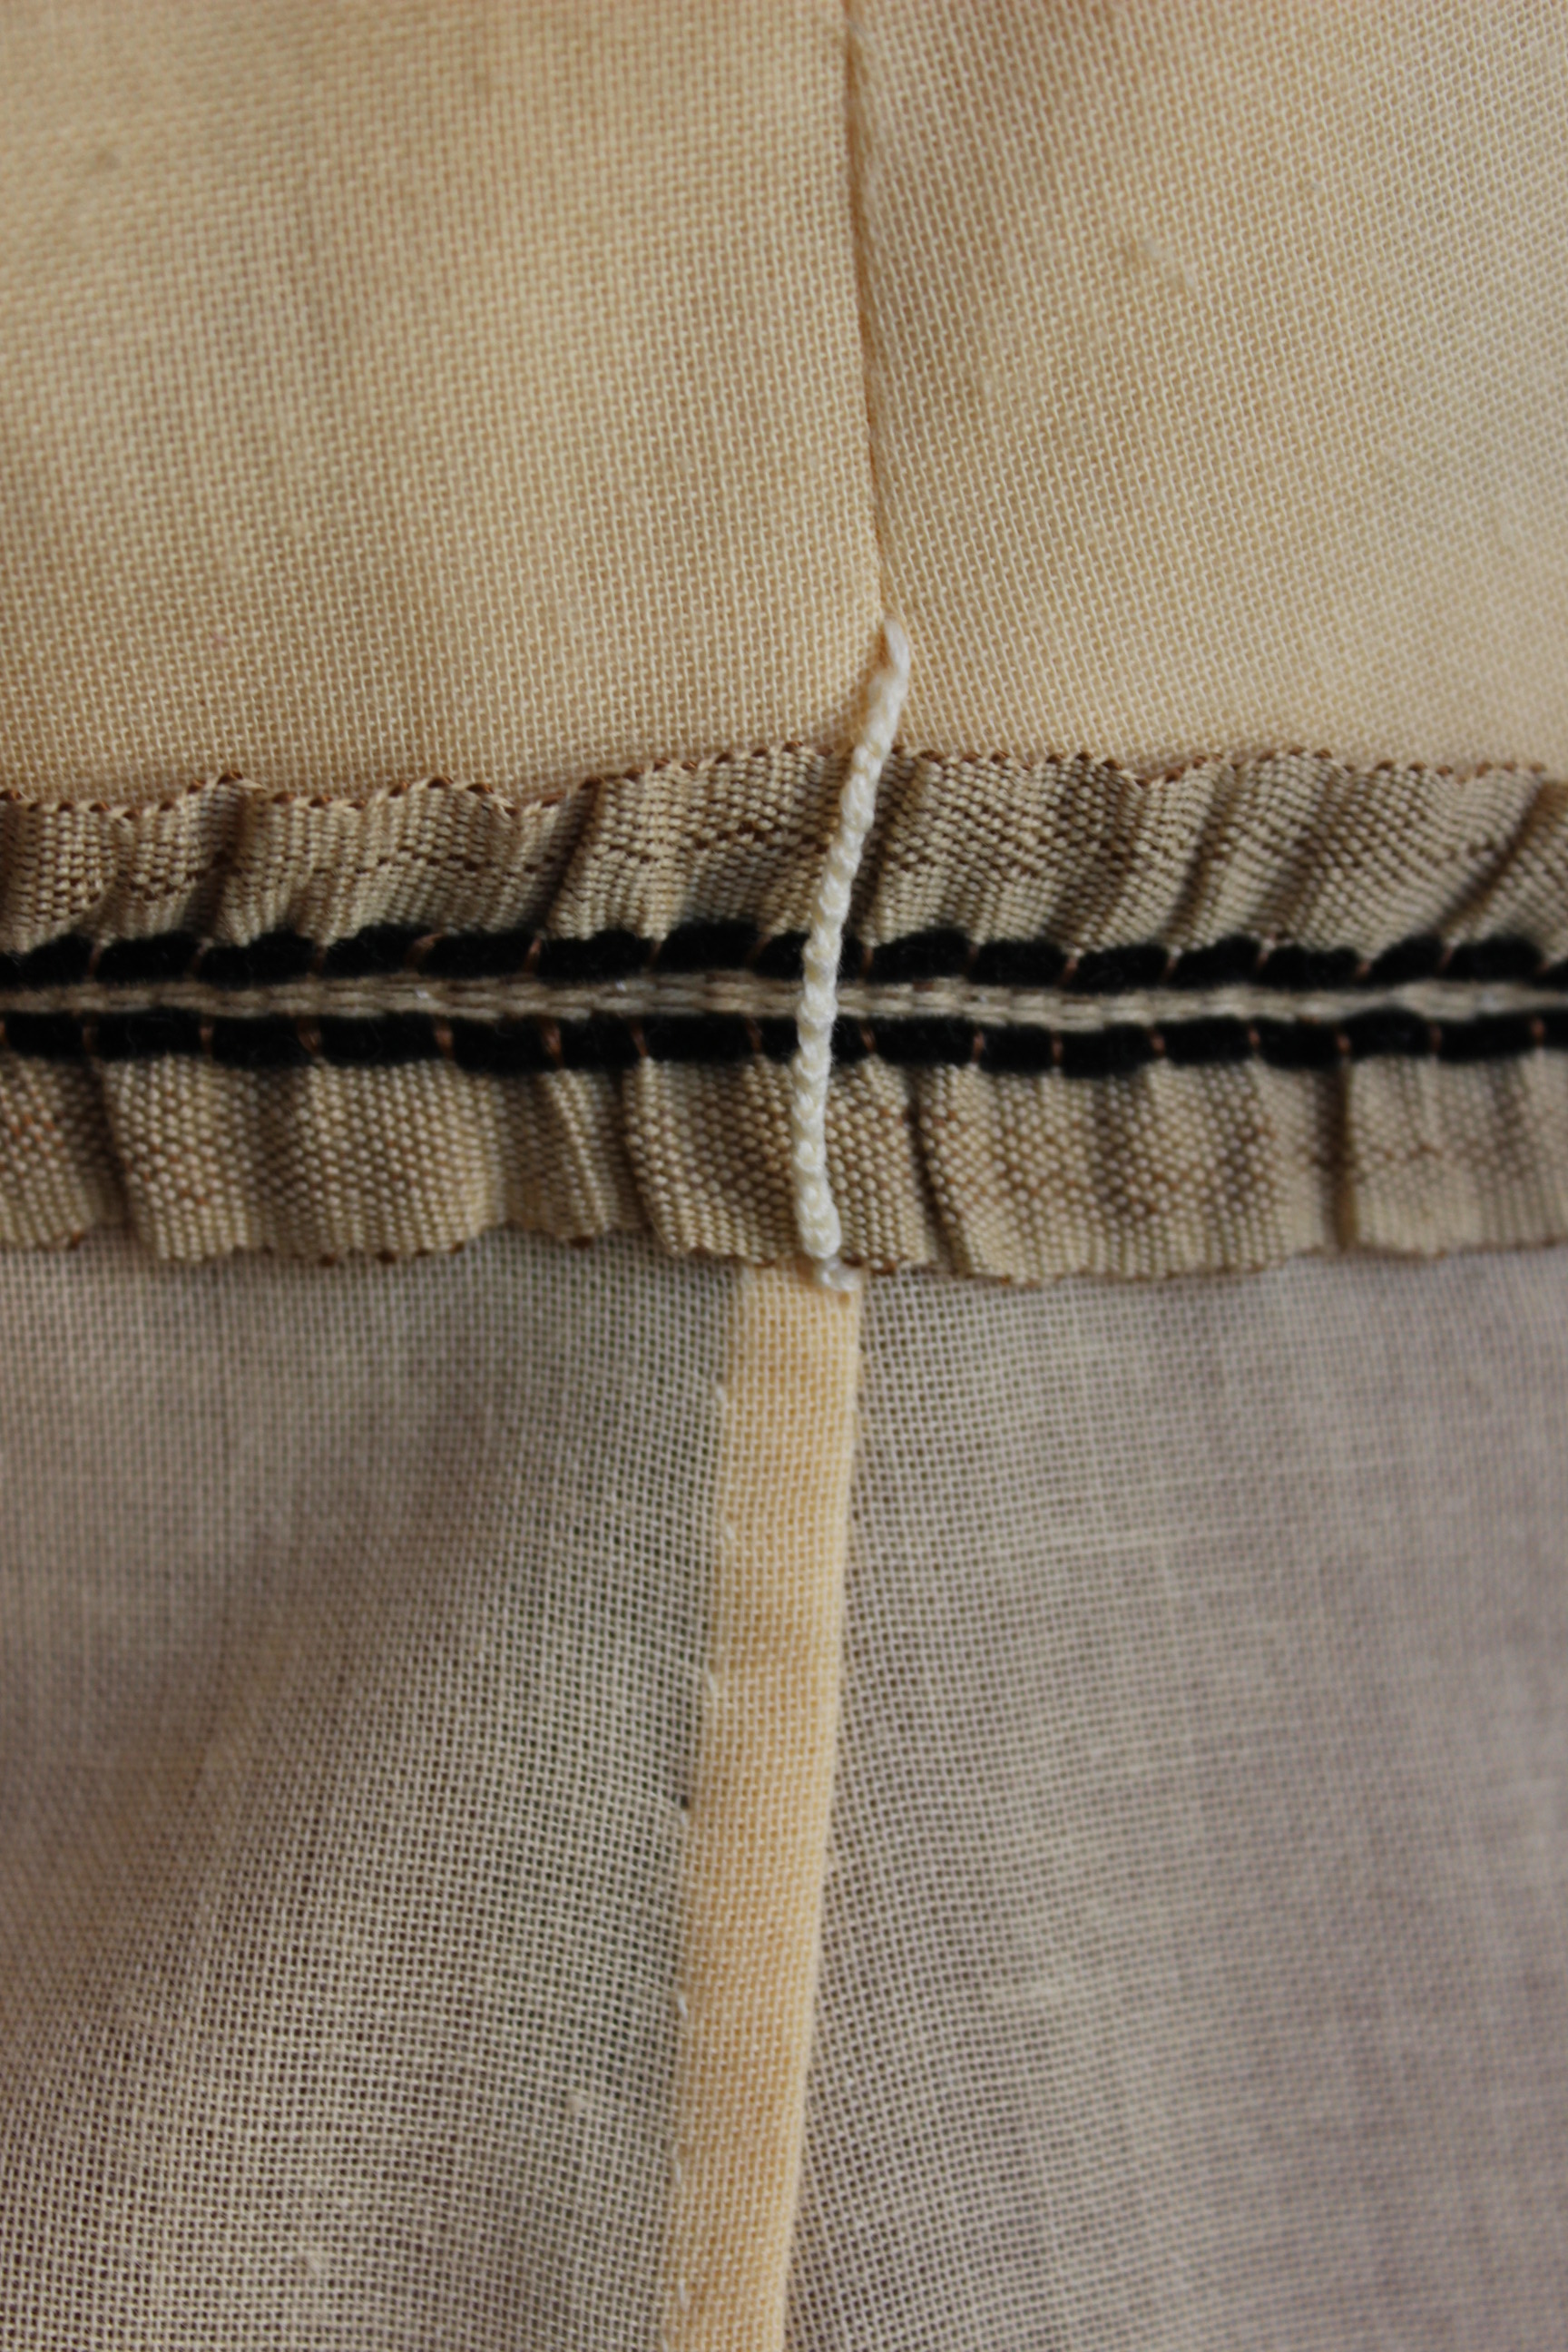
I worked some eyelets to the front lining, and stiched a chanal for the gatering-cord on the upper edge of the bodice.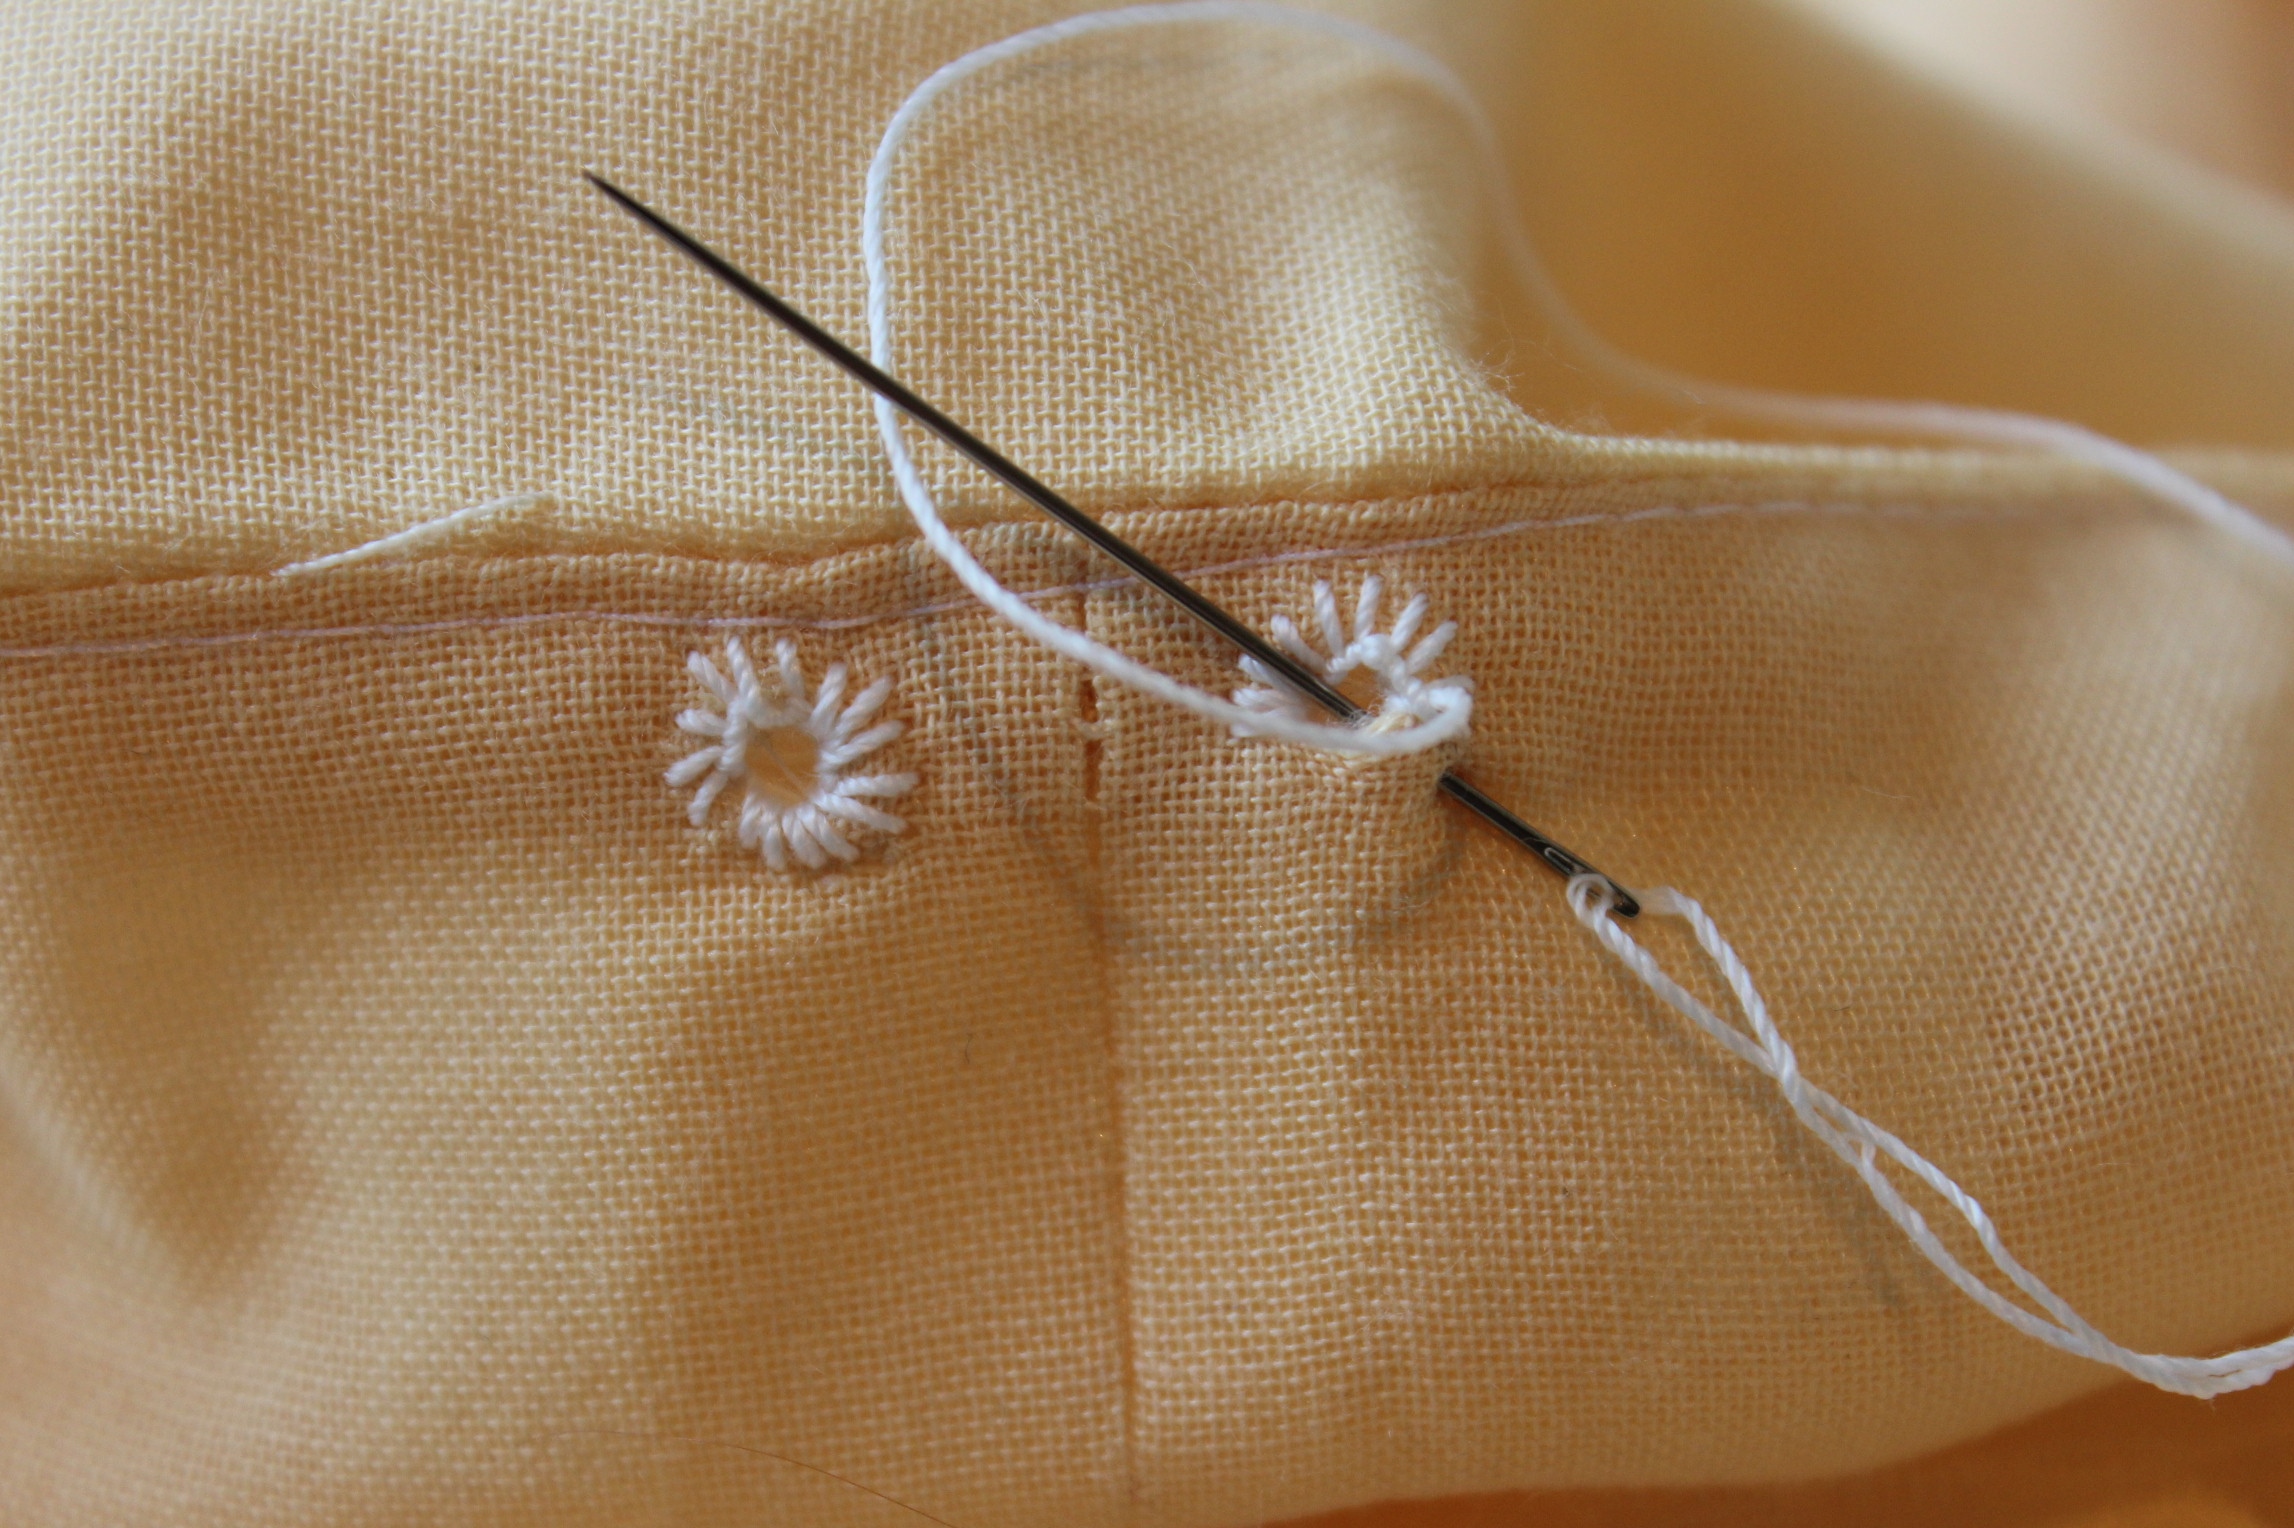 Then I attached the skirt to the bodice, put on some hooks and eyes for clouser, cut the lenght and sewed the hem (finishing about 10 minutes before I needed to put it on to be able to go to the recidal).
The Finished dress: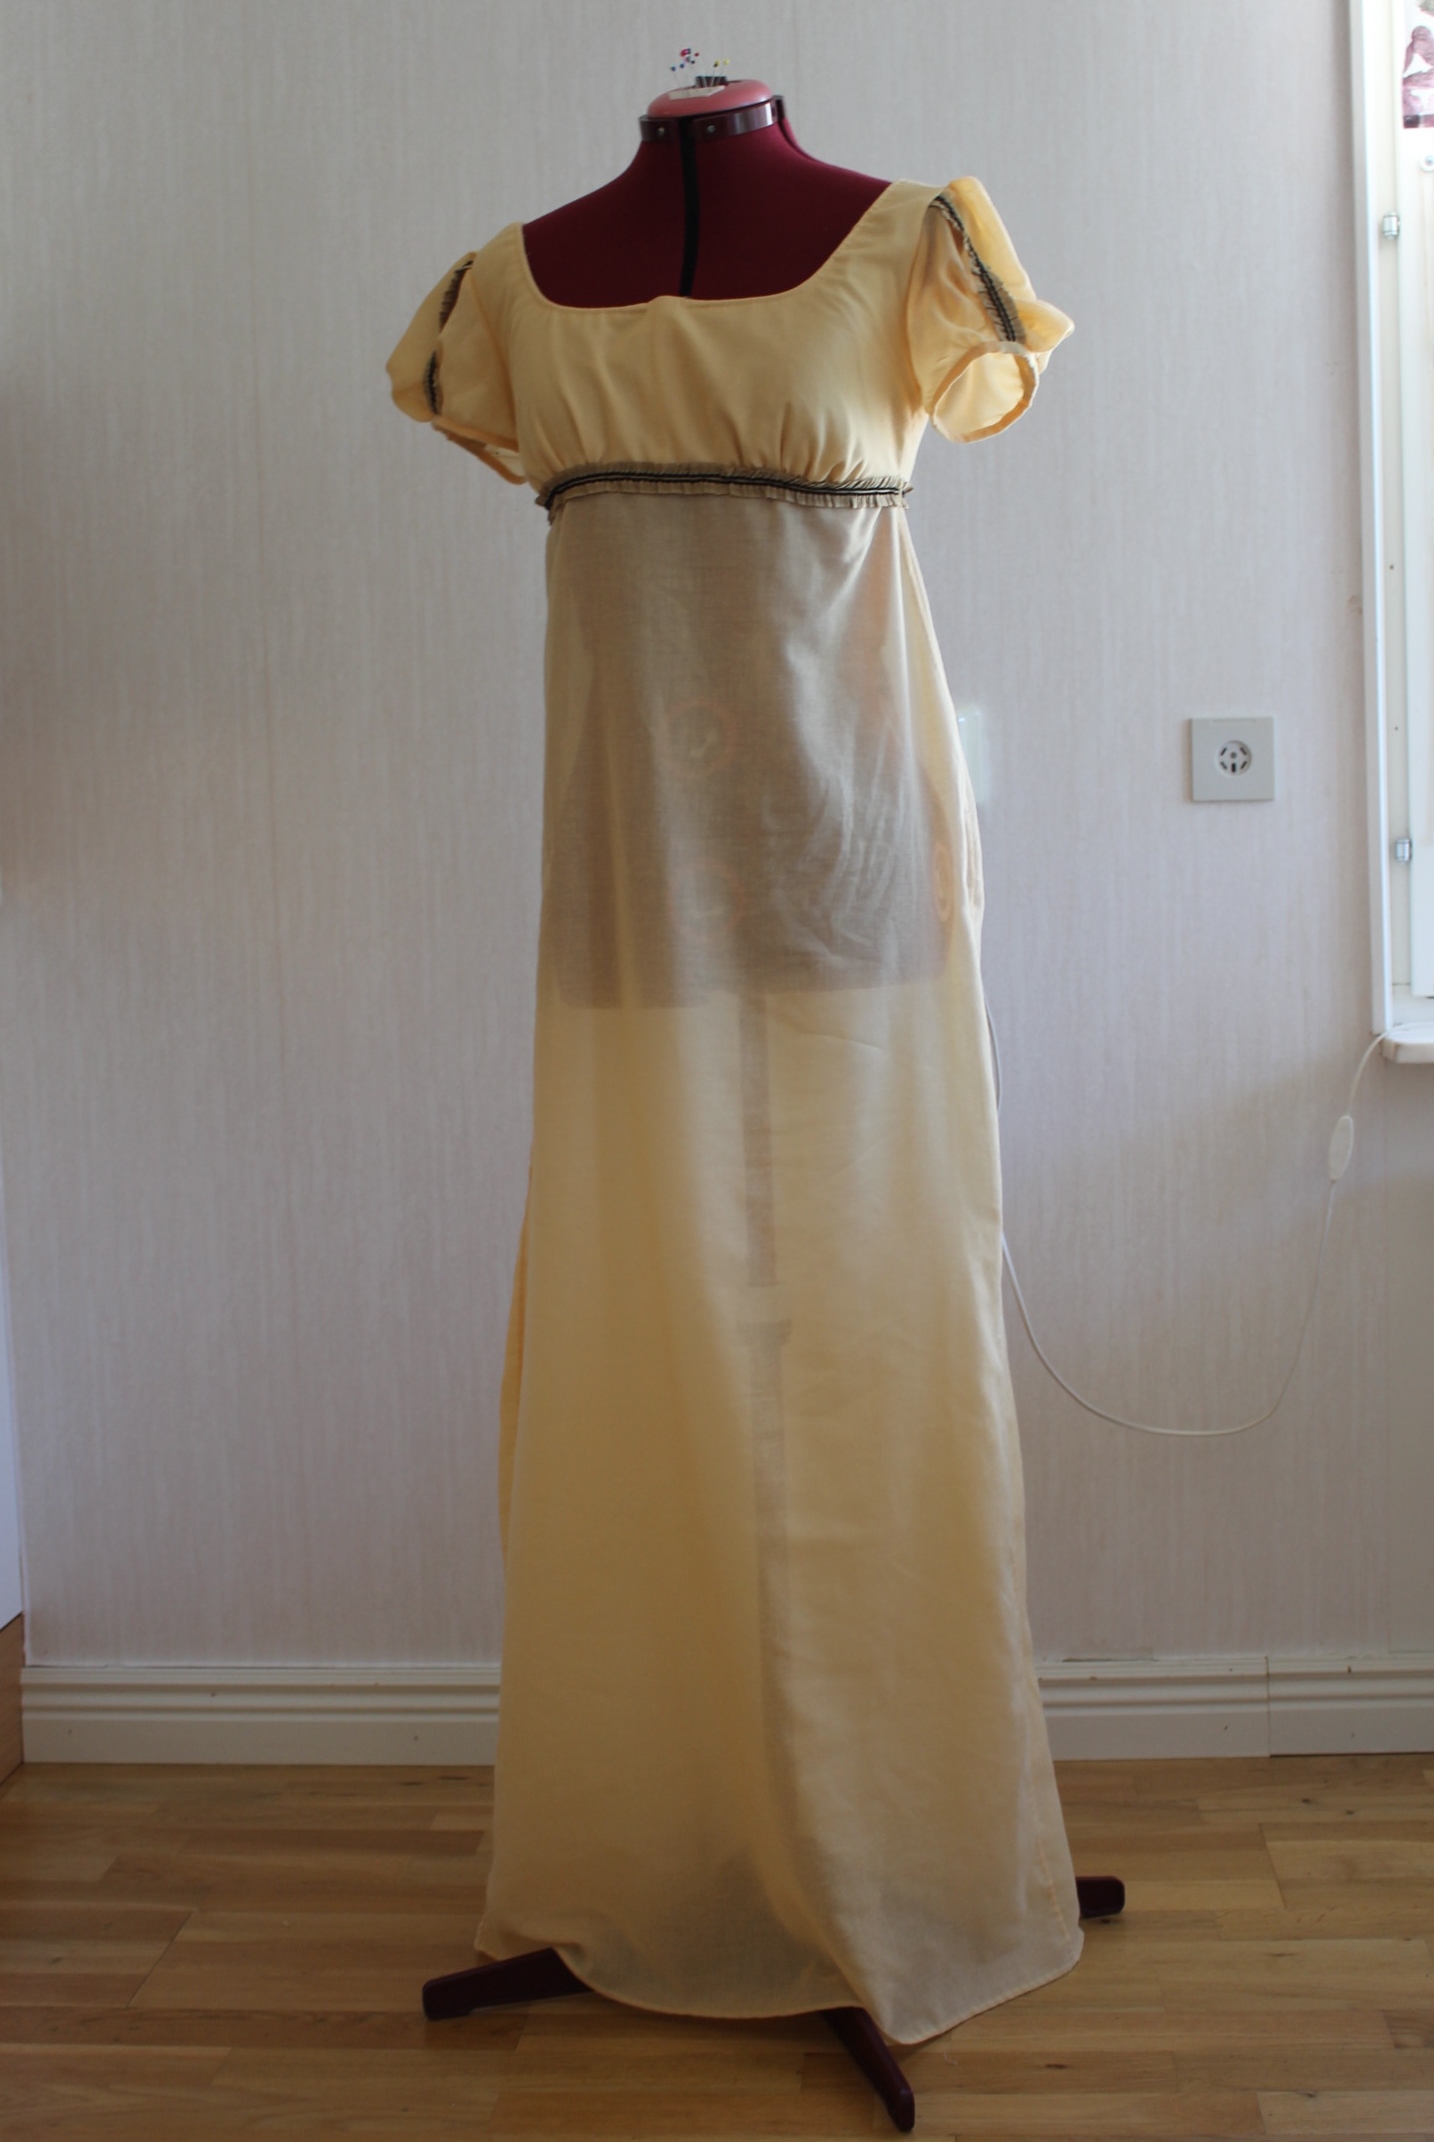


Sneak a peak from the photoshoot:
Just the facts:
Challenge: Nr 11 – The Politics of fashion
What: An early 19th century regency gown.
Politic: The softer style developed in the late 18th century as a reaction to a lots of things:
-The opulance in fashion in the upper class leading up to the french revoultion.
-The introduction of the cheeper, more light weight indian cotton now being avalible to people all over europe.
-And the discovery of Pompeii and Herculaium, creating a dream of the ancient democracy, and a thous new cravings for more draped greecian clothing.
Read more on: http://en.wikipedia.org/wiki/1795%E2%80%931820_in_Western_fashion
Pattern: Simplicity 4055 regency gowns.
Fabric: 1,5 m of light yellow cotton voile, 0,3 m of thin ivory cotton for interlining.
Notions: Thread, buttonhole thread, hooks and eyes, 1m of cord and 2 m of decoation trim.
How historical accurate: The pattern are supposed to be from an autentic sorce, but since I adapted it to my likning and fabric measurments I really don’t know anymore. The fabrics and ribbons are right, but since some of it are made on the sewing machine I would say 6/10.
Time: Since such a big part of the dress are sewed by hand, I think the total tally are up to about 15-20 hours. (Made only on machine it wouldn’t have taken more then 6 I think.)
Cost: No more than 100 sek (16 Usd).
First worn: On june 14th at the local dance festival, where my historic dance group did a performance. (picture are comming soon)
Final thoughts: I wished I would have had a bit more fabric for the back gahtering, and also that I would have taken the time to get the bust gatering in the right place (now they are a bit to far at the sides, making the bodice line look a bit bulky). But otherwise I like the it a lot, even though it reminds me of bumblebees a bit with the darer stripes.
And I’m happy that the pattern turned out to work so well.
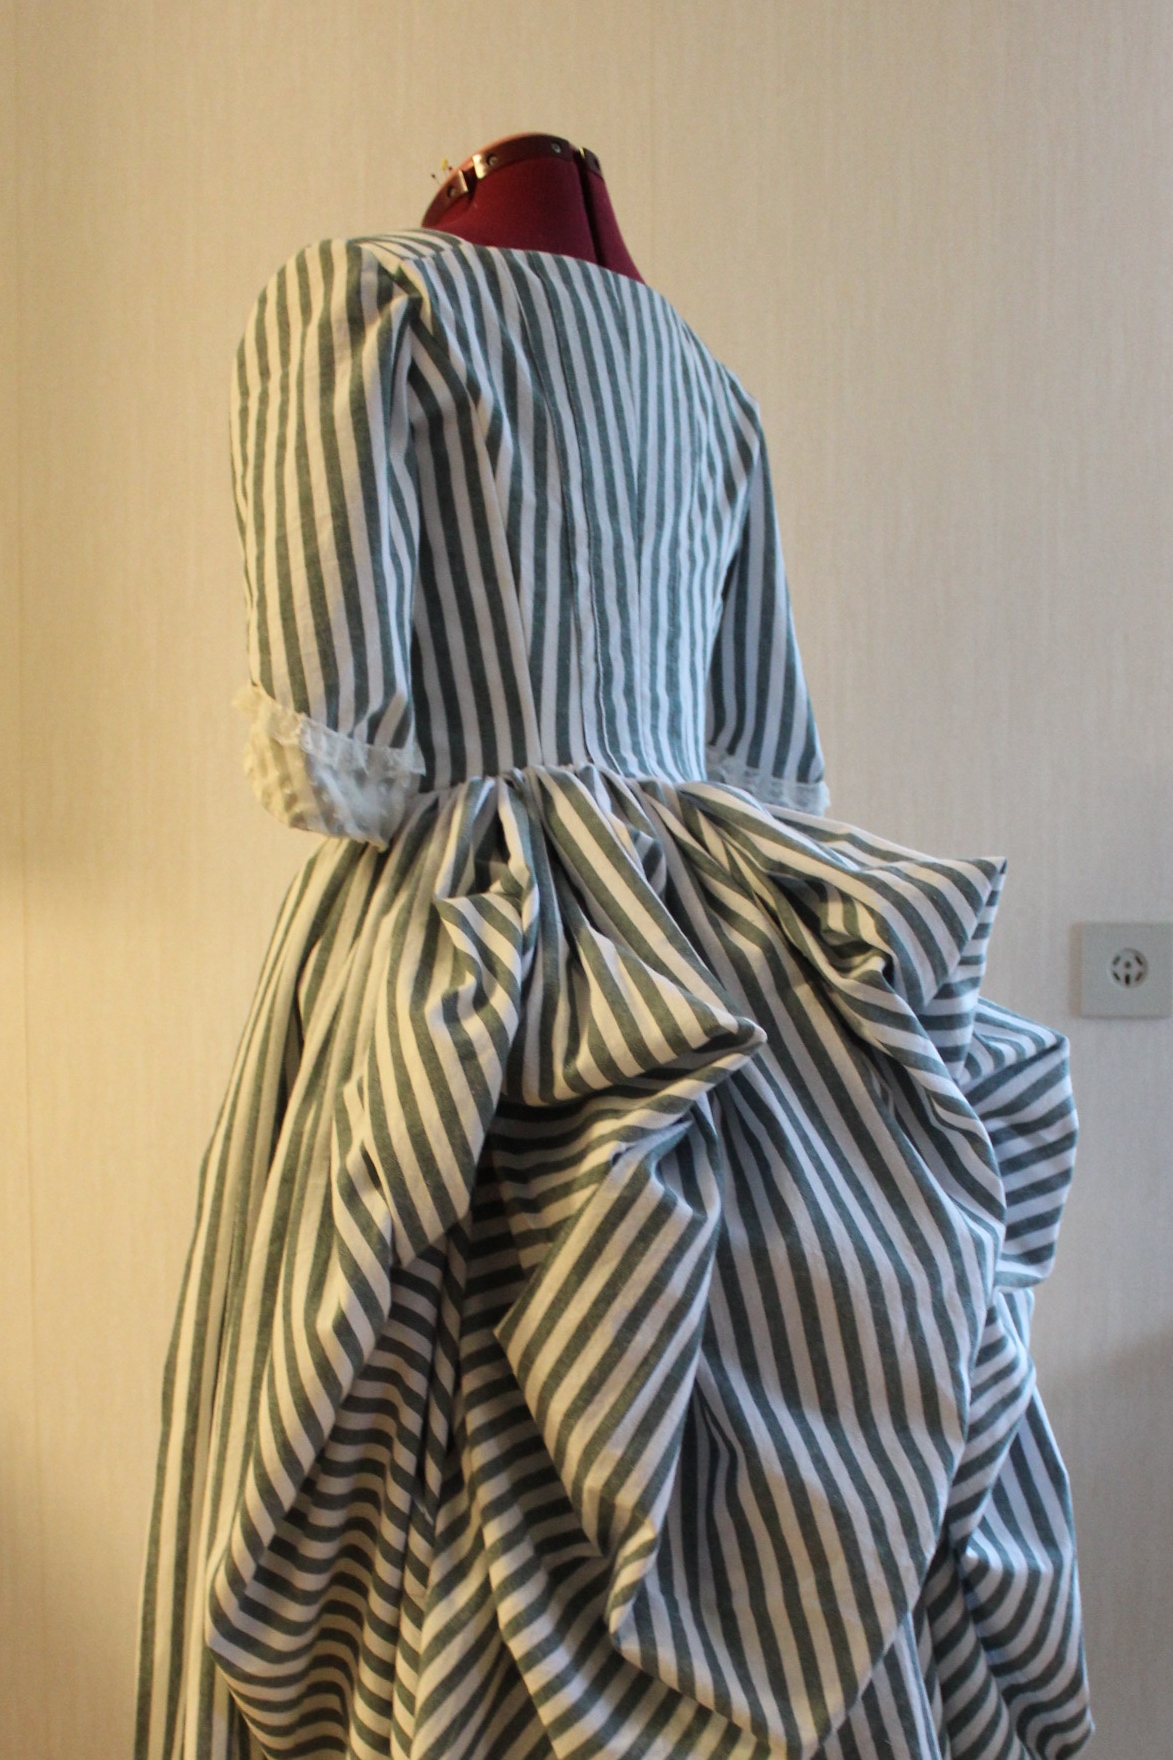
When the 10th HSF challenge – Art, was announced I didn’t need to think for long. I emetetly knew I wanted to make the Rose Adélaïde Ducreuxs dress fom her “self portraite whit a harp”.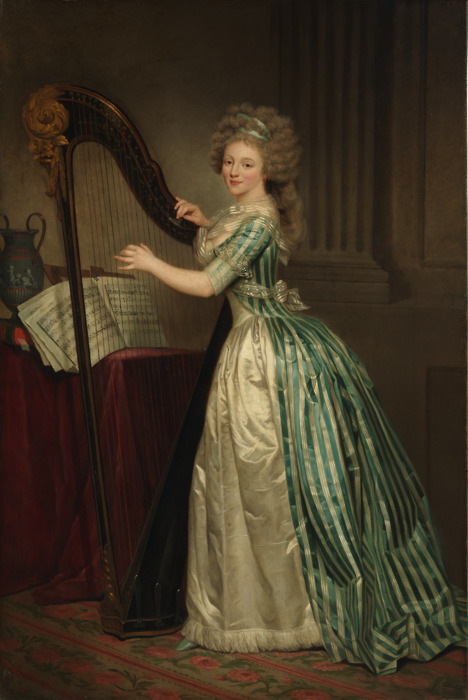 I even took the opurtunity to make the skirt and fichu from the portrait for a previous challenge, to be able to only focus on the dress for this one.
I alreay had the fabric 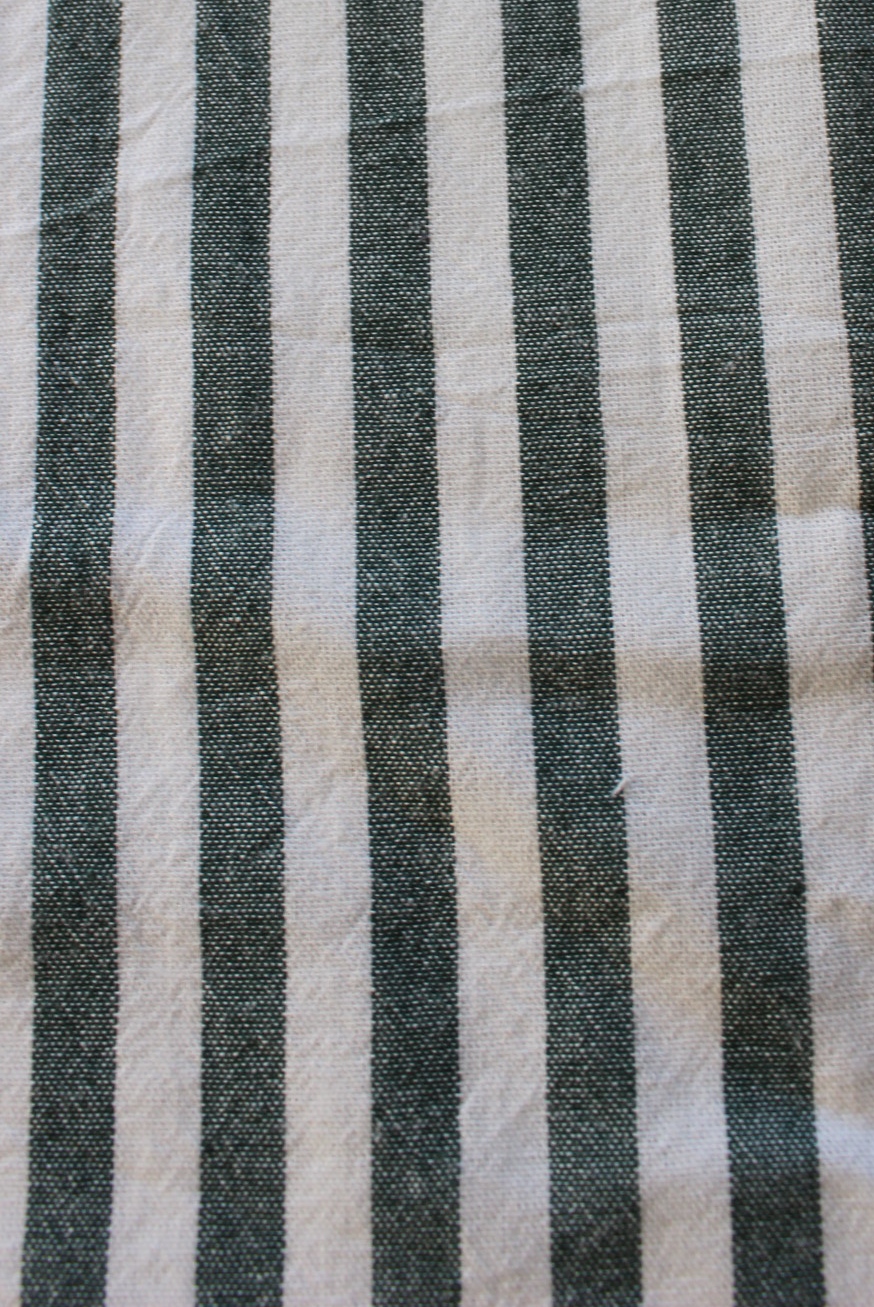 8m of striped cotton, bought on sale about a year ago.
I put my corset, bumpad, and petticoat on the dressform and started to drape the bodice pattern.

Then I cut the toile, sewed it togeter and tried it on.

Then it was time to cut the fabric. Besides from the striped cotton, I used a bleached linnen fabric for the zone front and a white cotton twill for interlining.
My original plan was to make the gown entierly by hand, but time ran out and life interupted, and on top of that I’m starting to think it is a waist of time to hand stich a gown in the wrong material. so, after some back and fort, I decided to make it by machine. (And boy am I happy about that decision now…)
I started the sewing by basting togeter all the different layers – so yes, I did do some handsewing. 
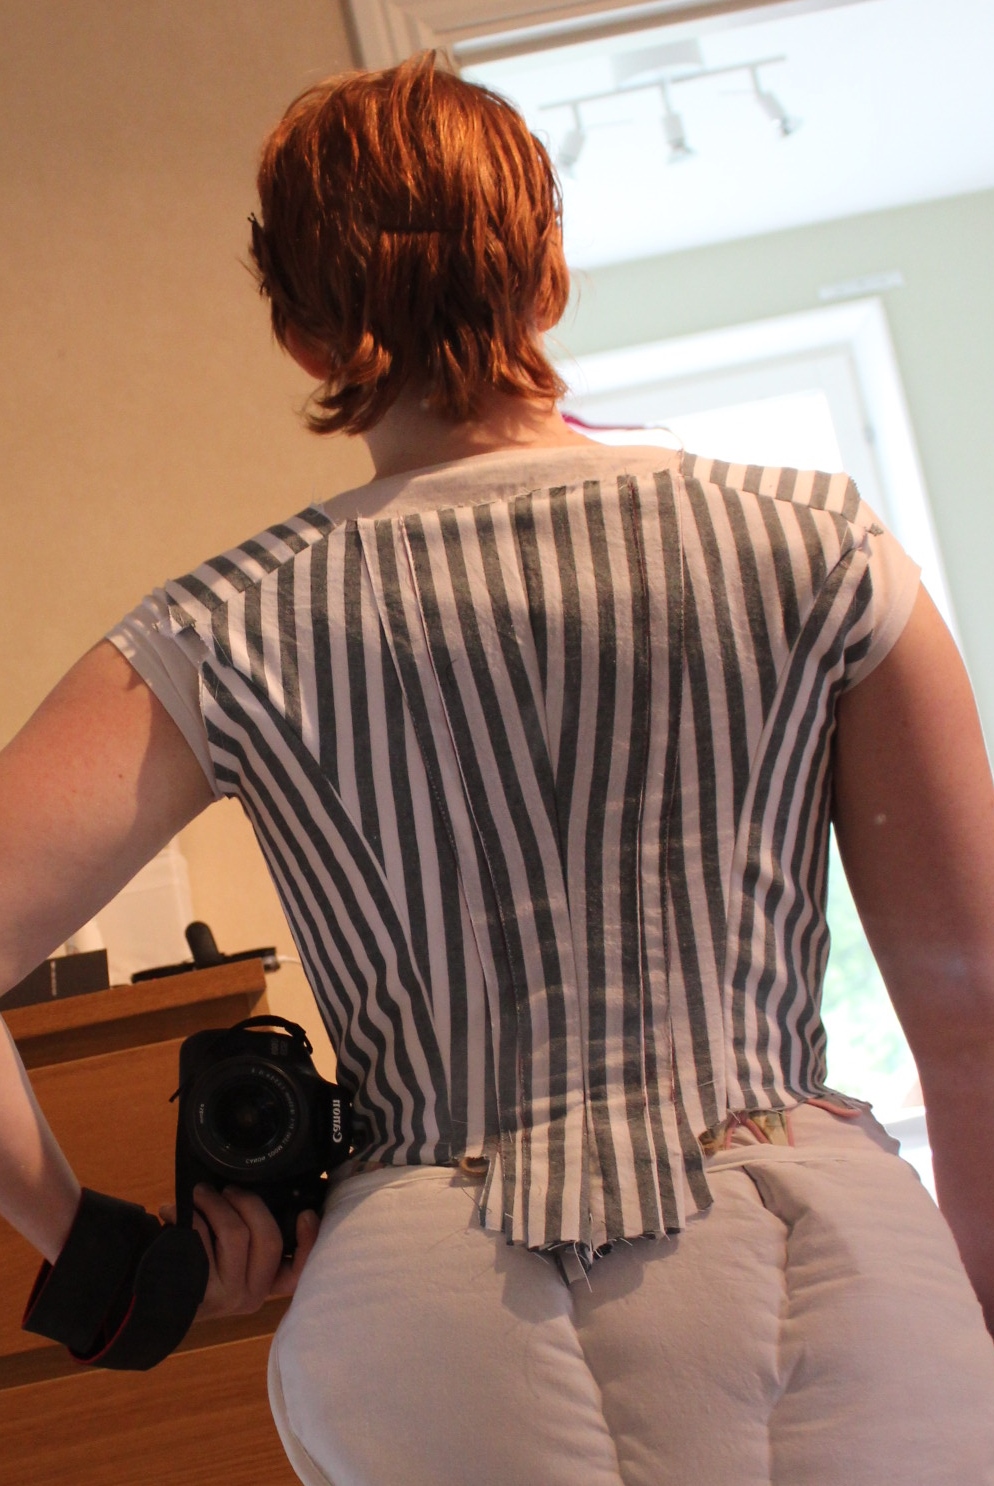
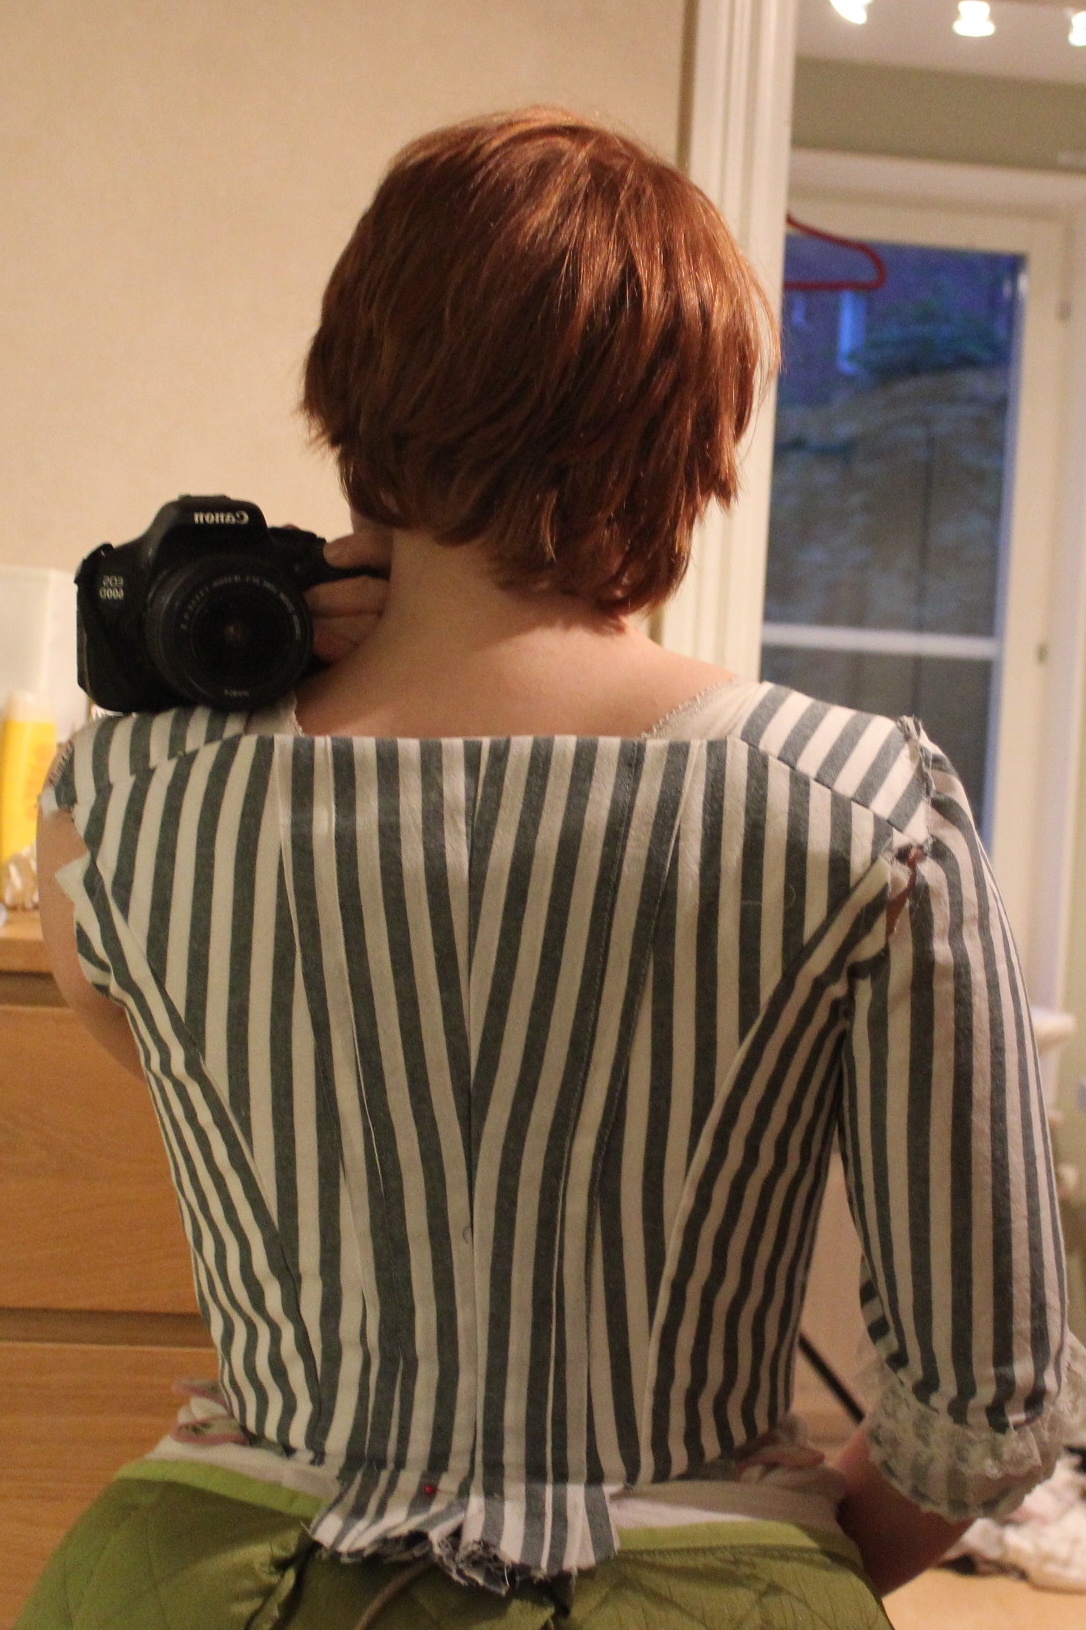
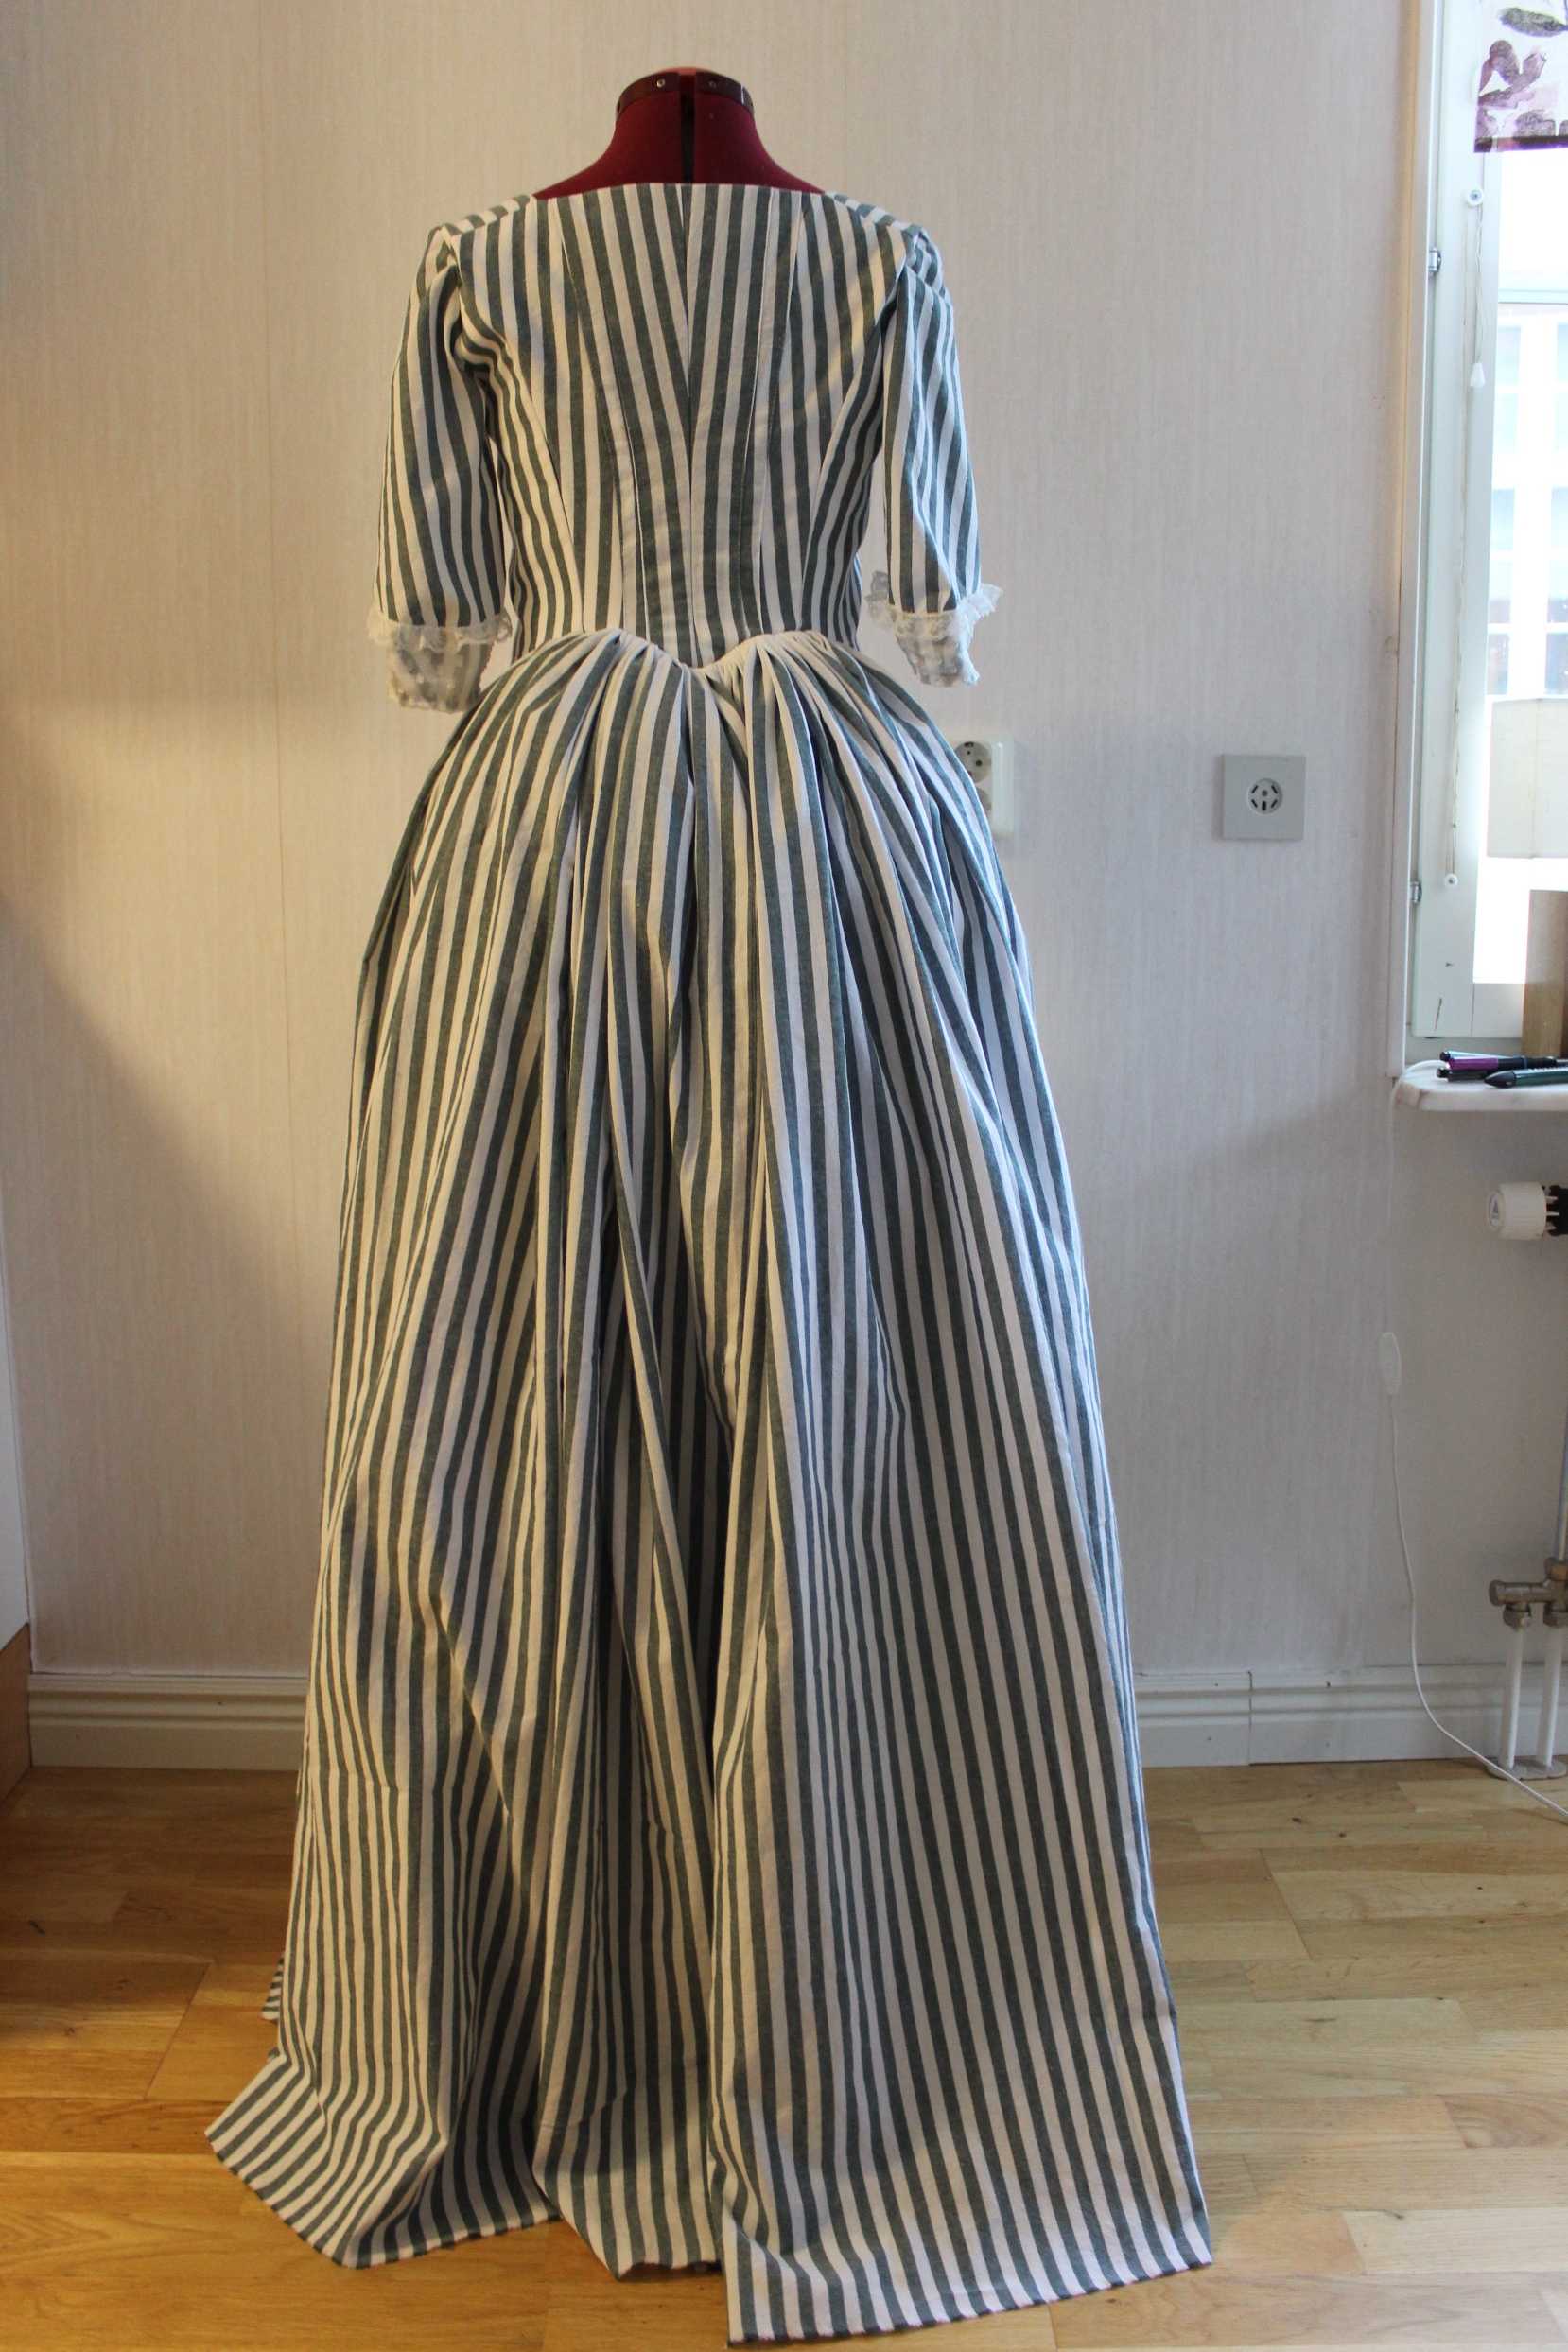
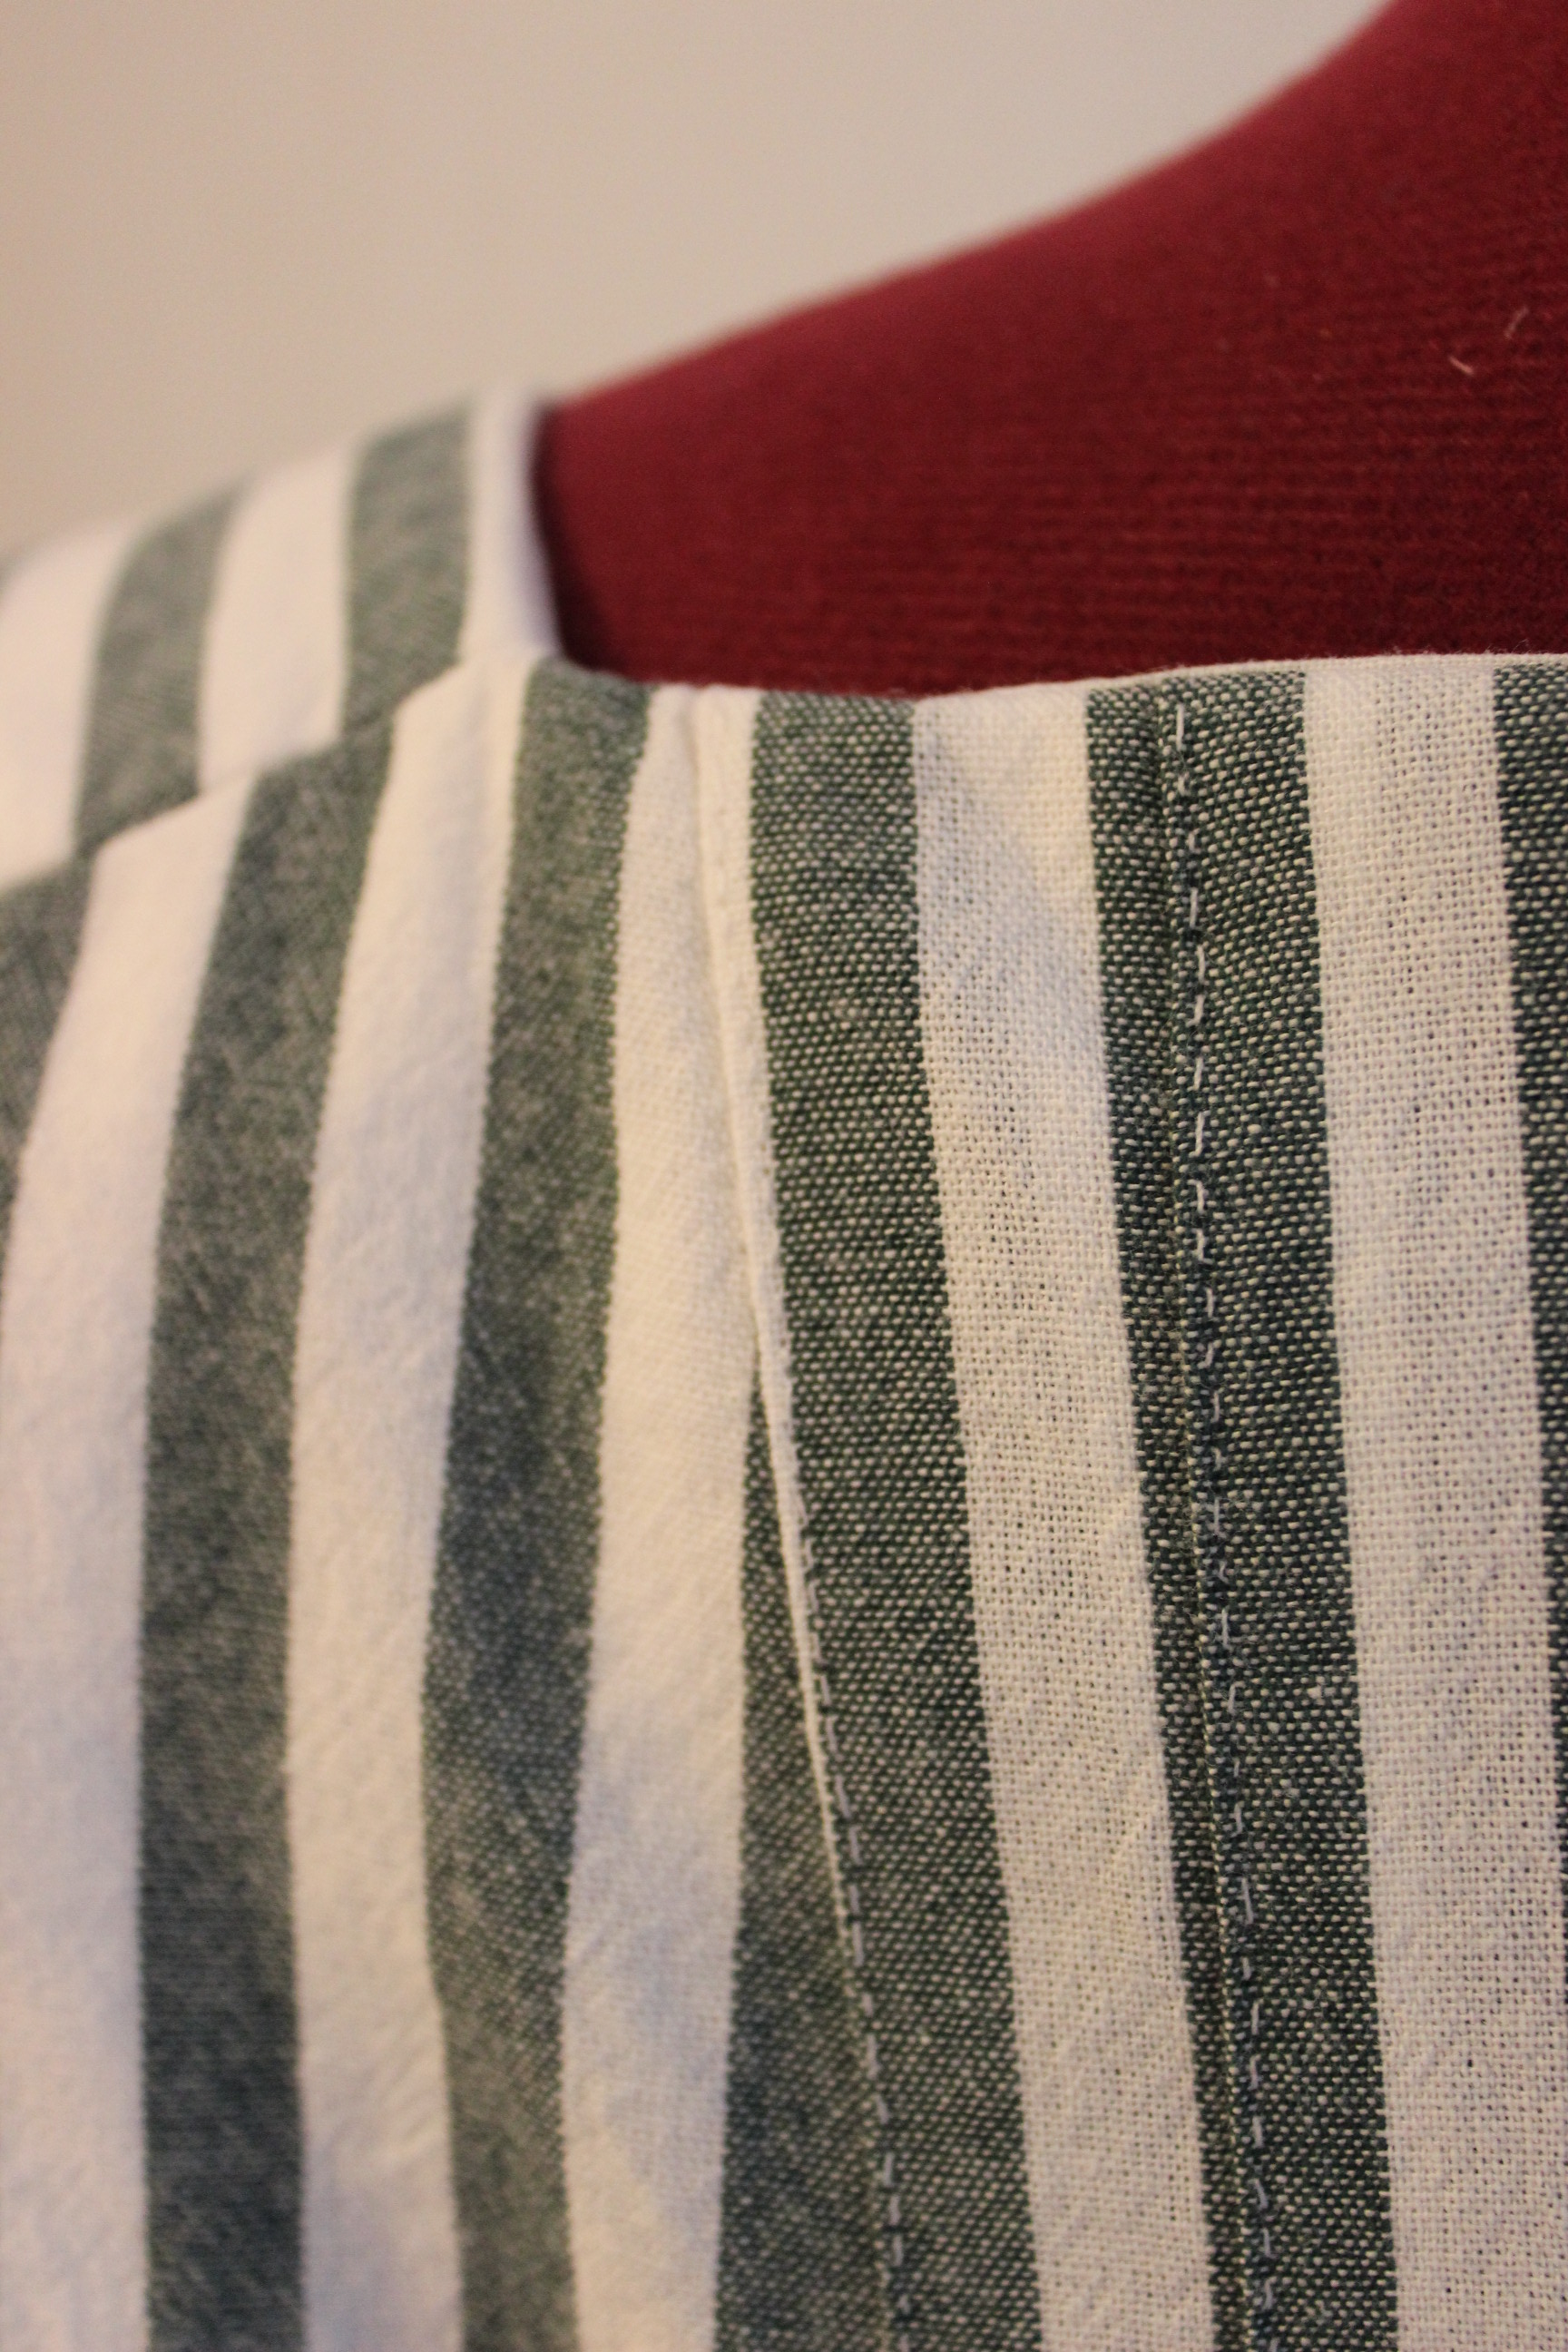
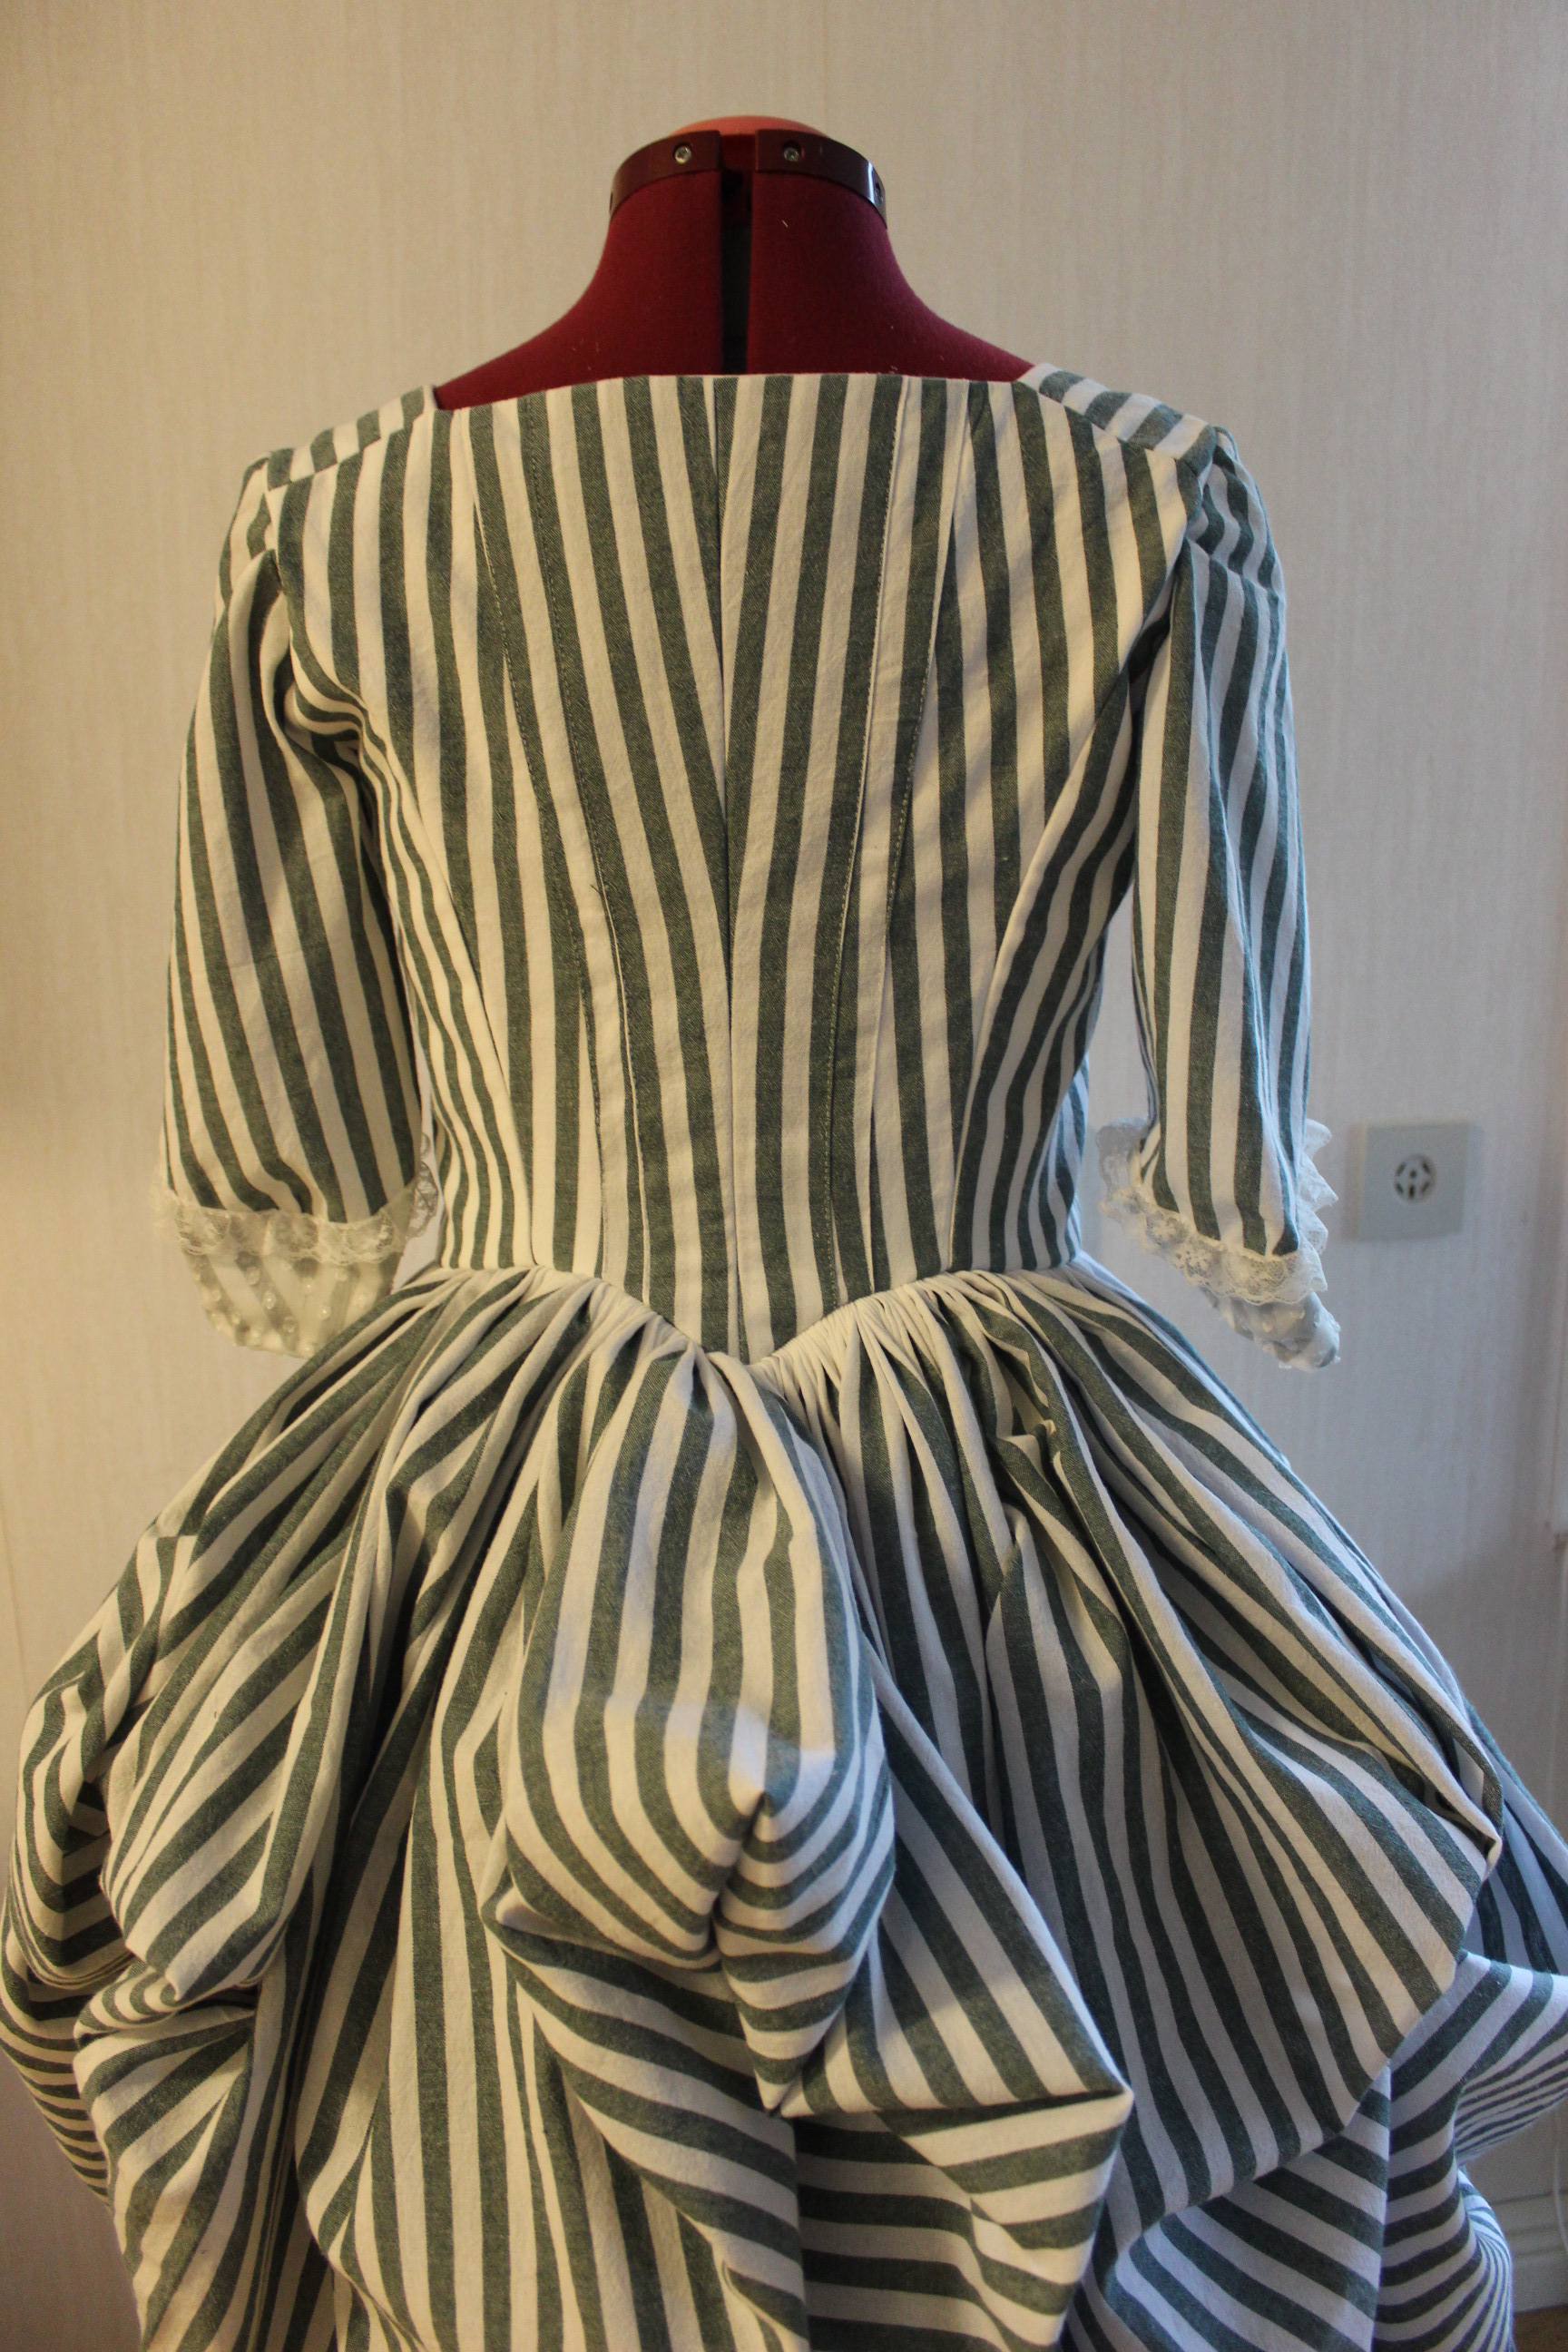
Then I shaped and stiched the back pleats in place, usin tiny backstitches.  back piece and back lining.
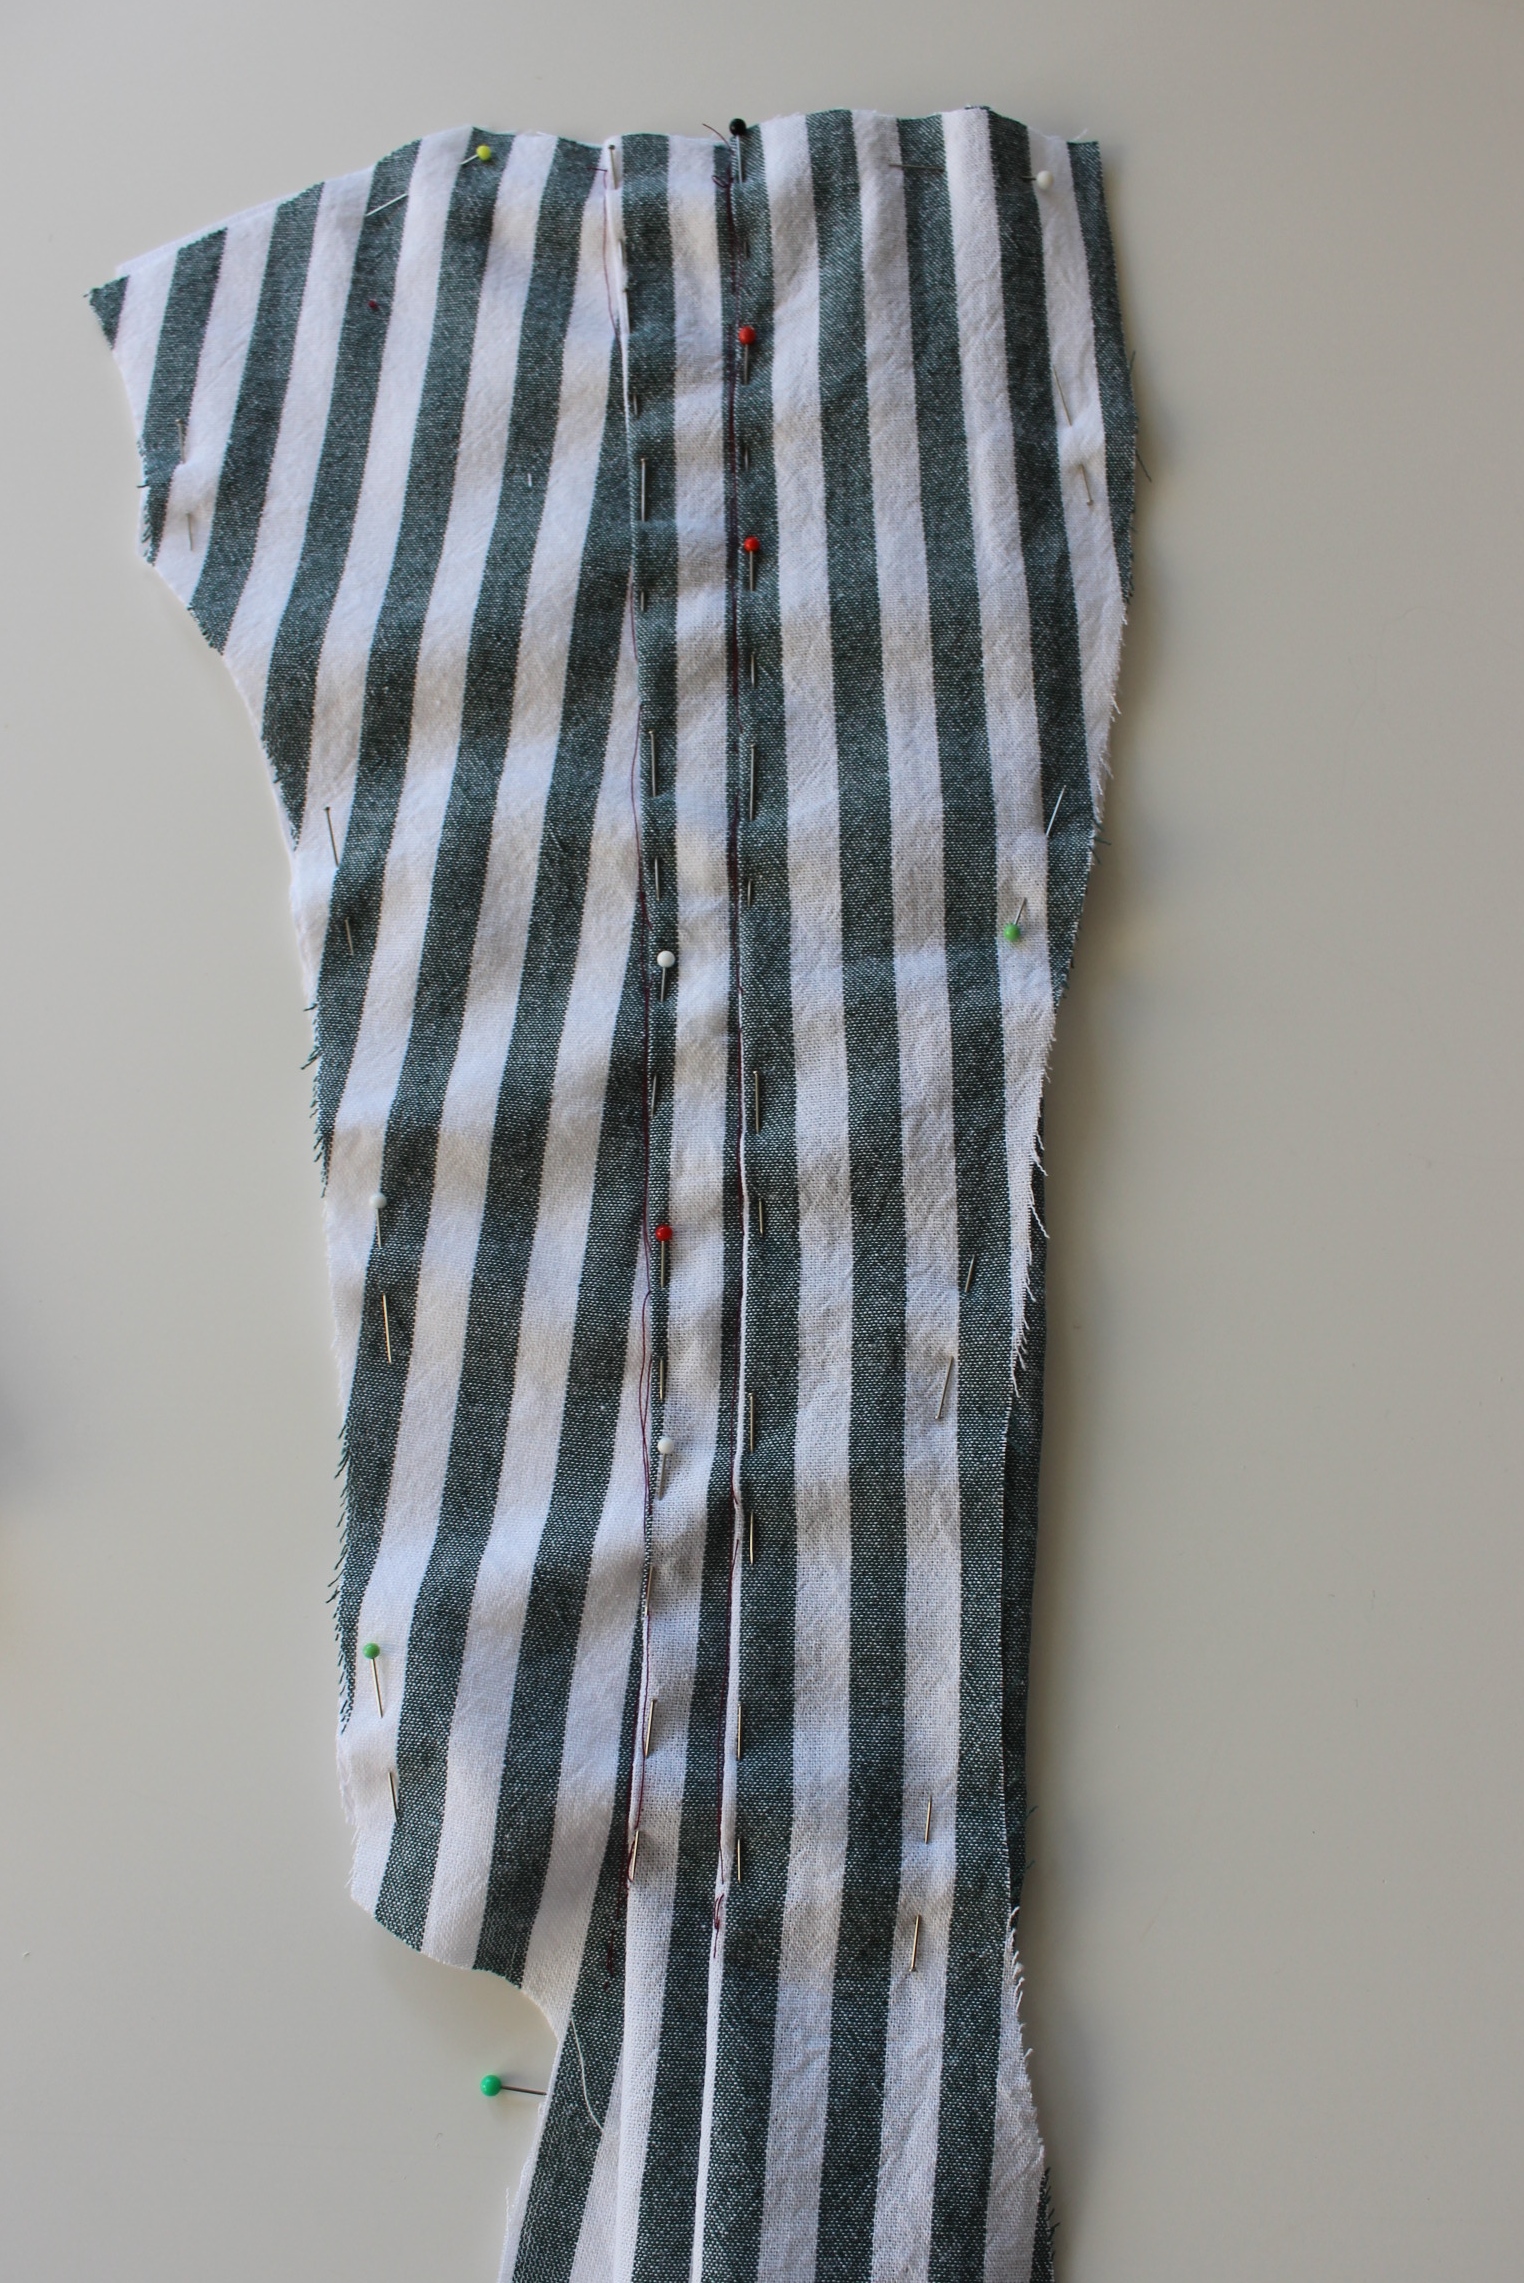
 Close-up on the stiches.
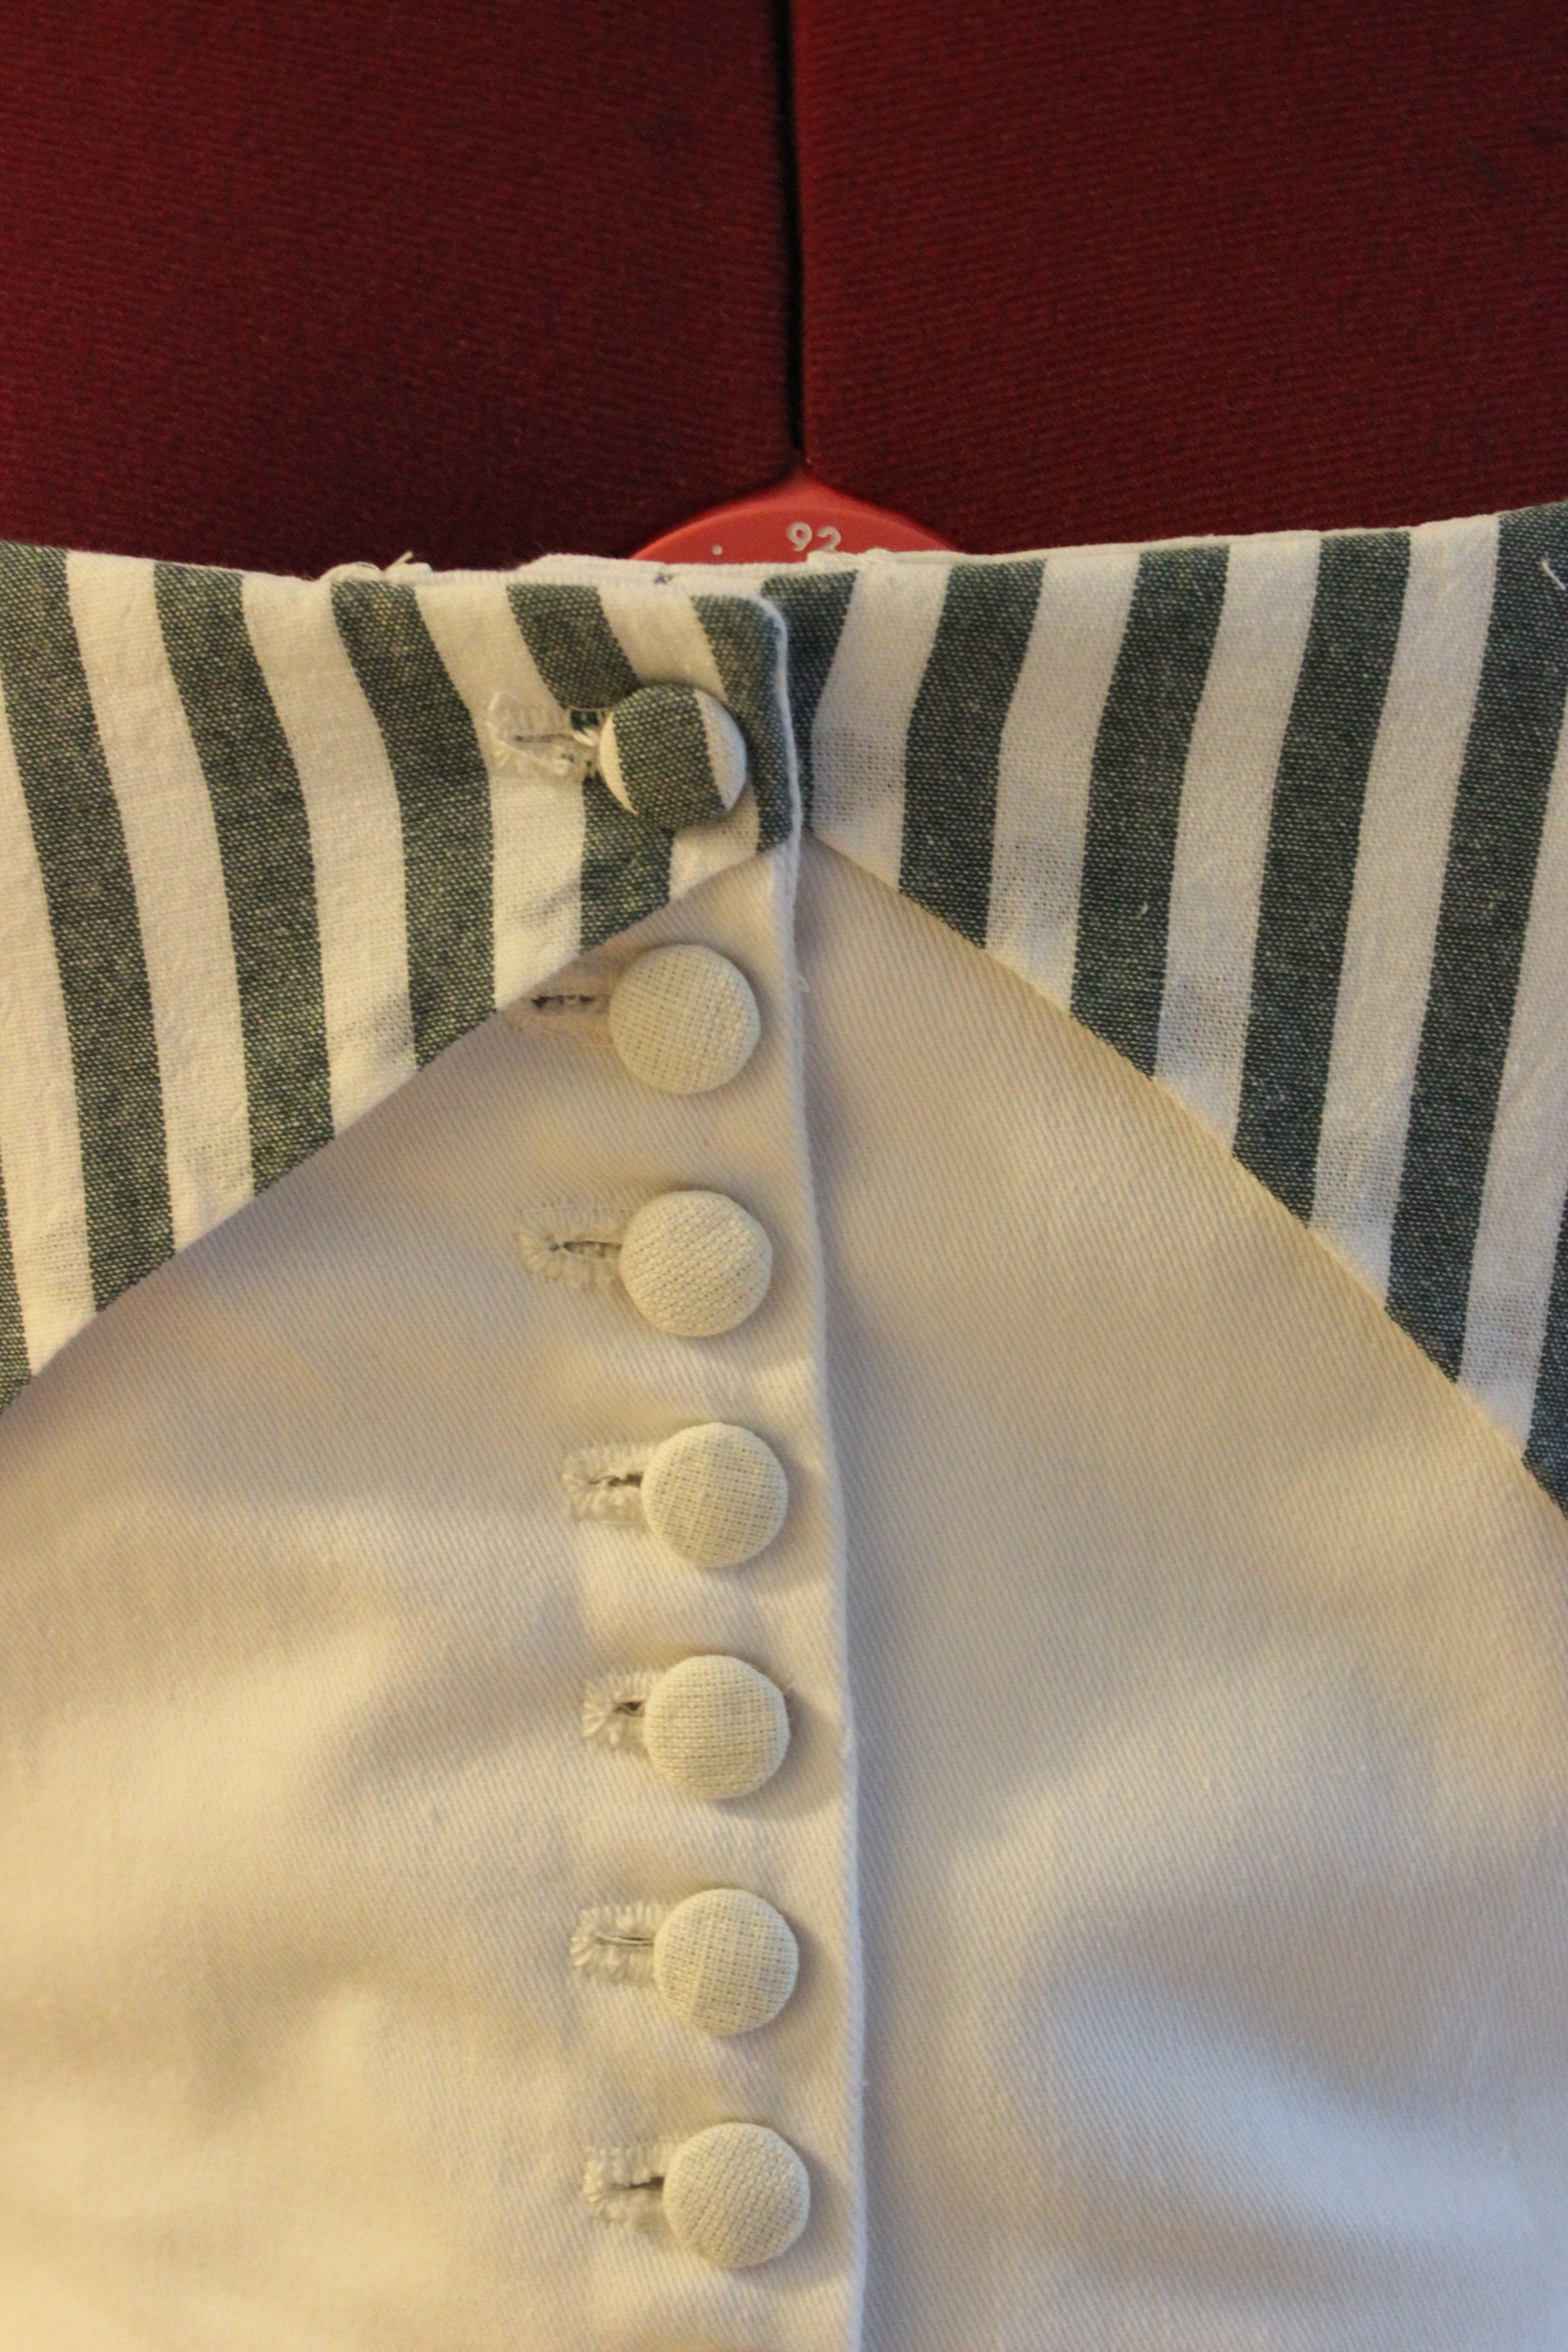
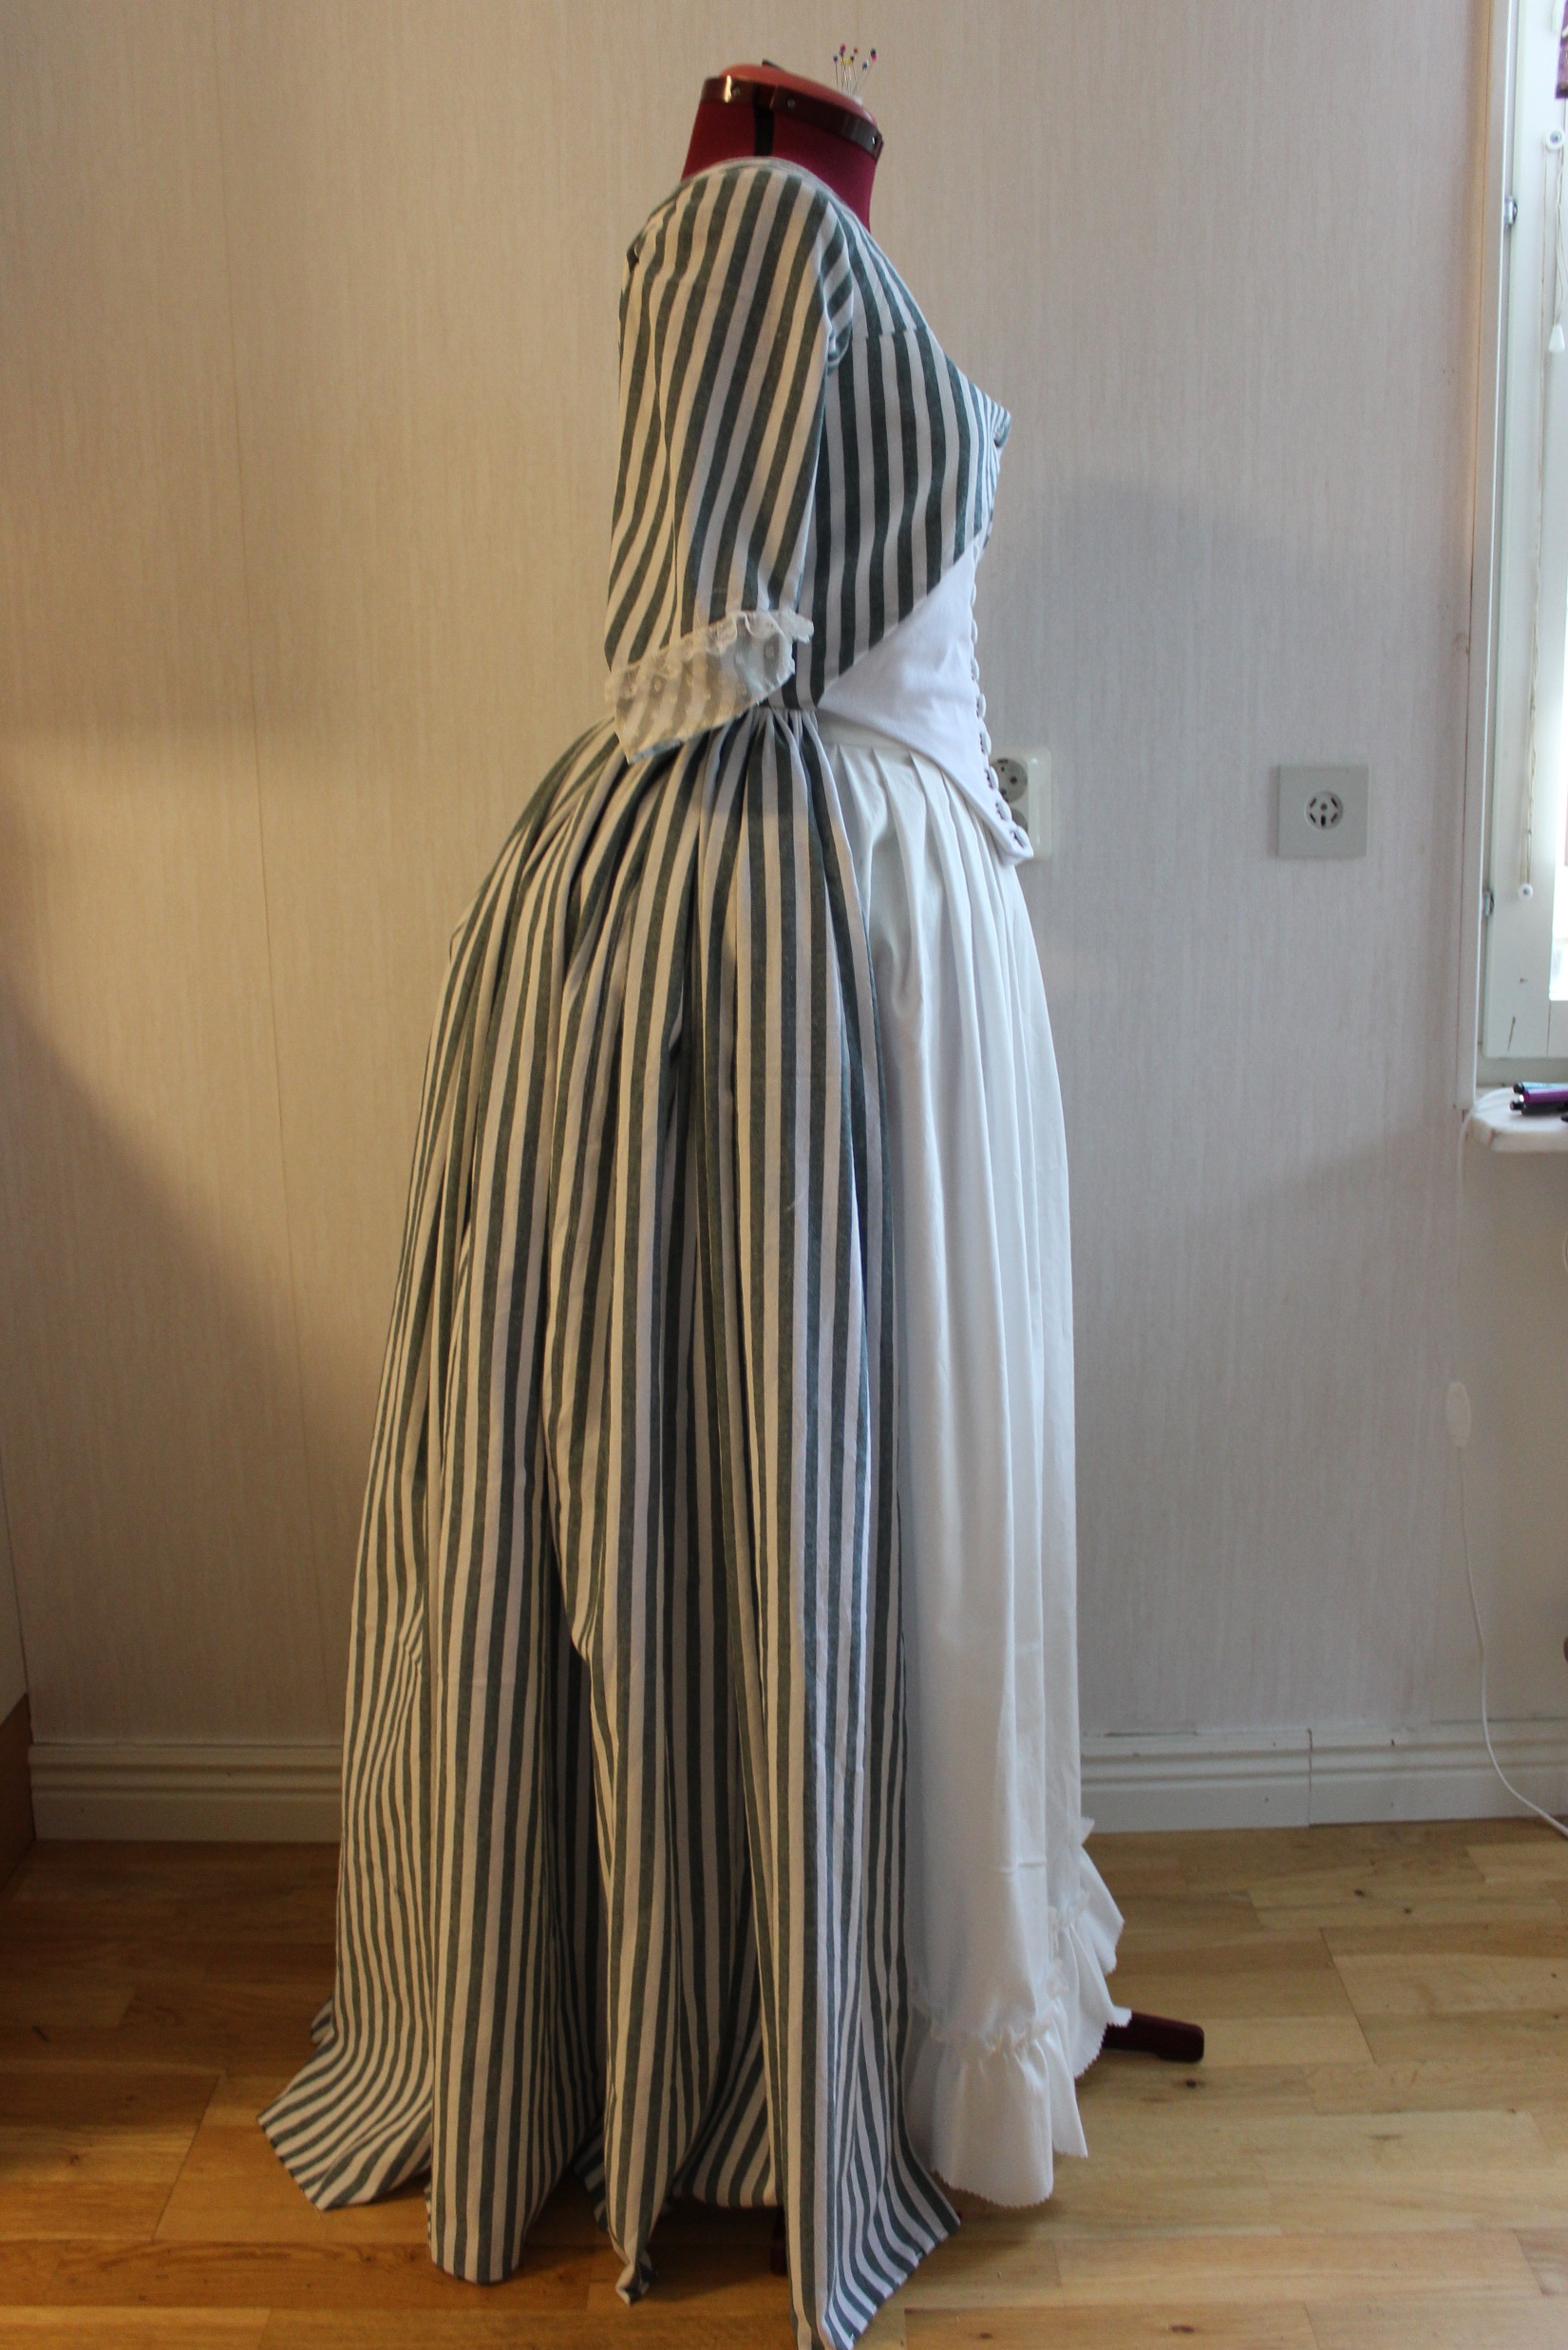
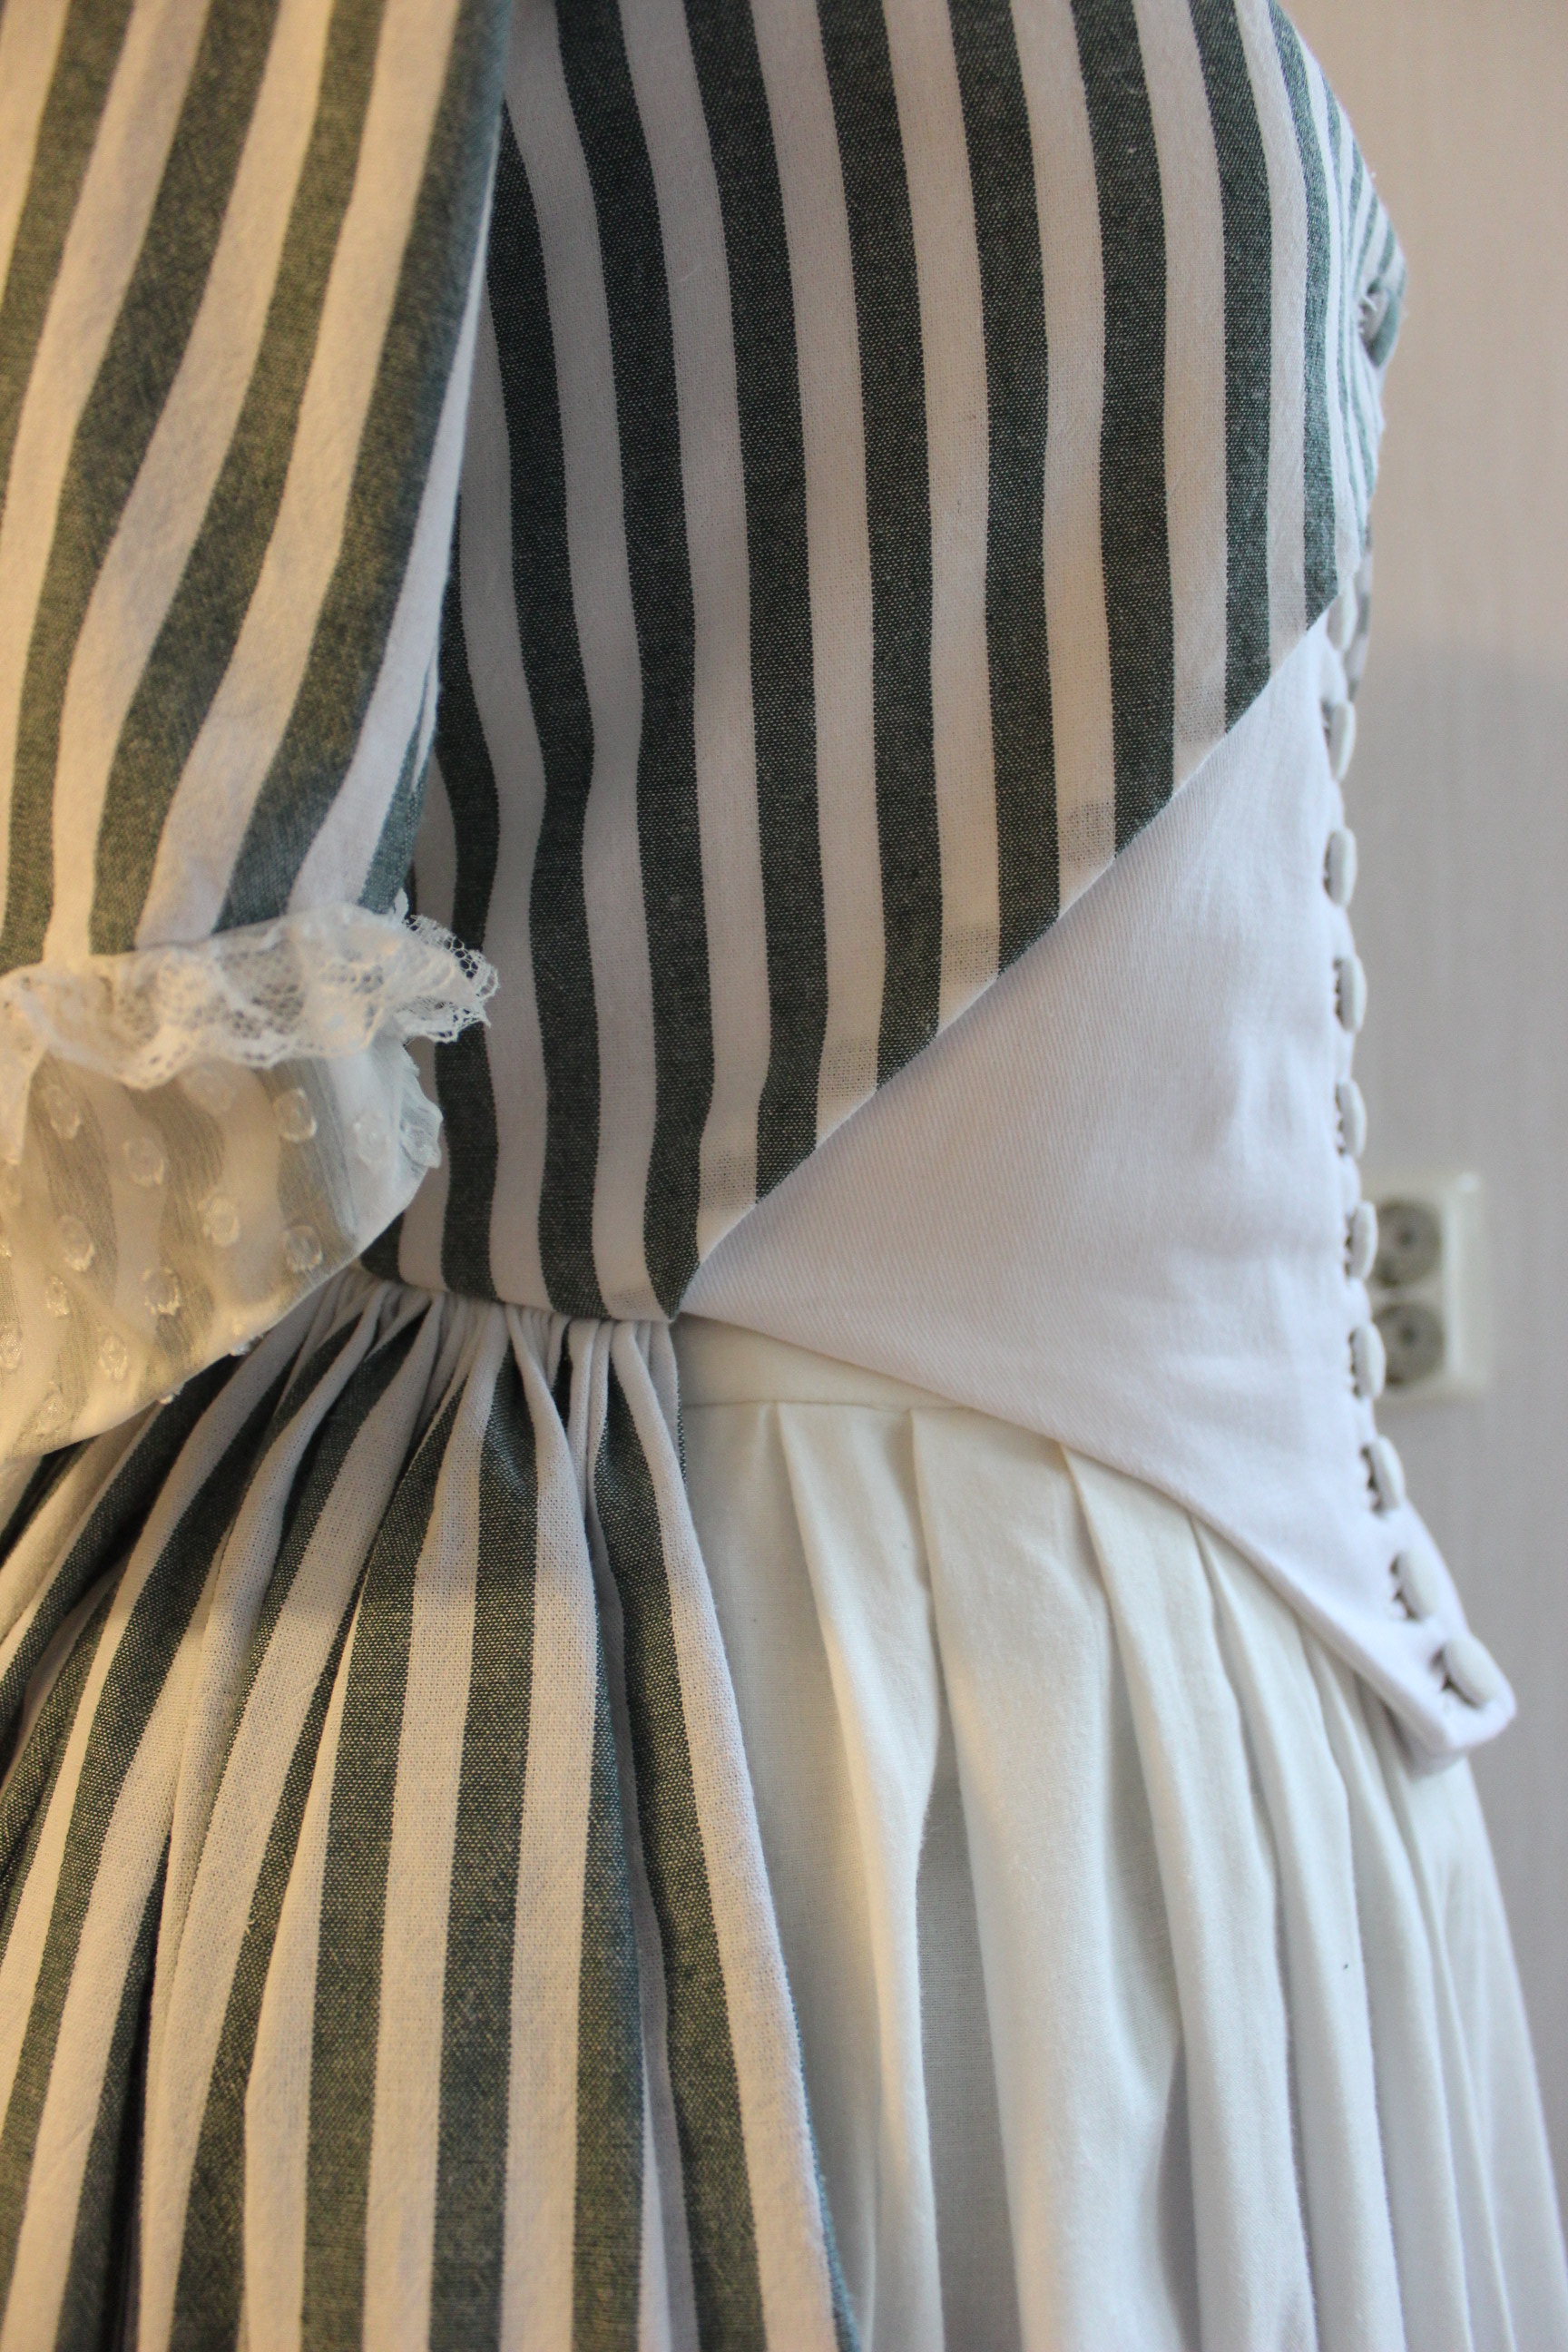
I then sewed the bodice togeter and tried it on to check the front closeur.
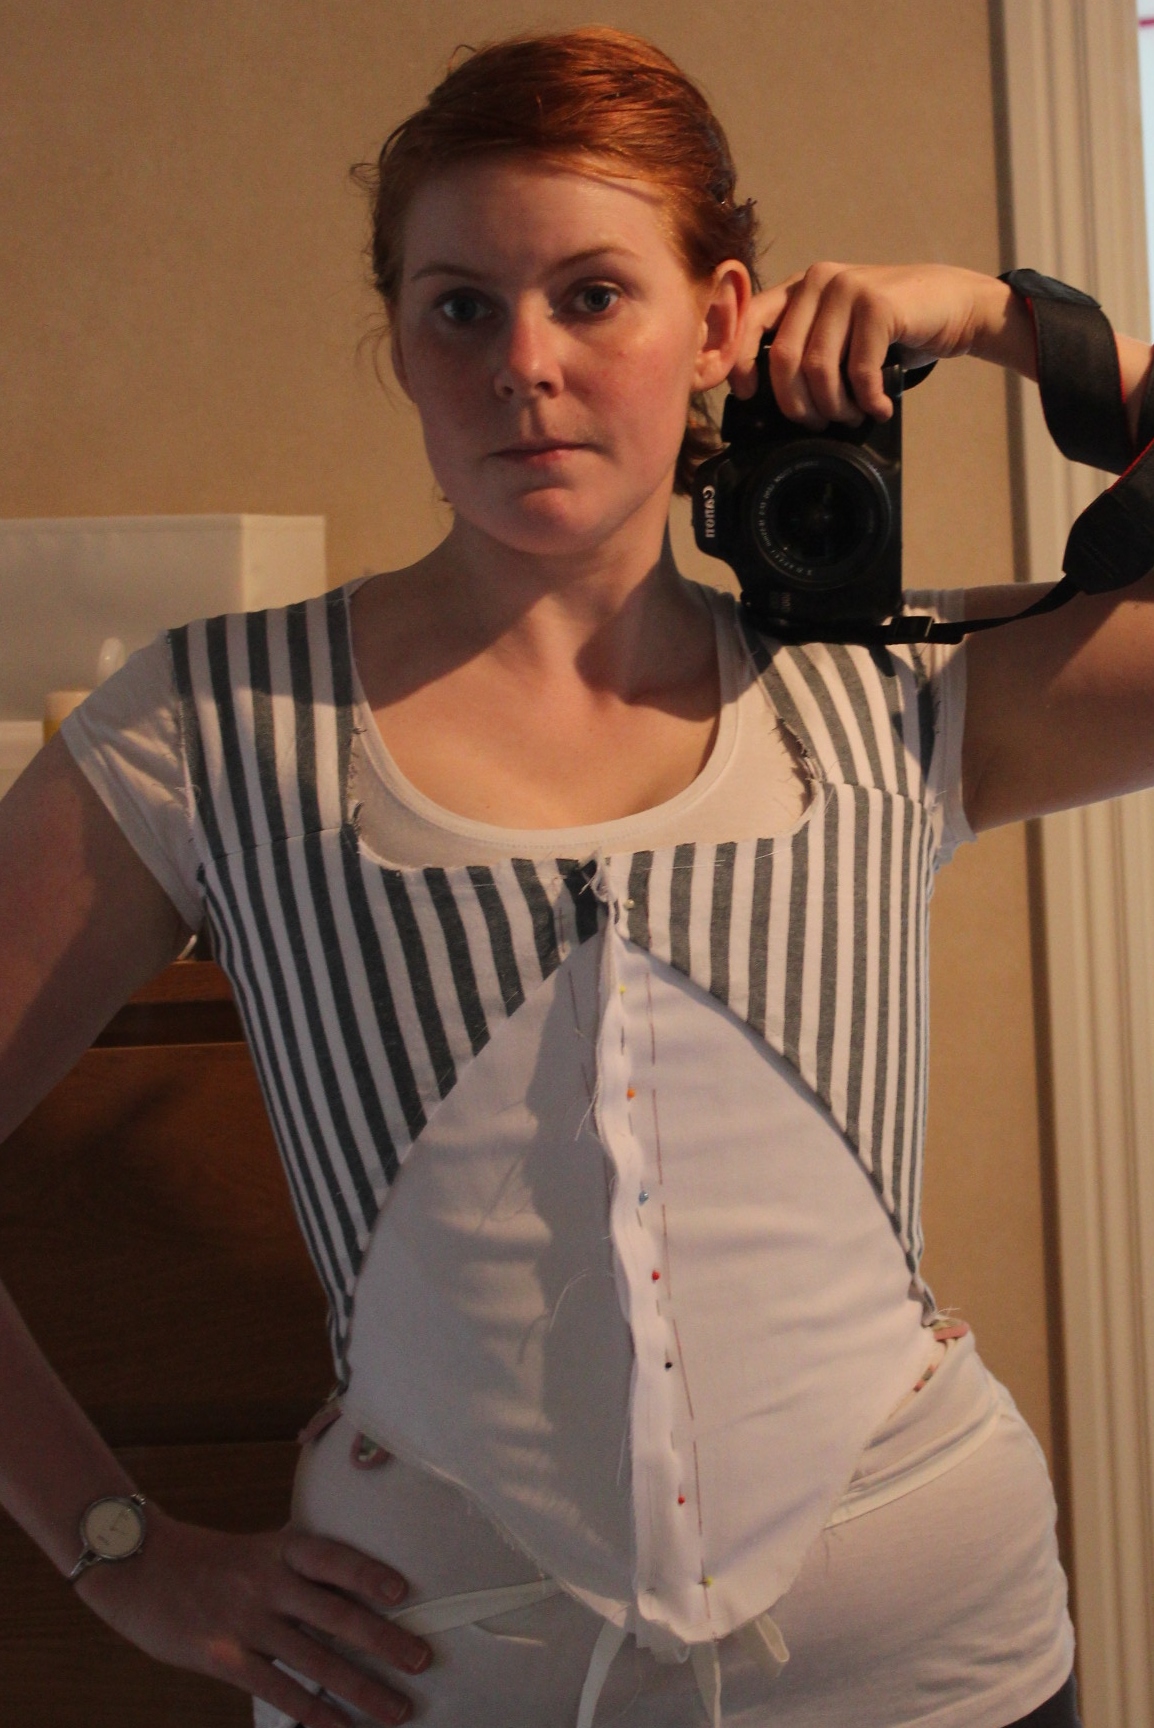
And as you can se the front lines dont match up. So to fix that I needed to adjust the center front line and make a buttonhole placket. This metod is usaly a big no no in sewing but time was sparse and I’ve already manadged to mach the stripes pretty good, so I did’nt want to adjust the side seams.
Then I started on the button and buttonholes, also hand stitched. 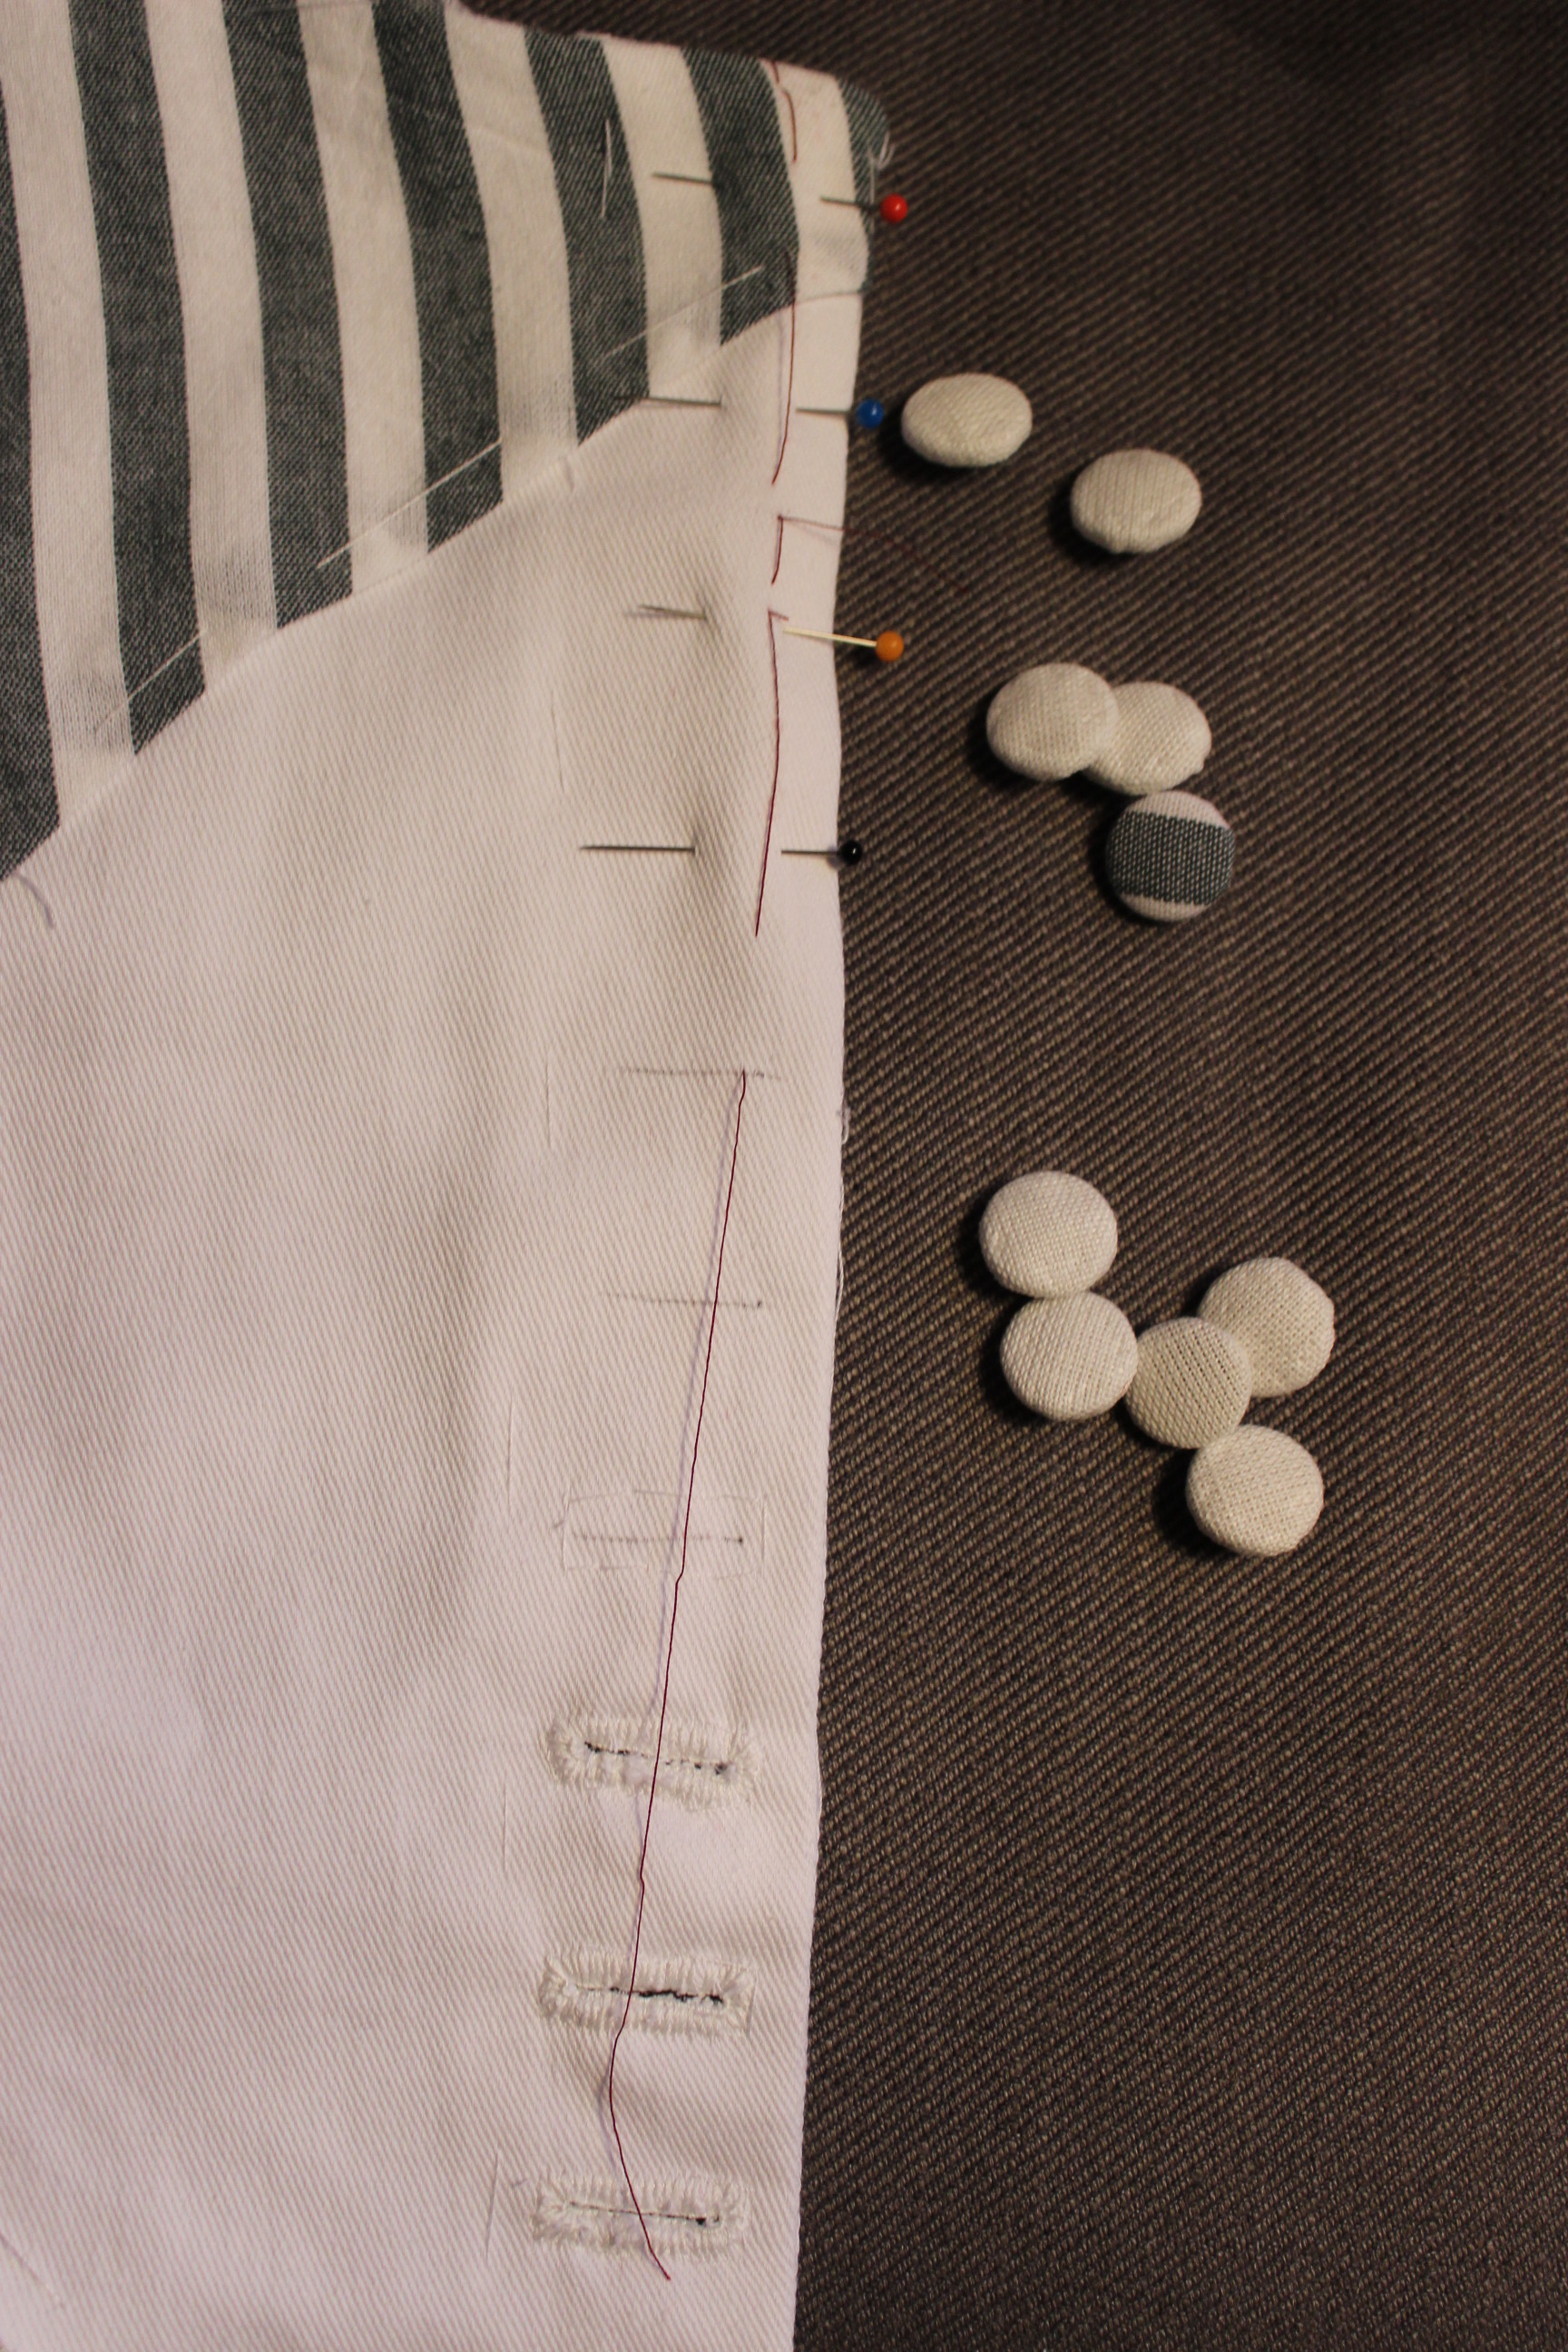 They are not as neat and pretty as I would have liked but they will have to do. And I even needed to use some fabric glue on the buttons to keep them from snapping apart.
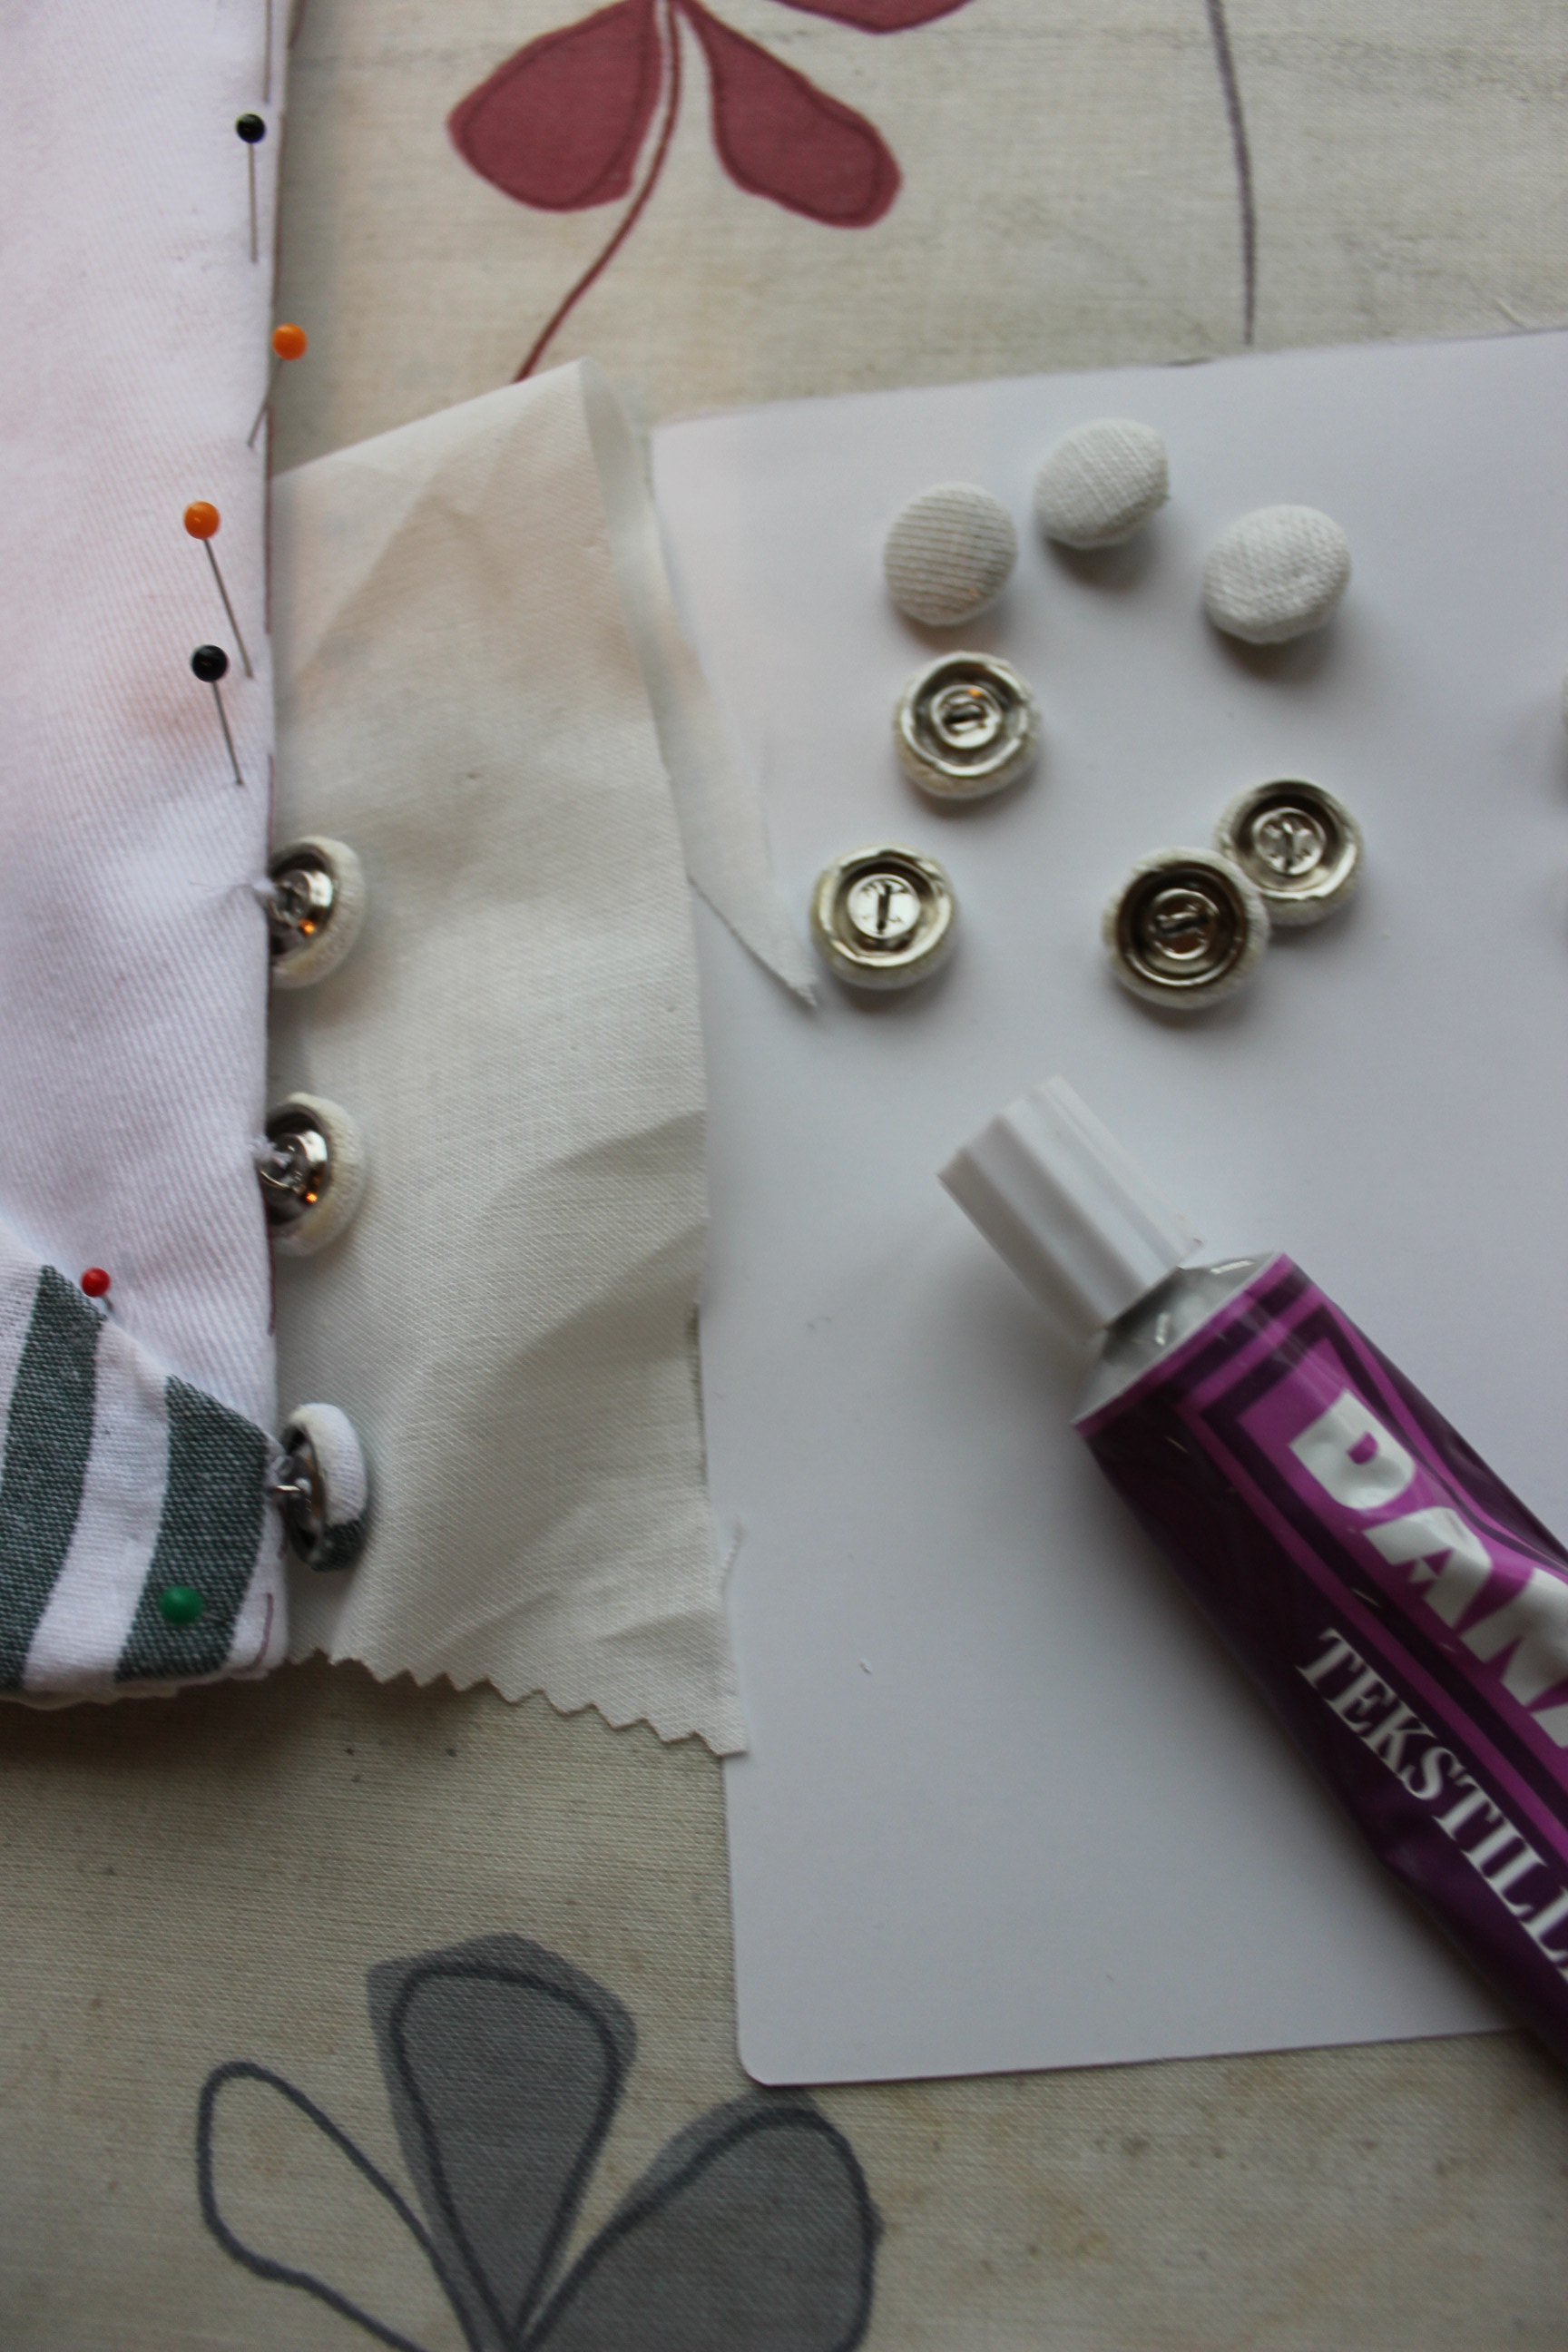
It was about here I noticed that something was of with the front piece interfacing. While basting the layers togeter I’ve manadged to put the interling as outer fabric, then stich the hole bodice up like that and on top of that make the buttonholes. Darn it.
Well there wasn’t much to do then go on pretending that the twill was supose to be the outer fabric. Fortanly, no other part of the bodice was white so the only thing revealing my mistake is the linnen covered buttons… 
So I continued by cuting and setting the lining, using a regular white cotton fabric.
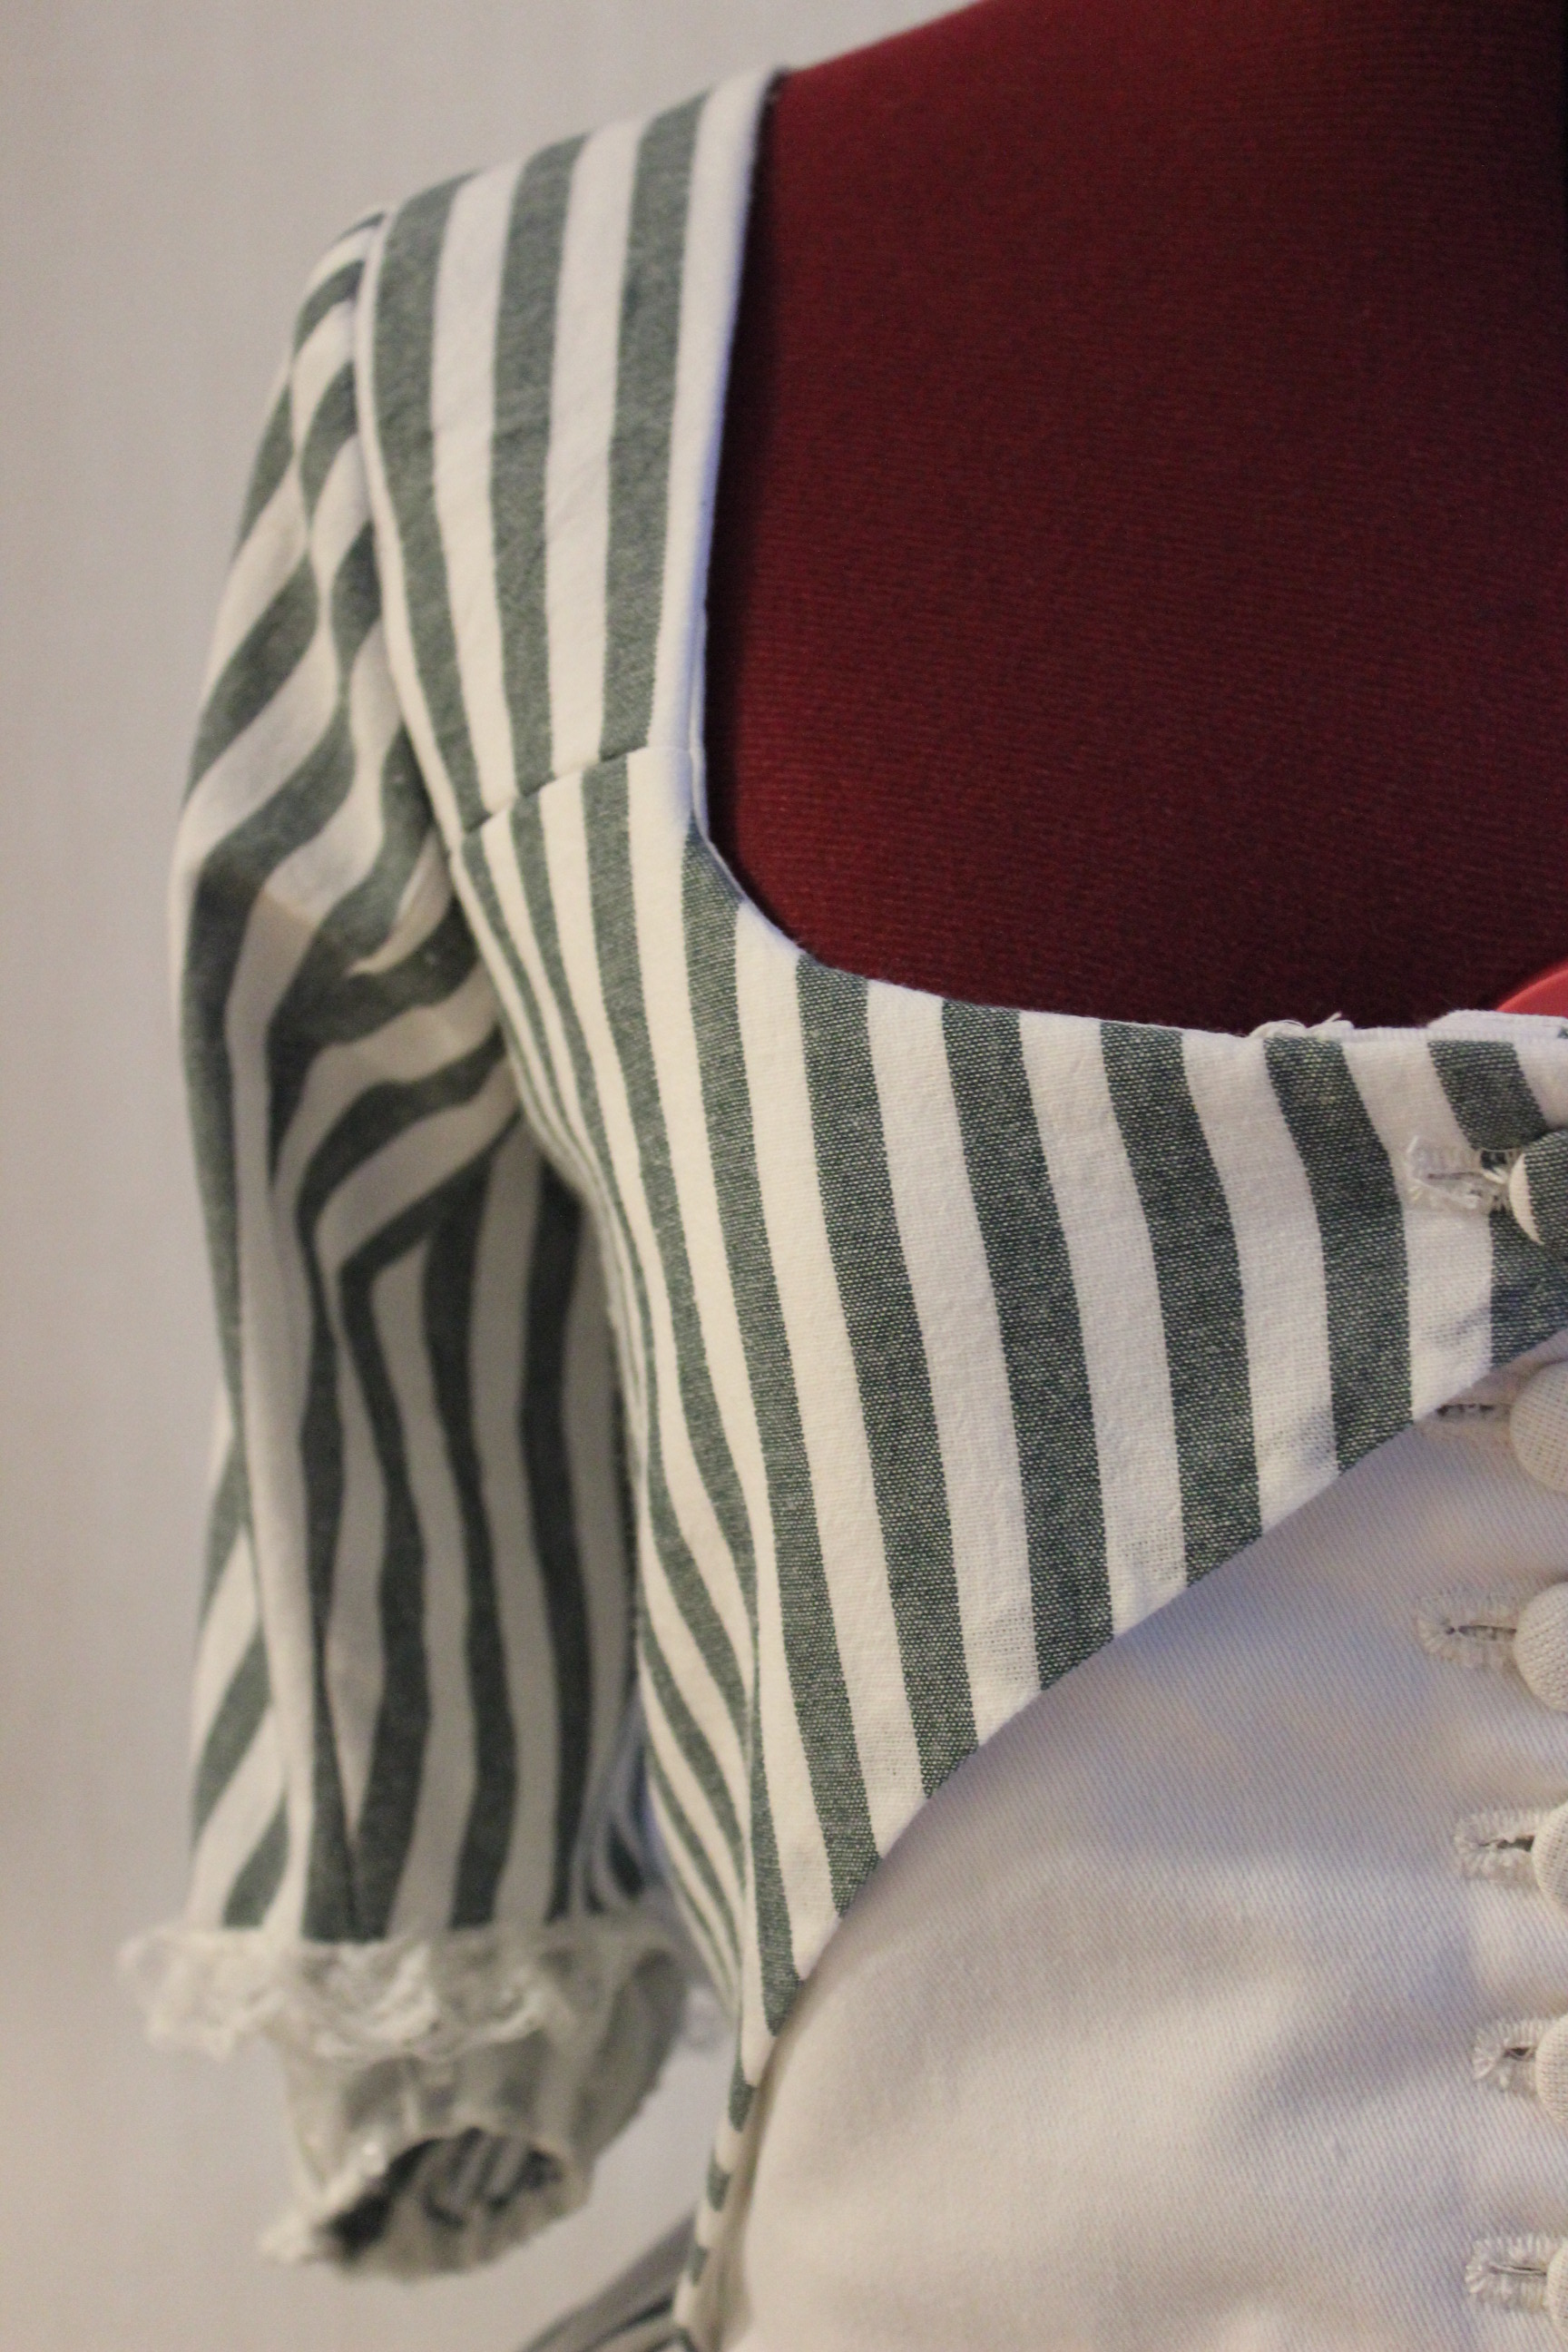
Before the next try on I pinned the sleeves on losely to get a grip on their placement.
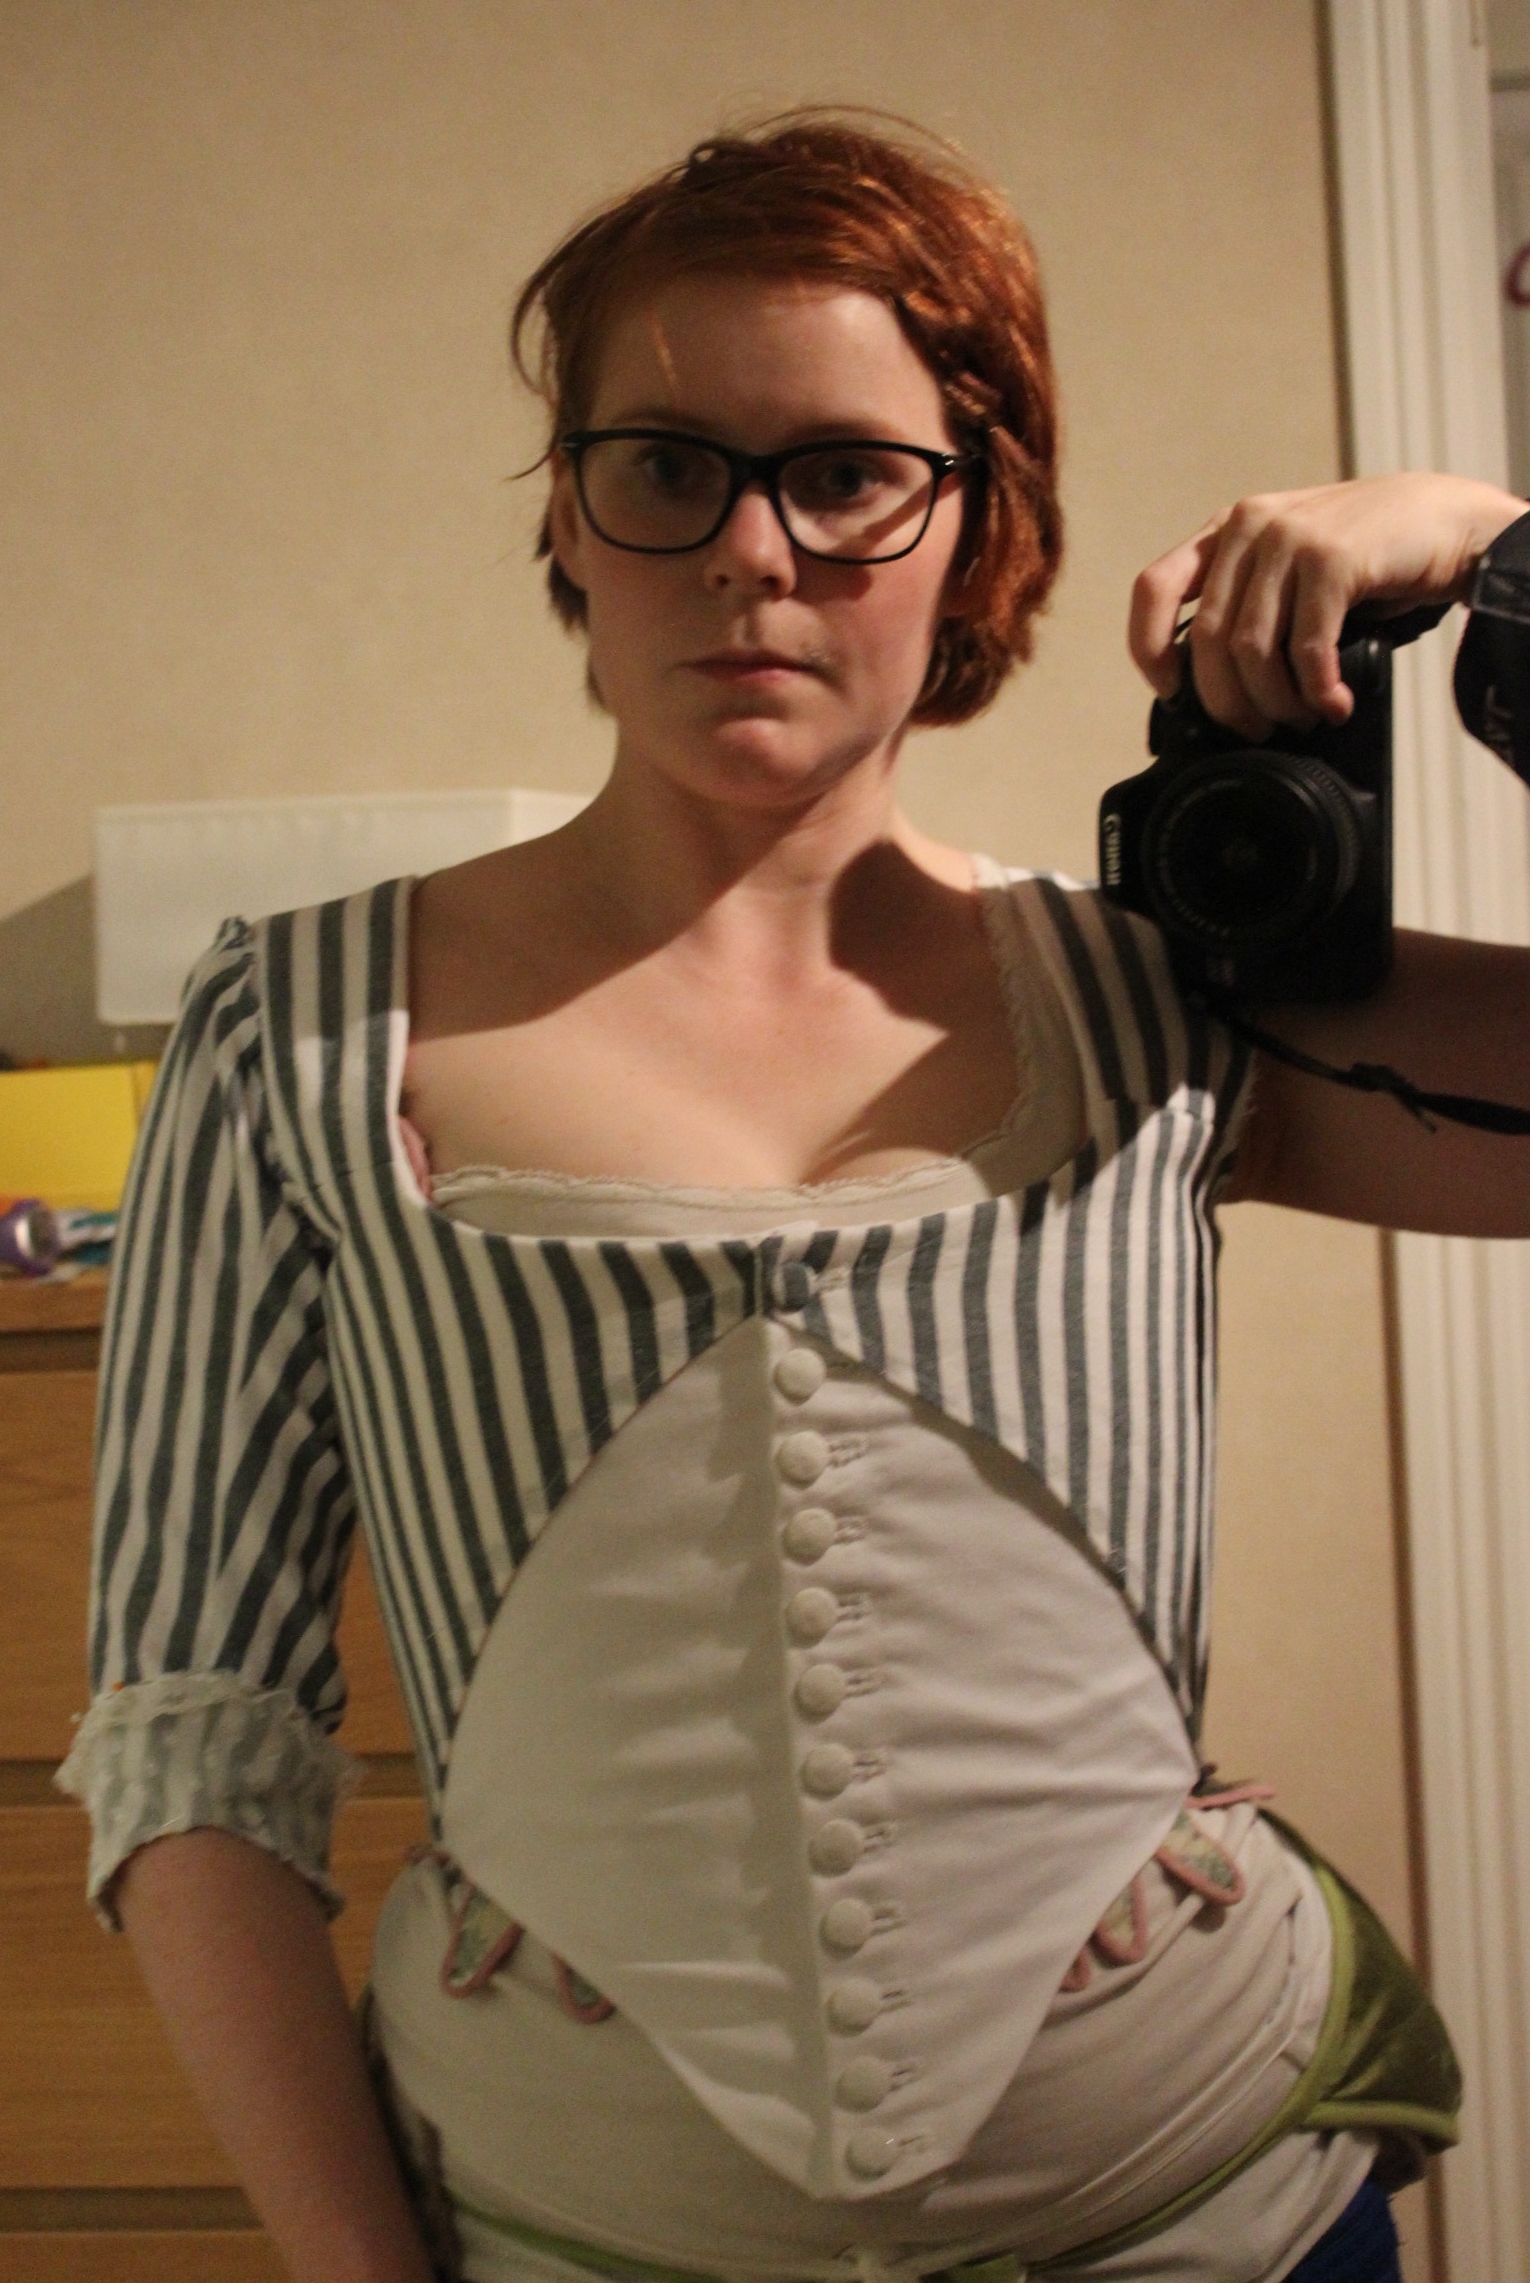
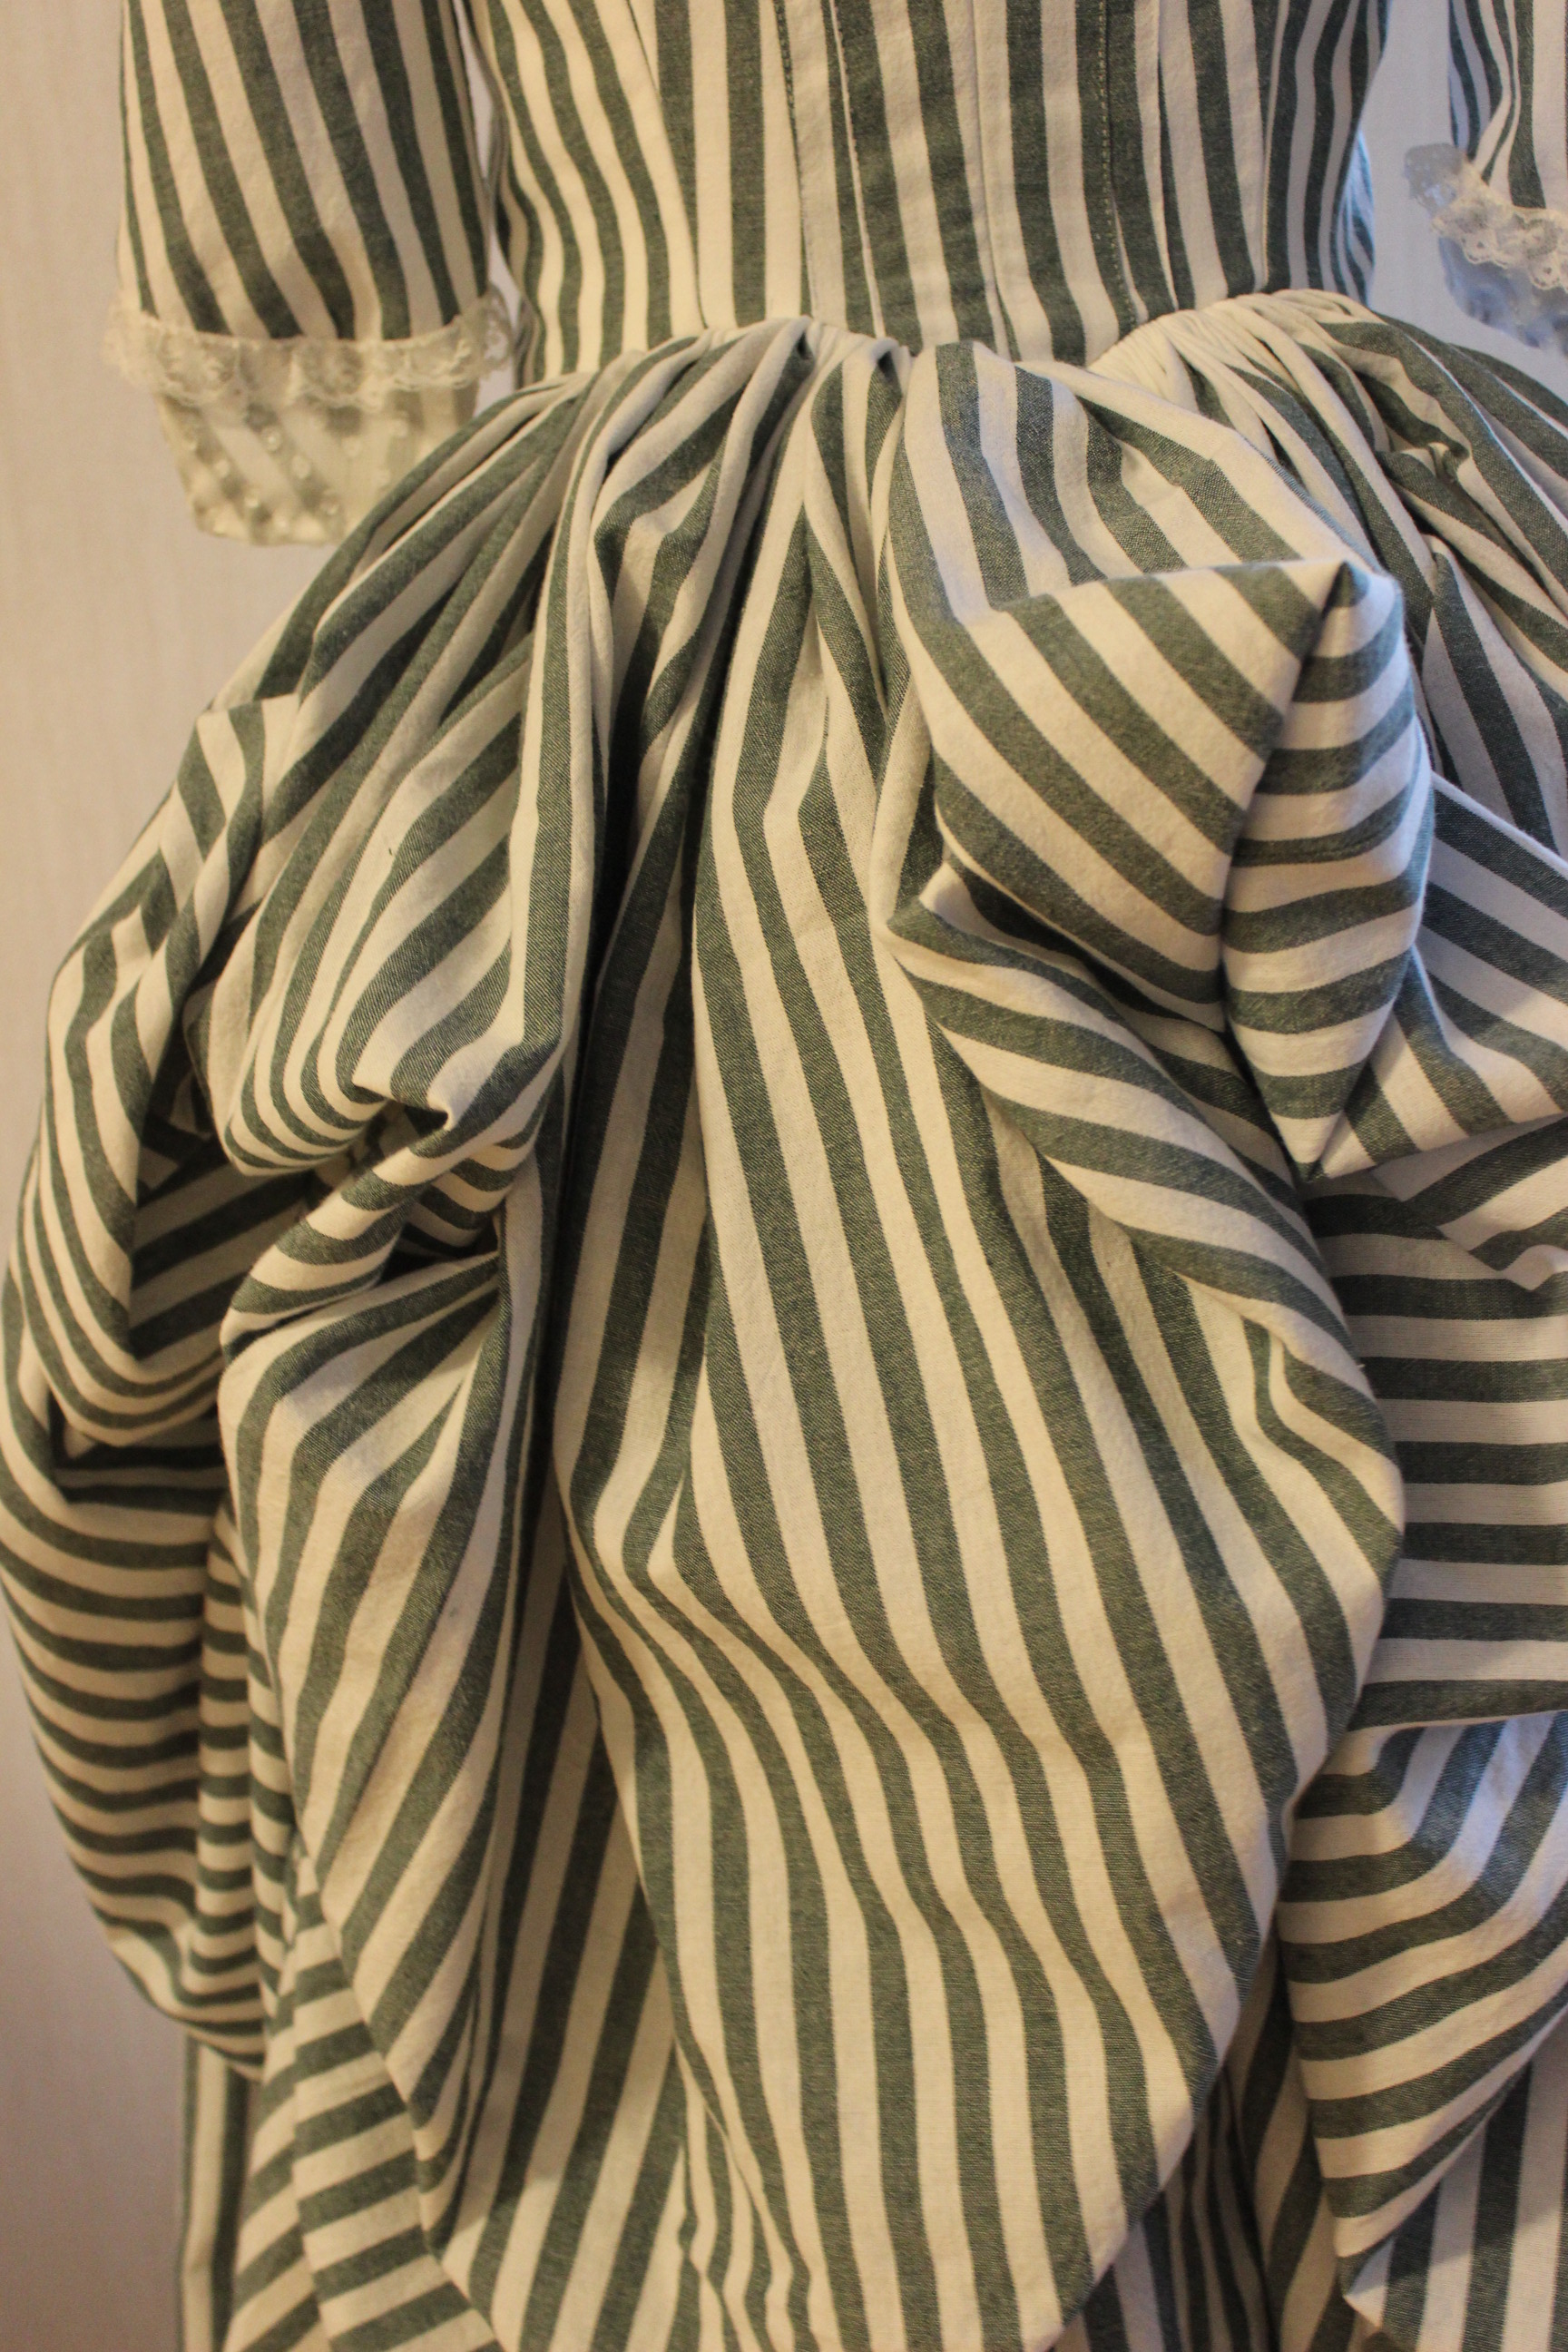
Unfortanly the sleeves were the last things I noticed when I put it on – The stupid bodice was way to smal. I tightened my corset all I could, and did manadged to close all the buttons. Only now the bodice looked horrible and the stresslines were pulling all over the front.
So back to the sewing machine I whent, using the alowence in the side/back seams to make the bodice a total of 2,5 cm bigger. 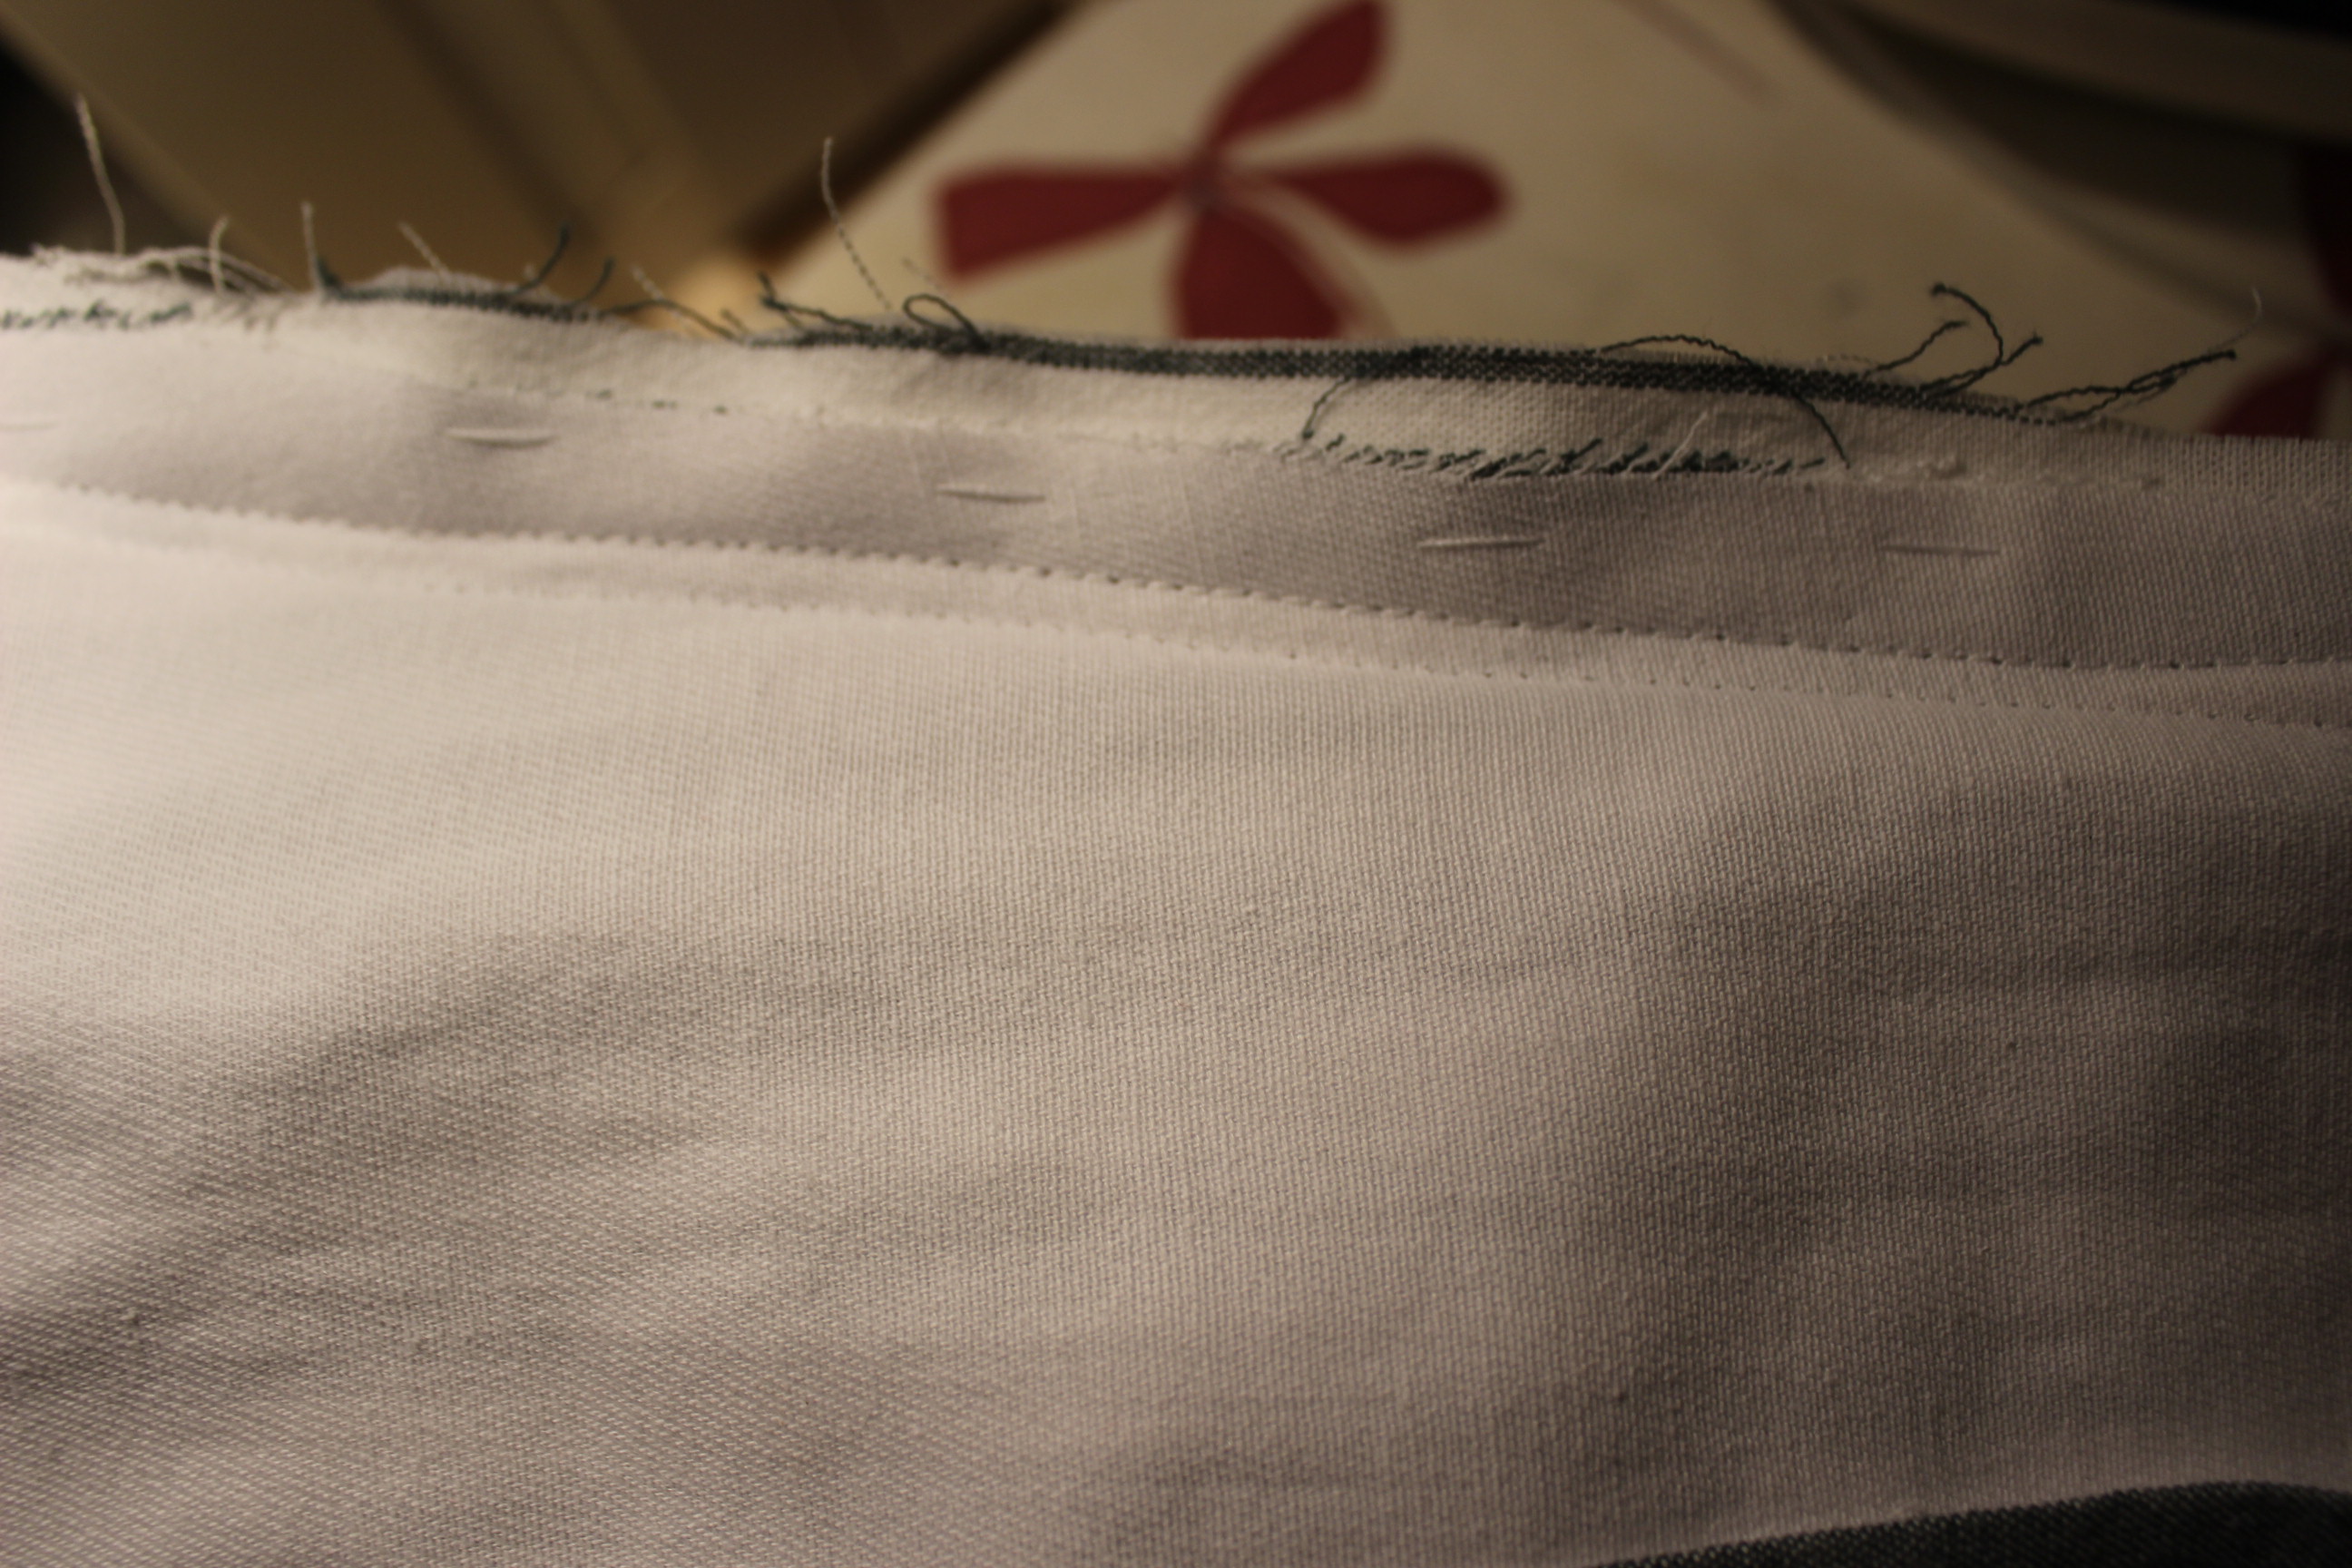
Then I pinned and sewed the sleeves. The insertion was an easy one, but the deciding on the sleeve trim was a bit harder. In the end I decided to stepp away from the inspiration and go with my guts and use a smaler design then originaly planed.
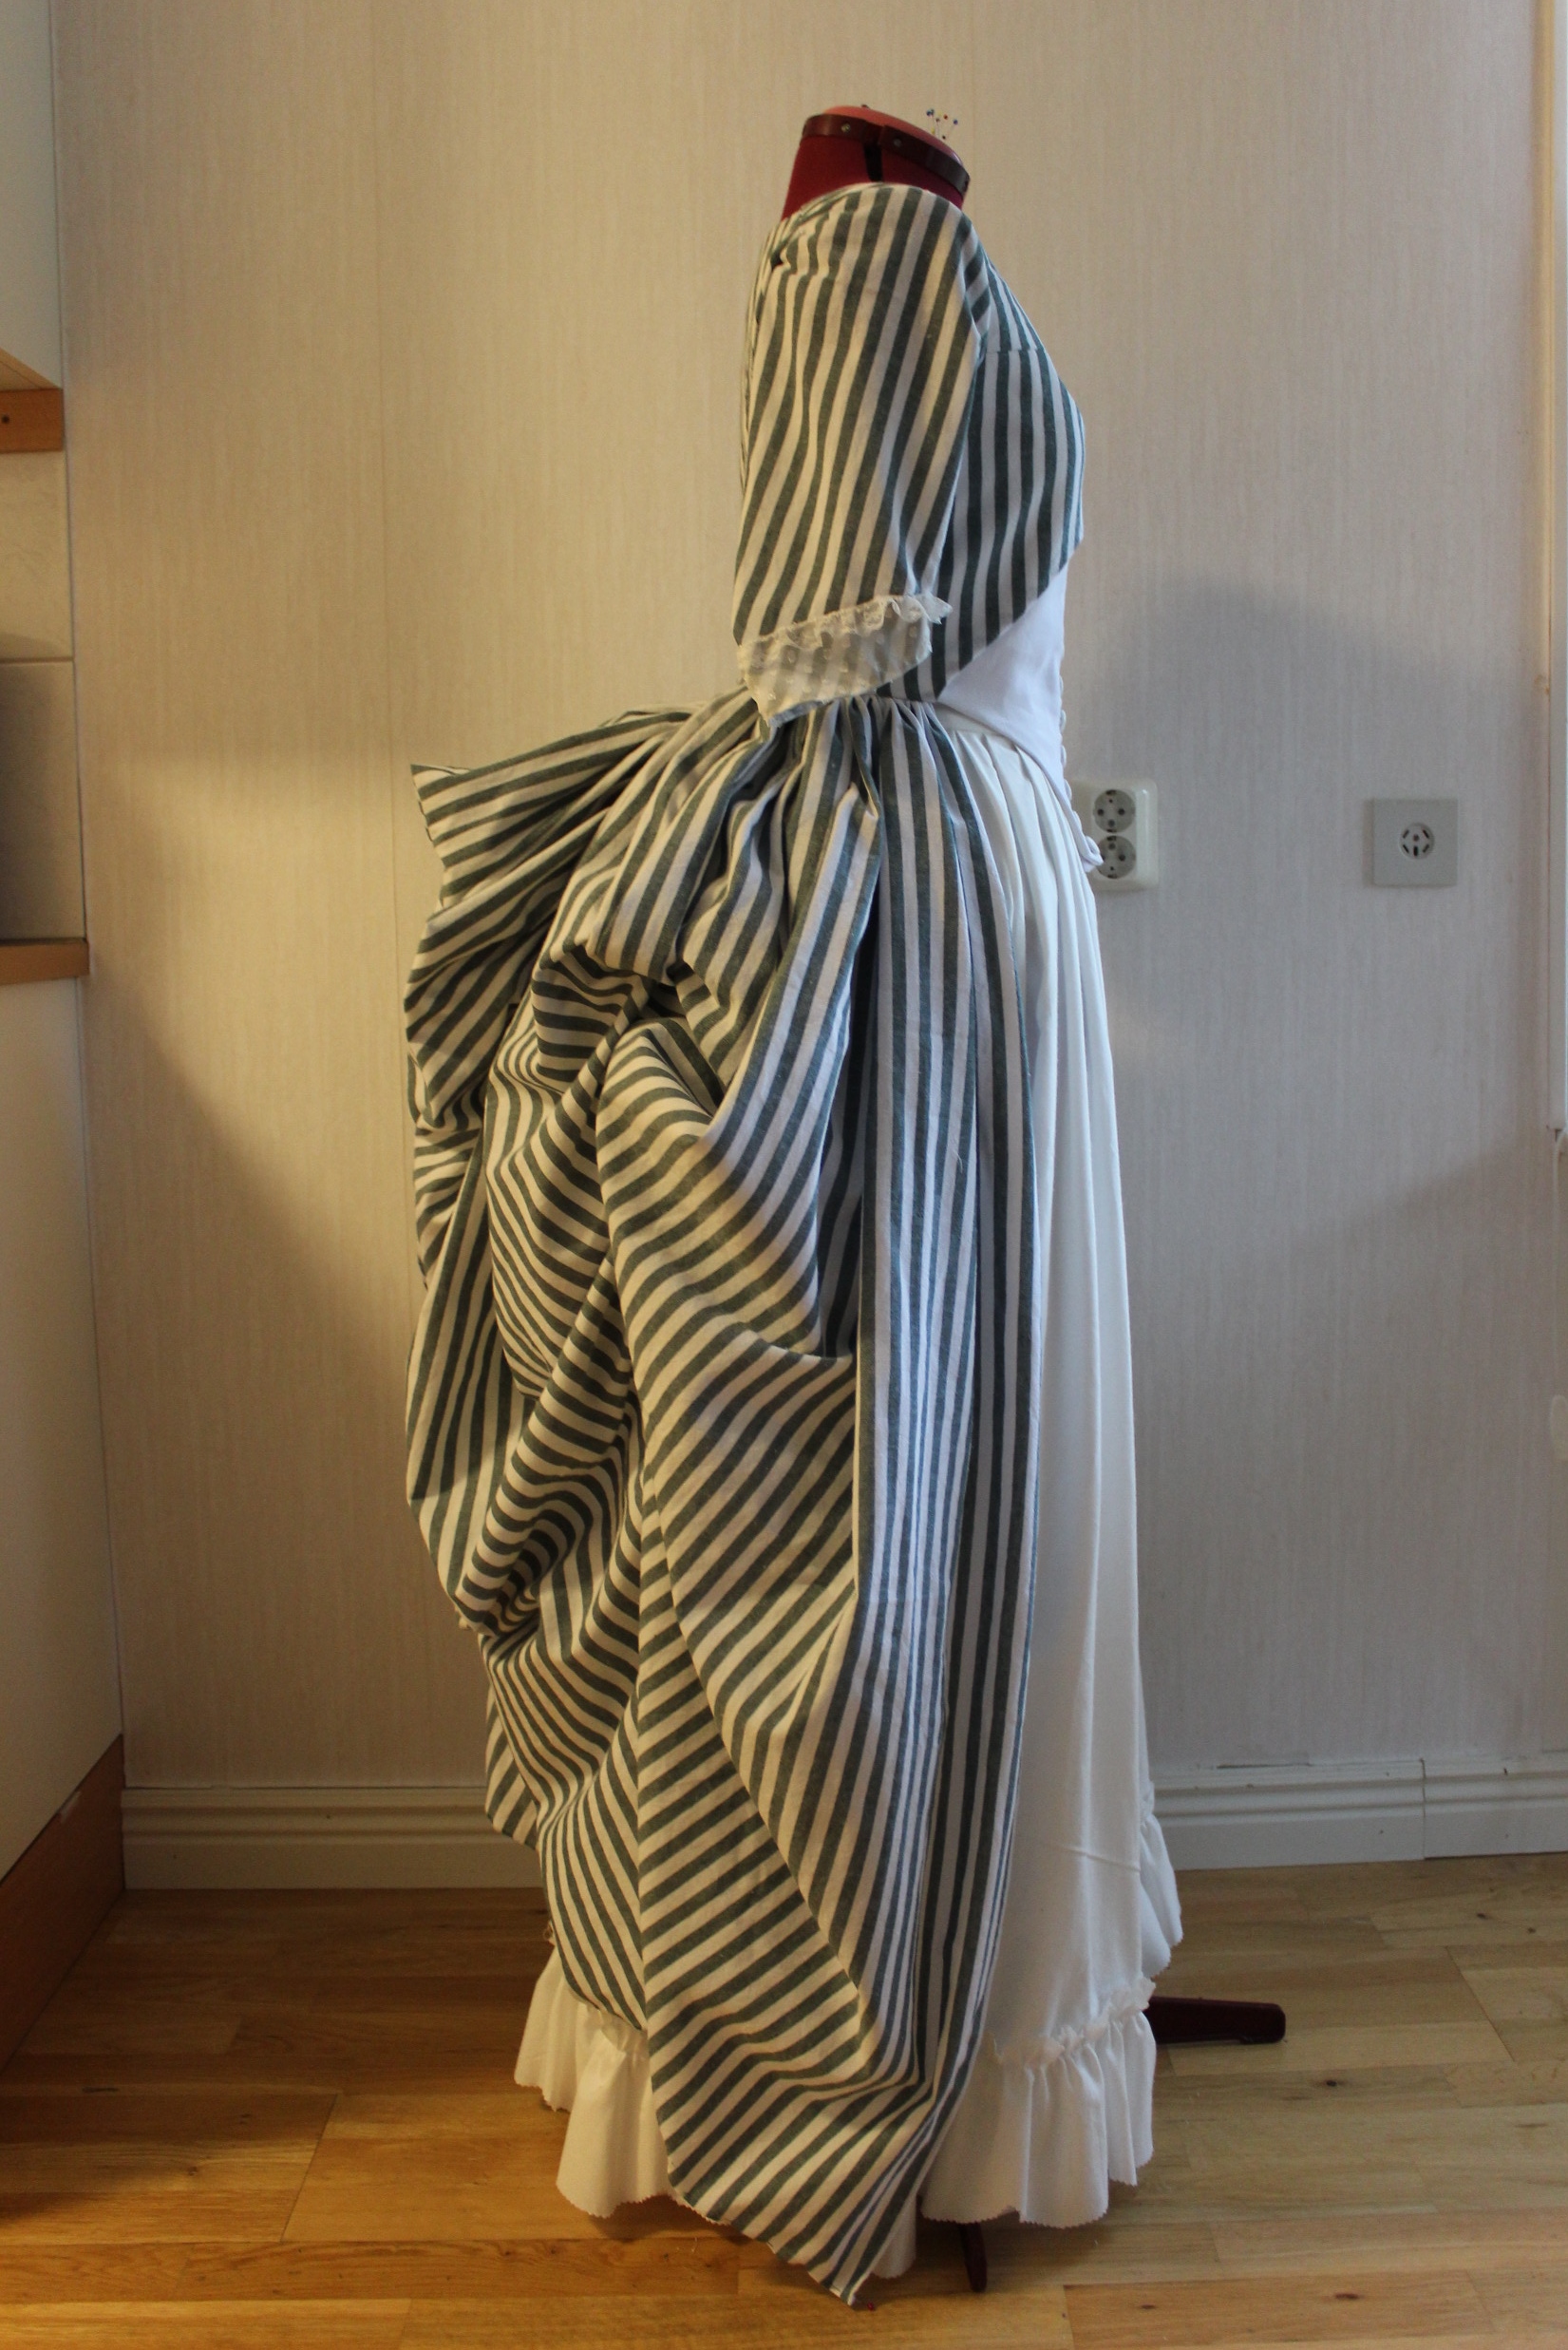
Now it was time for the skirt. I sewed the pannels together and hand stiched lines of gatering thread, to get them nice and even al over the skirt. 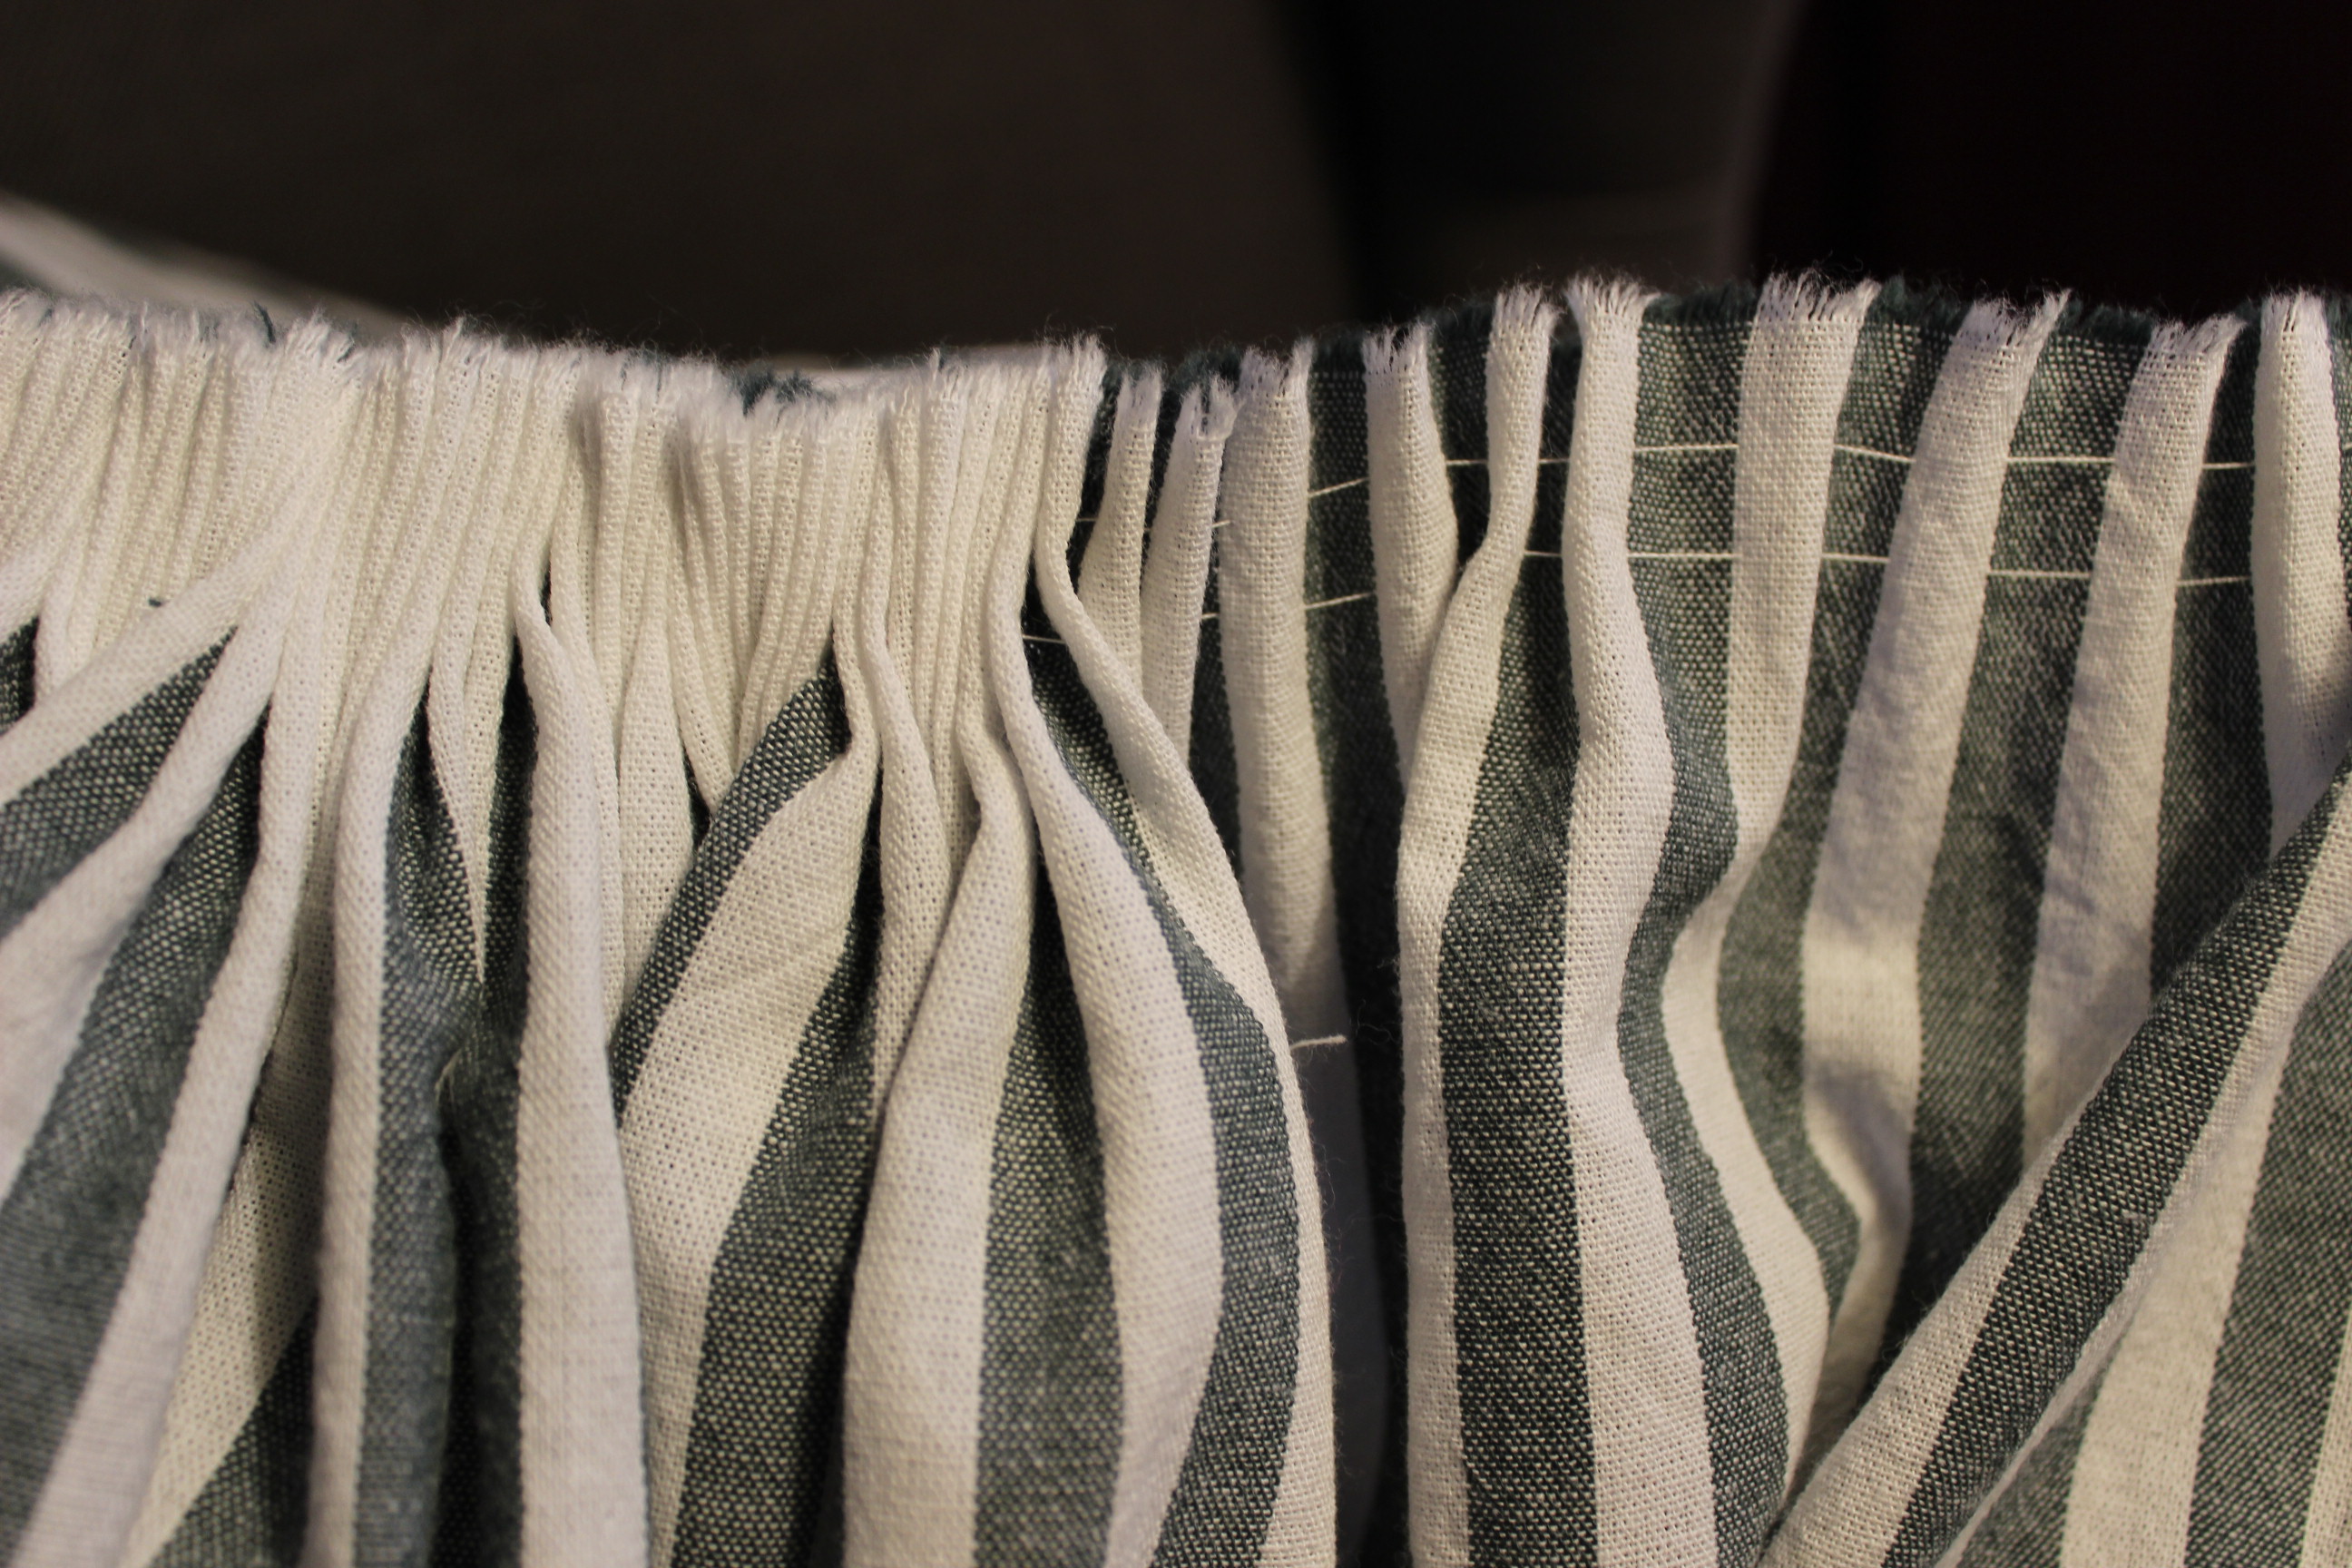 Then I pulled the skirt waist togeter and pinned it to the bodice, using the zone front as a mark were to start the skirt.
The sewing was abit tricky, geting all the fabric to lay smothly. 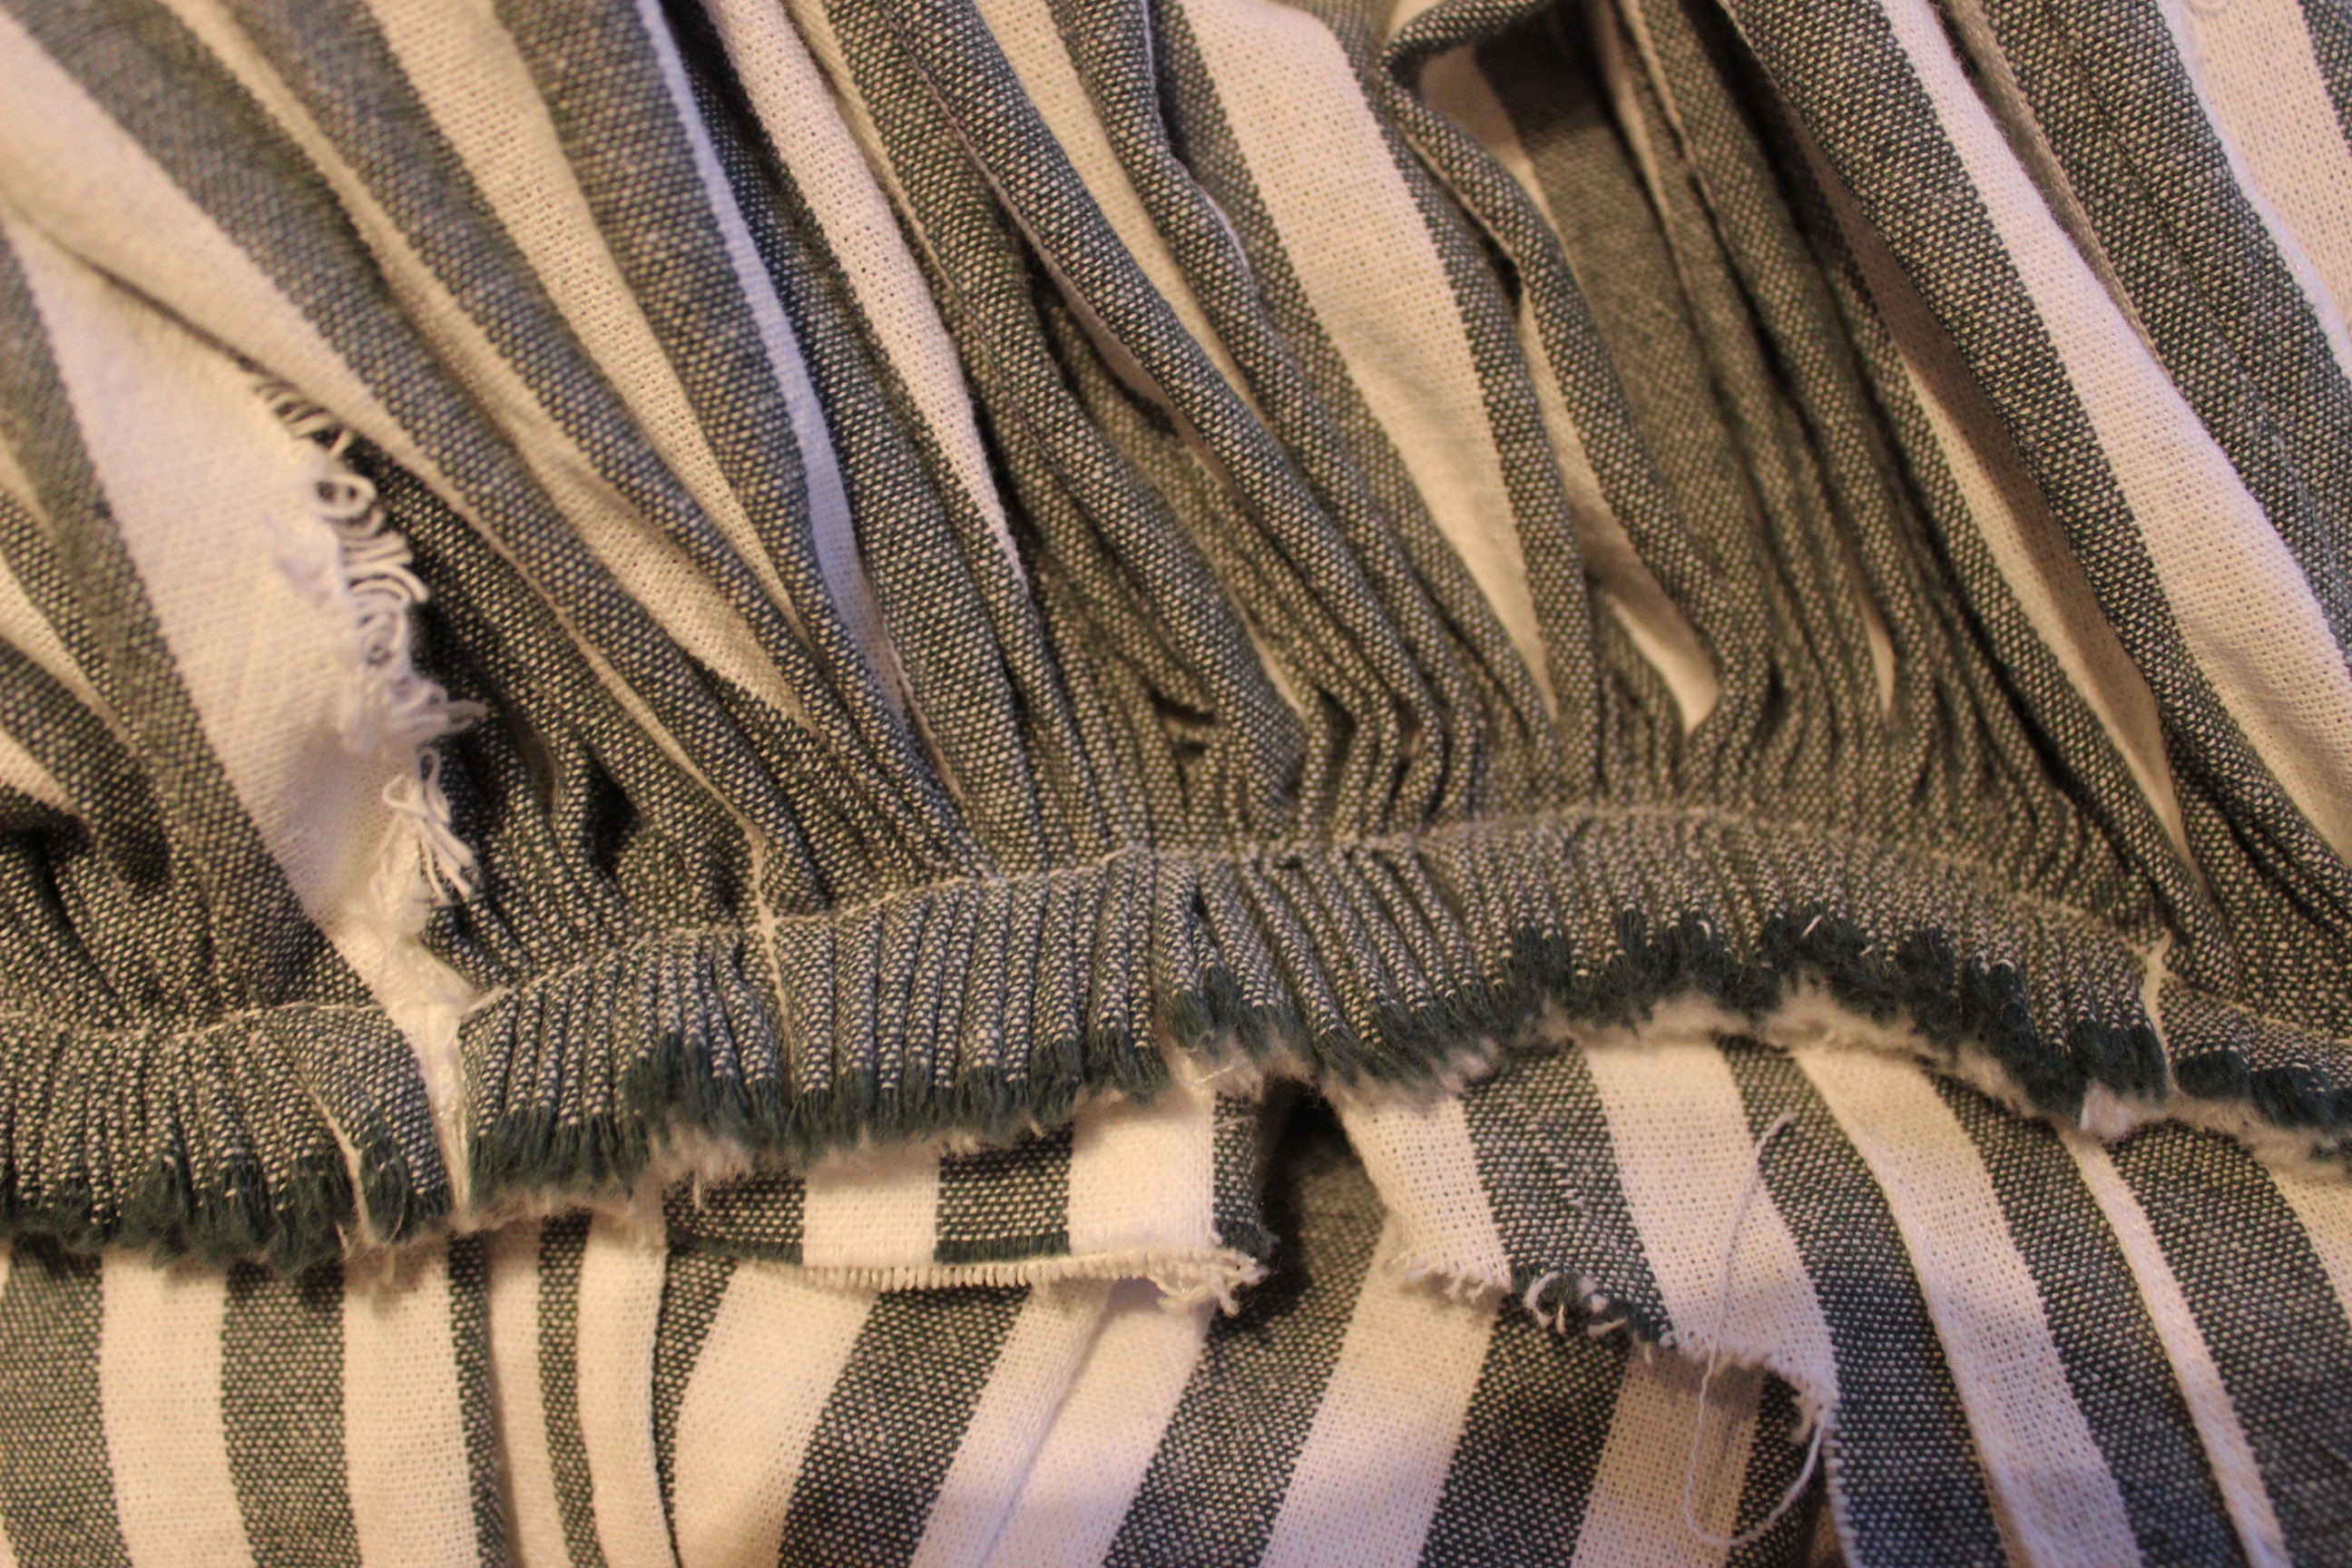
The final touches was to finish of the arm hole, tuck down the lining and stich on some Busteling-ties to make it an “Polainese”.
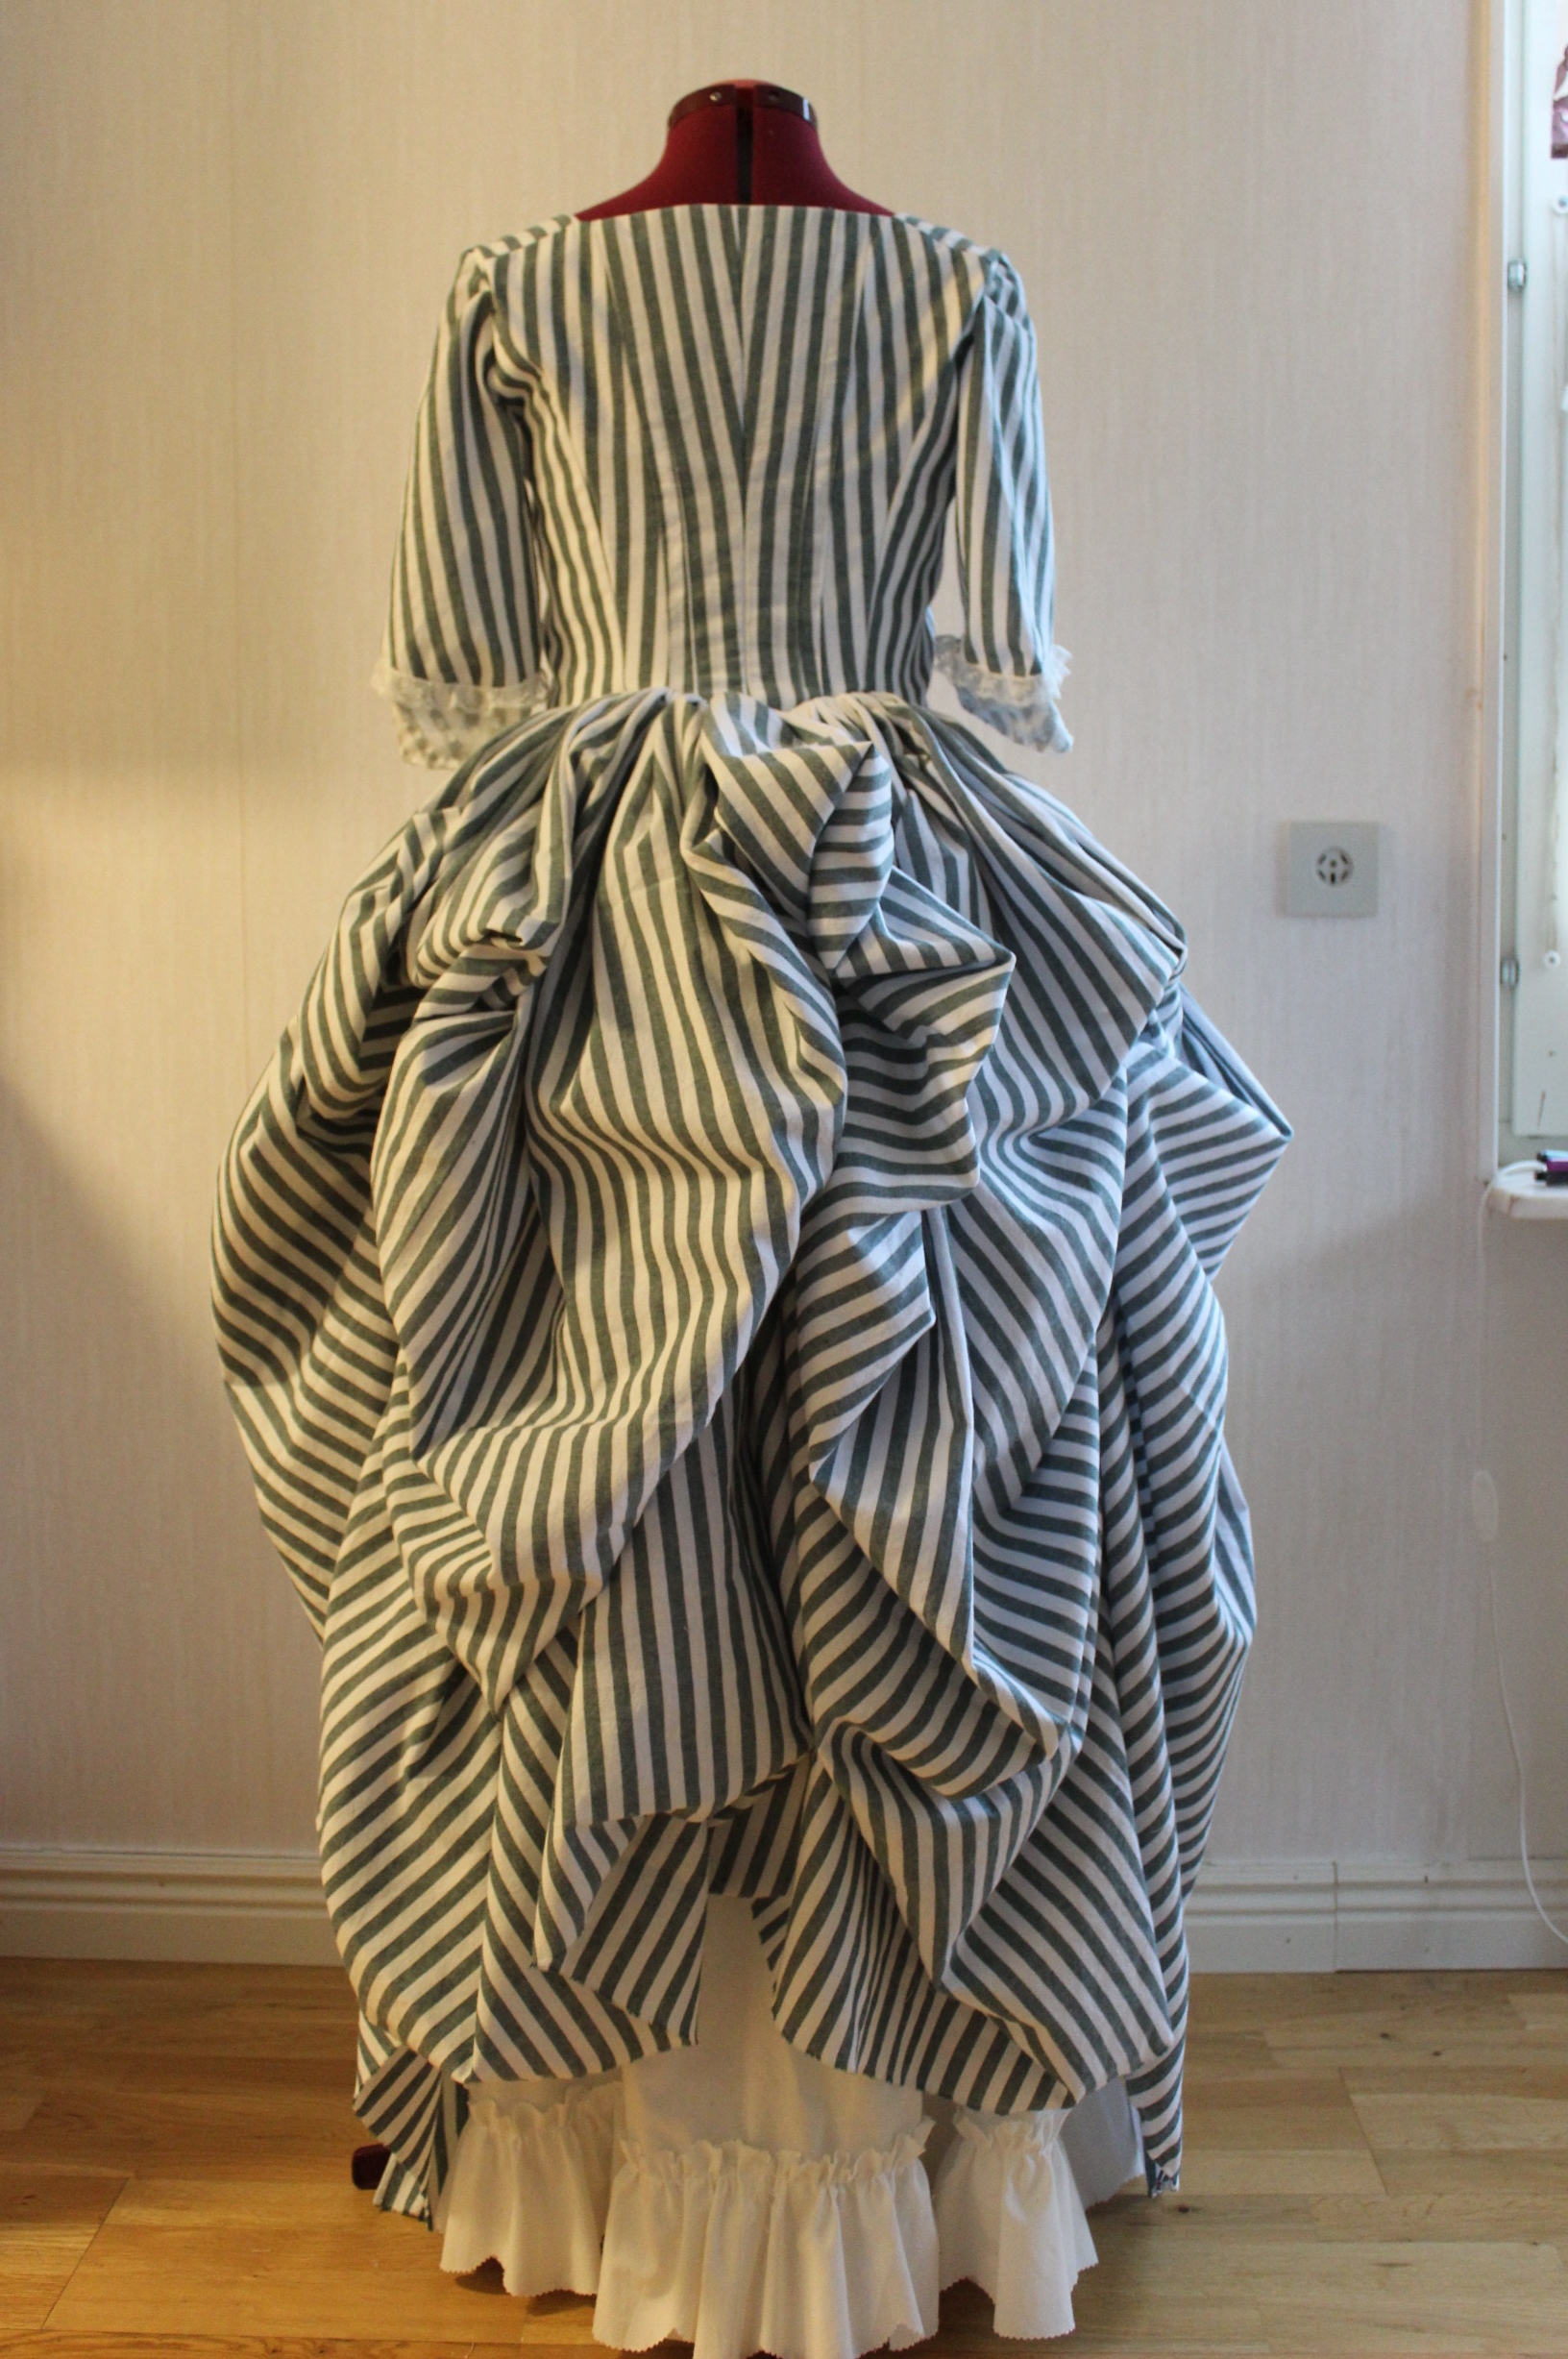
Finished dress:


Just the Facts:
Challenge: nr 10 – Art
What: a 1780s robe Anglaise.
Inspiration: Rose Adélaïde Ducreux “self portarit with a harp”.
Pattern: I draped my own, using Arnolds “Pattern of Fashion” as a guide.
Fabric: 4 m of striped white/green cotton, 0,5 m of white linnen, 0,5 m of white twill for interlining, 0,5 m of white cotton sheet for lining and 0,3 m of white dotted organdy for sleeve cuffs.
Notions: Thread, 10 self covered buttons, 1 m plastic boning, 5 cm cottin string.
How historical accurate: The shape and look of the garment are ok, but it is compleatly machine made with modern tecniques. I dind’t had the time or the money for a compleatly hand made silk dress.
Time: On and of for two weeks – maybe 15-20 hours.
Cost: about 300 Sek (48Usd). All fabrics were stash and bought on sale.
First worn: Not yet, but will be (pared with the White entries) next weekend for the huge historical picknick i the capital.
Final thoughts: The dress are not an exact copie of the one in the portrait, but I do think it looks pretty good. I’m a bit anoyed about the stress wrinkels on the front bodice, but with the time constriant am glad I manadged to finish it of at all. Tomorrow I will give it a real try out and se if it passes the test.
For the HSF nr 9: Black & white, I decided to make some pieces I’ve needed to make my next big costuming project work.
Since my plan is to make a compleatly hand made Robe Anglaise as the next challenge (due 1 june) I needed to give myself a head start. So by making a simple piece for this one, I could save some time and make it possible to start the Anglaise earlier.
The theme of this challenge fit perfectly for some of the pieces I needed for the “Art” gown to be finished.
First: The skirt.
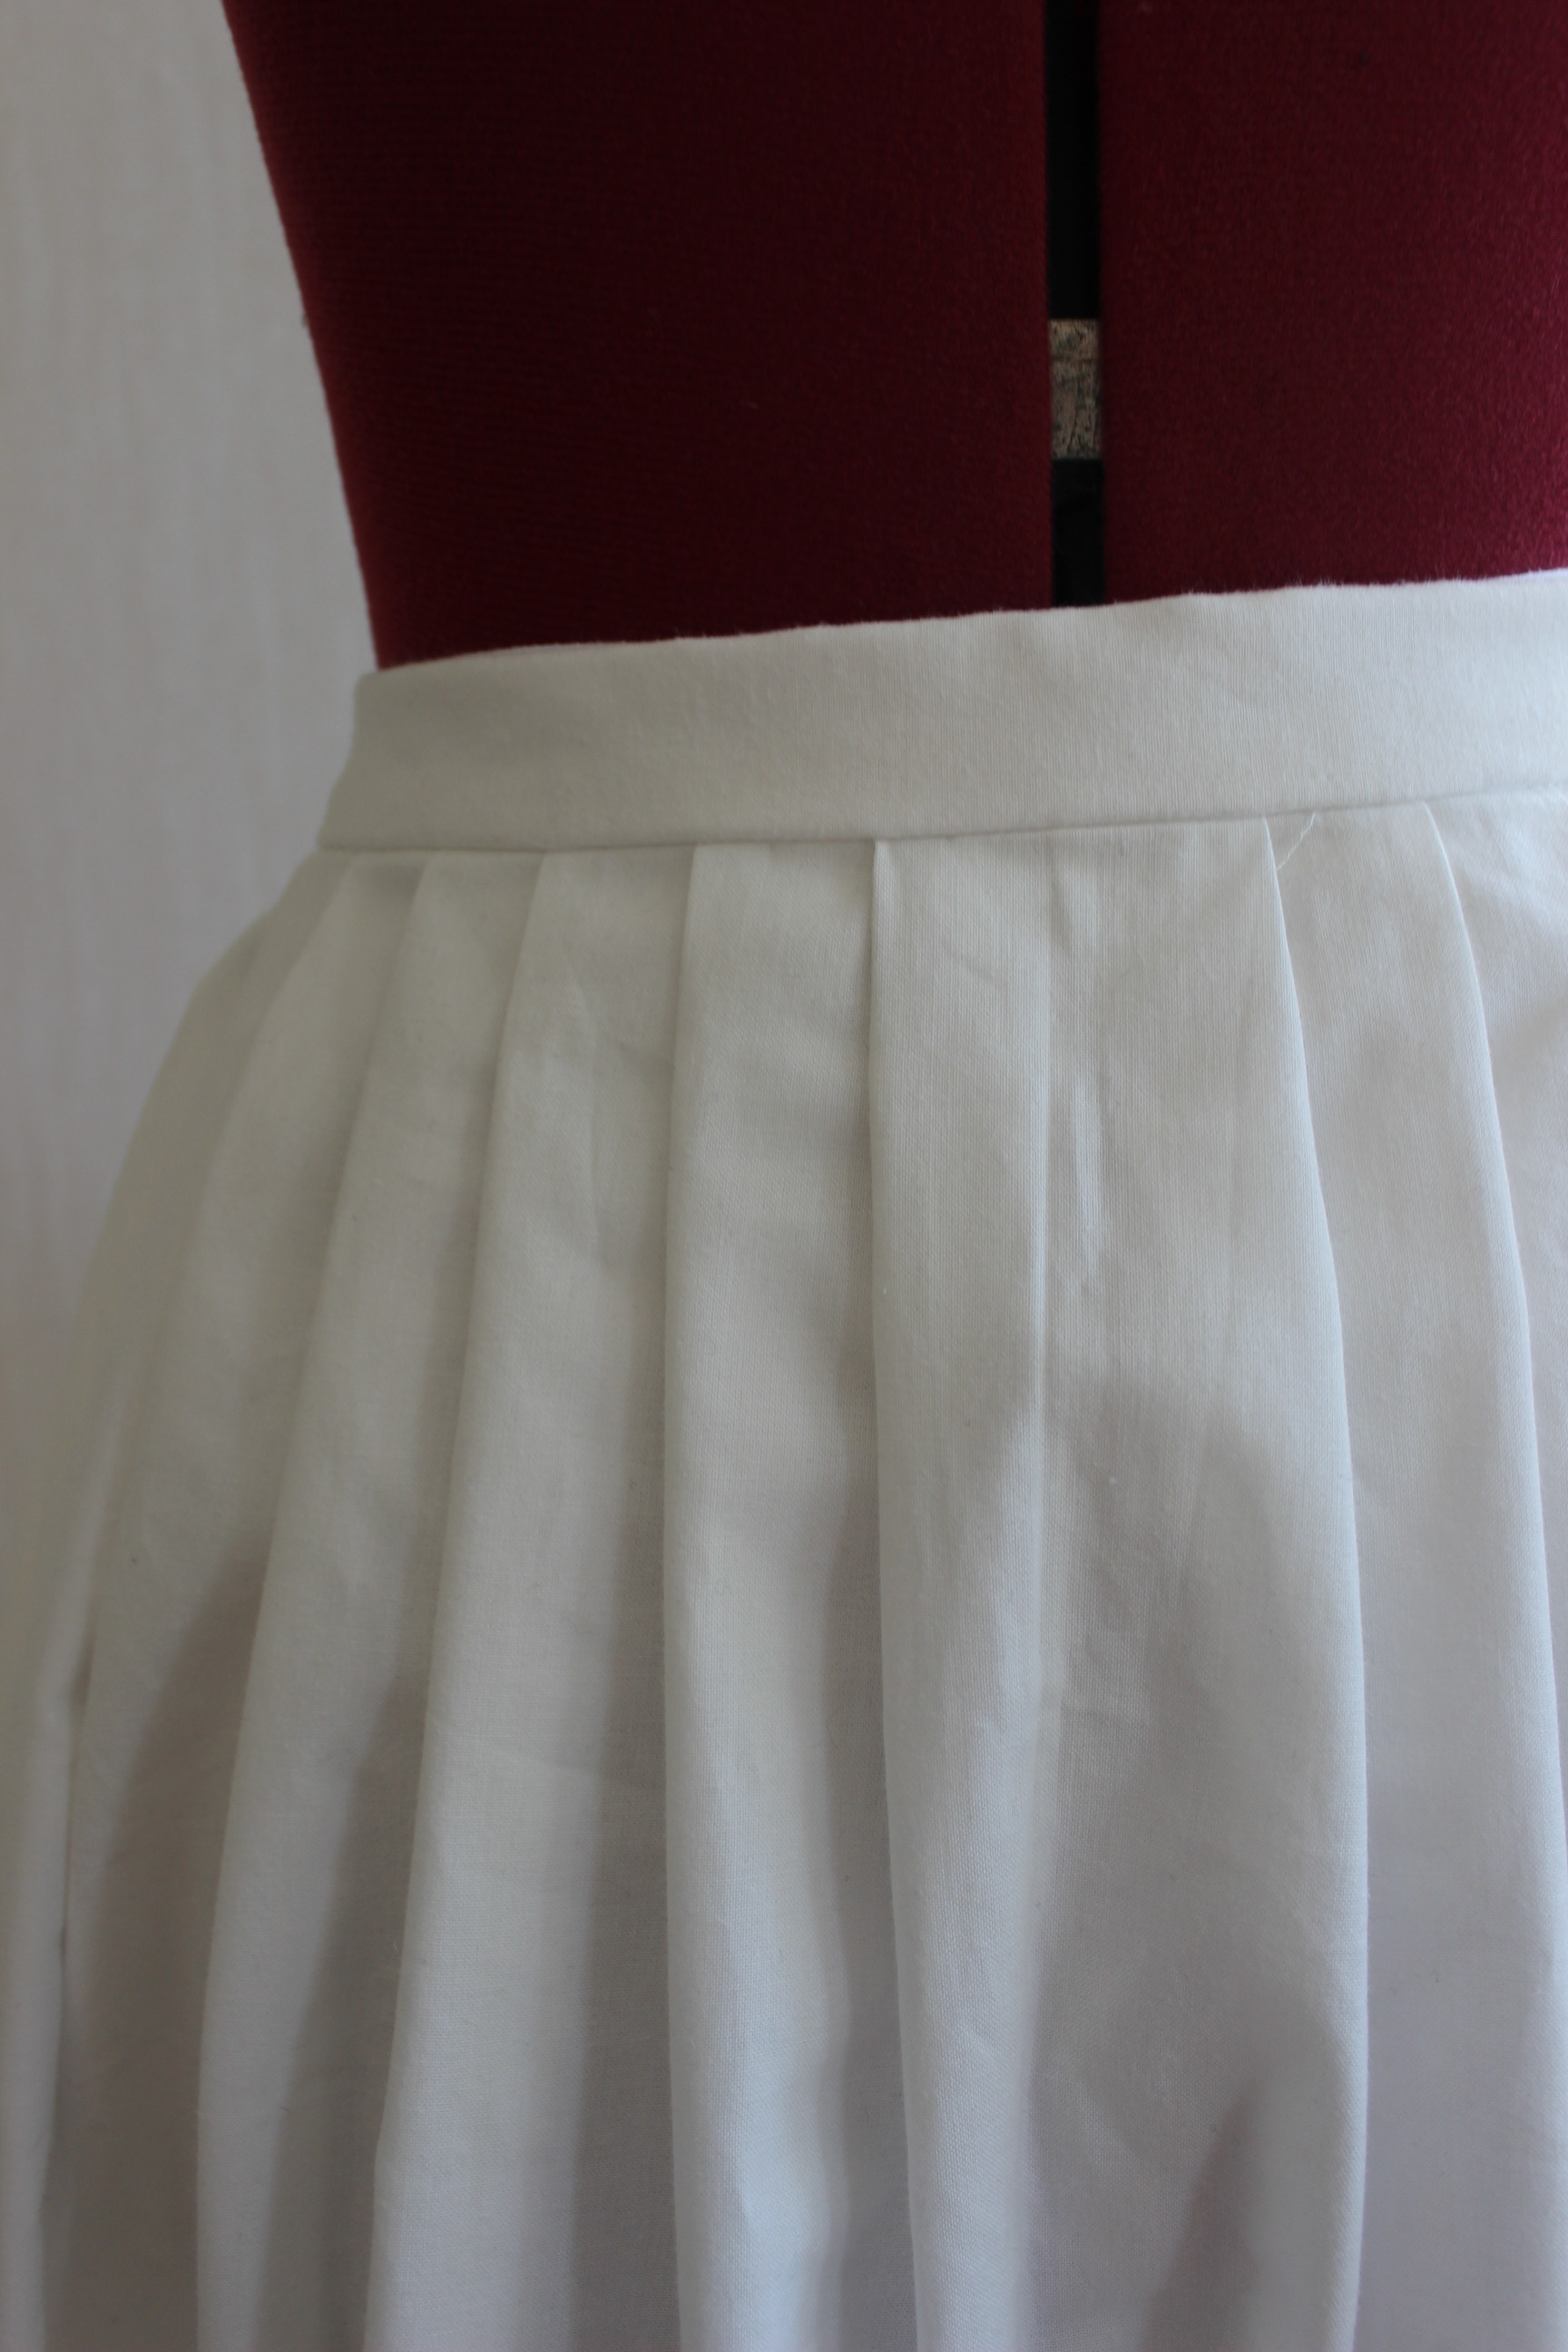
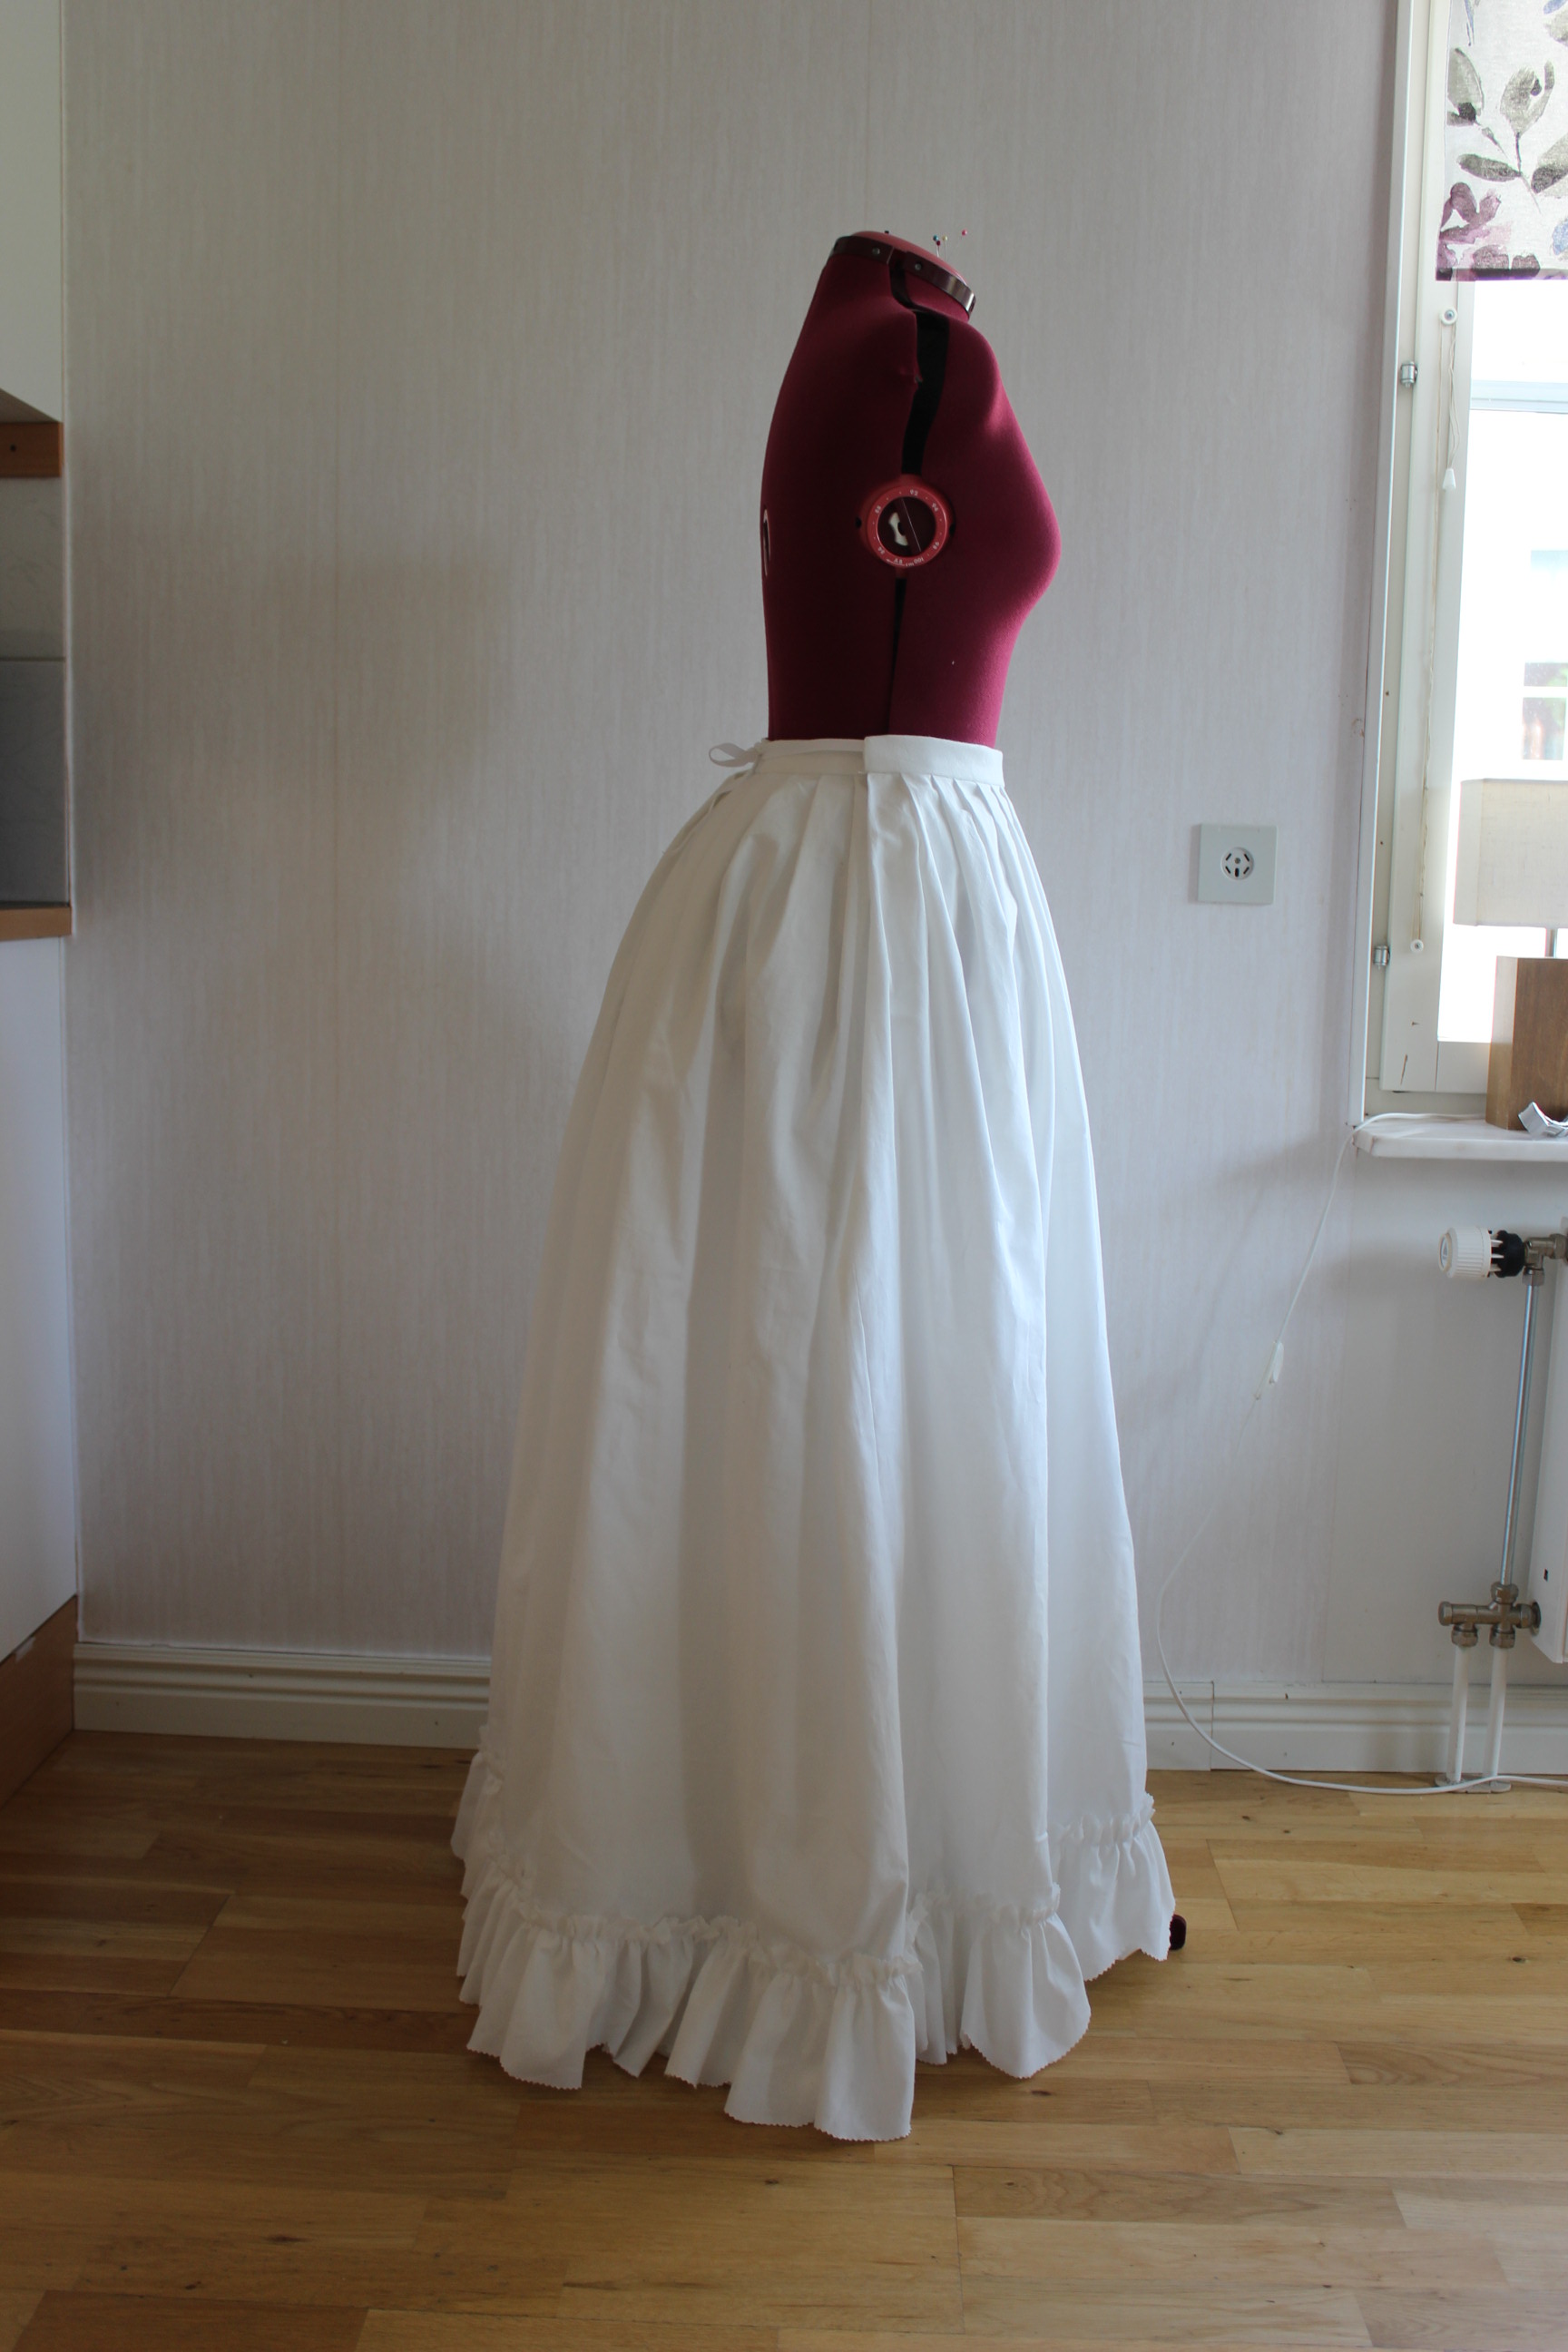
A 18th century petticoat/skirt made from regular white cotton (I needed it to be both quick and cheap).
I used a regular white cotton fabric that I found in my stash.
Since I made almost the exact skirt for the previous challenge, I won’t bore you with construction detals, but instead go straight to the Finished photos. (If you’re still want to know how I made it, take a look at my Pastell UFO skirt.

 Just The Facts:
Challenge: nr 9: Black & white.
What: A 18th century skirt/petticoat.
Pattern: None, just measured and cut.
Fabric: 2,5 m of white cotton sheets.
Notions: Thread and 2 m cotton ribbon for tying at the waist.
How Historical Accurate: So so. The time constraint caused me to sew it by machine (and Ialso do think it is stupid to handsew pieces which are clearly in the wrong material). But the shape and construction are plausable.
Time: 4 hours
Cost: 60 sek (9Usd)
First worn: Not yet. But hopefully at june 6 for a huge costuming event.
Final thoughts: I had some trouble deciding on the bottom flounce.The original calles for fringes, but there was no way I was going to get hold on some cheap and sutable ones in time. I did try to make my own, but they lacked the weight neccesary to hang nicely. In the end I opted for a narrow flounce, and I’m pretty happy with the result.
***
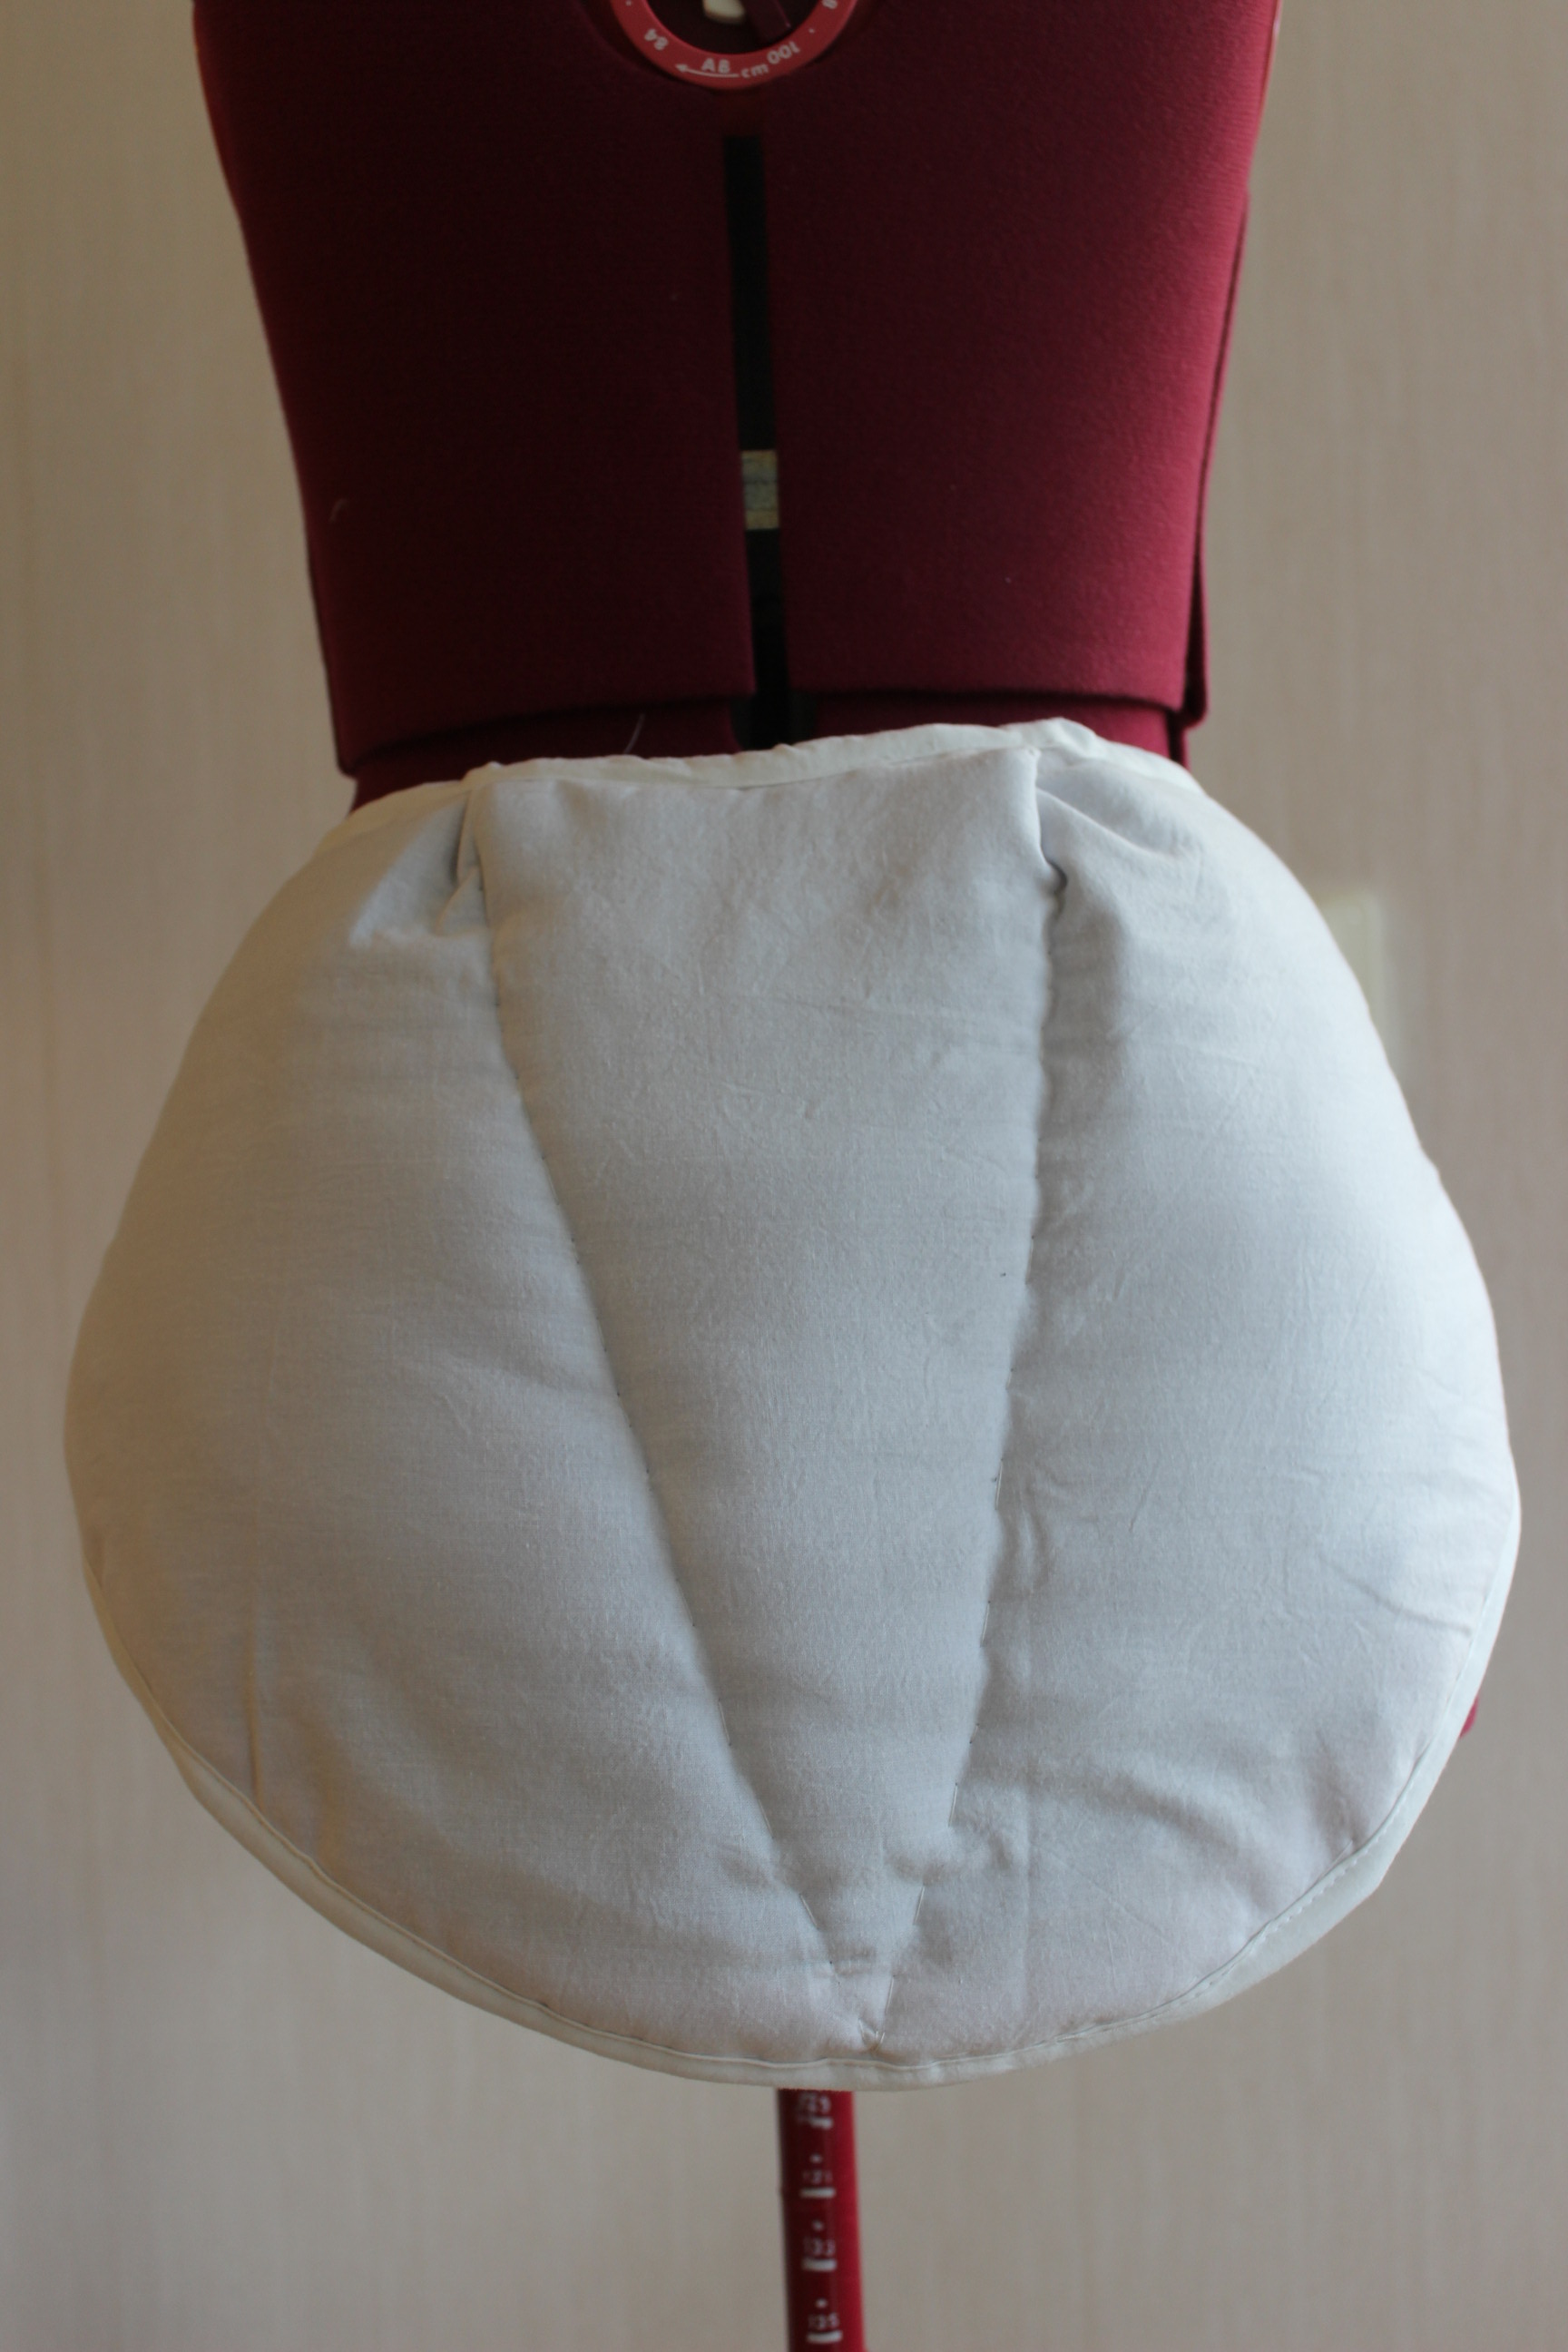
The second thing I needed was a bigger bumpad.
I’ve made a temporary one about a month ago, to wear with my Edwardian dress. However, I didn’t had the time to finish it, so last night I picked it up again.
 Pink and purple cotton basted to several layers of quilt padding.
 It was originaly ment to be a quilted petticoat, but as you can see, I didn’t get very far.
I covered the pad in white cotton, leftover from a previous project. Making self fabric bias-tape to trim the edges and make tying ribbons.
 It was such a quick and easy project.
Finished:


Just the facts:
Challenge: 9 – Black and white
What: A bumpad – 18th century to early 20th century.
Pattern: None
Fabric: 0,5 m of white cotton (originaly 0,5 m of quilting padding and some leftover fabric scraps).
Notions: Thread.
How historical accurate: Not at all. Maybe the shape will pass, but the construction, material and look is all wrong.
Time: 1 hour (perhaps 30 min more, if it hadn’t been half finished already).
Cost: Nothing since I only used leftover scraps.
First worn: Not yet. But hopefully at june 6 for a huge costuming event.
***
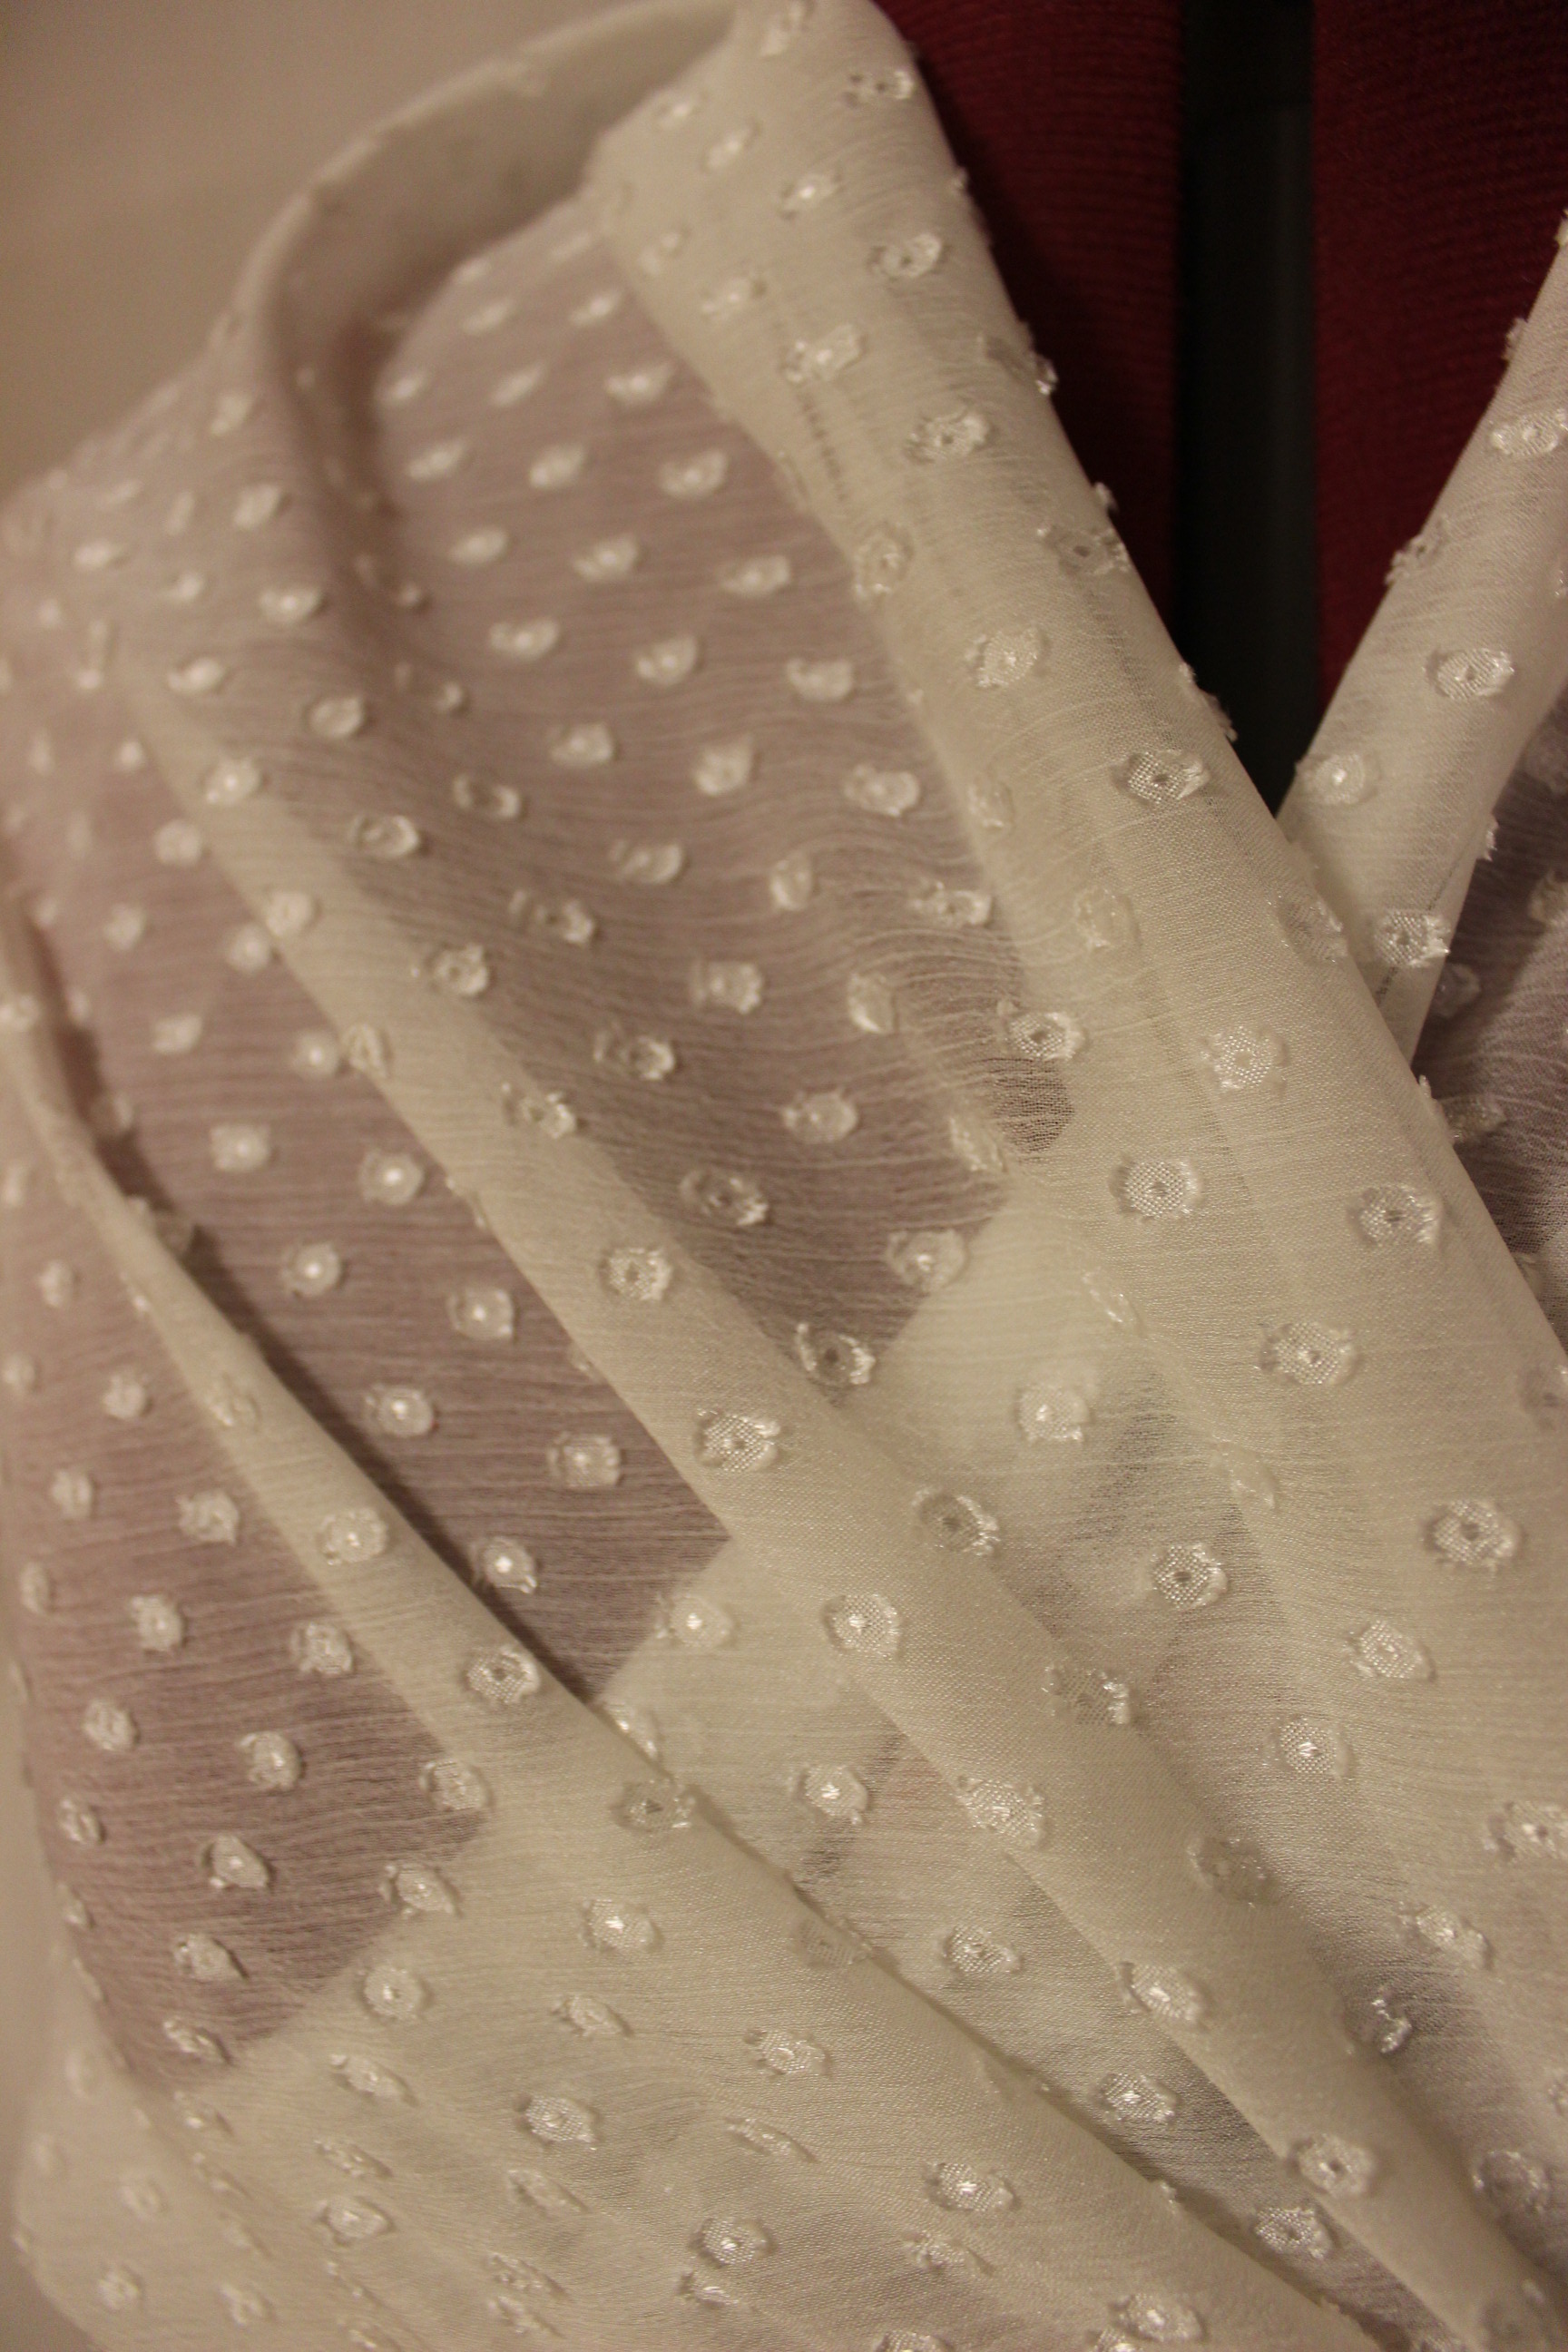
I had time to make one final item before the deadline – a fichu.
I wanted to make one large enough to wrap around the body and tie in the back, like you se in many paintings from the 1780s.
Using some adwise I got on the internet, I cut two large triangles and stiched them togeter to make one huge.
Then I shaped and rounded of the neck, to make it wrap better around the neck. I french seamed the center back, and hemmed the whole thing – everything by machine. 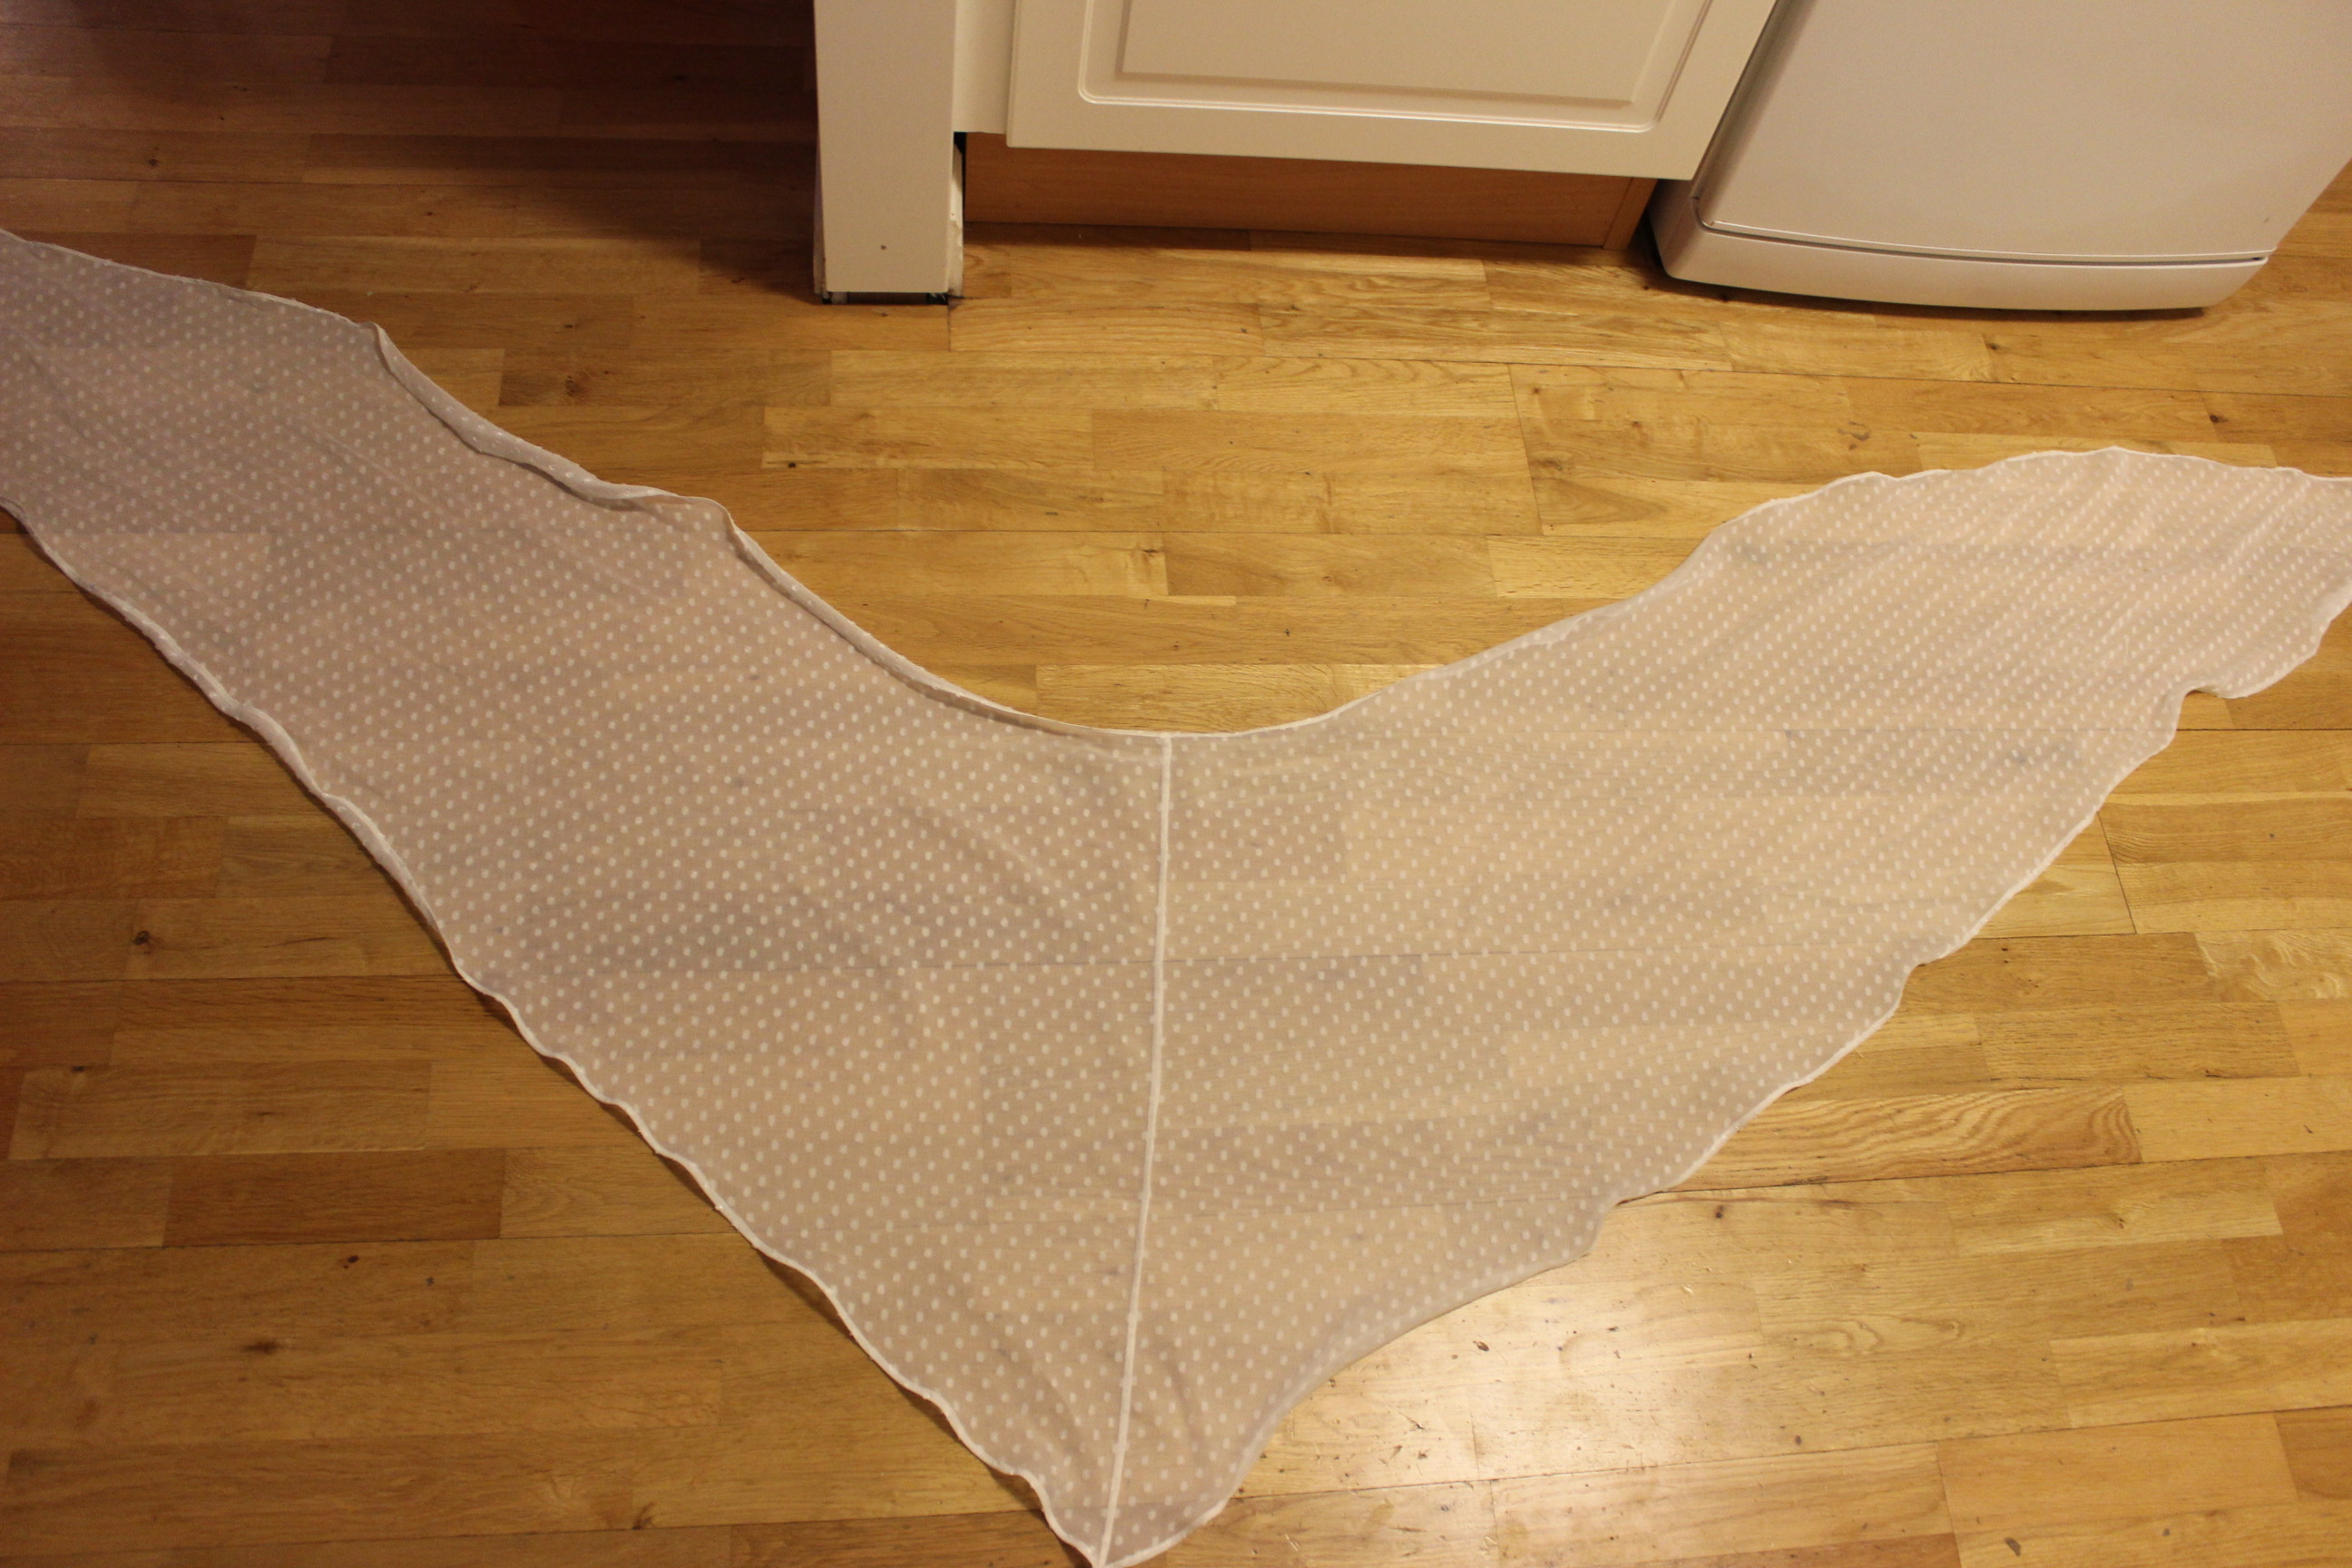
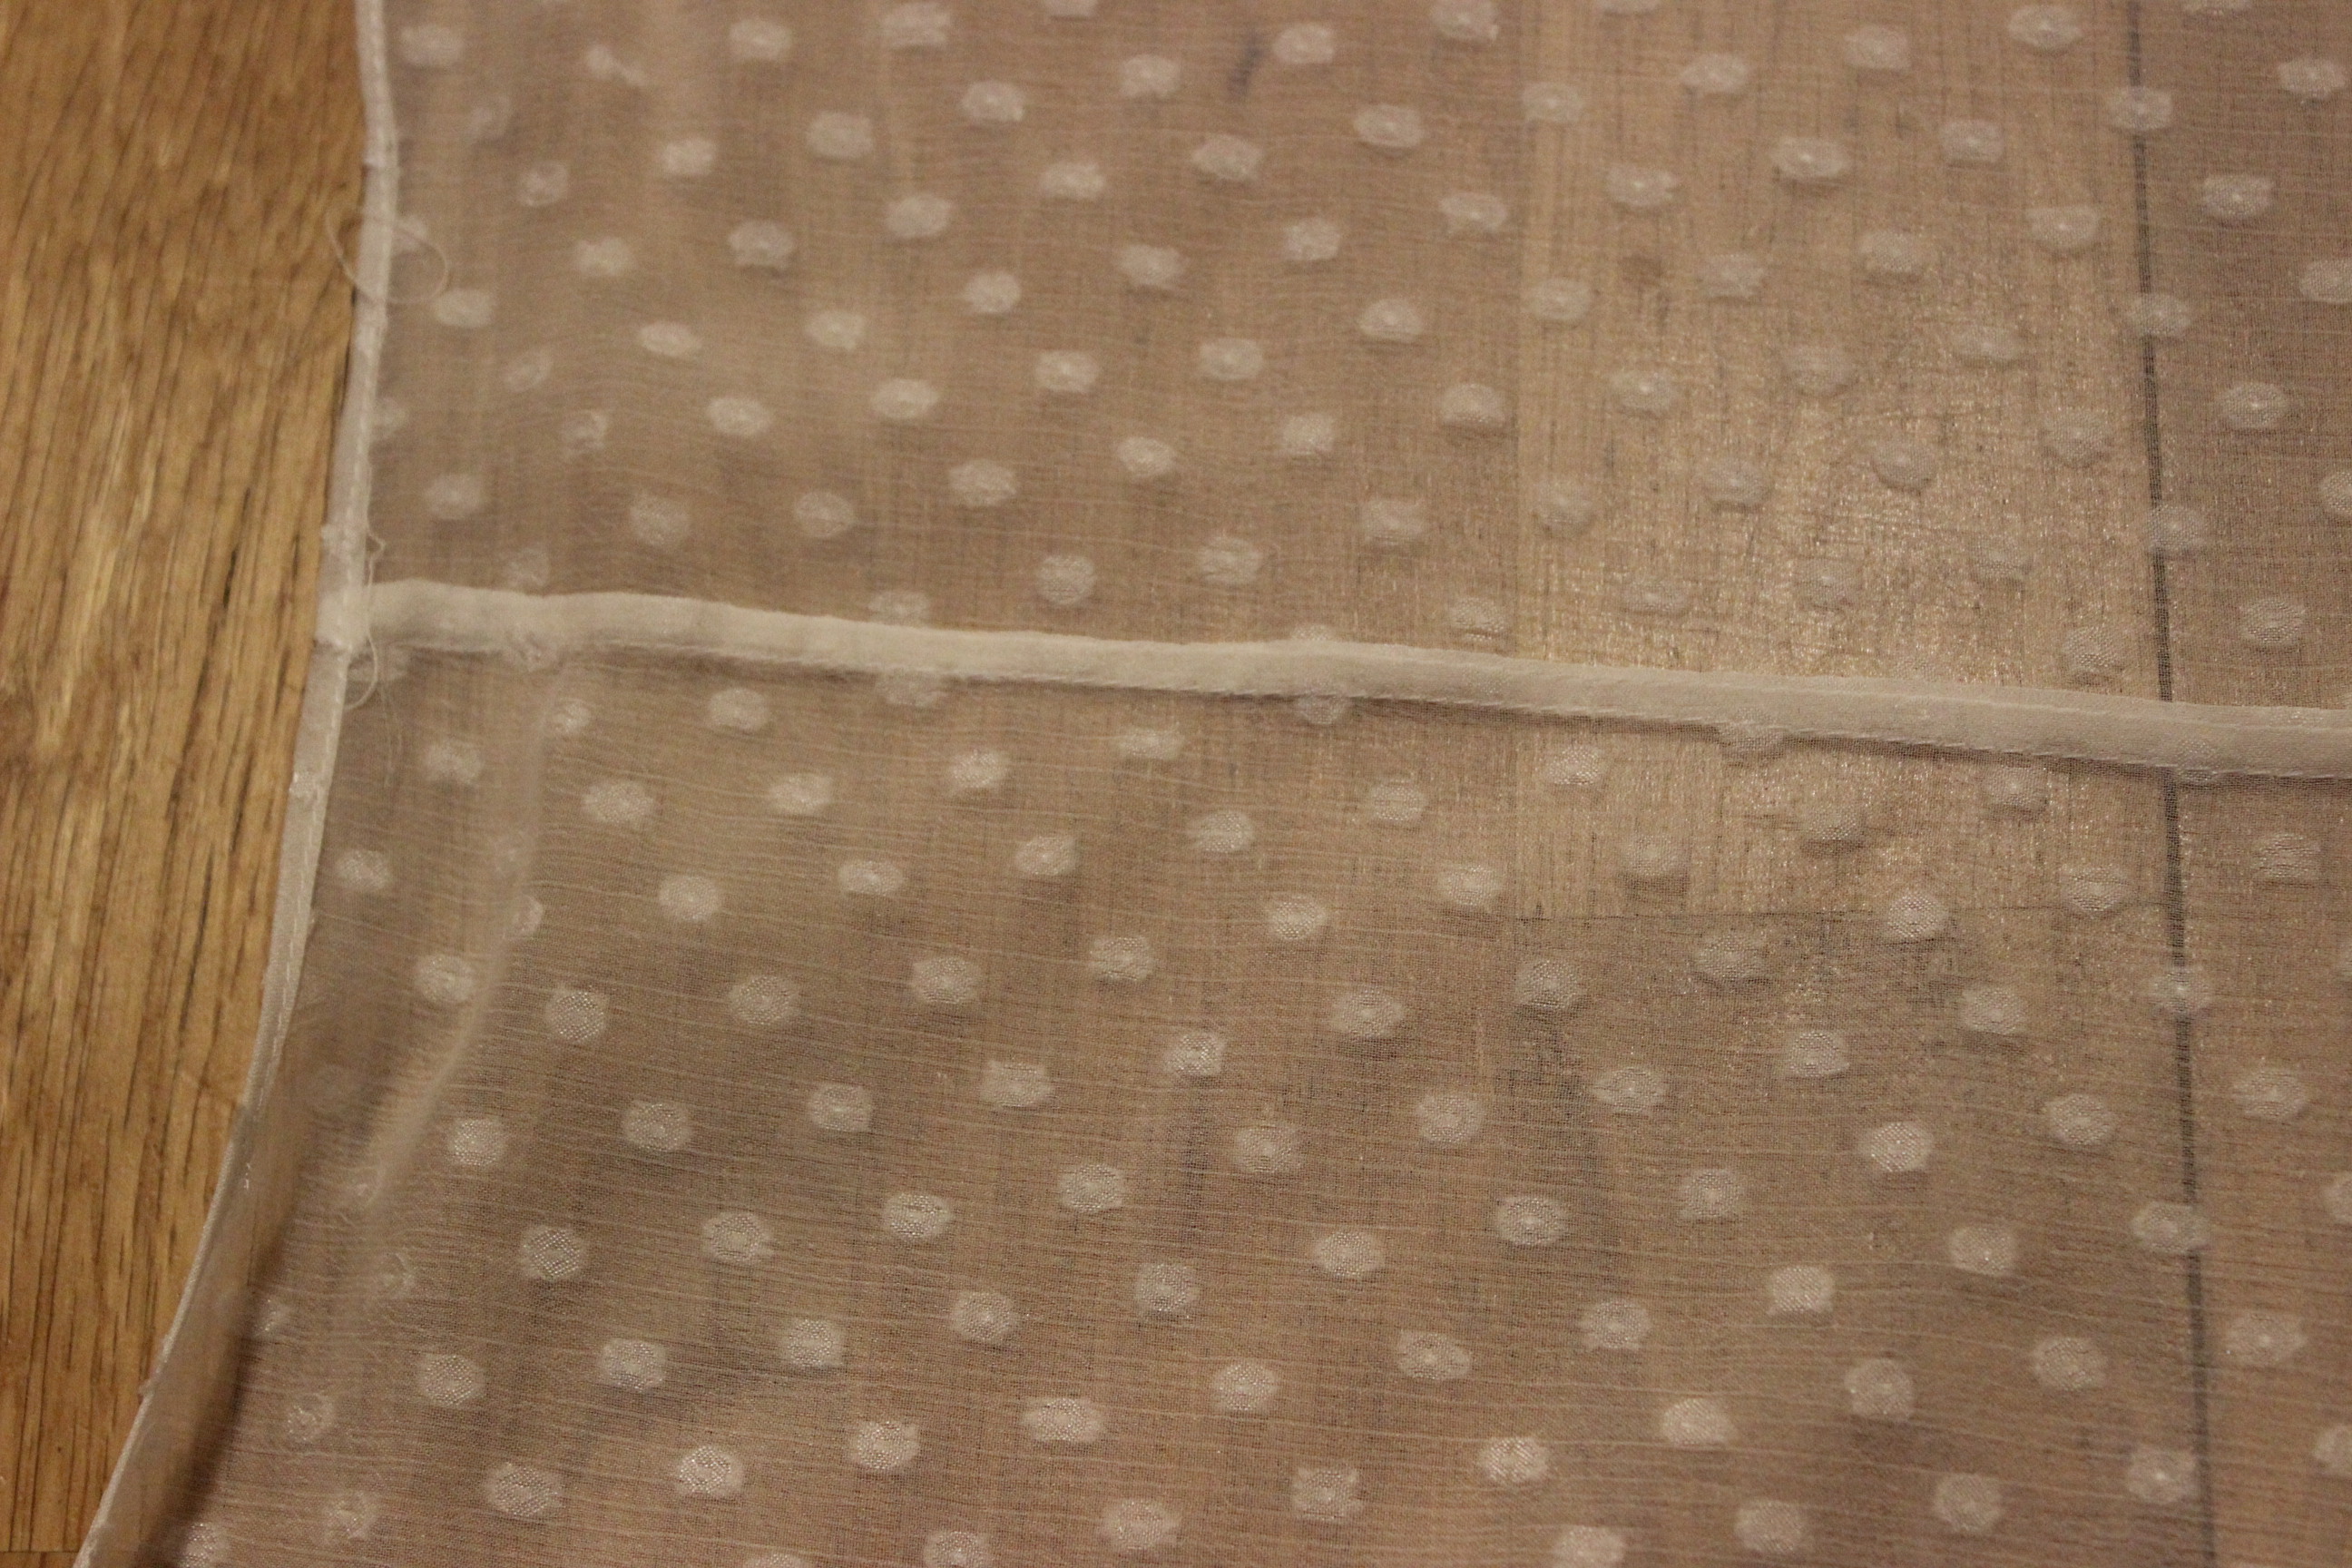 Close up: French seam and hem.
Finished: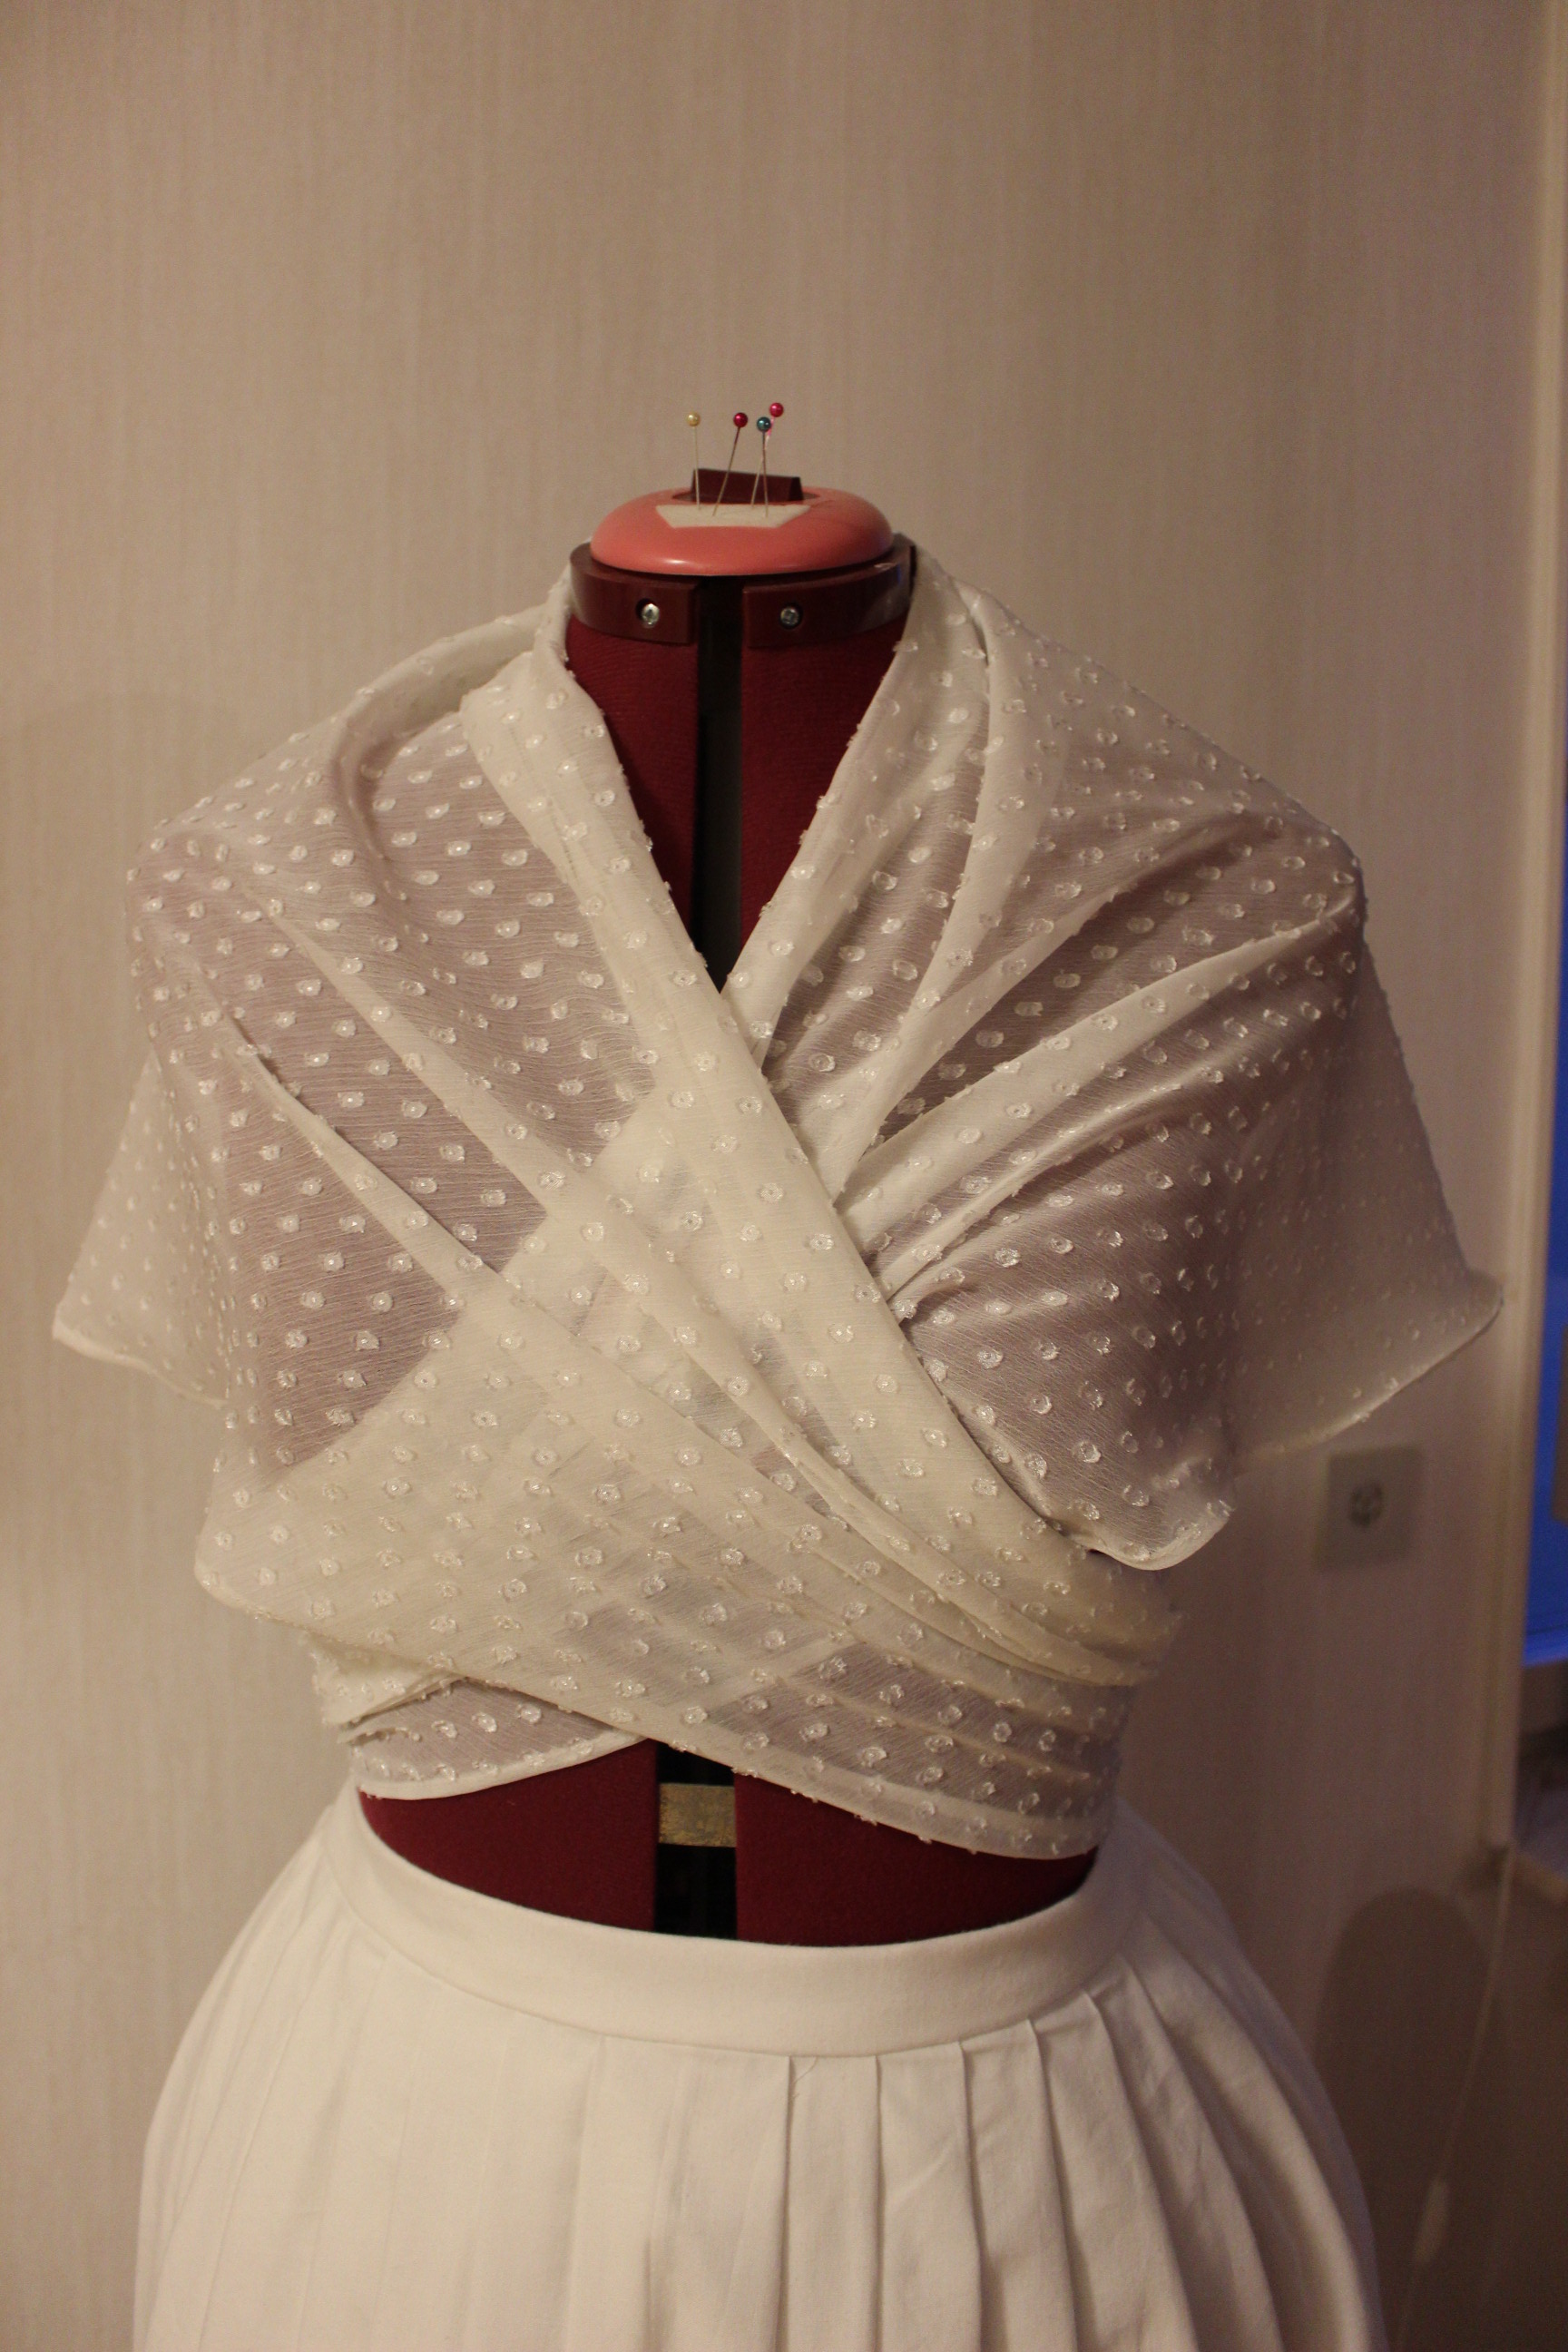

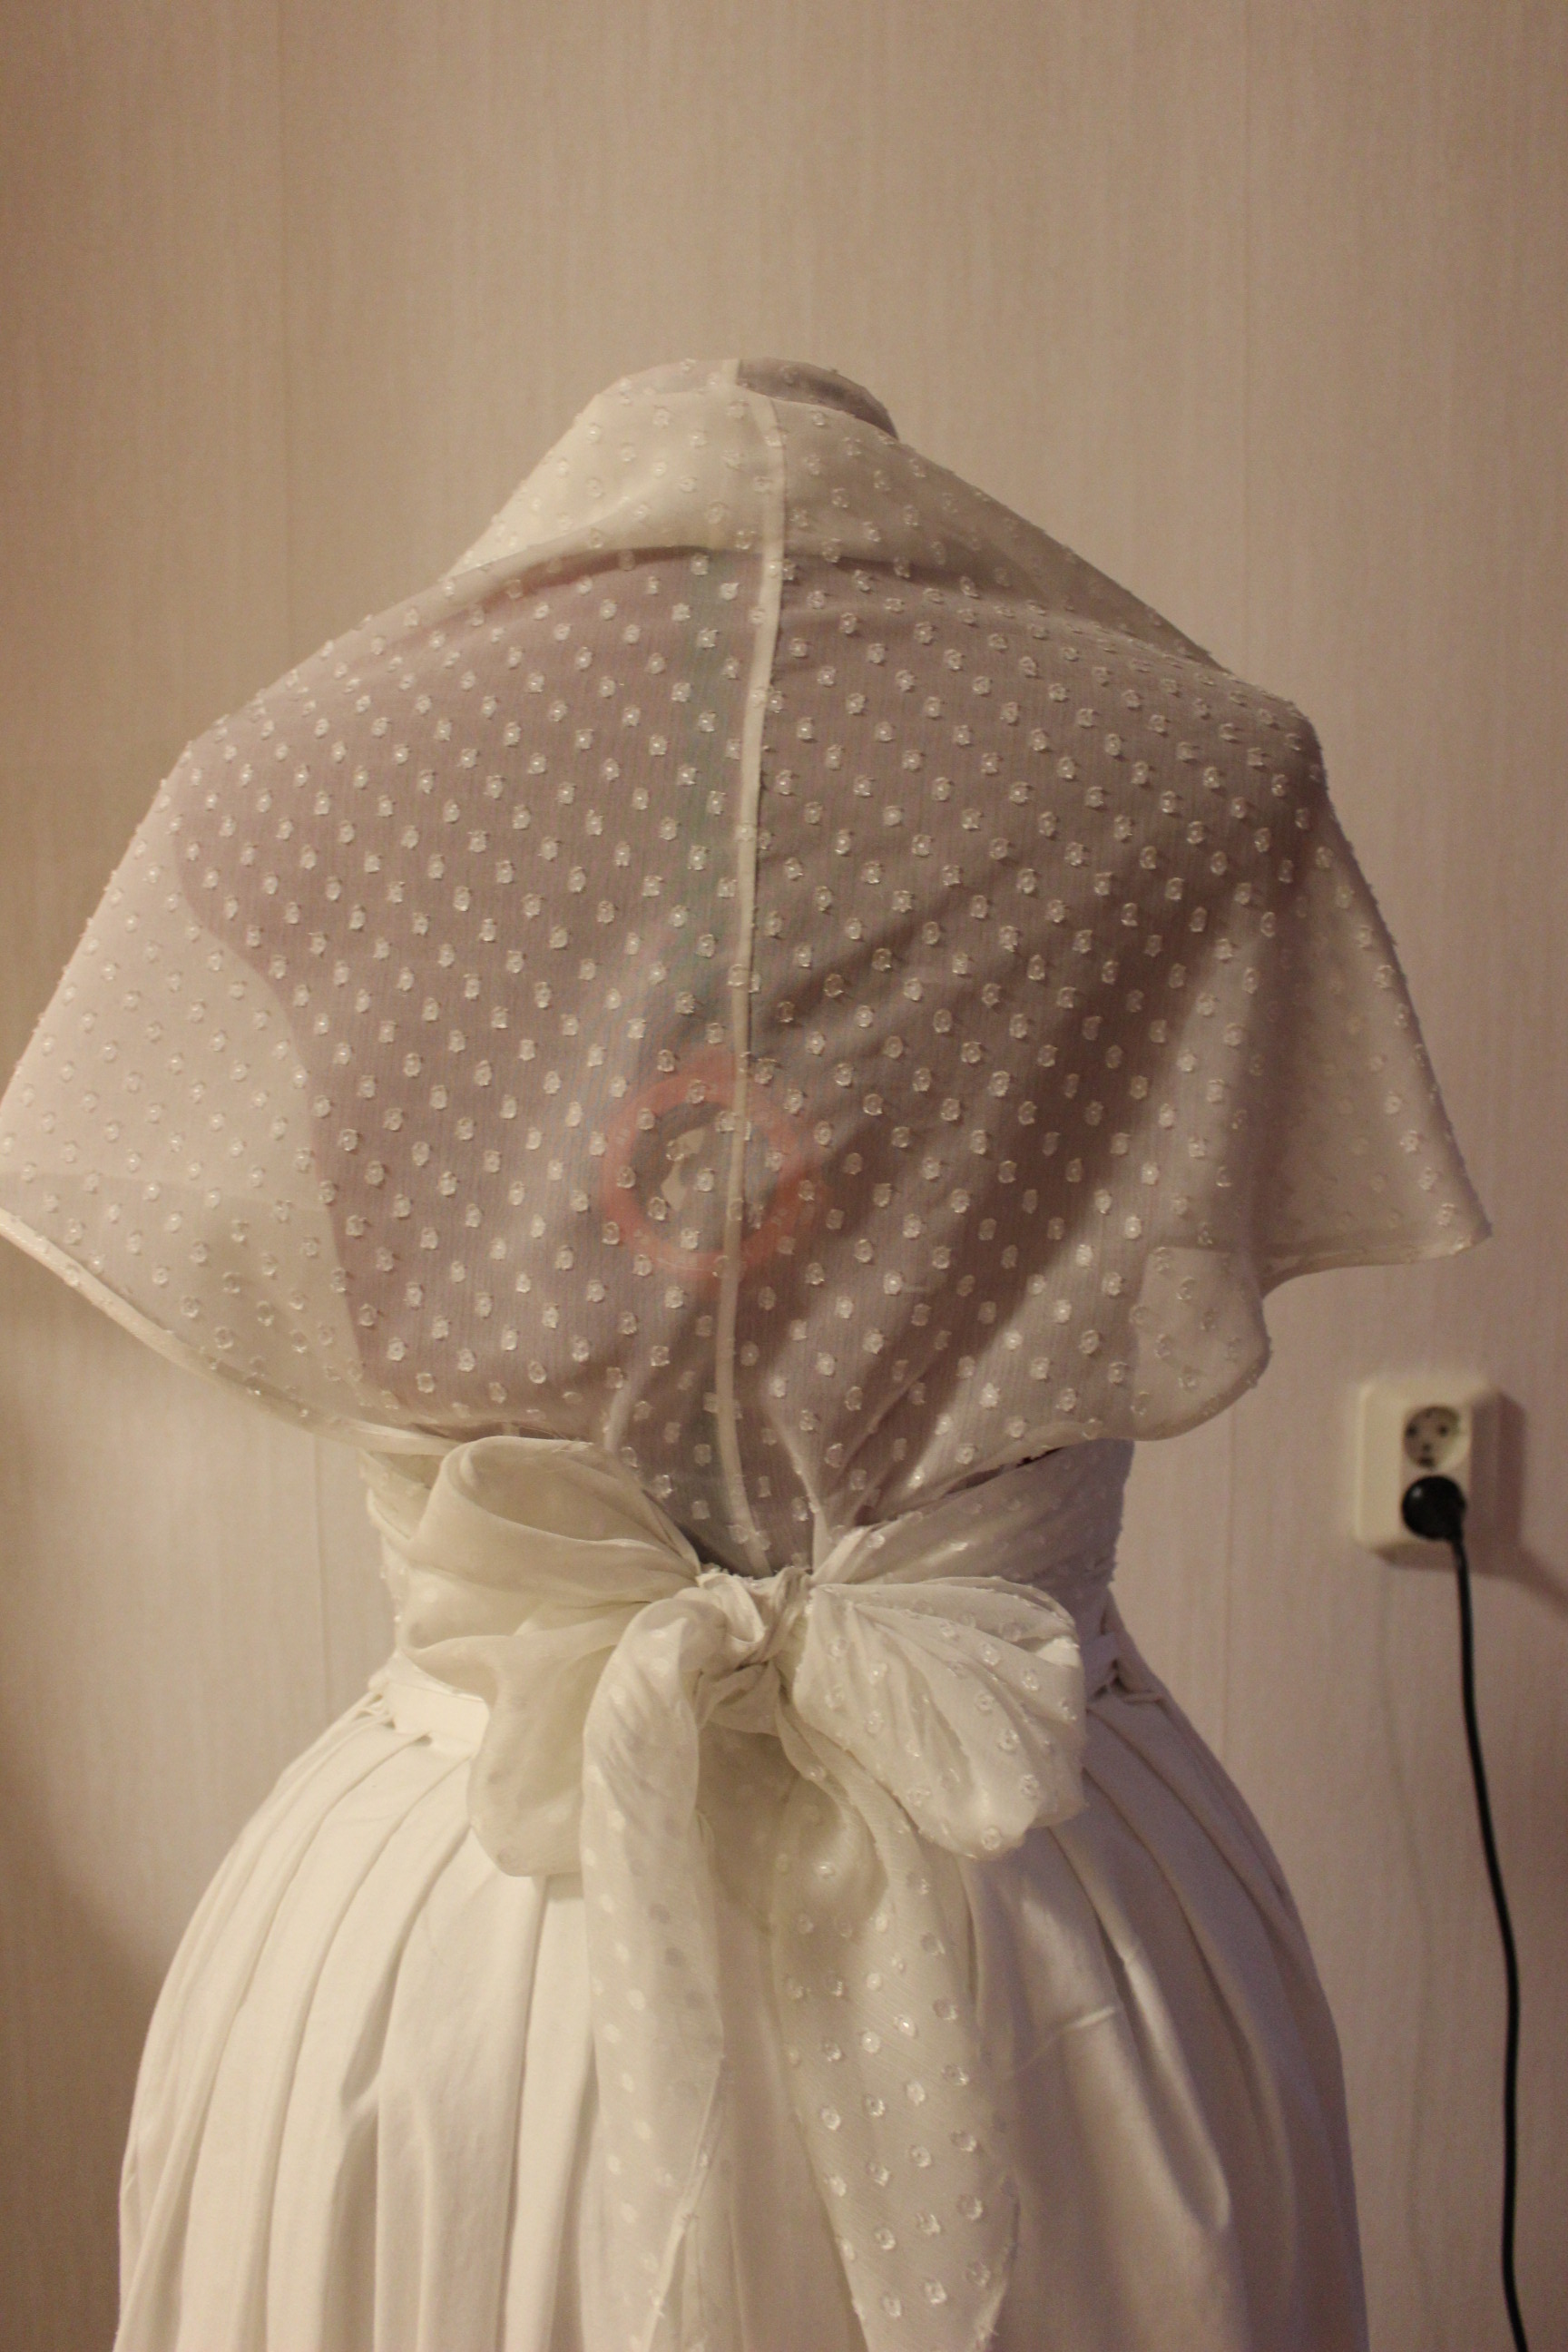

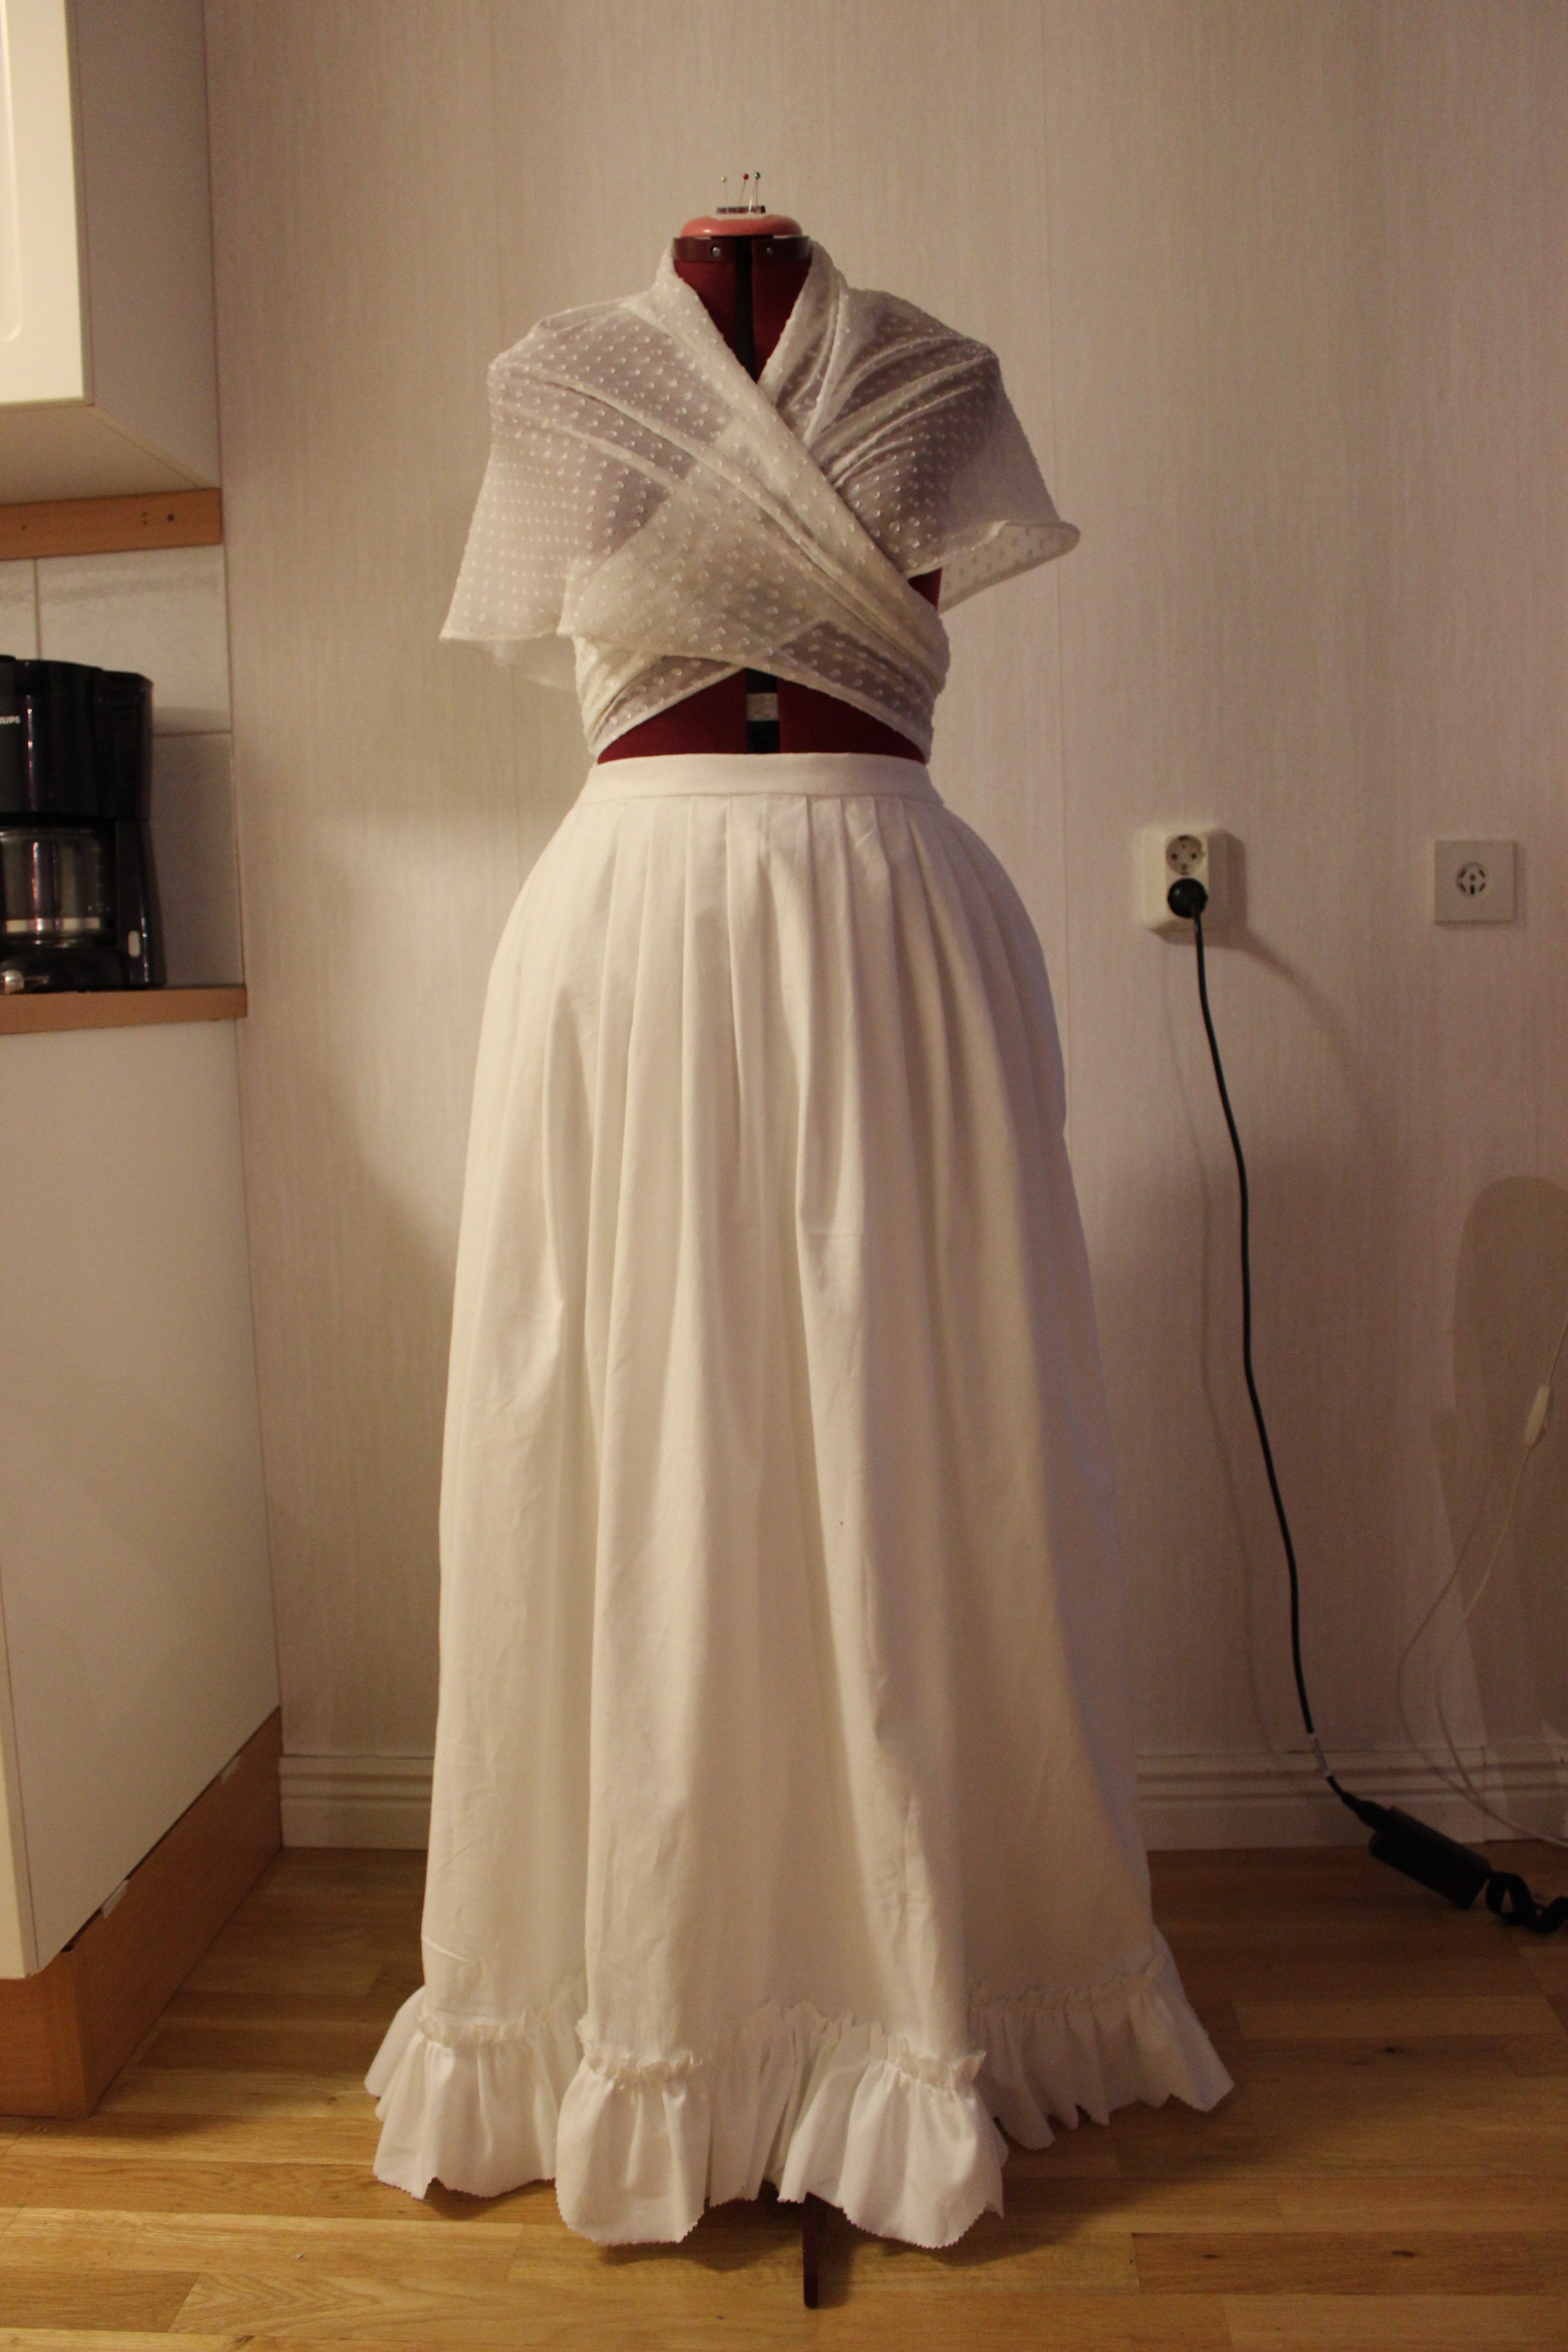 All my “White” items at once.
Just the facts:
Challenge: Nr 9 – Black and white.
What: A big fichu ca 1780.
Pattern: none.
Fabric: 70 cm of dotted white polyester organza.
Notions: Thread
Historial accuracy: I think the pattern shape will suffice, but the material and use of sewing machine is all wrong.
Time: Half an hour.
Cost: Perhaps 20 Skr (1 USD)
First worn: Not yet, but hopefully at a big costuming picknic next month.
***
I had originaly planed to make all tese items compleatly by hand. But as usual life happens, and time is never enough for everything you want to do – so this time the hand sewing had to go.
But I don’t really mind. I kind of think it’s a waist of time to hand sew istorical items made from polyester fabric.
And as you probably can guess – I hadn’t even started the “Big Project” yet.
Since I didn’t really had any historical UFOs worth finishing for the HSF challenge nr 8 – UFO (Un Finsihed Object), I decided to make a UFI (Un Finished Idea) instead.
And something I’ve been thinking about, but not had had the time to make, was a matching skirt to my sisters “new” Pink Caraco jacket.
So I brought out the newly re-dicovered light pistage coloured cotton, leftover from my Regency striped gown. I’ve had quite a lot of fabric left (and still do after this project) and it looked so nice together with the soft pink colour of the jacket. So there was really no discussion on what to make of it.
I started by cutting two lenghts of fabric (using the whole width), shaping the top a bit to fit over a bumpad.  Then I sewed them together, leaving 20 cm at the top un-stitched, and cut and hemed it to the right lenght.
Then I used 6 withs of fabric, each 30cm broad, to make a ruffle. I sewed the together to a continious piece, and bede sure every piece was the same size.
I wanted to try something new on this ruffle, and drew round shapes on some cardboard to use as stencils when cutting/hemming the ruffle. Smal one for the top, and larger one for the bottom line.
 Making a test piece, using some scrap fabric and a rick-rack scissors.
Once I’ve finished the stencils I started to cut the edges of the ruffle.  It was a long and tedious work and I emedetly regretted the idea.
Then I stitched on a gathering thread, close to the smaler scalopes.
Gathered, pinned and sewed the ruffle to the skirt.
I placed the ruffle so to make the lower scaloped edge overlap the skirts hem by a few cm.
Then it was time for the wasitband. I cut two pieces each half the wasit measurment, and basted on some interlining.
Then I folded the pieces, putt some cotton cords between, and stiched them together at the ends. Two halves makes a whole wasitband.
I then measured and pinned the pleats in the skirt to mach the front and back waistband.  I basted the pleats in place.
And pined on the wasitband. Then I folded the back of the band under and hand tacked it in place.
The finished skirt:


Just the Facts:
Challenge: nr 8 – UFO (Un Finished Object)
What: A 1750-1780s skirt.
Pattern: None, just measured and cut.
Fabric: 3 m of soft pistage coloured cotton, and scraps of white cotton for interlining.
Notions: Thread, 2 m of cotton cord.
How historical accurate: So so. I think the shape and colour is good. But it is compleatly machine made, and cotton was not really used for this kind of skirts untill a bit later.
Time: Much more then I care to admit. If not for the scaloping on the ruffle, 3 hours, but all and all about 6 hours.
Cost: About 60 Sek (9 Usd)
First worn: On easten for photos (pictures from the shoot will be in my next post).
Final thoughts: Both me and my sister like it a lot. It is pretty, soft and moves nicely when she moves. I will have to make it shorter though – about 10 cm, to make it more of a walking skirt then the evening lenght it curently have. But once that finished I’m sure it will look really lovely and summery.
