Once my Burgundian gown (finally) was finished, I decided to take some nice wintery photos of it.
But since being pregnant (and feeling “fat – not yet baby belly”) and constantly tired, combined with the planing it takes to get these shoots together, had the snow melted by the time.
The good thing about this dress is that even though I did’n know about the coming baby when I started the gown (last fall) there was no problem what so ever, of fitting in it 🙂
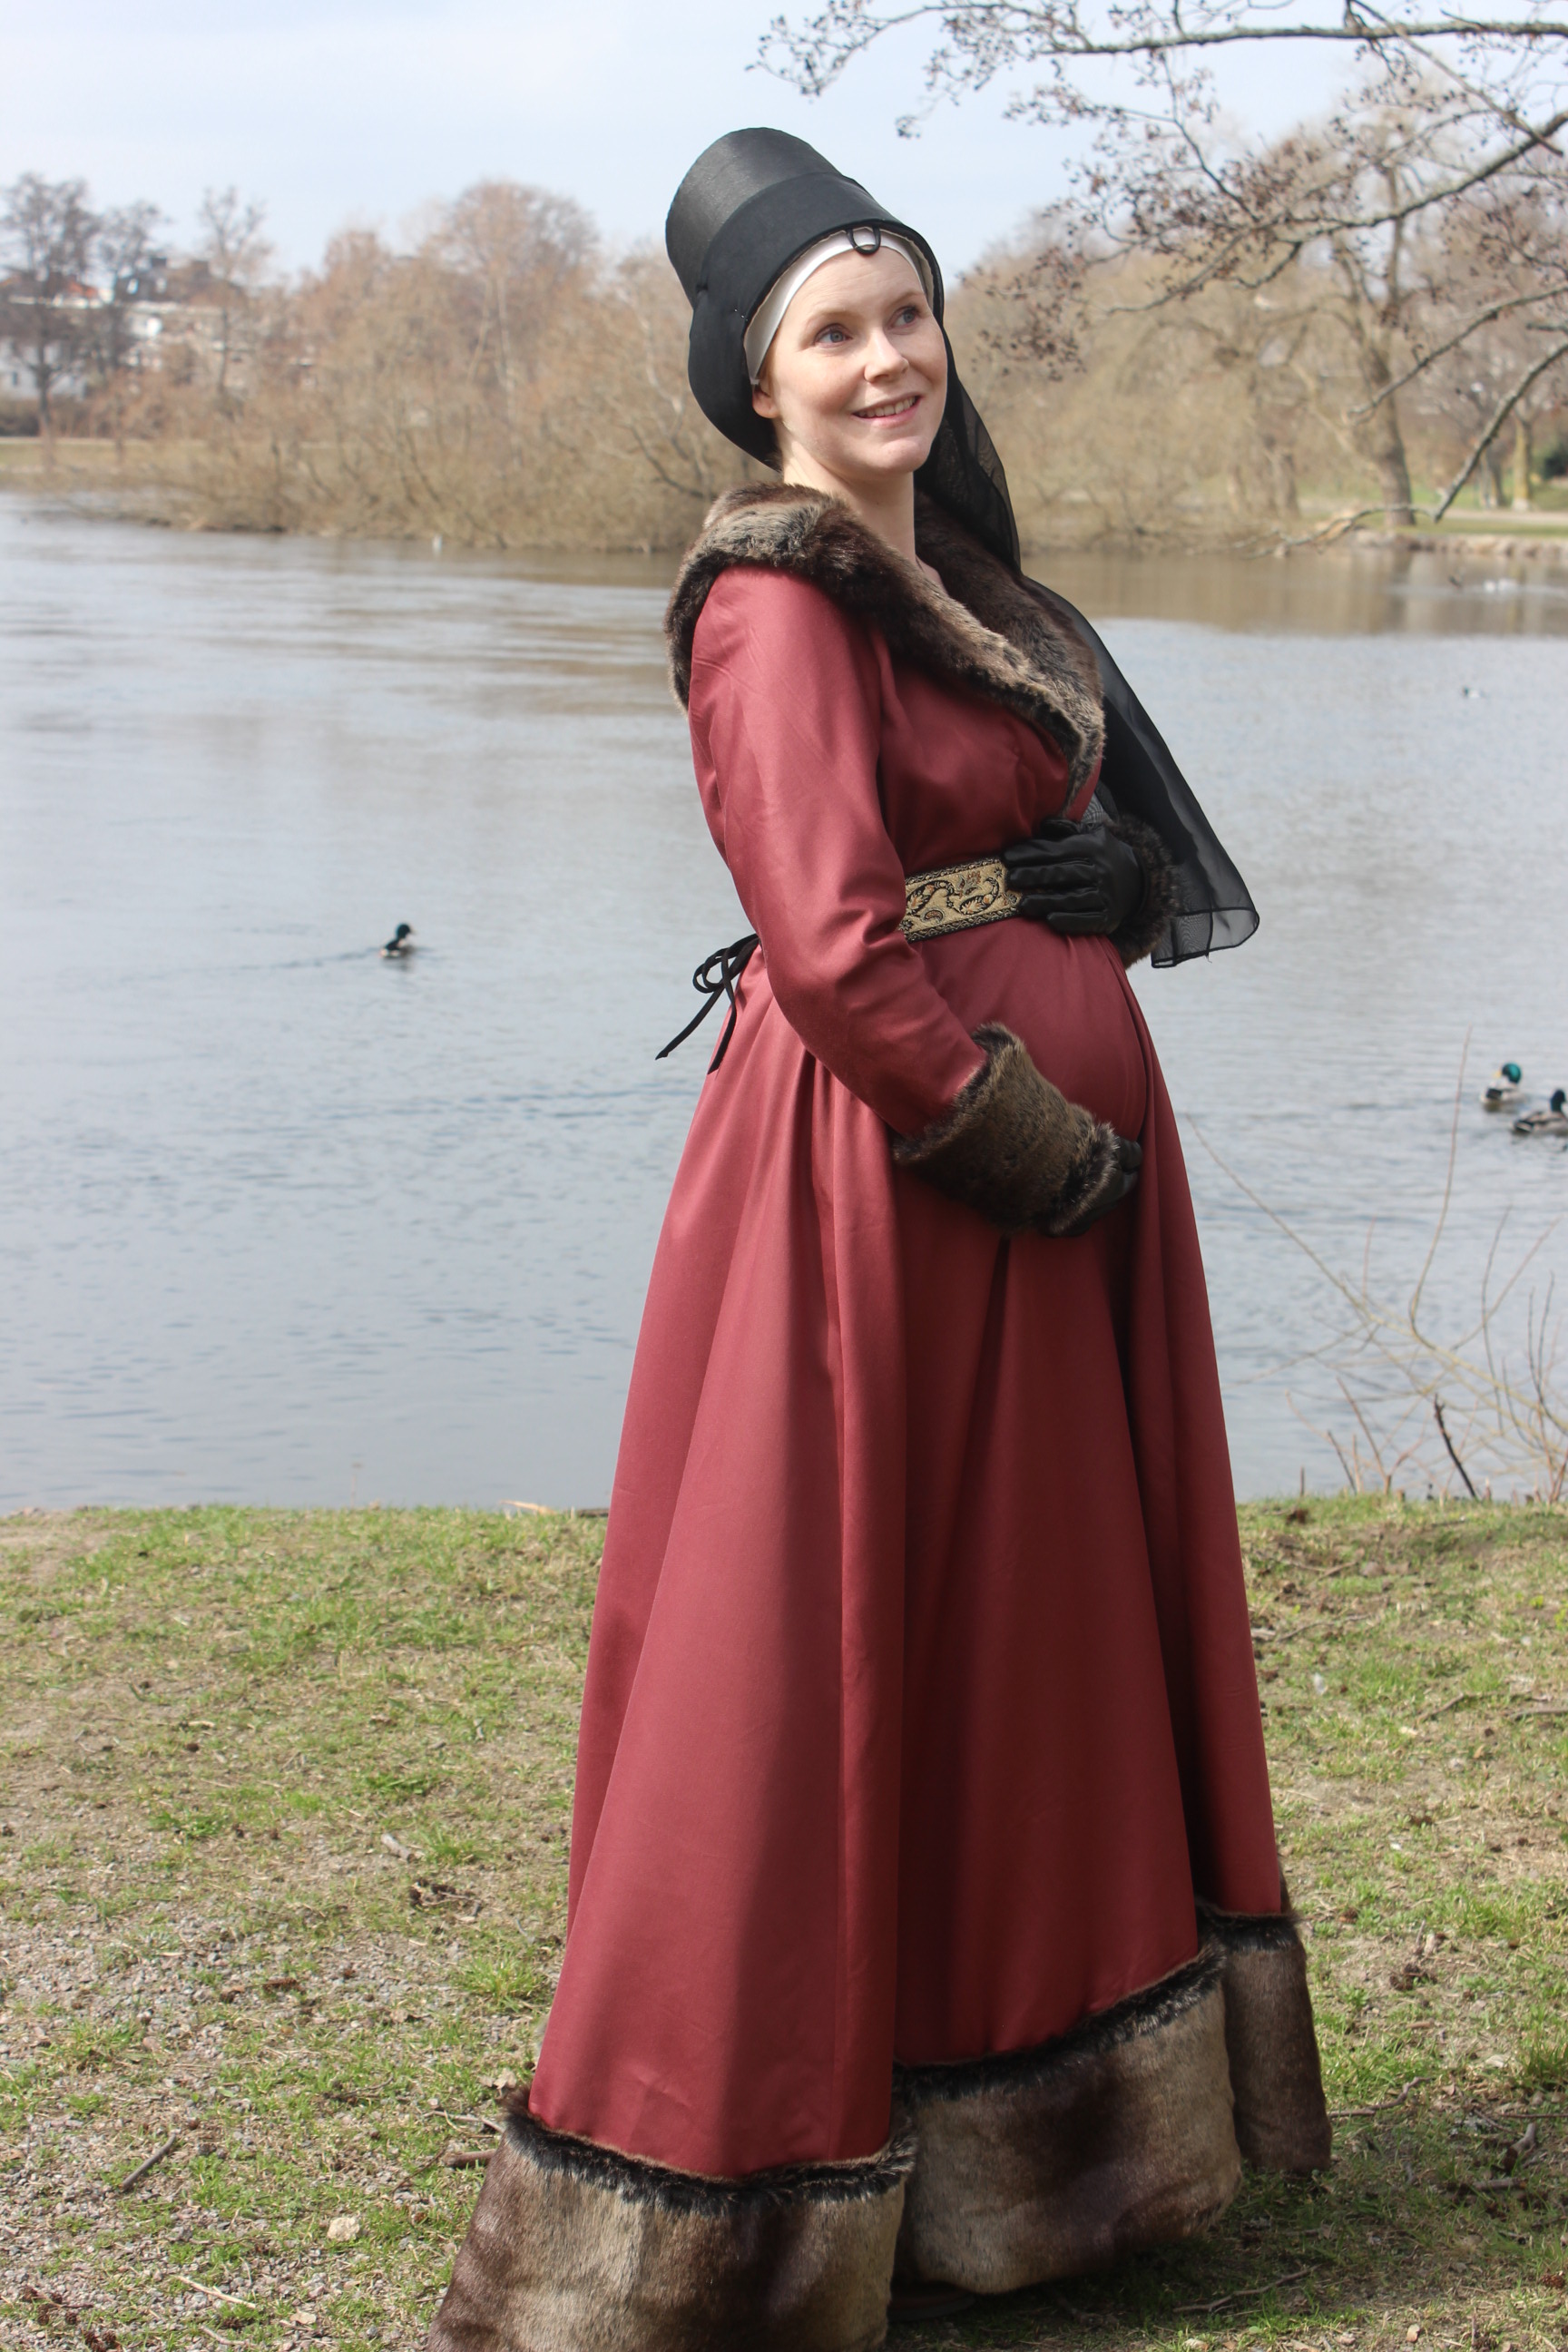
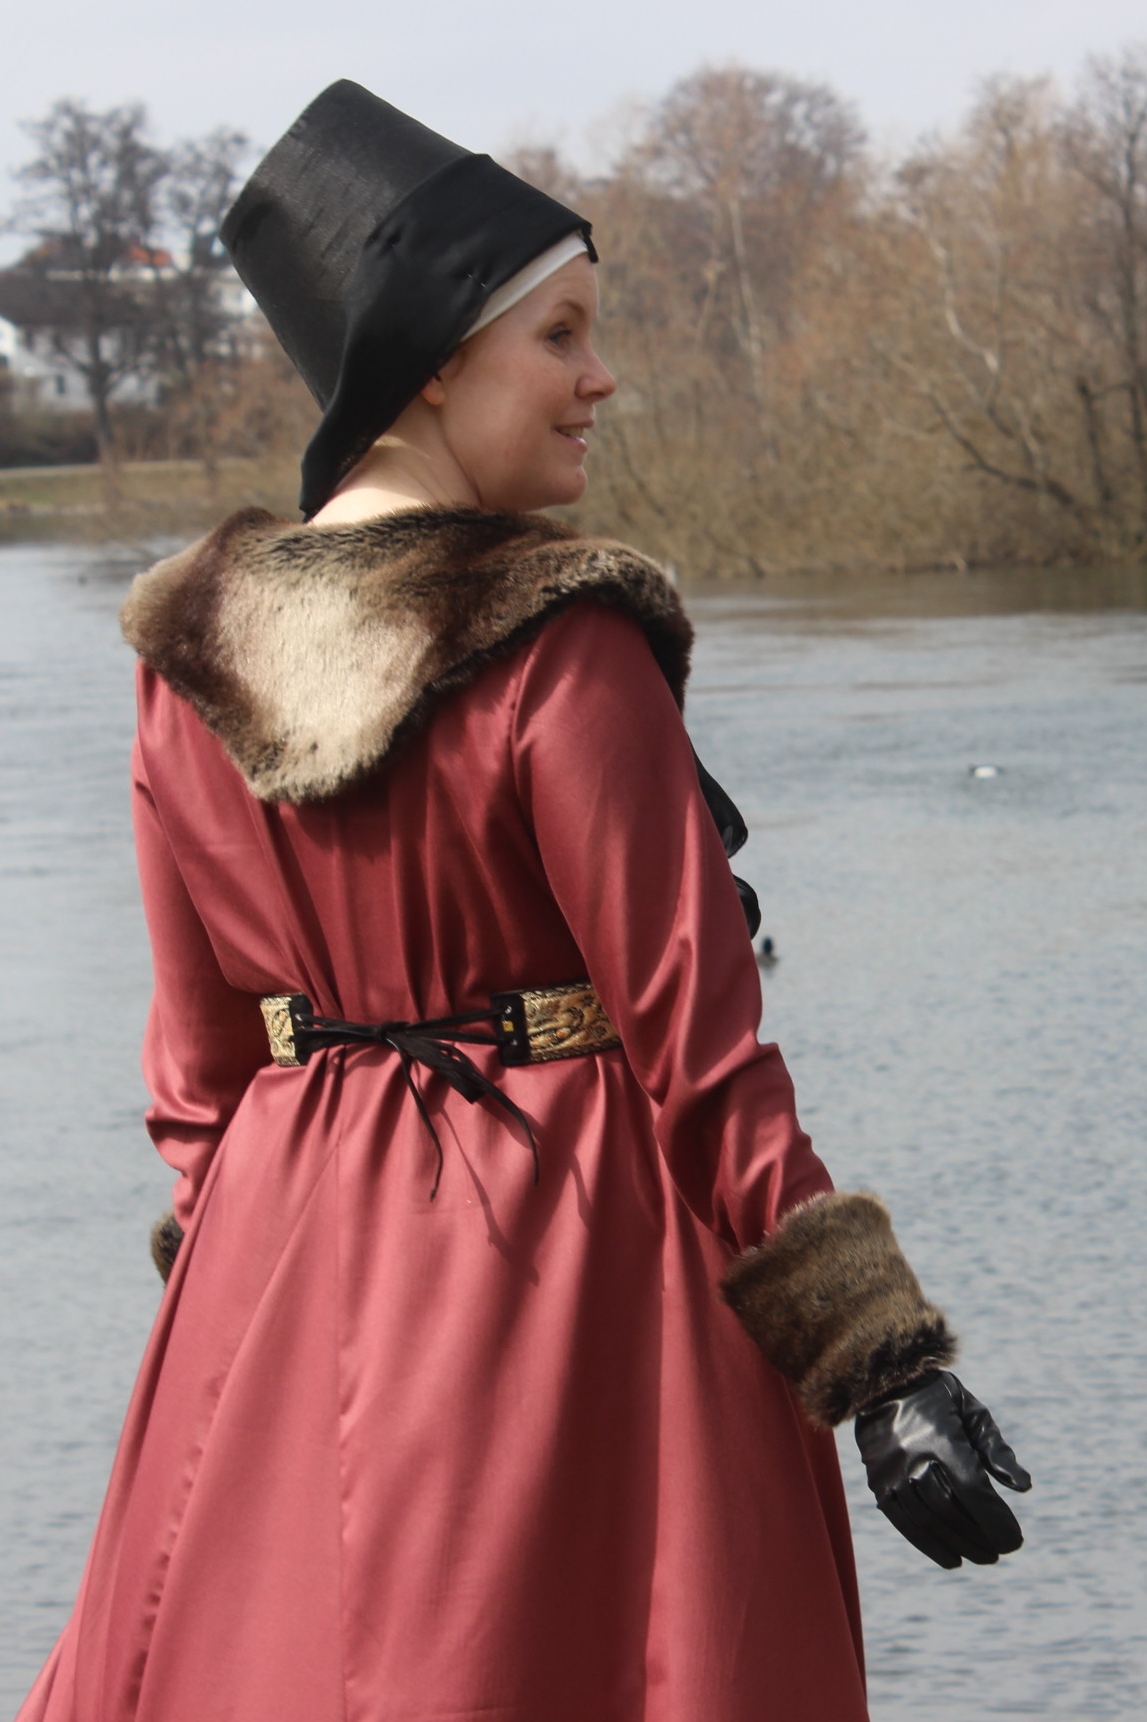
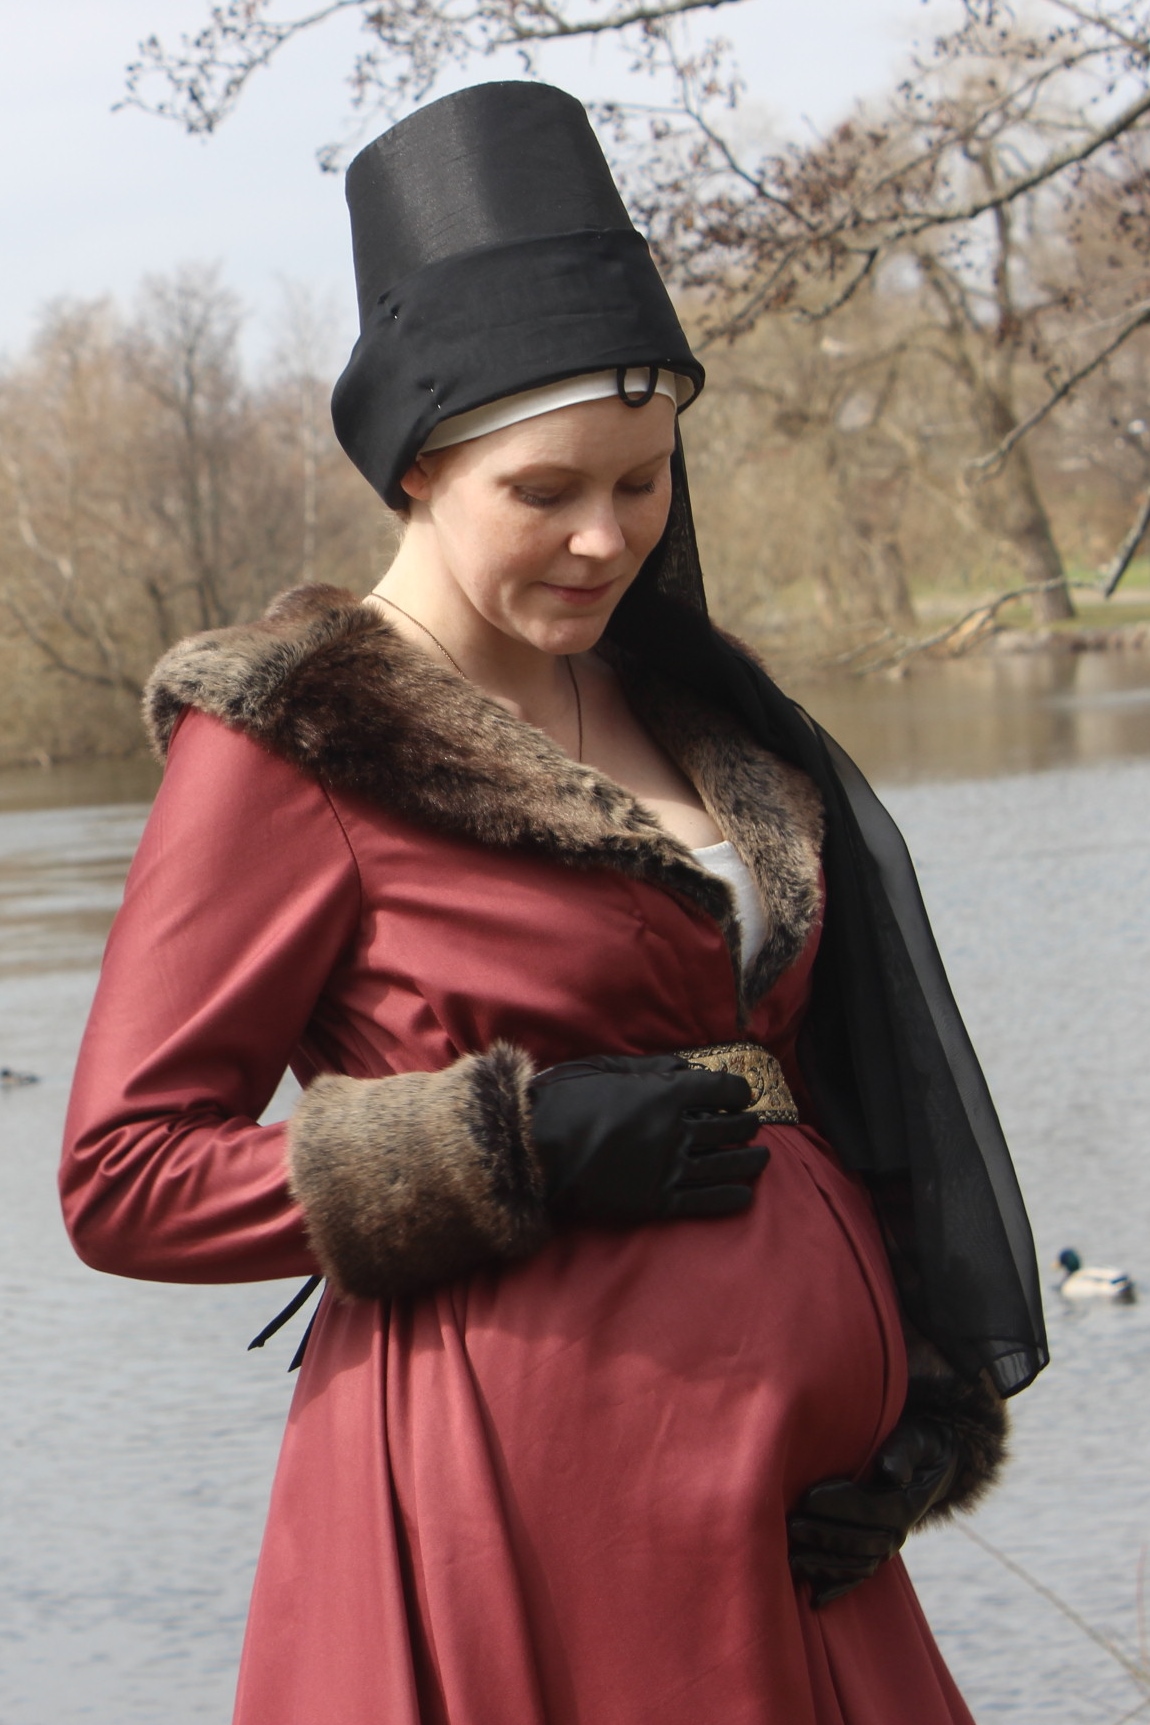
We even got some nice “maternity” photos.
This gown been long over due (originally planed to enter it to the HSM 2017 nr 12), and since starting it (in early september 2017) I had some serious down time in energy and sewing time.
But this spring I decided I really wanted it finished and of the UFO-pile, so here it is.
Ever since I made my sister her Burgundian gown, I knew I wanted one of my own, so when the challenge “Animal” came my way through the “Historical sew Monthly 2017”, I immediately started plotting my gown.
I used a Burgundy (dark-red/brownish) colored cotton satin, that I got for a steal on a fabric sale about a year ago.
The 5 m I had, was just enough to piece out dress and additional skirt gores.
Since this was to be a quick and “un-necessary” project, made in a not historical accurate fabric I decided to stitch it all on my sewing-machine.
So that’s what I did, overlocking the edges and everything.
I think I spent the whole of 1 hour stitching it together, adding the sleeves and asking my boyfriend to mark the hem.
But then I got stuck – on the fur trimings.
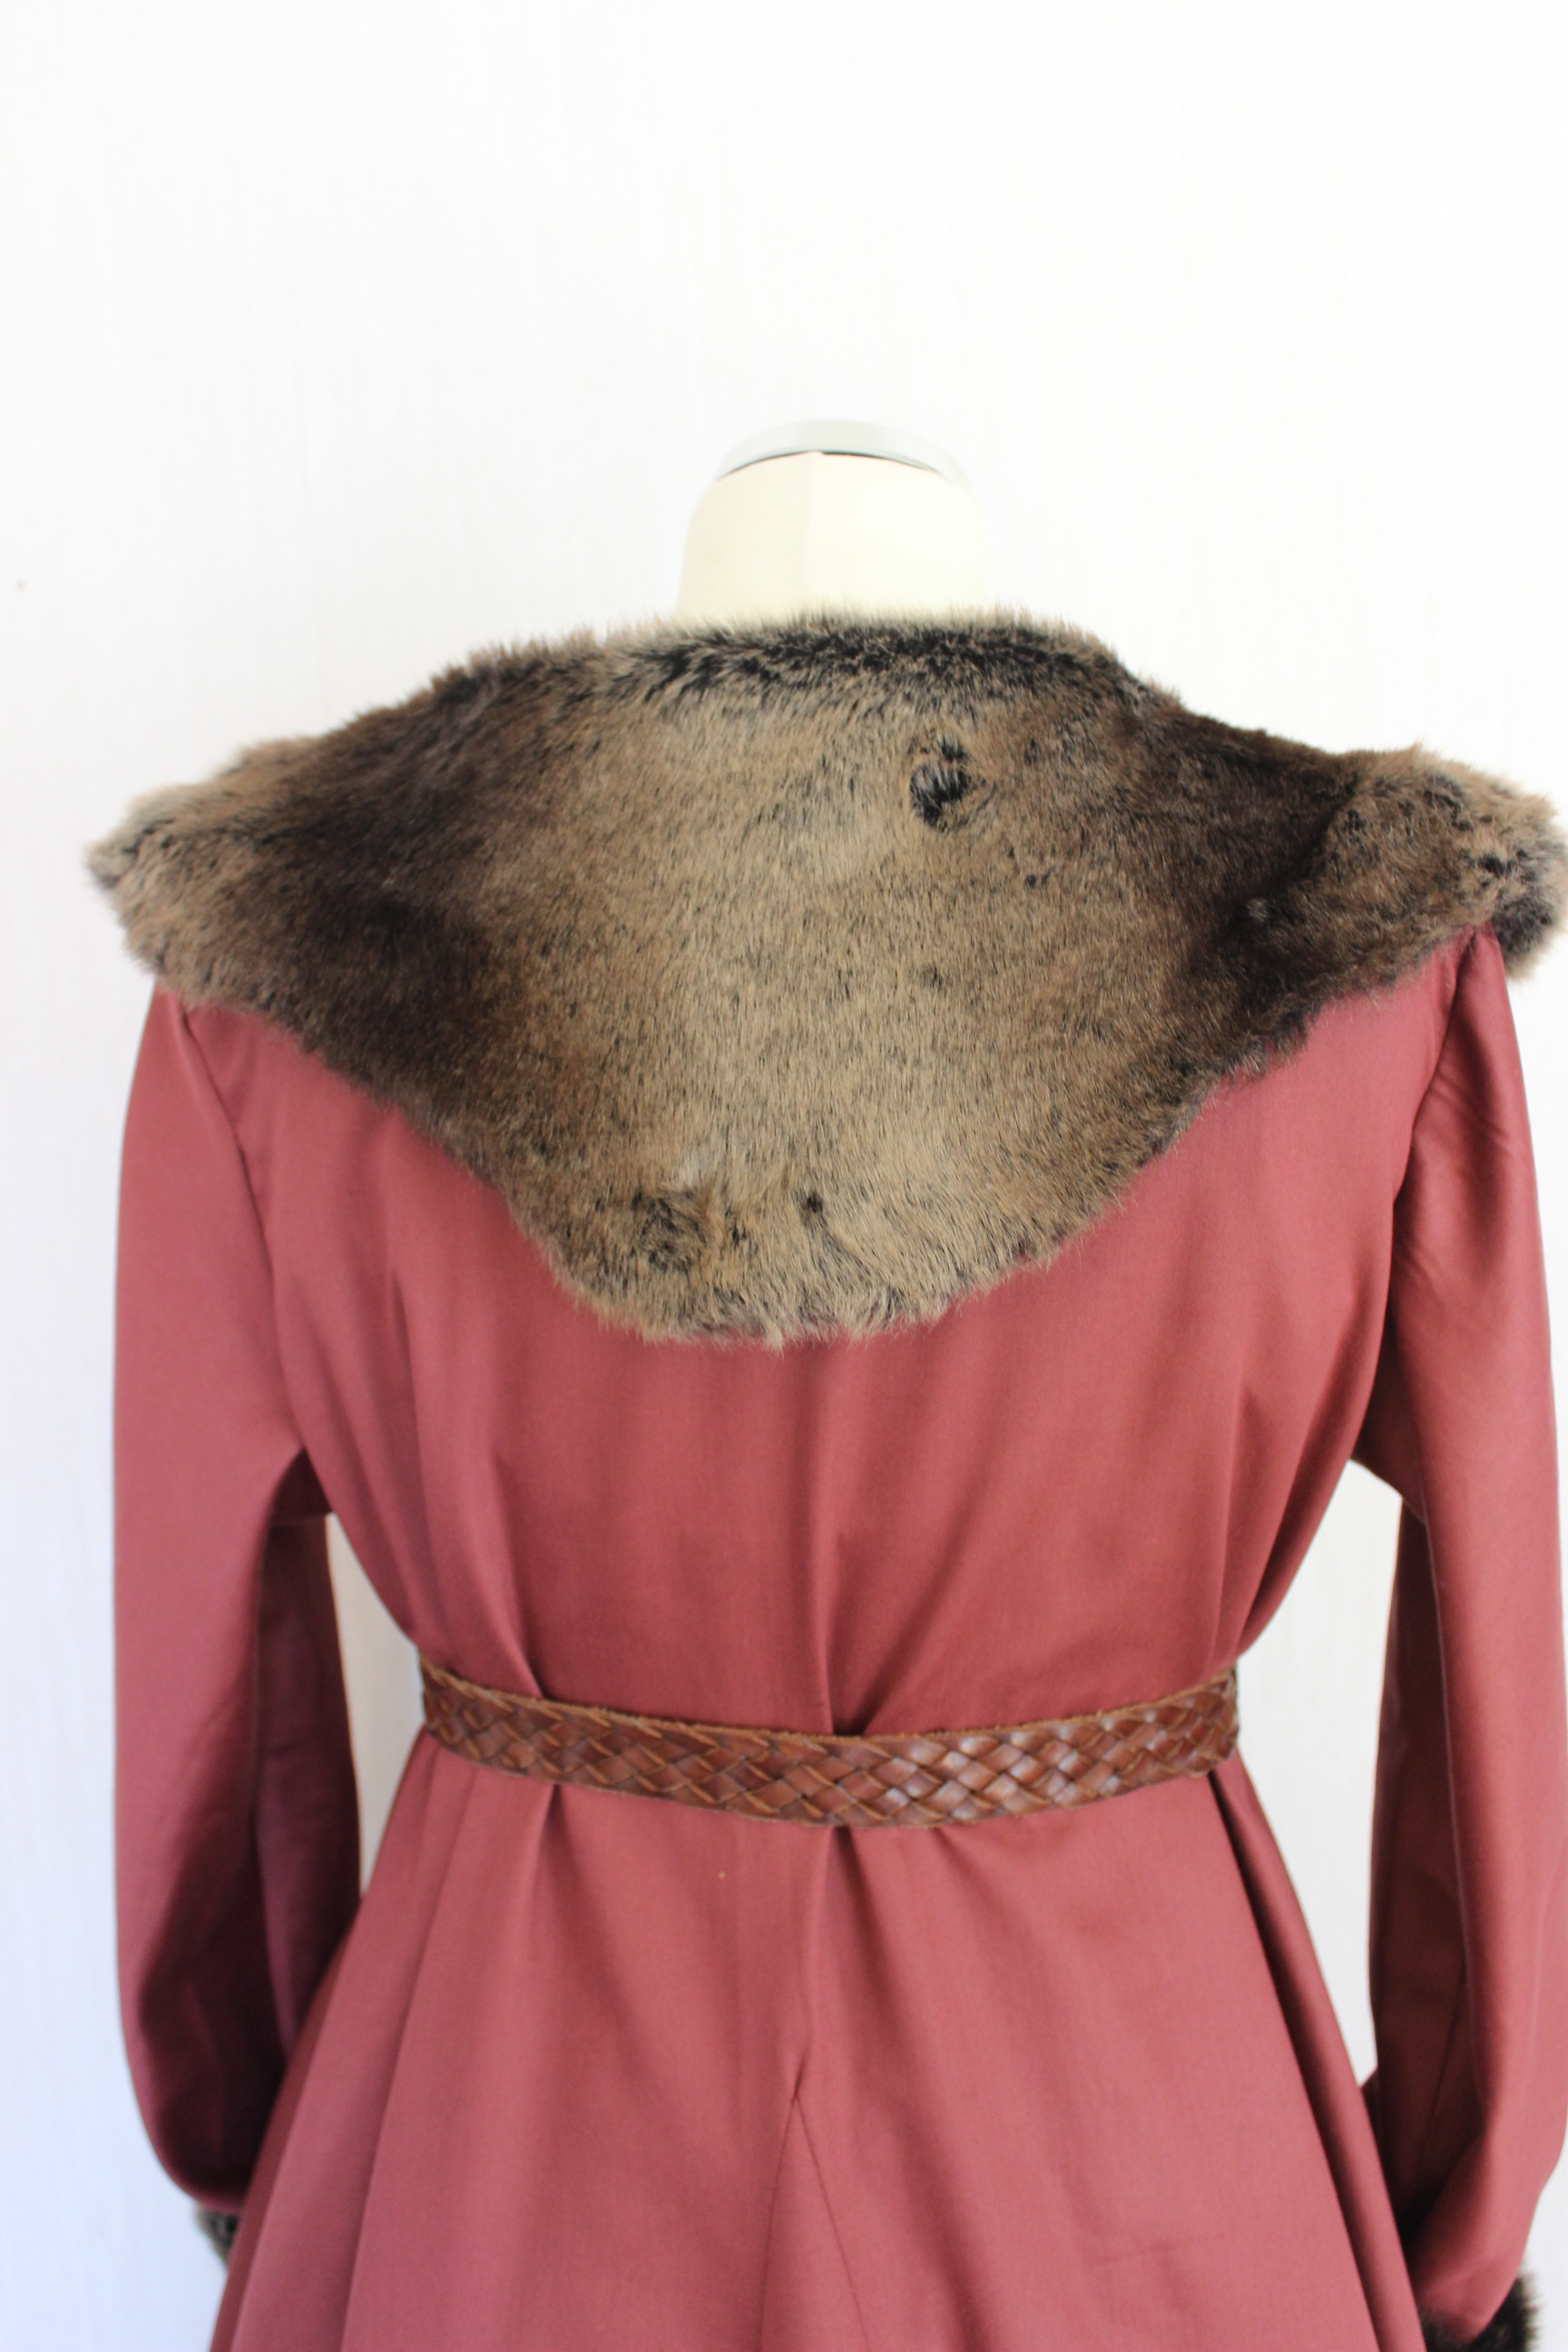
After some searching, both for inspirational pictures and in the fabric stores, I decided on a dark brown faux “wolf” fur, that would work nice with the red and browns in the gown.
But by the time I got the fur into my sewing-room, I realized it would take some serious planing to get it done.
Having a 1,5 year old kid around meant I needed to find at least a couple of hours of un-interrupted sewing/cutting time…
Yeah, good luck with that.
So there I was, trying to find both the energy, inspiration and time to finish the dress.
Neddles to say the gown went into my UFO pile for a few months.
I dug it out to finish only this past weeks, so that I could wear it on a dance recital late april.
The dance recital didn’t happened, but the dress got finished, so I count it a win anyway.
Against my better judgement I decided to cut the fur like it was a regular fabric – which it clearly is not!
I spent a few hours cursing my lazy as for not bothering to cut the pieces one by one from the backside of the fabric (like I should have), thous ending up with hairs and fur bits EVERYWHERE.Can you say – werewolf 😉
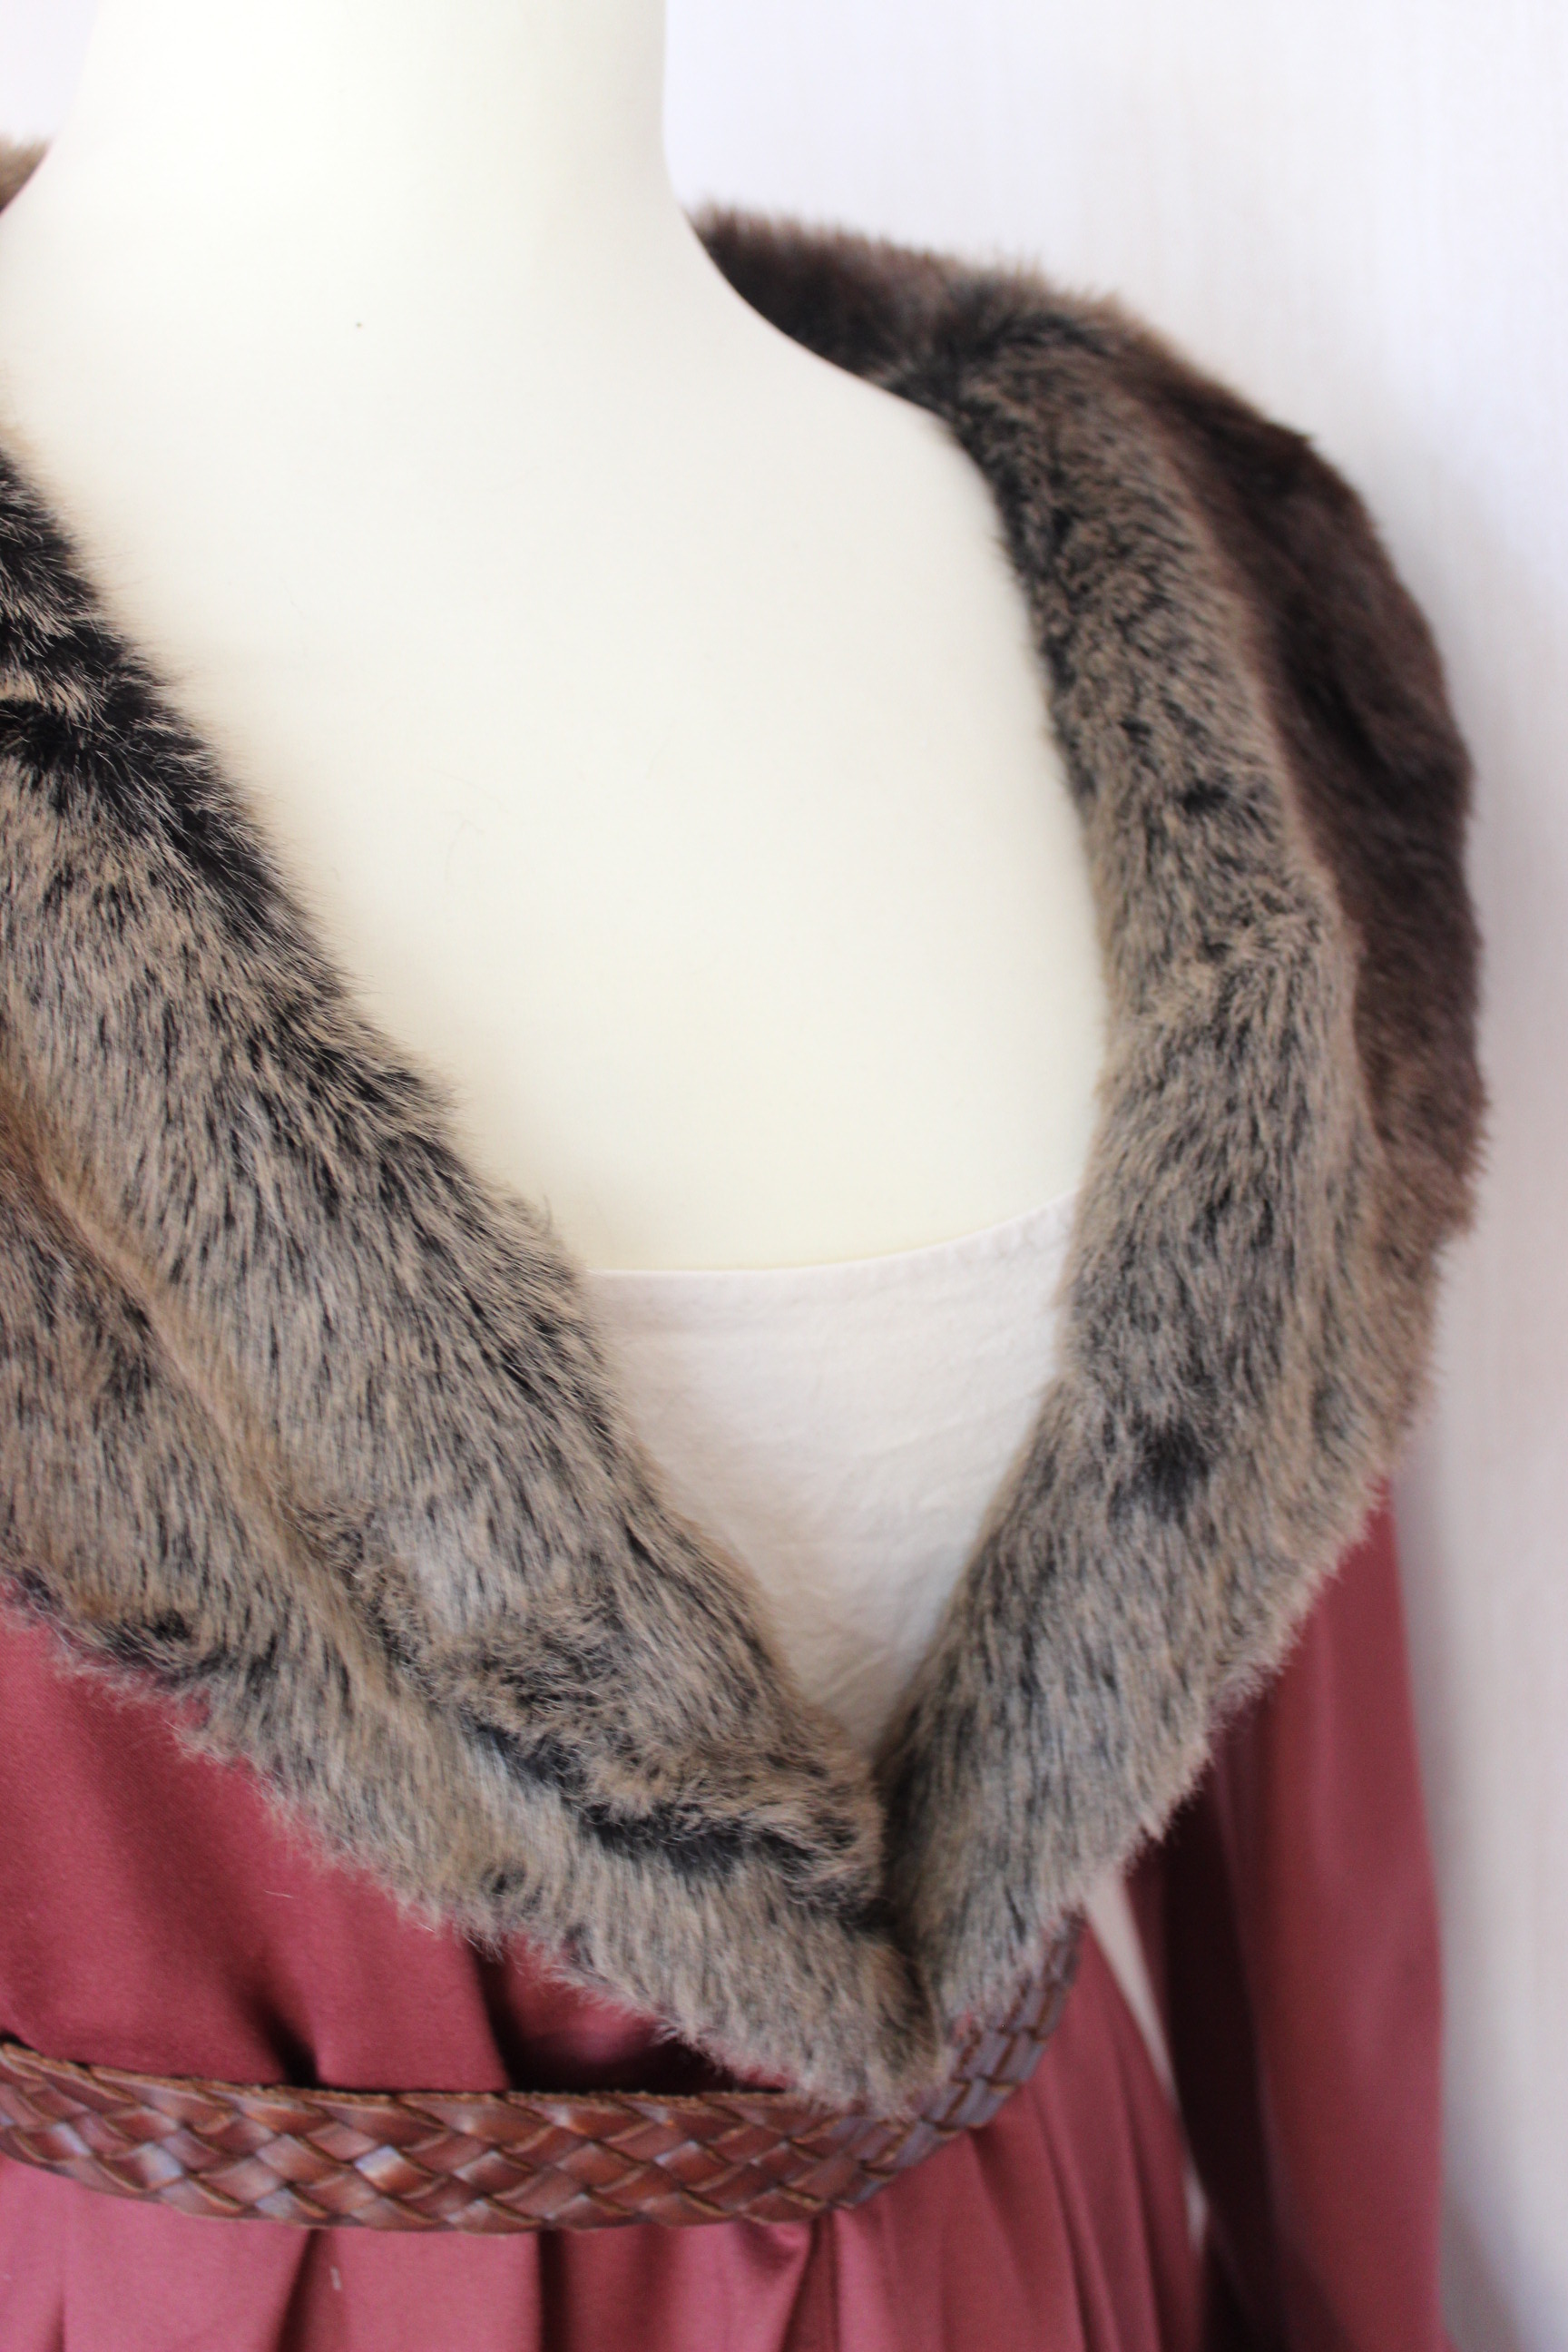
Attaching the fur went pretty easy, only the fur was so thick I had a bit trouble seeing my needle when I hand stitched it on.There is a needle attached to that tread, I promise…
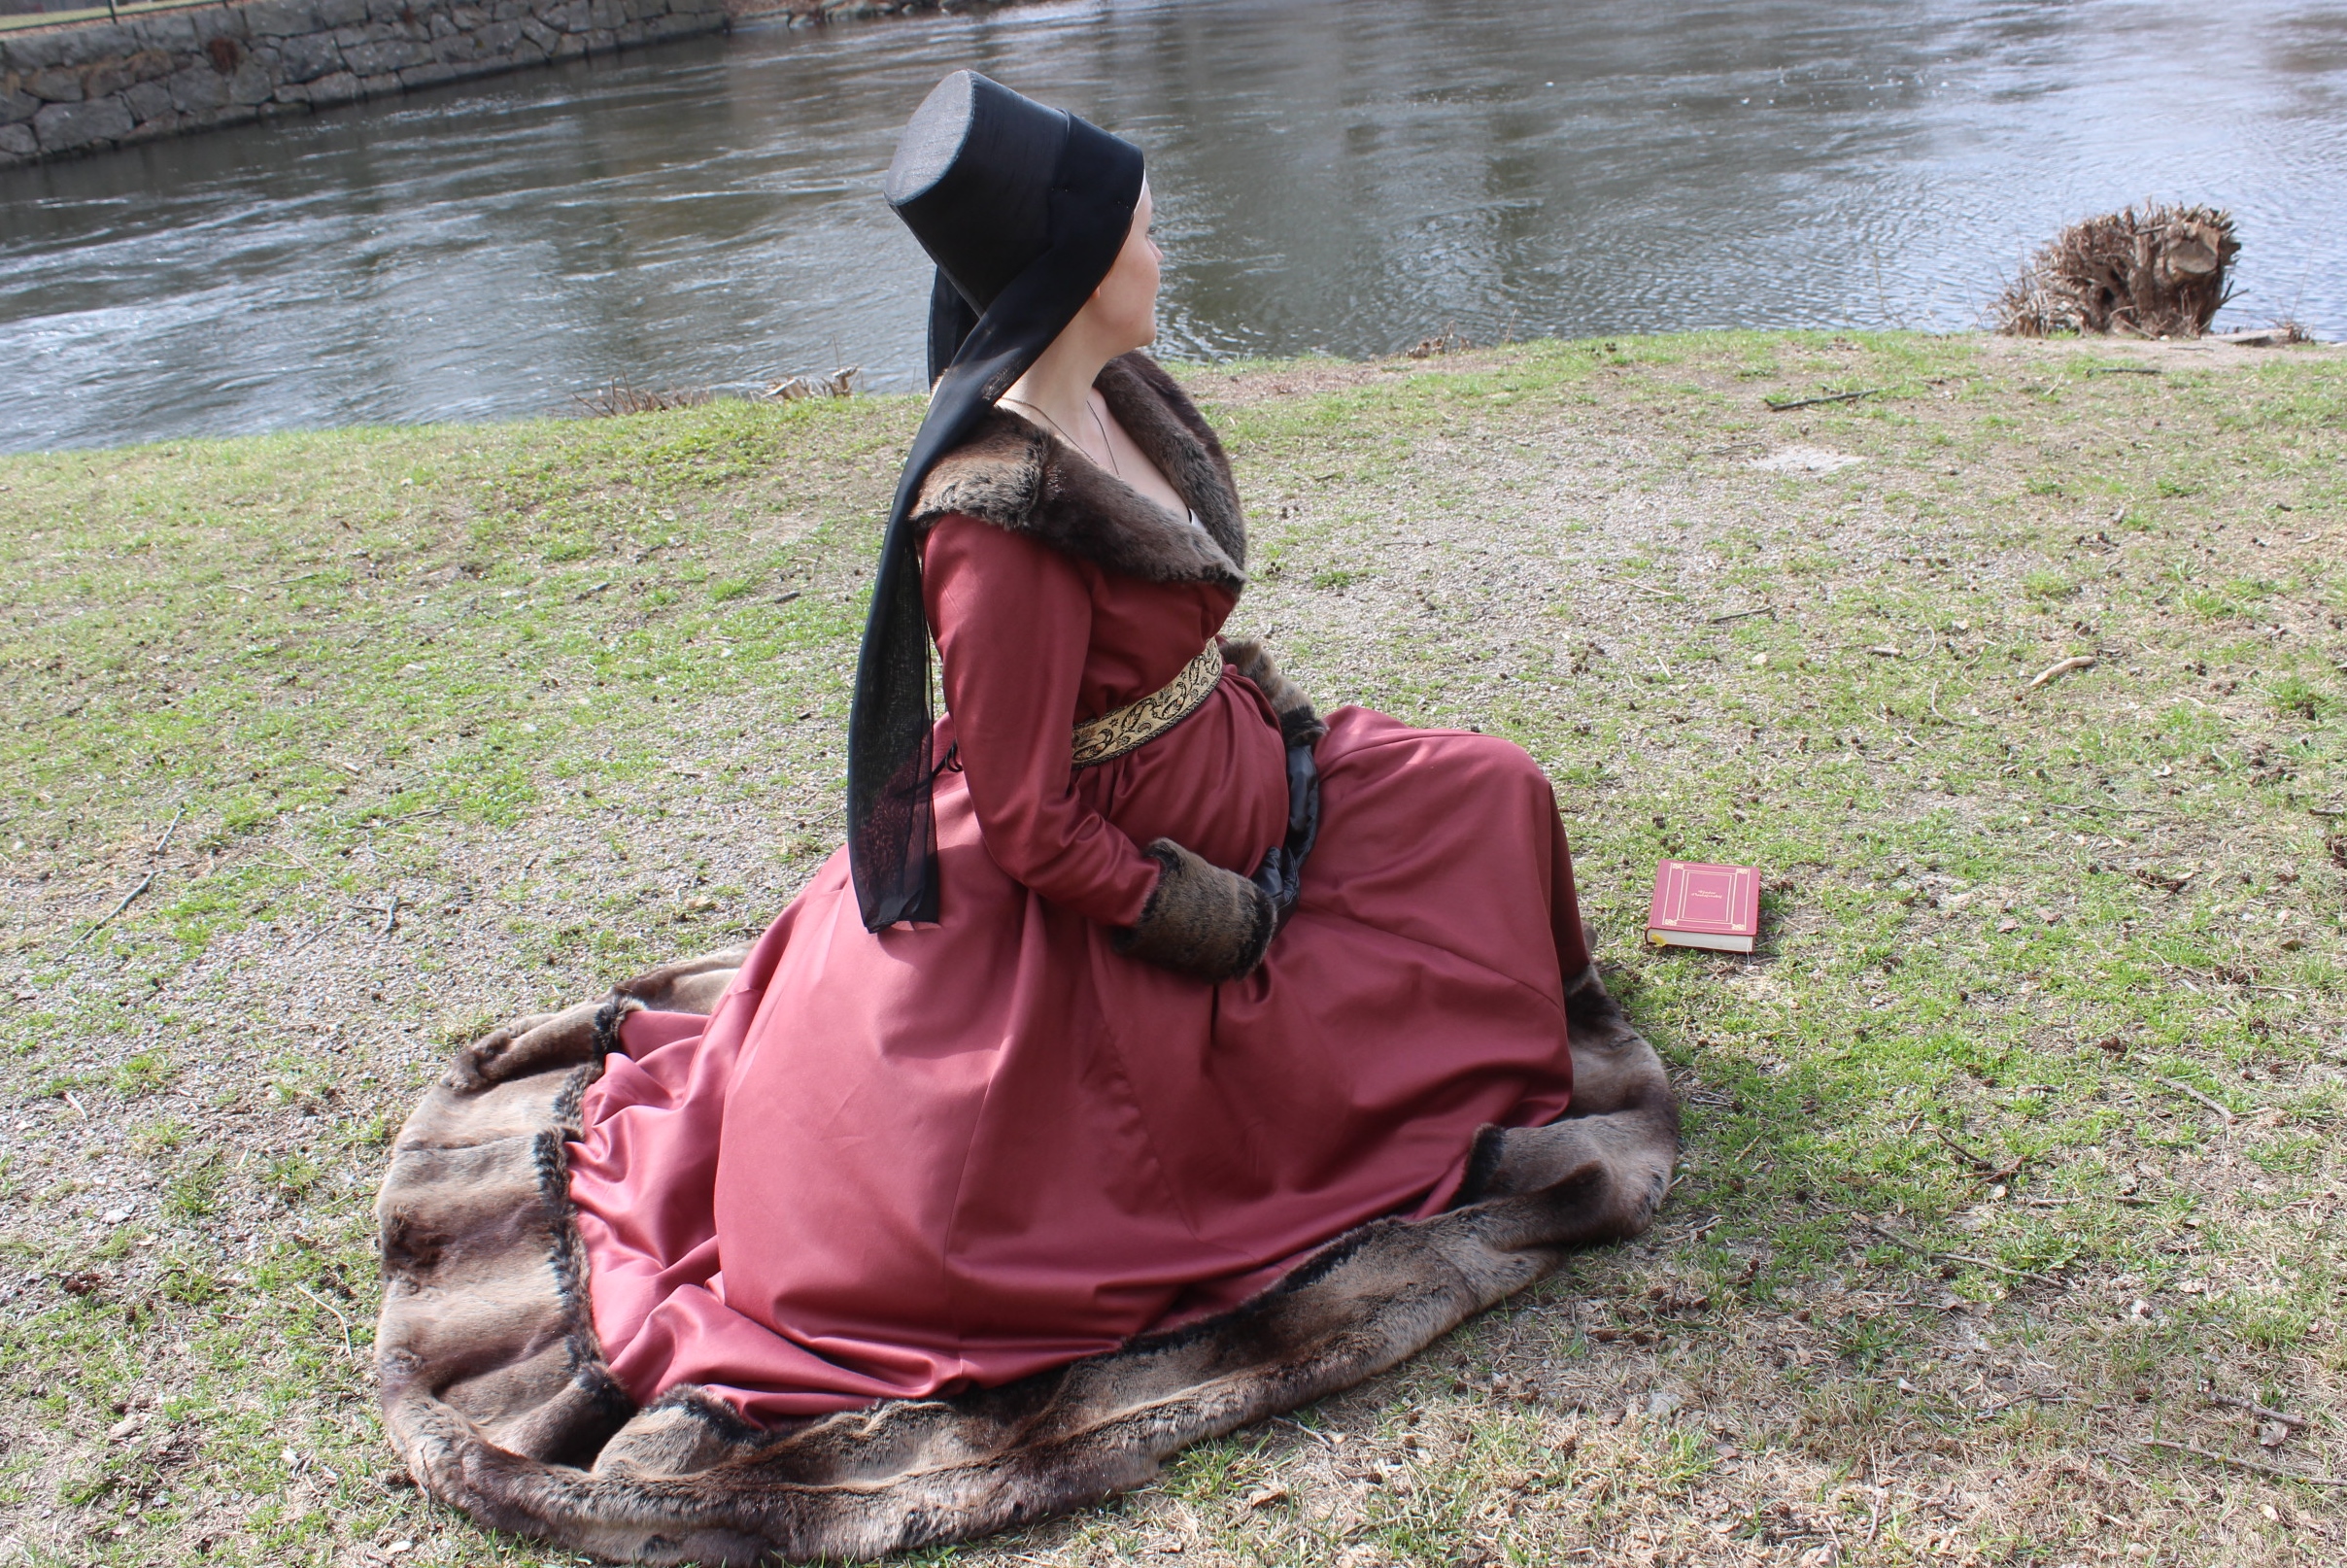
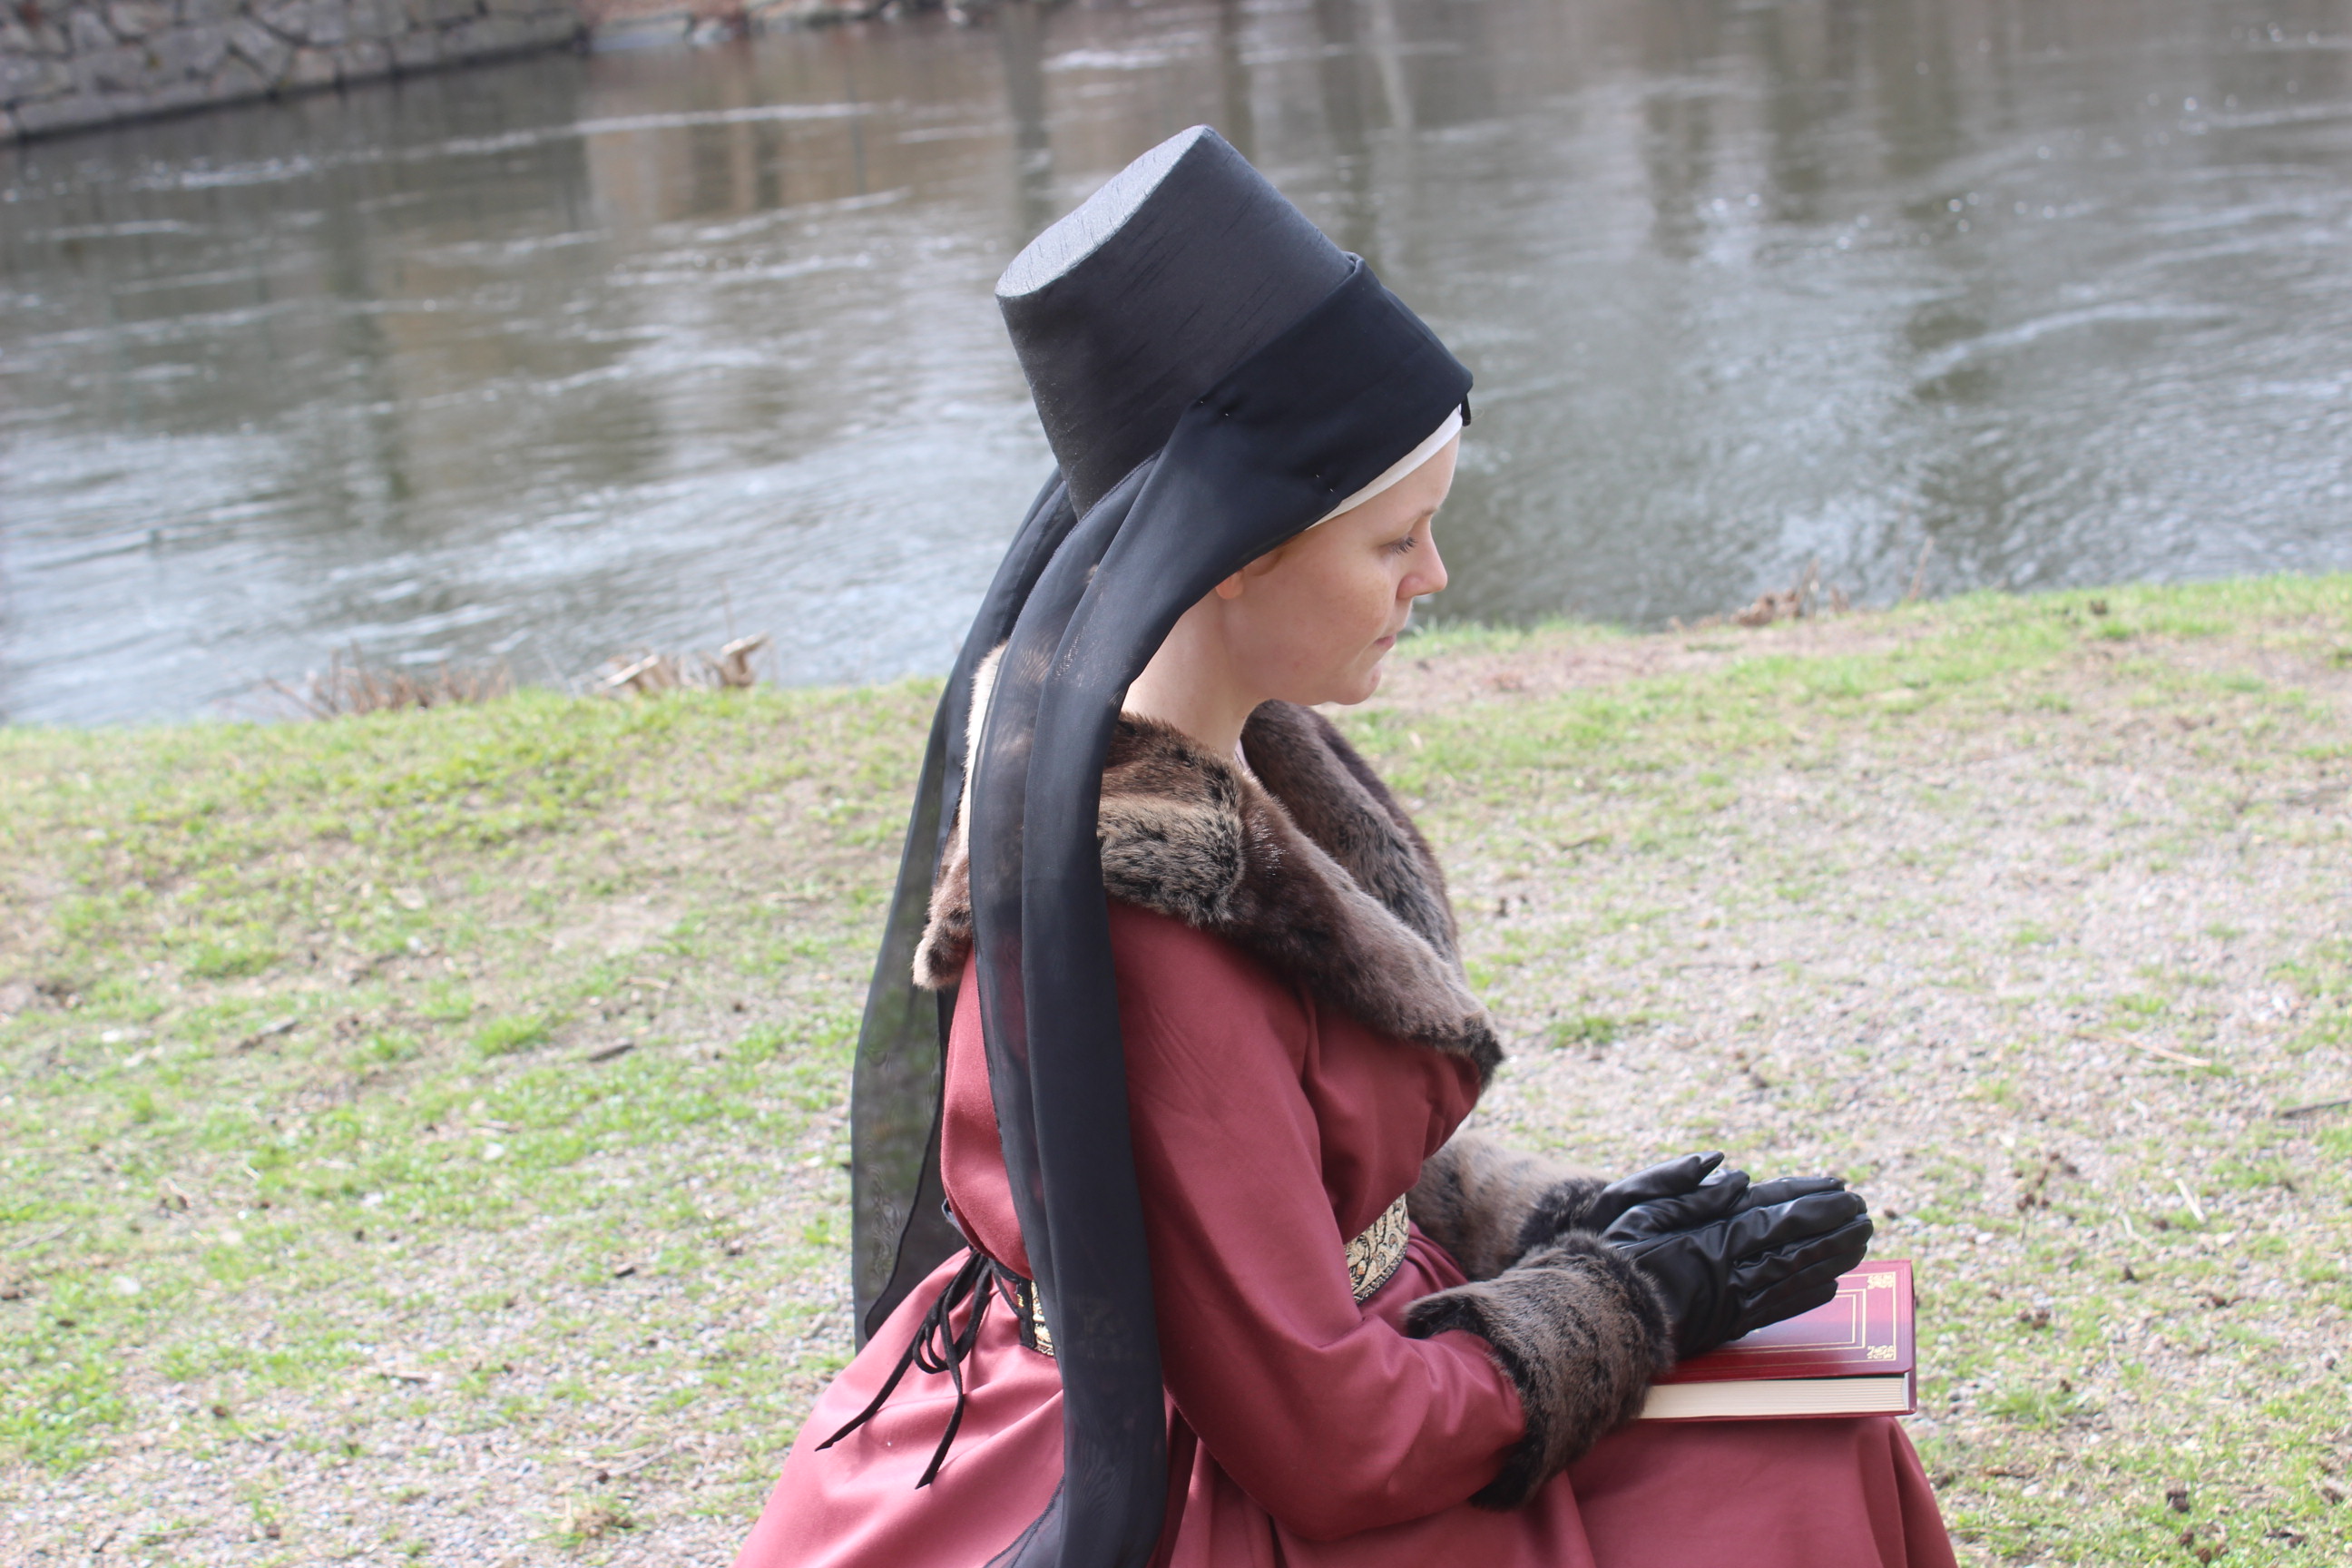
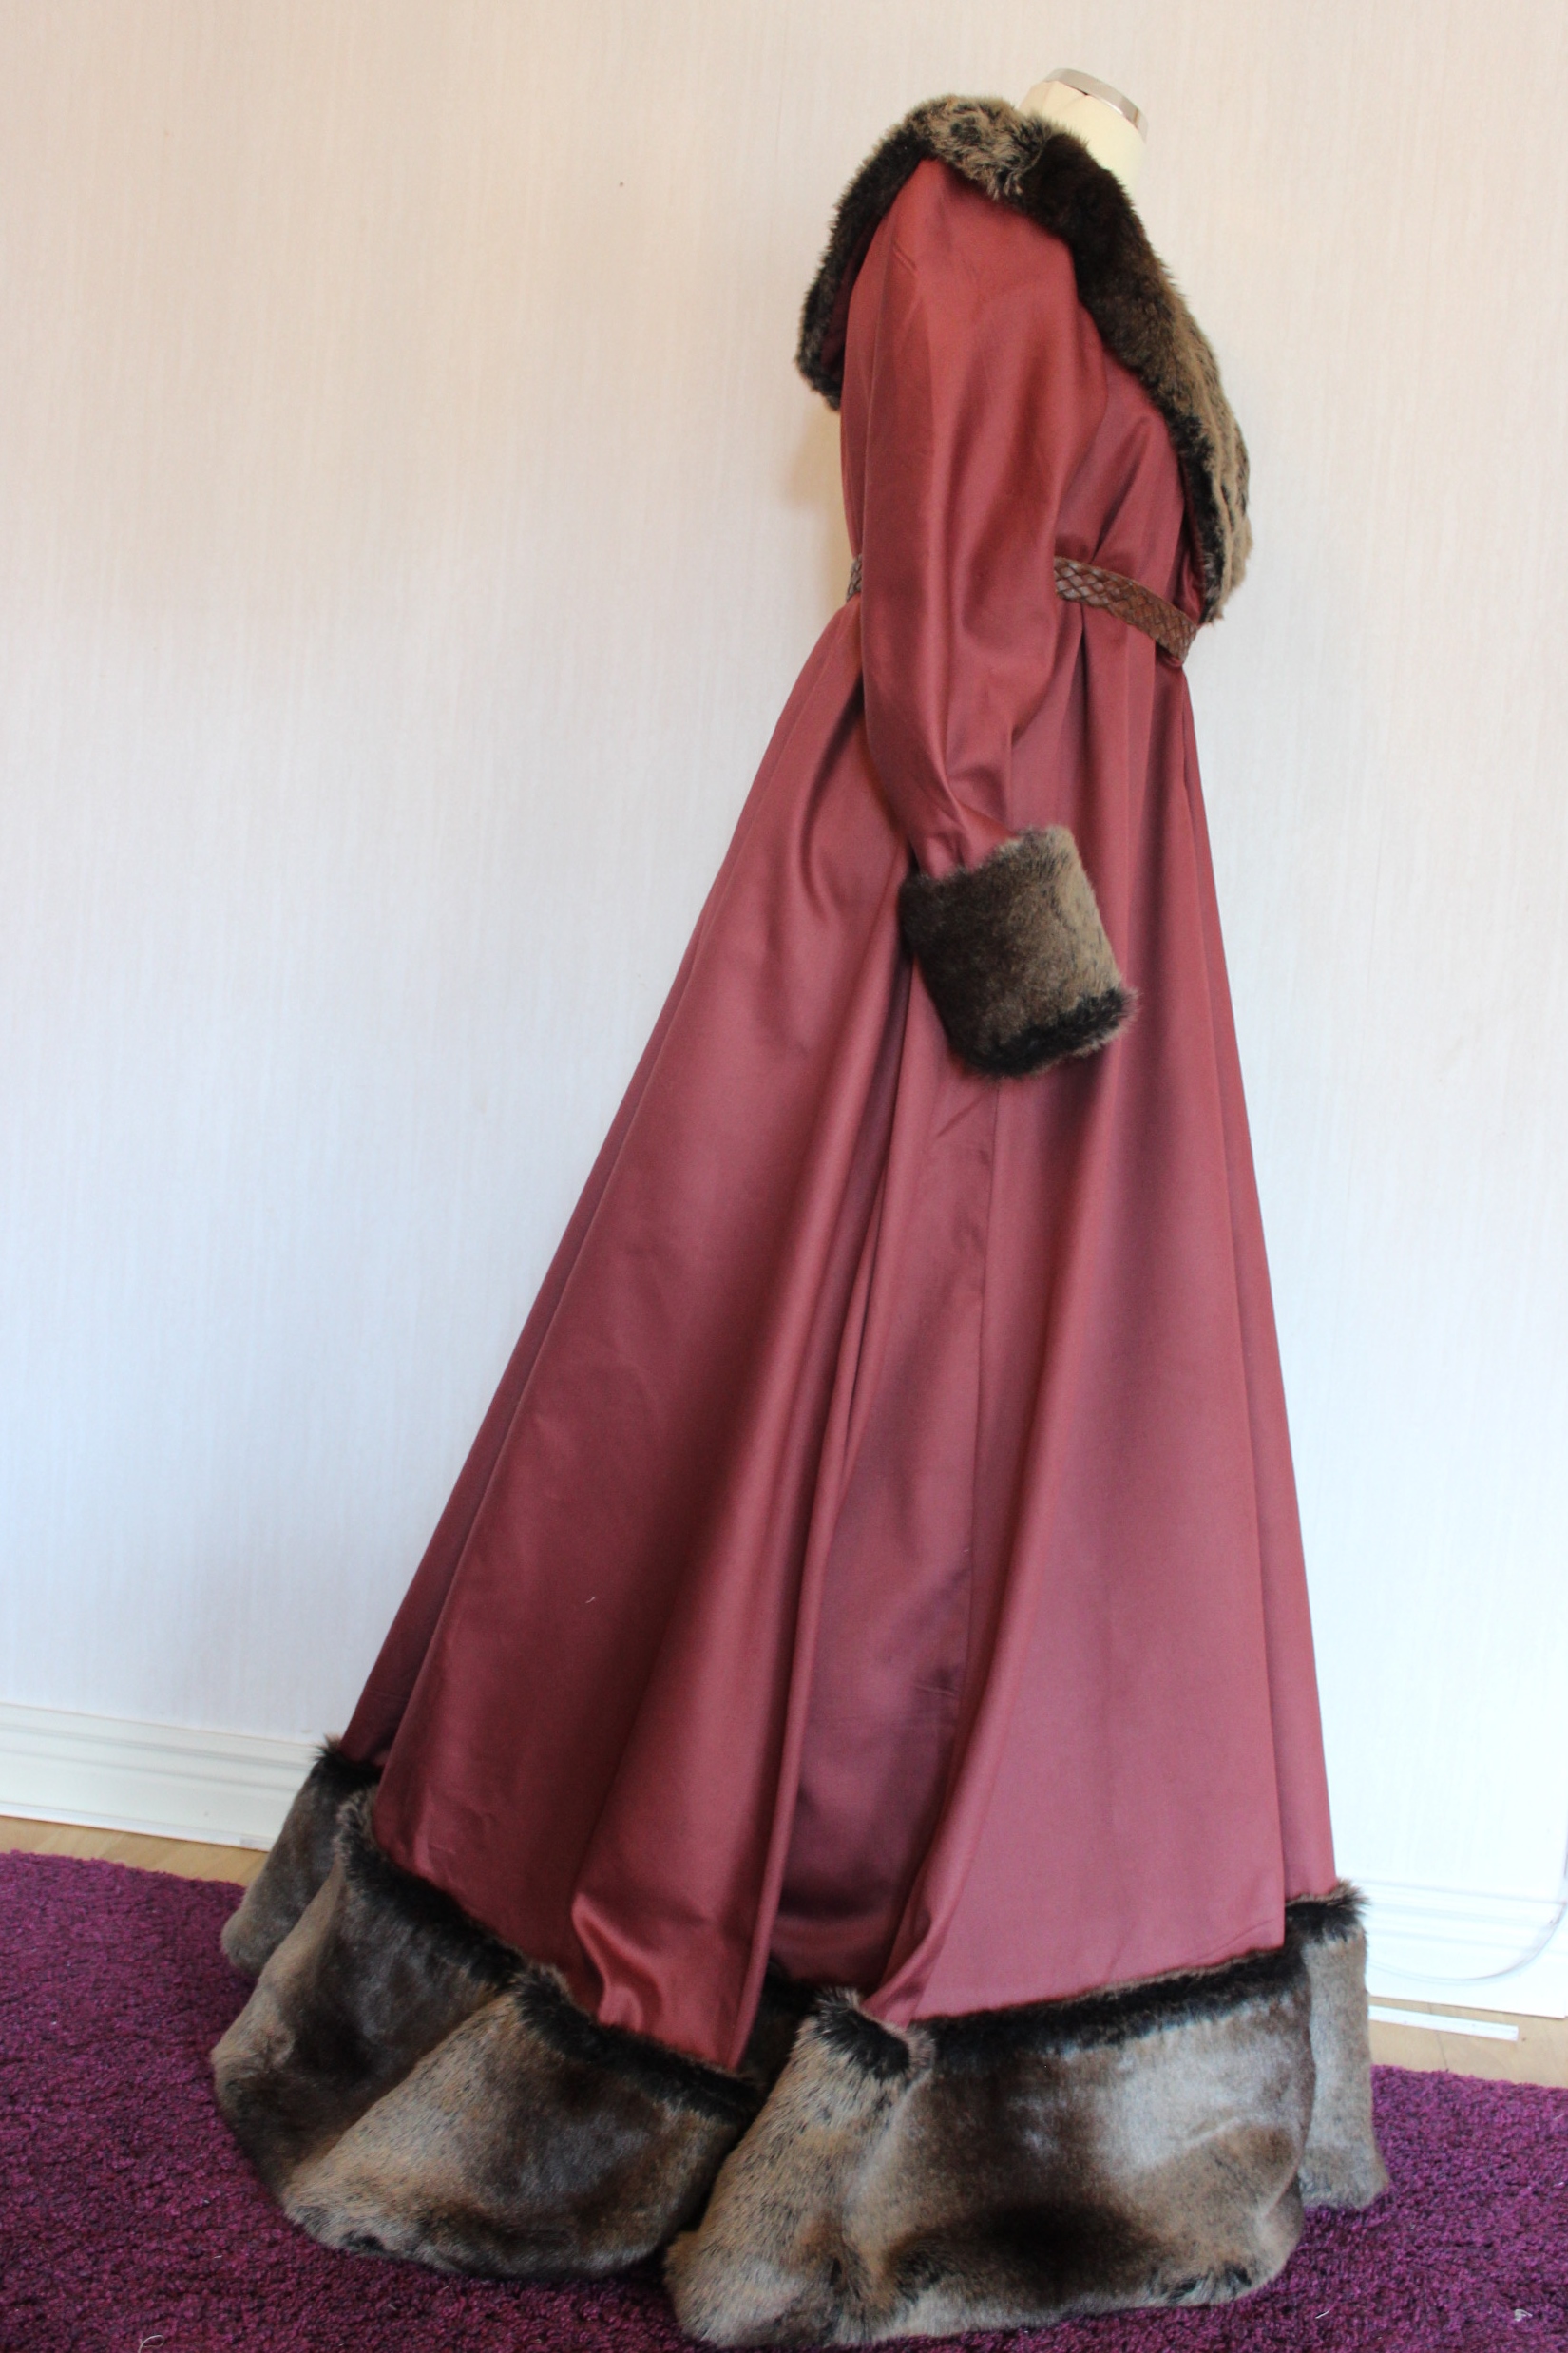
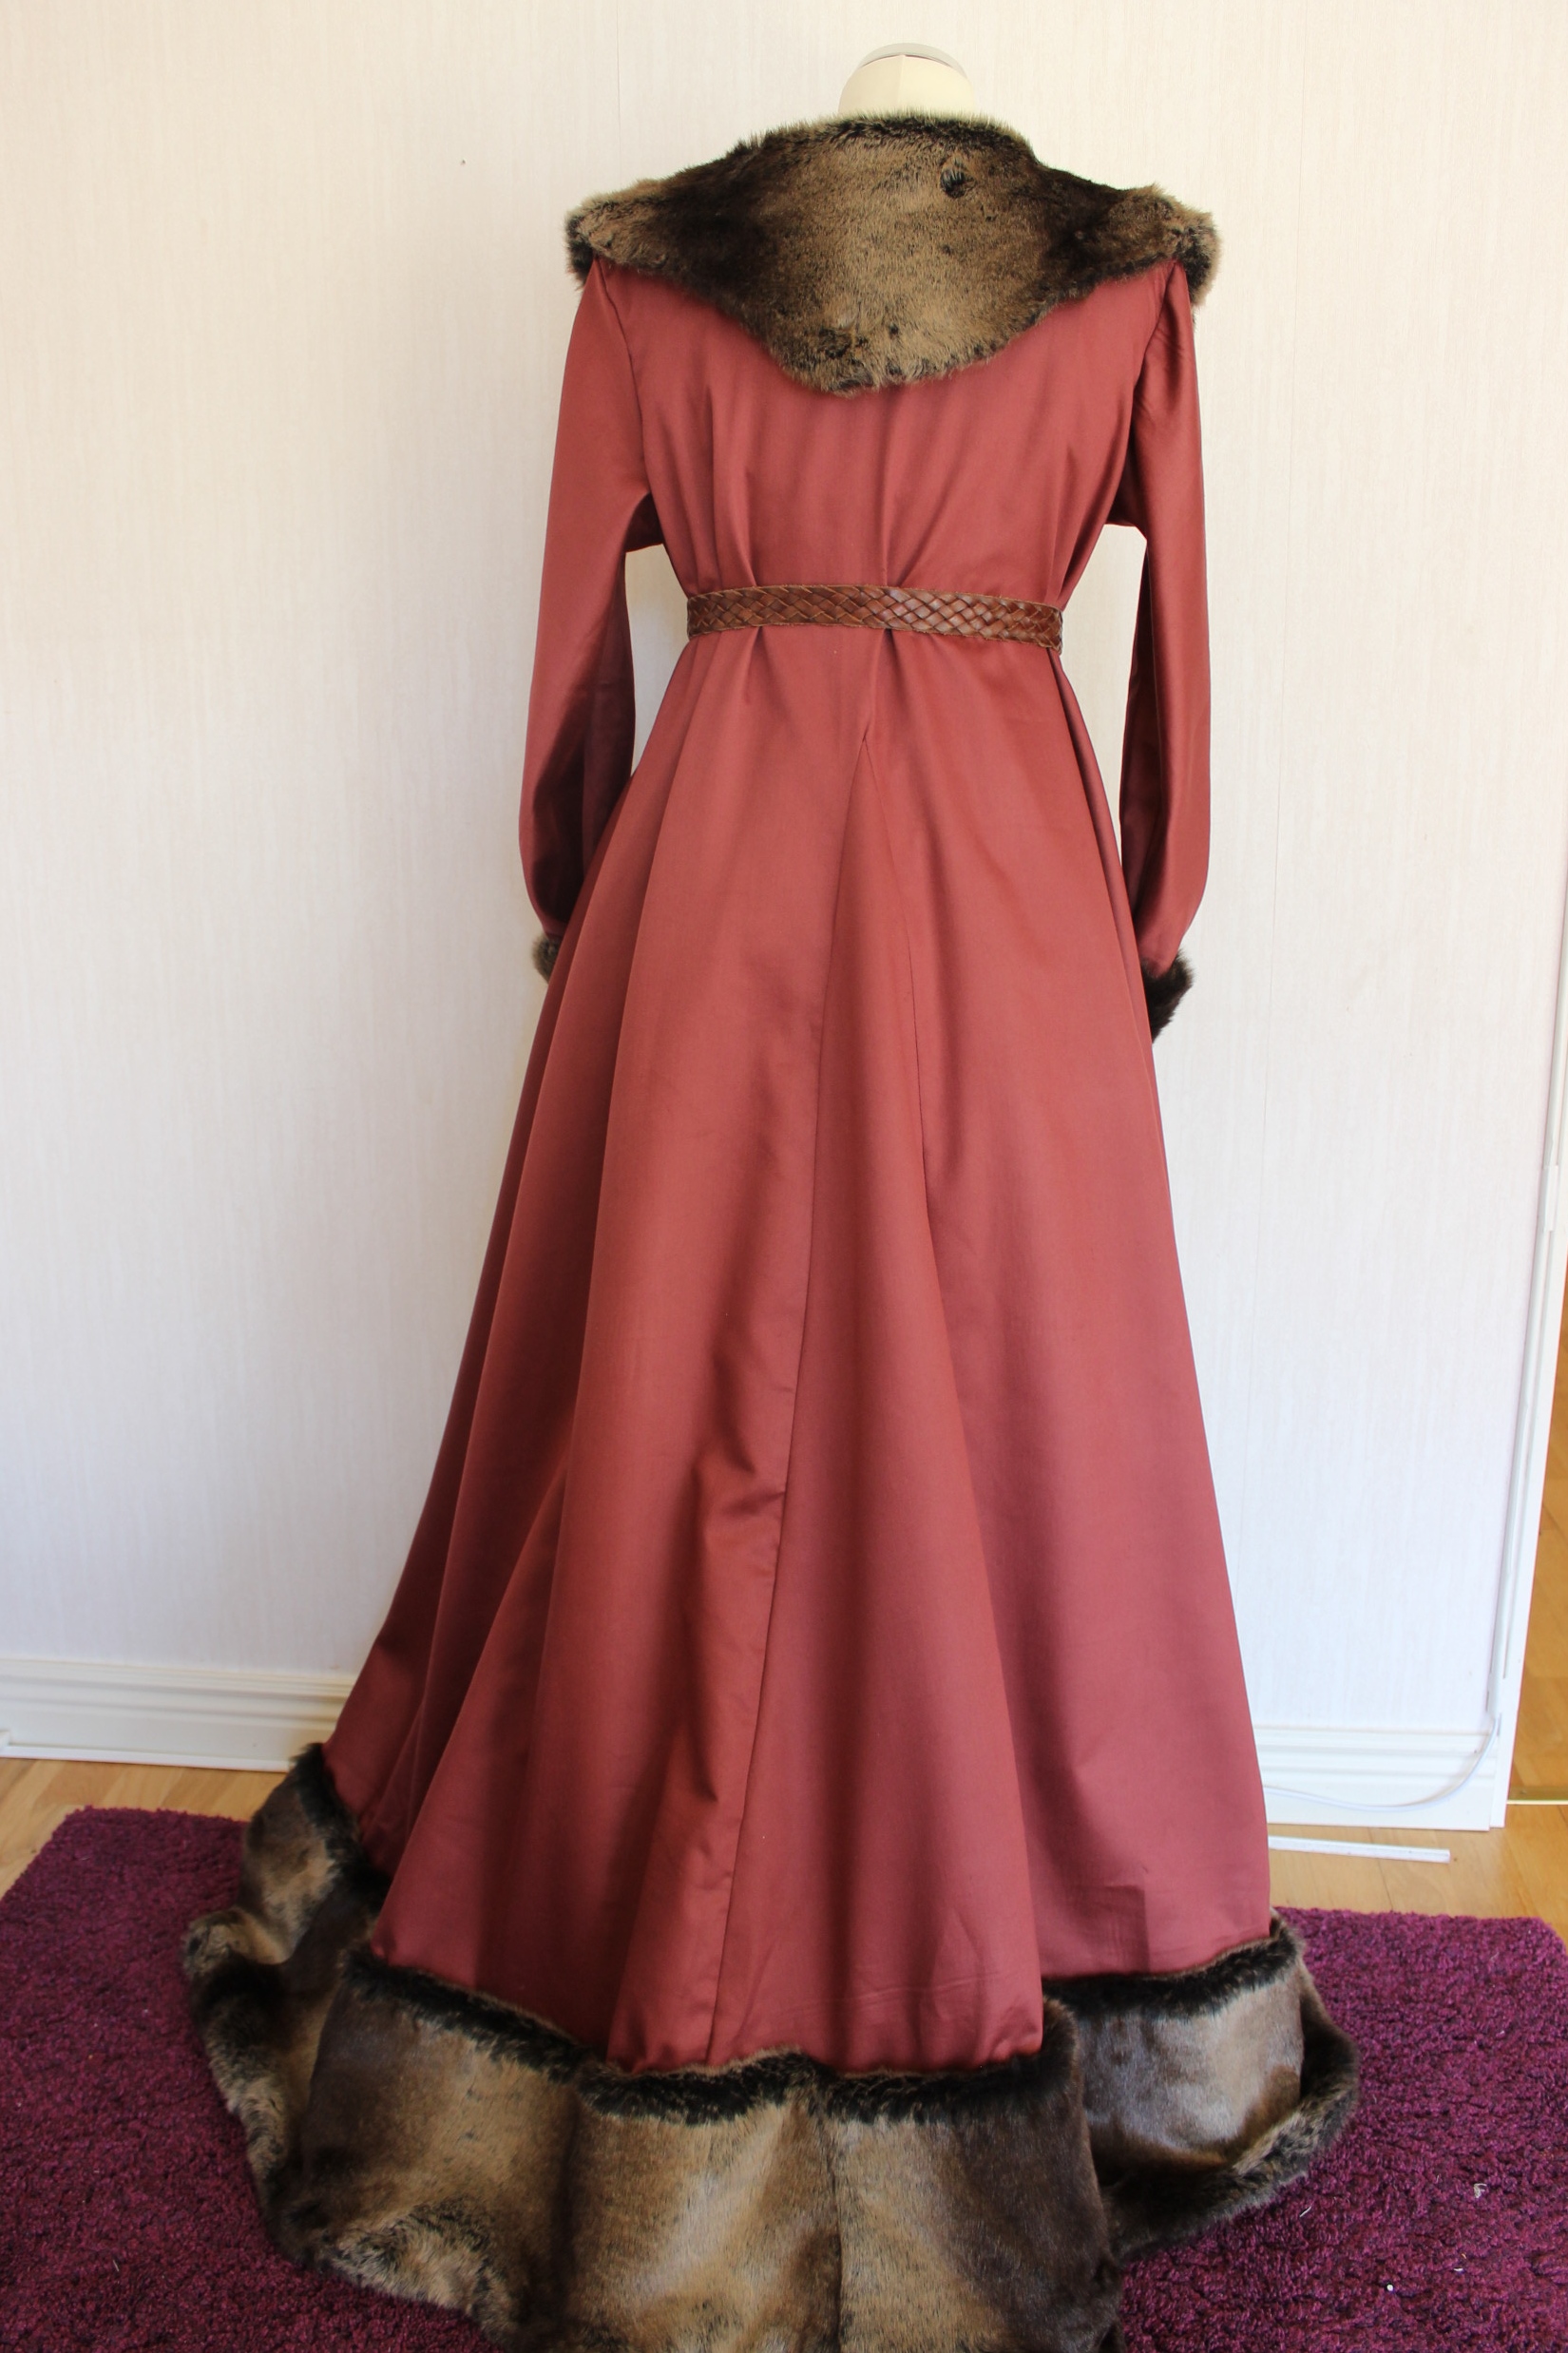
The work payed of, and the effect of the dark fur against the burgundy of the gown is striking.
Testing the almost finished gown to see how it looks.
I’m so happy I stuck to it, and managed to finish it, even though I will probably find fury bits in my sewing-room (and the rest of our apartment) for a few years time…Finally finished
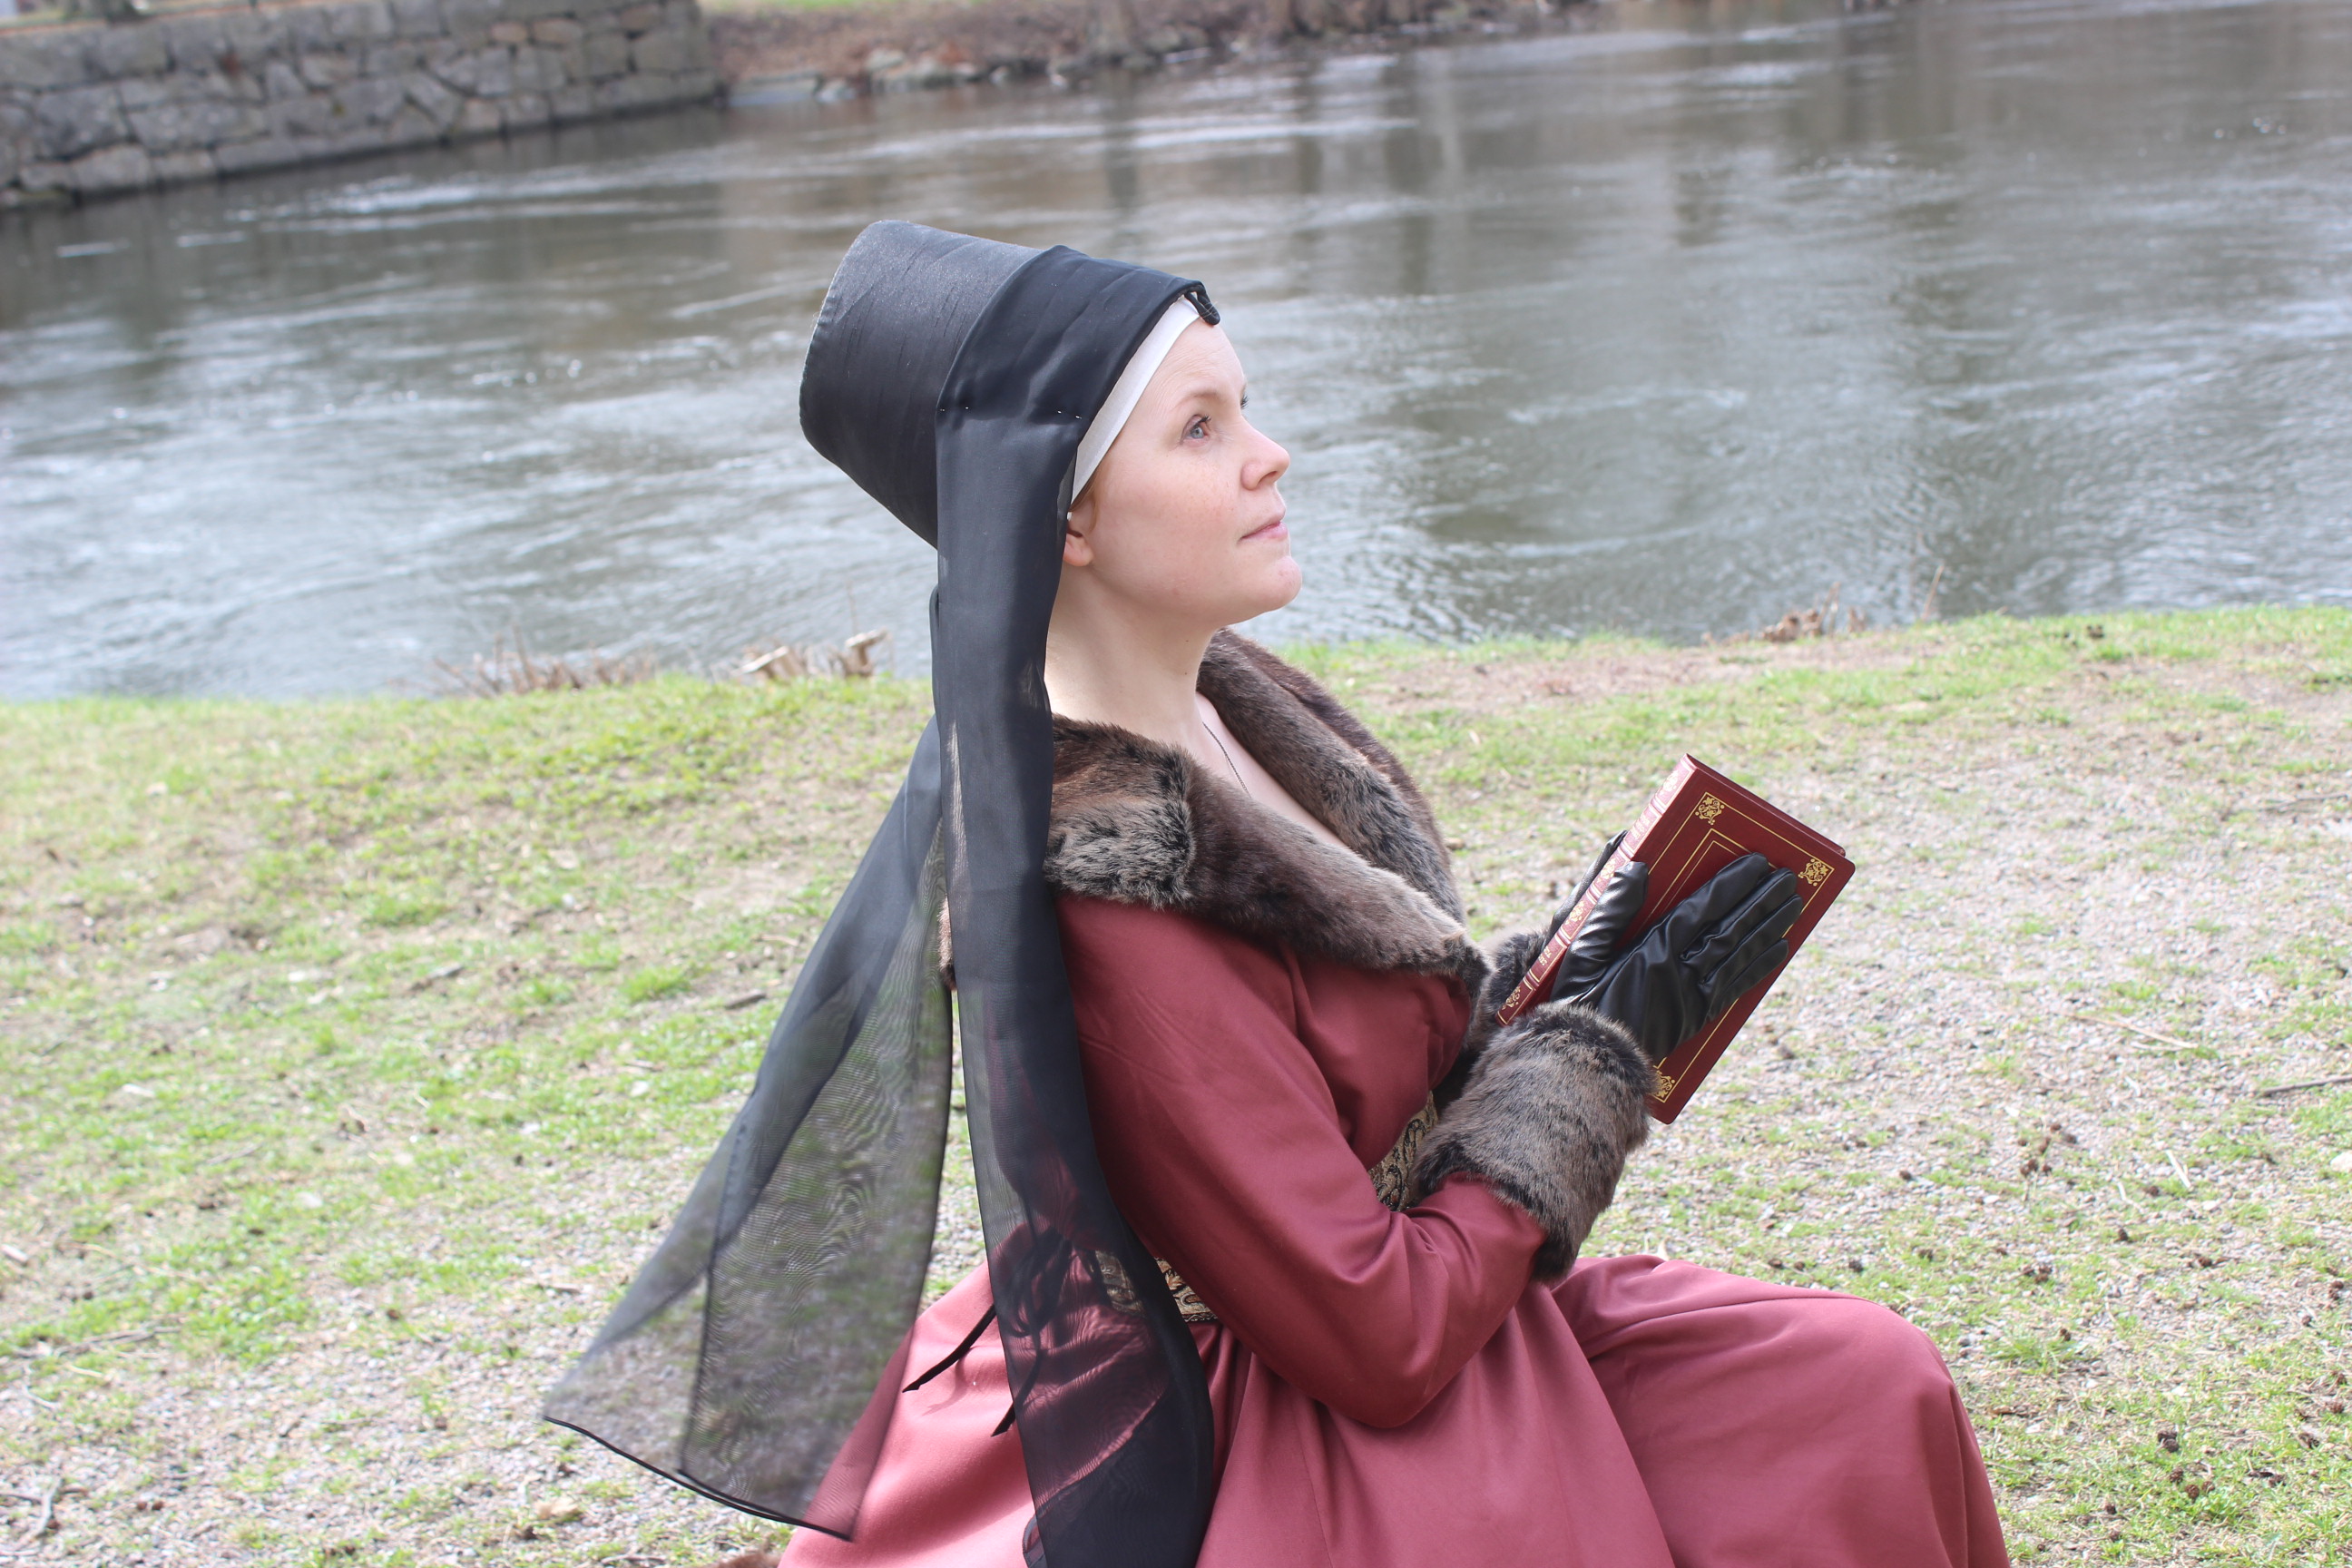
Finished Pictures:
The facts:
What: a 1450s Medieval “Burgundian” gown.
Pattern: Self drafted based on pattern from “The Medieval Tailor assistant”
Fabric: 5 m of cotton sateen and 2 m of faux fur
Notion: Thread
Time: 10 hours (of sewing time)
Cost: About 50 Sek for the fabric and 200 Sek for the fur so about 20Usd total.
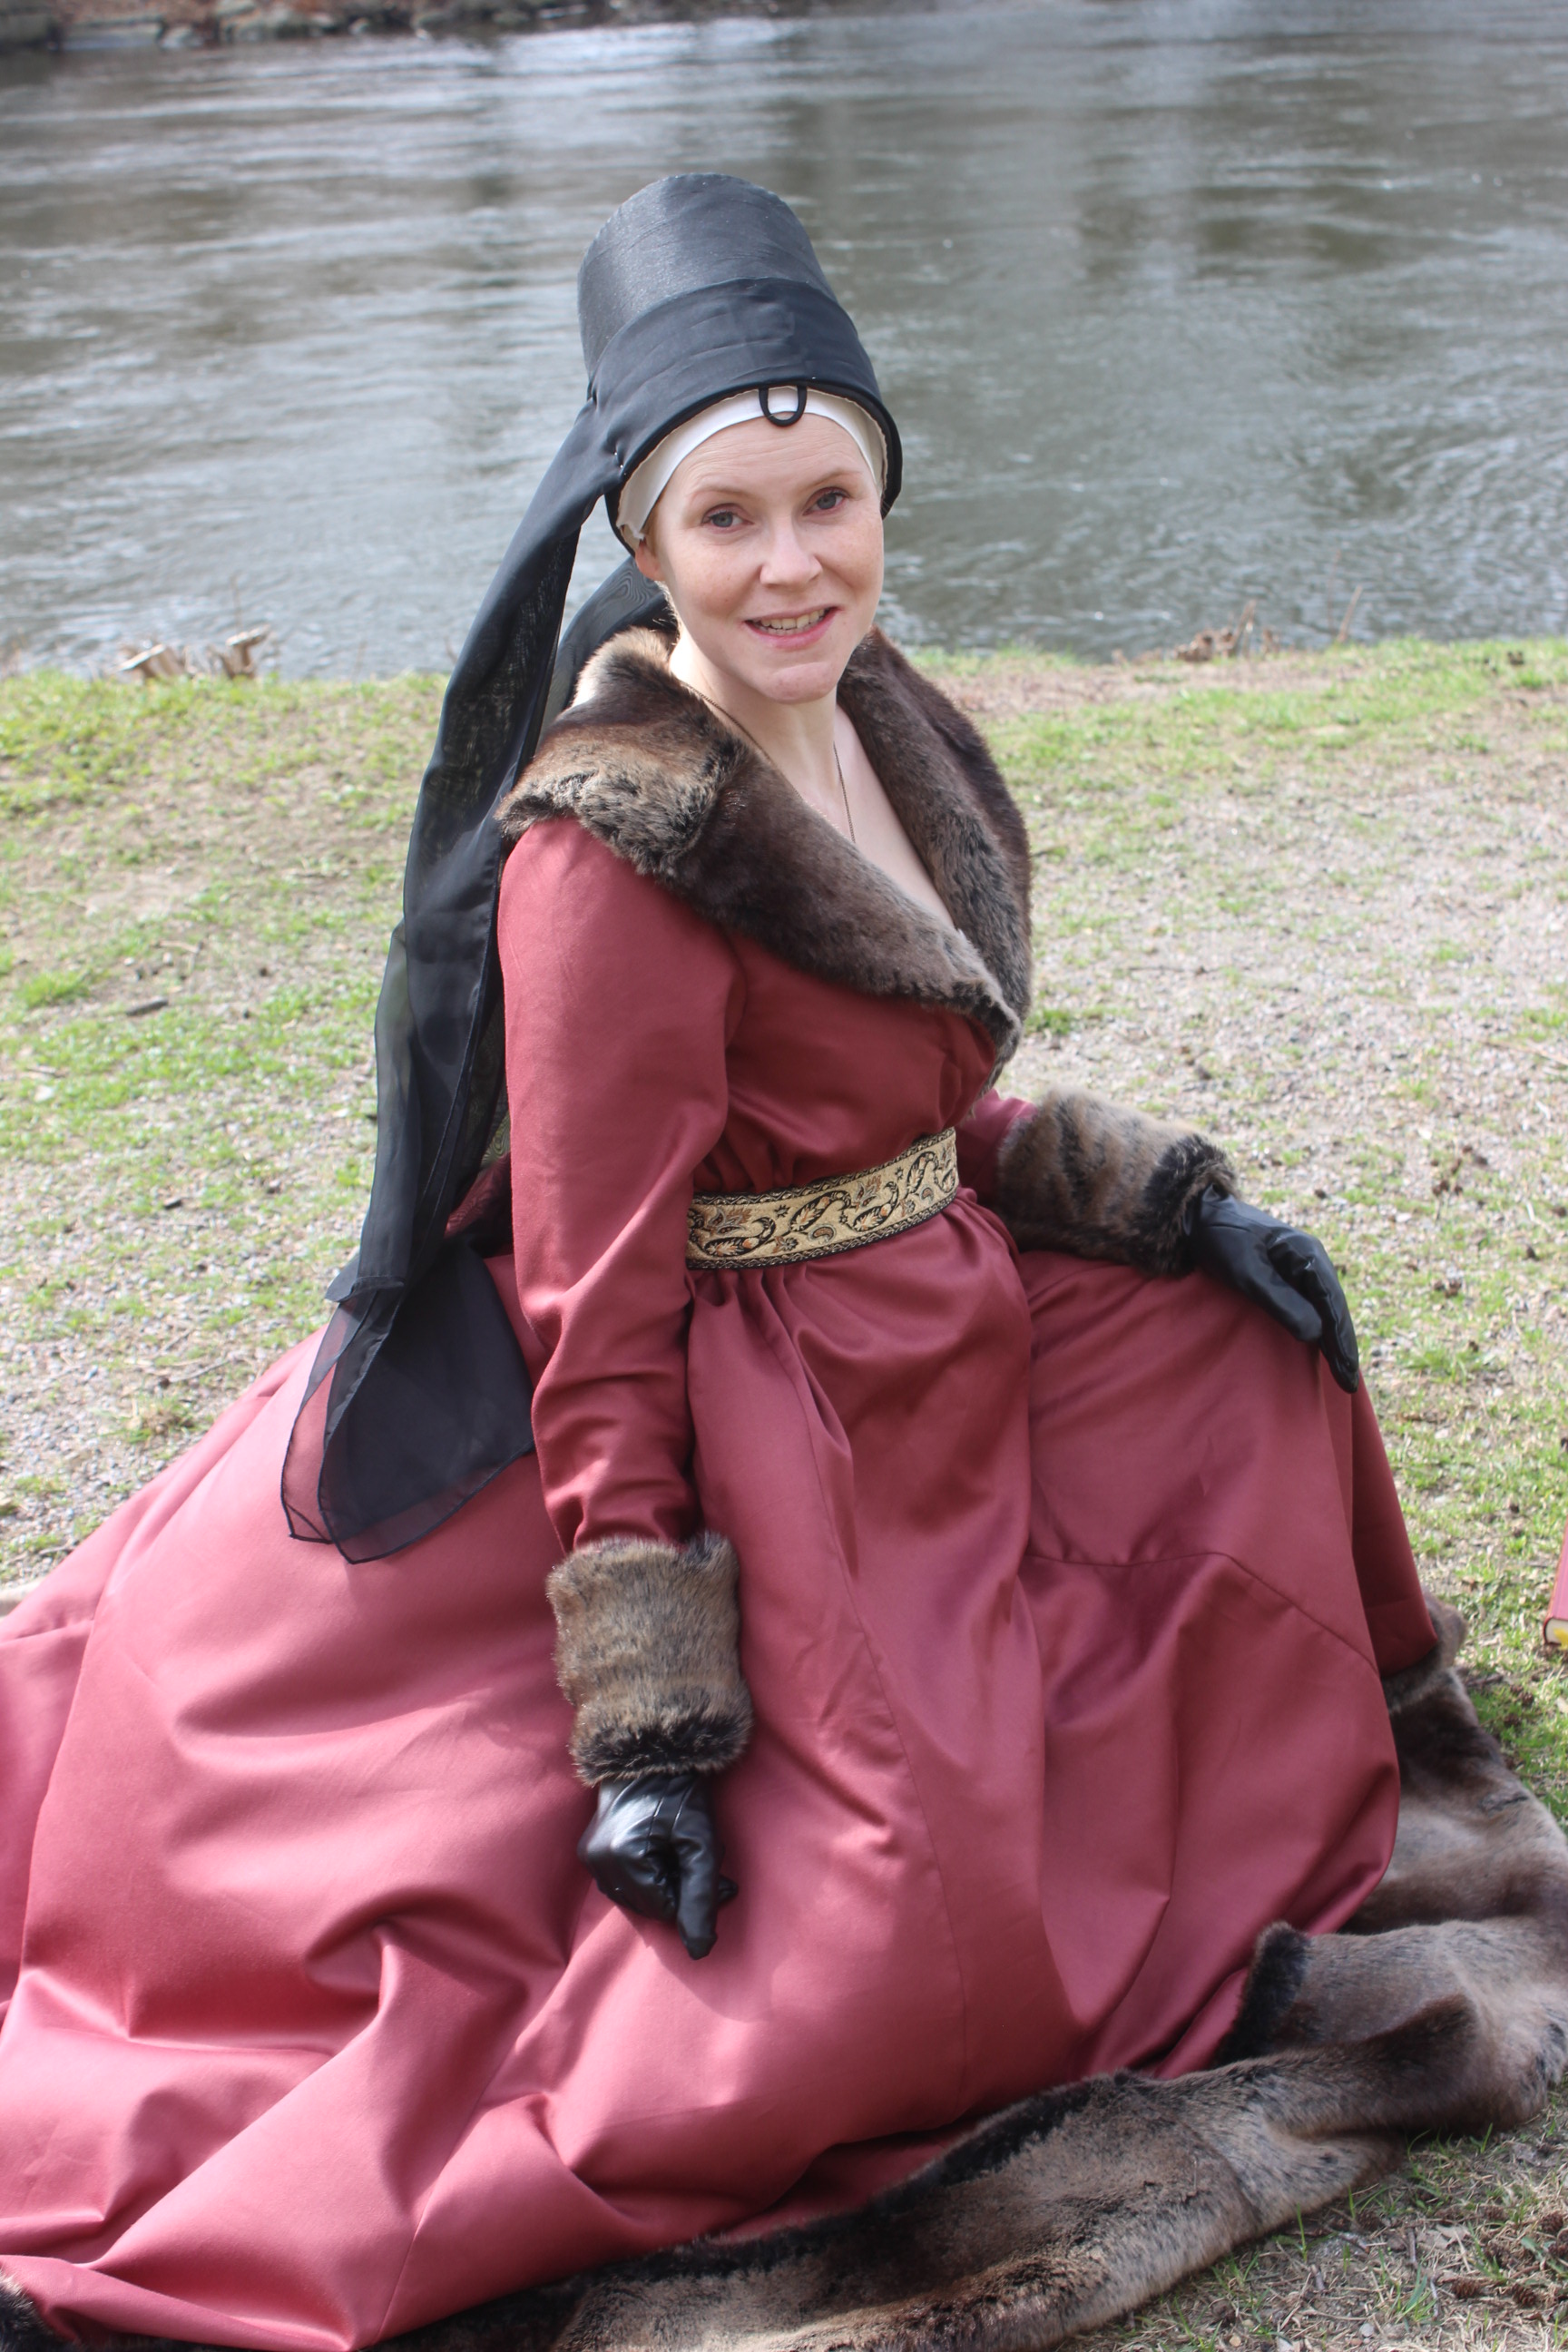
Final thoughts: I really like this type of gown. It looks so elegant and beautiful, and since it doesn’t require any particular fitting I can wear it both with and without the baby bump. Dressed and ready for some photos.
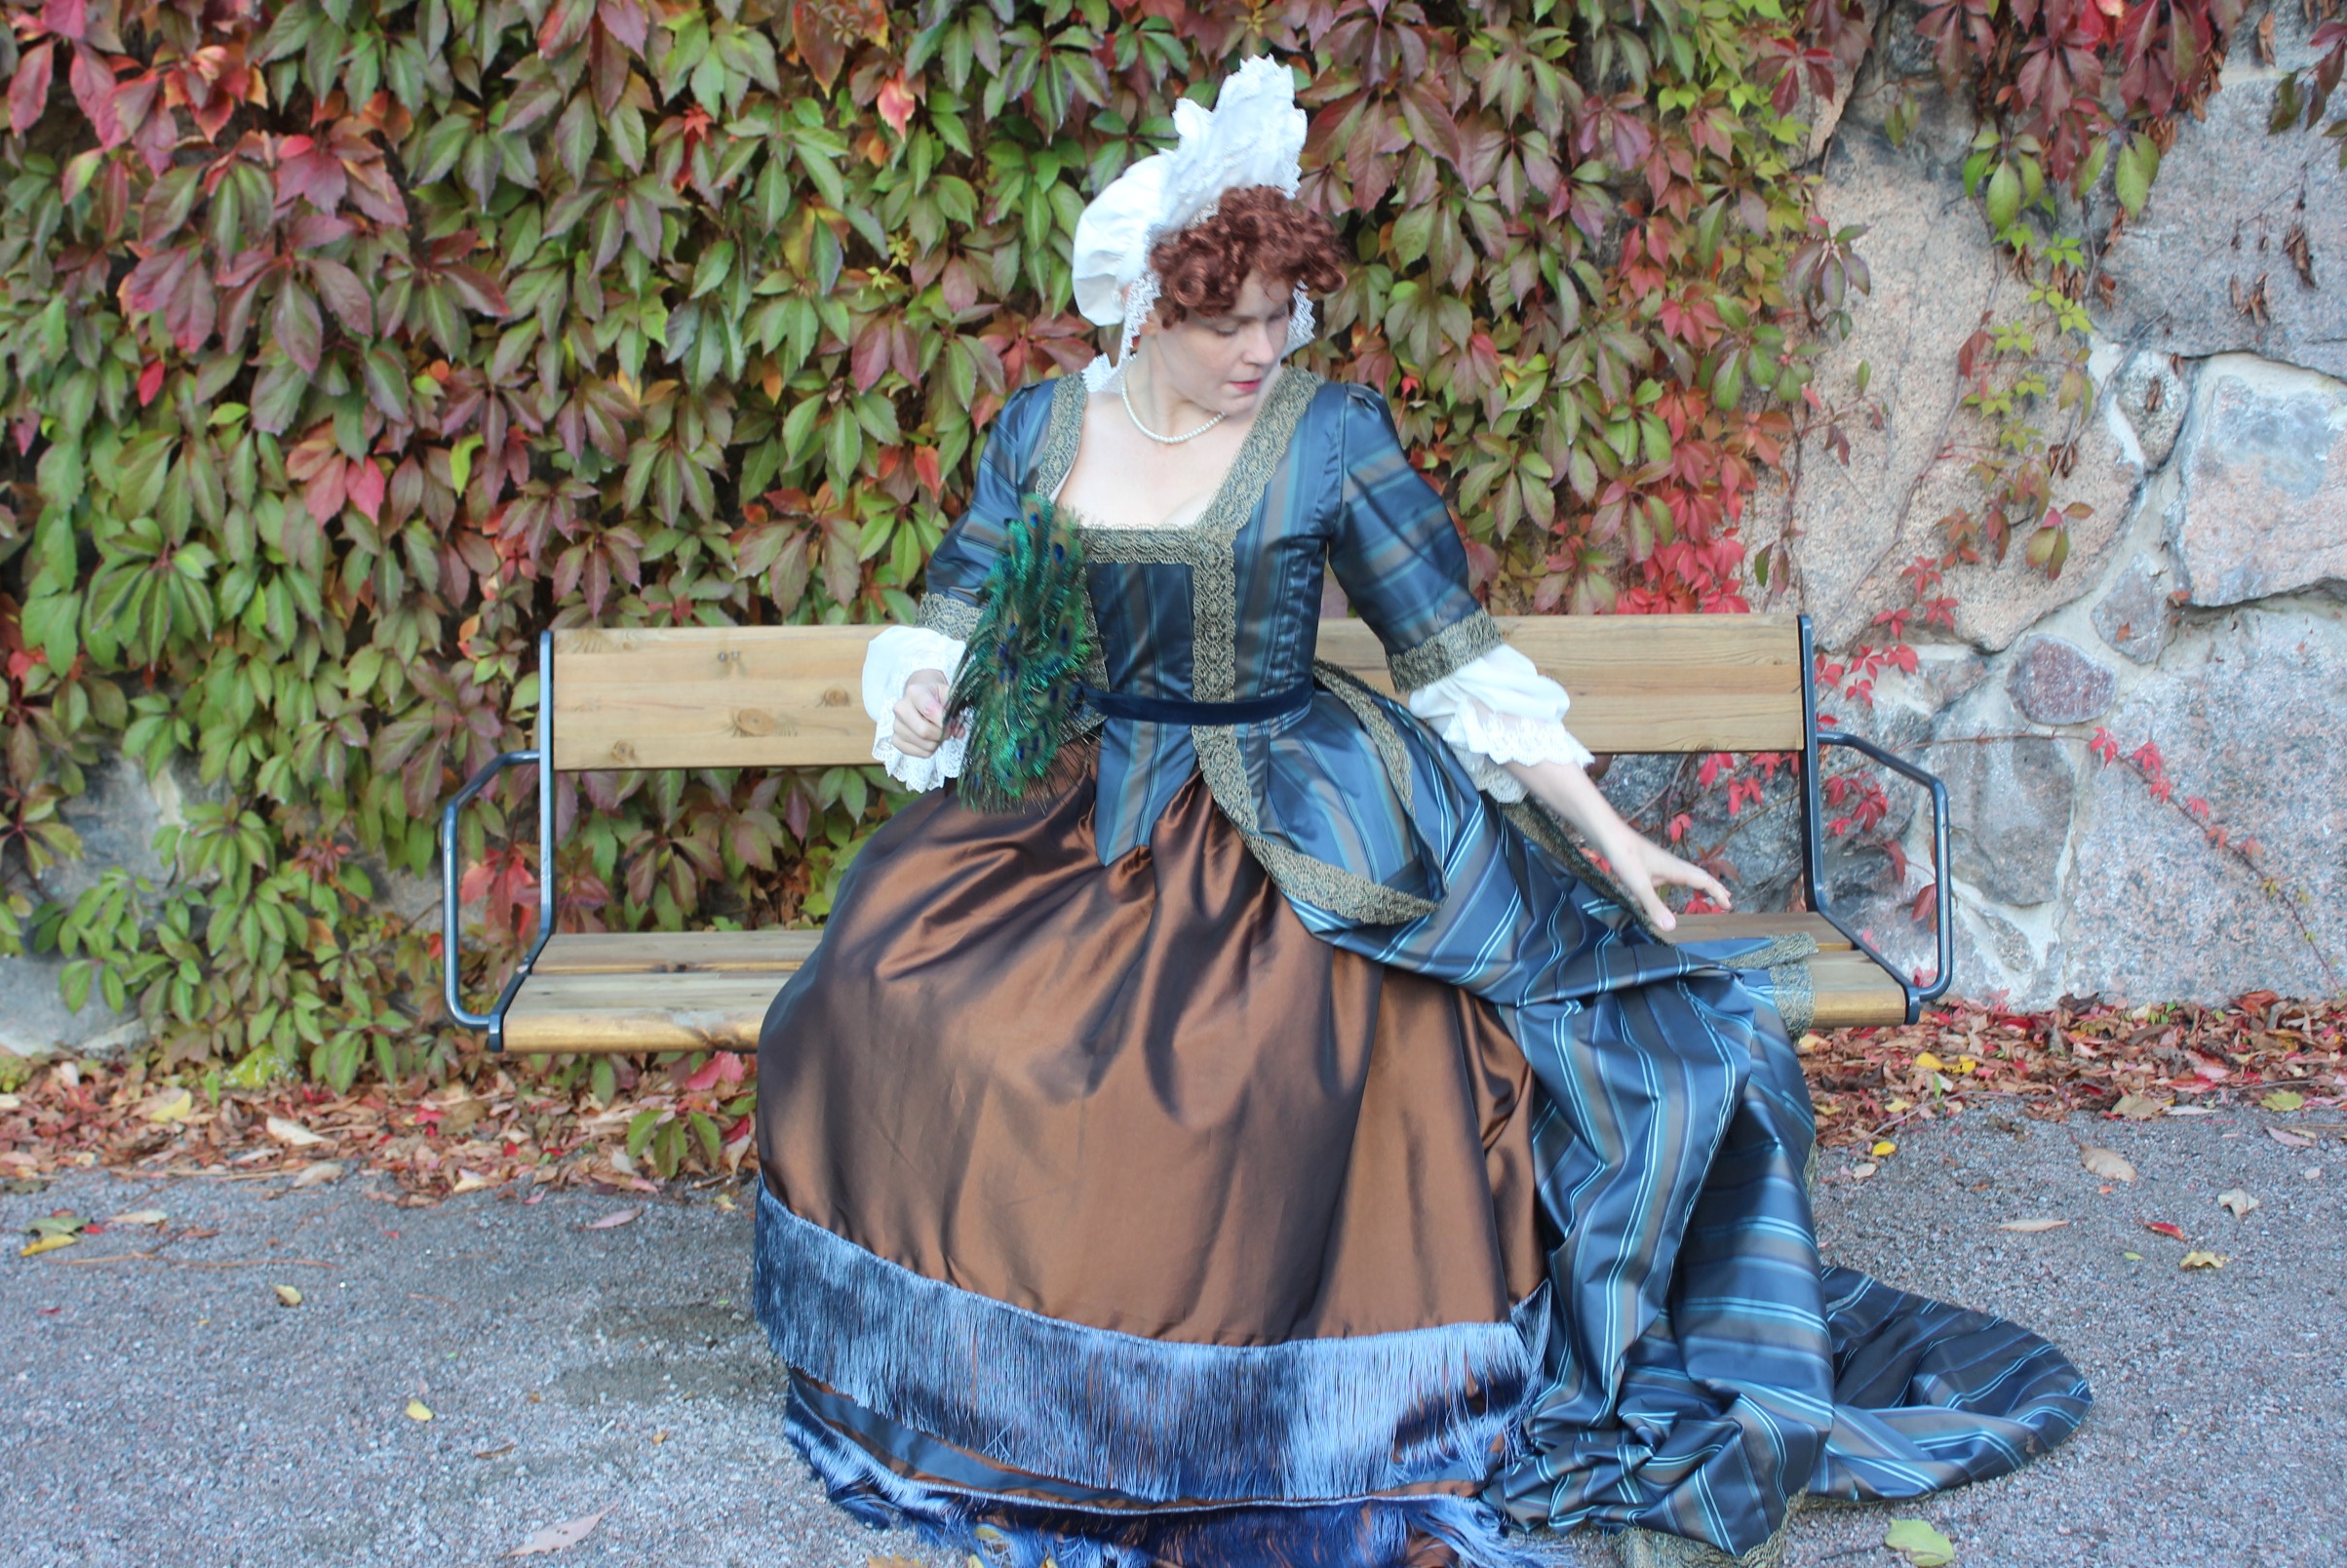
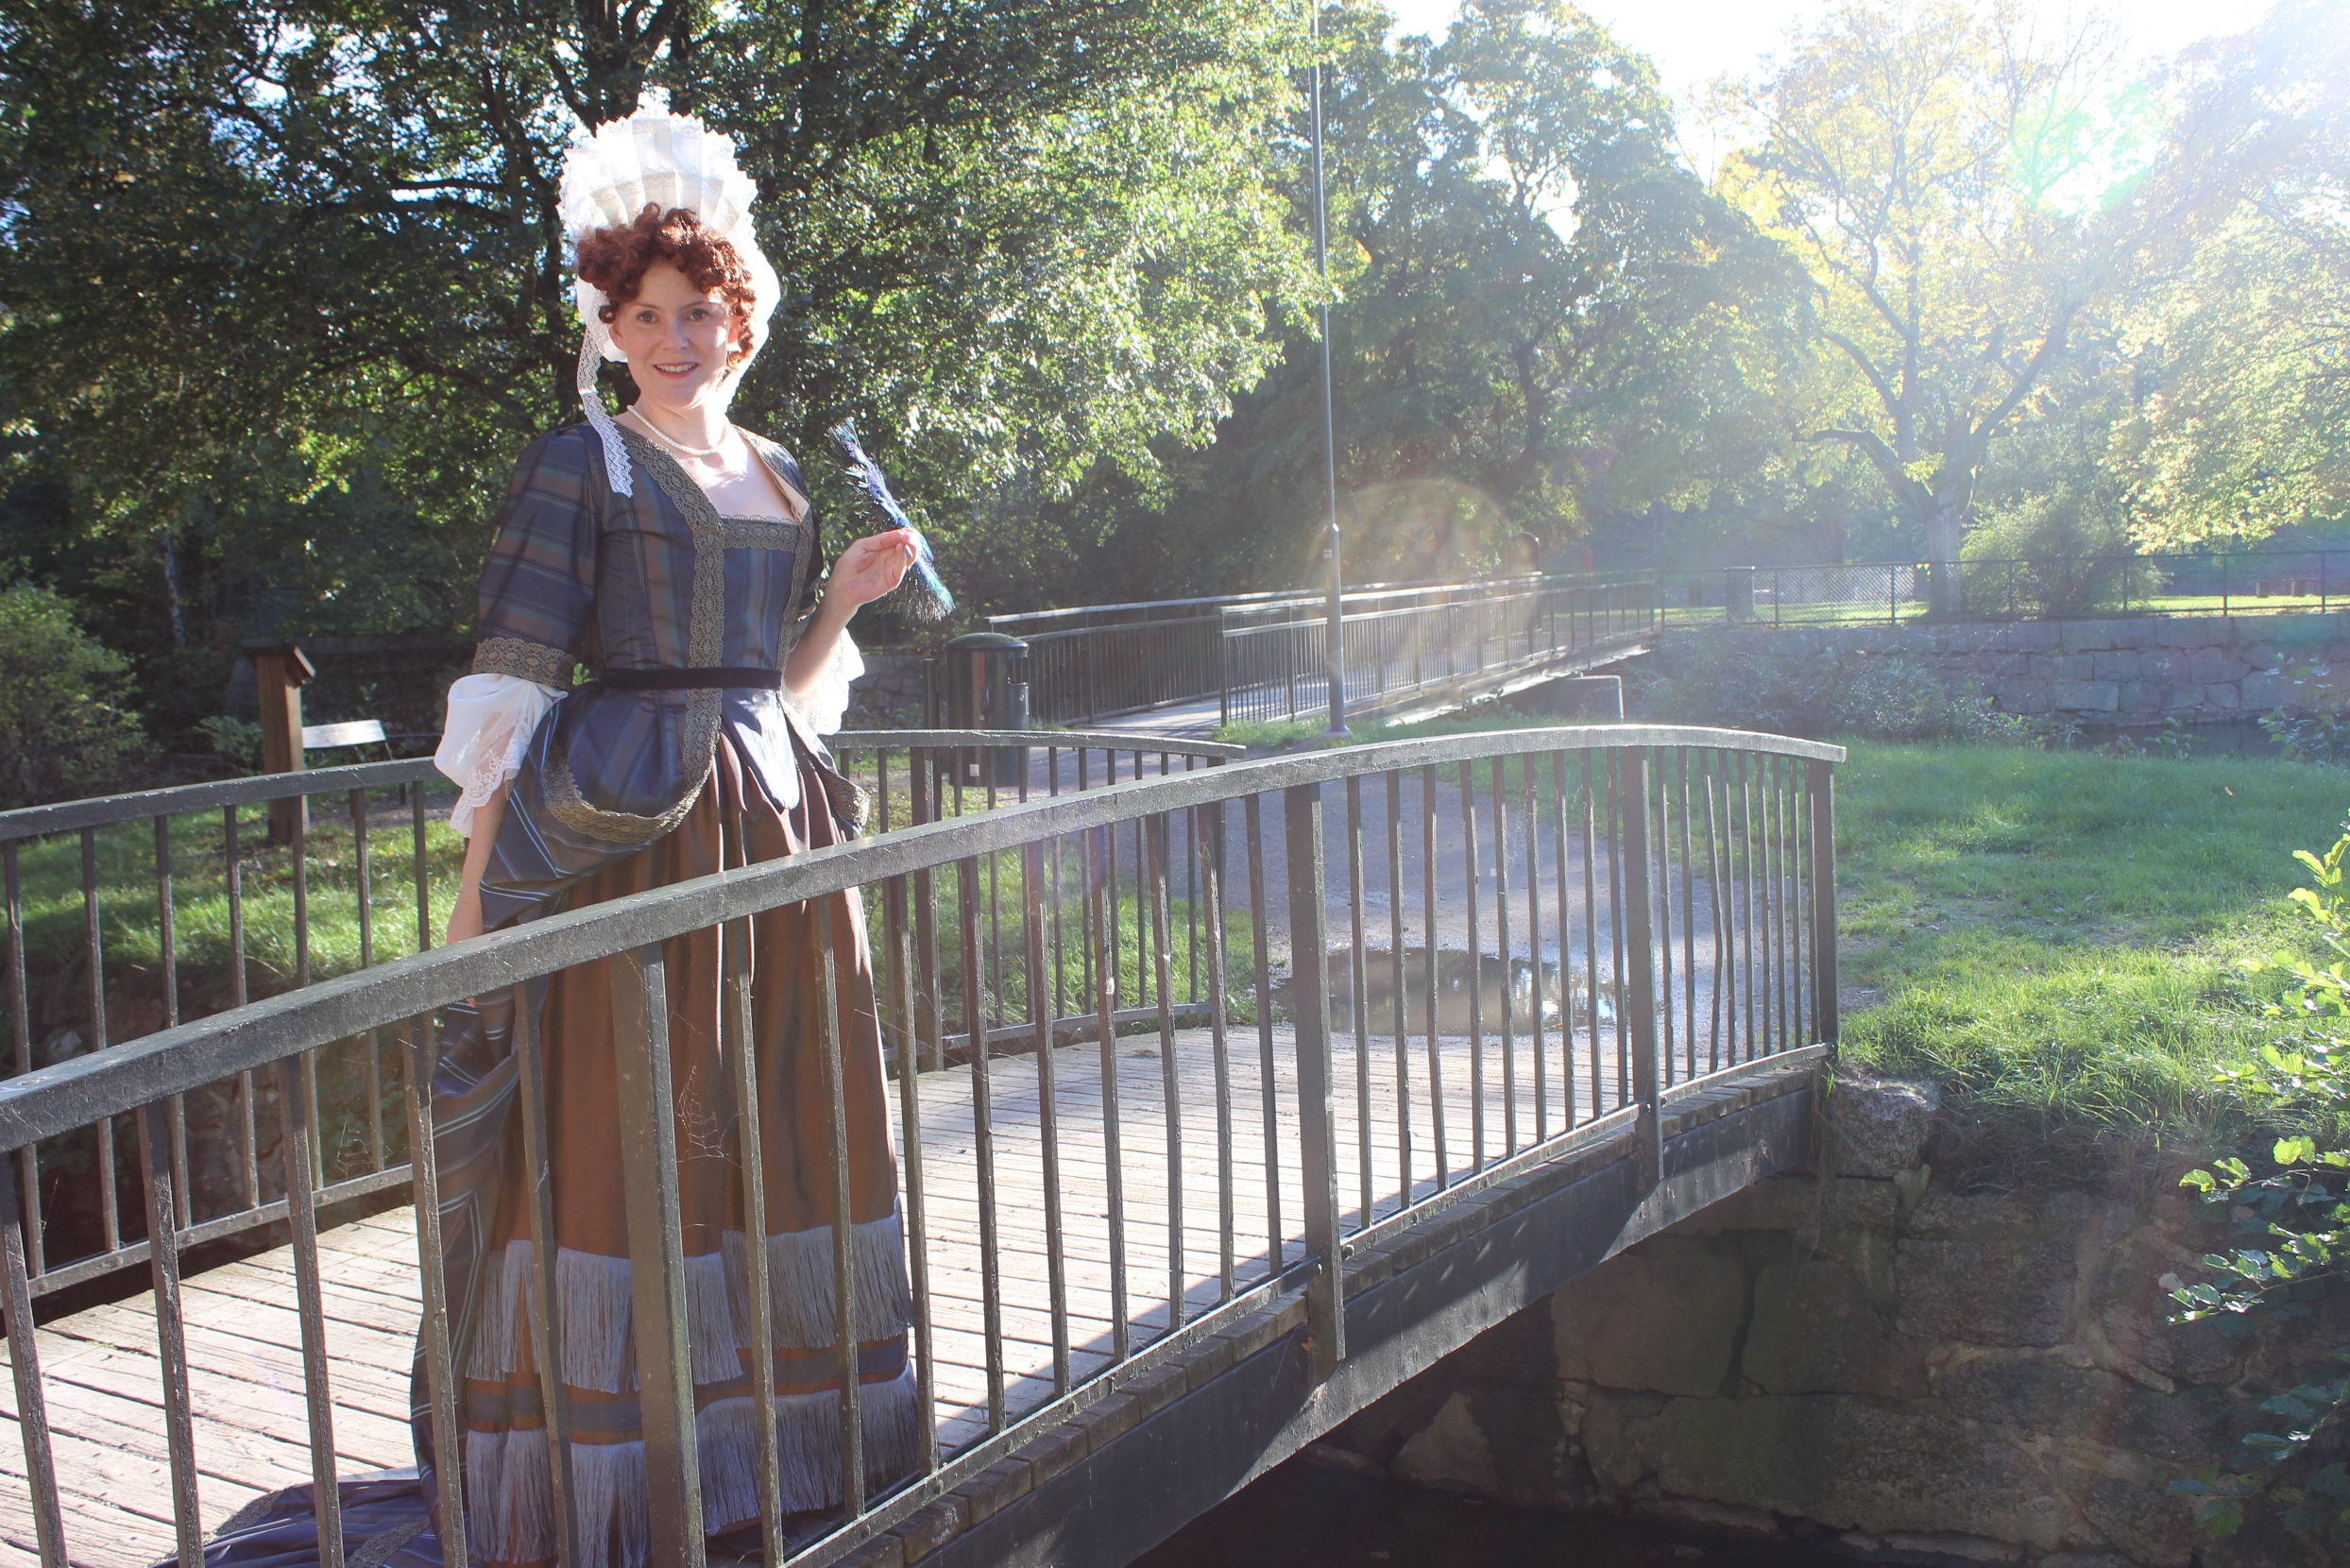
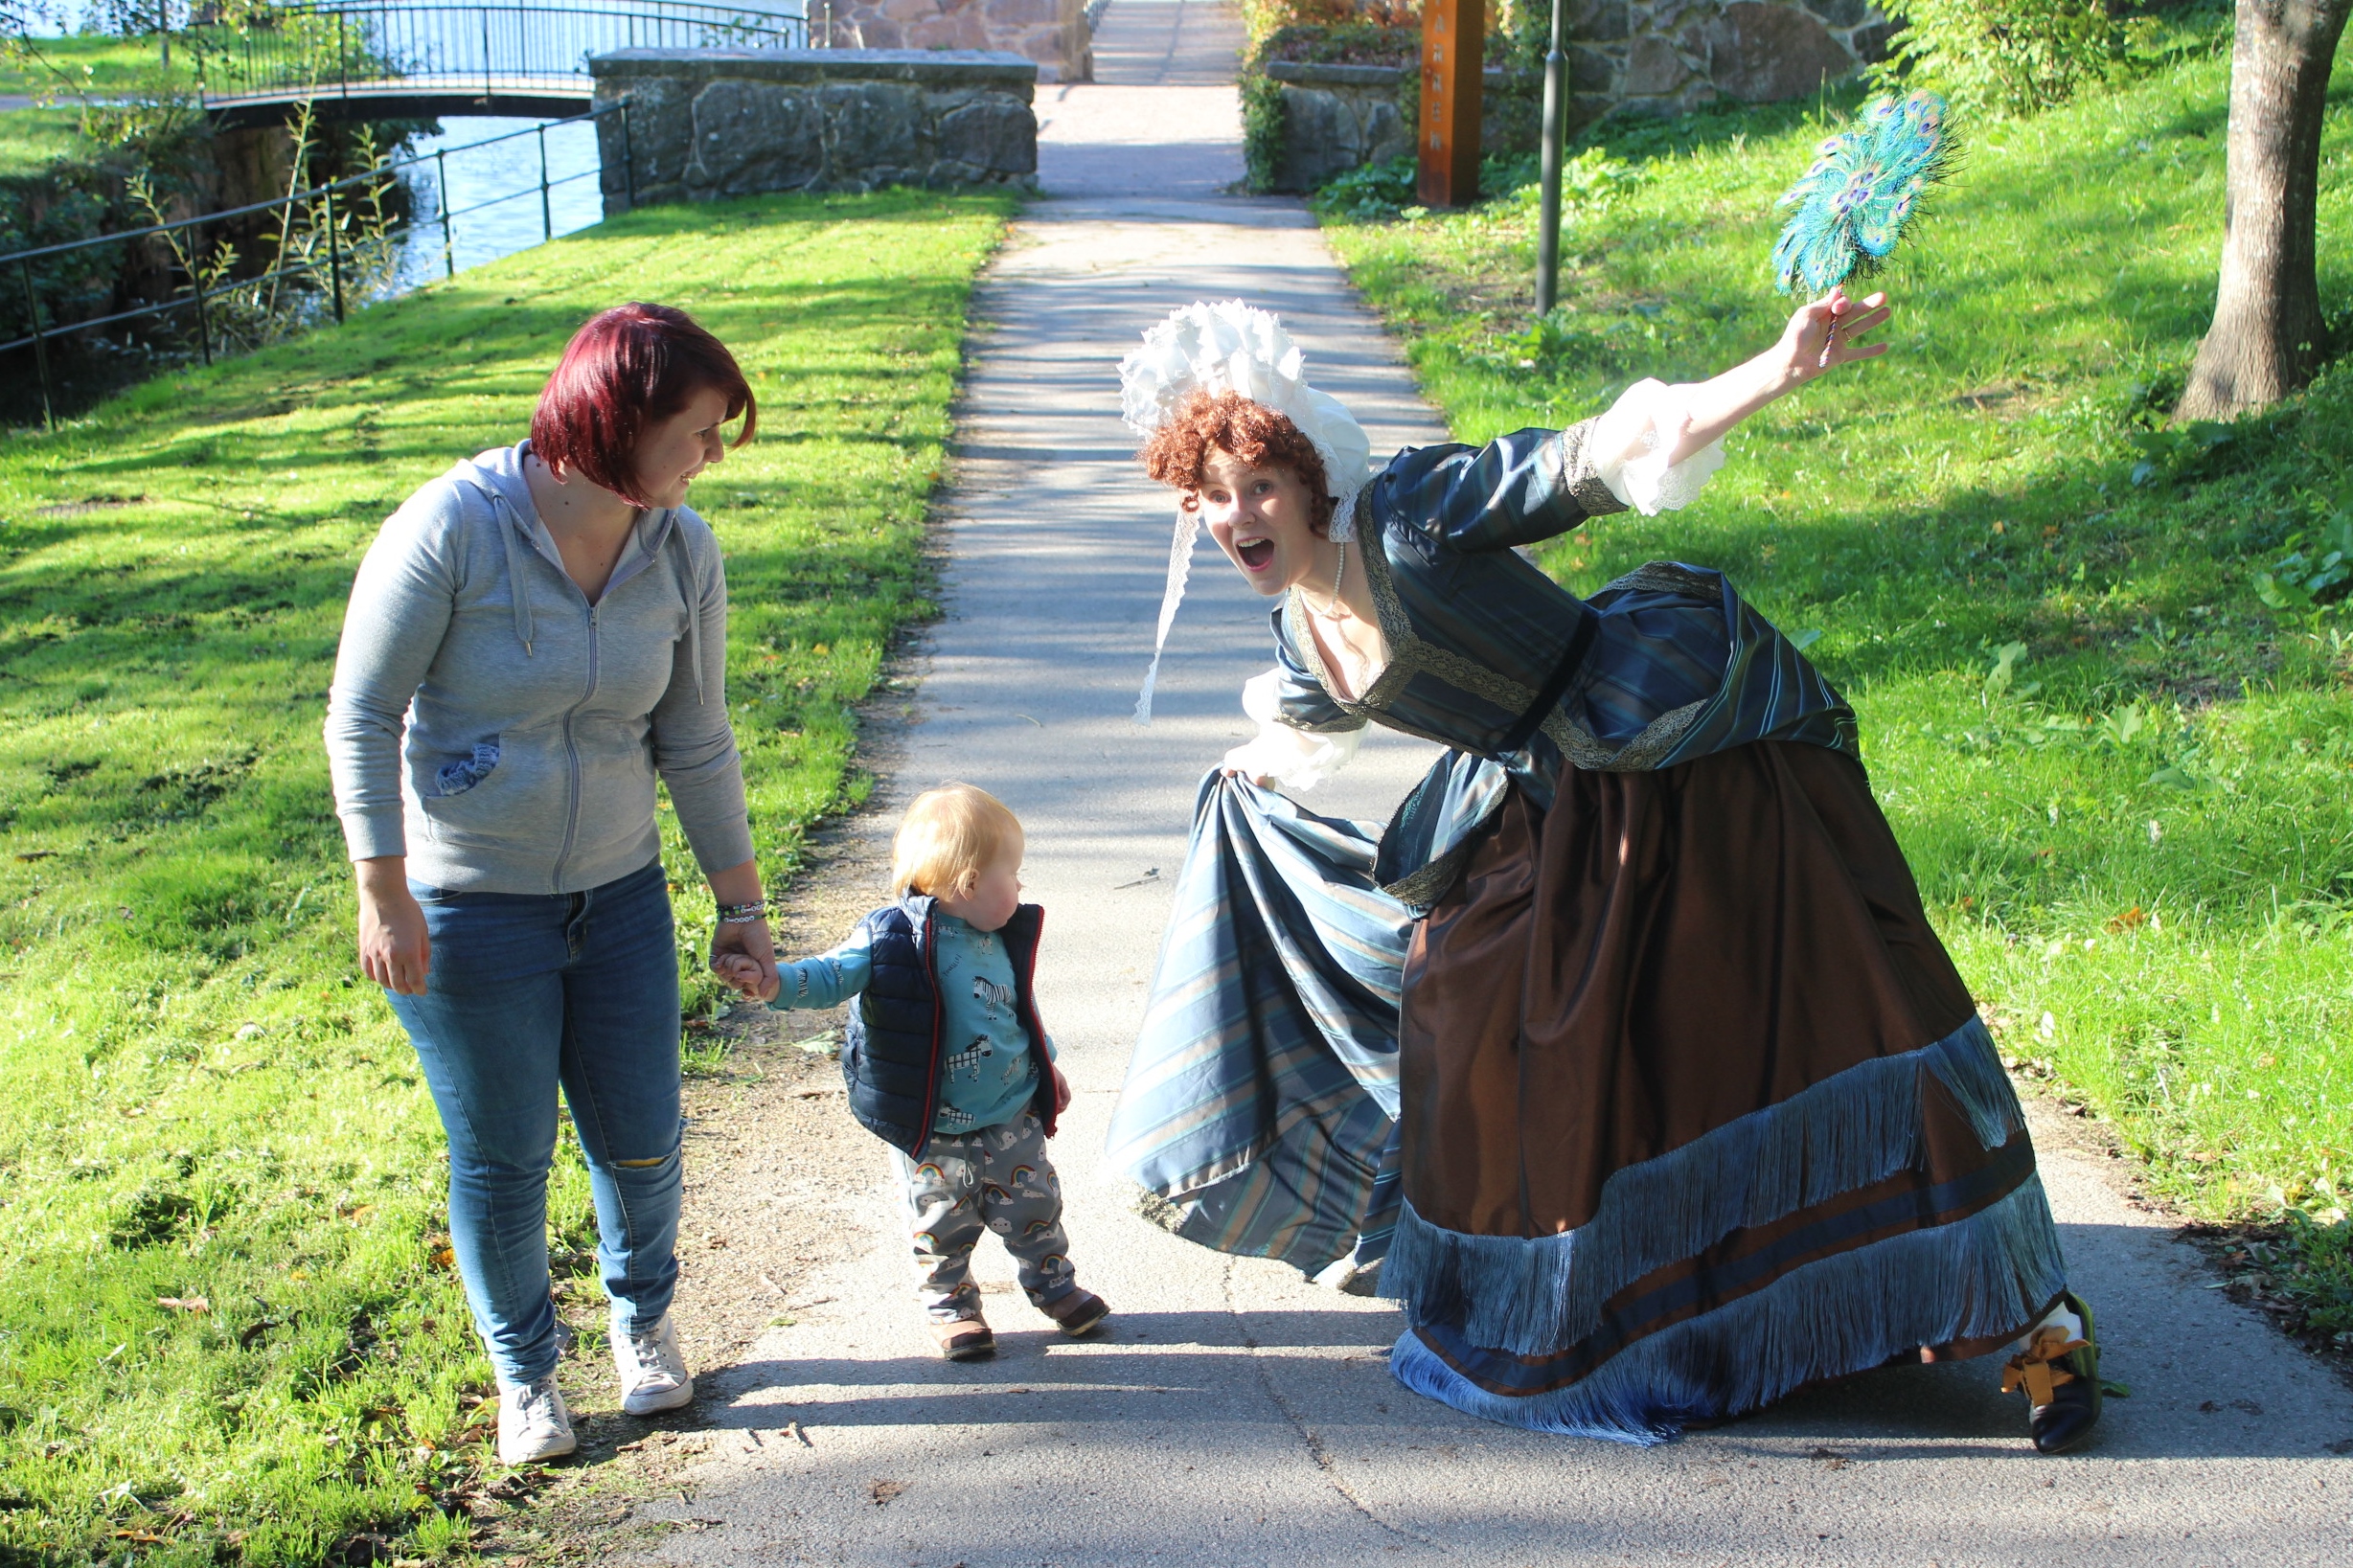
With the dress finished a good month before, I finally got all the components (photographer, babysitter, day of work and nice weather) together for a photoshoot in early October.
For the location we chose (as so many times before) the park and creak right outside my home, including our parking-lot (super fancy, right? :-D).
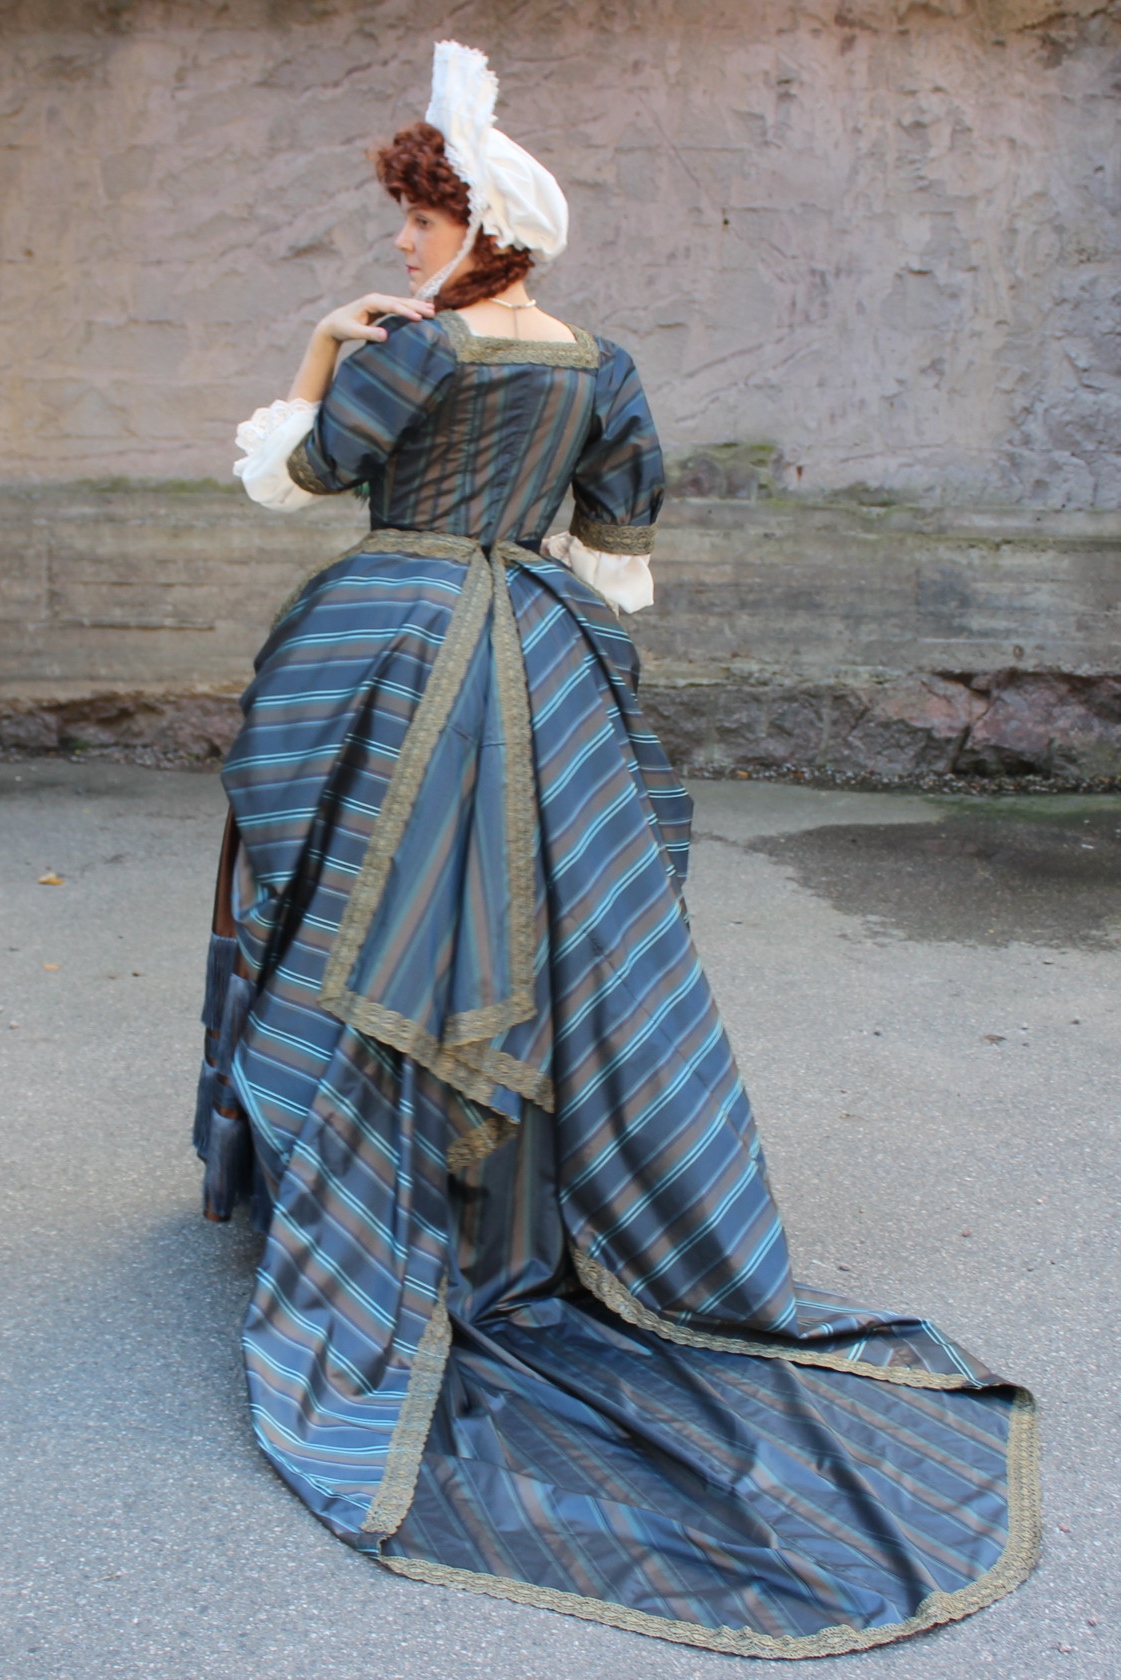
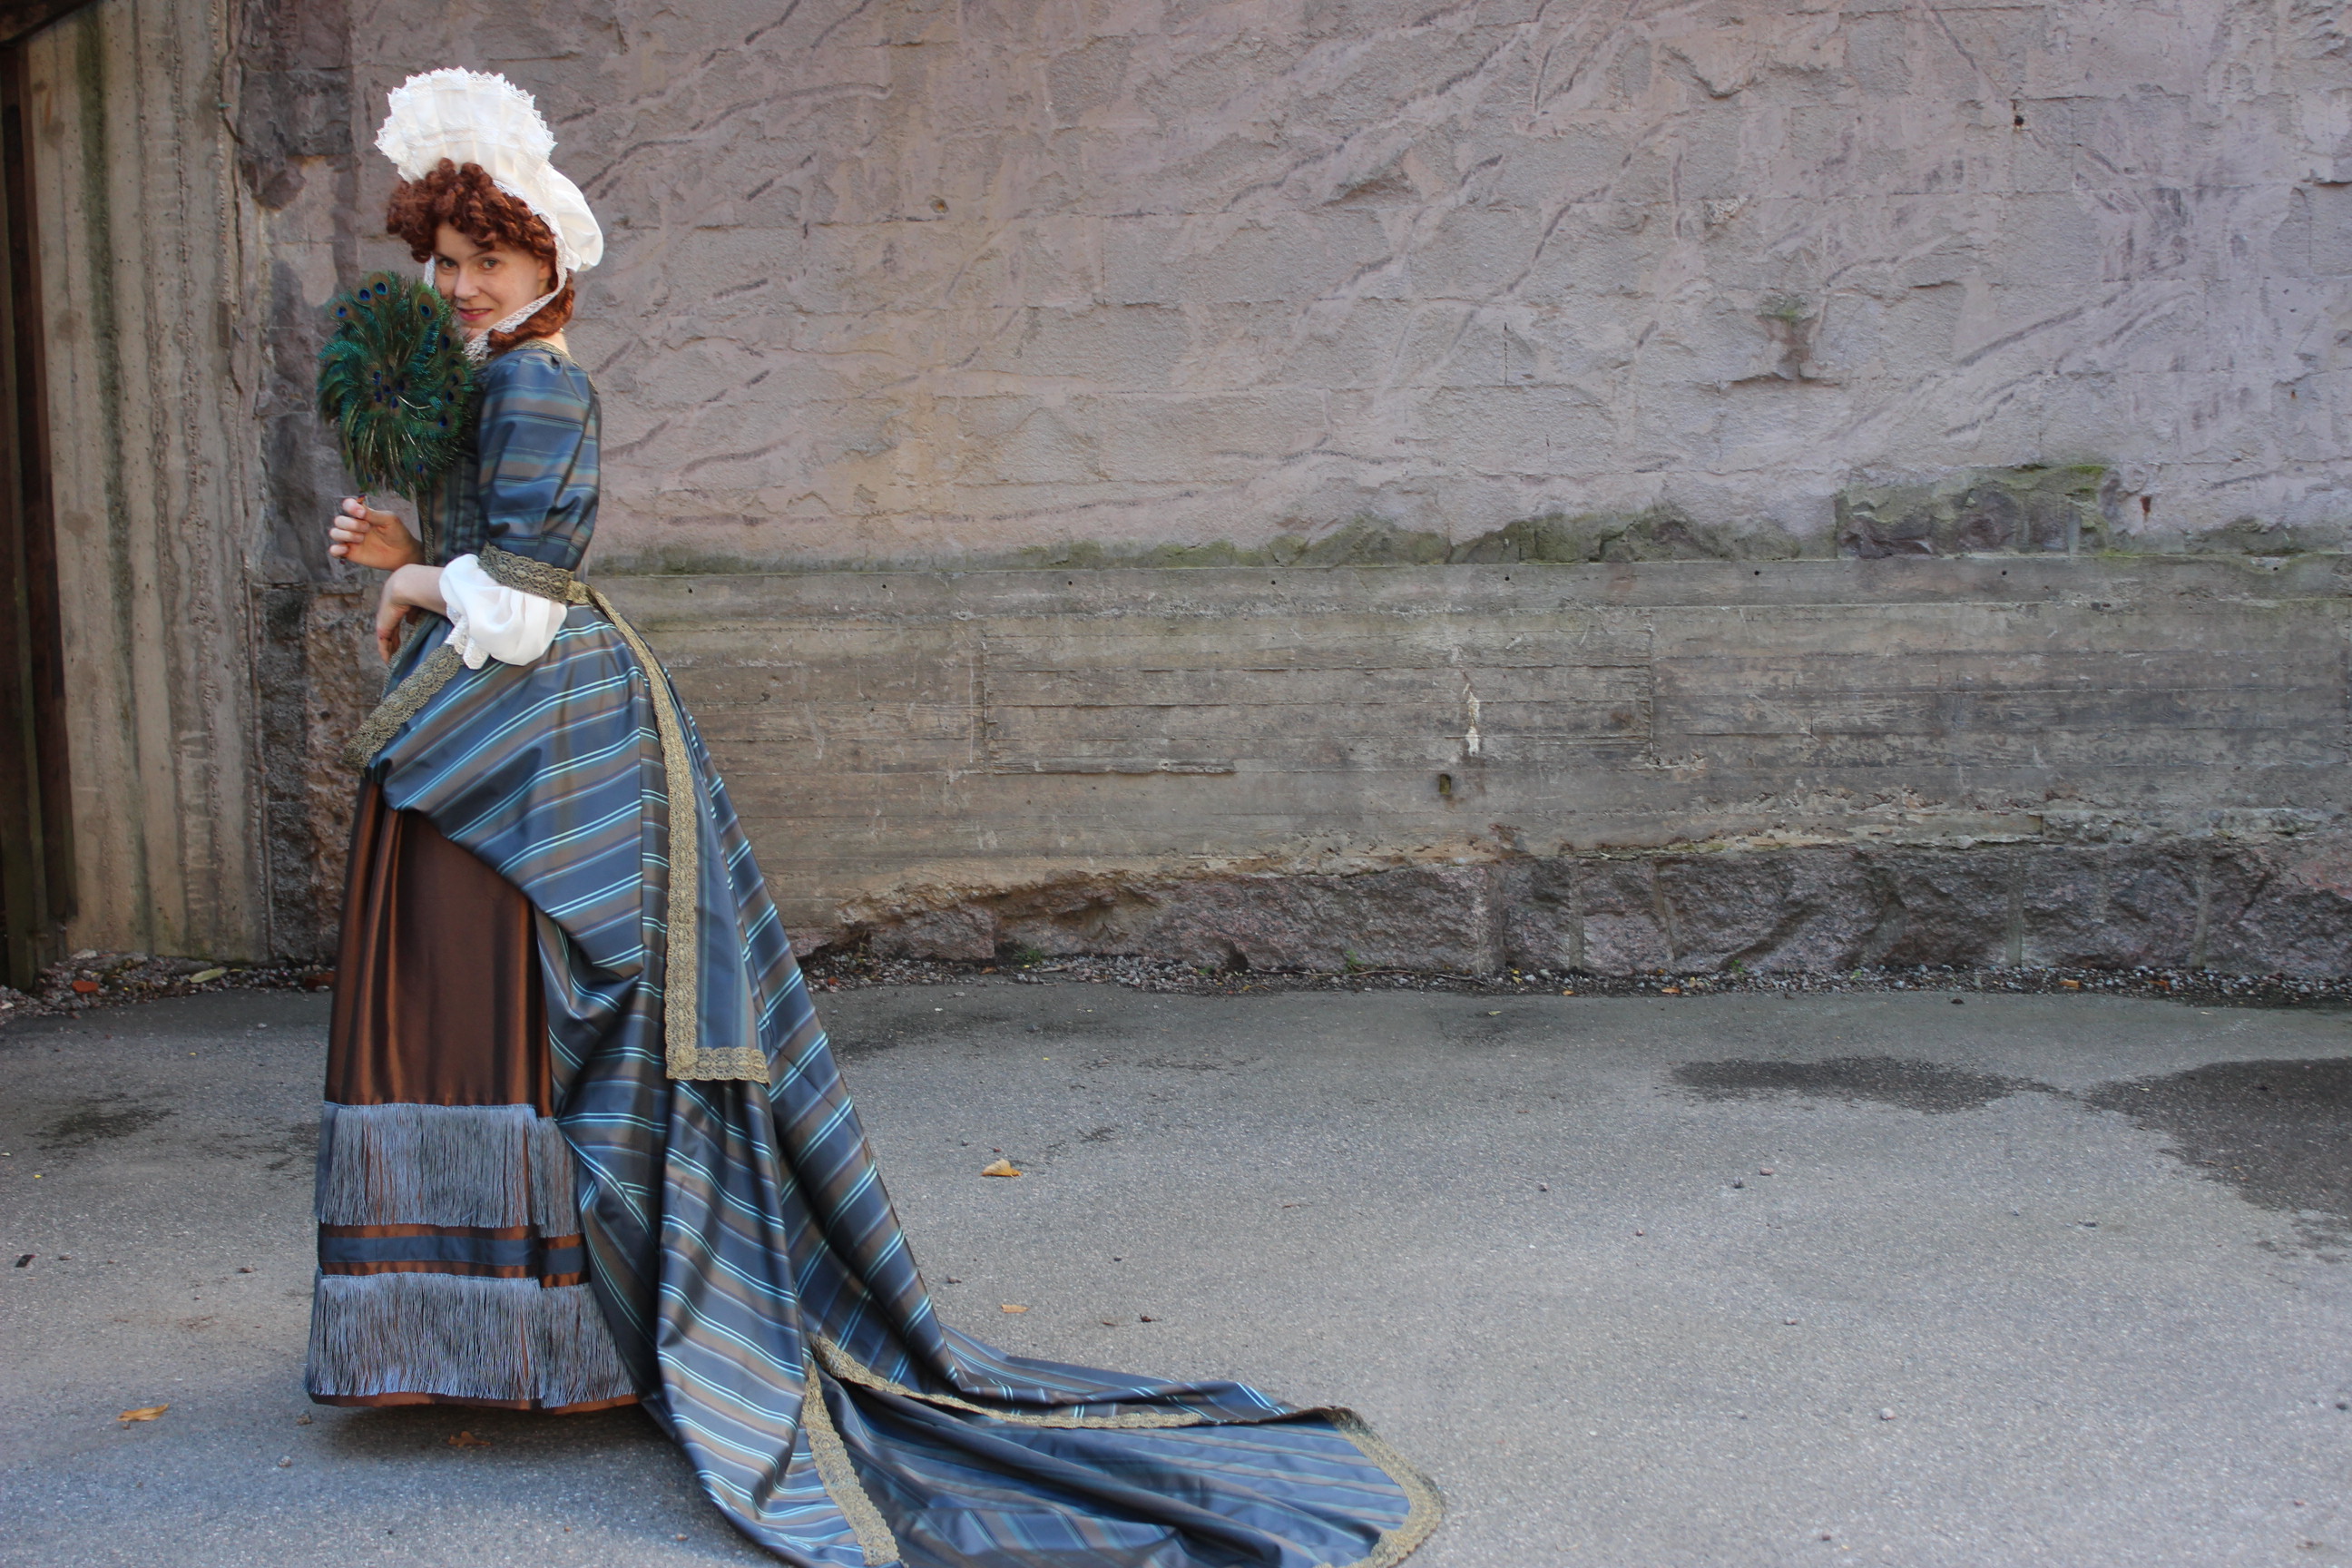
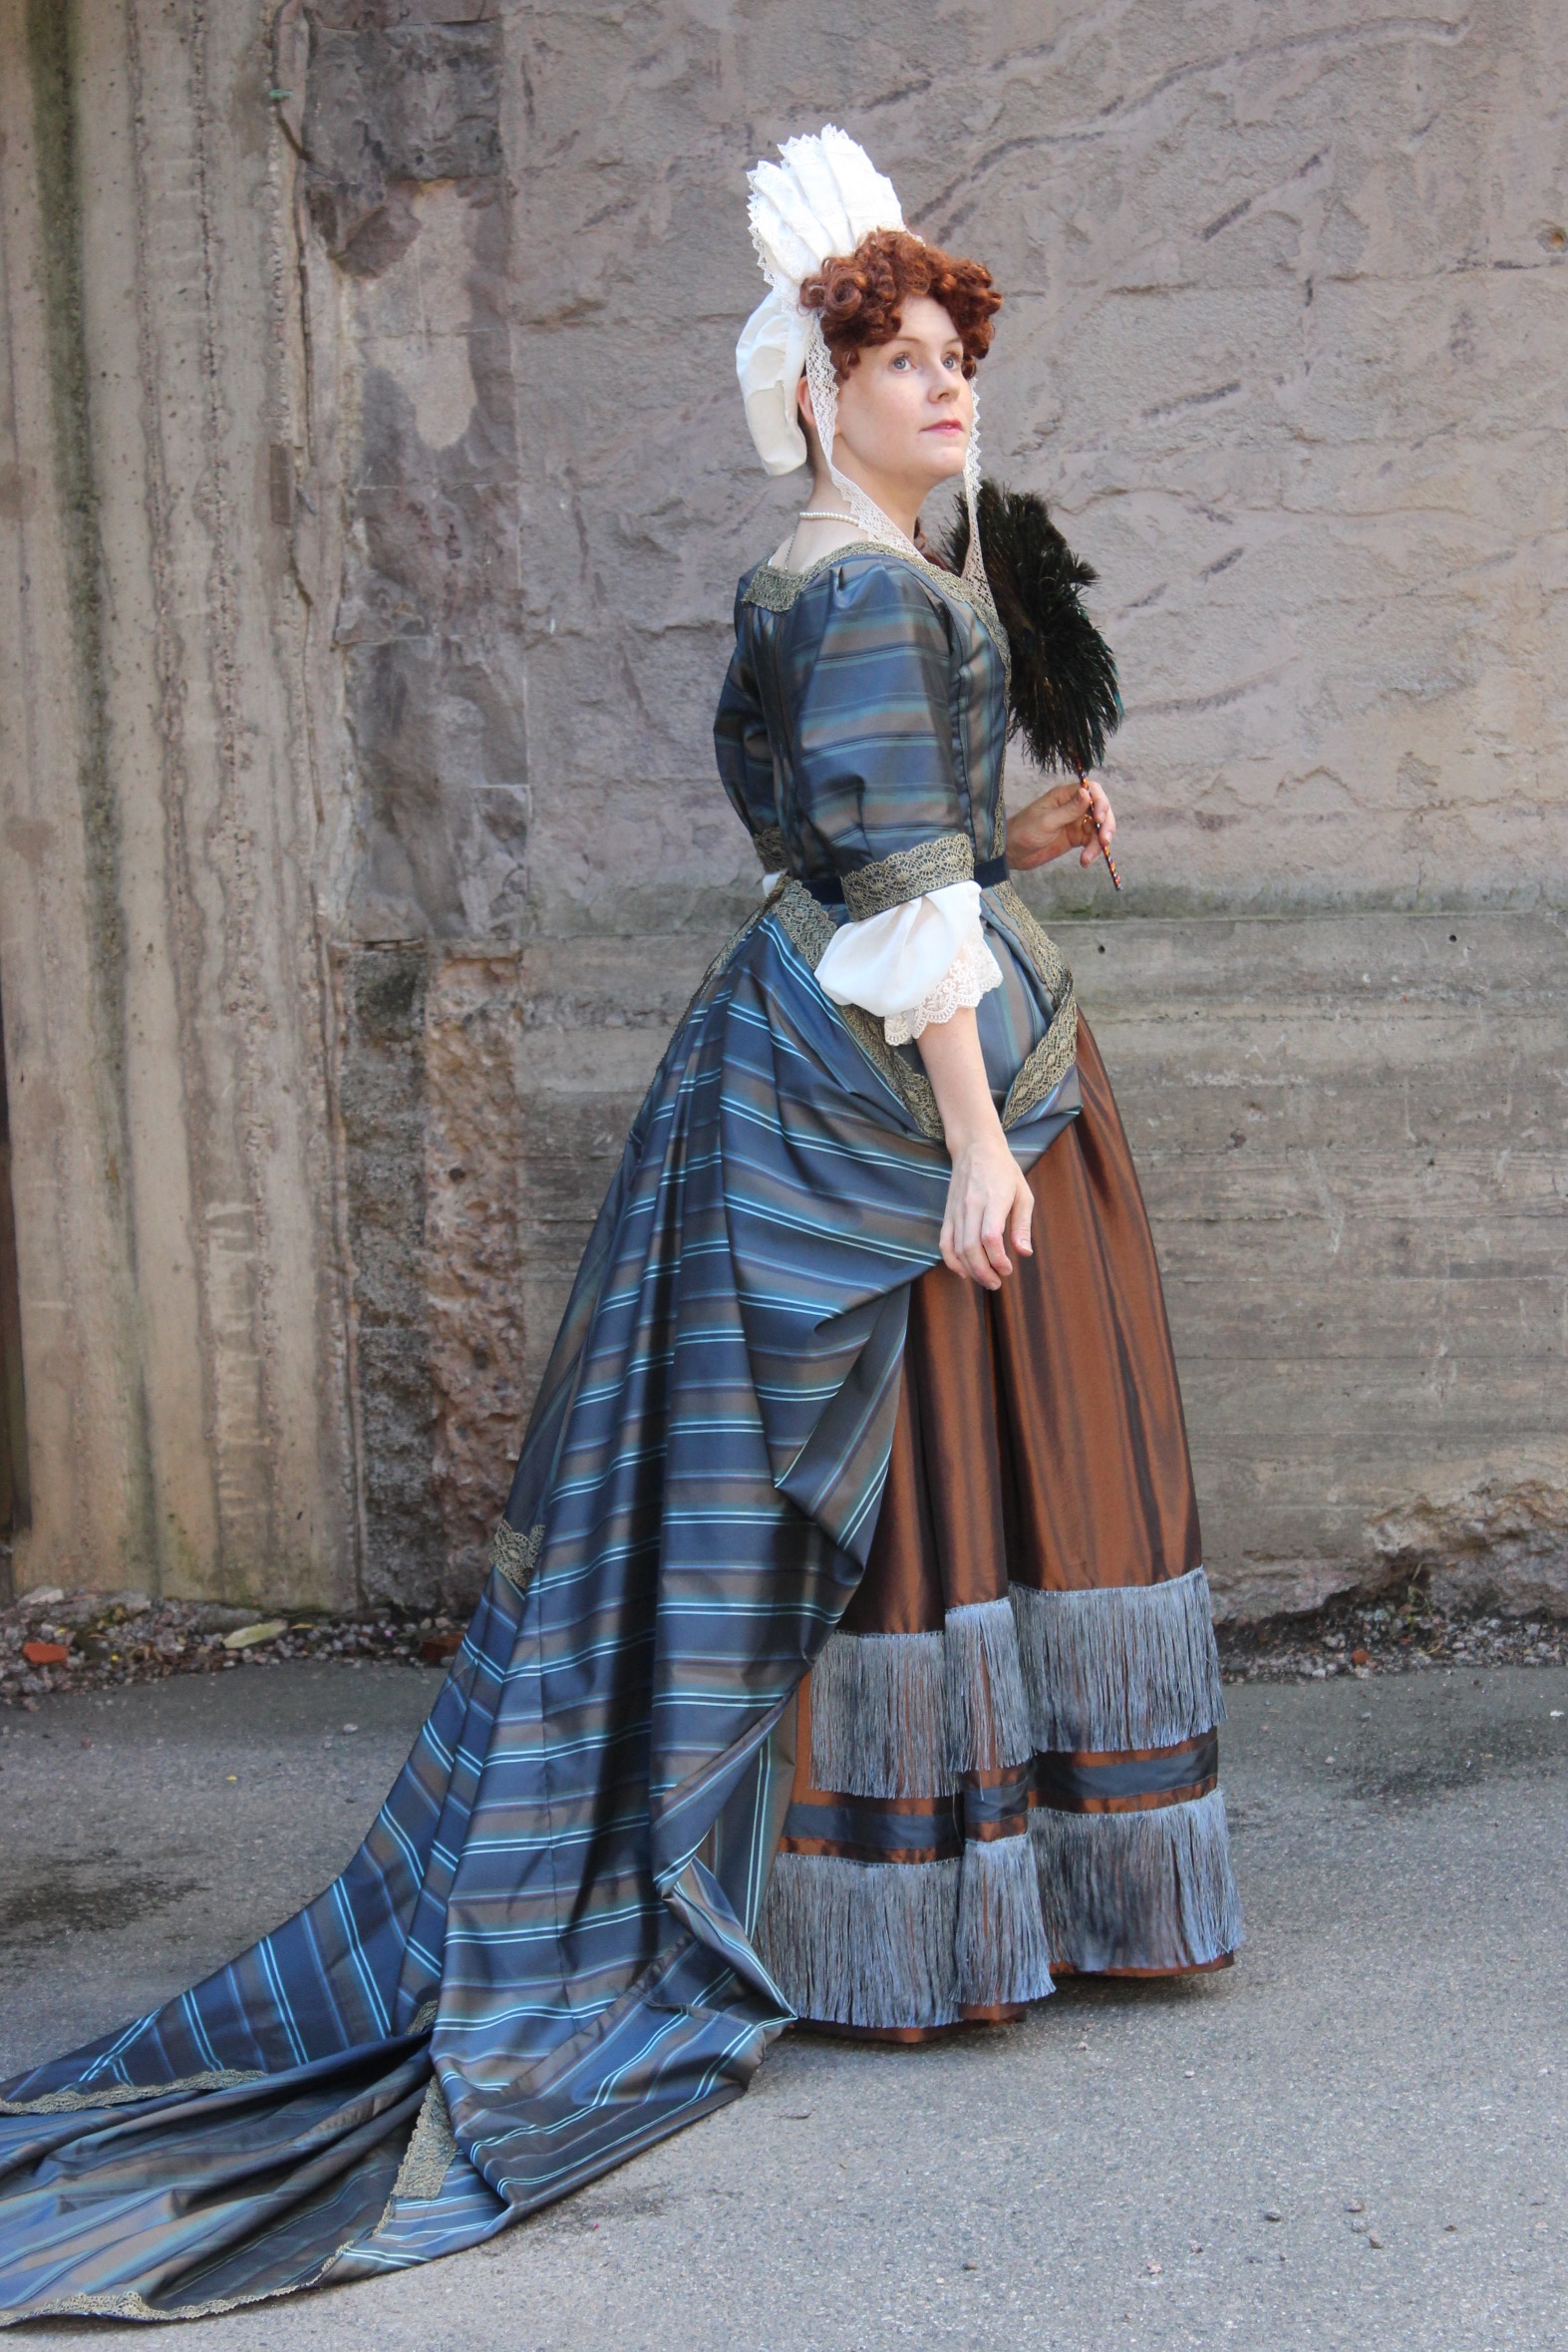
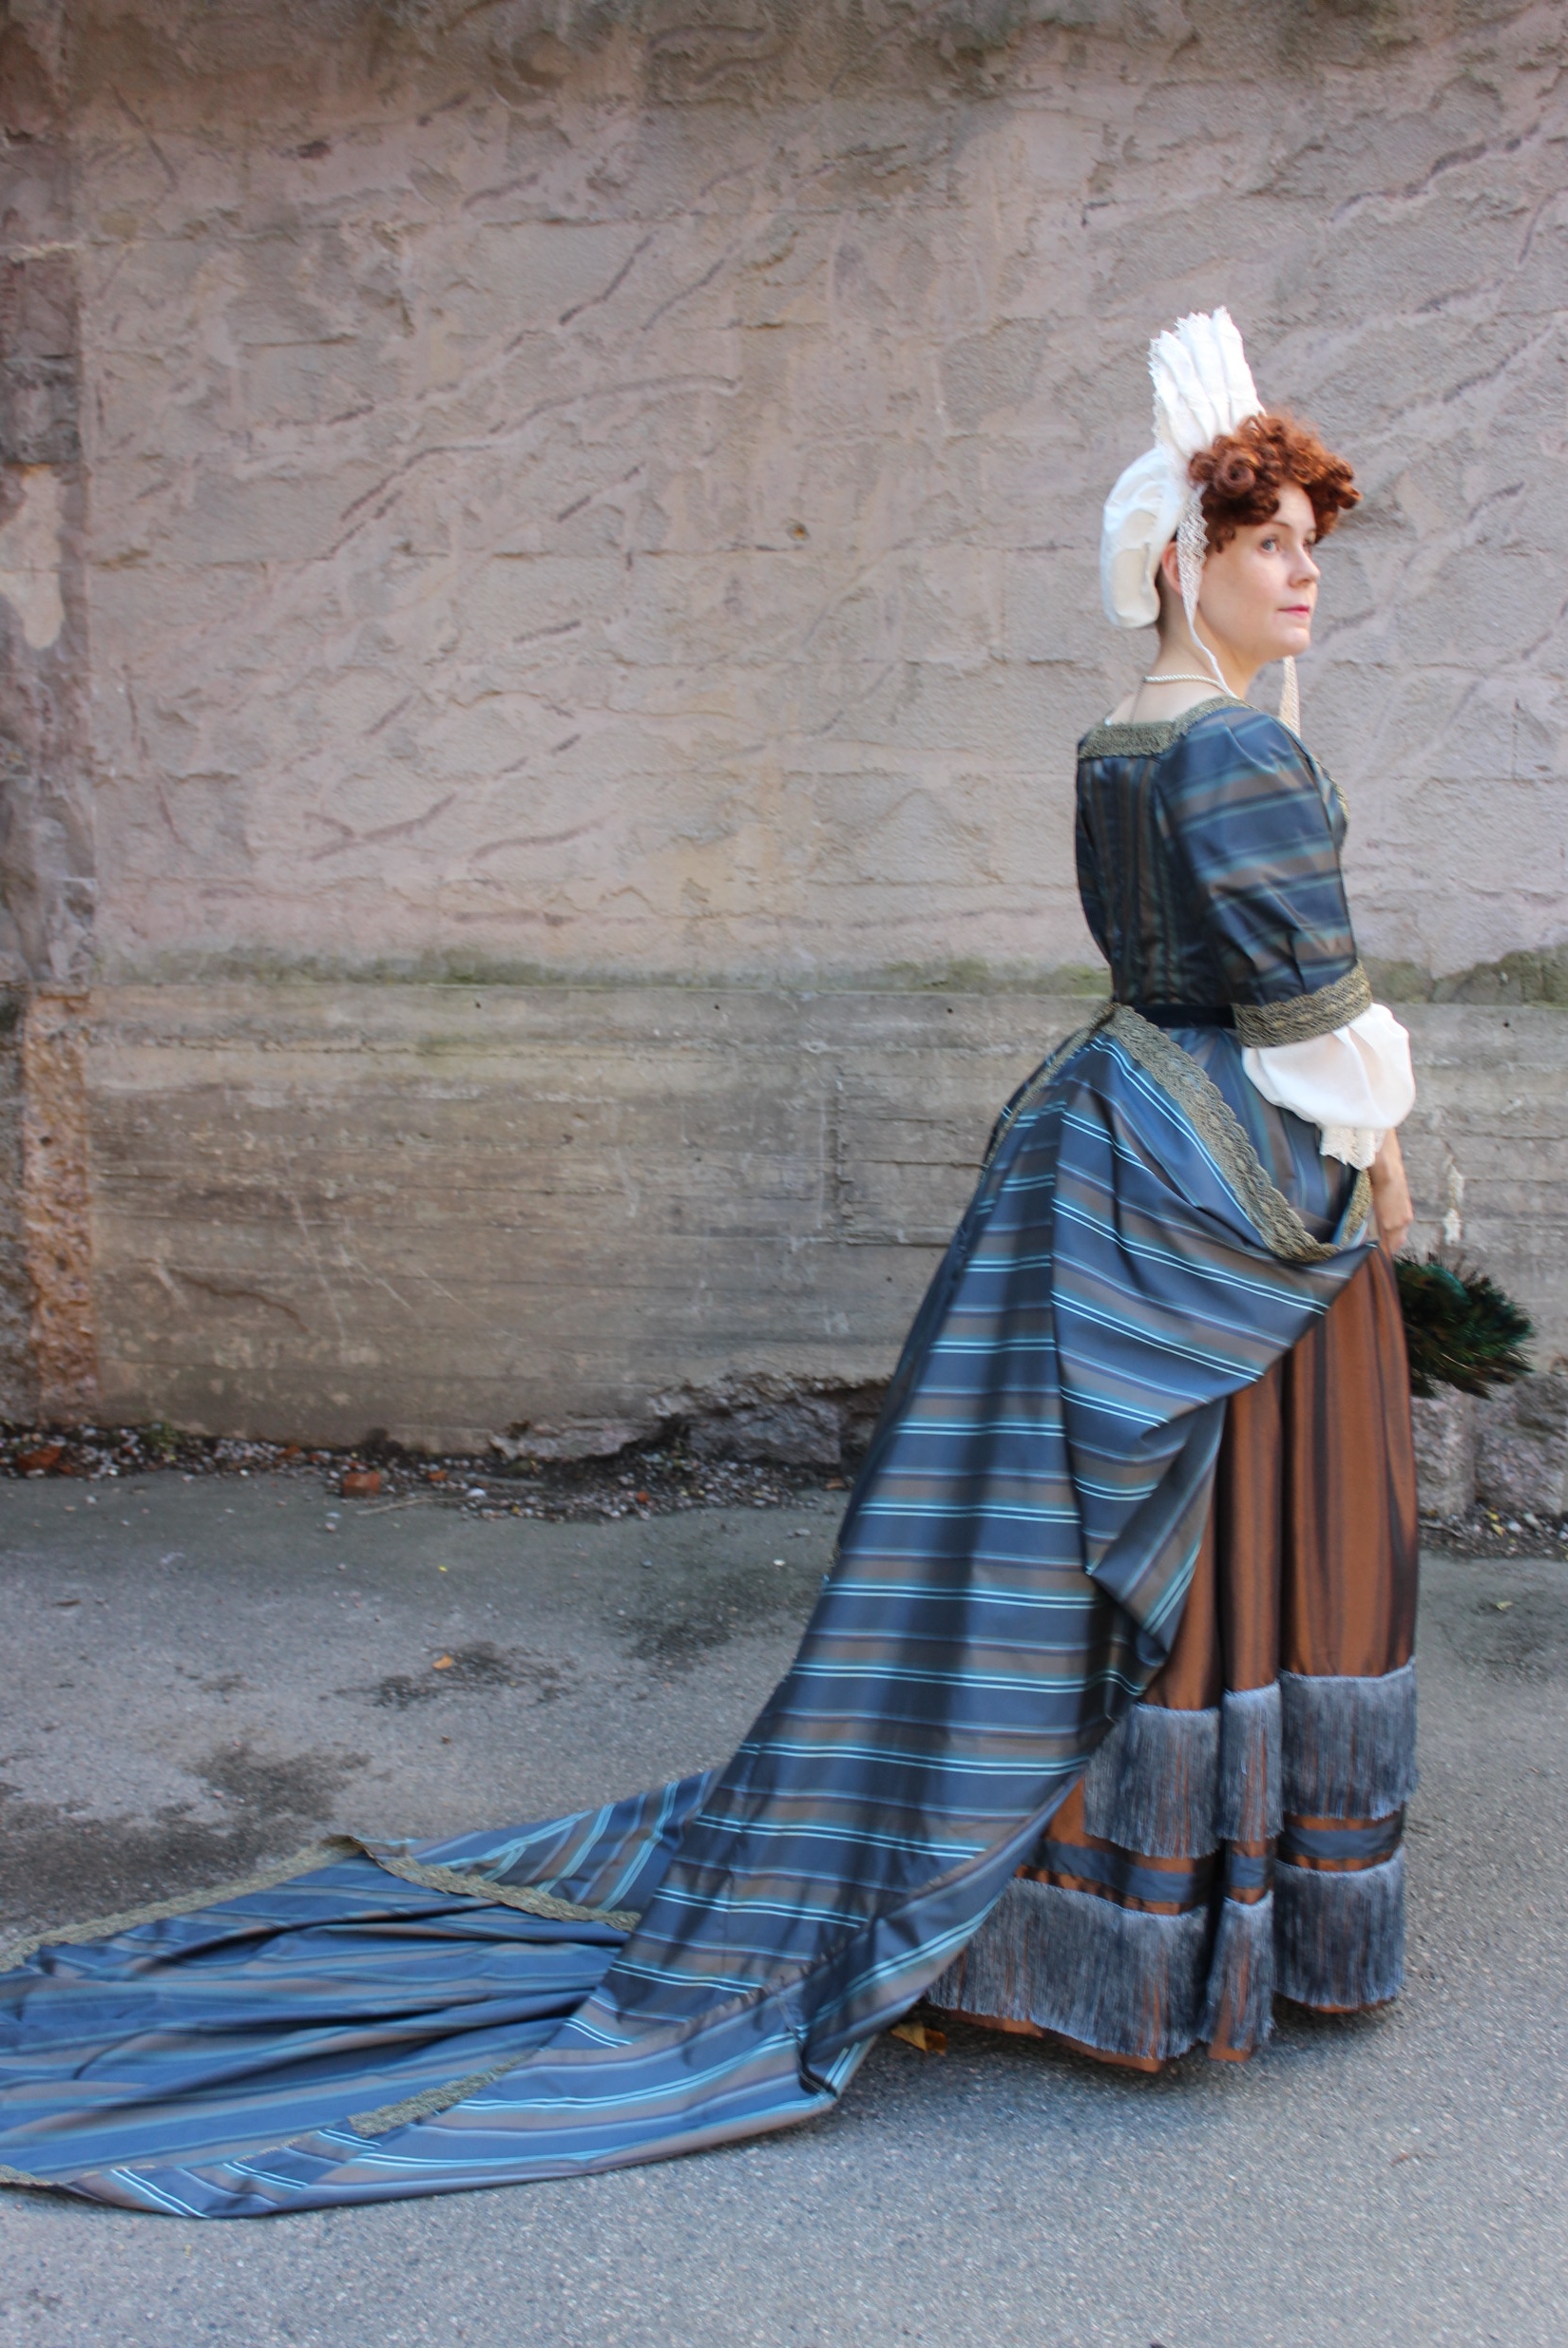
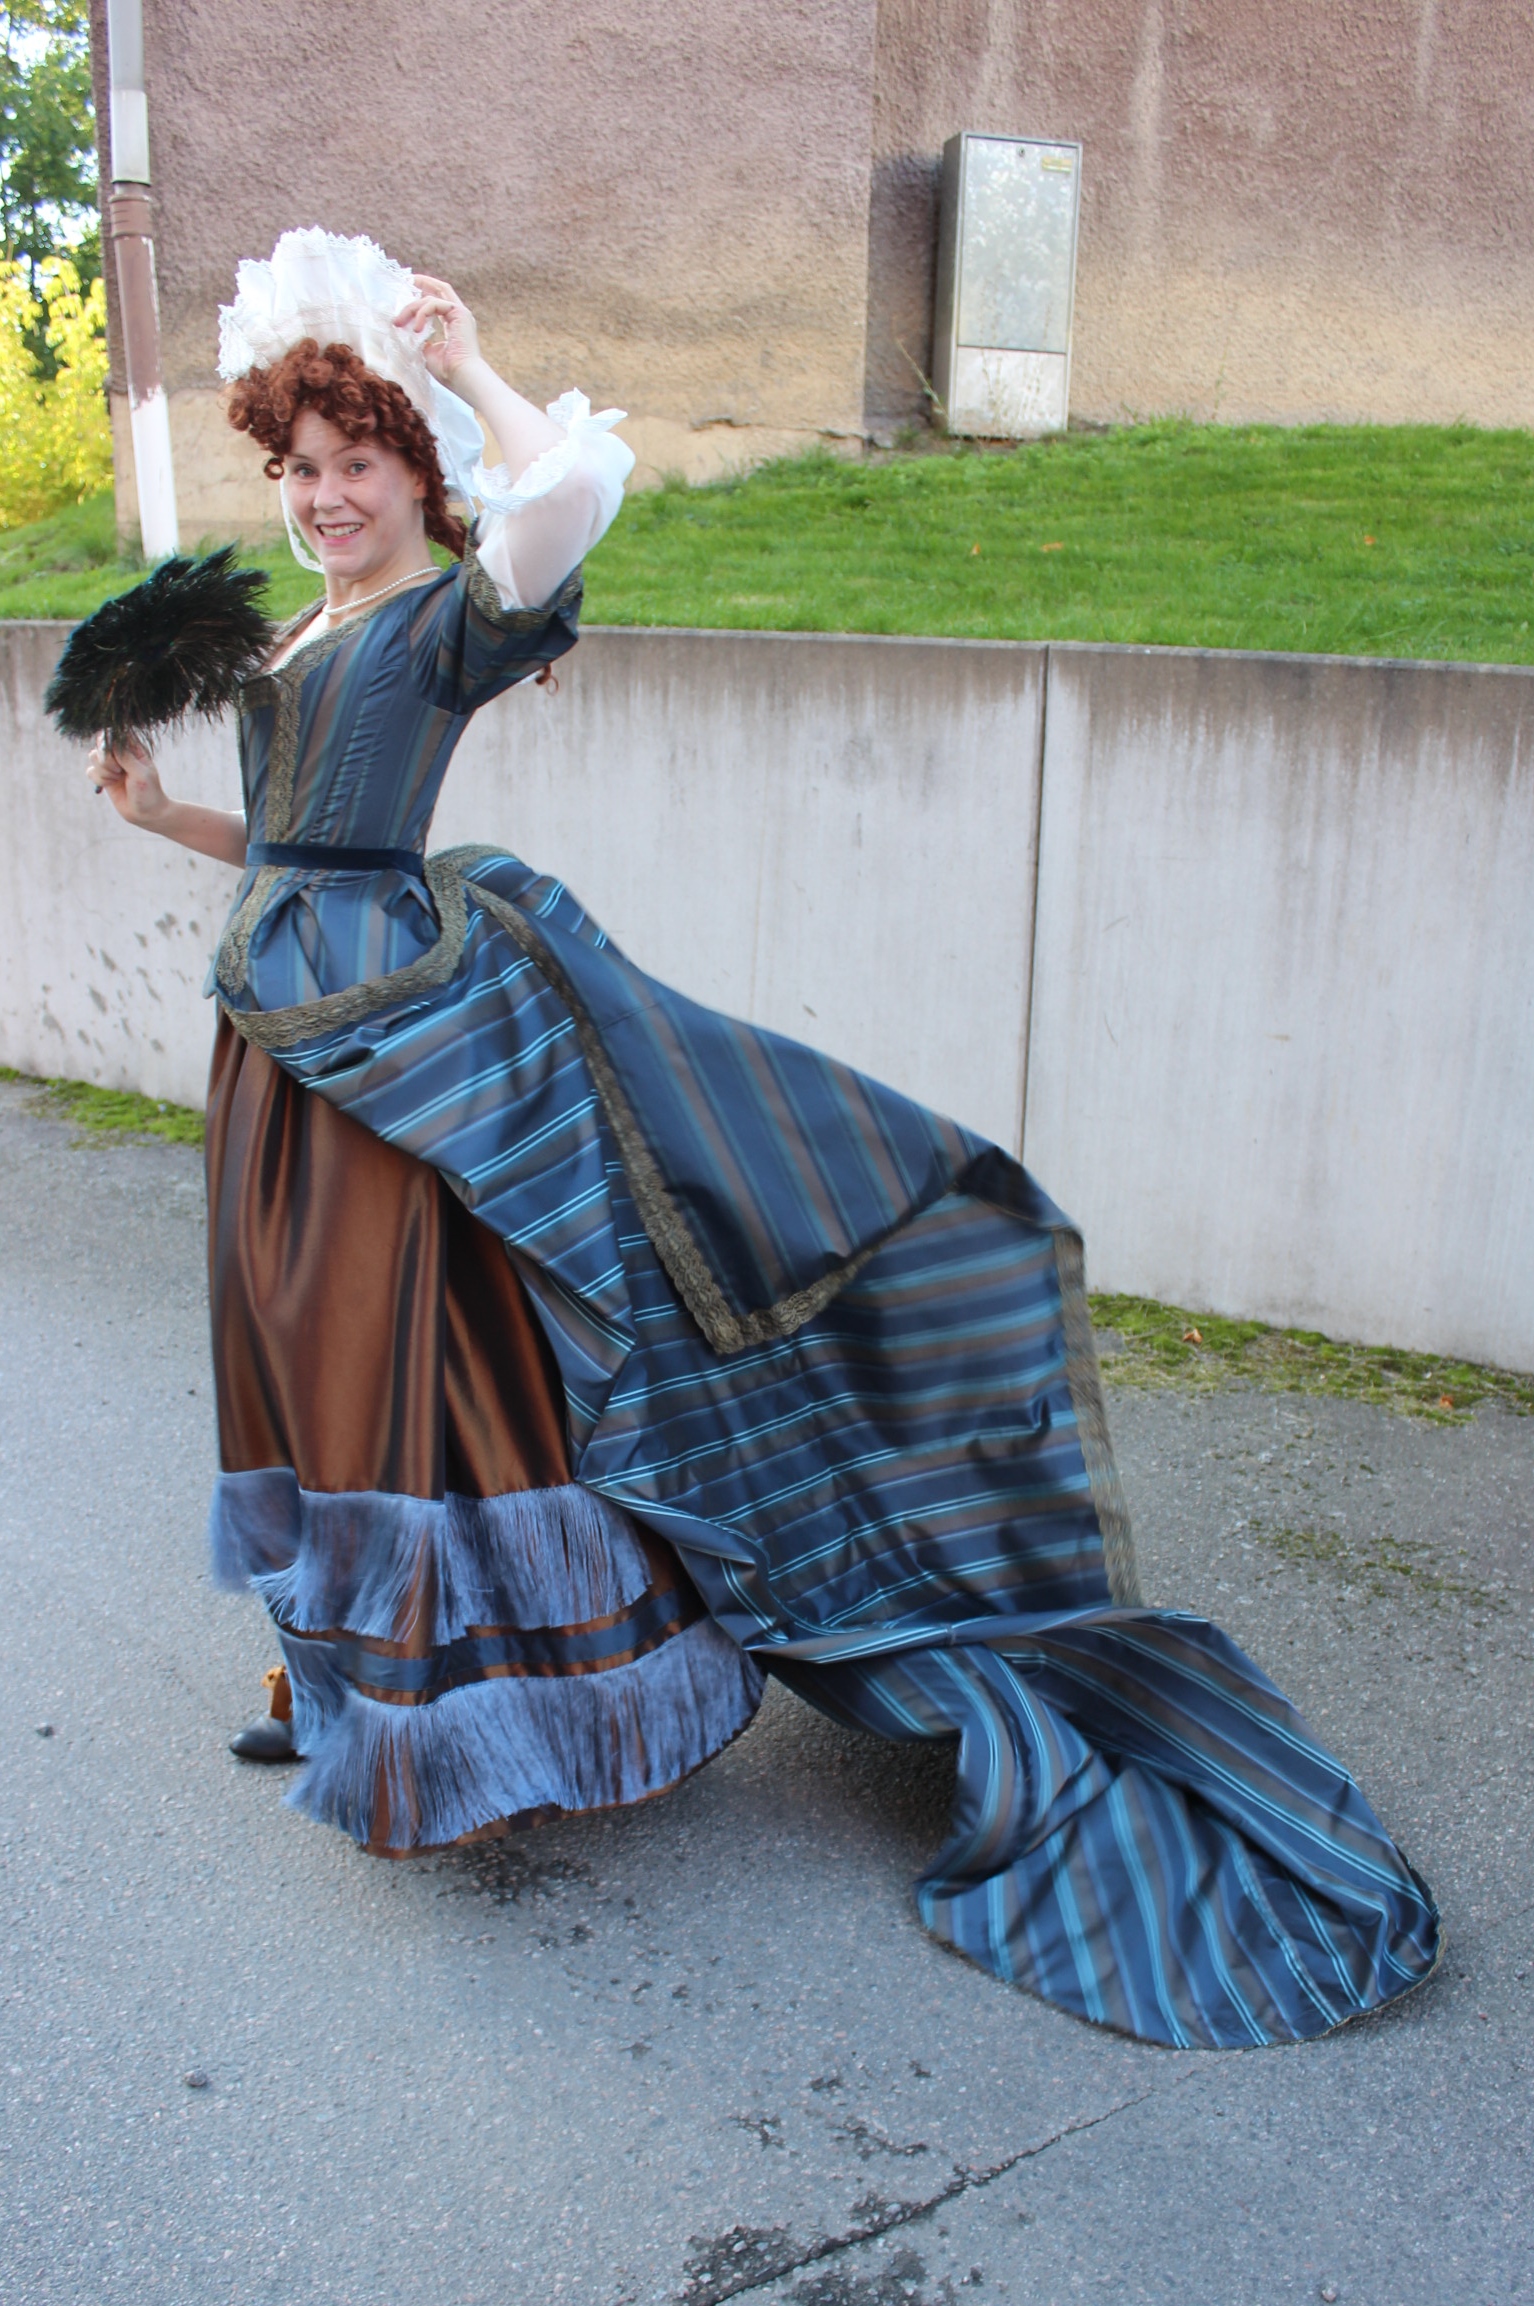
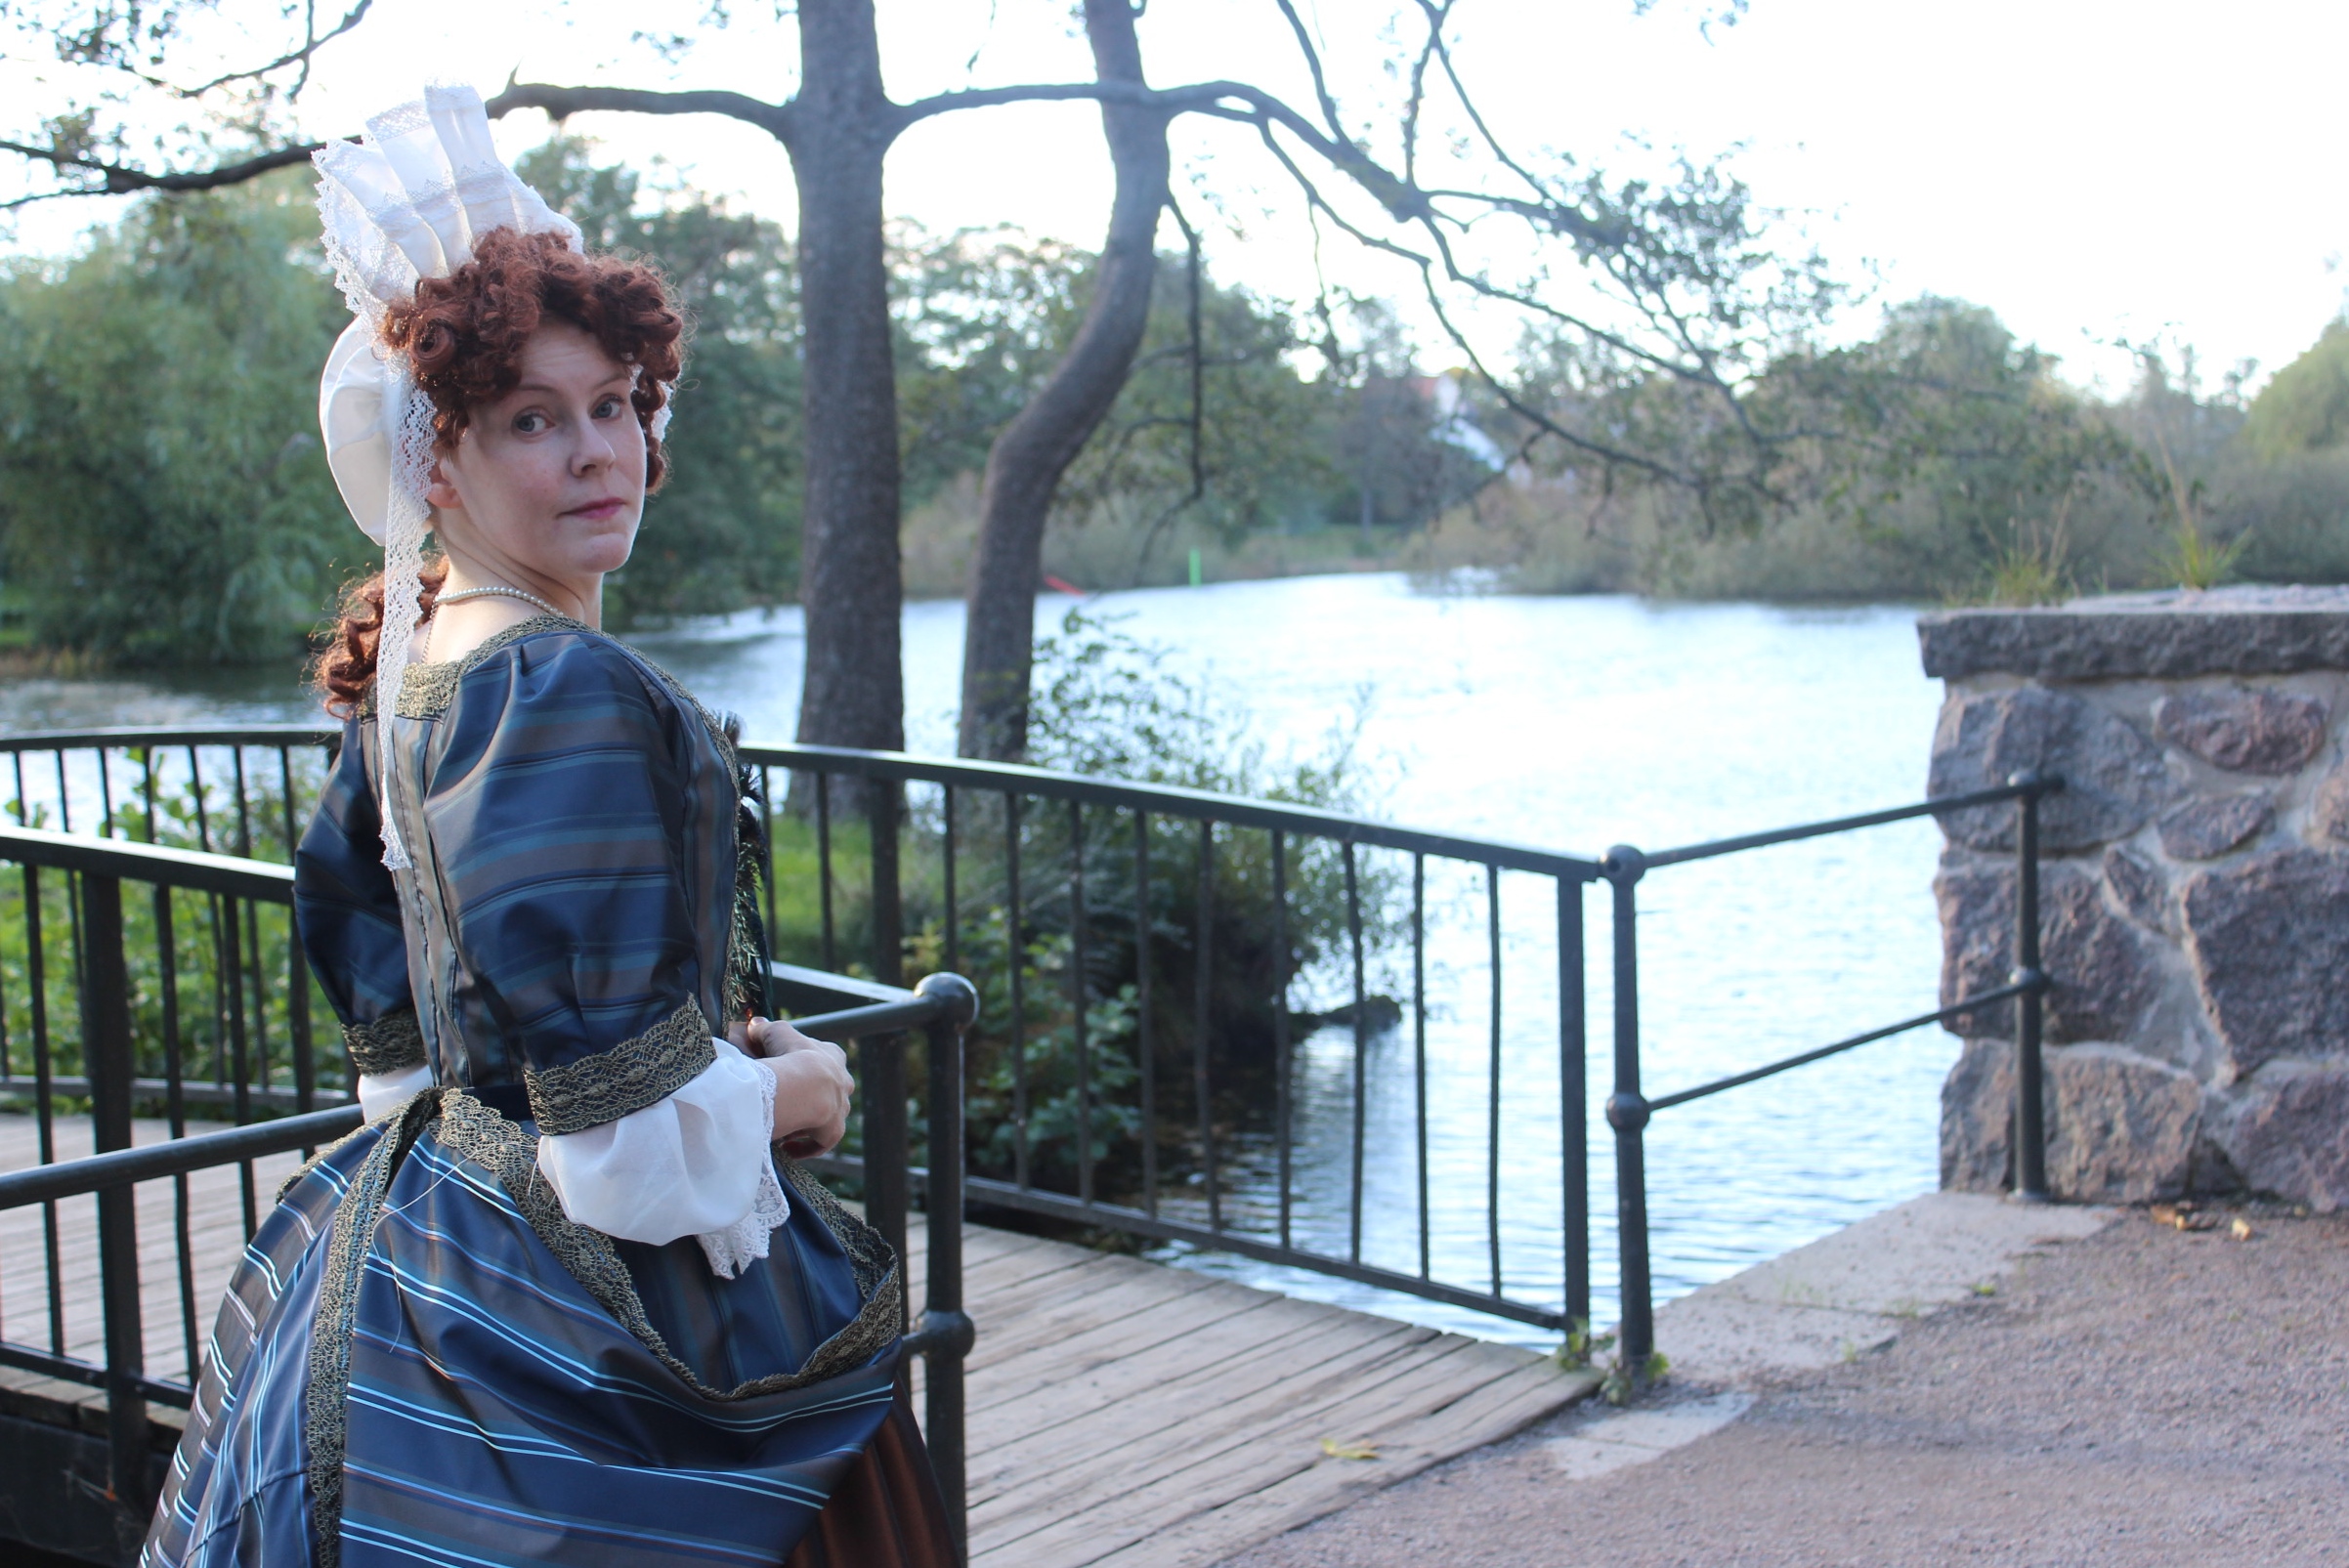
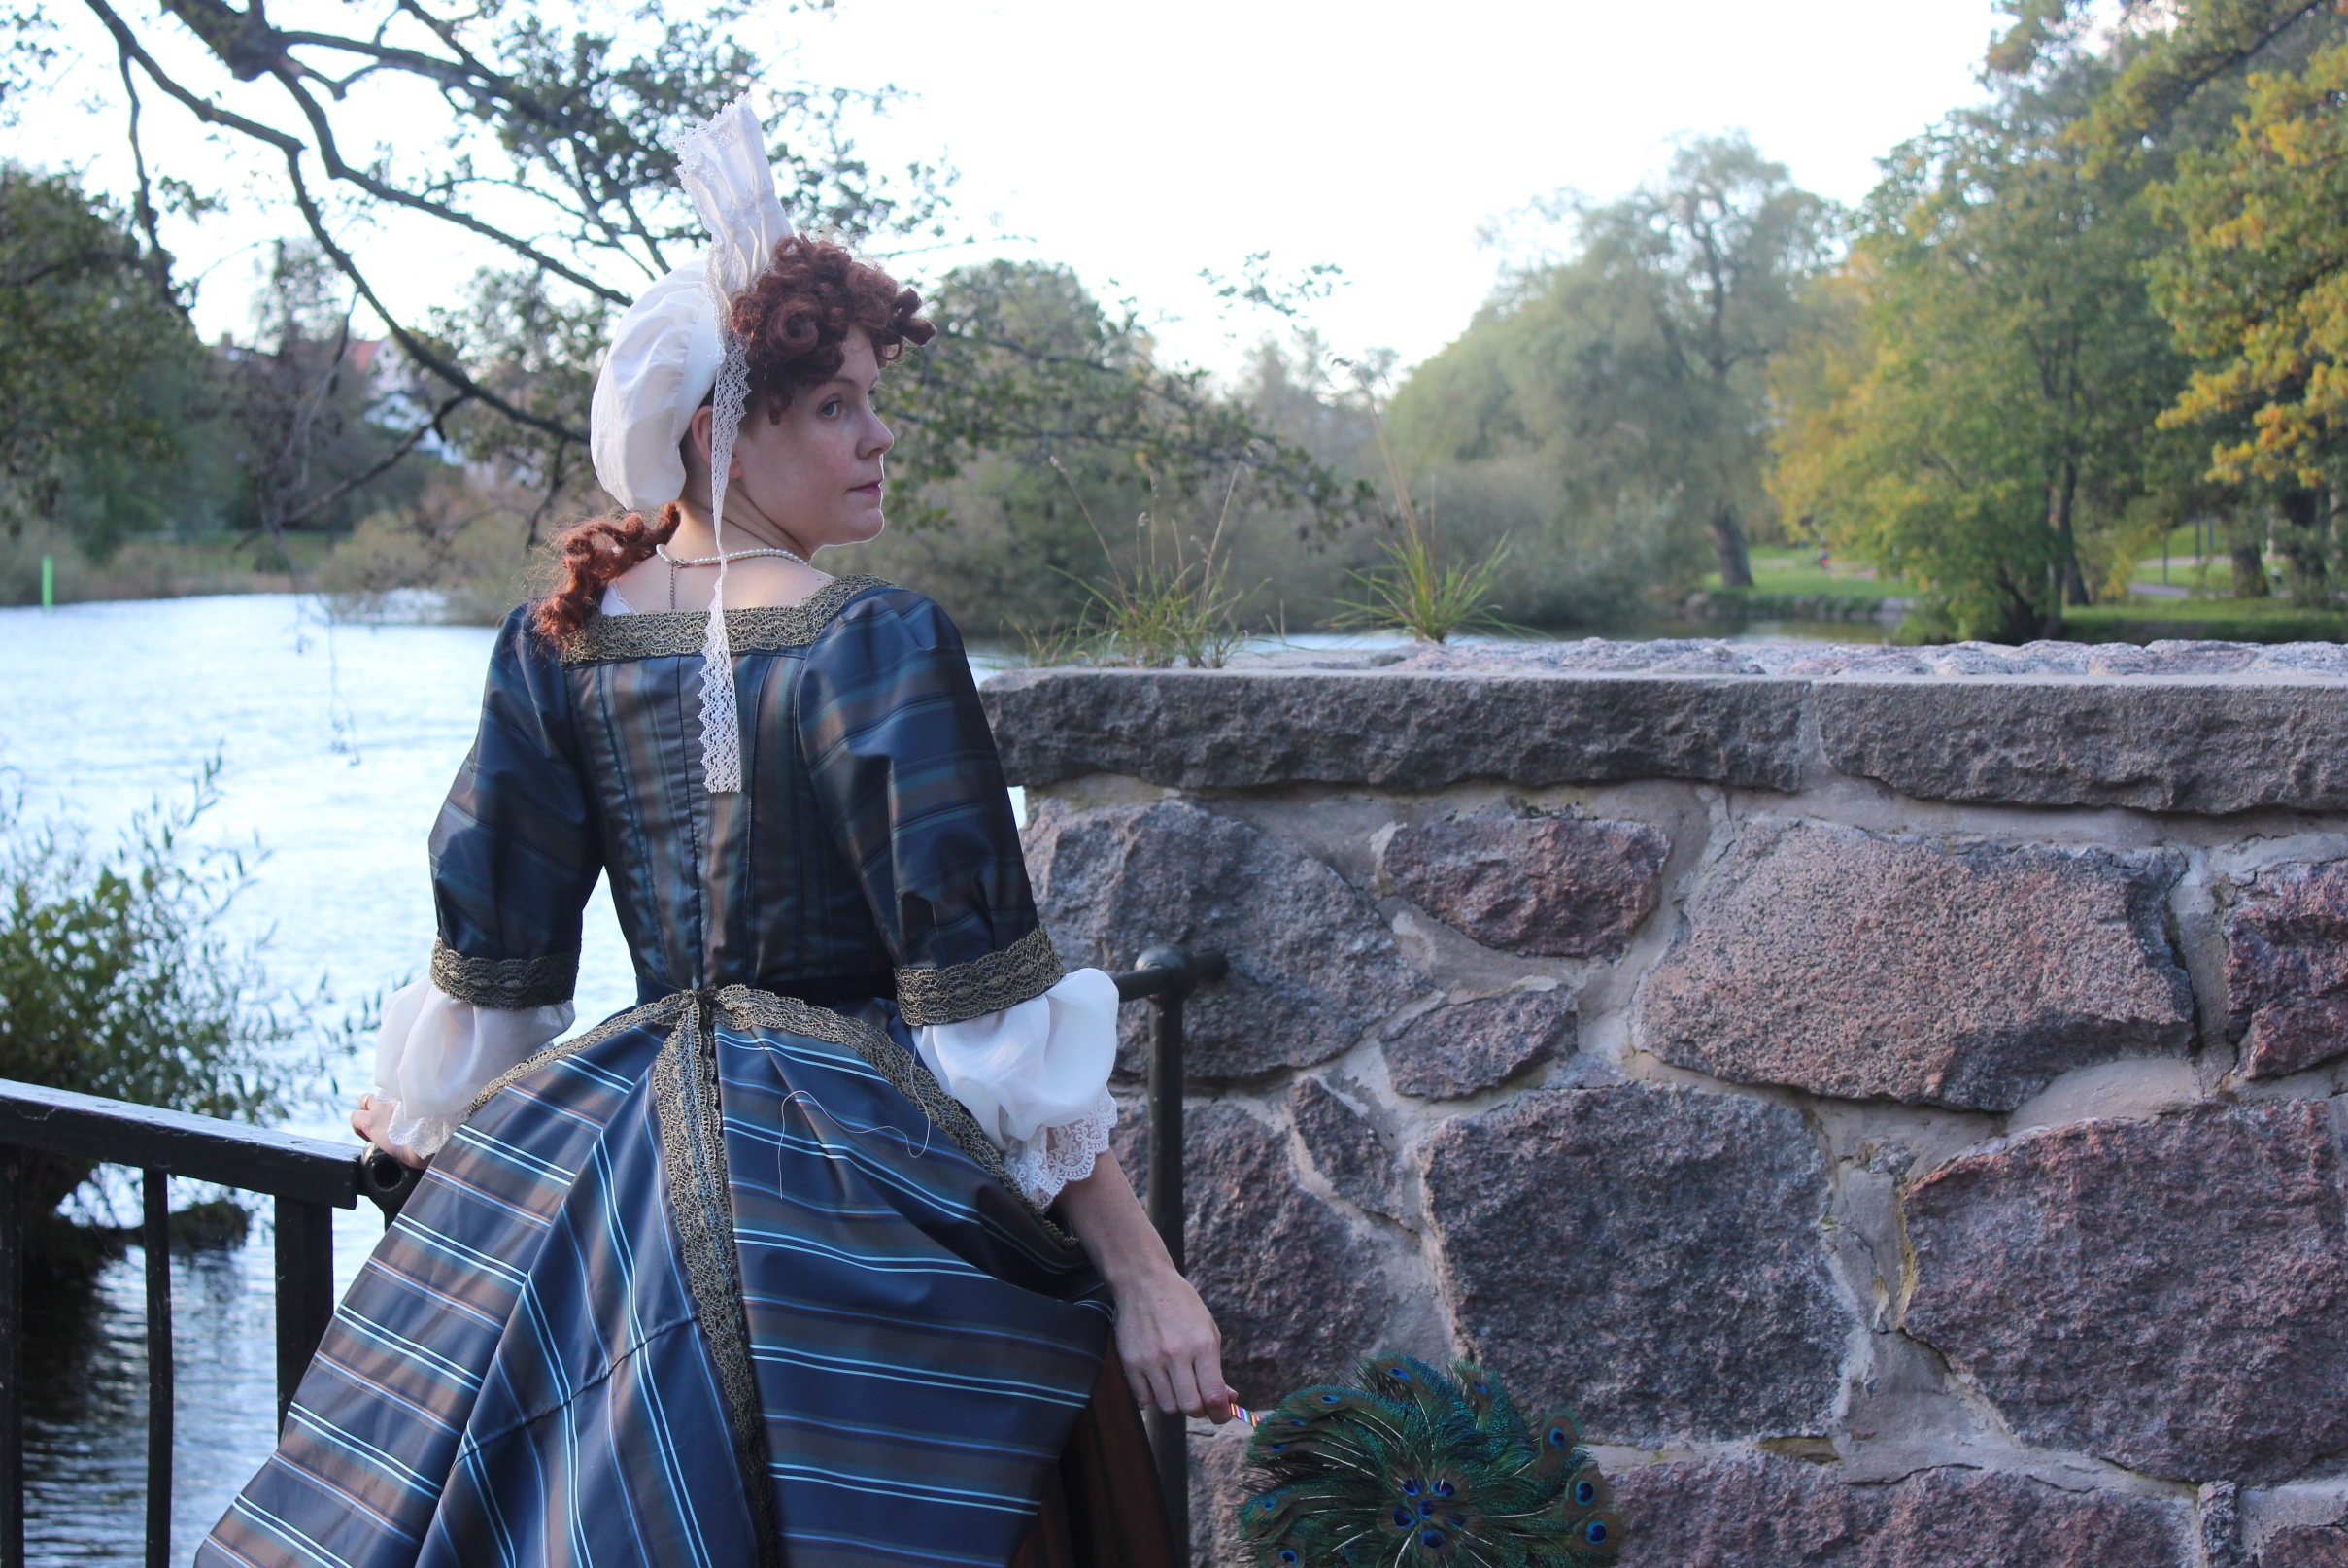
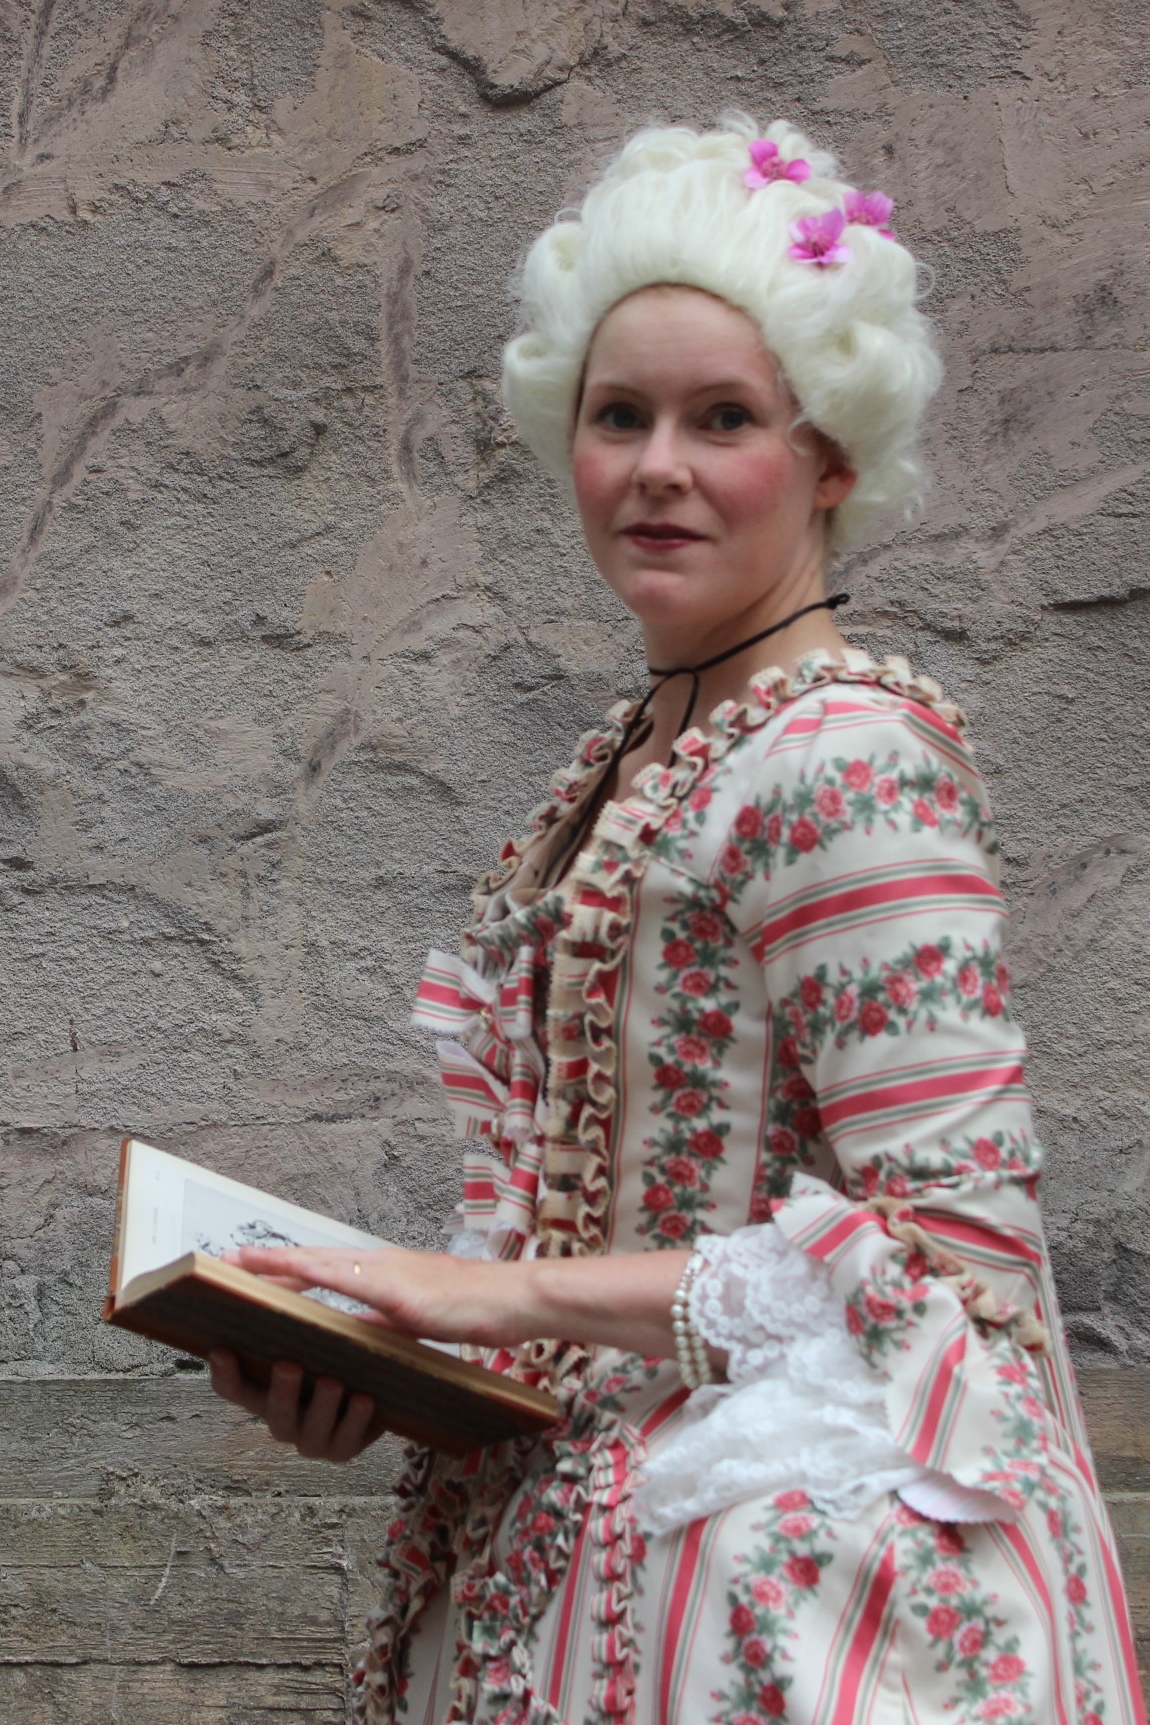
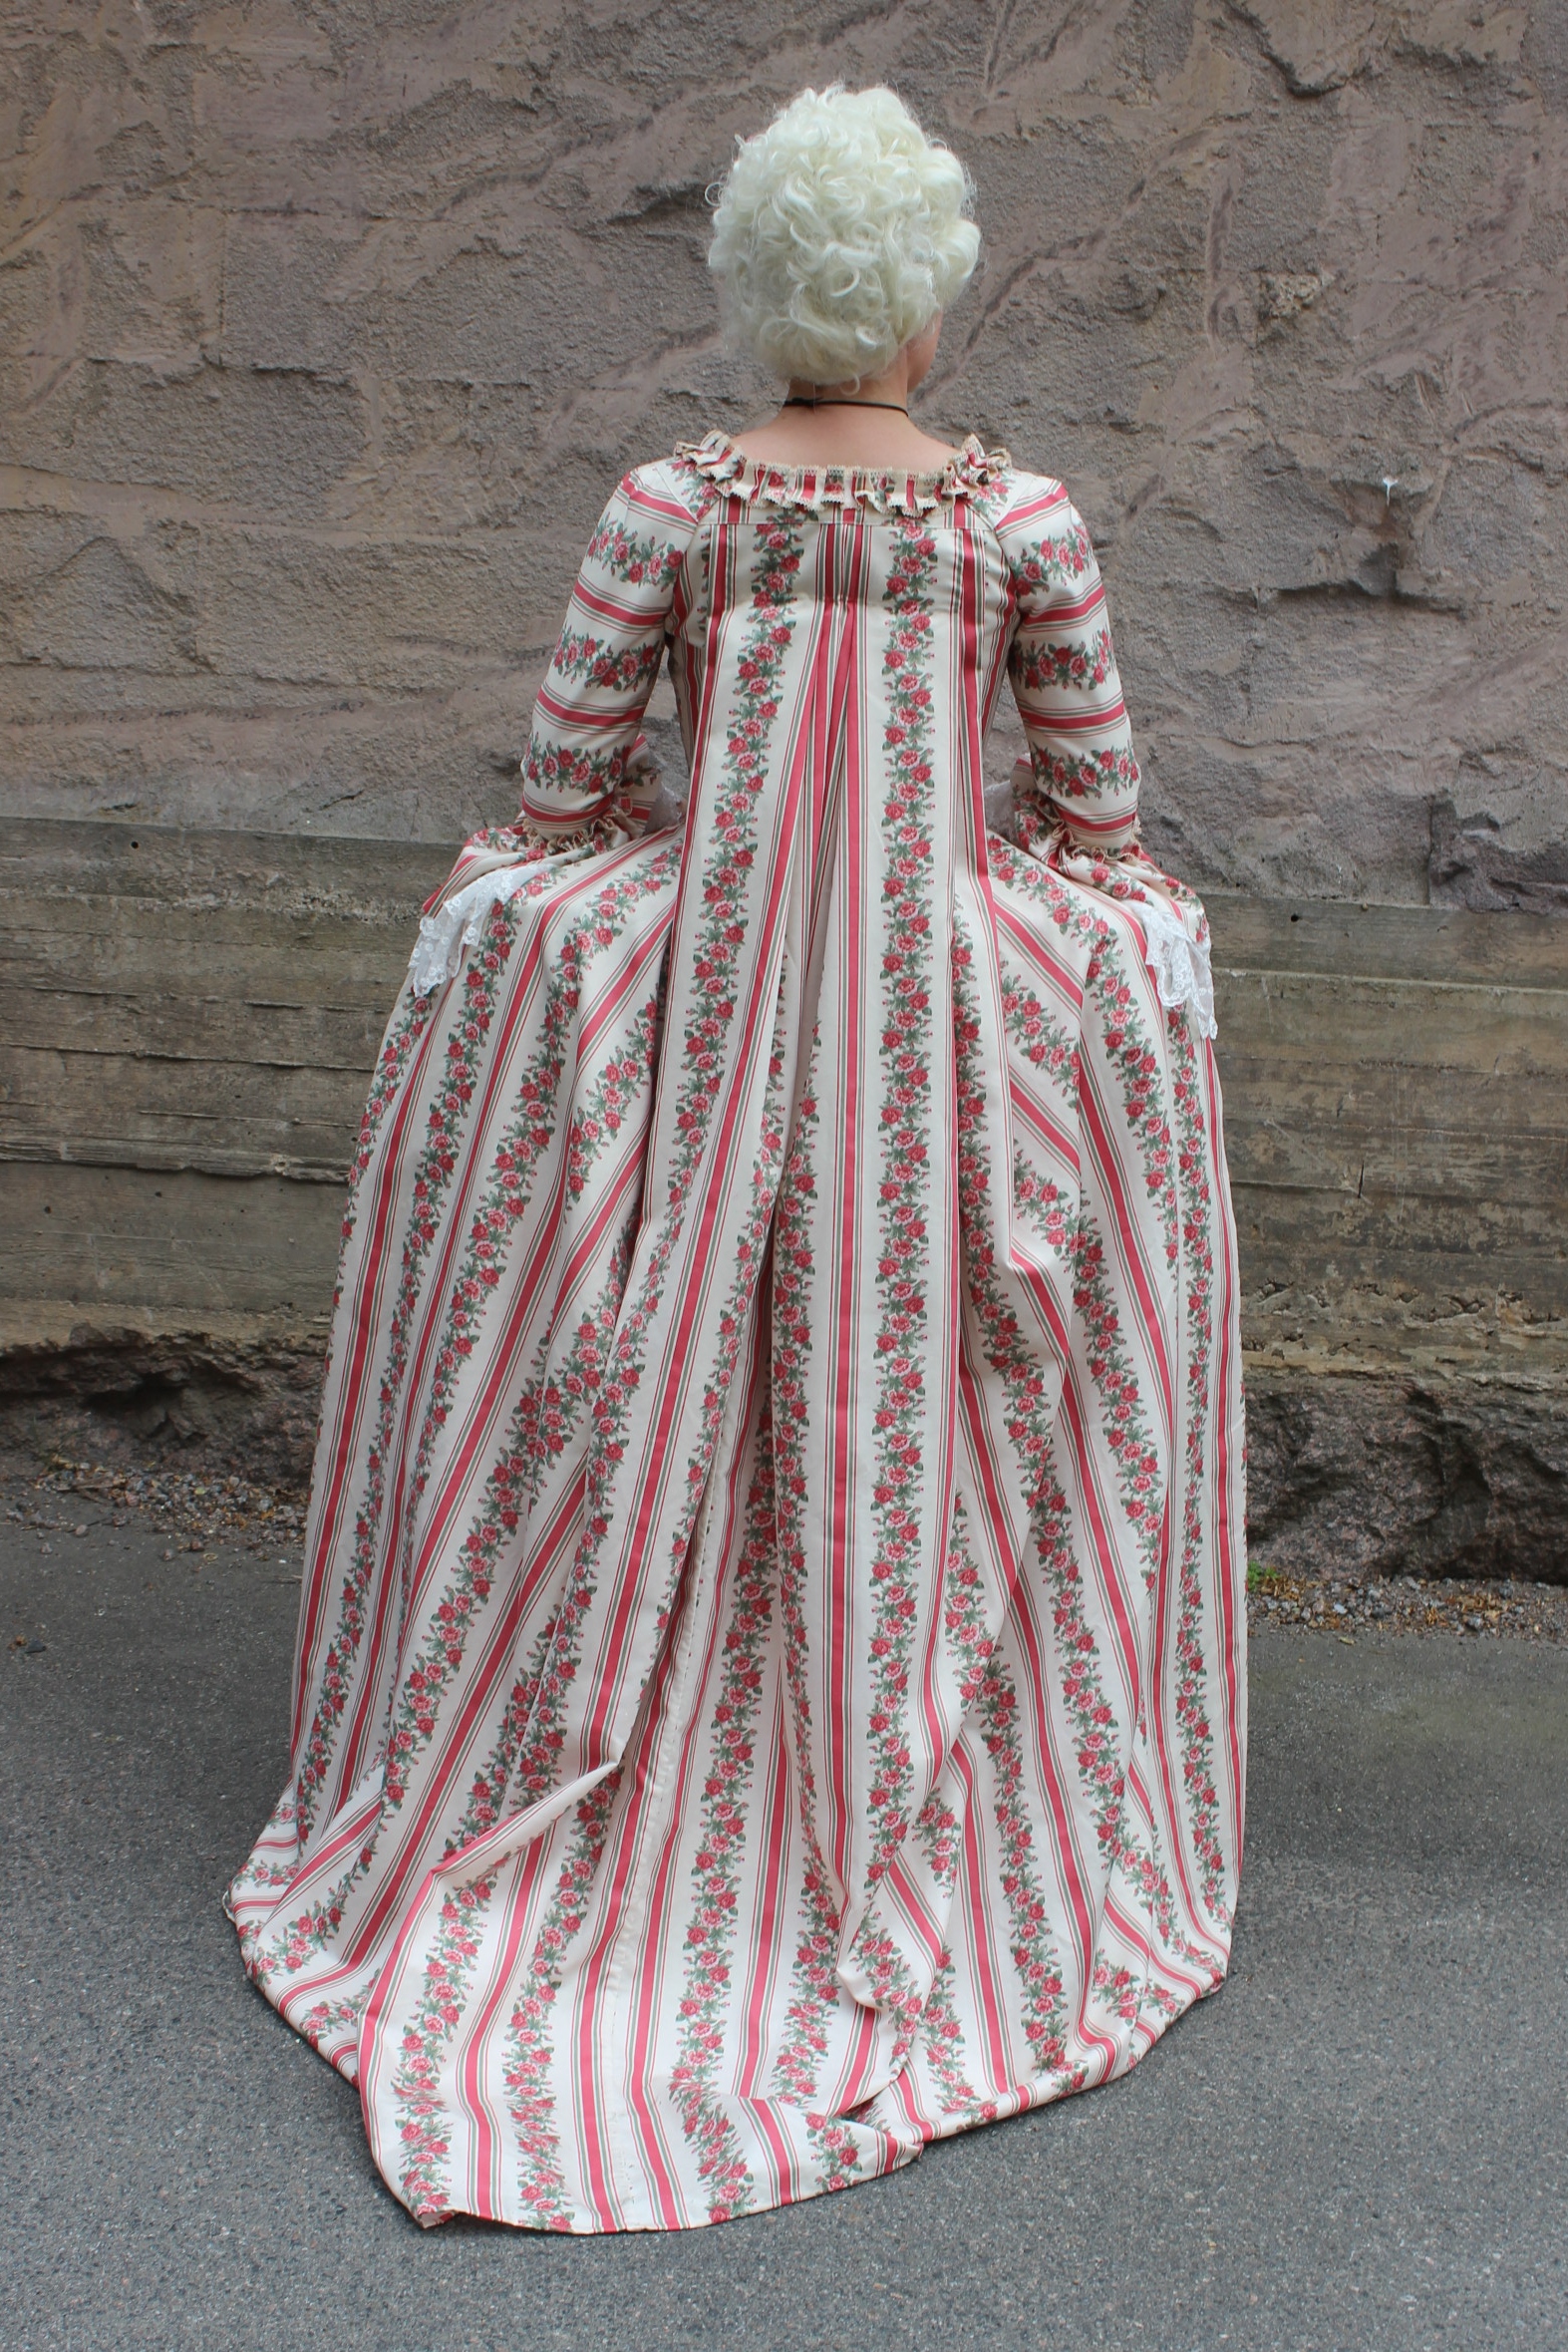
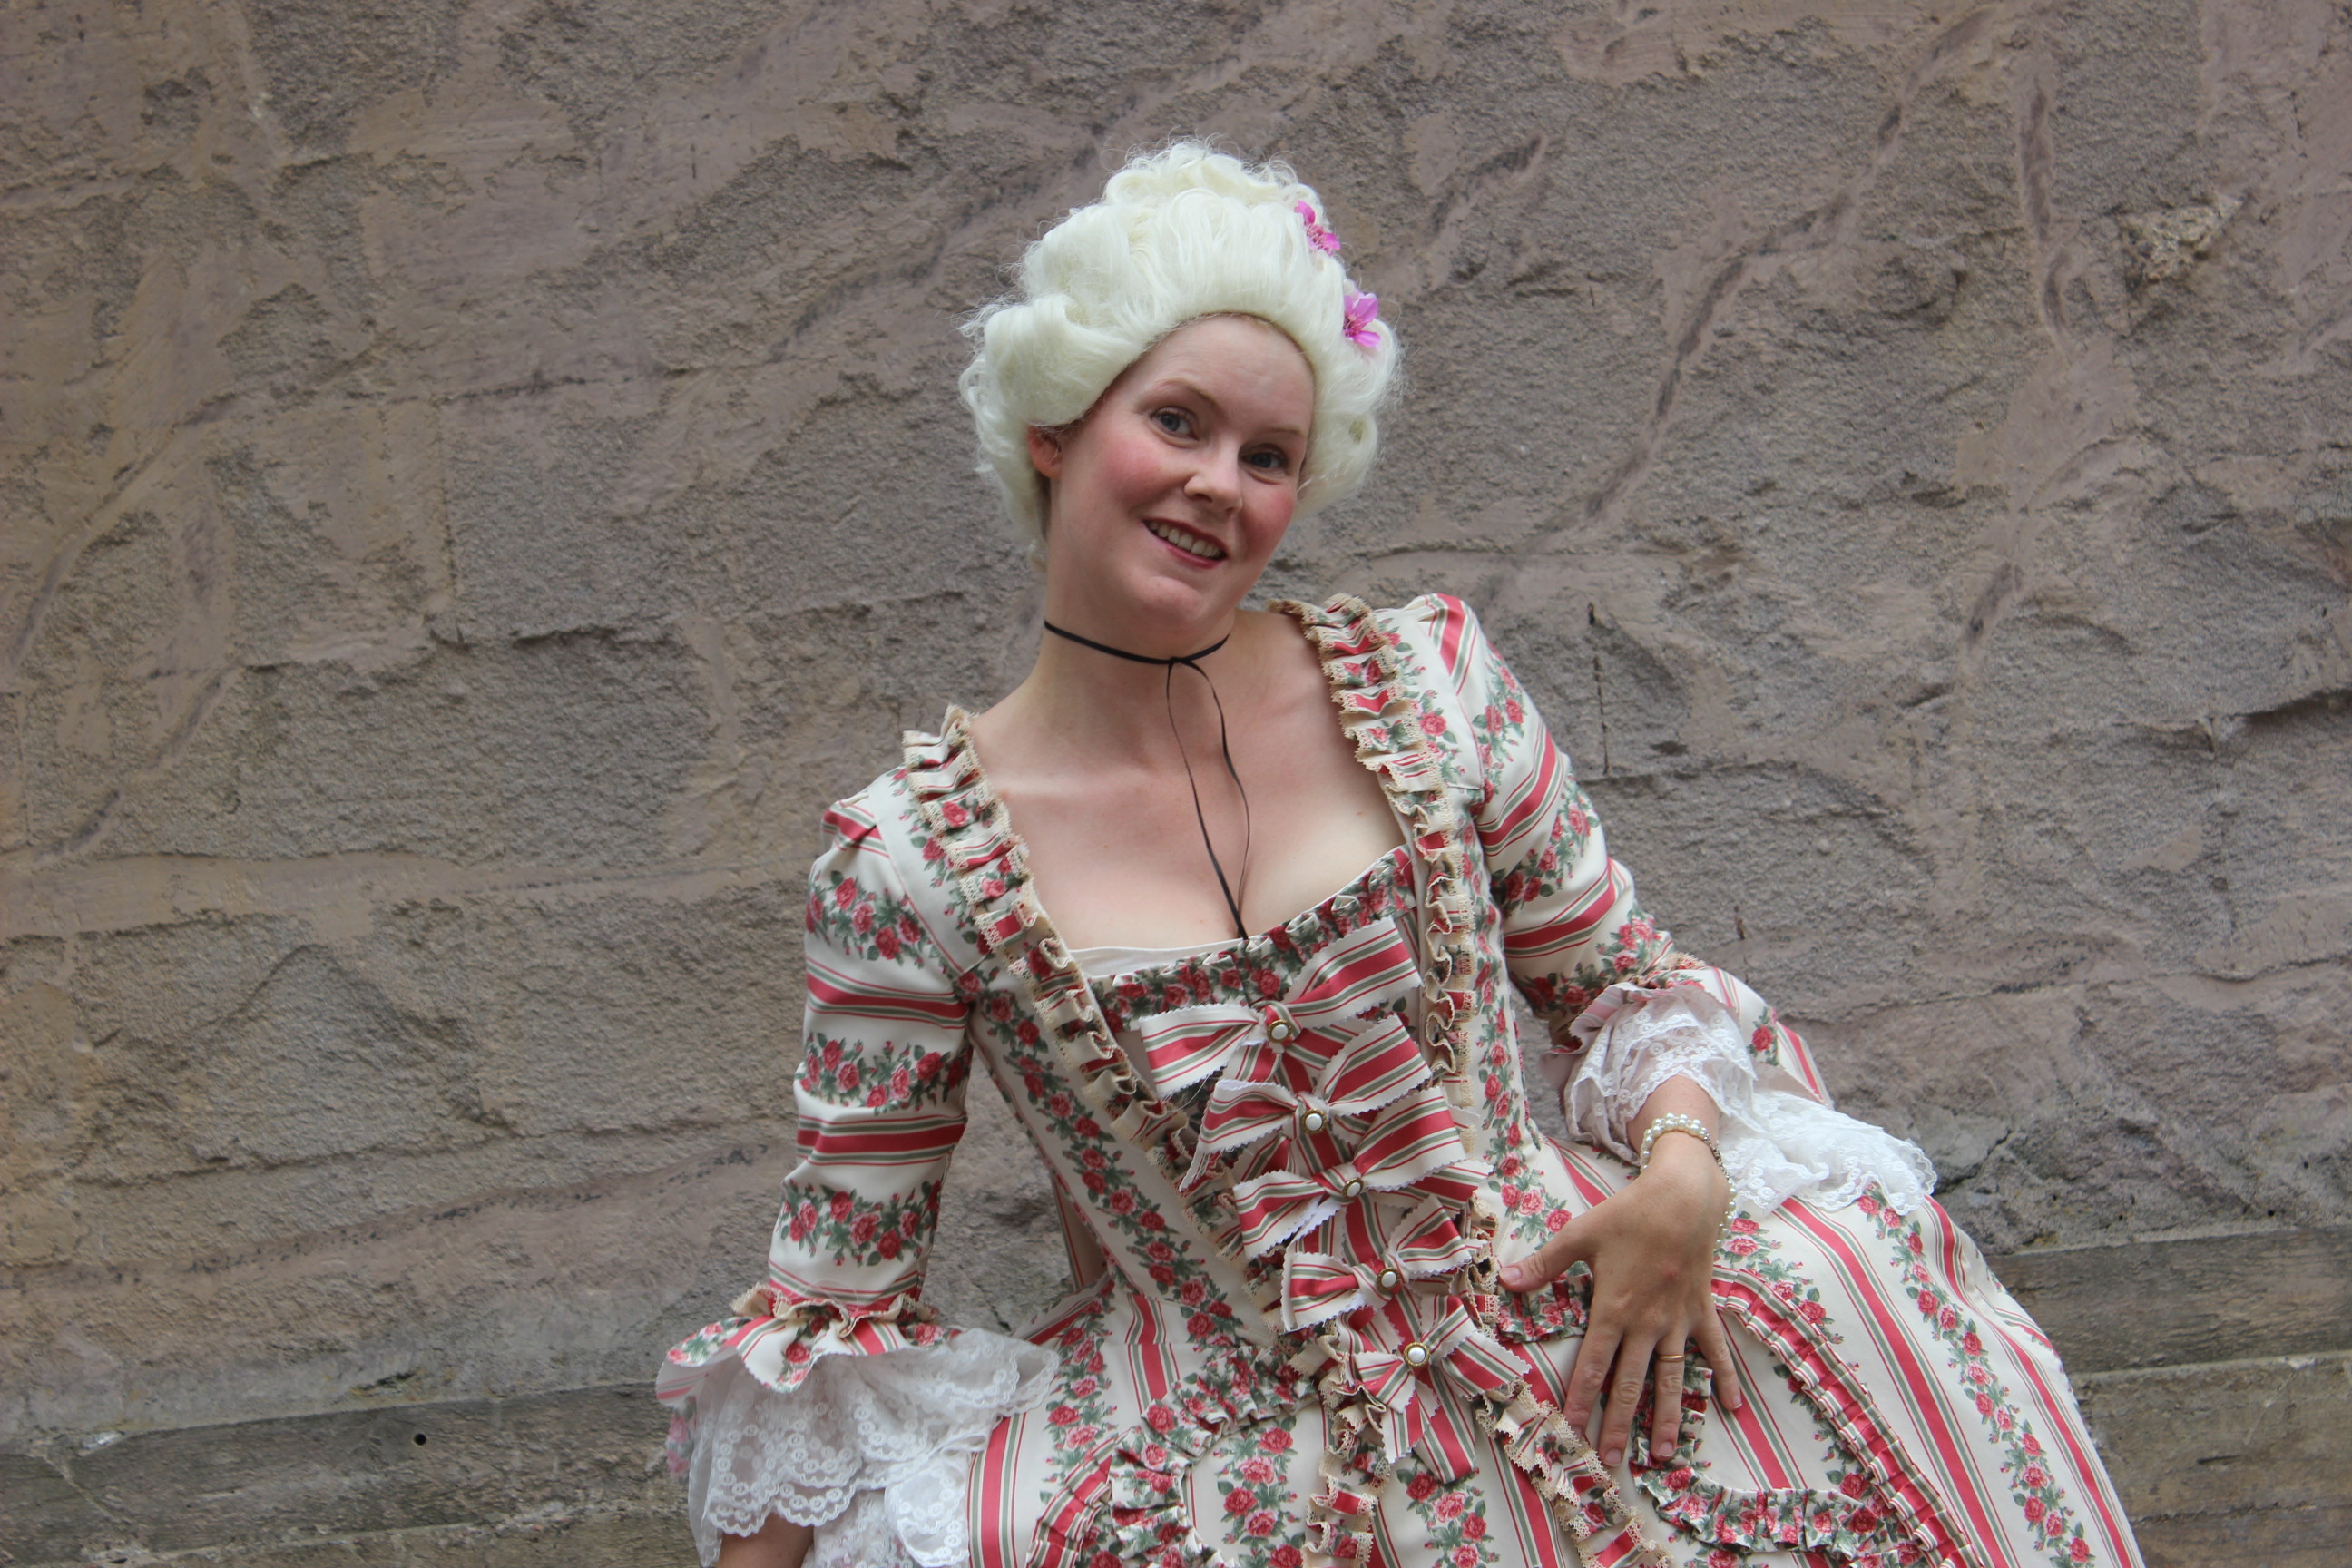
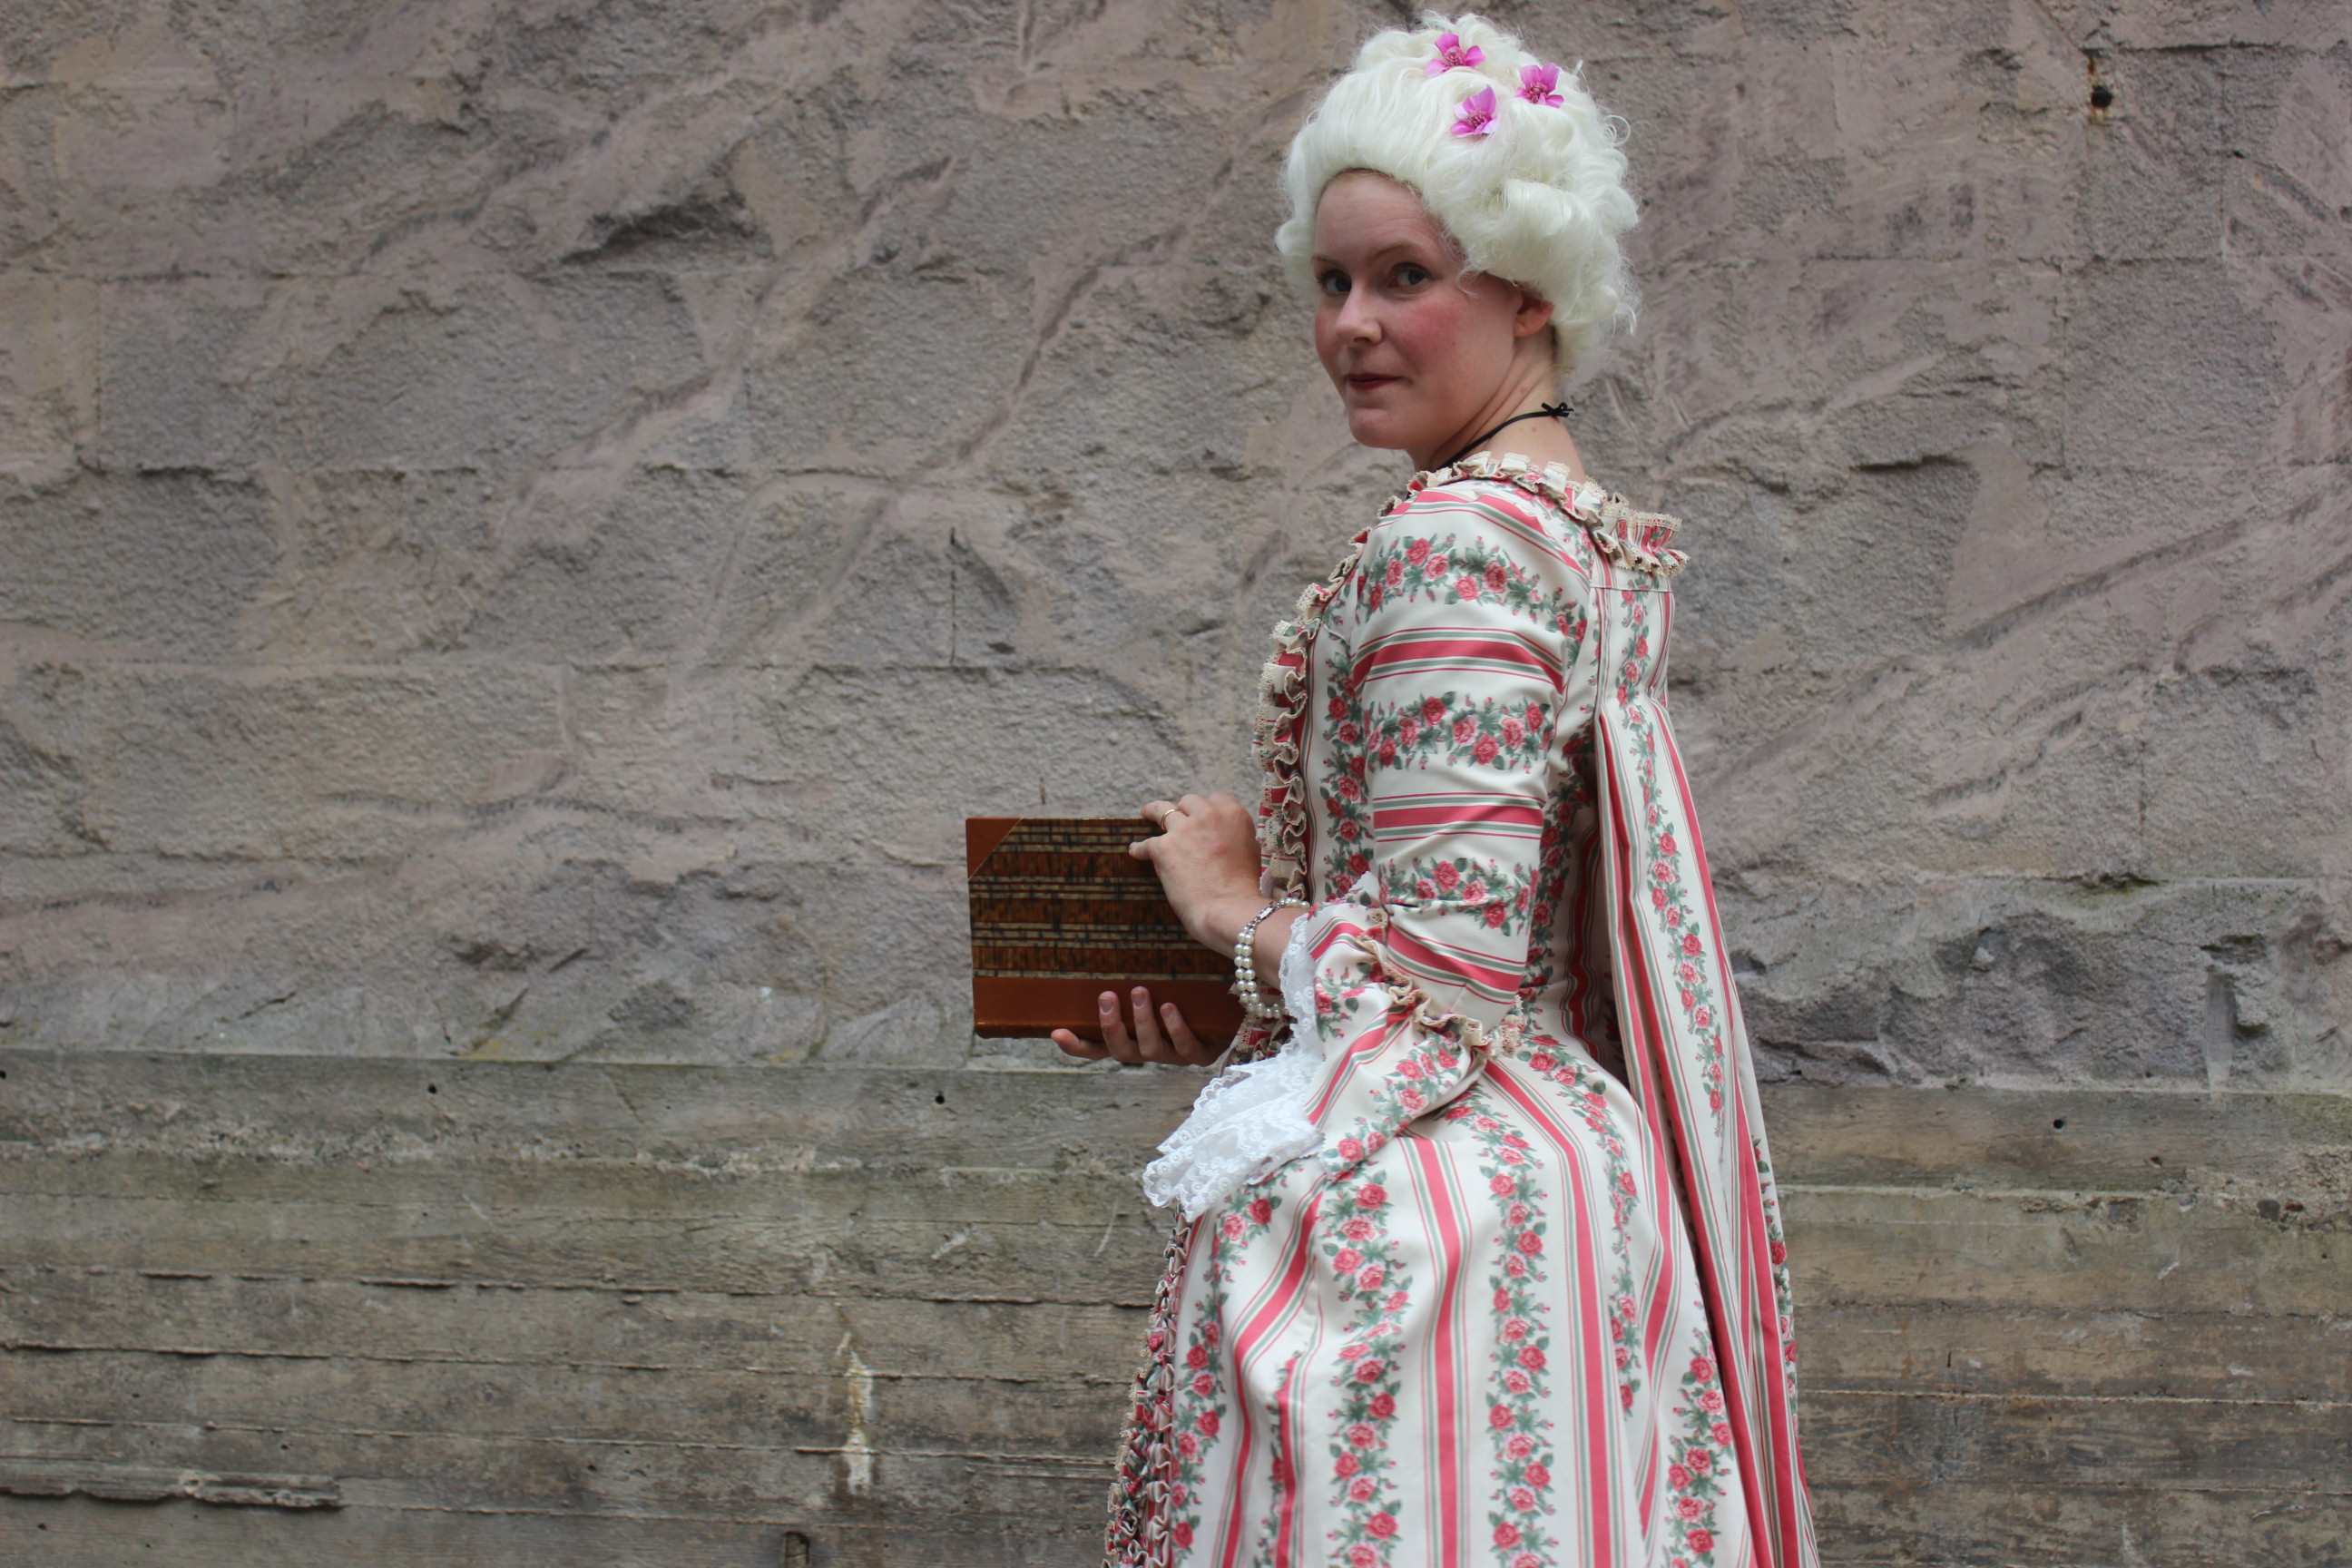
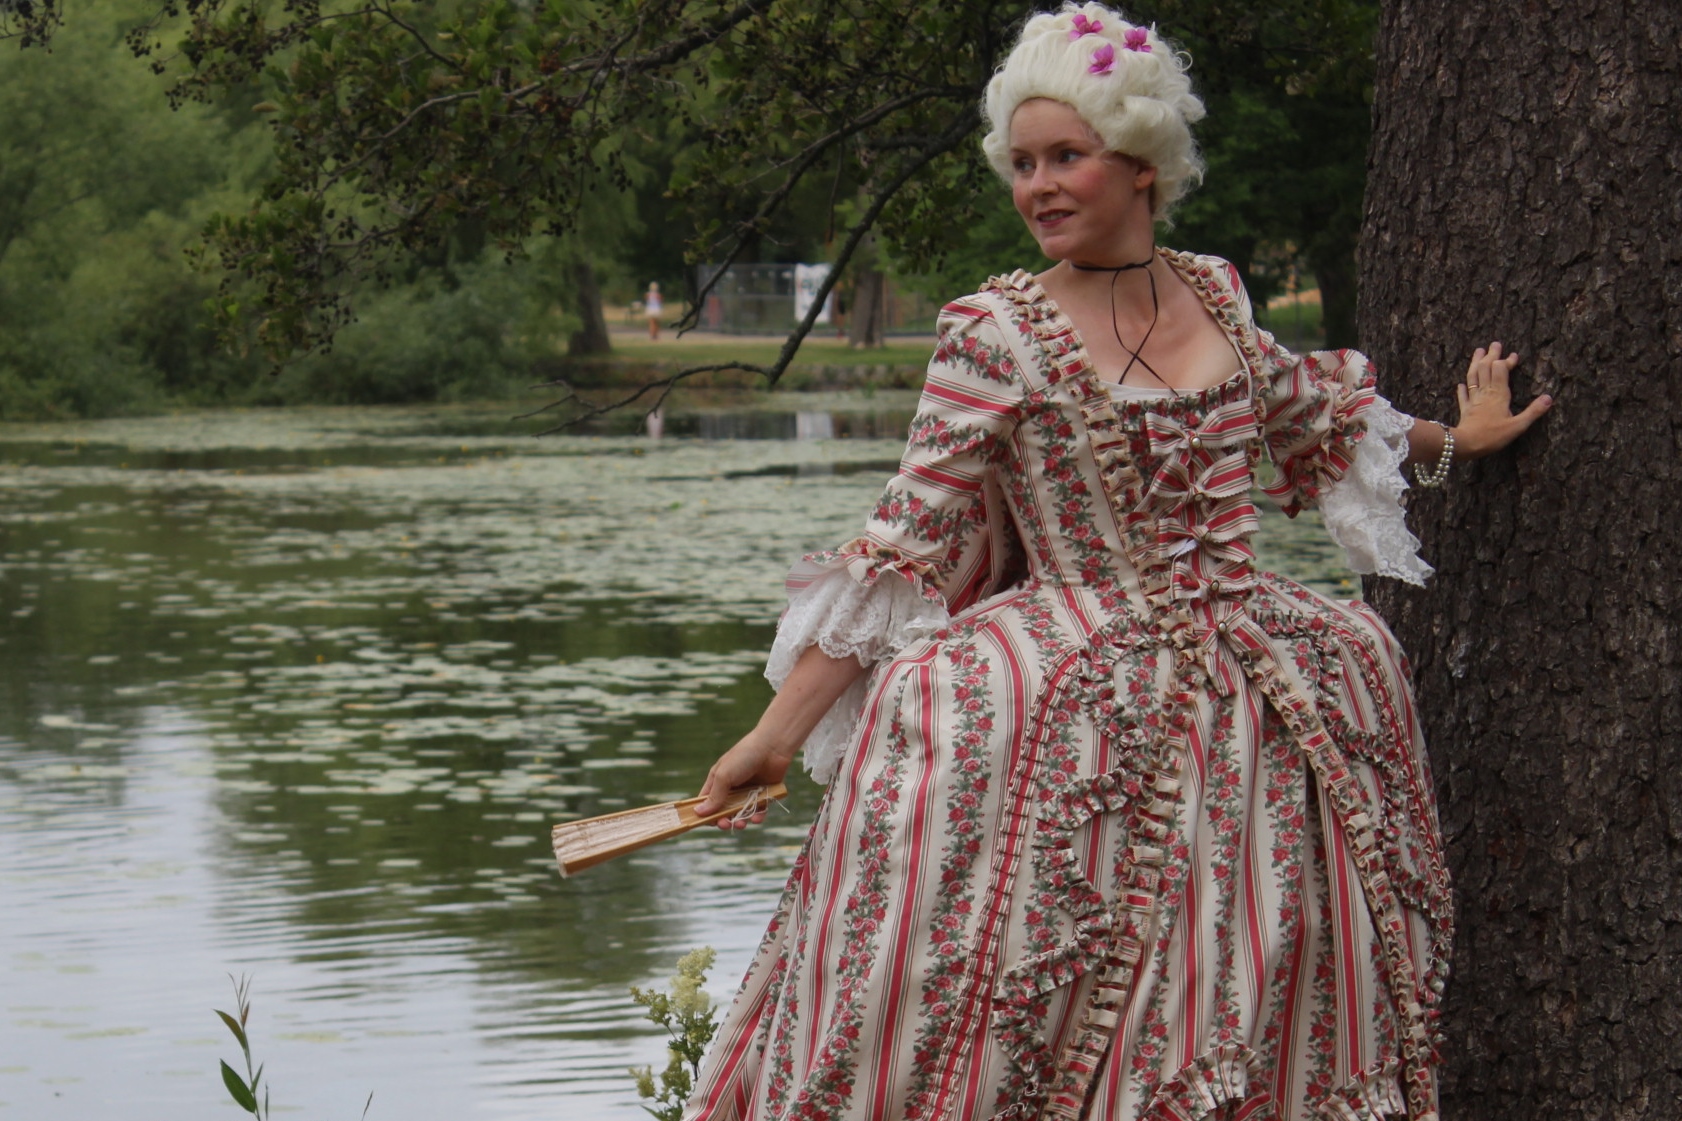
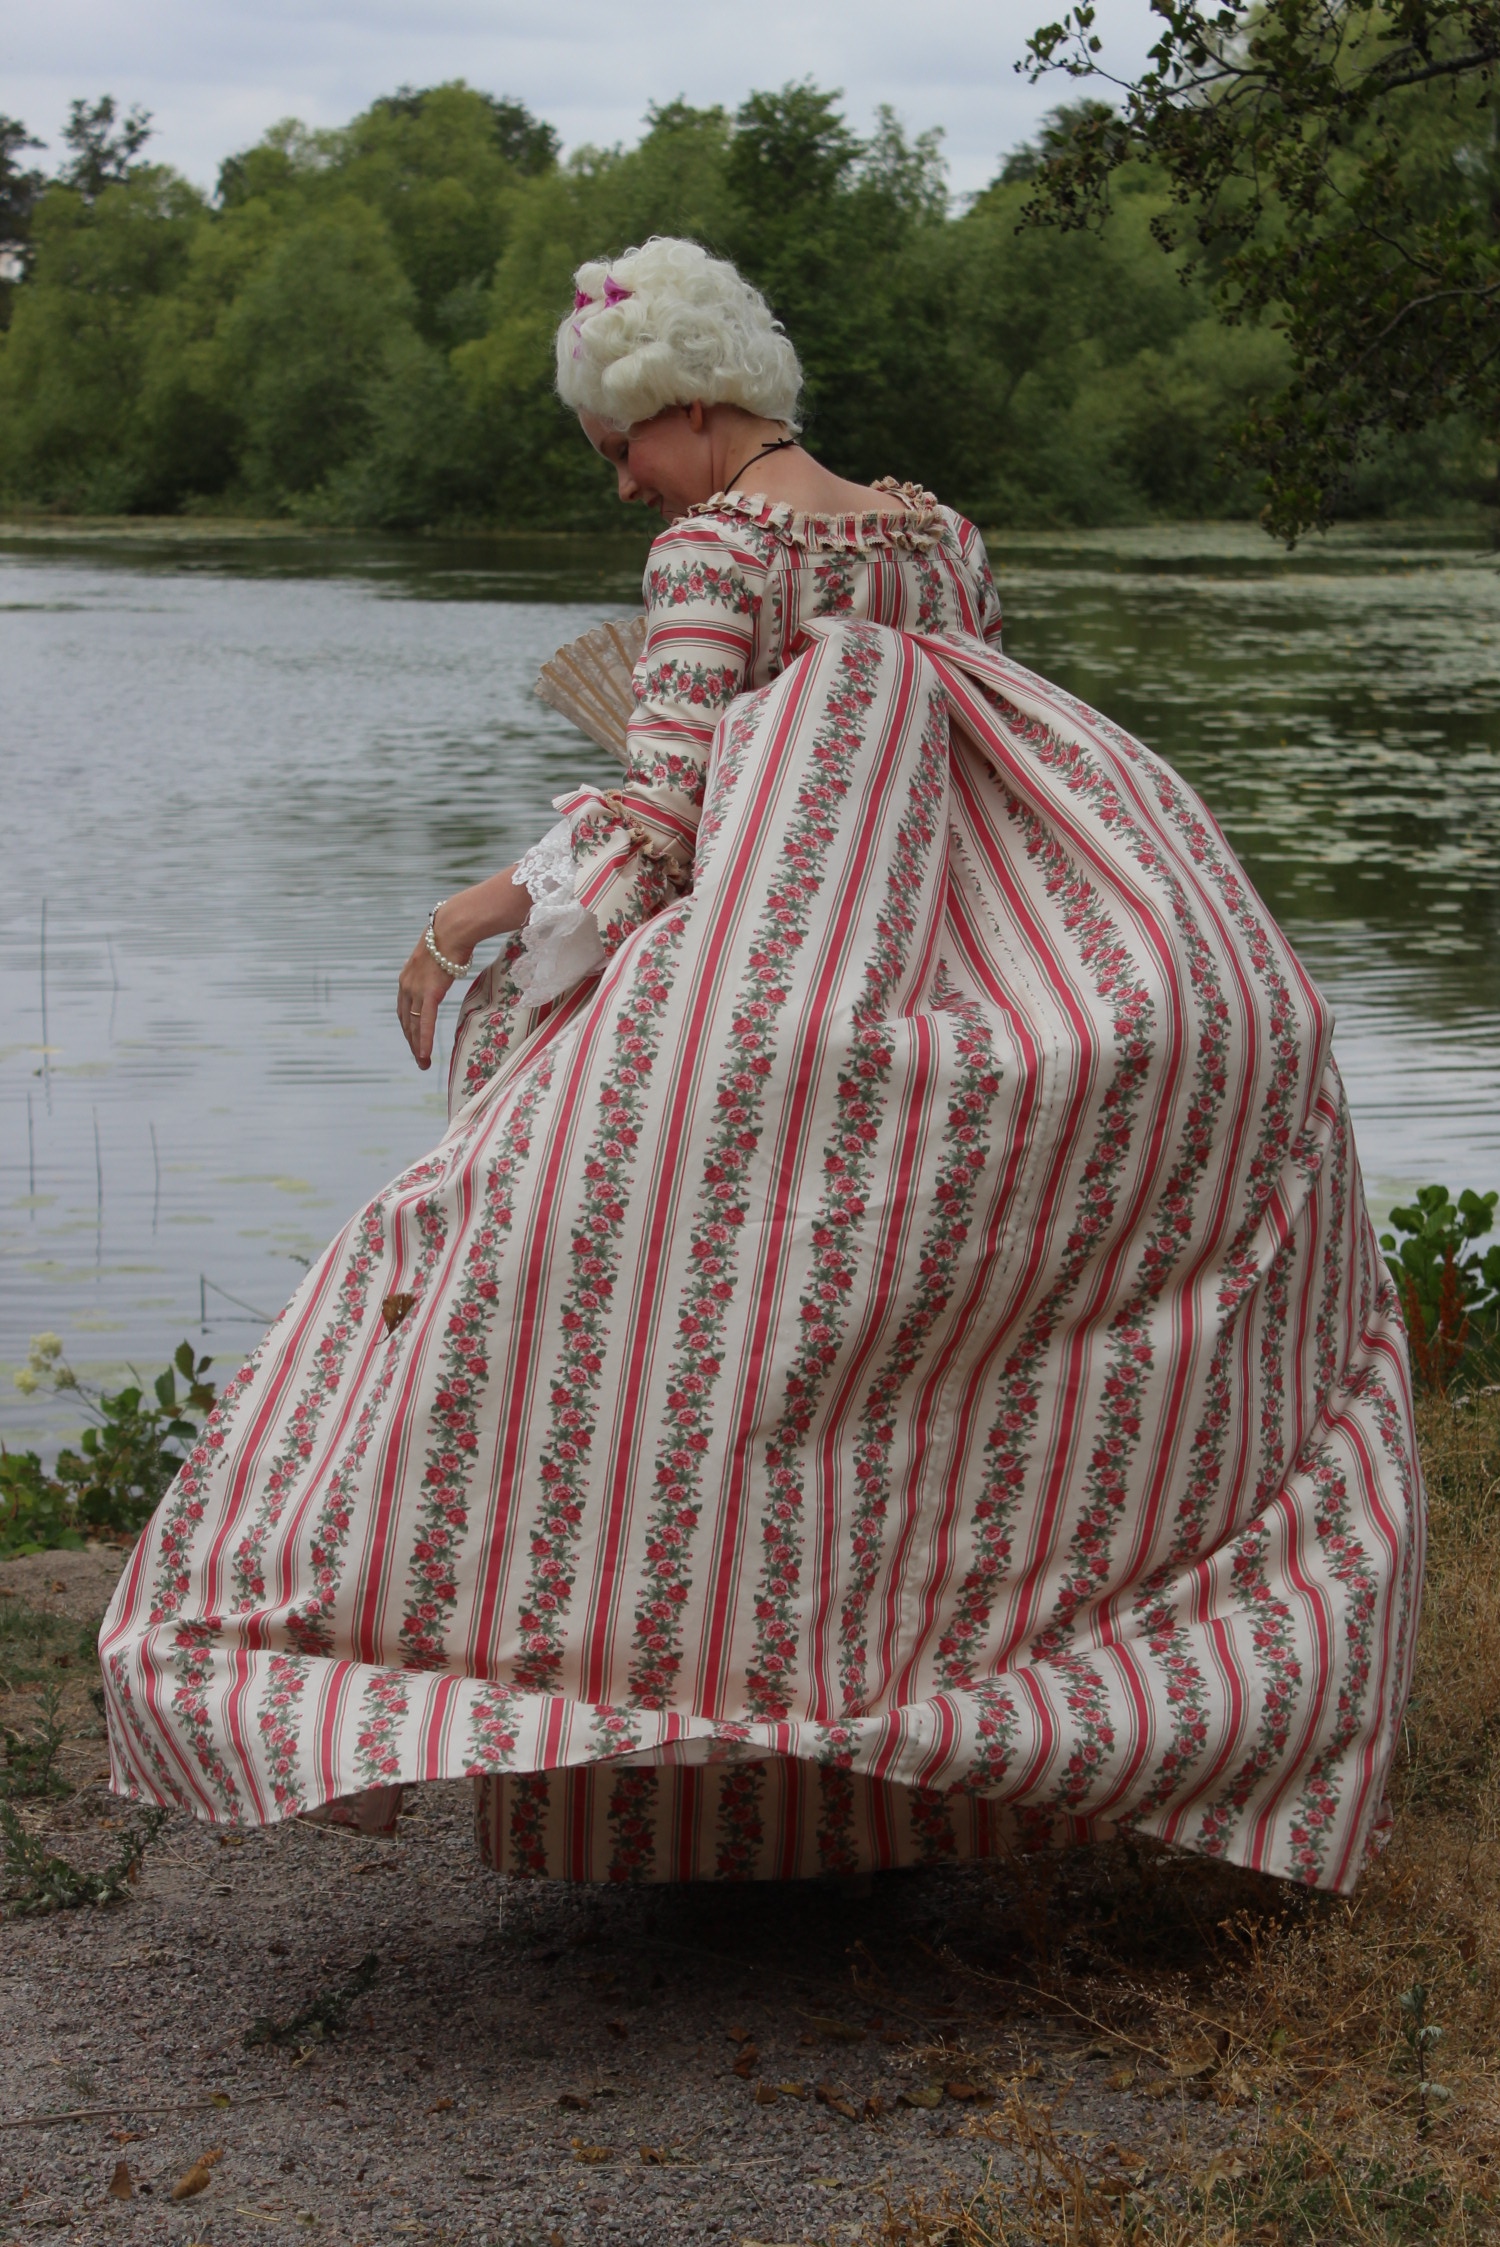
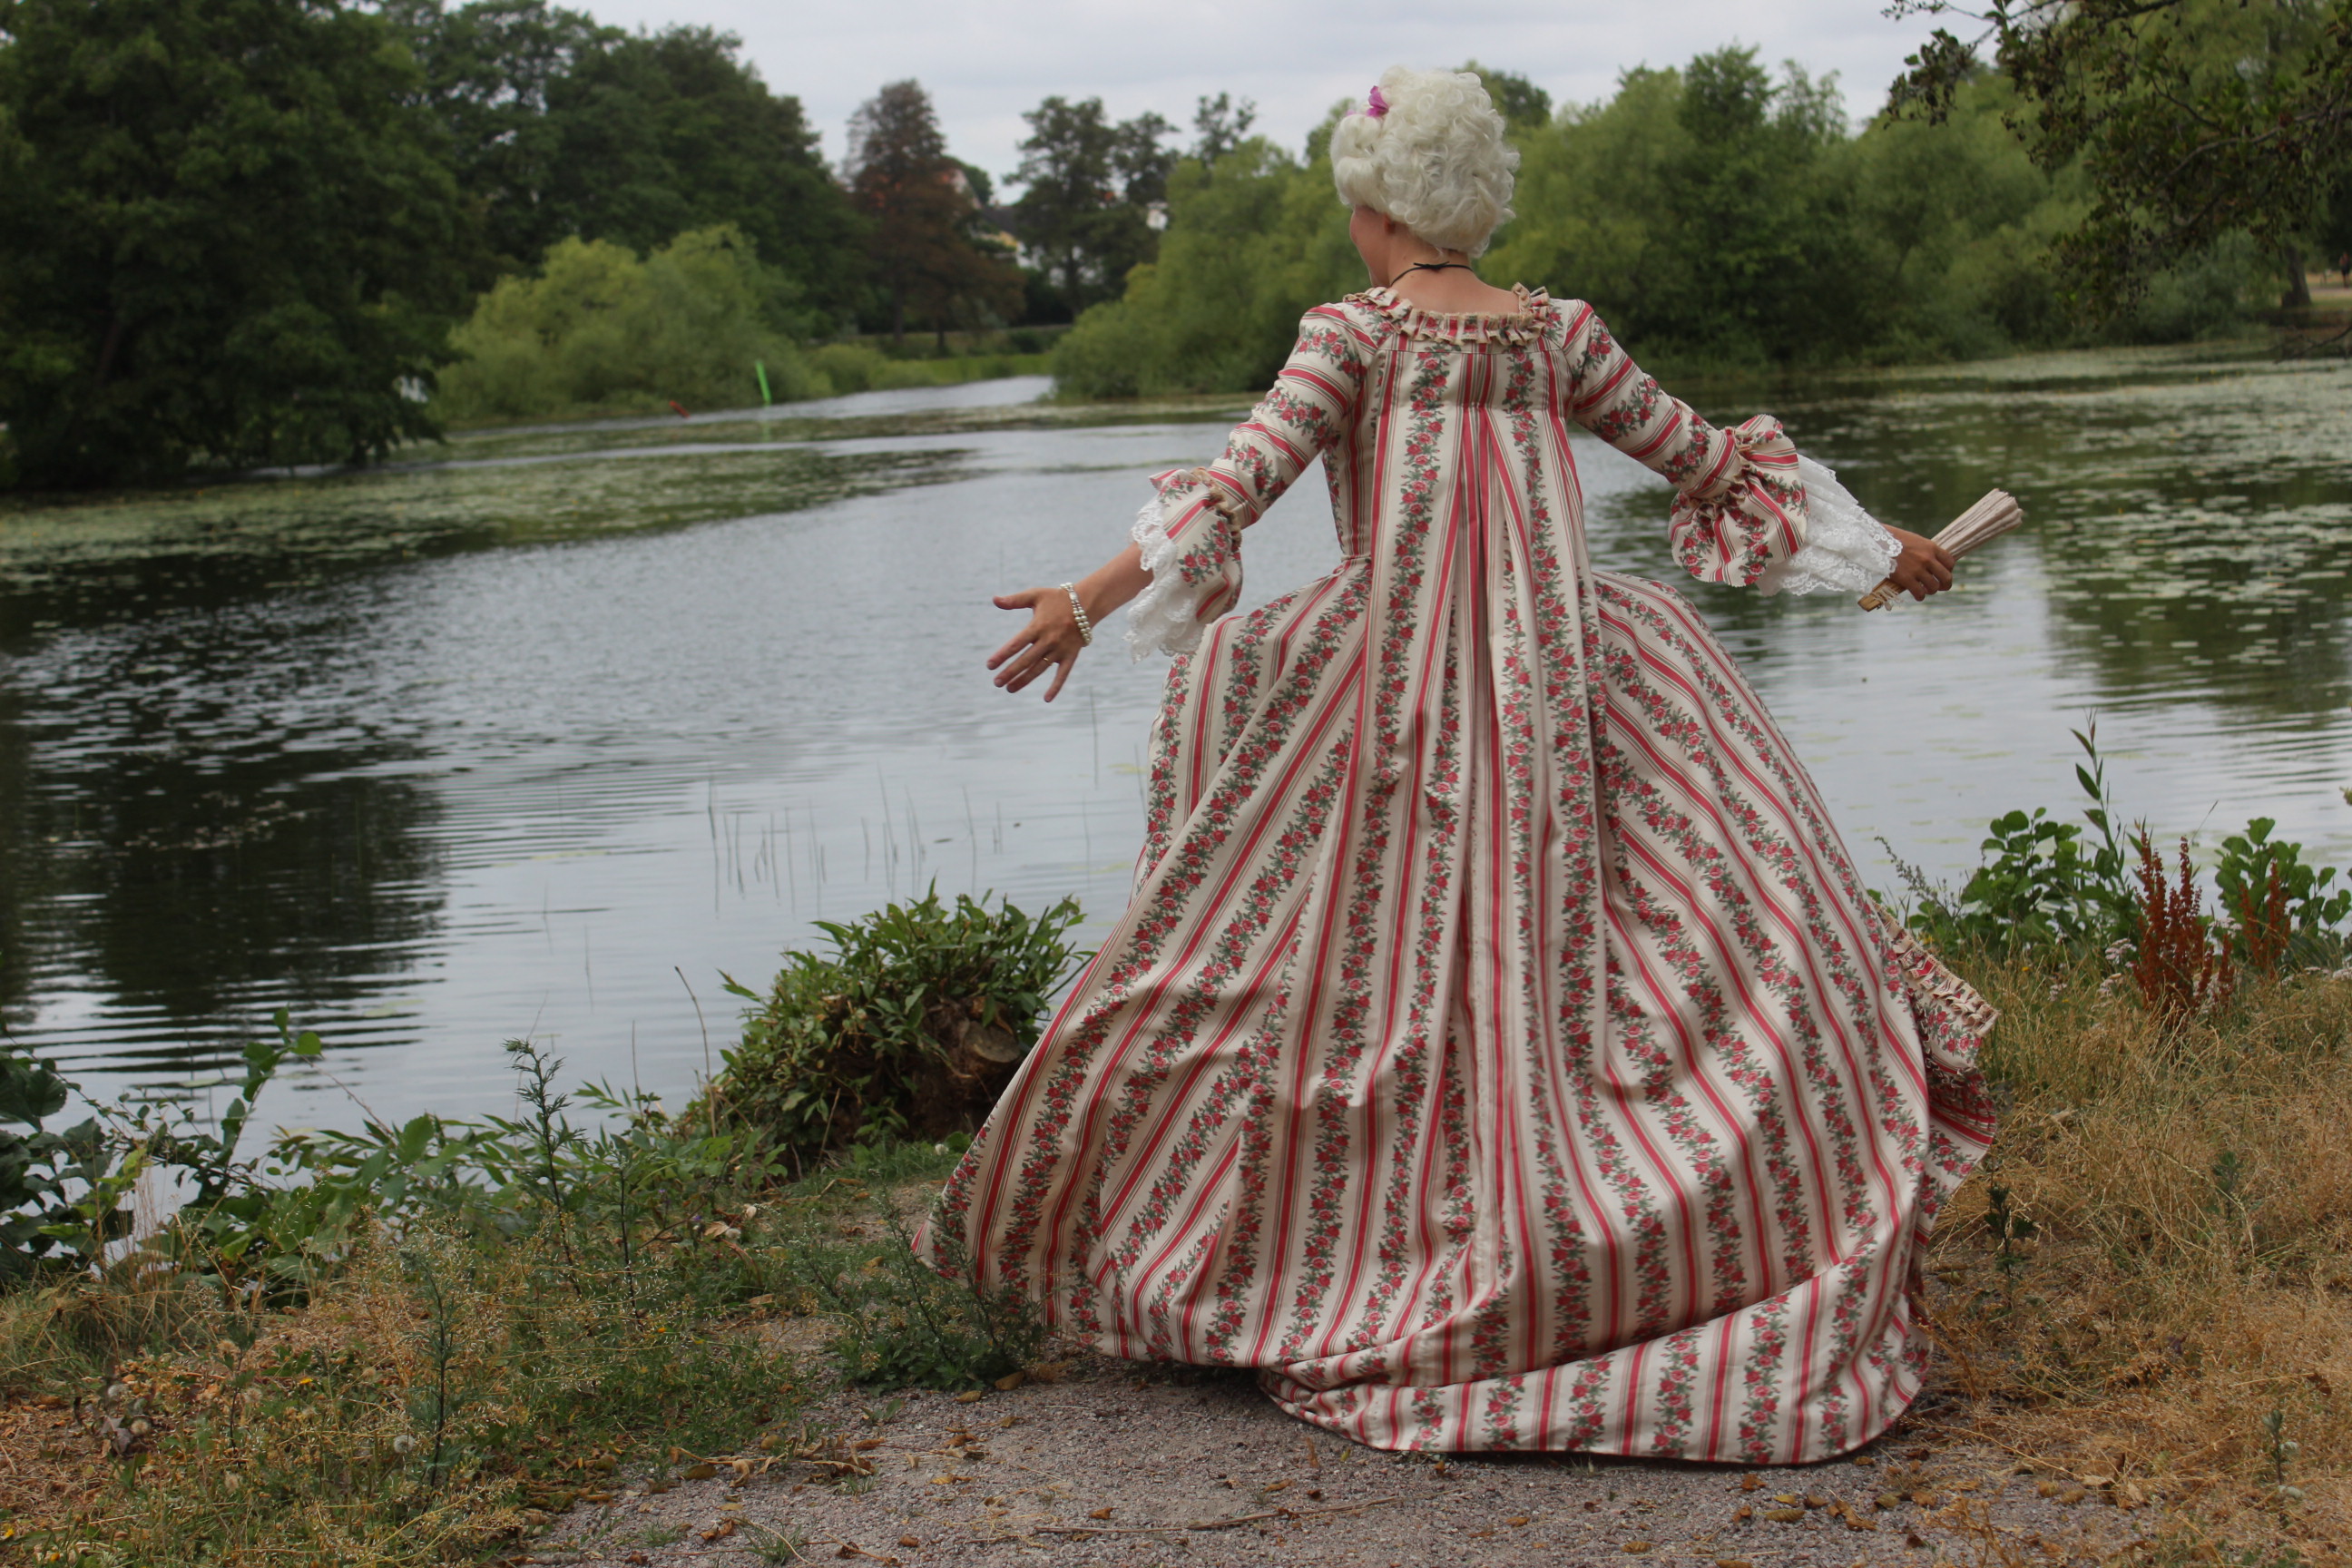
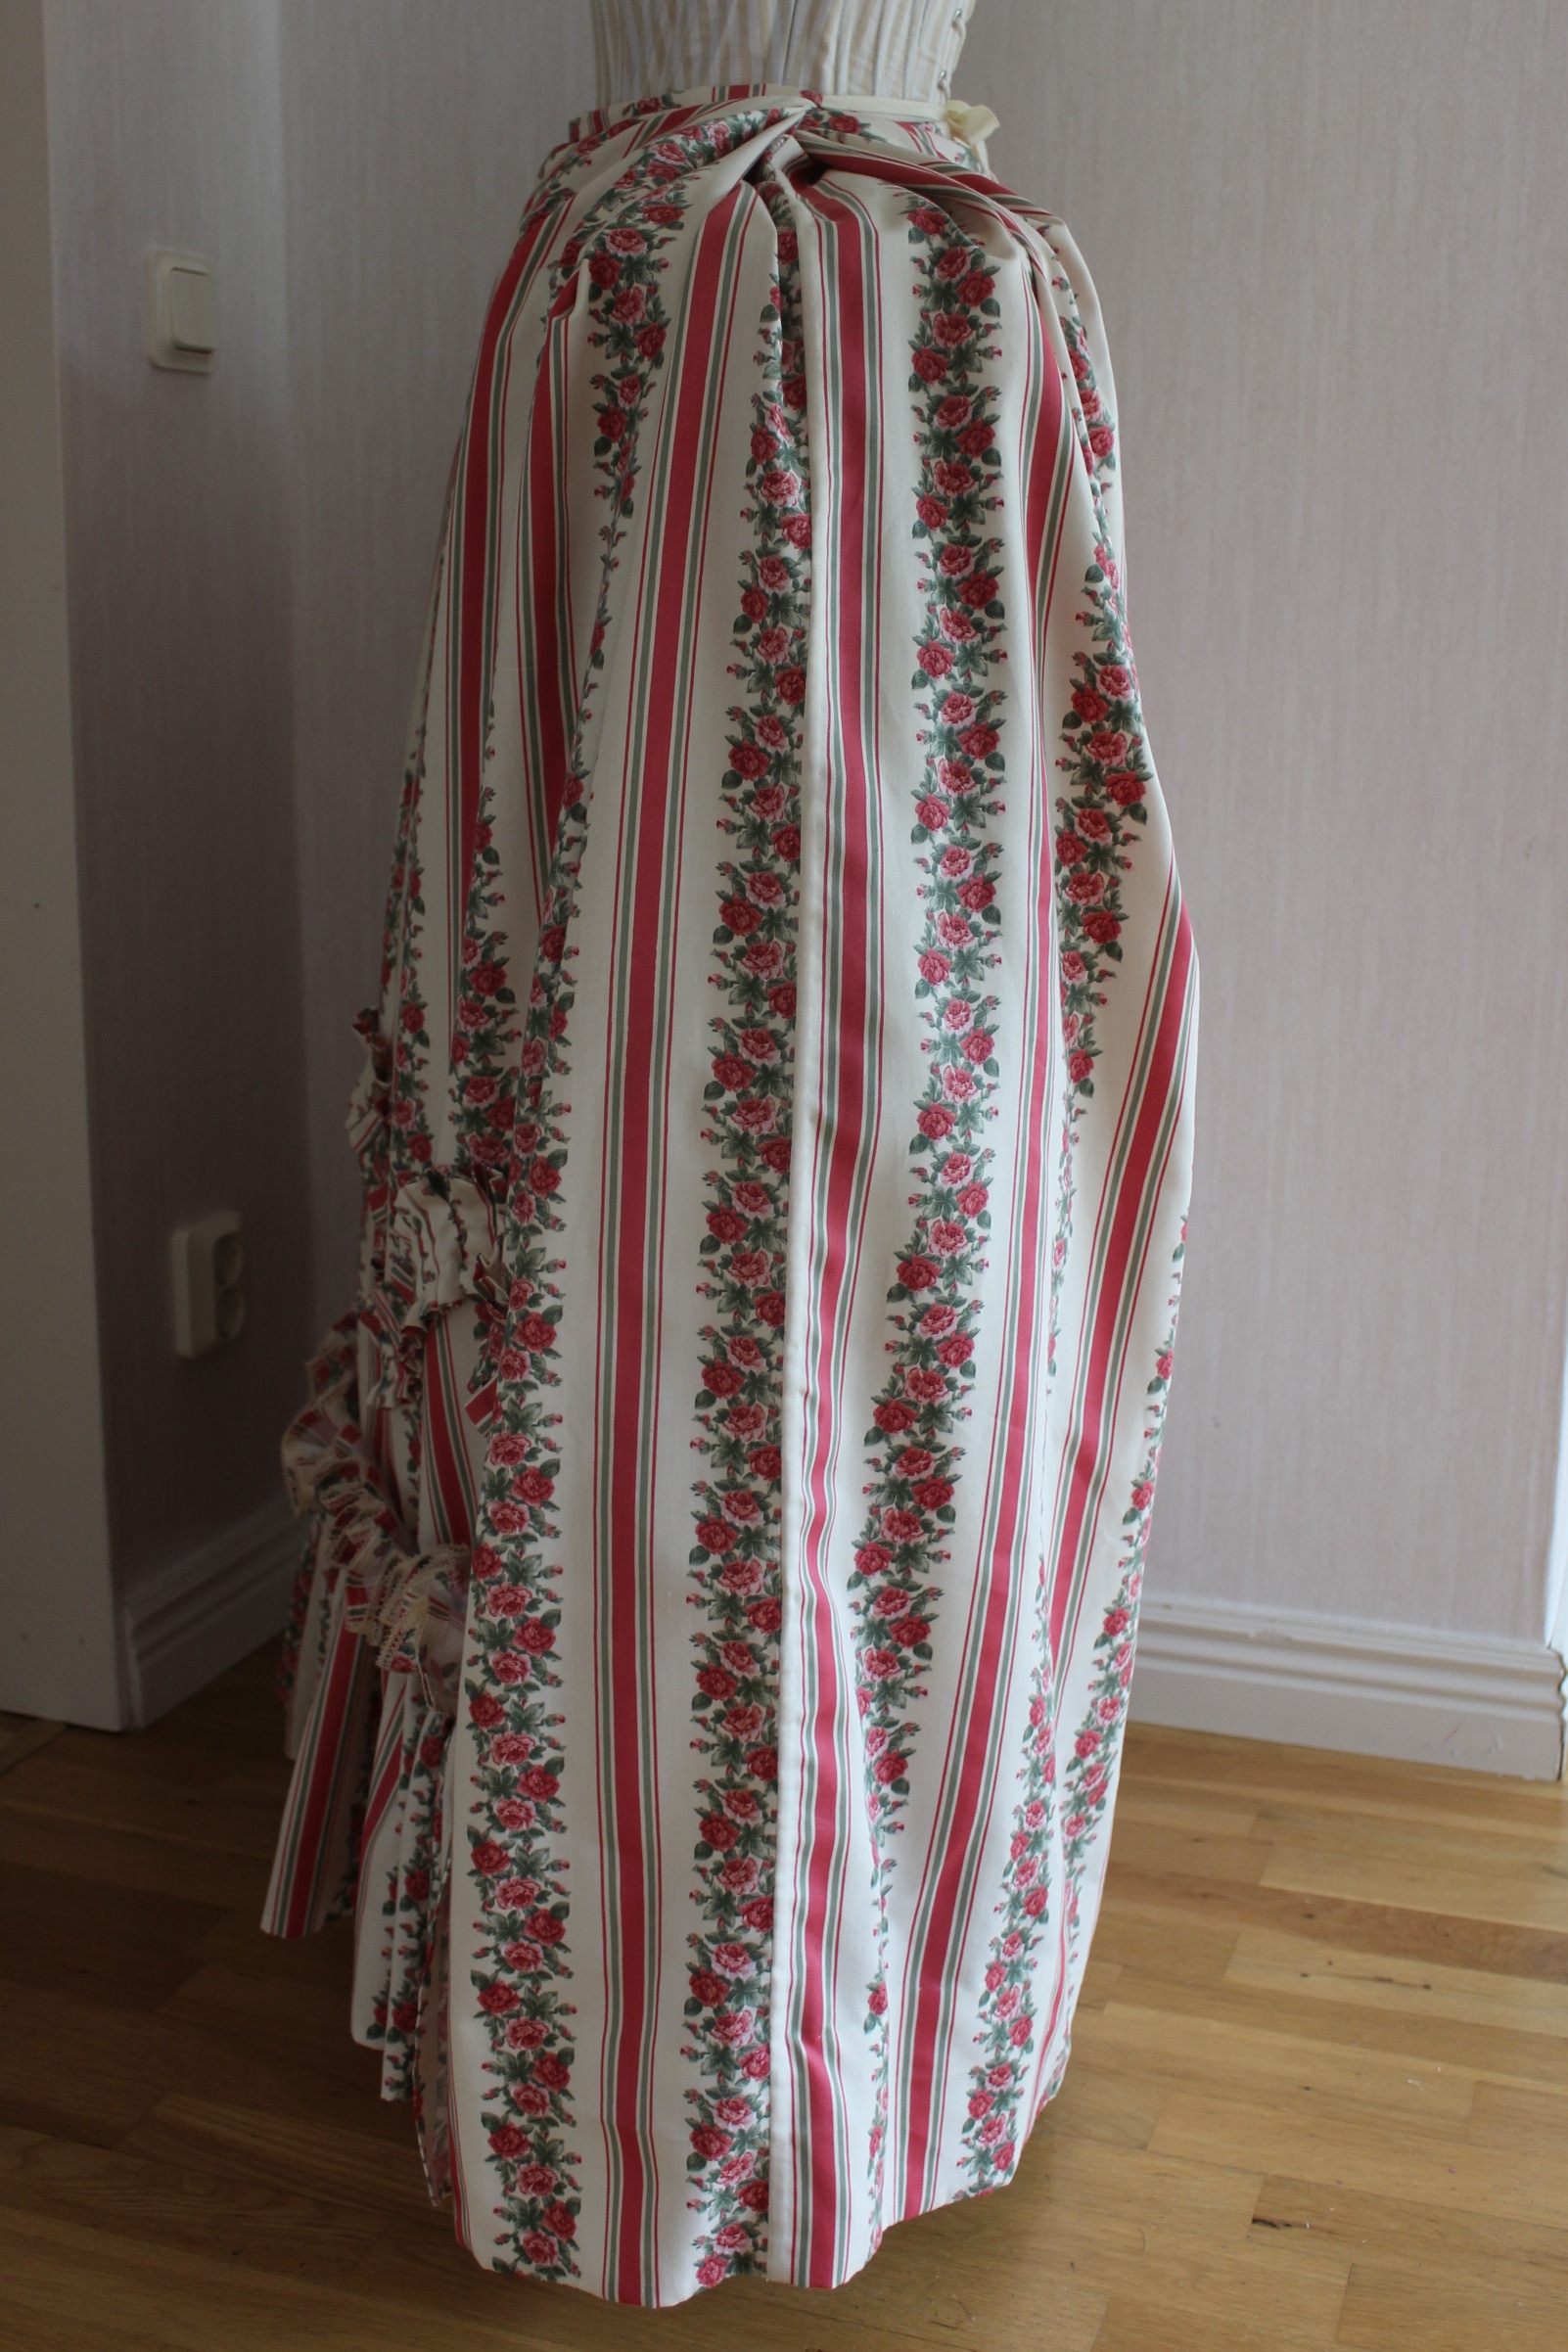
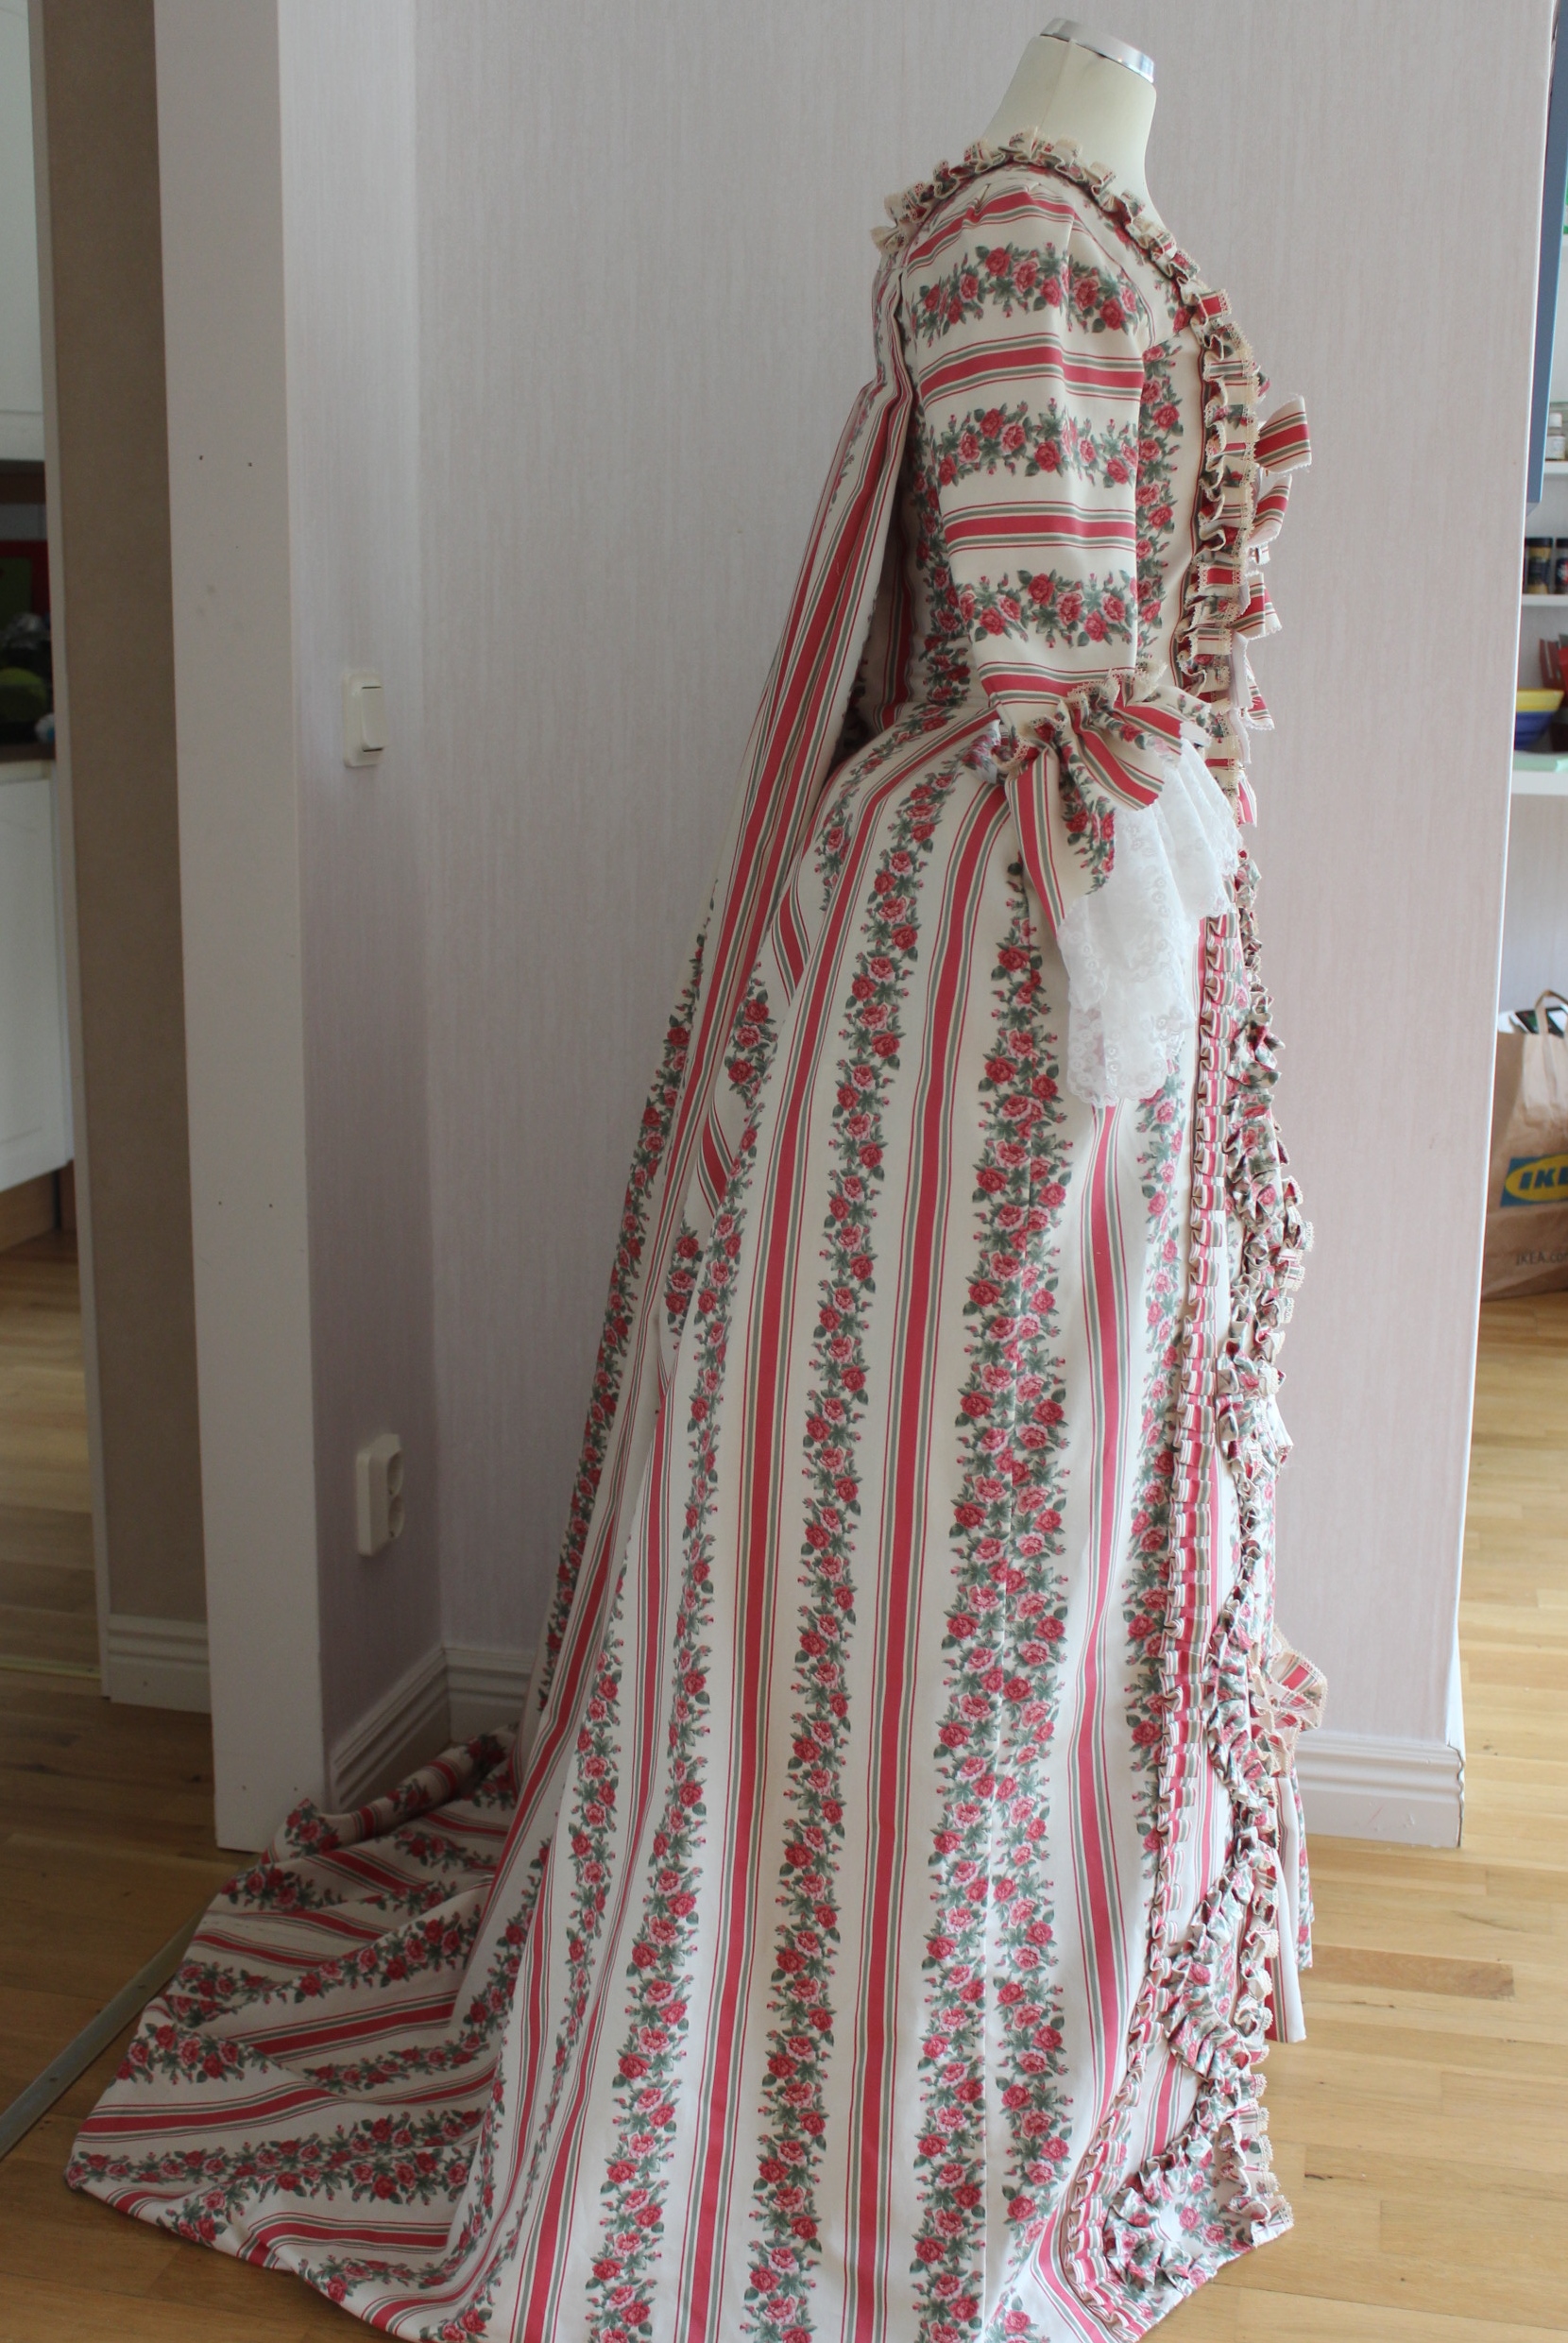
I’m wearing the 1690s striped Mantua over the corresponding skirt, my 18th century stays, chemise, 2 small bumpads, quilted petticoat, an regular petticoat, stockings and Kensington shoes.
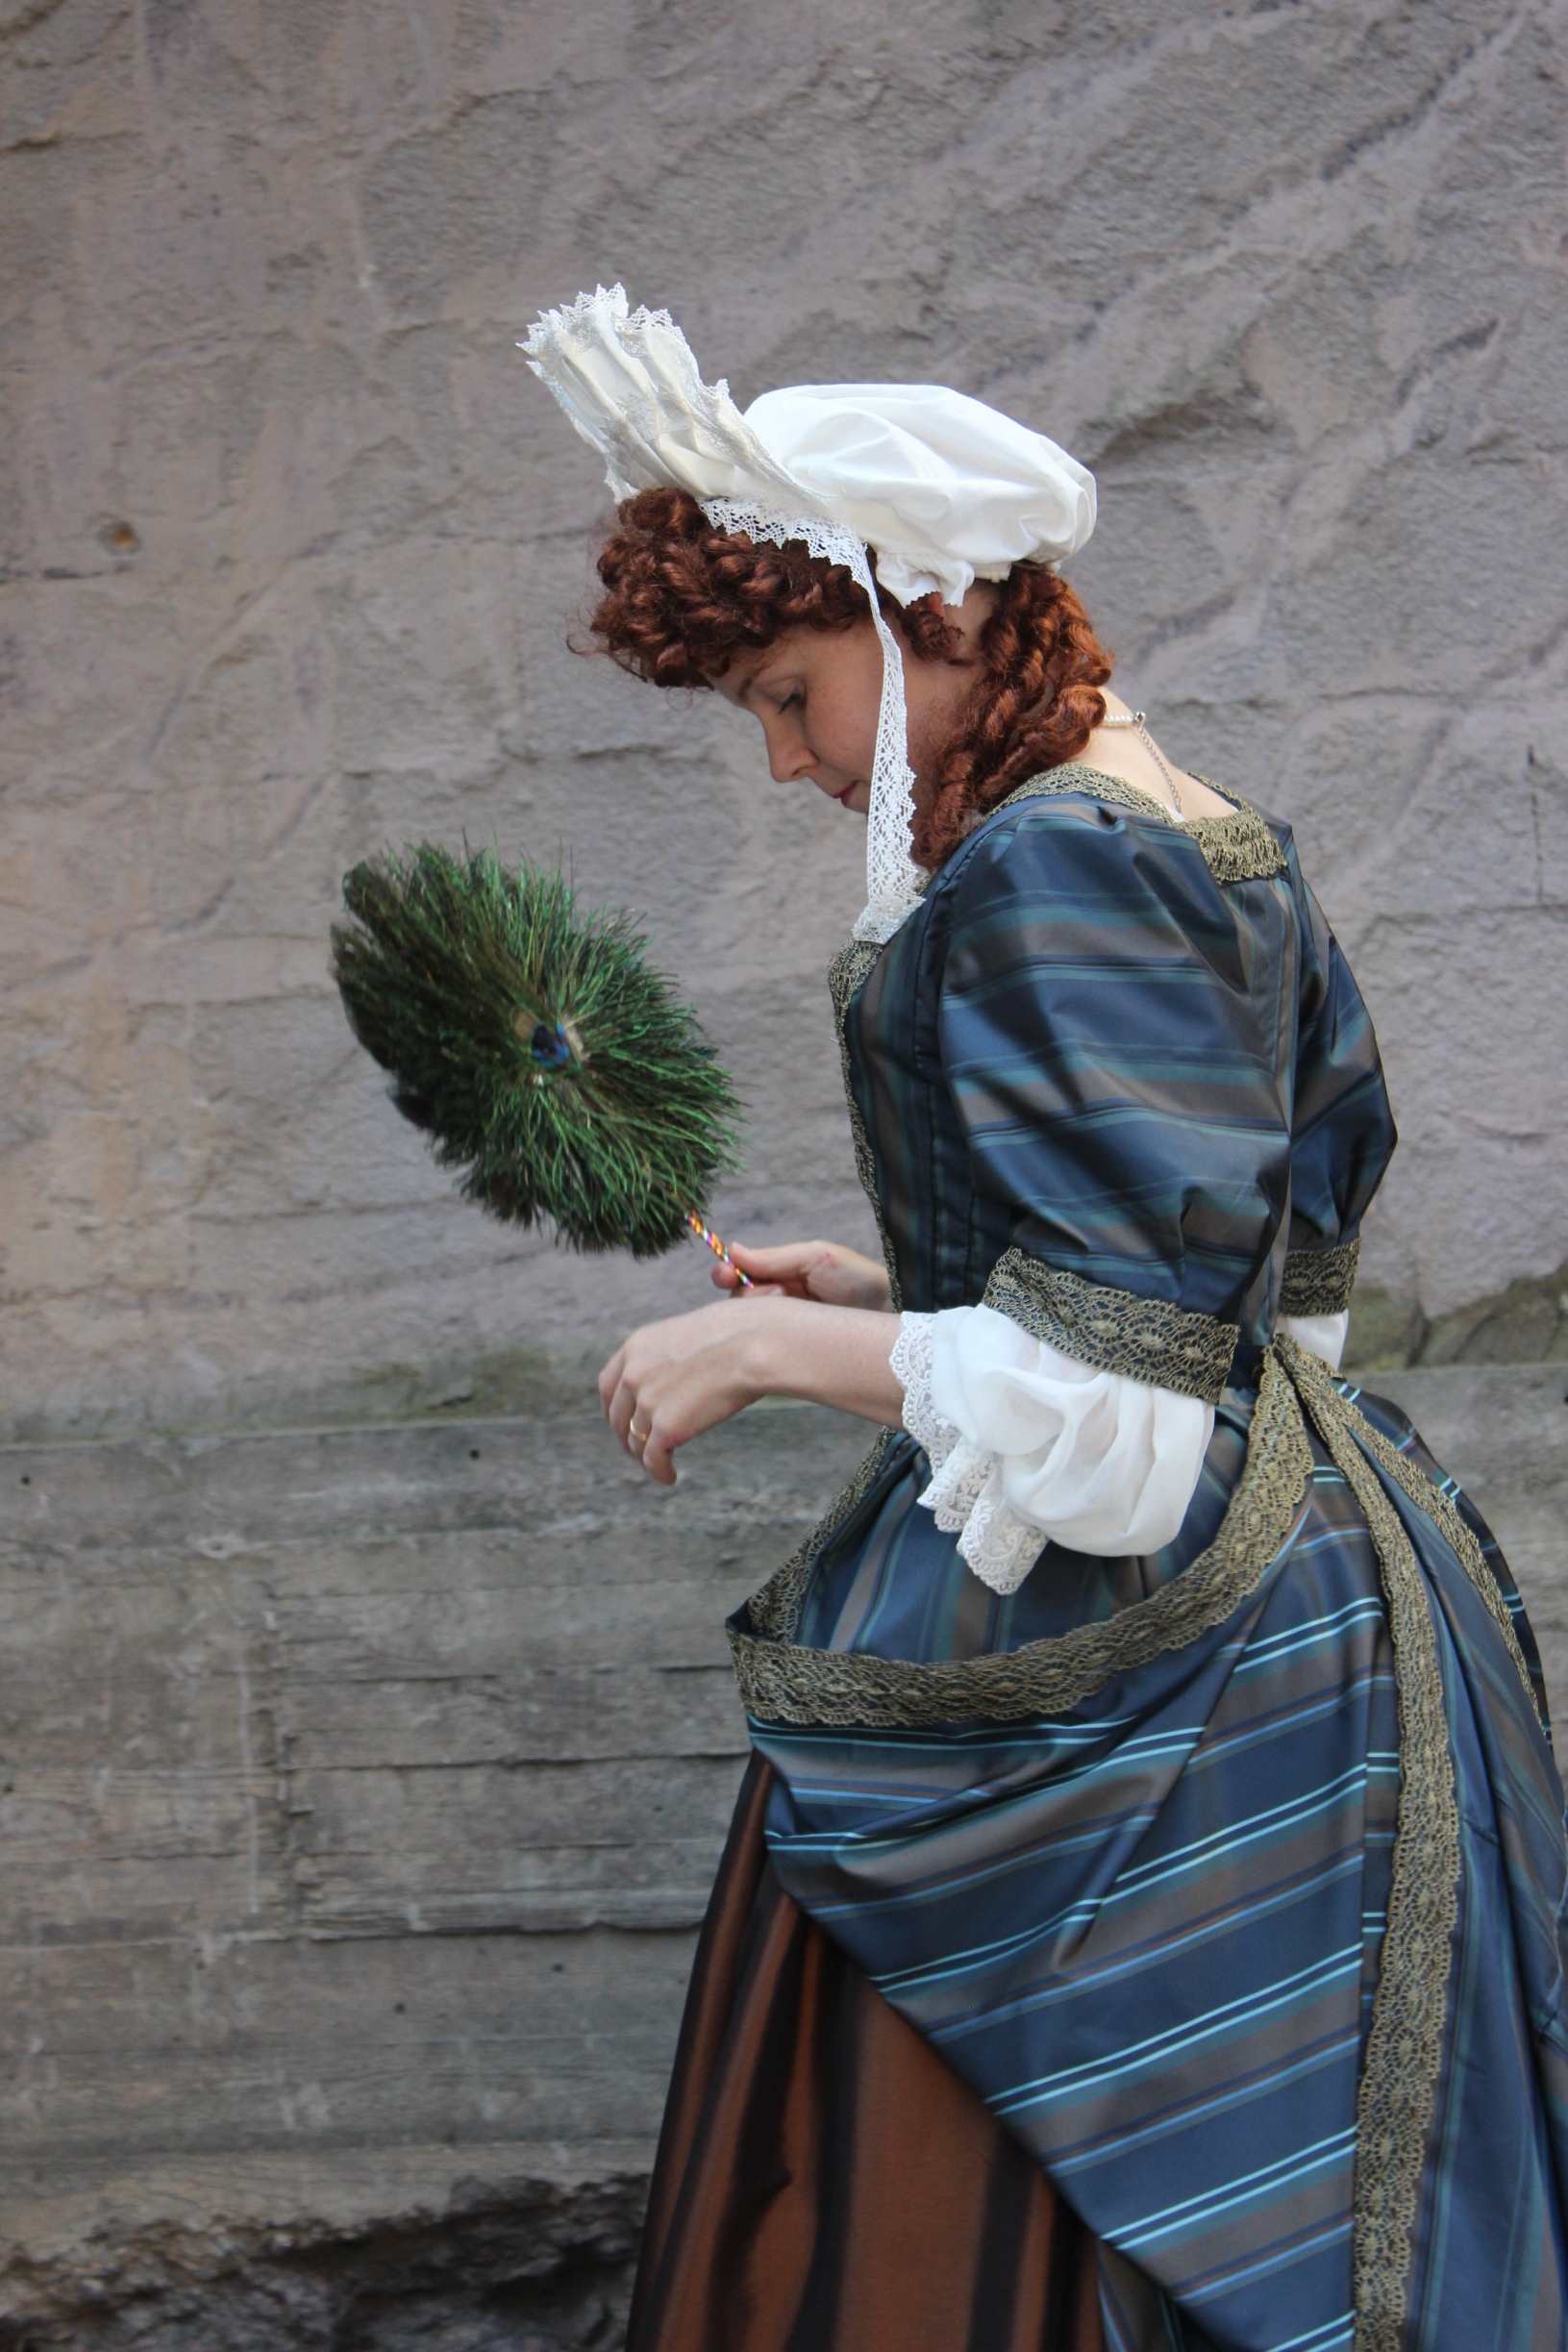
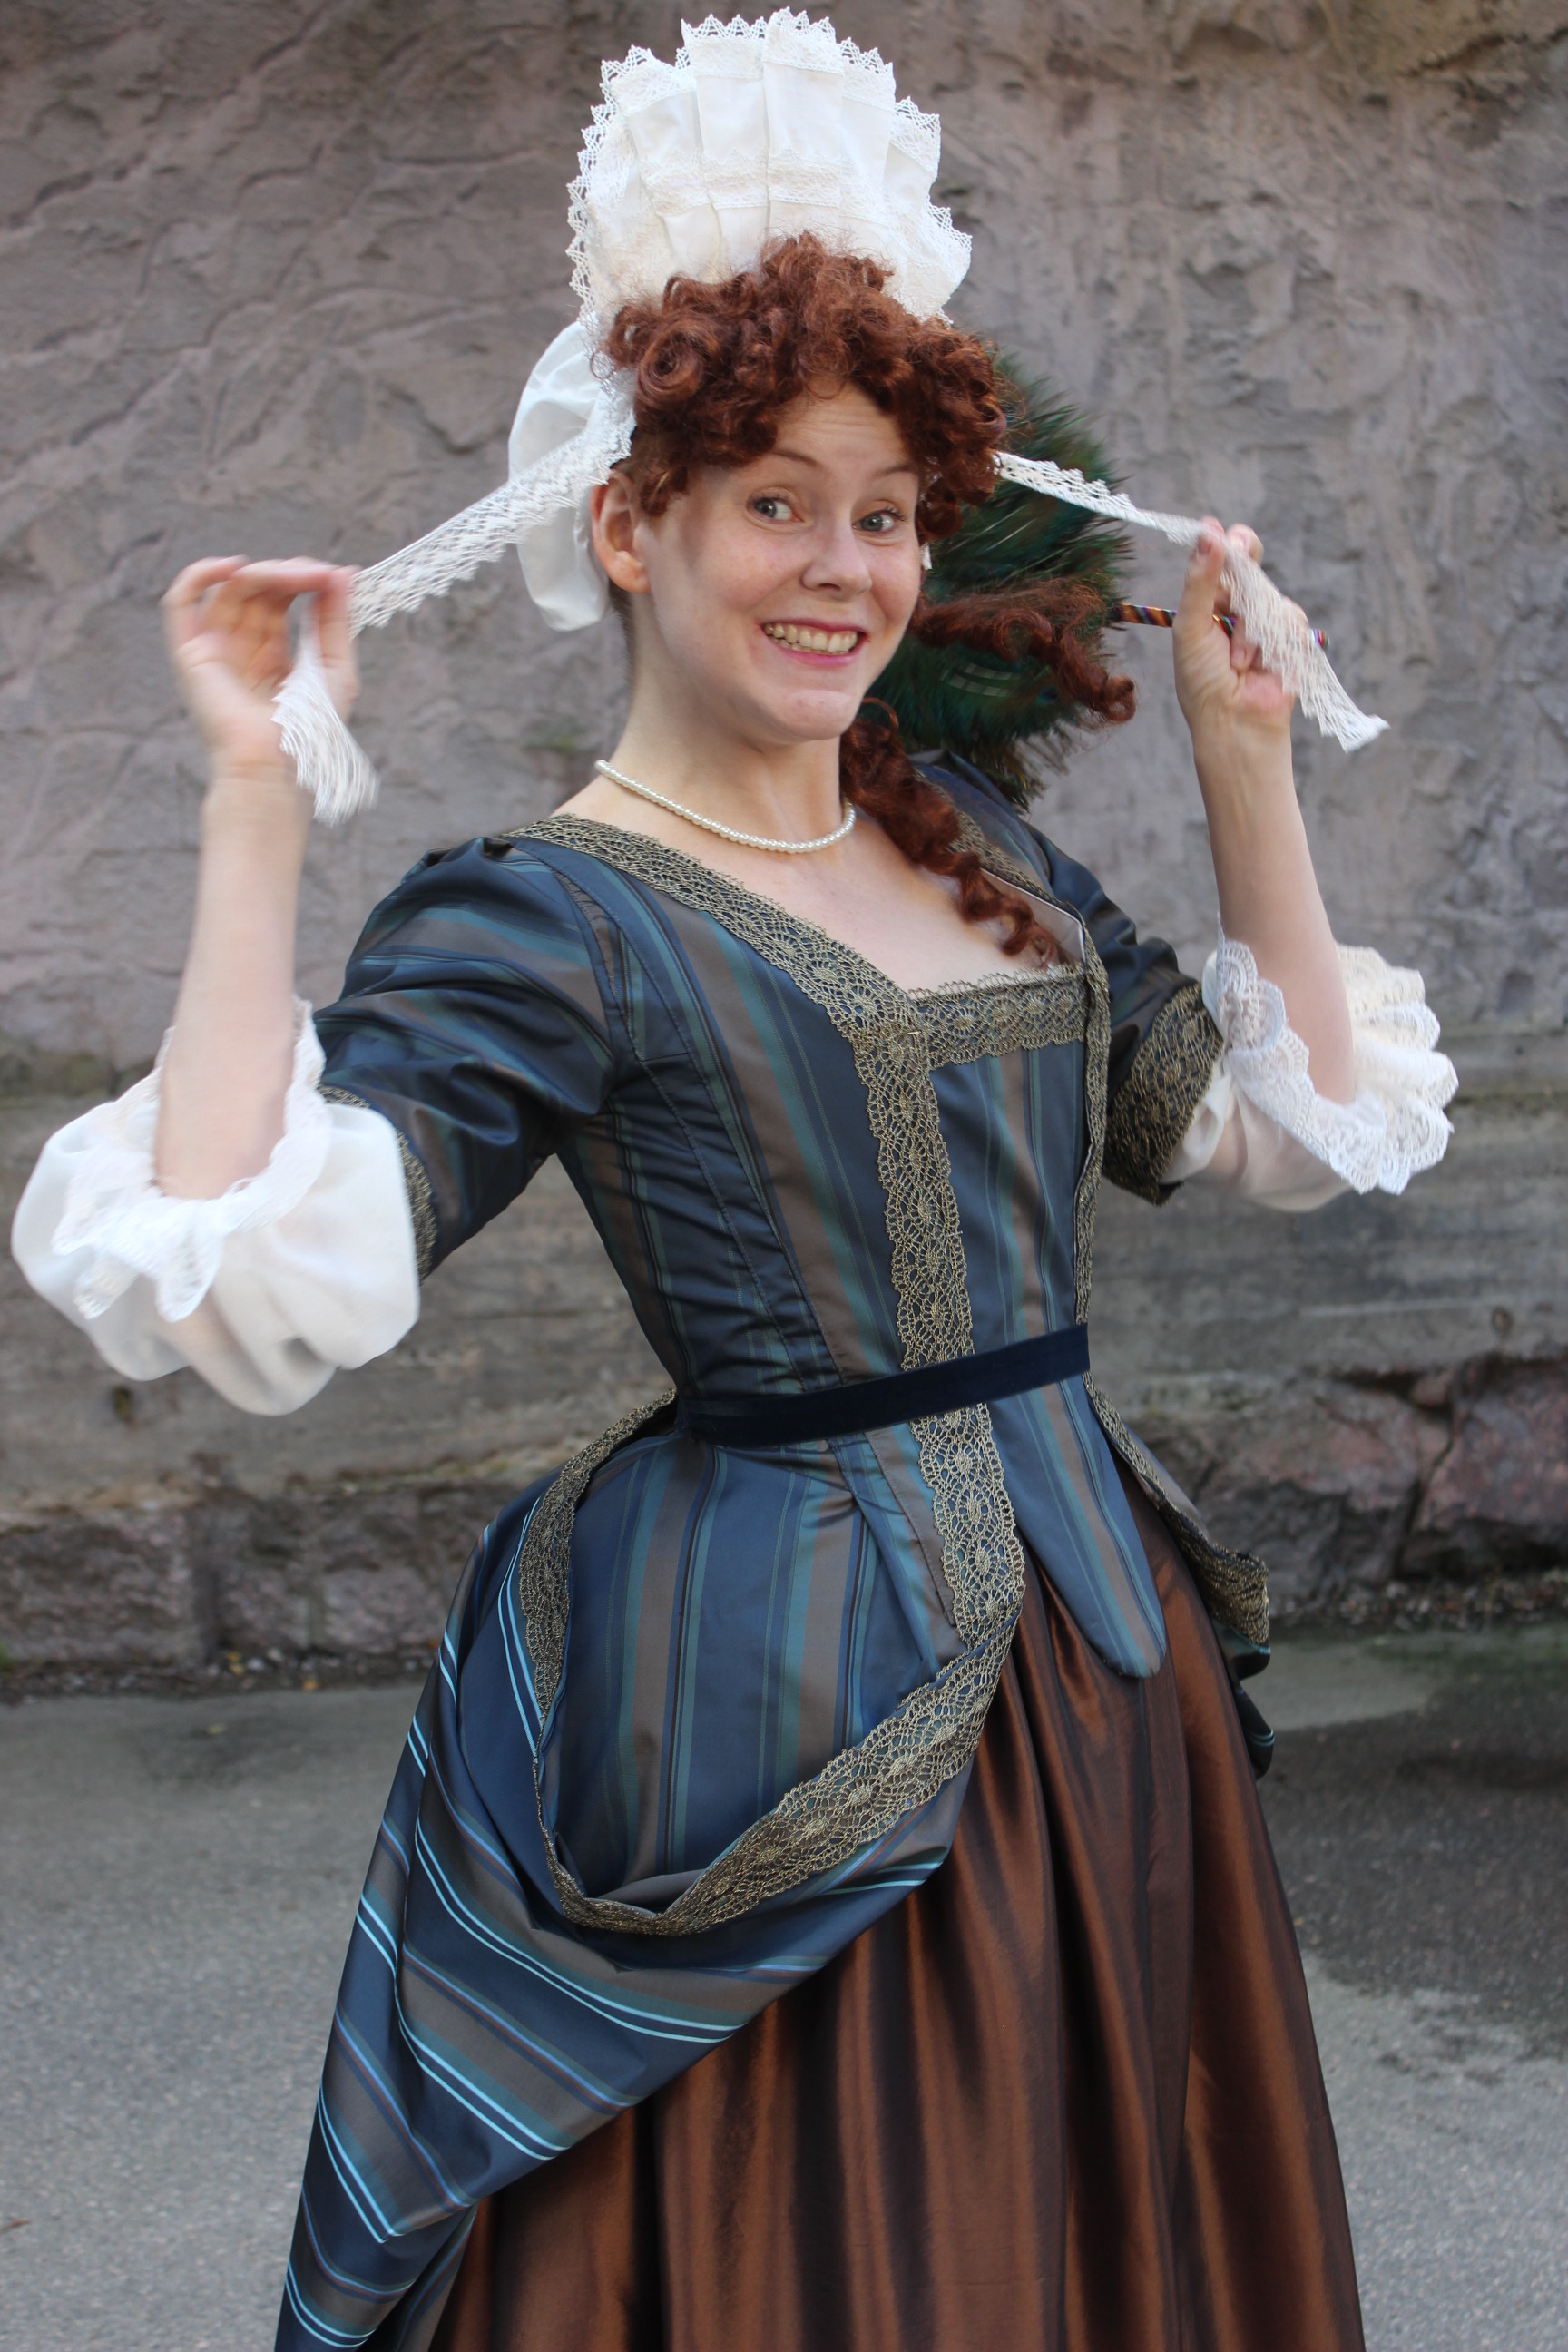
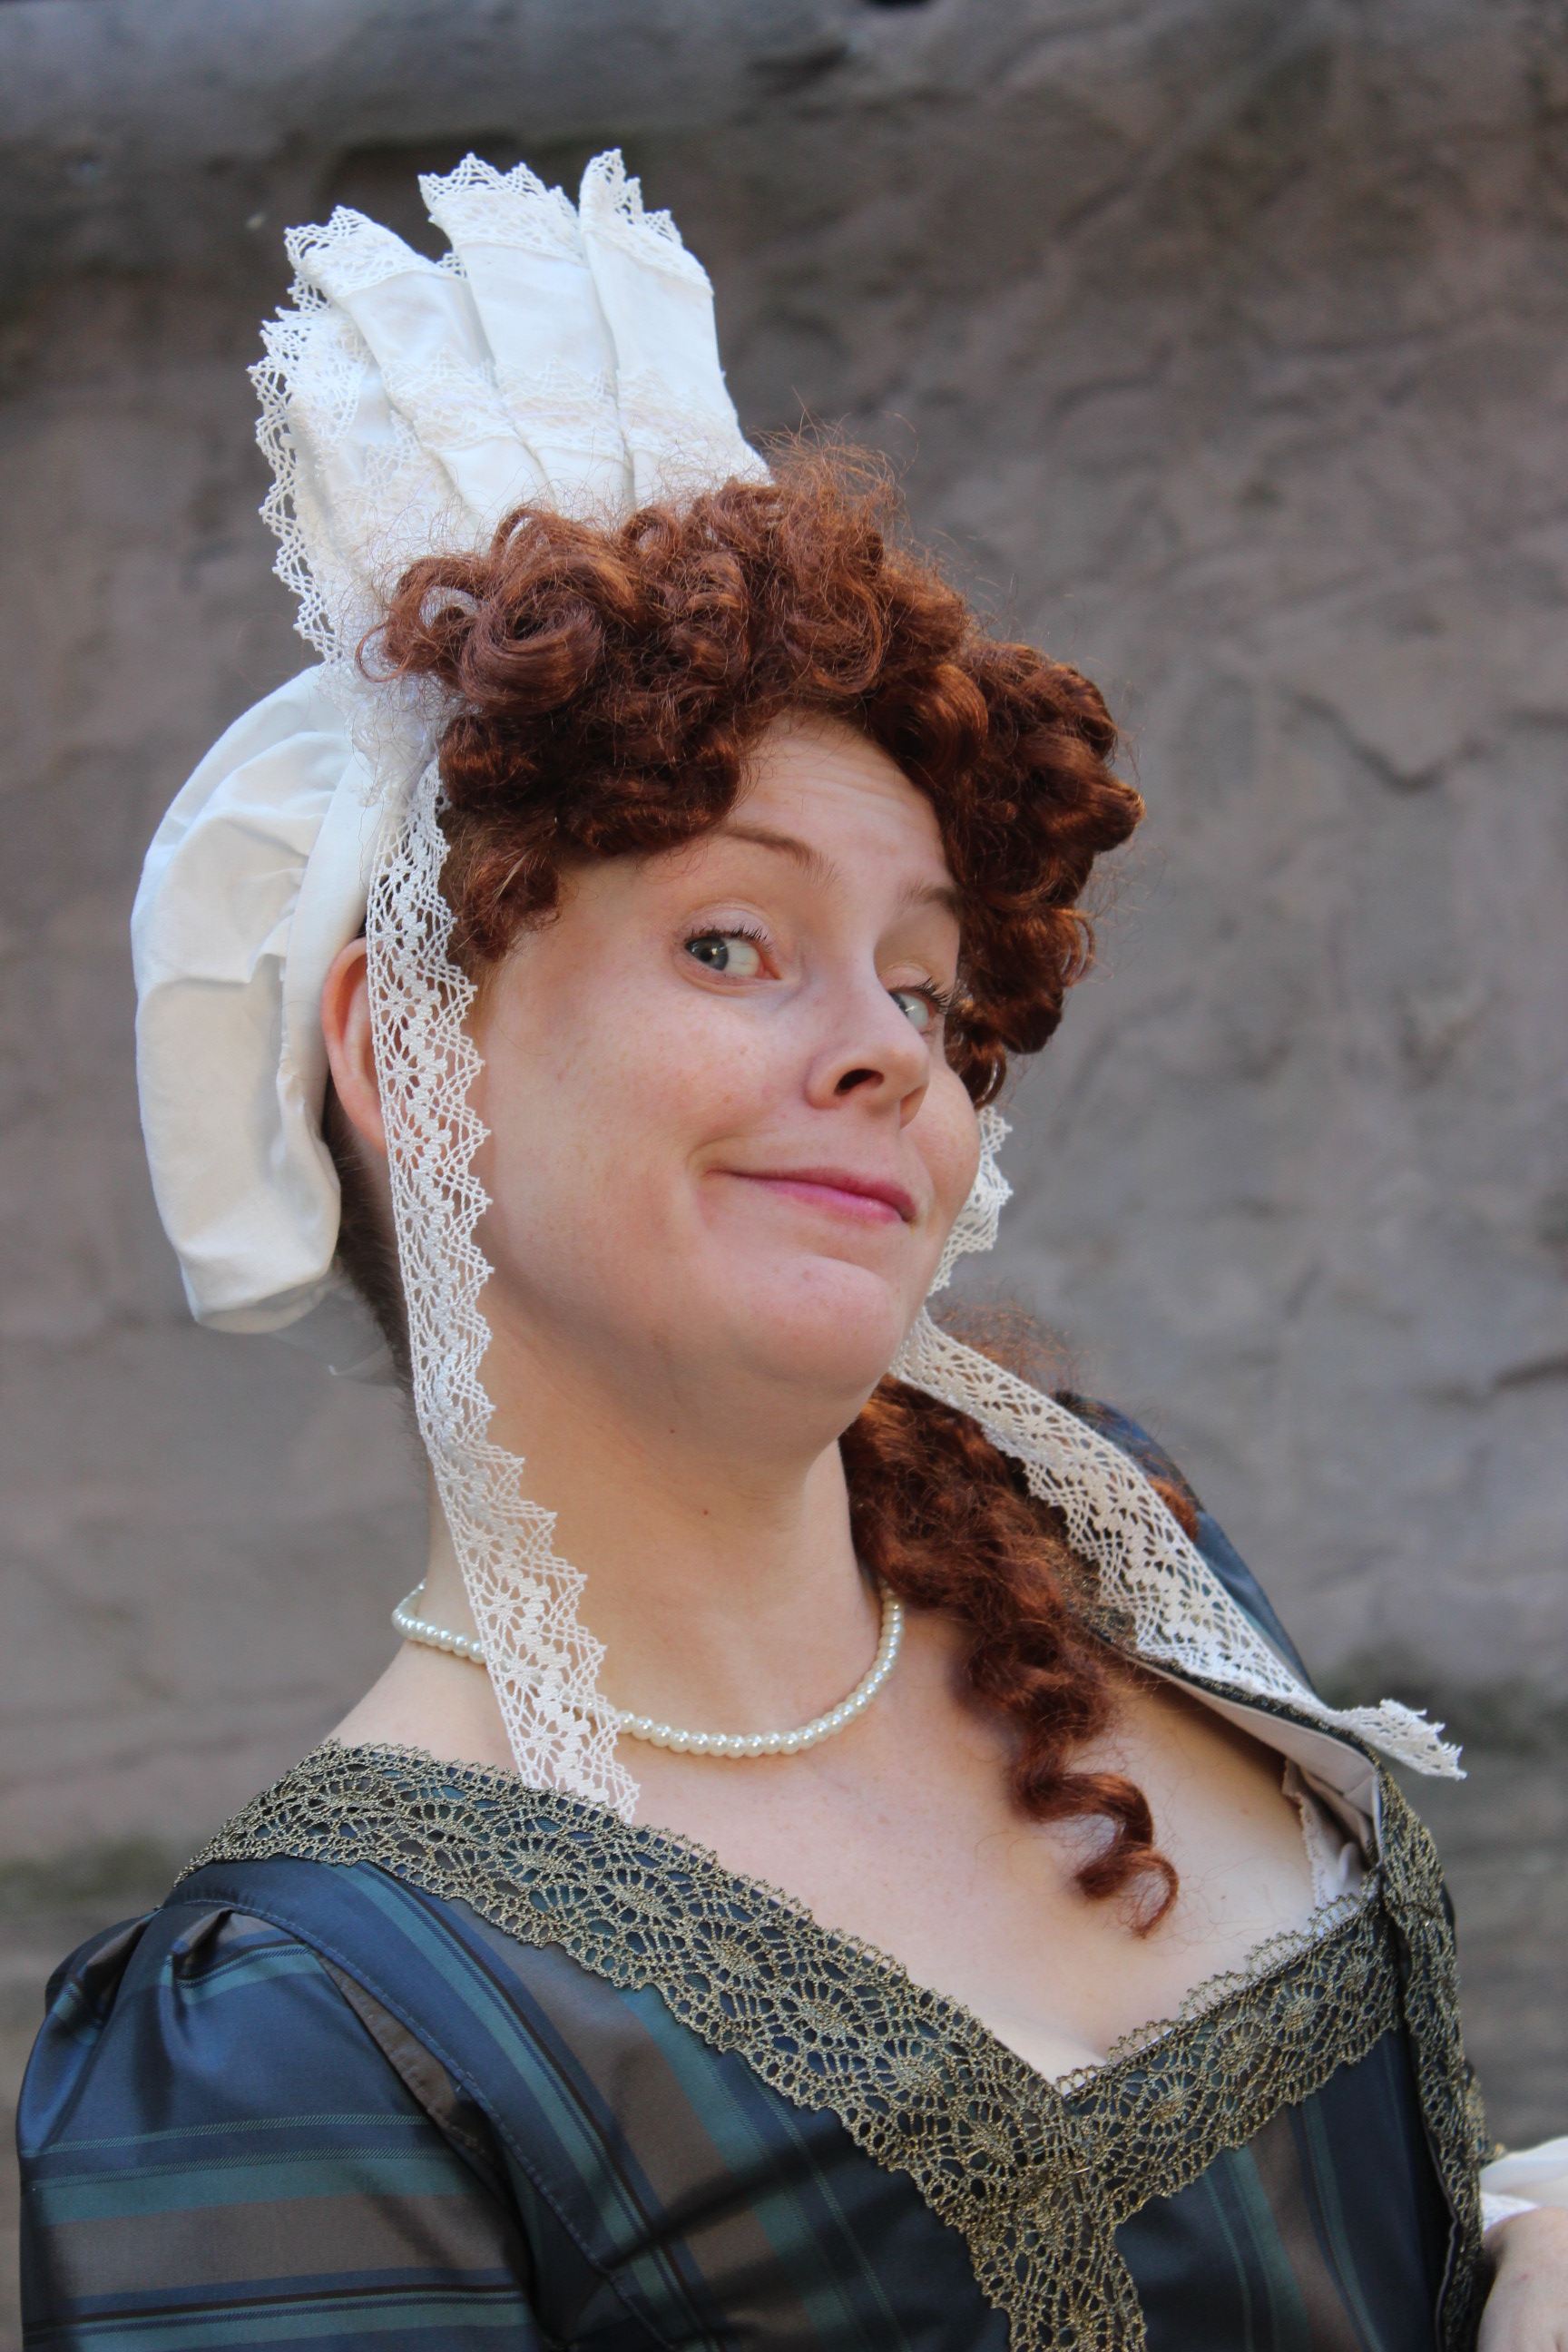
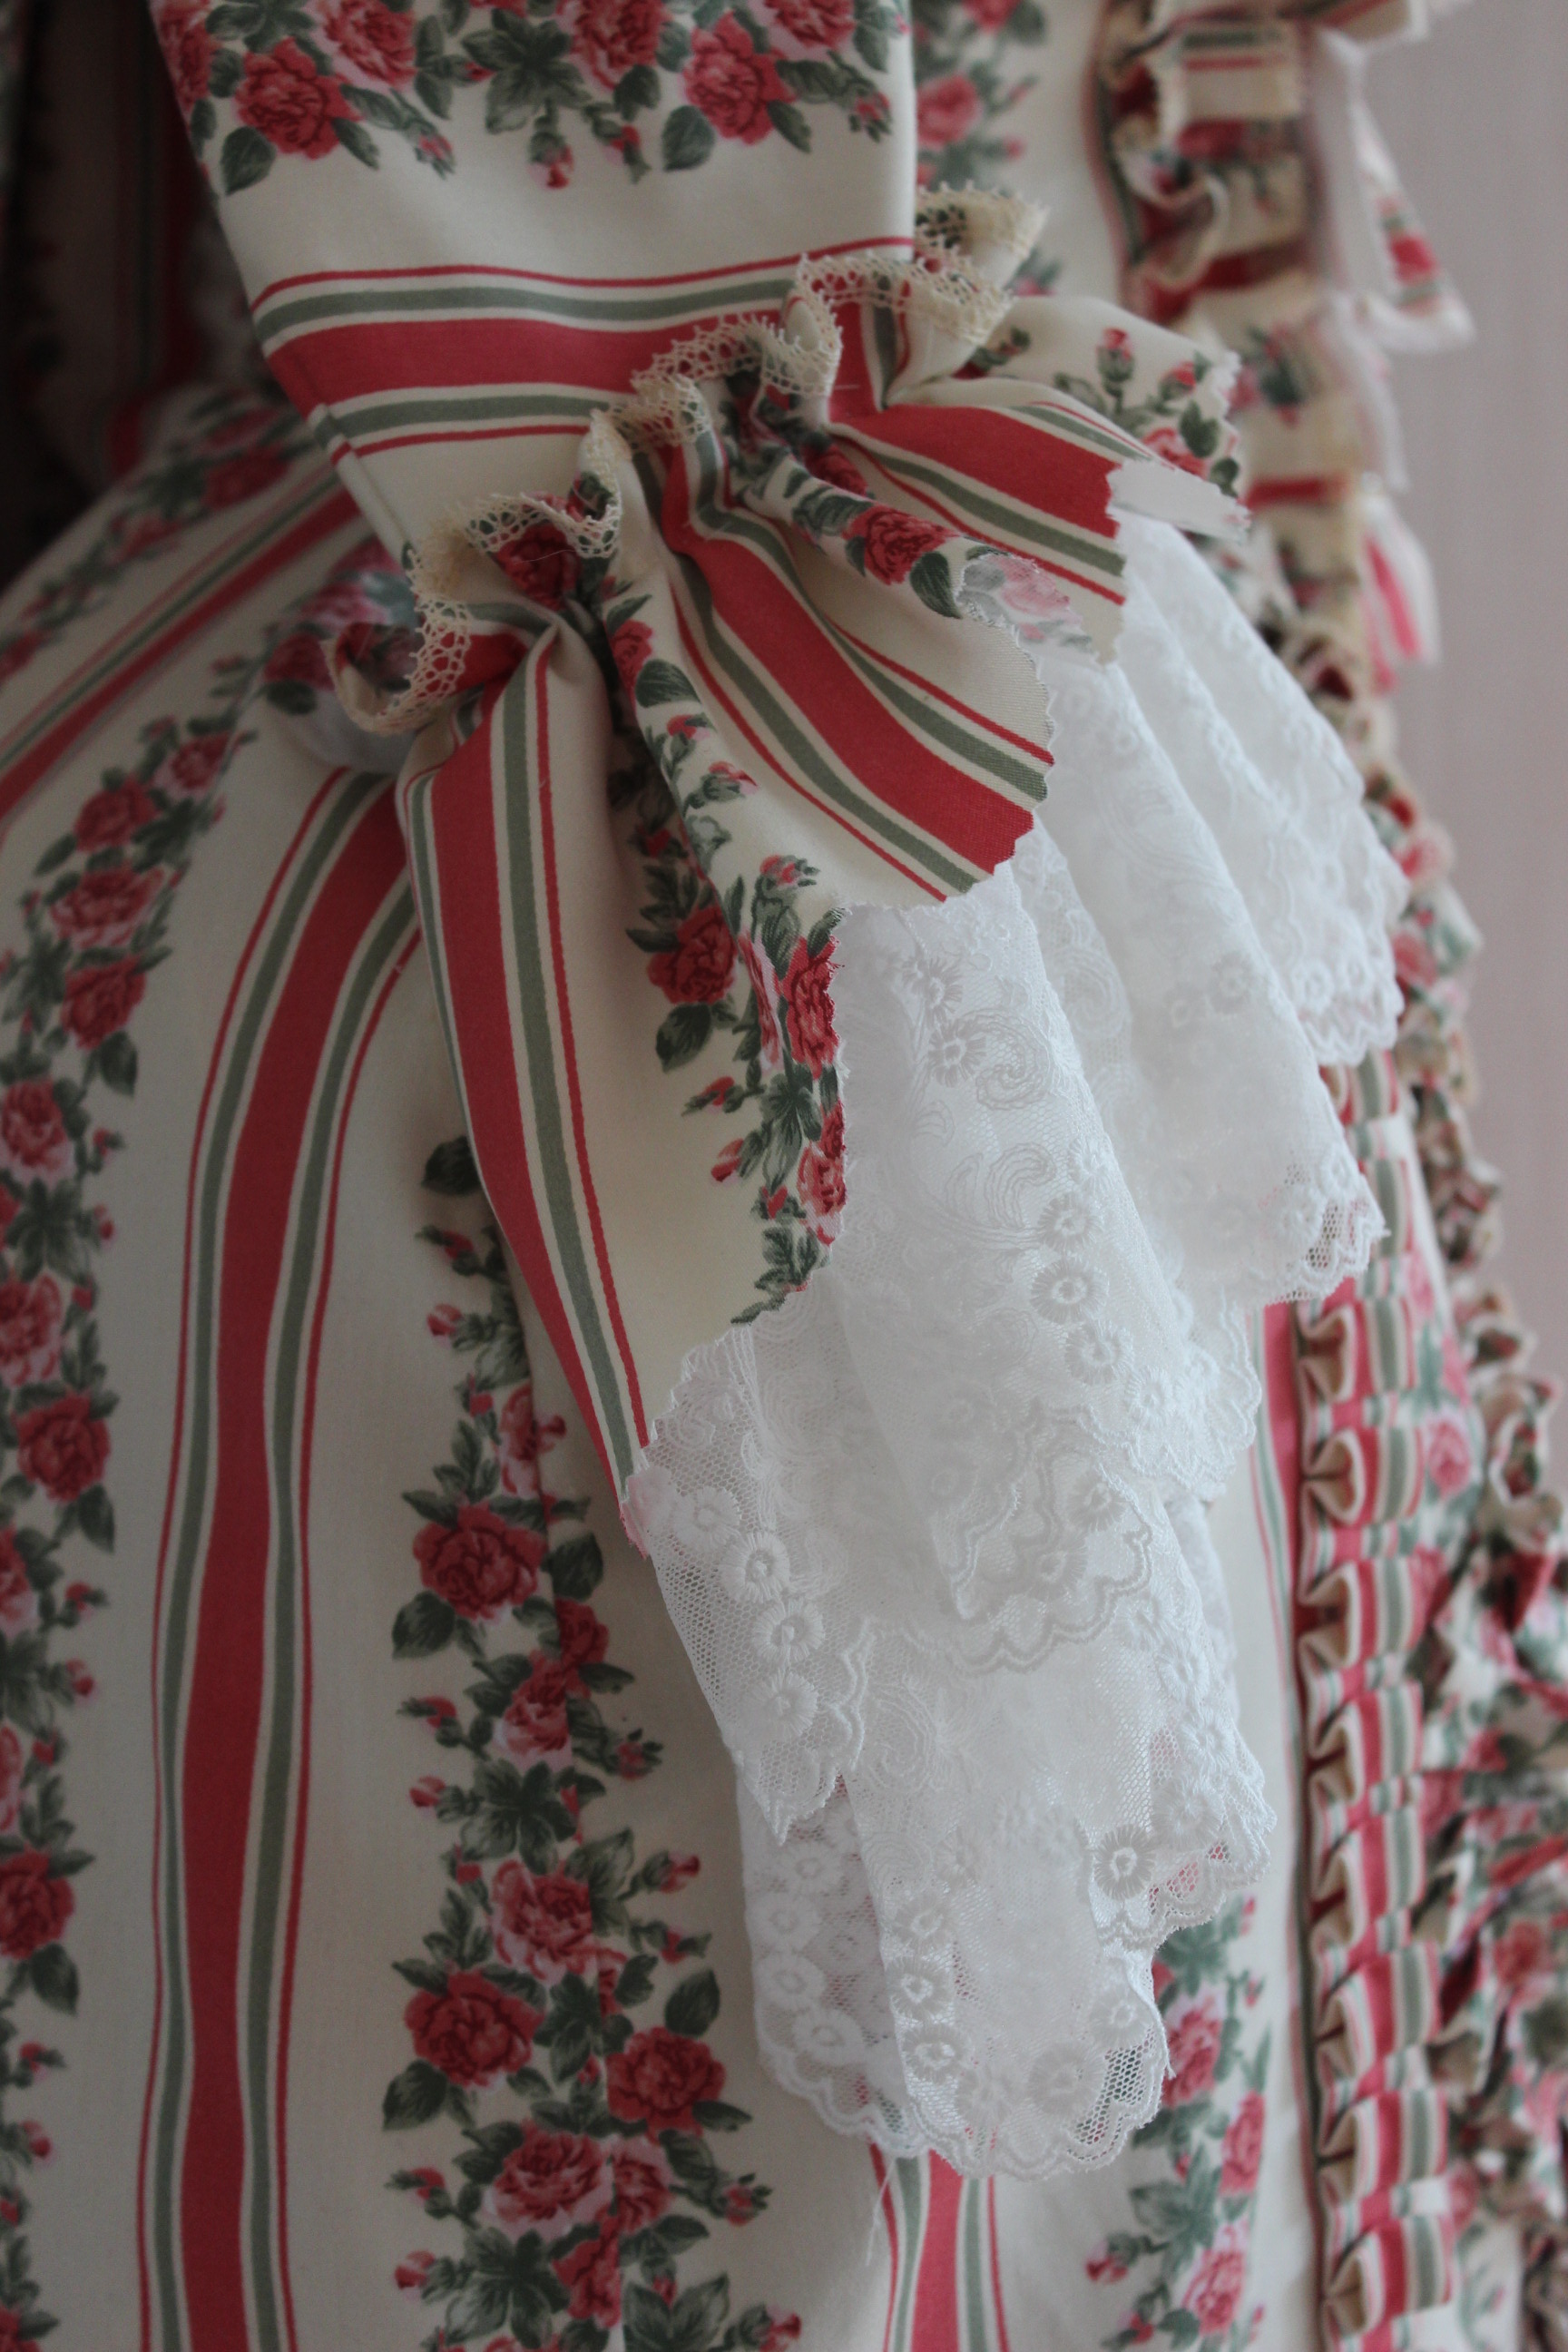
I’m also wearing a quickly made “Fontage” made from lace and cotton scraps pinned to my 18th century cap, fake curls, a pearl necklace and a peacock-feather fan.
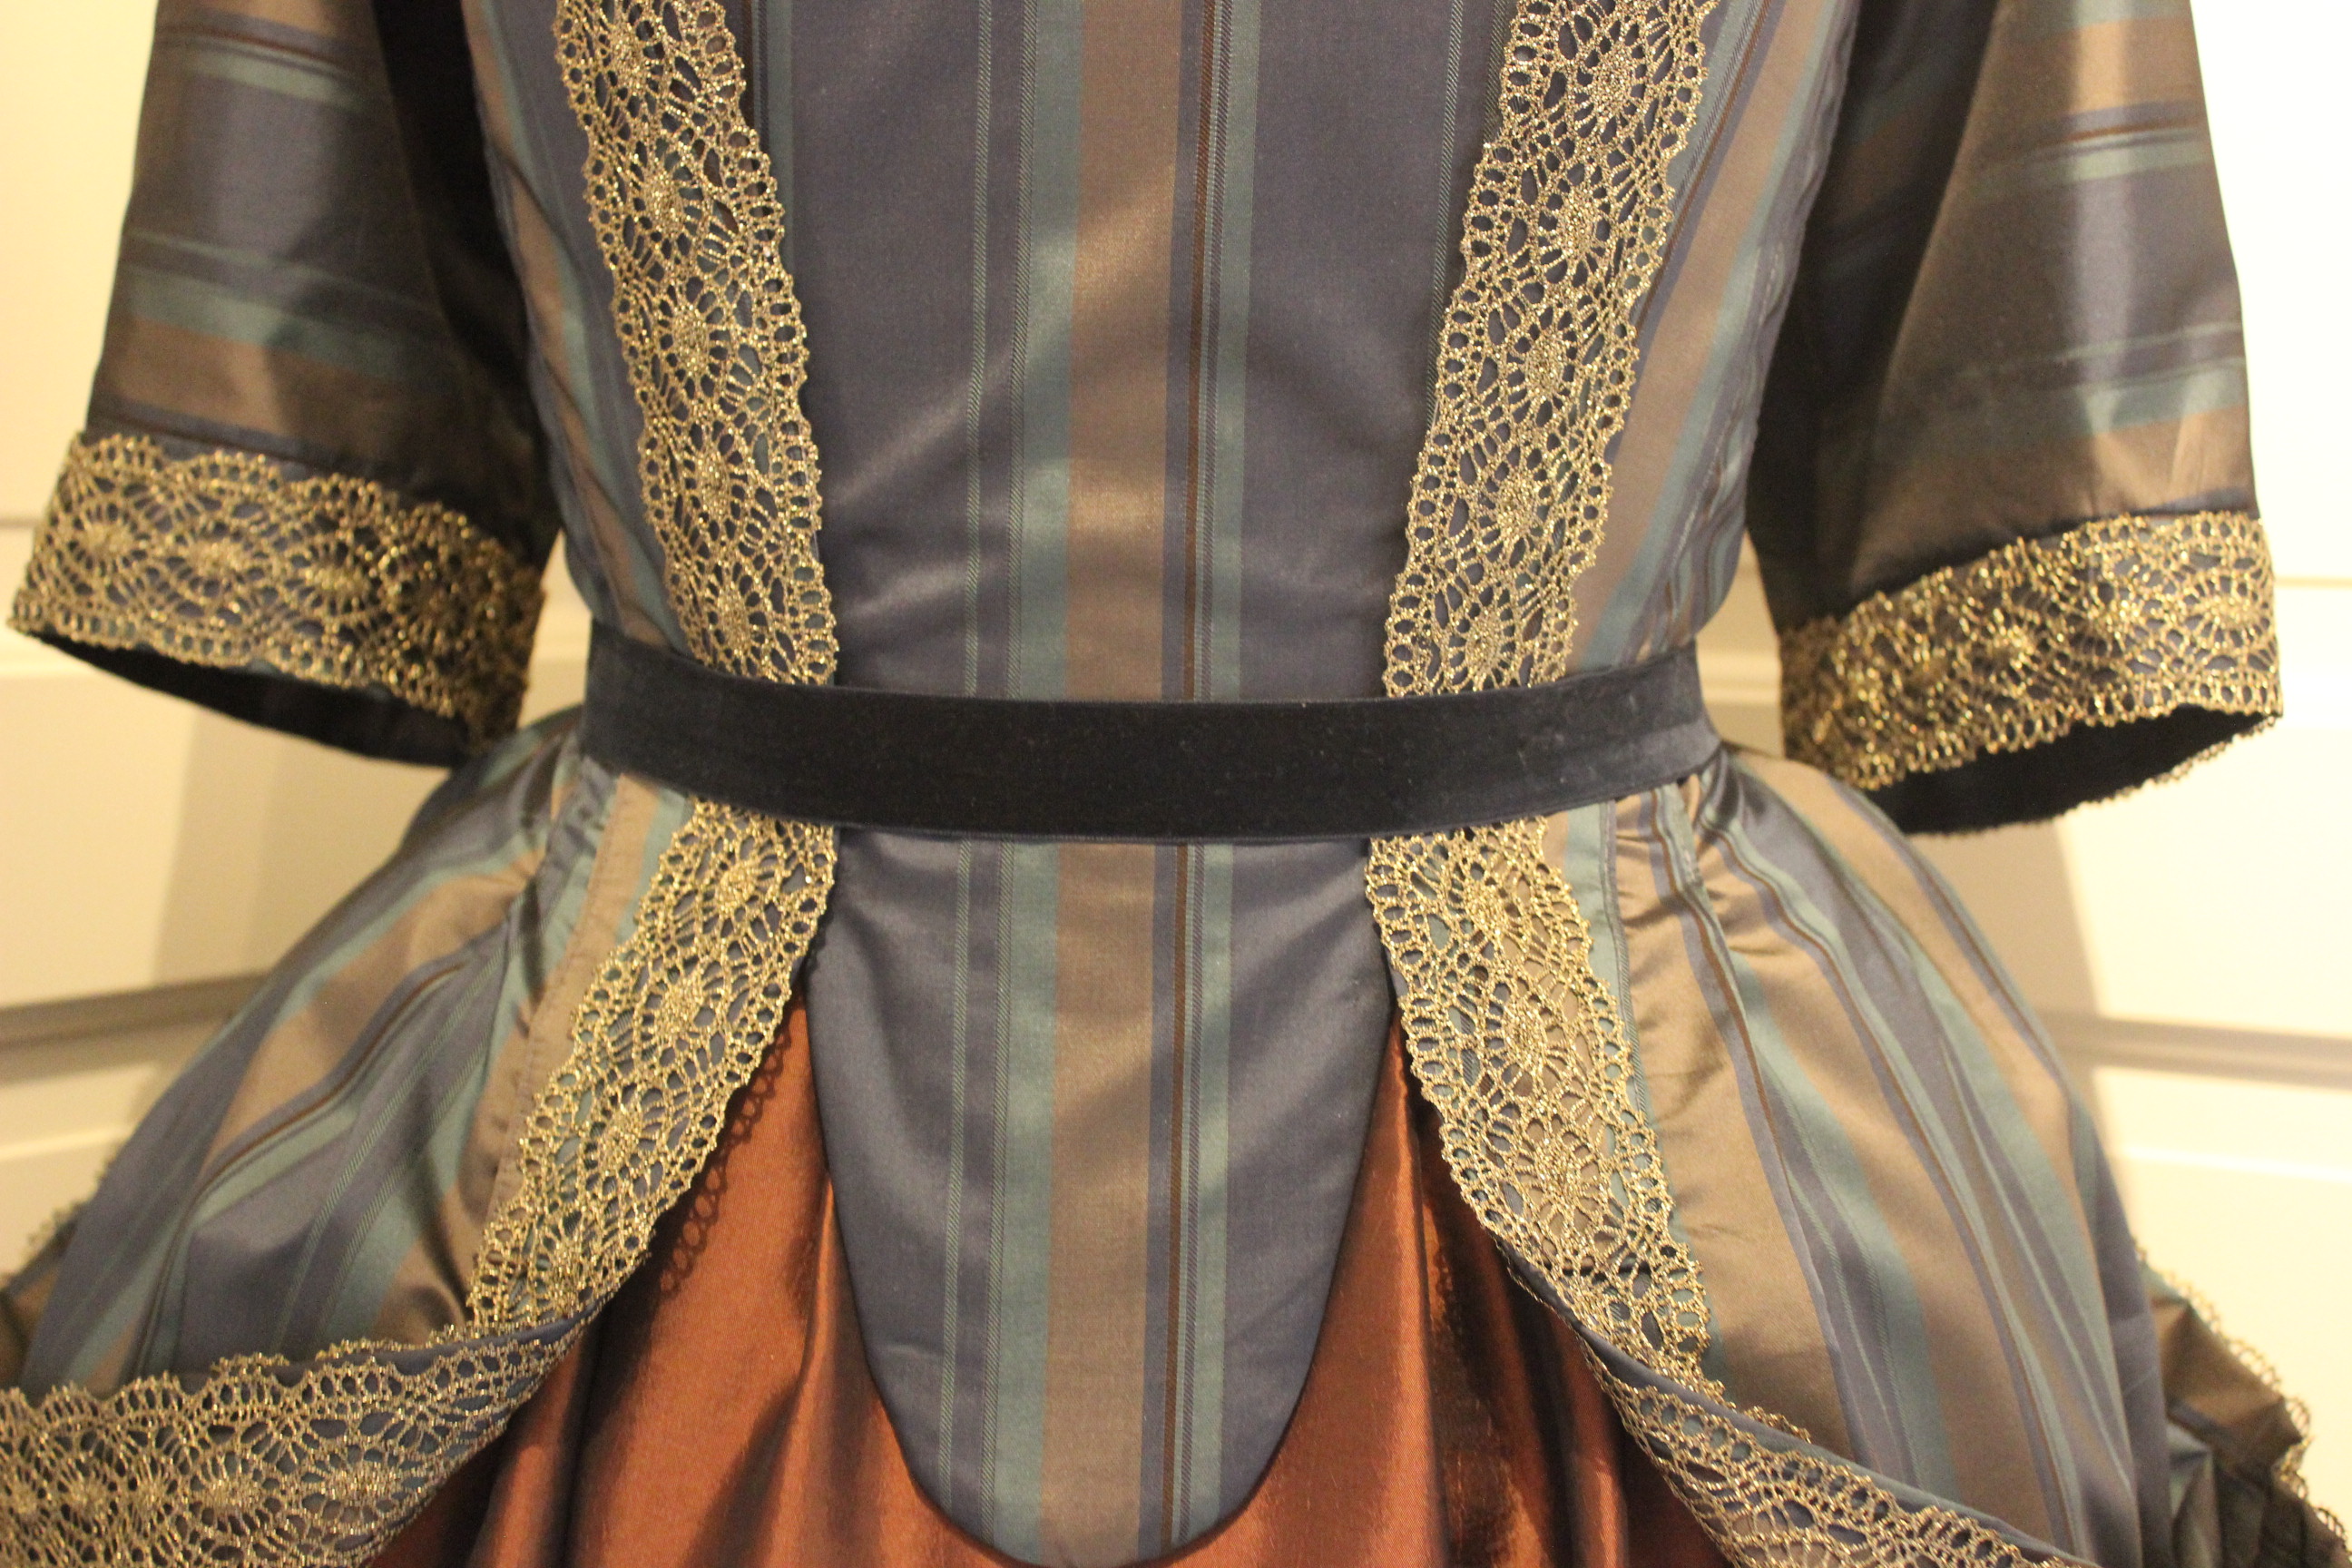
The belt is just a piece of navy velvet ribbon pinned in back and the under sleeves of the chemise is fake, and made from pieces of cotton voile and lace gathered and tacked to the sleeve cuffs.
Once the skirt was done (read about it here) it was time to cut the new fabric for the gown.
The only trouble was that not only did I not have enough fabric, The fabric also had the stripes running the wrong way to my cutting plan.
So I ended up spending an entire evening re-calculating and testing layouts until I finally cut the whole gown on the cross (to get the stripes running down the body) and pieced the heck out of the train in several places.
Then it was time to actually get on to the sewing.
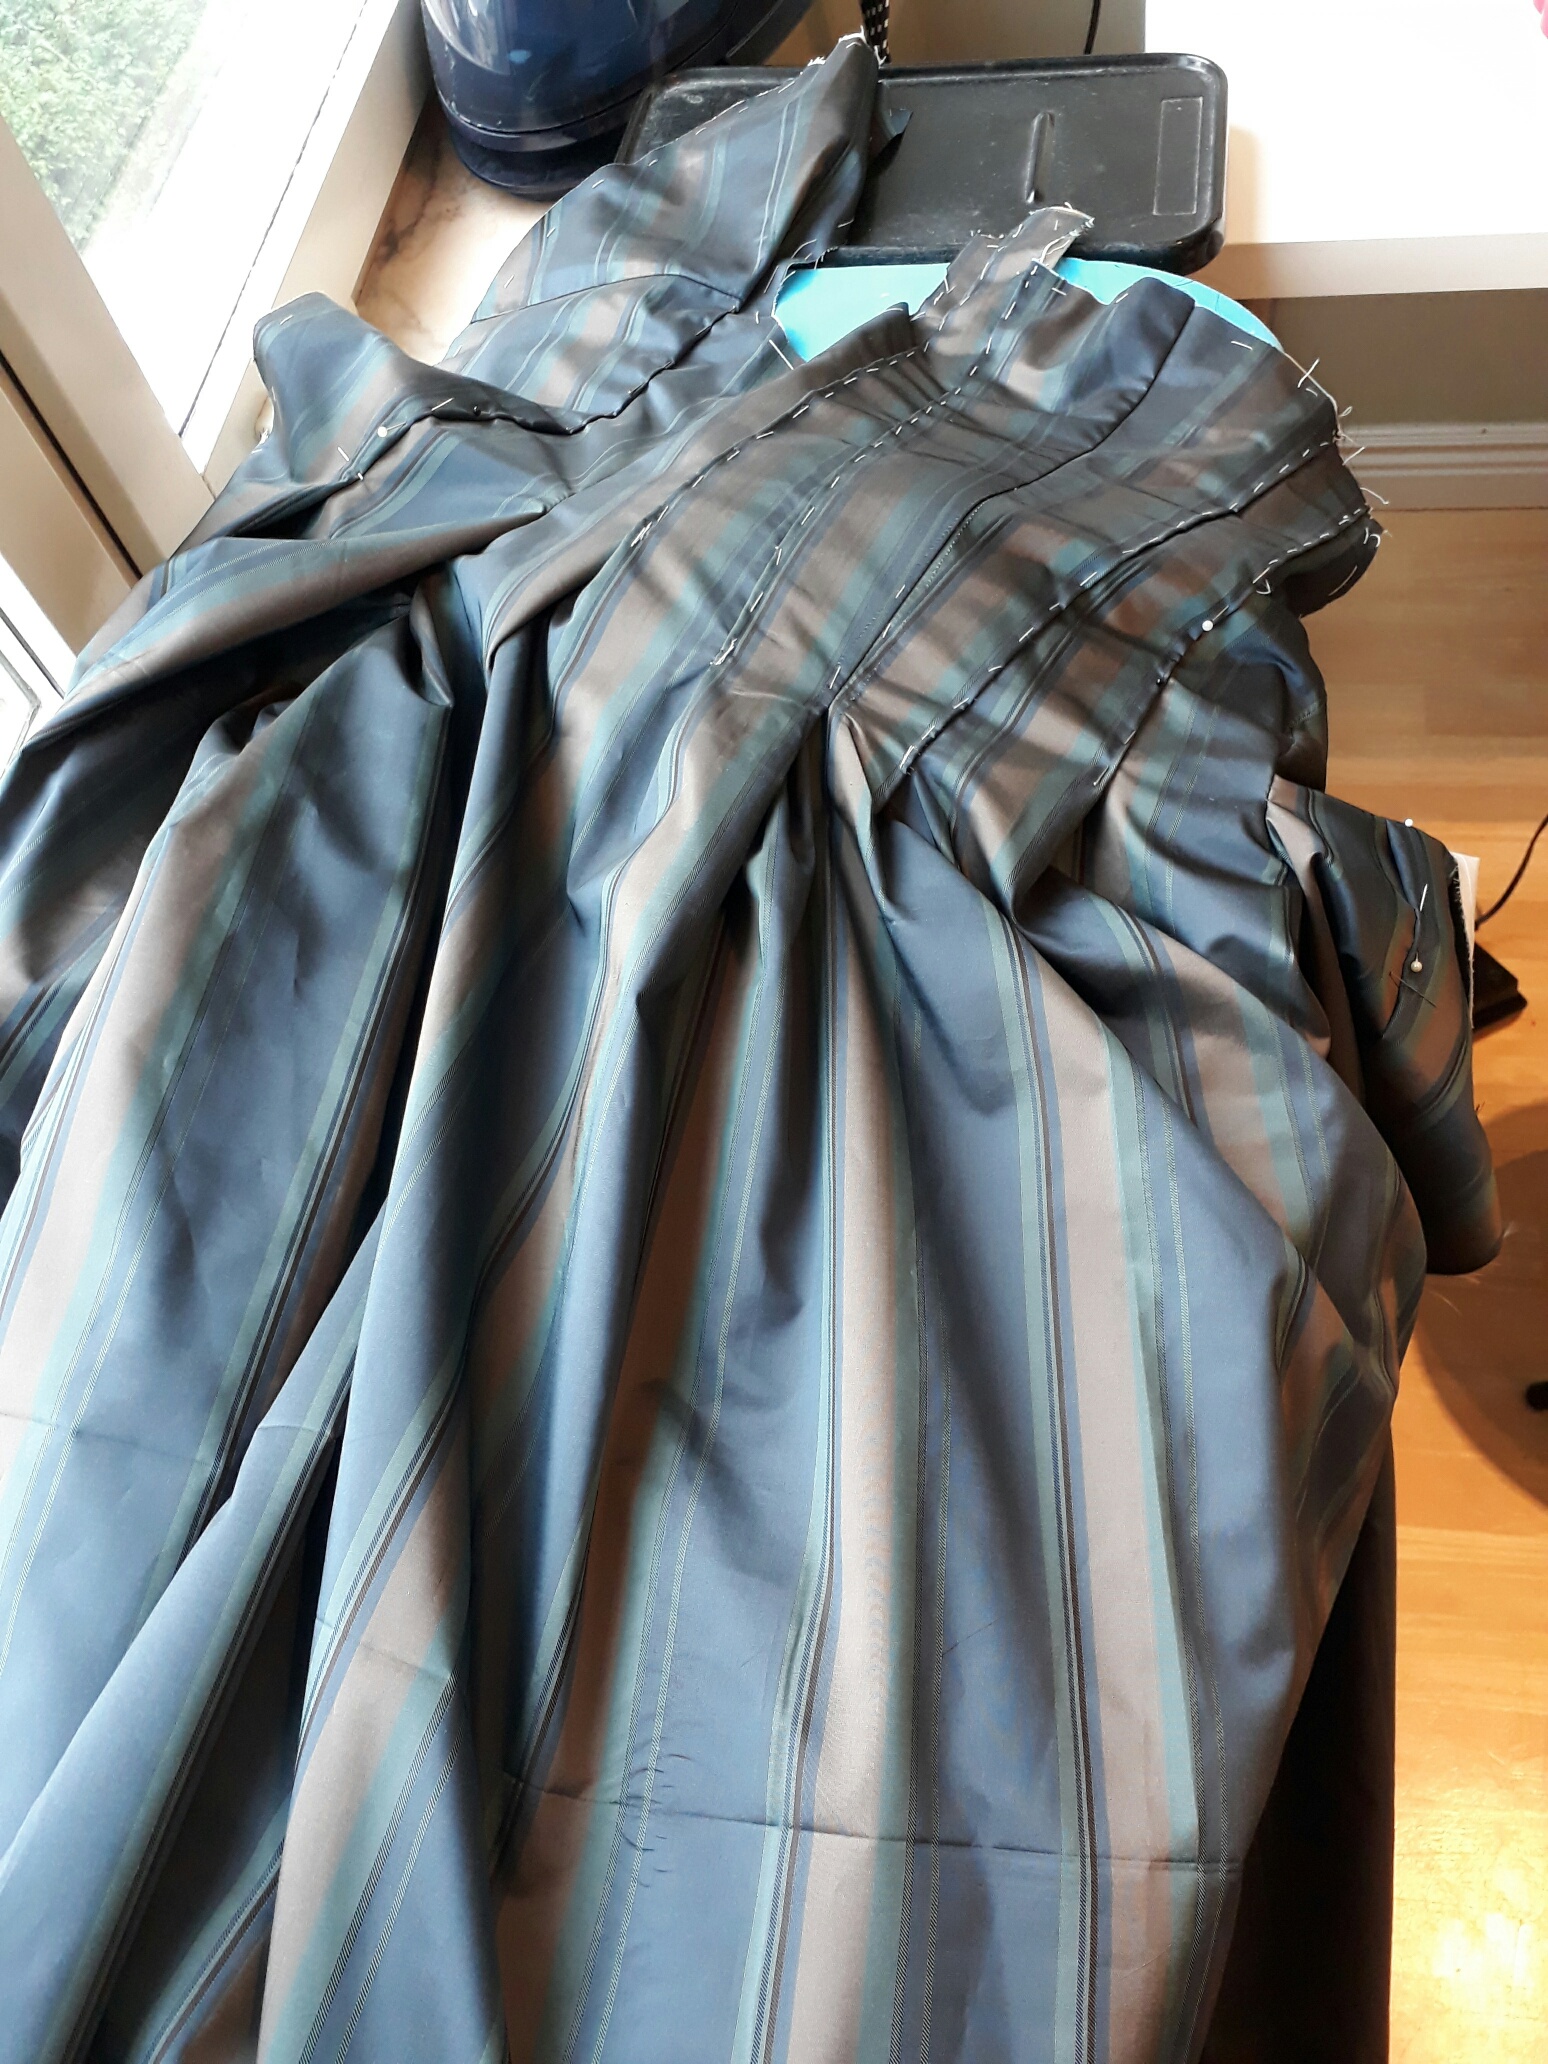
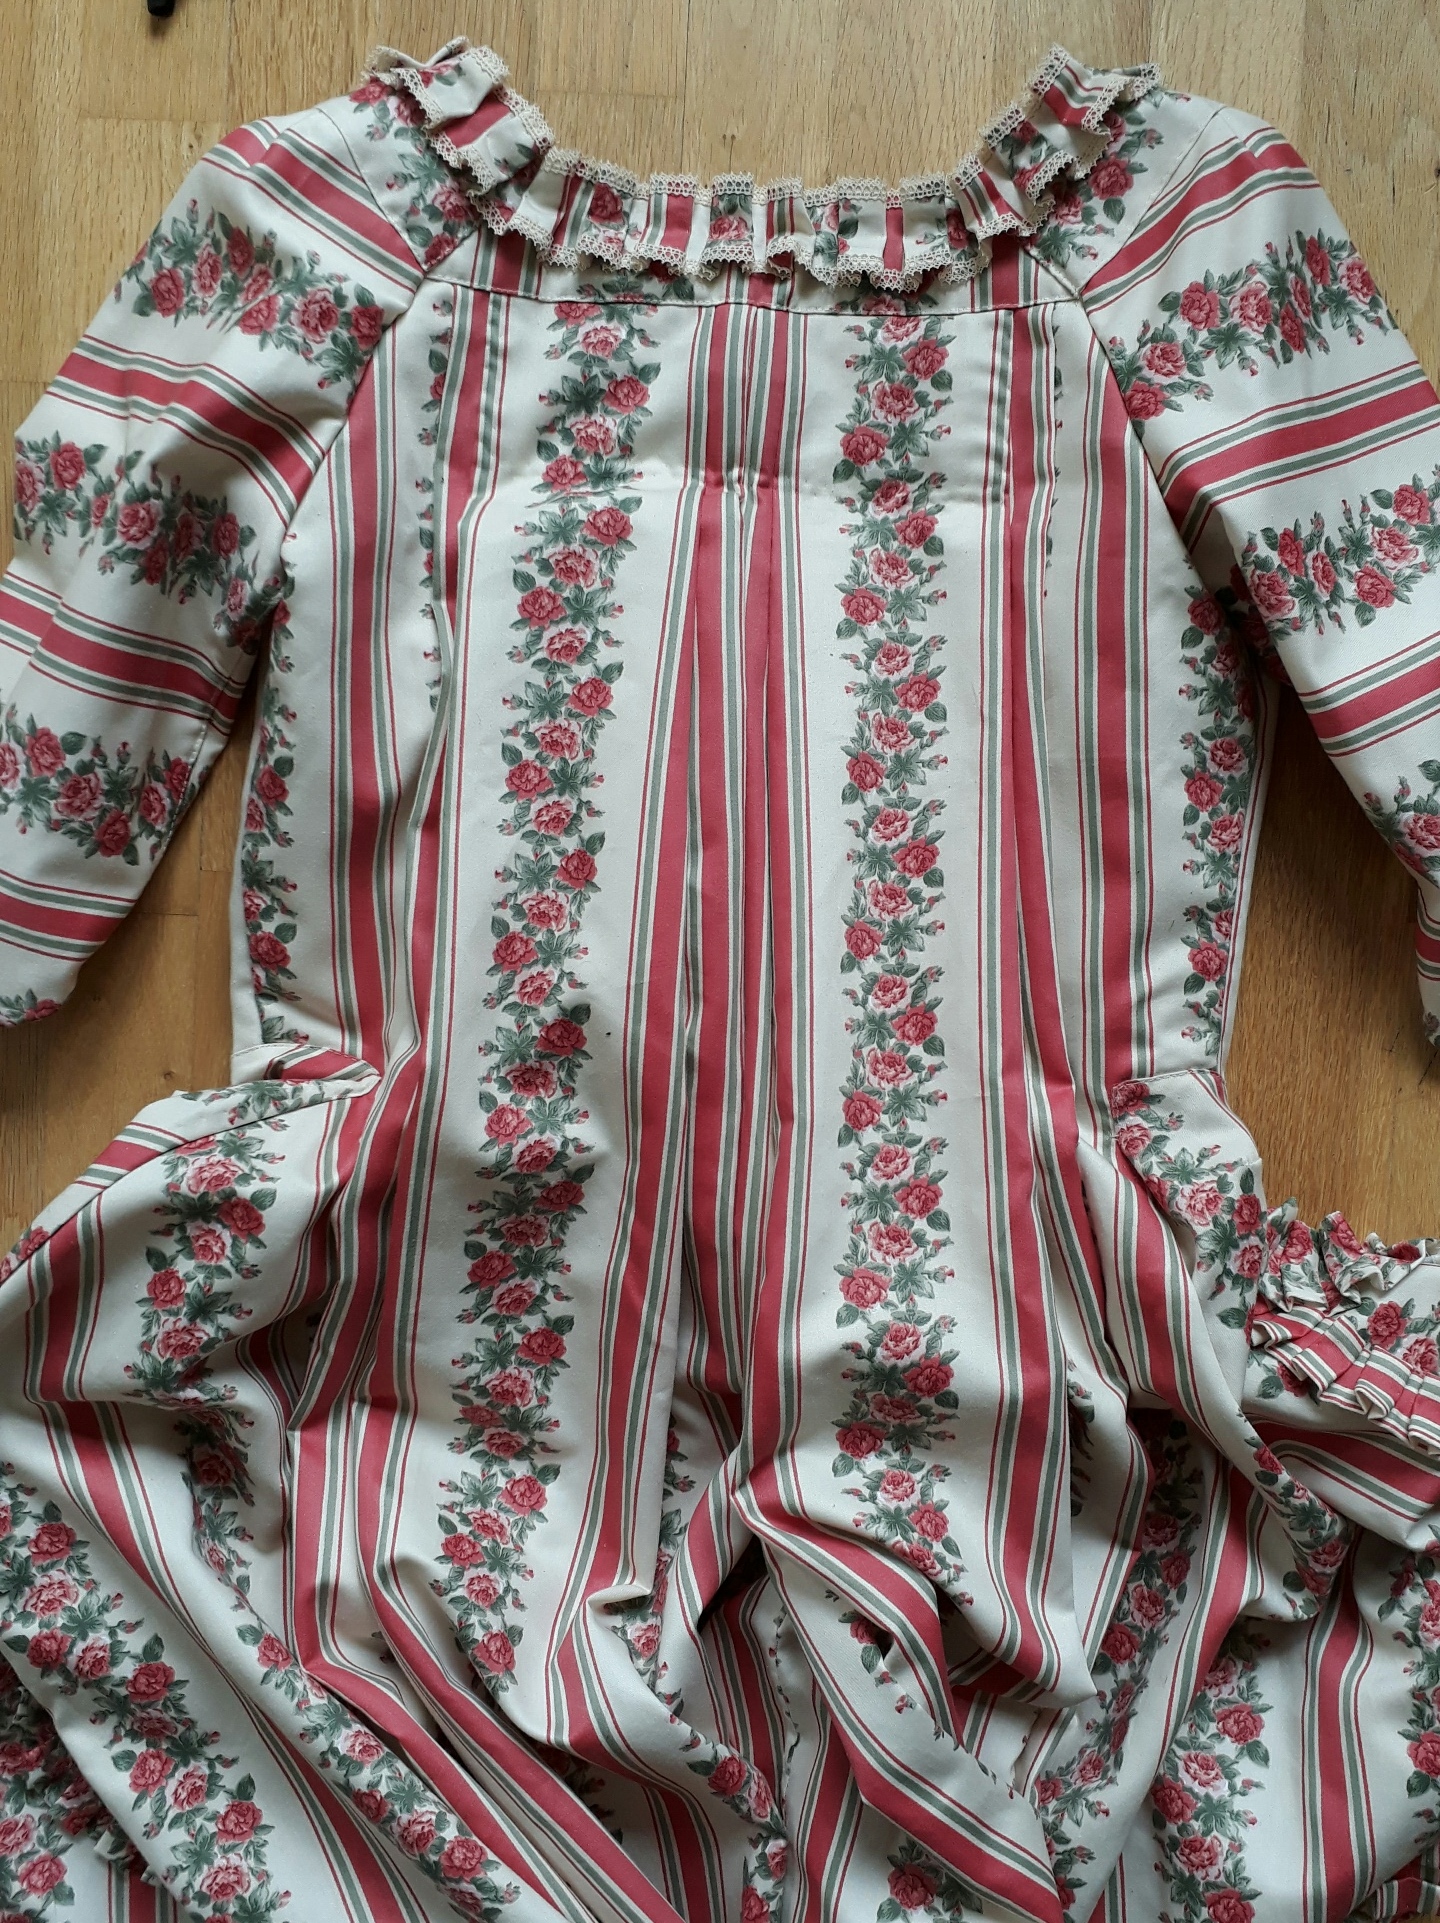
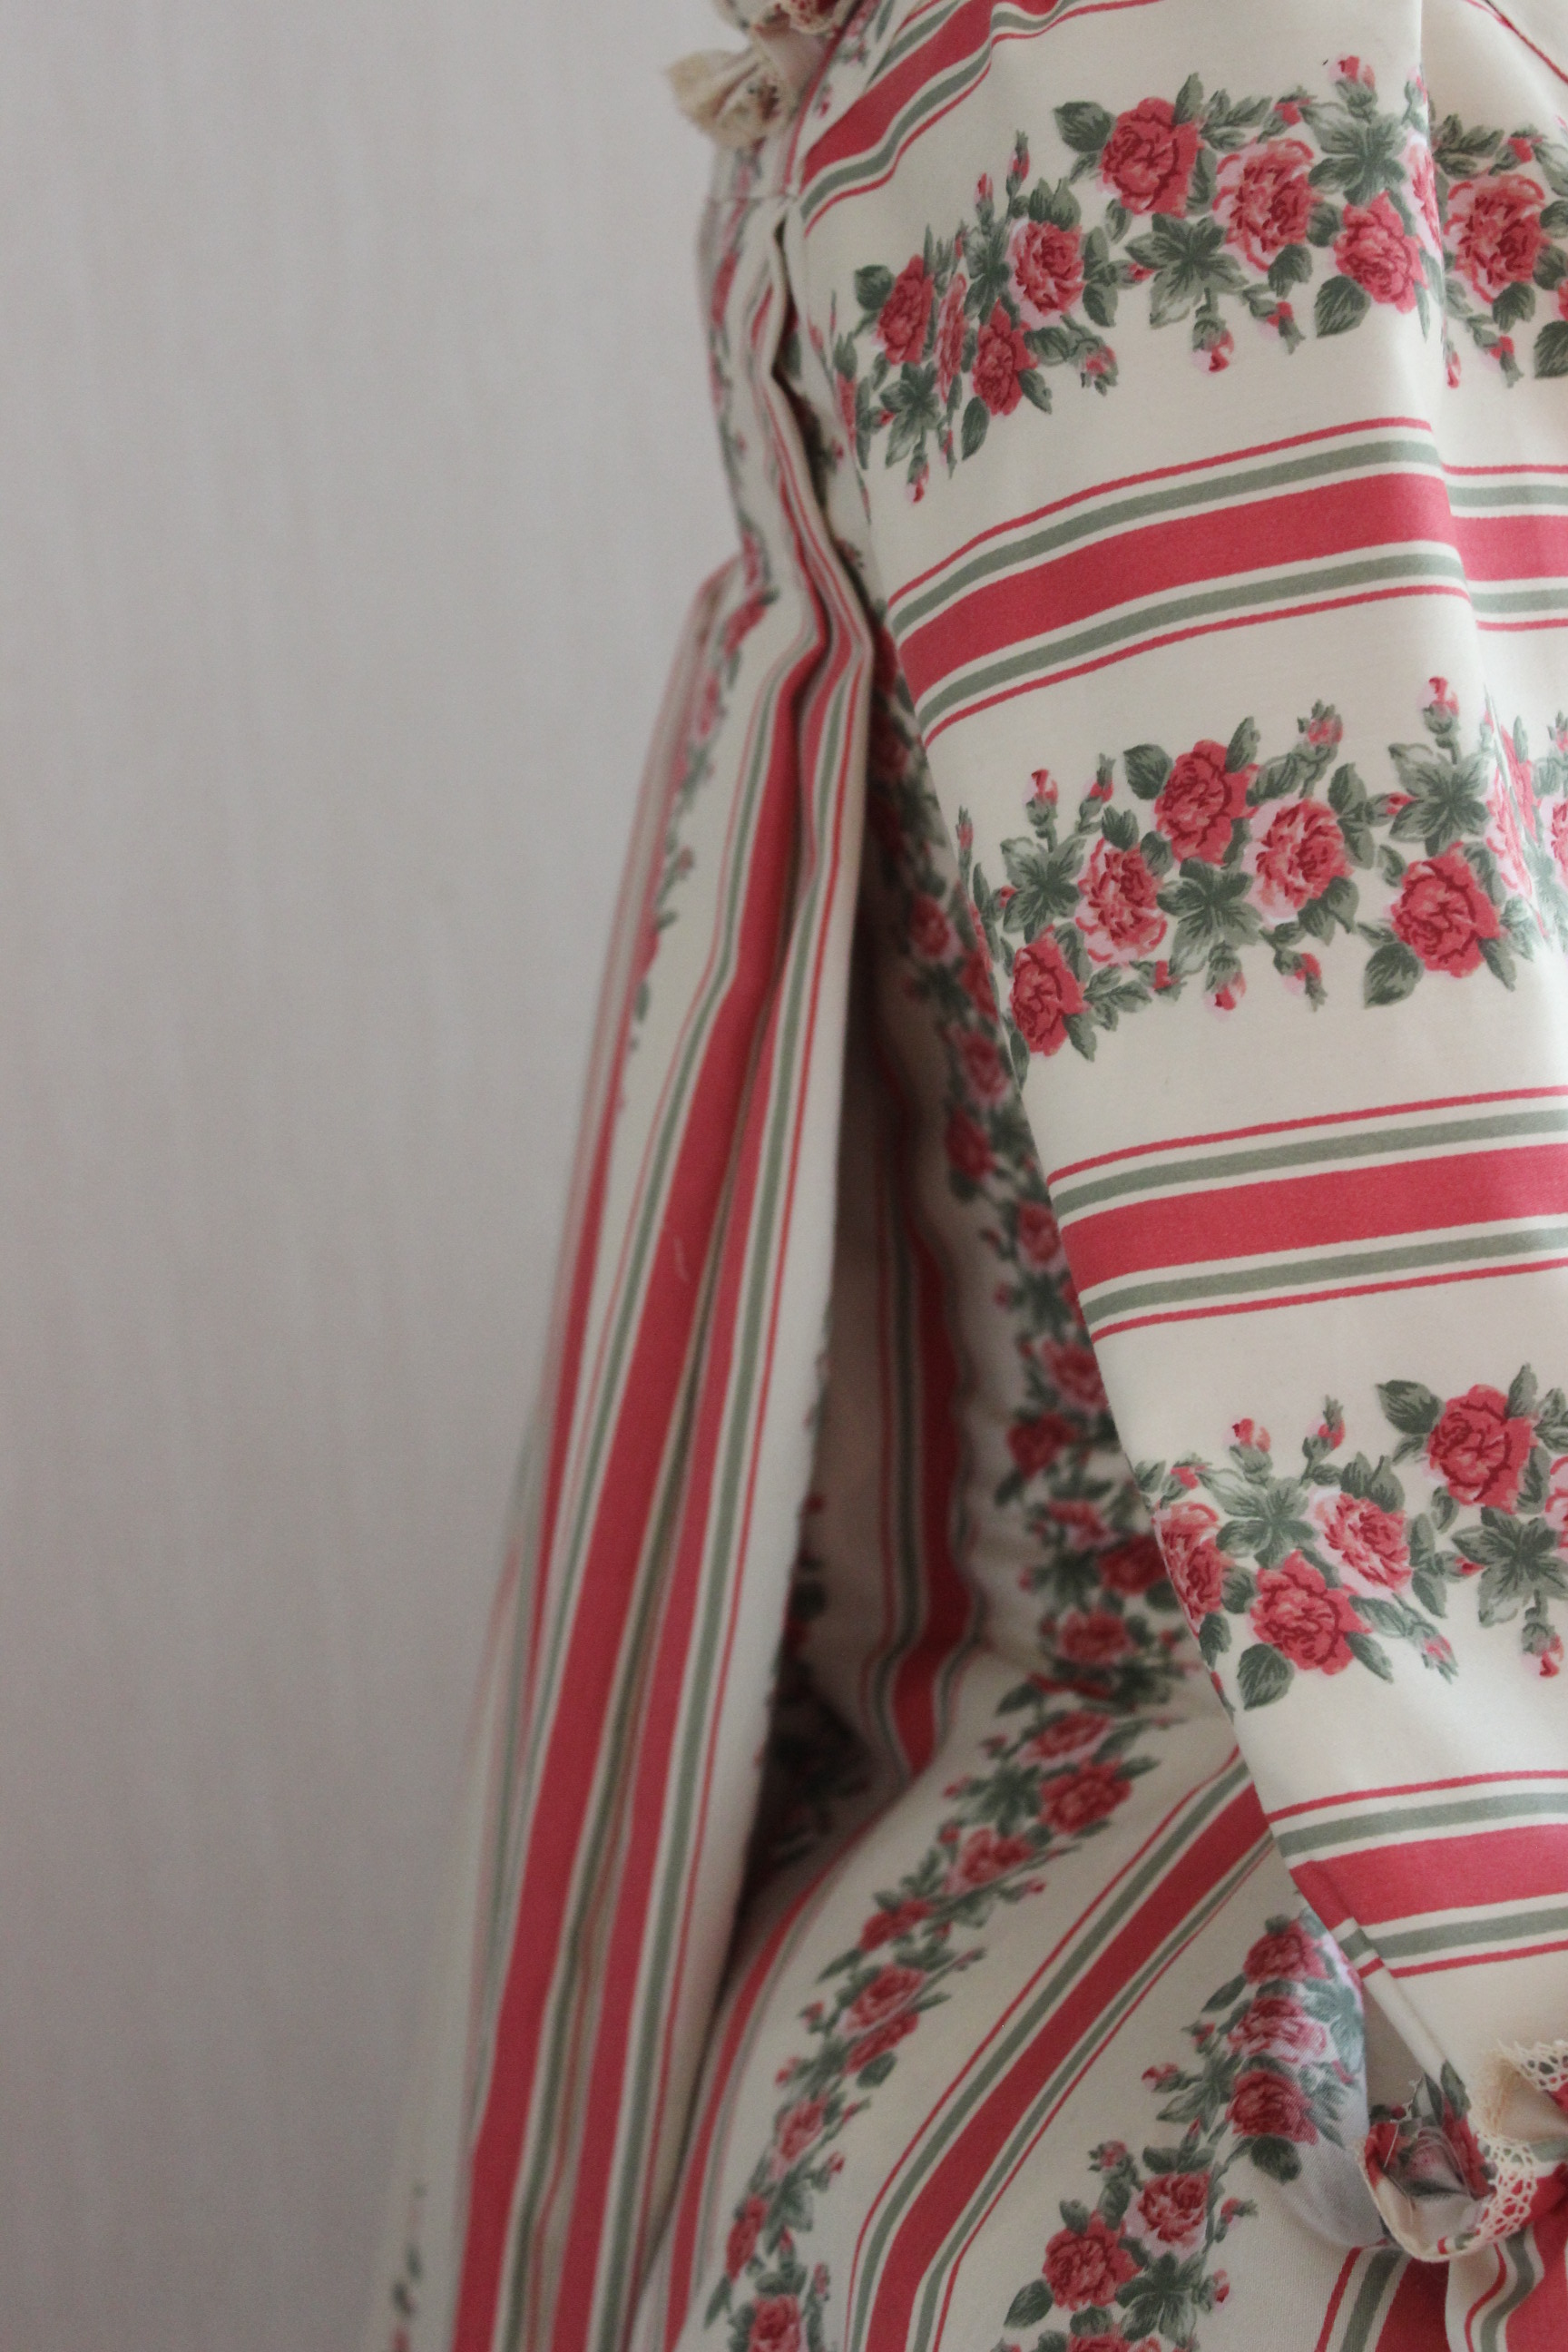
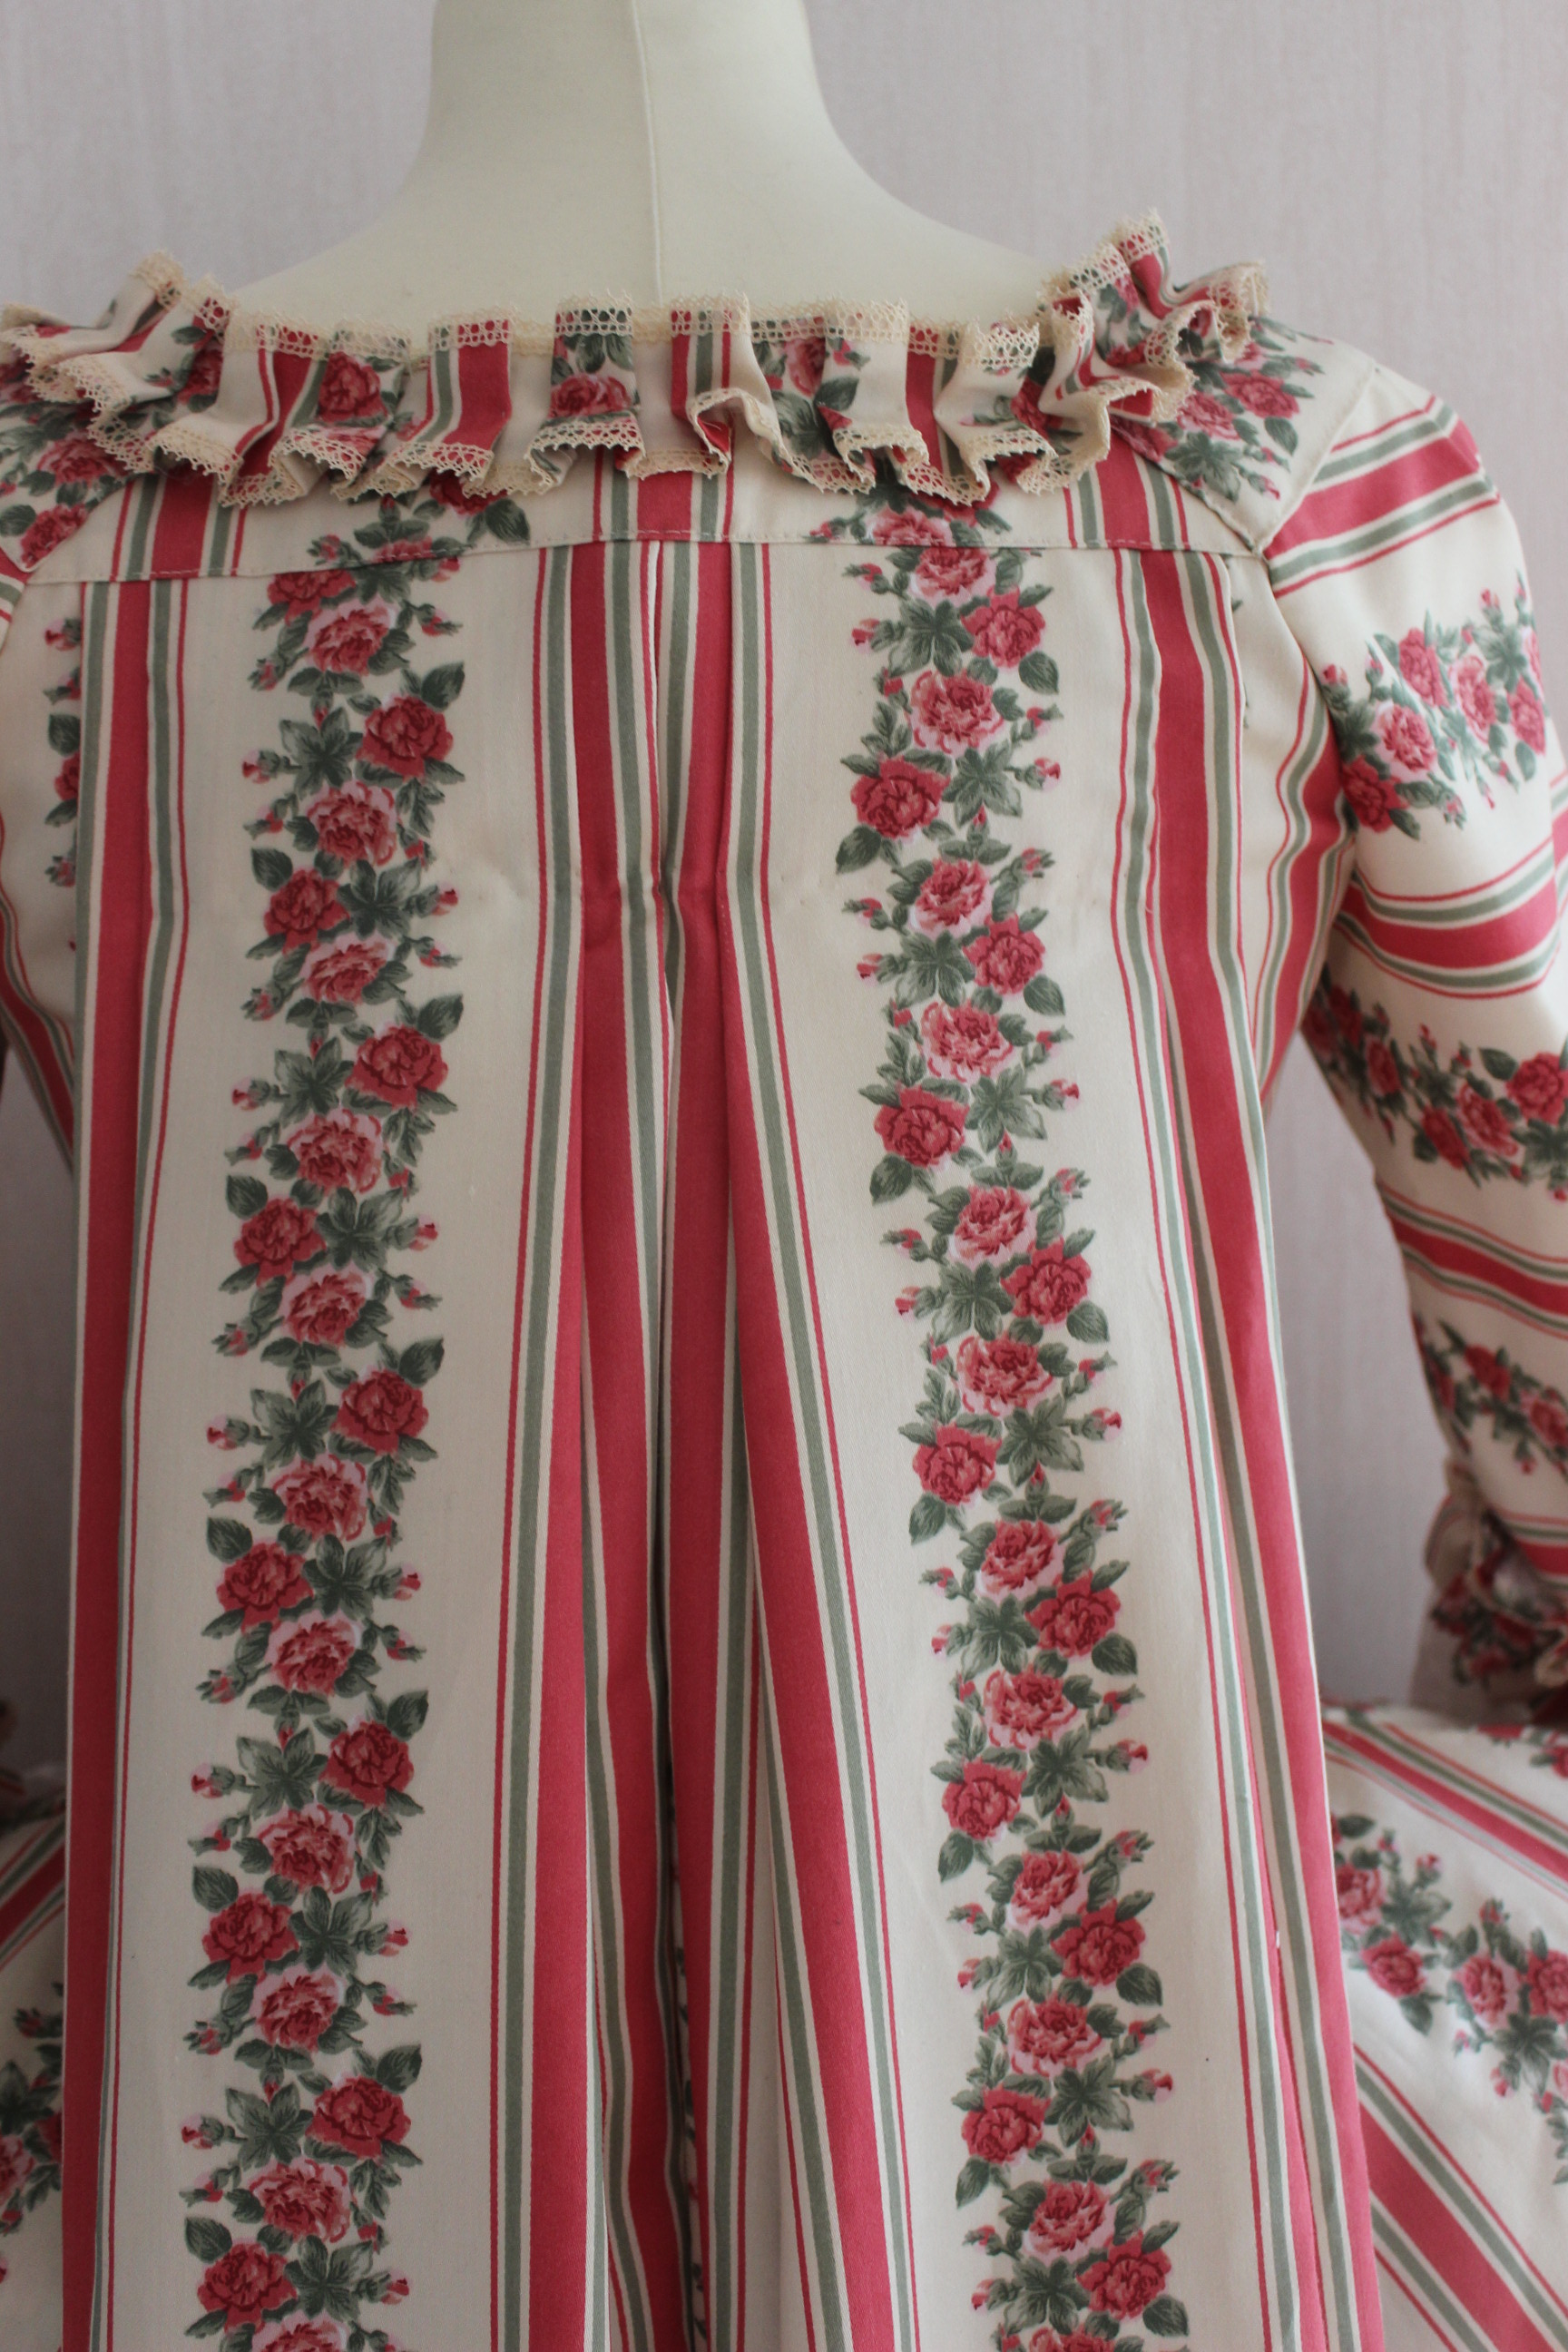
I started by basting interfacing to the main pieces, but not after going through some decision-anxiety about which side of the fabric I was to use. The choice fell on the “wrong” side where the stripes was les pronounced.
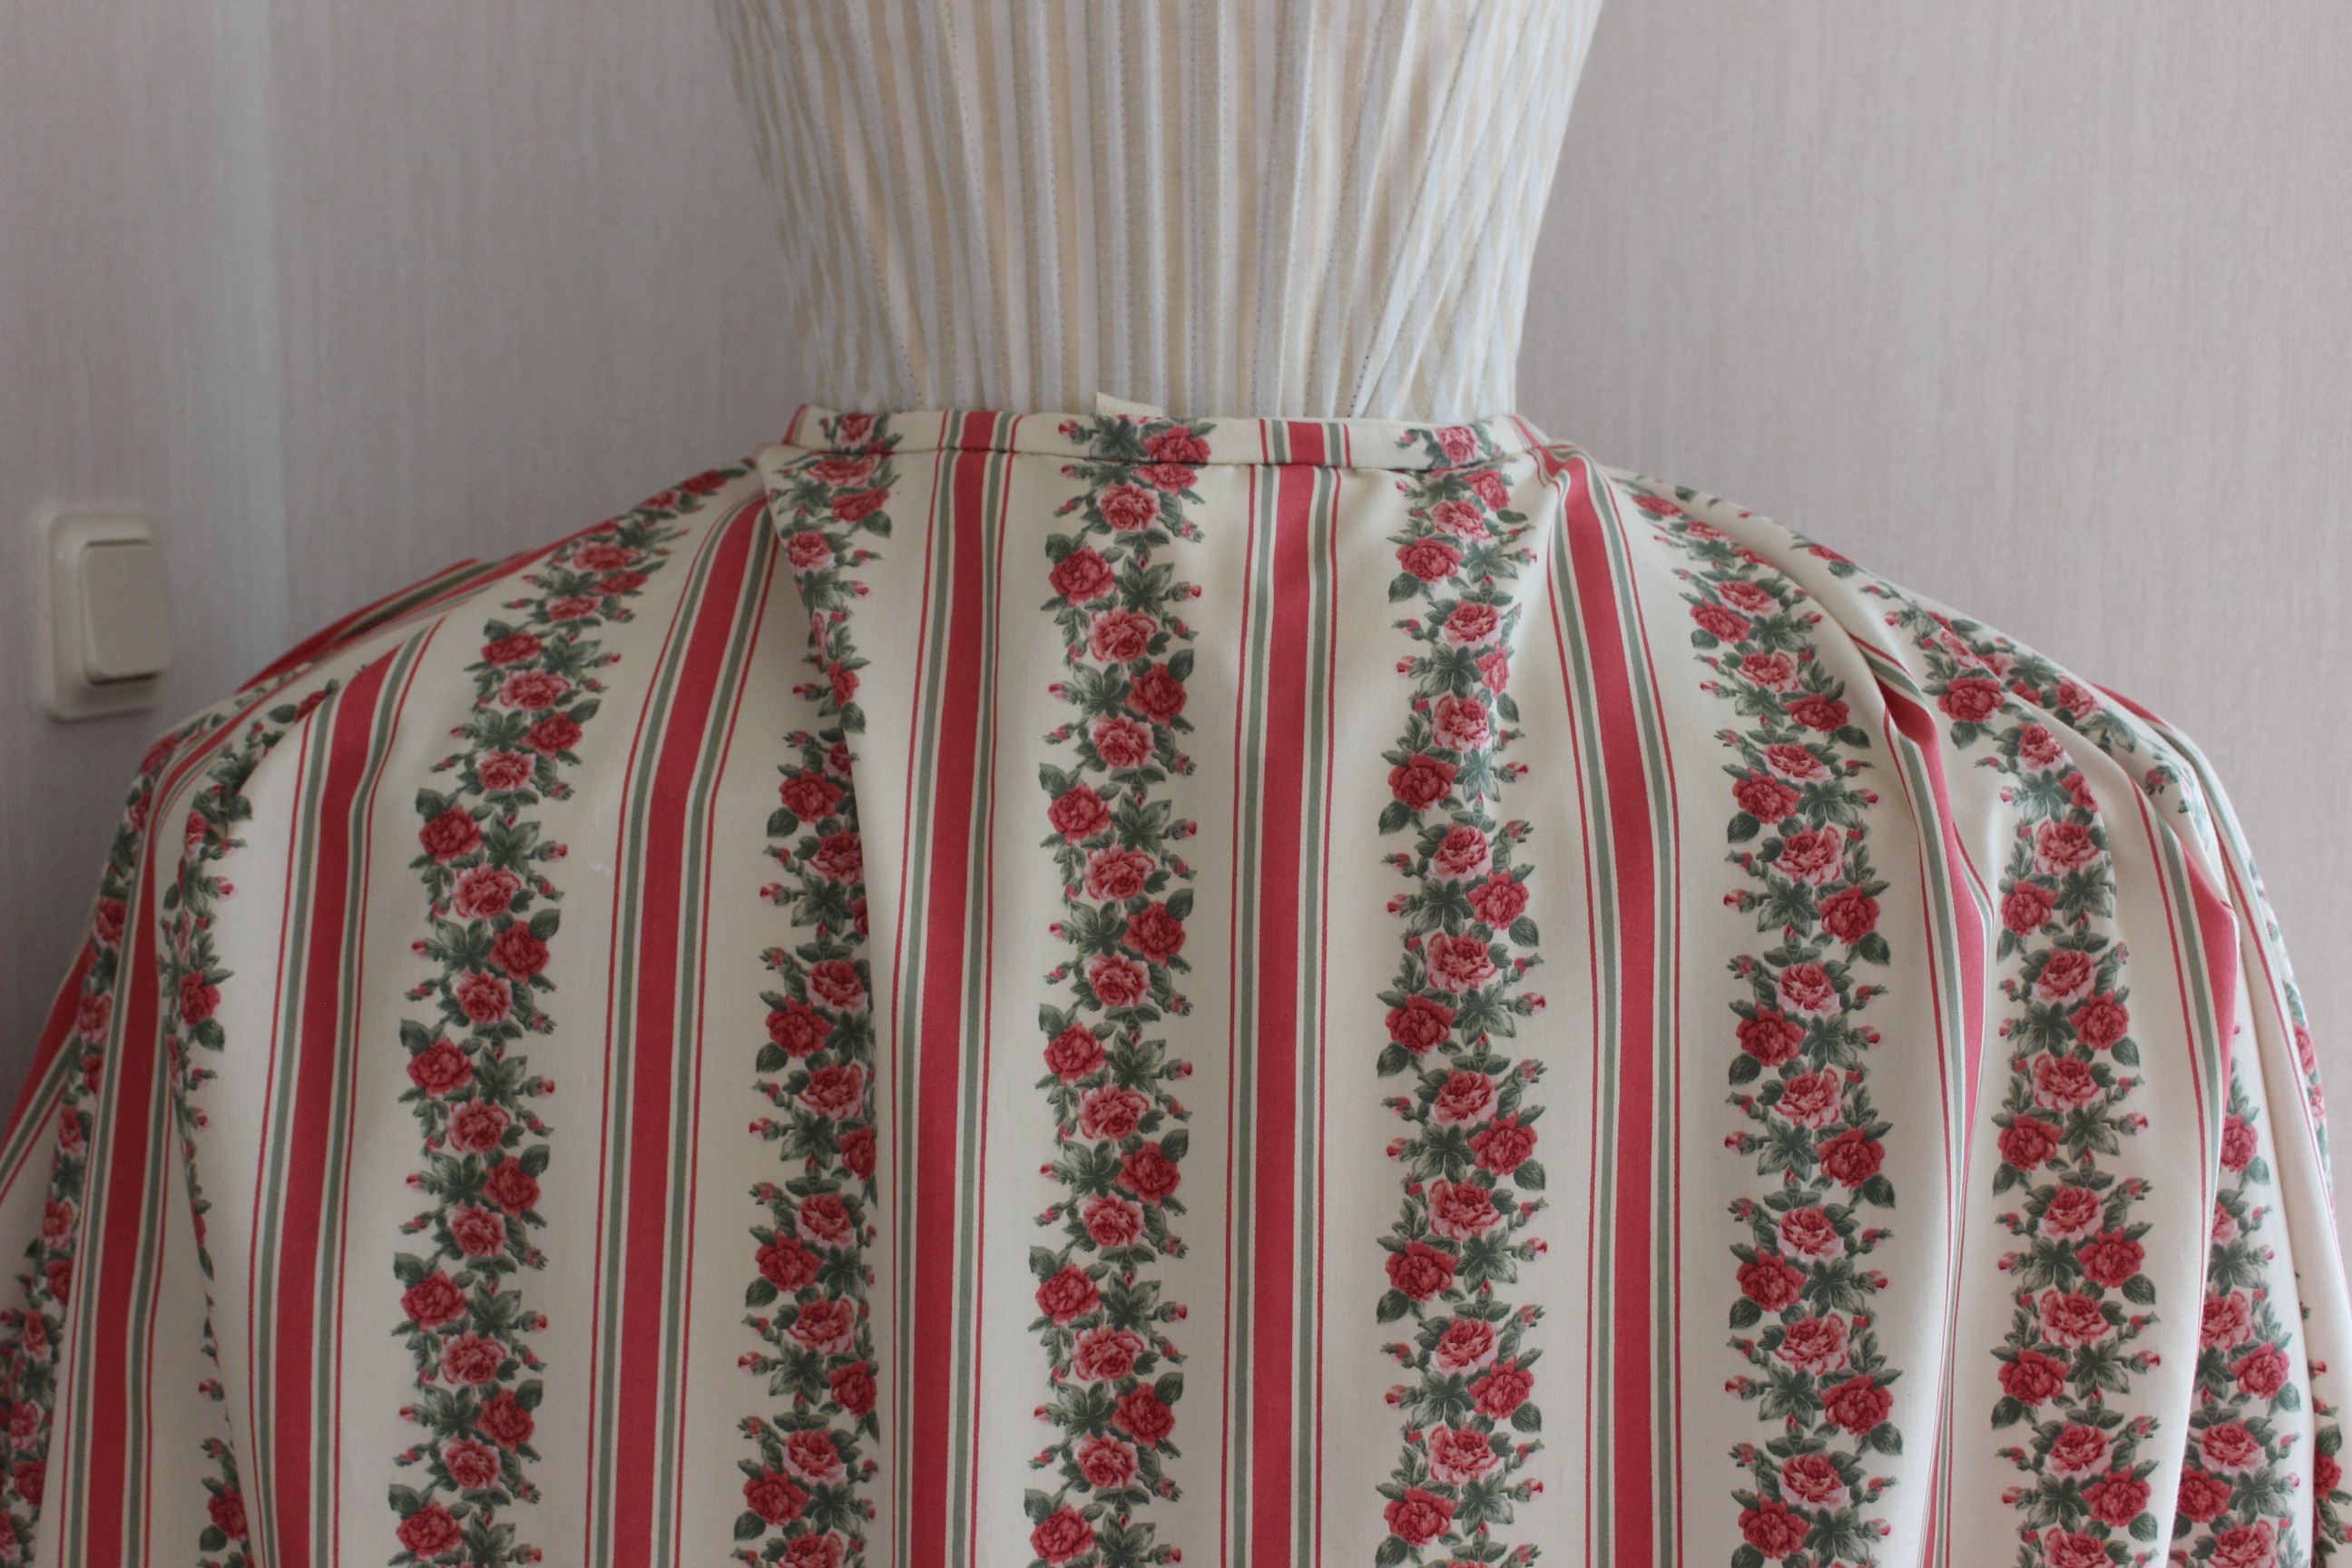
I basted the pleats and stitching the front and back bodice together.
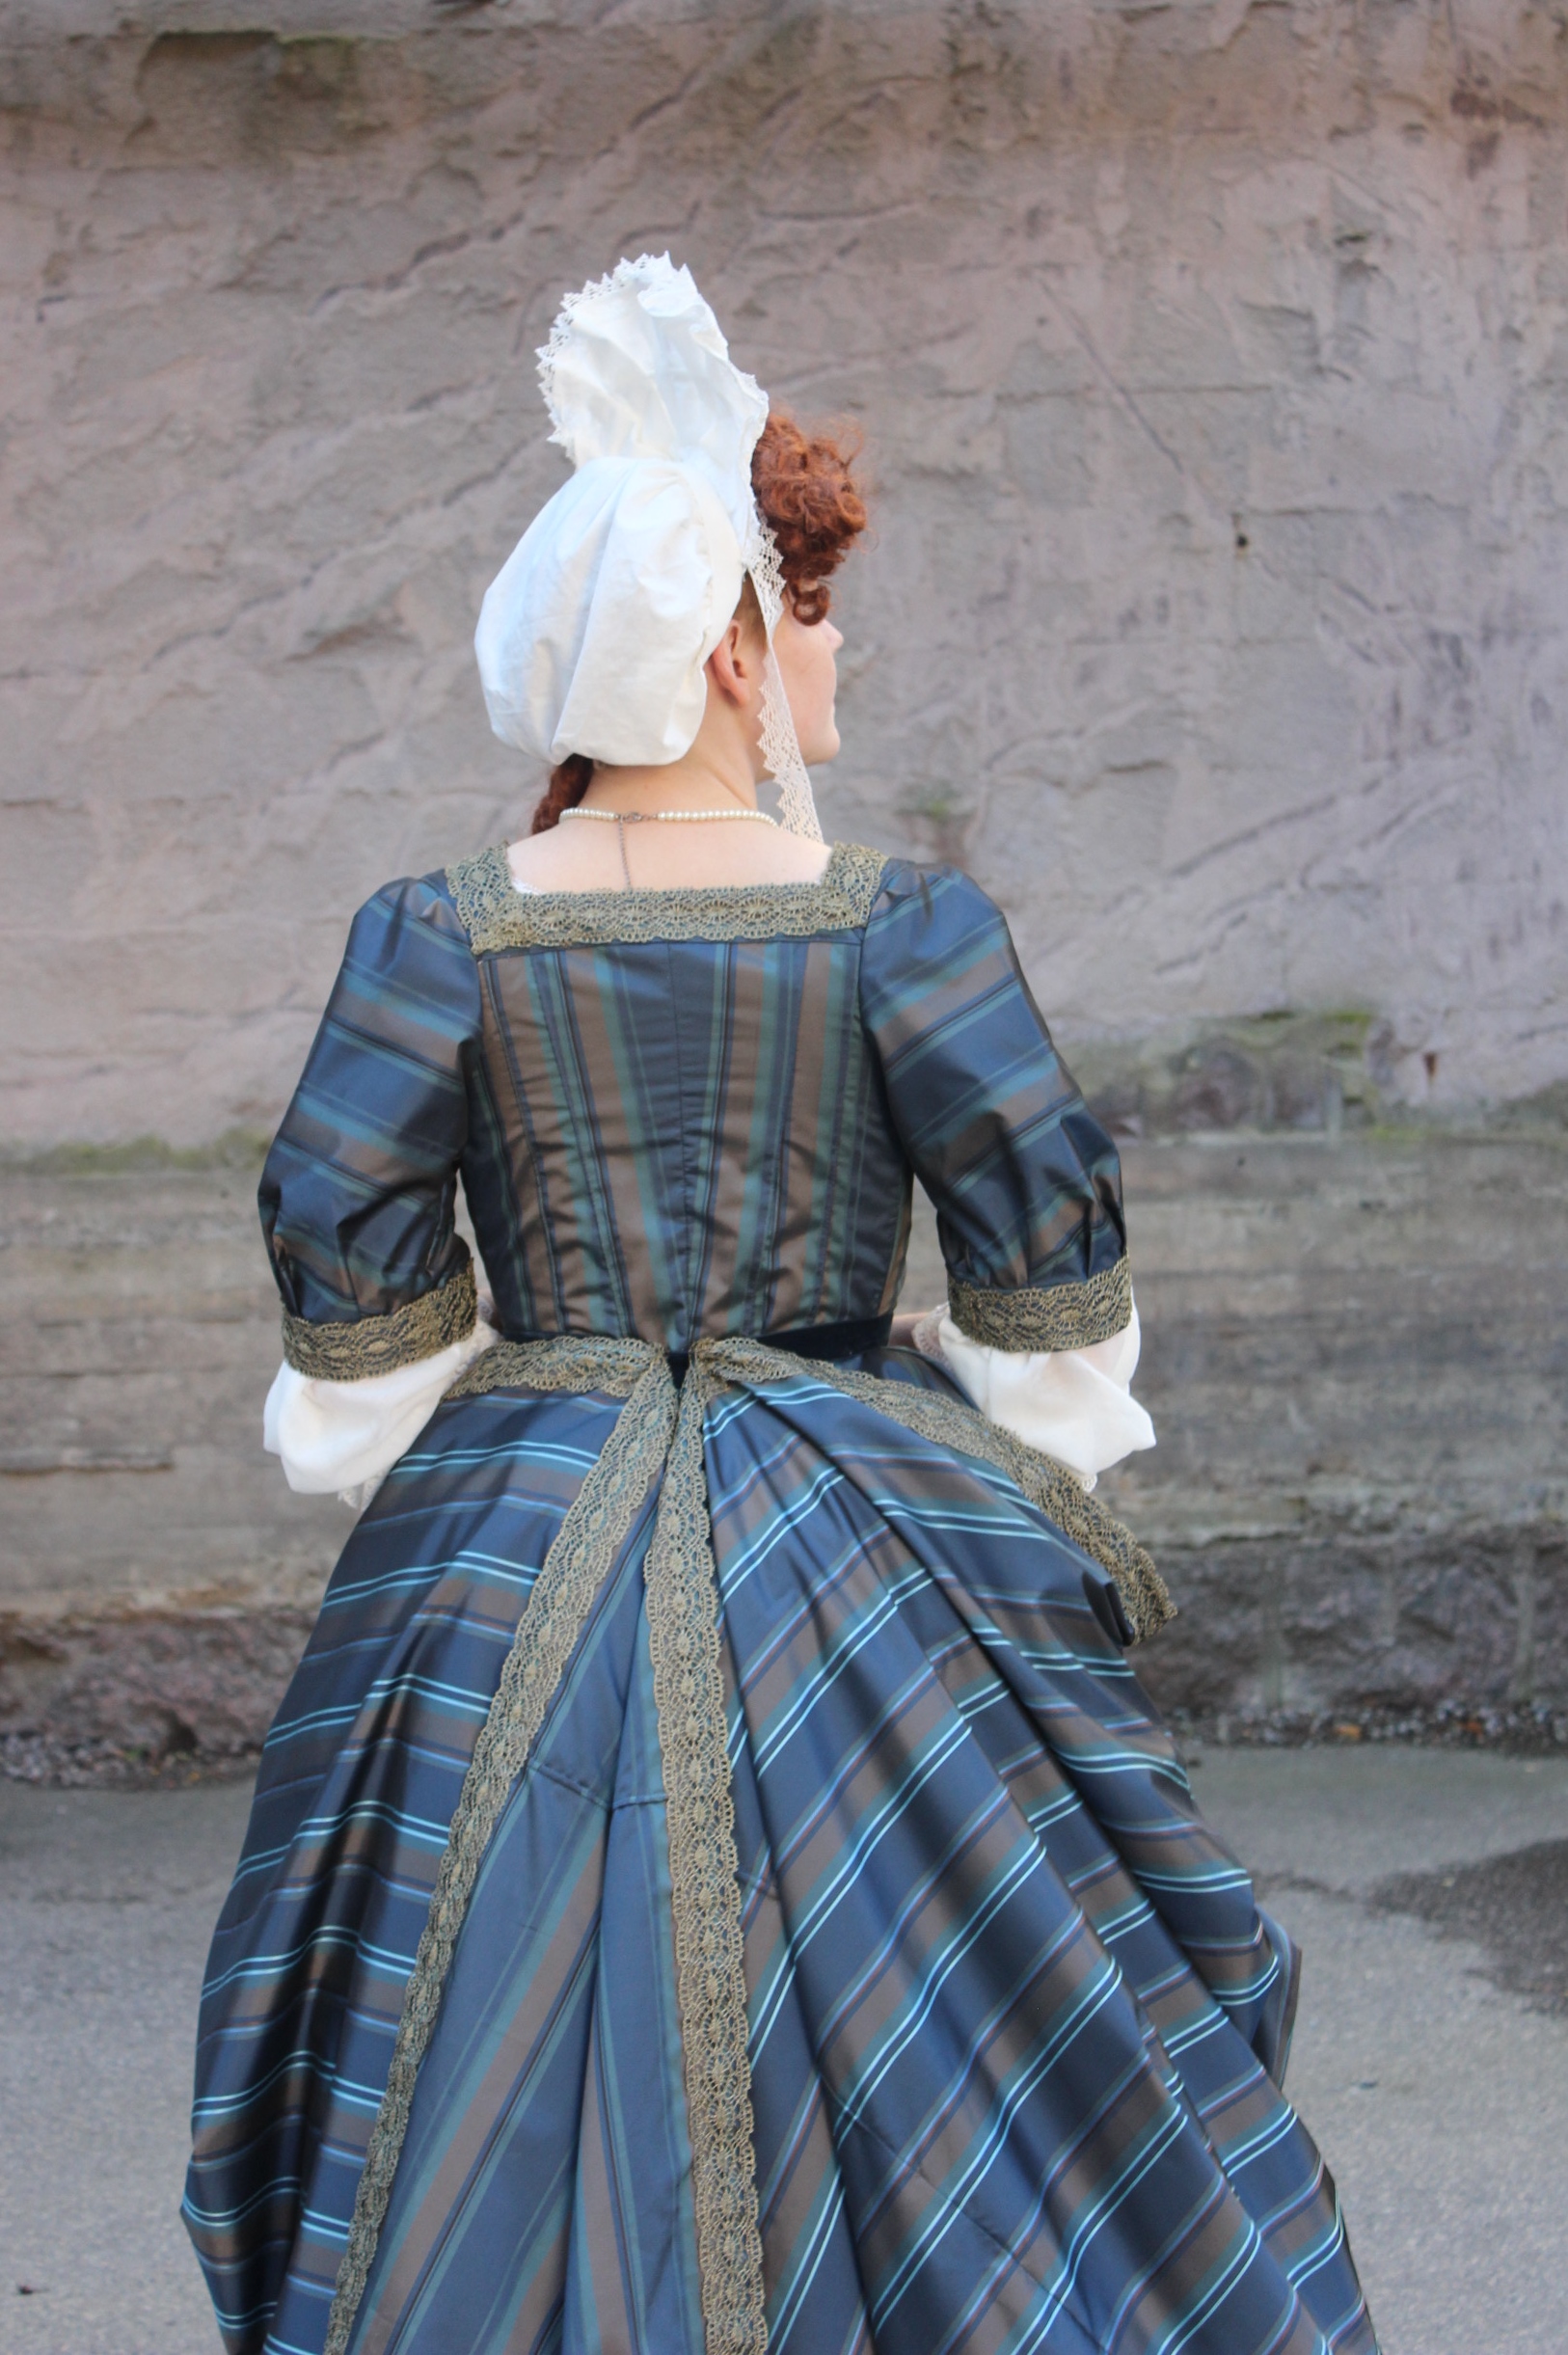
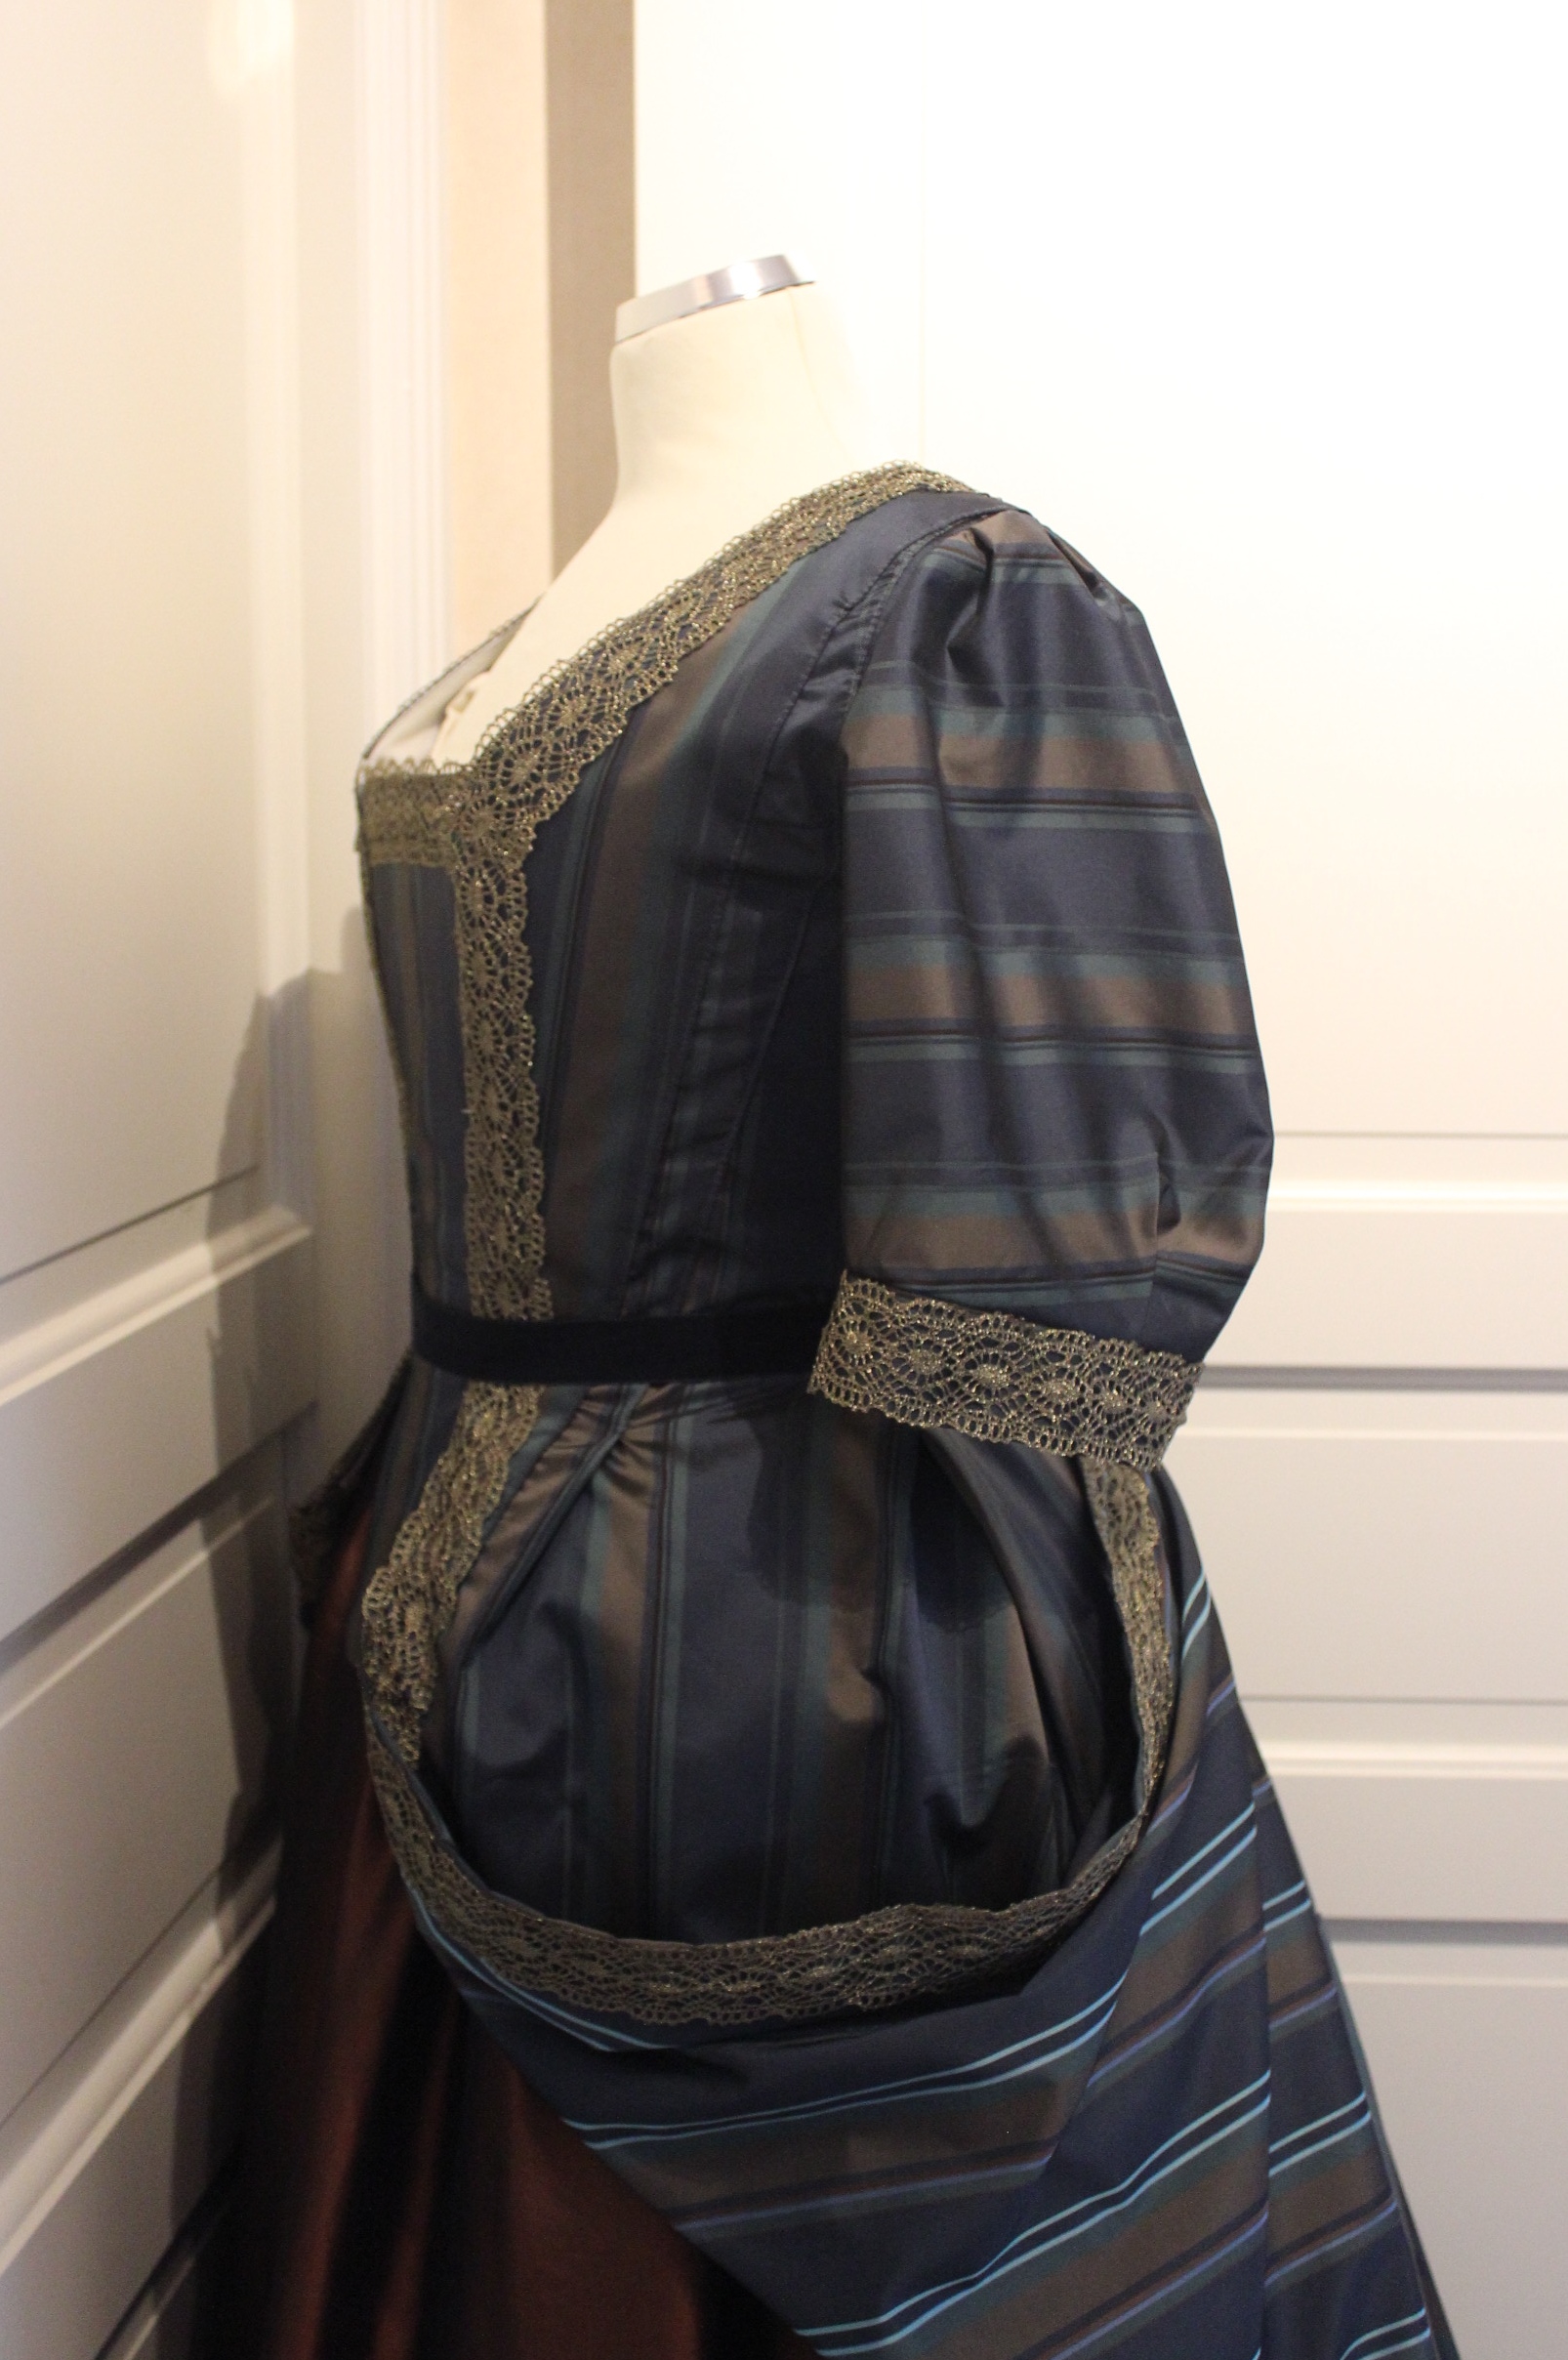
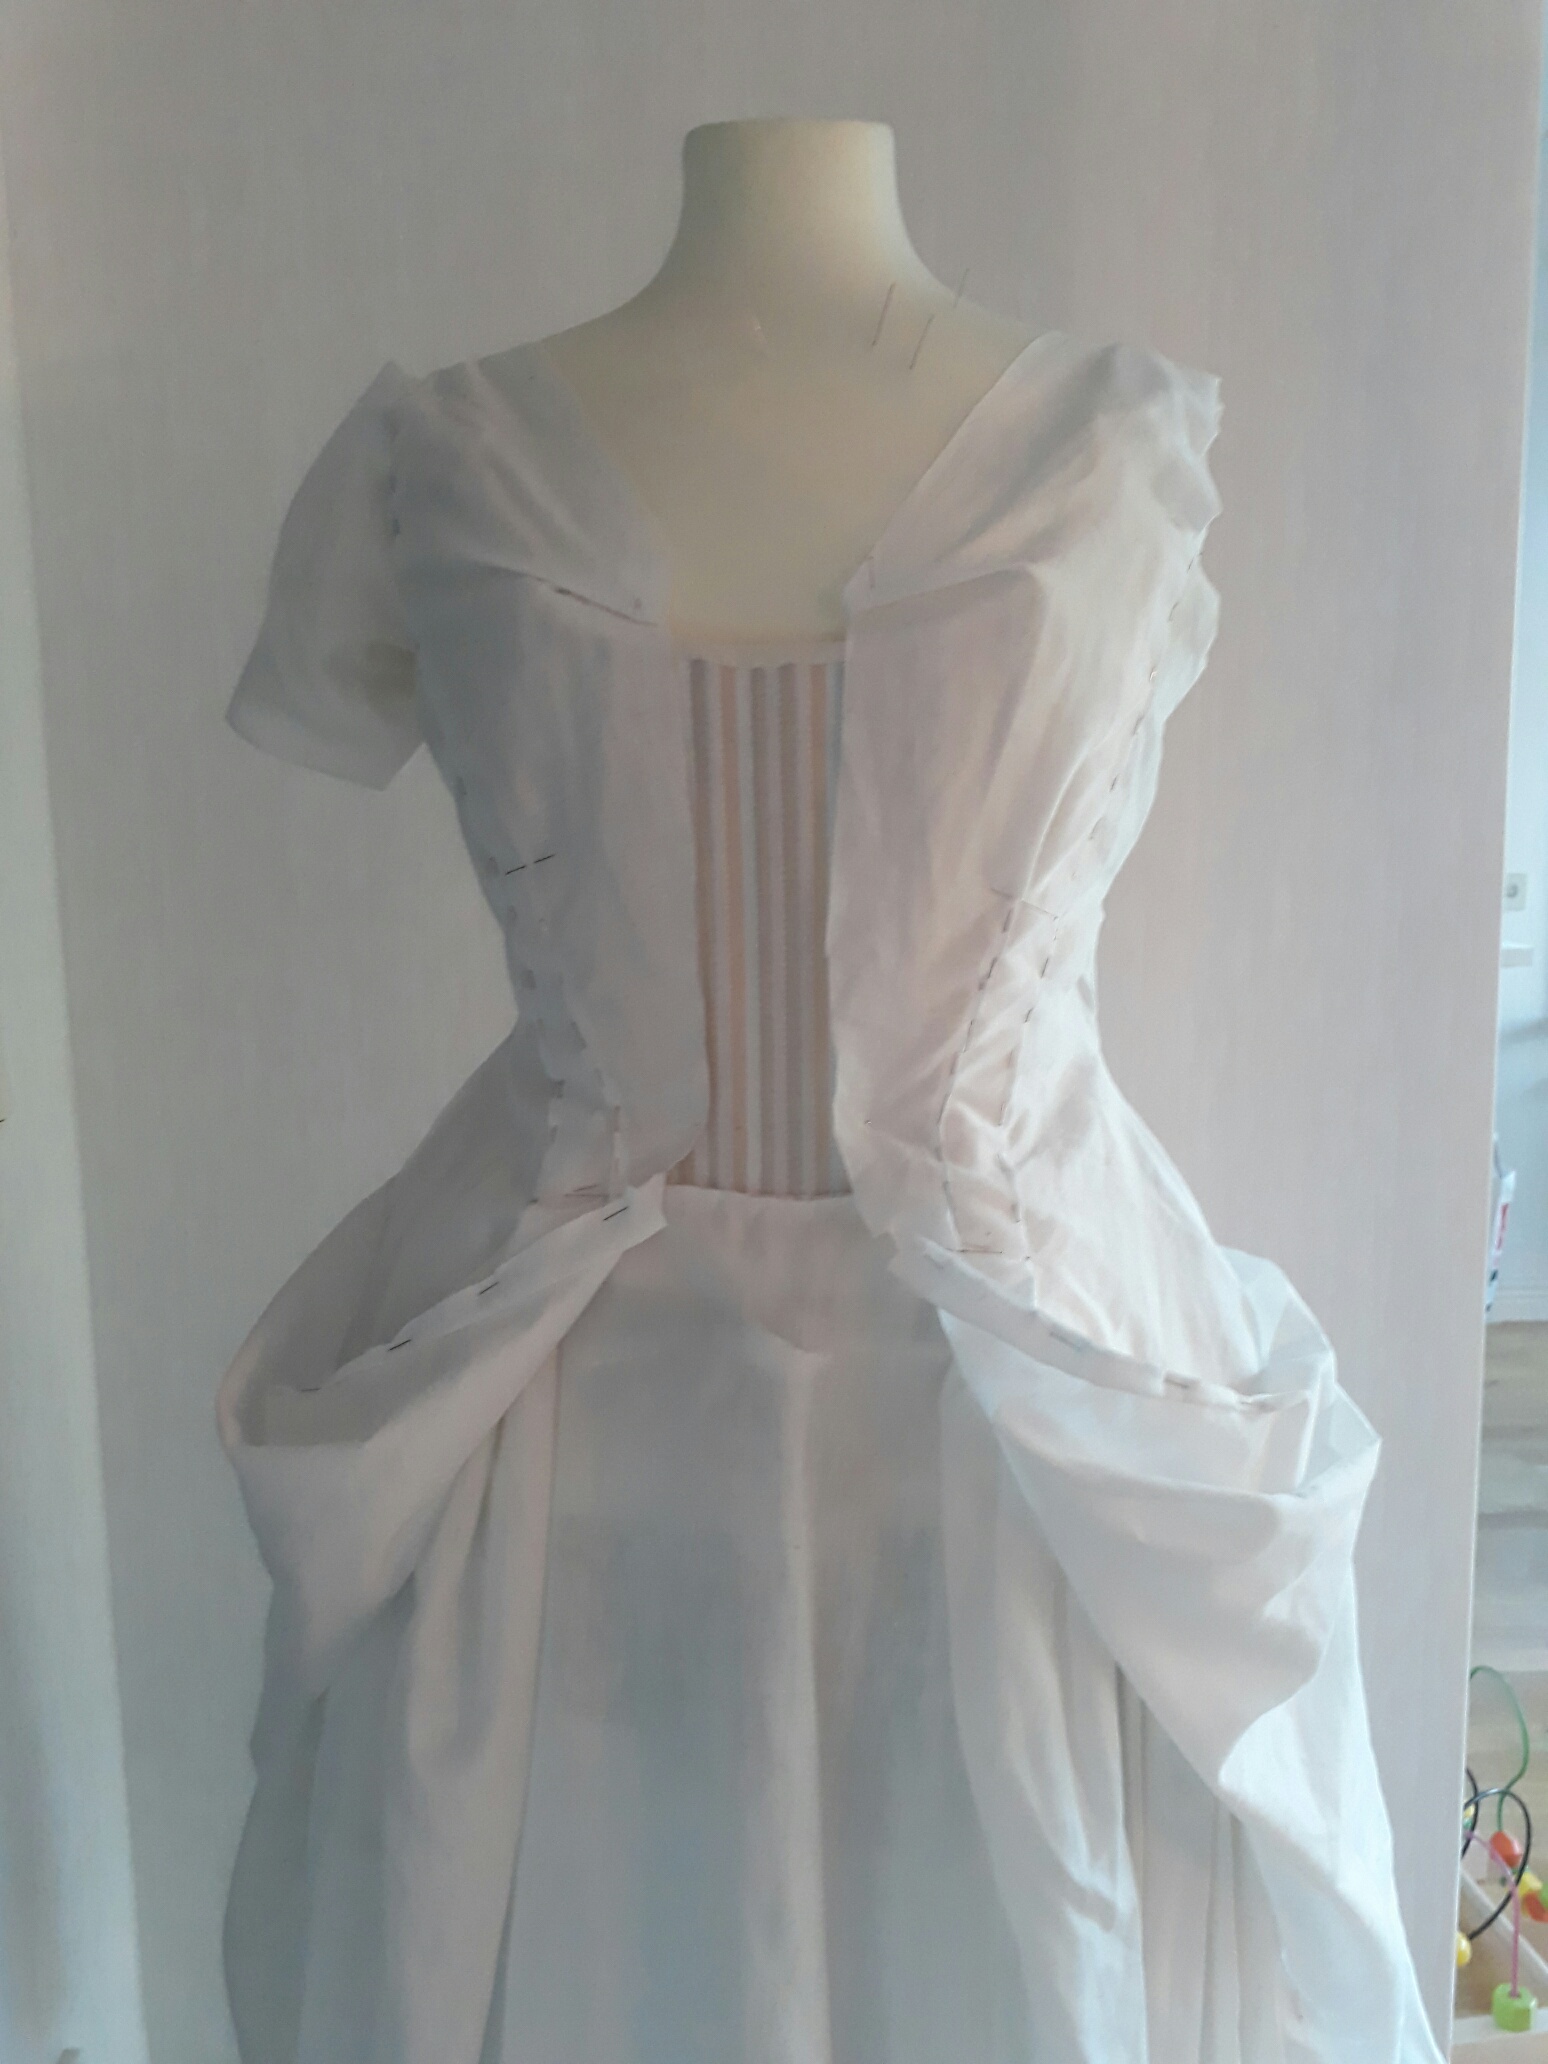
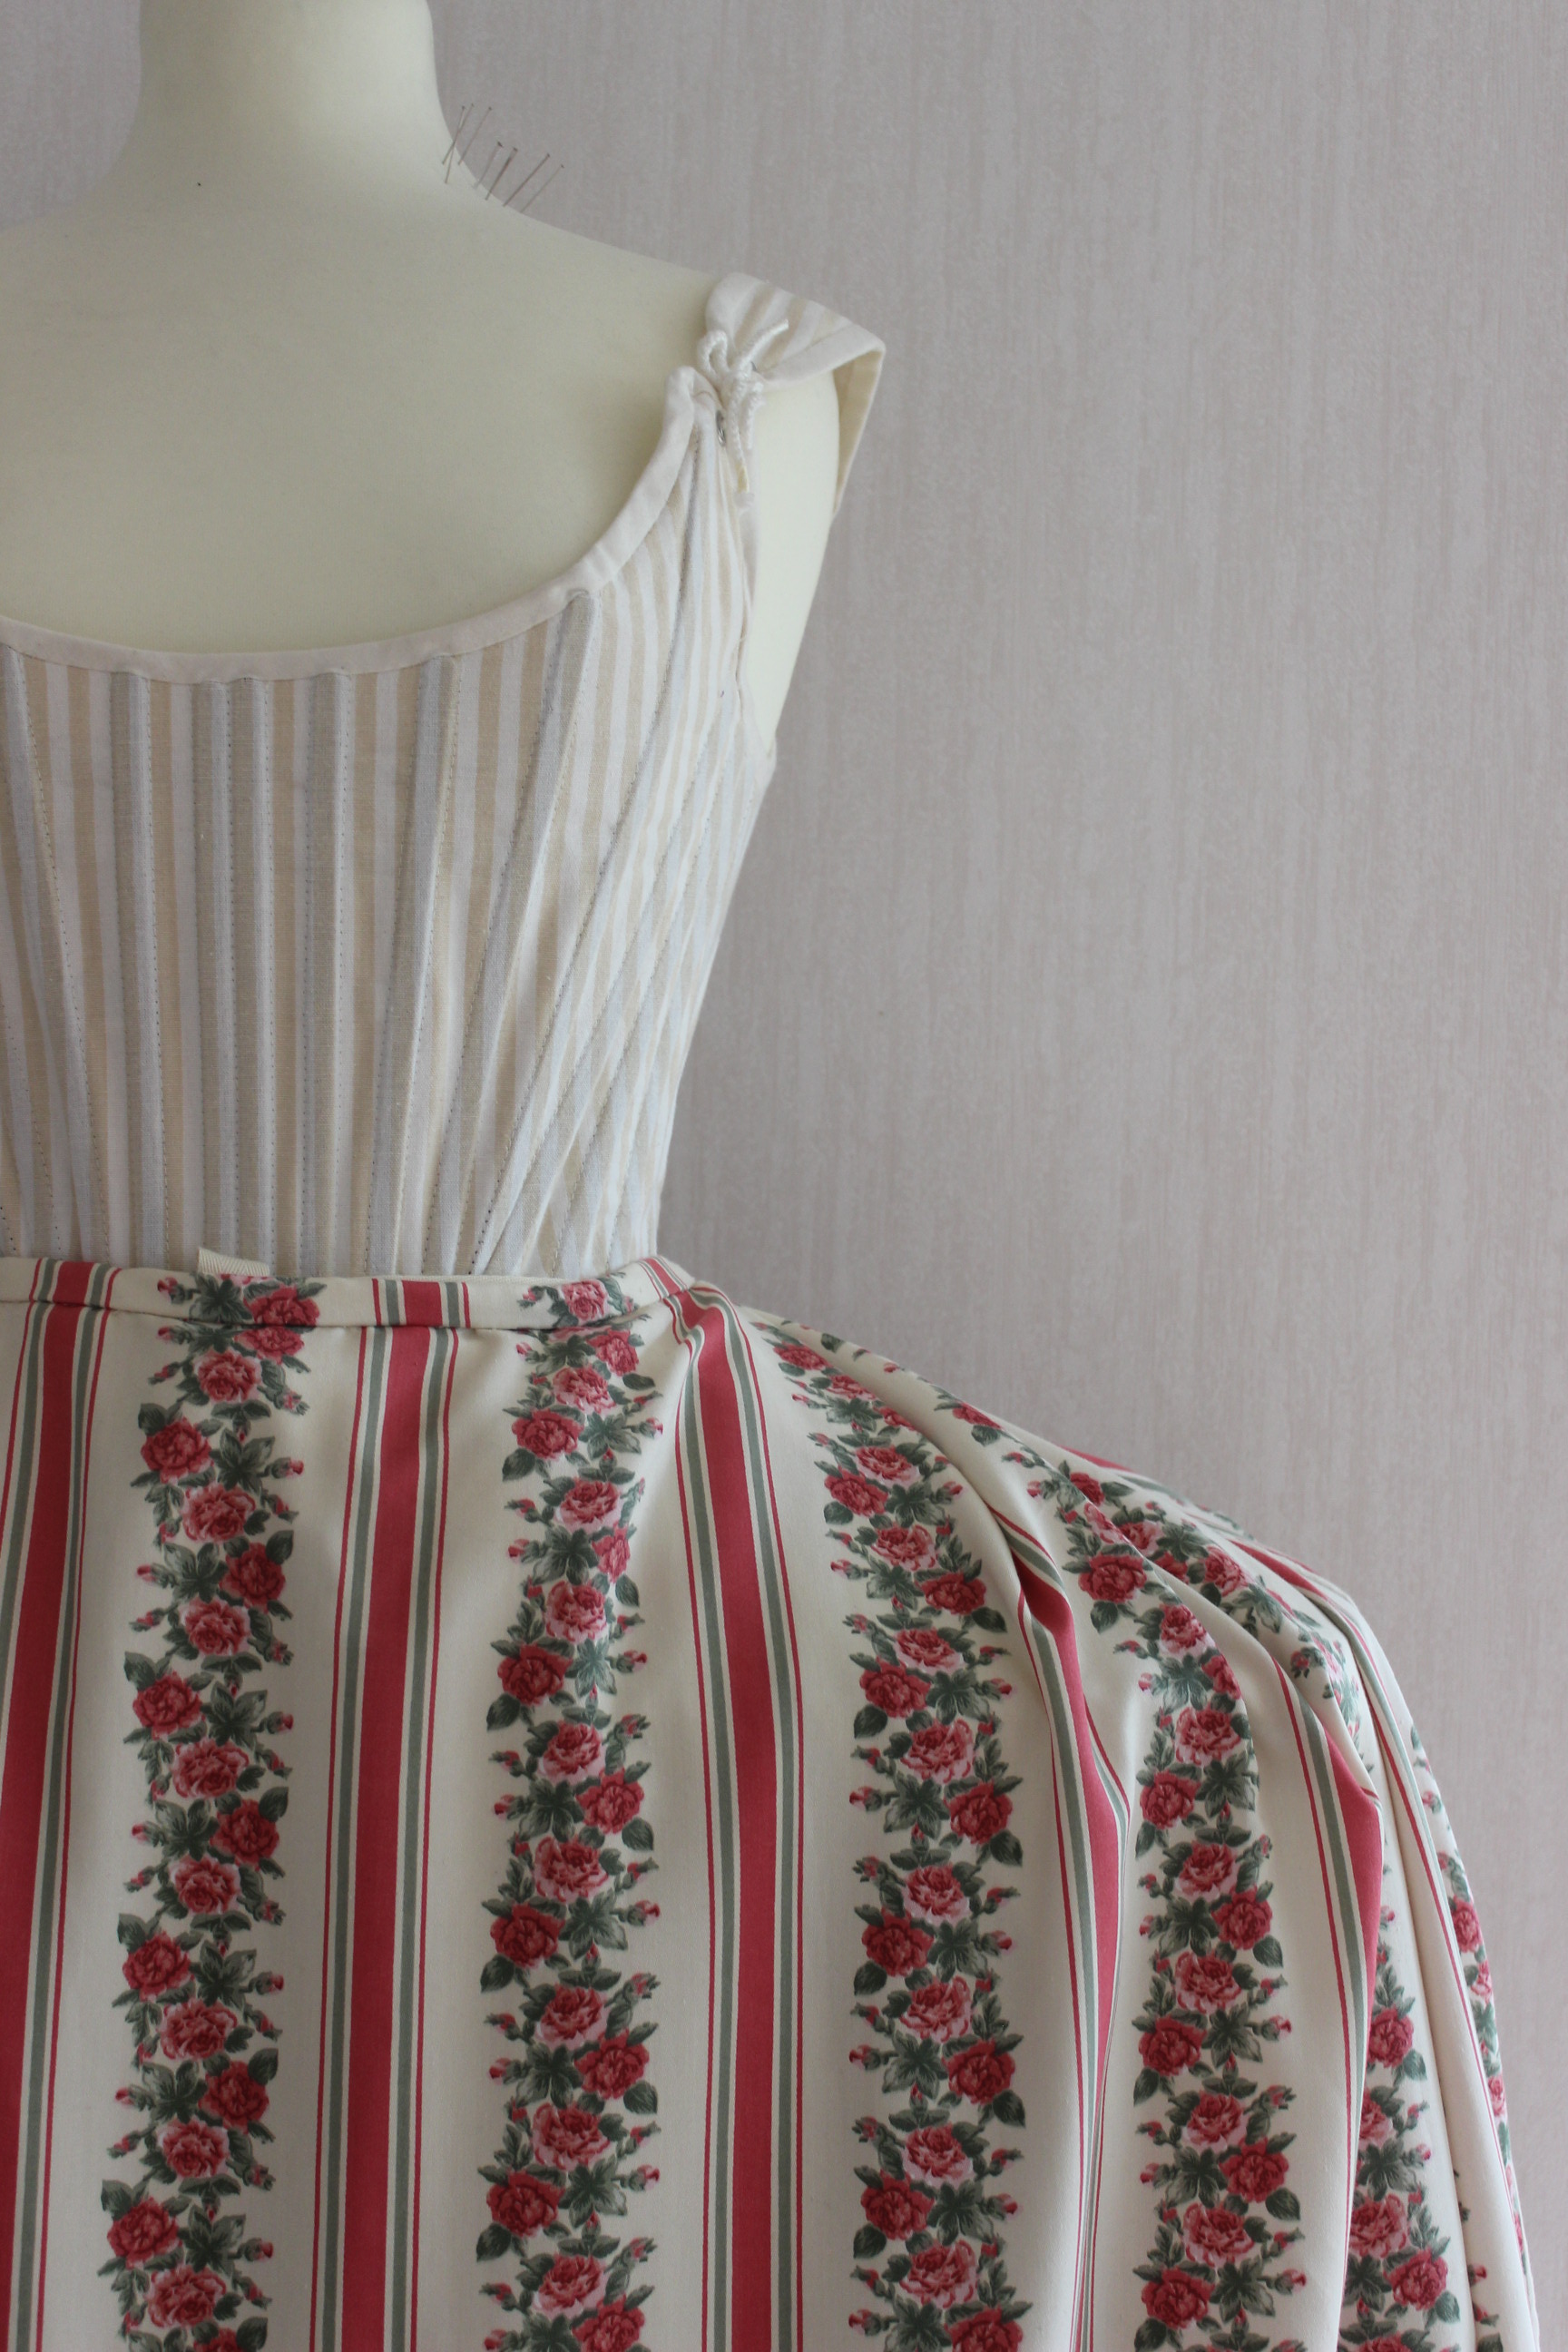
I basted the neck piece and did a first test drape of the skirt.Here you can clearly se the difference between the back bodice sober stripes and the horizontal “right side” stripes on the draping.
Then I put it on for a try.
The fit was pretty good, but a bit to snug.
So I stitched down the pleats and the front darts, forgetting to let it out a bit when sewing up the side seams. Stitching the back seams.
Unfortuanly the fabric shows EVERY mistake, both puckering and letting out of seemsSo I decide to keep it as it where – better a tad to small then ugly markings at each seam.
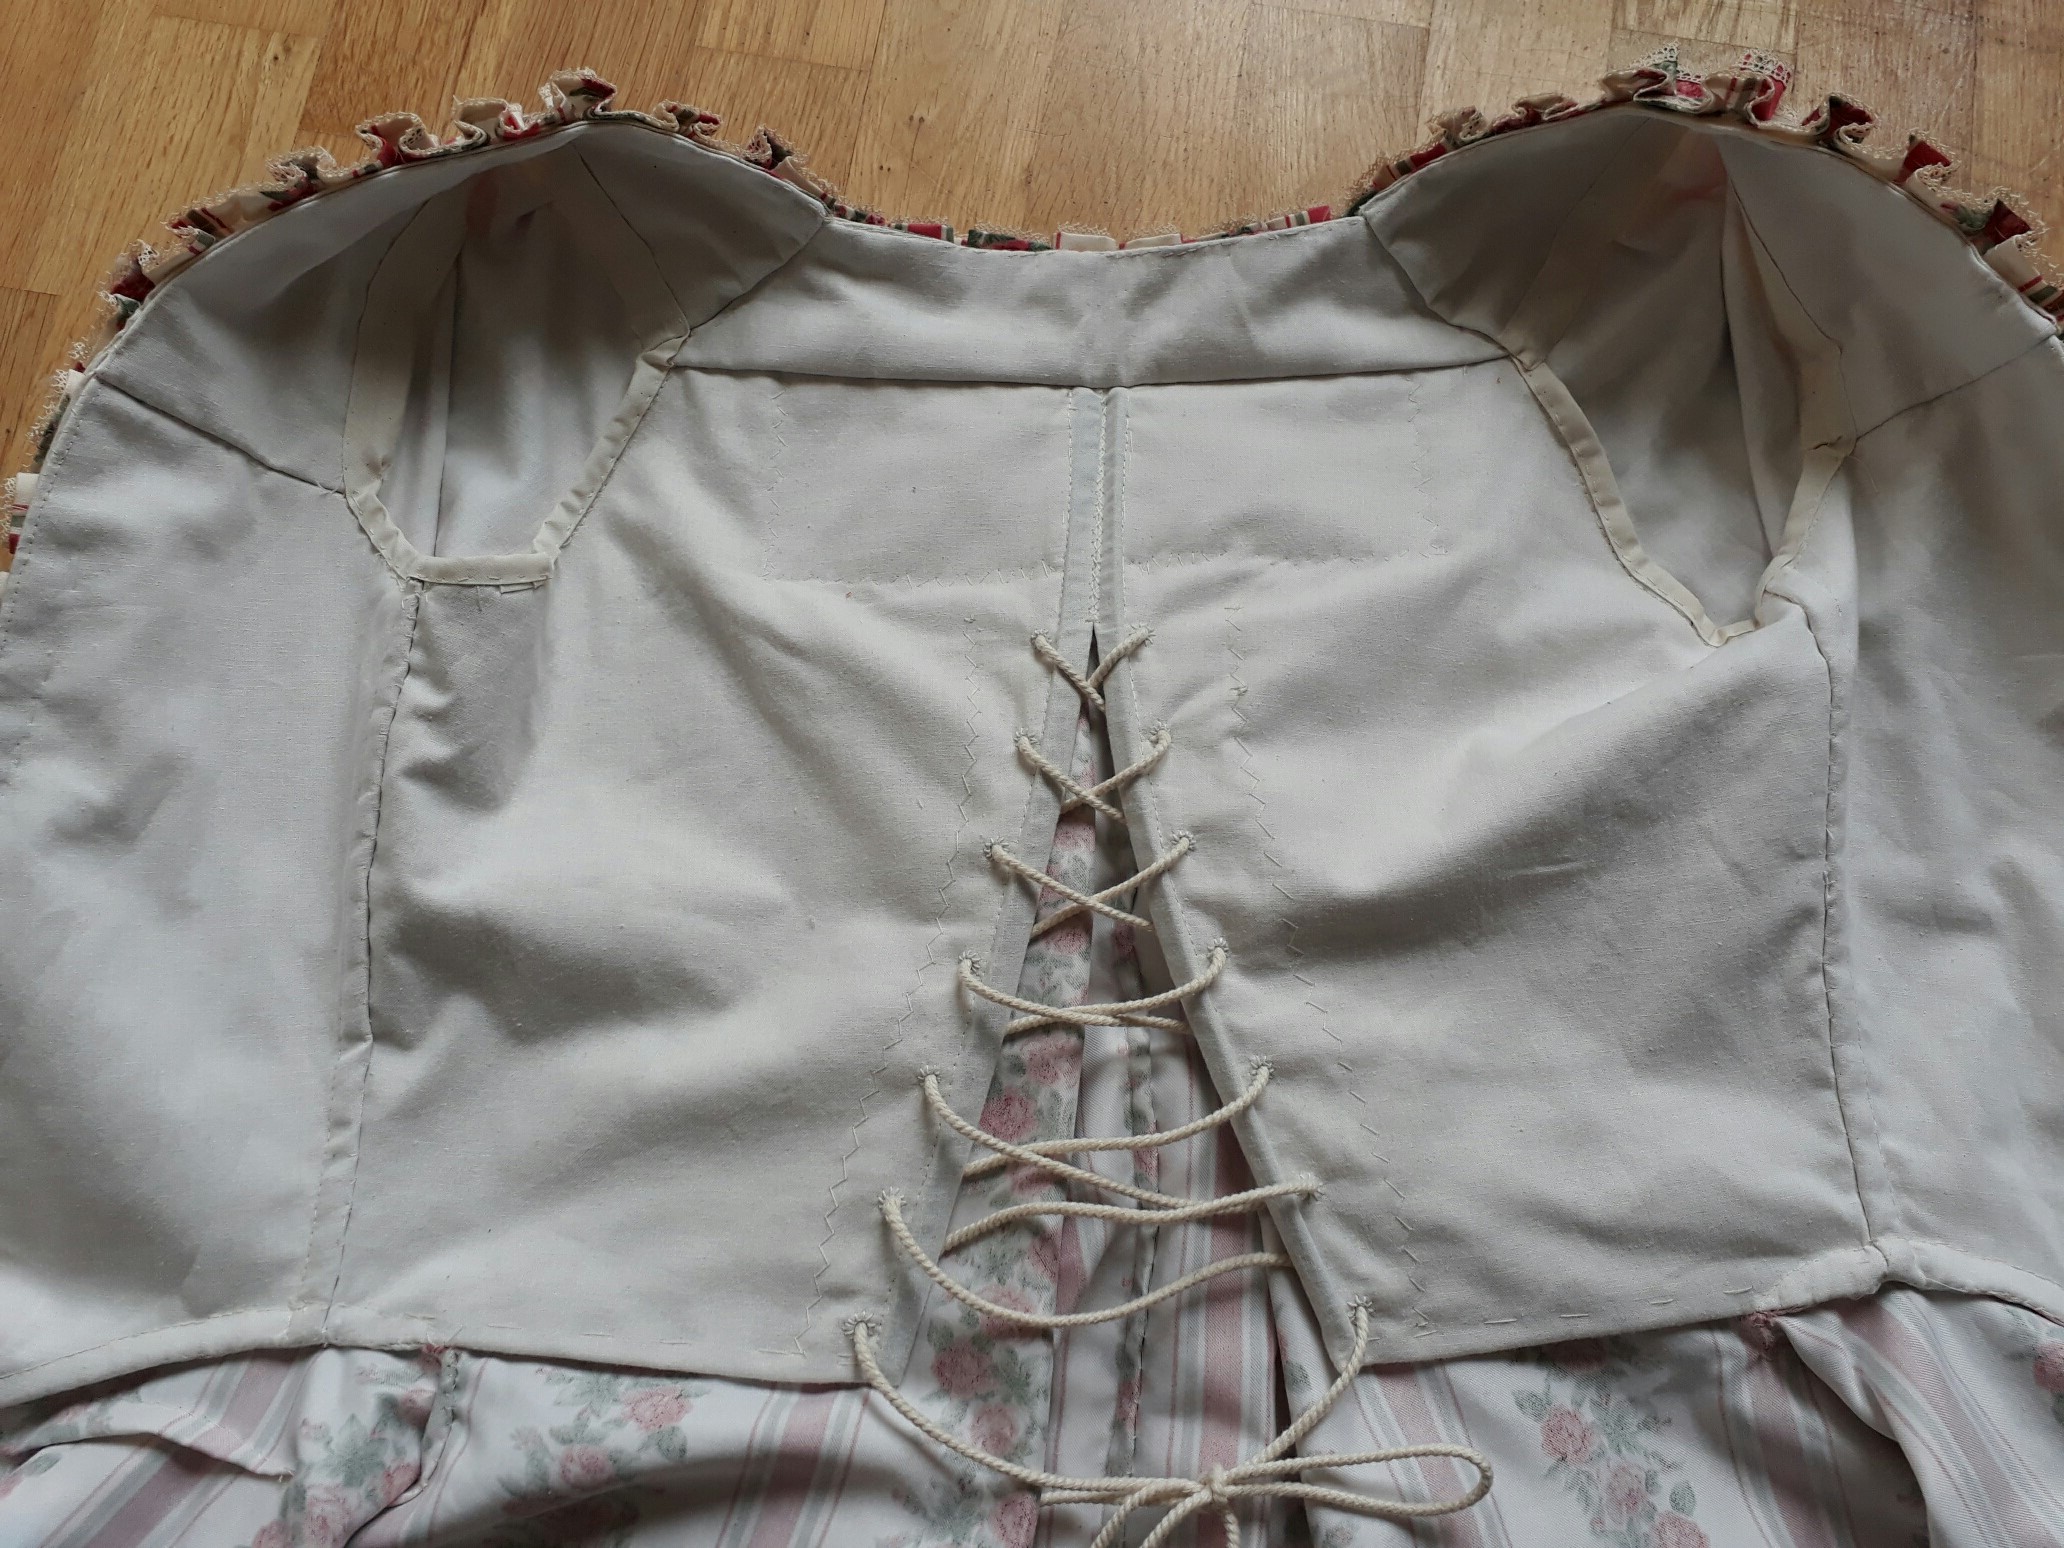
The I added some boning to the back and side seams to help keep the shape on the fabric once worn.
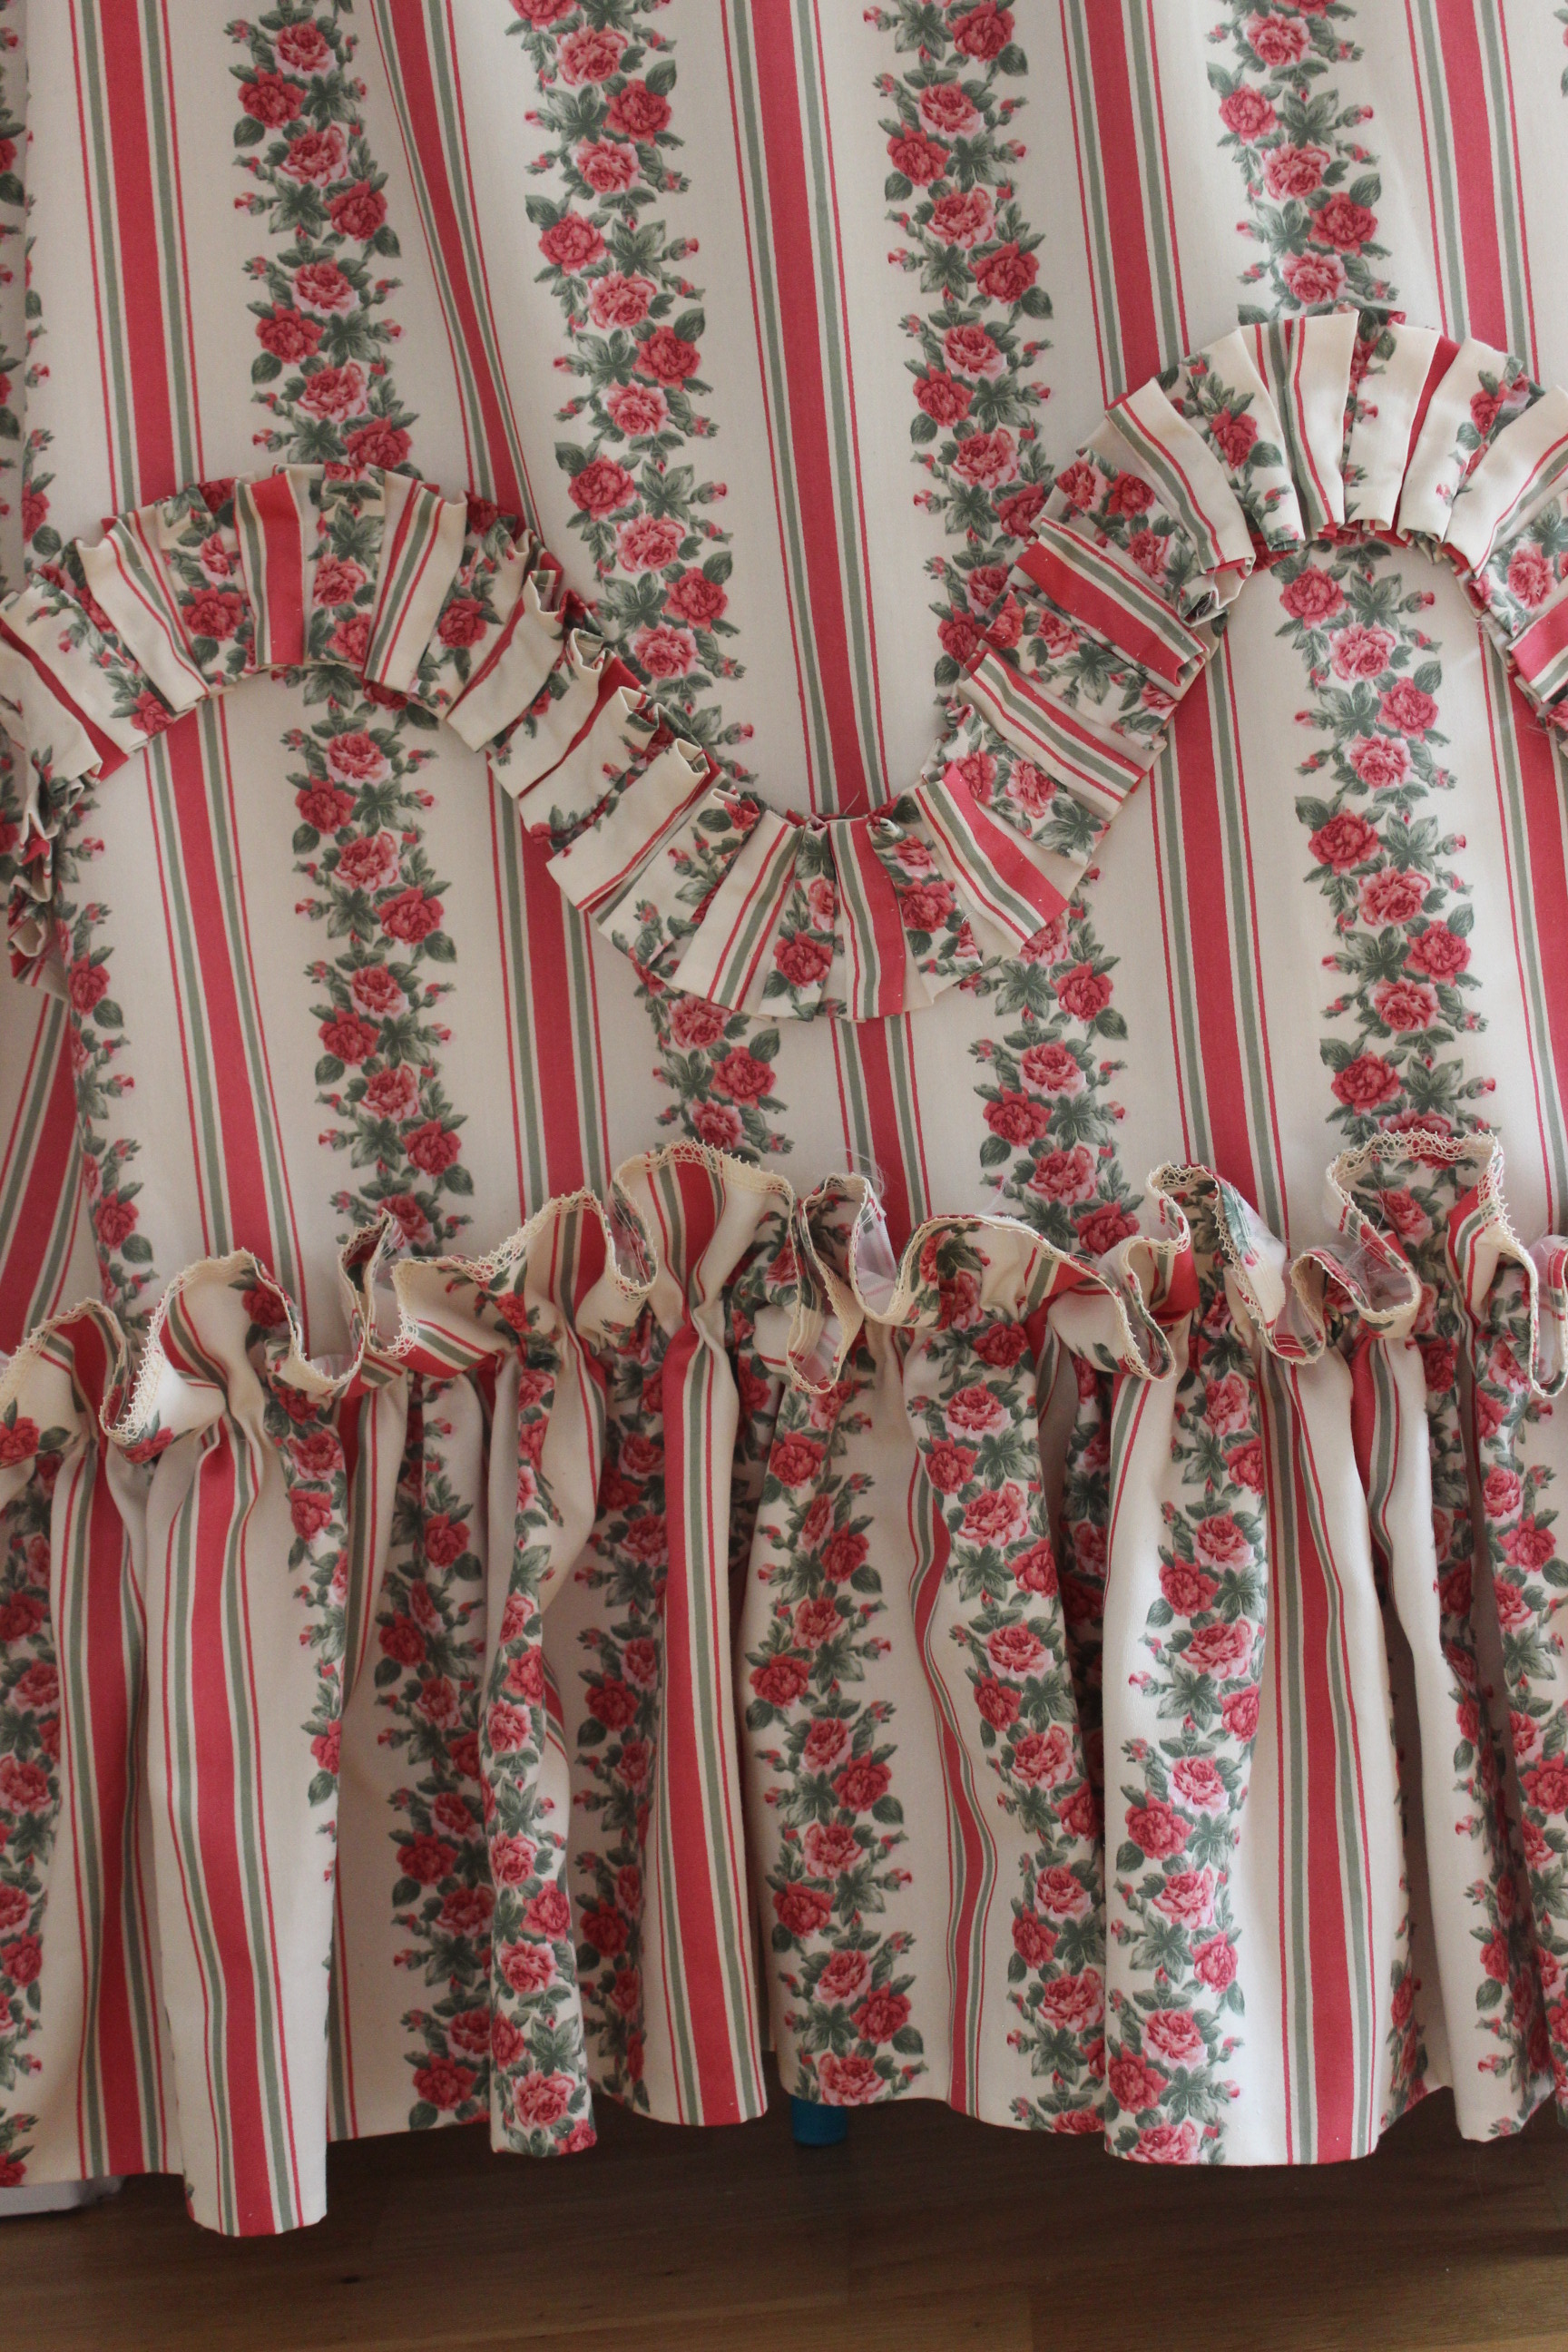
Once the main bodice was done, I started on the front pieces/robbings(?)And as I didn’t had a pattern piece for them I’d just cut something along the right shape when i cut the fabric. And after some draping on the dressform (and myself) I ended up with a smaller shape which I then pinned and stitched down on top of the front hiding bot the darts and the strange seam that was the shoulder seamHere you can see the experimenting and draping of the front pieces on myself.
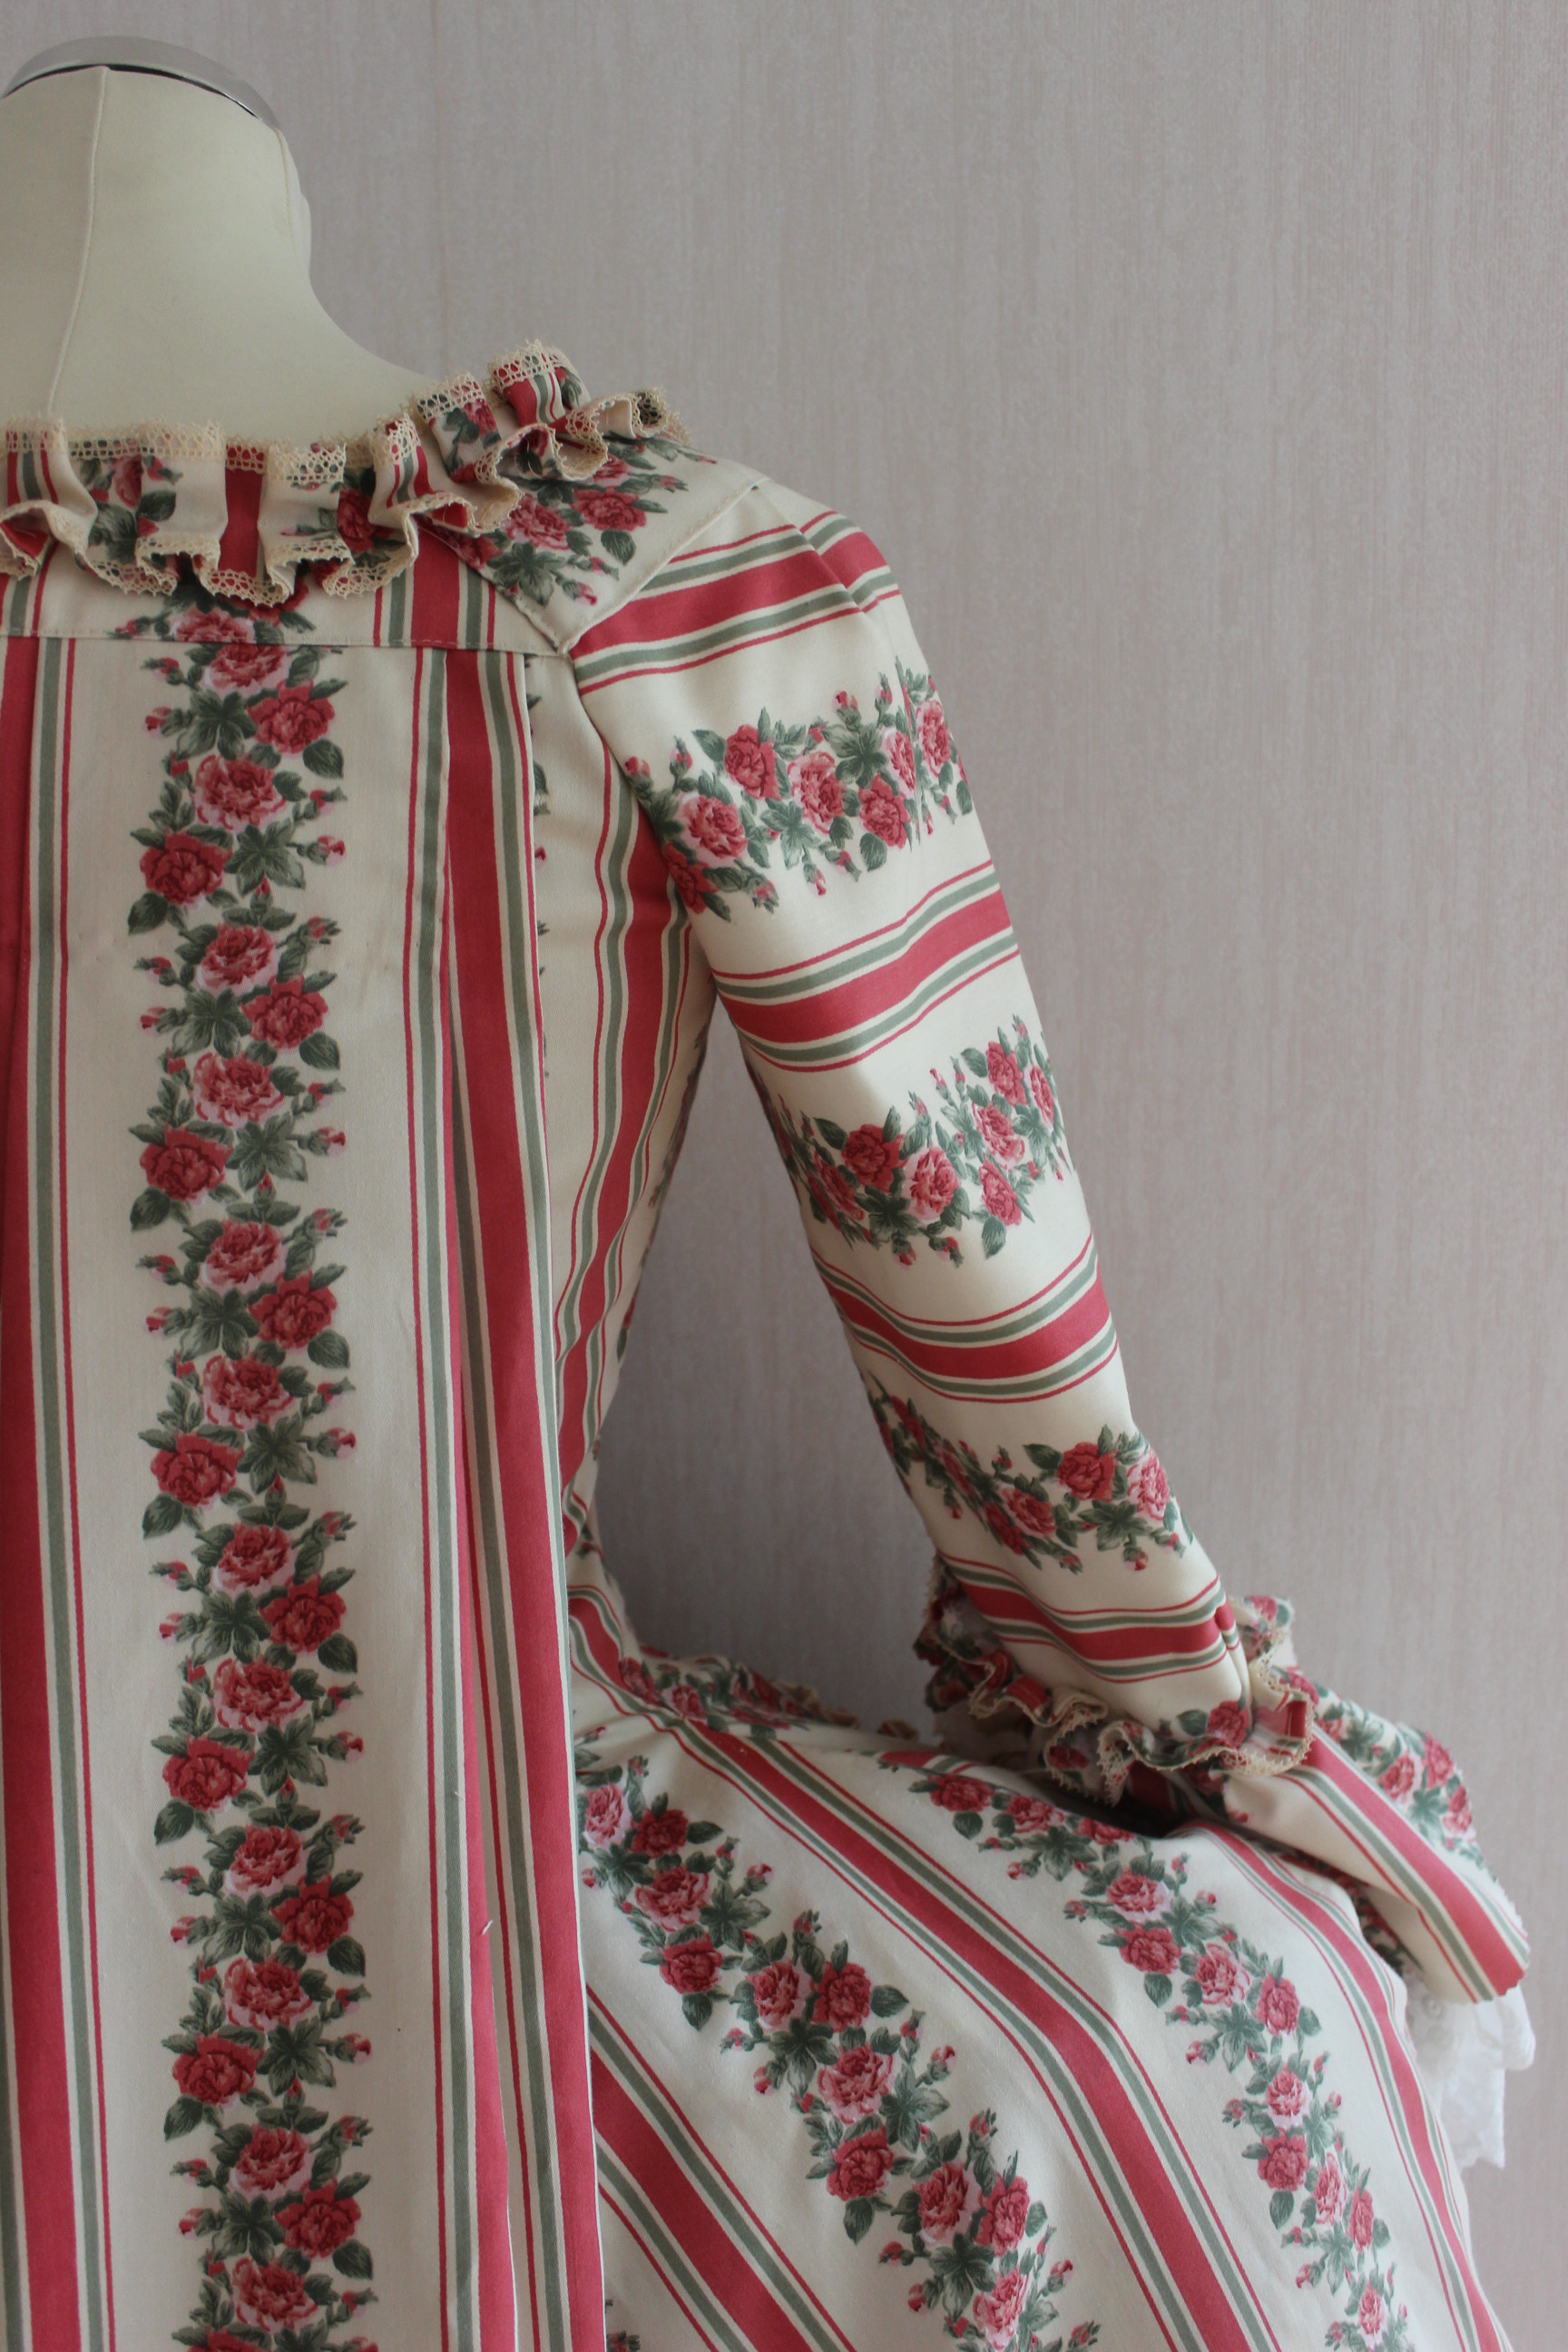
I also did some work on the sleeves and added a cuff and pleated the top to the armhole.Trying out the sleeve before attaching the neck and front-piece.
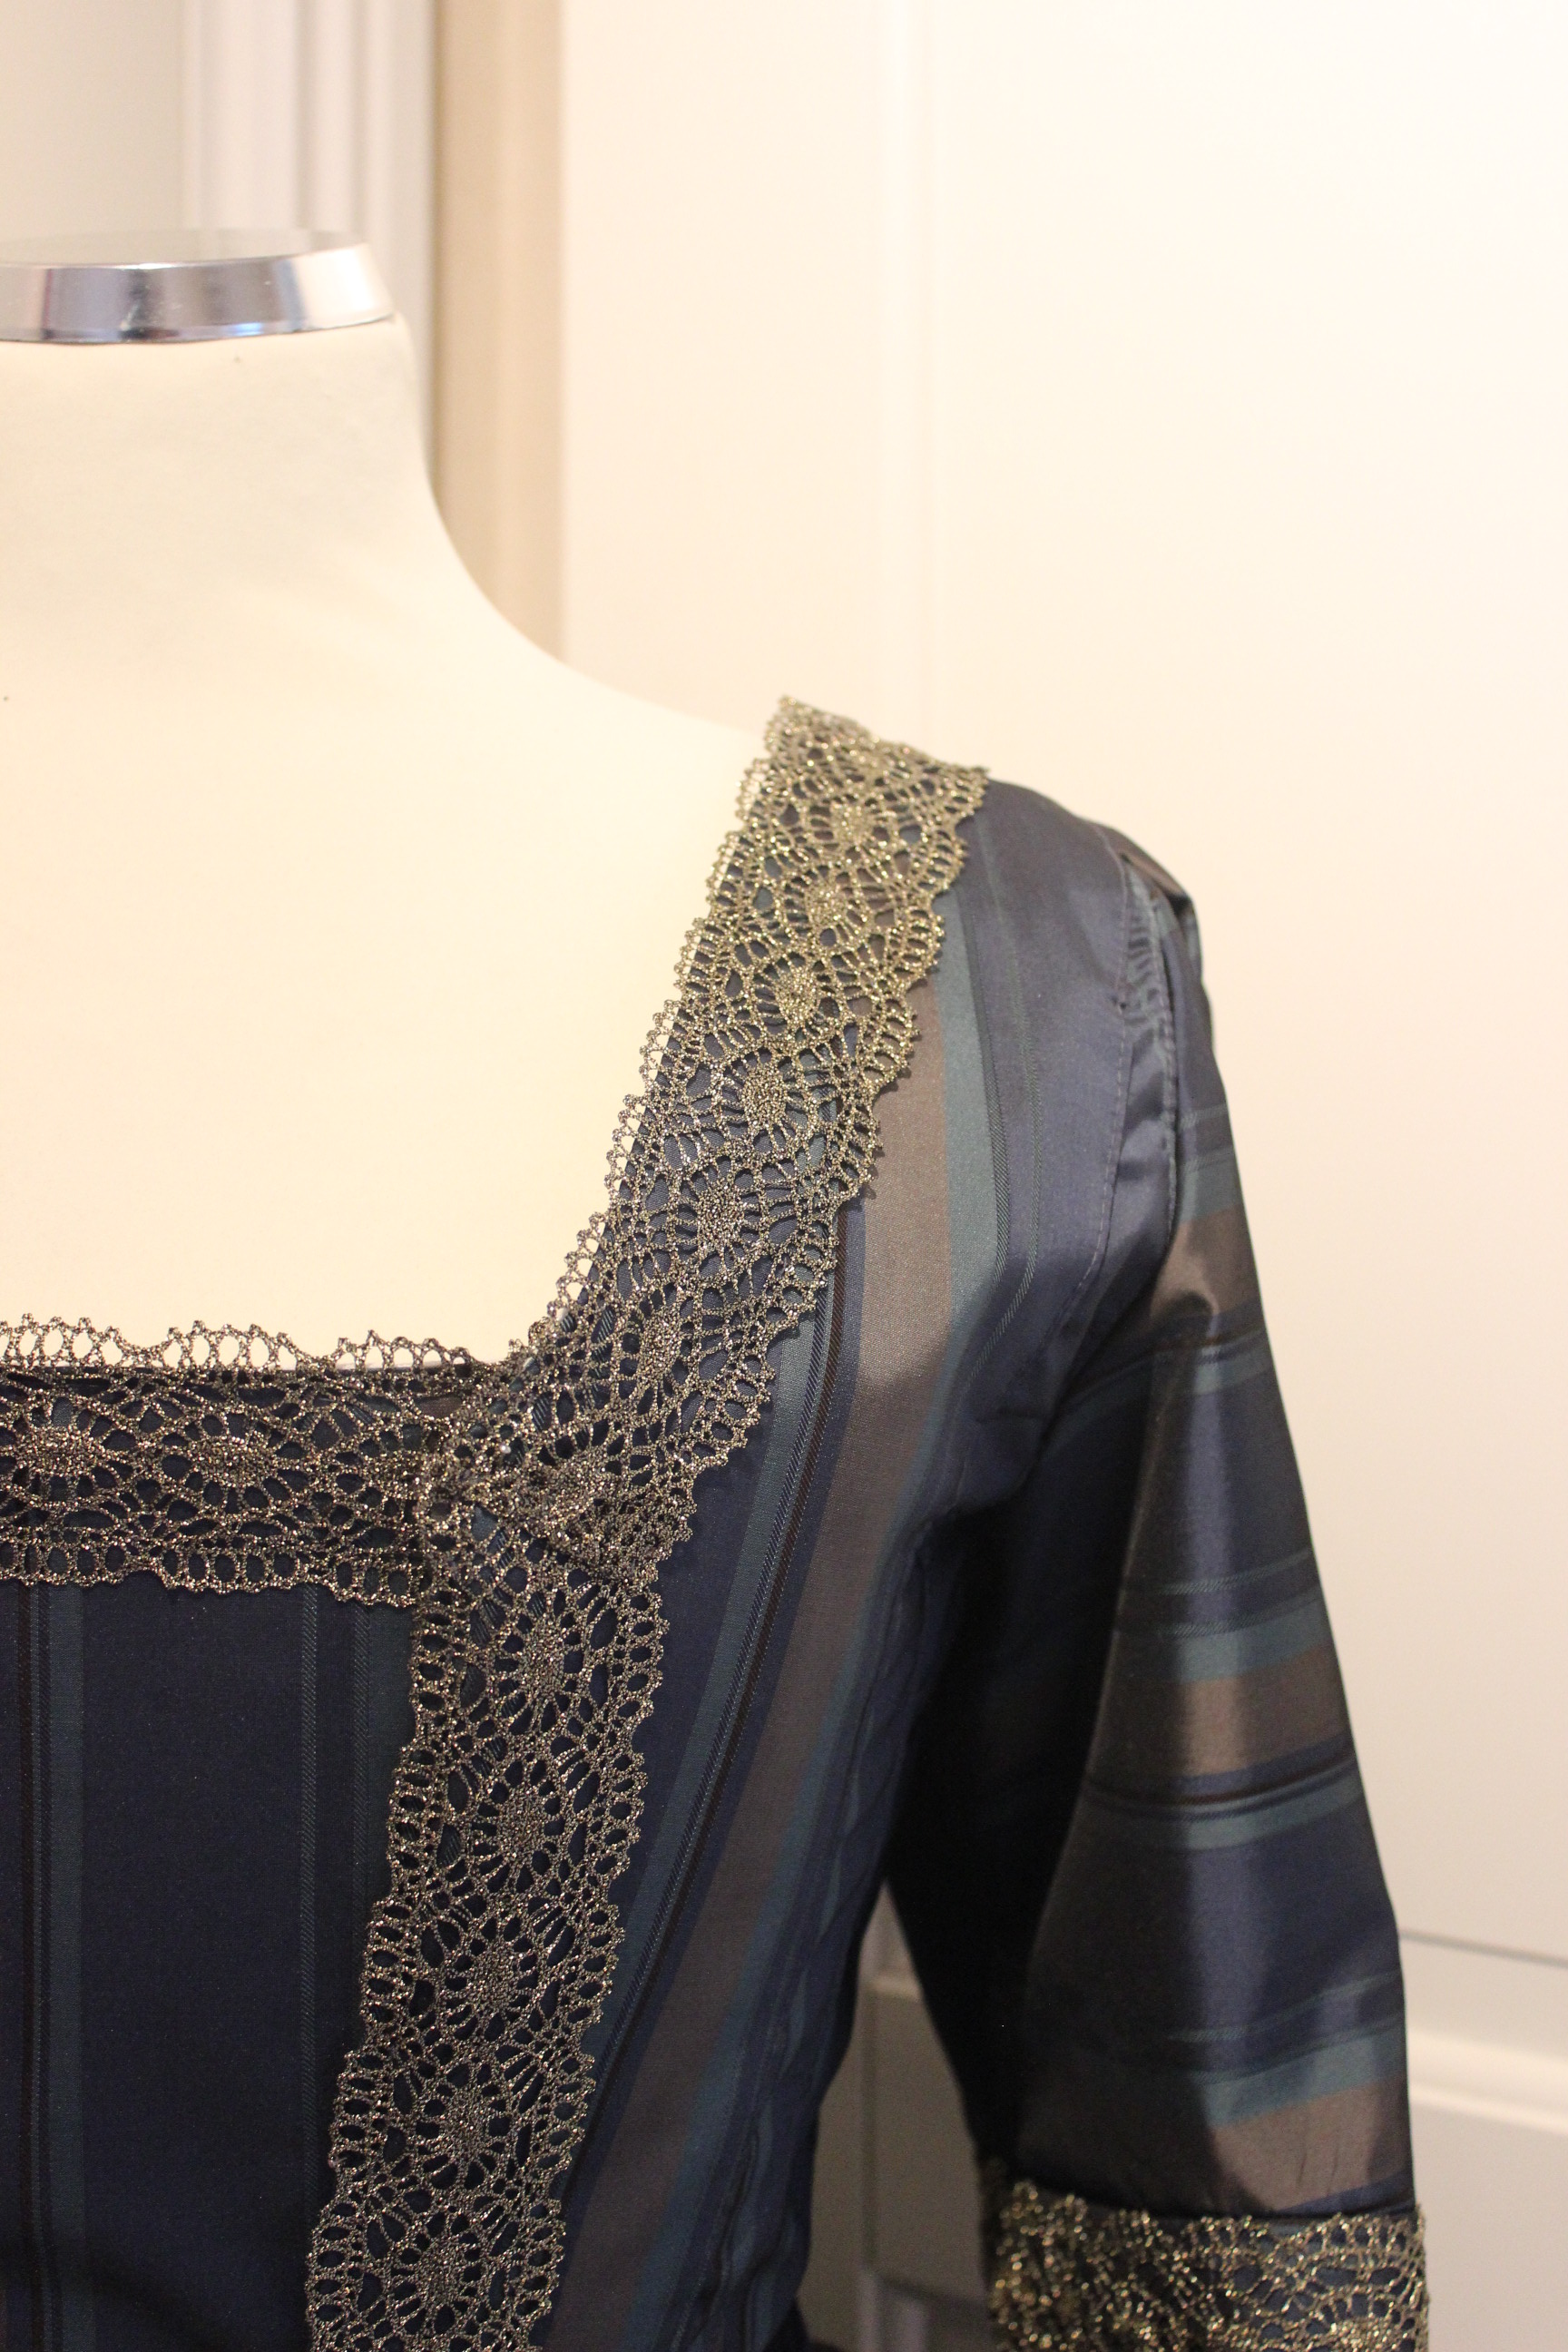
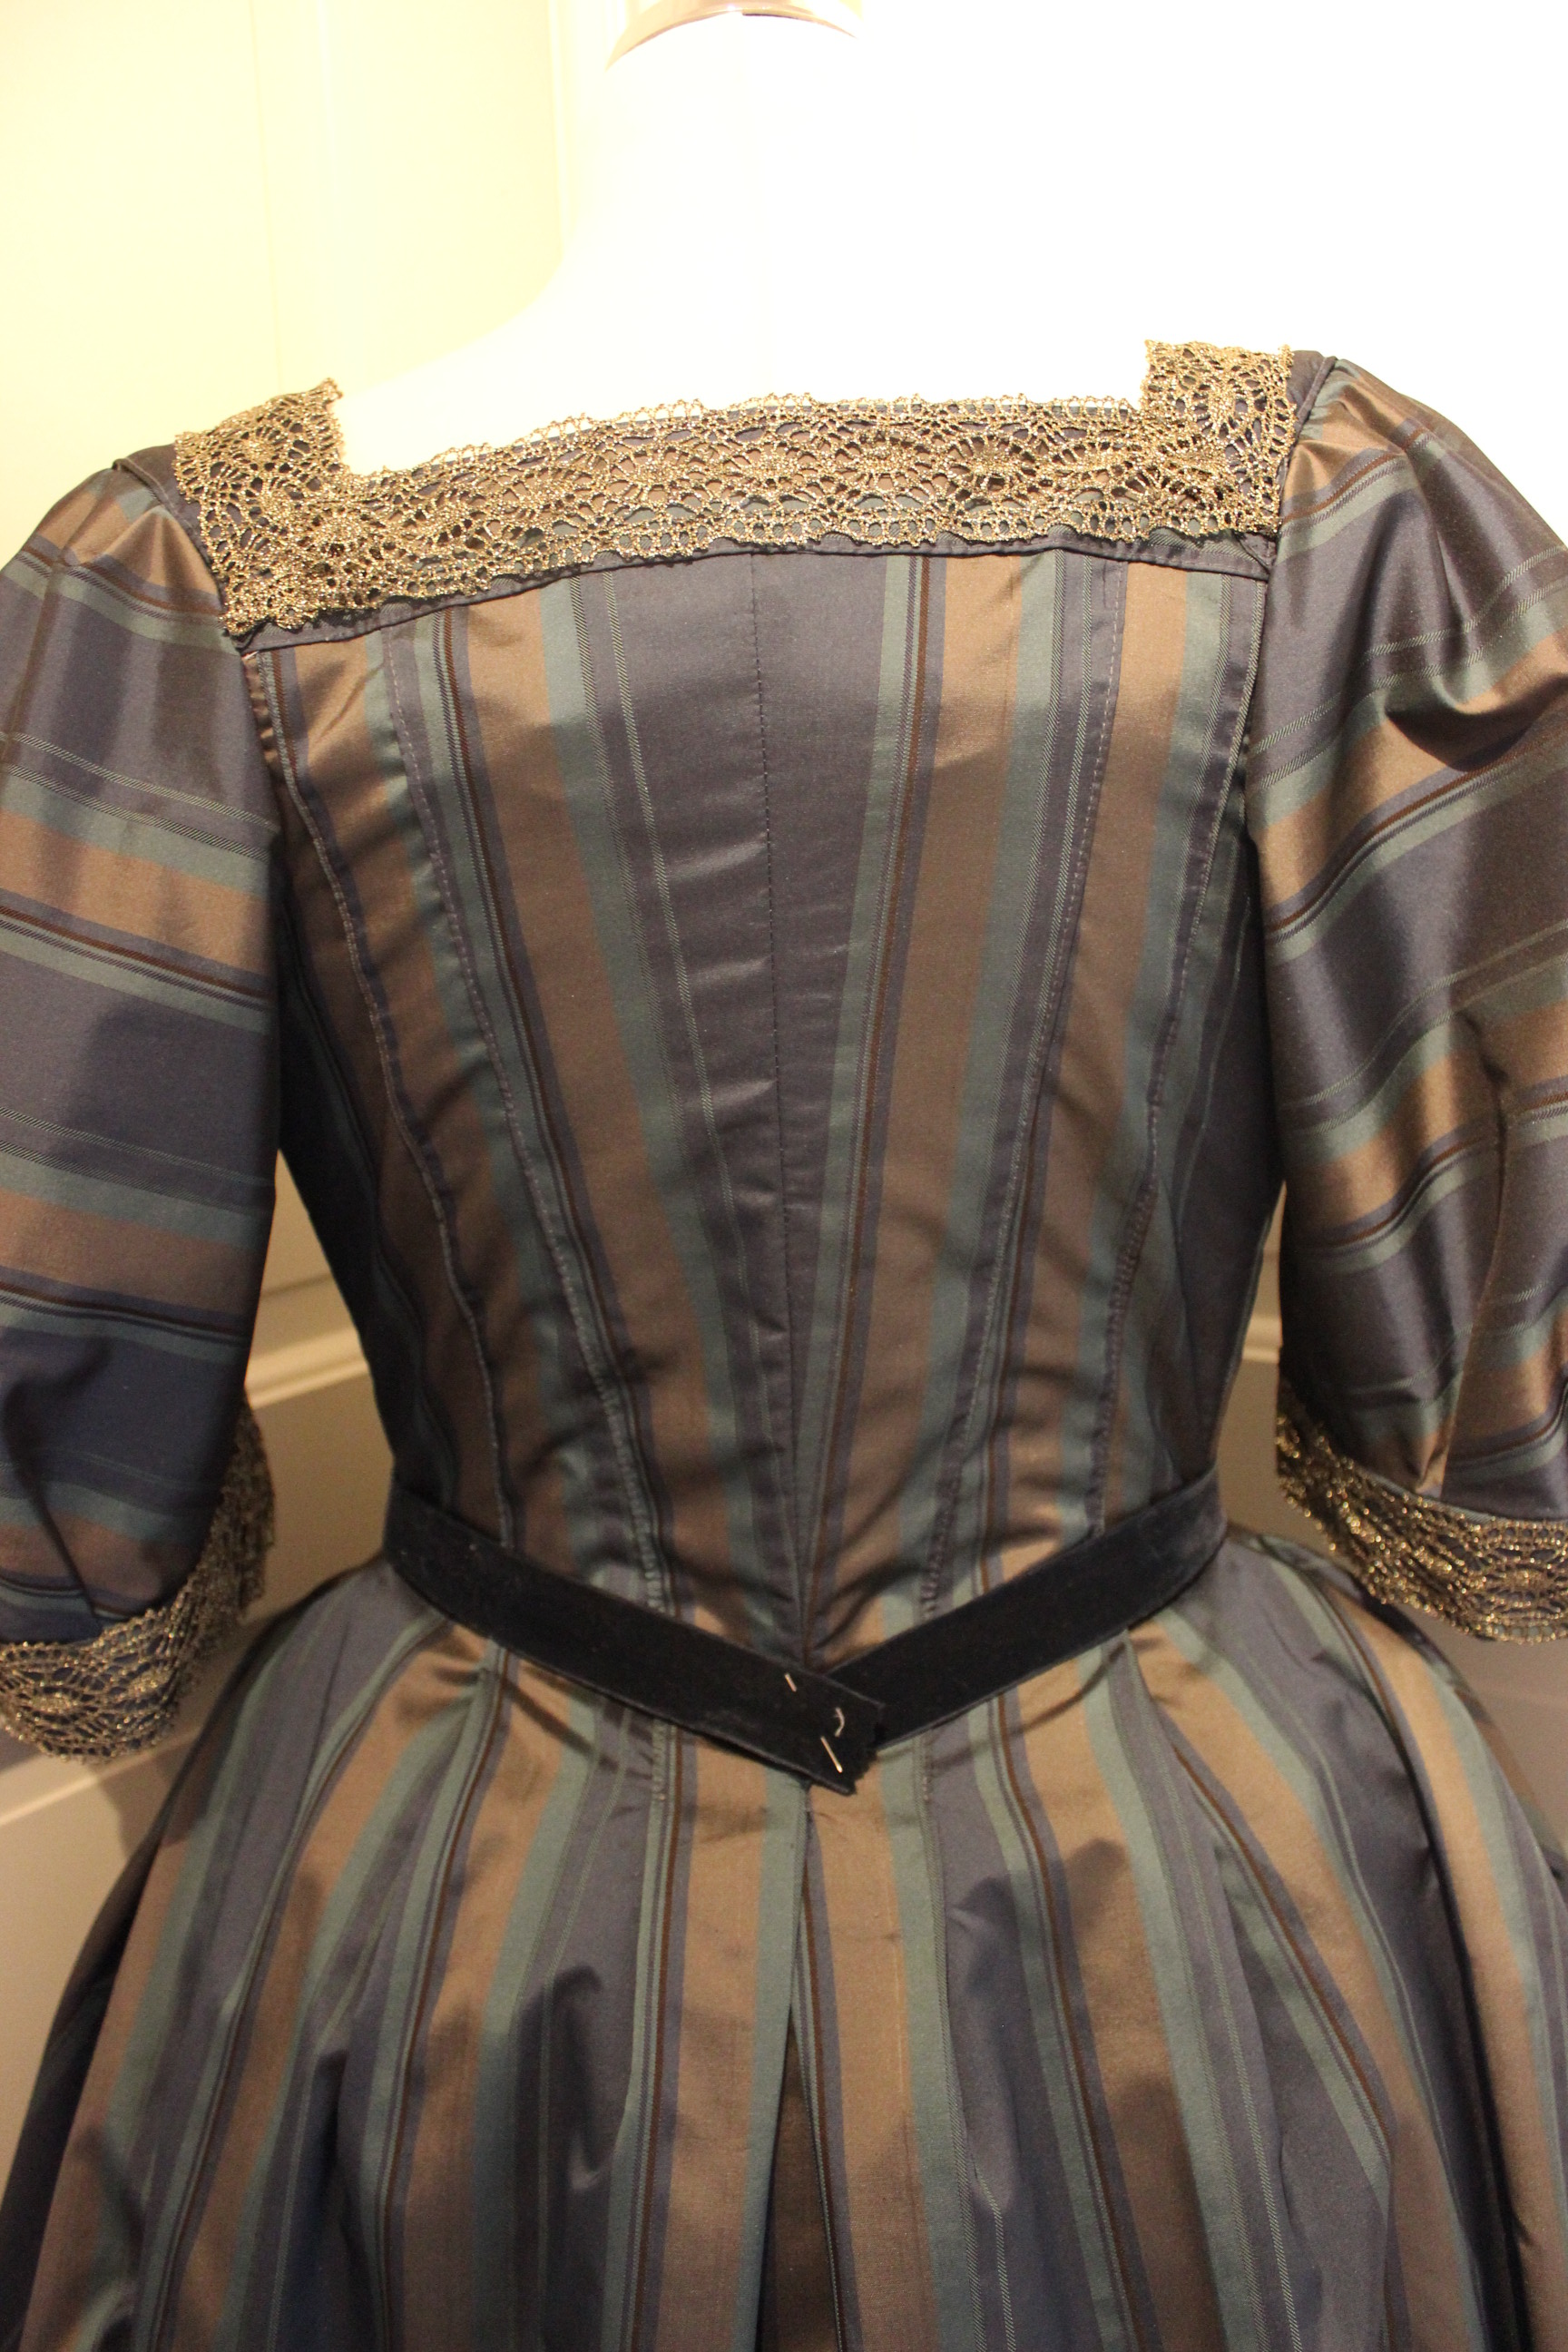
Once the main gown was finished the only other thing that I needed to decide was what color would I trim it in? Silver or gold?
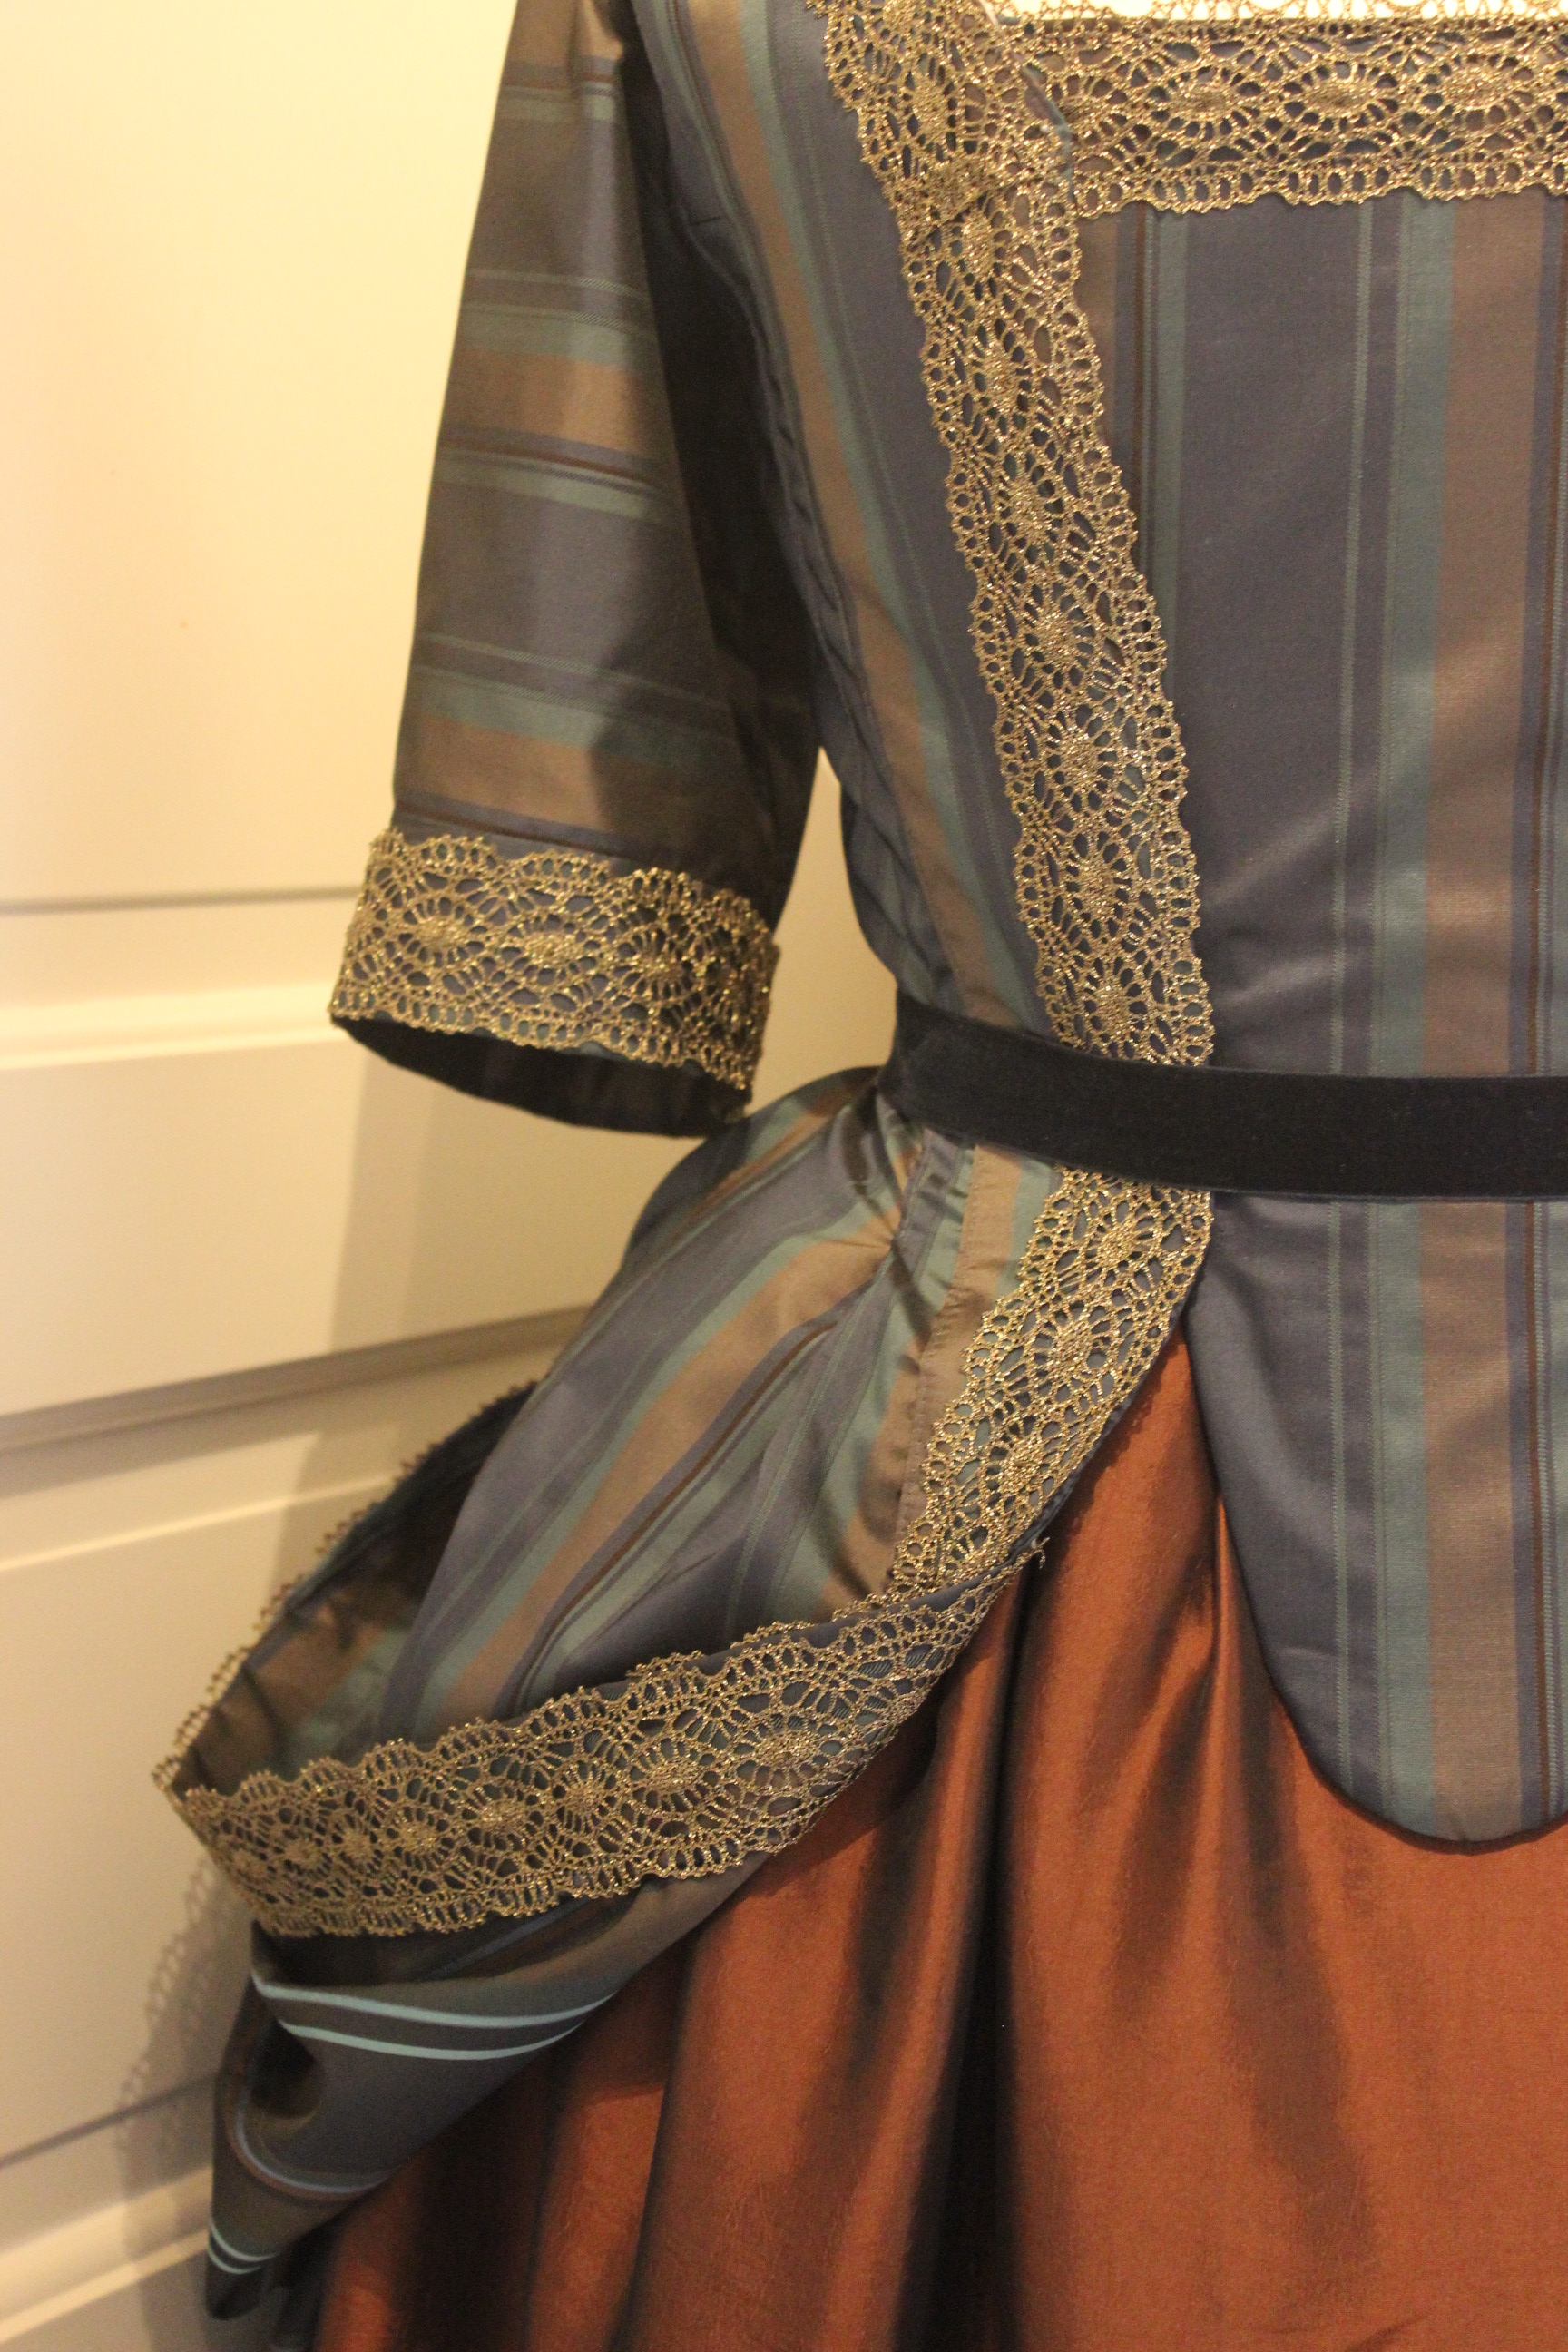
Both have there merits – silver matches the gown fabric nicely, but the gold was more common in the time-period and brings out the copper in the petticoat.
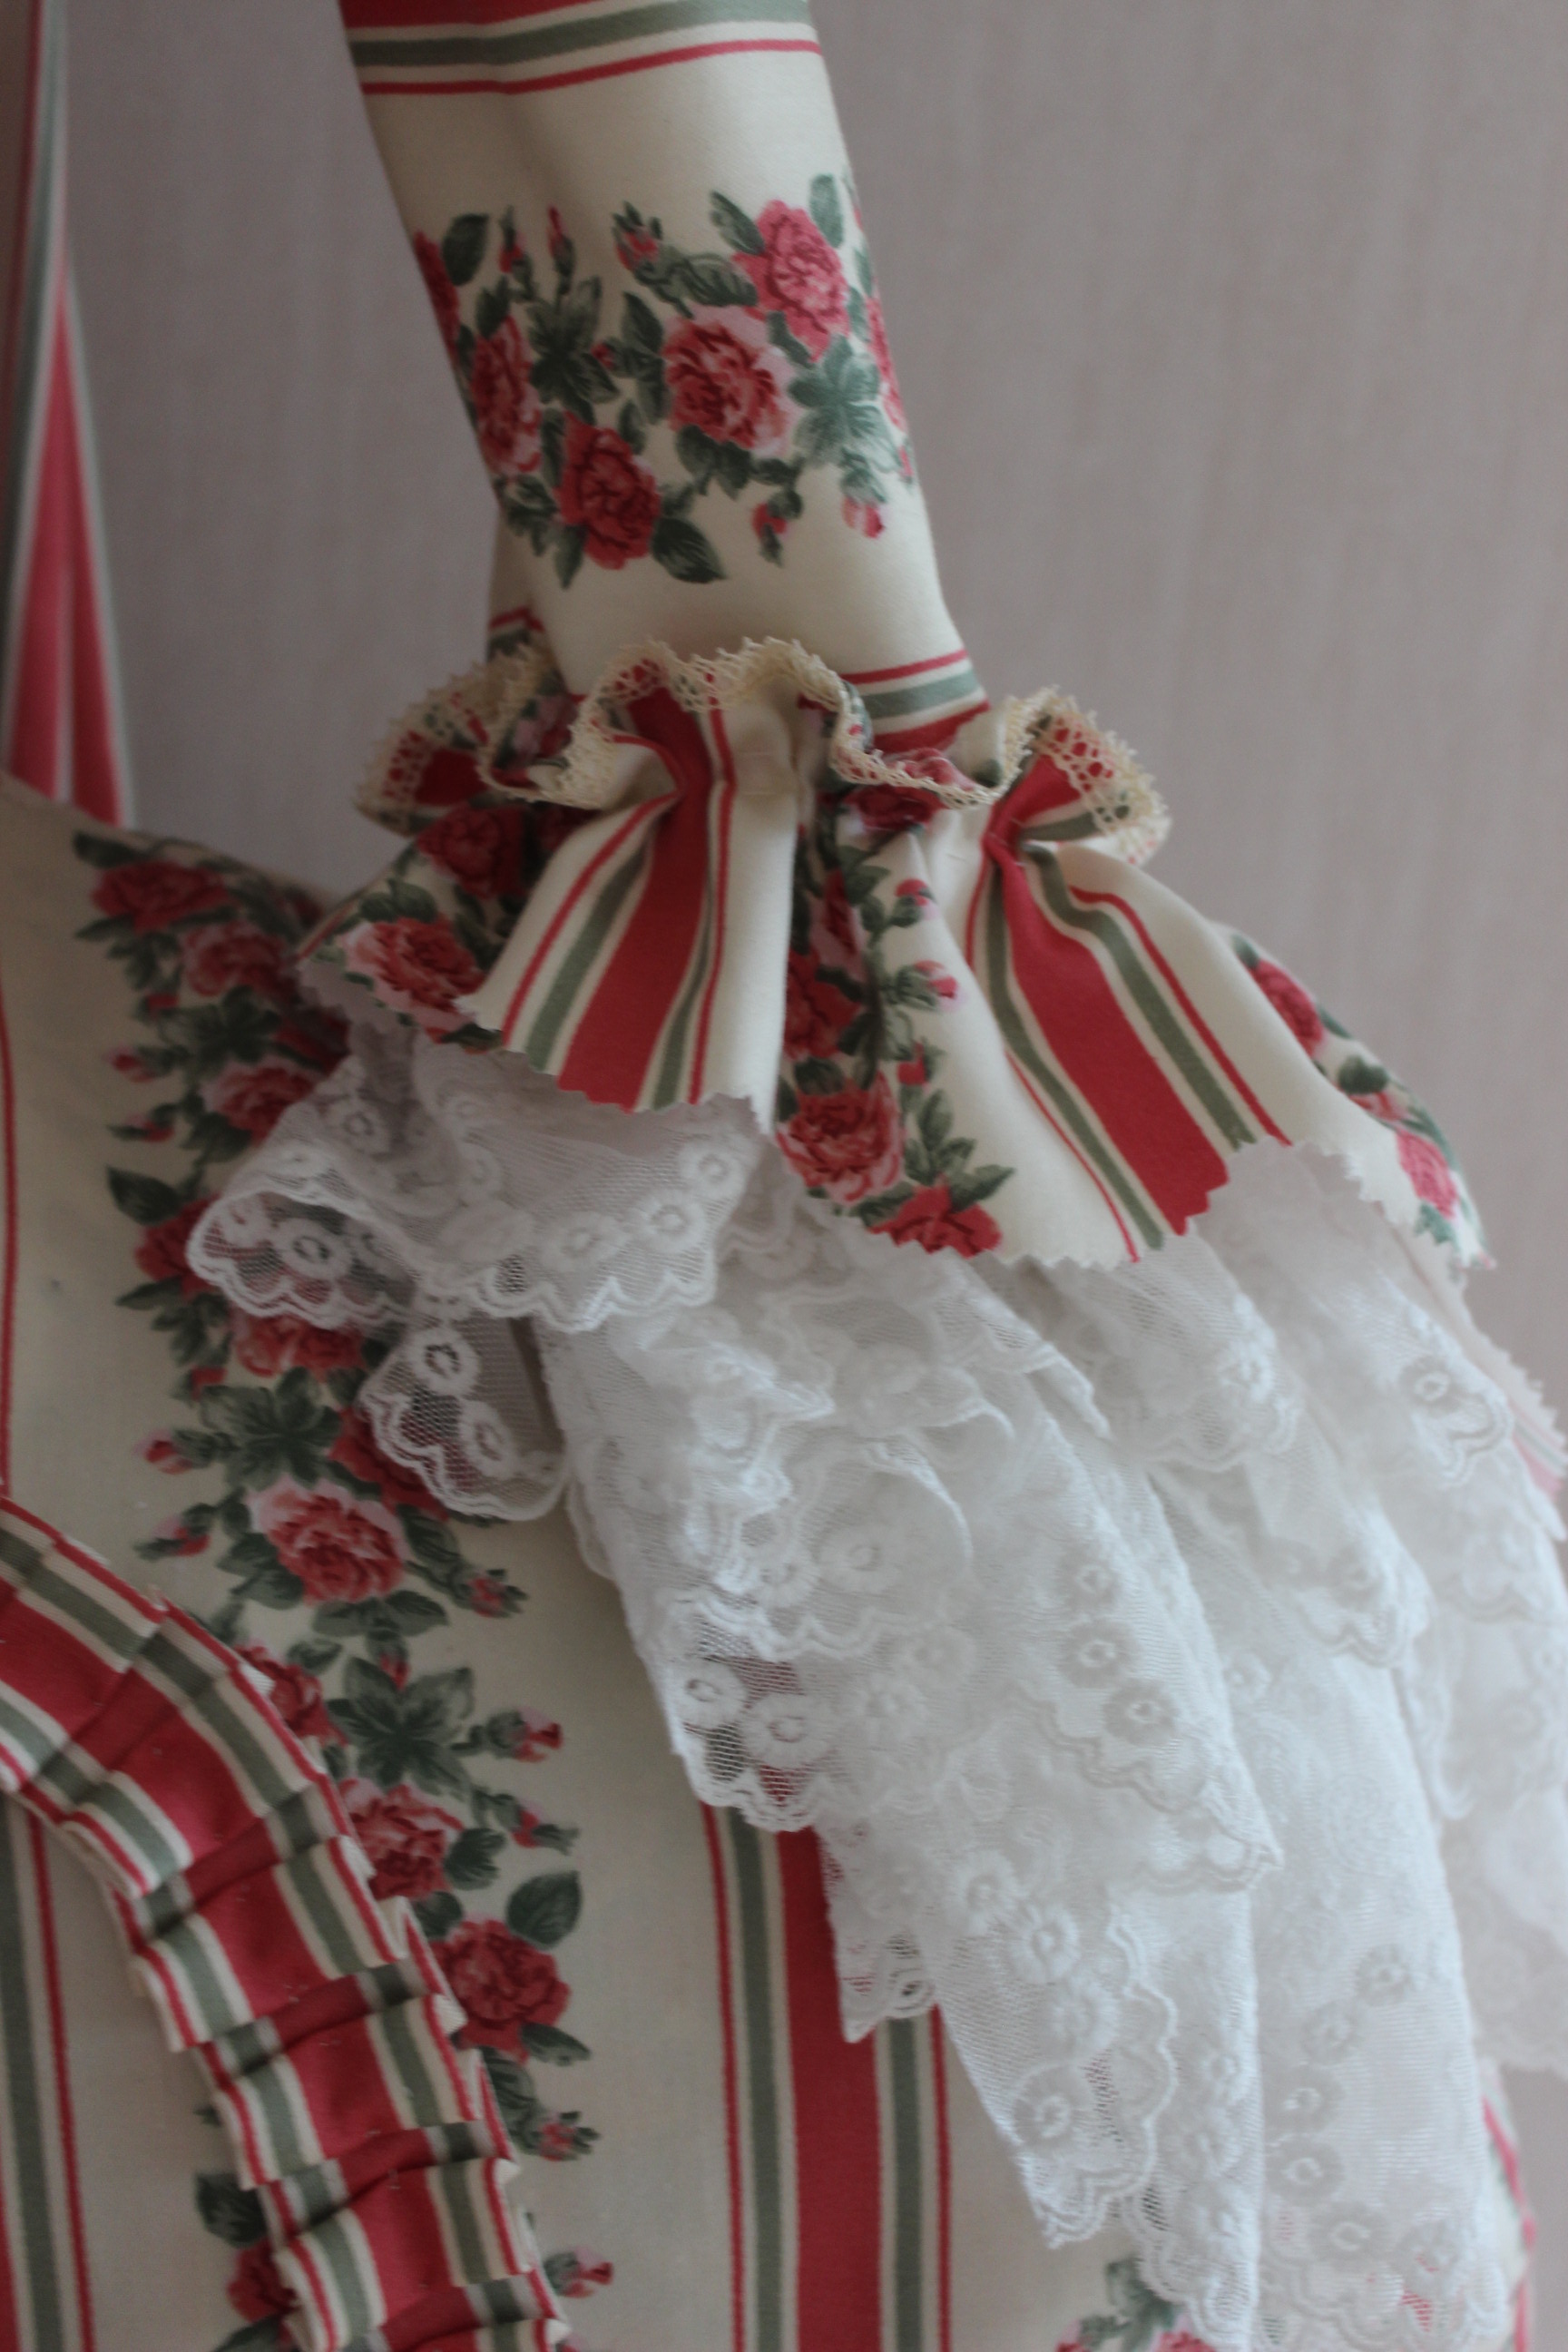
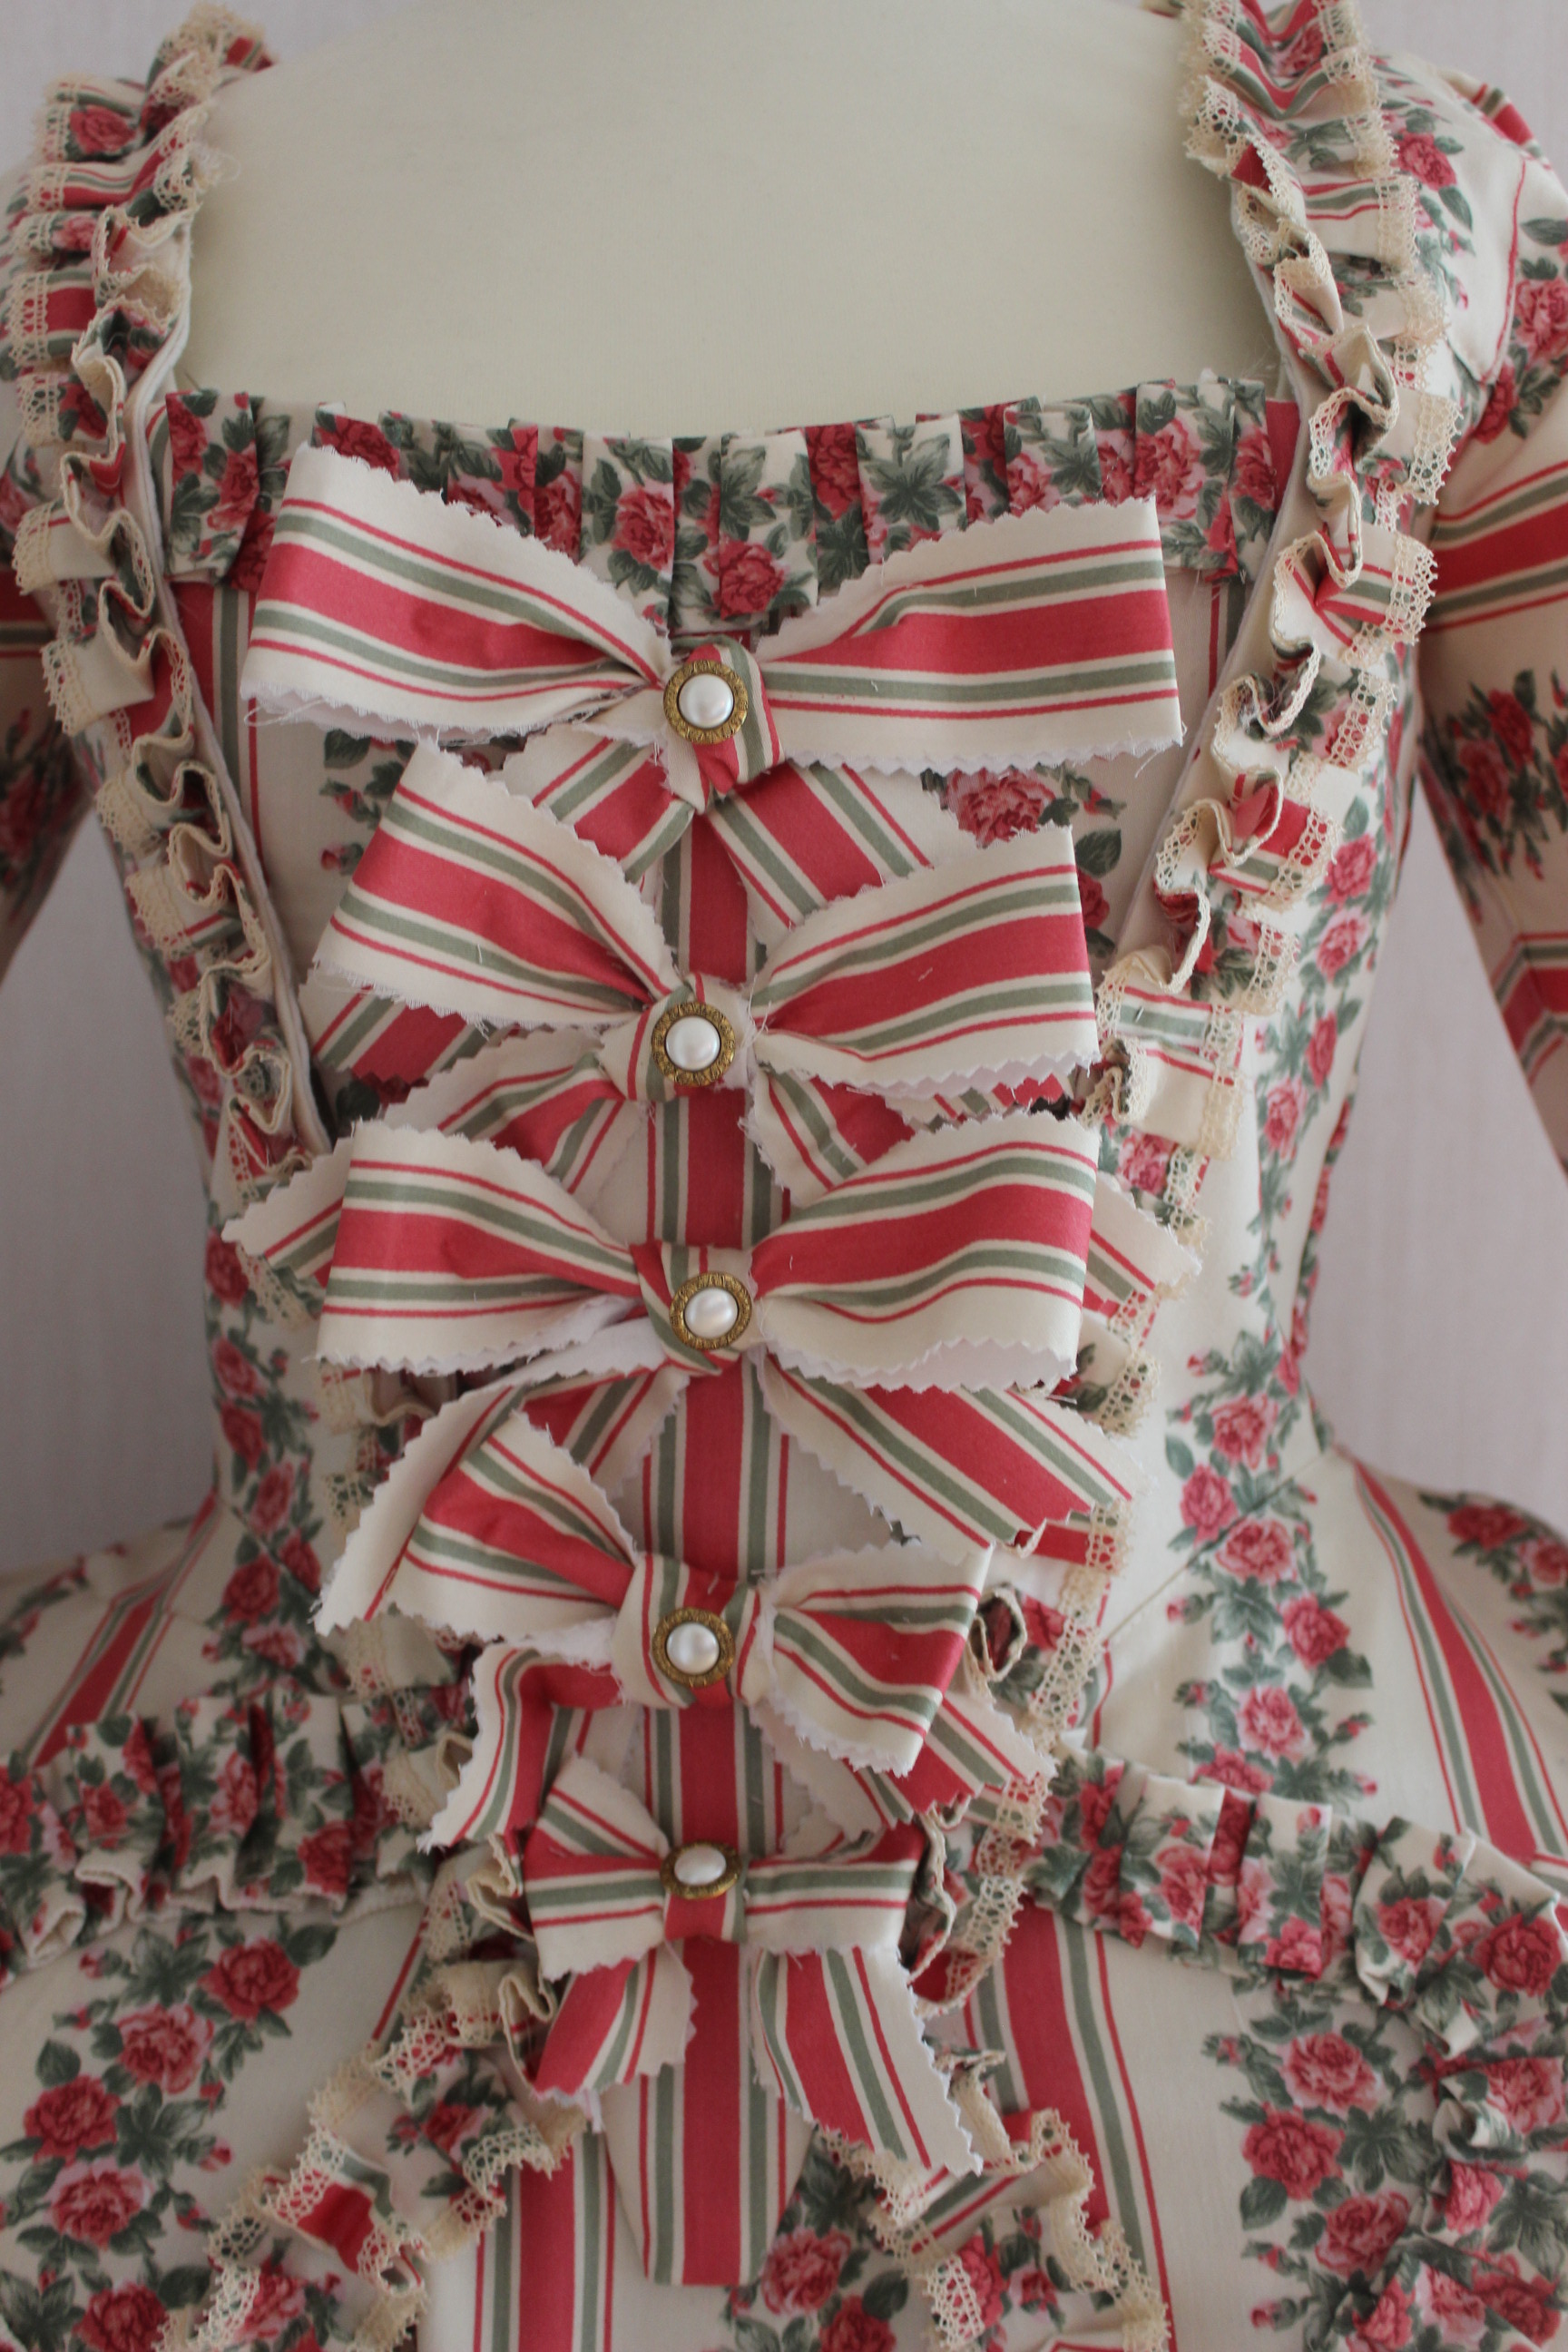
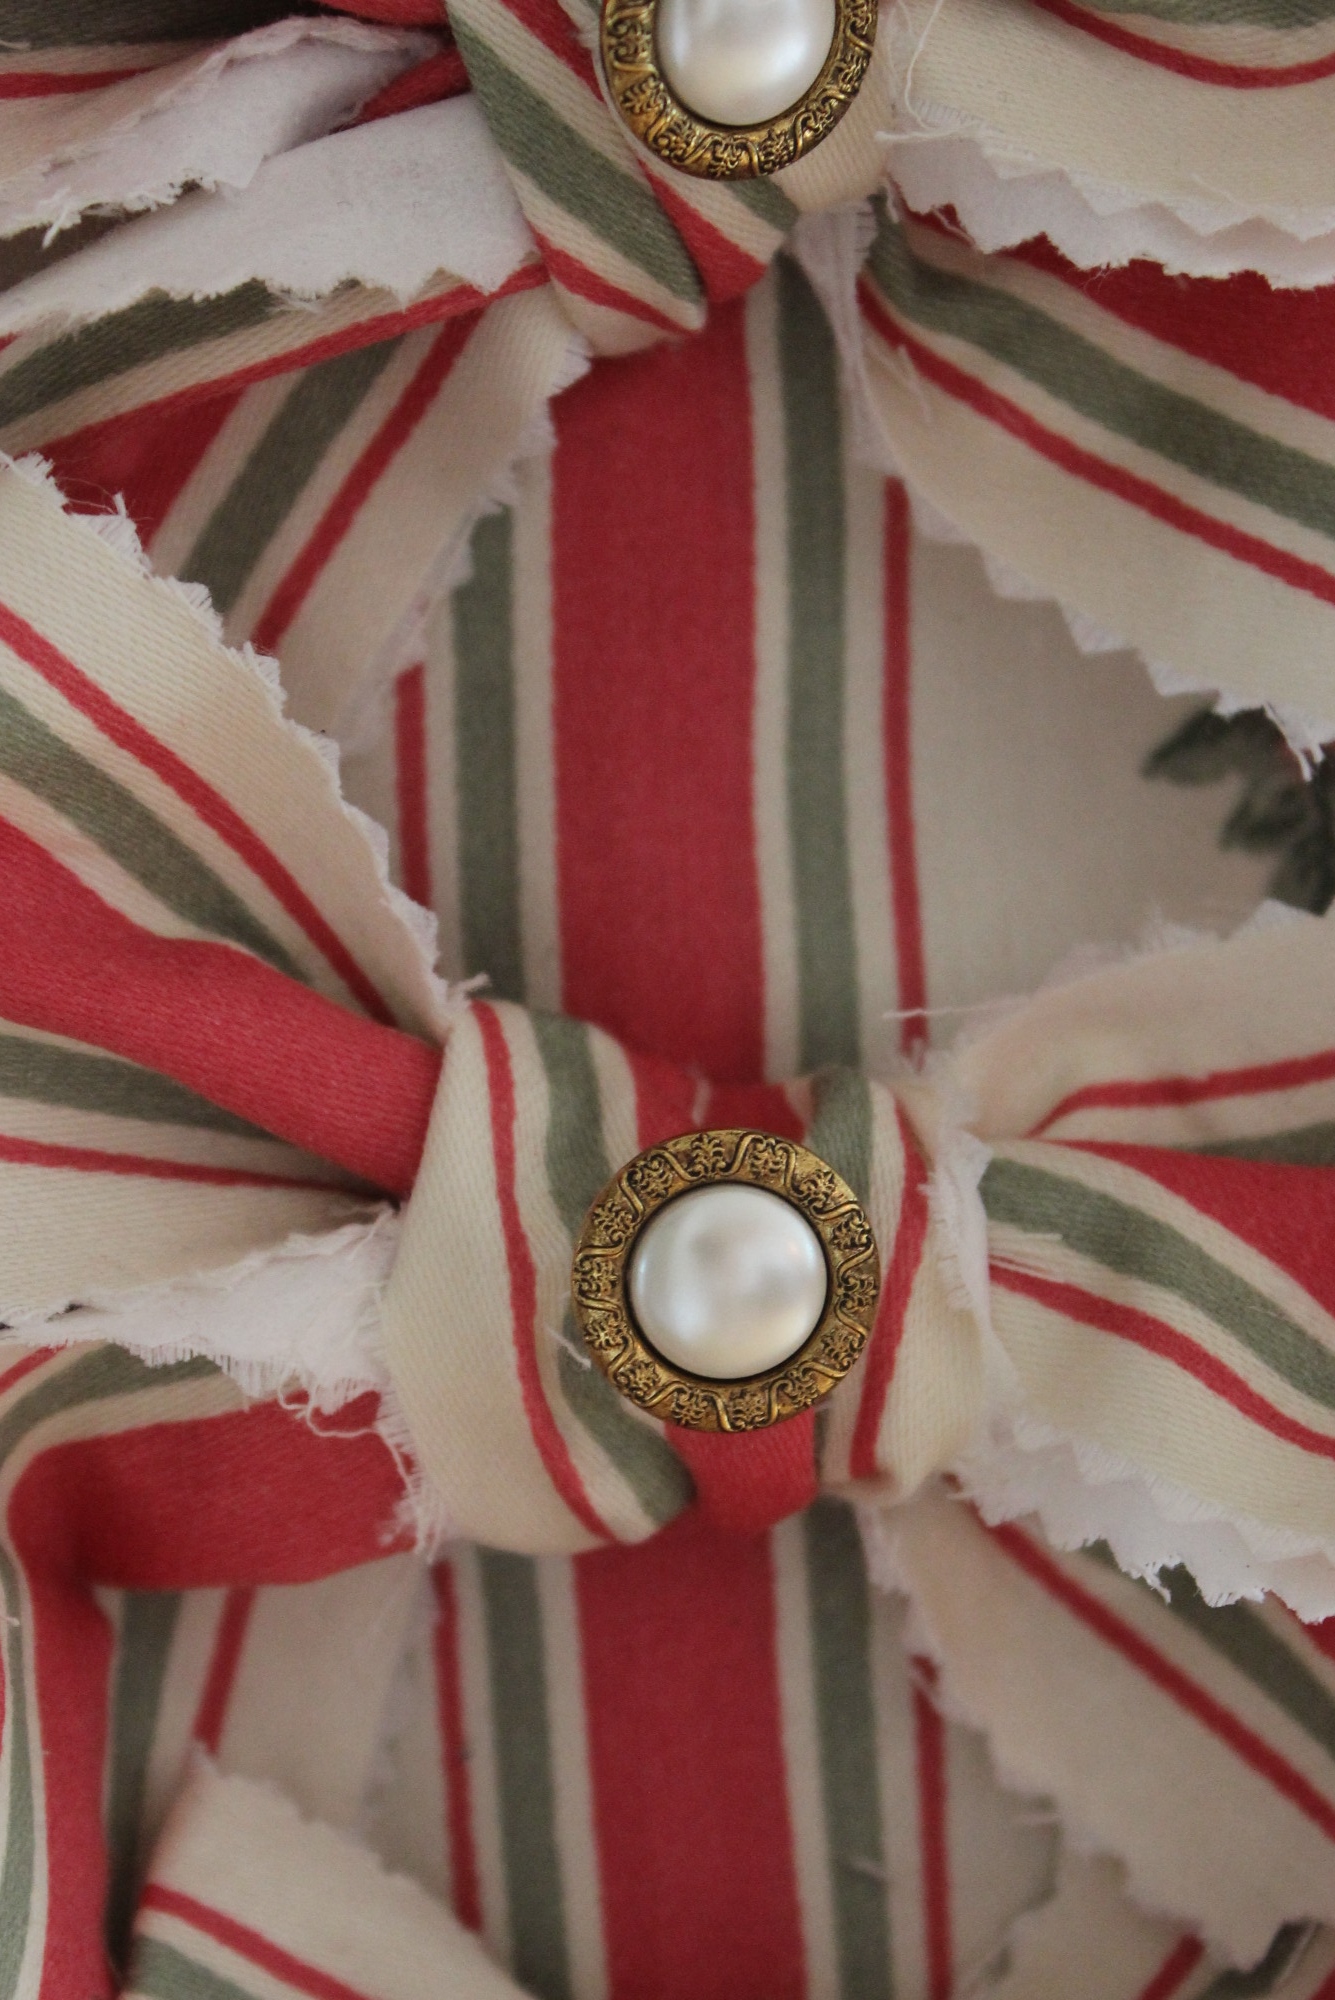
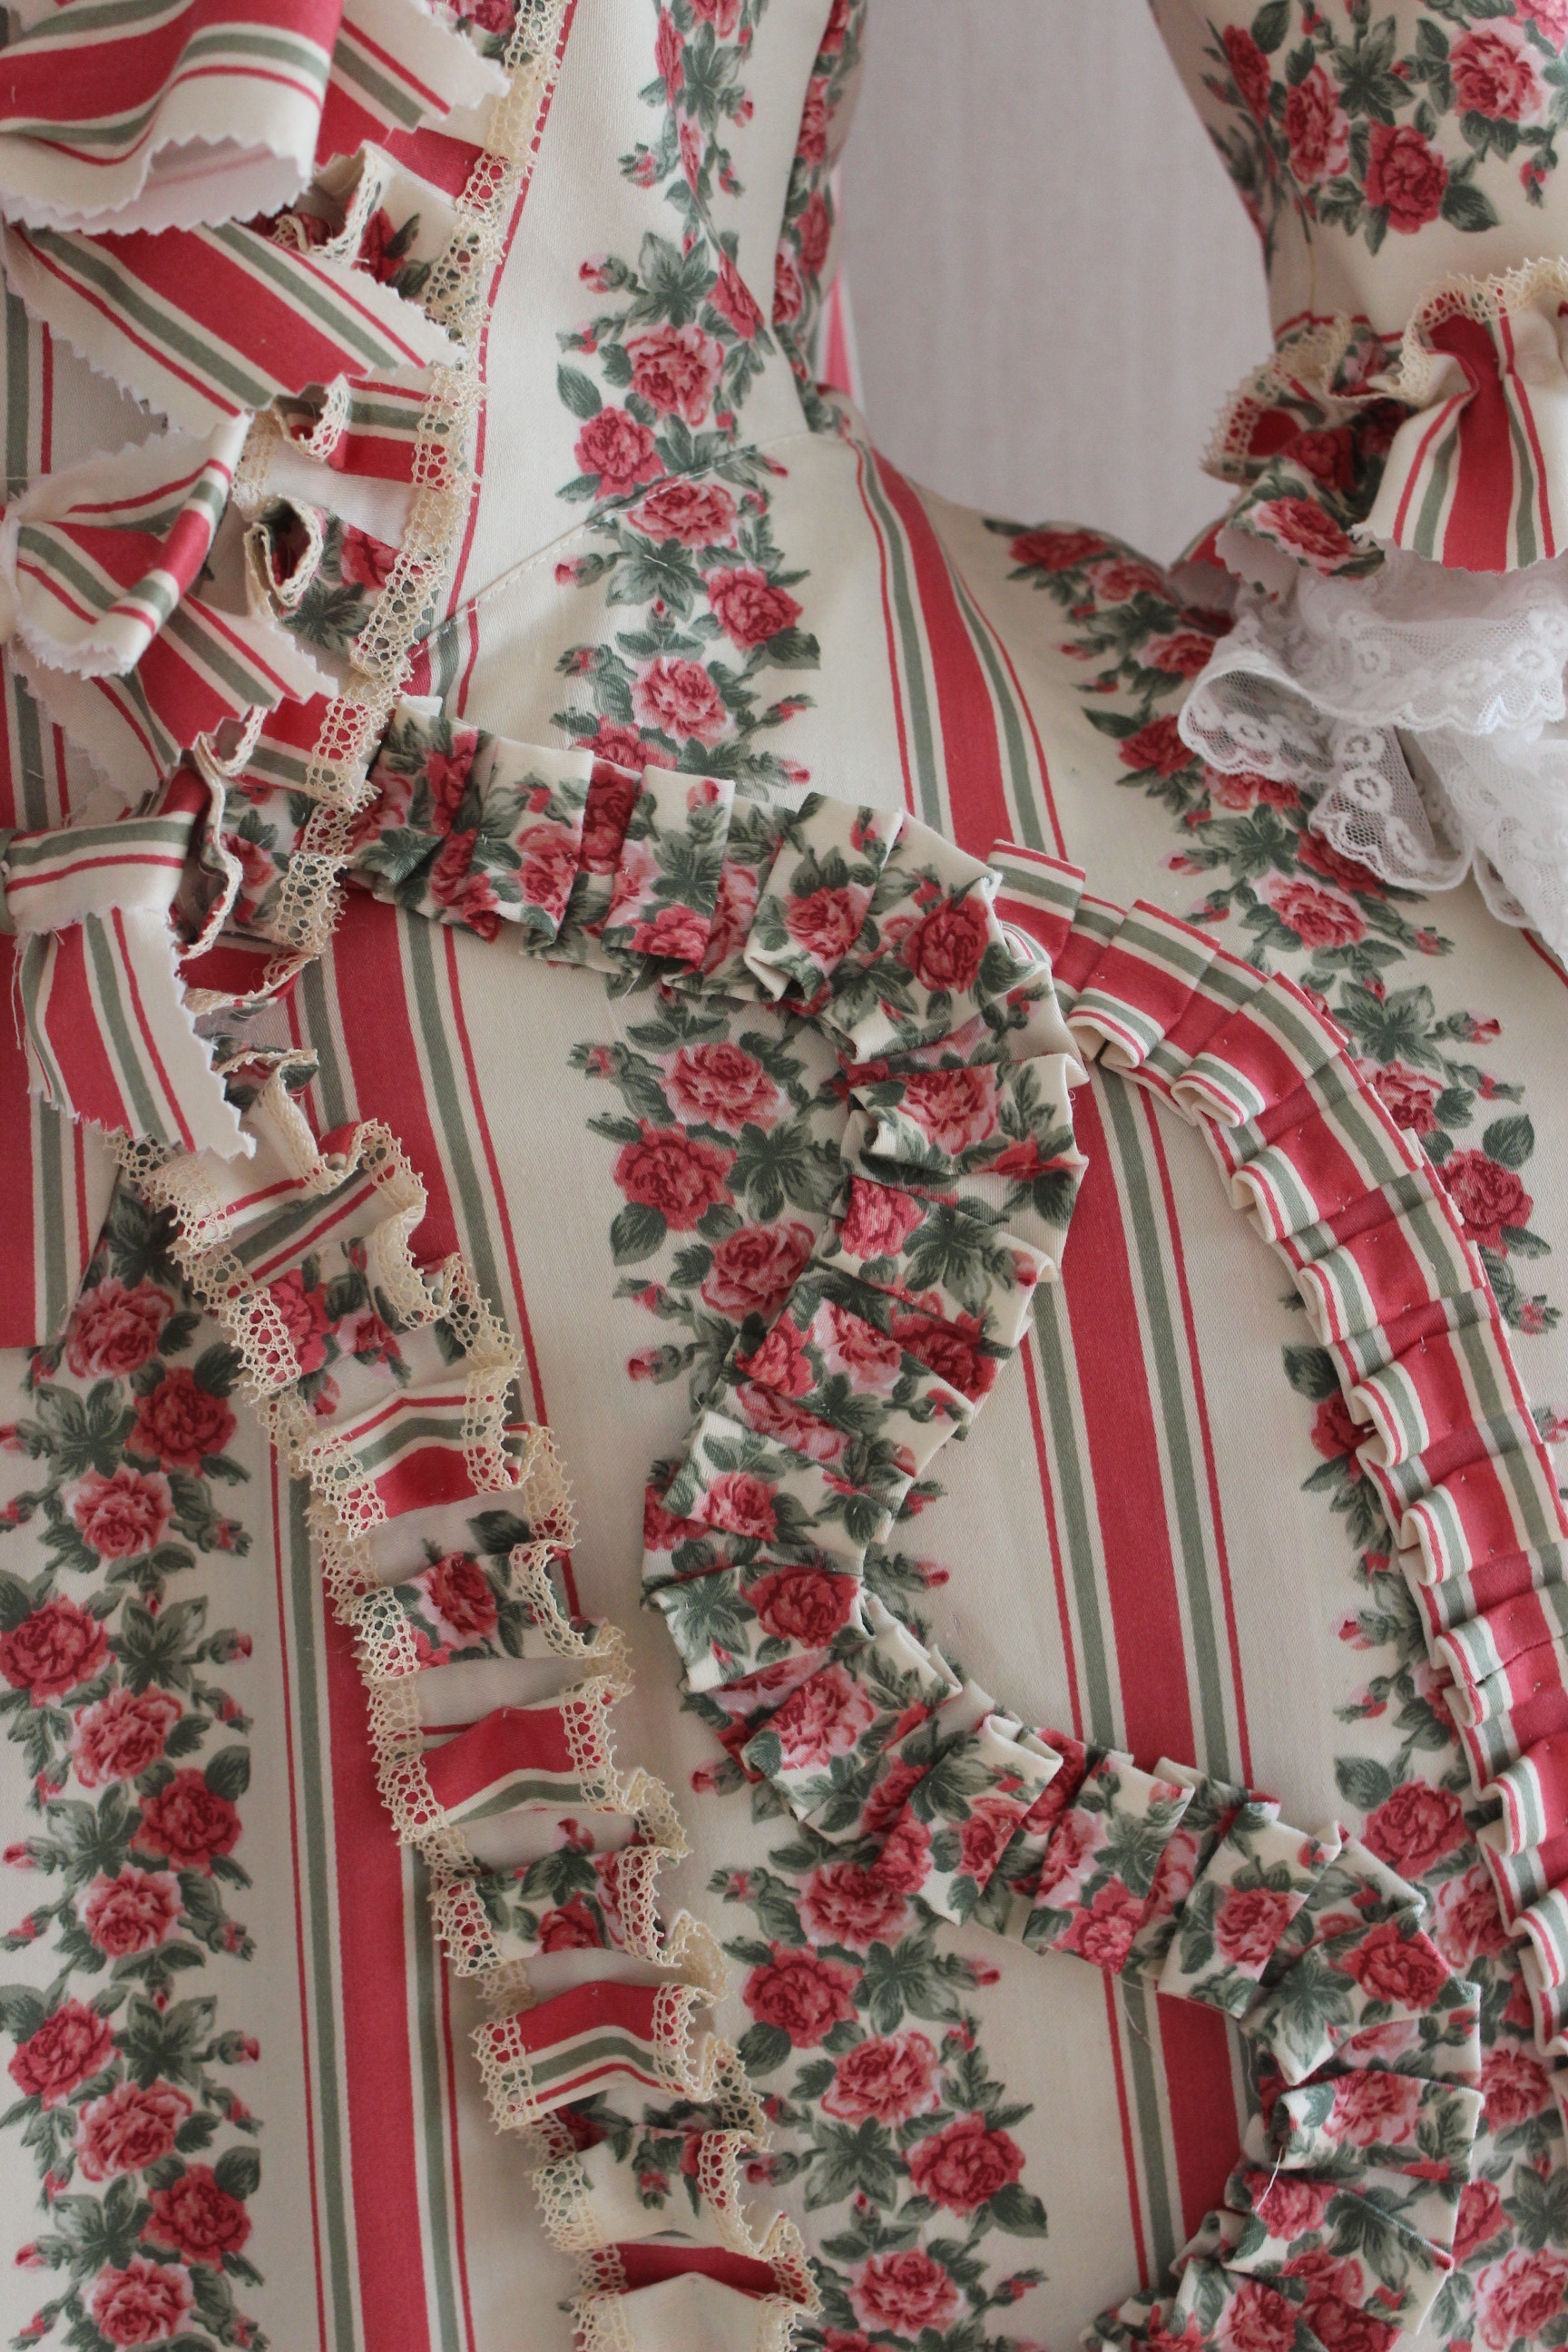
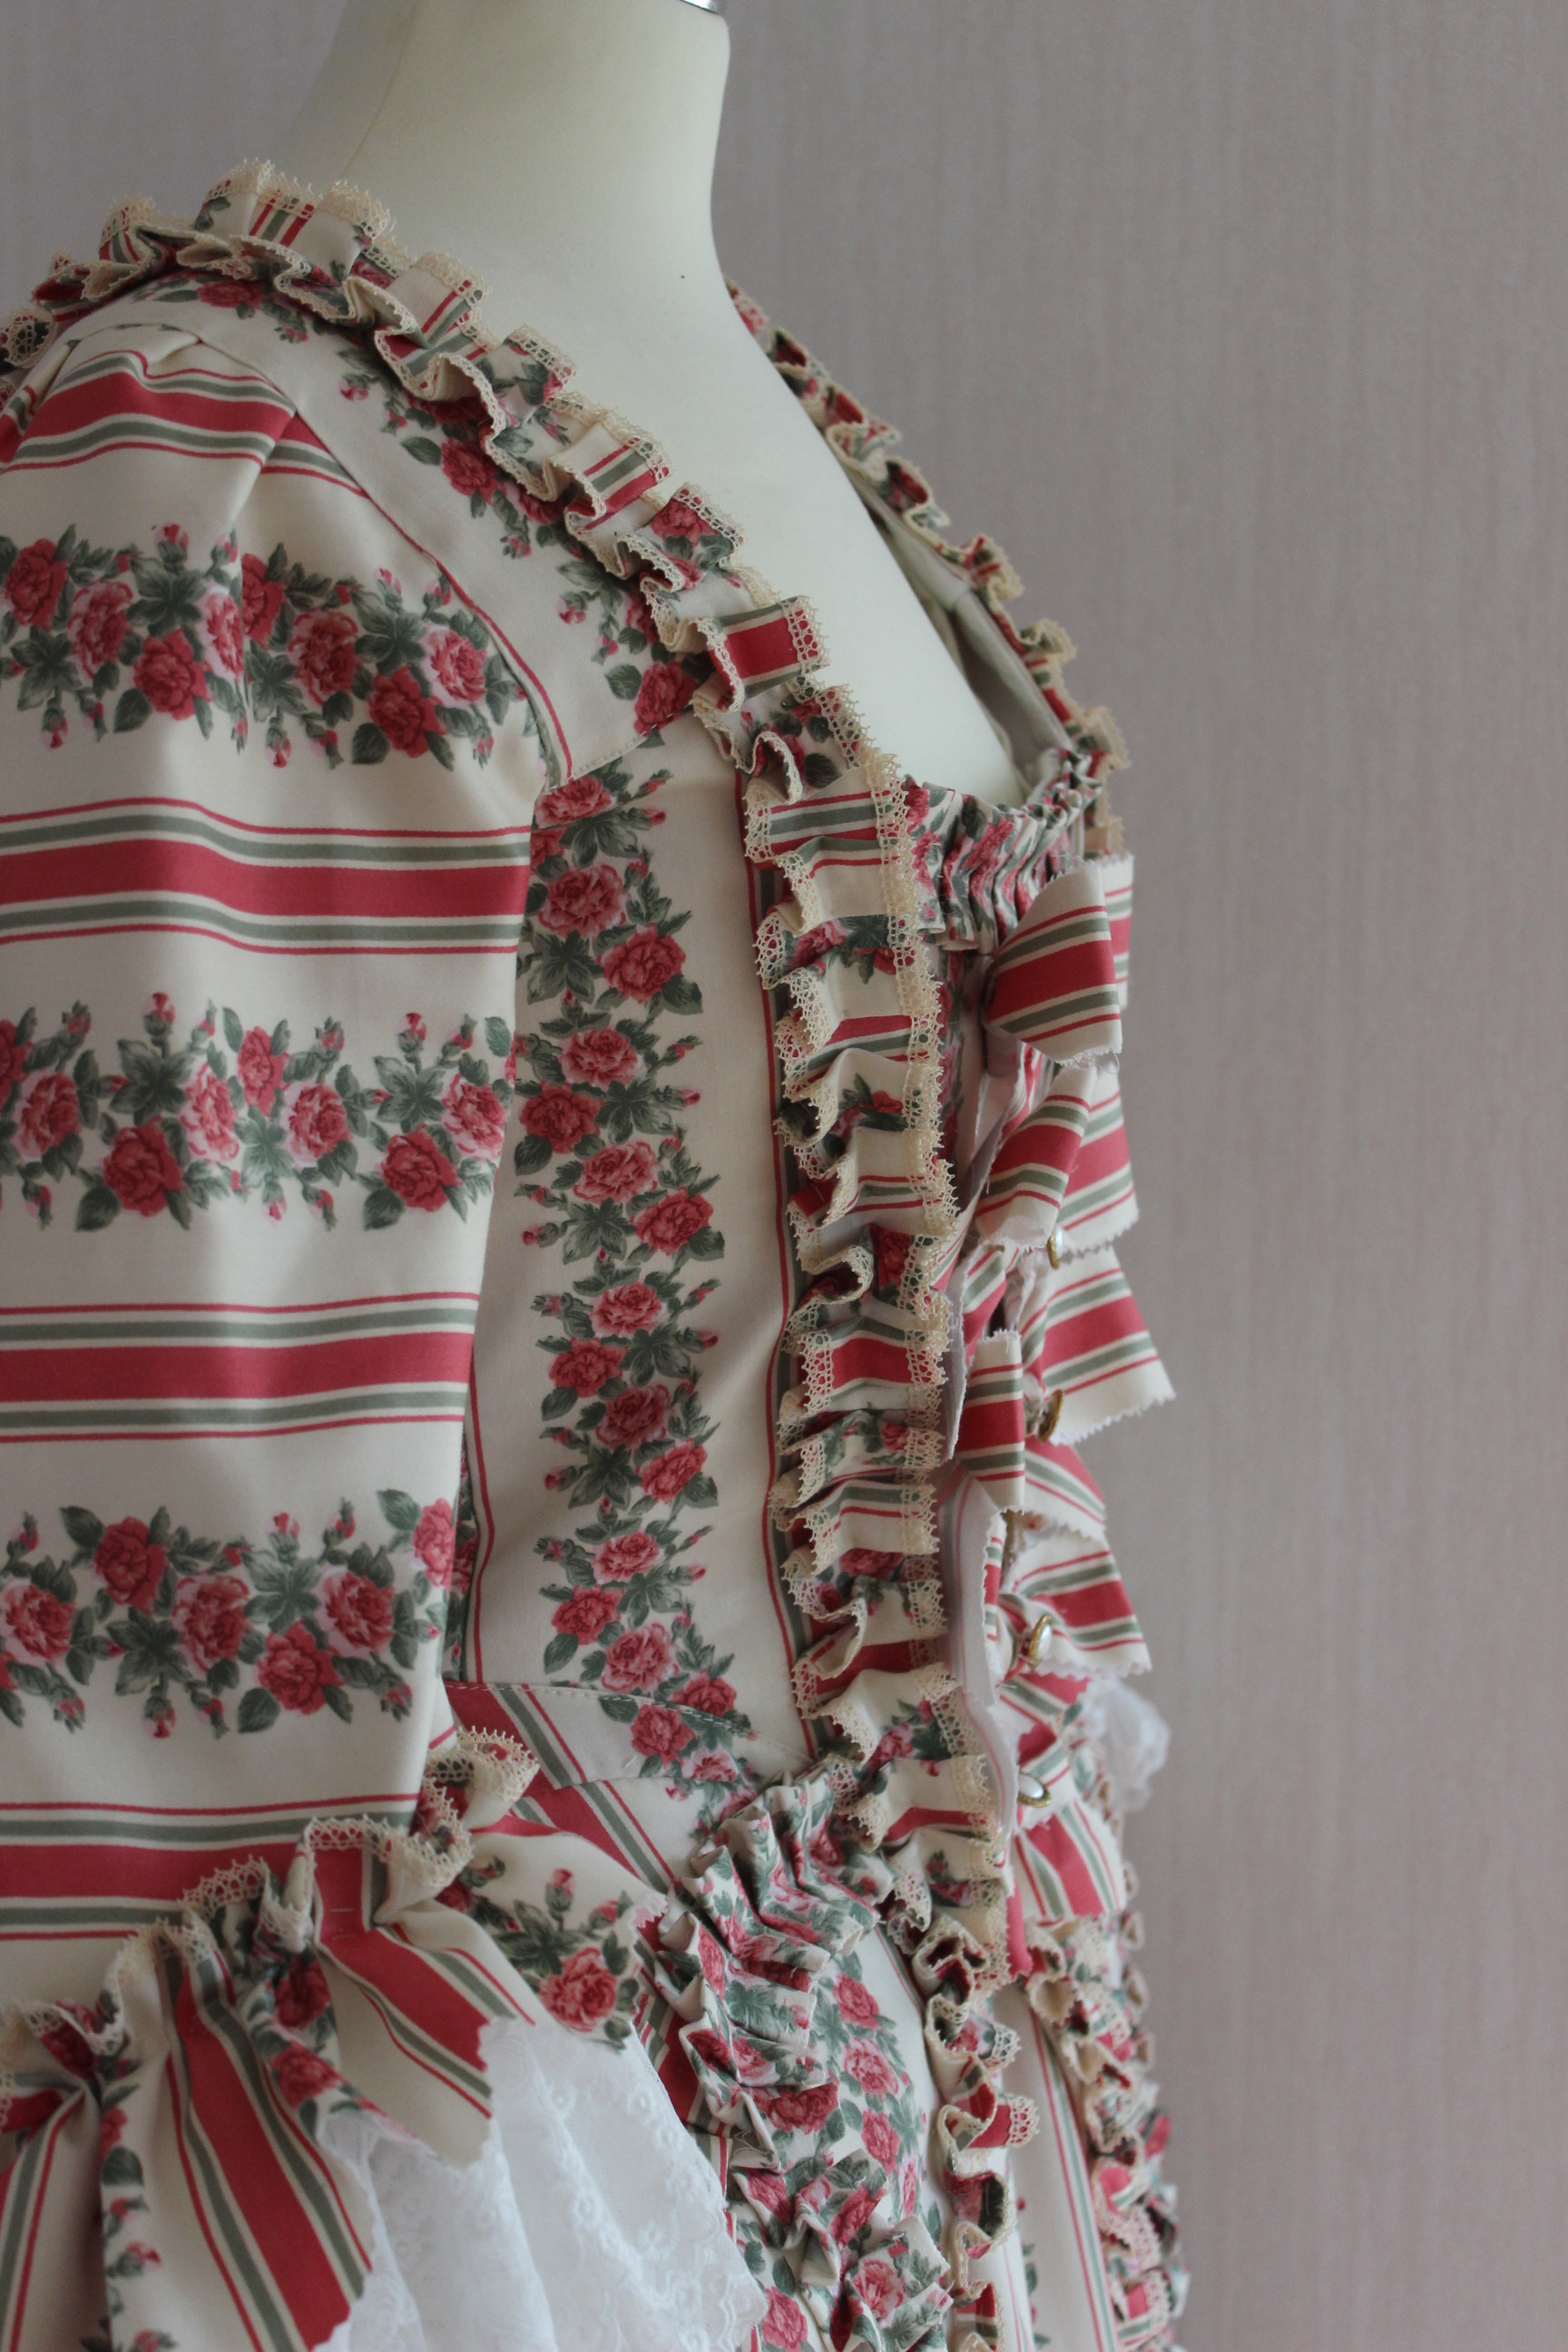
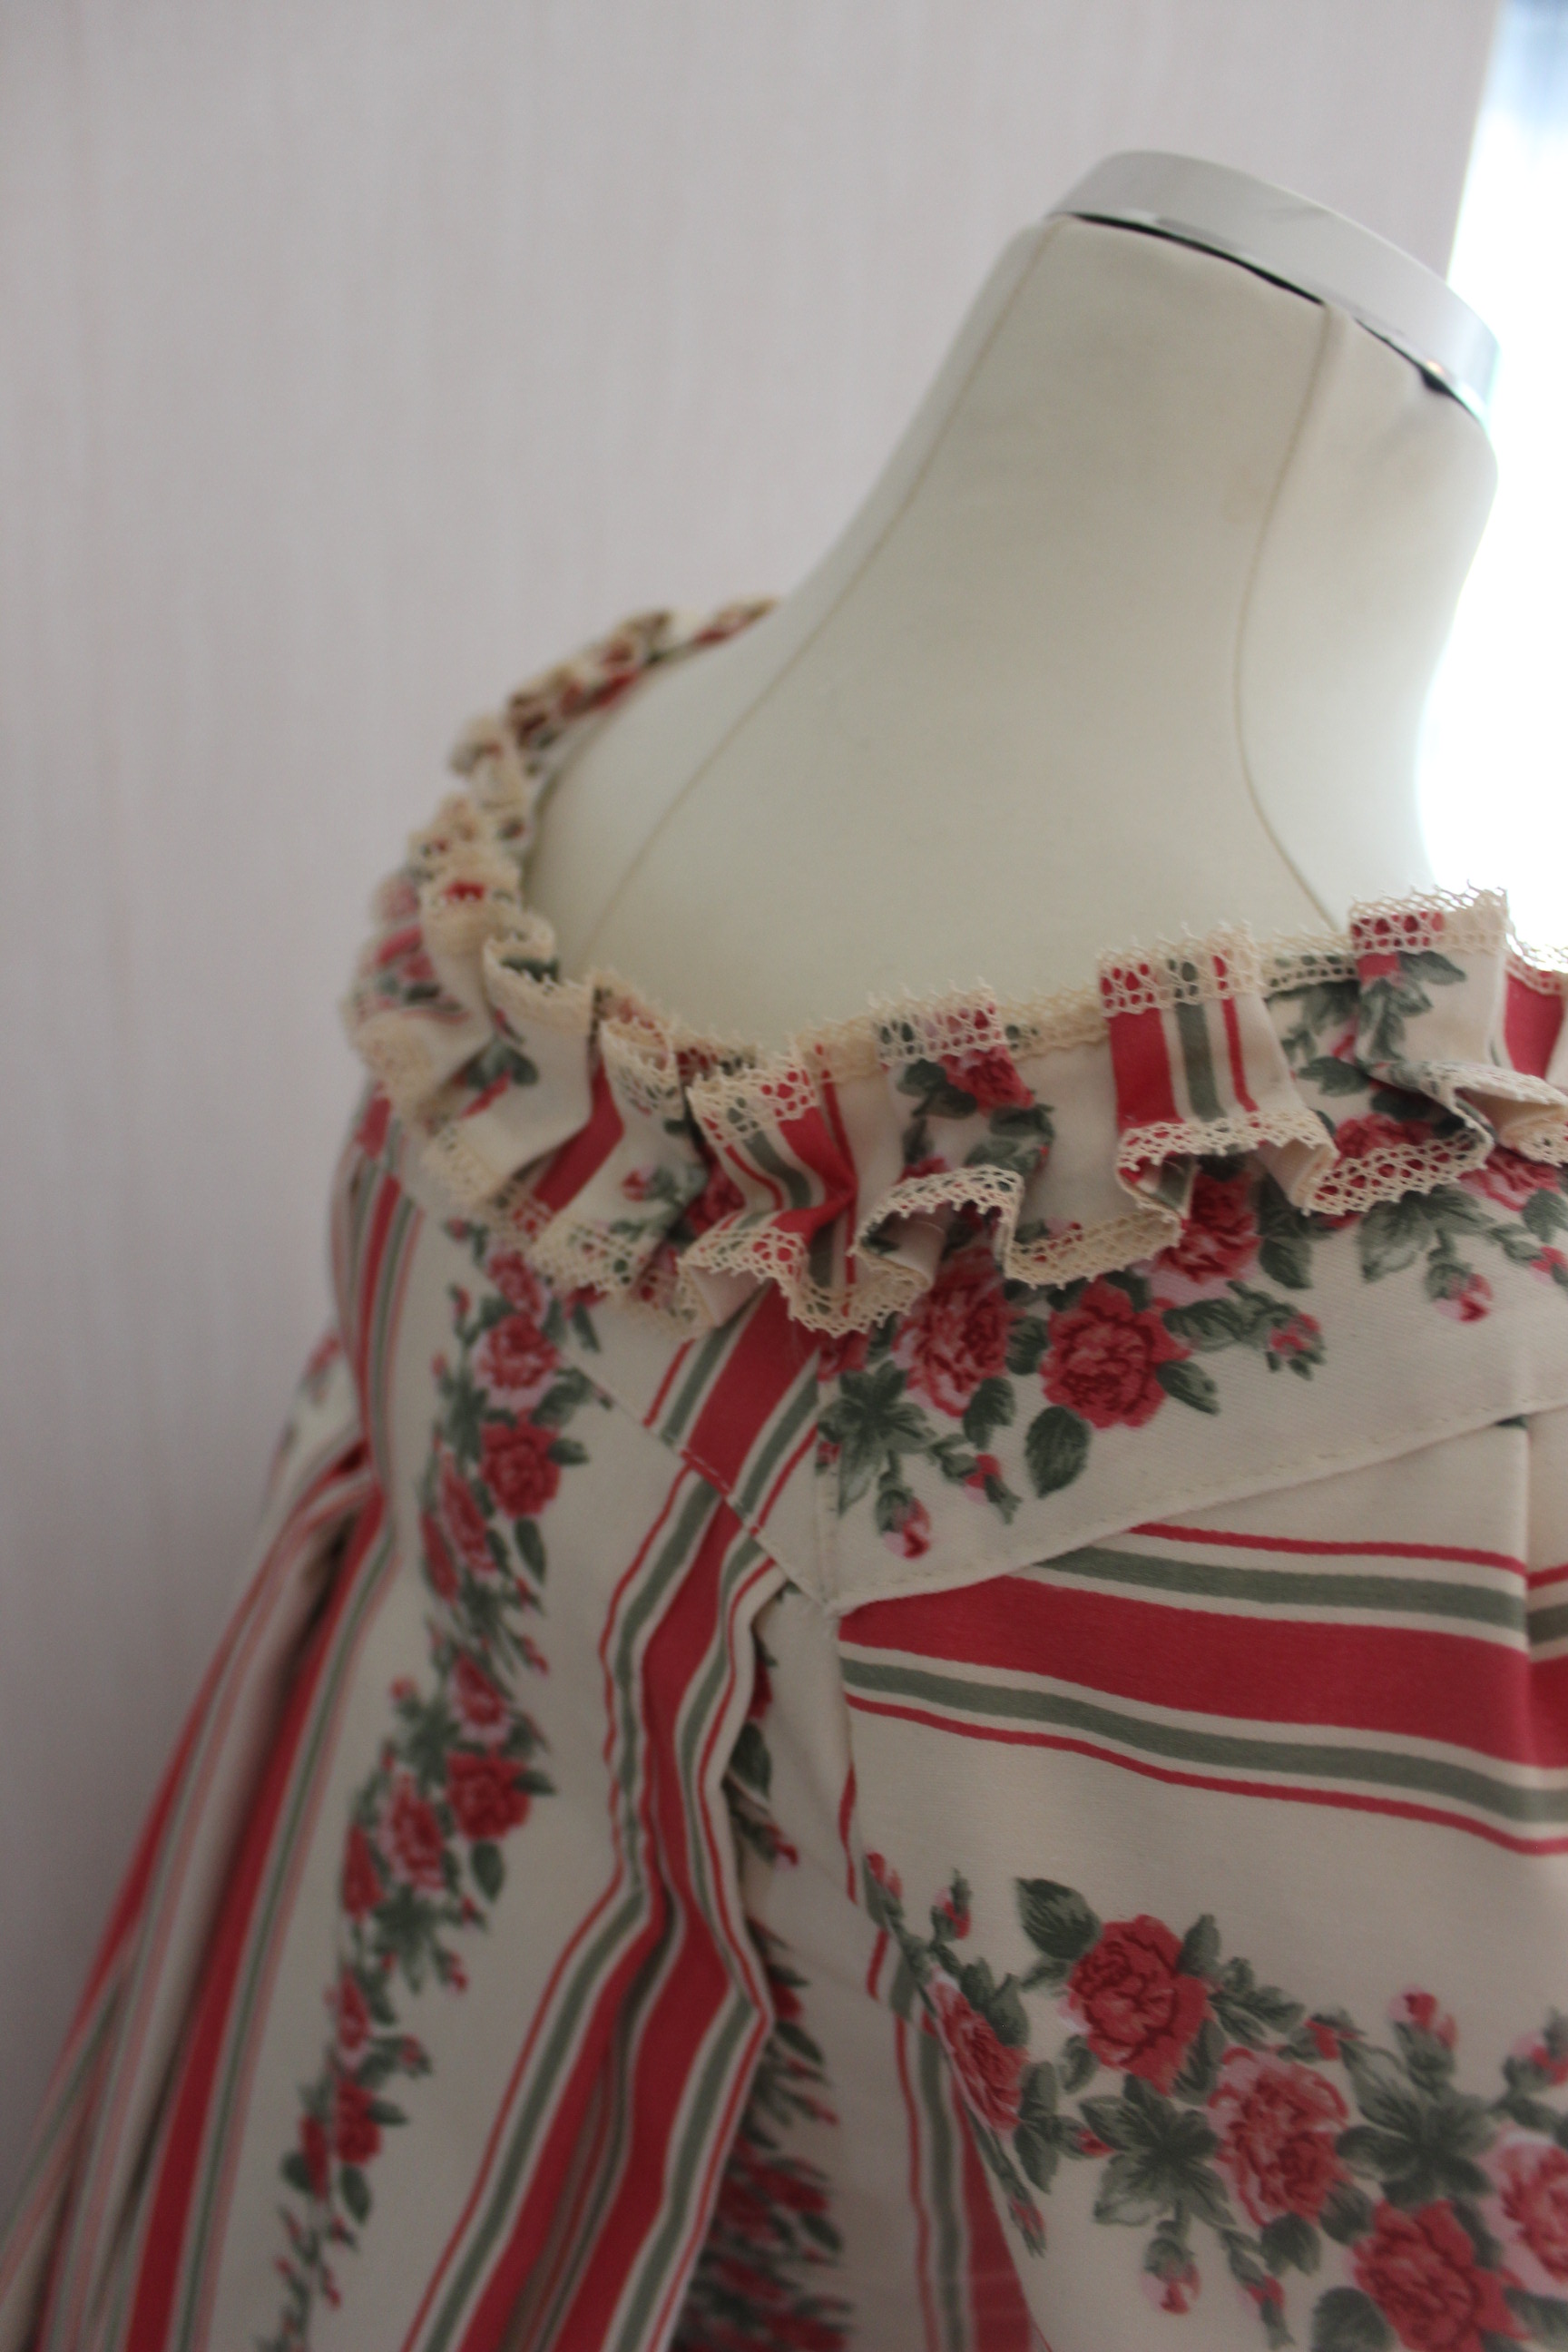
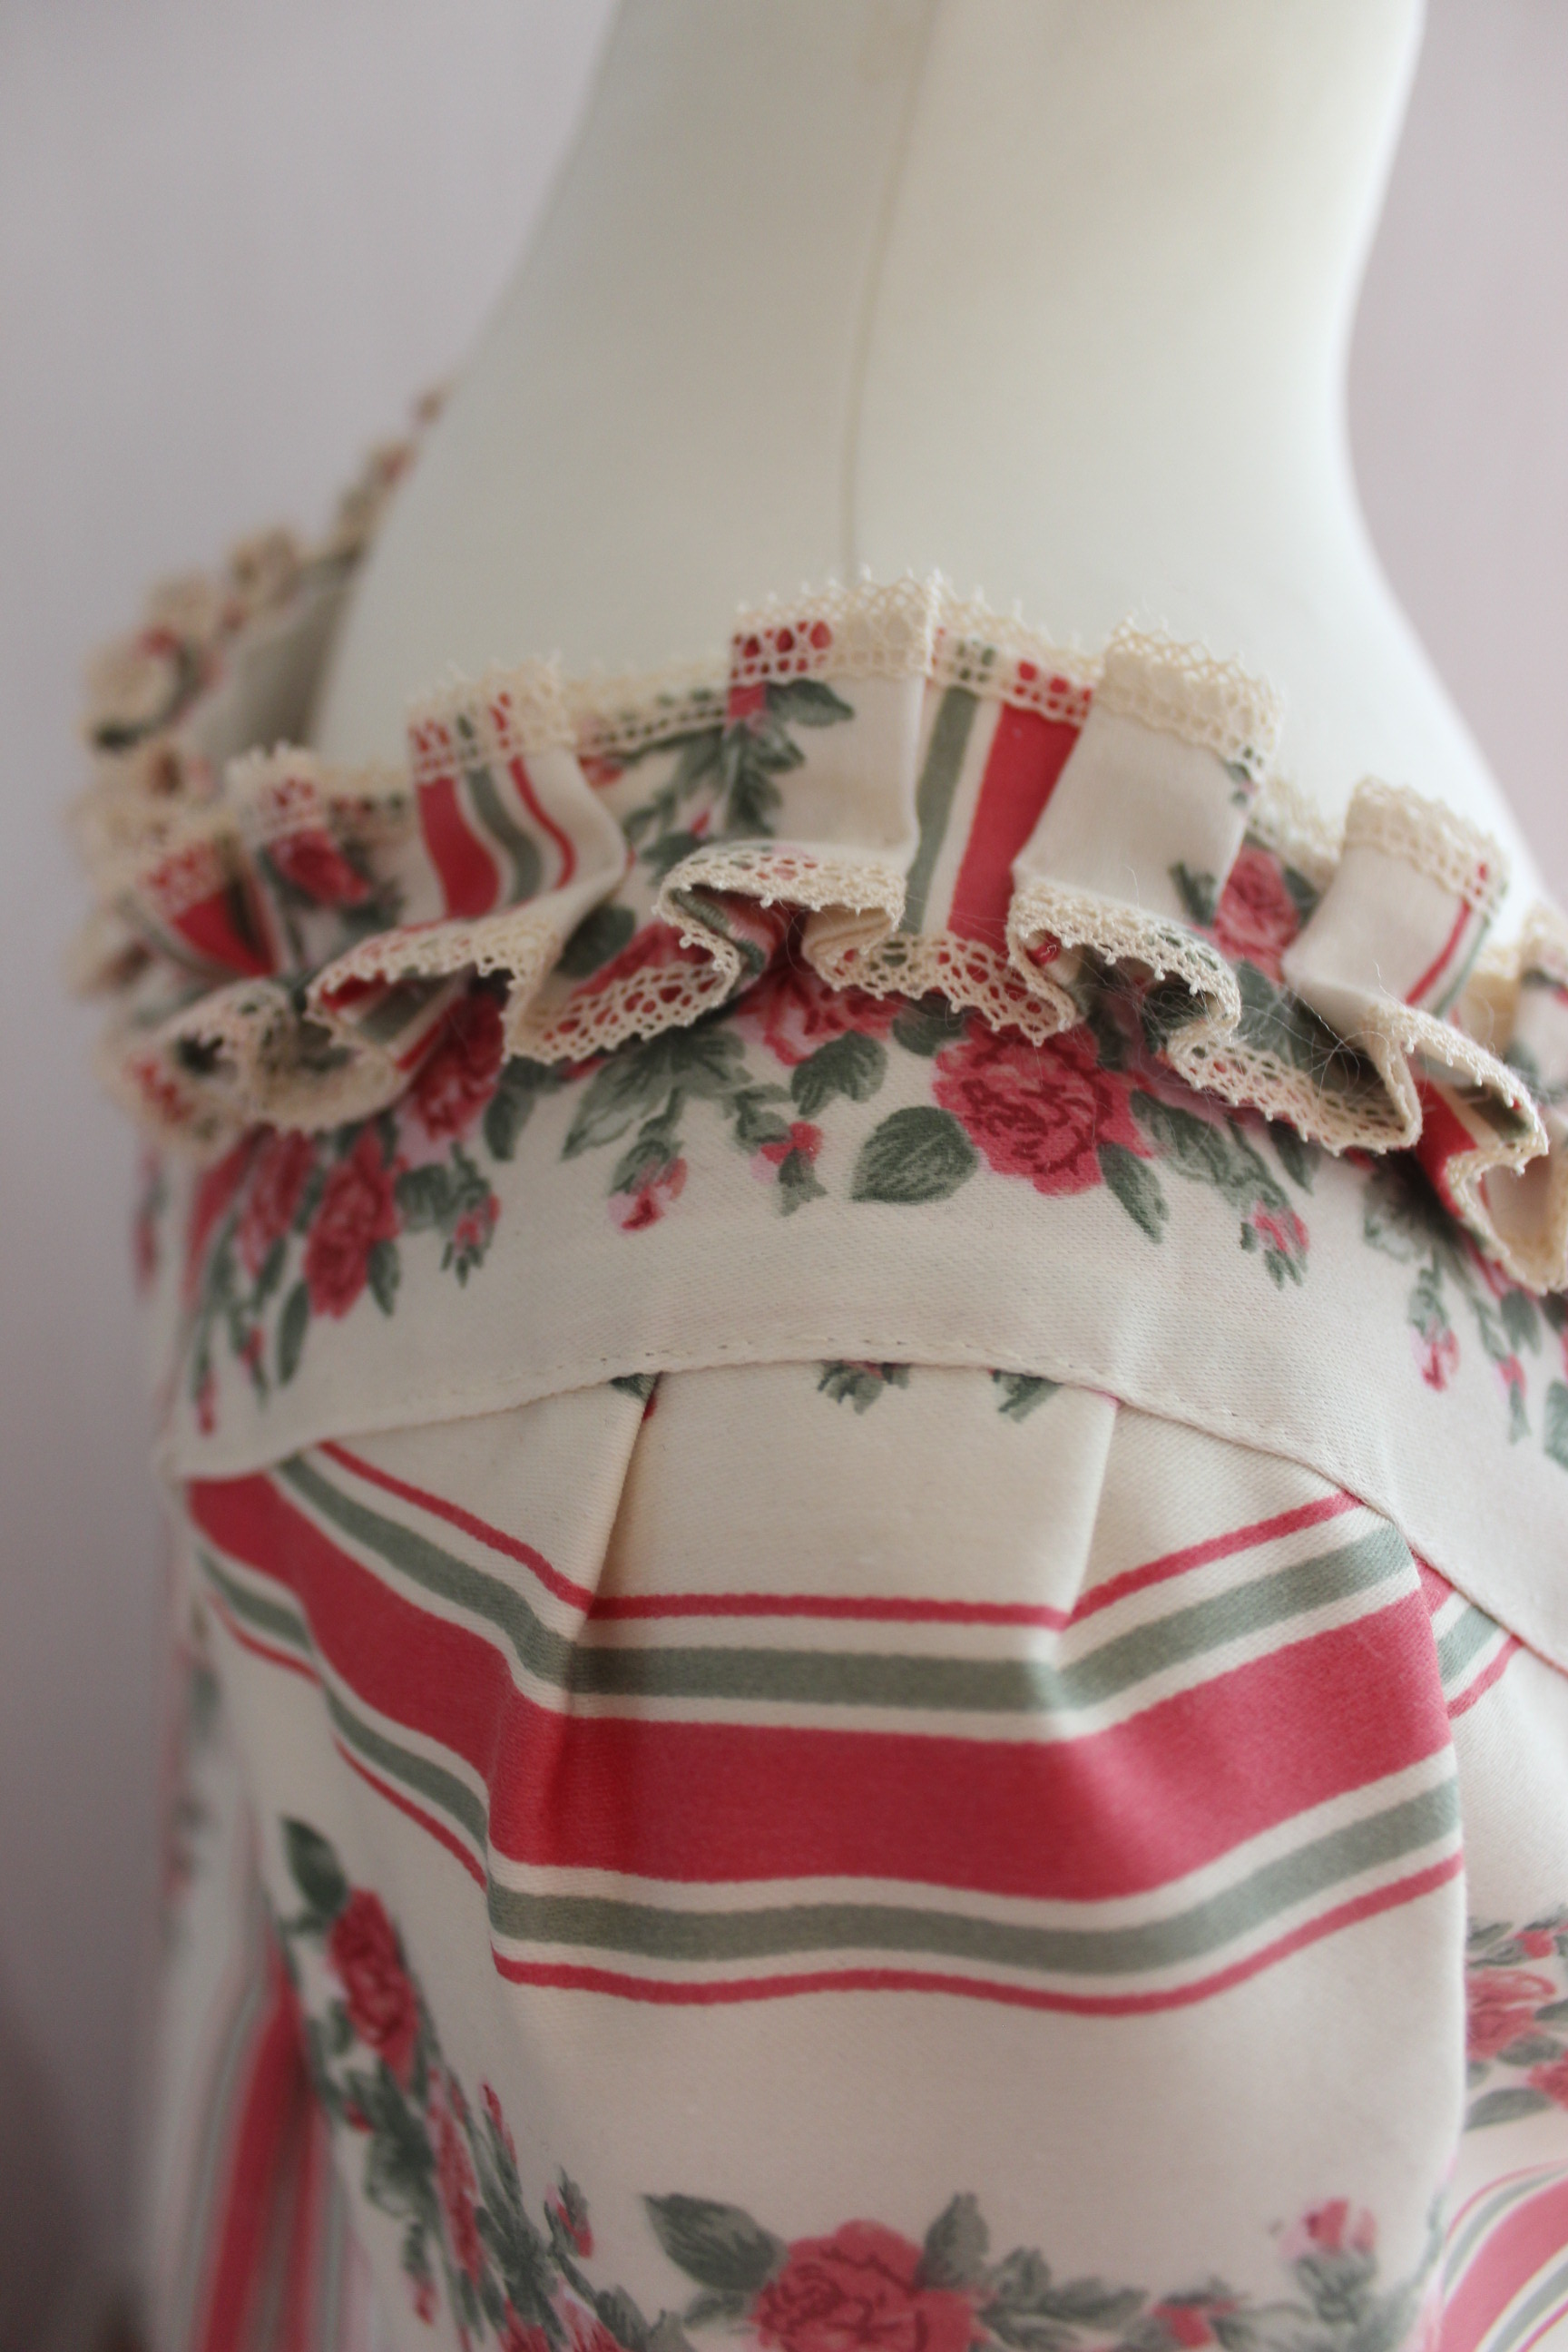
After lots of back and forth (why is these decisions always so damn hard?) the golden trim won, and I hand basted and stitched 12 m of lace to the gown and stomacher. I though for a while to ad eyelets to tie the gown on top the stomacher as seen in several pictures, but figured I’d just pin it in place for the time being.
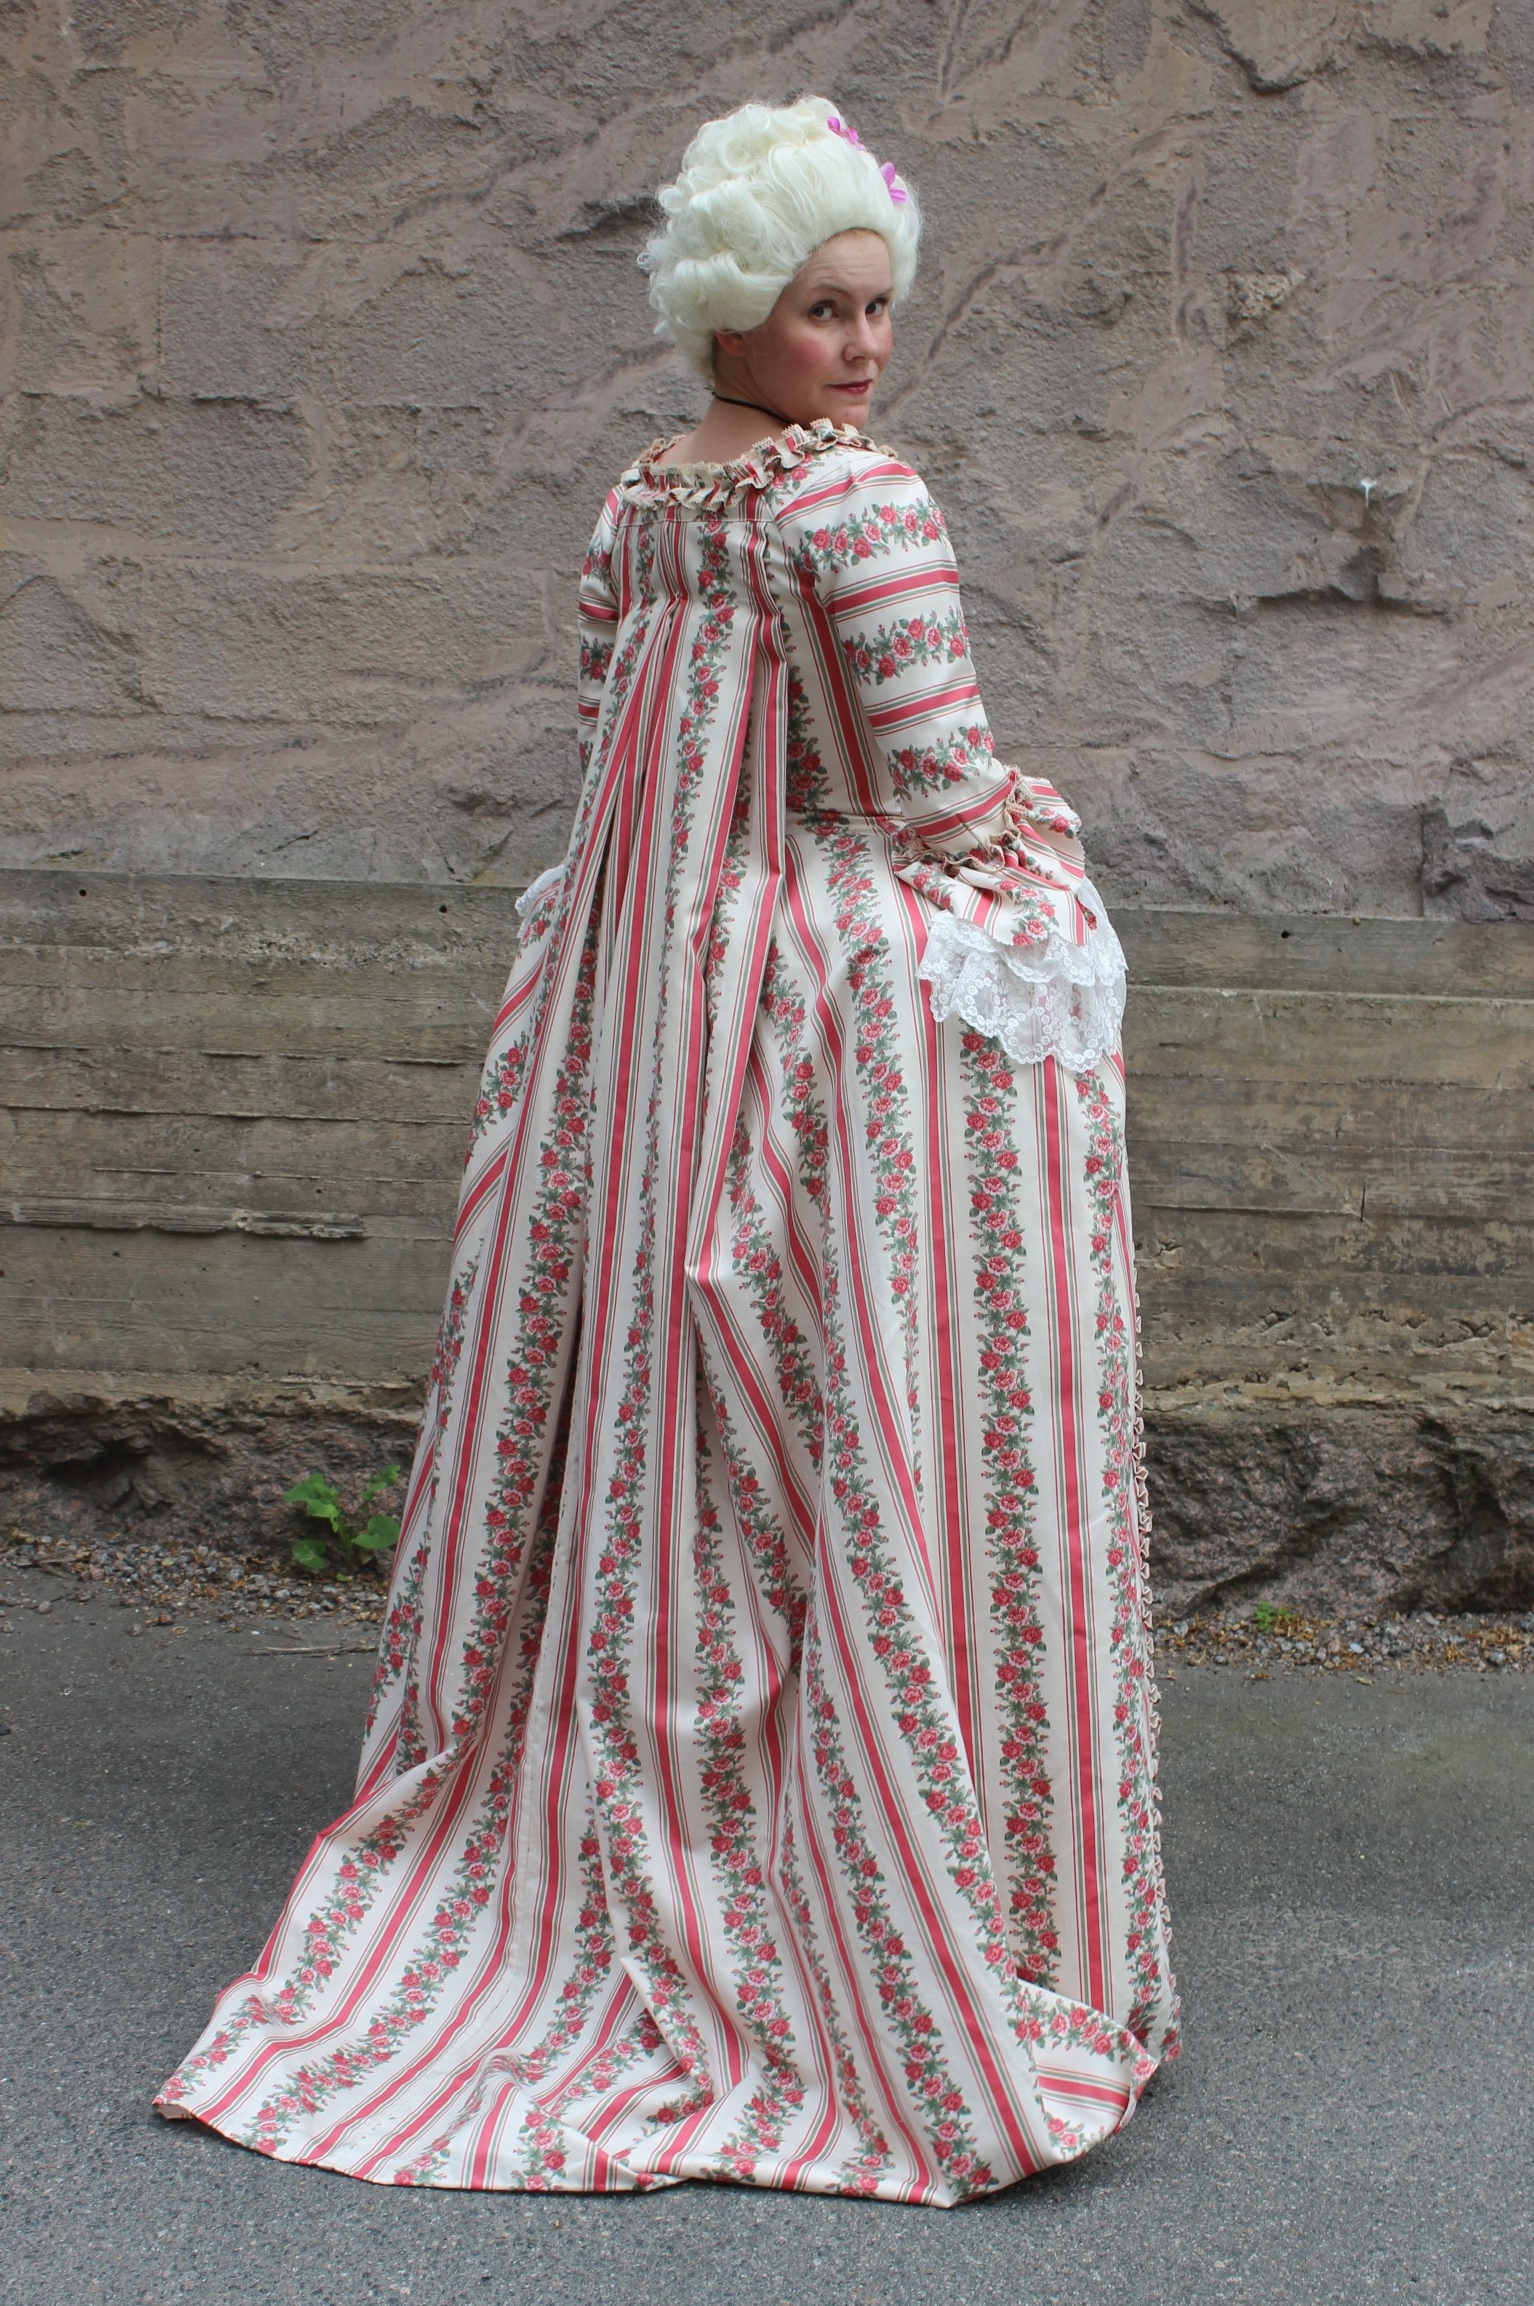
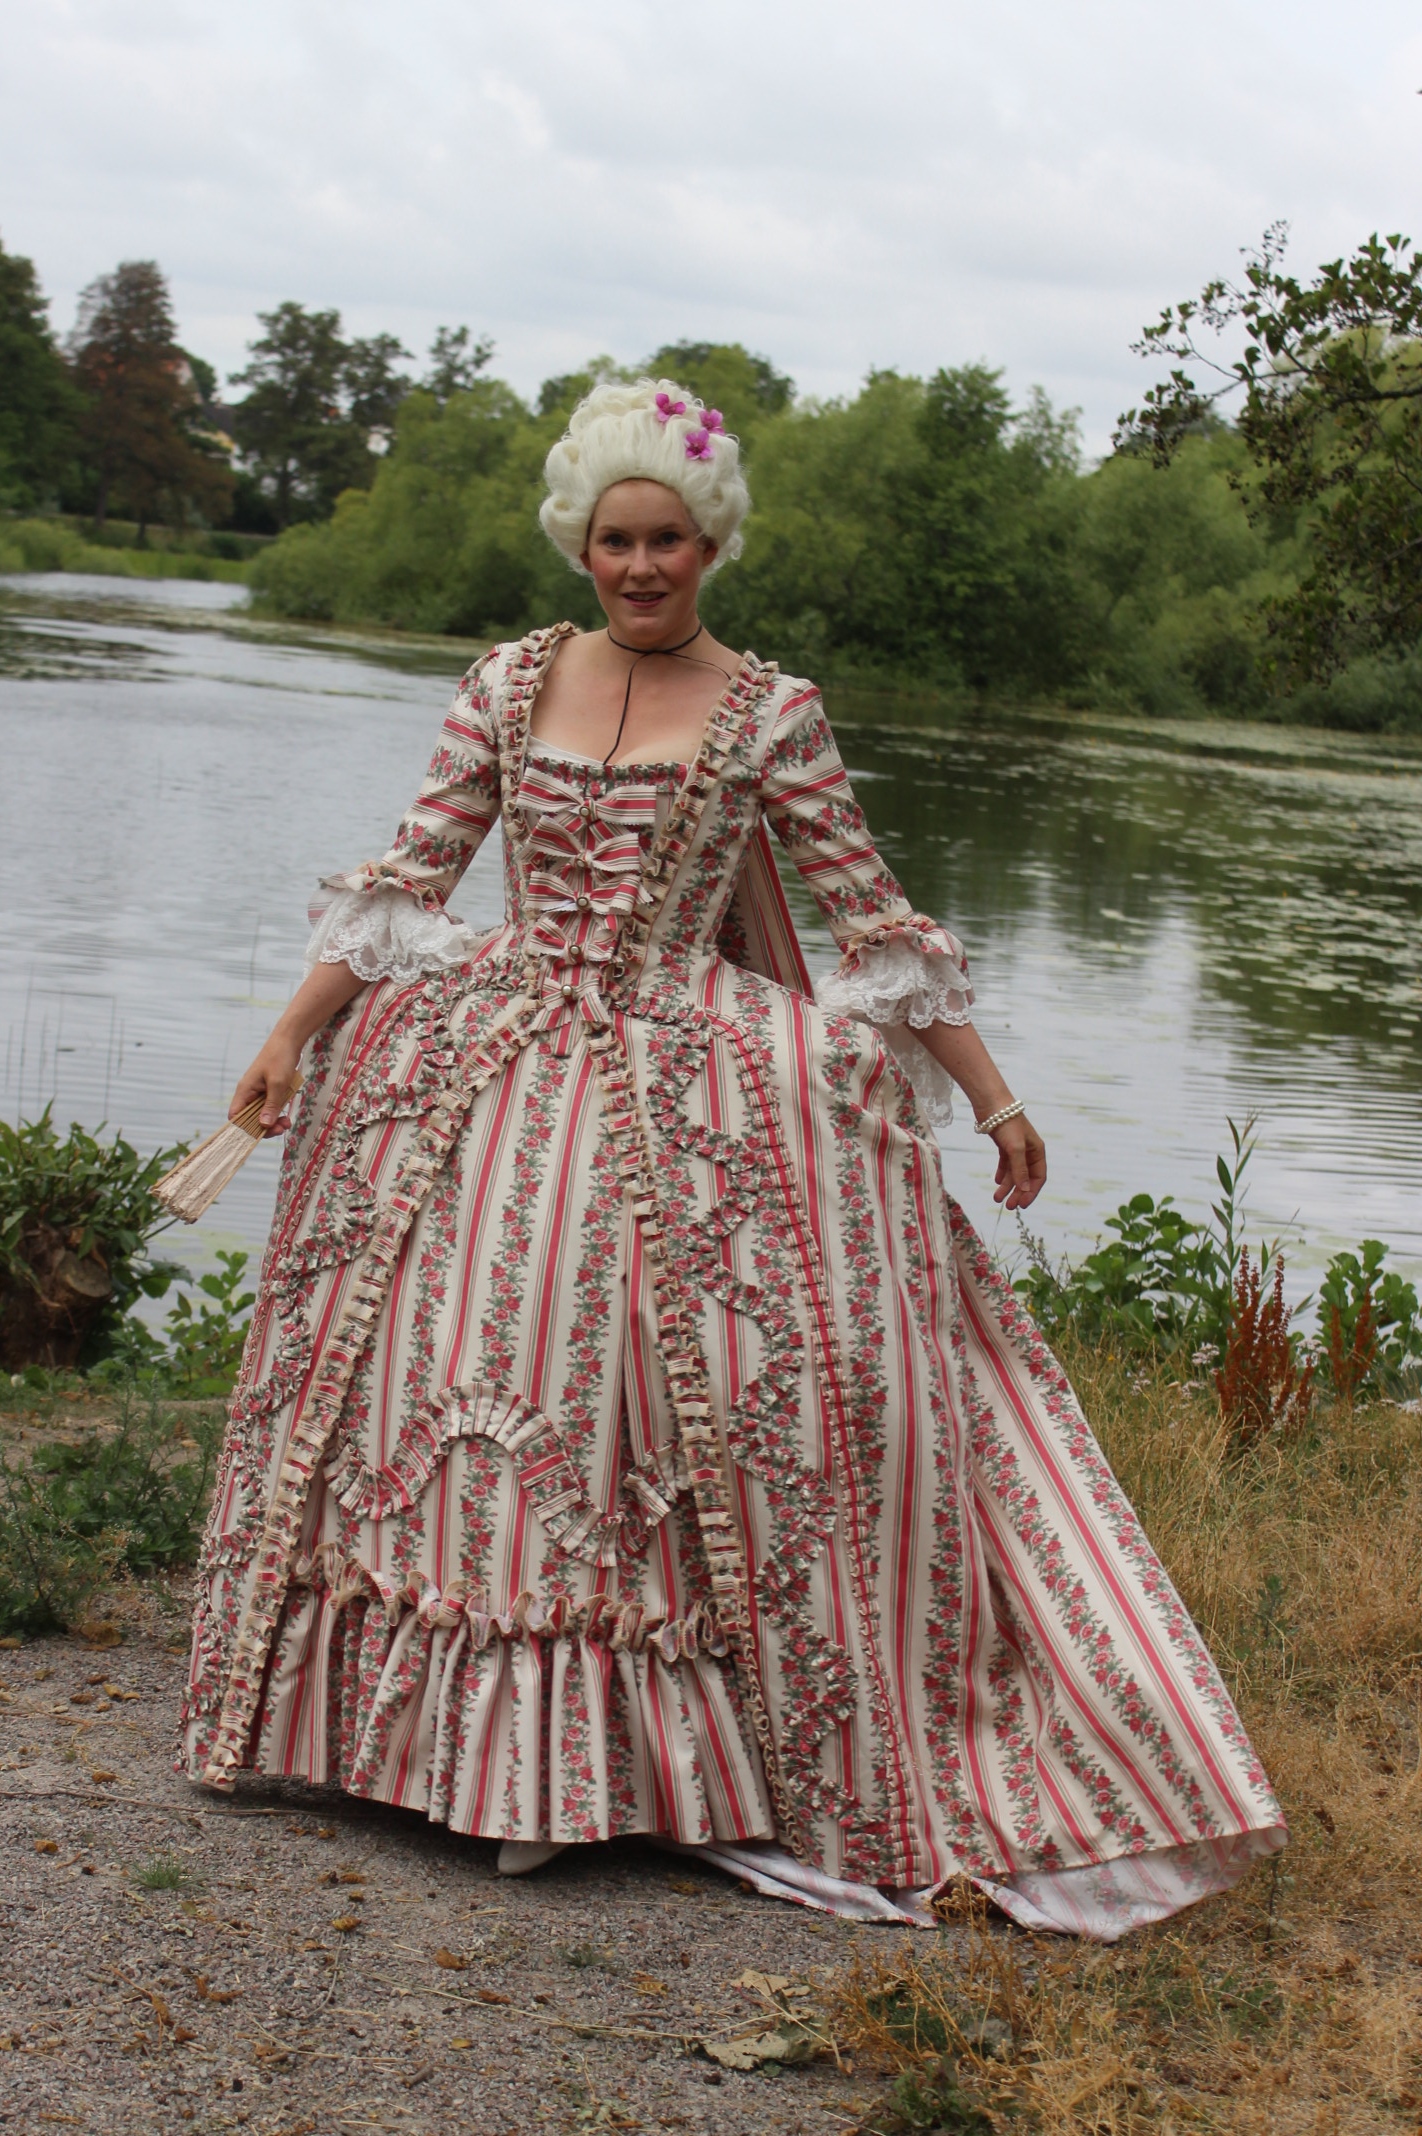
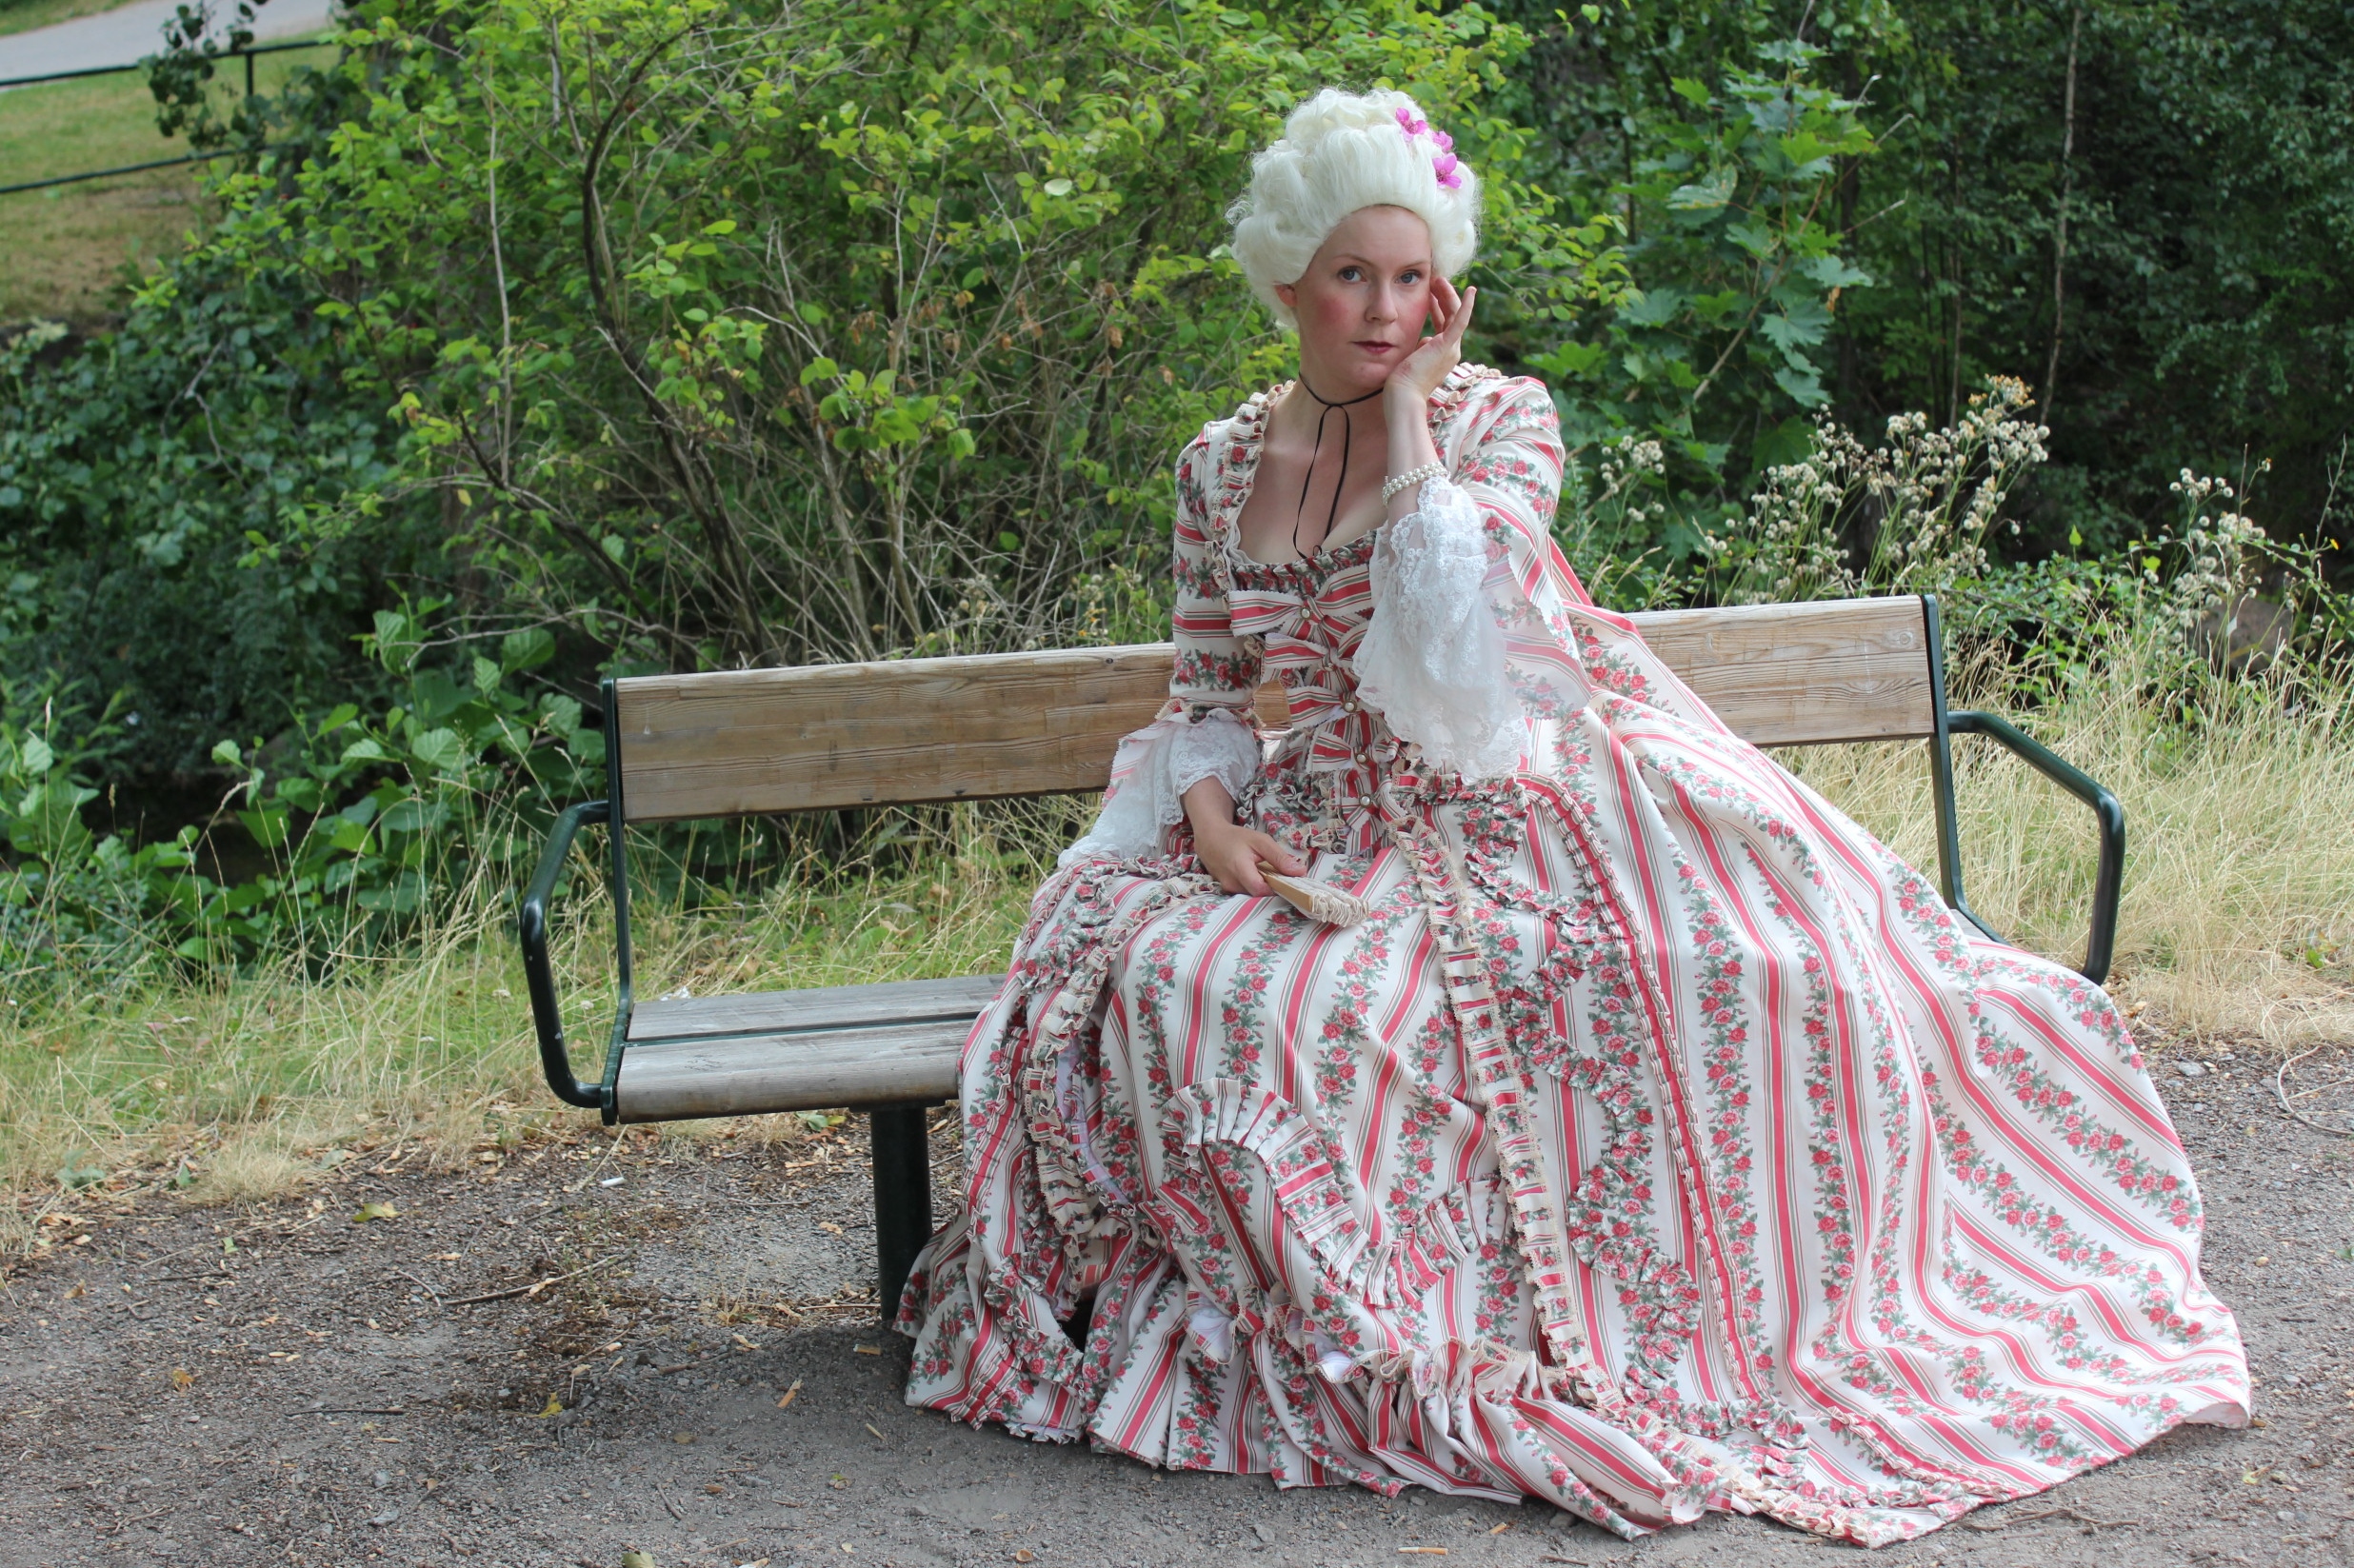
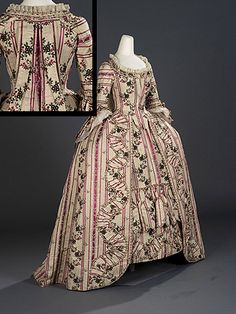
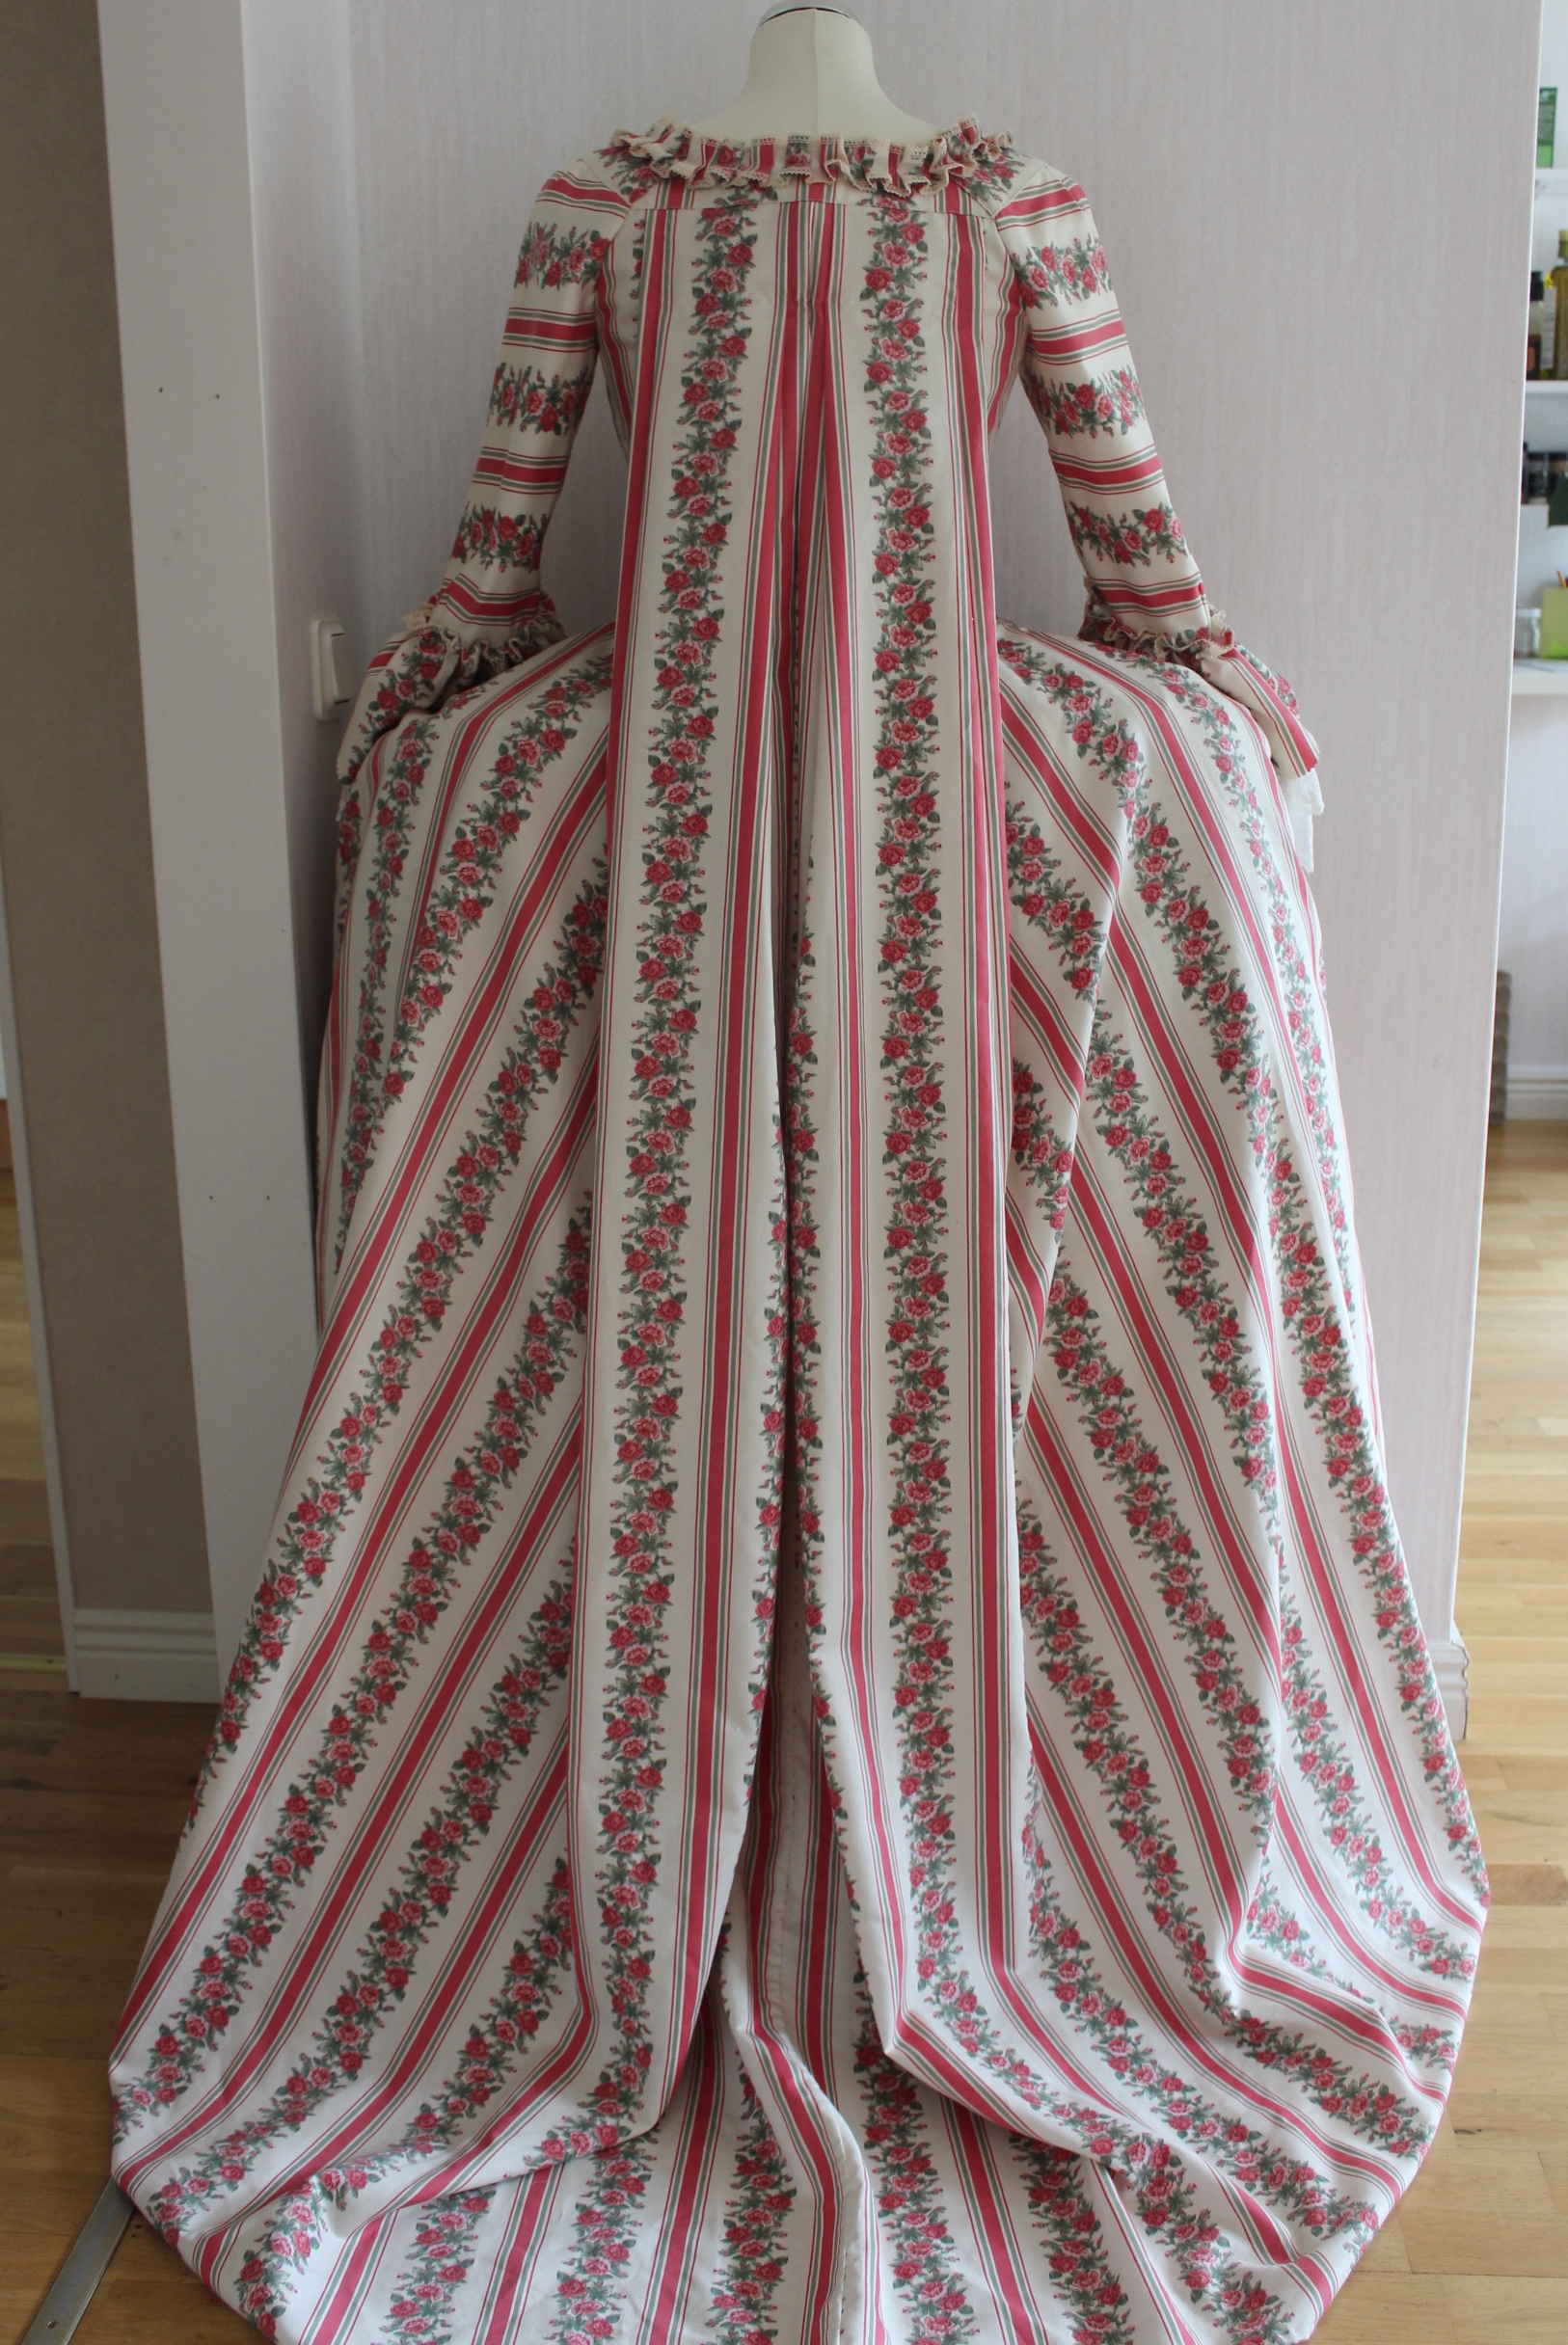
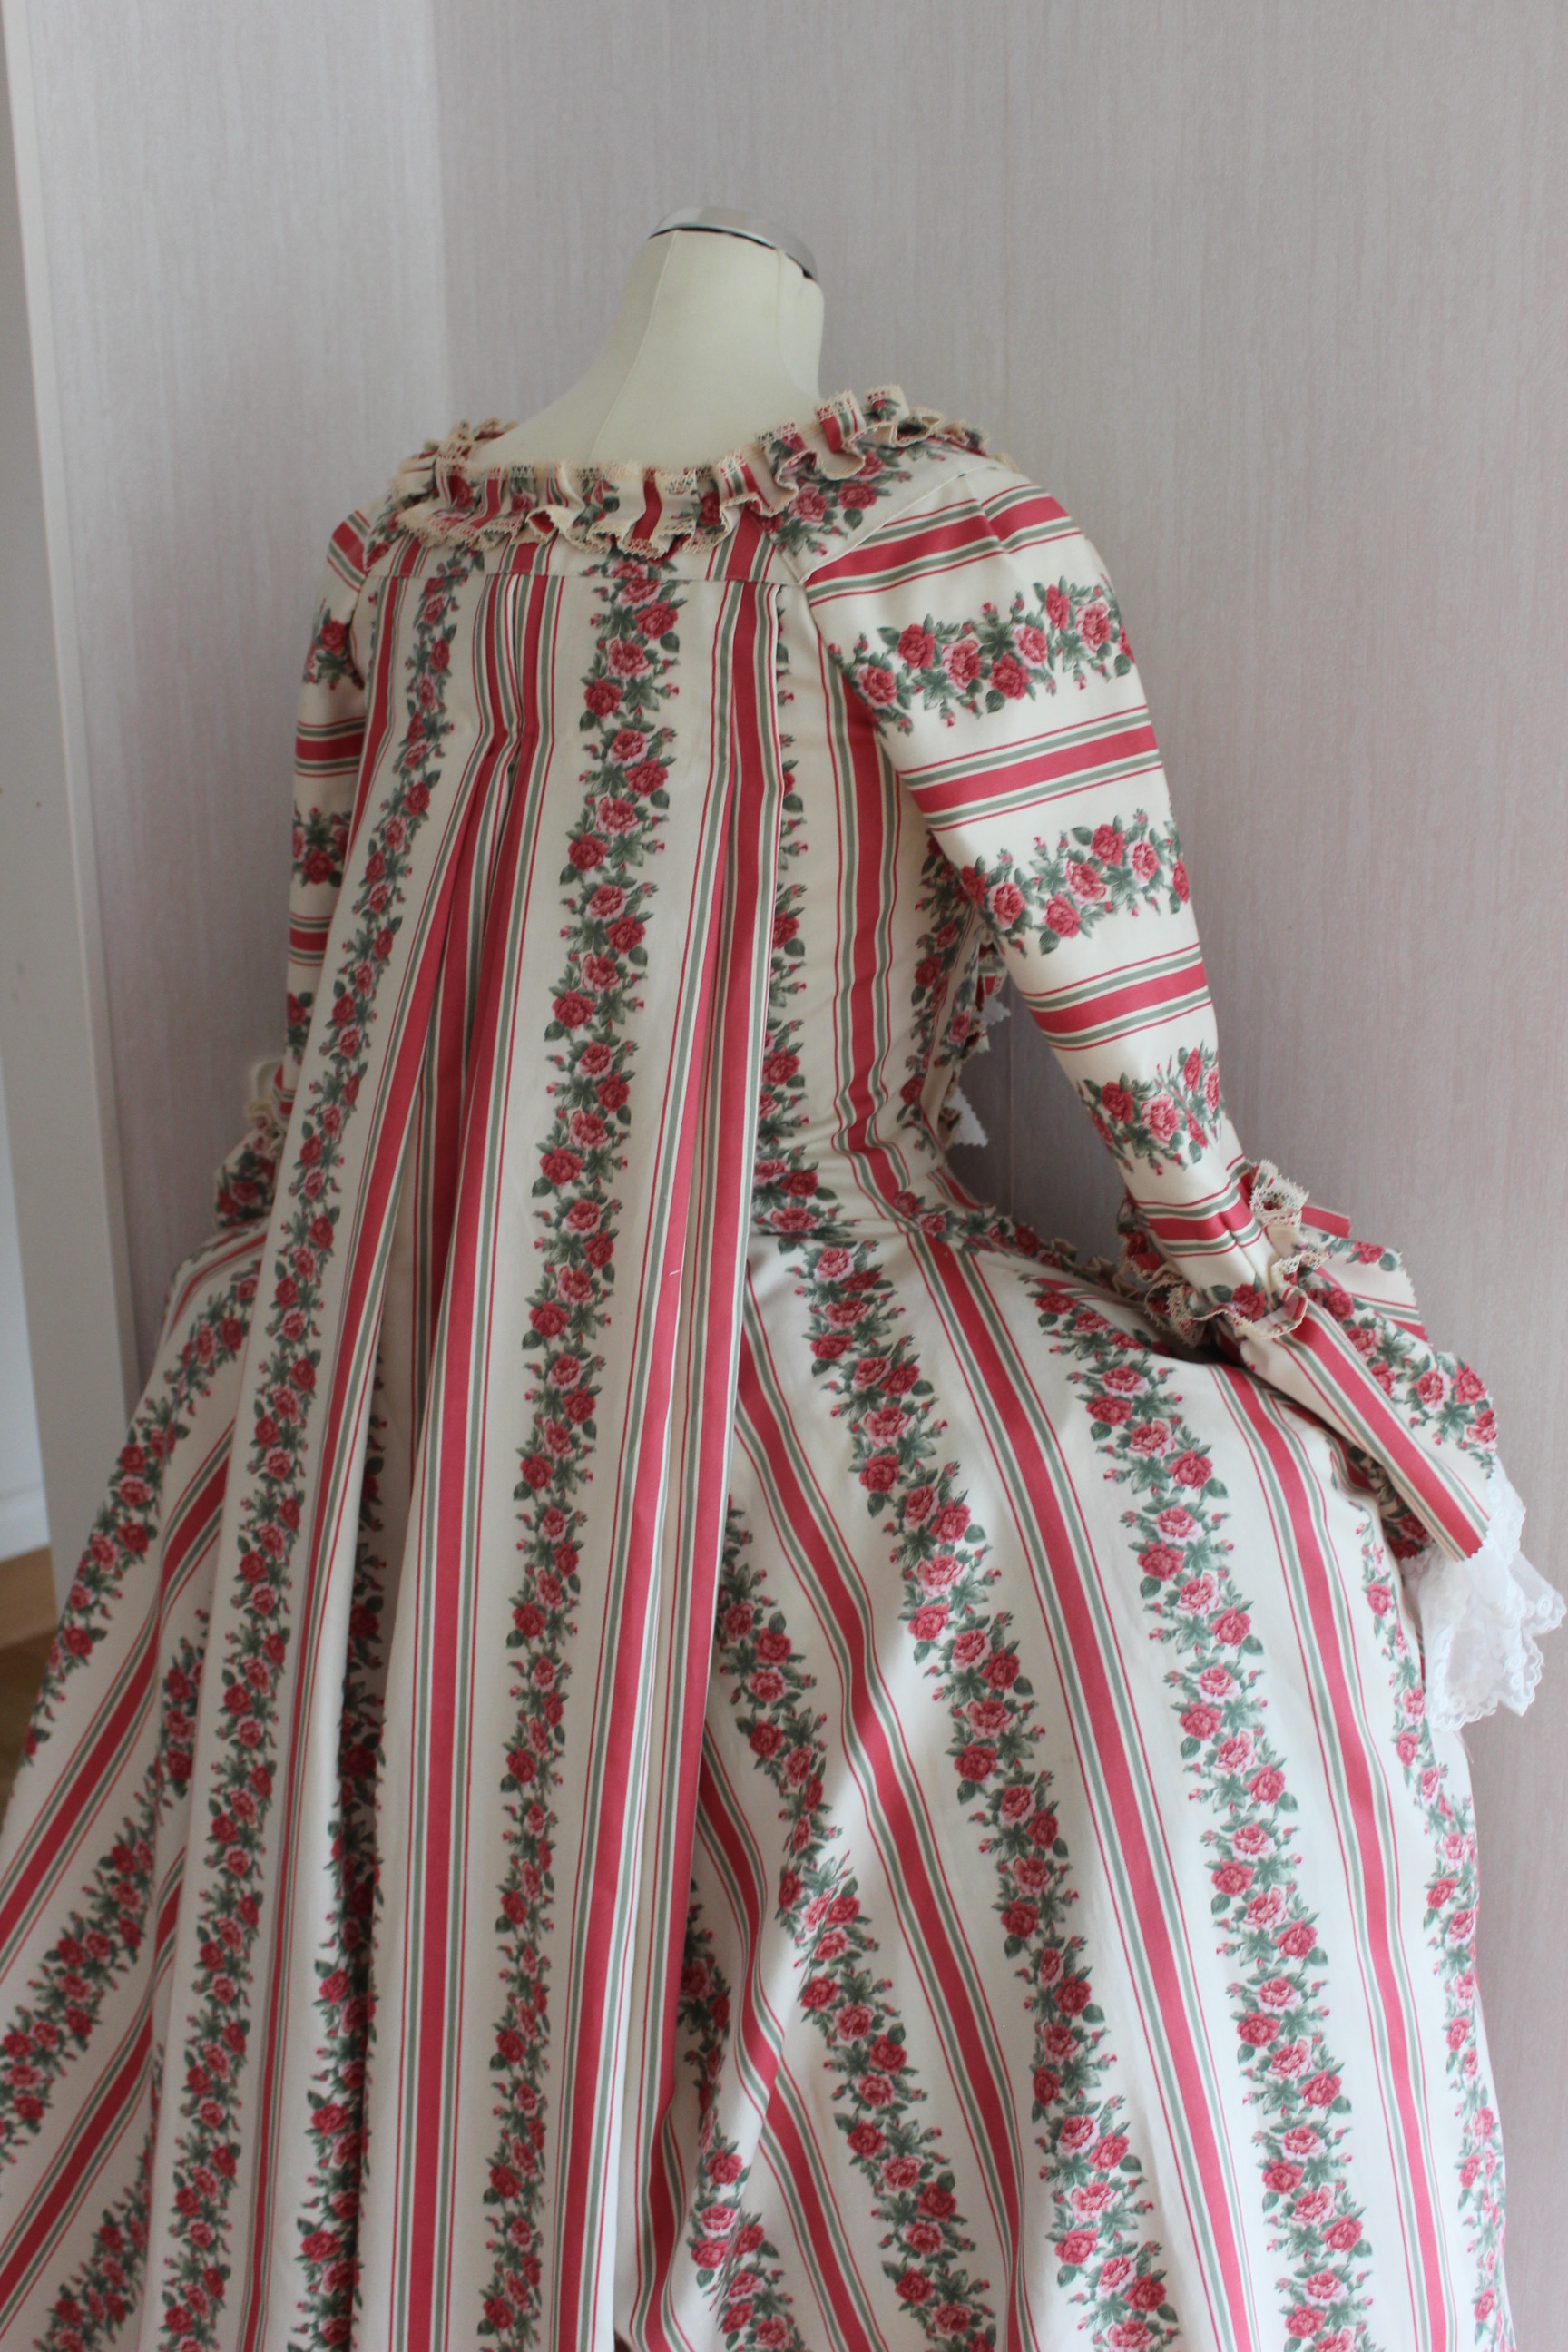
The finished dress:
Just the facts:
Challenge: nr 9/2017 – Seen on screen – Be inspired by period fashions as shown onscreen (film or TV), and recreate your favourite historical costume as a historically accurate period piece.
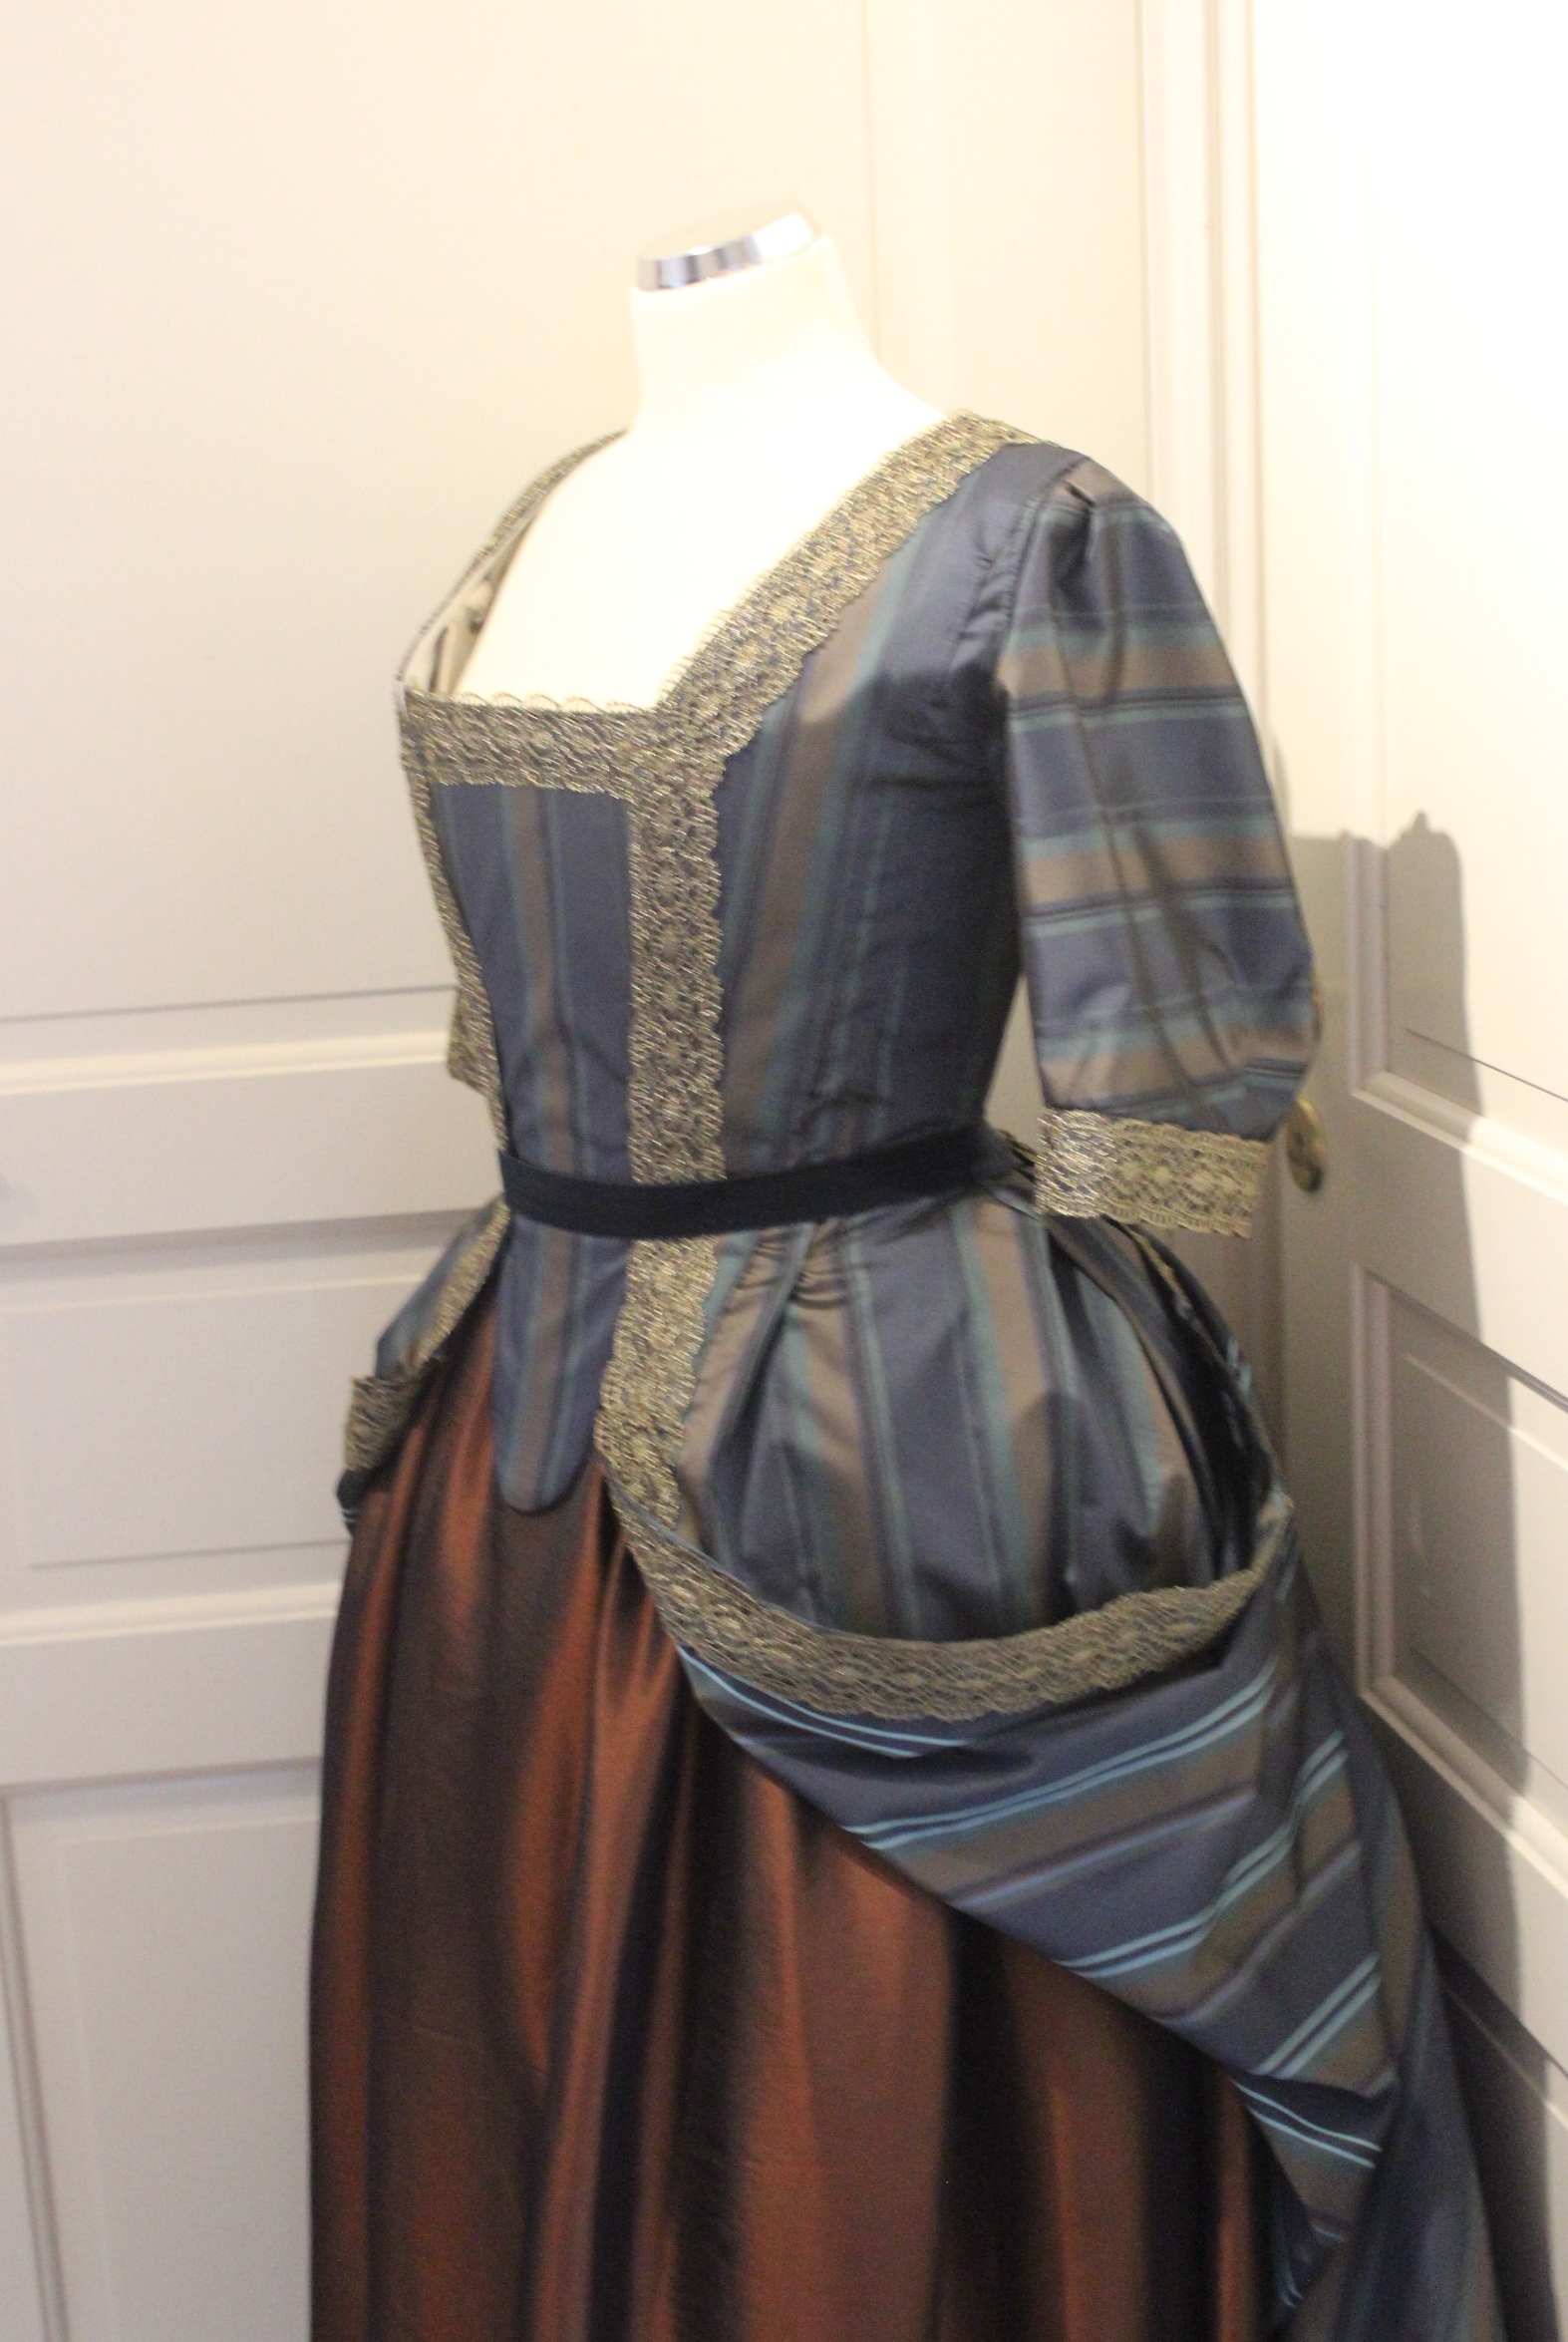
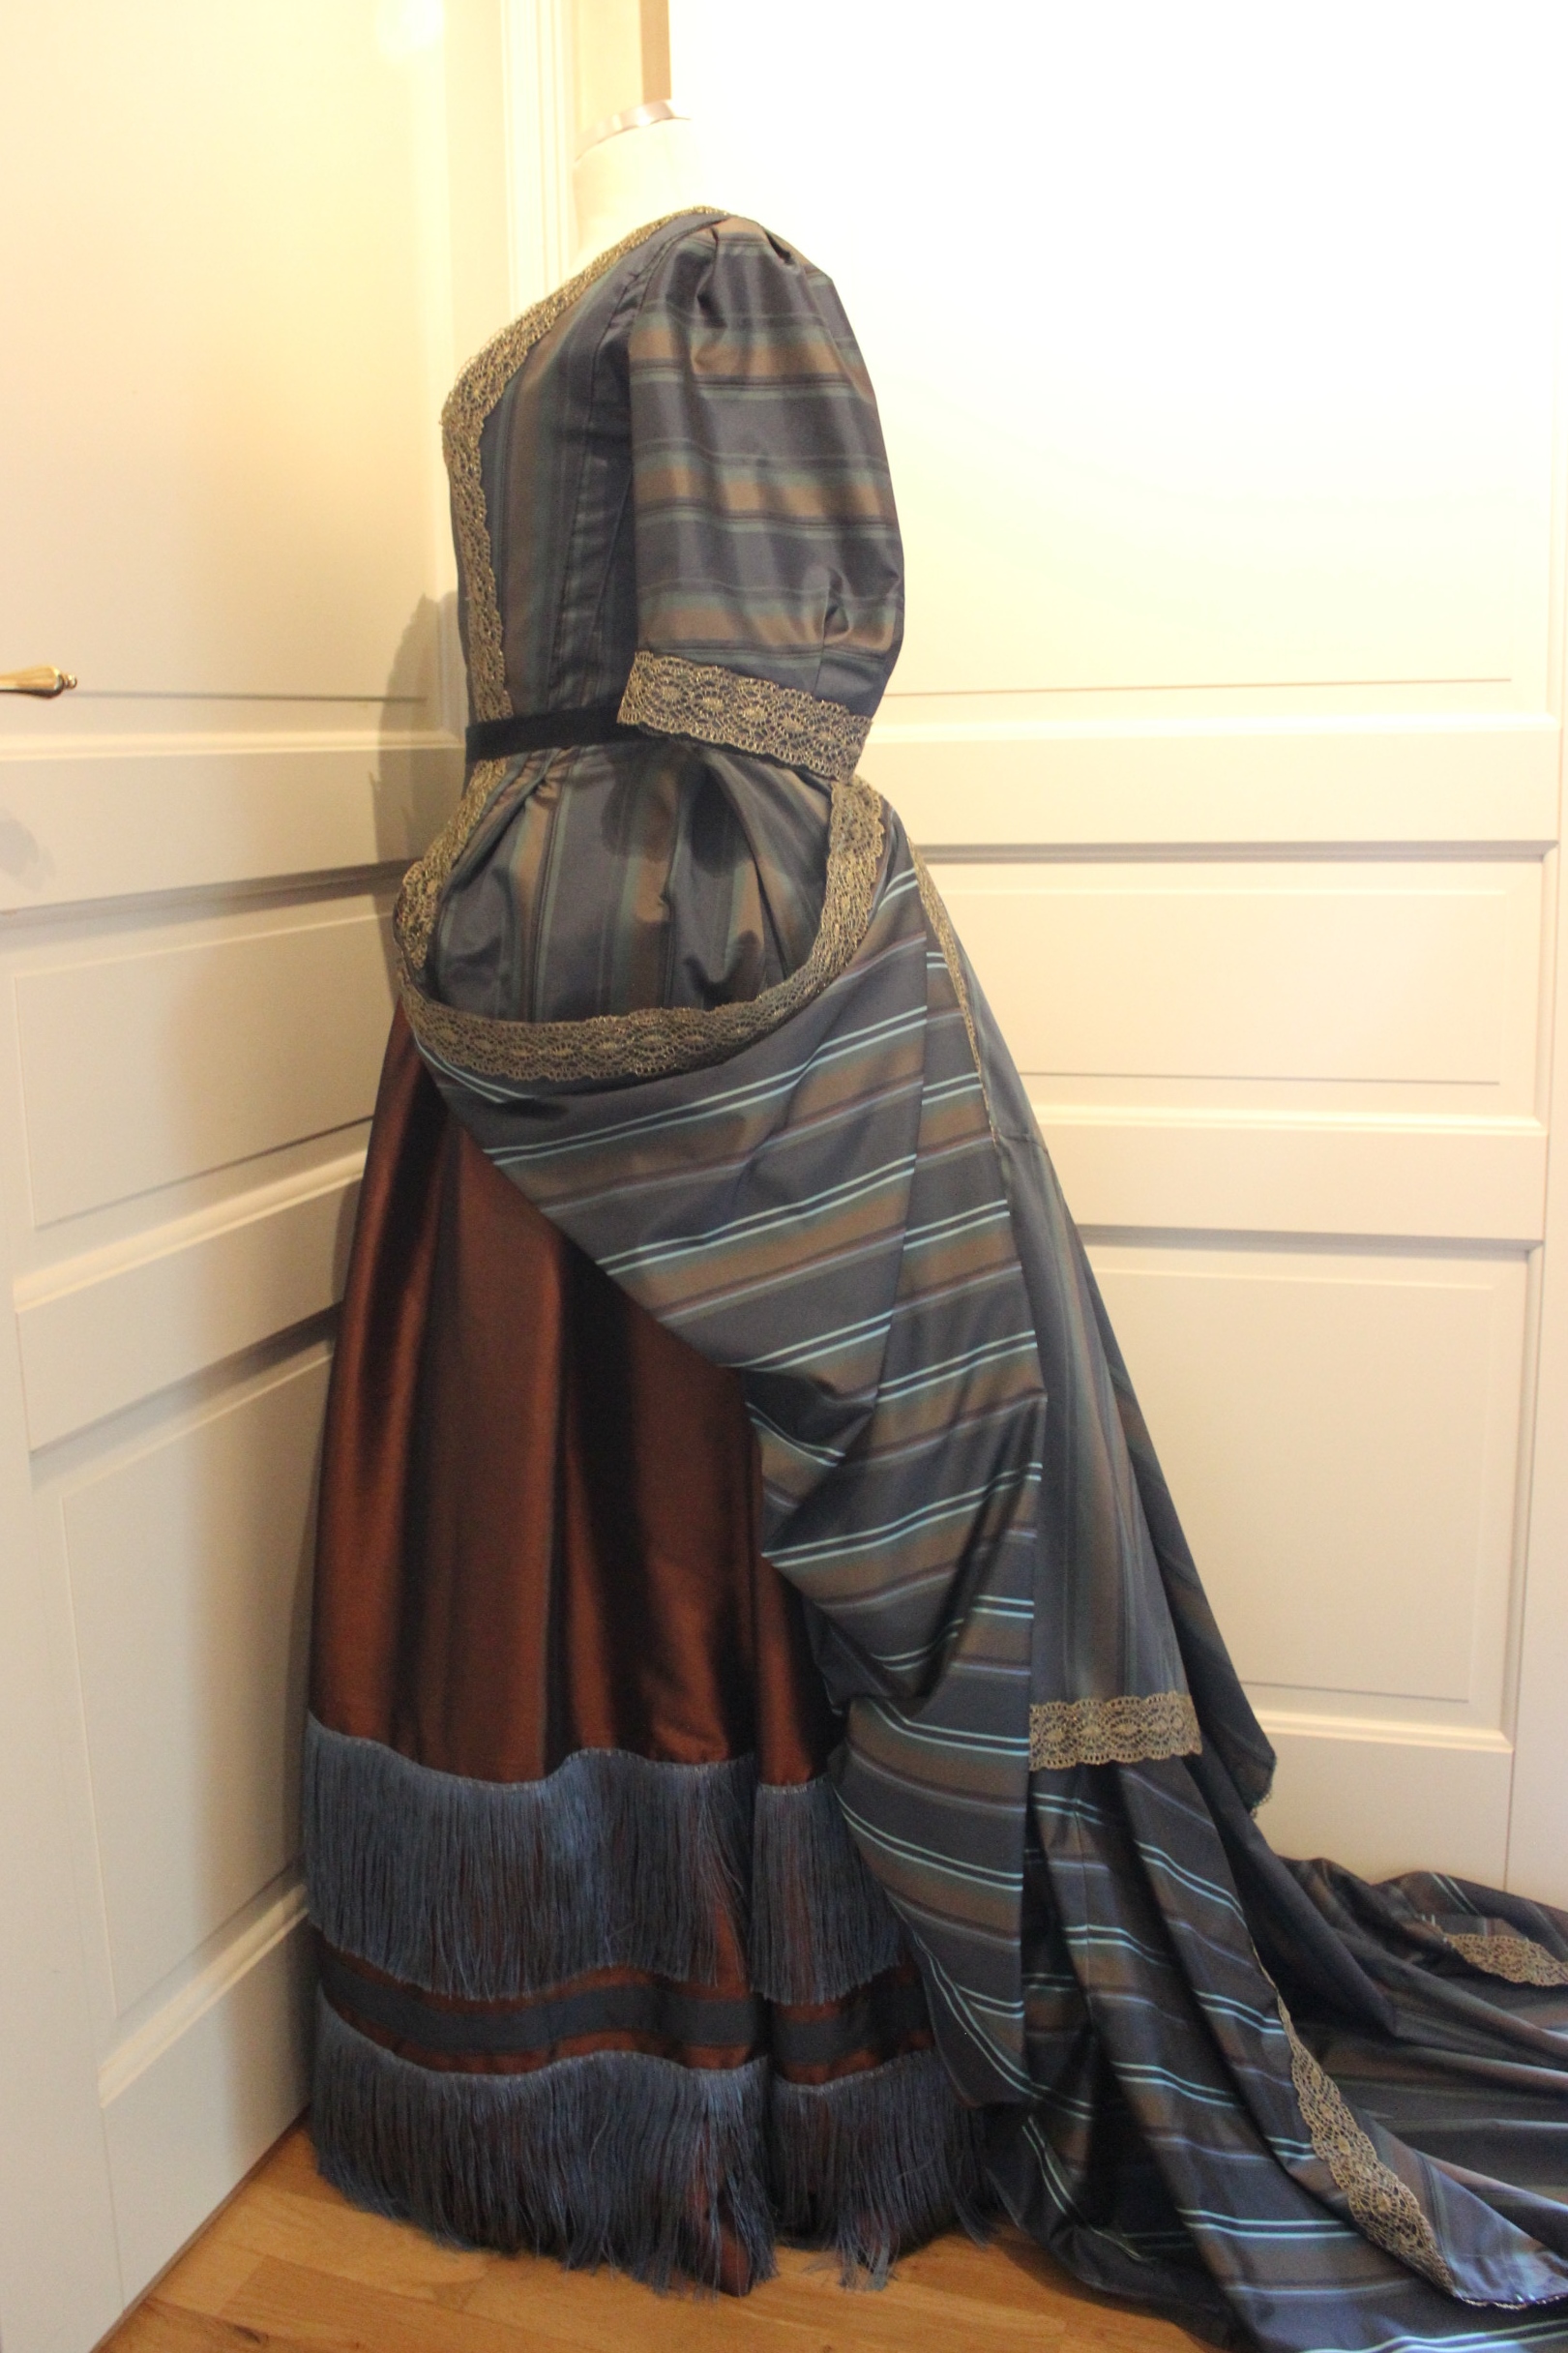
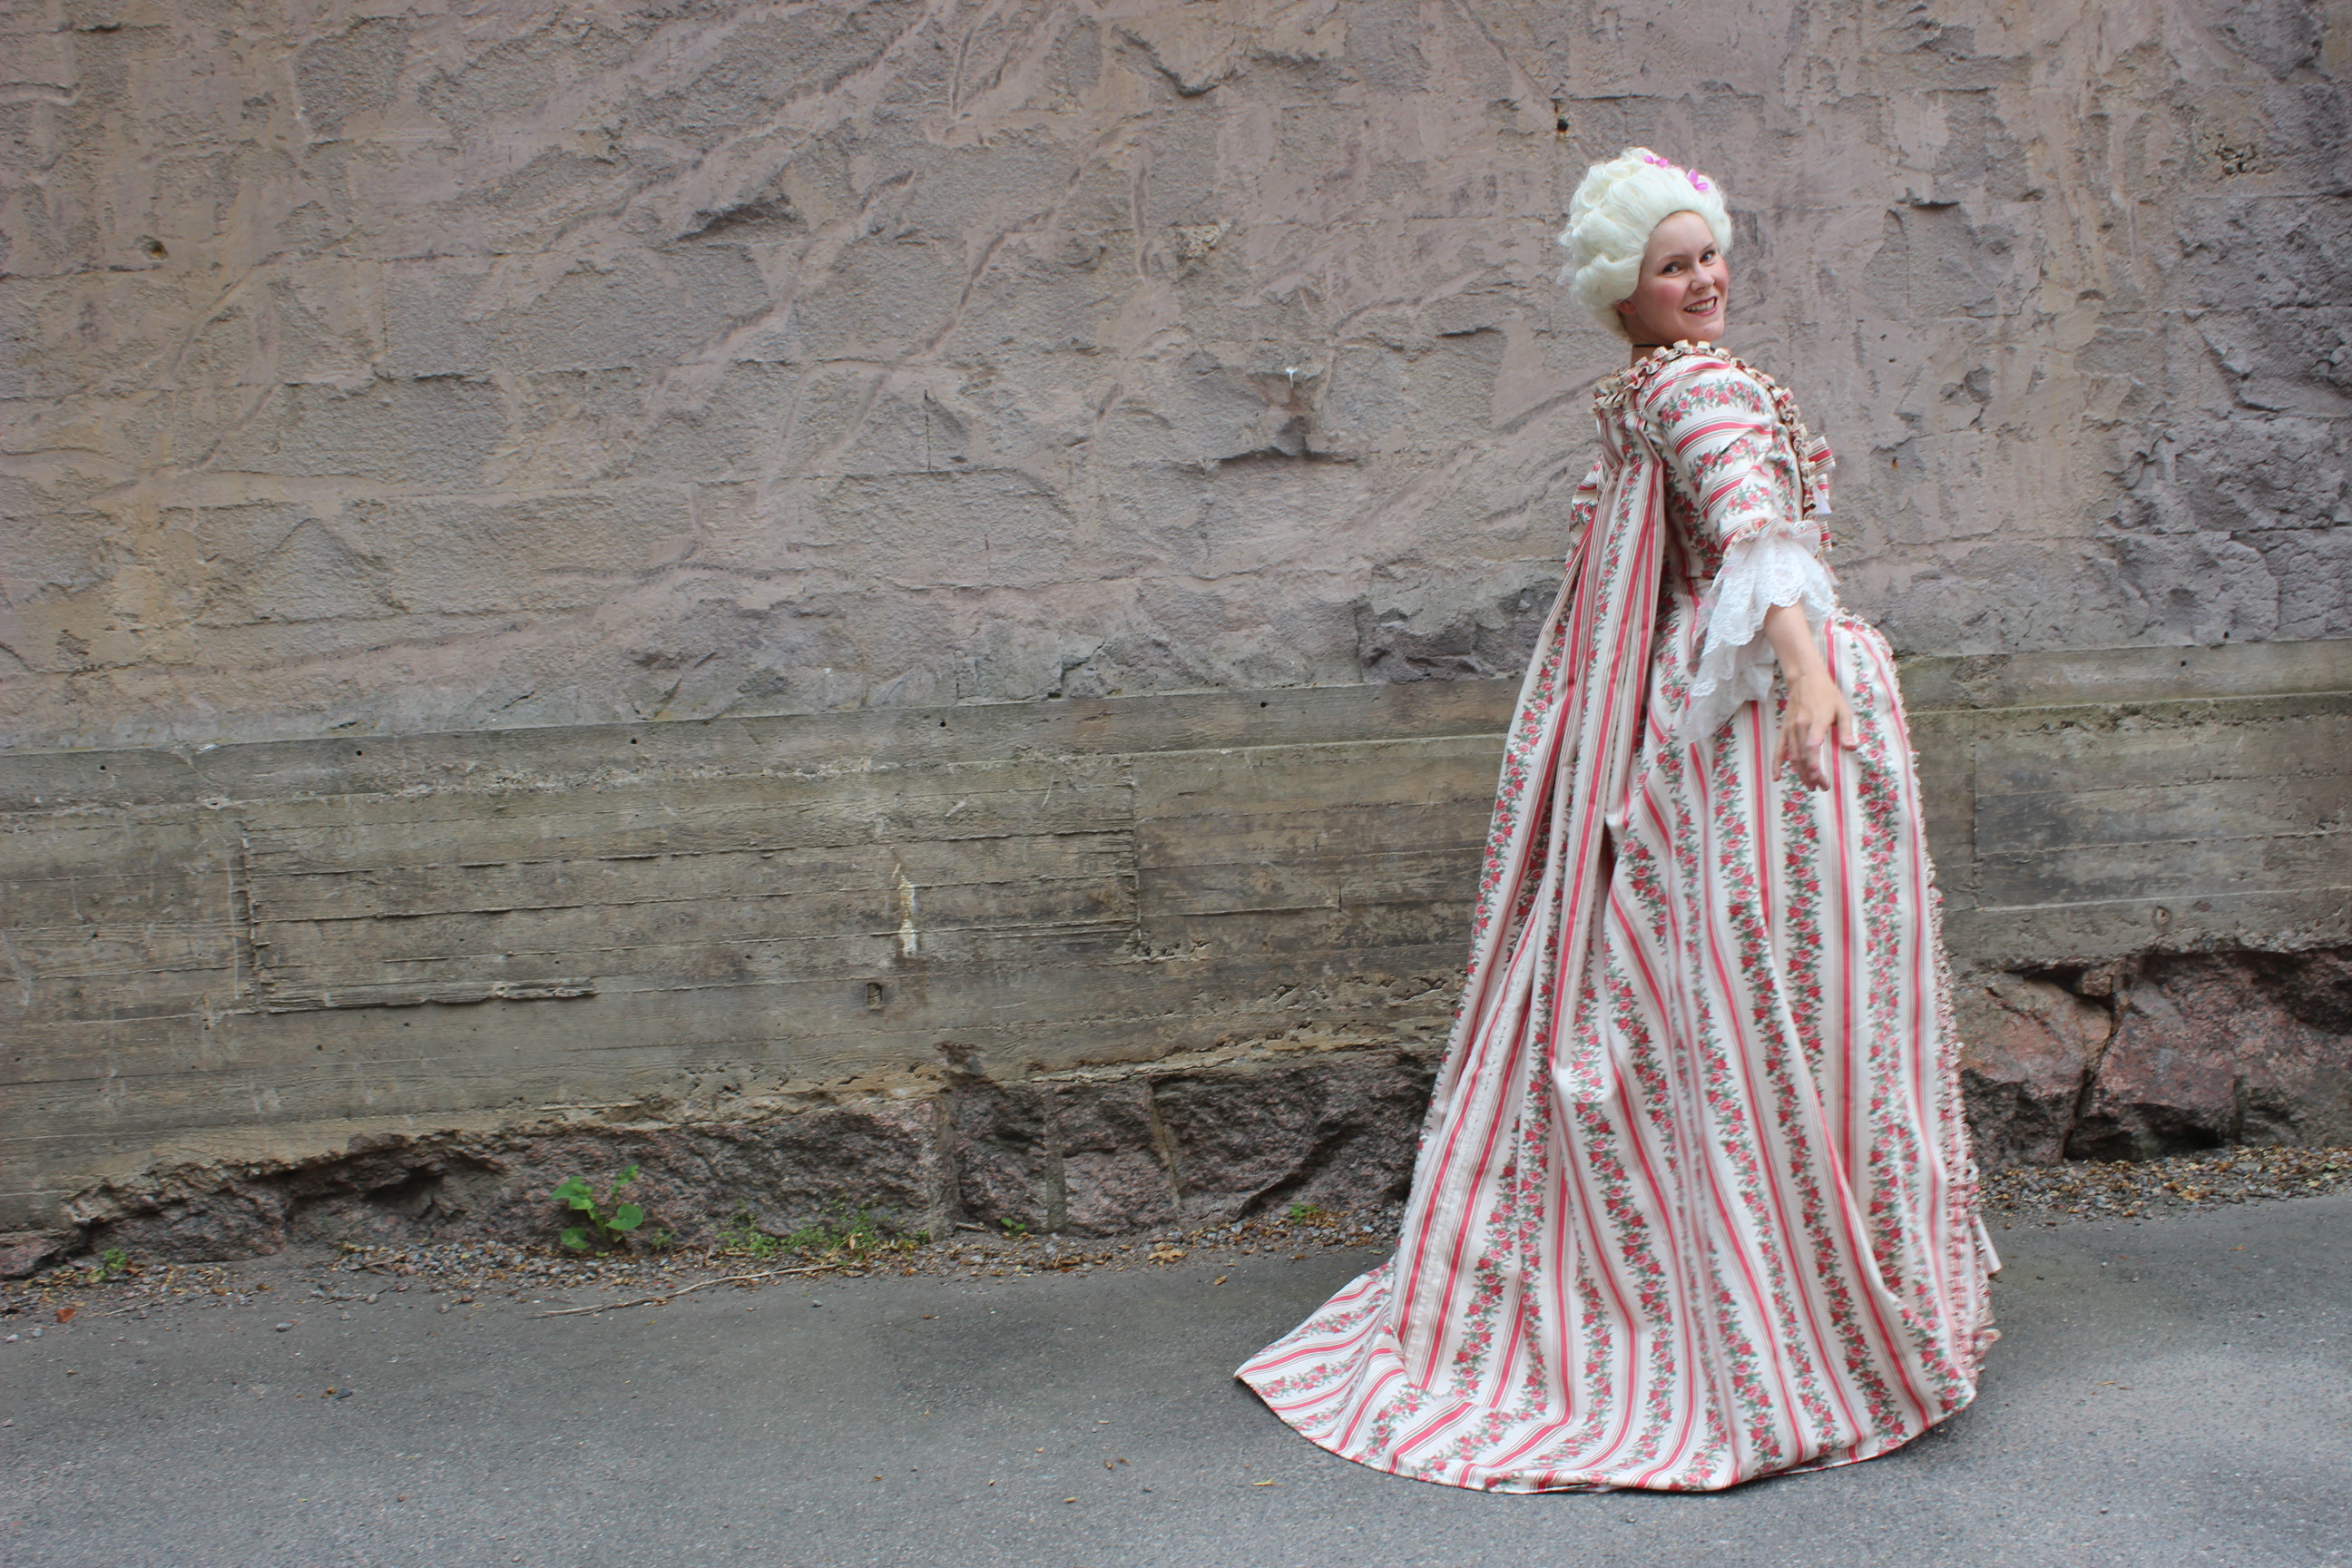
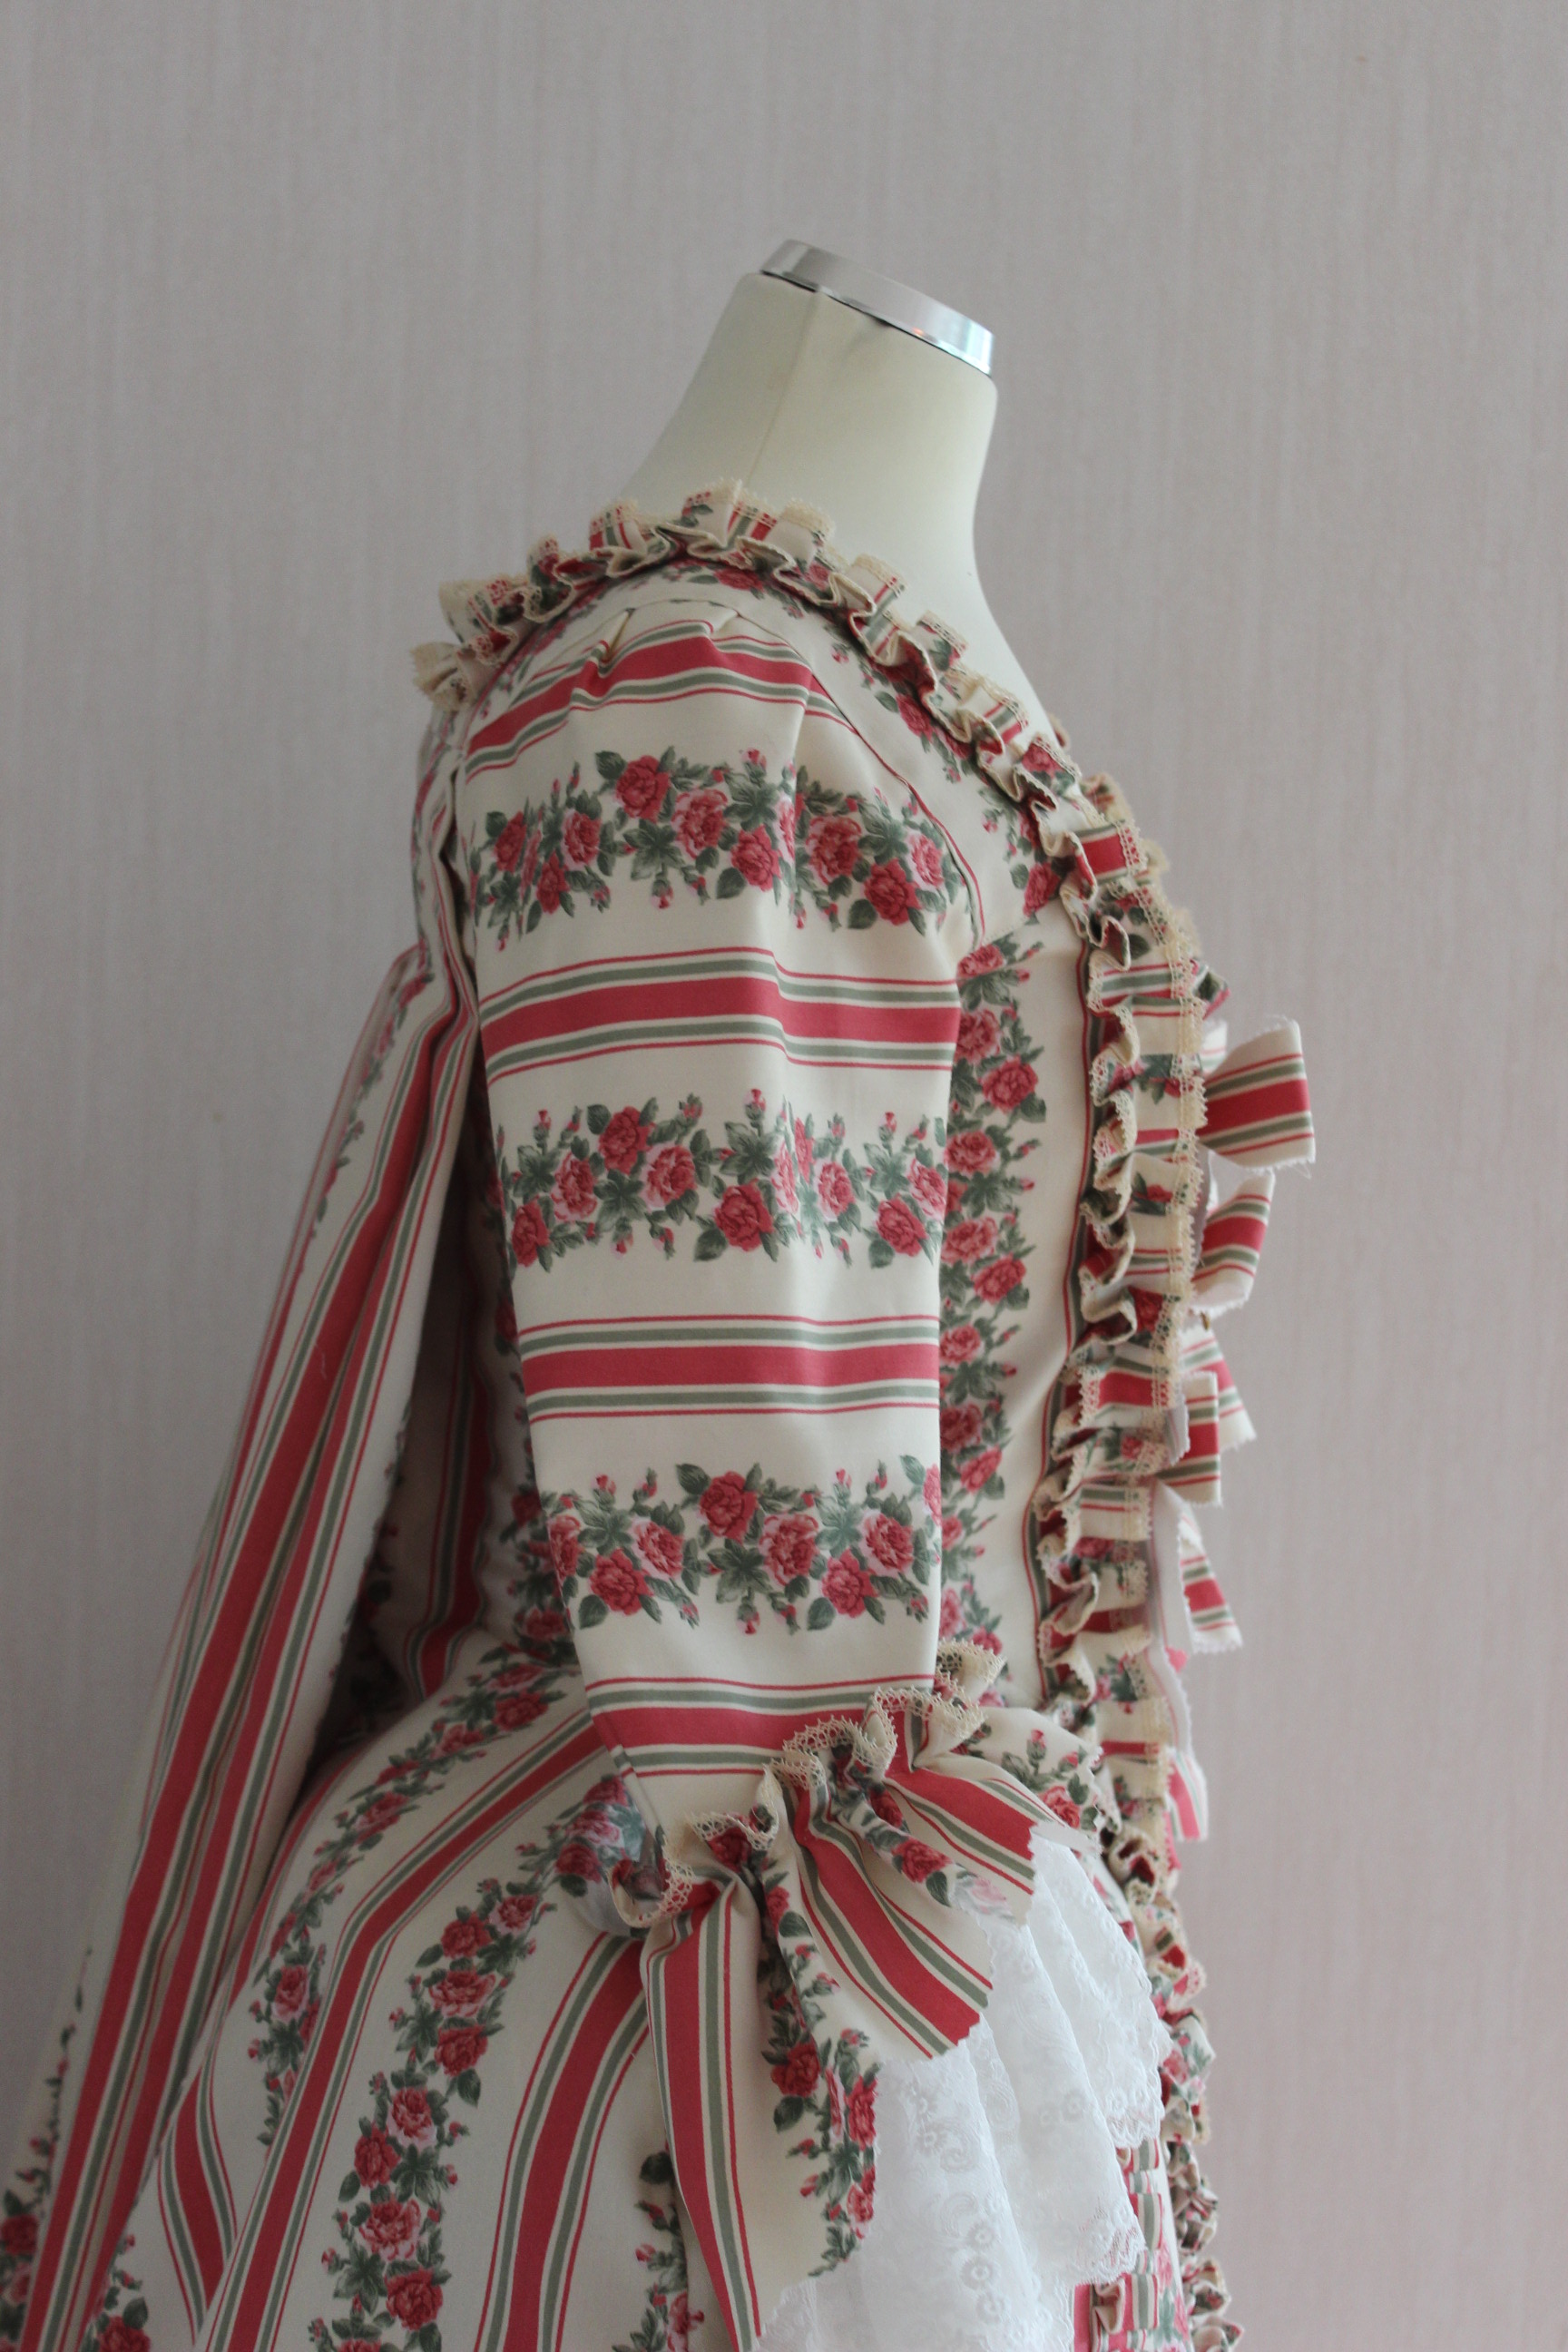
What: a 1690s Mantua
How it fit the challenge: Gowns like this was worn during Louis VIX reign in France, and therefor fit perfectly with the TV-show Versailles.
Pattern: I drafted my own using the 1690-1770s Mantua pattern from Waughs “Cut of Womens clothes”.
Fabric: 5 m of striped polyester taffeta and 1 m of white cotton for lining for dress, and 2,5 m of copper polyester taffeta for the skirt.
Notions: Thread, boning for the stomacher and back/side seams, 1 m of bias tape for boning channels, 12 m of golden lace trim, and 1 m of dark blue velvet ribbon for belt. And 5 m of blue polyester fringe for the skirt.
How historical accurate: Not particularly I’m afraid. The fabric and construction techniques are all modern, even though the pattern and general shape is ok, and they did have a flair for stripes and fringes at the time. One thing I didn’t know until halfway done though, was the facts that this type of gowns usually closed center front omitting the stomacher of the later era completely. I’ll give it a 5/10.
Time: About 30 hours in total, but I’ll guess at 10-15 hours if I was to make another one right away.
Cost: Everything besides from the fringe (which I got from a thrift store) came from stash. But I’ll guess about 600 Sek (50 Usd) wen first bought.
First worn: Early October for photos
Final Thoughts: I’m feeling a bit mixed about this dress. I did feel fabulous wearing it (and most of the photos turned out great), but I’m not entirely happy about some of the constructions “mistakes”, like puckering seams in the back and the fact it’s not a closed front as it should be.
The 17th century have long been on my wishlist to explore deeper (I have so far only made one dress from that entire century), and even though it seems to be a relatively forgotten part of costume history (at least if you compare to the ever popular 18th and early 19th century), It seams like it’s grown in popularity in the last year(s).
So when the news hit that there was to be a grand ball dedicated to the 1680s this fall, I knew that 2017 would be the year of the Mantuas.
Unfortuanly I wasn’t fast enough snatching a ticket (with the costs of the ball and a really clingy/mommsy toddler combined, I hesitated to long, and once I decided I was to go, it was to late), but the dress got done anyway and in perfect time for the HSM 9/2017 – Seen on Screan – “Be inspired by period fashions as shown onscreen (film or TV), and recreate your favourite historical costume as a historically accurate period piece.”
The only thing I needed to make the challenge was to find a tv-show/movie that would fitt the bill.
And what would be better then the Tv-show “Versailles” that airs its second season now. I know the series focus it’s story around 1667 and the young king Louie VIX. But since his reign reaches into the 18th century I figured it wouldn’t be to far fetched to use it as inspiration.
As usual I started my process by doing some research on the topic. After a quick glance at the existing pattern for this kind of dress (there is about 1 that I know of, and it haven’t gotten the best reviews) I decided to try and draft my own using The 1700s mantua from Waughs “Cut of Womens Clothes” and the great blogpost by Isabella of “A damsel in this dress”.Drafting on the floor.
I started by drafting the papper pattern following the direction and measurments from the book. Checking the general fit and proportions.
Then I cut and made a mock-up After some tweaking – like making the whole thing a little bit bigger, it was time to cut the fabric.
And here’s where I hit my first road bump.
I’ve been looking for a suatable fabric (for a good price) for a couple of months but hadn’t found any. So I decided to make do, and use something from my stash.
After some digging I surfaced with tre options: Green, red or striped?
I did a quick survey on my Instagram and got my own instincts re-asured – Green for the win!
The only trouble was that I only had aprox. 4 m of it, and I the grown usually requires a lot more fabric then that.
But with some resorceful cutting and carefully measuring I was confident I could do it. Sleeve and back pieces being cut.
Mind, this was around 23 o clock (11pm) and no cutting should EVER take place at that time…
Of course my eagerness to get started on the dress backfired,
And I realized to late, I’d cut two lefts and no rights…
With no possible way to rescue the situation, I had a quick breakdown and went to bed really annoyed and frustrated with myself.
It took a few weeks before I could gather the entusiasm needed to continue the gown.
Because I got upset every time I glanced at the pile of destroyed green fabric and un-cut pattern pieces.
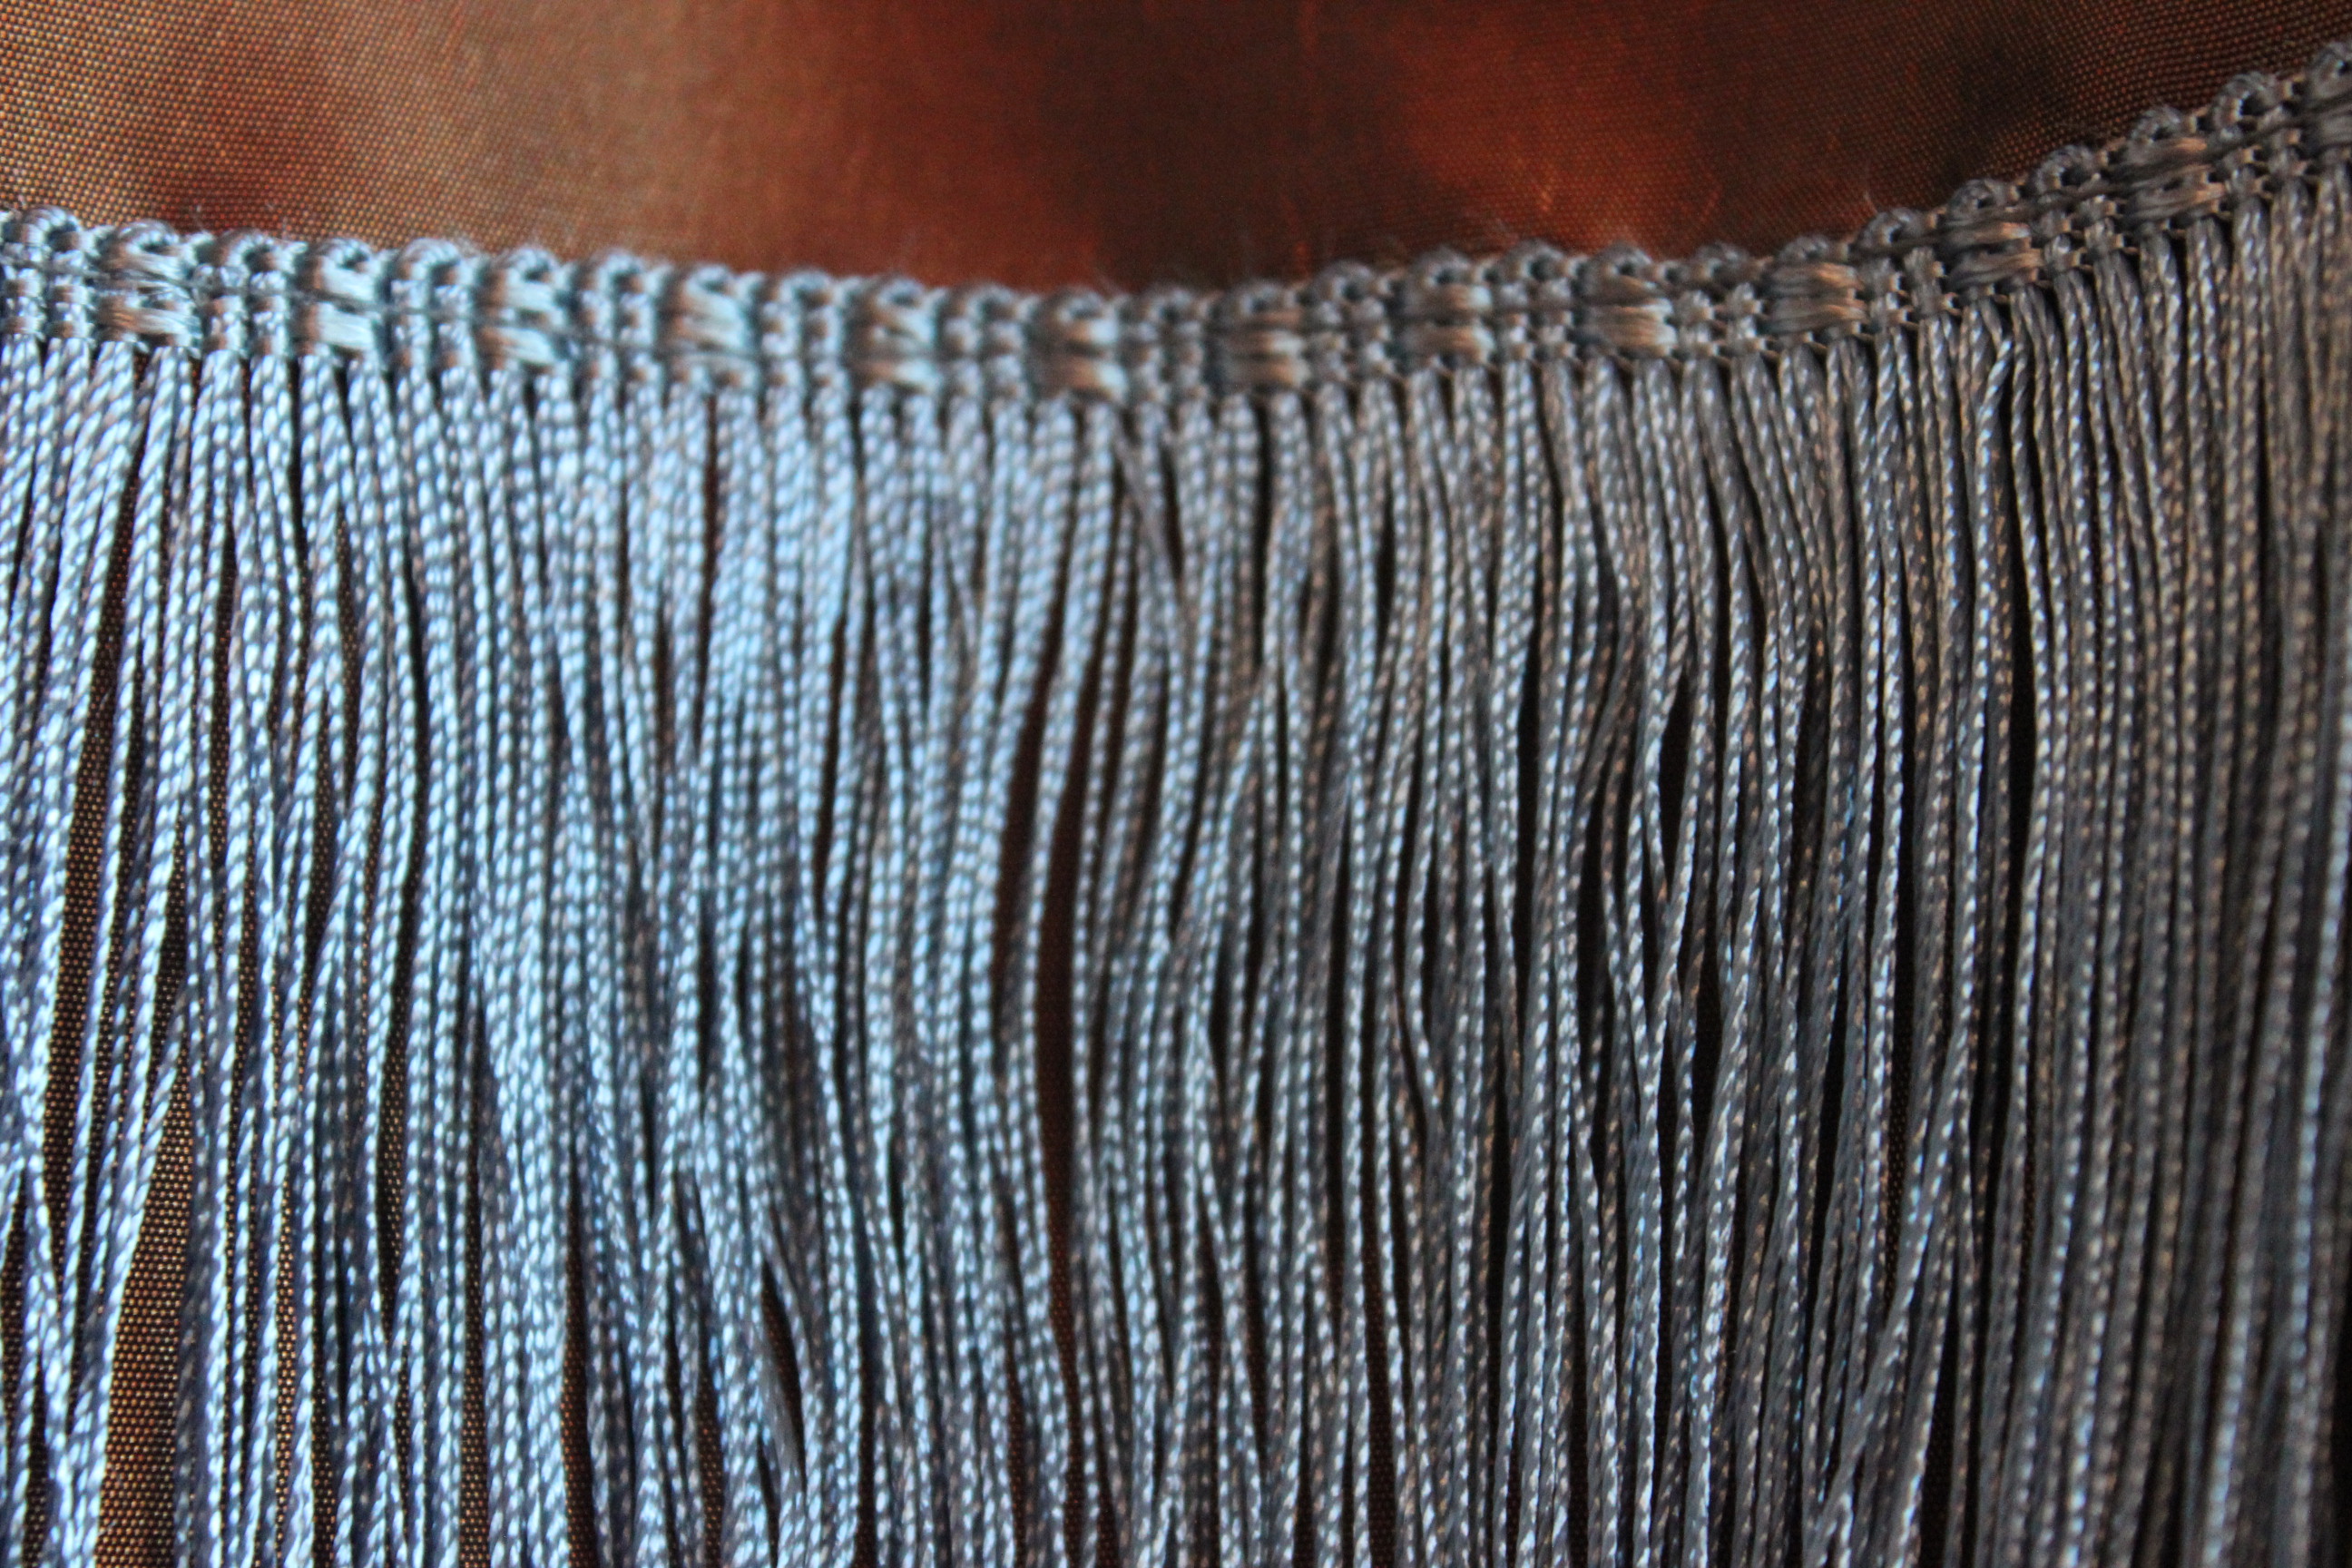
But once I discovered a copper taffeta in my stash witch happened to match perfectly with the stripes in the grey fabric, and which would be perfect for the skirt/petticoat, I was back on track. It’s hard do se in these pics but one of the stripes matches perfectly with the copper of the taffeta, and the blue/grey fringe is identical in hue to the main fabric/strip in the gown fabric.
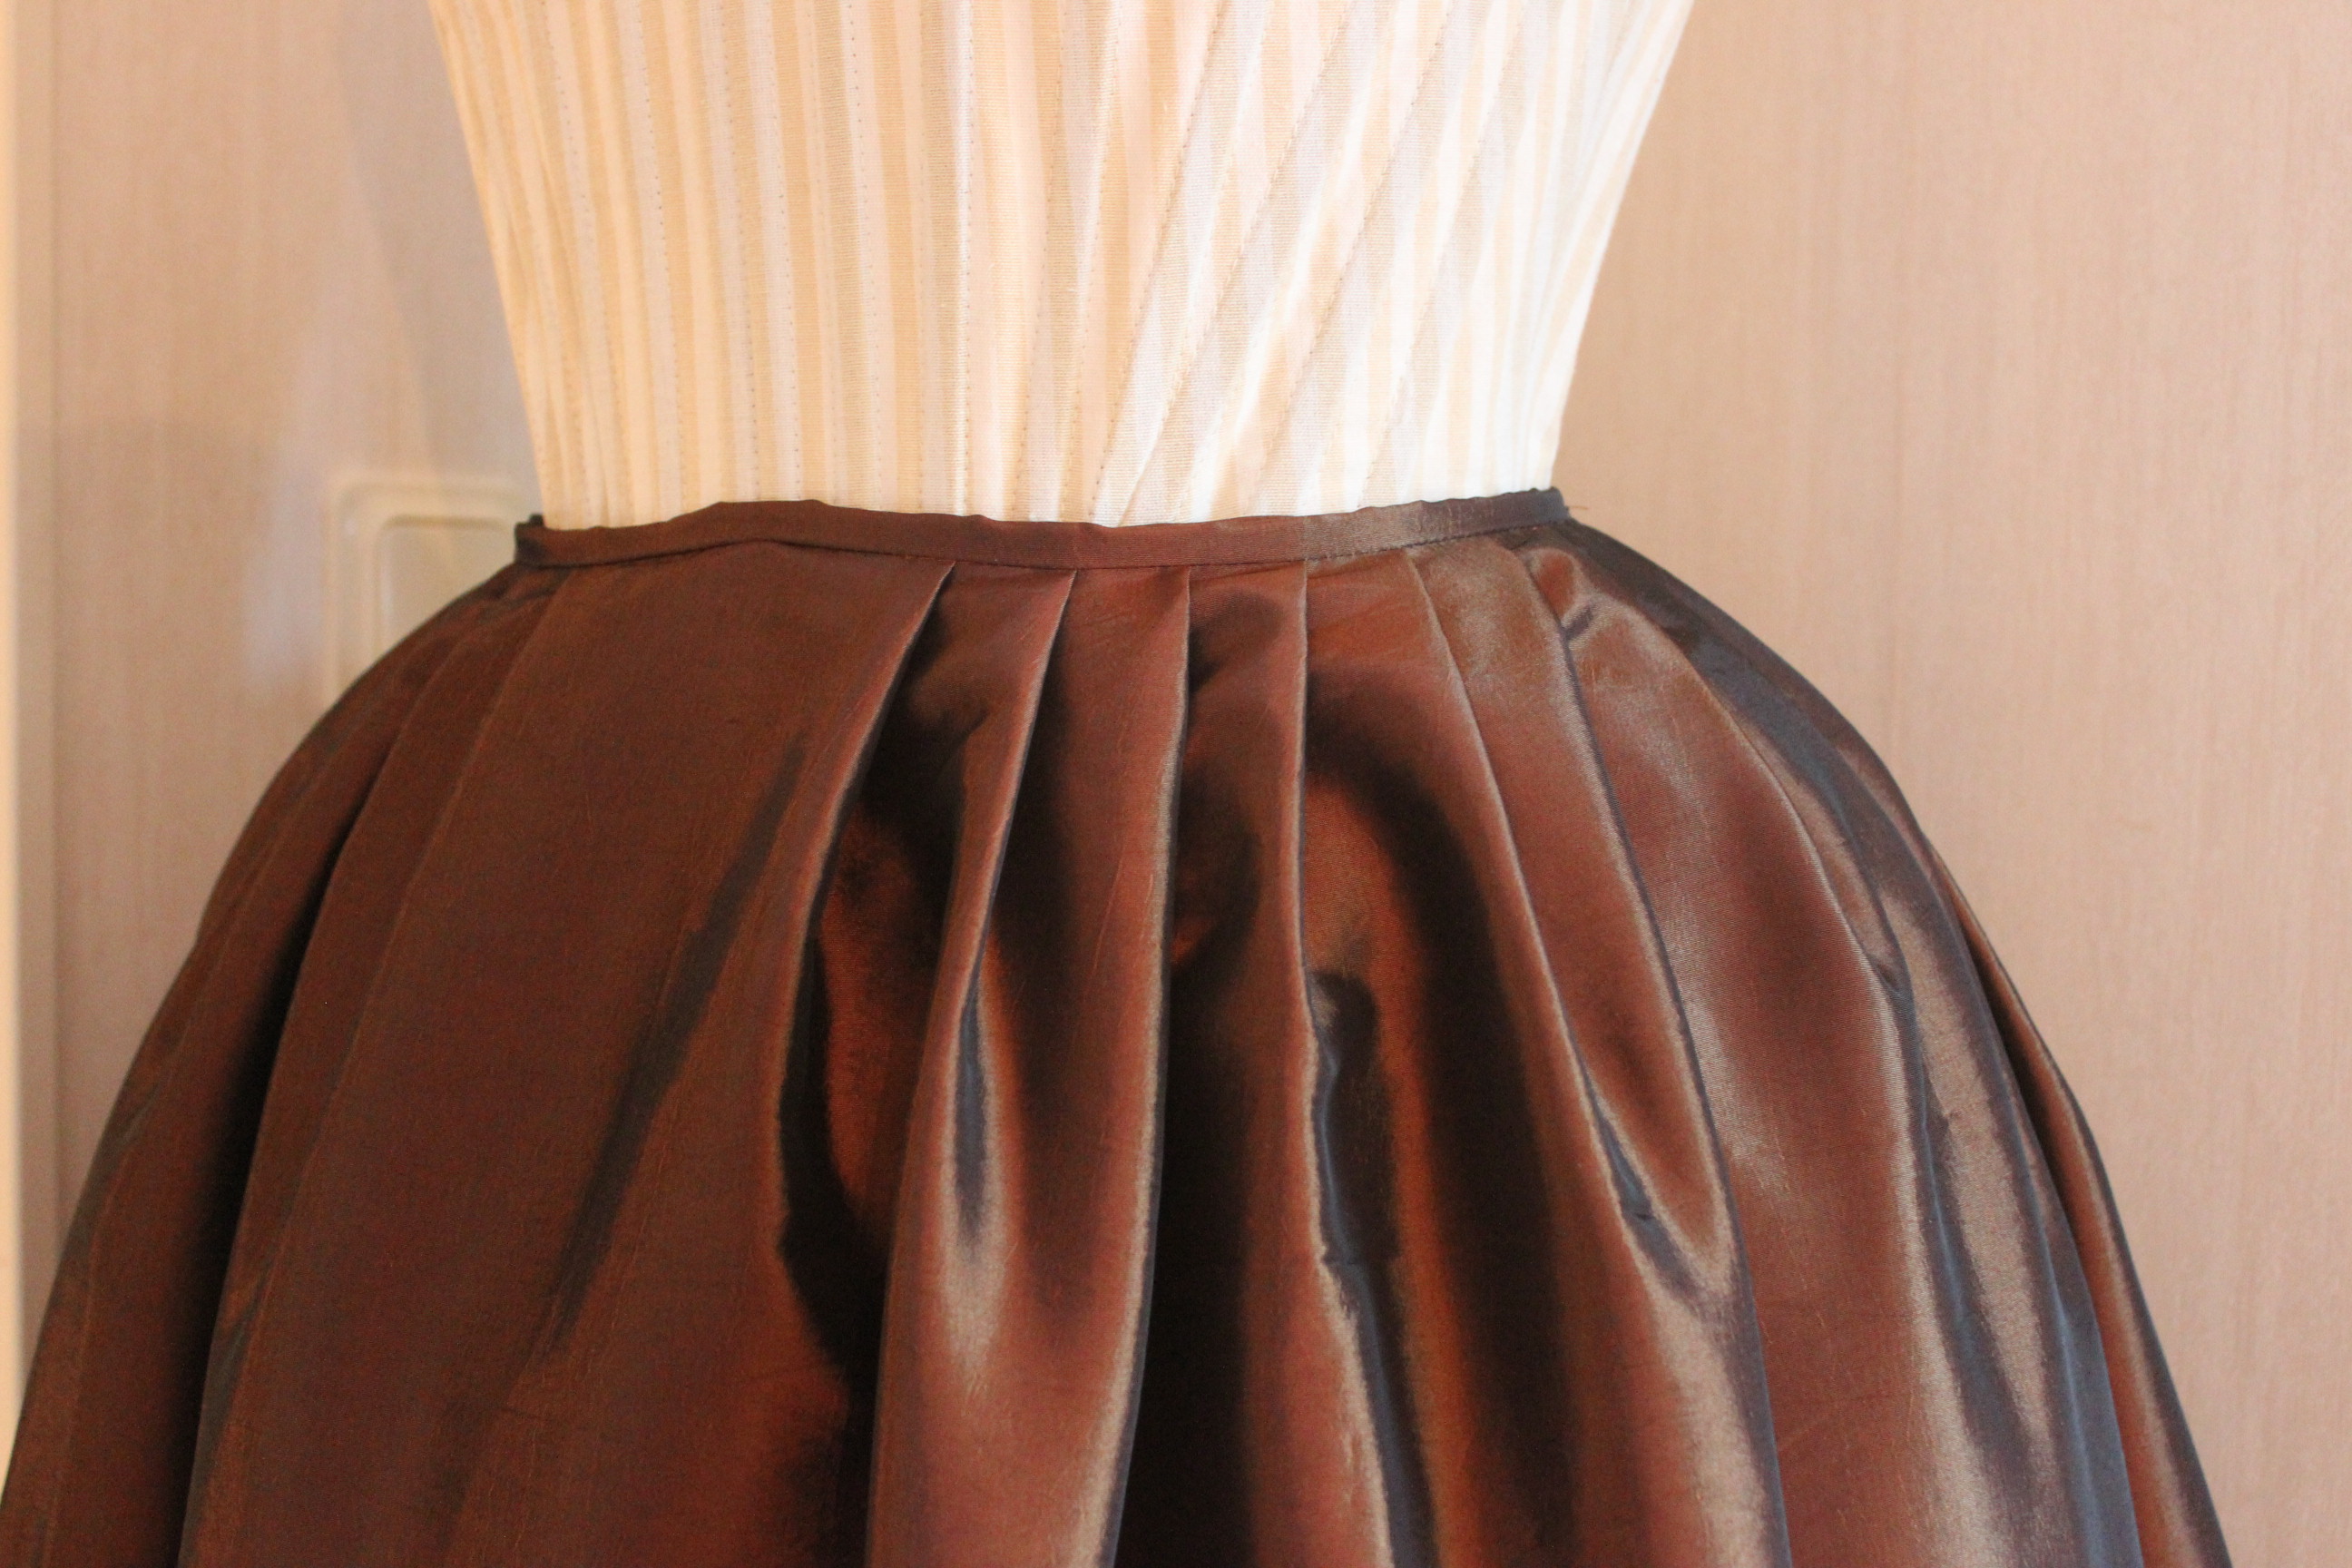
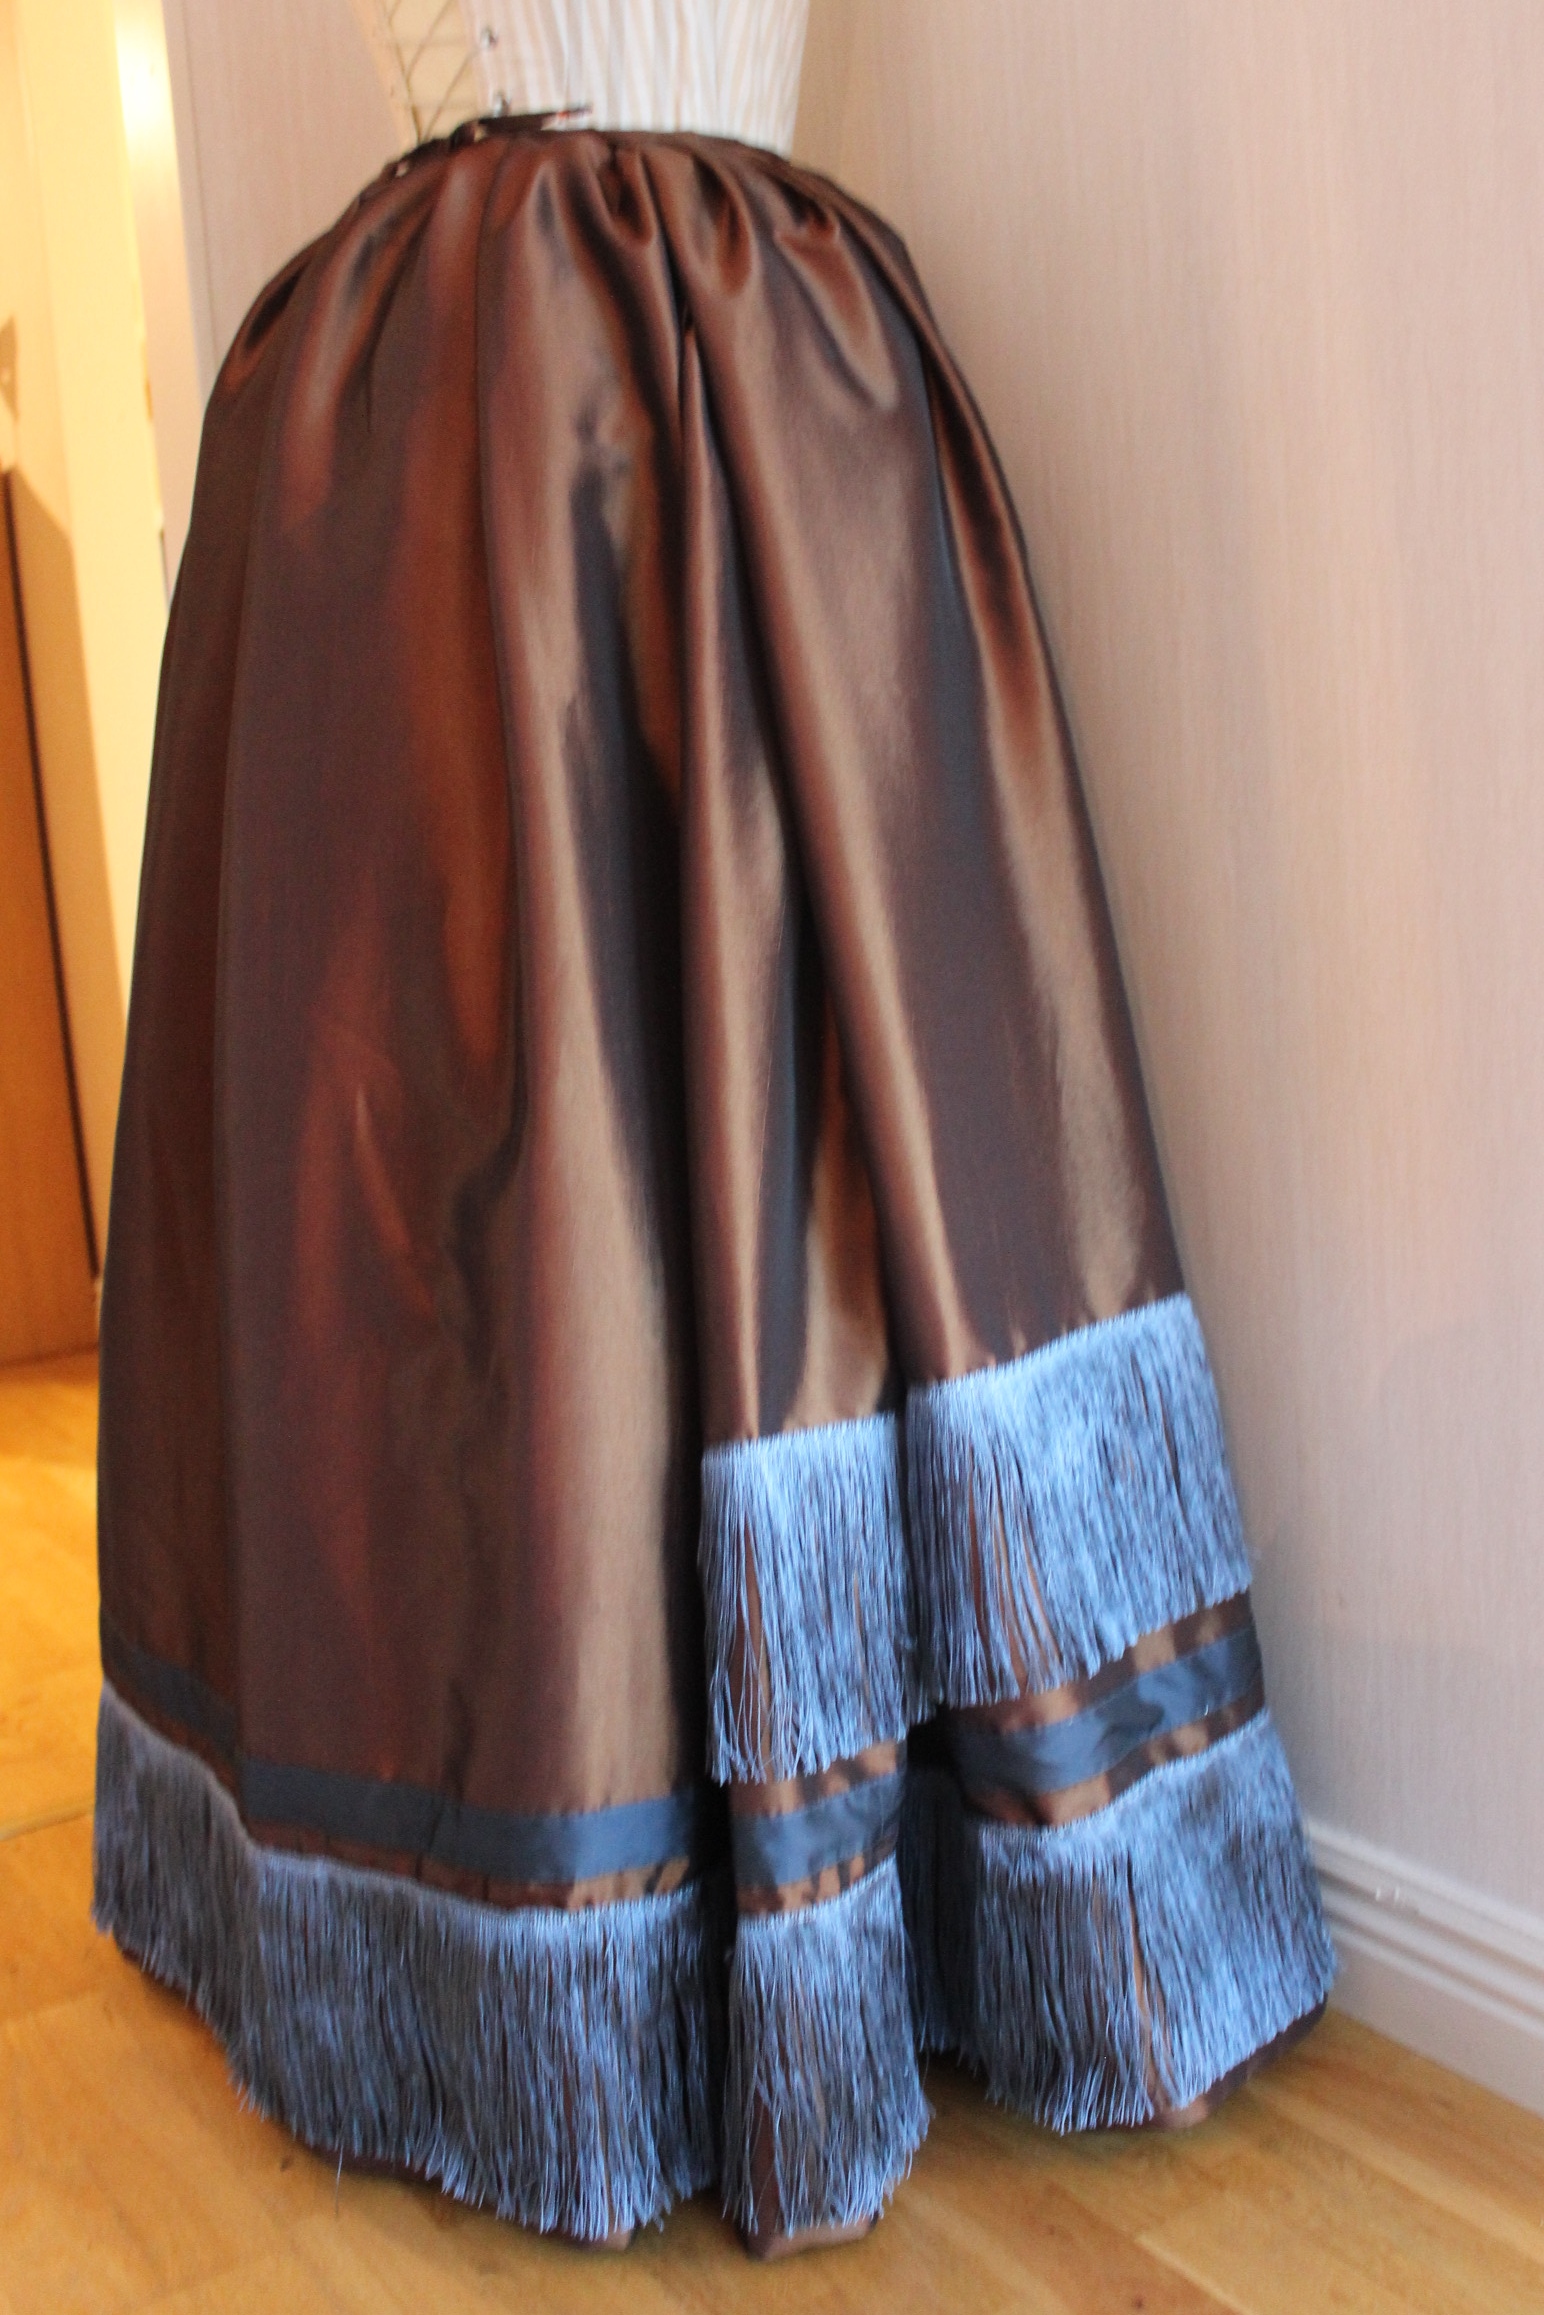
Starting with the skirt/petticoat, constructing it as you would an 18th century skirt (using two widhs of fabric pleated to an overlapping waistband).
The only thing that took a bit of time was the decoration, made from two rows of fringe and a strip of grey/blue fabric, that needed to be measured and placed exact right to look good
Unfortuanlly I only gotten 1 of the two fringe trim avalable at the thrift store, and my dream of several rows of fringe fell short of 1 m. 😦
But I figured it wouldn’t be noticable benneth the train anyway (at least I hope so).
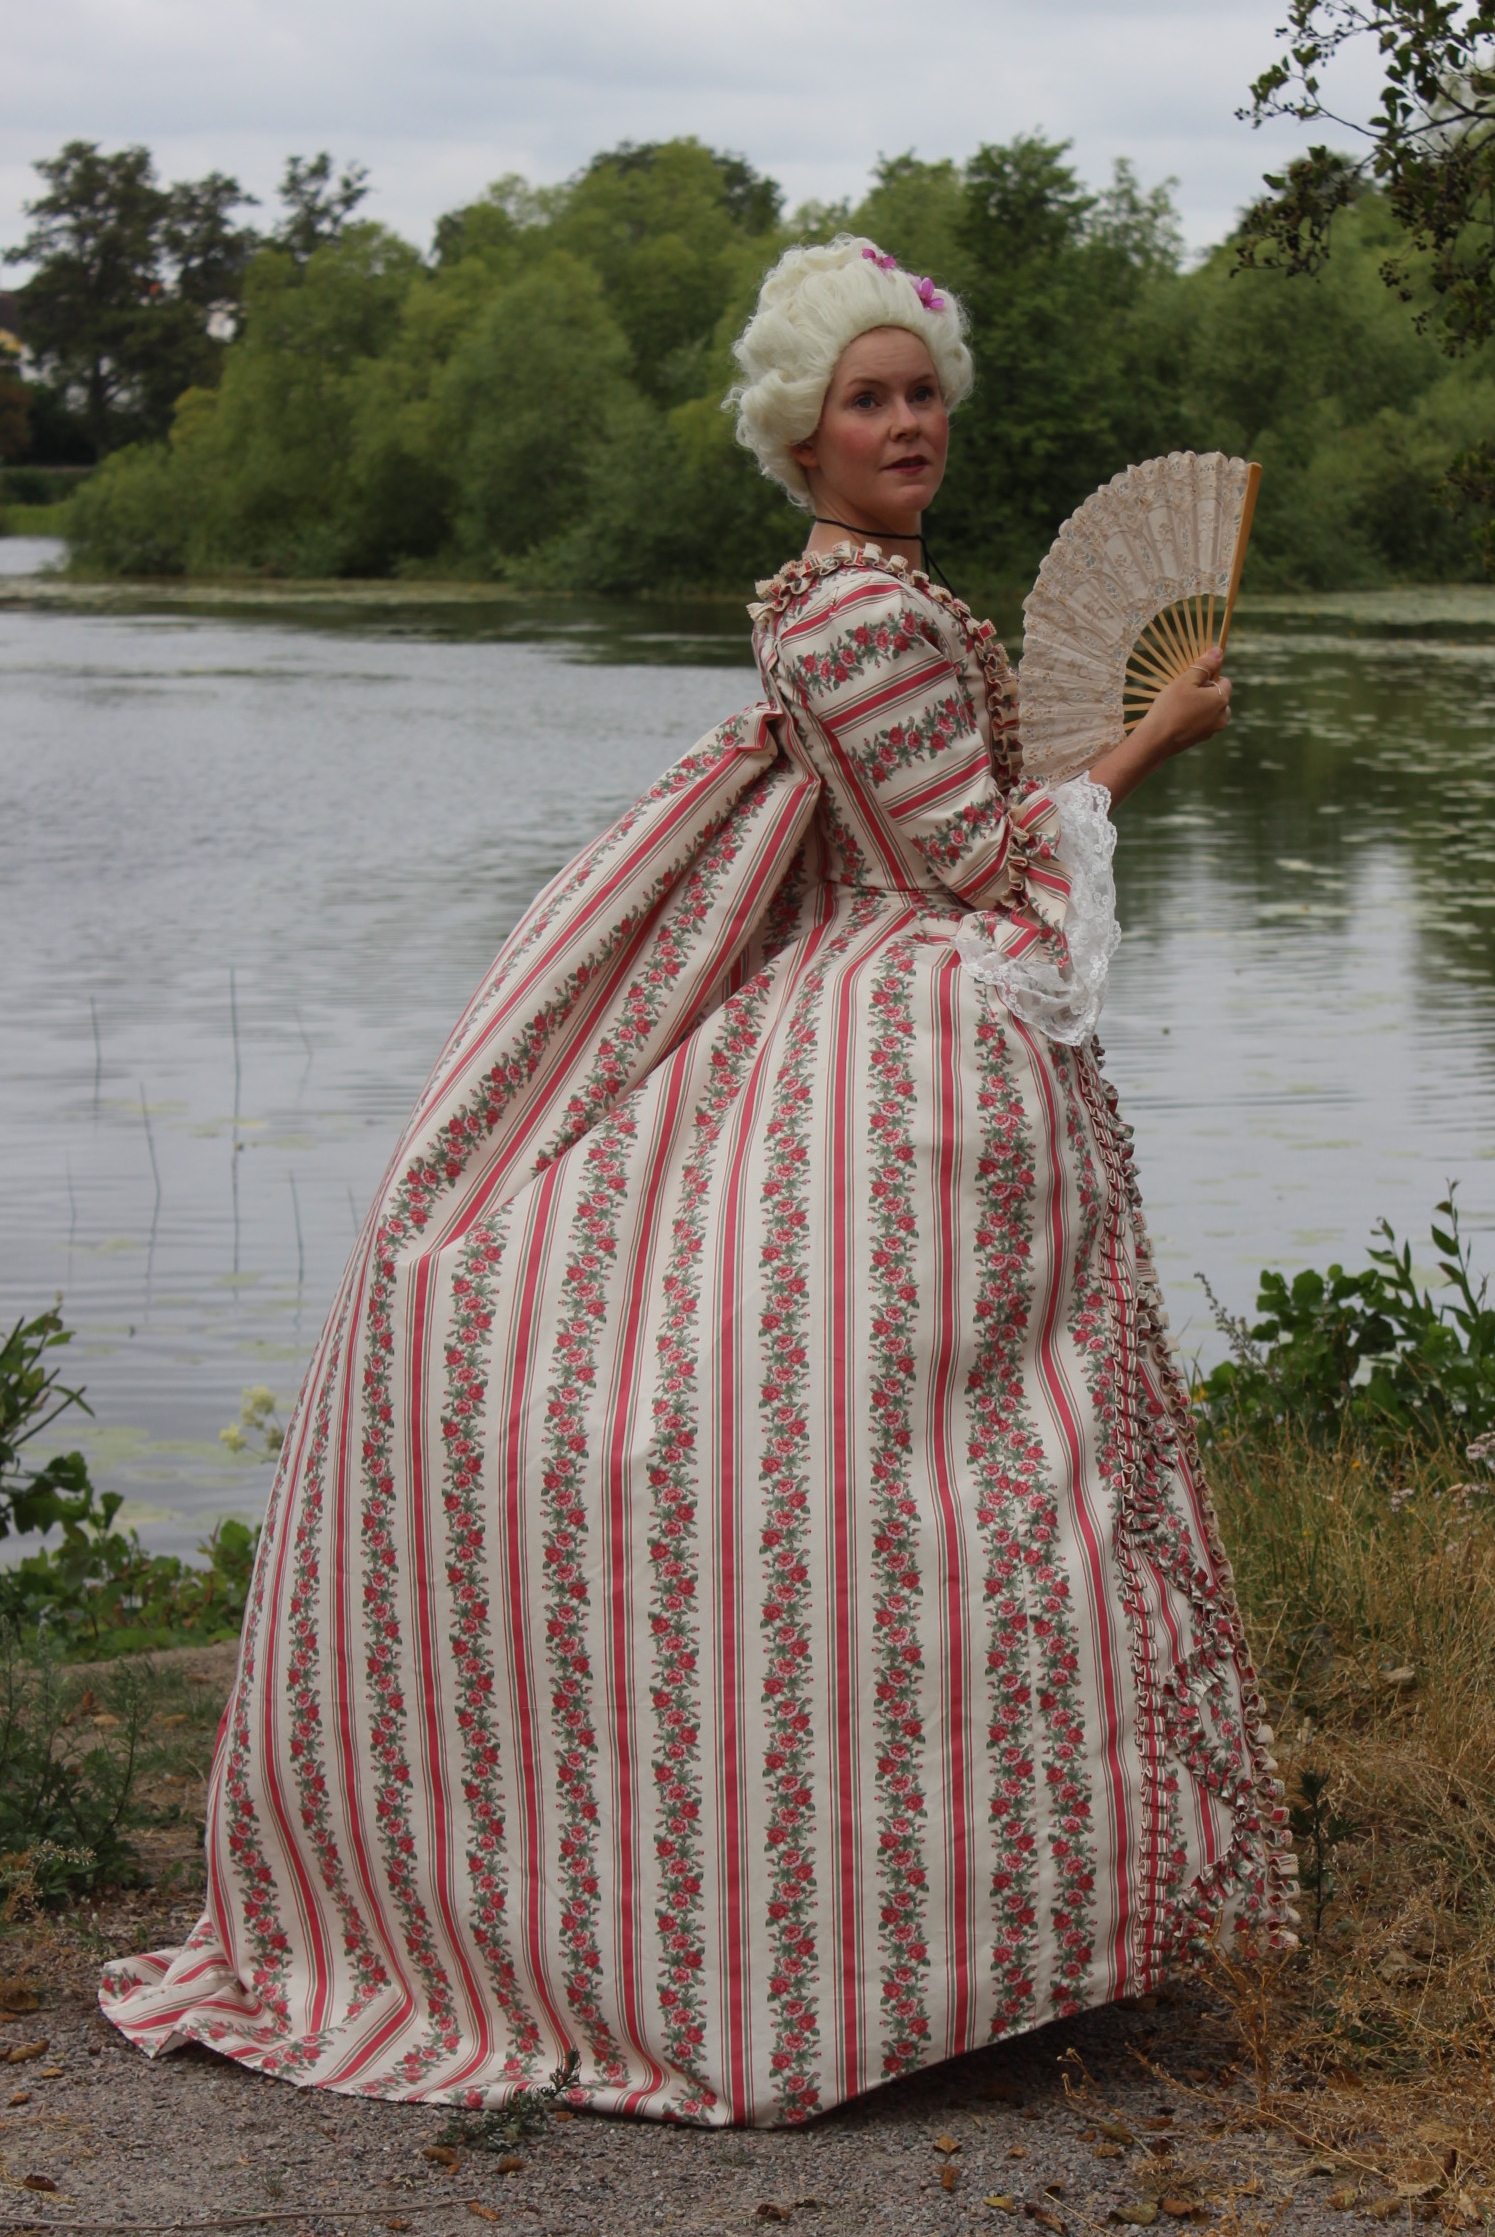
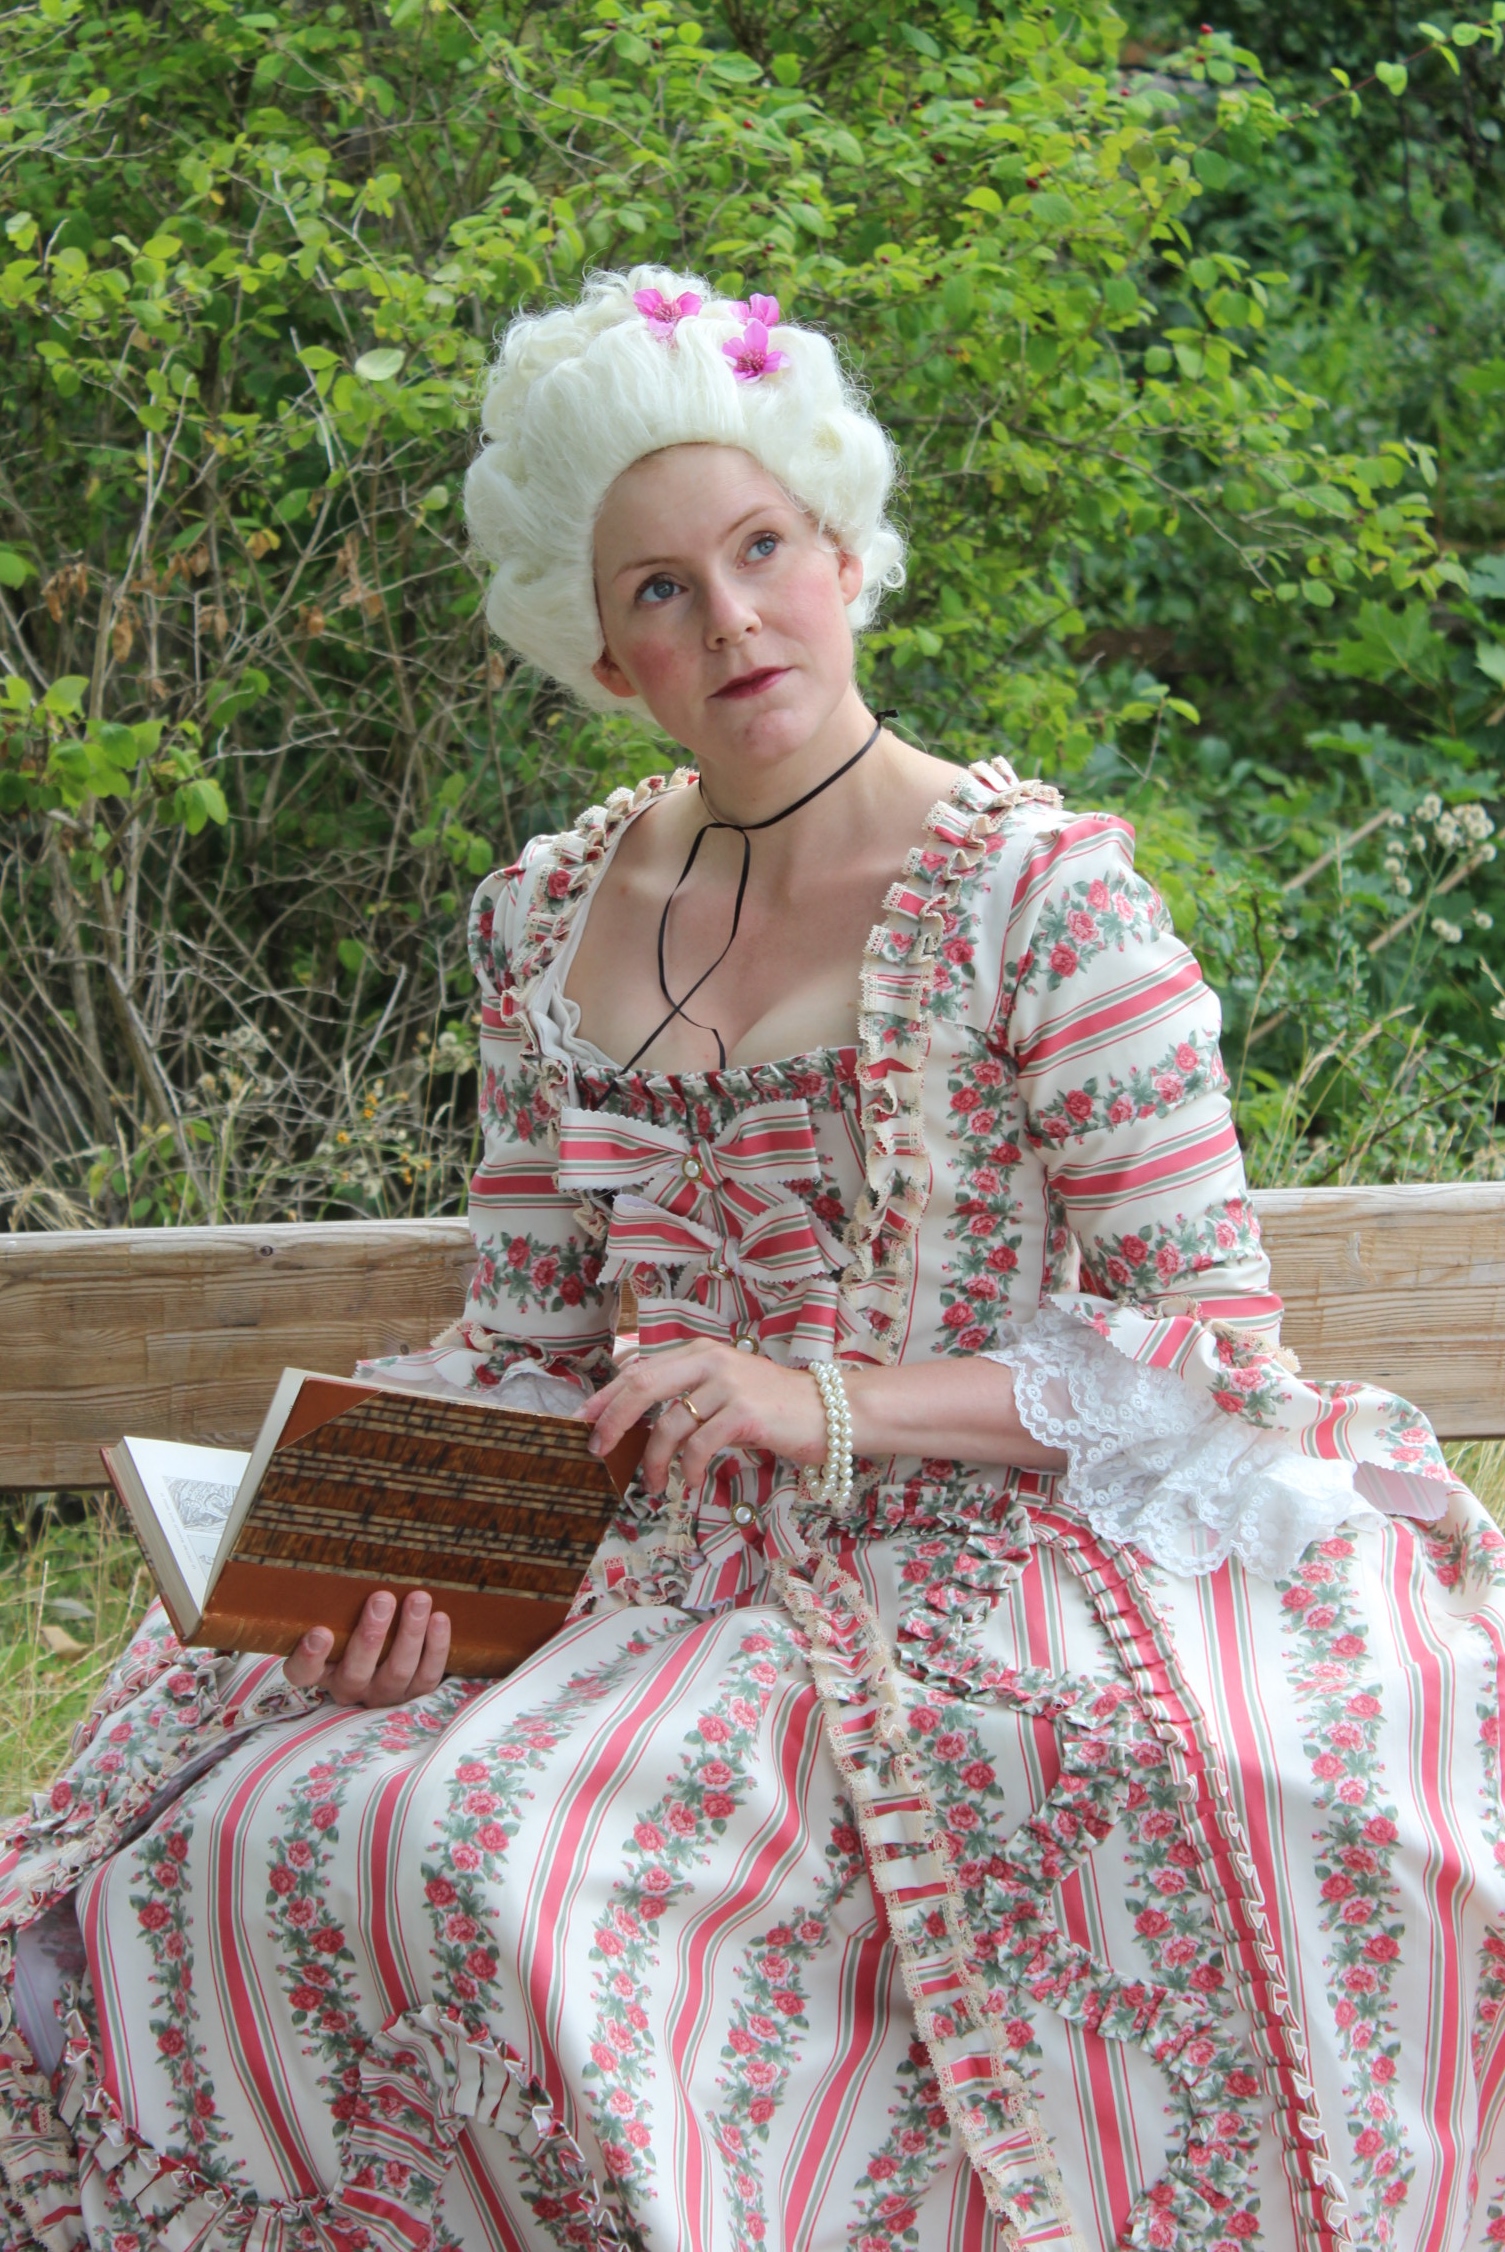
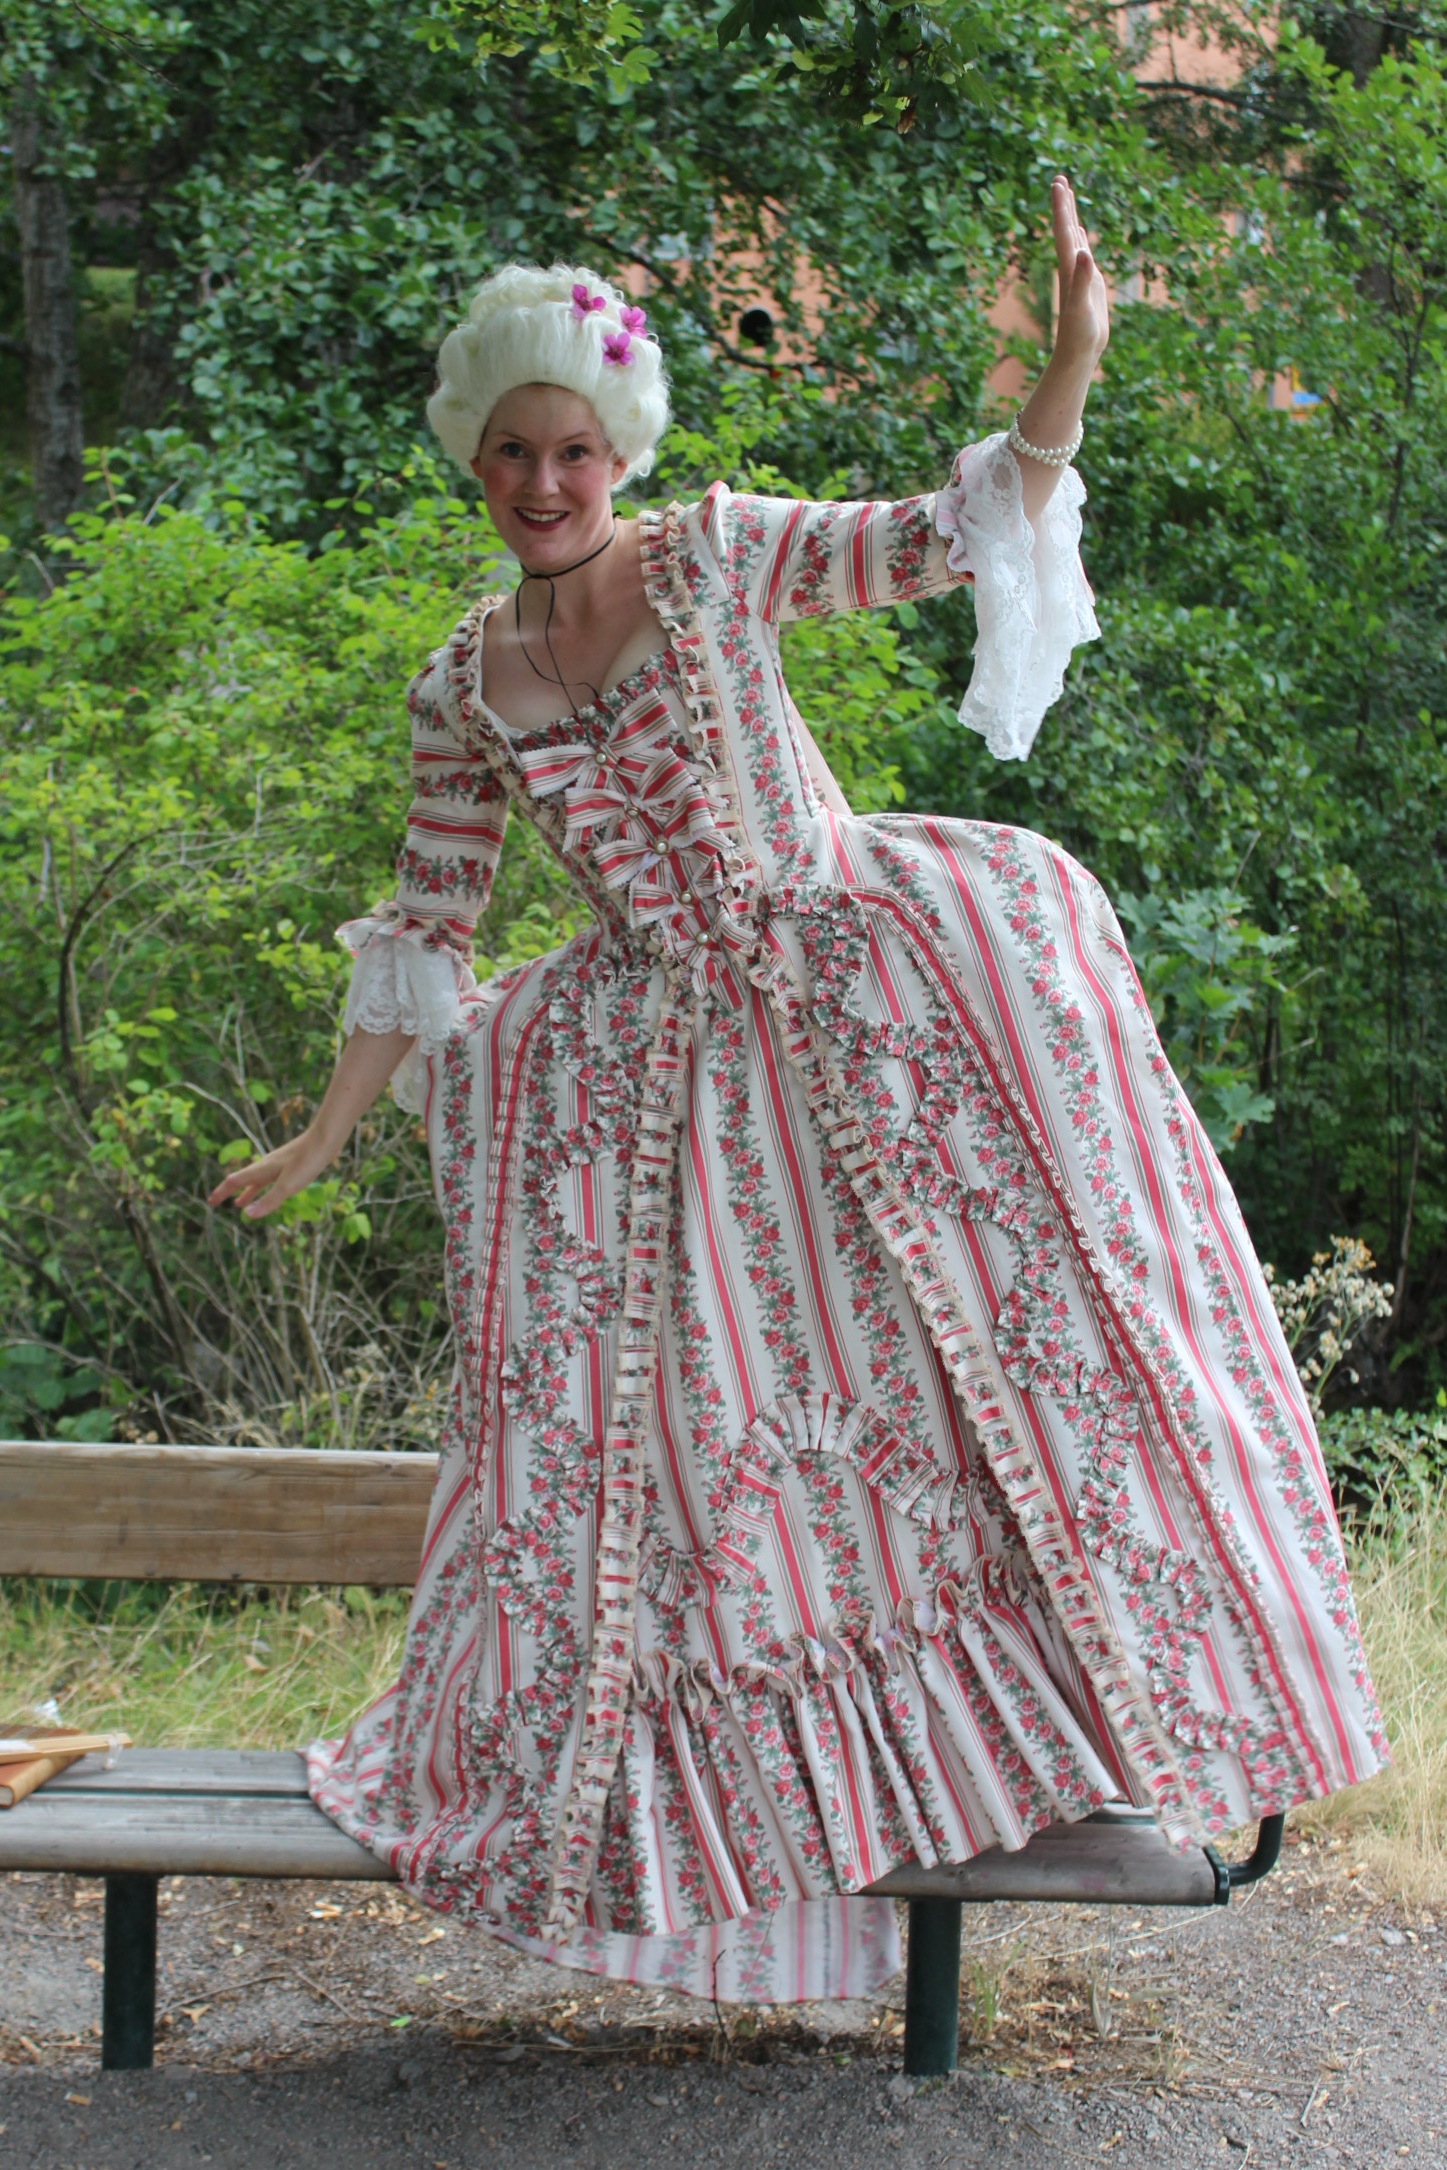
Once the Robe a la Francaise finally was finished, I couldn’t wait to get it photographed. So I asked my sister to help me take some pic (on one of the windiest day no doubt).
When I started this project back in 2014 I never thought it would take this long to get it done, (then, a bit later I thought I would never finish) But here it finally is, My long awaited Robe a la Francaise.
As mentioned this project took it’s sweet time to get finished, and it all started with this: A pink/flower/striped polyester satin found in the bargain bin at my local fabric store.
I immediately though it would be perfect for a Francaise, and bought the while bolt (8-9m)
Then it rested a while in my stash while I finished some other projects and gathered the courage to actually get on with it.
The intention was to make something like these
The project then started in 2014 when I made my 18th century long stays, and then cut into the fabric to make the skirt/petticoat for the dress.The first version of this petticoat paired with my (then) newly made stays.
In jan 2015 I continued the project by making my “Panniers of pain” (and getting started on the actual robe)
Along the way the petticoat have evolved a bit and here is the final result after some additional tweaking of the hip-pleats, hem and adding of some decoration.
In January 2015 I started on the robe by drafting the pattern, making the mock-up and cutting the fabric.
I spent so manny hours hand-stitching the pieces, draping the pleats, adding the lining, and making the lacing holes, that I eventually tried of the whole thing.
(the curse of the creative – always got to move on to new exiting things).
Then, in Jan 2017 I picked them up again, and continued by adding the sleeves, and making (and adding) all the trimmings. The firs try on after 2 years (and 1 baby) – and it fits like a glove :-D.
But then I got stuck on how to best solve the tapering of the sleeve flounce, and since I no longer felt the excitement over neither the fabric nor the gown itself the project once more went back in the closet.
Unfortunately all y pictures from the construction (from 3 years past) got lost in a computer crash in mars, (It wasn’t even the damn computer that crashed – but the extern memory/safety backup where I kept all the old pictures:-( – how is that even possible) and all I got left are these who happened to be on my phone.
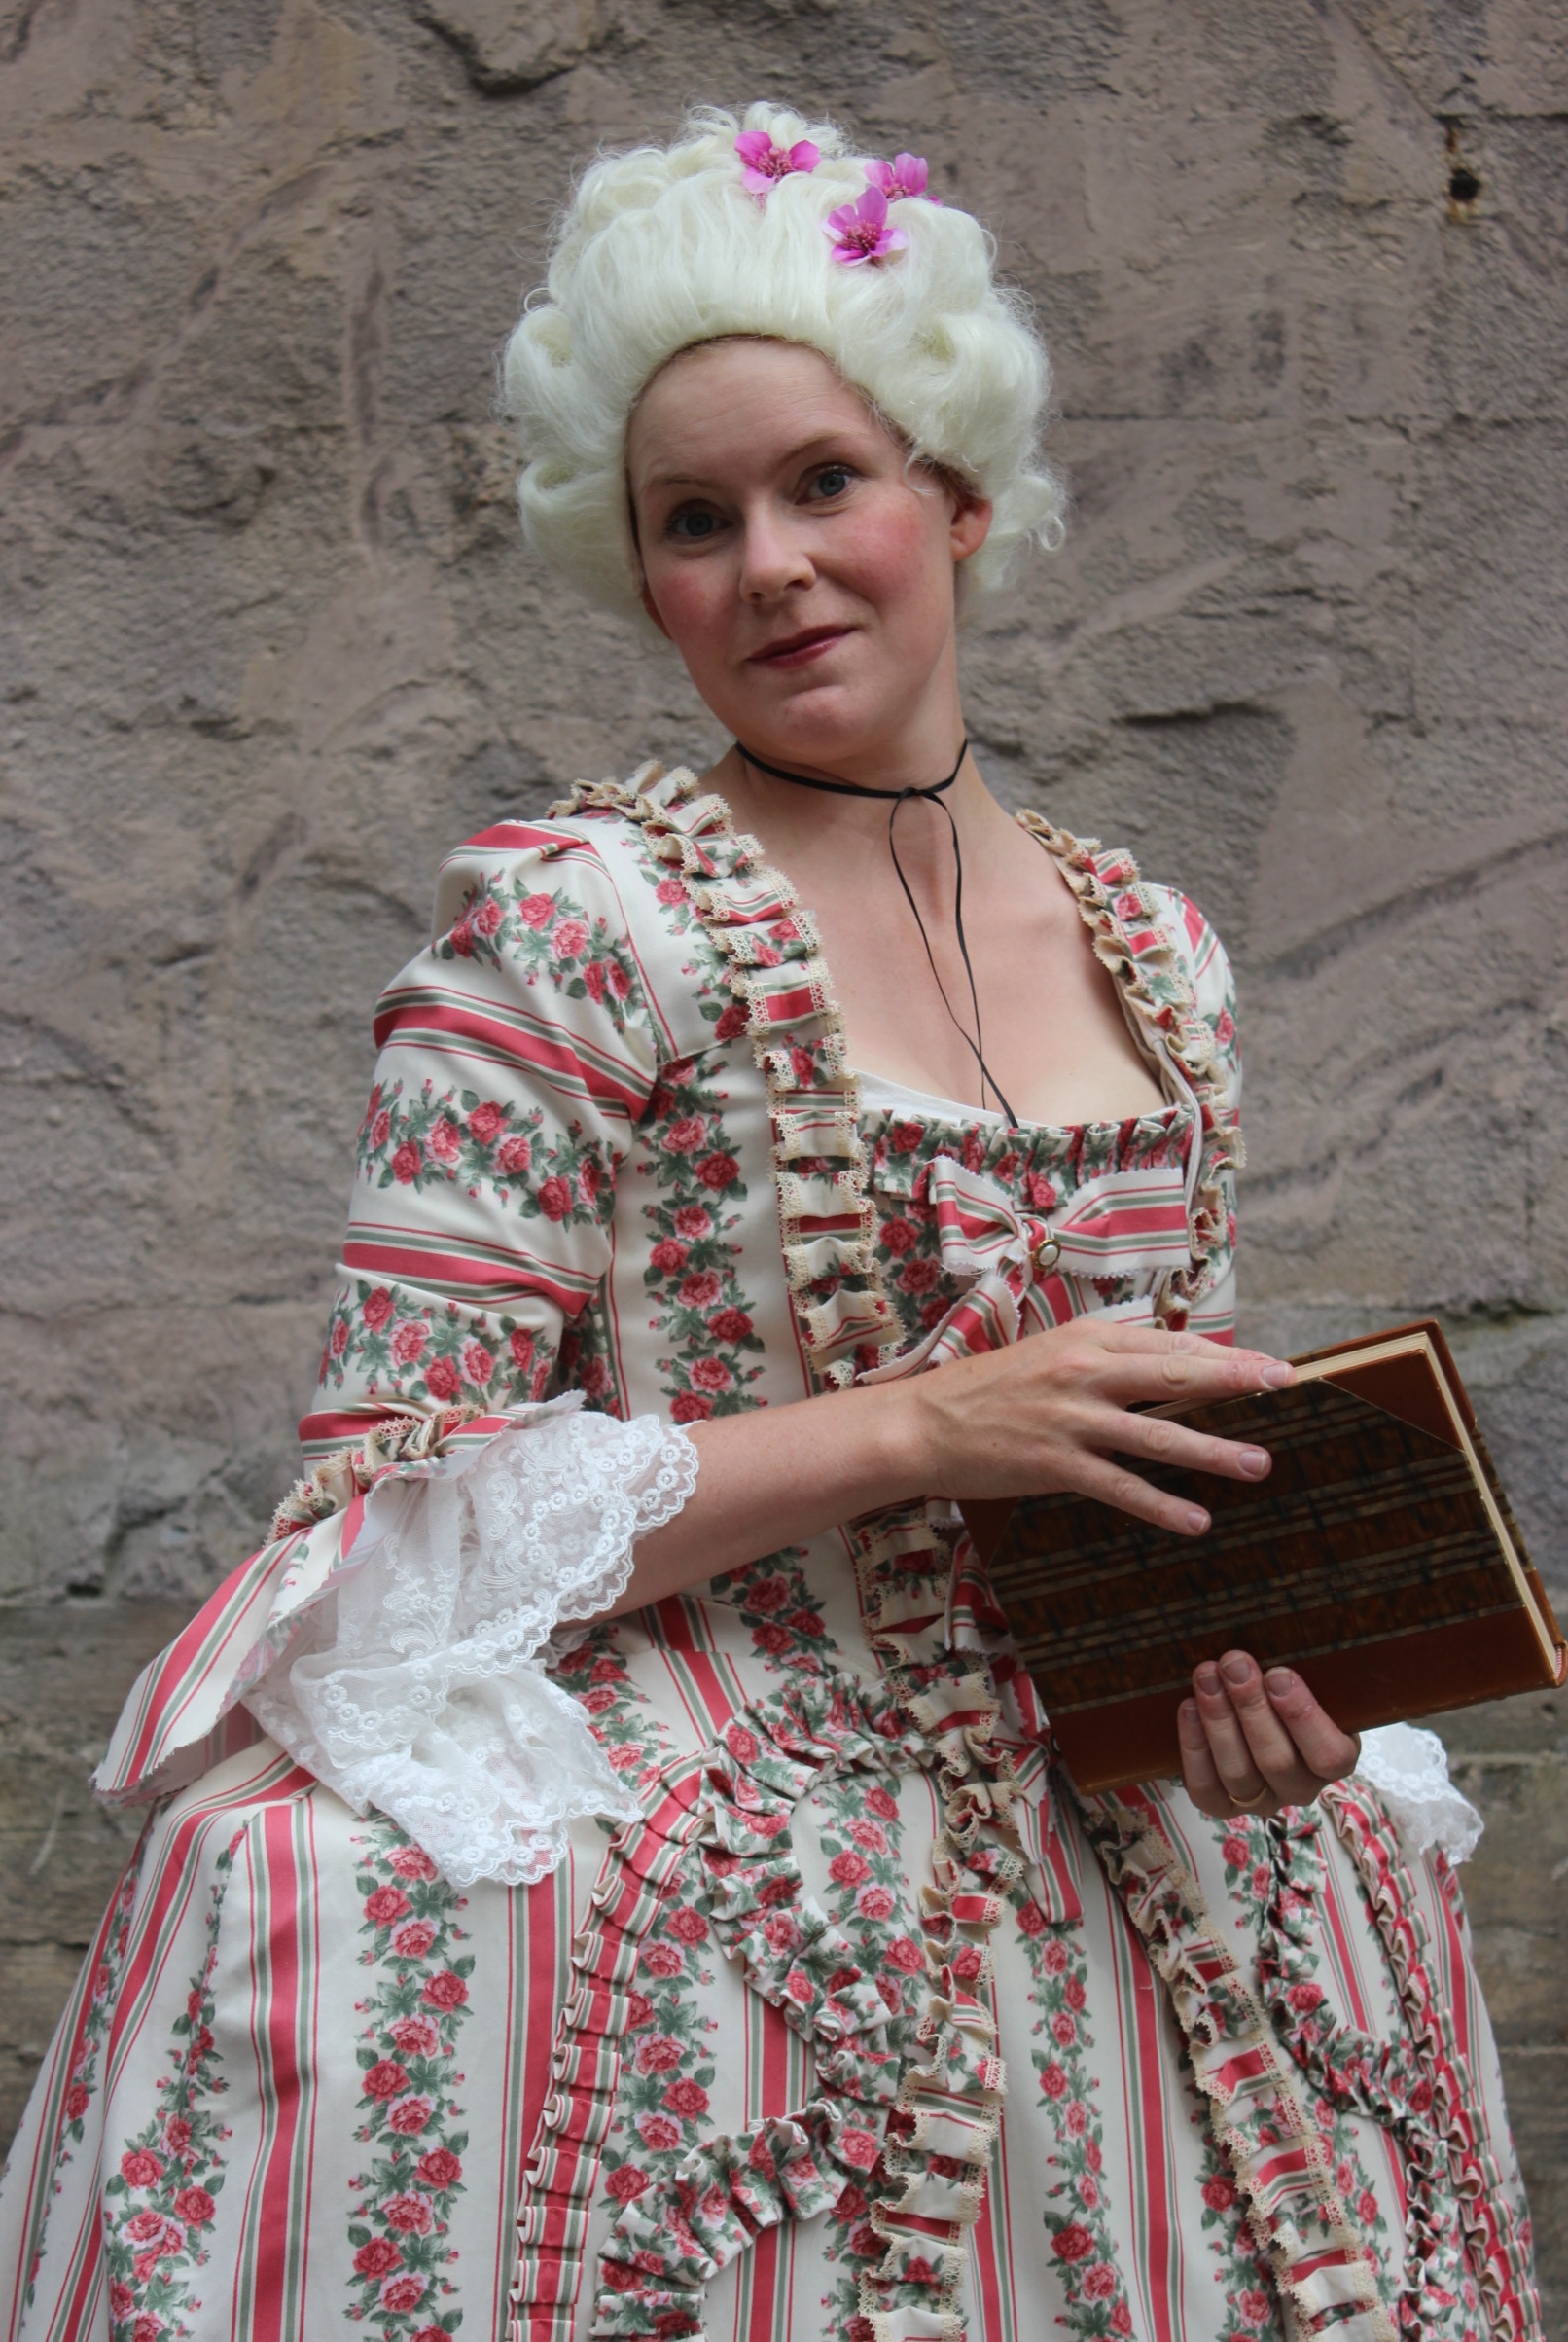
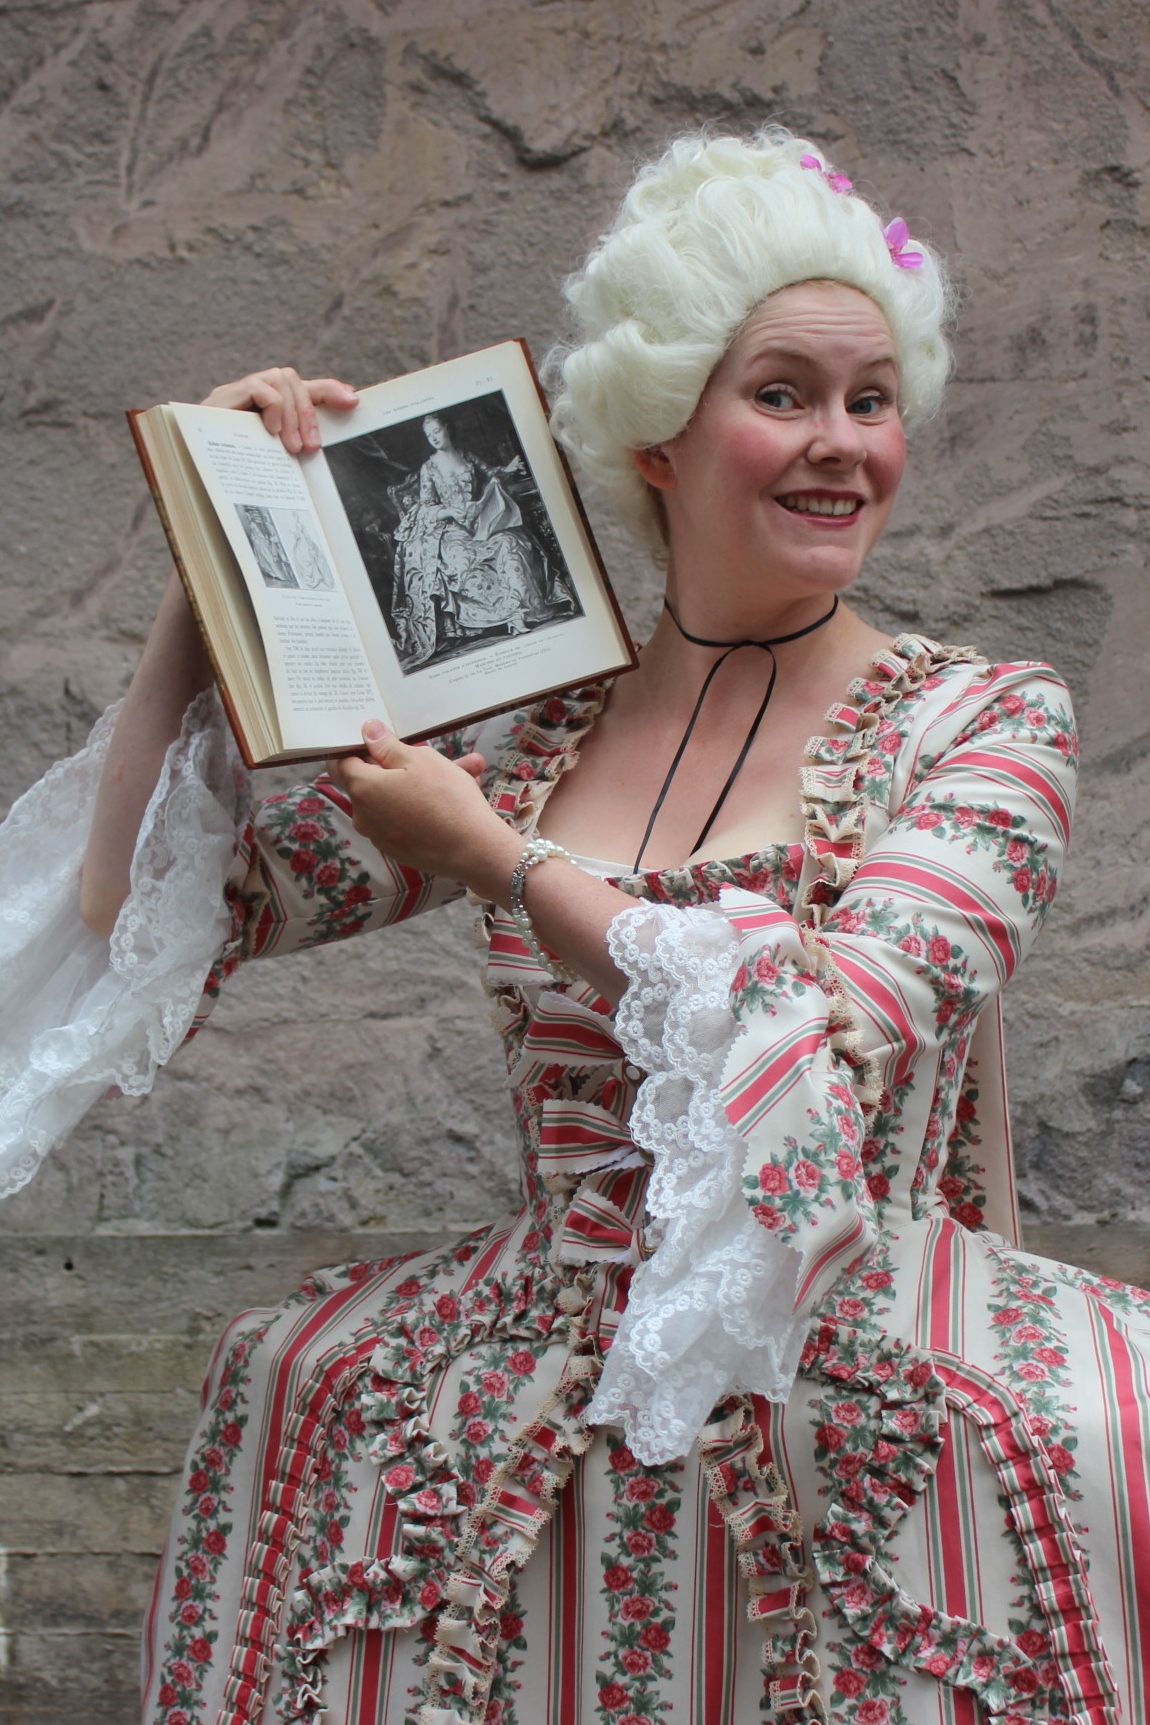
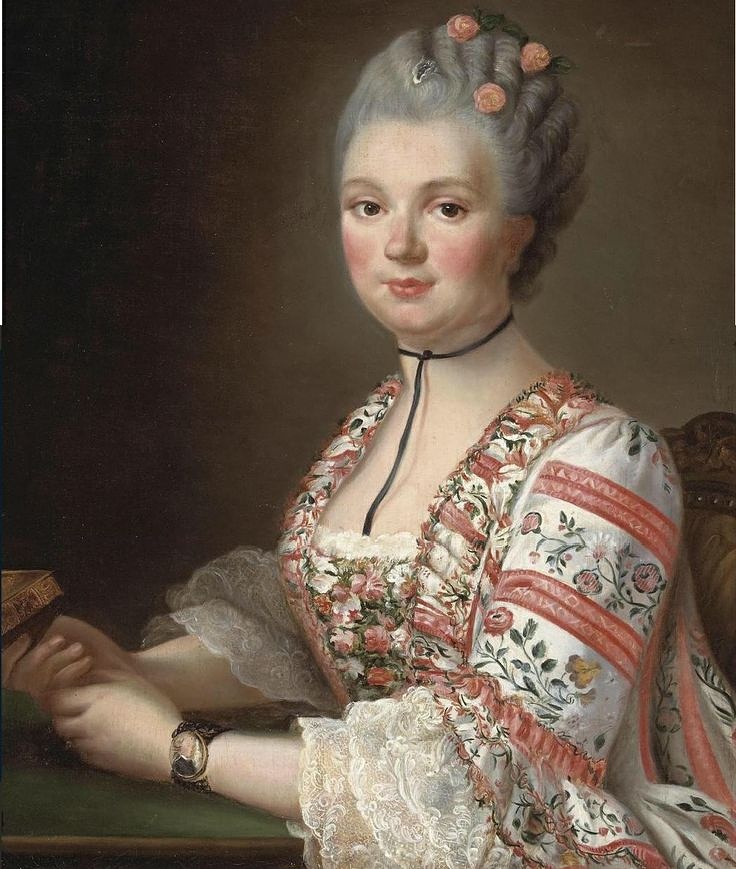
In June, however, my interest returned when I found this picture: “Portrait of a lady” (thought to be Madame de Pompadour) by François-Hubert Drouais
Whoa!
So close!
And once more the excitement came rushing back.
So I spent a few more hours finishing the lace flounces and decorating the stomacher, and that was that.
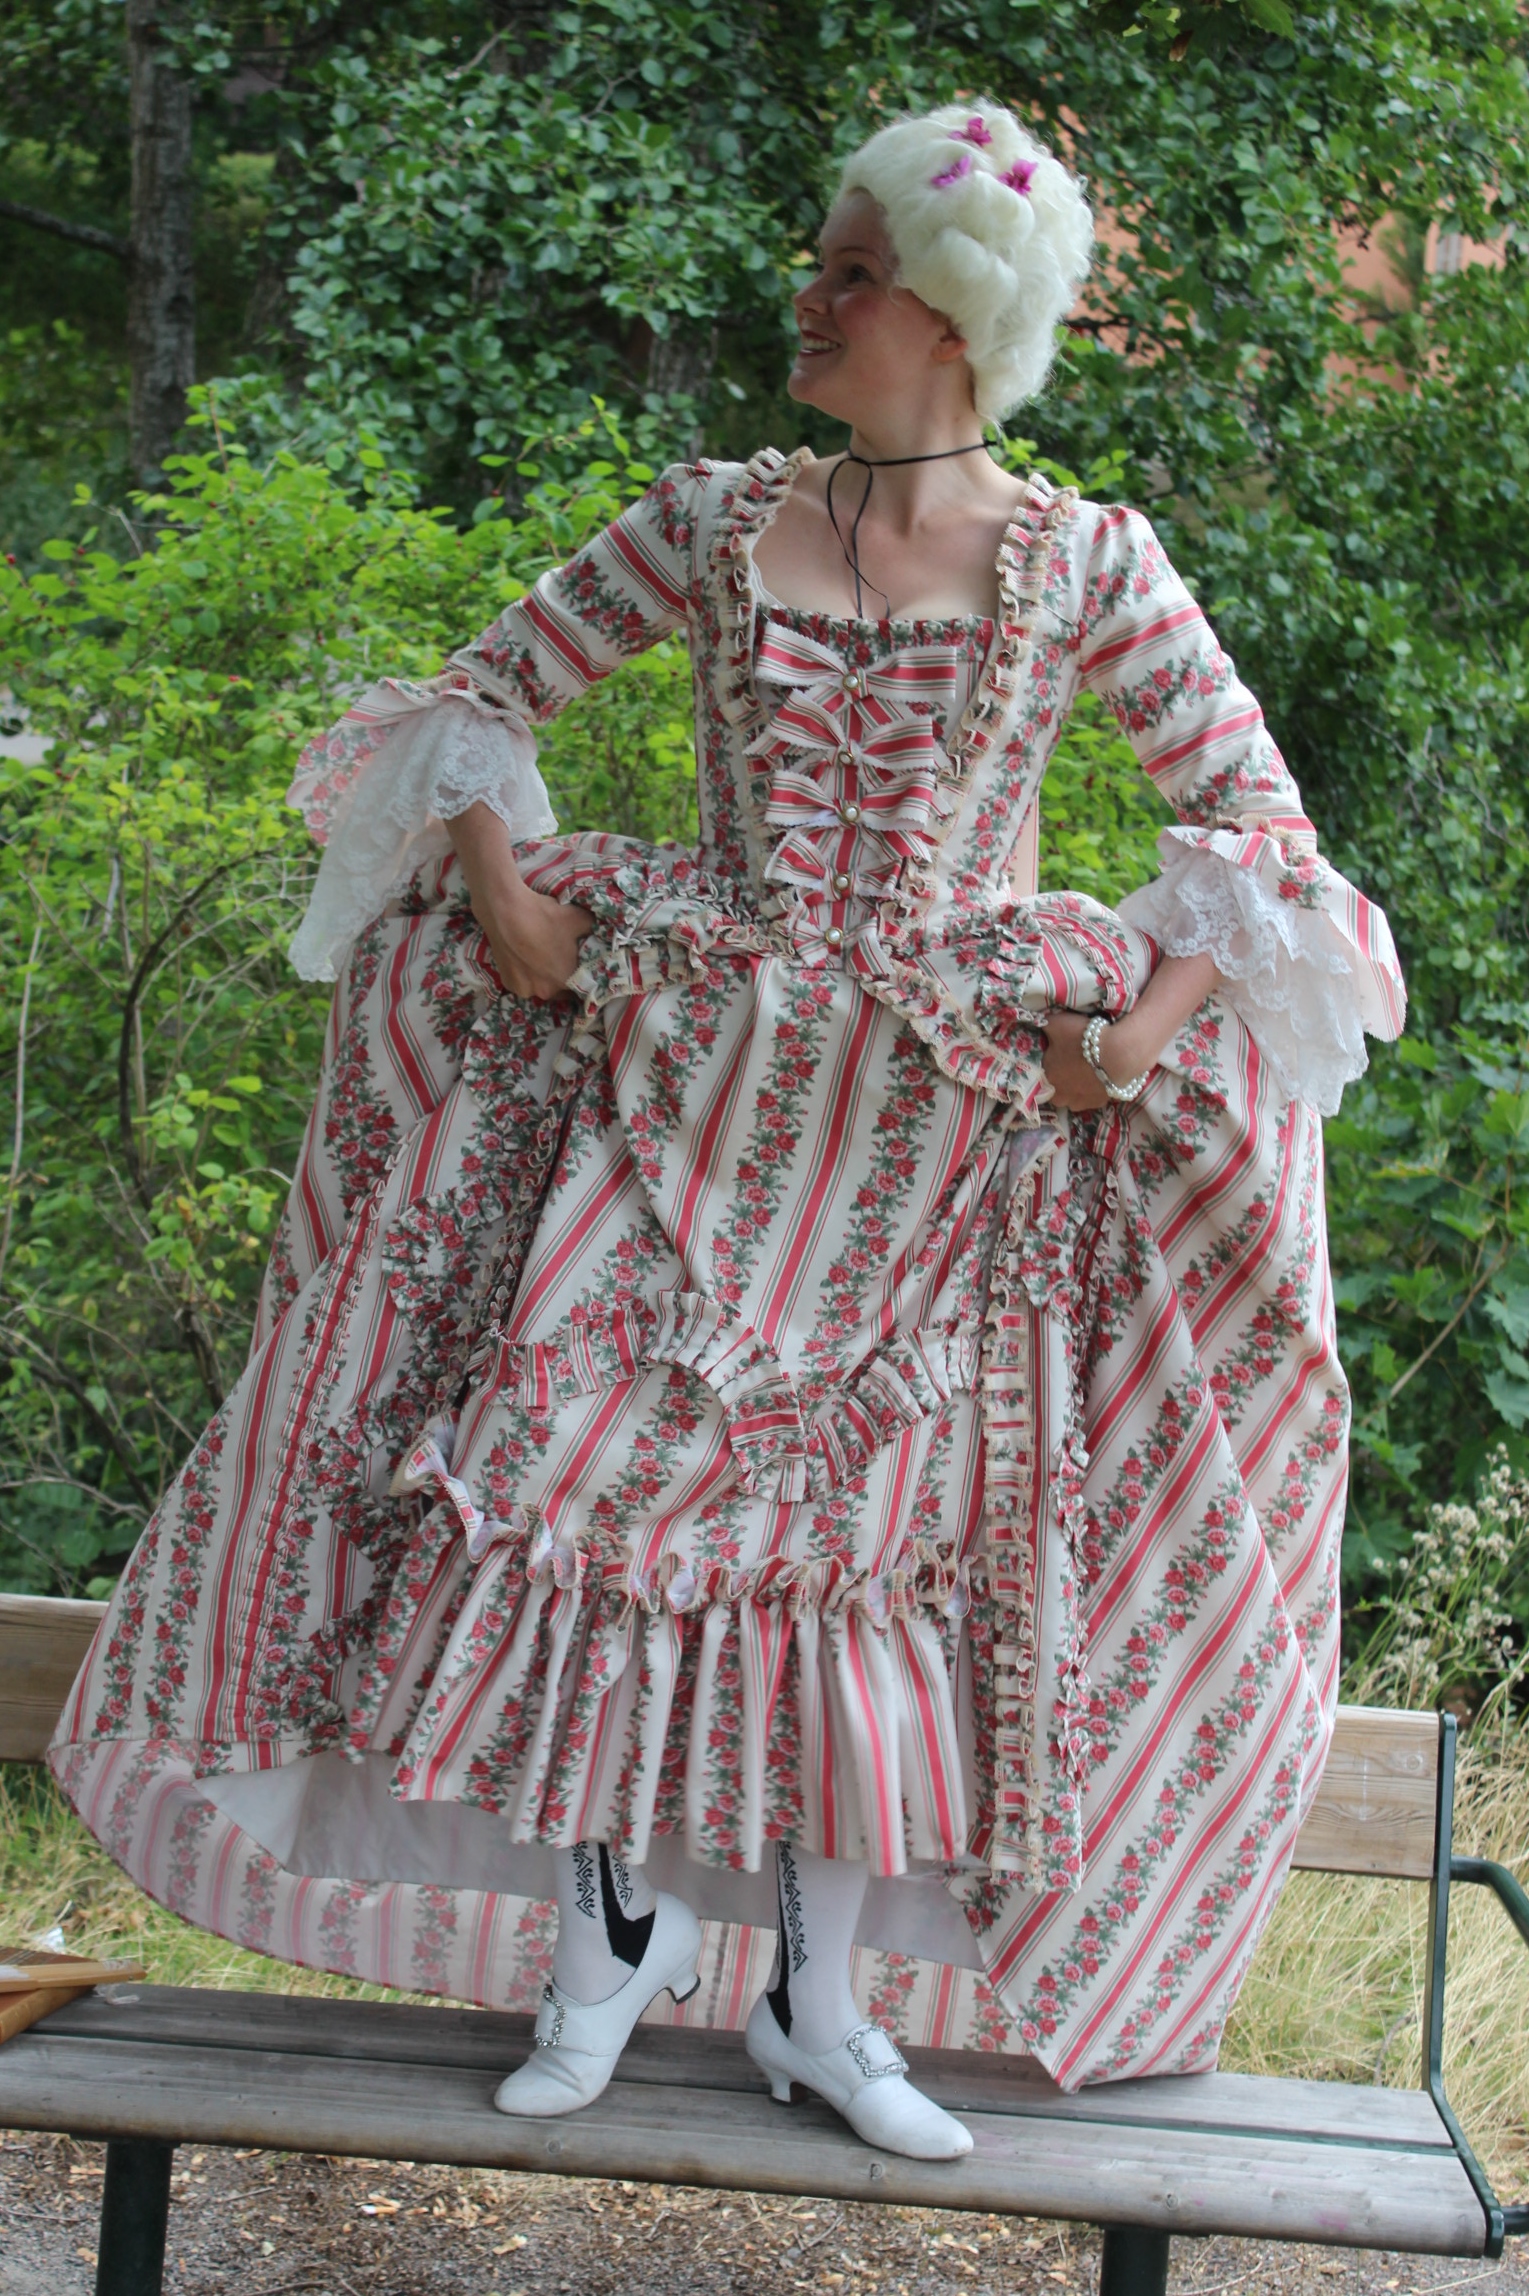
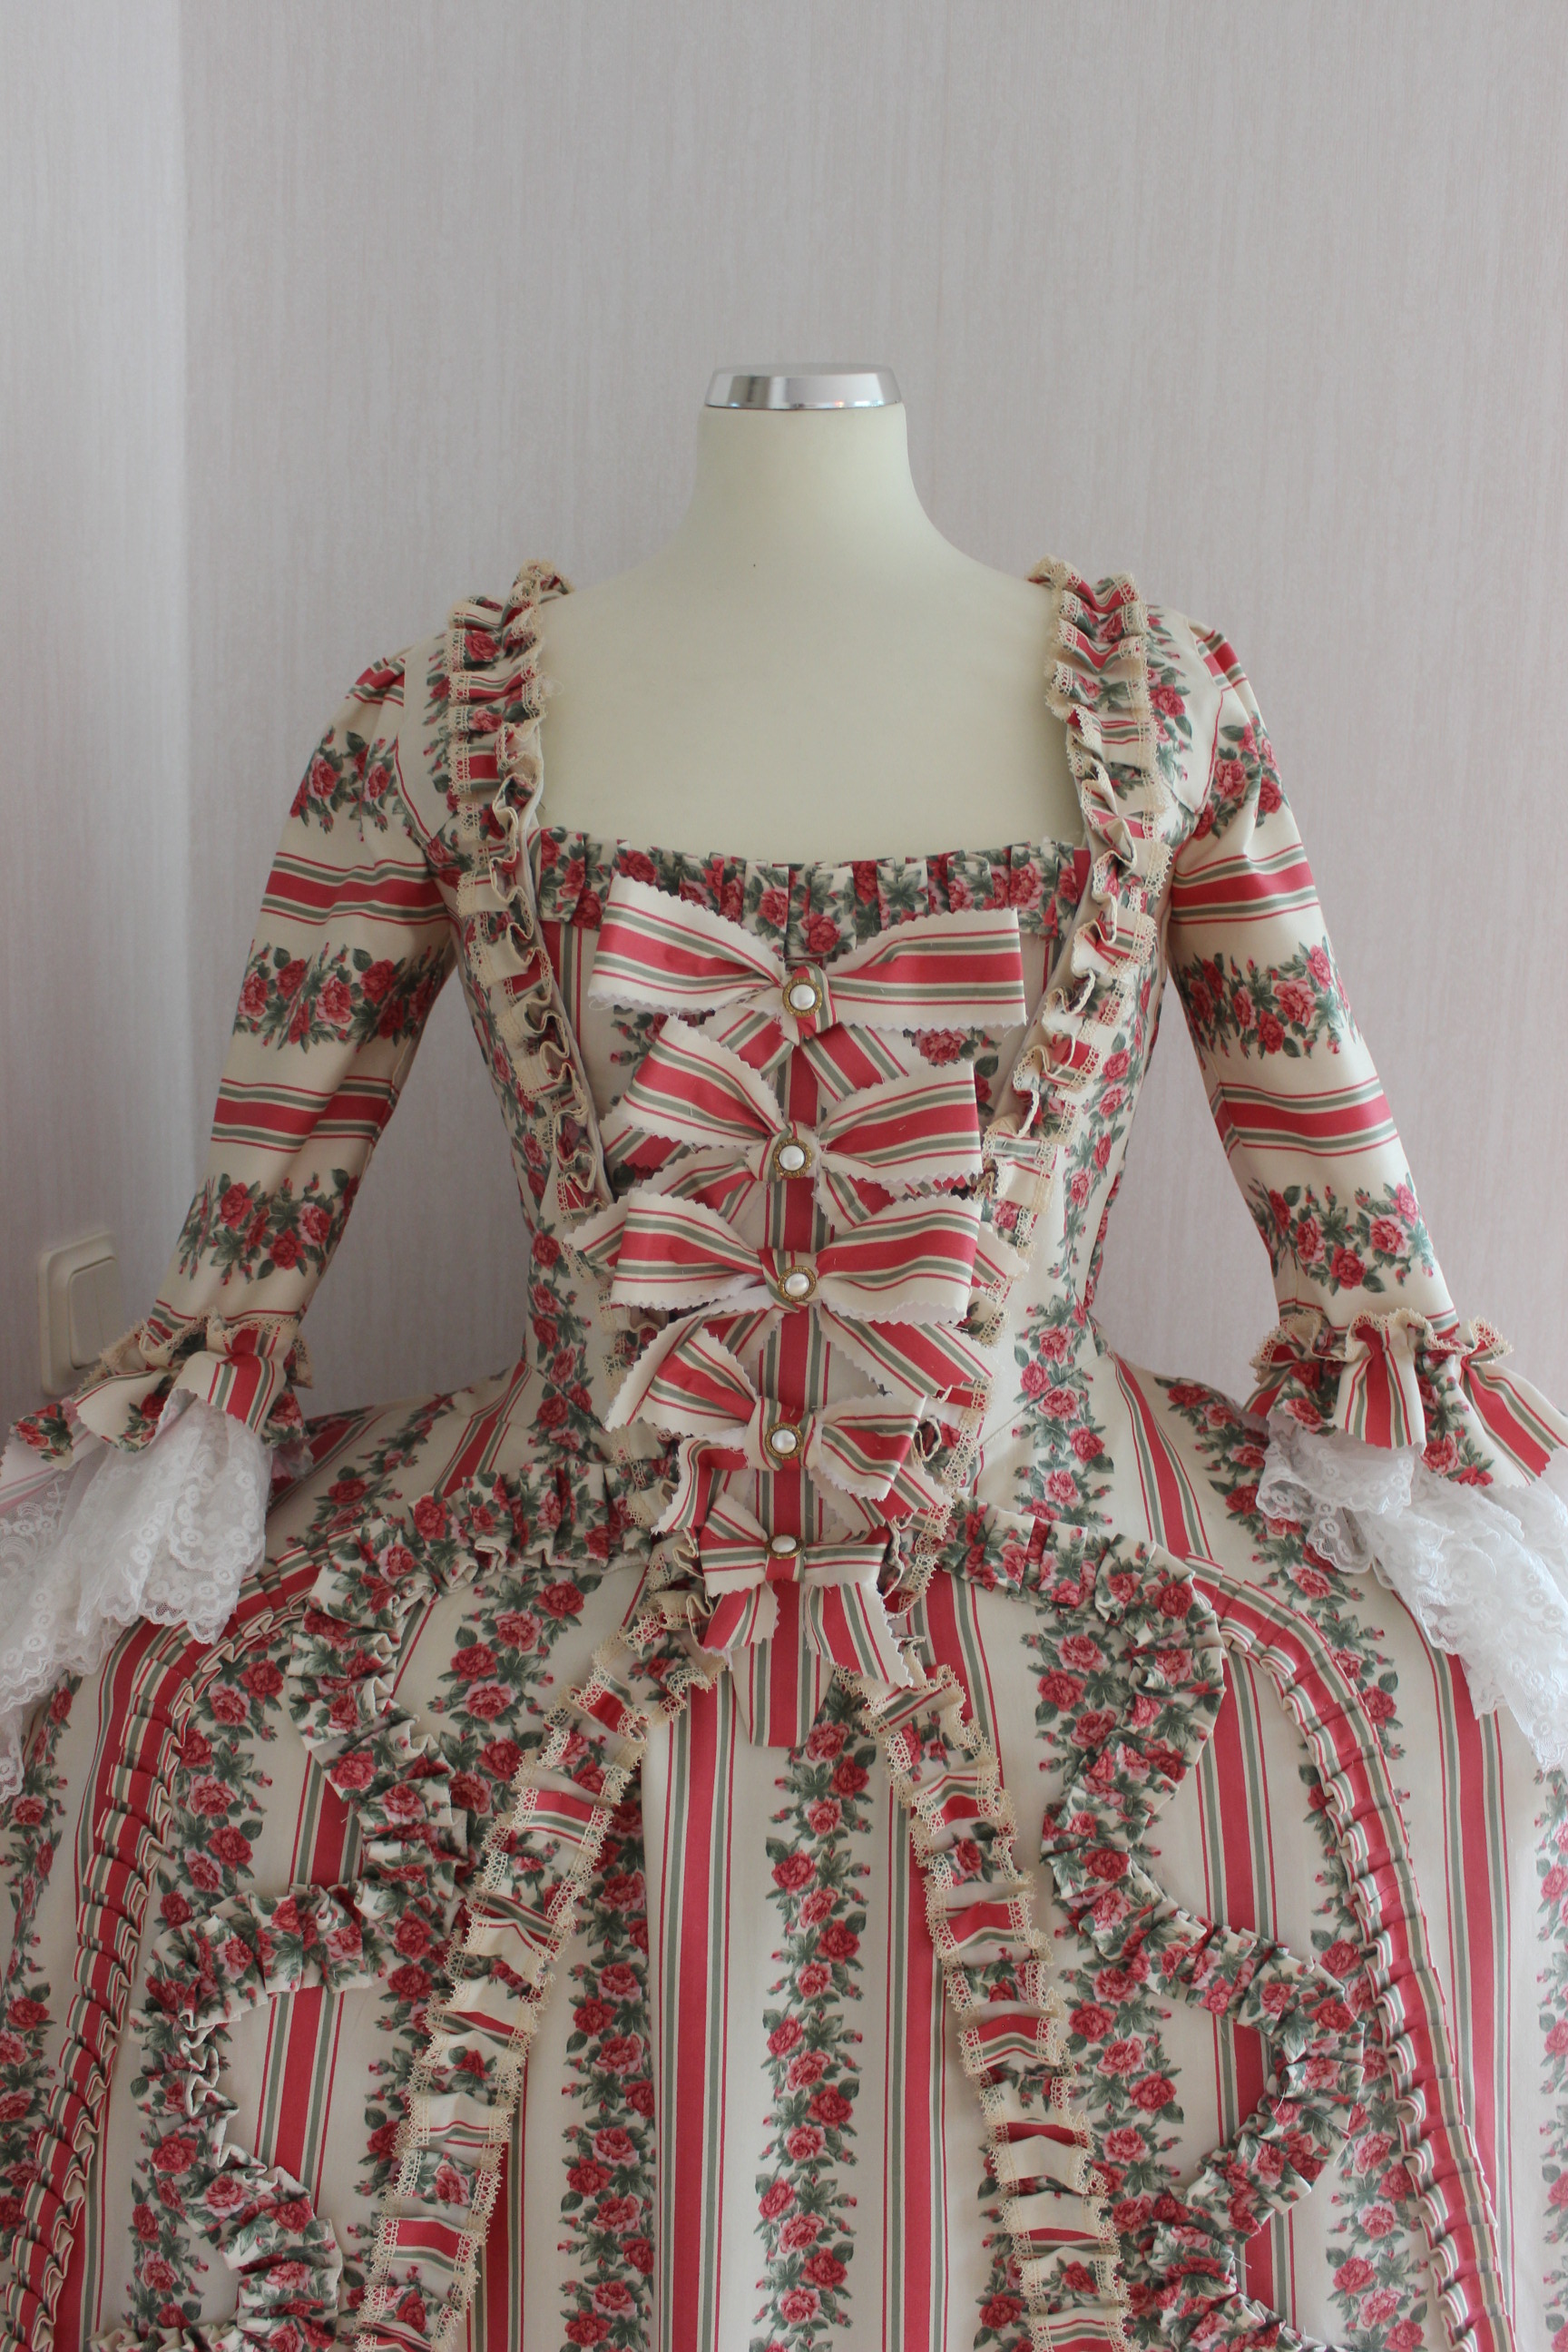
The Finished Francaise:
Just the facts:
Challenge: nr 8/2017 – Ridiculous – Fashion is sometimes a little silly, and historical fashions can look particularly odd. Make something that was considered outrageous in its own time, or is just utterly ridiculous to modern eyes.
What: A 1760s Robe a la Francaise
How it fit the challenge: The special shape of the Robe Francaise, with its wide hips/panniers and full back pleats makes it instantly recognizable for the modern viewer as a piece from one of the most exaggerated part of history. Both the shape and the “fru fru” trimmings are cause for ridicule and head-scratching in our time, even if it was a more common and sought after sight back in the 18th century.
Pattern: I draped my own based on drawings from Waughs “Cut of Womens Clothes” and Arnolds “Pattern of Fashion”
Fabric: 6-7 m of a thick flowery/striped polyester satin, 0,5 m cotton twill for interlining and 0,5m white cotton for lining.
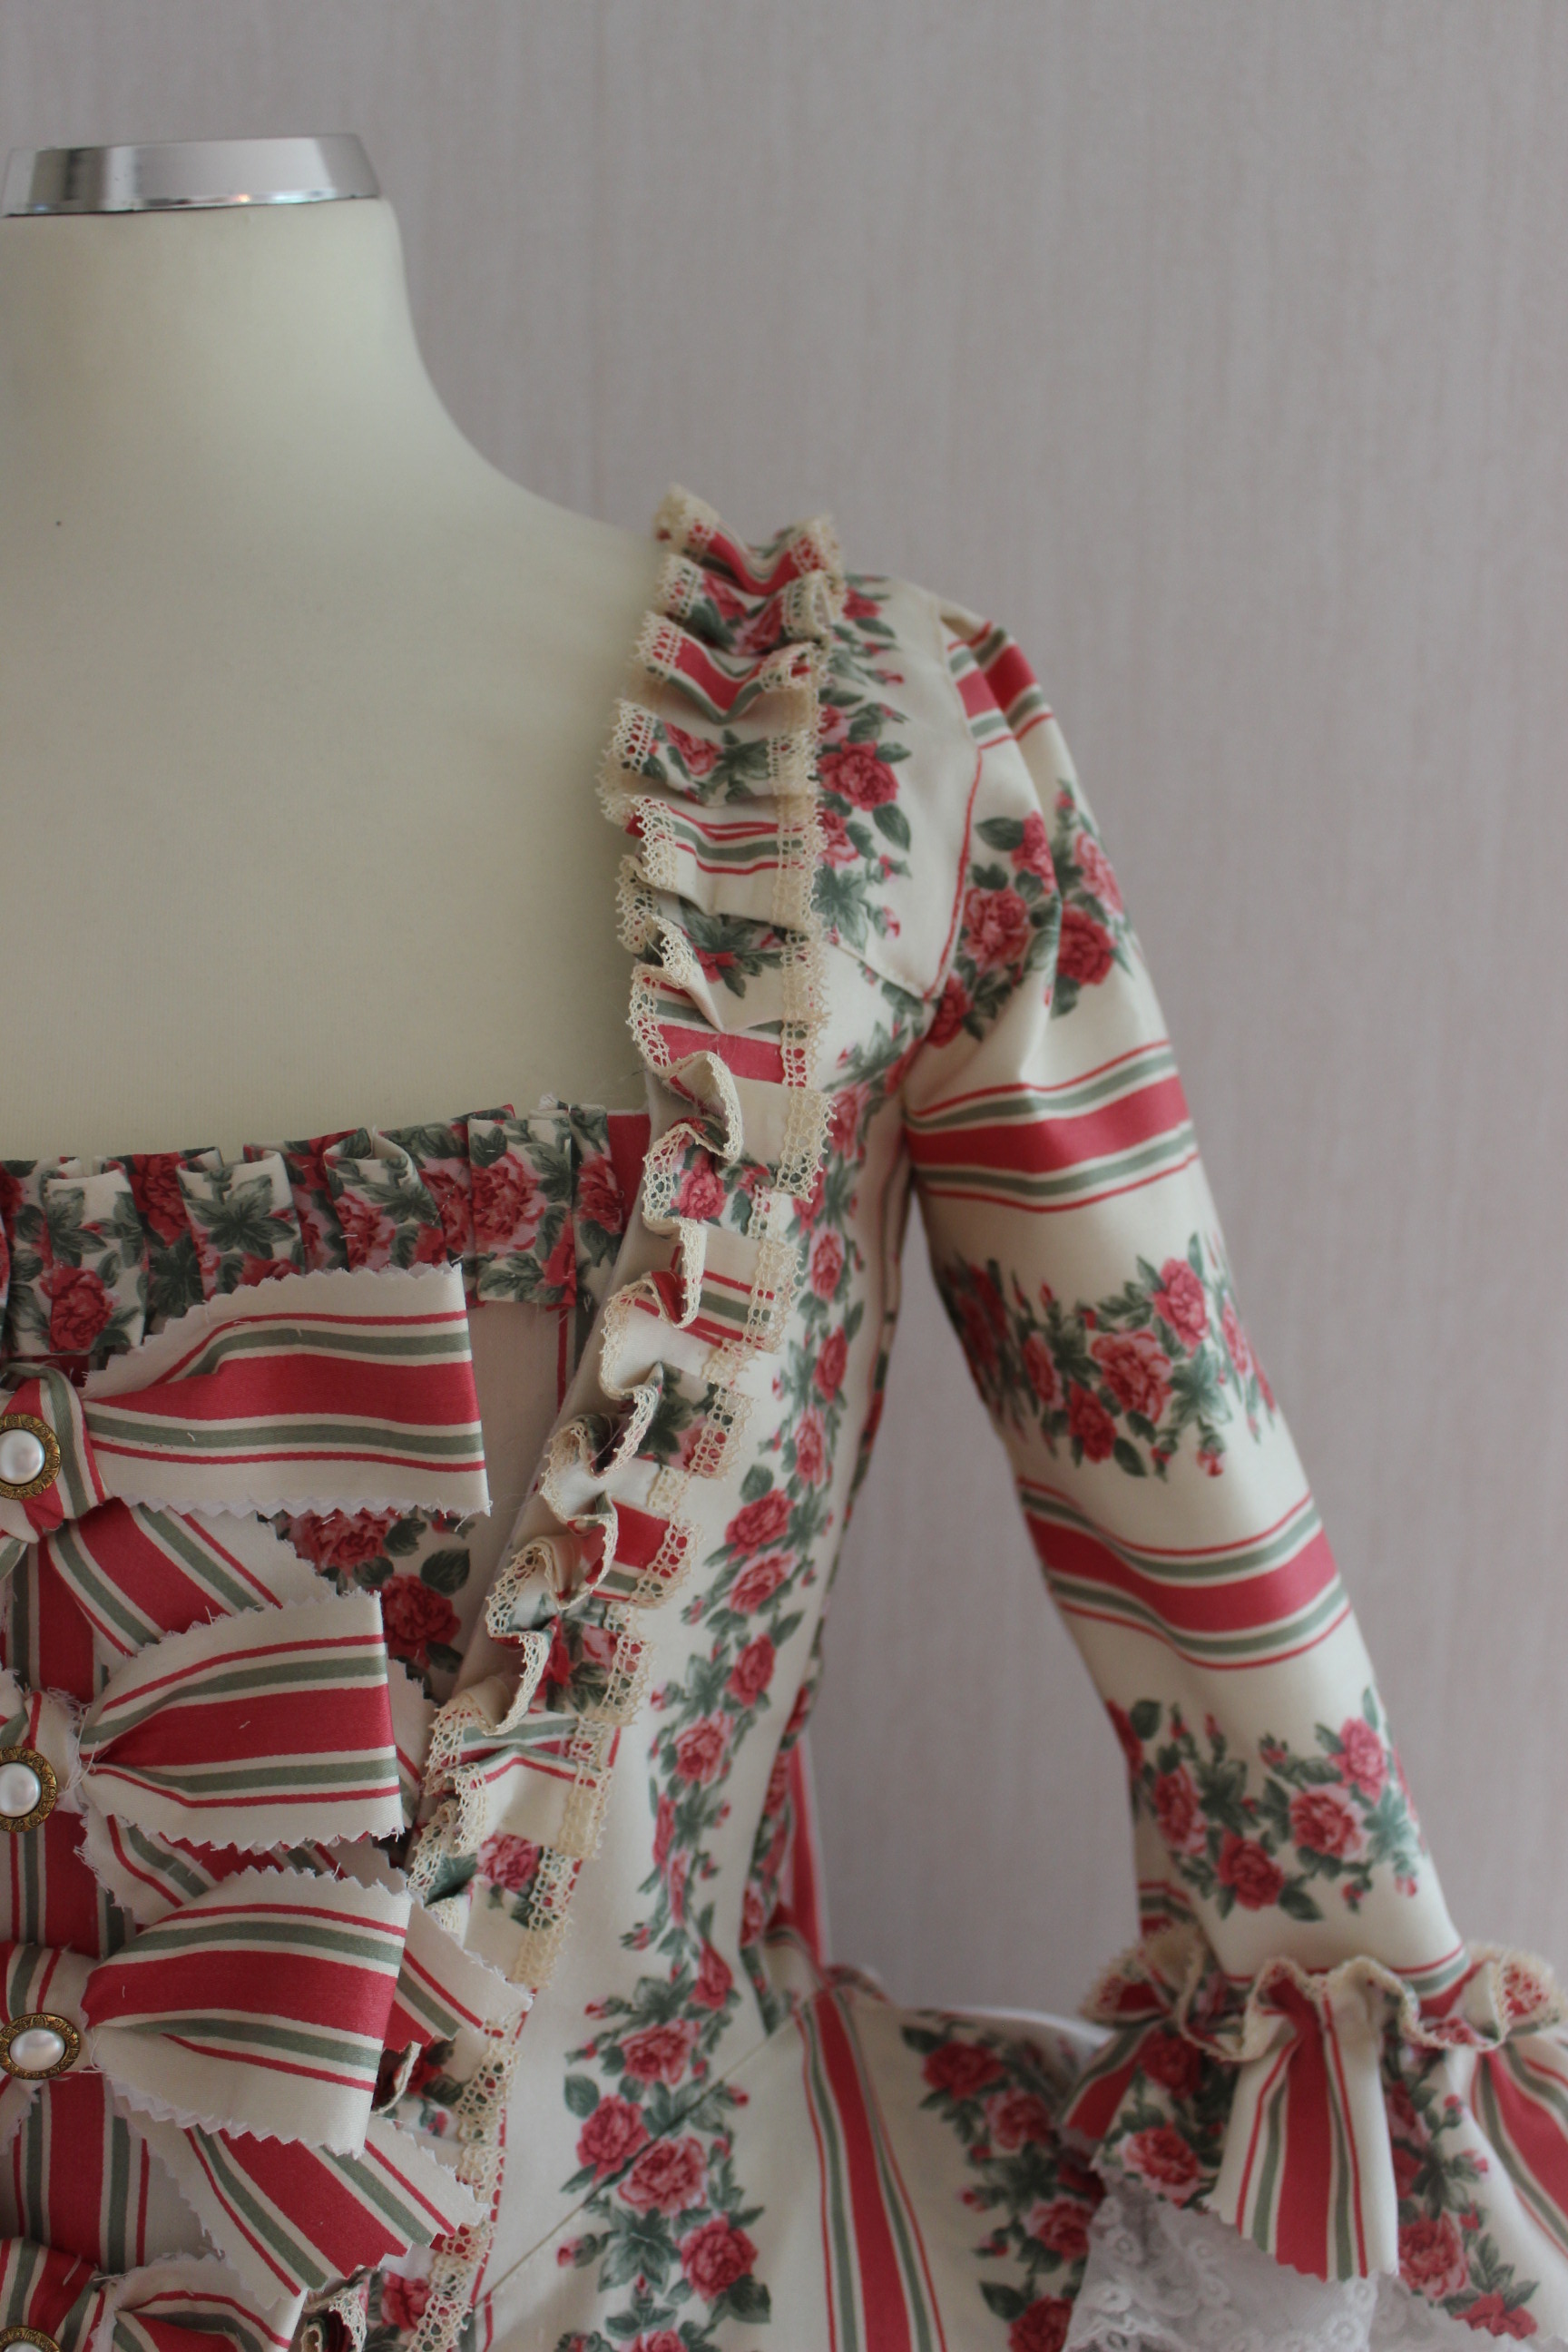
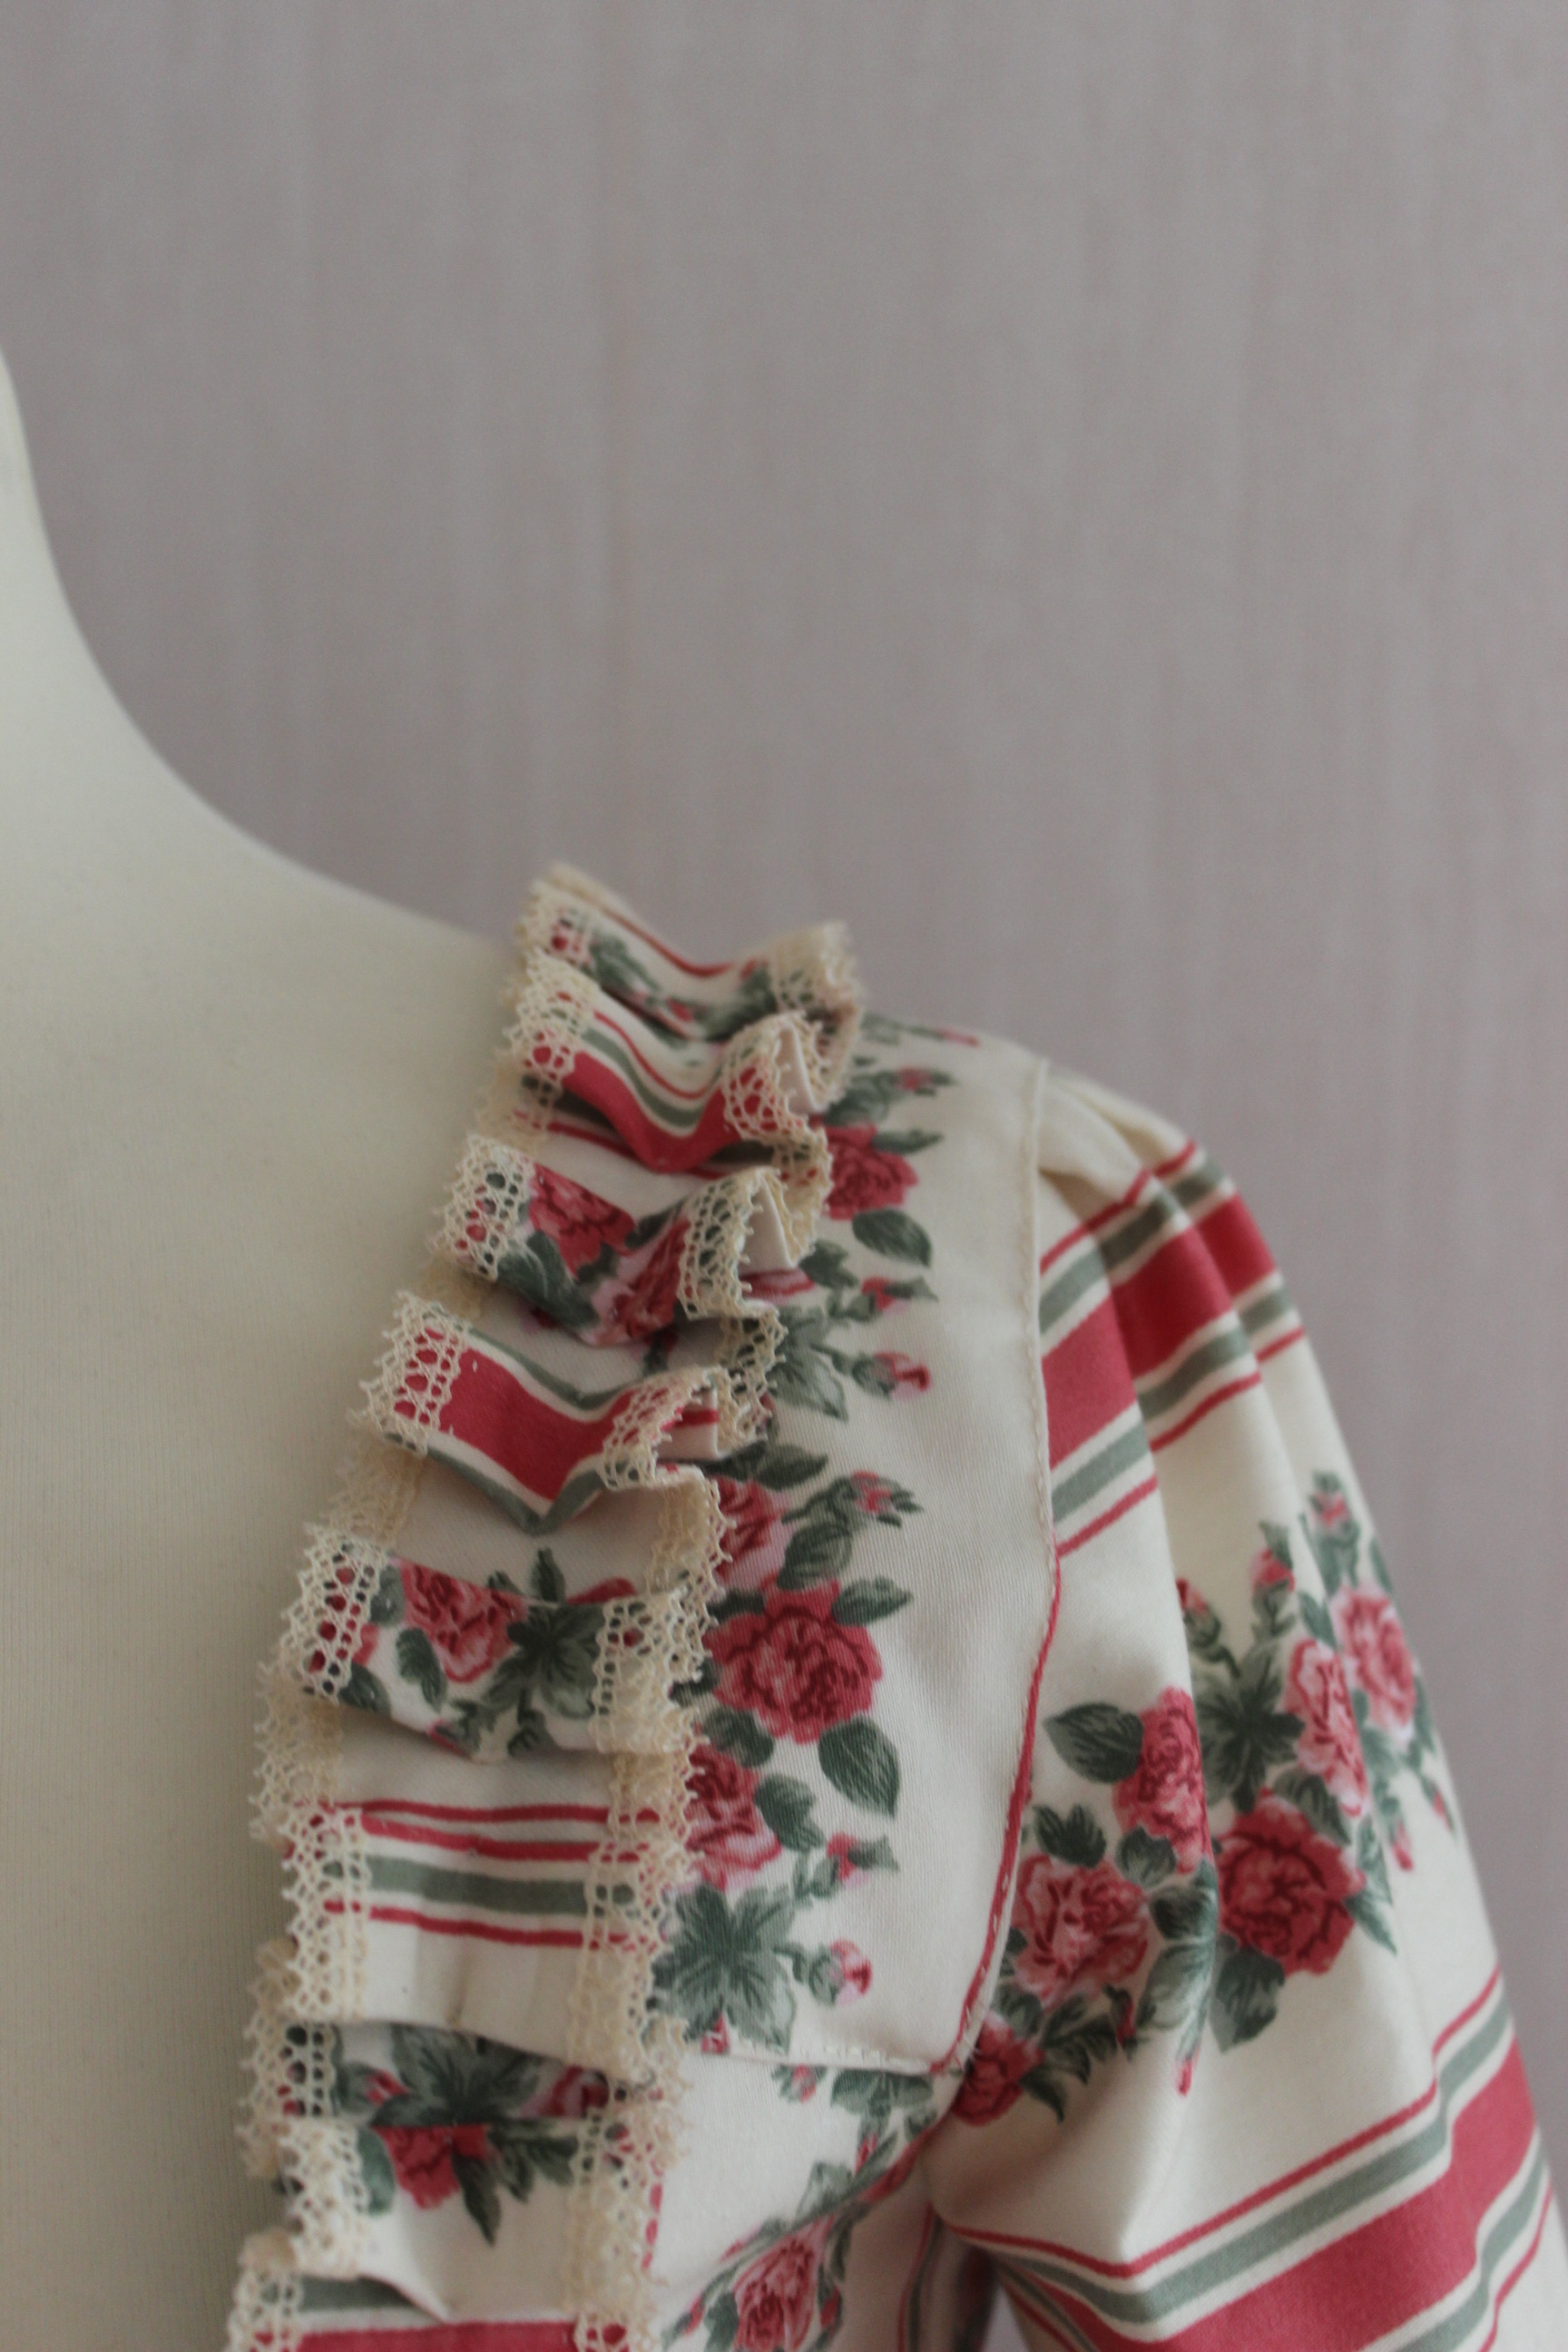
Notion: Thread, 2 m cotton cord for lacing, 3 m plastic bones for back opening and stomacher, about 20m of thin cotton lace for the trimming, 5 m of 15 cm whide cotton lace fro the sleeve ruffles and 5 buttons for decoration on the stomacher.
How historical accurate: So so. The fabric are polyester (should have been silk), the pattern and construction method are ok since its draped for my (corseted) body and entirely hand sewn. The print on the fabric is a bit to modern, but as shown in the above portrait not to far of. The business of the design/print are totally accurate even though it may seem a bit over the top for our modern sensibilities. I’ll give it a 7/10
Time: Waaay to long… I started this project in the autumn 2014, the again winter 2014/2015, and again winter 2016/2017 and only now (summer 2017) got around to finish it. I spend somewhere between 100-150 hours on the dress.
Cost: Not sure but I’ll guesstimate about 600 Sek (75Usd).
First worn: For photos in late July
Final thoughts: I’m so happy that it is finished! And even though there is some things I liked to have made differently I think it is spectacular, and it’s so fun to wear.
***
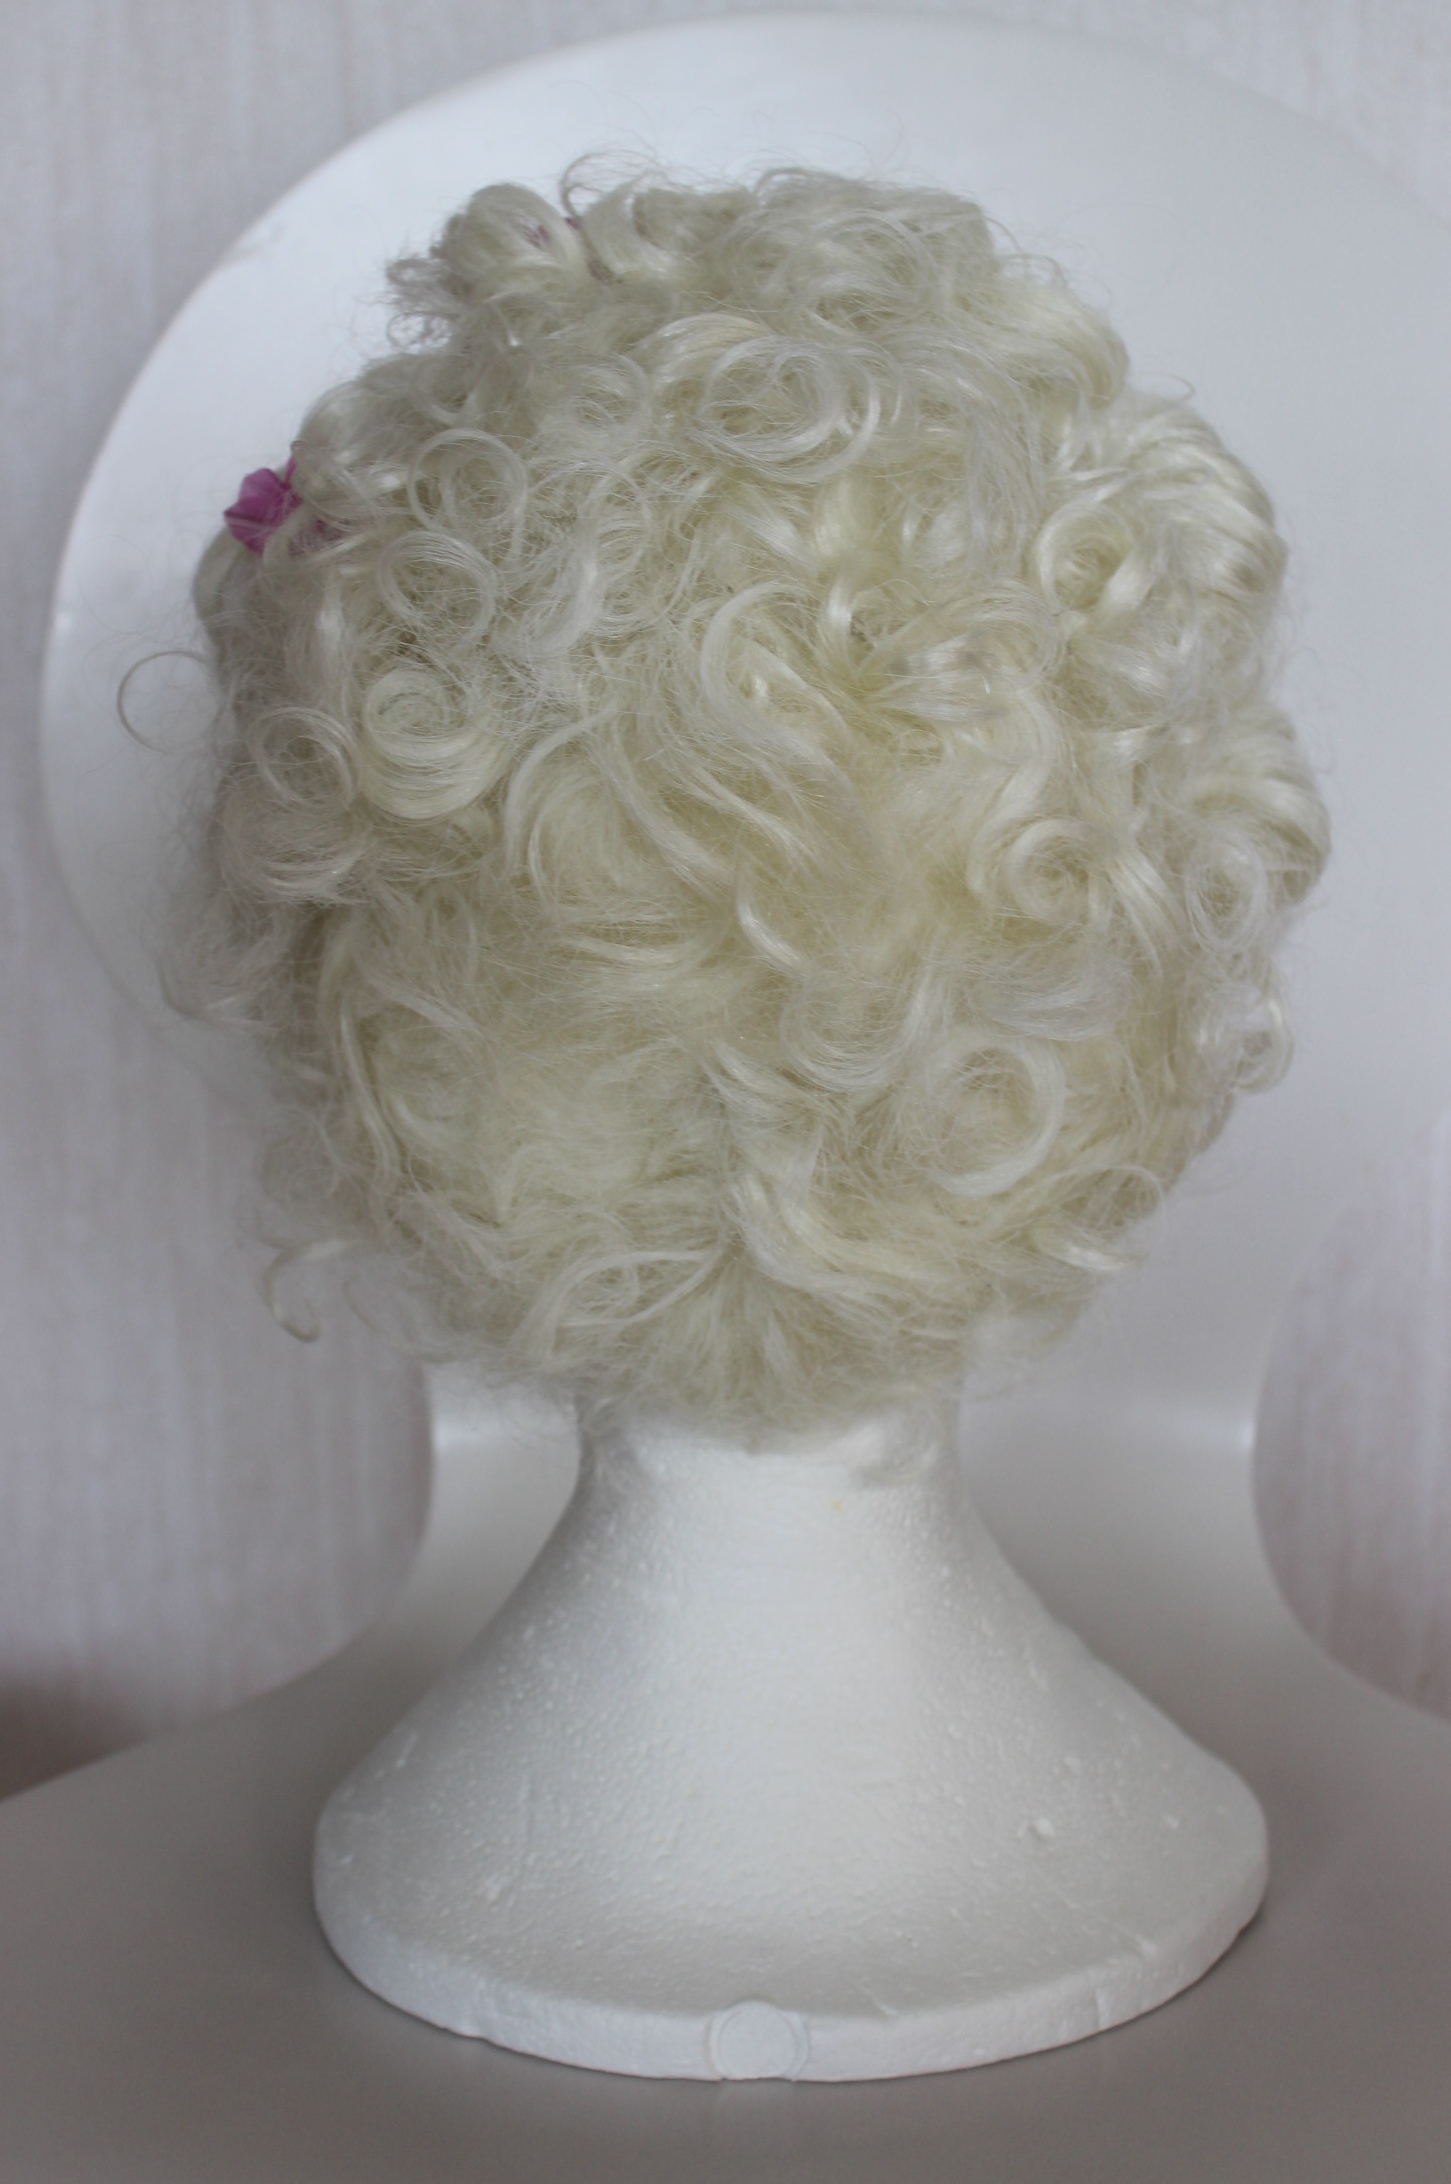
For this project I alos made a Masquerade wig to match my gown.
It’s made from a re-styled and powdered halloween wig.
Since my first planes for the HSM nr 6/2017 fell through, I needed to think of something else to make.
Stuck in the 1920s as I where, I quickly decided to use on of my old fabrics (you know the ones you bough really Loooong ago, when you were “young” and foolishly though everything poly and shiny was pretty).I still think this fabrics pretty, sort of, but now I’m all to aware that sequined polyester lace was not a 1920s thing.
Anyhow I figure if I ever’s gona use it now might be the time.
Unfortunately I only had about 1 m.
Not enough for a dress – how small the 20s fashion ever might be compared to my usual stuff.
Hm, how to get that little amount of fabric to cover the body?
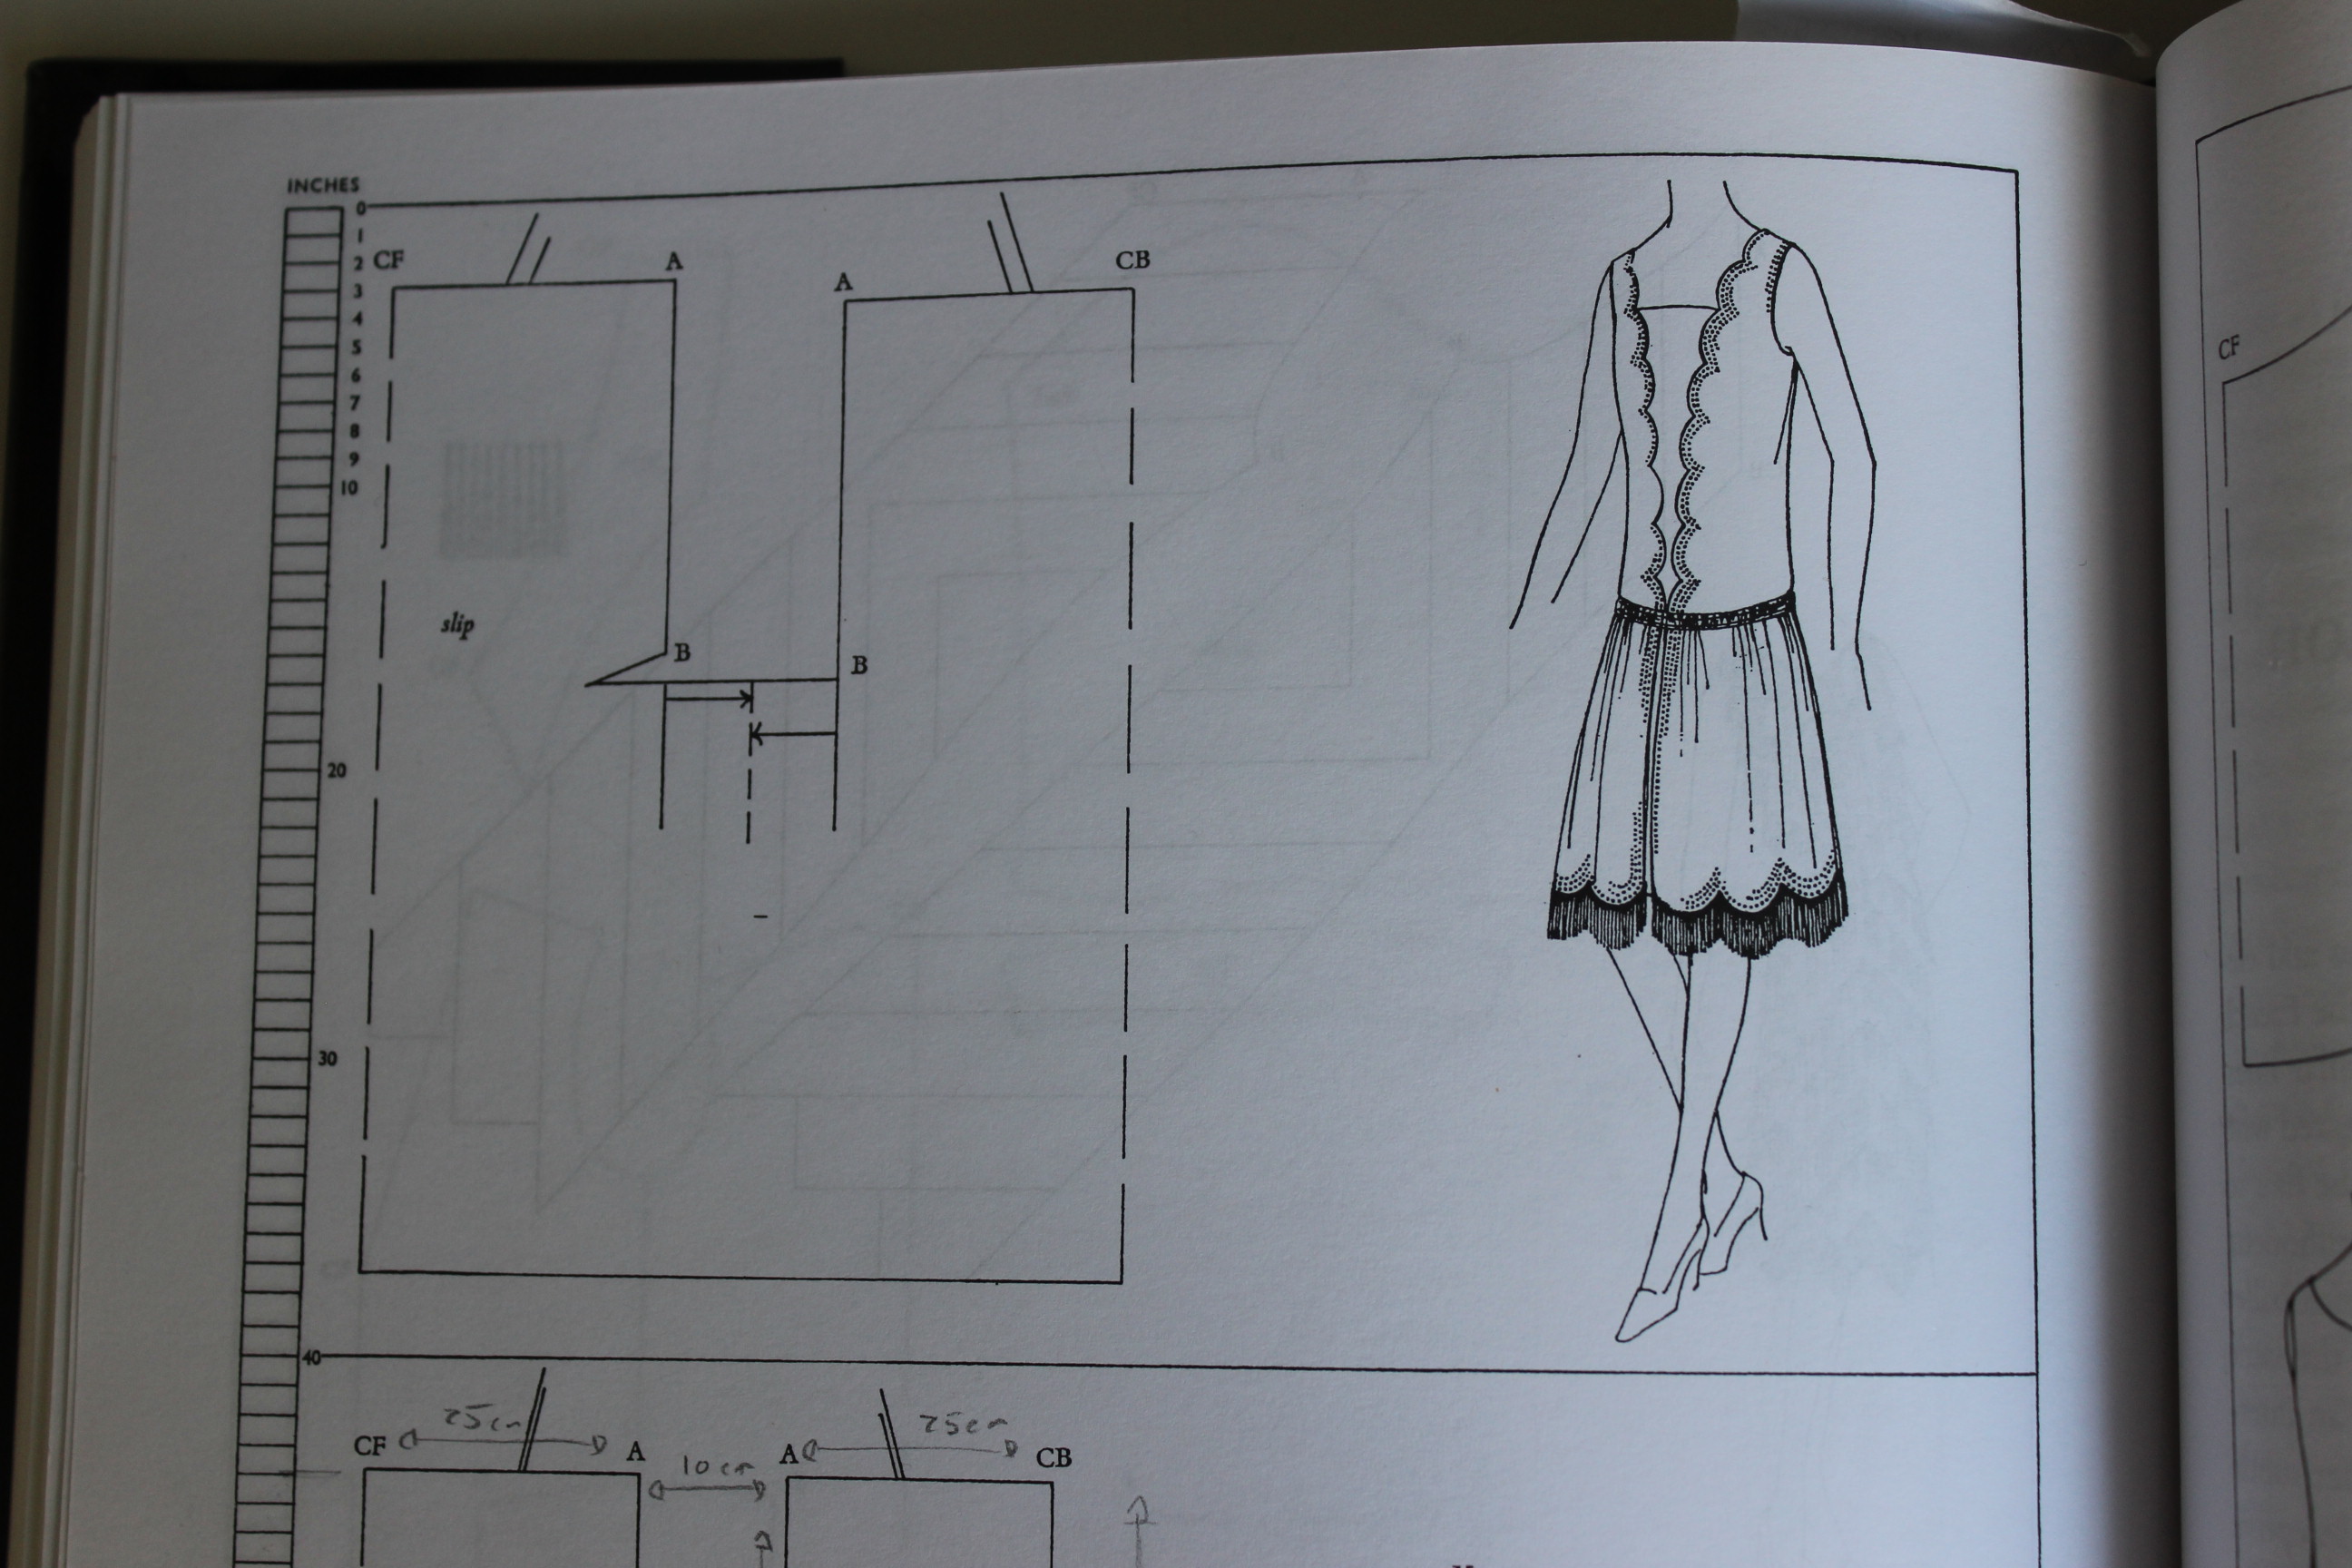
By making really low necklines and short hemes of course. like the V-necks in this fashion plate or the pattern from “Waughs Cut of Womens clothes”
So I though of the brilliant idea to cut the lace in half almost at the bias to create the triangular pieces that would make up the bodice. only trouble was I forgot to mirror the pieces for the second cut – which of course left me with 4 identical trapezes pieces of fabric (and not 2 left and 2 right which I needed).
Crap!
I had absolutely no fabric left, not even scraps, so I experimented with using the wrong side of the fabric for two of the pieces.
No, that would not work, neither esthetically or functionally, since the sequins would snatch hold on the lining or underdress.
So I decided to try to fix my mistake by also cutting the pieces the correct way. Which ment they would need to be mended back together form the first cut. This resulted in slightly smaller pattern pieces and a mend that would hopefully not be this obvious with selveges cut down and worn over a underdress.
I experimented on my dressform to get the sizing right and cut and stitched as I went along, deciding on a knot for the front to make it easy to adjust and to create some interest in the otherwise simple design. I also found the perfect little dress (on sale) to use as a slip.The dress worn open.
The Finished dress:
Just the facts:
Challenge: 2017 nr 6 – Metallics – make something in silver, gold, bronze, and copper, whether it be an actual metal, cloth of gold or silver, or lamé.
What: a 1920s silvery palette party gown
Pattern: None – I just cut and stitched
Fabric & Notions: 1,5m of white/silver palette lace in polyester and sewing thread.
How historical accurate: Not at all. Maybe the silhouette would be passable but it lacks lots of the refinement the dresses of the time possessed. i’ll give it a 3/10.
Time: About 6 hours (most of which I spent scratching my head and cursing, wanting to trash the damn thing).
Cost: About 50 Sek (5 Usd), found the fabric in the clearance bin several years ago.
First worn: Beginning of July for photos.
Final thoughts: I can’t say I’m particular happy about this dress. The dress itself are fine, but the road to make it was only trouble and the fit is strange on me (it requires a smaller figure). But I am glad I pushed through and finished it despite everything, then again I’ll be reminded of it every time i find some more lost sequins in my home (which will probably be for several more years)
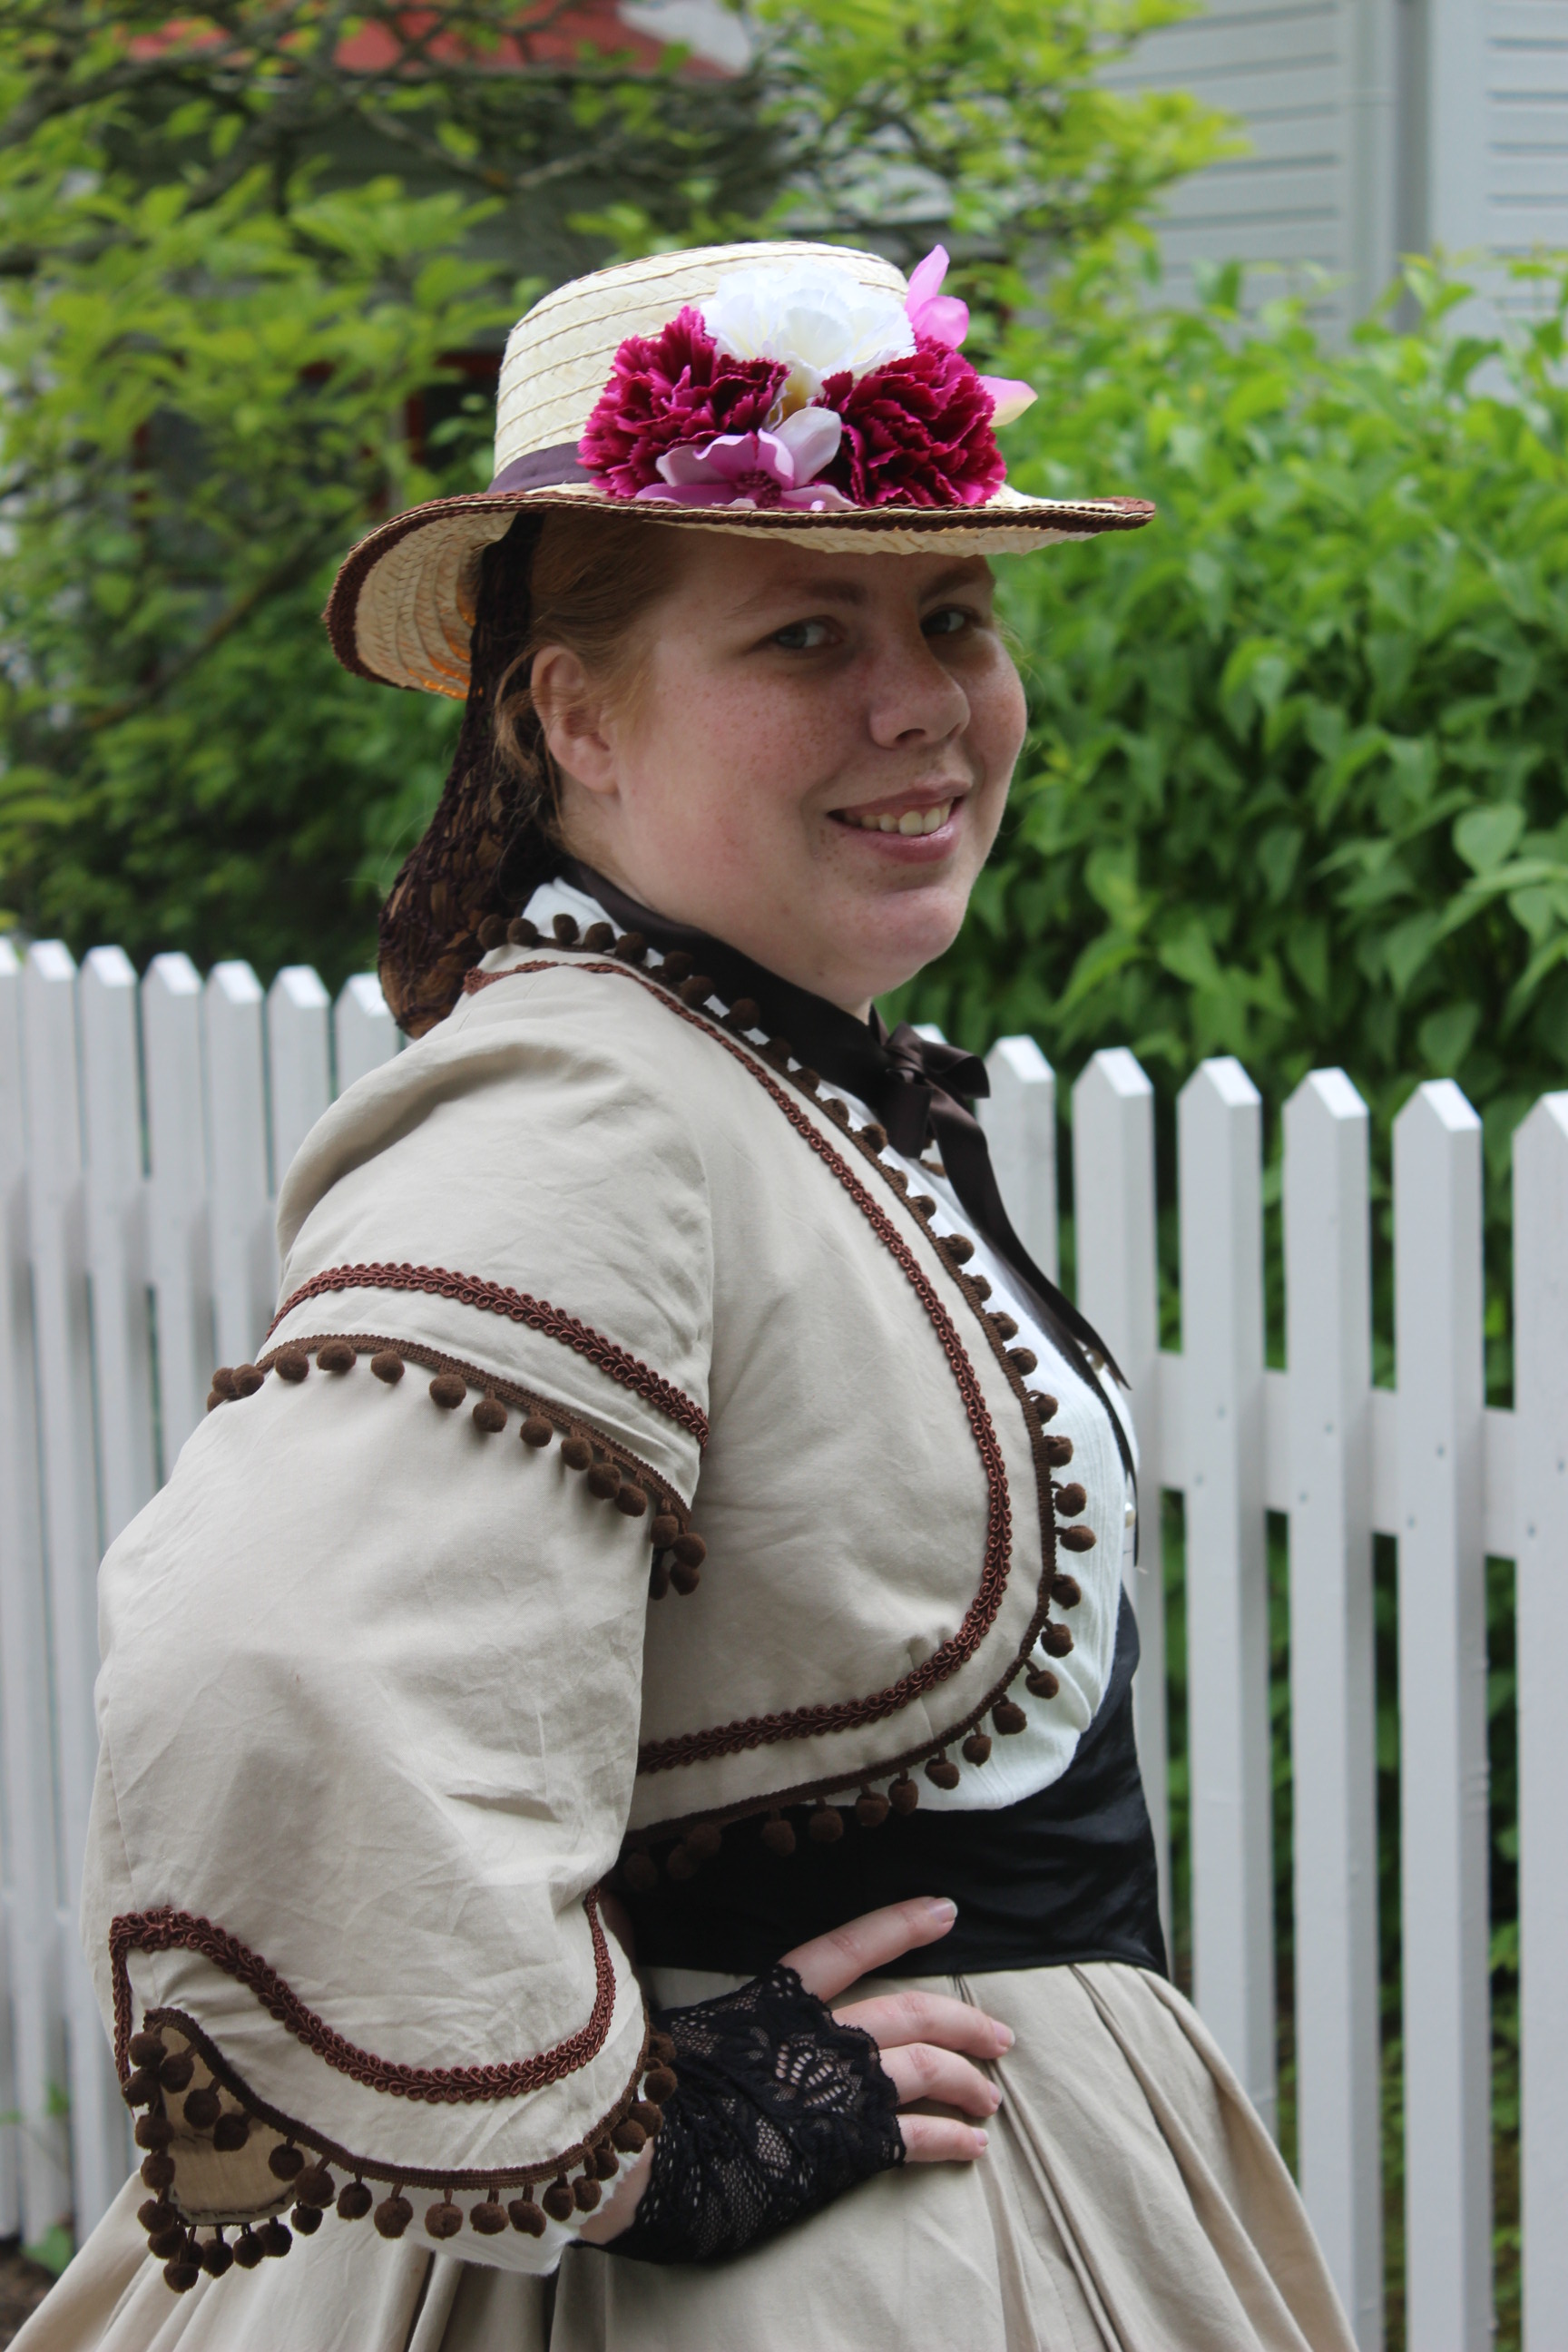
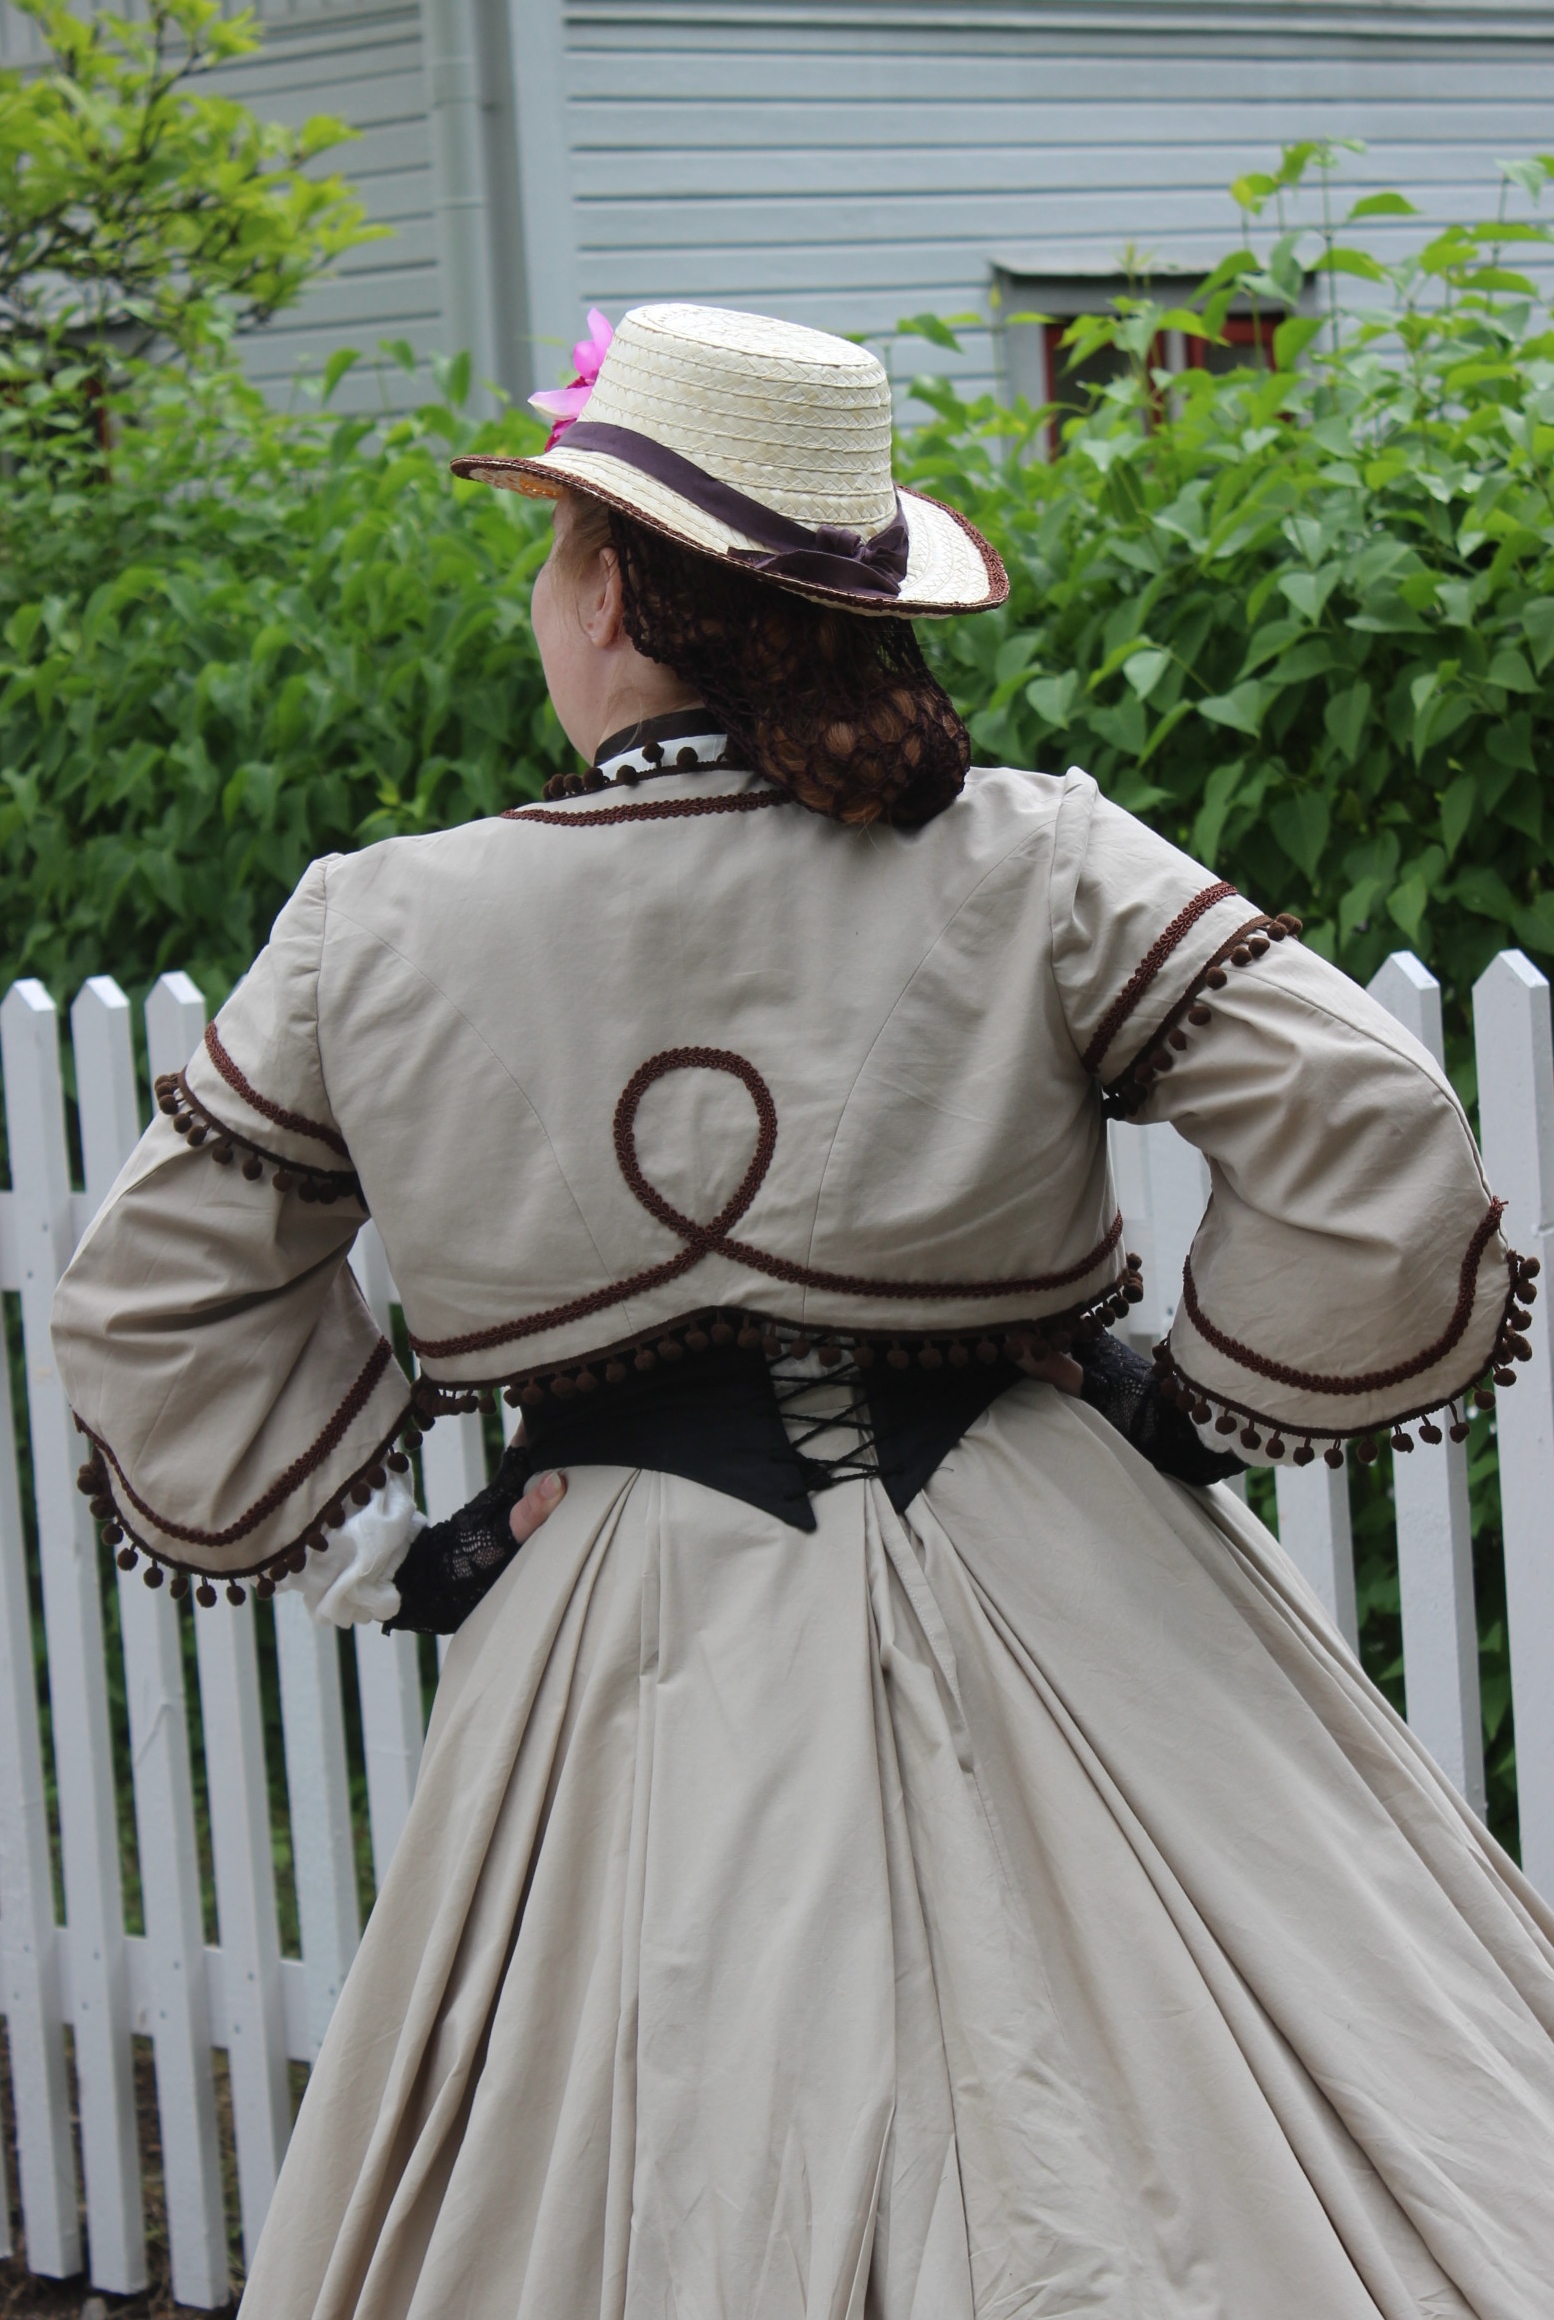
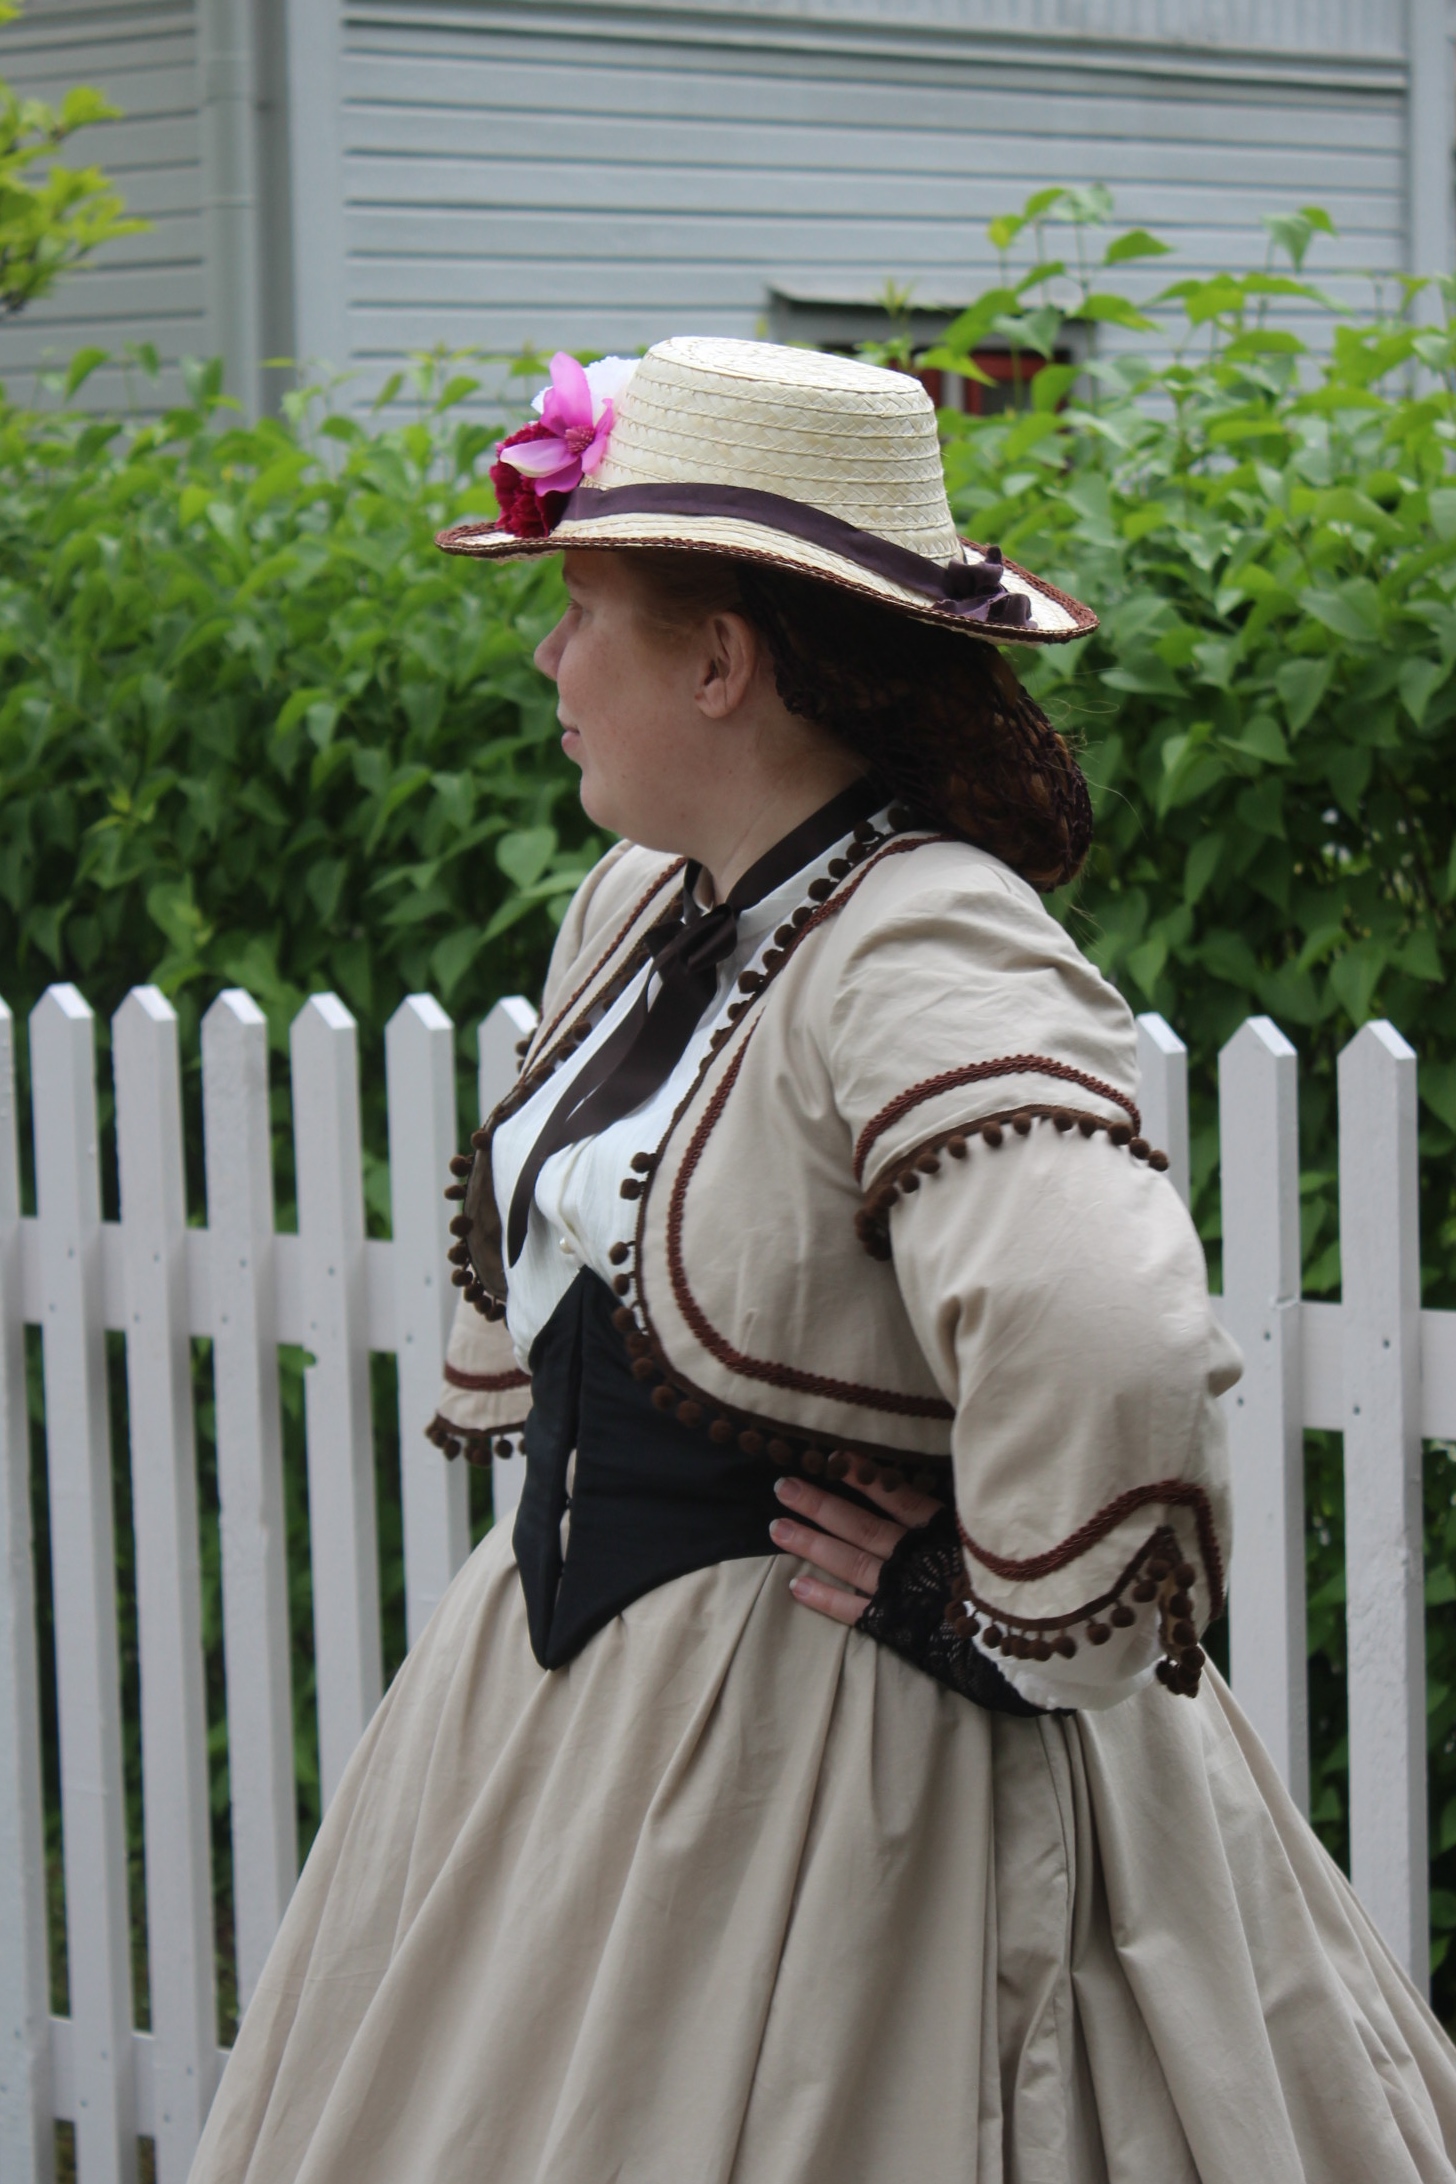
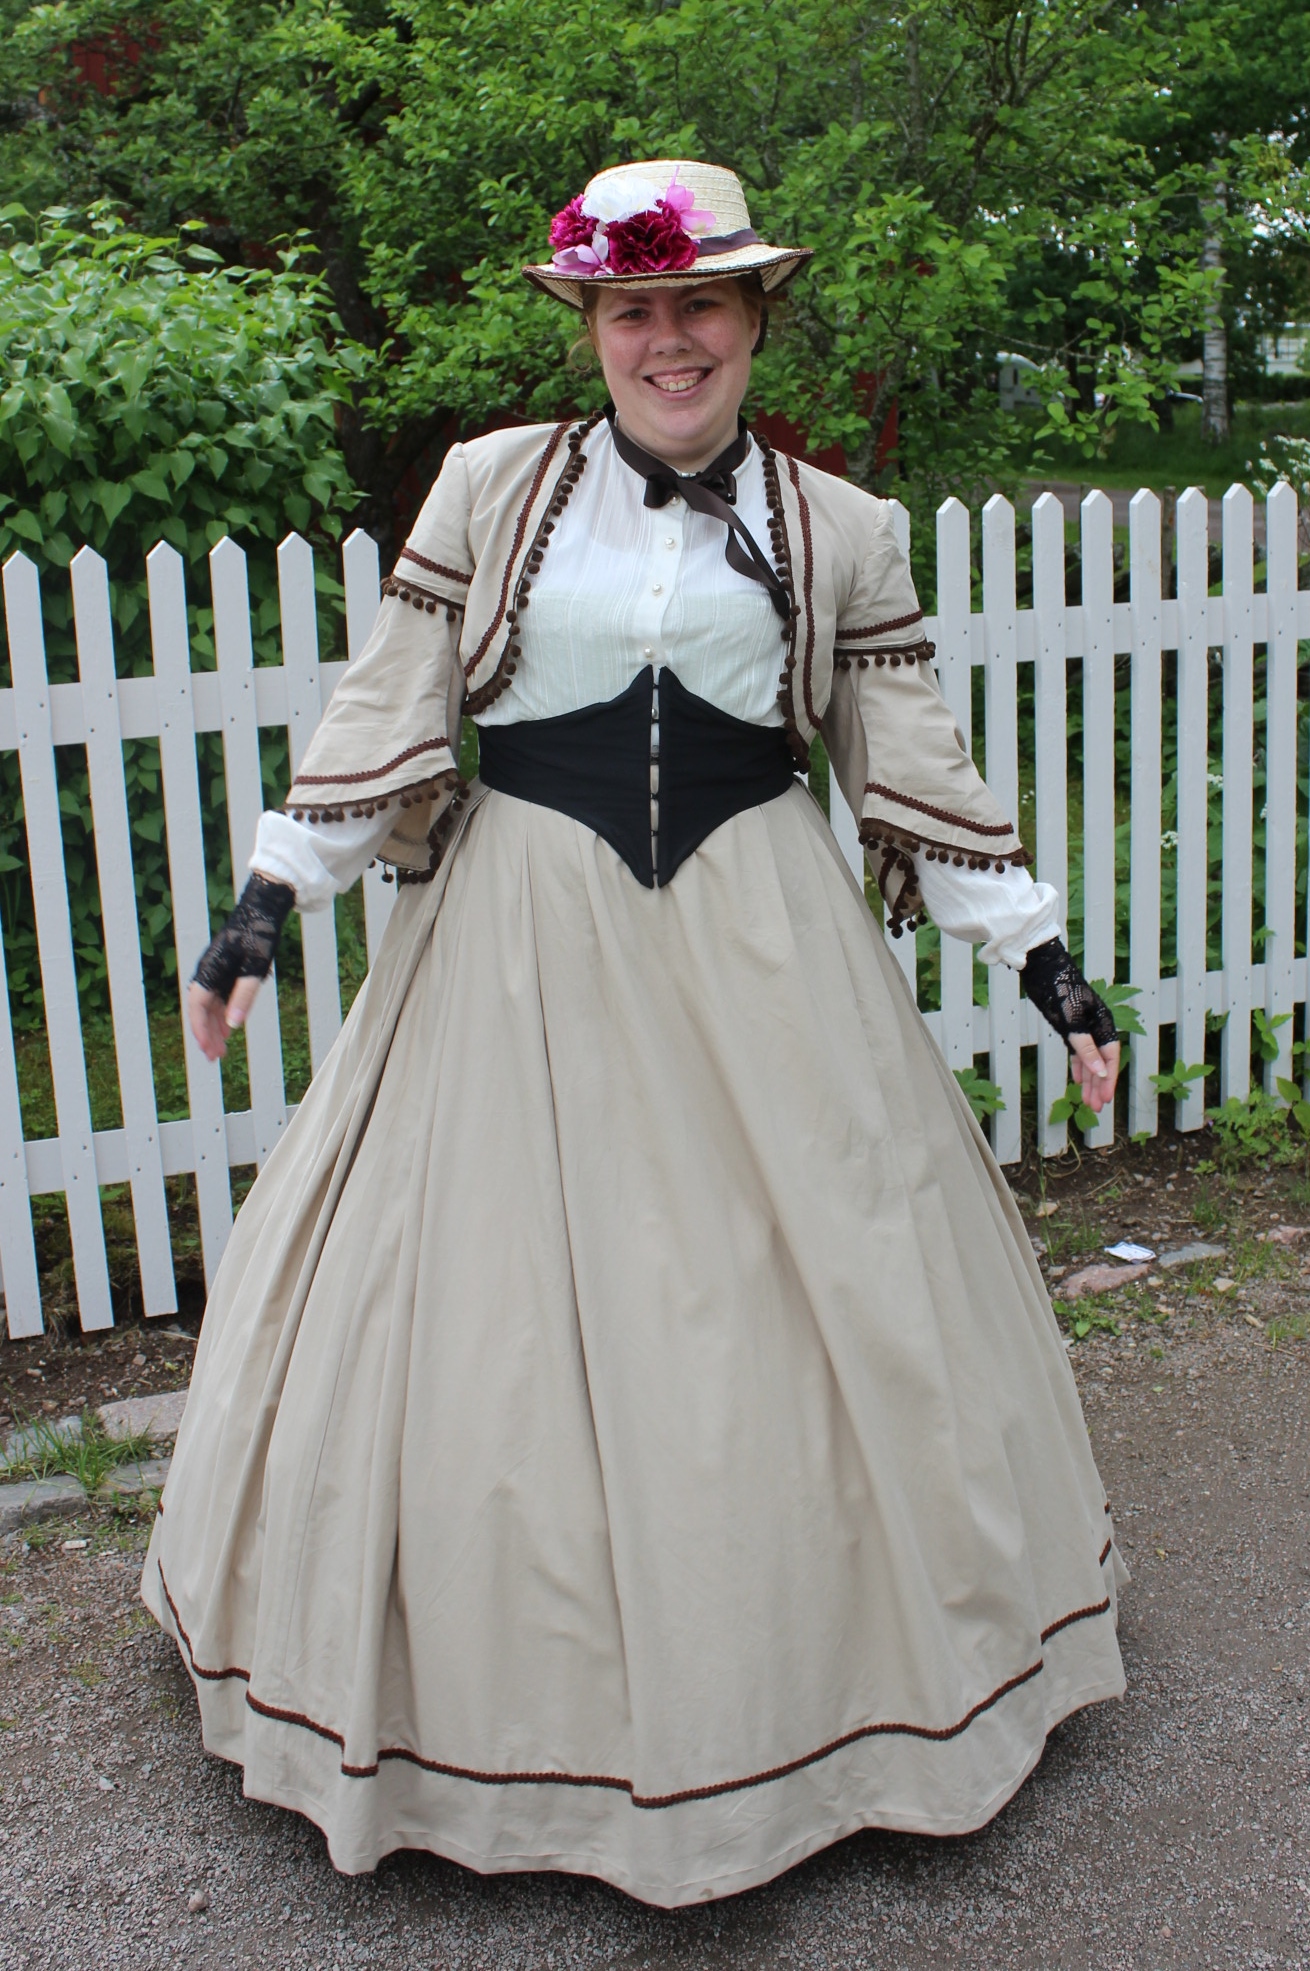
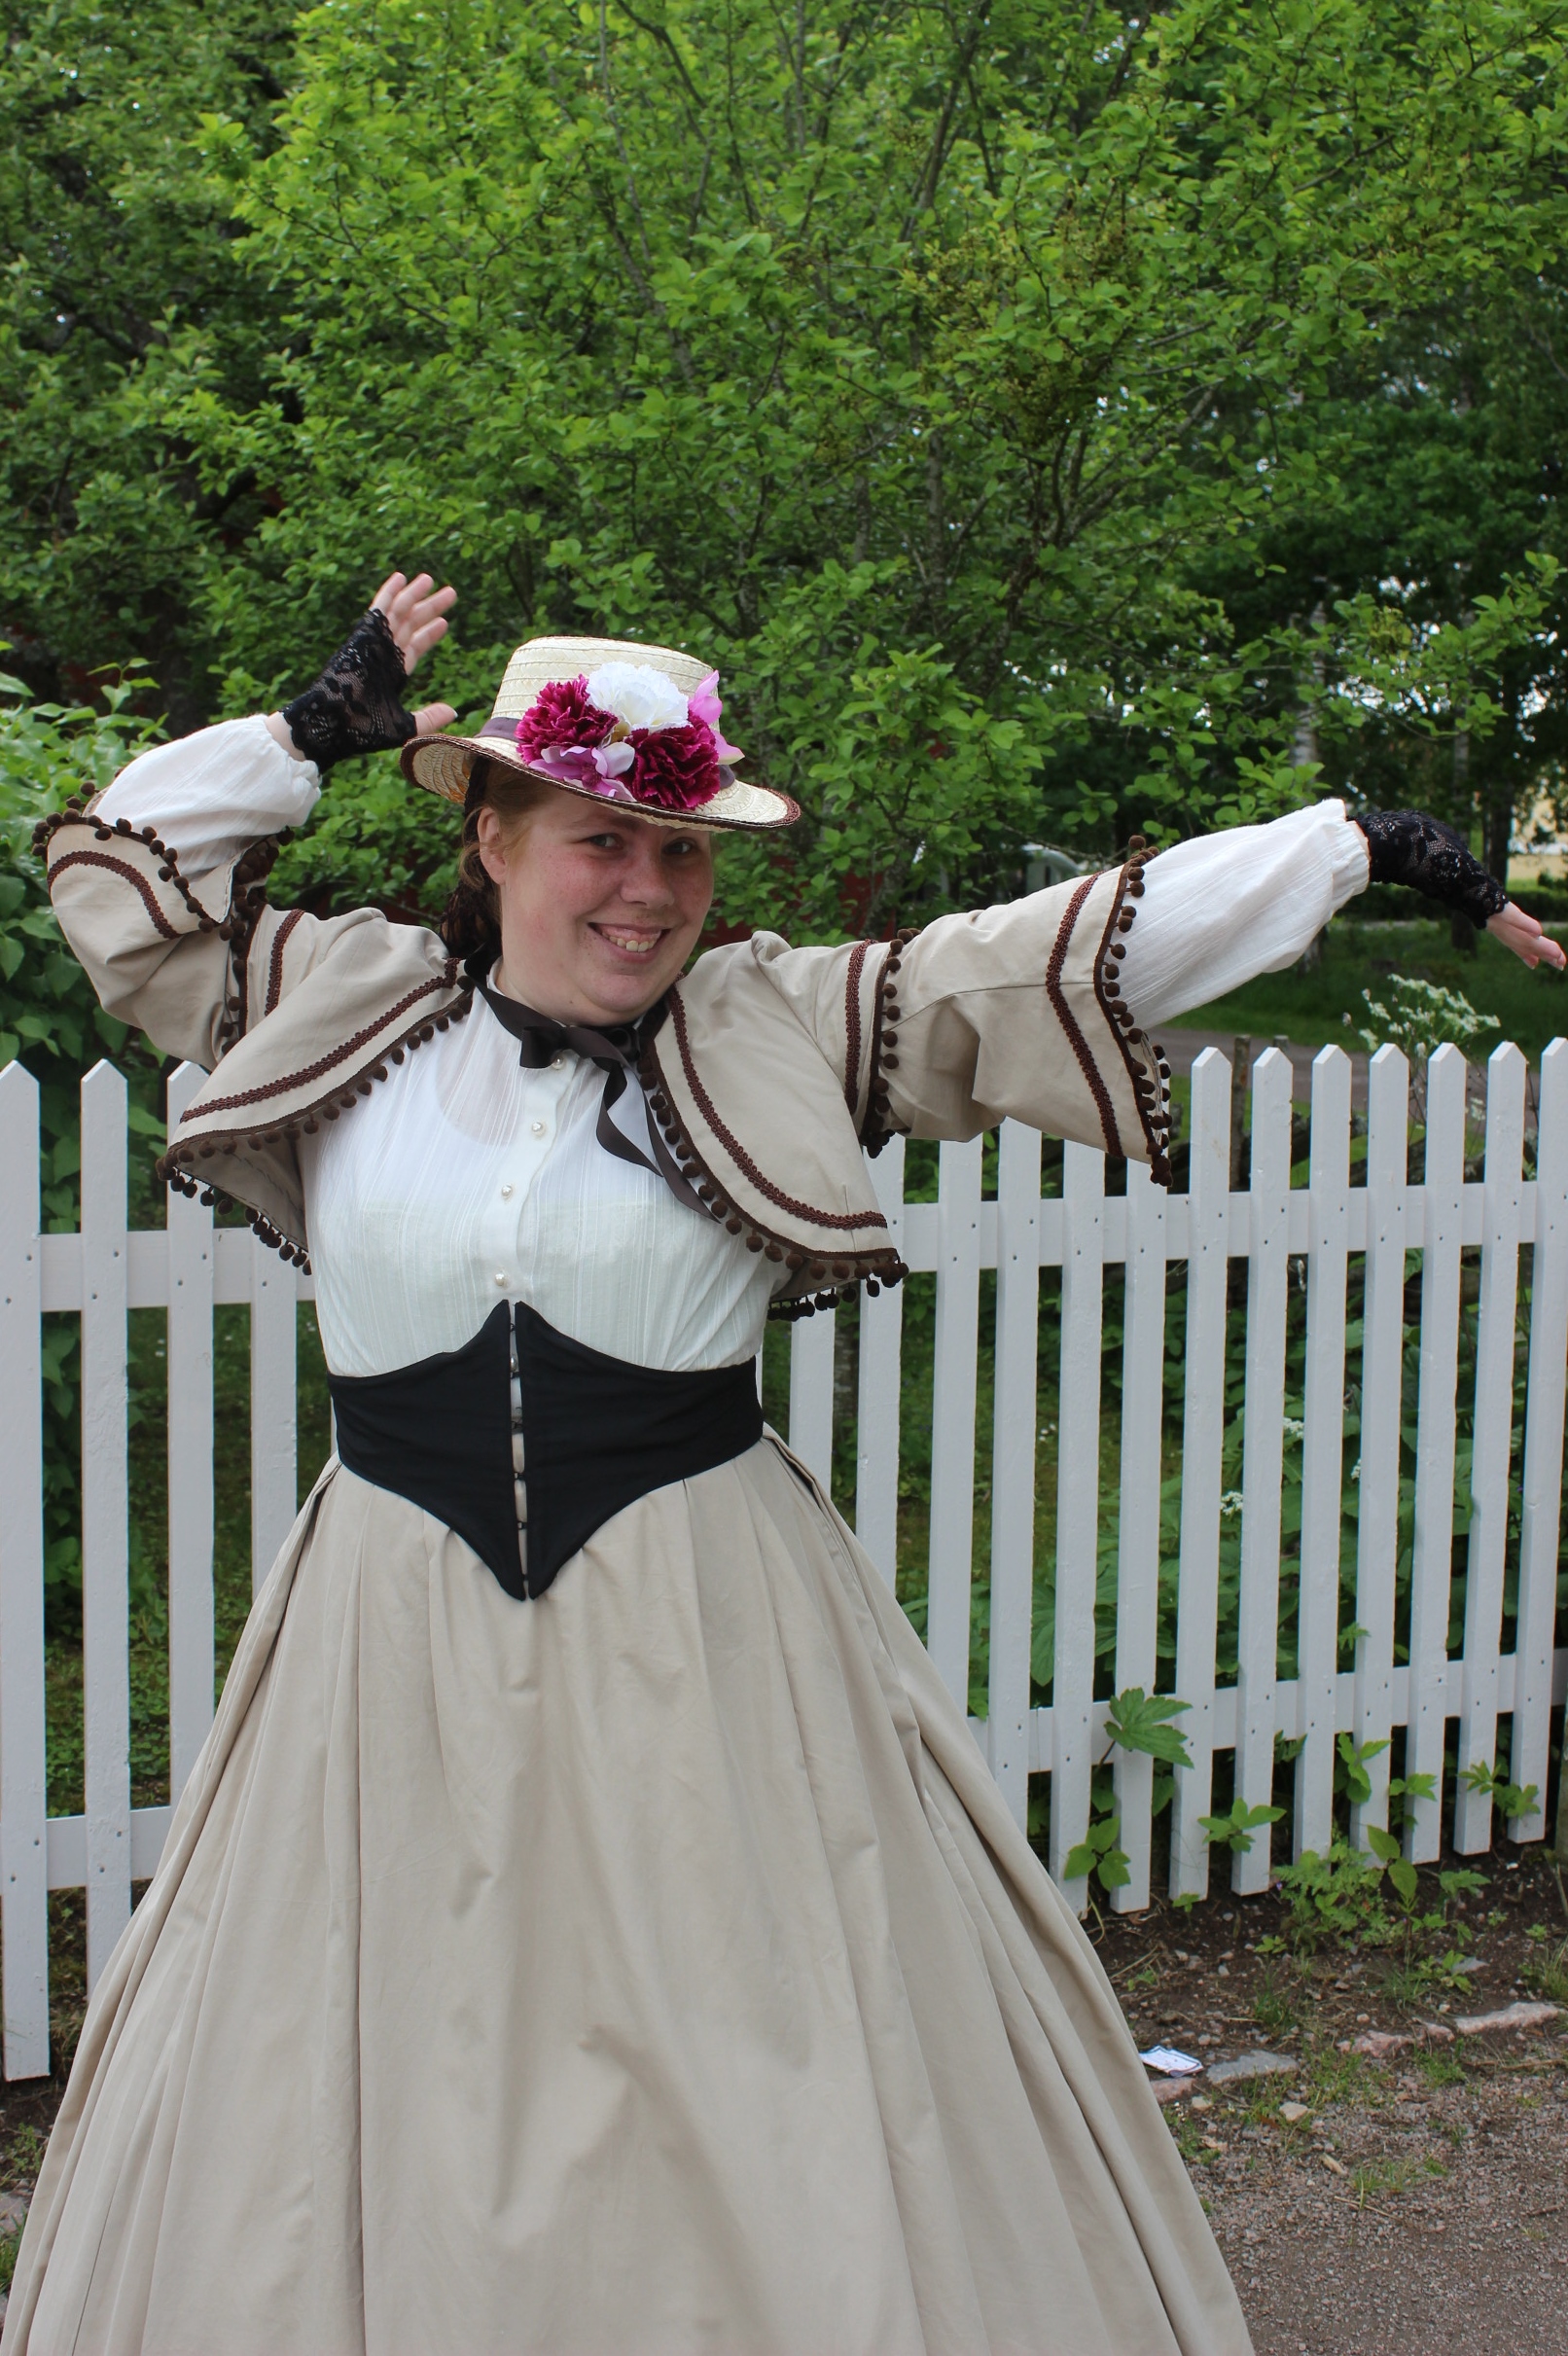
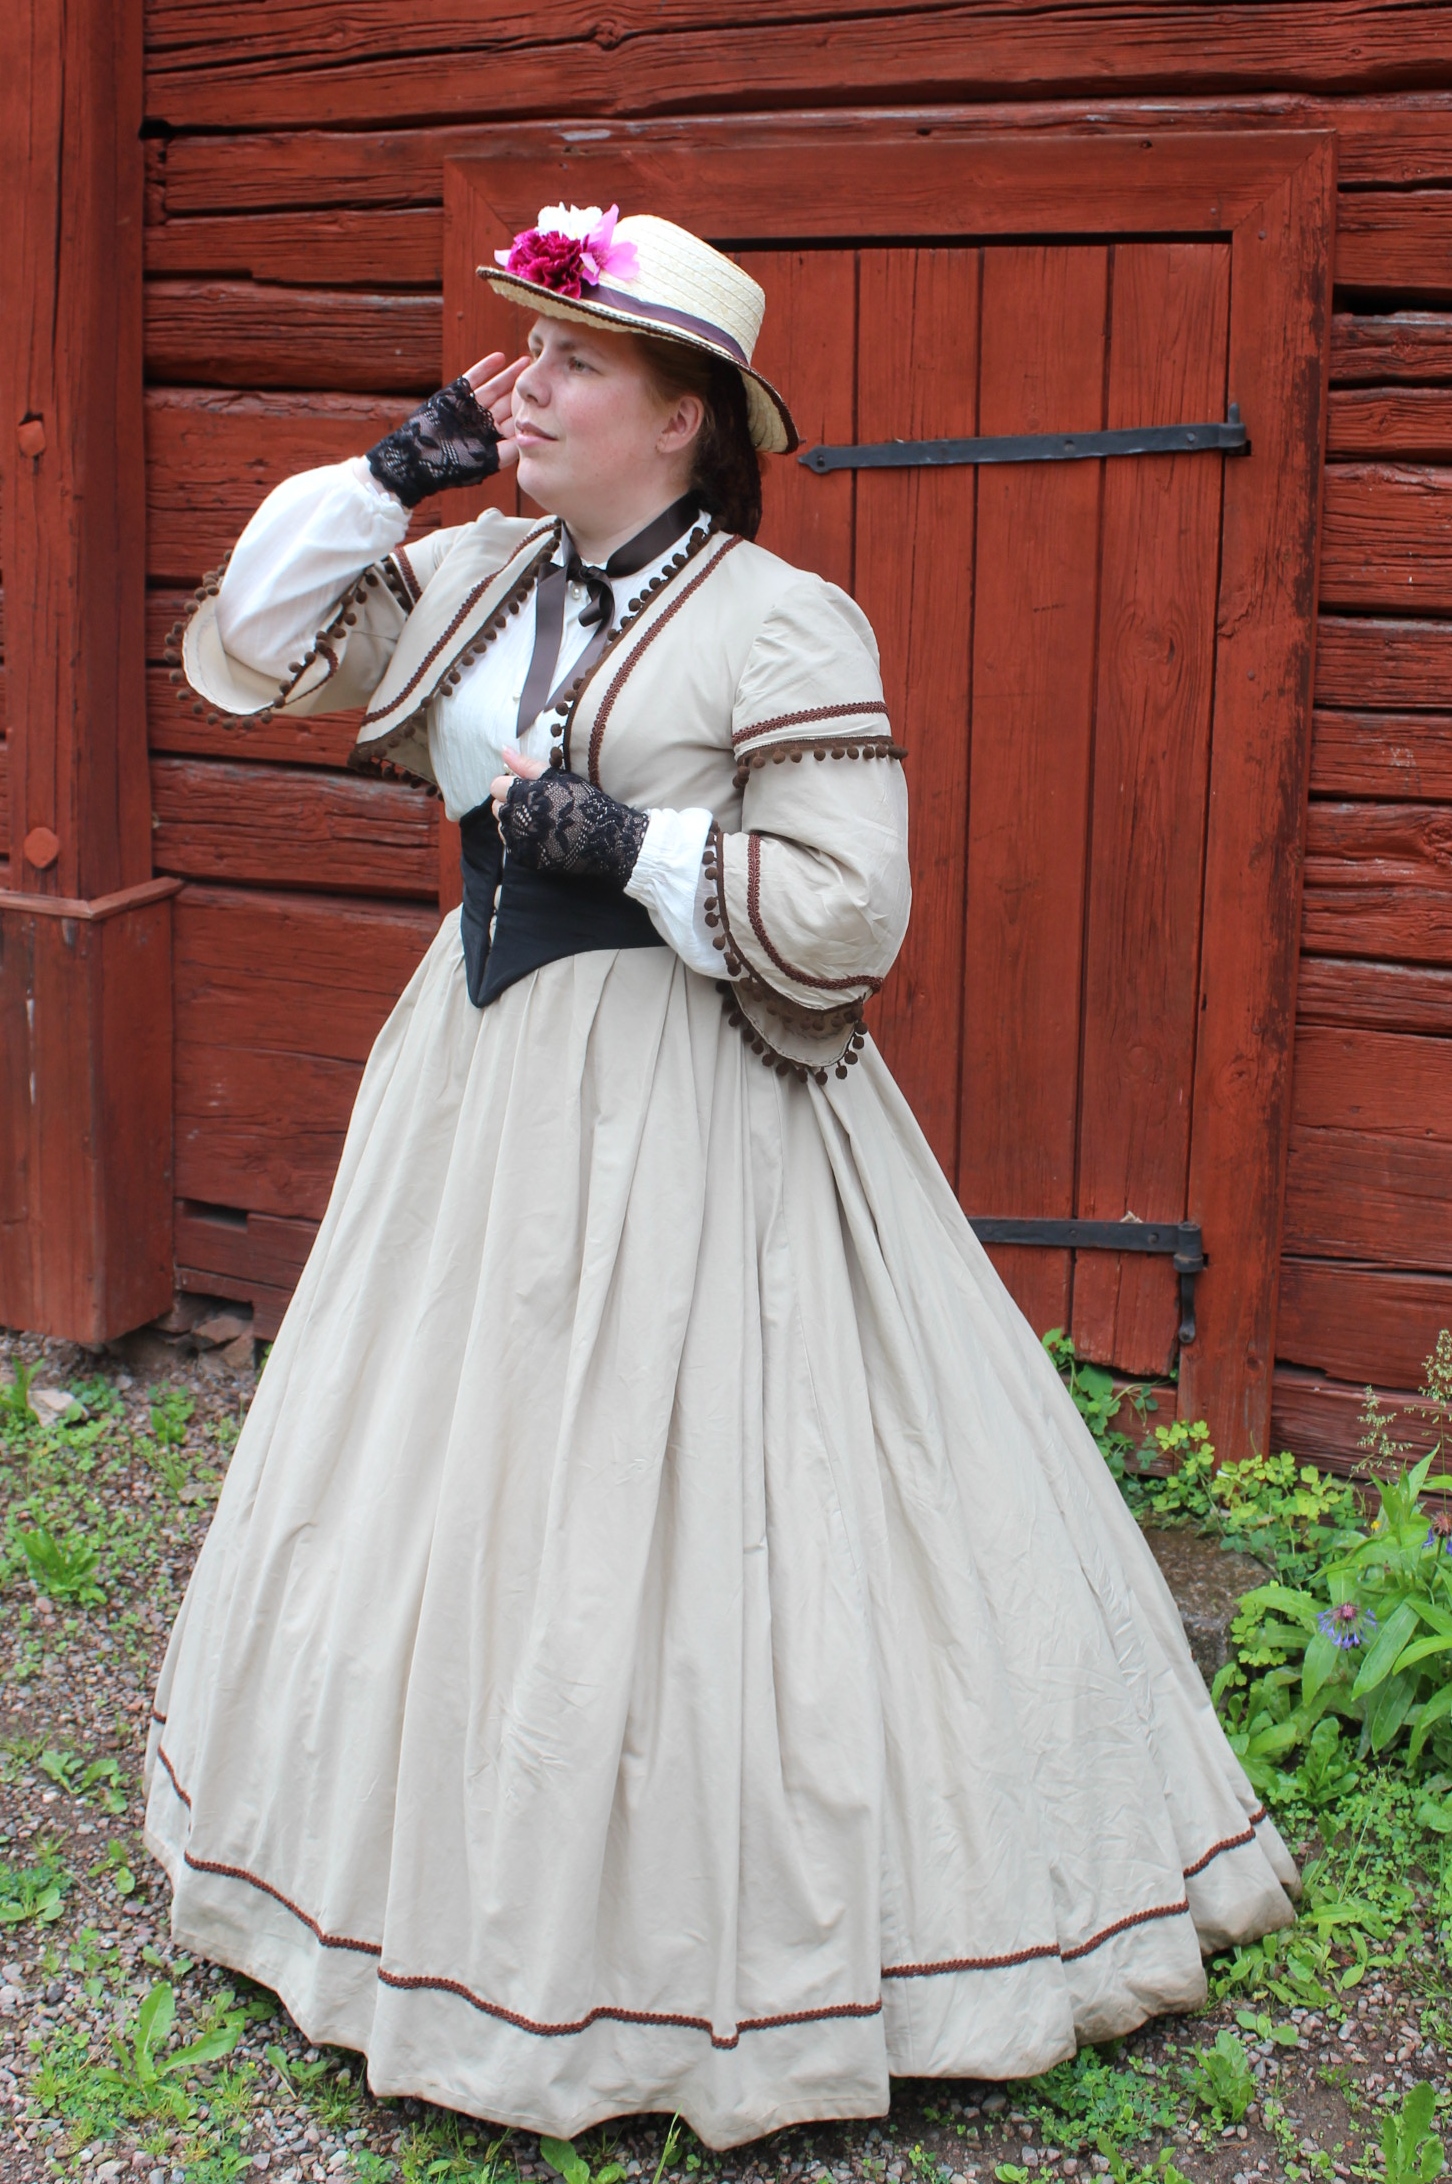
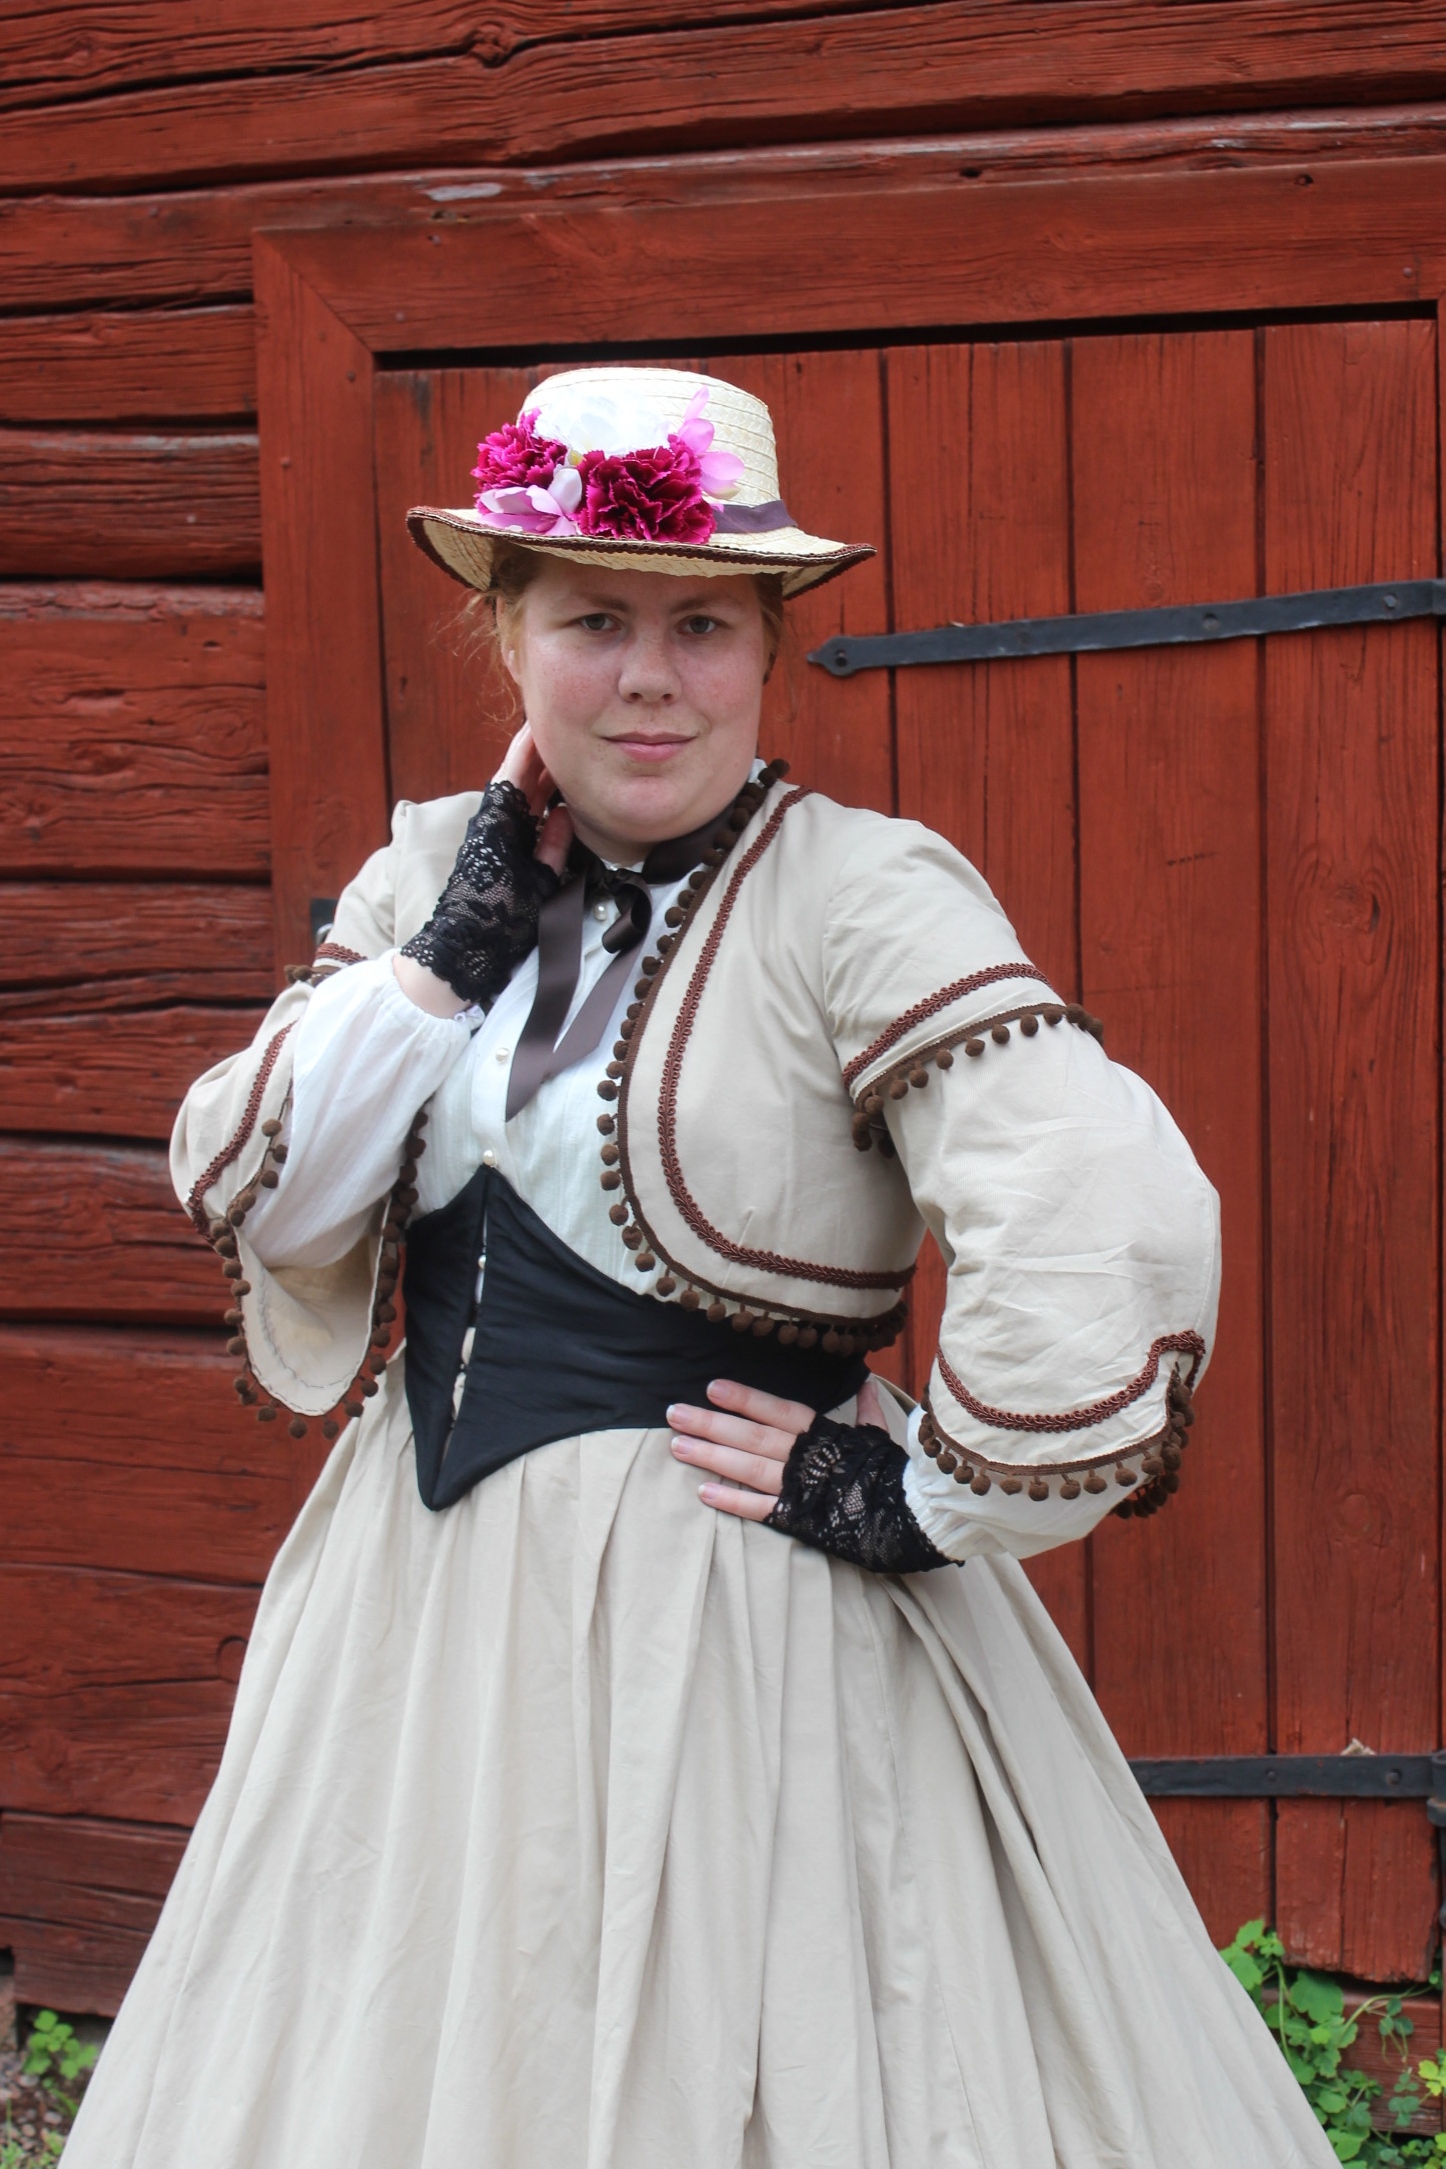
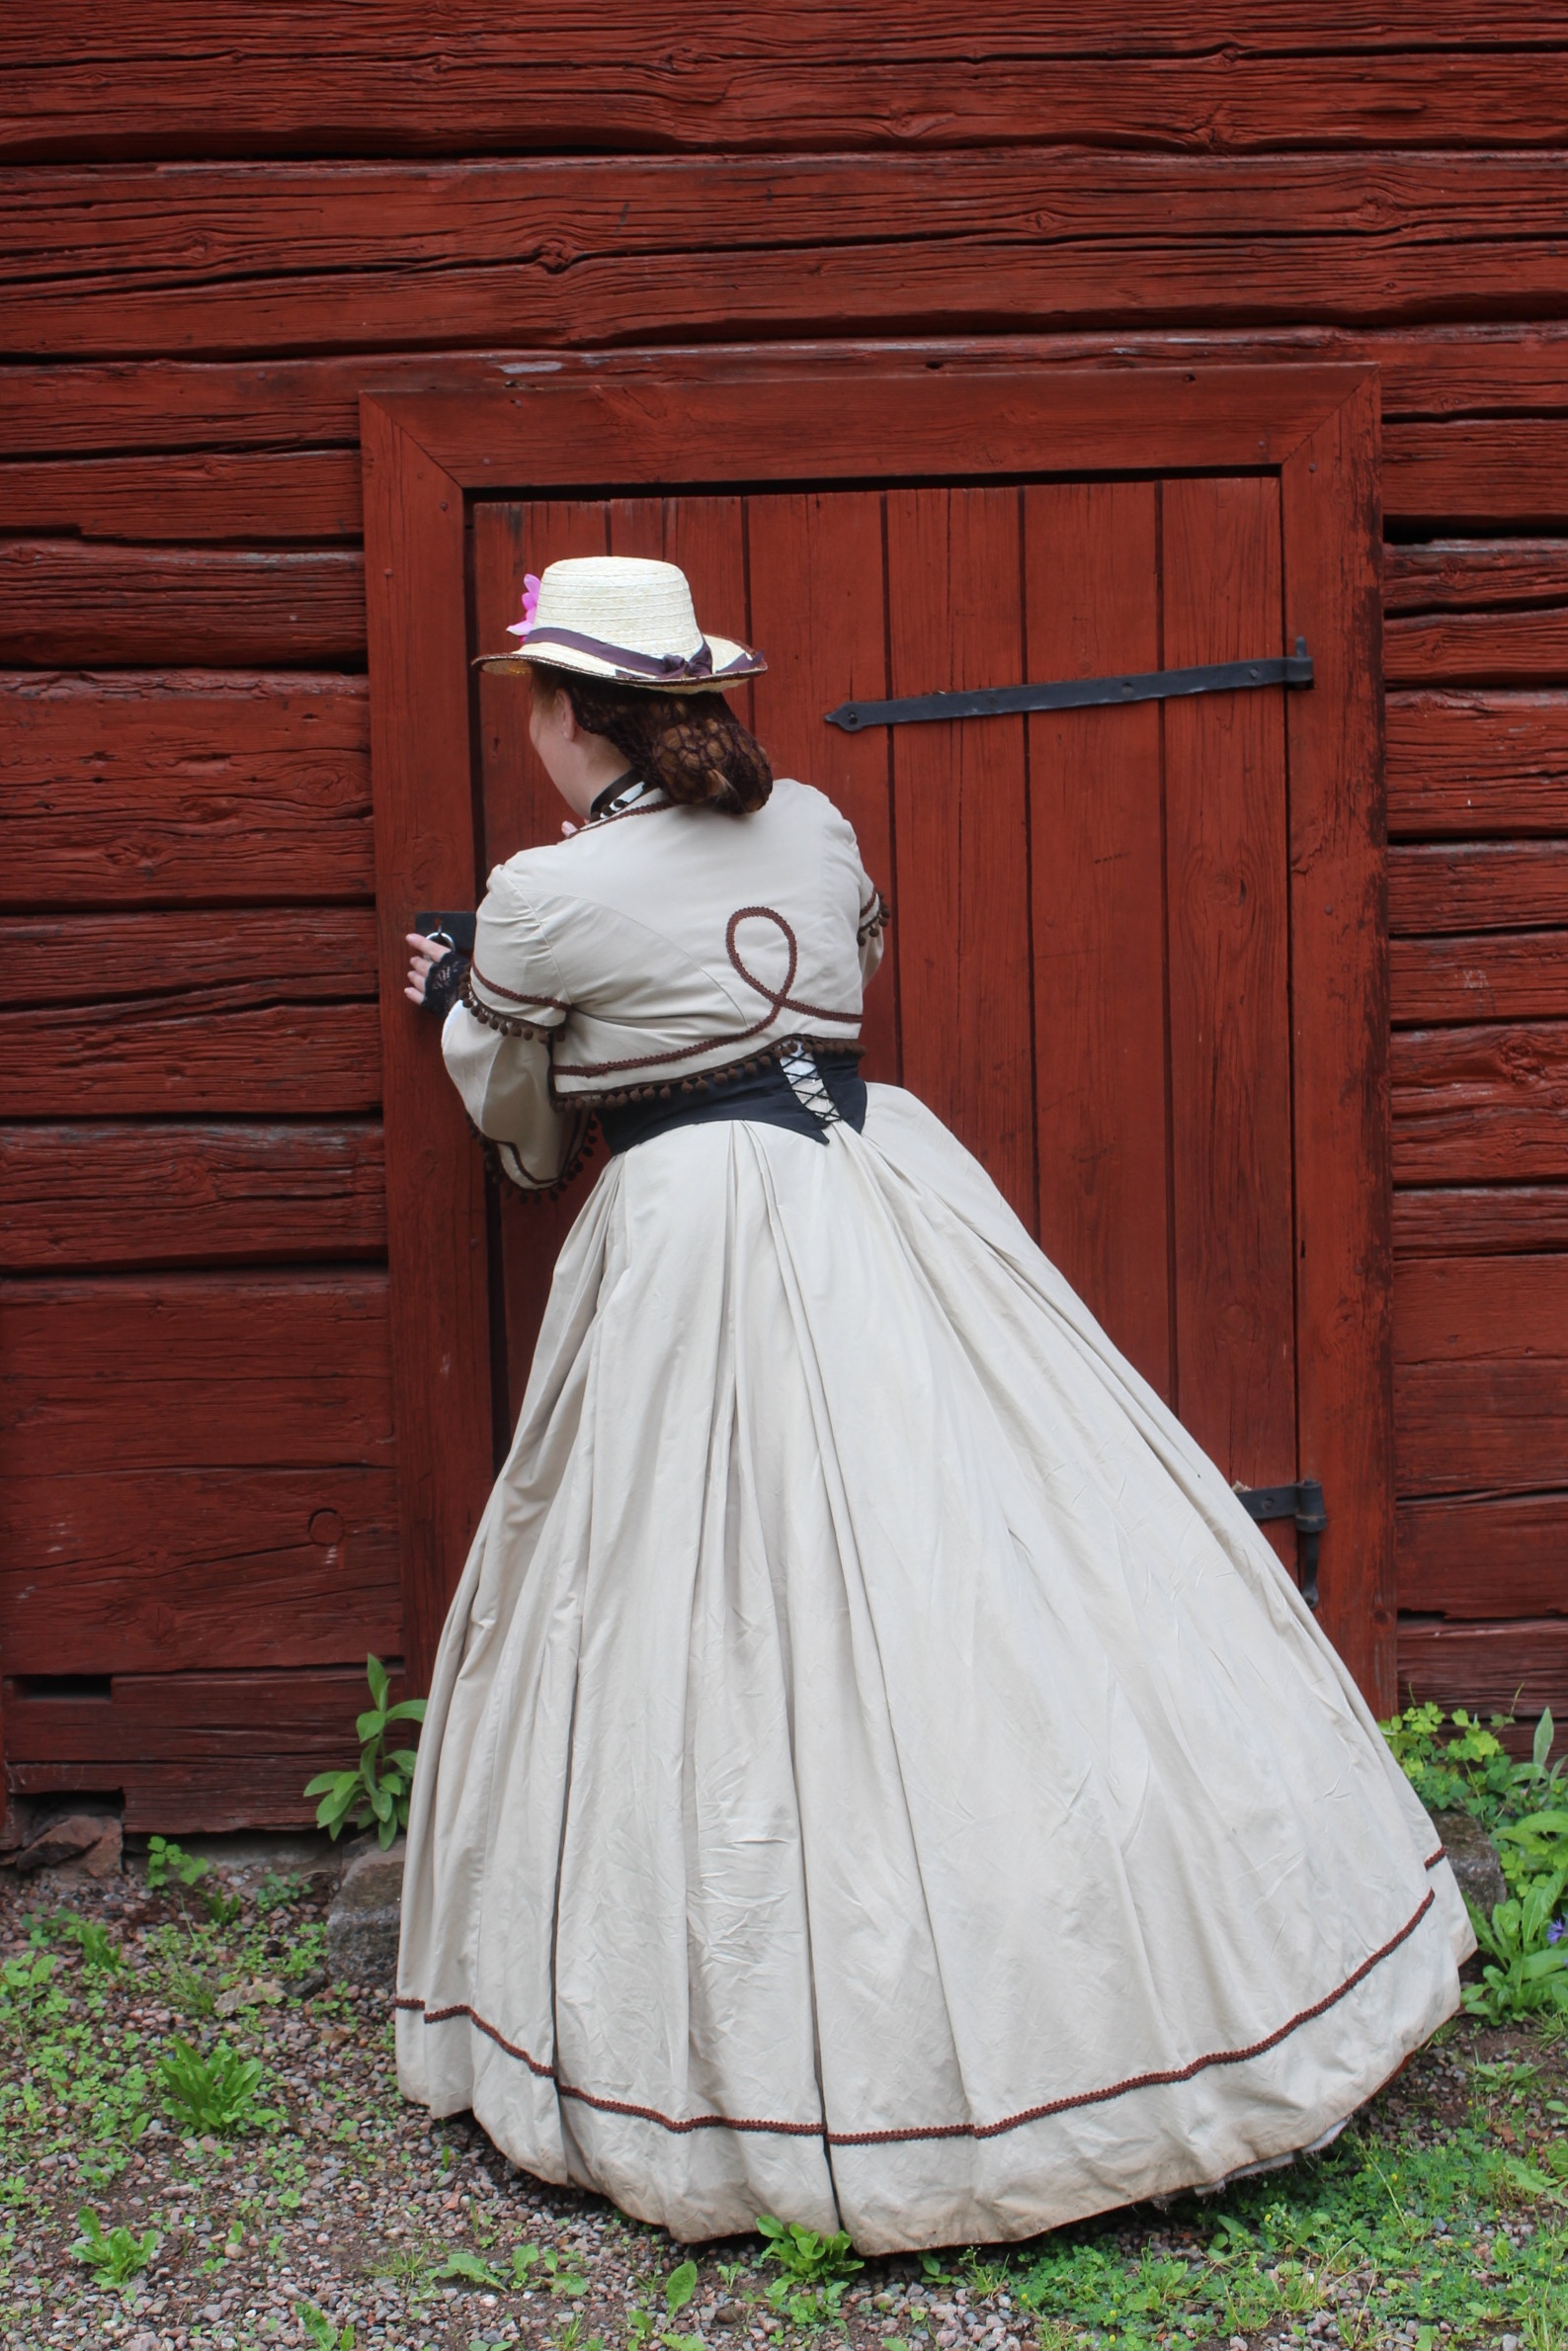
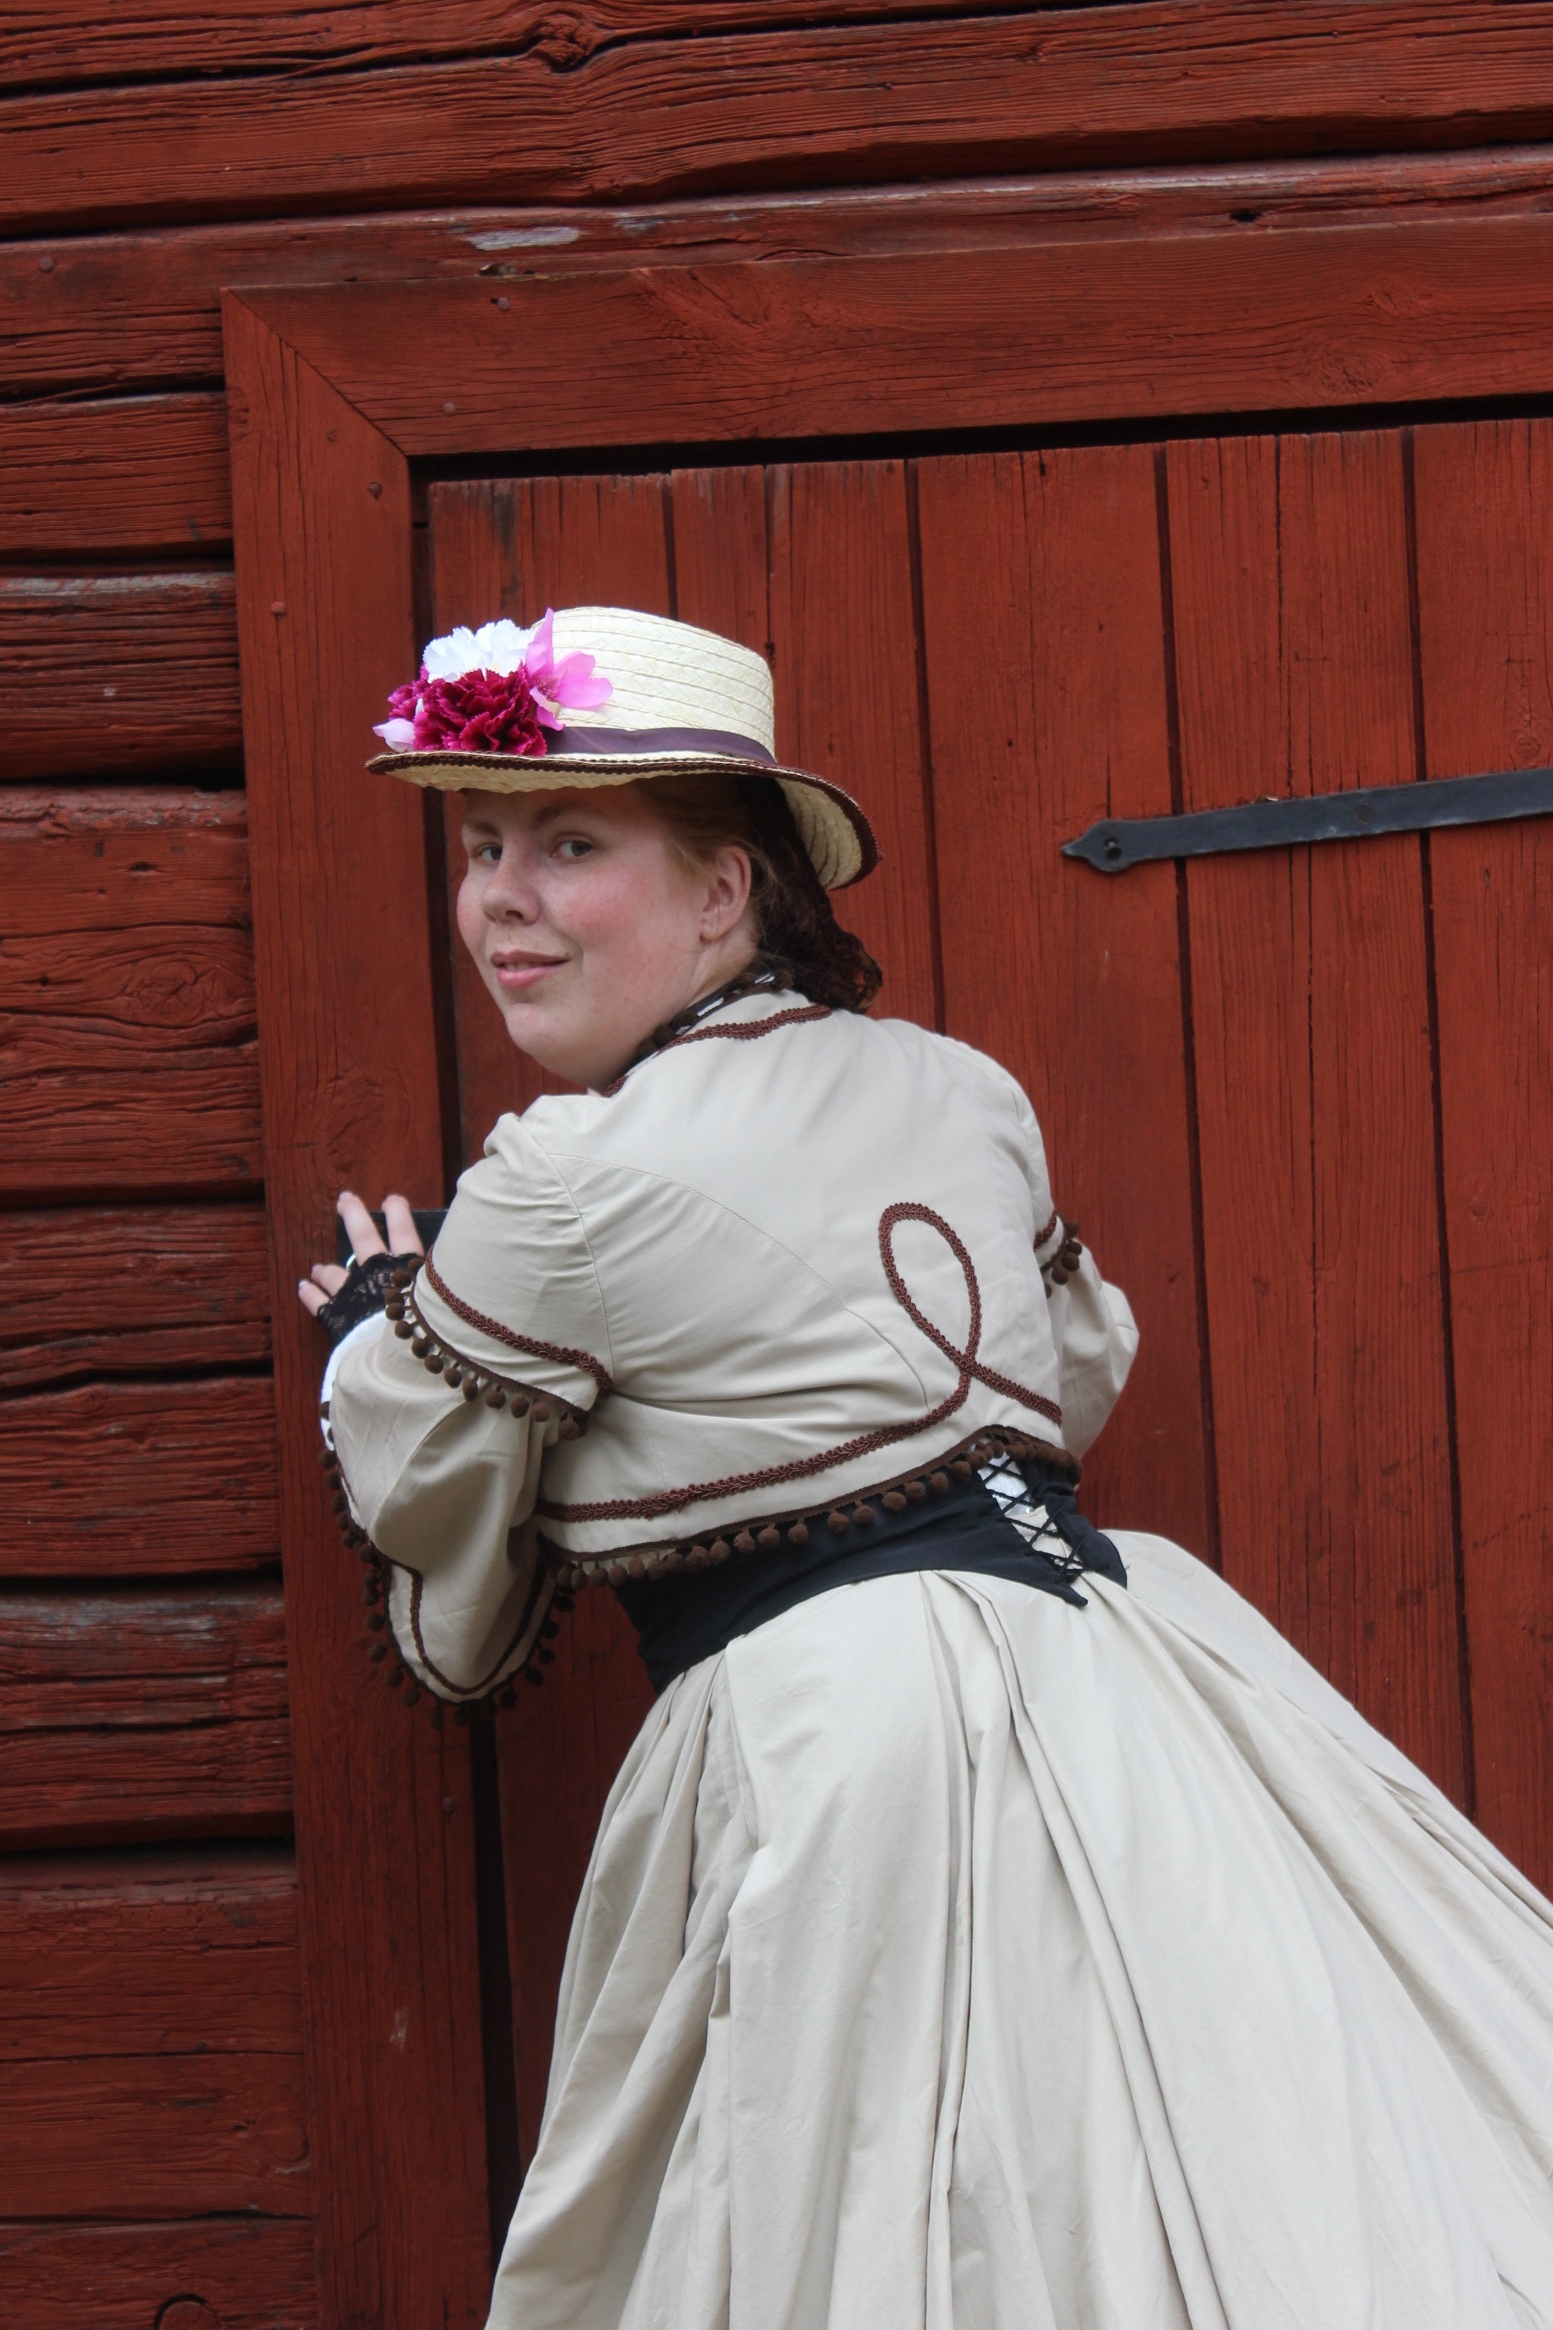
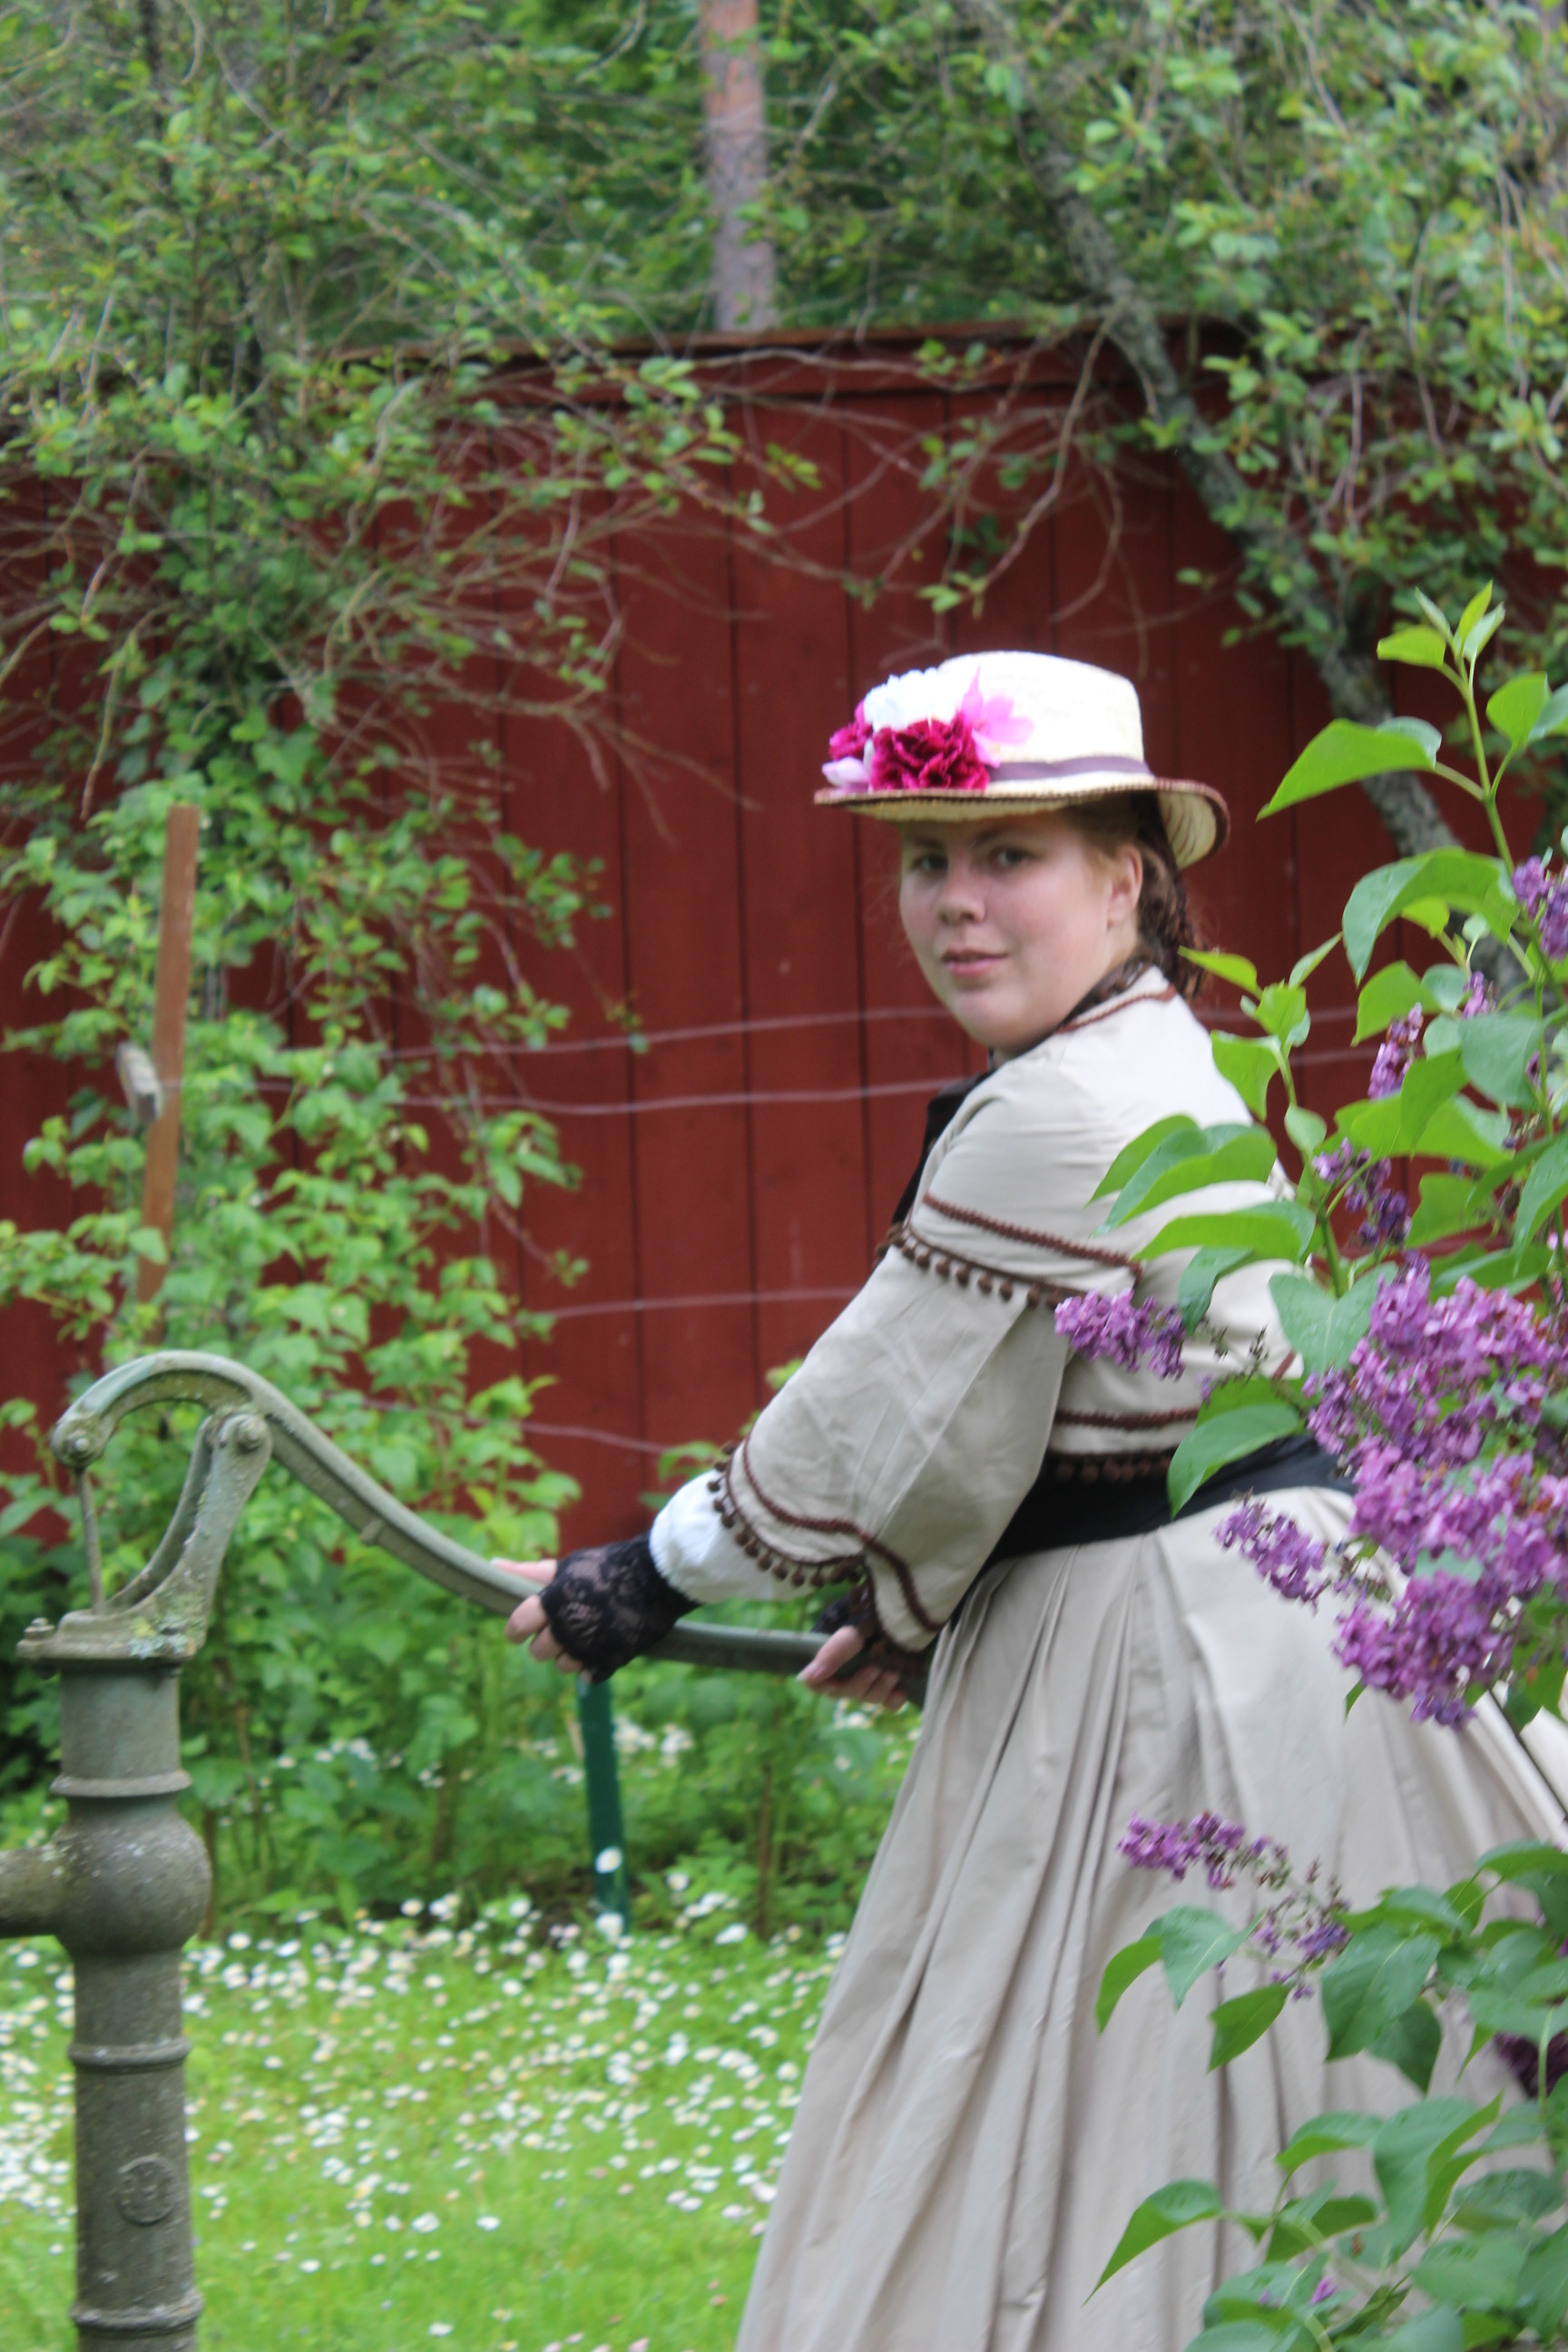
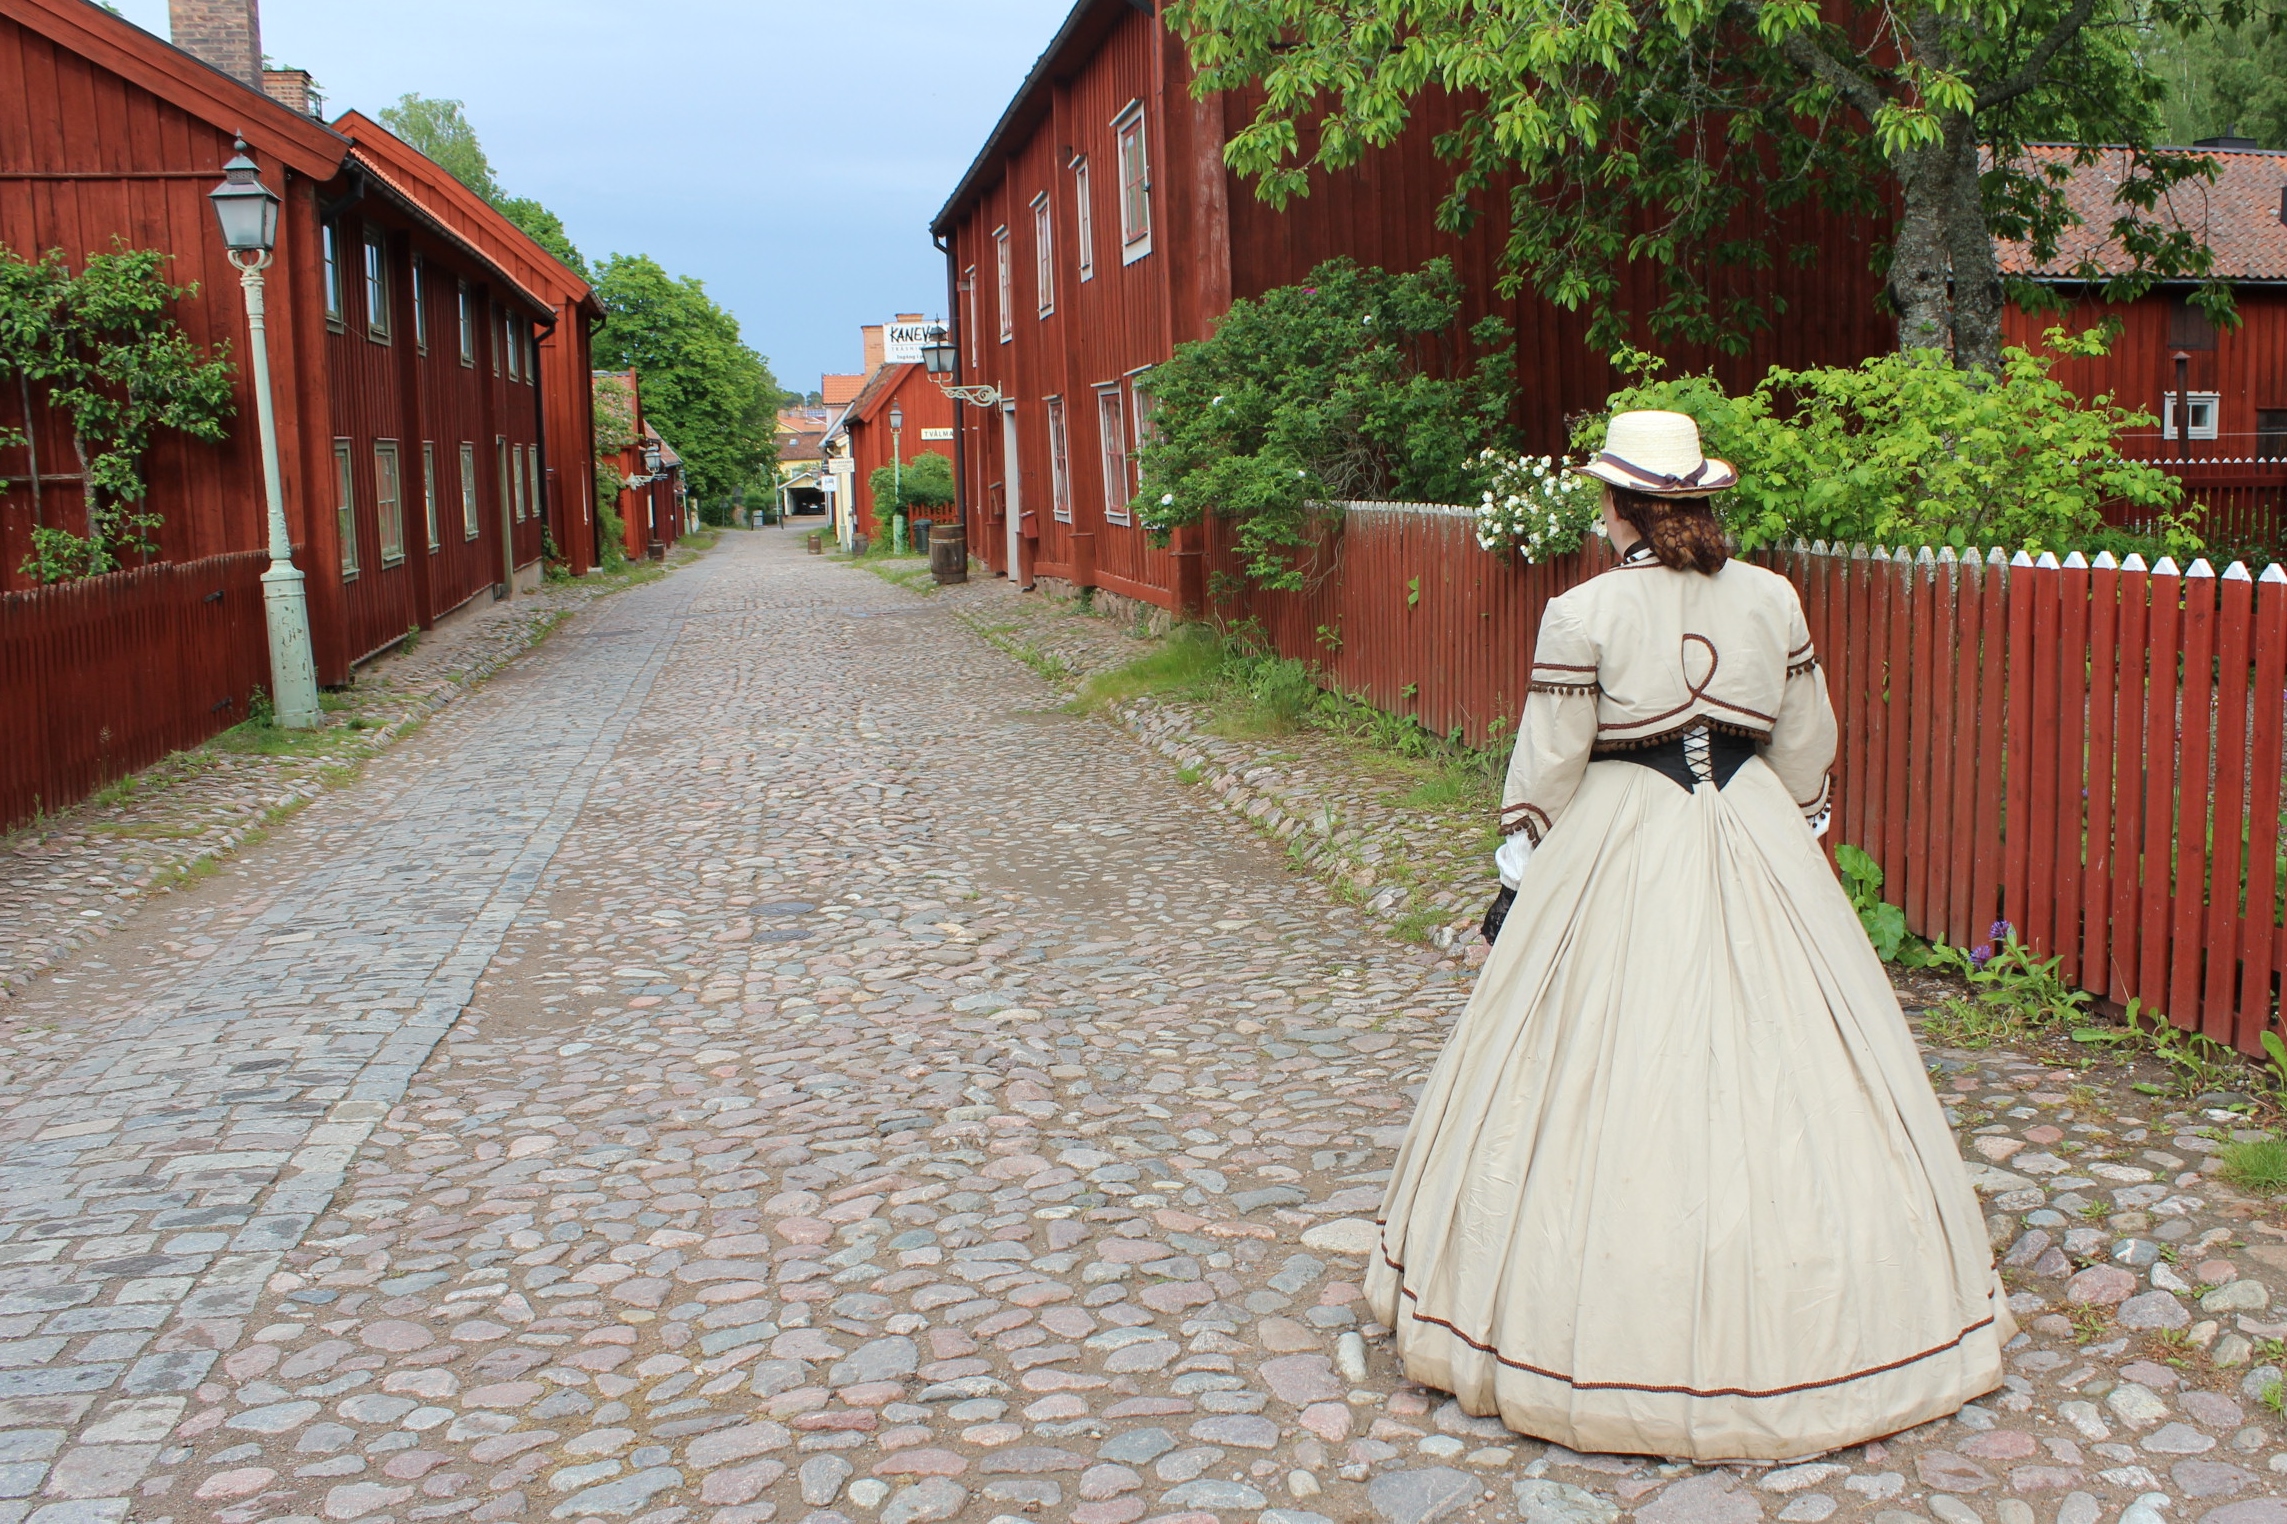
Even though the weather was gloomy on the day of the 1850s event, me and my sister took the opportunity to take some photos of her outfit. Inspirational Fashion plate


 Can you say – werewolf 😉
 There is a needle attached to that tread, I promise…
 Testing the almost finished gown to see how it looks.
 Finally finished
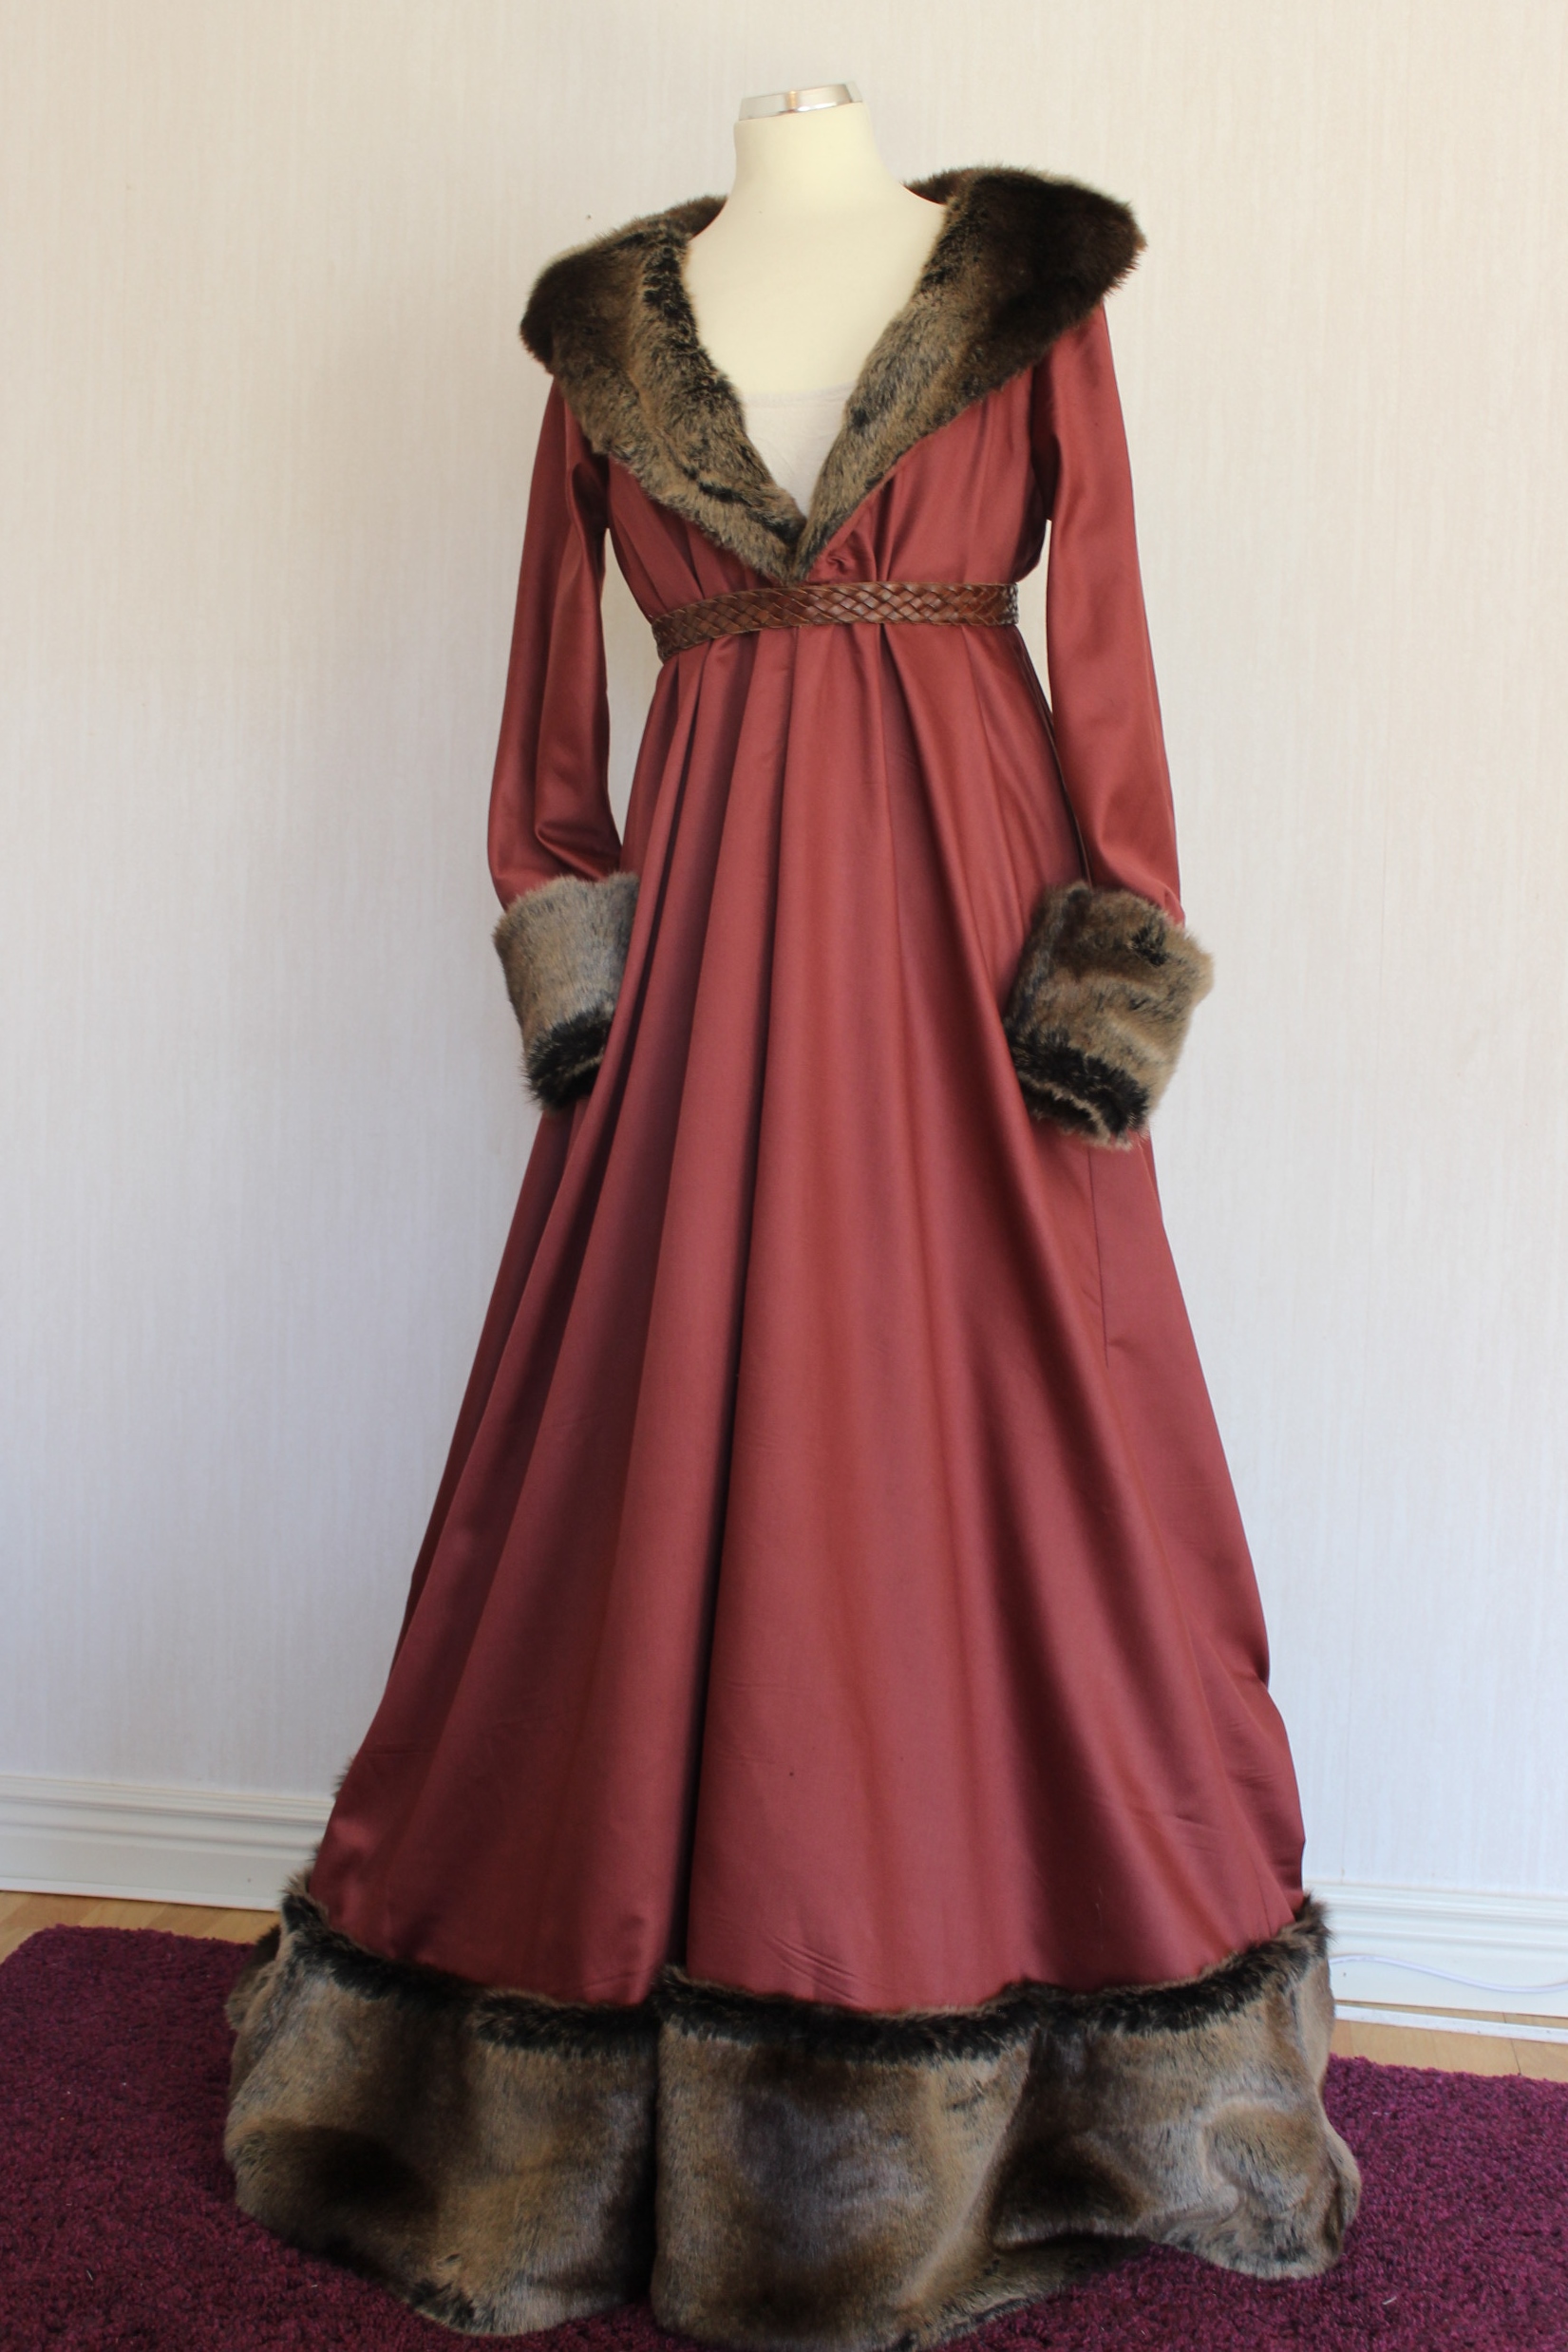


 Dressed and ready for some photos.


 Photos by: Maria Petersson
 Last fix-up in the elevator
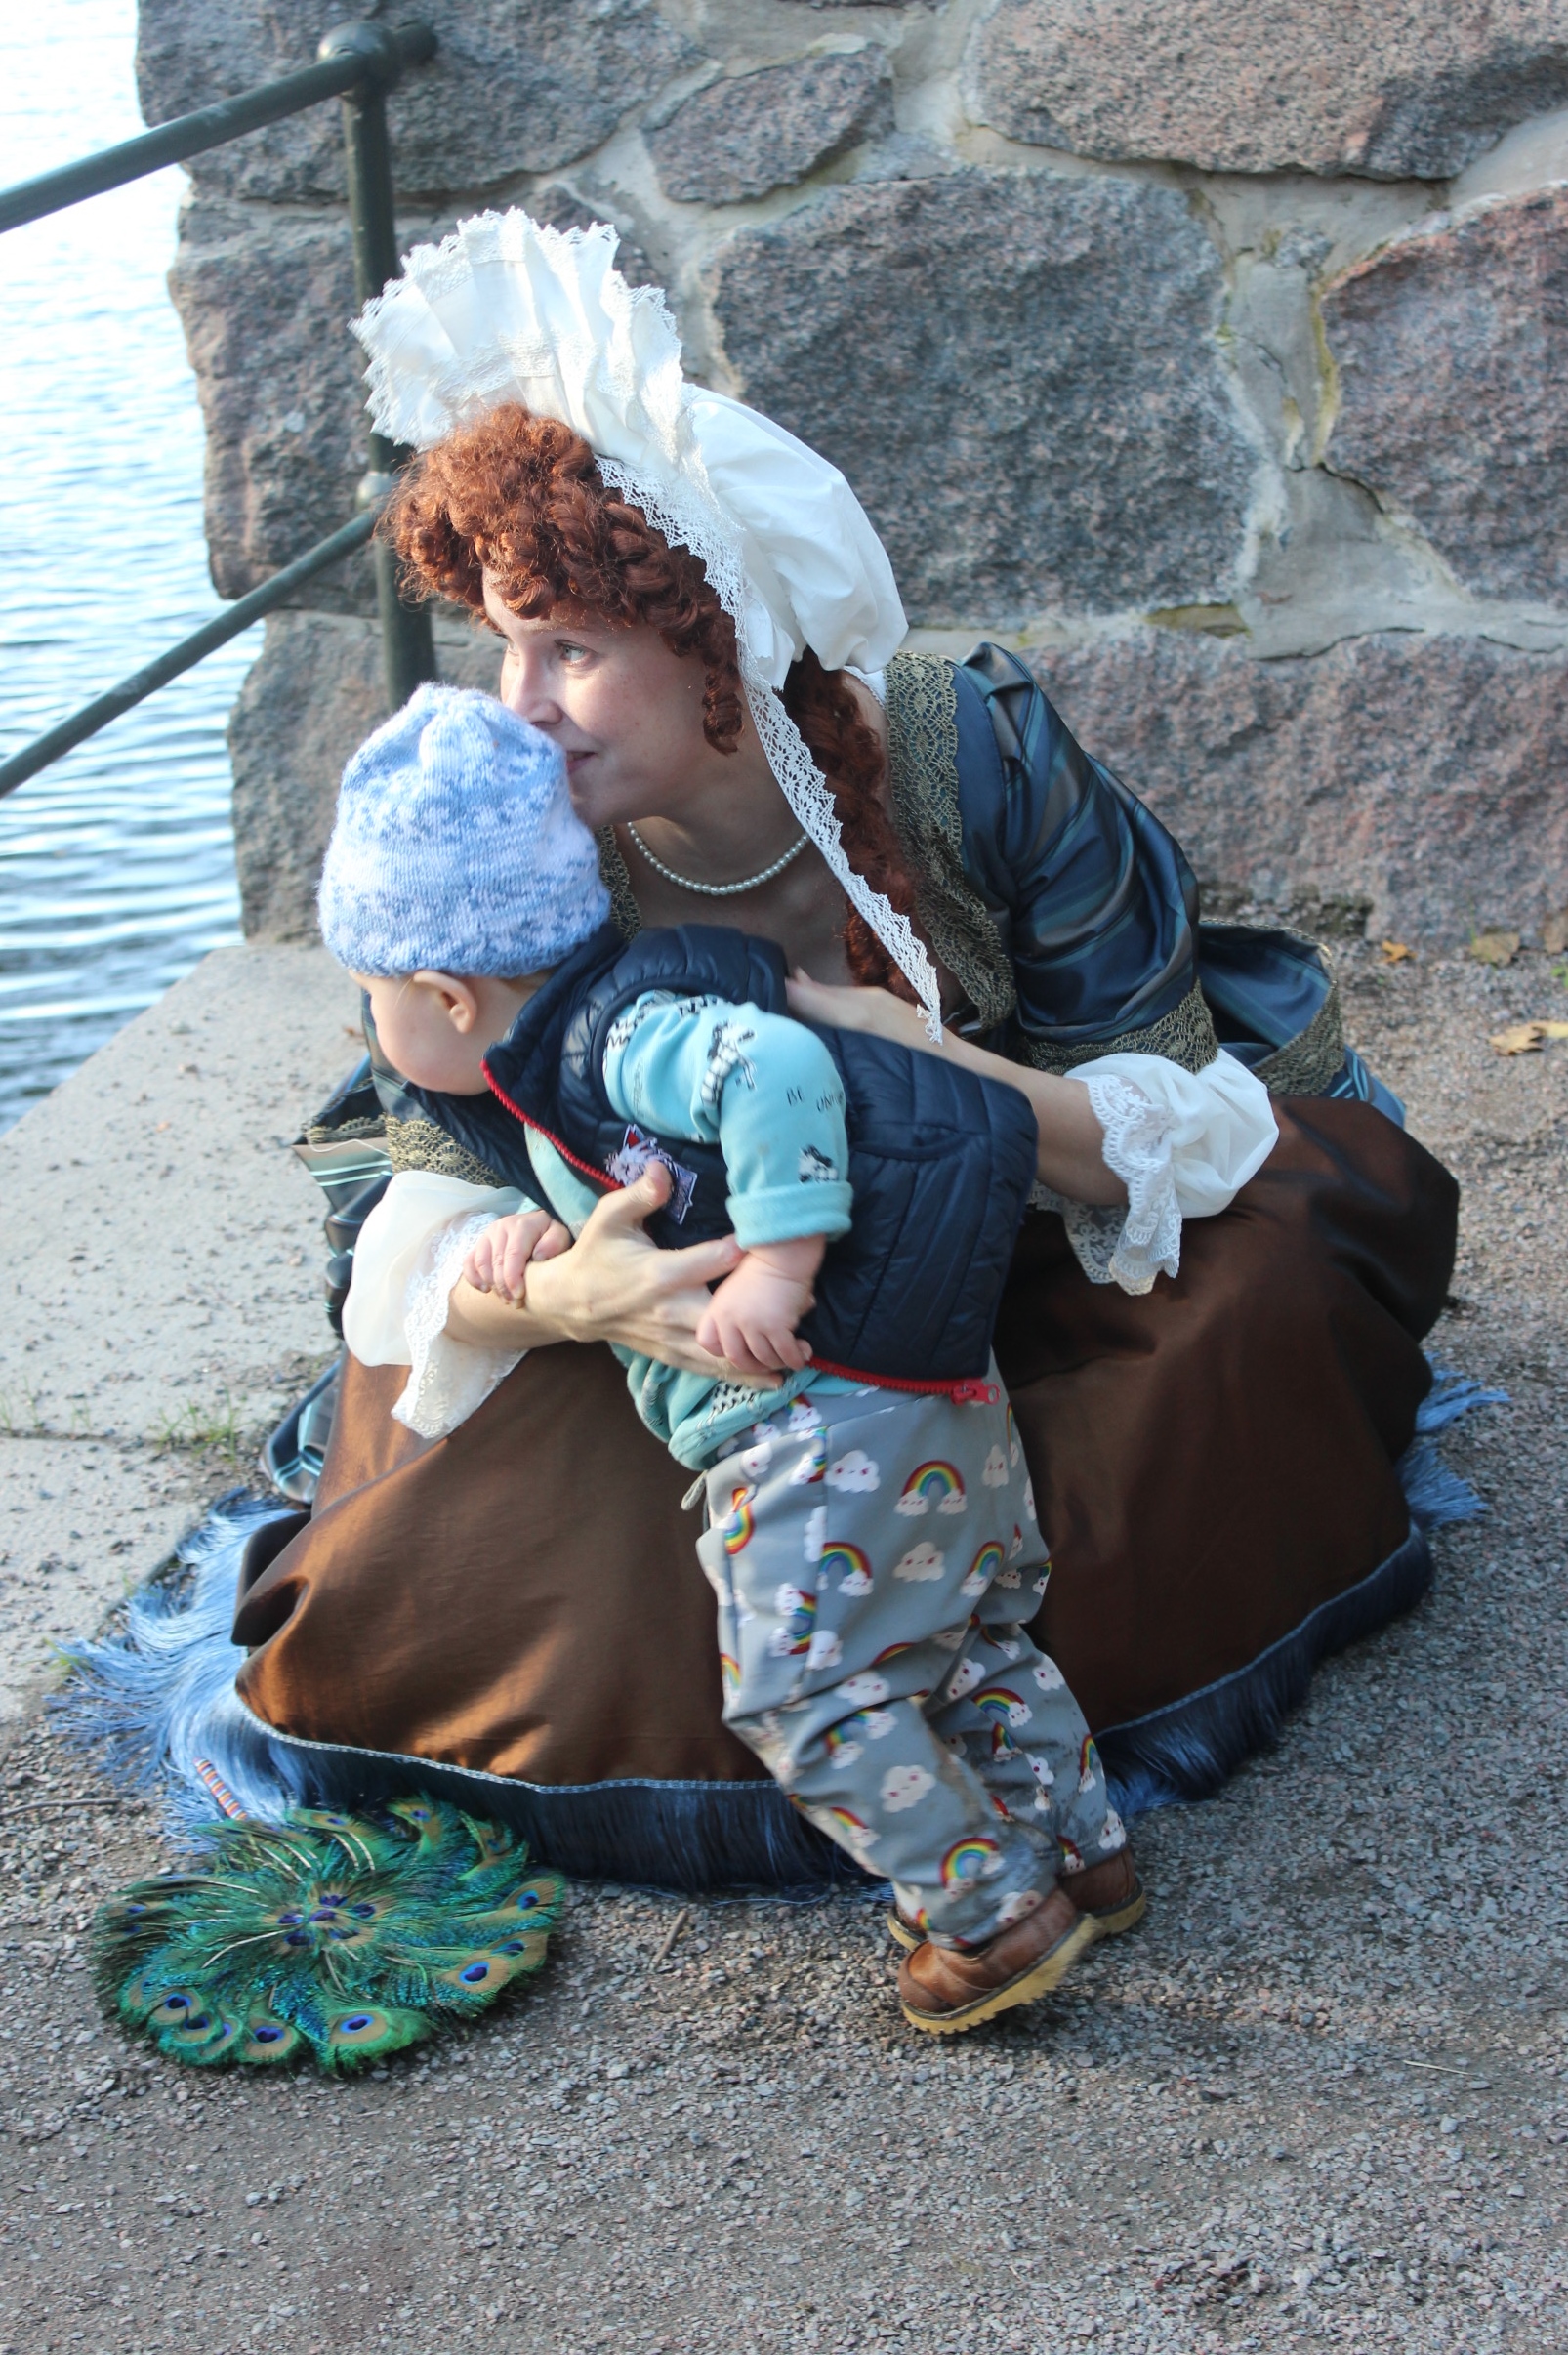

 Here you can clearly se the difference between the back bodice sober stripes and the horizontal “right side” stripes on the draping.
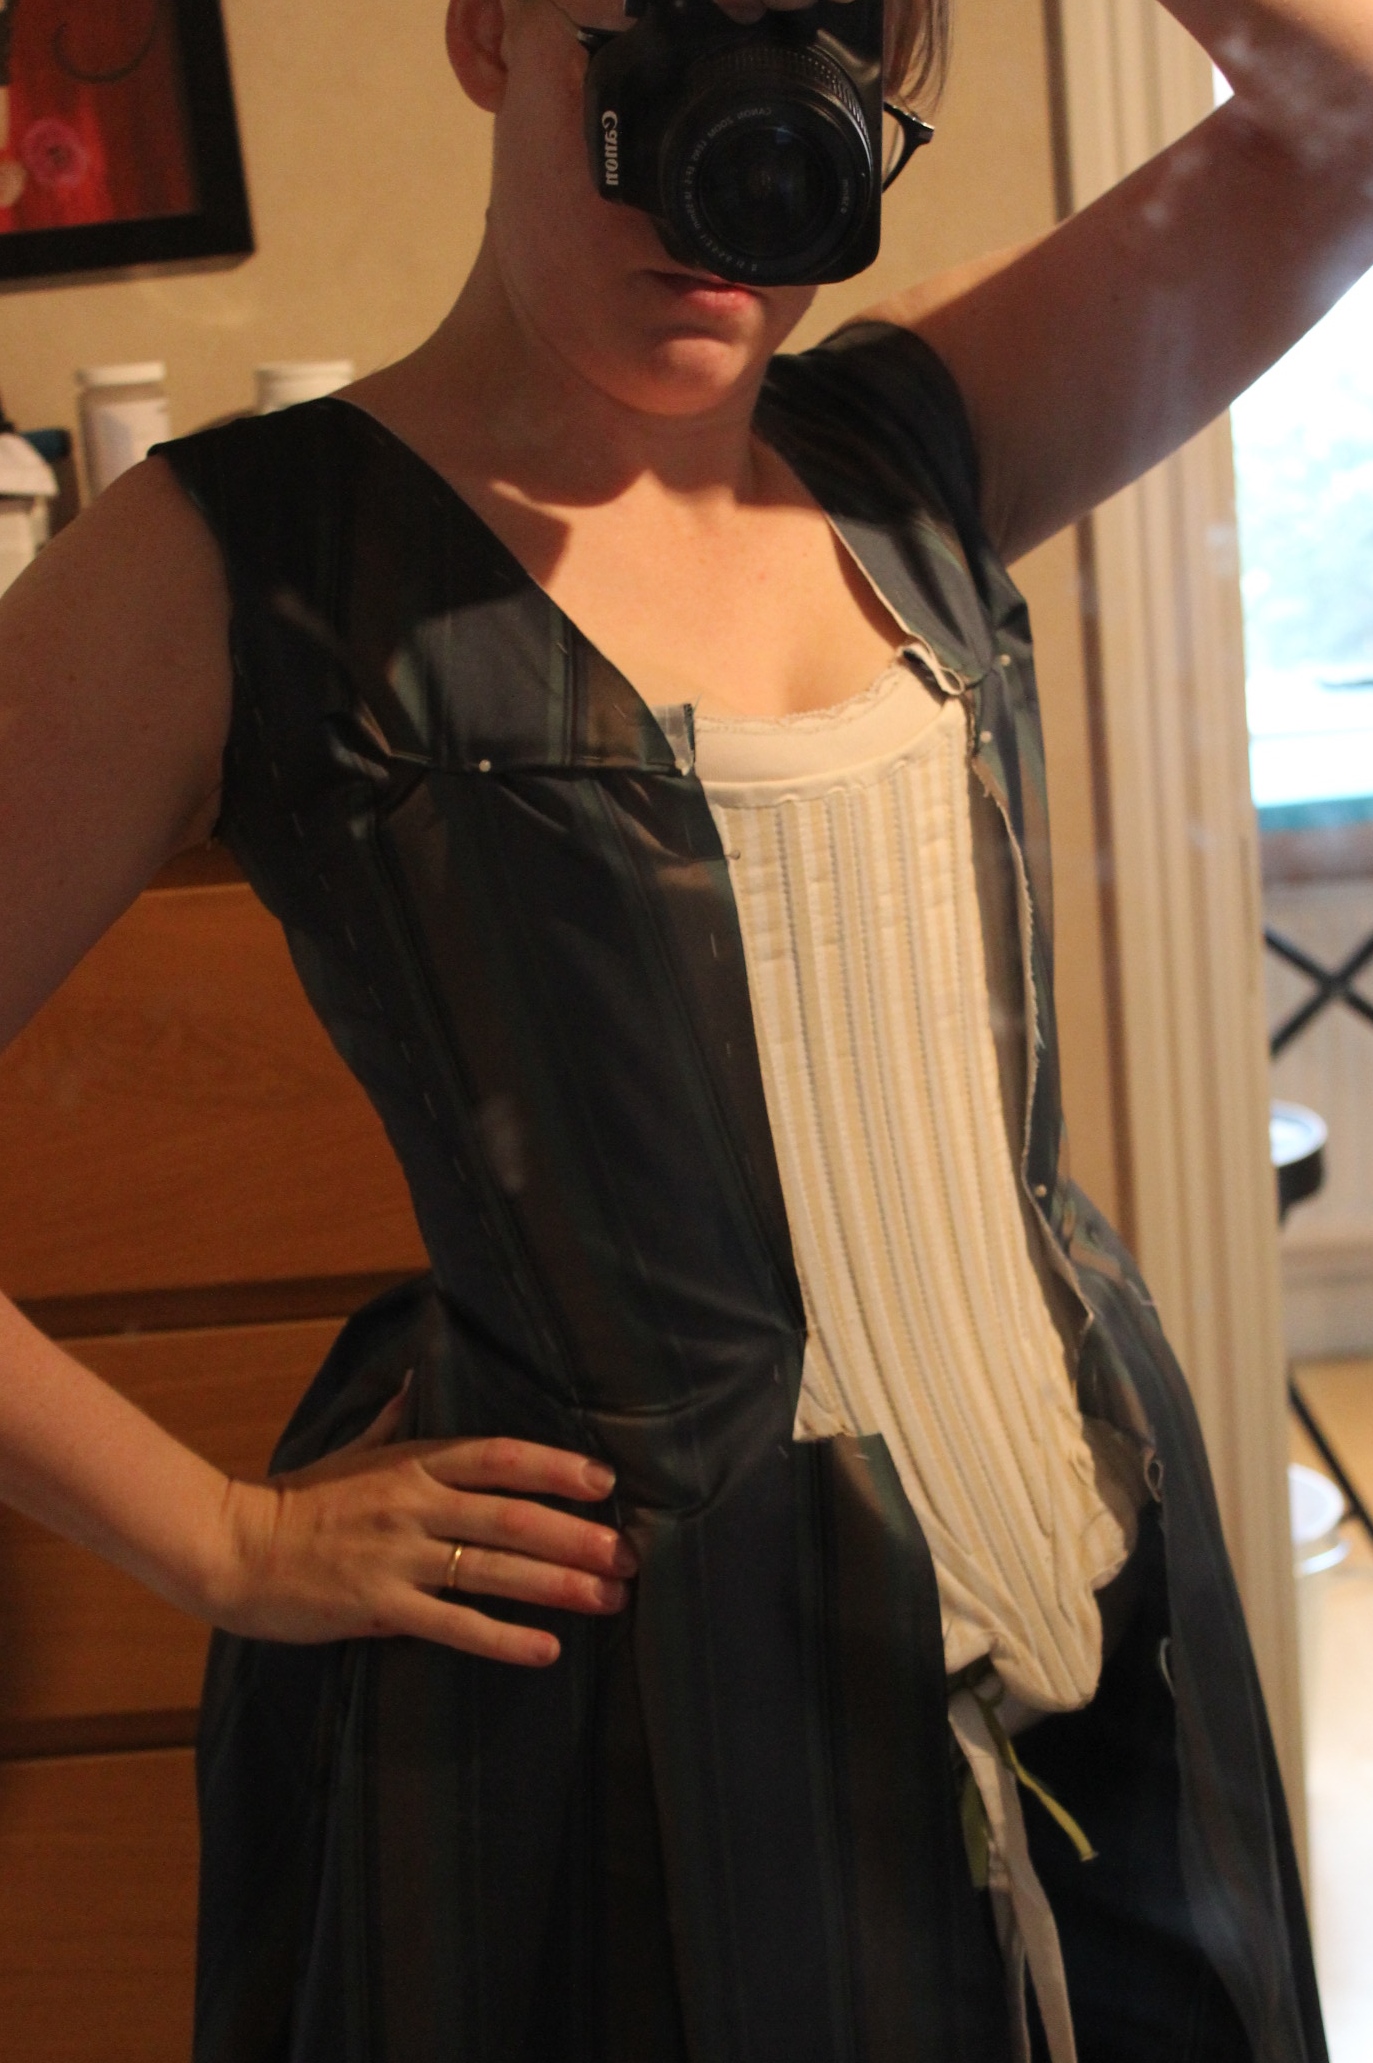


 So I decide to keep it as it where – better a tad to small then ugly markings at each seam.
 And as I didn’t had a pattern piece for them I’d just cut something along the right shape when i cut the fabric. And after some draping on the dressform (and myself) I ended up with a smaller shape which I then pinned and stitched down on top of the front hiding bot the darts and the strange seam that was the shoulder seam
 Here you can see the experimenting and draping of the front pieces on myself.
 Trying out the sleeve before attaching the neck and front-piece.
 Silver or gold?
 I though for a while to ad eyelets to tie the gown on top the stomacher as seen in several pictures, but figured I’d just pin it in place for the time being.


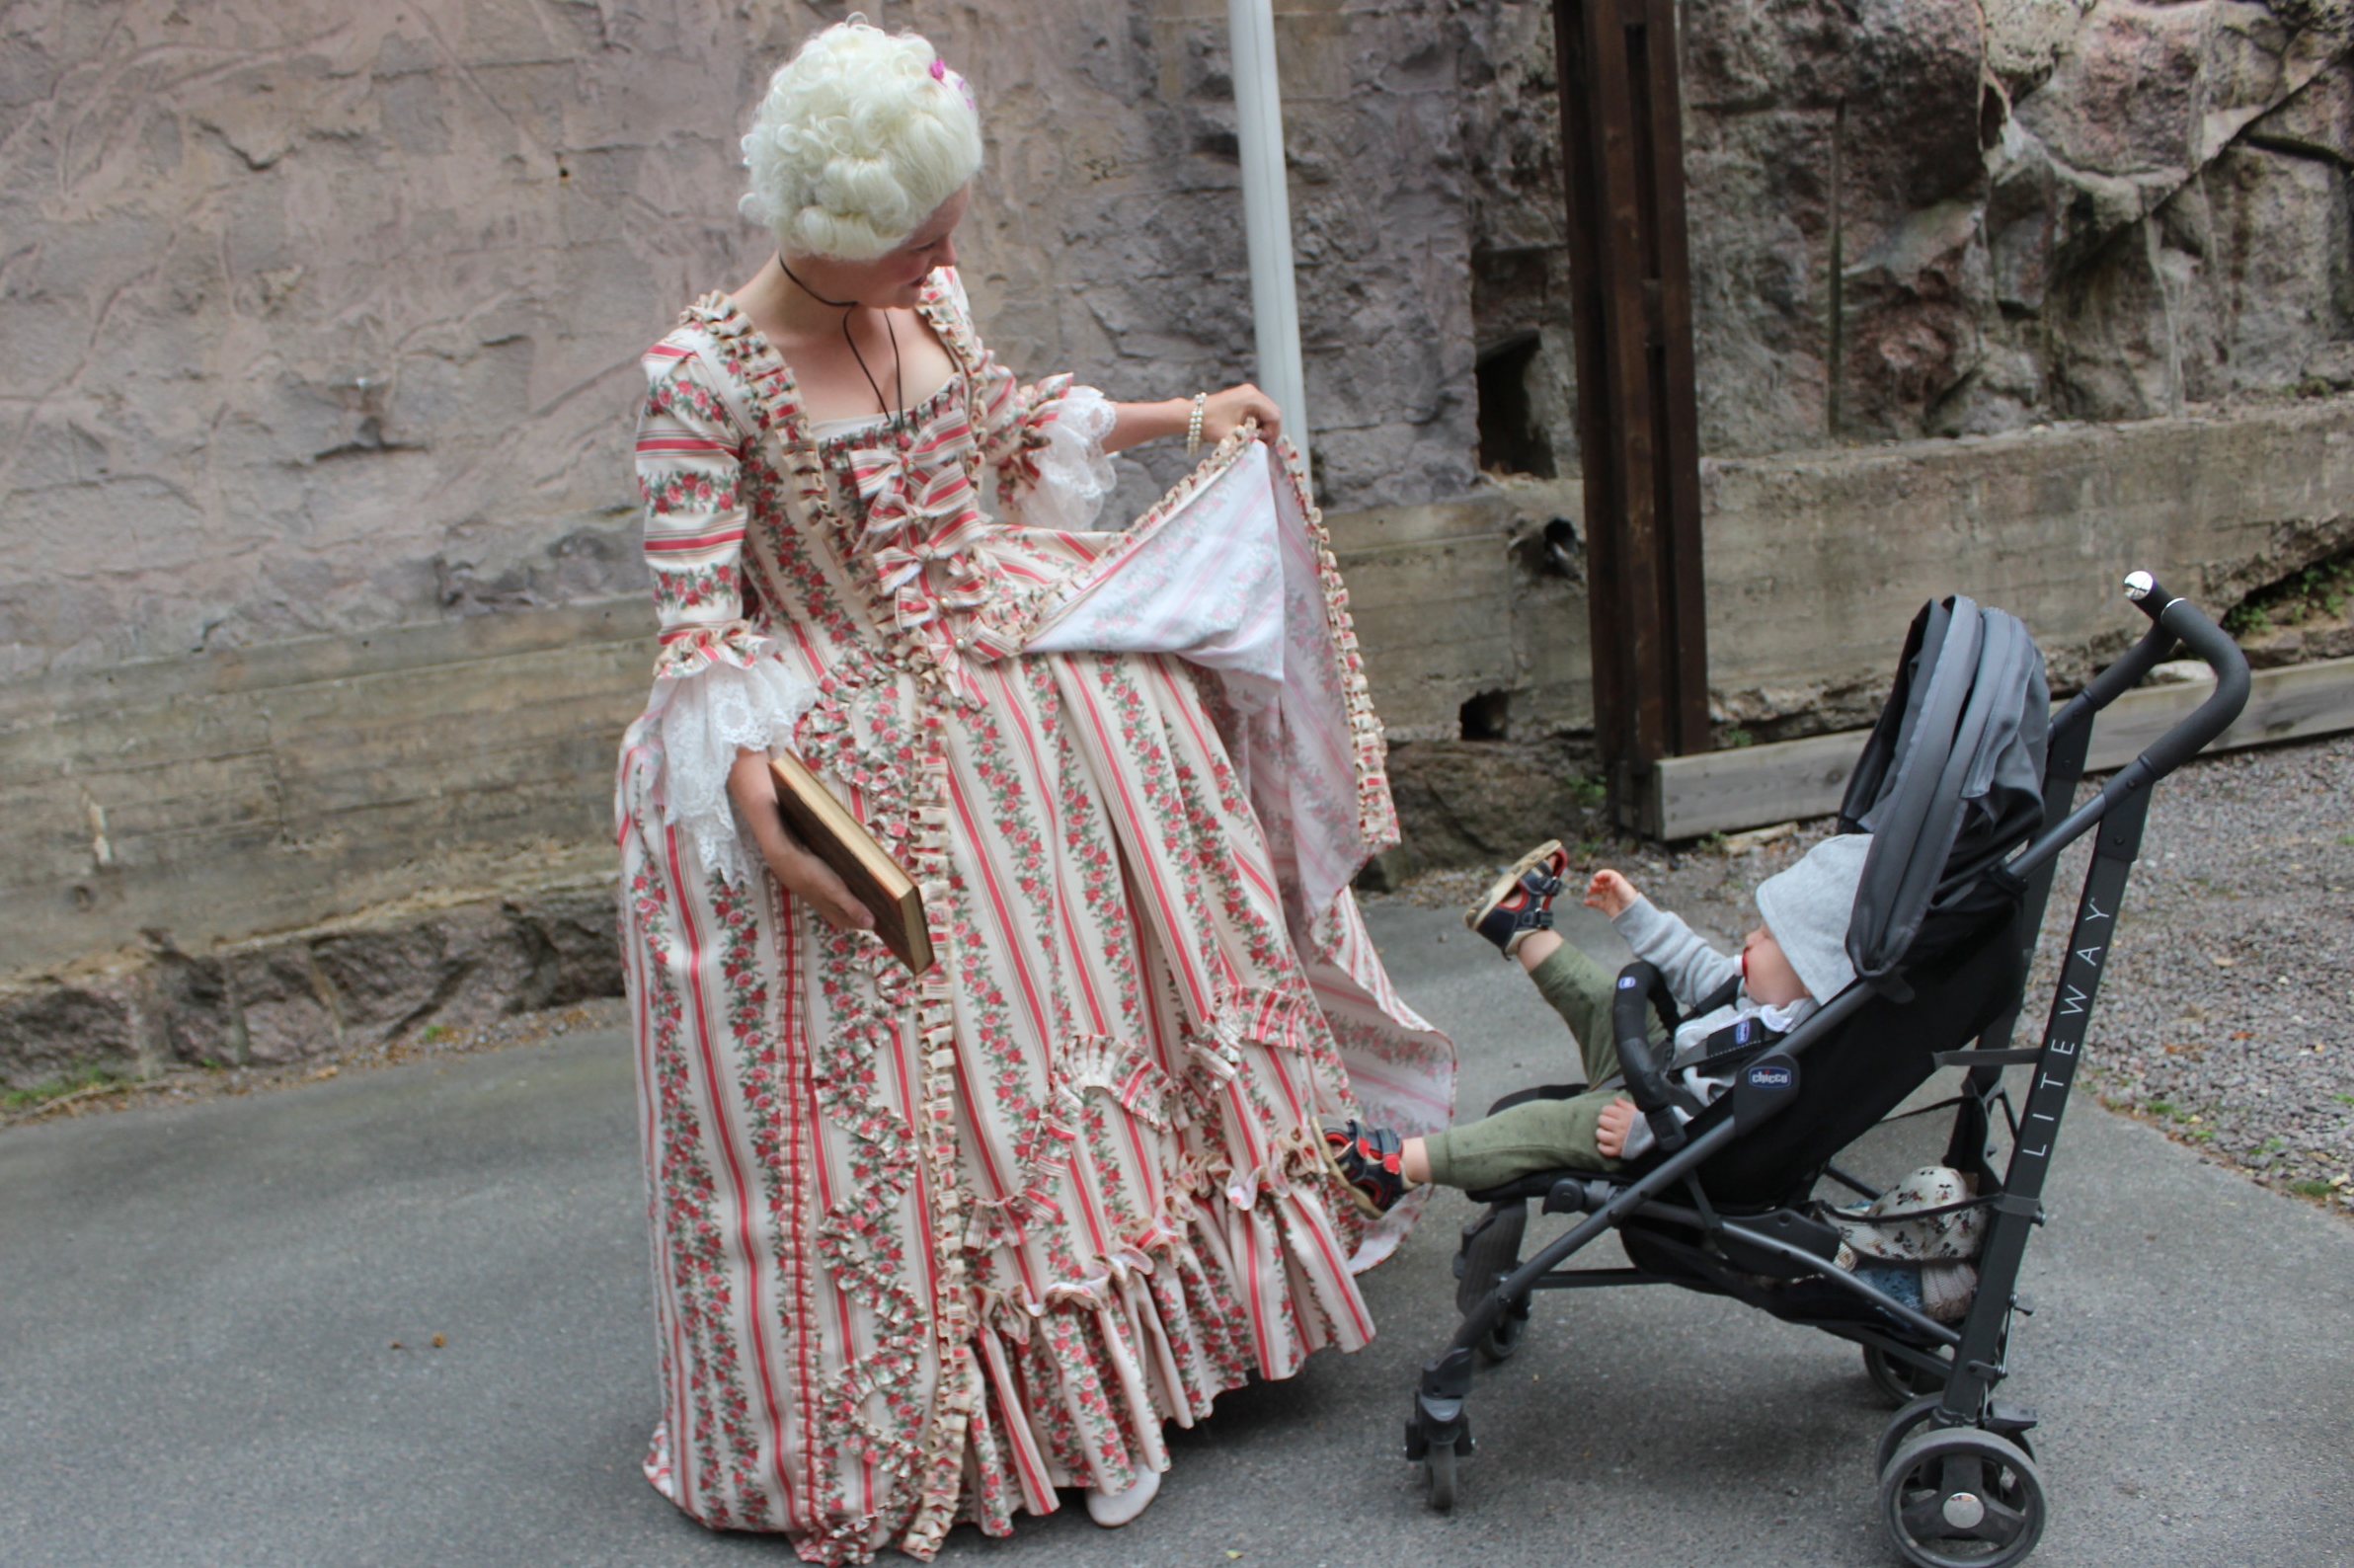
 Apparently it works as a driveway to 🙂
 I know the series focus it’s story around 1667 and the young king Louie VIX. But since his reign reaches into the 18th century I figured it wouldn’t be to far fetched to use it as inspiration.


 Drafting on the floor.
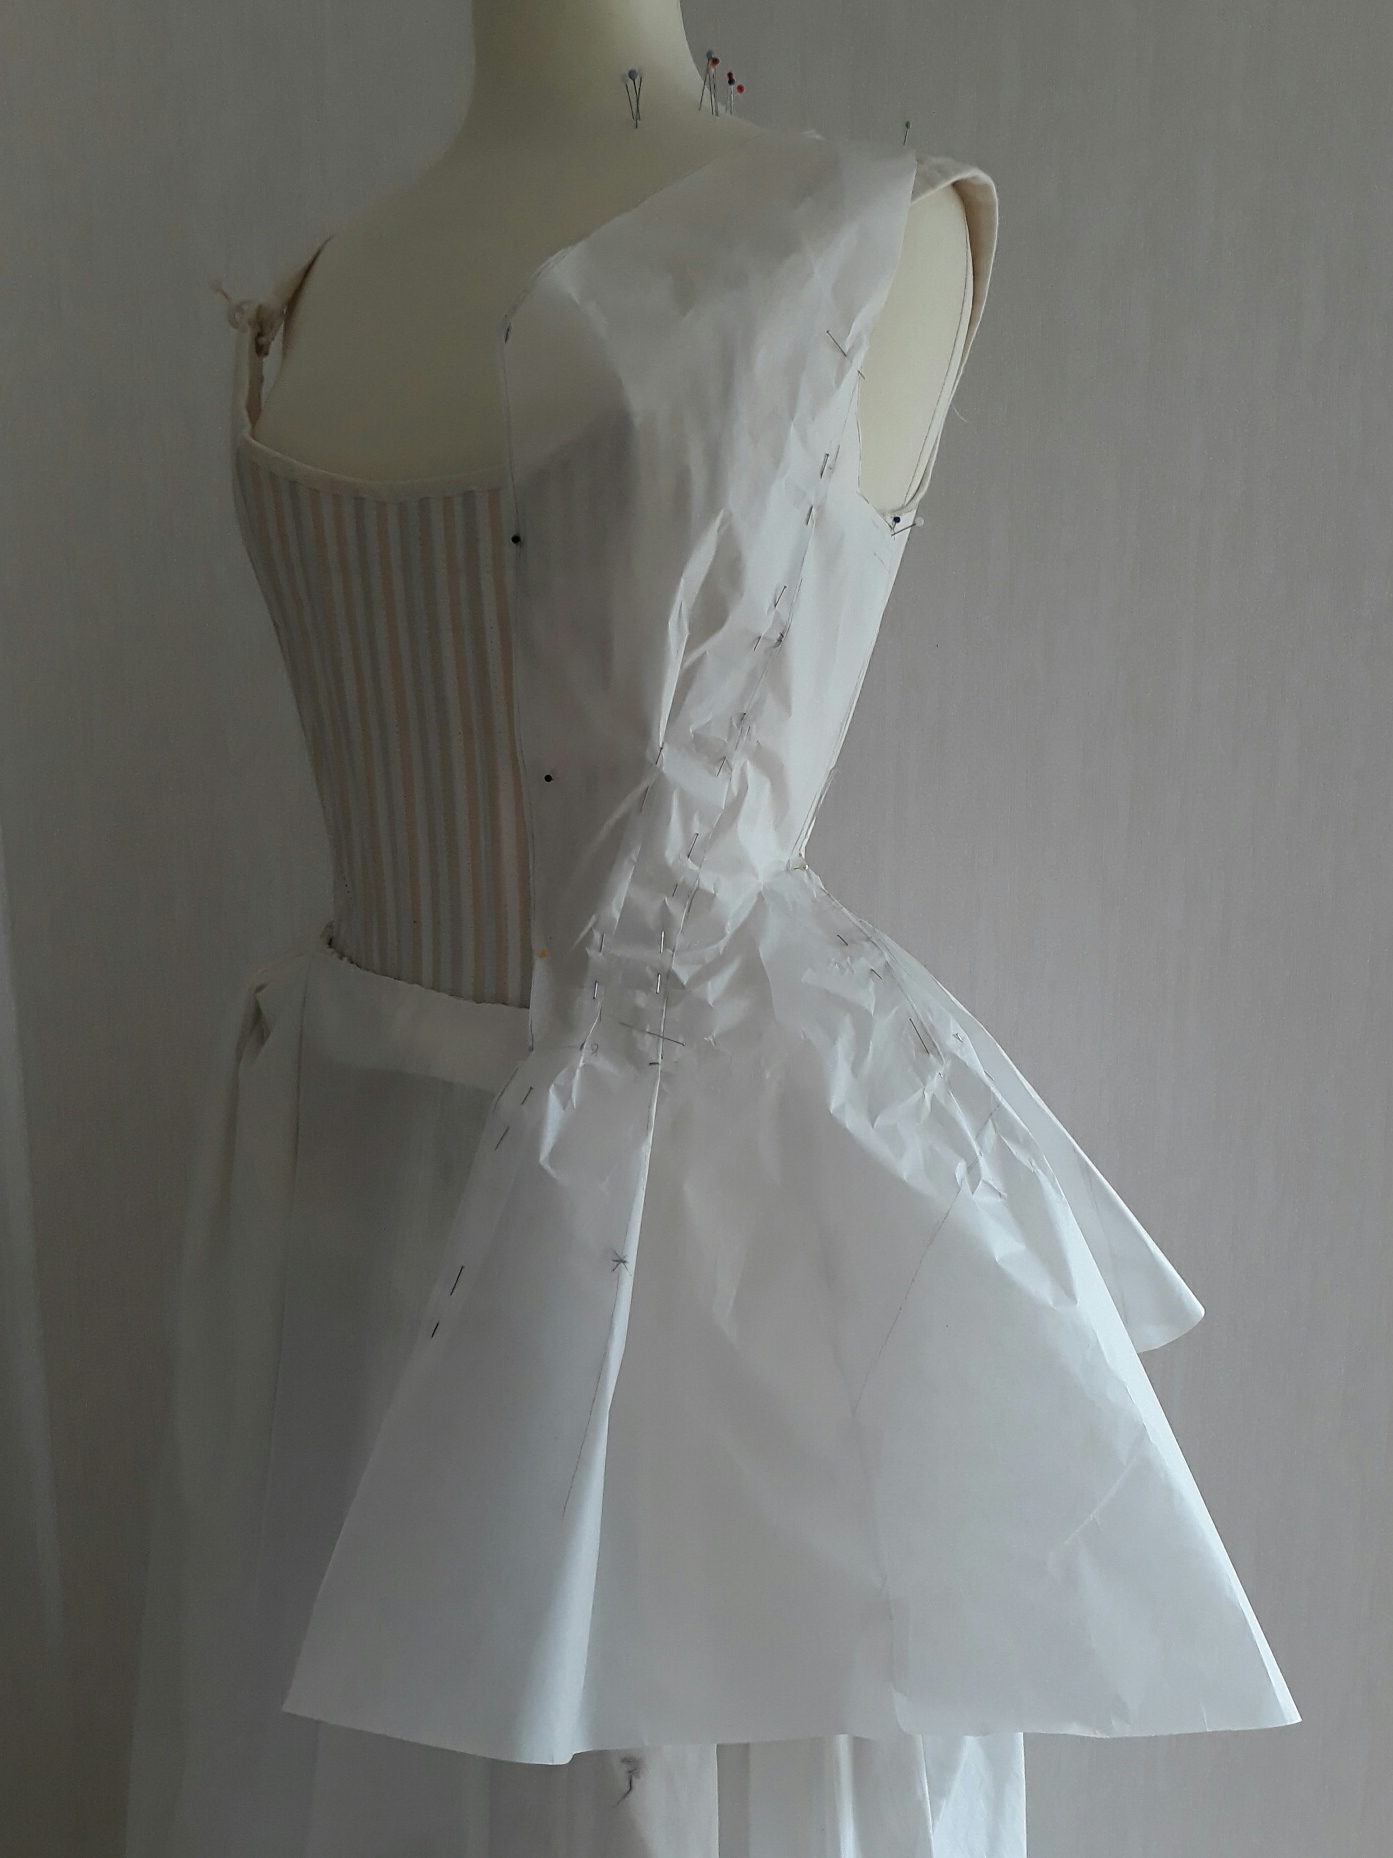


 Sleeve and back pieces being cut.


 Inspiration
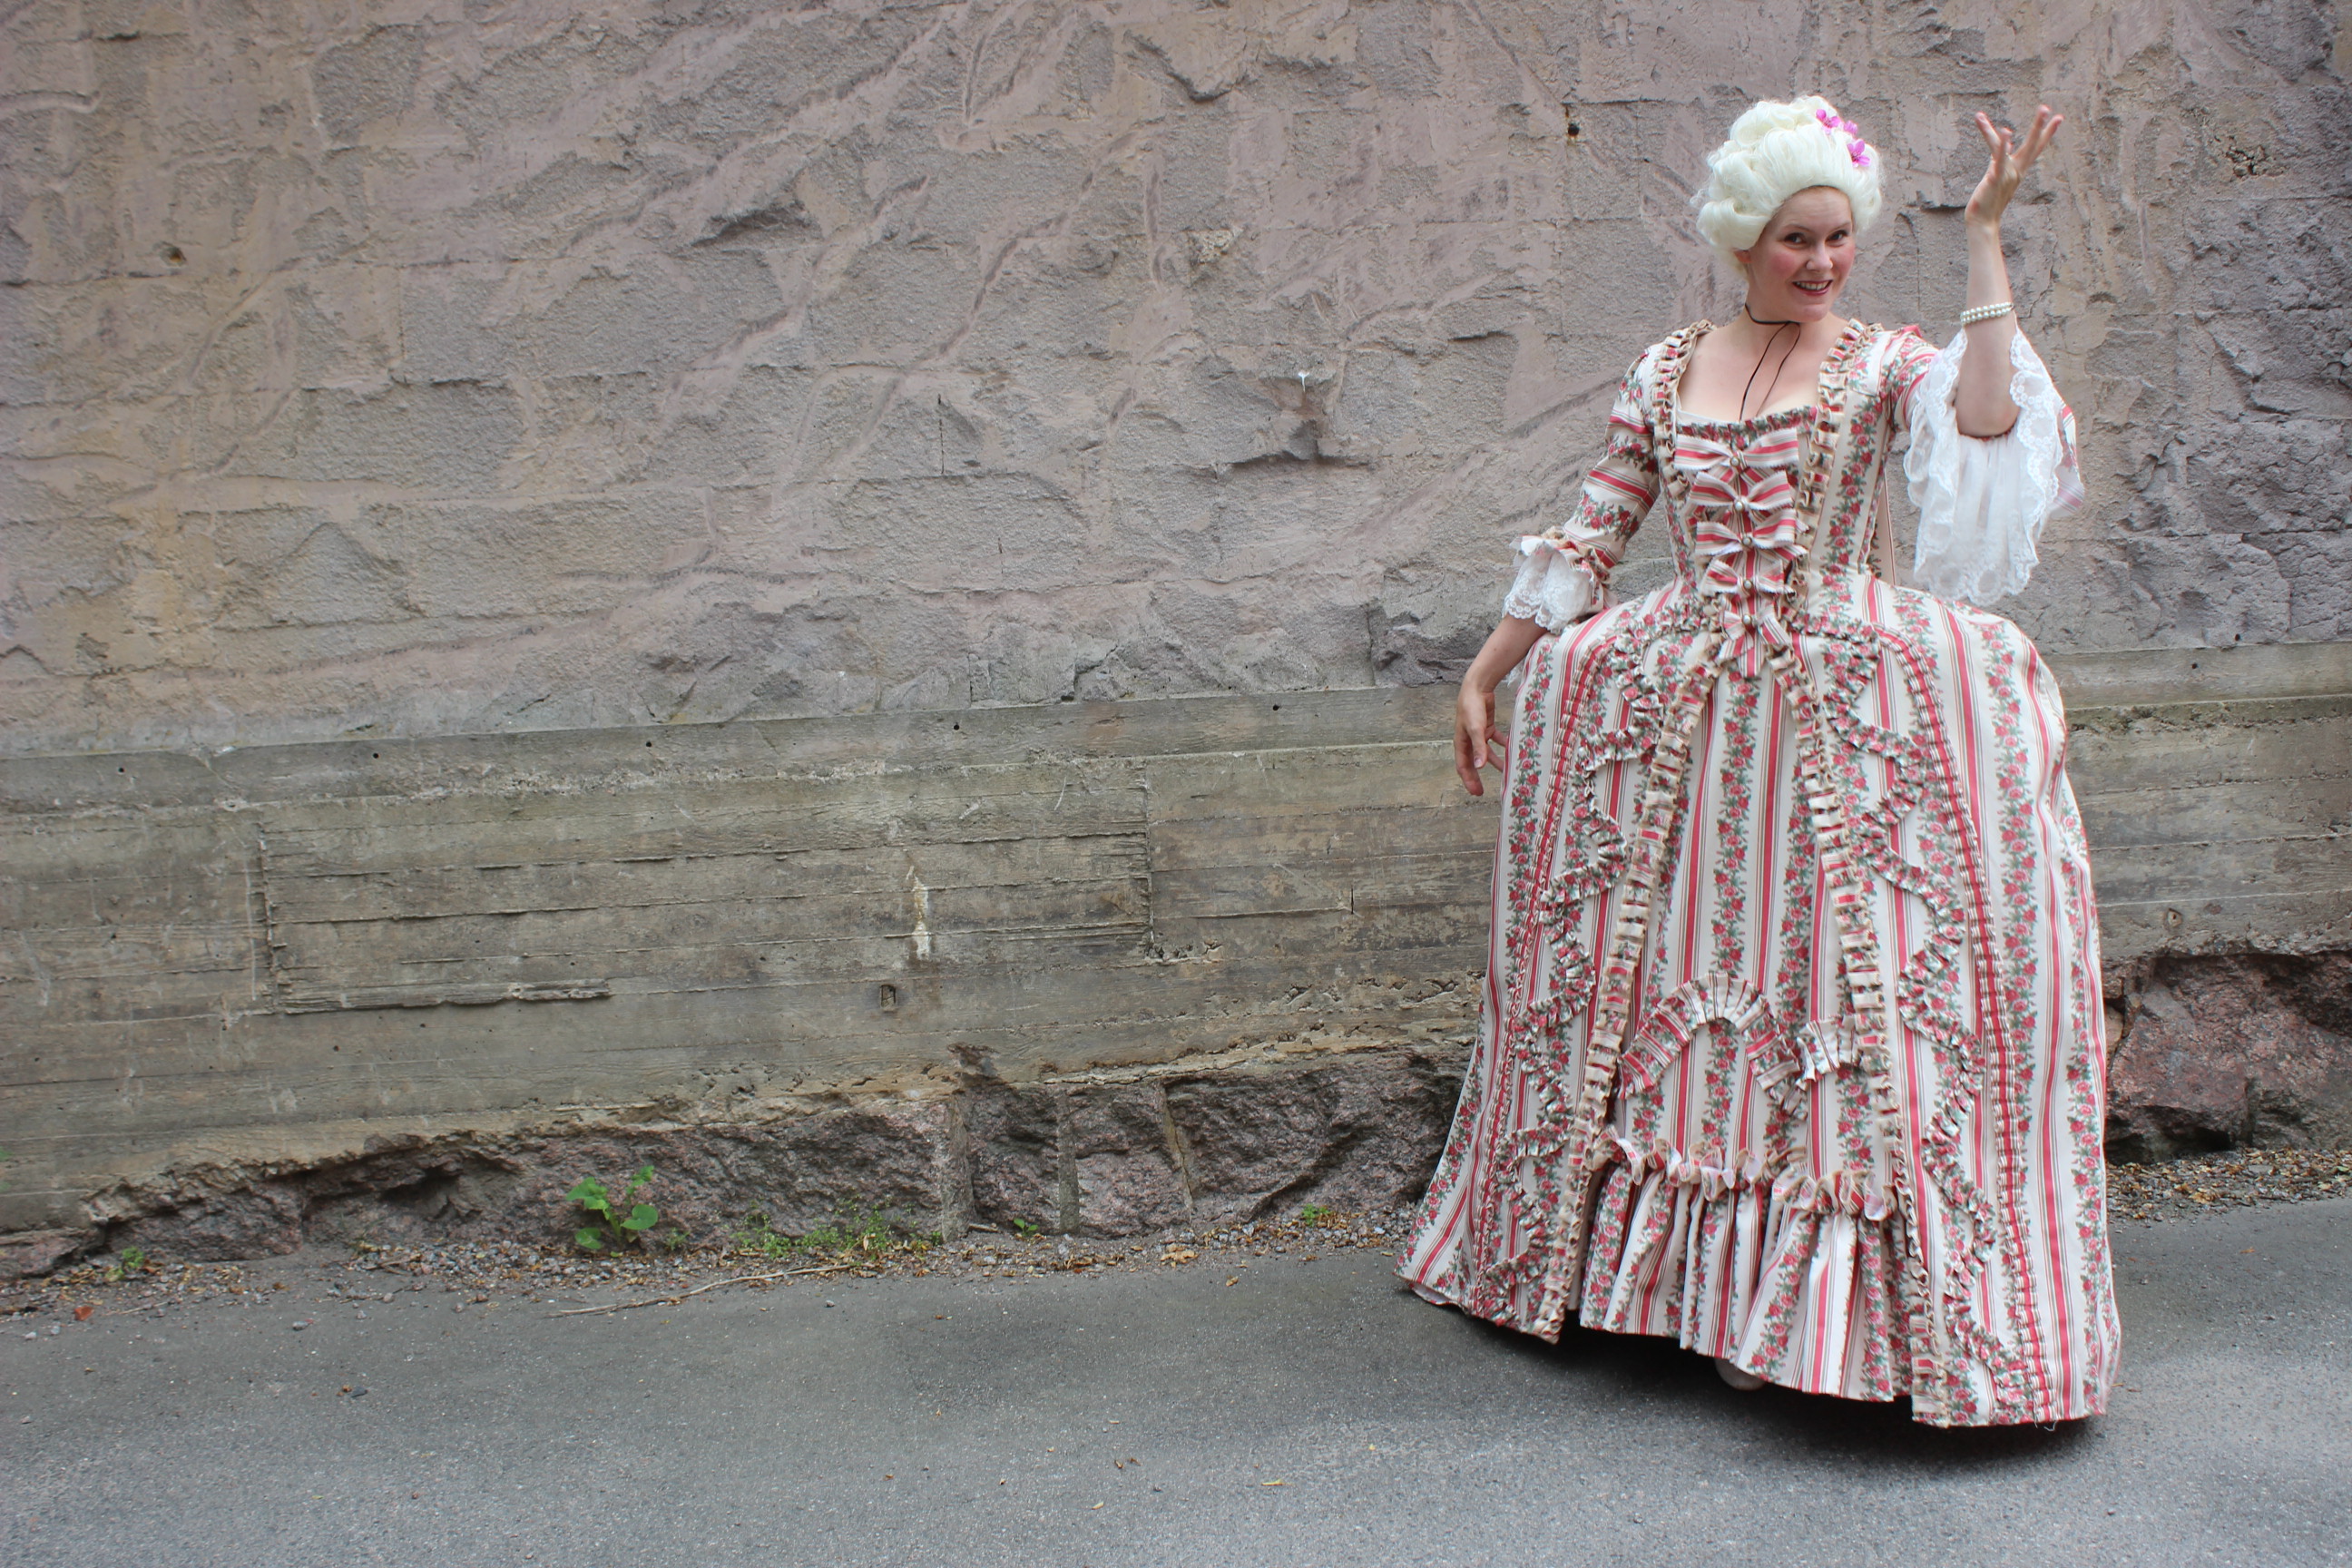


 Pictures by: Elin Evaldsdotter
  A pink/flower/striped polyester satin found in the bargain bin at my local fabric store.
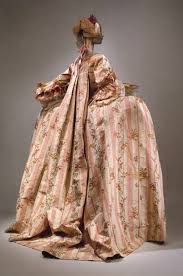
 The first version of this petticoat paired with my (then) newly made stays.

 The firs try on after 2 years (and 1 baby) – and it fits like a glove :-D.
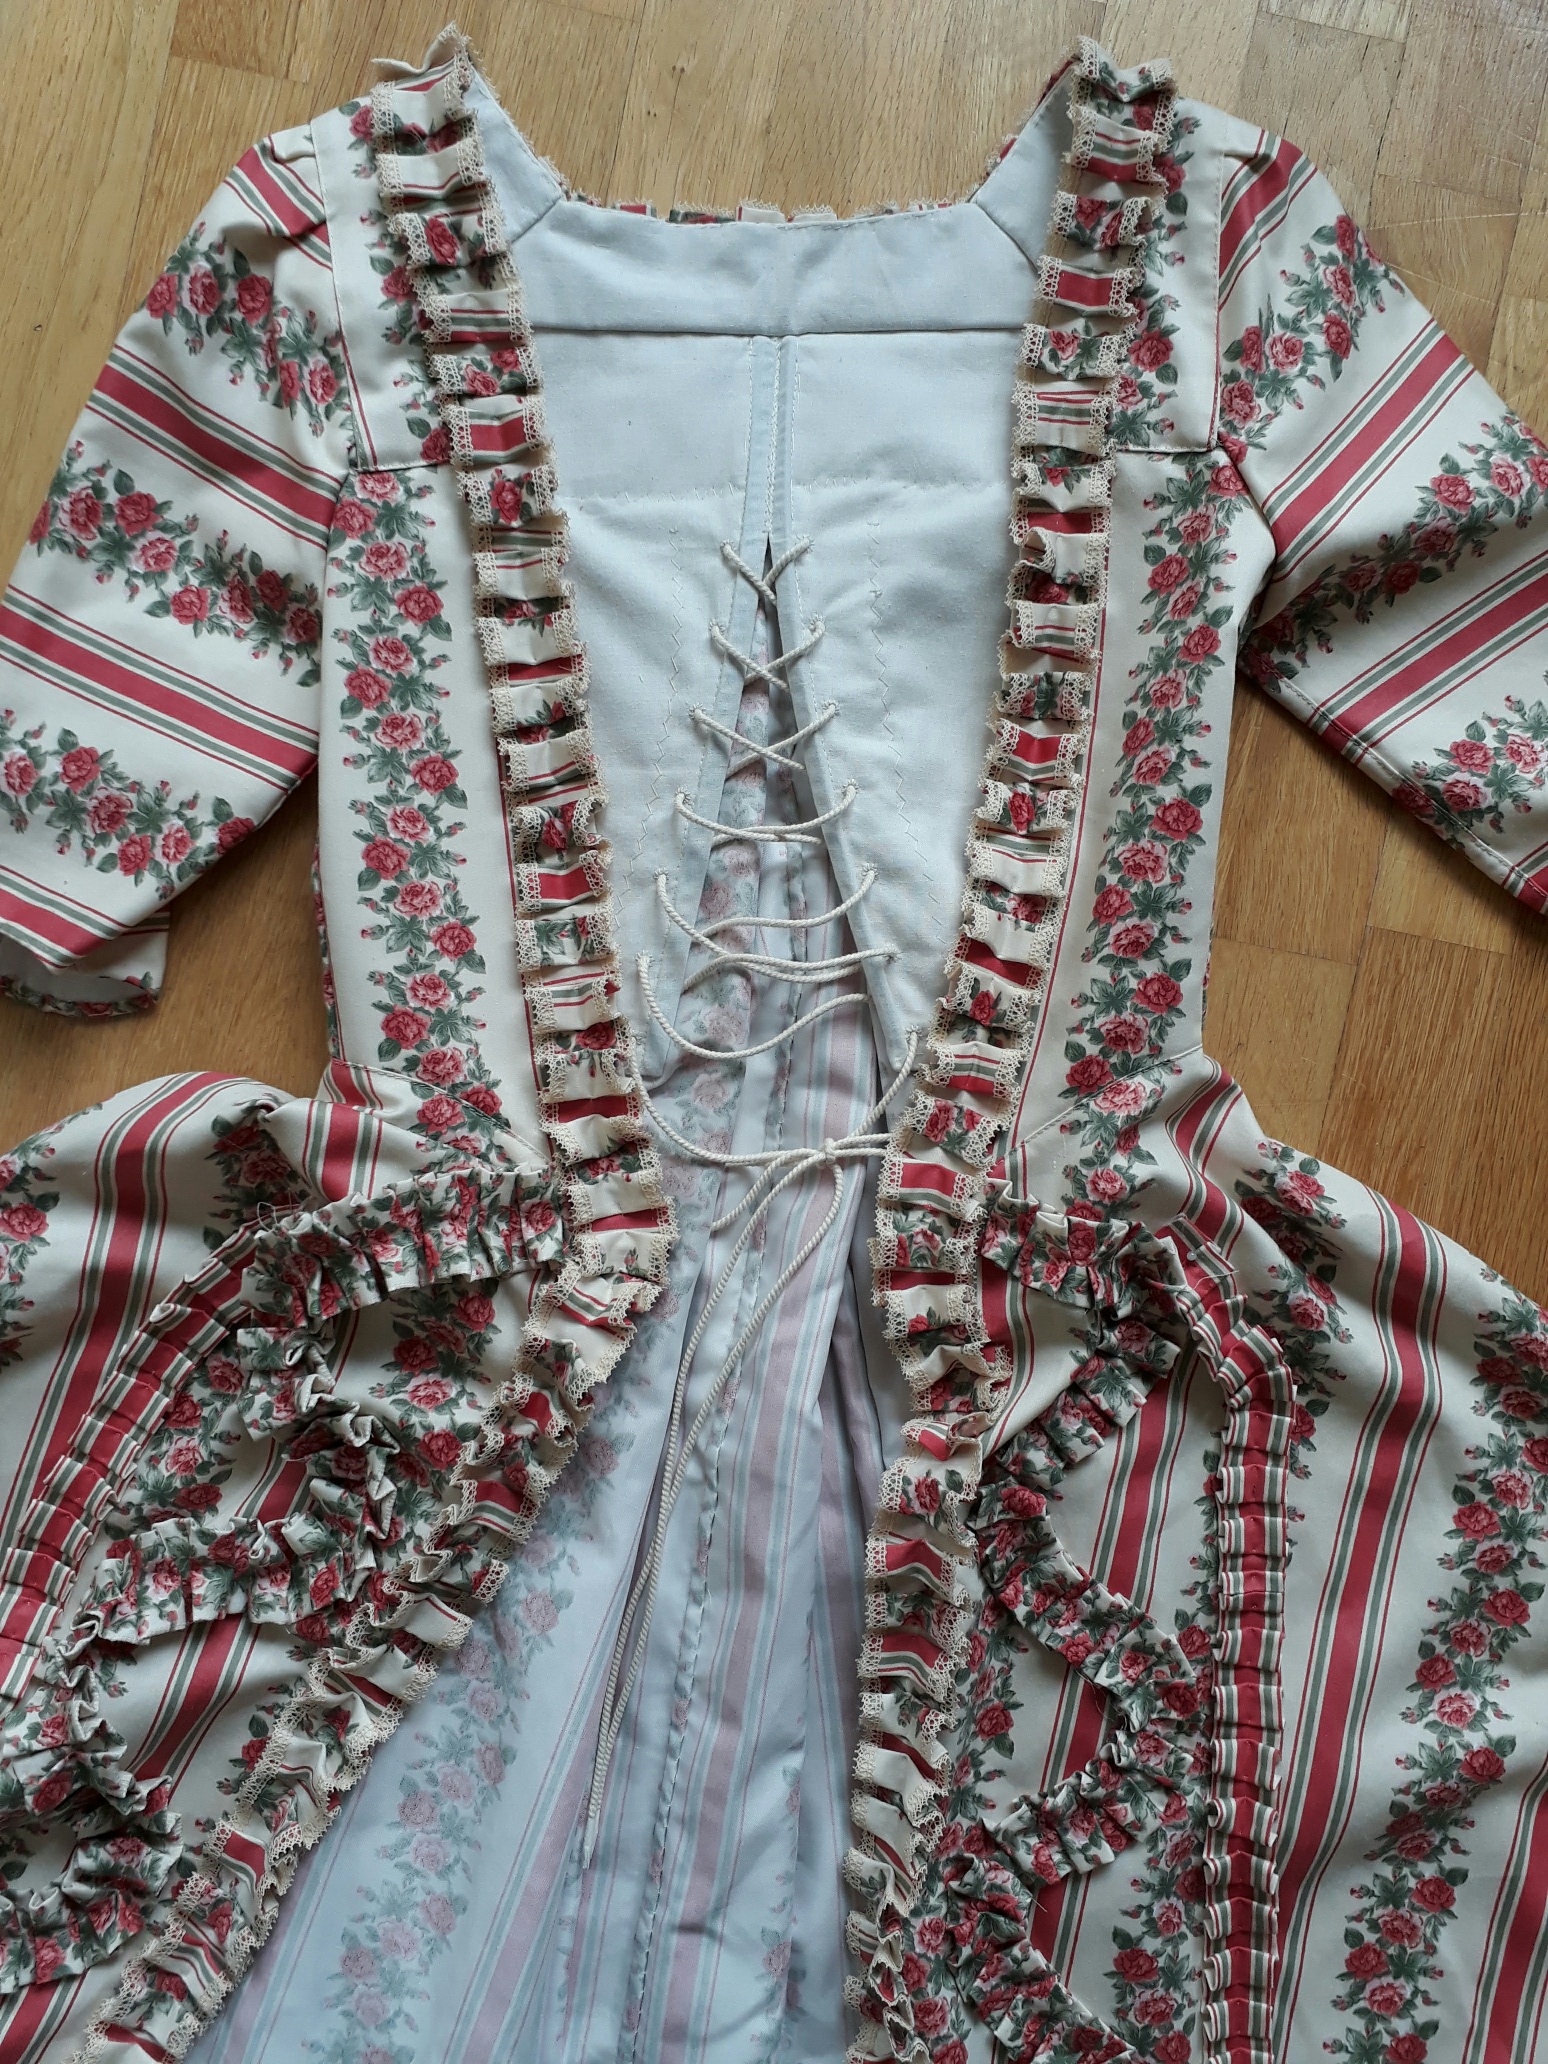


 pic from before the photoshoot


 Photos by: Elin Evaldotter

 only trouble was I forgot to mirror the pieces for the second cut – which of course left me with 4 identical trapezes pieces of fabric (and not 2 left and 2 right which I needed).
 This resulted in slightly smaller pattern pieces and a mend that would hopefully not be this obvious with selveges cut down and worn over a underdress.

 I also found the perfect little dress (on sale) to use as a slip.
 The dress worn open.


 Inspirational Fashion plate