“Sew 17th century Challenge” – The Bodice (part 1 – The pattern)

The last piece I needed to complete the “Sew 17th century challenge” was also the main piece – the bodice.
Read about the other garments here: Skirt, Cufs,Coif, Fur Shawl
And to make this post a bit lighter I’ve cut it up in a few manageable pieces.
First up – The Pattern

12312767024_07604ef369_h

When researching the bodice I found several different patterns*, and after some narrowing things down, I ended up with two finalists to make into mock-ups. Both from Waughs “Corset and Crinolines”

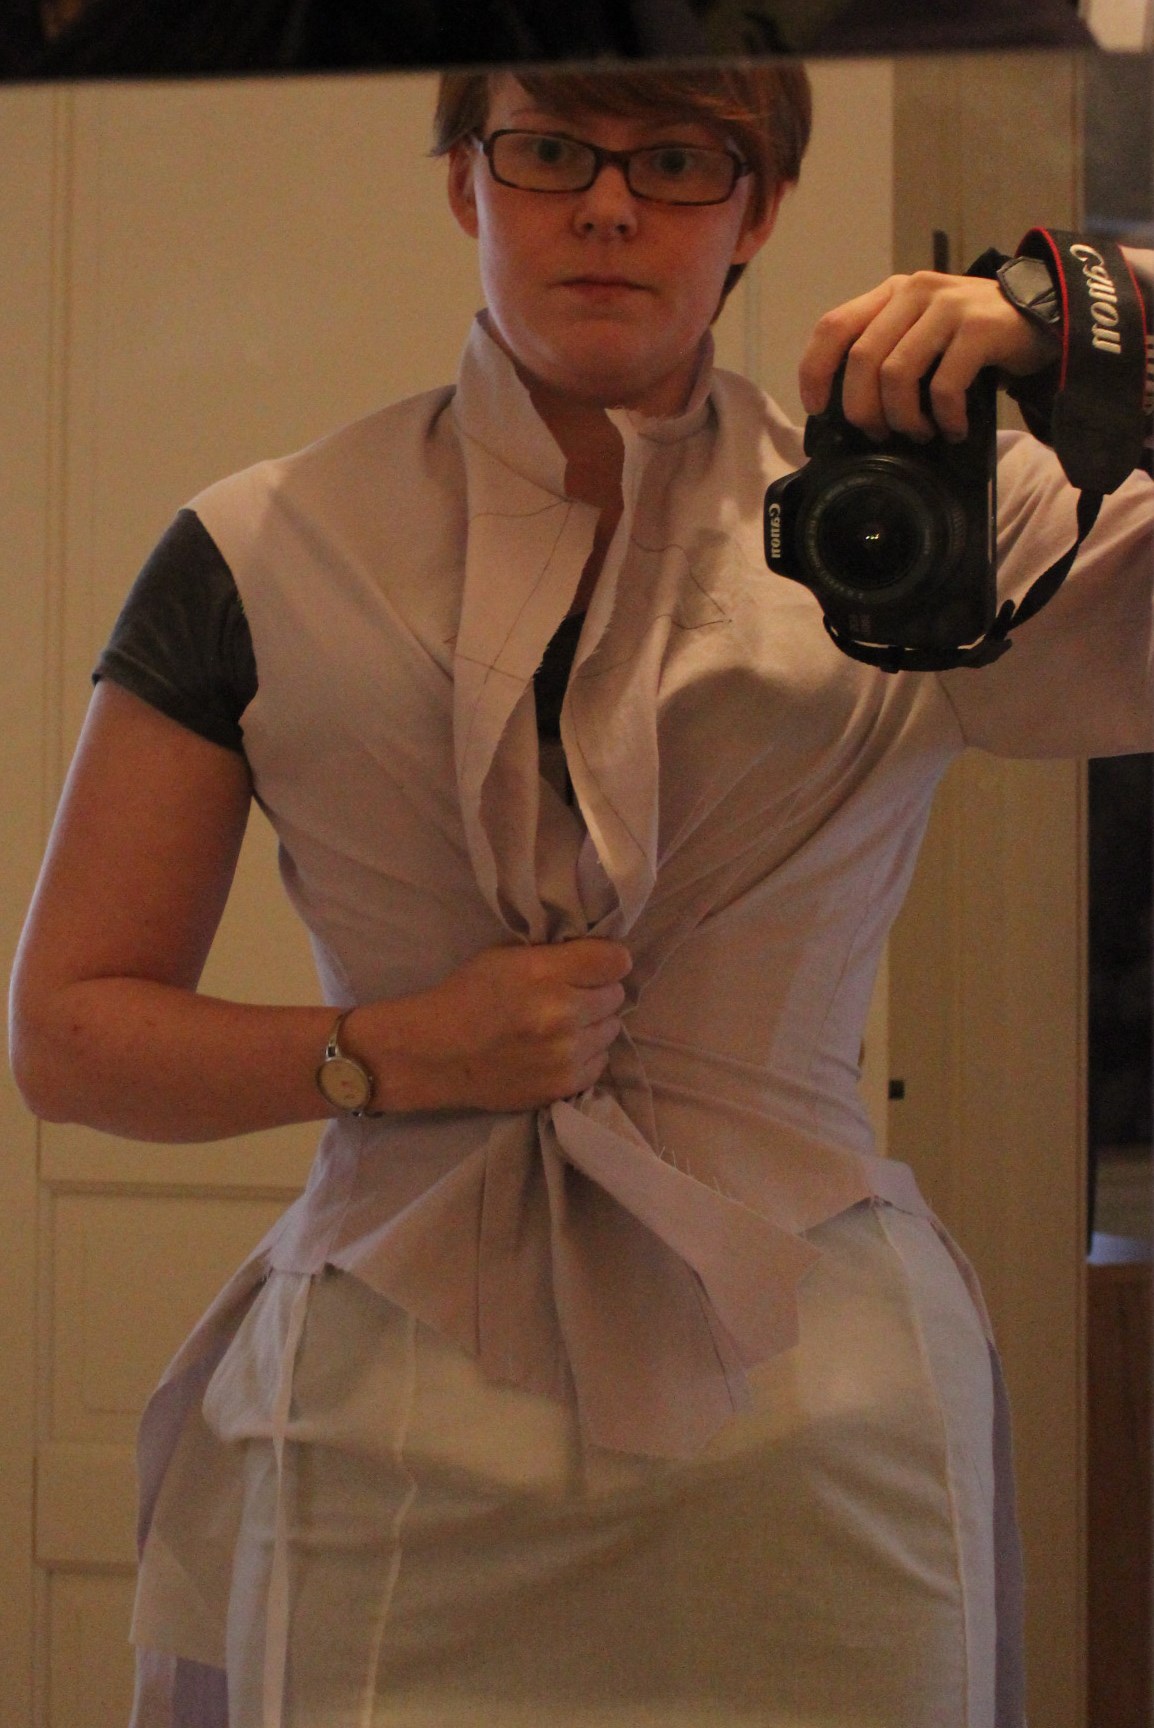
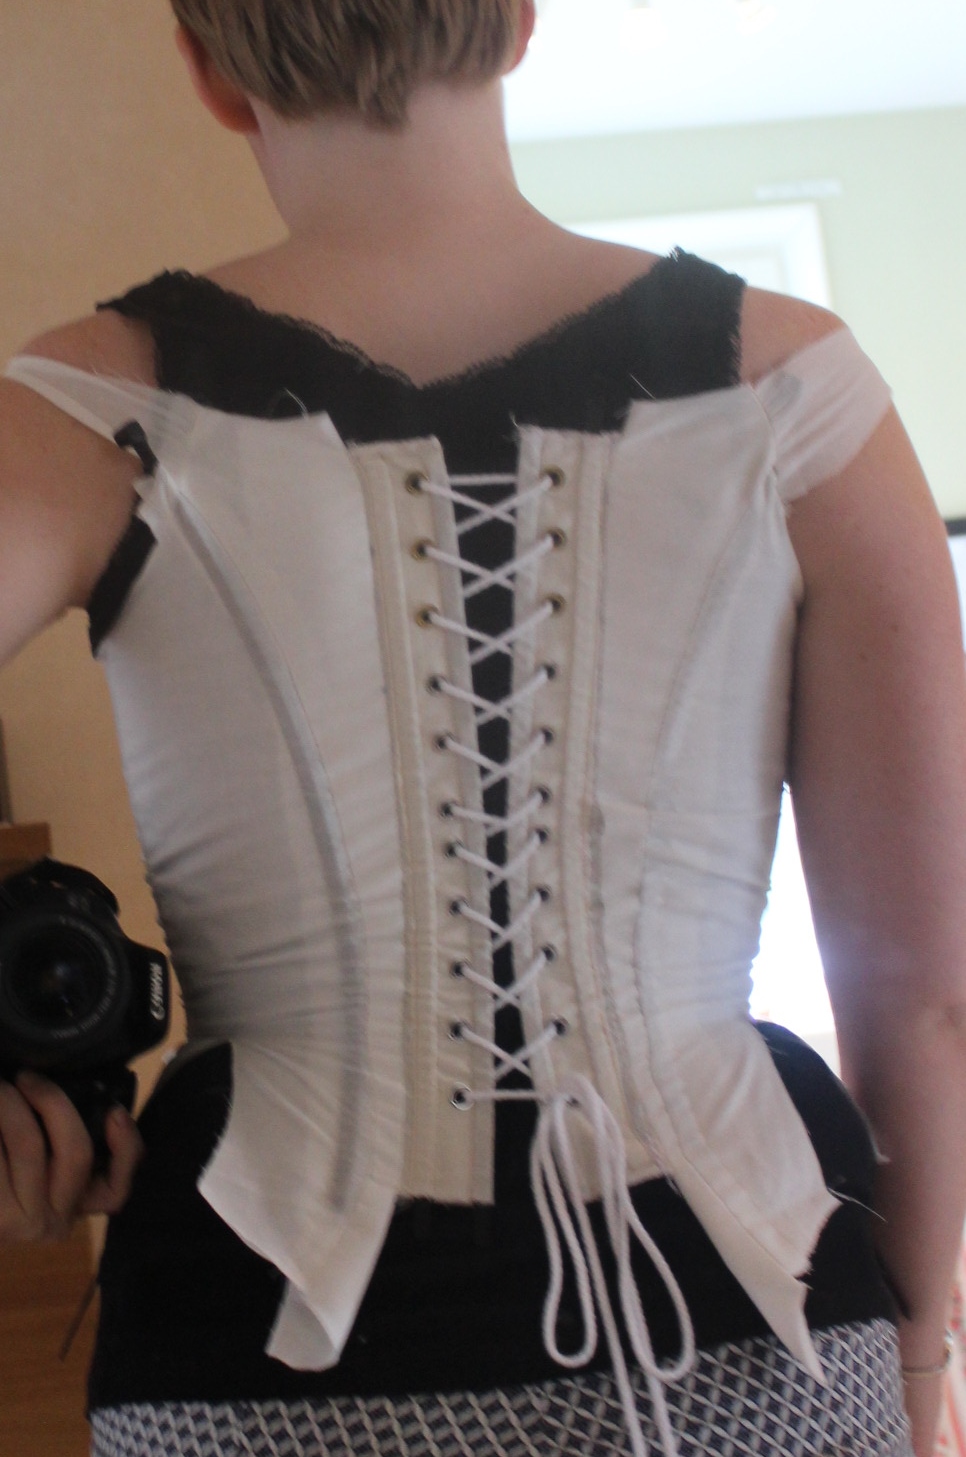
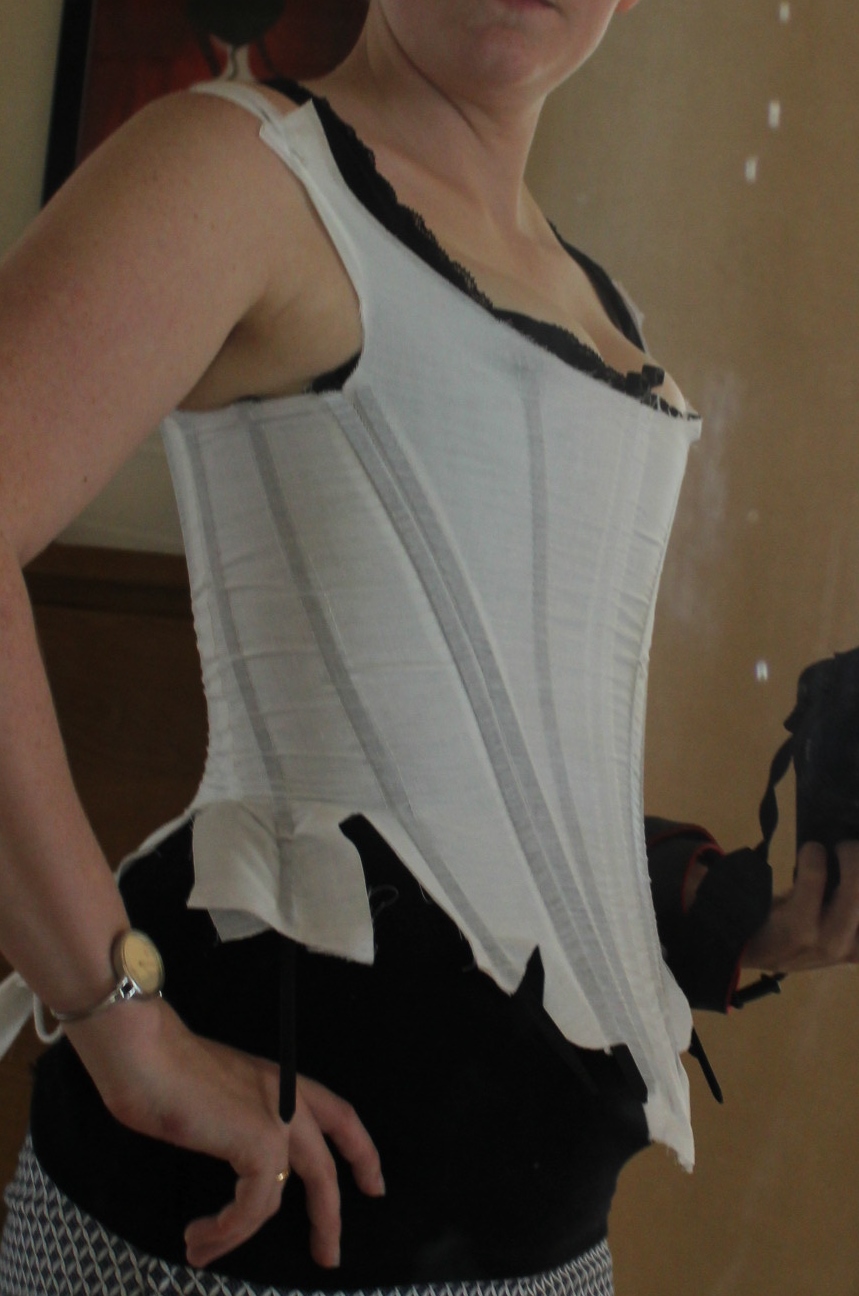
The first pattern I picked was “1660s bodice lining”
It has the perfect neck scope and shoulders, and the much need lacing down the front.
The only thing I’m missing is the tabs down the hips.1650 waugh

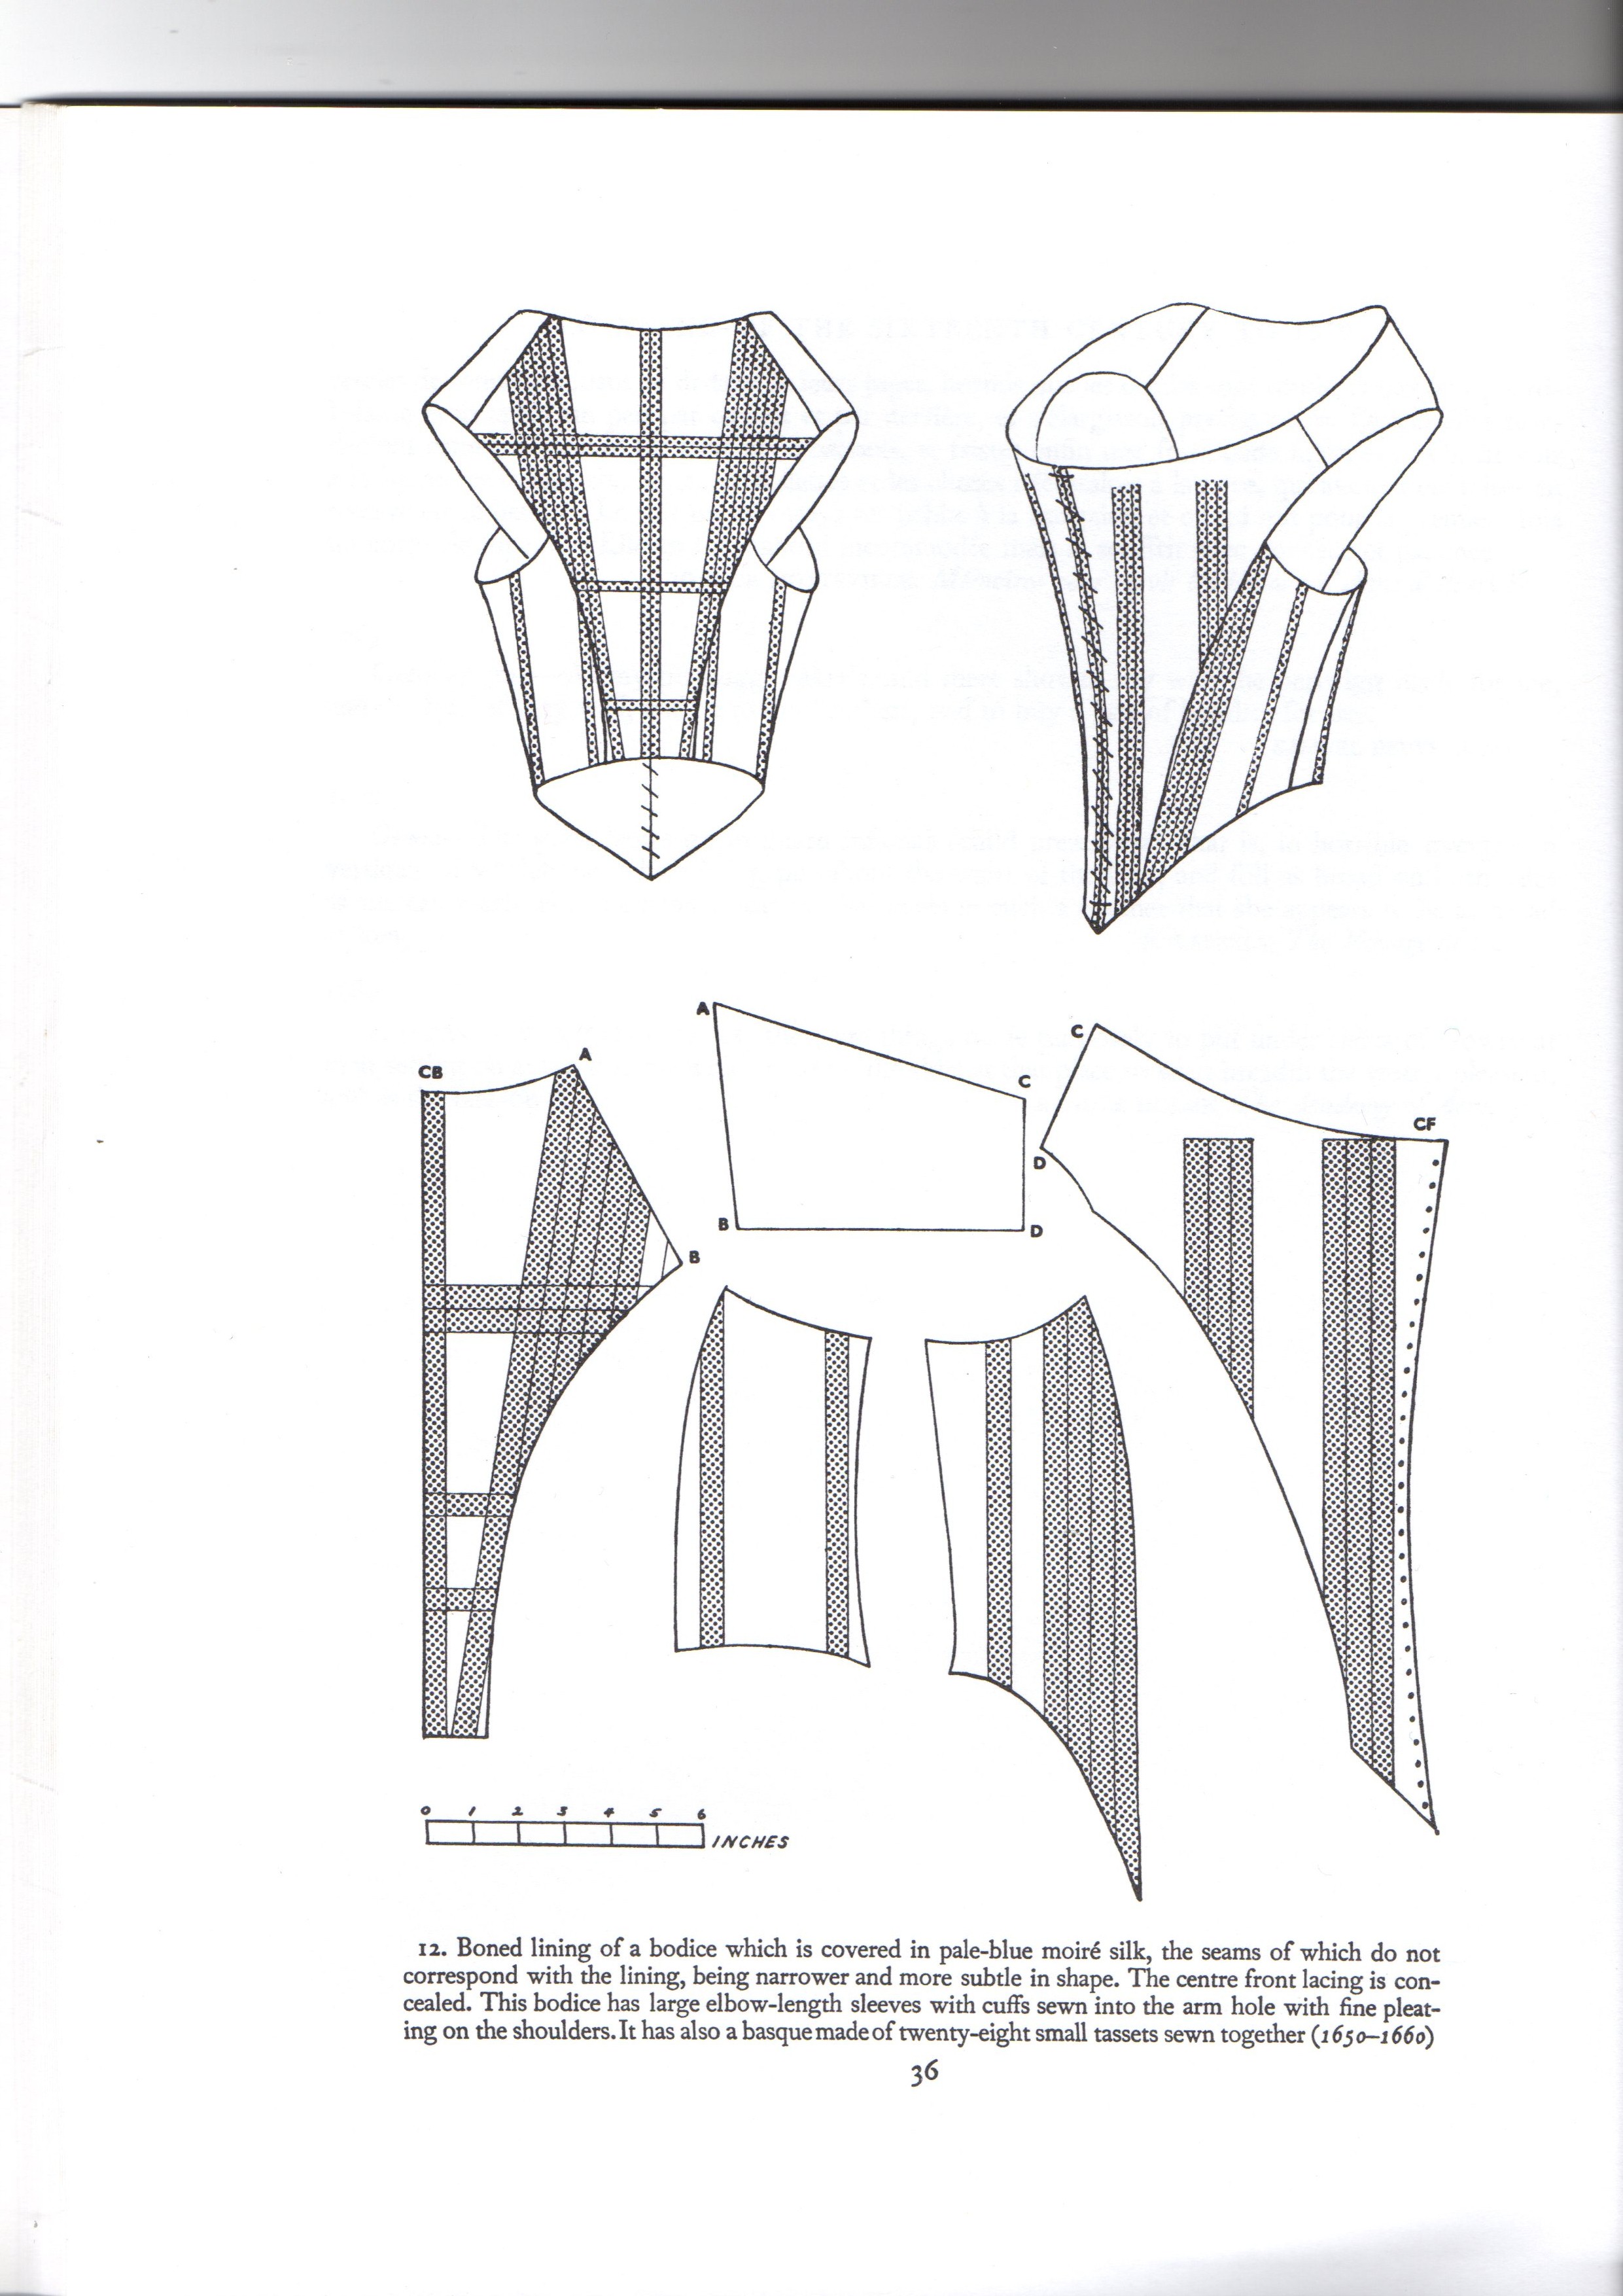
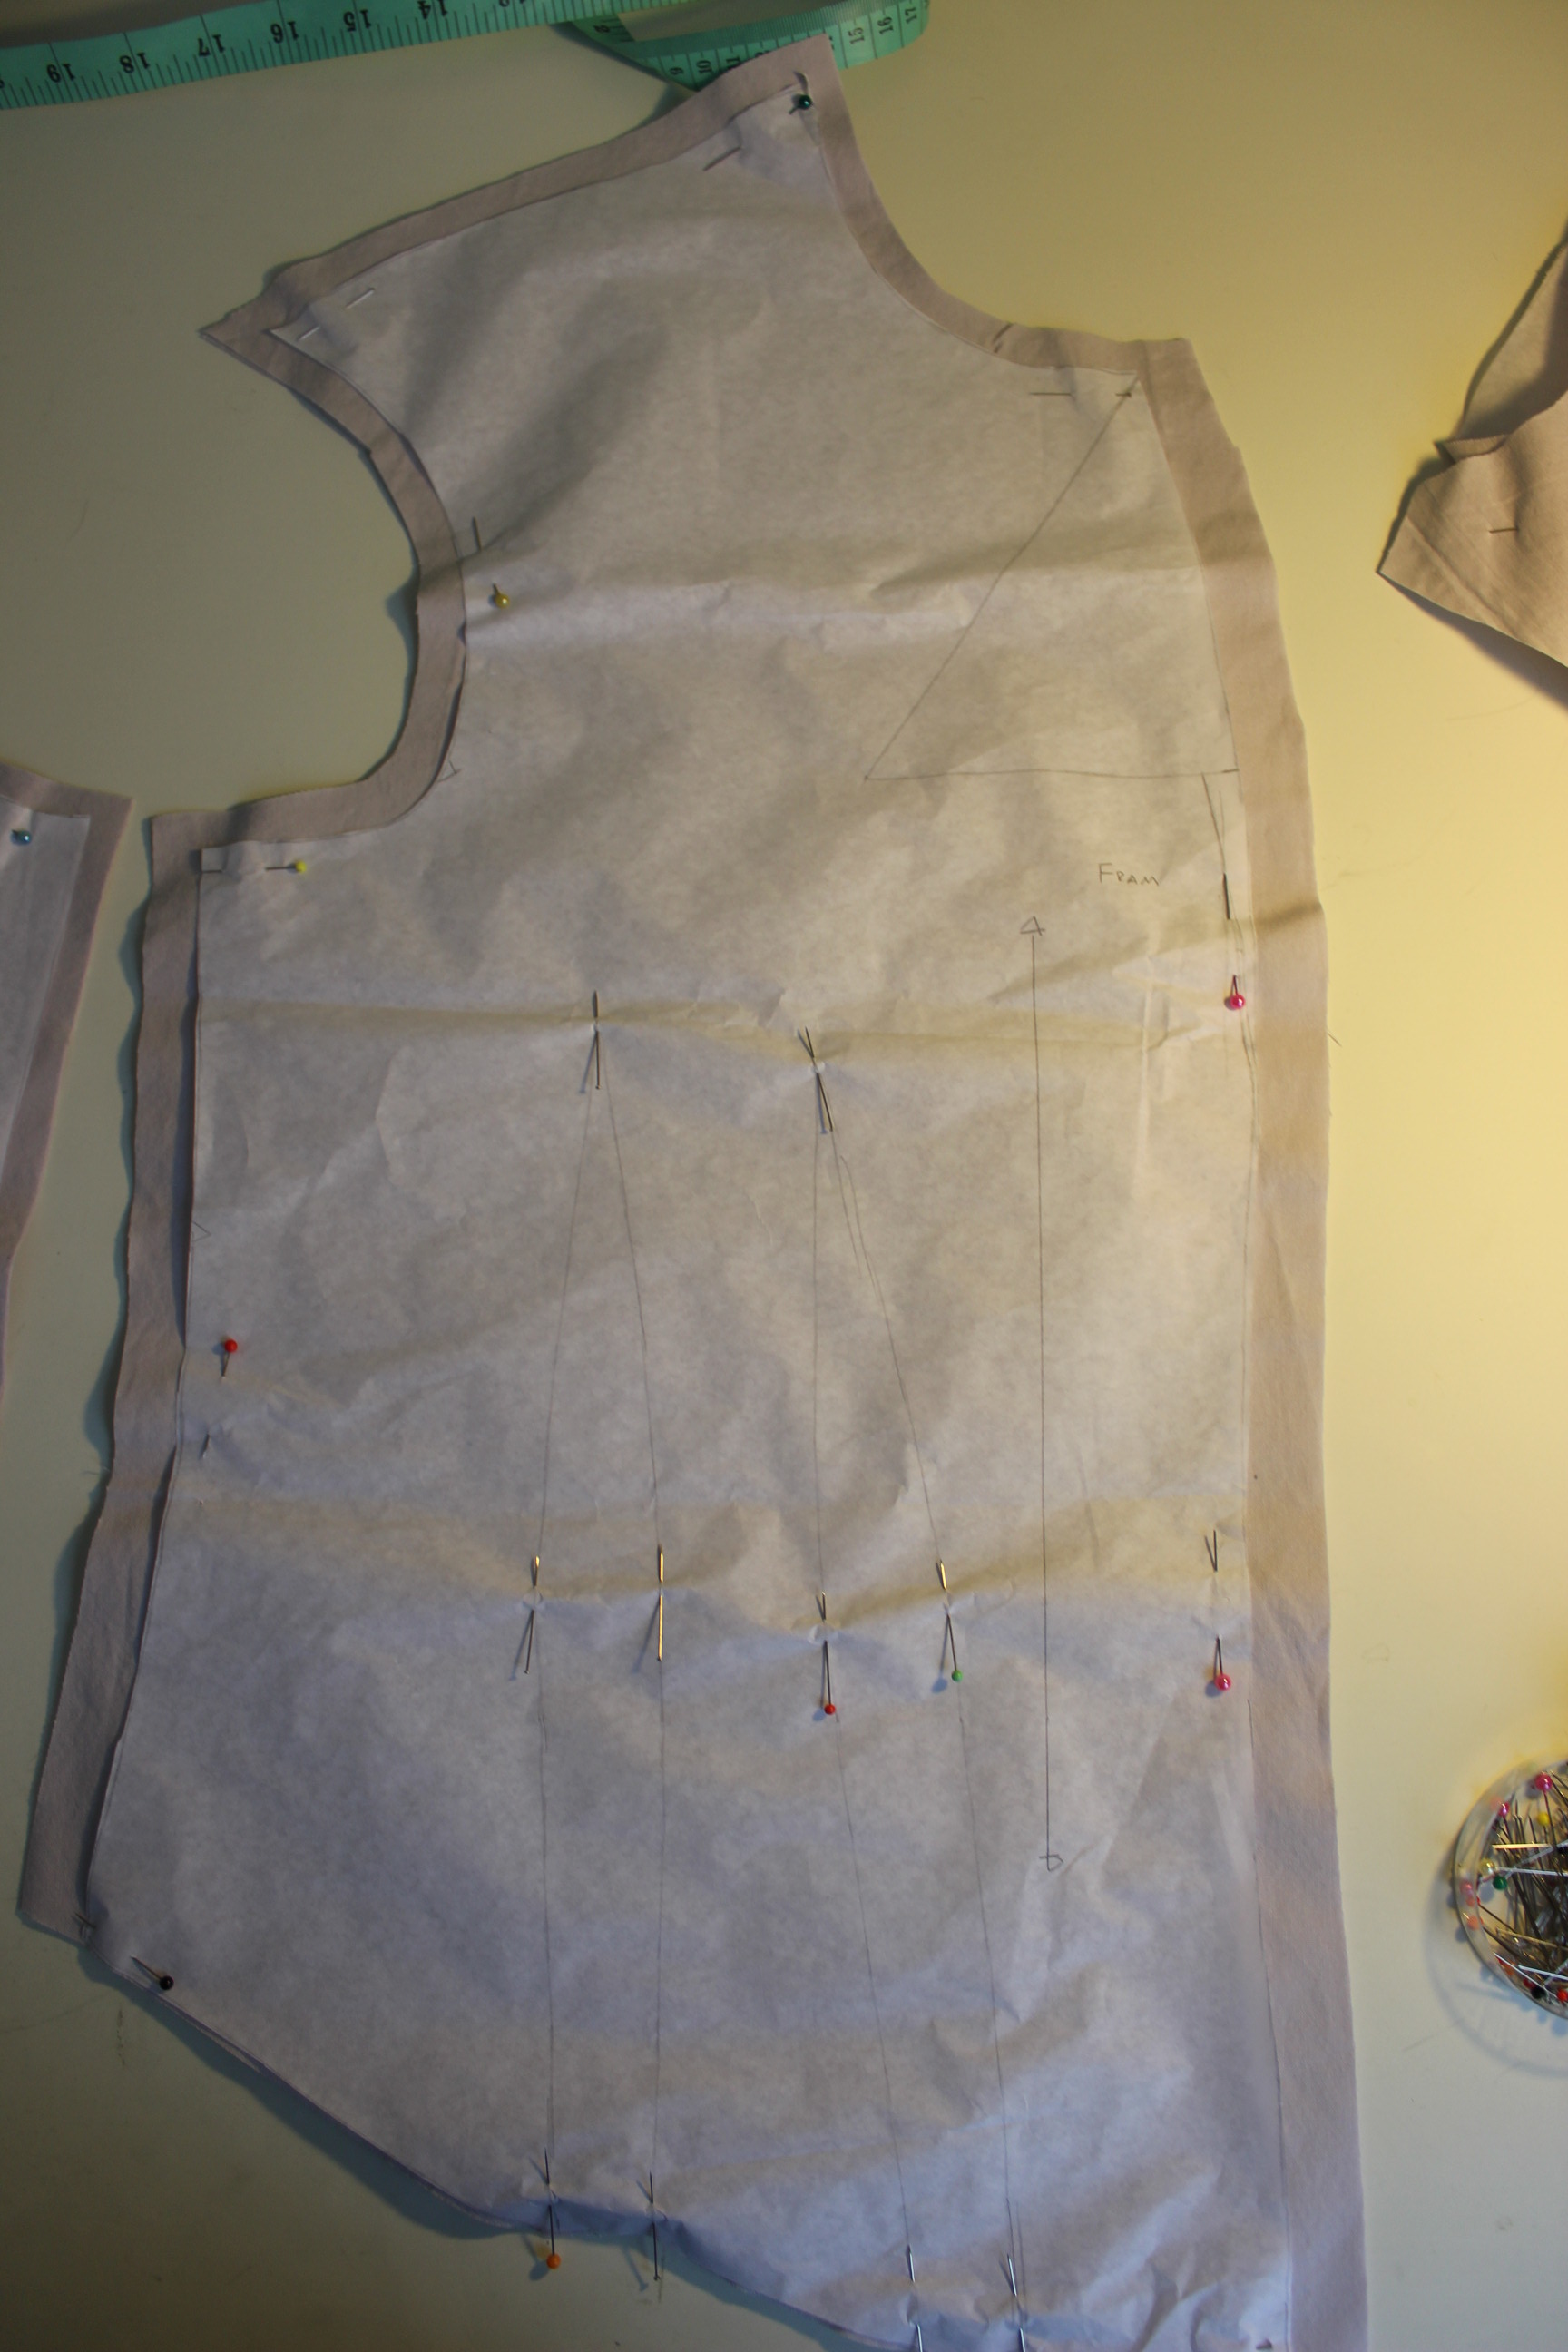
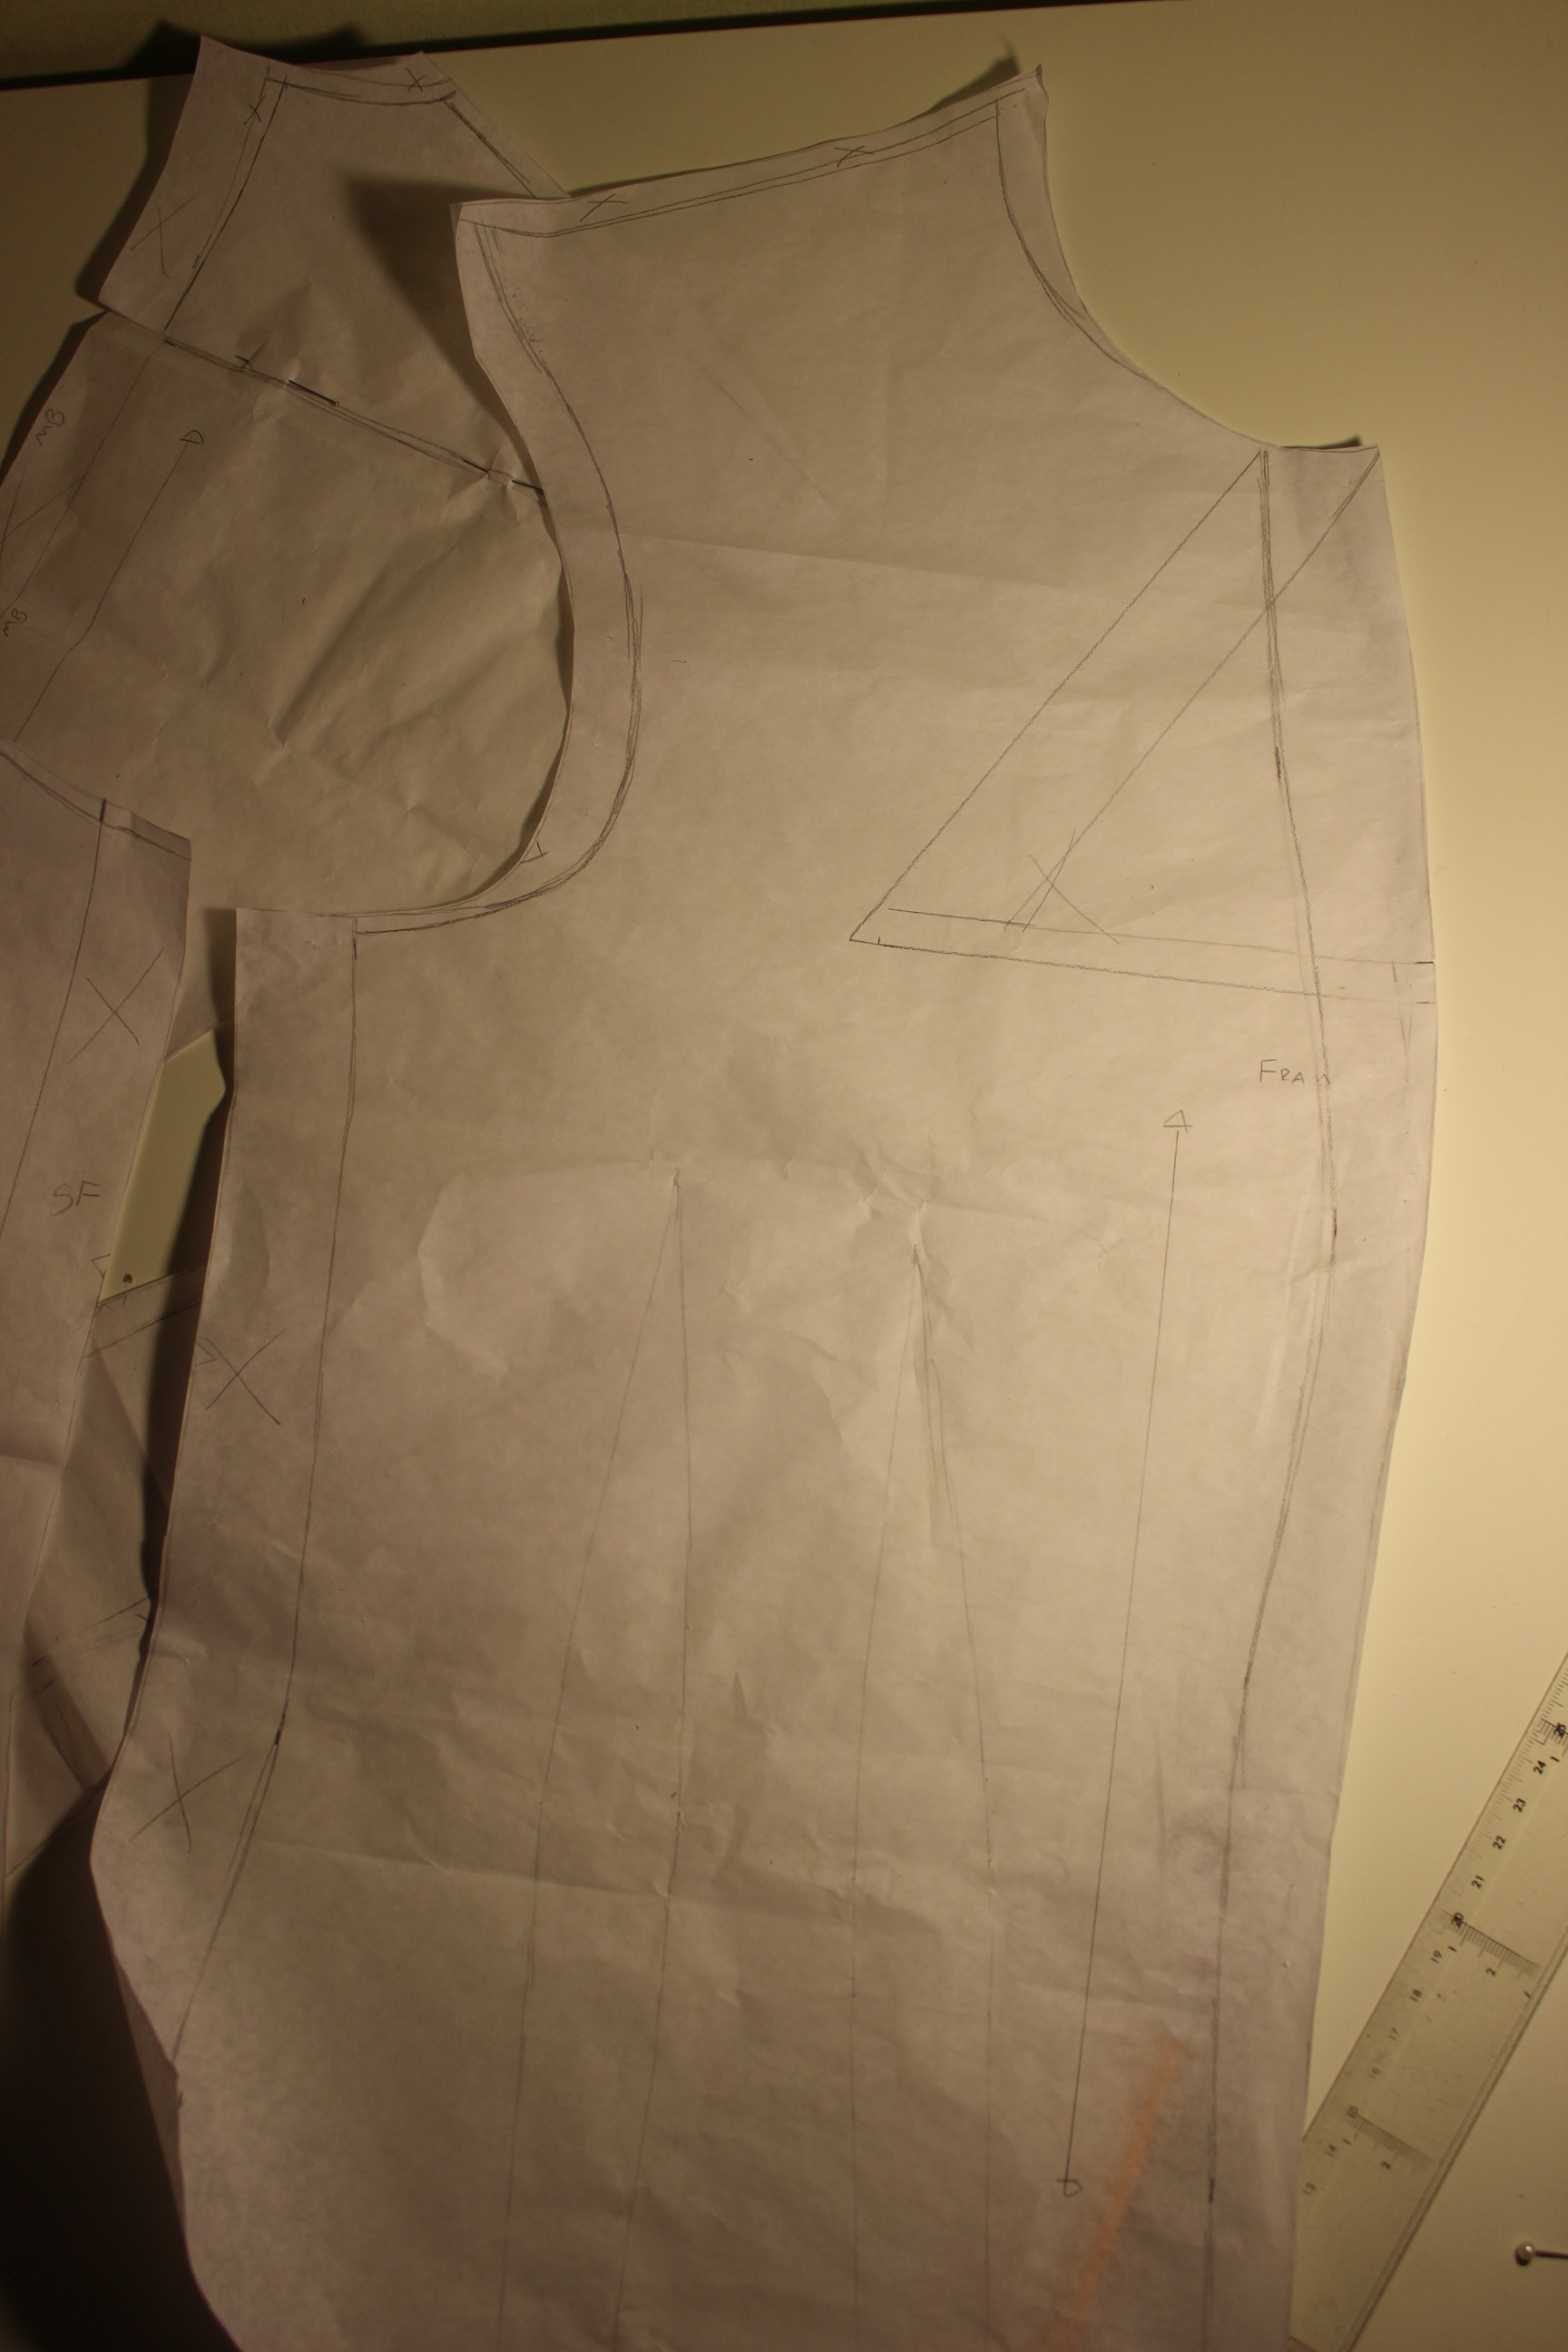
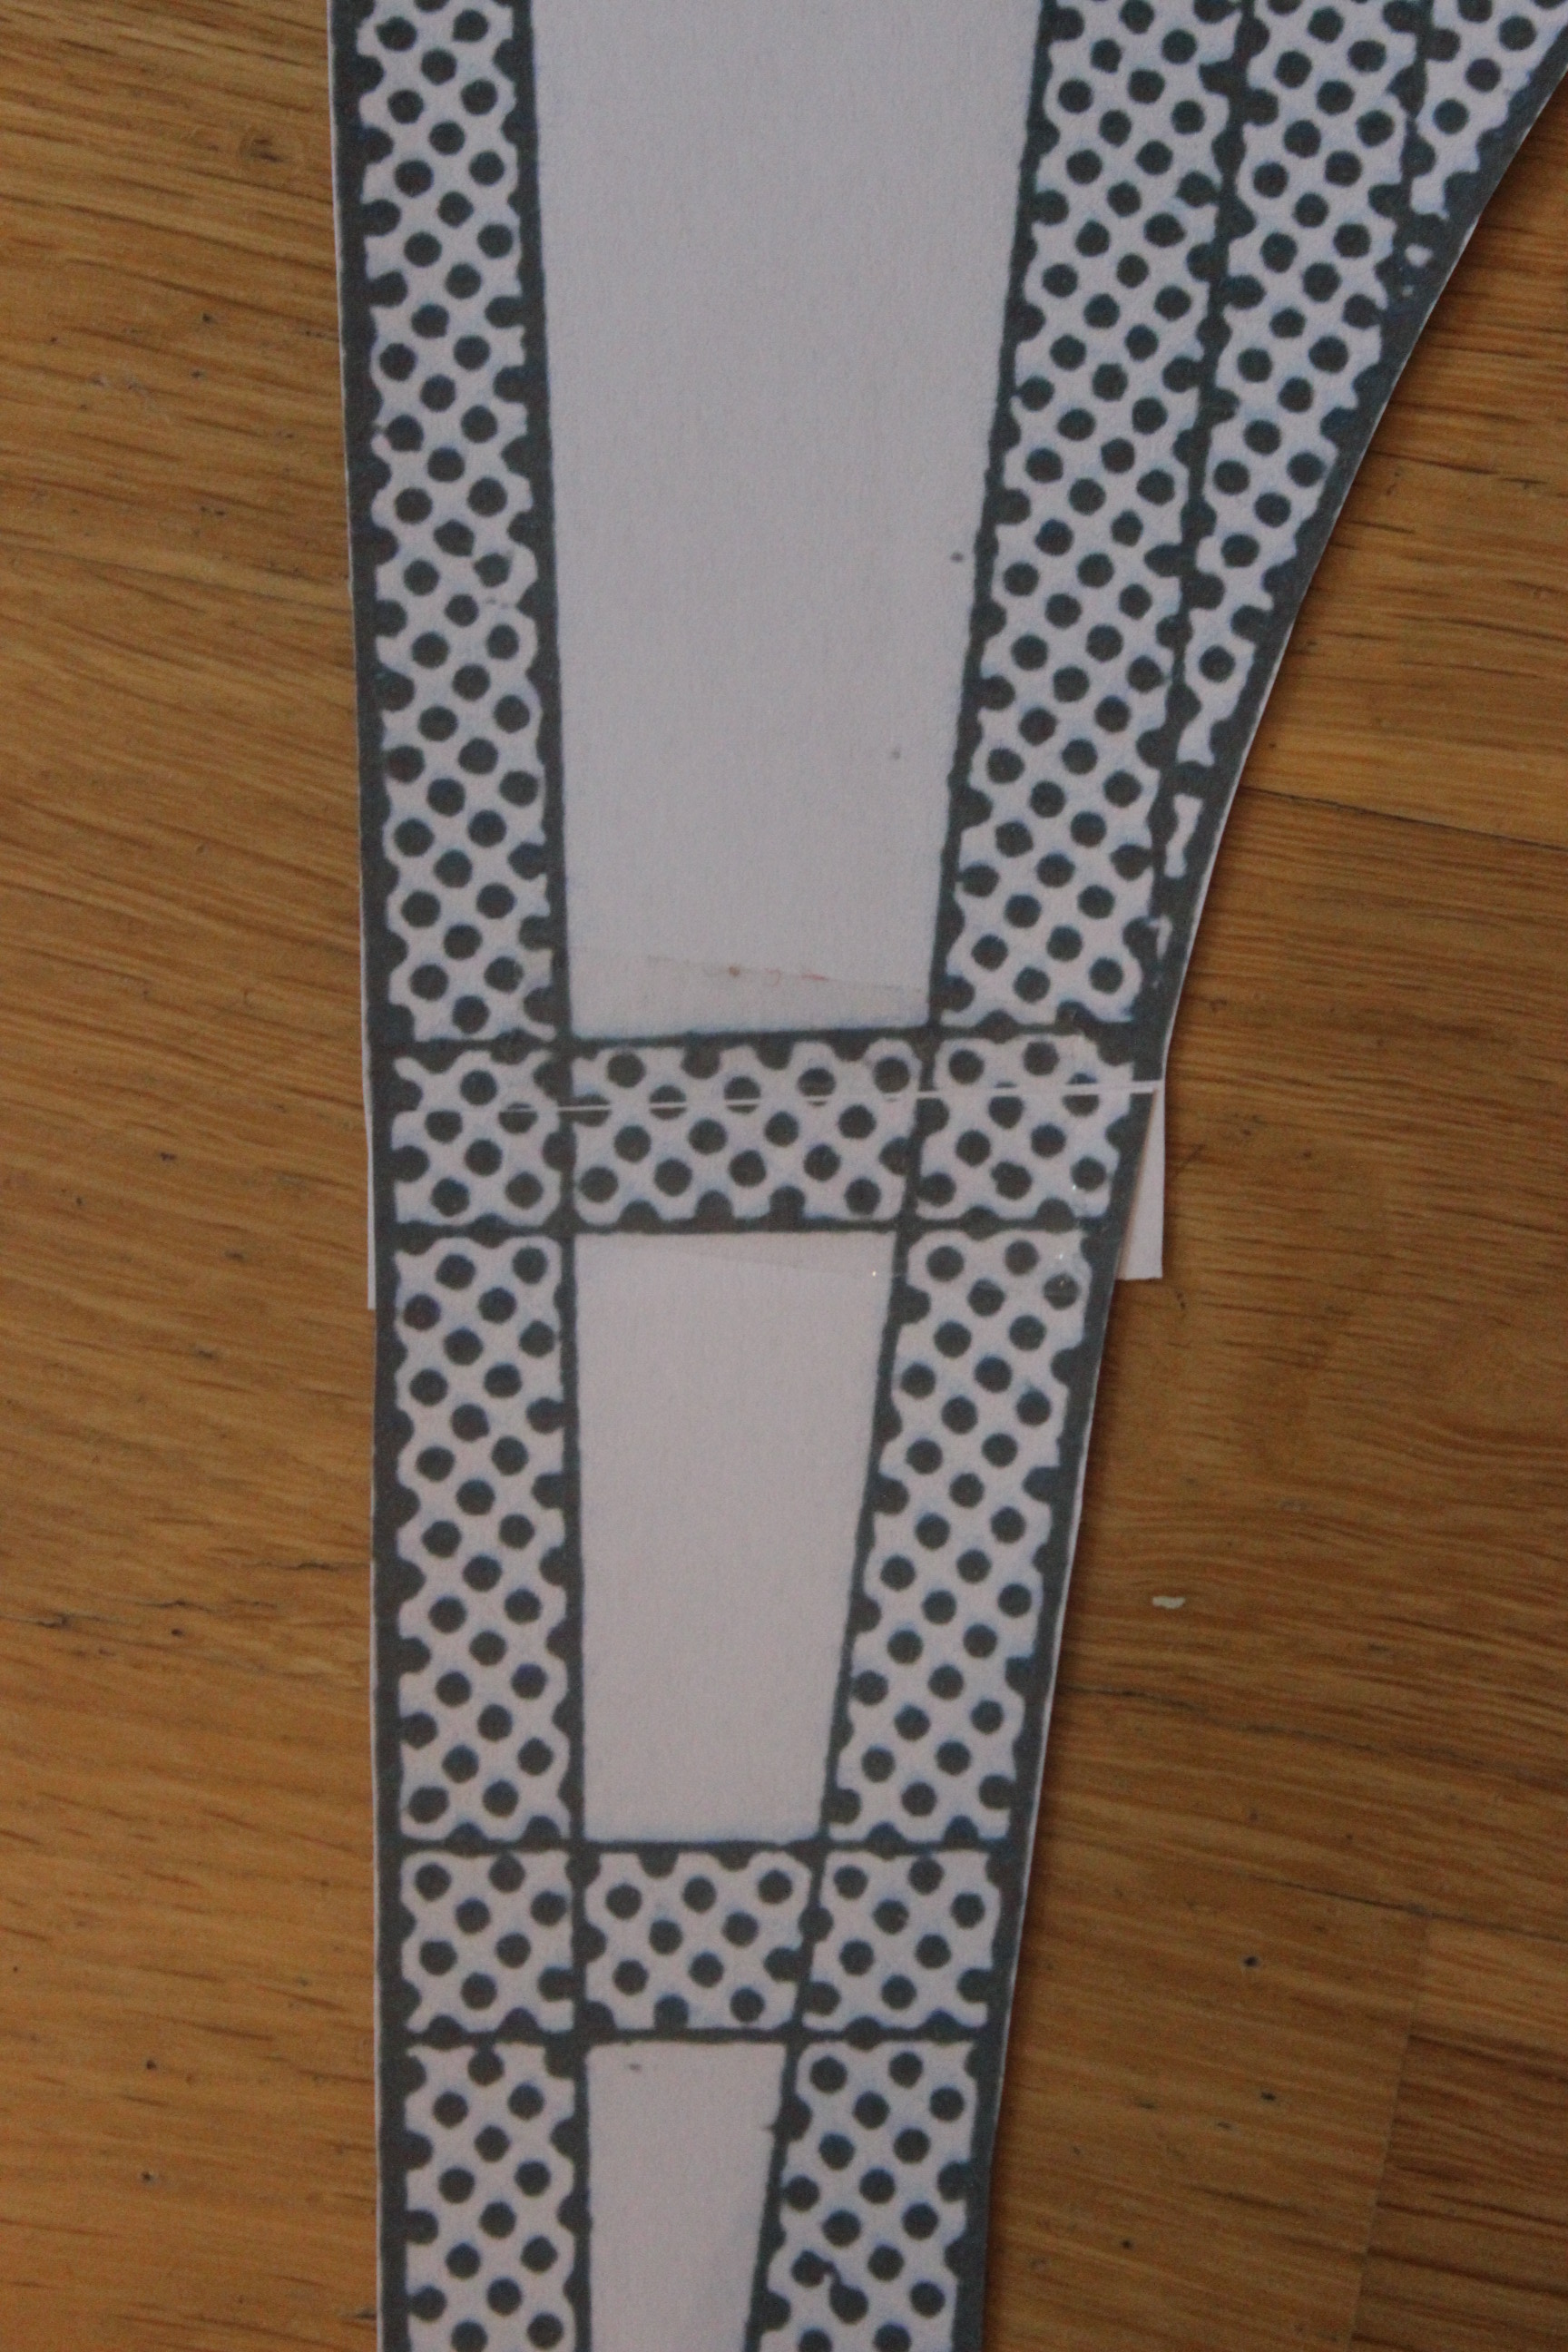
I scanned the pattern, opened it in Paint and changed the printer settings to 400%
IMG_7338

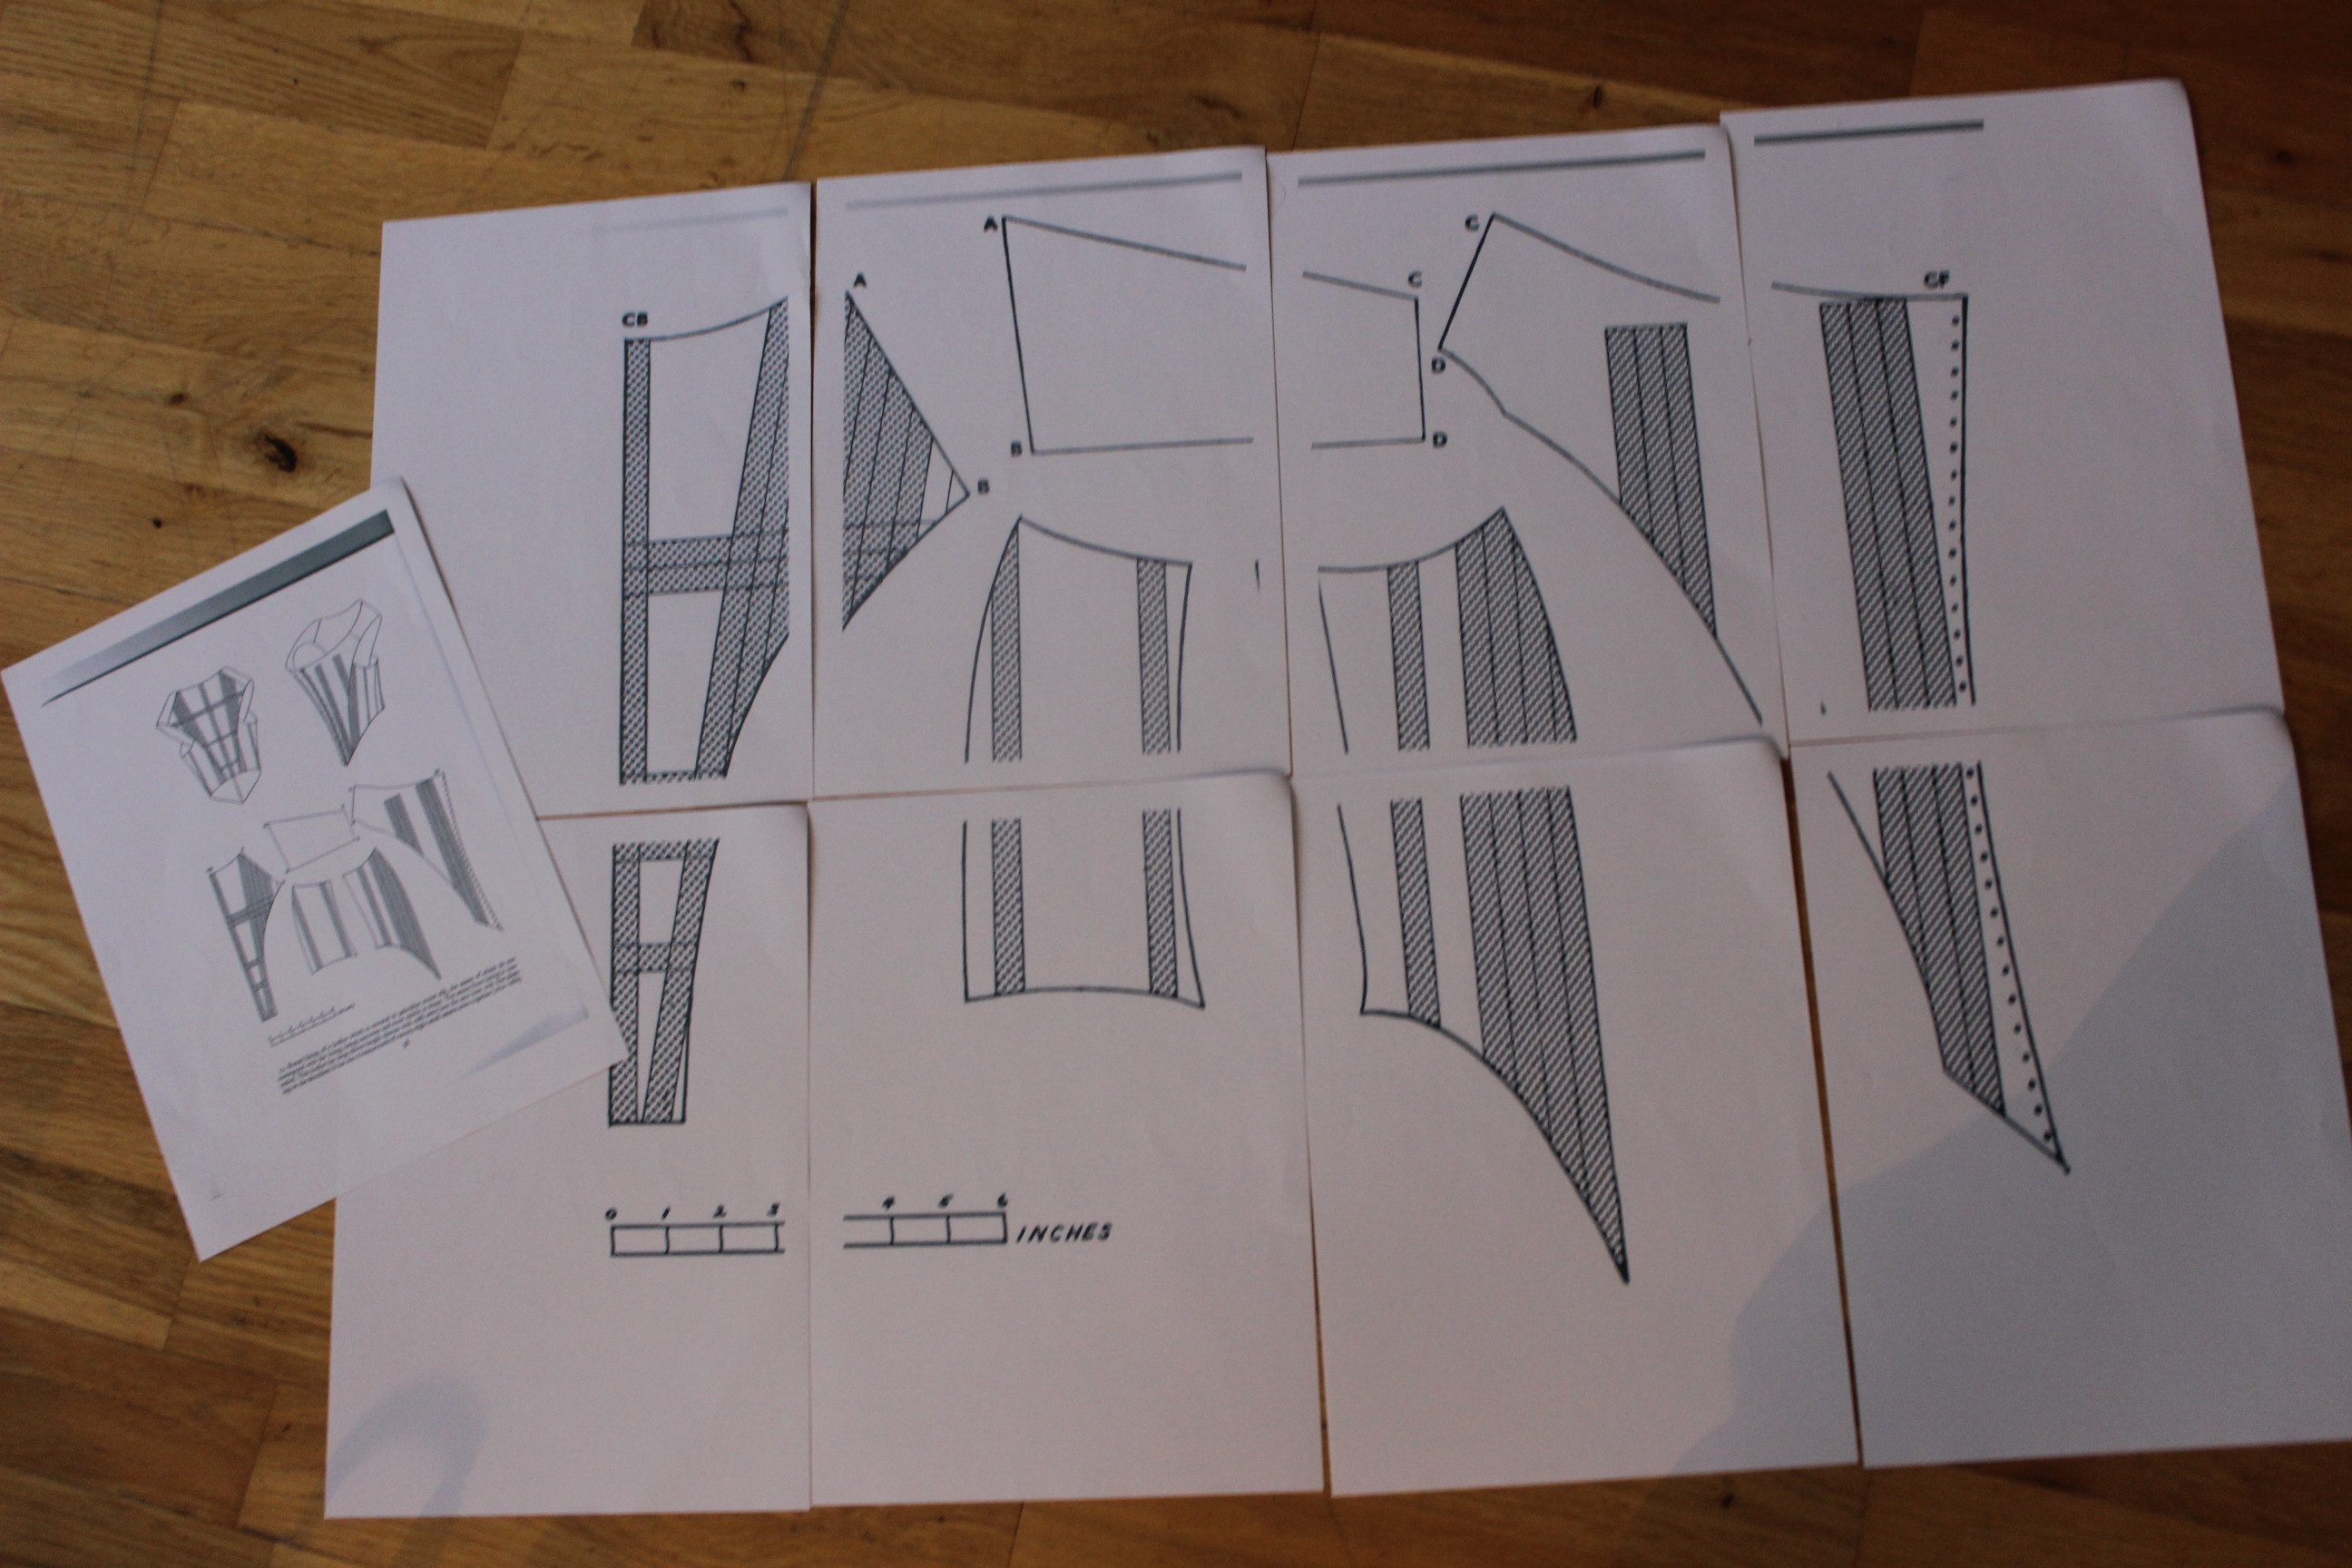
Then I cut all the pieces and taped them together. IMG_7342

IMG_7343 IMG_7344

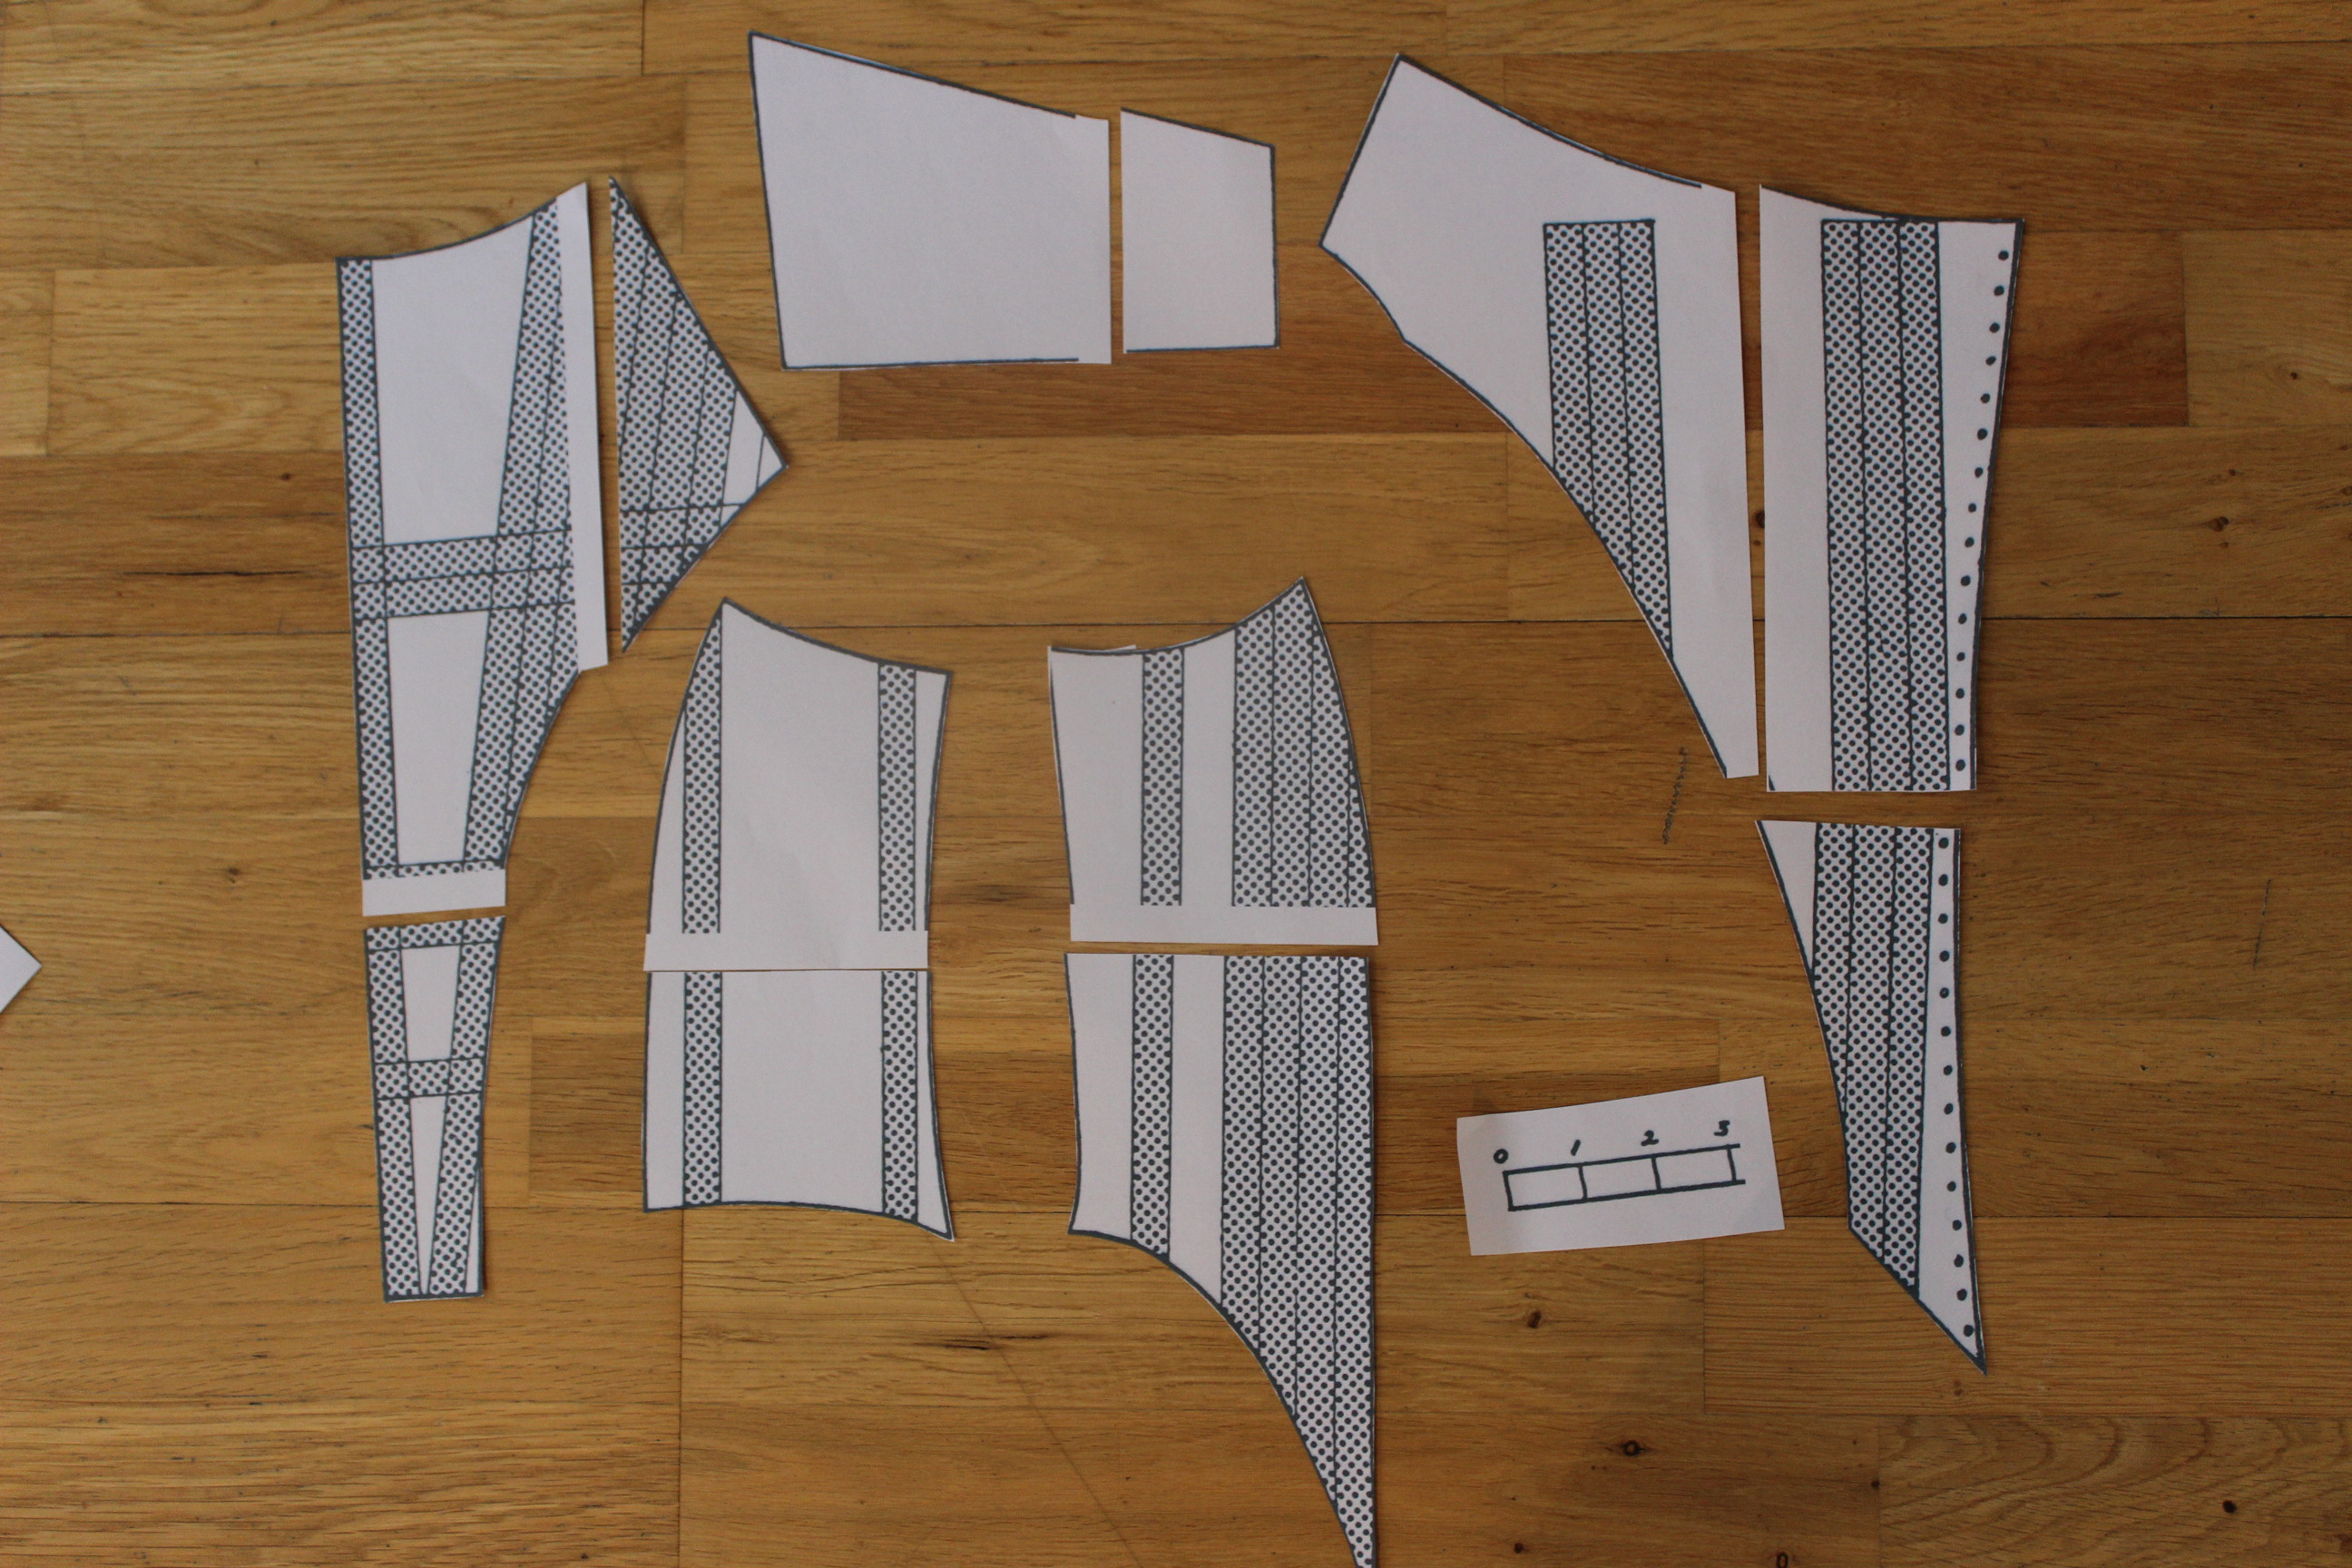
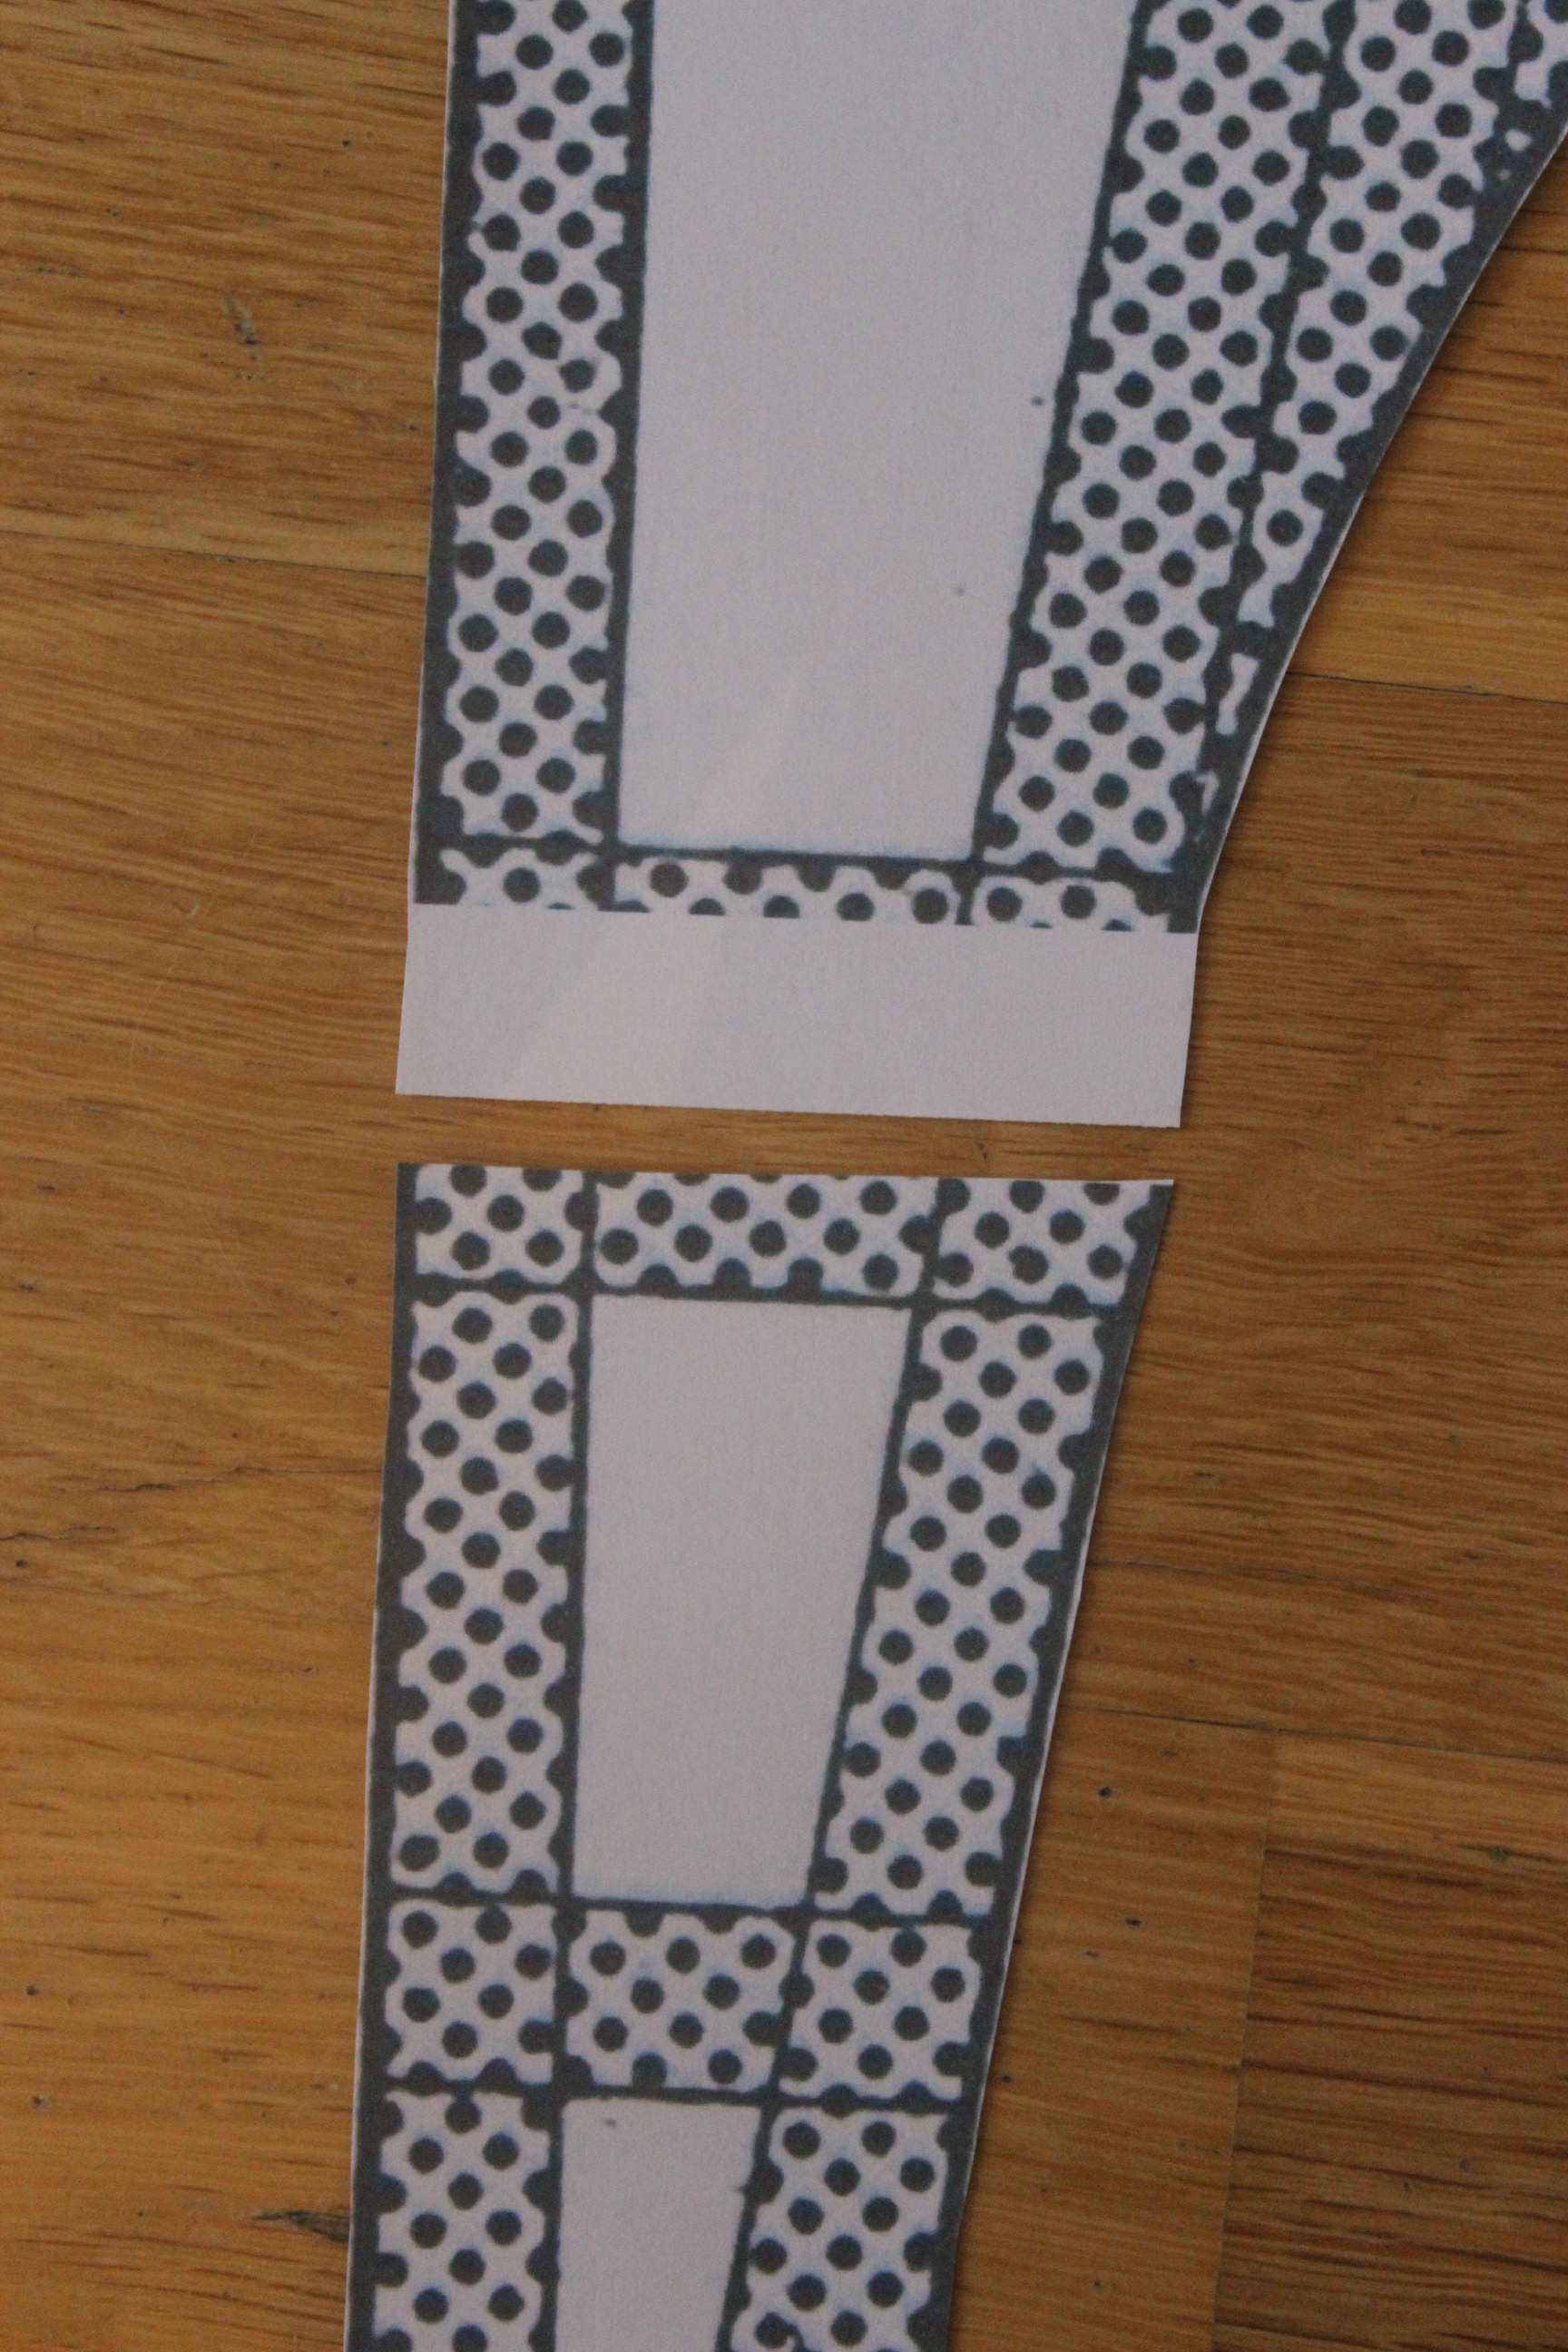
I traced the pieces and made some alteration to my measurements.IMG_7354

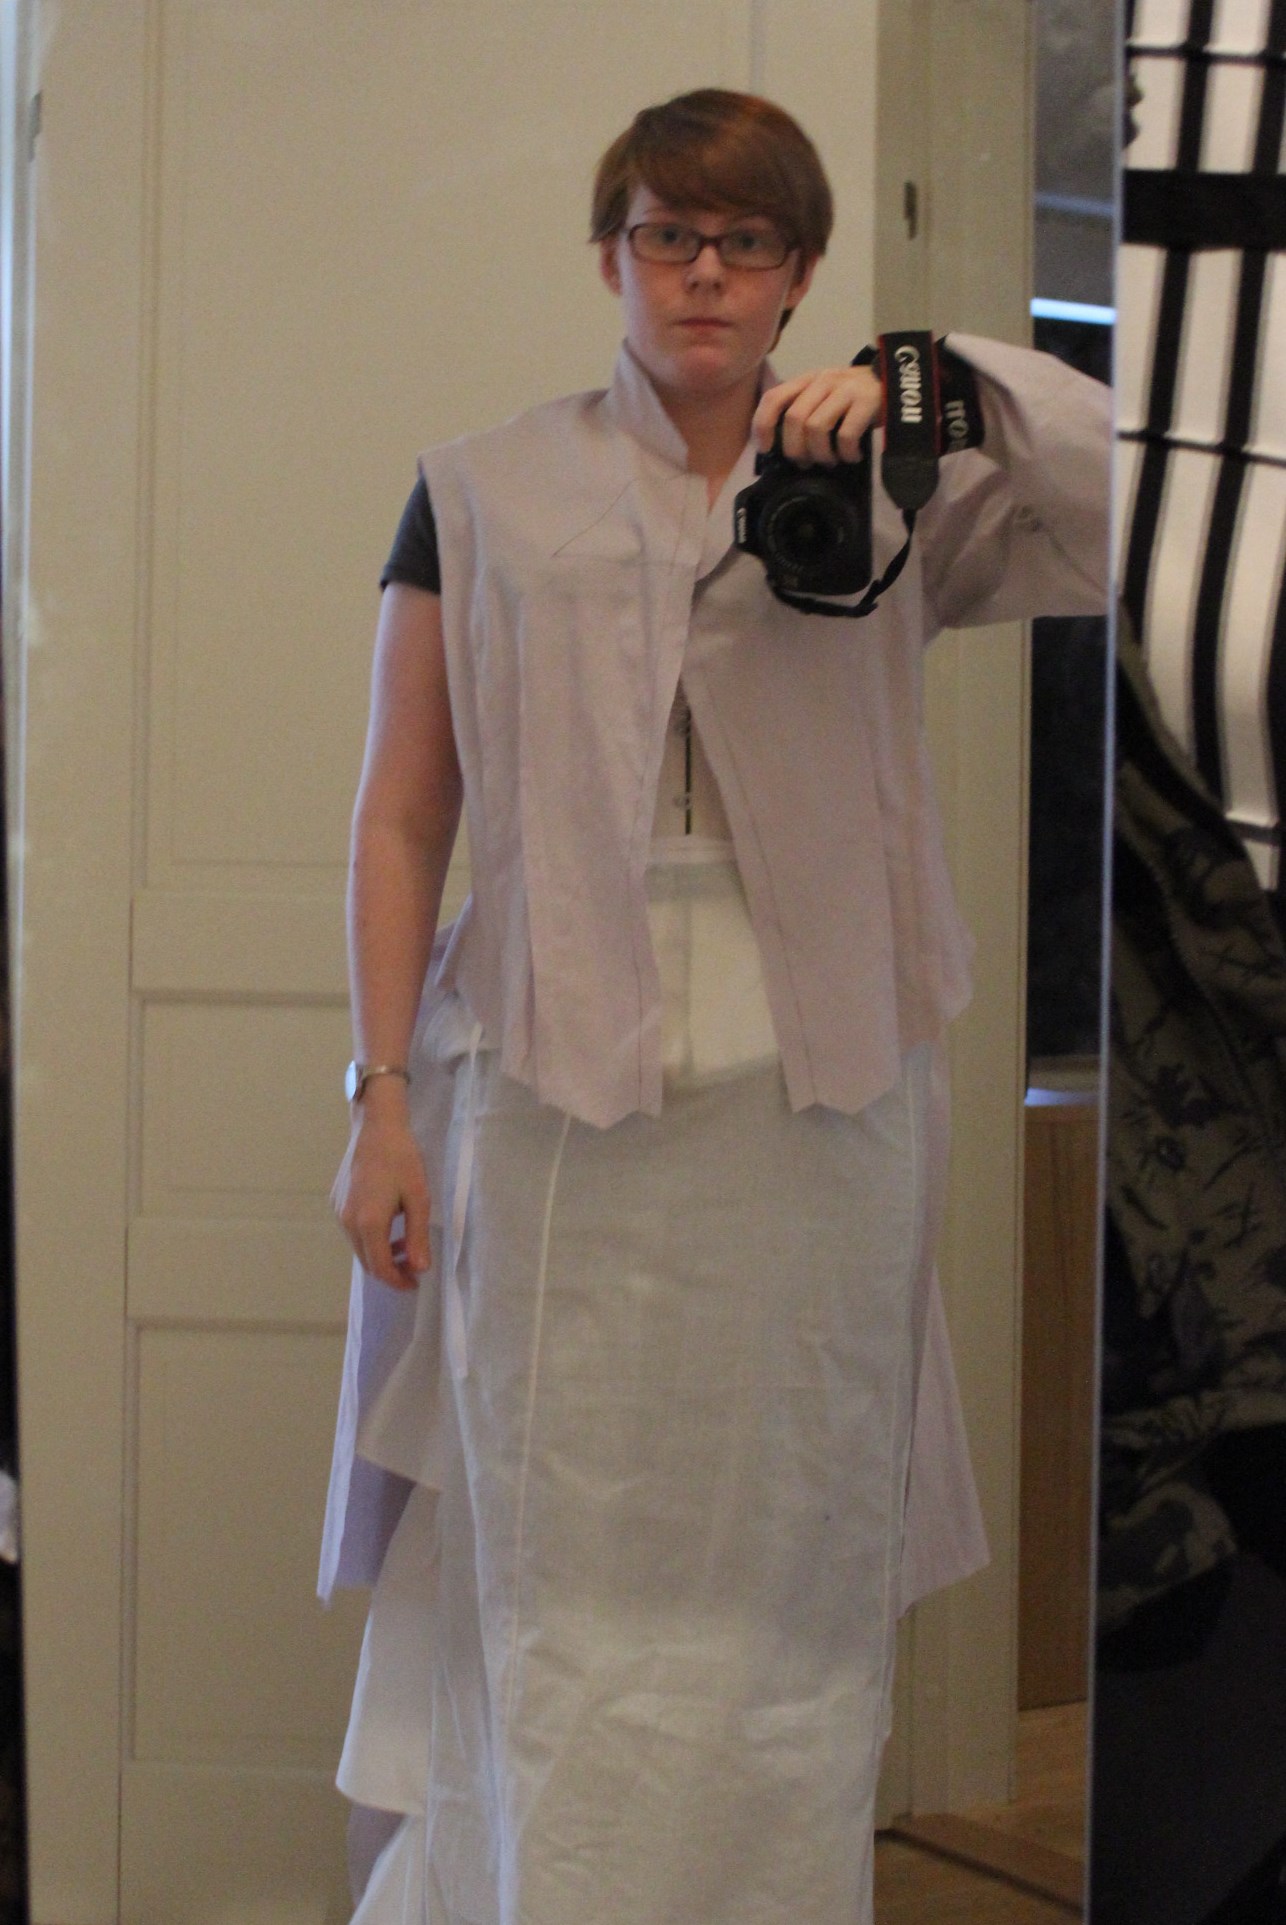
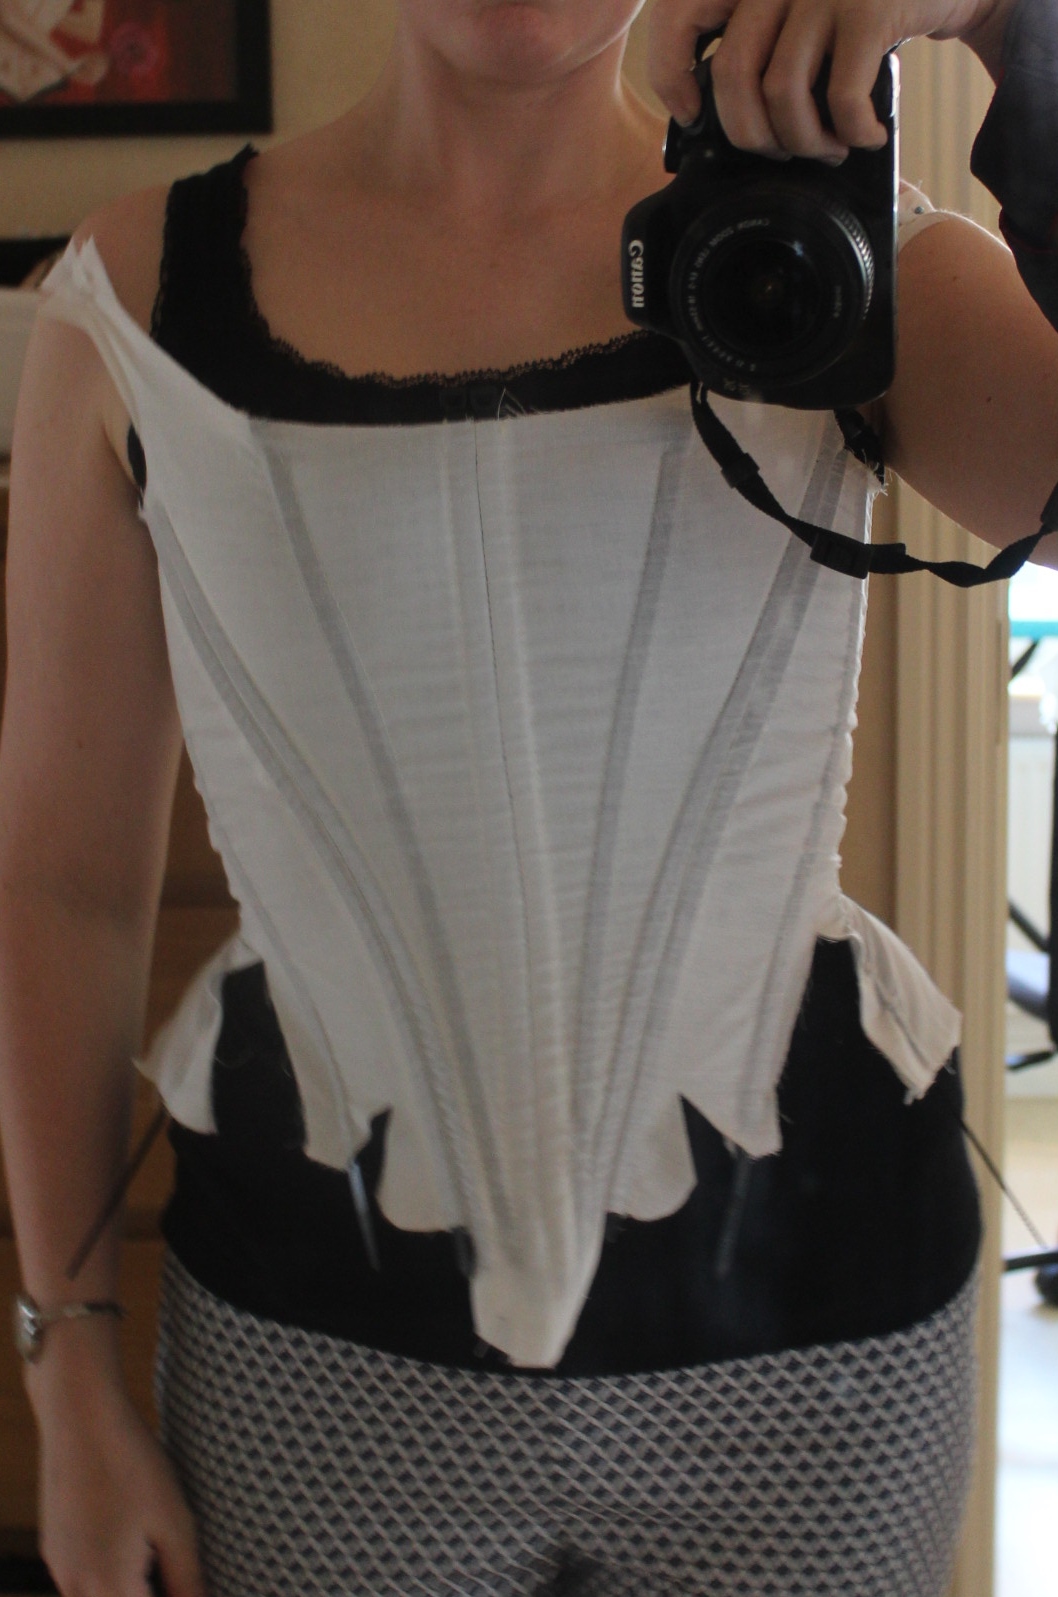
Then it was time to bring out the cotton sheeting to cut the mock-ups.IMG_7356

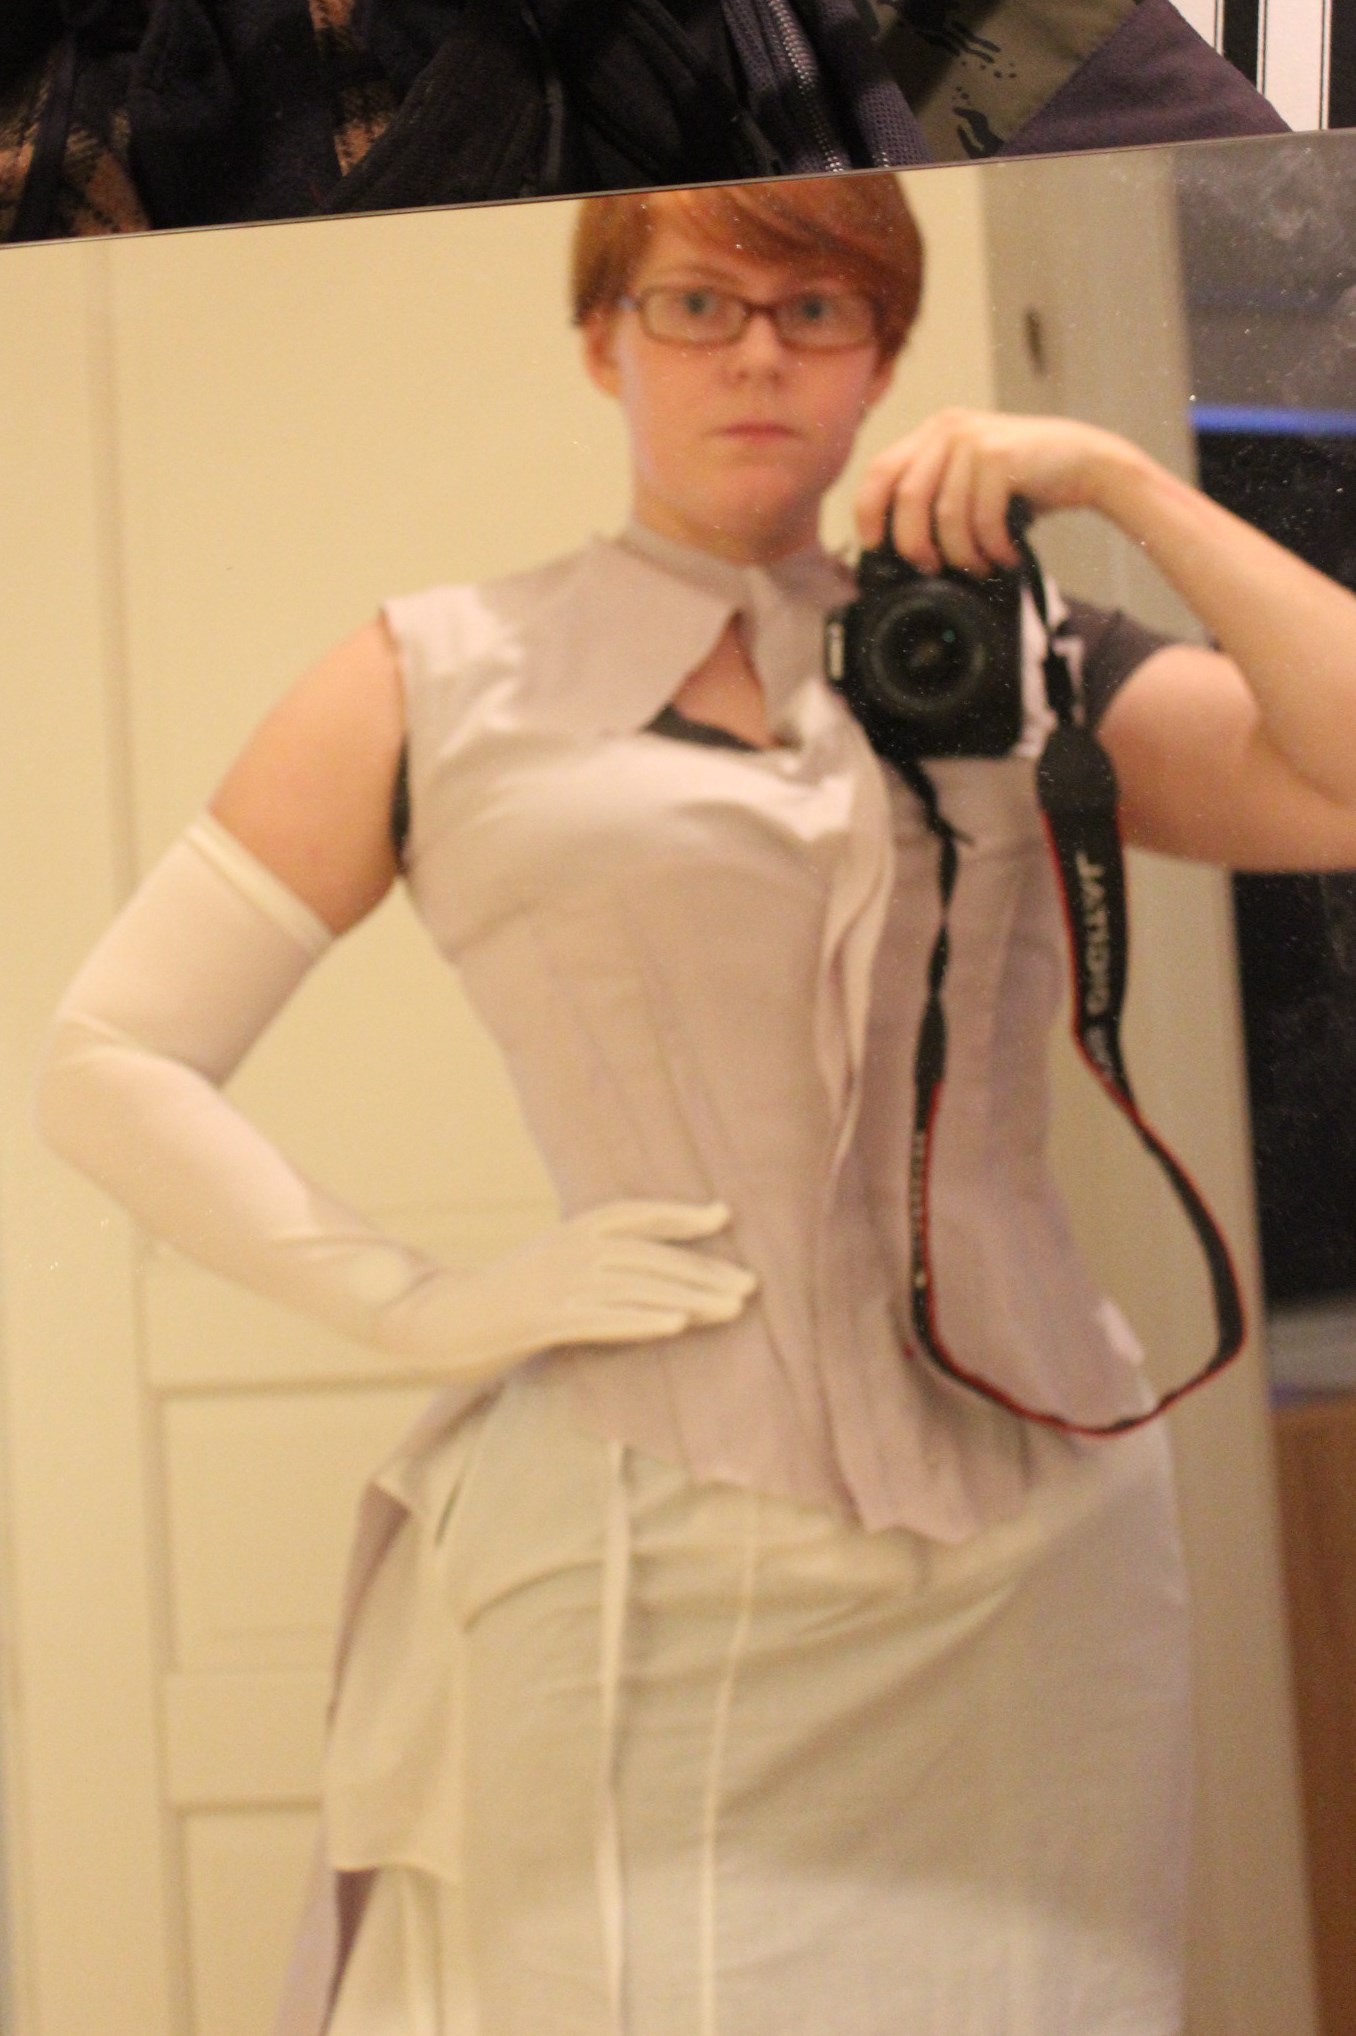
I added boning at some vital places, and my pre-made lacing strip to the font, to get a more accurate fitting.
IMG_7403 IMG_7397
IMG_7396
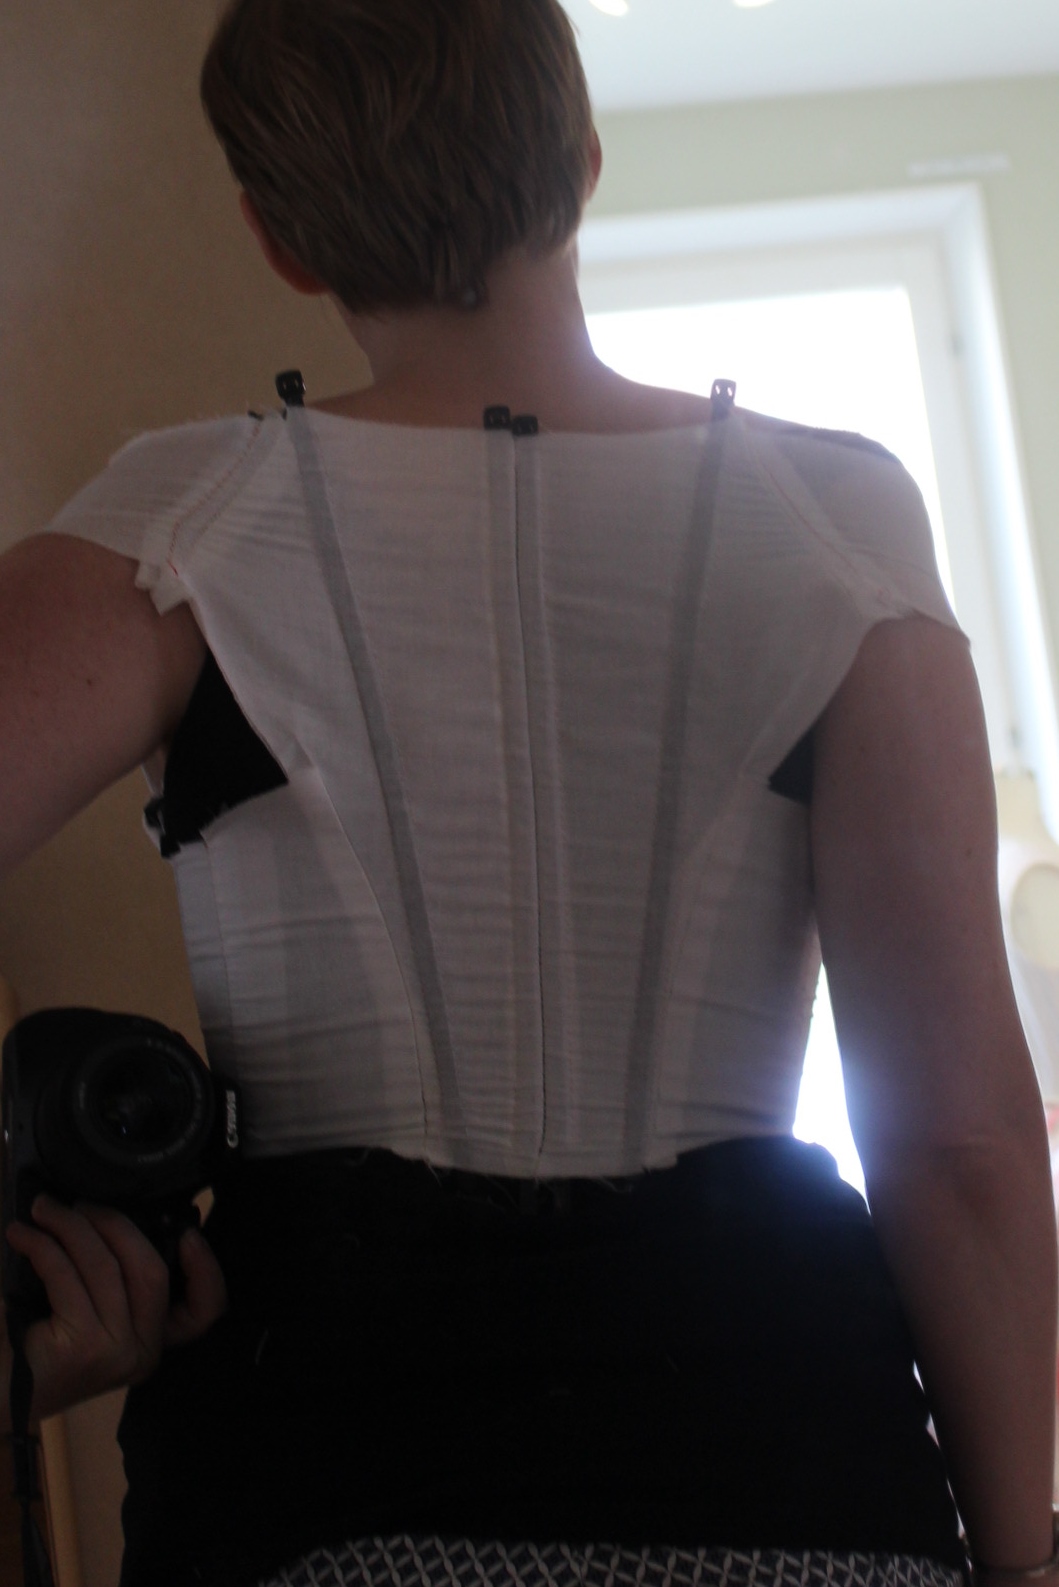
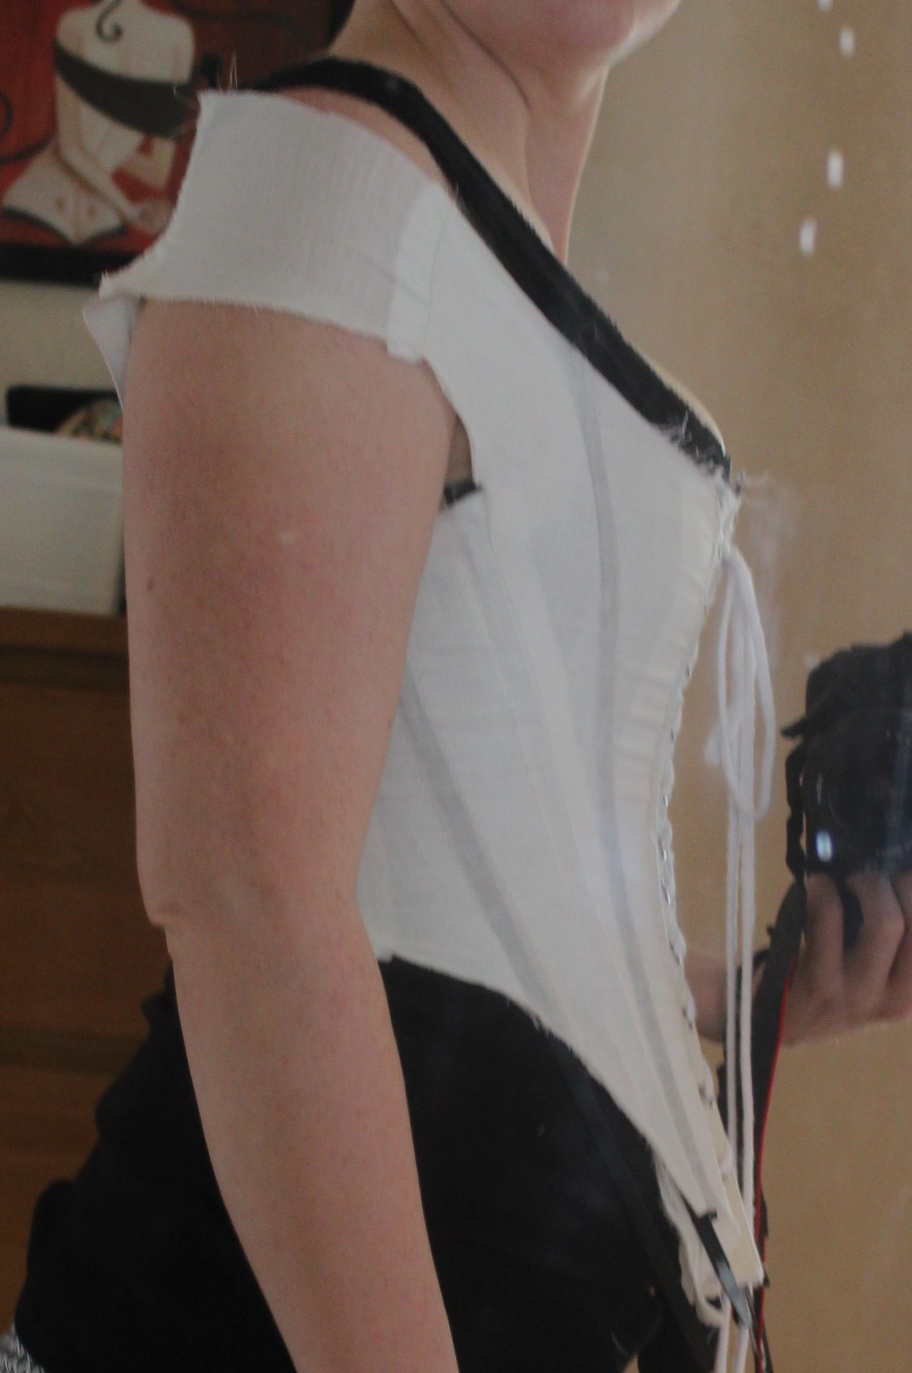
I really liked how the pattern fitted my body – both comfortable and strong.
I also like the look of the off-the-shoulder sleeves, even though I can hardly lift my arms.

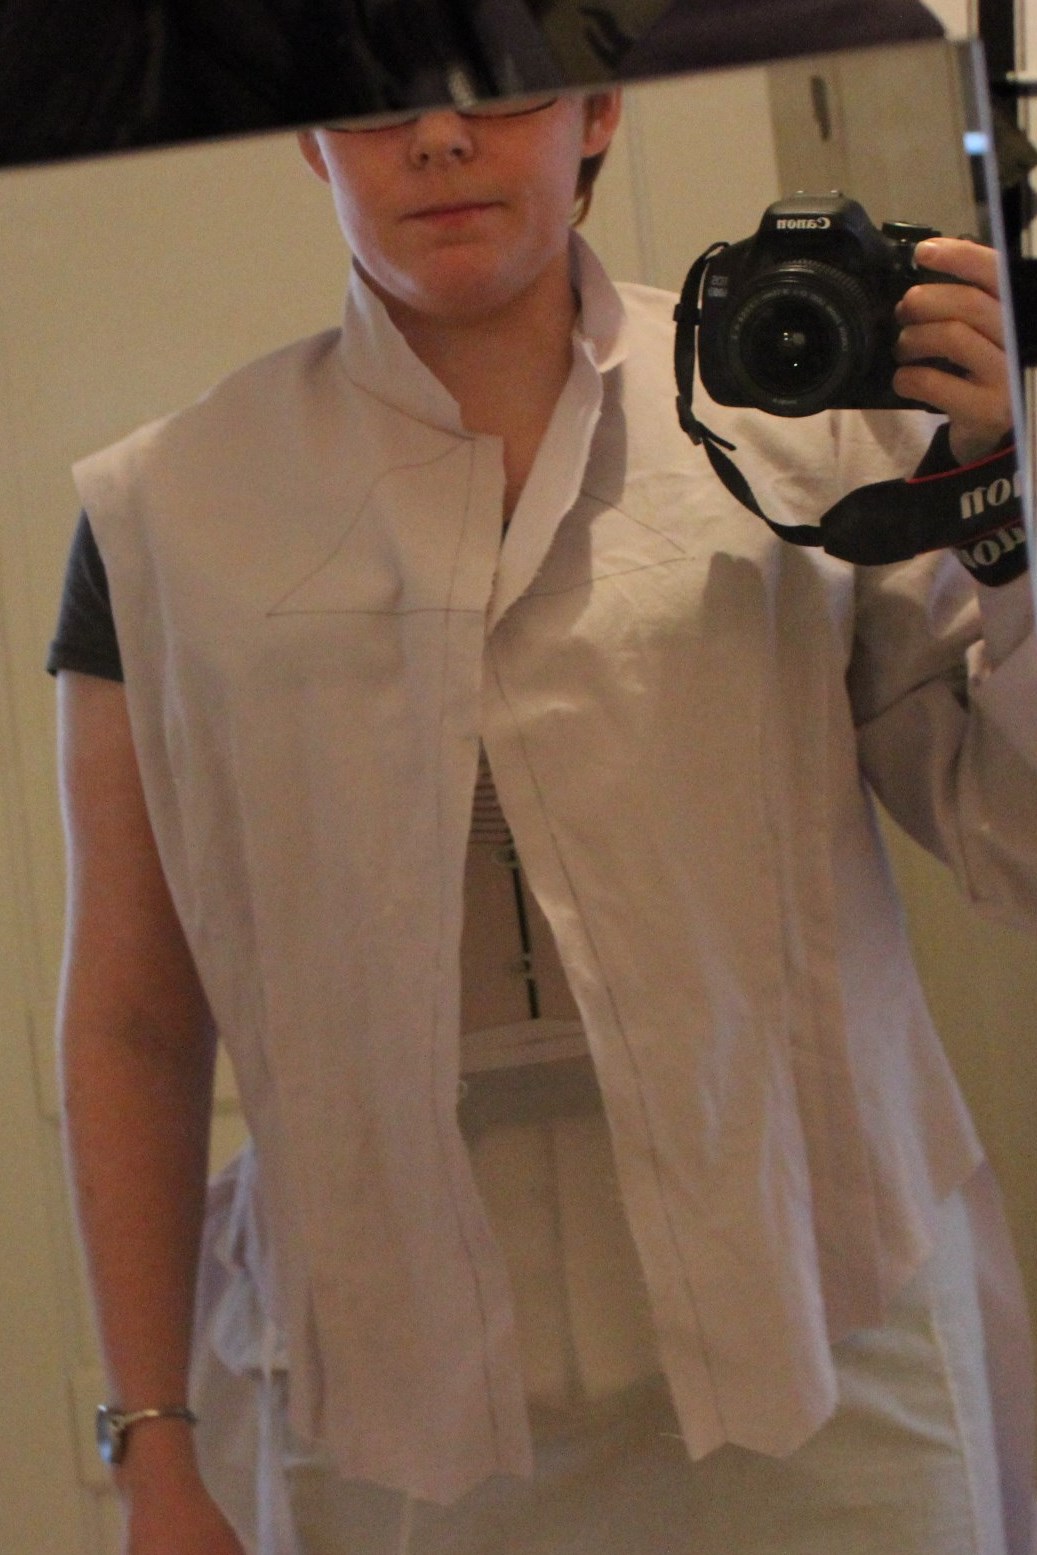
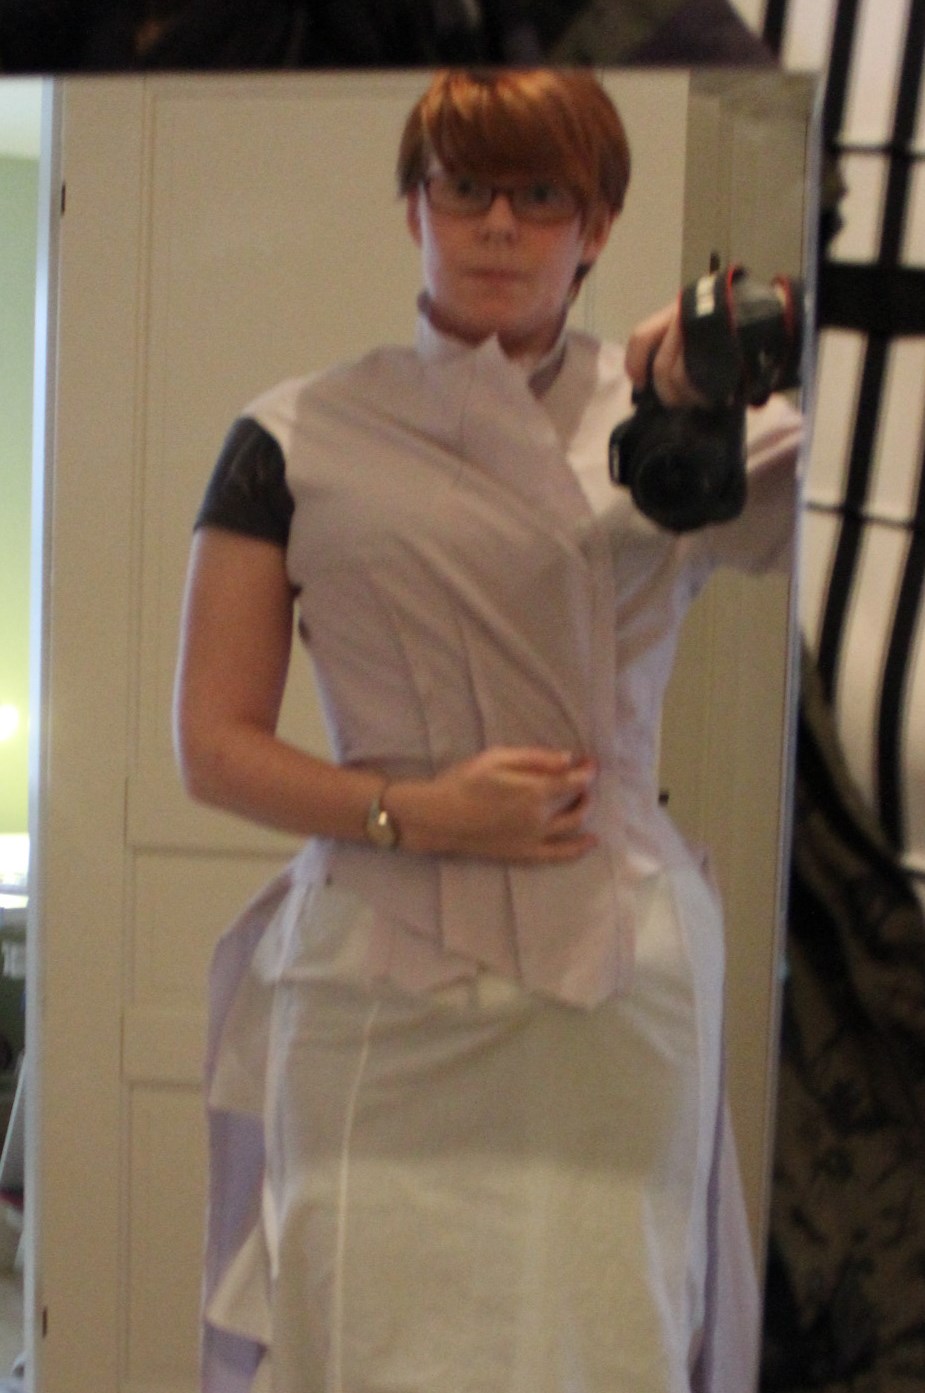
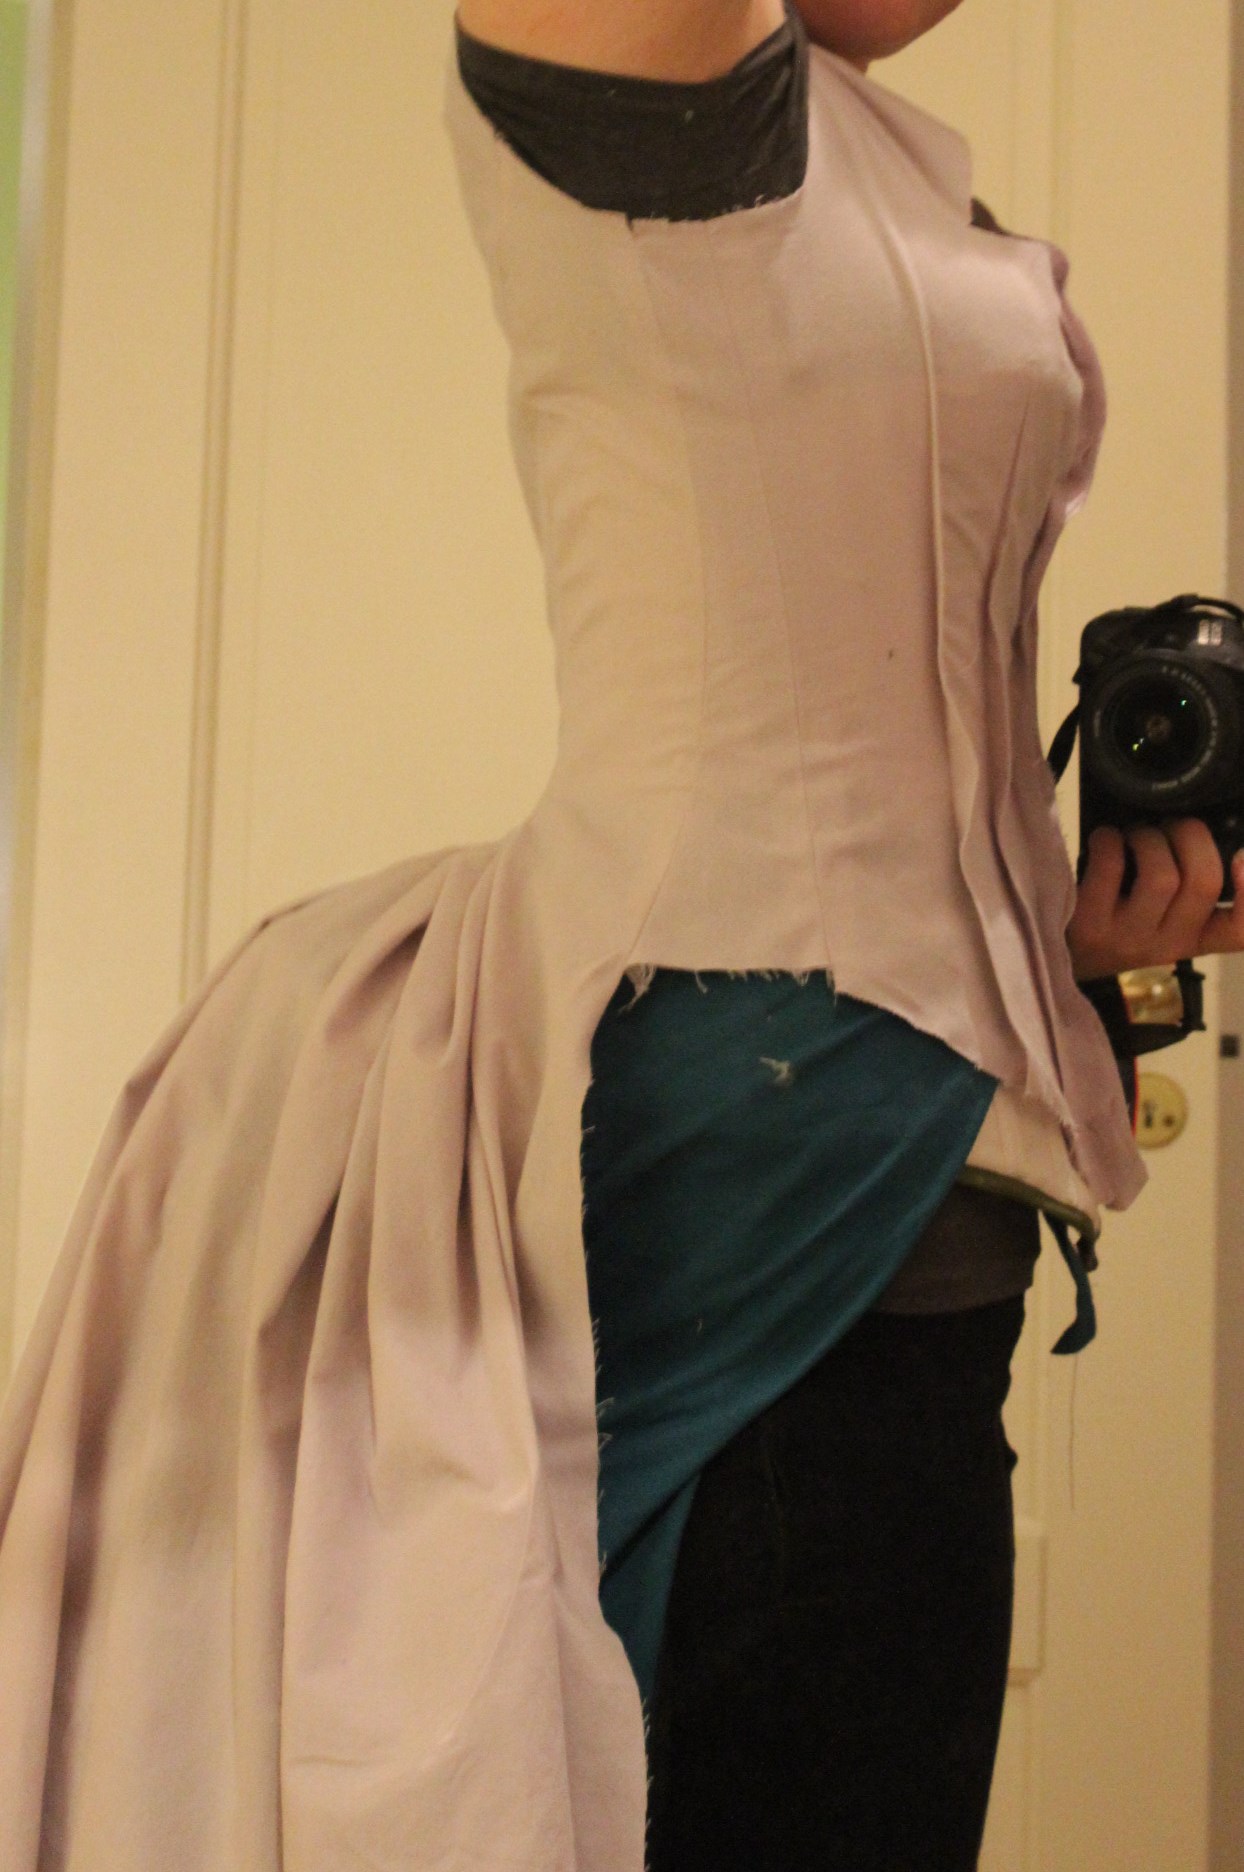
The next pattern to try was the “1680s court bodice”.
1680 waugh

I printed, attached and sewed the pieces in the same way as before.
IMG_7367 IMG_7361
IMG_7378I love the shape it gives me, but It’s not nearly as comfortable as the previous one.
I’ll have to move the lacing to the front on this one, and to do some serious editing to the sleeves and neckline.

Hm, which one to choose…

In the end I opted for the “1660s bodice lining.

IMG_7406
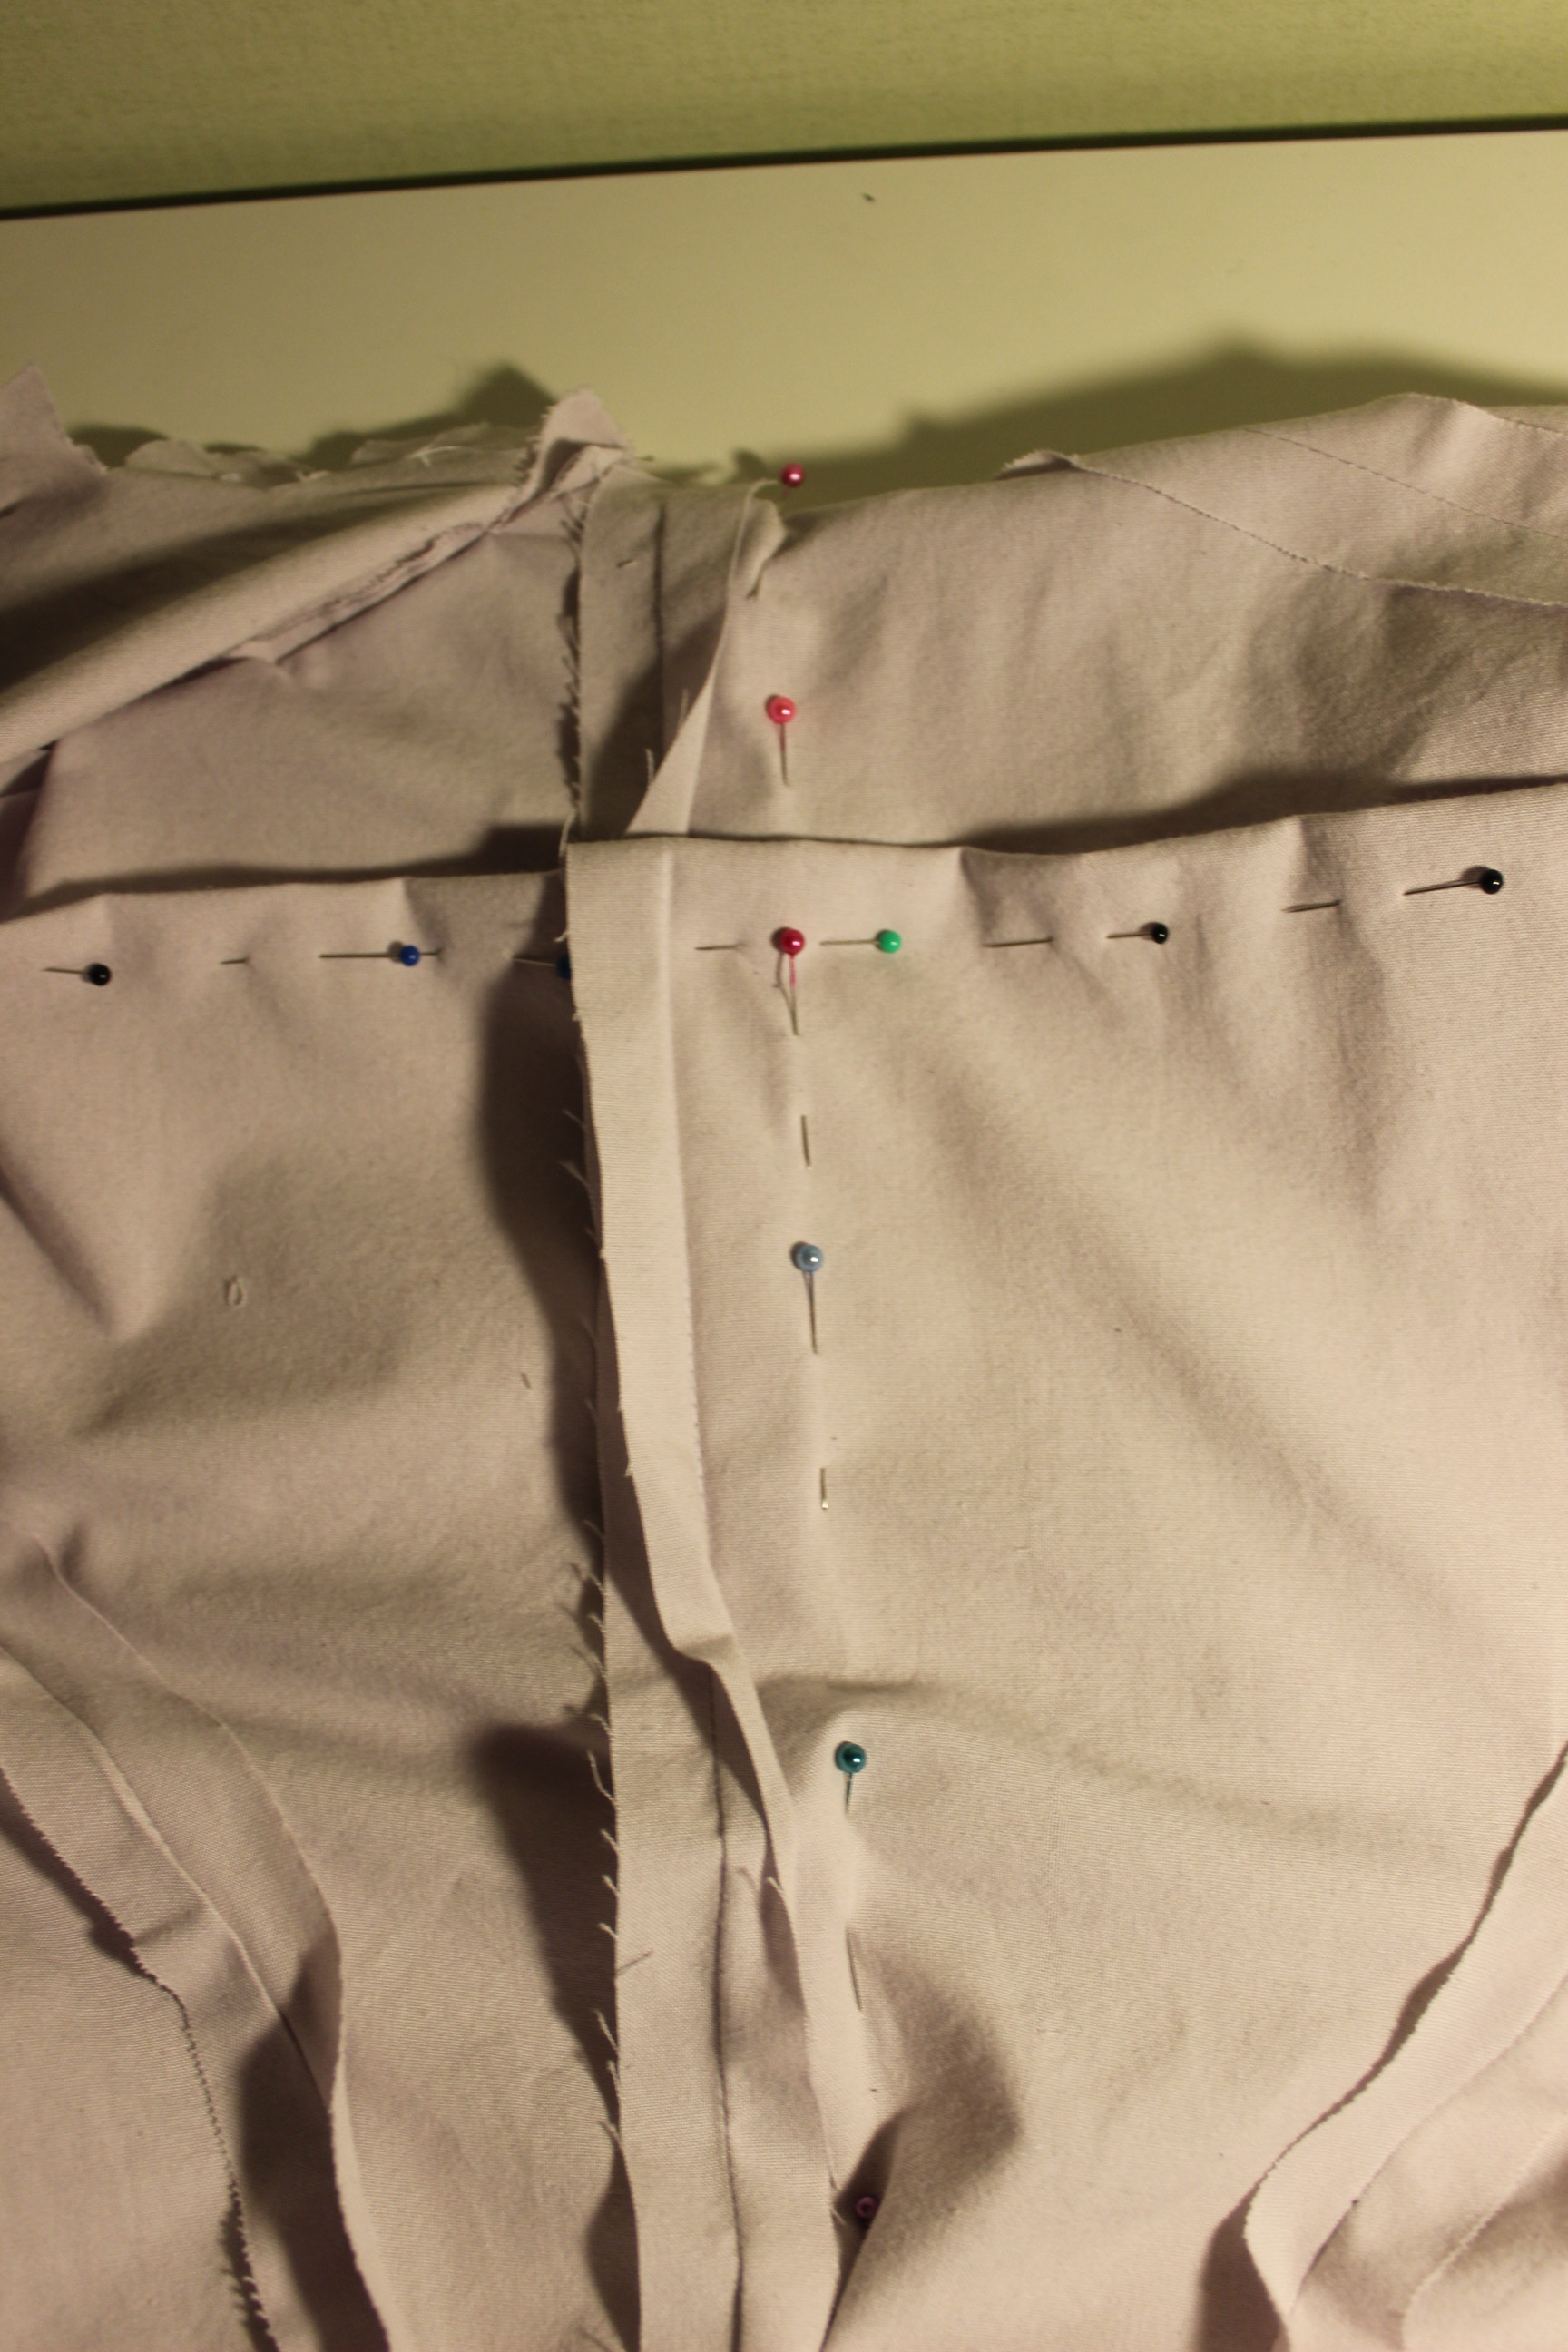
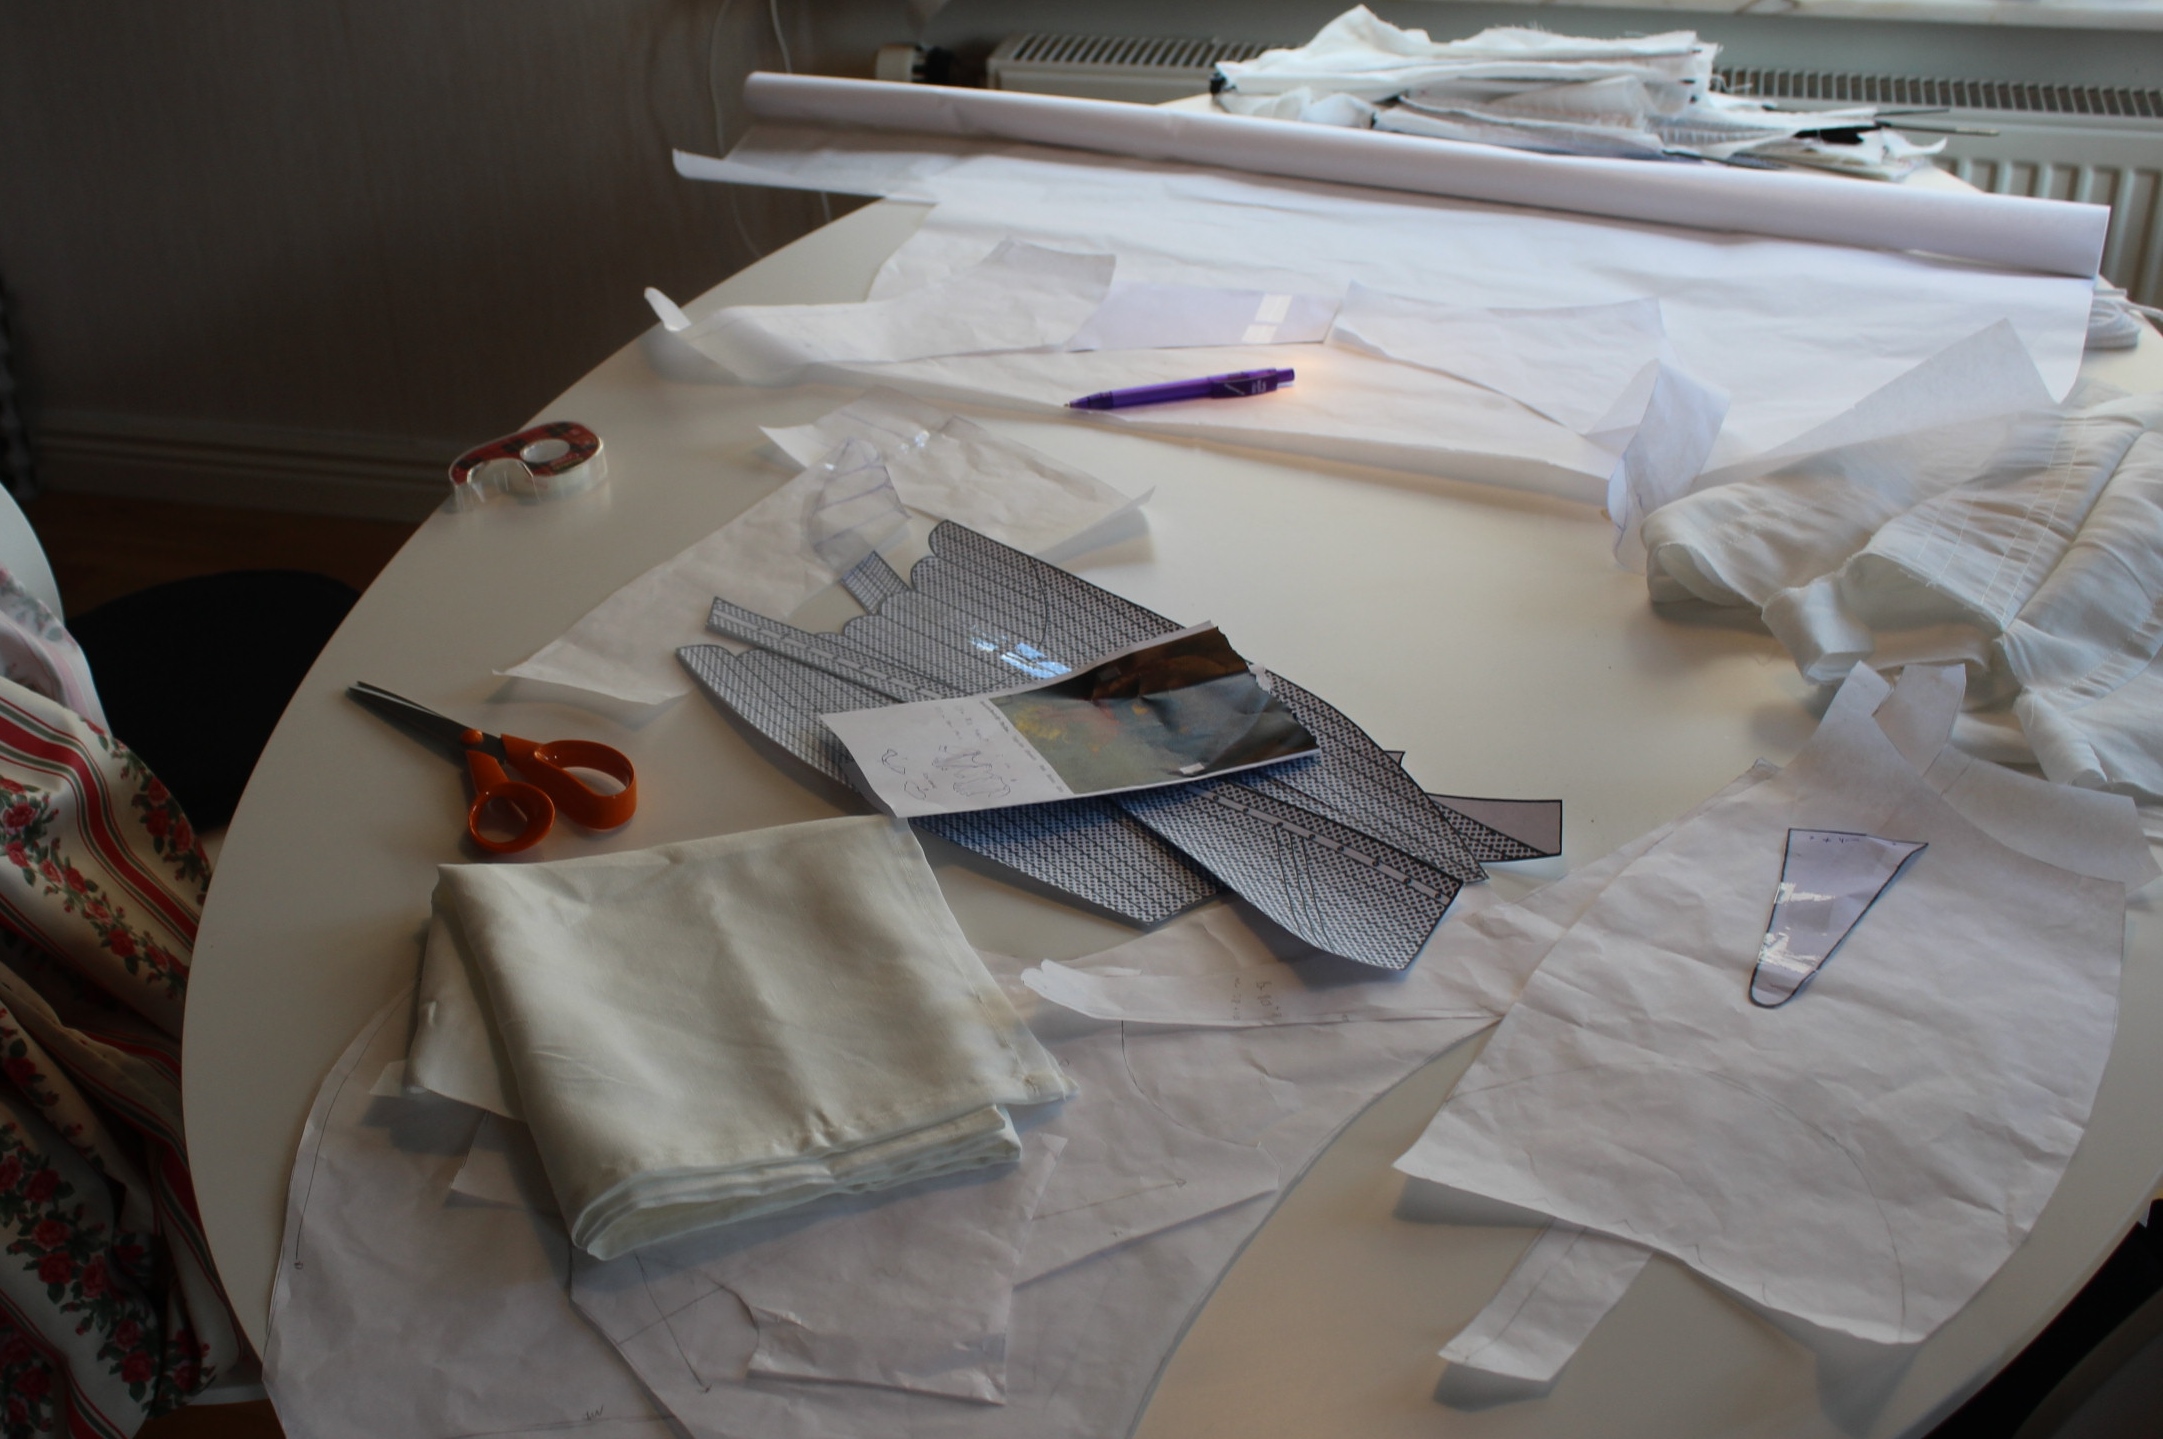
Creative mess, right?

So then it was back to the drawing table to ad some tabs to the otherwise perfect pattern.
IMG_7390
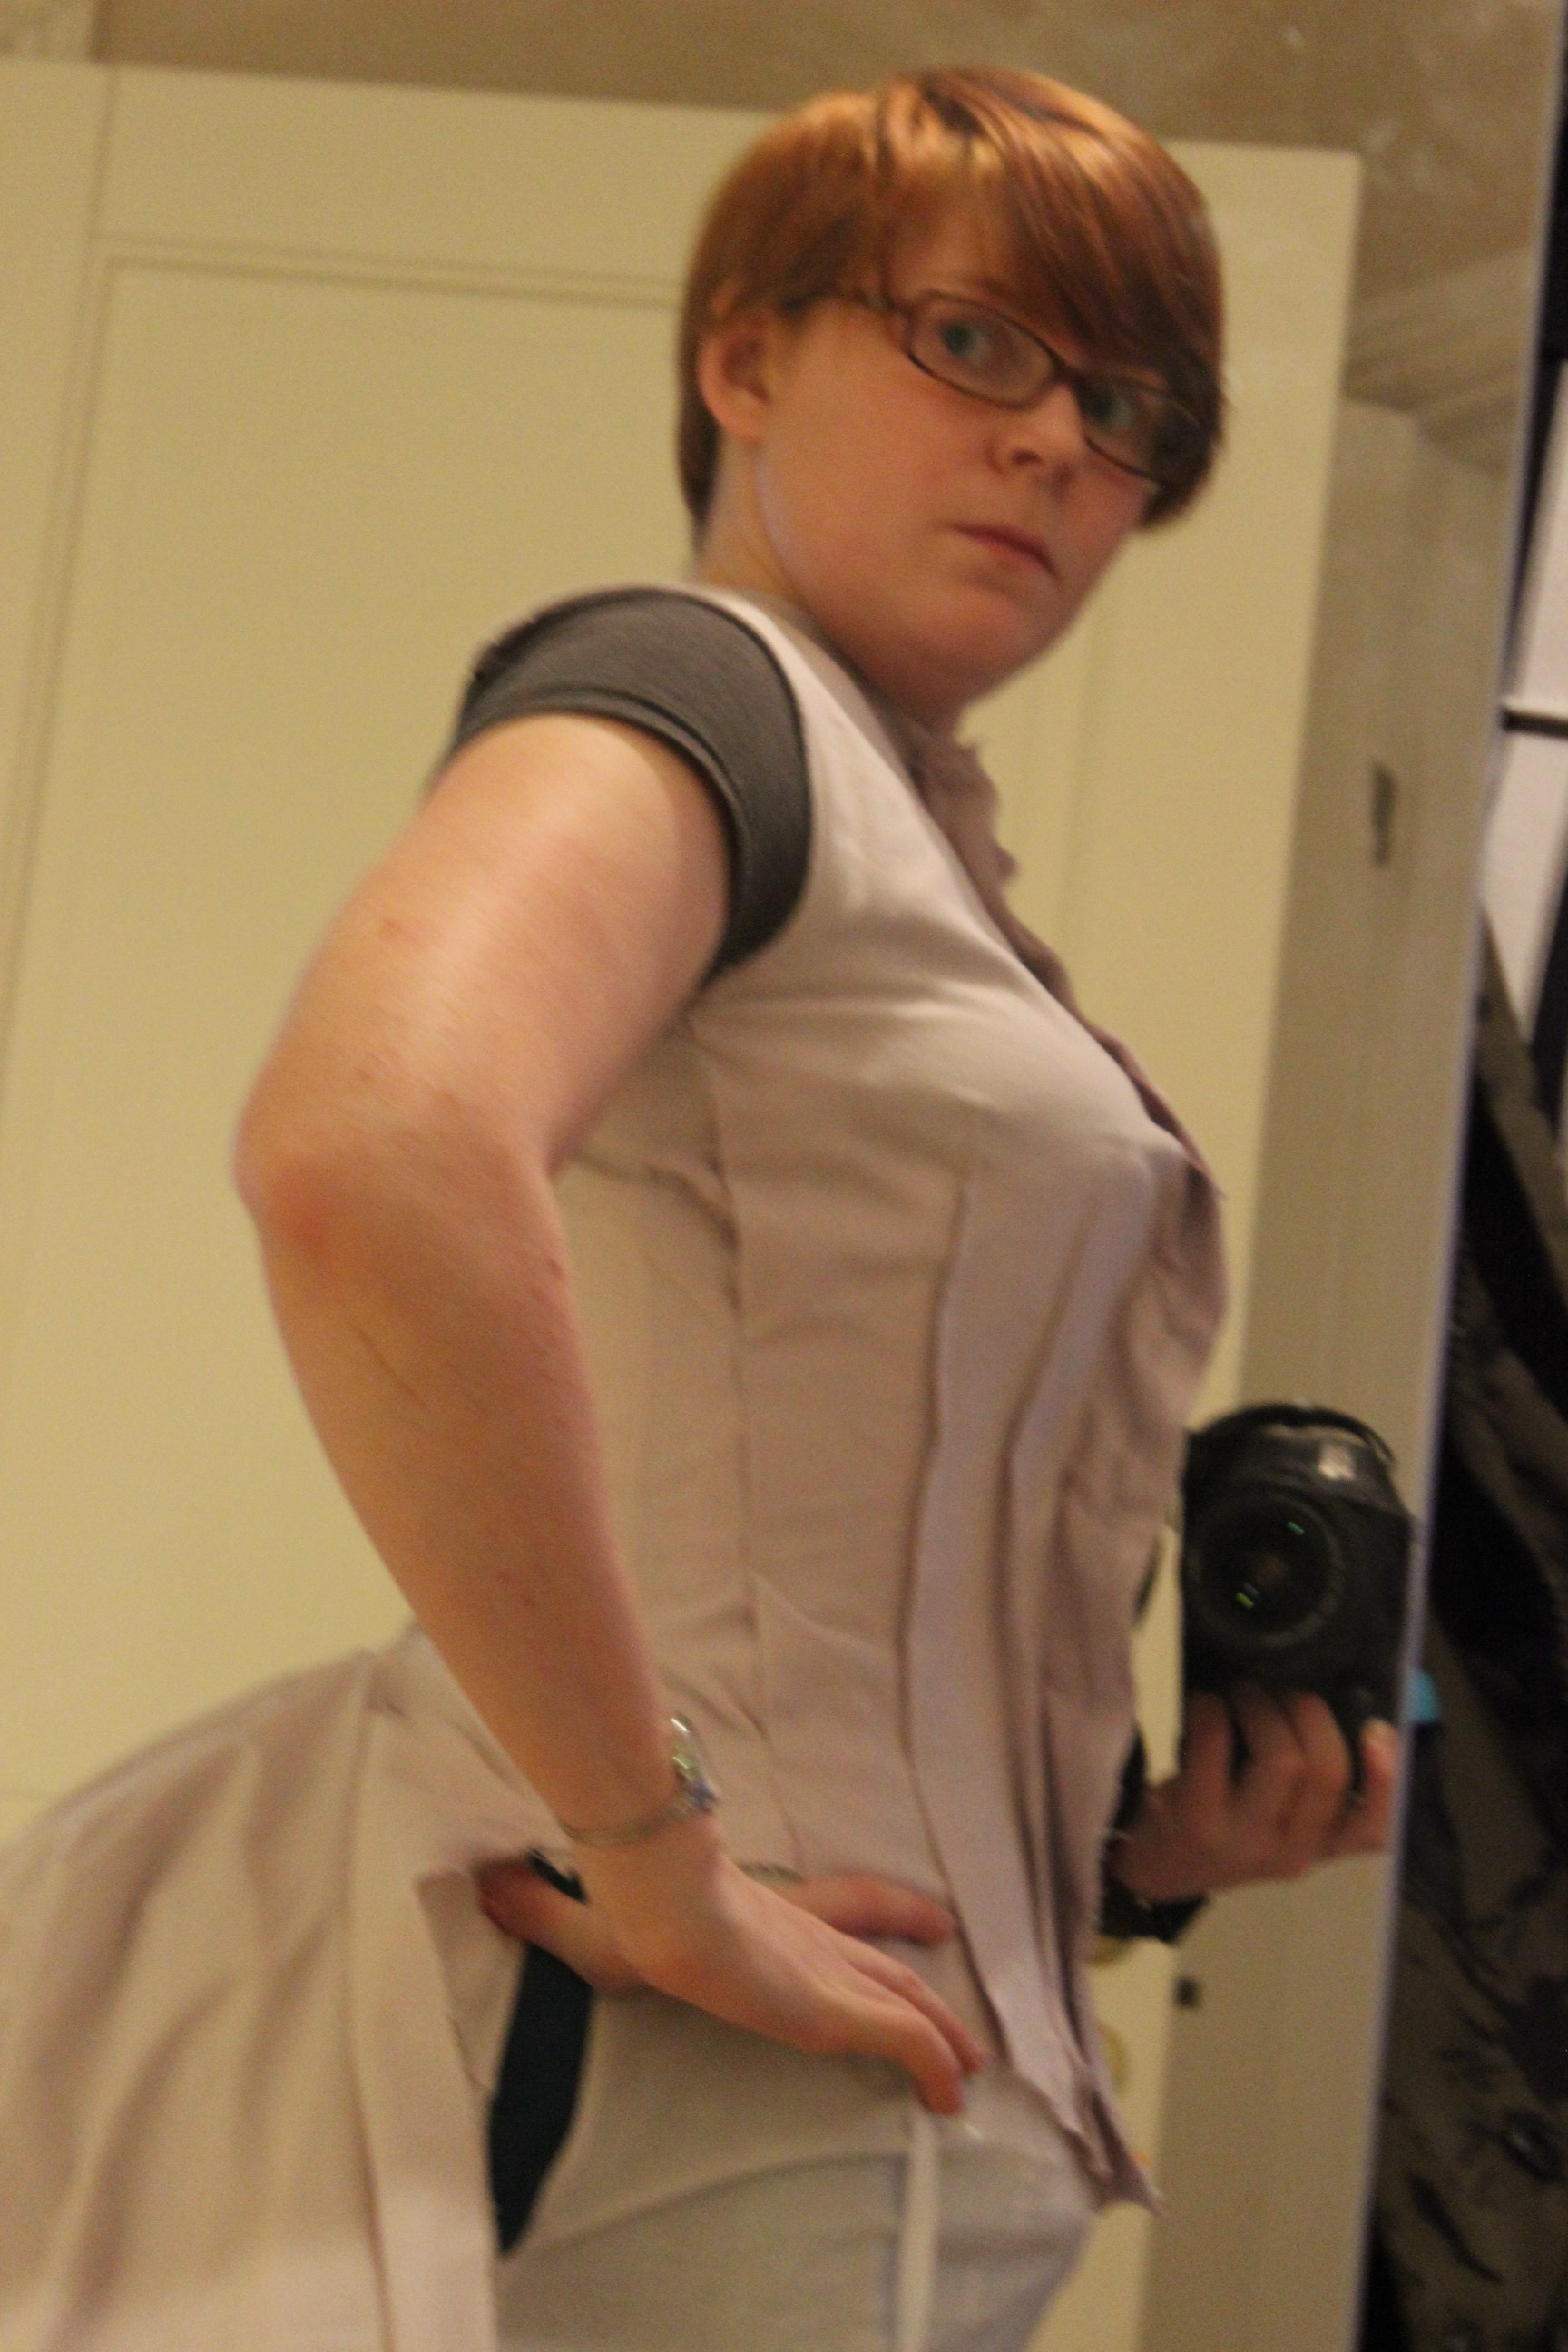
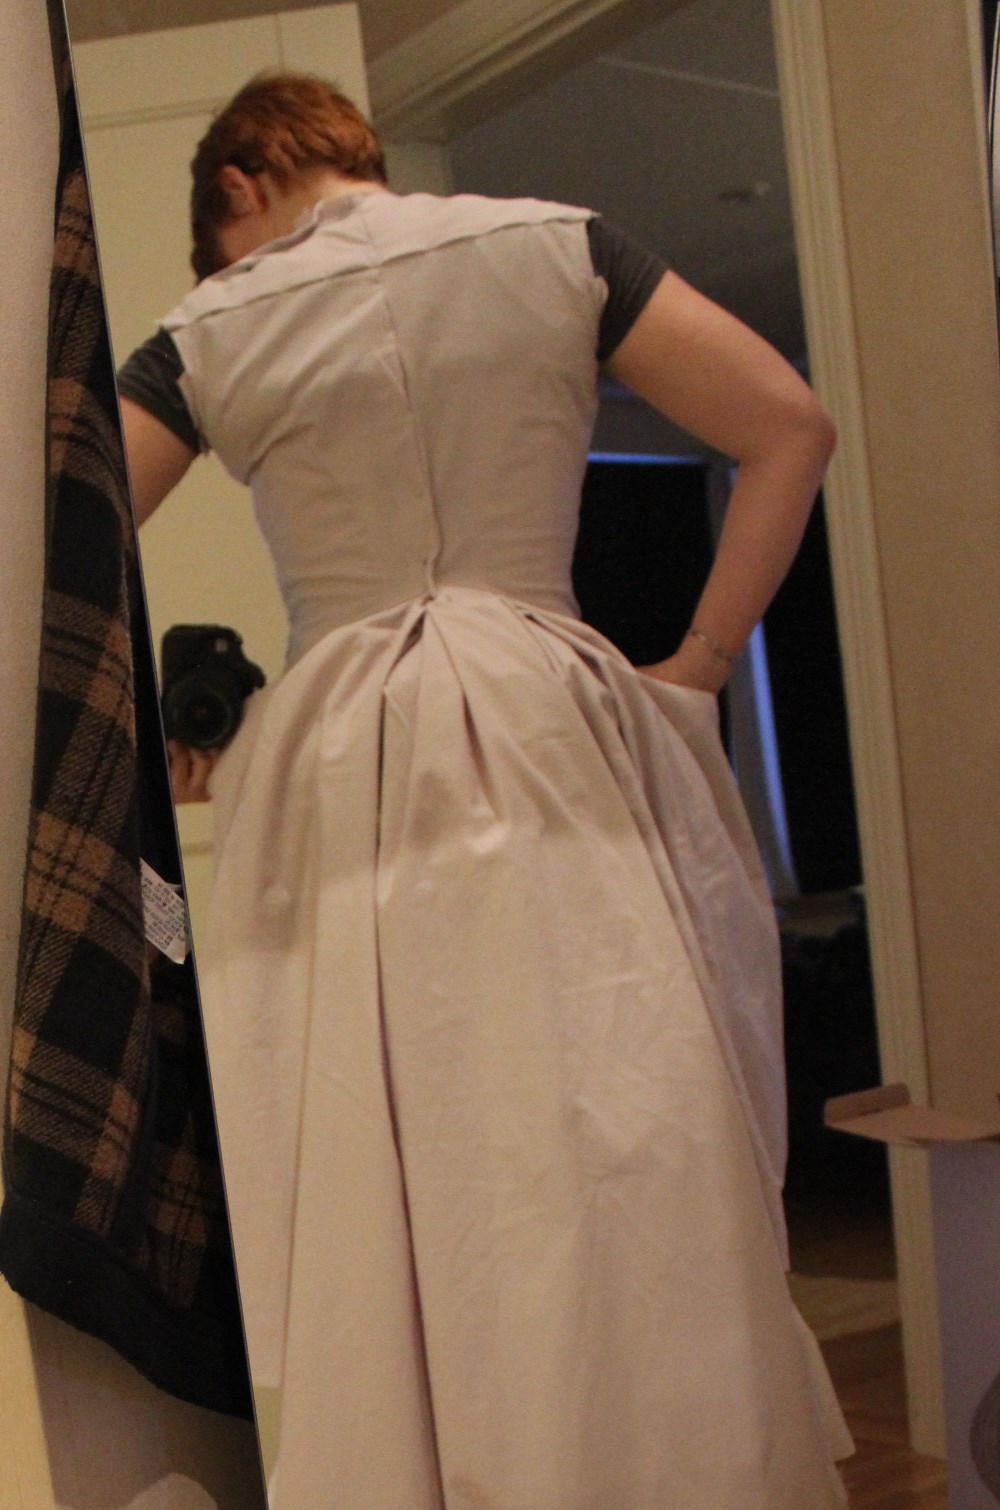
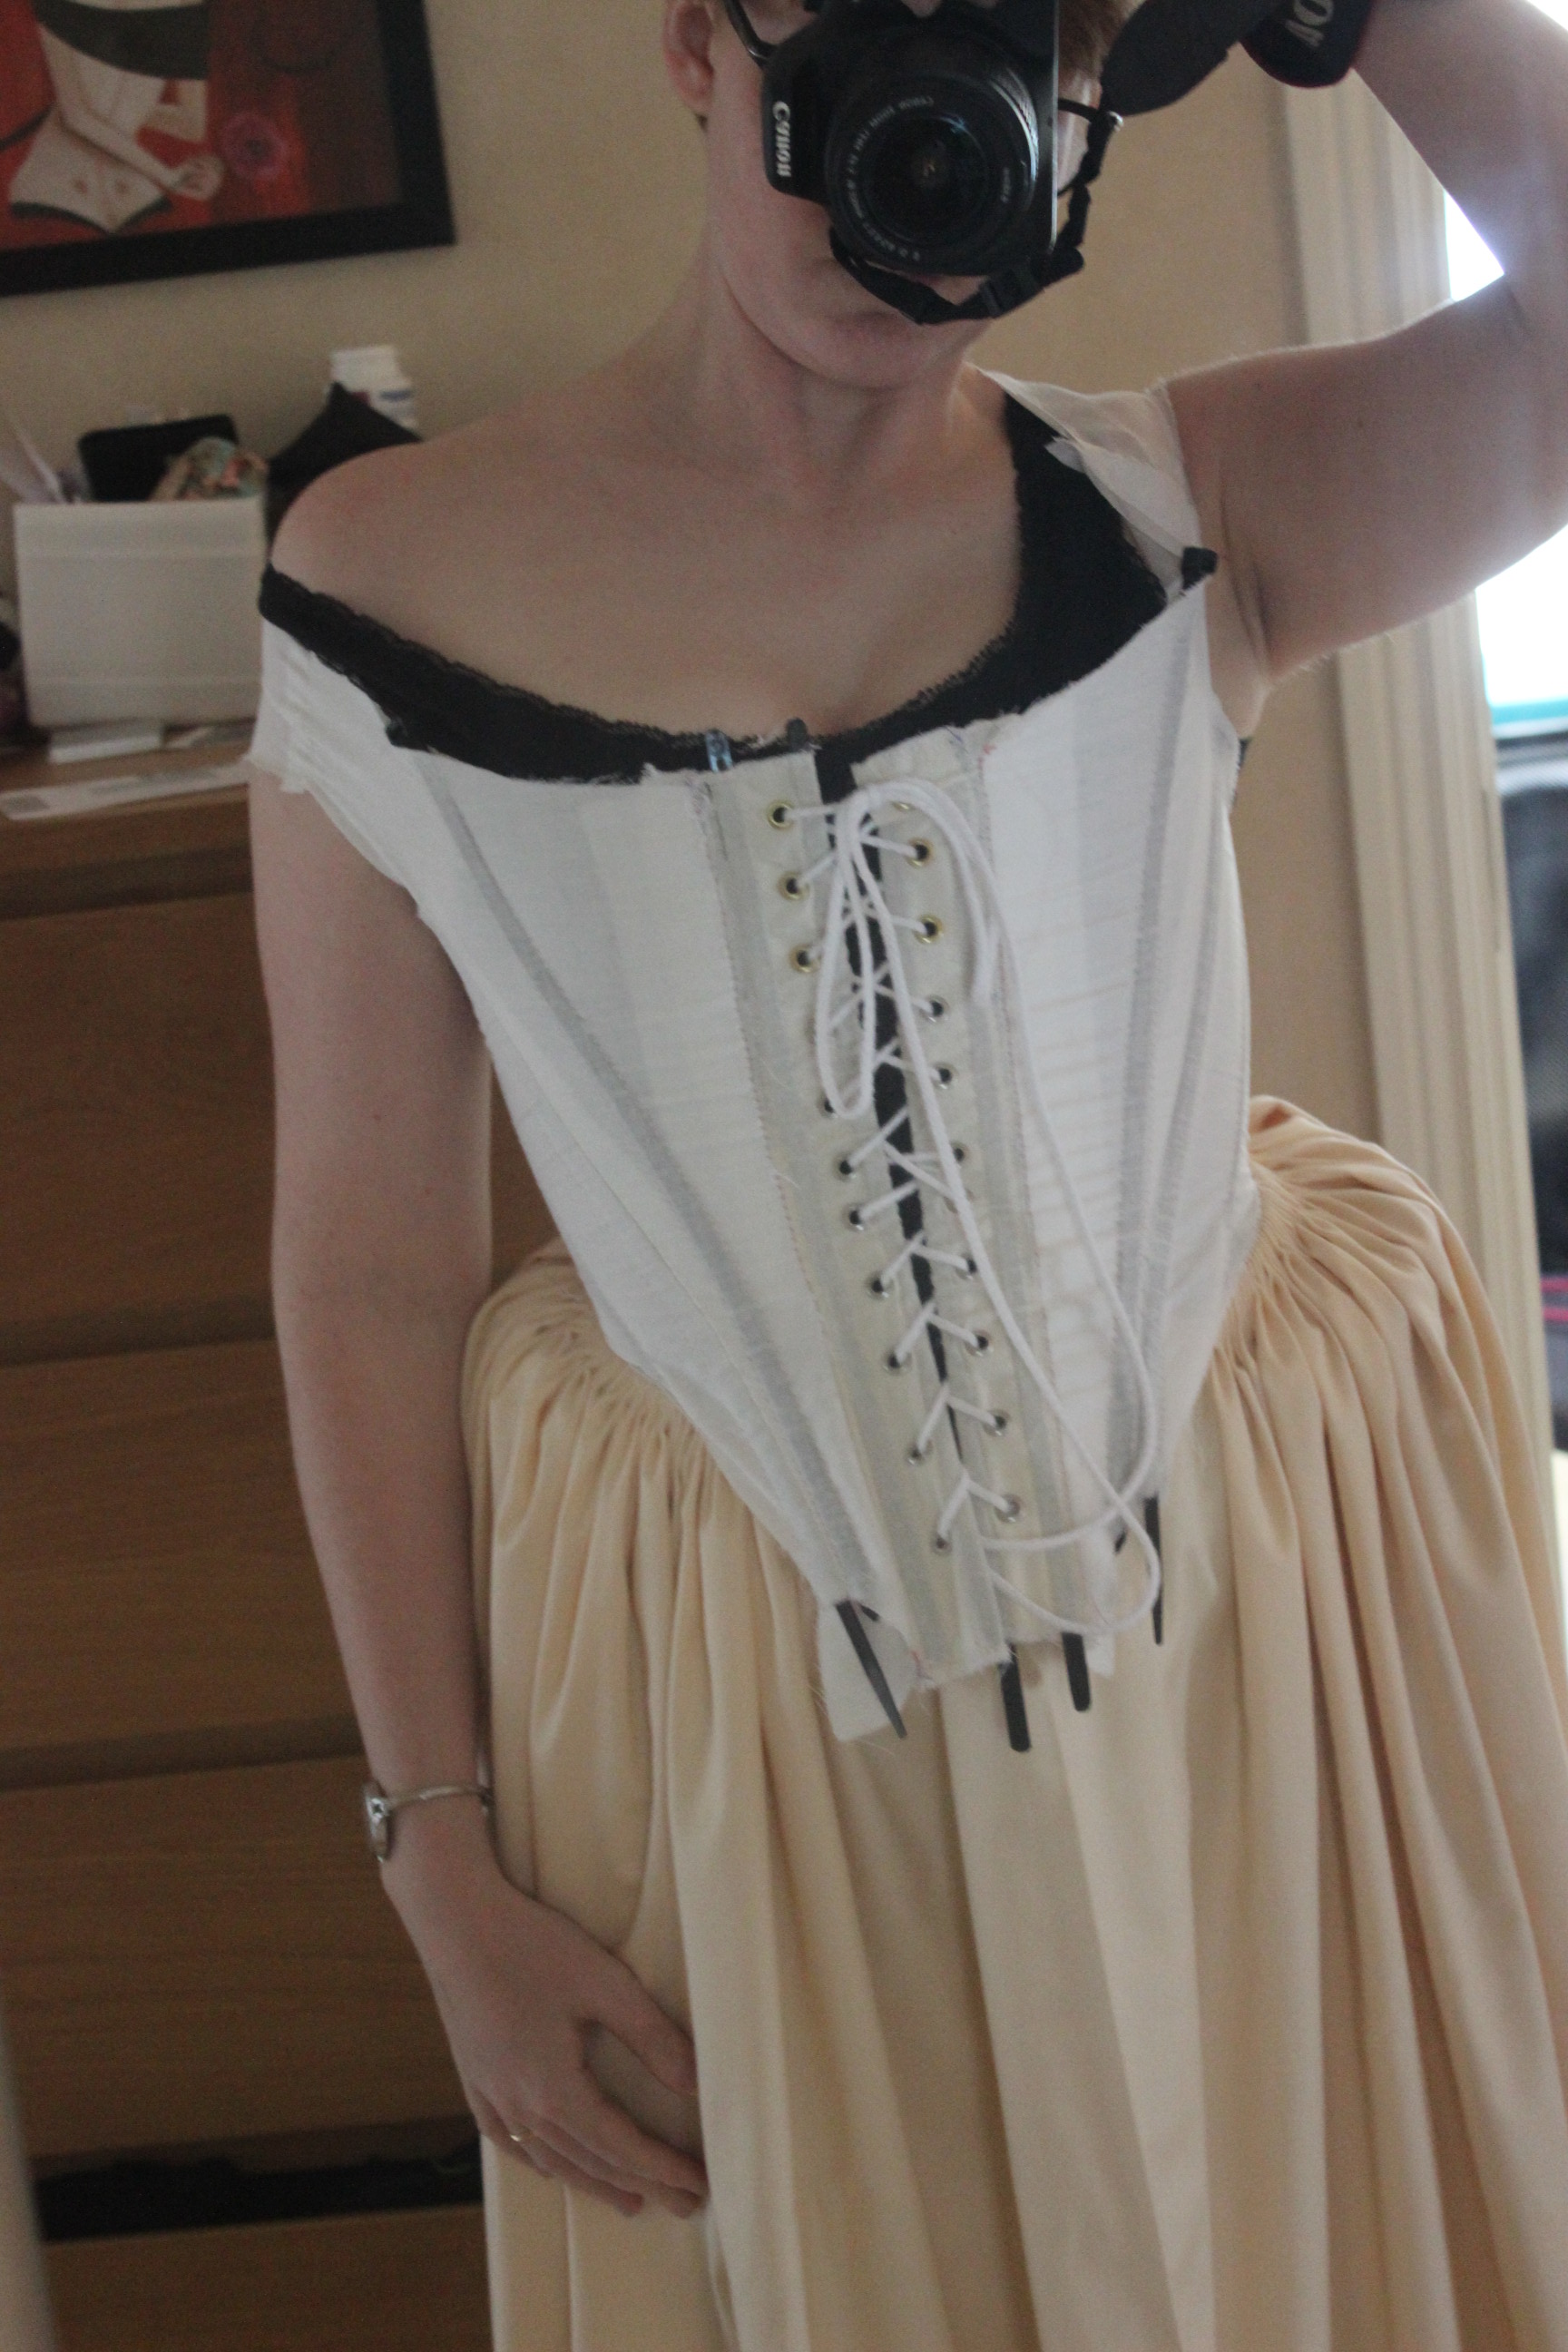
I even tried it on with my (at the time) almost finished skirt.
Pretty rough, but you get the idea if the shape.

*I found patterns for 17th century stays and bodices in almost every book covering this period: Waugh’s “Cut of Womens Clothes”, Arnold’s “Pattern of fashion” and “Seventeen-Century Women’s Dress Patterns” by North & Tiramani.

Next up – making the foundation…

1880s Evening Gown – Pattern Trouble

I’ve been so busy finishing my opera gown, that there’s been no time to blog about the process – and really, I didn’t want to spoil it and show it of here (in the unlikely case someone at the bal, read this before the big night).

But now the night has past and I can tell you all about my trials and errors in the making of the gown.

As some of you might know I decided to make myself a gow similar to this one, to wear at the “Oskarsbal” late januay.39.384 000239.384_side_CP4

I almost jumped up and down finding the perfect pattern online and decided to buy it, instead of draping/drafting my own, thinking I would save some time and effort.

IMG_4854Truly Victorian 462 had the perfect neck opening, and the train extended from the bodice back piece without a seam. Exactly like my inspiration gown.

So I took my mesurments, and drafted the pattern from the pattern sheets, without any alterantion.

IMG_4851 IMG_4857

I cut and sewed a mock-up, and then I laced myself into the corset, doned the bustle and petticoat and tried it on.

IMG_4859And it was huge!

IMG_4861 IMG_4875

I mean look at that – so increadable large, not even the shoulders fitted, and that sleeve – I could get two arms down that sleeve.

IMG_4862 IMG_4866

What the heck went wrong?

I went back to the pattern, and quickly discovered that I’ve drafted the wrong size (no brainer), following the lines on the wrong side of the intended letter, thous drafting one size to big. And since I’ve wanted to stay true to the pattern, I didn’t think of controling the mesurments before cuting the mock-up (stupid).

But it seems to me there is way to much widht to acomodate only one size. I doubt there is about 30cm in differens between sizes. Ok, I don’t know, but somewhere it went wrong, and the only thing to do is to try to fix it.

Being in a bit of a rush, and not trusting the pattern anymore, I decided not to draft another pattern in the correct size, but to try to adjust the current mock-up to fitt.

I started by pining away 6cm in each side seam, and 4 at center back. I also pinned a 3 cm vertical tuck on the backpiece to acomodate my erect posture.

IMG_4925IMG_4923

Then I put it back on. (I’ve been doing all this thinking and pinning still wearing my undergarments).

IMG_4909 IMG_4890

IMG_4899

So much better. But still some thing needed to be altered. So I made the front 4cm smaler, took out a bit on the shoulders, and made the neck opening a bit bigger.

I then transfered the alterations to the pattern, moving the mesurments around a bit to get a good spread at the different seams. IMG_4929(Everything outside the lines are to be cut of)

Then I re-cut the mock-up and sewed it up again.

IMG_4935

IMG_4937 IMG_4943

Now we talking.

And before I took it of I cut some of the neckline and put on my long opera glowes, just to get a feel for how it would look.IMG_4921

I even tryed to drape the bustle, but I guess it’s easier to do when you’r not wearing it…IMG_4913

All this fiddeling and messing around with the pattern set me back almost a whole day. So with now only 6 days left to the bal it was time to move on to the sewing.