
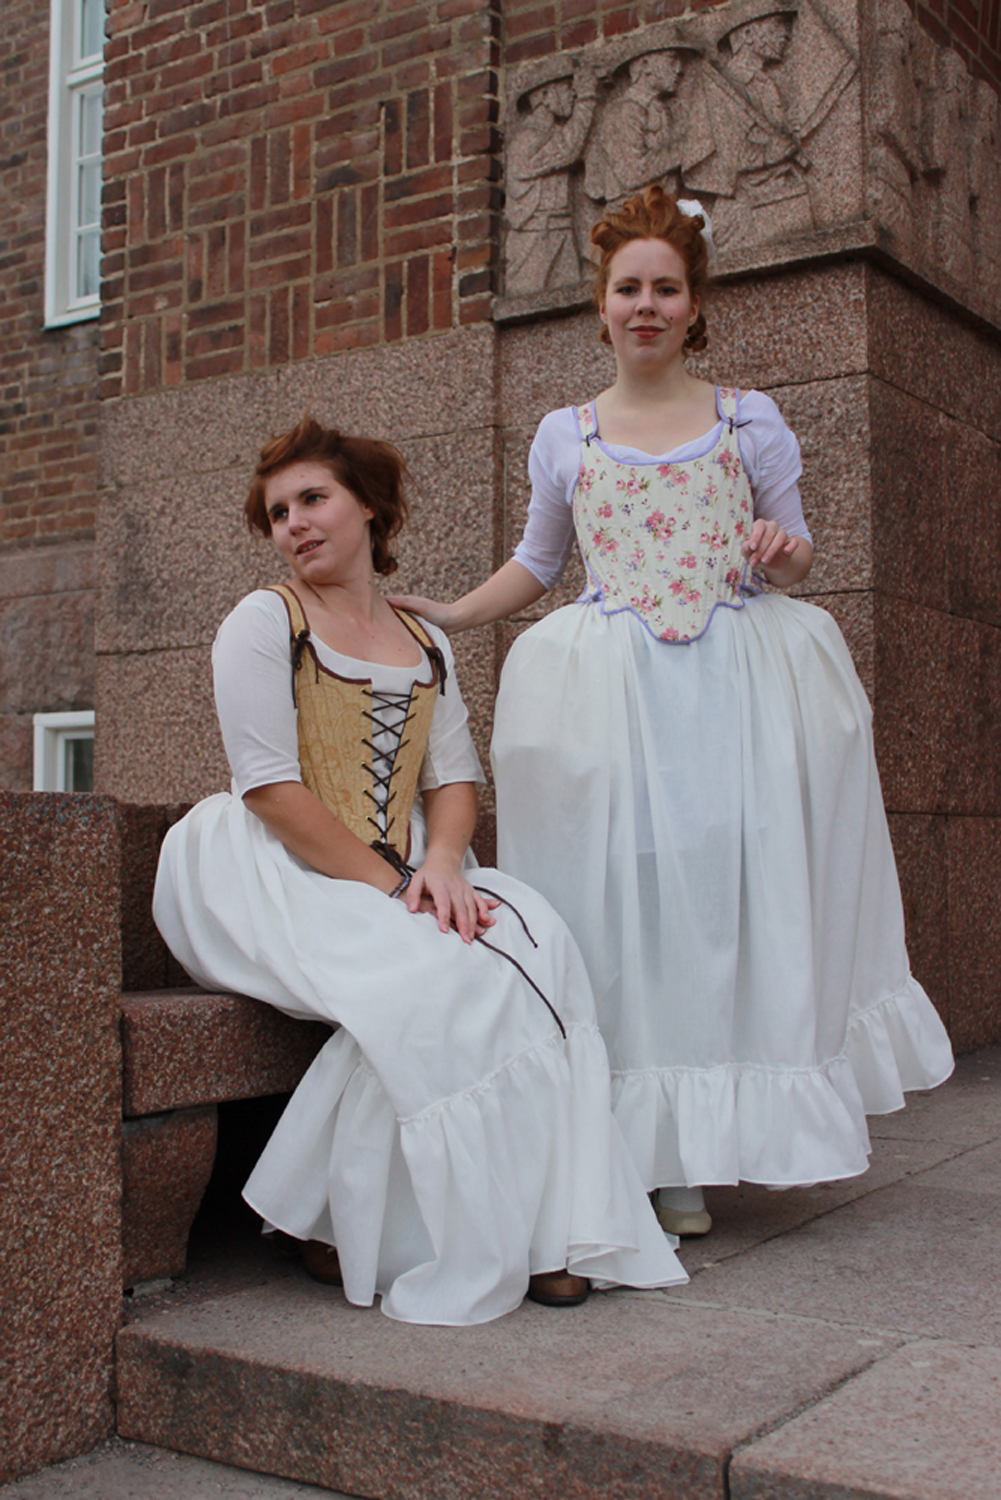
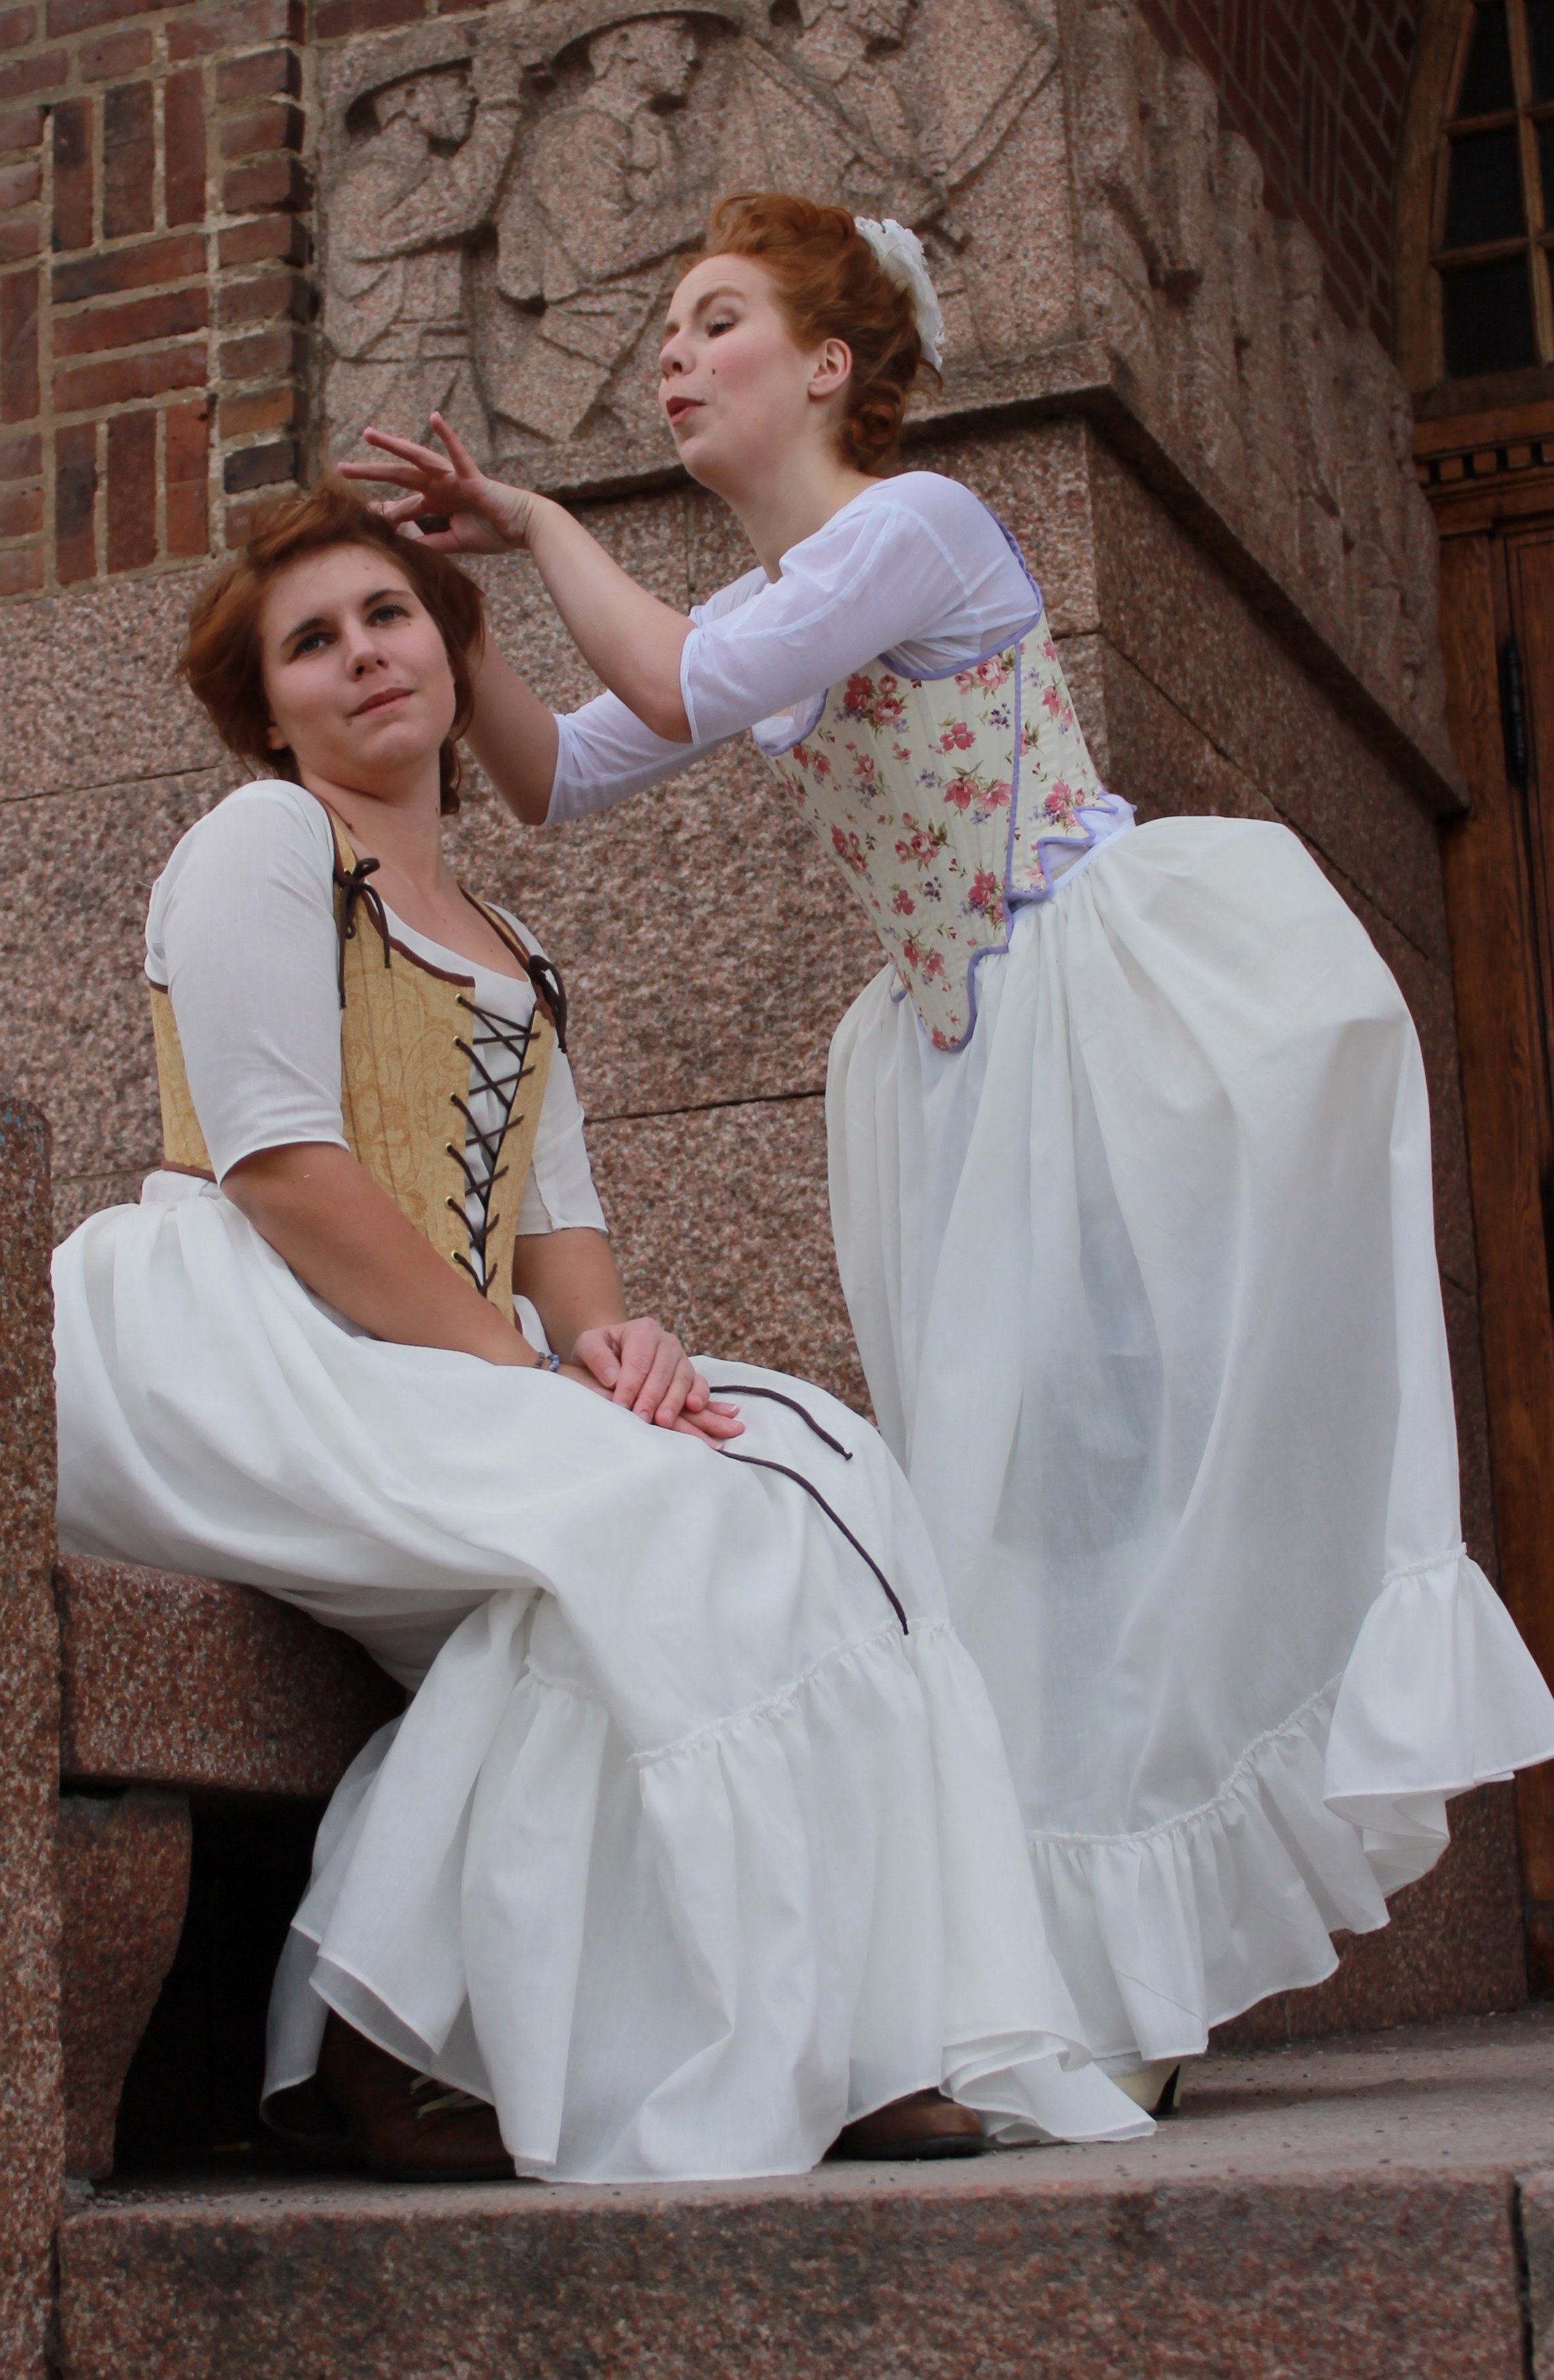
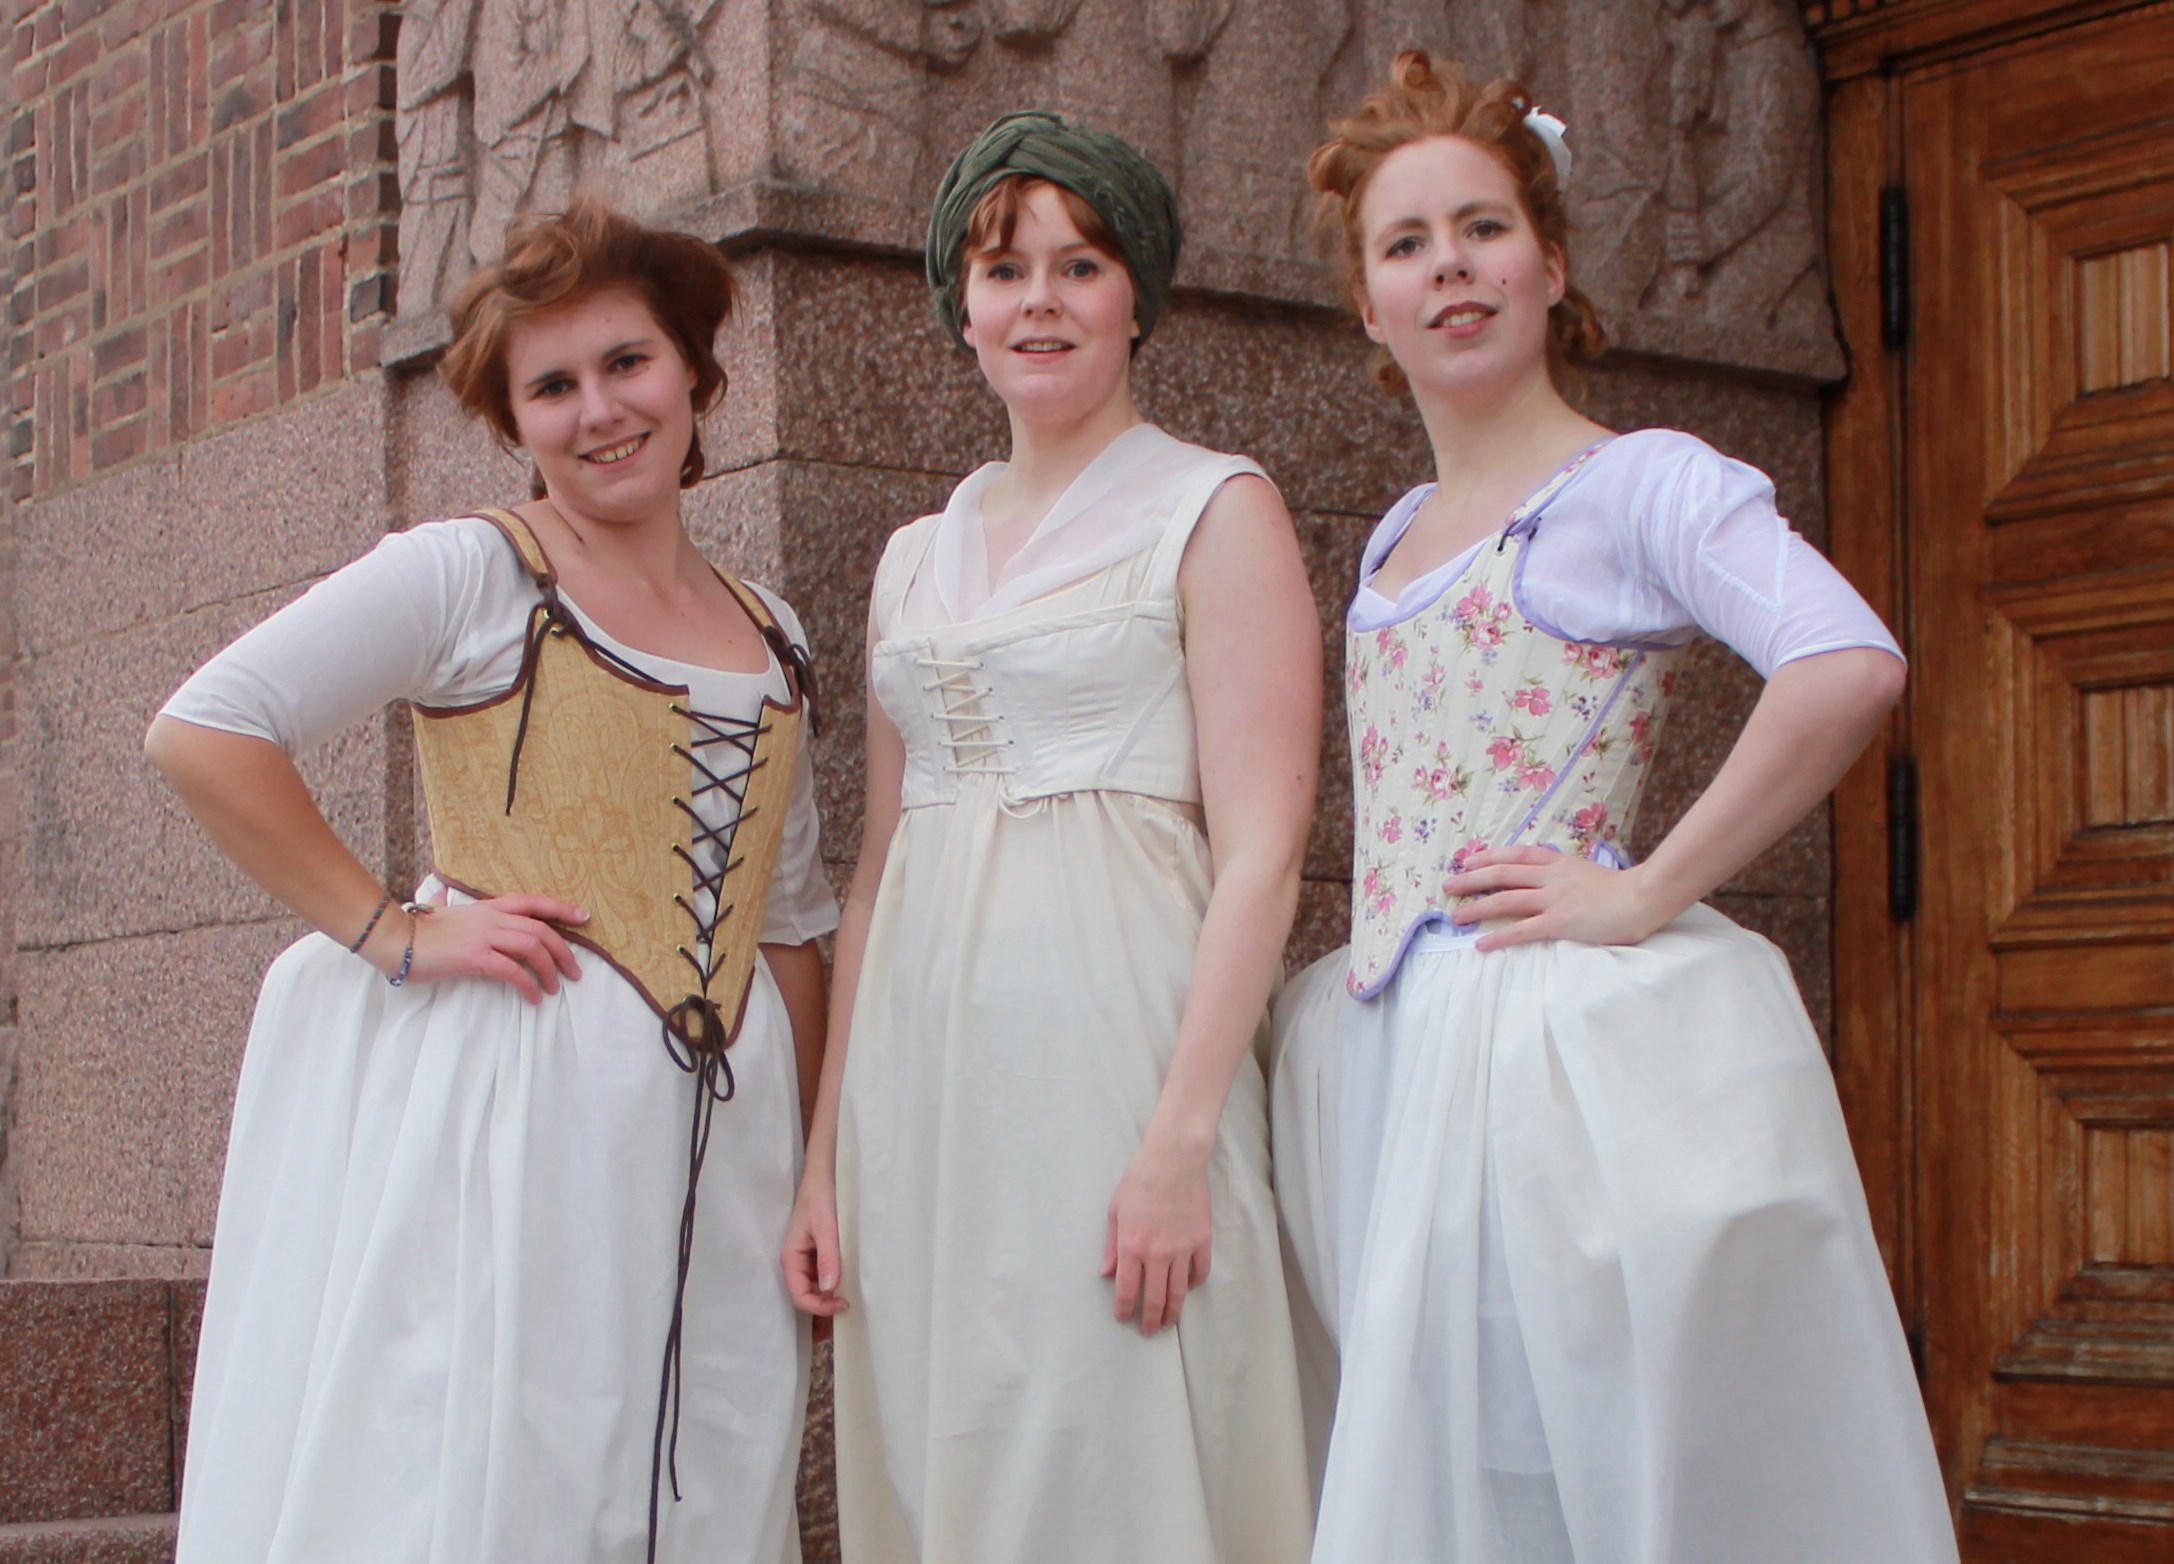
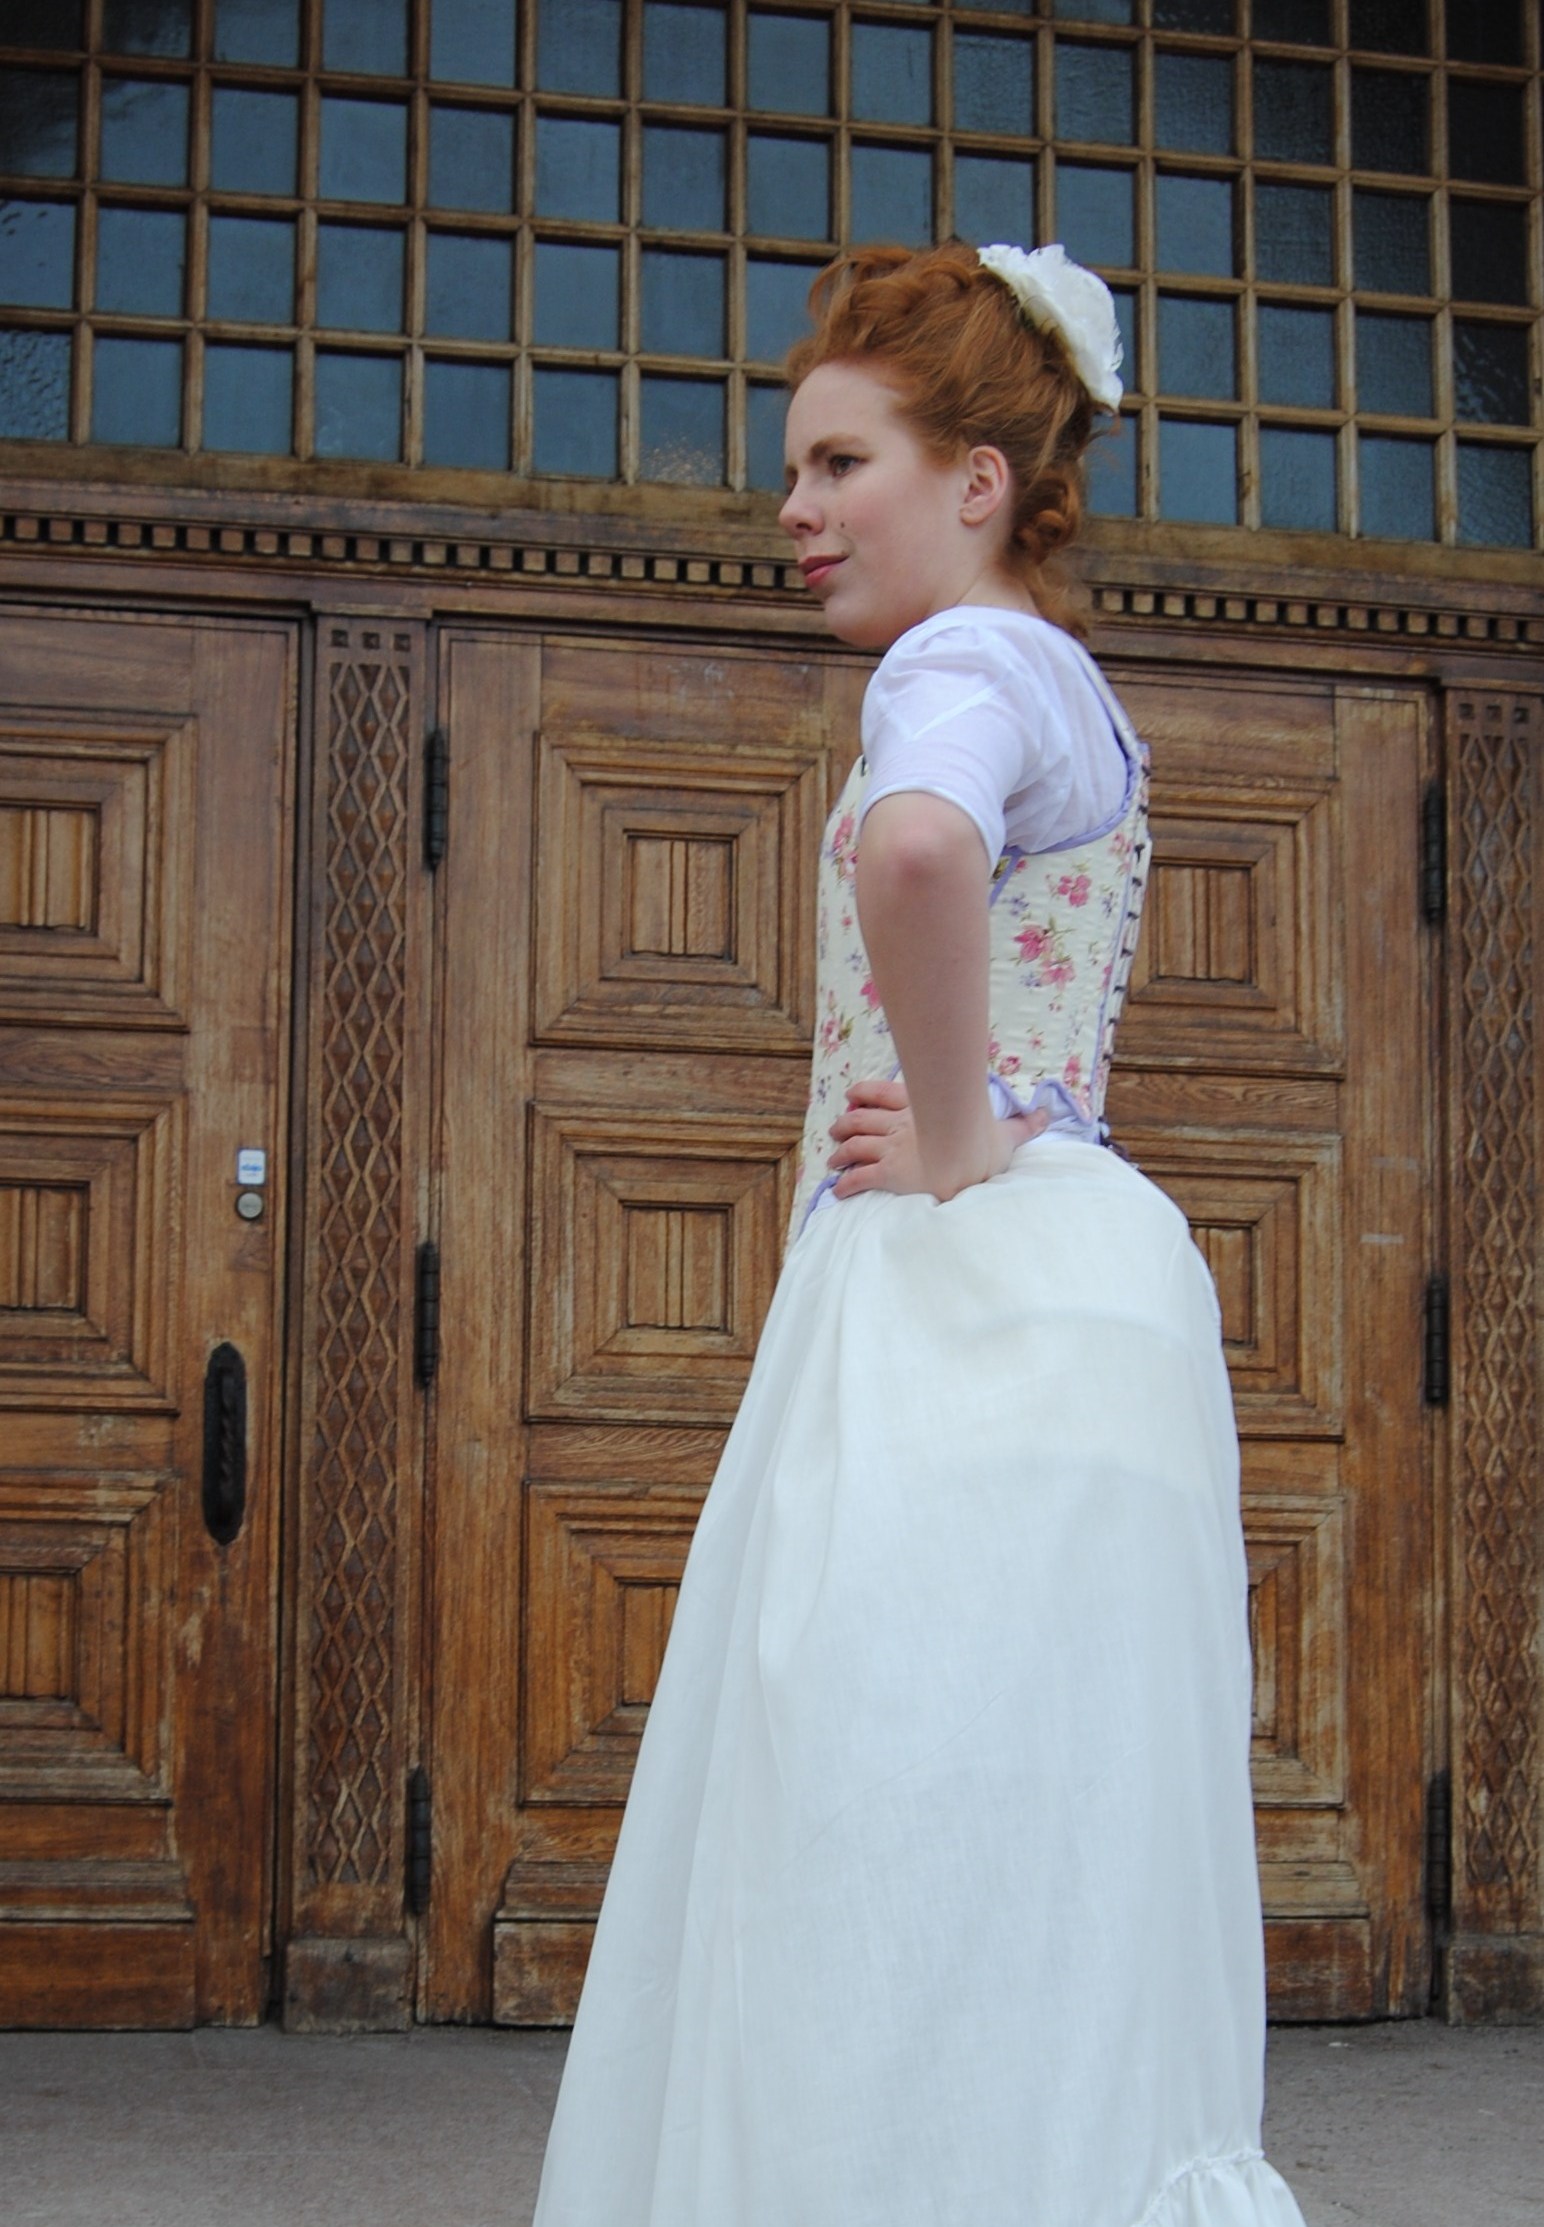
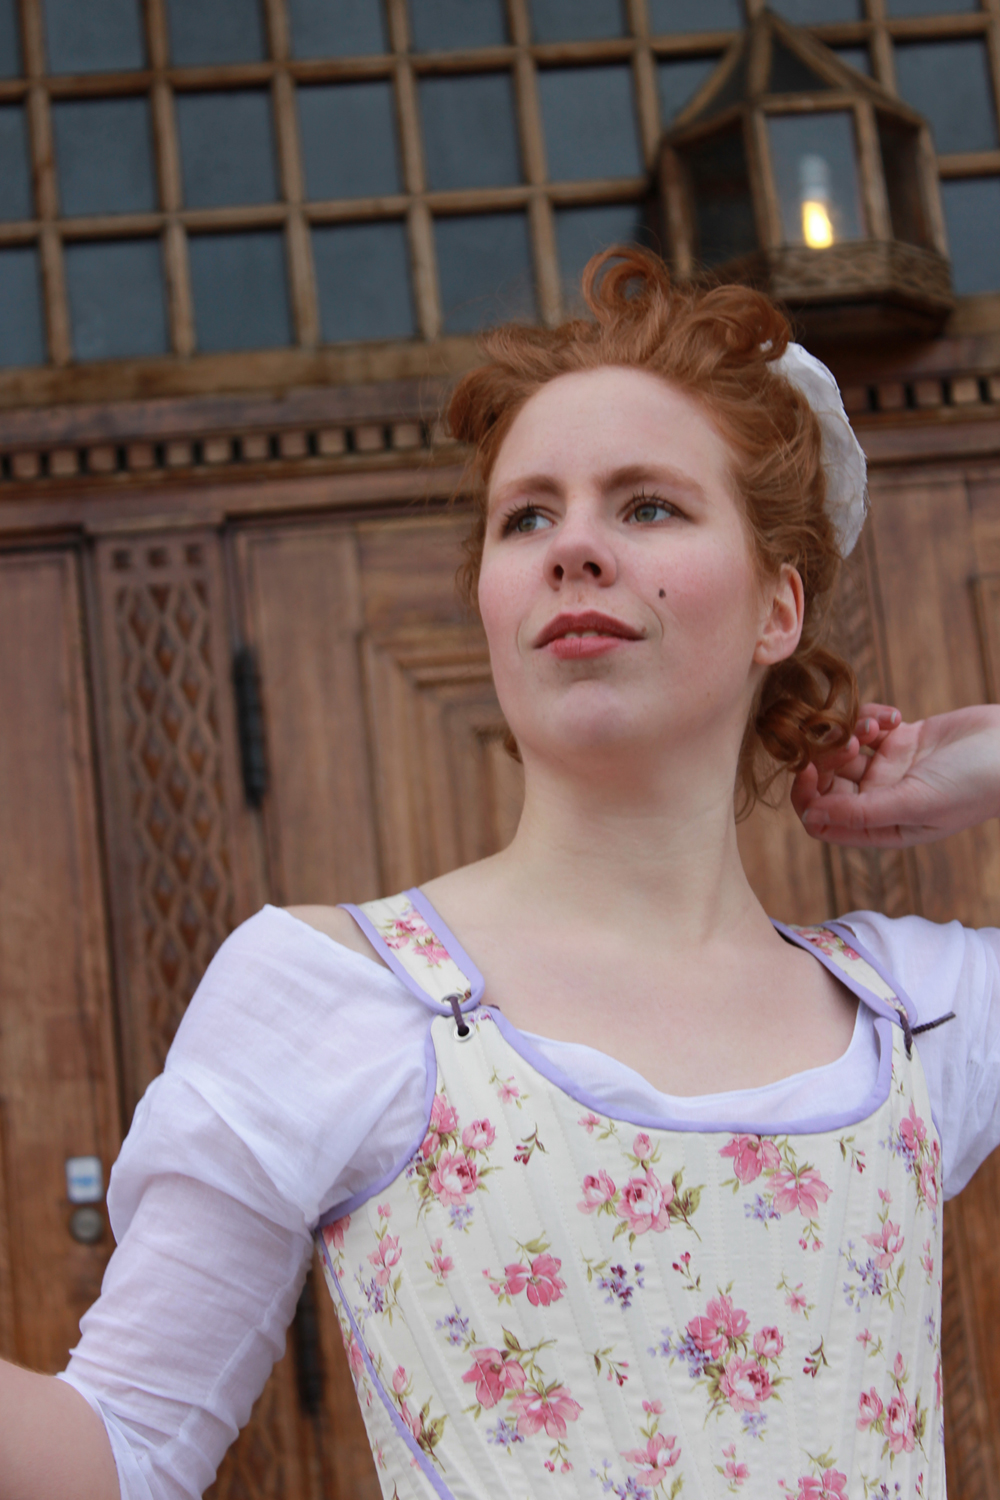
Here are some pictures which me and my sister took last spring.
We dressed up in 18th century underwear (1750s, 1780s & 1790s) and posed in front of the beautiful building next to my home.


Here are some pictures which me and my sister took last spring.
We dressed up in 18th century underwear (1750s, 1780s & 1790s) and posed in front of the beautiful building next to my home.
And so it’s time to present the last (of my old, prevously compleated) HSF entrys. The Challenge nr 2: UFO – Un Finished Object.
As a novice in costuming I didn’t had many UFOs laying around. But I did however have a costuming piece, not yet started but, promised to my sister.
A 1700s corset.
I’ve already made her one in the previuos year, but it was noting but a mess. Lets take a look at my very first atempt at historic corset making.
I used a pattern from Jill Salens book “Corsets”.


The fabric is a lovely cotton print (which I still love, by the way).
I even made her a design sketch.
Then I started to sew.
And this is what I came up with.
Ok, its not that bad for a first try- if you ignore the gromets.
It acctualy look pretty decent…
Until you realises how extremly smal it is.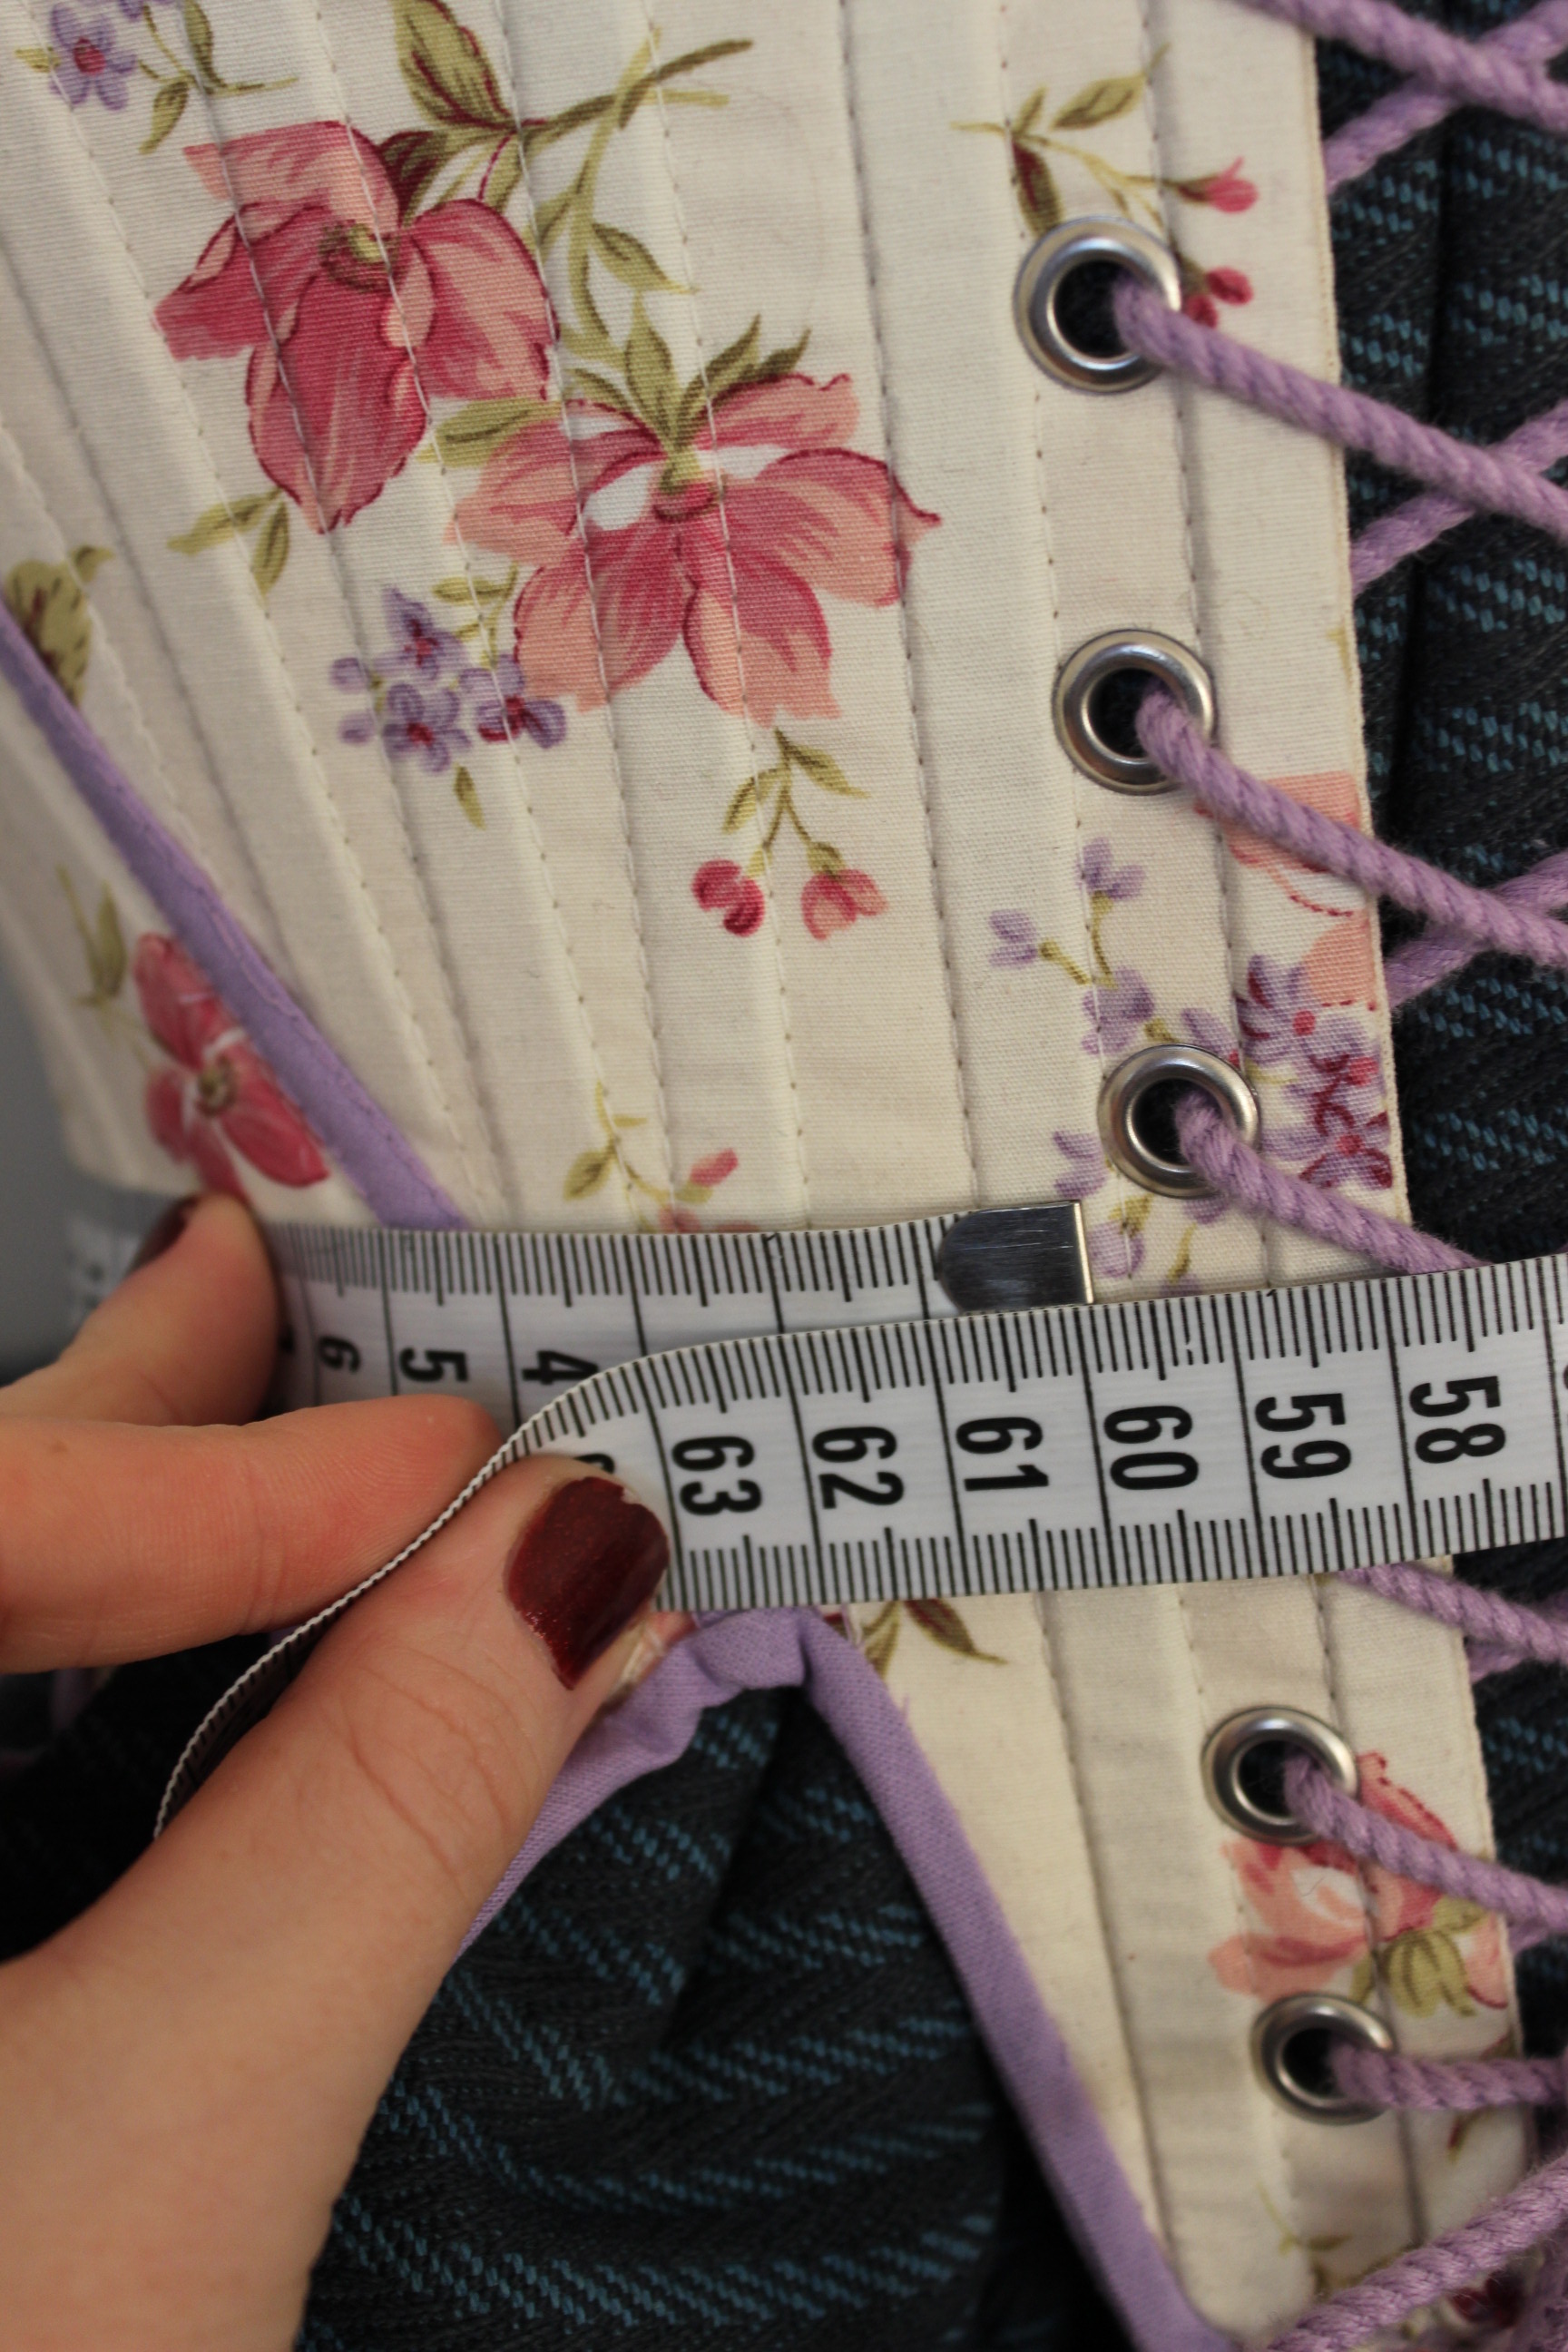 It wouldn’t even fit my size 36 dressform.
My sister is not particular big, and even after some serious skwezing the darn thing still didn’t fit her.
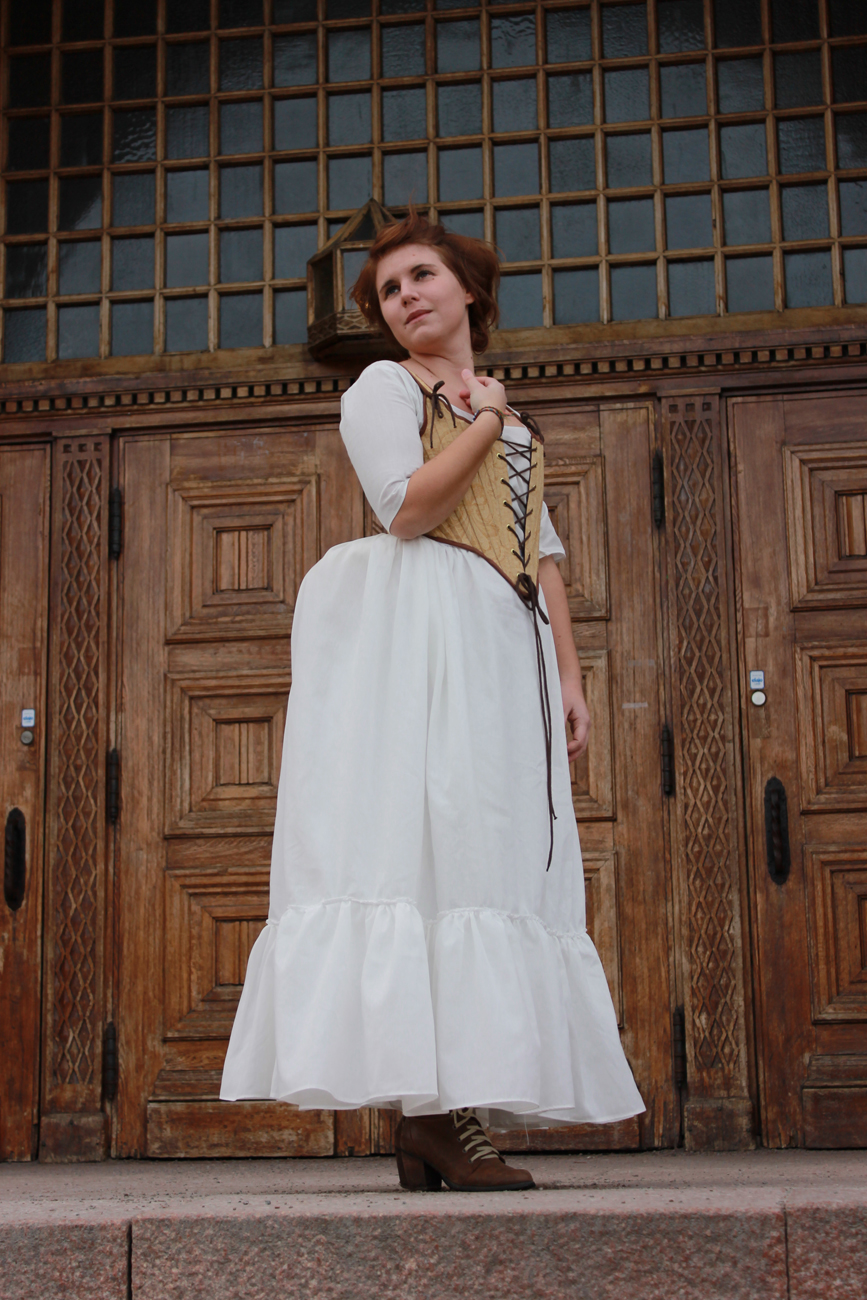
We did get some pretty picture though.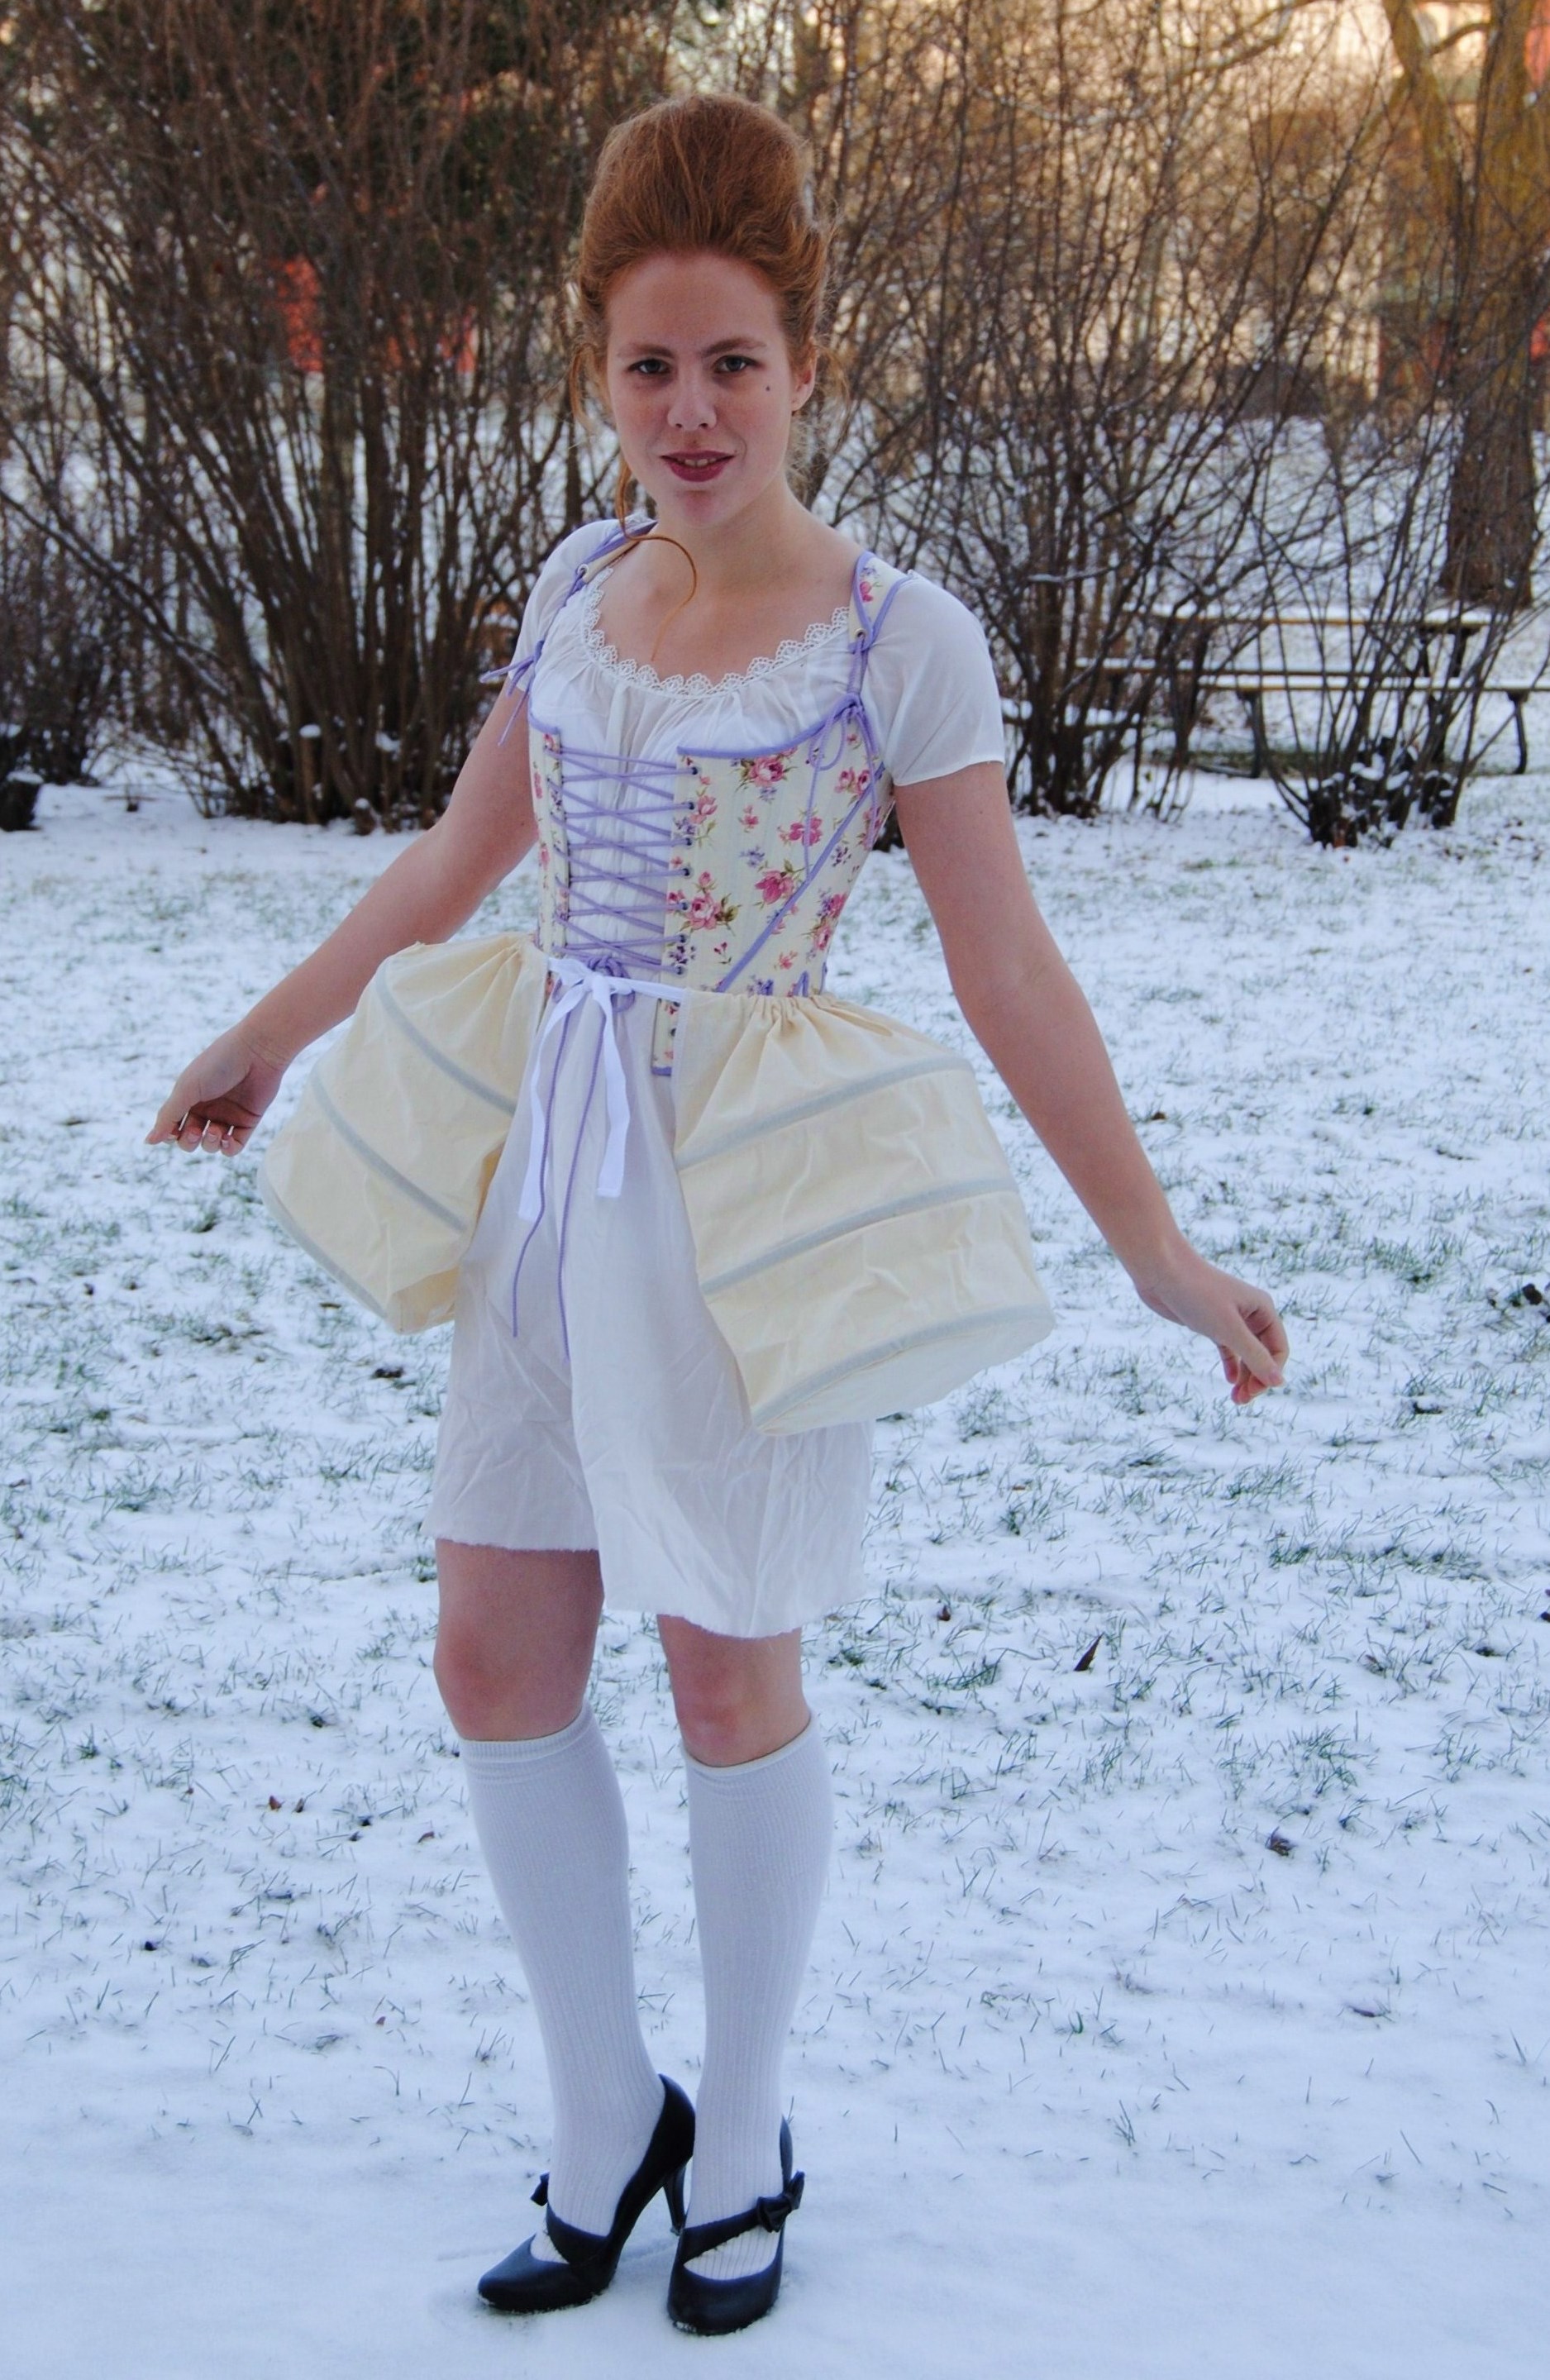
 And the minute we where done photograping, the whole thing whent straight into a box in the basement.
The pocket hoops are made from Waughs pattern and still works perfectly.
***
Now back to the UFO.
After I’ve promised my sister to make her an other corset, that would actualy fit her.
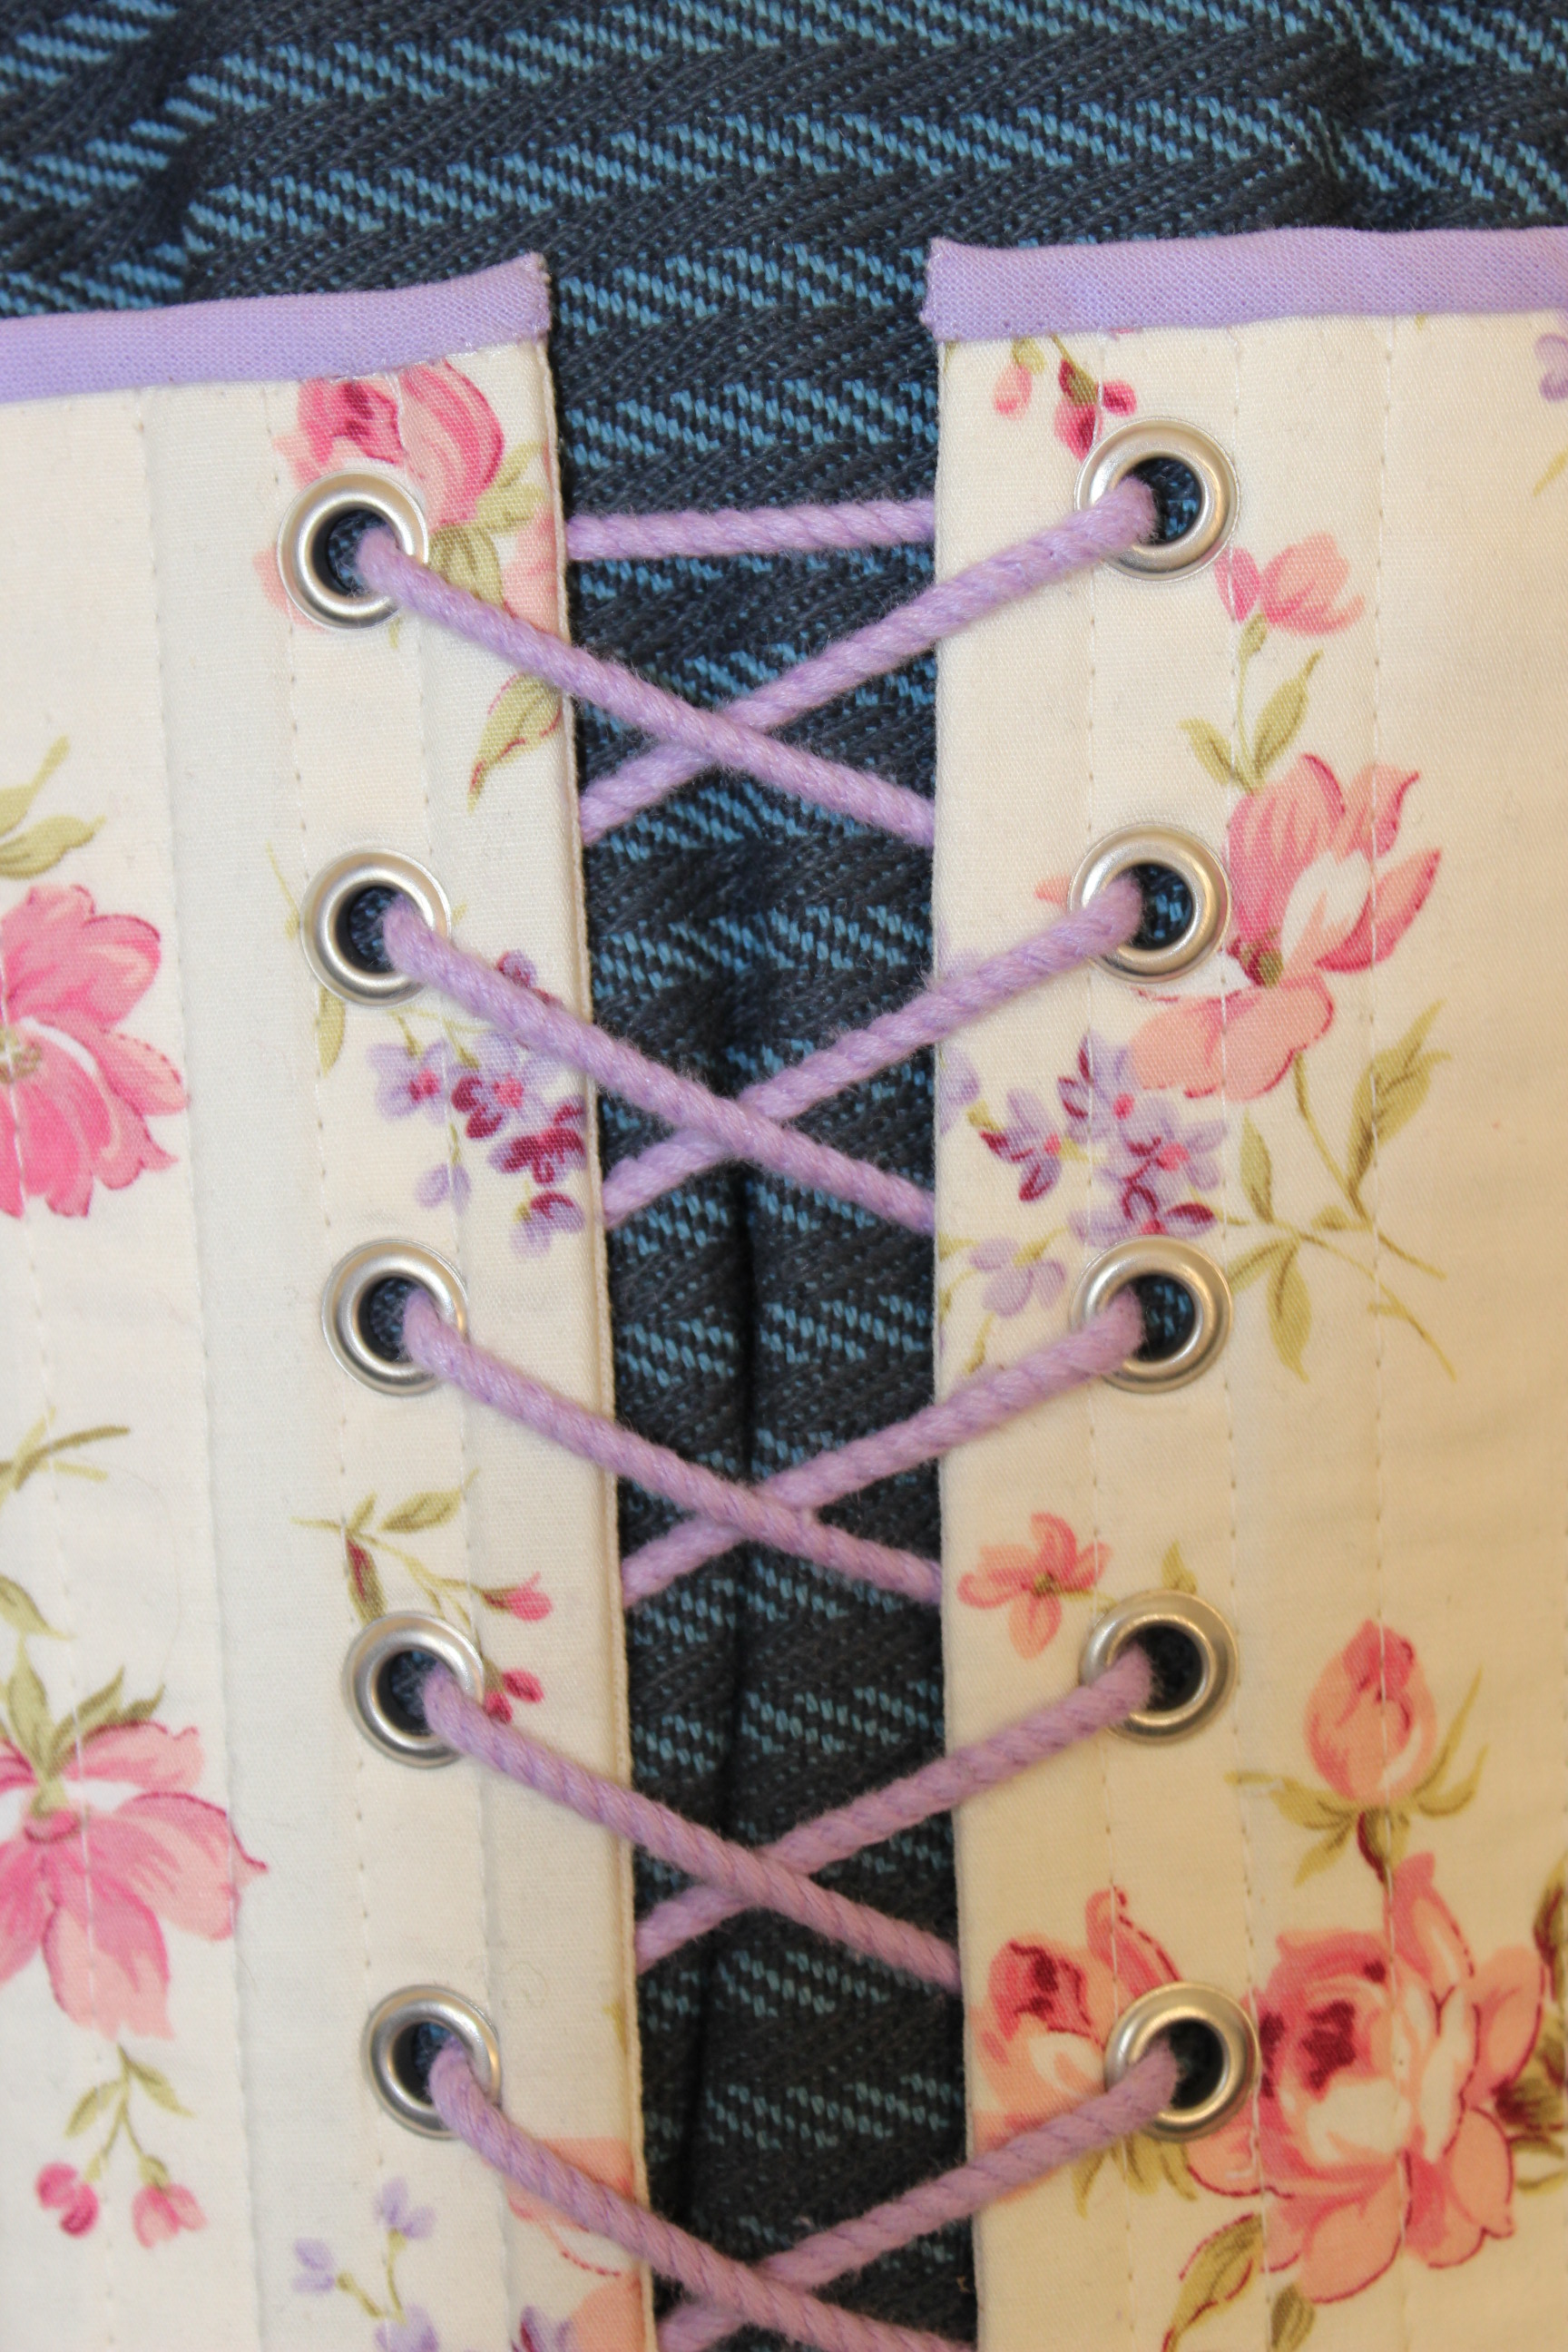
We trashed the old pattern, starting from skratch, and drew her a new one using Waugs “Corset and Crinolines” – 1790s corset pattern, and modified to fit my sister. I also took away the front lacing, and added tabs at the waist.
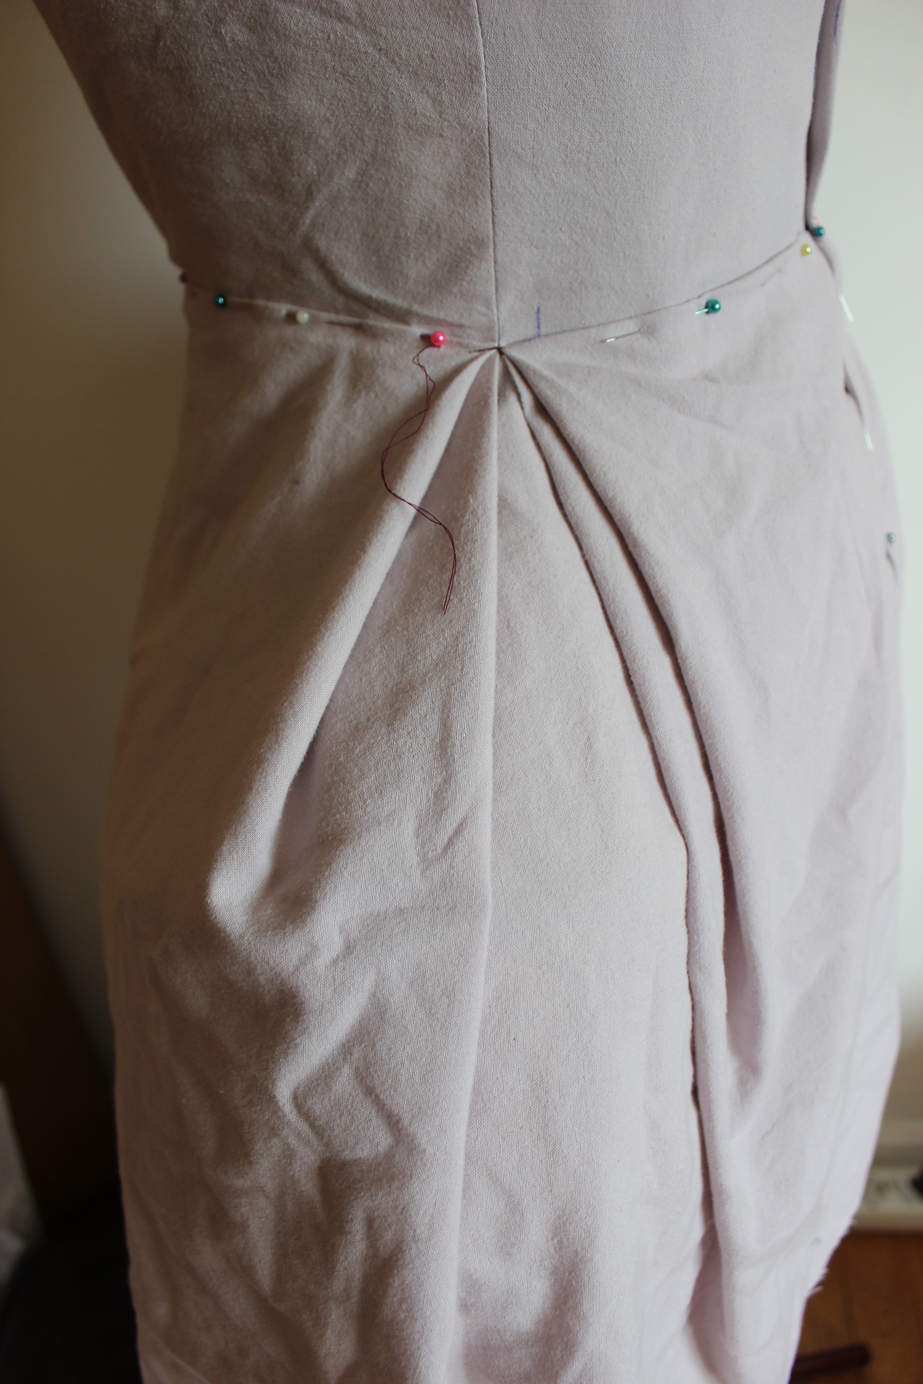
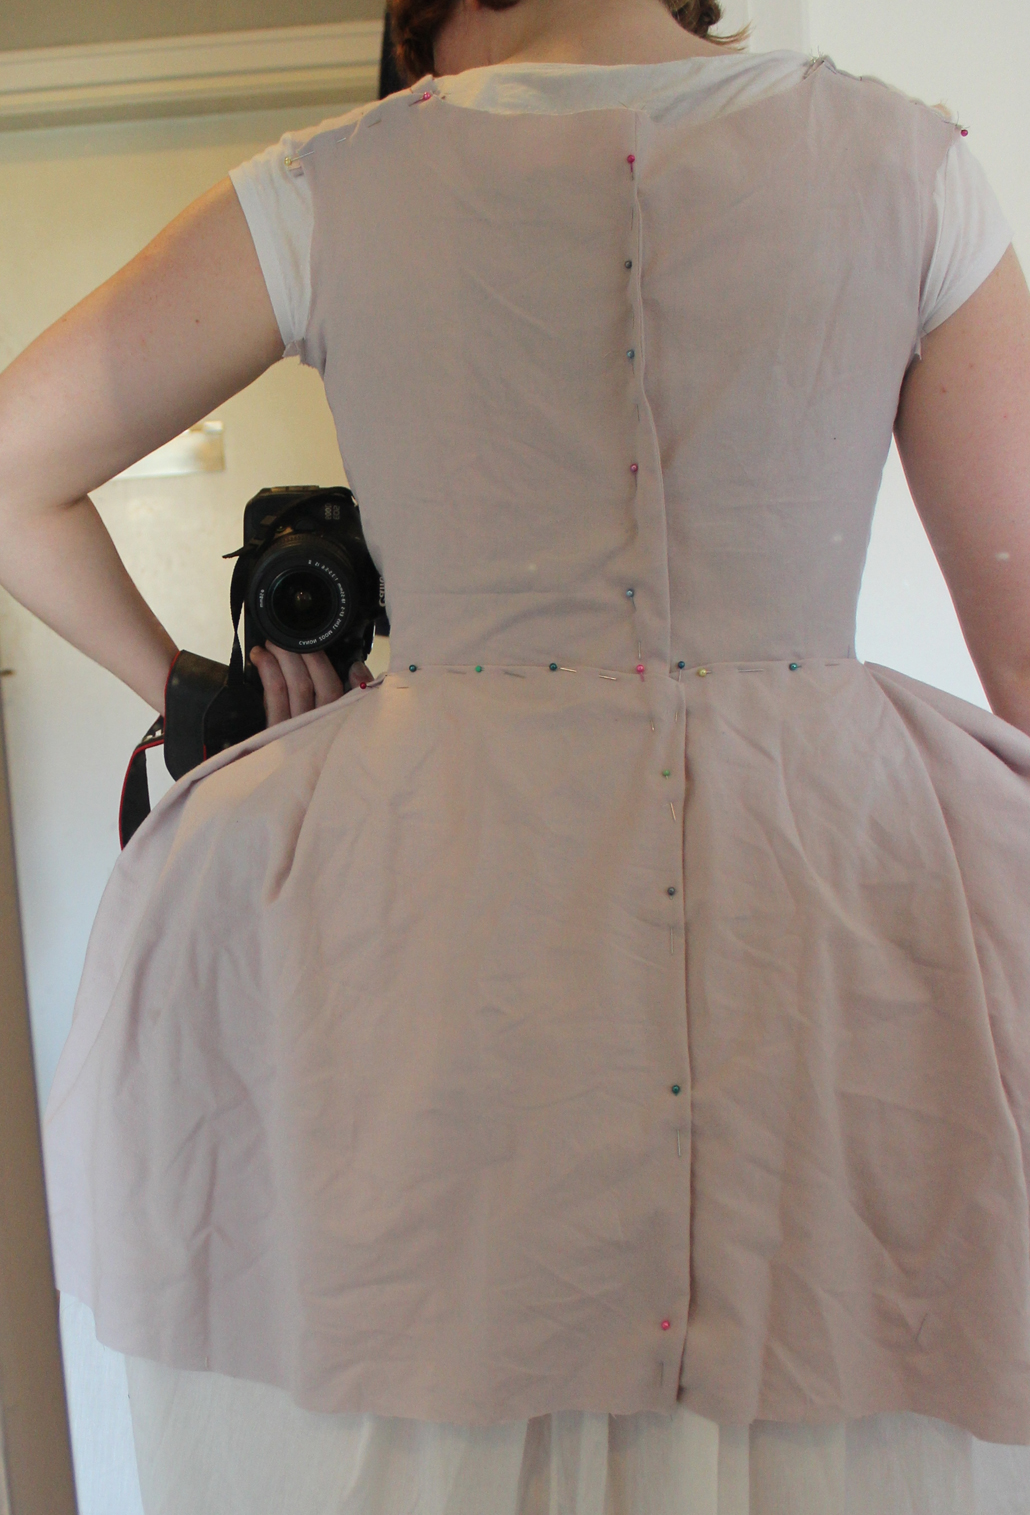
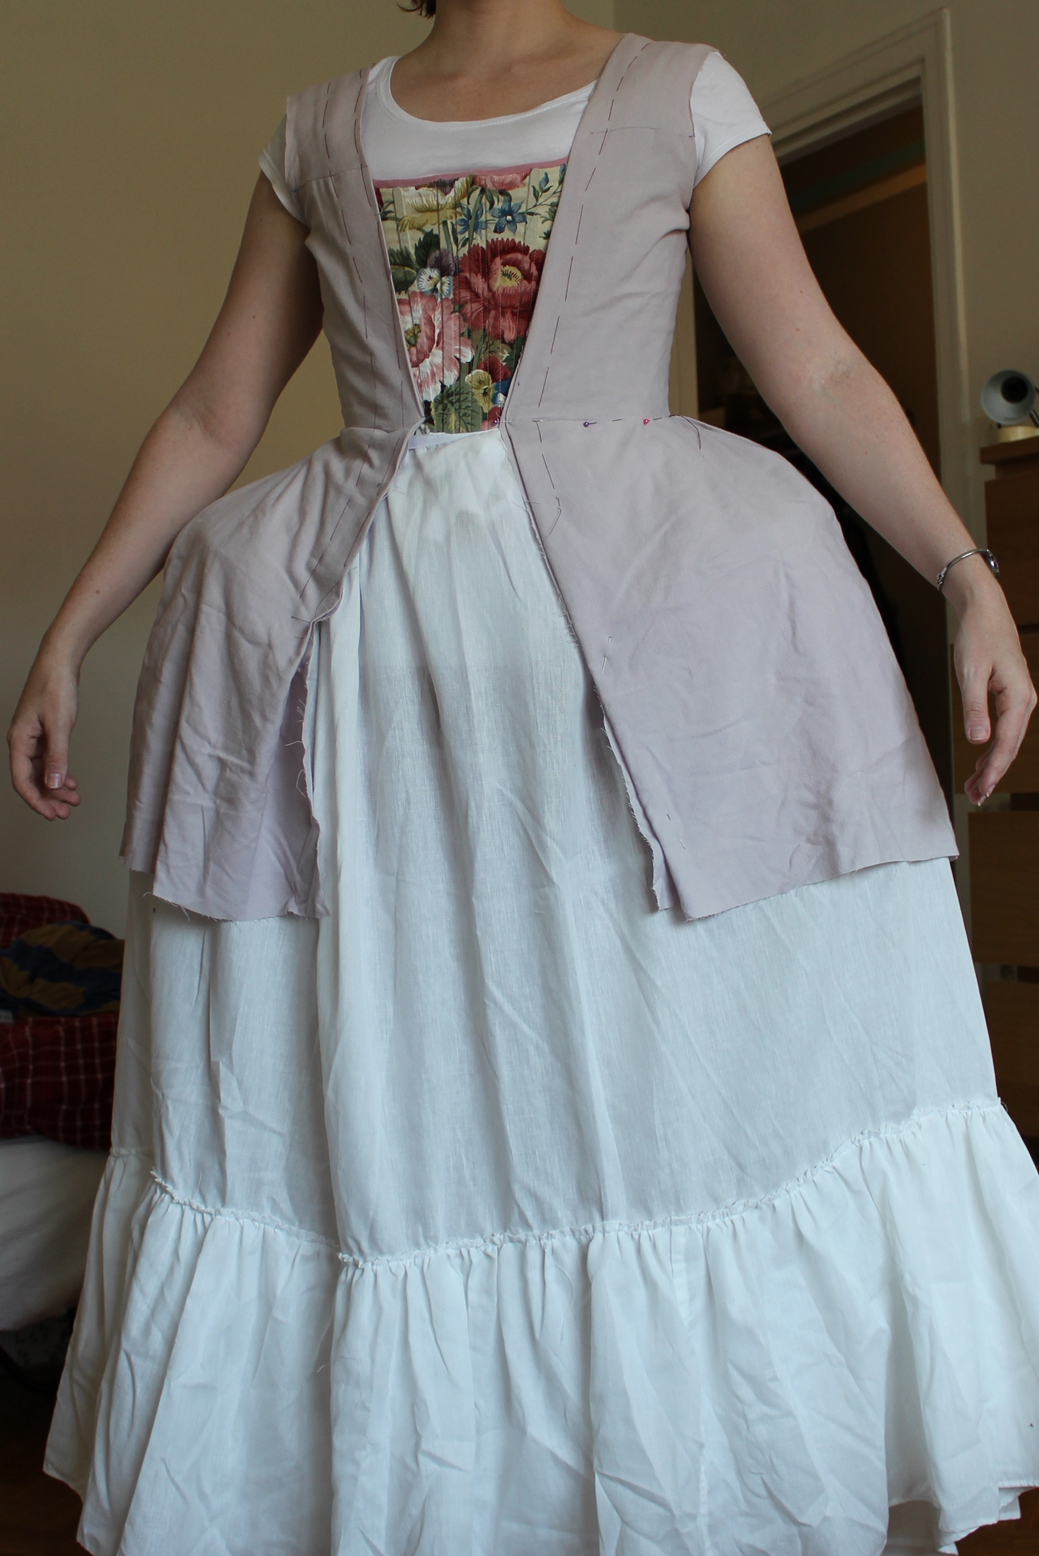
So I made a toile, fitted it and started on the corset itself. Since me and my sister lives in oposite sides of the country I didn’t have the chans to try it on her until it was finished.
Looking much better.
But it is still to smal!
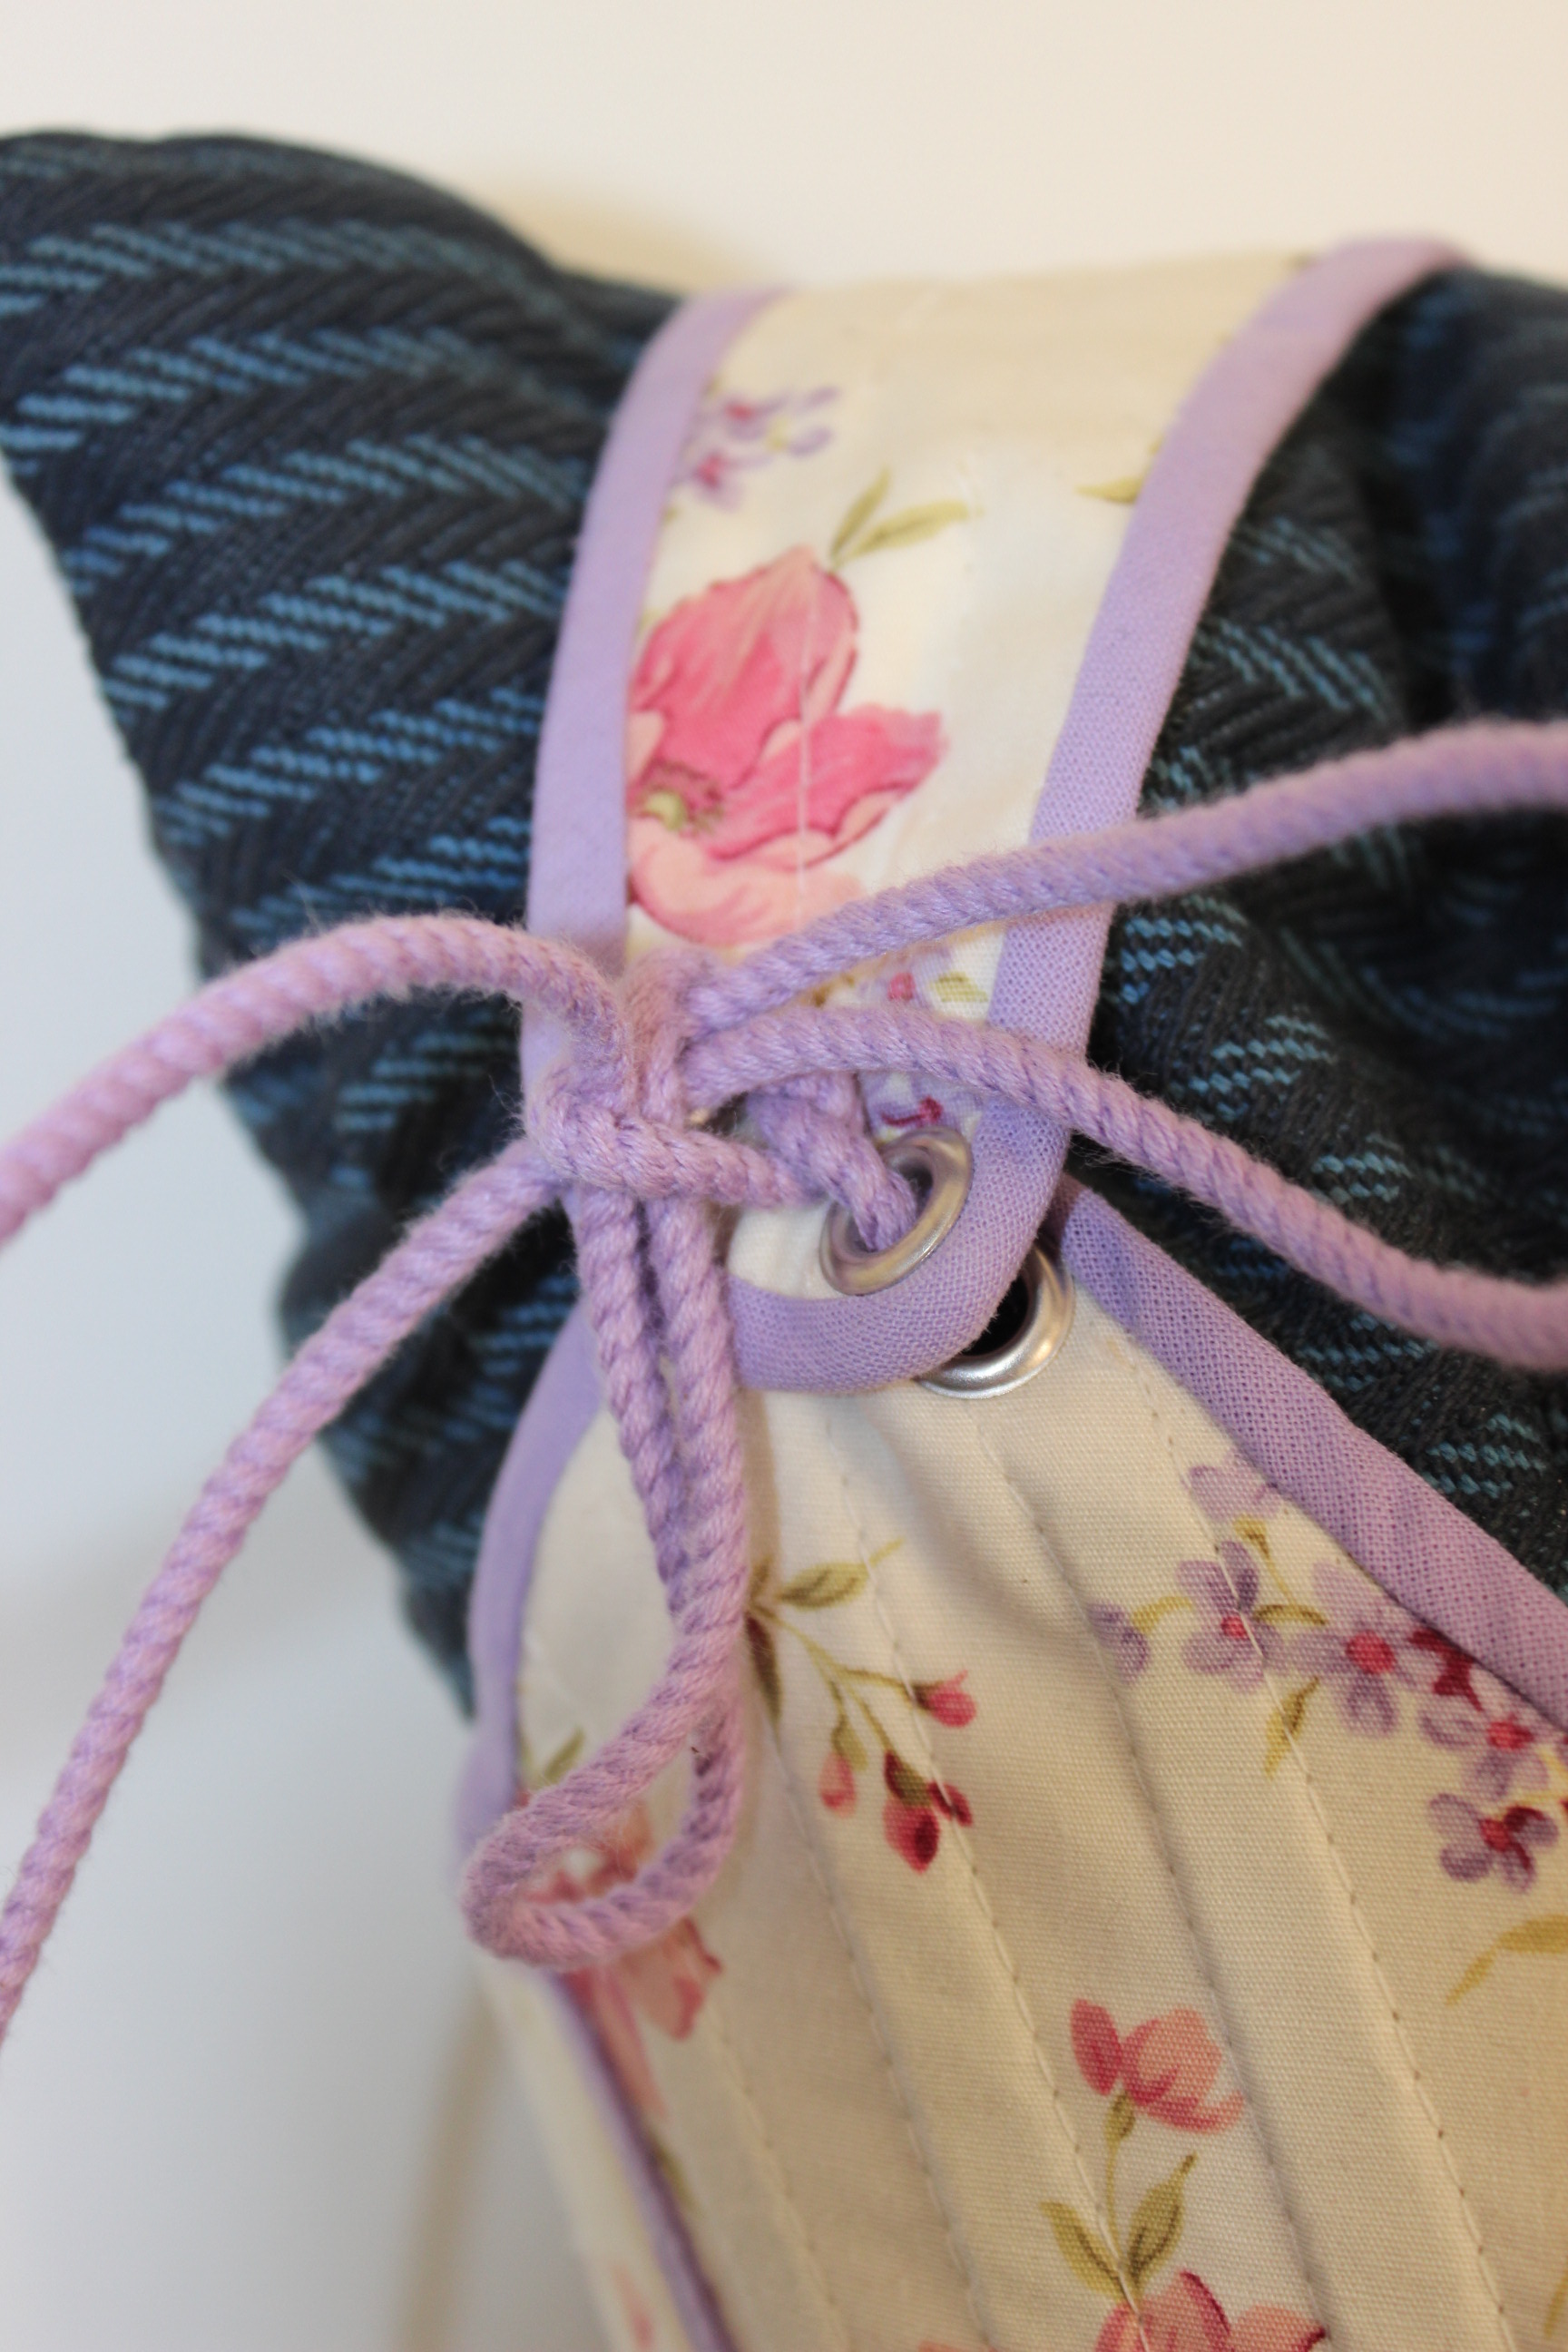
This time I fixed it by ripping it open and inserting some godgets at the back seams.

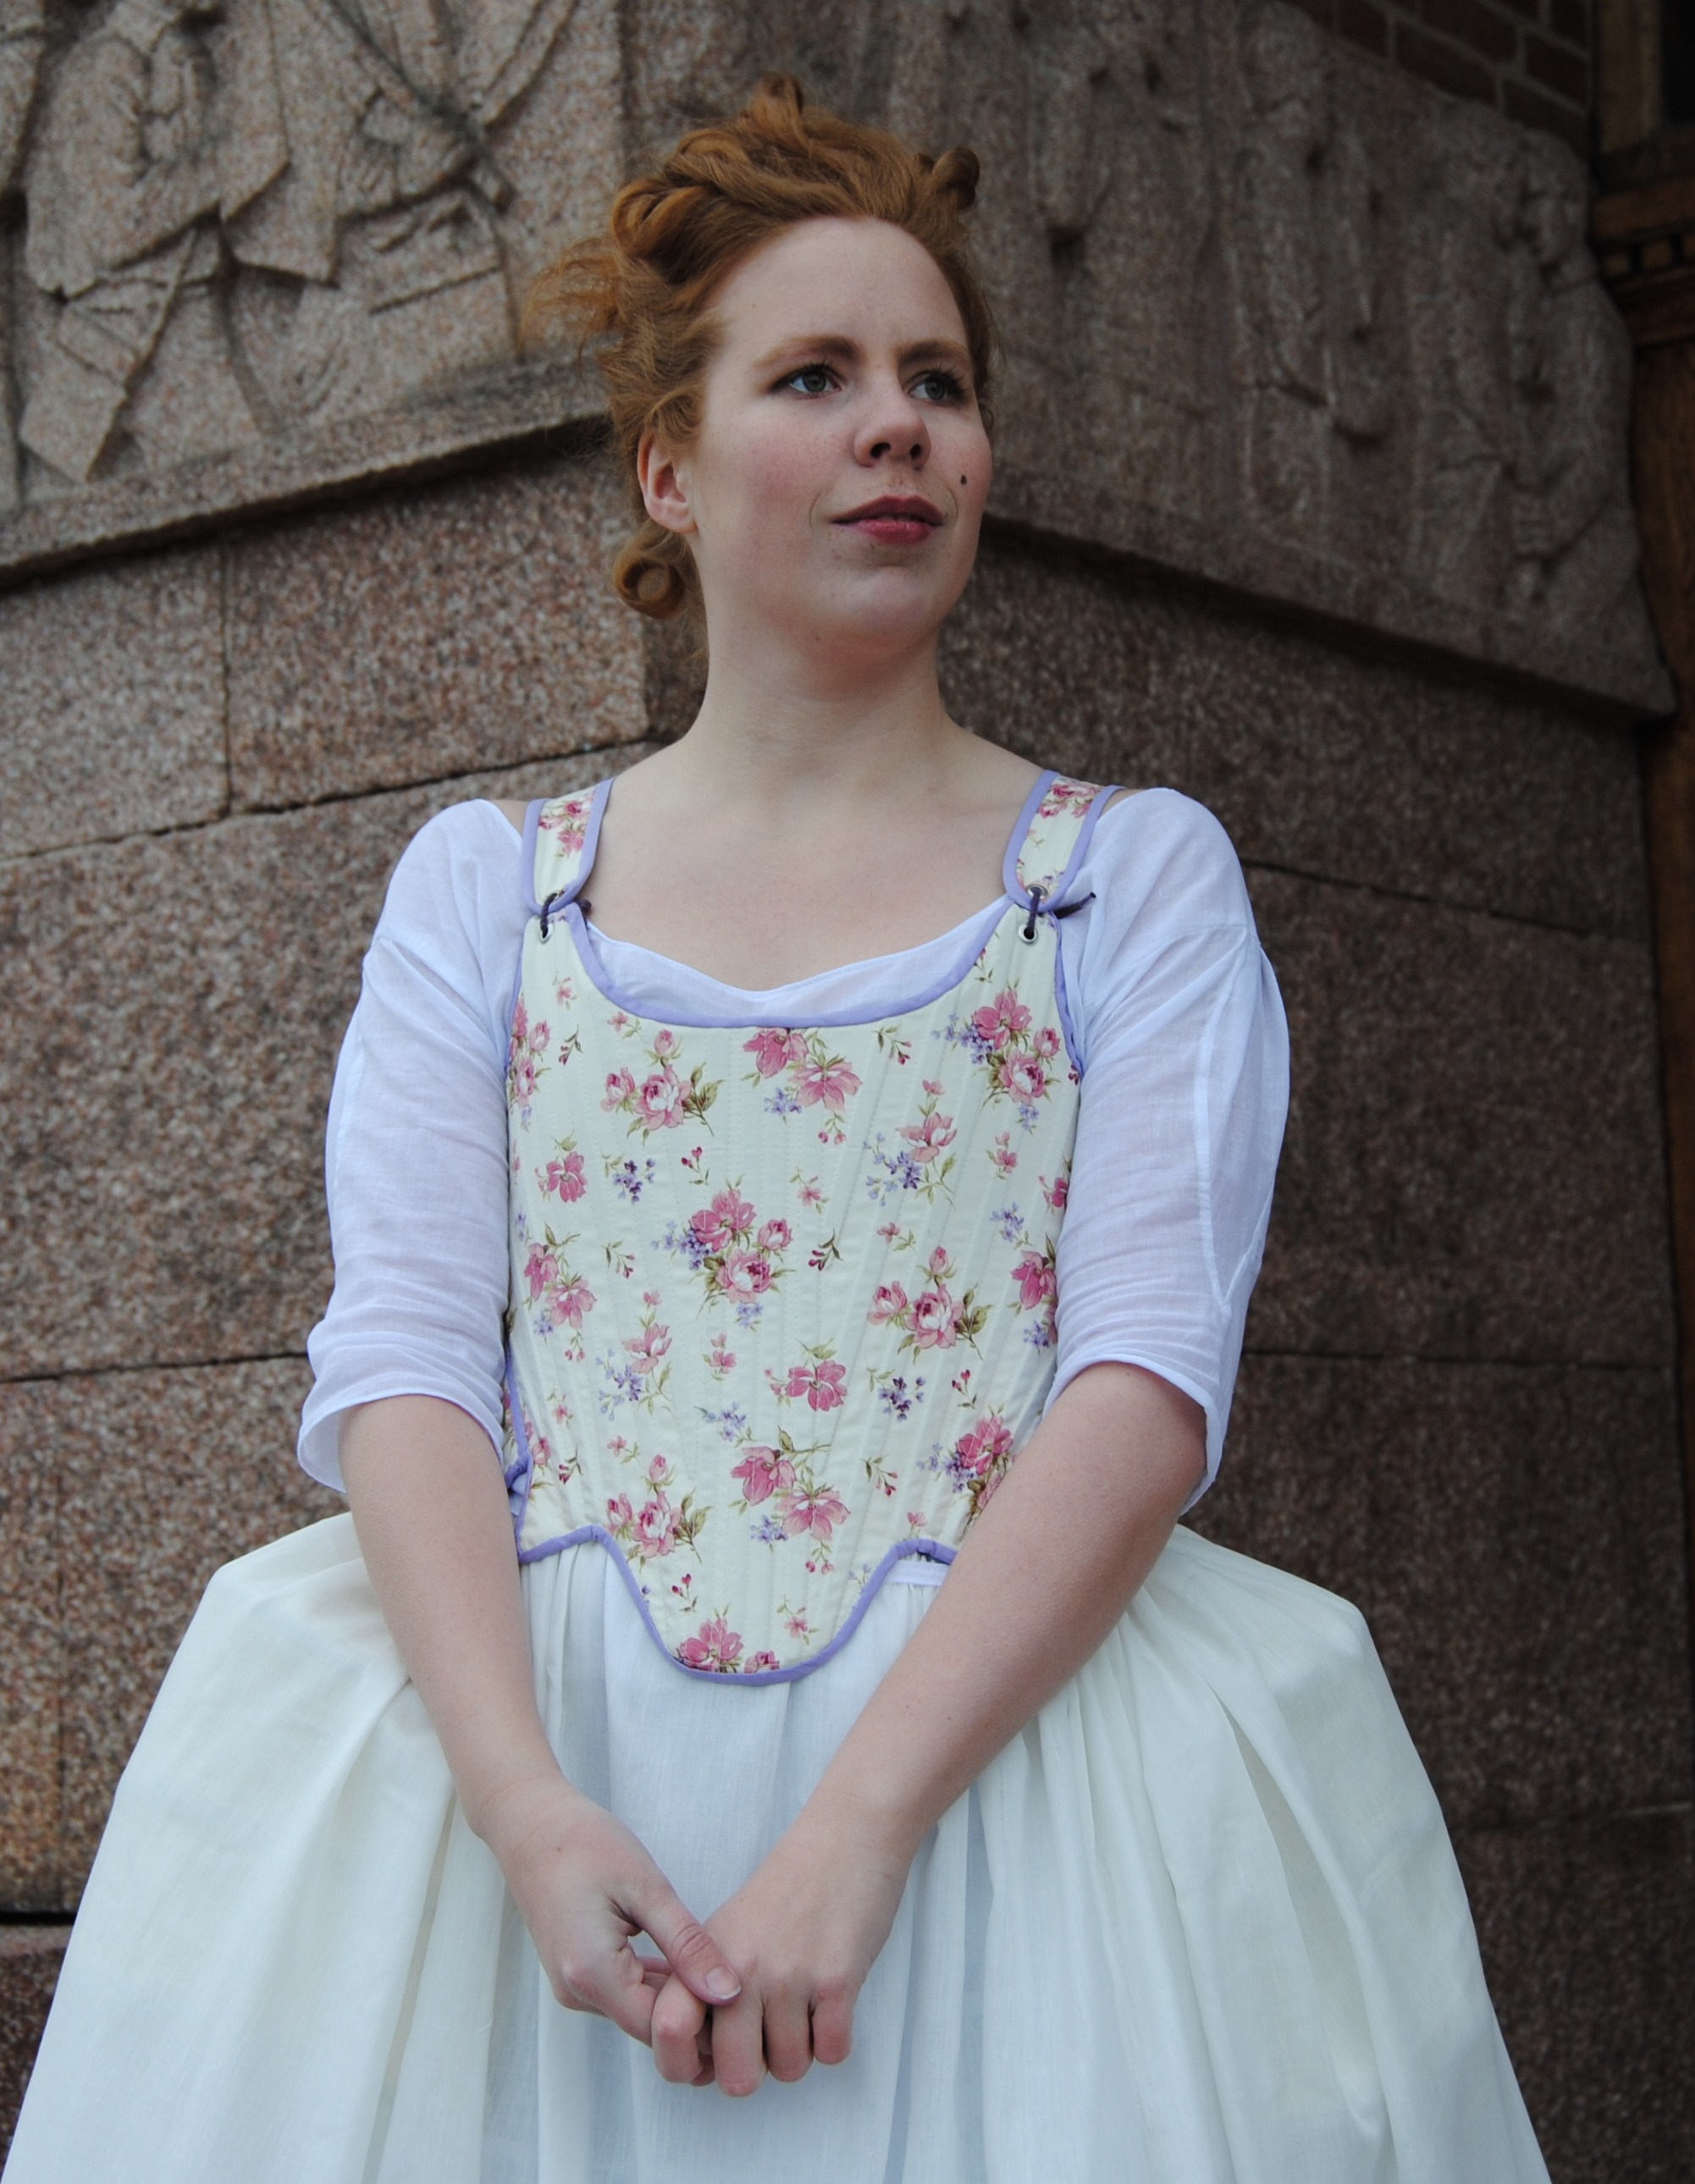
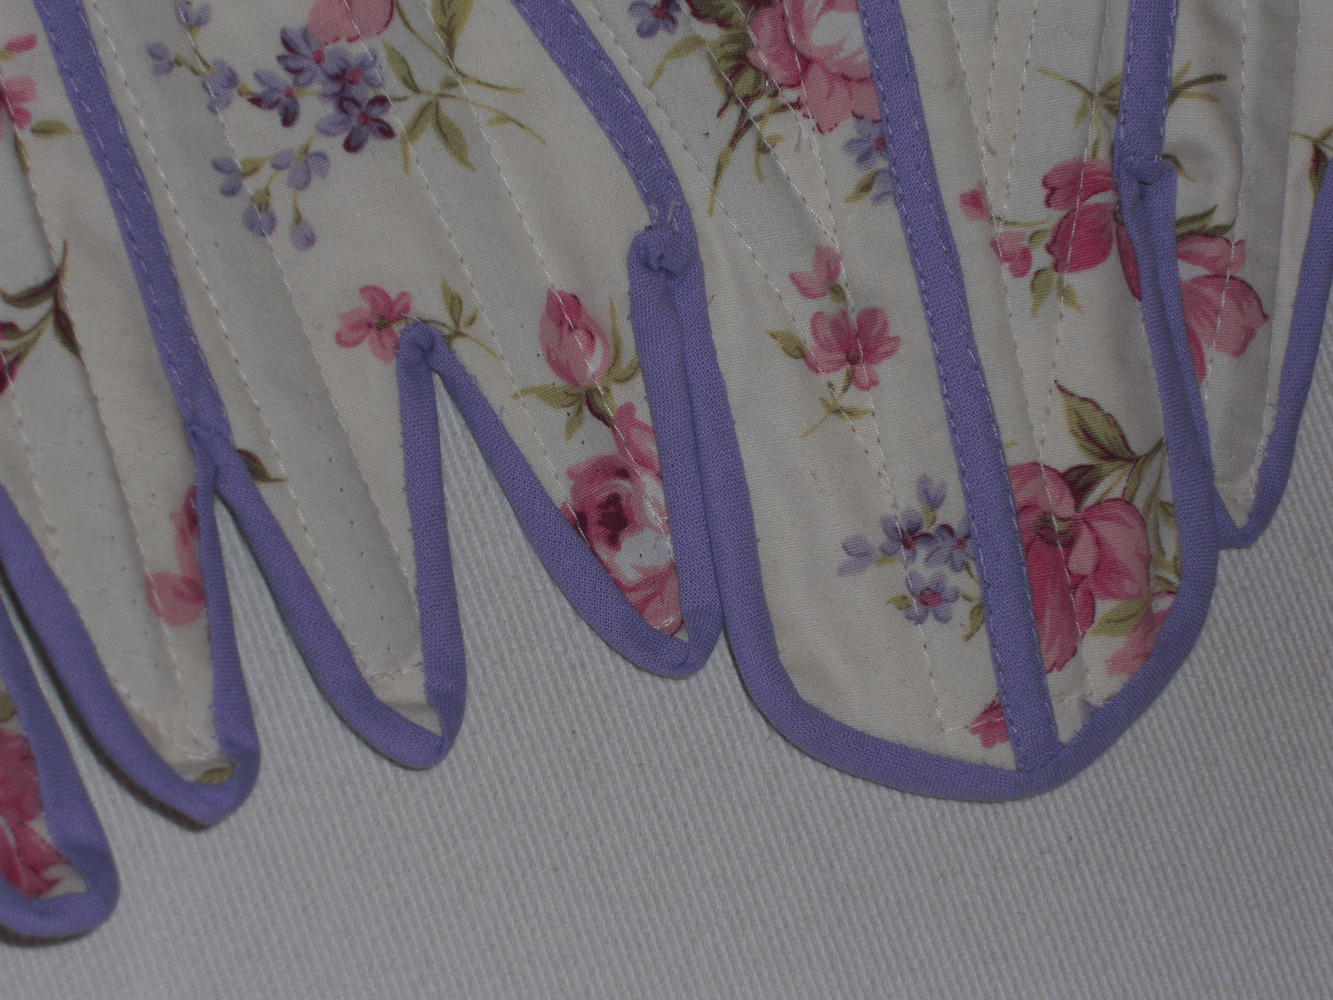
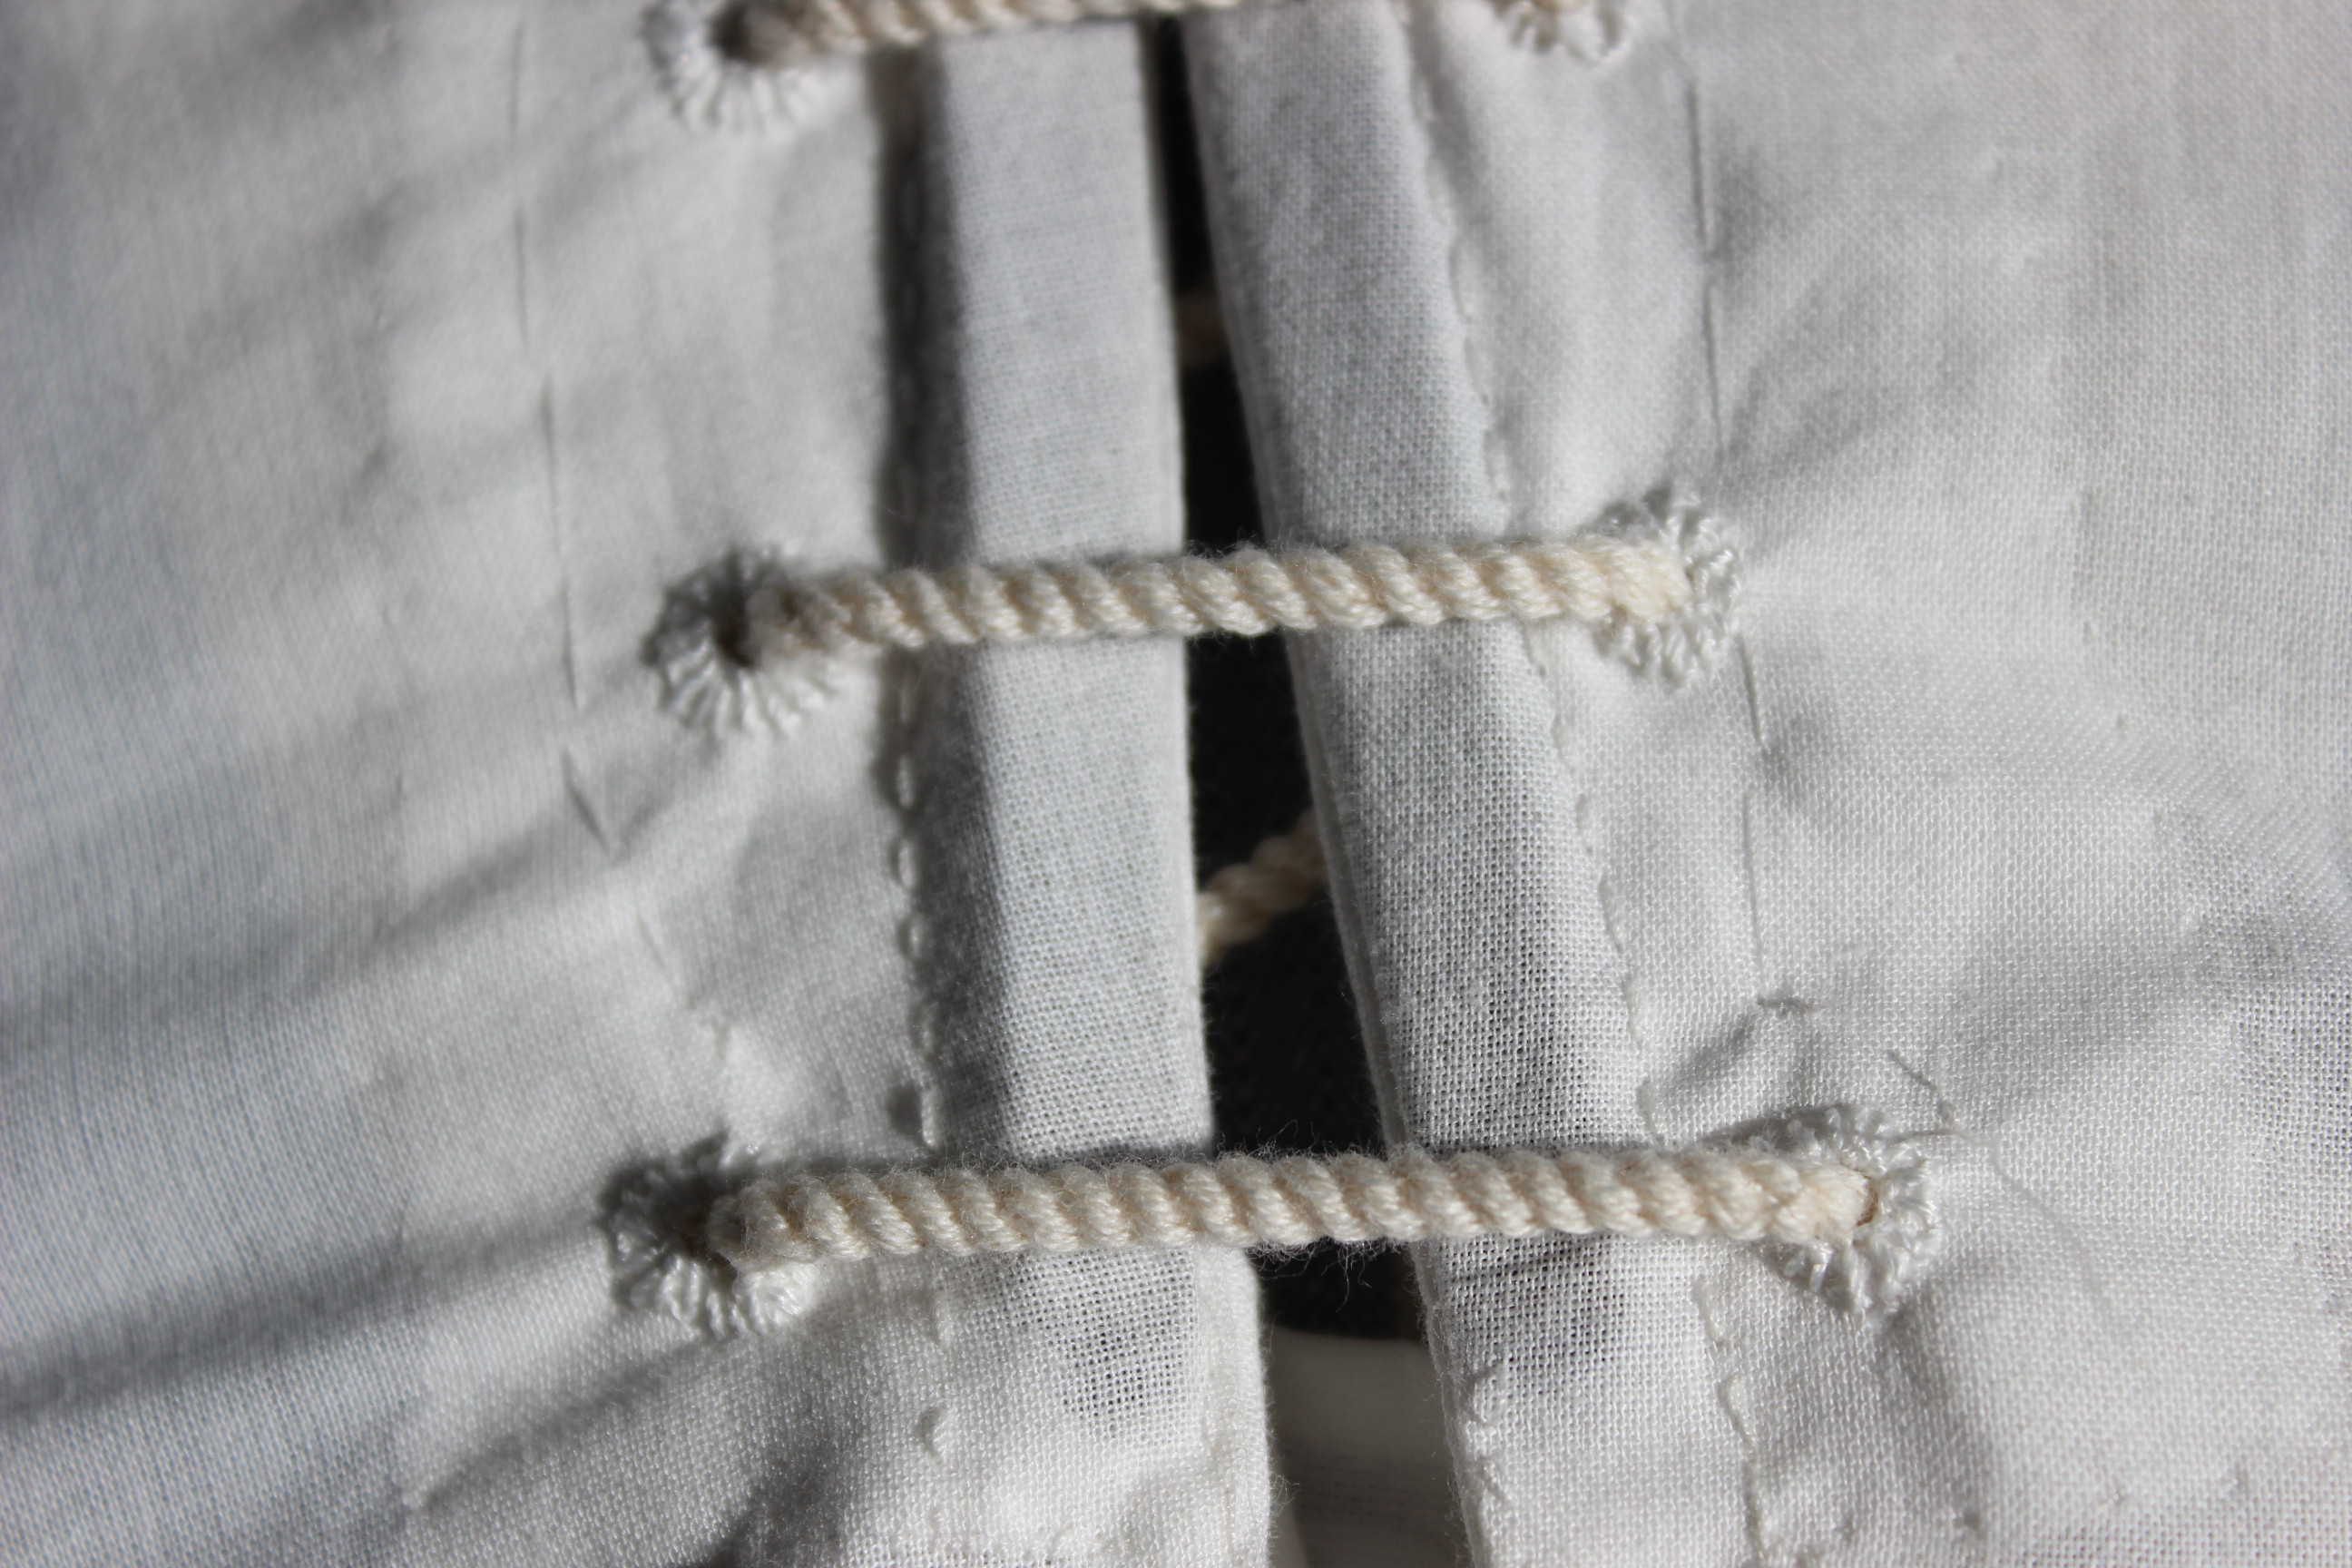
The finished corset.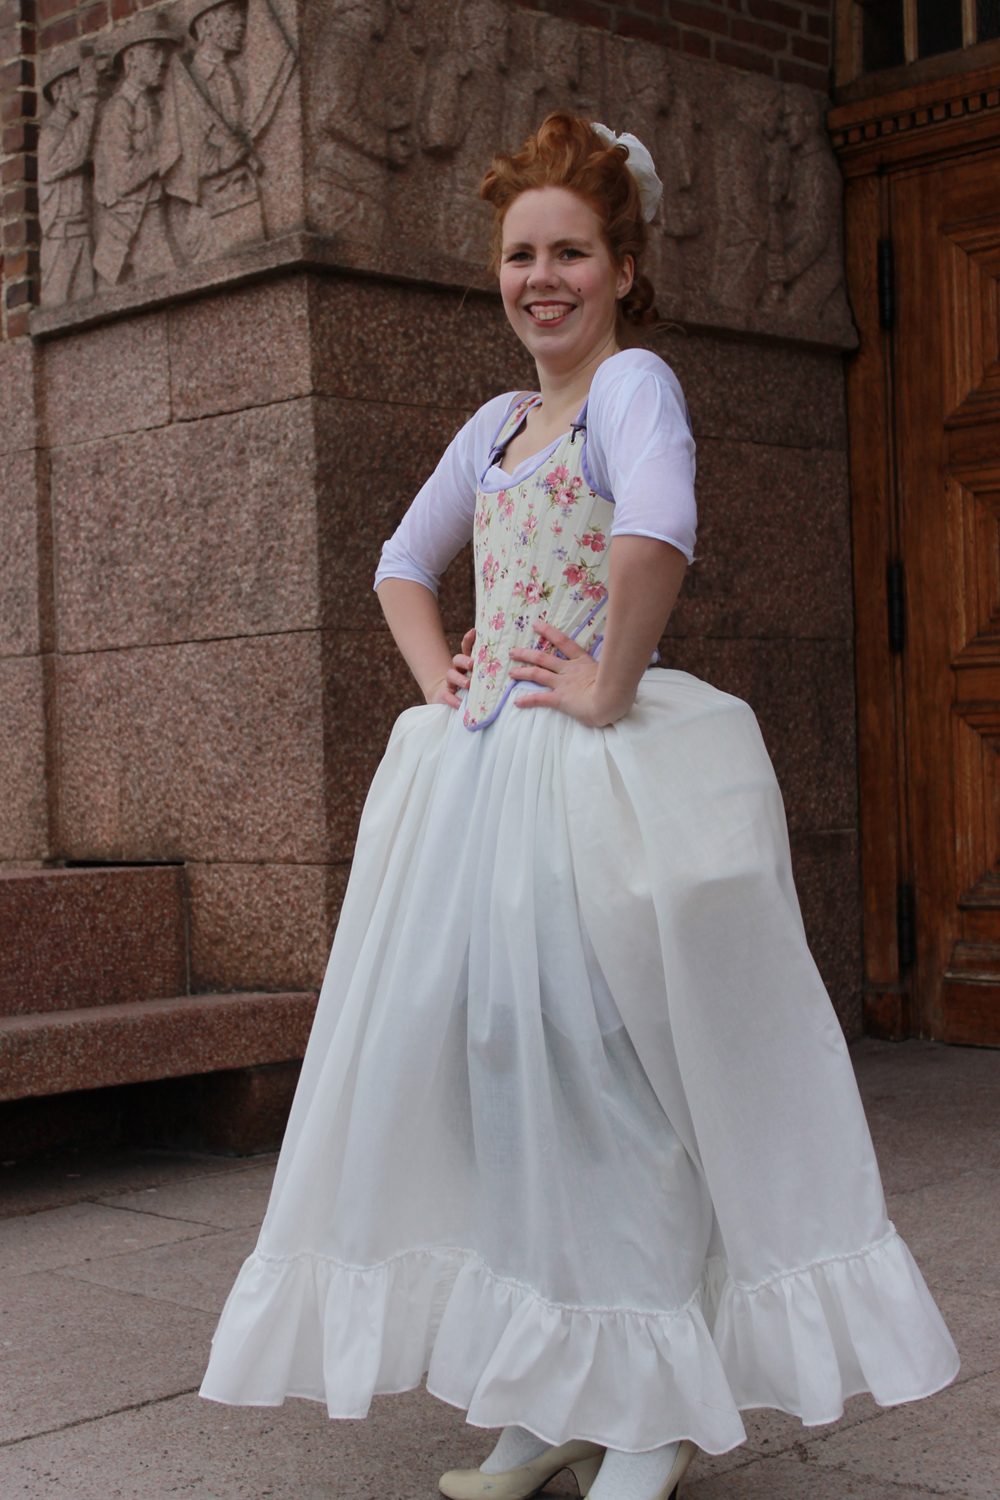


Just the facts:
Challenge: nr 2 – UFO
What: A 1740-1780s corset
Pattern: Jill Salen “Corsets – 1780s corset” re-worked.
Fabric: 0,5 m of cotton print and 1m of white cotton lawn.
Notions: gromets, thread, lacing cord, cable ties and purple bias tape.
How Historical Accurate: Not really. The decorative printed corsets didn’t exist until 200 years later, and the sewing and construction are all modern. It does however give her the desired body shape. So maybe 2/10.
Time: 25 hours.
Cost: 200 Sek
First worn: At the photoshoot in february 2013.
Since I was already running late with both the 16th and the 17th challenge for the HSF, I decided to wait to photograp the skirt, and instead do a combined photoshoot when both items was ready.
So this weekend me and my sister went for a walk, and shoot some pictures at a couple of beautifully historical location close to my home.
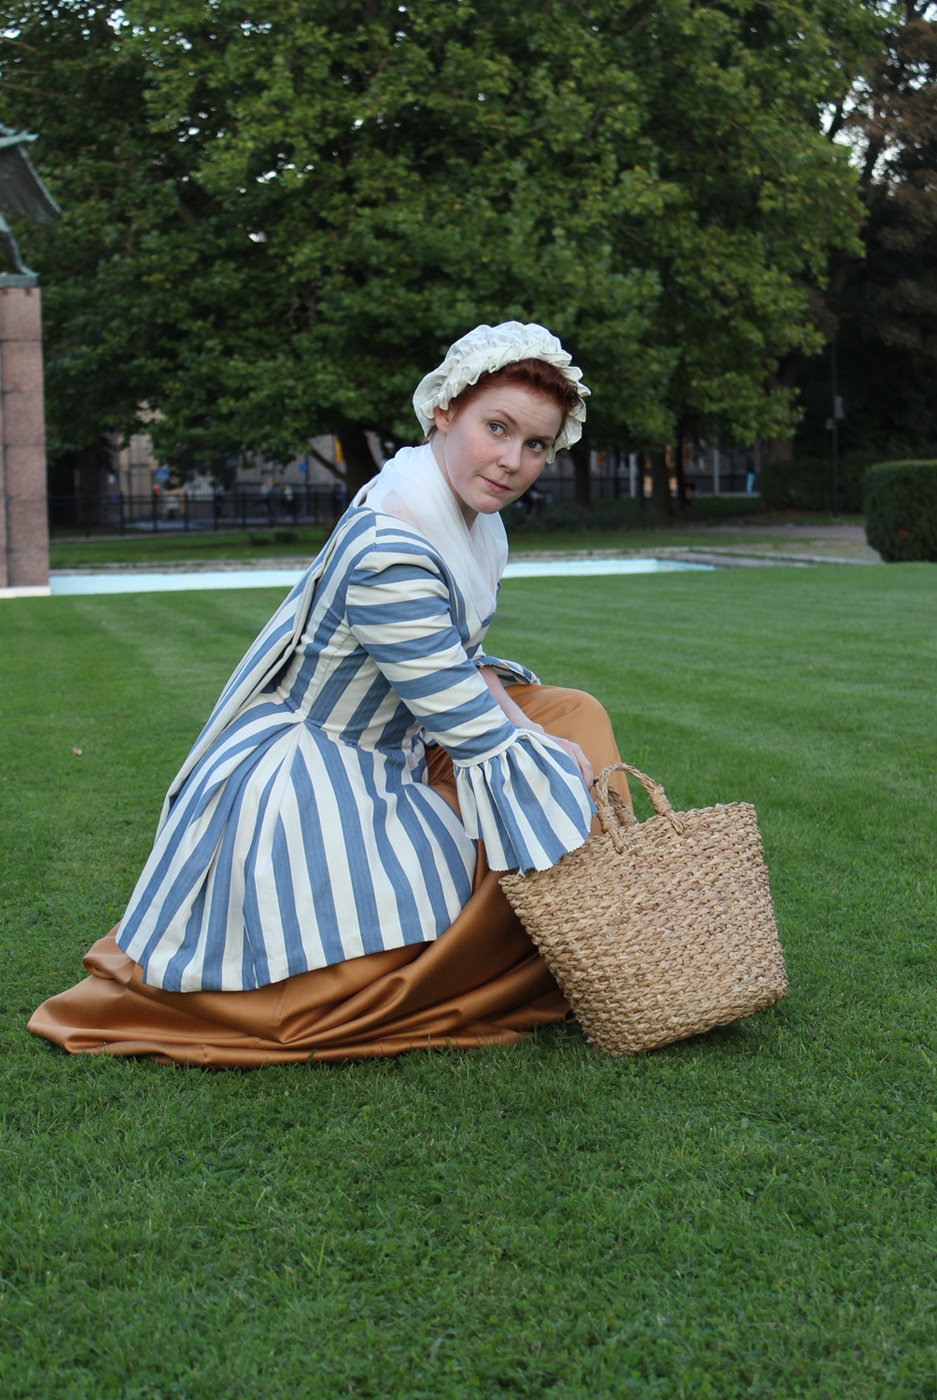
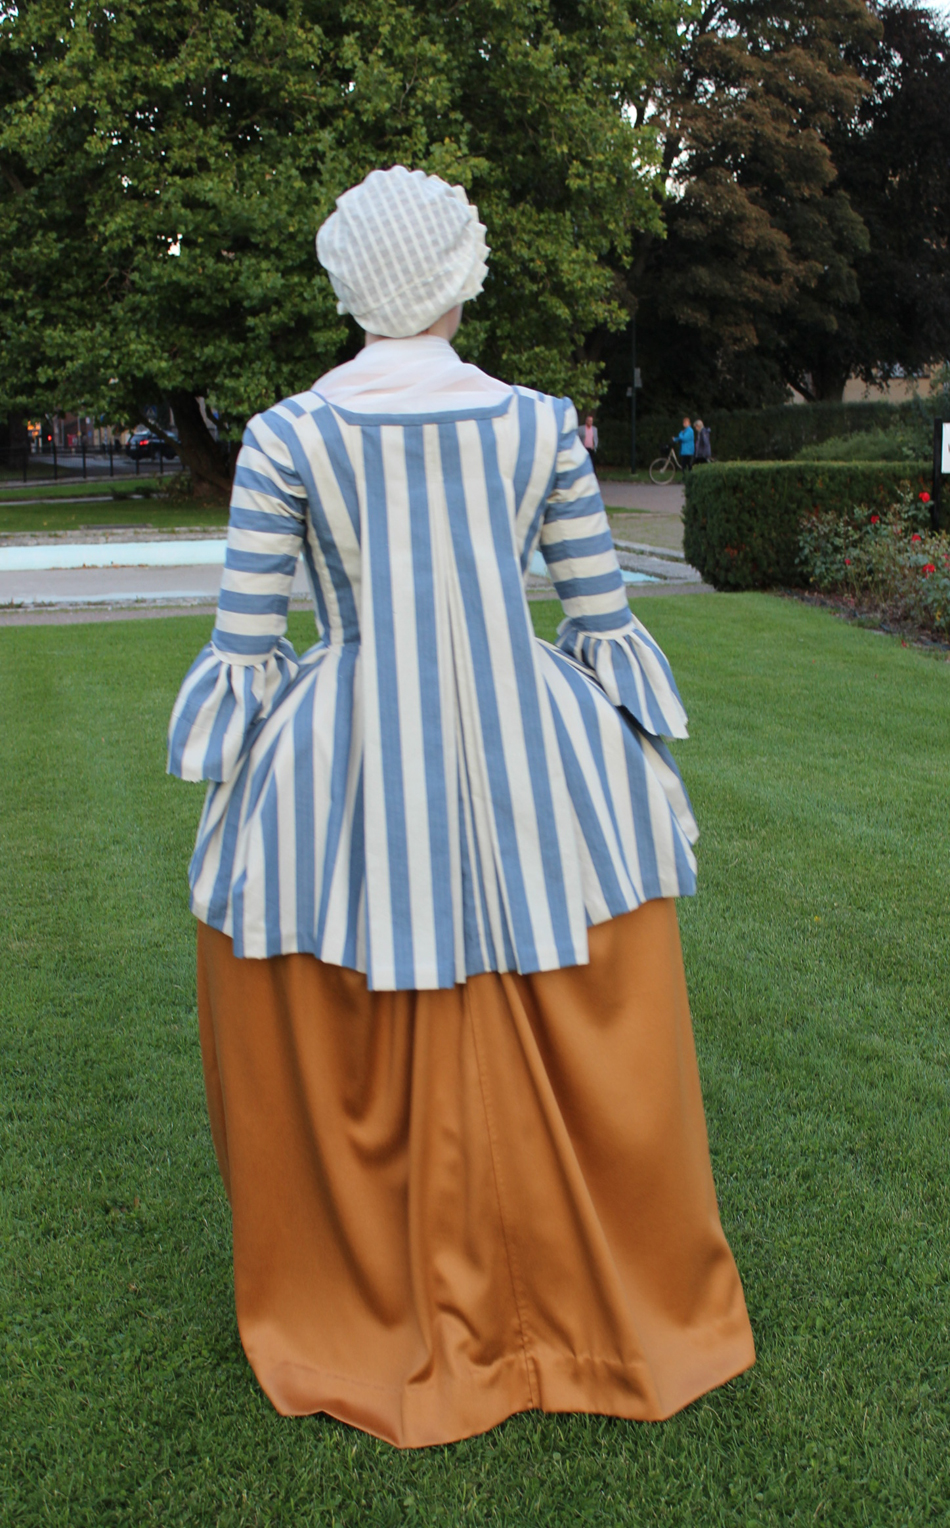
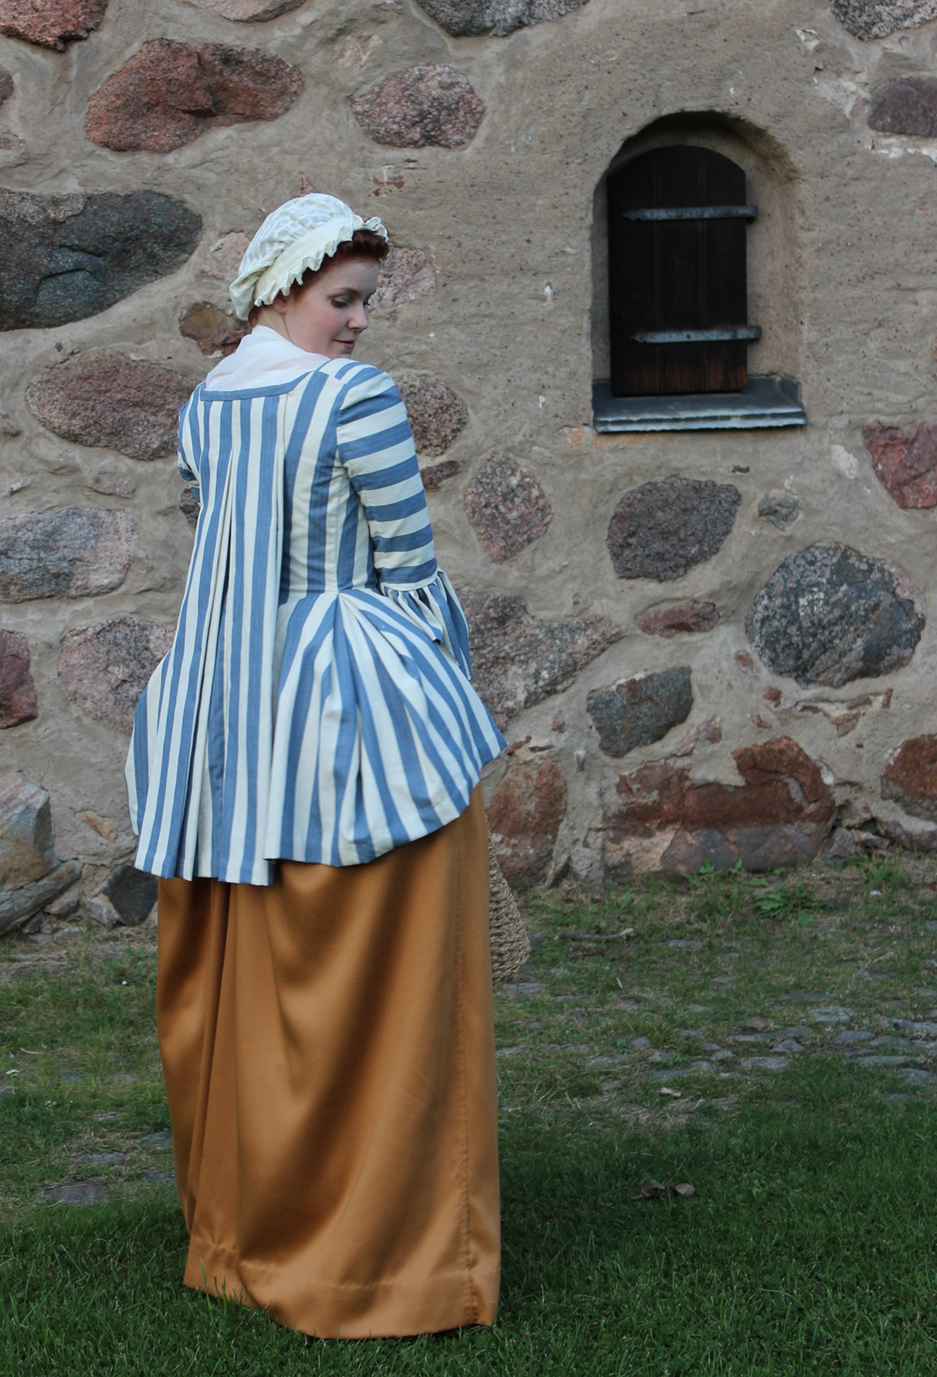
The only truble was the swedish fast fading autumn light. For this photoshoot I wanted to show the versatility of the garmnents, and styled the jacket and skirt in two different ways, using only accessories.
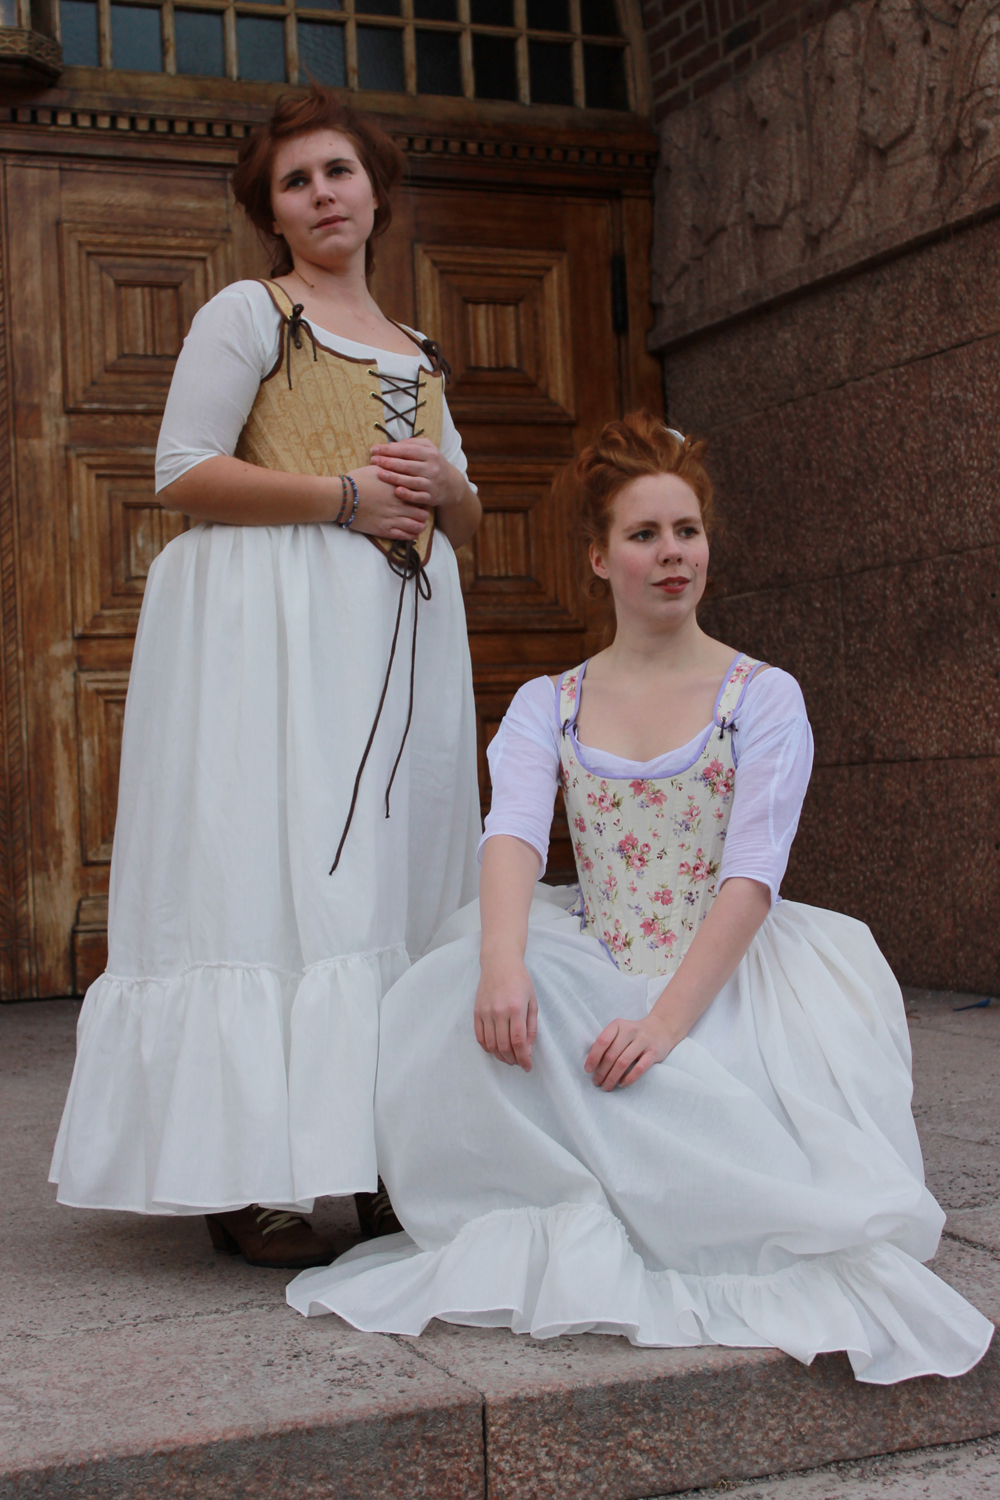
The towns woman: 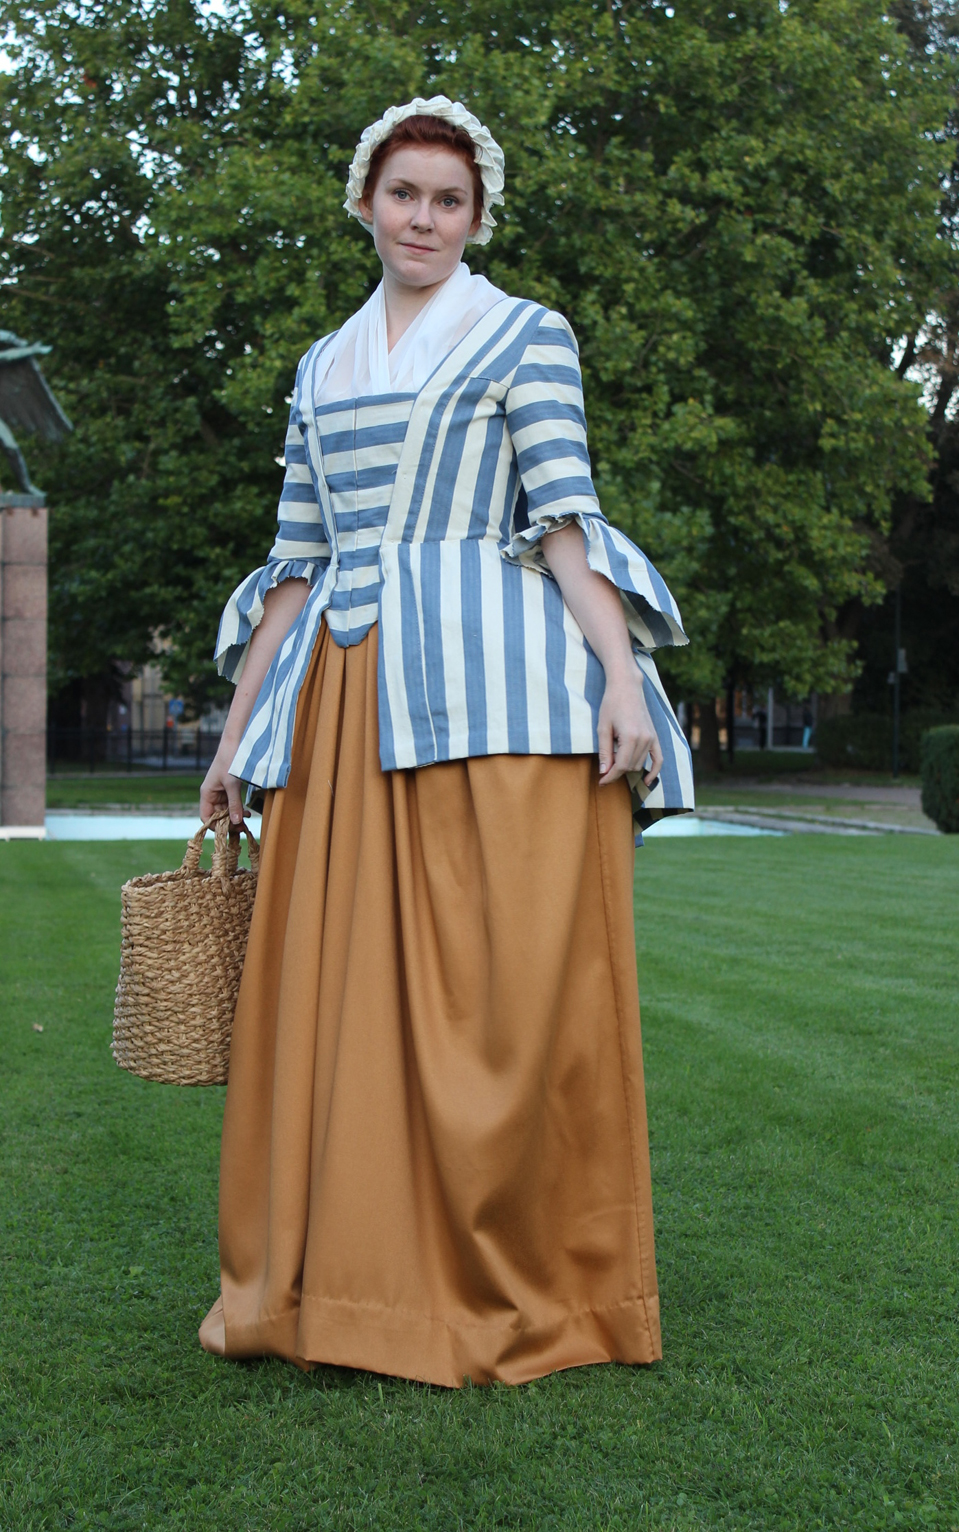


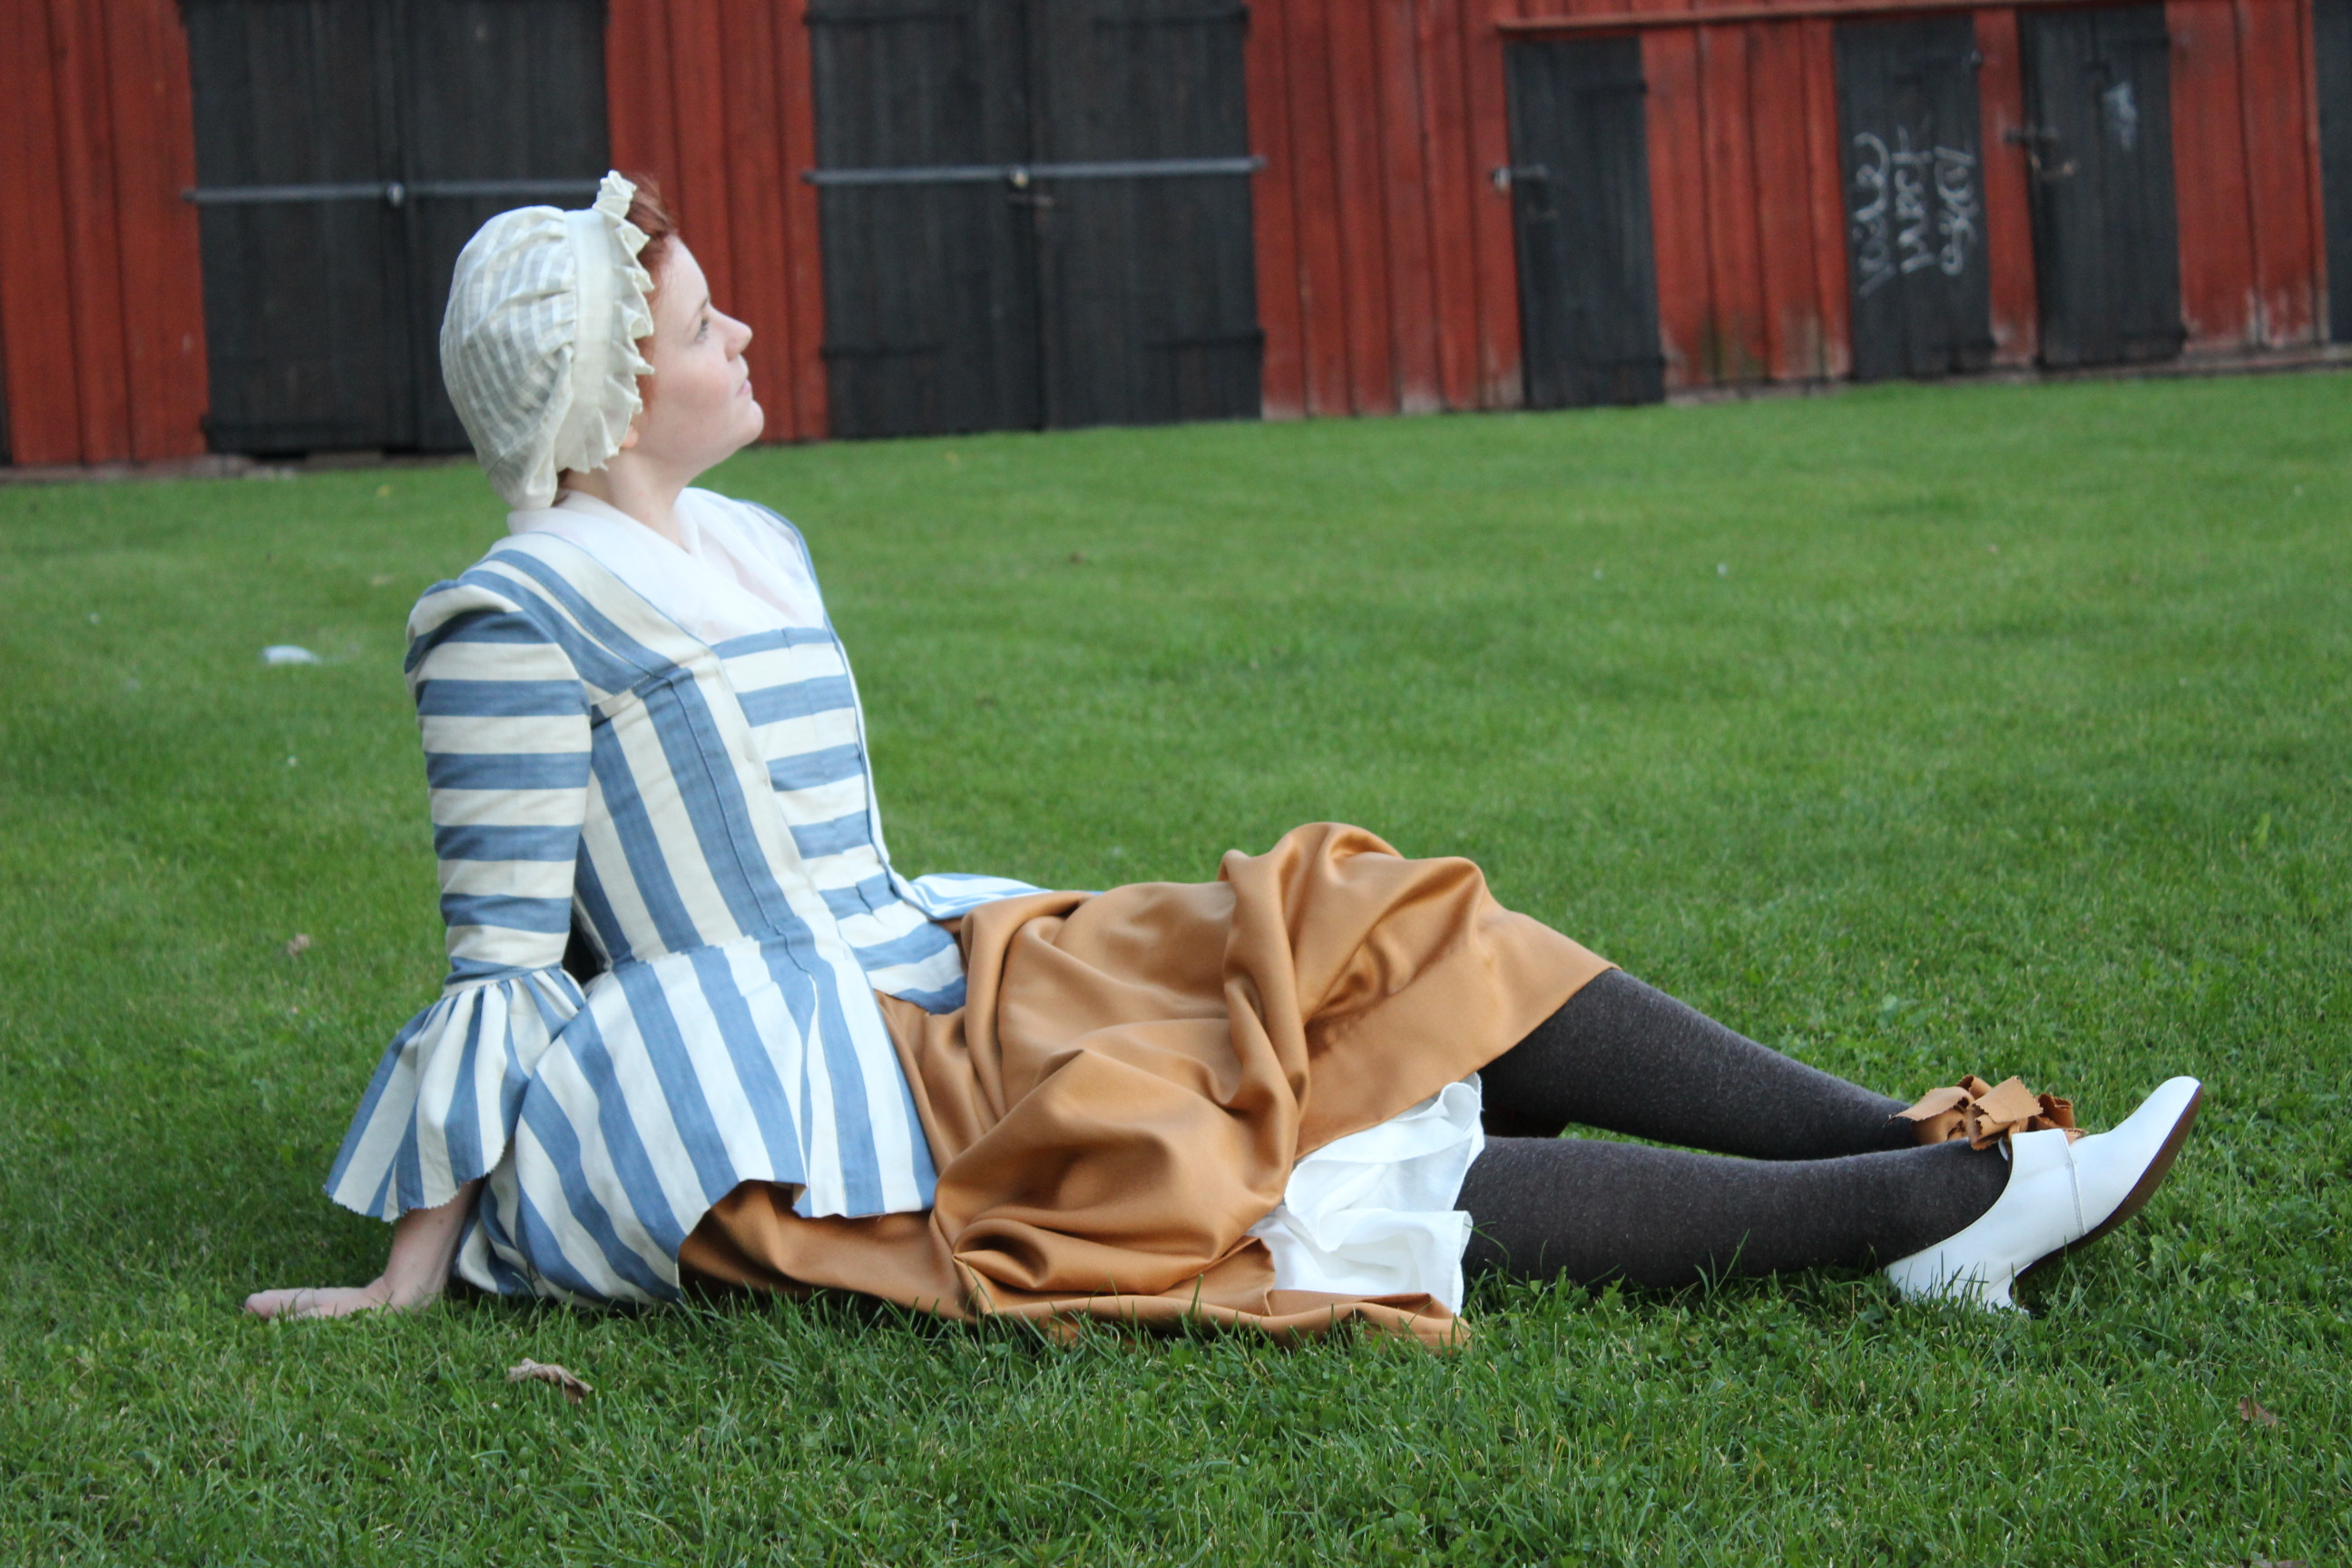

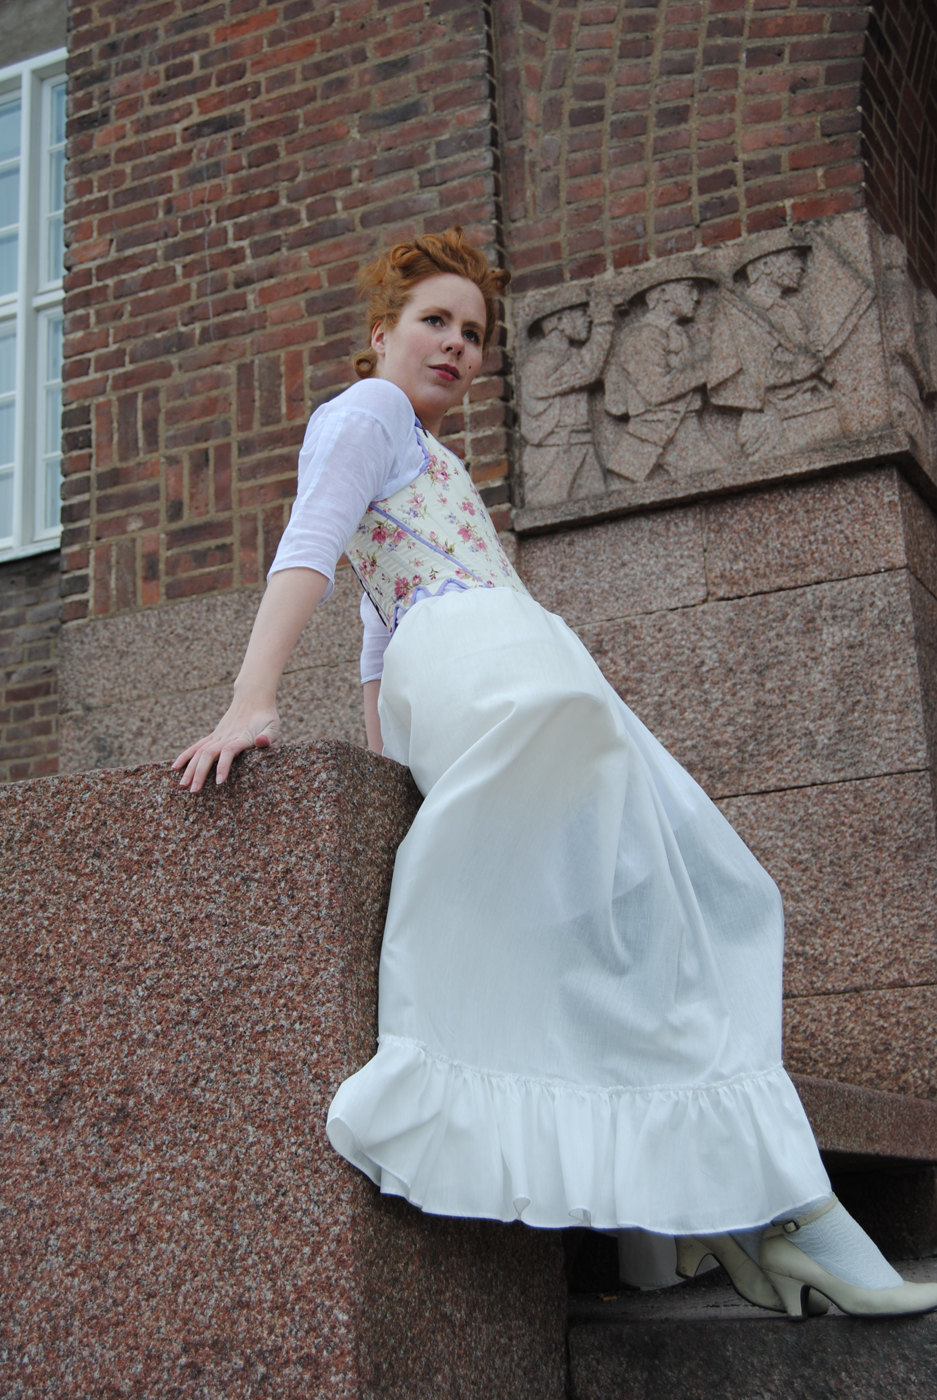
The court lady:


 Foto: Maria Petersson
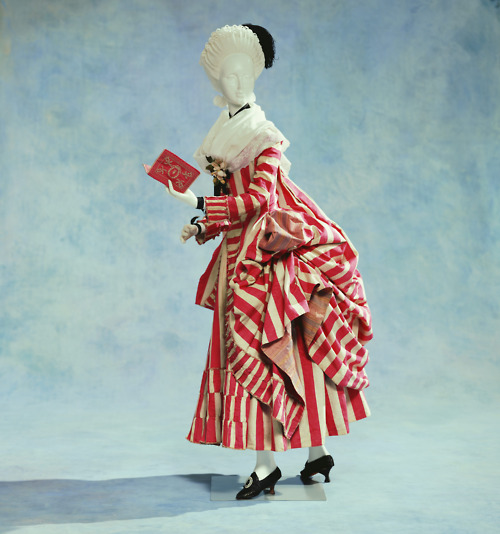
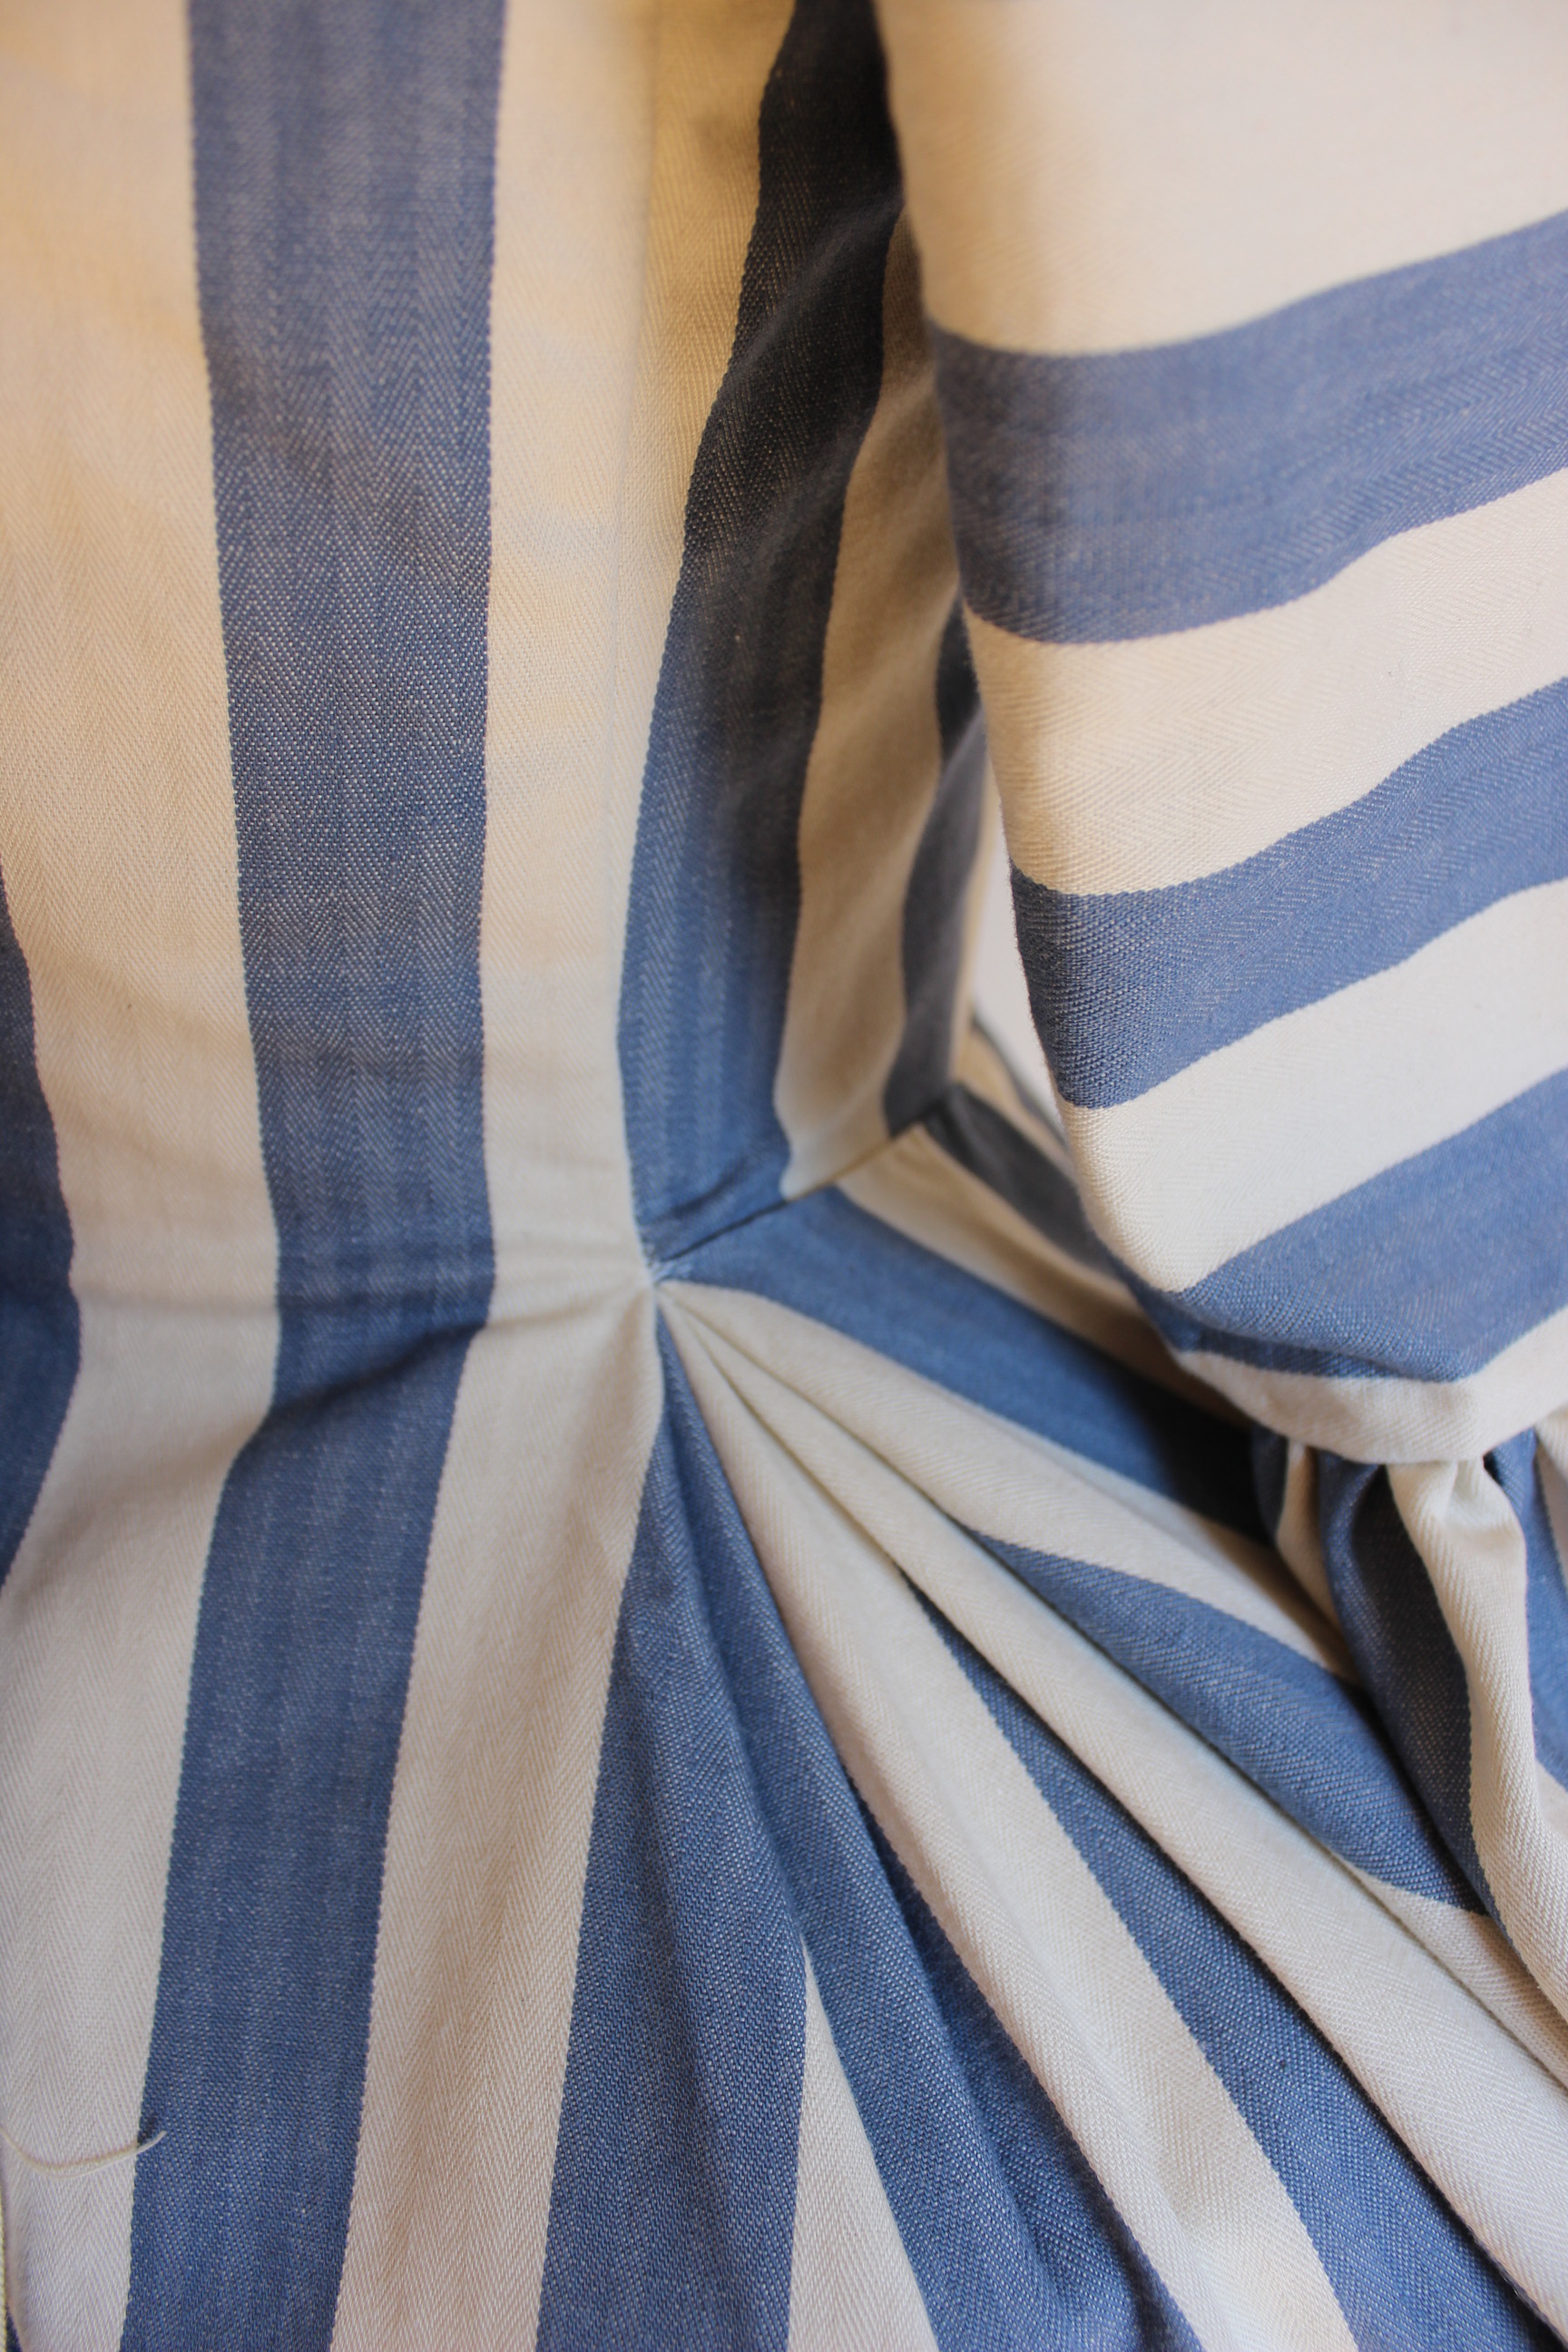
I bought this blue and white striped cotton for 15 Sek/m a while back, and since it was the last 2,5m on the bolt I decided it would make a perfect 18th or 19th century jacket.
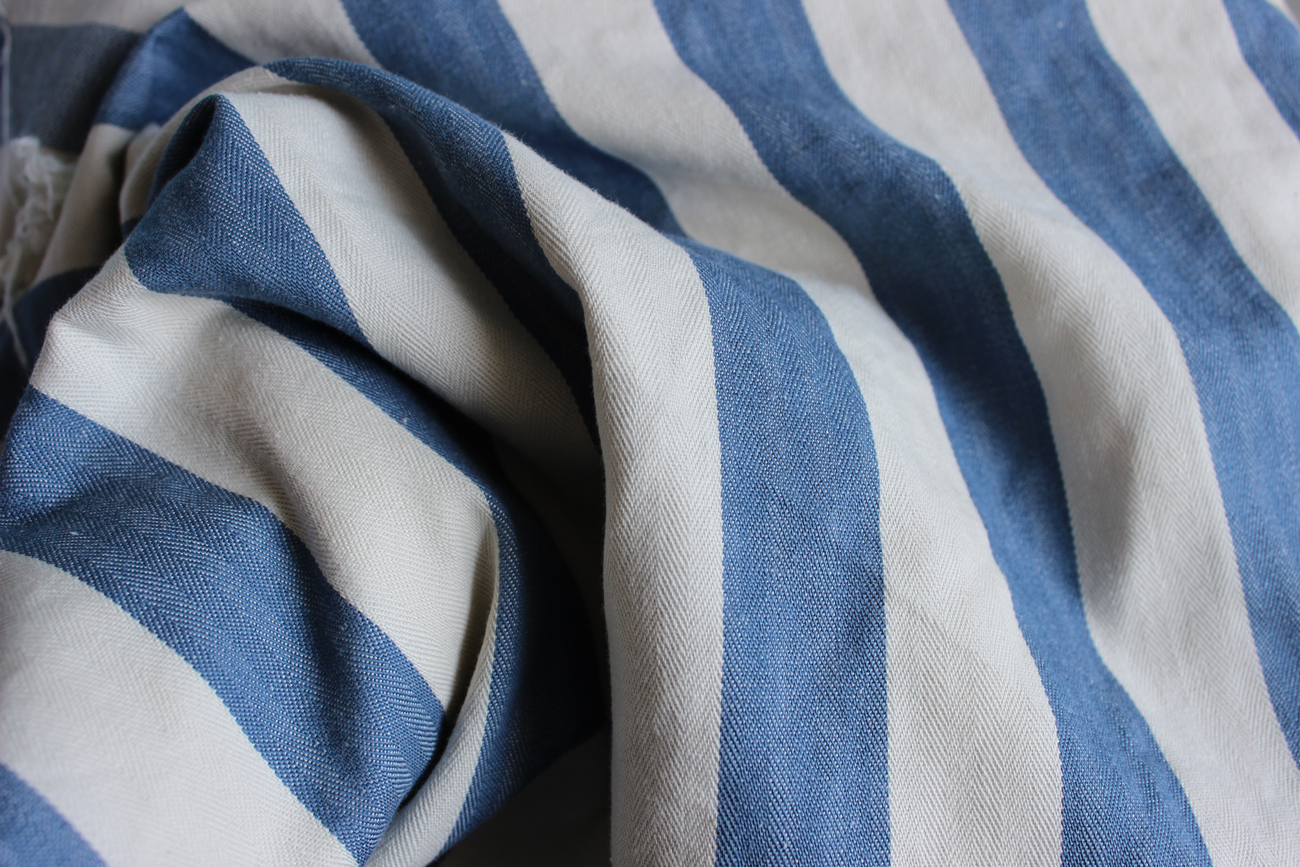
So when the 17th HSF challenge was announced as – Robes and Robings, it was the perfect opportunity to use the fabric.
“And what are robings? They were also called robins and round robins. Basically they are the trimming round the neck and down the front of 18th and early 19th century gowns and pelisses.” quote from the Dreamstress in her annoncement of the challenge.
As usual I started with some inspirations pictures.
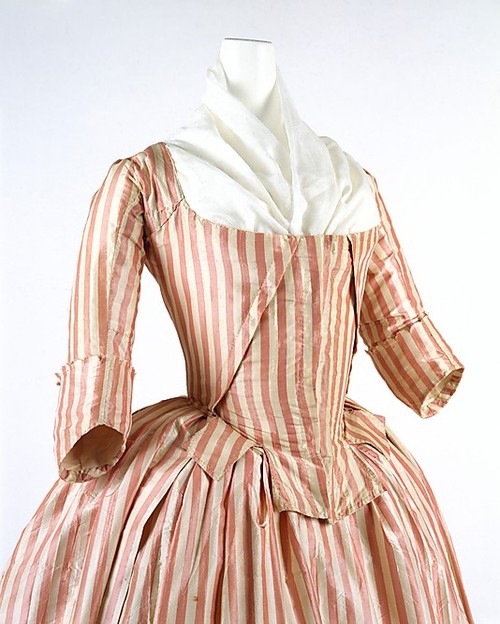
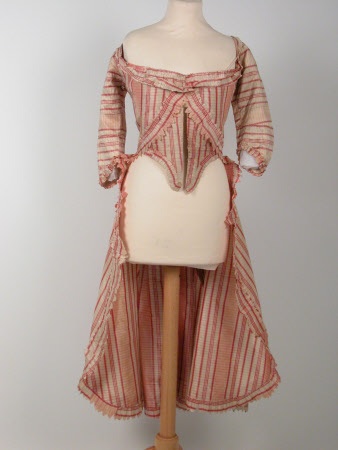
 (quite a pink-orama)
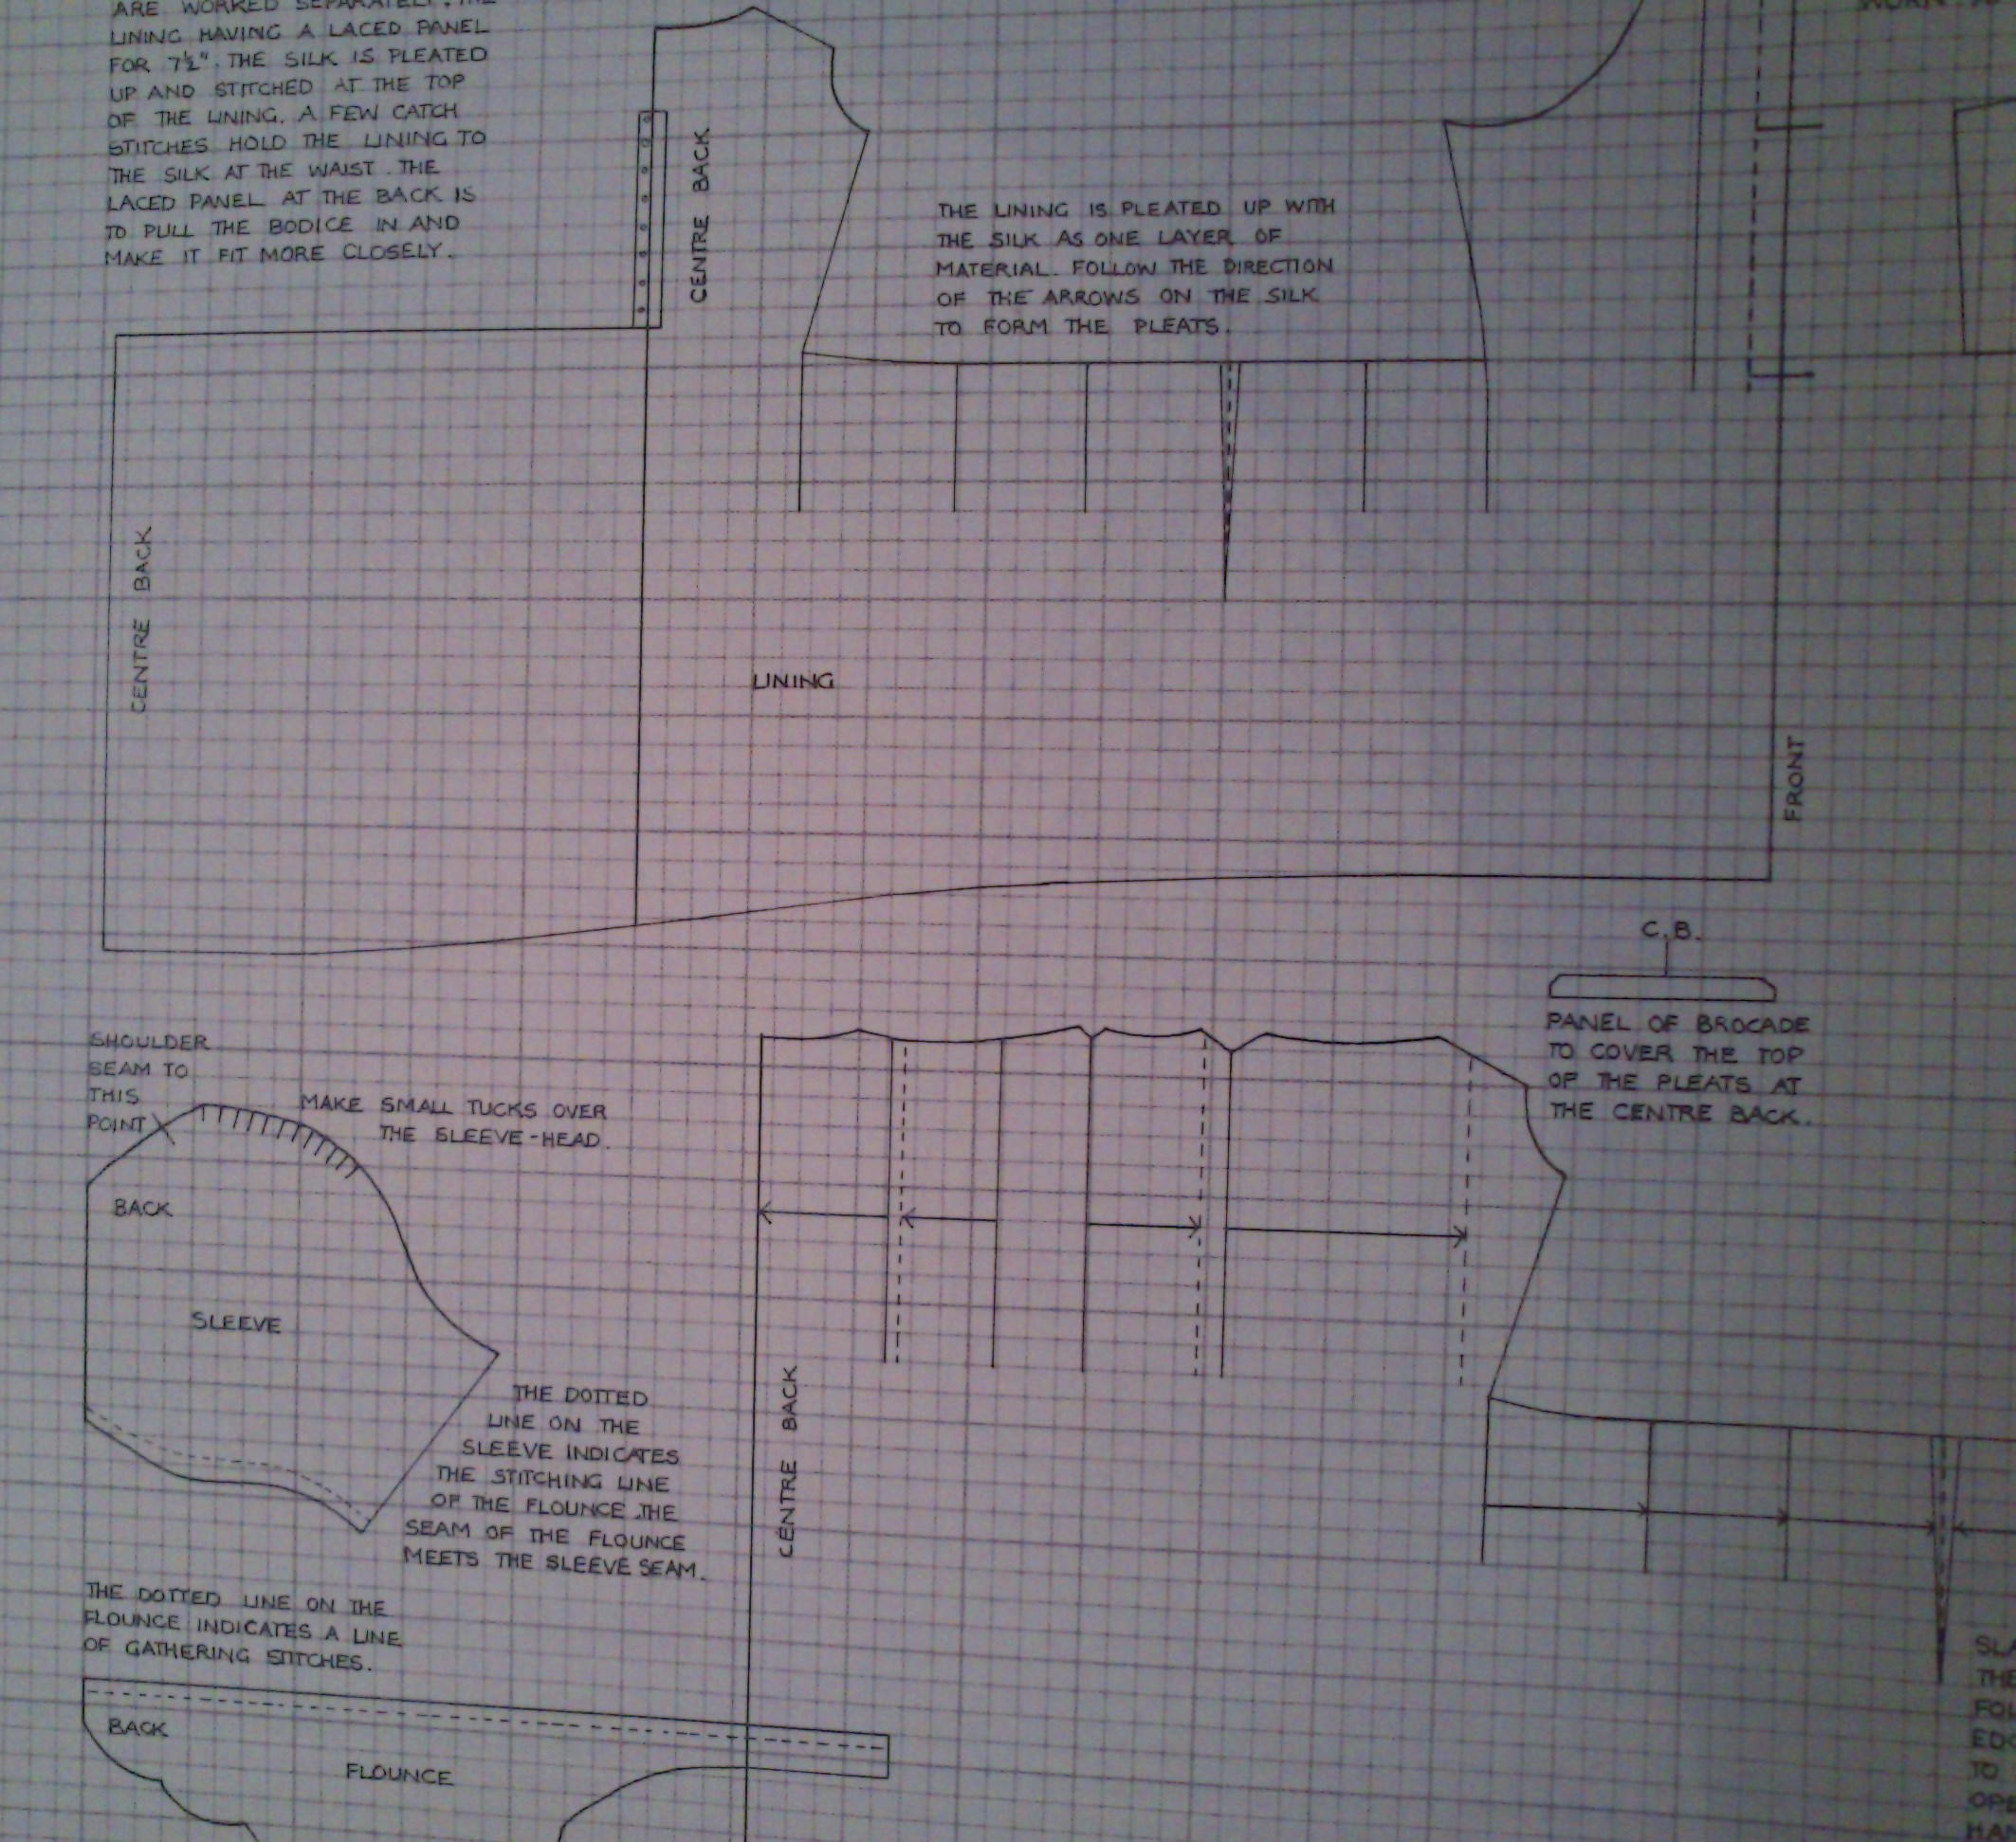
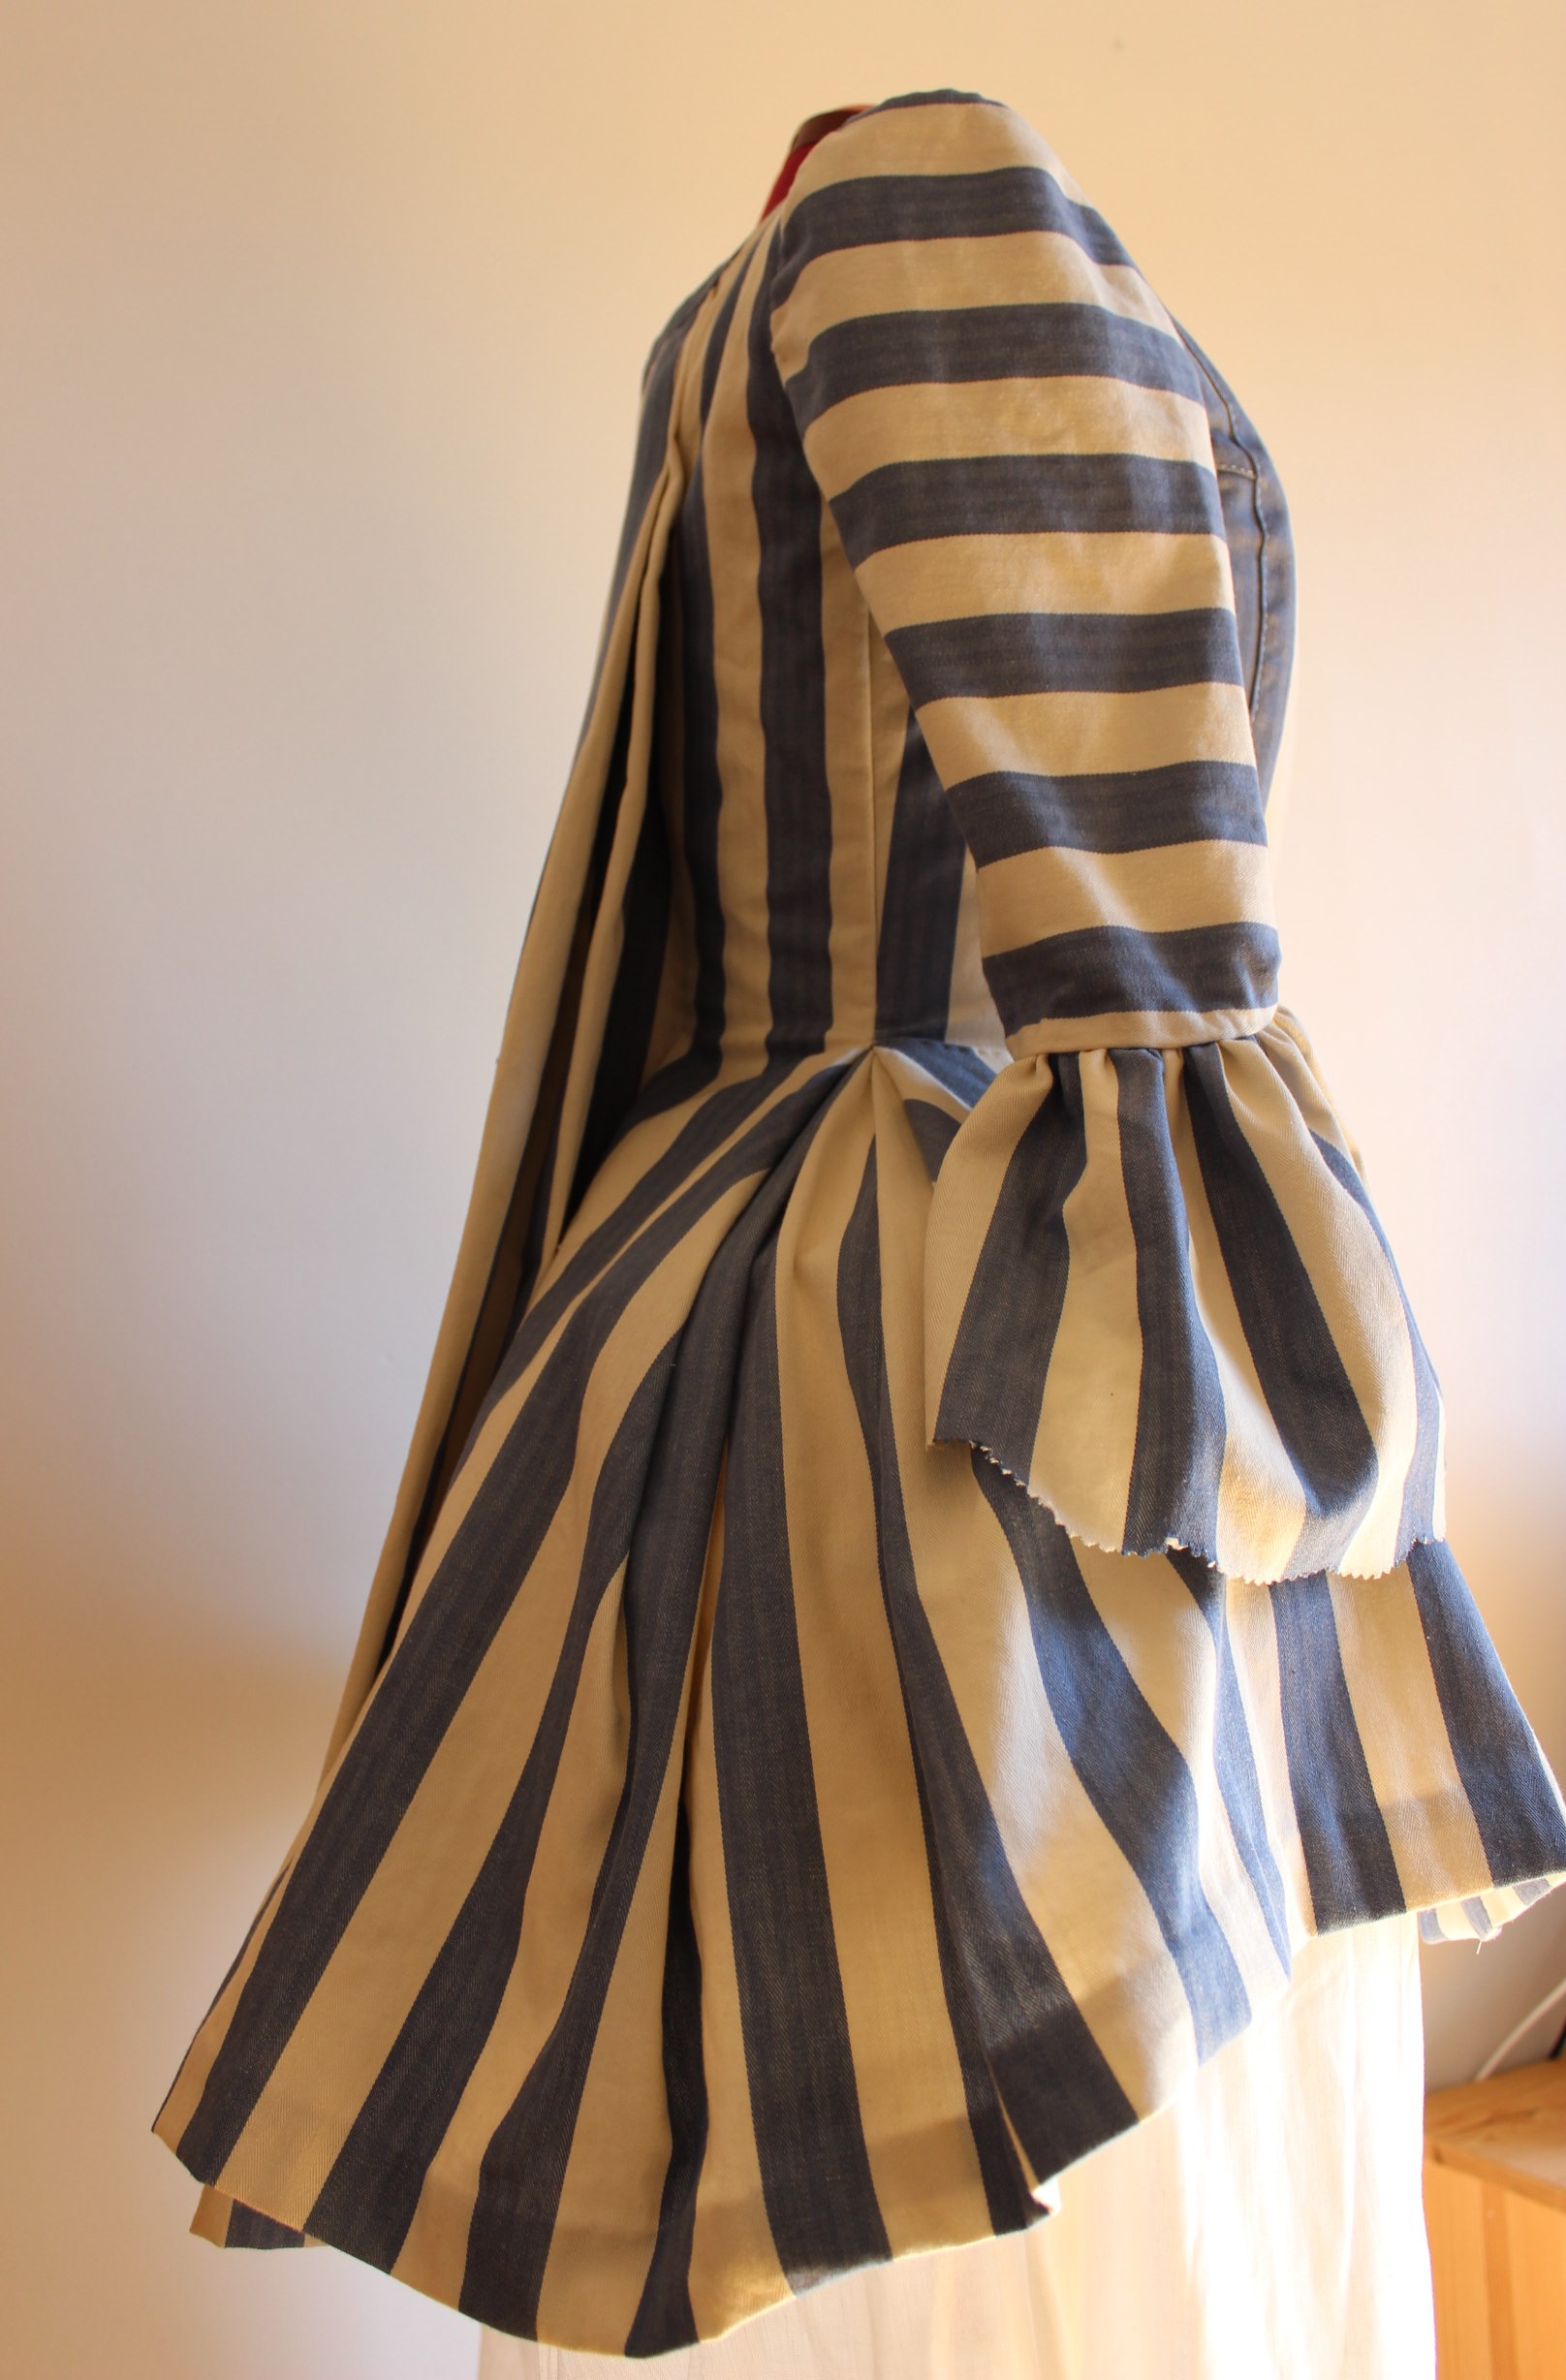
As pattern for the jacket I turned to Janet Arnold, and her beautiful 1750s pet-en-l’aire (jacket).

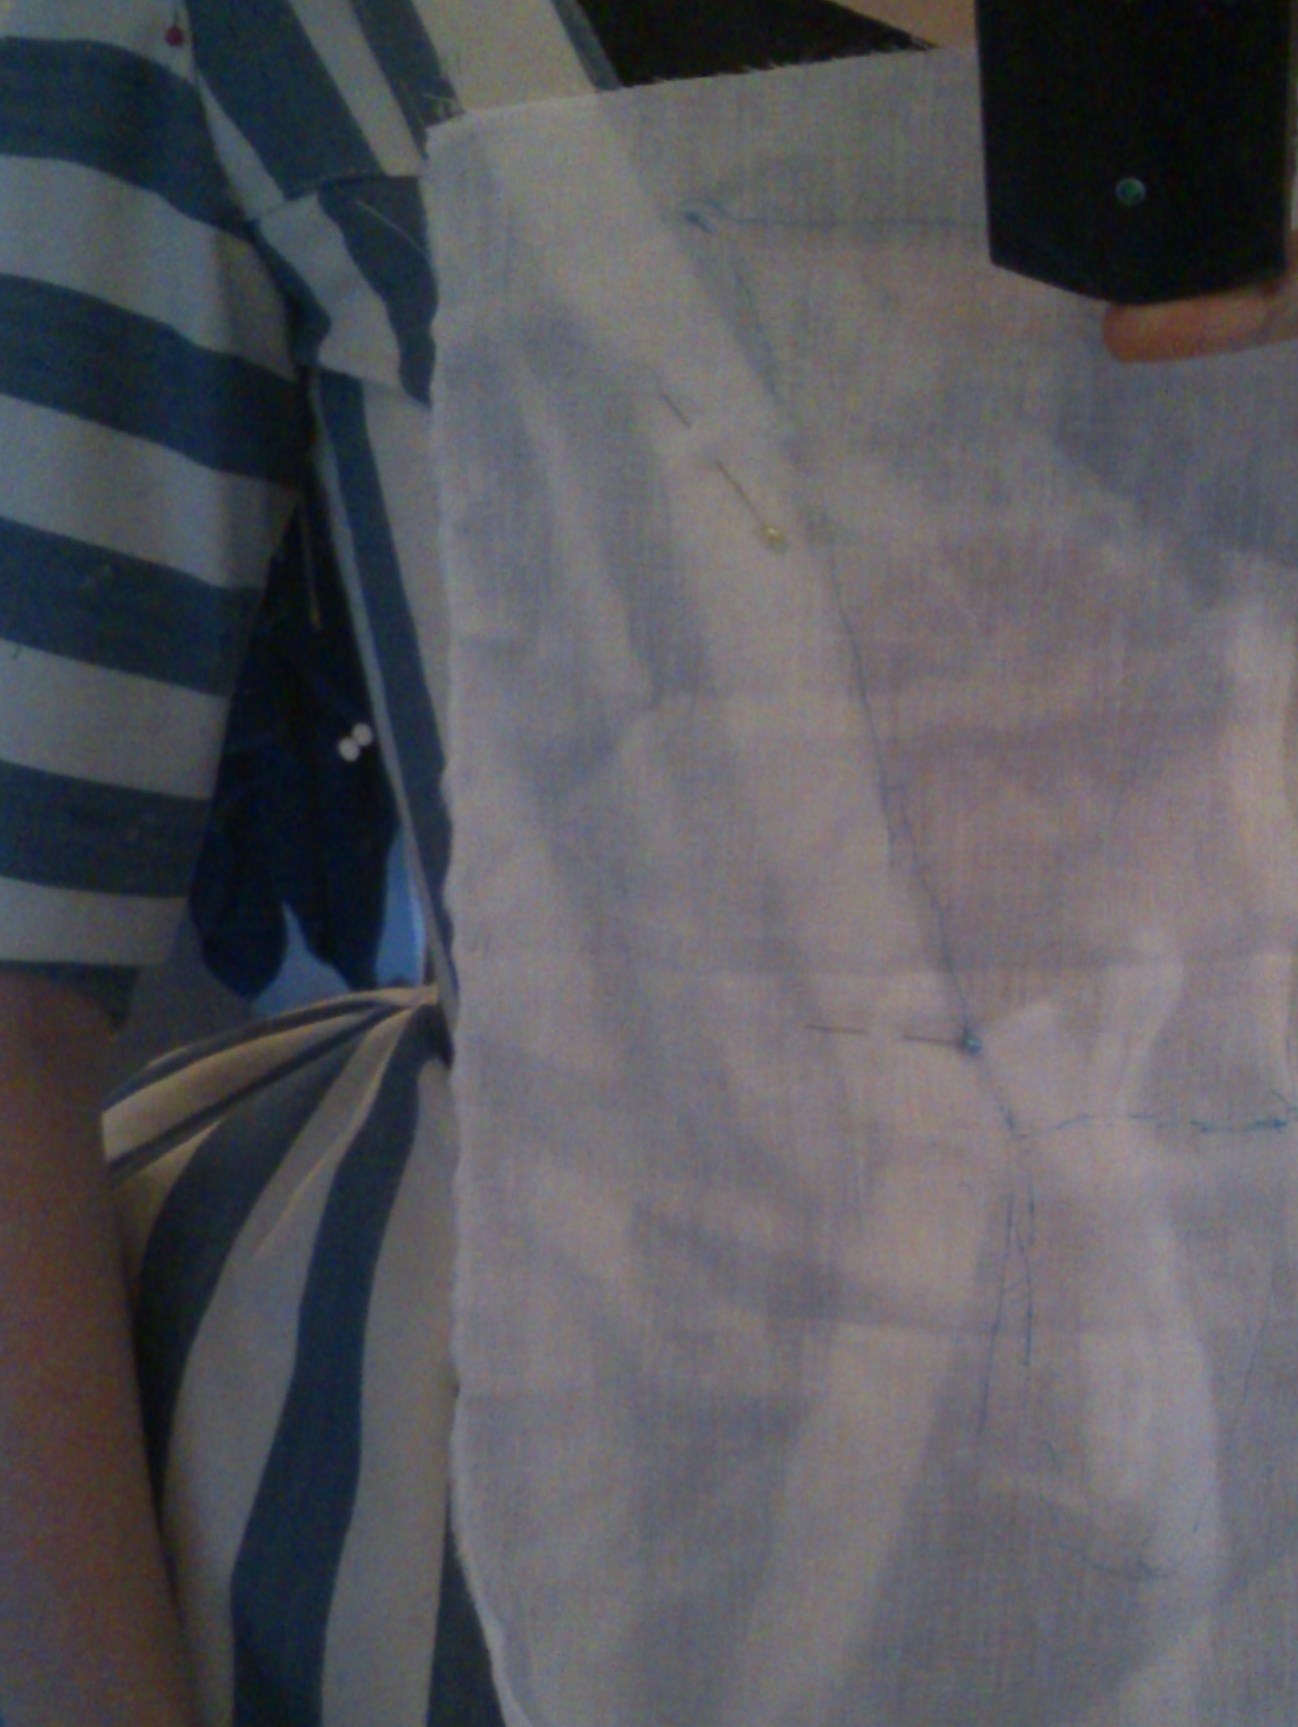
So I put the corset and pocket-hoops on my dressform and started to drape a pattern.
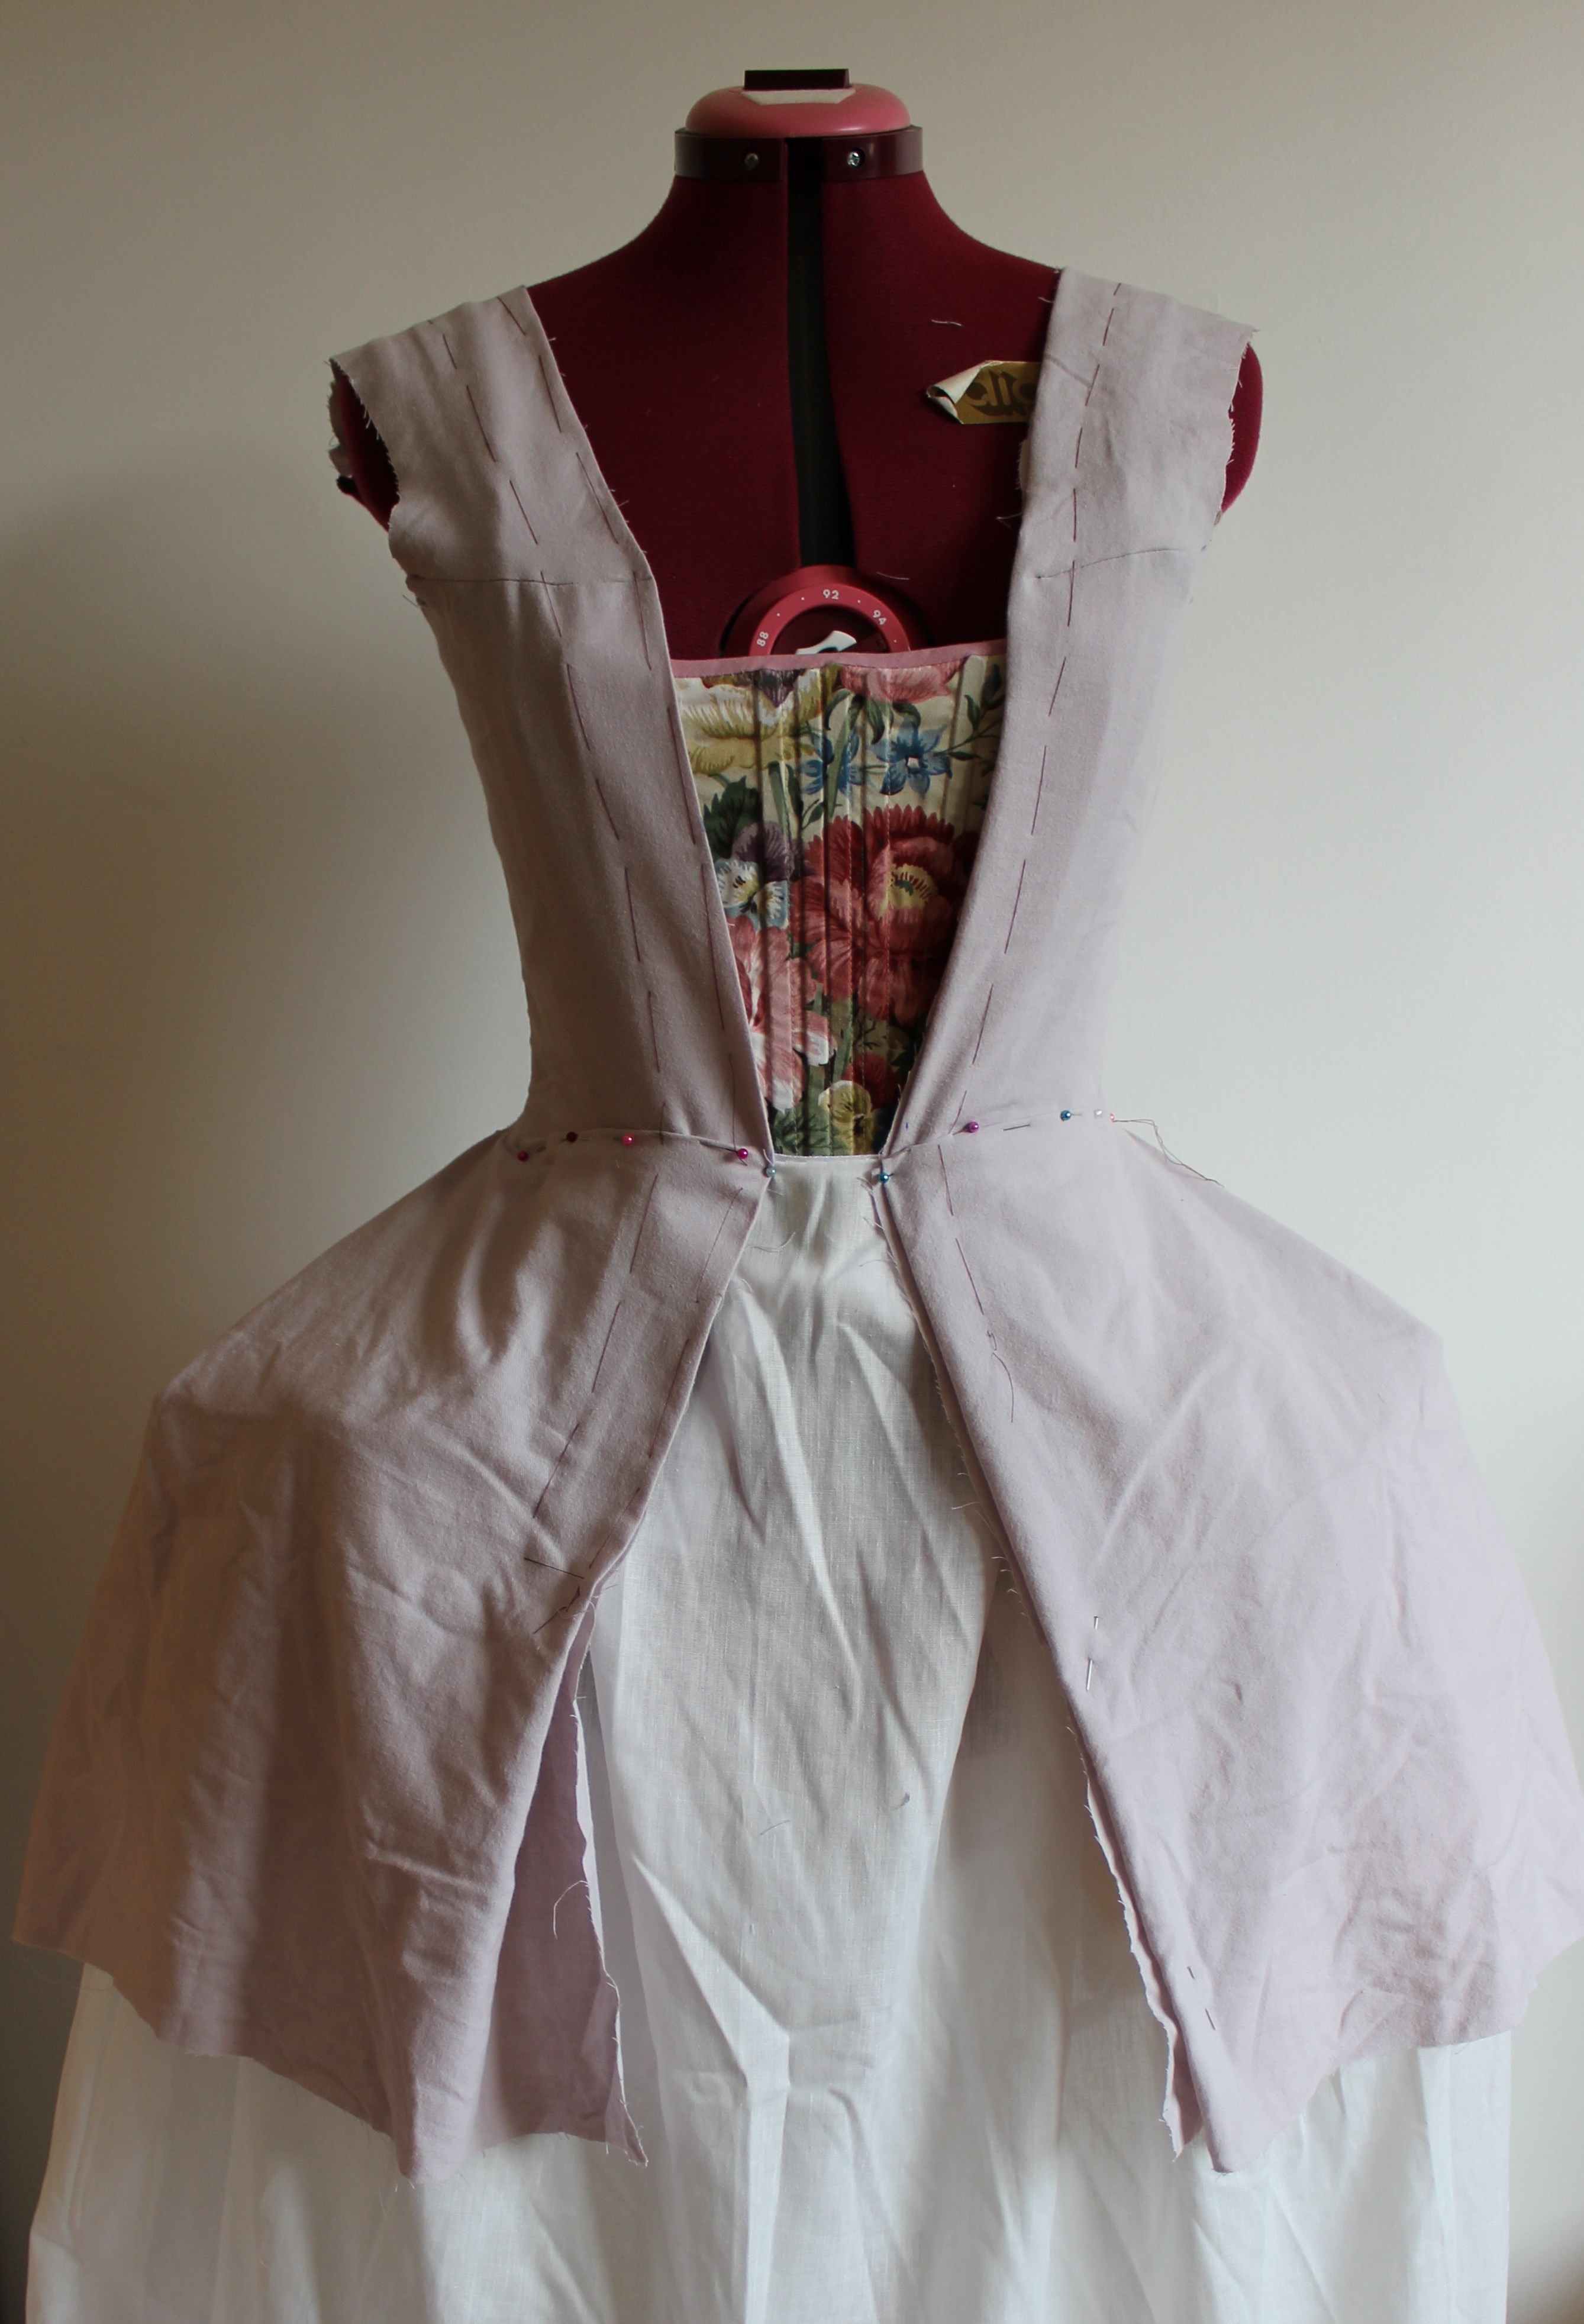
Then I removed it, sewed and tried it on as a mock-up.

After a few alterations it was time to cut the fabric.
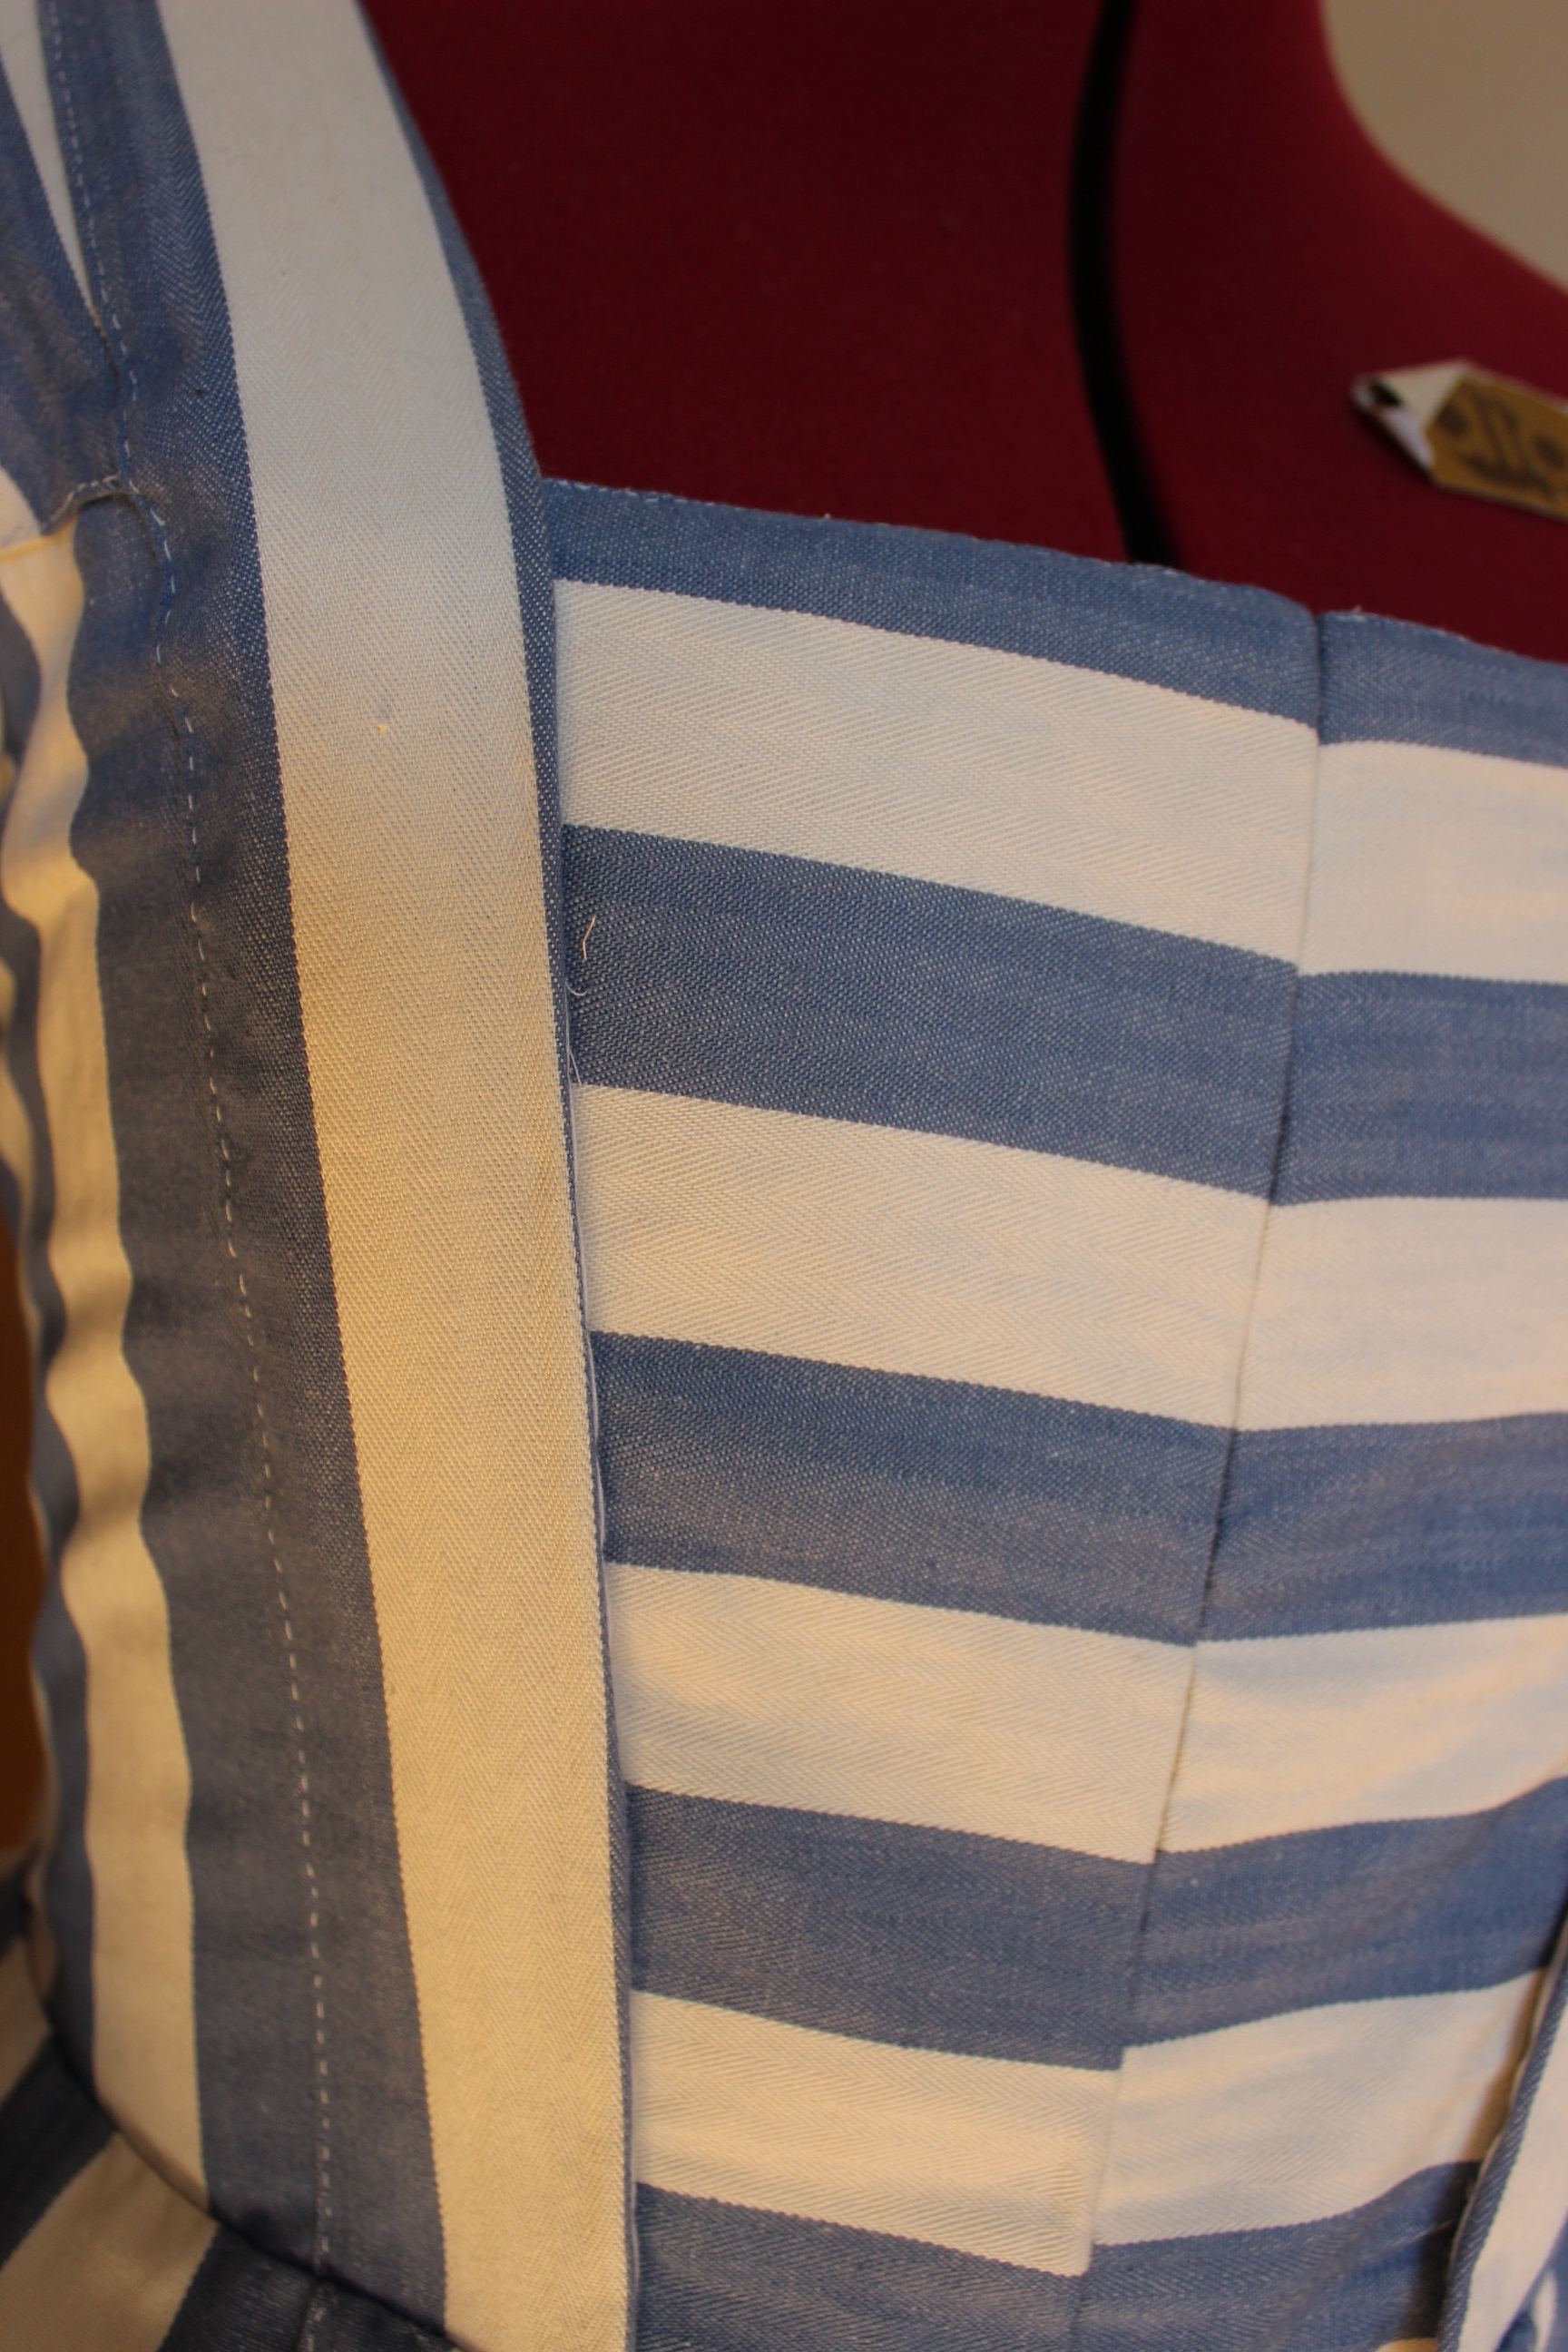
 left and right sides being cut separatly so to mach the stipes perfectly.
I used plain white cotton as lining, and started the handsewing by working the eyelets into the back of the linning.

I basted the lining to the striped fabric as a interlining.
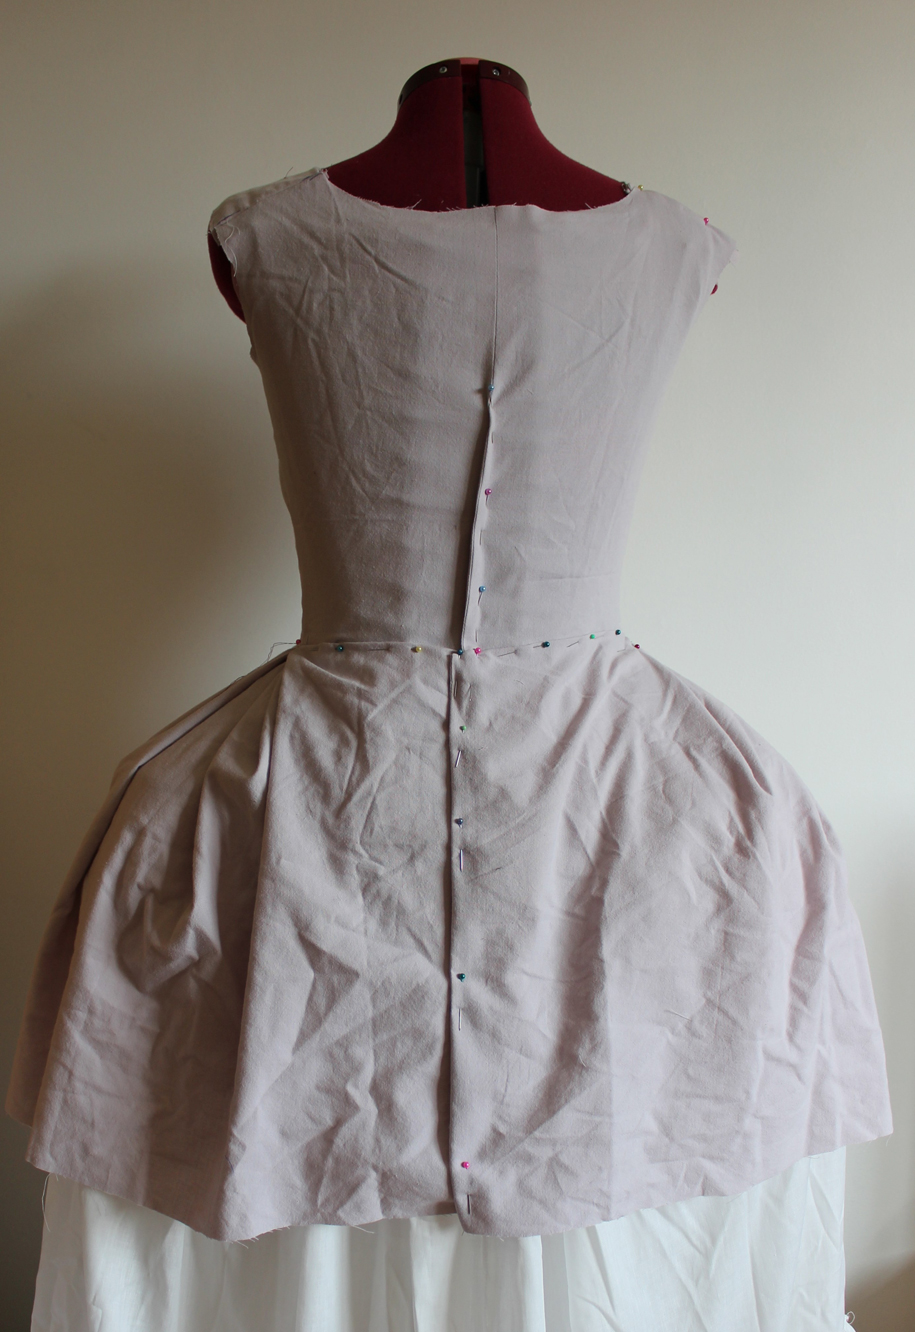
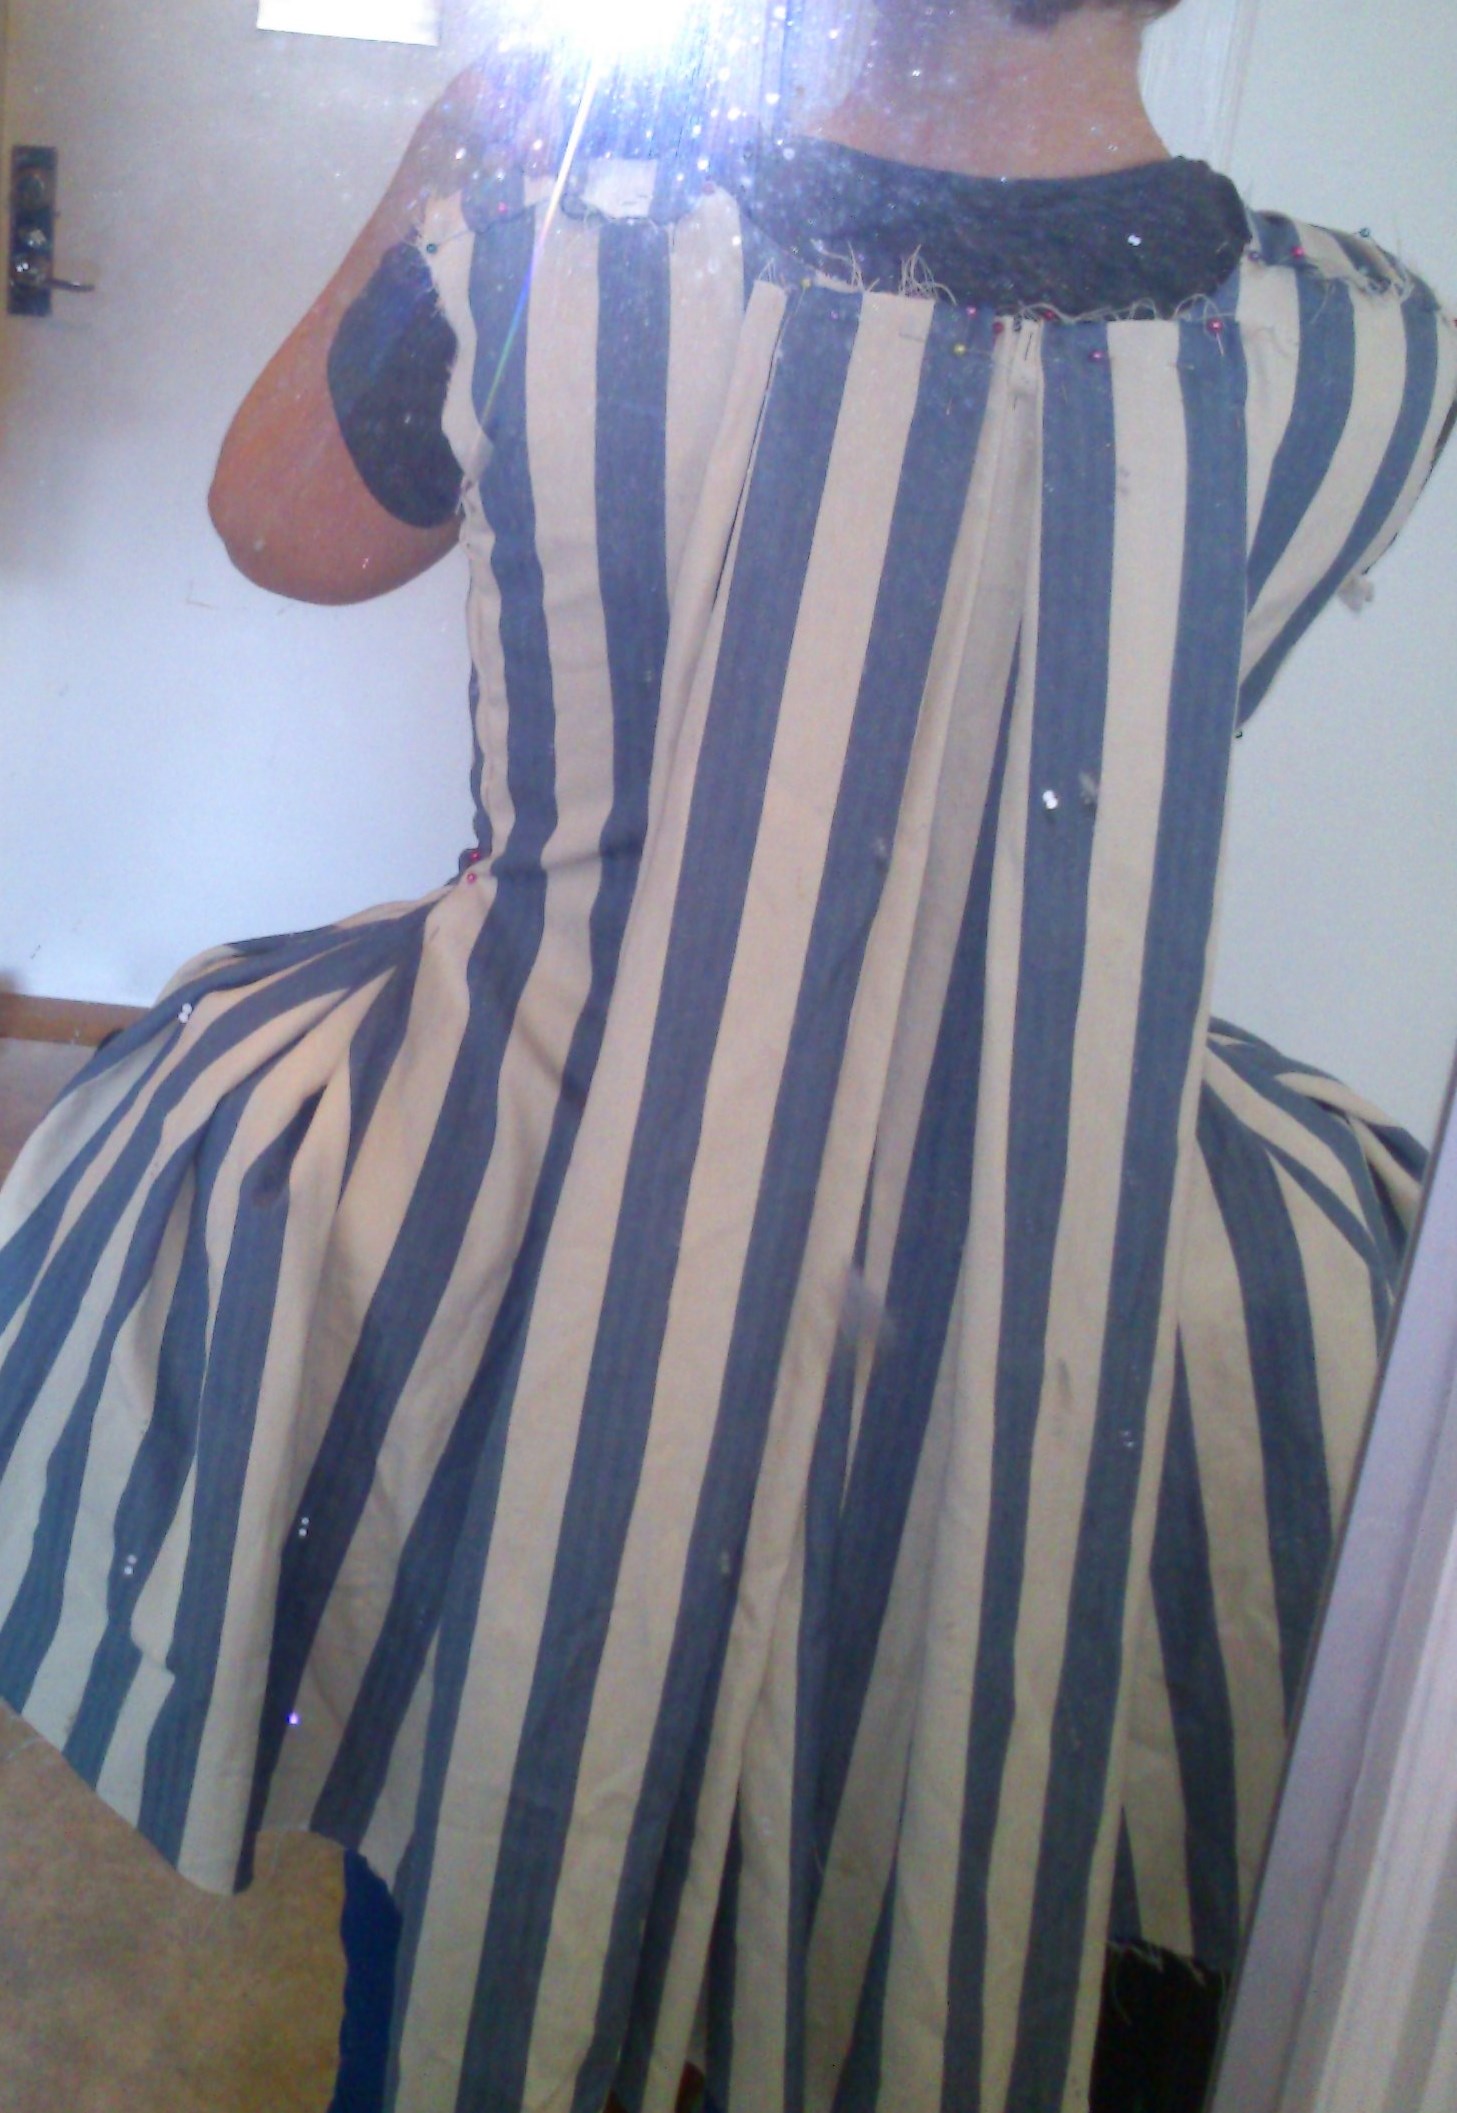
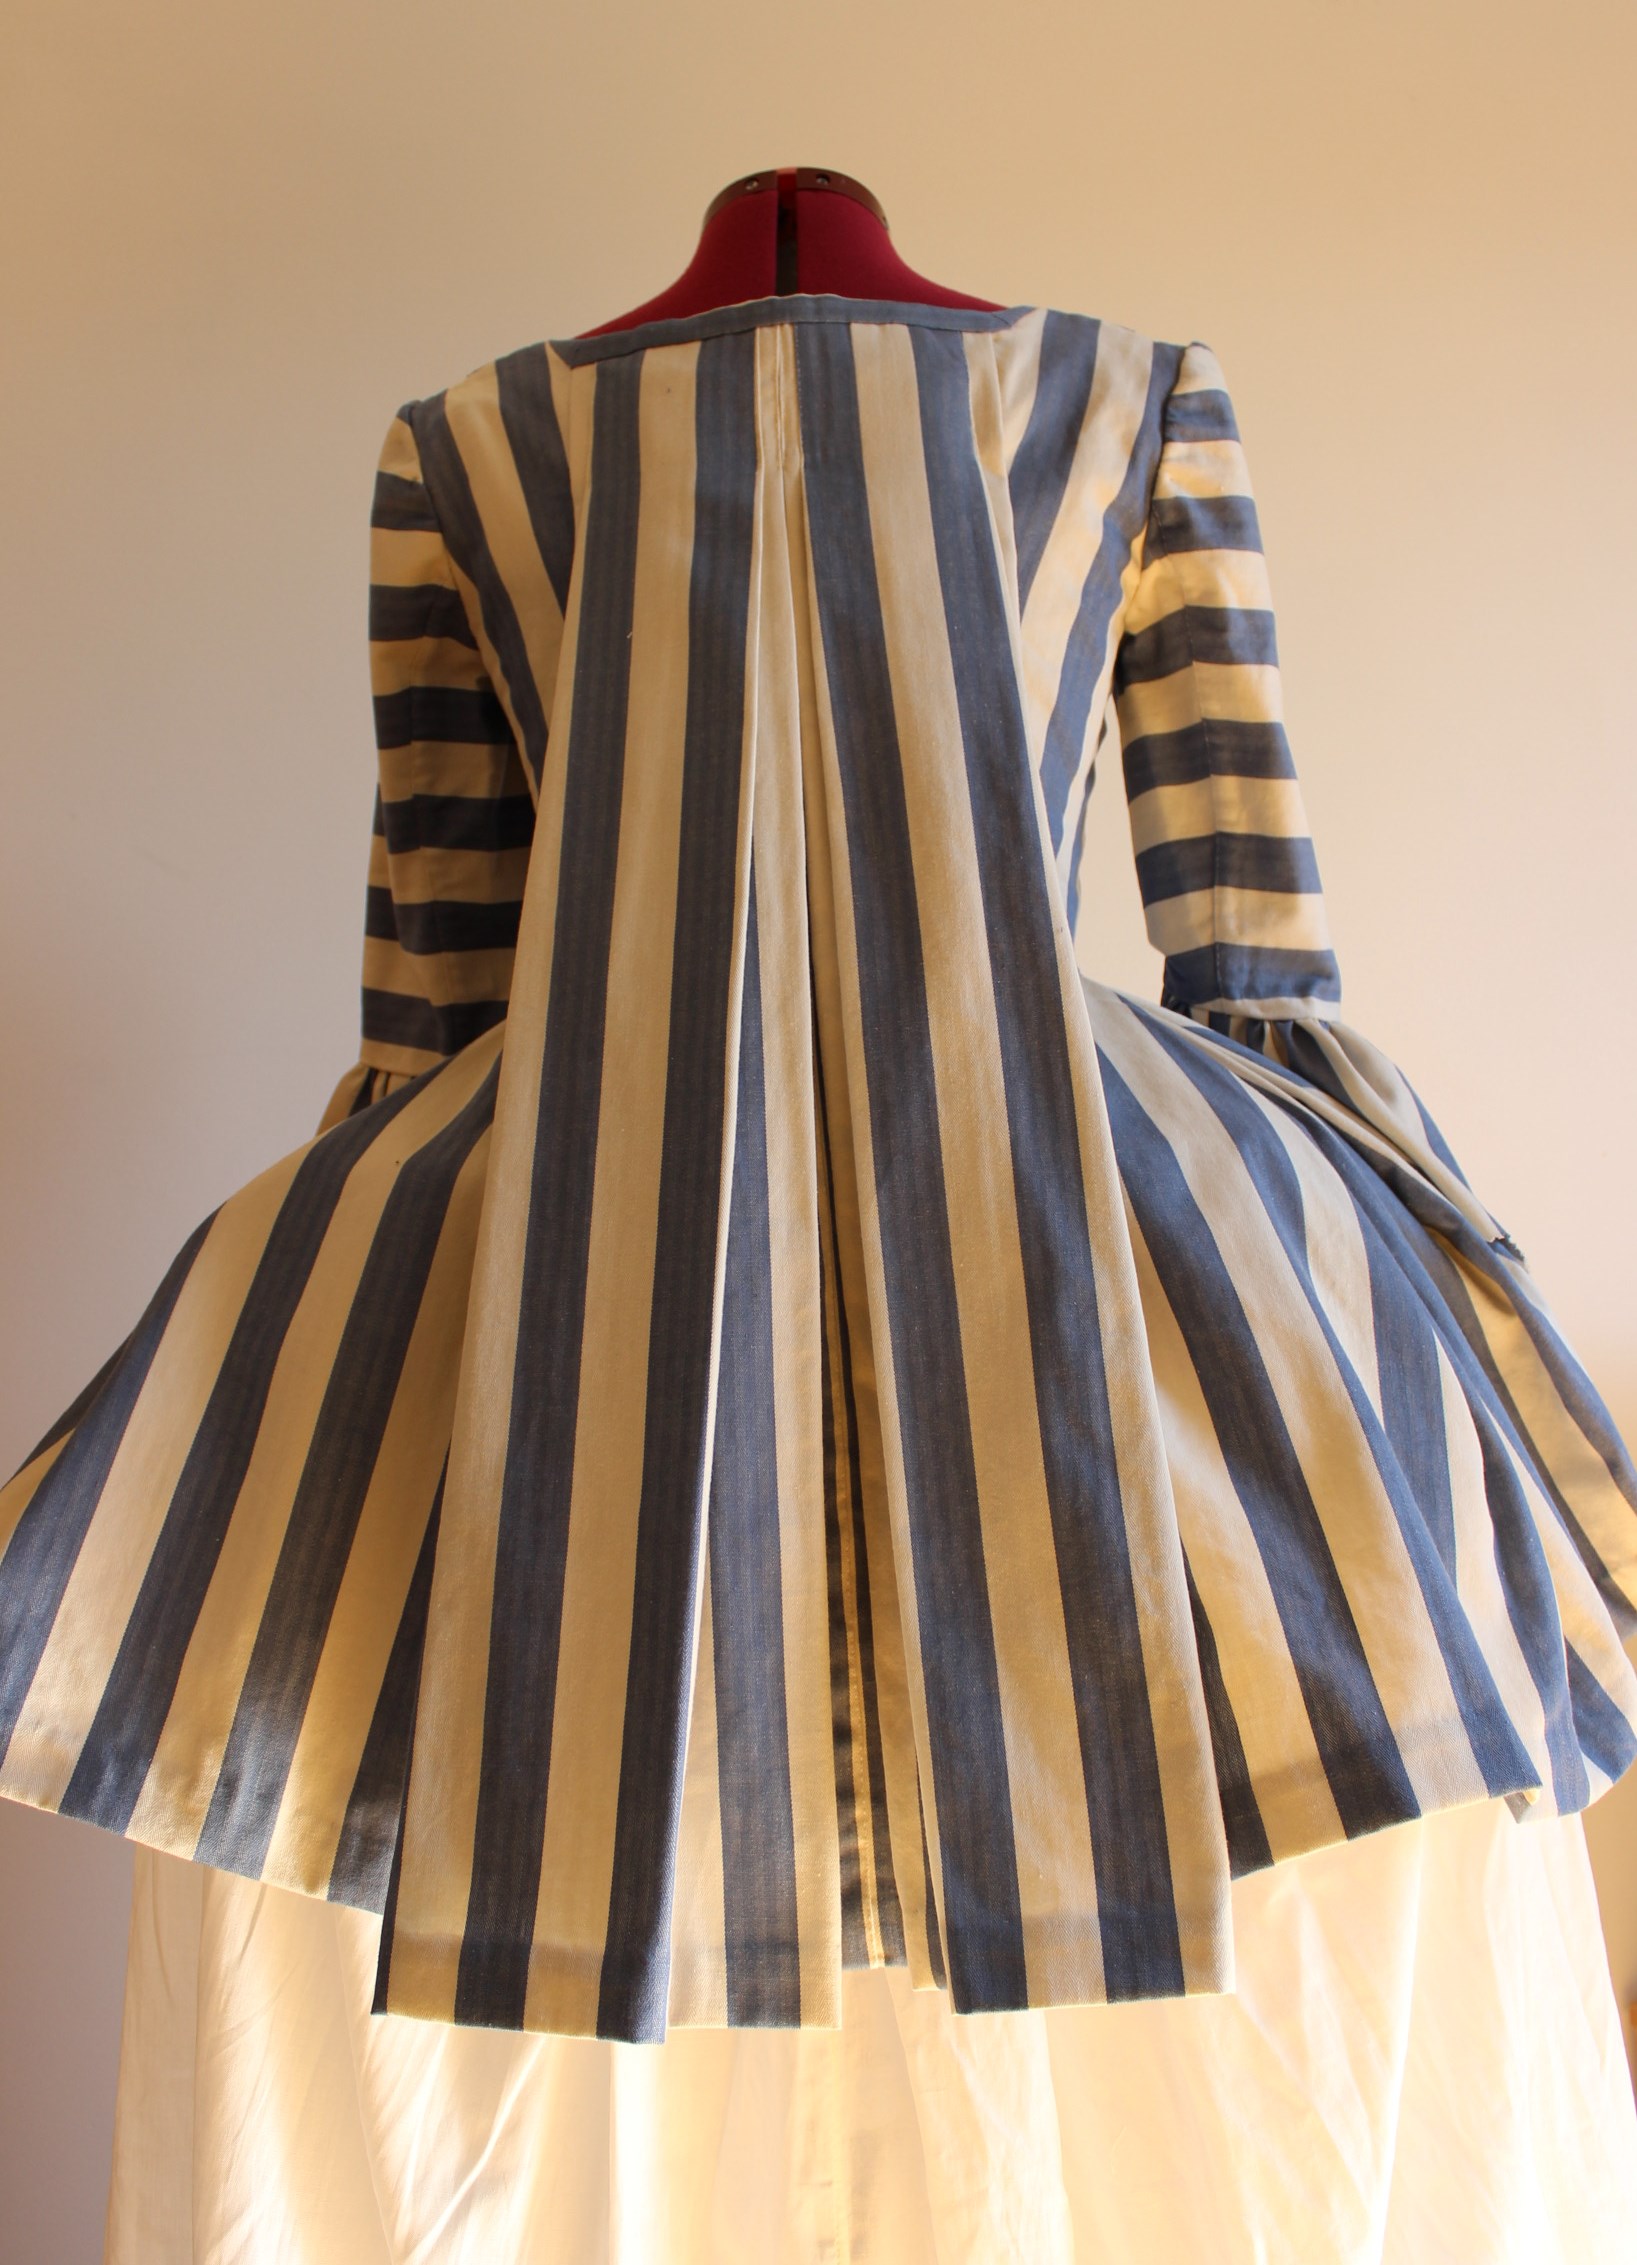
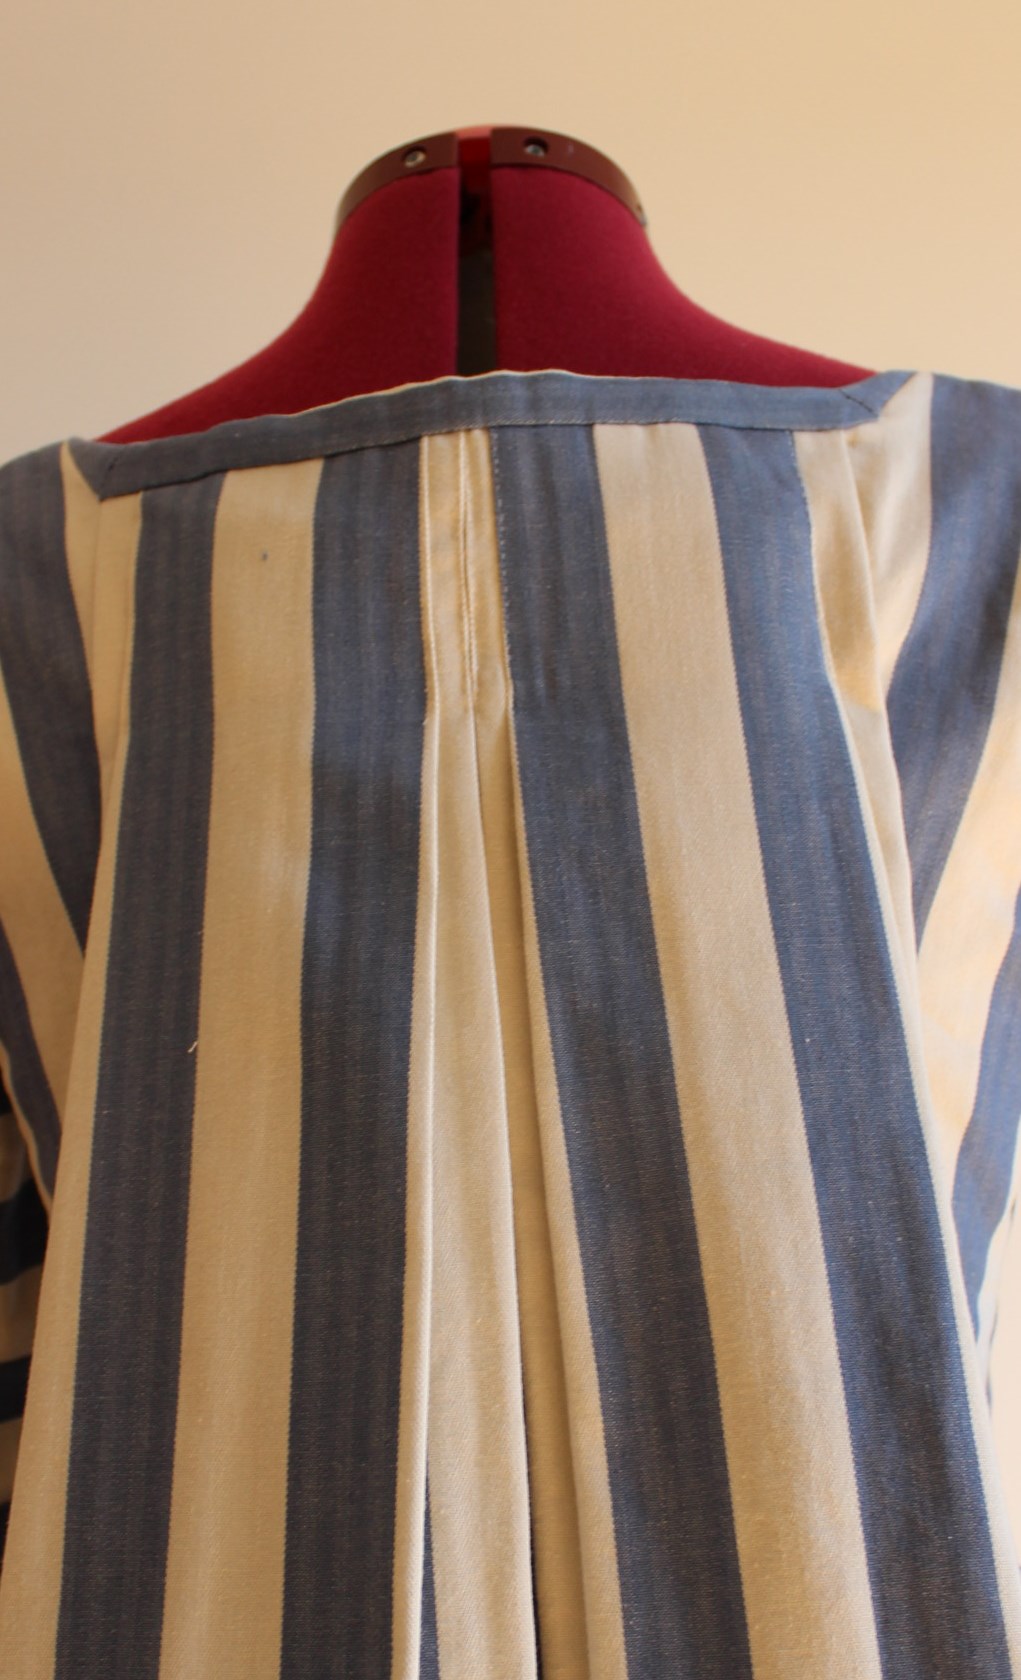
Now it was time to arrange the backpleats. Something that took a bit of time and carefull forcing of the fabric.
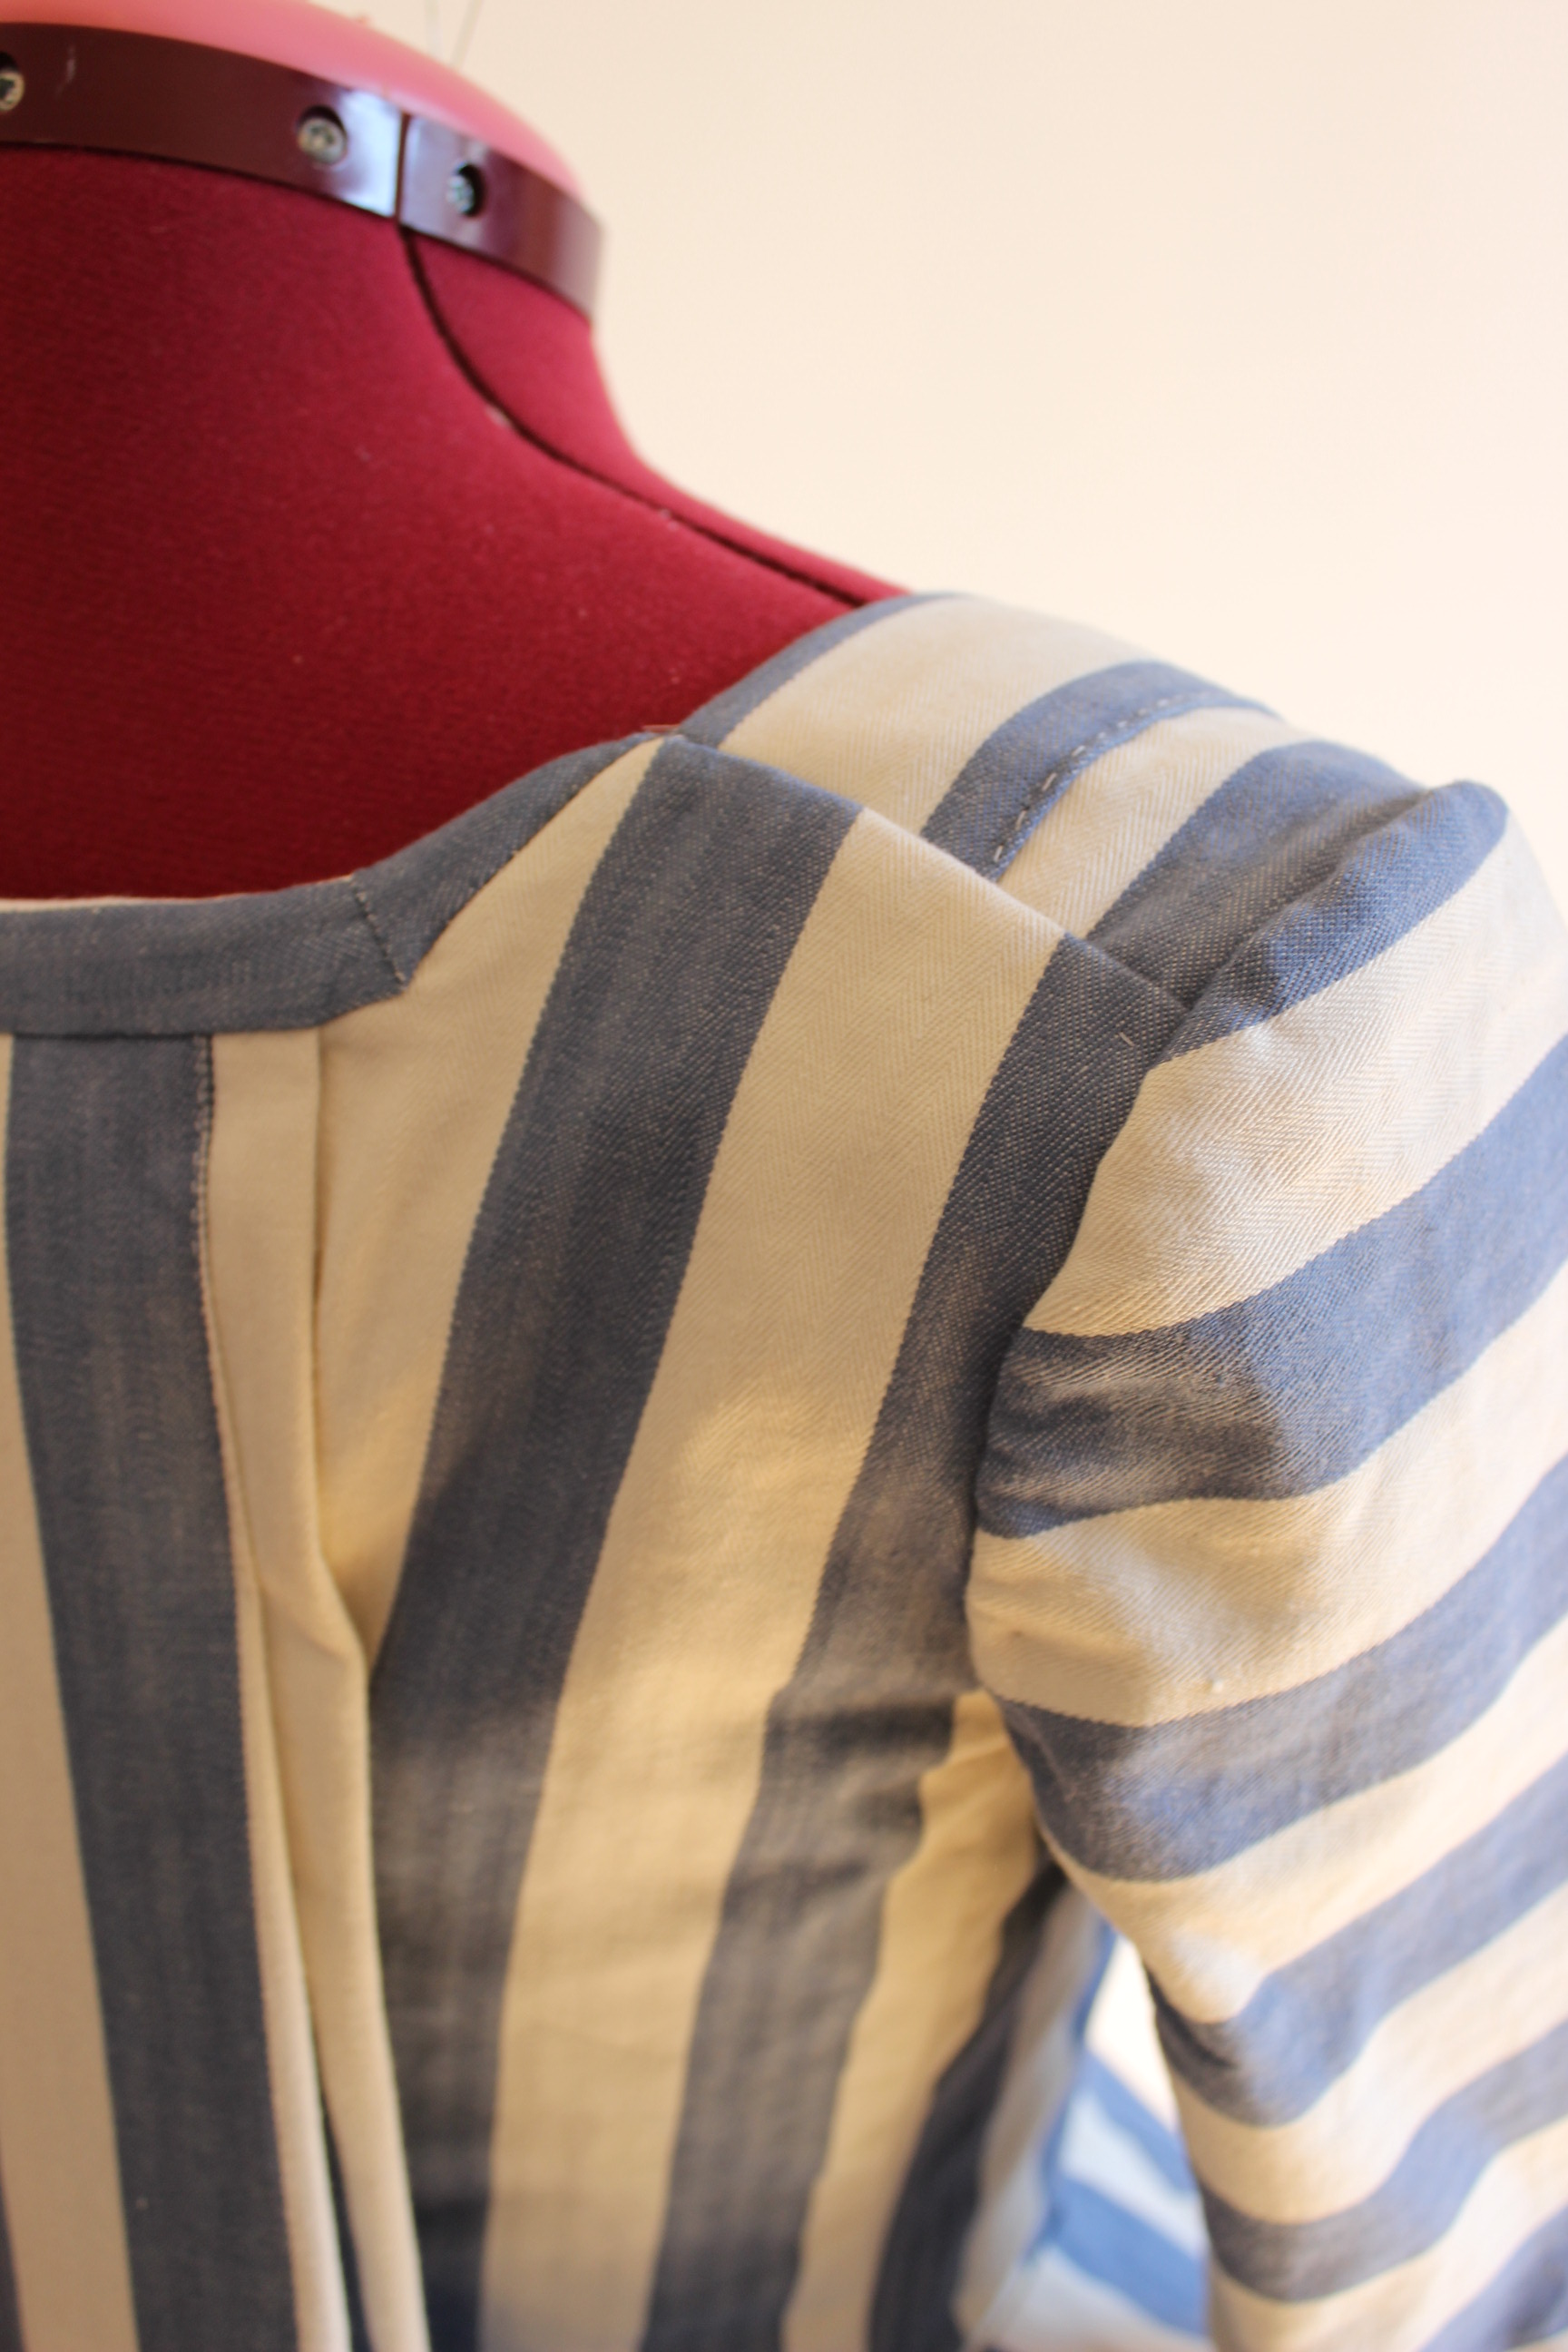
Then everything went pretty fast, and I sewed the shoulders, the hip-pleats and the side seams. And I tried it on for further adjustments.
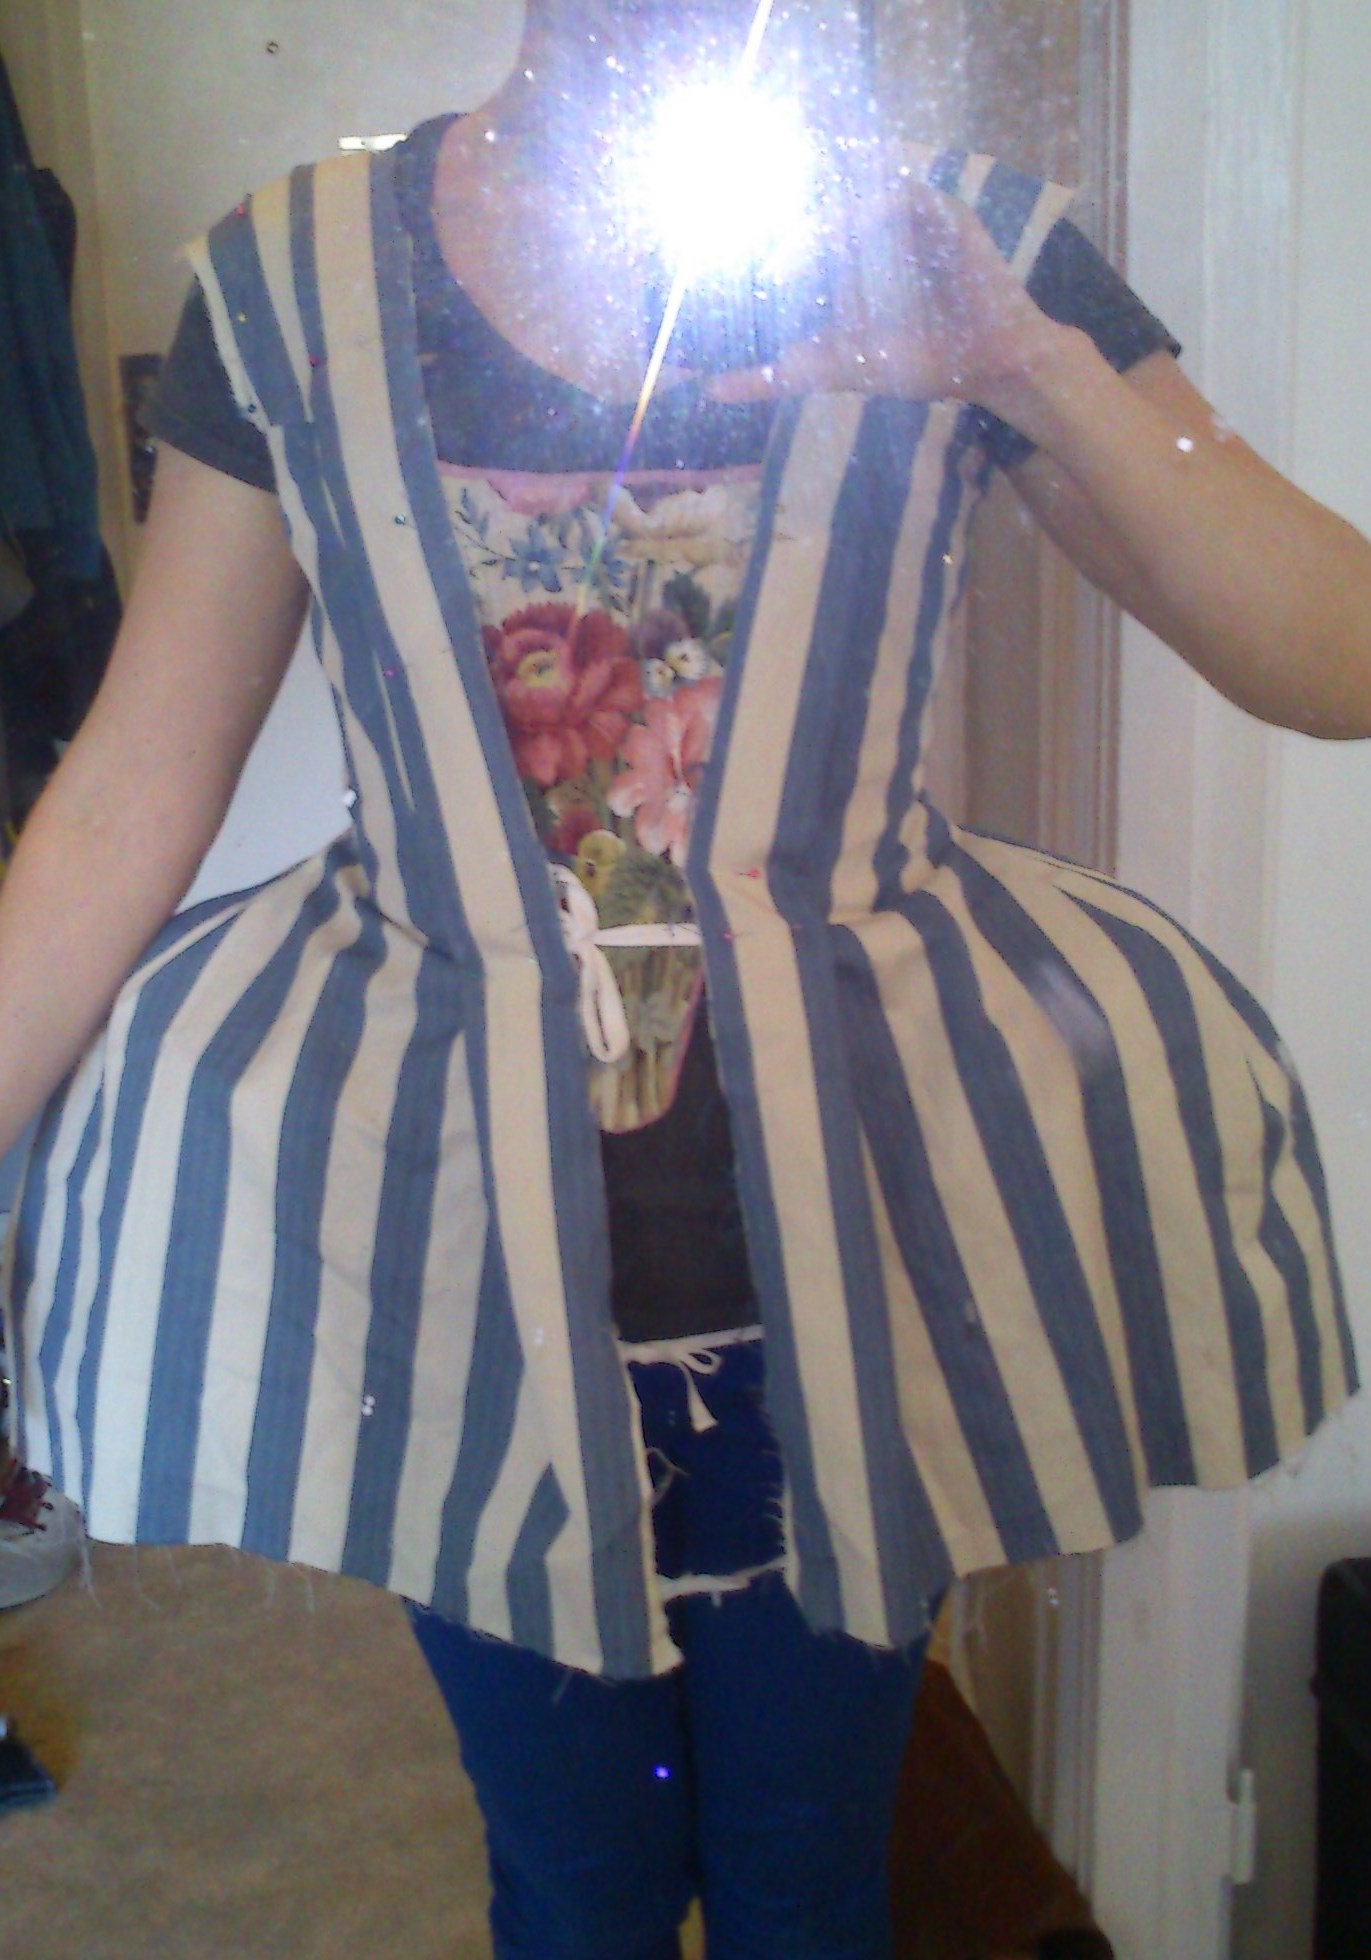
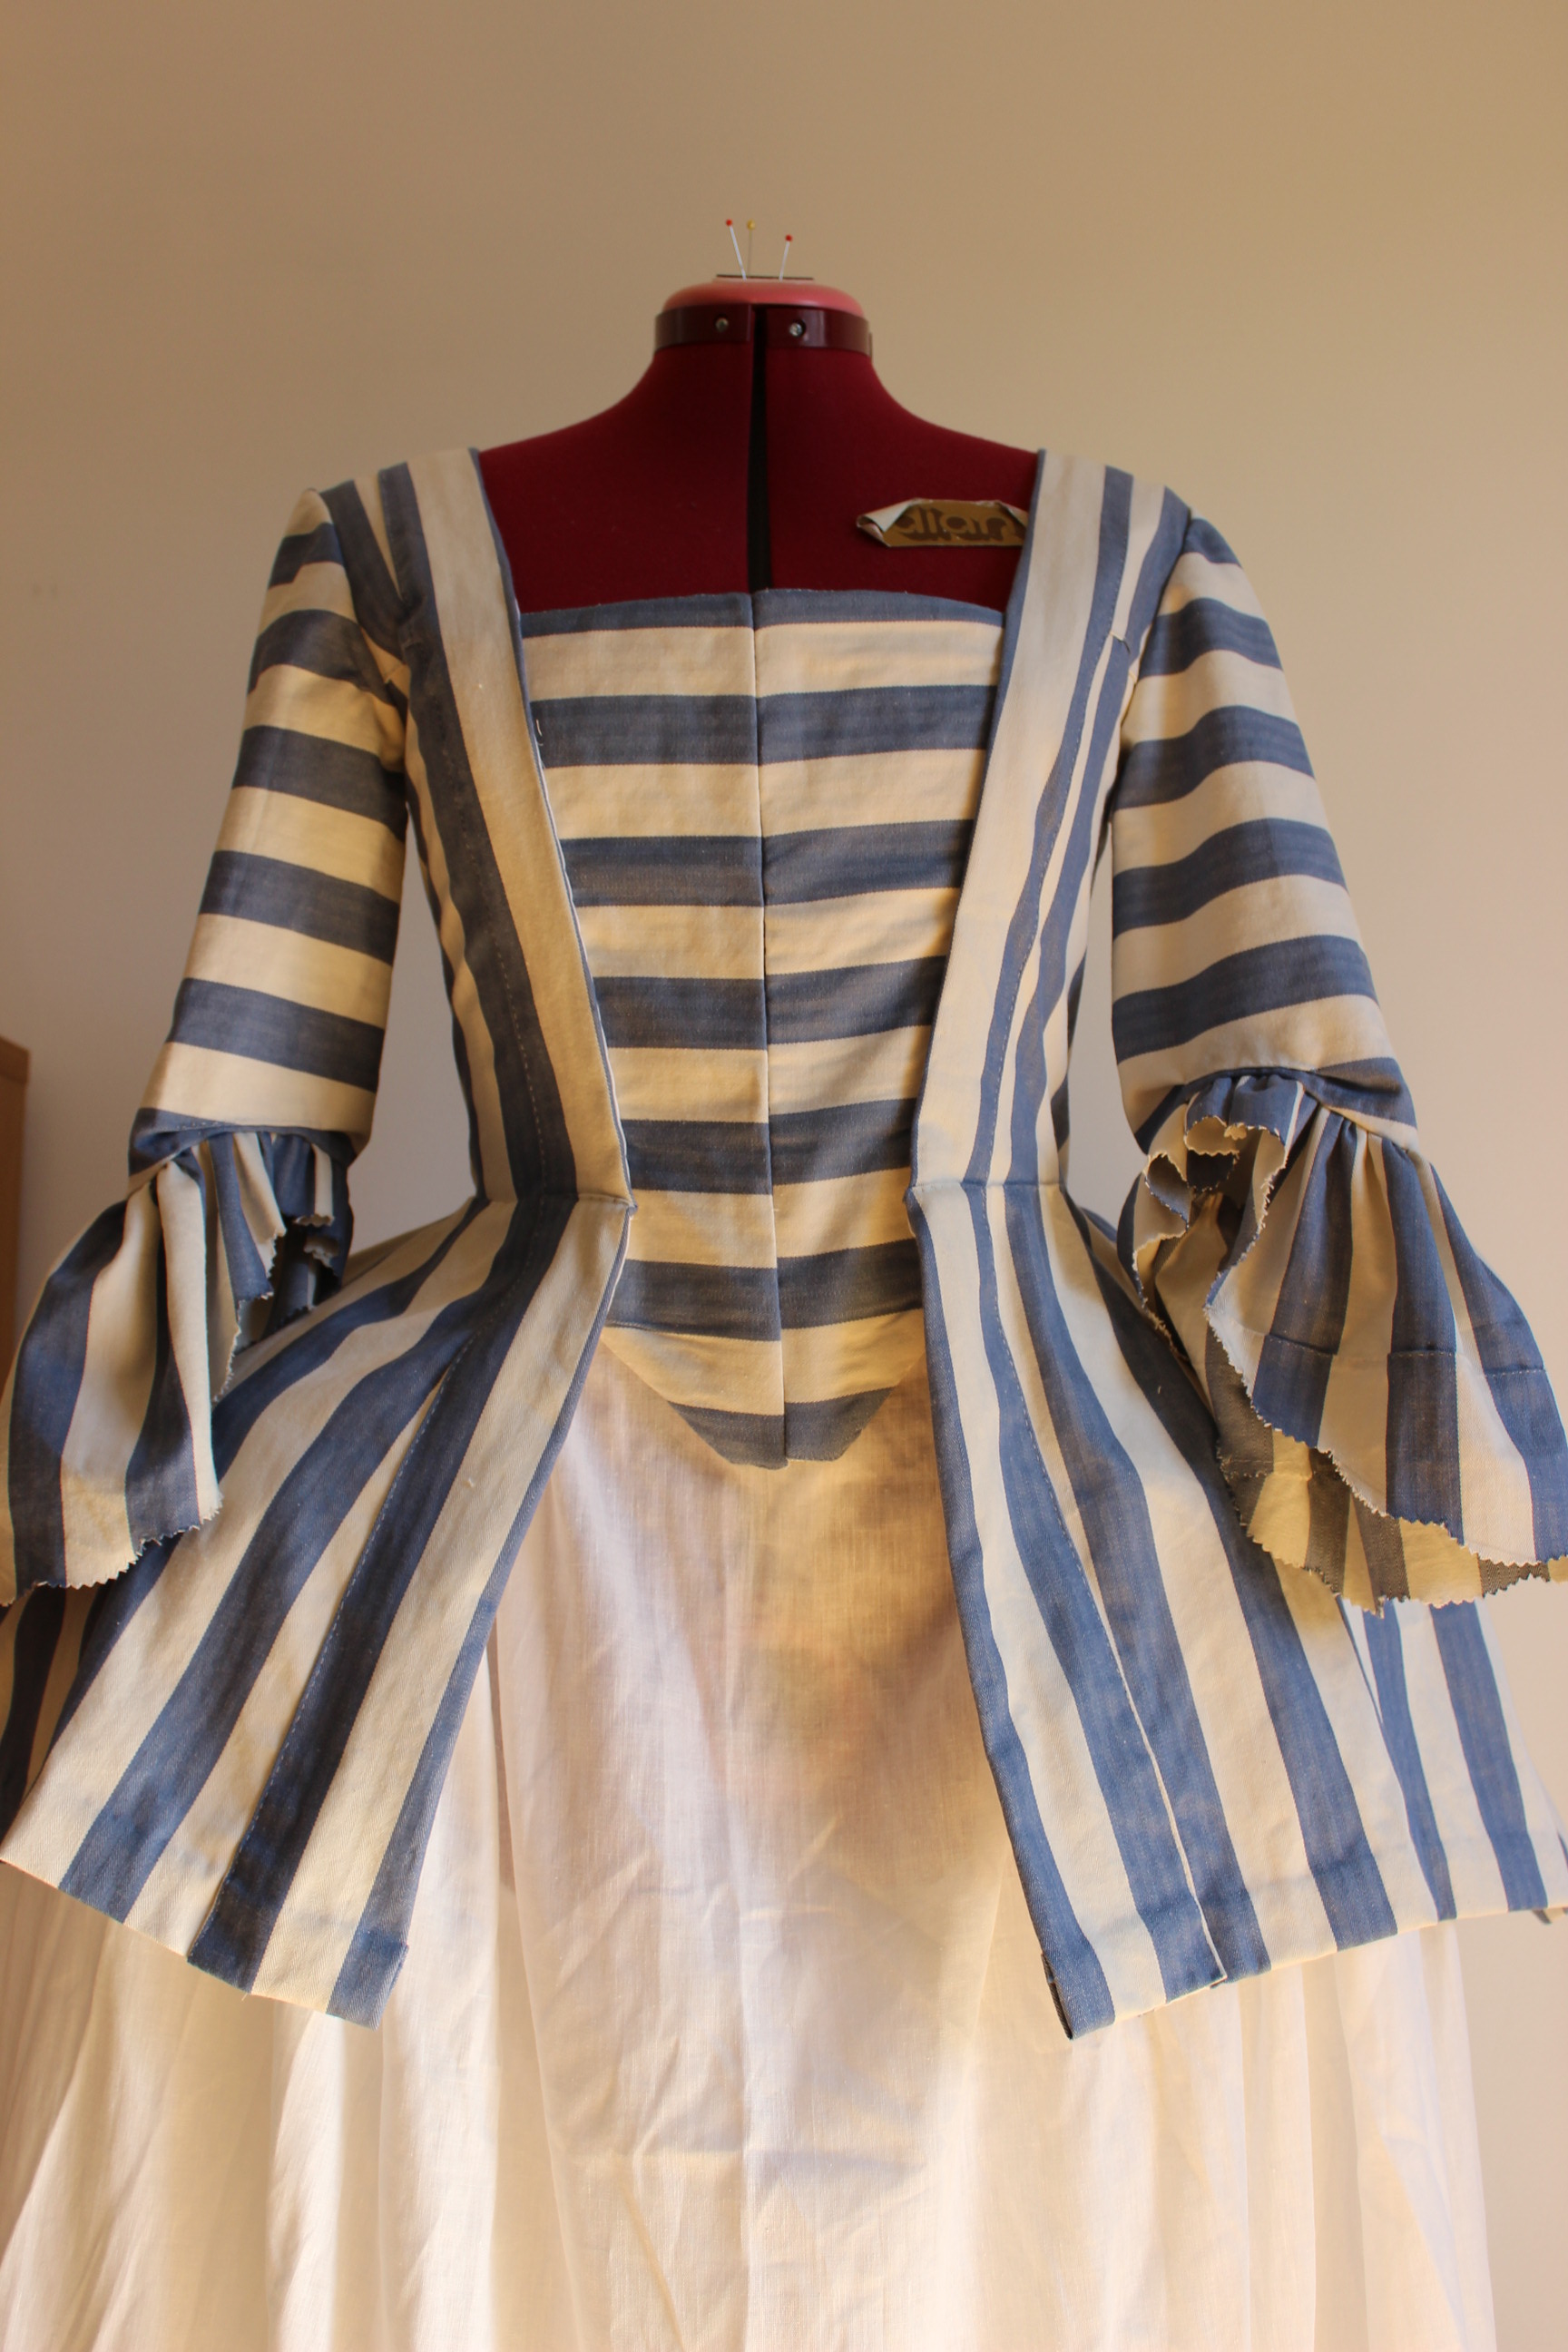
I needed to make a few alterations and then I continued by folding and hemming the layers seperatly, and cut and turned under all the seam-allowences. I attached the sleeves and made the elbow flounce.
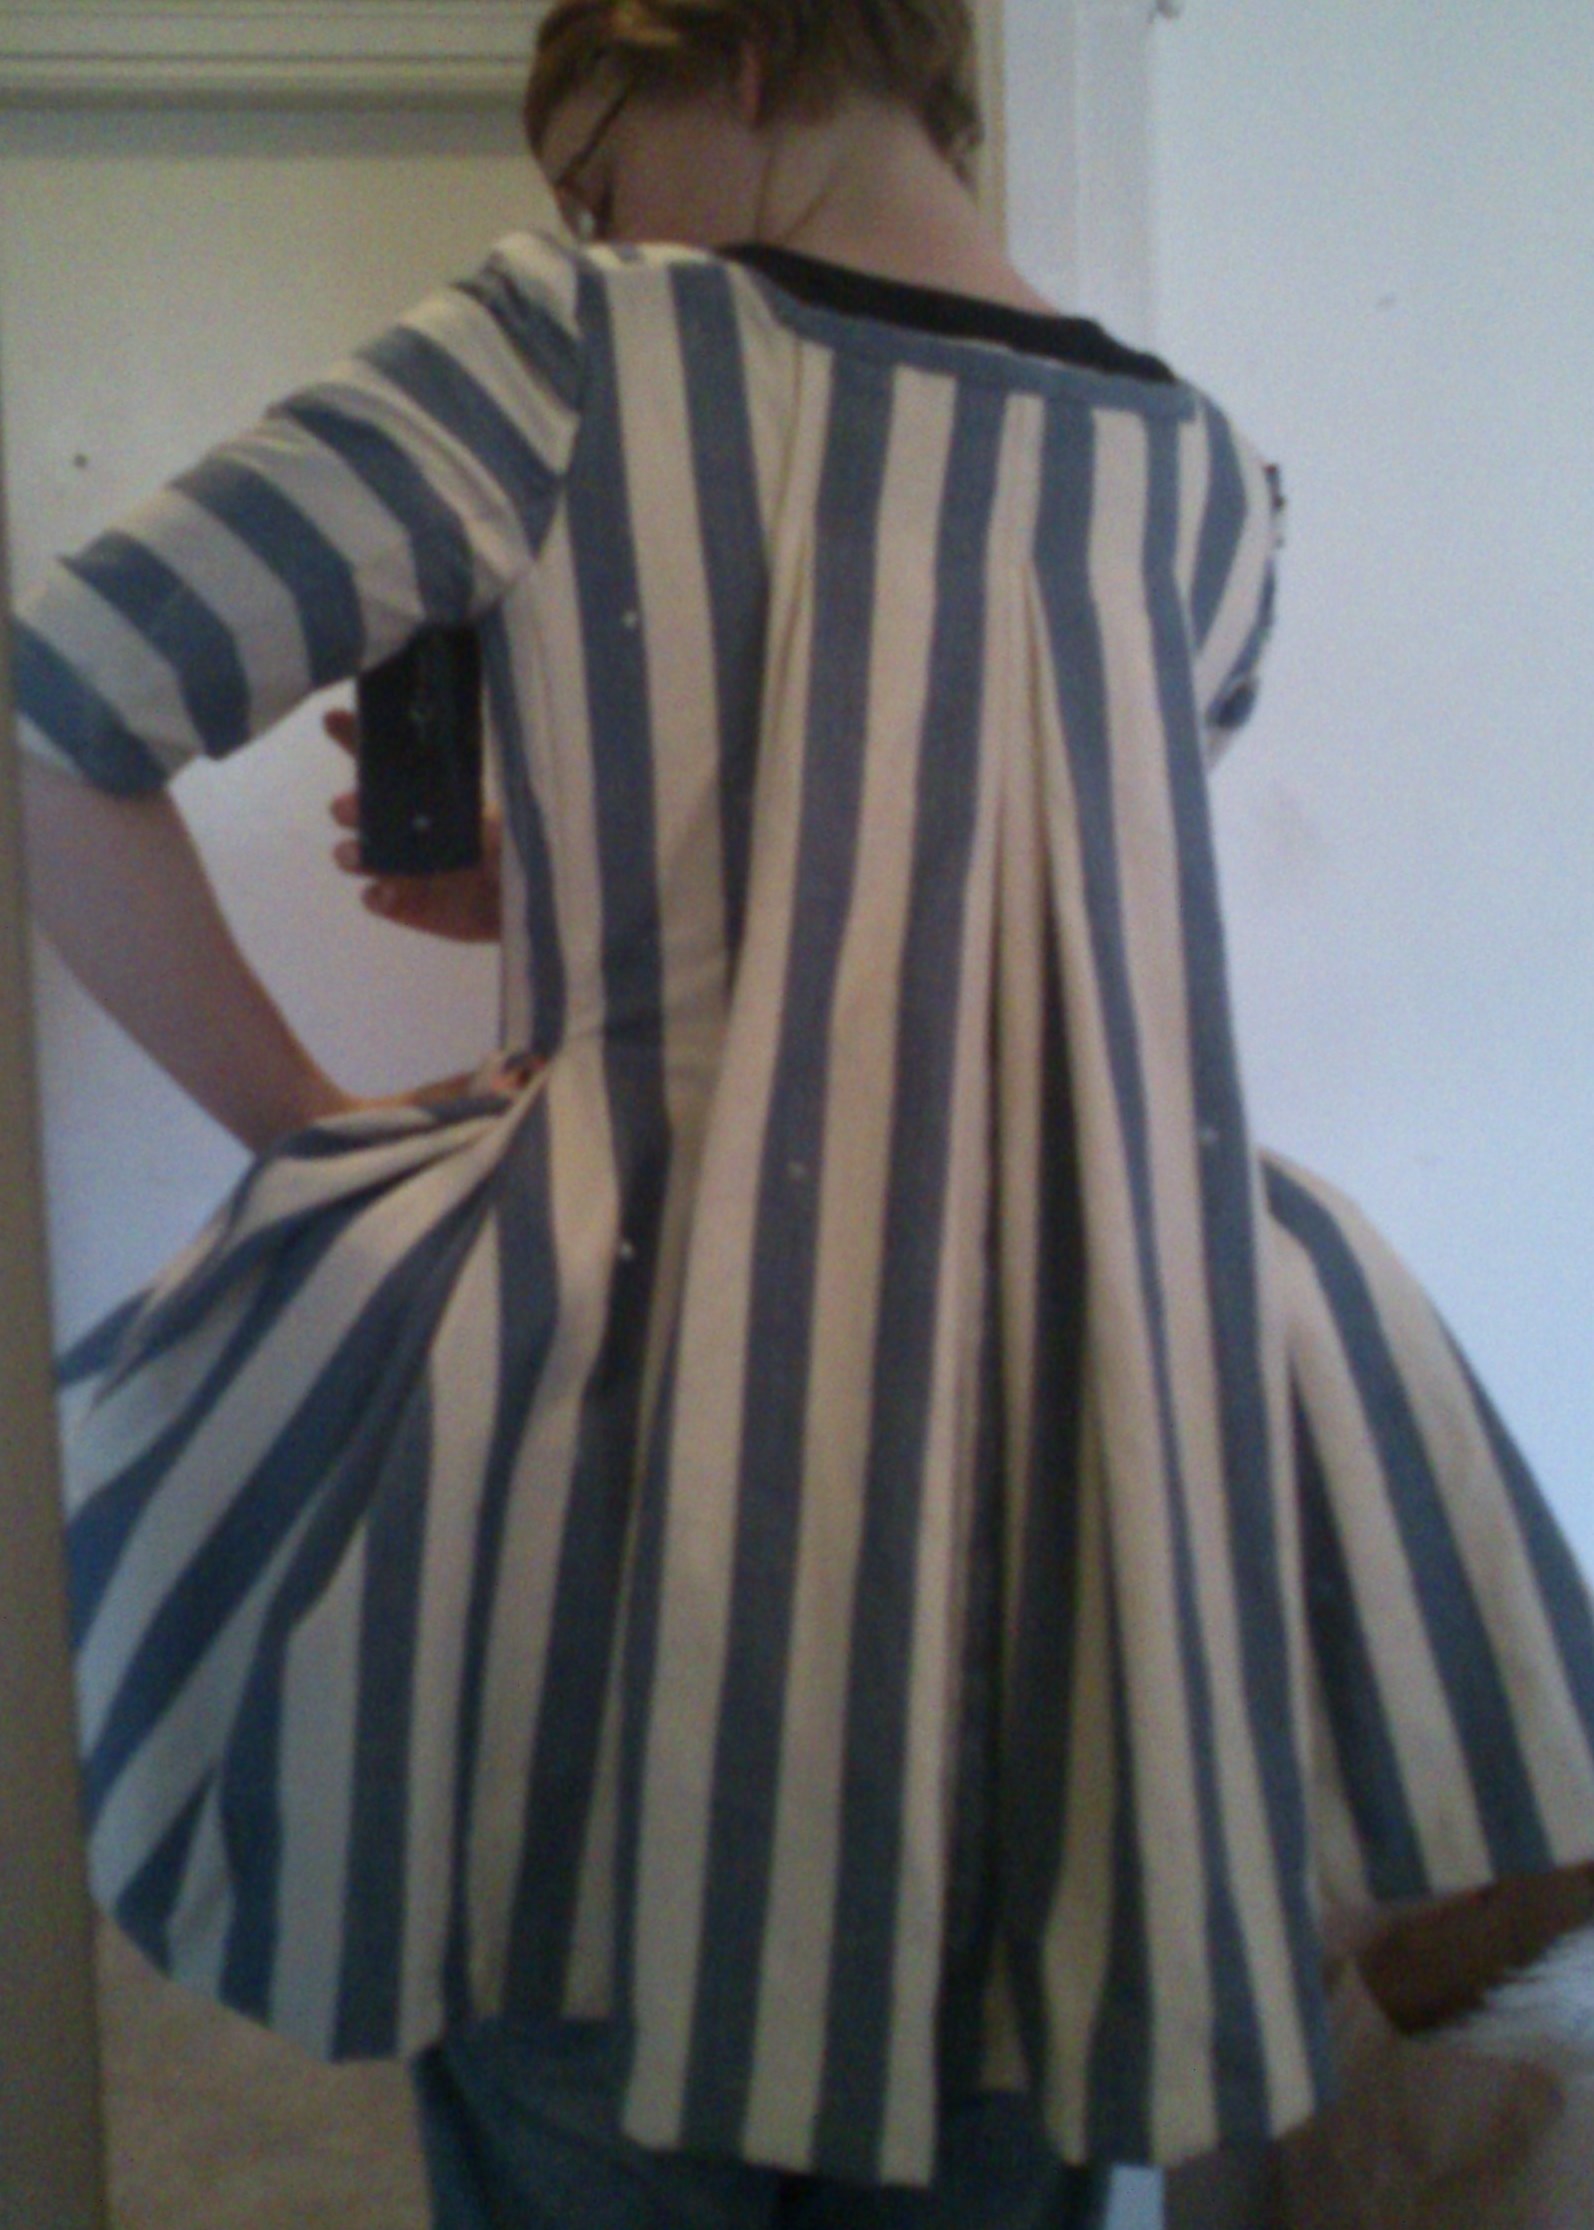
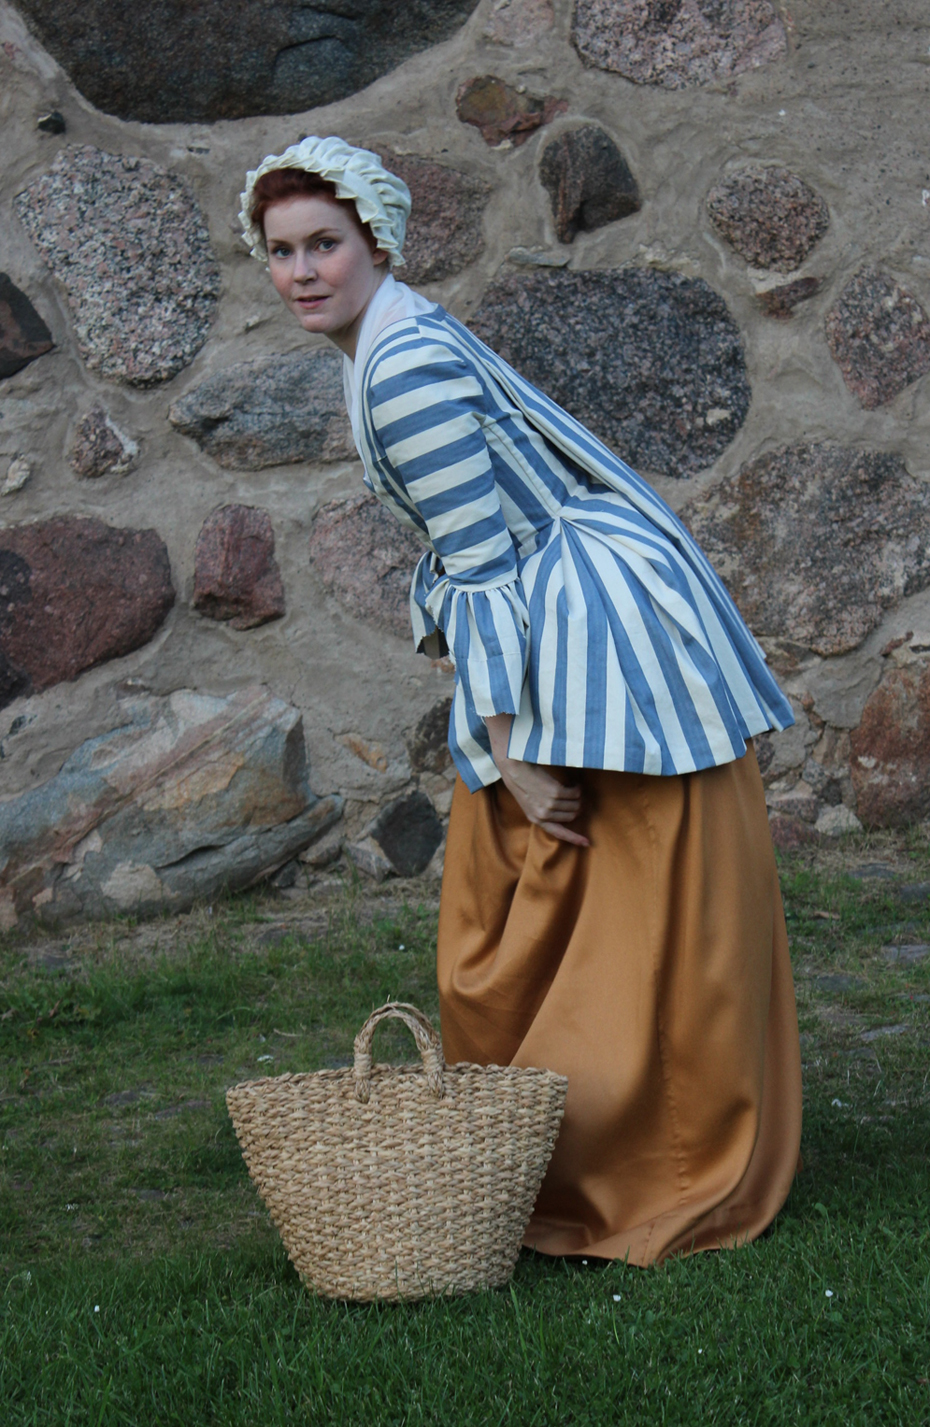
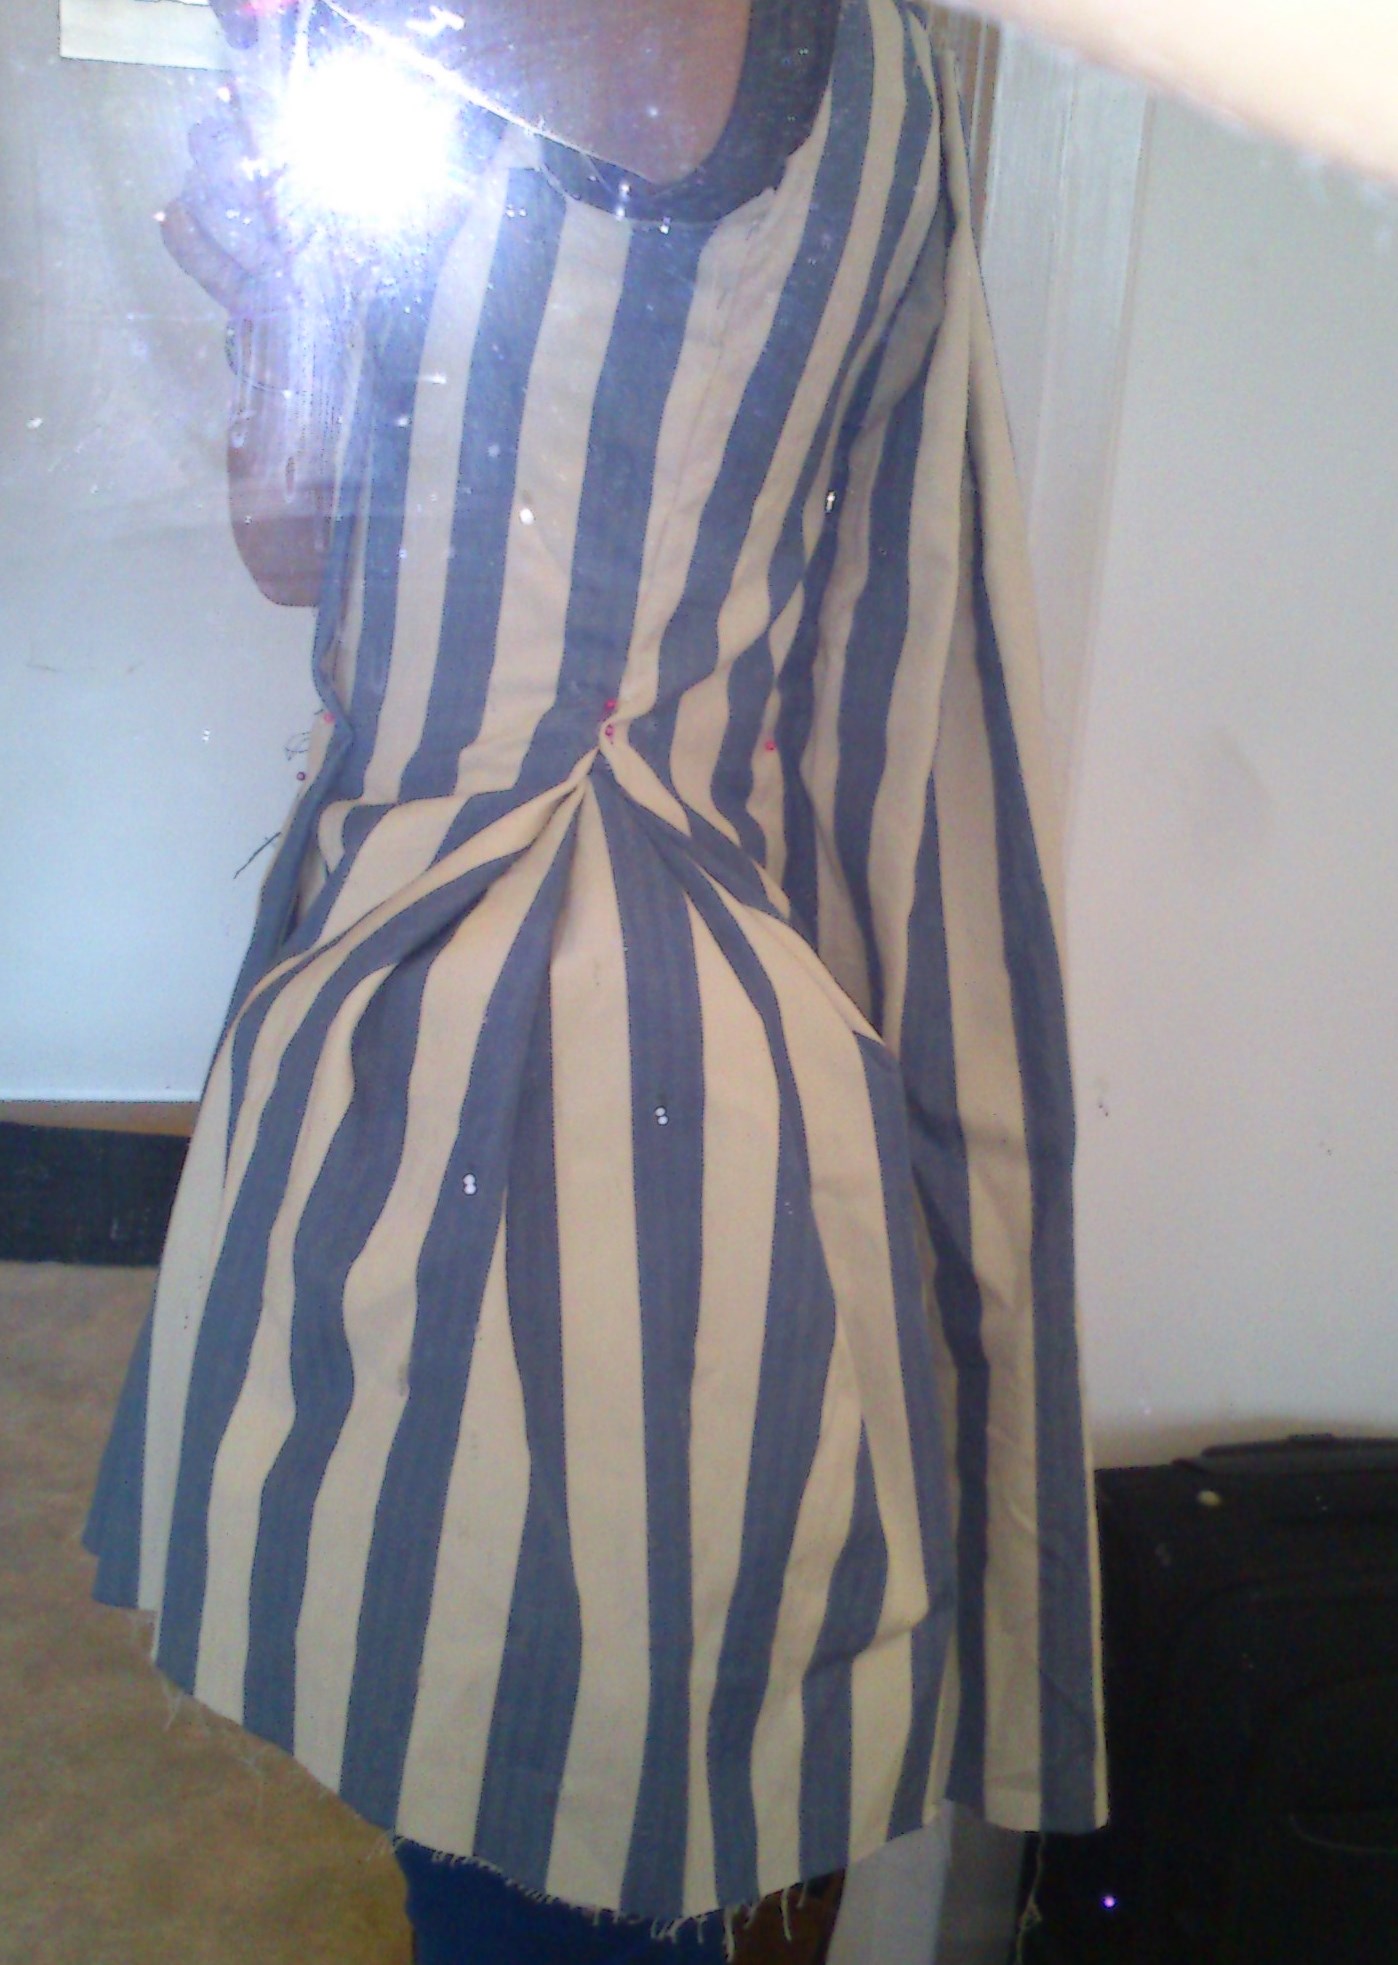
I’m a bit worried by the wrinkles in the waist. I had hoped to be able to make the jacket without a waist seam. But I had to give in to the wrinkles and decided to sew them down as they lay, creating a false seam.
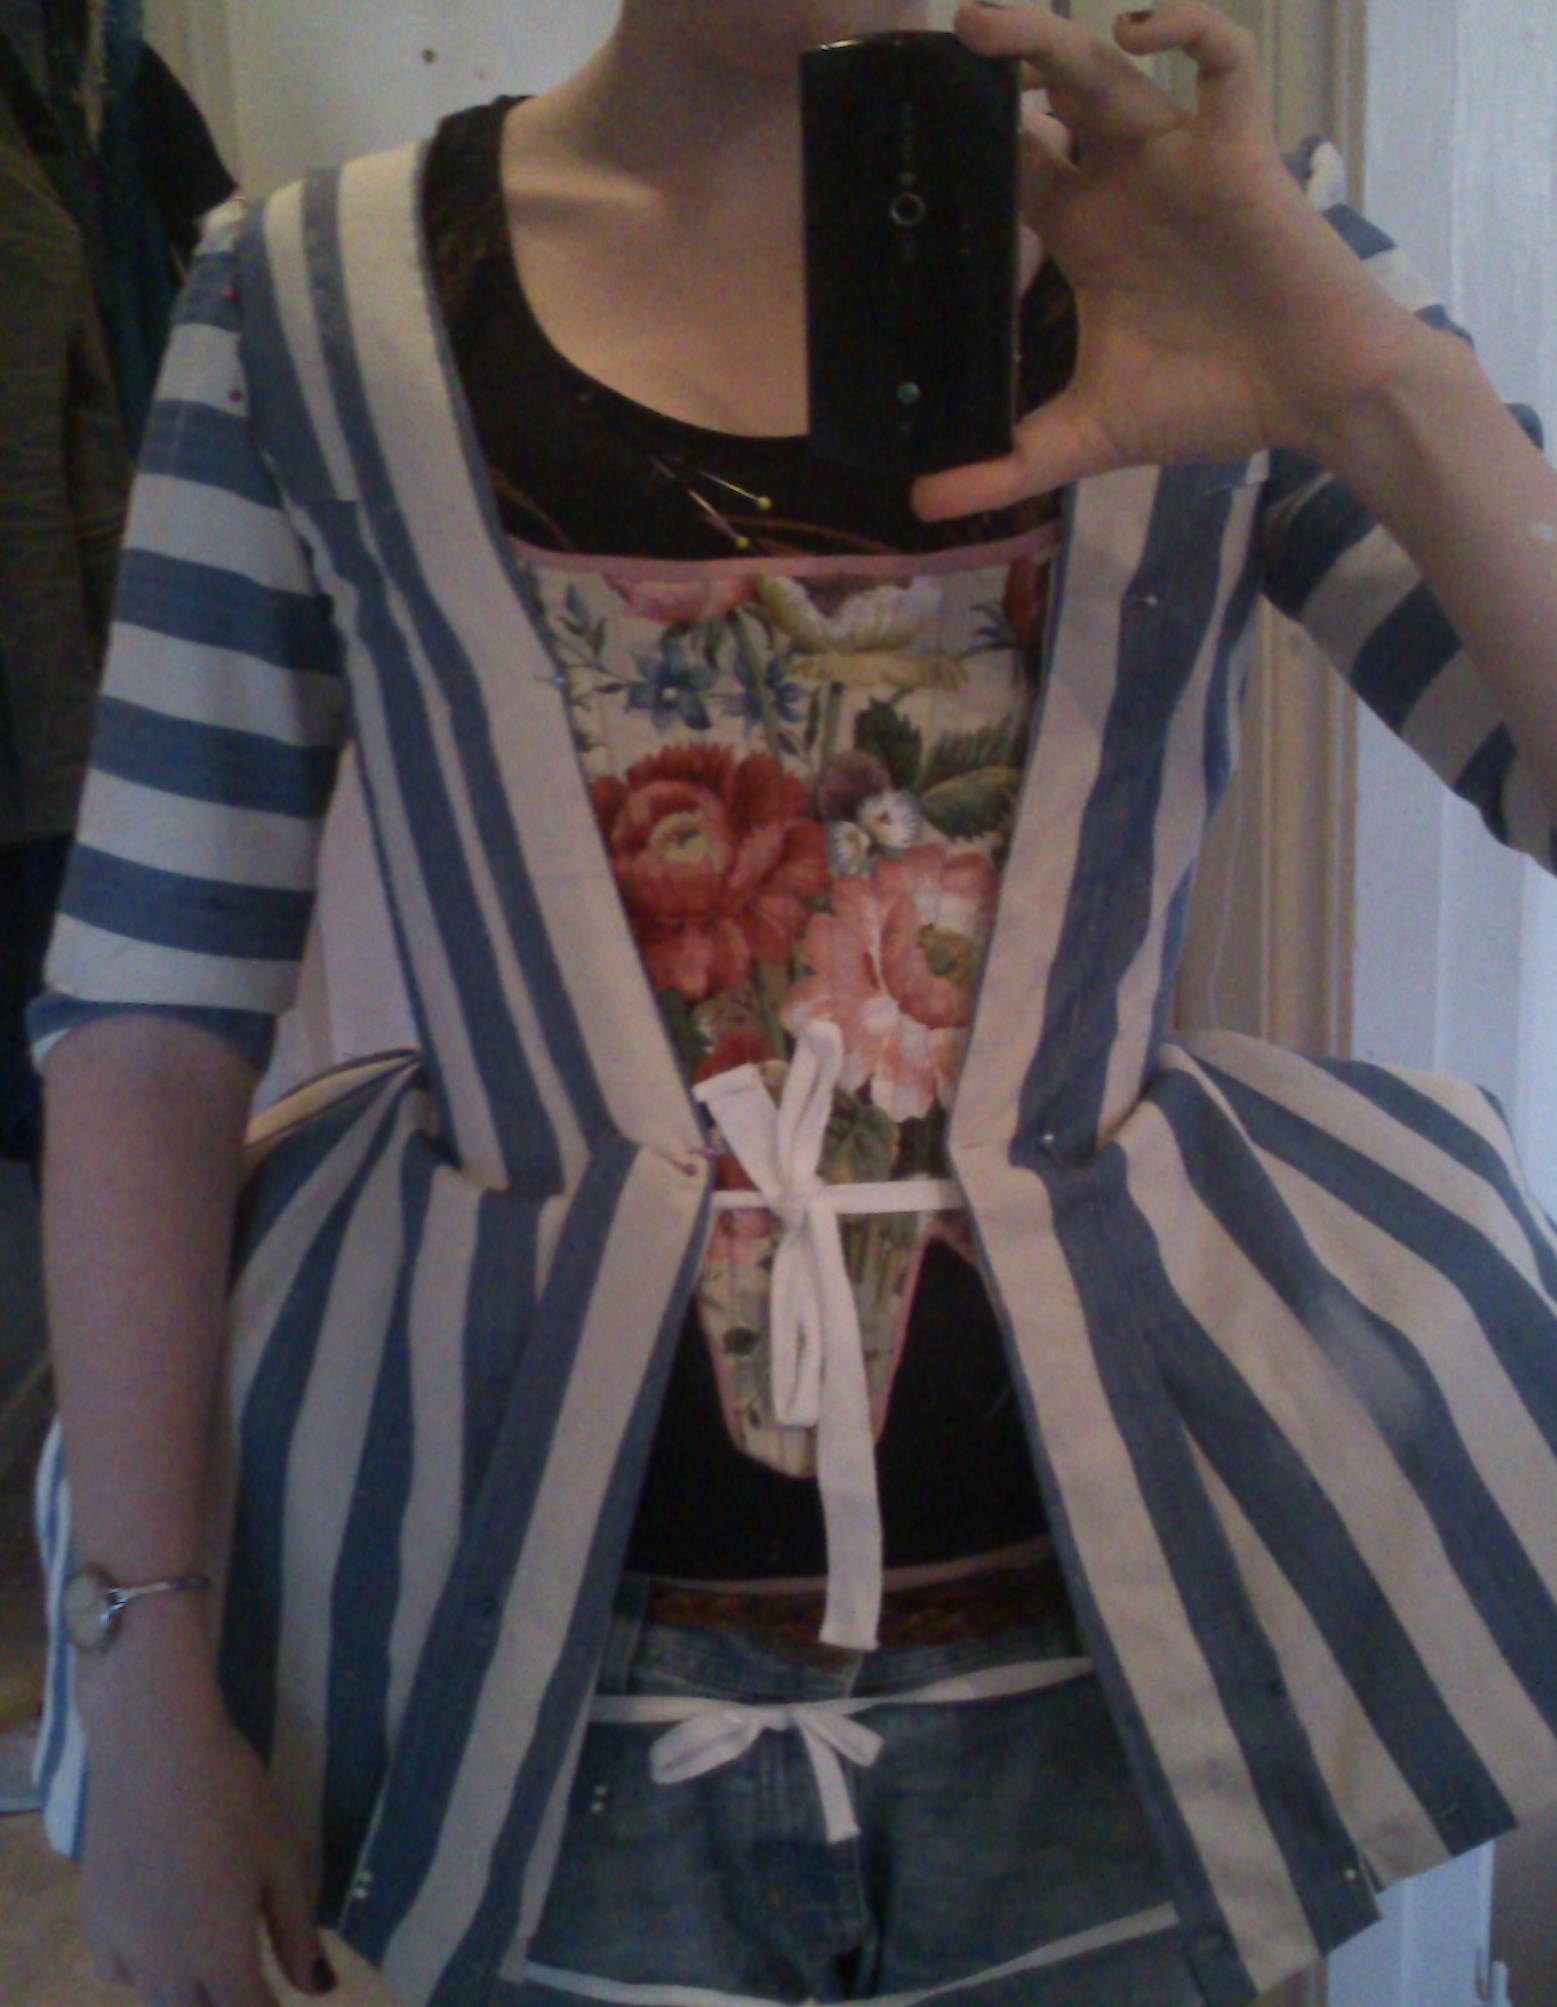
I draped the stomacher straight to the body when wearing the jacket, to get the opening and sizing right. I cut the stomacher in two parts, who closes at center front by hooks and eyes.
The hole jacket are compleatly handsewn and I’m very proud of it. I used up every single piece of the fabric and manadge to only piece it in one place – the left sleeve flounce.
And thisweekend me and my sister had a photoshoot of the jacket paired with the separate skirt, that I will show you pictures of in my next post.
Some finished pictures on the dressform.

Just the facts:
Challenge 17. Robe and Robbings
What: A pet-en-l’air (Jacket)
Year: 1745-1755.
Pattern: Janet Arnolds “Pattern of Fahsion 1” A pet-en-l’air
Fabric: 2,5 m of striped cotton, and 2,5 m white cotton-sheet for lining.
Notions: Thread, hooks and eyes, lacing cord, plastic boning for the stomacher and lacing.
How historical accurate: My closest yet. Compleatly handsewn with period stiching, pattern and cutting methods. I’d say about 90%.
Time: 25 hours
Cost: 100 Sek (11USD)
First worn: On the photoshoot mid sep.
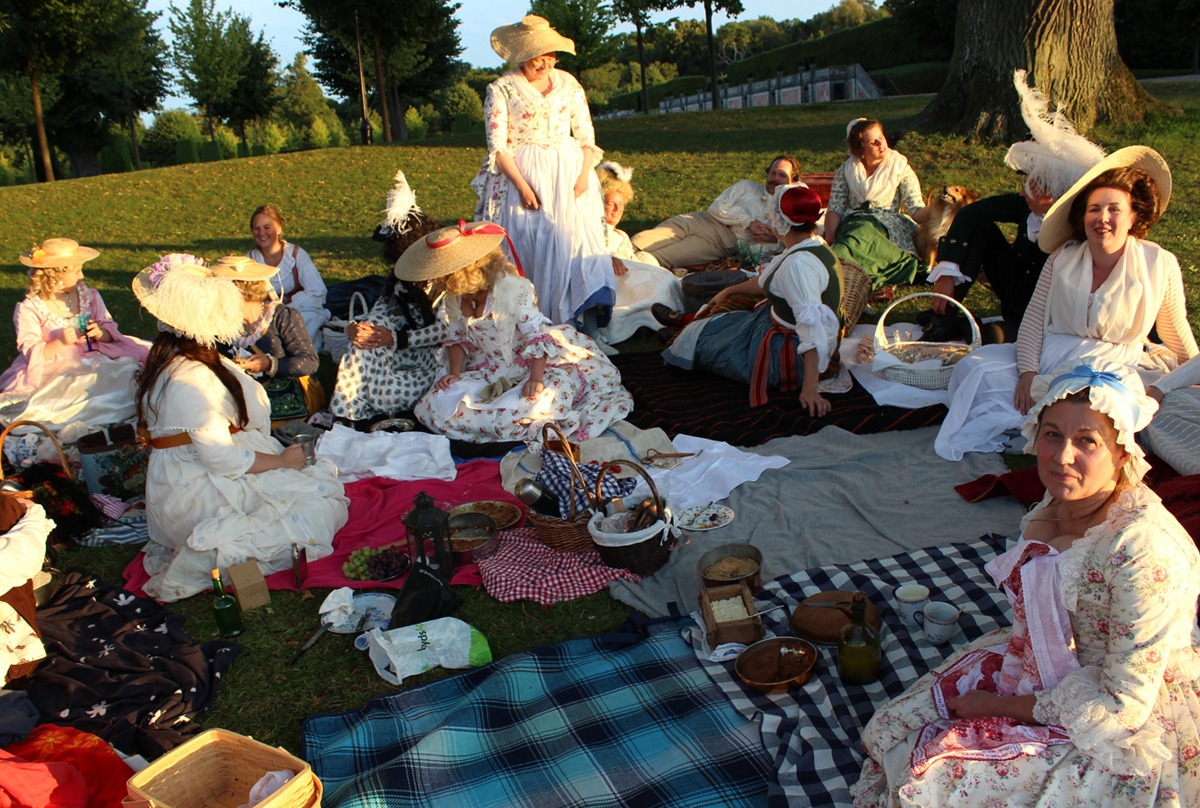
Right in the middle of my stressfull work with the Huldra movie I got invited to join my costume group for a 18th century picnick.
At first I tought that I was not going to be able to come. But as the day drew neerer i decided that i was most defenetly going – I was desperatly in need for someting to take my mind of the endless work hours and this picknic seemed like the perfect thing.
So I dove in to my box of costumes (having a bit of a crizis over wich dress to wear), and left work early to get myself dressed.
The picnic it self was located in the beautiful park of Drottningholm (the royal castle). And even tough I had to stress like hell, changing into the historical stockings and petticoats and wigs, and then ride the metro and the buss alone in my costume it was totaly worth it.
The weather was perfect and when I opened my picnic basket i found the most wounderful pacage of fruit, sandwishes, chocolate and juice – that my friend so thoughtfully packed when I was rushing around trying to find my bumroll and shoebuckles.
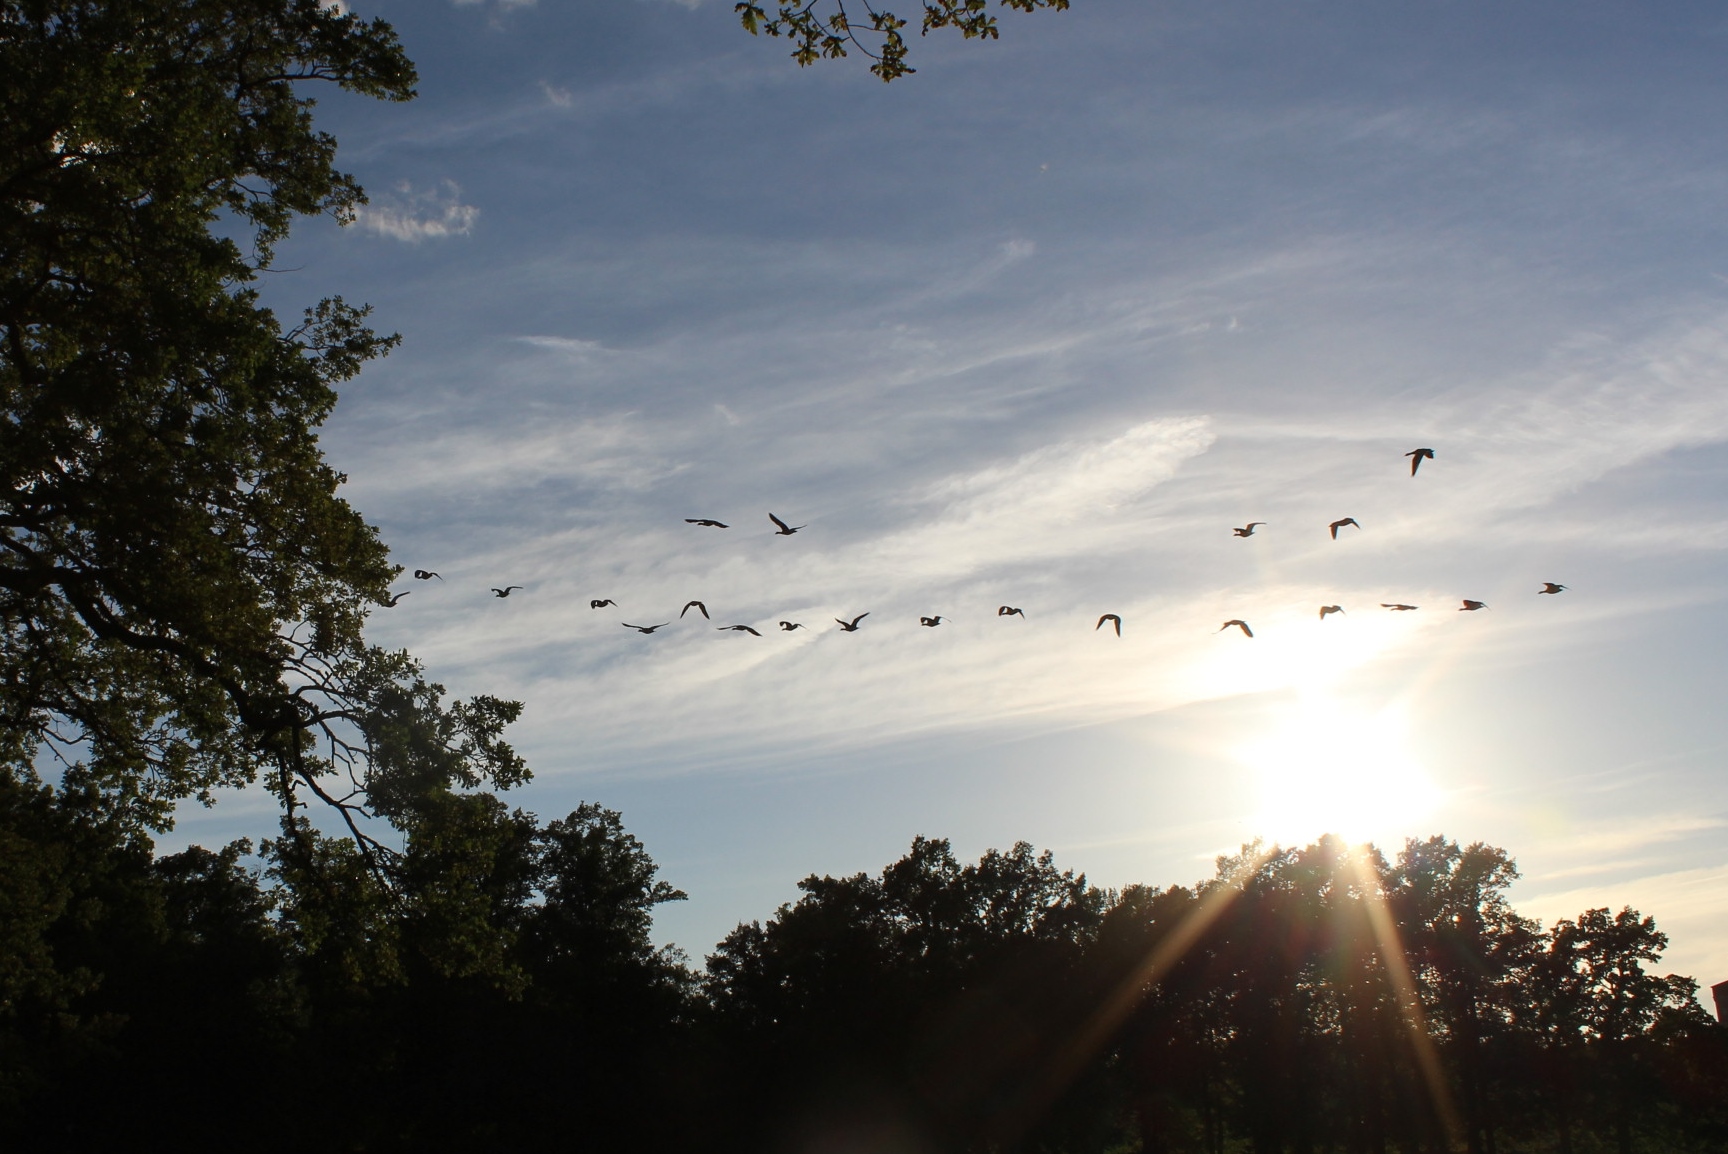 The birds take flight to warmer countryes.

 Just look at all that lovely food.
 A fancy and historical way of dressing a sandwich and a juice-bottle (Thank you Kristin).

 Me in my Chemise a Lamballe.

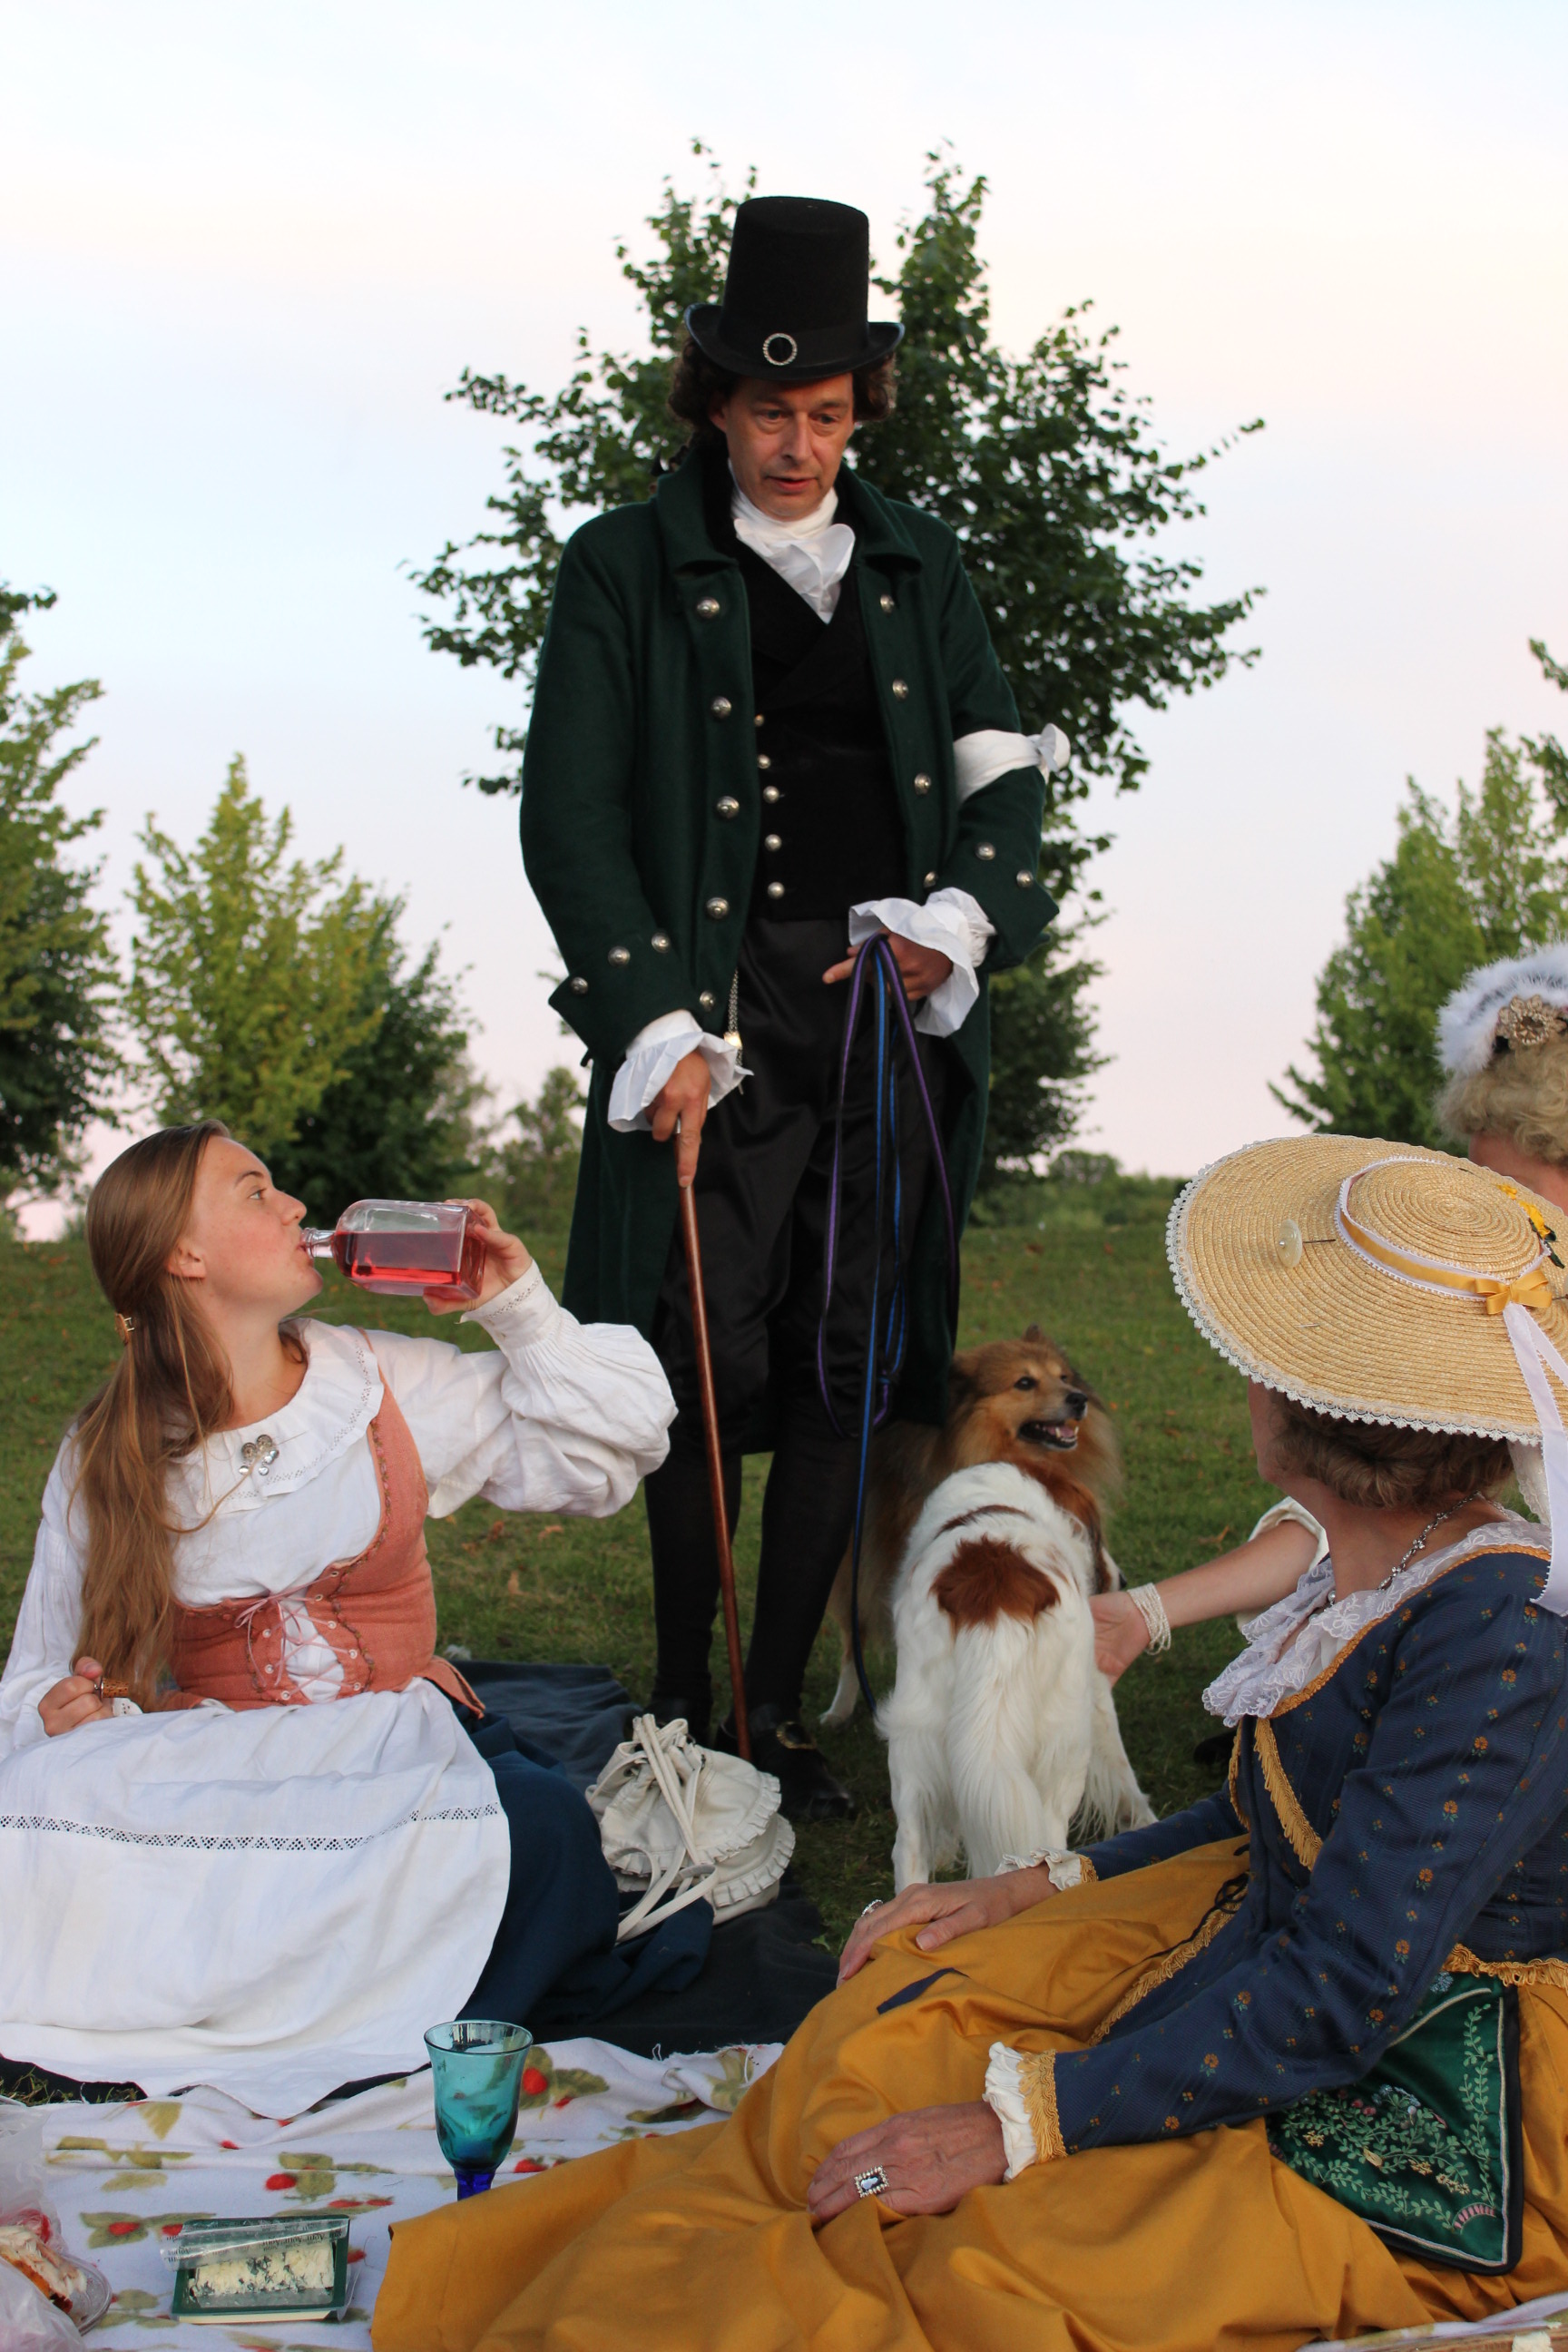 We even had some gentlemen and some adorable dogs in our group.
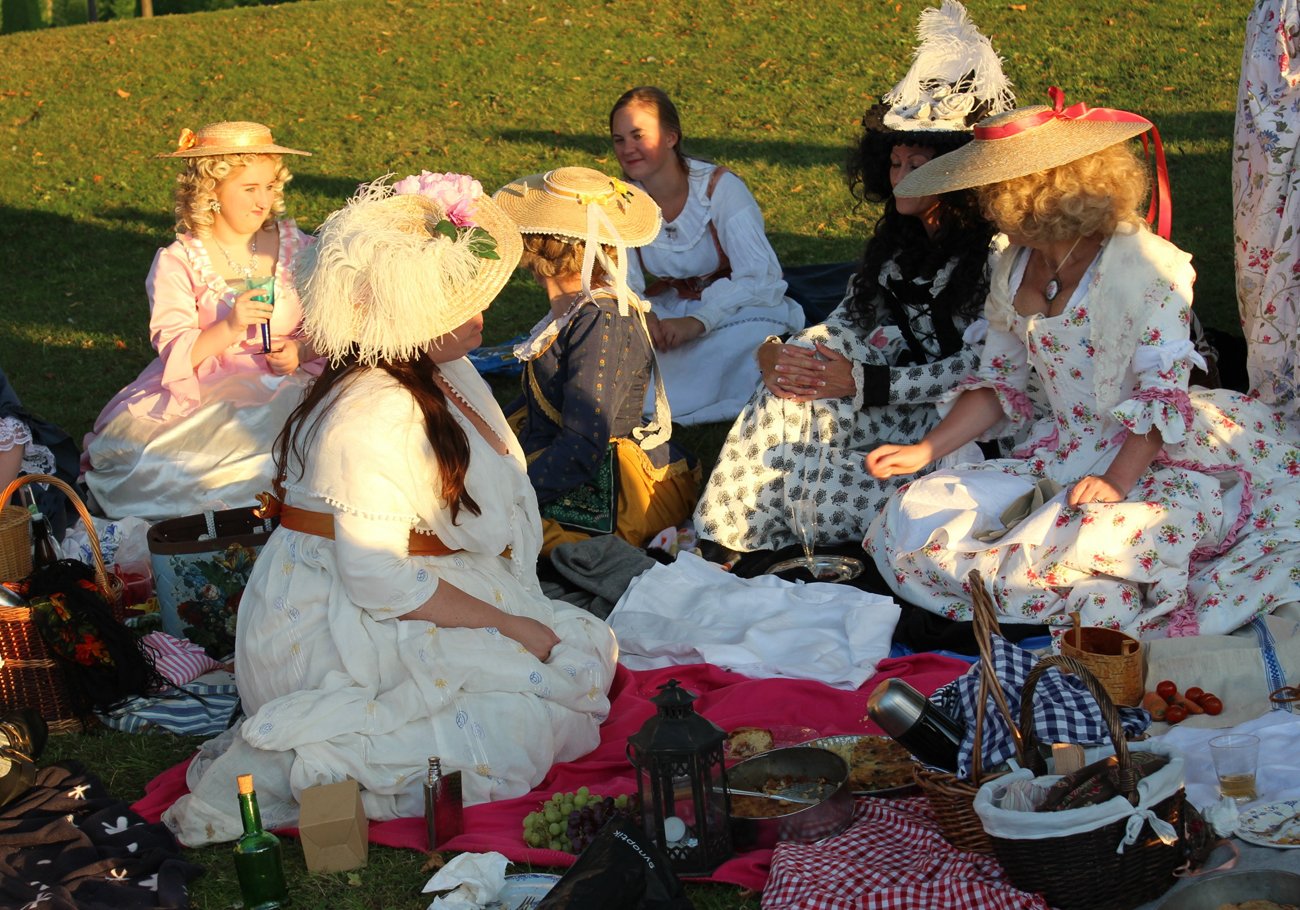
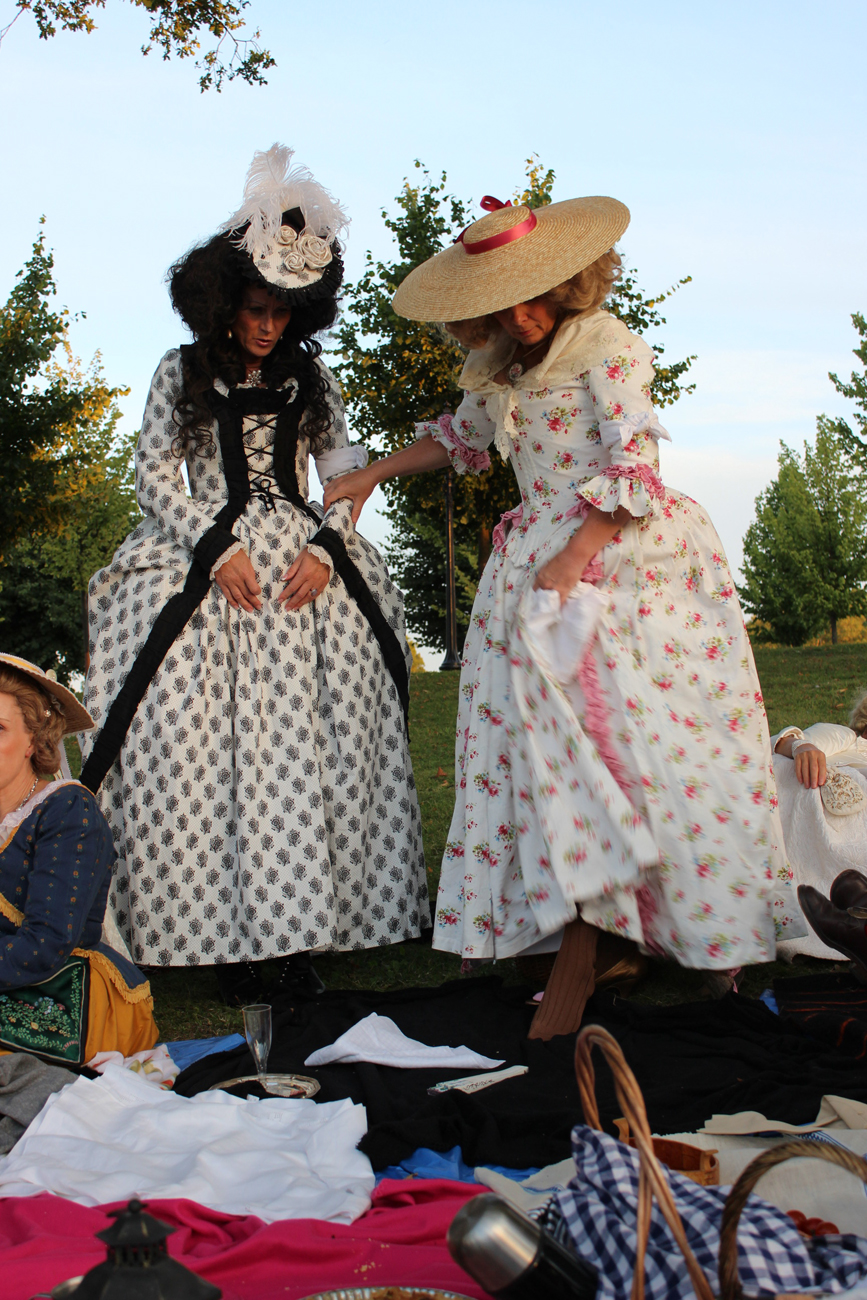
 I love the mixing of patterns in thier dresses.
 A story illustrated with papper-dolls was performed to our amusement.
 Smoking pipe in the dusk.
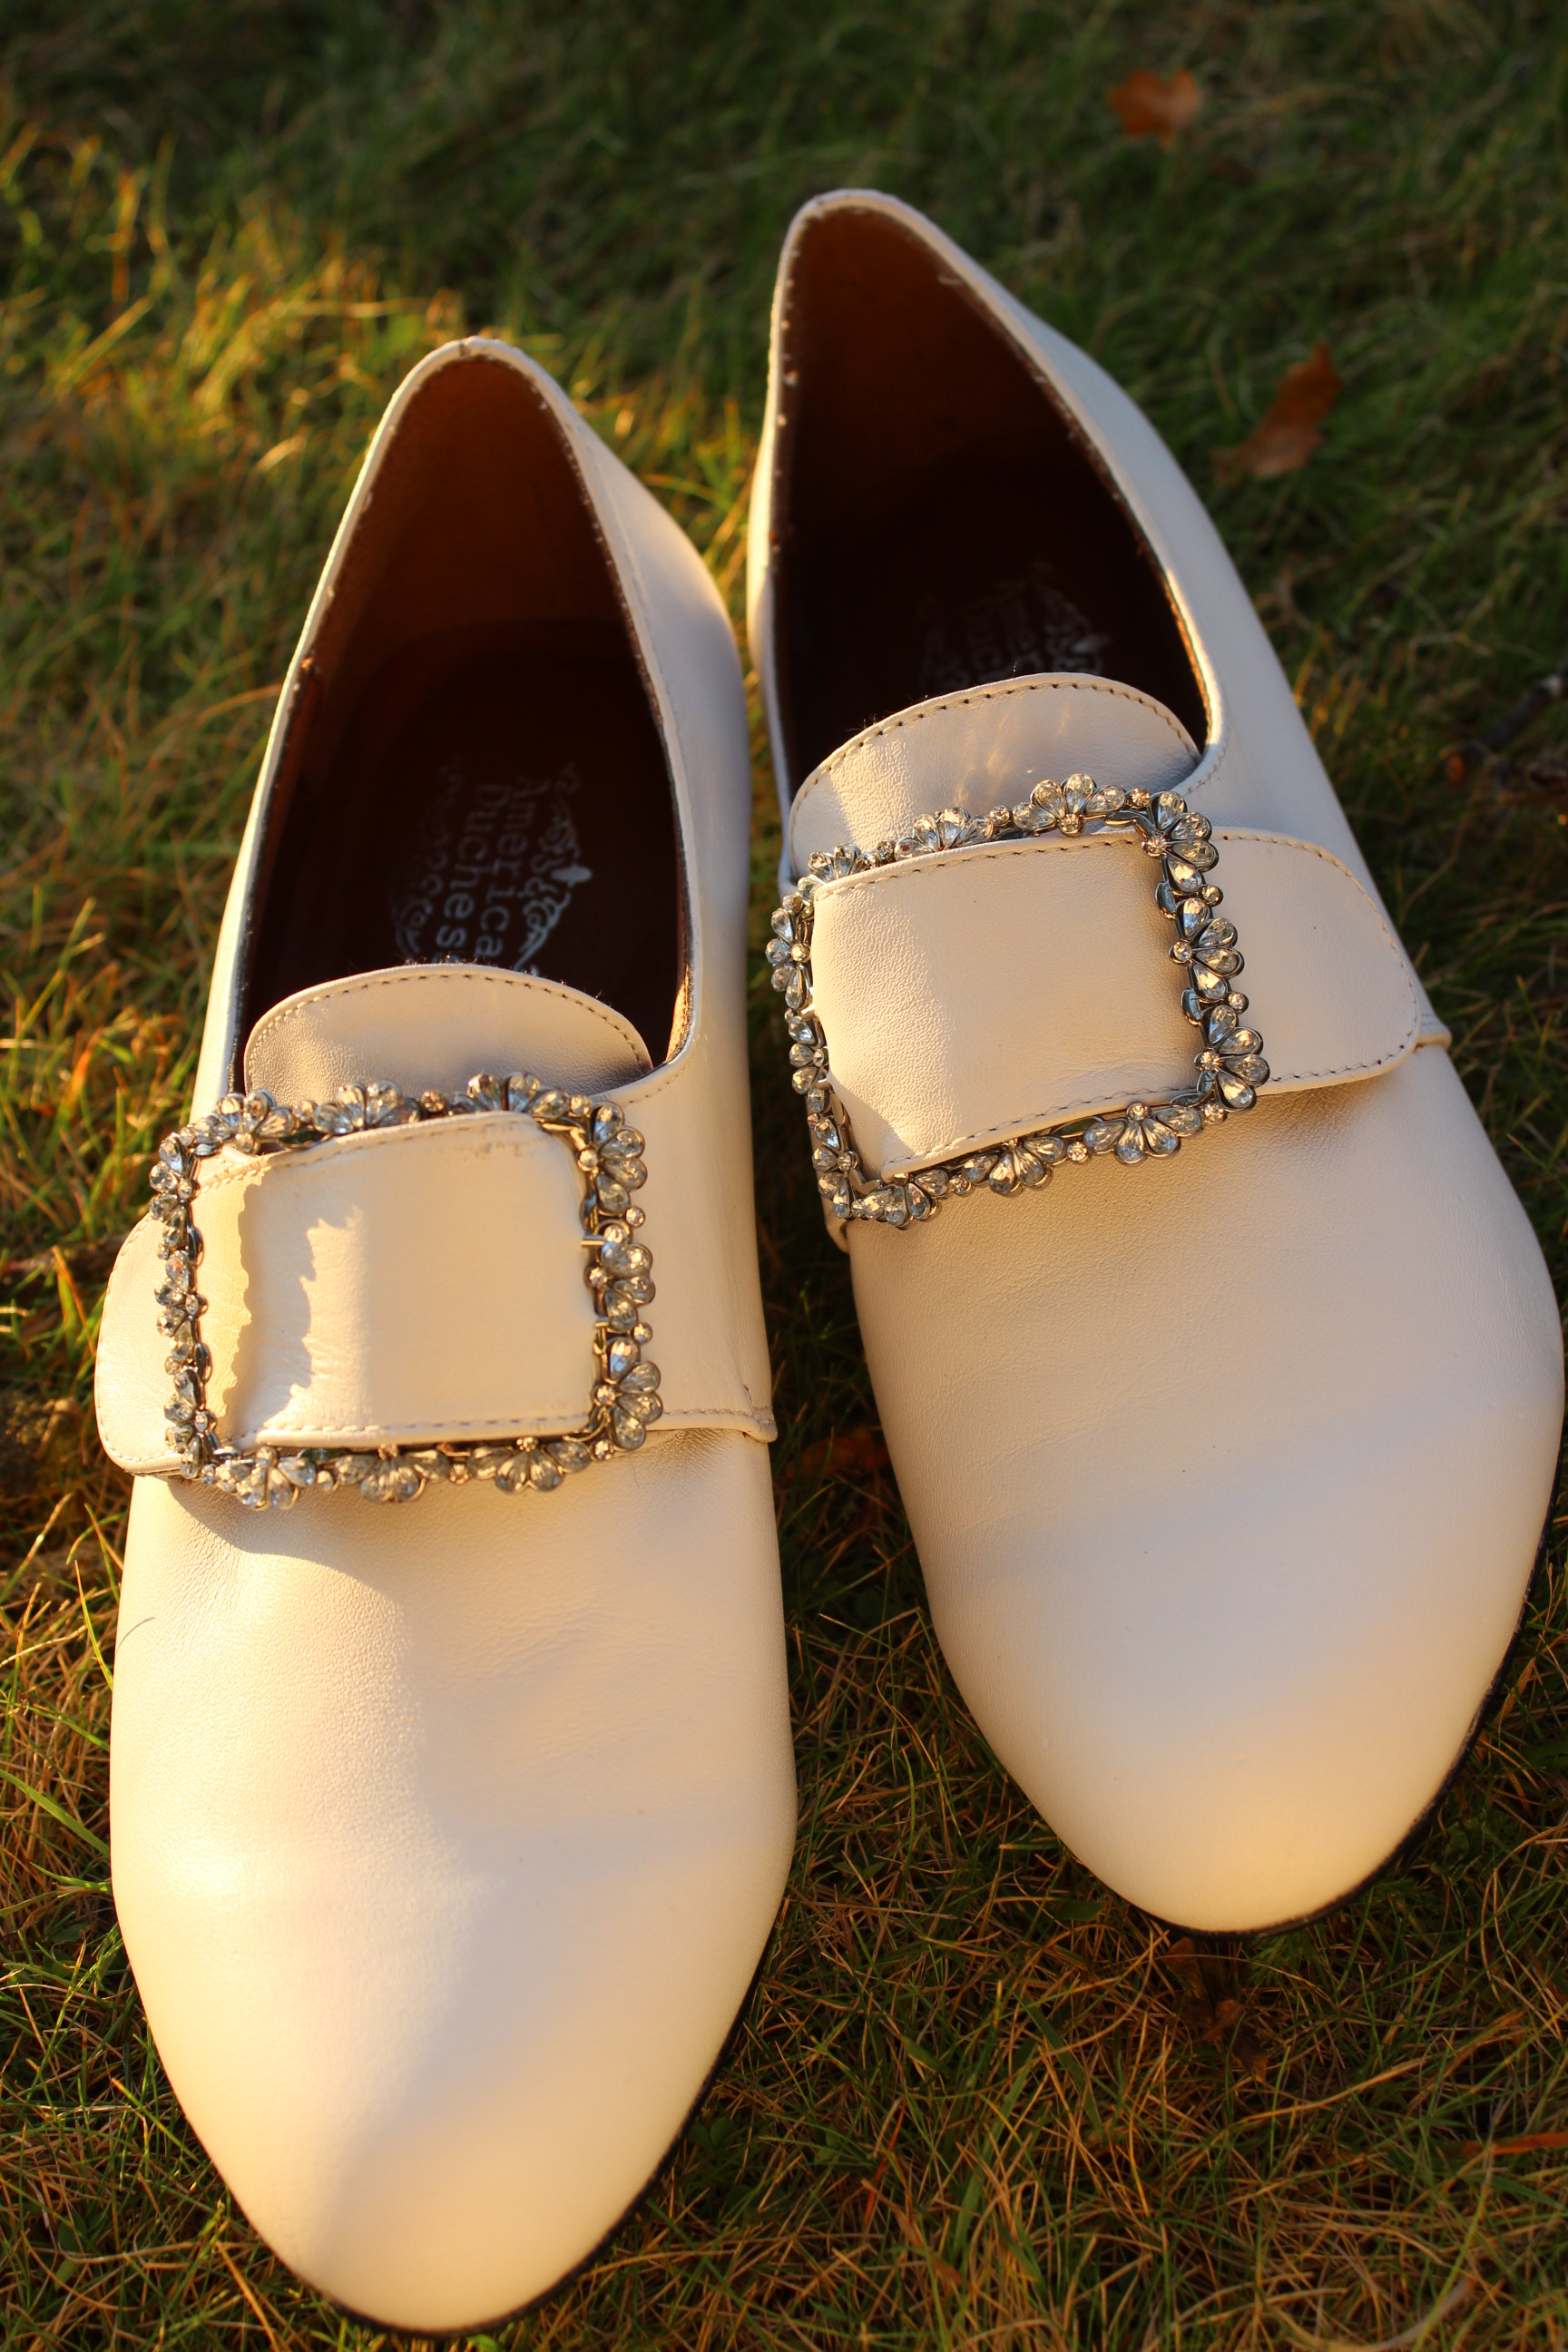 My American Duchess shoes.
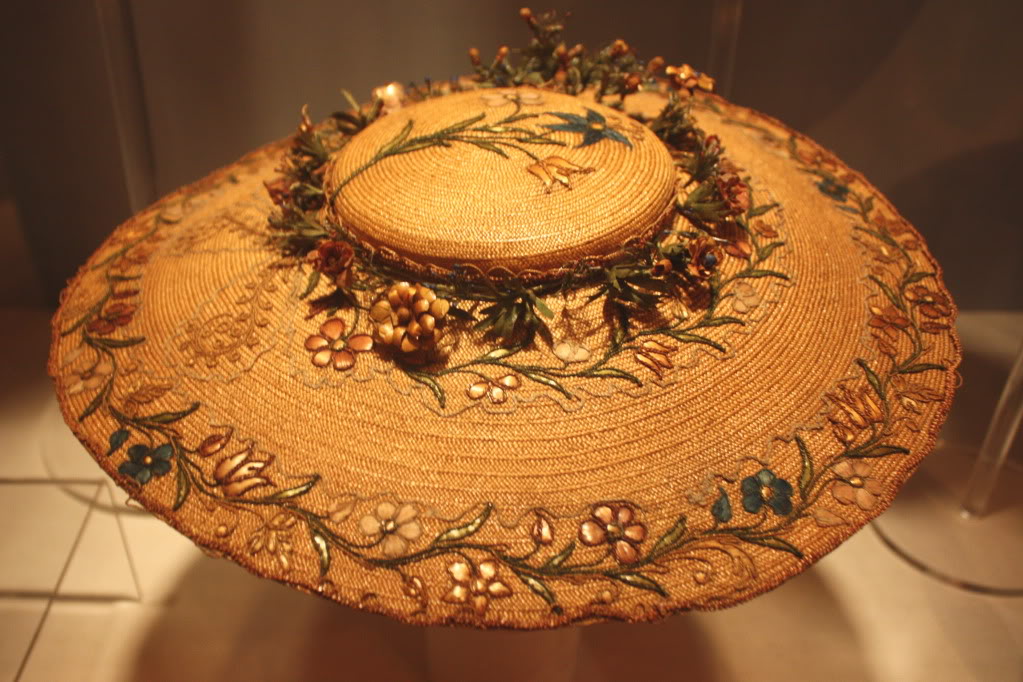
 Not mine, but so beautiful and autentic.
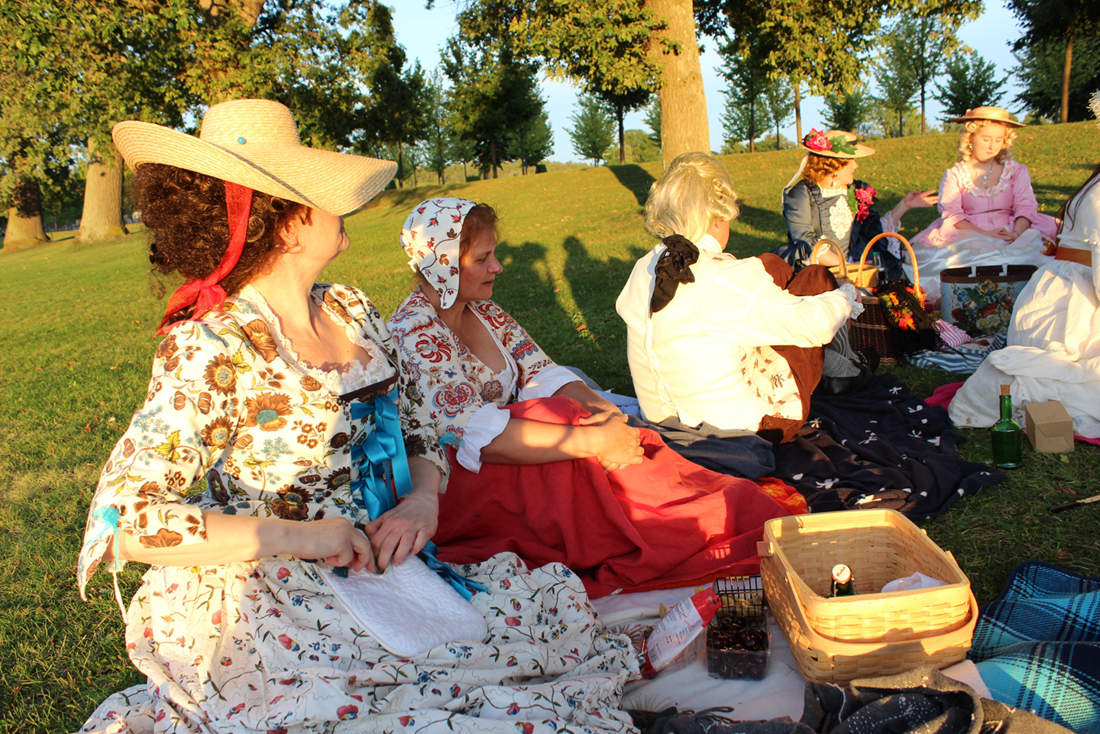
 My favorite picture – Lady taking a strol while the sun sets.
If you like history or costuming – or the two combined, you know that a lady never ever leaves her house without something on her head.
Different eras calls for different headwear but it has always been present, and can easily make or break any historical outfit.
Since I’ve been sewing so much 18th century costumes lately, I needed to make myself a hat – preferebly one that could be used with several different outfits.
So today I give you the Bergère:

“A bergère (French for shepherdess) hat is a flat-brimmed straw hat with a shallow crown, usually trimmed with ribbon and flowers. It could be worn in various ways with the brim folded back or turned up or down at whim. It is also sometimes called a milkmaid hat. It was widely worn in the mid-18th Century.
It has been suggested that the hat was named after Madame Bergeret,who is certainly holding a shepherdess-style hat in a Boucher portrait painted c.1766″ (from Wikipedia).

And here are a few other versions of the hat.
 Vigée Le Brun in a selfportrait
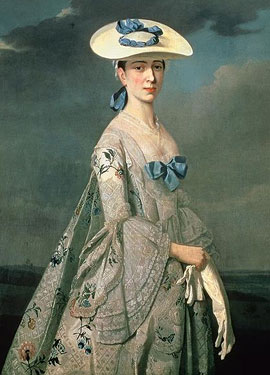
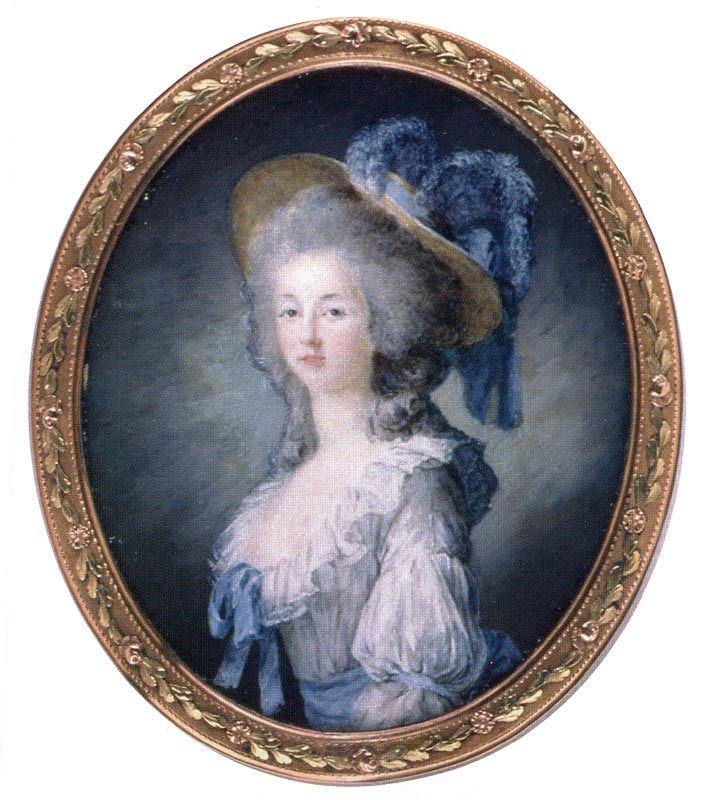 Princess Lamballe (and my inspiration for “the Chemise a la Reine”)
 Picture from the movie “The Duchess” with Keira Knightley
It is a pretty simple hat to make on your own, but I will not go into details as The Dreamstress have this wonderful tutorial which really says it all, and which I used to make my own version.
Some pics of my hat in the making.
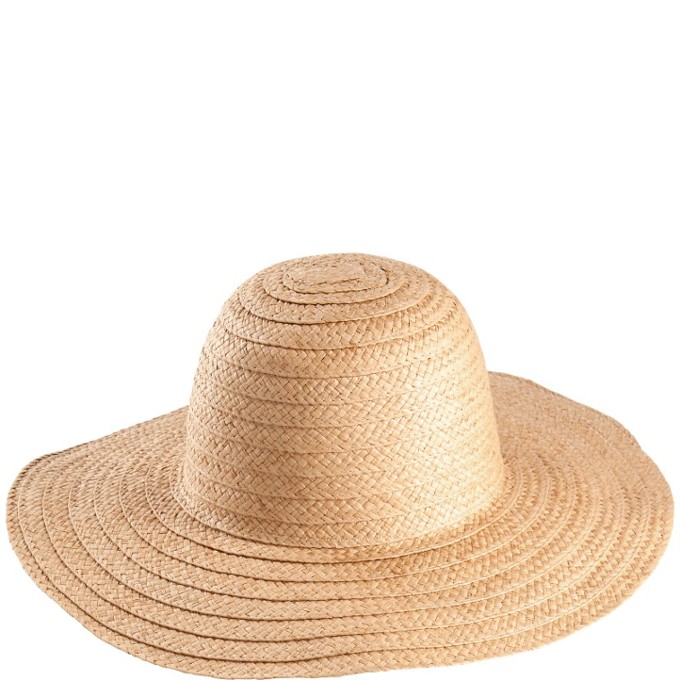 An ordinary straw hat.
 Cut, reshape and glue the crown back on.
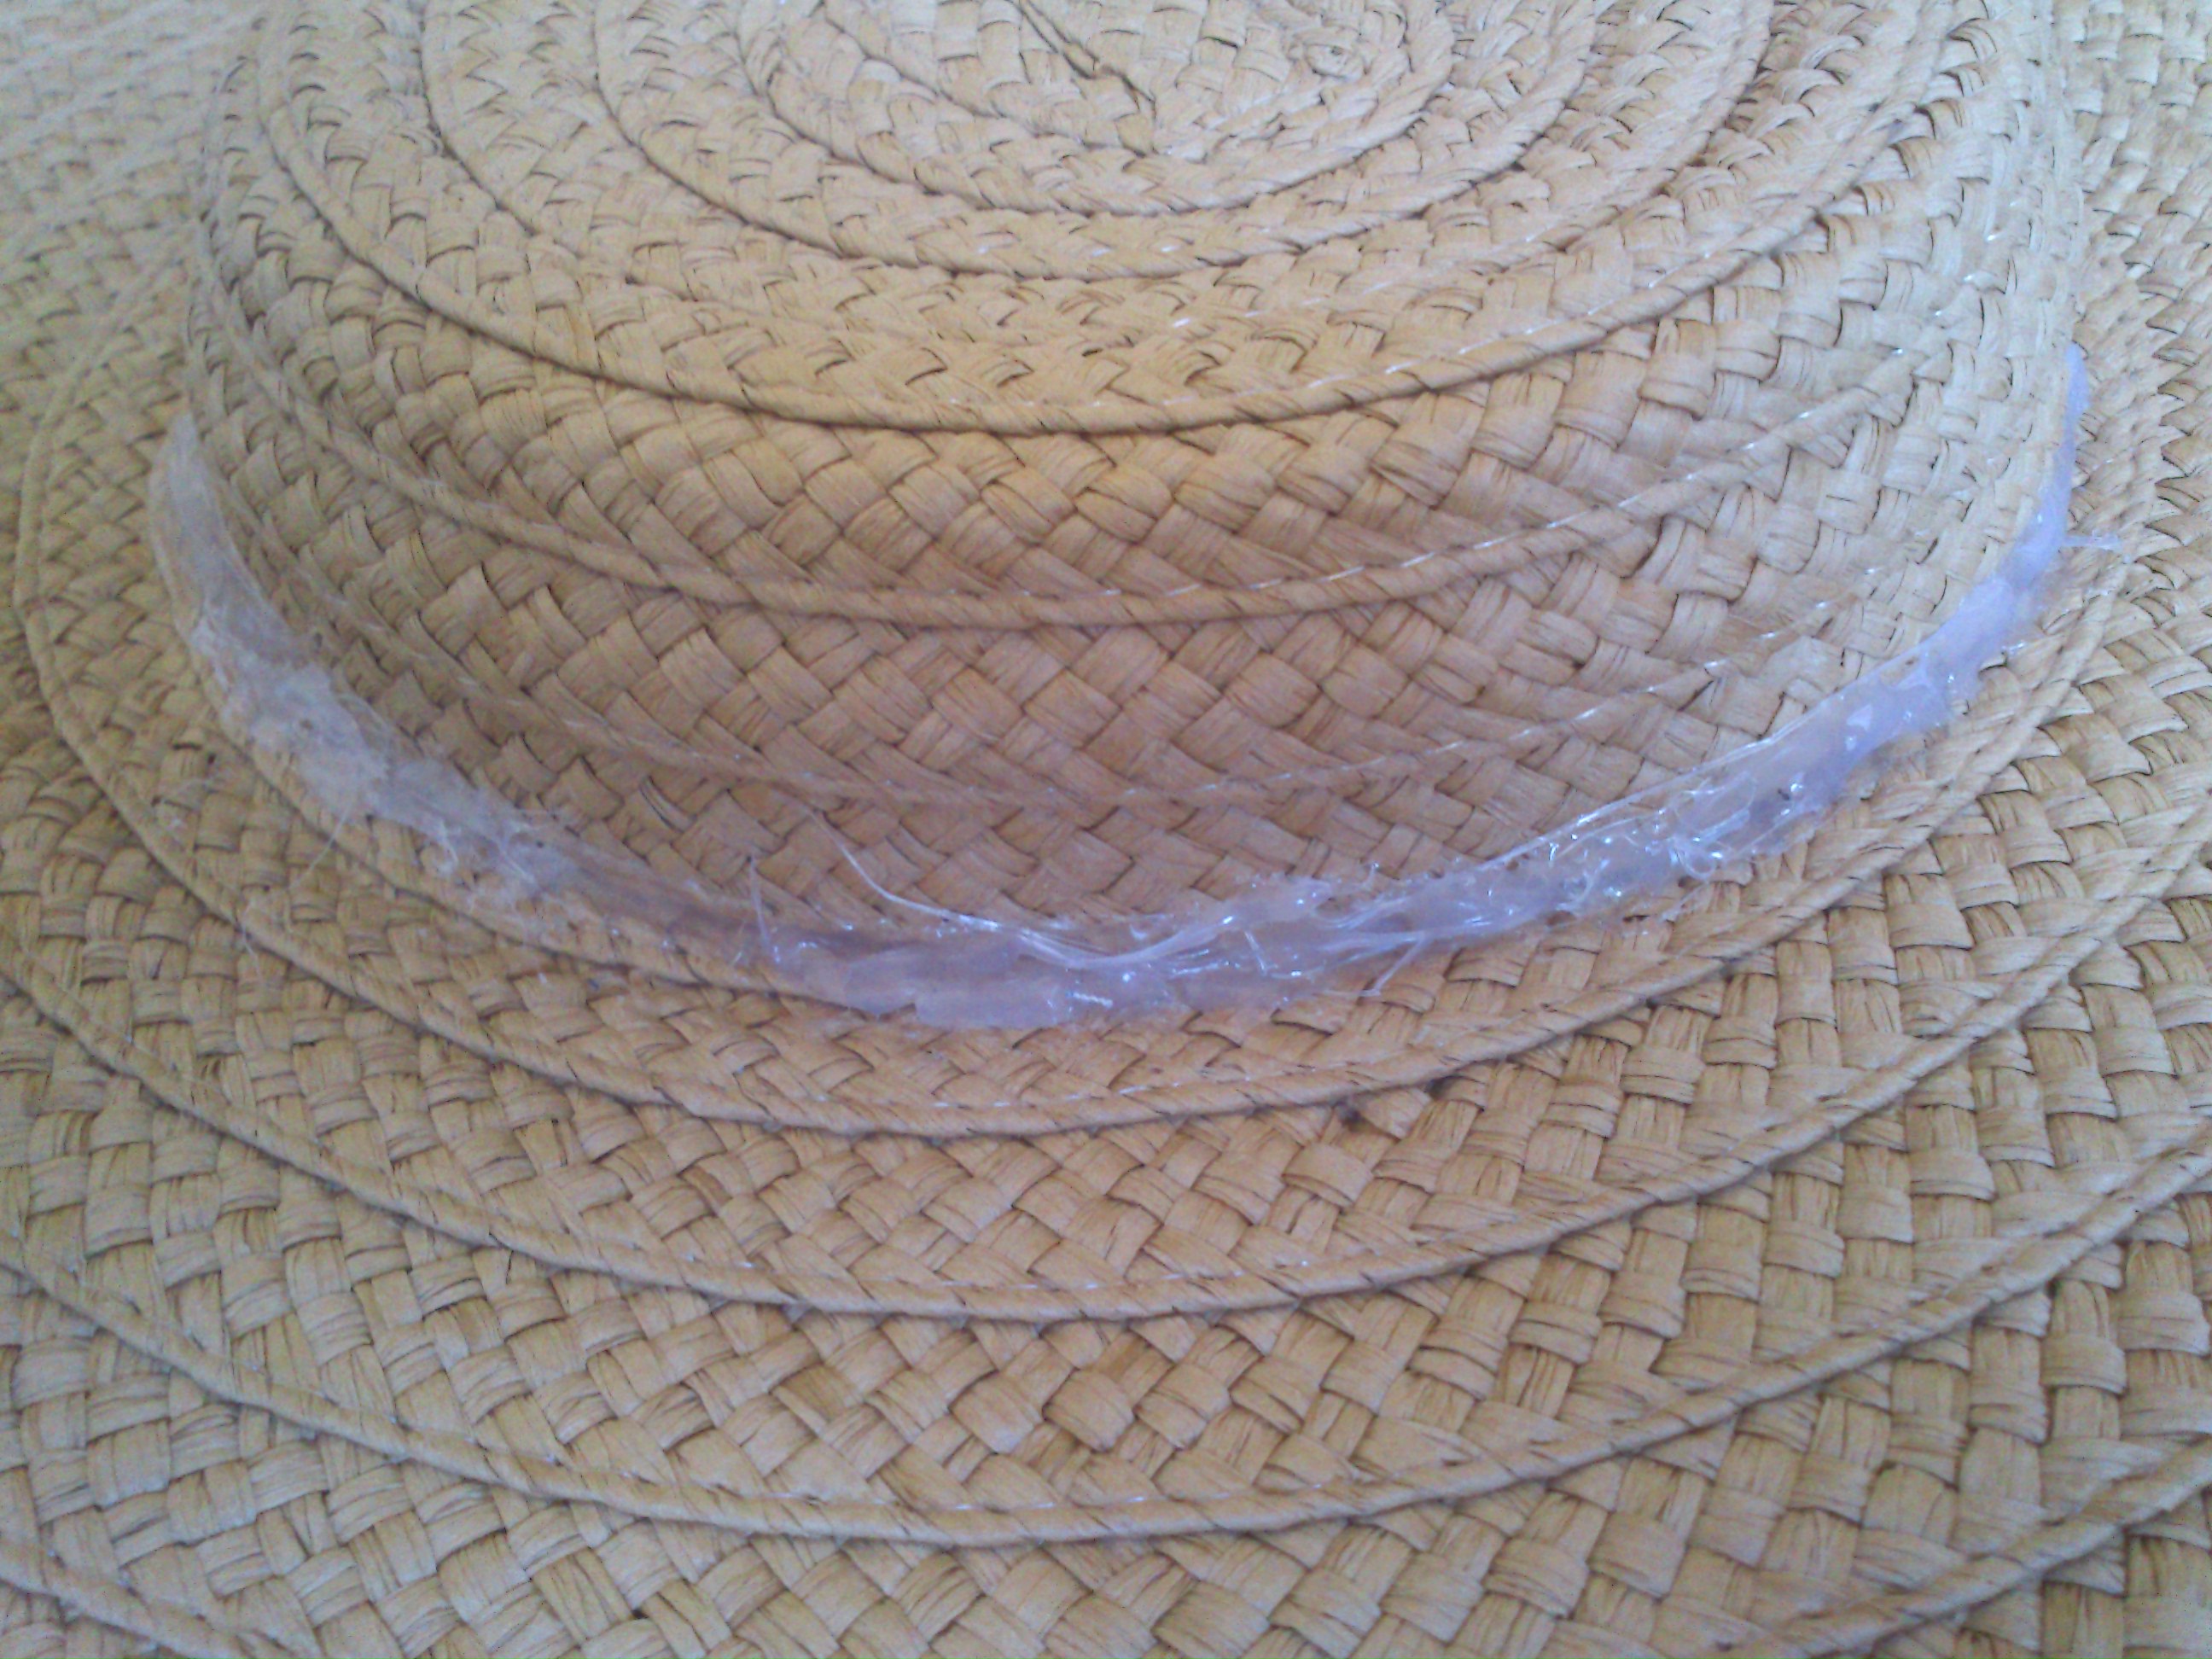
 Trimming
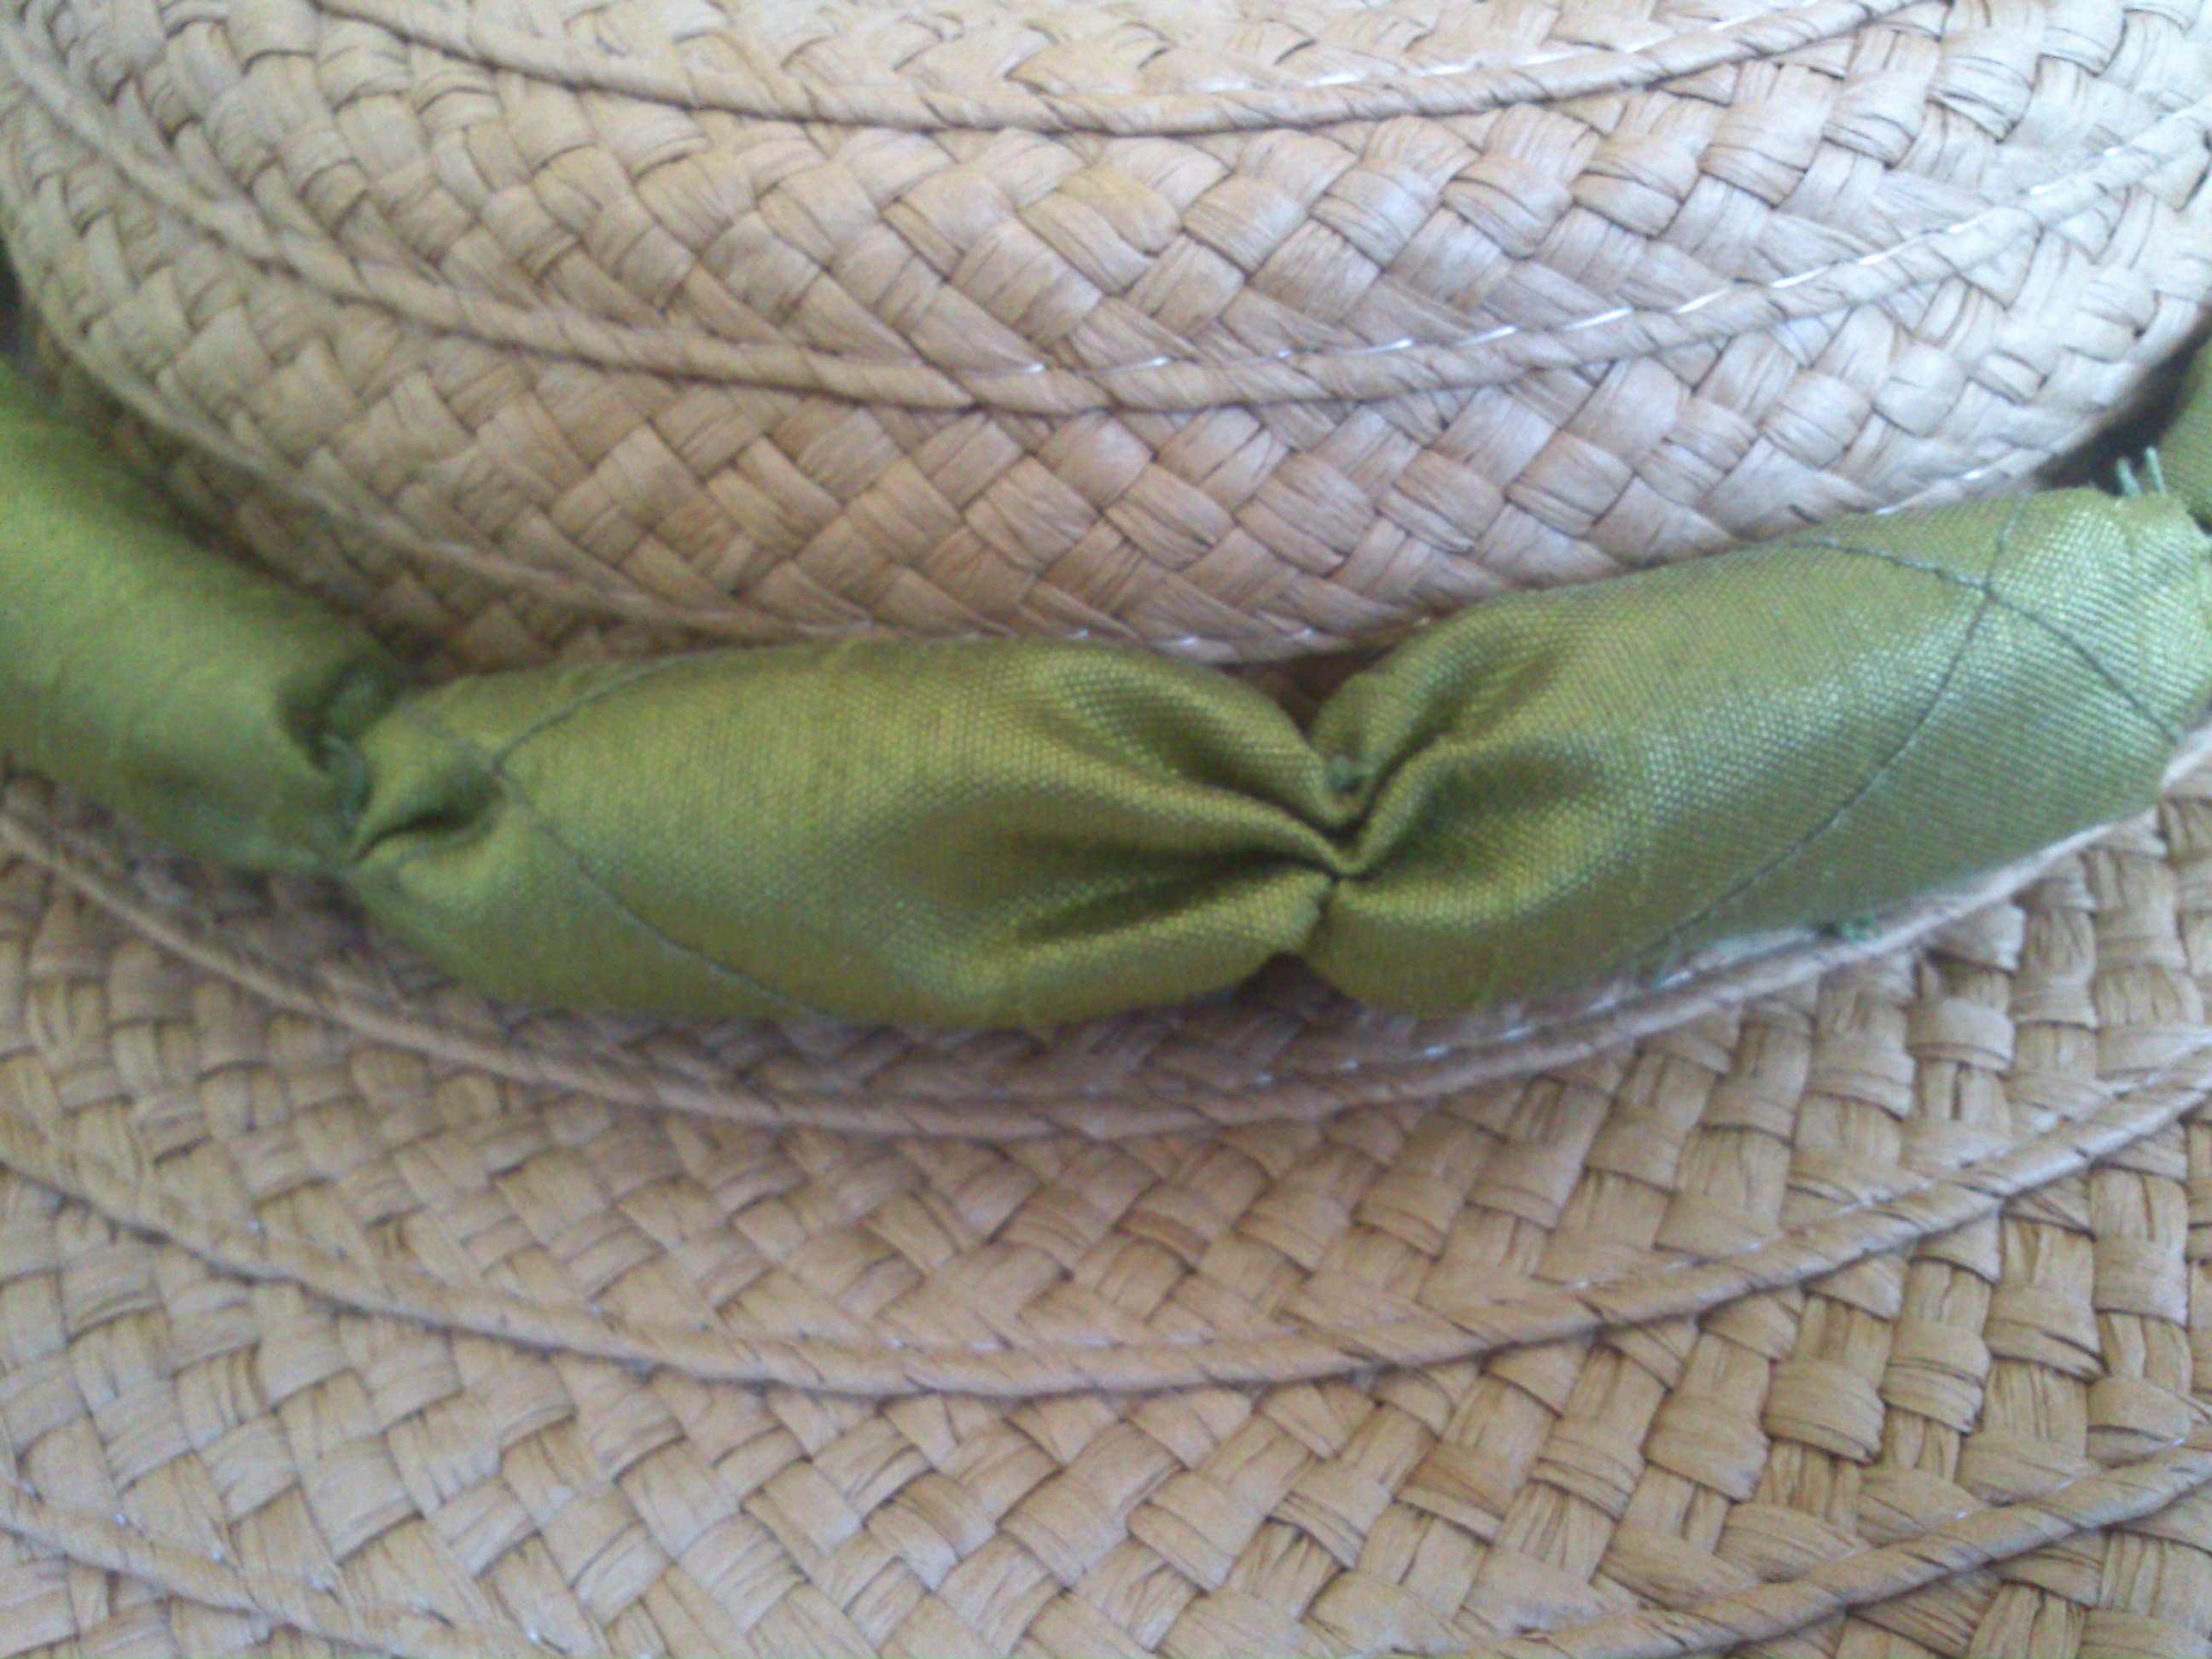 For the trim I used the pre-quilted leftovers from “The green Quilted Petticoat”
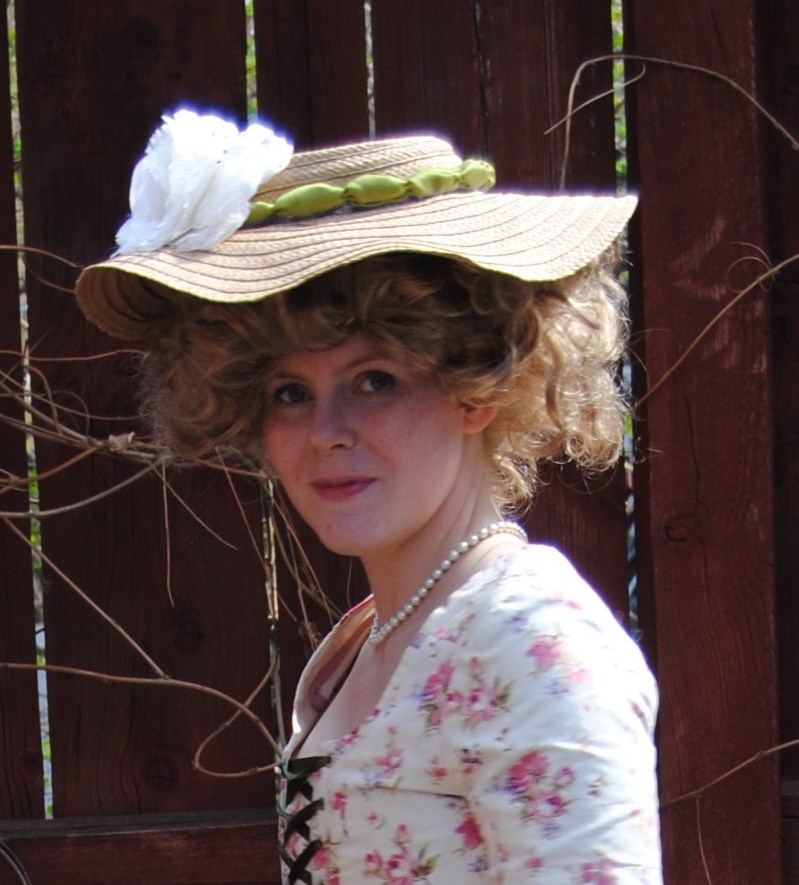
So far I’ve used this hat for three different dresses and re-trimmed it once.
“The Anglaise of satin trouble”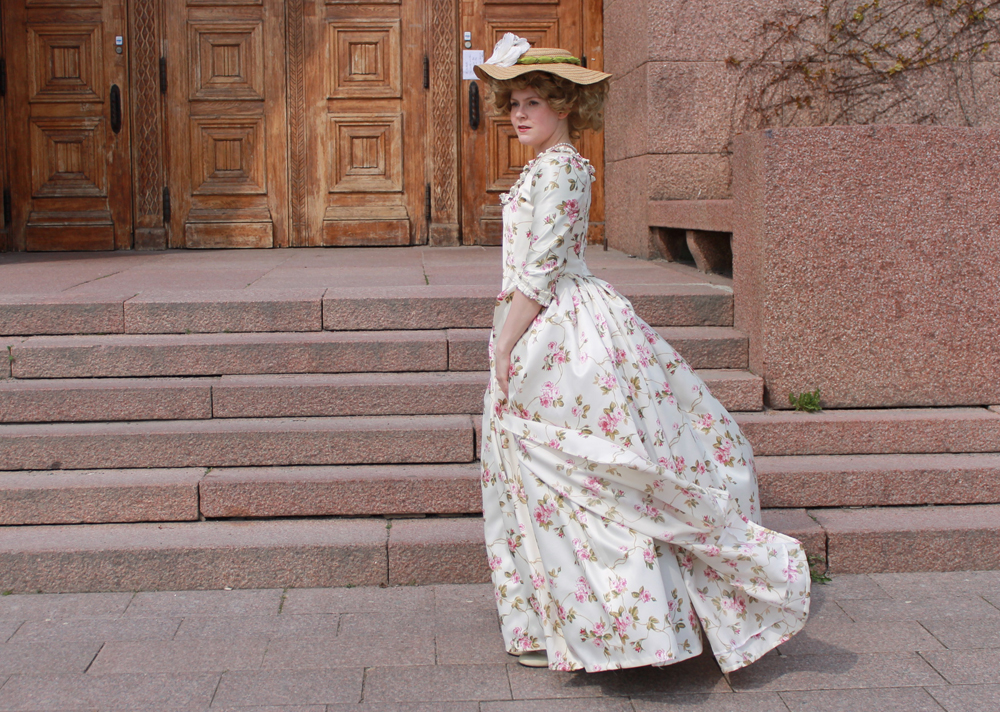

“The green Quilted Petticoat” and “The Flowery Jacket”
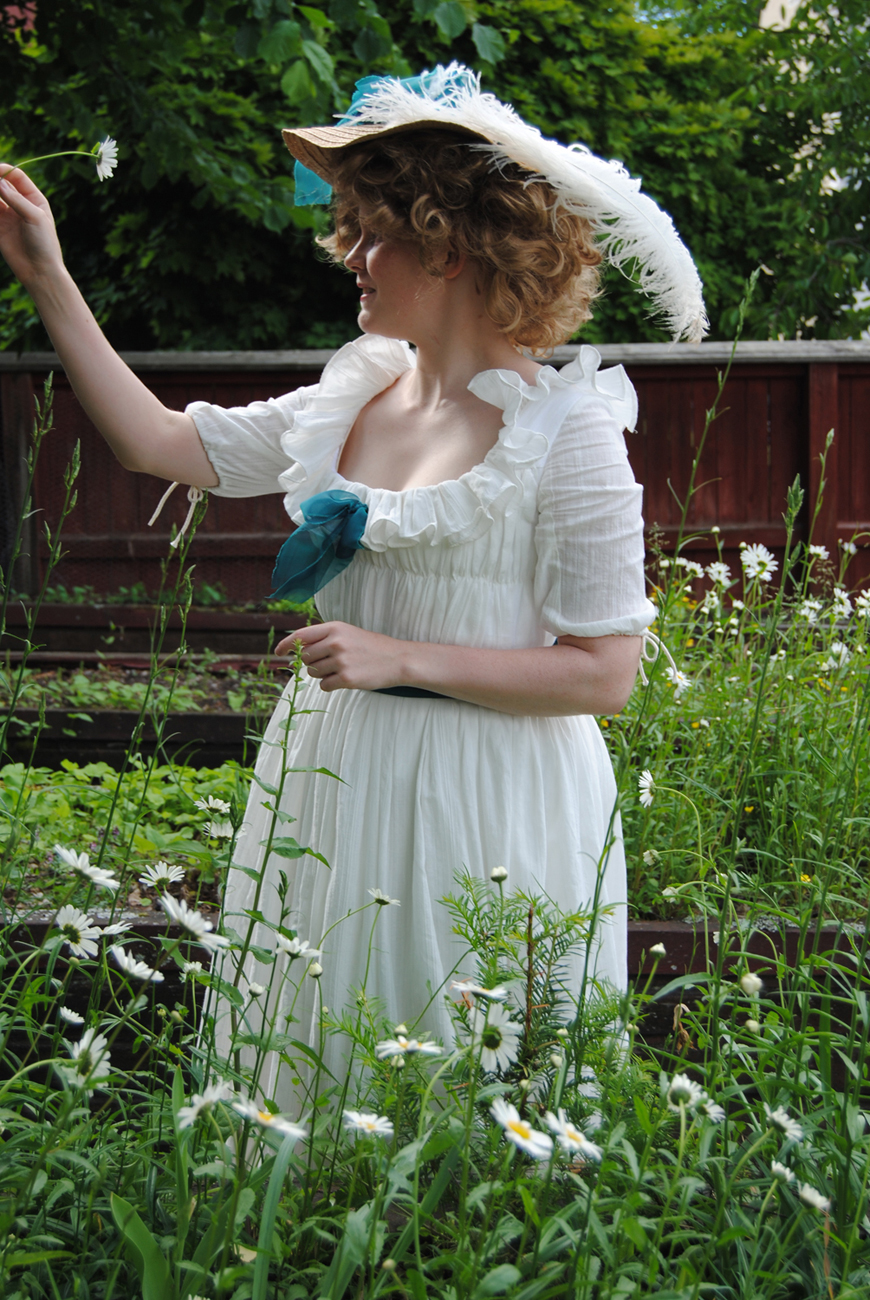
New trimming with feathers and ribbons for… … “The Chemise a Lamballe”

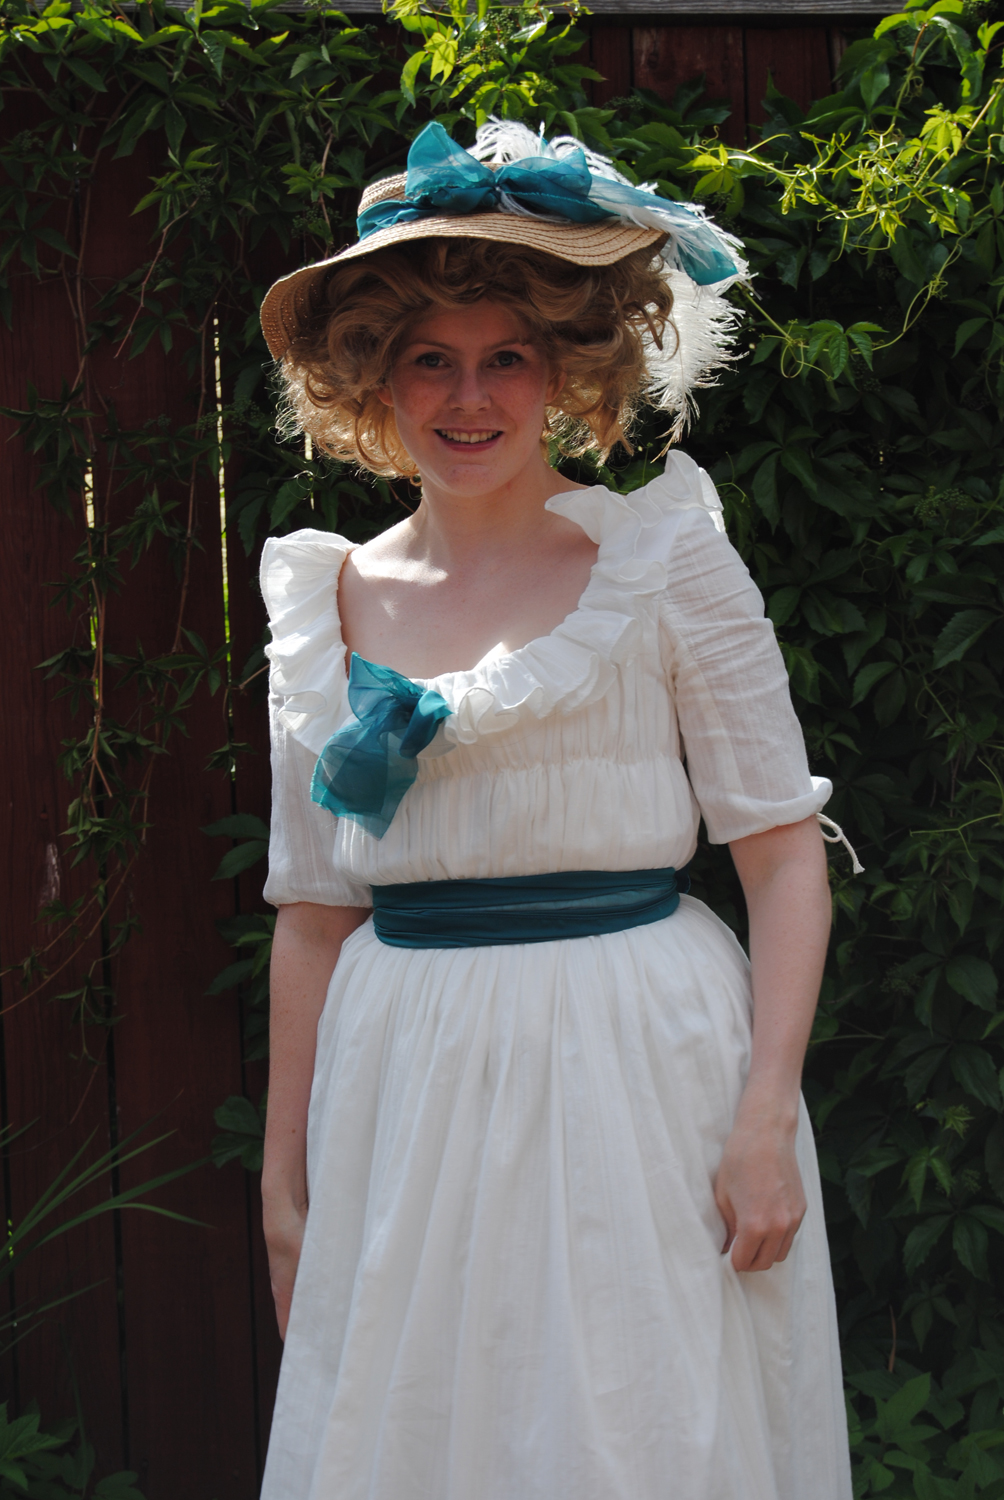
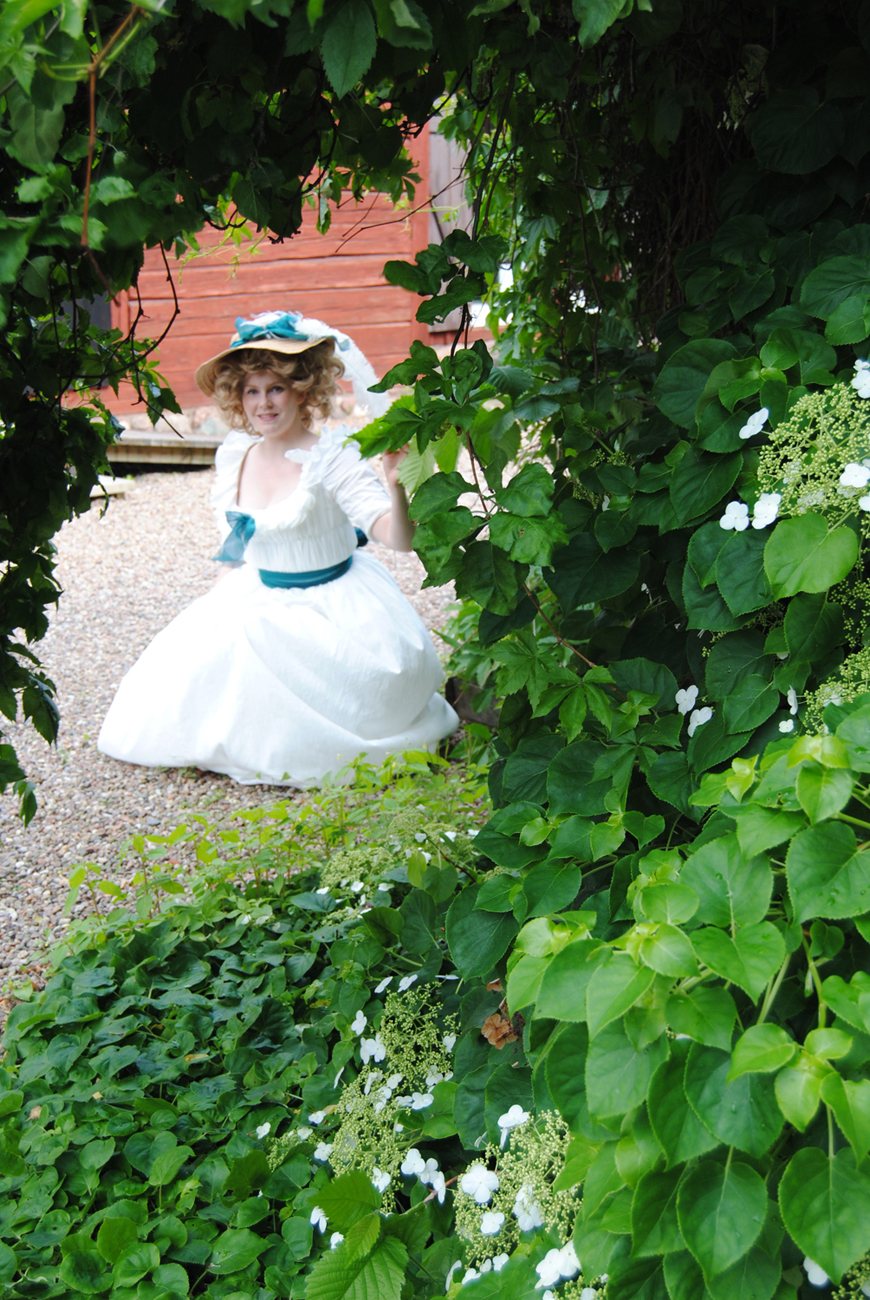
For the Chemise photoshoot (construction post Here) me and my sister went to this amazing group of old houses from late 18th centrury, located in the middle of our town. It’s not like “Old Town” or something like that just these old wooden houses, with their lovely gardens left untouched in the midst of all the modern houses. (I will show you all of their beauty in a photo-post one day).
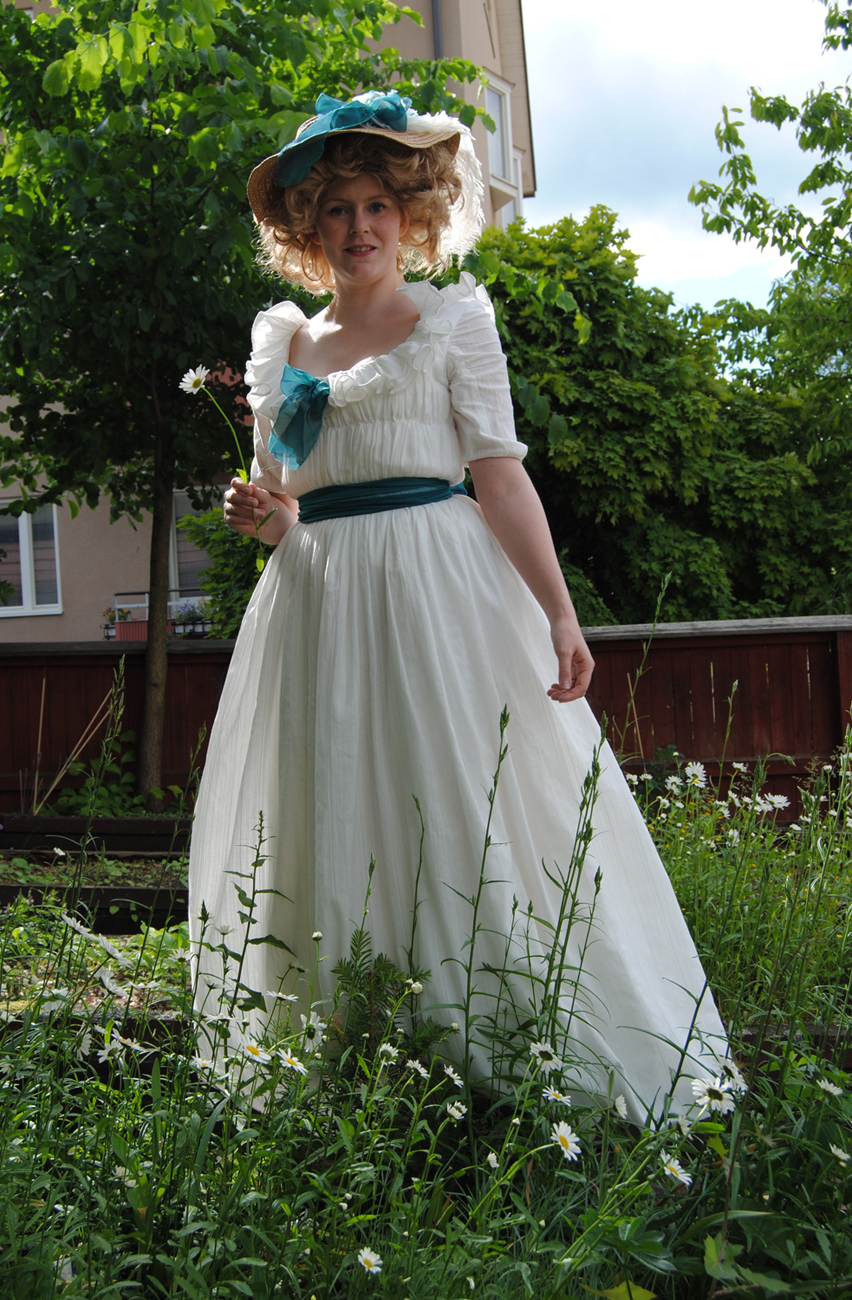
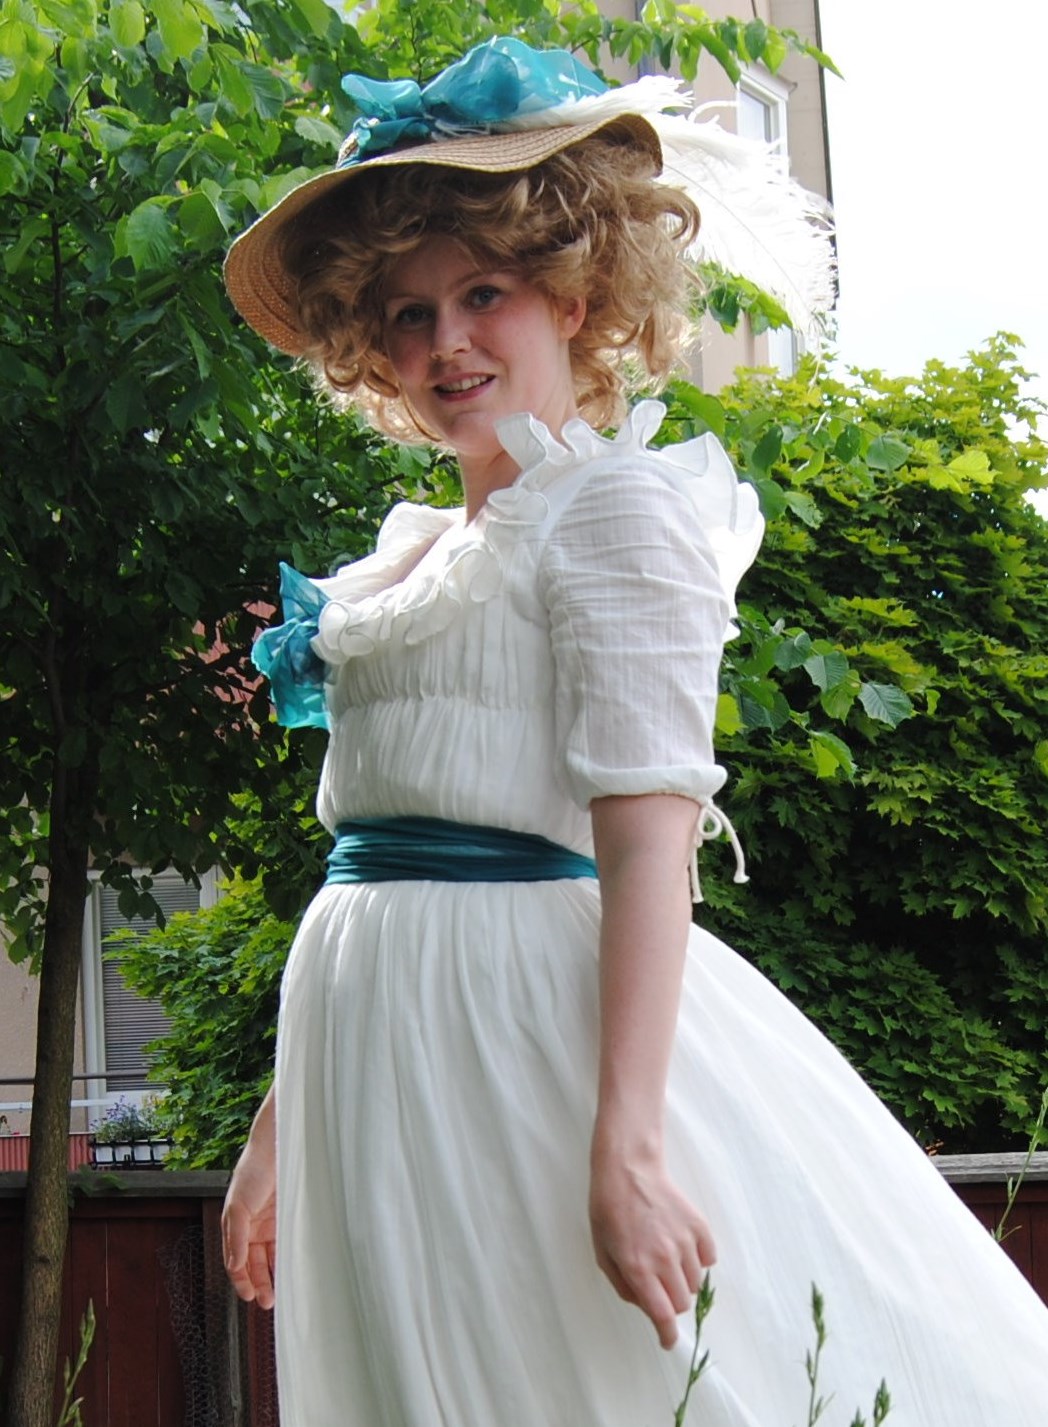
We took so many good and wonderful pictures, and it was soo hard to select only a couple of them to show you. But finally I managed to get the numbers down. So here are 12 of my favorites, which I think best captures the softness and beauty of the Chemise a la Reine.


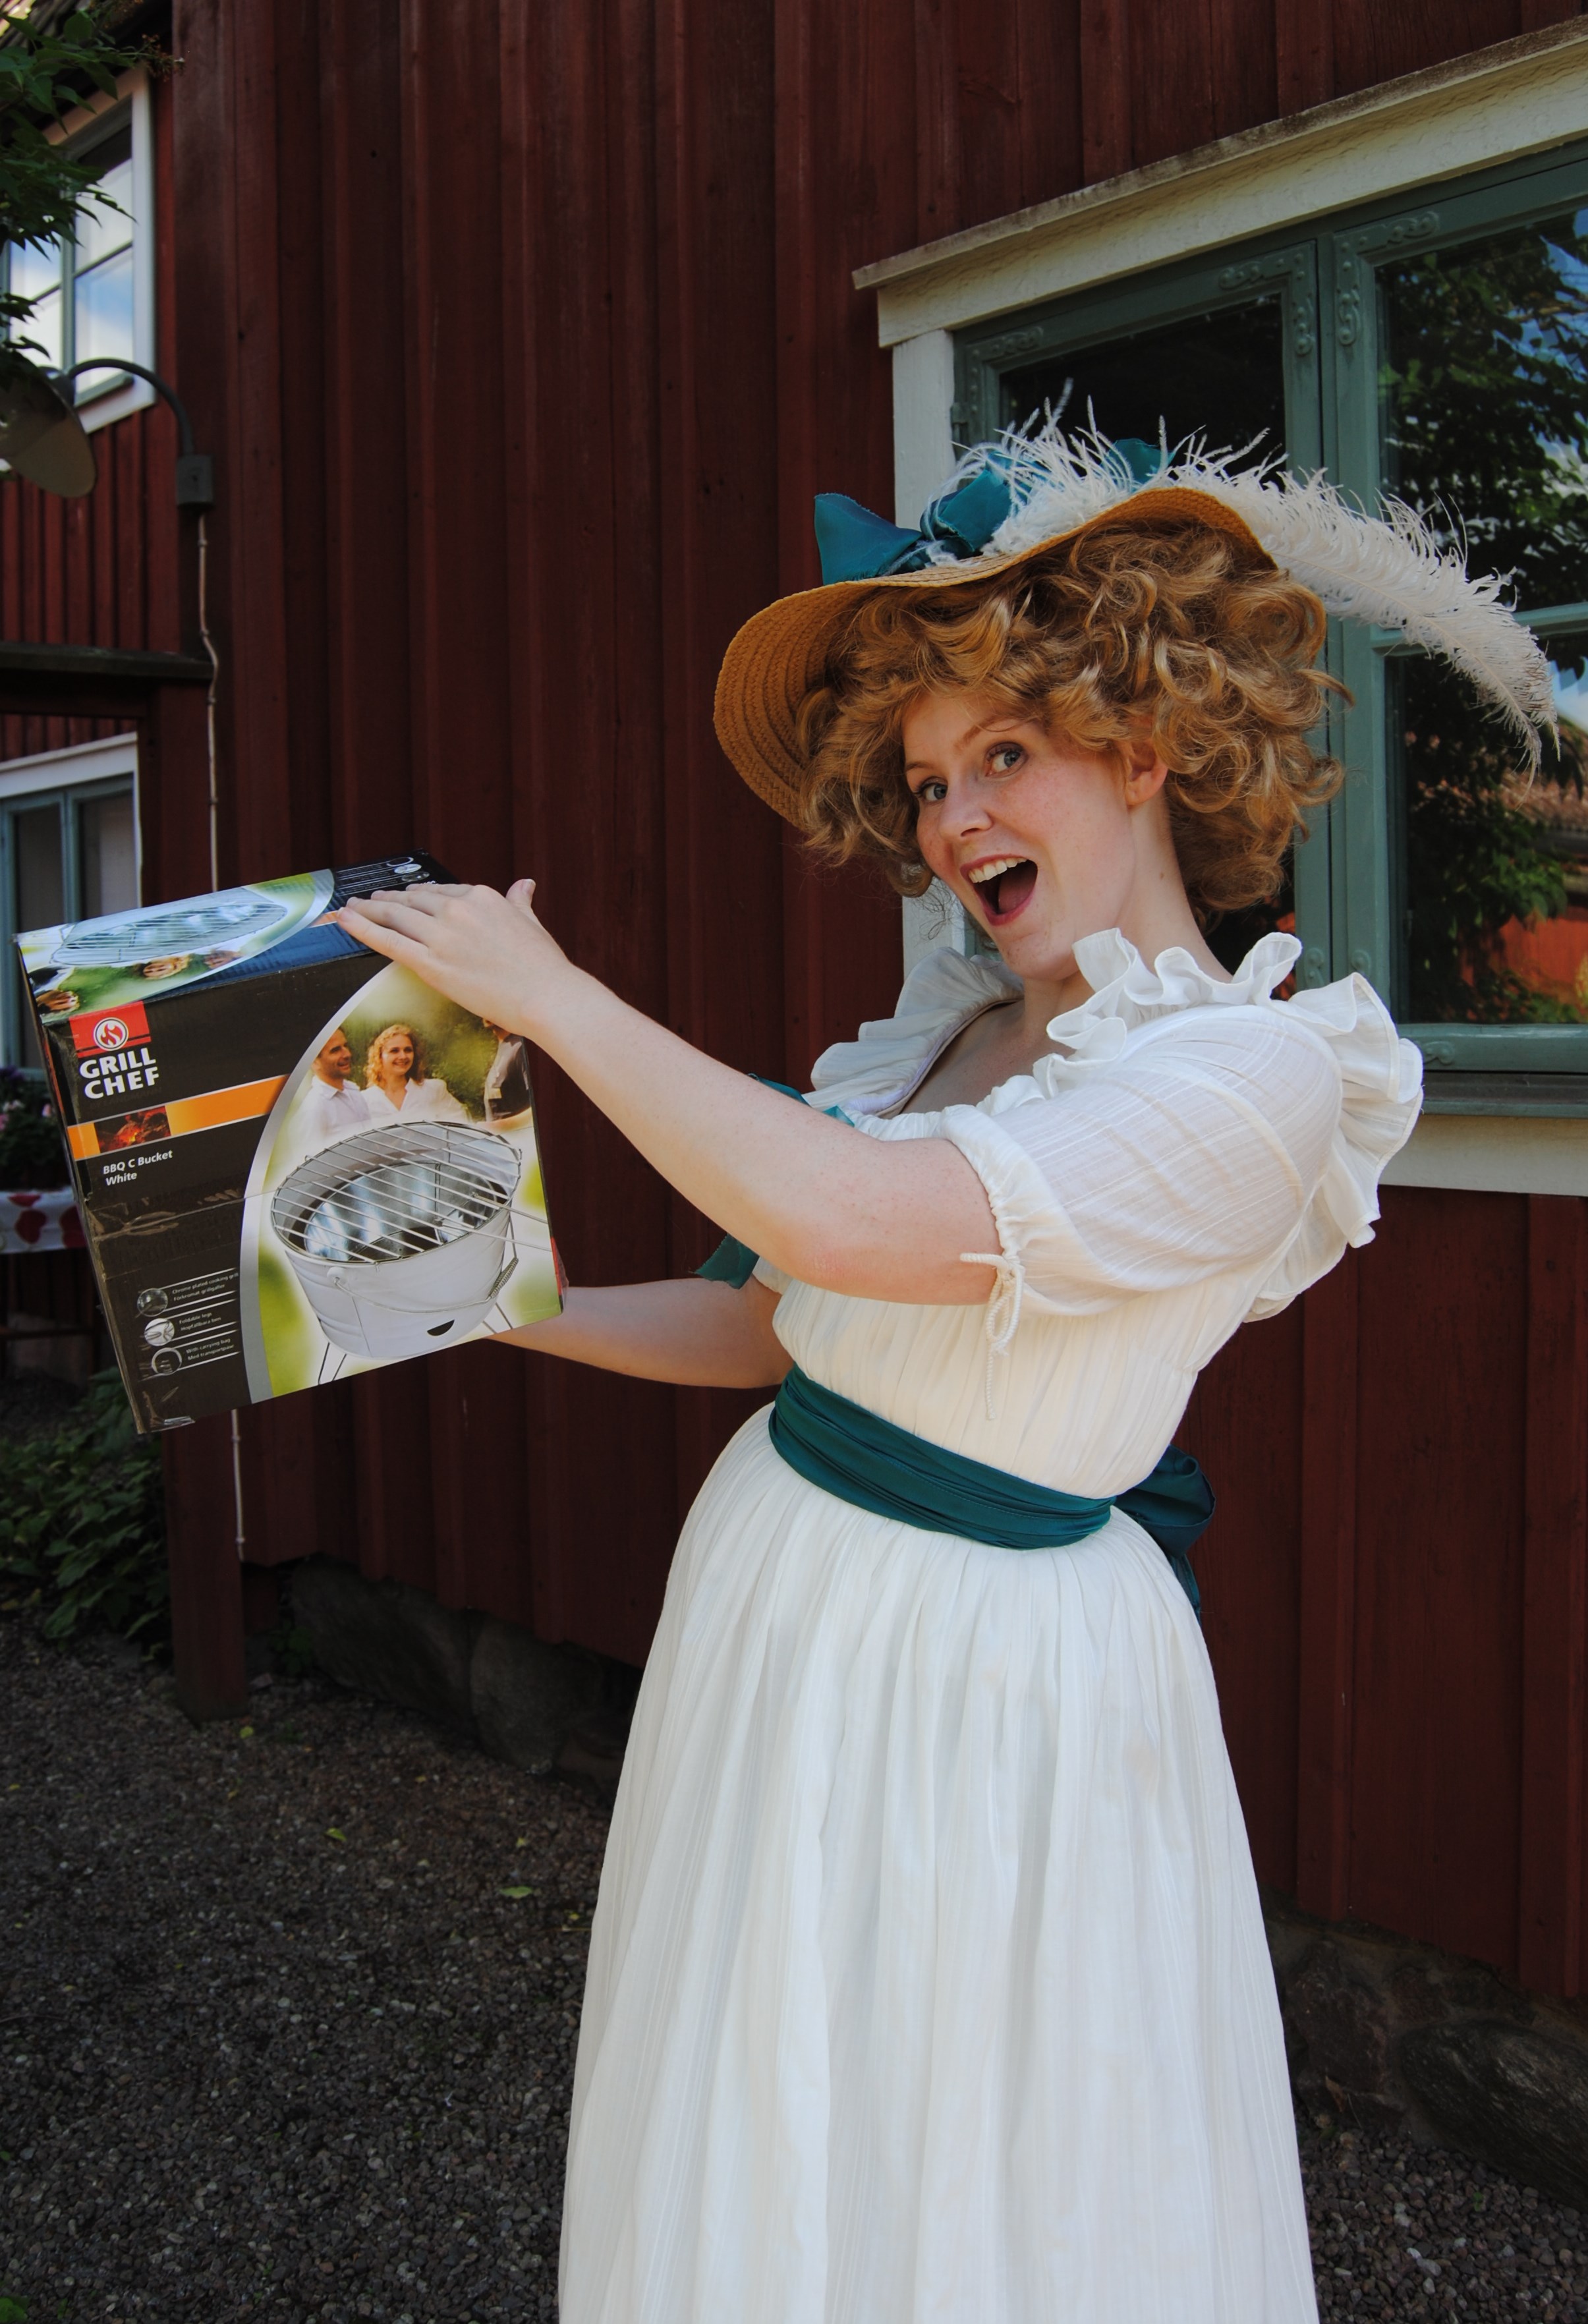 And of course we had to make some advertising for this fabolous grill – after all it’s barbecue season…
Photo: Maria Petersson
For the HSF:s 12th challenge – Pretty Princesses – I went trough my mental archive for all my favorite royalties.
Like Anne Boleyn…

Or her daughter Elizabeth I.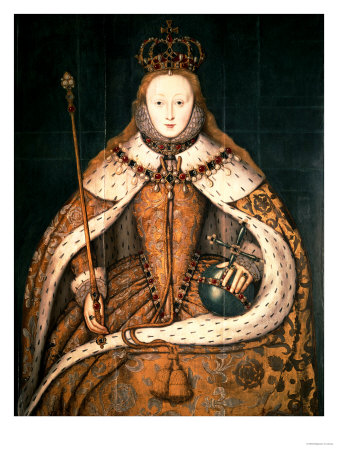
Or perhaps the Swedish queen Kristina.
And of course there are always the (in)famous Marie Antoinette.
I knew I wanted to make something pretty but much simpler than what you normally visualise when you hear the word “princess”. And then I remembered the fascinating and really tragic faith of one of Marie Antoinettes friends – the princess Lamballe.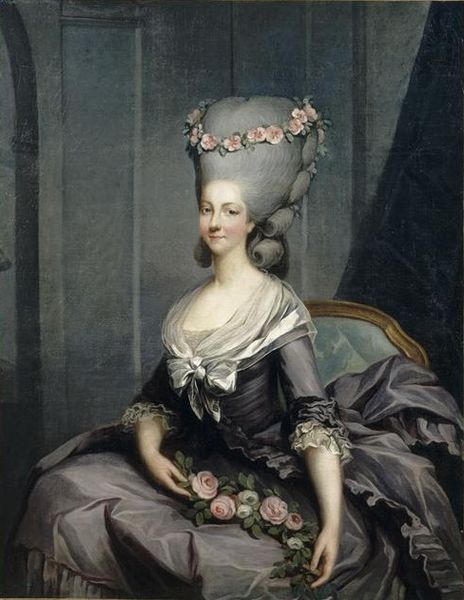
Married at 17 to Louis Alexandre de Bourbon-Penthièvre (a marriage that lasted only one year, before the prince died of sicknes). She then moved on to Versailles and became a close friend to the new french queen. A friendship that would cost her life in the most brutal way when the revolutinaries in 1792 stormed her home, dragged her through the streets and threw her to the mob (which killed and mutilated her within minutes). They then put her head on a spike and paraded it down the streets outside Marie Antoinettes prison window.
In most of the princess portraits she is wearing the “chemise a la Reine” – a style Marie Antoinette made famous and Lamballe was known to favour.
So what would be more suitable to hounor the princess with than to recreate the dress she loved.
The pattern is from Waughs “cut of woman’s clothes” and the fabric is a lightweight cream coloured striped cotton voile.

I originally planned to make the dress all by hand but soon realised that I din’t have that kind of time for this project. Since I am starting this dress with only 3 days to go until challenge deadline I decided that it needed to be sewn on machine.
So I cut out the pieces, measured and sewed on the channels with the cord already inside. One at the waist and one about 10 cm above the waist.
Then I put it on my dressform to get a perception of what it would look like and to cut the neckline. As you can see, it is horrid. Way to much fabric and bulky gathering from the cord. It doesn’t look slim and neat as it should.


So I decided to start all over again – thank god I hadn’t handsewn the whole thing.
I took it down and cut the skirt off, and sewed it togheter in the front. I then re-made the gathering at the waist of the skirt without the cord, using only thread gathering.
Then I started to drape a toile for a foundation bodice on my dressform.


I also decided that the gathered sleeves had to go, and instead made a pair of fitted 3/4 sleeves.
I sewed the bodice together and draped and sewed a gathered front and back piece on the foundation.
And this time it looked so much better.


Then I sewed on the skirt, the sleeves and put on neck ruffle and the belt – made of turquoise/blue organdy. I hemmed the skirt and put the hooks and eyes in for the back clousure.
For this outfit I also re-trimmed my bregere hat.
Then me and my sister went outside to shoot some gorgeous photos. (More pictures from yesterdays photoshoot will be shown in upcoming post.)
Just the facts:
Challenge: Pretty Princesses.
What: A chemise a la Reine (Gaulle).
Year: 1780s.
Pattern: I draped my own.
Fabric: 4 m of striped cotton voile and 0,5 m white cotton fabric for interlining and lining, and 0,5 m turquoise organdy.
Notions: Thread, hooks and eyes.
How historical accurate: Not at all – totally machine sewn, in a way too heavy fabric. The only thing that is accurate is the color and the silhouette. 3/10.
Hours: About 15.
Cost: Approx. 16 USD (100SEK), everything came from stash.
First Worn: On the photoshoot yesterday.
It was about the same time as I started doing historical costuming, that I for some reason decided to cut my long hair off. It is not something I regret on a day to day basis but every once in a while (mostly when it comes to historic photoshoots) I would really like to have my long hair back.
Well not much to do but to buy myself a wig…
And penniless as I am, I settled for the not so perfect cheap stuff from an internet shop dealing in masquerade costumes.

I picked the pretty “Marie Antoinette” wig in golden (not wanting the white one), knowing very well that it would never look totally like a historic “pouf” – but It could hardly be worse than my own boyish looks…
It looked so pretty in the picture, but what I got was a horrible mess of plastic hair that would never ever pass for a historical hairdo. I even got so disappointed that I forgot to take a photo of it, but just threw it back in its bag and then into my costuming box – never wanting to see the horrid thing again.
But after a couple of days I took it out, thinking that maybe it wasn’t so bad after all, and maybe I could fix it up a little.
So I cut the silly pink bows off it, and tried to pin it to something slightly similar to a pouf. But no, it was no point in even trying – so down in the box it went again.
It wasn’t until I read the blogpost of the faboulus American Duchess and how she was making experiments on the exact same wig, that I finally got the courage to re-do my own once and for all.
I wouldn’t say that mine look exactly like the duchess’s wig (hrm). In fact it is not even close, but I think my wig does what I want, and for a first try it is acceptable, and after all I only paid about 11 euro (100 SEK).


I made this jacket a year ago, as my first real attempt at historical clothing. I have tried it a bit previously but never bothered to read up on historical techniques and silhouettes so the result is really nothing I’m proud of. But with this jacket I made a new attempt and this time i actually read and reaserched a lot before starting.
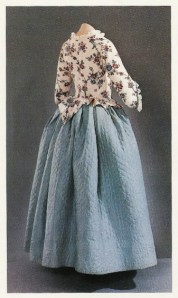
It was when I bought the book “Costume close-up” by Baumgarten it all started for me. In that book I found this wonderful picture of a flowery jacket worn with a quilted petticoat. The whole silhouette was so beautiful and I fell in love with the little peplum and the wounderful simplicity of the outfit.
I immediately went to the fabric store and picked out some printed cotton. The little pink and violet flowers seemed to be made for some 18th century garnment. I also bought some ivory cotton for the linning, and some violet ribbon for the front lacing.

I enlarged the pattern from the book with the help of my computer and printer. I adjusted the pattern pieces after my measurments and started to cut out the fabric.
I sewed it all up by machine, and put the gromets in the front for lacing. It wasn’t until I finished the jacket I realised I had made it two inches too small. I’ve been too eager to get started to bother to make a mock-up and never stopped to test it while sewing. Even though it didn’t fit me I absolutely loved the jacket and decided to give it to my smaller little sister.
I’ve never gotten around to give it away and now, a year later, the jacket fits me like a glove.


By now I’ve also found a couple of things to change on it, like the gromets (I’m planning to cover them in thread) and I would have liked it to be completely hand-sewn. But anyhow I’m still really proud of it.
And here are som pictures of the jacket in action – paired with a green petticoat I will tell you about next time.


