Crazy Hedgehog wig

It was about the same time as I started doing historical costuming, that I for some reason decided to cut my long hair off. It is not something I regret on a day to day basis but every once in a while (mostly when it comes to historic photoshoots) I would really like to have my long hair back.

Well not much to do but to buy myself a wig…

And penniless as I am, I settled for the not so perfect cheap stuff from an internet shop dealing in masquerade costumes.

151656241_1
I picked the pretty “Marie Antoinette” wig in golden (not wanting the white one), knowing very well that it would never look totally like a historic “pouf” – but It could hardly be worse than my own boyish looks…

It looked so pretty in the picture, but what I got was a horrible mess of plastic hair that would never ever pass for a historical hairdo. I even got so disappointed that I forgot to take a photo of it, but just threw it back in its bag and then into my costuming box – never wanting to see the horrid thing again.

But after a couple of days I took it out, thinking that maybe it wasn’t so bad after all, and maybe I could fix it up a little.
So I cut the silly pink bows off it, and tried to pin it to something slightly similar to a pouf. But no, it was no point in even trying – so down in the box it went again.

It wasn’t until I read the blogpost of the faboulus American Duchess and how she was making experiments on the exact same wig, that I finally got the courage to re-do my own once and for all.

I wouldn’t say that mine look exactly like the duchess’s wig (hrm). In fact it is not even close, but I think my wig does what I want, and for a first try it is acceptable, and after all I only paid about 11 euro (100 SEK).

2013-05-07 11.41.08

2013-05-07 11.41.02

IMG_2593

Grass-green quilted petticoat

For the 11th challenge on “The historical Sew Fortnightly” – Rectangels – I decided to make something quite simple. I’ve been so busy and stressed lately with my previous (over achieving) dresses, so I needed to take it a little easy this time.

So what will be more simple and fit the theme more then a quilted petticoat.

I bought some lovely green pre-quilted fabric from my nearest fabric store – I know it is kind of cheating to use pre-quilted fabric but I just didn’t have the time to hand-quilt (or even machine-quilt) a petticoat on my own this time.

I used “Costume Close-up” for directions on how to cut the fabric in a historic fashion. Staying true to the book I started with a rectangle, and sewed the back seam together almost to the top.

2013-05-25 16.23.48

Then I hemed and faced the skirts inside with a plain green cotton weave. I took some basic measurments on the length and cut the excess off at the waist.

Then I did some math to calculate the depth of the pleating to fit the waistband. I pleated and sewed the waistband on to the skirt. Then I finished off with some hooks and eyes.

2013-05-25 16.21.52

So simple and fast. It only took me one evening to make, and I immediately felt the need to make one for my sister.

I’m really proud of my time management this time since I made this petticoat the night before me and my sisters were supposed to have the photoshoot.

The petticoat is really comfortable to wear and works perfect both as a hidden petticoat under skirts for some extra fullnes, and as a skirt on its own. And I love that it matches both my new robe anglaise and a jacket I made a year ago. It makes me feel like I for once actually planned my historic wardrobe.

Here are some detail pictures of the skirt, and also a couple of pictures of the skirt in action paired both with the Anglaise of satin trouble and the flowery printed jacket I’ve told you about in previous posts.

2013-05-25 16.22.322013-05-25 16.23.09
Front and back of the pleating and waistband.

Petticoat paired with the flowery jacketIMG_2732DSC_0072Lady got back…

DSC_0091

DSC_0114

And paired with Anglaise of troubleIMG_2576

IMG_2542Shecking those shoes out

Just the facts:

Challenge 11. Rectangels

What: A quilted petticoat

Year: 1750-1780

Pattern: None, I looked at Baumgarters “Costume Close-up” Petticoat no 5

Fabric: 2 m of green pre-quilted polyester taffeta, I also used about 0,5 m of plain green cotton weave for the hem facing.

Notions: Thread, hook and eye.

How Historical Accurate: Not really – all machine-sewed in polyester fabric. The only right thing about it is the pattern, so maybe 20 %.

Time: 5 hours

Cost: 16 USD

First worn: On 9th of may for the photoshoot.

Flowery cotton Jacket (18th century)

I made this jacket a year ago, as my first real attempt at historical clothing. I have tried it a bit previously but never bothered to read up on historical techniques and silhouettes so the result is really nothing I’m proud of. But with this jacket I made a new attempt and this time i actually read and reaserched a lot before starting.

1775-85-quilted-petticoat


It was when I bought the book “Costume close-up” by Baumgarten it all started for me. In that book I found this wonderful picture of a flowery jacket worn with a quilted petticoat. The whole silhouette was so beautiful and I fell in love with the little peplum and the wounderful simplicity of the outfit.


I immediately went to the fabric store and picked out some printed cotton. The little pink and violet flowers seemed to be made for some 18th century garnment. I also bought some ivory cotton for the linning, and some violet ribbon for the front lacing.

img310


I enlarged the pattern from the book with the help of my computer and printer. I adjusted the pattern pieces after my measurments and started to cut out the fabric.

I sewed it all up by machine, and put the gromets in the front for lacing. It wasn’t until I finished the jacket I realised I had made it two inches too small. I’ve been too eager to get started to bother to make a mock-up and never stopped to test it while sewing. Even though it didn’t fit me I absolutely loved the jacket and decided to give it to my smaller little sister.

I’ve never gotten around to give it away and now, a year later, the jacket fits me like a glove.

2013-04-07 13.37.55

2013-04-07 13.37.34


By now I’ve also found a couple of things to change on it, like the gromets (I’m planning to cover them in thread) and I would have liked it to be completely hand-sewn. But anyhow I’m still really proud of it.

And here are som pictures of the jacket in action – paired with a green petticoat I will tell you about next time.

DSC_0062

DSC_0098

DSC_0096

Satin trouble and Merteuil together

When me and my sisters had the photoshoot for “Floral anglaise of satin trouble” and “Francaise a la Merteuil” we also took some pictures of the two dresses togheter. And of course we had a hard time keeping it seriuos.

Here are a few of the pictures we took.

IMG_2508Posing, looking pretty

IMG_2525The backsides, still looking pretty

IMG_2545Oh, naughty

IMG_2520But wait a minute, whats going on here?

IMG_2495Yes, you should be embarresed

IMG_2489Big sister help fix little sisters dress

IMG_2498A very happy, pretty lady

IMG_2590Hm, that’s just strange…

Photos by: Elin

Francaise a la Merteuil – Finished

“The Historical Sew Fortnightly” challenge 10. Literature

For this challenge I decided to finally finish the robe a la Fraincaise my sister Maria has been promised for over a year.

Here are som pictures of the gown, based on the caracter Marquise Merteuil from ” Les Liasions Dangereuses”.

IMG_2462

IMG_2478

IMG_2466

IMG_2664

A la polonaise

IMG_2640

IMG_2708

Photos by: Elin Petersson

Francaise a la Merteuil – construction

For “The Historical Sew Fortnightly’s” (link) 10th challenge – Literature – I had to think long and hard on what to make. I didn’t have the time to make a whole garment from scratch, so I decided to finish a dress I’ve been working on since january.

I have promised a Robe a la Francaise to my sister Maria for over a year and never really had the time to make it. But now it was finally going to happen.

2013-03-03 18.48.00


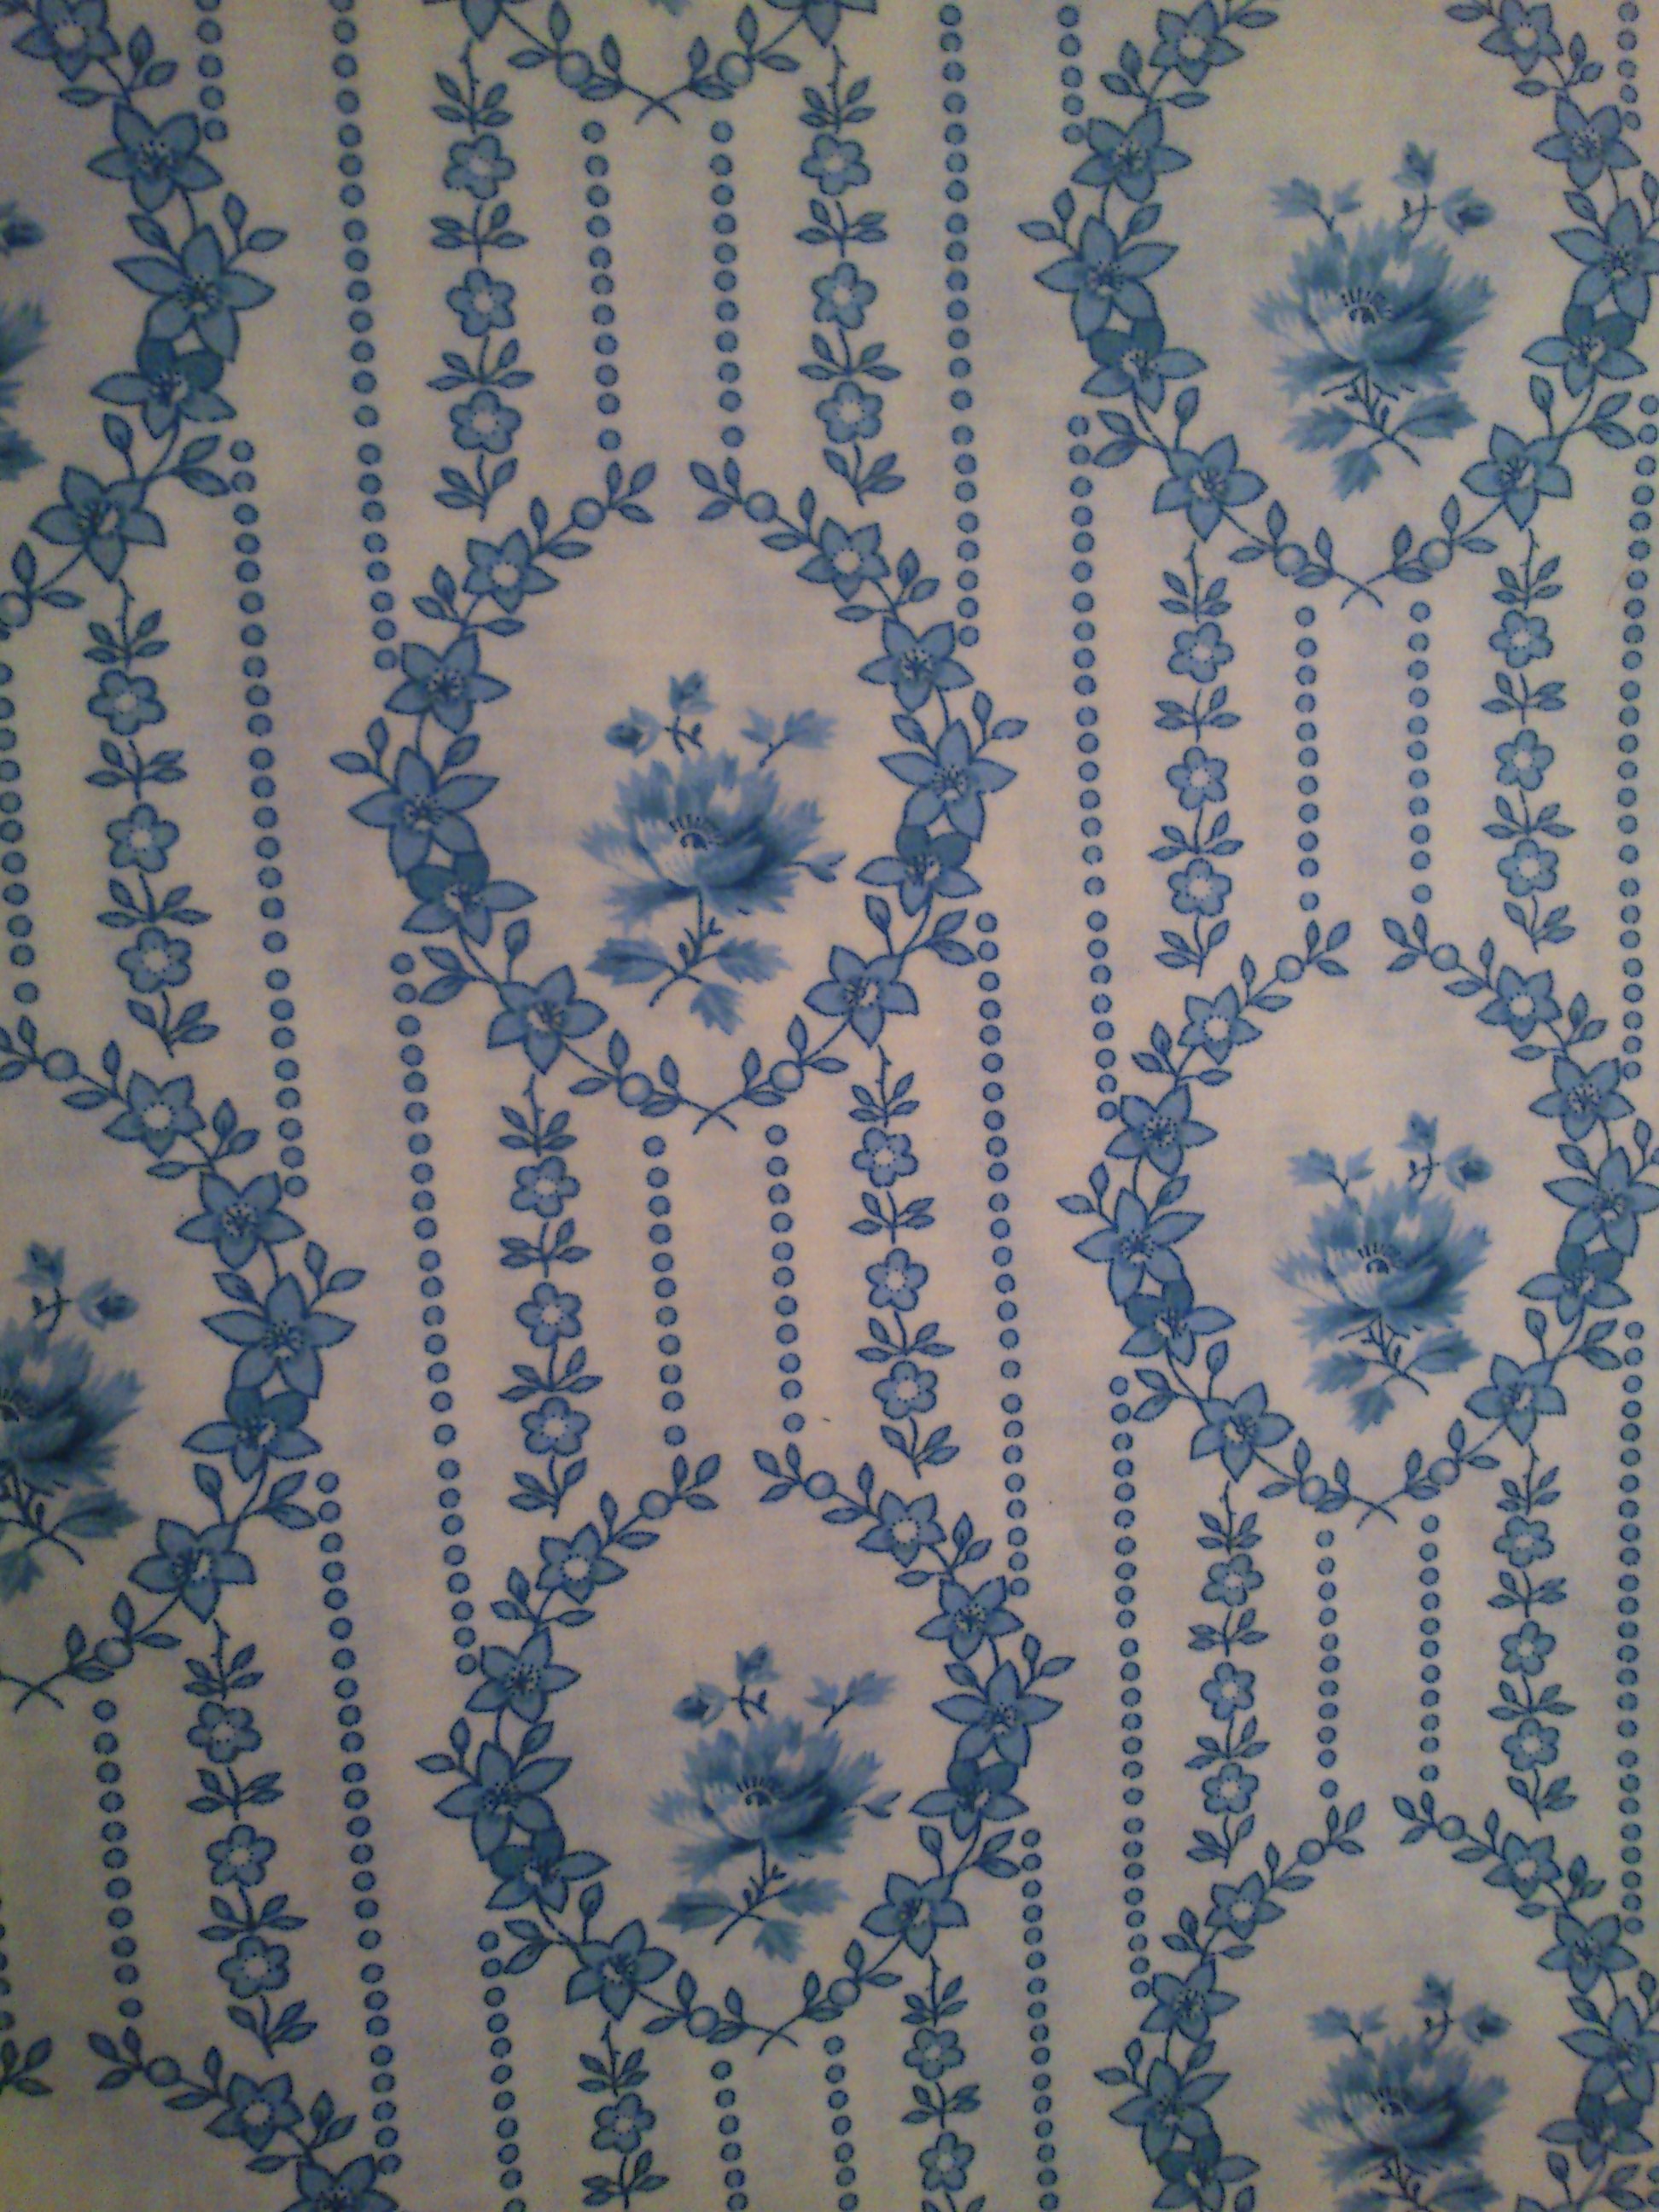
I bought the fabric from an online auction site last may. It is a flower printed cotton made for quilting and home decoration. 120 cm x 7 m fabric for 200 SEK (about 30 USD). I think the fabric  is lovely and the stripey pattern reminds me of some of the inspiration gowns I and my sister looked at when we tried to decide the final look of the gown.

img309


I used three of my favourite pattern books for references when draping the bodice: Arnold, Waugh and Baumgarten.

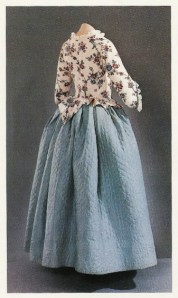
This draft is from Baumgartens “Costume close-up”


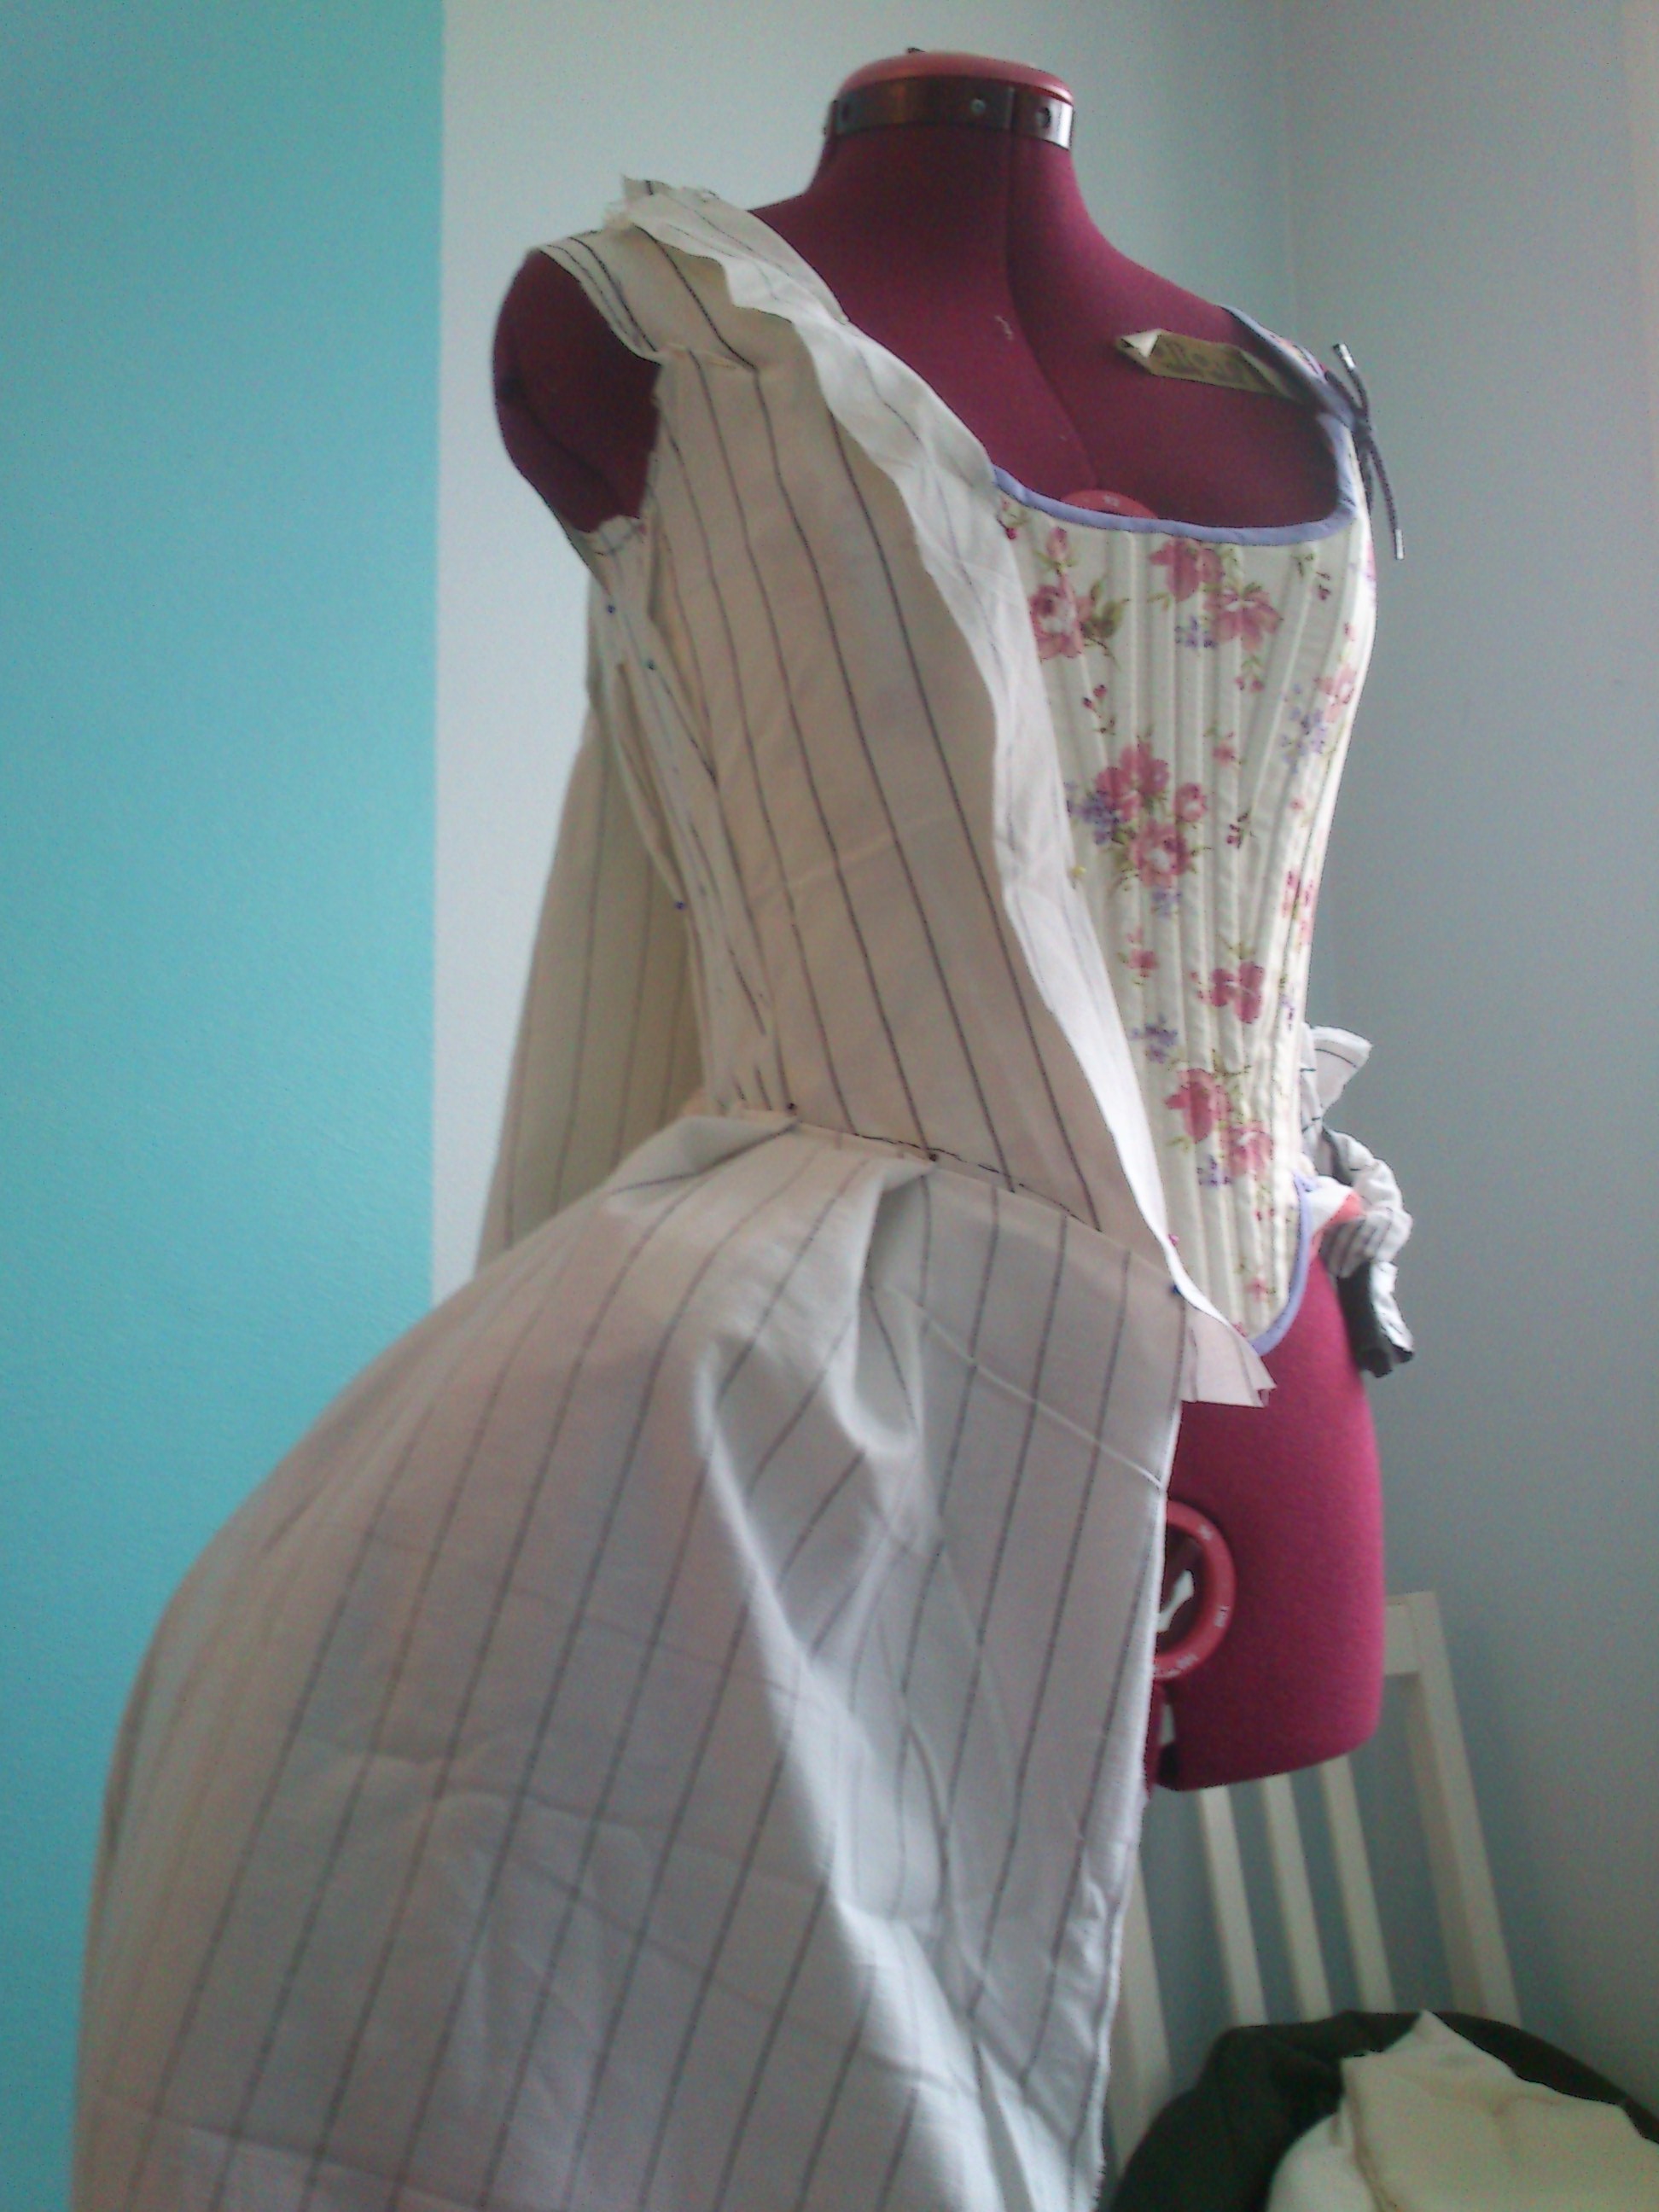
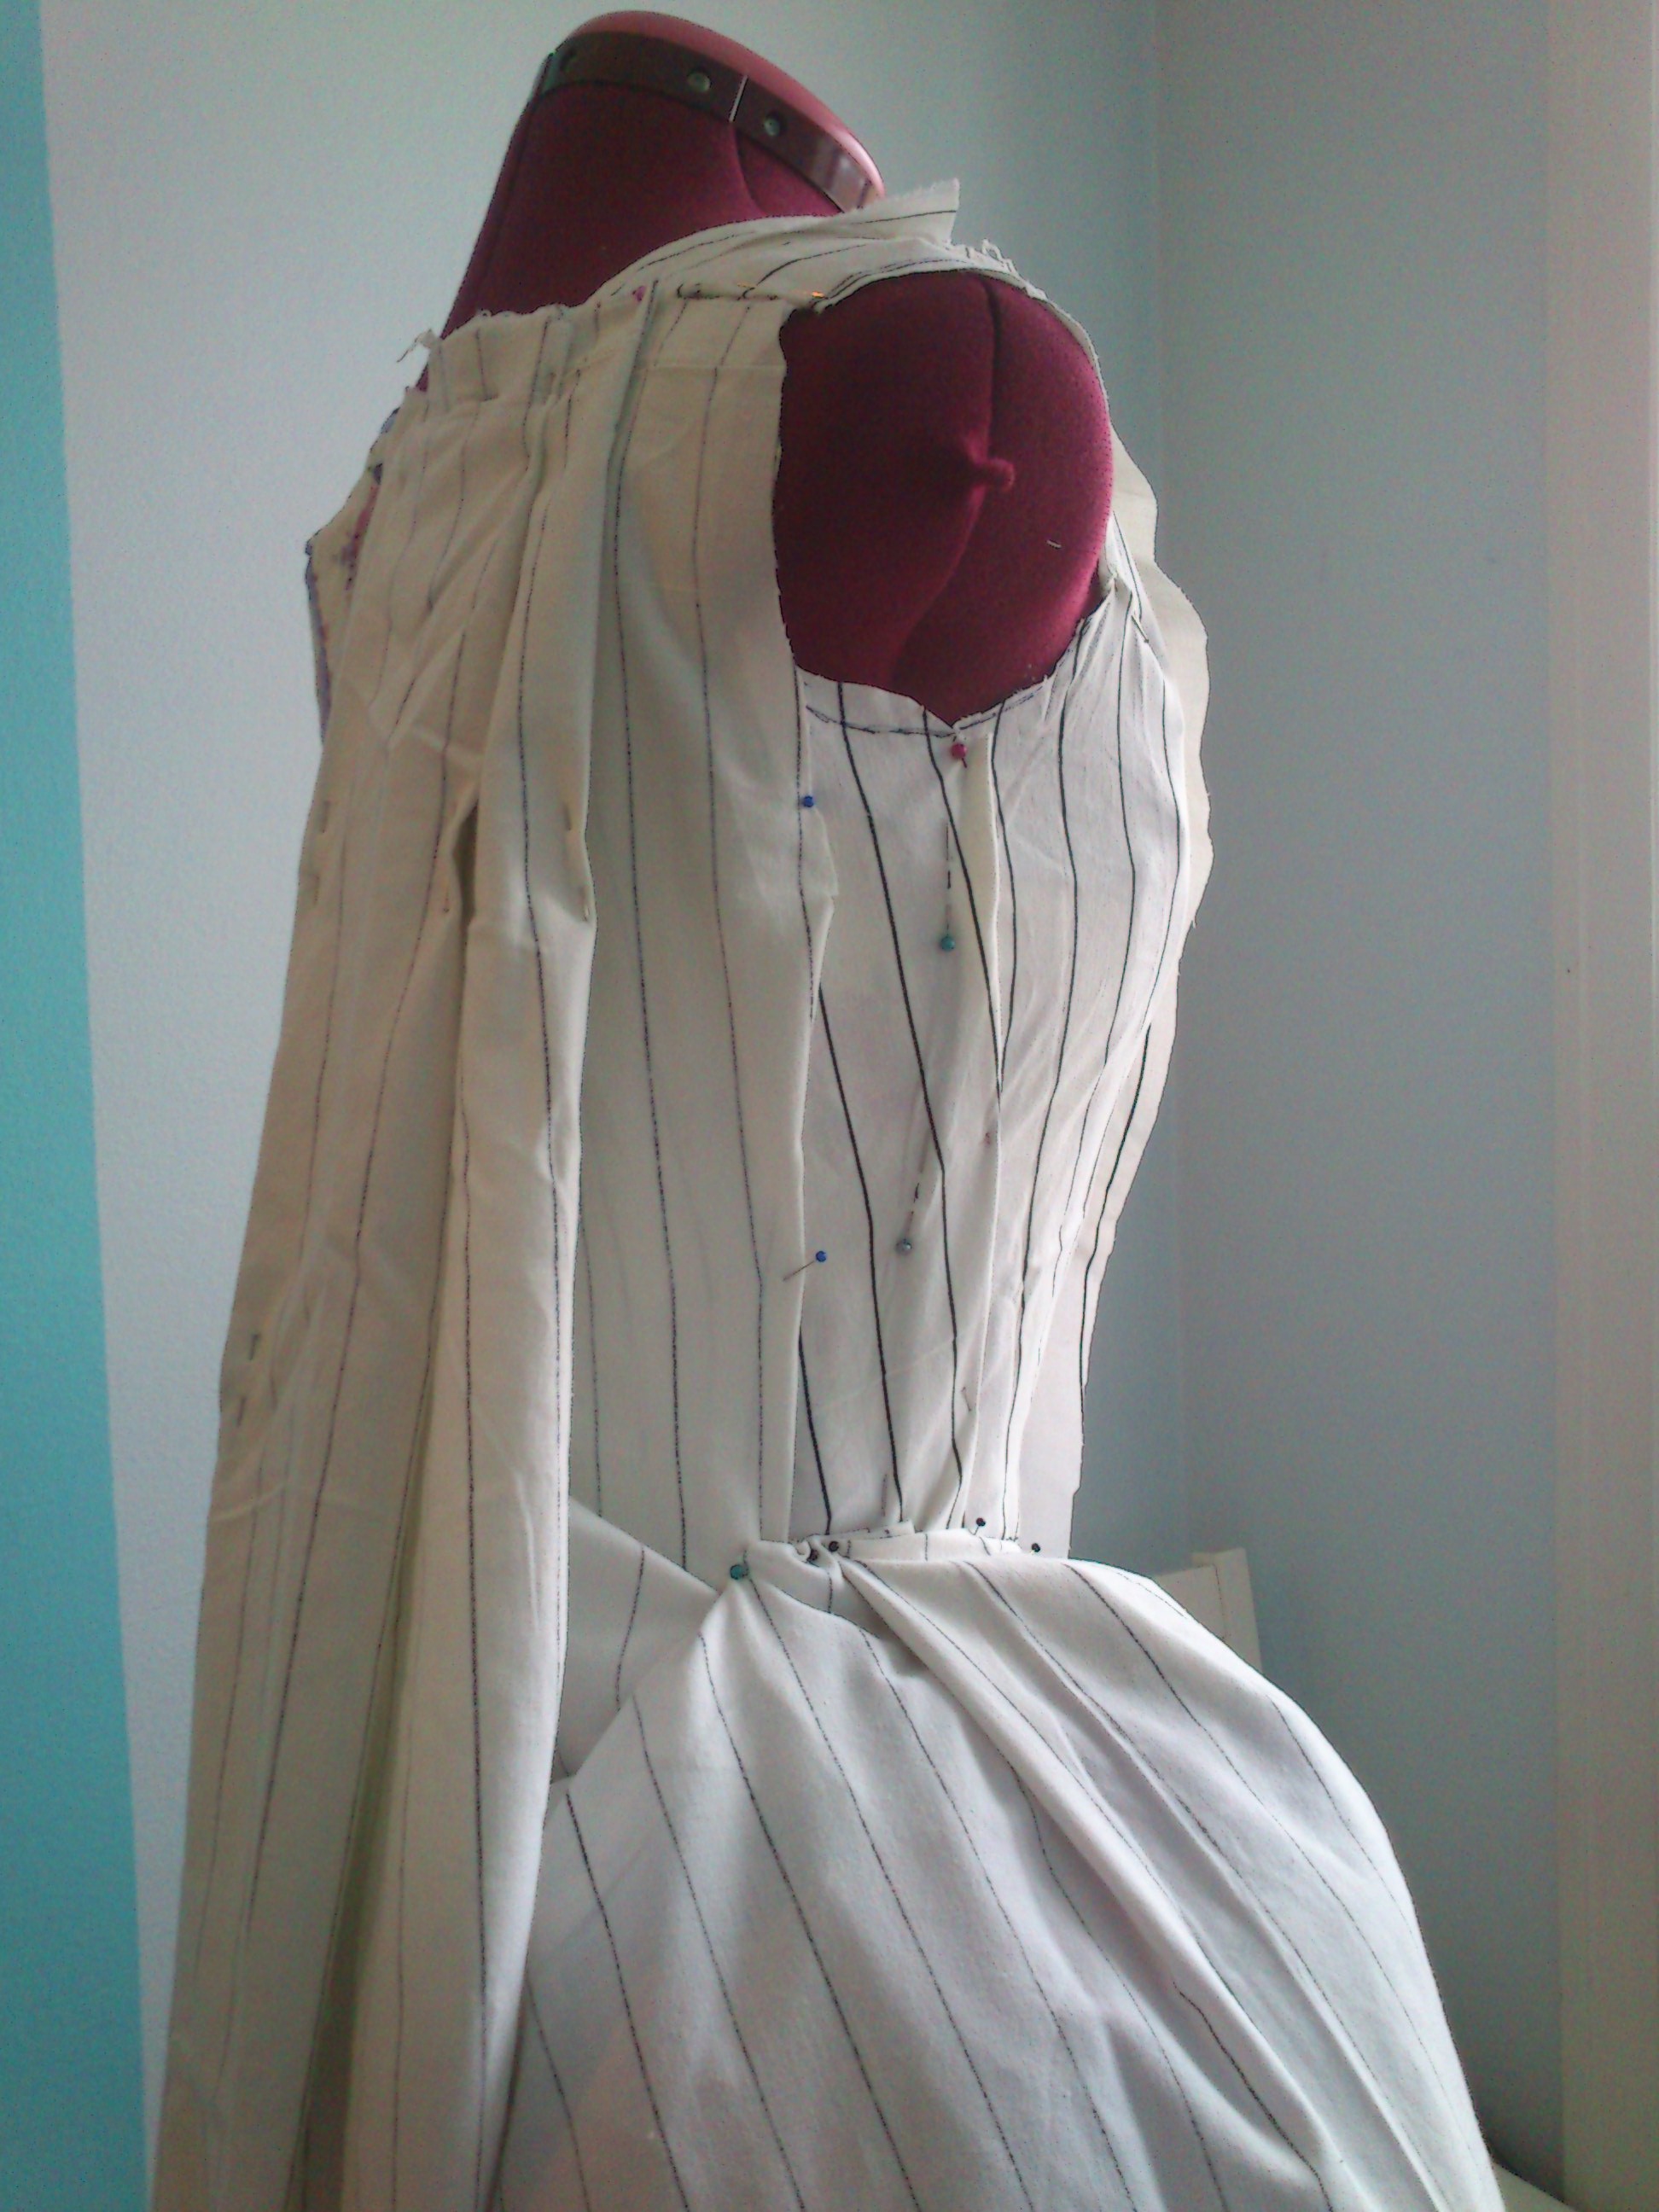
After taking the measurements I needed on my sister, I put her corset on the dressform and started to drape. It went fast and easy and in no time I had a nice looking pattern. I then cut and sewed the mock up for the bodice.

2013-02-13 15.26.352013-02-13 15.26.17

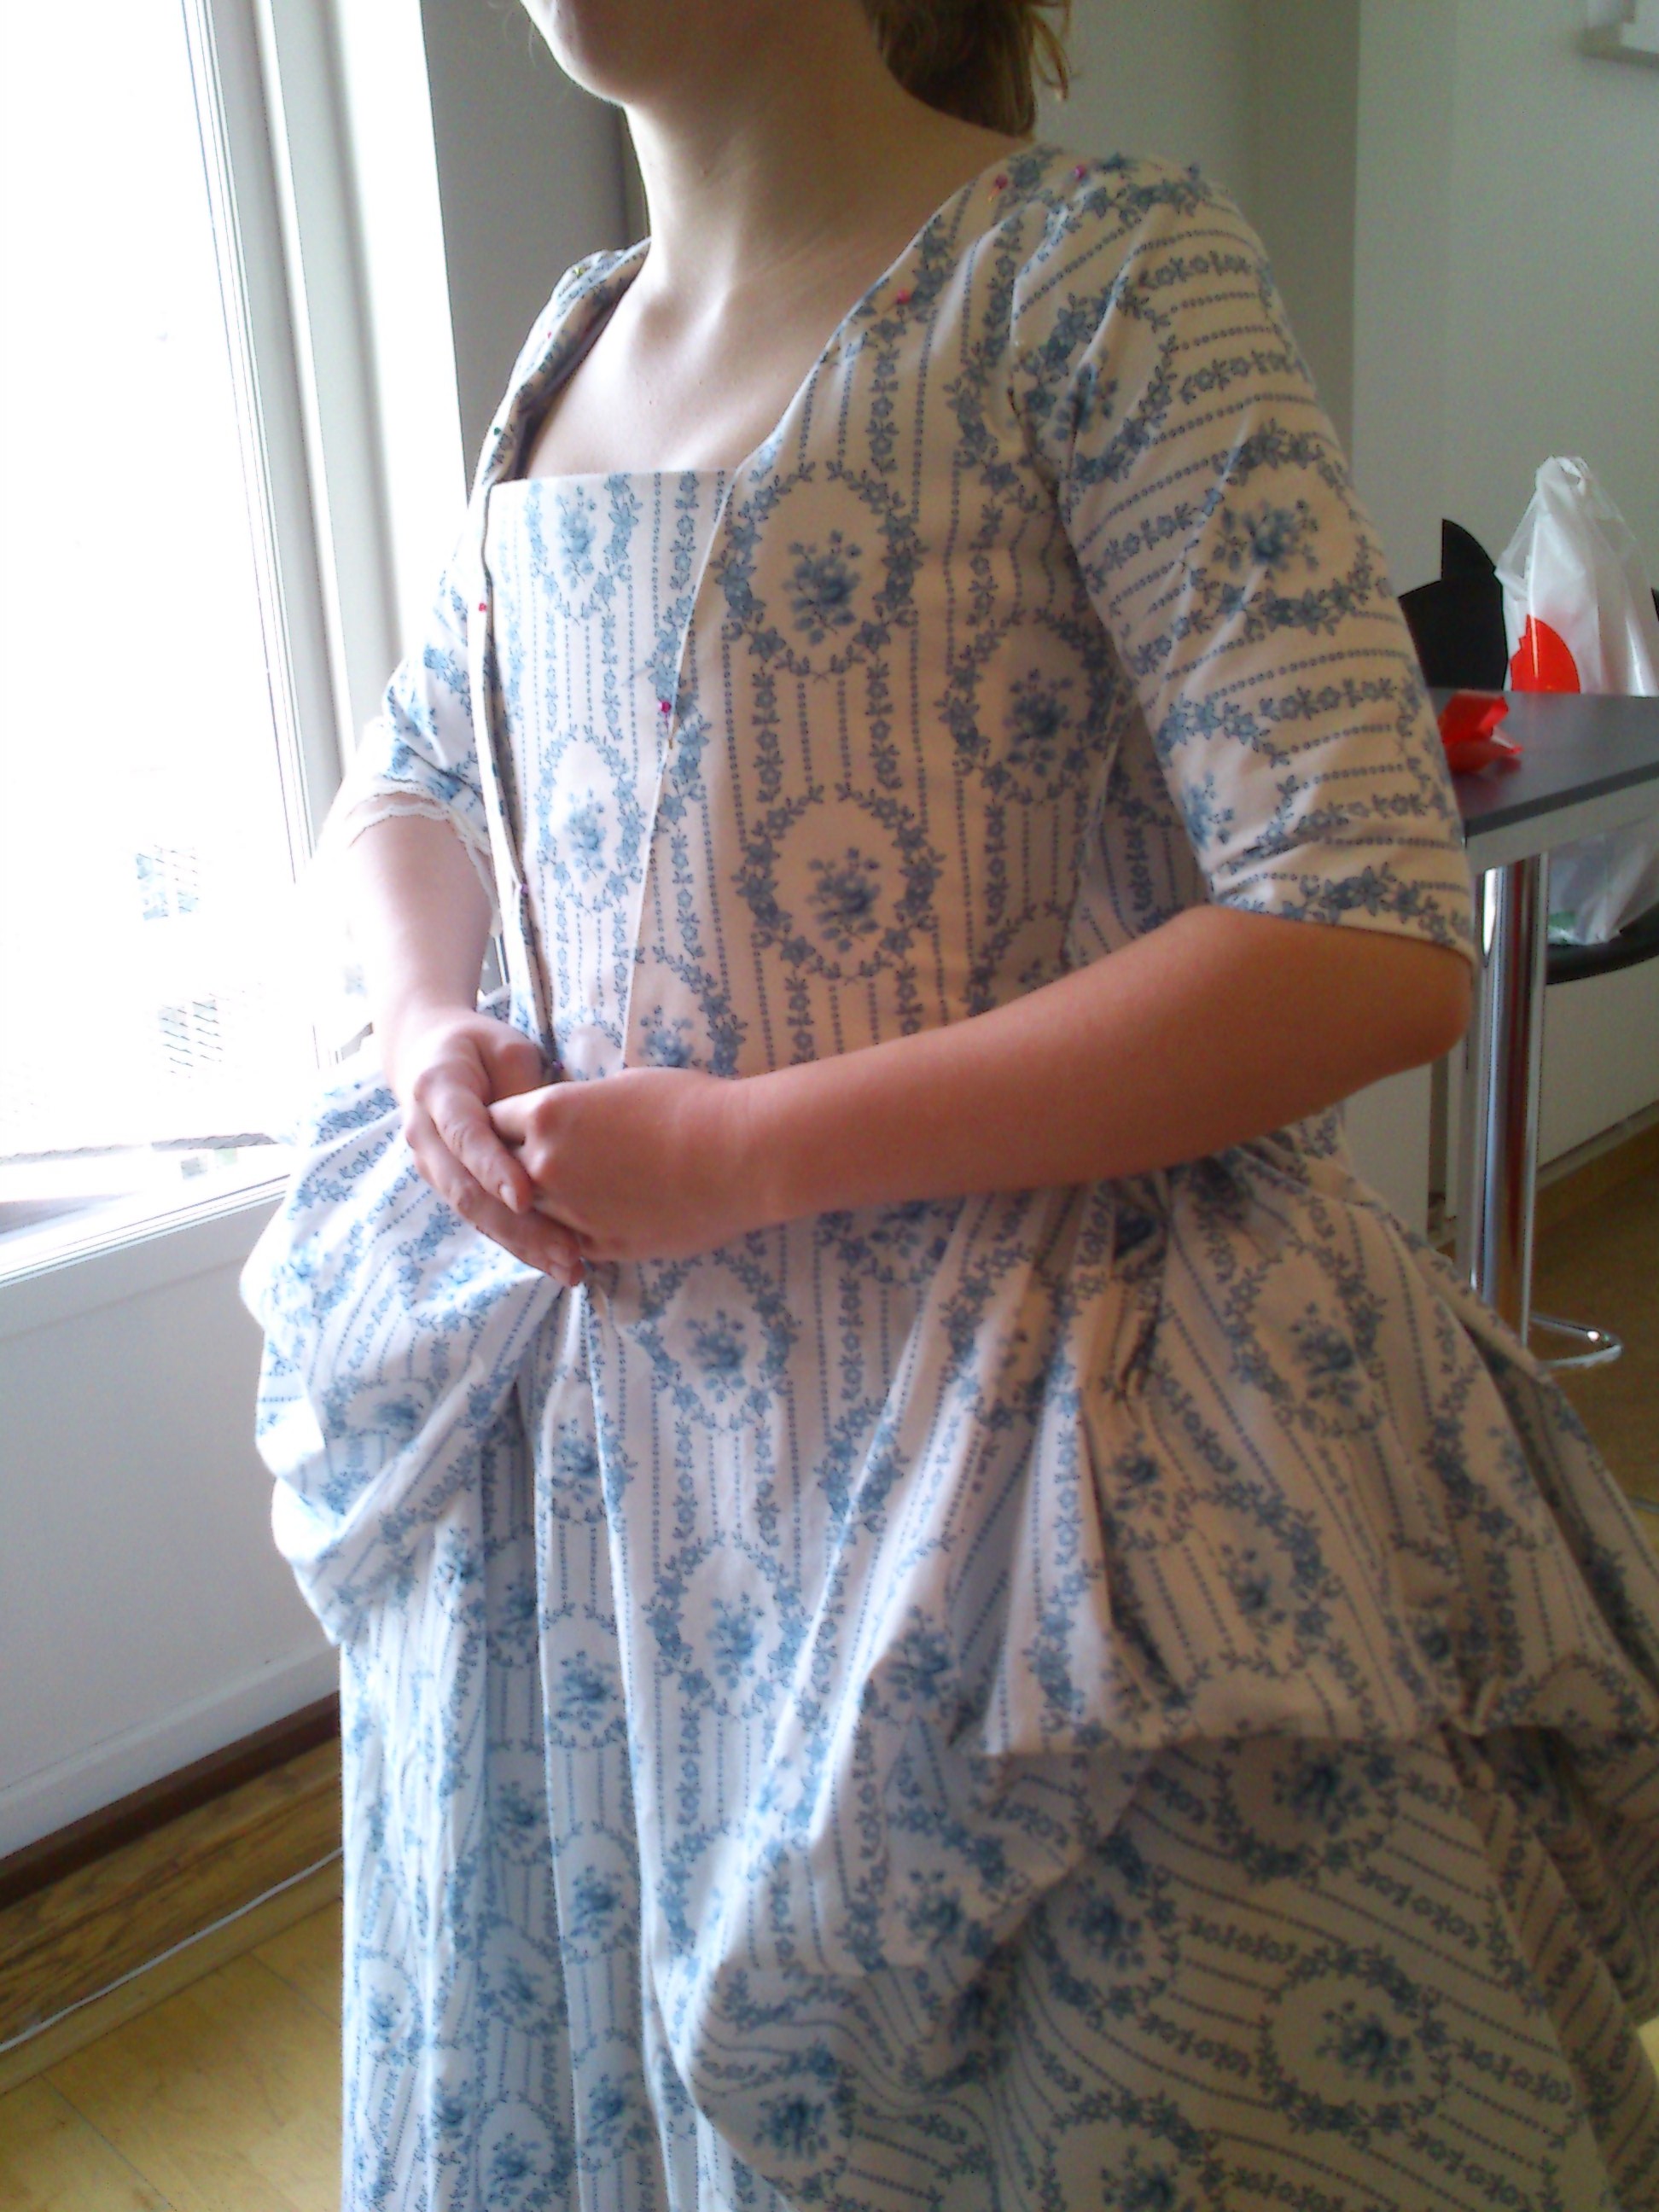
Then it was time to travel the 3 hours by train to my sisters home town for the first try on. And the fit was terrible, the shoulders didn’t fit, the waist was way to long and the front just wouldn’t sit where it was supposed to.

I ended up draping a whole new mock-up directly on her body.

halloj 148halloj 141

I went home confident I had a working pattern and started cutting the fabric the next day.

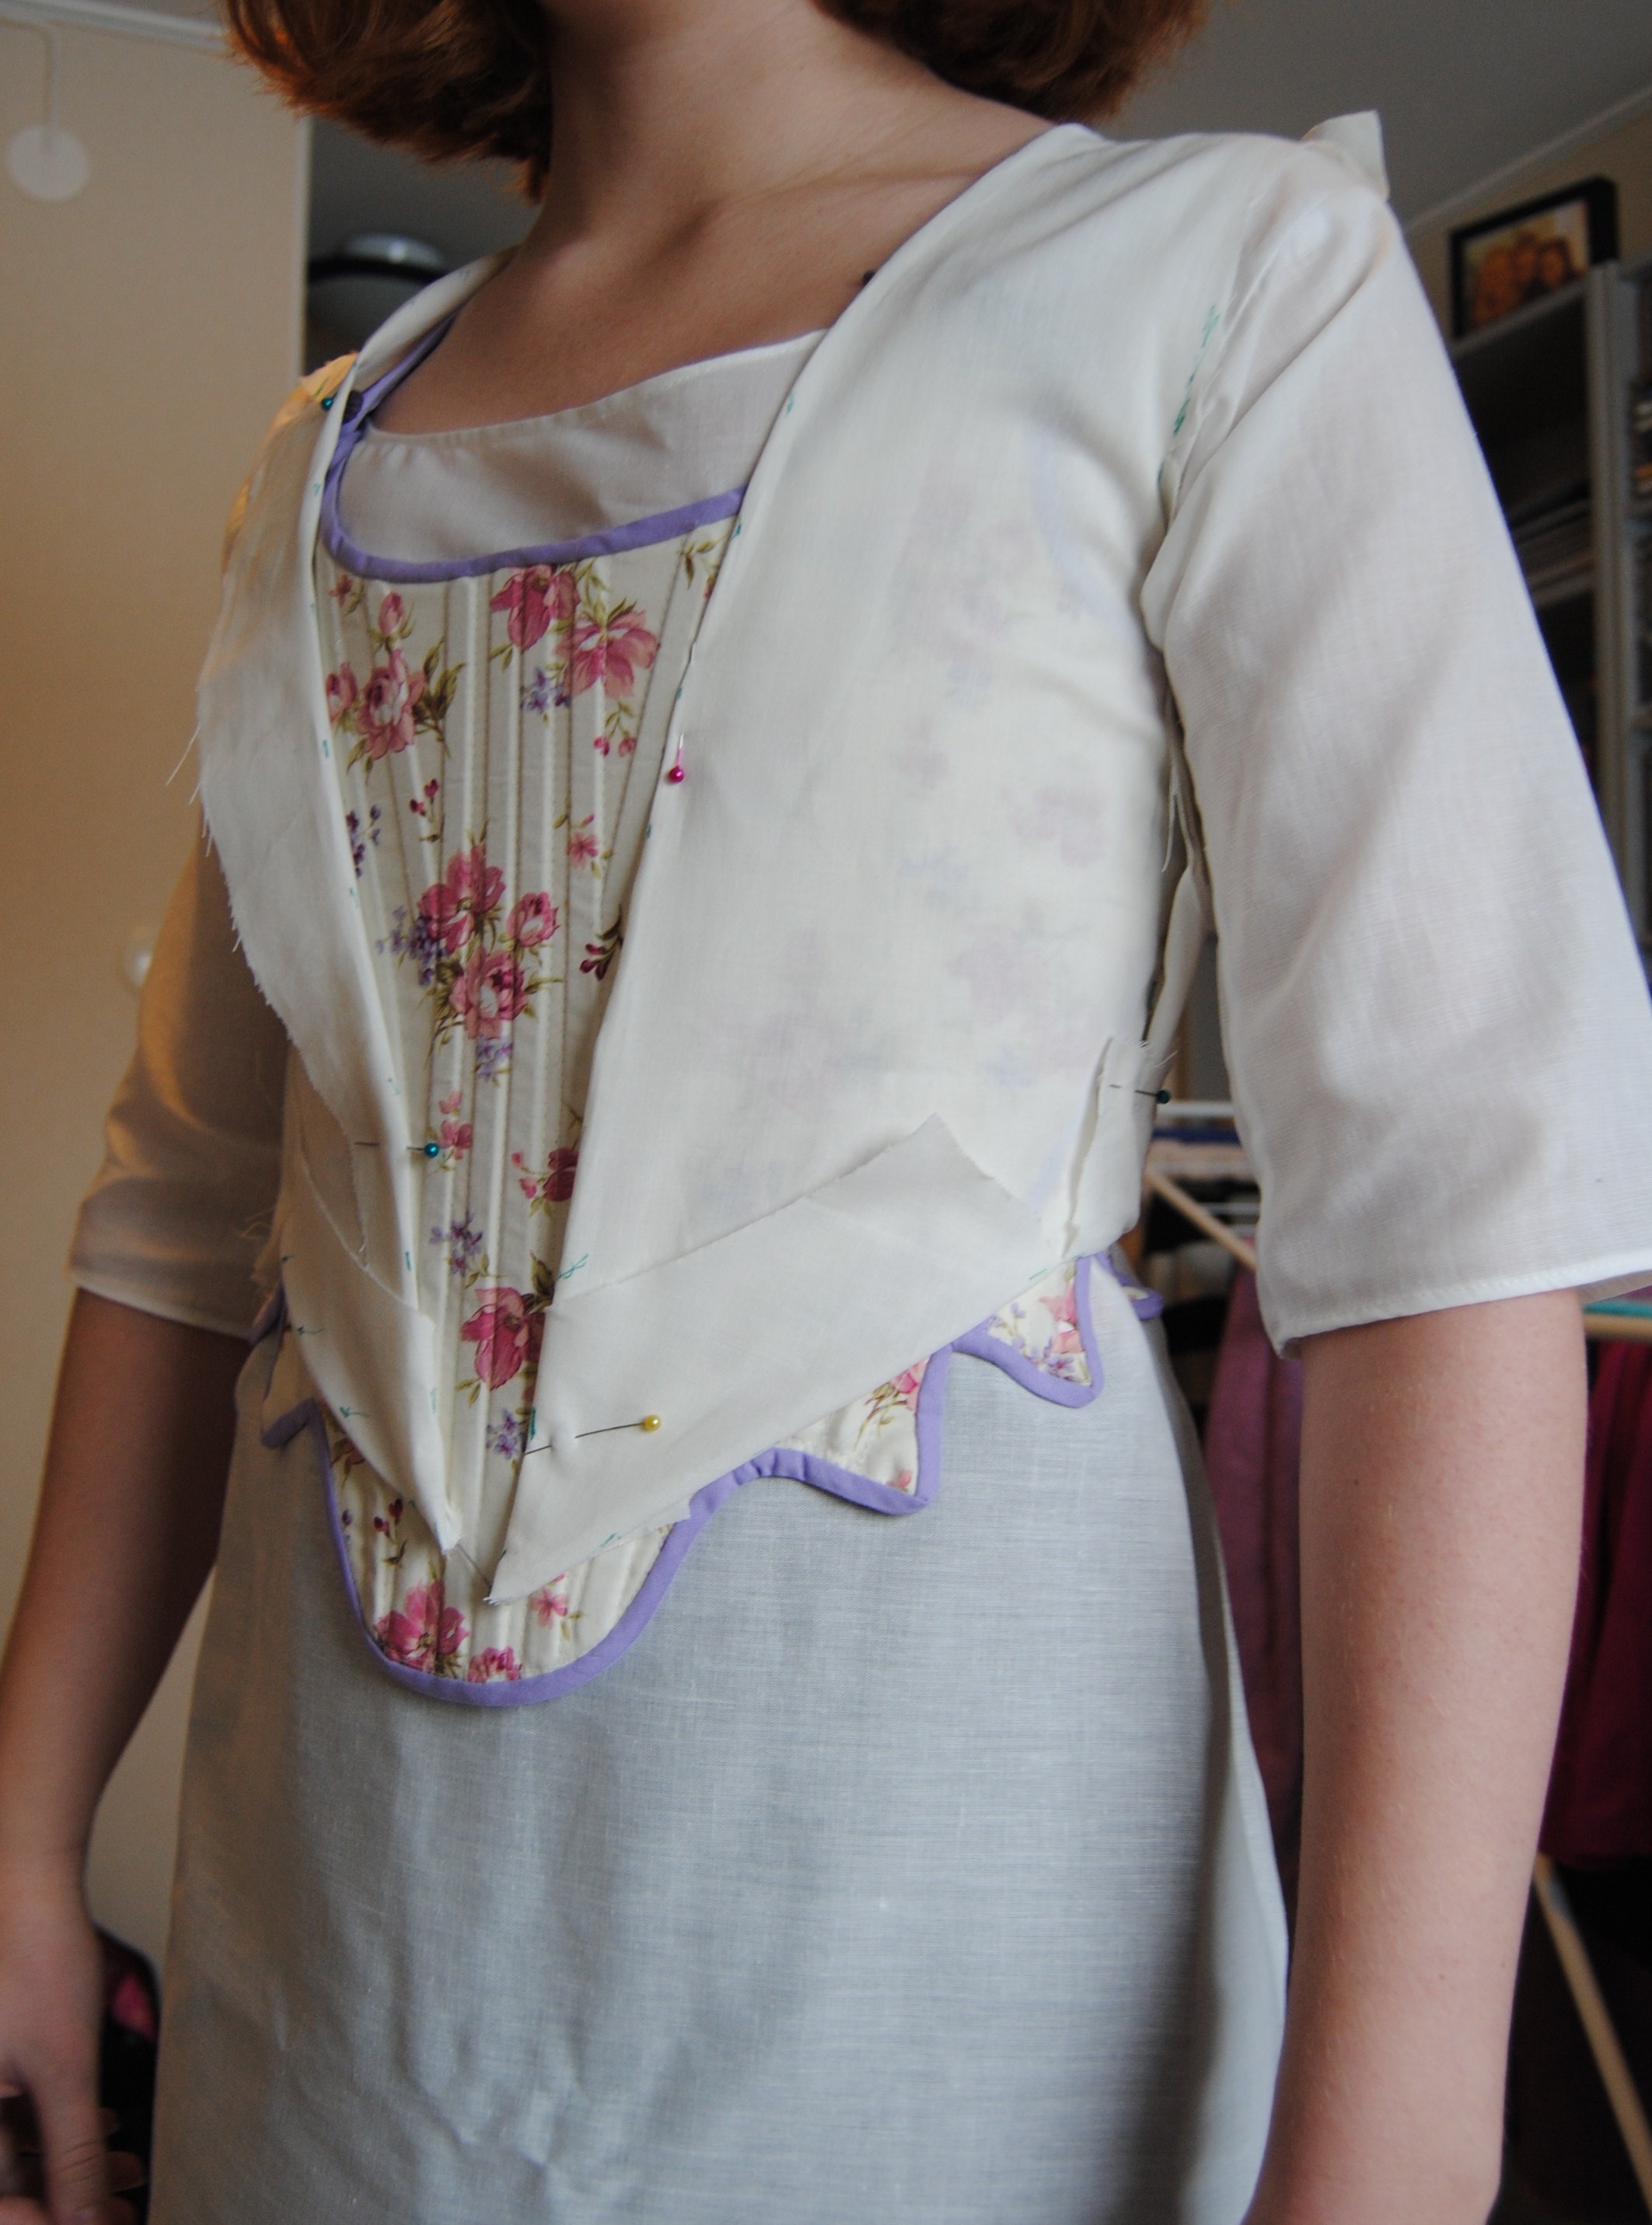
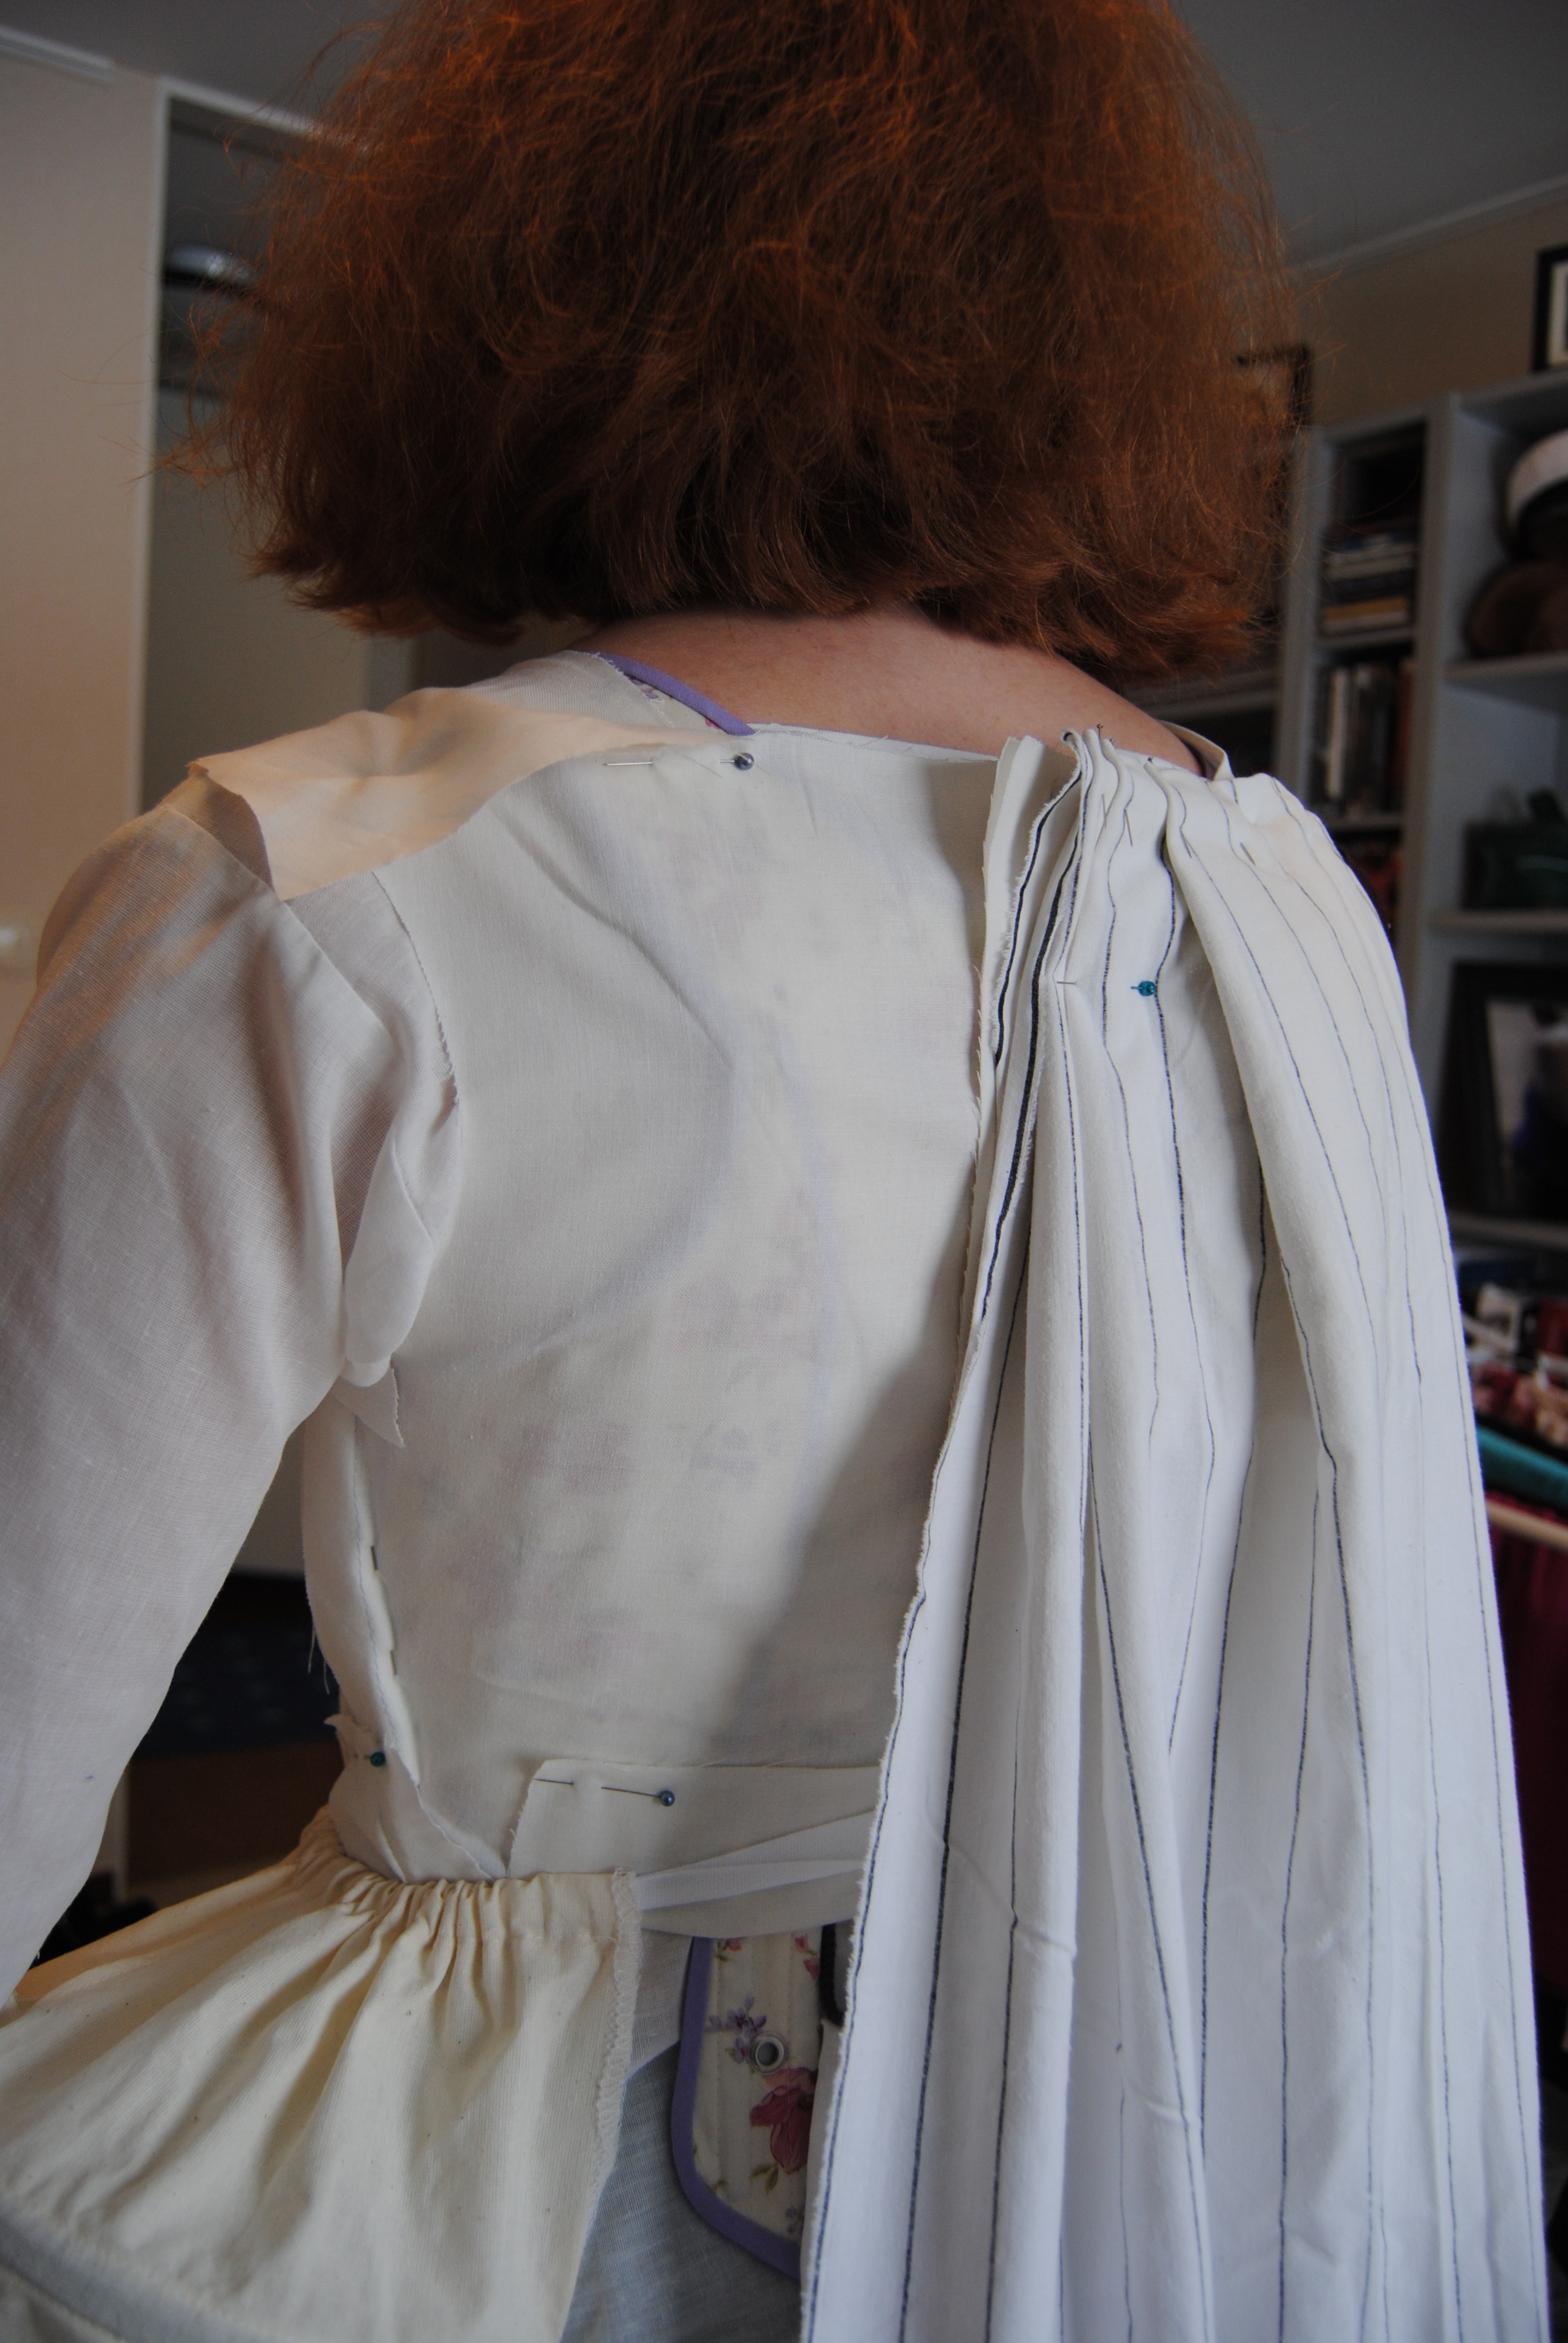
The sewing went quick and easy, starting with the bodice lining and putting some gromets and lacing in the back for a better fit. I draped and put the loose back on the lining, and sewed it down to the bodice side seams.

The skirt parts was pleated at the sides and sewed on and the sleeves was lined and sewed together but left lose until the next try on. I cut and sewed the petticoat to the waistband, sewed and boned the stomacher and started on the trimming.

2013-05-03 18.05.17


Then once again I met with my sister for a try on.

And this time it fitted almost perfectly.

2013-05-03 18.04.19


All that needed to be done was to:

Hem the skirt and petticoat

Lower the neck in the back

Trim and put the sleeves in

Decorate the stomacher

Make and sew all the trimming on.

Some final polish

2013-05-03 18.49.34


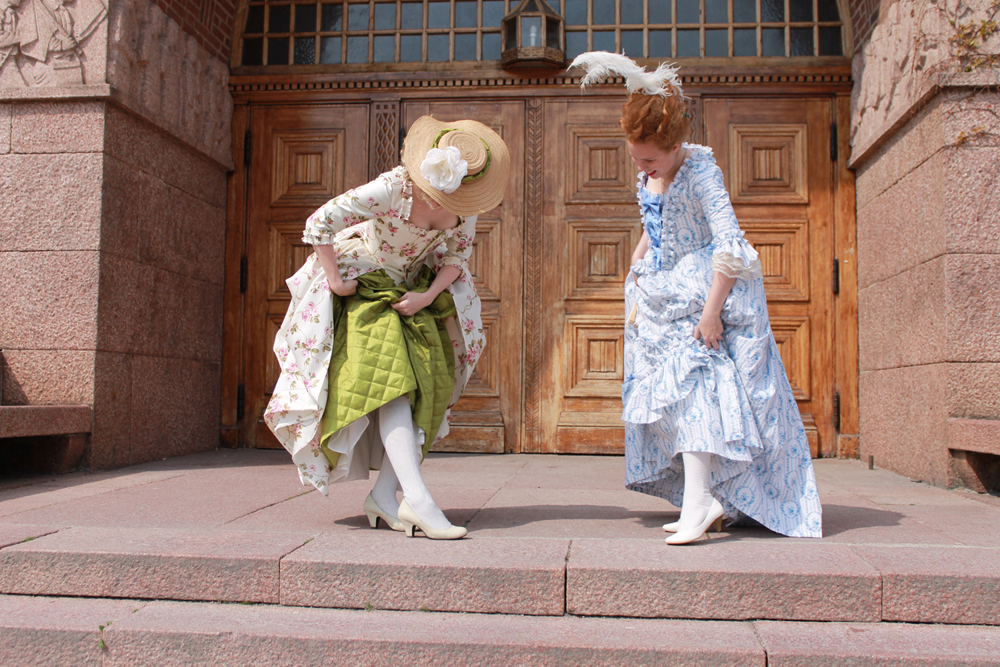
I was relieved that it wasn’t more to do or change since I just realised I only had 3 days (of wich I would be home for one evening) to do all this finishing, before we were supposed to have the final photoshoot.

After a lot of handsewing on my worktrip (on the train, bus, aeroplane, hotel etc.) I managed to get the dress done in time.


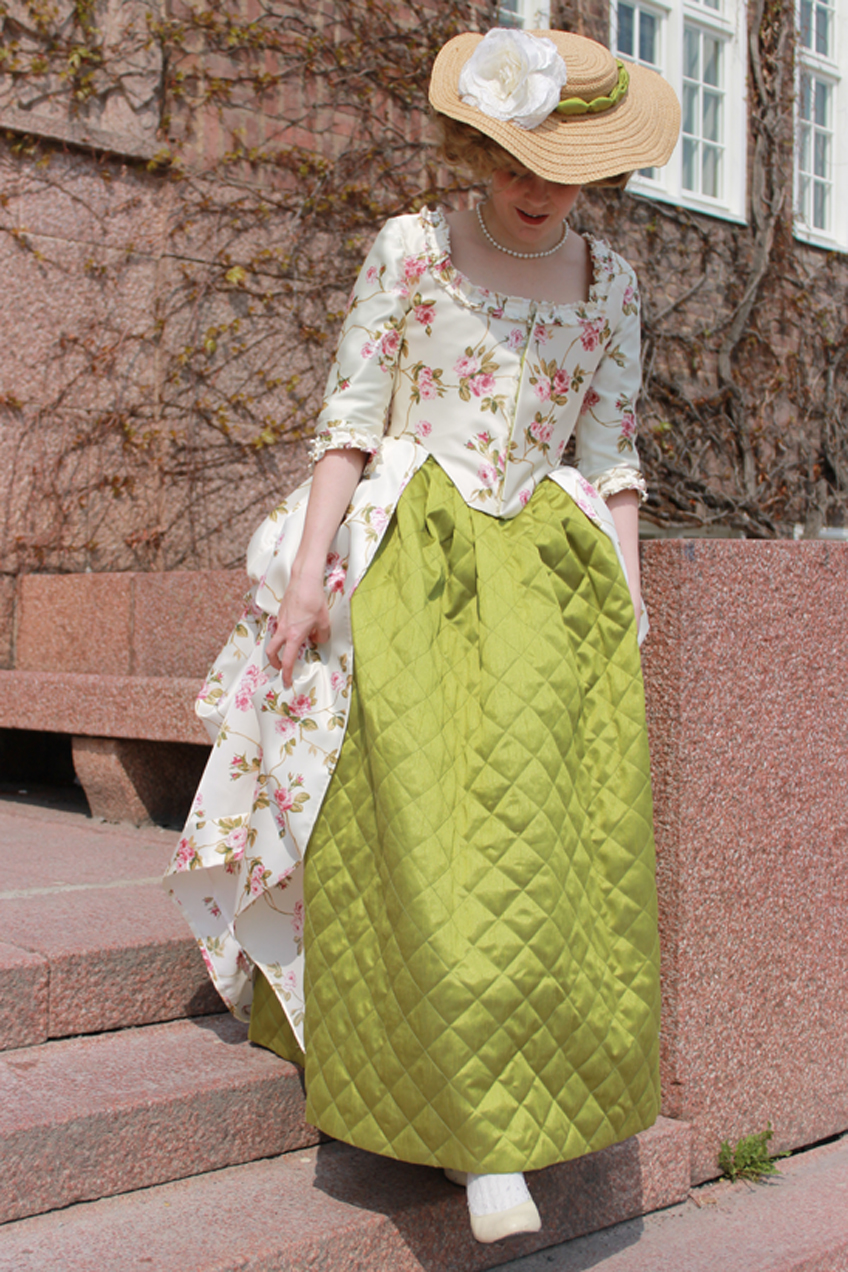
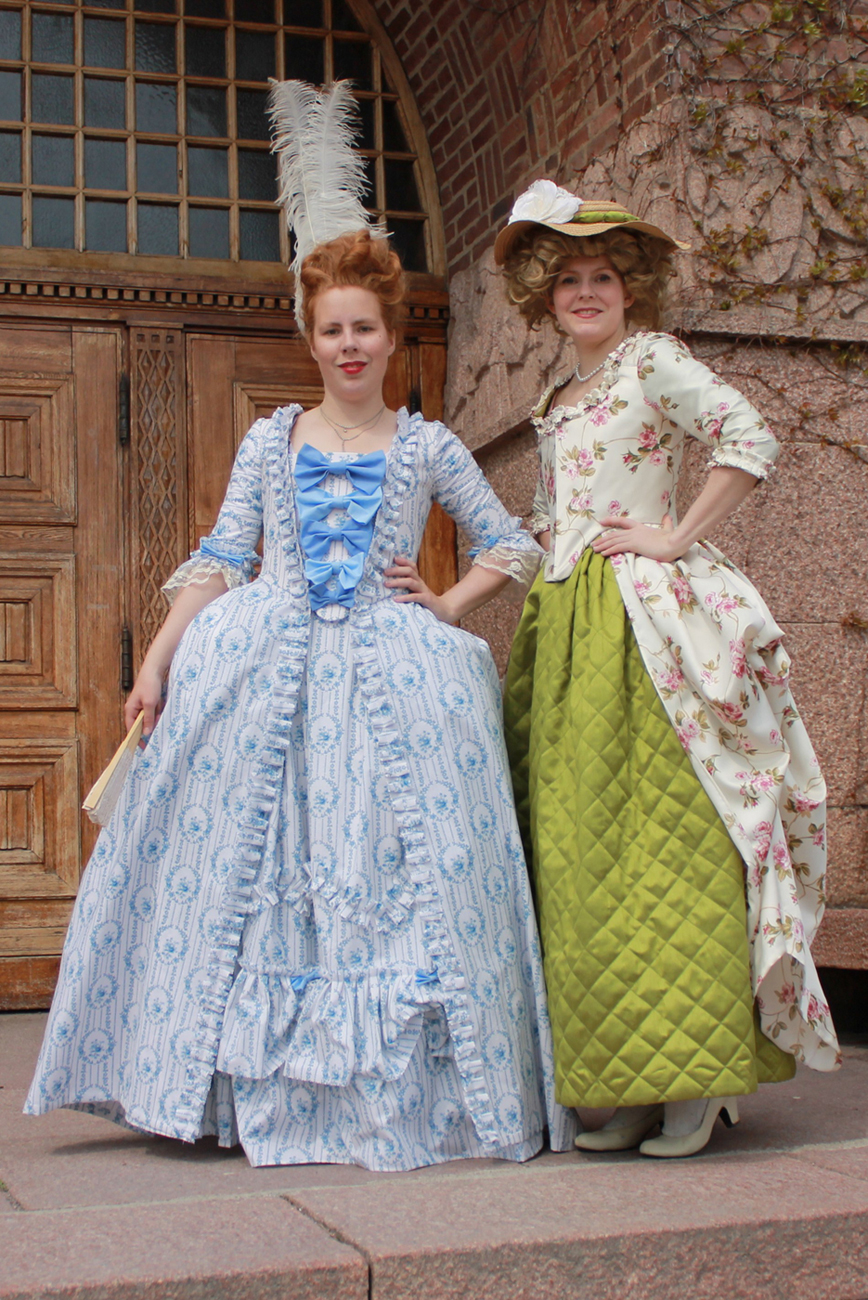
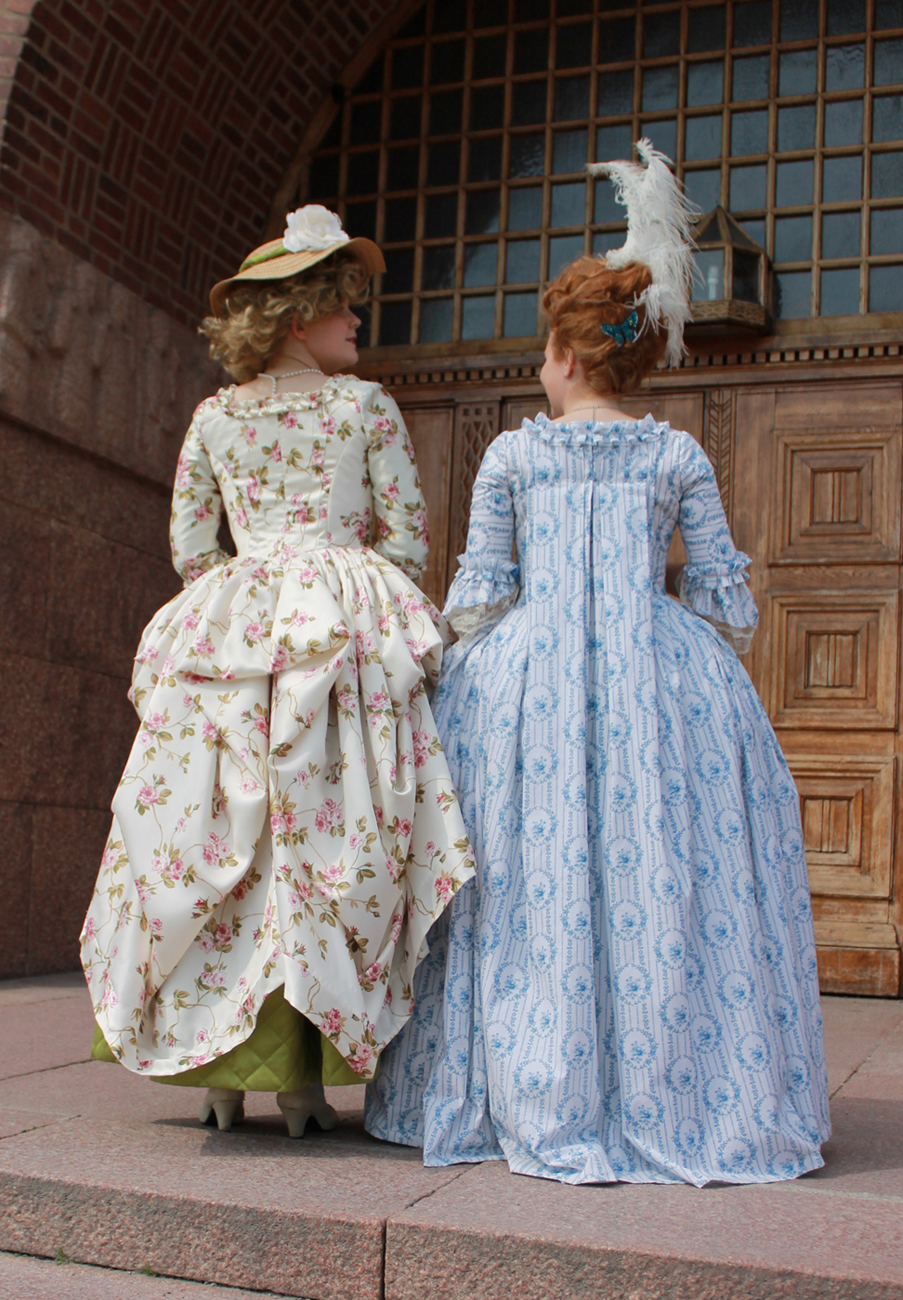
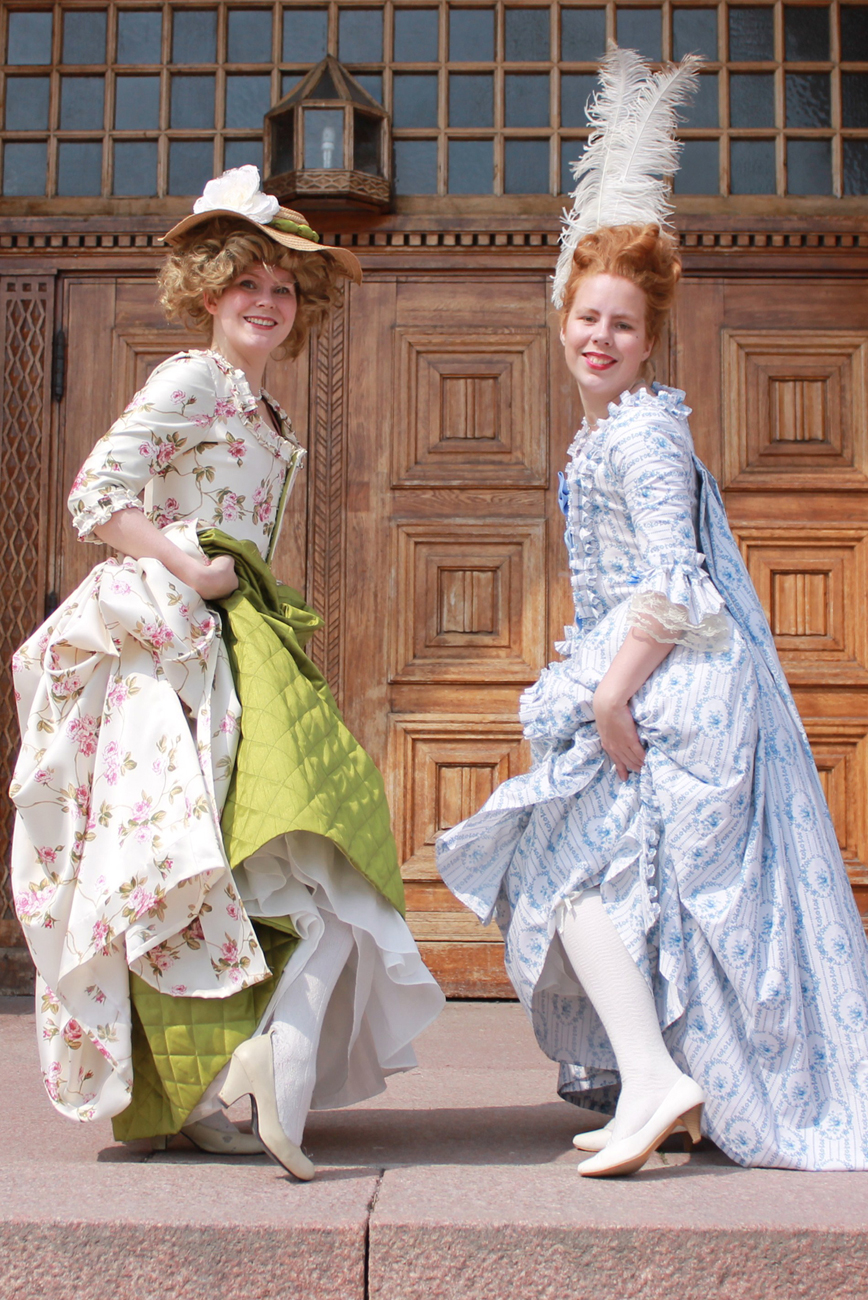
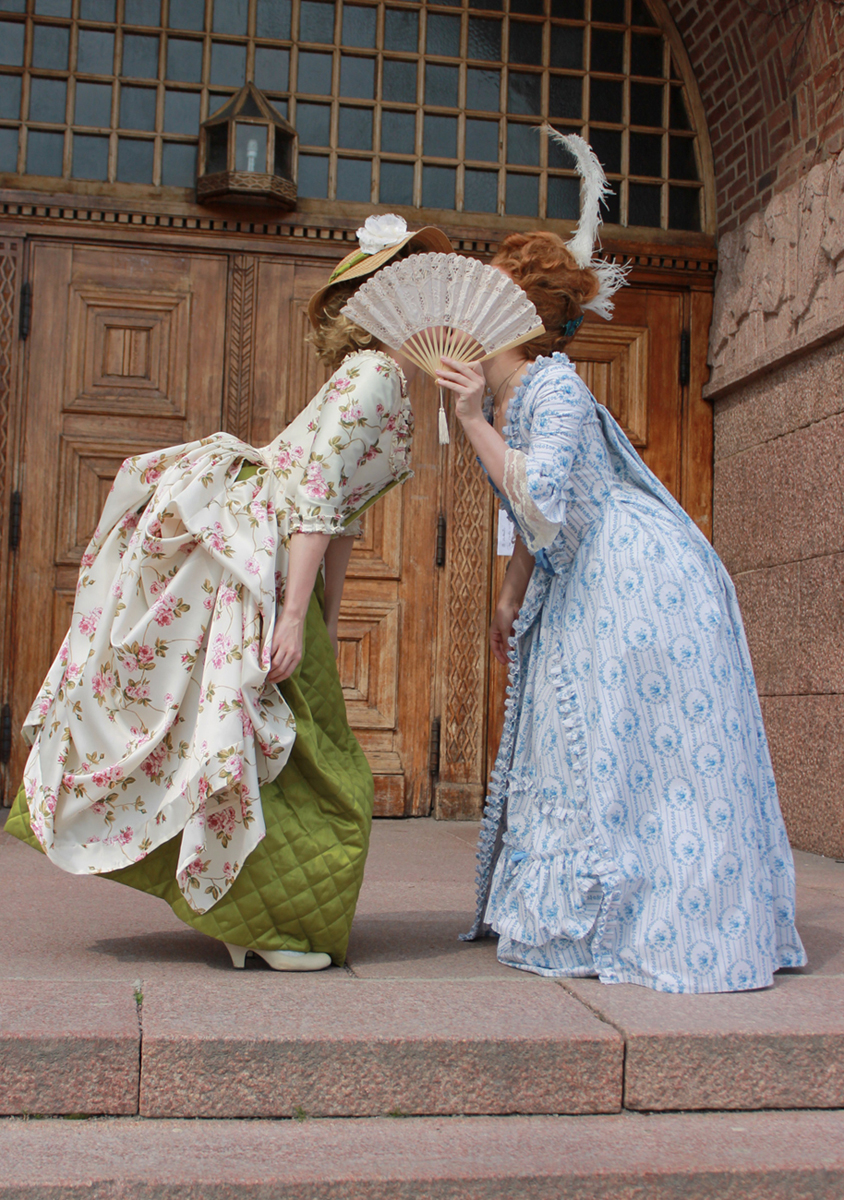
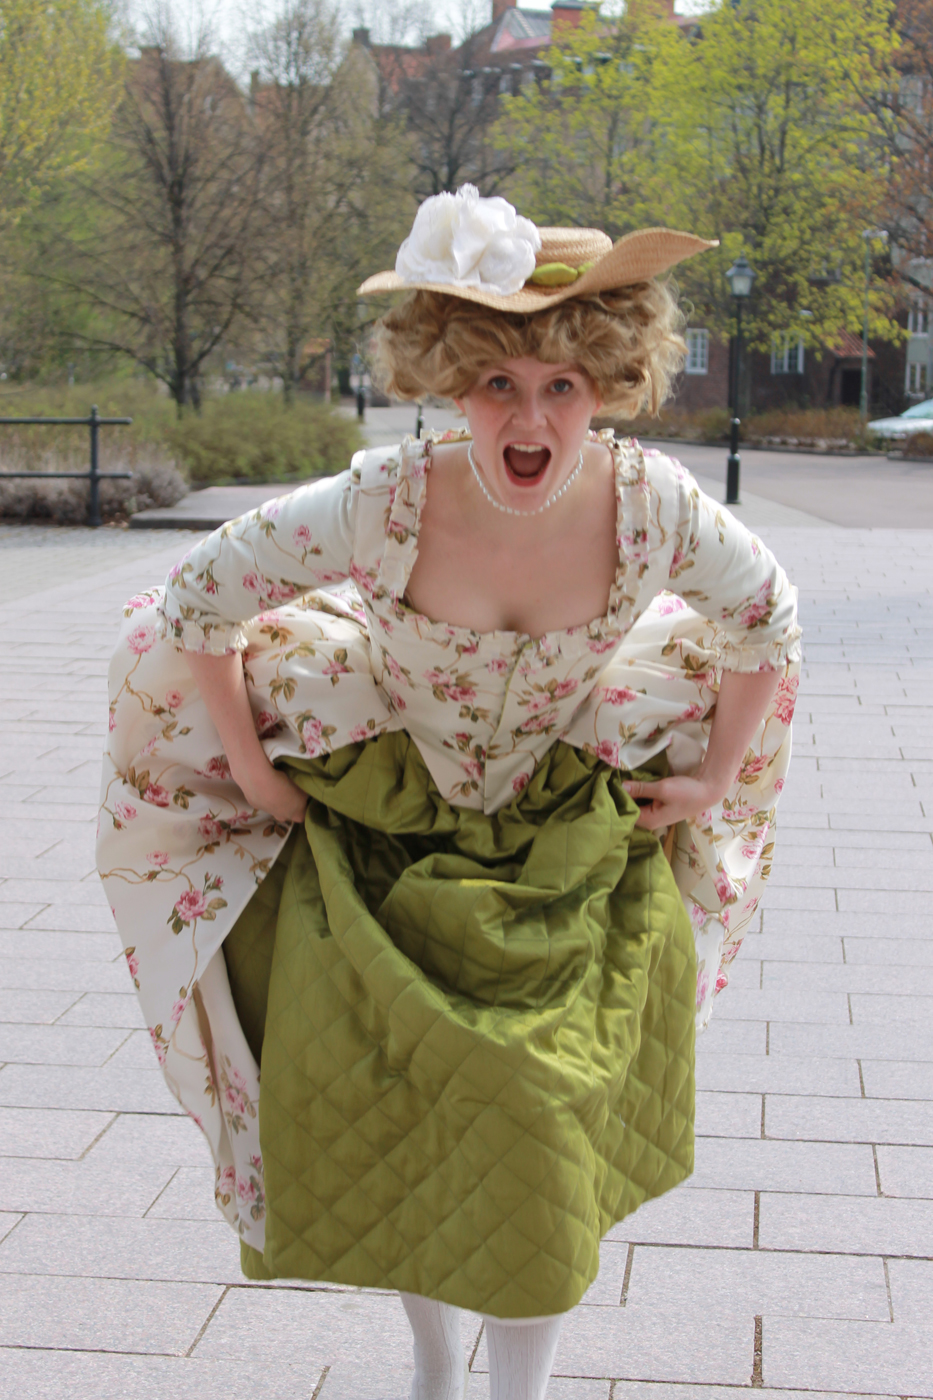
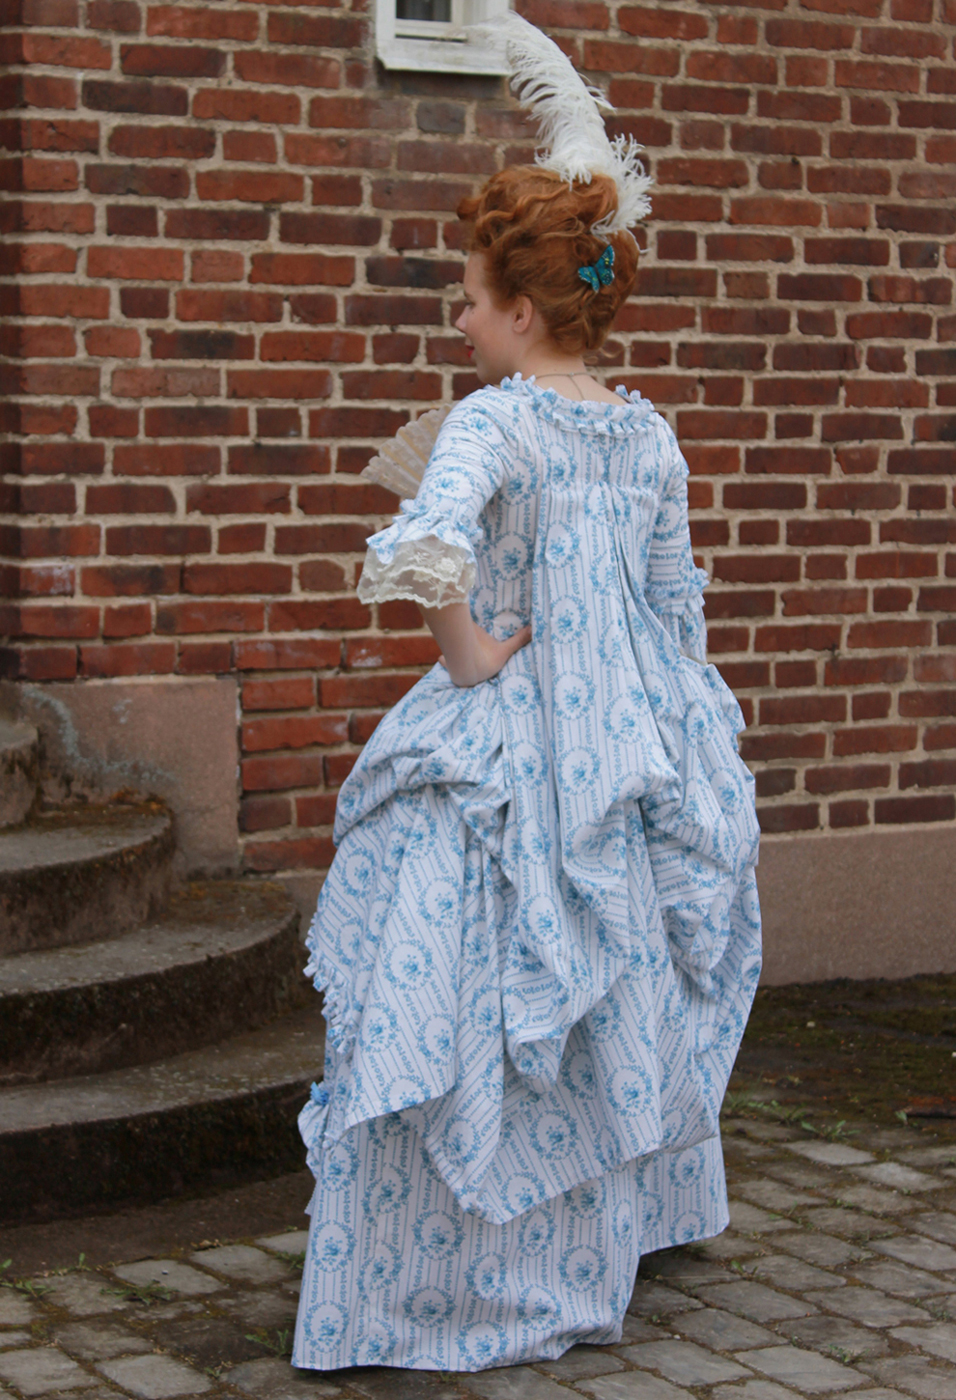
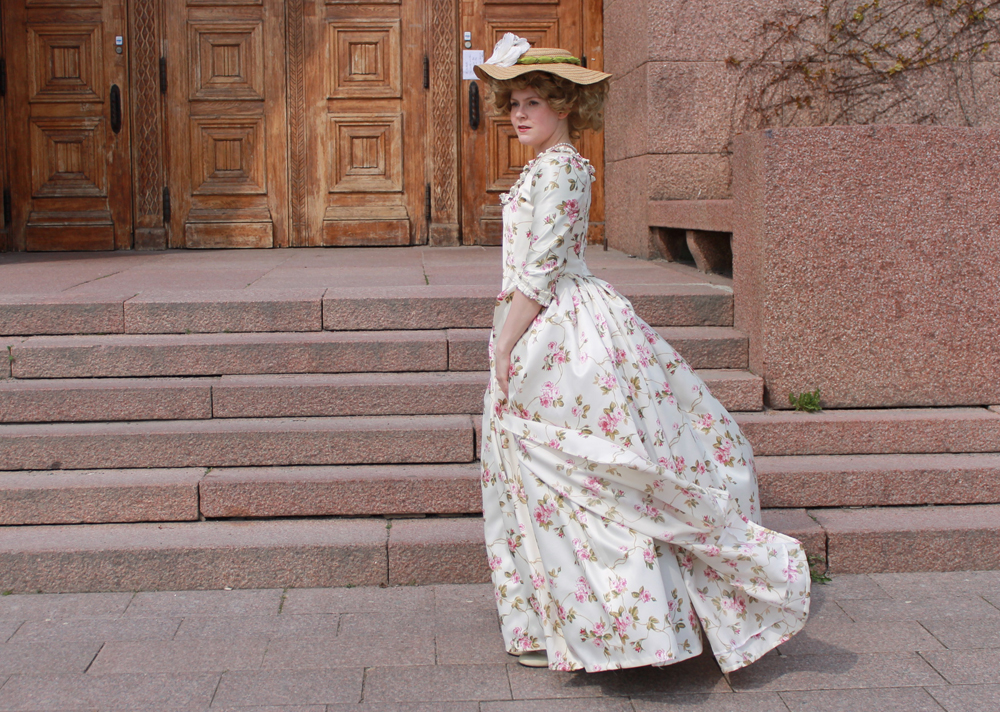
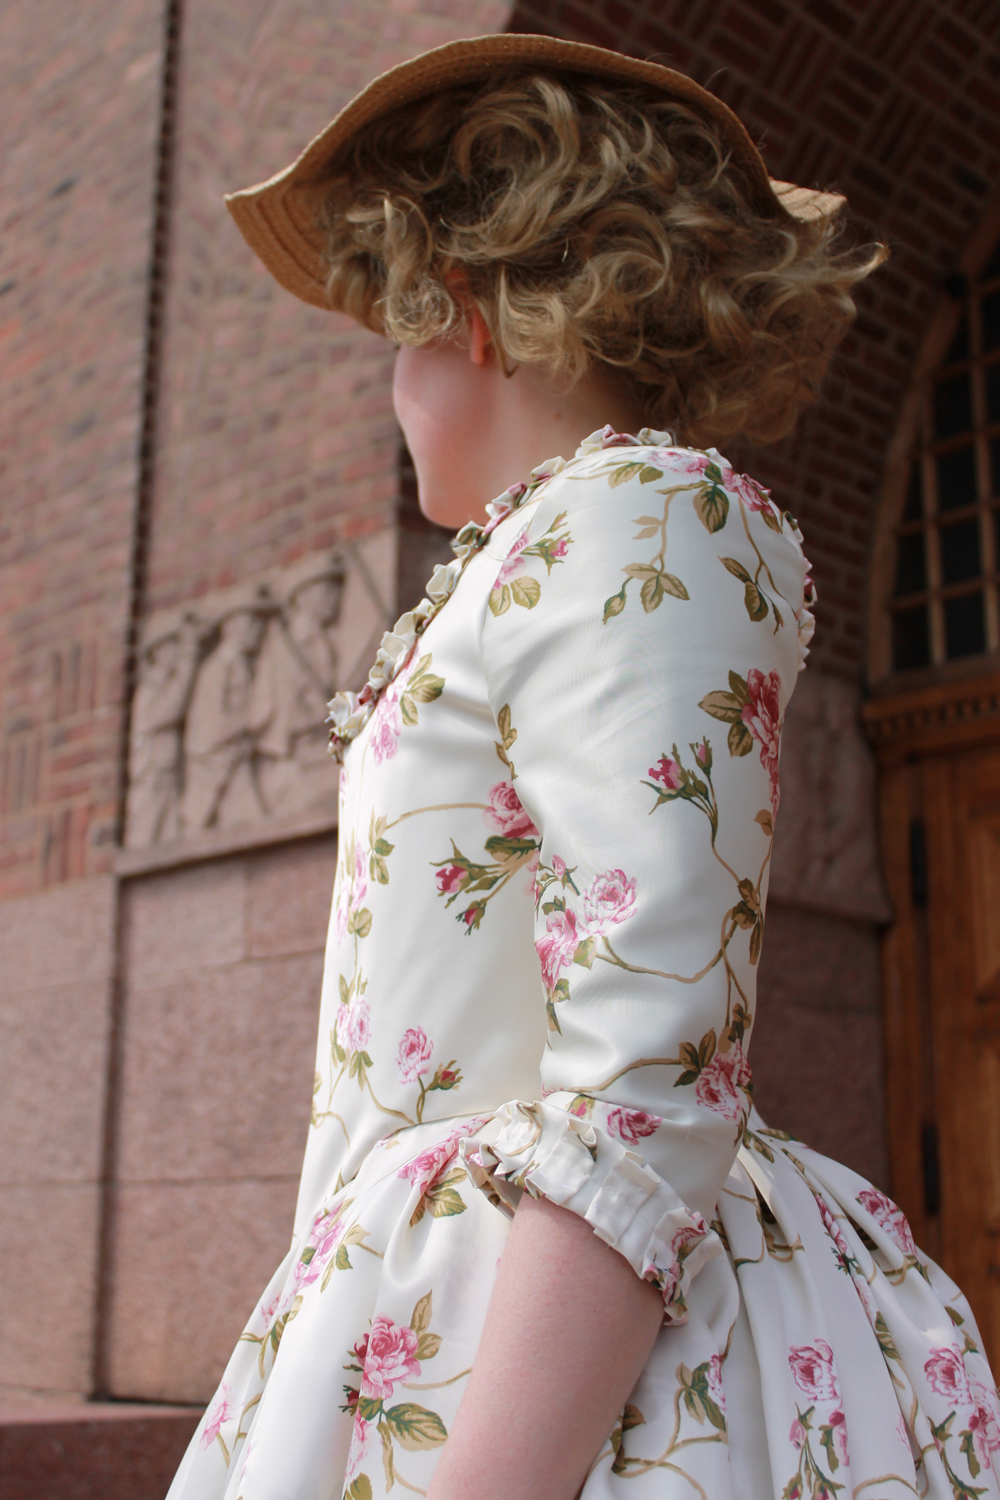
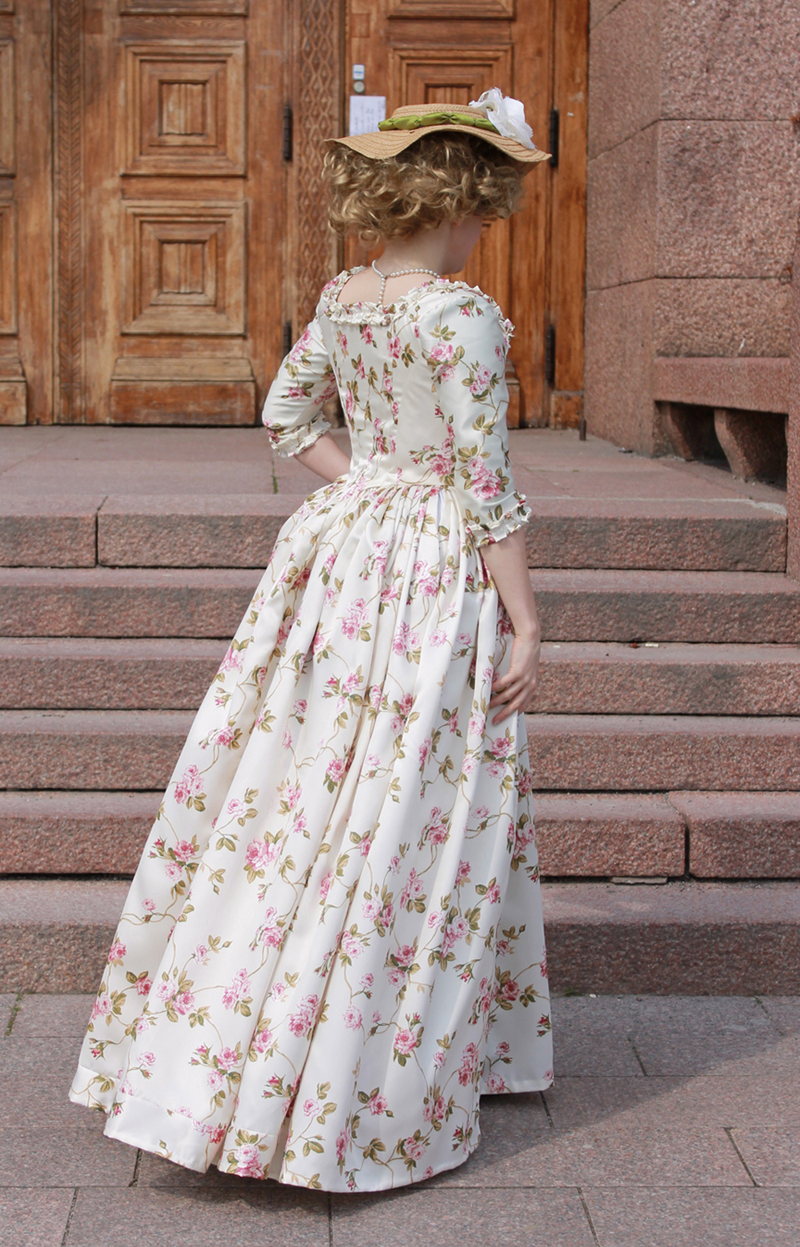
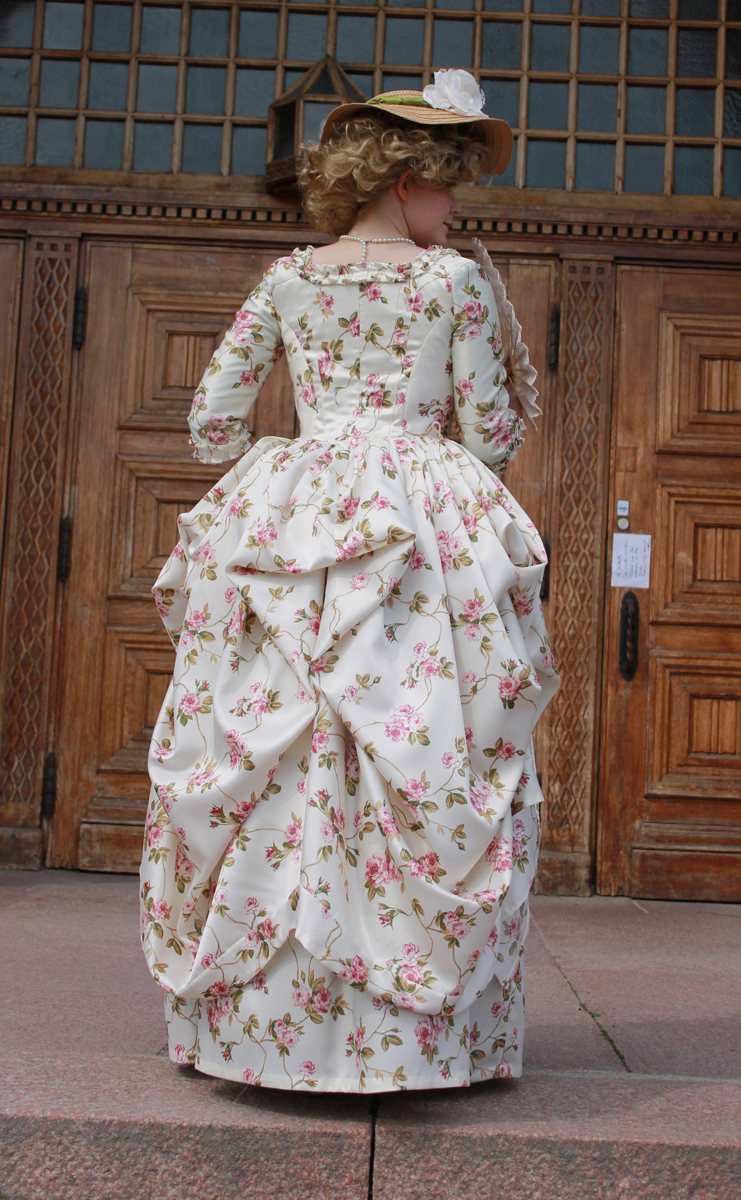
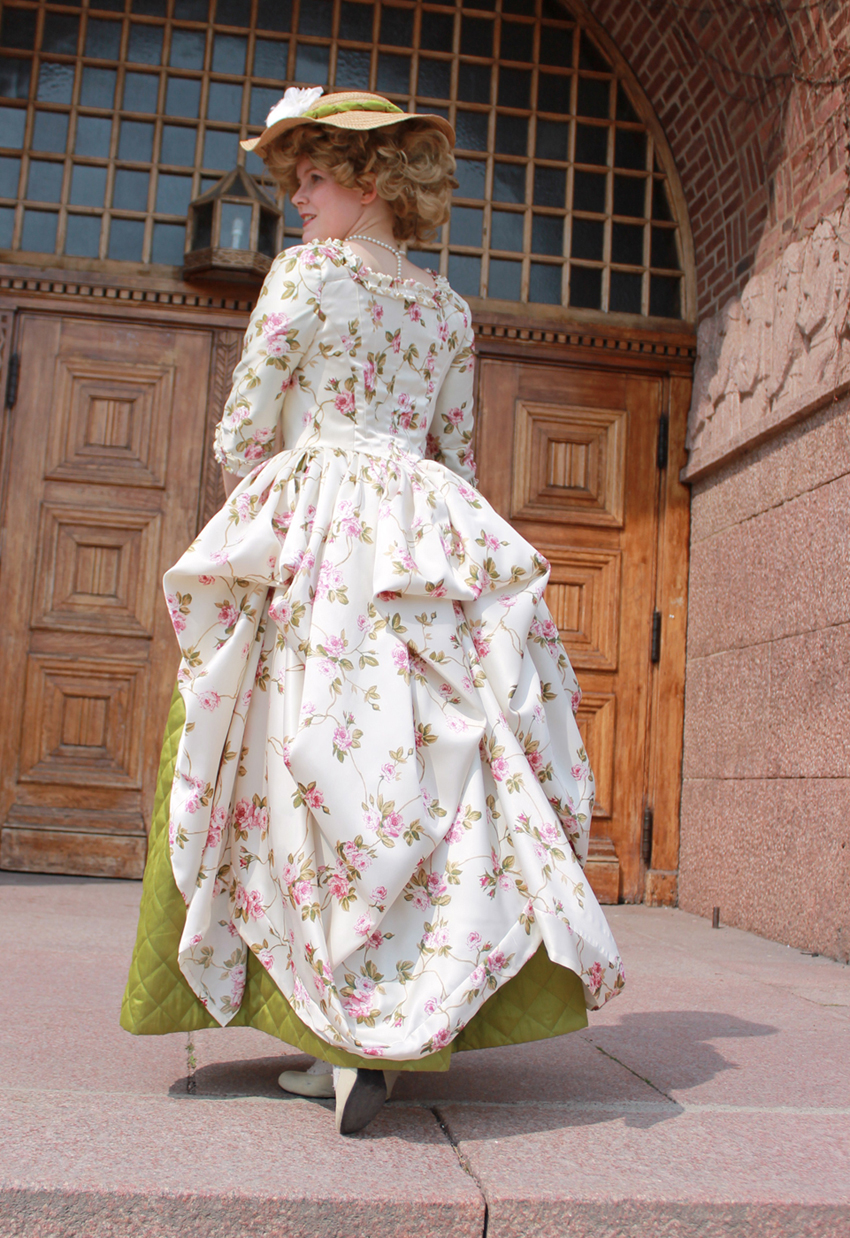
Here are some pictures of the finished dress on my dress form. Pictures from the photoshoot will be shown in a later post.

2013-05-07 11.50.03
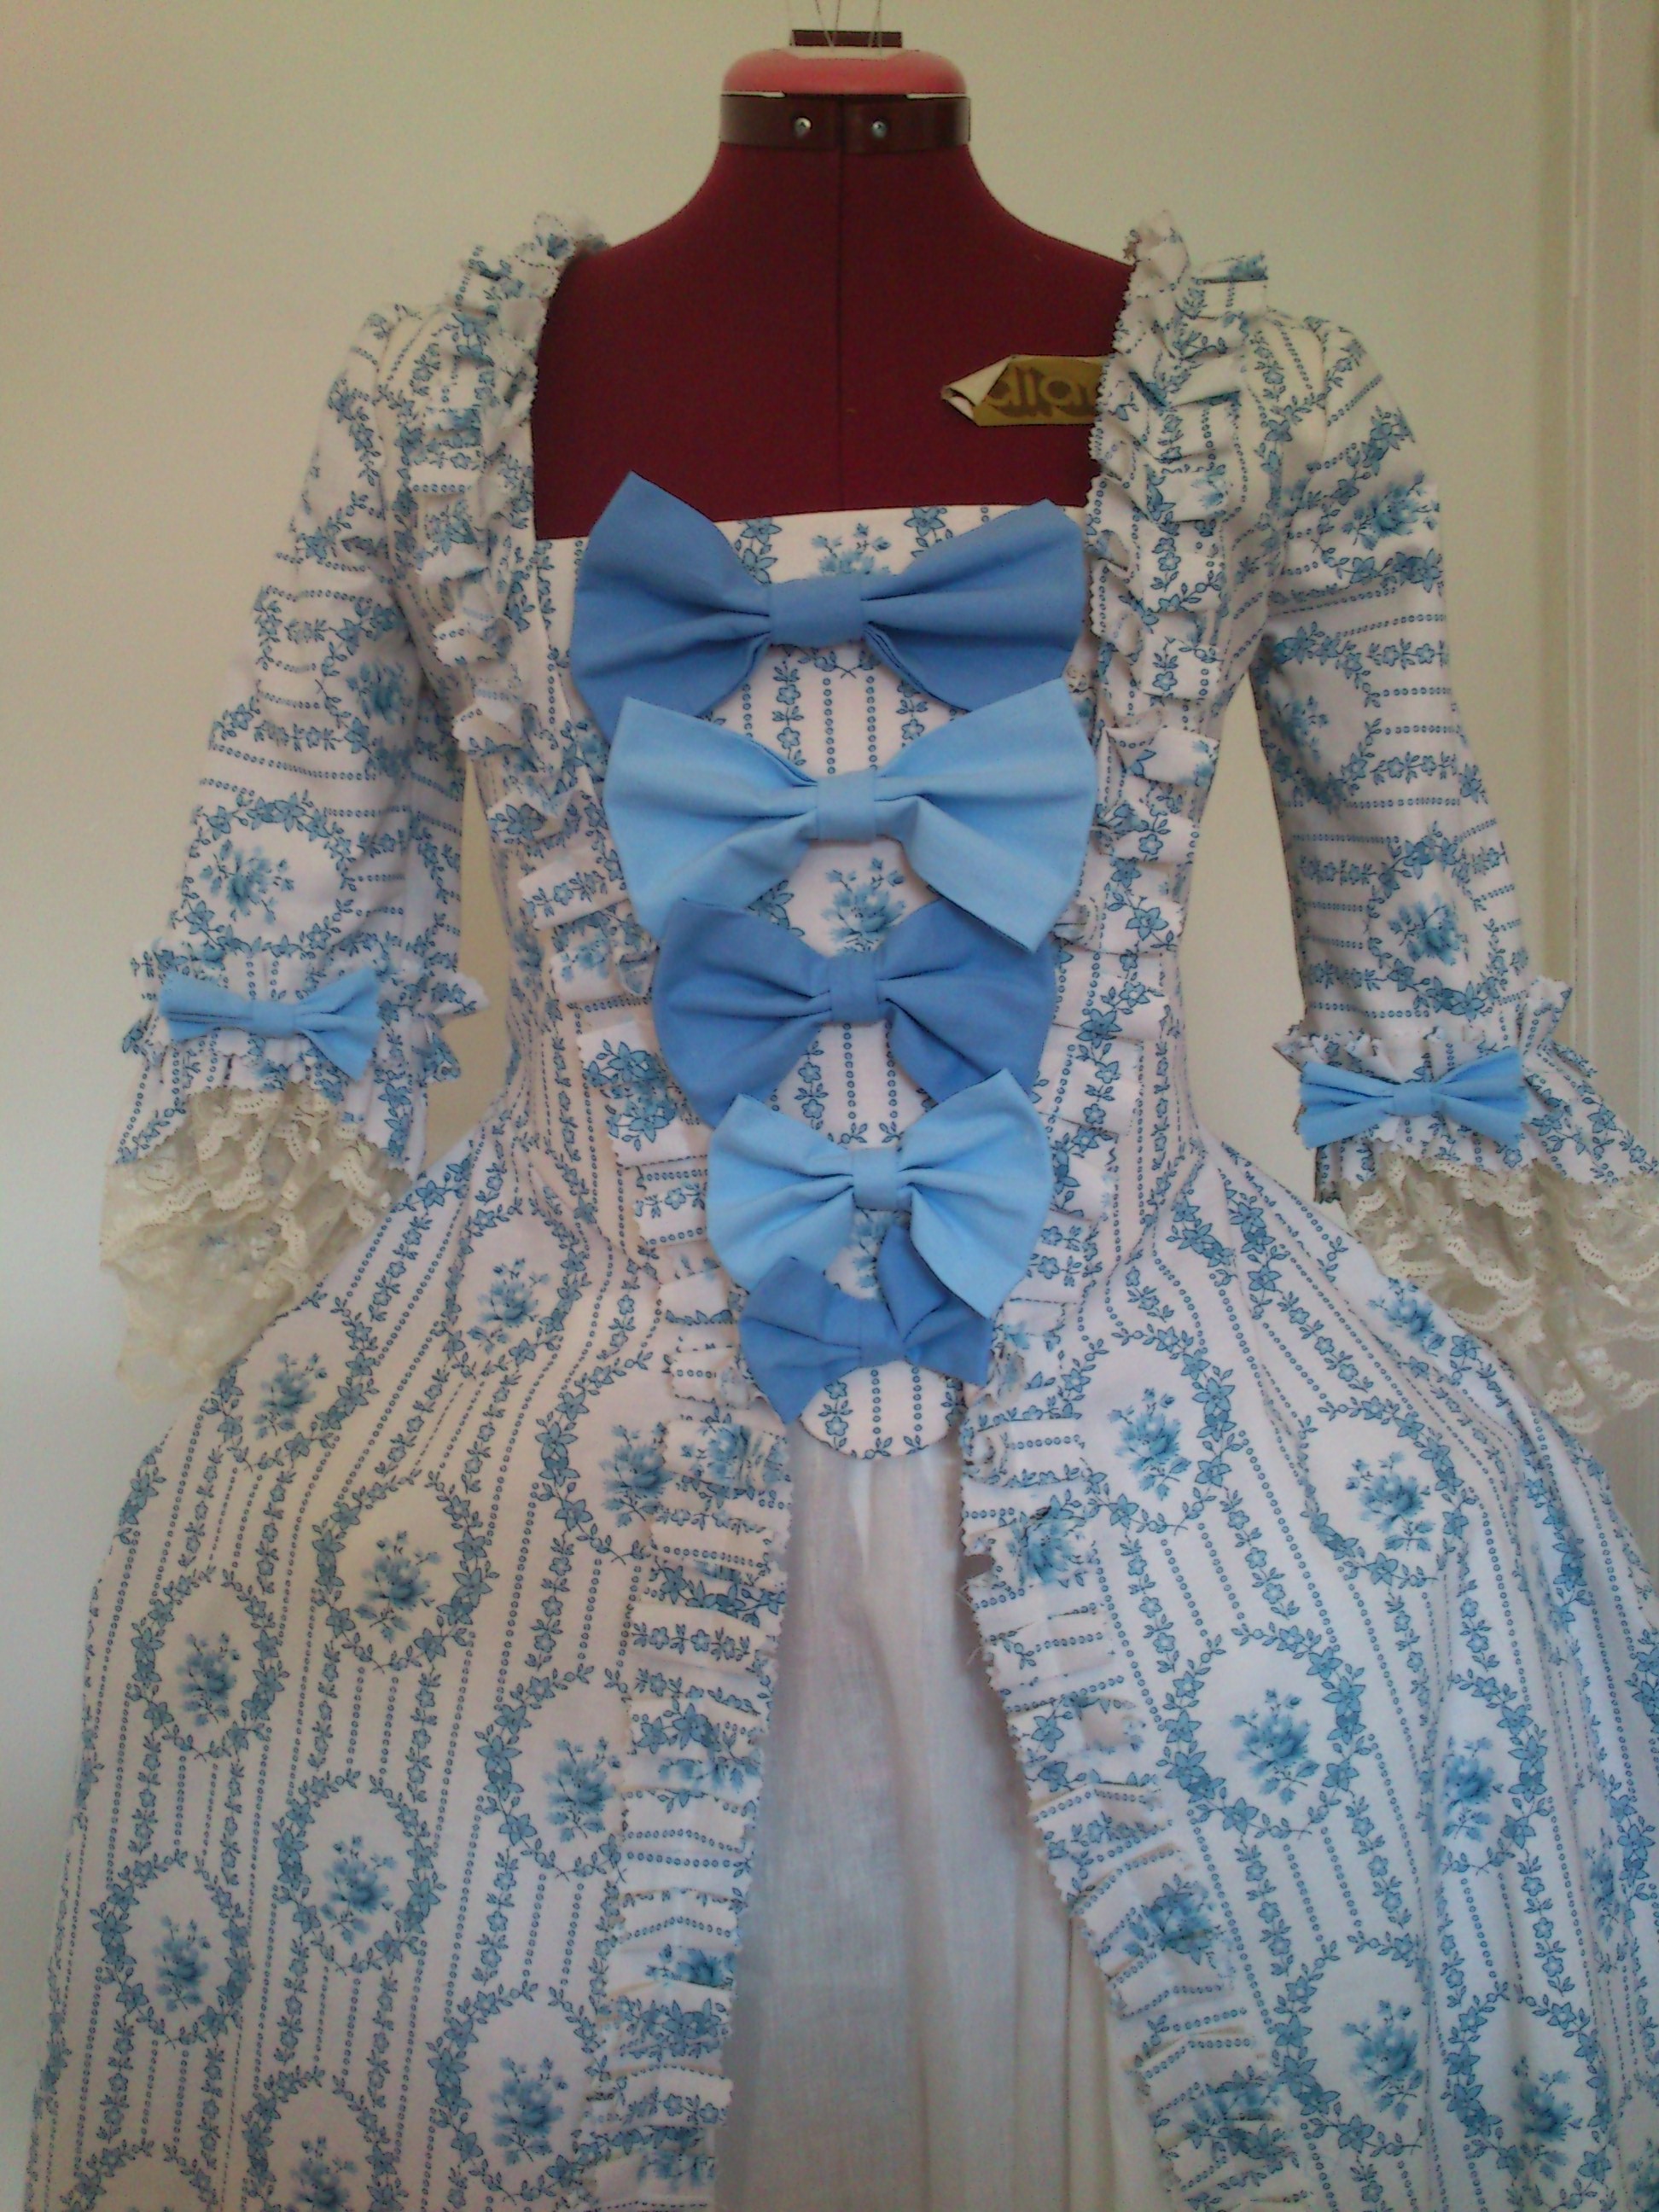
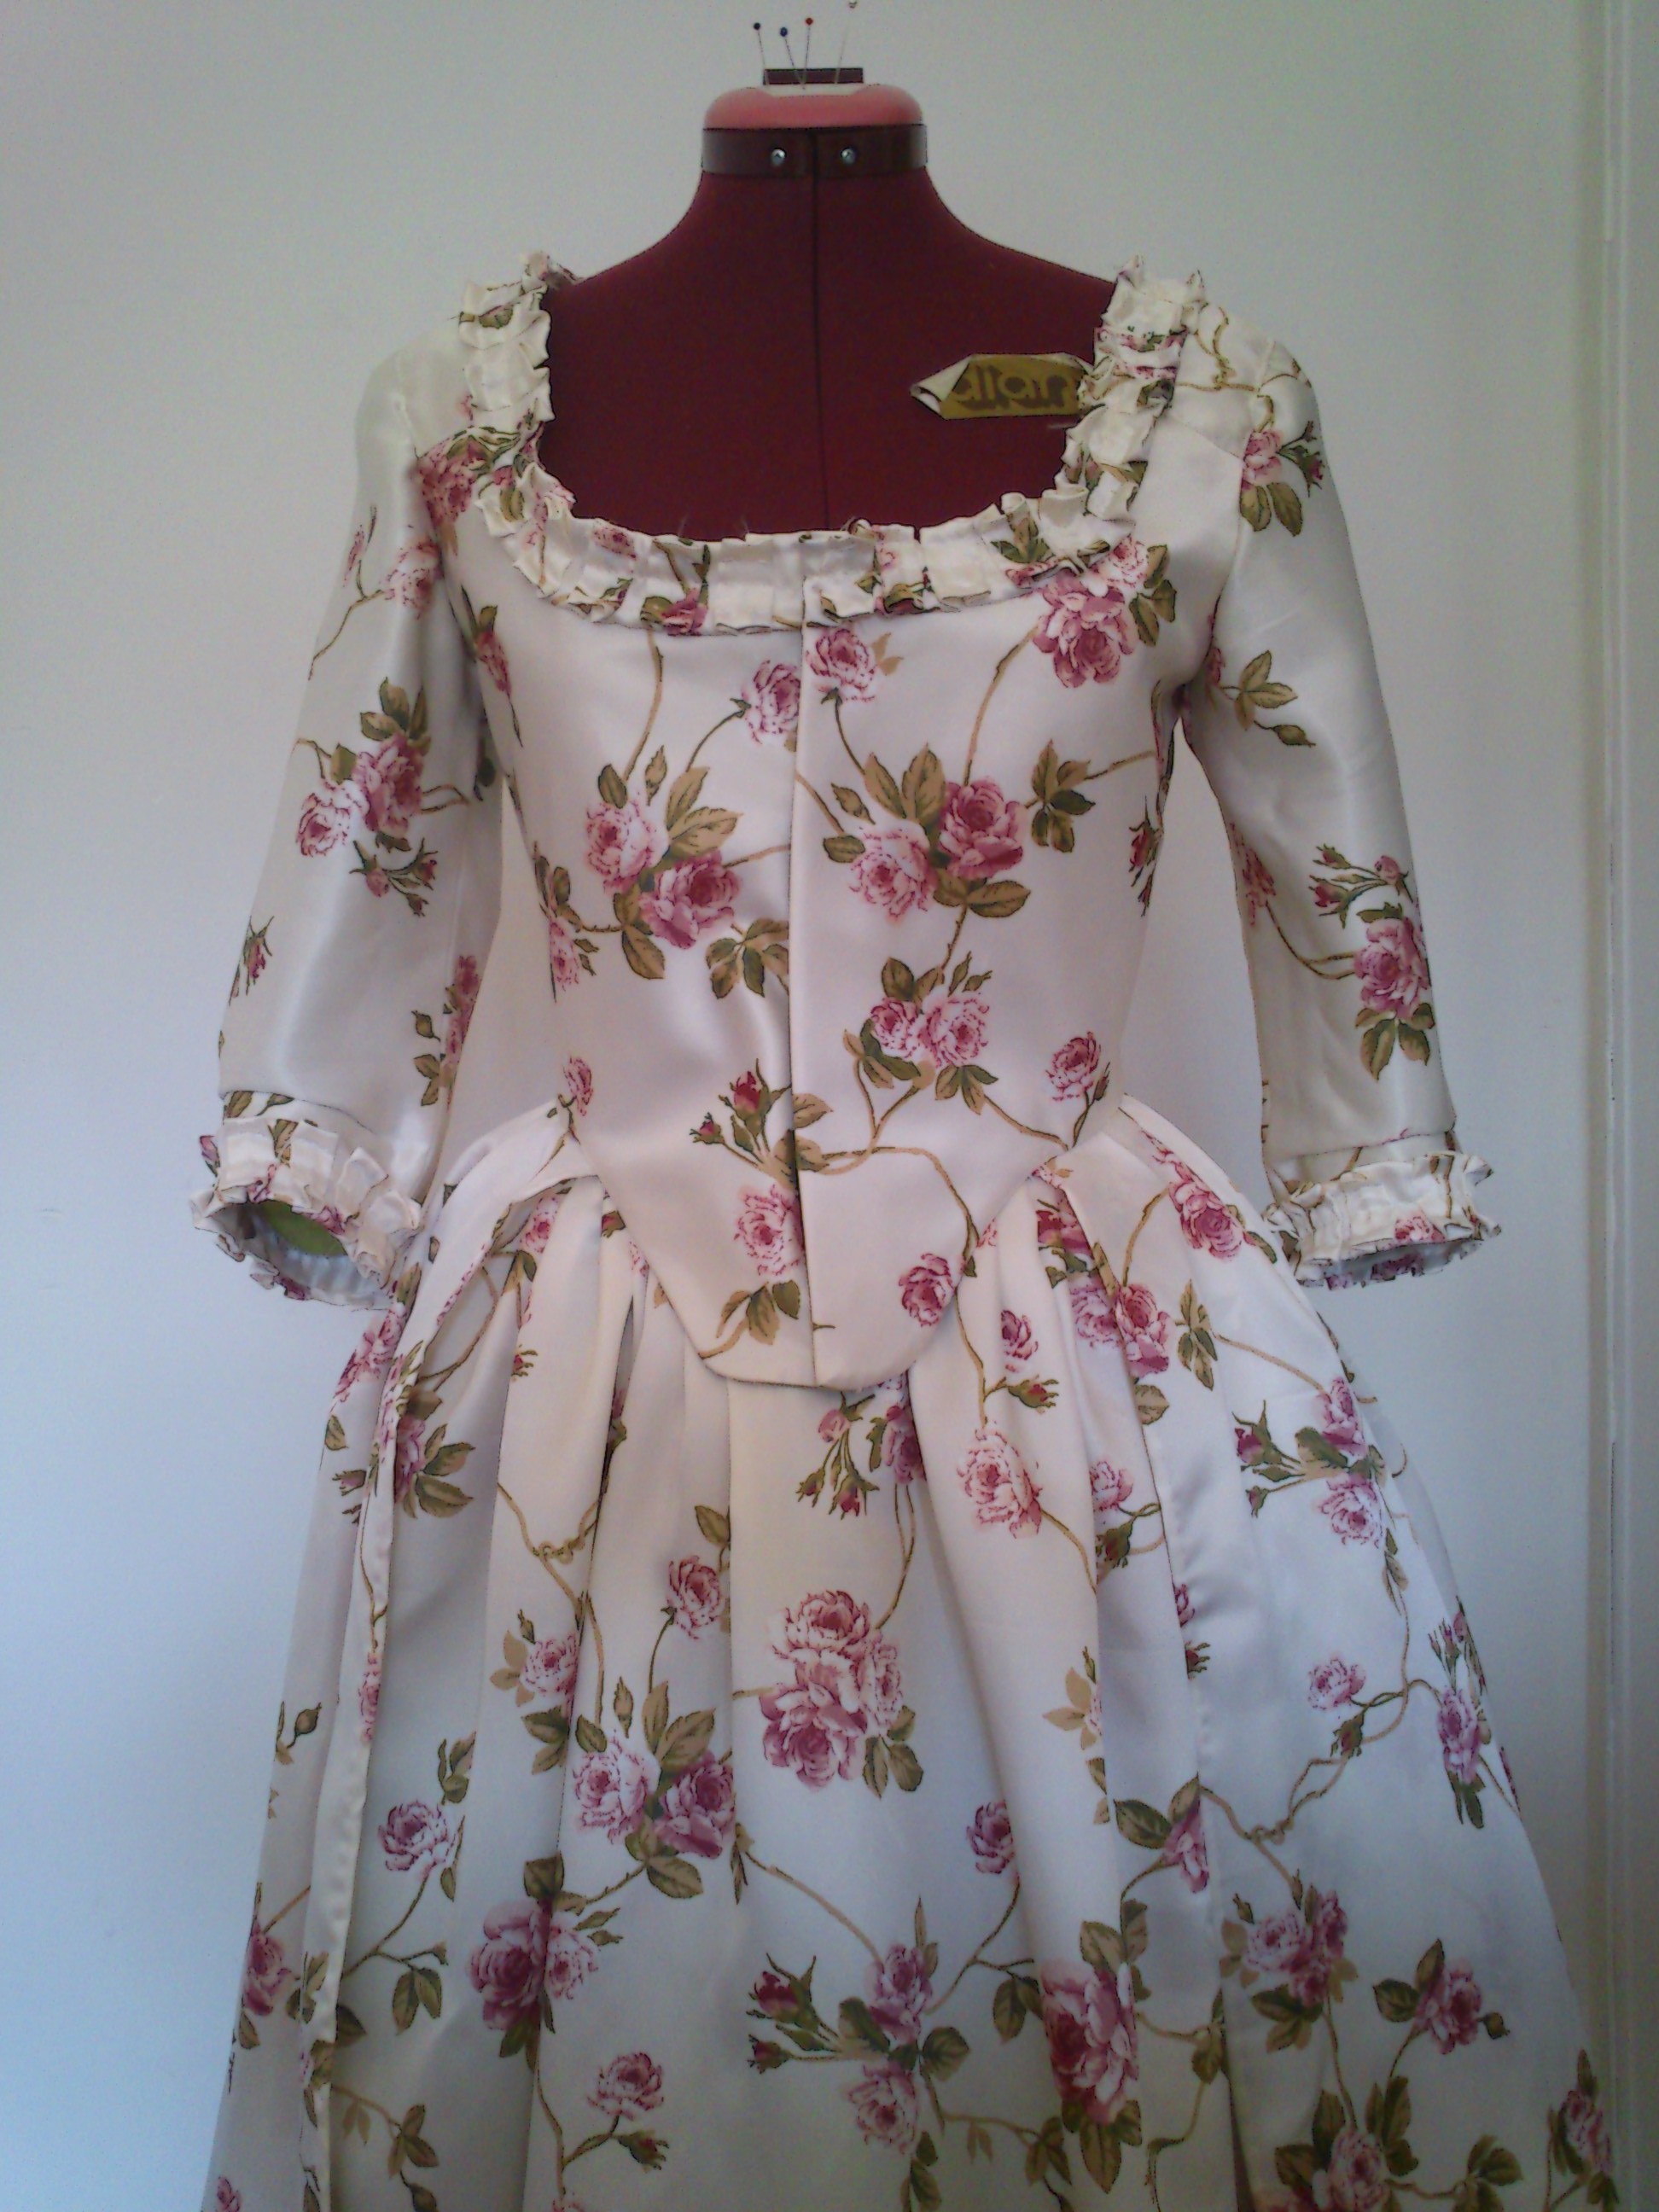
Front of the dress with the stomacher decorated with bows

2013-05-07 11.50.36
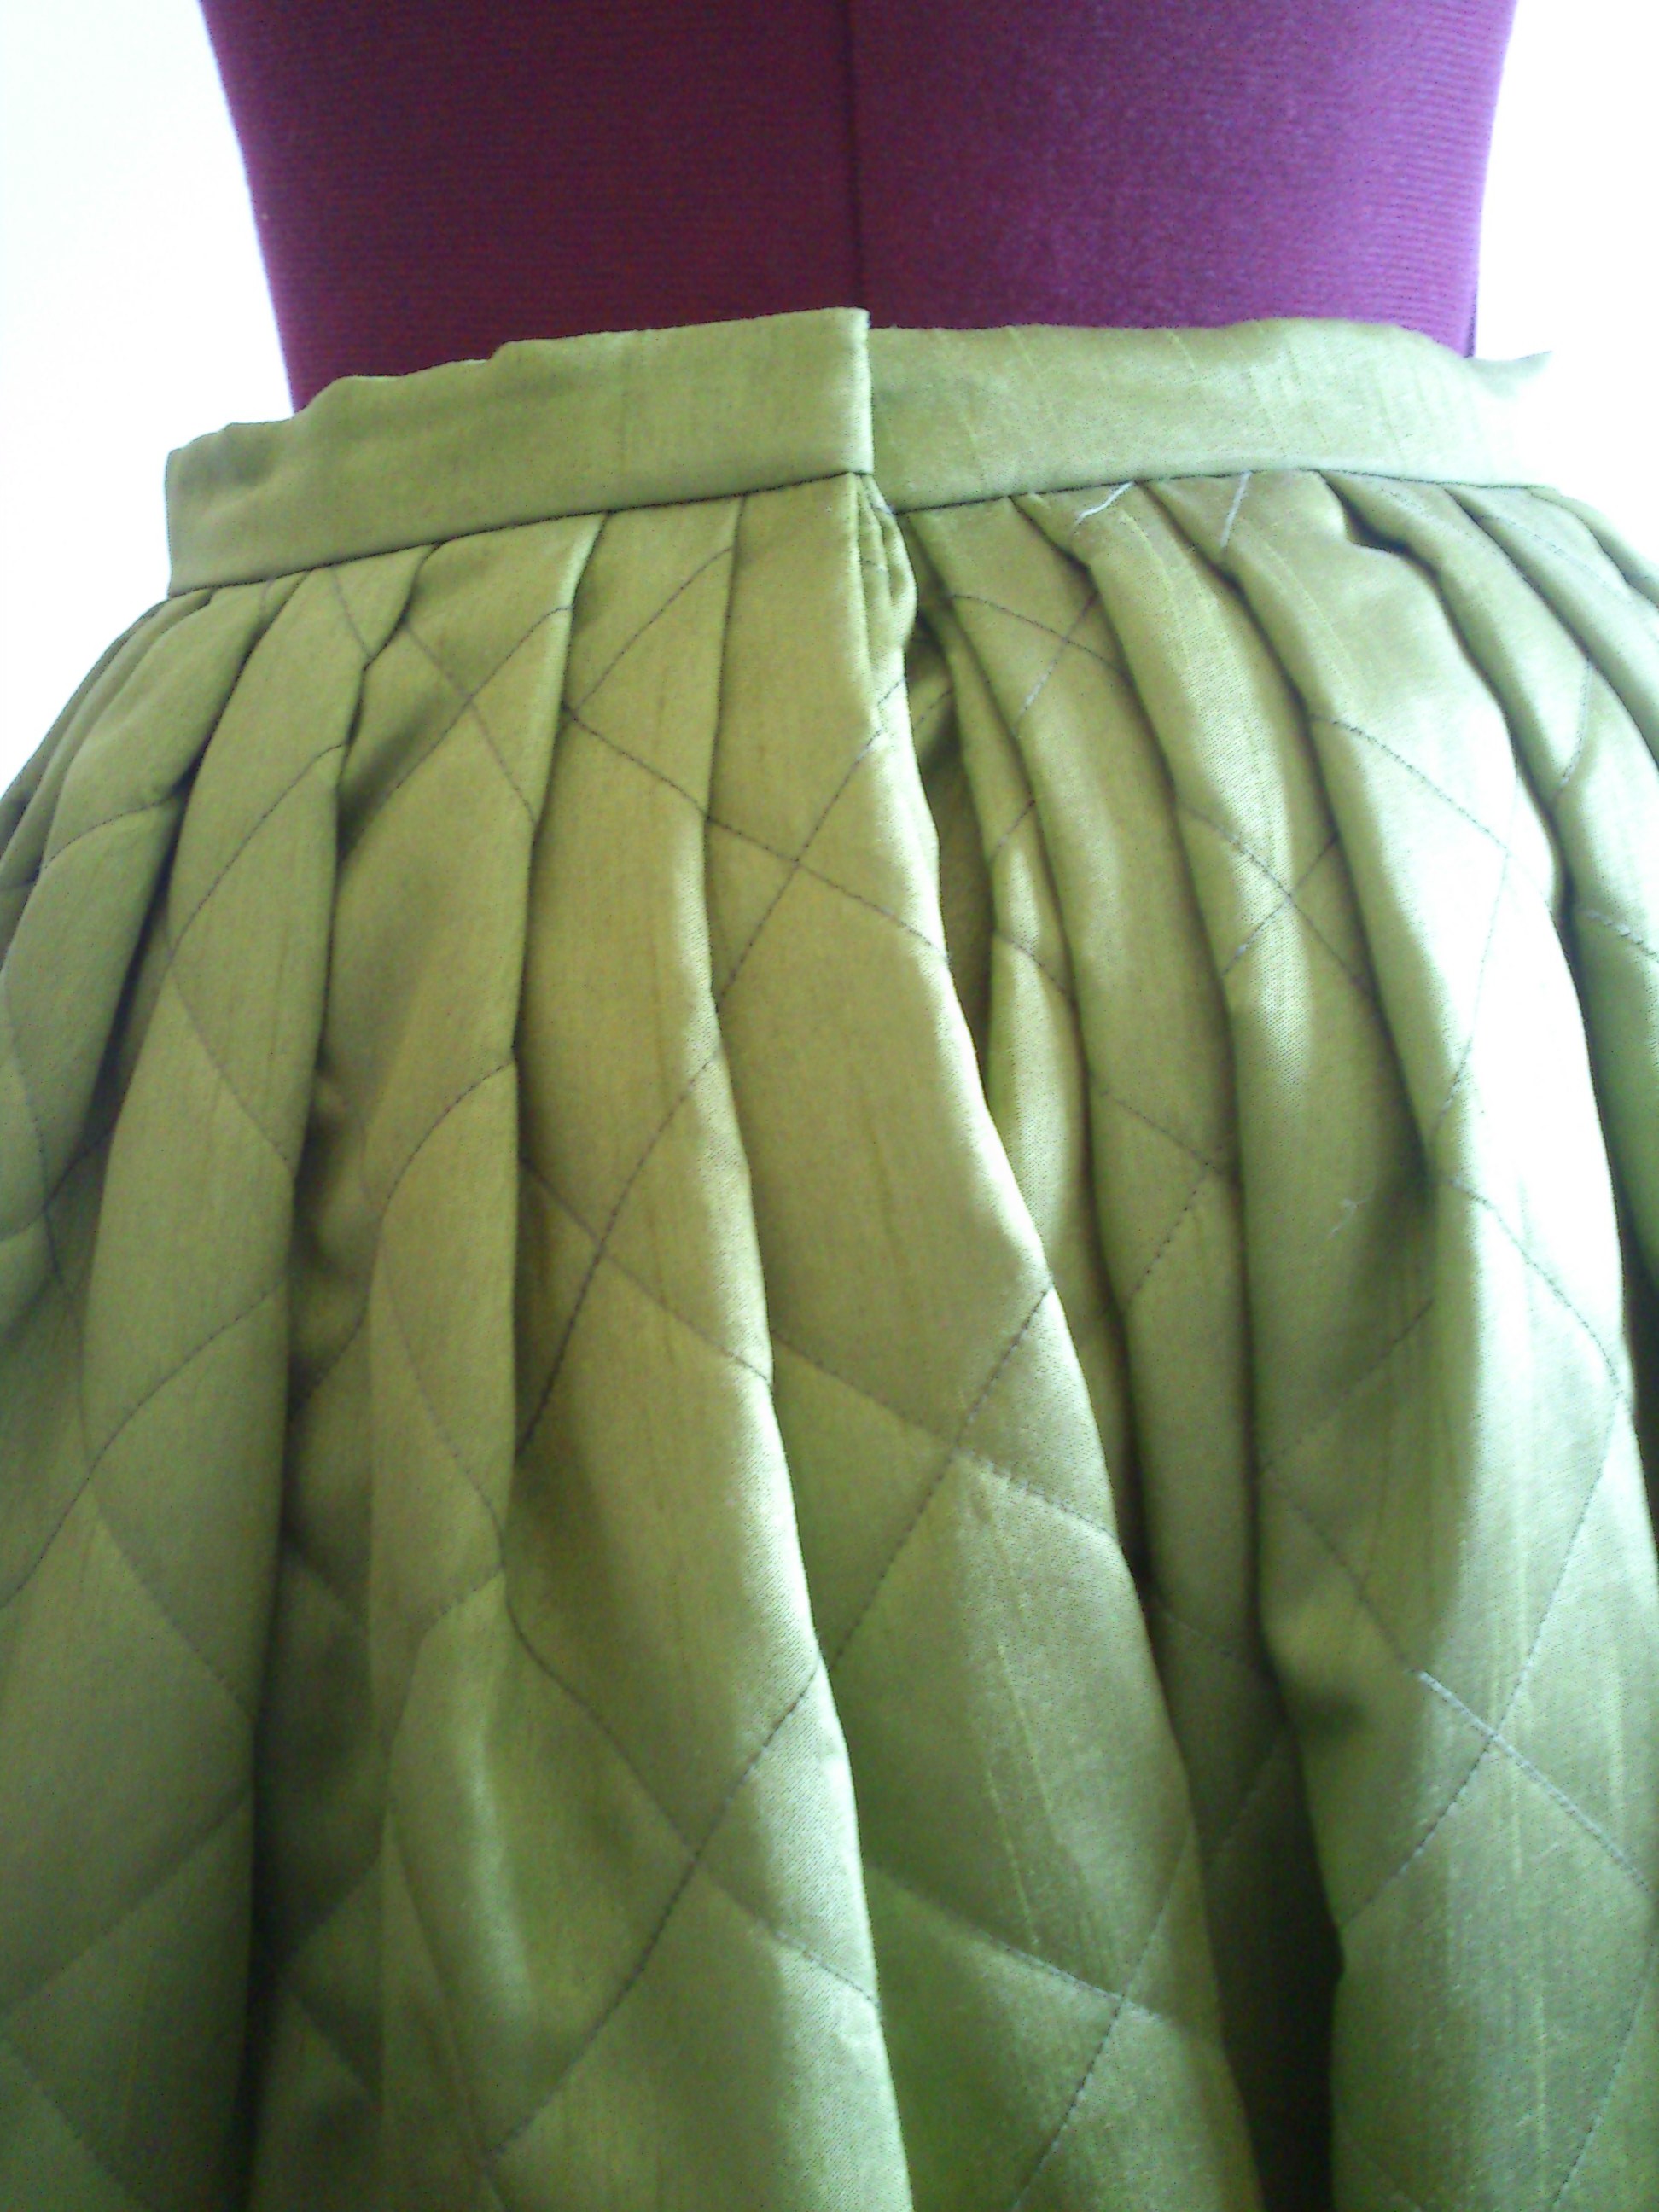
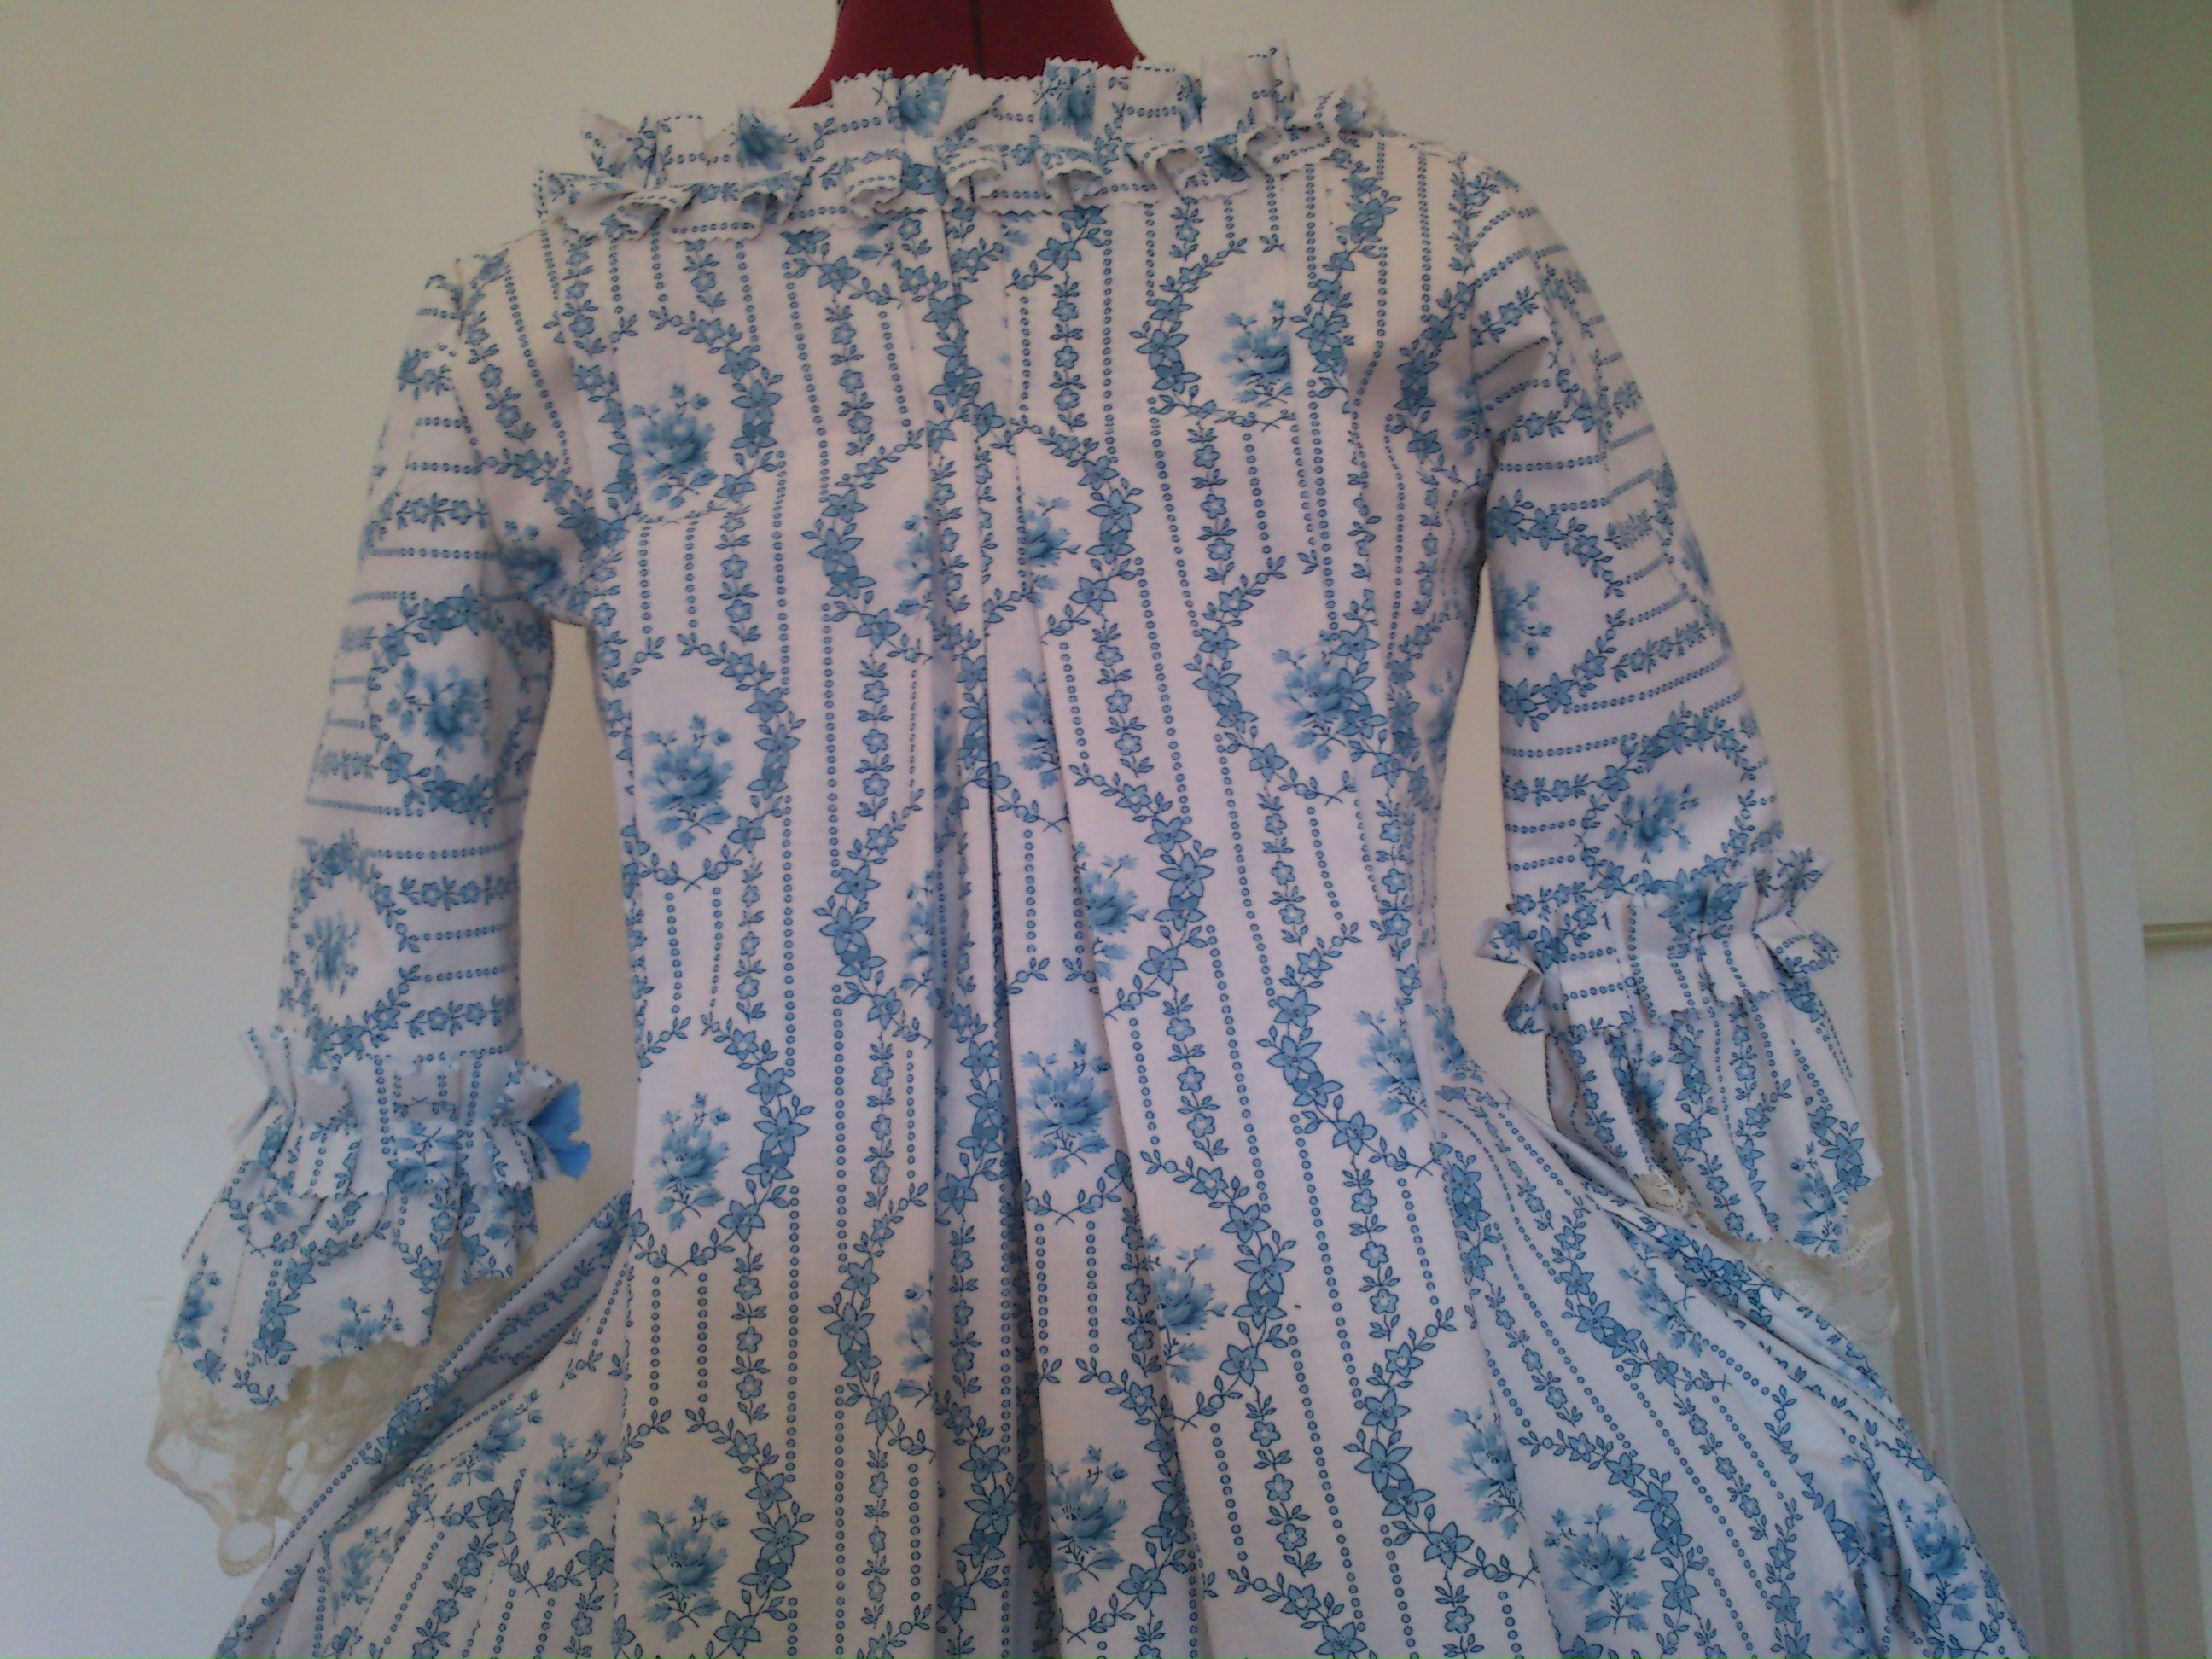
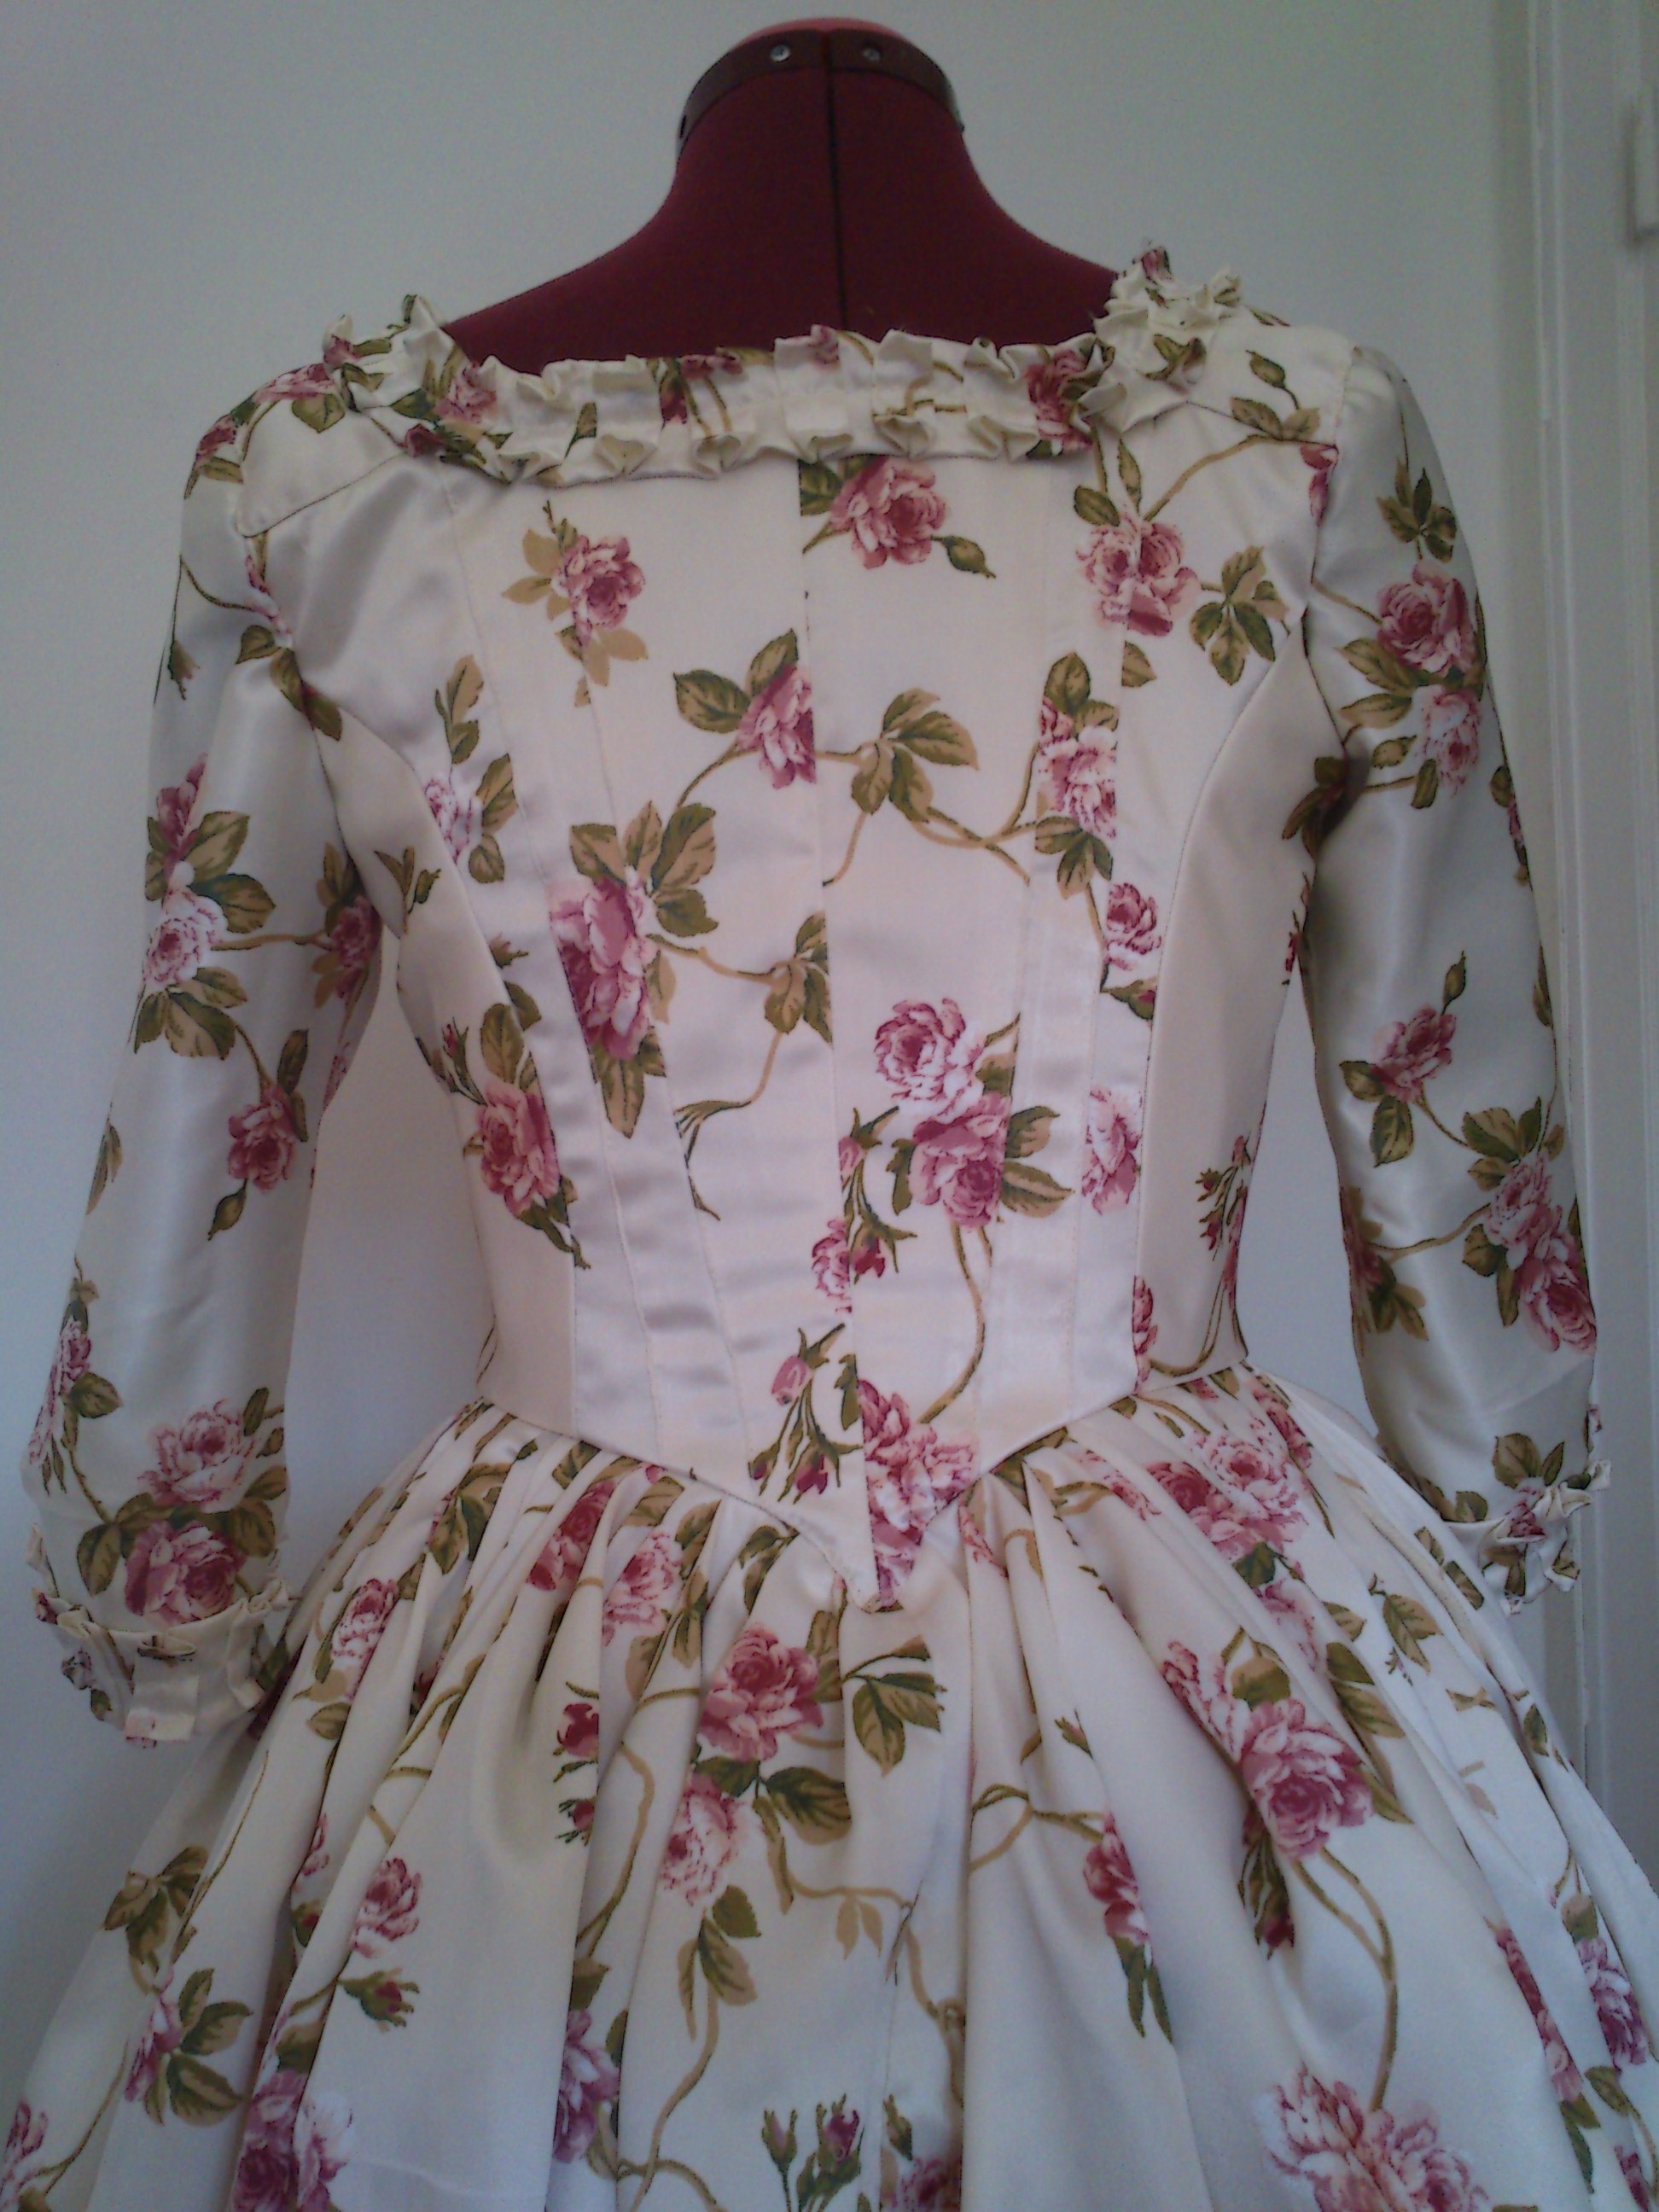
The back with Wattaue-pleats
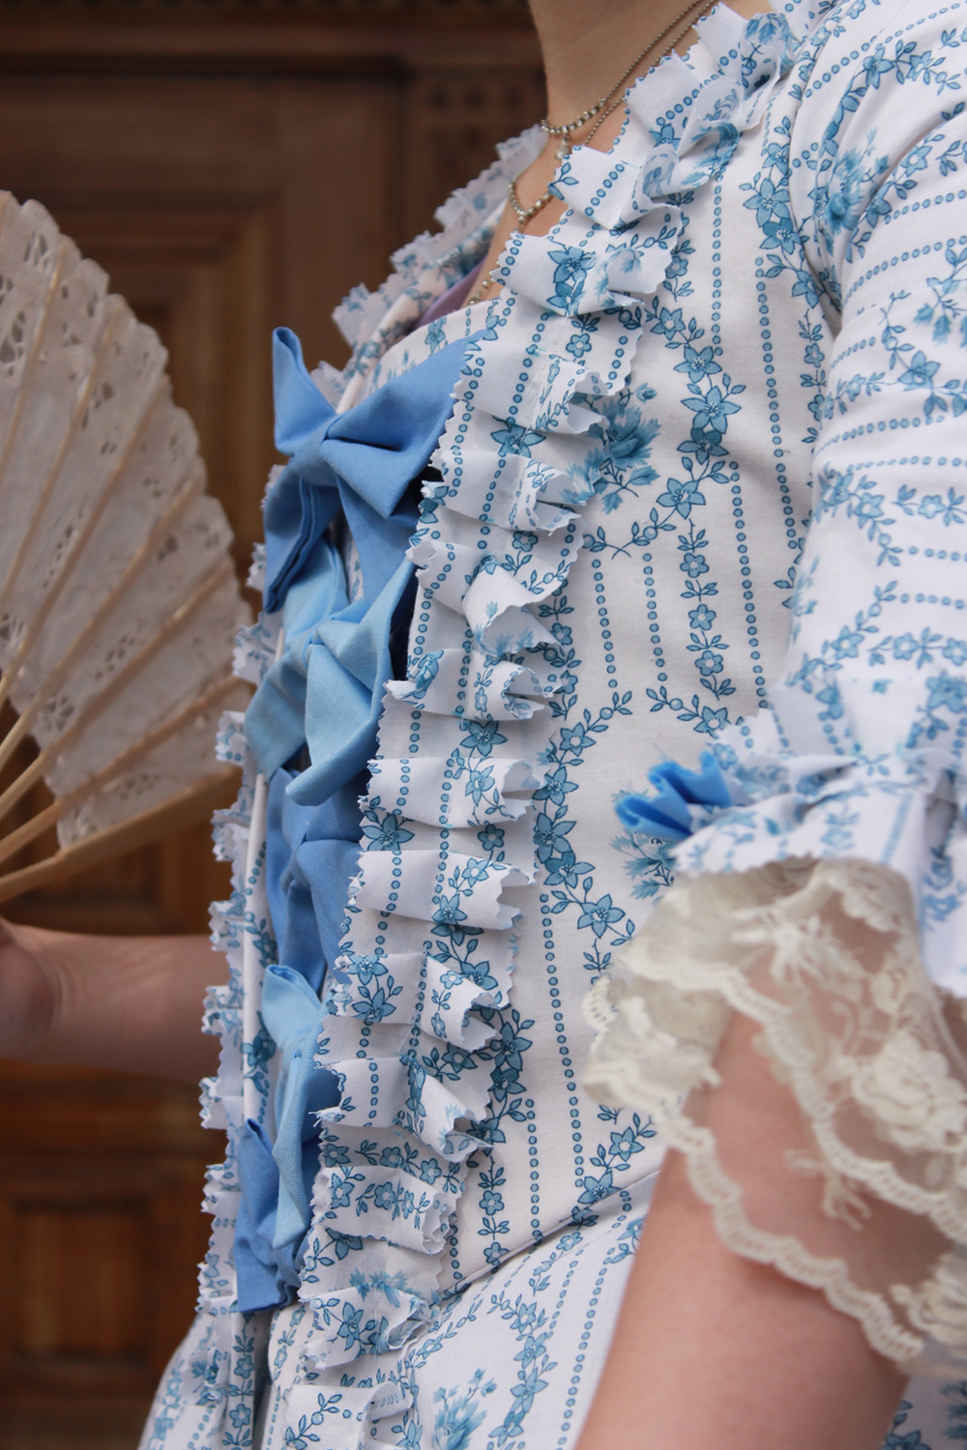
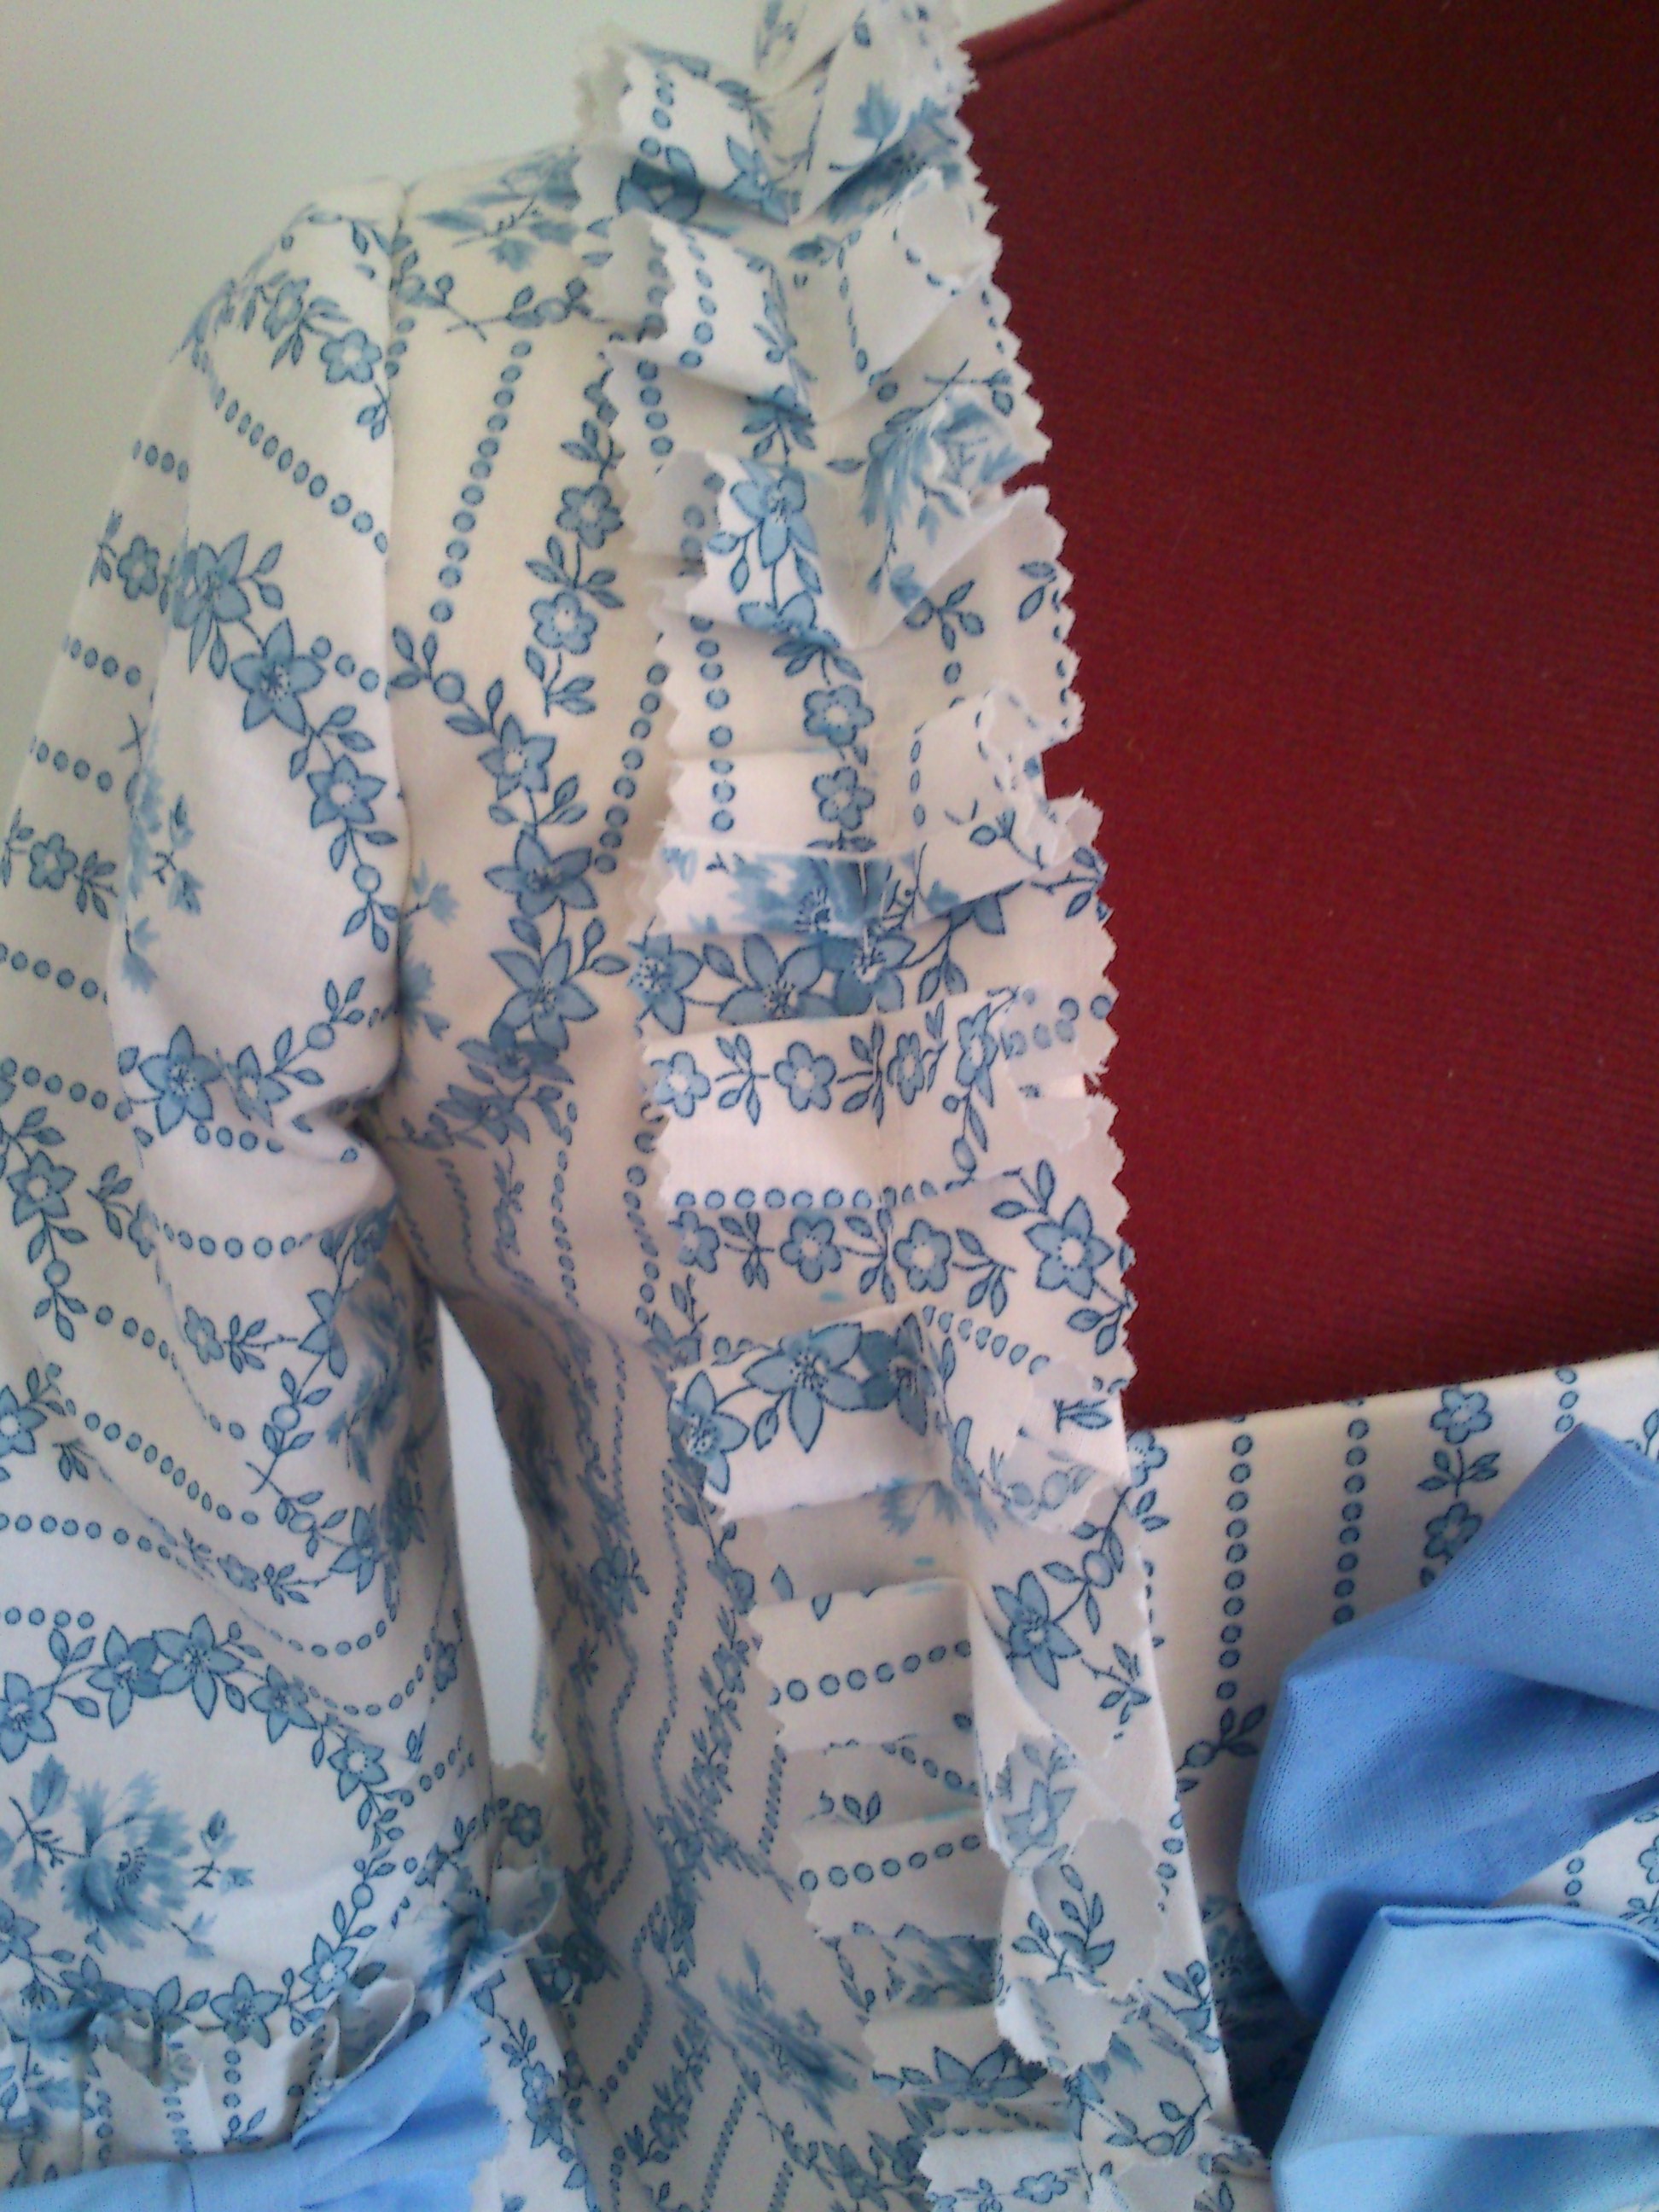
2013-05-07 11.51.18Trimming

2013-05-07 11.51.06
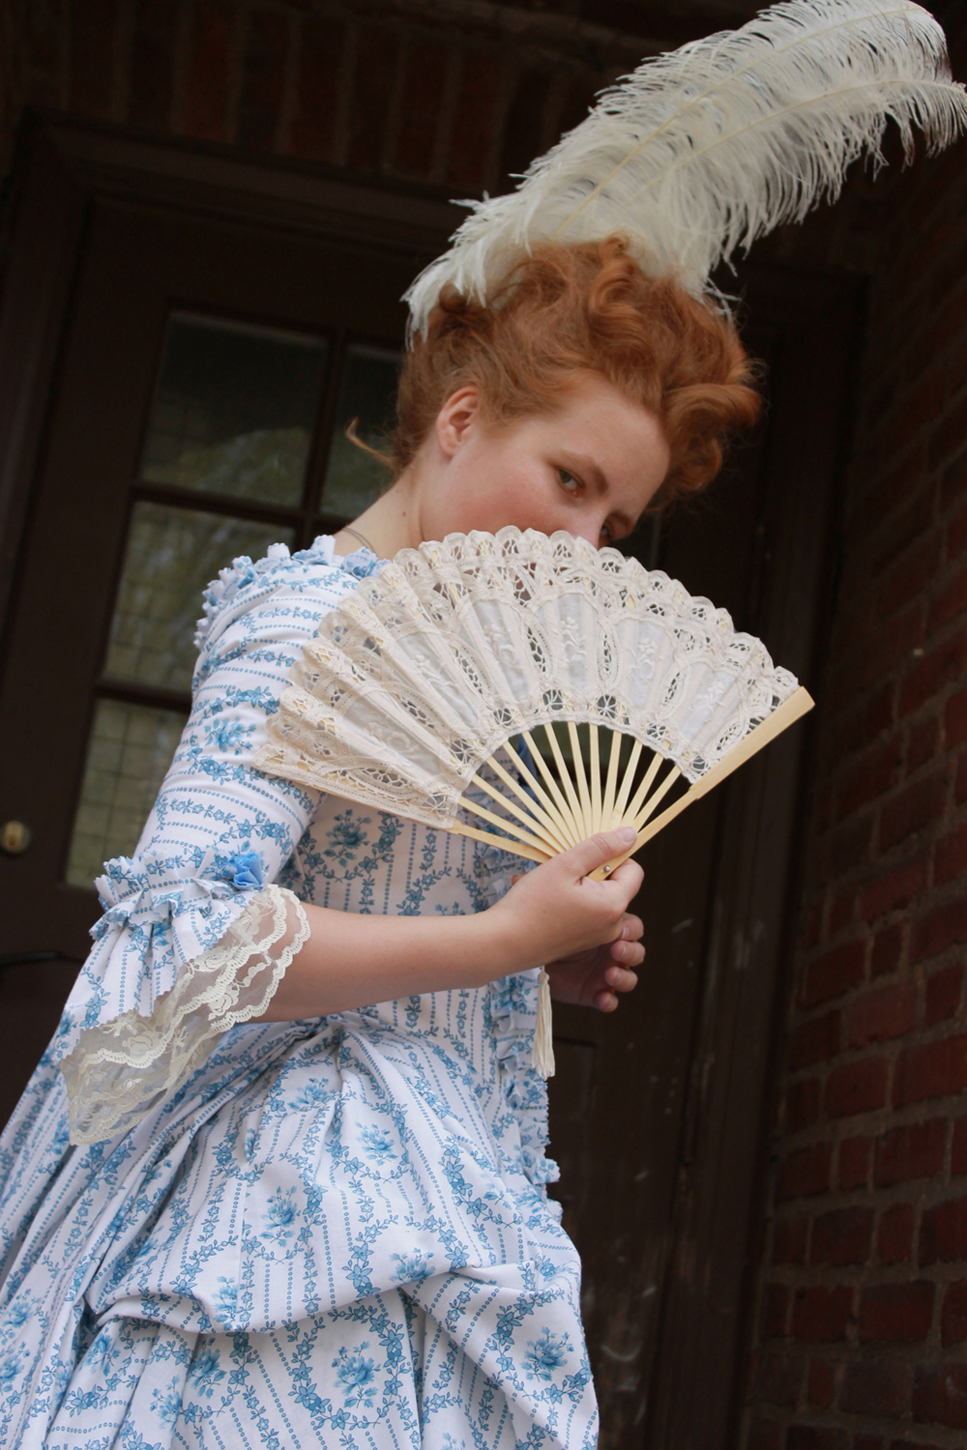
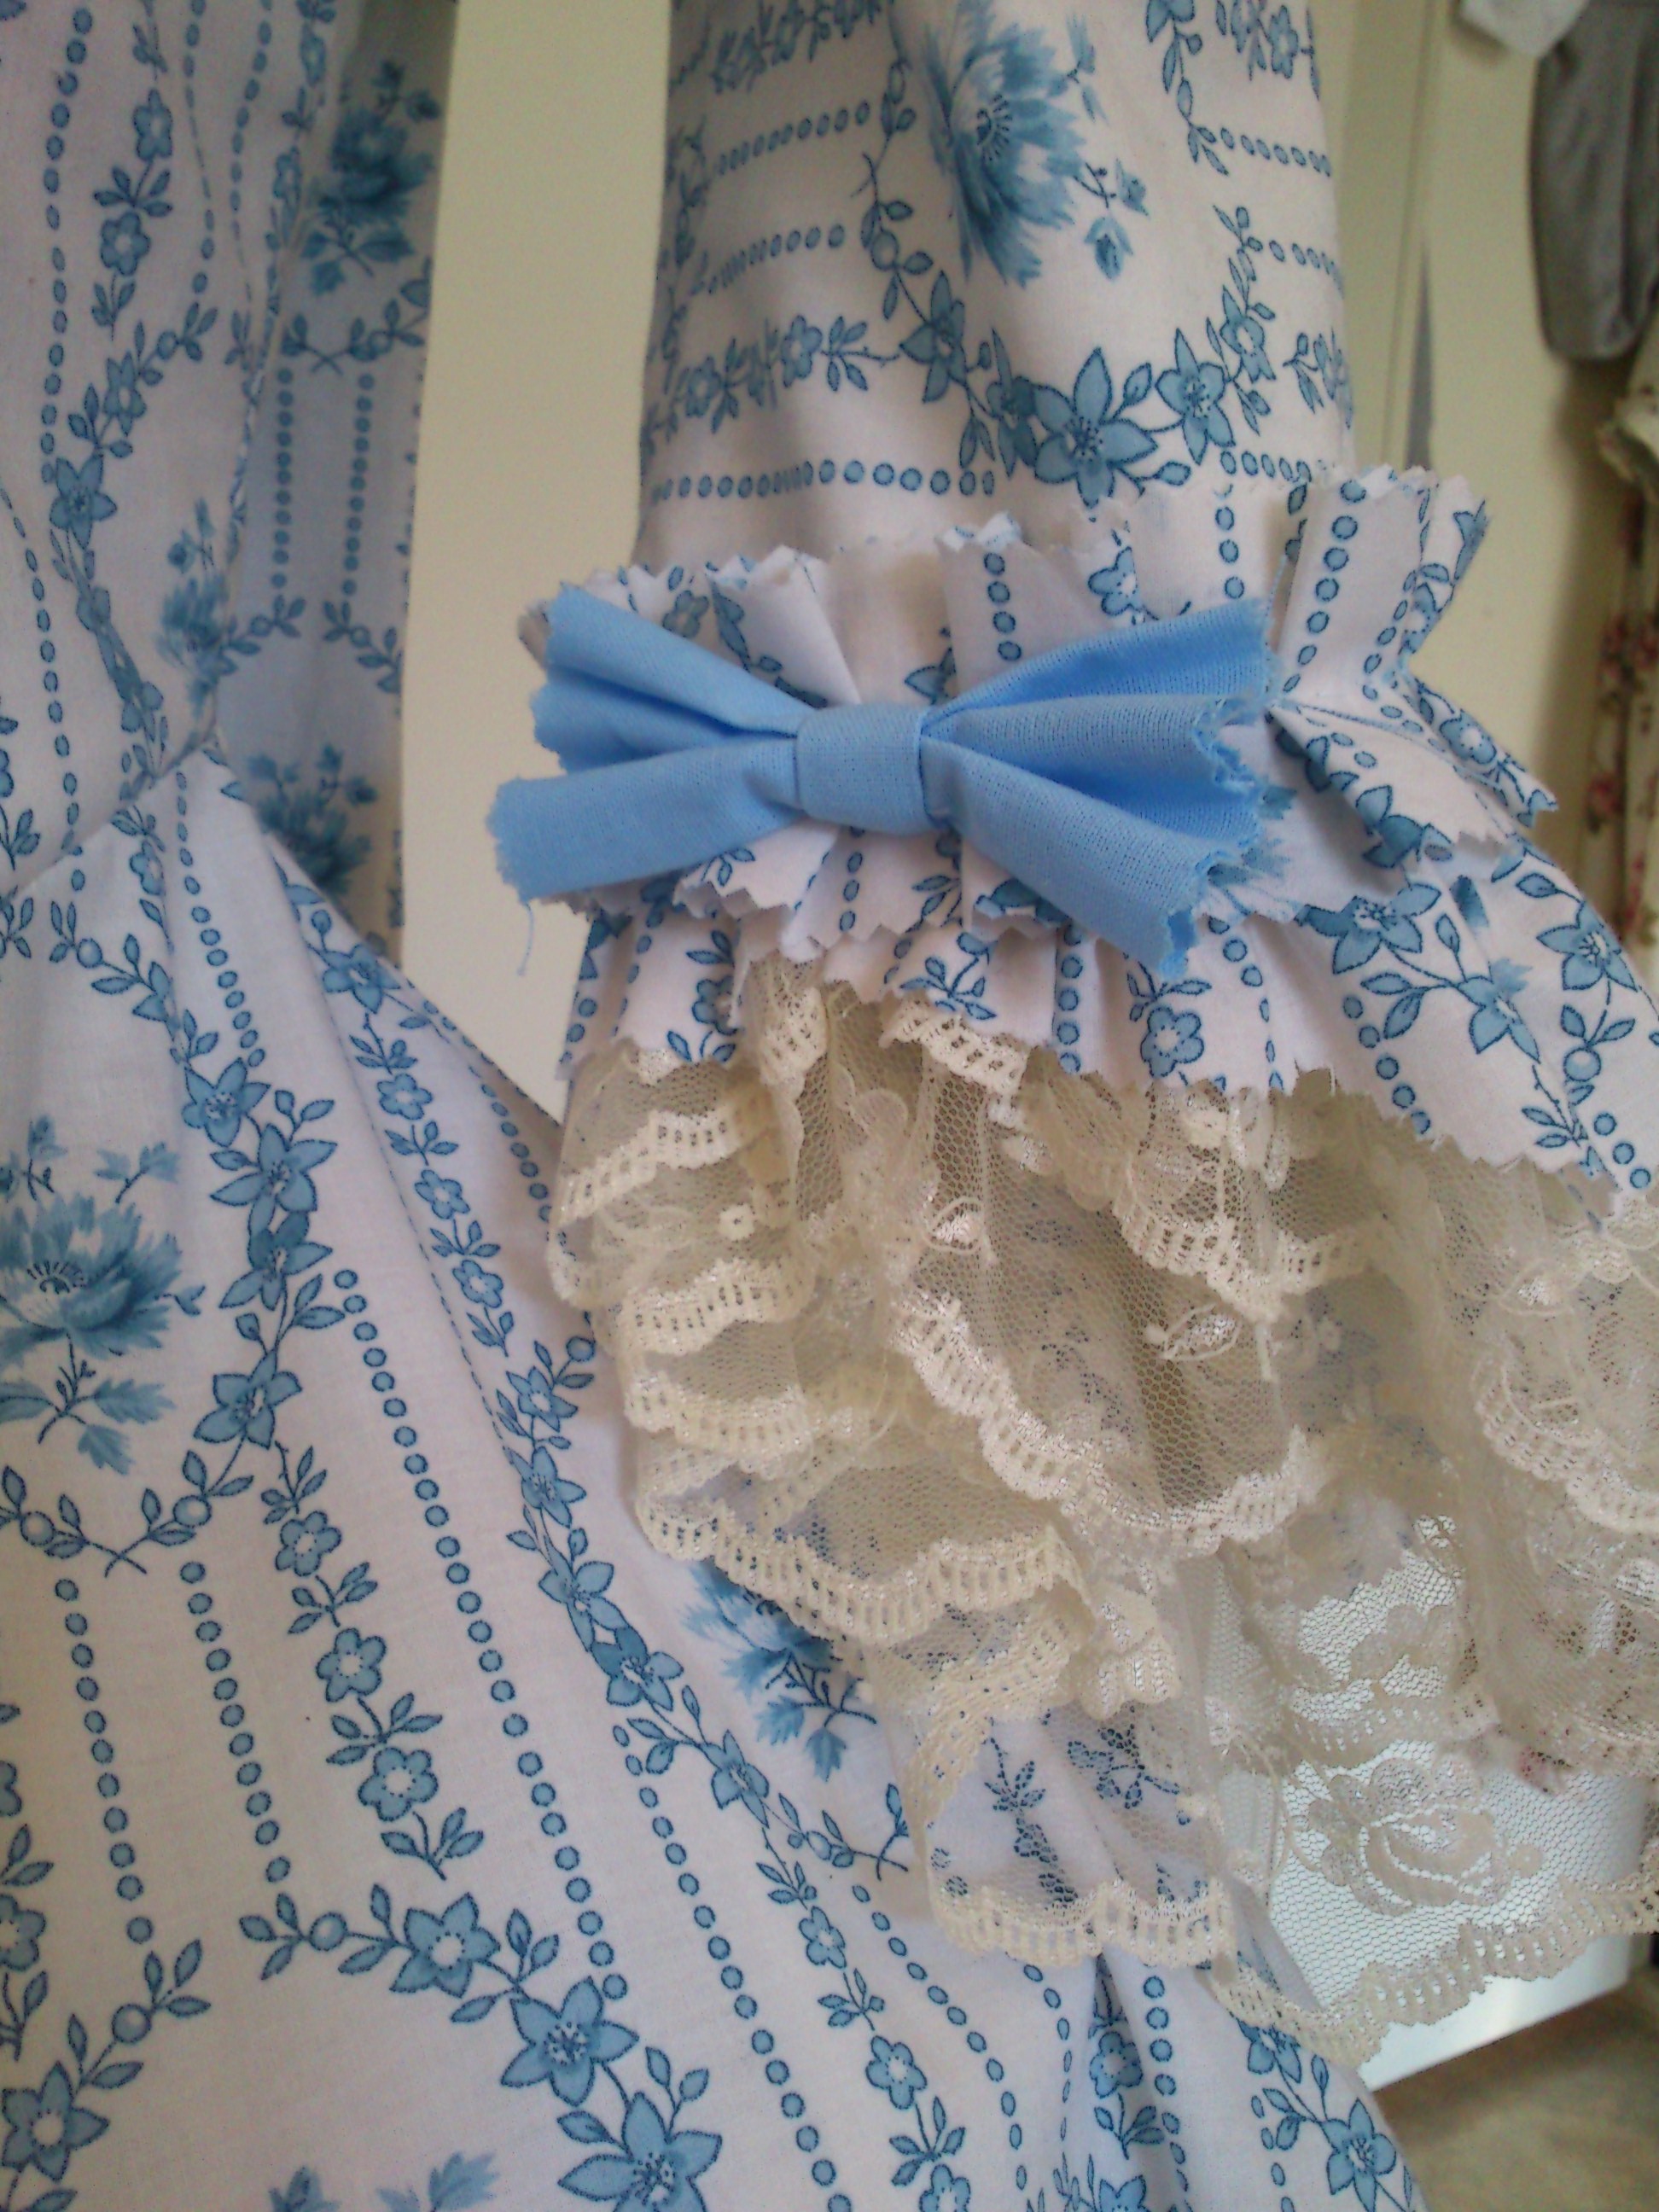
Sleeve decoration with lace and bow

Just the facts:

Challenge 10. Literature

Novel: “Les Liasions Dangereuses” by Choderlos de Laclos

Caracter: Marquise Merteuil

Fabric: 6 m printed cotton, the bodice is lined and interlined with white cotton fabric.

Pattern: I draped my own pattern based on Baumgartens “Costume close-up” gown 2 – Robe a la Francaise with polonaise.

Year: ca 1770 – 1780

Notions: Thread, hooks and eyes, lace fabric, blue cotton fabric for bows and cotton string for the polonaise.

How historical accurate: Mostly machine sewn – I only had one chance to try the dress on my sister and had to sew it really fast. The pattern and over all look of the dress is fairly accurate. But probably not more than 40%.

Hours: I didn’t count but probably 40 something.

Cost: about 45 USD.

First worn: May 9th, for the photoshoot.

Floral anglaise of satin trouble – construction part 2

When I first realised I needed to cut away the beautiful part of the back, i refused to listen to that part of my brain. But after tedius atempts to fix the back of the bodice and to pleat and re-pleat the skirt in the right way, I grabbed the sissors.

Two cuts and it was done, and I was relieved to find that the pleating of the skirt went so much easier.

I pleated the skirt to the bodice and left two pocket slits at the sides when I sewed the skirt together. Once again things seemed to run on wheels, so I decided to cut out the petticoat after all. The sewing and pleating went so fast and easy that I finished it in no time.

Then it was time for another try-on.

I got help from my sister Elin to put the sleeves in the right position and to check the lenght of the skirt and petticoat.

2013-04-28 15.45.06

This time the back looked pretty good – I just needed to rise the waist a little more (I will have to live with the remaning wrinkles).

We decided that the skirt needed to be lengthen in the back – this meant I would have to piece the hem with stripes of fabric to get some extra length. And this was when the problem started again…

Of course I was out of fabric – all I had left was some small pieces for decoration and trimming.

2013-04-28 15.44.39

The only way to fix the 8 centimeters too short skirt was to take some fabric from the petticoat. I already had a 50 cm “patch” in the back, due to lack of fabric. So this time I had to cut away two 10 cm pieces on the horisontal of the skirt, and then re-pleat the petticoat to the waistband.

Then it was time to deal with the sleaves. To get the right 18th century look, and to save myself some trouble with getting the sleeve-cap in the sewing machine, I decided to handstitch the sleeves in place. When that was done all I needed to do was to put the shoulder piece over the sleeve-cap and hand stitch them down.

The only thing left to finish the dress was to put some trimming on it.

This proved more difficult and time consuming then I had anticipated. I cut stripes of the few pieces of fabric I had left and sewed them together in to one 4 m stripe. Then I had to hem the stripes both sides by hand (all 8 m), and then go on to pleat and baste it all down. Then at last I could attach the trim to the gown.

Well here it is – the finished dress. After all the trouble and setbacks I still really like this dress and feel pretty comfortable wearing it. I may even have to invent a reason to wear it.

2013-05-07 11.41.312013-05-07 11.42.01

2013-05-07 11.42.18

Floral Anglaise of satin trouble… done

The 9th challenge in “The Historical sew Fortnightly”  Flora and Fauna

This dress has been very “interesting” to make, but now at last it is done.

I will show you the finished pictures now, and in a later post tell you all about the pattern and construction of this satin monster.

IMG_2325

IMG_2359

IMG_2421

IMG_2332

IMG_2437

a l’anglaise

IMG_2399

With a different petticoat

IMG_2558

IMG_2572

IMG_2593

Photos by Elin

To start with a bang…

Since this is to be my first blog post ever it seems only fitting that I make a short presentation of myself and the intended purpose of this blog.

I am an educated seamstress who have a dream that I some day will design costumes for theater. This is not a dream I’ve had all my life, but something that have gradually grown in my mind, and it is only in the last couple of years I have started to work towards this goal.

I grew up in a really small village in Sweden  together with my 4 siblings. My only brother could not have had the easiest time dealing whit 4 crazy sisters every day. I knew early that I wanted to do things with my hands like drawing, building models with Lego and clay. My parents got so tired of me constantly showing them my drawings that they even stopped looking at them – I don’t blame them, I must have been really annoying at times.

When I got older I pursued this interest but with a twist – I attended the Fashion and sewing program at the nearest high school, and then went on to study advanced pattern making. After I moved back I worked for a while in an bridal shop, and then went to the capital to study fashion at the university. And once again circumstances brought me back to (almost) my home town. Right now I’m working at the theater as a call in seamstress, ticket seller, tour leader and everything in between.

My reason to start this blog is to have some place to showcase my work and hopefully learn a lot about sewing and writing along the way. My main priority is historical sewing – more or less historically accurate, but there will probably even be some “modern” sewing and life stuff in here too.

So without further a do – welcome, and let the blogging begin…

bild 1