I’ve long wanted o make an early Italian Renaissance dress inspired by the series “The Borgias”
 Main inspiration
But it wasn’t until I remembered these two fabrics in my stash the design really took shape. A beautiful striped brocade I bought a whole bolt of for a steal about a year ago, and a dove grey/blue satin acquired on a fabric sale for about 5 Sek/m (it’, only 1,20 wide but for that price I could live whit that)
 Isn’t it gorgeous!
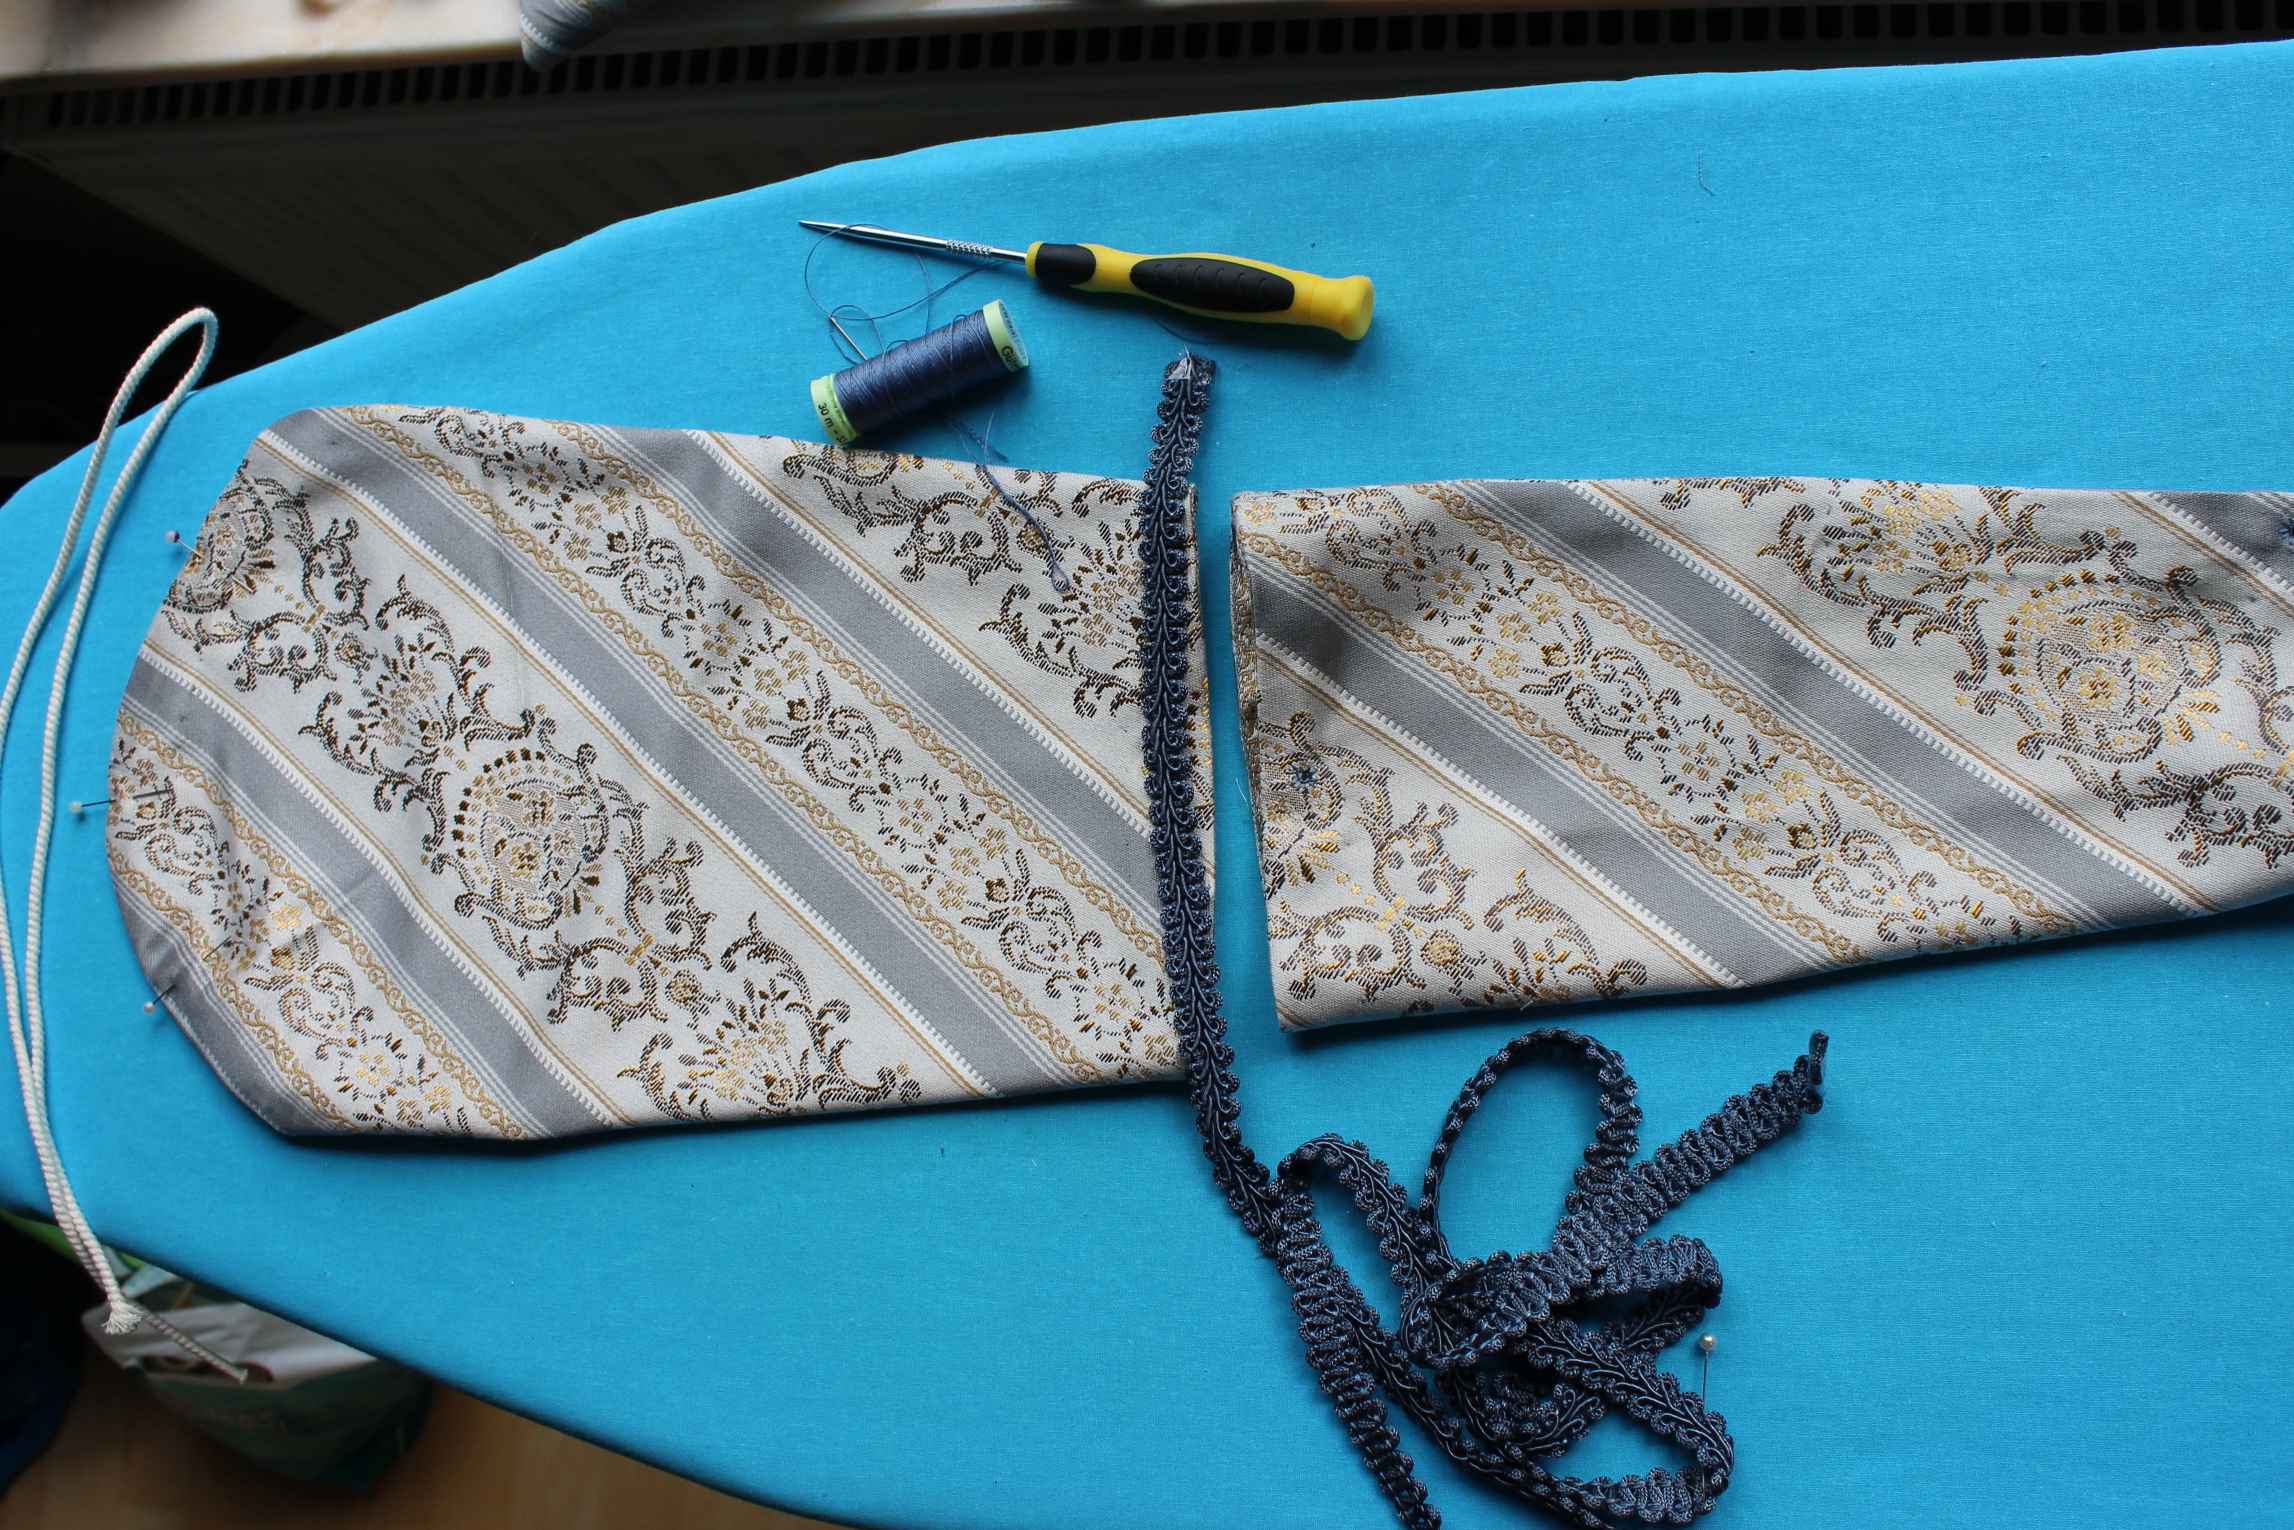
Playing around with the design I decided to use the design on the brocade for stripes and trim.. Three different sizes of “trim”
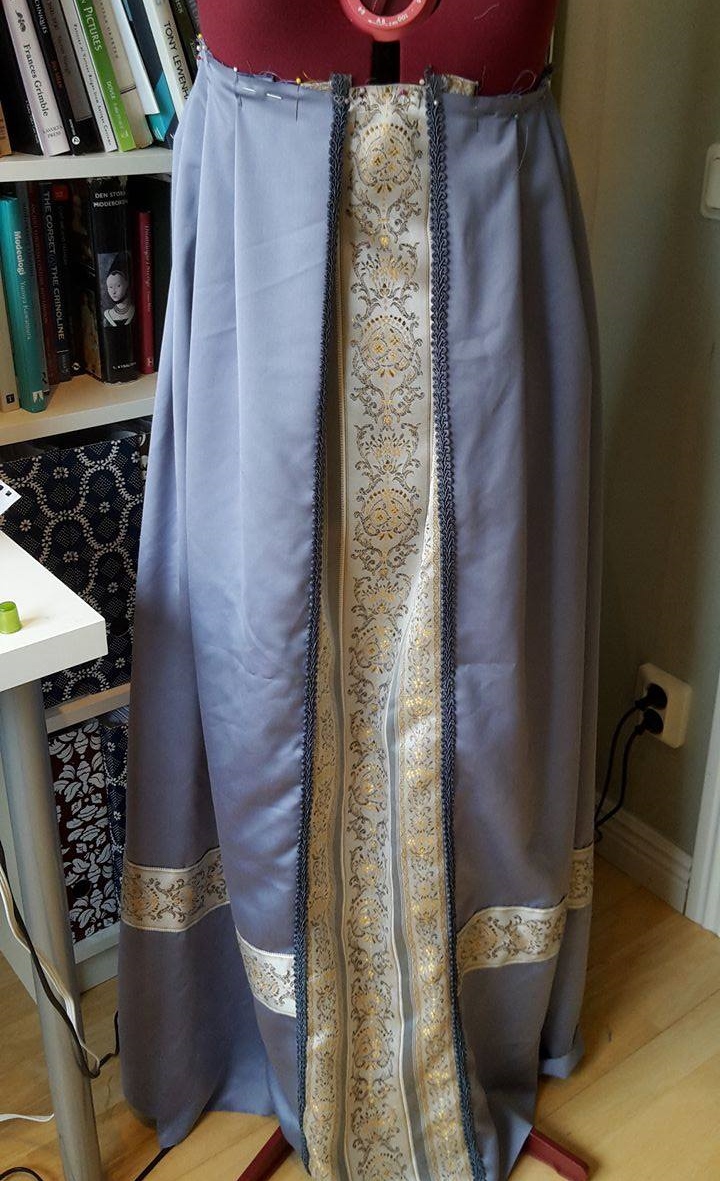
once all the pieces was cut I started working on the skirt. I stitched the panels together, leaving the center back open. Then I pinned and basted two different kinds of brocade trim to the front and along the lower edge.  I also added some blue furniture band along the center front decoration.
Then I stitched the back shut and pleated the waist to the right measurement.


The wide stripe looked a bit strange at the top, so I folded some of it under to create an adjustable pleat.
Then it was time for the sleeves.
 Cutting the sleeves on the bias.
After some hesitation I decided to cut the sleeves into two pieces each and to make them tied on, like the ones in my inspiration.  experimenting with trim
 All the pieces of the sleeves ready for decoration.
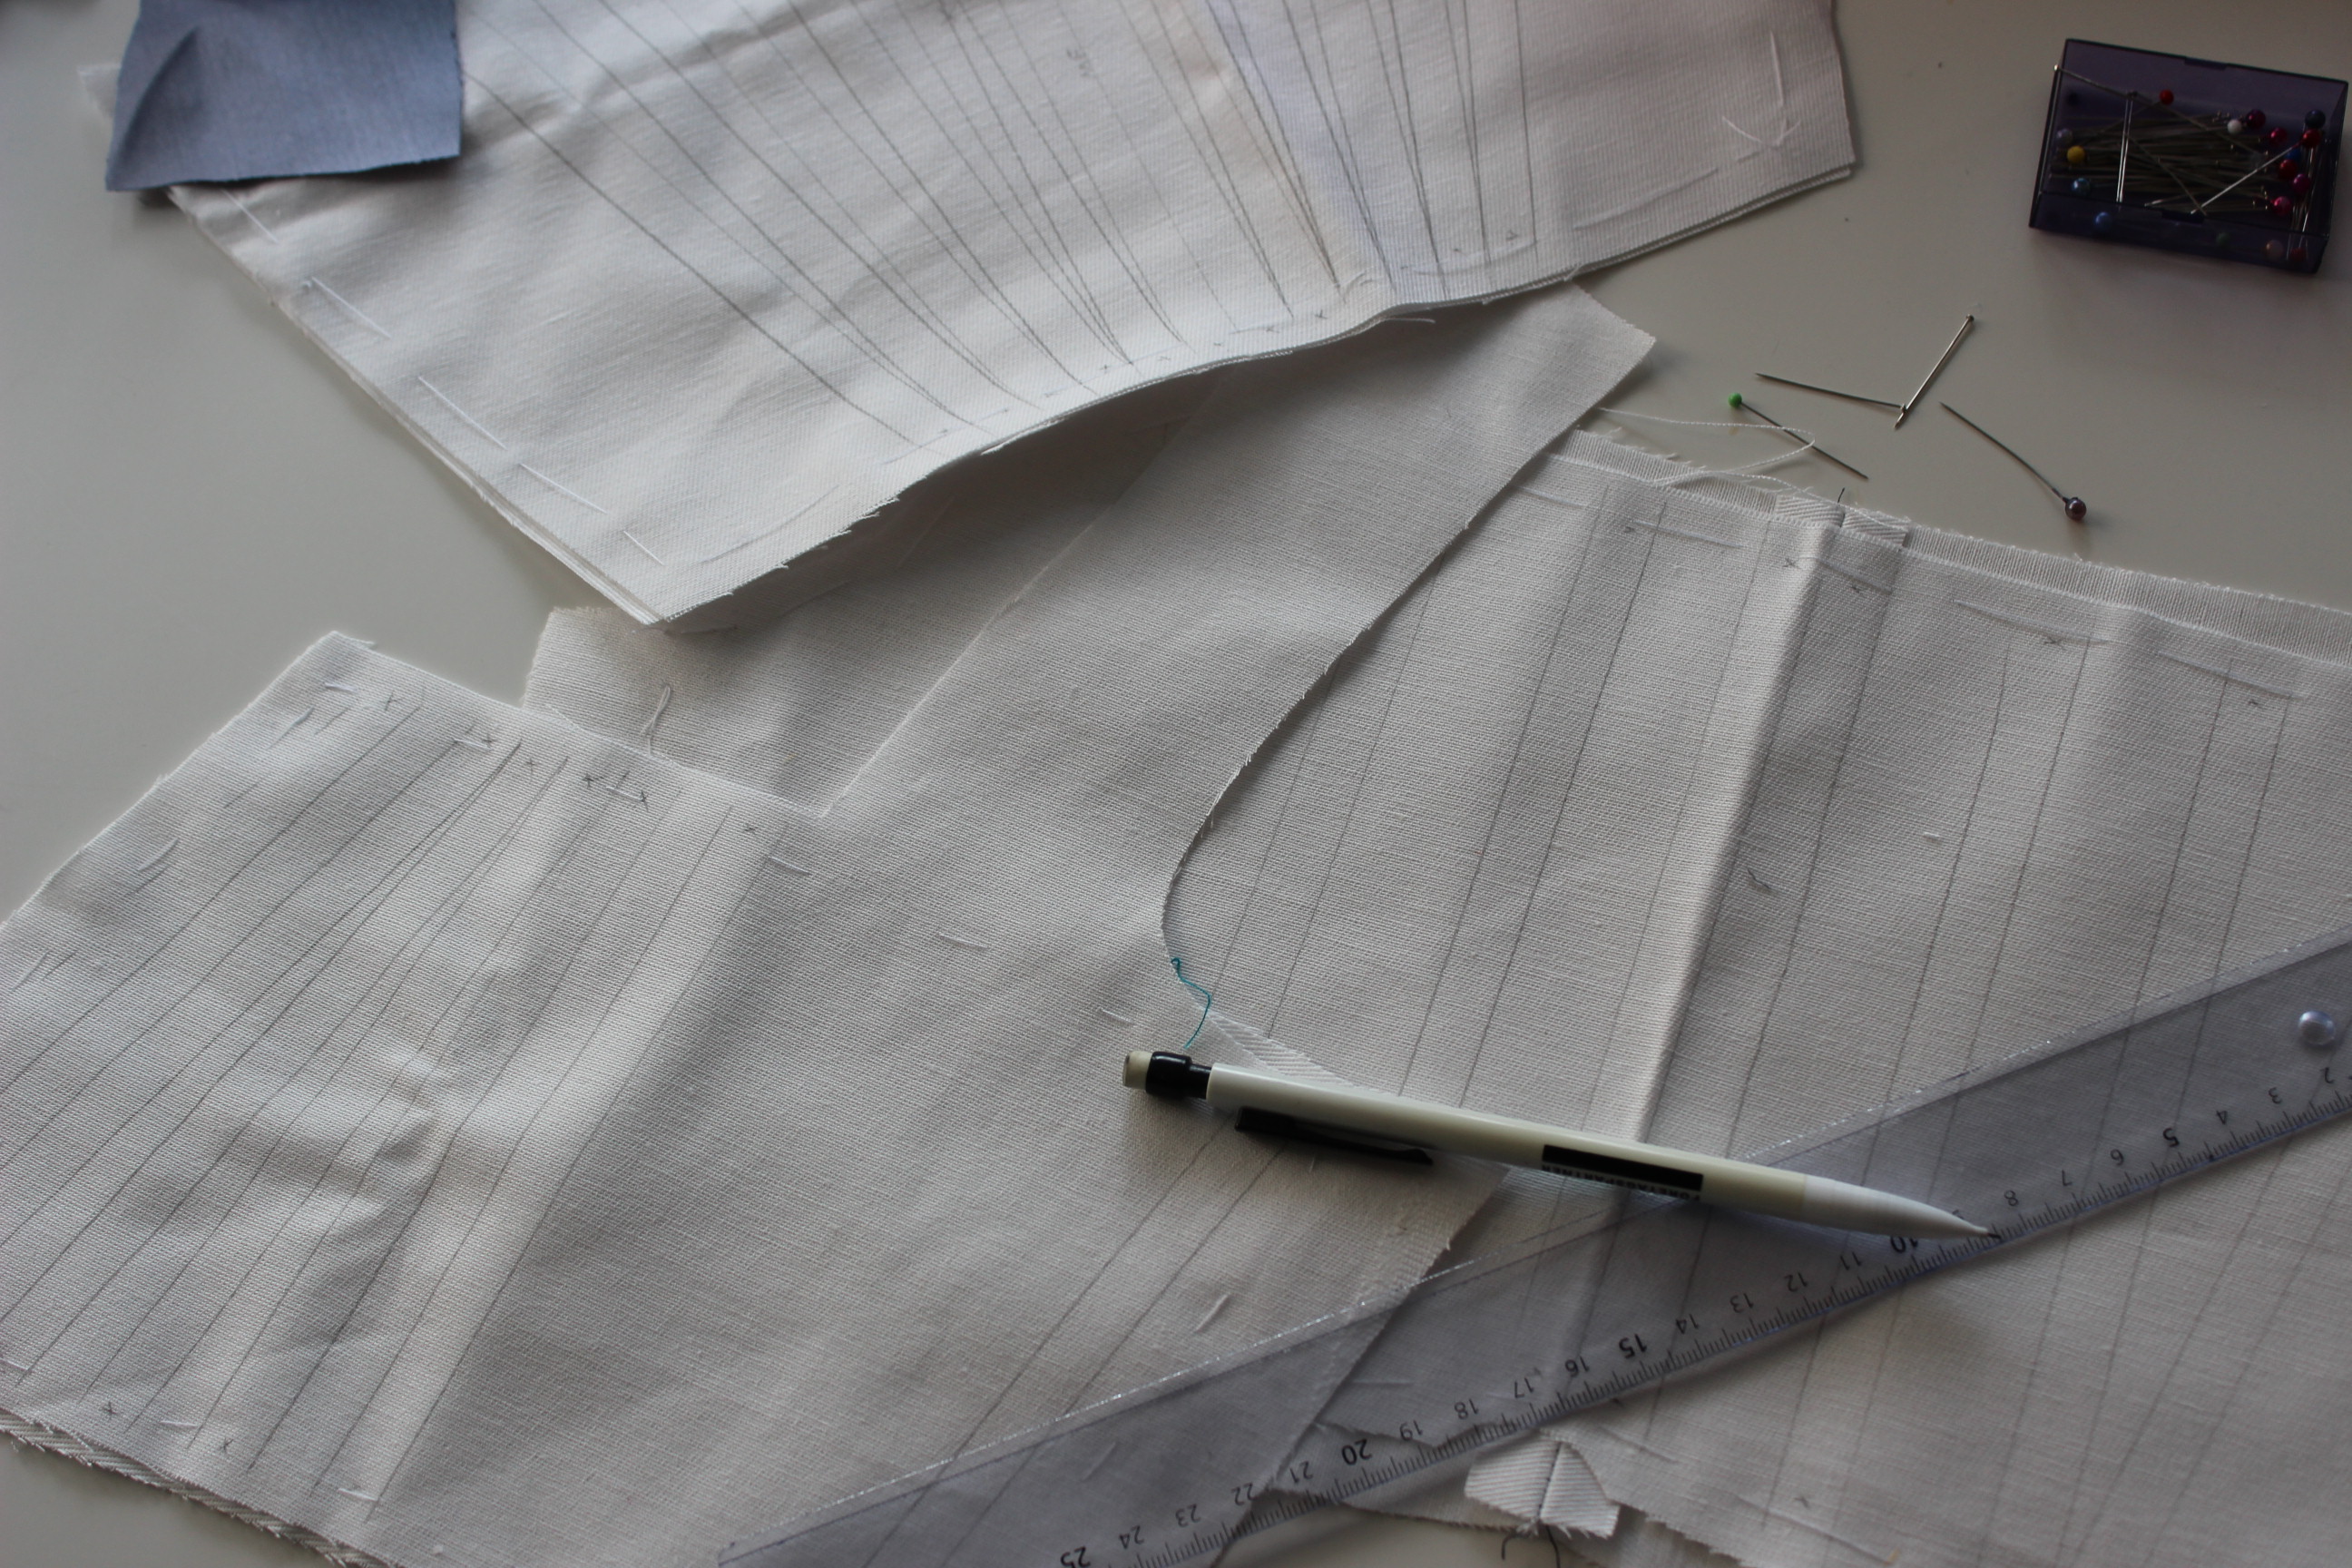
Then it was time for the bodice. Drafting the pattern
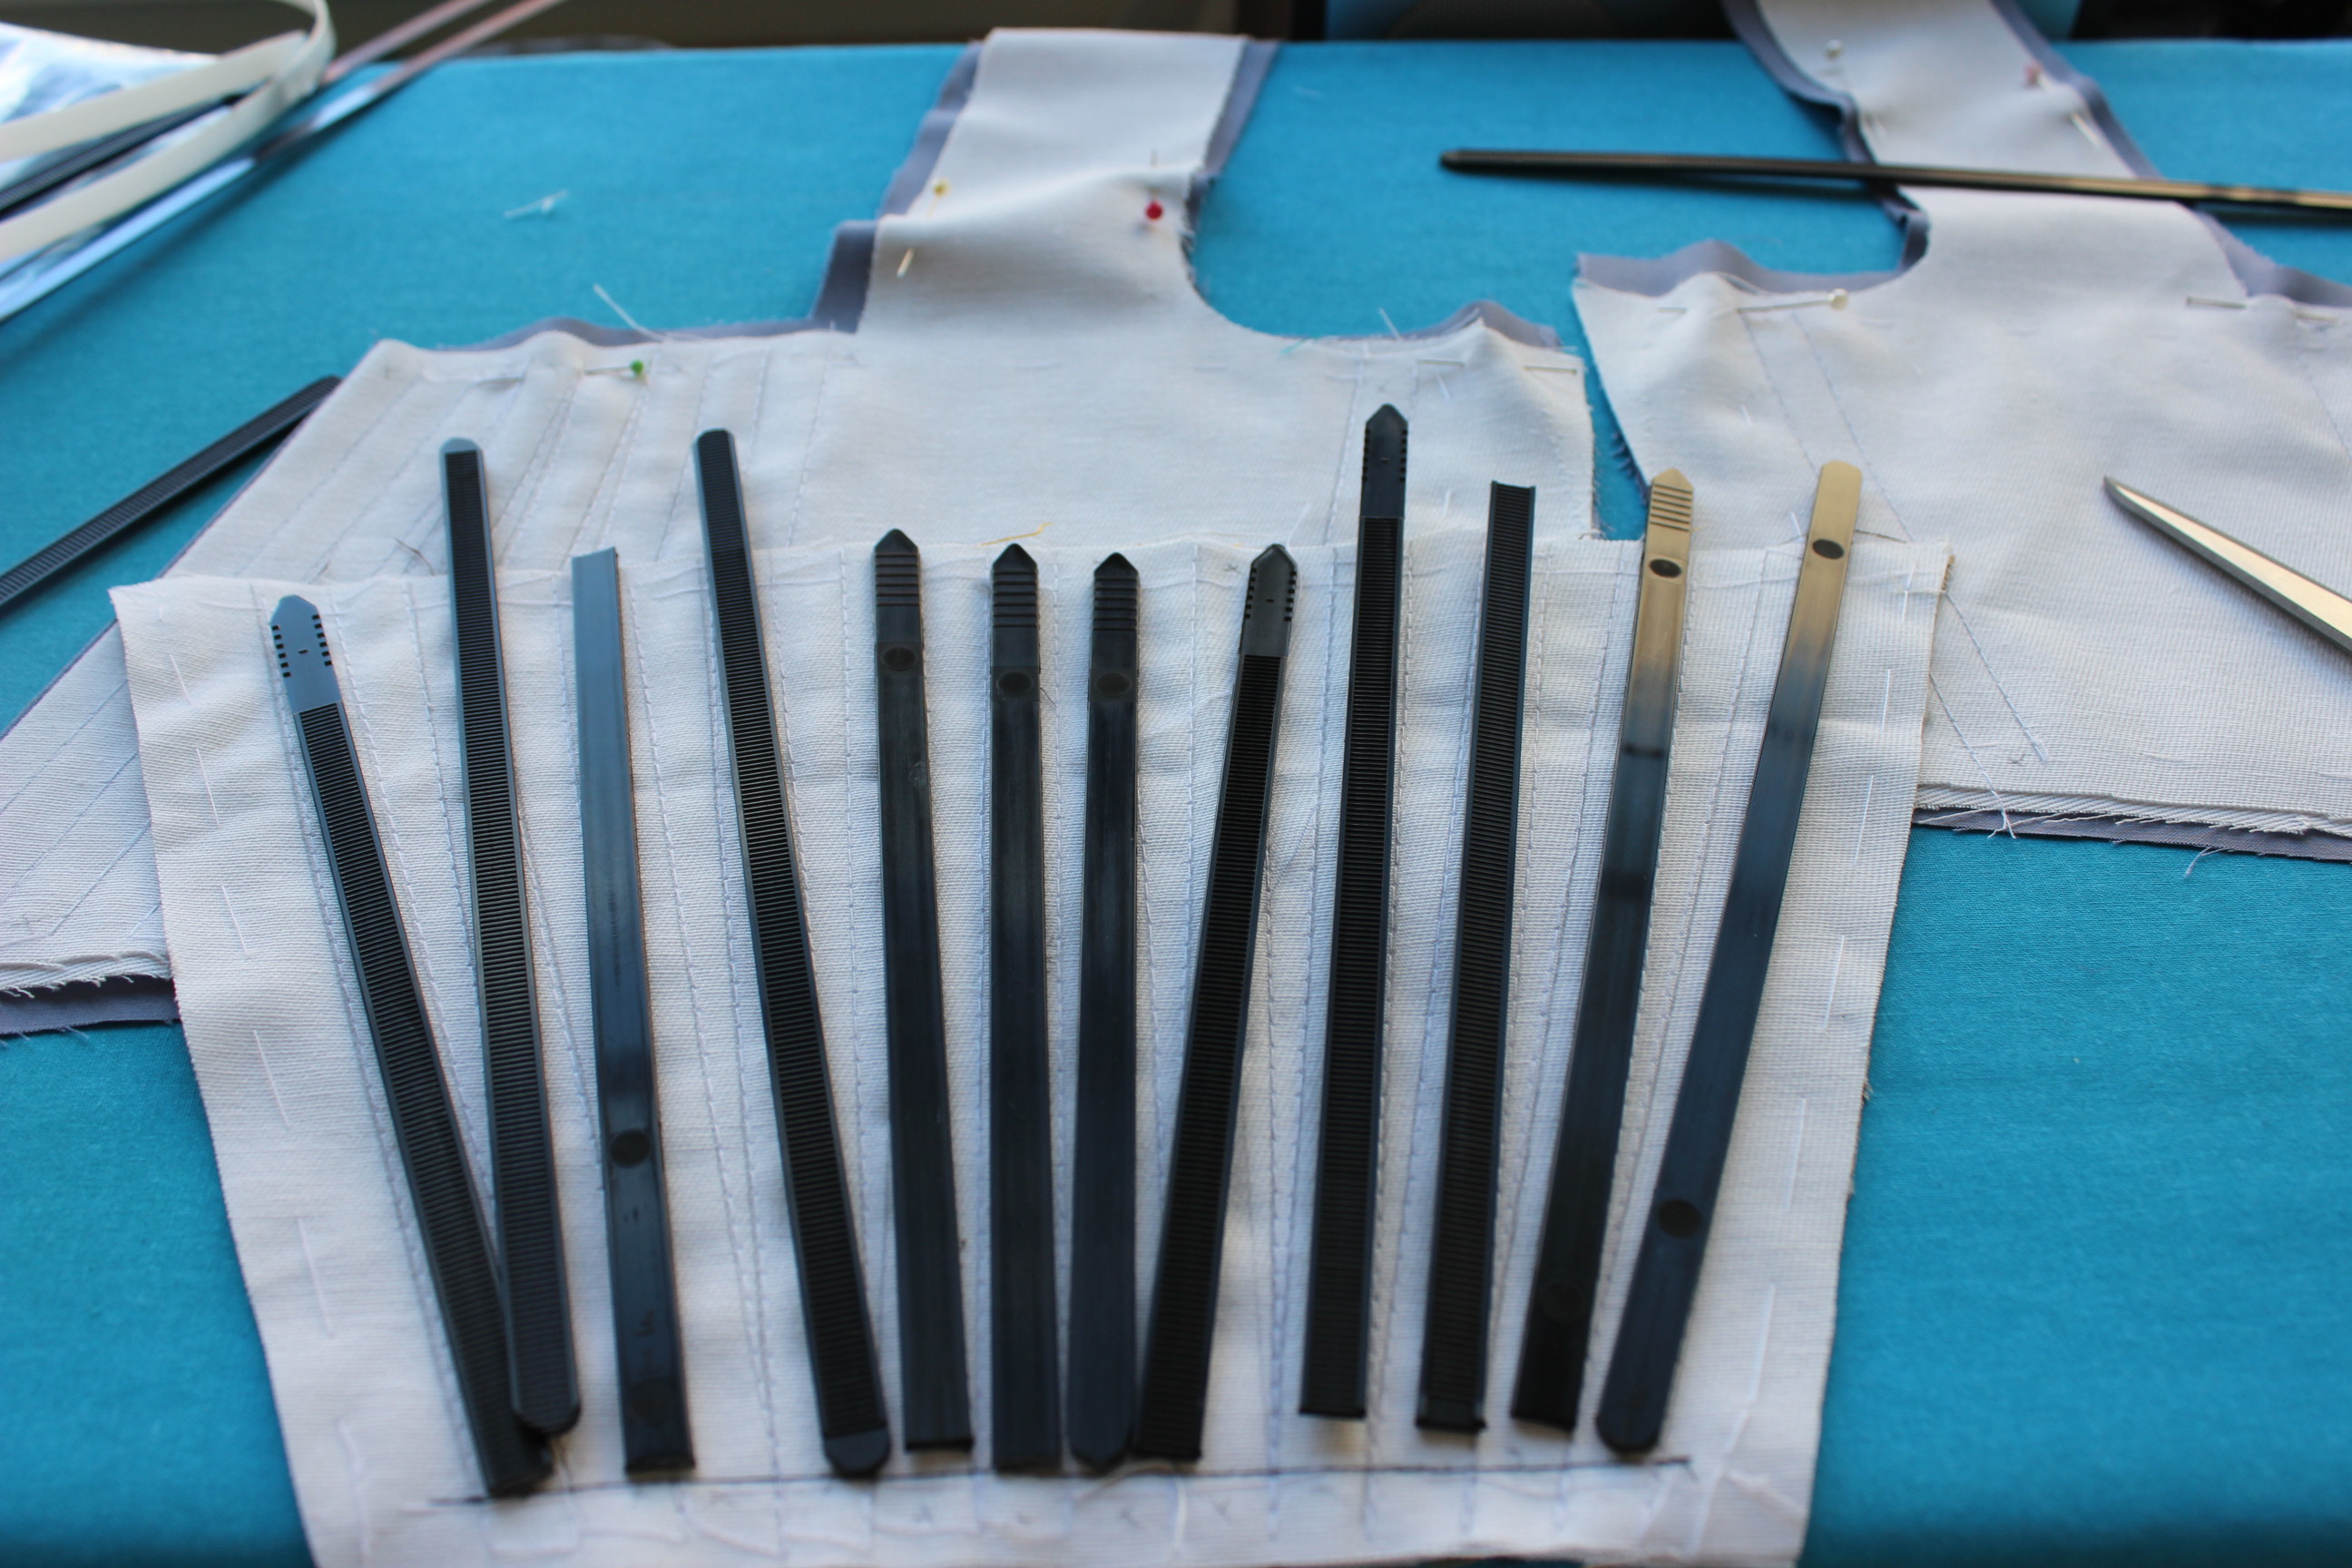
I cut the pieces in blue satin with un-bleached cotton for lining and interlining which I basted to the satin after drawing on the boning channels. 
I used plastic zip-ties for boning 
 in and outside of the bodice
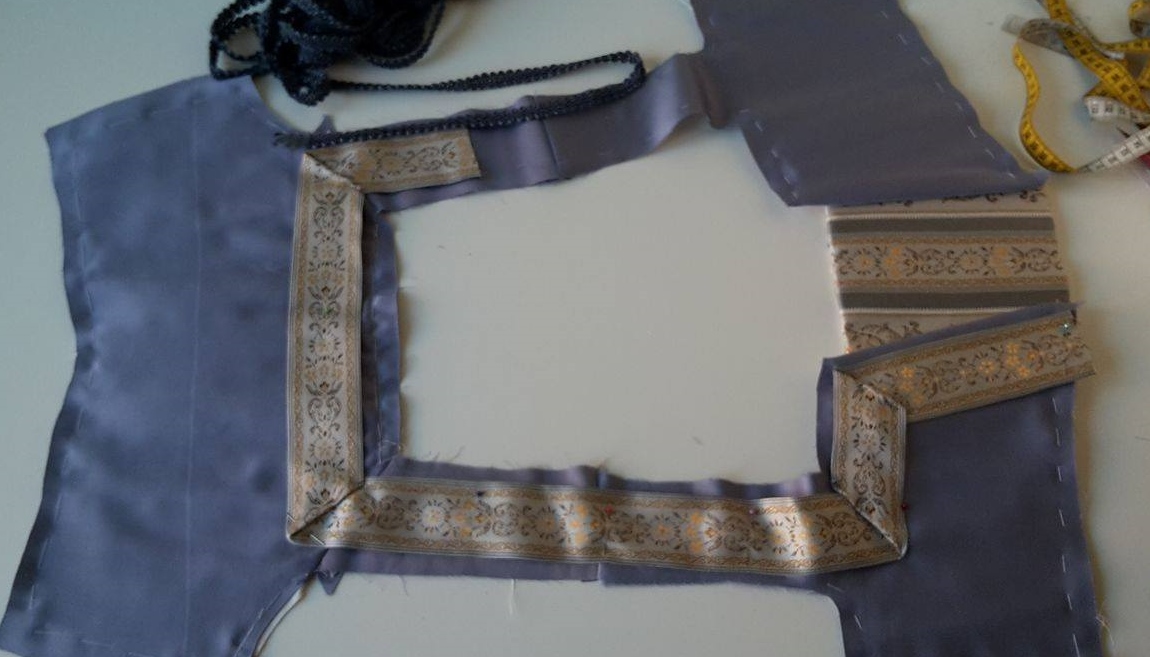
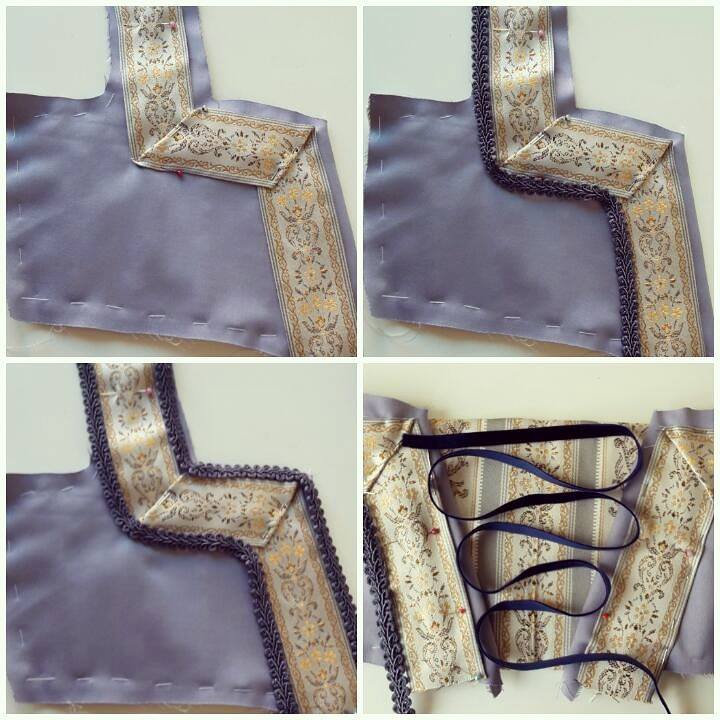
Before stitching it together I needed to figure out and ad the decoration. One line of brocade pinned on.
 different ways of trimming the bodice
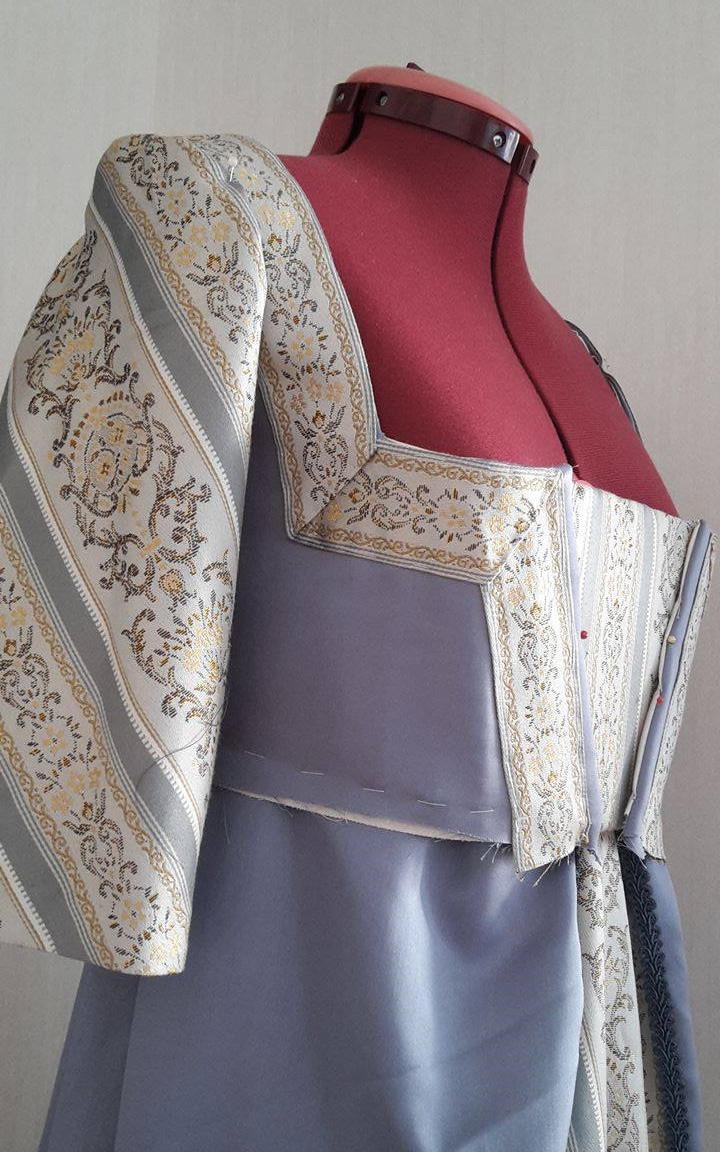
It was around this point I put it on the dressform to get a grip on the over all look.
 And unfortunately I hated it 😦


 Main inspiration

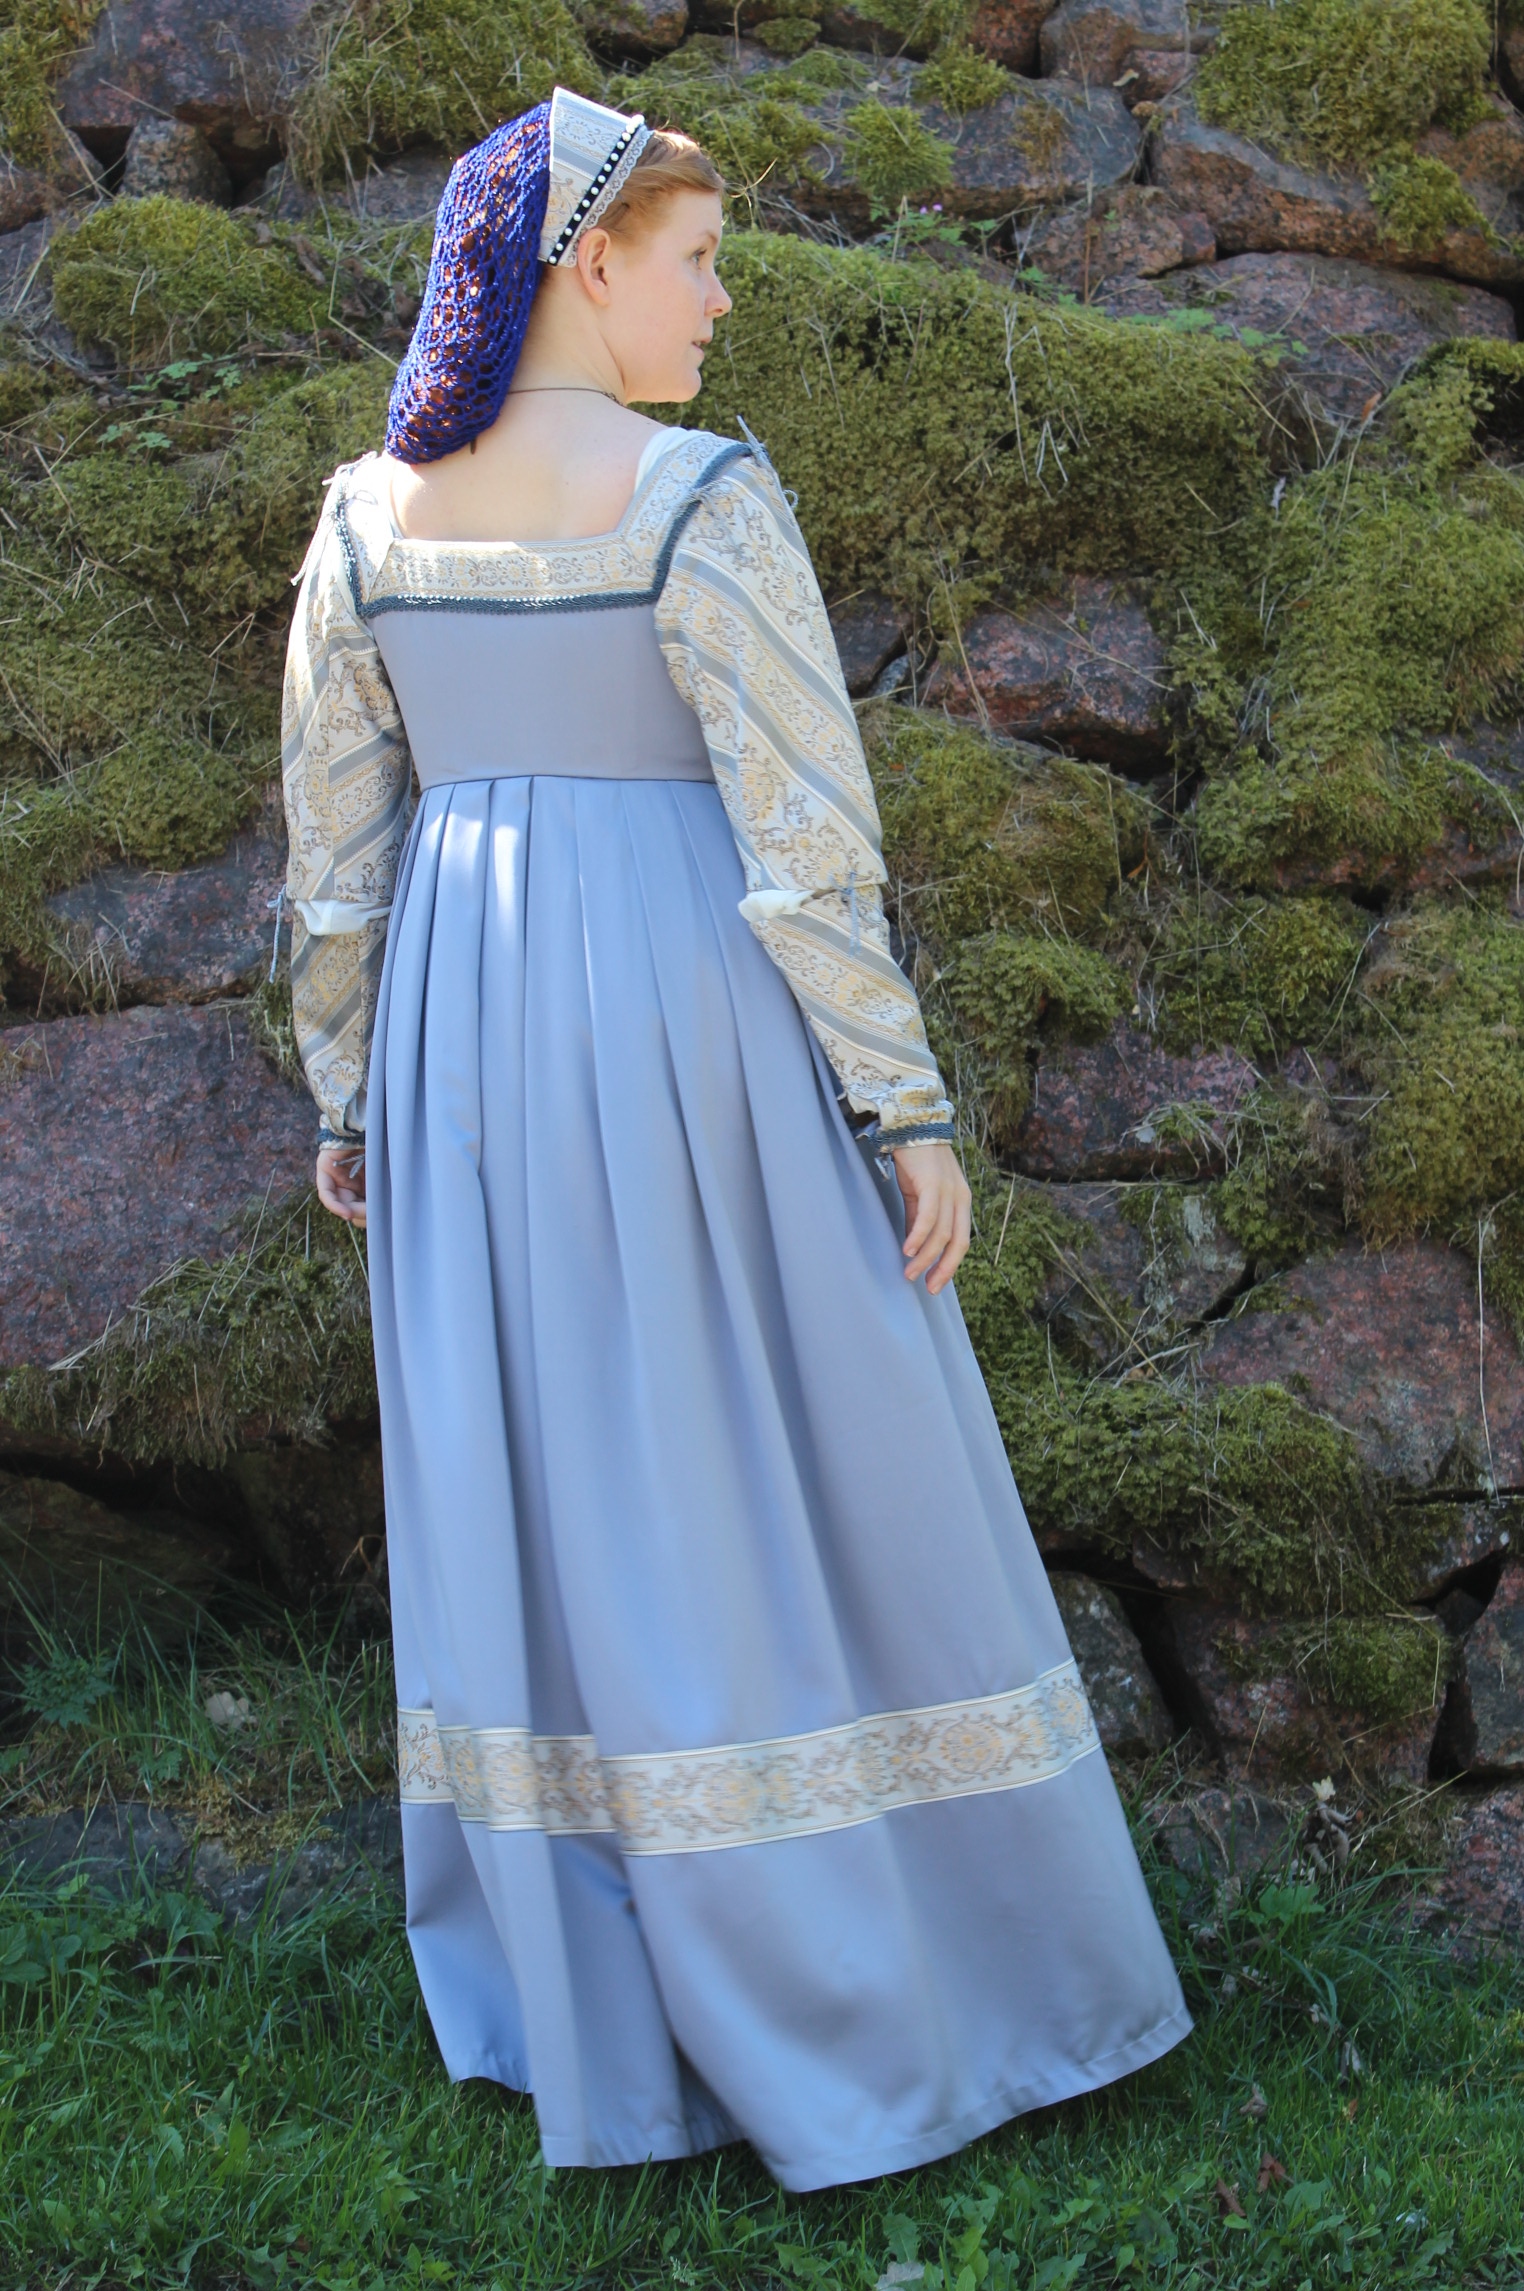


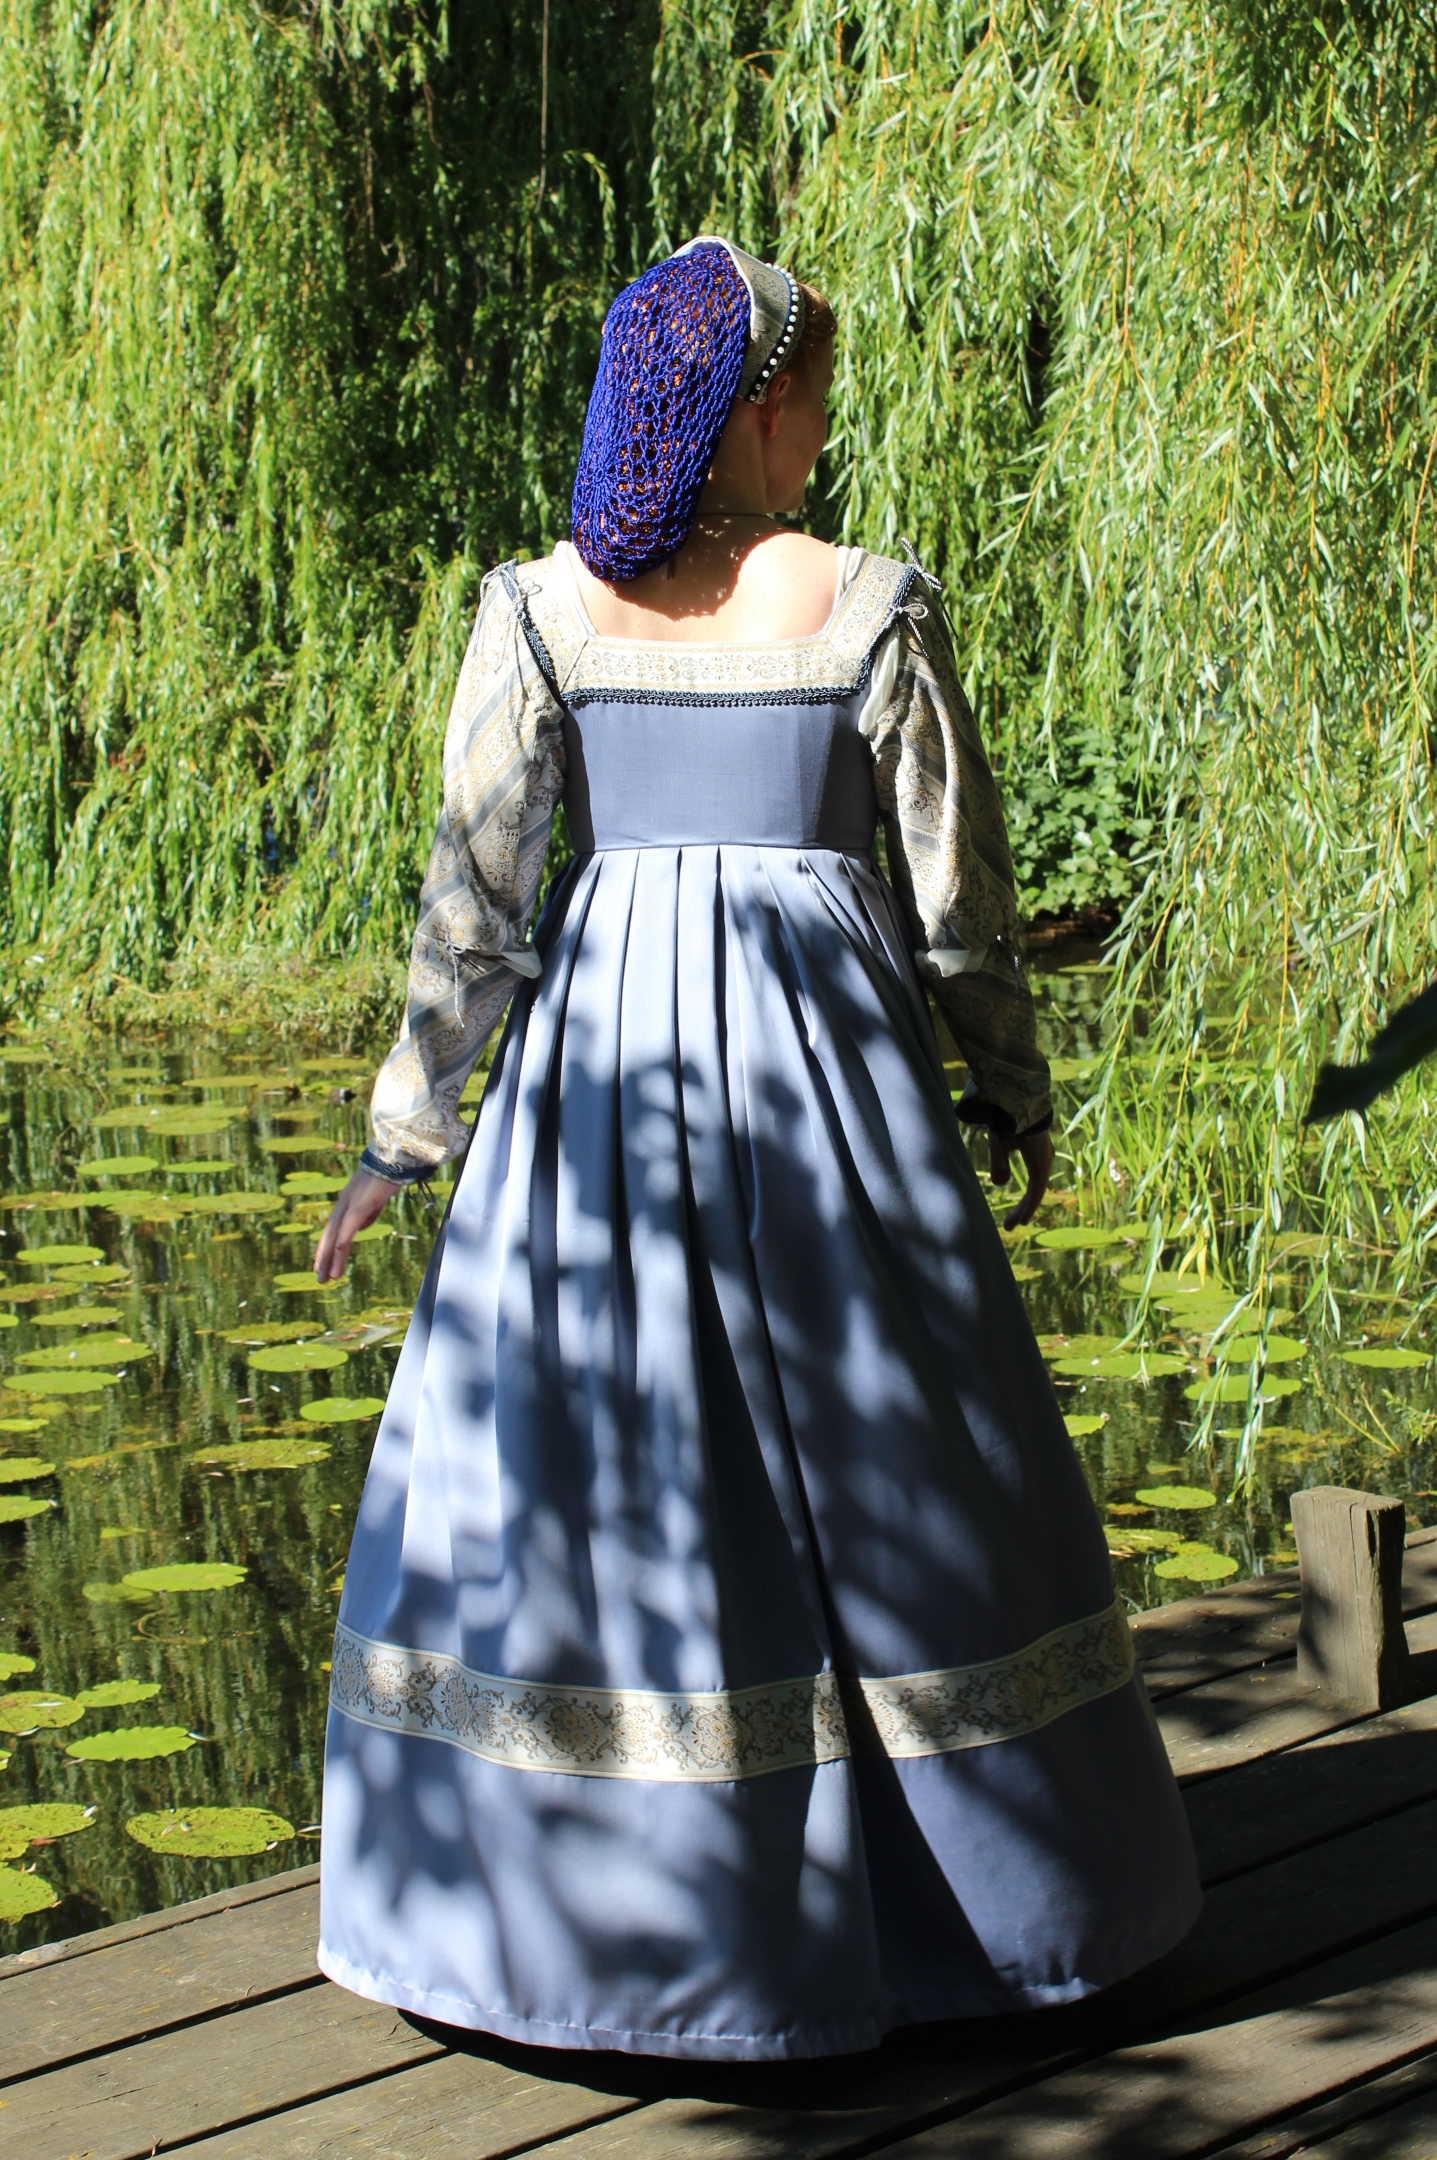

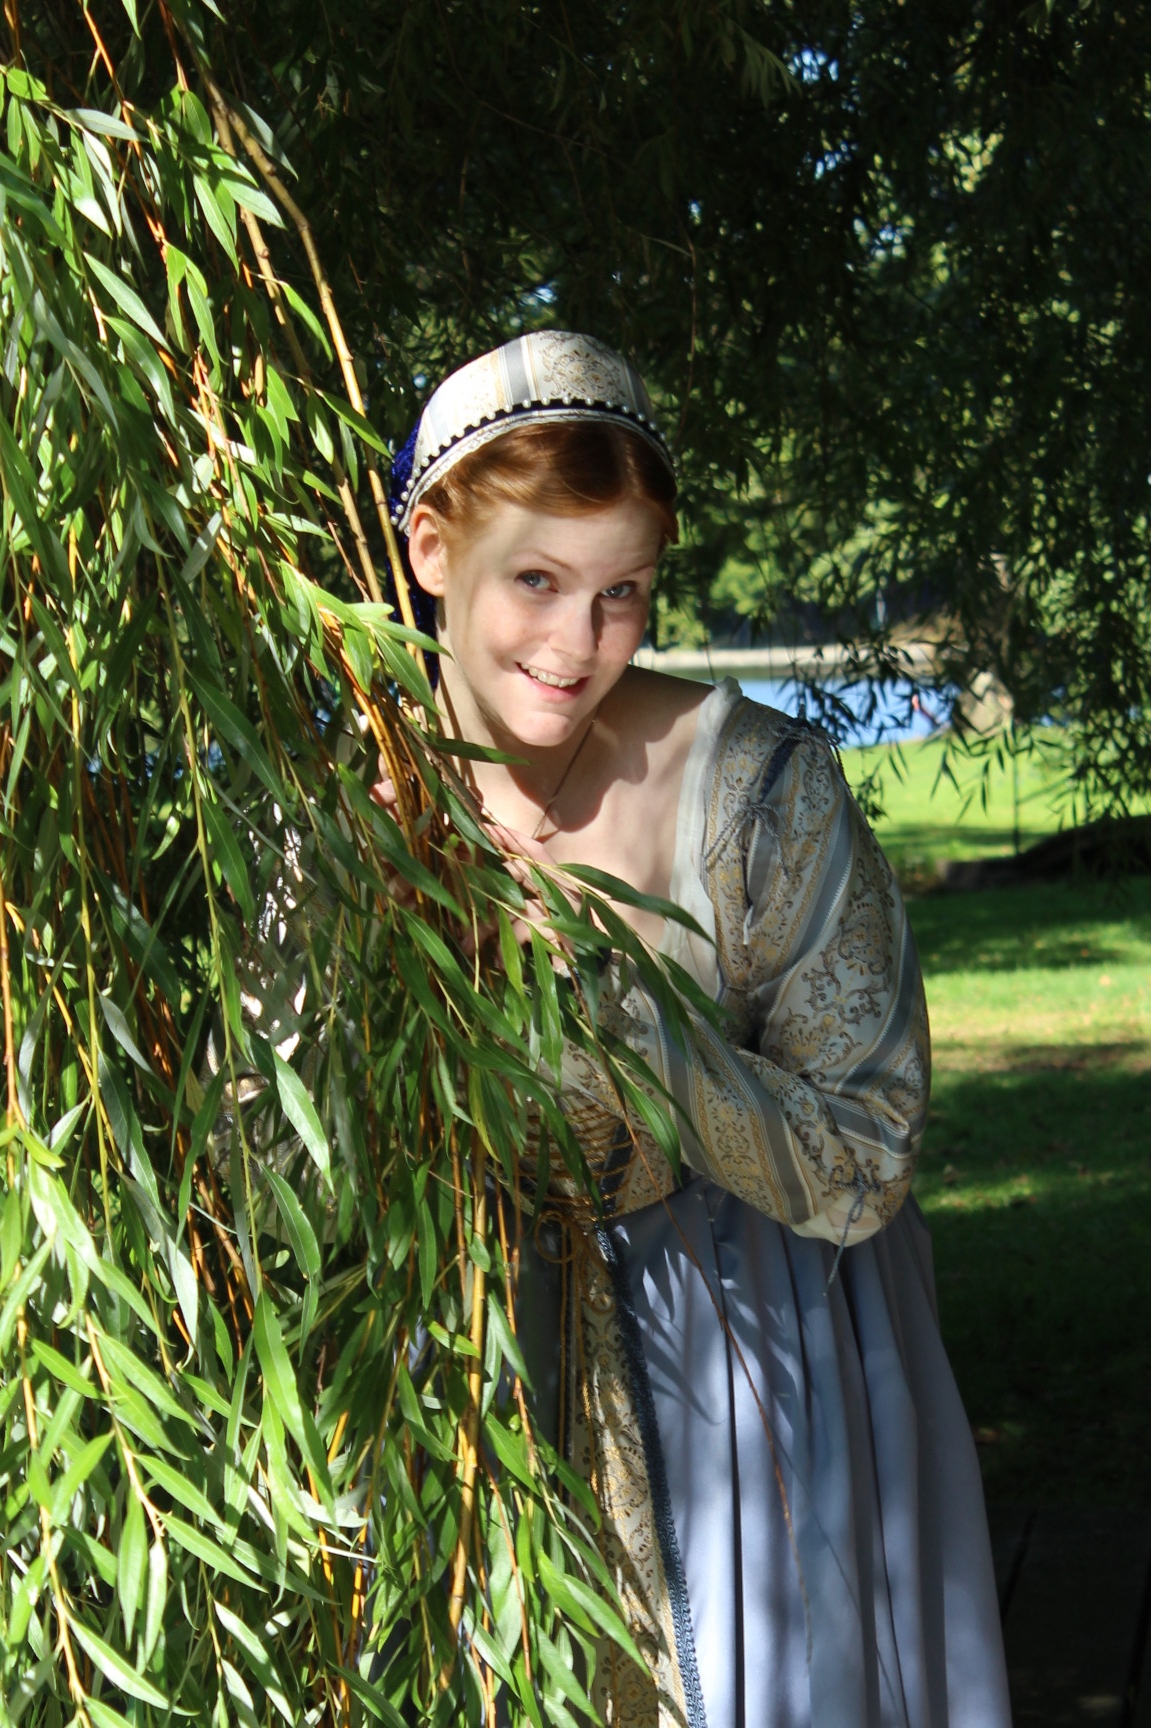
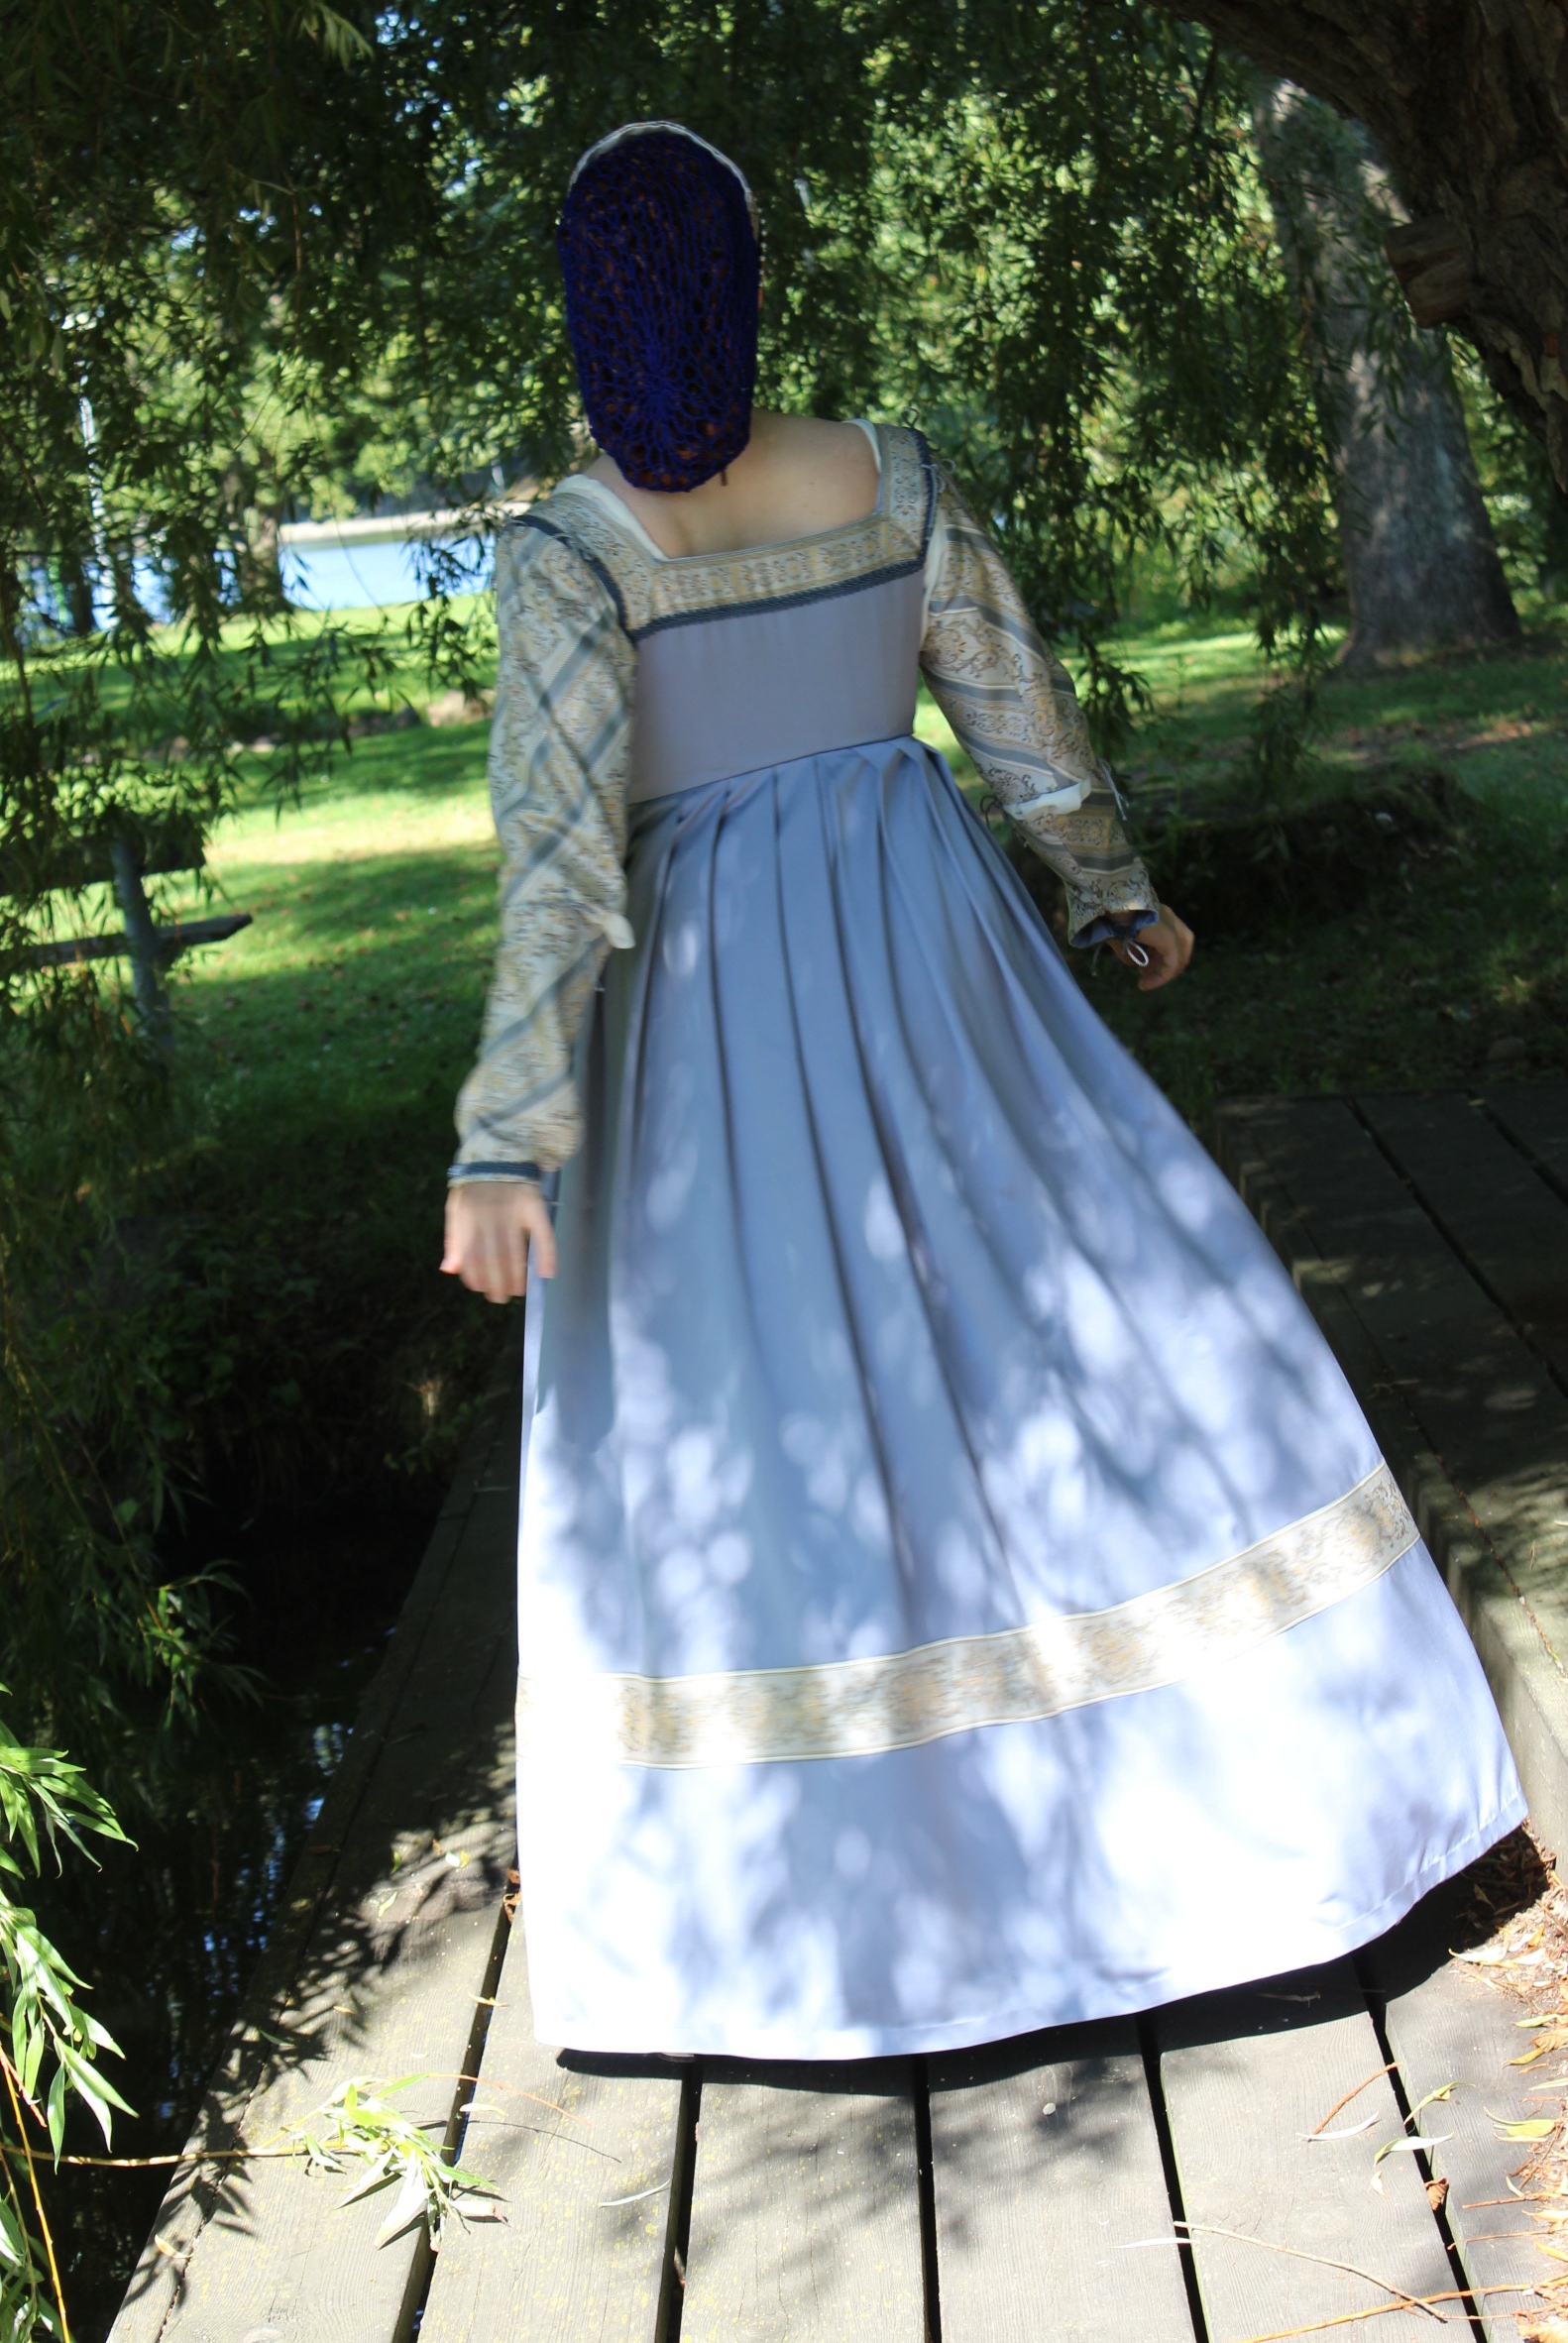


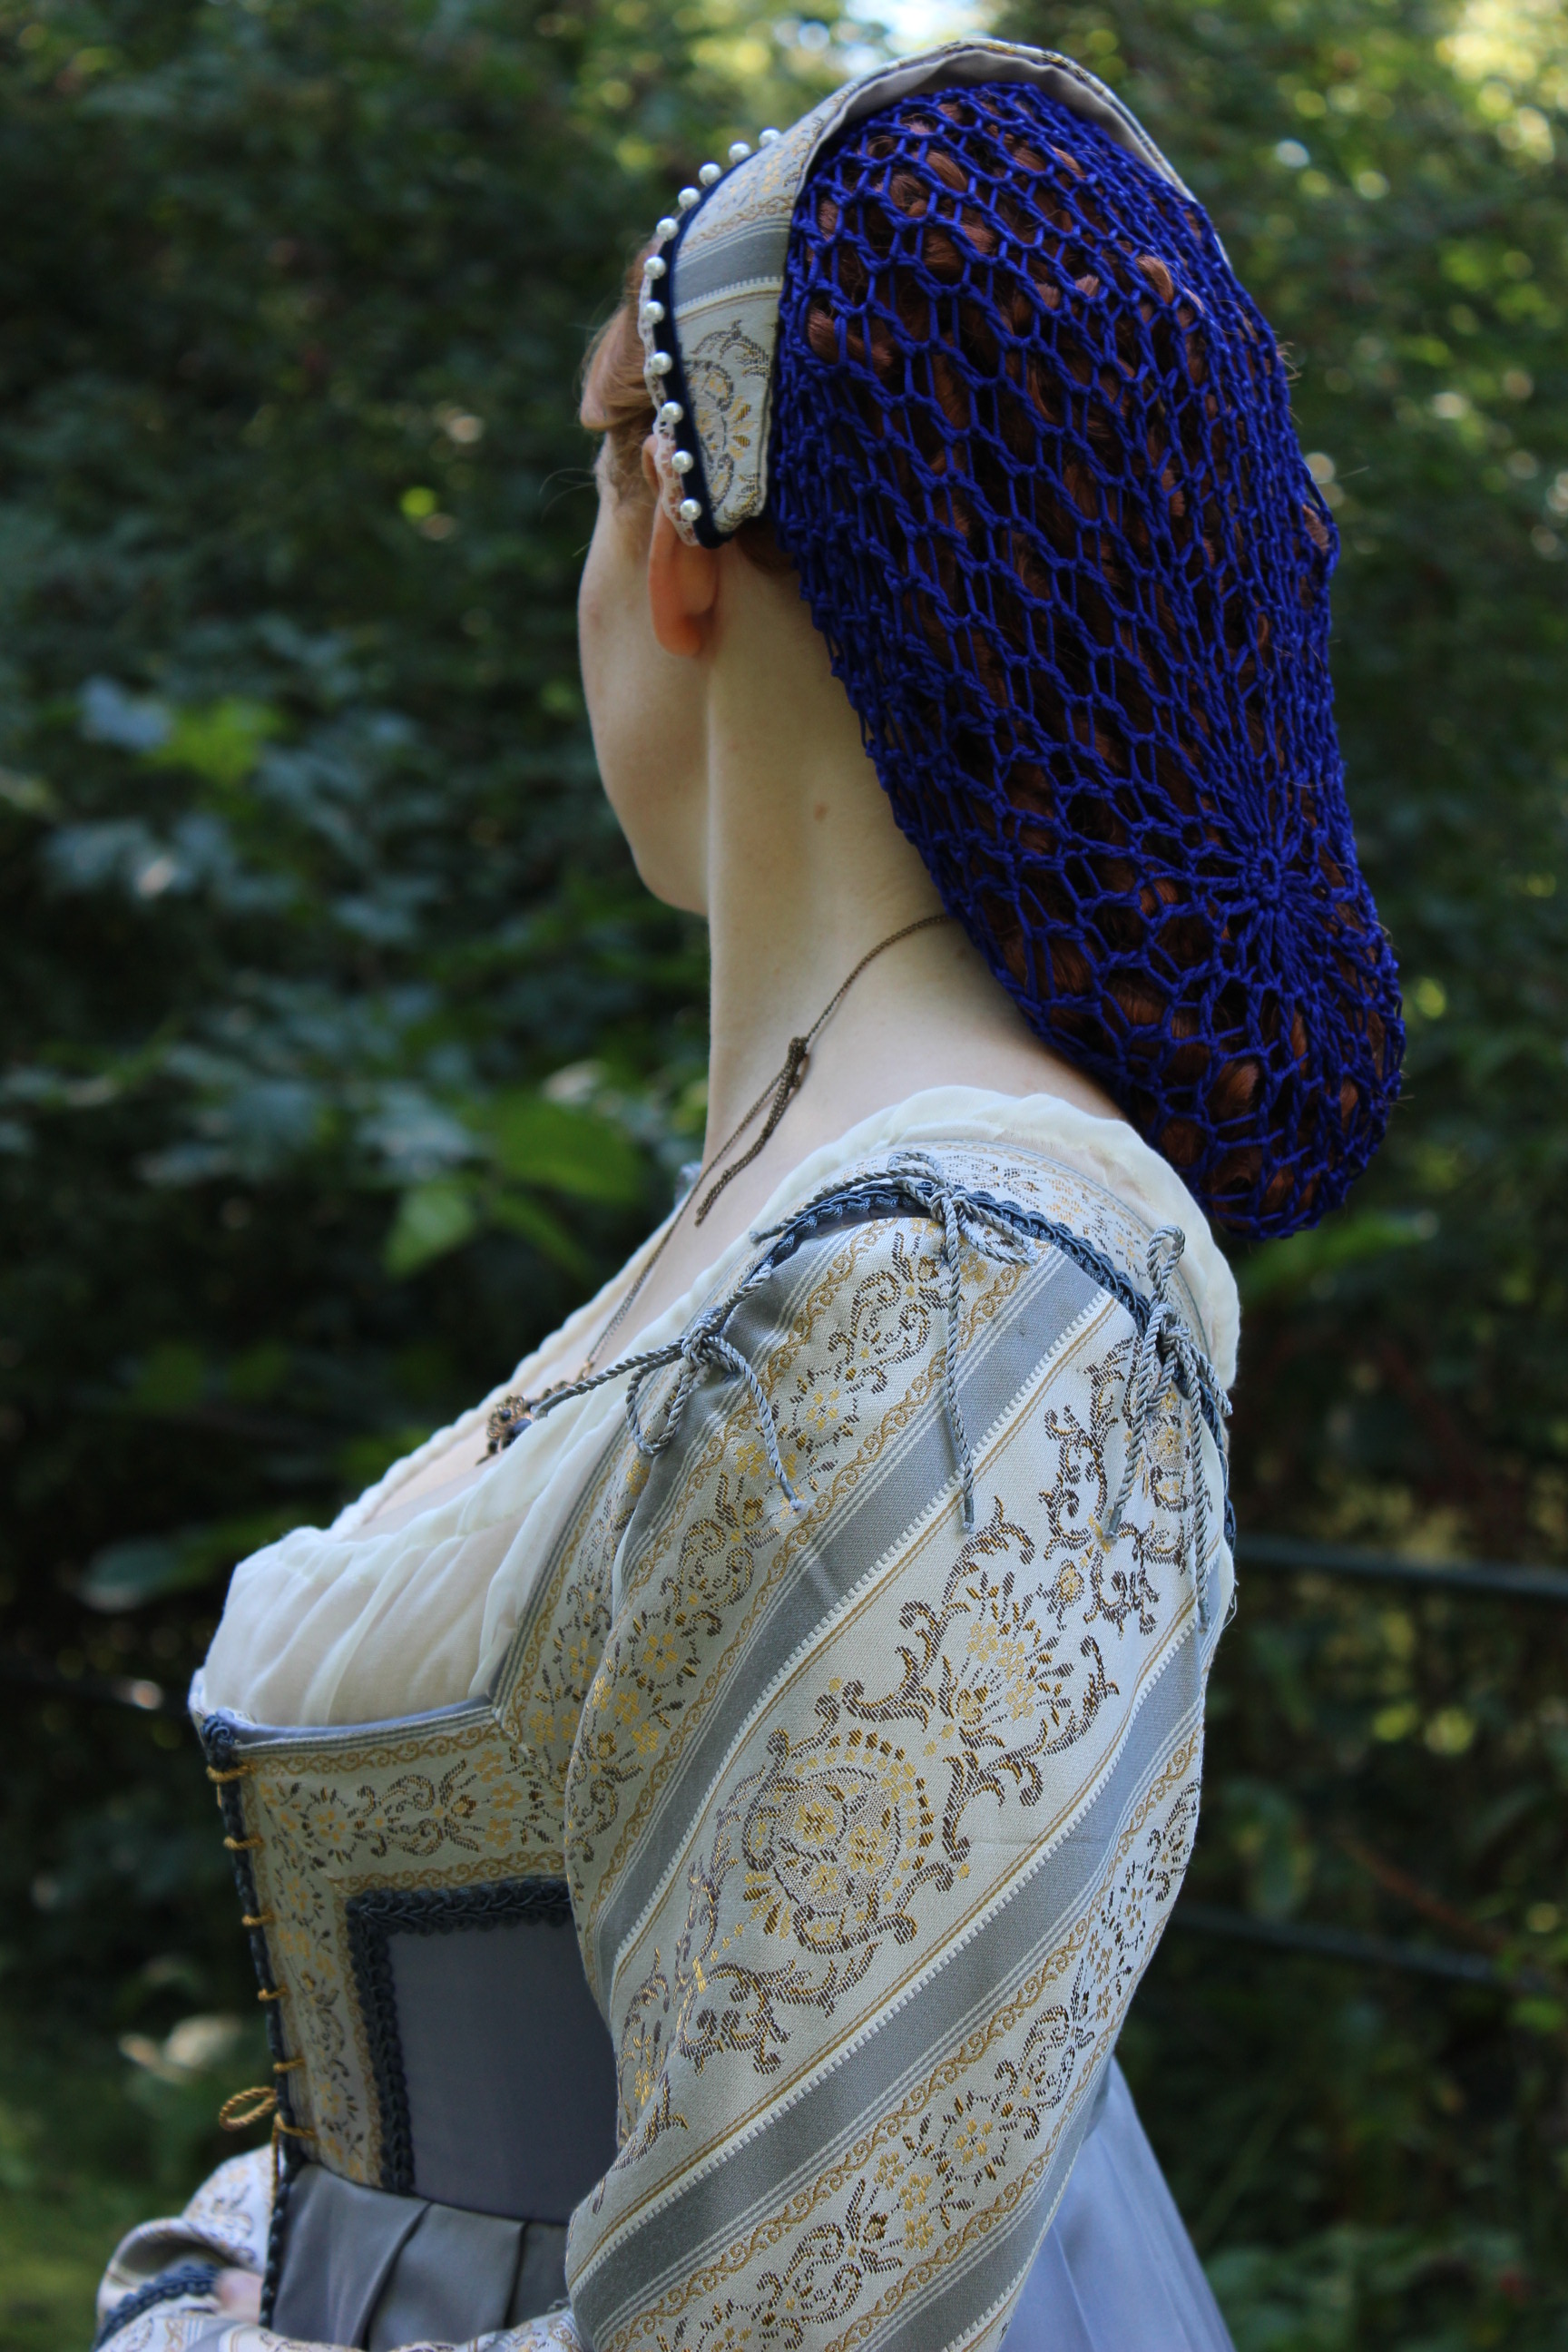


 Photo: Maria Petersson
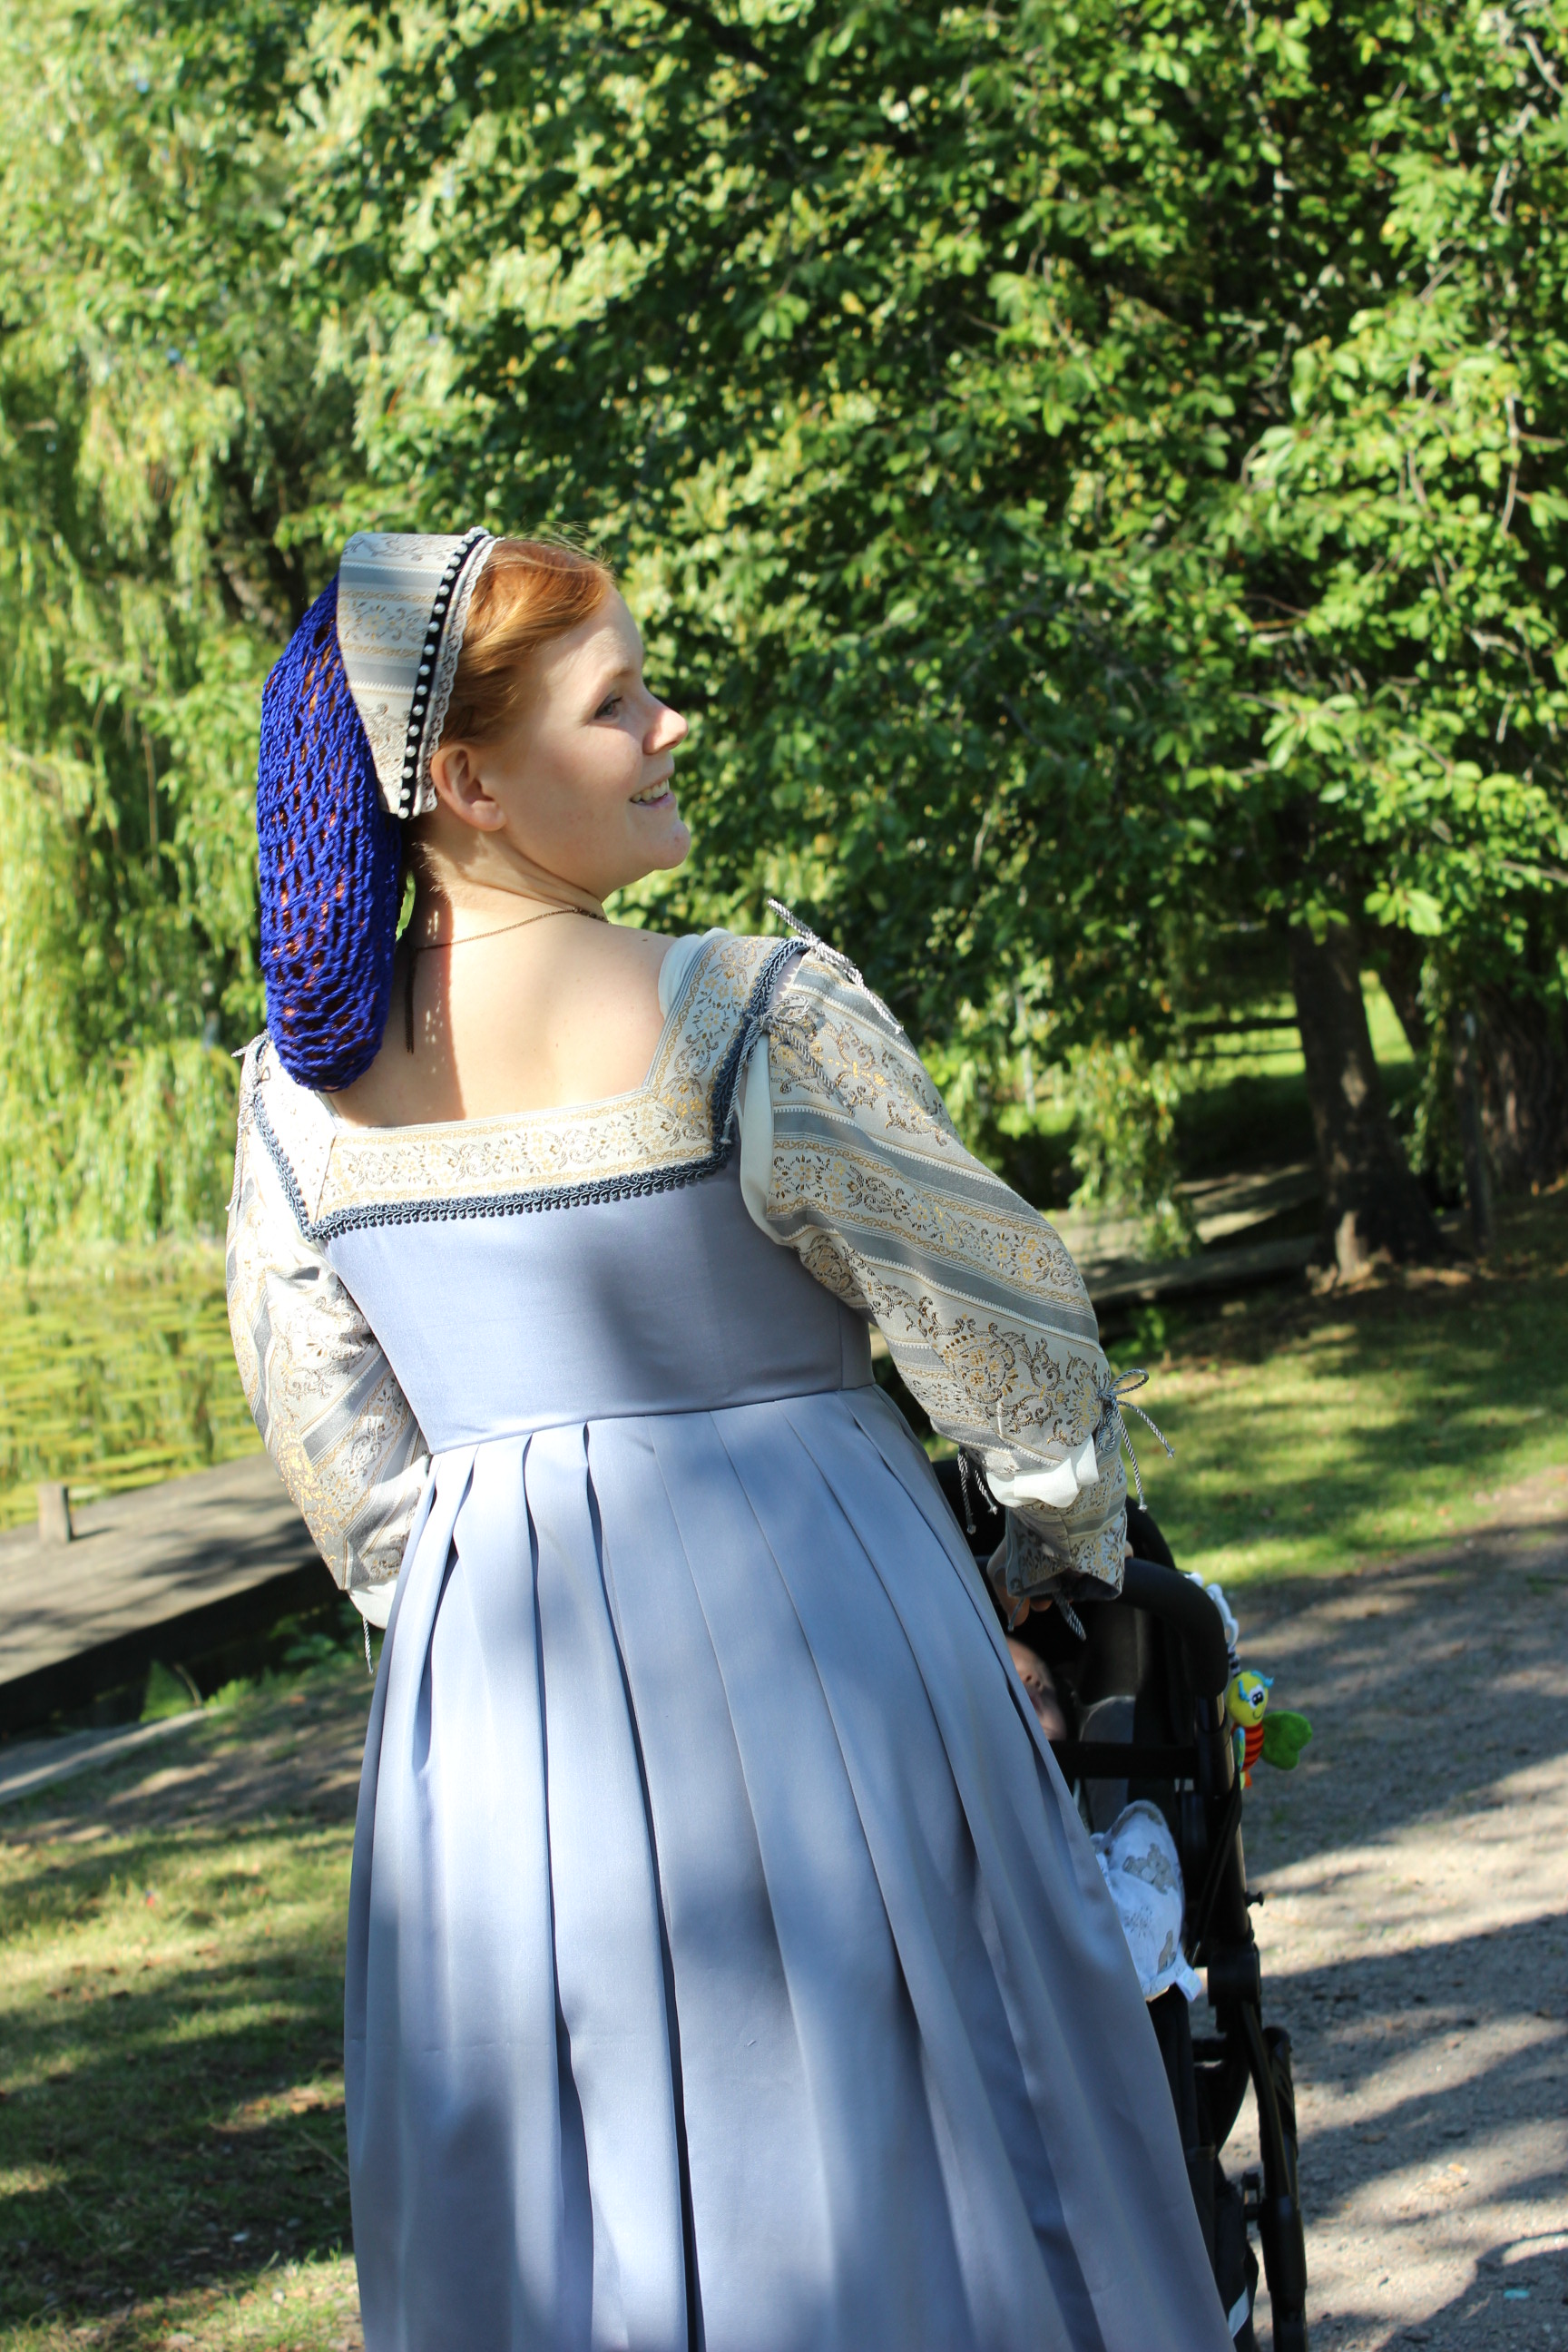 Just a Mama out on a walk…
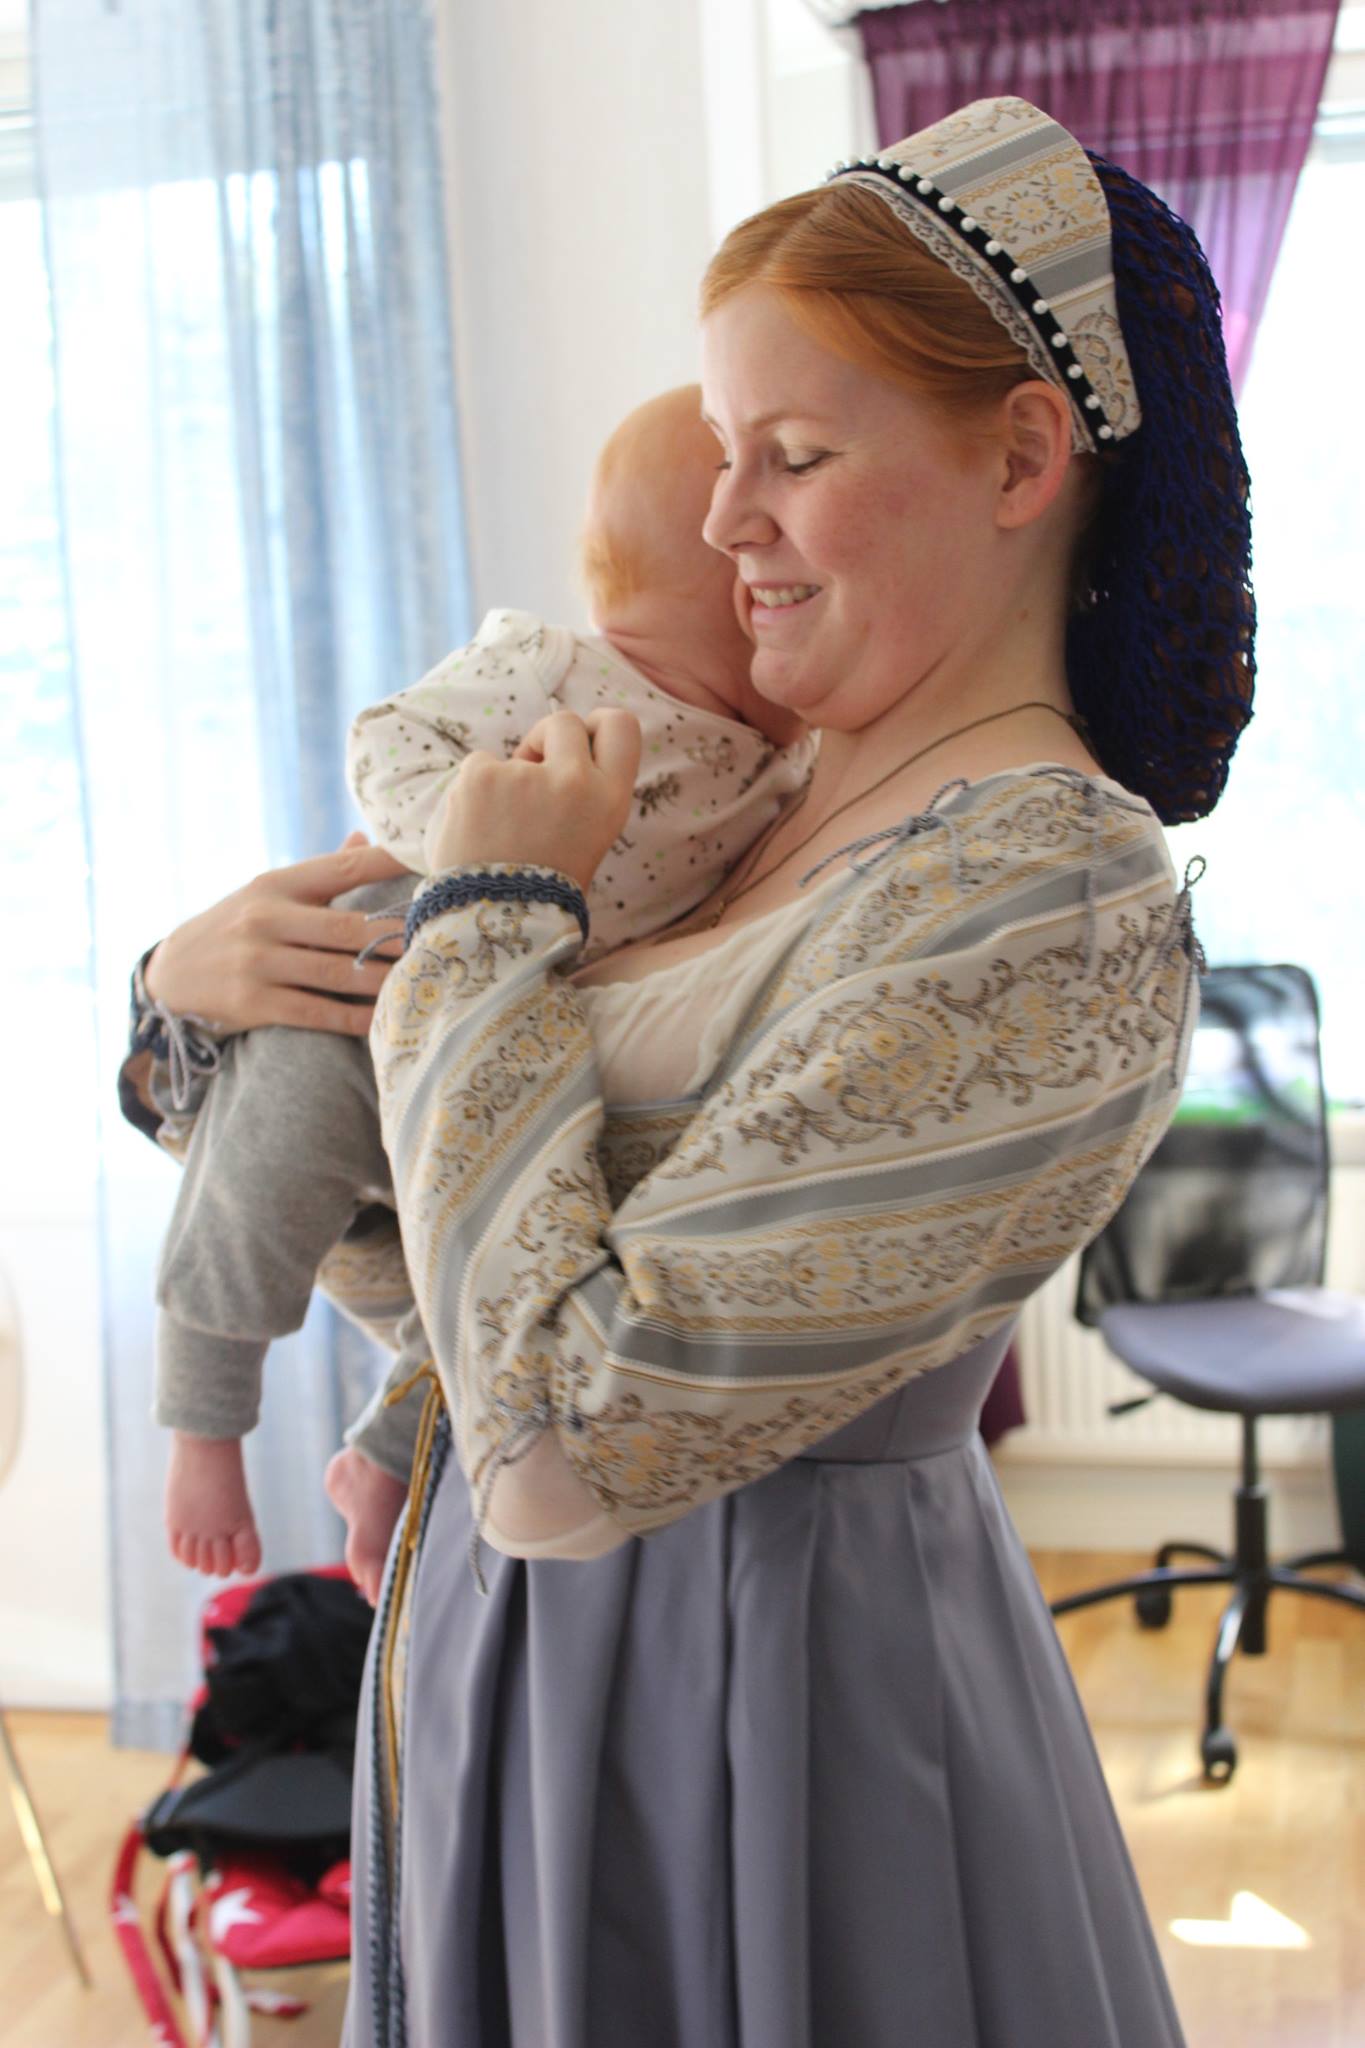 Hugs and kisses