The next thing that I needed to make to complete the Elizabethan look was some kick as headwear.
And what is more associated with this time period then the french hood.
 Elizabeth I in “power suit” and crazy perm – and some kind of french(isch) hood.
I used the pattern from “The Tudor Tailor”, and “A Damsel in this Dress” great tutorial for the construction.
Starting by cutting the fabric from the (by now VERY limited) scraps of the golden brocade I used for the dress, cotton sheet for lining and buckram.
 I used the version with the pointed font edge, to make it a it later in style then the regular ones you often see.
Then I stitched the millinery wire to the buckram and the brocade to the now even stiffer pieces. 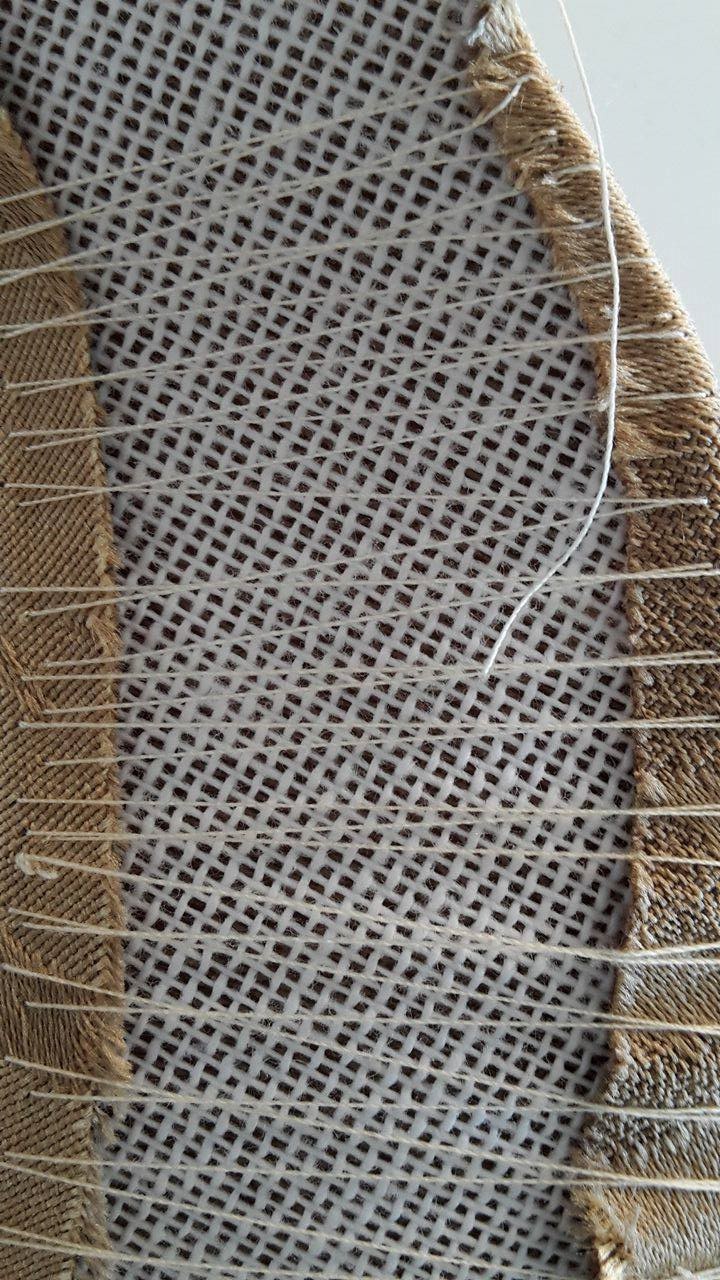 Attaching the outer fabric by stitching over the piece again and again.
Then I added the lining.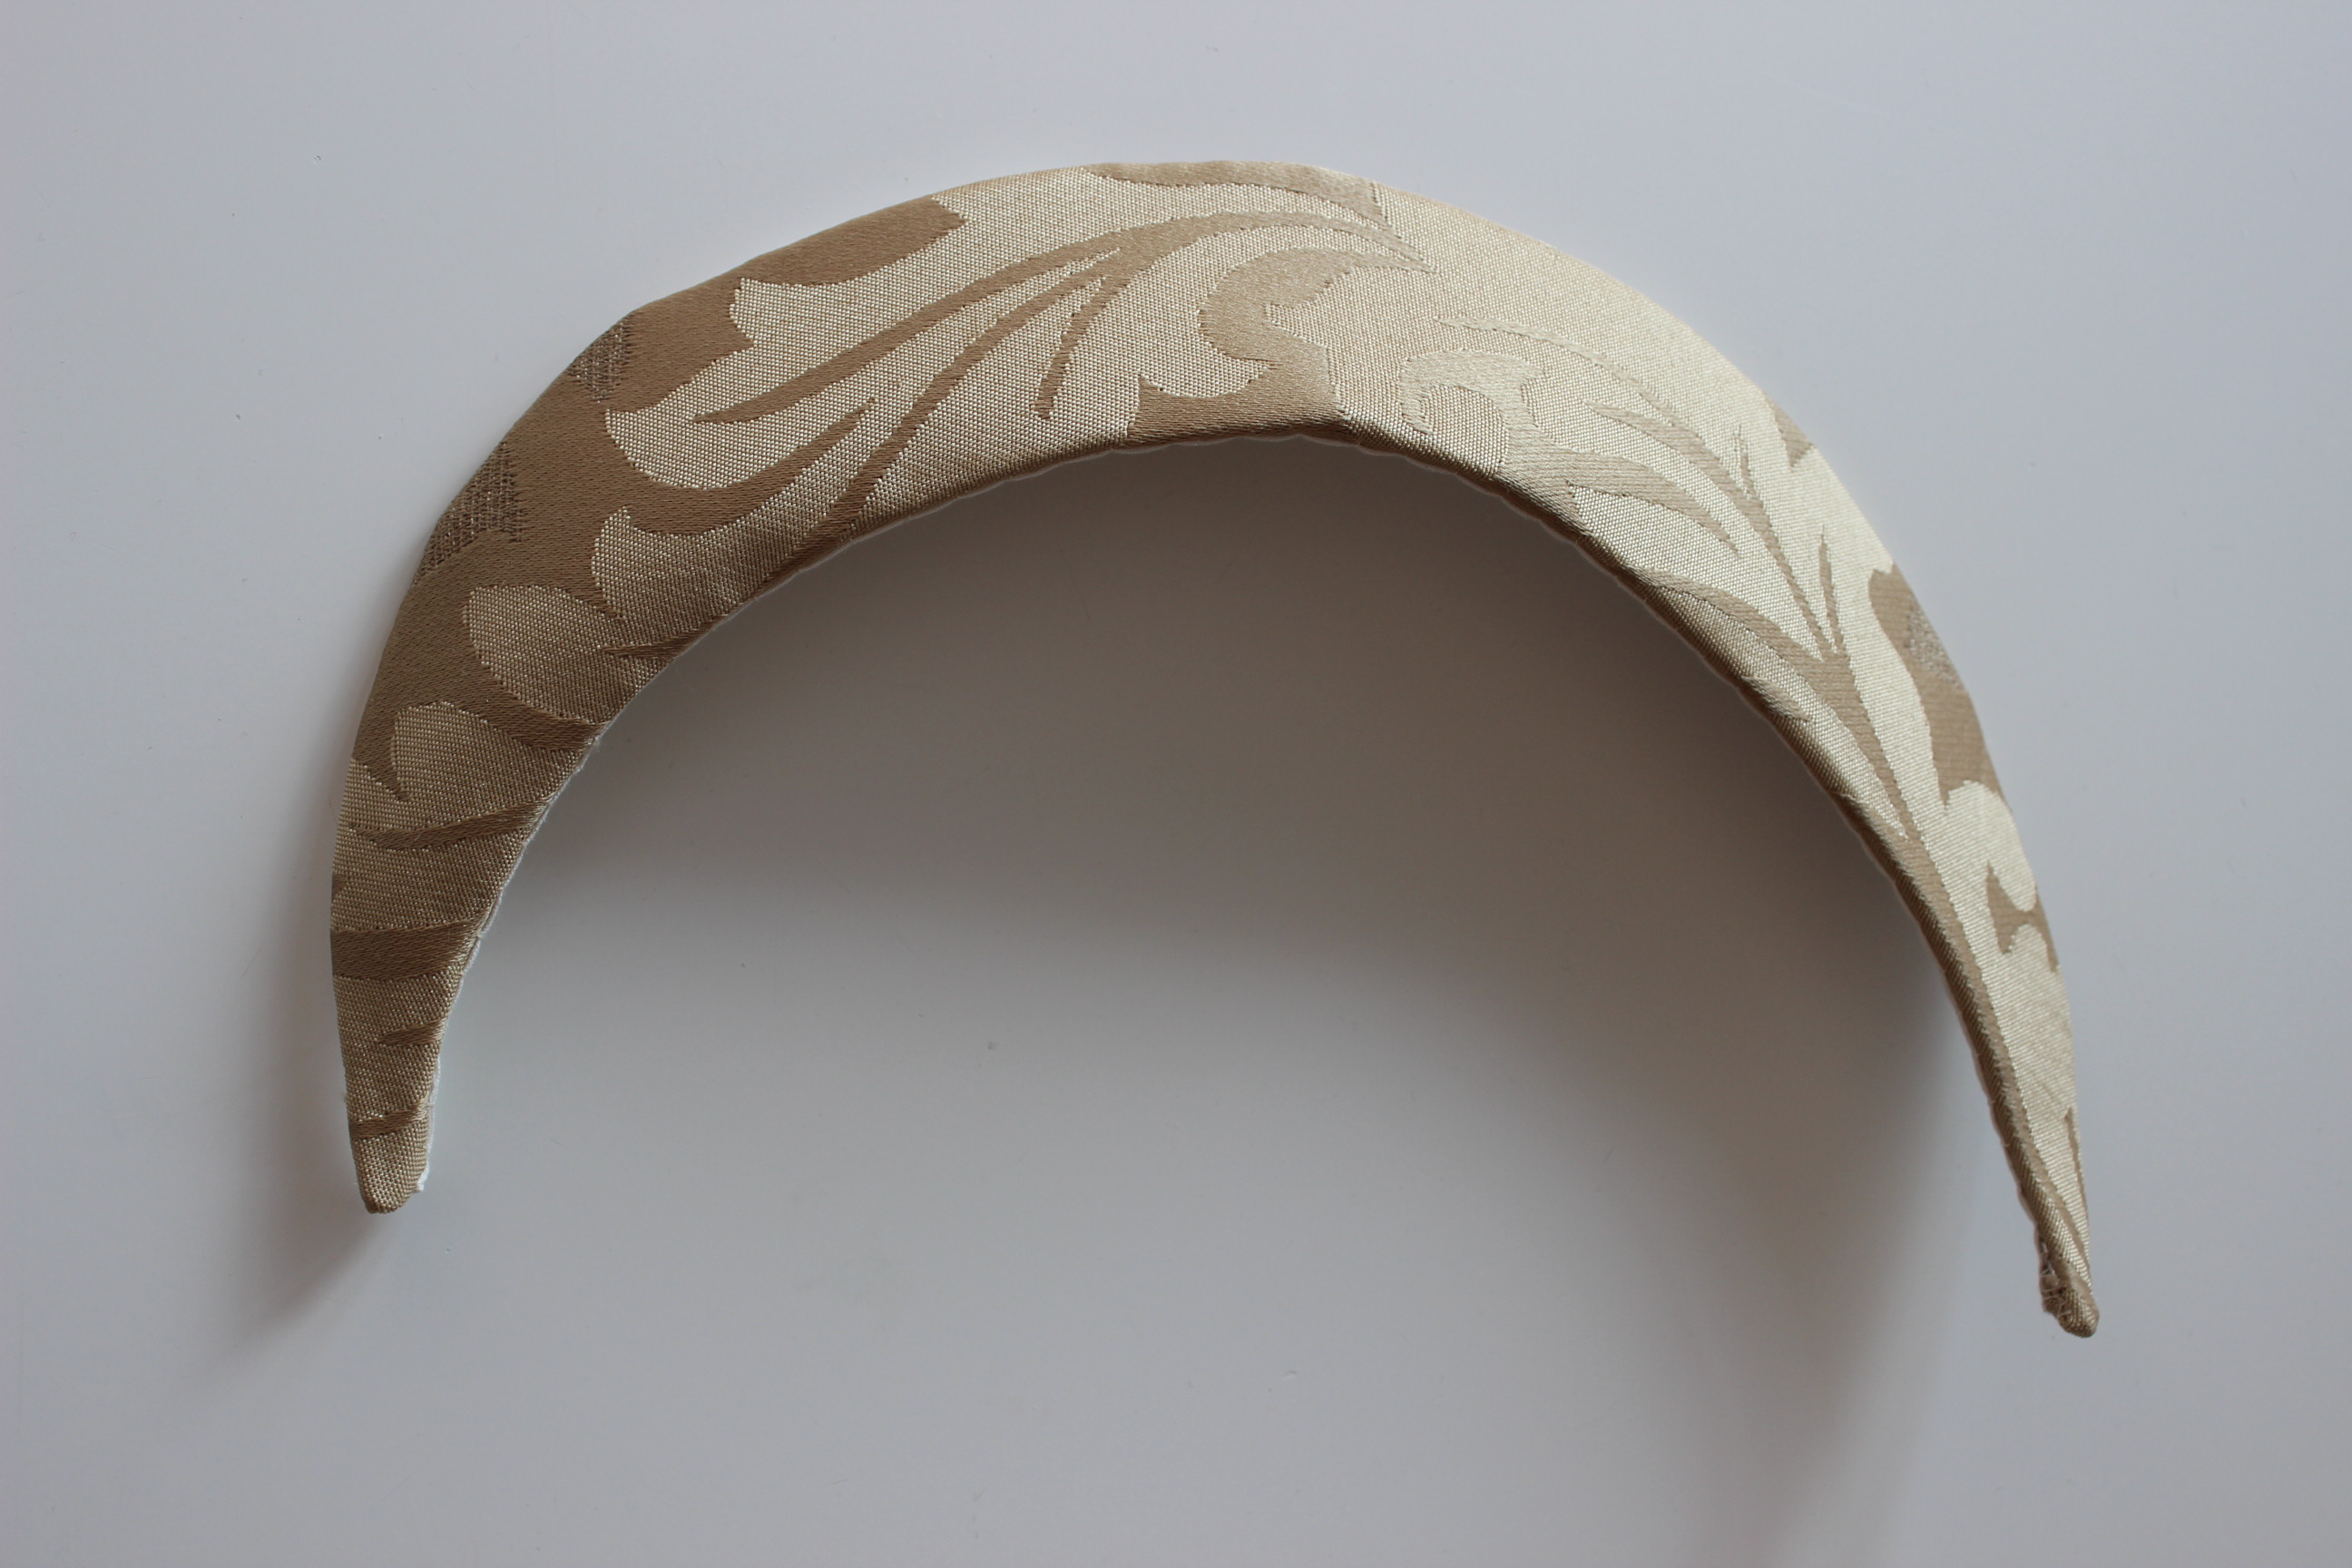
And steamed the pieces into shape. 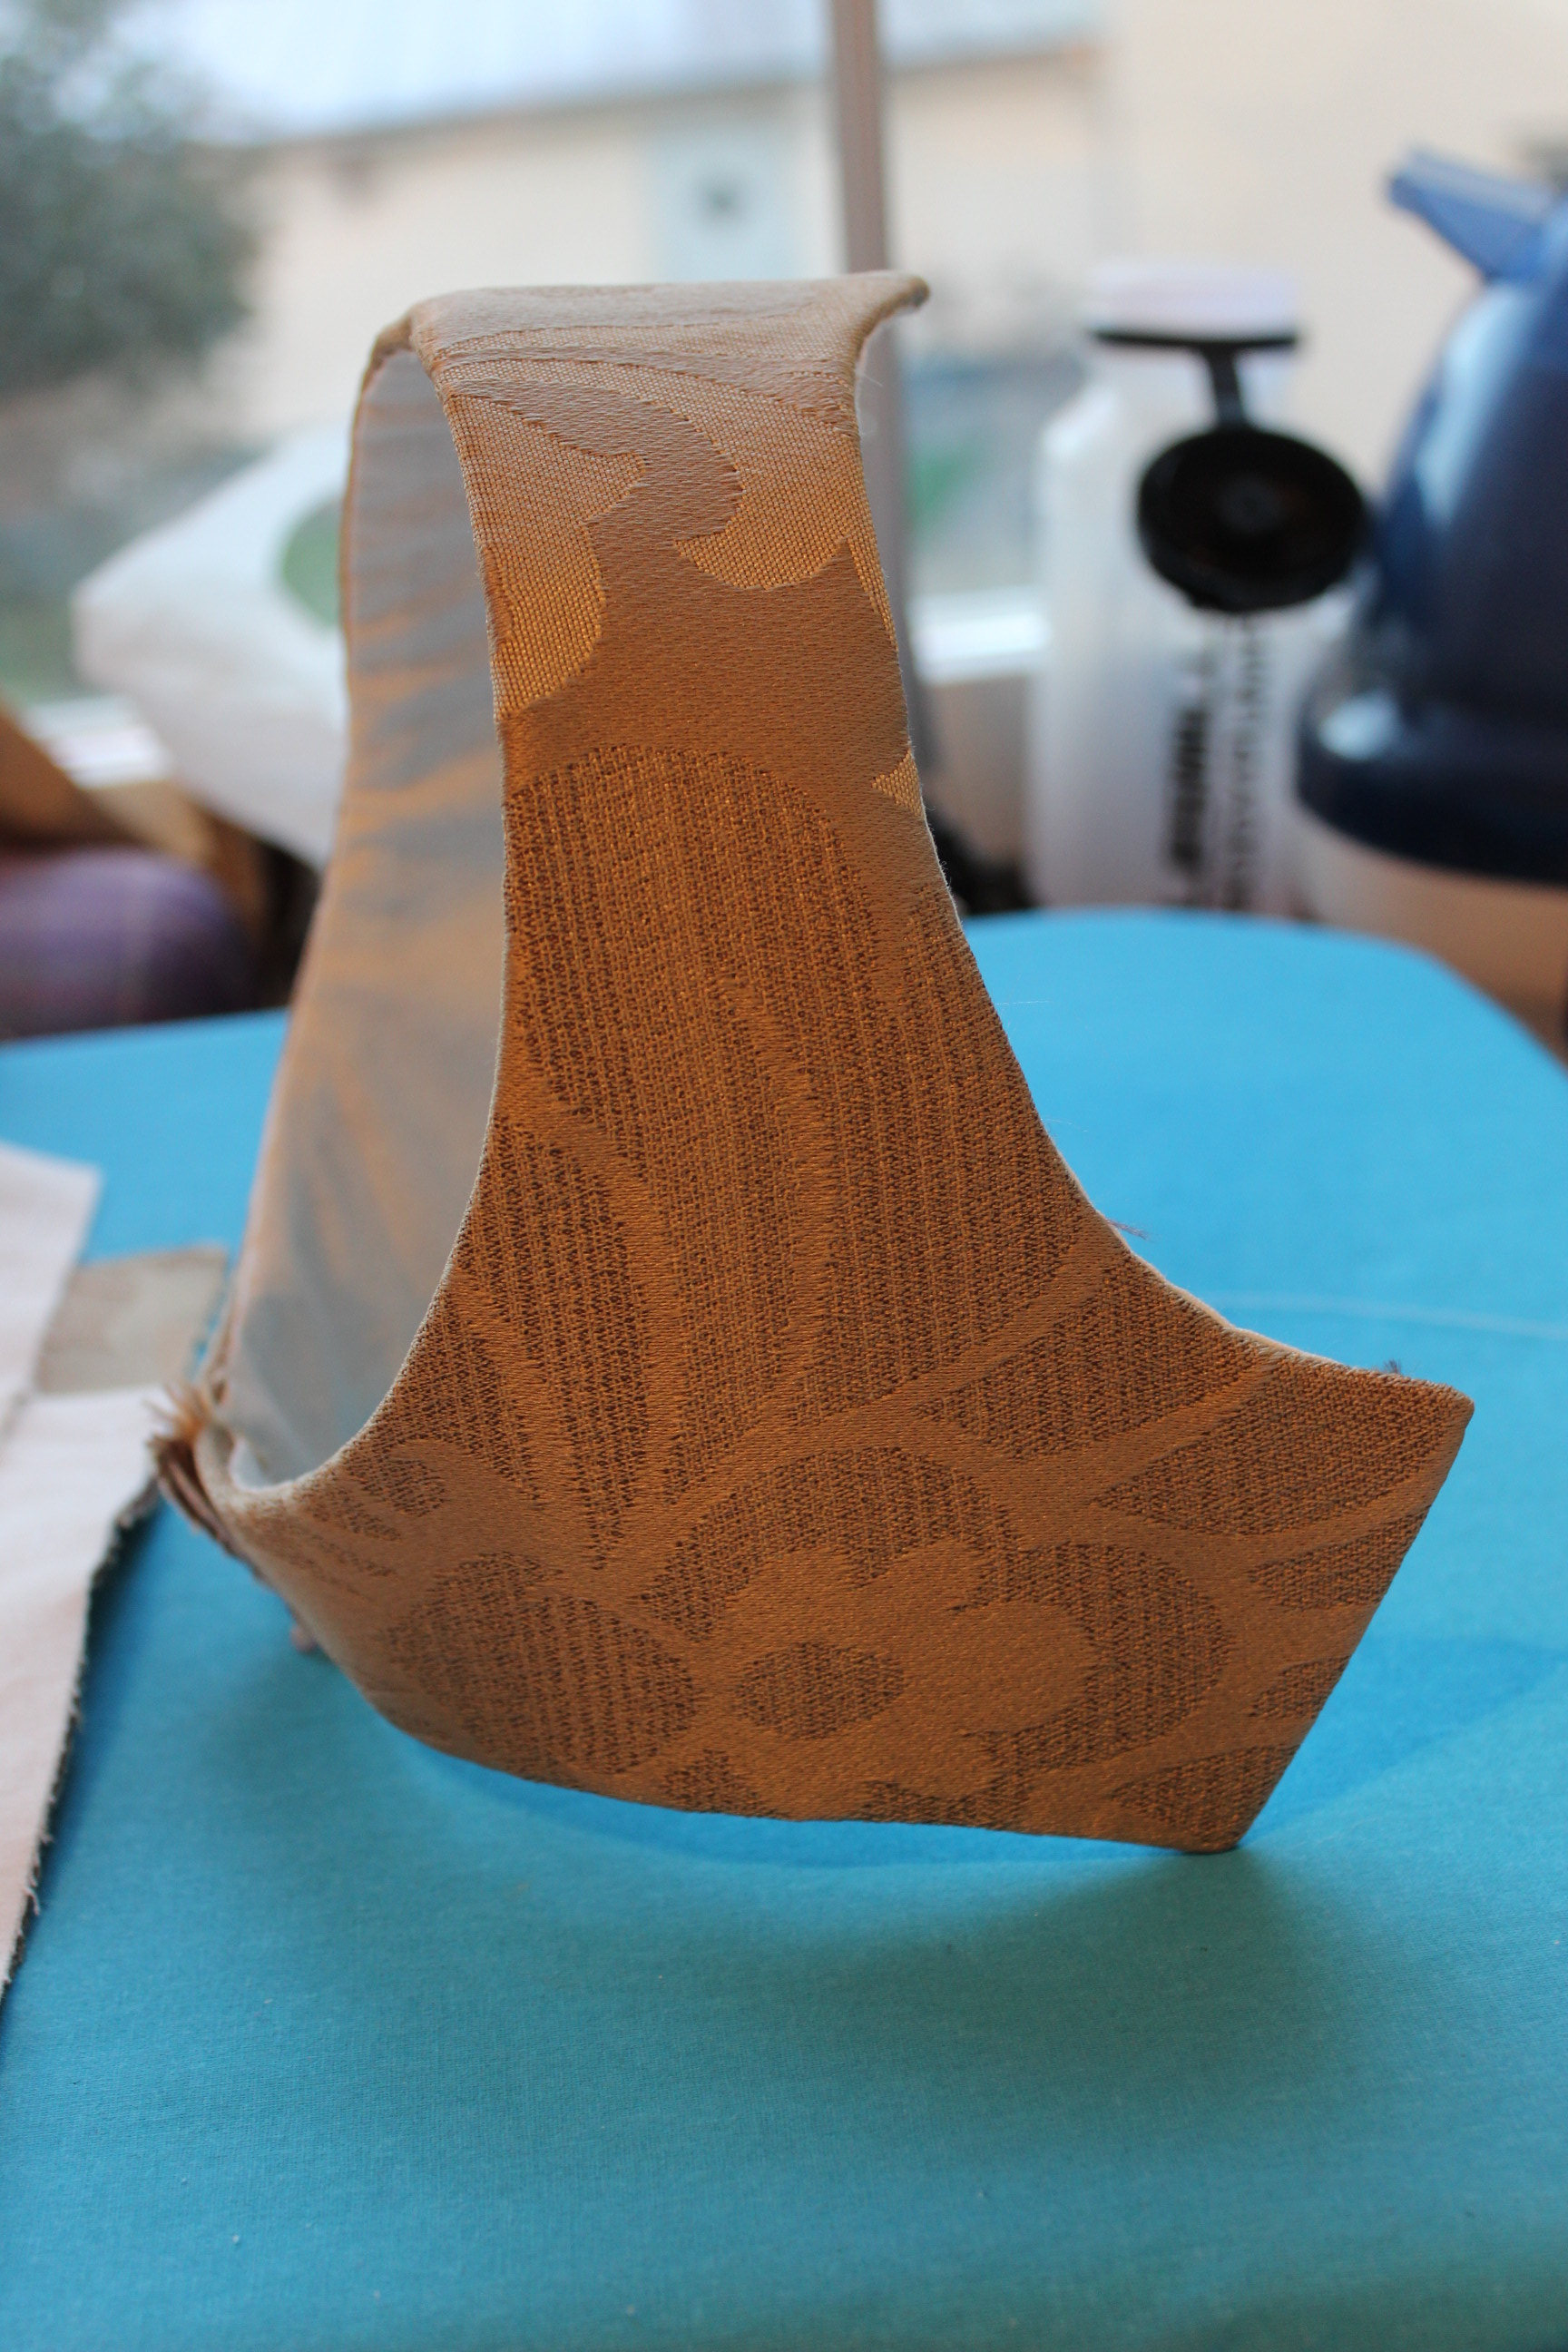 Side piece/headband seen form the side.
Despite careful measuring and testing of the pattern it ended up a bit to small, causing me to eliminate the seam allowance and stitching the the back seam edge to edge.  Which I then covered with another scrap piece of fabric.
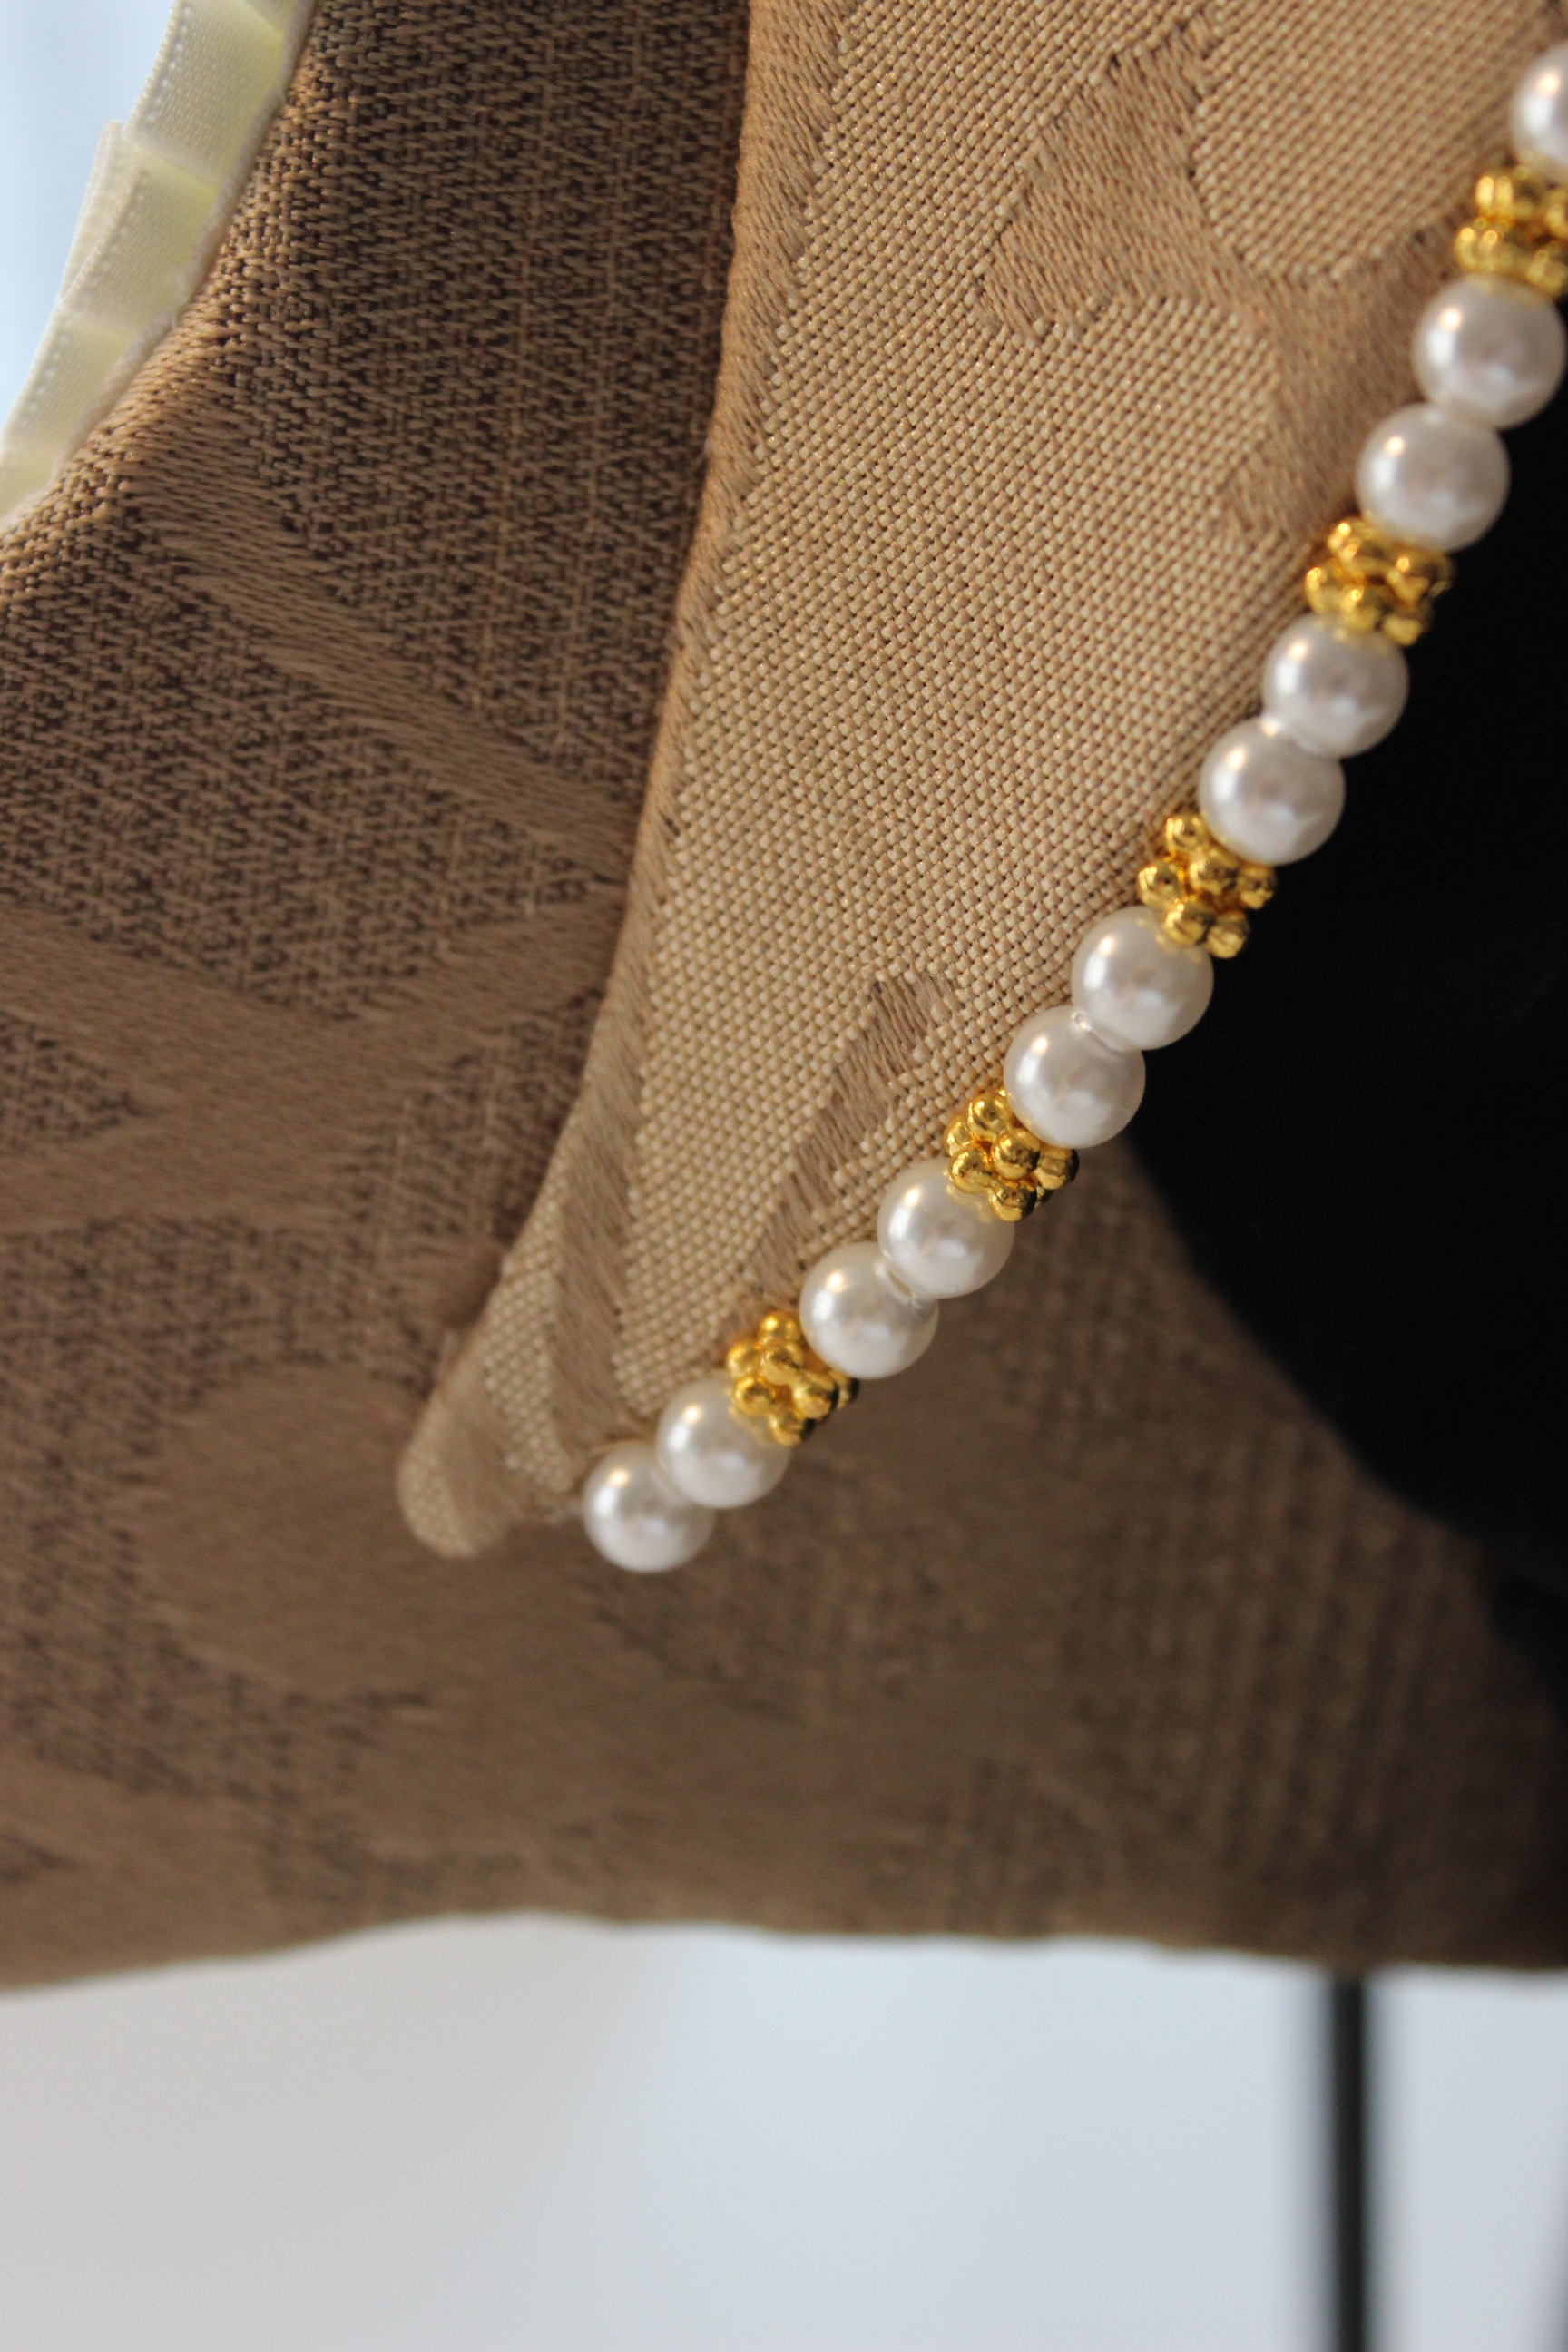
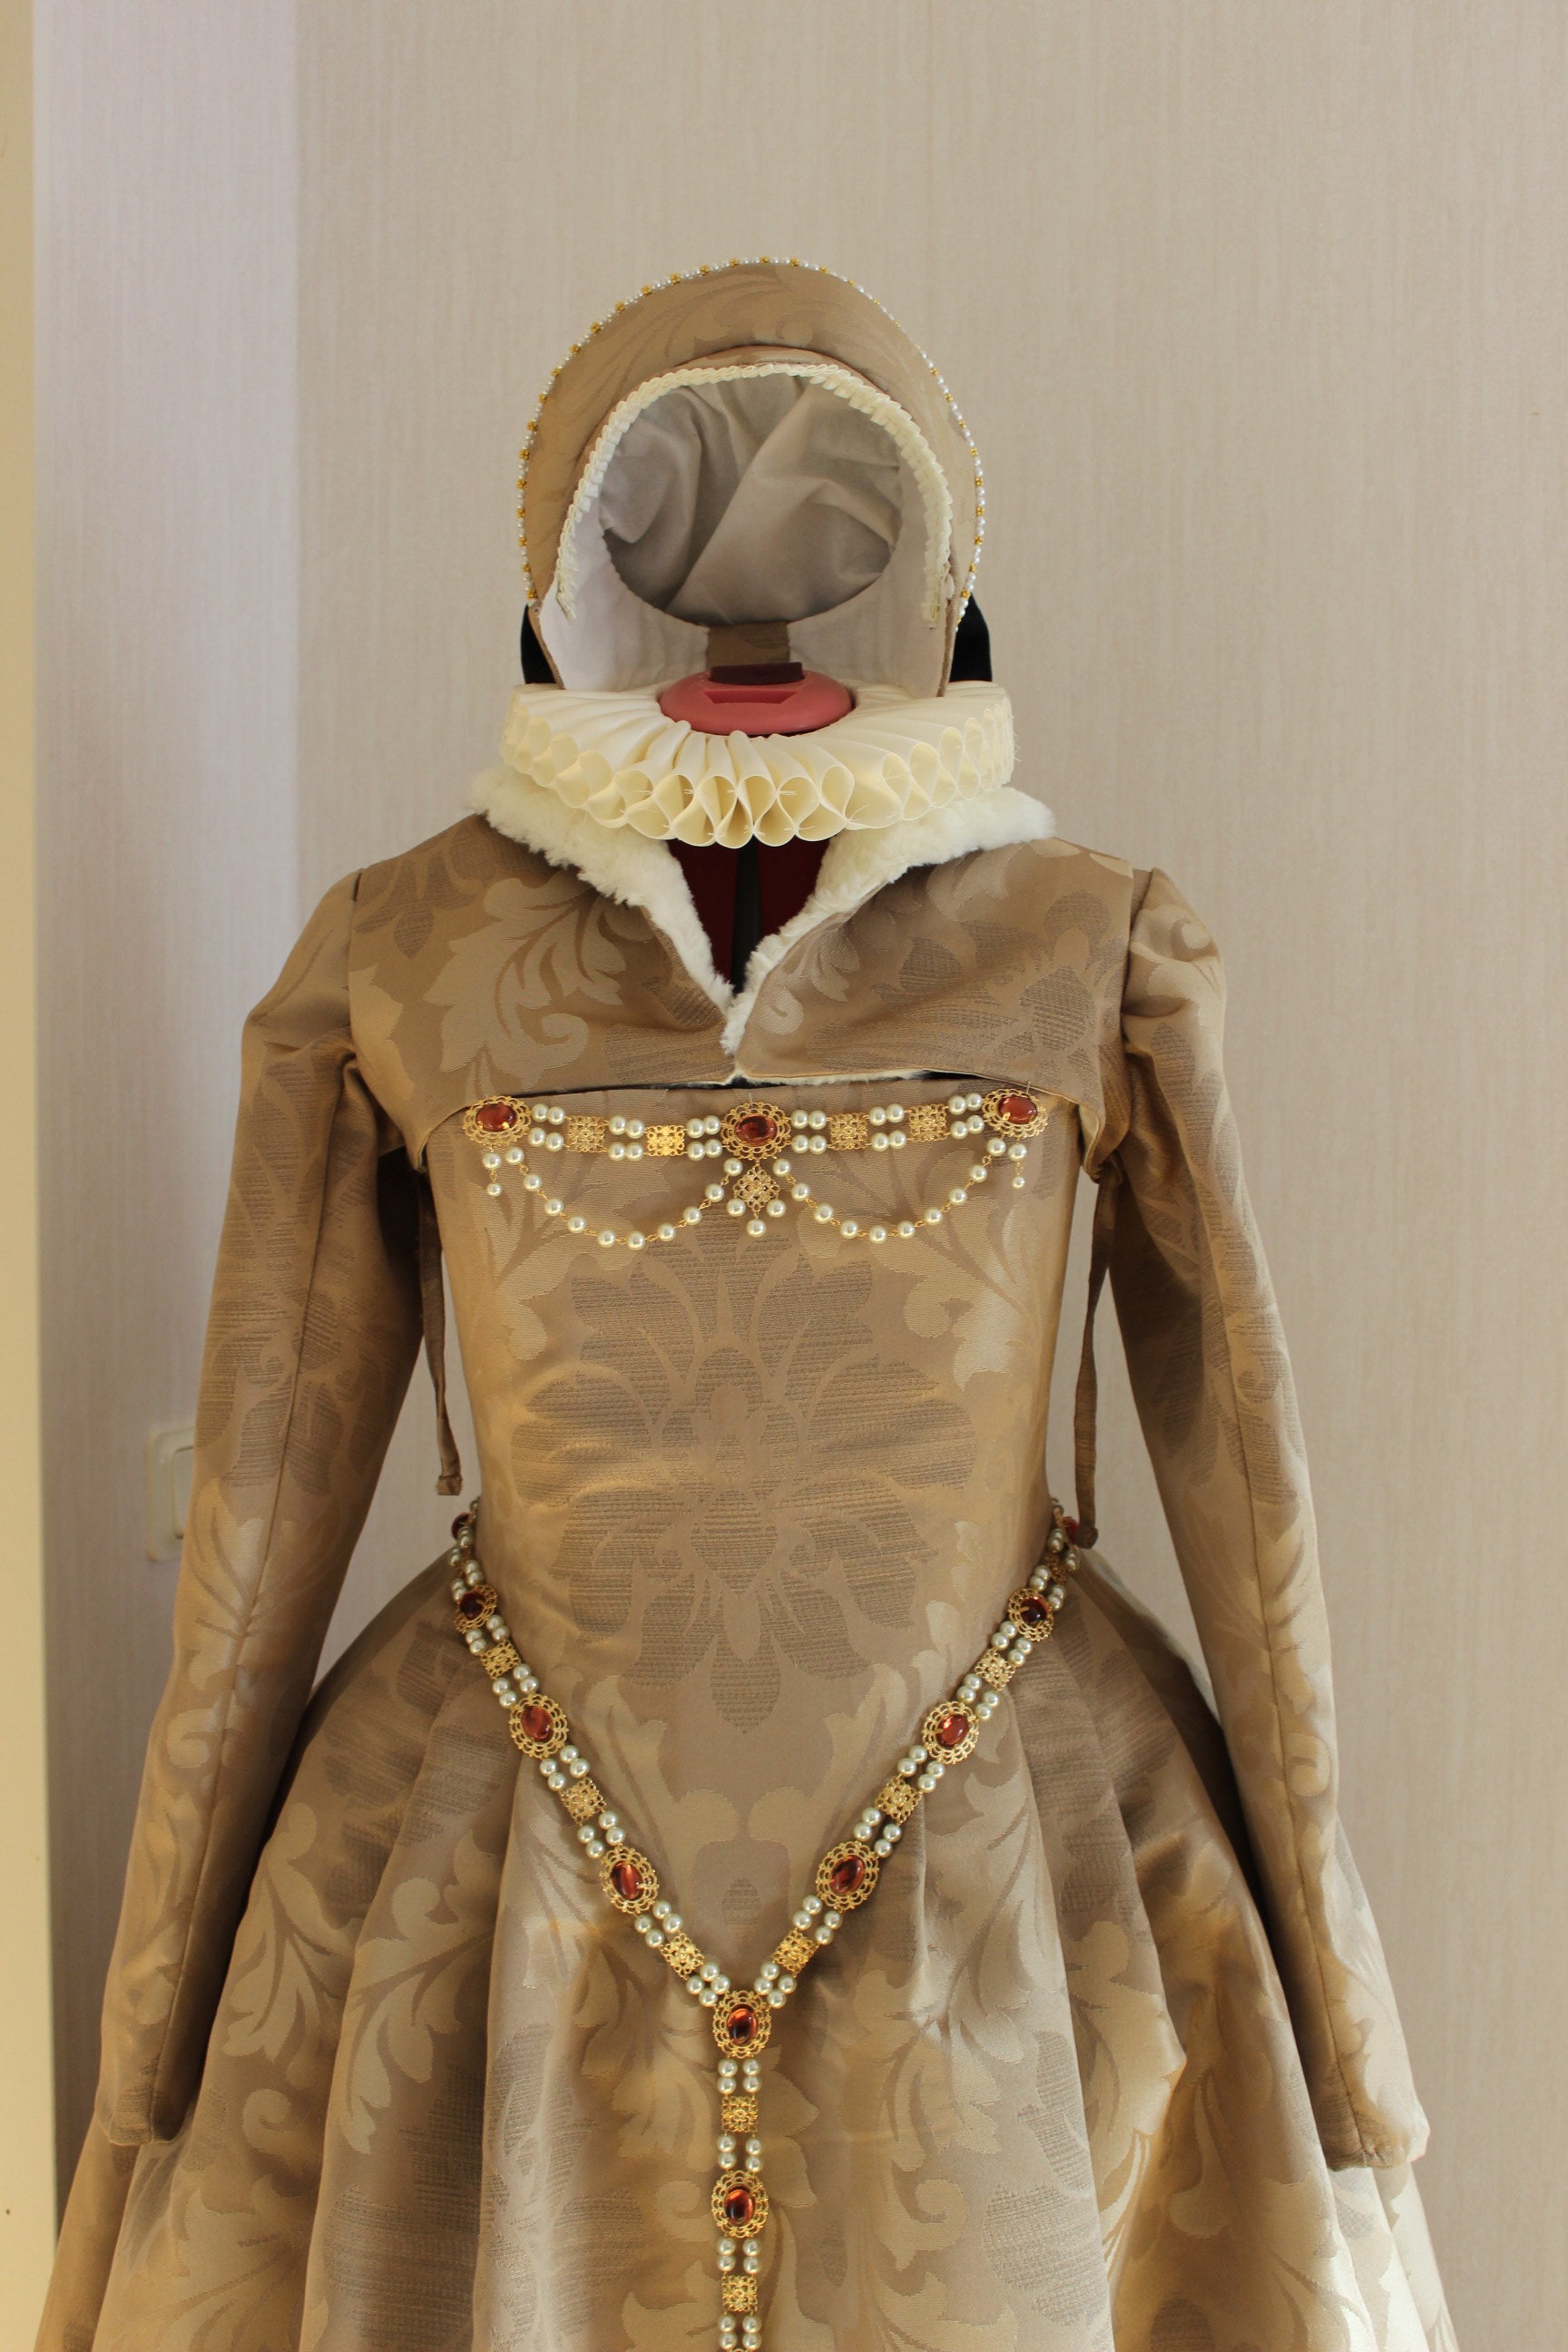
Then it was time to make the billiment, using plastic and golden pearls. 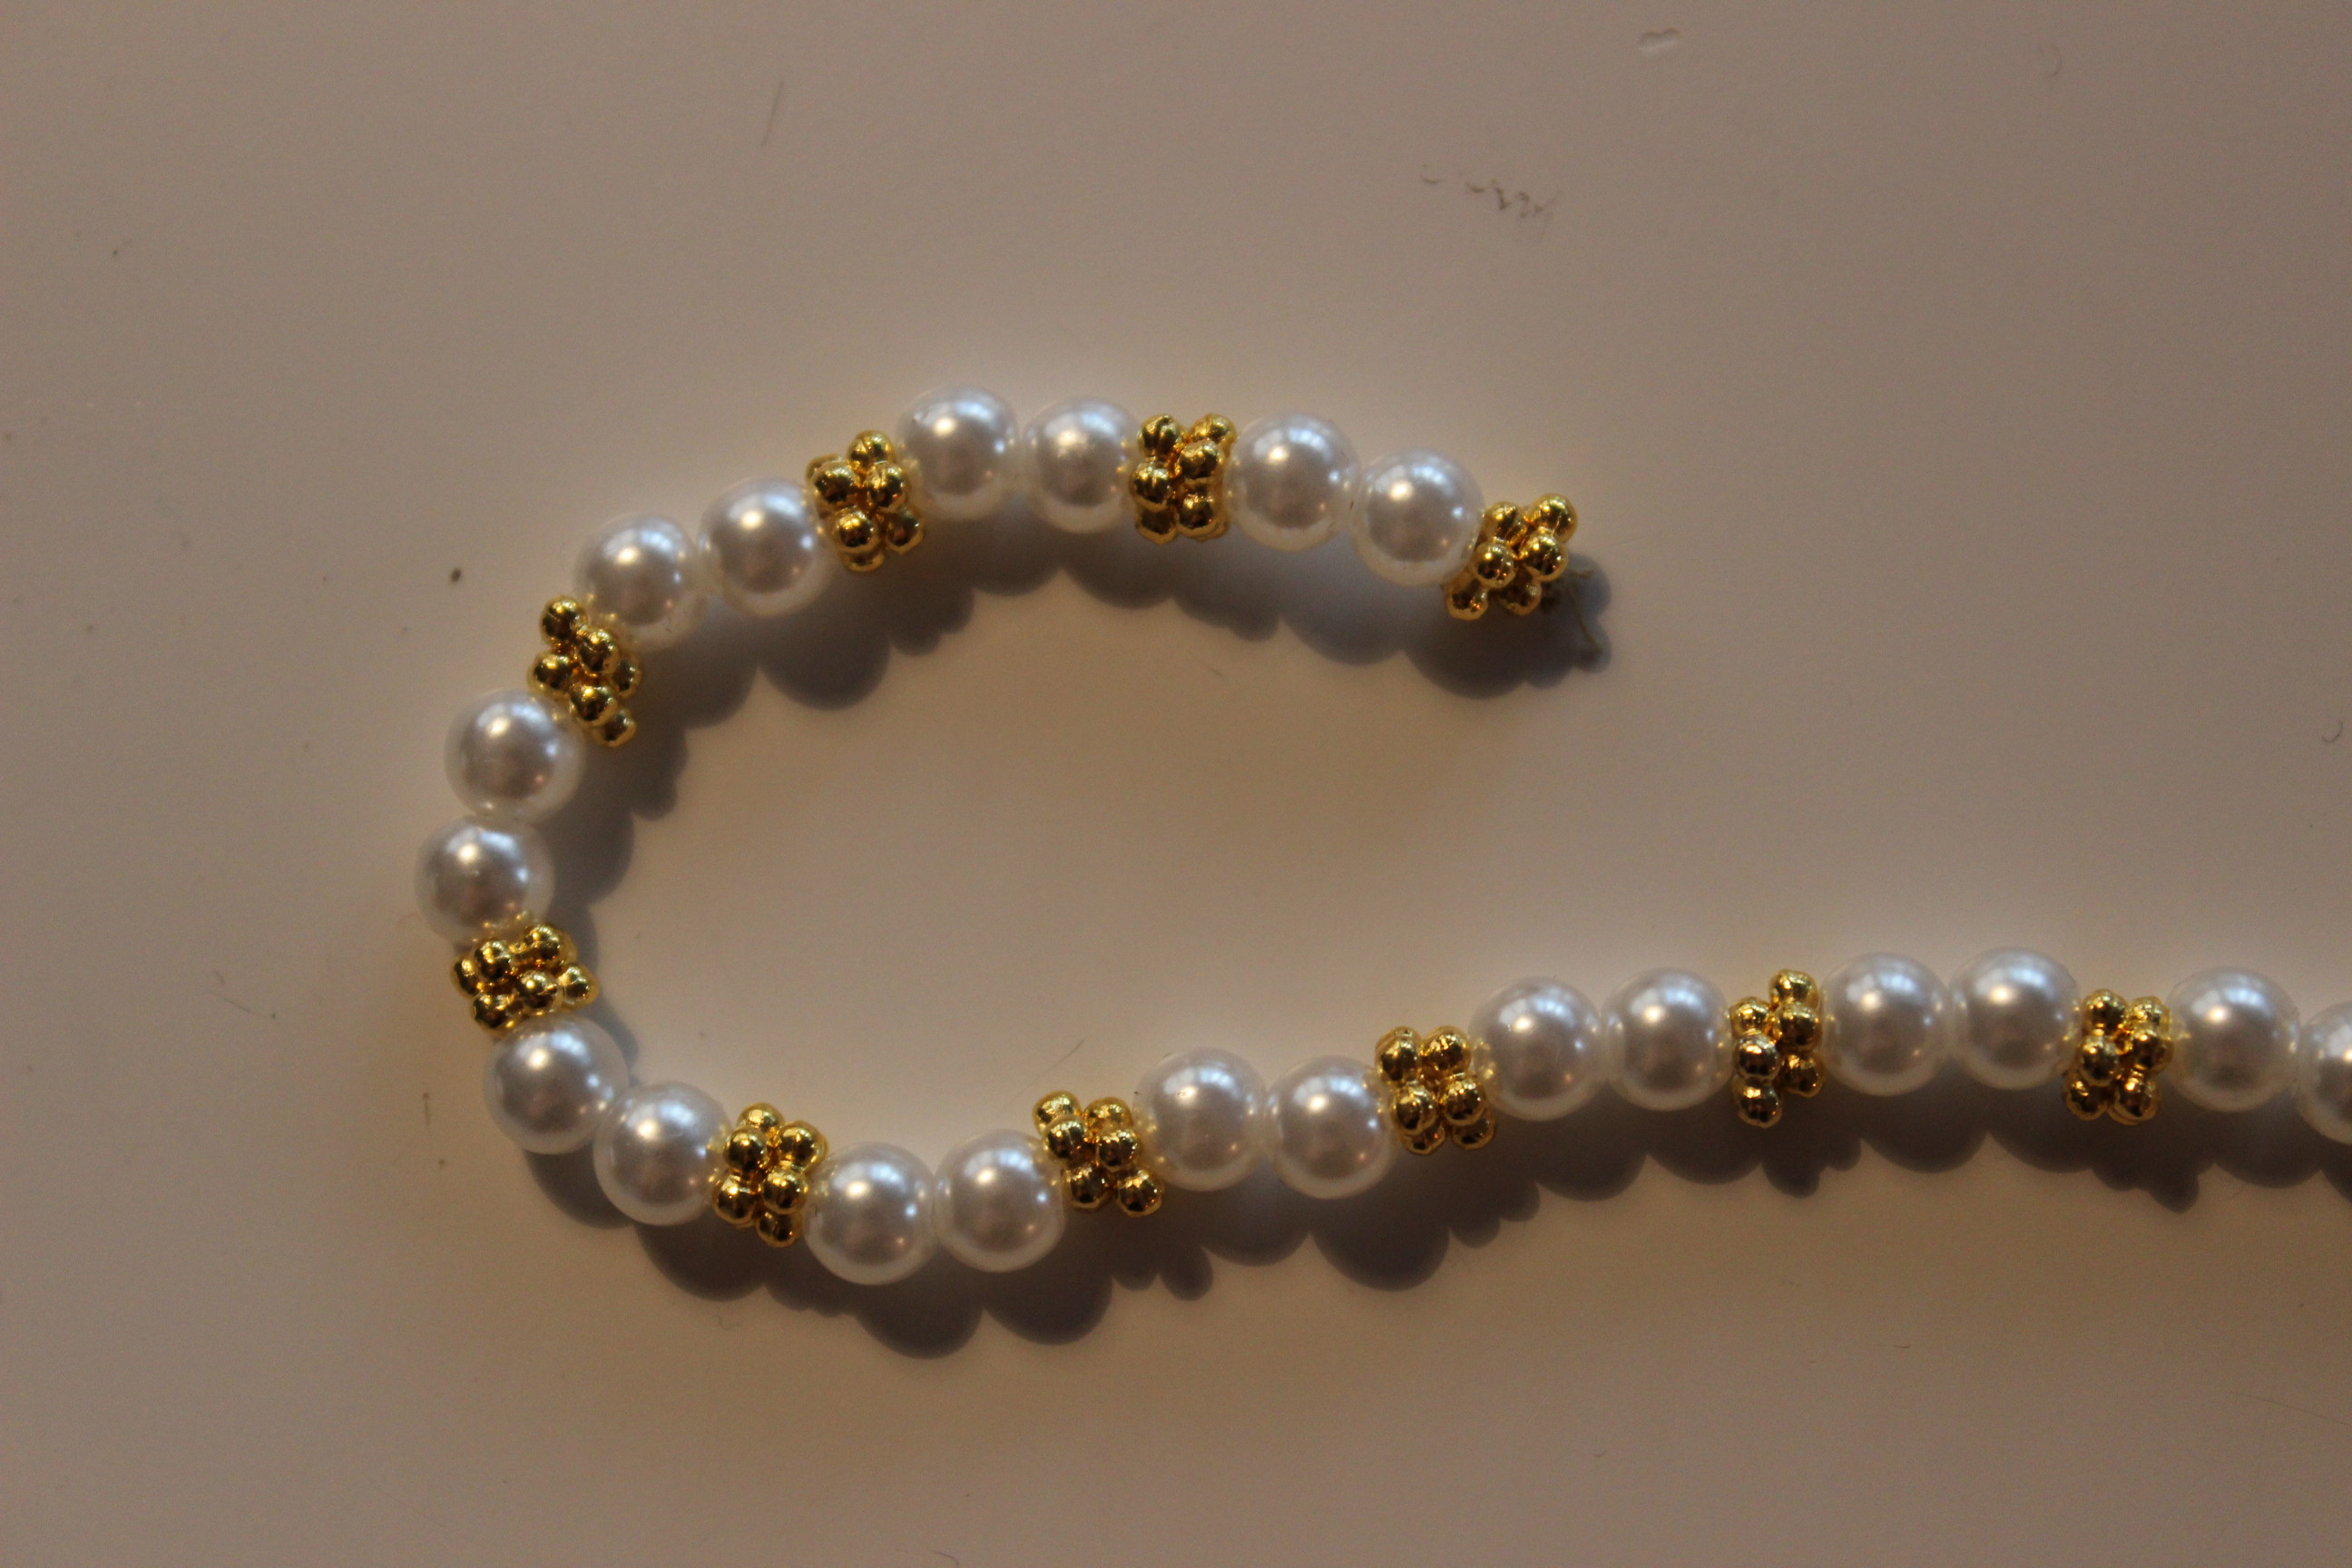
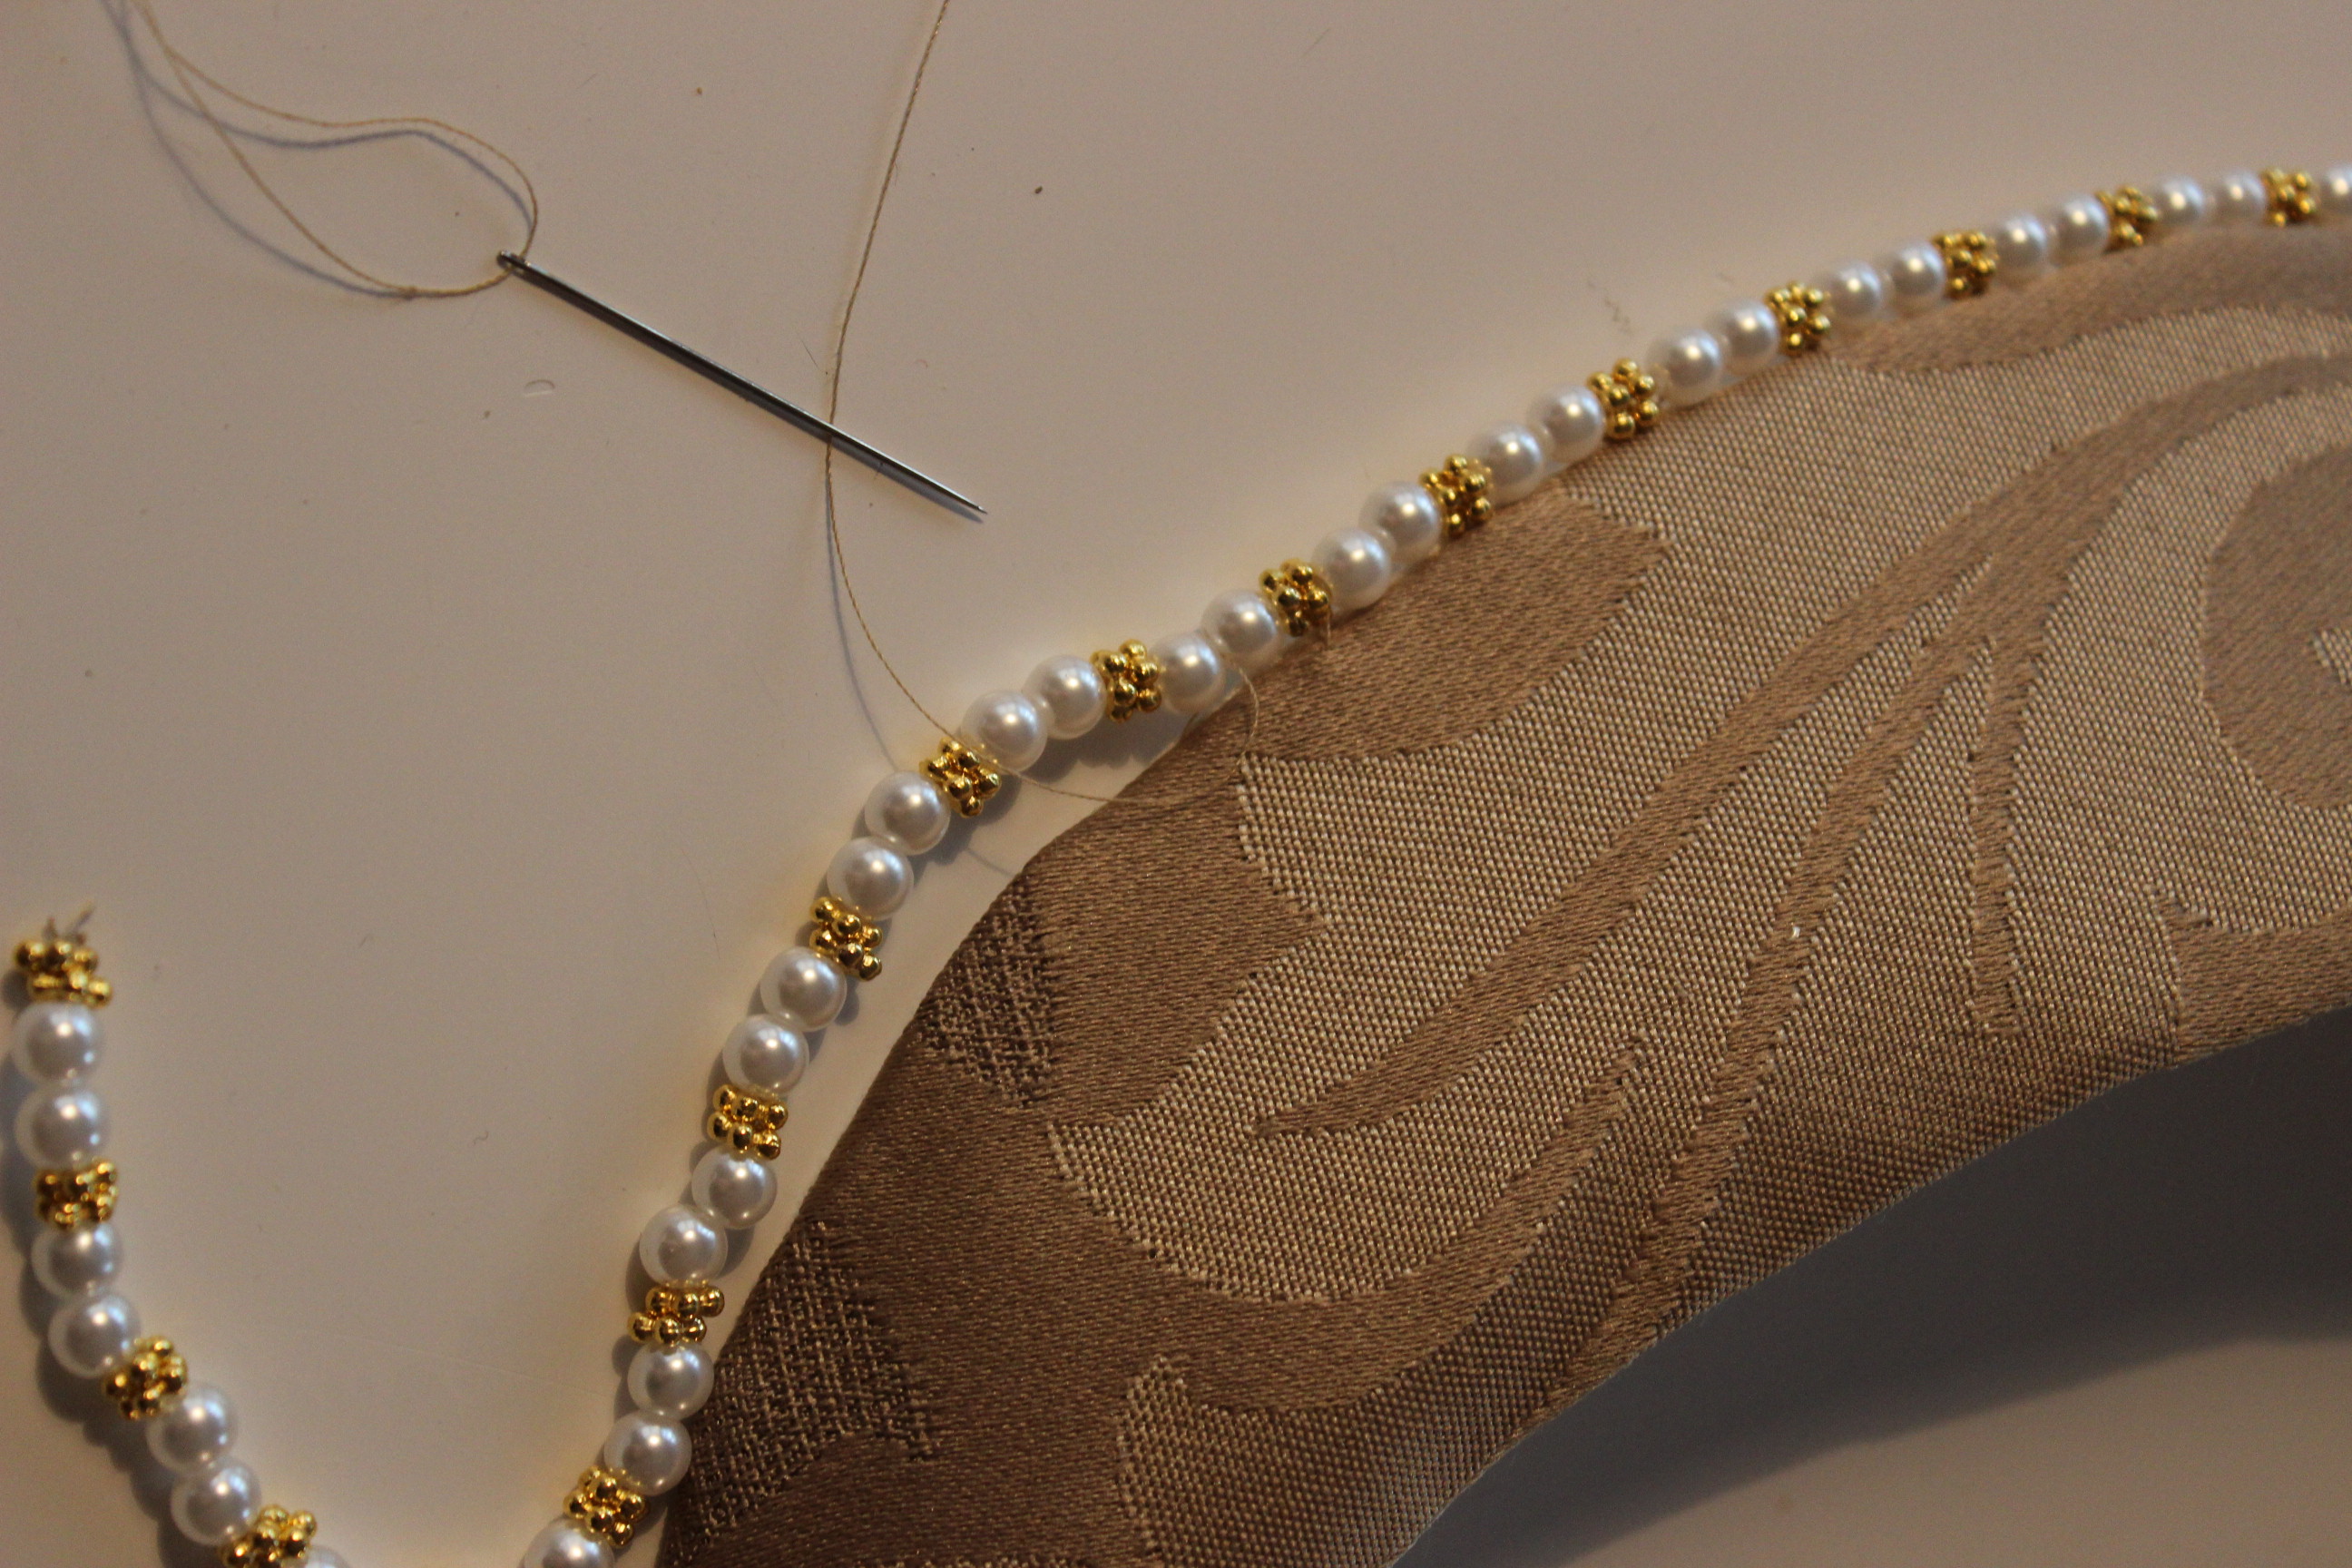 Attaching the string of pearls to the edge of the cresent.
Another piece of billiment was pleated using satin ribbon and attached o the front edge of the hood.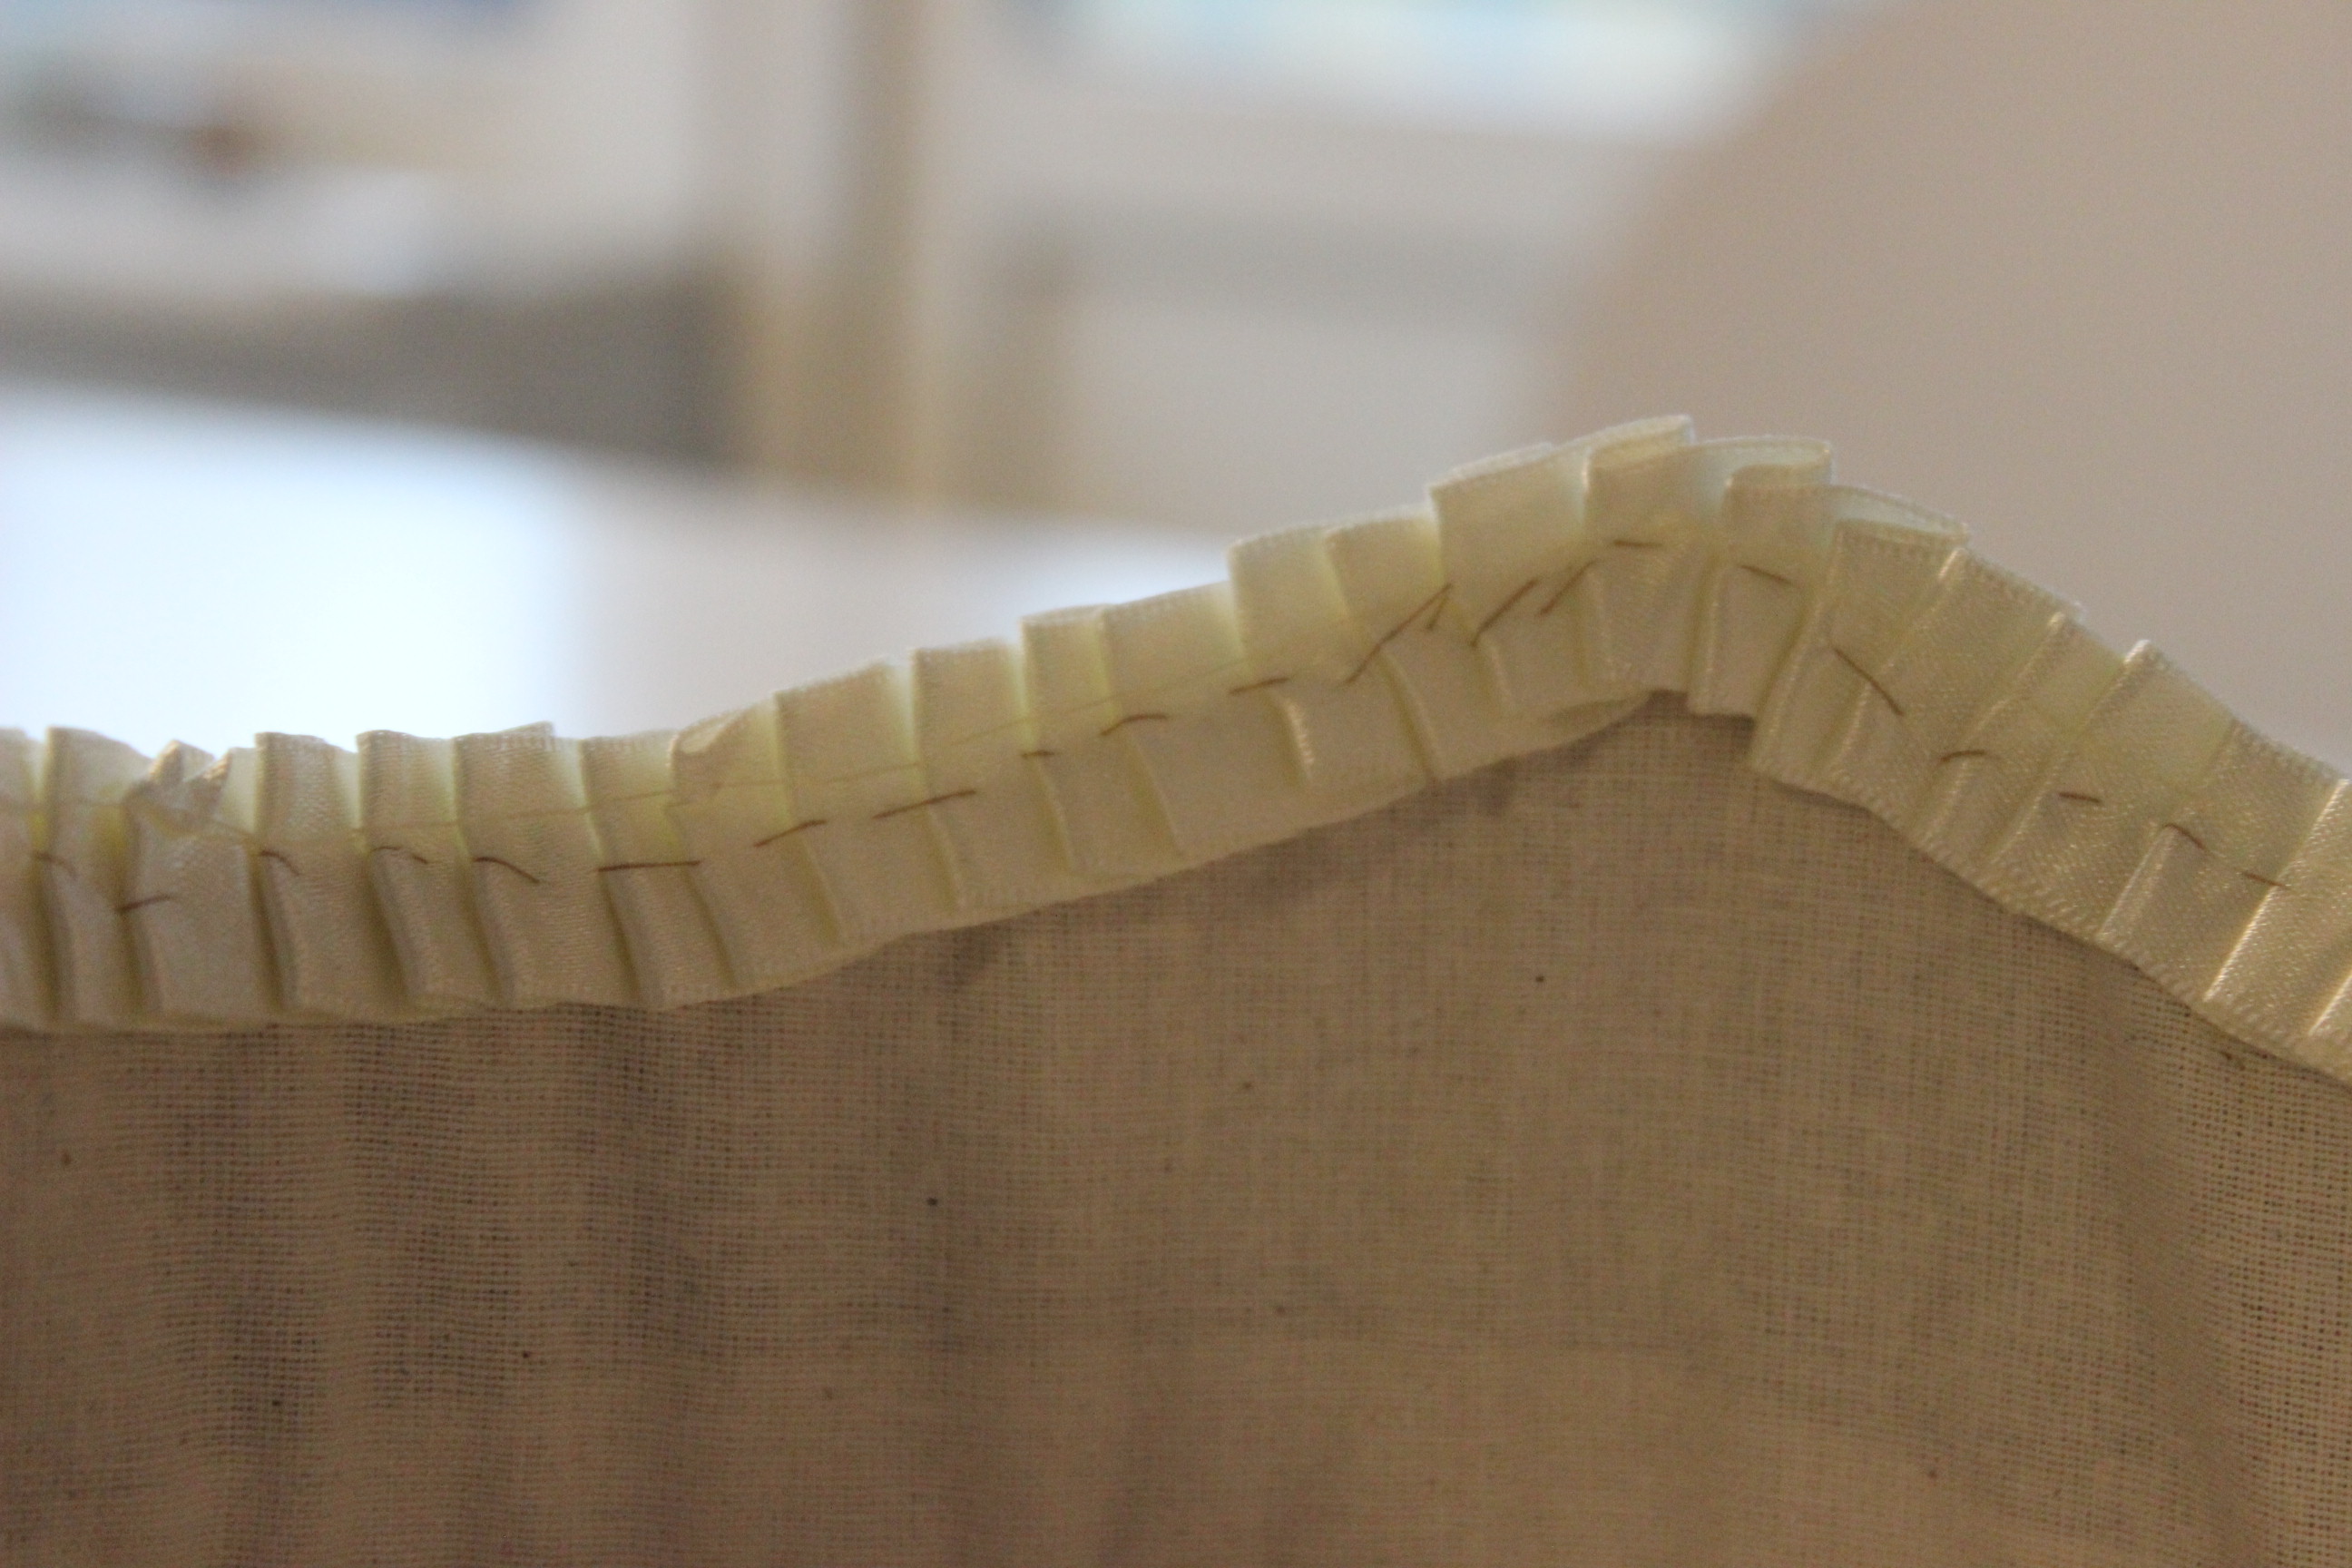
Then I added the cresent to the base
and stitched the lining/bag to the back. Here you can also see covering of the piecing at the back.
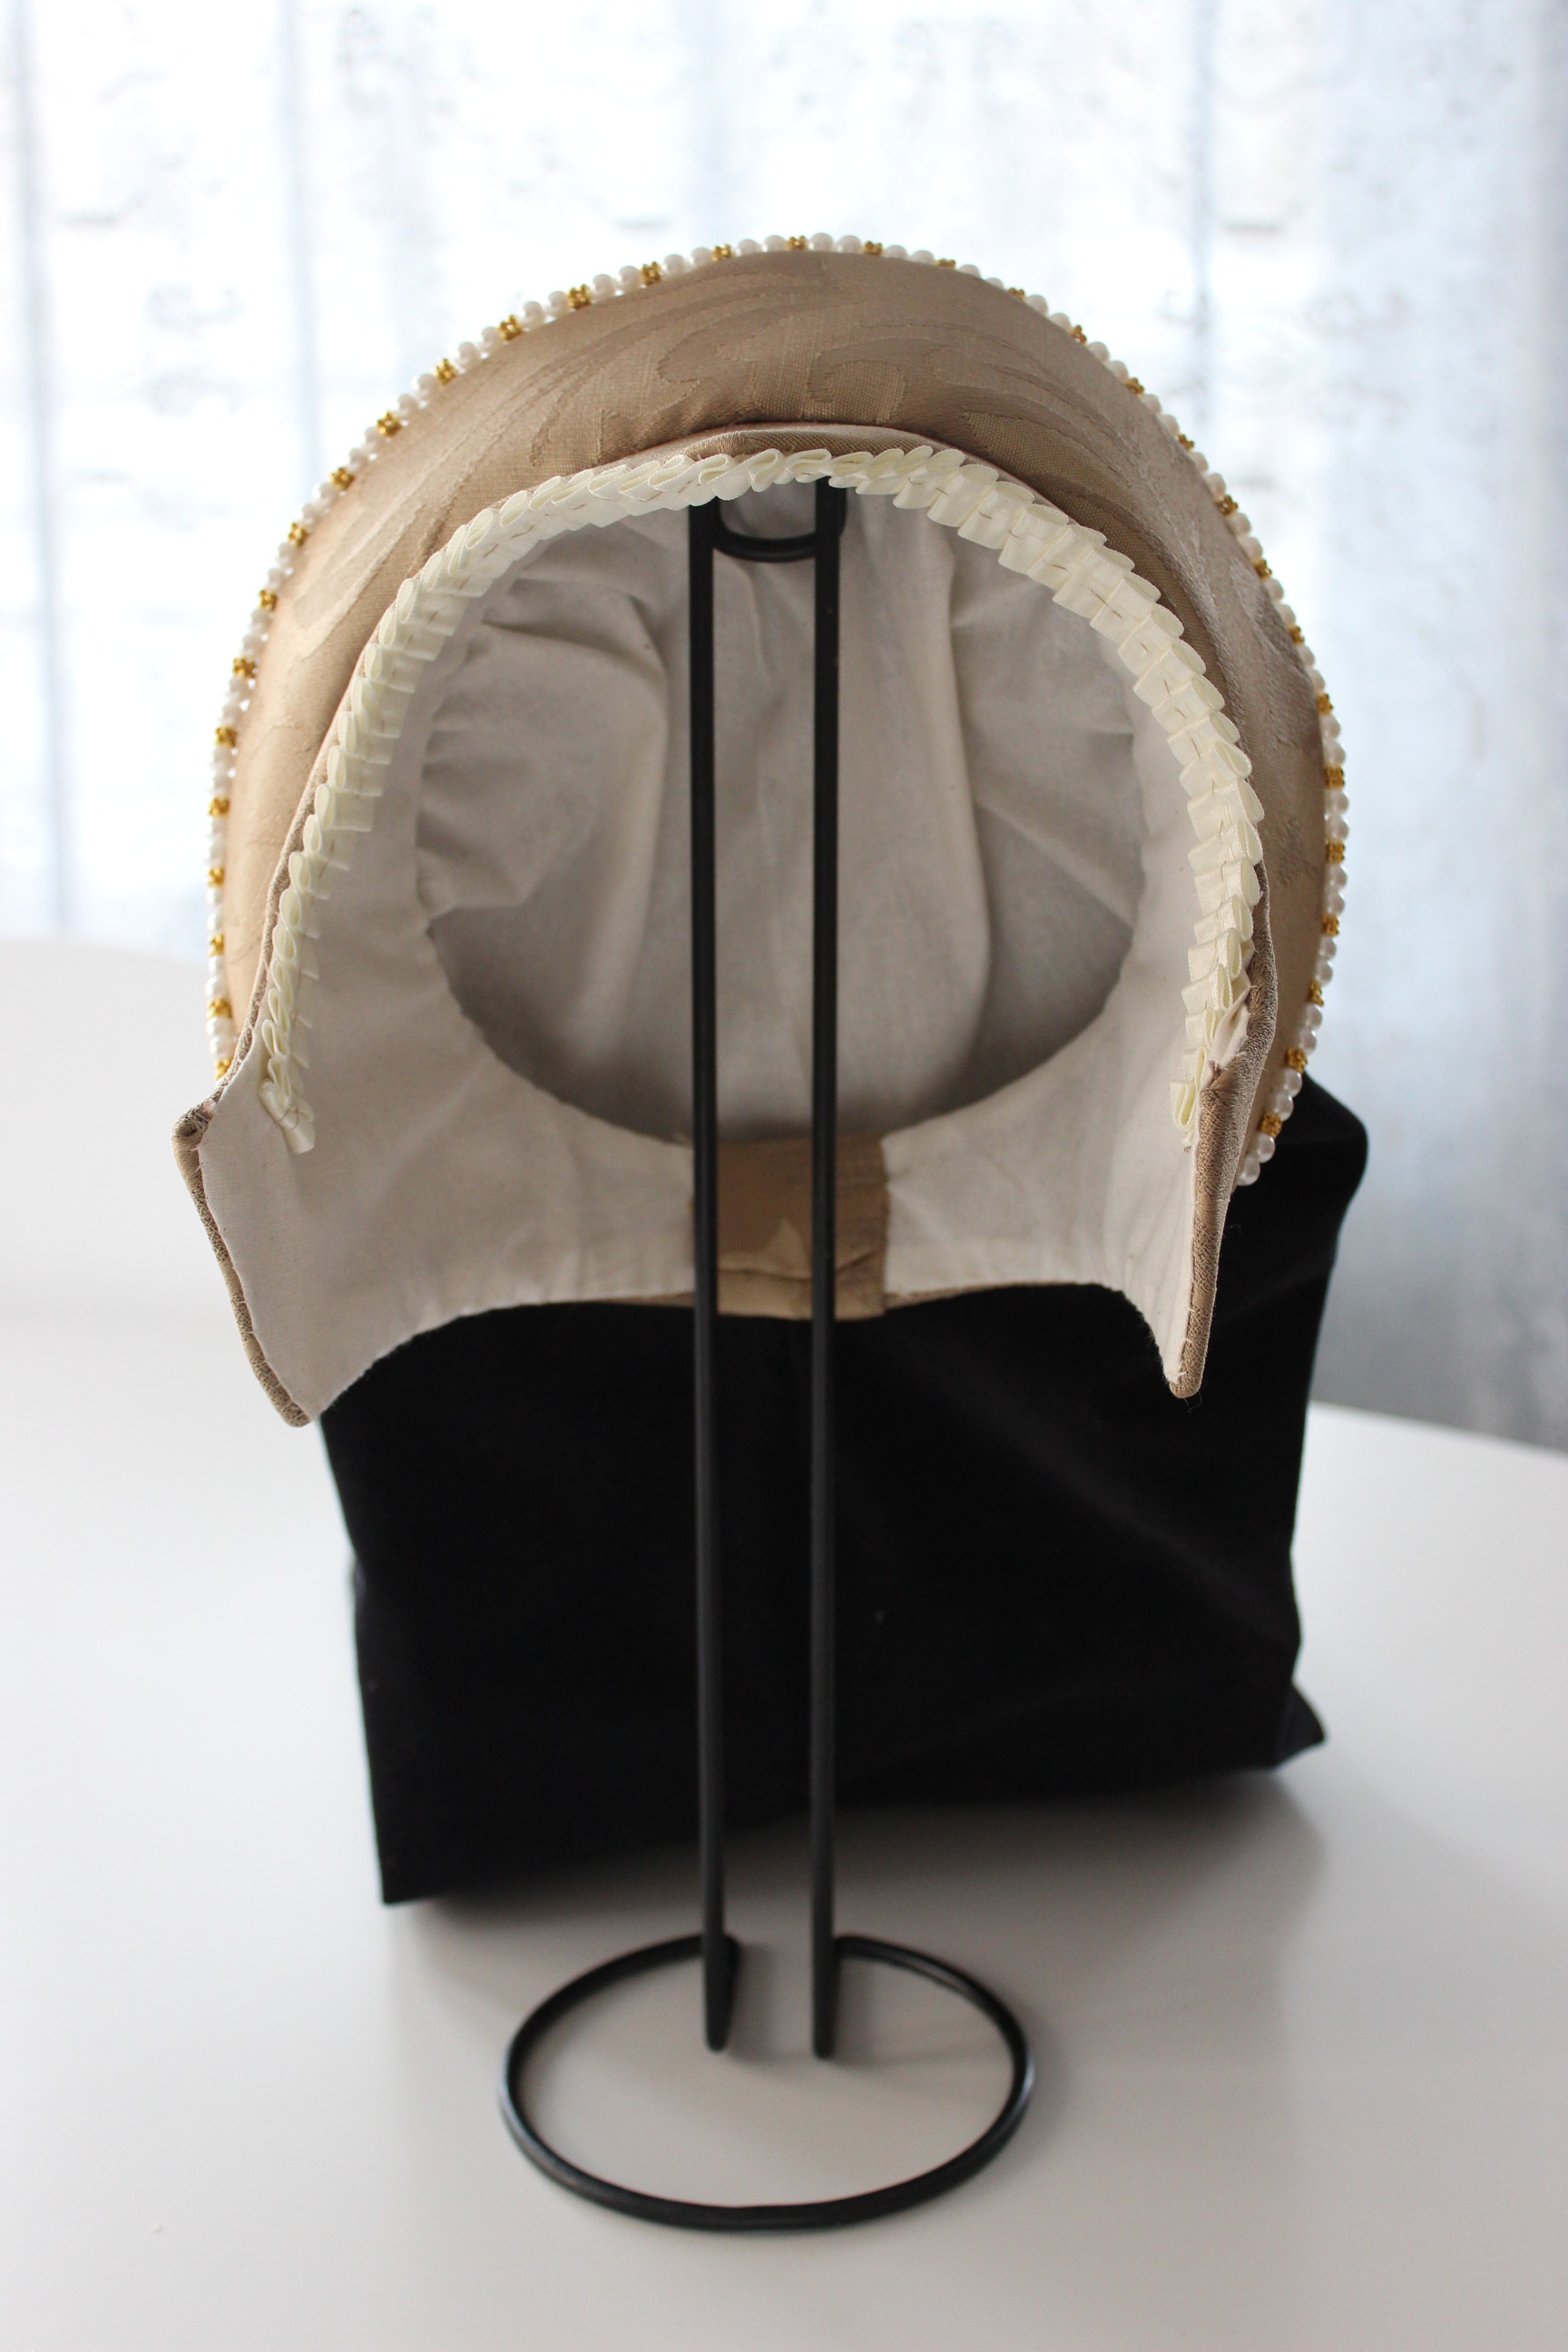
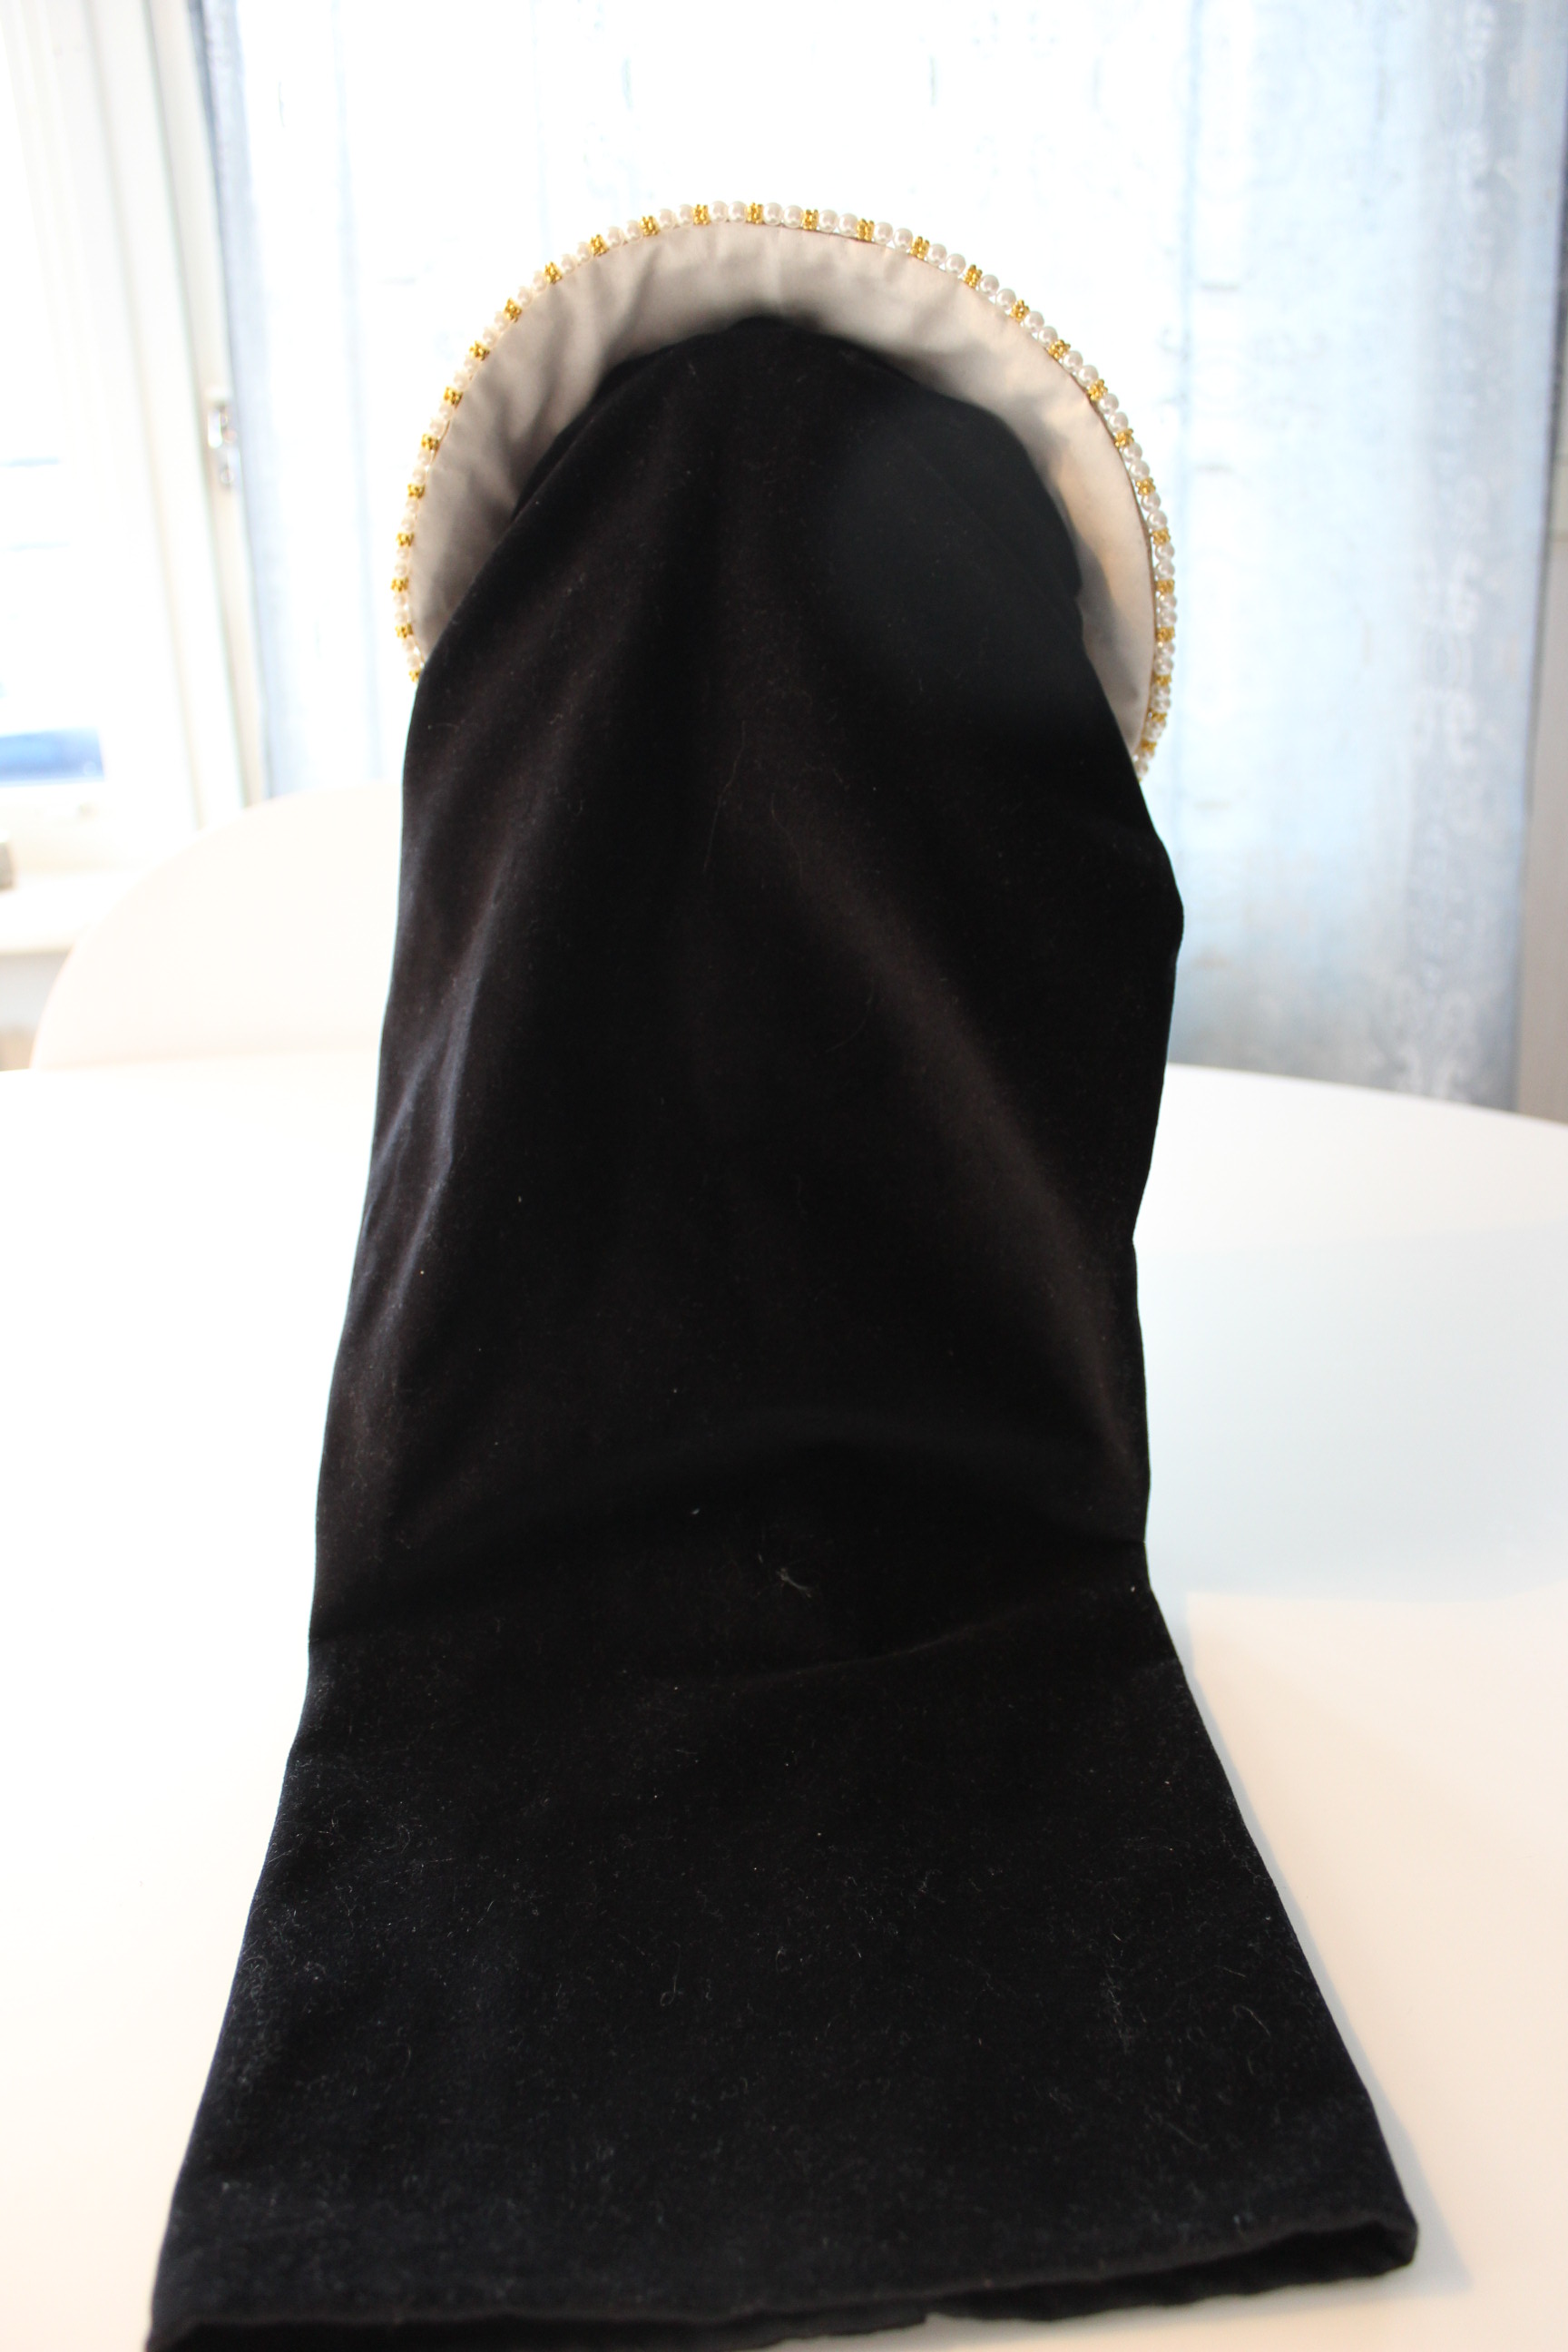
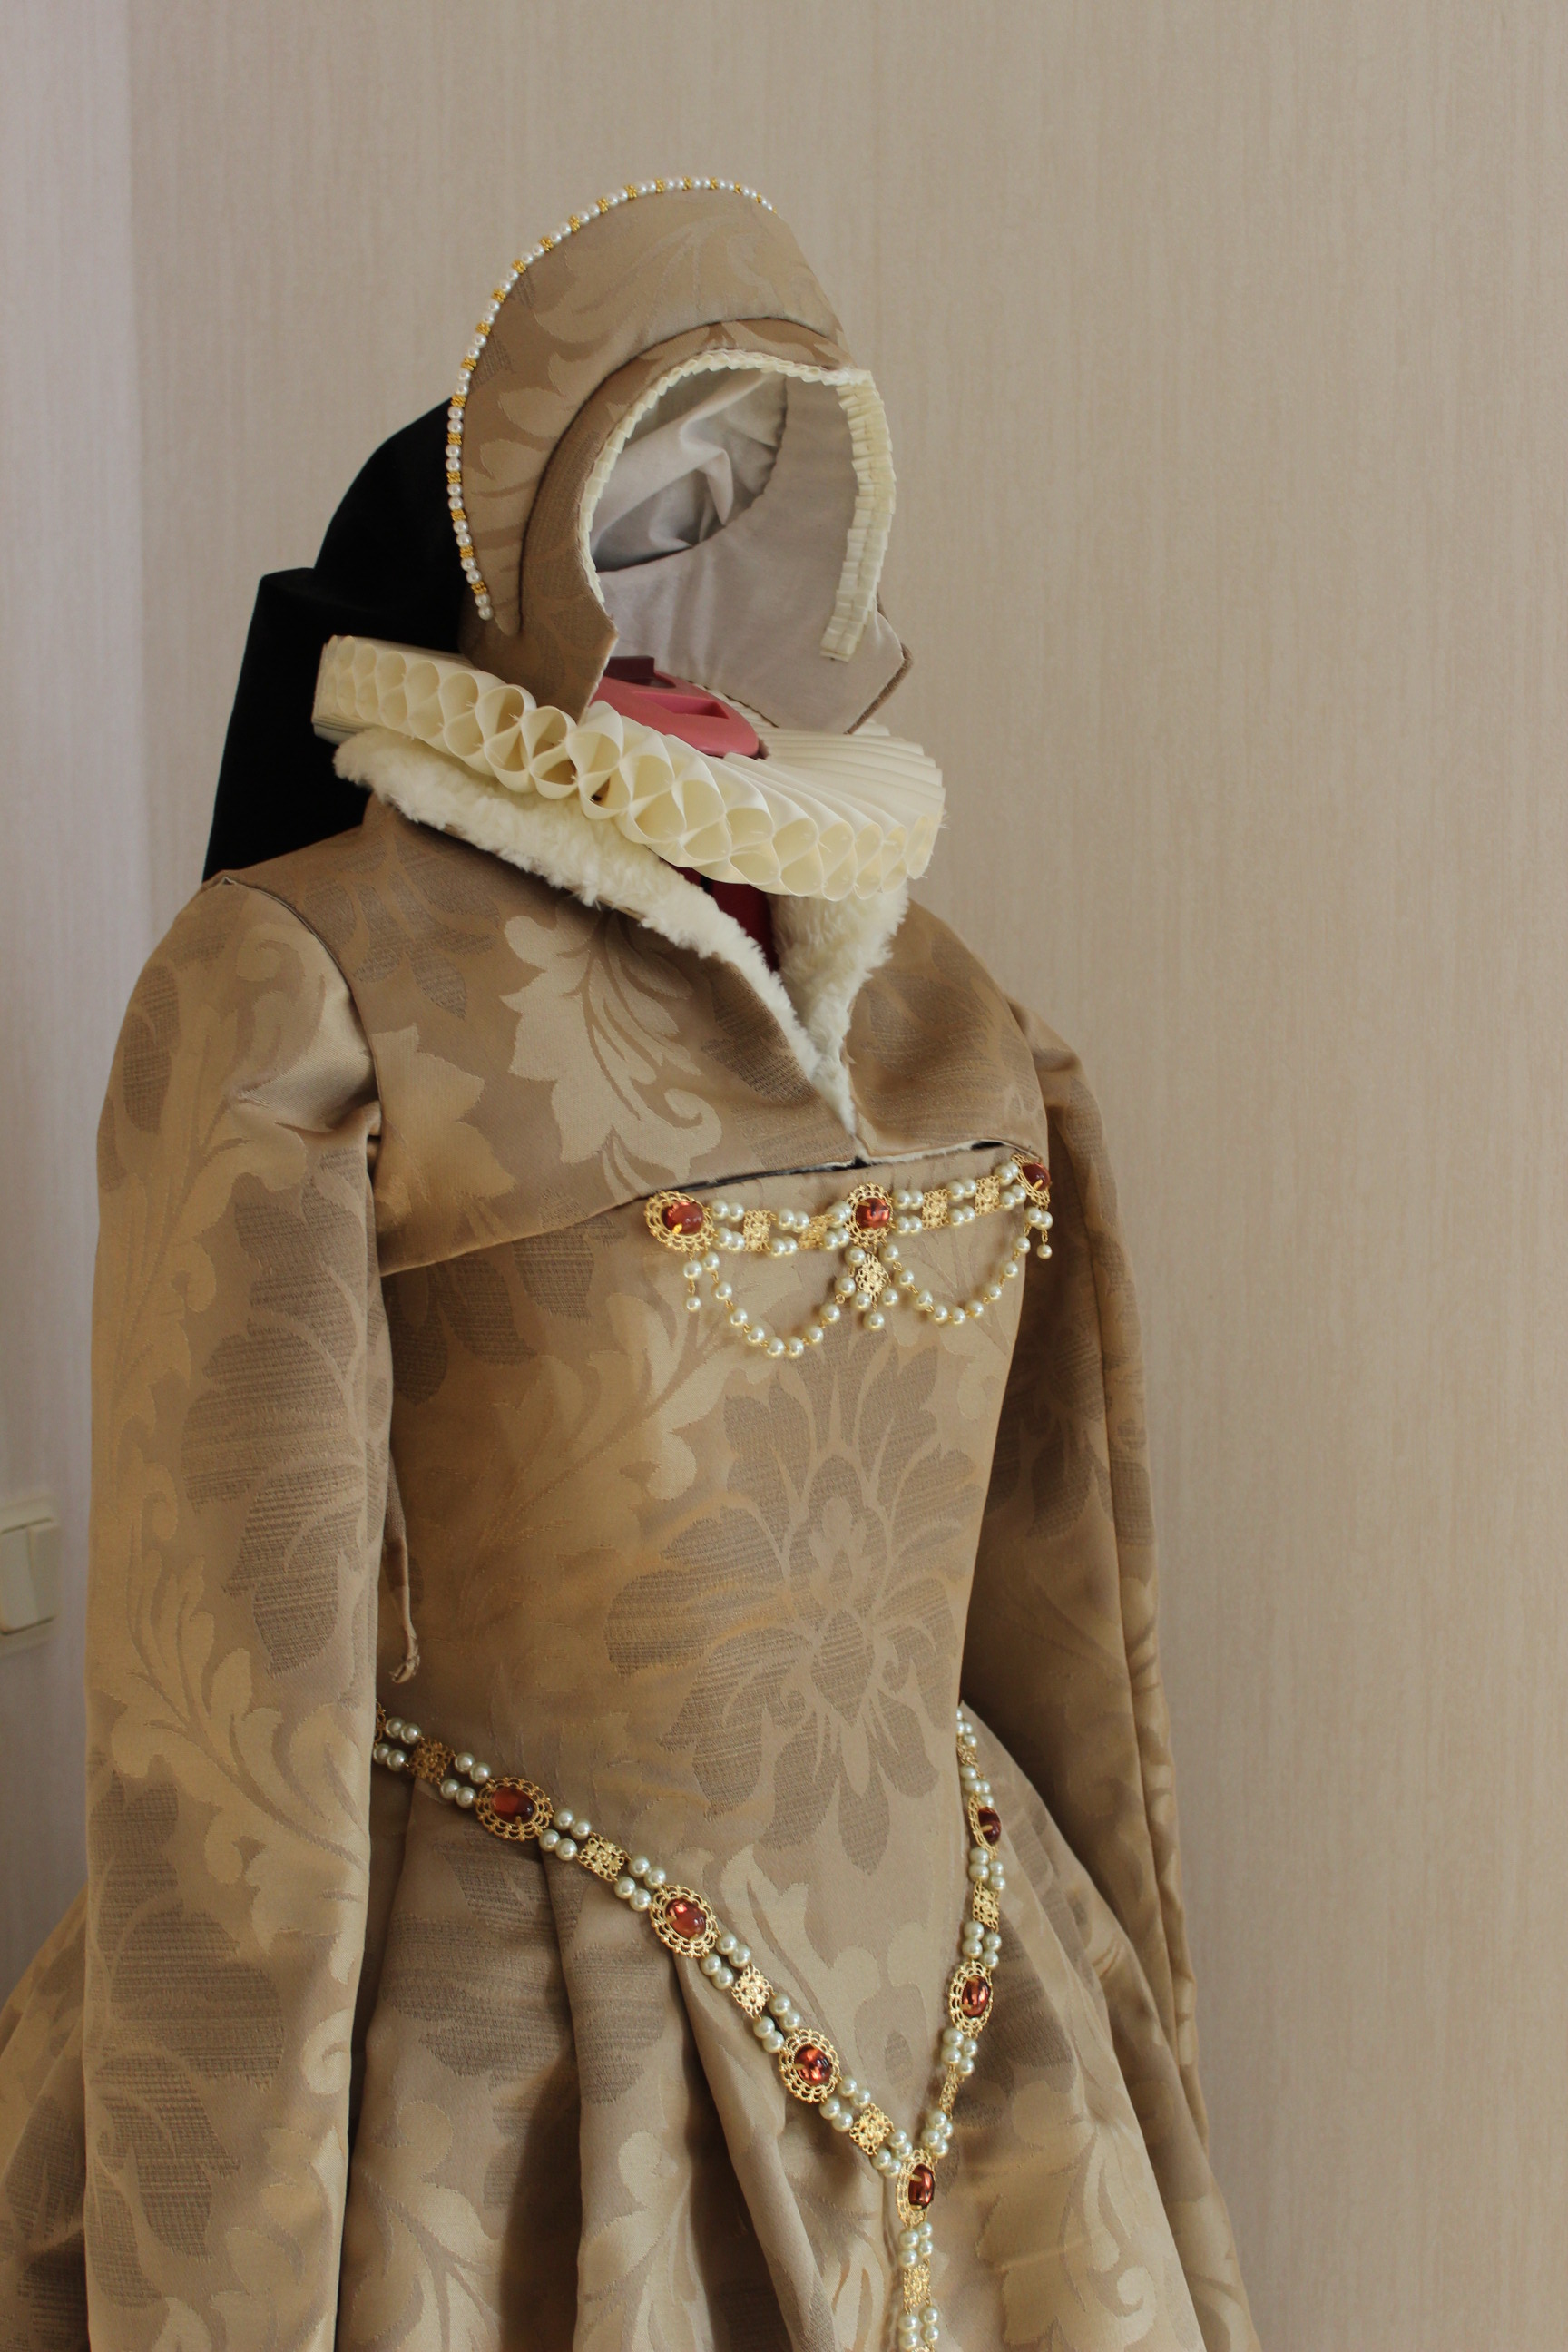
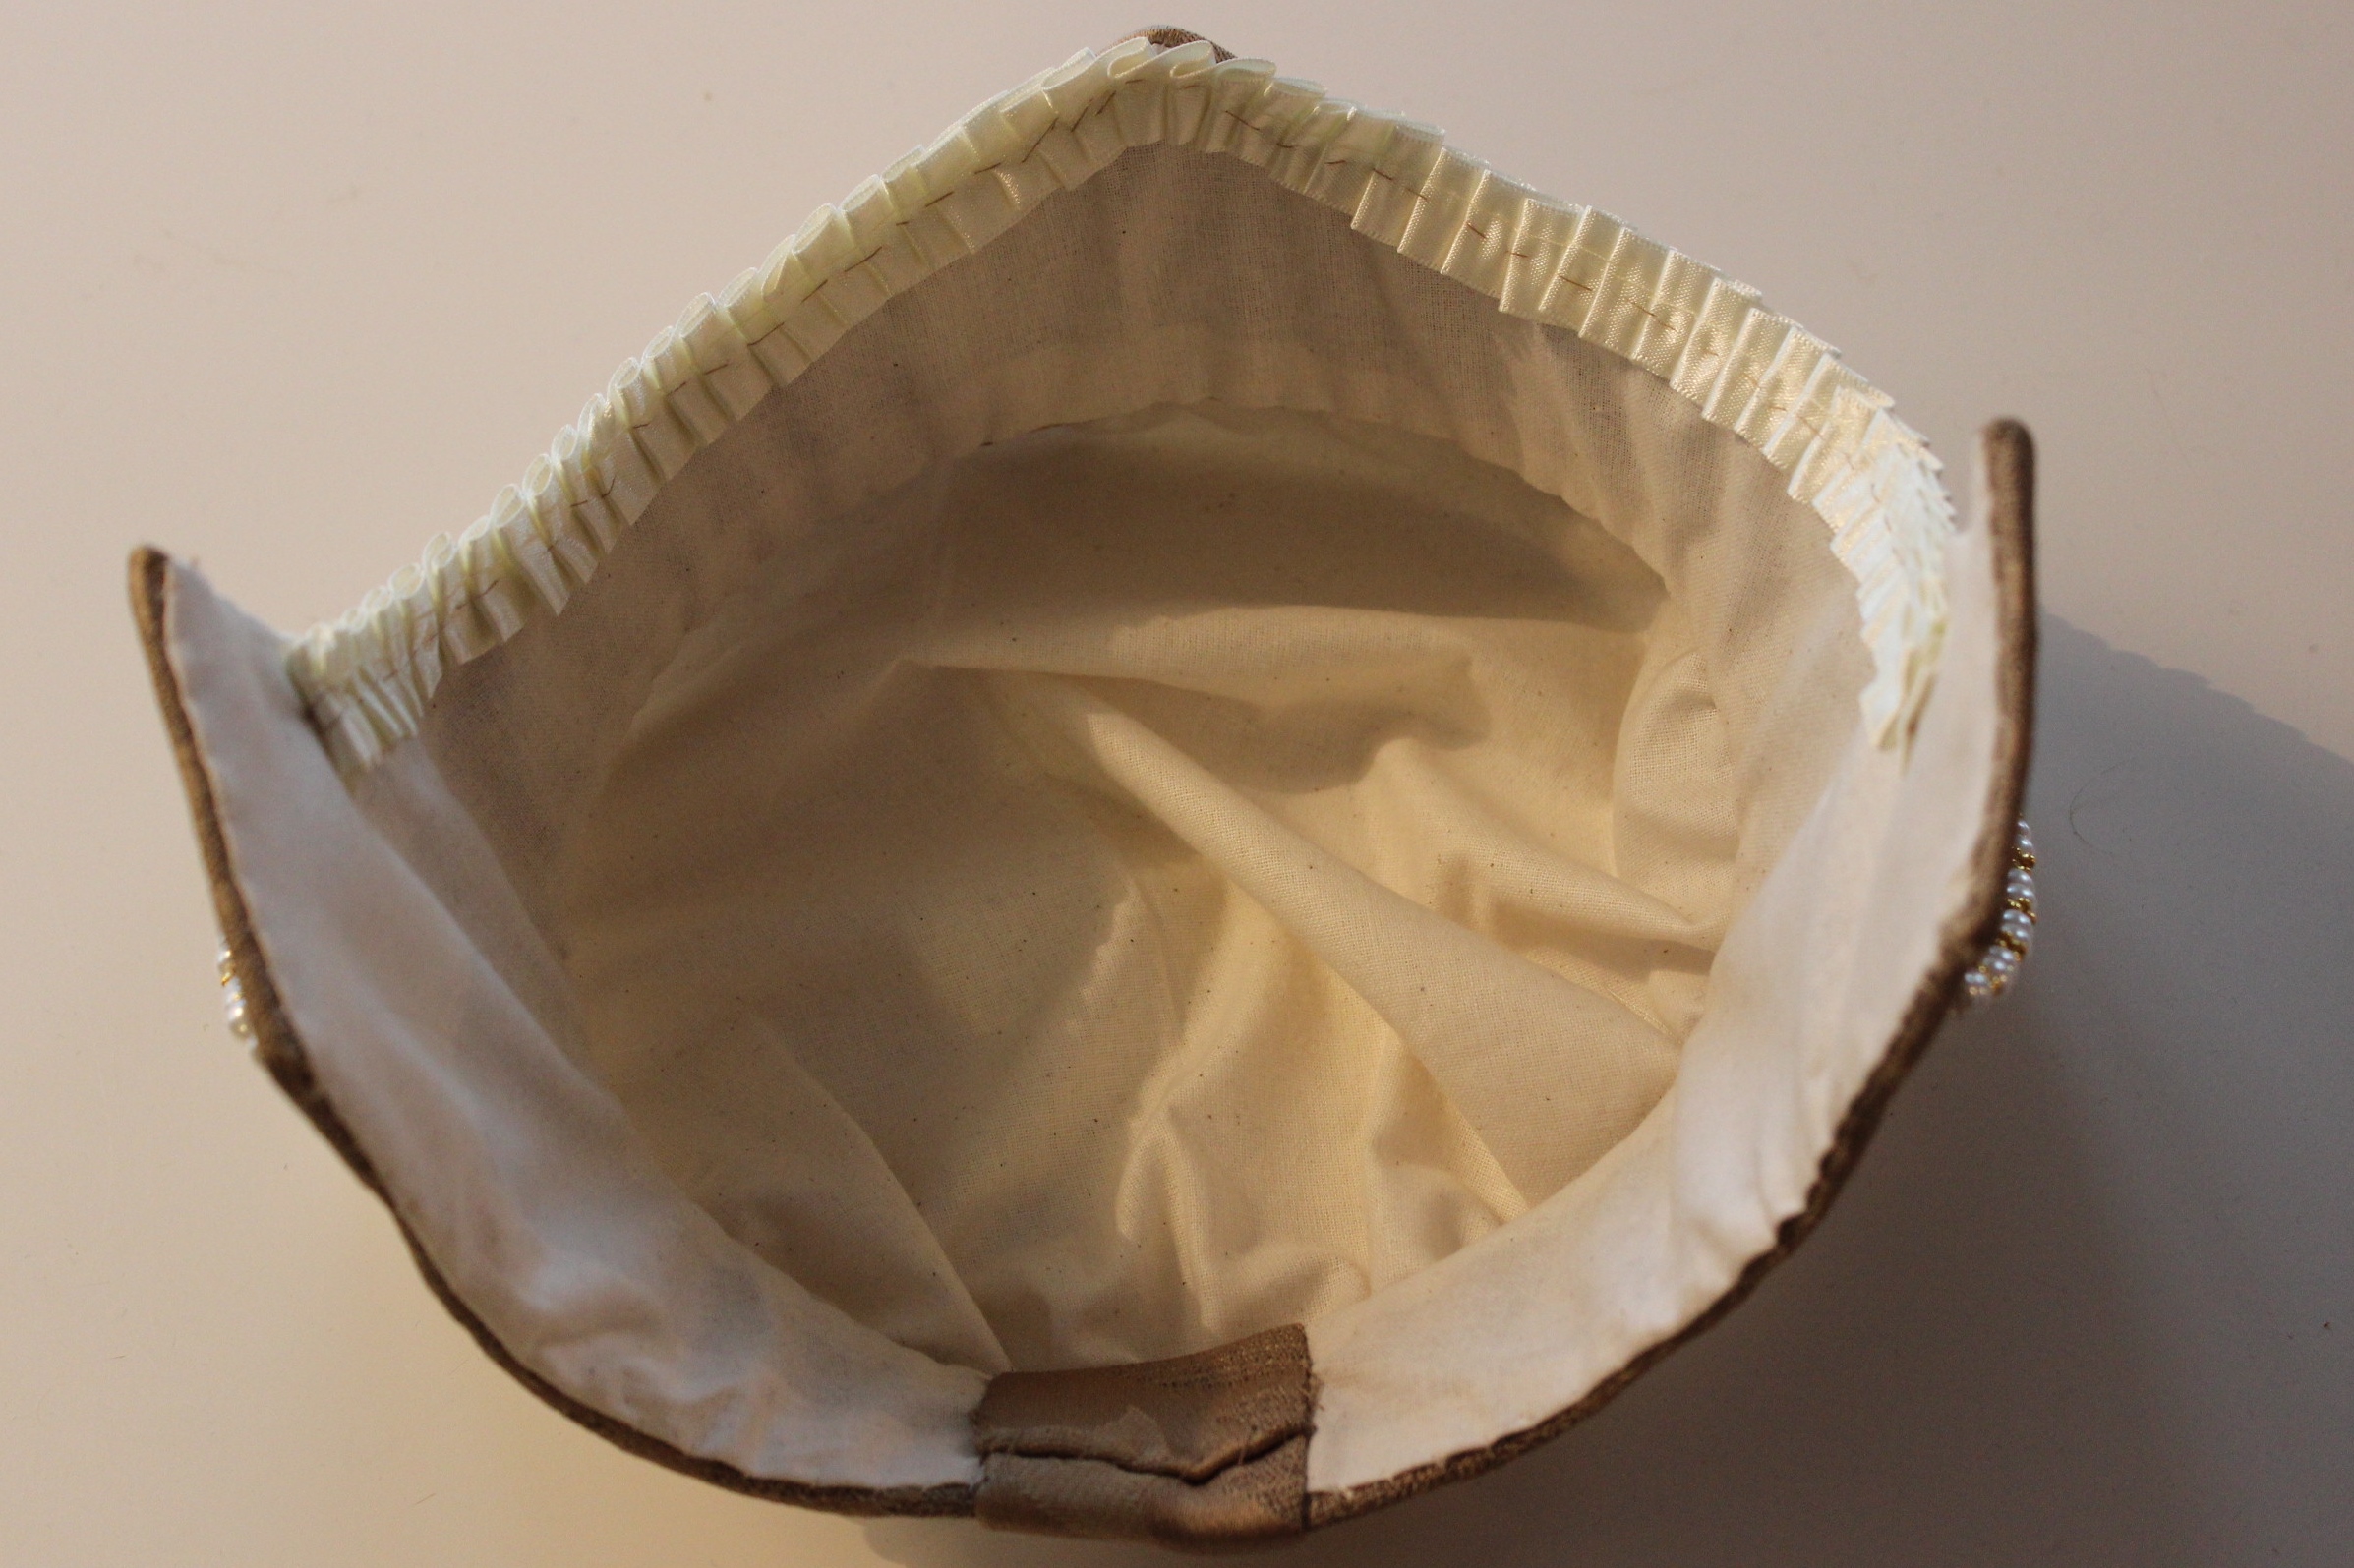 The hood from the inside
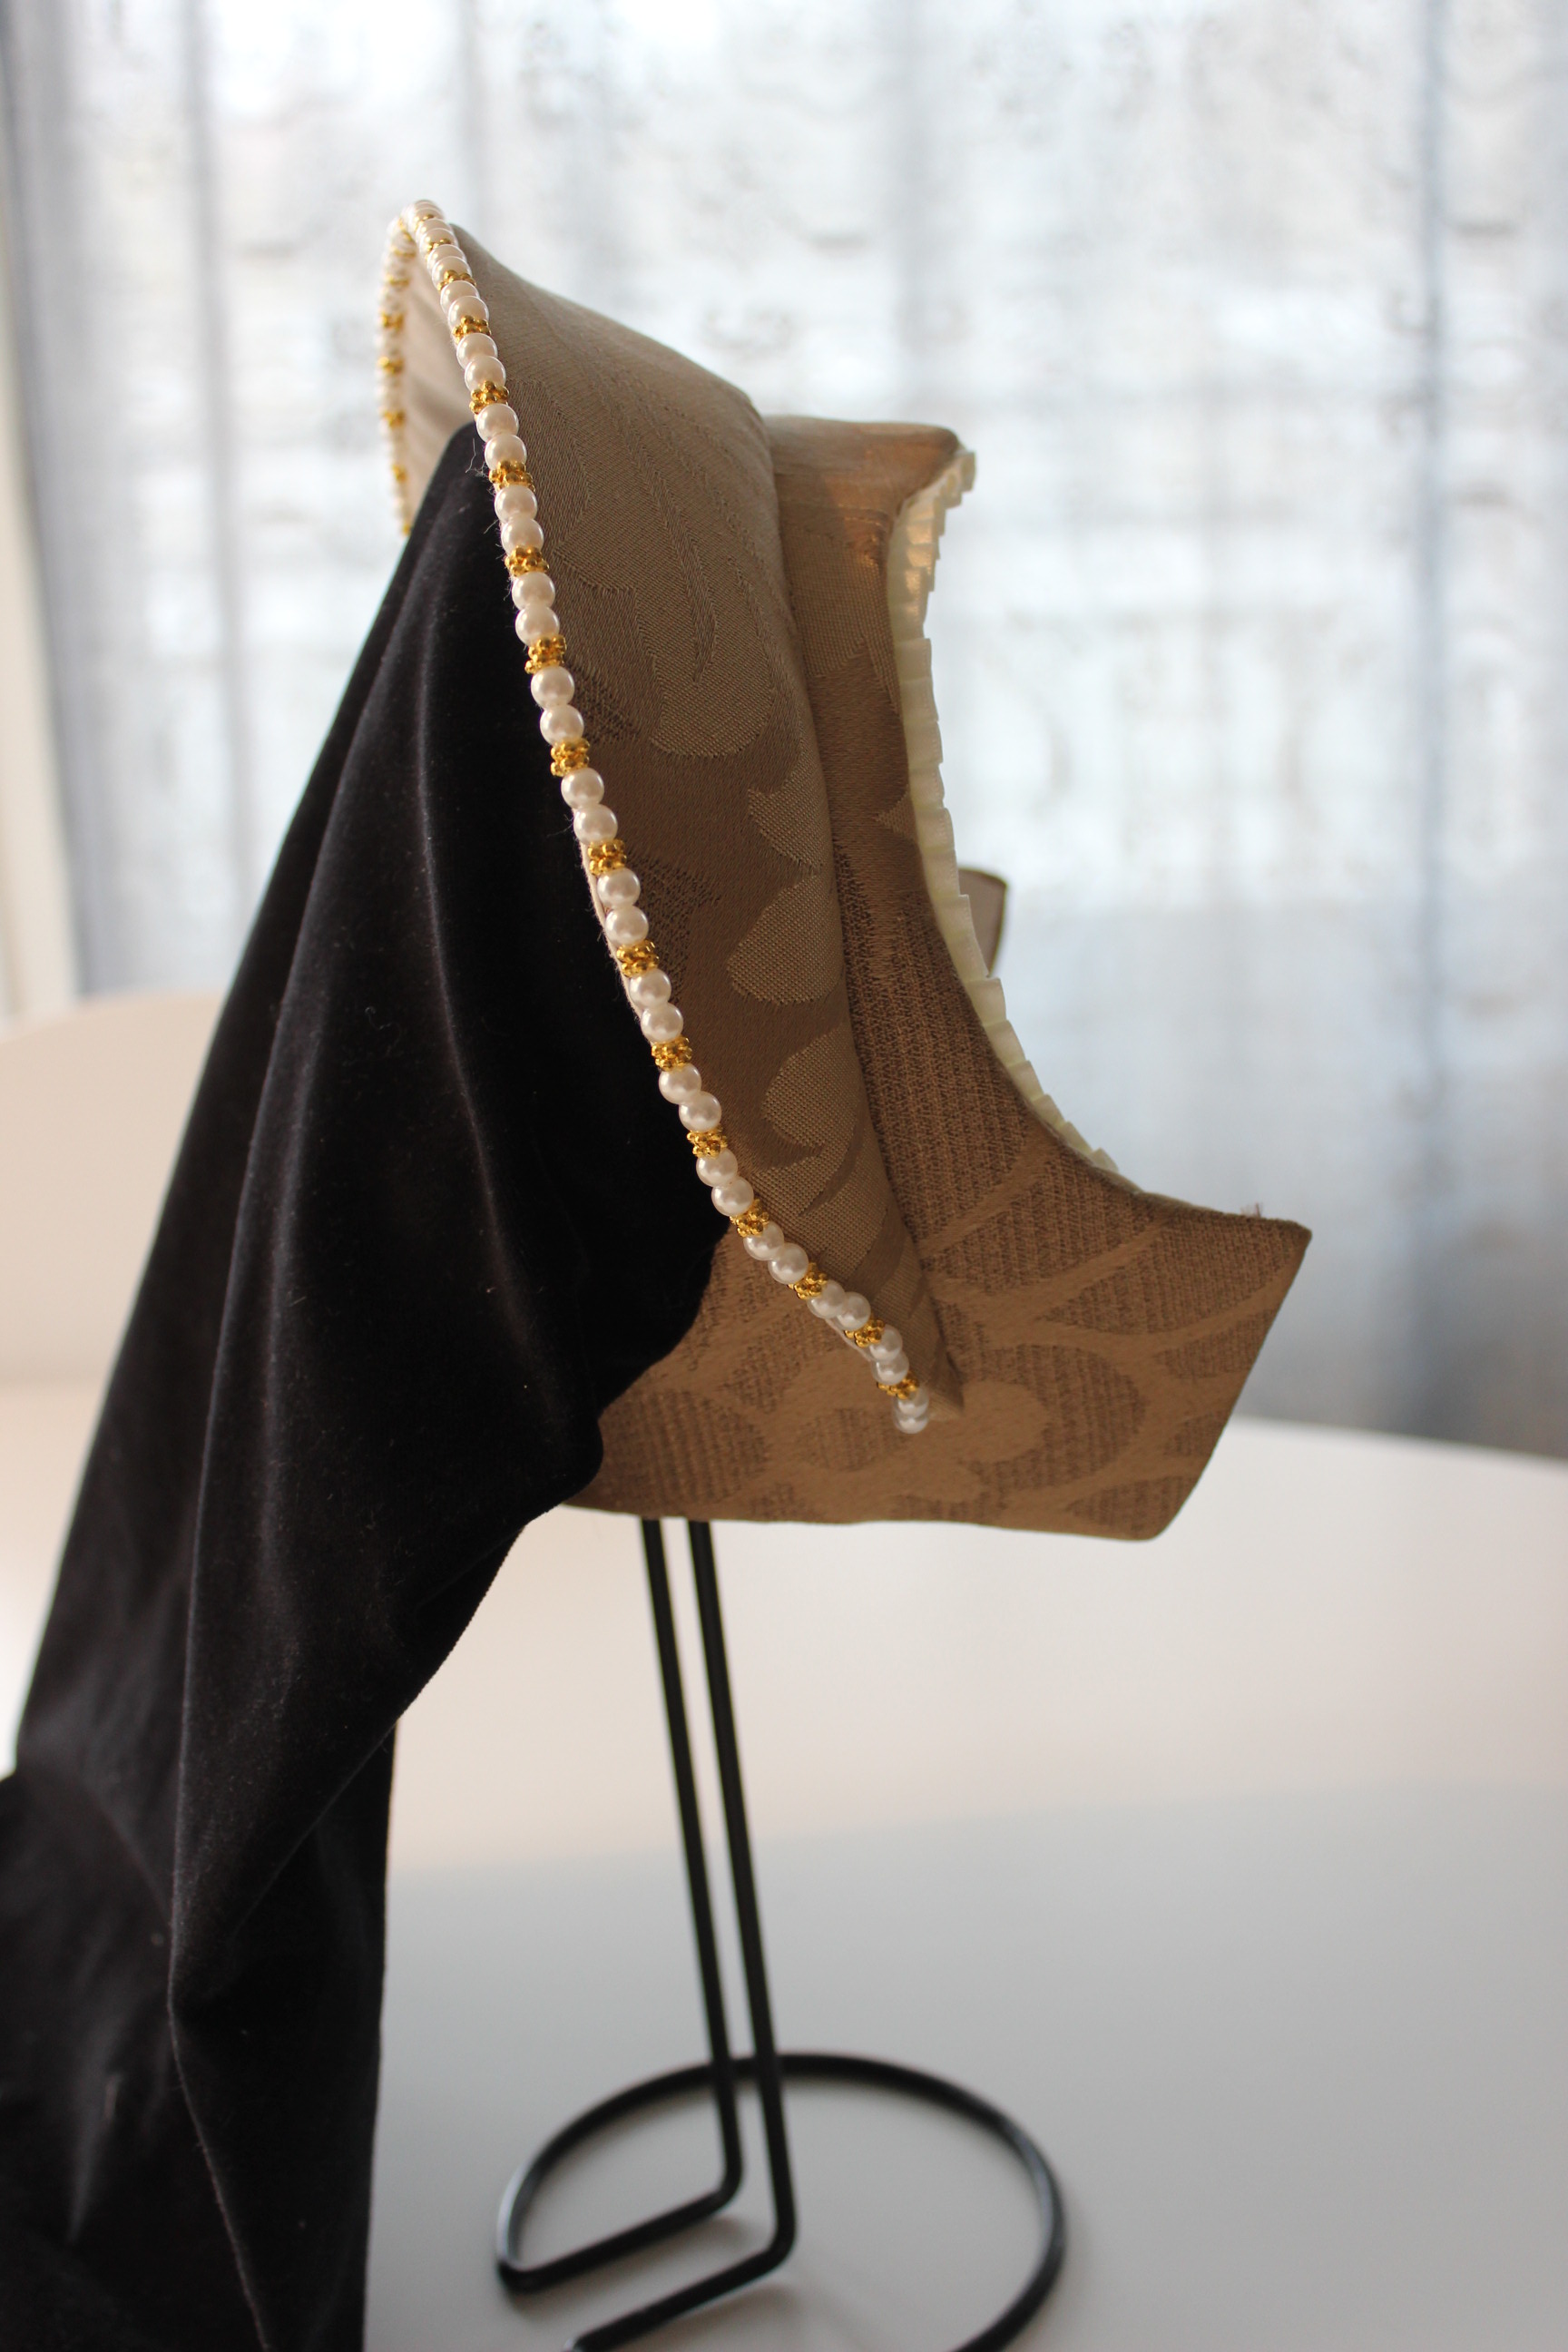
 From the side.
The last thing to do was to make and attach the veil.
I used some nice black velvet cut almost in the shape of a sleeve, and attached to the back of the hood. 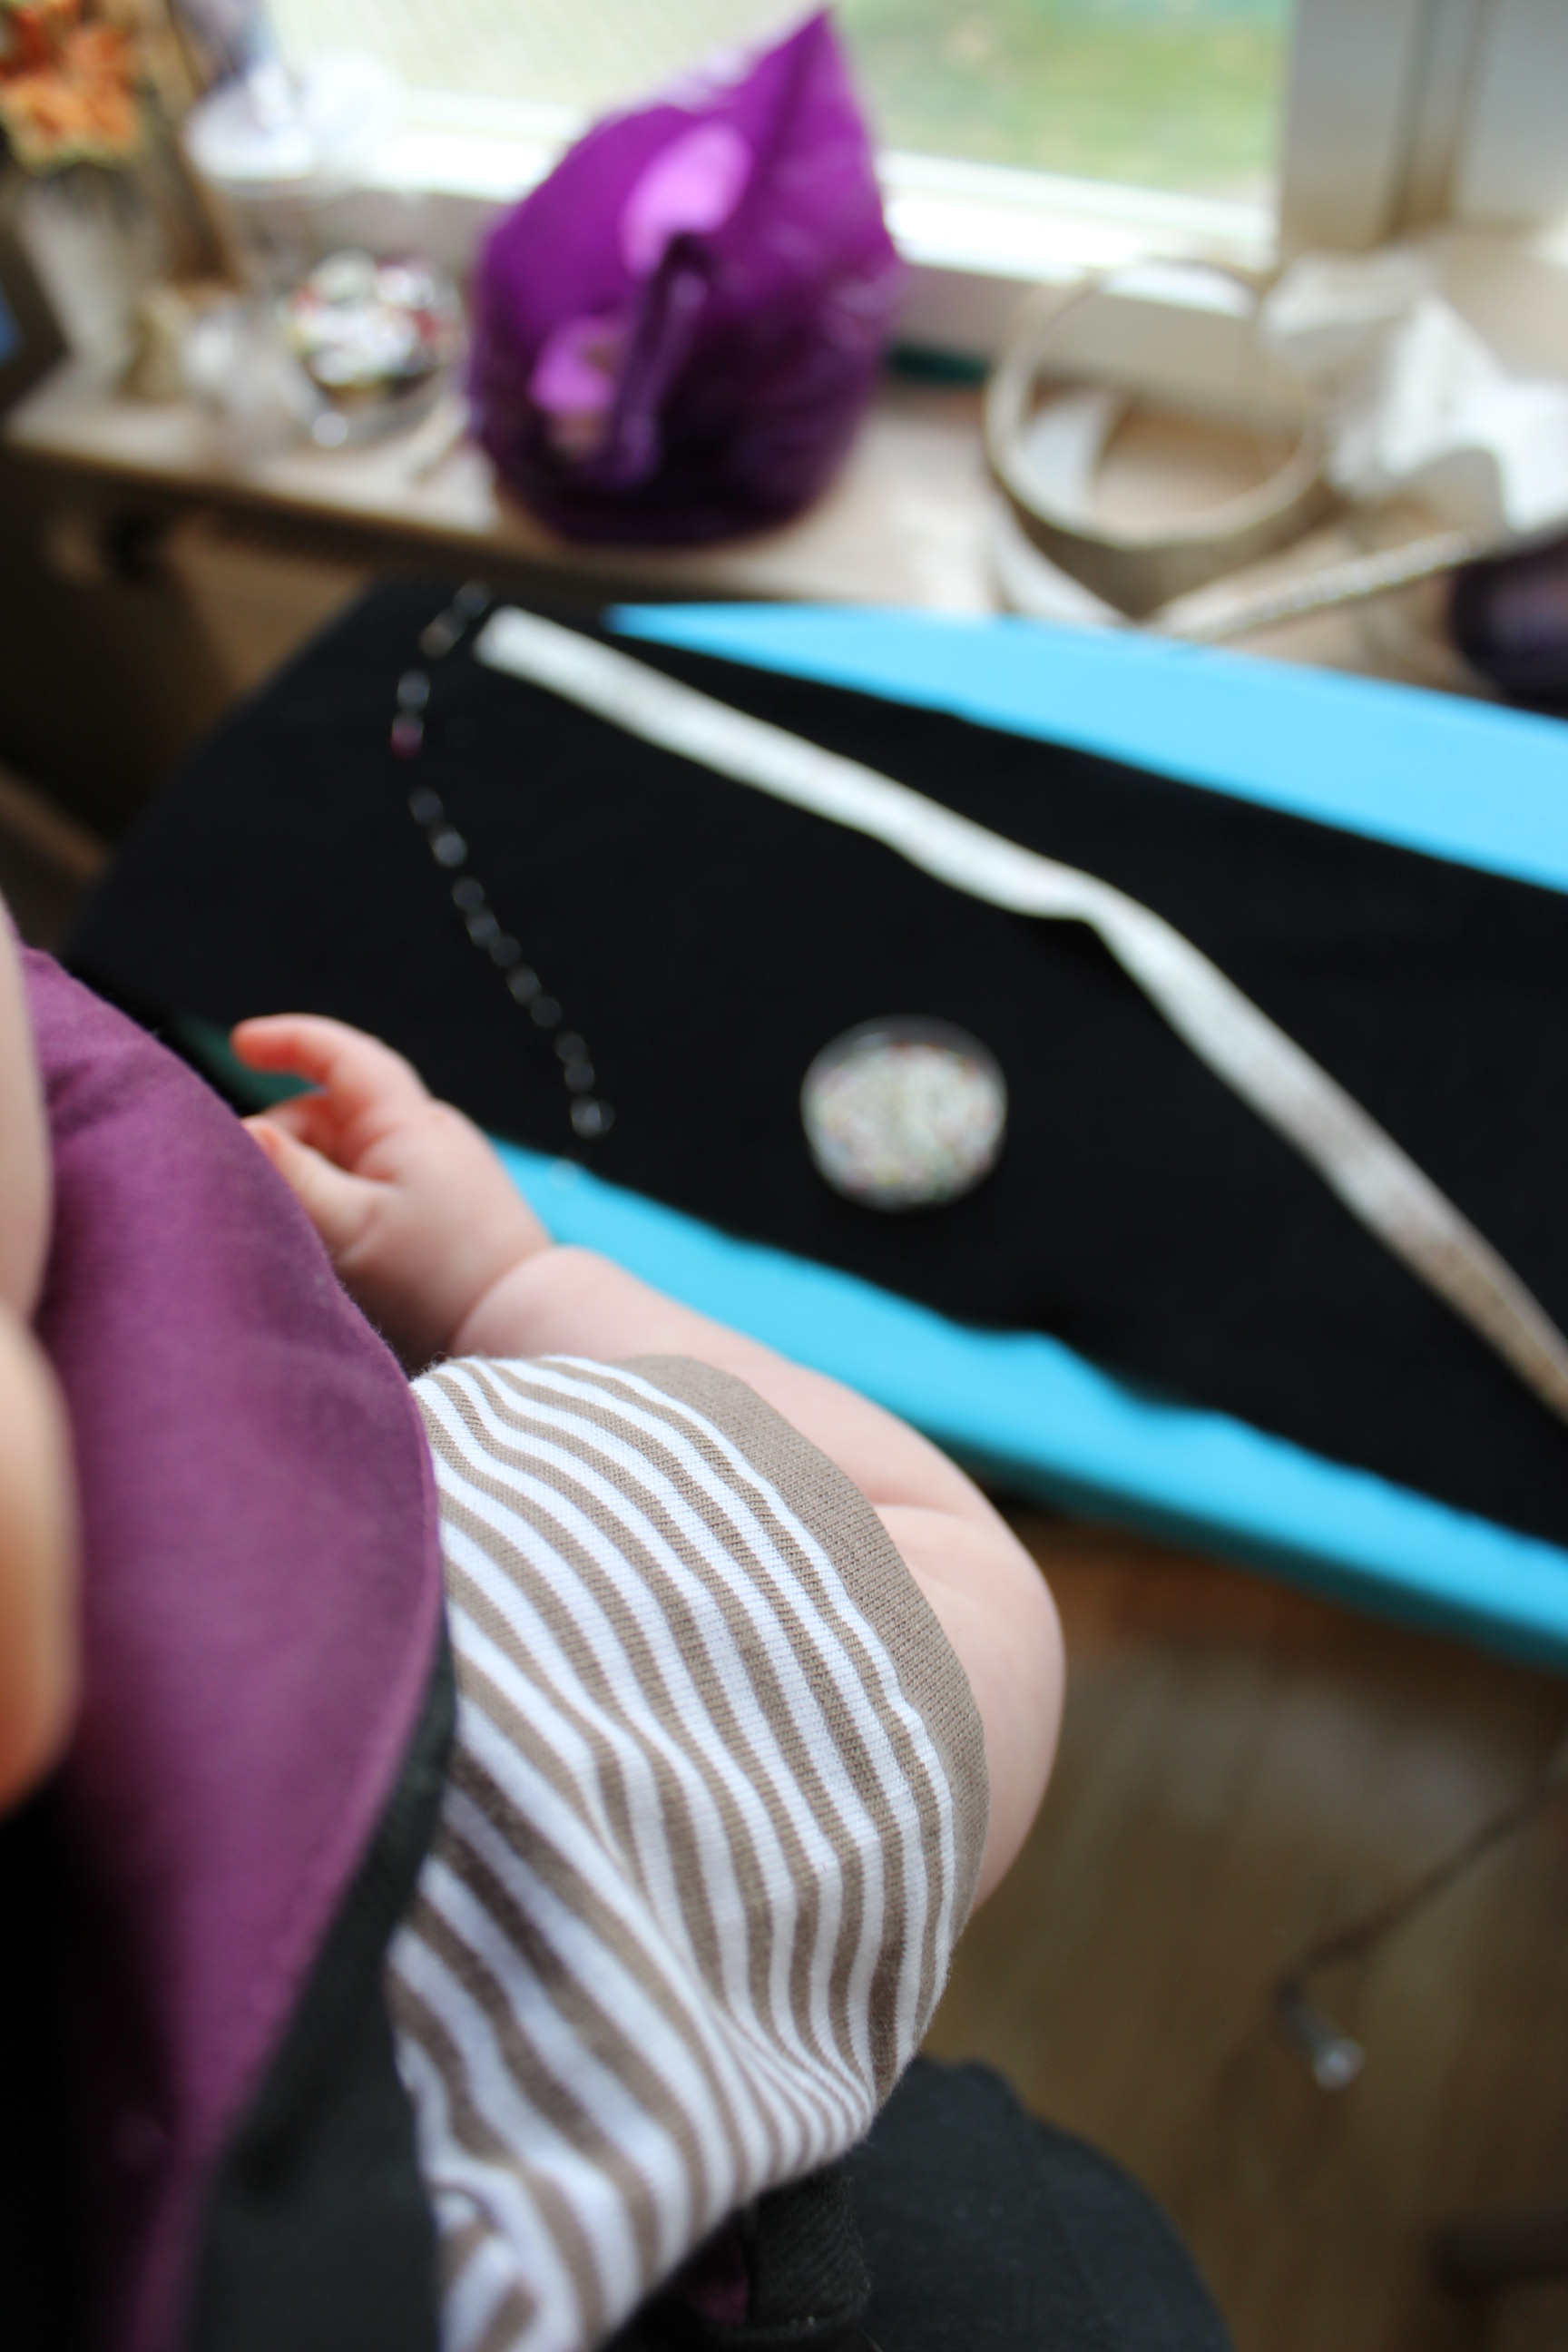 In case you wonder, <= This is how I made almost the whole hood (carrying my baby on my body)
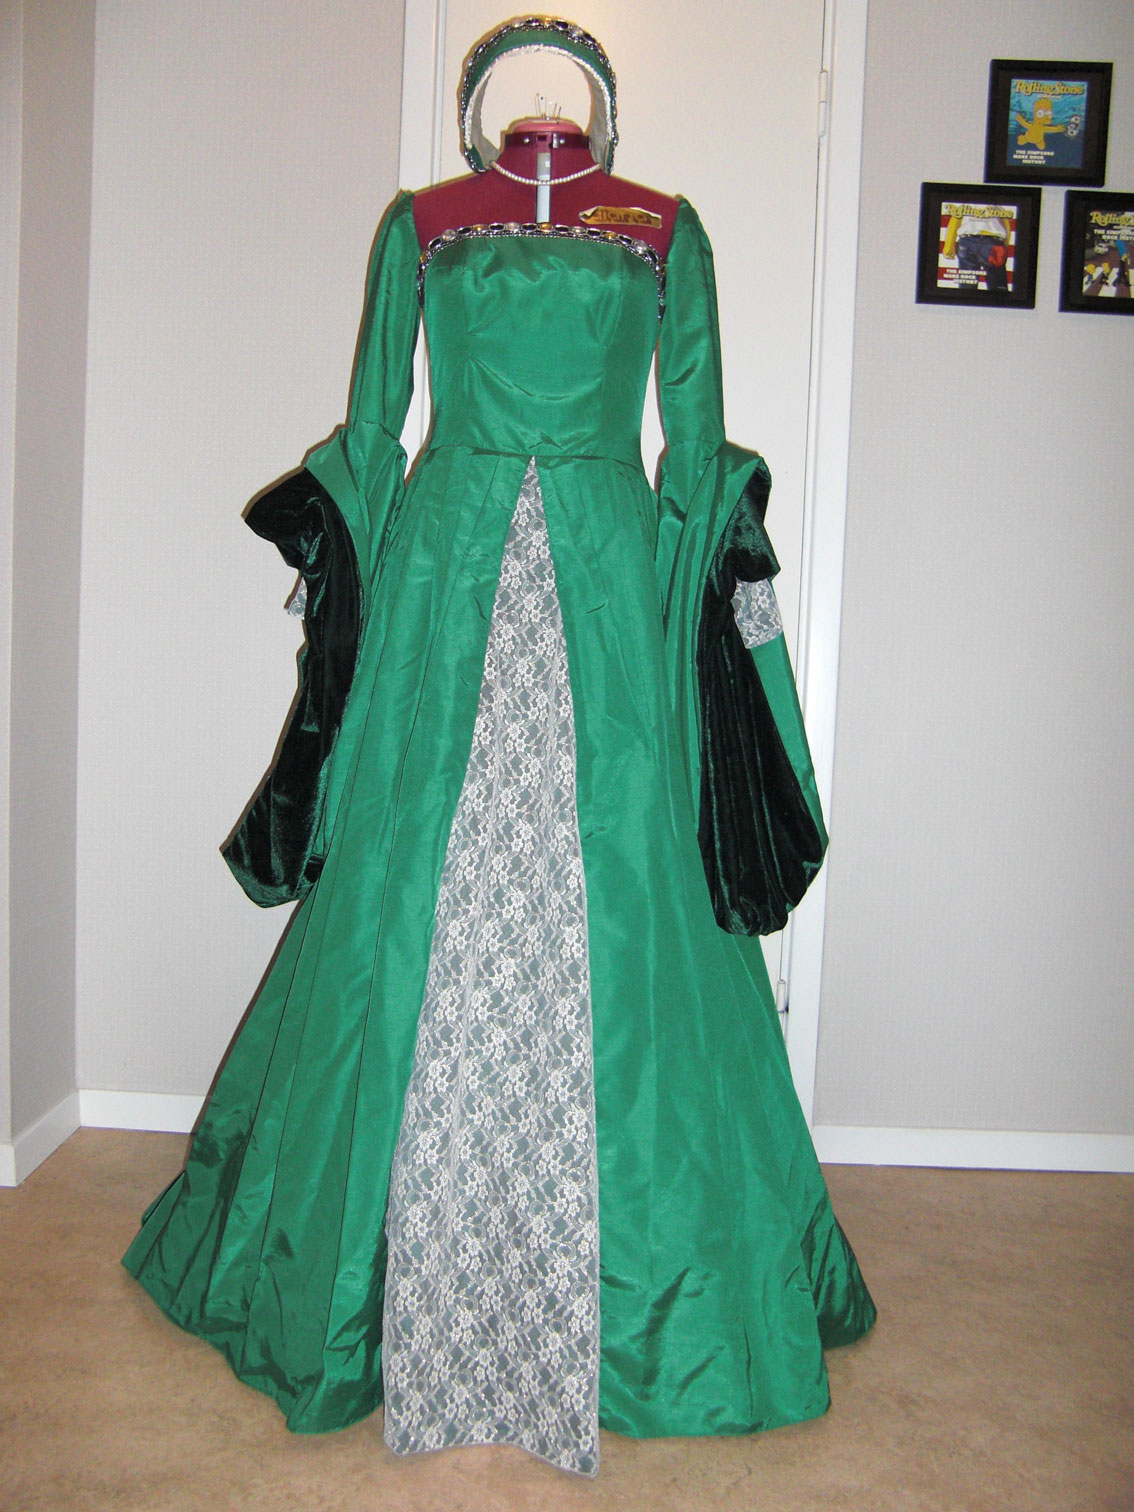
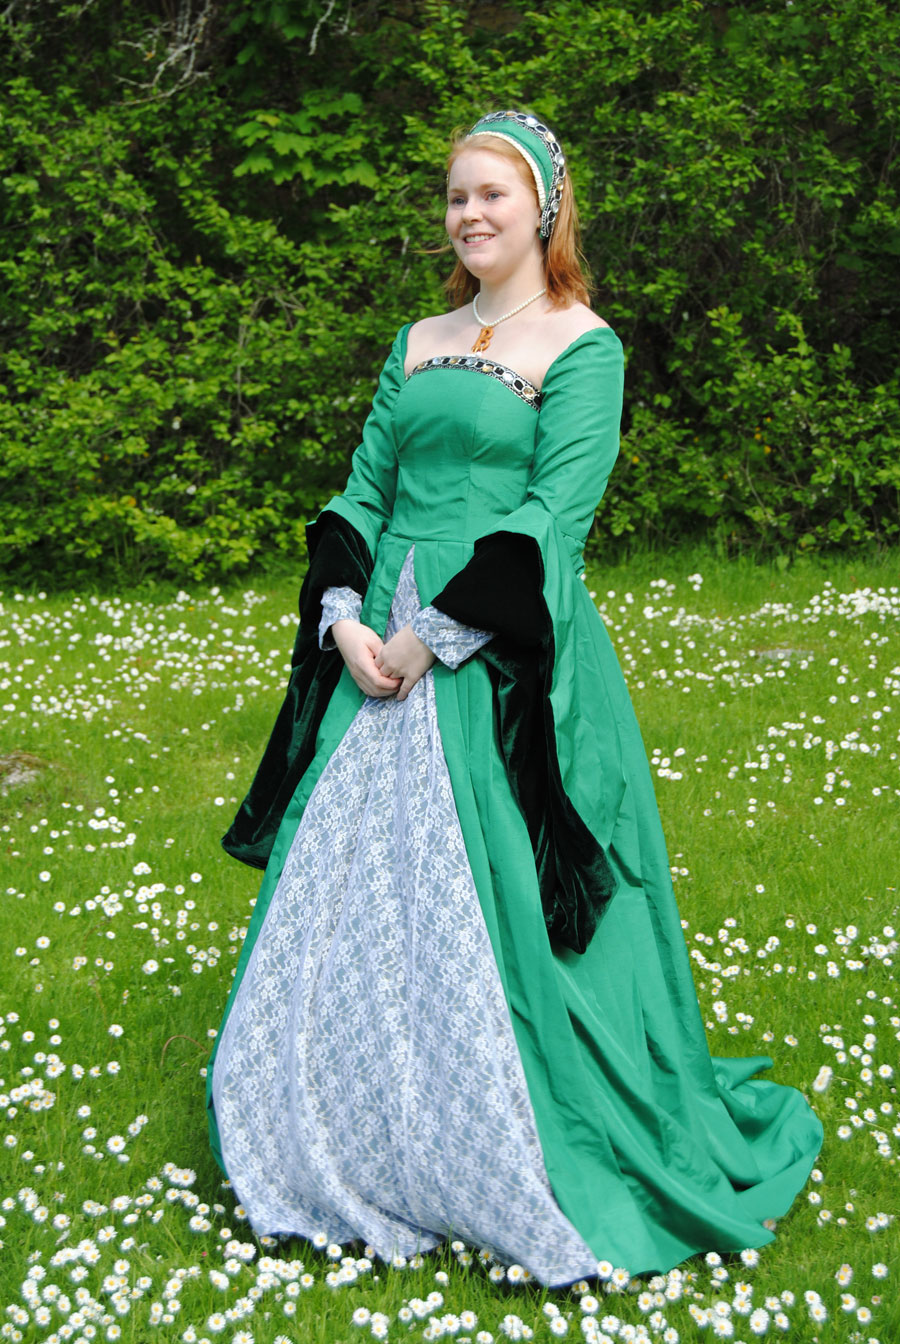
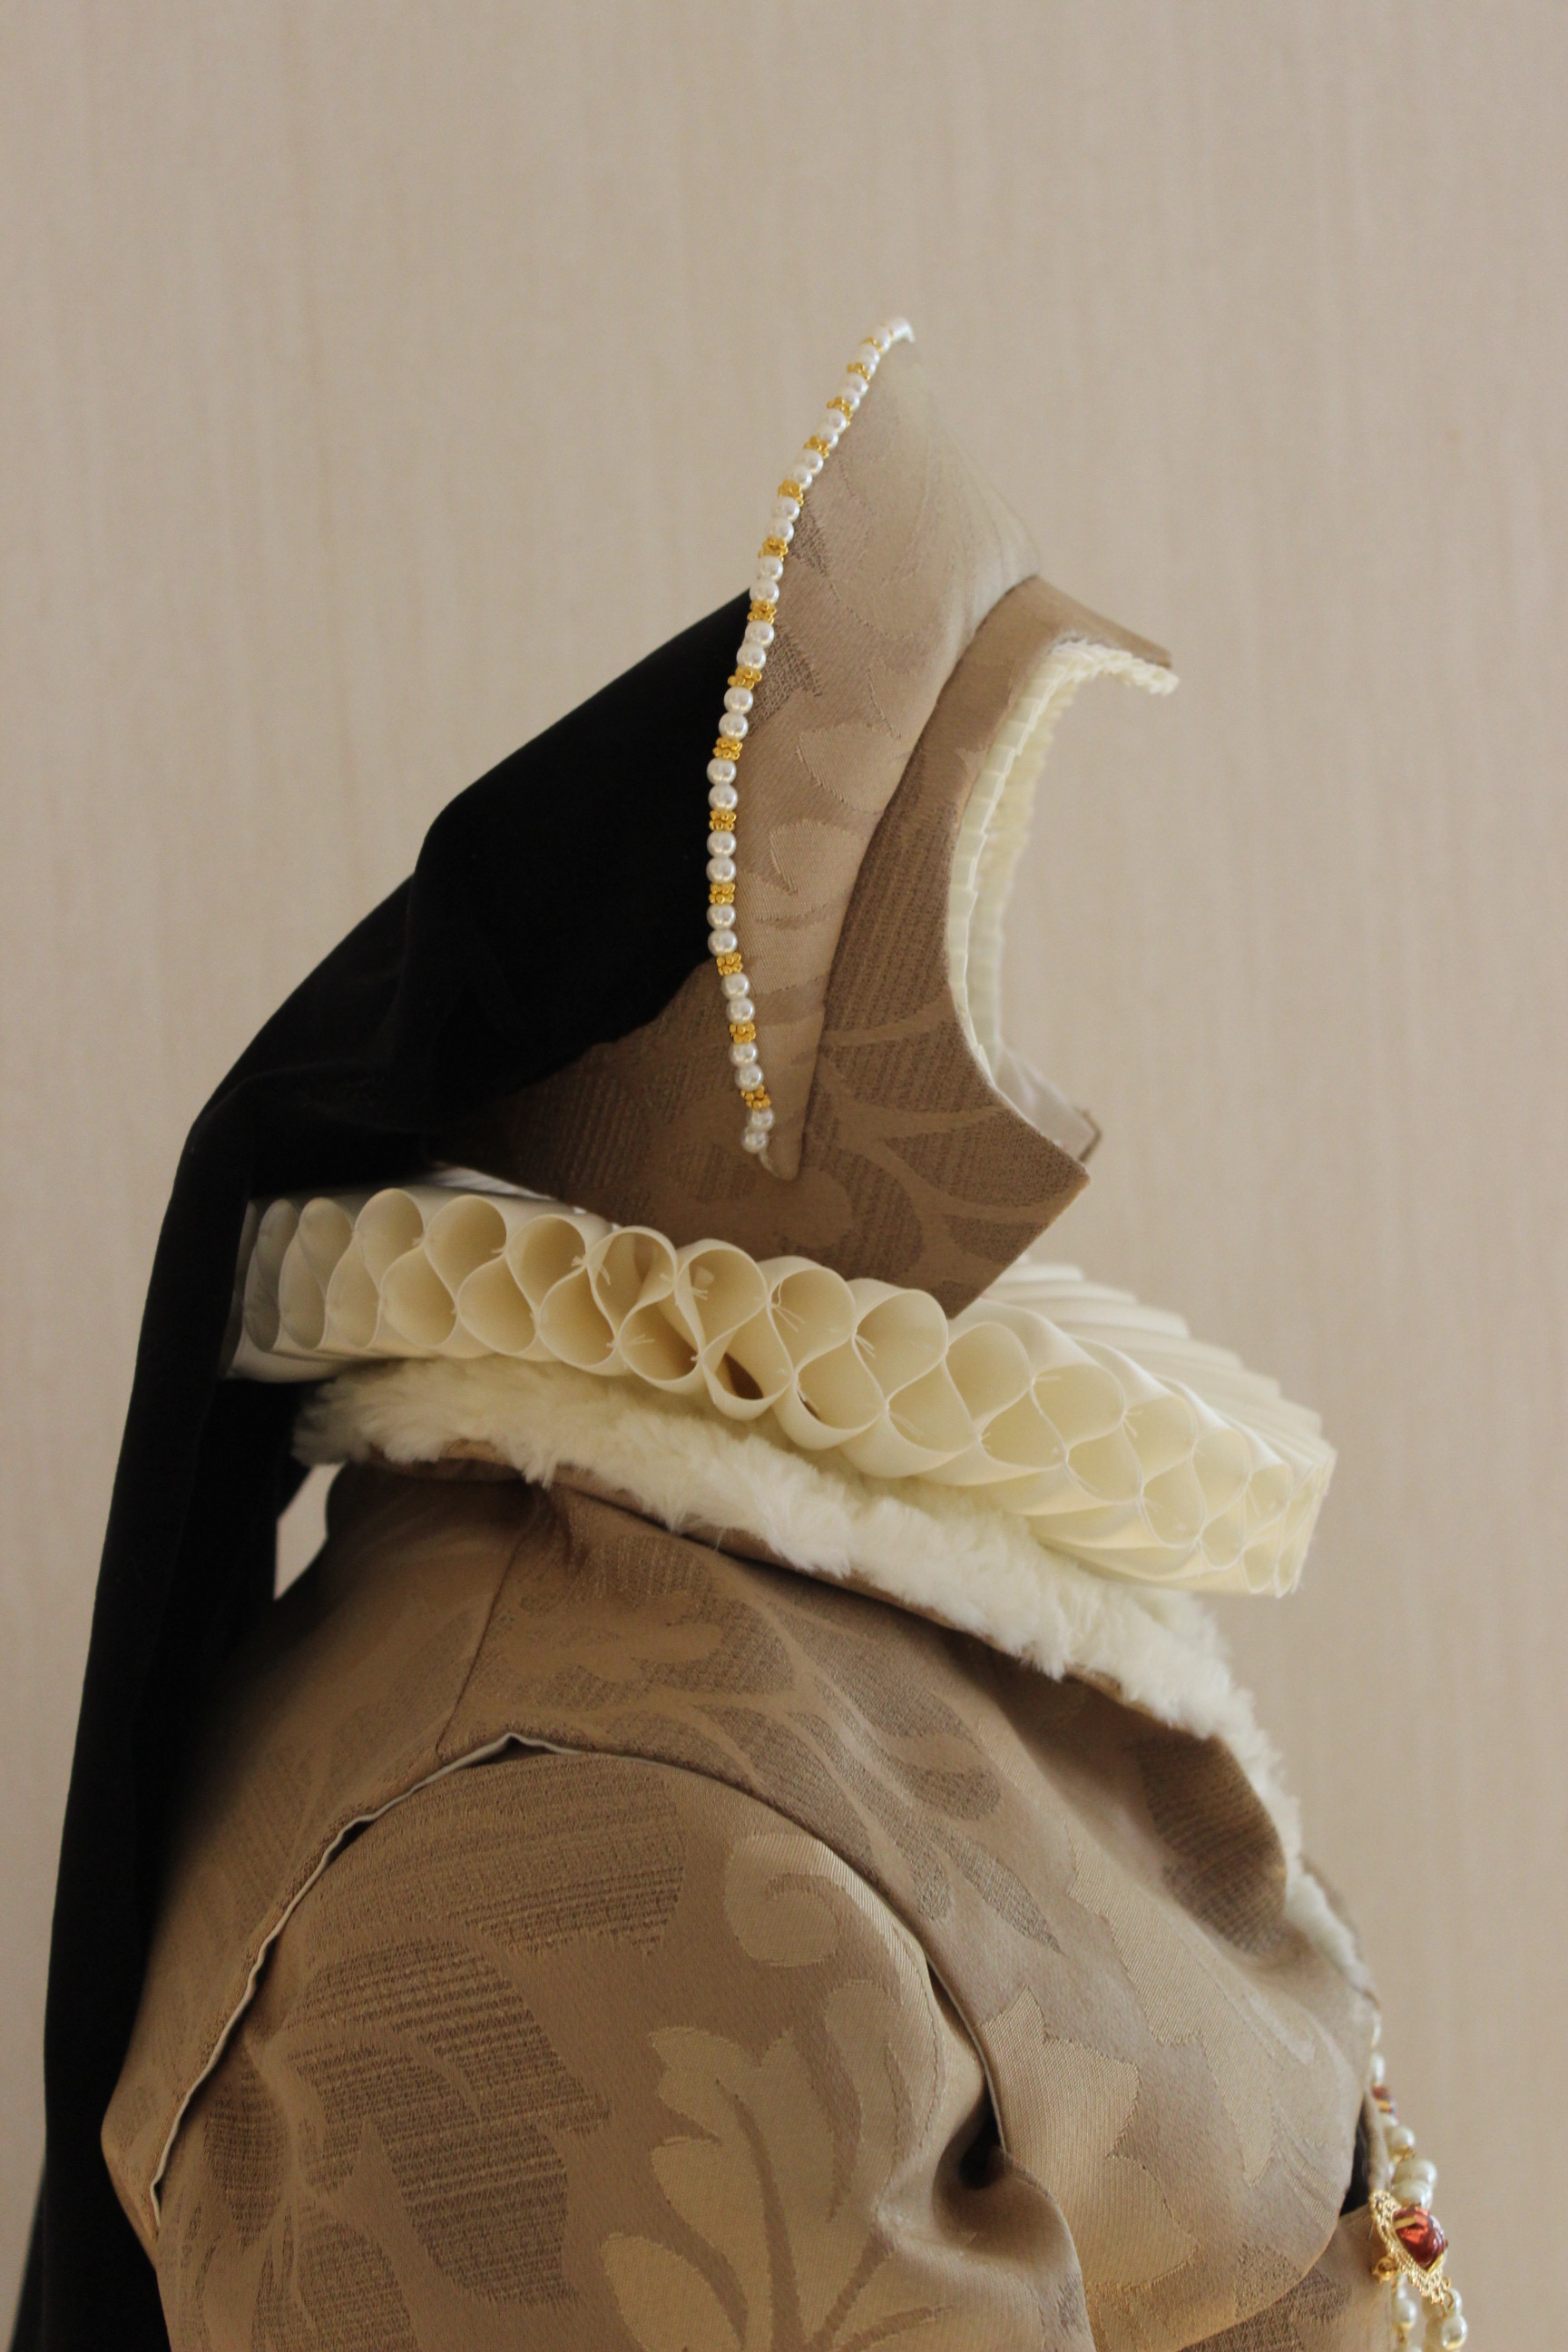
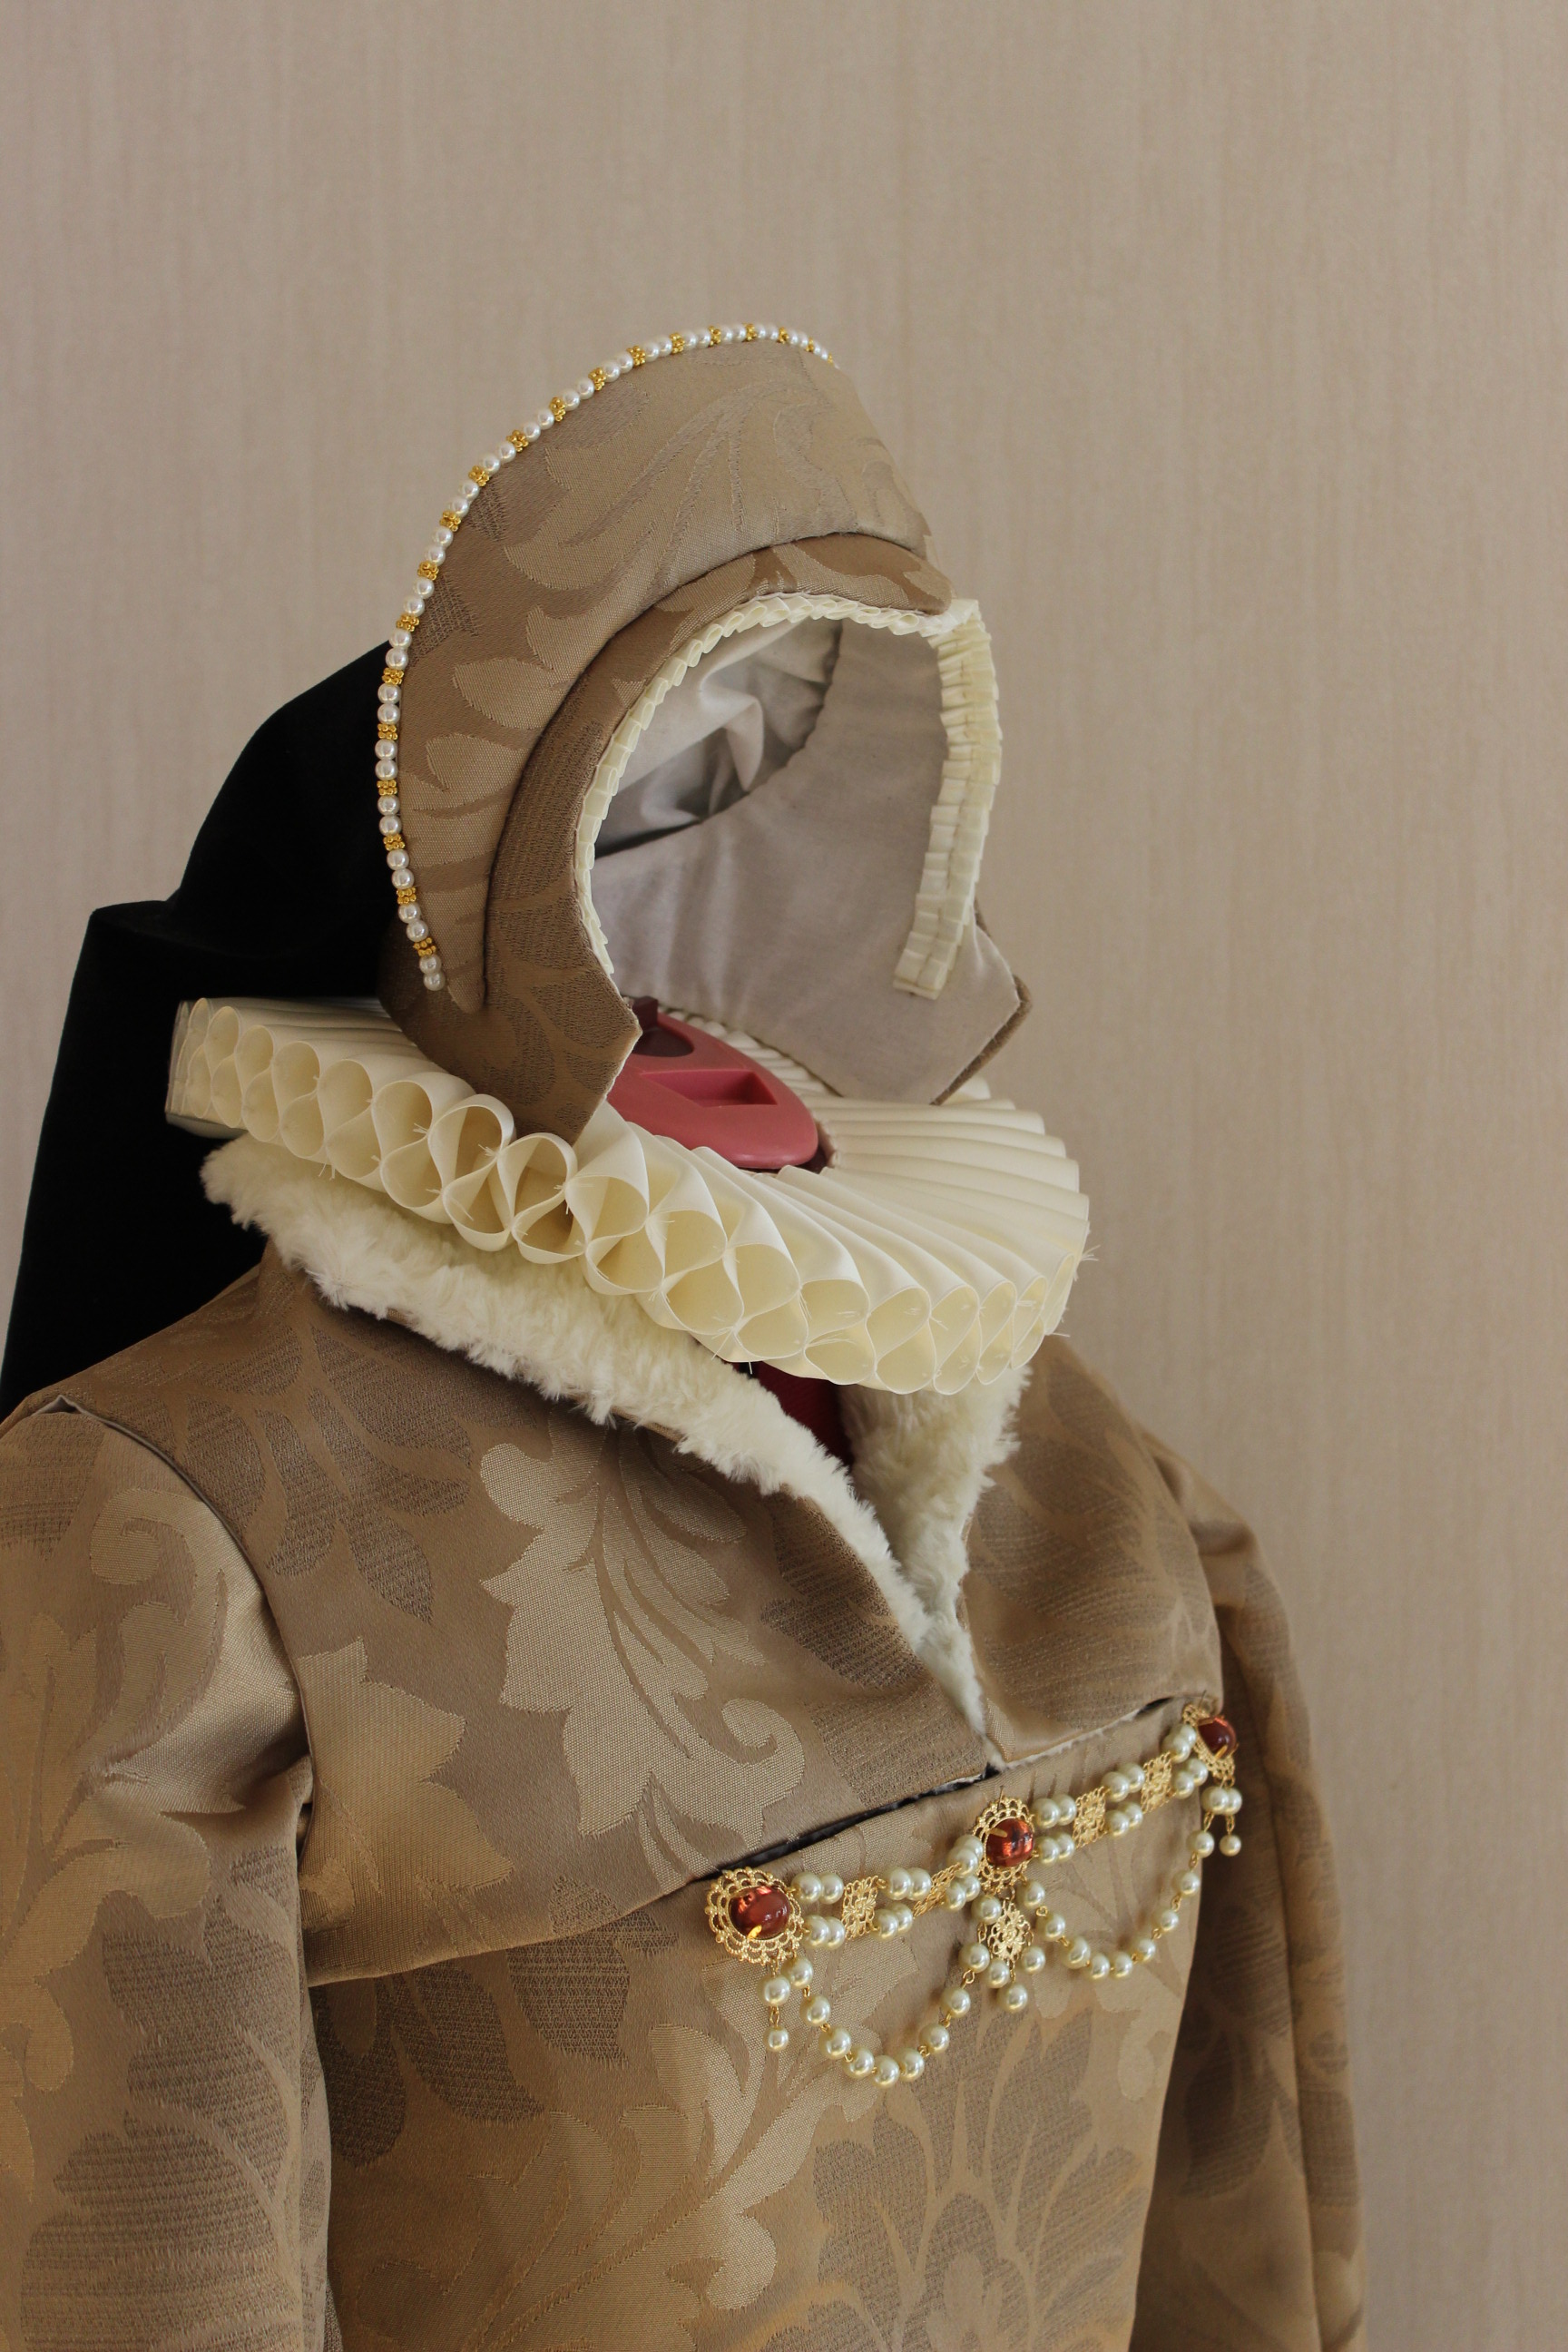
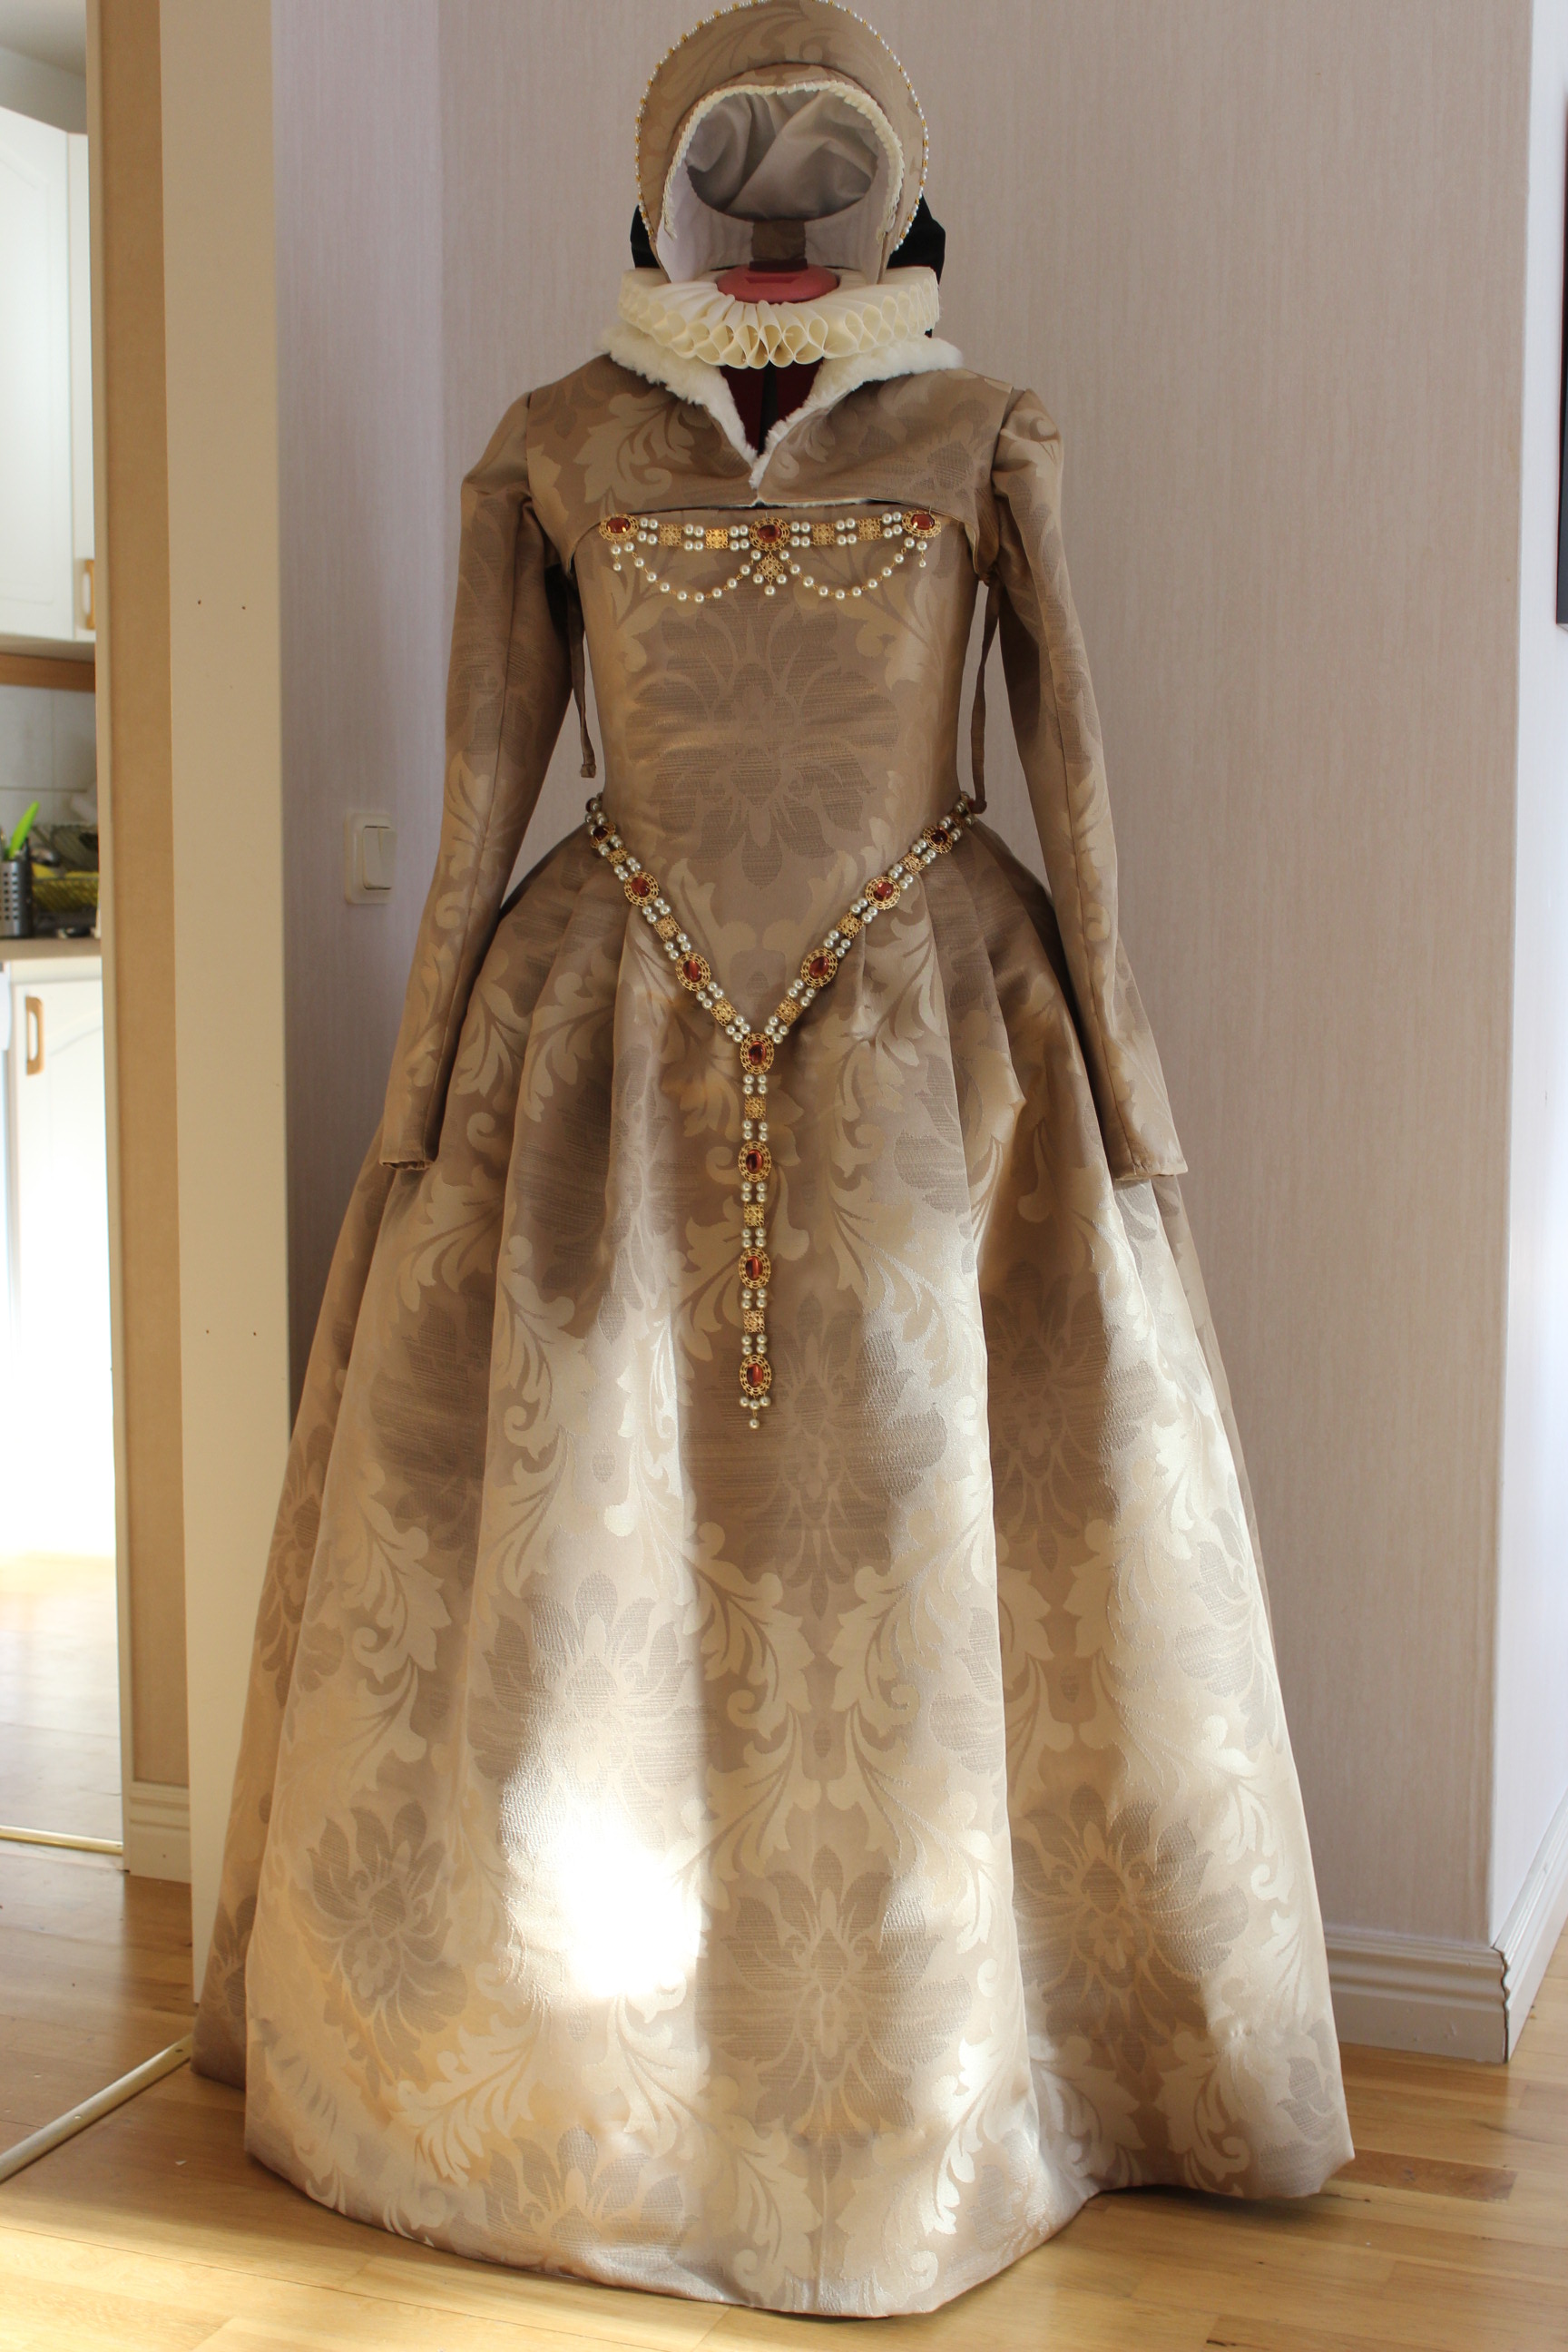
The Finished Hood:


(Worn with Elizabethan dress, partlet, jewelry and neck ruff)
Facts:
What: A 1550s French Hood
Pattern: French Hood from “The Tudor Tailor”.
Fabric & Notions: Scraps of golden brocade, cotton lining, and buckram, 1 m satin ivory ribbon, thread, 0,5 m black velvet, 2 m millinery wire, ivory and golden pearls.
Time & Cost: About 5 hours (its almost completely made by hand) and about 100 Sek (10 Usd)
Final Thoughts: I LOOOVE it! 🙂
I think this is one of my best millinery work so far. It look so nice and authentic and I had so much fun making it.