
Since I won’t have anything new to show you until after the weekend, I figured I do a “Throwback Thursday” post, and show you one of my past projects.
This was one of those project with a steep learning curve, but which you will always think about with pride and a smile (before you remember the colossal amount of work and bad words uttered during the process of making it).
It all started when I offered to sew my youngest sisters prom dress.
– Let’s just start by saying that the senior proms in out town are HUGE.
Each year the couples attending the prom start practicing the Waltz in January. Then do so every weekend, until the prom in May/June, where they all (dressed to their teeth) perform a one hour, extremely complicated dance routine in front of thousands of people.
I think it’s needles to say that the dresses are extremely important during this day.
So in february I meet with my sister to discuss the dress design. She showed me her inspiration pic and told me what she wanted. Her original inspiration – The red dress from Tim Burtons “Alice in Wonderland”.
I drew some sketches for our next meeting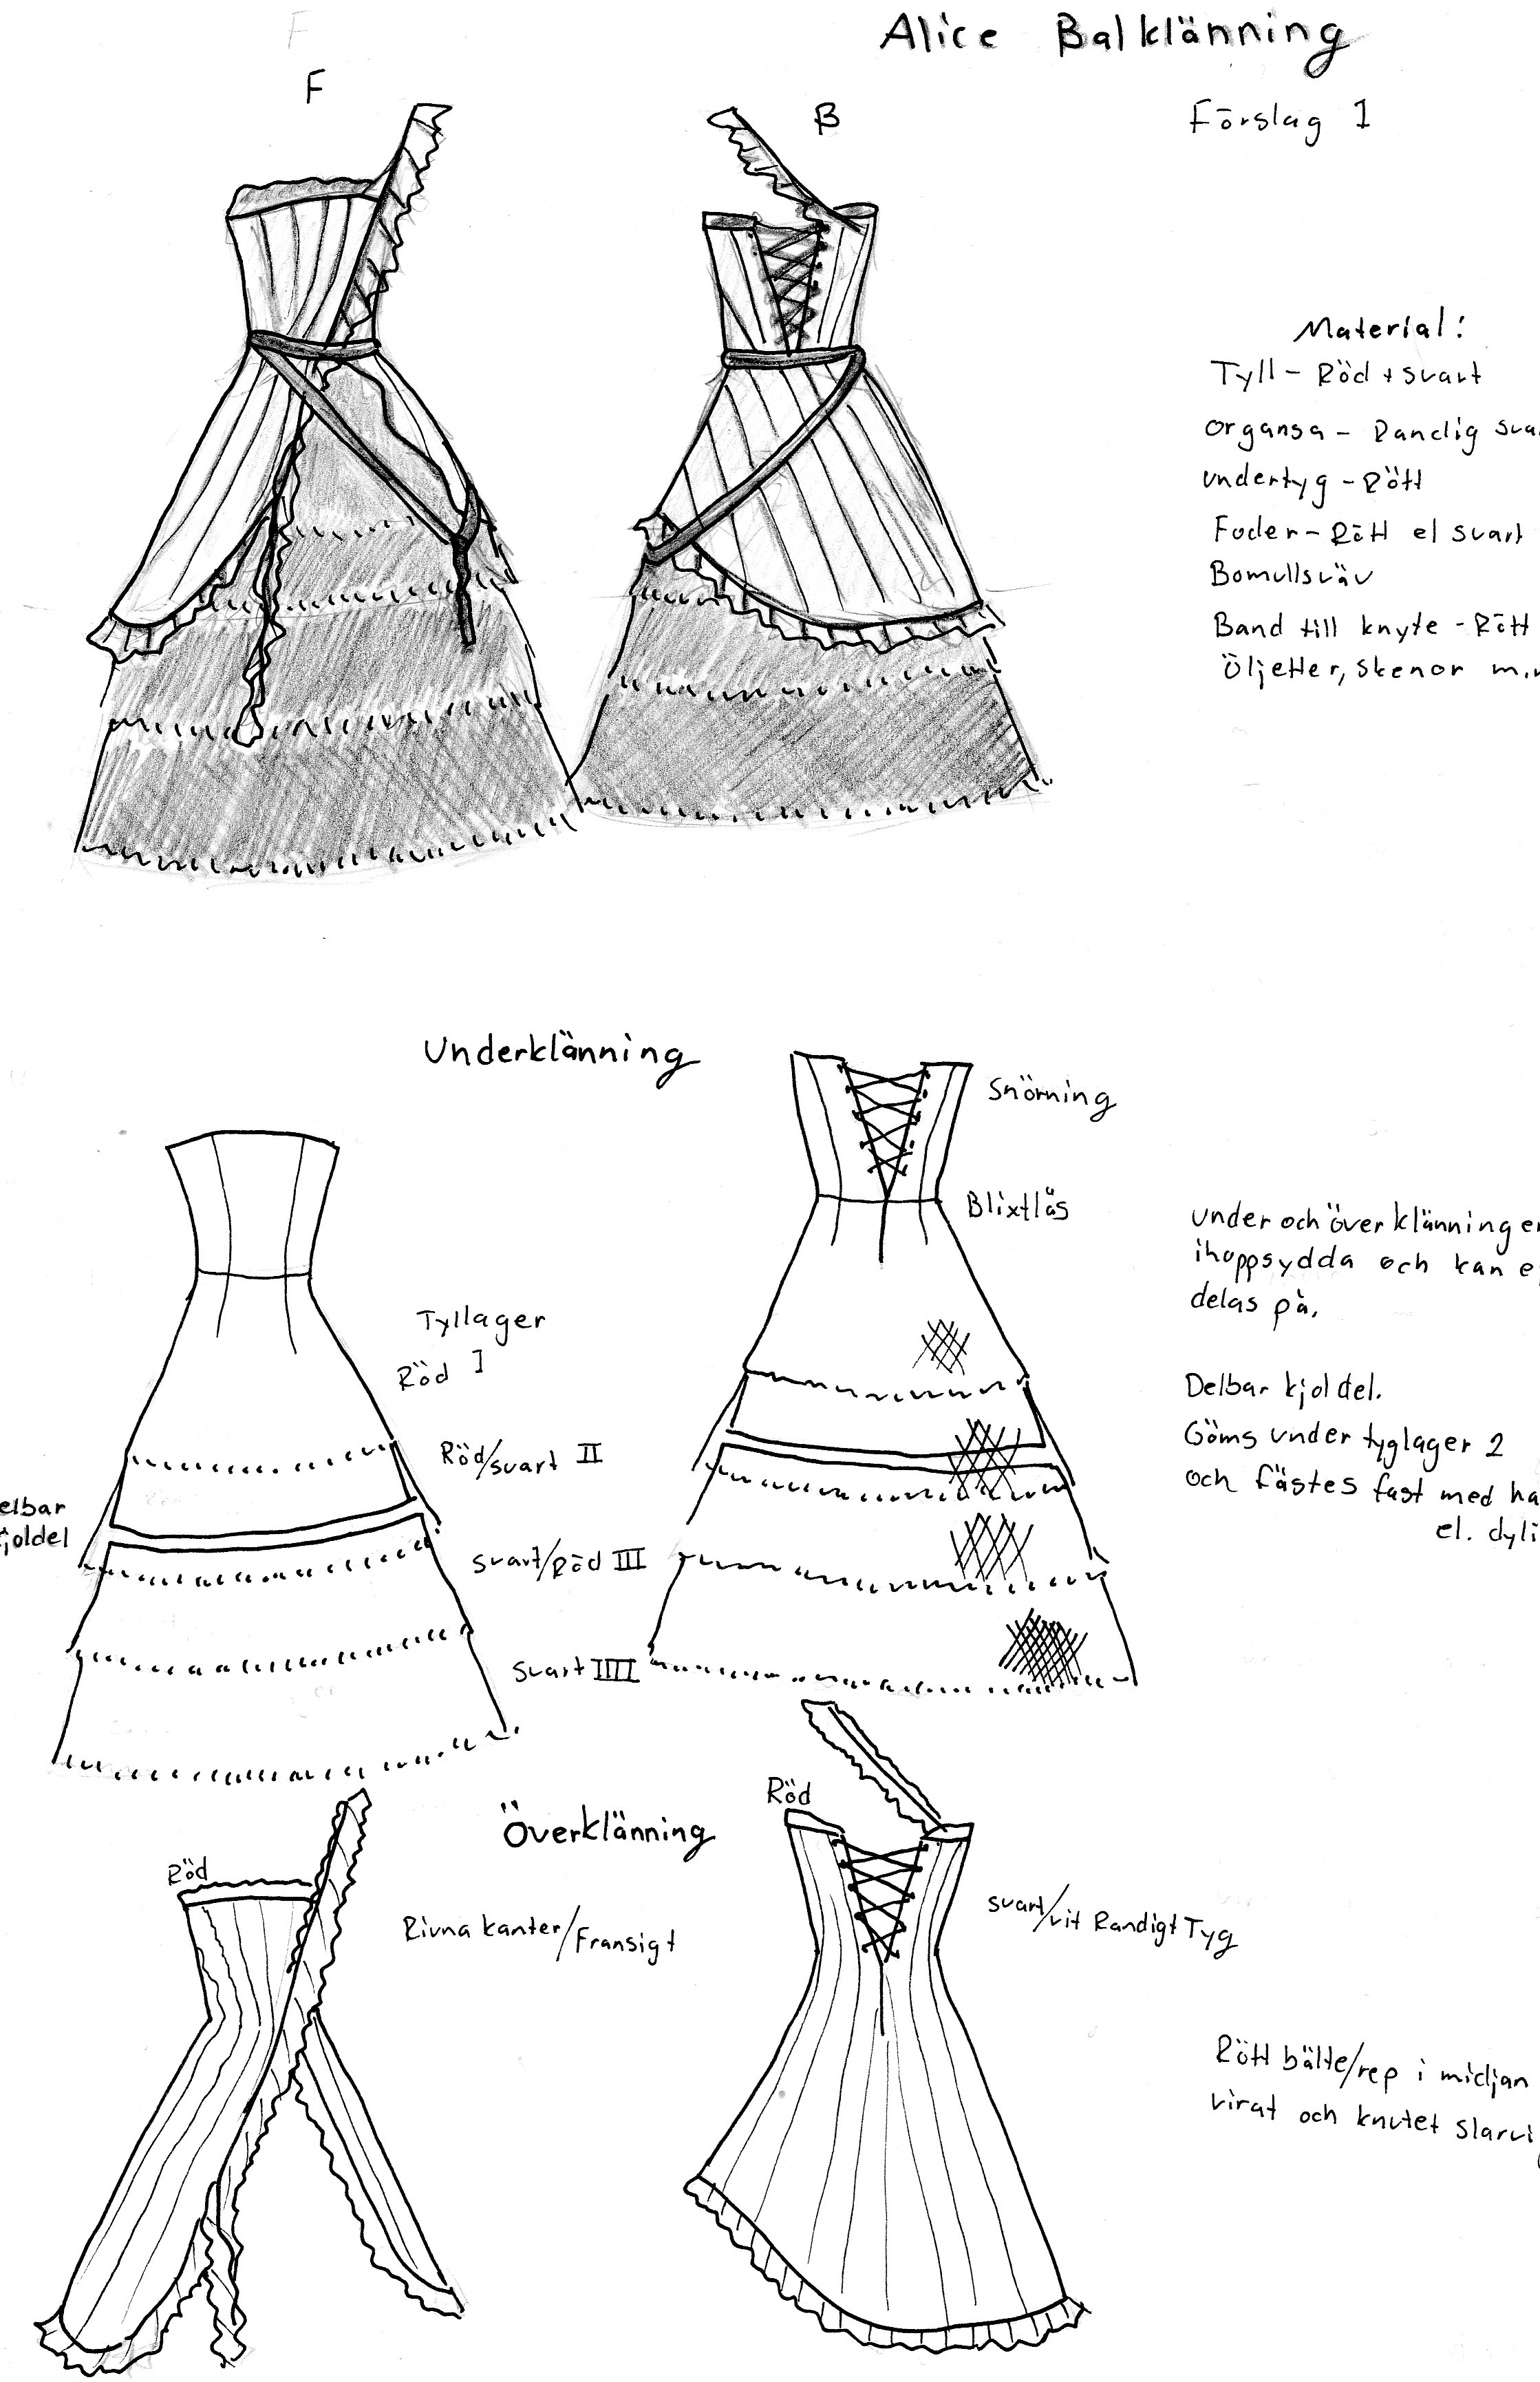 The idea was to make the dress in two layers, with a floor length under layer in tulle (which of course would have to be detachable to make a short dress), and a sheer shorter upper layer with ruffles and ribbons.
For our last design meeting I’d scaled it down a bit, and added some new interesting details like the curved lacing in the back. We had also trashed the idea of a detachable lower half.
In mars my sister traveled the 3 hours ride to the capital (where I lived at the moment) to fit the mock-up.

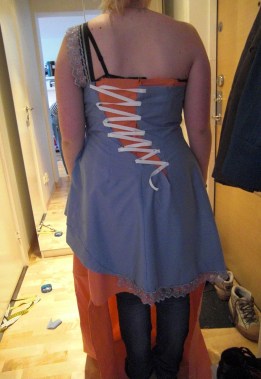
It looks kind of ludicrous in these pictures, and the color is just awful, but I wanted to test the length of the upper layer, the curve of the lacing and of course the usual bust, waist, hip fit. Which actually were pretty good.
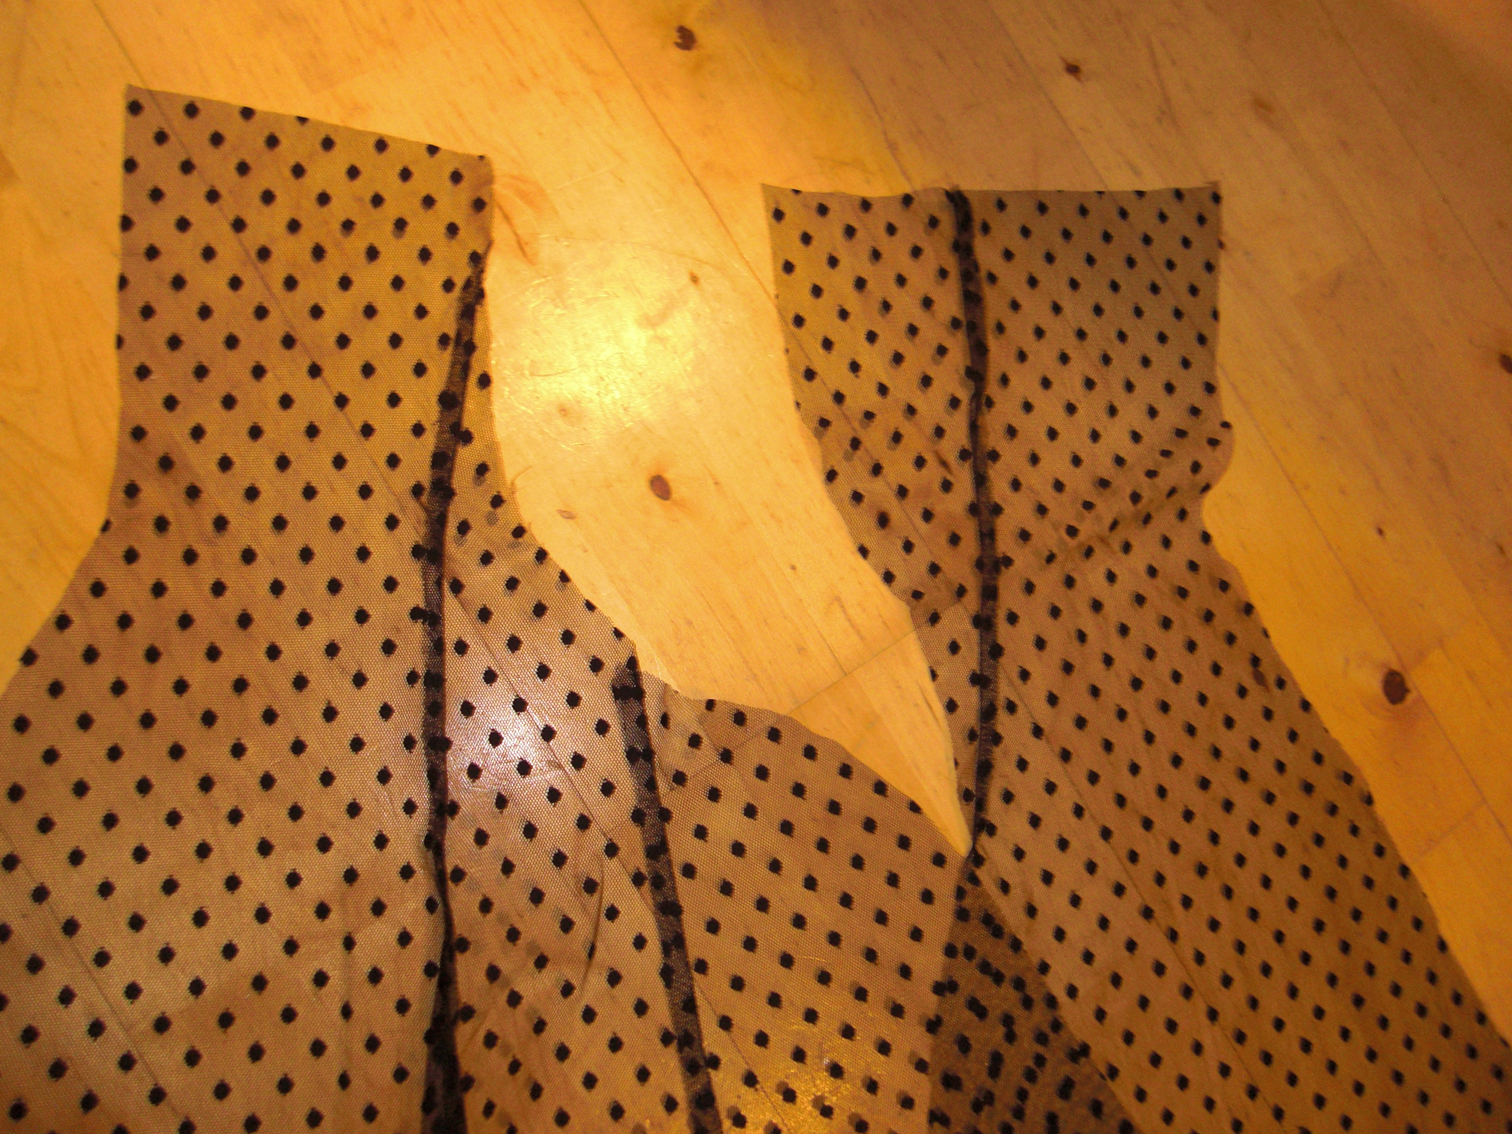
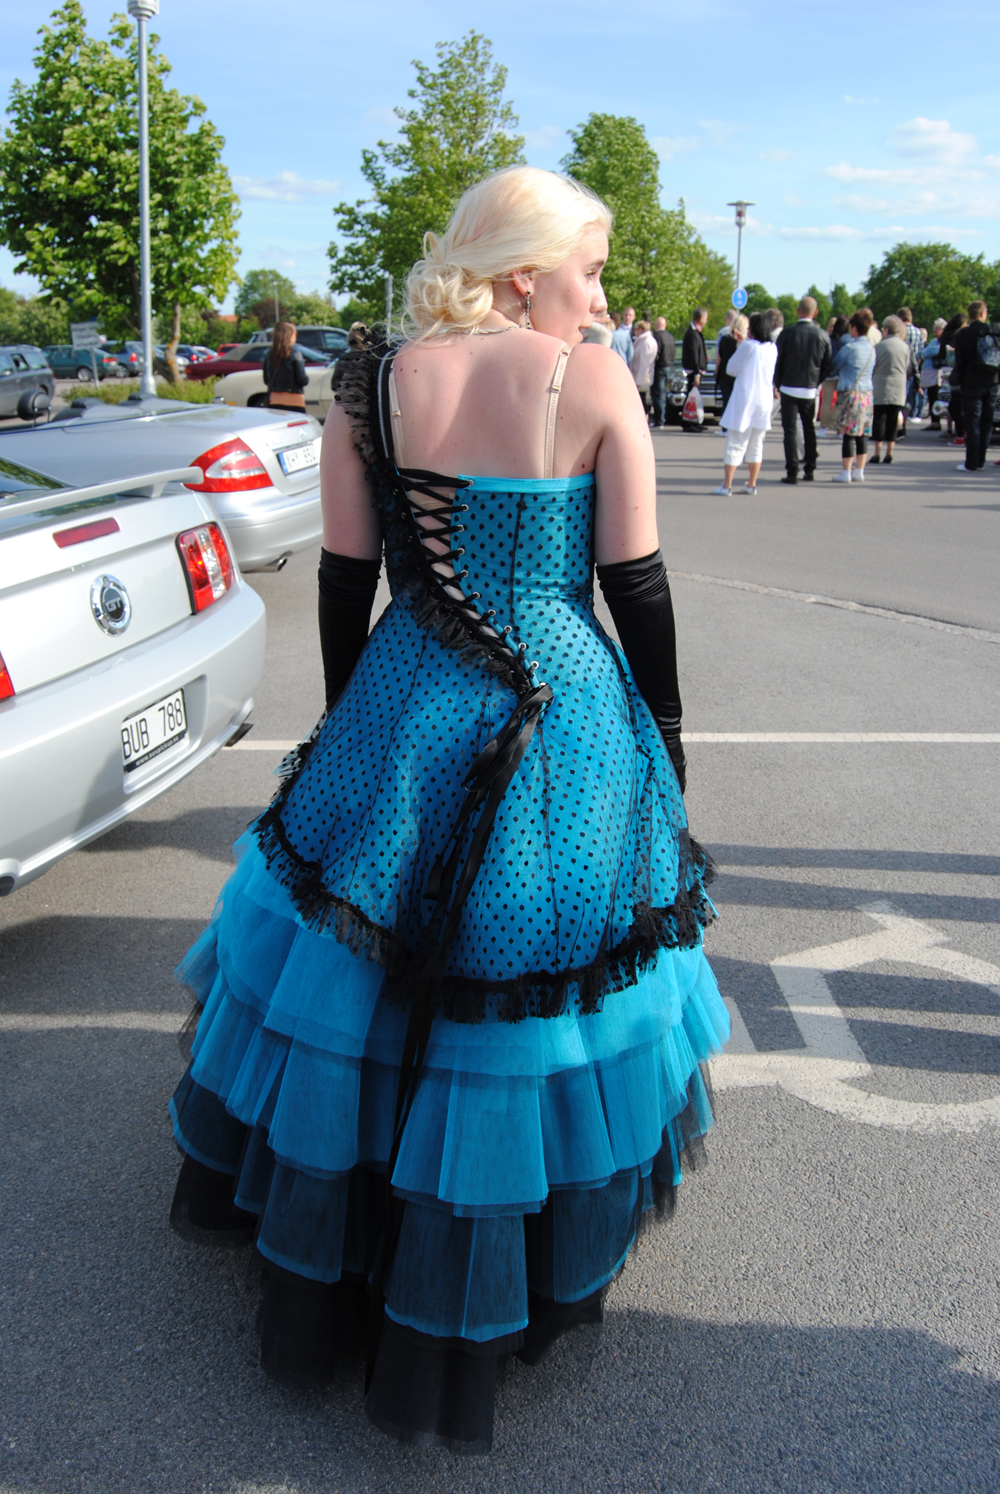
We also decided on the fabric. The gown was to be turquoise with the skirt tapering to black at the bottom, and a sheer dotted black over layer.
 I loved the effect of the black dots on top of the turquoise.
I stitched the interlining to the turquoise under layer, and then stitched the pieces both the inner and outer layers together
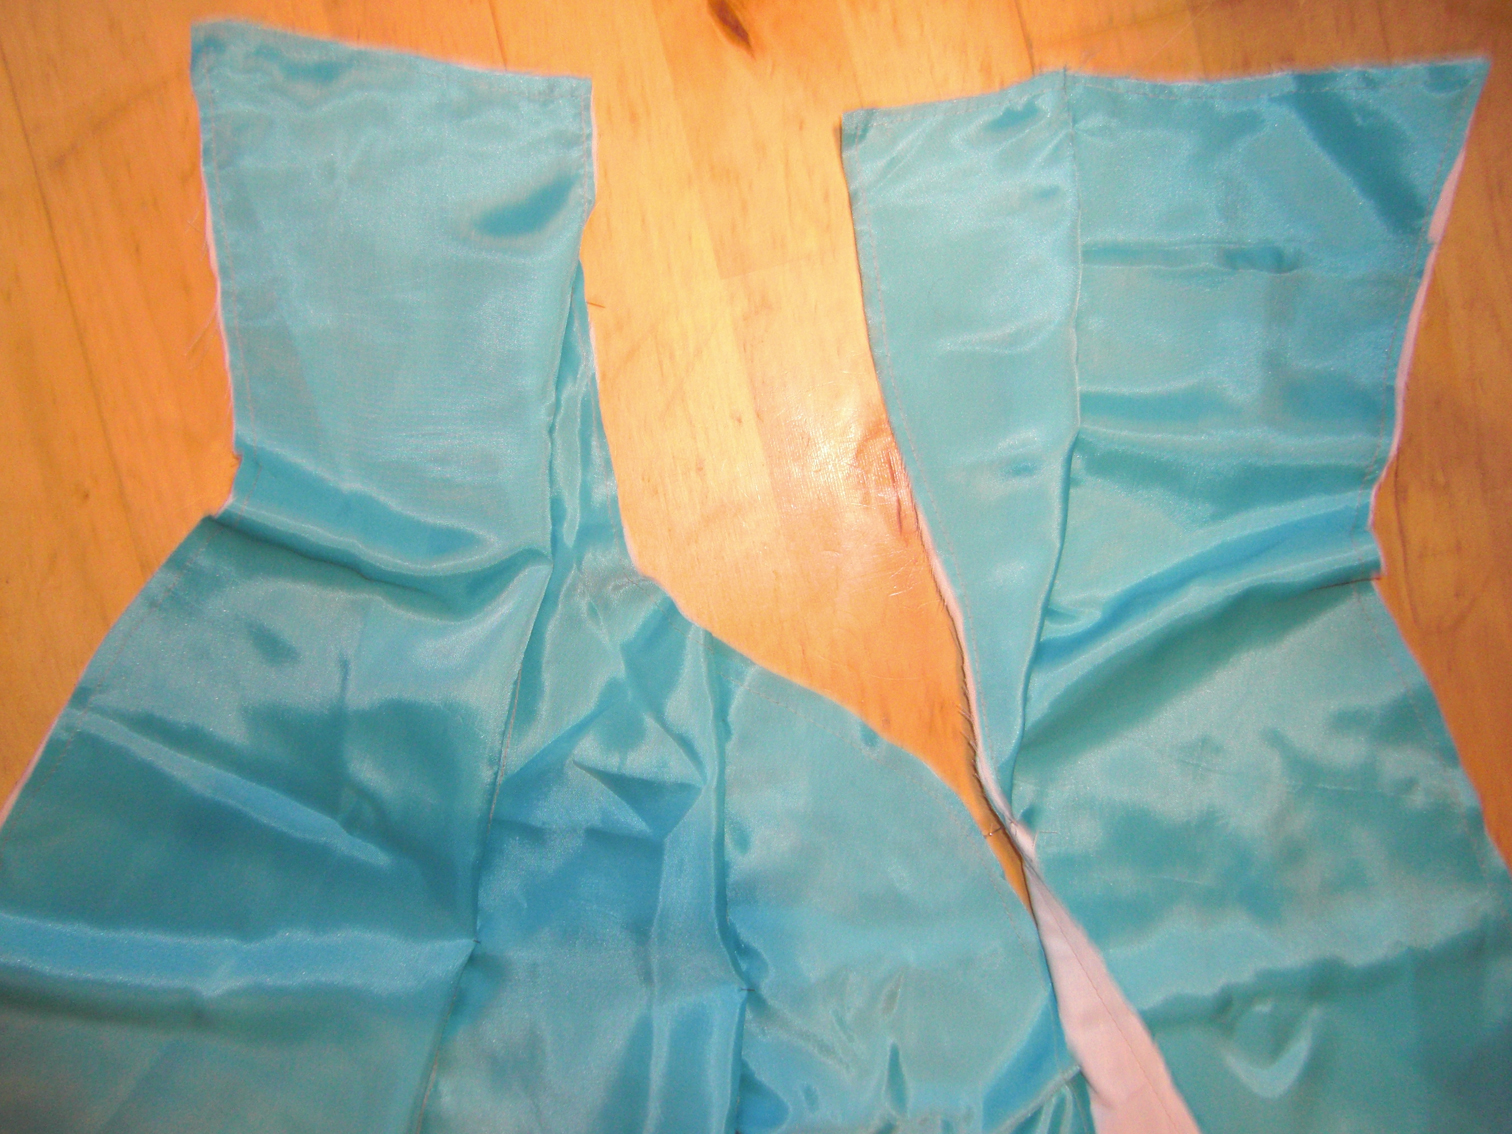
I basted the dotted tulle to the under layer.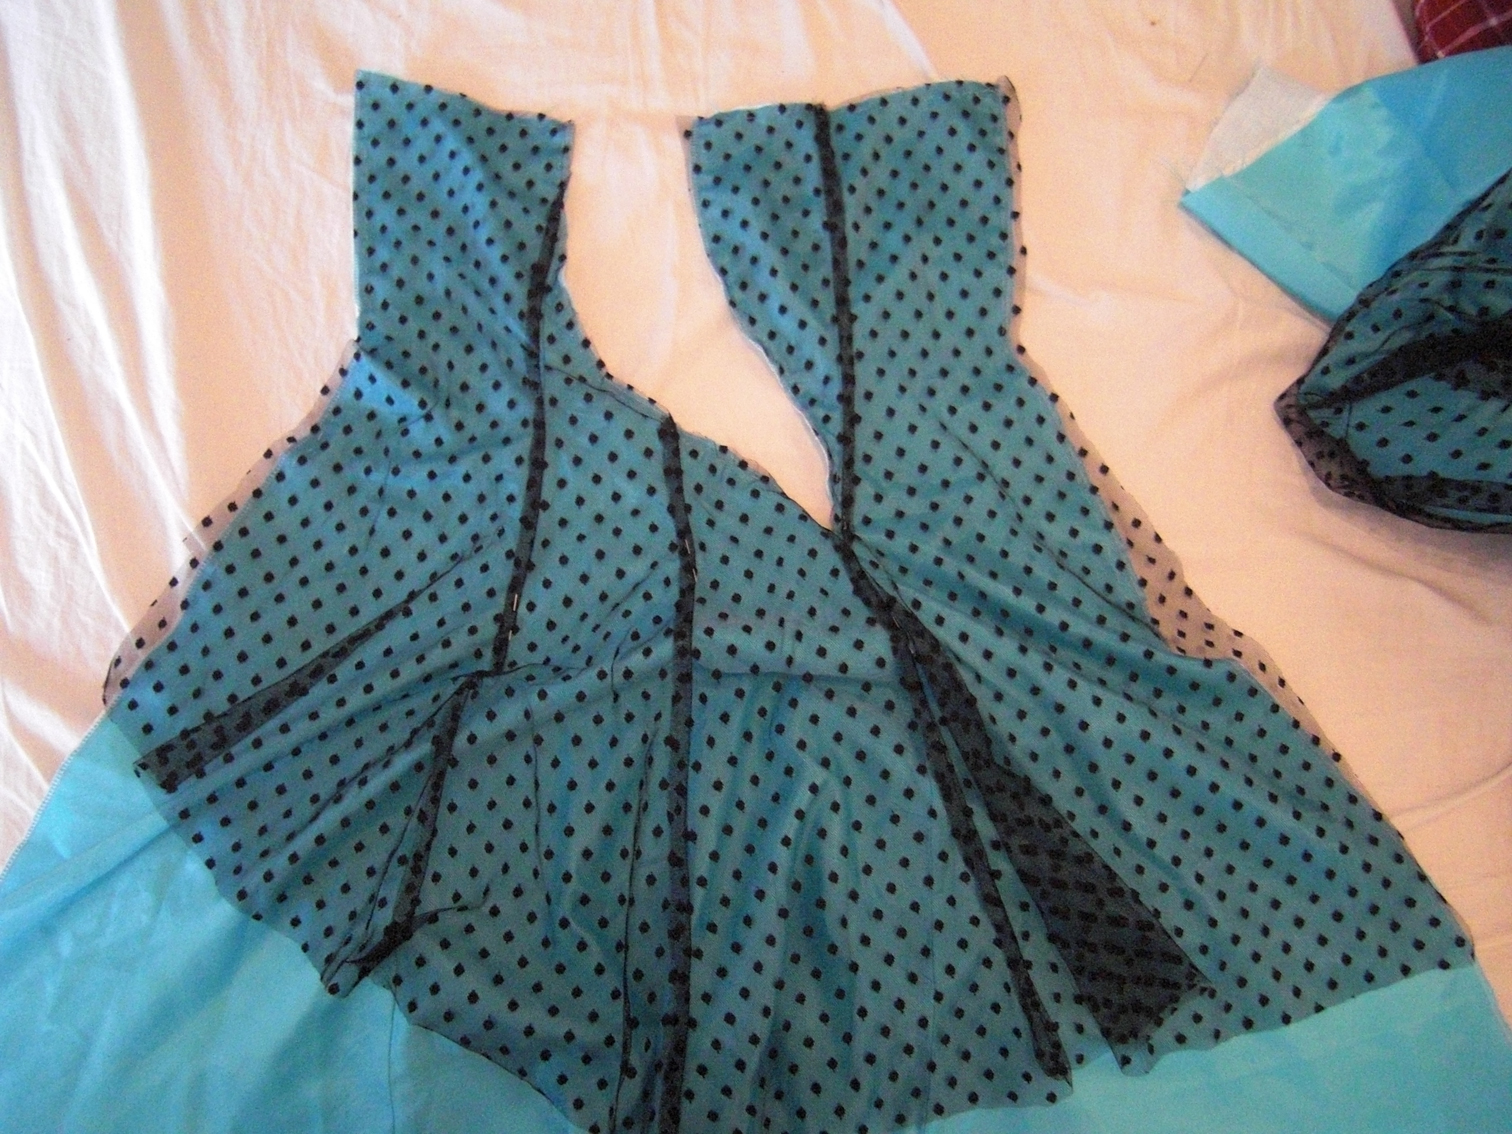
Then I did one extra foundation layer in which I inserted the curved boning.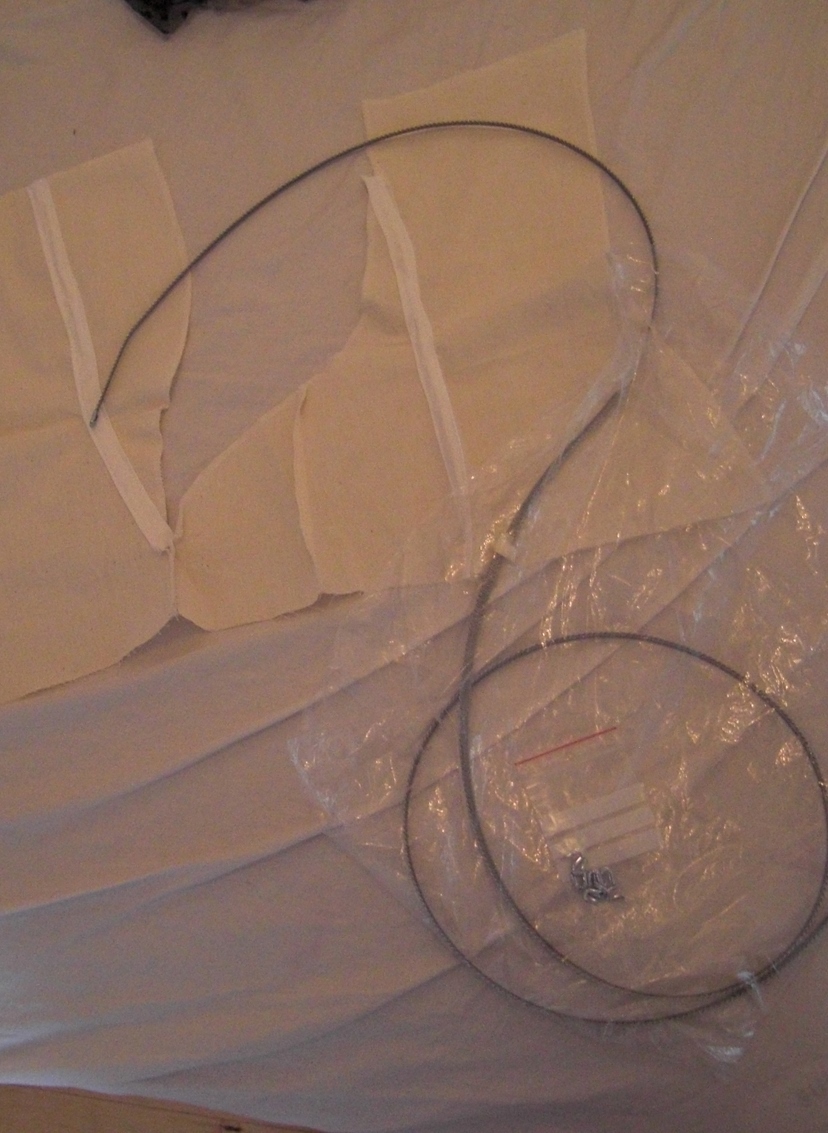

 I used a bias strip to the back side to get the nice curve on the lacing gap. The front and back pieces where now ready to be attached to each other.
 The front and back stitched together.
 I used a zipper at the side to make the dress fit perfectly, without disturbing the back lacing.
I used lengths of gathered dotted tulle as decoration to the shorter hem and strap. 
I also used a heavy duty zipper as shoulder strap.
 The back of the dress ready for some grommets.
I used a black satin ribbon for laces.

 Then it was time to start attaching the tulle.
I only had about 40 m or so of black and turquoise tulle to attach. phew… Starting at the top,working downwards adding more and more black to the layers.
 Love the effect of different color combinations in the layers.
The finished dress took up so much space in our small apartment, that the only place I could keep it was in the almost empty hall closet.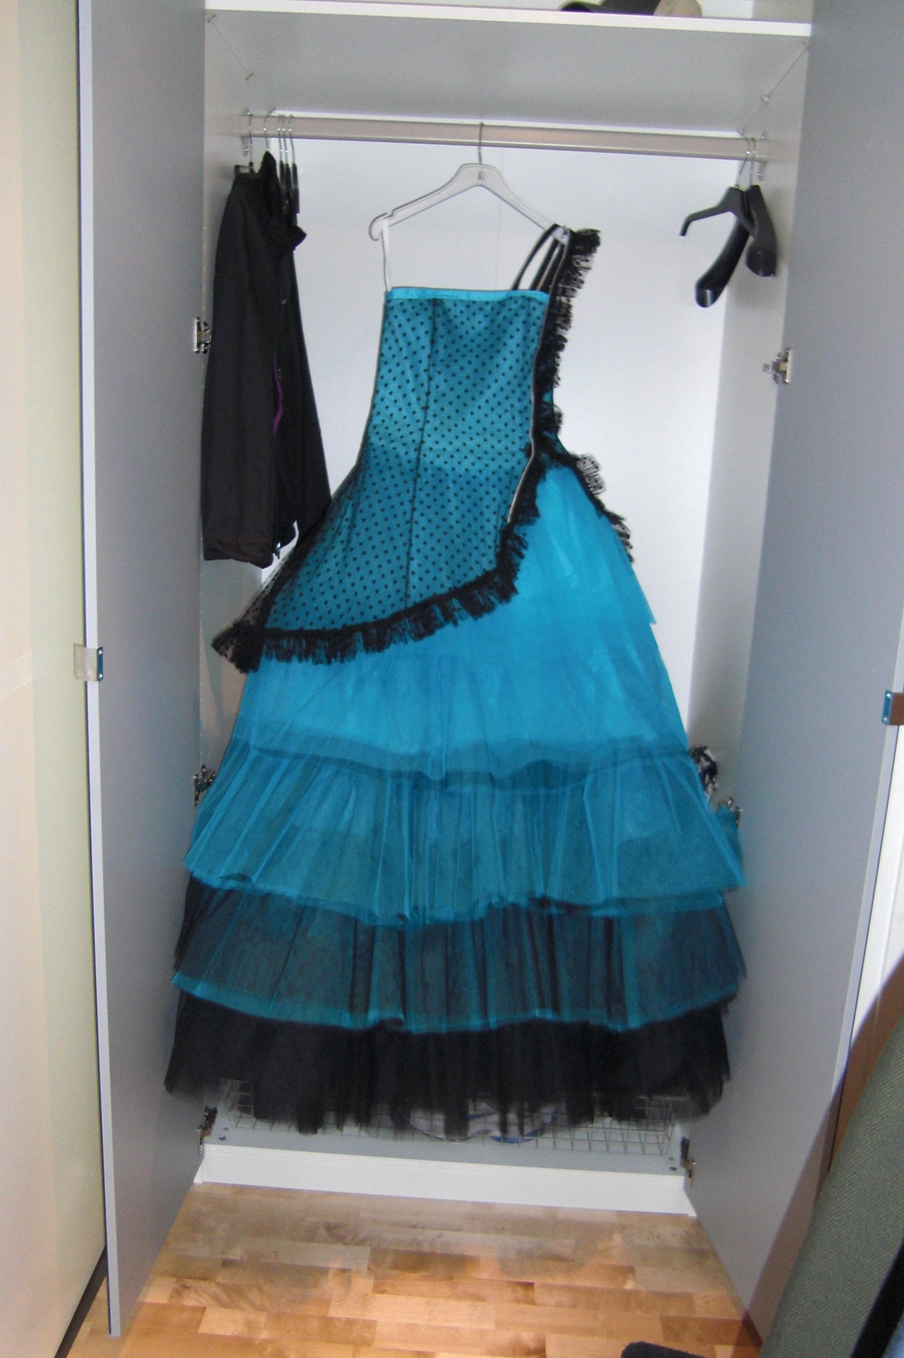
The week before the prom, I brought the dress down to my sister and did the final adjustments on it. 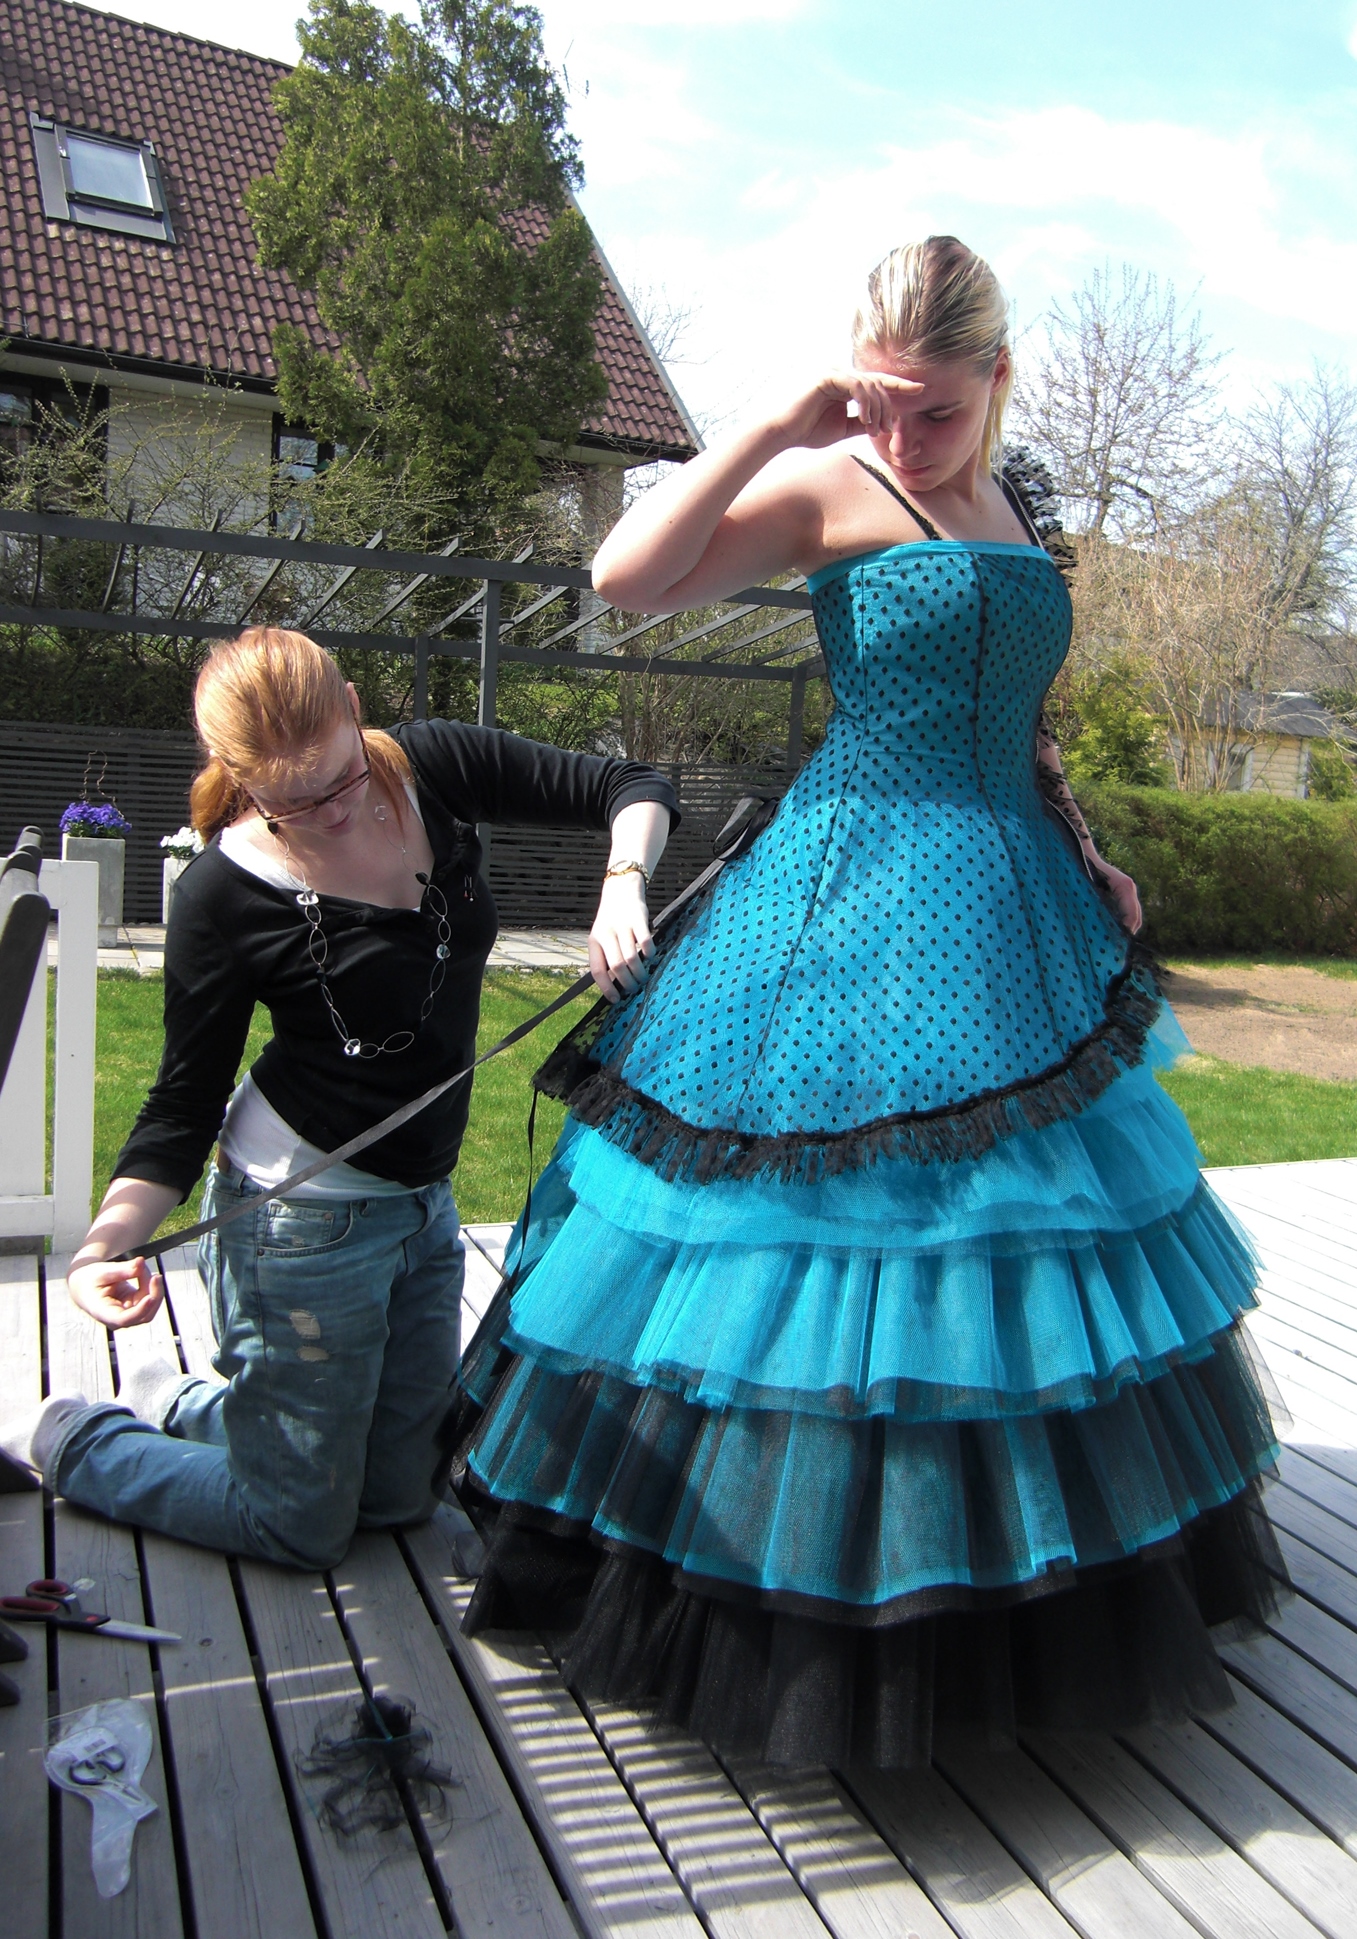
 I was really relived when I zipped the dress up and the back fit perfectly.
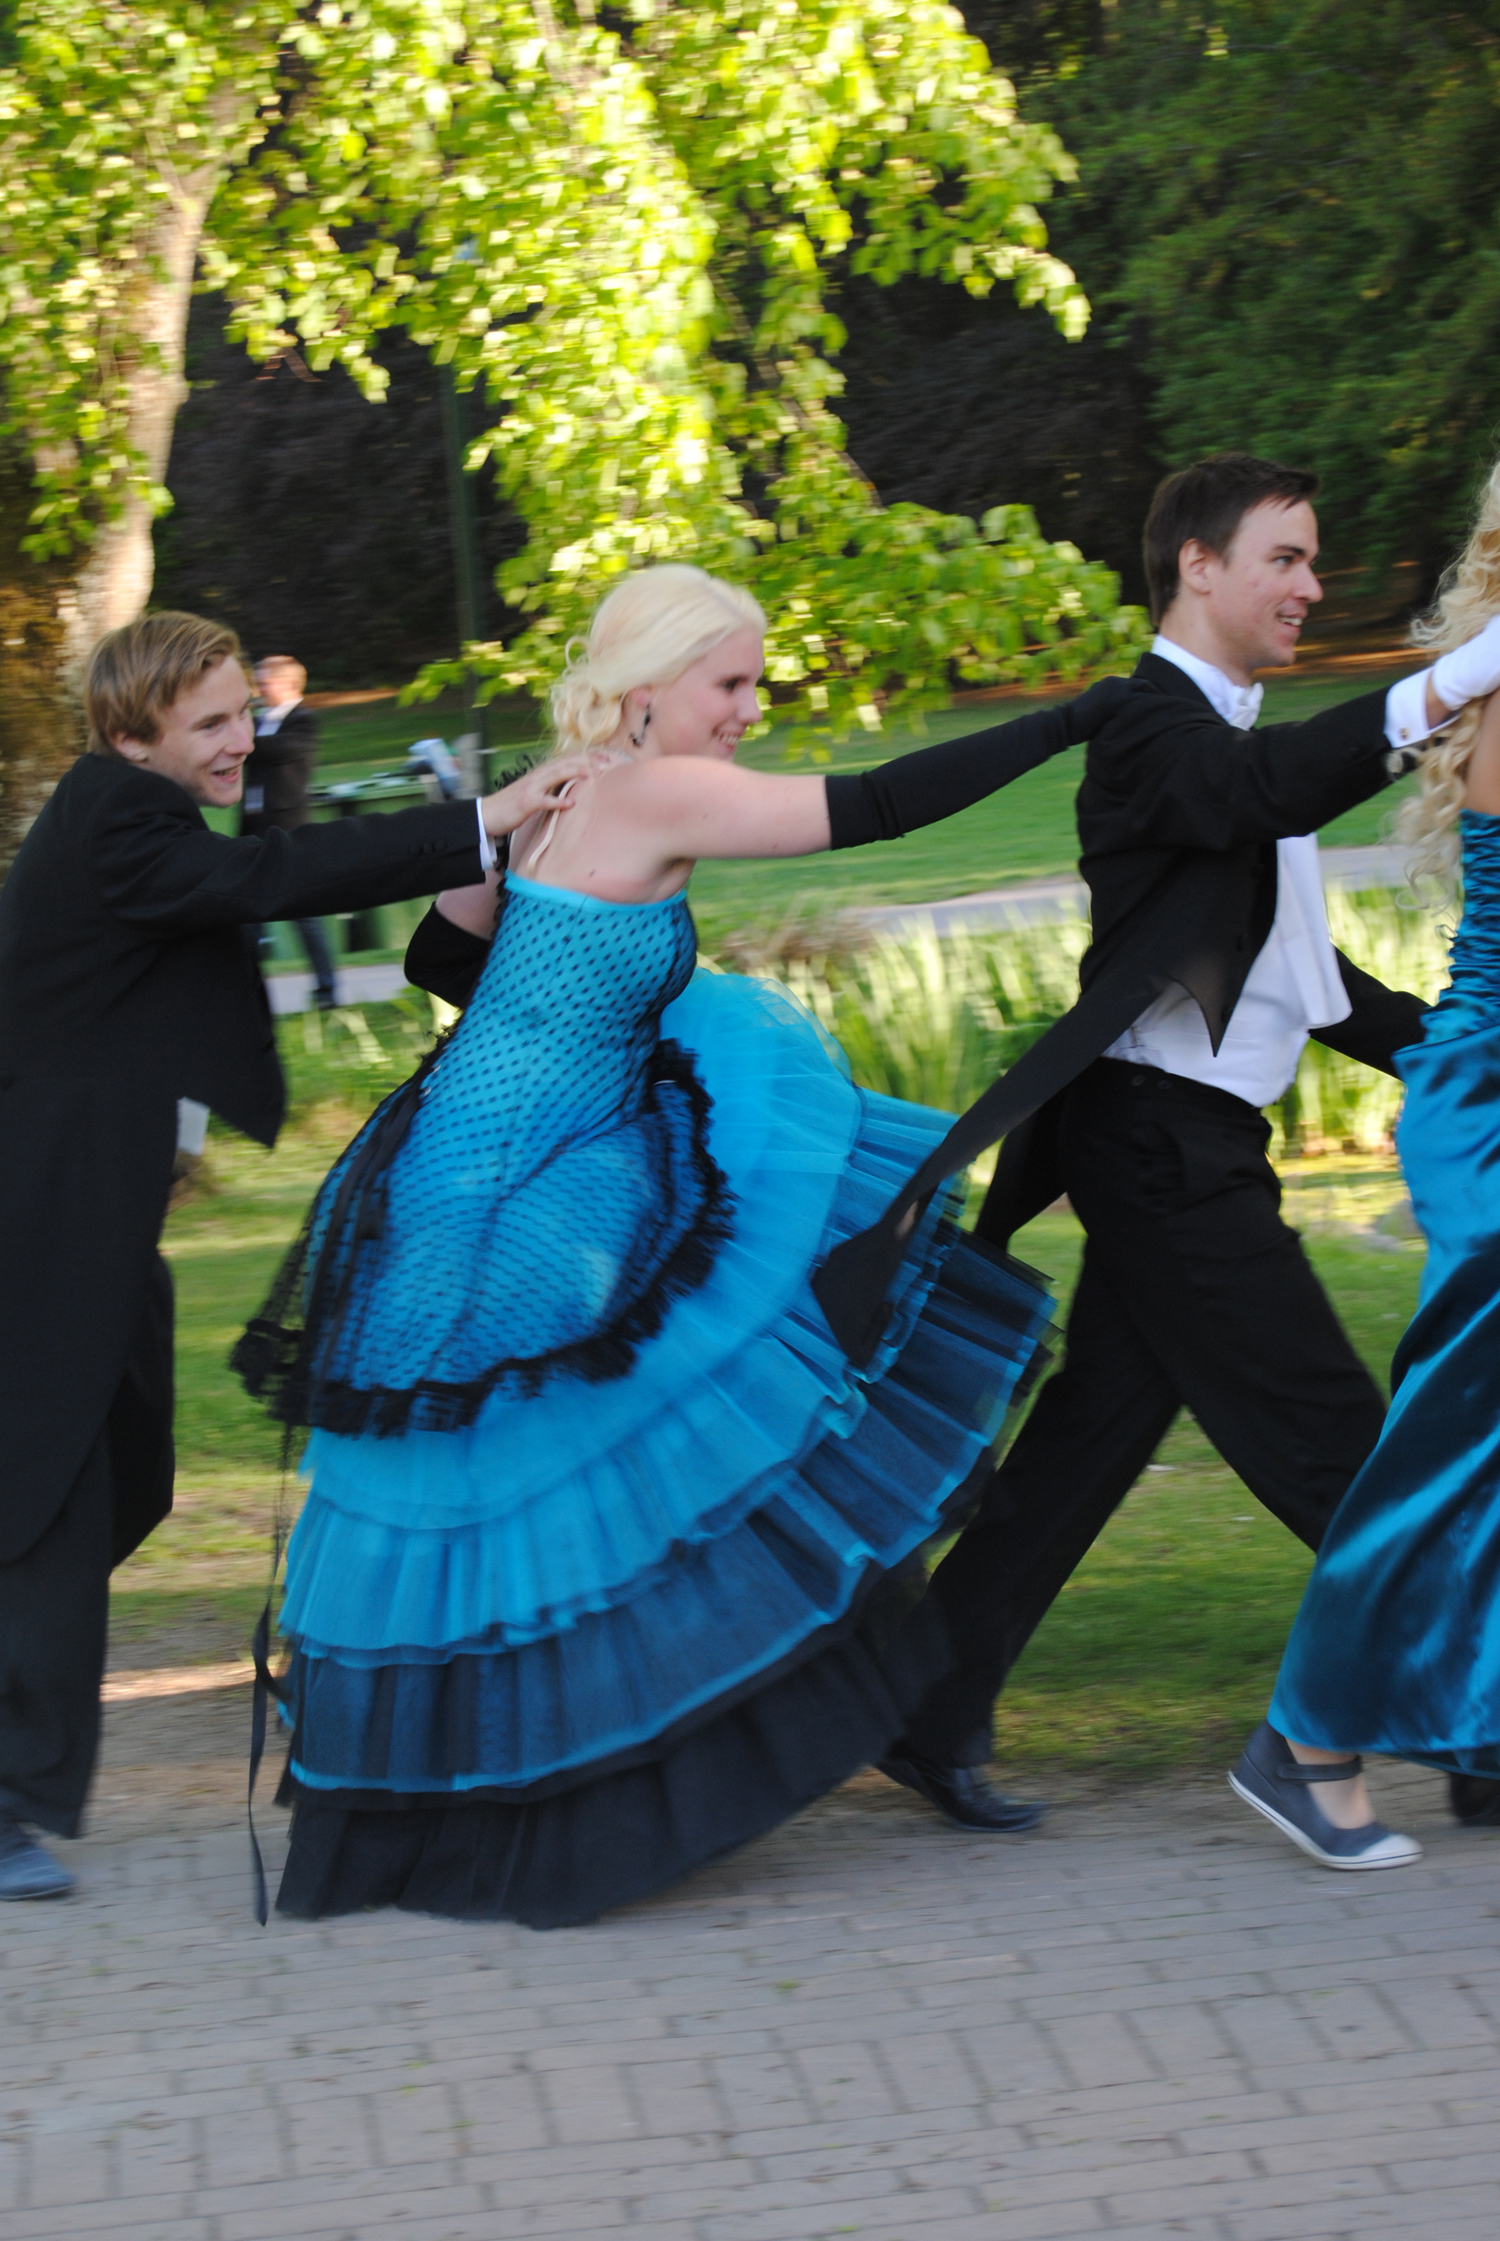
Then it was time for the prom. We had no difficulty finding her among the other dancers…


 And of course i needed to fix the lacing one final time.
 My three sisters, all in turquoise – not intentional.

 And then she was of for the dinner and following party.
 The dress was picked out of 250 pictures to be featured on the front of our local newspaper.

I love that you do so many things for your sister. It’s really fun to see. That dress is so original and amazing.
Thanks! I do love to sew things to my sisters. As long as they appreciate it I will continue.
My sister sewed my dress for my end of school formal (not nearly as fancy but the same sort of idea I guess…). Congratulations on being an amazing sister 🙂
That’s fabulous! What did you use for the curved boning at the back lacing?
Thanks 🙂
I used metal spiral boning. It was the only kind of boning I found which would flex both front/back and side to side.